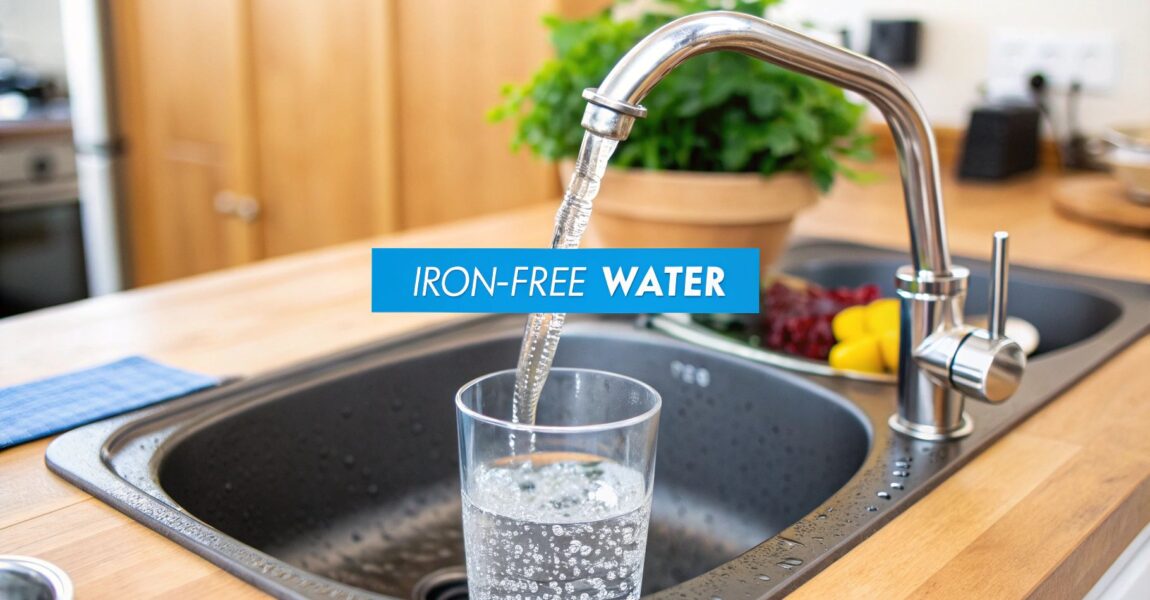
So, you've got an iron problem. Welcome to the club! It often starts with a faint metallic taste in your coffee or a stubborn, reddish-brown ring in the toilet bowl that defies all scrubbing efforts. The good news is that you're not doomed to a life of rusty water. Kicking iron to the curb is totally achievable once you know what you’re up against.
Think of yourself as a water detective. Different types of iron are like different suspects, and each requires a specific takedown method. Your mission, should you choose to accept it, is to identify whether you're dealing with dissolved "invisible" iron, visible rust particles, or a funky bacterial slime. Let’s get to work.
Recognizing the Sneaky Signs of Iron Contamination
Before you know it, that little metallic taste has escalated. Your crisp white laundry is now a depressing shade of orange, and your sinks and tubs look like they've been crying rust-colored tears. These aren't just household quirks; they're classic red flags that iron has crashed your party.
And it's not just a cosmetic issue. The U.S. Environmental Protection Agency (EPA) flags iron concentrations above 0.3 mg/L for causing taste and staining problems. This isn't a small-time nuisance; it's a massive issue for homeowners, driving a market for iron removal filters valued at a staggering USD 1.5 billion in 2024 and still growing.
The Three Faces of Iron
To get rid of iron for good, you need to know which of its three forms you’re up against. Each one has its own tell-tale signs and requires a different battle plan.
To make it easier, here's a quick reference table to help you pinpoint what’s going on with your water.
Identifying the Three Types of Iron in Your Water
| Iron Type | How It Looks in a Glass | Common Signs Around the House |
|---|---|---|
| Ferrous (Clear-Water Iron) | Looks totally clear at first, but turns cloudy or forms rust particles after sitting out for a while. | Orange or reddish-brown stains on fixtures and laundry. Metallic taste in water and food. |
| Ferric (Red-Water Iron) | Water comes out of the tap looking reddish or yellowish with visible rust particles floating in it. | Staining is immediate. Water has a noticeable color right from the faucet. |
| Bacterial Iron | You might see an oily sheen on the water's surface and a reddish, slimy sludge inside the toilet tank. | Foul, swampy odors from your water. Slimy buildup clogs pipes, filters, and even your toilet tank. |
This simple visual test is often all you need to figure out your next steps. Bacterial iron is the easiest to spot (and the grossest), while the difference between ferrous and ferric comes down to whether the rust appears instantly or over time.
Homeowner Tip: Ferrous iron is the real trickster. It looks perfectly clear, so you might not think it's the source of your stains. The "overnight glass test" is your best friend here—if a glass of clear water leaves a rusty residue by morning, you've found your culprit.
Beyond the Stains
While staining is the most obvious sign, iron's impact goes deeper. It can clog up pipes and fixtures, killing your water pressure and wrecking appliances from the inside out.
Iron often goes hand-in-hand with hard water minerals, leading to stubborn buildup on your fixtures. If you're seeing this, learning about removing stubborn calcium deposits from your faucets can help you keep things clean and working properly.
It also completely ruins the taste of everything, from your morning coffee to a simple pot of pasta. Figuring out which type of iron you have is the critical first step. It's what saves you from the frustration—and expense—of picking the wrong filter.
How to Accurately Test Your Water for Iron
Guessing how much iron is in your water is like trying to bake a cake without a recipe—you’re setting yourself up for a mess. You could easily end up with a filter that's too weak to do the job or, just as bad, overspend on an industrial-grade system you just don't need. The only way to get this right is to take the guesswork out of the equation.
To figure out what’s really going on with your water, you need actual data. That means choosing between a simple DIY test kit or a more detailed professional lab analysis. Each one has its place, and the right choice depends on how bad your problem looks and what other issues might be lurking in your water.
The Quick Check: DIY Test Kits
For a fast and cheap baseline, DIY water test strips or kits are a great place to start. You can grab these online or at most home improvement stores. They’ll give you a good ballpark idea of your iron concentration, which is usually measured in parts per million (PPM).
Think of it like taking your own temperature—it tells you there's a problem, but it won't diagnose the underlying cause. A decent DIY kit will usually check for a few key things:
- Total Iron: This gives you one number that combines both dissolved (ferrous) iron and the solid, rusty kind (ferric).
- pH Level: This is super important. Many iron filters are picky and only work well within a certain pH range. For instance, some oxidizing systems need a pH of at least 6.8 to be effective.
- Water Hardness: Iron and hardness often show up together. Knowing this helps you figure out if a water softener could be part of your solution.
Using them is easy. Just dip a strip into a water sample, let the colors develop for a minute, and then match them up with the chart that came in the box. It’s not as dead-on as a lab test, but it's an excellent first move to confirm your suspicions.
Expert Insight: If your DIY test shows iron levels pushing past 2-3 PPM, that’s a big red flag. It’s a strong sign you should pony up for a professional lab test before you even think about buying filtration equipment. You can often tackle minor issues with simple fixes, but higher concentrations demand a much more precise game plan.
When to Call in the Professionals: A Lab Analysis
If that home test comes back with high iron, you see rust-colored slime in your toilet tank (a classic sign of iron bacteria), or you just live somewhere known for well-water headaches, send a sample to a state-certified lab. This is the water equivalent of getting a full diagnostic workup from a specialist.
A professional lab analysis gives you a much deeper and more detailed report. It goes way beyond a simple PPM number and will precisely measure the levels of both ferrous and ferric iron—information that is absolutely critical for picking the right kind of filter. It also sniffs out other troublemakers that love to hang out with iron.
Your lab report will give you hard data on:
- Manganese: This mineral is notorious for causing ugly black stains and needs specific filter media to get rid of it.
- Tannins: These are just organic compounds from decaying plants, but they can give water a nasty yellowish tint and gum up filtration systems.
- Total Dissolved Solids (TDS): High TDS can mess with filter performance and make your water taste off.
- Alkalinity and pH: Getting these numbers right is essential to make sure the filtration chemistry will actually work as advertised.
With this detailed "diagnostic report" on your water, you can confidently choose a system that is perfectly dialed in for your home's unique situation. It's the most important first step to finding the right cure and making sure you only pay for the solution you truly need.
Matching the Right Filter to Your Iron Problem
Alright, with your water test results in hand, you’re past the diagnosis stage. Now comes the satisfying part: picking the right tool for the job. Choosing an iron filter isn’t a one-size-fits-all deal. The best solution hinges entirely on the type of iron you have, how much of it there is, and other water chemistry factors like your pH level.
Think of it like being a mechanic for your plumbing. You've run the diagnostics, and now you need to pick the perfect part. An undersized filter will barely make a dent in those rust stains, while going overboard is just a waste of money. Let's walk through the most common whole-house systems to find the right match for your home.
The Heavy Hitters: Oxidizing Filters
When you're up against moderate to high levels of ferrous (dissolved) iron, your best weapon is oxidation. This process is pretty clever—it forces the invisible, dissolved iron to become solid, visible rust particles (ferric iron). Once the iron is in a solid state, it’s easy to trap and filter out.
Two technologies really lead the pack here:
-
Air Injection Oxidation (AIO) Systems: These are the modern workhorses of iron removal. An AIO system uses a single tank to pull in oxygen from the air, creating an "air bubble" at the top. As your water flows through it, the iron oxidizes almost instantly, turning into particles that get snagged in the media bed below. The system then automatically backwashes every few days to flush all that trapped rust down the drain. Simple, chemical-free, and seriously effective.
-
Manganese Greensand Filters: This is a classic, time-tested method that still works great. Greensand is a specific type of filter media coated with manganese dioxide, which acts as a powerful catalyst for oxidation. When ferrous iron touches the media, it converts to ferric iron and gets trapped. These systems do need to be "regenerated" periodically with an oxidizing chemical, usually potassium permanganate (a distinct purple solution), to recharge the media's power.
Both are fantastic options for iron levels between 3 and 10 PPM. AIO systems are hugely popular because they're chemical-free, but a greensand filter can be a real powerhouse, especially if you're also fighting hydrogen sulfide (that rotten egg smell) or manganese.
Can Your Water Softener Do the Job?
A lot of folks ask if their water softener can tackle their iron problem. The answer is a definite "maybe," but it comes with some serious fine print. A standard ion-exchange water softener is built to remove hardness minerals like calcium and magnesium, but it can grab small amounts of dissolved ferrous iron along the way.
Here’s the deal:
A water softener can handle clear-water ferrous iron up to about 2-3 PPM, max. The iron ions are attracted to the resin beads and get swapped for sodium, just like hardness minerals. The problem is, if you have any ferric (rust) iron or, worse, iron bacteria, they will absolutely wreck the resin bed, clog up the control valve, and eventually destroy your softener.
So, if your water test shows low levels of purely dissolved iron and you need a softener for hard water anyway, it might work out. But trying to make a softener handle a bigger iron problem is just asking for expensive trouble down the road.
When Chemical Treatments Are Part of the Plan
In some cases, a little chemical assistance is the most effective way to get rid of iron and other troublemakers in your water. This infographic gives a good visual of how a controlled chemical treatment process fits into a larger filtration strategy.
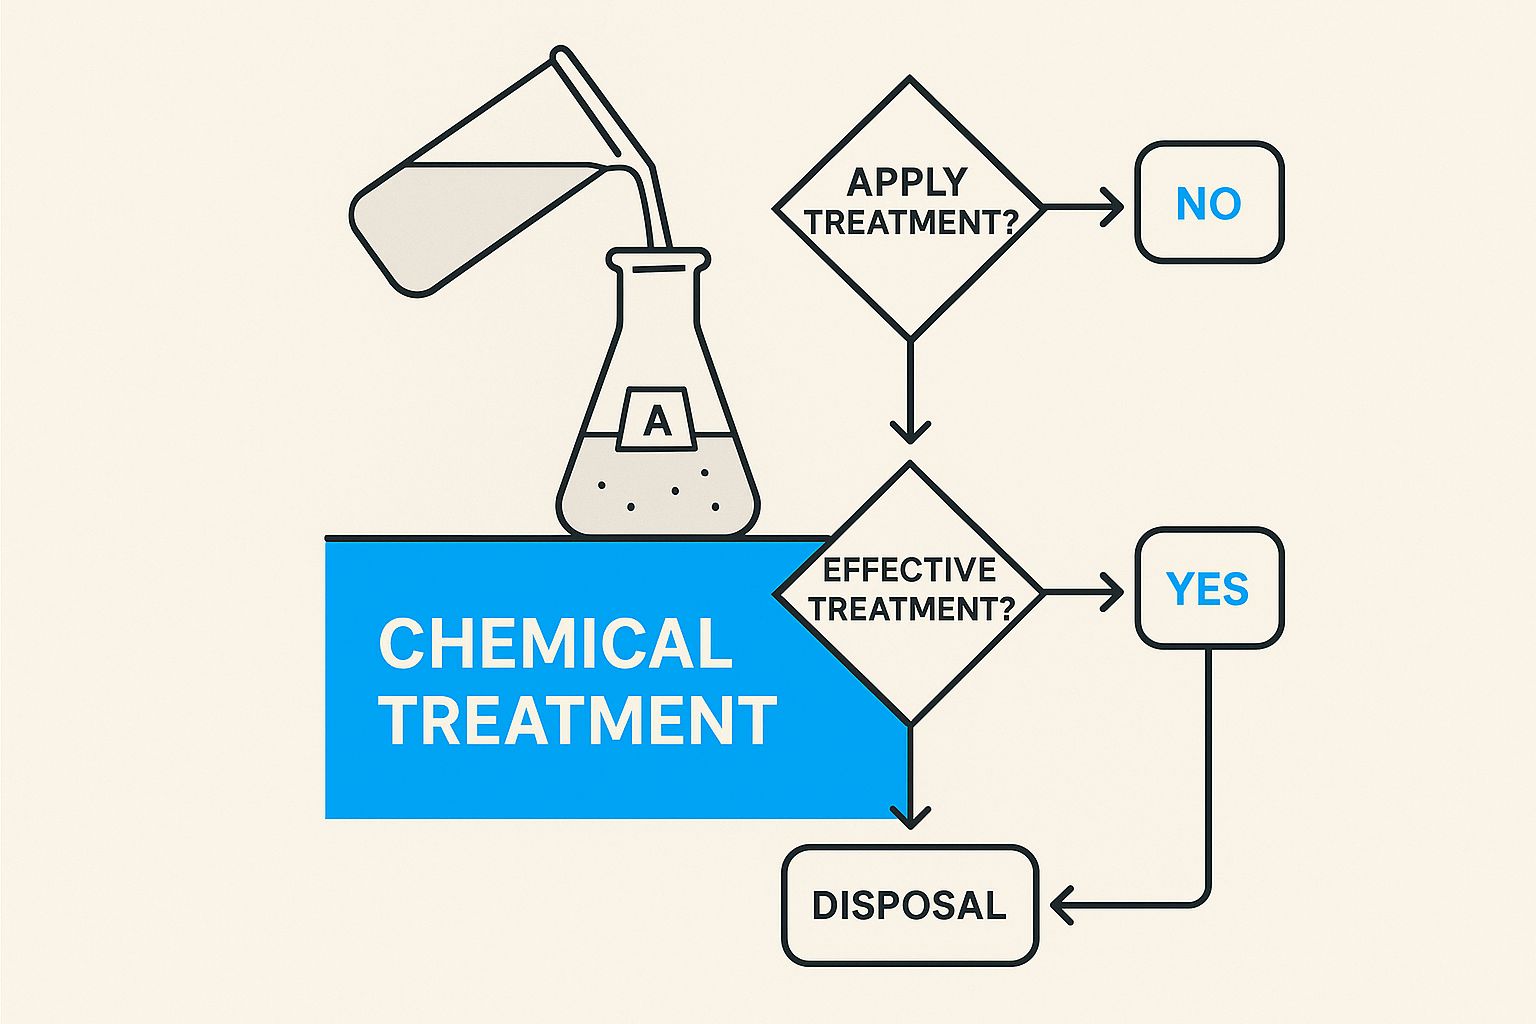
As you can see, introducing an oxidizer is the key step to converting dissolved contaminants into solids. This is the core principle behind systems like manganese greensand filters and even more heavy-duty chlorination setups.
To make things a bit clearer, let's break down the main options in a simple table.
Which Iron Removal Method Is Right for You?
| Filtration Method | Best For (Iron Type & Level) | Pros | Cons |
|---|---|---|---|
| Air Injection Oxidation (AIO) | Ferrous iron, 3-10 PPM | Chemical-free, low maintenance, effective. | Can be less effective on very high iron levels or low pH. |
| Manganese Greensand | Ferrous iron, 3-10 PPM. Also removes manganese & hydrogen sulfide. | Very powerful and effective for multiple issues. | Requires potassium permanganate for regeneration. |
| Water Softener | Ferrous iron only, < 3 PPM. | Solves hardness and low iron issues with one unit. | Easily fouled by ferric iron or iron bacteria. |
| Sequestration (Polyphosphate) | All iron types, < 1 PPM (stain prevention only). | Inexpensive, easy to install, stops staining. | Doesn't actually remove iron from the water. |
| Reverse Osmosis (RO) | Polishing filter for all iron types. | Removes up to 98% of contaminants for drinking water. | Not a primary iron filter; membrane will clog quickly. |
This table should give you a good starting point for narrowing down your choices based on what your water test revealed.
Specialized Solutions for Unique Problems
What if your iron problem is minor, or you have a different kind of issue? There are a few other tools in the toolbox for these specific scenarios.
Sequestration with Polyphosphates
If you have very low levels of iron (less than 1 PPM) and your main goal is just to stop the ugly orange and brown stains on your fixtures, sequestration is worth a look. This method doesn't actually remove the iron. Instead, a food-grade polyphosphate is added to the water, which coats the iron ions and keeps them from oxidizing and making a mess.
It’s an affordable and low-maintenance fix for cosmetic issues, but just remember—the iron is still in your water.
Reverse Osmosis (RO) as a Final Polish
Reverse osmosis systems are purification beasts, capable of removing up to 98% of just about everything dissolved in water, including iron. So why isn't this the top recommendation? Because RO membranes are delicate and can be pricey to replace. Throwing high levels of iron at an RO system is a surefire way to clog that membrane in a hurry.
It's best to think of RO as a "polishing filter." Use it at a single faucet, like your kitchen sink, after a whole-house iron filter has already done the heavy lifting. This gives you incredibly pure water for drinking and cooking without destroying the RO system.
The technology in this space is always improving, with things like advanced catalytic filter media and hybrid systems changing the game. You can always explore more about these industry trends in water filtration to see where things are headed.
Ultimately, the key is to let your water test be your guide. Matching the right technology to your specific iron type and PPM level is the only way to guarantee clear, clean, and stain-free water for years to come.
A Practical Guide to Installing Your Iron Filter
Alright, you’ve done your homework. You tested your water, picked the right iron filter, and now it’s sitting in a box, ready to go. The final step is getting it installed. While we always recommend a licensed plumber for peace of mind, if you've got some solid DIY skills, installing a whole-house filter is a totally manageable weekend project.
This guide will walk you through the key steps, whether you're tackling it yourself or just want to know what the plumber you hired should be doing.
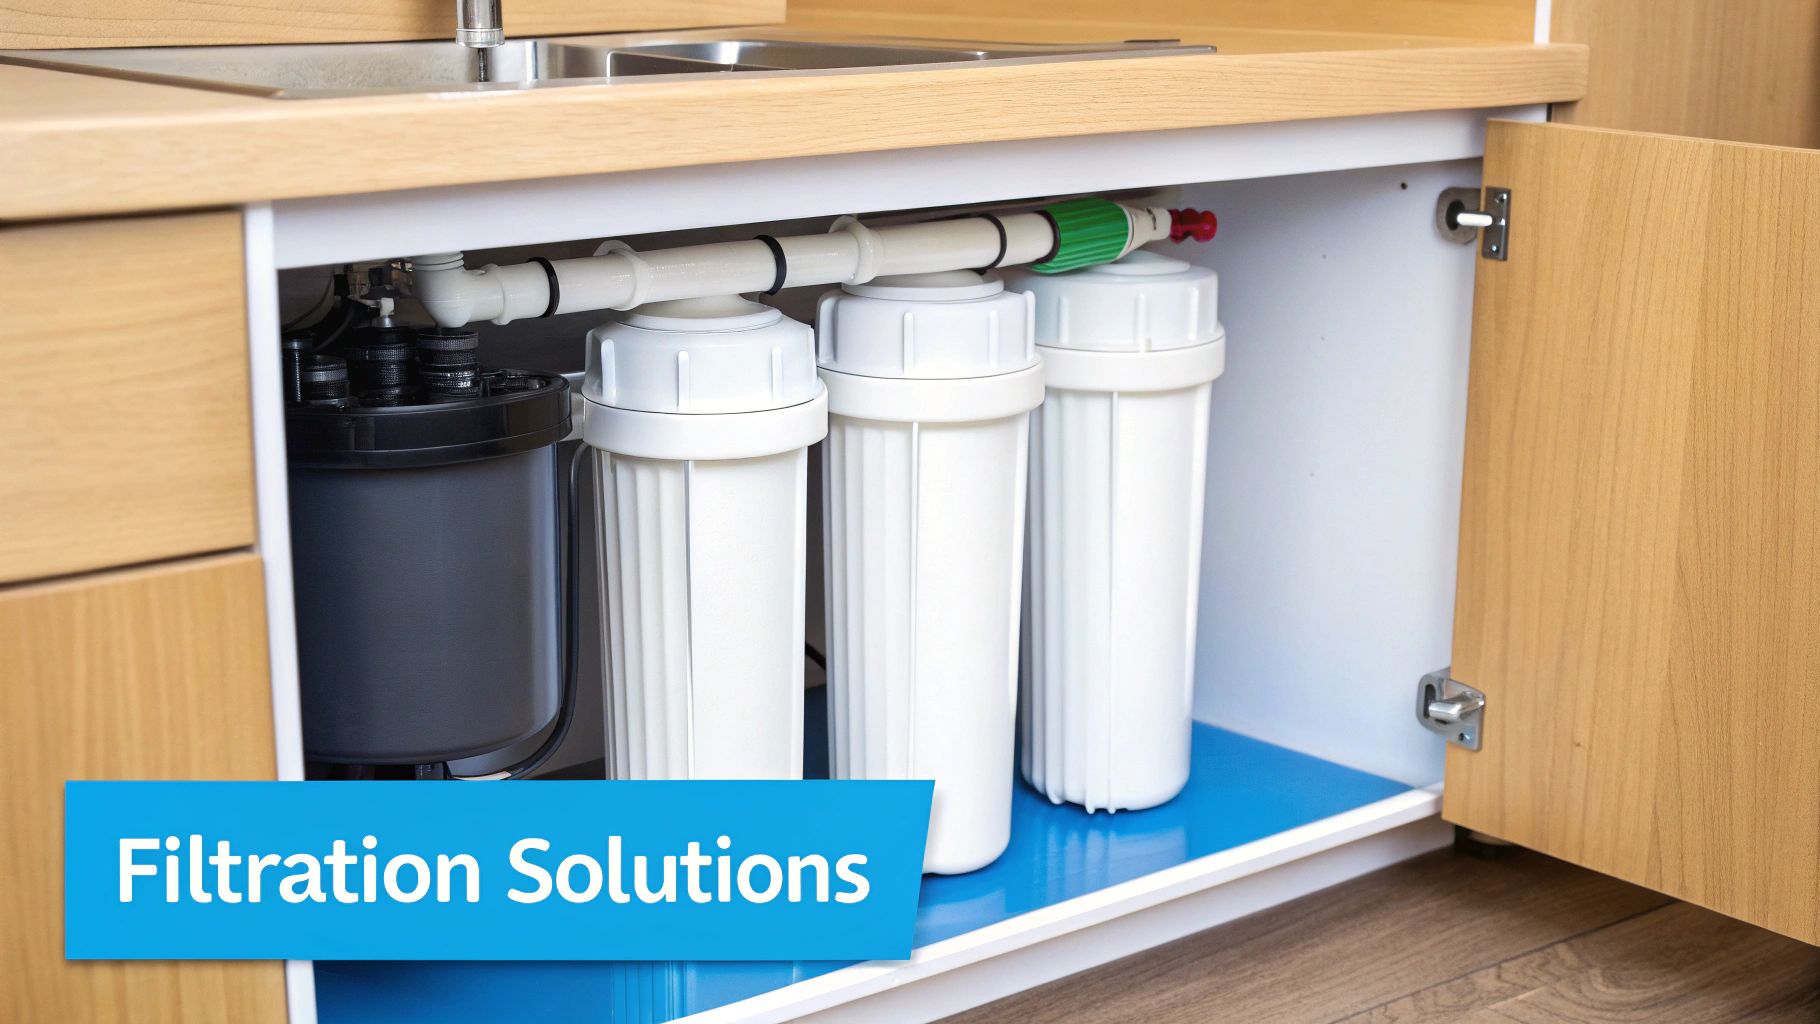
Getting the installation right from the start is about more than just stopping leaks. It's about making sure the system works efficiently for years to come and making your own life easier when it's time for maintenance. Think of this as the last crucial step to finally getting rid of that iron.
Laying the Groundwork for a Smooth Install
Before a single pipe gets cut, a little prep work is non-negotiable. First thing's first: shut off the main water supply to your house. No exceptions. Then, head to the lowest point in your home—like a basement sink or outdoor spigot—and open a faucet to drain the lines.
Next, get your tools together. Trust us, you don't want to be making a frantic run to the hardware store with your water shut off.
Your Essential Tool Checklist:
- Pipe Cutters: Essential for making clean, straight cuts on your plumbing, whether it's copper or PEX.
- Wrenches: A couple of good pipe wrenches or adjustable wrenches are a must for tightening down fittings.
- Teflon Tape: Also called plumber's tape. Don't even think about threading pipes together without it.
- PEX Crimp Tool & Rings: If you have PEX plumbing, this is how you'll make secure connections.
- Measuring Tape: The old saying "measure twice, cut once" exists for a reason.
Now, scout your location. You want the filter as close as possible to where the main water line enters your home. If you're on a well, it needs to go after the pressure tank. Make sure the spot is level and leaves you enough room to get in there for maintenance down the road.
Making the Right Connections
Okay, with your location picked and the water off, it's go-time. Your filter will have an inlet and an outlet, usually marked with arrows showing the direction of water flow. Getting this right is absolutely critical. If you hook it up backward, it simply won't filter your water.
This is also the perfect time to install a bypass valve. A bypass is basically a three-valve setup that lets you route water around the filter. Why bother? Because when you need to change the media or service the unit, you can just flip the valves and keep the water on in your house. It's a small step now that prevents a massive headache later.
Pro Tip: When you're wrapping threaded fittings with Teflon tape, always wrap it clockwise (the same direction you'll be tightening the fitting). This keeps the tape from bunching up and ensures a perfect, leak-free seal.
Setting Up the Drain and System Flush
Most iron filters, especially the oxidizing ones, need to backwash to clean themselves out. This requires a drain line to carry away the flushed-out iron and gunk. Run this line to a floor drain or utility sink. Just be sure to leave an "air gap"—a small space between the end of the drain tube and the drain itself. This prevents nasty drain water from ever siphoning back into your clean filter.
Once all the pipes are connected and you've double-checked that every fitting is tight, you can move on to the initial system flush. This is a vital step to rinse out any dust or fine particles from the filter media before it hits your home's plumbing.
Slowly, and we mean slowly, open the main water valve partway to let the tank fill up. Then, follow the manufacturer's directions for the first backwash and rinse cycle. You'll probably run the backwash for around 10 minutes, then a rinse for another 5 minutes. Don't be alarmed if the water coming out of the drain line is brown or black—that's the filter doing its job and cleaning itself out.
Once the water from the drain runs clear, you're ready to open the outlet valve and let that fresh, iron-free water flow into your house. Before you celebrate, do one last walk-through and check every single connection for even the smallest drip. Now you can put your tools away.
Keeping Your System Running Like New
An iron filter is a true workhorse, but it's not something you can just set and forget. To get years of crystal-clear, iron-free water, you need to stay on top of maintenance. If you let it slide, you’re just asking for clogs, poor performance, and the return of those awful rust-colored stains.
Think of your filter like your car—it needs regular tune-ups to perform its best. Ignoring it doesn't just make it less effective; it can seriously shorten the life of your investment. This is your long-term care guide to keep your system in peak condition.
Building a Simple Maintenance Playbook
Different systems have different needs, but the goal is always the same: keep the filter media clean and the regeneration cycles working. A clogged or exhausted filter is just an expensive, heavy piece of plumbing.
For instance, an air injection oxidation (AIO) system is pretty low-maintenance, but it still absolutely depends on a proper backwash cycle. This is the crucial step where the system flushes all the trapped iron particles down the drain. If that cycle fails or isn't set right, iron will quickly overwhelm the media.
Key Takeaway: The single most important maintenance task for most iron filters is making sure the backwash or regeneration cycle runs as scheduled. It's the system's "reset" button, and without it, performance will plummet.
The Specifics of System Care
Let’s get into the maintenance checklists for the most common iron filters. Each one has a few unique things you need to stay on top of.
For Water Softeners Handling Low Iron:
- Keep the Brine Tank Full: The salt is what recharges the resin beads so they can keep pulling out iron and hardness. Check the salt level monthly and never let it drop below one-quarter full.
- Use the Right Salt: Stick with high-purity salt pellets made for water softeners. Some even have additives to help clean iron off the resin, which is a great bonus.
- Clean the Brine Tank: Once a year, it's smart to empty and clean the brine tank to get rid of any sludge or "salt mush" that's built up at the bottom.
For Oxidizing Filters (Greensand, etc.):
- Monitor Your Regenerant: If your system uses potassium permanganate (the purple stuff), you have to check the level regularly and refill it per the manufacturer's directions. Letting it run dry will stop the filter cold.
- Check the Injector: This small part draws the regenerant into the system and can get clogged with iron sediment. Cleaning it out once a year is a smart preventative move.
Knowing When to Replace Your Filter Media
No matter how well you maintain it, the filter media inside your tank won't last forever. Over time, it just loses its ability to grab or oxidize iron. The lifespan can vary a lot based on how much iron is in your water and how much water you use every day.
A good manganese greensand media might last 3 to 5 years, while the media in a high-quality AIO system could go for 10 years or more. The first sign of trouble is usually a slow decline in performance—maybe you notice a faint metallic taste coming back, or light staining reappears in your sinks. When that happens, it's time for a "re-bedding," or media replacement.
This really highlights why these systems are so important, especially for anyone not on city water. Roughly 10 million households in the U.S. get their water from private wells, and a lot of them deal with high iron levels. This widespread problem is what drives the demand for effective filters and shows why good upkeep is so critical. You can learn more about the growth of the iron removal filter market on Verified Market Reports.
Handling the Slime: Bacterial Iron
If you’re dealing with the slimy, gross mess of bacterial iron, your maintenance plan needs an extra, non-negotiable step: sanitation. This kind of iron requires a much more aggressive approach.
The main treatment is usually shock chlorination of your well, which is a job best left to a professional. The process involves using a high concentration of chlorine to kill the bacteria throughout your entire water system. After the shock treatment, your filtration system will also need to be completely sanitized to make sure no bacteria are left behind to repopulate. You'll need to monitor your water consistently, as bacterial iron can be stubborn and might require periodic treatments.
Answering Your Top Questions About Iron Removal
Once you start looking into iron filters, the questions start piling up. That's totally normal. You want to have all the facts before you invest in a system for your home. Here, we're going to tackle the most common questions we get, with clear, straightforward answers to help you make that final decision with confidence.
Think of this as your last Q&A session before you pull the trigger. We're here to clear up the confusion on some of the trickiest topics in iron filtration.
Can a Standard Water Softener Remove Iron?
This is the big one we hear all the time. The short answer is yes… but with a big asterisk. A standard water softener can definitely handle small amounts of dissolved ferrous iron—usually in the 2-3 PPM range. It grabs the iron ions the same way it grabs hardness minerals, using its ion exchange process.
But here’s the catch: it’s not a dedicated iron filter. If you've got ferric iron (that visible rust) or, even worse, the dreaded slimy iron bacteria, it will gum up the resin bed in a hurry. That can ruin the whole system. For homes with low iron and hard water, it's a fantastic two-in-one deal. For a real iron problem, you need a different tool for the job.
How Do I Know if I Have Iron Bacteria in My Well?
Iron bacteria is a nightmare for well owners, but it leaves some pretty obvious clues. You're probably dealing with it if you see these signs:
- A gross, reddish-brown or yellowish slime building up inside your toilet tank.
- Water that smells musty, swampy, or sometimes even like oil.
- An oily-looking sheen on the water's surface.
While these symptoms are a dead giveaway, the only way to be 100% sure is with a professional lab test. Treating iron bacteria is a whole different ballgame, too. It usually requires a shock chlorination of your well before you even think about installing a filter. It's a stubborn problem that demands a much more aggressive fix.
Will an Iron Filter Affect My Water Pressure?
A properly sized and installed iron filter shouldn't tank your water pressure. You should barely notice it's there. Most modern systems are built with high flow rates specifically to keep up with a busy household.
If you do see a big pressure drop after installation, that's a red flag. It usually points to one of three things: the filter is clogged and needs to run its backwash cycle, the media inside is used up and needs replacing, or the unit itself is just too small for your home's water demand. Staying on top of regular maintenance is the absolute key to keeping your pressure strong.
Homeowner Reality Check: Don't just live with a sudden drop in water pressure. It's your filter's way of telling you something's wrong. A quick check of the backwash settings or a call to a pro can often fix it before it becomes a bigger headache.
What's the Difference Between an Iron Filter and a Rust Filter?
People often use "iron filter" and "rust filter" like they're the same thing, but there's a key distinction that helps you buy the right equipment.
A "rust filter" is usually just a simple sediment filter. Its only job is to trap physical particles of ferric iron (rust) that are already floating around in your water. It’s a physical net, nothing more.
A true "iron filter", like an air injection or manganese greensand system, is much more advanced. It’s built to go after the dissolved ferrous iron—the kind you can't even see. It works by first oxidizing that invisible iron, turning it into a solid particle (rust), and then filtering it out. For a deeper dive into picking the perfect system, you can find a ton of great resources and expert water filtration advice available online. This will point you toward a solution that actually solves your specific iron problem for good.
At Water Filter Advisor, our goal is to empower you with the knowledge to achieve safer, better-tasting water at home. Explore our guides and find the perfect solution for your family. Visit us at https://www.waterfilteradvisor.com.
- October 1, 2025
- 0
- Uncategorized