Water Softener Sanitizing: A Complete How-To Guide
You notice it first in the little things. The water smells off at the tap, the brine tank looks slick, or the softened water just doesn't taste a ...
You notice it first in the little things. The water smells off at the tap, the brine tank looks slick, or the softened water just doesn't taste a ...
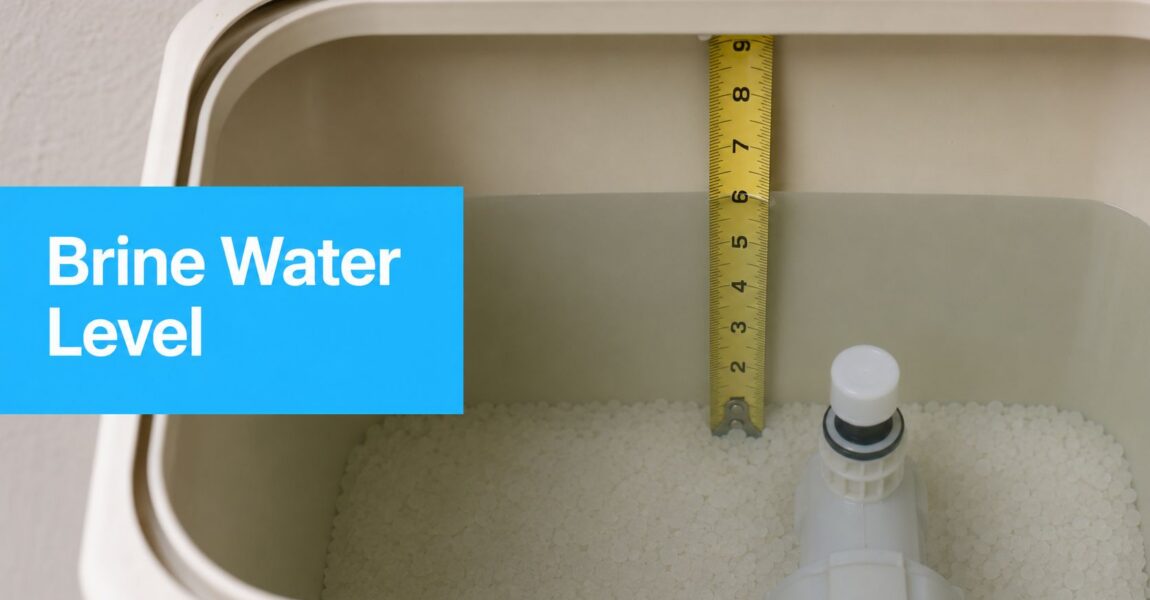
A wet brine tank should hold 3–6 gallons of water, about 6–10 inches deep. Dry brine systems should be mostly empty between regeneration cycles. You� ...
You've got the box open, the parts are spread across the counter, and the cabinet under the sink already looks smaller than it did an hour ago. T ...
You're standing at the sink with a new filter housing, a wrench in one hand, and that familiar doubt in the back of your mind. If the threads don ...

Have you ever bought a pH machine for water expecting it to make your tap water “better,” only to realize you're not even sure whether you needed ...
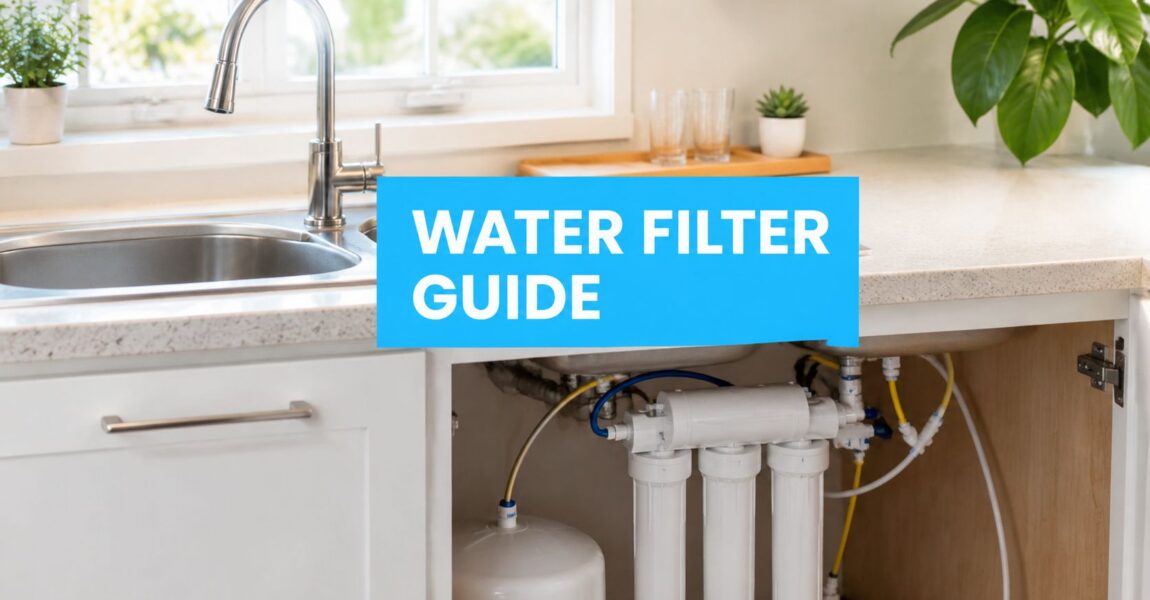
You're probably doing what most homeowners do. You notice chlorine taste, orange staining, dry skin after showers, or a nagging doubt about what's coming out of the tap, then you search for a home water filter system near me and start scrolling local listings.
That's usually too early.
The biggest mistake I see is shopping by installer before you know what your water needs. Local companies often sell what they stock, not what your report supports. A clean install on the wrong system is still the wrong system. The smartest buyers slow down, verify the water first, then make installers prove their recommendation fits the facts.
You taste chlorine at the kitchen sink, see orange staining in a toilet bowl, or notice scale building up on fixtures. Two houses on the same street can need different fixes. A local search will not sort that out for you.
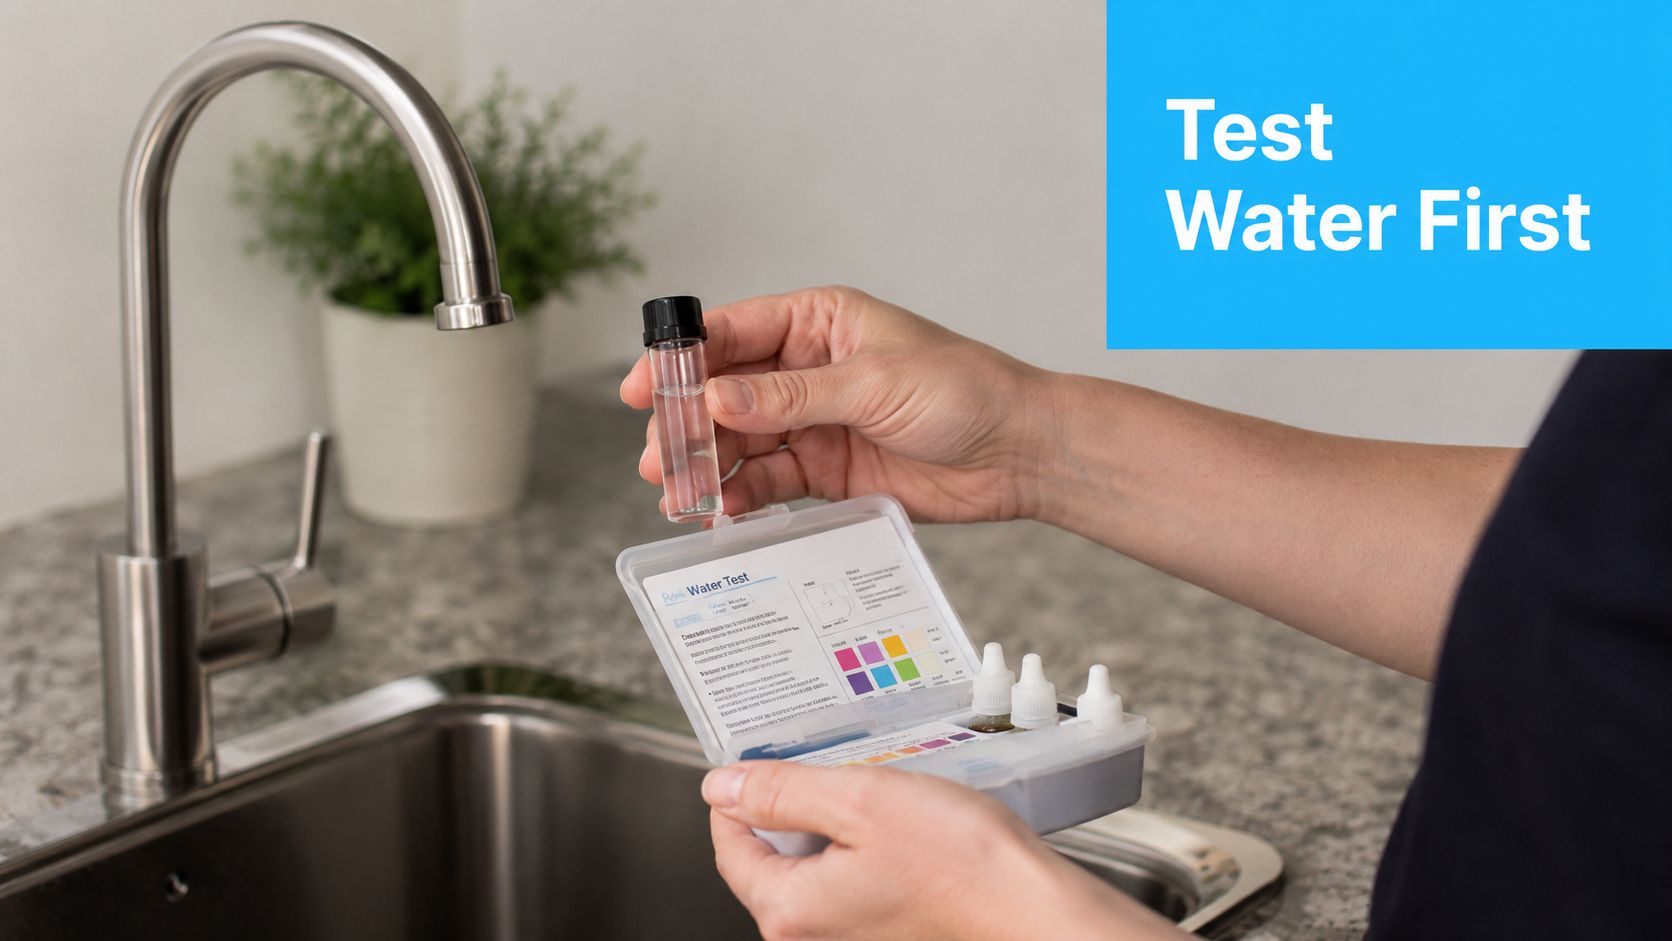
Start with the water report before you talk systems.
City water and well water follow different rules, and good installers treat them differently from the first call.
If your home is on municipal water, pull the Consumer Confidence Report first. Green America notes that utilities issue these reports annually, and the report shows what the utility tested for and how those results compare with EPA limits, according to Green America's water filter guidance. That gives you a starting point, not the full picture inside your house. Old interior plumbing, a service line issue, or a problem isolated to one faucet will not always show up clearly in a utility-wide report.
If your home is on a private well, the job is more hands-on. There is no utility report to fall back on. Test the water directly, and retest when taste, odor, color, or nearby ground conditions change.
One rule matters here. Do not accept a recommendation from anyone who has not first asked whether you are on city water or a well.
A proper recommendation starts with three checks:
Source water
Municipal supply and private well water point to different testing steps and different equipment choices.
The actual problem
Chlorine taste, sulfur smell, hardness, sediment, lead risk at one tap, and bacterial concerns are separate problems. They do not call for the same filter.
The treatment point
Drinking water at one sink is a different project from treating every fixture in the house. That decision changes equipment size, replacement costs, and installation labor.
Many local providers cut corners. They show up with a standard package, test for hardness and chlorine with a quick strip, then start pricing equipment. I have seen homeowners spend whole-house money on a problem that only affected drinking water at the kitchen sink. I have also seen the reverse. A cheap under-sink unit did nothing for staining, odor, or scale because the issue was in the incoming supply.
If you want a plain-English reference before talking to contractors, Water Filter Advisor's guidance on test results, certifications, and filter types is a useful place to sort out the basics.
Once you have actual test data, the conversation gets sharper. Ask the installer to tie the recommendation to the report, line by line. What contaminant or condition is the system meant to address? What certification supports that claim? What does it not solve?
That last question matters. Carbon can help with chlorine, odor, and some taste issues. It does not handle every dissolved contaminant. Reverse osmosis can address a different set of problems, but it adds reject water, slower flow at the faucet, and routine membrane service. UV can disinfect, but it does not remove sediment or hardness. Each tool has a lane.
Bring the report to every estimate. If a contractor barely glances at it and goes back to the same package they sell everyone else, keep looking.
Testing also helps you price the job accurately. A targeted under-sink system can be a manageable DIY project if you already have a shutoff valve, enough cabinet room, and basic plumbing skill. A whole-house system is different. You may need a prefilter, bypass valves, drain routing, pressure checks, and enough space to service tanks later. Professional installation costs more upfront, but it can prevent pressure-loss problems, bad drain connections, and expensive rework. The same logic applies to other hidden water issues. If testing or installation raises concerns about concealed plumbing leaks, it is smart to review Georgetown's trusted leak detection companies before the wall damage gets worse.
A water report is not a sales weapon. It is a way to keep the conversation tied to the house, the water, and the actual problem.
The first page of local search results usually reflects marketing strength, not filtration skill. A company can dominate map listings and still be weak at sizing systems, reading reports, or handling pressure-loss problems.
I'd rather find the installer backward.
If you already know the type of system you likely need, check manufacturer dealer locators and installer networks. That doesn't guarantee perfection, but it does improve the odds that the installer has worked with that valve, housing, bracket spacing, bypass layout, and service schedule before.
Then call a local plumbing supply house. Not the retail aisle. The pro counter. Ask who regularly installs whole-house filtration, under-sink systems, and pressure-sensitive setups without callbacks. Supply houses hear about the failures fast. They know who buys quality parts and who cuts corners.
A third route is neighborhood groups and community forums. Don't ask, “Who's the best water filter company?” That gets you fluff. Ask sharper questions:
Did they review your water report first
If not, the recommendation was probably generic.
Did your water pressure change after install
That answer tells you whether the system was sized properly.
Did they explain replacement filters clearly
A clean install with no maintenance plan becomes a headache later.
Did the final invoice match the estimate
Plumbing surprises happen, but vague pricing is a warning sign.
Sometimes the best lead comes from related trades. If a company is known for careful diagnostic plumbing work, that's often a better sign than a polished filtration ad. For example, homeowners comparing Georgetown's trusted leak detection companies can learn a lot from how those firms communicate about diagnosis, documentation, and repair logic. Those same habits matter when someone is cutting into your main line for a filtration system.
Good installers don't just sell water treatment. They diagnose the house, the plumbing, and the usage pattern.
Don't spend twenty minutes listening to a pitch. Use the first call to filter out weak options.
Ask:
If they can't answer those cleanly, they're not your shortlist.
Once you know what's in your water, system selection gets much easier. You're matching a problem to a tool instead of buying the biggest unit with the nicest brochure.
There are two broad paths. Point-of-entry (POE) systems treat water as it enters the house. Point-of-use (POU) systems treat water at a specific tap. Aquasana's explanation of how whole-house water filters work describes whole-house filters as POE systems installed at the main water line, often using a three-step process with sediment filtration, KDF and activated carbon, and a final polishing stage.
If your issue affects every faucet, shower, and appliance, a POE system makes sense. That includes whole-house chlorine odor, sediment, or water that leaves residue throughout the home.
If the concern is mainly drinking and cooking water, a POU system often gives better value. Lead at one tap, taste complaints at the kitchen sink, or concern about a narrow set of contaminants can often be handled without filtering every gallon used for laundry and toilets.
For a practical homeowner-level read on when a larger setup is worth it, this guide to evaluate whole home water system benefits is useful because it frames the decision around household use, not marketing language.
Not all filter types solve the same problem.
| Home Water Filter System Comparison | |||
|---|---|---|---|
| System Type | Best For Removing | Typical Cost (System Only) | Maintenance Frequency |
| Activated carbon | Chlorine, taste, odor, some chemical issues | Varies by system and size | Follow manufacturer schedule |
| Reverse osmosis | Broad purification for drinking water | Varies by system and size | Follow manufacturer schedule |
| UV filter | Microorganisms and disinfection use cases | Varies by system and size | Follow manufacturer schedule |
| Whole-house POE system | House-wide treatment at every fixture | Varies by system and size | Pre-filters and media need scheduled replacement |
| Under-sink POU system | Drinking and cooking water at one location | Varies by system and size | Cartridge or membrane changes required |
Activated carbon is a workhorse for taste and odor issues, especially chlorine and chloramines. It's often the first thing I reach for when homeowners say, “The water smells like a pool,” or “Coffee tastes off.”
Reverse osmosis dominates the installed home market globally with a 62.8% share, according to Industry Research's household water purifier market report. That tracks with what homeowners want from a drinking-water system: broad purification at a single tap. But RO is not a magic answer for everything. It isn't the right response to every whole-house complaint.
UV is for disinfection scenarios. It's useful where microbial control is the issue, but it doesn't replace the need to match the rest of the system to the water chemistry.
For parasite concerns such as Cryptosporidium, the EPA guidance is specific. Use a point-of-use filter with an absolute pore size of 1 micron or smaller and look for certification under NSF 53 or 58 for cyst reduction or removal, as explained in the EPA filtration FAQ.
A filter that “improves taste” is not the same thing as a filter certified for the contaminant you're worried about.
Buyers quickly become more informed. 92% of water filter owners say they're more likely to buy filters with an independent certification seal, and they're willing to pay an average premium of 17% more for certified products, according to NSF consumer research on certified water filters.
That behavior makes sense. Certification doesn't mean every product is right for your house. It does mean the claims are easier to verify. I'd rather install a plain-looking certified system that matches the report than a flashy box with vague promises.
A water filter installer should be able to do more than solder pipe and tighten unions. Their primary job is matching the equipment to the water, the plumbing layout, and the household demand.
Most bad installs don't fail because the wrench work was awful. They fail because the recommendation was lazy.
The CDC notes that 77% of U.S. water systems have detected contaminants above health guidelines, and that filter choice depends on the specific contaminants in your water. That's why a Verify Before You Buy approach matters, including making installers review your CCR before they quote, as outlined in the CDC's home water filter guidance.
Ask every installer these questions:
Show me how this recommendation fits my report
If they can't tie the system to your water data, the quote is just a sales package.
What happens to pressure and flow after install
This reveals whether they've thought about household demand, bathroom count, and simultaneous use.
What type of plumbing are you tying into
Copper, PEX, and older mixed-material plumbing each bring different install details.
Who handles warranty service
Some companies install the unit and disappear. Others support the equipment and the labor.
What is the exact maintenance schedule
If they act fuzzy here, expect confusion later when performance drops.
You're not only listening for expertise. You're listening for evasion.
Red flags include:
“This is the system we put in for everyone.”
Water conditions aren't one-size-fits-all.
“You don't need the report.”
That's a shortcut that usually benefits the seller.
“Pressure should be fine.”
“Should” is not sizing.
“Just change filters when you remember.”
Maintenance isn't casual if you expect the system to keep working.
If the installer talks more about financing than filtration, you're in a sales appointment, not a diagnostic appointment.
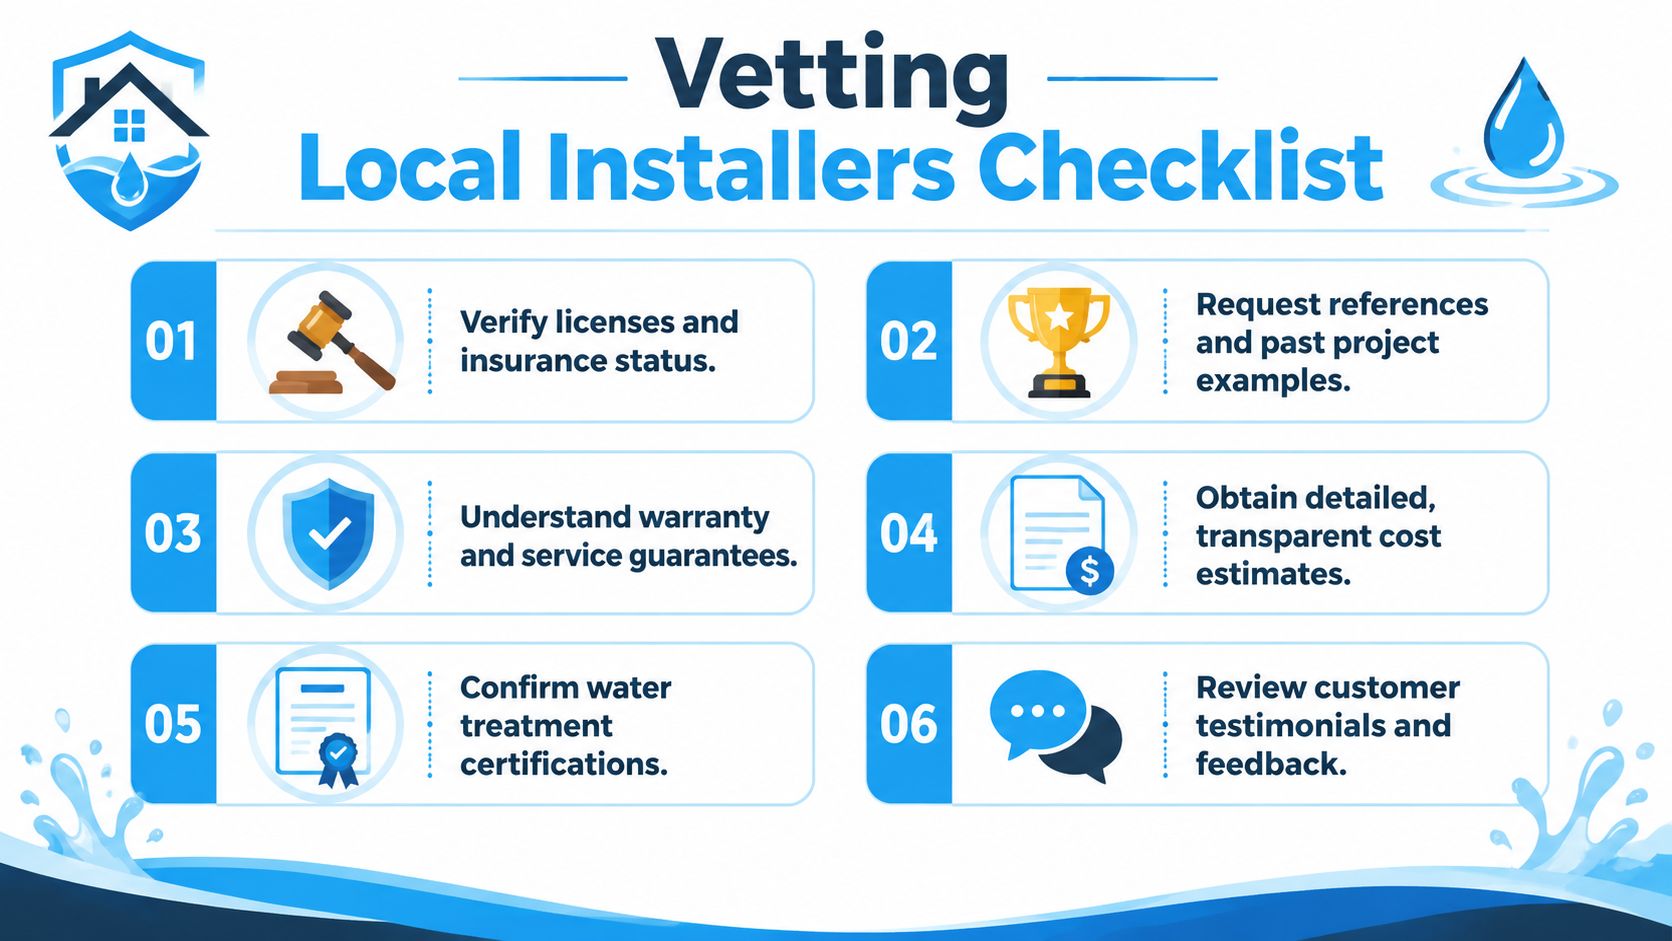
A solid installer should be comfortable showing license information, insurance details, references, and photos of similar installs. I also like asking what they do when the main line location is cramped, or when a customer wants a bypass for easier service. People who've done this work repeatedly answer those questions quickly and specifically.
Confidence is cheap. Clear answers are better.
Installation costs are where “near me” searches get slippery. Many local pages make the equipment price look clear and the labor feel fuzzy.
That's backwards. Labor, access, and plumbing layout often decide whether the project feels smooth or annoying.
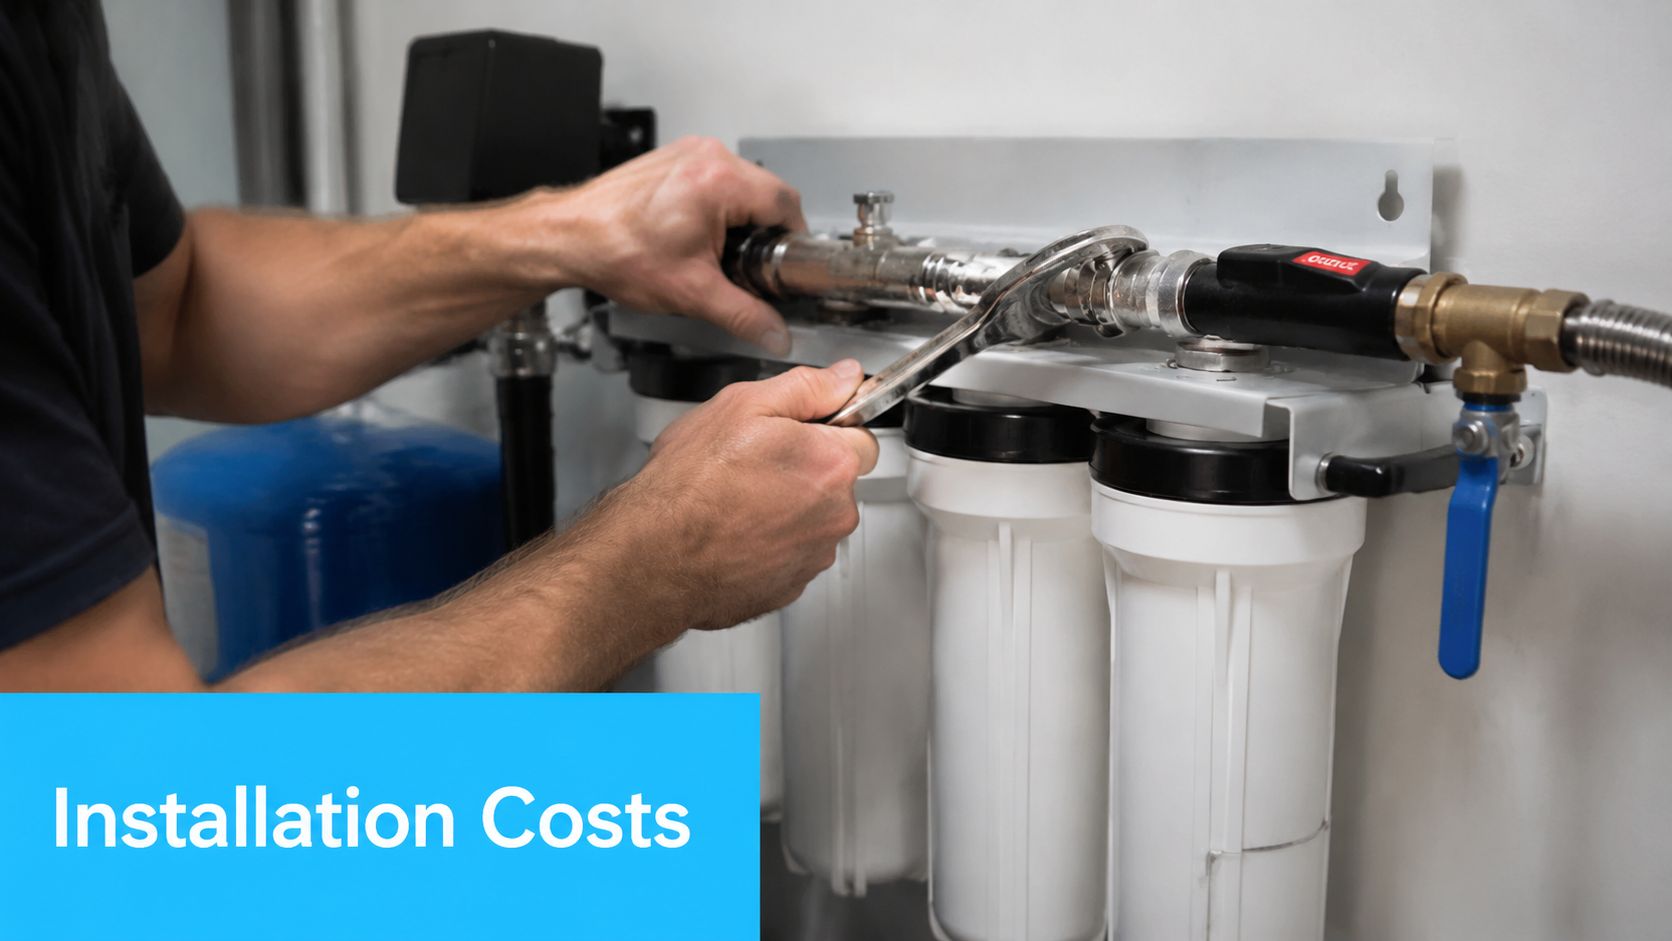
The gap can be bigger than homeowners expect. The typical local search often hides a $300 to $800 markup contractors charge for standard whole-house installations compared with $50 to $150 in DIY parts cost, according to Home Depot's walkthrough on installing a whole-house water filter.
That doesn't mean DIY is always the right move. It means you should understand what you're paying for.
If the main shutoff is accessible, the pipe run is straightforward, and you're experienced with plumbing work, DIY can be realistic. If the line is in a cramped crawlspace, the plumbing is older, or grounding becomes an issue, the cost of getting it wrong can wipe out any savings.
One issue rarely mentioned in local ads is electrical grounding risk. Installing a metal filter housing can interrupt the home's grounding path if it isn't properly bridged. That's not cosmetic. It's a safety problem.
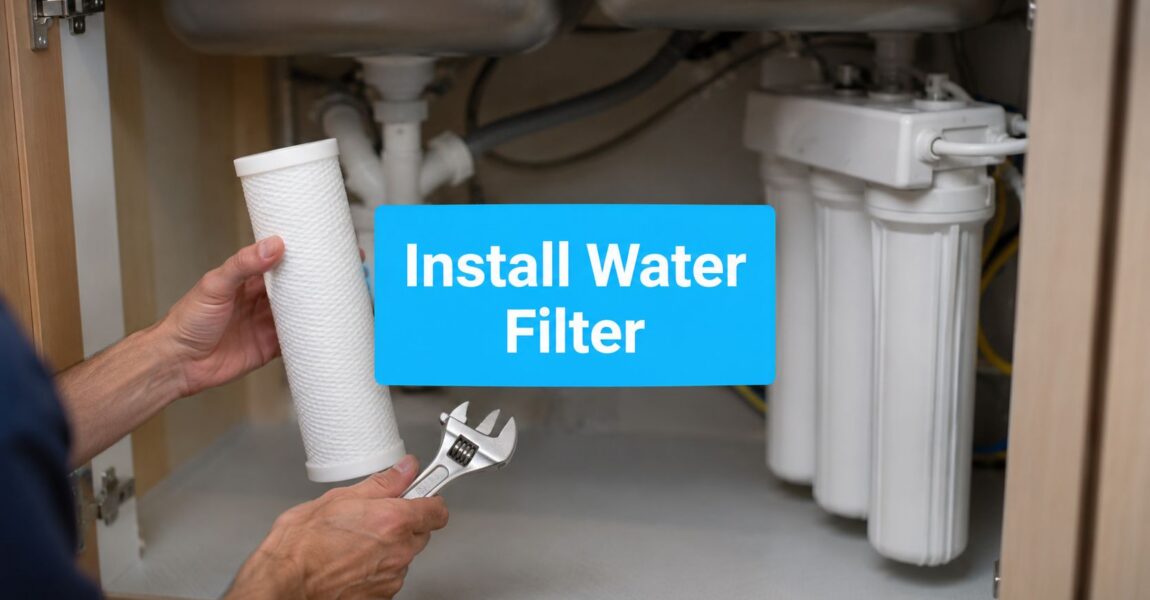
A normal install usually includes shutting off the water, cutting into the main line for a whole-house unit or tying into a sink supply for a point-of-use unit, mounting brackets or housings, checking for leaks, and flushing the system before use.
Space matters more than people expect. Whole-house systems need room for the body of the unit, clearance to service housings, and enough access that someone can replace filters without dismantling half the setup. Under-sink systems need space around disposal lines, drain connections, and stored household junk that somehow always ends up under the kitchen sink.
For homeowners comparing trade labor in different home systems, these Brisbane hot water system installation insights are worth a look because they show the same broad truth: access, complexity, and code issues drive labor more than the equipment photo suggests.
Here's a useful visual if you want to see the install process before deciding who should handle it.
Use the estimate process to pin down logistics:
Where will the system go
Get the exact location, not “near the main line.”
Will there be a bypass
A bypass makes servicing much easier.
Who handles permit or code questions if they apply
You want one clear answer before pipe gets cut.
What does labor warranty cover
Equipment and labor are not always covered the same way.
Cheap installs get expensive when the unit is awkward to service, badly placed, or installed without regard for grounding and access.
The purchase price is only the opening number. Ownership cost lives in the maintenance schedule.
For many whole-house setups, sediment pre-filters need replacement every 3 to 6 months, while carbon or specialty media last 6 to 12 months. If you blow past those intervals, filtration performance can drop hard. Leaf Home notes that failing to stay on schedule can reduce efficacy by over 50% within 6 months after the required replacement point in its advanced filtration maintenance guidance.
You don't need fancy software. You need a repeatable habit.
Write install dates on the housing
A marker on the canister beats guessing later.
Save model numbers and filter sizes
Replacement confusion is one of the most common homeowner headaches.
Watch pressure and taste changes
The water often tells you when maintenance is overdue.
Flow rate matters. If a whole-house unit is undersized for the home, showers, laundry, and kitchen use can fight each other. That's when homeowners think the brand is bad, when poor sizing was the issue.
Local code and HOA issues are less exciting, but they still matter. Main-line equipment placement, drain routing for certain systems, and service access can all become problems if nobody checks the rules before install day. Ask early, get it in writing, and keep the paperwork with your filter records.
A good system should be easy to live with, not just nice to buy.
If you want a straightforward place to compare filter types, understand certifications, and keep maintenance from turning into guesswork, Water Filter Advisor is a useful resource for homeowners sorting through whole-house, under-sink, shower, and replacement-filter decisions.
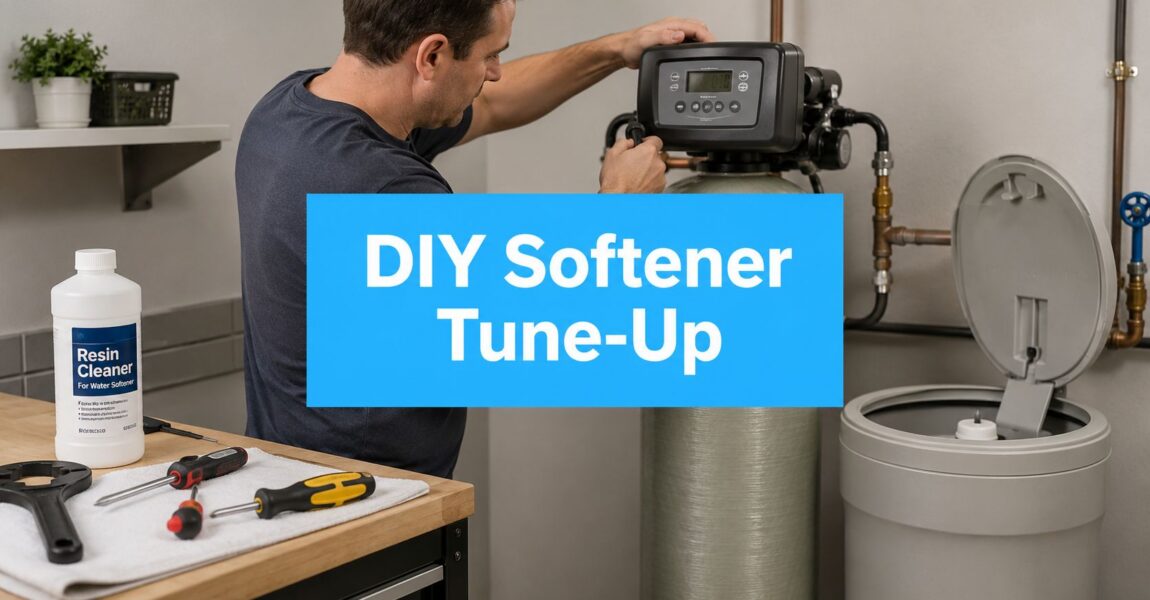
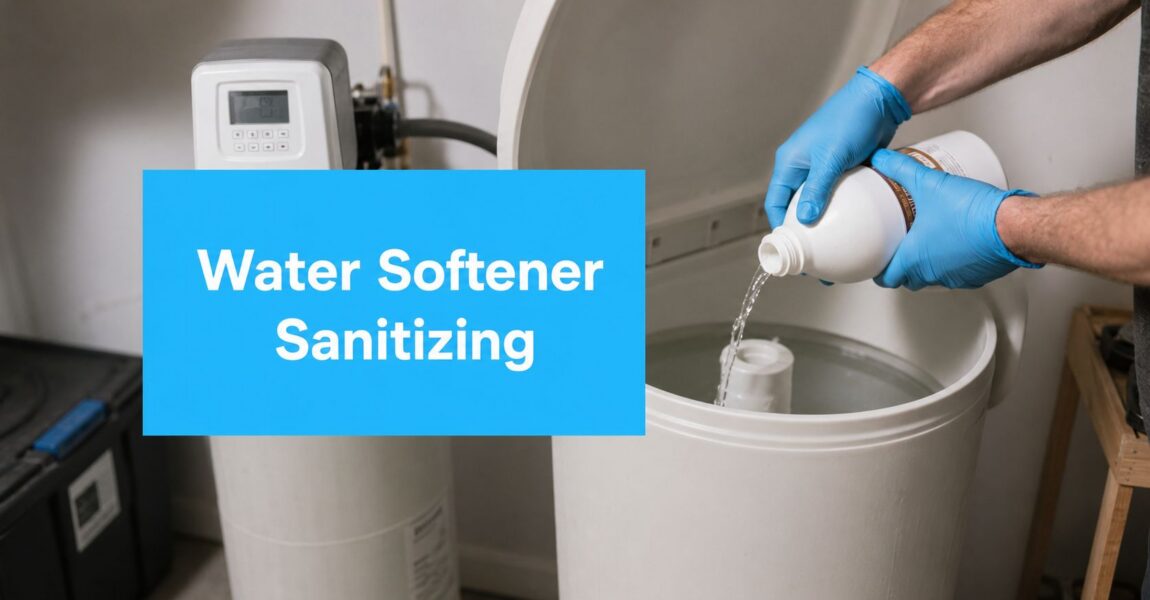
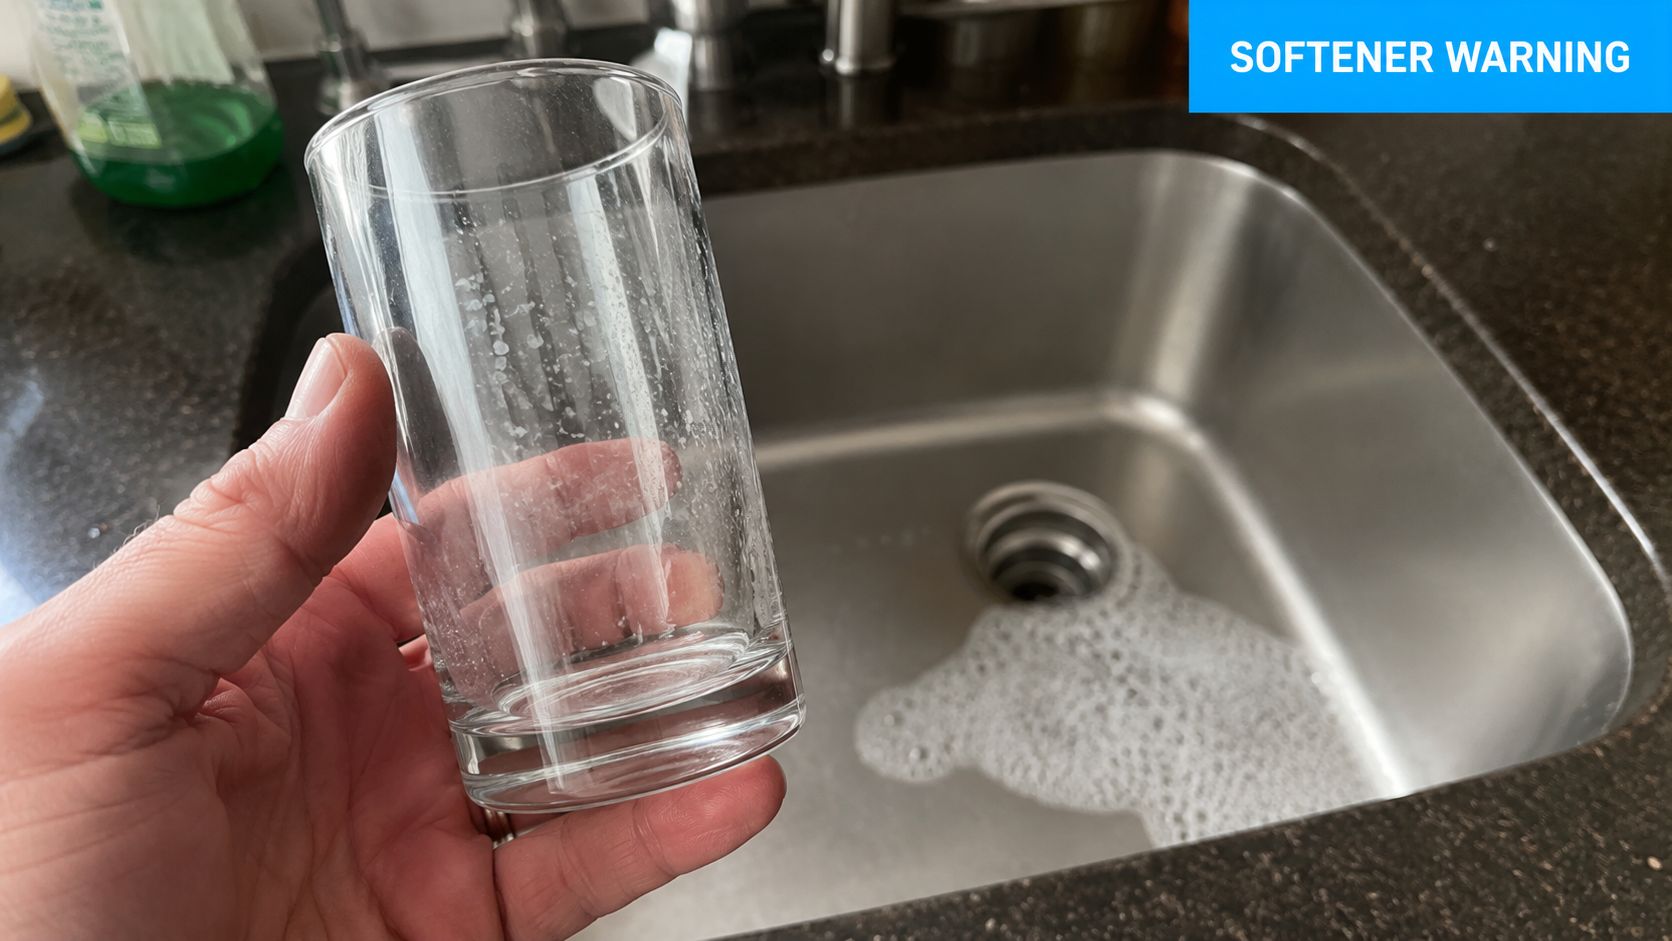
You top off the salt, close the lid, and expect the softener to handle the rest. Then the soap stops lathering the way it used to. Glassware comes out with a faint haze. The shower door starts collecting spots again. That's usually the moment homeowners realize a water softener doesn't stay dialed in forever.
A proper water softener tune up is part cleaning job, part inspection, and part calibration. The cleaning matters. So does the salt. But an important aspect that is often overlooked is whether the softener is set to match the water coming into the house. If the settings are off, a clean machine can still give you hard water, waste salt, or hide a deeper problem in the resin bed.
If hard water signs are creeping back in, adding another bag of pellets might help for a weekend, but it won't fix the reason the softener is underperforming. A softener works when three things line up: the brine system is clean, the resin is still healthy, and the controller is programmed for your water.
A lot of homeowner advice stops at “check salt, clean tank, done.” That's why people get fooled by partial performance. Existing homeowner guides often miss that users don't know how to adjust the hardness setting to match real-time conditions, which can lead to wasted salt or hard water breakthrough, a gap noted in this water softener maintenance guide.
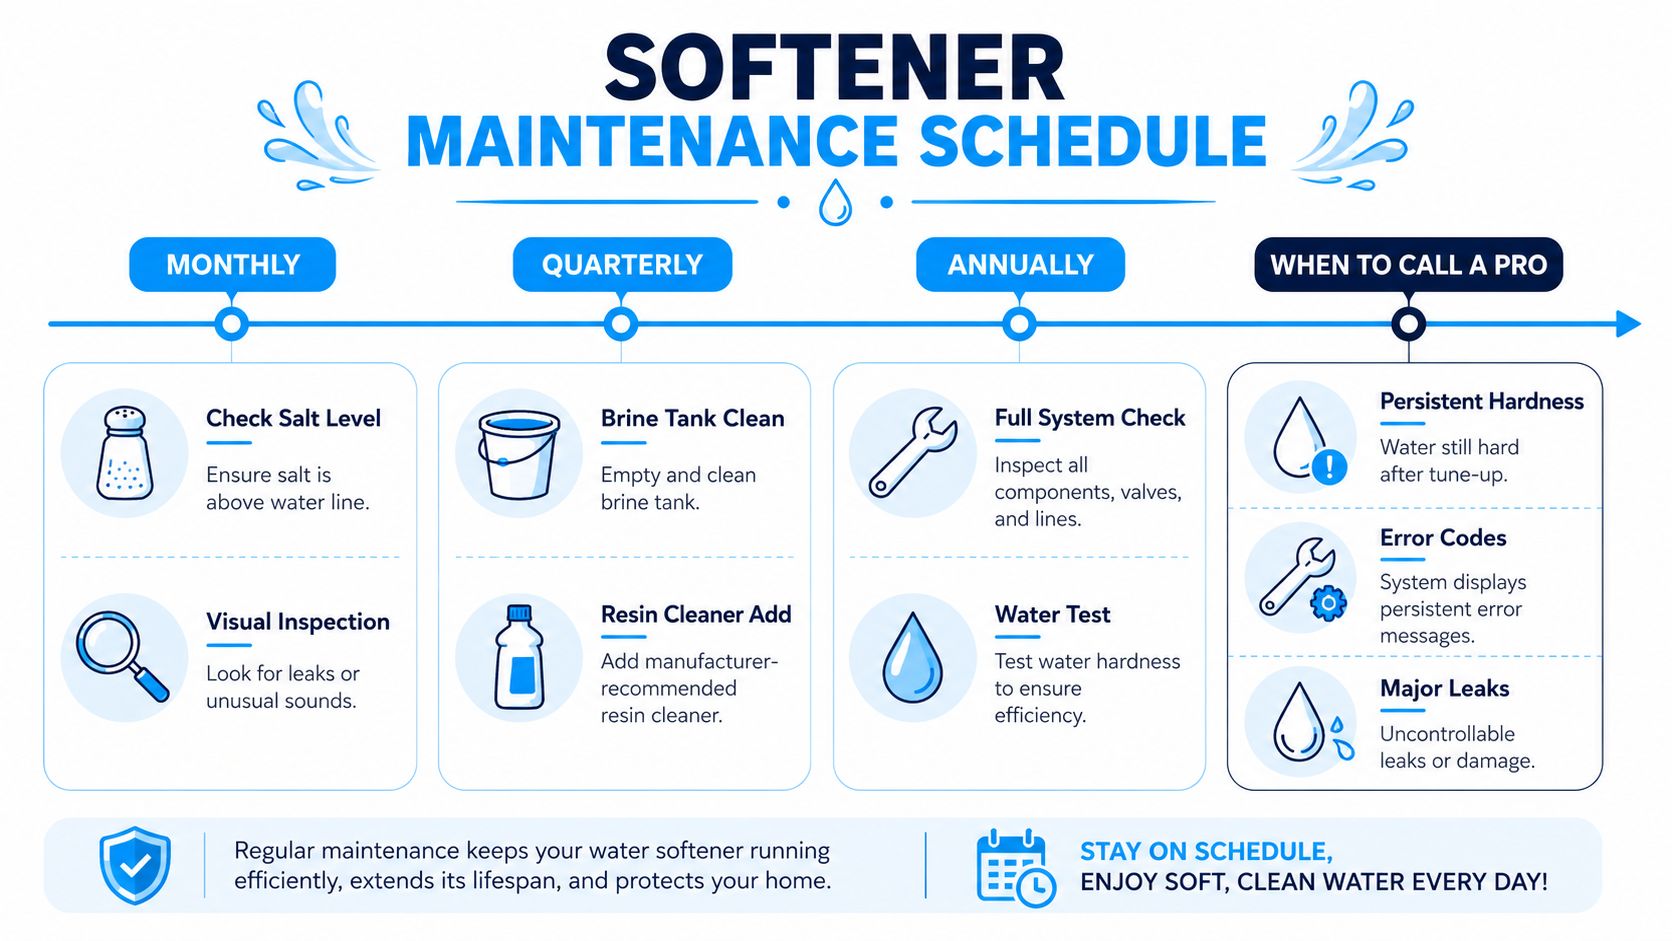
A true tune up checks whether the softener is:
Practical rule: If your softener is clean but your dishes still spot and your tap water still tests hard, the next suspect is usually the settings, not the salt level.
That's the angle most DIY articles skip. Cleaning is the easy part. Calibration is what turns maintenance into actual performance. If scale control elsewhere in the home matters to you too, this guide to effective scale prevention gives useful context on how mineral buildup behaves in water systems.
Before opening anything, get your tools in one place and establish a baseline. The single smartest move in a weekend water softener tune up is testing your water before you start. Without that, you're guessing whether the work helped.
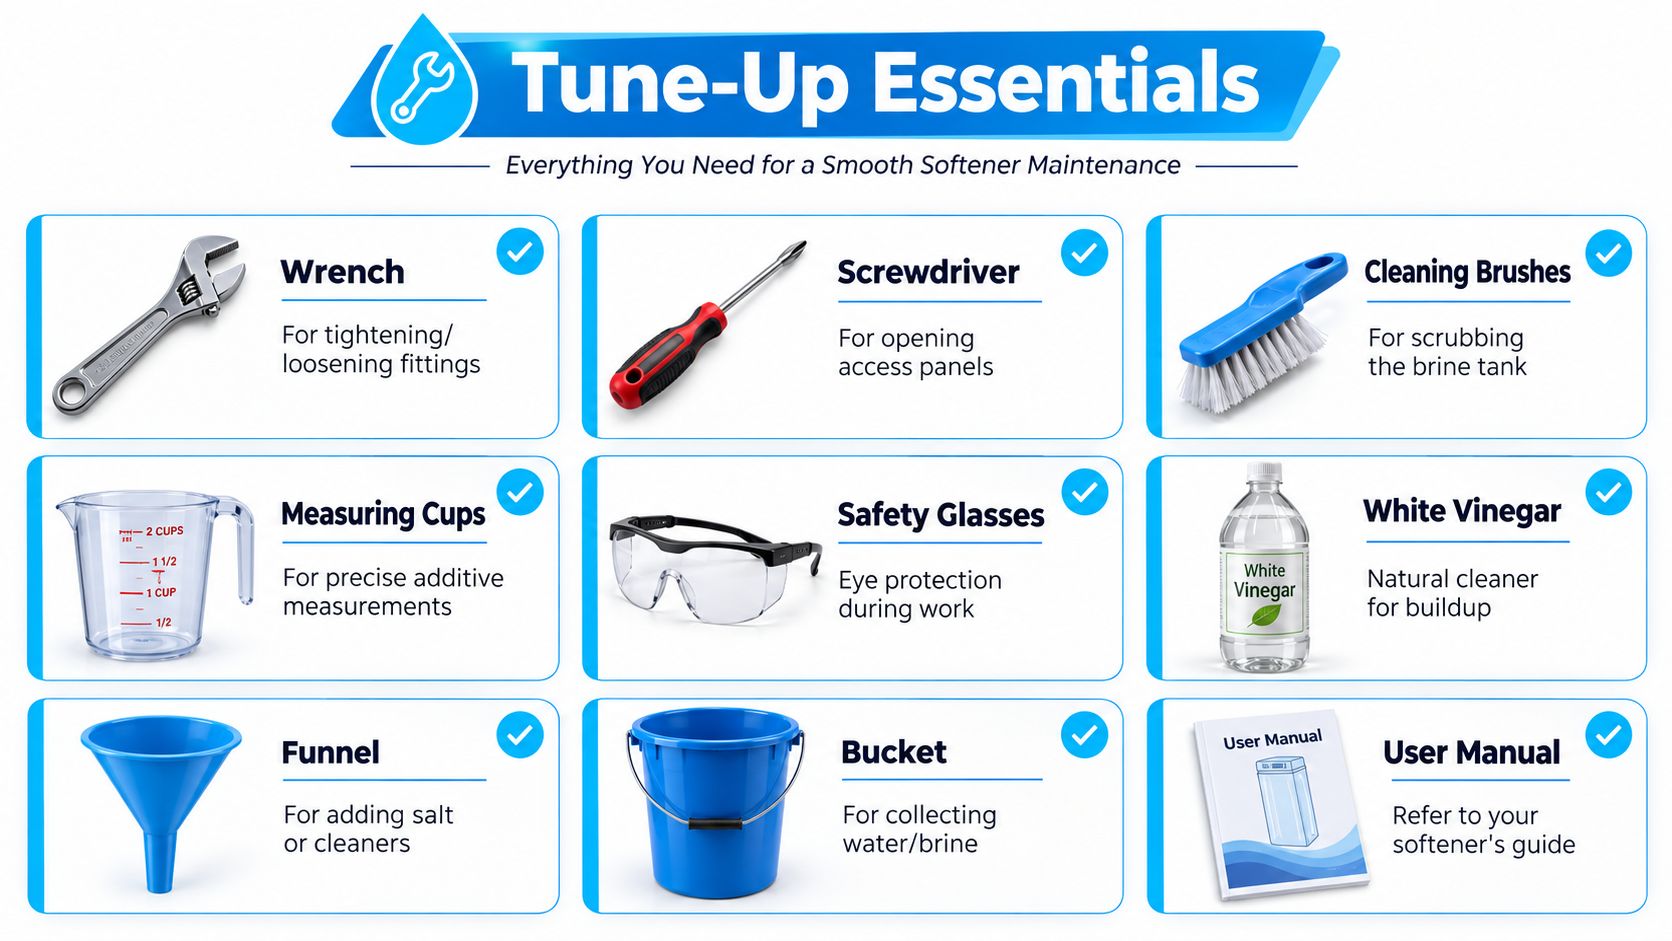
Keep the setup simple and practical:
If you want broader background on home treatment maintenance, the practical articles at Water Filter Advisor's advice library are worth bookmarking.
Take two water samples if you can:
Write down what you find. Also note whether the softener just regenerated or is near the end of its cycle. A softener can look fine right after a recharge and fail later when the resin starts to exhaust.
Don't start cleaning until you've looked for obvious clues.
| Check | What you're looking for | Why it matters |
|---|---|---|
| Salt surface | Hollow spot, crust, or hard cap | Can indicate a salt bridge |
| Water level in brine tank | Unusually high or oddly low | Points to draw or refill issues |
| Around fittings | Damp spots or dried salt trails | Small leaks often show here first |
| Drain line | Kinks or loose connection | A blocked drain can ruin regeneration |
| Controller display | Error message, wrong time, odd settings | Programming problems can mimic hardware failure |
Test first, clean second. If you skip the baseline, you won't know whether the tune up fixed the issue or just made the tank look better.
A lot of weekend tune ups stall right here. The owner breaks up a salt bridge, dumps in fresh pellets, and expects soft water by dinner. Then the shower still feels hard because the underlying problem is lower in the tank, or inside the resin where you cannot see it from the lid.

Put the softener in bypass first if your plumbing setup allows it. Shut off power if your manufacturer calls for that before service. Then scoop usable salt into a clean bucket and remove the rest of the mush, loose sludge, and old brine.
Check for a salt bridge as you empty the tank. It can feel solid across the top with a hollow pocket under it, so the tank looks full while the system cannot make proper brine. Break it up with a blunt tool such as a broom handle. Do not strike the tank walls. Brine tanks crack more often than homeowners expect, especially in cold garages or basements.
Once the tank is empty, wash the interior with warm water and a brush. Mild dish soap is usually enough. Rinse until there is no cleaner left behind, because soap residue can cause foaming and interfere with brine draw on some units.
If your model lets you remove the brine well cap, float assembly, or injector-related parts, clean them one at a time and set them out in order. Photos help during reassembly. A float set too high or a blocked air check can make a clean tank act like a broken softener.
This is the best time to inspect parts that are usually buried.
The Water Quality Association advises using high-purity salt to reduce insoluble buildup in the brine tank, a practical step that cuts down on sludge and service issues over time, as noted in its consumer guidance on water softener salt and maintenance.
A light tank cleaning every year is good preventive maintenance. A heavier cleanout matters when you find sludge, repeated bridging, or draw problems. If the tank keeps fouling quickly, stop treating it like a housekeeping issue and look at the water itself. High iron, sediment, or poor salt quality will keep recreating the same mess.
The resin bed does the actual ion exchange. If the beads are coated with iron, manganese, organics, or bacterial film, the softener may regenerate on schedule and still leak hardness. That is why a tune up that stops at the brine tank can look successful for a day or two and then fail again.
Use a resin cleaner that matches the fouling you suspect and your softener manufacturer allows. Iron cleaner is common for wells with iron staining. Follow the product label exactly, including dose and where to add it. Some cleaners go into the brine well. Others are added during a specific regeneration step.
A full manual resin-bed cleaning is not always a homeowner job. If the resin is old, badly fouled, or physically damaged, cleaner may only give partial improvement. The National Sanitation Foundation notes that treatment systems need maintenance and periodic component replacement to keep performing as certified, which is a useful reminder that cleaning cannot restore worn-out media indefinitely, as explained on NSF's home water treatment maintenance guidance.
Here's a visual walkthrough many homeowners find helpful before they start the dirty part:
A clean brine tank does not confirm a successful water softener tune up. It only removes one possible cause.
Refill the tank with clean salt after everything is back together. Do not pack it to the top. Keep enough salt in the tank to cover the water level, but leave room to monitor bridging and mushing. If the tank was nearly empty, knock loose any crust stuck to the walls before you refill.
One last practical check matters here. If you clean the tank, run resin cleaner, and still test hard water after a proper regeneration, the problem may be resin degradation or incorrect settings rather than dirt alone. That is the point of this tune up. Clean the system, then verify that it can still do the job.
You finish cleaning the softener, add fresh salt, run a regeneration, and the shower still leaves soap scum. That usually means the problem is in the settings, not the cleanup. Calibration is the part that tells you whether the unit is matched to your water, or whether cleaning only covered up a sizing, programming, or resin problem.
Do not program anything until you know your raw water hardness. Use a current test result from a water report or a reliable hardness test kit. If your water also contains iron or manganese, use the compensated hardness number your valve manufacturer calls for, not just the plain hardness reading.
Many control valves use a compensation rule that adds hardness for iron and manganese because those contaminants consume exchange capacity too. The exact formula varies by brand, so check your manual first. If you enter the raw hardness number when iron is present, the softener can appear to work for a day or two, then leak hardness before the next regeneration.
That is a common homeowner mistake.
Open the manual and find the settings that control how much work the unit thinks it can do before it needs to recharge:
Those settings work together. Raising hardness without checking capacity and salt dose can make the unit regenerate too often. Lowering salt dose without enough real capacity can save salt on paper and leave hard water in the house by the end of the cycle.
A properly tuned softener should regenerate often enough to keep hardness out of the tap, but not so often that it burns through salt and water early. In the field, the sweet spot for many homes is driven by two things: actual water hardness and actual daily water use.
A simple way to check your programming is to estimate daily demand. Multiply the number of people in the house by typical daily gallons per person, then multiply that by hardness in grains per gallon. Compare that demand to the softener's usable capacity at the current salt setting. If the math says the unit should last about five days and it is regenerating every two, the settings are likely wasteful. If the math says five days and hard water shows up on day three, suspect under-programming, unexpected water use, channeling, or tired resin.
Set the regeneration time for a period when no one needs water, usually overnight. That part is simple. Getting the hardness, capacity, and reserve lined up with real household demand is what makes the tune-up stick.
Calibration takeaway: A successful water softener tune up ends with verified soft water at the tap, not just cleaner parts and new settings on the screen.
One more trade-off matters here. Programming hardness a little high can protect against breakthrough if your source water fluctuates, but setting it far too high wastes salt and water. Programming too low does the opposite. It stretches each cycle until the softener is spent early. If you have to push the settings hard just to get acceptable water, that is a warning sign. The resin bed may be fouled, aged, or no longer delivering its rated capacity.
After cleaning and programming, don't just close the lid and walk away. Give the system one complete quality check.
Use this short punch list:
Then trigger a manual regeneration. Listen for normal valve movement. Watch for water moving to drain when the cycle reaches that stage. You don't need to stare at it for an hour, but the first few minutes tell you a lot.
Some common post-tune-up complaints are easy to sort out.
Water tastes salty.
That usually points to incomplete rinsing after regeneration, too much salt setting, or a brine draw issue. Run another regeneration if your manual allows it, then retest.
Water pressure seems lower.
Check whether the unit is fully out of bypass and whether a screen, venturi, or line was reassembled incorrectly. If your flow is poor only when the softener is in service, compare it to bypass mode.
You still get spots after the tune up.
Don't assume the whole job failed. Test the softened water again. If hardness is still present, the issue is likely programming, poor brine draw, or worn resin.
If bypass mode restores good flow but service mode does not, the softener itself is the restriction. That narrows the problem fast.
The brine tank fills oddly or not at all.
Recheck the float assembly and tubing routing. One mis-seated part can upset the whole cycle.
A good tune up earns its keep over the next few months, not just on the day you clean the tank. The ultimate test is whether the softener still matches your water. Municipal supply can shift. Well water can drift with seasons. If hardness at the tap starts climbing while your settings stay the same, the schedule needs attention, not more salt.
Use a simple log. Write down raw water hardness, softened water hardness, salt use, and any setting changes. That one habit makes troubleshooting much faster because you can see whether performance drifted slowly or failed all at once.
That seasonal check is where many tune ups succeed or fail. A softener can look clean and still perform poorly if it is set for water conditions from a year ago.
Resin also has a service life. If your unit has been in place for years and needs frequent corrections to maintain soft water, stop treating every symptom as a cleaning problem. Physical wear, iron fouling, chlorine damage, and channeling inside the resin bed can all reduce exchange capacity.
Call a pro if testing and calibration no longer agree with the results at the tap.
That usually shows up in a few specific ways:
Here is the practical line I use in the field. If testing shows the settings are wrong, recalibrate. If testing shows the settings are right but the water is still hard, start looking for a failed component or spent resin.
A tune up works best when it includes both cleaning and proof. Test the water, compare it to your programmed settings, and keep a short record. That is how you catch a drifting water source early and avoid wasting time on a softener that needs repair, not another bag of salt.
If you want clear, no-hype help choosing test kits, comparing filtration options, or maintaining the rest of your home water setup, visit Water Filter Advisor. It's a solid resource for homeowners who want better water without guessing.
Your shower might already be telling you what's wrong. Your skin feels tight after ten minutes under hot water. Your hair gets rougher the day after wash day. The bathroom carries that faint pool-like smell, especially when the water is steaming.
Most detachable shower head guides act like the big decision is spray pattern versus finish. For people dealing with chlorine, hard water, or skin irritation, that's the wrong question. The best shower head detachable setup is the one that keeps filtration working without turning your shower into a weak trickle.
A detachable head isn't just a convenience tool for rinsing tile, bathing kids, or washing a dog. In a filtration-focused bathroom, it becomes part of a water treatment system. That changes how you judge it.
Most reviews still rank handheld models by how many settings they have, how shiny the chrome looks, or whether the hose feels flexible. That misses the issue that decides whether the shower feels better after a week or worse after a few months. The ultimate test is how the detachable head behaves once a filter is added in line.
According to plumbing guidance on detachable heads and filter pressure loss, existing content on best shower head detachable options largely ignores whether added hardware pushes pressure loss beyond the filter's rated limit. The same source notes that a 2025 study by the American Society of Plumbing Engineers found 38% of shower filter users reported reduced spray performance after 6 months, often because detachable fittings added pressure drop that no buying guide tested end to end.
That finding matches what shows up in real bathrooms. A detachable head can look excellent on paper and still perform poorly once a filter cartridge, swivel connection, and longer hose all start resisting flow.
When I assess a detachable model for filtration use, I care about a different shortlist:
Practical rule: If a detachable head doesn't work well with a filter installed, it isn't a premium shower solution. It's just a nice-looking nozzle.
That's why this guide stays focused on filtration performance first. Spray patterns matter. Clean water matters more.
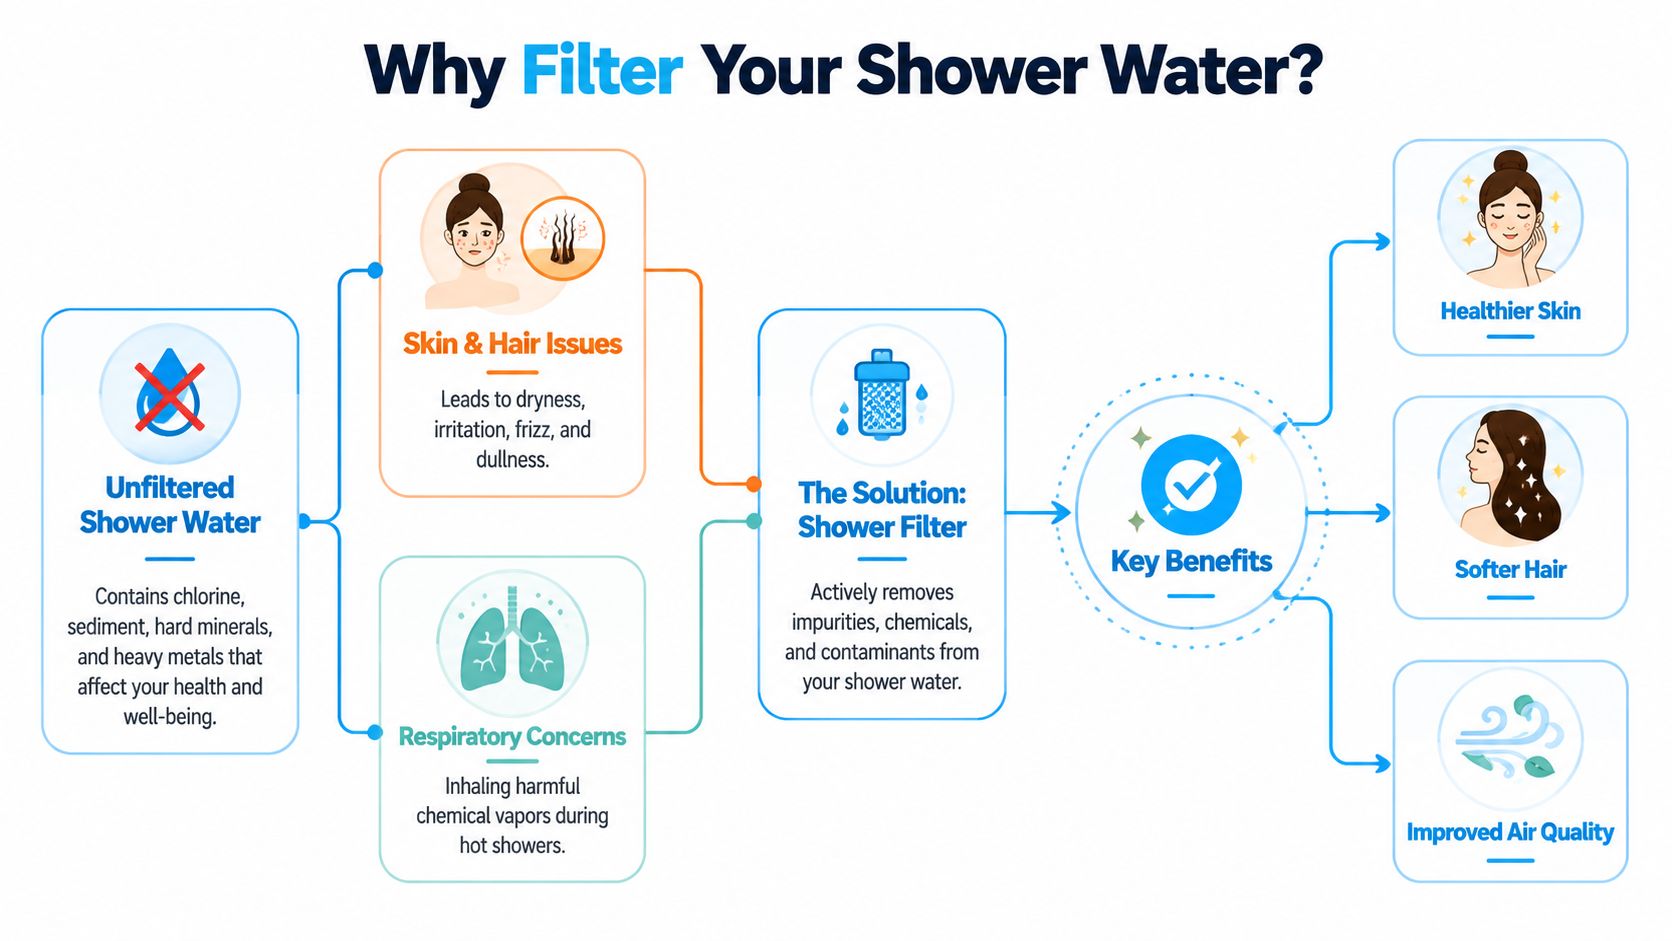
A new head can change how water feels. A filter changes what's in the water.
That distinction matters because many of the complaints people blame on “bad shower pressure” are really water quality problems. If chlorine is stripping oils from skin and hair, a stronger spray won't solve it. If sediment is irritating the scalp or clogging the faceplate, more spray modes won't fix that either.
In the United States, chlorine is common in municipal supplies. It's present in over 90% of U.S. public water systems, and showering turns a portion of it into airborne exposure because hot spray aerosolizes the water. Studies cited in the verified data show that up to 70 to 80% of airborne chlorine exposure occurs in the bathroom due to shower spray, and detachable heads using combinations of KDF, activated carbon, and mineral balls can reduce chlorine concentration by 95 to 99% under standard flow conditions of 2.0 to 2.5 gpm.
That's why filtered shower heads often help in ways people notice quickly. Less chlorine contact usually means less post-shower tightness, less roughness at the ends of the hair, and a less aggressive chemical smell in the steam.
Not all integrated filters do the same job. The names matter.
The practical point is simple. If a detachable head advertises “filtration” but doesn't clearly identify its media, I treat that as a warning sign. Vague claims usually mean vague performance.
Shower water hits more than your body. You inhale it too. Hot water opens pores, wets the scalp thoroughly, and fills a small enclosed room with vapor. That makes shower filtration different from a countertop drinking filter. The contact is broader, warmer, and harder to ignore.
The verified data also notes that prolonged exposure to chlorine and chloramine in shower steam is linked to skin dryness, hair damage, and respiratory irritation, especially for people with sensitive skin or asthma. It also states that the American Academy of Dermatology reports over 40% of adults say shower water quality affects their skin health.
If your skin feels worse after showering than before, the water itself deserves attention.
A shower filter moves from “nice upgrade” to “smart fix” in a few situations:
For more practical home filtration guidance, the advice library at Water Filter Advisor is worth bookmarking.
If you're shopping for the best shower head detachable model for filtration, ignore marketing terms like “spa rain” until you know what sits inside the filter body and how the unit is built around it.
Early in the search, a comparison table helps separate actual filtration choices from generic handhelds with decorative promises.
| Model | Filtration Type | Key Contaminants Removed | Flow Rate (GPM) | Best For |
|---|---|---|---|---|
| Cobbe Handheld Shower Head with Filter | 15-stage integrated filtration | Heavy metals, chlorine, and other impurities | Not specified | Users who want integrated contaminant reduction in one handheld unit |
| Multi-layer detachable filtered heads | KDF, activated carbon, mineral balls | Chlorine and common shower-water impurities | 2.0 to 2.5 under standard testing conditions | Sensitive skin and chlorine-focused filtration |
| Chrome or stainless steel detachable filtered heads | Varies by cartridge design | Depends on media used | 1.8 to 2.5 for balanced performance | Buyers prioritizing durability and long-term seal quality |
| Basic detachable heads without a defined filter system | Minimal or unclear | Unclear | Varies | Better avoided if filtration is the priority |
The clearest named example in the verified data is the Cobbe Handheld Shower Head with Filter. According to testing coverage of handheld shower heads, it uses a 15-stage filtration system designed to remove heavy metals, chlorine, and other impurities.
That matters for one reason above all. A detachable head with integrated filtration has fewer mismatched parts than a setup where you combine a random hose, a random handheld, and a separate in-line cartridge. Fewer transitions usually mean fewer places for pressure loss, leaks, and thread wear to show up.
A bigger stage count doesn't automatically mean better filtration. Some brands stretch stage language for marketing. What matters more is whether the unit pairs useful media with a design that still showers well once the cartridge starts doing real work.
I rank detachable filtered heads using four practical criteria:
A filtered handheld should feel like a reliable plumbing fixture, not a beauty gadget.
Integrated filtered handhelds are attractive because installation is simpler. Renters like them because they usually swap in and out without much trouble. They also keep the filtration point close to where water exits, which can be useful when chlorine reduction is the main goal.
Separate in-line filter plus detachable head setups can be stronger when you want more control over cartridge style or replacement sourcing. The downside is compatibility. Every added joint, washer, and swivel can affect pressure and long-term sealing.
Here's where buyers often go wrong. They compare detachable heads as if the head alone creates the result. In practice, the shower arm, filter housing, hose, cartridge age, and docking bracket all influence the final experience.
For renters
A compact integrated unit usually makes the most sense. It installs fast, removes easily at move-out, and doesn't ask you to build a multi-part system.
For families with skin concerns
Look for multi-layer media that clearly includes chlorine-focused filtration, especially KDF and activated carbon. Skip vague wellness language.
For households hard on hardware
Choose metal-bodied detachable heads where possible. The hose gets handled often, the dock gets used often, and cheap plastic tends to show wear earlier.
For buyers chasing “high pressure”
Be careful. High-pressure branding often hides the fact that once filtration starts restricting flow, the spray can become sharp but not effective. Good rinsing is the goal, not aggressive needle spray.
The right detachable filtered head depends less on brand hype and more on the problem coming out of your pipe. If you don't match the filter to the water issue, you'll spend money and still hate your shower.

This is the most common starting point for city-water households. If your bathroom smells chemical when the shower gets hot, prioritize media designed for chlorine reduction. In practice, that means looking for cartridges built around KDF, activated carbon, or a layered design that clearly identifies both.
This is also the group that notices cosmetic improvements first. Skin comfort, scalp calmness, and a less harsh steam profile usually improve before anything else.
Hard water isn't the same as chlorine, and buyers confuse the two all the time. Hardness usually shows up as scale on fixtures, rough hair feel, and soap that doesn't rinse cleanly.
A detachable filtered head can help with the shower experience, but it won't replace a full hardness treatment strategy for the whole home. For renters, though, a filtered handheld is often the only realistic move because it addresses the point of use. If your hot water system is also part of the problem, resources on expert water heater fixes in Las Vegas show the kind of mechanical issues that can worsen mineral-related headaches in real homes.
A common pitfall for many filtered detachable setups involves performance. The EPA established the WaterSense program in 2007, requiring showerheads to stay at a maximum of 2.5 gpm at 80 psi, and compliant detachable models can cut water use significantly while still performing well when they're engineered properly. For low-pressure homes, choosing a model built to work efficiently within that 2.5 gpm limit matters because once you add filtration, a poorly designed head will feel weaker.
Test first if you can. Even a simple strip test gives you a better starting point than buying by online star rating.
A filtered detachable setup isn't hard to install, but careless installation is one of the fastest ways to create leaks, weak spray, and early seal failure.
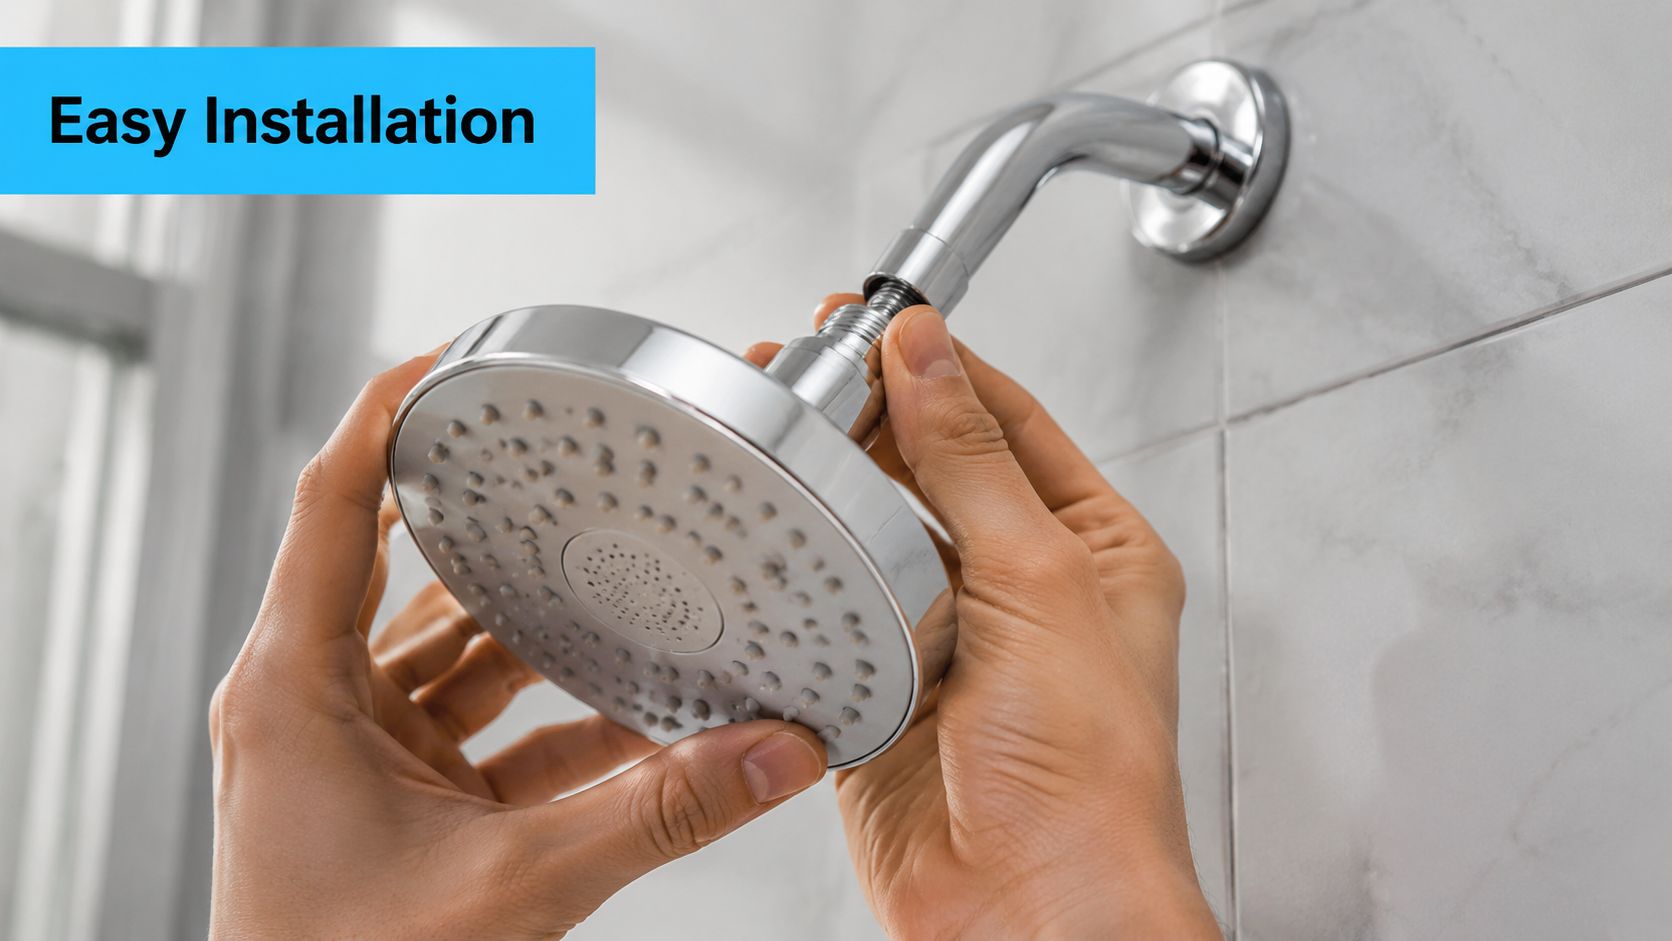
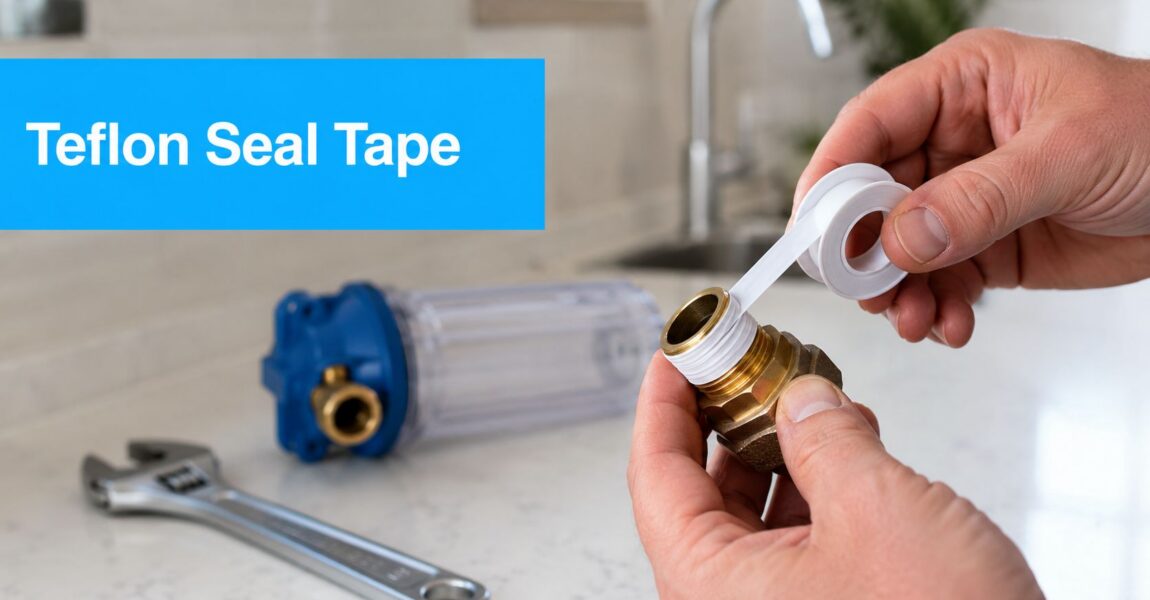
Start by removing the old head and cleaning the shower arm threads. If the new unit includes washers, use the supplied ones in the right locations instead of stacking extras from another product. Hand-tighten first. If you reach for tools too early, cross-threading gets much more likely.
After installation, run cold water first, then warm water, and check every joint. The common leak points are the shower arm connection, the filter housing seam, and the hose nut at the handheld.
One of the least discussed failure points is mechanical stress. Verified field data states that 27% of filter inlet failures in multi-use households stem from mechanical stress at connection points. That's exactly why some detachable filtered systems age badly even when the cartridge itself is still serviceable.
In daily use, a few habits help:
A shower filter doesn't just stop working all at once. More often, pressure fades first, then spray quality gets uneven, then users start blaming the head. In reality, the cartridge is usually loading up with what it captured.
That's why maintenance should be tied to shower performance, not just memory. If a once-clean spray starts feeling patchy or the handheld suddenly seems weaker, inspect the filter before replacing the entire fixture.
Here's a useful installation walkthrough if you want a visual reference before starting:
Replace worn washers early. A cheap seal often decides whether the whole filtered system feels solid or annoying.
There isn't one best shower head detachable option for every bathroom. There's a best fit for the water problem you have.
For families with sensitive skin, the smartest choice is a detachable head with clearly identified multi-layer filtration media aimed at chlorine reduction. If the product doesn't tell you what's in the cartridge, move on. Skin-focused buyers need clarity more than style.
For renters, an integrated filtered handheld is usually the strongest answer. It installs without much fuss, removes cleanly when you move, and avoids the compatibility headaches that come with assembling separate parts from different brands. That's where a model like the Cobbe concept is appealing. The integrated approach is simple and practical.
For homes with low pressure, efficiency matters more than “rainfall” branding. Stay with designs that work well inside the WaterSense flow limit and avoid bulky heads that only feel good when supply pressure is already generous. A smaller, better-engineered filtered handheld often outperforms a larger fashionable one.
For buyers who are tough on fixtures, pick durability over novelty. Metal-bodied detachable heads with dependable seals usually age better than lightweight plastic units, especially in busy bathrooms where the handheld gets pulled off the dock constantly.
The main takeaway is simple. Buy the shower head as part of a filtration system, not as a standalone accessory. If the filter media is credible, the body is durable, and the pressure stays usable as the cartridge does its job, you've found the right setup.
If you want help comparing shower filters, understanding media types, or choosing a system that fits your water and budget, Water Filter Advisor is a practical place to start. It's especially useful when you need straight answers on chlorine, hard water, replacement filters, and what is effective in everyday homes.
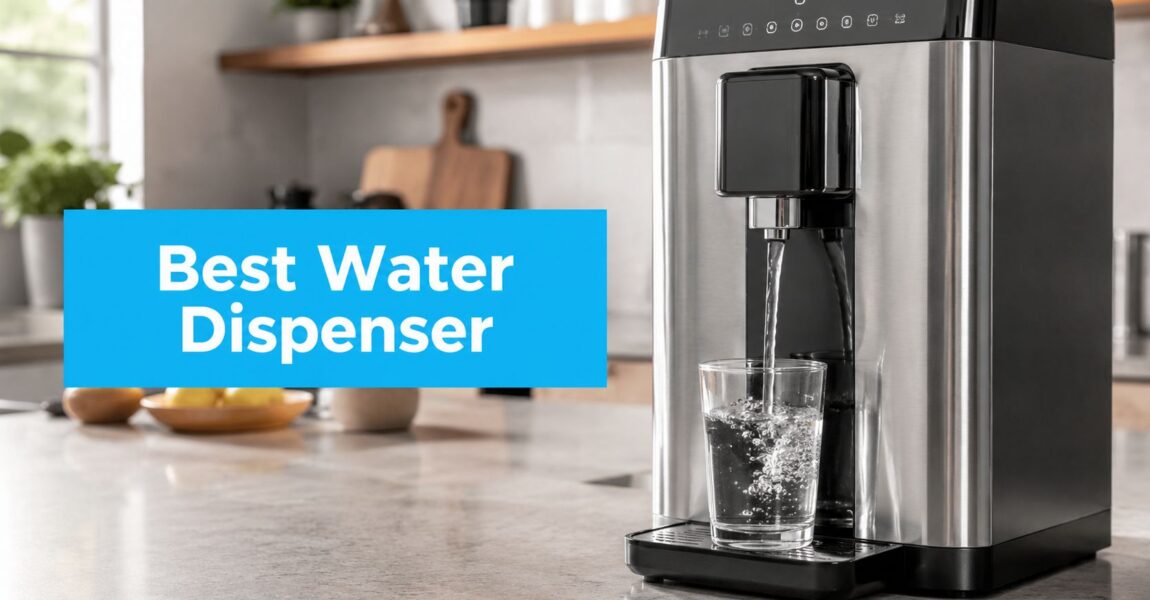
You fill a glass from the kitchen tap, hold it to the light, and it looks fine. That's the problem. Water issues that worry most families don't announce themselves. Chlorine can show up as taste and odor, but lead, dissolved solids, and newer concerns like PFAS don't give you the courtesy of a warning label.
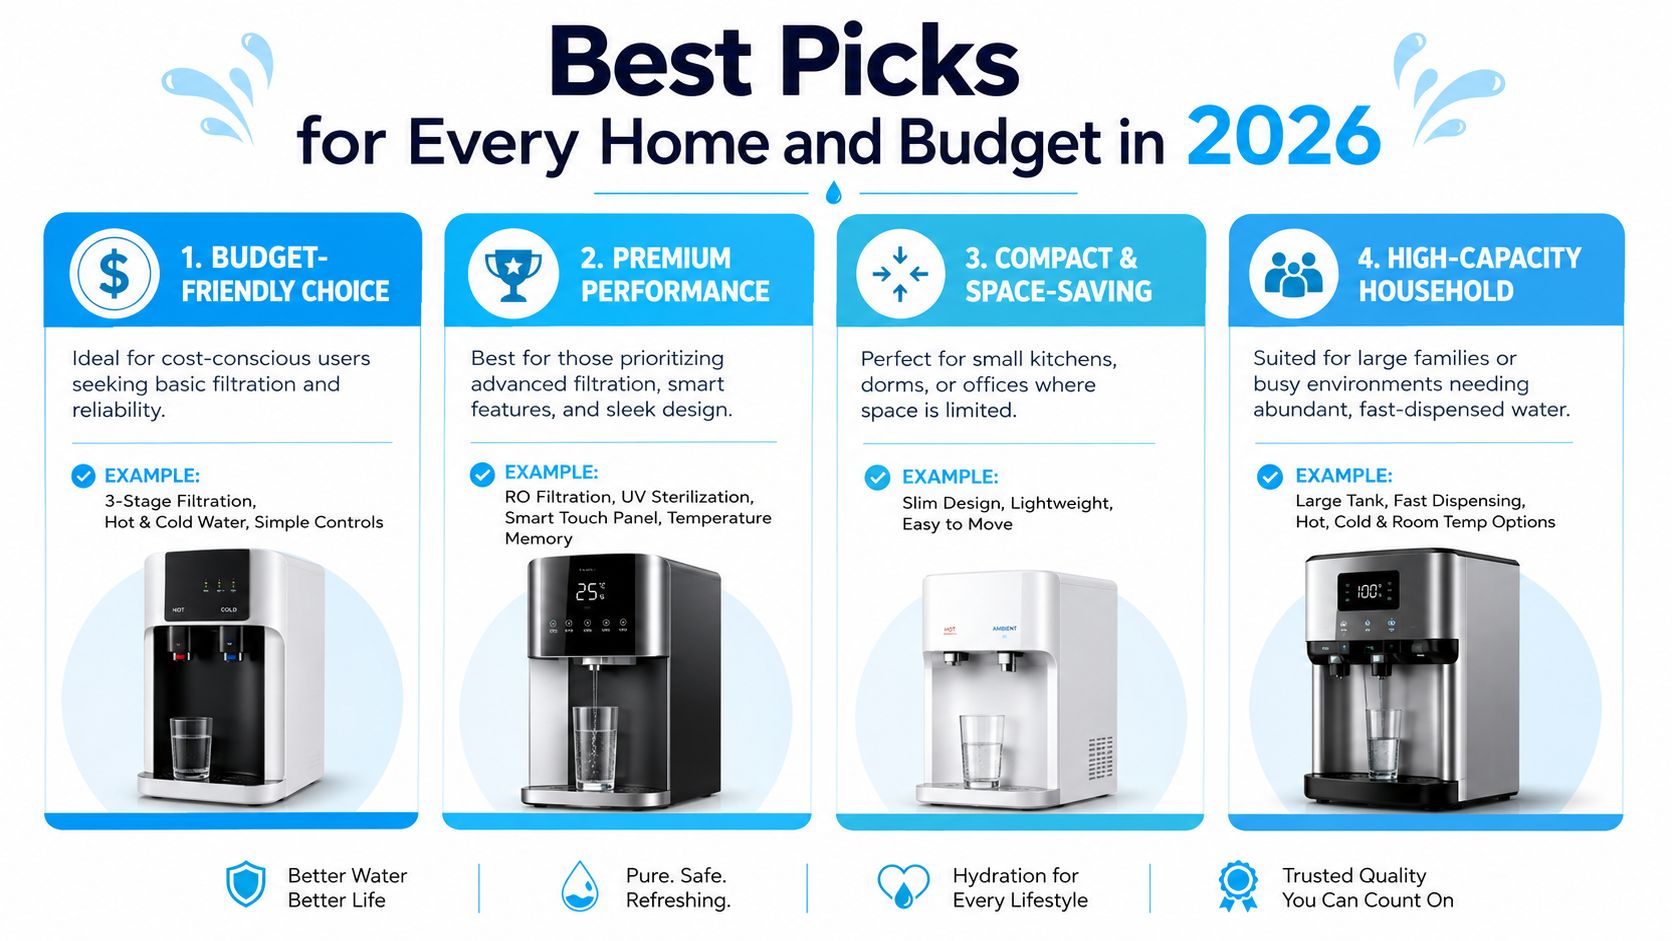
That's why countertop systems have moved from “nice to have” to a serious home upgrade. The category reached USD 3,157 million in 2024, with projected growth at 11.2% CAGR through 2031 to USD 6,638 million, and the average selling price of USD 160 per unit implies roughly 19,731,000 units sold globally in 2024 according to market analysis on countertop water dispensers. People want better water without opening cabinets, drilling counters, or committing to plumbing work.
A good countertop dispenser can absolutely solve that problem. A bad one can leave you with expensive filter replacements, weak contaminant removal, annoying refill routines, or a bulky appliance that becomes a regret purchase after the first month. The best countertop water dispenser isn't the one with the flashiest feature list. It's the one that fits your water risks, your kitchen, and your long-term budget.
Countertop dispensers appeal to people who want control without remodeling. Renters like them because they don't need permanent installation. Homeowners like them because they can target drinking water quality without replacing the whole plumbing system.
That convenience matters, but convenience alone shouldn't drive the decision. Water filtration is a health purchase first. If your main complaint is flat taste or chlorine smell, a simpler system may be enough. If you're worried about a broader range of contaminants, the wrong technology can leave a big gap between what the product promises and what it removes in the glass you drink.
Here's the part many shoppers miss. This market is growing fast because countertop units have become mainstream, not because every unit performs equally well. The category is expanding faster than the broader water dispenser market, which tells me buyers are prioritizing ease of use and no-plumber setup, but it also means the shelves are crowded with models that look similar while doing very different jobs.
The smartest buyers start with the contaminants they care about, then choose convenience features second.
A family kitchen usually needs four things from a dispenser:
That last point deserves more attention than it gets. I've seen plenty of people buy a countertop unit for the compact footprint, then realize the recurring costs are what really determine whether they keep using it.
Early on, it helps to compare by filtration type, ownership costs, and practical fit, not by lifestyle branding.
| Best fit | Filtration style | Main strength | Main trade-off |
|---|---|---|---|
| Taste and odor improvement | Activated carbon | Simple, familiar, convenient | Doesn't match RO for broad contaminant removal |
| Broad contaminant reduction | Reverse osmosis | Strong removal of dissolved contaminants | Slower process and maintenance complexity |
| Low-tech backup or off-grid use | Gravity-fed | No power required | Slower dispensing and fewer premium features |
Most countertop units look like small appliances. Inside, they behave very differently. If you understand the filter type, you can ignore half the marketing language on the box.
Right near the top of the list is the filtration media itself.

Activated carbon is the workhorse in countertop filtration. According to Consumer Reports' summary of countertop filter technology, activated carbon-block technology, the primary filtration method in all tested countertop water filters, uses black granular activated carbon to pull solid and gas contaminants from water flow, reducing chlorine, sediment, off tastes, odors, and sometimes lead, solvents, and pesticides.
In plain English, carbon acts like a contaminant trap. It's especially good for making municipal water more pleasant to drink. If your tap water smells like a pool or leaves a chemical aftertaste in coffee, carbon is often the first thing that helps.
What it doesn't do well is solve every water problem. Carbon is strong for taste-driven complaints and some health-related contaminants, but performance depends heavily on cartridge design, contact time, and certification. One carbon filter can be solid for chlorine and weak for broader reduction claims. Another can be much better. You have to read past the headline.
Reverse osmosis is the heavy-duty option in this category. It pushes water through a semipermeable membrane that removes dissolved solids, heavy metals, and many contaminants that simpler filters can't tackle as effectively.
The trade-off is mechanical complexity. RO systems are usually slower, they need more filter stages, and they produce reject water. The best measured efficiency among lab-tested countertop RO systems noted the AquaTru Carafe at a 4:1 pure-to-waste ratio, meaning 4 gallons of purified water for every 1 gallon wasted, according to testing cited in this countertop dispenser review. That's a strong result for countertop RO, but it still reminds you that high-performance purification comes with operational trade-offs.
For households concerned about PFAS, dissolved solids, or a wider contaminant profile, RO is usually where I tell them to start looking.
Before comparing specific models, this walkthrough gives a useful visual overview:
Gravity-fed systems work by letting water move through filter media without pumps or pressure. Their appeal is obvious. They're simple, quiet, and often don't need electricity. That makes them attractive for backup use, cabins, or families who hate appliance complexity.
But gravity systems are usually slower, and they don't automatically compete with RO on dissolved contaminant removal. They're best when simplicity matters more than speed or advanced purification.
UV is different. UV doesn't filter particles out of water. It targets microorganisms by exposing water to ultraviolet light. In countertop dispensers, UV is best thought of as an added treatment layer, not a replacement for solid filtration. If a unit advertises UV, ask what the core filtration media does first. UV can be a useful bonus. It isn't a complete answer by itself.
Practical rule: Choose carbon for better-tasting city water, RO for the toughest contaminant concerns, and gravity when reliability and no-power operation matter most.
A dispenser can filter well and still be annoying to live with. A proper test happens on a busy weekday morning when someone wants cold water, someone else is filling a bottle, and the unit is humming on the counter next to the coffee maker.
The certification marks matter because they separate broad promises from defined test standards. Top countertop dispensers are commonly judged against NSF/ANSI 53 and 42, alongside performance factors like temperature stability and noise, according to this technical market guide for water dispensers. In practical terms, many shoppers use NSF/ANSI 42 to think about aesthetic issues like chlorine taste and odor, while NSF/ANSI 53 is more relevant when health-effect contaminant reduction is part of the buying decision.
Certification is where I start. Everything else comes after.
Powered countertop dispensers can be wonderfully convenient, but they're still appliances. Some make enough noise to irritate you in an open kitchen. In the same technical guide, the ClearJet Compact+ (Countertop) is listed at 32 dB, while annual energy use across the market ranges from 0 kWh for the EverClear EcoFlow S to 264 kWh for the AquaGuard Freestanding Elite. That range tells you how wide the gap can be between a passive system and a feature-heavy unit.
A few performance details are worth watching closely:
Capacity, refill frequency, and dispenser height matter more than shoppers expect. A compact unit that fits under cabinets can still be frustrating if it can't handle family bottle refills without constant attention.
If you're comparing models and need a broader framework for evaluating certifications, maintenance, and use cases, Water Filter Advisor's advice library is a practical reference point.
Buy for your busiest day, not your quietest day. A dispenser that feels adequate for one glass can feel undersized by dinner.
The best countertop water dispenser depends on what problem you're solving. I'd rather match a product to a household than declare one universal winner.
| Household need | Recommended type or model | Why it stands out | Main caution |
|---|---|---|---|
| Maximum contaminant reduction | AquaTru Carafe | Exceptional validated contaminant performance | Ongoing filter cost matters |
| Simple daily use | Gravity-fed countertop system | Quiet, low-tech, dependable | Slower and less comprehensive |
| Small kitchens | Compact carbon-based dispenser | Better fit and easier placement | Check cartridge performance carefully |
| Budget-focused homes | Basic certified carbon system | Lower entry cost and easy routine use | Don't expect RO-level purification |
If your priority is health-focused performance, AquaTru Carafe is the standout name in this category. Independent Tap Score analysis in lab testing of 9 countertop RO systems gave it a 9.57/10 score, and the testing reported 100% removal of every health-related contaminant in baseline samples along with performance certification for all 83 of its claimed reduction metrics, as detailed in Water Filter Guru's countertop RO testing.
That's a rare result. It's the kind of performance benchmark that separates serious purification from “good enough for taste.”
For buyers worried about what they can't see, AquaTru Carafe is the strongest evidence-backed countertop pick in this group.
Pros
Cons
Who this is for
Families concerned about a wide contaminant spectrum, including households that want stronger reassurance than basic chlorine and lead reduction.
PFAS has pushed a lot of families to look beyond generic certifications. That's wise. Many countertop units can claim solid chlorine and lead performance while saying much less about emerging contaminants.
According to Quality Water Lab's countertop review, only the AquaTru Carafe is IAPMO-certified to eliminate 84 contaminants including PFOA and PFOS, while many competitors only meet NSF/ANSI 42 and 53 for chlorine and lead. If PFAS is your top concern, that distinction matters more than countertop aesthetics or touch controls.
Why I'd separate this category from the one above: a system can be generally strong and still not be the one I'd point to first for PFAS-focused buying. Here, the documented certification angle is the key advantage.
A gravity-fed countertop system isn't glamorous, but there's a reason many households stay loyal to this format. There's less to break, less noise, and usually less frustration. If you value predictable operation over fast dispensing or advanced temperature features, this style has a lot going for it.
What works well:
What doesn't:
This is also the category I suggest for people trying to solve coffee and water issues together in one kitchen setup. Taste improvement often changes tea, coffee, and drinking water all at once, and simpler countertop systems can be a sensible entry point if your goal is better flavor with minimal fuss.
Small kitchens punish oversized appliances. A compact carbon-based countertop dispenser often makes the most sense here because it keeps the footprint manageable and the user experience simple.
The catch is that “compact” shouldn't become an excuse for weak filter performance. In tiny kitchens, buyers tend to overvalue dimensions and undervalue cartridge capability. That's backwards. I'd rather see a slightly larger unit with stronger certified reduction than a sleek cube that mostly improves taste and leaves bigger questions unanswered.
Counter space is expensive. Don't spend it on a dispenser that only looks efficient.
Who this is for
Apartment dwellers, condo owners, dorm users, and anyone working with low cabinet clearance or a crowded prep area.
A basic certified carbon system is still a smart buy for the right home. If your water is municipally treated, your main complaints are chlorine smell and unpleasant taste, and you want a lower-cost entry into filtration, this category can be very satisfying.
The mistake is assuming “budget” means “best value.” Sometimes it does. Sometimes it means a cheaper unit that burns you later with inconvenient cartridge changes or disappointing contaminant coverage. Budget buys work best when your expectations are realistic and your water concerns are modest.
Sticker price tricks people. A countertop dispenser can look affordable on day one and become expensive by the end of the first year.
That's especially true with RO systems. CNET's review of countertop water filters notes that AquaTru Carafe costs $375 and that replacement filters can exceed $100 annually. That doesn't make it a bad buy. It means you should judge it like an appliance with recurring operating costs, not like a one-time kitchen accessory.
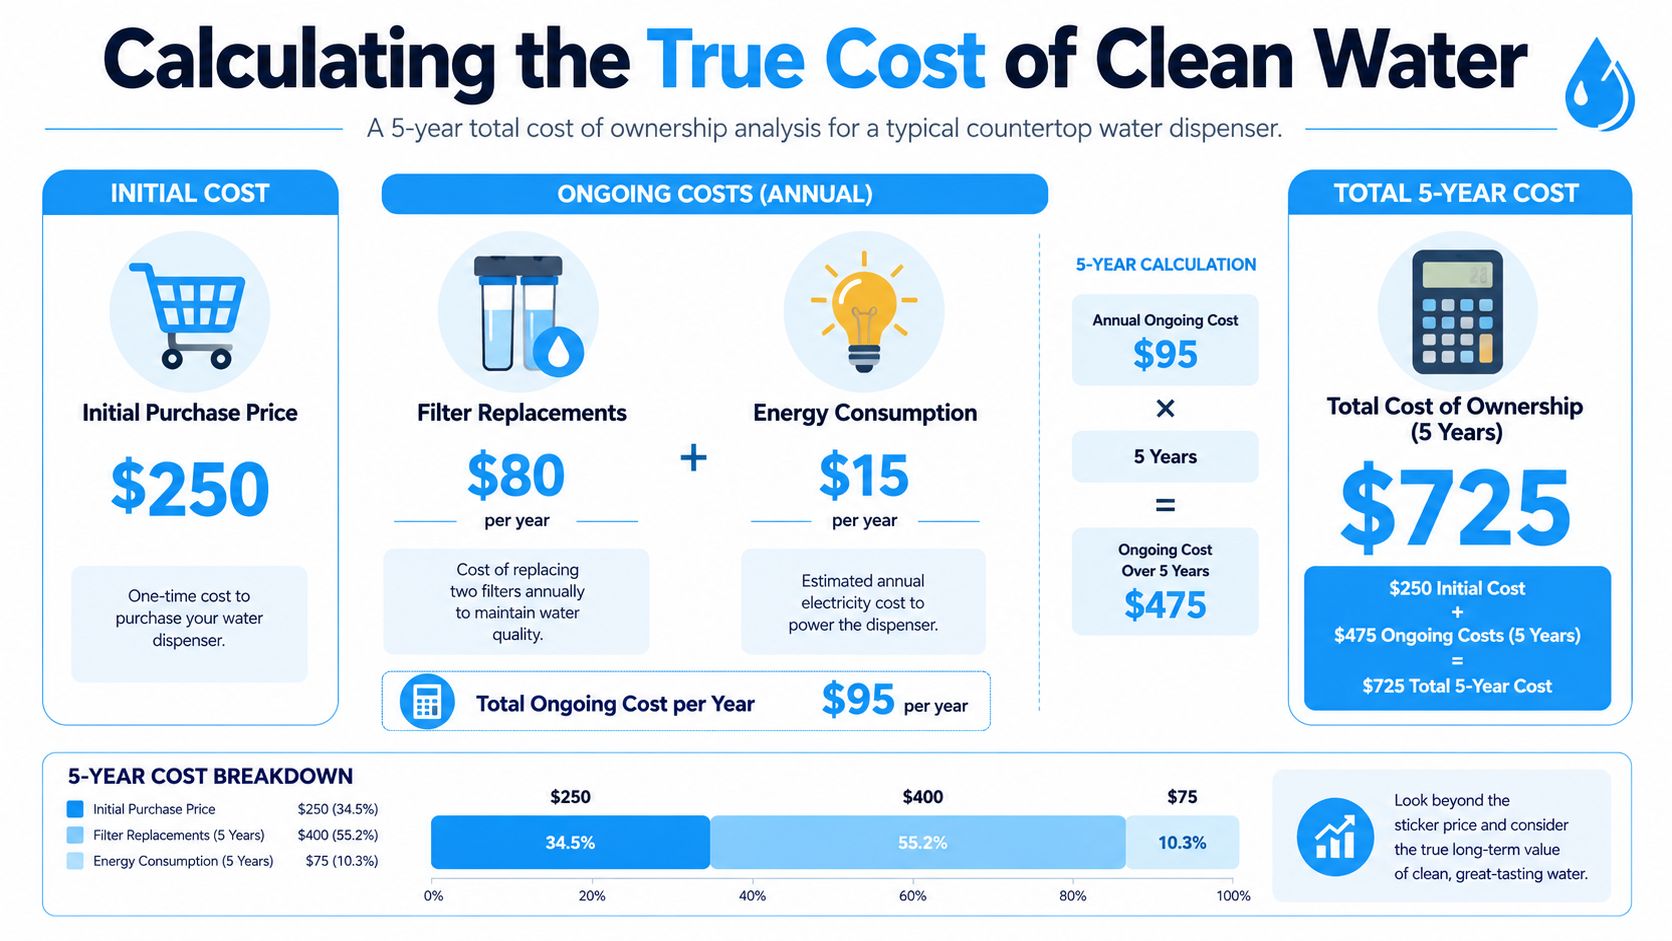
When I evaluate a countertop unit, I separate ownership into three buckets:
Purchase price
This gets the most attention and often deserves the least.
Replacement filters
Regarding these components, cheap-looking systems can become expensive, and premium systems can justify themselves.
Energy use
Powered heating and cooling add convenience, but they can also add ongoing cost and noise.
A simple way to think about it is this. If a family buys for taste improvement only, a basic carbon unit may deliver a lower long-term burden. If a family needs stronger contaminant reduction, a more expensive RO unit may still be the better value because it solves the actual problem instead of the superficial one.
Good value isn't the lowest upfront number. It's the lowest cost for the level of protection and convenience you need.
Use this quick screen when comparing options:
Regional water conditions can change the math, especially if you're comparing point-of-use filters against larger home upgrades. For households thinking more broadly, this water filtration guide for Northern Colorado homeowners is a useful example of how local conditions affect system choice and budgeting.
A countertop dispenser only stays trustworthy if you maintain it. Neglected units can develop odor, scale, slime around dispensing points, and performance drop-off that people wrongly blame on the filter brand.
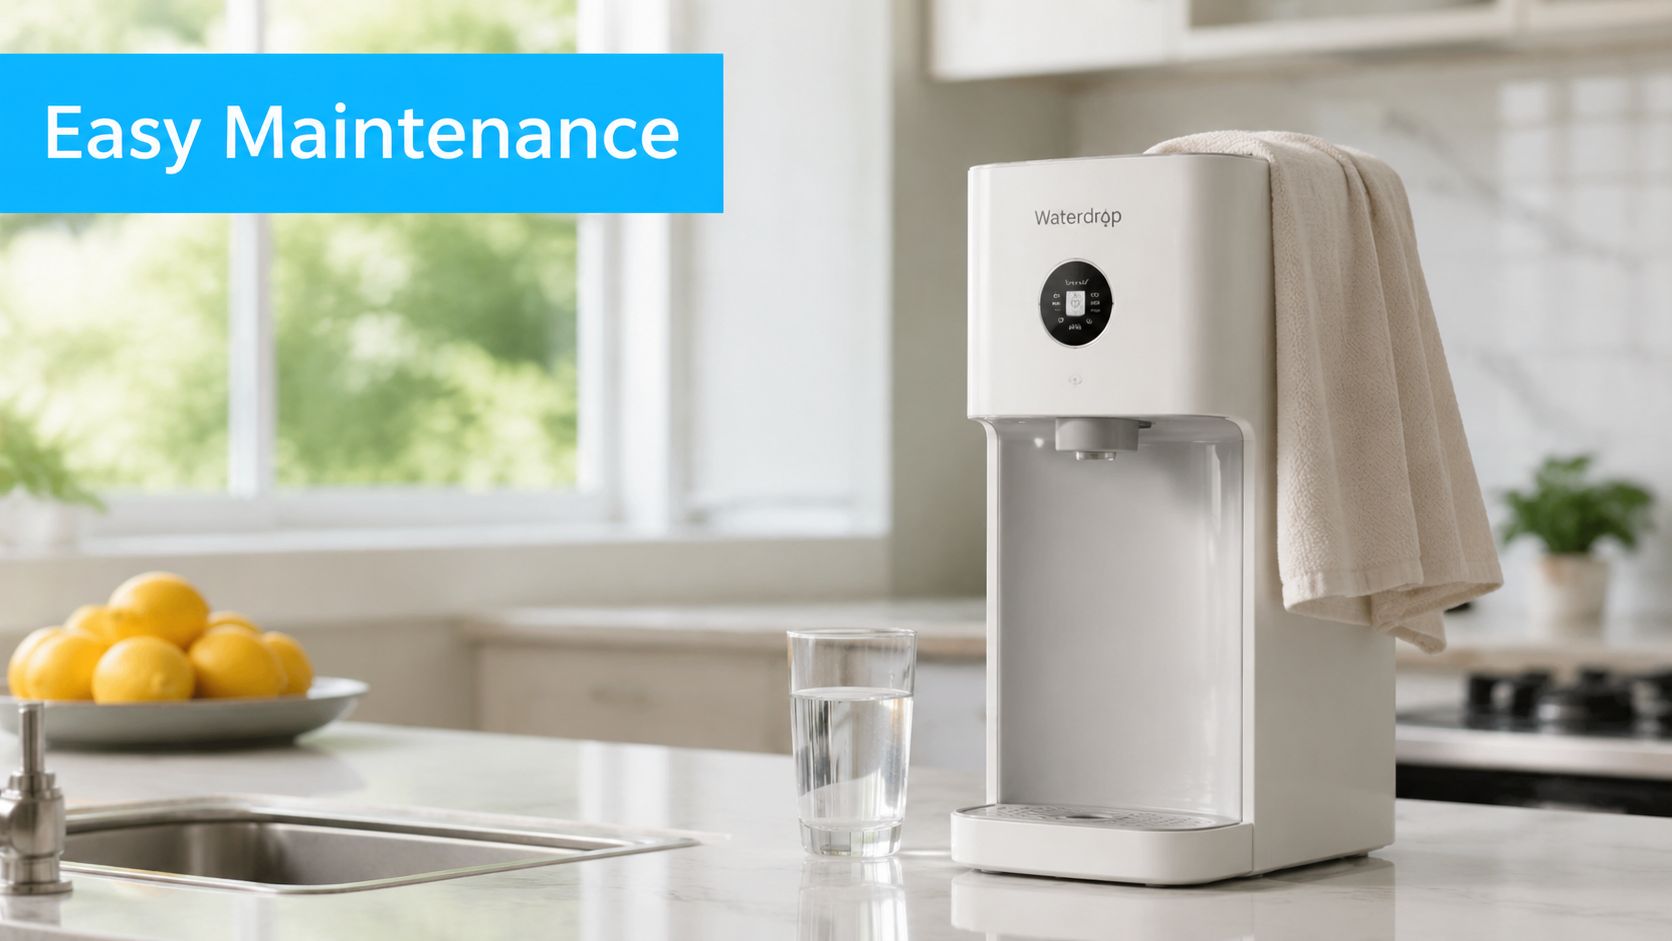
Some owners replace the filter and forget the rest of the machine. Others clean the tank but ignore seals, lids, and drip trays. Both shortcuts come back to bite.
A clean filter in a dirty dispenser still gives you a dirty user experience.
The best habit is simple. Put maintenance on a calendar. Countertop systems don't need constant attention, but they do need consistent attention. A few minutes of care protects taste, flow, and confidence in what you're drinking.
Some do, some don't. Chilling is a feature, not a default. If cold water matters in your home, verify that the unit actively cools rather than storing room-temperature filtered water.
Sometimes, but you should be careful. Well water quality varies too much for blanket advice. Test the water first, then choose a system based on the actual contaminants present. A countertop dispenser can help, but it shouldn't be your first guess.
Follow the manufacturer's schedule first. If the unit has an indicator, use it as a reminder, not an excuse to ignore taste changes, slow flow, or odor. Those are practical warning signs too.
Some do, especially RO systems. Whether that matters depends on your priorities and diet. For many buyers, contaminant reduction is the bigger concern. For others, mineral retention affects taste preference more than health concerns.
Usually no, if you manage drips, spills, and heat correctly. If your dispenser sits on quartz, these tips for protecting quartz counters are worth a look so the appliance doesn't leave stains, moisture issues, or heat marks over time.
If you're narrowing down the best countertop water dispenser for your home, Water Filter Advisor is a strong next stop for practical buying guides, filter comparisons, and maintenance advice that helps you choose a system you'll still be happy with long after installation day.
You bought a faucet filter for one reason. You wanted better-tasting water without tearing apart your kitchen plumbing. Then you opened the box, unscrewed the aerator, held the filter up to the faucet, and realized the threads don't match.
That's the point where a lot of people think they bought the wrong filter. Sometimes they did. More often, they ran into the small metal part nobody talks about until installation day: the faucet water filter adapter.
This part matters more than the filter marketing. If the adapter matches the faucet, installation is usually simple. If it doesn't, the filter is just an expensive object sitting on the counter. And with modern kitchen faucet designs, especially pull-down sprayers, the problem often isn't user error at all. It's a design mismatch built into the product category.
A common kitchen scene goes like this. The old aerator comes off easily. The new filter body looks straightforward. Then the adapter in the box either won't catch the threads, only turns half a rotation, or wobbles enough that you know it's going to leak.
That frustration is justified. Faucet-mounted filters are sold as easy home upgrades, but the connection point is where most installs go wrong. The issue usually comes down to one of three things: the faucet has the opposite thread type from the adapter provided, the faucet uses a non-standard size, or the faucet is a pull-down design that was never a good candidate for a faucet-mounted filter in the first place.
Millions of households run into that same bottleneck. The global market for faucet-mounted filters is projected to hit $4.5 billion by 2033, and that growth means many buyers each year still have to connect a new filter to one of several faucet thread standards, according to DataHorizzon Research on the faucet-mounted water filter market.
Manufacturers tend to show the clean final result. They rarely show the awkward middle part where someone stands at the sink with three tiny adapters, a damp washer, and no clear idea which piece fits what.
The smallest part in the box is often the most important. The adapter is the bridge between your faucet's threads and the filter housing. Without the correct bridge, nothing seals correctly, no matter how good the filter cartridge is.
Practical rule: If the adapter doesn't thread on smoothly by hand, stop. Don't force it. Cross-threading a faucet tip turns a simple filter install into a repair job.
Older standard faucets are usually predictable. Modern designer faucets are not. Pull-down and flexible spray heads changed the look of kitchens, but they also broke compatibility with a lot of faucet-mounted filtration products.
That's why some installs fail before they even start. The kit may be complete. The instructions may be fine. But the faucet geometry, thread location, or moving spray head makes a proper seal impossible.
A faucet water filter adapter is plumbing's version of a travel plug adapter. Your filter has one connection format. Your faucet has another. The adapter translates between them so the two parts can join without leaking.
If you strip away the packaging and brand language, the job is simple. The adapter matches the faucet on one side and the filter on the other. That's it. But because kitchen faucets come in different thread styles and sizes, a single adapter can't solve every install.
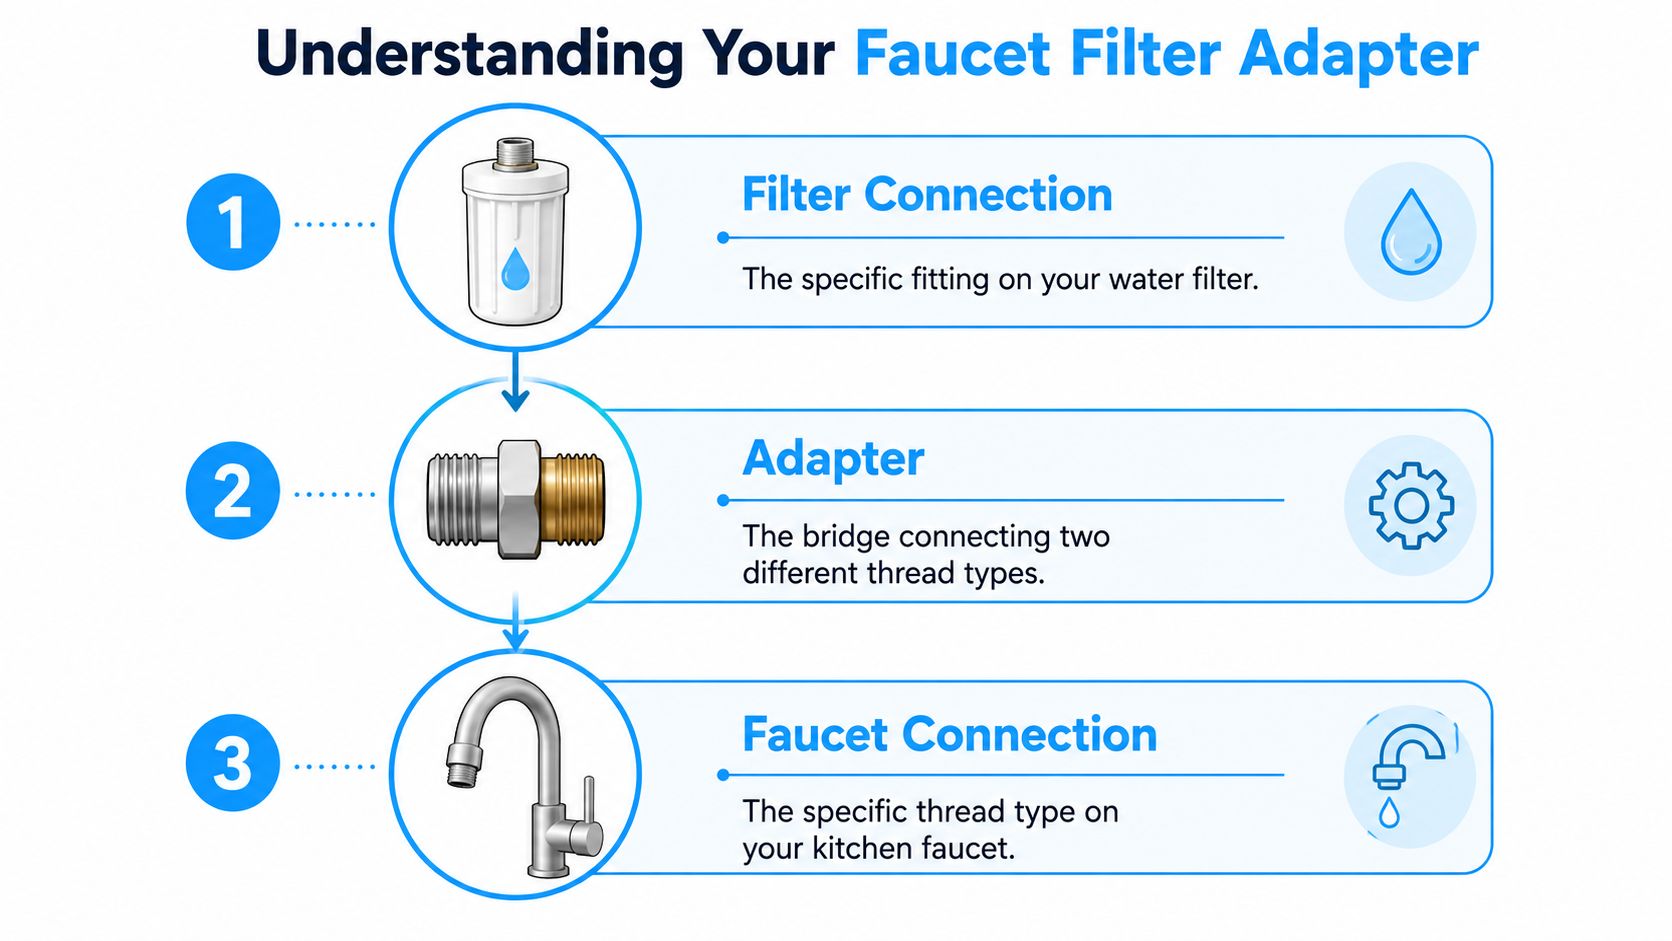
Most home setups fall into these categories:
Male-threaded adapter. This is used when the faucet has threads on the inside of the spout opening. The adapter presents the matching external thread so the filter can mount correctly.
Female-threaded adapter. This fits faucets that have visible threads on the outside of the spout. The adapter slips over and threads onto that exterior pattern.
Universal adapter. This is the rescue part for non-standard faucets, odd metric sizes, or faucets that don't match the basic adapters included in a standard kit.
The language confuses people because “male” and “female” can refer to either the faucet or the adapter. The easiest way to stay clear is to look at the faucet first. If the faucet has visible threads on the outside, you need the adapter that mates with that. If the threads are recessed inside the spout, you need the opposite style.
A good adapter doesn't just “fit.” It needs to do four jobs at once:
Some systems also use a 3/8-inch splitter with a female-male-male configuration to feed both the main sink line and a filter line without interrupting normal use, as shown in this 3/8-inch splitter installation example on YouTube.
The adapter is small, but it does the sealing, alignment, and compatibility work that makes the whole filter system possible.
Most bad installs don't fail because the metal part is defective. They fail because the wrong washer was reused, the old aerator gasket stayed behind, or the installer forced mismatched threads and hoped tightening harder would fix it.
It won't. Threads create alignment. The washer creates the seal. You need both.
If you want the filter to fit on the first serious attempt, identify the faucet threads before buying anything else. This is the step that saves the most time and prevents most leaks.
In standard residential setups, compatibility is usually built around a 7/8-inch external male thread with 27-UNF, but non-standard faucets require precise measurement of the outer diameter for male threads or inner diameter for female threads to pick the correct universal adapter and get a leak-free seal, as detailed in Aquafilter's faucet thread guidance.
Remove the aerator and look closely at the faucet tip.
A coin or rough eyeballing isn't enough when the faucet is non-standard. Use calipers if you have them. For male threads, measure the outermost diameter. For female threads, measure the innermost diameter.
| Common Name | Male Thread Diameter | Female Thread Diameter |
|---|---|---|
| Standard residential faucet thread | 7/8-inch | Match by corresponding internal size |
| Non-standard metric example | M18.5 | Match by corresponding internal size |
| Non-standard imperial example | 15/16-inch | Match by corresponding internal size |
| Non-standard imperial example | 13/16-inch | Match by corresponding internal size |
The point of the table isn't to make you memorize thread families. It's to show why “universal” can still mean “measure first.”
A lot of leaks blamed on the adapter are really washer problems. The seal depends on a rubber O-ring or washer seated correctly in the threaded end. If the original aerator washer remains in place and you stack another washer on top of it, the adapter may appear tight but still leak under pressure.
Leave the old aerator parts out unless the filter manufacturer specifically tells you to reuse them. One proper washer in the right place seals better than two jammed together.
Many guides often dodge the issue. They say “check compatibility” and leave it there. That doesn't help someone with a modern kitchen faucet whose spray head pulls out on a hose.
Installation materials confirm that many faucet-mounted filters explicitly don't fit on flexible or extendable faucets, and that mismatch shows up again and again in returns and buyer frustration, according to EPA installation guide material covering these fit limitations.
The reason is mechanical, not personal. Pull-down sprayers move, vibrate, and often don't provide a fixed threaded surface where a locking collar can seat securely. Even if you can force an adapter onto the end, the moving hose and spray-head design may make the setup drip, loosen, or fail outright.
If you have a pull-down faucet, assume incompatibility first and prove compatibility second.
A correct install is simple. A rushed install creates leaks. The difference is usually five extra minutes at the sink.
Start with the faucet turned off. Clear the sink so small washers and adapters don't disappear down the drain. Keep a towel nearby, because even clean installs usually drip a little while parts are being swapped.
Here's the visual sequence most DIYers need:
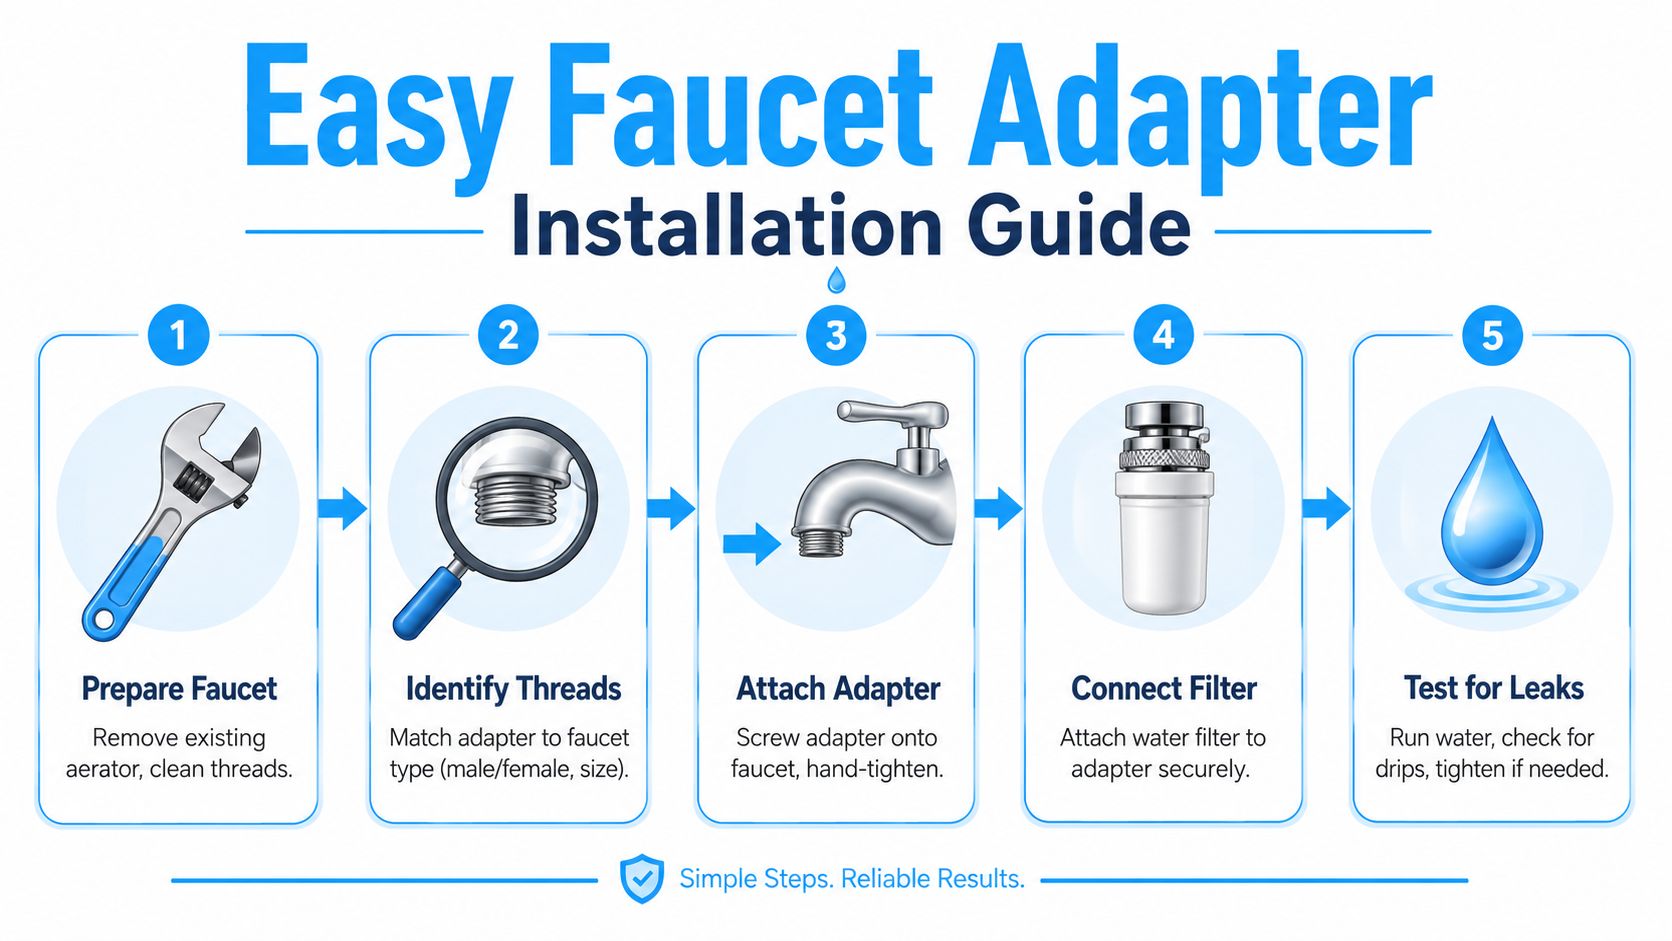
Remove the aerator carefully.
Unscrew it by hand if possible. If it's stuck, use pliers with a cloth around the finish so you don't scar the metal.
Clean the faucet threads.
Mineral scale and grit make good threads feel like bad ones. Wipe the end of the spout and check for leftover gasket material.
Match the adapter to the faucet.
Don't guess. Offer up the adapter and make sure it starts straight. It should turn smoothly by hand.
Seat the correct washer or O-ring.
The adapter needs its sealing washer in place. On many setups, leaving the original aerator washer behind causes leaks or crooked engagement.
Hand-tighten first.
Thread the adapter on by hand until snug. Then attach the filter body according to the manufacturer's mount design.
After that, run cold water gently and inspect the joint. Increase flow only after the connection stays dry.
A short video can help if you want to see the motion and hand positions:
Some homeowners also compare faucet-mounted systems with under-counter units that use dedicated connections. Whichever route you take, connect the system only to the cold-water line. Hot water can severely damage filtration components and compromise the system, as stated in Home Depot's under-counter filter installation document.
This is not a minor warning. Filtration media, housings, seals, and plastic components are not designed for hot supply exposure unless the manufacturer says otherwise.
If a metal adapter needs force to start, it's the wrong adapter or it's going on crooked. Good fits feel almost effortless at the beginning.
The easiest filter to live with is not always the one with the loudest contaminant list on the box. For home use, the smart buy is the system that fits your faucet cleanly, includes a sensible adapter kit, and stays easy to service after the novelty wears off.
That long-term part matters. Top-tier faucet filters can reduce 71 specific contaminants in certified configurations, and many are rated for 100 gallons per cartridge, which works out to about three months of typical use. That means most households handle filter replacement 3 to 4 times annually, according to Wirecutter's review of faucet water filters. Every one of those changes puts hands back on the adapter and threads.
Choose the system like a plumber would, not like a box designer wants you to.
If you want a broader reference point on comparing systems, replacement parts, and household filtration options, the practical guides at Water Filter Advisor's advice section are worth keeping bookmarked.
Adapter care is basic, but a lot of people skip it.
After each cartridge change, inspect the threads for mineral crust, wipe the washer seat clean, and check whether the rubber washer has flattened or cracked. If the adapter uses a removable O-ring, make sure it hasn't rolled out of its groove. These tiny parts do the sealing work.
A few habits make a big difference:
A faucet filter is a user-experience product as much as a water-treatment product. If the adapter system is poor, the cartridge quality won't save the ownership experience. The best setup is the one that fits your faucet, seals on the first try, and stays predictable through repeated filter changes.
Some kitchens aren't good candidates for a faucet-mounted filter. That's not failure. It's just an honest diagnosis.
The biggest dead end is the modern pull-down or extendable spray faucet. Manuals and installation materials confirm that many faucet-mounted filters don't fit on flexible or extendable faucets, and that mismatch is a major reason buyers move to under-sink or countertop systems, as noted in the earlier guidance on fit limitations. If the spray head moves, vibrates, or lacks a stable threaded endpoint, another adapter usually won't solve the underlying problem.

A pivot makes sense when any of these are true:
An under-sink filter is usually the cleaner permanent answer. It hides the filtration hardware below the counter and keeps the main faucet area uncluttered. For many households, that solves both the compatibility problem and the visual one.
A countertop filter works well when you need a no-fuss setup and don't want to gamble on faucet thread compatibility. It's also a practical move for renters who want filtration without depending on the faucet tip design.
Sometimes the right plumbing decision is to stop trying to make the wrong product fit. A different filter style can be faster, cleaner, and less aggravating than one more adapter order.
The useful takeaway is simple. If you have a standard threaded faucet, a faucet-mounted filter and the right adapter can be a tidy home filtration upgrade. If you have a flexible spray faucet, treat incompatibility as a normal industry limitation, not a personal mistake.
If you're comparing faucet, countertop, and under-sink options and want clear, no-hype guidance, visit Water Filter Advisor. It's a solid resource for choosing the right filtration setup, understanding maintenance, and avoiding the compatibility mistakes that waste time and money.