How to Change Whole House Water Filter: 2026 DIY Guide
You notice it gradually. The shower doesn't hit as hard as it used to. The kitchen tap starts looking a little lazy. Then your coffee tastes a bit off, or the water has that faint chlorine smell you swear wasn't there a month ago.
A lot of homeowners assume something serious is going wrong with the plumbing. Most of the time, the culprit is simpler. Your whole house filter is doing its job, and now it's loaded up enough that it needs attention.
That's the good news. Learning how to change a whole house water filter usually isn't a big plumbing project. Once you're prepared, one installation guide notes the replacement itself can take about 10 minutes without tools or a plumber, which is why many homeowners treat it as routine maintenance instead of a major repair job, especially when a bypass valve is installed (Kind Water's replacement guide).
The part that rattles first-timers isn't usually the filter. It's the fear of opening the wrong thing, getting sprayed, or putting it back together and finding a leak. Fair concern. I've seen perfectly capable DIYers make the same avoidable mistakes over and over: skipping the pressure relief, pinching the O-ring, reinstalling stages in the wrong order, or cranking the housing down like they're sealing a submarine hatch.
None of that is hard to avoid once you know why each step matters. That's what makes this job manageable. You're not just swapping a cartridge. You're protecting water pressure, water taste, fixture performance, and the rest of your plumbing.
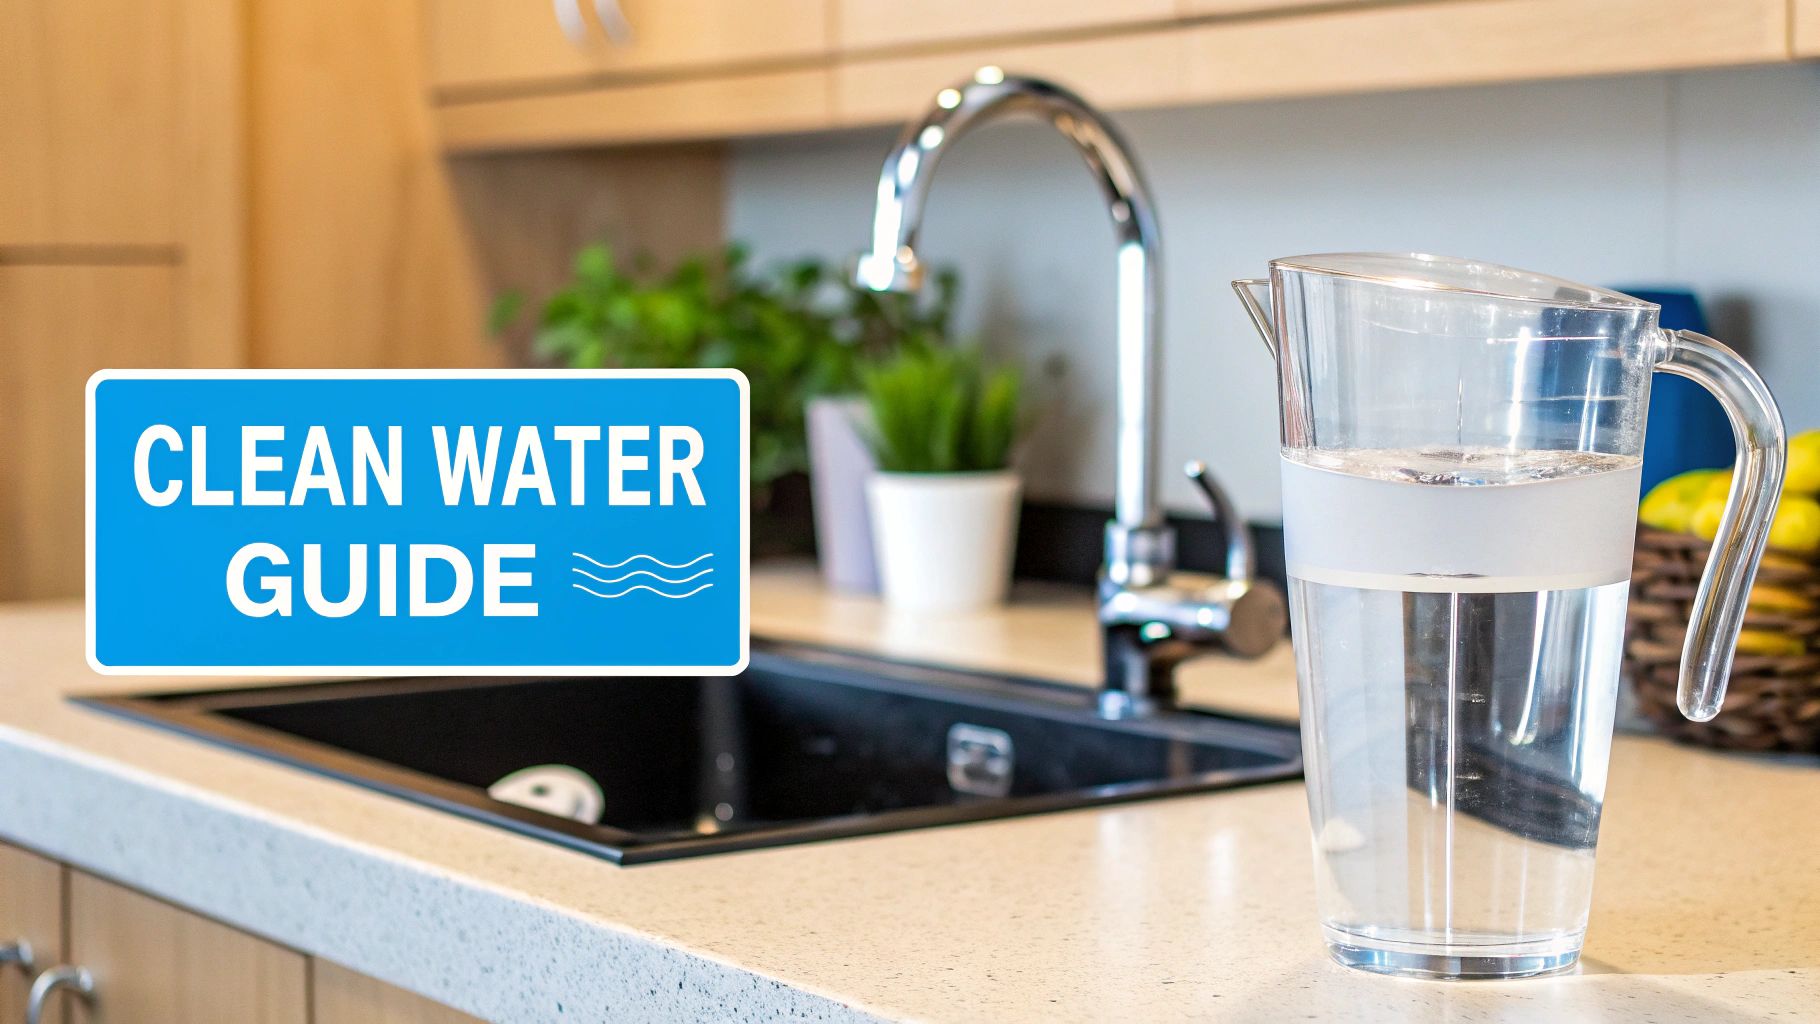
Your Guide to Cleaner Water and Better Pressure
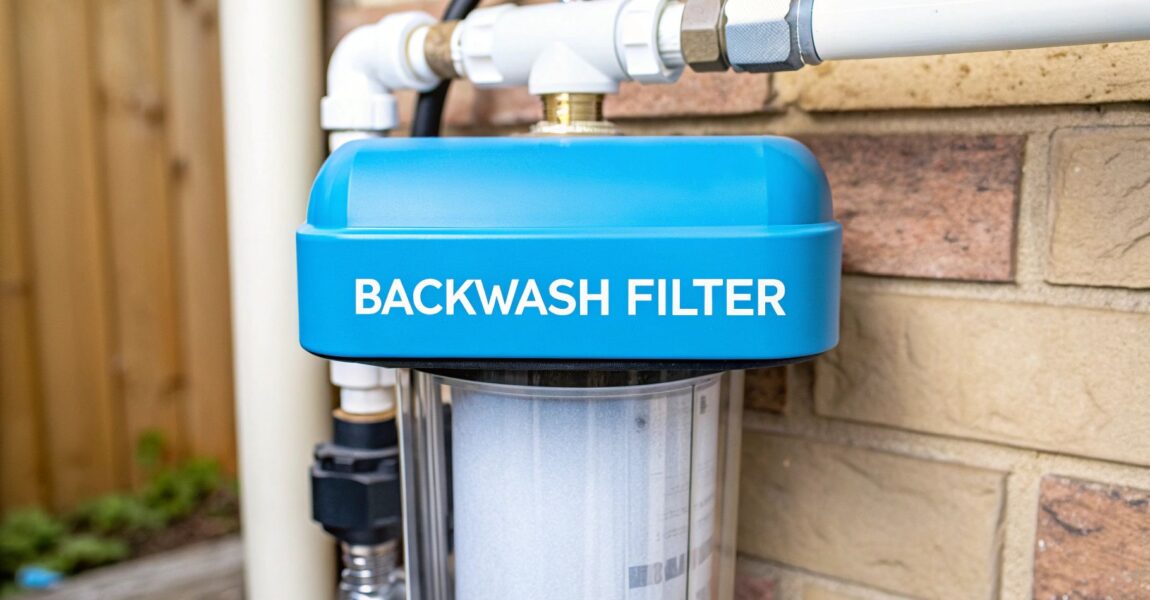
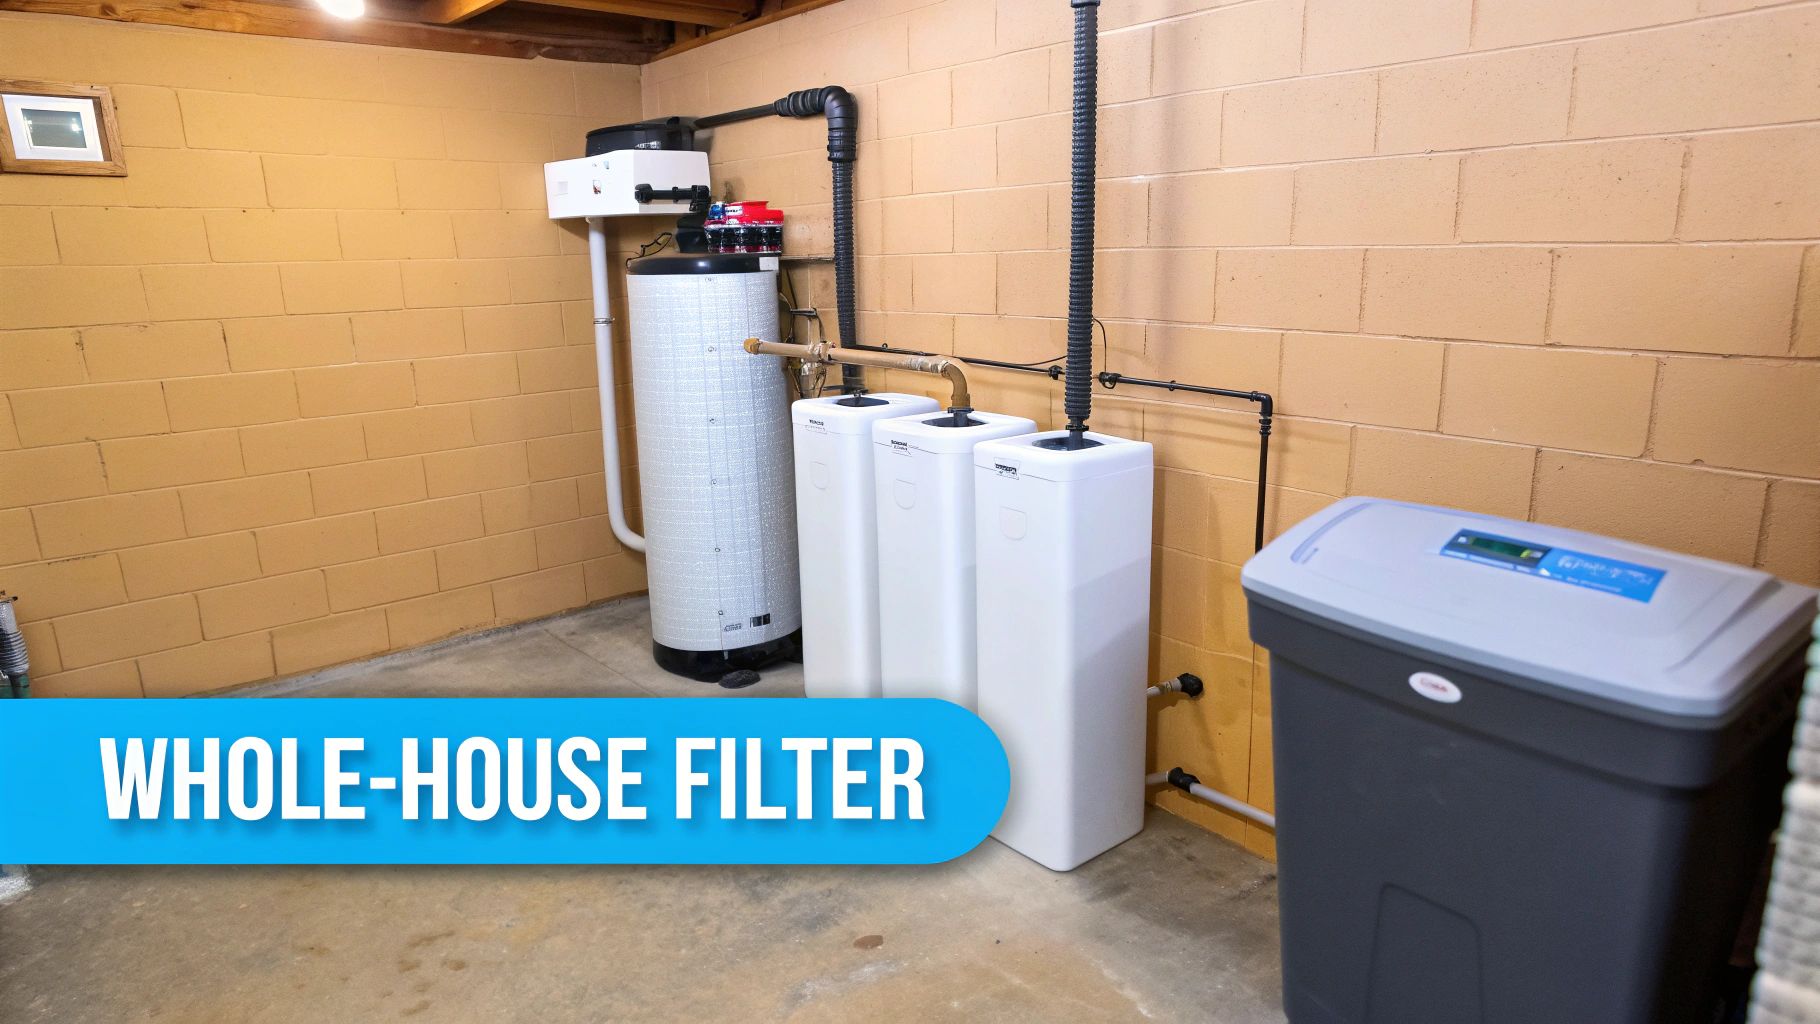
A whole house filter sits in a funny spot in home maintenance. When it works, nobody thinks about it. When it starts clogging, the whole house feels it.
You'll often see the first clues in ordinary routines. The upstairs shower feels weak. The washing machine seems to fill slower. A glass of water tastes flatter, harsher, or just different enough that you notice. Those changes can sneak up on you because filtration problems don't usually announce themselves all at once.
Why this job feels bigger than it is
Homeowners hear “main water shutoff” and immediately think “plumber.” That's understandable. But replacing a cartridge in a whole house system is usually more like careful appliance maintenance than a complex pipe repair.
What matters is control. Shut water off cleanly. Relieve pressure. Open the housing the right way. Check the seal before you reassemble. Bring the system back online slowly.
Practical rule: If you move slowly on the shutdown and restart, the rest of the job gets much easier.
The actual swap is usually the shortest part. The prep and restart are where people either make life easy for themselves or create a mess.
What a successful filter change should feel like
A good filter change isn't dramatic. You don't need brute force, panic tightening, or improvised plumbing heroics. You need a clear path, the right cartridge, and a little patience.
Here's what usually goes right when the job is done properly:
- Pressure returns smoothly: Fixtures stop feeling strangled by a clogged cartridge.
- Water quality improves: Taste and odor issues that crept in often settle back down.
- You avoid surprise leaks: A clean, properly seated O-ring does most of that work.
- The next change gets easier: Once you know your shutoff, housing, and cartridge sequence, future swaps feel routine.
That's why this is a confidence-building project. You're working on something that affects every faucet in the house, but the task itself is very approachable when you respect the sequence.
Gathering Your Tools and Prepping the Area
The easiest filter change starts before you touch the housing. Most bad experiences come from stopping halfway through to hunt for towels, realizing the replacement cartridge is wrong, or discovering you don't know where the shutoff valve is.
Preparation is what keeps this from turning into wet, annoying chaos.
What to set out before you begin
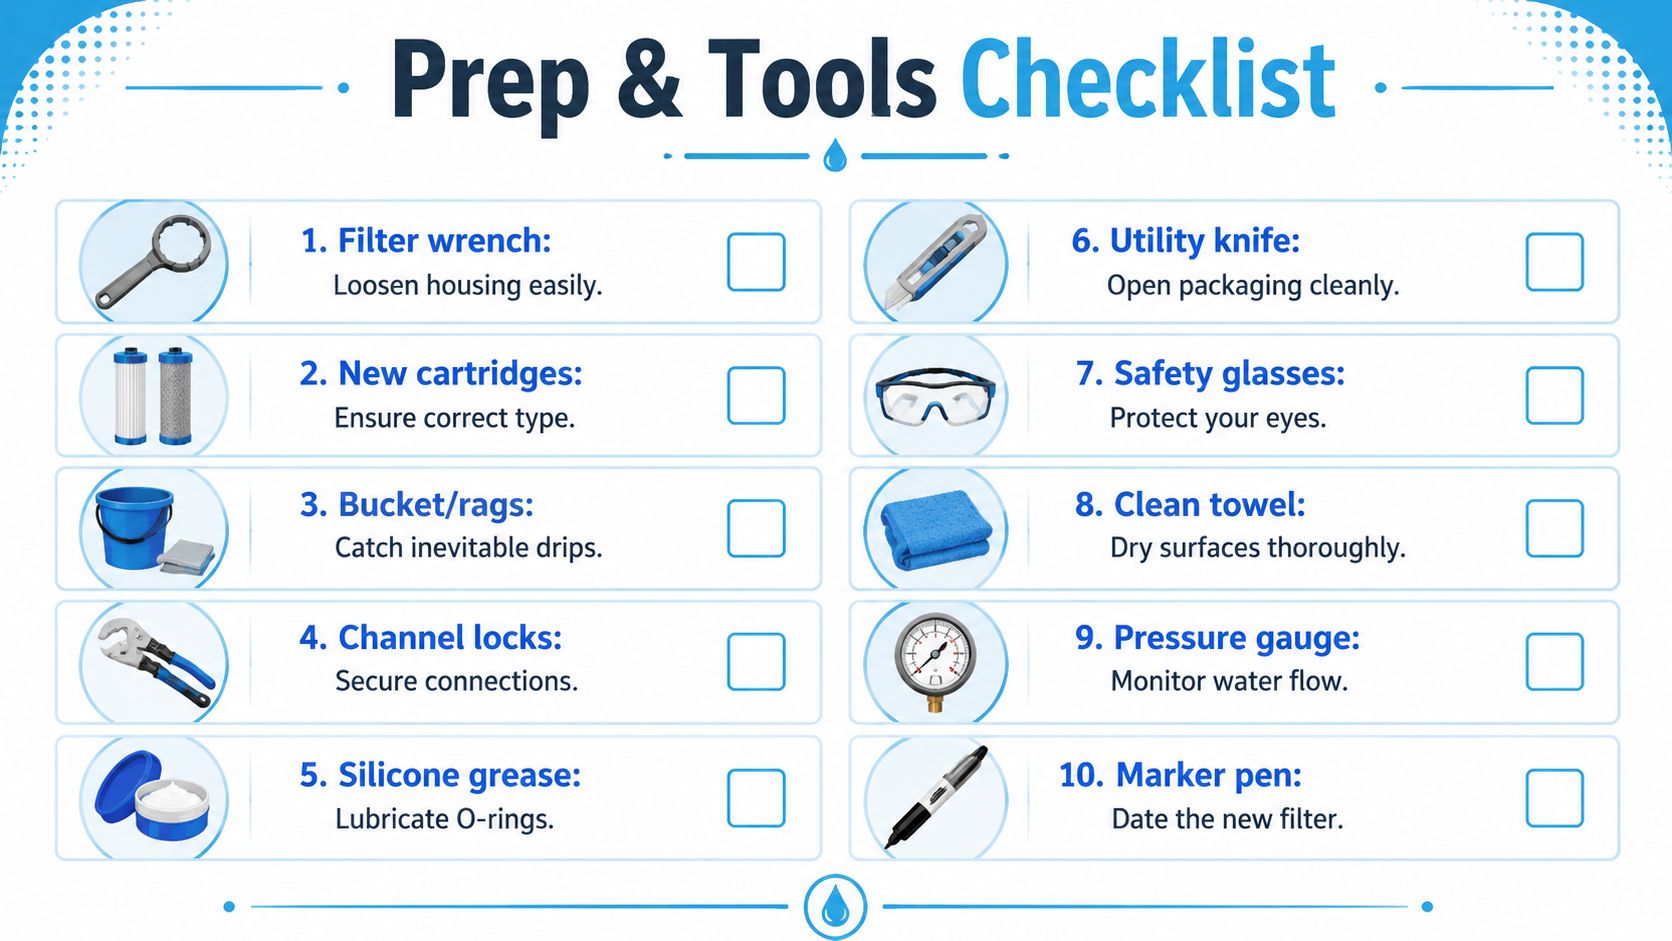
Lay everything within arm's reach. Don't count on “I'll grab that in a second” once the system is open.
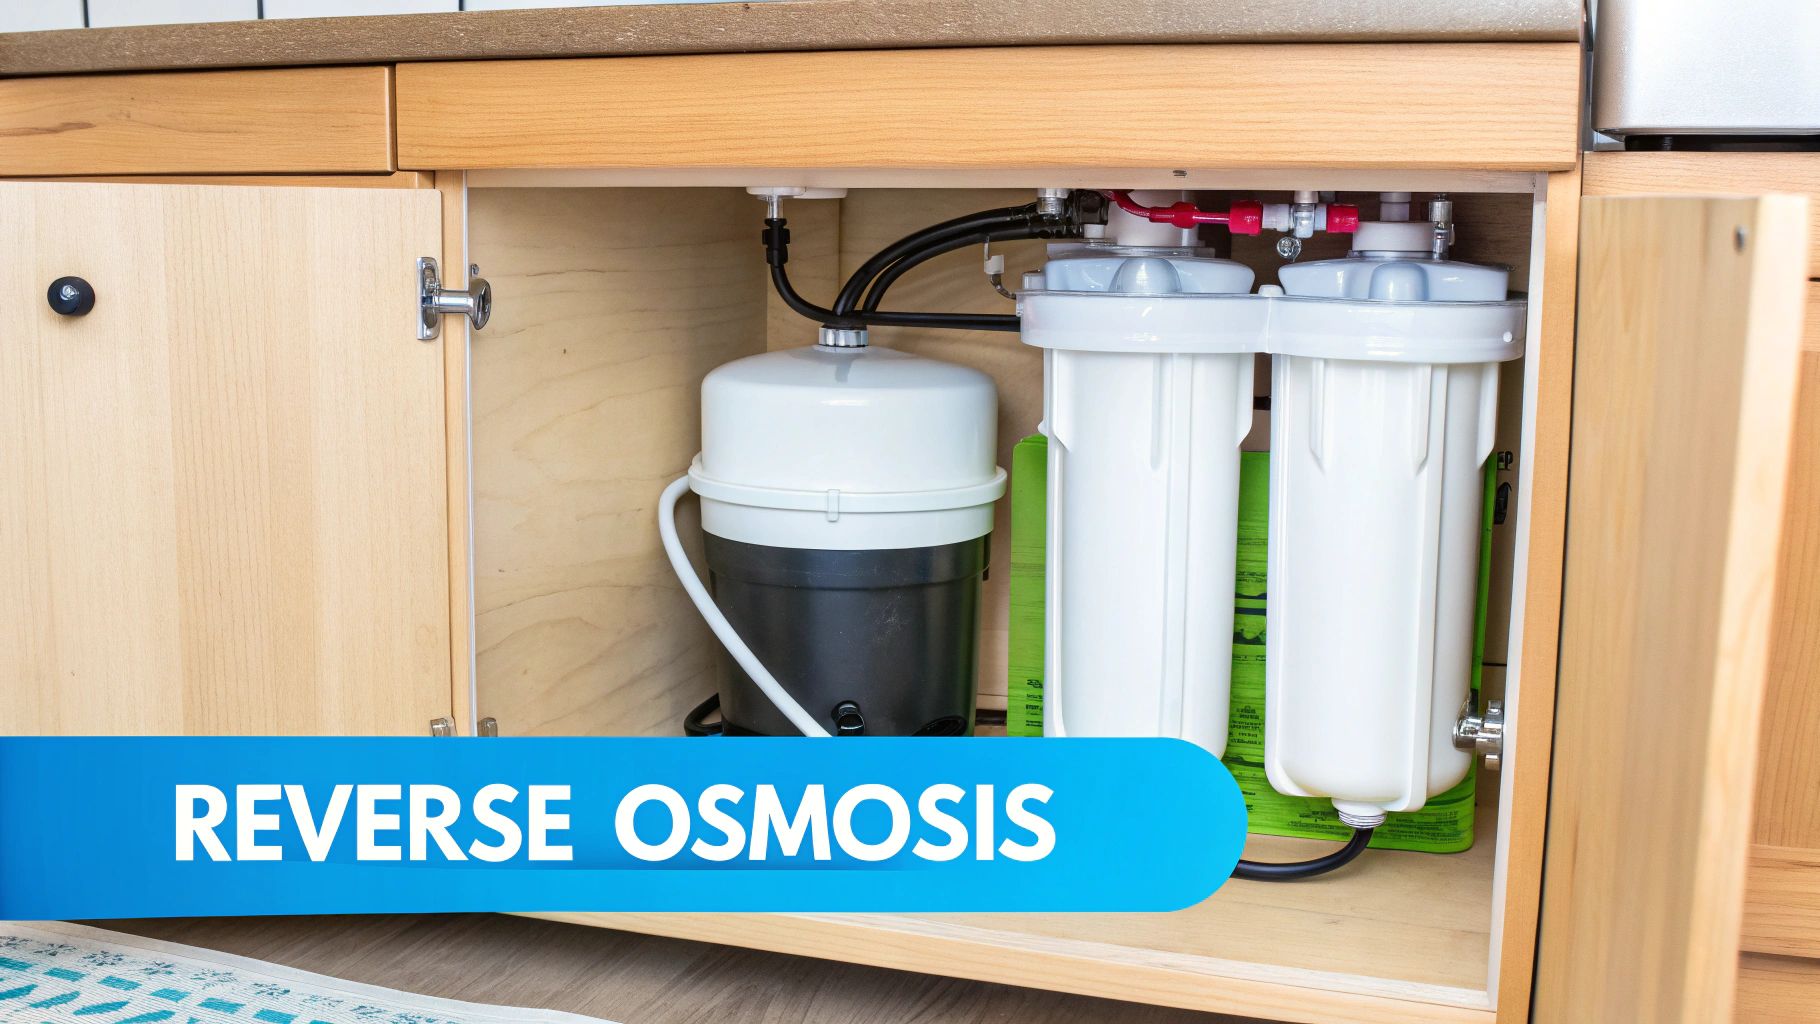
- New cartridges: Match the exact type your system uses. Sediment, carbon, and specialty cartridges are not interchangeable just because they fit the housing.
- Filter wrench: This gives you controlled turning force on the sump housing without beating it up.
- Bucket and rags: Even a clean, careful swap releases trapped water.
- Channel locks: Useful for nearby fittings if something needs light correction, but they are not your first choice for the plastic housing.
- Food-grade silicone grease: A light coat on the O-ring helps it seat properly and reduces the chance of twisting or pinching.
- Utility knife: Handy for packaging, especially when you don't want cardboard scraps and plastic wrapping near the open housing.
- Safety glasses: Pressure relief can spit.
- Clean towel: Use this to wipe the O-ring groove and housing threads.
- Pressure gauge: Helpful if your setup includes one or if you like tracking system behavior over time.
- Marker pen: Write the install date on the housing or cartridge if there's room.
The prep that prevents panic
Before you do anything else, find these parts:
| What to locate | Why it matters |
|---|---|
| Main shutoff valve | You need a reliable way to stop incoming water before opening the housing. |
| Bypass valve | If your system has one, it can shorten downtime and make servicing calmer. |
| Nearest downstream faucet | You'll use it to release pressure from the line. |
| Pressure-release button | Some housings have one on top. It makes opening the sump much easier. |
If you have a multi-stage system, line up the new filters in installation order before starting. Don't open every package at once and mix them on the floor.
The homeowners who have the smoothest filter changes are almost never the strongest. They're the ones who prepared the area first.
Clear the work zone
Give yourself room. Move storage bins, detergent bottles, holiday decorations, or anything else crowded around the filter bracket.
A few practical habits help:
- Put the bucket directly under the housing: Not “nearby.” Directly under it.
- Protect the floor: A towel under the bucket catches the drips that miss.
- Use decent lighting: Most sealing mistakes happen because someone couldn't clearly see the O-ring groove.
- Keep kids and pets out of the area: You don't want someone bumping your arm while you're reseating a housing.
The goal is simple. When the system is open, you want both hands free and your brain calm.
The Main Event Performing the Filter Swap
The part that makes first-timers nervous is usually the moment the housing starts to turn. That hesitation is healthy. A whole house filter can hold pressure, and I've seen people crack a sump, dump a bucket of water on the floor, or pinch an O-ring because they rushed the swap.
Shut the water down the right way
Shut off the water feeding the filter housing. If your system has a bypass, set it the way the manufacturer calls for before you open anything. If it does not, shut off the main supply upstream of the filter.
Then open a cold faucet downstream and leave it open for a moment. If your housing has a pressure-release button, press it. The goal is simple. Remove pressure before you try to unscrew the canister.
Skipping that step is how a routine filter change turns into a mess. If the housing feels unusually tight, trapped pressure is often the reason, not just a stubborn thread.
Loosen the housing with control
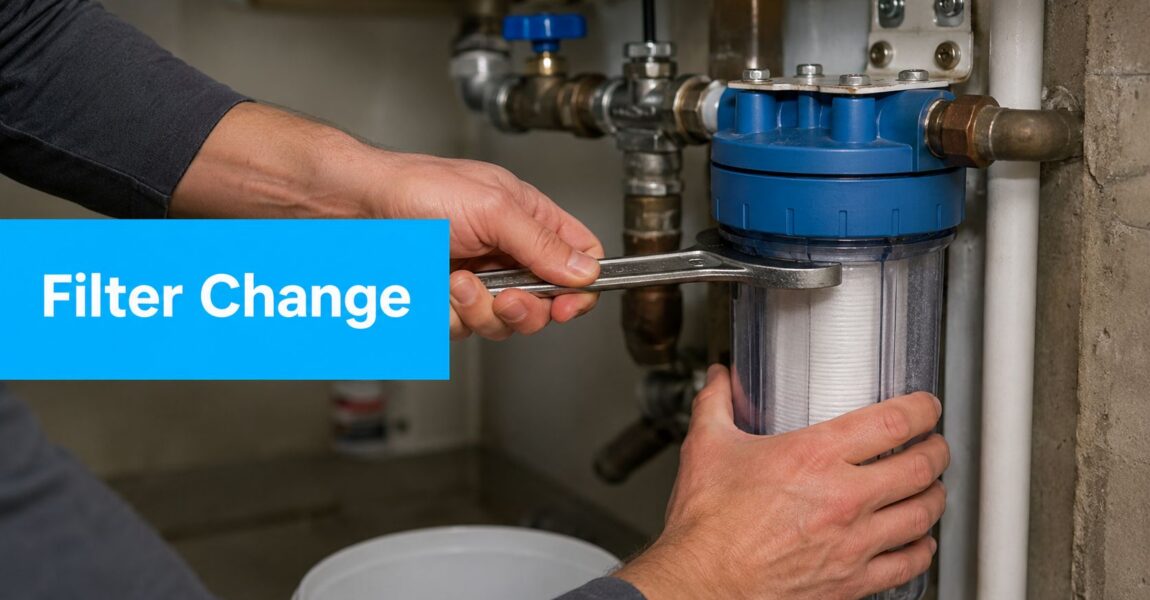
Put the bucket directly under the sump, then fit the housing wrench squarely around it and turn counterclockwise. Use steady pressure. Sharp jerks tend to slip the wrench or crack older plastic.
If it does not move, stop and verify two things before adding force:
- the water is fully shut off
- the line pressure is relieved
- the wrench is seated flat on the housing ribs
Support the housing with your free hand as it comes loose. It usually holds more water than people expect, and dropping a full sump can damage the threads or the cartridge seat.
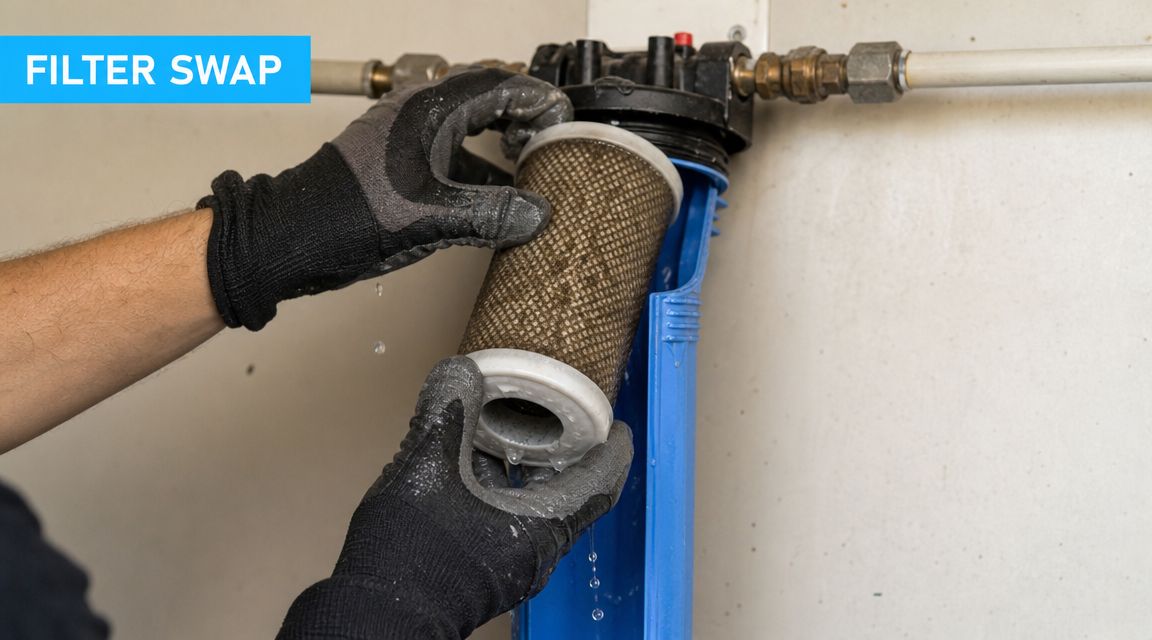
Remove the old filter and inspect the sealing surfaces
Lift out the old cartridge and set it in the bucket. Then check the inside of the housing, the threads, and the O-ring groove before you even touch the new filter.
Look for the stuff that causes leaks later:
- sediment or sludge in the bottom of the housing
- grit stuck in the O-ring groove
- a dry, flattened, twisted, or cracked O-ring
- signs the old cartridge was sitting off-center
Wash the housing with mild soap and water, then rinse it well. Wipe the groove and threads clean. A single grain of sand under the O-ring can be enough to cause a slow drip once pressure returns.
If the O-ring is damaged, replace it. If it is still in good shape, apply a light coat of food-grade silicone grease. Light coat. Too much grease attracts debris and makes it easier for the O-ring to shift out of place.
Set the new cartridge in correctly
Install the new cartridge in the orientation the manufacturer specifies. Some filters can go in either direction. Others have a clear top and bottom, a gasketed end, or a flow arrow that matters.
For multi-stage systems, keep each cartridge in its proper housing and order. First-timers often focus on getting the new filter to fit and miss the bigger issue, which is whether each stage is doing the job it was chosen for. Sediment, carbon, and specialty media are not interchangeable just because the cartridges look similar.
If your main reason for changing the filter is weak fixtures or poor flow, MG Drain Services' expert advice gives a good overview of other pressure causes worth ruling out. A clogged filter is common, but it is not the only reason a house loses pressure.
Reassemble carefully and stop before overtightening
Put the O-ring back in its groove and make sure it sits flat all the way around. Then thread the housing on by hand. It should turn smoothly with even resistance.
If it feels crooked, gritty, or hard to start, back it off and try again. Cross-threading is one of the costliest DIY mistakes on these housings, and once the threads are damaged, tightening harder only makes it worse.
Use the wrench only for the final snug fit if needed. Plastic filter housings do not need brute force to seal. They need clean threads, a seated O-ring, and even contact.
Use this quick check before you call the swap done:
| Reassembly check | What you want to see |
|---|---|
| O-ring | Flat in the groove, not pinched or bulging |
| Housing threads | Even and straight, no visible tilt |
| Cartridge position | Properly seated and centered |
| Housing body | Hand-tight or just slightly snugged with the wrench |
For readers who like seeing the process in motion, this walkthrough can help with hand position and pacing:
Mistakes that cause trouble fast
A few shortcuts create the same problems again and again:
- Using petroleum grease on the O-ring: Use food-grade silicone grease only.
- Forcing in a cartridge that is only "close enough": Similar size does not mean correct seal or filtration.
- Ignoring cartridge direction or stage location: The system may run, but performance can drop and filters can load up early.
- Cranking the housing down hard: Extra force often means the O-ring is out of place or the threads are misaligned.
The best filter changes look boring. That's a good sign. Calm hands, clean parts, and a careful reassembly beat strength every time.
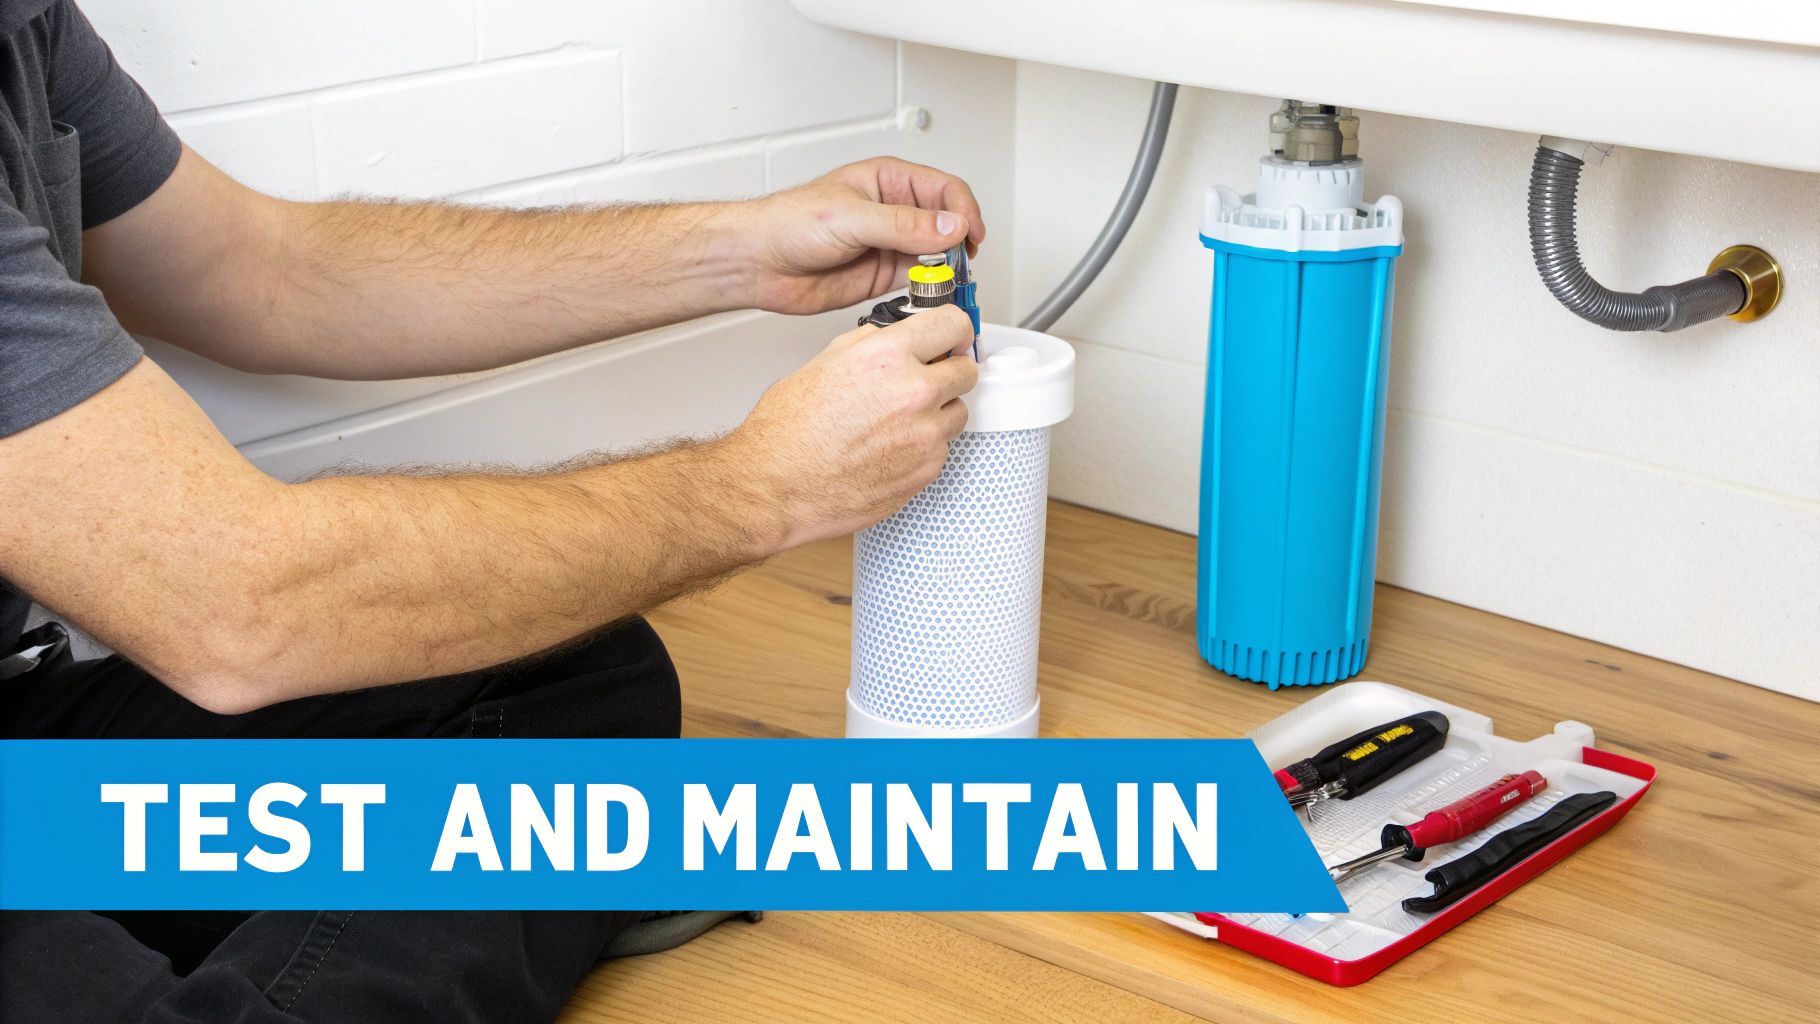
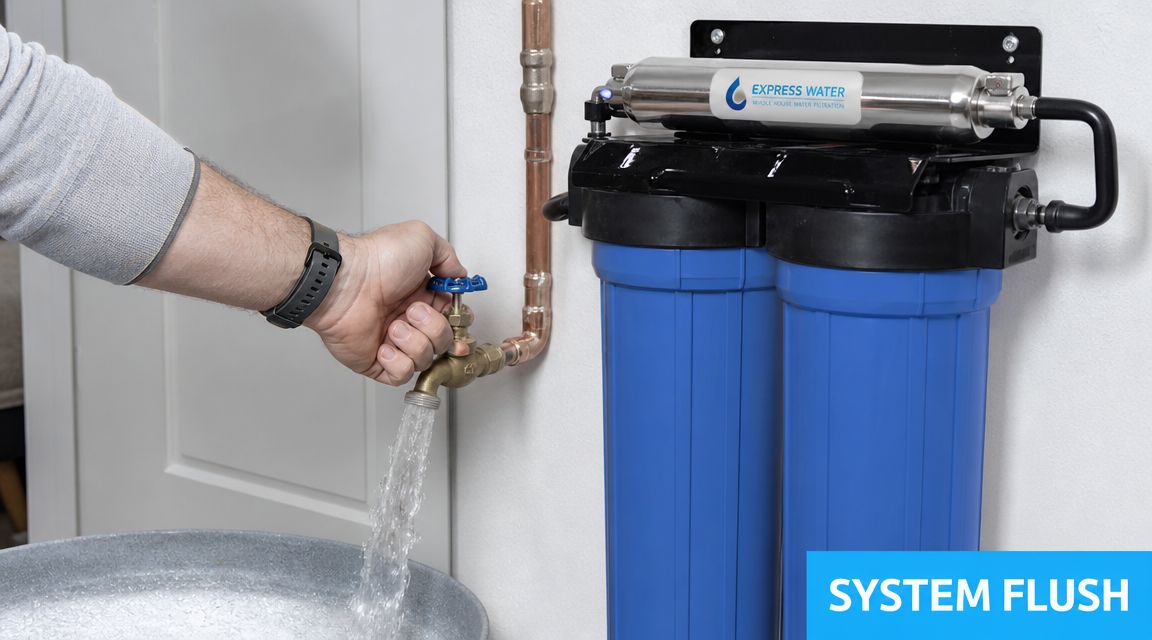
Post-Installation Checks and System Flushing
A lot of first-timers relax too early here. The housing is back on, the wrench is down, and it feels finished. I've seen more leaks show up in the first few minutes after re-pressurizing than during the actual swap, so treat startup like part of the job.
Start by bringing the water back on slowly. If your system has a bypass, return it to the filter position in a controlled way. The goal is to let the canister fill gradually so the O-ring can settle under pressure instead of getting hit all at once.
Watch the housing closely as it fills. Don't just look from a few feet away. Run a dry hand or paper towel around the seam, the cap, and any nearby fittings. Small leaks hide there first.
If you catch a drip, shut the water back off and relieve pressure before touching the housing. In my experience, the usual causes are simple. The O-ring shifted, a little grit got onto the sealing surface, or the sump threaded on slightly crooked. A tiny leak almost never stays tiny once the system sits under full pressure.
Once everything stays dry, flush the new filter with cold water only. Run water long enough to clear the startup dust and air from the cartridge. New carbon filters often shed harmless black or gray fines at first, and trapped air can make the water spit and surge. If you want a broader reference on filter care and replacement timing, this whole house water filter advice guide is a useful companion.
That flush does more than improve appearance. It clears loose media, pushes air out of the lines, and helps keep faucet aerators and appliance screens from catching that debris later. Skip this step and you may end up chasing cloudy water or weak flow at fixtures that were working fine before.
A little cloudiness right after the change is usually normal. Pour a glass and let it sit for a minute. If the cloudiness clears from the bottom up, that's air, not contamination.
You may also hear a bit of pipe noise or get some sputtering at faucets for a short time. That usually settles down as the air works out of the system. What should get your attention is different. A housing that keeps weeping, a strong bad taste that doesn't improve after flushing, or low flow across the whole house means something still needs attention.
Before you walk away, do a quick round of the house. Run a few cold fixtures, check that pressure feels normal, and come back to the filter housing after it has been under pressure for a bit. Then mark the install date on the housing.
That date saves guesswork next time. It also tells you, at a glance, whether a filter is due or just being blamed for another plumbing problem.
Solving Common Problems During a Filter Change
Most filter-change problems come down to a short list. The nice thing is that they're usually fixable without tearing the whole setup apart.
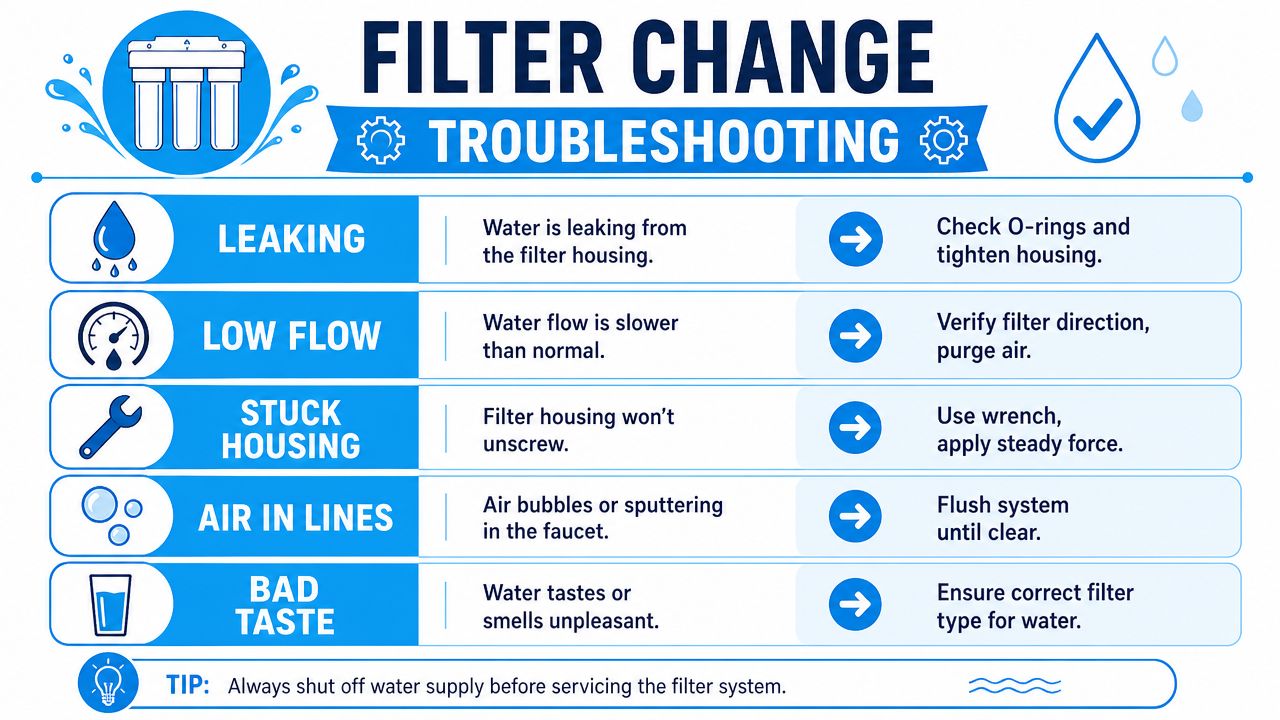
Leak at the housing
If the housing drips after reassembly, the first suspect is the O-ring. Not the threads. Not your tightening strength. The O-ring.
Common causes include:
- It slipped out of the groove
- It twisted during tightening
- There's grit in the groove or on the sealing surface
- It's worn or cracked
Shut the water off, relieve pressure, reopen the housing, and inspect everything carefully. Most recurring leaks trace back to seal alignment.
Housing is stuck solid
This usually happens when someone over-tightened it last time, or pressure wasn't fully relieved before trying to remove it.
Use the proper wrench and apply steady force. If low flow has been one of your household symptoms, MG Drain Services' expert advice is a useful companion read because it helps you separate filter-related restriction from broader plumbing pressure issues.
Slow, even pressure with the correct wrench works better than sudden force.
Avoid pipe wrenches on the plastic sump unless you're prepared to replace parts.
Pressure is still poor after the new filter
If the old filter was clogged and the new one didn't fix low flow, check these likely culprits:
| Symptom | Likely cause | What to check |
|---|---|---|
| Weak flow everywhere | Valve not fully reopened | Main shutoff or bypass position |
| Weak flow right after replacement | Air still in lines | Continue flushing cold water |
| Flow dropped after install | Cartridge mismatch or wrong orientation | Filter type and seating |
| Only some fixtures affected | Debris reached aerators | Faucet aerators and showerheads |
If you installed a finer filter than your system usually runs, that can also change how the house feels. Not every cartridge that fits a housing is a good match for whole-home flow demands.
No water flow at all
This one sounds scary, but it's usually something simple.
- Bypass left in the wrong position
- Main valve still shut or only partially open
- Cartridge seated incorrectly and blocking flow
- A direction-specific filter installed backward
When there's zero flow, go back to basics. Valve positions first. Cartridge orientation second. Fancy theories later.
Smart Maintenance and Choosing Your Next Filter
The easiest whole house filter change is the one you saw coming. Don't rely on memory. Set a reminder on your phone, write the date on the housing, and keep the correct replacement cartridges on hand before you need them.
If you use a multi-stage system, remember the maintenance logic that matters most: replace filters based on how the system behaves, not just on habit. Reduced pressure, changing taste, odor issues, and visible sediment loading are all practical signals that the system wants attention.
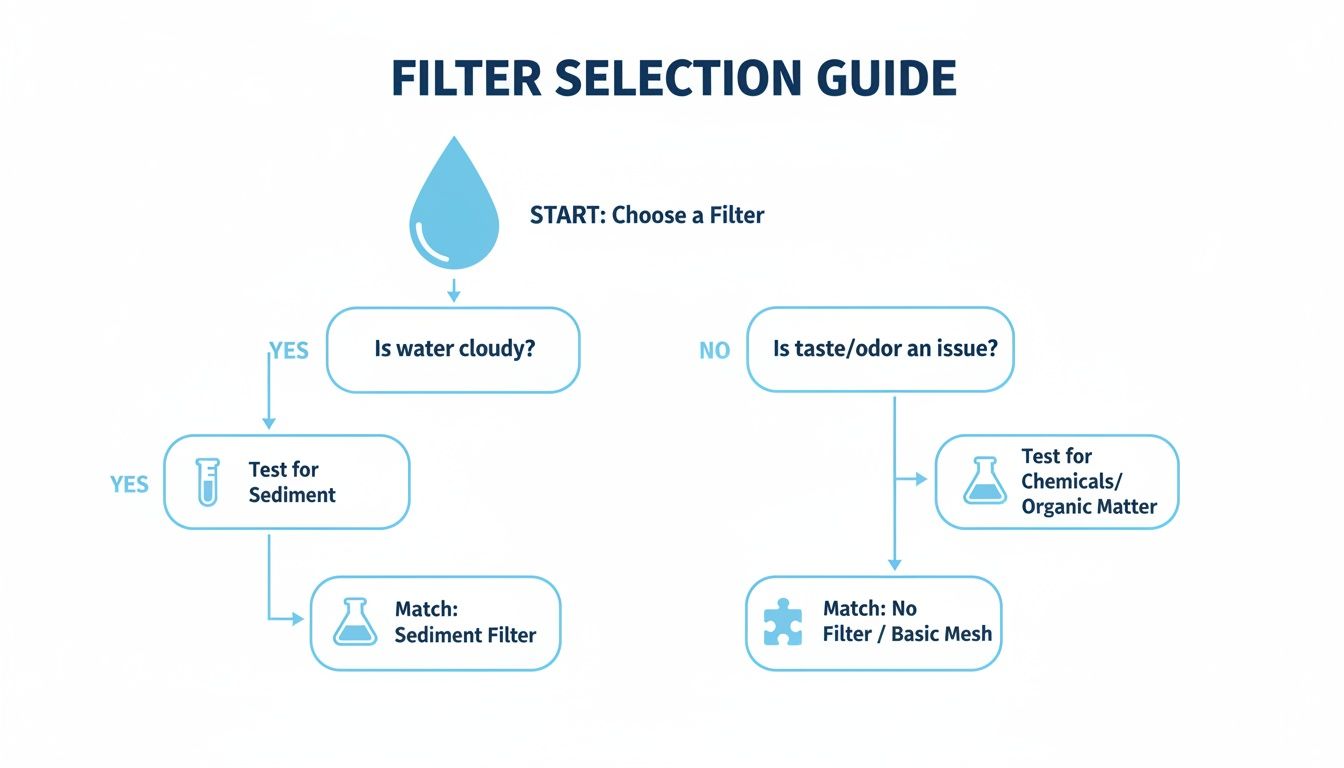
Pick the next filter with your water in mind
Your next cartridge choice should match your water source and what you're trying to fix.
- Sediment filters: Best when sand, rust, or visible particles are the main issue.
- Carbon filters: Better for chlorine taste and odor concerns.
- Well water setups: Often need a different approach than municipal water because the water problems aren't the same.
- Very fine cartridges: They can improve certain outcomes, but they can also create flow complaints if they're too restrictive for the house.
If you want to sharpen your filter selection before the next purchase, the buying and maintenance articles in Water Filter Advisor's advice library are a useful place to compare system types, cartridge roles, and homeowner-friendly maintenance tips.
Dispose of the old cartridge according to the manufacturer's instructions and your local waste rules. Don't toss a soaking wet used filter on a shelf and tell yourself you'll handle it later. That's how basements start collecting mystery messes.
If you want help choosing the right replacement cartridge, comparing whole-house systems, or getting clearer answers on maintenance, visit Water Filter Advisor.