High Iron in Water: Your 2026 Home Filtration Guide

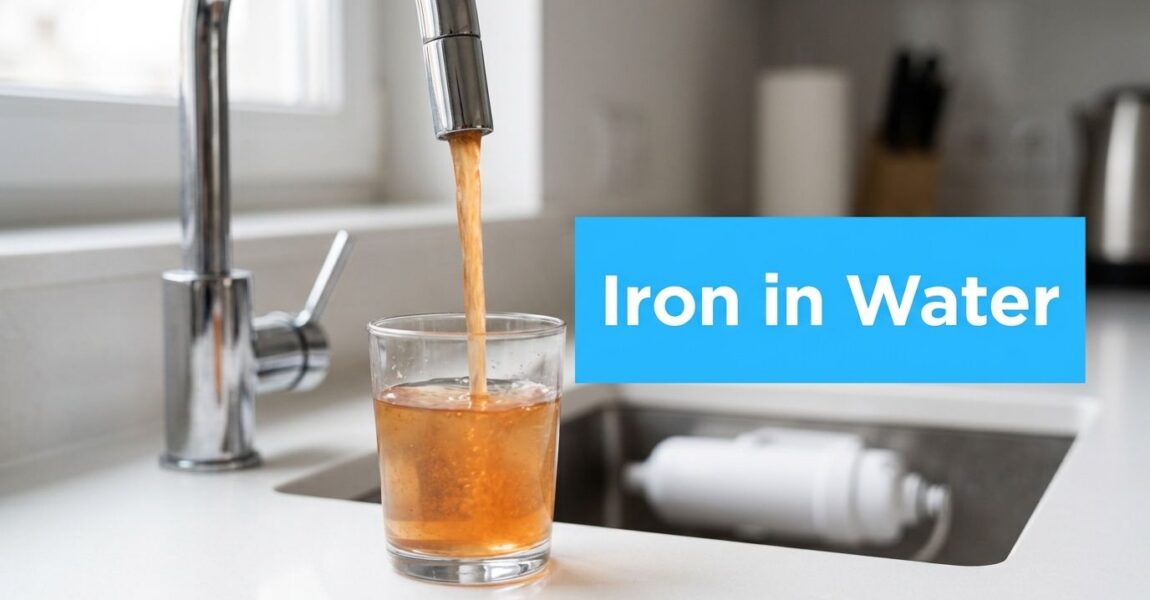
You turn on the kitchen tap, fill a white mug, and notice a yellow tint that wasn't there before. The sink has orange streaks around the drain. Fresh laundry comes out looking a little tired, and your coffee has that metallic edge you can't ignore. That's the moment most homeowners start searching for answers, and it's also where a lot of expensive mistakes begin.

High iron in water usually looks worse than it is. For most homes, it's a filtration and maintenance problem, not a crisis. The hard part isn't figuring out that iron is present. The hard part is figuring out which kind of iron you have, because that's what determines whether a softener helps, a filter works, or a brand-new system fails in a week.

The Rusty Truth About High Iron in Water

Orange stains on the toilet bowl, reddish rings in the tub, and metallic-tasting water all point to the same broad issue. Iron has made its way into your household water, and once it starts showing up, it affects more than appearance. It can foul fixtures, stain fabrics, leave residue in appliances, and make ordinary water feel unpleasant to use every day.

The first thing to know is that this usually isn't a major health alarm for healthy adults. According to the U.S. Environmental Protection Agency, the Secondary Maximum Contaminant Level for iron in drinking water is 0.3 mg/L, and that limit is based on staining, taste, and other aesthetic issues rather than health risks (EPA iron standard explained here). That's why homeowners often discover iron because of what they can see, smell, and scrub, not because they felt sick.

If you've already got rust-colored marks outside the house from sprinkler overspray or runoff, this practical guide on how to remove rust stains from concrete can help with cleanup while you solve the water issue at the source.

Practical rule: If the symptom is staining, taste, residue, or repeated fixture cleanup, start with water testing before you buy equipment.

A lot of homeowners jump straight to “best iron filter” searches. That sounds sensible, but “iron filter” is too broad to be useful. Some systems are built for dissolved iron that looks clear at first. Others handle visible rust particles. Some are defeated by tannins and organic iron even when the product box says “iron removal.”

That's where this gets practical. The goal isn't to buy the most powerful-looking system. The goal is to match the water chemistry to the right treatment path so the fix works the first time.

Understanding the Four Types of Iron Contamination

Most homeowners talk about iron as if it's one contaminant with one fix. It isn't. High iron in water can show up in four forms, and each behaves differently inside plumbing and filtration equipment.

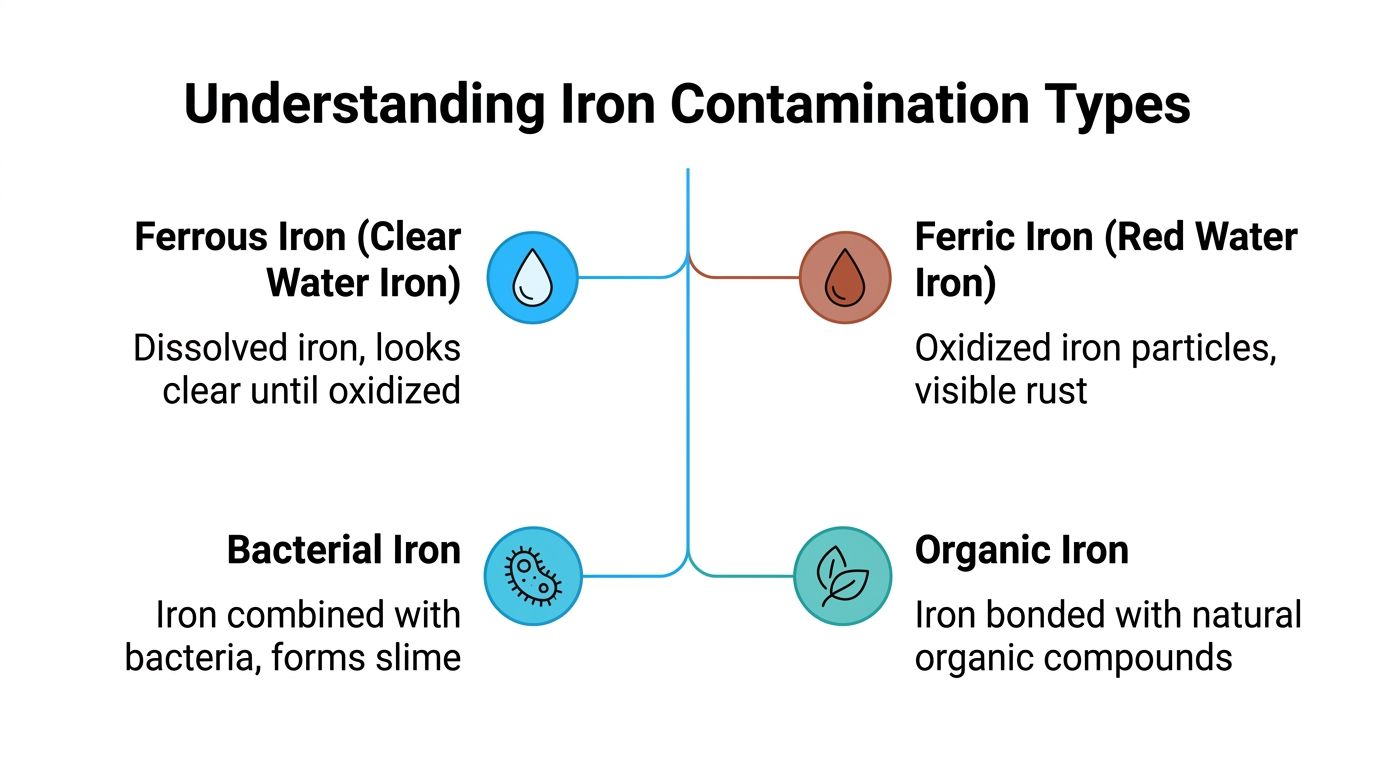
A diagram illustrating the four common types of iron contamination in water, including ferrous, ferric, bacterial, and organic iron.

Ferrous iron

Think of ferrous iron as sugar dissolved in tea. You can't see it once it's mixed in, but it's there. Water with ferrous iron often comes out of the tap looking clear, then turns yellow, orange, or brown after it sits and meets air.

This is what many people call clear-water iron. It slips past basic sediment filters because it's dissolved, not solid.

Ferric iron

Ferric iron is the opposite. It's already oxidized and has turned into visible particles. If ferrous iron is dissolved sugar, ferric iron is sand in a glass of water.

You'll usually notice cloudiness, rust-colored water, or visible particulate staining. Ferric iron is often easier to understand because you can see it. It's also one reason some homes do well with sediment filtration or dedicated iron media when the contamination is mostly particulate.

Organic iron

Organic iron is where many home filtration plans go off the rails. This form is bonded with natural organic matter, often creating tea-colored or yellow-brown water that doesn't behave like ordinary rust.

It helps to think of it like a stain already mixed into the water. It doesn't always oxidize the way standard iron filters expect it to. That's why a homeowner installs a Birm or greensand unit, follows the instructions, and still gets discolored water. The equipment may not be broken. The water chemistry may be wrong for that technology.

Bacterial iron

Bacterial iron involves iron and microorganisms working together. Instead of just staining, this contamination can form slime inside pipes, tanks, and fixtures.

The warning signs are different:

  • Slimy buildup: You may find gel-like residue in toilet tanks or around filters.
  • Recurring fouling: Fixtures clog again soon after cleaning.
  • Persistent odor or film: The water may have a swampy or unpleasant character along with staining.

Iron bacteria complicate treatment because you're not just removing iron. You're also dealing with biofilm inside the plumbing system.

Why the type matters

Here's the practical takeaway. Two houses can both have “iron problems” and need completely different systems.

  • Ferrous iron: Often treated with softening or oxidation-based media, depending on level.
  • Ferric iron: Often treated with sediment removal or iron filtration.
  • Organic iron: Often needs chemical oxidation and a more specific approach.
  • Bacterial iron: Usually calls for disinfection plus filtration, not just a single tank.

If you don't identify the form first, you're guessing. In water treatment, guessing gets expensive fast.

How to Test for Iron and Read the Results

Starting with what's easy, many purchase test strips, dip one in a sample, and hope for a simple answer. Test strips can be useful as an early clue, but they rarely give enough information to choose a whole-house iron system with confidence.

A person testing discolored, potentially contaminated tap water with a chemical test strip in a glass.

What a basic test can miss

A strip may suggest iron is present, but it usually won't tell you the full story. It won't reliably sort out whether the problem is dissolved iron, oxidized iron, organic iron, or iron tied up with bacteria. It also won't give you the broader chemistry that affects filter performance.

That broader chemistry matters. pH, hardness, and tannins can decide whether a treatment method performs well or fails completely.

When iron concentrations rise above 0.3 ppm, the water is considered objectionable, often causing yellow, red, or brown discoloration and a strong metallic taste. Many wells have iron levels below 10 mg/L, so knowing your actual level is key to treatment (North Carolina iron guidance).

What to ask for in a proper water test

If you're shopping for a home filtration system, ask for a test that goes beyond “iron yes or no.” You want a report that helps you make a buying decision, not just confirm what your sink already told you.

Look for these items:

  • Iron level: This tells you how much contamination you're dealing with.
  • Iron form clues: Clear-water behavior, visible particles, or tea-colored water all point in different directions.
  • pH: Some iron filters depend on oxidation conditions that pH can affect.
  • Hardness: This helps determine whether a softener is even part of the conversation.
  • Tannins: This is the often-missed one, especially with yellow or tea-colored water.

If your water is discolored and a standard iron filter doesn't seem to make sense on paper, ask about tannins before you buy anything.

A good visual overview can help if you're trying to understand how field testing fits into the process:

How to read the result without overcomplicating it

Don't treat the lab sheet like a chemistry exam. Read it like a filter shopping guide.

If iron is above the aesthetic threshold, action makes sense. If the water stays clear in the glass and then turns rusty later, dissolved iron is likely involved. If the sample looks rusty right away, particulate iron is likely a bigger share of the problem. If the water looks tea-colored or yellow and common oxidation media has a poor track record in your area, organic iron and tannins move to the top of the suspect list.

That's the point where a homeowner stops buying hardware blindly and starts choosing equipment based on evidence.

Your Complete Guide to Home Iron Filtration Methods

There isn't one “best” iron filter for every house. There are only systems that match your water and systems that don't. The most useful way to compare them is by what type of iron they handle, how much complexity they add, and where they tend to disappoint.

The right treatment depends on the iron type: ferrous iron can be removed by a water softener if under 5 to 10 mg/L, but higher levels often require oxidation via manganese greensand filters. Organic iron and iron bacteria usually need more intensive treatment, typically chemical oxidation followed by filtration (iron treatment overview).

Iron filtration method comparison

Method Best For (Iron Type) Iron Capacity Key Advantage Key Disadvantage
Water softener Low-level ferrous iron Under 5 to 10 mg/L Can address hardness and mild dissolved iron together Not a good fit for tougher iron problems
Manganese greensand filter Ferrous iron after oxidation, moderate to higher iron loads Up to 10 to 15 mg/L in suitable applications Strong option for dedicated iron removal Can struggle when organic iron or tannins are present
Birm or similar oxidizing media Low to moderate dissolved iron in the right water chemistry Best for small amounts of iron Chemical-free operation appeals to many homeowners Water chemistry can make or break performance
Sediment or iron filter for ferric iron Ferric, particle-form iron Below 10 to 15 mg/L before stronger pretreatment is needed Straightforward for visible rust particles Won't solve dissolved iron by itself
Chemical oxidation plus filtration Organic iron, iron bacteria, mixed iron problems Suitable for severe or complex cases Handles difficult water and disinfects when needed More components, more maintenance
Aeration plus filtration Higher dissolved iron where oxidation is needed Used when simple media isn't enough Chemical-free oxidation route in some systems Not ideal for every flow pattern or water chemistry

Water softeners

A softener is often the first device homeowners ask about because it already has a place in many homes. That's fair. For mild ferrous iron, it can work.

The limitation is important. A softener is not a universal iron machine. It's most appropriate when dissolved iron is on the lower end and when hardness removal is already part of the plan. If the iron is heavier, mixed with other forms, or accompanied by staining that never lets up, a softener alone often turns into a maintenance burden.

Pros

  • Two jobs in one: It can soften hard water and reduce mild clear-water iron.
  • Familiar equipment: Plumbers and homeowners already understand the maintenance routine.
  • Good fit for mild issues: It makes sense when iron is present but not dominant.

Cons

  • Limited range: It isn't built for severe contamination.
  • Not for slime or tea-colored water: Organic iron and iron bacteria usually overwhelm this approach.
  • Resin fouling risk: Iron can load up the system and reduce performance over time.

For mild situations, this can be a smart move. For stubborn staining, it's often a detour.

Oxidizing media filters

This category includes systems built around media such as manganese greensand or Birm. These filters work by converting dissolved iron into particles and then trapping those particles in the media bed.

They're popular because they sound elegant. No one loves the idea of storing chemicals if a media tank can do the work. In the right water, they can be very effective. In the wrong water, they become a lesson in why pre-purchase testing matters.

A filter can be correctly installed and still be the wrong solution.

These units are usually strongest when the water contains the kind of dissolved iron that oxidizes predictably. They are much less forgiving when tannins or organic bonding interfere with oxidation.

Ferric iron filtration

If the water already carries visible rust particles, treatment can be more mechanical. Ferric iron is often handled with sediment filtration or a dedicated iron filter designed for particle removal.

This is the part many homeowners intuitively understand. If there are particles in the water, trap the particles. That logic works, but only if dissolved iron isn't also slipping through upstream.

A house with mixed iron forms may need more than one stage. Particle removal can clean up what's visible while oxidation or another pretreatment handles what you can't see yet.

Chemical oxidation systems

When iron gets more stubborn, chemistry usually enters the room. Chemical oxidation systems commonly use chlorine or hydrogen peroxide, then follow with filtration to remove the oxidized material. In the more difficult scenarios described in the verified guidance, the oxidant needs contact time before filtration can do its job.

This is often the right lane for:

  • Organic iron
  • Iron bacteria
  • Mixed iron and manganese problems
  • Repeated failure of standard media filters

If you're planning service work around your water entry point, shutoff location matters too. Homeowners doing broader plumbing upgrades often benefit from understanding expert guide to external stop taps, especially before adding tanks, bypass valves, or treatment loops.

Aeration systems

Aeration exposes water to air so dissolved iron oxidizes and can then be filtered out. It's attractive because it can reduce reliance on chemicals in some applications.

The trade-off is that aeration isn't magic. It still depends on the water being compatible with that oxidation path. If the contamination includes organic iron or tannins, air alone may not get you where you need to go.

How homeowners usually narrow the field

Start with the water result, not the equipment catalog.

  • Mostly mild ferrous iron plus hardness: A softener may be enough.
  • Moderate dissolved iron without complicating factors: Oxidizing media can make sense.
  • Visible rust particles: Sediment or ferric-focused filtration can be part of the solution.
  • Organic iron, tannins, or bacterial slime: Chemical oxidation plus filtration is usually the more dependable path.

If you want broader homeowner guidance on treatment choices and system upkeep, this water filtration advice library is a useful reference point while comparing options.

Choosing the Right Iron Filter System for Your Home

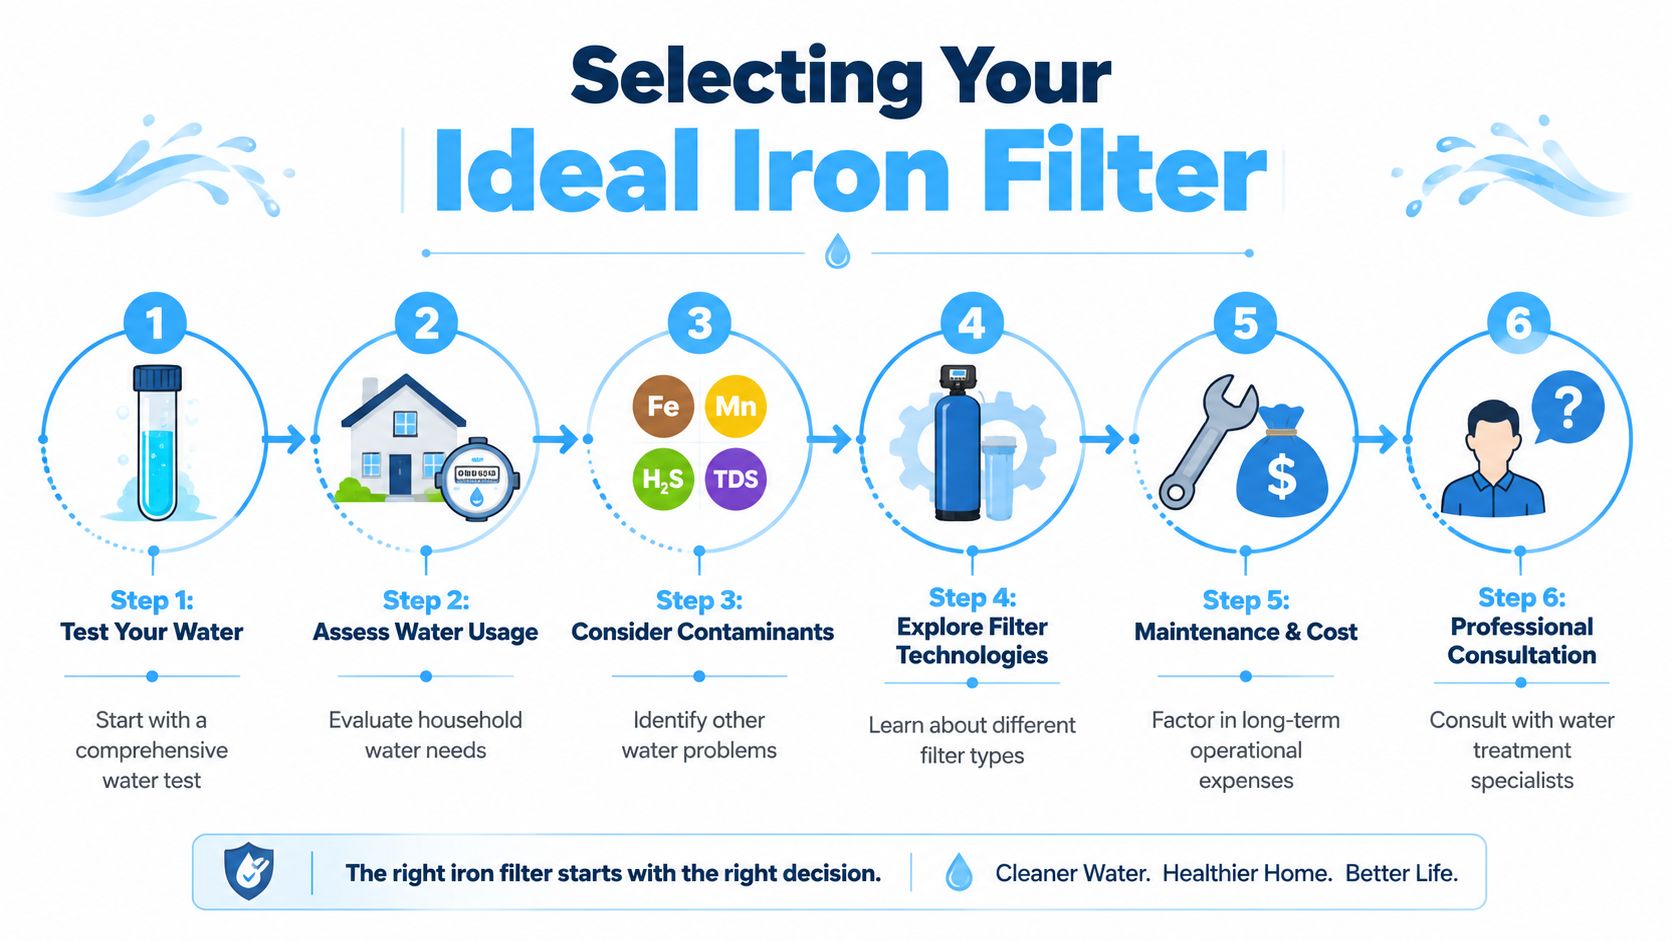
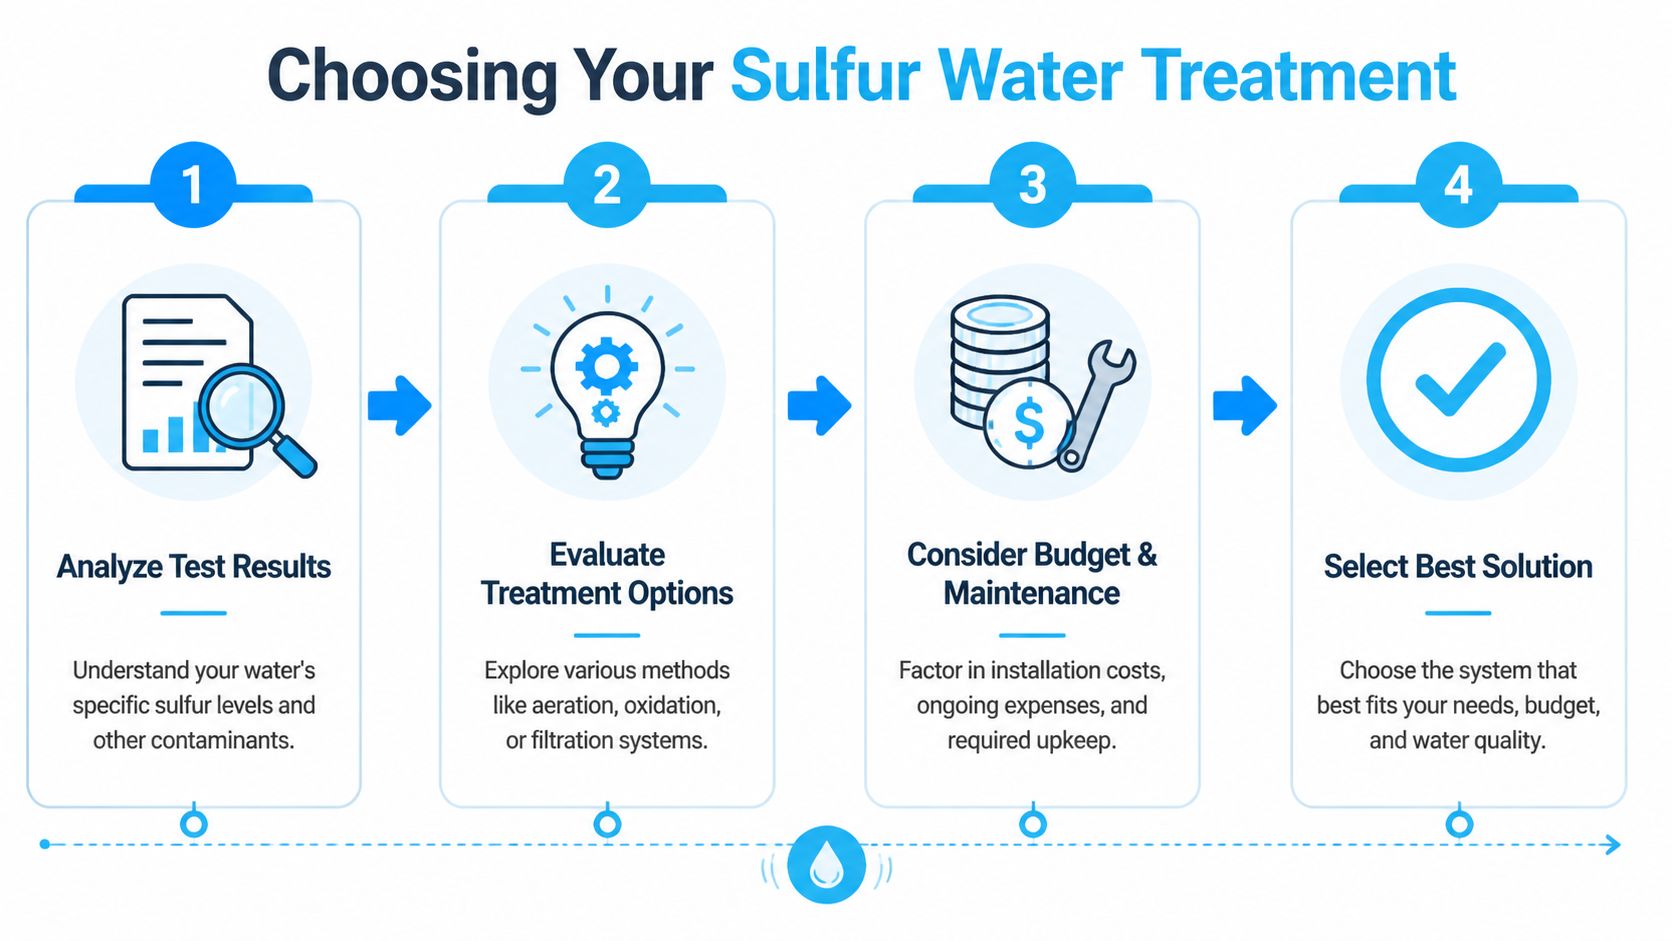
Buying the right iron filter isn't about finding the system with the biggest claims. It's about matching the system to your exact water profile. The homeowners who avoid buyer's remorse are the ones who work through the decision in order.

A six-step infographic guide for selecting an ideal water iron filter for your home.

If your iron is mild and dissolved

If the test points to ferrous iron and the level is still in the range where softening is appropriate, a water softener may be the practical answer. This is especially true when hard water is already annoying you with scale, soap performance, and spotty fixtures.

That's the simplest decision tree. Mild dissolved iron plus hardness often supports a simpler system.

If your water turns rusty after exposure

If the water looks clear at first and then oxidizes after sitting, an oxidation-based filter may fit. For such applications, many people compare greensand, Birm, and similar systems.

But this is also where the most common mistake happens.

A common cause of filter failure is the presence of organic iron and tannins, which prevent the oxidation process used by popular Birm or greensand filters. A water test for tannins is essential before purchase to determine whether advanced chemical oxidation or another method is required (Illinois iron fact sheet).

Don't buy an oxidation filter for yellow or tea-colored water until tannins have been ruled out.

That one step can save a homeowner from installing a perfectly respectable system that never clears the water.

If the water is tea-colored or filters keep “failing”

This is the red-flag scenario. If your water has a yellow-brown cast, looks like weak tea, or keeps defeating common iron filters, think beyond standard media tanks.

In many homes, that points toward organic iron, tannins, or both. At that stage, a stronger oxidation and filtration setup is often the safer investment than trying one more “chemical-free” unit and hoping for a different outcome.

If slime is part of the problem

Slime in toilet tanks, gelatinous residue, or recurring fouling suggests bacterial involvement. Once bacteria enter the picture, filtration alone is usually too narrow a solution.

You need treatment that addresses the biological component as well as the iron itself.

A simple selection framework

Use this checklist before you sign off on equipment:

  • Match the iron form first: Dissolved, particulate, organic, and bacterial problems don't belong in the same shopping basket.
  • Check for tannins: This is the step many homeowners skip, and it's one of the costliest mistakes.
  • Factor in flow needs: Whole-house treatment must keep up with showers, laundry, and fixtures running together.
  • Think about maintenance tolerance: Some people want low-touch equipment. Others don't mind refill and service routines if the results are dependable.
If you're curious how aeration concepts scale beyond the home, these aerobic units for industrial applications are a useful example of how retention and oxygen exposure become part of larger treatment designs. The home version is obviously much smaller, but the principle helps explain why contact time matters.

Estimating Costs and Planning for Maintenance

The biggest cost mistake with high iron in water isn't always overspending on equipment. It's buying the wrong category of equipment, then paying to service, replace, or supplement it when the water still stains.
Because systems vary so widely by plumbing layout, water chemistry, flow demand, and whether professional installation is needed, the smartest way to think about cost is by total ownership, not sticker price. A softener may look simpler at first, but if the water really needs oxidation and filtration, that “lower-cost” choice can become the expensive one.

What maintenance really looks like

Different systems ask different things from you:

  • Water softeners: Expect ongoing salt use and periodic attention if iron starts fouling the resin.
  • Oxidizing media filters: These need backwashing and eventually media service or replacement.
  • Chemical oxidation setups: You're taking on replenishment, contact time, and multiple components that need periodic checks.
  • Aeration systems: These can reduce chemical handling, but they still need cleaning and filter upkeep.

The severe end of the spectrum is less forgiving. For severe cases involving iron-eating bacteria in well water, the most reliable treatment involves chlorination, a retention tank for contact time, and a backwashing carbon filter to remove oxidized iron and residual chlorine (multi-stage bacterial iron treatment).

How to budget without guessing

Before you approve a system, ask these questions in plain language:

  1. What recurring supplies will I need?
  2. How often does this system need service or cleaning?
  3. What happens if my water chemistry changes seasonally?
  4. Does this setup treat the actual cause, or just the visible symptom?

The best iron system isn't the one with the fewest parts. It's the one you can maintain consistently and that actually matches the water.

High Iron in Water FAQs

Can city water have iron too?

Yes. Municipal water can still cause staining or metallic taste if iron is present in the supply or introduced through older plumbing infrastructure. Homeowners often associate iron with wells, but a city connection doesn't automatically rule it out.

Will a pitcher filter remove iron?

Usually, no. Pitcher filters are not a serious whole-house or high-iron solution. They don't have the treatment capacity or the right process for most dissolved, organic, or bacterial iron problems, and they won't protect fixtures, laundry, or appliances.

Why is my new iron filter not removing yellow water?

This is one of the most common complaints, and it often points to organic iron or tannins. Standard oxidation-based filters may be designed for more straightforward dissolved iron. If the water is tea-colored or stays yellow after treatment, the system may be mismatched to the water chemistry rather than defective.

Is a whole-house system better than point-of-use treatment?

For most iron problems, yes. Iron affects more than drinking water. It stains tubs, sinks, toilets, fabrics, and appliances. Whole-house treatment solves the problem where the water enters the home instead of trying to clean up after it fixture by fixture.

What's the first thing I should do if I suspect high iron in water?

Get the water tested with enough detail to identify the likely iron form and check for factors such as tannins, hardness, and pH. That single step saves more money than any coupon code or “top-rated” product roundup ever will.


If you're comparing treatment options and want neutral, homeowner-focused guidance, Water Filter Advisor is a solid place to start. It's built for people who want to understand what a filter does, what maintenance looks like, and how to choose a system that fits their water instead of buying on marketing alone.

UV Water Purification Systems: Your 2026 Guide

You get your water test back, and one line grabs all your attention: bacteria. Or maybe you're on city water, everything seems fine most days, and then a boil-water notice lands in your inbox. Either way, the feeling is the same. The water looks normal, tastes normal, and suddenly doesn't feel normal at all.

That's where UV water purification systems earn their place. They're not flashy. They don't change the taste of your water, and they don't usually become the part of the plumbing system people brag about. But when they're installed correctly, they act like a silent final barrier against microbiological contamination.

For homeowners, that's the right way to think about UV. Not as a magic box that fixes every water problem, but as a focused tool for one job: making biologically unsafe water microbiologically safer to drink. If your concern is bacteria, viruses, or cyst-related risk, UV is one of the cleanest, most targeted solutions available. If your water also has sediment, metals, staining, sulfur smell, or chemical contamination, UV still helps, but only as one stage in a complete treatment setup.

The Invisible Shield Protecting Your Home's Water

You can have clear water, no odor, no staining, and still have a problem that only shows up on a lab report. That is usually the moment homeowners start looking at UV.

I see it in two situations all the time. Well owners want a final disinfection step after finding bacteria risk, and city-water homeowners want backup protection after a service interruption or boil-water notice. In both cases, the appeal is practical. UV adds disinfection without feeding chlorine or another chemical into the plumbing.

Why UV feels different from ordinary filtration

A sediment filter catches grit. Carbon reduces chlorine, taste, and some organic compounds. UV does a different job. It passes water through a chamber and exposes microorganisms to germicidal light, which works a lot like sunscreen in reverse for microbes. Instead of shielding them, the light damages them so they cannot keep multiplying.

That difference matters in real-world system design. Homeowners often expect one device to handle everything, but UV is usually the last protective step, not the whole treatment plan. If the water is cloudy or full of iron, hardness scale, or fine sediment, those issues need to be handled before the UV unit can do its job well.

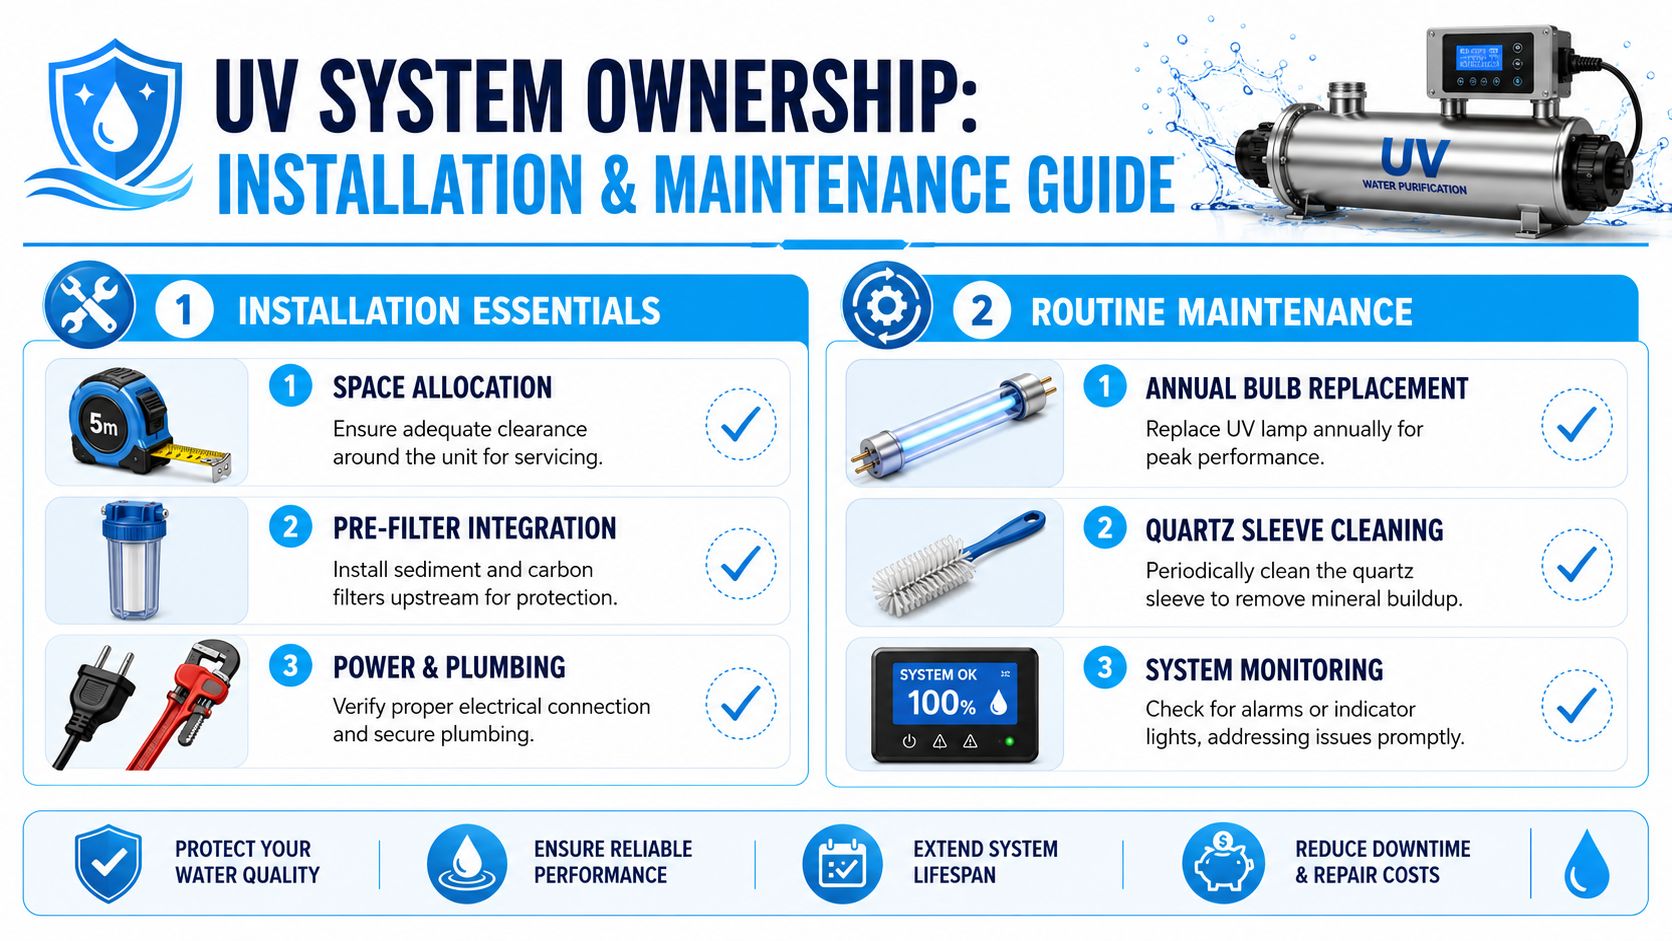
That is also why ownership costs start before the unit is installed. A UV system may look simple on the wall, but the full decision includes prefiltration, lamp replacement, sleeve cleaning, and making sure the flow rate matches the house. The unit itself is only part of the purchase.

Where homeowners usually use it

Residential UV systems usually fit one of two setups:

  • Whole-house protection: Installed on the main line, usually after prefilters and any softener or iron treatment.
  • Point-of-use protection: Installed under a sink or at a dedicated drinking water tap.

Whole-house UV gives broader protection, but it costs more upfront and usually needs more careful sizing. Point-of-use UV costs less and can make sense if the concern is limited to drinking and cooking water, though it does nothing for showers, bathroom sinks, or ice makers on untreated lines.

Homeowners who have looked at HEPA and UV air systems already know the basic idea. UV handles threats you cannot see. In water treatment, the same principle applies, but sizing and water quality matter a lot more because the light has to reach organisms as water moves through the chamber.

One more distinction helps set expectations early. Some UV systems are built for contaminated water risk, while others are intended as added protection for already treated municipal water. That is why product class, flow rating, and the condition of your incoming water matter more than marketing language. UV is a targeted disinfection step, and it works best when the rest of the treatment train is planned around it.

How UV Light Makes Your Water Safe

A family can fill glasses from a perfectly clear tap and still have a disinfection problem. That is the part UV is built to address. It targets living microorganisms that you cannot see, taste, or smell.

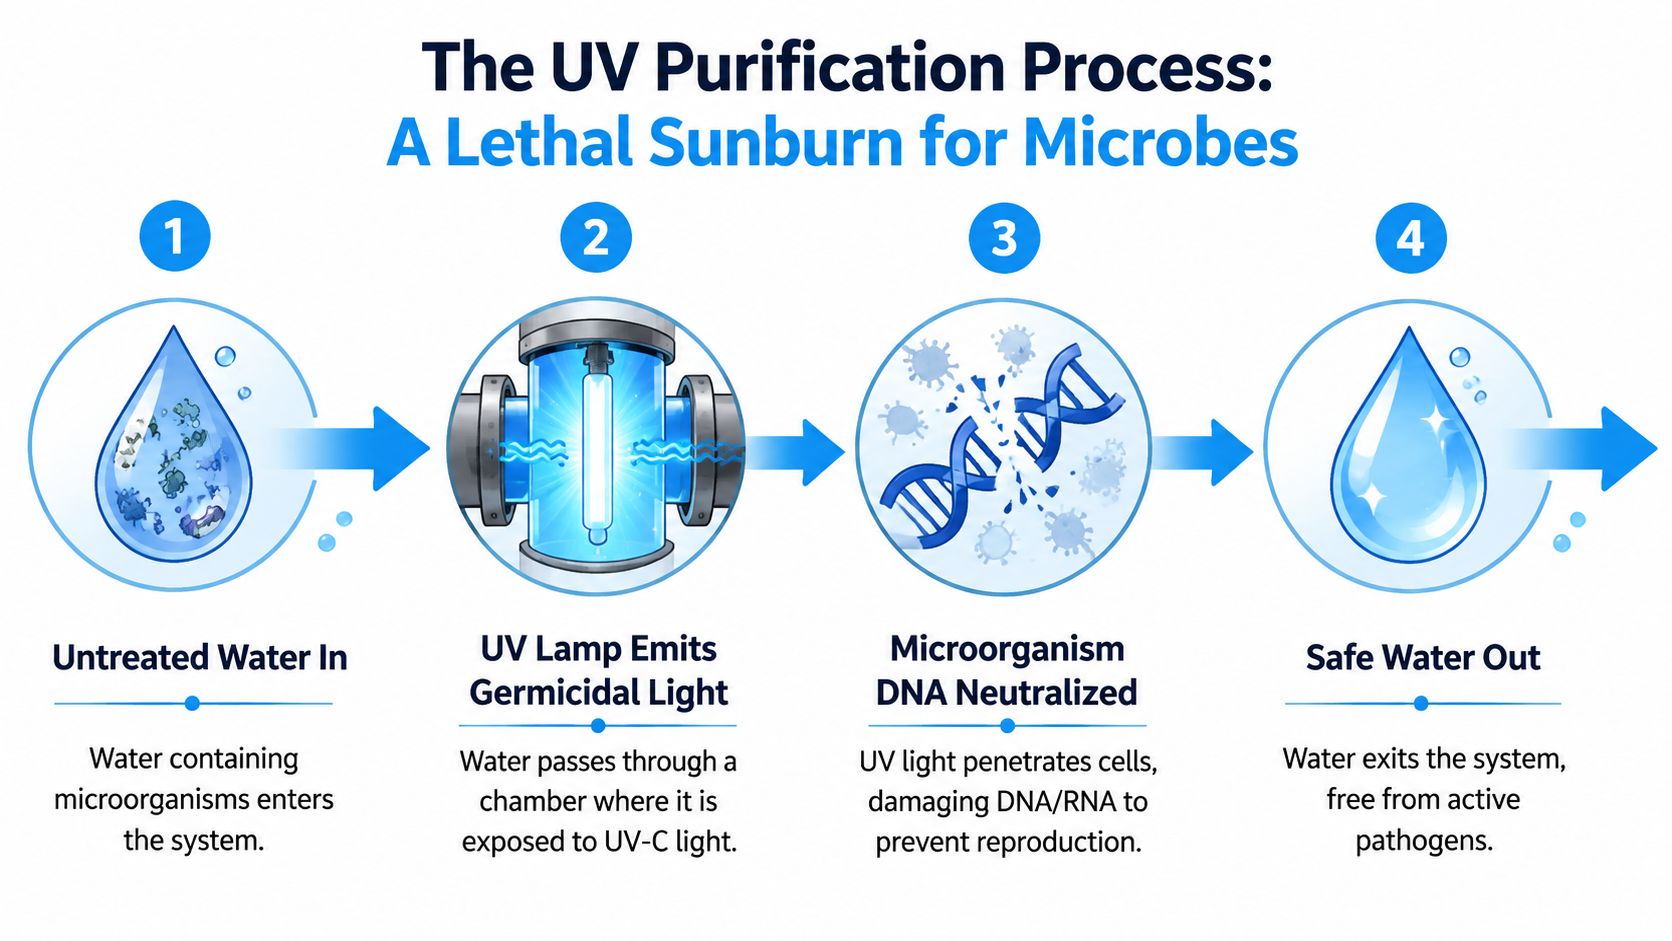
UV treatment uses UV-C light, typically at 254 nm, to damage the genetic material inside microbes. A practical way to picture it is sunscreen in reverse. Instead of shielding cells from light damage, the system exposes bacteria, viruses, and protozoa to a level of light that keeps them from reproducing. Once they cannot reproduce, they cannot keep infecting people.

A diagram illustrating the four steps of a UV water purification system for removing active pathogens.

What actually happens inside the chamber

Inside the reactor, water flows past a UV lamp that sits inside a clear quartz sleeve. As water moves through that treatment zone, microorganisms are exposed to germicidal light for a controlled amount of time. If the unit is sized correctly and the water is clear enough for the light to pass through, the organisms are inactivated before the water reaches the rest of the house.

That last part matters. UV is a disinfection step, not a capture step. It does not strain organisms out of the water, and it does not remove dirt, chlorine, iron, hardness, or chemical contaminants. It changes whether microbes are still viable.

For homeowners, that distinction affects planning and long-term cost. A UV unit can do its job very well, but only if the water reaching the chamber gives the light a fair shot. Cloudiness, sediment, and mineral fouling on the sleeve all reduce performance, which is why prefiltration and sleeve maintenance are part of the complete ownership picture, not optional add-ons.

Why dose matters more than bulb wattage

A lot of product pages push lamp wattage because it is easy to compare. Wattage alone does not tell you whether the system will disinfect your water under real household conditions. UV dose matters more.

Dose is the amount of germicidal energy the water receives as it passes the lamp. A simple paint analogy fits here. A bigger paint sprayer helps, but coverage still depends on speed and distance. In a UV chamber, delivered dose depends on lamp output, contact time, flow rate, and how clear the water is.

This is why sizing mistakes show up later as ownership problems. A unit picked only by price or bulb size may look fine on paper, then struggle during high-demand periods when several fixtures run at once. A properly sized system is built around your peak flow, your incoming water quality, and the maintenance routine you will keep up with.

Why filtration and UV are often paired

If you've looked into indoor air quality, the logic will sound familiar. Homeowners often pair filtration with UV in air treatment for the same reason they pair sediment or carbon filtration with UV in water treatment. Each stage does a different job. This overview of HEPA and UV air systems shows that same layered approach in a different setting.

Here's a quick visual if you want to see the water-side process in action:

Practical rule: Judge a UV system by delivered dose at your home's real flow rate, and by the prefiltration and upkeep it needs to keep that dose consistent over time.

Anatomy of a Home UV Purification System

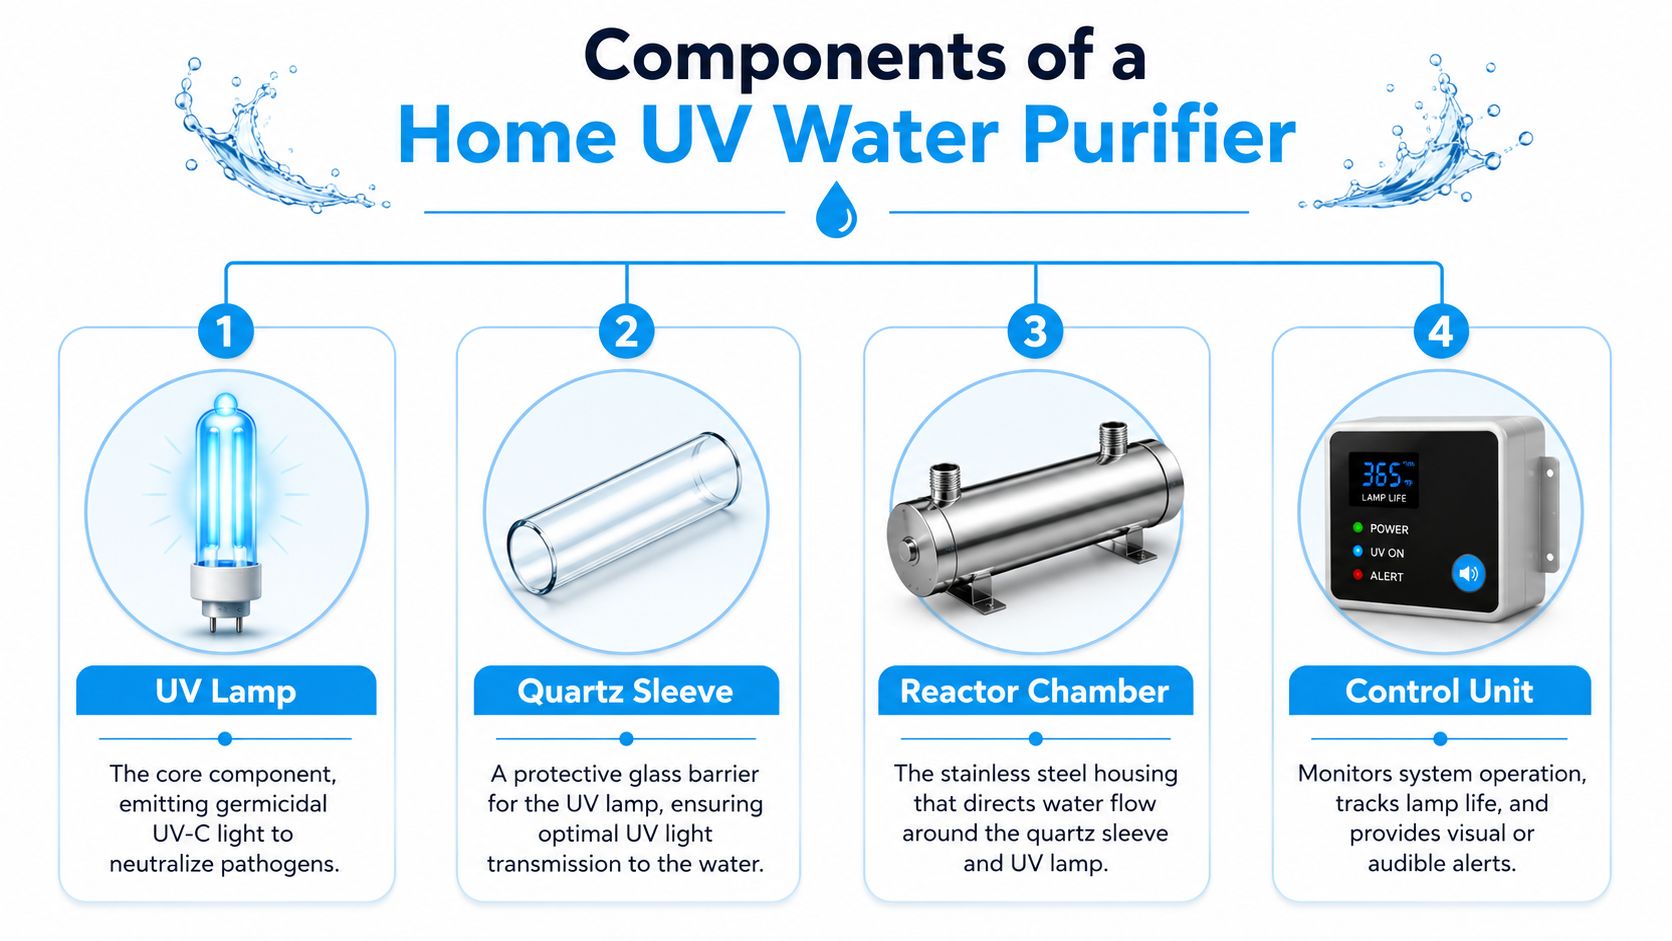
A home UV unit looks simple from the outside. Inside, four parts do almost all the work.

A diagram illustrating the four main components of a home UV water purification system.

The lamp

The UV lamp is the heart of the system. It generates the germicidal light that treats the water. When the lamp ages, the system may still appear to be on, but disinfection performance can drop if output isn't maintained. That's why lamp replacement is part of ownership, not an optional extra.

The quartz sleeve

The quartz sleeve is a clear protective tube that separates the lamp from the water. It lets UV light pass through while keeping the electrical lamp dry.

This part often gets ignored until performance problems show up. If minerals, iron fouling, or film build up on the sleeve, the lamp may still be glowing while less useful light reaches the water.

The reactor chamber

The reactor chamber is usually stainless steel. It holds the sleeve and lamp in the correct position and directs water through the treatment zone.

Good chamber design matters because water needs consistent exposure as it passes through. In practical terms, residence time and exposure path are combined.

The controller

The controller or ballast powers the lamp and usually provides status information. Better controllers help homeowners notice trouble early by tracking lamp condition or signaling when service is due.

A simple way to think about the whole assembly:

Component Job in the system
UV lamp Produces germicidal UV-C light
Quartz sleeve Protects lamp while allowing light through
Reactor chamber Routes water through the disinfection zone
Controller Powers and monitors system operation

When homeowners understand these parts, maintenance starts to make sense. You're not just “changing a bulb.” You're preserving the conditions that make disinfection possible.

What UV Purifiers Do and Do Not Remove

You install a UV unit, the lamp is glowing, and the water still smells like chlorine or leaves orange stains in the sink. That does not mean the UV system failed. It means it was asked to solve the wrong problem.

UV water purification systems target living contaminants. They are built to disable bacteria, viruses, and other microbes so they cannot reproduce and spread illness. In a home setup, that makes UV a disinfection step, not a catch-all treatment method.

A glass being filled with clean water from a kitchen faucet, emphasizing purified drinking water.

What UV is good at

A properly sized UV system works like sunscreen for microbes. The light damages their genetic material, so they can no longer multiply. That is why UV is often the last stage in the treatment line, after other filters have already cleaned up the water enough for the light to do its job.

This matters in real homes. If your concern is well water with possible bacterial contamination, UV can be a smart final barrier. If your concern is metallic taste, hard scale on fixtures, or chemical runoff, UV will not fix those issues.

What it leaves behind

UV does not remove:

  • Sediment and turbidity: Dirt, silt, rust, and cloudiness remain in the water.
  • Chemicals: Chlorine, pesticides, and many dissolved contaminants stay put.
  • Metals: Lead, iron, manganese, and similar metals are not filtered out by UV.
  • Hardness minerals: Calcium and magnesium still form scale.
  • Taste and odor compounds: If the cause is chemical, mineral, or organic, UV usually will not change the flavor or smell.

That limitation shapes the whole ownership cycle. A UV system is rarely a one-box answer. It usually sits behind sediment filtration, and often behind carbon as well, because those earlier stages handle the contaminants UV cannot touch. Homeowners comparing setups can review broader treatment combinations in this home water filtration advice library or find your ideal water purification system.

Why pre-filtration matters so much

Clear water gives UV the best chance to work. Cloudy water does the opposite.

Suspended particles can shield microbes from the light. I explain it to homeowners this way: if the germ is hiding behind a speck of sediment, the UV light may never reach it with enough strength to do the job. The lamp can be on, the controller can look normal, and protection can still drop if the upstream filtration is undersized or overdue for service.

That is one of the practical trade-offs many guides skip. The cost of owning UV is not just the unit itself. It includes the sediment filters, carbon cartridges if needed, and the maintenance discipline required to keep the water clear enough for the UV chamber to stay effective.

Choosing the Right UV System for Your Home

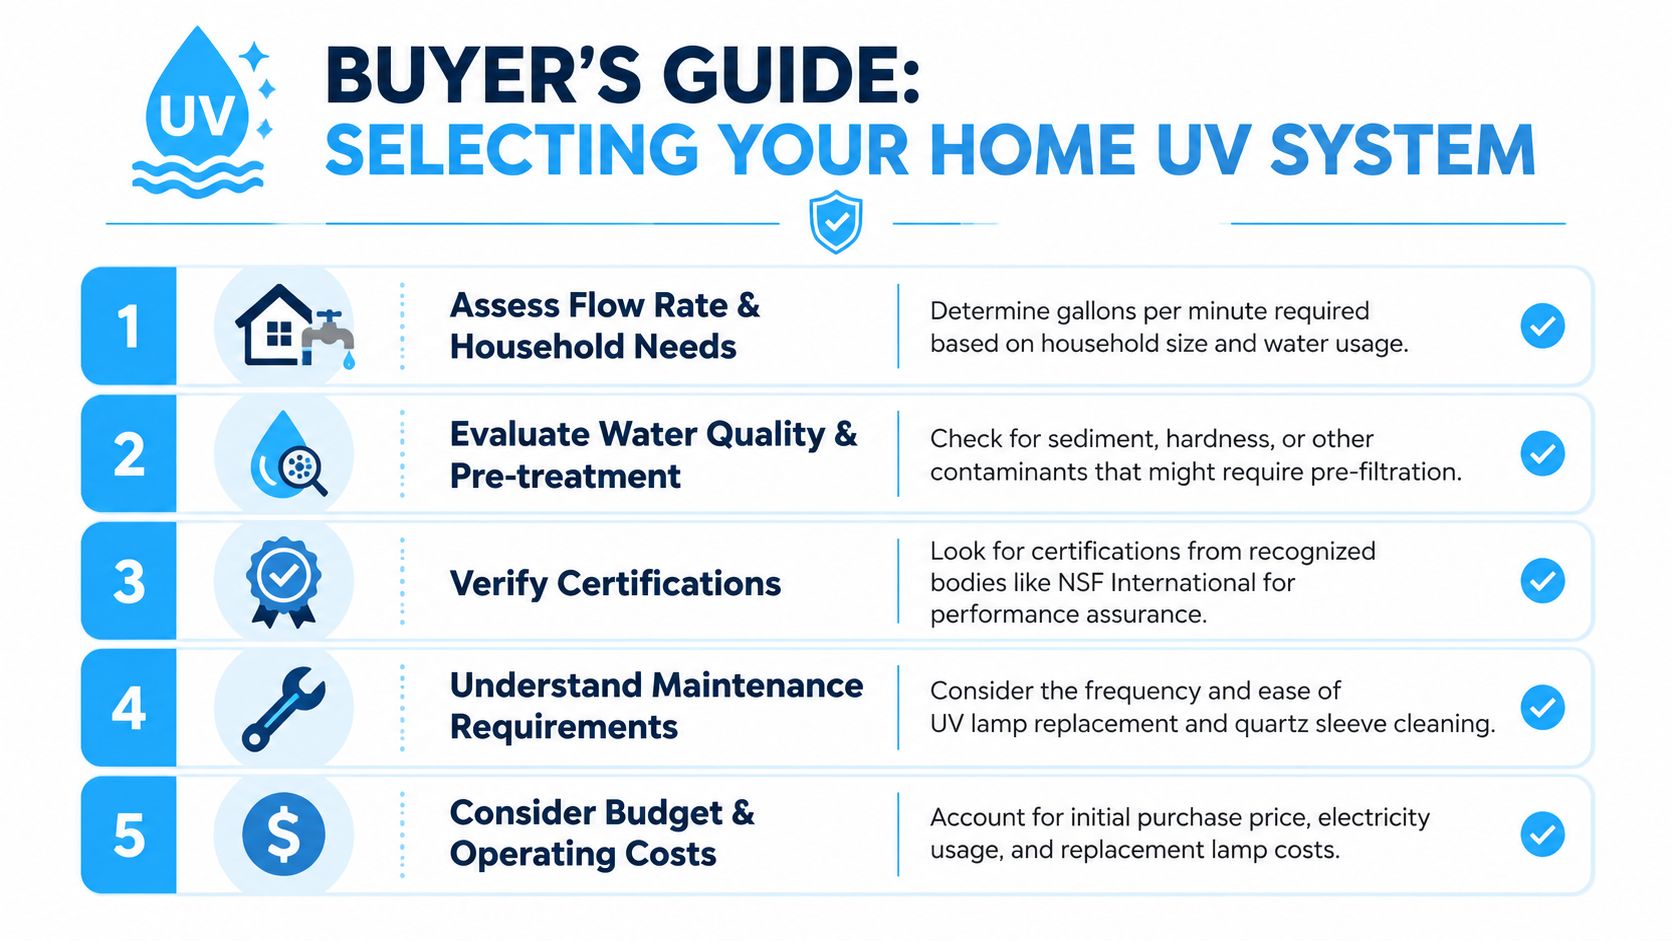
A family can live with a UV unit for years and still buy the wrong one on day one. The usual mistake is focusing on the box and forgetting the ownership cycle: water source, peak flow, pre-filtration, service access, and the steady cost of lamps, sleeves, and replacement filters.

A five-step buyer's guide infographic on selecting and installing a home UV water purification system.

Start with your water source

The right UV choice starts with one basic question: what water are you treating?

Private well owners usually need to be stricter about UV selection because they are responsible for the treatment barrier at the house. Municipal water users are often adding UV as extra protection at the point of entry or point of use, not replacing the utility's disinfection. That difference affects how much safety margin you want, whether whole-house treatment makes sense, and how much attention you need to give upstream filtration.

Water test results matter here. A UV chamber works like sunscreen for microbes. It blocks their ability to reproduce, but only if the light reaches them cleanly and at the right dose.

Whole-house or under-sink

A whole-house UV system treats incoming water for the entire home. That matters if you want every cold-water outlet covered, or if the concern is the source itself rather than one drinking tap.

An under-sink UV system is a narrower tool. It can be a practical fit for city water users who mainly want added protection for drinking and cooking water, or for homes where space and budget rule out a full point-of-entry install.

The better choice depends on risk and daily use, not just price. If the water source is questionable, treating one faucet leaves the rest of the house outside that protection.

Size for peak demand, not quiet-hour use

Sizing mistakes usually show up during busy household moments. One shower is running, a toilet refills, the washer starts, and someone opens the kitchen tap. That is the flow the UV unit has to handle.

UV is dose-based. As flow rises, contact time drops. In plain terms, water moving too fast through the chamber gets less exposure to the lamp. A unit that looks fine on paper can be undersized in real use if it was chosen around average consumption instead of simultaneous demand.

This is also where buyers miss the full-system cost. If the home needs better sediment reduction or carbon pre-treatment to support the UV chamber, the correct purchase is not just the UV unit. It is the UV unit plus the filter stages that keep it working as intended.

Understand Class A and Class B

Certification still matters, even if the labels are not always explained well in product listings.

Class A systems are intended for situations where microbiological safety is the main concern. Class B systems are typically used as an added measure on already potable water. For a homeowner, the practical takeaway is simple: if the source water itself may be unsafe, Class A is usually the category to look for first. If the goal is extra polish on treated city water, Class B may fit.

Do not treat those labels as marketing language. They describe different jobs.

A buying checklist that avoids expensive mistakes

Use this checklist before you order:

  • Test first: Confirm whether the problem is microbial, or whether sediment, iron, hardness, tannins, or chemicals also need treatment elsewhere in the system.
  • Match the unit to actual flow: Count fixtures that may run at the same time, not just your usual low-demand hours.
  • Choose the treatment scope: Whole-house for source-water protection across the home. Under-sink for one tap or a limited use case.
  • Confirm the certification class: Class A and Class B are not interchangeable.
  • Check pre-filtration needs: UV performs best when upstream filters are sized and maintained properly.
  • Leave room for service: Lamp changes and sleeve cleaning are routine ownership tasks, so cramped installs become expensive installs.
  • Price the full lifecycle: Include the lamp schedule, sleeve replacement risk, quartz cleaning, and any sediment or carbon cartridges the system depends on.

If you are still comparing treatment paths, these home water filtration advice resources can help you sort out where UV fits. You can also find your ideal water purification system if you are weighing UV against broader whole-home treatment setups.

Installation Tips and Lifetime Ownership Costs

A UV system usually succeeds or fails long before the first lamp change. The deciding work happens at installation. A well-sized unit, placed in the right spot with enough room to service it, tends to be quiet and dependable. A cramped install with weak pre-filtration turns routine maintenance into a recurring headache.

Set UV at the end of the treatment train, after sediment filtration and after any other treatment stages that can add debris or cloudiness. UV light only disinfects what the light can reach. If the water carries silt, rust, or other suspended material, some microbes can pass through shaded from the lamp, like sunscreen for microbes.

Where installation usually goes right or wrong

Placement is only part of the job. Service clearance matters just as much.

Leave enough straight space to remove the lamp and quartz sleeve without cutting pipe or unmounting the chamber. I have seen solid UV units installed so tightly against a wall joist that a simple lamp swap turned into a plumbing call. That is avoidable. Check the manufacturer's clearance requirements before the unit is mounted, not after.

Flow rate is the other common mistake. UV works on contact time. If the home can demand more water than the chamber is rated to treat, exposure drops right when protection is needed most. Size for real peak use, such as showers, laundry, and kitchen demand happening together, not for the quiet hour when one faucet is running.

A few practical install habits also pay off over the full life of the system:

  • Add isolation valves and a bypass if the layout allows. This makes lamp or sleeve service much easier.
  • Protect the chamber with the right pre-filtration. Sediment control upstream usually does more for long-term UV performance than homeowners expect.
  • Install where status lights or the controller are easy to see. Hidden alarms get missed.
  • Avoid hard-to-drain locations if your area deals with freezing risk or seasonal shutdowns.
  • Check water conditions before finalizing the layout. Hardness, iron, and manganese often decide how often the sleeve needs attention.

The best UV install is the one that is easy to maintain a year from now, not just easy to pipe in today.

What ownership actually costs

The purchase price is only the front end of ownership. The true budget shows up in the annual lamp schedule, occasional sleeve replacement, electricity use, and the filters that protect the chamber.

Here is where the money usually goes:

  • Lamp replacement: UV lamps are consumable parts. Even when a lamp still glows, its disinfecting output drops with age, so replacement follows the manufacturer's schedule.
  • Quartz sleeve cleaning: Mineral scale, iron film, and fouling reduce how much UV reaches the water. Some homes need only occasional cleaning. Others need it as part of regular service.
  • Quartz sleeve replacement: Sleeves can crack during handling, become badly etched, or stay fouled enough that cleaning is no longer worth the effort.
  • Pre-filter cartridges: This is the cost many buying guides skip. If the UV unit depends on sediment or carbon stages upstream, those filters are part of the UV system's real operating cost.
  • Power use: UV systems run continuously in many homes, so they add a small but ongoing electrical cost.

This is why I tell homeowners to price the first three years, not just the box on the shelf. A cheaper unit with expensive lamps, awkward sleeve access, or fussy pre-filtration can cost more to live with than a better-designed system.

Maintenance mindset

UV ownership works best with a calendar, not guesswork.

Check the controller or indicator lights. Replace the lamp on schedule. Inspect the sleeve if your water has hardness or iron. If water quality changes seasonally, pay closer attention during those months. Homes on wells often see this more than homes on stable municipal water.

Treat UV like a safety device that needs routine attention. It functions discreetly, but only if the lamp is fresh, the sleeve is clear, and the water reaching the chamber has already been properly filtered.

Frequently Asked Questions About UV Water Purifiers

Some questions keep coming up because they sit right at the intersection of plumbing, water quality, and daily life. Here are the short answers homeowners usually need.

Quick answers that matter in practice

Question Answer
Does UV change the taste of water? Usually no. UV disinfects microbiologically, but it doesn't remove chlorine, minerals, or other compounds that affect flavor.
Can UV fix cloudy water? No. Cloudiness and suspended matter should be handled upstream with filtration.
Is UV enough for well water? Sometimes, but only when microbiological contamination is the main issue. Many wells also need sediment, iron, hardness, or other treatment stages.
Should UV go before or after other filters? Usually after them, as the final disinfection step.
Can I install UV under the sink instead of treating the whole house? Yes, if your goal is protected drinking and cooking water at one location rather than every fixture in the home.
If the lamp is glowing, is the system definitely working properly? Not always. Lamp output, sleeve condition, and flow conditions all matter.
Does UV remove lead or pesticides? No. Those require other treatment methods.
What's the biggest mistake homeowners make? Buying UV to solve every water problem, instead of using it for the specific job it's designed to do.

The best owner mindset

The happiest UV owners usually do three things well. They test their water before buying, they build the treatment system in the right order, and they treat maintenance as part of the purchase, not a surprise later.

That approach keeps expectations realistic. It also keeps the UV unit doing the one thing it's meant to do well.

Buy UV for microbiological protection. Buy other filtration stages for everything else.


If you're comparing filtration options or trying to build the right treatment train for your home, Water Filter Advisor is a practical place to start. It helps homeowners sort through whole-house filters, under-sink systems, replacement cartridges, certifications, and maintenance questions so you can choose a setup that fits your actual water problems, not just the marketing.

Water Filter for Iron Bacteria: Your 2026 Guide

You lift the toilet tank lid and find reddish-brown slime clinging to the sides. The water smells a little earthy. Your white laundry keeps picking up rust stains. Then you search for a water filter for iron bacteria and get flooded with promises about miracle cartridges, UV gadgets, and “all-in-one” fixes.

That's where a lot of homeowners lose time and money.

Iron bacteria usually aren't a direct health threat, but they are a stubborn well-water nuisance. The Minnesota Department of Health describes them as naturally occurring microorganisms that combine iron or manganese with oxygen to form rust-like deposits and slime that can clog wells, reduce water production, and foul plumbing, as explained in the Minnesota Department of Health guidance on iron bacteria. In plain English, they turn your plumbing into a slow, sticky mess.

A simple filter often won't solve that. It may catch some debris for a while, but it won't deal with the living colony and the slime protecting it. And while people often worry about biological contamination in water for good reason, that concern is broader than iron bacteria alone. If you want a separate look at another contamination question homeowners ask, this guide on the risks of drinking moldy water gives useful context on why different water problems need different responses.

The Slimy Truth About Your Water

The biggest mistake homeowners make is treating iron bacteria like ordinary sediment.

That approach fails because the problem is not sitting in one spot waiting to be strained out. Iron bacteria can colonize the well, pressure tank, plumbing, and fixtures, then coat those surfaces with slime that keeps trapping iron and manganese. By the time reddish buildup shows up in a toilet tank, the issue usually involves the whole water system.

A cartridge filter may catch loose debris for a short time. It does not remove the colony feeding the slime, and it does not clean the fouled parts upstream.

What homeowners usually notice first

The first warning is usually a pattern in the house, not a lab result.

  • Slime in the toilet tank: The buildup looks slick, stringy, or gelatinous, not just dusty rust.
  • Staining that returns quickly: Sinks, tubs, and laundry pick up orange-brown marks again soon after cleaning.
  • Reduced flow: Aerators, showerheads, and narrow plumbing passages start plugging up.
  • Musty or swampy odor: The smell often shows up along with staining and slime.

Those symptoms point to a system problem. They also explain why a single filter so often disappoints.

Practical rule: If you have slime, odor, and recurring staining together, plan on disinfection plus filtration.

What doesn't work well on its own

A common dead end for homeowners is buying a standalone iron filter before dealing with the bacterial growth itself. In the field, that often means the media loads up with slime, pressure drops, and the original odor or staining returns sooner than expected.

UV is another shortcut that gets overestimated. A well-water guide says “Do NOT use UV lights to control iron bacteria” because UV does not remove iron fouling or the slime layer protecting the growth, as noted in this iron bacteria treatment guide from Aqua Science.

The better approach is a treatment train. First break up or disinfect the biological growth. Then filter out the oxidized iron, loosened slime, and sediment. Homeowners who start with that sequence usually avoid the expensive cycle of replacing cartridges and blaming the wrong piece of equipment.
Iron bacteria are also different from other biological water issues people read about online. If you want a separate example of how contamination problems can have very different causes and responses, this guide on the risks of drinking moldy water gives useful context.

Meet the Culprits Iron Bacteria Explained

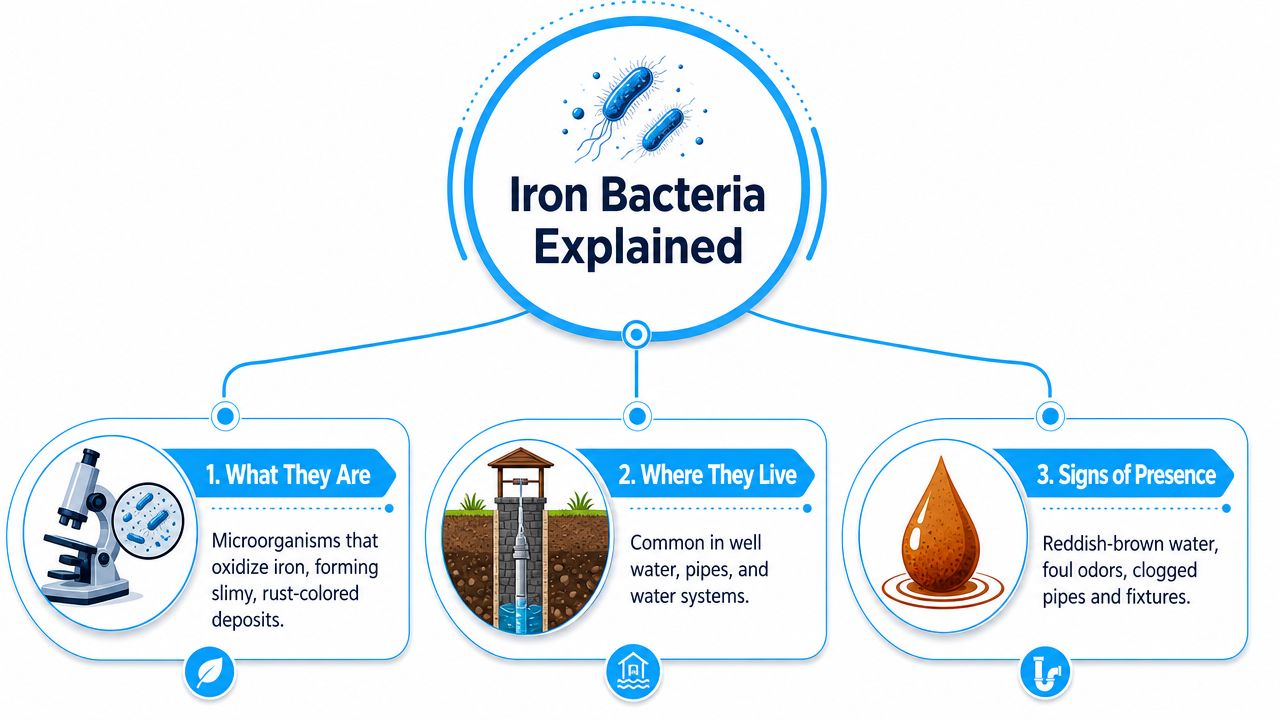
Iron bacteria are living organisms that feed on iron and manganese in groundwater and leave behind slime and rust-colored deposits. They often enter the system from the well itself, which is why even a clean, well-kept home can still develop the problem.

An infographic explaining iron bacteria including what they are, where they live, and signs of presence.

The three parts of the mess

“Iron in the water” sounds simple, but iron bacteria create a system problem with three separate parts.

  • The bacteria: A living colony that settles in the well, pressure tank, and plumbing.
  • The biofilm: A slime layer the colony builds on wet surfaces. It helps the growth stay attached and makes cleanup harder.
  • The deposits: Rust-colored material and debris that stain fixtures, foul valves, and plug screens.

That distinction matters because each part behaves differently. A filter may catch loose debris. It does not remove a colony attached to the inside of the well casing. A one-time disinfecting step may knock the growth back, but if the loosened iron and slime are not filtered out, the system still performs poorly.

Why a single filter usually falls short

This is the mistake I see most often. A homeowner installs a sediment cartridge or a standard iron filter, the water improves for a short time, and then the odor, slime, or flow problems return.

The reason is mechanical as much as biological. Iron bacteria do not just float through the water like grit. They attach to surfaces, build layers, and keep shedding material back into the line. Oxidation helps convert dissolved iron into particles a filter can grab, but it does not replace disinfection. Backwashing helps carry trapped material to drain, but it cannot clean a contaminated well by itself. The parts have to work together.

A good way to understand it is to picture the system like a pipe with grease inside. Catching a few chunks downstream does not remove the buildup on the pipe wall.

Why the slime causes so much trouble

Biofilm is what turns an iron problem into a recurring service problem. It narrows water passages, coats moving parts, and gives the colony protection from light treatment attempts. That is why faucet aerators plug, toilet tanks develop sludge, and pressure problems keep coming back.

This issue is usually more about performance, maintenance, and nuisance conditions than direct health risk. But for a homeowner, that distinction does not make the problem minor. Water that smells bad, stains fixtures, and keeps fouling equipment is expensive and frustrating.

Where it usually shows up

The usual trouble spots are easy to recognize:

Location What you may see
Toilet tank Rust-colored slime on walls and parts
Faucet aerators Gunk, clogging, reduced flow
Pressure tank and plumbing Fouling, buildup, recurring restrictions
Well casing Deposits and ongoing recolonization

The main takeaway is simple. Iron bacteria are not a single-filter problem. They are a whole-system problem, which is why lasting treatment usually starts with disinfection and follows with the right filtration setup.

Testing Your Water for Iron Bacteria

Homeowners often call after trying a cartridge filter, a softener setting change, or a stain remover, and the slime keeps coming back. That usually happens because the purchase came before the diagnosis.

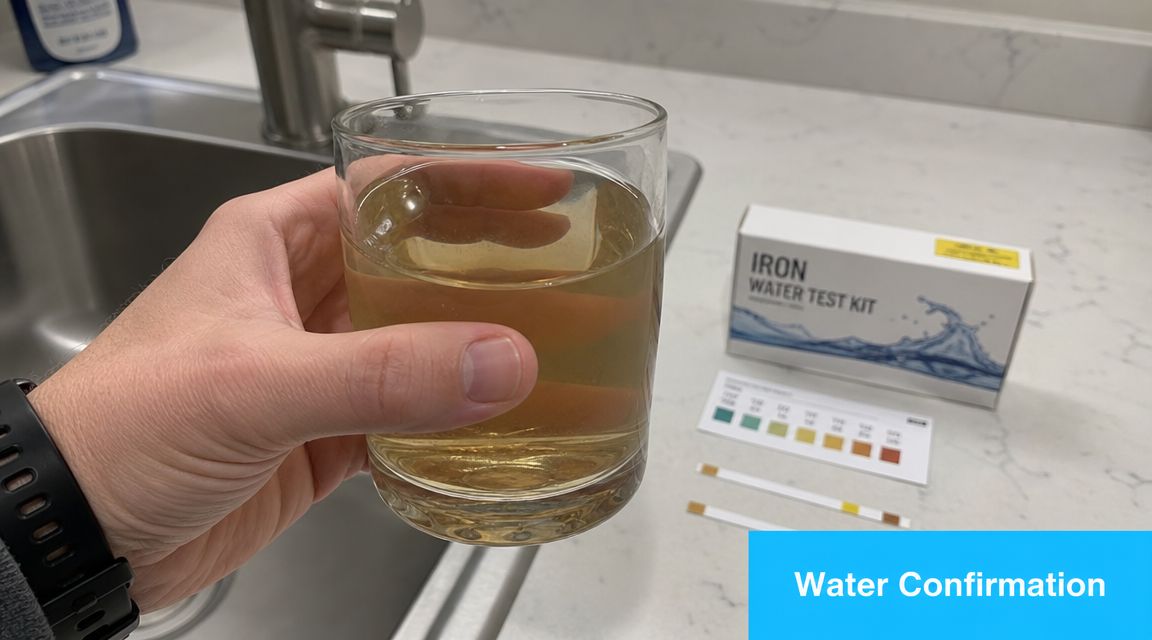
A hand holds a glass of yellowish discolored water next to an iron water test kit package.

Testing is how you avoid that mistake. Iron bacteria problems are built around a system. The well, the plumbing, the iron level, and the household's flow demand all affect what will work.

Start with what you can see and smell

Begin at the fixtures that collect buildup fastest. Lift the toilet tank lid and look for reddish-brown slime on the walls, flapper, and fill valve. Hard rust staining is one thing. Sticky or stringy residue points more toward biological fouling.

Then check faucet aerators and showerheads. If they keep clogging with soft gunk instead of gritty sediment, that matters. Let a glass of water sit for a while and watch what settles out or clings to the sides. Odor also helps with the diagnosis. Water affected by iron bacteria is often described as swampy, earthy, or musty.

This quick inspection will not size equipment, but it does tell you whether you may be dealing with more than dissolved iron.

A practical home check includes:

  • Toilet tank: Look for slime, not just orange staining.
  • Aerators: Check for sticky buildup and repeat clogging.
  • Standing water: Watch for murky residue, film, or floating material after the water sits.
  • Odor: Note earthy or marsh-like smells, especially from cold water.

Then test the water chemistry and the well conditions

Visible symptoms are only half the job. The next step is water testing that helps you choose treatment that fits the house.

For iron bacteria cases, I want to know:

  • How much iron is in the water
  • Whether manganese is also present
  • The pH
  • Whether there is hydrogen sulfide or other nuisance odor
  • How much water the house uses at peak times
  • Whether a lab can confirm iron-related bacteria or biological fouling

Those details matter because a system that works in a small cabin may be undersized in a busy family home. Flow rate affects filter size. Fouling levels affect how often equipment needs to backwash. If bacteria are established in the well and plumbing, a simple sediment cartridge usually plugs fast and does little to solve the source of the problem.

That is the mistake to avoid. Buying from symptoms alone, such as a stain photo or a jar of discolored water, is a risky approach.

A short visual walkthrough can help if you're not sure what signs you're seeing:

What testing should help you decide

Good testing does more than confirm a nuisance issue. It helps separate three different questions that often get lumped together:

  1. Is there biological fouling in the well or plumbing?
  2. How much iron and manganese must the filter remove after cleanup?
  3. How large does the equipment need to be for the home's actual water use?

If you skip those questions, it is easy to buy the wrong tool. A standard iron filter may remove some oxidized iron and still struggle if biofilm is coating the well and plumbing. A sediment filter may catch debris for a short time and then choke down flow like a vacuum bag packed with wet leaves.

Testing gives you the blueprint for a full plan instead of another temporary fix.

The Complete Arsenal Against Iron Bacteria

A homeowner usually calls after trying the obvious fix first. They change a cartridge, maybe add an iron filter, and for a few weeks the water seems better. Then the orange slime returns, the toilets stain again, and the pressure starts dropping.

That pattern points to a planning problem, not just a product problem.

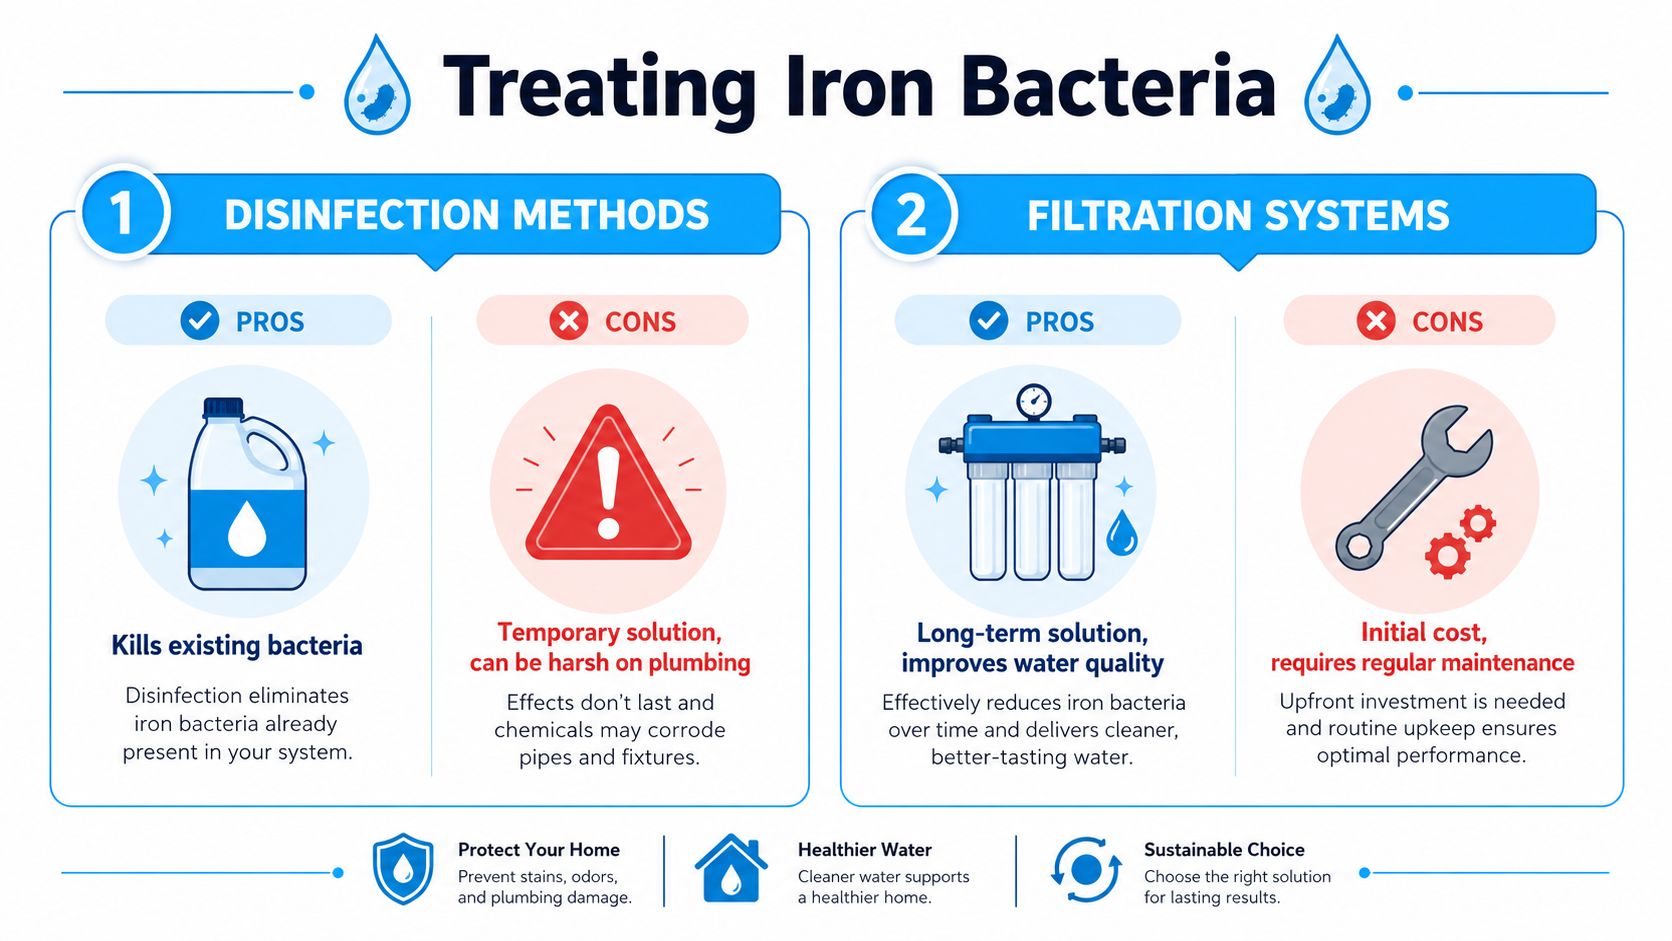
An infographic comparing disinfection methods and filtration systems for treating iron bacteria in home water systems.

Iron bacteria treatment works best as a sequence. Clean up the colony. Give the chemistry time to work. Then remove what the treatment creates. If one of those steps is missing, the rest of the equipment has to do a job it was never built to do.

Start by knocking back the colony

If slime is already growing in the well or plumbing, the first move is usually disinfection. The goal is to break up the biofilm and reduce the living mass coating the system.

Biofilm behaves like grease baked onto a pan. Running water past it does very little. A filter downstream does even less. The colony has to be attacked at the source before filtration can hold the line.

In the field, this is why a new filter installed on a fouled system often disappoints. The filter is catching debris from an active infestation while fresh slime keeps forming upstream.

Then build the treatment train

After cleanup, the permanent setup usually has three working parts:

  1. A feed point for an oxidant or disinfectant to react with iron and suppress regrowth
  2. A contact or retention stage so the water has time to finish that reaction
  3. A backwashing filter to carry the solids out of the house water supply

That middle step gets overlooked all the time. Water needs a little dwell time. Oxidation works like soaking a dirty pot before scrubbing it. If the water rushes straight from chemical injection into a filter, the reaction is incomplete and the media gets overloaded.

Backwashing matters for the same reason. Iron bacteria leave behind sticky solids, not just loose grit. A disposable cartridge can plug fast and drag down pressure. A backwashing media filter is built to flush itself clean on schedule, which is a much better fit for this kind of fouling.

Why the single-filter approach fails

A sediment filter can trap visible flakes for a while. It does not sanitize the well, clean the plumbing walls, or stop fresh slime from forming.

A standard iron filter can help with staining if the water chemistry is favorable. It still may struggle if bacterial slime is coating the media or if the iron has not been properly oxidized before it reaches the tank.

UV also gets misunderstood here. UV can disinfect clear water passing the lamp, but it does not remove iron, strip out slime, or clean buildup already attached to the system. For iron bacteria problems, that makes UV a supporting tool at best, not the main fix.

What each part of the system actually does

Treatment stage Main job Common mistake
Disinfection or oxidation feed Knock back bacteria and start changing dissolved iron into filterable particles Skipping it and expecting the filter to solve an active colony
Retention or contact time Let the reaction finish before filtration Undersizing the contact stage and sending half-treated water to the filter
Backwashing media filter Remove oxidized iron, slime fragments, and sediment Using a small cartridge that clogs and starves the house of flow

This is the part many articles gloss over. Iron bacteria are rarely a one-tank problem.

The right setup depends on where the trouble really lives. Some homes need a one-time cleanup plus a properly sized iron filter. Others need chemical feed, retention, and backwashing filtration because the well keeps reintroducing slime and iron. If you want help sorting out those trade-offs, the well water treatment guides and system advice can help you compare approaches before you buy equipment.

A good system does two jobs at once. It clears up the symptoms you see today, and it stops the same fouling cycle from chewing up the next filter you install.

How to Choose the Right Filtration System

A homeowner usually starts with the wrong question. They ask for the best filter for iron bacteria. The better question is which treatment train will stop the slime, protect flow, and fit the way the house uses water.

That difference matters because iron bacteria are a system problem. A cartridge may catch rust for a few days. A standard iron filter may improve color for a while. Neither one reliably handles an active colony that keeps coating pipes, pressure tanks, and fixtures with slime.

Start with the failure point

Choose the system by identifying what keeps going wrong.

If the main complaint is orange staining with only occasional slime, a properly sized backwashing iron filter may be enough after the well and plumbing have been cleaned up. If the water smells swampy, fixtures clog, toilet tanks grow slime, or the problem returns soon after shock chlorination, plan for disinfection plus filtration, not filtration alone.

That is the myth to drop first. There usually is no single magic tank for iron bacteria.

Three practical factors narrow the field fast:

  • How persistent the fouling is: A one-time cleanup problem is different from a well that keeps feeding slime into the house.
  • How much water the home uses at once: A small system can look fine on paper and still fail when two showers, laundry, and an outside hose run together.
  • How much routine attention the owner will give the equipment: Some setups need chemical refills and dose checks. Others reduce that chore but still need strong backwashing and periodic service.

A family home, a rental, and a weekend cabin can test almost the same and still need different equipment choices.

Comparing Iron Bacteria Treatment Systems

Filtration Method How It Works Best For Upfront Cost Ongoing Maintenance Pros Cons
Backwashing media filter with oxidation support Traps oxidized iron and fouling in self-cleaning media Homes with manageable iron and limited biological fouling after cleanup Moderate to higher Backwash monitoring and eventual media service Better whole-house flow and dirt-holding capacity than disposable cartridges Can struggle if active bacteria are still growing upstream
Greensand filter Oxidizes and filters iron under the right water conditions Specific water chemistry where the media is a good match Moderate Regular care and media-specific upkeep Can work well in the right application Easy to oversell as a cure-all when bacteria are the real issue
Chlorine injection plus retention plus filtration Disinfects first, gives contact time, then filters out the byproducts Persistent iron bacteria, recurring slime, and systems that foul quickly Higher Chemical refills, pump checks, backwashing Addresses the biological side and the iron side together More parts to size, install, and maintain
Hybrid oxidation and filtration setup Uses oxidizing media or air-based oxidation with backwashing filtration Owners who want less day-to-day chemical handling when water chemistry allows Varies Backwashing and periodic service Lower routine chemical handling in some homes Still has to be matched carefully to the water and may need disinfection support

The trade-off many homeowners miss

The strongest-performing setup is not always the one people like living with.

Chemical feed systems can work very well, especially where bacteria keep coming back. But they ask something from the owner. Someone has to keep solution on hand, refill the tank, watch the feed pump, and make sure the dose stays in range. In a full-time home, that may be fine. In a cabin or rental, it often gets neglected.

Backwashing media systems reduce some of that hands-on work, but they are not maintenance-free. They need enough flow to clean themselves properly, a working drain, and settings that match the actual water use. Backwashing works like rinsing mud out of a sponge. If the rinse is weak or too short, the buildup stays behind and performance falls off.

The best system is the one that treats the water problem and still gets maintained six months from now.

Homeowners comparing equipment styles and upkeep can review these well water treatment guides and system advice before choosing a layout.

A simple buying mindset

Use five questions before buying anything:

  • Does the setup disinfect, or does it only strain out particles?
  • Where does the water get enough contact time to finish the reaction?
  • Is the main filter backwashing, or is it a disposable cartridge that will plug quickly?
  • Can it handle the house at peak flow, not just average flow?
  • What will you have to refill, clean, test, or service?

That checklist saves people from wasting money on undersized equipment and filter housings that were never built for slimy well water.

One more practical point. If your water system work is already tied up with plumbing repairs or you are coordinating other household priorities, such as emergency hot water services, keep the treatment design simple enough that it will still get looked after. Good water treatment on paper is worthless if nobody wants to run it.

Installation Maintenance and Long-Term Costs

A good system can solve the water problem and still frustrate you if installation and upkeep were underestimated.

That happens often with iron bacteria because the treatment setup is more involved than a basic under-sink filter or a simple cartridge housing.

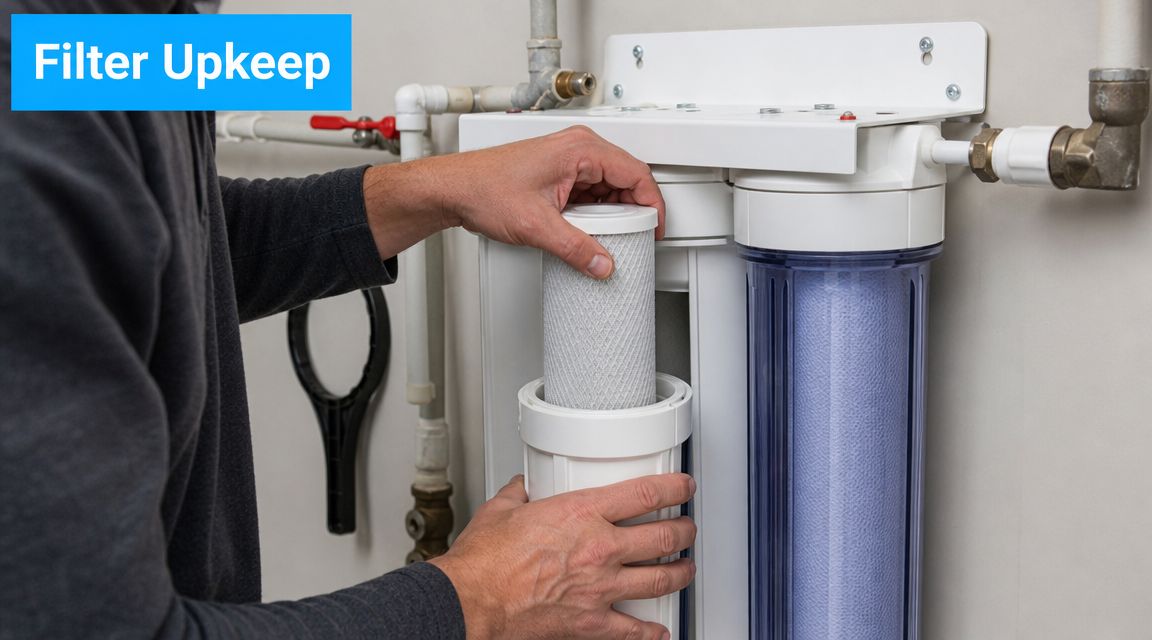
A person changing a replacement water filter cartridge in a home water filtration system unit.

DIY versus professional installation

Some homeowners can install parts of a whole-house filter train, especially if they're comfortable with plumbing and drain connections. But iron bacteria systems often include injection equipment, retention components, drain lines for backwashing, and control settings that need to match actual water use.

If the system is installed poorly, the equipment may still run while performing badly. That's the dangerous part. You can end up thinking the water chemistry is impossible when setup is the issue.

A practical rule is simple:

  • DIY is more realistic for straightforward filter replacements or simple housings.
  • Professional installation makes more sense when the system includes disinfection feed, retention, or complex backwash controls.

What ownership usually looks like

Long-term care depends on the equipment, but common tasks include:

  • Checking chemical solution levels: Injection systems need regular refilling.
  • Making sure backwash cycles happen properly: A backwashing filter that isn't cleaning itself will lose performance.
  • Watching for flow changes or odor return: Those are often early warning signs.
  • Planning for media service: Filter media doesn't last forever.

For households with heaters or plumbing already stressed by poor water quality, failures sometimes stack up. If treatment issues contribute to broader plumbing trouble, having access to reliable emergency hot water services can be useful when a fouled system starts affecting hot water delivery.

Costs that are easy to overlook

The sticker price isn't the full price. Owners should think about:

Cost area What to expect qualitatively
Chemicals Ongoing if your system uses chlorine injection
Electricity Control valves, pumps, and backwashing use power
Maintenance time Refills, inspections, and occasional troubleshooting
Media replacement A periodic cost on backwashing media systems
Service calls More likely if the system is undersized or poorly tuned

The best way to control long-term cost isn't always buying the cheapest equipment. It's buying the right-sized equipment and maintaining it before performance slips.
Troubleshooting Common Issues

If the slime comes back, don't assume the whole system was a waste. Iron bacteria treatment often fails for a specific reason, and that reason can usually be narrowed down.

When common symptoms return

Use this quick guide:

  • Slime is back: The initial disinfection may not have fully knocked down the colony, or the ongoing treatment setup may not be controlling fouling well enough.
  • Water pressure drops: The filter media, aerators, or plumbing may be loading up with deposits. Check the backwashing function and inspect fixtures.
  • Odor remains: That can point to incomplete treatment, poor retention, or contamination that wasn't fully addressed by the chosen equipment.
  • Filter performance falls fast: The system may be undersized for the household's flow demand, or the water chemistry may call for a different treatment sequence.

When to stop troubleshooting yourself

Homeowners can inspect, clean aerators, confirm settings, and watch system behavior. But some situations need a pro:

  • Major leaks around treatment equipment
  • Electrical or control valve problems
  • Backwashing that won't run correctly
  • Persistent poor water quality after system adjustments
  • Any uncertainty around shock chlorination handling

If you're dealing with a living biofilm problem, random trial and error usually costs more than targeted help. The smart move is to treat the system logically, not keep swapping filters and hoping one finally wins.


If you're comparing options and want practical buying help without the usual marketing fog, Water Filter Advisor is a solid place to start. It's built for homeowners who need to choose, compare, and maintain filtration systems that fit their water problems, including tricky whole-house issues like iron, odor, and well-water fouling.

Ultraviolet Light Water Filtration Systems: A Buyer’s Guide

You're probably here because your water feels like a question mark.

Maybe you're on a private well and the last test raised concerns about bacteria. Maybe your town has had boil water advisories often enough that you no longer trust “clear” water at face value. Or maybe you've gone down the rabbit hole of home treatment systems and found the same confusing promise over and over: UV fixes everything.

It doesn't. But it does one job very well.

Ultraviolet light water filtration systems can be an excellent way to make water microbiologically safer in a home. They're especially appealing because they work as a chemical-free disinfection step, which sounds almost too clean and simple to be true. The catch is that UV only solves the part of the problem that UV is built to solve. If you expect it to remove sediment, metals, chlorine taste, or mystery contaminants, you'll end up disappointed.

That's why the smartest way to shop for a UV unit isn't to ask, “Which one is best?” It's to ask, “What role should UV play in my system?”

Is UV Light the Answer to Your Water Worries?

A lot of homeowners start looking at UV after a stressful moment. A well test comes back with a bacterial concern. A neighbor mentions Giardia. A municipal notice says boil your water until further notice. Suddenly the water that looked fine yesterday doesn't feel fine at all.

That reaction makes sense. Microorganisms are invisible, and that's what makes them unsettling. You can see rust. You can smell sulfur. You can taste chlorine. You can't look at a glass of water and know whether bacteria or viruses are part of the picture.

UV enters the conversation because it offers a modern line of defense without adding chemicals to the water. For many homes, that's exactly the appeal. You're not pouring something into the water. You're passing water through a treatment chamber that targets living organisms.

Clean-looking water can still need disinfection. Appearance tells you very little about microbial safety.

The important part is keeping expectations realistic. UV is often sold as if it's a complete purifier. In practice, it's better understood as a specialist tool. If microorganisms are your main concern, UV may be the right answer. If your water also carries sediment, iron staining, chlorine taste, or dissolved contaminants, UV needs help from other treatment stages.

That distinction is where good decisions start. The homeowners who end up happy with ultraviolet light water filtration systems are usually the ones who treat UV as part of a complete plan, not a magic tube with a glowing lamp.

How UV Light Makes Water Safe Without Chemicals

UV sounds technical, but the working idea is simple. Water passes by a UV lamp, and that light disrupts the genetic material of microorganisms. Instead of “filtering out” bacteria or viruses like a screen would, UV inactivates them.

A useful analogy is a bouncer who doesn't throw every troublemaker out of the building, but does take away their ability to cause any more trouble. The organisms are still physically present in the water stream, but their DNA or RNA has been damaged, so they can't reproduce the way they normally would.

What UV is actually doing

Modern UV disinfection is a physical, chemical-free process. UV-C light around 254 nm damages microbial DNA and RNA, and practical home systems commonly target a 40 mJ/cm² dose to achieve 99.9% to 99.99% microbial reduction when the water is clear enough and the system is properly maintained, according to the University of Hawaiʻi guidance on UV water treatment.

An infographic explaining the benefits and mechanism of UV light water purification as a chemical-free safety method.

That's why UV is so attractive for homes with microbial concerns. It's effective against most viruses, bacteria, and protozoa under the right conditions, including Giardia and Cryptosporidium, as explained in this overview of how UV water disinfection works in home systems.

If you want a plain-language primer on germicidal ultraviolet light itself, this guide to killing harmful germs is a useful companion read.

What UV does not do

Here is where buyers get tripped up.

UV does not remove chlorine. It does not remove VOCs. It does not remove sediment. It does not remove heavy metals. And it does not improve water by physically straining out particles.

That means UV is a disinfection device, not a stand-alone filter.

If your water has dirt, iron, manganese, or other particles, those can absorb or scatter the UV light before it reaches microorganisms. The effect is similar to trying to shine a flashlight through muddy water. The lamp may be working perfectly, but the light isn't penetrating the way it should.

Practical rule: UV works best on clear water. If the water isn't clear, treat that problem before the UV chamber.

Why prefiltration matters so much

The best home UV setups almost always include upstream filtration. What that looks like depends on the water problem:

  • For sediment and cloudiness: install a sediment prefilter so particles don't shield microbes from the UV light.
  • For iron or manganese issues: use treatment that addresses those minerals before the UV stage, because they can reduce light transmission and foul components.
  • For chlorine taste or odor: add carbon filtration if taste and smell matter, since UV won't change either.

This is the practical heart of ultraviolet light water filtration systems. The UV unit is your microbiological safety step. The filters before it prepare the water so the UV light can do that job reliably.

Deciding Between UV and Other Water Treatments

Most homeowners aren't choosing between “safe water” and “unsafe water.” They're choosing between treatment methods that solve different problems.

If your goal is to deal with bacteria in well water, UV deserves serious attention. If your goal is to remove chlorine taste from city water, carbon filtration makes more sense. If you want broad contaminant reduction, you may need a layered system rather than one device.

Match the treatment to the problem

Here's the simplest way to think about it.

If you say, “I want to remove bacteria from my well water,” UV is often a strong fit because disinfection is exactly what it's designed to do.

If you say, “I want my water to stop tasting like a pool,” UV won't help much. That's a carbon filter job.

If you say, “I want to remove particles and improve drinking water quality at one sink,” you may be looking at a point-of-use system with filtration stages, possibly with UV added if microbial risk is part of the picture.

UV versus chlorination versus carbon

Method Primary Target Effect on Taste/Odor Ongoing Maintenance Chemicals Added
UV Microorganisms such as bacteria, viruses, and protozoa Usually doesn't change taste or odor Lamp changes and sleeve care No
Chlorination Microbial disinfection Can affect taste and odor Chemical monitoring and replenishment Yes
Carbon Filtration Chlorine, some taste and odor issues, and selected organic compounds Often improves taste and odor Cartridge replacement No

That table leaves out one important reality: these methods are often partners, not rivals. A house can use sediment filtration, carbon filtration, and UV together because each stage handles a different job.

Why UV systems aren't all equal

One of the better indicators of whether a UV unit matches your water challenge is its classification. The NSF/ANSI 55-2024 ultraviolet treatment standard identifies Class A systems at 40 mJ/cm² for disinfecting contaminated water and Class B systems at 16 mJ/cm² for supplemental treatment of already potable water.

That difference matters in practice. A homeowner with a well and a known microbial concern shouldn't shop the same way as someone adding an extra barrier to an already acceptable municipal supply.

A UV system isn't “good” or “bad” in the abstract. It's either matched to the water challenge, or it isn't.

If you've ever been frustrated by broad claims that a UV purifier “does it all,” this is the corrective. UV can be the star of the show when microbial risk is the main issue. It becomes a supporting actor when the bigger problems are chlorine, sediment, dissolved contaminants, or aesthetic complaints.

How to Choose the Right UV System for Your Home

A common homeowner mistake happens at the kitchen table, not in the basement. They pick a UV unit by brand or price before they know two things: how fast water moves through the house at busy times, and what has to be removed before that water reaches the UV chamber.

A home water filtration system installed on a copper pipe wall in a laundry room setup.

That second point gets missed all the time. UV is a disinfection step. It does not strain out sand, clear up cloudy water, reduce iron, or improve taste. If the water is dirty enough to block light, even a well-made UV unit can underperform. For many homes, choosing the right UV system really means choosing the right treatment train around it.

Point-of-entry or point-of-use

A point-of-entry UV system treats water where it enters the home. This is usually the better fit for private wells or any house where the goal is whole-home microbial protection. Showers, bathroom sinks, the kitchen tap, and the washing machine all get water that has passed through the same disinfection stage.

A point-of-use UV system treats one faucet or appliance. It makes sense for a narrow job, such as protecting a drinking water tap, but it leaves the rest of the plumbing untreated.

For most houses with a bacteria concern, whole-house UV is the practical choice. Under-sink UV is better suited to limited use cases.

Size by peak flow, then build the pre-filtration around it

UV units are sized by flow rate, usually in gallons per minute. That number matters more than lamp marketing terms because water needs enough contact time inside the chamber for the UV dose to do its job.

Start with your busiest water-use moment, not your average day. A shower running while a toilet refills and a faucet is open can push demand much higher than homeowners expect. If the house can draw more water than the UV unit is rated to treat, you get reduced protection right when demand is highest.

Then look upstream. A UV system should usually sit after the filters or treatment stages that improve clarity. Depending on the water, that may include:

  • Sediment filtration for sand, silt, or rust
  • Carbon filtration if chlorine needs to be reduced before UV equipment or for taste and odor improvement
  • Iron or manganese treatment if staining minerals are present
  • Water softening or scale control if hardness is likely to foul the quartz sleeve

This is the part that separates a UV add-on from a working system. If the water has visible turbidity, iron, or scale issues, solve those first. For broader system planning beyond the UV chamber itself, the articles in Water Filter Advisor's advice center can help you compare filter stages and layout options.

What to check before you buy

A good buying checklist stays grounded in daily use and service reality:

  • Choose the application: whole-house for full plumbing protection, point-of-use for one tap or appliance
  • Match the unit to peak flow: size for simultaneous use, not a quiet hour
  • Verify the certification: look for a unit tested to NSF/ANSI 55, with the class matched to your water situation
  • Review water quality first: cloudy water, hardness, iron, and sediment often need treatment before UV
  • Check service clearance: leave enough room to remove the lamp and quartz sleeve
  • Confirm operating conditions: residential UV systems are typically installed on cold water lines

This walkthrough shows the kind of installation layout homeowners often see in real systems:

The best UV unit is the one that fits your actual flow rate, your actual water quality, and the rest of the treatment system feeding it. In many homes, the smartest purchase is not a bigger UV chamber. It is better pre-filtration ahead of the UV chamber.

Your Guide to UV System Installation and Maintenance

A UV system often looks deceptively simple once it is on the wall. Water goes in, treated water comes out, and the controller shows a reassuring light. In practice, long-term performance depends on two plain things: correct installation and routine service.

The biggest installation mistake is treating the UV unit like a standalone fix. It is the final disinfection step in the treatment train, not the whole treatment train. If sediment, hardness, iron, or staining minerals are still in the water, they can block UV light or coat the sleeve. That is why the UV chamber usually belongs after the filters and conditioning equipment that clean up the water first.

Installation details that make or break performance

Placement matters more than many homeowners expect. The chamber needs enough room for someone to remove the lamp and quartz sleeve without fighting the wall, ceiling, or nearby piping. I have seen good UV units turn into frustrating service calls because the installer left no clearance to pull the lamp straight out.

It also helps to install shutoff valves or a bypass where they make service easier. That can reduce the mess and cut downtime during lamp changes or sleeve cleaning.

An infographic titled UV System Ownership showing steps for installation and routine maintenance of water purification units.

Service access should be part of the layout from day one. If maintenance is awkward, it usually gets postponed.

The annual lamp replacement

UV lamps need replacement on schedule, usually once a year or after about 9,000 hours of use, because a lamp can keep glowing after its germicidal output has fallen below the effective range. That guidance is outlined in this home UV maintenance reference.

That catches homeowners by surprise. A blue glow does not confirm proper disinfection. The lamp may look normal while delivering much less useful UV energy to the water.

For that reason, lamp replacement is a calendar task, not a wait-until-it-fails task.

The quartz sleeve needs attention too

The quartz sleeve is the clear tube that separates the lamp from the water while letting UV light pass through. If minerals or fouling build up on that surface, the lamp can be working correctly and the water still receives less UV exposure than the system was designed to provide.

Prefiltration's utility is evident. A sediment filter helps keep particles from shading microbes. Water treatment for hardness or iron can reduce the scale and staining that often collects on the sleeve. Homeowners sometimes blame the UV unit when the actual issue is the water feeding it.

A good maintenance routine looks like this:

  1. Replace the lamp on schedule. Do not wait for the lamp to go dark.
  2. Inspect the sleeve during lamp service. Check for haze, scale, or discoloration.
  3. Clean the sleeve if needed. Light buildup is much easier to remove than heavy mineral crust.
  4. Check the controller and any alarms. A warning light should lead to inspection, not be ignored.
  5. Keep the upstream filters serviced. A neglected prefilter can reduce UV performance even if the UV unit itself is fine.

A homeowner checklist that holds up over time

  • Write down the install date and lamp change date: annual service is easy to forget
  • Keep the replacement lamp on hand before the due date: delays often turn a one-day job into a multiweek one
  • Review prefilters on their own schedule: the UV stage depends on the water arriving clear enough for treatment
  • Look for signs of fouling if your water has hardness or iron: those homes often need more frequent sleeve checks
  • Treat the UV unit like safety equipment: if an alarm sounds or service is overdue, address it promptly

The best results usually come from systems that are boring to own. Correct layout, clear water entering the chamber, and routine service keep UV doing the job it is meant to do.

Understanding the Total Cost of a UV System

A lot of homeowners price the stainless UV chamber and stop there. That is how budgets go sideways.

The overall cost is the cost of the full treatment train, not just the disinfection device. If the water reaches the UV chamber with sediment, tannins, or other light-blocking material, the lamp may be on and the water may still not be getting the dose you paid for. In homes with city water, that full setup might include a sediment filter and carbon ahead of the UV unit. On private wells, it can also mean iron reduction, softening, or both.

That is why UV often looks inexpensive in a catalog and more expensive on the final quote. The UV unit itself is only one part of a working system.

Ongoing costs are usually straightforward. Plan for a lamp replacement on schedule, periodic sleeve cleaning or replacement if fouling is an issue, and whatever prefilter cartridges your setup uses. Electricity is usually a minor line item for a residential unit compared with service parts and filters.

A simple way to budget is to split the cost into two categories:

  • Purchase and installation: the UV reactor, controller, plumbing labor, and any prefiltration the water needs
  • Annual operating cost: replacement lamp, replacement cartridges, sleeve service if needed, and power use

This is also where homeowners make better decisions by asking one practical question. Are you buying UV to solve a disinfection problem, or are you expecting it to fix overall water quality? If the water also has taste, odor, hardness, iron, or staining issues, the total project cost rises because those problems need their own treatment stages.

A UV system is often a good value. A UV chamber by itself can be a false economy.

Common Questions About Home UV Water Purifiers

What happens during a power outage?

A UV system needs power to disinfect. If the power is out, the UV lamp isn't operating. In practical terms, that means you shouldn't assume the water passing through the chamber is being disinfected during the outage.

Does UV change the taste or smell of water?

Usually, no. UV is a disinfection method, not a taste-and-odor treatment. If your water tastes like chlorine or has an earthy or metallic note, that points to other treatment stages such as carbon or specialty filtration.

Is the UV light dangerous to be around?

In a properly assembled home unit, the UV light is enclosed inside the chamber. You're not meant to be exposed to the lamp directly during operation. A primary safety issue for most homeowners isn't stray UV exposure. It's neglecting maintenance and assuming an aging lamp is still protective.

Can I install it myself?

That depends on your plumbing comfort level, the electrical setup, and local code expectations. Some skilled DIY homeowners can handle straightforward installations. Many people are better off using a qualified installer, especially when the UV unit is part of a larger whole-house treatment train with multiple filters.

Is UV enough by itself?

Sometimes, but not often. If the only issue is microbial contamination and the water is already clear, UV can be a strong solution. In many homes, it works best as the final disinfection stage after the water has already been cleaned up by prefiltration or other treatment.

Is UV a good fit for city water?

It can be, especially if you want an added microbiological barrier. But many city-water homeowners care more about chlorine taste, odor, or chemical reduction. In those cases, UV may be secondary rather than the first device to buy.


If you're comparing treatment options and want help sorting out what your home needs, Water Filter Advisor is a solid place to start. The site does a good job of breaking down filtration types, maintenance demands, and buying decisions in plain language, which makes it easier to build a water treatment setup that solves the right problem instead of just adding more hardware.

Home Sulfur Water Treatment Guide

You turn on the faucet for a glass of water, lean in, and get hit with that rotten egg smell again. Then you notice it in the shower. Then in the dishwasher. At that point, most homeowners stop asking whether the smell is real and start asking how expensive this is going to get.

The good news is that sulfur water treatment is usually very fixable when you diagnose it in the right order. The bad news is that a lot of people buy the wrong filter first. They throw carbon at a bacterial problem, shock chlorinate a heater issue, or install an oxidation filter without checking whether the water chemistry will let it work well.

A sulfur problem feels mysterious because the smell can come from different places. The source water. The well. The plumbing. The water heater. Sometimes more than one at once. Once you sort out where the odor starts and how strong it is, the treatment path gets much simpler.

That Rotten Egg Smell Ends Today

You fill a pot at the kitchen sink and catch that sulfur smell right away. An hour later, the shower is worse. By evening, you are wondering whether you need a filter, a plumber, or a whole new well setup.

Start with the right question. Where is the odor showing up, and under what conditions?

Rotten egg odor usually points to hydrogen sulfide or a related sulfur issue, but the smell alone does not tell you which fix will work. One house needs a water heater service call. Another needs oxidation and filtration at the entry point. A third has a one-faucet problem that has nothing to do with the well itself.

Practical rule: Don’t choose equipment based on smell alone. Two homes with the same rotten egg odor can need completely different fixes.

I’ve seen homeowners replace fixtures, change cartridges, and blame the municipal supply when the actual problem was in the well system. I’ve also seen the reverse. A family assumes the well is contaminated, but the odor only shows up on the hot side, with the heater causing most of it.

The right sulfur water treatment doesn’t start with shopping. It starts with separating symptoms from causes, then matching the fix to the source, concentration, and budget.

That decision process is what keeps costs under control. If the smell is only in hot water, the least expensive answer may be at the heater. If it shows up in both hot and cold water at every tap, treatment usually needs to happen earlier in the plumbing line. If the odor is light and occasional, a simpler approach may hold up well. If it is strong, constant, and paired with staining or corrosion, the treatment plan usually needs more than a basic filter.

Sulfur problems are usually fixable. The key is choosing in the right order so you do not spend whole-house money on a local problem, or patch a whole-house issue with the wrong small fix.

Diagnosing the Source of the Sulfur Odor

A sulfur smell at the kitchen sink in the morning can point to one problem. The same smell only in the shower on the hot side points to a different one. That is why the first step is always location, not equipment.

A person leans toward a steaming bathroom sink faucet to smell the hot water flowing out.

Start with hot water versus cold water

Run a simple check at two or three fixtures. Test cold water first, then hot. If the odor shows up only in hot water, the water heater moves to the top of the list. I see this often with older heaters, inactive heaters, or tanks with conditions that let odor problems build inside the unit.

If the odor is present in both hot and cold water, look upstream. On a well, that usually means the source water, pressure tank, or plumbing before the heater. If the smell is strongest after water sits for hours and improves after a minute or two, stagnant plumbing or bacterial growth inside parts of the system may be contributing.

Use this quick home checklist

  • Hot water only: Start with the water heater. This is usually the lowest-cost place to investigate.
  • Hot and cold at every tap: Suspect incoming water or the well system.
  • Only one faucet: Check that fixture, its drain, and nearby plumbing before blaming the whole house.
  • Hot water much worse than cold: The heater may be making a mild sulfur issue smell much stronger.
  • Odor comes and goes: Seasonal well changes, plumbing stagnation, or intermittent bacterial activity are common causes.

This distinction is simple but important. A sulfur odor can be a nuisance at low levels and can also contribute to corrosion and unpleasant-tasting water over time. As noted earlier, the smell problem is not always just a smell problem.

Well water and city water don't behave the same way

For private well owners, sulfur odor often starts in the groundwater or somewhere in the well system itself. Sulfur bacteria can also be part of the picture, especially if the smell is persistent or returns quickly after shock treatment.

For municipal water users, a true source-water sulfur issue is less common. In city homes, I would first check the water heater, dead-end plumbing, infrequently used fixtures, and any point-of-use filters that have been left in service too long.

A good diagnosis follows a simple flow. First ask where the smell appears. Then ask whether it is hot only, cold only, or both. Then ask whether it affects one fixture or the whole house. That sequence narrows the repair fast and keeps you from buying a whole-house system for a problem sitting inside one appliance.

If the smell is only in hot water, don’t buy a whole-house filter first. Confirm the heater is not the real culprit.

If you want a grounded overview of sampling and interpretation before you test, these practical water quality insights are worth reading.

How to Accurately Test Your Water for Sulfur

Once you know where the odor appears, stop guessing and test the water. Smell tells you there’s a problem. It doesn’t tell you the concentration, whether iron is tagging along, or whether the treatment system you’re considering is oversized, undersized, or just wrong.

A close-up of a person's hands holding green testing strips inside a glass beaker filled with water.

Start with screening, then confirm with a lab

A simple home strip or kit can help you confirm that the odor isn’t your imagination and can point you toward a sulfur issue. That’s useful as a first pass, especially if you’re deciding whether to call a lab.

For system selection, though, a certified water test is the smarter move. Hydrogen sulfide is volatile, so sample handling matters. If the sample isn’t collected properly, the gas can escape and the result won’t reflect what’s reaching your fixtures.

If you want a grounded overview of sampling and interpretation, these practical water quality insights are worth reading before you order a test kit or schedule lab work.

What to ask for in your test

You don’t need to become a chemist. You just need a usable water profile.

Ask the lab or water professional about:

  • Hydrogen sulfide level: This is the key number for treatment matching.
  • Iron and manganese: These often change which media or oxidation approach makes sense.
  • pH and alkalinity: These affect oxidation performance and filter reliability.
  • Bacterial indicators: Helpful when odor patterns suggest biological activity.
  • Raw water sample location: Test before existing treatment equipment if possible.

A good video can make the process less intimidating before you collect samples:

Read the result like a buyer, not a scientist

What matters most is whether your result lands in a low, moderate, or high treatment range. That’s what drives equipment choice.

A low reading may allow a simpler odor-polishing setup. A moderate reading usually points toward oxidation or air-injection style treatment. Higher levels often need stronger pretreatment, longer contact time, or chemical injection before filtration.

Bring your test sheet to any installer conversation. If they recommend equipment without looking at the raw numbers, slow the process down.

The right sulfur water treatment starts with a real number attached to the smell.

A Clear Path to Choosing Your Treatment

Most sulfur filter decisions get messy because homeowners compare products before they compare conditions. That flips the process upside down. You want to pick a treatment category first, then narrow to models.

A four-step infographic illustrating the process of selecting a sulfur water treatment system for your home.

Follow the decision flow

Use this practical flow instead of shopping by brand name.

  1. Check where the odor starts
    If it’s hot-water-only, investigate the heater first. If it’s in hot and cold, treat the incoming water.

  2. Match the treatment to the hydrogen sulfide range
    Low levels can sometimes be handled with simpler filtration. Moderate levels often respond well to aeration or oxidizing media. Higher levels usually need a stronger oxidation approach with contact time and follow-up filtration.

  3. Look for iron and manganese before finalizing the system
    A sulfur-only filter can struggle if the water also carries metals. In practice, combination problems often call for combination treatment.

  4. Decide how much maintenance you’ll really do
    Some systems are clean and simple. Others work well but need regular chemical handling, backwashing, or media attention.

Budget and upkeep matter as much as performance

A system can be technically correct and still be a bad fit for the household. If you don’t want to refill tanks, handle regenerants, or monitor settings, don’t choose a method that depends on owner discipline.

That’s why it helps to compare broader residential water filter options before locking into one sulfur-specific setup. You’re not just solving odor. You’re choosing how your home will live with the solution.

For deeper homeowner-focused guidance on evaluating fit, maintenance, and filtration categories, the advice library at Water Filter Advisor is a useful place to continue the comparison process.

A fast way to narrow the field

  • Mild sulfur odor, no major side issues: Start by evaluating catalytic carbon.
  • Moderate sulfur with possible iron or manganese: Look closely at air injection and oxidizing filters.
  • Higher sulfur levels or recurring bacterial problems: Consider chemical injection with filtration.
  • You want stronger oxidation without chlorine residuals: Ozone can be attractive, but it’s more complex.
  • You hate maintenance: Avoid systems that only work well when the owner keeps up with frequent chemical steps.

A good choice feels boring after installation. The odor stops, the water runs normally, and you’re not thinking about the filter every week.

Comparing Top Sulfur Treatment Methods

There isn’t one best sulfur water treatment method. There’s a best fit for your water, your plumbing, and your tolerance for maintenance. Here’s how the main options stack up in real homes.

Aeration systems

Aeration or AIO systems introduce air so hydrogen sulfide can oxidize and then be filtered out. For many households, this is one of the cleanest long-term approaches because it avoids continuous chemical feed.

The catch is that oxidation systems need the water chemistry to cooperate. For many aeration and oxidation-based sulfur filters to work efficiently, minimum influent alkalinity of 100 ppm is required, and performance suffers if alkalinity is too low, according to the Culligan High Efficiency Sulfur-Cleer owner’s guide.

Aeration works best when the sulfur load is within the equipment’s comfort zone and the rest of the water profile supports oxidation.

Catalytic carbon filters

Catalytic carbon is often the first thing people hear about because it’s familiar and easy to understand. It can be a solid choice for lighter odor issues, especially as a polishing stage after oxidation.

On its own, though, it’s easy to overestimate. Carbon doesn’t magically solve every sulfur problem. If the odor is strong, the load fluctuates, or bacteria are involved, carbon alone may become a short-lived fix instead of a durable one.

Manganese greensand filters

Manganese greensand has been around for a long time because it works well in the right conditions. It can handle sulfur along with iron and manganese, which makes it useful when the water has more than one issue.

The trade-off is maintenance. Greensand systems usually need regeneration, and that means paying attention to chemicals, settings, and schedule.

Greensand is often a strong performer for mixed contaminant water, but it’s not a “set it and forget it” choice.

Chemical injection systems

Chemical injection uses an oxidant, commonly chlorine, ahead of filtration. This approach is effective for tougher sulfur situations and can also help when bacterial activity is part of the problem.

It’s not the most hands-off option. You’ll need solution refills, contact time, and post-filtration to clean up taste or residual effects. But when sulfur levels are beyond what simpler media can comfortably handle, chemical injection often makes the system more dependable.

Ozone treatment

Ozone is powerful and appealing because it oxidizes aggressively and doesn’t leave the same kind of chemical residual homeowners worry about with chlorine. It can work very well.

It also brings more complexity. Ozone systems are more equipment-heavy, more sensitive to design quality, and usually a better match for homeowners who are comfortable with a more advanced setup or are working with a seasoned installer.

Quick comparison table

Method Effective H2S Range (ppm) Initial Cost Maintenance Needs Best For
Aeration system Moderate range Moderate Backwashing and periodic checks Homeowners who want chemical-free oxidation
Catalytic carbon Low range Lower Media replacement Mild sulfur odor, especially as a polishing stage
Manganese greensand Up to 6 ppm in common residential use Moderate Regeneration and chemical handling Sulfur with iron or manganese
Chemical injection Above 6 ppm and tougher cases Moderate to higher Refill solution, monitor feed, post-filtration Strong sulfur odor and recurring source issues
Ozone Moderate to high range Higher More technical service and monitoring Homes needing strong oxidation without standard chlorine feed

What tends to work and what tends to disappoint

Works well: matching the technology to the actual sulfur level and the presence of metals.

Disappoints: buying the cheapest odor filter without testing, or installing a system that looks good on paper but doesn’t match the home’s flow rate or maintenance habits.

The best sulfur water treatment method is the one that keeps working after the first month, not the one with the flashiest product page.

Installation Costs and Long-Term Maintenance

A sulfur system earns its keep over years, not on installation day. The price on the estimate matters, but the better question is what it will cost to run, service, and keep working when life gets busy.

A professional water filtration system installed on a brick wall with tools nearby for maintenance.

Think beyond the day it goes on the wall

Two systems can solve the same odor and feel very different to own. One may need little more than periodic media changes. Another may ask you to refill solution tanks, clean an injector, check a feed pump, and stay on top of settings. Neither is automatically wrong. The right choice depends on your water, your budget, and how much upkeep you will realistically do.

That ownership side gets missed all the time.

For example, oxidizing filters that use manganese greensand often bring ongoing chemical costs that buyers do not factor in up front. Potassium permanganate regeneration can add $50 to $200 annually in chemical expense, according to Penn State Extension guidance on hydrogen sulfide odor in wells.

DIY versus professional installation

DIY installation can work if the job is simple and the water test is clear. A single-tank backwashing filter in an accessible basement is one thing. A setup with chemical injection, a retention tank, drain routing, and multiple treatment stages is another.

Professional installation usually pays for itself when the system depends on correct contact time, feed rate, backwash flow, or control settings. I have seen good equipment underperform because the injector fouled early, the drain line was undersized, or the backwash schedule never got dialed in for the household's actual use. The equipment was fine. The setup was not.

Key maintenance questions to ask before buying

Ask these before you sign off on a system:

  • What will I refill, replace, or clean each year? Media, chemicals, injector parts, test kits, and prefilters all count.
  • How often does it need attention? Monthly checks feel very different from annual service.
  • What happens if service gets delayed? Some systems lose performance gradually. Others let odor break through fast.
  • Can I tell when it is falling behind? Clear indicators and simple testing are easier to live with than guessing.
  • Who will service it if I do not want to? Some local dealers support what they install well. Some do not.

Those answers should steer the purchase as much as sulfur level and equipment type.

Where homeowners get caught off guard

The most common problem is a mismatch between the system and the owner's habits. A chlorine injection system, for example, can be very effective on stubborn sulfur problems, especially when the water also needs disinfection or has recurring odor swings. But if the solution tank runs dry, the feed pump is ignored, or the post-filter is left past its service life, the smell comes back and confidence in the whole setup drops fast.

The cheapest sulfur water treatment is often the one you’ll maintain properly for years.

Low-involvement households usually do better with simpler equipment, even if the installed price is higher. Households willing to check tanks, refill supplies, and schedule service can justify more aggressive treatment. Use that as part of the decision flow. Match the sulfur source and concentration first, then choose the system your budget and maintenance tolerance can support.

Enjoying Your Clean Odor-Free Water

Once the diagnosis is right and the system fits the water, sulfur problems usually stop feeling dramatic. The kitchen stops smelling. Showers feel normal again. You stop apologizing for the tap water when someone visits.

That’s the ultimate payoff of good sulfur water treatment. Not just cleaner-smelling water, but confidence that the fix matches the problem instead of masking it for a few weeks.

The best results usually come from a simple discipline. Confirm the source. Test the water. Match the treatment to the concentration and the chemistry. Choose a system you’ll maintain. Homeowners who follow that sequence waste less money and get to a dependable solution faster.

There’s also a promising future angle worth watching. An emerging treatment trend uses sulfur-oxidizing bacteria to convert hydrogen sulfide into sulfate without chemicals, a direction described in this overview of the sulfur cycle in wastewater systems. For residential wells, it’s more of a future-facing option than a mainstream one right now, but it shows where low-chemical sulfur treatment may head next.

For today, the smartest move is still the practical one. Solve the odor you have, with equipment designed for the water that’s entering your home.


If you’re comparing systems, testing options, or replacement media, Water Filter Advisor is a solid next stop for homeowner-focused guidance on choosing and maintaining the right filtration setup without overspending.

Diagnose & Fix Your Whole House Water Filter Sulfur Smell

You turn on the kitchen tap, fill a glass, and catch that unmistakable rotten egg smell. Then you test the shower. Same thing. Maybe the hot water is worse. Maybe the smell showed up after rain, after changing a filter, or after moving into a house with a well. Either way, it’s maddening.

Most homeowners jump straight to the wrong conclusion. They blame the filter, the well, or the city water, then buy equipment that doesn’t match the actual problem. Sulfur odors are fixable, but only if you diagnose them in the right order.

That Rotten Egg Smell in Your Water Is Not Normal

That smell usually comes from hydrogen sulfide gas, often written as H2S. In home water, it’s the classic sulfur odor. It can show up in well water, inside plumbing, or inside a water heater. It doesn’t always mean the same thing, and that’s where people get into trouble.

A young woman wearing a beanie reacts to a foul odor while standing next to a sink.

In the field, the pattern is familiar. A homeowner notices the smell, swaps a cartridge, pours bleach somewhere in the system, gets a few days of improvement, and then the odor creeps back. That doesn’t happen because sulfur is mysterious. It happens because the smell can come from more than one place, and each source needs a different fix.

What’s usually happening

Hydrogen sulfide forms naturally in low-oxygen environments. That includes some wells, sections of plumbing, and water heaters where bacteria and reactive metals create the right conditions. At very low levels, you may only notice a faint odor. At higher levels, the smell can hit every faucet in the house.

The practical point is simple. A whole house water filter sulfur smell problem is not one single problem. It’s a symptom.

Practical rule: Don’t buy a sulfur filter until you know whether the smell is coming from the source water, the heater, or both.

Why this matters beyond the smell

A sulfur odor doesn’t just ruin a glass of water. It can make bathing unpleasant, affect cooking, tarnish fixtures, and contribute to plumbing headaches. It also makes homeowners lose trust in the entire water system, even when the fix may be fairly targeted.

Three common scenarios show up again and again:

  • Only hot water smells: the water heater is the prime suspect.
  • Hot and cold both smell: the source water or main treatment train needs attention.
  • The smell started after a new filter install: sizing, placement, or pre-filtration may be wrong.

You don’t have to live with it, and you don’t have to guess. The smart approach is to test first, isolate the source, and only then choose the treatment method that fits your water.

Is It Your Well Water or Just Your Water Heater?

Before anyone spends money, run one simple test. Check hot water and cold water separately. This is the fastest way to avoid misdiagnosis.

A four-step infographic illustrating how to diagnose the source of a sulfur smell in home water.

A lot of sulfur complaints that sound like “bad well water” turn out to be heater problems. According to Aquasana’s sulfur smell guidance, EPA data shows hydrogen sulfide levels above 0.05 mg/L can trigger odors, anode reactions can amplify that 10 to 20 times in water heaters older than 5 years, and a 2025 study in Journal of Water Process Engineering found 68% of U.S. well households misdiagnose heater issues as well problems.

The hot versus cold test

Run this test at a sink where you can isolate temperature easily.

  1. Run only cold water first
    Let it flow long enough to clear water that’s been sitting in the faucet branch. Smell the water directly from the stream and from a glass.

  2. Run only hot water next
    Use the same faucet if possible. Again, smell the stream and a fresh glass.

  3. Compare the result
    Don’t overthink it. You’re looking for a clear pattern, not lab perfection.

  4. Repeat at another fixture
    A bathroom sink and the kitchen sink usually give enough confirmation.

How to read the result

Use this decision guide:

  • Hot water smells, cold water doesn’t: your water heater is the likely source.
  • Cold water smells, hot water smells too: the issue is likely in the source water or treatment system.
  • Cold water smells but hot doesn’t seem worse: still treat it as a source water problem until testing says otherwise.
  • The smell comes and goes: look at seasonal changes, plumbing dead legs, or intermittent bacterial activity.

If the odor appears only on the hot side, don’t start by replacing your whole house filter. Start at the heater.

Why heaters cause sulfur odor

Most heater-related sulfur problems come from the anode rod. That rod is there to protect the tank. In some water conditions, especially where sulfates and certain bacteria are present, a magnesium anode can contribute to hydrogen sulfide production. The result is a strong odor that seems like “the whole house water is bad,” when the cold water may be fine.

The fix can be much smaller than people expect:

  • Inspect the anode rod
  • Flush the water heater
  • Replace the rod with an alternative type if appropriate
  • Check for age-related buildup inside the tank

If a house only has odor in hot water, a sulfur filter on the main line may not solve the actual cause. At best, it masks part of it. At worst, it leaves the smell untouched and drains your budget.

Signs the heater is the problem

A heater-driven odor usually has a recognizable pattern:

  • The smell is stronger first thing in the morning
  • Hot water at every fixture has the same odor
  • Cold water from the same fixture smells normal
  • The heater is older or hasn’t been flushed regularly

Signs the source water is the problem

Source-water sulfur behaves differently:

  • Both hot and cold water smell
  • Outdoor spigots or untreated lines show the same odor
  • The smell gets worse after rain or seasonal shifts
  • You also see staining or sediment that suggests multiple contaminants

A smart order of operations

Don’t buy equipment in the dark. Use this order instead:

  • Step one: isolate hot versus cold.
  • Step two: if it’s the heater, inspect and service the heater first.
  • Step three: if it’s both, get a water test for hydrogen sulfide and the basics that affect sulfur treatment, especially iron, manganese, and pH.
  • Step four: only after that should you choose a whole-house system.

People get frustrated because sulfur smell feels urgent. It makes the house feel dirty, even when the fix is straightforward. But this is one of those problems where patience saves money. The difference between a heater repair and a full sulfur treatment train is huge in practice, so this first diagnosis matters.

Matching Your Filter System to Your Water Test Results

Once you know the smell is coming from the source water, the next step is matching the treatment to the actual hydrogen sulfide level. Generic advice becomes ineffective for this specific task.

According to Frizzlife’s sulfur treatment guide, hydrogen sulfide can occur at less than 0.3 ppm, where point-of-use carbon filters may offer temporary relief. Levels of 0.3 to 5 ppm, common in household wells, require catalytic carbon or oxidation filters. Concentrations above 5 ppm often need chemical injection systems to work effectively.

That framework is practical and lines up with what works in real homes. Low sulfur can sometimes be managed with simpler media. Moderate sulfur usually needs oxidation in the treatment process. High sulfur is where many undersized systems fail.

Read the water test before reading the product label

A sulfur system shouldn’t be picked by brand name first. It should be picked by water chemistry.

The minimum useful test includes:

  • Hydrogen sulfide
  • Iron
  • Manganese
  • pH

Iron and manganese matter because they compete for treatment capacity and can foul media. pH matters because oxidation performance changes with water conditions. A sulfur filter that looks fine on paper can struggle badly when the water contains more than one issue.

If your home also has hard water, this is the point where treatment planning matters. A sulfur system and a water softener system often need to be placed and sized as part of the same whole-house setup, not treated as unrelated purchases.

Three system categories that actually make sense

Catalytic carbon for lighter sulfur problems

Catalytic carbon is often the best fit when sulfur is present but not severe. It improves odor by adsorbing contaminants and works best when the load is manageable.

What it does well:

  • Handles lower sulfur levels better than standard carbon
  • Improves smell and taste without adding a chemical feed
  • Fits homeowners who want simpler upkeep

Where it falls short:

  • It can exhaust too quickly if sulfur is stronger than expected
  • It’s not the best choice when iron and manganese are also significant
  • Standard carbon gets confused with catalytic carbon all the time, and they are not interchangeable in sulfur service

Often, homeowners waste money. They install a basic carbon tank because “carbon removes odors,” then wonder why the rotten egg smell returns.

Air injection oxidation for moderate sulfur

Air Injection Oxidation, usually called AIO, is one of the most effective middle-ground solutions. It adds air into the treatment process so dissolved hydrogen sulfide can be oxidized, then captured by the media bed. Many well setups do very well with this approach when sulfur is no longer “light” but not so extreme that chemical injection becomes the obvious answer.

What it does well:

  • Stronger sulfur control than carbon alone
  • Good fit for whole-house treatment
  • Often a better long-term answer when you want to avoid constant media burnout

Trade-offs:

  • It needs proper backwash setup
  • Placement and drain access matter
  • It still has to be sized for the home’s flow rate and contaminant load

AIO systems are often the sweet spot because they treat the problem rather than trying to merely mask it.

Chemical injection for heavy sulfur

When hydrogen sulfide gets into the higher range, oxidation usually needs reinforcement. That’s where chemical injection enters the picture. The injection stage oxidizes the sulfur, and downstream retention and filtration finish the job.

What it does well:

  • Handles strong sulfur loads more reliably
  • Better suited to difficult water with multiple contaminants
  • More forgiving when sulfur spikes are severe

What homeowners need to understand:

  • It’s more equipment
  • It needs refill and maintenance discipline
  • A bad install can create as many headaches as the original odor

This is not the setup to choose because it sounds powerful. It’s the setup to choose when the water test says simpler options are likely to struggle.

Whole House Sulfur Filter System Comparison

System Type Best For (H₂S Level) How It Works Pros Cons Approx. Upfront Cost (Installed)
Catalytic carbon Lower sulfur levels in source water Uses catalytic carbon media to reduce sulfur odor and polish water Simpler setup, no chemical feed, good odor improvement in lighter applications Can exhaust faster under heavier sulfur load, less tolerant of complex water Qualitatively varies by size and installer
Air Injection Oxidation (AIO) plus catalytic carbon Moderate sulfur, especially whole-house odor issues Introduces air to oxidize H₂S, then filters and polishes residual odor Strong whole-house performance, avoids constant chemical handling, good balance of effectiveness and maintenance Needs correct sizing, backwash, drain access, and careful placement $2,500 to $4,000 installed for the AIO plus catalytic carbon approach in the referenced methodology, per Frizzlife’s AIO sulfur filter guide
Chemical injection with retention and filtration Higher sulfur levels, especially above the range where media-only systems struggle Injects oxidant, allows reaction time, then filters out oxidized sulfur Best fit for severe sulfur, handles tougher water conditions More moving parts, refill needs, higher maintenance burden Qualitatively higher than simpler media systems

What works and what doesn’t

A few practical truths save people from buying the wrong setup.

  • What works: matching the system to the test result.
  • What doesn’t: buying a “universal whole-house filter” and assuming sulfur will disappear.
  • What works: planning for iron and manganese if they’re present.
  • What doesn’t: treating sulfur in isolation when the water clearly has multiple issues.
  • What works: asking how the system backwashes, drains, and will be serviced.
  • What doesn’t: focusing only on tank size or marketing claims.

The right sulfur system doesn’t smell like a miracle. It looks boring, sized correctly, and matched to the water.

One more decision that matters

If a salesperson recommends carbon for every sulfur problem, be cautious. If another one pushes chemical injection on every job, be equally cautious. Sulfur treatment is one of those categories where the best answer often sits in the middle. The test result decides.

Getting Your New Sulfur Filter System Installed Correctly

A good sulfur filter can perform badly when it’s installed in the wrong place, with the wrong support equipment, or without enough room to service it. Most installation problems aren’t dramatic. They show up as weak odor control, pressure complaints, short media life, and a callback nobody wanted.

A technician performing maintenance on a whole house water filtration system in a basement setting.

According to Olympian Water Testing’s discussion of sulfur filter performance, 2026 projections for major markets say whole house filters in sulfur-prone areas remove 97% of associated chlorine and chloramine while targeting H2S through multi-stage media, but proper sizing and pre-filtration are critical to prevent 95% of filter-induced sulfur amplification and protect plumbing. The current takeaway isn’t the projection itself. It’s the installation lesson. Sizing and pre-treatment decide whether the system behaves.

Placement matters more than homeowners expect

On a well system, sulfur equipment usually belongs in a logical sequence after the pressure tank, with enough isolation points to service each piece. If the system includes oxidation, backwash, or polishing stages, each part needs room to work and room to be maintained.

Three installation details matter almost every time:

  • A bypass valve gives you a way to service the system without shutting down the house.
  • Drain access matters for any backwashing system.
  • Working space around the tanks matters because media systems eventually need inspection, rebuilding, or replacement.

A clean install is not just about neat pipes. It’s about future access.

Don’t skip the pre-sediment stage

If there’s one mistake that steadily ruins sulfur systems, it’s neglecting sediment control. Sand, silt, rust, and debris load up downstream equipment fast. If the water also carries iron, the need for pre-filtration gets even stronger.

A proper pre-sediment filter helps by:

  • Catching grit before it reaches control valves
  • Reducing fouling in sulfur media
  • Protecting backwash performance
  • Improving consistency across the whole treatment train

People often blame the sulfur filter when the root cause is upstream debris choking it.

A sulfur filter should treat sulfur. It shouldn’t be forced to act as the home’s main dirt catcher.

Flow rate and tank size are not optional details

A sulfur filter has to keep up with the house. If the family can run multiple showers, laundry, and a sink at the same time, the system needs to support that demand. An undersized tank or valve can lead to pressure complaints, poor contact time, and uneven treatment.

That’s why the install conversation should include:

  • How many bathrooms the house has
  • Whether irrigation or outdoor lines are on the same service
  • Peak household water use
  • Whether other equipment, such as a softener, sits before or after the sulfur stage

Here’s a useful visual overview before you approve a layout:

A better installation checklist

Walk through these points before anyone glues pipe or tightens fittings:

  1. Confirm the source of the odor
    If the hot-only test points to the heater, fix that first.

  2. Verify the treatment order
    Sediment, sulfur treatment, polishing, and hardness treatment need the right sequence.

  3. Make sure a bypass is included
    This is one of the first details experienced installers look for.

  4. Check drain and power needs
    Backwashing and powered systems need infrastructure, not just floor space.

  5. Leave service access
    If a tank can’t be opened or a valve can’t be reached, future maintenance gets sloppy fast.

DIY or professional

Some homeowners can install their own equipment well. But sulfur systems punish guesswork more than simple cartridge filters do. Even if a licensed pro does the work, it helps to know what “good” looks like so you can ask better questions and spot bad shortcuts.

Keeping Your Water Fresh and Your System Running Smoothly

Sulfur treatment is not a set-it-and-forget-it category. If the system is doing real work, it needs maintenance that matches the water conditions. The maintenance schedule changes by technology, leading homeowners to either protect the investment or slowly lose performance until the smell returns.

According to Mid Atlantic Water’s sulfur filter maintenance discussion, standard carbon-based filters exhaust quickly under high H2S loads above 1 ppm and may need media replacement every 3 to 6 months. Aeration-oxidation systems can offer media life of 5+ years, and a 2025 AWWA report on 150 installations showed 92% efficacy versus 65% for older greensand technology.

Why sulfur systems fail early

When a sulfur system starts smelling again, the cause is usually one of these:

  • The media is spent
  • Backwash isn’t running properly
  • Sediment or iron has fouled the tank
  • The original system was undersized
  • Seasonal water changes pushed the system beyond its capacity

That failure often feels sudden to the homeowner. In reality, it builds gradually. Odor control weakens, then the smell returns on heavy-use days, then it becomes permanent.

What each system needs from you

Different sulfur setups ask for different habits.

Carbon-based systems

These are simpler to live with, but they can demand more frequent media attention when sulfur is strong. If the smell starts creeping back, don’t assume the whole system is defective. Check whether the media has reached the end of its useful life.

Aeration and AIO systems

These typically reward homeowners with longer media life, but only if the backwash cycle is working as intended. If a valve malfunctions or a drain line clogs, the system can lose performance while still looking “on.”

Chemical injection systems

These can be very effective for difficult water, but they need a homeowner who monitors the feed tank, pump behavior, and downstream filtration. They don’t tolerate neglect well.

Sulfur treatment fails quietly. The house tells you first through smell, not through alarms.

A maintenance rhythm that makes sense

A simple ownership routine works better than waiting for odor to return:

  • Look at the system regularly: check tanks, valves, and any feed solution level.
  • Pay attention to backwash behavior: if a unit should be regenerating or backwashing and isn’t, performance will slide.
  • Keep basic notes: write down media changes, service dates, and any odor flare-ups.
  • Re-test water when performance changes: water chemistry can shift over time.

If you want a broader maintenance reference for home filtration equipment, this water filtration advice library is a useful place to compare upkeep expectations across system types.

The ownership trade-off

Carbon systems often look easier at purchase. Aeration systems often look more involved. Over time, the “easier” system can become the one that needs more frequent intervention if the sulfur load is high. That’s why the cheapest-looking option at install isn’t always the most comfortable option to own.

The best sulfur setup is the one you can maintain consistently.

Knowing When to Call a Water Treatment Professional

Some sulfur problems are manageable for a careful DIY homeowner. Others need a professional from the start.

Call a water treatment specialist when the smell comes with iron staining, black manganese staining, heavy sediment, pressure issues, or repeated system failure. Those combinations usually mean the water needs a coordinated treatment plan, not a single replacement tank.

You should also bring in a pro if:

  • The odor is strong throughout the house and keeps returning after simple fixes
  • Your water heater and source water may both be contributing
  • The home has multiple bathrooms and high peak demand
  • The existing treatment equipment was installed in pieces over time and nobody is sure of the order
  • Backwashing equipment has no clear drain setup or service access

A professional is also the better choice when you already spent money on the wrong solution once. At that point, paying for proper diagnosis is usually cheaper than another guess.

Good sulfur treatment depends on testing, hydraulic fit, equipment order, and maintenance planning. That mix is where experienced installers earn their keep. They can also separate a true sulfur issue from odor problems caused by stagnant plumbing, heater conditions, or filter fouling.

If a contractor talks only about the tank they want to sell and never asks about hot versus cold water, iron, manganese, pH, drain access, or household flow rate, keep looking. Sulfur odor is a system problem. It needs a system answer.

Your Next Steps for Sulfur-Free Water

The fastest path to clean-smelling water is also the least glamorous. Diagnose first. Test second. Buy equipment third. That order prevents most expensive sulfur mistakes.

If the smell is only in hot water, inspect the heater before shopping for a whole-house solution. If the smell is in both hot and cold water, get the water tested and match the treatment method to the sulfur level and the rest of the water chemistry. If the home also has hardness, sediment, or staining, plan the treatment train as one system rather than a stack of random add-ons.

For homeowners comparing layouts, treatment stages, and house-wide options, this guide to a whole home water filtration system is a useful companion read because it helps frame where sulfur treatment fits in the broader plumbing setup.

Quick answers homeowners usually ask next

Can a water softener remove sulfur smell

Not by itself. A softener addresses hardness. It’s not a sulfur treatment device. In some homes, a softener belongs in the overall plan, but it isn’t the cure for hydrogen sulfide odor.

Does shock chlorination fix sulfur smell

Sometimes temporarily. It can help knock back odor-causing activity for a while, especially after seasonal changes, but it usually doesn’t replace proper ongoing treatment when source water keeps producing sulfur odor.

Why do ice cubes smell bad when the tap doesn’t

Cold temperatures and storage can make odor seem different in ice than in flowing water. A refrigerator line, old filter, or stagnant branch line can also make the smell more noticeable there first.

Why did the smell start after I installed a new whole house filter

That often points to system mismatch, poor sizing, wrong media choice, or missing pre-filtration. The new filter may not be causing sulfur, but it may be exposing an untreated source or struggling under the actual contaminant load.

What’s the smartest first move today

Run the hot-versus-cold test. That one step narrows the problem immediately and keeps you from buying the wrong fix.


If you want help comparing sulfur filter types, maintenance demands, and whole-house treatment options without the sales pressure, Water Filter Advisor is a solid place to research your next move. It’s especially useful when you’re trying to decide between carbon, oxidation, and full system upgrades based on what your water is doing.

How to Remove Iron in Water: A Homeowner’s Guide

Orange streaks in the toilet bowl. Rust stains in the sink. White laundry that comes out looking dull. Water that runs clear from the tap, then turns tea-colored in the glass. That is how most homeowners discover they have an iron problem.

The fix is not “buy a filter.” The fix is choosing the right filter for the exact kind of iron in your water. That is where people waste money. They install a softener when they need oxidation. They buy a sediment filter for dissolved iron. They shock the well once, then wonder why the slime comes back.

If you want to know how to remove iron in water without guessing, use a simple rule. Match the iron type to the treatment method. That one decision saves the most frustration.

First Steps Uncovering Your Iron Issue

Iron is common in home water, especially from wells. The U.S. Environmental Protection Agency sets a secondary maximum contaminant level of 0.3 mg/L because iron causes staining and metallic taste, and some groundwater sources can exceed 10 mg/L according to the Ohio State University Extension fact sheet on iron in water.

That number matters less than this question: What kind of iron do you have?

A hand holding a water test strip in a clear glass of water to check quality.

Learn the four troublemakers

Most home iron problems fall into four buckets.

  • Ferrous iron means dissolved iron. Water often looks clear at first, then turns orange or brown after sitting.
  • Ferric iron means oxidized iron. It already exists as particles, so the water may look rusty right away.
  • Organic iron is iron tied up with organic matter. It often behaves unpredictably and can slip past filters.
  • Iron bacteria is not just iron. It is biological slime that feeds on iron and coats plumbing, tanks, and filter media.

A lot of bad equipment choices happen because people lump all four together.

Use simple at-home checks first

You can learn a lot before calling anyone.

Fill a clear glass from the cold water tap and look at it immediately. Then let it sit.

  • If the water starts clear and later turns rusty, suspect ferrous iron.
  • If it is already orange, brown, or cloudy, suspect ferric iron.
  • If it looks yellowish, tea-colored, or unusually stubborn to treat, organic iron moves higher on the list.
  • If you see slime, sheen, or stringy buildup in the toilet tank or around fixtures, iron bacteria becomes a possibility.

Another useful clue is where the problem shows up.

  • Only at one faucet: likely local pipe scale or fixture debris.
  • At every tap in the house: likely a whole-house issue.
  • Only on hot water: the water heater may be part of the problem.

Practical tip: Take the toilet tank lid off. Homeowners often spot iron bacteria there first because the tank sits undisturbed long enough for slime and residue to show themselves.

Test before you shop

A basic iron test kit is useful because treatment decisions depend on concentration, not just appearance. Even if you plan to hire a pro, testing first keeps the conversation grounded.

For homeowners trying to sort out filtration options, maintenance, and testing tools in one place, this general advice library is useful: https://www.waterfilteradvisor.com/advice/

If your home also deals with drainage, runoff, or recurring groundwater around the property, broader site work can affect water quality conditions over time. In those cases, it is worth understanding water management solutions so you are not treating house symptoms while ignoring outside water movement.

Know when lab testing is worth it

Home screening gets you pointed in the right direction. Lab testing becomes worth the cost when:

  1. You are replacing an expensive system
  2. You suspect both iron and manganese
  3. You have odor, slime, or repeated fouling
  4. Your water changes seasonally
  5. You are on municipal water and want to separate source-water issues from pipe corrosion

For municipal homes, a useful trick is sequential sampling. Run one sample immediately after the tap sits, then another after flushing the line. If the first sample is worse, the iron may be coming from household plumbing or nearby pipe corrosion rather than the water source itself.

The diagnosis that guides the fix

Use this quick cheat sheet before spending money:

Sign you notice Most likely issue What it usually means
Clear water turns rusty after sitting Ferrous iron Dissolved iron needs oxidation or ion exchange
Water is rusty right from the tap Ferric iron Particle filtration matters
Tea tint or difficult-to-remove staining Organic iron Basic filters often struggle
Slime, odor, recurring orange buildup Iron bacteria Filtration alone usually is not enough

The best homeowner move is boring but effective. Test first, identify the iron form, then buy treatment. That order prevents the classic mistake of putting a softener in front of a problem it was never designed to solve.

Choosing the Right Iron Filtration System

Once you know the iron type, the equipment list gets much shorter. Most homes do not need every stage on the market. They need the one setup that matches the water.

The broad treatment thresholds are straightforward. According to the Illinois Department of Public Health guidance on iron in drinking water, polyphosphates sequester less than 2 mg/L, water softeners are best for less than 5 mg/L, manganese greensand filters handle up to 10 mg/L, and chlorine injection or aeration are necessary above 10 mg/L.

Infographic

Start with the mismatch to avoid

The most common bad match is simple. A homeowner has visible rust particles or slime, installs a water softener, and expects it to behave like an iron filter. It will not.

A softener can work well on low-level dissolved ferrous iron. It is a poor choice for ferric iron, heavy iron loading, or iron bacteria. In those situations, it fouls, loses efficiency, and turns into a maintenance project.

Iron Removal Method Comparison

Method Best For (Iron Type) Max Iron Level (ppm) Pros Cons
Polyphosphate feeder Very low dissolved iron <2 Simple approach for light aesthetic issues Does not remove iron, can be a poor fit for broader treatment goals
Water softener Low ferrous iron <5 Also removes hardness, familiar equipment Struggles with ferric iron, bacteria, and heavier iron loads
Manganese greensand filter Ferrous and some oxidized iron up to 10 Strong whole-house option for moderate iron Needs regeneration and regular upkeep
Aeration plus filtration Ferrous iron above 10 Chemical-free approach for the right water Needs enough contact and good filtration after oxidation
Chlorine injection plus filtration High iron or iron bacteria above 10 Handles difficult water and biological issues well More components, more maintenance
Sediment filter Ferric iron particles as pre-treatment qualitative Good at catching visible rust solids Does not remove dissolved iron
Reverse osmosis Select point-of-use problems, especially lower pipe-sourced issues qualitative Useful under the sink for drinking water Not a whole-house iron solution

Water softeners when they make sense

If your water test shows low dissolved ferrous iron, a softener is often the most economical answer. It pulls double duty by removing hardness too, which matters in homes already battling scale and soap problems.

A softener makes sense when:

  • The iron is dissolved, not visibly particulate
  • Staining is present but not severe
  • You already need hardness treatment
  • You are prepared to clean the resin and use the right salt setup

That last part gets ignored. Softener owners who treat iron casually often pay for it later with fouled resin and poor regeneration.

If you need plumbing help with this kind of setup, a local specialist in water softener installation and repair can be more useful than a general handyman because bypass placement, drain routing, and valve programming affect performance.

Oxidizing filters for the middle ground

This is the category many well owners need. Media like manganese greensand or systems using air injection oxidation work by changing dissolved iron into a particle, then trapping it.

These systems fit homes where:

  • the iron level is beyond what a softener handles comfortably
  • the water has recurring staining throughout the house
  • the homeowner wants whole-house treatment
  • chemical-free treatment is preferred, when the water chemistry supports it

Birm, greensand, and AIO filters all live in this neighborhood, but they are not interchangeable. Some need the right pH and oxygen conditions. Some regenerate. Some backwash heavily. The details matter.

Key takeaway: Oxidation systems are often the sweet spot for whole-house iron removal because they target the iron directly instead of asking a softener resin bed to do a job it only partly likes.

Chlorine injection for the ugly water

When iron is high, when the staining is aggressive, or when slime points to iron bacteria, chemical oxidation becomes hard to beat. This is not the prettiest setup, but it is one of the most effective.

A typical system includes:

  1. A metering pump that injects chlorine ahead of treatment
  2. A retention tank that gives the water time to react
  3. A backwashing media filter to capture oxidized particles
  4. Often a carbon stage to remove chlorine residual and polish taste

This is the setup I point homeowners toward when their problem is bigger than “some orange staining.”

What about municipal water

Municipal iron is a different animal. The iron can come from corroding pipes rather than the original water source. For that reason, a whole-house iron system is not always the best-value answer.

If the problem is mainly at the kitchen tap, or mainly affects drinking water, an under-sink RO system or a targeted cartridge setup may be the smarter buy. That is especially true for renters or owners who do not want to repipe or install a large backwashing tank.

The shortest decision framework

If you want the no-nonsense version, use this:

  • Low ferrous iron and hard water: water softener
  • Moderate iron with whole-house staining: greensand or similar oxidizing filter
  • High iron, bacteria, or severe fouling: chlorine injection plus filtration
  • Visible particles only: sediment pre-filtration can help, but only if the iron is already oxidized
  • Drinking-water-only issue on municipal supply: under-sink RO or targeted point-of-use treatment

That is how to remove iron in water without overbuying. You do not win by installing the fanciest system. You win by installing the least complicated system that matches the water.

A Practical Guide to Installing Your Iron Filter

A whole-house iron filter does not need a fancy install to work well. It needs a correct one. The plumbing path, drain arrangement, and service access matter more than polished pipe work.

Start with location. Install the system on the main incoming cold-water line, before the water heater. That protects fixtures, toilets, appliances, and the heater itself from iron buildup.

A professional technician using a wrench to install a Green Flow water filtration system for home use.

Pick the right spot

The ideal location has four things:

  • A nearby drain for backwash water
  • Enough space overhead to service the valve and remove media if needed
  • Protection from freezing
  • A level surface if the tank sits on concrete or a platform

Do not wedge a tall tank into a corner where you cannot turn a bypass or inspect a leak.

Build around a bypass

Every iron filter should have an accessible bypass valve. Many control heads include one. If yours does not, add one with basic plumbing.

A bypass lets you:

  • isolate the filter during maintenance
  • keep water flowing to the house during repairs
  • troubleshoot whether the filter or the plumbing is causing a pressure issue

Skipping a bypass saves a little effort now and creates a lot of annoyance later.

Follow the flow direction carefully

Tank systems are not forgiving about reversed flow. The inlet and outlet markings matter.

Before making final connections:

  1. Set the tank in place.
  2. Dry-fit the plumbing.
  3. Confirm the incoming main hits the inlet side.
  4. Confirm the outlet feeds the house.
  5. Confirm the drain line route before tightening anything.

I have seen more than one homeowner blame a new filter for poor performance when the unit was piped backward.

Account for backwash and drain lines

Iron filters need to flush themselves. That means the drain line is part of the treatment system, not an afterthought.

Use a drain route that is secure, unobstructed, and sized appropriately for the valve requirements. Keep it protected from kinks and freezing. If the drain backs up or the line is undersized, the media bed cannot clean itself properly.

For difficult water, some systems rely on oxidation before filtration. One effective example is chlorine injection. In those cases, high iron above 3 ppm or iron bacteria can be treated with chlorine injection, a metering pump, a retention tank with 20 to 60 minutes of contact time, and a backwashable media filter, achieving 98%+ removal rates, as shown in this video demonstration of chlorine injection iron treatment.

A quick visual walkthrough helps before first startup:

Add two simple upgrades

These are not required, but they make ownership easier.

  • Pressure gauges before and after the filter help you spot pressure drop as media loads up.
  • Unions or flexible connectors make future servicing much easier than cutting rigid pipe.

Neither upgrade is glamorous. Both are practical.

Installer tip: Leave enough room to remove the control head without tearing apart surrounding plumbing. Future you will appreciate the extra few inches.

First startup matters

Once the plumbing is complete, do not rush full flow through a dry tank.

Use this order:

  1. Put the system in bypass.
  2. Slowly pressurize the plumbing and check for leaks.
  3. Crack the bypass to fill the tank gradually.
  4. Run the manufacturer’s initial backwash or startup cycle.
  5. Flush until the discharge runs clean and stable.
  6. Return the unit to service and test at a nearby faucet.

Slow filling protects media beds and helps avoid sudden surges through the control valve.

When to hand it off to a pro

DIY installation is reasonable for many homeowners. It stops being a casual weekend project when you have:

  • chemical feed pumps
  • retention tanks
  • unusual drain limitations
  • old galvanized pipe
  • low pressure issues
  • mixed contaminants beyond iron alone

In those homes, a licensed water treatment installer or plumber earns the money by preventing callbacks, leaks, and misconfiguration.

Your Iron Filter Maintenance Checklist

Iron treatment systems fail at first. Stains creep back. Pressure slips. Backwash gets weaker. Then the homeowner says the filter “stopped working,” when the issue is usually maintenance.

That matters even more if iron bacteria is part of the problem. According to the Clean Water Store discussion of iron bacteria treatment, iron bacteria thrive in 15-20% of U.S. private wells, form biofilms that resist standard filters, and ongoing treatment such as weekly permanganate dosing for greensand filters or H2O2 injection can outperform one-time chlorination alone.

A person checking the pressure gauge on a green Pentair whole house water filtration system unit.

What to check routinely

A good maintenance routine is simple and repeatable.

  • Look for leaks: Check valve bodies, fittings, and drain lines. Small drips become bigger problems around treatment equipment.
  • Watch pressure behavior: A noticeable drop across the system often means the media bed or prefilter is loading up.
  • Confirm the control valve cycles properly: If the unit should backwash or regenerate and does not, treatment quality falls quickly.

System-specific upkeep

Different systems need different attention.

Water softeners

If a softener is handling iron, keep the brine tank in good condition and use cleaning products intended for iron fouling. Resin beds that treat iron need more attention than resin beds treating hardness alone.

Check for:

  • salt bridging
  • mush or sludge in the brine tank
  • resin fouling signs, such as stains returning before regeneration

Greensand and oxidizing filters

These systems depend on proper regeneration or backwashing. If they skip cycles, the media bed loads with iron and performance drops.

Pay attention to:

  • regeneration supply, if your system uses one
  • drain flow during backwash
  • changes in water color after a cycle

Chlorine or peroxide injection systems

These setups work well, but only if the feed system feeds.

Inspect:

  • chemical tank level
  • injector operation
  • tubing condition
  • retention tank cleanliness
  • post-filter performance

A homeowner checklist that works

Use this rhythm:

Timing What to do Why it matters
Frequent glance Check for leaks and unusual sounds Catches failures early
Regular review Inspect salt, chemicals, and pressure behavior Prevents underfeeding and fouling
Seasonal habit Clean tanks, replace prefilters if used, inspect drain line Keeps backwash and flow reliable
Periodic retest Test treated water Confirms the system is still matching the water

Practical tip: If stains return, do not immediately blame the media. First check whether the unit backwashed, regenerated, or drew chemical as intended.

Iron bacteria needs ongoing control

This is the category homeowners underestimate most. Shock chlorination may knock it back, but it rarely counts as a forever fix on its own. If slime returns, the treatment plan needs to include routine disinfection or a stronger oxidation strategy.

That is why maintenance is not optional in iron treatment. A neglected system does not age gracefully. It turns into expensive plumbing that lets rust through.

Understanding the True Cost of Iron-Free Water

The cheapest iron system on day one is often not the cheapest iron system to own.

Homeowners usually compare sticker prices and stop there. A better comparison includes equipment, installation labor or DIY supplies, consumables, replacement media or cartridges, and the time you spend babysitting the system.

Compare ownership, not just purchase

A softener can look attractive because it is familiar and often solves two problems at once when hard water is also present. But if you ask it to handle iron that pushes beyond its comfort zone, the hidden costs show up in resin cleaners, salt use, service calls, and reduced performance.

An oxidizing filter may cost more up front, yet feel easier to live with when it is correctly matched to the water. That is especially true for households treating whole-house iron instead of just kitchen drinking water.

Municipal homes should think differently

Most iron guides focus on well water, but municipal water can bring a different budget decision. According to the SoftPro discussion of municipal iron and point-of-use options, iron from corroding pipes affects 20-30% of U.S. urban households, and one overlooked comparison is about $200 in annual maintenance for a whole-house softener versus about $50 for under-sink RO replacement cartridges when the issue is lower, pipe-sourced iron.

That is a useful reality check. If the staining is minor and mostly tied to drinking water or one faucet, a whole-house install may be more system than you need.

The three cost buckets that matter

Upfront cost

This includes the equipment itself, plus bypass parts, shutoff valves, fittings, drain tubing, and any prefilters. DIY installs can reduce labor but still require proper materials.

Operating cost

Systems separate themselves by operating costs. Softeners need salt and often resin cleaning attention. Chemical injection systems need feed solution and periodic service. Cartridge-based point-of-use systems need replacement filters.

Hassle cost

This one never appears on the invoice, but it is real. A complicated system that constantly needs adjustment costs attention. A simpler system that does its job is worth more than many homeowners realize.

Best-value rule: Buy the smallest effective solution that fits the iron problem. Whole-house gear for a kitchen-only issue is overspending. A softener for a bacteria problem is underspending in the wrong direction.

The true cost is not “what did the tank cost.” It is “what will this setup ask from me every year, and is that fair for the problem I have?”

Troubleshooting Common Issues and Top Questions

Iron systems usually tell you what is wrong. You just have to read the symptoms correctly.

Quick fixes for common problems

The water pressure dropped after installation
Check the bypass setting first. Then check the sediment prefilter if one is installed. After that, look at whether the unit is overdue for backwash or whether the drain line is restricted.

The stains came back
Do not assume the media is spent. Confirm the system is cycling, drawing any required chemical, and treating the full house flow. Returned staining often points to a skipped maintenance step or a water change.

The filter seems to regenerate too often
Look at the settings, household water use, and whether the system was oversized or undersized for actual demand. Frequent cycling can also happen when iron fouls media faster than expected.

Common homeowner questions

Can a water softener really remove iron

Yes, but only in the right lane. It works best on low-level ferrous iron. It is not the right primary tool for visible rust particles, heavy iron loading, or iron bacteria.

Can I remove iron without chemicals

Yes. Aeration and other oxidation-based systems can work well in the right water conditions. They are often a good fit when the issue is dissolved iron and the water chemistry supports oxidation and filtration.

What if I have both iron and manganese

That usually pushes the setup toward a dedicated oxidizing filter or a more advanced treatment train rather than a simple softener. Mixed contamination is one of the clearest cases for thorough testing before purchase.

What if the rotten egg smell comes with the iron

Odor changes the equipment choice. Homes with both iron and sulfur issues often need an oxidation approach instead of basic ion exchange alone. This is one of the situations where a single “all-purpose” filter usually disappoints.

Do sediment filters remove iron

Only if the iron is already oxidized into particles. A sediment filter does nothing meaningful for dissolved ferrous iron by itself.

Is under-sink treatment enough

Sometimes. If the issue is limited to drinking water, especially on municipal supply, point-of-use treatment can be the smarter move. If toilets, tubs, laundry, and appliances all stain, you need whole-house treatment.

The pattern is consistent. Iron problems become expensive when the diagnosis is lazy. Once the iron type is clear, the right system usually becomes obvious.


If you want help comparing whole-house filters, under-sink systems, testing kits, and maintenance options without wading through marketing noise, visit Water Filter Advisor. It is a practical resource for choosing the right water treatment setup for your home and keeping it working.

Your Guide to the Best Water Filtration System for Well Water

When you have a private well, you're not just a homeowner—you're your own water manager. A water filtration system for well water is a combination of technologies that removes contaminants, improves taste, and makes your water safe. It's your home's personal water treatment plant.

Your Guide to Pure and Safe Well Water

A smiling person fills a clear glass with pure, safe water from a kitchen tap.

Owning a home with a private well means you don’t have to deal with municipal water bills or the chemicals used in city treatment. But this also means you carry a critical responsibility: ensuring the water from your taps is safe and clean.

Unlike city water, no public utility is monitoring your well. The quality is entirely in your hands. This guide gives you the expert information you need to turn your well into a reliable source of pure water.

What This Guide Covers

We're here to give you the knowledge to make the right decisions for your water. We will show you how to solve the most common issues well owners face.

  • Safety: We’ll show you how to identify and get rid of harmful bacteria, viruses, and chemicals you can’t see, smell, or taste.
  • Taste and Odor: Learn how to eliminate "rotten egg" smells from sulfur or the metallic tastes that make water unpleasant.
  • Staining and Damage: Find out how to stop minerals like iron and manganese from leaving ugly orange or black stains on sinks, tubs, and laundry.

A well water filtration system should use a multi-barrier approach. Think of it as layers of defense. Different stages work together to stop different threats before they get to your faucet.

The Multi-Barrier Approach

No single filter can solve every water problem. A complete system uses a team of filters working in sequence.

One filter might remove large particles like sand and sediment. Another filter might be a specialist, targeting specific chemicals or minerals. A final stage, like a UV light, can neutralize any bacteria or viruses that got through the other defenses.

This guide will walk you through this strategic approach. We will help you build a system that matches your water's specific chemistry. By the end, you'll have the confidence to choose, install, and maintain the right equipment to protect your family, your plumbing, and your peace of mind.

Understanding What's Really in Your Well Water

Let’s pull back the curtain on the world hiding inside your well water. Unlike city water that gets tested and treated before it ever reaches your faucet, well water is a direct pipeline from the ground to your glass. That means you’re getting water in its most natural state—which can also include a whole cast of uninvited guests.

This isn't to scare you; it’s to empower you. Knowing exactly what you’re up against is the first step in choosing a filtration plan that actually works for your home. You're not alone in this—over 13 million households across the country rely on private wells. That’s a huge number of families who could be dealing with contaminants that sneak into groundwater from all sorts of places. If you want to dive deeper, you can explore Frizzlife's complete 2026 guide for well water filters.

The "Nuisance Crew": Annoying but Mostly Harmless

Some contaminants are more of an annoyance than a real danger. I call them the "Nuisance Crew," and you'll know they're around by the headaches they cause. They’re often the reason you started looking for a water filtration system for well water in the first place.

  • Iron: The classic rusty stain artist. If you’re seeing reddish-brown streaks in your sinks, toilets, and even on your laundry, you’ve met iron. It also gives your water a distinct metallic taste.
  • Manganese: Think of manganese as iron's darker cousin. It leaves behind blackish or dark brown stains and can make your water taste bitter or metallic.
  • Hydrogen Sulfide: This is the prankster of the group, responsible for that unmistakable rotten-egg smell. While the smell is awful, the gas itself is typically not a health risk at the low levels found in residential wells.
  • Hardness Minerals: This is the duo of calcium and magnesium that causes hard water. They don’t stain like iron, but they leave behind a chalky scale buildup on faucets, showerheads, and inside your appliances, which slowly strangles their efficiency and shortens their lifespan.

The Invisible Invaders: The Real Health Threats

Much more serious are the contaminants you can’t see, smell, or taste. I call these the "Invisible Invaders" because they pose genuine health risks, and their presence is the number one reason why testing your water is non-negotiable.

The most dangerous contaminants are often undetectable by your senses. Relying on clear, good-tasting water as a sign of safety is a gamble. Professional testing is the only way to be certain.

These invaders can come from anywhere. Agricultural runoff can introduce nitrates and pesticides. A neighbor’s failing septic system can leach bacteria into the groundwater. Even the natural geology of your area can be a source of heavy metals. To grasp the severity, it's useful to know what professionals consider truly contaminated water—like Category 3 water damage, also known as 'black water', which illustrates the worst-case scenarios that good filtration helps you avoid.

Here are the main threats you need to be aware of:

  • Bacteria and Viruses: Pathogens like E. coli and coliform bacteria are major red flags. Their presence usually means sewage or animal waste has contaminated your water, and they can cause serious gastrointestinal illnesses.
  • Nitrates: Often found in agricultural areas from fertilizer runoff, high levels of nitrates are especially dangerous for infants and pregnant women.
  • Heavy Metals: Arsenic and lead are two of the most concerning. They can leach into groundwater from natural mineral deposits or old industrial sites and are linked to severe, long-term health problems.

To make this easier to spot, I've put together a quick reference table. It connects the dots between what you're seeing, smelling, or tasting and what might be causing it.

Common Well Water Contaminants and Their Telltale Signs

Contaminant Potential Sign Primary Concern
Iron Rusty/orange stains, metallic taste Staining, pipe buildup, metallic taste
Manganese Black/dark brown stains, bitter taste Staining, appliance damage, unpleasant taste
Hydrogen Sulfide Rotten egg smell Unpleasant odor and taste
Hardness (Calcium & Magnesium) White, chalky scale; soap scum Appliance inefficiency, pipe blockage
Bacteria (e.g., E. coli) Often no sign (sometimes slight odor) Gastrointestinal illness, serious infection
Nitrates No sign (tasteless, odorless, colorless) Developmental issues in infants ("Blue Baby Syndrome")
Arsenic No sign (tasteless, odorless, colorless) Long-term health effects, including cancer
Lead No sign (tasteless, odorless, colorless) Neurological damage, developmental delays

Remember, this table is a starting point. While these signs are good clues, the only way to know for sure what's in your water is to get it professionally tested.

Know Your Water Before You Filter

You can't choose the right water filtration system for well water until you know what's in your water.

Buying a filter without a water test is a guess. This is the first and most important step to getting clean, safe water from your well.

A water test gives you a detailed report on every contaminant in your well.

DIY Strips vs. Professional Lab Testing

You have two options for testing. They serve different purposes.

  1. DIY Test Strips: These give you a quick look. You can buy them at hardware stores or online. Dip them in water for instant results on basics like pH, hardness, and chlorine. They are good for a quick check but are not accurate enough to base your filtration system choice on.

  2. Professional Lab Testing: This is a full diagnosis and is non-negotiable for well owners. A state-certified lab provides a highly accurate, detailed analysis. This is the only way to find dangerous contaminants like bacteria, arsenic, lead, and volatile organic compounds (VOCs).

A professional lab report is the blueprint for your entire water filtration system. Without it, you are buying a system blind and may not be removing the most serious threats in your water.

How to Use a Certified Lab

Getting a professional test is a straightforward process.

First, find a state-certified laboratory. Search online for "[Your State] certified water testing lab" or check your state's Department of Environmental Protection (DEP) or Department of Health website for a list.

Next, request the right tests for a well owner. This should include:

  • Total Coliform and E. coli: Checks for bacterial contamination.
  • Nitrates/Nitrites: Important for wells near agricultural areas.
  • pH Level and Hardness: Tells you if your water is acidic or alkaline and the level of minerals like calcium and magnesium.
  • Iron and Manganese: These are what cause staining on fixtures and laundry.
  • Lead and Arsenic: Critical tests for heavy metals with serious health risks.

The lab will give you a special collection kit with strict instructions. Follow them exactly. Use their bottles, do not touch the inside of the cap, and return the sample to the lab quickly. This ensures your results are accurate.

Your report will show results with terms like "mg/L" (milligrams per liter) or "CFU/100mL" (colony-forming units per 100 milliliters). The report will list your results next to the EPA’s maximum contaminant levels (MCLs). If your water exceeds an MCL, you need to address it. This data will point you directly to the correct filtration solution.

Assembling Your Filtration Dream Team

Choosing the right water filtration system for well water isn't about finding one magic bullet. It’s more like building a team where every player has a key role. No single filter can solve every problem, so the goal is to create a strategic lineup that guarantees pure, safe water for your home.

Your lab report is your playbook. It tells you exactly what you’re up against—sediment, iron, bacteria, you name it. Now, let’s go over the key players you can recruit for your home's water defense.

The Bouncer at the Door: Sediment Filters

Every great system starts with a solid front line. For water filtration, that's your sediment filter. It's almost always the very first stage in a whole-house system for a good reason: its job is to act as a bouncer.

Think of it this way: your water is a stream carrying all sorts of debris. The sediment filter is the screen that catches all the big stuff—dirt, sand, rust, and silt. It doesn't handle dissolved chemicals or bacteria, but it stops the grit that clouds your water and would otherwise clog up every other filter down the line.

  • How It Works: A physical barrier, often a pleated or wound-string cartridge, uses microscopic pores to trap physical particles.
  • Pros: Protects all your other filters and appliances, makes water clearer, and is cheap to install and maintain.
  • Cons: Doesn't remove anything you can't see, like dissolved contaminants, bad tastes, odors, or bacteria.

This is how you go from suspecting a problem to knowing exactly what to fix. From a simple DIY test to a full lab analysis, you get the data you need to build the right filtration plan.

A water testing concept map illustrating DIY kit initial checks, detailed lab analysis, and actionable reports.

Once you have that detailed lab report, you can start picking the right players for your team.

The Chemical Sponge: Activated Carbon Filters

Next up is your team's workhorse, the activated carbon filter. The best way to picture it is as a massive sponge with millions of tiny, porous pockets. Its job is to grab all the things that make your water taste and smell off.

Activated carbon uses a process called adsorption, where contaminants literally stick to its surface. It's incredibly effective against chemicals like chlorine, pesticides, and many volatile organic compounds (VOCs). This is the filter that takes water with a funky chemical or earthy smell and makes it taste crisp and clean.

The Heavy Lifters: Water Softeners and Iron Filters

Some problems just need brute force. That's where water softeners and iron filters come in—they are the heavy-lifters on your team, built to tackle the minerals that cause the most obvious headaches around the house.

A water softener goes after one thing: hardness minerals like calcium and magnesium. Through a process called ion exchange, it swaps out those scale-forming minerals for sodium ions. This is what stops that chalky buildup that destroys appliances and leaves spots all over your dishes.

An iron filter is even more specialized. It's designed specifically to get rid of iron. It oxidizes the dissolved iron in your water, turning it into a solid particle that can then be easily filtered out. This is your go-to defense against those ugly rusty-orange stains that plague so many homes with well water.

The Silent Assassin: UV Purifiers

For the threats you can't see, you need a silent assassin. A UV purifier is your final line of defense against the nasty biological stuff. It's unique because it doesn’t add any chemicals to the water, nor does it remove anything.

Instead, a UV light chamber bombards the water with powerful ultraviolet rays, scrambling the DNA of bacteria, viruses, and protozoa like E. coli and Giardia. This neutralizes them, making it impossible for them to reproduce and make your family sick. It’s a simple, set-it-and-forget-it solution for microbiological safety.

A UV purifier is a must-have for well owners. Bacteria can get into your well without changing the water's taste or smell, and a UV system provides a constant guard against illness-causing pathogens.

The Perfectionist: Reverse Osmosis (RO) Systems

Finally, for the absolute purest drinking water right from the tap, you bring in the perfectionist: a reverse osmosis (RO) system. This is typically a point-of-use system installed right under your kitchen sink.

An RO system works by forcing water through a special semi-permeable membrane, which strips out up to 99% of all dissolved solids at a molecular level. We’re talking about nitrates, arsenic, lead, fluoride, and so much more. For the 15% of Americans on private wells, this technology can be a lifesaver. In the Flint water crisis, for instance, certified RO filters reduced lead to safe levels, with filtered water showing over 20 times less lead than unfiltered tap water. For well owners, an RO system is the final word in purity.

Getting a system like this installed properly is key to making sure it works right from day one. If you're not comfortable doing it yourself, finding a qualified plumber is a smart investment to protect your system and your home.

Alright, you've gotten your water test results back and you have an idea of what needs to be filtered out. Now comes the big decision: choosing the right hardware for the job.

Picking the best water filtration system for well water isn't about buying the most expensive gear you can find. It’s about matching the right equipment to your well, your home, and your family. The goal is to get clean, safe water without creating new headaches, like a sudden drop in water pressure every time someone starts the dishwasher.

Let's break down the technical specs you'll see on the box and translate them into what they actually mean for your day-to-day life. This way, you can feel confident you’re getting a system that’s a perfect fit.

Matching Flow Rate to Your Family's Needs

Have you ever been the last one to get in the shower, only to have the water pressure drop to a pathetic trickle? That’s what an undersized filtration system can feel like—all the time. This is why flow rate is the first thing you need to get right.

Flow rate, measured in gallons per minute (GPM), is simply how much water can move through the filter at once. If your system's GPM is too low, it creates a bottleneck for your entire home.

To figure out what you need, think about your family's busiest time of day. A shower might use 2.5 GPM, a dishwasher 1.5 GPM, and a washing machine 2 GPM. If all those are running during the morning rush, you need a system that can keep up.

A good rule of thumb is to budget 3-5 GPM for each person in your house. For a family of four, that means you should be looking for a system that can handle at least 12-15 GPM. This ensures you have plenty of water pressure, even when life gets hectic.

Filtration System Comparison for Well Water

With so many types of filters on the market, it can be tough to keep them straight. This table breaks down the most common options for well water, showing what they target, what they typically cost upfront, and what kind of maintenance you can expect.

System Type Primary Target Contaminants Typical Cost Range (Initial) Ongoing Maintenance
Sediment Filter Sand, silt, dirt, rust particles $50 – $500 Cartridge replacement every 3-12 months.
Carbon Filter Chlorine, pesticides, herbicides, VOCs, bad taste/odor $100 – $1,500 Cartridge replacement every 6-12 months or based on gallon rating.
Water Softener Hardness minerals (calcium, magnesium) $800 – $3,000+ Replenishing salt regularly (monthly); resin media lasts 10-15 years.
Iron/Manganese Filter Iron, manganese, hydrogen sulfide (rotten egg smell) $1,000 – $3,500+ Backwashing (automatic); media replacement every 5-10 years.
Reverse Osmosis (RO) Salts, lead, arsenic, fluoride, nitrates, cysts $200 – $1,000 (POU) Pre/post filter changes (6-12 mos); membrane change (2-4 yrs).
UV Purifier Bacteria, viruses, protozoa (E. coli, Giardia) $400 – $1,500+ UV lamp replacement annually; quartz sleeve cleaning.

Use this as a starting point. Your water test results will point you toward the right column, and from there you can begin to weigh the initial cost against the long-term upkeep.

Decoding Filter Capacity and Long-Term Costs

The sticker price is just the beginning. To understand the true cost of a system, you have to look at its filter capacity and lifespan. This is what determines how often you'll be pulling out your wallet for maintenance.

  • Filter Capacity: This tells you how much water a filter can clean before it's "full" and needs to be replaced. You'll often see this measured in gallons. For example, a whole-house carbon filter might be rated for 100,000 gallons.

  • Lifespan: This is the manufacturer's estimate of how long a filter or media will last, usually given in months or years. For systems that clean themselves, like backwashing iron filters or water softeners, this refers to the media inside the tank, which can last 5 to 10 years or even longer.

A cheap system with a filter you have to swap out every three months can easily end up costing more over time than a more expensive unit with a high-capacity filter that lasts a full year. Do the math on the long-term costs before you buy.

The Importance of NSF/ANSI Certifications

With well water, you can't just hope a filter is doing its job—you need proof. That’s where certifications from organizations like the NSF (National Sanitation Foundation) and ANSI (American National Standards Institute) come in. These aren't just fancy logos; they are a guarantee that the product performs as advertised.

Think of an NSF/ANSI certification as a promise that’s been independently verified. It means the filter has gone through rigorous testing to prove it removes the specific contaminants listed on the box, down to the percentages claimed.

For example, a filter with an NSF/ANSI 53 certification is certified to reduce health-related contaminants like lead or cysts. A filter with NSF/ANSI 42 is certified for aesthetic issues, like improving bad taste from chlorine. For any well owner, choosing a certified water filtration system for well water is the only way to be absolutely certain your family is getting the protection they need.

Keeping Your System Running Smoothly

A person replacing a filter, following a maintenance checklist for a system.

Putting in a water filtration system for well water is a great move for any well owner. But it's not a "set it and forget it" kind of appliance. You have to think of it like your car—it needs regular, simple tune-ups to keep it performing at its best for years.

Consistent upkeep is what protects your investment and makes sure your family's water stays pure and safe. The good news is, most of this maintenance is straightforward and something any homeowner can handle.

DIY Tasks vs. Professional Help

Not every maintenance job requires a phone call to a pro. Some are quick DIY tasks you can do in minutes, while others are best left to a plumber to avoid a simple job turning into a costly mistake.

Most of the routine stuff is designed to be user-friendly. For instance, swapping a sediment or carbon cartridge is usually as simple as unscrewing a filter housing, popping in the new filter, and screwing it back on. That’s a perfect DIY job.

But for the bigger jobs—like replacing the filtration media inside a large backwashing tank or troubleshooting a finicky control valve—you’ll want an expert. If a task involves cutting pipes or messing with complex wiring, calling a pro is always the safer and smarter choice.

Your Fridge-Worthy Maintenance Checklist

The secret to staying on top of maintenance is a simple schedule. No need to memorize it all. Use this checklist as your guide and pop some reminders in your phone's calendar to stay on track.

  • Every 3-6 Months: Swap Your Sediment Filter
    This filter is your first line of defense against sand, silt, and grit. How often you change it really depends on how much sediment your well kicks up, but checking it every three months is a great habit to get into.

  • Every 6-12 Months: Replace Your Carbon Filter
    The carbon filter is what gets rid of bad tastes and smells, but it has a limited capacity. Once it's "full" of contaminants, it can't absorb any more. Most whole-house carbon filters are good for about a year.

  • Monthly: Check Your Water Softener Salt Level
    If you have a water softener, it's useless without salt. Just pop the lid once a month and make sure the brine tank is at least half-full. It’s a two-second job that prevents hard water from coming back.

Consistent maintenance does more than just keep your system running; it ensures the water quality you paid for. A clogged filter can't remove contaminants effectively, and an expired UV lamp offers a false sense of security against bacteria.

Annual System Check-Up

Once a year, it's time for a more thorough check-in. This is a critical part of keeping your system in top shape for the long haul.

  1. Replace Your UV Lamp: This is non-negotiable. A UV lamp’s power to kill germs fades over time, even if the light still looks like it's on. You must replace the lamp every year to guarantee it's actually killing bacteria and viruses.

  2. Clean the UV Quartz Sleeve: While you have the lamp out, take a minute to gently clean the glass sleeve it sits in. Any mineral buildup on the sleeve will block the UV light and make it less effective.

Following a simple schedule like this will keep your water filtration system for well water working perfectly for a decade or more. It’s a small bit of effort that delivers huge returns in water quality, appliance life, and your own peace of mind. For more expert tips, you can find helpful advice on all types of water filters to keep your home's water pure.

Frequently Asked Questions About Well Water Filtration

Here are answers to the most common questions from well owners about water filtration. Use this information to choose, install, and maintain the right system for your home.

Do I Really Need a Whole House System or Is an Under Sink Filter Enough?

For well water, a whole-house system is almost always the best choice. Under-sink filters like reverse osmosis systems are designed for a single faucet, primarily for drinking water.

A whole-house system protects your entire plumbing infrastructure. It is the only way to guard appliances like water heaters, washing machines, and dishwashers from sediment, iron, and hard water minerals. It also provides cleaner water for showering and laundry, preventing skin irritation and stains on clothes. An under-sink unit cannot provide this level of comprehensive protection.

How Often Should I Test My Well Water?

The CDC recommends a professional lab test for your well at least once a year. The annual test should check for total coliform and E. coli bacteria, nitrates, pH levels, and total dissolved solids (TDS).

Do not wait for the annual test if you notice any changes. You should test your water immediately if:

  • You notice a change in taste, smell, or color.
  • A household member has recurring gastrointestinal illness.
  • A flood, chemical spill, or major construction has occurred nearby.
  • You have performed any maintenance on the well, like replacing the pump.

Annual testing is the best way to identify problems before they become health risks. Many dangerous contaminants are undetectable by taste, smell, or sight.

Can I Install a Well Water Filtration System Myself?

Installation depends on the system type and your skill level. A simple single-cartridge sediment or carbon filter can be a straightforward DIY project with basic tools.

Complex multi-tank systems—including backwashing iron filters, water softeners, or UV purifiers—are different. These require precise plumbing work, and UV systems also involve electrical wiring. Incorrect installation can cause leaks, void the system’s warranty, or make the filter ineffective. When in doubt, hiring a qualified, insured professional is the safest investment.

What Does an NSF Certification Mean and Why Does It Matter for Wells?

NSF certification is independent, third-party proof from the National Sanitation Foundation that a filter performs as advertised. An NSF/ANSI mark means the system was tested against strict public health and safety standards.

This certification is critical for well owners. With the variable quality of well water, an NSF seal provides peace of mind. For example, a filter certified to NSF/ANSI 53 is proven to reduce specific health-related contaminants like lead or cysts. Choosing a certified product ensures your system is protecting your family from the specific contaminants found in your water test.


At Water Filter Advisor, we help you make decisions with clarity. Our guides and reviews are here to support you from understanding your water test to choosing the right system. Explore our resources at https://www.waterfilteradvisor.com to get started.

Your Ultimate Guide to Well Water Sulfur Smell Removal

The first step in well water sulfur smell removal is figuring out what’s causing that awful rotten egg smell. The culprit is almost always hydrogen sulfide gas (H₂S), a sneaky compound that can come from naturally occurring sulfur deep in your groundwater or from bacteria throwing a party in your plumbing.

Don't worry—while the smell is a massive nuisance and can even corrode your pipes over time, it's a completely fixable problem. With the right water filtration approach, you can banish that stench for good and get back to enjoying fresh, clean water.

Uncovering the Source of That Rotten Egg Smell

If your well water suddenly smells like it's been hard-boiled and left in the sun, you're not alone. That unmistakable odor is one of the most common complaints we hear from homeowners on private wells. It comes from a gas called hydrogen sulfide, and even in microscopic amounts, it makes its presence known every time you turn on a faucet.

So where is this stinky invader coming from? There are two usual suspects:

  • Naturally Occurring Sulfur: Sometimes, the groundwater your well taps into is just naturally high in dissolved sulfur compounds. As that water travels to your home, this sulfur can convert into hydrogen sulfide gas, releasing that signature stench.
  • Sulfate-Reducing Bacteria (SRB): More often than not, the issue is biological. Certain types of bacteria, known as sulfate-reducing bacteria, thrive in oxygen-poor environments. Think wells, plumbing lines, and their absolute favorite hangout spot—your water heater. They essentially "breathe" sulfates found in the water and "exhale" hydrogen sulfide gas. It's a non-stop, stinky party, and your water heater is the club.

Why Pinpointing the Source Matters

Before you can choose the right filtration system, you have to play detective. Is the smell only coming from the hot water, or both hot and cold? Does it show up right away, or only after the water has run for a bit?

These answers are the critical clues. A problem isolated to your water heater, for instance, needs a completely different (and much cheaper) fix than an issue starting deep within your well that requires a whole-house filtration solution.

Hydrogen sulfide (H₂S) is a widespread issue for well owners. A detailed analysis of over 100 studies found that H₂S levels become noticeable by smell at just 0.05 mg/L. The research also showed private wells have prevalence rates up to 30% higher than municipal systems because the water is untreated.

In the U.S. alone, the EPA estimates 15 million households use private wells, and some reports suggest that up to 25% of them deal with sulfur odors. You can dig into the specifics in the full research on hydrogen sulfide prevalence.

To help you narrow it down quickly, here's a simple diagnostic chart focused on filtration-first thinking.

Quick Guide to Sulfur Smell Sources

Symptom Likely Source First Action Step
Smell is only in the hot water. Bacteria in the water heater. Turn up the water heater's temperature or consider a shock chlorination of the tank.
Smell is in hot and cold water, but fades after a few minutes. Bacteria in the well or plumbing. Perform a well shock chlorination to see if the smell disappears.
Smell is in hot and cold water and is constant. Hydrogen sulfide (H₂S) is present in the groundwater itself. Get your water tested to confirm the H₂S concentration and select the right filtration system.
Smell is only at one or two faucets. Bacteria is likely localized in the faucet aerator or drain. Clean the aerator and the drain P-trap thoroughly.

Figuring out whether your problem is geological or biological is the single most important step toward choosing the right filtration solution.

The bottom line is this: that awful sulfur smell is a clear signal from your water system that something needs attention. Once you’ve identified the likely cause, you can move on to a simple diagnostic test to confirm your suspicions and find the right filtration solution.

Putting on Your Detective Hat: A Practical Guide to Diagnosing Your Sulfur Problem

Before you can tackle that rotten egg smell for good, you need to do a little detective work. Pinpointing where the problem is coming from is the only way to choose the right water filtration solution. A few simple diagnostic tests you can do right at home will save you a ton of time, money, and frustration down the road.

Your first clue is the easiest one to get: just turn on a faucet and trust your nose. That smell—or the lack of it—is your most powerful piece of evidence. I always tell homeowners to think of their plumbing as having three main zones: the well itself, the pipes running through the house, and the water heater. Any one of them could be the culprit.

The Hot vs. Cold Water Test

This is, without a doubt, the most important test you can run. It’s a game-changer that immediately narrows down the suspects and points you toward the right fix.

Just head to the faucet closest to your water heater and run only the cold water for a minute or so. Do you smell it?

Now, switch over to the hot water. Let it run until it’s fully heated up, then give it another sniff. The difference you notice is the key.

  • The smell is ONLY in the hot water: This is the best-case scenario. It almost always means the problem is isolated inside your water heater. There’s a particular kind of bacteria, sulfate-reducing bacteria, that thrives in the warm, oxygen-poor environment of the tank. They have a chemical reaction with the standard magnesium anode rod that comes in most heaters, and voilà—you get hydrogen sulfide gas.
  • The smell is in BOTH hot and cold water: This tells us the issue is more widespread, and a whole-house filtration system is likely in your future. The source is either bacteria throughout your well and plumbing, or—more likely—the hydrogen sulfide gas is already dissolved in your groundwater before it even gets to your house.

The "Does It Fade?" Test

Okay, so you’ve found the smell in both hot and cold water. There’s one more quick test to try. Turn on a cold-water faucet and fill up a glass. Smell the water in the glass right away. Then, walk into another room, away from the sink, and smell it again after a minute.

If that rotten egg odor was strong at first but seems to disappear pretty quickly, that's a good sign the hydrogen sulfide is being produced by bacteria within your plumbing. The gas simply dissipates once it hits the open air.

But if that smell stays strong and pungent, even away from the tap, the hydrogen sulfide is dissolved in the groundwater itself. This means the problem starts at the source—your well—and you’ll need a whole-house filtration system to fix it.

This chart can help you visualize how these simple tests guide your diagnosis.

Decision tree for sulfur smell source, identifying issues in hot, cold, or both water supplies.

As you can see, figuring out if the smell is in the hot, cold, or both is the critical first step to finding where the problem lies.

Why a Professional Water Test Is Non-Negotiable

While these at-home "sniff tests" are fantastic for getting you started, they can't provide the one thing you absolutely need for a permanent fix: hard data. Getting a professional water test from a certified lab is your most powerful weapon in this fight.

A lab test doesn't just confirm that you have hydrogen sulfide; it measures the exact concentration in milligrams per liter (mg/L). This number is absolutely crucial for choosing a filtration system that’s strong enough for your water but isn't expensive overkill.

The lab will also check for other common well water troublemakers like iron and manganese, which often show up alongside sulfur. I've seen it countless times: someone buys a filtration system that works great for hydrogen sulfide, but it fails completely because high iron levels were never addressed. Skipping the professional water test is like trying to build a house without a blueprint—it’s just a recipe for costly mistakes and a smell that keeps coming back.

Immediate Fixes and Water Heater Solutions

When that rotten egg smell hits, you want it gone yesterday. While a whole-house filtration system is often the long-term answer, you can get some serious relief right now by focusing on the most common culprit for a "hot water only" stench: your water heater.

Think of your water heater tank as the perfect incubator for sulfate-reducing bacteria. It's warm, dark, and low on oxygen—everything they need to thrive. As they multiply, they pump out hydrogen sulfide gas, which gets released the second you turn on a hot water tap.

A man is squatting, working on a water heater with a blue bucket on a concrete floor.

The Anode Rod Swap: A True Game-Changer

Here's a pro-tip that solves this problem for a surprising number of people: check your anode rod. Most water heaters are sold with a standard magnesium anode rod. Its entire job is to sacrifice itself by corroding, which protects the steel tank from rusting out.

The catch? The chemical reaction from the corroding magnesium rod essentially supercharges the sulfate-reducing bacteria. It's like giving them an energy drink.

The fix is often as simple as swapping that magnesium rod for an aluminum/zinc alloy rod. The zinc is toxic to the bacteria, cutting off their power source and stopping the stinky chemical reaction cold.

For the handy homeowner, this is a very doable weekend project. It just requires shutting off the power and water to your heater first. If that sounds a bit out of your comfort zone, any plumber can knock it out for you in no time.

Flushing and Disinfecting Your Water Heater

If a new anode rod doesn't quite do the trick, or you just want to completely reset the system, a deep clean is your next move. Flushing and disinfecting the tank will wipe out the entire bacterial colony that’s taken up residence.

Here’s the basic game plan:

  • Kill the Power: First things first, turn off the electricity or gas supply to the water heater.
  • Drain the Tank: Hook up a garden hose to the drain valve and let it empty completely. You'll probably see a good bit of sediment come out, too.
  • Add a Disinfectant: You can use either 3% hydrogen peroxide or plain, unscented chlorine bleach. A good rule of thumb is about one gallon of peroxide for every 40 gallons of tank capacity.
  • Refill and Wait: Close the valve and fill the tank with cold water. Let it sit for at least a few hours to give the disinfectant time to work its magic.
  • Flush It Out: Drain the tank one more time. Then, refill it and run the hot water taps around your house to make sure you’ve rinsed all the cleaning solution out of your plumbing.

If you suspect your water heater is the source of the problem or you're weighing your options, getting help from professional water heater services can give you a clear diagnosis and a fast, reliable fix.

Shock Chlorinating Your Well

What if the smell is in your cold water, too, but it seems to clear up after running the tap for a minute? That’s a classic sign the bacteria are living in the well itself or somewhere in your plumbing.

When this happens, shock chlorination is a powerful—though often temporary—solution. It involves pouring a high concentration of chlorine bleach directly into your well to disinfect the entire system from top to bottom. This is a much bigger job than cleaning a water heater and requires careful calculations to get the dosage right without overdoing it.

Keep in mind, shock chlorination is more of a reset button than a permanent filtration fix. If the bacteria are constantly seeping into your well from the surrounding aquifer, the smell will eventually return. It cleans the slate but doesn't solve the underlying problem.

Choosing the Right Whole-House Filtration System

So your water tests confirmed the rotten-egg smell is coming from the well itself. This means you've moved past temporary fixes and are ready for a permanent solution: a whole-house filtration system. This is the point where you invest in a system that cleans your water right as it enters your home, ensuring every faucet delivers fresh, odor-free water.

Man holding a tablet displaying 'Choose Filtration' in a room with a complex well water treatment system.

I know the sheer number of options can feel overwhelming. But here's the key: your decision should always come back to your water test results. The amount of hydrogen sulfide (H₂S), along with other common culprits like iron and manganese, will point you directly to the best technology for your situation. Let's look at the most common workhorses for well water sulfur smell removal.

Air Injection Oxidation (AIO) Systems

Think of an AIO system as using a simple, powerful trick: oxidation. It's an elegant, single-tank setup that creates a pocket of compressed air at the top. When your well water flows through, it gets a shot of this oxygen, which instantly changes the dissolved hydrogen sulfide gas into solid sulfur particles.

Basically, it turns an invisible, stinky gas into tiny, filterable solids. The system’s filter media then easily catches these particles. Every so often, the system cleans itself out with a backwash cycle, flushing the trapped sulfur down the drain and refreshing its air bubble.

AIO systems are a fantastic choice for:

  • Moderate H₂S Levels: They shine when dealing with concentrations up to 10 mg/L.
  • Combined Iron Problems: AIO is a great two-for-one deal, as it also oxidizes and removes the dissolved iron that often goes hand-in-hand with sulfur.
  • Hands-Off Maintenance: These are chemical-free systems, so you never have to mix solutions or top off tanks. It just runs.

An air injection system can be a powerful cornerstone of your whole-house setup, offering a robust, self-managing solution for multiple water quality headaches at once.

Chemical Injection and Chlorination Systems

If you're up against seriously high levels of hydrogen sulfide or have a stubborn bacteria problem, it's time to bring in the heavy artillery. Chlorination is a more aggressive method that uses a chemical feed pump to inject a very specific dose of chlorine into your water.

The chlorine is a potent oxidizer, knocking out H₂S on contact and killing any sulfur or iron bacteria in the process. From there, the water sits in a contact tank to give the chlorine time to work its magic. The final step is a carbon filter that strips out any leftover chlorine, taste, and odor, leaving you with purified water.

While it’s a more involved setup, chlorination is hands-down the most powerful tool for severe sulfur and bacteria issues. It’s the go-to solution when H₂S levels climb above 10 mg/L or if you’re also fighting a recurring bacteria problem.

The main ongoing task with this system is keeping the chemical solution tank filled. But for really tough water, its effectiveness is unmatched.

Catalytic Carbon Filters

At first glance, a catalytic carbon filter looks just like a standard carbon filter, but it has a secret advantage. The carbon media inside has been specially treated to create a highly reactive surface. This "catalytic" surface turbocharges the reaction that turns hydrogen sulfide gas into harmless solid sulfur.

Once converted, these solid particles get trapped within the carbon's massive network of internal pores. This approach is incredibly effective for lower H₂S concentrations, typically in the 1-4 mg/L range.

The biggest draw here is simplicity. It's a single tank with no chemicals and very little maintenance besides the automatic backwashing cycles. The trade-off is that the carbon media will eventually wear out and need to be replaced, usually every 3-5 years, based on your water chemistry and how much water you use. It's an excellent "set it and forget it" choice for mild sulfur smells.

Comparing Well Water Sulfur Removal Systems

Here’s a side-by-side comparison of the most popular whole-house filtration methods for hydrogen sulfide, helping you choose the best fit for your home's needs and budget.

Filtration Method Best For (H₂S Level) Pros Cons Estimated Cost
Air Injection (AIO) Moderate (2-10 mg/L) Chemical-free, low maintenance, also great for iron removal. May not work on very high H₂S levels; needs a drain for backwashing. $1,000 – $2,500
Chlorination System High (10+ mg/L) Extremely effective on high sulfur and bacteria; kills microorganisms. Needs ongoing chemical refills; more complex, multi-component installation. $1,500 – $3,000+
Catalytic Carbon Low (< 4 mg/L) Simple setup, no chemicals, very effective for low-level odors. Filter media must be replaced periodically; not ideal for high iron. $800 – $1,800

Choosing the right filtration system is a major step toward finally solving your water problems for good. Use your water test as your guide, and you can confidently pick the technology that will deliver the most effective well water sulfur smell removal for your home.

Getting Your System Installed and Keeping It Running Smoothly

You’ve done the hard work—you’ve tested your water, weighed the options, and finally picked the right whole-house filtration system to knock out that sulfur smell. But the job isn't done yet. Getting the system installed properly and sticking to a simple maintenance routine is what separates a long-term solution from a temporary fix. Think of your new filter as a serious investment in your home's water quality; a little care goes a long way in protecting it.

Whether you're breaking out the toolbox yourself or calling in a local pro, the placement is non-negotiable. The filtration system needs to be installed on your main water line, right after the pressure tank but before the line tees off to your water heater and the rest of the house. This setup ensures that every single drop of water, hot or cold, gets treated before it reaches a tap.

The Installation: DIY or Pro?

If you're comfortable with basic plumbing, installing a single-tank catalytic carbon or an AIO filter can be a manageable weekend project. It typically involves cutting into your main water line, fitting the in/out connections, and setting the control valve's regeneration schedule. One pro tip I always give DIYers: make sure you install a bypass loop. This simple set of valves lets you shut off the water flowing to the filter for maintenance without turning off the water to your entire home.

That said, for more complex setups like a full-blown chlorination system, hiring a professional is almost always the better call. These systems have a lot of moving parts—chemical pumps, contact tanks, and delicate calibration—that need to be just right. A good water treatment specialist will not only install it by the book but will also fine-tune it to your home's specific flow rate and water pressure for peak performance.

A flawless installation is your first line of defense against future problems. An incorrect setup can lead to pressure drops, leaks, or even prevent the system from performing well water sulfur smell removal effectively.

Your Long-Term Maintenance Plan

A water filtration system isn't something you can just set and forget. It's working hard 24/7, and it needs a little TLC to keep doing its job. Luckily, most of the upkeep is straightforward and easy to schedule.

It’s just like changing the oil in your car—a small, proactive task that helps you avoid a huge, expensive headache down the road. Letting maintenance slide is the surest way to invite that rotten egg smell right back into your life. I once visited a homeowner whose AIO system failed after just a year. The culprit? He'd never once run a manual backwash cycle to flush out the gunk. The filter media was completely choked with sulfur and iron, rendering it useless.

Here’s a quick-glance maintenance checklist for the most common sulfur removal systems:

  • Air Injection (AIO) Systems:

    • Monthly Check-in: Just listen. Make sure the system backwashes on schedule (usually every 2-3 days). You should also hear a distinct hissing sound during the air draw cycle—that's the sound of it working.
    • Annual Service: Take apart and clean the injector assembly. It's a small but critical part that can get clogged with iron or sediment, which stops the system from creating the air pocket it needs to oxidize sulfur.
  • Chlorination Systems:

    • Weekly Check: Take a quick look at the chemical solution tank. You’ll get a feel for how fast your system goes through the chlorine and can plan refills. The number one rule is to never let it run dry.
    • Quarterly Task: Clean out the injection point on the chemical feed pump. This little check valve is prone to getting gummed up with mineral deposits over time.
  • Catalytic Carbon Filters:

    • Semi-Annual Check: Manually start a backwash cycle to make sure it runs properly and flushes out any trapped sediment.
    • Every 3-5 Years: This is the big one. The catalytic carbon media has a finite lifespan. Once it has absorbed all the sulfur it can hold, it’s done. You’ll need to replace the media to get the system working like new again.

When It's Time to Call a Water Treatment Professional

Look, tackling a sulfur smell can be a really satisfying DIY project. There’s a certain pride in fixing your own water. But there are absolutely times when you need to put down the wrench, pick up the phone, and call in an expert. Knowing when to make that call can save you a ton of headaches, money, and time.

If your water test results come back looking like a complex chemical cocktail—say, sky-high hydrogen sulfide levels mixed with a heavy dose of iron and manganese—you're officially in professional territory. An off-the-shelf filter from a big-box store just isn't going to cut it here. This kind of water chemistry demands a custom-designed, multi-stage system, and that's something an expert needs to spec out to avoid creating new issues, like a massive drop in your water pressure.

The Telltale Signs You Need Expert Help

Recurring problems are another huge red flag. Have you shock-chlorinated your well, only to have that rotten egg smell creep back a few weeks later? Then you do it again, and it comes back again? That points to a persistent, underlying issue that a professional needs to diagnose.

It also just comes down to comfort level. If you're not confident cutting into your plumbing or you're unsure how to properly integrate a whole-house filtration system, hiring a pro is the smart move. It’s all about peace of mind.

A certified water treatment specialist isn't just selling you equipment; they're providing a complete solution. They can spot underlying problems with the well itself, correctly size a system for your home's specific flow rate, and make sure the installation is done right the first time.

How to Find a Reputable Pro

When you start looking for a professional, keep an eye out for certifications. A specialist certified by the Water Quality Association (WQA) has demonstrated their expertise and is bound by a strict code of ethics. Don't ever feel shy about interviewing them before you hire them.

  • Ask to see their WQA certification. This is a non-negotiable for me. It’s a solid indicator of their knowledge and commitment to the industry.
  • Drill down on their experience with your specific issue. Ask them, "Have you dealt with wells that have high sulfur and high iron before? What was your approach?"
  • Insist on a detailed, on-site water analysis. They should be testing your water at your home, not just giving you a quote based on a phone call. One-size-fits-all solutions rarely fit anyone.

Bringing in the right expert turns the challenge of well water sulfur smell removal from a stressful guessing game into a smart, confident investment in your home's water quality.

Common Questions About Well Water Sulfur Smell

Even when you have a solid plan, questions are bound to pop up, especially when you're dealing with something as frustrating as that rotten egg smell. Let's tackle a few of the most common concerns homeowners have about well water sulfur smell removal so you can feel confident moving forward.

Is It Safe To Drink or Shower in Sulfur Water?

The short answer is yes, it's generally safe. At the levels you typically find in a household well, hydrogen sulfide (H₂S) is more of a nuisance than a real health threat. For most people, drinking it won't cause any issues, though some with sensitive stomachs might experience a bit of an upset. Showering in it doesn't pose a direct health risk, either.

That said, long-term exposure can leave you with dry, irritated skin and has a nasty habit of stripping color from dyed hair. And let's be honest, that lingering smell on your skin and hair really kills that fresh-out-of-the-shower feeling.

The biggest risk from sulfur in your water isn't actually to your health—it's to your home. Hydrogen sulfide gas is corrosive. Over time, it will eat away at copper and brass pipes, plumbing fixtures, and appliances, leading to some pretty expensive repairs down the road.

Will a Standard Water Softener Remove the Sulfur Smell?

This is a classic misconception, and I hear it all the time. A standard salt-based water softener is built to do one thing: remove hardness minerals like calcium and magnesium. It isn't designed to deal with dissolved gases like hydrogen sulfide.

While some softeners might slightly reduce a very faint odor, they are absolutely not the right tool for a noticeable sulfur problem.

In fact, trying to make your softener do a job it wasn't built for will likely foul the resin bed, damaging the system and potentially making your water quality even worse. To get a real, lasting fix, our water filtration advice can guide you to the technology that actually targets your specific problem. It all comes down to using the right tool for the job.


Ready to enjoy fresh, odor-free water from every tap? At Water Filter Advisor, we provide the expert guides and unbiased reviews you need to choose the perfect filtration system for your home. Explore our resources today at https://www.waterfilteradvisor.com.