Acid Neutralizer for Well Water: Your Ultimate Guide to Taming Aggressive Water

If you've ever spotted those bizarre blue-green stains colonizing your drains or found yourself patching yet another pinhole leak in your copper pipes, your well water is likely throwing a corrosive temper tantrum. The hero of this story? An acid neutralizer for well water, a whole-house filtration system designed to raise your water’s pH. Think of it as a giant antacid tablet for your entire home, stopping destructive water from literally eating your plumbing from the inside out.

What Is an Acid Neutralizer and Do You Need One?

Ever wondered why your pipes or water heater tapped out years ahead of schedule? The silent assassin is often acidic water, which is any water with a pH below a neutral 7.0. This low pH makes your water aggressive, allowing it to dissolve any metal it touches—including your expensive copper pipes, brass fixtures, and the guts of your water heater.

An acid neutralizer is a "point-of-entry" system, which is just a fancy way of saying it treats all the water flowing into your house right at the source. It works by sending your water on a journey through a tank packed with a special neutralizing media, usually calcite (a high-purity form of crushed marble). This media slowly dissolves, raising the water's pH to a safe, non-corrosive level while adding a few healthy minerals back into the mix.

Close-up of a rusty metal water tap over a dirty sink, with a sign asking 'Is your water acidic?'

Common Signs You Have Acidic Well Water

The damage from low-pH water is sneaky, often going unnoticed until you’re staring down a massive repair bill. Ignoring those early whispers can get expensive fast. In fact, industry data shows that untreated acidic well water is behind 60% of premature pipe failures in homes over 20 years old, with repairs hitting an average of $4,500 per household. For families we've helped at Water Filter Advisor since 2007, these systems are a game-changer, providing whole-house protection and cutting lead leaching by up to 90% once the pH is balanced.

So, how can you spot the problem? Keep an eye out for these tell-tale signs:

  • Blue-Green Stains: Seeing these distinct stains in sinks, tubs, and around fixtures is the classic calling card of acidic water dissolving the copper from your pipes. It's like your plumbing is crying, and these are its colorful tears.
  • Pinhole Leaks: If you're constantly finding and fixing tiny leaks in your copper plumbing, it’s a sure sign your pipes are being eaten away from the inside.
  • Metallic Taste: When water tastes sharp or metallic, it's because it's leaching metals like copper, zinc, and even iron straight into your drinking glass. Not exactly the refreshing mineral water you had in mind.
  • Appliances Dying Early: Low-pH water is tough on appliances. It corrodes the internal parts of dishwashers, washing machines, and water heaters, drastically shortening their lifespan.

To make it even simpler, here’s a quick-glance table to help you connect the dots between your water problems and the likely cause.

Diagnosing Acidic Well Water

Symptom Potential Cause Recommended Solution
Blue-green stains on fixtures Acidic water corroding copper pipes Test pH; install an acid neutralizer
Pinhole leaks in copper plumbing Internal pipe corrosion from low pH Test pH; install an acid neutralizer
Metallic or sour taste in water Leached metals (copper, zinc, lead) Test pH & heavy metals; install a filter system
Appliances fail prematurely Corroded internal components Test pH; install an acid neutralizer

This table should help you quickly identify if acidic water is the root of your issues. If you're seeing one or more of these signs, the next step is getting your water tested.

The core idea behind an acid neutralizer is simple: it sacrifices its own mineral media to save your plumbing. By letting the water dissolve a bit of calcium and magnesium, it becomes less aggressive and stops the corrosion dead in its tracks.

At the end of the day, getting an acid neutralizer isn't just about protecting your pipes. It’s about safeguarding your entire home’s plumbing infrastructure and ensuring the water your family drinks and bathes in is clean and safe.

Understanding Water pH and Why Your Well Is Acidic

Before we dive into fixing your acidic water, let's get a handle on what's actually going on inside your pipes. The whole issue boils down to your water's pH level—a simple scale that tells us how acidic or alkaline something is. It’s this hidden chemistry that determines if your water is playing nice with your plumbing or slowly eating it for lunch.

Think of the pH scale like this: 7.0 is perfectly neutral. It's the sweet spot. Anything below 7.0 is acidic, and the lower the number, the more corrosive it gets. Anything above 7.0 is alkaline, which is what you're aiming for.

Your goal is to nudge that pH number back up into a safe, neutral zone.

For your home's plumbing, the ideal pH range is between 7.0 and 8.5. Water that drops below a pH of 6.5 is considered highly aggressive. It's a serious threat to copper pipes, brass fixtures, and pretty much any metal component in your appliances.

What Makes Well Water Acidic in the First Place?

Unlike city water, which gets treated and balanced at a municipal plant, your well water is a direct reflection of its journey through the earth. Its chemistry is shaped by everything from the clouds in the sky to the ground it travels through before reaching your tap.

The main culprit is often rainwater itself. As rain falls, it picks up carbon dioxide from the atmosphere, forming a very weak carbonic acid. This makes most rainwater naturally a bit acidic, usually landing somewhere between a 5.0 and 5.5 pH. When this slightly acidic rain hits the ground, its real adventure begins.

How Your Local Geology Plays a Major Role

Once that rainwater seeps underground, its final pH is decided by the rocks and soil it encounters. This is where your local geology becomes the star of the show.

  • Granite and Sandstone Regions: If you live in an area with bedrock like granite or certain sandstones (common in the Northeast and Pacific Northwest), there's nothing there to buffer the water's acidity. These rocks don't dissolve easily, so the water stays acidic as it fills the aquifer your well pumps from.
  • Limestone and Dolomite Regions: On the flip side, if the groundwater filters through limestone or dolomite, it dissolves alkaline minerals like calcium carbonate along the way. This process naturally neutralizes the acid and raises the pH. People with wells in these areas almost never have to worry about acidic water.
  • Decomposition of Organic Matter: The soil itself also plays a part. In places with lots of vegetation or swampy ground, decaying leaves and roots release more carbon dioxide into the soil. This CO2 dissolves into the groundwater, making it even more acidic before it ever gets to your well.

Ultimately, acidic well water isn't a sign of pollution—it's just nature at work. An acid neutralizer for well water isn't some quick fix; it’s a necessary tool to counteract your property's specific geology and protect your home from the silent damage of low-pH water.

How Do Acid Neutralizer Systems Actually Work?

So, how does an acid neutralizer turn that aggressive, pipe-eating well water into something balanced and harmless? It's not magic, but it is a pretty clever bit of chemistry. The whole process hinges on a tank filled with a special mineral media that basically acts as a sacrificial hero, dissolving itself to save your plumbing.

At its core, the system is simple. It routes your incoming well water through this tank. As the acidic water washes over the mineral media, a natural reaction takes place. The media, which is alkaline, slowly dissolves and releases beneficial minerals like calcium and magnesium into the water. This process is what raises the pH, making the water far less corrosive and bringing it back into a safe, neutral range.

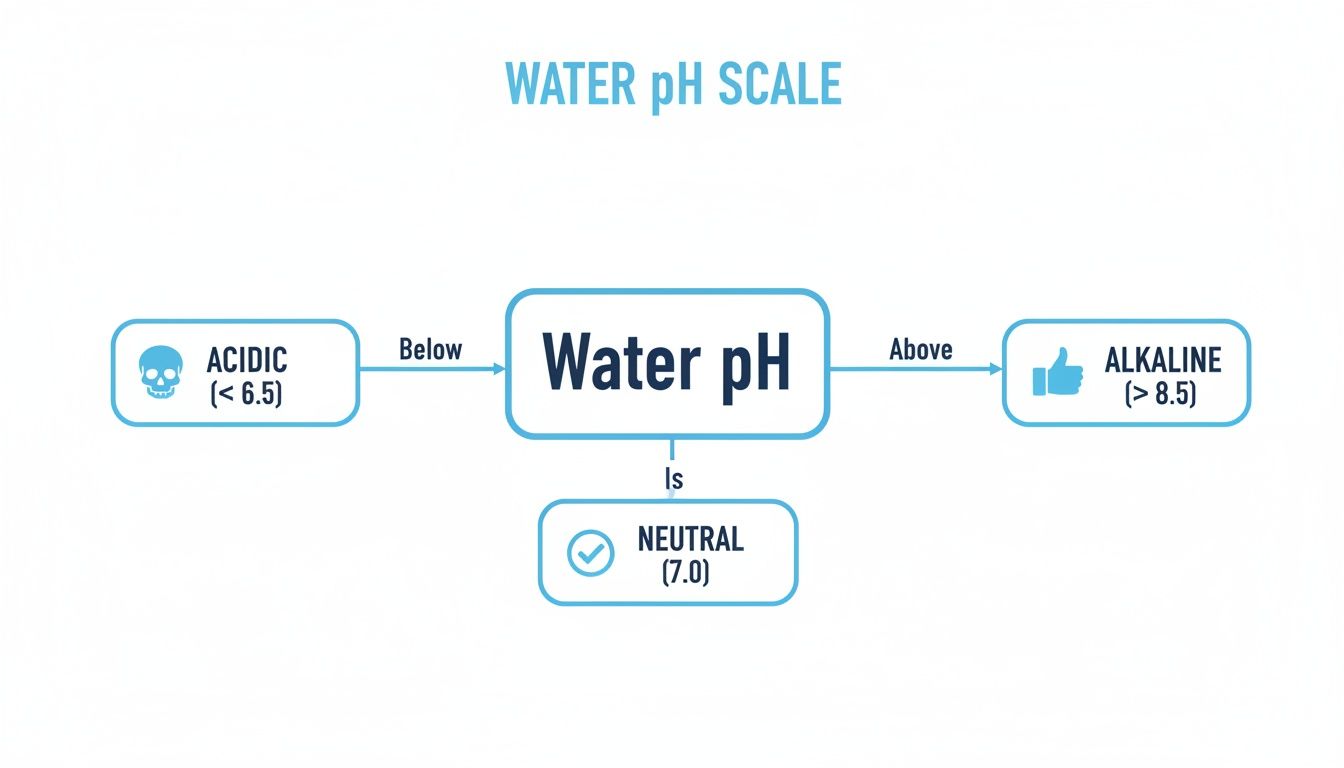
This chart gives you a great visual of the pH scale and where you want your home's water to be.

Flowchart illustrating the water pH scale, showing acidic, neutral, and alkaline ranges.

As you can see, the goal is to shift your water out of that damaging acidic zone (anything below 6.5) and into the ideal neutral or slightly alkaline zone (7.0 and up).

Upflow vs. Backwashing: The Two Main System Designs

Acid neutralizers typically come in two main flavors, and each one handles the water and the media inside a bit differently.

An upflow system works kind of like a lava lamp. Water comes in from the bottom of the tank and flows upward through the media, causing it to gently tumble and swirl around. This constant motion is key because it prevents the media from packing down into a solid, concrete-like block, ensuring every last drop of water gets properly treated.

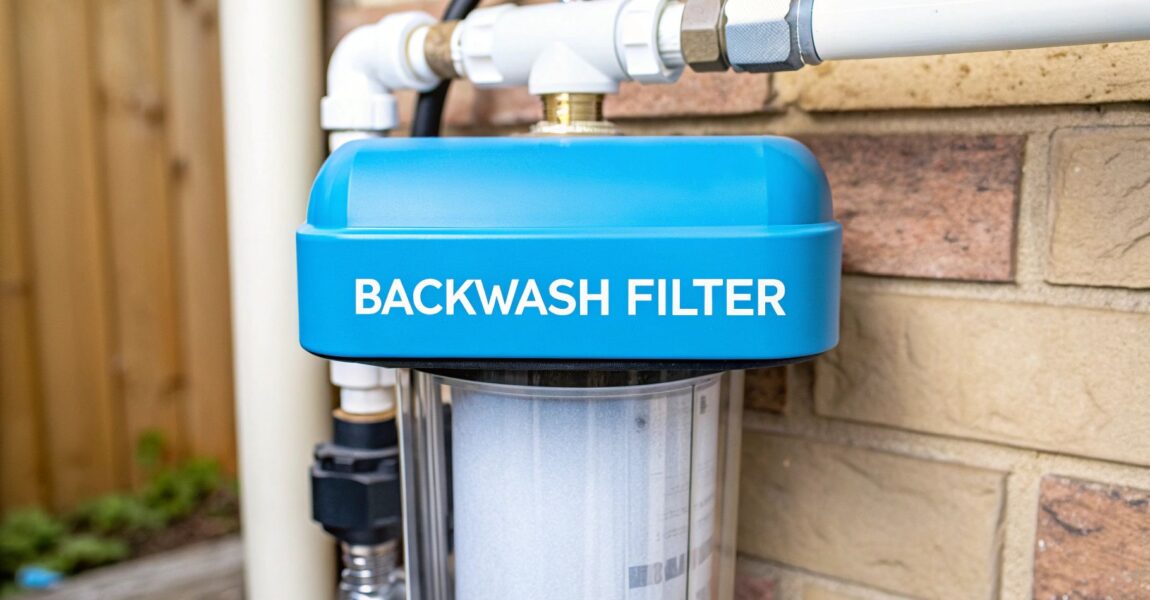
A backwashing system is more like a self-cleaning coffee maker. Water flows down through the media bed, just like a standard filter. But, on a set schedule (usually every few days), the system slams the flow into reverse. This powerful backwash cycle lifts and rinses the entire media bed, flushing out any trapped sediment and preventing "channeling"—which is when water carves a single path through the media, tanking its effectiveness.

The rise of non-backwashing acid neutralizers has been a game-changer for well owners looking for a low-maintenance fix. These systems, which really took off in the early 2000s, use self-dissolving media to continuously neutralize acids, making them perfect for wells with pH as low as 5.0. You can dig deeper into this trend by checking out market analysis reports on the acid neutralizer market from Data Insights Market.

The Key Players: Calcite and Magnesium Oxide

The real workhorses inside these systems are the neutralizing minerals. The two you’ll hear about most are Calcite and Magnesium Oxide, which is often sold under the brand name Corosex.

Calcite is the go-to for most situations. It’s essentially just crushed and screened white marble—a really pure form of calcium carbonate. It dissolves slowly and is "self-limiting," which means it naturally stops dissolving once the water hits a neutral pH. This makes it almost impossible to "over-correct" and make your water too alkaline.

Magnesium Oxide (Corosex) is the heavy hitter. It's way more reactive than calcite and can jack up pH levels much more effectively. This makes it the perfect tool for water that is extremely acidic (think pH below 6.0). But all that power comes with a catch: it can easily raise the pH too high if you're not careful.

To get the best of both worlds, a lot of pros will use a blend of the two. A common mix is 80-90% Calcite with 10-20% Magnesium Oxide. This gives you the steady, reliable neutralization of calcite with an extra boost from magnesium oxide to handle more aggressive water.

Choosing the right media—or the right blend—is everything. This table breaks down the key differences to help you figure out what your water needs.

Choosing Your Neutralizing Media: Calcite vs. Corosex

This quick comparison will help you see the strengths and weaknesses of the two most common neutralizing media, Calcite and Corosex, so you can decide which is the right fit for your well water's pH level.

Feature Calcite (Calcium Carbonate) Magnesium Oxide (Corosex)
Best pH Range Most effective for water with a pH between 6.0 and 6.9. Ideal for extremely acidic water with a pH between 4.5 and 6.0.
Neutralizing Power Slower acting and self-limiting; prevents over-correction. Highly reactive and powerful; can raise pH significantly.
Impact on Hardness Adds calcium, slightly increasing water hardness. Adds magnesium, which also contributes to water hardness.
Potential Drawbacks May not be strong enough for very low pH levels on its own. Can raise pH too high (over 8.5) if not blended or used carefully.
Common Use Case Used as the primary media in most residential systems. Often used in a blend with calcite to boost performance for low pH water.

Ultimately, testing your water is the only way to know for sure. If your pH is only slightly acidic, pure Calcite is usually the safest and most effective choice. For seriously acidic water, a carefully measured blend containing Corosex is likely the better solution.

Choosing the Right Acid Neutralizer for Your Home

Picking out the right acid neutralizer for your well isn't like grabbing a random box off the shelf at a hardware store. Think of it more like being a detective for your plumbing. If you choose the wrong system, you could be out a lot of money and either not fix the problem or, even worse, create new ones. Getting it right the first time means you have to really understand the unique chemistry of your water.

And that brings us to the absolute first step, before you even think about shopping: get a comprehensive water test. Forget those simple pH strips you use for a pool; they just won't cut it here. You need precise, hard numbers to make a smart decision and make sure your investment actually pays off.

What to Test for Before You Buy

A detailed lab report is your treasure map. It gives you the critical data points that will steer every decision you make, from the type of media you need to the size of the tank. Without it, you're just flying blind.

Here’s what your water test needs to cover:

  • pH Level: This is the big one. It tells you exactly how acidic your water is, which is the key to deciding if you need a gentle media like calcite or a more potent blend with magnesium oxide.
  • Hardness: This measures the dissolved calcium and magnesium already in your water. Since neutralizers work by adding these same minerals, you have to know your starting point to figure out how hard the water will be after treatment.
  • Alkalinity: People often mix this up with "alkaline," but it's different. Alkalinity is your water's ability to resist pH changes. If it's low, your pH can swing all over the place.
  • Iron Content: Iron is the arch-nemesis of neutralizing media. It can coat the minerals and stop them from working. If you have more than a tiny amount of iron, you'll probably need a separate iron filter installed before the neutralizer.

Think of your water test results like a prescription from a doctor. You wouldn't just start taking random medication without a diagnosis, right? The same goes for water treatment—don't buy a system until you know exactly what you're up against.

Sizing Your System for Optimal Performance

Once you've got that water report in hand, the next job is to size the system correctly. If it's too small, it won't be able to keep up when you're using a lot of water, which means your pH won't be corrected and you'll probably notice a drop in water pressure. Go too big, and you're just throwing money away.

The key is to figure out your home's peak service flow rate, which is just a fancy way of saying the maximum amount of water your household might use at one time. It's measured in gallons per minute (GPM).

Here's a quick way to get a rough estimate:

  • Kitchen Sink: 2.0 GPM
  • Bathroom Sink: 1.5 GPM
  • Shower: 2.5 GPM
  • Dishwasher: 2.0 GPM
  • Washing Machine: 2.5 GPM

Just add up the fixtures you could see yourself running at the same time. For instance, if someone is taking a shower (2.5 GPM) while the dishwasher is going (2.0 GPM), you'd need a system that can handle at least 4.5 GPM. For most homes with 2-3 bathrooms, the peak flow rate usually lands somewhere in the 8-12 GPM range.

You can check out our guide for more detailed advice on selecting a system that will meet your needs.

Upflow vs. Backwashing: The Final Decision

We touched on this earlier, but now that you have your water test data, you can make the final call between an upflow and a backwashing design.

An upflow system is a fantastic, low-maintenance choice if your water is clean and doesn't have much sediment. The water flows upward, which naturally keeps the media loose and prevents it from clumping together. This means consistent treatment without wasting any water on backwash cycles. It’s no surprise they’ve become a favorite, with the market growing from USD 567 million and projected to hit USD 881.11 million by 2033.

But—and this is a big but—if your water test shows any real amount of sediment, silt, or iron, a backwashing system is the only way to go. That powerful, periodic backwash is essential for cleaning the media bed and flushing out all the gunk that would quickly clog up an upflow system. It does need a drain and uses more water, but for problem well water, it's the right tool for the job. Let your water test be your guide here, because choosing the wrong one is a recipe for failure.

Installation and Long-Term Maintenance

So, your new acid neutralizer has arrived. Awesome! Now it's time to get it hooked up and start protecting your plumbing. Whether you're a seasoned DIYer or you're calling in a plumber, knowing the game plan is key to getting it right from the start. Proper installation isn't just about connecting a few pipes—it's about strategic placement so your entire house gets the benefit.

The sweet spot for your acid neutralizer is right where the main water line enters your home. To be specific, it needs to go after the pressure tank but before any other gear, like a water softener or an iron filter. This order is non-negotiable. You have to fix the pH first, which sets the stage for your other filters to do their jobs properly.

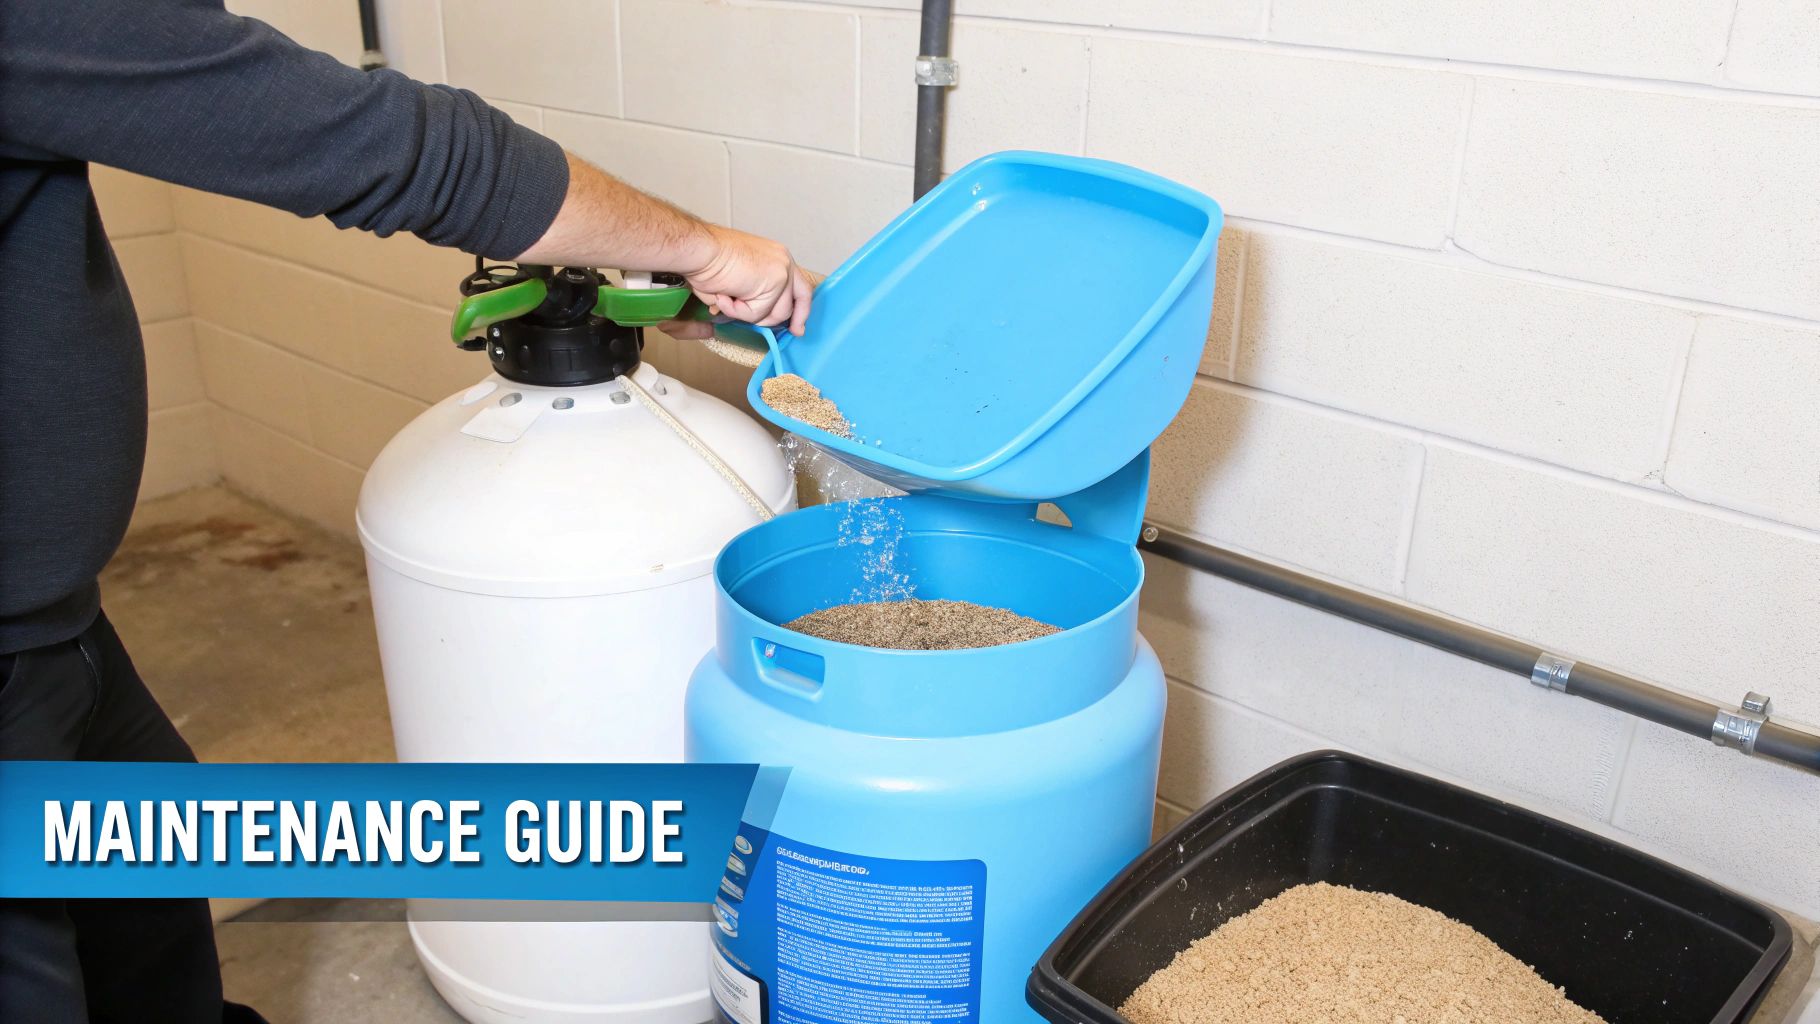
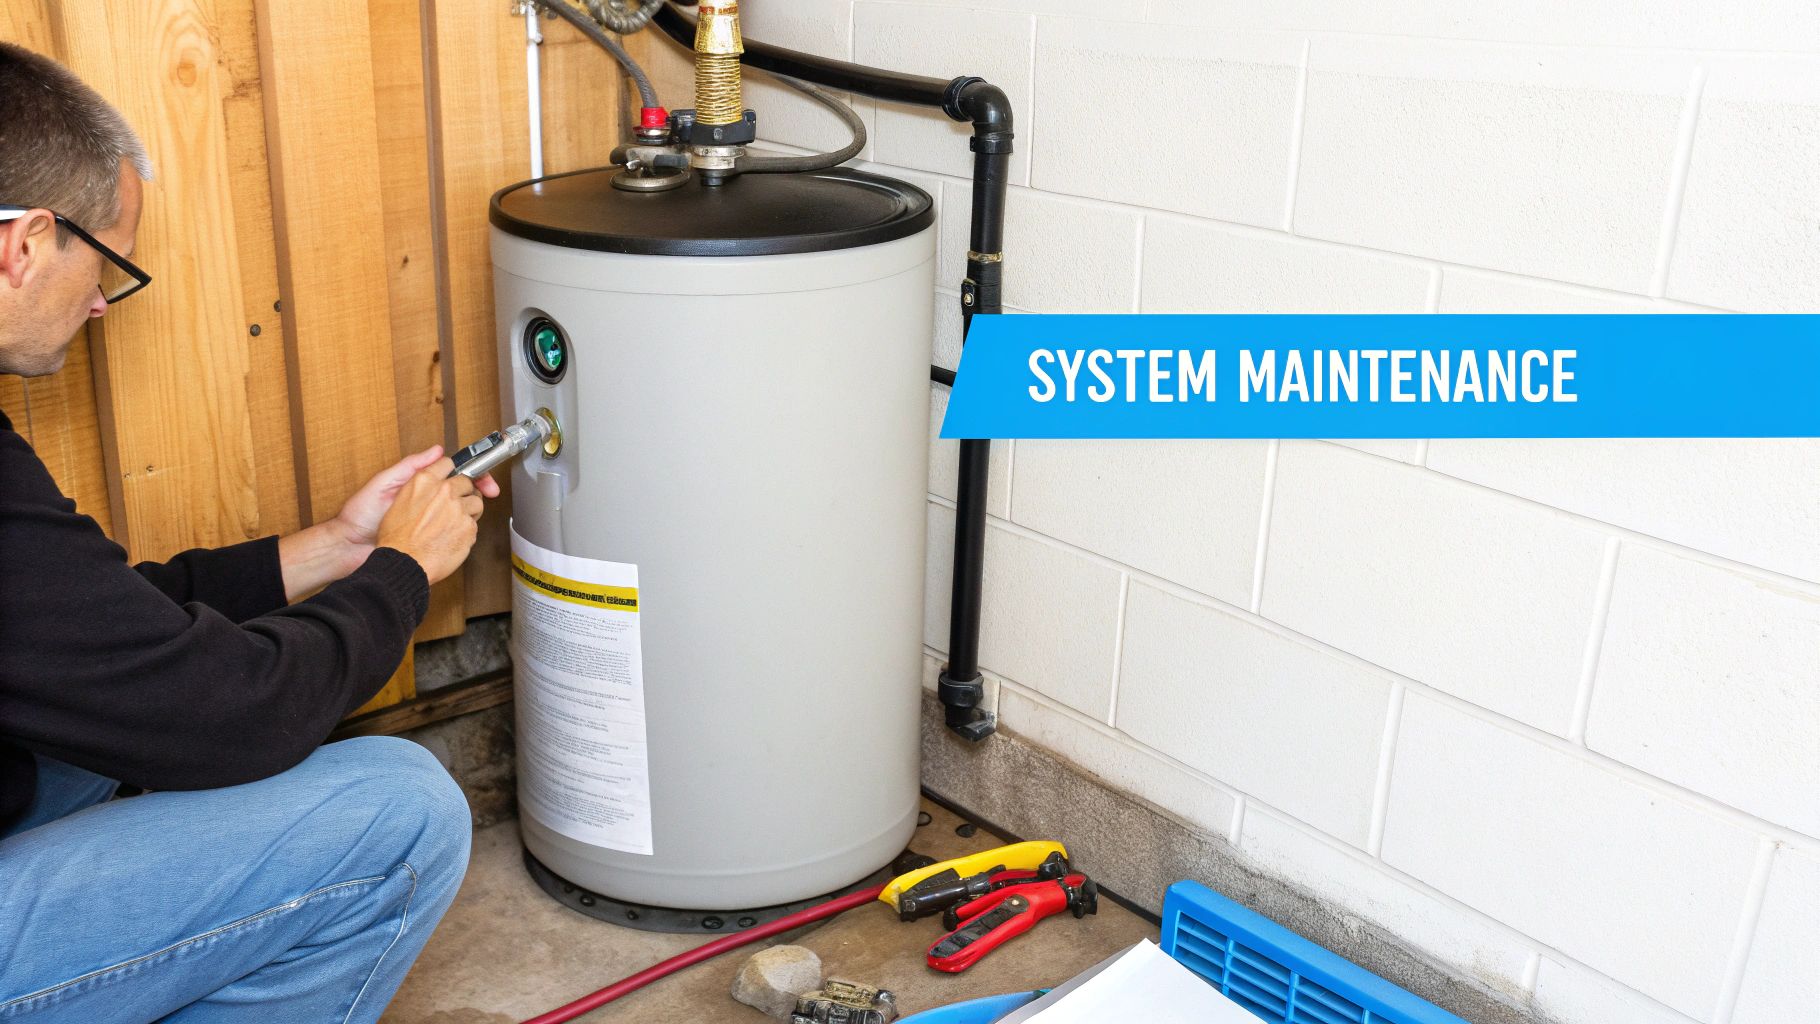
A person refills a blue water treatment tank with granular media, demonstrating system maintenance.

The Ongoing Commitment to Balanced Water

Here’s a common misconception: people think these systems are "set it and forget it." While they are incredibly low-maintenance, they do need a little TLC to keep working perfectly. The special media inside the tank—that calcite or calcite/Corosex mix—is designed to dissolve as it neutralizes the acid. It's just like a bar of soap getting smaller every time you use it.

This means you’ll have to add more media periodically. How often depends on a few things:

  • Your water's pH: The lower the pH (more acidic), the faster you'll burn through the media.
  • Your household's water usage: A big family will use up media way faster than a couple.
  • The size of your neutralizer tank: Bigger tanks hold more media, so they last longer between refills.

Most homeowners find they need to top off their acid neutralizer for well water every 1 to 3 years. It's a simple job: just depressurize the system, open the port on top of the tank, and pour in a new bag of media.

Here's an easy trick: check the media level in your tank twice a year. If it looks like it's dropped to about halfway, that's your cue to schedule a top-off. This simple habit keeps your pH from slowly creeping back into the danger zone.

What to Expect for Maintenance Costs

Beyond the initial purchase and install, your only real ongoing cost is the replacement media. A 50-pound bag of good-quality calcite usually runs between $50 and $100. If your water is very acidic and needs a blend with magnesium oxide (Corosex), the price might be a little higher.

Most home systems just need one or two bags for a refill, which keeps the yearly maintenance cost very manageable. When you stack that small expense against the thousands you could spend fixing corroded pipes, replacing a water heater, or dealing with pinhole leaks, the value is obvious. A quick check and a timely refill are all it takes to keep your neutralizer protecting your home for years to come.

Pairing Neutralizers with Other Water Filters

It's a rare day when a well only has one water problem. You're often dealing with a cocktail of issues. Maybe you've got acidic water eating away at your copper pipes, but you also have hard water leaving crusty white scale on your faucets and iron turning your laundry a lovely shade of orange.

An acid neutralizer is a fantastic piece of equipment, but it’s a team player. To get the best results, you need to understand its role and where it fits in with other treatment systems.

The Classic Combo: Neutralizer + Water Softener

The most common partner for an acid neutralizer is, without a doubt, a water softener. In most cases, this isn't just a good idea—it's practically a necessity.

Here’s why: an acid neutralizer works by dissolving media like calcite (calcium carbonate) or magnesium oxide into your water. This process raises the pH, but it also adds calcium and magnesium minerals. And what do those minerals cause? Hardness.

So, in fixing your low pH problem, you’re almost guaranteed to make your water harder.

Getting the Order Right is Everything

When you're installing both a neutralizer and a softener, the sequence is absolutely critical. There's no room for debate on this one.

The acid neutralizer must always be the first piece of equipment in line after your well's pressure tank. The water softener always comes second.

Why does it matter so much? Water softeners are built to work with water that's in a neutral pH range. If you pump aggressive, acidic water directly into your softener, it will slowly destroy the delicate resin beads inside. You'll shorten the life of your softener and cripple its ability to remove hardness.

By putting the neutralizer first, you protect your softener and let it do the job it was designed for.

So, You'll Probably Need a Softener

Once the neutralizer has balanced the pH, your pipes are safe from corrosion. But now you've got a new set of problems from the increased hardness:

  • Scale Buildup: That chalky white crust that clogs up faucets, showerheads, and coffee makers.
  • Soap Scum: Hardness minerals interfere with soap, preventing a good lather and leaving a gross film on your skin, hair, and dishes.
  • Appliance Damage: Scale is the mortal enemy of water heaters and dishwashers, clogging up pipes and ruining heating elements.

By following the neutralizer with a water softener, you create a powerful one-two punch. You get water that is perfectly balanced, non-corrosive, and soft.

Boosting Your Iron Filter's Performance

An acid neutralizer can also be a game-changer if you’re fighting iron. Most iron filters—especially the common air-injection or oxidizing types—work far better when the water's pH is neutral or even slightly alkaline.

If your well is both acidic and iron-heavy, the low pH keeps the iron dissolved, making it much harder for the filter to grab onto it.

Install an acid neutralizer for well water right before your iron filter, and you raise the pH to that sweet spot. This simple adjustment creates the perfect conditions for the iron to oxidize (basically, to rust) so the filter can easily pull it out of your water. No more stubborn orange stains on your sinks and tubs.

Frequently Asked Questions About Acid Neutralizers

Once you’ve got the basics down on how these systems work, a few practical questions almost always come up. Let’s tackle the most common ones head-on so you can feel confident about your next steps.

How Much Does an Acid Neutralizer Cost to Own?

It's smart to think about the total cost of ownership. The initial price for the system itself usually lands somewhere between $800 and $1,500. If you're having a pro handle the install, budget another $300 to $600 for that.

The main running cost is replacing the media inside the tank. You'll need to do this every 1 to 3 years, and a refill typically costs between $150 and $400. It feels like a big investment upfront, but it's a bargain compared to the thousands you could spend on plumbing repairs down the road.

Will an Acid Neutralizer Make My Water Hard?

Yes, it sure will. That’s actually a direct result of how it works. By dissolving minerals like calcium and magnesium into your water to raise the pH, it inherently increases the water's hardness.

This is exactly why so many people install a water softener right after their acid neutralizer. That one-two punch tackles both the acidity and the resulting hardness, giving you fantastic water quality all over the house.

Can I Install an Acid Neutralizer Myself?

If you're really comfortable with plumbing projects—we're talking cutting and fitting pipes—then a DIY installation is definitely possible.

However, getting it in the right spot in your plumbing line is absolutely crucial for it to work properly and not mess with your water pressure. Because an improper install can be a costly headache, most folks opt to hire a professional. Only take this on if you're 100% sure of your skills.

How Do I Know if My Neutralizer Is Working Correctly?

The most reliable way is to simply test your water again. About a week or two after the system is up and running, grab a good pH test kit and check the water from a faucet that's "downstream" from the neutralizer.

You're aiming for a pH between 7.0 and 8.5. If you’re not there yet, you might need to tweak the system's settings or look into a different media mix. On a simpler note, you should also notice those ugly blue-green stains starting to disappear over time.


At Water Filter Advisor, our goal is to give you the expert guidance and honest reviews you need to find the perfect water treatment system for your home. Check out our resources to make a smart decision and start enjoying safer, better-tasting water. Learn more at Water Filter Advisor.

A Homeowner’s Guide on How to Remove Arsenic from Well Water

So, you've discovered you might have a sneaky, unwanted guest in your well water: arsenic. Take a deep breath. This is a common issue for well owners and, more importantly, a solvable one. But because arsenic is the ultimate ghost—tasteless, odorless, and invisible—guessing isn't an option. The first, non-negotiable step is a professional water test.

This isn't just about getting a "yes" or "no" on arsenic. It's about getting a detailed profile of the specific type of arsenic in your water so you can choose a filtration system that will actually trap it.

Many well owners are surprised to learn they're not alone. The U.S. Geological Survey found that about 7% of private wells they studied had arsenic levels above the EPA's safety limit of 10 micrograms per liter (µg/L). That's a lot of households staring down the same problem.

Why Your Neighbor’s Water Report Means Nothing for You

Here’s a classic mistake: assuming your water is fine because your neighbor's test came back clean. This is like assuming you don't need glasses because your friend has 20/20 vision.

Arsenic leaches into groundwater from surrounding rocks and soil. Its presence can vary wildly from one property to the next based on local geology and water chemistry. Your well could be just a few hundred feet from your neighbor's and have a completely different arsenic profile.

Don't gamble with your family's health. Testing your own well is the only way to know for sure what's coming out of your tap.

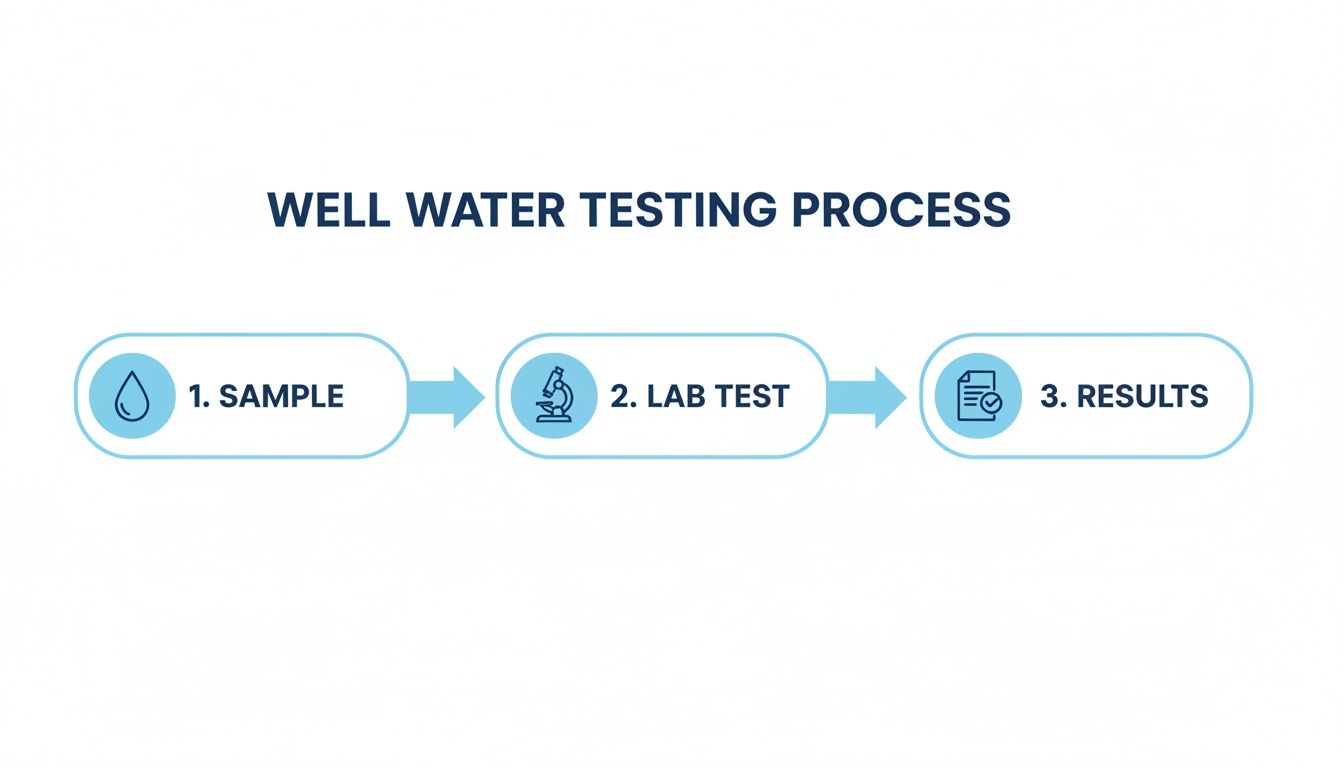
The whole process is pretty straightforward, from grabbing a sample to getting the lab results you need to make a smart decision.

A flowchart illustrating the well water testing process, showing steps for sample collection, lab testing, and results.

As you can see, getting that certified analysis is the critical step that tells you exactly what you're up against.

The Two Faces of Arsenic: Arsenic III vs. Arsenic V

Your lab report is the key that unlocks the right solution, and one detail is more important than any other: the form of arsenic you have. Arsenic shows up in two main "flavors" in well water, and they require totally different filtration game plans.

  • Arsenic-V (Arsenate): This is the "oxidized" form. Think of it as having a magnetic charge, which makes it easy for filtration systems like reverse osmosis and adsorptive media to grab onto and yank out of your water.
  • Arsenic-III (Arsenite): This form has no charge, making it super slippery and much harder for most filters to catch. It's the more toxic of the two and a true escape artist.

If your test shows a lot of Arsenic-III, a standard filter won't do the trick. The arsenic will just slide right through. You'll need an extra pre-treatment step—like an oxidation system—to convert the tricky Arsenic-III into the more manageable Arsenic-V before it ever reaches your main filter.

Key Takeaway: Knowing the specific type of arsenic in your well is non-negotiable. An effective filtration strategy depends entirely on targeting the correct form of the contaminant, which is why a comprehensive lab test is the essential first step.

Trying to decipher a water test report can feel like learning a new language. Getting some professional input can make all the difference in matching the right technology to your specific water profile. For more general insights, you can explore expert advice on a variety of water quality topics to make sure you’re not just buying a filter, but a real solution.

Comparing The Best Arsenic Removal Systems

With your lab results in hand, you’re ready to choose your defense against arsenic in your well water. This isn’t about picking the fanciest or most expensive filter; it’s about selecting the right technology for your specific water chemistry and your family’s needs.

Let's break down the heavy hitters in home water filtration to see how they stack up.

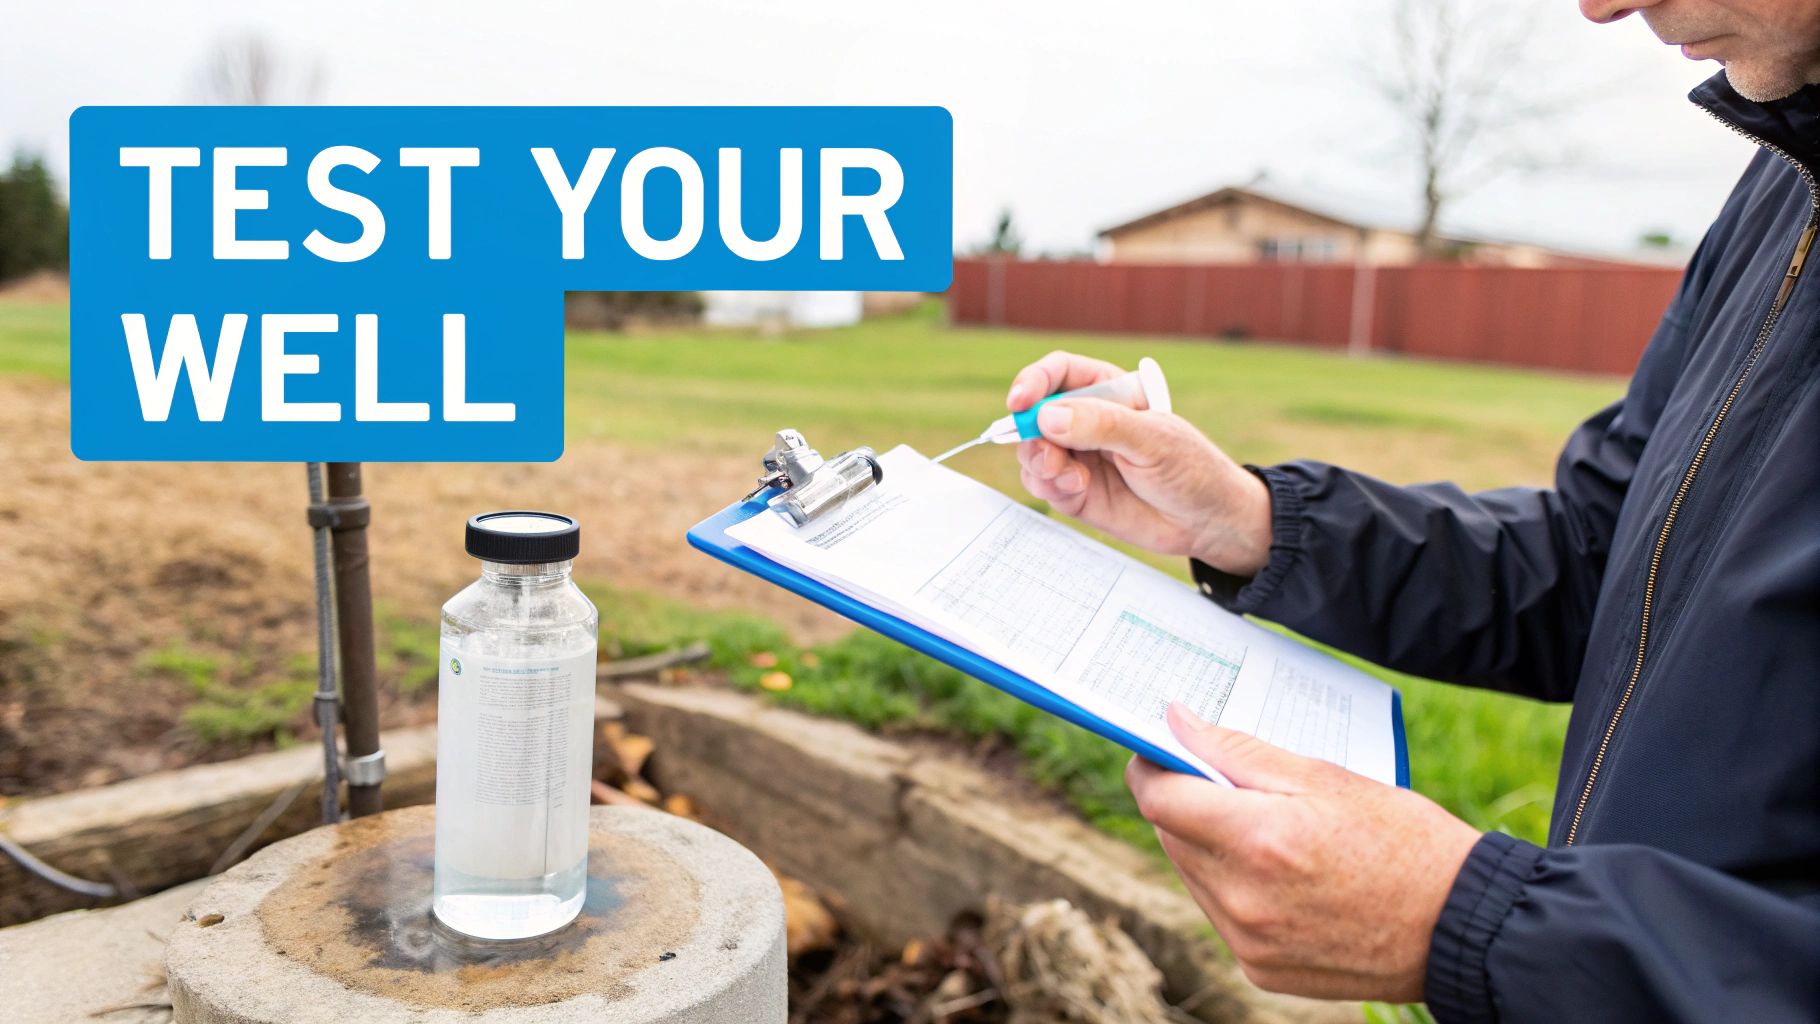
A technician tests private well water outdoors, holding a sample bottle and clipboard with a "TEST YOUR WELL" sign.

The three main technologies you'll encounter are Reverse Osmosis (RO), Adsorptive Media, and Anion Exchange. Each has its own superpowers, so knowing the difference is the key to making a confident choice.

Reverse Osmosis: The Precision Approach

When you want the absolute highest level of purity for drinking water, reverse osmosis is the gold standard. Think of it as a microscopic bouncer at the club door for your water. It uses an ultra-fine membrane to force pure water molecules through while leaving nearly everything else—including arsenic—behind. This method is incredibly effective, especially against the easier-to-remove Arsenic-V.

You’ll most often find RO systems as Point-of-Use (POU) units that fit neatly under the kitchen sink. This makes them a fantastic, budget-friendly way to guarantee your drinking and cooking water is pristine. You get a dedicated faucet that delivers highly purified water right where you need it most.

But this precision comes with a trade-off. RO systems create wastewater (often called brine) that carries away all the concentrated contaminants. For every gallon of pure water you get, several gallons are typically flushed down the drain. This is a key consideration if you're on a sensitive septic system or focused on water conservation.

Expert Insight: While whole-house RO systems exist, they're usually overkill for residential use. Their high water waste and energy demands make them impractical and expensive for most homeowners. An under-sink RO for drinking water is almost always the more practical and cost-effective route.

Adsorptive Media: The Whole-House Workhorse

If you need to treat all the water coming into your home, adsorptive media is often the champion. These systems use a specialized filter material, usually an iron-based media, that acts like a magnet for arsenic. As your water flows through the media tank, arsenic particles literally stick to the surface and are trapped.

The biggest advantage here is its effectiveness for Point-of-Entry (POE), or whole-house, applications. An adsorptive media system protects every single tap in your house, from the shower to the washing machine. It also doesn't produce any wastewater like an RO system, which is a huge bonus.

The main consideration is that the filter media is a consumable. Once it’s saturated with arsenic, it has to be replaced. How often you'll need to do this depends on your water usage and arsenic levels, so be sure to factor that long-term maintenance cost into your budget.

Anion Exchange: The Targeted Specialist

Anion exchange works a lot like a traditional water softener. It uses a special resin loaded up with harmless chloride ions. When water passes through, the resin grabs negatively charged contaminants like arsenate (Arsenic-V) and swaps them out for the chloride ions.

This method is fantastic for Arsenic-V but does absolutely nothing for the uncharged Arsenic-III. Its performance can also be thrown off by other things in your water, like sulfates, which will compete with the arsenic for a spot on the resin and wear it out much faster.

Because of this, an anion exchange system is a very specialized tool. It works best when your water is already fairly clean of other competing minerals and Arsenic-V is your primary target. Just like a softener, it needs regular regeneration with a salt solution to keep working effectively.

Arsenic Removal Methods At-A-Glance

To help you see the big picture, here’s a quick-and-dirty comparison. This table breaks down the key differences so you can weigh the pros and cons for your home.

Filtration Method Effectiveness (As-V) Effectiveness (As-III) Best For Avg. Initial Cost Maintenance Needs
Reverse Osmosis Up to 99% Poor POU (Drinking Water) $200 – $600 Annual filter changes
Adsorptive Media Up to 99% Poor POE (Whole House) $800 – $2,500 Media replacement (2-5 years)
Anion Exchange Up to 95% None POE (Specific Water) $900 – $2,000 Salt for regeneration

Choosing the right system comes down to matching the technology to your specific problem. Each of these methods has proven its worth in real-world applications.

The science backs this up. Independent research shows that these technologies can remove 80% to over 99% of arsenic from well water. Specifically, RO systems are known to achieve greater than 95% removal, though their brine waste is an important factor to weigh. You can dig deeper into the data by reading this in-depth study on arsenic removal from household water treatments.

Ultimately, the best system is the one that fits your lab results, your water usage, and your budget for both the upfront cost and the long-term upkeep.

The Hidden Water Issues That Derail Arsenic Filters

I've seen it happen more times than I can count: a homeowner invests in a top-notch arsenic filter, hooks it up, and… the arsenic levels barely budge. Why? Because simply installing an arsenic filter often isn't enough. You have to look at the rest of your water chemistry.

Think of your arsenic filter as a specialist surgeon. It’s brilliant at its one job, but it can’t perform surgery in a chaotic emergency room. It needs a clean, prepped environment to work effectively.

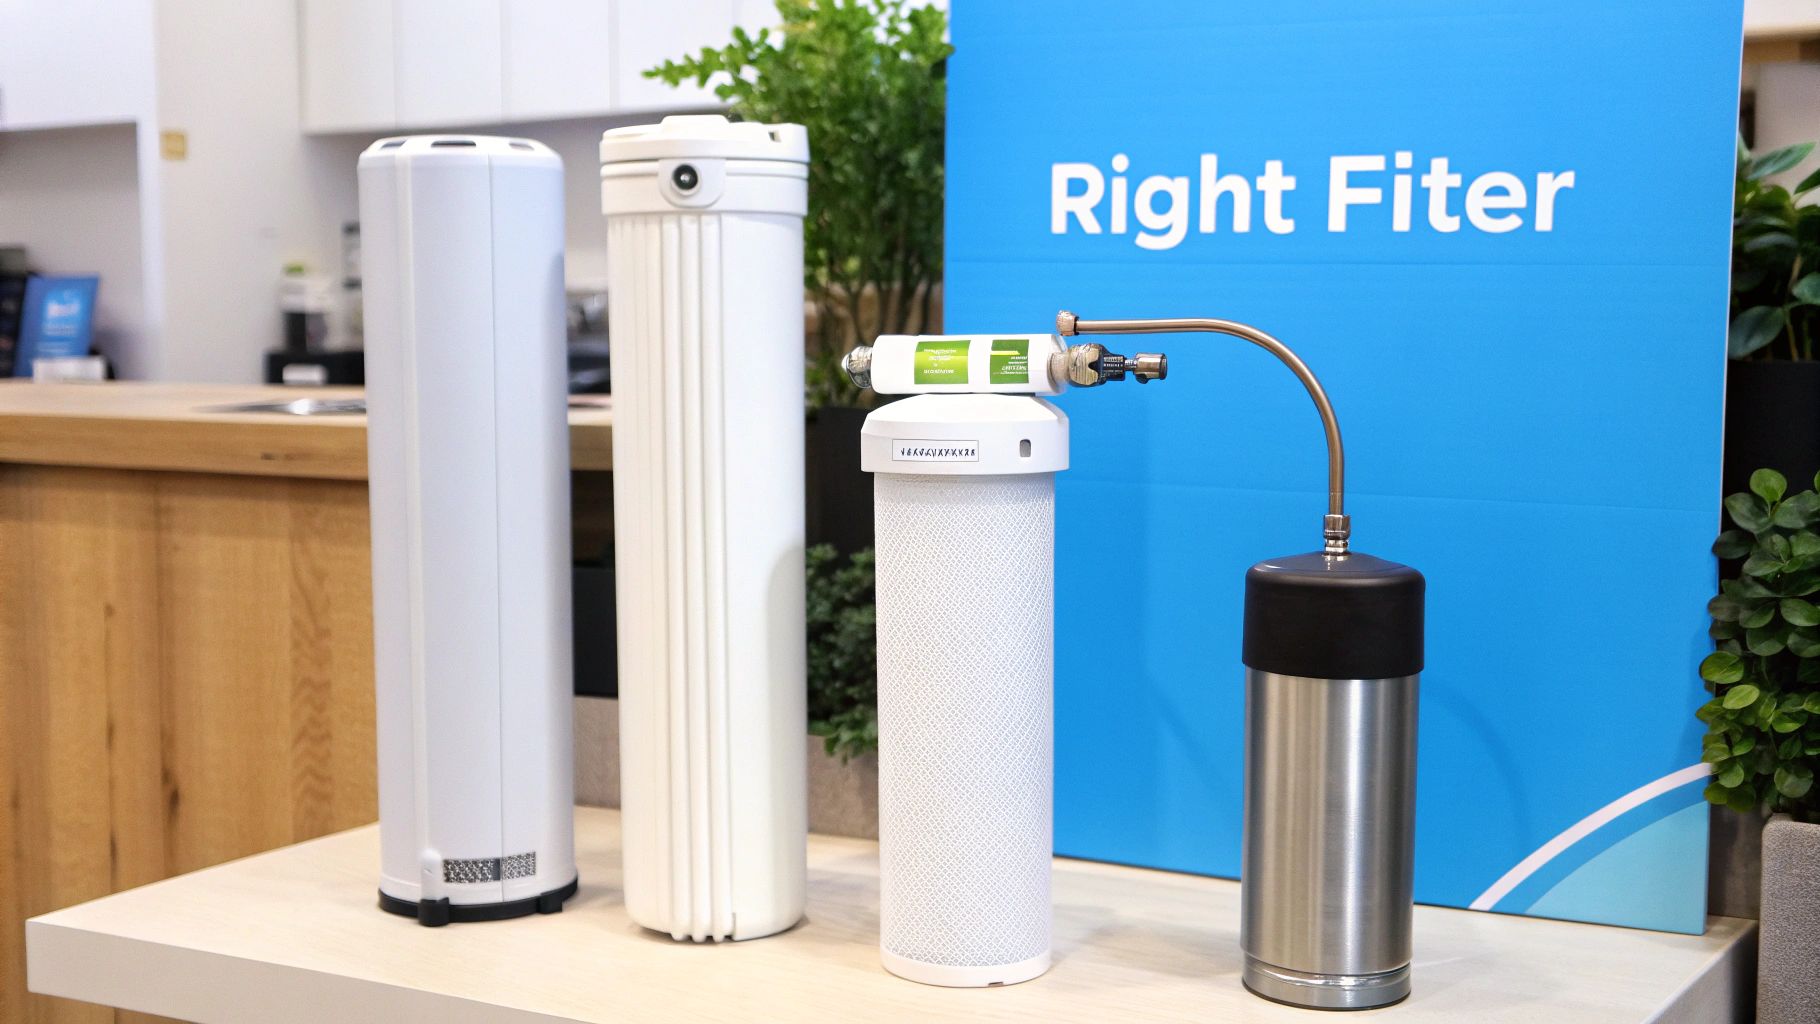
Four different water filtration systems displayed on a counter, with a blue "Right Fiter" sign.

The real performance of your system hinges on what else is floating around in your well water. Let’s pull back the curtain on the hidden problems that can sabotage your filtration efforts.

The Arsenic-III Conundrum

We've touched on the two forms of arsenic, but this is where it gets critical. If your lab results show you have Arsenic-III (arsenite), most standard arsenic filters will completely fail you.

Because Arsenic-III has no electrical charge, it zips right past the most common treatment methods like adsorptive media and anion exchange resins. They simply can't grab onto it.

To catch this slippery form of arsenic, you first have to change it into the much more cooperative Arsenic-V (arsenate). The process for this is called oxidation. An oxidation system is a pre-treatment step that uses something like chlorine or an air injection system to alter Arsenic-III's chemical structure. This "primes" the water so that by the time it gets to your main filter, the arsenic is in a form that can actually be removed.

A Real-World Example: A client called me, totally frustrated that his brand-new adsorptive media system wasn't working. I took one look at his water report and saw the problem: over 70% of his arsenic was Arsenic-III. We installed a simple chlorine injection system right before his main filter, and his next test came back with non-detectable arsenic levels. Problem solved.

When Iron and Manganese Crash the Party

Iron and manganese are the classic well water villains—they're the culprits behind those ugly reddish-brown or black stains on sinks, toilets, and laundry. But they're not just a nuisance; they are absolute saboteurs when it comes to arsenic removal.

Here’s how they ruin the show:

  • They Clog Everything Up: Both iron and manganese will happily coat the specialized media inside your arsenic filter. This is a process called fouling, and it creates a physical barrier that literally stops the media from touching and adsorbing the arsenic.
  • They Steal All the Good Seats: Think of your filter media as a concert venue with a limited number of seats for contaminants. Iron and manganese are aggressive—they’ll rush in and take up all the valuable spots, leaving no room for the arsenic.

If your water test shows iron levels above 0.3 parts per million (ppm) or manganese over 0.05 ppm, you absolutely must install a dedicated iron and manganese pre-filter. Think of it as a bodyguard for your arsenic system. It removes the troublemakers so your specialist filter can do its job without interference.

The Problem with Hard Water

Hard water, which is just water with high levels of calcium and magnesium, creates a different kind of disaster, especially for reverse osmosis (RO) systems.

When hard water is forced through a delicate RO membrane, the calcium and magnesium minerals crystallize and form a crusty layer called scale. This scale buildup clogs the microscopic pores of the membrane, crippling its efficiency and eventually destroying it.

If your water hardness is over 7 grains per gallon (GPG), a water softener is a non-negotiable pre-treatment investment. By removing the hardness minerals before they can reach your more sensitive arsenic filter, a softener dramatically extends the life of your equipment and guarantees it performs as intended.

At the end of the day, learning how to remove arsenic from well water is about seeing the whole picture. Your water is a complex ecosystem. A comprehensive water test isn't just about finding the arsenic—it's your roadmap to clearing all the other roadblocks that stand in the way of a truly effective, long-lasting solution.

Deciding Between Whole-House and Point-of-Use Filters

Alright, you've got your lab results and you know what you’re up against. Now for the big strategic question: do you treat just the water you drink and cook with, or do you treat every drop coming into your house? This is the classic Point-of-Use (POU) vs. Point-of-Entry (POE) debate.

There’s no single right answer here. The best choice for your home boils down to your specific water test results, your budget, and your daily habits.

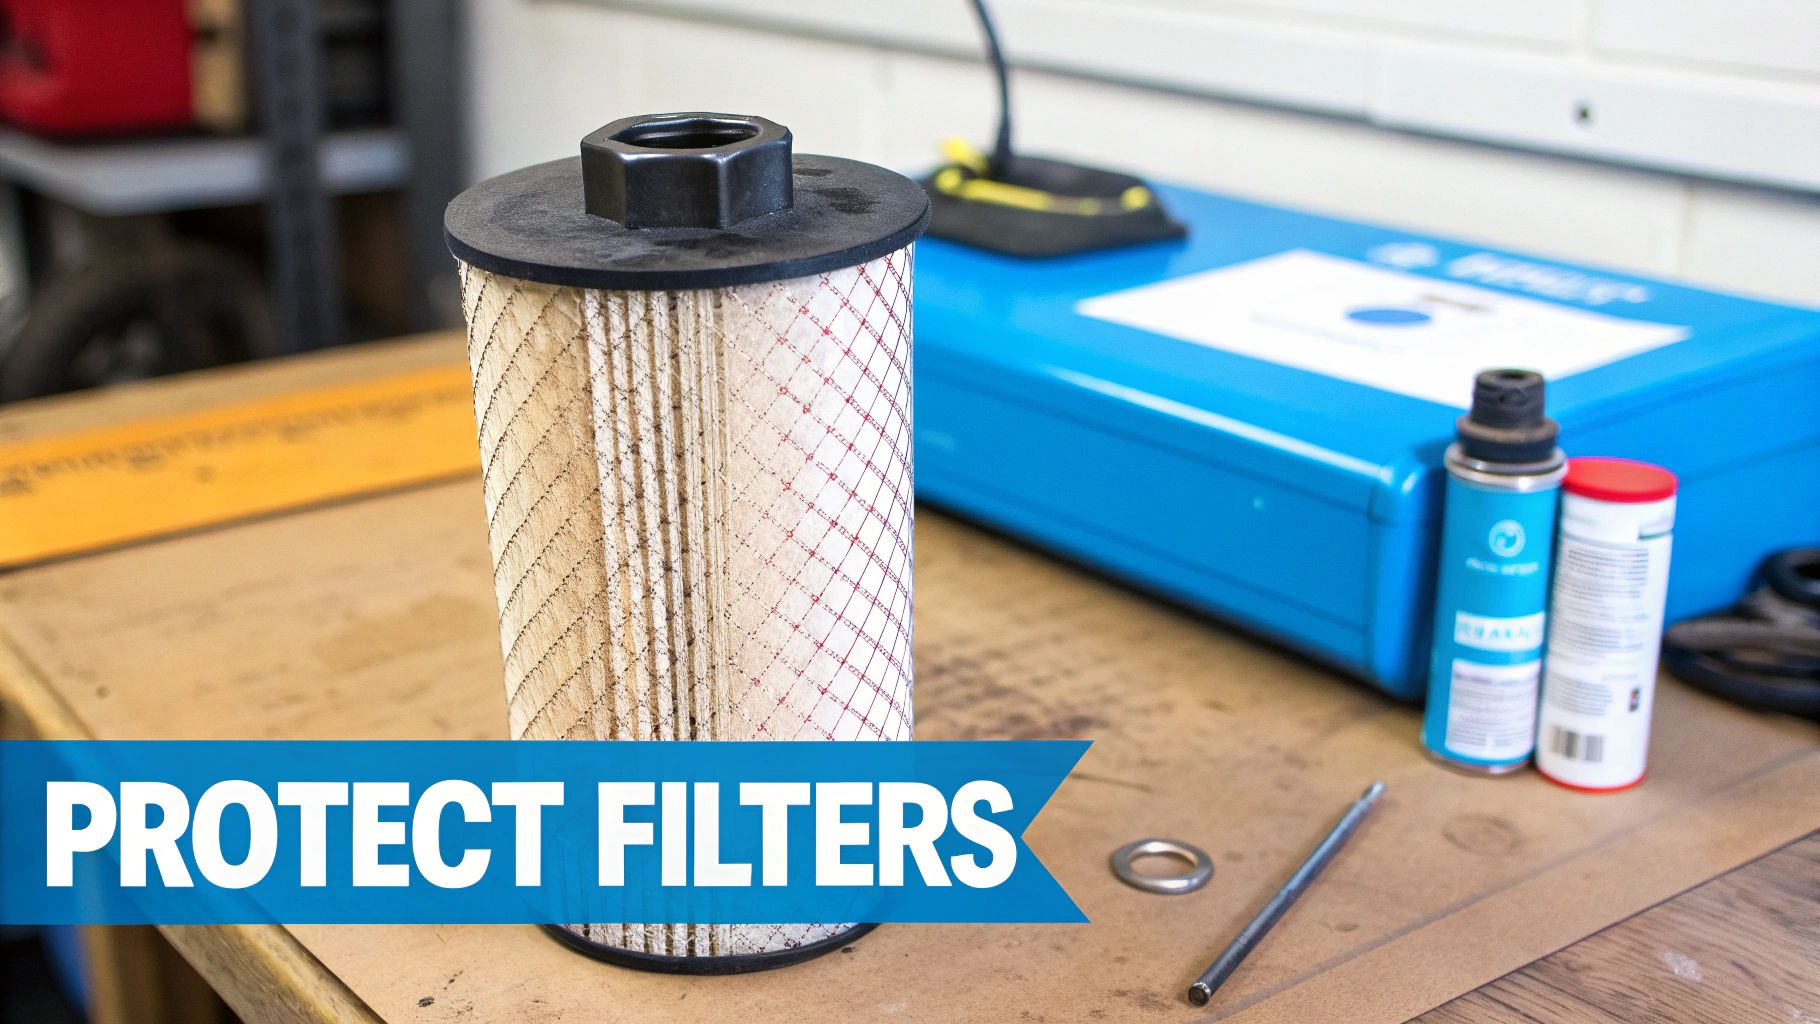
A large industrial filter element on a workshop table with tools, emphasizing filter protection.

Let's walk through how to make a smart decision you can feel good about.

The Case for Point-of-Use Precision

A Point-of-Use (POU) system is like a sniper rifle—it’s a targeted strike right where you need it most. These systems are installed at a single faucet, usually the kitchen sink, to give you ultra-clean water for drinking and cooking. The go-to POU system for arsenic is typically an under-sink reverse osmosis (RO) unit.

This focused approach is brilliant for a few reasons:

  • Cost-Effective: It's way cheaper to install and maintain a small system for one tap than to treat your entire home. You get top-tier protection for the water you're actually ingesting without wasting money purifying toilet water.
  • High-Purity Water: Systems like RO are the gold standard for purification, removing an incredibly high percentage of all sorts of contaminants, including arsenic.
  • Simple Installation: Most homeowners with basic DIY skills can get an under-sink unit up and running in an afternoon.

If your arsenic levels are just a little over the 10 µg/L limit and your main concern is safe drinking water, a POU system is a smart, budget-friendly move. It tackles the primary risk—ingestion—head-on.

When a Whole-House System Is the Only Answer

A Point-of-Entry (POE) system, also known as a whole-house system, is like a fortress gate. It's installed right where the main water line enters your house, so every single drop gets treated. While it's a bigger investment, a POE system is sometimes the only practical solution.

You should seriously consider a whole-house system if:

  • Your Arsenic Levels are Very High: If your lab report came back with a number that made your jaw drop (say, over 50 µg/L), treating everything provides total peace of mind. While skin absorption of arsenic from water is not a primary health concern, at very high levels, eliminating all contact is the safest route.
  • You're Fighting Multiple Water Problems: This is a big one. A POE setup lets you build a complete treatment "train." You can line up a water softener, an iron filter, and then an adsorptive media tank for arsenic. It’s a comprehensive fix for complex well water.
  • You Value Total Convenience: With a whole-house system, you just don't have to think about it. Every faucet delivers clean, safe water. It simplifies life, especially for a busy family.

A Practical Way to Think About It
If your arsenic level is a minor issue, a POU filter is like hiring a security guard for just the front door. But if arsenic is a major threat, a POE system is like installing a full security system around your entire property.

This isn't just a problem for a few isolated wells; it's a massive global issue. The World Health Organization estimates that 140 million people across 70 countries are drinking water with unsafe arsenic levels. Many rely on private wells that go untested, making home filtration the critical last line of defense. You can learn more about the scale of the problem in this report on global arsenic contamination.

Ultimately, let your lab report be your guide. For low-to-moderate arsenic, a POU system is an effective way to protect your family's health and your wallet. But for higher concentrations or a cocktail of water quality issues, investing in a whole-house system provides the bulletproof protection your home deserves.

Keeping Your Filter in Fighting Shape: Maintenance & Testing

You’ve installed a high-quality arsenic removal system. That’s a massive step toward safer water, but the job isn’t finished. Think of your filter like a car—it needs regular tune-ups to keep running at peak performance. Consistent maintenance isn't just a good idea; it's the only way to guarantee your system continues to protect your family.

Skipping upkeep is a dangerous gamble. Over time, filter media gets saturated, membranes clog, and parts wear out. It's a huge mistake to just assume the system is working because water is still flowing from the tap, especially when you're dealing with an invisible threat like arsenic.

The Hidden Danger of "Media Breakthrough"

One of the biggest risks with adsorptive media and anion exchange systems is something called media breakthrough. This happens when the filter media becomes so loaded with arsenic that it simply can’t grab any more.

Once that media hits its limit, any new arsenic flowing in passes right through the tank, completely untreated, and straight into your pipes. You won't notice a thing—no change in taste, color, or smell. The only way to know for sure that you're still protected is to stick to a proactive maintenance and testing schedule.

The Hard Truth: A filter that has hit media breakthrough is no better than having no filter at all. This is why following a maintenance plan and re-testing your water are non-negotiable for long-term safety.

Your Maintenance and Testing Game Plan

Your system's user manual is your new best friend; it will lay out the specific timelines recommended by the manufacturer. But to give you a clearer picture of what to expect, here’s a general rundown for the most common systems.

  • Reverse Osmosis (POU) Systems:

    • Sediment & Carbon Pre-filters: Plan on changing these every 6 to 12 months. Their job is to protect the delicate RO membrane from gunk like sediment and chlorine.
    • RO Membrane: This is the heart of the system. It typically needs replacing every 2 to 3 years, depending on your water quality.
    • Carbon Post-filter: This "polishing" filter keeps your water tasting fresh and should be swapped out once a year.
  • Adsorptive Media (POE) Systems:

    • Media Replacement: The specialized arsenic-grabbing media is the main consumable. Expect to replace it every 3 to 5 years, depending on your water usage and arsenic levels.
    • Backwashing: Most of these systems have an automatic backwash cycle that cleans the media. You just need to check that the control valve is programmed correctly and doing its job.

When handling old filter media, remember it's concentrated with arsenic. Proper disposal is crucial, so it's wise to understand the basics of effective hazmat waste management strategies.

A clear schedule is the best way to stay on top of these tasks.

Sample Maintenance Schedule for Arsenic Filters

System Type Task Frequency Estimated Annual Cost
Reverse Osmosis (POU) Replace Sediment/Carbon Pre-filters Every 6-12 months $30 – $75
Replace RO Membrane Every 2-3 years $25 – $50 (prorated)
Replace Carbon Post-filter Annually $15 – $30
Adsorptive Media (POE) Replace Media Bed Every 3-5 years $150 – $400 (prorated)
Inspect Control Valve & Seals Annually $0 (DIY) – $150 (Pro)
Anion Exchange (POE) Replenish Salt/Brine Tank Monthly $50 – $100
Replace Resin Every 5-10 years $100 – $250 (prorated)

This table gives you a ballpark idea, but always follow the manufacturer's guide for your specific model to ensure you're keeping things in top shape.

The Only Way to Be Sure: Re-Test

So, how do you really know if your filter is still working? You have to test your water again. It's as simple as that. Even with a perfect maintenance routine, your well's water chemistry can shift over time, and that could impact your filter’s performance.

I always recommend this simple plan: test your treated water at least once a year. This "post-filter" test is the ultimate report card for your system. It’s the only way to confirm that your arsenic levels are staying safely below the 10 µg/L standard and gives you concrete proof that your investment is still paying off with safe, clean water for your family.

Common Questions About Arsenic in Well Water

Even with a solid plan, it’s natural for questions to pop up. When you’re dealing with something as critical as your family’s water safety, you need clear, straightforward answers.

Let's tackle some of the most common things homeowners ask about getting arsenic out of their well water.

Is It Safe to Shower in Water with Arsenic?

This is a great question and one we get all the time. For the most part, arsenic isn't absorbed well through the skin, so the actual risk from bathing or showering is considered extremely low.

The real danger comes from drinking the water or using it for cooking, which is how arsenic gets into your body. That said, if your levels are exceptionally high or you just want complete peace of mind, a whole-house (Point-of-Entry) system is the way to go. It treats every single drop of water coming into your home.

Can I Just Boil the Water to Remove Arsenic?

Absolutely not. This is a common and very dangerous misconception. Boiling water will not get rid of arsenic.

In fact, it does the exact opposite. As some of the water turns to steam and evaporates, the arsenic gets left behind in the remaining water. This actually increases the concentration of arsenic, making it even more hazardous. The only safe way to deal with arsenic is with a proper filtration system.

How Do I Know if My Arsenic Filter Is Still Working?

You can’t see, taste, or smell arsenic, so the only way to know for sure if your filter is doing its job is to test the water periodically.

We always tell people to test their treated water at least once a year. This is the only way to confirm your system is keeping arsenic below the 10 parts per billion (ppb) EPA limit. Don't just rely on the manufacturer's replacement schedule; your specific water chemistry and how much water you use can wear out a filter faster than you'd think.

What Happens to the Arsenic My Filter Removes?

Where the captured arsenic ends up completely depends on the type of system you have. It's a key difference to understand for maintenance down the road.

  • Reverse Osmosis systems work by flushing the arsenic and other contaminants out with wastewater. This concentrated "brine" just goes down your drain.
  • Adsorptive Media and Anion Exchange systems are different—they trap and hold onto the arsenic inside the filter. Once the media is full, you have to replace the cartridge or the entire tank of media. You'll need to dispose of the old filter according to local rules, so always check with your manufacturer or local waste authority for guidance.

At Water Filter Advisor, we're committed to giving you the clear, unbiased information you need to protect your home's water. Explore our expert guides and reviews to find the perfect solution for your family at https://www.waterfilteradvisor.com.

Your Guide to Choosing the Right Coliform Water Filter for Home

So, you've discovered you might have uninvited guests—bacteria—in your home's water. Your first thought might be to just boil your water, but that's like putting a band-aid on a broken pipe. For a permanent fix, a good coliform water filter is your champion. It’s the ultimate security system for your tap, working 24/7 to ensure every drop is safe, giving you that priceless peace of mind.

The Hidden Dangers in Your Drinking Water

Ever seen a "boil water" alert flash across the local news or gotten a troubling test result back from your well? It’s a jarring moment. Suddenly, the water you and your family use every single day for drinking, cooking, and even brushing your teeth feels like a bit of a gamble. This guide is here to help you take back control and turn your tap water from a source of worry into a source of pure, safe hydration.

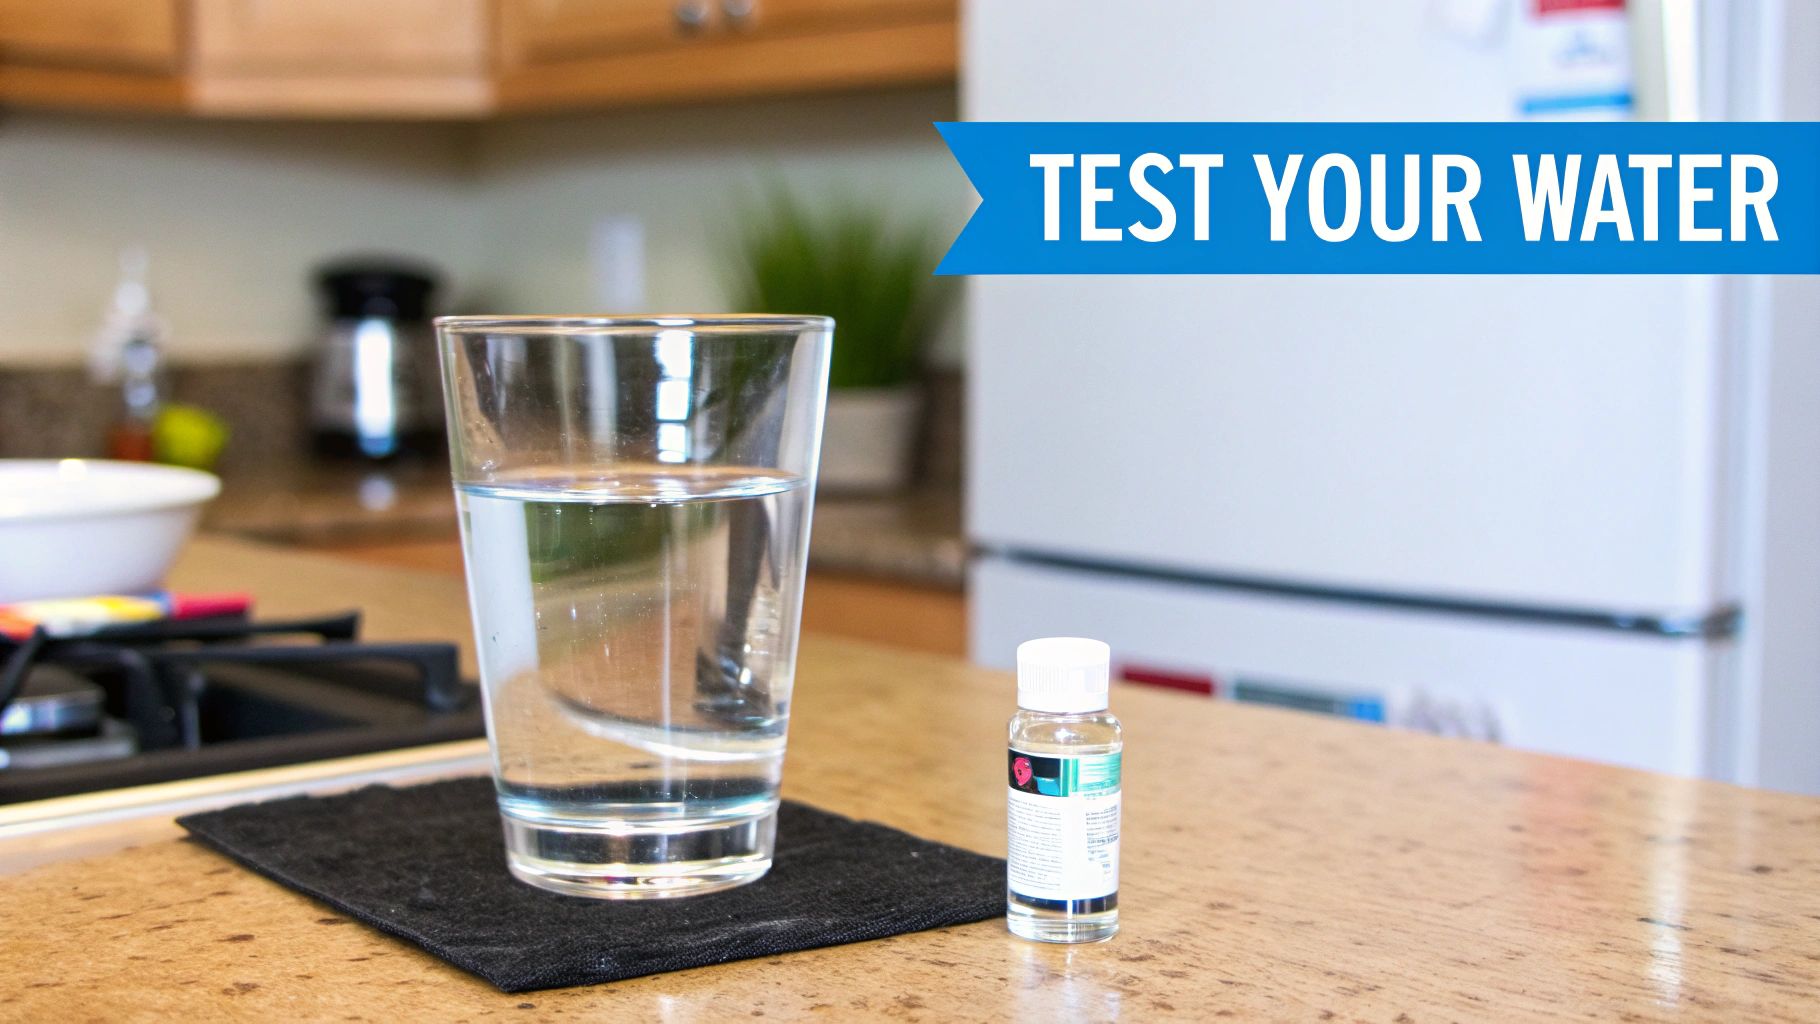
A glass of clear water and a small water testing bottle on a kitchen counter with a 'TEST YOUR WATER' banner.

Why Coliforms Are a Critical Warning Sign

Think of coliform bacteria as the 'canary in the coal mine' for your water supply. Here’s the surprising part: most types of coliforms won't actually make you sick. Their presence, however, signals a breach in your water's defenses—a potential pathway for much nastier pathogens to sneak in. They are an indicator, a bright red flag that something is wrong with your water system.

A positive coliform test means your water source or plumbing has a vulnerability. It’s a clear signal that disease-causing organisms like bacteria, viruses, and protozoa could get into your water.

Ignoring this warning is like leaving your front door unlocked; it leaves your family exposed to contaminants that can lead to nasty gastrointestinal illnesses and other health problems.

Taking Proactive Control of Your Water Safety

Instead of living in reaction mode, waiting for the next contamination scare, installing a high-quality coliform water filter is a permanent, proactive power move. More and more homeowners are making water safety a top priority, which is why the global water filters market is booming. It was valued at over USD 15 billion in 2024, and all that growth is pushing innovation and making top-tier filtration systems more affordable for everyday homeowners. If you're curious, you can explore more about market trends and growth projections to see how this shift in consumer awareness is shaping the industry.

Here's our game plan to get you from worried to wonderfully prepared:

  • Understanding the Problem: We’ll demystify the science and explain what coliforms really are and the risks they signal.
  • Testing Your Water: You'll learn how to play detective and test your water the right way to get results you can trust.
  • Choosing a Solution: We’ll break down the best filtration technologies on the market so you can pick the perfect system for your home with total confidence.

Understanding Coliforms From Warning Signs to Real Threats

Getting a water test result that flags "coliforms present" can be pretty unnerving. What does it even mean? Let's use an analogy: think of it like seeing a puff of smoke on the horizon. This is your first warning, and in the water world, we call this total coliforms.

Total coliforms are a huge family of bacteria found just about everywhere in the environment—in soil, on plants, and in rivers. Most of them are harmless, but finding them in your drinking water is a red flag. It means there might be a crack in your water system's armor, a potential opening for more dangerous microbes to get into your pipes.

From General Warnings to Specific Dangers

Now, what if that puff of smoke on the horizon turns into a dark, billowing cloud? The threat just got more serious. This is what happens when your test finds fecal coliforms. This is a smaller, more specific group of bacteria that comes directly from the gut and waste of humans and animals. Finding them is a much stronger indicator that your water has been contaminated by sewage or animal droppings.

And if you finally see flames licking through that smoke? That’s E. coli (Escherichia coli). As a specific type of fecal coliform, E. coli is the smoking gun—it’s definitive proof of recent fecal contamination and an immediate health risk. The U.S. Environmental Protection Agency (EPA) has a zero-tolerance policy for E. coli in drinking water. A single positive sample is a serious problem that demands immediate action.

The presence of coliforms, especially E. coli, is a direct warning that your water may contain disease-causing pathogens. These can include other bacteria, viruses, and protozoa that travel the same contamination pathways.

This tiered system—from total coliforms to E. coli—is how water quality pros help homeowners figure out the level of risk and how to fight back.

The Real Health Risks Involved

The idea of bacteria in your water is gross, but the health consequences are what truly matter. Drinking water contaminated with these pathogens can lead to a whole range of nasty gastrointestinal illnesses, with symptoms often mistaken for a bad case of food poisoning.

These symptoms can include:

  • Nausea and vomiting
  • Stomach cramps and abdominal pain
  • Diarrhea
  • Headaches and fever

For most healthy adults, these illnesses are temporary, though intensely unpleasant. But for vulnerable people—young children, the elderly, and anyone with a compromised immune system—the stakes are much higher, with risks of severe, even life-threatening complications. This is exactly why a reliable coliform water filter is a non-negotiable shield for any home with confirmed contamination.

This isn't just a niche concern; it's a global driver for better home water purification. Documented public health crises and stricter regulations are creating huge demand for filters that can tackle coliforms. For example, the Asia-Pacific region accounts for over 40% of market revenue due to widespread contamination, while concerns over aging infrastructure in North America and Europe are pushing homeowners toward advanced point-of-use systems. You can explore the full market analysis on Mordor Intelligence to see how these trends connect.

At the end of the day, "coliforms" are more than just a word on a lab report. They’re a critical signal tied directly to the health and safety of your family, and they demand your full attention.

How to Test Your Home Water for Bacteria

You can't see, smell, or taste coliform bacteria, which makes them particularly sneaky. When your family's health is on the line, guessing just won't cut it. Before you even think about buying a water filter to tackle bacteria, you need to know for sure what you're dealing with.

Confirming the problem is your first and most critical mission. You have two main ways to get the answers you need: sending a sample to a professional lab or using a do-it-yourself kit at home. The best choice really boils down to whether you need CSI-level accuracy or just a quick, initial check-up.

The Gold Standard: Professional Lab Testing

For results you can bet the house on, nothing beats sending a water sample to a state-certified laboratory. This is the only way to get a definitive, legally defensible answer and a precise count of any bacteria in your water. That information is crucial for picking the right filtration system to solve the problem for good.

Finding a lab is easier than you might think. Your local health department or the Environmental Protection Agency (EPA) website can point you to a list of certified labs nearby. Once you choose one, they'll send you a sterile collection bottle and a very specific set of instructions. Follow these directions to the letter—it's the key to avoiding a contaminated sample and a false positive result.

Key Steps for a Pure Sample:

  • Use the Right Tap: Pick a simple, cold water faucet without a screen or fancy swivel attachment. A basic utility sink or an outdoor spigot is perfect.
  • Sterilize the Faucet: Wipe down the end of the faucet with an alcohol pad or a bit of diluted bleach to kill any bacteria hanging out on the surface.
  • Run the Water: Let the cold water run for a good 3-5 minutes. This flushes out any stagnant water sitting in your pipes, giving you a fresh sample.
  • Collect Carefully: Open the sterile bottle without touching the inside of the cap or the bottle's rim. Fill it to the indicated line, and seal it up right away.
  • Deliver Promptly: Time is of the essence. Most labs require you to return the sample within 24-48 hours to ensure the results are accurate.

Your lab report will usually give you a "present/absent" result for total coliforms and E. coli. If bacteria are found, many reports will also provide a count in Colony Forming Units per 100 milliliters (CFU/100 mL), which gives you a much clearer idea of the scale of the contamination.

The Convenient Alternative: DIY Home Kits

Want a quick check without the hassle of sending a sample off to a lab? A DIY home testing kit can be a great place to start. You can find these kits easily online or at most hardware stores, and they offer a simple way to screen your water fast.

Most DIY kits are pretty straightforward. You add your water to a small vial that contains a special nutrient powder. If coliform bacteria are present, they'll feast on the nutrients and cause the water to change color—often from clear to a distinct yellow or blue-green—within 24 to 48 hours.

It’s important to know their limits, though. These kits are generally less sensitive than a professional lab test and are more prone to user error, which can skew the results. Think of a DIY kit as a preliminary screening tool, not a final verdict. If you get a positive result, your very next step should be to confirm it with a professional lab test before you invest in a filtration system.

Choosing Your Coliform Removal Technology

Once you’ve confirmed that coliform bacteria have crashed your water party, it’s time to pick your defense. This is where you match the right technology to the problem. When it comes to eliminating microscopic threats like bacteria, not just any filter will do. You need a system built specifically for microbiological purification.

Let's walk through the three heavy hitters that act as your home’s personal security detail against bacteria. Each one has a unique way of neutralizing the threat, and understanding how they work is the key to choosing the best fit for your home.

The Microscopic Bodyguard: UV Disinfection

Picture a microscopic security guard armed with a germ-zapping ray gun. That's essentially what an Ultraviolet (UV) disinfection system is. It doesn't actually remove bacteria from the water. Instead, it blasts them with a powerful dose of UV-C light, which scrambles their DNA, making it impossible for them to reproduce and cause illness.

Water simply flows through a chamber containing a special UV lamp. In a matter of seconds, any living microorganisms are rendered completely harmless. It’s a clean, chemical-free solution that won't change your water's taste or smell, and it’s incredibly effective against bacteria, viruses, and other pathogens.

The only catch? UV light needs a clear line of sight to work its magic. If your water is cloudy or has a lot of sediment, those tiny particles can act like little bodyguards for the bacteria, shielding them from the UV rays. That’s why UV systems are almost always paired with a sediment pre-filter to ensure the light can reach and zap every last microbe.

The Physical Gatekeeper: Ultrafiltration

Think of Ultrafiltration (UF) as a bouncer at an exclusive nightclub with a very strict door policy. A UF system uses a membrane made of hollow fibers, which are covered in microscopic pores—typically around 0.02 microns in size. As water is pushed through, water molecules pass through easily, but bacteria, viruses, and protozoa are simply too big to get through the tiny openings.

They get stopped at the door and flushed away, leaving only pure, clean water to flow to your tap. UF is a fantastic physical barrier that works without chemicals or electricity (beyond what's needed for normal water pressure). It’s a great choice if your primary target is microbiological contaminants.

A major plus is that UF leaves all the healthy, beneficial minerals in your water, so it won't affect the taste. The only real maintenance is that, like any physical filter, the membrane will eventually get clogged with all the contaminants it catches. It will need to be cleaned or replaced periodically to keep it working effectively.

The Ultimate Sieve: Reverse Osmosis

If UF is a bouncer, then Reverse Osmosis (RO) is the Fort Knox of water purification. It uses your home's water pressure to force water through an even more advanced membrane with pores as tiny as 0.0001 microns. This process is so thorough that it removes not only bacteria and viruses but also an extensive list of other contaminants.

Reverse Osmosis is one of the most comprehensive filtration methods available for home use. It effectively reduces dissolved solids, heavy metals like lead and arsenic, nitrates, and even salt, in addition to providing a powerful defense against coliforms.

This all-in-one purification makes RO a top choice for anyone dealing with multiple water quality issues beyond just bacteria. The trade-off? The membrane is so fine that it also strips out healthy minerals, which can make the water taste a bit flat. Many modern RO systems solve this by including a special remineralization filter to add those good minerals back in. RO systems also create some wastewater in the process, which is something to consider if water conservation is a priority.

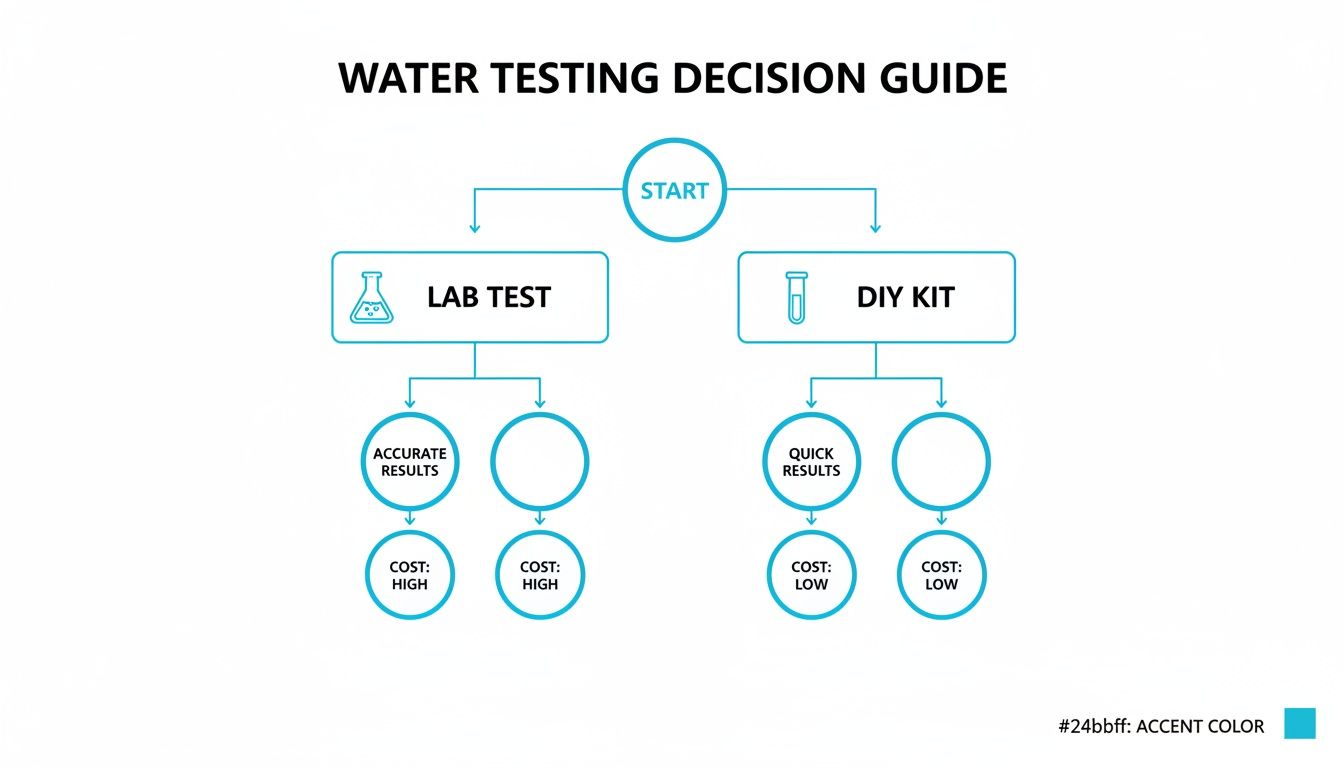
Before picking a system, you need to know what you're up against. This flowchart is a great tool for figuring out the best way to test your water.

A water testing decision guide flowchart compares lab tests (accurate, high cost) with DIY kits (quick, low cost).

As you can see, a quick DIY kit can give you a hint, but a professional lab test gives you the solid answers you need to choose your filtration system with confidence.

Comparing Coliform Removal Technologies for Home Use

With three solid options on the table, how do you decide? The best choice really comes down to your water test results, your budget, and how much maintenance you’re willing to do. This table lays it all out to help you compare. For commercial kitchens, it’s a whole different ballgame; this ultimate guide to water filtration systems for restaurants has specialized advice for those settings.

Technology How It Works Effectiveness on Coliforms Pros Cons Best For
UV Disinfection Zaps bacteria DNA with UV-C light, making them harmless. Excellent No chemicals, low maintenance, doesn't alter water taste. Needs clear water to work (pre-filter often required), uses electricity. Homes with clear water targeting just bacteria & viruses.
Ultrafiltration (UF) A fine physical membrane blocks microbes from passing through. Excellent Physically removes bacteria, keeps healthy minerals, no electricity needed. Can clog over time, doesn't remove dissolved chemicals. Well water or city water where the main concern is microbes.
Reverse Osmosis (RO) Pushes water through an ultra-fine membrane to strip out nearly everything. Excellent Removes the widest range of contaminants, including heavy metals. Produces wastewater, removes healthy minerals (can affect taste). Water with multiple issues beyond just bacteria (e.g., chemicals, lead).

These powerful technologies are a big reason why the market for home water treatment is booming. Point-of-use systems, where you’ll find most of these filters, made up a market worth between USD 31.9–34.5 billion in 2024. That number is expected to jump to over USD 53 billion by 2030, mostly because systems like UV, UF, and RO give people peace of mind against microbial threats like coliforms. This steady growth means we'll keep seeing better and more affordable solutions for keeping our water safe at home.

Installation and Maintenance for Lasting Protection

Picking out a powerful coliform water filter is a huge win for your home's water safety, but the job isn't quite done when you unbox it. A top-tier system is only as good as its upkeep. Sticking to a consistent maintenance schedule ensures your investment remains a rock-solid barrier against bacteria, protecting your family for years.

A man replaces a water filter cartridge under a kitchen sink, with tools on the counter.

Before we get into the nuts and bolts of maintenance, it helps to know where your system is going to live. You've got two main choices—whole-house or under-sink—and that decision shapes both the installation and the long-term care.

Whole-House vs. Under-Sink Systems

A whole-house system, sometimes called a Point-of-Entry (POE) system, gets plumbed in right where your main water line enters the house. It’s like having a security guard at the front door, screening every single drop of water before it heads to your showers, faucets, and appliances. This is the ultimate solution for total, comprehensive protection, especially if you have a private well where contamination could affect your entire home.

Then you have the under-sink system, or Point-of-Use (POU) system. As the name implies, it’s installed right where you use the water, usually under the kitchen sink. This gives you highly purified water for drinking and cooking from a dedicated faucet. It's often a more budget-friendly and less invasive setup, perfect for homeowners or renters who are mainly focused on ensuring their drinking water is perfectly safe.

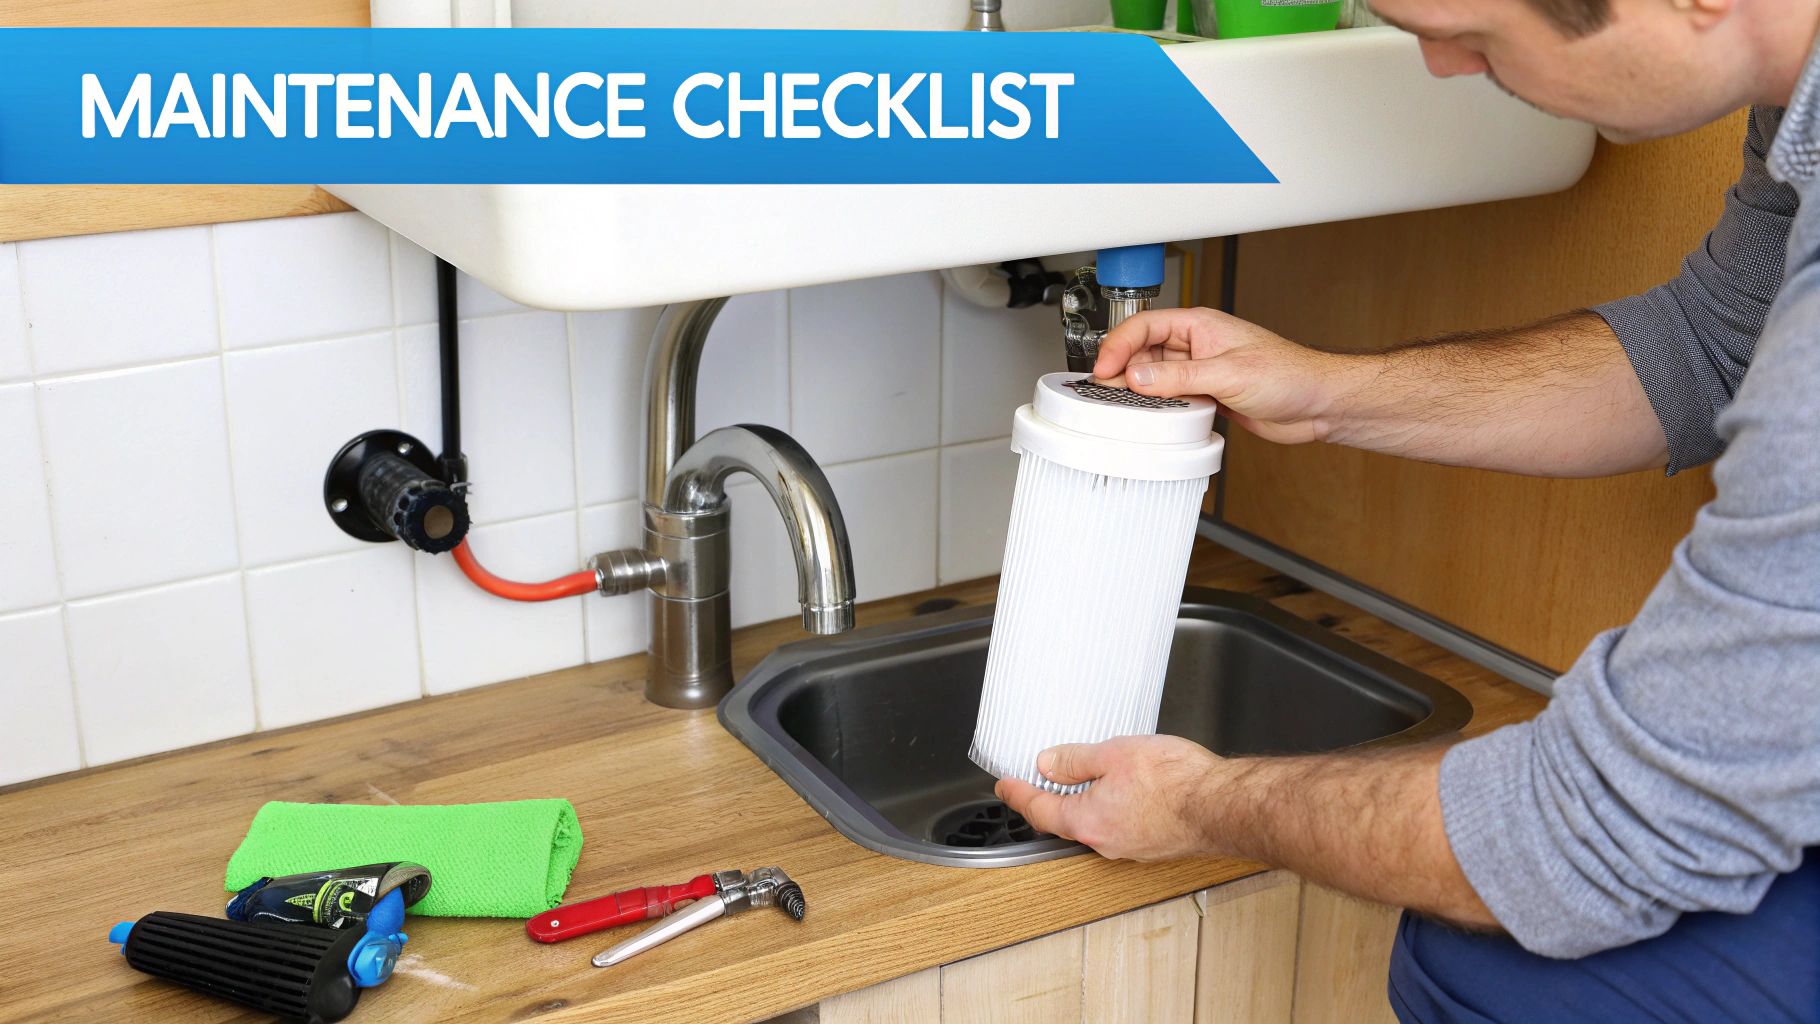
Your Essential Maintenance Checklist

Once your system is up and running, a simple maintenance routine is all it takes to keep it performing at its best. Skipping these steps is like buying a state-of-the-art security system and then leaving the front door unlocked—it defeats the purpose. Think of your filter’s manual as your playbook; follow the manufacturer's directions to the letter.

Here’s a straightforward checklist to keep everything in prime condition:

  • Change Sediment Pre-Filters: These are your system's first line of defense, catching dirt, sand, and rust. They typically need replacing every 6 to 12 months to prevent clogs and ensure your main filter or UV system can do its job effectively.
  • Replace UV Lamps Annually: A UV bulb loses its germ-killing power over time, even if the light still turns on. Swapping it out once a year is critical to ensuring it’s delivering a knockout punch to any bacteria.
  • Sanitize System Components: Whenever you change a filter or lamp, it's a smart move to clean and sanitize the filter housings or the UV chamber. This prevents any potential bacterial growth within the system itself.
  • Check Seals and Connections: Give your system a quick visual inspection every now and then for any leaks or drips. A tiny leak can lower your water pressure and, worse, create an opening for contaminants to bypass the filter.

Don't forget that your filter is just one part of the equation. Keeping all your water-related equipment clean is crucial for true protection. For instance, following the best practices for cleaning a water dispenser makes sure your purified water stays that way until you're ready to drink it.

Verifying Performance with Periodic Re-Testing

So, how do you know your system is still working perfectly a year or two down the road? Simple: test your water again. It's a step people often forget, but it provides incredible peace of mind.

Periodic re-testing is like a performance review for your water filter. It confirms that your maintenance routine is effective and that your barrier against coliform bacteria remains strong and secure.

If your home is on a private well, getting your water tested for bacteria every year is a wise move. For those on a city supply, re-testing every couple of years or after any major plumbing work is a great habit to get into. This simple check confirms that your coliform water filter is working as advertised, so you know every glass of water is just as safe as it was on day one.

How to Make a Confident and Smart Purchase

With all the different options out there, how can you possibly pick a coliform water filter you can actually trust? The trick is to ignore the marketing hype and focus on what really matters: proof that the system works. That proof comes from certifications from independent, third-party organizations.

Think of a certification as a seal of approval from an unbiased expert. It verifies that the filter performs exactly as the company claims. When you're dealing with something as serious as bacterial contamination, this kind of guarantee isn't just nice to have—it's essential.

Decoding the Most Important Certifications

The gold standard in the water filtration world is NSF/ANSI. This is an independent group that sets public health standards and runs certification programs to help protect our food, water, and consumer products. For coliform, there are two certifications you really need to know about.

  • NSF/ANSI 55 (Class A): This is the one you absolutely must look for on any UV disinfection system. Class A certification confirms the system delivers a strong enough dose of UV light to kill or inactivate nasty microorganisms like bacteria, viruses, and cysts. It’s your guarantee of microbiological safety.

  • NSF/ANSI 53: While this standard isn't exclusively for bacteria, it certifies that a filter can reduce specific health-related contaminants, which can include cysts like Giardia. If you’re leaning toward a physical filter like an ultrafiltration or reverse osmosis system, keep an eye out for this one.

A product that is "NSF Certified" has gone through a tough series of tests. These checks make sure it meets strict standards for performance, material safety, and structural integrity. It means you can be confident the system will do its job when it counts.

Critical Questions to Ask Before You Buy

Once you’ve got a shortlist of certified products, it's time to dig into the details. Asking the right questions now will save you from headaches and buyer's remorse later. For more helpful tips on water treatment, you can also check out our general water filter advice section.

Your Pre-Purchase Checklist:

  1. What is the system’s flow rate? You need to make sure the Gallons Per Minute (GPM) rating can handle your family's needs, especially during peak times like morning showers. Otherwise, you'll notice a frustrating drop in water pressure.
  2. What are the annual maintenance costs? Don't just look at the upfront price. Add up the cost of replacement UV lamps, filter cartridges, and any other parts you'll need to buy each year to get the true cost of ownership.
  3. What does the warranty cover? A good, solid warranty is a great sign that the company stands behind its product. Find out exactly which parts are covered and for how long.

Frequently Asked Questions About Coliform Filters

Navigating the world of water filtration can bring up a lot of questions, especially when you're dealing with something as serious as bacteria. We've put together some straight answers to the most common things homeowners ask when choosing and using a coliform water filter so you can feel confident you're making the right call for your home.

Will a Standard Brita Pitcher Filter Remove Coliform Bacteria?

This is a big one, and the answer is a simple, firm no. Your standard pitcher filters, like a Brita or a Pur, use activated carbon. Their main job is to improve your water's taste and smell, primarily by removing things like chlorine.

They simply aren't designed to stop microscopic organisms like bacteria. For true microbial safety, you absolutely need a system that is specifically certified for microbiological purification. That means a technology like UV disinfection, ultrafiltration, or reverse osmosis. Think of pitcher filters as a quick flavor fix, not a health shield.

Is City Water Safe from Coliform Contamination?

For the most part, yes. Municipal water treatment plants are under strict regulations and do an excellent job of disinfecting water before it ever leaves the facility. The catch? It's a long journey from that plant to your kitchen sink, and things can go wrong along the way.

What could happen?

  • Aging Infrastructure: Old city water mains can develop cracks or leaks, creating a perfect entry point for contaminants to get into the "clean" water supply.
  • Water Main Breaks: When a main breaks, the sudden pressure drop can actually suck untreated groundwater and bacteria directly into the pipes.
  • Local Plumbing Issues: Sometimes the problem isn't with the city's pipes, but with the plumbing inside your own home.

While you can generally trust your city's water, a home filtration system acts as that final, critical line of defense. It ensures that anything that might have snuck in after treatment gets eliminated before it ever reaches your glass.

How Often Should I Retest My Water After Installing a Filter?

Installing a filter is a huge step, but you need to verify it's actually doing its job. It's a best practice to test your water again shortly after your new system is up and running. This first re-test simply confirms that the installation was successful and the system is working as expected.

After that, how often you test really depends on your water source. If you have a private well, you should plan on testing for bacteria annually. Well water quality can change with the seasons, so it's smart to stay on top of it.

If you're on a municipal supply, re-testing every 2-3 years is a good rule of thumb. You should also get a test done anytime you notice a sudden change in your water's taste, smell, or appearance. It's a simple habit that ensures your system is still working correctly and your family is protected.


Here at Water Filter Advisor, our mission is to give you the clear, straightforward information you need to choose what's best for your family’s health. Check out our in-depth guides and reviews to find the perfect setup for safe, great-tasting water in your home.

Find Your Ideal Water Filter on WaterFilterAdvisor.com

Removing Sulfur From Well Water: Your Guide to Ditching That Rotten Egg Smell

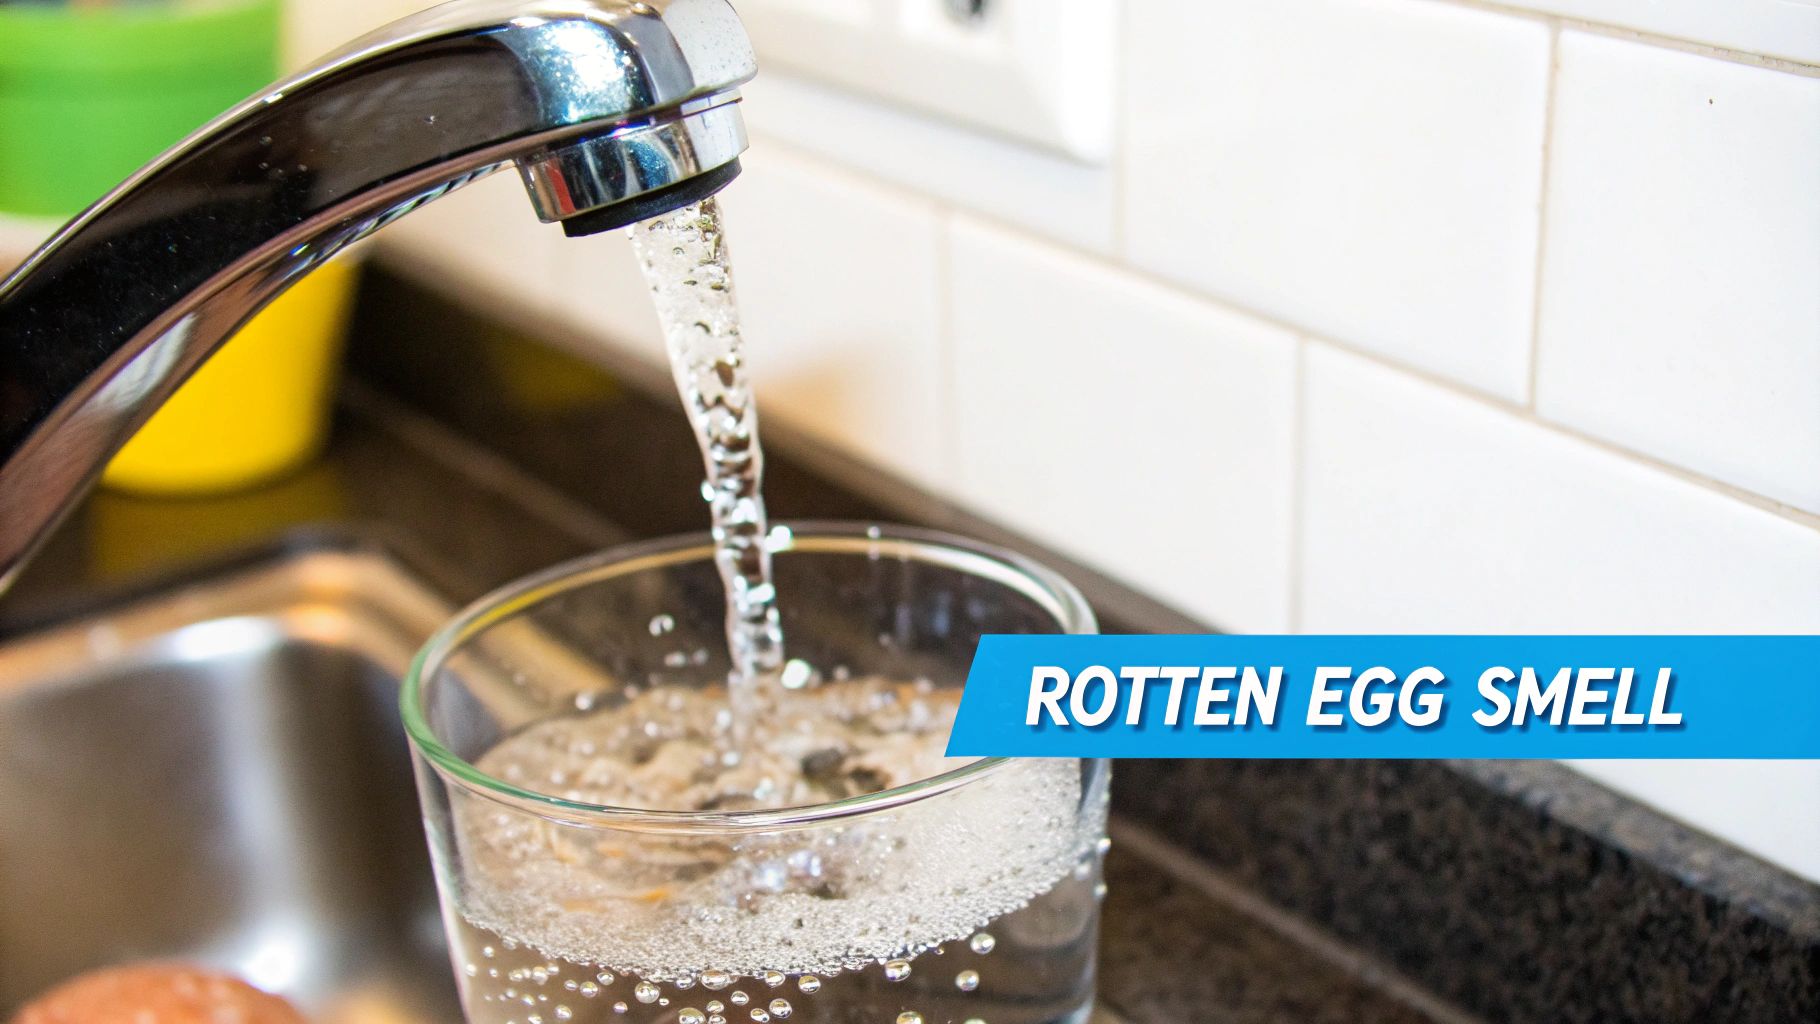
Ah, the rotten egg smell. It’s the unmistakable, nose-wrinkling sign that your well water has a sulfur problem. But here's the good news: removing sulfur from well water is a totally winnable battle with the right filtration game plan. The culprit is almost always hydrogen sulfide gas, and it doesn't just stink—it can wage a corrosive war on your plumbing and fixtures over time. Figuring out where this smelly villain is hiding is the first and most important step to kicking it out for good.

Why Your Well Water Smells Like a Science Experiment Gone Wrong

Chrome faucet filling glass with water that has rotten egg sulfur smell odor

If you've ever turned on a faucet only to be blasted by that nasty rotten egg odor, you’ve just been formally introduced to hydrogen sulfide (H₂S). It's the number one reason homeowners start a frantic Google search for home water filtration systems. So, where does this stuff come from? Is your well sitting on a portal to another dimension? Not quite. The problem can be geological or biological, and sometimes it's hiding right inside your own house.

Most often, sulfur in well water is just nature doing its thing. Sulfates are naturally found in rocks and soil. As groundwater journeys through these mineral deposits, it dissolves them and brings them straight into your well. The hydrogen sulfide gas that produces the smell is incredibly potent—your nose can detect it at concentrations as low as 1 ppm (part per million). Even tiny amounts make water corrosive enough to tarnish your copper pipes and silverware. You can dig deeper into sulfur's effects by checking out the EPA's supply chain profile.

The Two Main Suspects in the Sulfur Caper

Nailing down the exact cause is the key to choosing the right weapon for the fight. In my experience, it almost always comes down to one of two things.

  • Geological Presence: For many folks, sulfates and hydrogen sulfide are just part of the local geology. If you live in an area rich with shale, sandstone, or gypsum, your water is basically picking up these sulfur compounds on its way to your well. It’s not a flaw; it’s just a feature of the neighborhood.
  • Bacterial Shenanigans: This one is a real party crasher. Certain types of bacteria, called sulfur-reducing bacteria, absolutely love low-oxygen hangouts like wells, plumbing lines, and especially hot water heaters. They throw a feast on the naturally occurring sulfates in your water and, as a thank you, produce stinky hydrogen sulfide gas as a byproduct.

While these bacteria aren't harmful to drink, they are the tiny factories turning your water into a foul-smelling brew.

Key Takeaway: That rotten egg smell is more than just an annoyance. It's a clear signal of hydrogen sulfide, a gas that can lead to serious corrosion in your pipes and fixtures, causing expensive damage if you ignore it.

Plot Twist: Your Water Heater Might Be the Real Problem

Before you start pricing out a filtration system that could rival a small car in cost, do a little detective work. Is the smell only coming from the hot water taps? If so, the villain is almost certainly your water heater.

Most water heaters have a component inside called a magnesium anode rod. Its noble job is to sacrifice itself to prevent the steel tank from rusting out. The catch? This rod can have a chemical reaction with sulfates in the water, creating a non-stop supply of hydrogen sulfide gas. The warm, oxygen-starved tank is the perfect five-star resort for this reaction.

If this sounds like your situation, you might be in luck. Often, simply swapping that magnesium rod for an aluminum one can stop the reaction in its tracks and solve the smell completely, no expensive filter needed.

Pinpointing Your Sulfur Problem Like a Pro

Before you spend a single dime on a home water filtration system to get rid of sulfur, you’ve got to play detective. The whole point is to figure out exactly what kind of sulfur issue you have and where it's coming from. Getting this wrong is like buying shoes without knowing your size—it’s just a recipe for an expensive and frustrating fix that doesn't work.

The first, and by far the easiest, diagnostic you can run is the hot versus cold water showdown. This simple little experiment can literally save you hundreds, if not thousands, of dollars. Just run a cold water tap for a few minutes and give it a good sniff. Then, do the same thing with a hot water tap.

Does that rotten egg funk only show up with the hot water? If so, you can breathe a huge sigh of relief. The problem is almost certainly your water heater, not your well. Like we mentioned earlier, the magnesium anode rod inside the tank is probably reacting with naturally occurring sulfates, which creates hydrogen sulfide gas. The fix might be as simple as swapping it out for an aluminum or powered anode rod.

When Your Nose Isn't Enough: Calling in the Experts

If both your hot and cold water carry that distinct sulfur perfume, the issue is deeper in your plumbing or the well itself. This is your cue to move past the sniff test and get some hard data. While you can find DIY water testing kits at the hardware store, for a sulfur problem, a professional lab analysis is a much smarter investment.

Why go pro? A lab report gives you precise, actionable numbers that a home kit just can't match. It’s the difference between guessing and knowing.

You wouldn’t accept a medical diagnosis without bloodwork, so don’t choose a water treatment system without a proper water analysis. The details in that report are the blueprint for your solution.

A comprehensive lab test provides the critical information needed to pick the right home filtration system. It takes the conversation from "my water stinks" to "I have 5 ppm of hydrogen sulfide and a pH of 6.8." See the difference?

Decoding Your Water Test Report: A Cheat Sheet

When you get that professional water analysis back, it might look a little intimidating with all its numbers and chemical names. Don't sweat it. You only need to zero in on a few key metrics to really understand your sulfur problem and find the right way to get it out of your well water.

Here’s what to look for and what it means for your home:

  • Hydrogen Sulfide (H₂S) Concentration: This is the big one, measured in parts per million (ppm). This number is the single most important factor in deciding which type of home water filtration system you need. A level below 2 ppm might be handled by a simple carbon filter, but if you're seeing numbers above 6-7 ppm, you’ll need a more heavy-duty solution like chemical injection.
  • Iron and Manganese Levels: These minerals are sulfur's partners in crime. They often show up together and can sabotage certain sulfur removal methods. High iron, for example, can completely foul up carbon filters and some oxidation media, which means you’ll need a system designed to handle both.
  • pH Level: This tells you how acidic or alkaline your water is. Your water's pH can dramatically affect how well certain treatments work. Chlorination, for instance, is far more effective at a lower pH, while some other systems work best in a neutral to alkaline environment.
  • Presence of Bacteria: The test should also check for sulfur-reducing or iron-related bacteria. If these nasty bugs are the root cause, you need a system that also disinfects the water—like a chlorine injection system or an ozonator—not just one that filters it.

Armed with this data, you can have a real, informed conversation with a water treatment specialist or confidently compare systems yourself. You’ll know exactly what you’re up against, ensuring the home filtration solution you pick is perfectly matched to your well’s unique water chemistry.

Matching the Right Filtration Fix to Your Sulfur Issue

Alright, you've got your water test results. Now for the fun part: playing matchmaker between the problem and the solution. When it comes to getting sulfur out of well water, there's no magic bullet. The right home water filtration fix is always dictated by the data you're holding in your hand.

Think of it like this: you wouldn't take a painkiller for a broken arm. You need the correct treatment for your specific ailment, and just guessing is a surefire way to waste money on something that won't work.

The whole game is about matching the filtration technology to the concentration of hydrogen sulfide (H₂S) in your water. A system that’s perfect for a faint whiff of sulfur will get completely steamrolled by a heavy-duty problem. On the flip side, installing an industrial-strength system for a minor odor is just burning cash. Let's walk through the options so you can pick a system that’s got the muscle you need without the hefty price tag.

First, this quick decision tree can help you figure out if the problem is just your water heater or if you're dealing with a whole-house issue.

As you can see, the first diagnostic step is critical. If that rotten egg smell only shows up when you run the hot water, the problem is almost certainly your water heater. If it's in both hot and cold, you're looking at a whole-house water filtration system.

Solutions for Low Sulfur Levels (Up to 2 ppm)

If your test came back showing hydrogen sulfide levels below 2 parts per million (ppm), you're in luck. This is more of a nuisance level that can usually be handled with simpler, more affordable gear. These home filtration methods are fantastic for getting rid of that annoying background smell without a huge investment.

A go-to solution in this range is a good old activated carbon filter. These work through adsorption—the carbon media essentially acts like a sponge, grabbing the hydrogen sulfide gas and yanking the odor out of your water. They're pretty easy to install and maintain, usually just needing a cartridge change every few months.

One thing to keep in mind, though: if you also have a lot of iron in your water (a common partner-in-crime with sulfur), it can exhaust the carbon filter much faster. They work best when the water is otherwise relatively clean.

Tackling Moderate Sulfur Levels (2 to 6 ppm)

Once your H₂S concentration starts creeping into that 2 to 6 ppm range, a simple carbon filter isn't going to have enough firepower. At this point, you need a more powerful system that actively removes the sulfur instead of just trapping it. This is where oxidation filters really start to shine.

These home water filtration systems, which you'll often see called air injection or iron filters, work by pulling an oxidizer (usually just plain air) into the water. This process instantly changes the dissolved hydrogen sulfide gas into tiny solid particles of sulfur. From there, these particles get trapped in a bed of special filter media.

Some of the most popular media types include:

  • Manganese Greensand: This is a classic, tried-and-true media coated with manganese dioxide. It does a great job but needs to be regenerated every so often with potassium permanganate, a strong purple oxidant that you need to handle carefully.
  • Katalox Light or Filox: These are more modern, high-performance media. They can handle higher flow rates and knock out sulfur, iron, and manganese all at once, often without needing any chemical regenerants.

These systems are super effective and pretty self-sufficient. They automatically backwash every few days, flushing all the trapped sulfur particles down the drain to clean themselves out.

Heavy-Duty Systems for High Sulfur Levels (Above 6 ppm)

If your test results are showing H₂S levels above 6 or 7 ppm, you've officially entered heavy-duty territory. At this concentration, even a good oxidation filter can get overwhelmed. You need a more aggressive approach to guarantee that fresh, odor-free water you're after. The undisputed champion here is a chemical injection system.

This setup uses a small feed pump to inject a very precise amount of an oxidizing agent right into your water line. The two most common choices for homes are chlorine and hydrogen peroxide.

The word "chemical" can sound a little scary, I get it. But when these systems are sized and maintained correctly, they are an incredibly safe, reliable, and powerful way to completely wipe out even the most severe sulfur problems.

The injected chemical oxidizes the H₂S, and a large carbon filter downstream removes the resulting particles. Chlorine is a fantastic option because it also kills any sulfur-reducing bacteria that might be causing the problem to begin with. Hydrogen peroxide is a strong, clean alternative that breaks down into just oxygen and water, so it leaves no residue behind.

While your main concern is the well water, sometimes other stubborn smells can hang around the house. If that's the case, you might look into comprehensive odor removal services to make sure your whole home feels fresh.

Comparing Your Home Water Filtration Options

To help you see how these solutions stack up, I've put together a quick comparison table. Choosing the right system means balancing the upfront cost with long-term maintenance and overall effectiveness. Each one has its own strengths and weaknesses.

Sulfur Treatment Options by Concentration Level

Treatment Method Best For (H₂S Level) Pros Cons
Activated Carbon Filter Low (0-2 ppm) Inexpensive, easy to install, improves taste Short filter life with iron, doesn't kill bacteria
Oxidation Filter Moderate (2-6 ppm) Chemical-free, low maintenance, very effective Higher initial cost, requires backwashing
Chemical Injection High (6+ ppm) Kills bacteria, handles very high H₂S levels Requires ongoing chemical purchase, more complex

At the end of the day, picking the right equipment for removing sulfur from well water is a decision driven by data, not guesswork. Your water test results are your roadmap, and understanding these home water filtration options gives you the tools to follow it. By matching the technology to your specific sulfur level, you'll land on a solution that gets rid of that rotten egg smell for good—without breaking the bank.

How to Choose and Size Your Home Water Filtration System

https://www.youtube.com/embed/ak5o479A–o

You’ve done the hard part—you’ve tested your water and you know which filtration technology you need. Now, it's time to match that technology to the right system for your home. This is where the rubber meets the road, and getting it right is the difference between fresh, clean water and dealing with a system that just can't keep up.

This is about more than just picking a brand. You need to make sure the system can handle your family's water demand without dropping the ball. Trust me, sizing a system incorrectly leads to nothing but headaches: weak water pressure, that rotten egg smell creeping back in, and a much shorter lifespan for your equipment.

Calculating Your Home's Peak Flow Rate

The very first number you need to nail down is your home's peak flow rate, measured in gallons per minute (GPM). This is a snapshot of the maximum amount of water your household might use at any given moment. A system that can’t meet this demand will leave you with a dribble in the shower the second someone flushes a toilet or starts the dishwasher.

Here’s a simple way to get a solid GPM estimate using a fixture count:

  • Standard Faucets (Kitchen, Bath): 1.5 GPM each
  • Showerheads: 2.5 GPM each
  • Dishwasher: 2 GPM
  • Washing Machine: 2.5 GPM

Just add up the GPM for all the fixtures you could see running at the same time. For a typical family of four, that might be a shower (2.5 GPM), the dishwasher (2 GPM), and a kitchen sink (1.5 GPM). That adds up to a peak demand of 6 GPM. Your new home filtration system must have a service flow rate that meets or, even better, exceeds this number.

Considering Other Water Quality Issues

Here's something I've seen trip up countless homeowners: sulfur rarely shows up to the party alone. Other common well water issues like iron, manganese, and hardness can absolutely wreck the performance of your sulfur removal system if you ignore them.

For example, high iron levels will quickly foul up the media in an oxidation filter or clog an activated carbon filter solid, making it totally useless against sulfur. Hard water is just as bad, creating a rock-like scale buildup inside your system that chokes its efficiency and can lead to expensive mechanical failures.

Pro Tip: Always look for a system designed to handle the full picture of your water quality. It’s almost always more effective and cheaper in the long run to install a single system that treats both iron and sulfur, rather than trying to bolt on a second unit later.

Understanding Key System Specifications

When you start comparing models, that technical spec sheet is your best friend. Don't let your eyes glaze over—the details on that page tell you everything you need to know about the system's real-world performance and long-term costs.

Pay close attention to these critical specs:

  • Backwash Rate and Frequency: This tells you how much water the system uses to clean itself and how often it needs to do it. An efficient backwash cycle is absolutely crucial for keeping the filter media healthy and effective.
  • Media Lifespan: How long will the filter media last before you have to shell out for a replacement? A system with media that lasts 5-10 years offers far better long-term value than one that needs new media every year or two.
  • Warranty Details: A strong warranty is a good sign that the manufacturer stands behind their product. Look for comprehensive coverage on the tank, the control valve, and the electronics.

If you want to dig deeper into choosing a system, our guide on general water filtration advice is a great place to broaden your knowledge.

The good news is that modern systems are incredibly effective. Most quality units on the market today boast over 90% removal efficiency for sulfur. These advancements in sulfur removal technology have been a game-changer for well water treatment. By carefully sizing your system and paying attention to these key specs, you can make a smart investment that delivers fresh, odor-free water for years to come.

Installation and Long-Term Maintenance Insights

Plumber performing maintenance on residential water heater system with tools and equipment

Alright, so you've picked out your new home water filtration system. It's a beast of a tool in the fight for fresh, odor-free water, but let’s be clear: it's not a "set it and forget it" appliance. The real difference between a quick fix and a lasting solution comes down to proper installation and consistent maintenance. Nail these two things, and you’ll get every penny's worth out of your investment for years to come.

Whether you're a seasoned DIYer ready to get your hands dirty or you're calling in a pro, a solid setup starts with a little planning. Think about where this thing is going to live. Ideally, you want to install it after your pressure tank but before your water heater. This protects both appliances from whatever you're filtering out. It also needs a nearby power source for the control valve and, critically, a drain for its backwashing cycles.

Make sure the spot you pick is level and won't freeze in the winter. Just as important, leave yourself enough elbow room to get around it for future service. It might be tempting to shove it into a tight corner to save space, but you’ll be kicking yourself the first time you need to check a fitting or swap out the media.

Your Essential Maintenance Checklist

Once your system is humming along, a simple, consistent maintenance routine is your best friend. This is what keeps that rotten egg smell from making a comeback. We're not talking about spending every weekend tinkering with your plumbing—just a few scheduled checks to stop big problems before they start.

For most systems, it boils down to a handful of key tasks. Think of it as a quick health checkup for your water.

  • For Chemical Injection Systems (Chlorine/Peroxide): You’re the supply manager here. At least once a month, pop the lid on your chemical solution tank and top it off. While you're there, give the injection pump and tubing a quick once-over for any clogs or leaks.
  • For Oxidation Filters (Air Injection, Greensand): These are pretty self-sufficient, but the media inside won't last forever. Check the manufacturer's guidelines and mark your calendar. You'll likely need to replace the media every 5-10 years.
  • For All Systems: Every few months, just do a quick visual inspection of all the fittings and connections. A tiny drip might not seem like a big deal, but it can waste a surprising amount of water and signal a bigger problem.

Maintenance Mindset: Treat your filtration system like any other major appliance in your home—your furnace, your A/C, your water heater. A little proactive care goes a long way in ensuring it lasts and does its job, protecting both your investment and your water quality.

Spotting Trouble Before It Starts

Even with perfect maintenance, things can still go sideways. The trick is to know the early warning signs so you can jump on a problem before it turns into a costly repair or, worse, a full-blown return of the sulfur stench.

Start by listening. Pay attention to the sounds your system makes. Is the backwash cycle suddenly running way longer than it used to? Do you hear the well pump kicking on and off more often? These little changes are often the first clues that something’s not quite right.

Another huge red flag is a gradual drop in your home's water pressure. This almost always points to a clog somewhere in the system, either from sediment building up or the filter media getting fouled. If you notice the flow from your faucets getting weaker, it’s time to investigate the filtration unit. Catching these things early is the key to keeping your system for removing sulfur from well water running like a top.

Common Questions About Sulfur in Well Water

Once you've zeroed in on the right system for removing sulfur from well water, you might still have a few questions rattling around. It's totally normal. Sorting out those last few details can feel a bit overwhelming, but getting solid answers is key to feeling confident about your new home filtration setup.

Let's dive into the most common questions we hear from homeowners who are just about to cross the finish line on their water treatment project. We'll cover everything from the role of your water softener to what you should expect the moment your new system fires up.

Will a Standard Water Softener Remove the Rotten Egg Smell

This is probably the number one question we get, and the short answer is almost always no. A standard water softener is a specialist; its whole job is to pull out hardness minerals like calcium and magnesium using a process called ion exchange. It's built to stop scale, not fight odors.

Sure, some softeners might seem to knock back very low levels of hydrogen sulfide, but they simply aren't designed for it. Worse, high concentrations of sulfur can actually foul the softener's resin bed over time, making it less effective and shortening its life. To really solve the problem, you need a dedicated piece of equipment like an oxidation filter or a chemical injection system.

Think of it this way: you wouldn't use a hammer to turn a screw. A water softener is the wrong tool for the sulfur job. Relying on it is an ineffective and potentially costly mistake.

Is It Safe to Drink Water That Smells Like Sulfur

For the most part, the hydrogen sulfide gas that causes that rotten egg smell is more of a nuisance than a direct health threat at the levels you'd typically find in a home well. The US Environmental Protection Agency (EPA) actually classifies it as a secondary contaminant, which means it mainly impacts things you can taste and smell.

But, and this is a big but, that smell is a major red flag. Its presence can signal that conditions in your well are perfect for certain types of bacteria to thrive. Plus, high levels of sulfates—a different, related form of sulfur—can have a laxative effect, which is a real concern for infants or even visitors not used to the water. The only way to know for sure what's going on is to get your water professionally tested. While you're at it, you might have other frequently asked plumbing questions about your home's water system in general.

How Long Does It Take for a New Filtration System to Work

You should notice a huge difference almost immediately after your new sulfur filter is installed and flushed out. As soon as the system runs its first cycle, that treated, odor-free water will start making its way into your pipes.

That said, it takes a little time to completely push out all the old, smelly water that's already in your plumbing—especially inside your hot water tank. Give it a few hours, or maybe even a full day, for the rotten egg smell to vanish completely. If the odor is still hanging around after 24 hours, it’s a good time to double-check the system's settings or give your installer a call to see what's up.


At Water Filter Advisor, we provide the practical guidance and research-driven reviews you need to make confident decisions about your home's water quality. Find the perfect solution for your needs at https://www.waterfilteradvisor.com.