Well Water Filter System Diagram: Your Home Guide

You turn on the kitchen tap and the water smells off. The bathtub picks up a rusty ring. White crust forms on fixtures. Maybe the water looks clear one day and dull the next, which is what makes well water so frustrating. The problem isn't just that something's in the water. It's that the fix depends on exactly what that “something” is.

That's where most homeowners get steered wrong by a generic well water filter system diagram. They find one neat picture online, buy the boxes it shows, and install them in that order. Sometimes they get lucky. Often they build a system that fights itself.

A good diagram is less like a universal blueprint and more like a road map drawn around your water test. If your well has sediment and iron, one sequence makes sense. If low pH is driving corrosion, the order may need to change. If odor is the main issue, the layout can shift again. The parts matter, but the order matters just as much.

Your Roadmap to Crystal Clear Well Water

Bad well water has a way of becoming part of the house. You see it in laundry stains, smell it at the tap, and hear about it when guests ask why the water tastes different. Homeowners often start by shopping for a filter, but what they really need first is the right map.
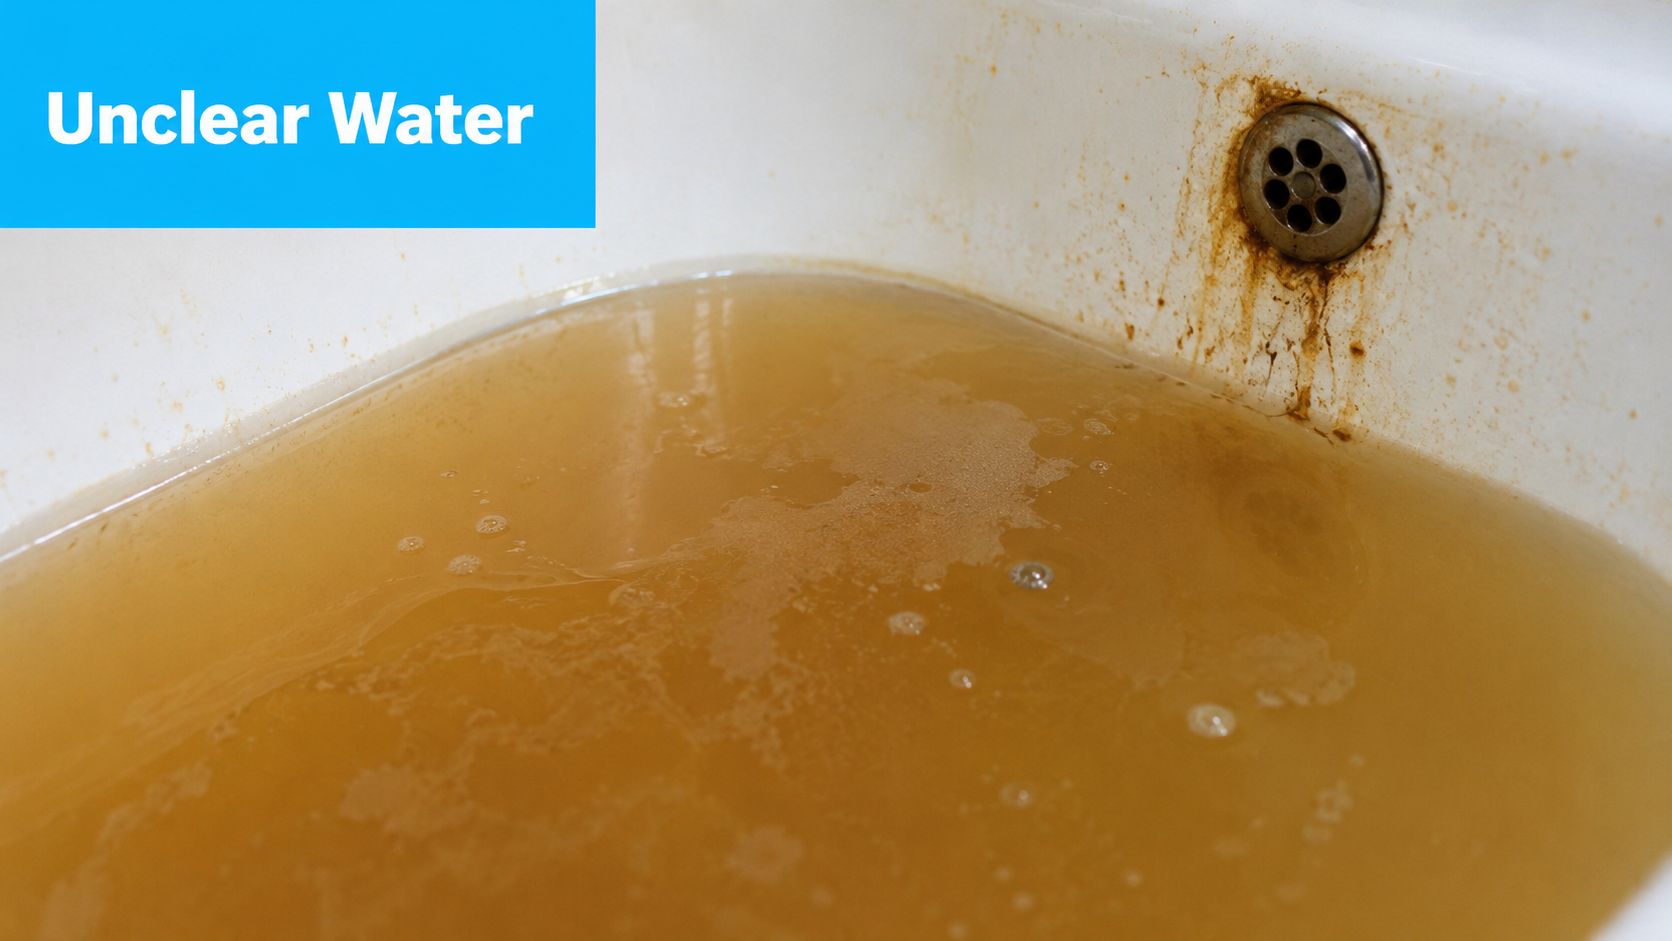
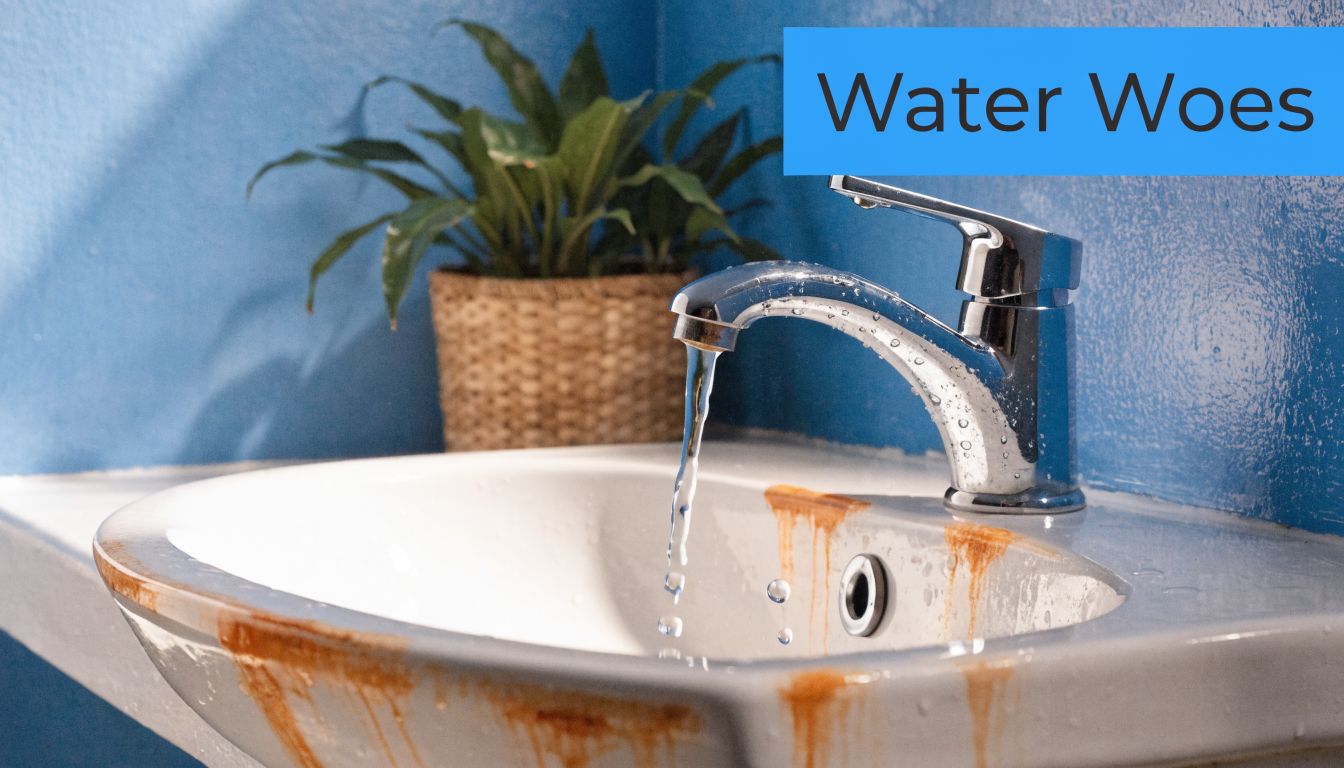
A dirty, stained bathtub filled with murky brown, contaminated water indicating poor plumbing or water quality issues.

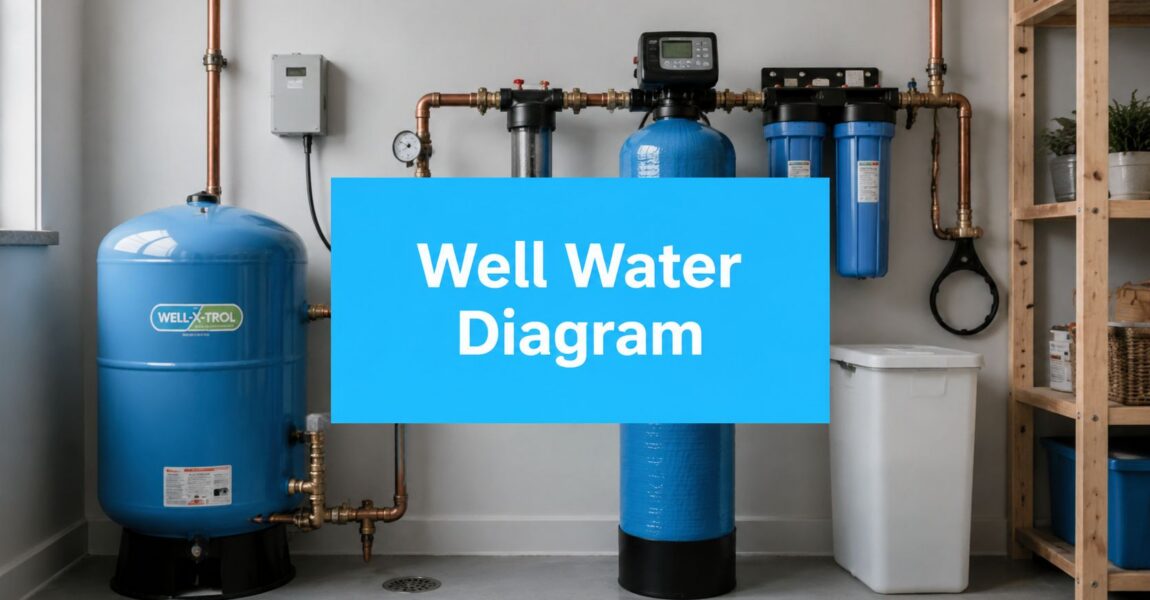
A well water filter system diagram should show the path water takes from the well to the tap, and why each component sits where it does. Consider the analogy of lining up workers on a jobsite. If the wrong worker shows up first, the whole crew slows down. A UV unit can't disinfect cloudy water well. A softener doesn't like being asked to handle heavy iron. A sediment filter placed carelessly can clog fast and starve the rest of the system.

Practical rule: The best diagram isn't the prettiest one online. It's the one that matches your test results and your home's actual plumbing layout.

You may also be chasing plumbing symptoms that overlap with water quality issues. If banging pipes are part of the headache, Platinum Heating & Cooling water hammer tips are worth a look because pressure behavior and treatment equipment often affect each other in real homes.

The goal is simple. You want water that doesn't stain, doesn't smell, doesn't attack plumbing, and doesn't leave you guessing what failed. That starts with understanding the pieces in the system before deciding on the order.

Decoding the Diagram The Cast of Components

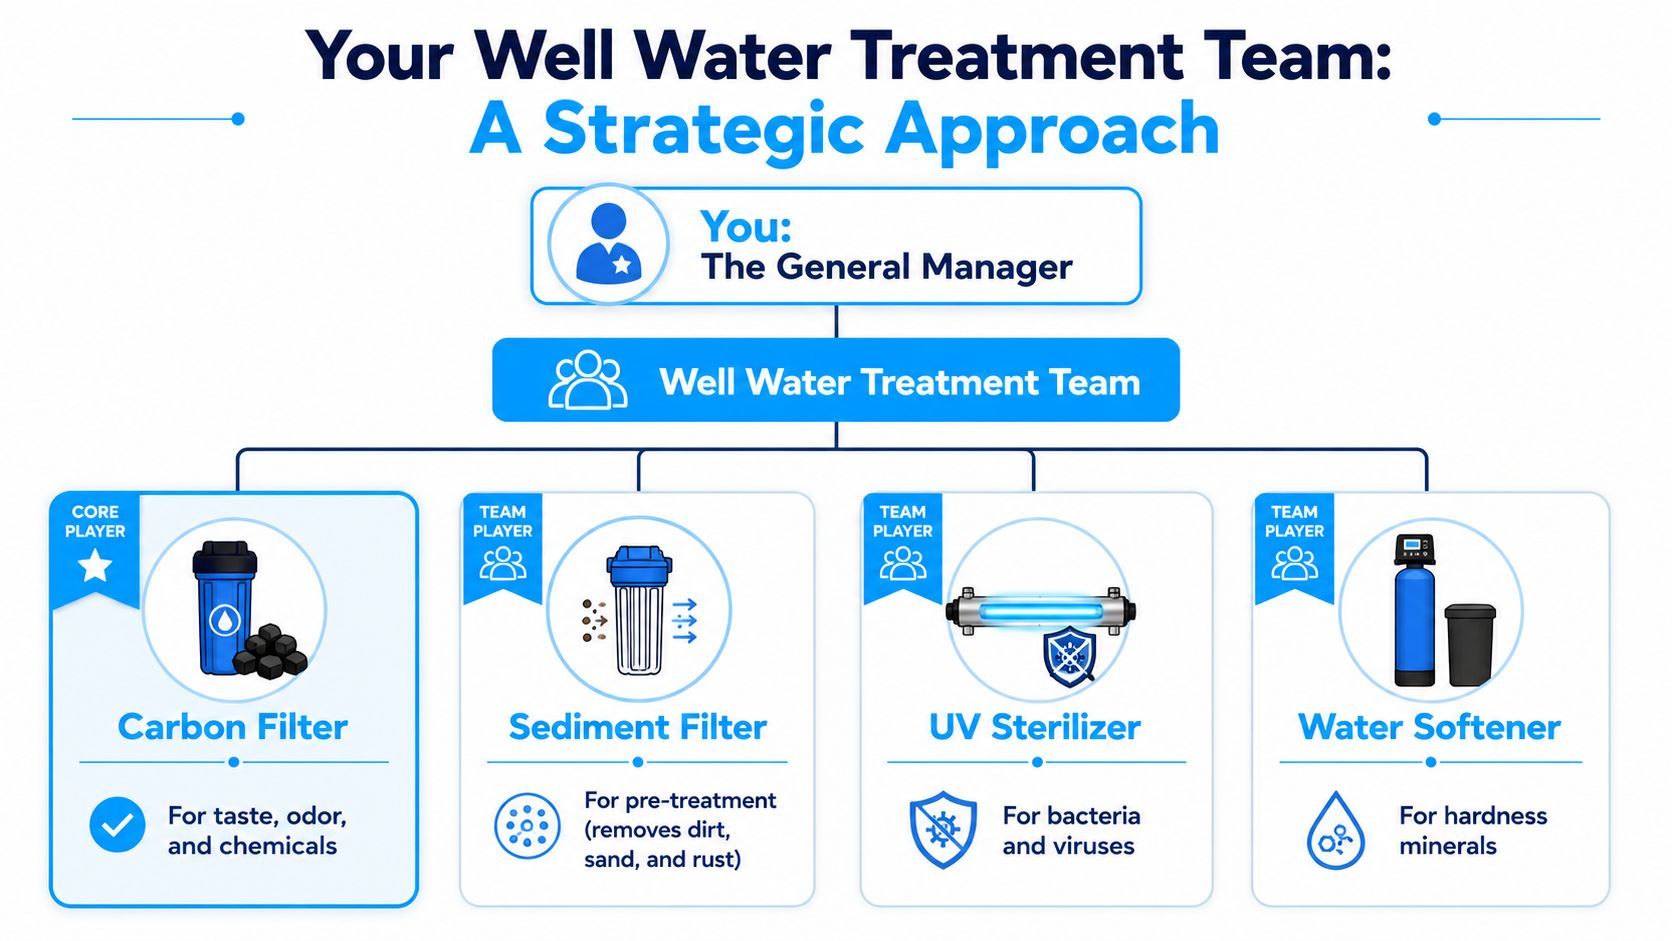
Before a diagram makes sense, the hardware has to make sense. Each treatment stage has a job. Some remove particles. Some change water chemistry. Some polish. Some disinfect. If you ask one component to do another component's work, you get poor performance and a lot more maintenance.
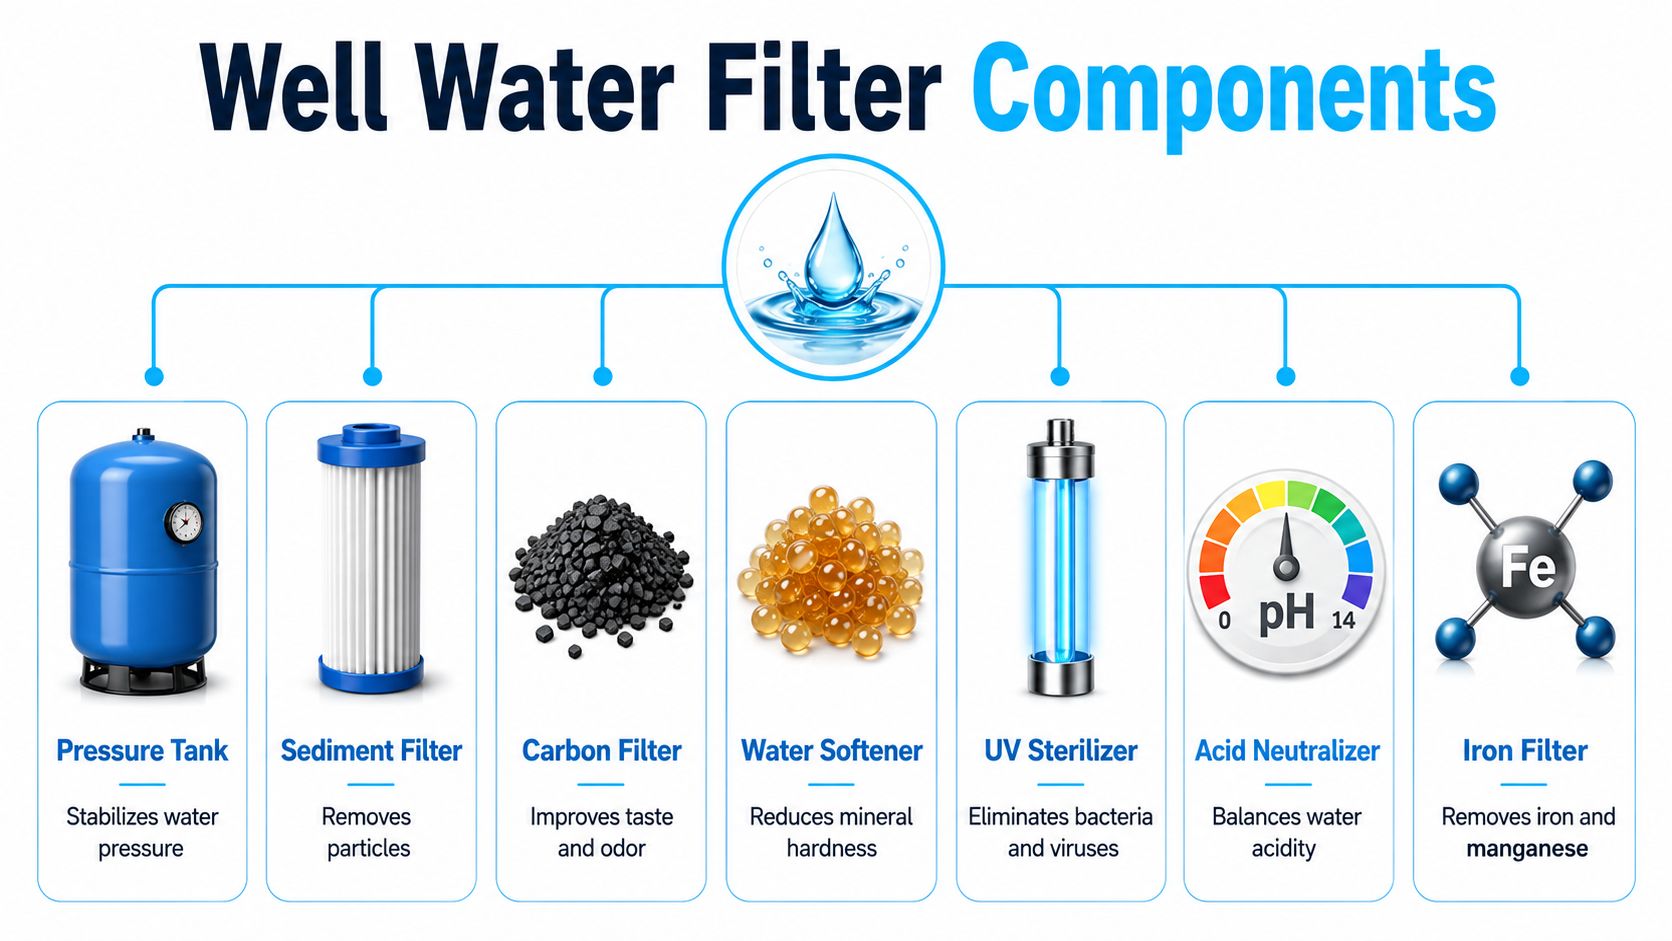
A diagram illustrating the seven essential components of a well water filtration and treatment system.

The front end of the system

The pressure tank is the traffic controller. It stabilizes water delivery and provides the pressure needed for equipment to operate correctly, including backwashing filters. Without stable pressure, even good media can't clean itself properly.

The sediment filter is the bouncer at the door. It catches dirt, sand, and other physical debris before those particles jam control valves or load up downstream media. According to benchmark discussion and field guidance summarized in this Water Treatment thread on well water treatment diagrams, pleated sediment filters provide 30–50% higher flow rates than standard solid filters and last longer because their larger surface area spreads out the dirt load.

The problem solvers in the middle

The iron filter handles staining minerals and sulfur-related odor issues when the chemistry is right for that technology. A common example is a Fleck 2510AIO paired with Katalox Light media. In the verified guidance, that type of setup is described as suitable for up to 30 ppm iron, 15 ppm manganese, and 10 ppm H₂S. That doesn't make it universal. It means the unit has to be matched to the test and placed where it can do its work.

The acid neutralizer corrects low pH. If your water is acidic, it can corrode pipes and leave blue-green staining. This stage isn't cosmetic. It protects plumbing and can determine whether downstream equipment works at all.

The water softener removes hardness. It also cleans up excess hardness added by a neutralizer. That's why the softener often belongs after pH correction. In real installations, this pairing is common because neutralizing media can solve corrosion and create a hardness side effect at the same time.

Clear water and soft water aren't the same thing. One fixes particles and staining. The other fixes scale.

The finishing stages

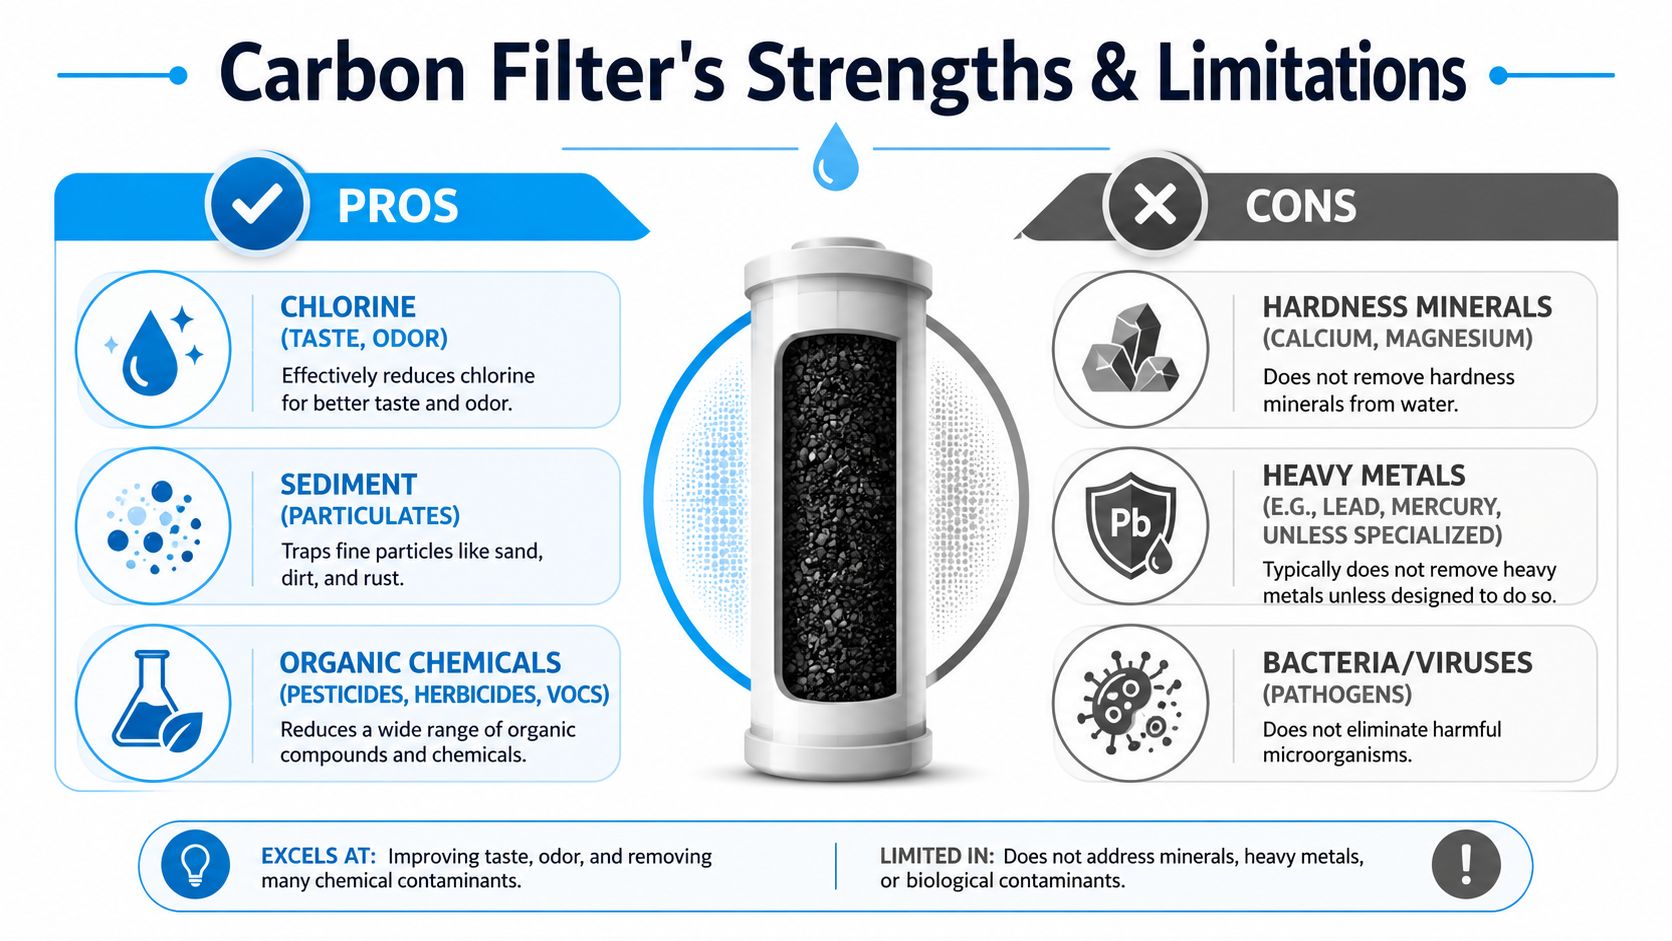
The carbon filter is the polisher. It improves taste, reduces odors, and removes certain chemicals. It belongs late in the chain because cleaner, softer water lets carbon focus on polishing instead of acting like a dirt trap.

The UV purifier is the final guard. It disinfects, but only after the water is already clear. Verified data notes that UV systems can achieve a 99.9% pathogen kill rate when the water is properly pre-treated and sediment is controlled. If particles or hardness remain, they can shield microorganisms from the light.

Here's the quick-read version:

Component Main job What goes wrong if misplaced
Pressure tank Stabilizes pressure Backwash and flow problems
Sediment filter Traps dirt and sand Valves clog, media loads up
Iron filter Removes iron, manganese, sulfur odor in-range Softeners foul, staining remains
Acid neutralizer Raises pH Corrosion continues
Water softener Removes hardness Resin can foul if iron hits it first
Carbon filter Improves taste and odor Carbon plugs early if used too soon
UV purifier Disinfects clear water Poor kill performance in dirty water

The Standard Well Water Filter System Diagram Explained

Most whole-house well systems start from a familiar baseline. That baseline is useful, but only if you treat it as a default, not a law.

The common sequence follows a simple logic. Water leaves the well, enters the pressure tank, and then moves through treatment stages that get progressively more specialized. Big physical debris gets handled first. Chemistry corrections happen in the middle. Final polishing and disinfection happen last.

The default sequence that usually makes sense

A verified installation guide from Mid Atlantic Water's complete guide to well water filtration systems states that a complete system should follow this order:

  1. Pressure tank
  2. Sediment filter
  3. Iron filter
  4. Acid neutralizer
  5. Water softener
  6. Carbon filter
  7. UV purifier

That order isn't arbitrary. The sediment stage protects downstream control heads. The iron filter goes ahead of the softener because softener resin is a poor place to dump heavy iron. The neutralizer comes before the softener because it raises pH and can add hardness that the softener then removes. Carbon sits near the end for polishing. UV comes last because disinfection works best on clear, conditioned water.

A useful detail from the same verified guidance is that placing a 5-micron sediment filter after a softener can be acceptable, because the resin bed itself acts as a filter. Placing that kind of cartridge before the right upstream stages can be ineffective and may lead to premature clogging.

What the standard diagram gets right

The standard layout works well when water problems line up with the assumptions behind it. You have particulate matter that needs screening, iron that responds to the selected media, acidity that needs correction, hardness that belongs in a softener, and a need for final taste improvement or microbial control.

This walkthrough helps visualize the flow in a real installation:

Put a softener before an iron filter in high-iron water and you're asking the softener resin to do the dirty work. That's how systems get expensive fast.

Where homeowners misread the standard diagram

Trouble starts when people treat the default sequence as a universal answer. A standard diagram is a starting point. It is not permission to skip testing. If the water chemistry doesn't match the assumption built into that order, one stage can cripple the next.

Why One Diagram Does Not Fit All Customizing Your System

The biggest mistake in home well filtration is assuming there's one correct well water filter system diagram for every house. There isn't. The right order depends on what dominates your water chemistry.
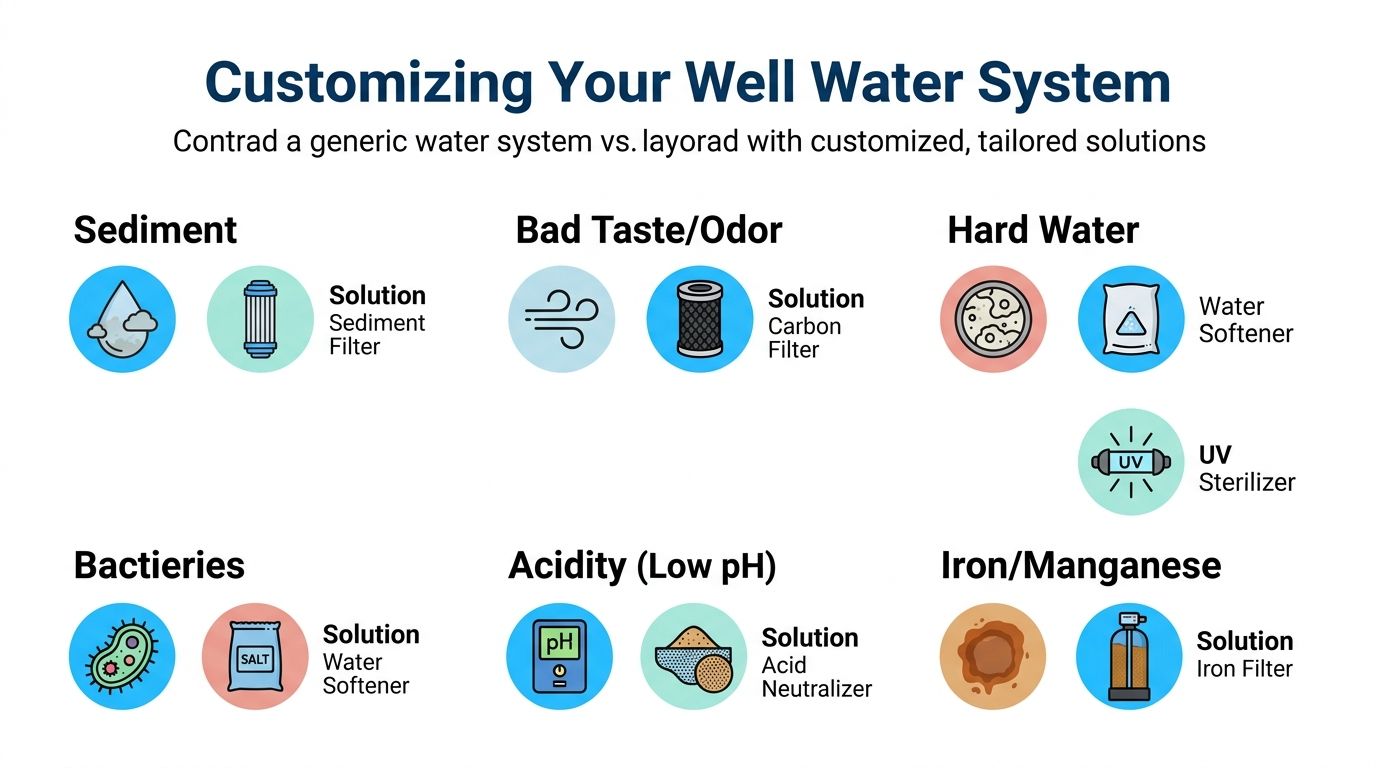
A diagram illustrating customized water treatment solutions for common well water issues like sediment, odor, and hardness.

Verified data makes the problem plain. 78% of DIY well owners install systems in a standard order without prior water testing, leading to 60% premature filter clogging or recontamination. It also states that 92% of retail diagrams fail to show alternative ordering, and 70% of system failures trace back to incorrect sequencing. Those numbers explain why so many homeowners buy decent equipment and still hate the result.

When low pH changes the order

Acidic water can interfere with iron treatment. In some wells, the pH has to be corrected before iron removal works the way it should. That means the standard order gets rearranged.

A practical custom sequence for that water profile often looks like this:

  • Pressure tank
  • Sediment filter
  • Acid neutralizer
  • Iron filter
  • Water softener
  • Carbon filter
  • UV purifier

Why the swap? Because the iron filter may need a friendlier pH environment to perform well. If you leave the neutralizer too late, the iron stage may underperform and pass trouble downstream.

When sulfur becomes the main issue

Hydrogen sulfide changes the conversation again. In the verified guidance, sulfur-dominant wells are called out as a major reason static diagrams fail. If hydrogen sulfide is the primary issue, it may need to be removed before pH adjustment to avoid acid generation that can corrode downstream piping.

That leads to a different logic:

Water problem driving the design Order logic
Low pH blocks effective iron treatment Neutralize before iron removal
Hydrogen sulfide dominates Remove sulfur before pH adjustment
Heavy sediment load Protect every valve and media bed early

This is why a one-size chart misleads people. Two homes can both have “well water problems” and require different treatment order because one is staining and corrosive while the other is odorous and reactive.

A water test doesn't just tell you what to buy. It tells you what must go first.

The myth of the universal online diagram

A lot of online diagrams are clean, simple, and wrong for somebody's well. They show the same lineup every time because it's easier to publish one picture than to explain branching logic. The result is a homeowner staring at a nice visual that doesn't match the chemistry in the basement.

Here are the warning signs that the generic diagram in front of you may not fit your house:

  • It never mentions pH: Low-pH wells can demand a different sequence.
  • It treats sulfur as an afterthought: Odor-first wells often need their own layout logic.
  • It never asks for a test result: If the diagram starts with shopping instead of testing, it's skipping the step that drives the design.
  • It assumes every home needs every stage: Some homes need the full chain. Others need fewer stages, but in the right order.

Build the diagram from the test, not from the catalog

The right way to customize is simple in principle, even if the details get technical. Start with the contaminants that can damage equipment or block later treatment. Then place the chemistry-correction stages where they support the next filter, not where a generic image says they belong. Finish with polishing and disinfection.

That's the shift homeowners need to make. Don't copy a diagram. Diagnose the water, then assemble the order.

Practical Layouts Point of Use vs Whole House

Once the order is right, the next decision is scope. Do you want to treat every gallon entering the house, or only the water used for drinking and cooking?

Whole-house treatment

A point-of-entry system treats water where it enters the home. This is the right layout when the problems affect plumbing, appliances, bathing, laundry, and fixtures. Iron stains on toilets, scale on water heaters, and sulfur odor in showers are whole-house problems, so they usually need whole-house treatment.

This layout is also the only sensible path when the system includes equipment like an acid neutralizer, iron filter, softener, or UV stage meant to protect the entire home. If the issue follows water to every tap, isolating treatment to one sink won't solve much.

Under-sink treatment

A point-of-use system treats water at a single fixture, usually the kitchen sink. This makes sense when your main concern is drinking water taste or a targeted contaminant at one tap, while the rest of the house water is acceptable.

A point-of-use layout is simpler, smaller, and often easier for a handy homeowner to install. But it won't stop iron stains in the shower or scale in the dishwasher. It won't protect the water heater. And it won't fix corrosive water attacking plumbing in the walls.

A practical comparison

Layout Best for Not ideal for
Whole house Stains, odor through the home, hardness, low pH, broad protection Homeowners who only want to improve drinking water
Point of use Drinking and cooking water at one tap Fixture staining, appliance protection, whole-home odor or scale

If you're weighing options and want a broader consumer-style comparison, this roundup of top water filter systems for home can help frame the categories. Just remember that category choice comes after you decide whether your water problem lives at one faucet or across the entire house.

Installation Essentials Bypass Loops and Maintenance Access

A clean diagram on paper can still become a miserable install if nobody leaves room to service it. Good water treatment has to be maintainable. That means bypass valves, access space, drains where needed, and a way to test before and after treatment.

The bypass loop is not optional

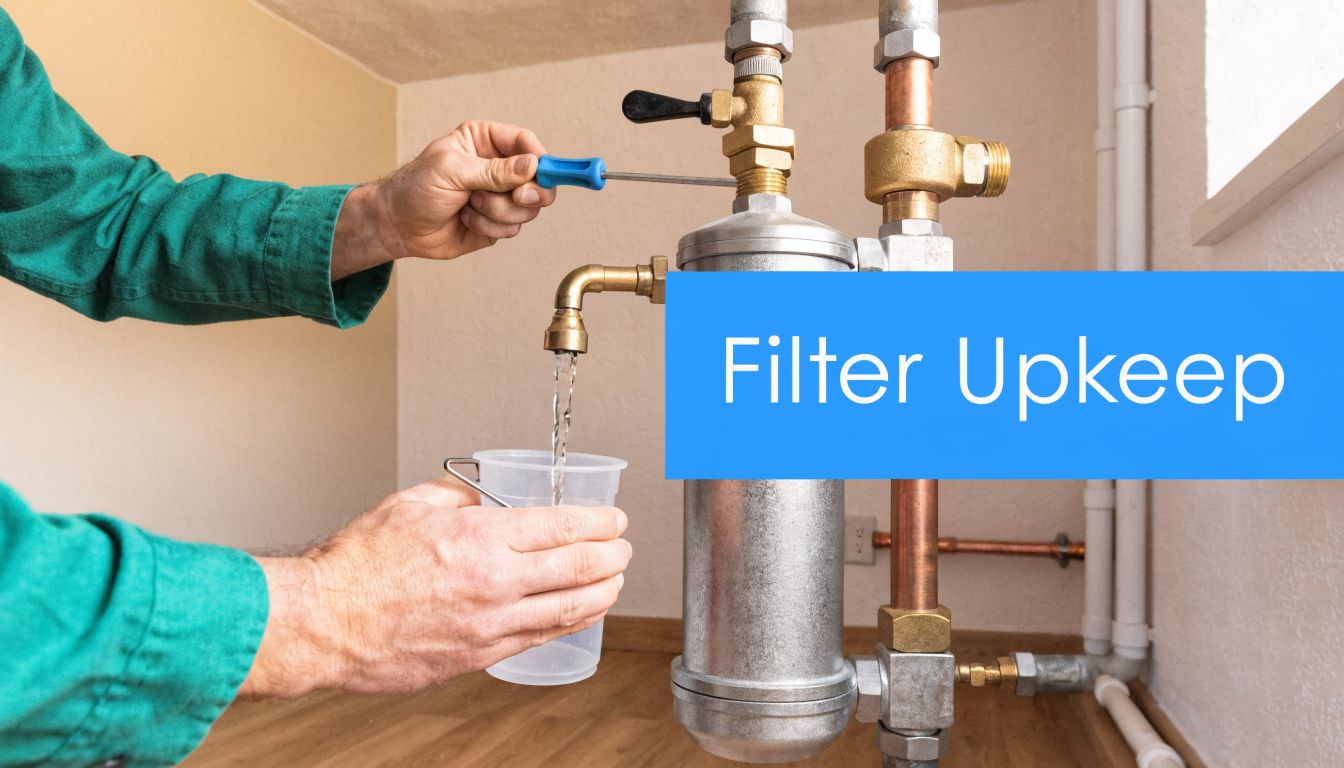
A bypass loop lets you isolate the treatment train without shutting water off to the whole house. When a filter needs service, you can route water around the equipment temporarily. That matters on routine maintenance days and on the bad days when a valve sticks or a tank needs repair.

Build for testing and servicing

Verified data notes that the lack of maintenance-focused planning is a major failure point. 95% of well system failures stem from neglected maintenance, and 82% of owners skip backwashing, causing 70% of iron filter failures. Accessible valves and gauges help prevent that by making routine service visible and easier to do.

Use this checklist during layout:

  • Add sample taps: One before treatment and one after treatment let you confirm performance.
  • Leave working room: Cartridges need clearance below housings. Softeners need room for salt loading.
  • Keep drains practical: Backwashing equipment needs a reliable place to discharge.
  • Label the valves: A bypass is only useful if someone can operate it correctly during a rushed repair.
  • Plan maintenance paths: Helpful service guidance from Water Filter Advisor's advice section can make ongoing care easier to track.

Service access is part of treatment design. If you can't reach it, test it, or bypass it, you don't have a finished system.

Beyond the Diagram A Living System

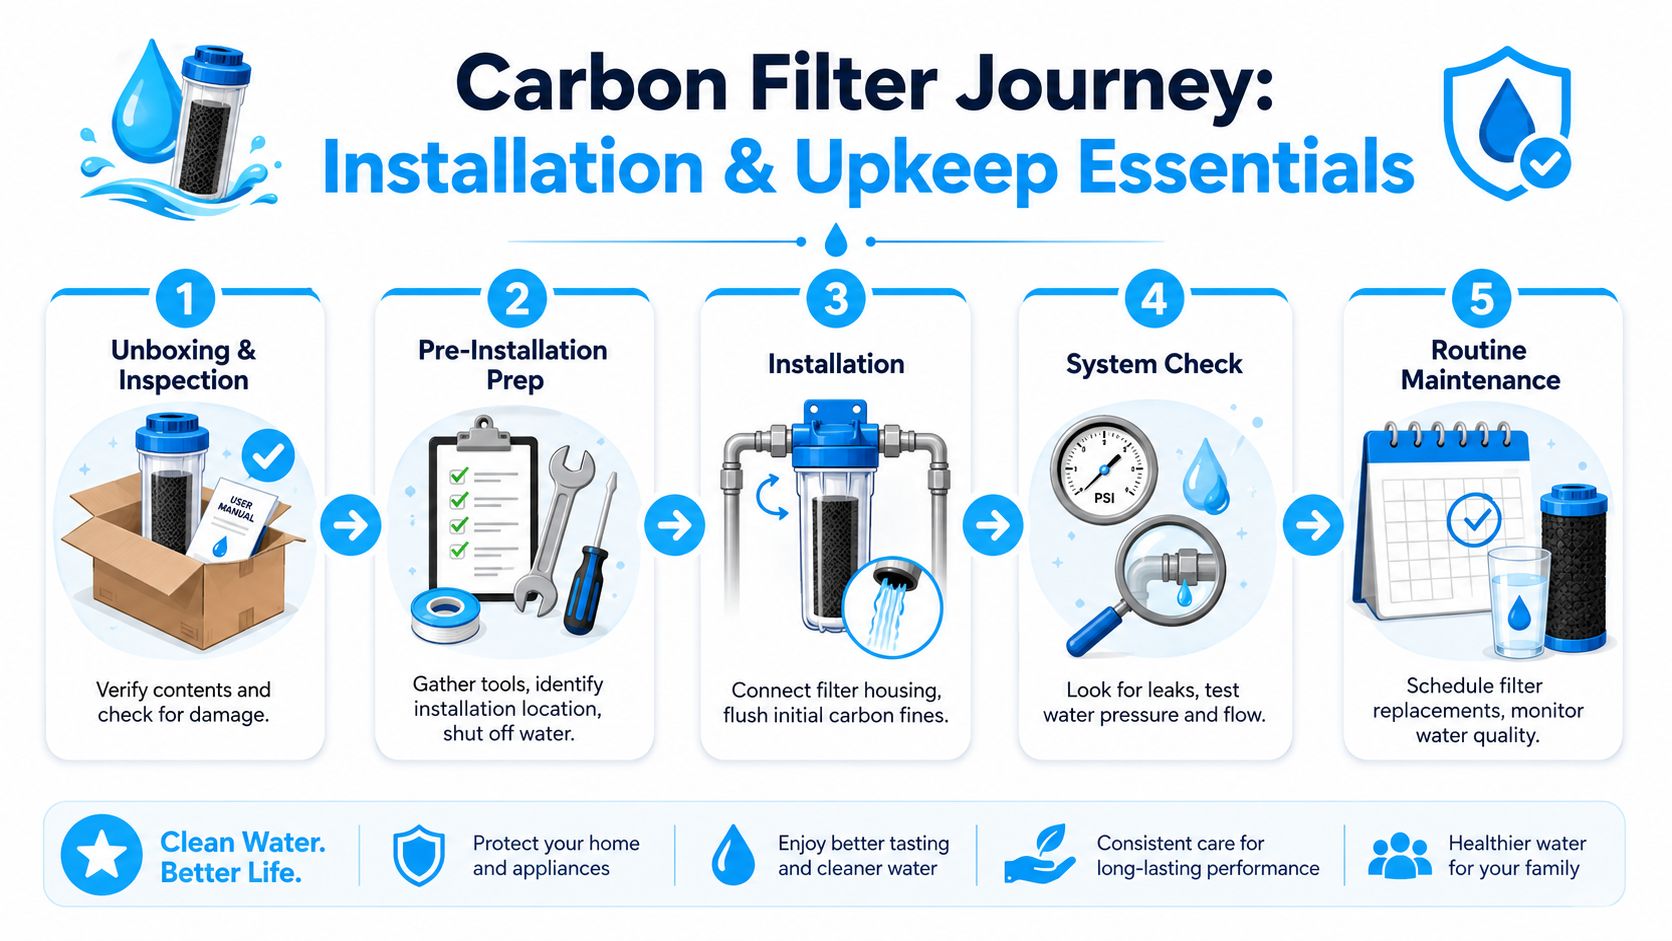
A well water filter system diagram shouldn't end the day the plumber leaves. It should stay useful afterward as a maintenance map. Sediment stages load up. Iron filters need proper backwashing. Softeners need salt and correct settings. Carbon eventually loses polishing power. UV units need clean conditions and routine attention.

The homeowners who do best with well water usually treat the system like a piece of working equipment, not a decorative appliance. They know what each stage does, what symptoms show up when it falls behind, and which valve to turn when service day arrives.

If there's one step that separates a smart install from an expensive guess, it's the water test. That test tells you whether the standard order fits, whether the order needs to flip, and whether you need the full chain at all. Start there, and the diagram stops being confusing. It becomes accurate.


For homeowners who want help choosing, comparing, and maintaining the right filtration setup, Water Filter Advisor is a useful next stop. It's a practical resource for sorting out whole-house systems, under-sink options, replacement filters, and maintenance questions so you can turn a confusing water problem into a plan that works.
Reverse Osmosis for Well Water: The Complete Homeowner Guide

You're standing at the sink with a glass of water that came from your own well, and instead of feeling proud of that independence, you're second-guessing every sip. Maybe the water tastes metallic. Maybe the kettle scales up fast. Maybe a lab report just came back with nitrate, arsenic, fluoride, or a TDS reading high enough to make you stop and stare.

That's the moment many homeowners start looking at reverse osmosis for well water.

It's a smart place to look. A properly matched RO system can turn difficult well water into clean drinking water that tastes dramatically better and removes contaminants a basic sediment or carbon filter can't touch. But well water isn't forgiving. The same chemistry that makes RO so useful also makes it easy to install the wrong setup, foul a membrane early, and waste money on equipment that never had a chance.

Is Reverse Osmosis the Answer for Your Well Water Woes

A common scenario goes like this. A homeowner gets a water test after years of putting up with odd taste, white crust on fixtures, or concern about what's really in the glass. The results show a mix of nuisance issues and health-related contaminants. That's usually when bottled water starts showing up in the garage.

RO is often the right answer, but only for the right job.

For homes on well water, reverse osmosis can remove about 90 to 99% of minerals and dissolved solids such as nitrates, arsenic, and fluoride, depending on water chemistry and membrane type, and it often produces water with TDS under 10 to 50 mg/L after treatment, according to this overview of RO for homes on well water. That's why RO sits in a different category from ordinary cartridge filters. It's designed to deal with what's dissolved, not just what's floating.

When RO makes sense

RO usually belongs on your shortlist when your well water has issues like:

  • High dissolved solids that create a salty, bitter, or flat taste
  • Nitrate concerns that simple sediment filters won't solve
  • Arsenic or fluoride that call for a more targeted treatment method
  • Persistent scaling from mineral-heavy water, especially at the drinking tap
  • A desire to stop buying bottled water while getting more consistent quality at home

When RO alone is not the answer

RO is not a magic box you bolt under a sink and forget.

A strong RO system can polish water beautifully. It can't make bad raw water harmless if the pretreatment is wrong or missing.

If your well has bacteria, heavy sediment, iron staining, manganese, severe hardness, or unstable seasonal water quality, RO may still be part of the solution. It just won't be the whole solution. That distinction saves homeowners a lot of frustration.

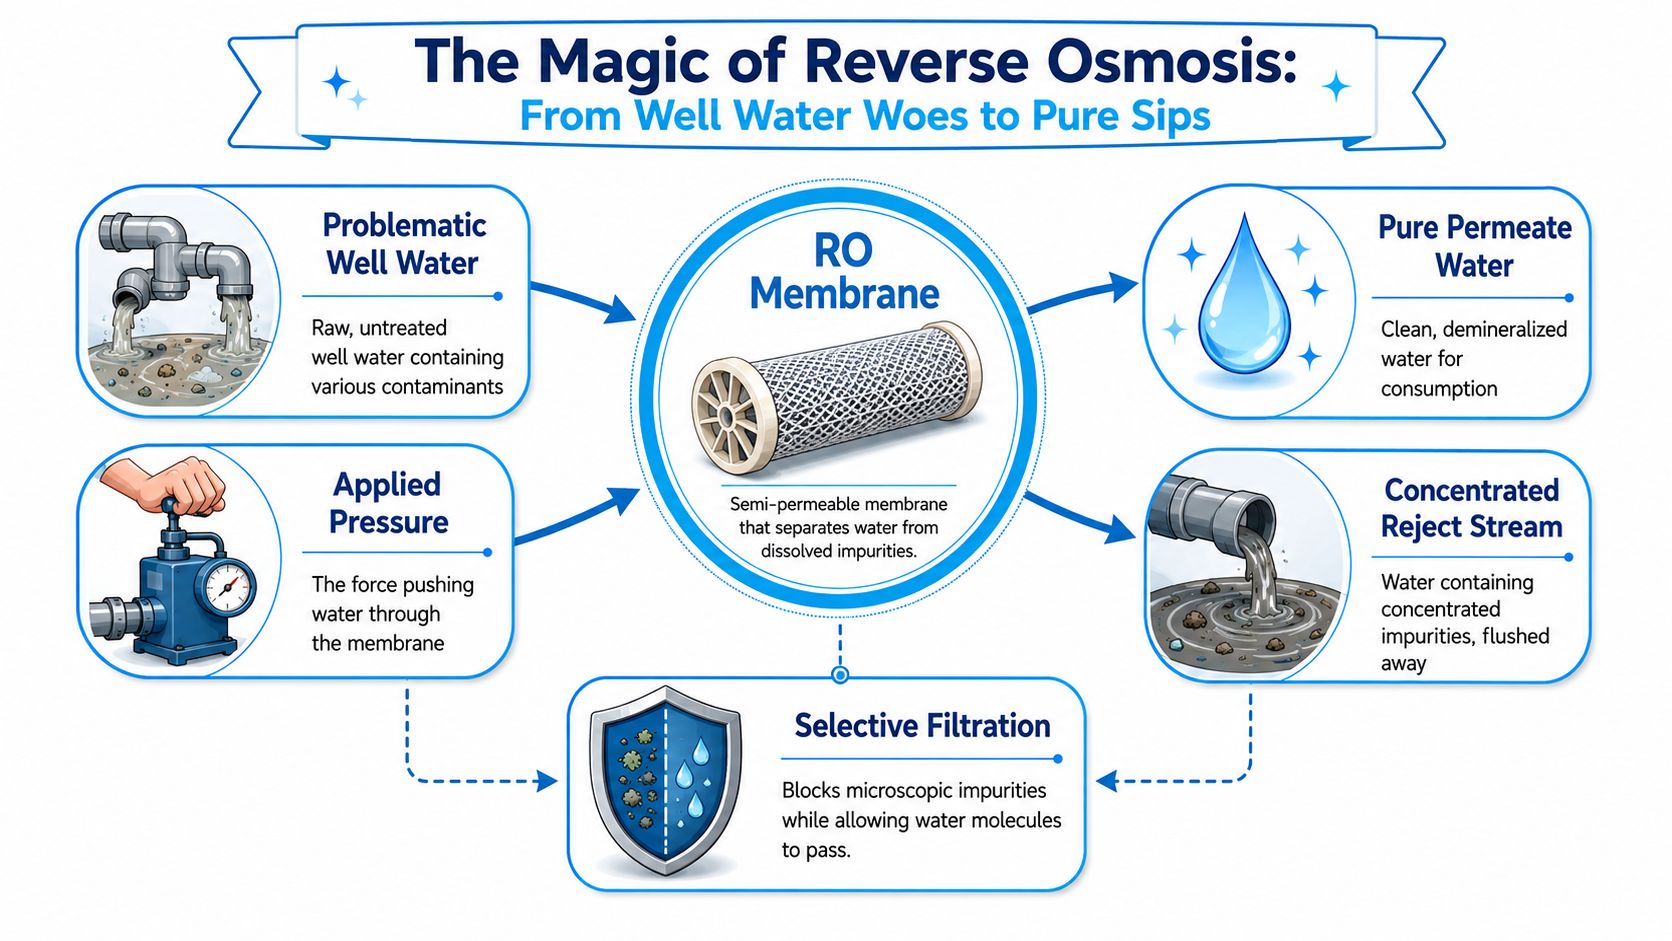
How RO Transforms Well Water from Problematic to Pure

At the heart of reverse osmosis is a semipermeable membrane. The easiest way to think about it is as a pressure-driven barrier. Water molecules pass through. Many dissolved contaminants do not. That's very different from a basic sediment filter, which mainly catches visible particles.

A diagram illustrating the reverse osmosis process, showing how well water is purified through a membrane filter.

What actually happens inside the system

Your well water enters the system under pressure. The membrane separates the flow into two streams:

Stream What it is What happens next
Permeate Purified water that passes through the membrane It goes to the storage tank or faucet
Reject stream Concentrated water carrying the contaminants left behind It goes to drain

That reject stream matters because RO doesn't “destroy” contaminants. It separates them. Dissolved salts, nitrate, arsenic, fluoride, and heavy metals stay concentrated on one side, while the purified water moves to the other.

What RO is especially good at in well water

Well-designed RO membranes typically remove 90 to 99% of dissolved salts, nitrate, arsenic, fluoride, and heavy metals, can reduce TDS from over 1,000 to 2,000 mg/L in some wells to below 50 mg/L, and have shown arsenic removal exceeding 95% with fluoride reductions of 90 to 98%, as detailed in this reverse osmosis water filtration guide. That's the practical reason homeowners install it. It tackles the things ordinary whole-house filters often leave behind.

RO-treated water also feels different in daily use. Coffee tastes cleaner. Ice cubes stop carrying that odd mineral edge. Tea doesn't get that murky top film as easily.

RO water and very low mineral content

Some homeowners are surprised by how “light” RO water tastes at first. That's normal. Once you strip out much of the dissolved mineral load, the water often tastes cleaner and less harsh. If you've ever looked into ultra-pure water in other uses, this expert guide to deionized window cleaning is a useful example of how removing dissolved minerals changes performance in a totally different setting. The principle is the same. Fewer dissolved solids means fewer spots, deposits, and residues.

RO shines when the real problem is dissolved contamination. It's less impressive when homeowners expect it to handle every upstream problem by itself.

That's why the membrane gets the credit, but the rest of the system decides whether the membrane gets to do its job for years or fails early.

Start with a Water Test Not a Shopping Cart

The costliest mistake I see is buying an RO system first and asking what the water contains later. That's backwards. A well isn't a standardized water source. Two houses on the same road can have very different chemistry.

A shopping cart won't tell you whether your membrane is about to face iron, manganese, hardness, fine sediment, bacteria, tannins, or a salinity level that changes how the system should be configured. A proper test will.

What your test needs to tell you

At minimum, you need a recent lab-quality picture of the water chemistry that affects both safety and system design. The exact panel can vary, but the decision logic doesn't.

Look for these categories:

  • Dissolved contaminant profile so you know whether RO is needed for nitrate, arsenic, fluoride, or high TDS
  • Hardness and scaling potential because membrane performance drops when scale forms
  • Iron and manganese because those two foul membranes fast when they oxidize and plate out
  • Sediment and clarity issues that can overload prefilters and shorten service life
  • pH and general stability because treatment performance depends on feed-water conditions
  • Bacteria testing because biological contamination is a separate treatment issue, not a detail to ignore

Why guessing gets expensive

Homeowners often choose systems based on gallons per day, stage count, or online reviews. Those things matter less than the feed water. A beautifully built RO unit still loses if raw well water arrives dirty, oxidizing, or scale-forming.

Public guidance on RO and well water doesn't always help with the practical trade-off either. This well water treatment guidance from Nebraska Extension makes an important point: homeowner materials often explain what RO can remove, but don't break down how salinity, recovery, concentration, scaling, and wastewater interact in actual well-water conditions. That gap is why people buy systems that look right on paper and perform poorly in the field.

A better buying sequence

Use this order instead:

  1. Test first with a recent, thorough sample.
  2. Read the report for treatment design, not just pass or fail.
  3. Match pretreatment to the water, not to a product ad.
  4. Choose the RO unit last, once you know what it will be fed.

If you want help interpreting the treatment side of that process, the practical articles at Water Filter Advisor's advice center are a useful starting point for comparing common filtration approaches without jumping straight into a purchase.

Buy an RO system without a water test, and you're not making a decision. You're placing a bet.

The Non-Negotiable World of RO Pre-Treatment

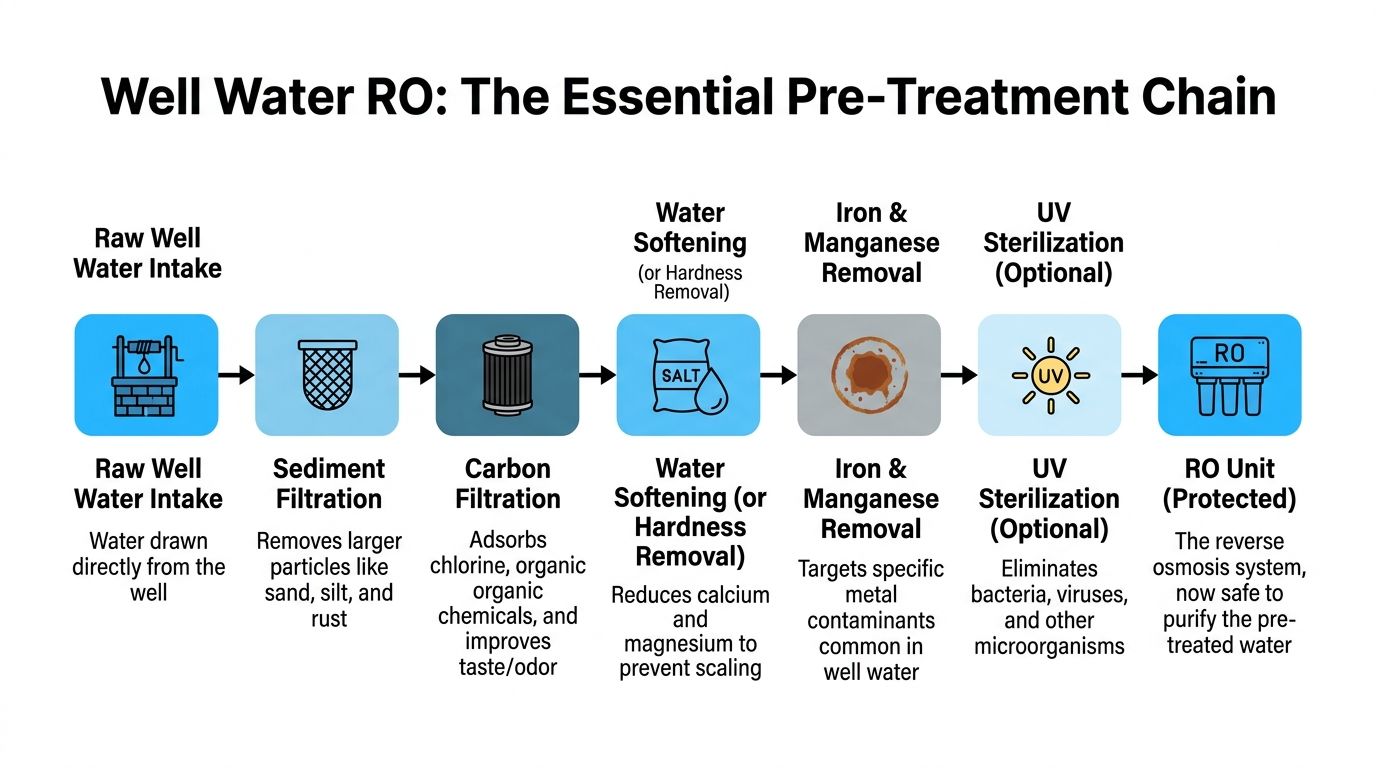
For well water, pretreatment isn't an accessory. It's the difference between an RO membrane that works cleanly and one that clogs, scales, or fouls before it should.

A diagram illustrating the step-by-step pre-treatment process for well water before entering a reverse osmosis system.

Raw well water often brings a combination of suspended solids, hardness, iron, manganese, and organic matter. Each one stresses the membrane differently. The membrane doesn't care whether the damage came from grit, scale, or metal fouling. It just stops performing.

The basic if your water has X then you need Y logic

This is the practical treatment chain most homeowners need to think through:

  • If your water has sand, silt, or cloudiness, start with sediment filtration. Fine particles don't just make water look bad. They abrade and clog downstream components.
  • If your water has chlorine from any prior treatment step or objectionable taste and odor compounds, activated carbon usually belongs ahead of the RO unit.
  • If your water is hard, a softener is often the membrane's best friend. Hardness minerals are a classic source of scaling.
  • If your water has iron or manganese, use dedicated removal ahead of RO. Don't expect the membrane to tolerate metal loading for long.
  • If bacteria is part of the picture, address that separately with the right disinfection strategy. RO is not a substitute for a properly designed microbiological treatment step.

The operating targets that matter

For well water treatment, feed water turbidity should be below 1 NTU and SDI below 3 to 5. Iron and manganese should be under 0.05 ppm to prevent fouling. Effective pretreatment can extend RO membrane life from a typical 3 to 5 years to over 7 years, according to the earlier-cited RO water filtration guidance.

Those aren't abstract design notes. They're the thresholds that separate a protected membrane from one that slowly loses rejection, pressure, and output.

A short visual helps here before the deeper system discussion.

What works in the field

A good pretreatment train is boring in the best way. It removes stress before the water reaches the membrane.

Here's the sequence that usually makes sense:

Water problem Pretreatment tool Why it matters
Sediment Sediment filter or multimedia filtration Keeps particles from plugging cartridges and membrane surfaces
Hardness Water softener or hardness control Reduces scale formation on the membrane
Iron and manganese Oxidation-filtration or dedicated iron removal Prevents metal fouling and pressure rise
Taste, odor, residual oxidants Activated carbon Protects components and improves final water quality

What does not work

What fails most often is partial pretreatment. A homeowner installs a small under-sink RO because the faucet water tastes bad, but the incoming well water still carries iron or hardness that the system was never built to handle. The first months look fine. Then production slows, the drain runs longer, and the water quality drifts.

Field note: Membranes usually die from what happened before them, not inside them.

Treat the RO unit as the final polishing stage, not the first line of defense. That mindset changes everything.

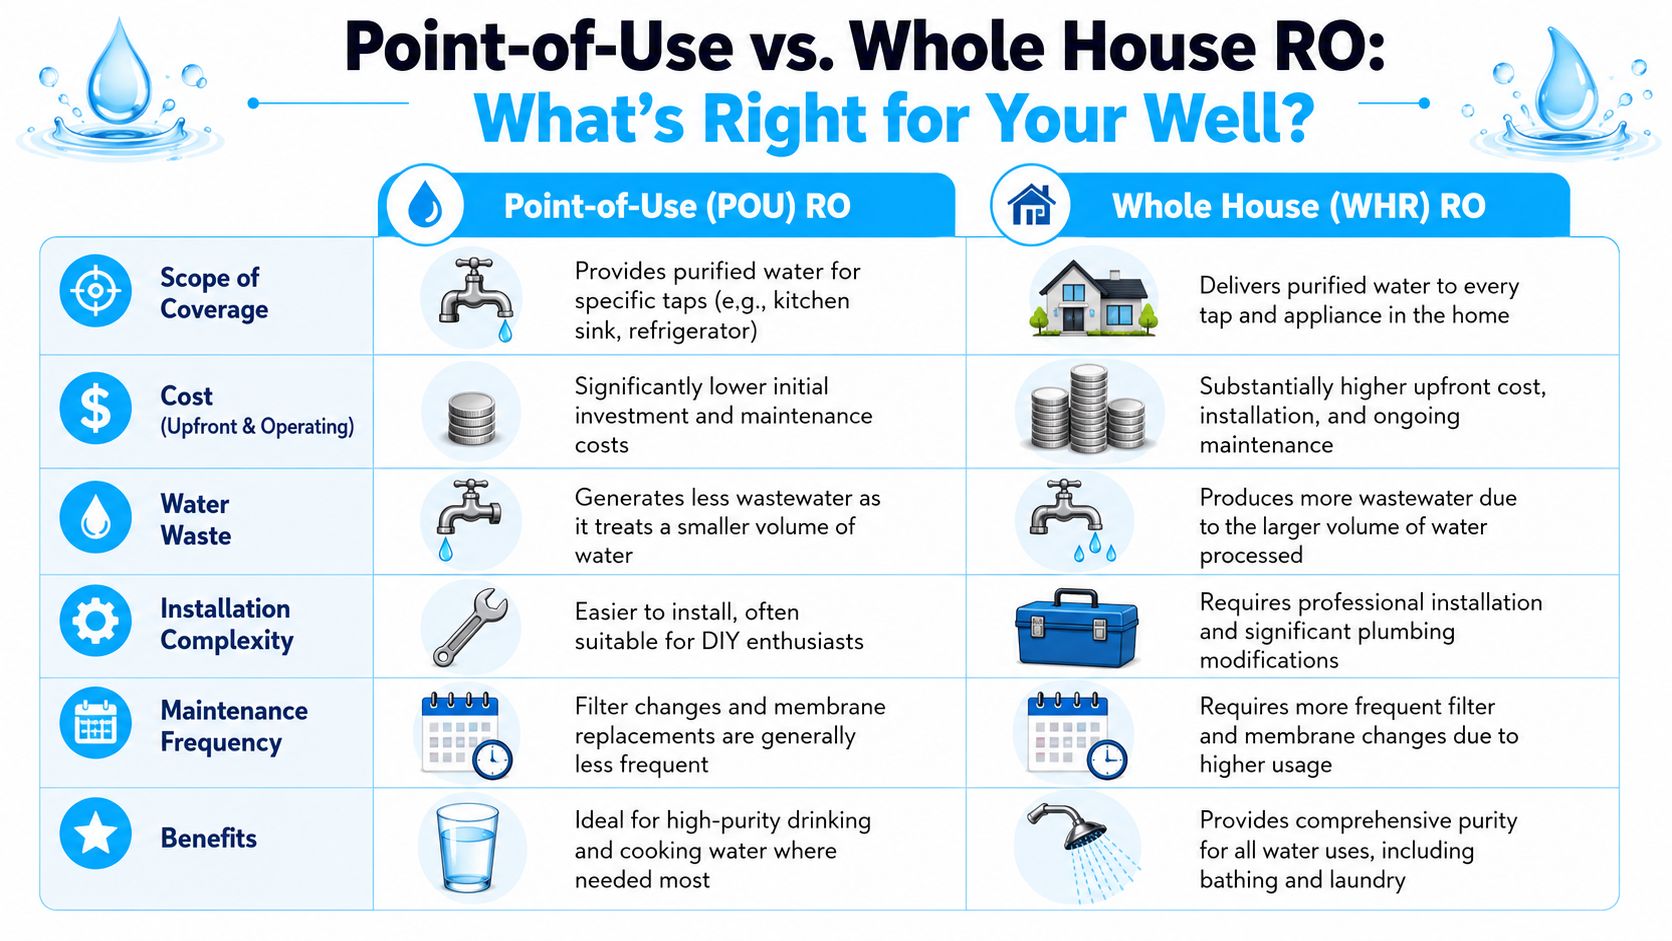
Choosing Your System Point of Use vs Whole House

Once the pretreatment picture is clear, the next decision is scope. Do you want RO water at one faucet, or at every fixture in the house?

A comparison chart outlining the differences between point-of-use and whole house reverse osmosis water treatment systems.

For most homes, this comes down to a straightforward question. Where do you need ultra-low-TDS water? Drinking and cooking are one answer. Every shower, toilet, and laundry line is another.

Point of use under the sink

A point-of-use RO system usually sits under the kitchen sink and feeds a dedicated faucet, sometimes the refrigerator as well. This is the practical winner for many well owners.

Why? Because the highest-value use of RO water is usually drinking, cooking, ice, coffee, infant formula, and food prep. That's a relatively small daily volume, and a smaller system can serve it well.

Point-of-use systems also keep the wastewater and maintenance burden contained to one area. If your goal is safer, better-tasting water at the tap you drink from, this is often the sharpest answer.

Whole-house RO

A whole-house RO system treats water before it enters the home plumbing. It's a major project. It takes space, planning, a drain strategy, storage, and a realistic conversation about water use.

Whole-house RO makes sense in narrow situations, such as extremely poor source water where the homeowner wants low-mineral water throughout the property, or where specific non-drinking uses are also suffering from the dissolved load. But it is not the default answer for the average household on a private well.

Side-by-side practical comparison

Decision factor Point-of-use RO Whole-house RO
Best use case Drinking and cooking water Entire home water supply
Installation Smaller plumbing job Large equipment and professional design
Water demand Lower treated volume High treated volume
Wastewater impact Easier to manage Much more important to evaluate
Maintenance burden Focused and simpler Broader and more involved

Water efficiency matters more than many buyers realize

This is where product selection starts to matter in a very practical way. Older RO systems can waste 5 to 10 gallons for every gallon of pure water, while WaterSense-labeled systems must send no more than 2.3 gallons of reject water to drain per gallon treated and can save a household over 3,100 gallons of water annually, according to the EPA's WaterSense information on point-of-use reverse osmosis systems.

That matters even more on well water because reject water isn't just a utility bill issue. It affects septic loading, drain planning, and how much total water your system handles in daily life.

A practical rule for choosing

  • Choose point-of-use if your main goal is high-quality drinking water and you want the cleanest, least complicated path.
  • Choose whole-house only if you have a specific reason to need RO-quality water everywhere and you're prepared for the infrastructure that comes with it.
  • Stay skeptical of oversized solutions if a smaller one solves the core problem better.

Most families don't need RO water in every toilet tank. They need excellent water where they eat and drink.

Installation Maintenance and Long-Term Costs

The system price is only the opening bid. The full ownership story includes installation quality, feed pressure, filter service, membrane replacement, and the discipline to maintain the equipment on schedule.

Installation realities

A straightforward under-sink system is often within reach for a confident DIY homeowner, especially if the plumbing is accessible and the pretreatment is already in place. Well-water setups get more complicated fast when you add softeners, iron filters, booster pumps, drain connections, storage tanks, or a whole-house layout.

Pressure is one of the first practical hurdles. RO depends on pressure to move water through the membrane. If the well system delivers inconsistent or low pressure at the point of use, the RO unit may produce water slowly, reject more water than expected, or fail to perform consistently. In those cases, a booster pump often turns a frustrating system into a workable one.

The maintenance schedule you can't skip

The maintenance rhythm is simple, but it has to happen. Typical RO maintenance involves replacing sediment and carbon pre-filters annually, while the membrane itself generally needs replacement every 3 to 5 years, depending on water quality and usage. Poor maintenance can increase bacterial growth risk and allow contaminant breakthrough, according to Culligan's reverse osmosis maintenance guide.

That schedule assumes the system is properly matched to the water. If pretreatment is weak, the membrane may not make it to the healthy end of that range.

What homeowners should budget for mentally

Think in three layers:

  • Initial setup includes the RO unit, any required pretreatment, possible plumbing work, and sometimes a pressure upgrade.
  • Routine service includes cartridge changes, periodic sanitizing, and keeping an eye on performance.
  • Long-cycle replacement includes the membrane and, eventually, other wear components such as tanks, valves, or pumps.

If you want low-hassle RO ownership, spend your effort on design and pretreatment at the beginning. That's where the future service calls are won or lost.

Signs your system needs attention

Don't wait for total failure. Common warning signs include:

  • Slow production at the drinking faucet
  • Taste drift after a period of good performance
  • Long drain run times
  • Drop in pressure at the RO faucet
  • Visible neglect on filters that should've been changed already

A well-built RO system can be satisfying to live with. A neglected one turns into an expensive reminder that water treatment is a process, not a one-time purchase.

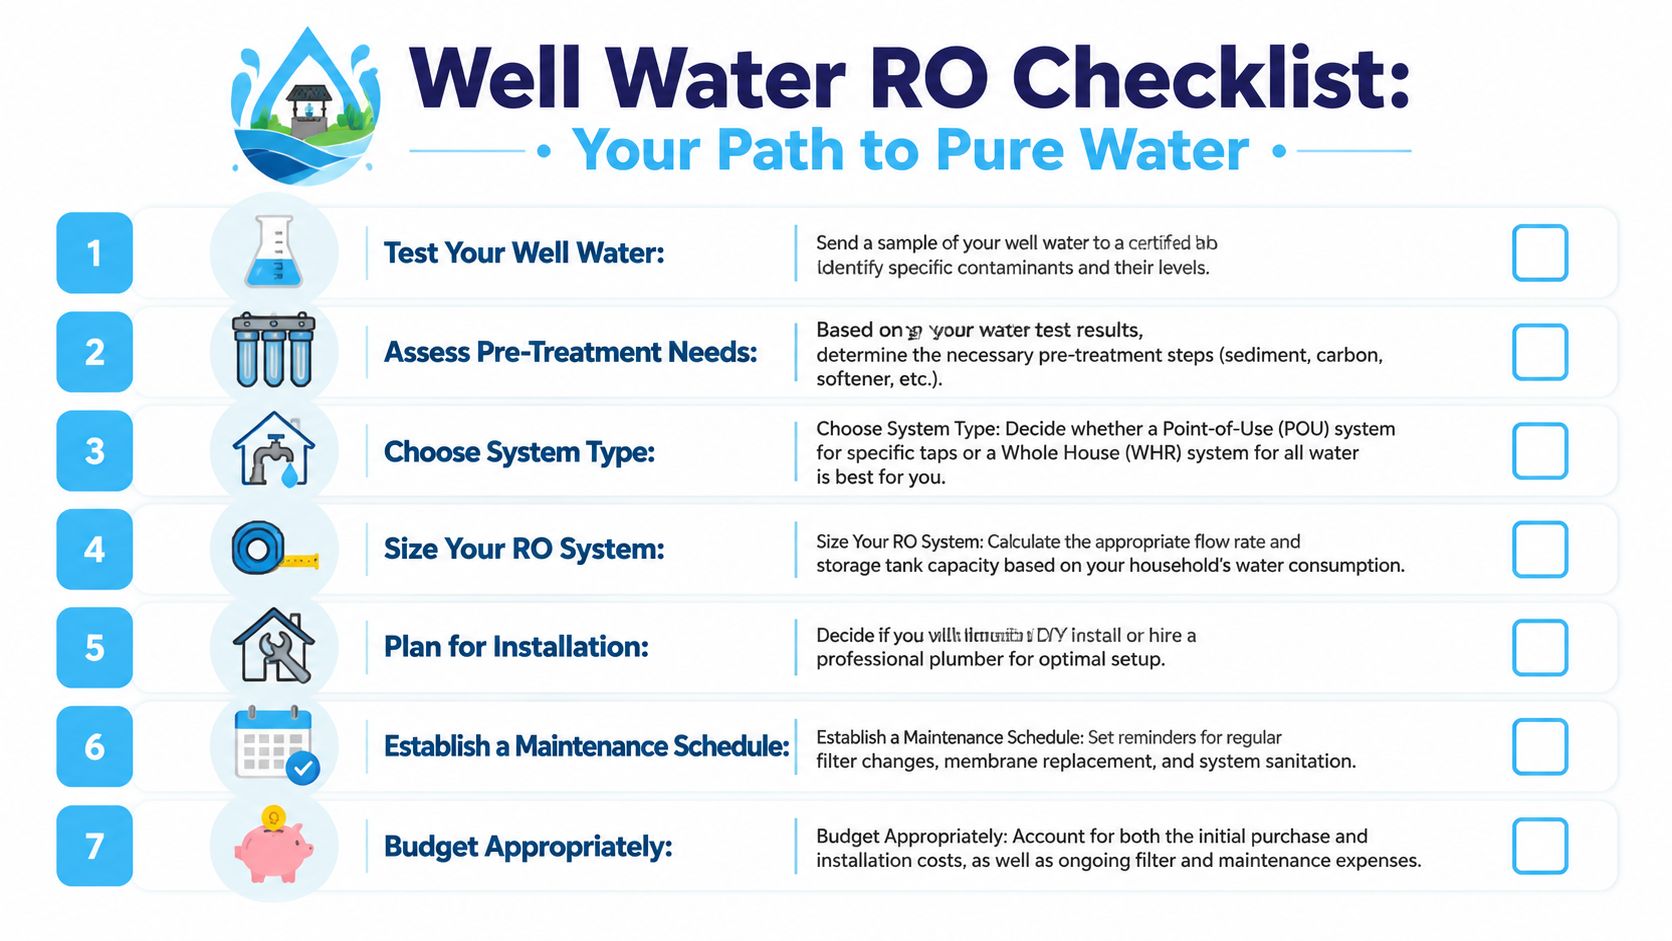
Your Final Decision Checklist for Well Water RO

The best reverse osmosis system for well water isn't the one with the most stages or the slickest ad. It's the one that matches your water, your house, and your tolerance for maintenance.

A 7-step checklist illustrating the process of installing a reverse osmosis system for well water usage.

Run through this checklist before you buy:

The homeowner sanity check

  • Have you tested the well water recently and reviewed the results for treatment design, not just potability?
  • Do you know the pretreatment needs for sediment, hardness, iron, manganese, and any microbiological concerns?
  • Have you chosen the right scope between under-sink point-of-use and whole-house treatment?
  • Have you checked pressure and drain needs so the system can operate properly in your home?
  • Do you understand the maintenance cycle and are you willing to stay on top of it?
  • Have you planned for reject water and how that fits your plumbing or septic setup?
  • Are you buying a treatment system, not just an RO box?

The decision that usually works best

For many homeowners, the smart path looks like this: test the well, install the right pretreatment, and use a point-of-use RO system for drinking and cooking water. That gives you the highest-value improvement with the least disruption.

Whole-house RO has its place. It's just a specialized solution, not the automatic upgrade many people assume it is.

Good RO ownership starts before installation. The winning move is matching the system to the water you actually have.

If you make the decision that way, reverse osmosis stops being a gamble and starts behaving like what it should be: a dependable piece of home water treatment equipment.


If you're comparing filtration options and want plain-English help sorting through well water problems, replacement schedules, and system types, Water Filter Advisor is a useful resource for homeowners who want practical guidance before they buy.

Best Water Filter Pitcher for Well Water: 2026 Guide

A lot of advice about the best water filter pitcher for well water starts in the wrong place. It starts with brands, pitcher size, or which one tastes best.

That's backwards.

If you've just moved into a home with a private well, a pitcher might help, but it also might give you false confidence. Well water isn't pre-treated the way city water is. It can look crystal clear and still have a problem a basic pitcher won't touch. And some of the most common well issues, like sediment, bacteria, iron, or sulfur odors, can overwhelm a pitcher fast.

A pitcher can still make sense in a narrow situation. The key is knowing whether you're dealing with a small drinking-water problem or a whole-house water-treatment problem. That distinction matters more than the logo on the box.

Can a Water Filter Pitcher Really Handle Well Water

A water filter pitcher is often the wrong tool for well water.

That sounds backward because pitchers are sold as a simple fix. Fill it, wait a few minutes, pour a glass. For a home on treated city water, that can be enough for taste or odor. For a private well, the safer question is not “Which pitcher is best?” It is “Is a pitcher appropriate at all?”

Why the usual advice falls apart

A standard pitcher works like a small, targeted filter. It can help with certain drinking water problems if the cartridge is certified for that exact contaminant. It does not clean all the water in your home, and it does not fully treat a well with multiple issues.

That distinction matters.

Well water problems often come in layers. You might notice a smell, but the bigger concern could be something you cannot see or taste. Or you may have sediment and iron that clog a pitcher quickly, even if the pitcher helps a little with flavor. In that case, the pitcher is not solving the main problem. It is covering one symptom while the underlying issue stays in place.

A good way to frame it is tool versus job. A pitcher can be the right tool for a narrow drinking-water problem. It is a poor fit for water that needs disinfection, heavy sediment removal, strong iron treatment, or whole-house protection. If you want a simple way to sort those situations, our well water treatment advice and filter guides can help you match the problem to the right kind of system.

Bottom line: The best water filter pitcher for well water is only “best” if your test results show a problem the pitcher is built to handle.

What well owners usually miss

People new to private wells usually judge the water by the clues they can spot right away. That makes sense. If the water smells like sulfur or leaves orange stains, it is hard to think about anything else.

But visible clues only tell part of the story.

  • Bad taste
  • Musty or sulfur smell
  • Cloudiness
  • Orange or black staining

Those signs can point to real treatment needs, but they do not tell you whether a pitcher is enough. A pitcher may improve taste and still leave the main risk untouched. That is the trap with well water. Better-tasting water can make people feel safer than they should.

The better approach is to start with the water itself, not the pitcher box. Once you know what is in the well, you can decide whether a pitcher makes sense for a limited drinking-water use or whether the job calls for a stronger system.

Before You Buy Anything Test Your Well Water

Testing isn't an extra step. It's the first step.

If you skip it, you're guessing. And with well water, guessing is how people end up filtering for chlorine they don't have, while ignoring a problem they do have.

A hand holds a multi-parameter water test strip dipped into a clear glass of tap water.

Why testing matters more for wells

A city utility usually treats water before it reaches your house. A private well doesn't come with that safety net. The well owner is responsible for knowing what's in the water and choosing treatment that fits.

The hard part is that well problems fall into very different buckets. One family may have sediment and iron. Another may have a contamination issue that needs disinfection or specialized filtration. Both homes might say, “Our water tastes a little off,” but the solution could be completely different.

Here's a practical way to approach this:

Water issue type What it can include Why a basic pitcher may fall short
Microbiological Bacteria and other microbes Many standard pitchers aren't designed as primary disinfection tools
Metals and inorganic contaminants Lead and other dissolved substances Some pitchers can reduce certain metals, but only if the model is certified for them
Organic contamination Agricultural or chemical contamination Performance varies widely, and broad marketing language isn't enough
Aesthetic problems Taste, odor, and some discoloration Pitchers often help here, but that doesn't mean the water is comprehensively treated

Test first, then match the filter

Consumer Reports' advice for well owners is the right mindset: test first, then buy a pitcher certified to remove the contaminants your report found. It also warns that phrases like “tested to” aren't the same as certification. That's an important distinction because pitcher performance varies a lot, especially once you move past taste and odor concerns.

If you want plain-language help interpreting results and comparing treatment options, Water Filter Advisor's filtration advice library is a useful place to keep reading after you have your report in hand.

Water that looks fine can still require treatment. A lab result tells you what your eyes and taste buds can't.

Lab test or home kit

A home kit can be a decent early clue. It can tell you whether something seems off. But if you're making a buying decision about the best water filter pitcher for well water, a certified lab test is the safer basis for that decision.

Use the home kit like a smoke alarm. Use the lab report like the fire inspector.

When you read the report, don't get distracted by marketing promises on a box. Focus on one simple question: what specific contaminants need to be reduced for your drinking water?

Why modern pitchers still need matching chemistry

Pitcher filters have become more advanced over time. An academic study of nine water filter pitchers found models using up to five filtration stages. Some filters reduced fluoride significantly, including two with statistical significance at p < 0.001 and p = 0.030, while most also reduced calcium concentrations at p < 0.01, according to this academic review of pitcher filtration performance.

That sounds promising, and it is, but it leads to the most important lesson: performance is not uniform. Different pitchers use different media and behave differently. So the right question isn't “Which brand is popular?” It's “Which certified filter chemistry matches my water?”

Decoding Pitcher Filters What They Can and Cannot Do

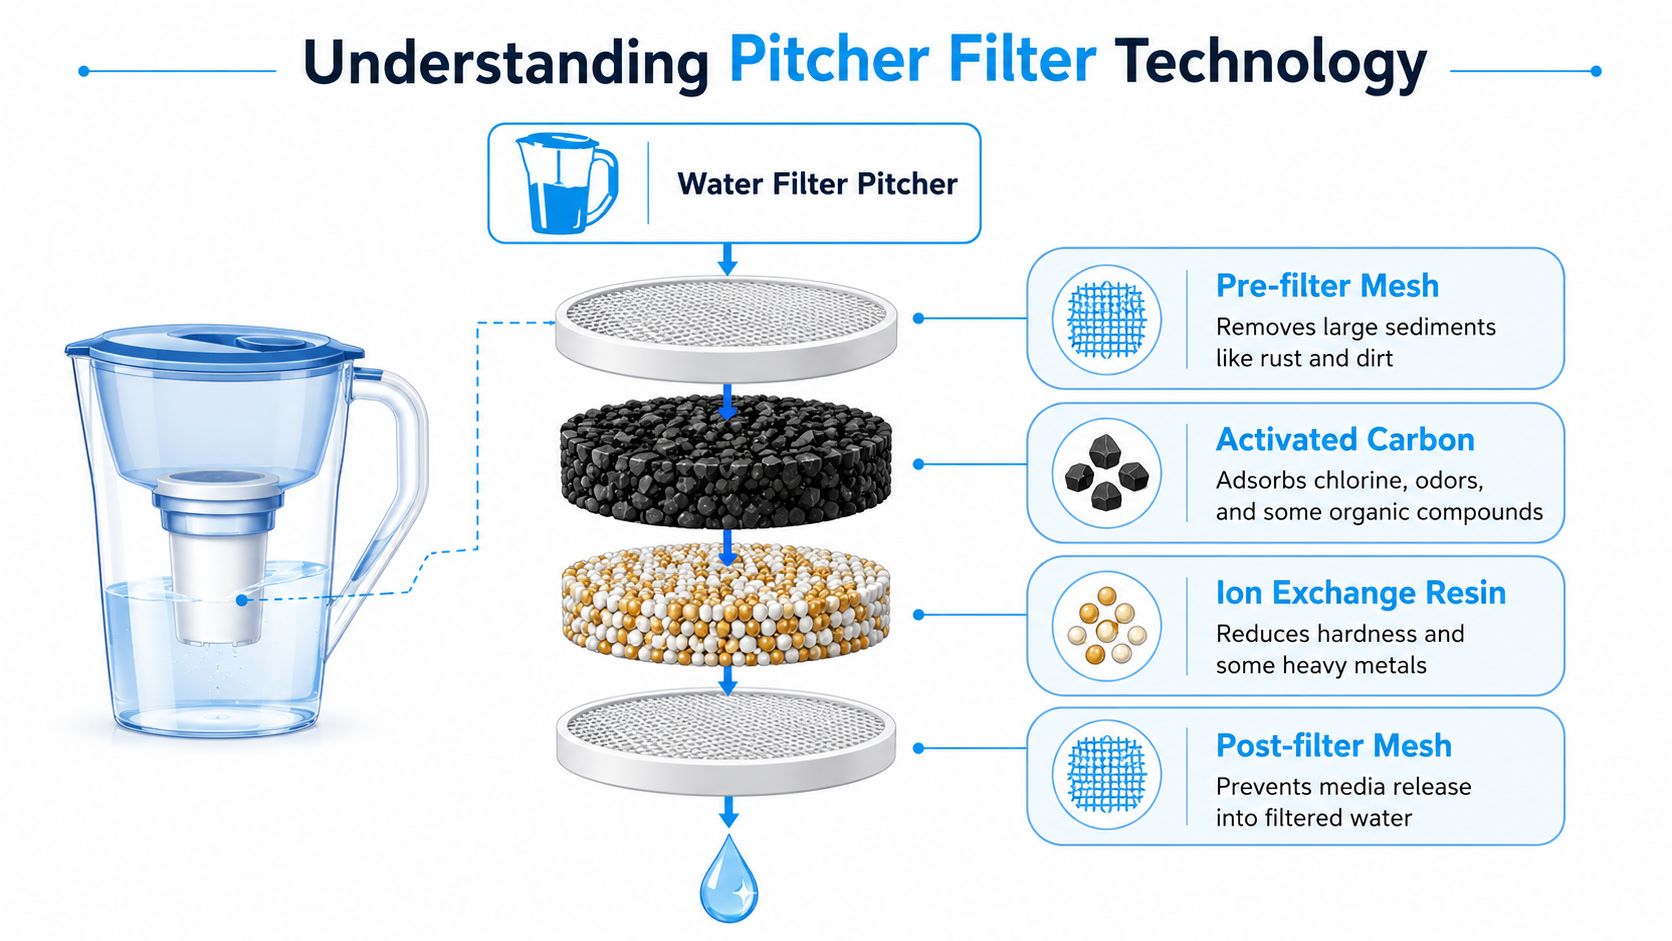
Inside a pitcher, you're not getting one magical layer. You're getting a small stack of media, and each layer has a different job.

Imagine fishing nets with different mesh sizes. One net catches leaves. Another catches pebbles. Another is designed for something much smaller. If you throw the wrong net in the water, the fish you care about swim right through.

A diagram illustrating the four layered components of a water filter pitcher and their purification functions.

What the common filter media do

Most pitchers use some combination of the following:

  • Activated carbon: This is the workhorse for improving taste and odor. It can also reduce some chemicals, depending on the design.
  • Ion-exchange resin: This media can help with certain dissolved contaminants, including some metals.
  • Pre-filter and post-filter screens: These help manage larger particles and keep filter media from ending up in your drinking water.

That mix is why one pitcher can be decent for lead reduction while another mainly improves flavor. From the outside they can look nearly identical. Inside, they may be solving different problems.

What pitchers usually handle reasonably well

If your well test points to a limited drinking-water issue, a pitcher can sometimes be useful for:

  • Taste and odor improvement
  • Certain certified contaminant reductions
  • Convenient point-of-use treatment for drinking water only

This is the lane where pitchers shine. They're simple, easy to use, and they don't require plumbing changes.

A pitcher is a point-of-use tool, not a whole-home fix. Treat it like a coffee maker for cleaner drinking water, not like a treatment plant for the entire house.

Where pitchers hit a wall

Many buyers are often confused. A pitcher may make water taste better while leaving the actual problem unsolved.

A standard pitcher is generally a poor fit for these common well-water situations:

Problem in well water Why a pitcher struggles
Heavy sediment or silt The filter clogs quickly and flow slows down
Iron or manganese These usually need specialized treatment, not a fridge pitcher
Hydrogen sulfide odor The “rotten egg” issue often needs a treatment approach beyond pitcher media
Hardness Pitchers aren't a practical fix for whole-house scaling and soap problems
Microbial contamination A pitcher should not be your first-line answer when disinfection is needed

Some newer pitchers are marketed for bacteria or parasite reduction, and that can sound like the perfect answer for a well. The catch is practicality. Source water with sediment, iron, or recurring contamination can make a specialized pitcher slow, expensive, or frustrating to live with.

So if you're evaluating the best water filter pitcher for well water, don't just ask what it removes. Ask how it behaves when real well water starts stressing the filter.

How to Choose a Pitcher That Matches Your Water Test

A good pitcher choice starts with one question: what, exactly, showed up in your water test?

That sounds obvious, but it is where buyers get tripped up. A pitcher box may promise cleaner, better-tasting water, while your lab report is asking a much narrower question. Can this filter reduce the specific contaminant in my well water, at the level and under the conditions I have?

A water test is your map. The pitcher is only one tool in the toolbox. If you use the wrong tool, you may get better taste and still leave the actual risk in the glass.

Start with certified claims you can match to the report

As noted earlier, independent ratings often show a gap between taste improvement and meaningful contaminant reduction. That matters for well owners because taste is not the same thing as treatment.

Read the package like you would read a prescription label. Look for a claim that matches your test report, not a broad promise.

Here is the plain-English version:

  • Certified means the claim has been checked against an independent standard.
  • Tested or lab tested sounds reassuring, but it may only reflect the brand's own testing.
  • Reduces many contaminants is too fuzzy to trust for a specific well-water problem.

If your report shows lead, for example, the pitcher should clearly say it is certified to reduce lead. If your report shows PFAS, the claim should name PFAS. If the package makes you guess, keep shopping.

Use a filter-match process, not a popularity contest

A lot of roundup articles rank pitchers like coffee makers. Well water does not work that way. You are matching a device to a contaminant profile.

Use this process:

  1. Mark the contaminants that matter for drinking water
    Circle the items on your report that affect health or make the water unpleasant enough that your family will avoid it.

  2. Separate pitcher problems from system problems
    Some issues belong in the pitcher category. Others belong in the treatment-system category. A pitcher may fit mild chlorine taste in city water. Well water with iron, sulfur, sediment, recurring bacteria, or major hardness usually needs a different class of equipment.

  3. Match each concern to a named certified claim
    Do not settle for “better water” language. Match contaminant to claim, one by one.

  4. Check capacity against your real routine
    One person filling a glass twice a day has very different needs than a family filling bottles, cooking pasta, and making coffee.

  5. Estimate maintenance realistically
    Well water can be harder on filters than the ideal test conditions used for marketing. Slow flow and frequent cartridge changes are common signs that the pitcher is being asked to do too much.

A quick way to judge whether a pitcher fits your test

Here is a practical screen you can use.

Water test result Pitcher may fit? Why
A specific contaminant the pitcher is certified to reduce, with otherwise clear water Possibly This is the narrow use case where a pitcher can make sense
Sediment, sand, or visible particles Usually no Particles clog filters fast and shorten cartridge life
Iron or manganese Usually no These often need specialized treatment media
Hydrogen sulfide or strong sulfur odor Usually no Odor may improve briefly, but the root issue often remains
Bacteria or other microbial concerns Use extreme caution A pitcher should not be your fallback safety plan for a contaminated well
Hardness, scale, soap problems No practical fit That is a house-wide water chemistry issue, not a pitcher job

This table is why a pitcher is often the wrong first purchase for well water. It can be useful, but only in a narrow lane.

Secondary details matter more with well water

Once you confirm the filter claim matches your test, look at the daily-use details.

Filter life matters more than many new well owners expect. A cartridge rated for a certain number of gallons may hit frustratingly slow flow much sooner if your water carries fine sediment or nuisance metals.

Pitcher speed matters too. Slow filtration sounds like a small annoyance until three people are waiting to fill bottles before school.

Total cost deserves a hard look. A cheap pitcher with frequent cartridge changes can end up being the expensive option. If your test suggests you are already close to needing a stronger treatment setup, compare that long-term cost with the benefits of Halo water solutions or another whole-home approach designed for well conditions.

What a sensible pitcher choice looks like

A reasonable pitcher choice for well water usually looks like this:

  • You have a current water test.
  • The concern is narrow and clearly identified.
  • The pitcher has a matching certified claim for that specific contaminant.
  • Your water is not loaded with sediment, iron, sulfur, or microbes.
  • You only need better drinking and cooking water at the kitchen level.
  • You accept the refill routine and cartridge costs.

That is a much smaller target than product roundups usually admit. For well water, that honesty matters. A pitcher can be a useful finishing tool, but only when the water test says it is the right tool.

When to Look Beyond a Pitcher for Well Water Treatment

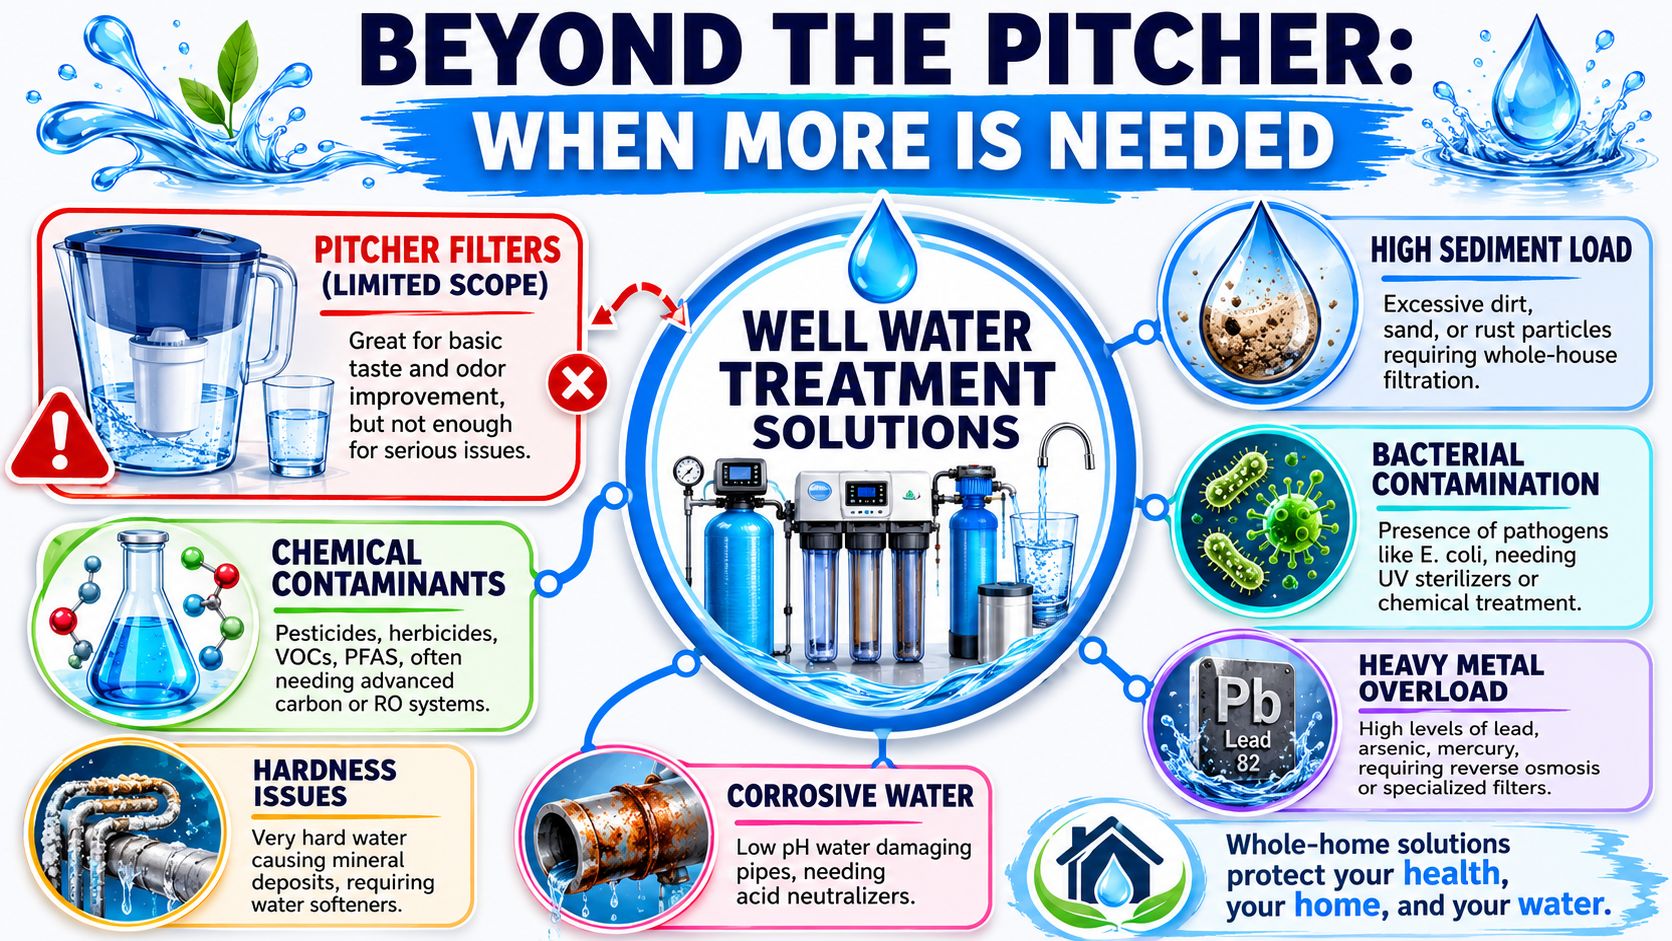
Some well-water problems are too serious, too broad, or too stubborn for a pitcher. That doesn't mean your water is hopeless. It just means you need the right class of treatment.

An infographic detailing water contamination issues and the necessity of whole-home well water treatment solutions beyond pitchers.

The clearest signs a pitcher isn't enough

If any of these sound familiar, stop looking for a fridge pitcher as your main answer:

  • Your water test shows bacteria or recurring microbial issues
  • You see sand, dirt, rust, or heavy cloudiness
  • Fixtures stain orange, black, or blue-green
  • The water smells strongly like sulfur
  • Your home has scale buildup, soap problems, or appliance wear linked to hardness
  • You're trying to protect the whole house, not just one drinking-water container

Those are treatment-system clues, not pitcher clues.

Match the problem to the right tool

Here's the practical side-by-side view:

Well water problem Better treatment direction
Bacterial contamination UV purification or another disinfection approach
Sediment and silt Whole-house sediment prefiltration
Iron and manganese Specialized iron treatment
Hardness Water softening
Broad contaminant concerns for drinking water Under-sink treatment or reverse osmosis, depending on the issue
Corrosive low-pH water Neutralizing treatment

A pitcher sits at the end of the line. These systems address the problem earlier, where it affects the whole home or where stronger treatment is needed.

For homeowners trying to understand what a more complete approach can look like, this overview of the benefits of Halo water solutions from JMJ Plumbing is a helpful example of how whole-home treatment is framed around actual water conditions, not just convenience.

Why high-performance pitchers can still be a bad fit

Some newer pitchers are marketed for bacteria and parasites. That sounds promising, especially for anxious well owners. But the often-missed question is whether those products are practical on real well water.

Epic's discussion of well-water pitchers highlights the issue clearly. It notes that high-performance pitchers can still be expensive or inconvenient for wells because flow rate, replacement cost, and filter life become a problem when source water has high sediment, iron, hydrogen sulfide, or recurring microbial load, as described in Epic Water Filters' discussion of pitcher suitability for wells.

That means a specialized pitcher may be a stopgap, not a durable plan.

This short video gives a helpful visual overview of why well treatment often goes beyond countertop options.

A simple neighbor-to-neighbor rule

If the problem affects only the glass you drink, a pitcher may help.

If the problem affects pipes, fixtures, showers, laundry, appliances, or family safety, you're in system territory.

That's the point where looking for the best water filter pitcher for well water can waste time. The smarter move is upgrading to treatment that matches the seriousness of the problem.

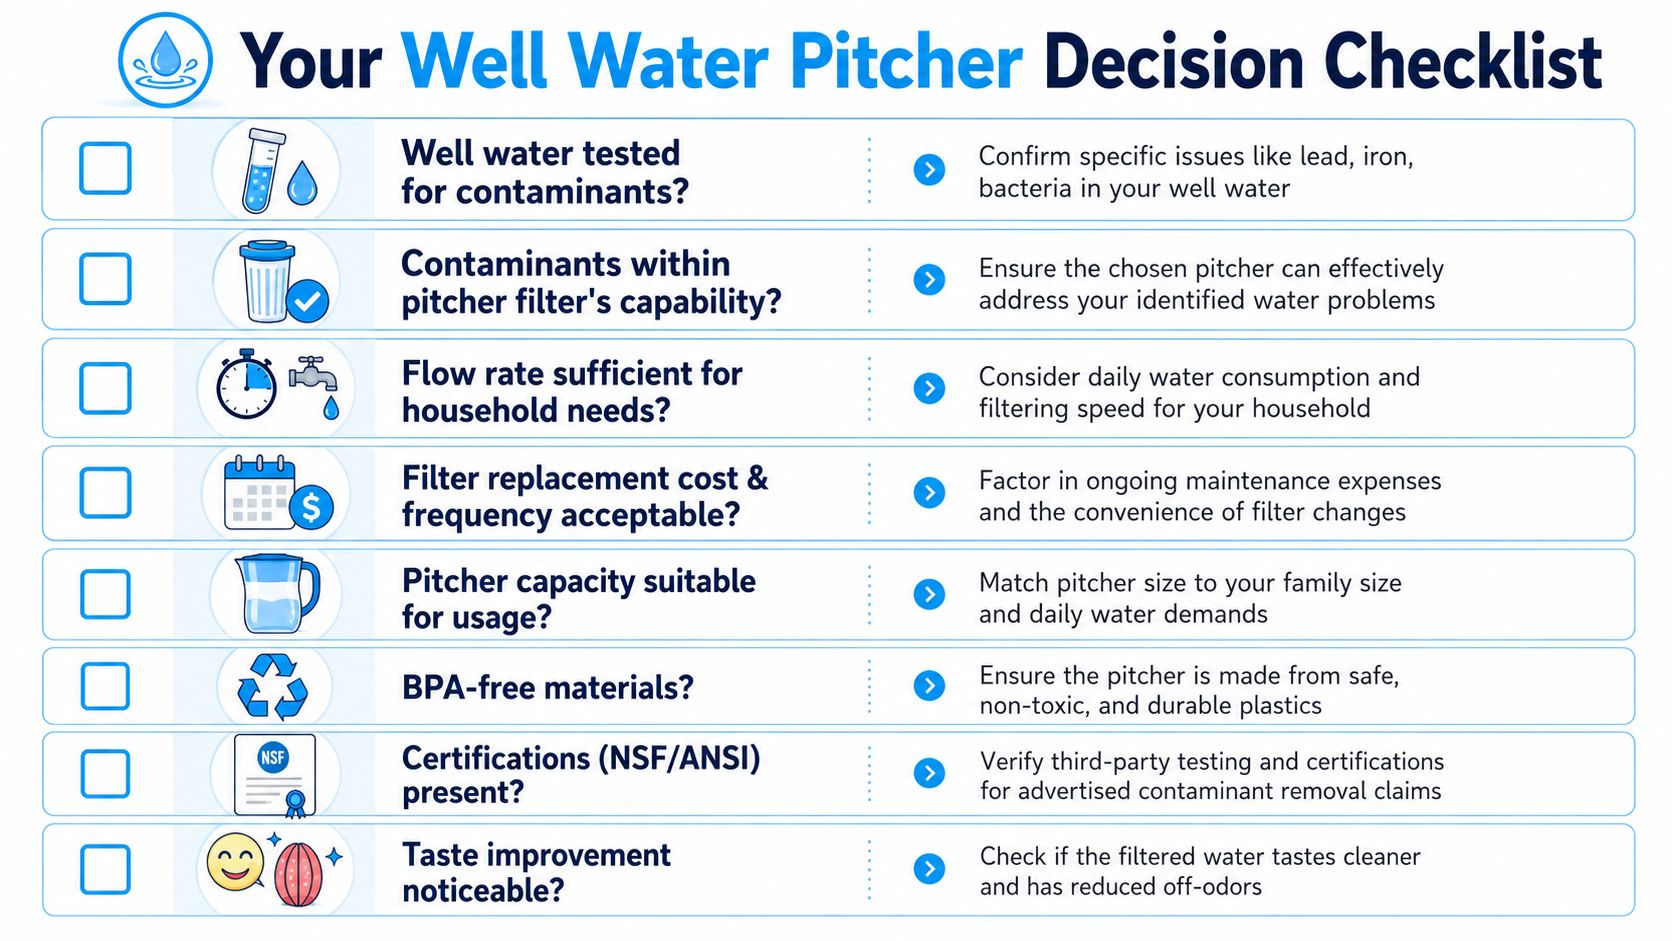
Your Well Water Pitcher Decision Checklist

A good decision isn't complicated once you strip away the packaging language. Save this checklist and use it before you buy anything.

A checklist for selecting a water filter pitcher specifically designed for well water filtration systems and safety.

Run through these questions in order

  • Have you tested your well water?
    If not, stop here. Don't pick a filter blind.

  • Is the problem limited to drinking water?
    If the issue shows up all over the house, a pitcher is too small a solution.

  • Does your report show a contaminant a pitcher can reasonably address?
    Some do. Many well-water problems don't fit this category.

  • Does the exact pitcher have the right certification for your contaminant?
    “Better tasting water” is not enough.

  • Will sediment, iron, sulfur odor, or microbial load make the pitcher impractical?
    Even a capable filter can become a headache on rough well water.

  • Can your household live with the refill routine, flow rate, and cartridge replacement schedule?
    Convenience matters because treatment only helps if people make use of it.

  • Are you using the pitcher as a temporary drinking-water tool, not as a substitute for whole-home treatment when that's needed?
    Safe decisions usually become obvious when considering this.

If you need confidence more than convenience, choose the treatment category first and the product second.

A pitcher can be the right answer, but only in a narrow lane. For many private wells, the safer answer is broader treatment and a pitcher only as a supplemental tool, if you want one at all.


If you're sorting through test results, certifications, and the difference between a quick fix and a proper treatment plan, Water Filter Advisor can help you compare options in plain English and choose a filtration setup that fits your home.

Find the Best Water Filter for Iron Bacteria

You lift the toilet tank lid and there it is. A reddish-brown slime clinging to the sides, maybe a swampy smell near the sink, maybe stains that seem to come back no matter how hard you scrub. A lot of homeowners see that mess and immediately search for a water filter for iron bacteria, hoping there's one box they can install and forget.

That instinct makes sense. It's also where many people waste money.

Iron bacteria problems usually aren't solved by filtration alone. They're solved by figuring out what's in the water first, then matching the right treatment system to the problem. Sometimes the issue is iron bacteria. Sometimes it's plain dissolved iron, manganese, sulfur, or a mix. Those problems can look similar from across the bathroom.

If you're dealing with slimy buildup, rusty staining, odors, or recurring fouling in a private well system, the goal isn't to buy a magic filter. The goal is to stop the living growth, remove what feeds it, and keep the plumbing from turning into a petri dish again. Think of this as a homeowner's roadmap from “What is this gross stuff?” to “What equipment will fix it?”

That Red Slime in Your Toilet? Let's Talk About It

A homeowner once described it to me this way: “The toilet looks clean on Monday, and by Friday it looks like something is growing in it.” That's a classic reaction, because iron bacteria often show up as a repeating nuisance, not a single dramatic failure. You wipe it away, flush a few times, and it comes back.

The clues tend to arrive in clusters. You may notice slimy buildup in the toilet tank, rusty residue in faucet aerators, laundry that picks up strange discoloration, or water that smells earthy or swampy. Some people assume they just have “hard well water.” Others buy a sediment filter, then wonder why the slime keeps winning.

Why homeowners get tripped up

The confusing part is that iron bacteria can mimic other water problems. Plain iron can stain. Manganese can darken fixtures. Sulfur can create odor complaints. If you treat the wrong problem, the equipment may work on paper and still fail in your house.

That's why the smart path starts with diagnosis.

Practical rule: If the problem is slimy, recurring, and tied to well water, don't shop by stain color alone.

A proper fix usually involves more than one piece of equipment. It may include cleaning, disinfection, contact time, and a filter that can handle oxidized material without plugging up right away. The filter matters. But the filter is part of a system, not the entire answer.

What a good solution should do

A lasting home treatment plan should help you answer three questions:

  • What am I dealing with. Iron bacteria, dissolved iron, manganese, sulfur, or a combination.
  • What needs to be killed or cleaned first. Living slime behaves differently from mineral staining.
  • What should be filtered continuously afterward. Ongoing filtration keeps the problem from rebuilding.

If you keep that order straight, choosing a water filter for iron bacteria becomes much easier.

Unmasking the Slimy Culprit in Your Pipes

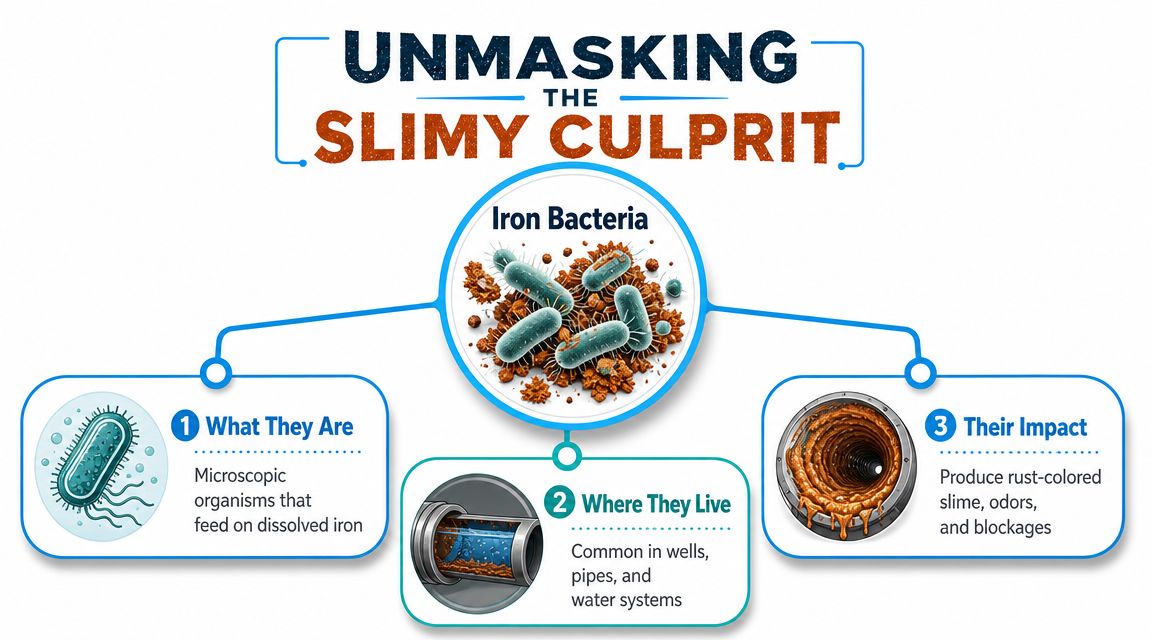
Iron bacteria are living microorganisms found most often in well-water systems. They feed on dissolved iron and oxygen, then leave behind a slimy biofilm that can coat wells, pipes, pressure equipment, and fixtures. The Minnesota Department of Health explains iron bacteria in wells and notes that they are not known to cause disease in people, but the biofilm can clog pipes, reduce well yield, and create conditions where other microorganisms may grow.

That last part matters. Homeowners often hear “not known to cause disease” and assume the issue is harmless. It isn't harmless to your plumbing system. It's more like plaque on teeth. The plaque itself may not be the whole problem, but once it builds up, it creates a place for other trouble to stick around.

An infographic explaining what iron bacteria are, where they live, and the impact they have on water systems.

What makes iron bacteria different from plain iron

Dissolved iron is a water chemistry issue. Iron bacteria are a biological growth issue. That distinction changes everything about treatment.

If you only have dissolved iron, your system's job is to convert that iron into filterable particles and remove it. If you have iron bacteria, you also need to deal with a living colony attached to surfaces. A filter can catch particles passing through it. It can't reach deep into slime coating your well casing or the inside of your plumbing and magically erase a colony.

Here's a simple way to separate the ideas:

Problem What it is What you notice
Dissolved iron Iron in the water Stains, discoloration
Iron bacteria Living microorganisms using iron Slime, odors, clogging, repeat buildup

Where the mess comes from

Iron bacteria act like tiny squatters in the system. They settle where water moves slowly or where iron and oxygen are available. Then they build up a film that traps more material. That's why homeowners often see trouble in toilet tanks, filter housings, pressure tanks, and low-flow plumbing parts.

The slime is the clue. Rust staining alone points one way. Stringy or gel-like buildup points another.

This is also why the search for a “water filter for iron bacteria” can be misleading. The right equipment usually has to do two jobs. It must help control the living growth and then remove the oxidized iron and debris left behind.

Is It Really Iron Bacteria? A Homeowner's Diagnostic Guide

The most expensive filter mistake is buying before testing. Public-health guidance stresses that iron bacteria should be confirmed by laboratory testing because the symptoms can look a lot like other iron, manganese, or sulfur issues. A useful homeowner-friendly explanation appears in this guide on iron bacteria in well water and why testing comes first.

A person holding a glass of murky water with sediment, concerned about water quality in their kitchen.

Start with what you can see

Before you call anyone, do a slow visual inspection around the house.

  • Check the toilet tank. Slimy walls or gel-like residue are stronger clues than ordinary rust staining.
  • Look at faucet aerators. If they clog with stringy material, that points more toward biological fouling than simple sediment.
  • Notice the odor. Earthy or swampy smells often send homeowners toward bacteria, though sulfur can confuse the picture.
  • Watch how the problem returns. If you clean a surface and the slime comes back quickly, that suggests active growth somewhere upstream.

If your concern is smell around a single sink, it's also worth separating water quality issues from drain issues. A drain trap or biofilm in the drain line can create odors even when the incoming water is fine. This guide on how to eliminate drain odors can help you rule that out before blaming the well.

Try a simple jar check

A basic home check can help you think more clearly before lab testing.

  1. Fill a clear jar with cold water from a tap that shows the problem.
  2. Look at it right away. Is it clear, cloudy, rusty, or does it have visible debris?
  3. Let it sit undisturbed for a while.
  4. Check the bottom and sides. Sediment alone suggests one kind of issue. Slimy or stringy material suggests another.

This won't replace a lab. It helps you avoid guessing blind.

What to ask a lab or water treatment pro

When you call for testing, don't just say, “My water is orange.” Describe the slime, odor, fixture buildup, and whether you're on a private well. Ask whether they can help distinguish among iron, manganese, sulfur-related issues, and iron bacteria.

A useful inspection includes more than the water sample. A good pro also looks at the well system, plumbing condition, and any treatment equipment already in place. If the well has been fouled for a long time, the system may need cleaning and disinfection before any filter has a fair chance.

For a visual walkthrough of common signs, this short video can help you compare what you're seeing at home.

What testing gives you: permission to stop guessing. Once you know whether the problem is biological, mineral, or mixed, the treatment path gets much simpler.

The Two-Punch Strategy for Total Elimination

Homeowners often ask whether they need a filter or a disinfectant. For iron bacteria, the answer is usually both. Think of the right approach as a two-punch strategy.

The first punch is disinfection. The second is filtration.

Punch one means killing the colony

If iron bacteria have colonized a well or plumbing system, you need to knock back the living growth. In well systems, shock chlorination is the standard first-line disinfection approach. Minnesota guidance specifies a chlorine concentration close to, but not greater than, 200 ppm, and notes that going significantly above that can reduce effectiveness. It's a useful reminder that stronger isn't always better.

That point surprises a lot of people. Many assume that if a little chlorine works, a lot must work better. Water treatment rarely rewards that kind of improvisation.

If you're trying to understand the chemistry side before attempting any cleanup, this article on the proper use of bleach in plumbing is a helpful companion for separating safe, targeted use from random pouring and hoping.

Punch two means removing the food and debris

Once the system has been disinfected, filtration takes over the ongoing job. Iron bacteria depend on iron as a growth substrate. If you remove the iron effectively, you make regrowth harder and reduce the staining and fouling that homeowners notice every day.

Here's the key mistake to avoid:

A filter can remove iron. It does not automatically erase an established colony living in the well and plumbing.

That's why a single “iron filter” often disappoints in homes with confirmed bacterial iron. The filter may reduce discoloration while the slime continues to rebuild upstream.

Why the two steps belong together

This paired approach works because each step covers what the other can't.

  • Disinfection handles the living contamination on surfaces.
  • Filtration handles the iron and oxidized material moving through the water.
  • Together they reduce recurrence better than either step alone.

In stubborn cases, homeowners may need repeated cleaning or follow-up treatment because biofilm protects bacteria much the way baked-on grease protects what's underneath. You don't wipe once and call the pan clean. You break up the layer, flush it out, and then keep new buildup from forming.

Building Your Iron Bacteria Defense System

A reliable home setup for iron bacteria usually looks like a treatment train, not a single canister. The Water Systems Council describes a multi-stage iron bacteria setup that uses disinfectant injection, a retention tank for contact time, and a backwashing media filter, often with 10-micron filtration to capture oxidized particles.

That sequence matters because each component does a different job.

A five-step diagram illustrating an iron bacteria water treatment process starting from raw water source to optional disinfection.

The basic treatment train

A typical whole-house system for this problem may include:

  1. Chemical injection
    An injection pump feeds a disinfectant into the incoming water. In many homes that means chlorine. The point isn't just odor control. It's to attack bacteria and oxidize dissolved iron so later equipment can catch it.

  2. Retention tank
    Water needs time with the disinfectant. If it rushes straight from the injection point into a filter, the chemistry may be incomplete and the bacteria may not be controlled well. The retention tank gives the water dwell time.

  3. Backwashing media filter
    This is the workhorse filter in many systems. It captures oxidized iron and suspended material, then cleans itself during a backwash cycle so the media bed doesn't stay packed with debris.

Why cartridge filters usually disappoint

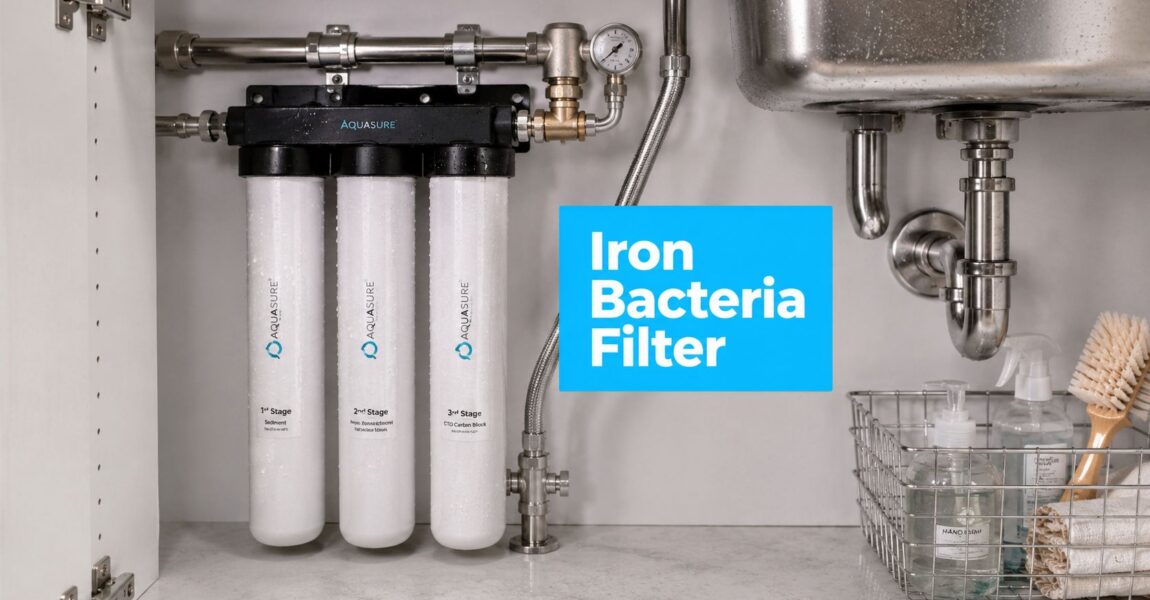
A homeowner will sometimes ask whether a big blue housing with a replaceable cartridge can do the job. For temporary polishing, maybe. For an active iron bacteria issue, usually not well enough.

Cartridge filters tend to load up quickly when slime and oxidized iron are both present. They can become maintenance magnets. A backwashing filter is better suited to ongoing whole-house service because it sheds accumulated material instead of asking you to swap cartridges every time the water gets ugly.

How to think about media choices

You'll hear a lot of media names in this category, including Manganese Greensand, Birm, and Catalytic Carbon. Each has a place in water treatment conversations, but the right choice depends on your water chemistry, whether disinfection is part of the system, and how much maintenance you're willing to handle.

A simple homeowner view looks like this:

Component What it does What to watch
Injection pump Adds disinfectant Needs refill and adjustment
Retention tank Provides contact time Must be sized to household flow
Backwashing filter Removes oxidized material Needs proper drain and backwash setup
Polishing stage if used Improves finished water Adds maintenance and cost

Sizing matters more than homeowners expect

The Water Systems Council notes that system sizing must match household flow demand. That means the tank and filter need to be large enough for peak use, not just average use. If the system is undersized, a shower, washing machine, and kitchen faucet running together can push water through too fast for treatment to finish properly.

That's why two neighbors with “the same iron problem” may need different equipment layouts. One household may have low demand and modest plumbing runs. Another may have multiple bathrooms, irrigation tie-ins, or fixtures that draw heavily at the same time.

If you're comparing configurations and trying to learn the language vendors use, Water Filter Advisor's filtration advice library is a useful place to sort through filter types, maintenance expectations, and matching systems to home water problems.

A dependable system is boring in the best way. It gives disinfectant time to work, filters the water without choking, and keeps doing that every day without constant babysitting.

Choosing the Right Filtration Method for Your Home

Once testing confirms what's in the water, the next choice is matching the treatment method to the iron load and the nature of the problem. Homeowners should then stop looking for a universal answer. The “best” water filter for iron bacteria depends on concentration, whether bacteria are present, and how much upkeep you're willing to take on.

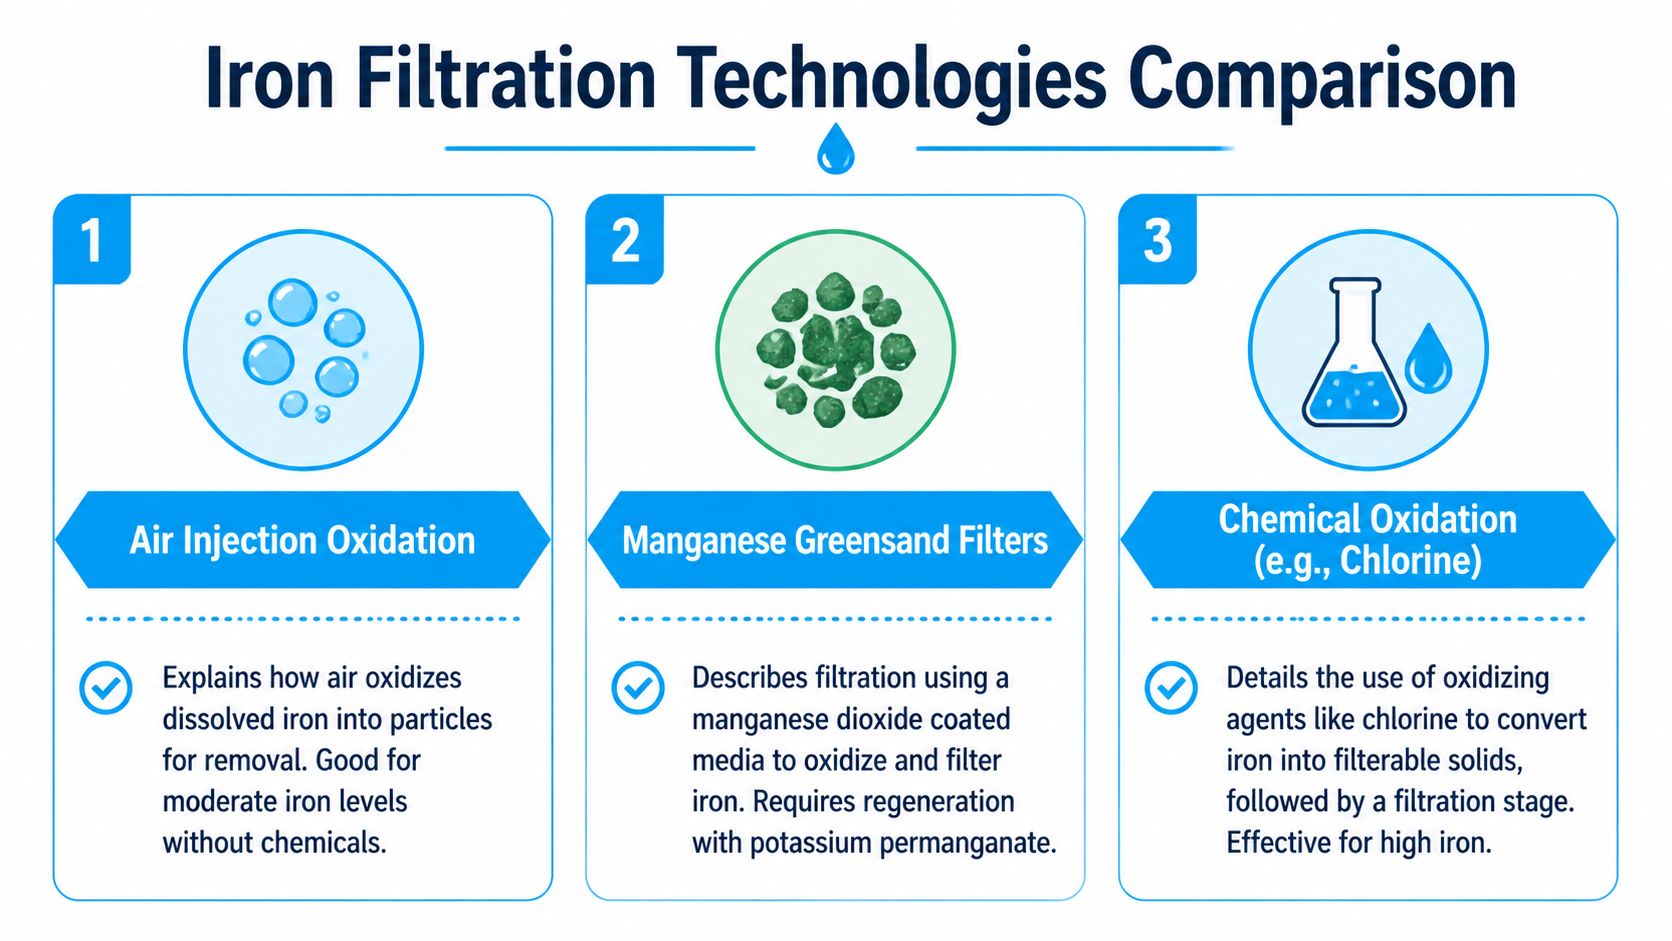
The strongest hard thresholds available come from Ohio State University Extension. It states that a water softener may be used for less than 5 mg/L iron, an iron greensand filter is recommended for less than 10 mg/L, and for more than 10 mg/L the preferred approach is chlorine followed by filtration. The same guidance says the water should stay in contact with chlorine for 20 to 30 minutes before filtration so iron particles can form. It also notes that chlorine may need to be applied more than once in stubborn situations, which lines up with what homeowners see when biofilm is involved. These treatment thresholds are outlined in Ohio State University Extension's iron removal guidance.

A comparison chart highlighting the differences between chemical, aeration, and greensand/birm methods for filtering household water contaminants.

A homeowner comparison

Method Best fit Strength Trade-off
Water softener Lower iron levels Can help when iron is modest Not a cure for iron bacteria
Greensand-style iron filter Moderate iron levels Purpose-built iron removal Still not a standalone answer for biofilm
Chlorine plus filtration Higher iron or bacterial iron concerns Handles oxidation and supports disinfection More equipment and more maintenance

How to decide without overbuying

If your testing shows iron on the lower end and no confirmed bacterial issue, a simpler iron treatment approach may be enough. If the report confirms iron bacteria, your decision changes. The system needs a disinfection philosophy built into it, not just a media tank with a persuasive label.

Use these questions to narrow the field:

  • Do you have confirmed iron bacteria or just iron staining
    If bacteria are confirmed, filtration alone is usually the wrong first move.

  • How much maintenance will you tolerate
    Chemical feed systems ask you to monitor solution levels and keep the equipment adjusted. Some homeowners don't mind that. Others want the simplest setup that still works.

  • Is your household flow modest or heavy
    Bigger families and homes with multiple simultaneous demands need properly sized retention and filtration stages.

  • Do you want a temporary improvement or a durable fix
    Small filters can reduce symptoms for a while. Whole-house treatment trains are better suited for lasting control.

Cost and hassle trade-offs

A more complete system usually costs more upfront and asks more from the installer. But that's often cheaper than buying the wrong filter first, then replacing fouled cartridges, cleaning clogged fixtures, and still living with slime.

Here's the practical truth. The lowest equipment price is not always the lowest ownership cost. A filter that constantly plugs, stains, or needs manual attention can become the expensive option fast, even without dramatic numbers attached to it.

Buy for the water you actually have, not the product description you wish were true.

If your home has recurring slime, odors, and well-water staining together, lean toward systems that combine disinfection, contact time, and backwashing filtration. Those systems are built for the problem you're trying to solve, not just for pretty water in a brochure.

Keeping Your Water Clear for the Long Haul

Getting rid of iron bacteria once is one job. Keeping it from creeping back is another. The homeowners who do best over time treat their system like a piece of household equipment that needs observation, not like a black box in the basement.

A simple maintenance rhythm

Keep an eye on the basics:

  • Watch for returning slime. Toilet tanks and aerators often show the first warning signs.
  • Check treatment supplies. If your system uses chemical injection, don't let the solution tank run dry.
  • Confirm backwashing is happening. A backwashing filter can't protect your home if it isn't cycling correctly.
  • Pay attention to flow changes. Reduced pressure can mean fouling, clogged components, or a filter that's no longer clearing itself well.
  • Retest when symptoms change. New odors, discoloration, or recurring buildup can mean the water chemistry has shifted or the colony has re-established itself.

When to stop troubleshooting and call a pro

Some signs mean it's time for expert help.

If the slime returns after disinfection and the equipment appears to be operating properly, the well or plumbing may need a deeper cleaning plan. If fixtures clog repeatedly, if multiple water issues seem to overlap, or if your treatment setup was pieced together without a full diagnosis, a water treatment specialist can save you months of frustration.

The right long-term mindset is simple. Diagnosis first, treatment second, maintenance always. That's how you choose a water filter for iron bacteria that works as part of a complete home solution, not as another expensive experiment.


If you're comparing system types, trying to understand filter media, or sorting through whole-house options for well water, Water Filter Advisor is a practical resource for researching filtration choices before you buy.

Carbon Filter for Well Water: Your 2026 Home Guide

You fill a glass from the kitchen tap, take a sip, and pause. Maybe it smells faintly earthy. Maybe there's a swimming-pool note, a metallic edge, or that unmistakable rotten-egg odor that makes you second-guess every shower and coffee pot in the house. If you're on a private well, that reaction is common.

A lot of homeowners land on one solution fast: install a carbon filter for well water. That instinct isn't wrong. Carbon is one of the most useful tools in home water treatment. It can make water far more pleasant to drink and use around the house.

But carbon also gets oversold. It's often treated like a cure-all, when in real well-water work it's usually a specialist. It shines in some jobs and completely misses others. If you know where it fits, you can build a system that works. If you expect it to do everything, you can spend good money and still have unsafe or frustrating water.
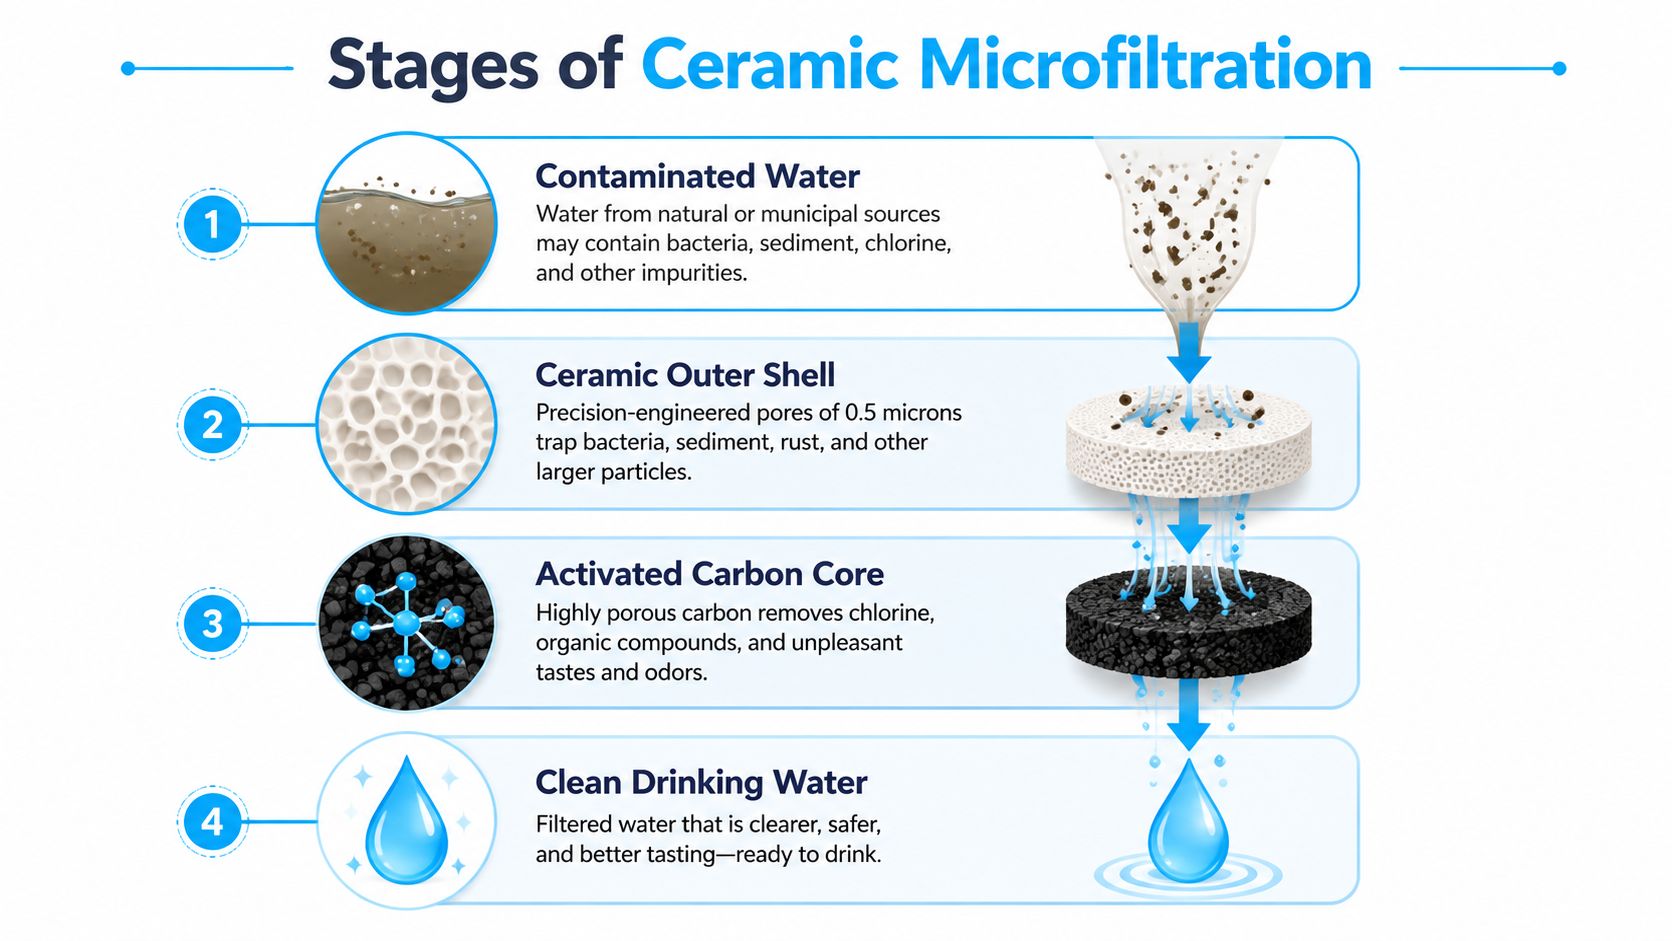
Why Your Well Water Tastes and Smells So Funny

You pour a glass from the tap, take a sip, and immediately notice something is off. Maybe the water smells like wet leaves after rain. Maybe it has a sharp chemical edge. Maybe the odor only shows up in hot water, or only at one bathroom sink. Those details matter, because taste and odor problems in well water usually come from a specific source, not from “bad water” in some general sense.

A private well pulls water straight from the ground under your home. On its way to your faucet, that water can pick up natural organic material, dissolved gases, minerals, or leftover treatment chemicals. Your nose and tongue often catch those changes first.

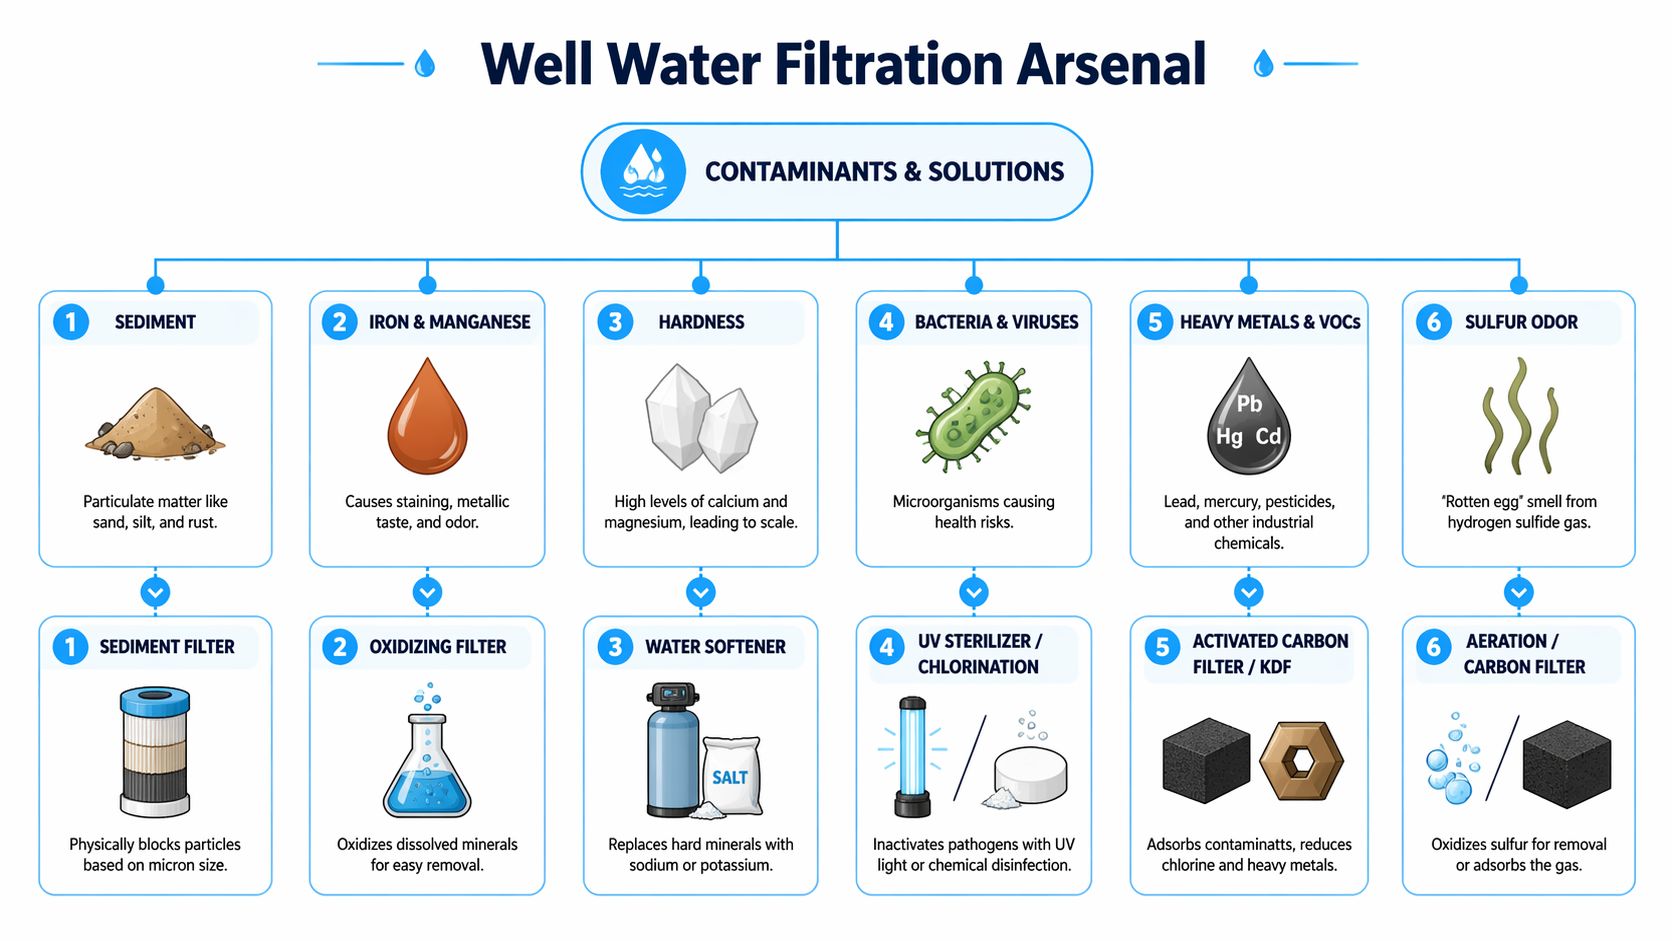
That is why odd taste and smell are useful clues.

What homeowners usually notice first

A carbon filter for well water often enters the conversation after complaints like these:

  • Musty or earthy taste and smell: Often linked to natural organic matter or decaying material in the water source.
  • Chemical or medicinal notes: Sometimes related to chlorine added for disinfection, or to certain organic compounds.
  • Flat, stale, or unpleasant flavor: Water may be technically clear but still unpleasant to drink.
  • Sulfur or rotten-egg odor: Often associated with hydrogen sulfide gas or sulfur-related bacteria.
  • One-faucet-only odor: This can point to a plumbing or water-heater issue rather than a whole-house water problem.

A helpful overview from Wellness Apothecary's water guide explains how different filter types target different classes of contaminants. That distinction matters with well water, because the smell you notice and the problem you have are not always the same thing.

Why smell does not always point to the right fix

Carbon is often a good match for water that tastes or smells unpleasant because it is very good at catching many organic compounds and removing chlorine after disinfection. It works a bit like a sponge for certain chemical compounds that cause bad taste and odor.

But a bad smell does not automatically mean carbon is the answer.

Rotten-egg odor is a good example. Homeowners often hear “bad smell” and buy carbon first. Sometimes that helps. Sometimes it barely changes anything, because the underlying issue is hydrogen sulfide, sulfur bacteria, iron, manganese, or a water heater reaction. In those cases, carbon may be only one player on the treatment team, or the wrong first step entirely.

The expensive mistake many well owners make

Water that smells better is not always water that is fully treated.

That is the trap. A carbon filter can make water more pleasant very quickly. The odor drops. The taste improves. The family stops complaining. Meanwhile, other problems can still be present, including hardness, bacteria, nitrates, or dissolved metals that carbon does little or nothing to remove.

For your well, the practical takeaway is simple: treat taste and odor as a starting clue, not a full diagnosis. If the problem is mainly unpleasant flavor or smell, carbon may be a strong fit. If the concern is safety, staining, corrosion, or known contaminants from a water test, carbon alone is often not enough.

How Carbon Filters Magically Clean Your Water

A carbon filter looks simple. Inside, though, it works less like a screen door and more like a giant parking garage built for unwanted chemicals.

An infographic explaining carbon filtration by using a parking lot analogy for water purification processes.

Think parking spaces, not holes

When carbon is activated, it's processed so it has a huge network of tiny internal surfaces. That matters because contaminants don't just get blocked. Many of them stick to the surface of the carbon.

That sticking process is called adsorption.

Absorption is what a bath towel does when it soaks up water. Adsorption is different. It's more like dust clinging to a TV screen or a magnet attracting filings. In a carbon filter, certain compounds in water are drawn to the carbon's surface and stay there while the water keeps moving.

What the water is doing inside the filter

Think of the filter this way:

  1. Water enters the system carrying a mix of useful water molecules and unwanted compounds.
  2. Those unwanted compounds move past millions of surface sites inside the carbon media.
  3. The right contaminants park there and stay behind.
  4. Cleaner-tasting, better-smelling water exits the filter.

That's why carbon is so good at taste and odor work. It doesn't need to strain out every dissolved substance. It just needs to attract and hold the compounds it's good at targeting.

If you want a broader plain-English overview of common home filter types, Wellness Apothecary's water guide is a helpful companion read.

Why contact time matters

A carbon filter for well water needs enough time and enough media to do its job. If water rushes through too quickly, contaminants have fewer chances to stick. If the carbon is exhausted, the “parking spaces” are already full.

That's why two carbon filters can perform very differently even if both are called “whole-house carbon filters.” Tank size, media type, flow rate, and cartridge design all matter.

Carbon works best when water moves through it at a pace the media can handle. Faster isn't always better.

Why some filters feel more “powerful” than others

Some systems use loose granular activated carbon, often called GAC. Others use a dense carbon block. Some use catalytic carbon, which is modified for tougher chemistry.

To a homeowner, the simplest way to think about it is this:

  • GAC systems are usually good at handling larger household flow.
  • Carbon block systems usually provide tighter filtration and more contact, but they can restrict flow more.
  • Catalytic carbon systems are chosen when standard carbon isn't enough for the smell or chemistry involved.

A carbon filter isn't magic in the mystical sense. It's selective chemistry packed into a very practical piece of plumbing. Once you see it that way, the key question becomes much easier: what exactly is your water asking the carbon to remove?

What Carbon Filters Remove and What They Ignore

You turn on the kitchen tap because the water smells earthy, oily, or a little like a swimming pool after shock chlorination. A carbon filter can help with some of that. It can also leave the underlying problem untouched.

That gap matters. Many well owners buy carbon expecting “cleaner” water in the broad sense, then learn later that the filter improved flavor while doing little for bacteria, hardness, nitrate, or metal problems.

An infographic showing the pros and cons of using carbon water filters for home water purification.

Where carbon earns its keep

Activated carbon works like a sponge for many taste, odor, and chemical compounds. It is especially useful with certain organic contaminants that want to cling to the carbon surface instead of staying in the water.

For a homeowner, that usually shows up as improvement in a few familiar areas:

  • Bad taste: musty, stale, chemical, or unpleasant flavors
  • Odor problems: especially smells tied to organic compounds
  • Chlorine taste and smell: often after a well has been disinfected or when chlorine is being used as part of treatment
  • Some VOCs and related organics: carbon is often used for these chemicals when the system is sized and maintained correctly

The U.S. Environmental Protection Agency explains that activated carbon can reduce many organic contaminants and is commonly used for taste and odor improvement in drinking water treatment (EPA overview of activated carbon treatment).

That is why carbon often feels impressive at the tap. Water that smelled harsh or tasted flat can become much easier to drink.

What carbon leaves behind

Carbon has clear limits, and from these limits, costly misunderstandings arise.

A carbon filter for well water usually does not solve these problems:

  • Bacteria
  • Viruses
  • Nitrates
  • Hardness minerals
  • Dissolved iron and manganese as primary contaminants
  • Many other dissolved metals

A simple way to picture it is this. Carbon is good at grabbing many chemical hitchhikers that affect taste, smell, and some organic contamination. It is not built to remove every dissolved mineral or kill living organisms.

So if your lab report shows E. coli, nitrate, hard water, arsenic, iron staining, or manganese, carbon should not be your main answer. It may still belong in the system, but only as one part of it.

Why the bacteria myth causes trouble

Homeowners often hear that carbon “purifies” water. That word causes confusion.

Research published in Applied and Environmental Microbiology found that activated carbon did not significantly reduce bacteria in domestic water use conditions (study on activated carbon and bacteria in household water). In plain terms, carbon can make unsafe water taste better without making it microbiologically safe.

That is a dangerous combination. Better-tasting water can create false confidence.

A quick reality check for your well

Use this table as a first screen before you spend money:

Water problem Is carbon usually a strong fit?
Musty or chemical taste Yes
Odor from many organic compounds Yes
Chlorine taste after disinfection Yes, often as a polishing step
VOC concerns Often, if the filter is properly selected
Hard water scale No
Bacteria concerns No
Nitrate concerns No
Iron staining Usually no, not as the main treatment

If your water problem sits mostly in the “No” column, carbon is being asked to do the wrong job.

Homeowners who want help matching symptoms to the right treatment order can review well water treatment advice by problem type. If you are also sorting out plumbing flow issues around the system, water filter drain cleaning can help you understand that side of the setup.

Building Your Well Water Treatment Team

A lot of expensive well water mistakes start with one assumption: “If I buy a carbon filter, I'm done.”

For some wells, carbon is a smart part of the answer. For many others, it is only one player in a larger setup. That difference matters, because carbon can make water smell and taste better while leaving the underlying problem untouched.

A strategic diagram showing a water treatment team consisting of carbon filters, sediment filters, UV sterilizers, and water softeners.

Carbon is one specialist on the team

Well water is local. Two homes on the same road can need completely different treatment because the wells, plumbing, geology, and contamination risks are different.

Carbon works like a sponge for many taste, odor, chlorine, and organic chemical issues. It does not solve every well water problem. If your concerns are bacteria, nitrates, hardness, or heavy metals, carbon is usually the wrong lead treatment. As noted earlier, in such instances, homeowners can spend real money and still end up with unsafe or frustrating water.

That is why a treatment system should be built from your test results, not from the most appealing product page.

Match each device to one clear job

A good well setup works best when each piece of equipment has a narrow role.

  • Sediment filter: Catches sand, grit, rust, and other particles before they clog downstream equipment.
  • Carbon filter: Improves taste and odor, removes chlorine after shock treatment or continuous disinfection, and can reduce some organic contaminants.
  • Water softener: Removes hardness minerals that leave scale on fixtures, shorten appliance life, and make soap harder to rinse.
  • UV sterilizer: Disinfects clear water when microbial protection is part of the plan.
  • Other targeted treatment: Some wells need dedicated equipment for iron, manganese, sulfur, arsenic, nitrate, or other contaminants that carbon does not handle well.

The practical lesson is simple. Ask each device to do the job it is good at, and no more.

Order matters as much as equipment choice

Treatment equipment works like a relay team. If the first runner stumbles, the rest of the system struggles too.

Sediment ahead of carbon helps the carbon last longer. Problem-specific treatment ahead of carbon prevents the carbon from getting overloaded with the wrong contaminant. UV usually belongs after the water is physically clear, because cloudy water can block the light and reduce disinfection performance.

A common sequence looks like this:

  1. Sediment reduction
  2. Treatment for the main well problem
  3. Carbon as a polishing stage, when carbon fits the water
  4. UV at the end, if disinfection is needed

That middle step is where many systems succeed or fail. If iron is the primary concern, iron treatment often belongs there. If sulfur is the main complaint, the right sulfur strategy belongs there. If lab testing shows bacteria, the plan needs to center on microbial safety, not on carbon.

Three real-world examples

Bad smell, clear lab results for bacteria:
Carbon may be a good finishing step if testing points to organic-related odor or leftover chlorine taste after disinfection.

Orange stains, metallic taste, clogged fixtures:
Start by looking at iron or manganese treatment. Carbon alone usually disappoints because it is being asked to fix a staining problem it was not designed to solve.

A failed bacteria test after heavy rain:
Carbon should not be treated as the fix. The system needs a disinfection strategy, often with correction of the source issue and possibly UV or another appropriate treatment method.

This is the honest part that sales pages often skip. Better-tasting water is not the same as fully treated water.

If you are comparing combinations and trying to avoid buying equipment in the wrong order, this collection of well water treatment advice by problem type can help you sort symptoms into the right treatment roles. Homeowners planning drain lines, backwash routing, or service access can also review this guide to water filter drain cleaning before installation.

Choosing the Right Carbon Filter System

Once you know carbon belongs in your setup, the next job is choosing the right style. In this process, many homeowners accidentally buy a system that sounds good online but doesn't match their water or their house.

GAC, carbon block, and catalytic carbon

The biggest distinction is the type of carbon media.

Standard GAC is loose granular activated carbon. It's widely used in whole-house systems because it can support household flow without feeling too restrictive.

Carbon block compresses carbon into a denser form. That usually means finer mechanical filtration and stronger contact, but it can also mean more pressure drop and more frequent cartridge changes in some applications.

Catalytic carbon is the one homeowners should pay close attention to when odor is the main complaint. Technical guidance notes that standard GAC excels at chlorine and VOCs, while catalytic carbon is superior for chloramines and hydrogen sulfide, the classic rotten-egg smell in well water (technical guide to carbon types and well-water odor issues).

If you have sulfur odor and a seller is pushing ordinary carbon without discussing catalytic media, ask harder questions.

Cartridge system or tank system

The next decision is the system format.

A cartridge system is common for smaller installations or point-of-use treatment. It's straightforward, easy to understand, and familiar to DIY-minded homeowners. The trade-off is hands-on maintenance. You have to stay on top of replacements.

A tank-based system is more common for whole-house treatment. It's usually better suited to larger flows and whole-home polishing. Up front, it's a bigger commitment. Over time, many homeowners prefer it because daily use feels more automatic.

Flow and placement matter more than people expect

Some whole-house inline carbon systems commonly target about 4–10+ GPM service flow, and technical guidance often recommends treatment order of sediment first, then carbon, then optional lead, cyst, or UV equipment downstream (whole-house inline carbon filter technical guidance).

That matters because a carbon filter for well water must fit your house at peak use. If two showers, a washing machine, and a kitchen faucet run at once, an undersized system can choke flow and make the filter seem defective when it's really just too small.

Carbon Filter Type Comparison

Filter Type Best For Maintenance Level Typical Cost
GAC tank Whole-house taste, odor, chlorine, some organics Moderate Varies by size and system design
Carbon block cartridge Finer filtration at a point of use or smaller-scale applications Higher Usually lower up front, ongoing cartridge replacement
Catalytic carbon tank or cartridge Chloramines and hydrogen sulfide odor issues Moderate Usually higher than basic standard carbon options

A practical buying checklist

Before you buy, answer these questions:

  • What did your water test show? Buy to the test, not the symptom alone.
  • Is the problem taste and odor, or safety? Carbon handles one category far better than the other.
  • Do you need whole-house flow or single-tap treatment? Don't undersize.
  • Is rotten-egg smell part of the complaint? If yes, look closely at catalytic carbon.
  • Will the filter sit after sediment treatment? It should, in most well setups.

The best carbon system is rarely the one with the loudest claims. It's the one whose media, size, and placement match the exact job.

From Box to Tap Installation and Maintenance

Saturday morning is when many well water mistakes show up. The new carbon filter is in place, the first faucet opens, and out comes gray water, weak pressure, or a taste that somehow seems unchanged. In many cases, the filter itself is fine. The trouble is the setup around it.

A step-by-step infographic illustrating the installation and maintenance process for a residential carbon water filter system.

Put carbon in the right place

Carbon usually works best near the end of the treatment line, not at the front. A good way to picture it is as a finishing sponge for dissolved taste and odor compounds. If you force that sponge to catch sand, rust, and heavy well contamination first, it plugs up faster and does a worse job.

For many private wells, the sequence looks something like this:

  • Sediment filtration first: catches grit, sand, and debris before they load up the carbon
  • Problem-specific equipment next: such as iron treatment, softening, or other equipment your water test calls for
  • Carbon after that: improves taste, odor, and some chemical-related complaints
  • UV last, when used: keeps the disinfection step downstream of the other treatment stages

That order matters because carbon is not a cure-all. If your well has iron, manganese, sulfur bacteria, or other raw-water problems, carbon often needs help from other equipment. Putting it in the wrong spot can make a decent filter look ineffective when the actual problem is that it was asked to do a job outside its lane.

Don't skip the startup flush

Fresh carbon media often sheds a small amount of black dust at startup. Those particles are called fines. They look alarming, but they are common with new media and after service.

Flush the system exactly as the manufacturer instructs before using the water normally. That first flush is like rinsing a new coffee filter before brewing. Skip it, and the mess shows up in the cup.

This installation video gives a helpful visual reference for what a residential filter setup process can look like in practice.

Maintenance is where carbon systems succeed or fail

Carbon rarely quits in a dramatic way. More often, performance fades a little at a time. The water starts to smell different. The taste gets flatter or mustier. Pressure slips enough that a shower feels weaker, but not weak enough to trigger immediate concern.

Watch for these clues:

  • Taste or odor returns: a common sign that the carbon is used up or no longer matches the water conditions
  • Pressure drops: often caused by a clogged sediment pre-filter, a loaded cartridge, or flow restrictions around the system
  • Uneven flow in the house: can point to valve issues, partial clogging, or an installation problem
  • Black specks after service: usually disturbed carbon fines that need flushing out

Tank systems and cartridge systems have different service schedules, but the homeowner routine is similar. Keep a simple log. Write down install dates, flush dates, filter changes, and any change in taste, smell, or pressure. That record helps you tell the difference between normal carbon exhaustion and a bigger well water problem that carbon was never meant to solve.

New carbon systems often need a good flush before the water runs clear. Black fines at startup are usually a commissioning issue, not a contamination emergency.

Keep the system easy to service

Service access sounds boring until the first filter change. Then it becomes the difference between a 15-minute job and a half-day hassle.

Leave enough room around housings and tanks to open them properly. Make shutoff valves easy to reach. Install the system where you can change cartridges without moving storage boxes or kneeling in a cramped corner. Homeowners delay maintenance when service is awkward. Delayed maintenance leads to weak performance, shorter filter life, and the mistaken belief that carbon filters do not work.

A well-installed carbon system should be easy to reach, easy to flush, and easy to maintain. If it is difficult to service, the design needs work, even if the filter itself is the right one.

Troubleshooting Common Carbon Filter Problems

When a carbon filter for well water acts up, the symptom usually points to the cause if you know what to watch for.

Symptom and likely cause

Water pressure drops suddenly
The first suspect is often the sediment pre-filter. If that's loaded up, the carbon downstream doesn't get proper flow. In cartridge systems, the carbon block itself may also be spent or clogged.

Black or gray water appears after installation
That's usually carbon fines from new media or from a recent service event. Flush the system until the water runs clear.

Bad taste or smell comes back
Carbon media doesn't last forever. If the original complaint returns, the media may be exhausted or the water chemistry may have changed enough that the existing filter no longer matches the job.

A sulfur smell never improved much in the first place
That often points to the wrong carbon type. If hydrogen sulfide is the issue, standard carbon may not be the right choice.

Leaking around the housing
Check the O-ring, the seating surface, and whether the housing was tightened correctly. A tiny twist or bit of debris can cause a frustrating drip.

One modern troubleshooting check

If your concern is a newer contaminant category such as PFAS, don't rely on marketing language alone. The U.S. EPA's April 2024 guidance identifies granular activated carbon as one of the main household filter types that can reduce PFAS and advises consumers to look for certification to NSF/ANSI 53 or NSF/ANSI 58. The same EPA fact sheet also notes that certification claims currently center on PFOA and PFOS, and cites an independent summary reporting activated carbon removed about 73% of PFAS contaminants in drinking water (EPA PFAS and home water filter guidance).

A simple troubleshooting mindset

Start upstream, then move downstream.

  1. Check the pre-filter.
  2. Check whether the system was flushed properly.
  3. Check whether the carbon type matches the actual contaminant.
  4. Check whether the media is due for replacement.
  5. Check installation seals and housing connections last.

Most carbon problems aren't mysterious. They come from clogging, exhausted media, wrong media selection, or poor placement in the treatment train.


If you're comparing systems, replacement filters, certifications, or whole-house setups for your home, Water Filter Advisor is a practical place to continue your research. It's built for homeowners who want clear explanations, realistic buying guidance, and maintenance help without the usual filtration jargon.

Best Whole House Nitrate Filter Options for 2026

You open the lab report at the kitchen counter, scan past the pH and hardness numbers, and then see the word nitrate flagged high. That's usually the moment the questions start. Is the water safe to drink? Do you need a whole house nitrate filter right now? Or are you about to spend money on a system that treats far more water than you need to treat?

A lot of homeowners hit that exact fork in the road, especially on private wells. The good news is that nitrate contamination is a familiar water-quality problem with established treatment options. The bad news is that plenty of buying guides jump straight to product pitches before helping you decide whether a whole-house setup is even the right tool.

The Day Your Water Test Comes Back High in Nitrates

High nitrates on a water test feel personal fast. You think about baby formula, coffee, pasta water, pets, and every glass poured from the tap. If you rely on a well, you may also feel isolated, like this is your property's problem alone.

It usually isn't.

According to a foundational EPA survey, nitrate detection was projected in 57 percent of rural domestic wells, and more recent data shows that 1 in 5 households on private wells continue to have nitrate levels higher than the EPA's safe drinking water limit of 10 mg/L according to this nitrate overview. That tells you two things at once. First, your concern is justified. Second, this is a known problem with known responses.

A person holding a test strip indicating high nitrate levels in front of a kitchen faucet.

What matters first

The first practical move is simple. Don't guess from taste, smell, or water clarity. Nitrates don't announce themselves that way.

Start with these questions:

  • Who drinks the water most often. If infants, pregnant women, or medically vulnerable people are in the home, the decision gets more urgent.
  • Where the water is consumed. Kitchen tap, fridge dispenser, coffee maker, ice maker, and any bathroom tap used for brushing teeth all matter more than the shower.
  • Whether the result came from a reliable test. If the test was a basic strip, confirm it with a lab-quality result before sizing expensive equipment.

Practical rule: A high nitrate result is a treatment decision, not a panic decision.

Homeowners often assume the answer has to be a whole house nitrate filter because the phrase sounds thorough and safe. Sometimes that's correct. Sometimes it's expensive overreach. The right answer depends on your water chemistry, your plumbing demand, and one very important question that gets skipped too often: do you need to treat every gallon in the house, or only the water you ingest?

Understanding Nitrates in Your Water Supply

Nitrate is a form of nitrogen that moves easily with water. In home water problems, it often shows up after nitrogen from fertilizer, manure, septic influence, or decaying organic matter travels down through soil into groundwater. The simplest analogy is over-fertilizing a garden. What the plants don't use doesn't just disappear. Water carries some of it downward.

That's why wells are so often part of the nitrate conversation. Groundwater can pick up what's happening at the surface and hold onto it.

The one number to remember

For homeowners, the key benchmark is the EPA drinking water limit of 10 mg/L as nitrogen, often written as 10 ppm. If your result is above that number, you need a treatment plan or a safe alternate source for drinking and cooking water.

That number should guide every decision that follows. Not the sales page. Not the size of your house. Not the fact that your neighbor installed a big tank system.

If you want a plain-language refresher on the contaminant itself, this guide on nitrate in drinking water is a useful place to start.

Why ingestion is the real concern

Nitrate risk is primarily about what goes into the body through drinking and cooking. That's why water used for baby formula deserves special attention. It's also why homeowners can make smarter, more targeted choices instead of defaulting to treating every faucet and shower line.

A few practical examples make this easier to see:

  • Drinking water matters.
  • Water used to make soup, tea, coffee, and pasta matters.
  • Ice made from tap water matters.
  • Shower water and laundry water generally aren't the main nitrate exposure pathway.

High nitrates are a drinking-water problem first. That distinction saves some households a lot of unnecessary equipment.

Testing before buying

Before you compare filters, tighten up the testing side.

Use a result that tells you the actual nitrate level, and make sure the sample reflects the raw water entering the home. If you're on a well, test the untreated source water before any existing equipment. If you already have softeners, sediment filters, or carbon units, those matter for system design, but the raw-water number is what decides whether nitrate treatment is necessary at all.

A good nitrate plan starts with the test report, not the catalog.

Comparing Whole House Nitrate Removal Technologies

If you do need house-wide treatment, the technology matters as much as the nitrate number. A whole house nitrate filter is not one universal machine. It's a category, and the systems inside that category work very differently.

The two technologies homeowners see most often are nitrate-selective ion exchange and reverse osmosis. Distillation gets mentioned sometimes, but it's rarely the practical whole-house choice in normal residential settings.

A diagram comparing three technologies for removing nitrates from whole house water systems: ion exchange, reverse osmosis, and distillation.

How the main technologies behave in real homes

Ion exchange works like a bouncer swapping wristbands at the door. The resin bed captures nitrate ions and trades them for chloride. It's one of the most common whole-house approaches because it can keep up with household flow better than many alternatives.

According to product guidance summarized by Aqua Home Supply, nitrate-selective ion-exchange systems can reduce nitrate levels by up to 90% and are commonly sized with 1.0 to 2.0 cu ft of media to support service-flow targets of 9 to 13 GPM for residential nitrate treatment. In practice, that means sizing errors show up fast. Too little resin or too much demand, and nitrate breakthrough arrives earlier than expected.

Reverse osmosis works more like an ultra-fine screen. Water is pushed through a semi-permeable membrane while many dissolved contaminants, including nitrates, are rejected. RO is excellent for high-quality drinking water and can also remove a broader range of contaminants than ion exchange. The trade-off is complexity. Whole-house RO systems require careful pretreatment, storage, and pressure management.

Distillation separates water by boiling and condensing it. It can remove nitrates, but it's usually a niche fit for residential use because it's energy-intensive and not a normal answer for supplying a whole house.

Nitrate filtration technology comparison

Technology How It Works Pros Cons Best For
Ion exchange Swaps nitrate ions for chloride using resin Good fit for continuous household flow, common for whole-house use Needs salt regeneration, produces brine, sensitive to competing water chemistry Homes that need house-wide nitrate treatment and can support maintenance
Reverse osmosis Forces water through a membrane that rejects nitrates and other dissolved contaminants Broad contaminant reduction, strong drinking-water performance More complex as a whole-house setup, needs pretreatment and ongoing service Households with broader contamination concerns or targeted under-sink use
Distillation Boils water and condenses steam Effective in principle Slow, energy-heavy, impractical for full-home demand Small-volume specialty use

For readers comparing treatment paths for well water, this guide on how to remove nitrates from well water helps connect the technology to real installation choices.

What gets overlooked

Most homeowners compare removal claims and stop there. That's not enough. You also need to think about waste streams. Ion exchange produces brine. RO produces reject water. If your house runs on a septic or onsite treatment setup, the interaction between filtration equipment and wastewater handling matters. That's one reason some homeowners also review sustainable wastewater solutions from USA Tank when planning larger water-treatment upgrades.

A nitrate system that looks strong on paper can still be the wrong choice if your home can't comfortably support its maintenance and wastewater demands.

Sizing Your System for Flow Rate and Water Chemistry

Regarding nitrate projects, success or failure often depends on the approach. Homeowners often size by square footage or family count because that's easy to visualize. Nitrate systems don't care about your floor plan. They care about flow rate and source-water chemistry.

A whole house nitrate filter has to do two jobs at once. It has to keep up when multiple fixtures run, and it has to perform correctly against the specific minerals and contaminants in your water.

A diagram illustrating residential water system flow rates and pipe sizing for home plumbing infrastructure.

Flow rate decides whether the system keeps up

Think about your busiest water moment. A shower is running, someone starts the dishwasher, and a toilet refills. That combined demand is what the treatment system has to handle without starving the house for pressure or reducing contact time too much.

With nitrate ion exchange, undersizing creates a familiar failure pattern. The system may seem fine at first, but treated-water quality drifts as demand pushes the bed harder than it was designed for. Homeowners often describe this as a filter that “worked for a while and then didn't.” In many cases, the issue was sizing, not magic resin failure.

Water chemistry decides whether the system keeps working

Clean Water Store's guidance gets to the heart of it. The best-performing installations are built around lab-tested source water, not just household size, and product specs often cap hardness at less than 3 gpg and iron at less than 0.3 ppm because higher levels can foul the resin and push treated nitrate above the EPA's 10 ppm limit in real operating conditions.

That's why a detailed water test is not optional.

Here's what to watch for before choosing equipment:

  • Hardness and iron can foul media or create service problems that shorten effective run length.
  • Sulfates compete with nitrate in ion-exchange systems and can reduce removal efficiency.
  • Sediment can physically burden valves, beds, and membranes if you skip pretreatment.
  • Manganese and other nuisance minerals can turn a good design into a maintenance-heavy one.

Field note: Match the equipment to the water first, then match it to the family's usage pattern.

If a dealer recommends a one-size-fits-all tank without asking for a lab report, that's a red flag. The better installations are built from raw-water data outward.

The Hidden Costs Regeneration Maintenance and Upkeep

The purchase price gets attention because it's visible. The long-term burden usually doesn't, and that's where a lot of disappointment starts.

Ion-exchange nitrate systems often look straightforward from the outside. Tank, control valve, brine tank, done. But the system keeps doing work after installation. It regenerates, uses salt, backwashes, and sends waste brine out of the home. Those are not side details. They are part of the ownership cost.

What the brochure tends to underplay

According to RainDance's nitrate filter guidance, many ion-exchange systems advertised for 90%+ nitrate reduction require salt regeneration and produce waste brine, with hidden costs that include annual salt purchases, more water use for backwashing, and growing service complexity over time for the homeowner.

That translates into a few practical realities:

  • You'll buy salt regularly. If you dislike carrying bags and managing a brine tank, don't ignore that.
  • The system uses water to maintain itself. That matters on wells, septic systems, and properties where water efficiency matters.
  • Valves and controls need attention. Even good hardware can become unreliable if settings drift, injectors clog, or maintenance is skipped.

Reverse osmosis has its own upkeep profile

Whole-house RO avoids salt regeneration, but it doesn't eliminate maintenance. Pretreatment filters need replacing. Membranes eventually need service. Pumps, storage, and repressurization add moving parts and troubleshooting time.

I always tell homeowners to budget attention, not just money. The right nitrate treatment system should fit the amount of maintenance you will do, not the amount you hope you'll do.

For readers who like understanding what failure looks like before it happens, this piece on analyzing water treatment equipment failures is worth reviewing. It's useful because water systems rarely fail all at once. They usually drift, foul, clog, or lose performance in ways that are predictable if you know what to watch.

The honest cost question

The best nitrate system isn't the one with the boldest removal claim. It's the one you can keep operating correctly.

If maintenance gets neglected, the label on the tank won't save water quality. A simpler point-of-use setup that does get serviced can beat a neglected whole-house system every time.

The Big Decision Whole House vs Point of Use Filters

This is the question most buyers should ask before comparing brands. Do you need a whole house nitrate filter, or do you need safe water only at the taps used for drinking and cooking?

For many homes, those are not the same thing.

A person sitting between two blue Aquatemp water filters while appearing to contemplate a difficult decision.

Culligan's product guidance makes the central point clearly. Nitrate risk is tied primarily to ingestion, not skin contact, which means point-of-use treatment can be more cost-efficient for many homes, even though vendor pages often present whole-house nitrate removal as the default without much comparison.

When whole house treatment makes sense

A whole-house system is usually easier to justify when the household wants one treatment strategy across the property and understands the maintenance involved.

That choice tends to make sense when:

  • Multiple taps are used for drinking and cooking, including secondary kitchens, utility sinks, or bathroom taps.
  • The household wants every cold-water line treated because managing one protected tap isn't practical.
  • There are additional treatment goals that make a centralized setup more logical.
  • You're prepared for the service burden of a larger system.

When point-of-use is the smarter move

If nitrates are your main concern and the risk is about what people drink, an under-sink reverse osmosis unit or dedicated drinking-water tap is often the cleaner answer.

Point-of-use treatment is often the better fit when:

  • The concern is limited to ingestion.
  • Only one kitchen tap and maybe the ice line need treatment.
  • You want lower upfront cost and less whole-home plumbing disruption.
  • You're not interested in managing brine regeneration for every gallon used in showers and laundry.

Treating shower water for nitrate alone is often like putting a whole-house air filter in place because one room smells musty. Sometimes it's warranted. Often it's not.

A short explainer can help if you want to see the decision framed visually:

A practical decision path

Use this simple logic:

  1. Confirm the nitrate result with a reliable test.
  2. Ask where exposure happens in your home.
  3. If the main need is drinking and cooking water, start by evaluating point-of-use RO.
  4. If multiple points of consumption make POU impractical, price and size a whole-house system based on lab results.
  5. Choose the option you can maintain consistently.

The most expensive answer isn't automatically the safest one. The safest one is the treatment plan that reliably protects the water people ingest.

Installation Costs and Finding a Certified System

Once you know whether whole-house treatment is justified, the buying process gets easier. Cost still matters, but certification matters just as much.

According to Mid Atlantic Water, the upfront cost for a whole-house nitrate filter typically ranges from $2,895 to $3,295, with annual operating costs of about $100 to $200, and certified systems are proven to reduce nitrates by 78% to over 92% depending on the system and certification basis. Those numbers are useful because they set expectations before you talk to an installer.

What to check before you buy

Use this checklist:

  • Verify the treatment approach. Don't buy a whole-house nitrate filter before deciding that whole-house treatment is necessary for your household.
  • Ask for certification details. For RO, NSF/ANSI 58 matters for contaminant reduction claims. For other filters that reduce nitrates, look for the relevant certification support behind the claim.
  • Review the full water test. A nitrate system chosen without raw-water chemistry is guesswork.
  • Discuss maintenance in plain terms. Ask who changes filters, who sets regeneration, and how post-install testing will confirm performance.
  • Be realistic about DIY. Some homeowners can handle plumbing work, but nitrate treatment equipment is less forgiving than simple cartridge filters. A bad install can undermine a good system.

A certified system doesn't replace proper sizing, and a properly sized system doesn't replace maintenance. You need both. When those pieces line up, nitrate treatment becomes a manageable home-water project instead of a recurring source of worry.


If you're weighing a whole house nitrate filter against a simpler under-sink option, Water Filter Advisor can help you compare technologies, understand certifications, and choose a filtration setup that fits your actual water use instead of a sales script.

A Guide to the Best Ceramic Candle Water Filter for 2026

A neighbor once brought me a countertop ceramic filter and asked why it had become painfully slow. The answer was sitting right on the outside of the candle: a thin layer of trapped dirt doing exactly what the filter was built to do.

The Enduring Simplicity of Ceramic Water Filtration

A century ago, a family could set a clay filter on the counter, pour in cloudy water, and wait. No outlet, no app, no moving parts. The same basic appeal still draws homeowners to ceramic filtration today.

A ceramic candle water filter is simple by design. A porous, candle-shaped element sits inside a housing, and water passes through it slowly under gravity. The pace is part of the bargain. You get a filter that keeps working during a power outage, asks very little from the user, and is easy to understand with your own eyes and hands.

That simplicity is why ceramic filters have lasted so long. They solve a narrow set of problems well. If your main concern is visible dirt, cloudiness, or microbe reduction in a low-tech setup, a ceramic unit can be a practical fit. It works a bit like an old cast-iron pan in the kitchen. Slow, plain, dependable, and still useful because the basic job has not changed.

The trade-off matters.

A ceramic candle is not a fast, all-purpose treatment system. It usually produces water gradually, so it suits daily drinking and cooking better than whole-house demand. It also does not cover every contamination risk. Some dissolved chemicals, salts, and very small contaminants can pass through, which means the best choice depends on what is in your water, not just what you can see.

That is where many homeowners get tripped up. Clear water is not always fully treated water. Ceramic filtration earns its reputation by being reliable, repairable, and affordable to maintain, but its strengths are specific, not unlimited.

Used for the right job, it is one of the most sensible filter designs around. Used for the wrong job, it can give a false sense of security.

How a Ceramic Candle Turns Murky Water Clear

A homeowner fills the upper chamber with cloudy well water before bed. By morning, the lower chamber holds water that looks noticeably cleaner. The change can feel almost too simple to trust, especially because nothing buzzes, spins, or doses the water with chemicals.

What is happening is straightforward. A ceramic candle cleans by microfiltration. Its wall is full of tiny pores, and those pores act as a physical barrier. Water moves through. Larger particles and many microbes do not.

A diagram illustrating the four stages of a ceramic microfiltration water filter process, from contaminated water to clean water.

A coffee filter is a useful comparison for the first step of understanding. It separates liquid from visible solids. A ceramic candle does the same job at a much finer scale, catching material that is far too small to see clearly with the naked eye.

That is why murky water often clears up so well. The cloudiness usually comes from suspended sediment, silt, rust, or organic matter. As water passes across and through the ceramic surface, much of that material gets strained out and stays behind on the outside of the candle.

Here is the process in plain language:

  1. Untreated water surrounds the ceramic shell
    Gravity or household pressure pushes water toward the porous wall.

  2. The ceramic surface screens out larger contaminants
    Sediment and other suspended particles collect first on the outer surface, much like lint collecting on a dryer screen.

  3. Some particles lodge within the pore network
    The filter does not work only at the skin. It also traps material within its fine passages as water moves through.

  4. Filtered water reaches the inner core and exits cleaner
    In some candle designs, the water then passes through added media such as carbon for extra taste and odor improvement.

If you have ever noticed a used candle turning brown or gray, that discoloration is evidence of the job it is doing. The dirt is not disappearing. It is staying on the filter.

Pore size is the key idea that makes the whole system easier to understand. A ceramic candle is selective by size. It is very good at removing what is larger than its pore openings and far less dependable for contaminants that are dissolved in water or much smaller than the pores. That practical limit matters as much as the cleaning effect you can see in the reservoir.

Flow rate is the trade-off you feel every day. Water has to squeeze through a rigid maze of tiny passages, so production is gradual. Ceramic units work more like a slow drip coffee maker than a kitchen tap. That slow pace is part of why they are reliable and power-free, but it also means they are better suited to drinking and cooking water than to high-demand jobs.

People sometimes assume a slower filter is a failing filter. Often, the opposite is true. With ceramic candles, steady flow usually means the barrier is doing real physical work. If flow drops too far, the usual cause is buildup on the surface, which is why routine cleaning matters.

What Ceramic Filters Remove and What They Miss

A ceramic candle is often easiest to judge by the water it improves most clearly. If the problem is cloudy water, grit, or many larger microbes, it can do a very good job. If the problem is viruses, fluoride, or dissolved chemicals, a plain ceramic shell has clear limits.

A ceramic candle water filter showing condensation on its textured surface next to a glass of water.

That trade-off is why ceramic filtration has lasted so long. It is simple, durable, and easy to understand. But simple does not mean it handles every water problem.

Where ceramic candles perform well

Ceramic works like a very fine coffee filter for suspended material. It strains out what is physically larger than its pores, so it is well suited to water issues you can often see or that travel as particles.

In everyday home use, that usually means:

  • Sediment and turbidity
    If water looks muddy or hazy, ceramic candles are a strong match because they trap the fine material causing that cloudiness.

  • Many bacteria
    Bacteria are often large enough to be reduced effectively by a properly made and well-maintained ceramic element.

  • Protozoa and cysts
    These are larger targets than bacteria, so ceramic filters are often a good fit for this category too.

A good way to frame it is this. Ceramic candles are strongest when the contamination behaves like particles that can be screened out.

Where homeowners can get a false sense of safety

Cleaner-looking water can invite overconfidence.

A review from IRC on household ceramic filters notes that real-world microbiological performance can vary, and some commercial candles tested in older evaluations did not consistently produce water of acceptable bacteriological quality as standalone treatment devices (IRC review of household ceramic filter performance). That matches what water professionals see in practice. Ceramic filters can improve water significantly, but the result depends on the filter design, the condition of the candle, and the quality of the source water.

Clear water is not the same as fully treated water.

This matters most for private wells, stored rainwater, surface water, and emergency use. If the source may carry sewage-related contamination or outbreak-related pathogens, a ceramic candle alone may not give you enough protection.

The biggest gap is usually viruses

Viruses are much smaller than bacteria and protozoa. That is where the size-based strength of ceramic becomes a weakness.

For a homeowner, the practical question is simple. Could your water source be exposed to fecal contamination from failing septic systems, floodwater, livestock runoff, or poor sanitation upstream? If the answer might be yes, a ceramic candle should be treated as one part of a system, not the whole system.

That is why many households pair ceramic with disinfection, such as UV or boiling during higher-risk periods. You give up some simplicity, but you gain a wider safety margin.

Dissolved contaminants need different media

Ceramic is much less useful for contaminants that are dissolved into the water itself. Once a substance is dissolved, it is no longer acting like a particle that can be screened out by pore size alone.

Fluoride is a common example. Standard ceramic candles usually do not reduce it well unless the filter includes media made for that purpose (fluoride-specific ceramic candle example). The same caution applies to many dissolved chemicals and some metals. If the product does not list a dedicated treatment media for those contaminants, do not assume the ceramic shell is handling them.

Taste and odor follow the same pattern. A plain ceramic candle may make water look cleaner, but chlorine taste, musty smells, and many organic compounds are usually better handled by carbon. If you want a simple explanation of that pairing, this guide to how carbon block filters improve taste and chemical reduction is useful.

A plain-English scorecard

Water issue Ceramic candle alone
Cloudiness and visible sediment Strong fit
Bacteria Often a good fit, but performance depends on design, condition, and source water
Protozoa and cysts Strong fit
Viruses Weak fit
Fluoride Usually not effective unless specially enhanced
Taste and odor from chlorine Better handled when carbon is added
Broad dissolved chemical reduction Usually needs added media or different technology

The practical lesson is straightforward. A ceramic candle water filter earns its place when you want low-tech, power-free filtration for sediment and many larger microbes. It is a weaker choice when the main concern is viral contamination or dissolved pollutants.

Enhancing Filtration with Carbon Silver and UV

A ceramic candle is a strong first barrier, but it is only one barrier. That matters in real homes, because the problems in water do not all behave the same way. Mud, chlorine taste, bacterial growth inside the filter, and viruses each call for a different tool.

The practical question is simple. What are you trying to fix, and what trade-off are you willing to accept? Adding carbon, silver, or UV can make a ceramic system more capable, but each upgrade solves a specific problem rather than turning the unit into an all-purpose purifier.

What carbon adds

Carbon handles a different job from ceramic. Ceramic works like a coffee filter for sediment and larger organisms. Activated carbon acts more like a sponge at the molecular level, holding onto many compounds that affect taste, odor, and some chemical concerns.

That is why a ceramic filter with a carbon core often feels better to use day to day. Water may already look clear after passing through ceramic, yet still smell like chlorine or have a stale taste. Carbon is the part that usually improves that experience. If you want a plain-language explanation of why this pairing is so common, this guide to how carbon block filters improve taste and chemical reduction is a helpful reference.

There is a trade-off. Carbon has a finite capacity, and performance depends on the contact time, the type of contaminant, and how the cartridge is built. It can improve water noticeably, but it does not remove every dissolved pollutant.

What silver is actually doing

Silver is often misunderstood.

In a ceramic candle, silver is generally used to limit bacterial growth on or within the filter media itself. In practical terms, it helps the filter stay more sanitary between cleanings and during routine use. That supports reliability, especially in slow gravity systems that hold water for hours at a time.

Homeowners sometimes read "silver" and assume broad disinfection. That is too much credit. Silver supports the filter. It does not replace proper filtration, and it does not guarantee protection against every microbe in the source water.

When UV makes sense

UV works at the end of the treatment train, after the water is already clear enough for the light to do its job well. It does not remove grit, and it does not improve taste. Its role is disinfection, especially in setups where microbial risk goes beyond what a ceramic pore barrier can reliably address.

This is often the point where trade-offs become clear. A plain gravity ceramic unit is simple, quiet, and power-free. Add UV, and you gain another layer against microorganisms, but you also add cost, electricity dependence, lamp replacement, and a need for correct sizing and maintenance.

For some households, that is a smart exchange. If your water comes from a well, a rainwater system, surface-influenced storage, or an emergency reserve, UV can be a sensible partner for ceramic. If your main complaint is chlorine taste in treated municipal water, carbon may solve the problem without the extra complexity.

A layered system gives you a more targeted result because each part covers a weakness in the others. Ceramic handles sediment and many larger microbes. Carbon improves taste and addresses some chemicals. UV adds a disinfection step for risks that physical filtration alone may miss.

That same logic shows up in other home maintenance decisions. You do not judge one tool by asking it to do every job. The process of comparing professional cleaners in Northern Arizona follows the same common-sense approach. Match the method to the problem, then decide whether the added effort is worth the added protection.

For many homeowners, that is the best way to judge upgrades to a ceramic candle water filter. Keep the system simple if your water problem is simple. Add carbon, silver, or UV only when the water quality goal clearly calls for it.

Maintaining Your Ceramic Filter for Peak Performance

A ceramic candle often looks worst right before it reminds you why people still trust it. The outside turns brown or gray. Flow slows to a trickle. It can look like the filter is failing, when in many cases it is loaded with what would otherwise be in your drinking water.

That visible buildup is part of the trade-off. Ceramic filtration is simple and dependable because it works as a physical barrier, much like a very fine coffee filter for grit and suspended matter. The same barrier that catches sediment also clogs over time, so maintenance is the price you pay for that simplicity.

A hand washes a porous ceramic candle water filter element with a sponge under running tap water.

Why the outside gets dirty

Water meets the outer wall of the candle first. As water passes inward through tiny pores, larger particles stay behind on the surface. Over days or weeks, that coating gets thicker and flow drops.

That is usually normal.

The key point is to read the filter correctly. A stained exterior often means the candle has been catching sediment and other particulate matter as intended. Clearer source water usually means slower buildup. Silty well water, rainwater with fine debris, or stored emergency water can foul the surface much faster.

A simple cleaning routine

Ceramic maintenance is low-tech, but it still rewards care. Scrubbing too hard can wear away useful material. Handling the clean side with dirty hands can undo the benefit of cleaning in the first place.

Use a routine like this:

  • Wash your hands first
    Start clean so you do not transfer contamination to the filter body, threads, or lower chamber.

  • Remove the candle carefully
    Ceramic is durable in use but brittle if knocked against a sink or countertop.

  • Scrub only the outer surface
    A soft brush or non-aggressive pad works well for loosening the film of trapped material.

  • Rinse with clean water
    Flush away the loosened residue before reinstalling the candle.

  • Check washers and seals during reassembly
    A good filter element cannot protect you if water slips around it instead of through it.

For a broader maintenance checklist that applies across filter types, this guide on how to clean water filters gives a useful framework for handling cartridges, housings, and hygiene.

The logic is the same as routine cleaning elsewhere in the home. Regular light maintenance usually works better than waiting for a bigger problem. If you have ever looked into comparing professional cleaners in Northern Arizona, you have seen the same pattern. Consistent care preserves performance.

Watch the flow, not just the calendar

Calendar reminders help, but flow rate is often the better clue. A ceramic candle rarely stops all at once. It usually gets slower in stages.

Treat that slowdown as feedback. If a cleaning brings flow back to a useful level, the candle is still doing its job. If flow stays poor after proper cleaning, the pores may be too fouled, the element may be wearing thin from repeated scrubbing, or the candle may be at the end of its service life.

This is one of the practical trade-offs with ceramic systems. They give you a visible, understandable maintenance signal. You can often see the buildup and feel the slowdown. In return, you give up the set-and-forget convenience people expect from some enclosed cartridge systems.

Here's a practical visual walk-through of the process:

Signs it's time to replace the candle

Cleaning extends service life, but it does not make a ceramic element last forever. Replace the candle if you notice any of the following:

  • Flow remains very slow after cleaning
    That usually means buildup is no longer limited to the surface, or the element has reached the end of useful life.

  • Cracks, chips, or hairline damage
    Even a small fracture can create a path for untreated water to pass.

  • Changes in taste or odor in ceramic-carbon models
    The ceramic shell and the carbon media age differently. The carbon portion may be spent even if the outer ceramic still looks usable.

  • Repeated cleaning removes more material than buildup
    If the candle is getting noticeably thinner, replacement is safer than trying to stretch its life.

A ceramic candle should age gradually. Sudden changes in clarity, flow, or taste deserve a close inspection.

Maintenance keeps a ceramic candle water filter honest. It also helps you decide whether this simple system still matches your water. If cleaning becomes too frequent or performance remains inconsistent, the issue may not be the candle alone. Your source water may need a prefilter, a second treatment step, or a different setup altogether.

Choosing the Right Ceramic Filter Setup for Your Home

A homeowner with cloudy well water usually asks two questions first. Will this make the water look and taste better, and will it fit into daily life without becoming a chore? Those questions point you toward the right ceramic setup faster than any brand comparison.

A ceramic candle filter works best when the setup matches your routine, your water source, and your tolerance for slow flow. The practical trade-off is simple. You gain reliability, low-tech operation, and modest ongoing cost. You give up speed, and you may still need another treatment step if your water has viral risk or dissolved contaminants.

A side-by-side comparison of a gravity-fed water dispenser and a pressure-based water filtration system on a counter.

Gravity-fed countertop units

Gravity-fed units are the simplest version to live with. You pour water into the top chamber, gravity pulls it through the ceramic candles, and treated water collects below. It works much like letting coffee drip through a filter cone. The process is easy to see, easy to explain, and easy to troubleshoot.

This setup fits renters, cabins, emergency backup plans, and homes that do not want plumbing changes. It also suits people who value independence from electricity and moving parts.

The trade-off is output. These systems are slow by design, so they reward planning. If your household fills bottles in the morning and keeps a reserve ready, that pace often feels perfectly acceptable. If several people expect filtered water on demand from a tap, the slowness can become frustrating.

Pressurized and plumbed systems

Pressurized ceramic systems place the element inside an under-sink or faucet-connected housing. They feel more natural in a busy kitchen because filtered water comes from a tap where you already wash produce, fill pots, and pour drinking water.

They also give you more room to build a staged system. A sediment prefilter can protect the ceramic element from heavy dirt load. Carbon can help with taste and some chemicals. UV can add a disinfection step where microbiological risk is higher.

The trade-off here is maintenance discipline. A ceramic candle may be simple, but the full system includes housings, seals, fittings, and sometimes several cartridges with different replacement schedules. If you want the easiest possible ownership experience, a countertop gravity unit usually wins.

A side-by-side decision guide

Home situation Better ceramic setup
Apartment or rental Gravity-fed countertop unit
Power outage backup Gravity-fed countertop unit
Minimal installation hassle Gravity-fed countertop unit
Daily cooking and drinking at the sink Pressurized under-sink setup
Layered treatment with multiple stages Pressurized setup
Frequent moves Portable gravity unit

Cost and ownership

Ceramic often appeals to homeowners who dislike disposable, high-turnover filter systems. A good candle can last a long time with proper cleaning, and replacement costs are often manageable compared with more complex systems. Another practical advantage is that ceramic filtration does not remove the full mineral content of water the way reverse osmosis does, which some households prefer for taste.

That said, low operating cost only holds true when the filter matches the job. Very dirty source water can clog a candle quickly and turn a low-maintenance system into a frequent cleaning project. In that case, adding a simple prefilter can make the entire setup easier to own.

When ceramic is the right primary filter

A ceramic candle water filter makes the most sense when:

  • Your main concerns are visible sediment, cloudiness, and many larger microbes
  • You want a filtration method that works without electricity
  • You prefer equipment you can inspect, clean, and understand without special tools
  • You want a practical daily-use filter or a reliable backup option

When you should look beyond ceramic alone

Ceramic alone is usually the wrong tool if your main concern is something you cannot strain out physically. Dissolved contaminants do not behave like grit in water, and viruses are smaller than the pore sizes many ceramic candles are designed to block.

Choose another technology, or pair ceramic with other treatment, if you are dealing with:

  • Possible viral contamination
  • Fluoride reduction
  • A wide range of dissolved contaminants
  • High daily water demand where slow flow will feel limiting

A good buying rule is to match the filter claim to the problem in your water. If a product promises reduction of a specific contaminant, check for clear testing or certification for that contaminant, not just general marketing language.

Is a Ceramic Candle Filter Your Best Choice?

For many households, the answer is yes. A ceramic candle water filter is one of the most practical ways to improve water when your priorities are simplicity, reliability, low running cost, and freedom from electricity.

It's especially appealing if you want a countertop or portable solution that handles sediment, cloudiness, and many larger microbes without turning your kitchen into a plumbing project. It also earns points for long service life and easy cleaning when used within its limits.

But those limits matter. Ceramic is not the best standalone answer for viruses. It's also not the right tool if your main goal is aggressive reduction of fluoride or a broad range of dissolved contaminants. In those cases, ceramic works better as part of a multi-barrier setup than as a solo hero.

If your water challenges are mostly physical and microbiological, ceramic may be exactly the right fit. If your risks are more complex, use ceramic as the sturdy first stage and let other technologies handle the rest.


If you're comparing filter types, replacement costs, or home setups, Water Filter Advisor is a helpful place to research practical options for kitchens, whole-house systems, and ongoing filter maintenance.

Best Whole House Iron Filter for Well Water (2026 Guide)

Orange streaks in the toilet bowl. Brown staining around the tub drain. A glass of water that looks clear at first, then leaves a metallic aftertaste you can’t ignore. If that sounds familiar, you’re not dealing with a small nuisance. You’re dealing with a whole-house water problem that reaches every faucet, appliance, and pipe in the home.

A lot of homeowners start the search for the best whole house iron filter for well water by looking for one machine that will “remove iron.” That’s usually the wrong starting point. Iron is rarely the only issue in a well. It often shows up with hardness, manganese, sulfur odor, sediment, or even iron bacteria. Buy a filter for the wrong version of the problem, and you end up with staining that never goes away, pressure that drops, and equipment that clogs long before it should.

The better approach is to think like a water treatment installer. Build a treatment train. Test first, identify the actual contaminants, then choose the right sequence of equipment so each stage helps the next one work better.

Is Your Well Water Waging War on Your Home

The signs usually show up slowly. First it’s a faint orange line in the sink. Then white towels start coming out of the wash looking yellowed. Then someone mentions the water tastes like a handful of pennies. By the time most homeowners start shopping, the water has already been working on the plumbing for a while.

A bathroom sink stained with rust showing water flowing from a metal faucet against blue walls.

Iron in well water isn’t rare. Iron contamination affects approximately 23 million U.S. households relying on private wells, and the U.S. Geological Survey reports that 15 to 20% of these wells exceed the EPA’s secondary standard of 0.3 ppm for iron, which is where staining, metallic taste, and plumbing damage become common issues, according to this review of iron filter performance and well water conditions.

What iron does in a house

Iron creates two kinds of frustration at the same time. One is visible. Rust-colored staining on fixtures, tubs, toilets, grout, and laundry. The other is hidden. Iron builds up inside valves, water heaters, dishwasher parts, and narrow plumbing passages.

That combination tricks people into underestimating the problem. They focus on the ugly stains because they can see them. Meanwhile, the plumbing keeps collecting deposits.

Practical rule: If iron is staining your toilet tank or sink, it’s also traveling through everything else that uses water.

Why a simple product list won’t help enough

Homeowners often ask which unit is “best,” as if all iron filters are interchangeable. They aren’t. Some systems are strong with dissolved iron but struggle with sulfur. Some handle manganese well. Some are fine in a clean well but fail fast when hardness or bacteria gets involved.

That’s why the right answer usually sounds less exciting than people expect. It starts with diagnosis, not shopping. The best system is the one that matches your water chemistry, your home’s flow demand, and the order your equipment is installed in.

First Step Always Test Your Water

If you skip testing, you’re guessing. In well water, guessing gets expensive fast.

A homeowner sees orange staining and buys an iron filter online. It arrives, gets installed, and maybe it helps for a while. Then the rotten egg smell comes back, pressure starts dropping, or the stains never fully stop. Most of the time, the filter itself isn’t defective. The diagnosis was.

A person holding a clear sample vial filled with liquid for water quality testing purposes.

Iron isn’t one thing

When people say “I have iron,” they might mean very different water conditions.

  • Ferrous iron is dissolved iron. It often comes out of the tap looking clear, then turns orange after it sits or hits air. This is often called clear-water iron.
  • Ferric iron is already oxidized. You can think of it as rust particles floating in the water. It’s visible and easier to trap with the right filtration stage.
  • Iron bacteria is the troublemaker many product pages barely explain. It forms slime, fouls plumbing, and can overwhelm filters that would work fine on ordinary iron.

Each one behaves differently. That matters because treatment depends on how the iron enters the filter and what else is traveling with it.

What to test for besides iron

A proper well water workup should identify more than the iron level.

You also want to know:

  • Hardness, because hard water can interfere with some iron systems and create scale that shortens equipment life.
  • Manganese, because it often rides along with iron and can stain fixtures dark brown or black.
  • Hydrogen sulfide, which creates the rotten egg smell and changes the treatment approach.
  • pH, because some media need the right water chemistry to work consistently.
  • Sediment and turbidity, because grit can load a filter bed too quickly.
  • Bacteria concerns, especially if you’ve seen slime in toilet tanks or around plumbing fixtures.

Test results should tell you what needs to happen first, second, and third in the treatment line. They should not just point you to one tank.

Why testing saves money

The biggest mistake in this category is buying a strong iron filter for a mixed-contaminant well and expecting it to solve everything alone. It won’t. If the water contains iron plus hardness, or iron plus sulfur, or iron plus bacteria, you’re building a system, not buying a single fix.

That’s why I always treat testing as the first piece of equipment, even though it isn’t equipment. A test prevents you from putting the wrong tank in the middle of the plumbing and asking it to do a job it was never built for.

If you need help understanding the basics before you compare equipment, the practical guidance in Water Filter Advisor’s water filtration advice library is useful for sorting through common home treatment setups and terminology.

A quick read on the water you already have

Even before the formal test comes back, your house is already giving clues.

  1. Clear water that turns orange later usually points toward dissolved iron.
  2. Water that already looks rusty suggests oxidized iron or sediment-heavy conditions.
  3. Slimy buildup in the toilet tank raises suspicion for iron bacteria.
  4. Rotten egg odor usually means sulfur is part of the story.
  5. Soap that won’t lather and scale on fixtures points toward hardness joining the party.

Those clues aren’t enough to size a system, but they are enough to stop you from buying blind.

Comparing Iron Filtration Technologies

Most whole-house iron filters do the same job in broad terms. They convert iron into a form the system can capture, then they flush the collected material out during backwash. The difference is how they do that job, what kind of water they work best in, and how much babysitting they require.

Here’s a simple side-by-side view.

Technology Best fit Strengths Trade-offs
Air Injection Oxidation Homes with typical iron issues and a preference for chemical-free treatment Strong whole-house option, low day-to-day involvement, widely used Can struggle when water has iron bacteria or high hardness
Manganese greensand Water that needs oxidation and filtration in one media bed Effective when matched properly to the water Requires regeneration chemistry and more hands-on upkeep
Catalytic media such as Katalox-Light Homeowners wanting strong oxidation support with durable media Good fit in many iron and manganese applications Still depends on correct sizing and water chemistry
Chemical oxidation with chlorine or peroxide Tough wells with sulfur, slime, or severe mixed contamination More aggressive treatment for difficult water More components, more maintenance, and chemical handling
Water softener only Very light iron combined with hardness Useful support equipment in the right role Not a substitute for a real iron filter in most wells

A comparison chart showing three iron filtration technologies: air injection, manganese greensand filters, and chemical oxidation.

Air Injection Oxidation systems

Air Injection Oxidation, usually shortened to AIO, is where many of the best residential systems live. The idea is simple. The system introduces air into the tank, oxygen reacts with dissolved iron, and the iron changes from something invisible in the water into particles the media can catch.

This process is akin to taking steam and turning it into droplets you can wipe off a mirror. The iron was there the whole time. Oxidation just makes it possible to grab it.

Modern AIO systems are often a set-and-forget solution for many homes. Models like the SpringWell WS1 are presented as effective up to 7 ppm iron, while the SoftPro IronMaster is positioned for more severe situations up to 30 ppm, according to this roundup of whole-house well water systems.

That’s why AIO is often the first technology I look at for the best whole house iron filter for well water. It’s clean, effective in the right conditions, and doesn’t force the homeowner into constant chemical handling.

Catalytic media and why it matters

AIO systems still depend on the media inside the tank. Media is the working surface where oxidized contaminants get trapped and removed during backwash. One of the names you’ll see often is Katalox-Light, especially in systems built for stronger iron loads.

Some homeowners focus almost entirely on the control valve brand and ignore the media. That’s backwards. The valve controls the cycle. The media does the water treatment.

A stronger media bed can mean better contaminant handling, longer useful life, and more stable performance when the well water changes a bit through the year. That doesn’t make every catalytic-media system equal, but it does explain why two tanks that look similar on the outside can perform very differently.

If a product description talks about “removing iron” but says little about the media, be cautious. That’s like buying a vacuum based on the power button and ignoring the motor.

Greensand and older oxidizing media

Manganese greensand has been used for a long time, and it still has a place. It works by coating media with an oxidizing surface that helps convert and filter iron and manganese. The catch is maintenance. These systems typically need regeneration with chemicals.

That extra step doesn’t make greensand bad. It just makes it less appealing for homeowners who want low involvement. A well-matched greensand setup can work very well, but it asks more from the owner and leaves less room for neglect.

Birm also shows up in some comparisons. It can work in the right water, but it’s less forgiving than many people think. If the chemistry isn’t favorable, performance can fall off quickly.

Chemical oxidation for difficult wells

Some wells need a stronger approach. That’s especially true when sulfur odor, biofouling, or stubborn mixed contamination shows up. In those cases, a chemical feed system paired with a contact stage and filtration can outperform a simple AIO tank.

Chemical oxidation is the heavy-duty route. Instead of relying on air alone, the system injects an oxidizer such as chlorine or peroxide to convert contaminants aggressively before they hit the filter stage.

This approach is less elegant but often more dependable in ugly water. It’s the work truck of iron treatment. More parts, more upkeep, more attention. But when the water is hostile, a work truck beats a sports car.

The limited role of water softeners

A water softener can help with small amounts of iron in some homes, especially when hardness is also a problem. But using a softener as your primary iron filter is one of the most common mistakes in well water treatment.

Softeners are hardness machines first. If the well has meaningful iron, especially when staining is obvious, the softener usually needs help from a dedicated iron stage ahead of it or beside it in the treatment plan.

That’s the difference between a system that limps along and one that solves the problem.

Key Factors for Choosing Your System

Shoppers get overwhelmed because spec sheets throw around terms like valve size, media volume, service flow, and backwash rate as if everyone installs this equipment for a living. What matters is how those specs play out at 7 a.m. when someone’s showering, the dishwasher is running, and the washing machine kicks on.

Flow rate matters more than most people expect

If a unit is undersized for the home, it may still remove iron on paper and still feel disappointing in real life. That’s because the best whole house iron filter for well water has to treat the water without choking the house.

A larger household or a home with several bathrooms needs enough service flow to keep pressure usable during peak demand. If the filter can’t keep up, you’ll feel it first in the shower.

A few practical checks help:

  • Bathroom count matters: More bathrooms usually mean more overlapping water use.
  • Fixture habits matter: A home with irrigation, large tubs, or frequent laundry loads places a different demand on the system.
  • Well pump matters too: The filter can’t deliver more flow than the rest of the plumbing can support.

Size the plumbing path, not just the tank

Port size and pipe size affect how freely water moves through the treatment line. In a larger home, narrow connections can act like a pinch point even if the tank itself looks substantial.

That’s one reason I like homeowners to review complete-system layouts, not just isolated filter specs. Broader references on best whole home water filtration systems can help you compare how iron filters fit into full-house plumbing strategies rather than treating them like stand-alone gadgets.

Think in ownership costs, not sticker price

The cheap unit often becomes the expensive one. You pay once at checkout, then pay again in media changes, chemical supplies, lost pressure, or equipment that never fully fixes the stains.

Focus on these questions:

  • How often does the system backwash? Frequent backwash can be fine if it’s necessary, but it affects water use and wear.
  • What media is inside? Better media usually means better durability and less frustration.
  • Does the system need chemical replenishment? That changes both maintenance and running cost.
  • How easy is service? Straightforward controls and available replacement parts matter more than flashy marketing.

A good iron filter should fit your water and your habits. If it only works when everything is ideal, it’s not a good home system.

The control valve deserves attention

The valve is the traffic controller. It determines when the unit backwashes, how long cycles run, and how reliably the system cleans itself. A solid valve paired with the right media usually outperforms a fancy-looking tank with weak internals.

Homeowners don’t need to become valve experts. They just need to avoid treating the control head like an afterthought.

Best Iron Filters for Common Well Water Scenarios

Product selection finally makes sense. Not by asking which unit is “best” in the abstract, but by matching the equipment to the water profile.

Low to moderate iron with otherwise clean well water

If your test shows straightforward iron and no major sulfur, bacteria, or heavy hardness complications, an AIO system is usually the cleanest answer.

Systems like SpringWell WS1 make sense. It’s positioned for homes dealing with iron in the lower to moderate range, and the appeal is obvious. Chemical-free treatment, whole-house coverage, and a design homeowners can live with without constant attention.

This type of setup is often the sweet spot for people who want a real fix without building a mini treatment plant in the basement.

Higher iron levels that need more muscle

Once the iron gets more aggressive, you need a system built for heavy loading. That’s where SoftPro IronMaster stands out in many comparisons. It’s frequently mentioned for handling stronger iron situations and uses the AIO approach with media designed for tougher work.

The practical reason to step up here is simple. When iron is heavy, a lighter-duty system may work briefly, then start slipping. Staining returns, backwash becomes more important, and the homeowner ends up chasing symptoms.

For high-iron wells, I’d rather see a system with headroom than one operating at the edge of its comfort zone.

Iron plus manganese

Iron and manganese often travel together, but they don’t always behave the same way in treatment. Manganese can be harder on some systems and may push the recommendation toward media and designs known to handle that combination well.

In those cases, Pentair’s Iron & Manganese Combo is worth a look because it’s noted for manganese-heavy conditions among verified products. The key point isn’t the brand name alone. It’s that manganese changes the target. A filter that’s merely “good for iron” may not be the right fit once manganese becomes a priority.

Iron plus rotten egg odor

If the water smells like sulfur, don’t treat it like an iron-only job. That smell changes the system choice.

A strong candidate in this category is US Water Systems Matrixx Infusion, which is positioned for homes dealing with both iron and hydrogen sulfide. This is exactly the kind of scenario where homeowners waste money by buying a standard iron tank, only to learn later that odor control needed to be built into the original design.

For sulfur combinations, the right system doesn’t just remove staining. It restores the house to a point where showers, laundry, and kitchen water stop announcing themselves.

Iron plus hardness

This is one of the most common mixed problems in well water, and it’s where treatment train thinking pays off.

If the house has both iron and hard water, the answer usually isn’t “buy a better iron filter” or “buy a bigger softener.” It’s sequence. In many homes, the iron stage and the softener need to work together, each doing the part it’s good at.

A practical setup often looks like this:

  1. Sediment protection first if the well carries grit or visible particulate.
  2. Iron removal next so the softener isn’t asked to carry the whole load.
  3. Softener after that to deal with hardness and polish up the water for daily use.

That order protects the softener and gives better long-term stability.

Clean iron versus messy iron

Not every iron problem deserves the same confidence in AIO. If the well is relatively clean and the issue is mostly dissolved iron, AIO can be an excellent fit. If the well has slime, sulfur swings, or clear signs of biological fouling, I move much faster toward stronger pretreatment or chemical oxidation.

That distinction matters more than the brand list. Homeowners don’t lose money because they bought a “bad” product. They lose money because they bought the right product for somebody else’s water.

The best recommendation isn’t the unit with the loudest marketing. It’s the one that matches the chemistry in your test report and the order of equipment in your plumbing line.

Solving Complex Problems Iron Bacteria and Mixed Contaminants

Simple buying guides frequently fall short. They treat all iron like a basic oxidation problem. It isn’t.

Iron bacteria changes the game because you’re not just removing dissolved minerals. You’re dealing with slime, biofilm, and fouling that can coat plumbing and overwhelm media beds. A standard AIO tank can look perfect on the sales page and still struggle badly in that environment.

A useful warning from product analysis is that standard AIO systems can clog rapidly if water hardness exceeds 10 gpg or iron bacteria is present, often forcing the homeowner to add a pre-filter or water softener at an extra cost of $800 to $1,500, as noted in this discussion of mixed-contaminant well water and iron filtration limits.

How to recognize an iron bacteria problem

You may be dealing with iron bacteria if you notice:

  • Slimy residue in toilet tanks, filter housings, or around fixtures
  • Recurring odors that don’t line up neatly with a standard sulfur-only problem
  • Filters plugging early even when the equipment seems properly chosen
  • Persistent staining after installing a basic iron system

Iron bacteria often requires disinfection thinking, not just filtration thinking.

What usually works better

For these tougher wells, the treatment train often becomes more important than the individual filter.

A common order is:

  1. Sediment stage if grit or turbidity is present
  2. Oxidation or chemical injection stage when the water needs stronger treatment
  3. Iron filtration media tank
  4. Water softener if hardness is part of the water profile
  5. UV sterilizer when biological protection is needed after the rest of the treatment

This isn’t the only valid order, but it shows the logic. You don’t want downstream equipment fighting upstream problems it was never designed to handle.

Where homeowners get into trouble

The most expensive phrase in well water treatment is “I thought this one unit would do it all.”

Mixed contaminants rarely reward that mindset. If your well has iron, hardness, sulfur, and bacteria concerns, you’re building a chain. Every link has to support the next one. When that sequence is wrong, even good equipment performs like bad equipment.

Installation Maintenance and Troubleshooting

A whole-house iron system isn’t difficult to live with when it’s installed correctly. Most long-term headaches trace back to placement, drain setup, bypass access, or poor sequencing.

A professional maintenance person performs upkeep on a metal water filter system connected to plumbing pipes.

Decide early whether this is DIY or pro work

Some mechanically inclined homeowners can handle installation if the plumbing is accessible and the treatment plan is simple. But a whole-house iron filter still needs correct bypass orientation, drain routing for backwash, enough space to service the tank, and proper tie-in ahead of the fixtures you want protected.

If you’re installing equipment during a renovation or trying to understand where the treatment line fits into the home’s supply layout, a plain-English guide to plumbing rough-ins helps make sense of how and where water lines are set before finish plumbing goes in.

Maintenance that keeps the system working

A good maintenance routine is simple and repeatable.

  • Watch the backwash cycle: Make sure the system is cleaning itself and draining properly.
  • Inspect for pressure changes: A sudden drop can point to fouled media, clogged prefiltration, or a valve issue.
  • Check for returning stains or odor: That usually means the treatment is no longer matching the water, or a stage upstream is failing.
  • Keep the bypass accessible: You don’t want to dig behind storage shelves during service.
  • Retest water when conditions change: Seasonal shifts or well work can change performance.

Here’s a helpful walkthrough of what proper service and upkeep looks like in the field.

Troubleshooting the common complaints

If pressure drops after installation, check the sediment stage first and confirm the system was sized for household demand. If stains return, don’t assume the unit is “bad.” Confirm the media is still functioning, the valve is cycling properly, and the original test didn’t miss a mixed-contaminant issue.

If the system seems noisy during regeneration, that can be normal, but sharp changes in sound deserve a look at the drain line, valve movement, and backwash flow.

The goal is simple. Protect the investment by treating the system like home equipment, not a mystery tank you ignore until the toilet turns orange again.


If you want help comparing systems, understanding test results, or figuring out the right treatment train for your home, Water Filter Advisor is a practical place to keep researching. Their guides can help you sort through iron filters, softeners, UV systems, and maintenance questions so you can choose equipment that suits your water.

Best Home Water Filter for Well Water: A 2026 Guide

If you're shopping for the best home water filter for well water, you're probably already dealing with a clue your water is sending you. Orange stains in the toilet bowl. A rotten egg smell when the shower starts. Grit in aerators. Laundry that never looks fully clean. Or maybe the water looks fine, but you know private wells don't come with a city utility watching over them.

That last point matters most. Well water problems are local, specific, and often layered. One home has iron and sediment. The house next door has sulfur odor and bacteria concerns. A third has water that tastes metallic but leaves no visible staining. That's why the right answer usually isn't a single product recommendation. It's a system built from your test results, your plumbing, and your maintenance budget.

I've seen homeowners lose money by buying the wrong equipment for the right problem, and I've seen them lose even more by buying the right equipment in the wrong size. A proper setup treats the contaminants you have, preserves pressure throughout the house, and doesn't surprise you later with ugly maintenance costs. That's the framework that matters.

First Things First Test Your Well Water

Buying filtration before testing is like buying prescription glasses before the eye exam. You might get lucky. That, however, is rare.

A private well can carry several issues at once. Some are obvious, like metallic taste or staining. Others don't announce themselves at all. If you want the best home water filter for well water, your first job is to figure out exactly what your water contains and what it's doing inside the house.

A person wearing a black nitrile glove holding a water sample bottle in front of a rustic well house.

Use screening tools carefully

Home test strips and basic kits can be useful as an early warning. They can tell you whether you're likely dealing with hardness, pH issues, or a staining problem. They can also help you notice a change after a heavy rain, plumbing work, or a pump repair.

But strips don't give you the level of confidence you need before spending real money on treatment equipment. For a whole-house system, send a sample to a state-certified lab. That report becomes your equipment blueprint.

Practical rule: Don't size equipment from a hunch, a smell, or a strip color. Size it from a lab report.

What to ask the lab to test

A good well water panel should cover the contaminants most likely to affect home filtration decisions. Focus on the issues that change equipment selection:

  • Iron and manganese: These cause staining, taste issues, and can foul plumbing and fixtures.
  • Hydrogen sulfide: This is the classic rotten egg odor problem.
  • Sediment or turbidity indicators: These help you decide whether you need a strong pre-filter stage.
  • Bacteria or microbial indicators: Invisible problems need a different response than staining problems.
  • pH and general water chemistry: Some treatment media only work well inside certain operating ranges.

The collection step matters too. Use the lab's bottle, follow their timing instructions, and avoid contaminating the sample with dirty hands, faucet debris, or a bottle cap set on the counter. Small mistakes at this stage can push you toward the wrong system.

Think of water quality as a whole-house issue

Water testing also fits into the broader way you evaluate a home environment. Homeowners who are careful about private well safety often take the same approach with air and soil concerns. If you're already looking at broader property health, a guide to radon testing is another useful example of why proper diagnostics come before treatment.

For hands-on help with how to compare results and treatment options, a solid next stop is the practical guidance library at Water Filter Advisor advice.

Decoding Your Water Test Results

A lab report can look like it was written for a chemist. Homeowners don't need to become chemists. They need to know what each result means for faucets, laundry, plumbing, smell, and day-to-day use.

The most common well water troublemakers usually show up in patterns. Some leave visible evidence. Others announce themselves when you run hot water. A few don't show themselves at all until the lab report comes back.

Common well water contaminants and their symptoms

Contaminant Common Symptoms Impact on Home & Health
Iron Orange or reddish-brown staining, metallic taste, discolored laundry Stains fixtures and fabrics, can build up in plumbing and make water unpleasant to use
Manganese Dark brown or black staining, bitter or metallic notes Stains fixtures and laundry, can foul appliances and leave stubborn deposits
Hydrogen sulfide Rotten egg odor, stronger smell when water is first run Makes water unpleasant for showering and cooking, can contribute to corrosion problems
Sediment Grit in water, cloudy appearance, clogged faucet screens Wears on valves and appliances, reduces pressure, loads up downstream filters quickly
Bacteria or viruses Often no obvious sign, sometimes odor or slime depending on the cause Raises safety concerns and usually calls for disinfection rather than basic filtration alone

What the big five usually mean

Iron is the classic well-water nuisance. The verified data for whole-house systems notes that private wells across the United States frequently contain high levels of iron, hydrogen sulfide, and manganese, affecting an estimated 15 million private wells, with specialized systems such as the SpringWell WS1 designed to remove up to 7 PPM of iron, 8 PPM of hydrogen sulfide, and 1 PPM of manganese without chemicals using air injection oxidation technology, according to lab-test-based system data. In a home, iron usually shows up before the lab report does. Sinks, tubs, toilets, and white laundry tell on it quickly.

Manganese is iron's less famous cousin. It often creates darker staining and can leave black or brown marks that homeowners mistake for dirt or mold. It also changes what media type makes sense in an oxidation filter.

Hydrogen sulfide gives you the odor complaint that drives many well-water purchases. Standard carbon alone often won't solve a sulfur problem if the gas load is significant. That's where people waste money by buying a taste-and-odor filter for what is really an oxidation job.

If the problem stains, smells, and clogs, treat it as a system issue, not a drinking-water-only issue.

Pay attention to combinations

Sediment by itself is straightforward. Sediment combined with iron is not. Bacteria combined with sulfur odor is not. The report matters because contamination stacks change the order of treatment.

Here are the signs I tell homeowners to connect to the report:

  • Orange stains plus metallic taste: Usually points toward iron treatment, often ahead of any final polishing stage.
  • Black staining plus grit: Often means manganese and sediment both need attention.
  • Rotten egg smell with clear-looking water: Commonly calls for an oxidizing approach, not just a cartridge swap.
  • Pressure loss throughout the home: Frequently means sediment loading, fouled media, or both.

The most important reading skill

Don't read a lab report as a pass-fail document. Read it as a design document. A test result doesn't just tell you whether something is present. It tells you what treatment technology fits, where that treatment belongs in the sequence, and whether the long-term maintenance burden will be light or annoying.

That's the difference between buying a filter and building a water treatment plan.

Your Filtration Arsenal Matching Tech to Contaminants

Water treatment works best when you stop thinking in terms of one magic filter. A strong well-water setup is more like a layered security team. One stage catches grit. Another handles dissolved minerals that cause staining. A later stage cleans up odor or chemical carryover. If needed, a final stage deals with microbes.

That sequence matters because each component protects the one after it.

A chart illustrating different well water contaminants and their corresponding effective filtration or treatment solutions.

Sediment filters as the first line

A sediment pre-filter is the bouncer at the door. It catches sand, silt, rust flakes, and other particles before they crowd out the equipment downstream. If you skip this stage in a sediment-heavy home, you force every later filter to do a dirty job it wasn't meant to do.

Sediment filtration isn't glamorous, but it's often what preserves pressure and extends the life of expensive equipment. In homes with visible grit, this stage is rarely optional.

Oxidizing filters for iron manganese and sulfur

Specialized well-water gear proves its worth. Air injection oxidation systems create an air pocket inside the tank that oxidizes dissolved contaminants so the media can remove them. That's why systems like the SpringWell WS1 are built around oxidation rather than simple cartridge filtration.

When homeowners ask me what works for bad staining and sulfur odor, this category is usually the answer. The verified lab-based performance data tied to the WS1 is strong because it addresses the contaminants that show up repeatedly in private wells.

What doesn't work well is trying to force a generic whole-house carbon unit to solve heavy iron or sulfur. Carbon is a finisher. It is not a substitute for a proper iron filter when the chemistry says oxidation is needed.

A sulfur smell that survives a carbon cartridge usually isn't asking for more carbon. It's asking for the right pretreatment.

Carbon filters for polishing and chemical reduction

Activated carbon and catalytic carbon have a different job. They improve taste and odor, reduce certain chemical contaminants, and serve as a polishing stage after the rougher work is done upstream.

Carbon works best when the water reaching it has already been cleaned of sediment and major iron loading. If you send dirty or iron-heavy water through carbon first, you shorten its useful life and lower performance.

This is also where whole-house systems designed for chemical reduction can shine in the right application. They are especially useful when the concern isn't just staining but broader water quality cleanup through the home.

KDF media and specialty applications

KDF media often appears in specialty setups or in combination systems aimed at heavy metals and added protection for downstream media. It isn't the star of most private-well treatment trains, but it can make sense where water chemistry supports it and where the system builder is solving more than one issue at once.

The practical point is simple. Specialty media should be matched to a known problem. Don't buy it because it sounds advanced.

UV purifiers and disinfection stages

A UV purifier is the final guard. It doesn't remove staining minerals or sediment. It disinfects water by inactivating microorganisms as water passes the lamp. That means UV belongs after filtration stages that improve clarity. Dirty water can interfere with disinfection performance.

Some homes need UV. Some need a different disinfection strategy. But if the water test flags microbial concern, don't expect a sediment cartridge or iron tank to handle it.

A good system is staged on purpose

A practical well-water train often looks like this:

  • Stage one, sediment control: Protects valves, media tanks, and appliances from abrasive particles.
  • Stage two, problem-specific treatment: This might be an AIO iron and sulfur filter or a softener, depending on the water.
  • Stage three, polishing: Often carbon, used to improve final taste and odor.
  • Stage four, disinfection if needed: UV or another dedicated microbial treatment step.

That order keeps each component doing the work it was designed to do.

Deciding Between Whole House and Point of Use Systems

This decision gets simpler when you ask one question first. Are you trying to protect the whole home, or are you trying to improve the water at one tap?

If the problem is staining, sediment, sulfur odor in showers, or equipment wear, a point-of-use filter won't solve the full problem. It may improve drinking water at the kitchen sink while the rest of the house still suffers.

Where whole-house systems make sense

A whole-house system, also called point-of-entry treatment, handles water as it enters the home. That's the right strategy when the water is affecting plumbing, fixtures, appliances, bathing, laundry, or the water heater.

A strong example in this category is the SpringWell CF Series. According to SpringWell's CF Series specifications, the CF4 and CF+ provide 1,000,000-gallon capacity, 99.6% chlorine removal, and service flows of 12 GPM for the CF4 and 20 GPM for the CF+ at 25-80 PSI, with reduction claims that include PFAS, PFOA, and PFOS. Those numbers matter because undersized whole-house units often create pressure complaints before they solve water-quality ones.

If your water issue follows you into every bathroom and appliance, whole-house treatment is usually the practical choice.

Where point-of-use systems earn their place

A point-of-use system works at one location, usually under the sink or on a countertop. These setups are useful when your main goal is drinking and cooking water quality.

They can be a smart add-on even in homes with whole-house treatment. A homeowner might use whole-house filtration for sediment, iron, and odor control, then add a dedicated kitchen unit for a final drinking-water polish.

Side-by-side trade-offs

  • Scope of protection: Whole-house protects plumbing and appliances. Point-of-use protects only the tap where it's installed.
  • Installation complexity: Whole-house equipment usually requires more space, plumbing work, and proper sizing.
  • Maintenance style: Whole-house upkeep tends to involve fewer but larger service events. Point-of-use systems usually mean smaller, more frequent cartridge changes.
  • Best use case: Whole-house for house-wide water problems. Point-of-use for targeted drinking-water improvement.

If your shower smells bad and your toilet stains orange, don't try to fix a whole-house problem under the kitchen sink.

For many well-water homes, the answer isn't one or the other. It's a combination with each system doing a different job.

Sizing Your System and Calculating Long Term Costs

A filter can be technically correct and still be a bad purchase. That happens when the unit is undersized for the house, oversized for the chemistry, or cheap upfront but expensive to keep alive.

The homeowners who make the best decisions usually stop asking, "What's the price?" and start asking, "What will this cost me to run well for years?"

Flow rate is a comfort issue

Flow rate is the amount of water the system can move without choking the house. In practical terms, it shows up during peak use. Someone is showering, the dishwasher is running, and a toilet refills. If the equipment is too small, pressure drops and complaints start.

The simplest way to think about sizing is by household demand:

  • Small demand homes: Fewer bathrooms and less overlapping water use can often work with lower service flow.
  • Busy family homes: More fixtures running at the same time need more capacity and better valve performance.
  • Large homes or multi-bath layouts: These are where undersized treatment systems become obvious fast.

A filter that looks affordable but can't keep up isn't a bargain. It's a bottleneck.

The real number to watch is ownership cost

Many "best well water filter" lists fail people. They compare features and skip the long-term bill. Verified background on well-water filtration points to the importance of total cost of ownership, noting that replacement media under heavy contamination loads can run $200-500 annually, and that air injection systems such as the WS1 may keep media for up to 10 years under ideal conditions, while high iron levels above 5 PPM can cut that to 2-3 years, which can inflate costs 3x, according to Crystal Quest's well water filtration discussion.

That single point changes how you should shop. A system that looks inexpensive can become the expensive option if your water chemistry exhausts media early.

A better way to compare systems

When comparing two filtration setups, calculate the following over the years you expect to own the home or the equipment:

  • Pre-filter replacements: These are often the routine cost people forget to include.
  • Main media life: Ask how your actual water chemistry affects replacement timing, not just the best-case brochure claim.
  • Service needs: Some systems need more hands-on upkeep than others.
  • Related supplies: If a setup uses salt, chemicals, or power, include that in your budget.

The TCO questions that expose weak options

Ask every vendor these questions:

  1. How does my iron load affect media life?
  2. What part of this system needs replacement most often?
  3. What maintenance am I expected to do myself?
  4. What happens to pressure as the system loads up?
  5. Which costs are not included in the initial quote?

A good answer is specific to your report. A weak answer sounds generic.

Building Your Perfect Well Water Filtration System

The best home water filter for well water is usually not a single filter. It's a filtration train, arranged in the order your water needs.

That sounds complicated until you reduce it to a simple rule. Put the rough treatment first, the specialized treatment next, and the polishing or disinfection stage last.

A modular water filtration system showing various clear filter cartridges with different internal media components connected by blue tubes.

Matching the train to the test

Here are practical system layouts that make sense for common well-water scenarios.

  • Sediment plus iron: Start with a sediment pre-filter, then an iron filter, then a carbon polishing stage if taste or odor still needs cleanup.
  • Hydrogen sulfide odor plus staining: Use sediment protection if needed, then an oxidation-based sulfur and iron filter, followed by carbon if you want final odor polishing.
  • Bacteria concern with otherwise manageable water: Pre-filtration first, then the core treatment stages for any minerals or odor issues, with UV at the end.
  • Heavy particulate load with mixed nuisance issues: Use strong sediment control up front so the specialty tanks don't get buried in debris.
  • Hard water layered onto other problems: Treat nuisance contaminants in the right order, and place softening where it supports the system rather than interfering with it.

The order matters as much as the parts. A UV unit before cloudy water is a bad sequence. Carbon before heavy iron is usually a short-lived sequence. A softener thrown into the wrong place can complicate the system instead of helping it.

A few combinations that work well

A common setup for visible staining and dirty water is:

Sediment filter → AIO iron filter → carbon filter

A common setup where microbial protection is part of the plan is:

Sediment filter → primary contaminant treatment → UV

If your water smells bad at every tap but also carries particles, don't skip that first barrier. Sediment is what gradually shortens the life of everything behind it.

Good treatment trains don't ask one component to do three jobs badly. They give each stage one clear job and enough protection to keep doing it.

A short visual walkthrough can help if you're trying to picture how these parts fit together in a real installation.

The shopping list mindset

When I review a homeowner's plan, I don't look for the fanciest brand list. I look for a clean answer to four questions:

  • What exactly are we removing?
  • What has to be protected first?
  • Where is pressure most likely to become a problem?
  • What will this setup cost to maintain?

If you can answer those four, your system design is usually headed in the right direction.

Installation Upkeep and Common Troubleshooting

Even a well-chosen filtration system can disappoint if it's installed poorly or ignored after startup. Most long-term complaints come from three places. Bad placement, skipped maintenance, or unrealistic expectations about what the equipment is supposed to do.

A professional technician wearing a green uniform performs maintenance on a home water filtration system.

DIY or hire a pro

Some homeowners can handle basic installation work, especially when the system is simple and the plumbing layout is clean. Whole-house well systems get more demanding when they involve larger tanks, bypass valves, drain lines, pressure concerns, or disinfection equipment.

If you hire a professional, look for someone who can do more than connect pipes. You want a person who understands well-water chemistry, equipment order, service access, and how to leave room for future maintenance.

A maintenance routine that keeps systems honest

Create a written service schedule and keep it near the equipment. Don't rely on memory.

  • Check pre-filters regularly: These are often the first point of pressure loss.
  • Watch for returning odor or staining: That usually means a treatment stage is overloaded, exhausted, or bypassing.
  • Inspect bypass settings and valves: A partly closed or incorrectly set valve can make a healthy system look broken.
  • Look around the equipment base: Small leaks can gradually create bigger house problems over time.

If you're not sure what hidden moisture problems look like once water escapes containment, this guide on signs of water damage in your home is useful for spotting trouble early.

Quick troubleshooting that saves time

If pressure suddenly drops, start with the simplest suspect. Check the sediment stage first. That's often where a system announces that it has been doing its job.

If a sulfur smell comes back, don't assume the whole system failed. It may be one exhausted stage or a change in raw water conditions. If staining returns, compare where it appears. Whole-house return usually points to treatment performance. One fixture only may point to local plumbing or fixture buildup.

A good troubleshooting habit is to ask what changed. Water conditions, usage, service intervals, and valve positions usually explain the problem faster than guesswork.

Frequently Asked Questions About Well Water Filters

Can one filter handle all well water problems

Usually not. Well water often has layered issues, and different contaminants need different treatment methods. The best results usually come from staged treatment rather than a single all-purpose box.

Is a whole-house system better than an under-sink filter

It depends on the goal. If you're dealing with staining, odor, sediment, or appliance wear, whole-house treatment makes more sense. If you only want better drinking water at one tap, an under-sink unit may be enough.

Will a carbon filter remove iron and sulfur odor by itself

Sometimes it can help with mild odor polishing, but it often isn't the right primary treatment for heavier iron or hydrogen sulfide problems. Those usually need specialized pretreatment.

How do I know what size system I need

Start with your water test and your household demand. A system has to match both the chemistry and the amount of water your home uses at peak times.

Why do some homeowners regret the cheapest system

Because initial price isn't the full cost. Media replacement, routine upkeep, and pressure complaints can make a low-priced system the costly choice over time.

Should I install UV just to be safe

Only if the water conditions and test results support it and the system is built to feed UV properly. UV is a disinfection tool, not a substitute for sediment or iron treatment.


If you're comparing systems and want clear, practical help without the marketing fog, Water Filter Advisor is a solid place to research filters, maintenance needs, and the trade-offs that matter in a real home.