Best Under Sink Water Filter for Well Water (2026 Guide)

If you're shopping for the best under sink water filter for well water, you're probably already annoyed by something at the tap. Maybe the water smells faintly like rotten eggs in the morning. Maybe tea tastes metallic. Maybe the sink develops orange or brown stains no amount of scrubbing seems to fix. Those aren't cosmetic quirks. They usually mean your water needs a system built for well conditions, not a generic city-water filter with better marketing than staying power.

Most under-sink filter roundups miss the part that matters most to well owners. A strong drinking water filter is only half the job. The other half is protecting that filter from the sediment, iron, manganese, and microbial problems that make well water harder on cartridges, membranes, and UV chambers. I’ve seen plenty of homeowners buy an expensive under-sink unit, install it directly on untreated well water, and then wonder why flow drops, taste gets weird again, or replacement costs start stacking up faster than expected.

A good setup for well water usually isn't a single box. It's a complete system. Test the water first. Match the filtration technology to the actual contaminants. Add the right pre-filter so the under-sink unit can do its job. Then price the system based on what well water does to filters over time, not what a product page promises under ideal conditions.

Here’s the side-by-side view before we dig in.

Filtration approach Best for Main strength Main weakness Typical complete-system note
Carbon block under-sink Taste, odor, some metals, general polishing Good usability, no wastewater, usually simpler install Won't solve every dissolved contaminant issue and isn't a bacteria treatment Needs sediment protection on most wells
Reverse osmosis under-sink Dissolved contaminants, broad reduction goals Strong all-around contaminant reduction potential Sensitive to sediment and iron, creates wastewater, slower by design Usually needs pre-filtration before the RO unit
UV paired with filtration Microbial risk after proper pre-treatment Targets bacteria risk without changing taste much Doesn't work well if water is cloudy or full of particles Must be paired with sediment control and usually another filter stage
Complete staged system Most well-water homes with mixed issues Protects filter life and improves consistency More parts to maintain and more planning up front Best fit when the water report shows multiple problems

That 'Well Water Smell' Is a Warning Sign

A lot of well water problems start small. You fill a glass and notice a dull metallic finish. The guest bathroom toilet tank stains faster than it should. White laundry starts looking tired. Then the kitchen faucet begins to sputter a little, and suddenly that cheap filter choice from a year ago doesn’t look so cheap anymore.

Private well owners live with a different reality than city-water households. Municipal water is treated and regulated before it reaches the home. Well water isn't. That means your water can carry a shifting mix of sediment, iron, manganese, sulfur compounds, hardness minerals, nitrates, and microorganisms, depending on your geology, recent weather, the condition of the well, and how the plumbing system is set up.

Practical rule: If your water leaves stains, smells off, or changes with the season, treat that as a filtration design problem, not just a nuisance.

The mistake I see most often is buying an under-sink system for the symptom instead of the cause. A homeowner wants better-tasting water, so they install a sleek kitchen filter. But if the actual issue is oxidized iron and grit grinding through cartridges, or bacteria risk that a basic carbon block can't address, the “fix” becomes a short-term patch.

That’s why the best under sink water filter for well water is rarely just the unit under the sink. It’s the combination that works with your well instead of against it. Sometimes that means a carbon block system protected by a sediment stage. Sometimes it means reverse osmosis with a dedicated pre-filter. Sometimes it means you shouldn’t start under the sink at all until the incoming water is stabilized.

Homeowners who get this right usually stop chasing symptoms. Their filter lasts longer. Flow stays consistent. The water tastes better because the system is finally dealing with the actual problem.

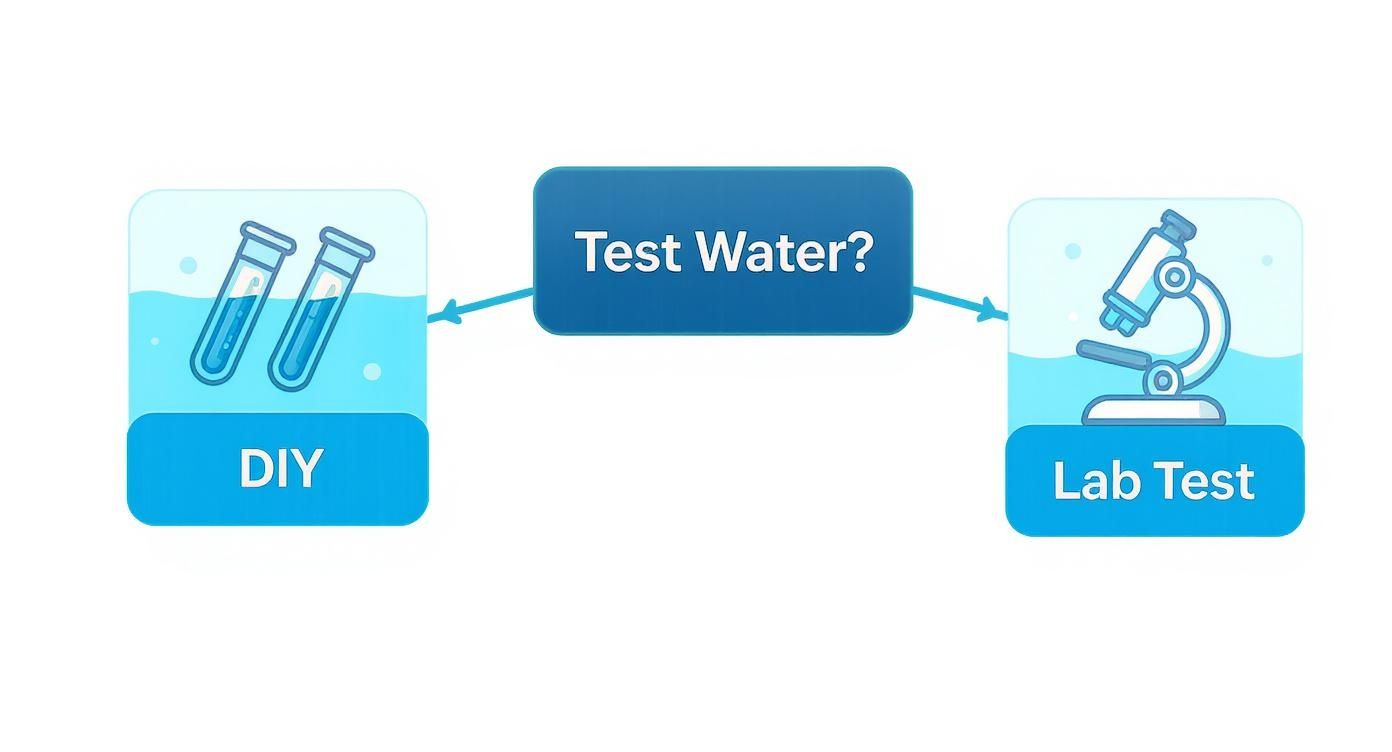
Test Before You Invest in Any Water Filter

A homeowner sees brown staining in the sink, notices a sulfur smell on some mornings, and buys an under-sink filter to fix the drinking water. Six weeks later, flow drops, the cartridges are coated with rust-colored sludge, and the odor is still there. I’ve seen that sequence many times on private wells. The filter was not the first problem. It was the last piece in a system that had not been diagnosed.
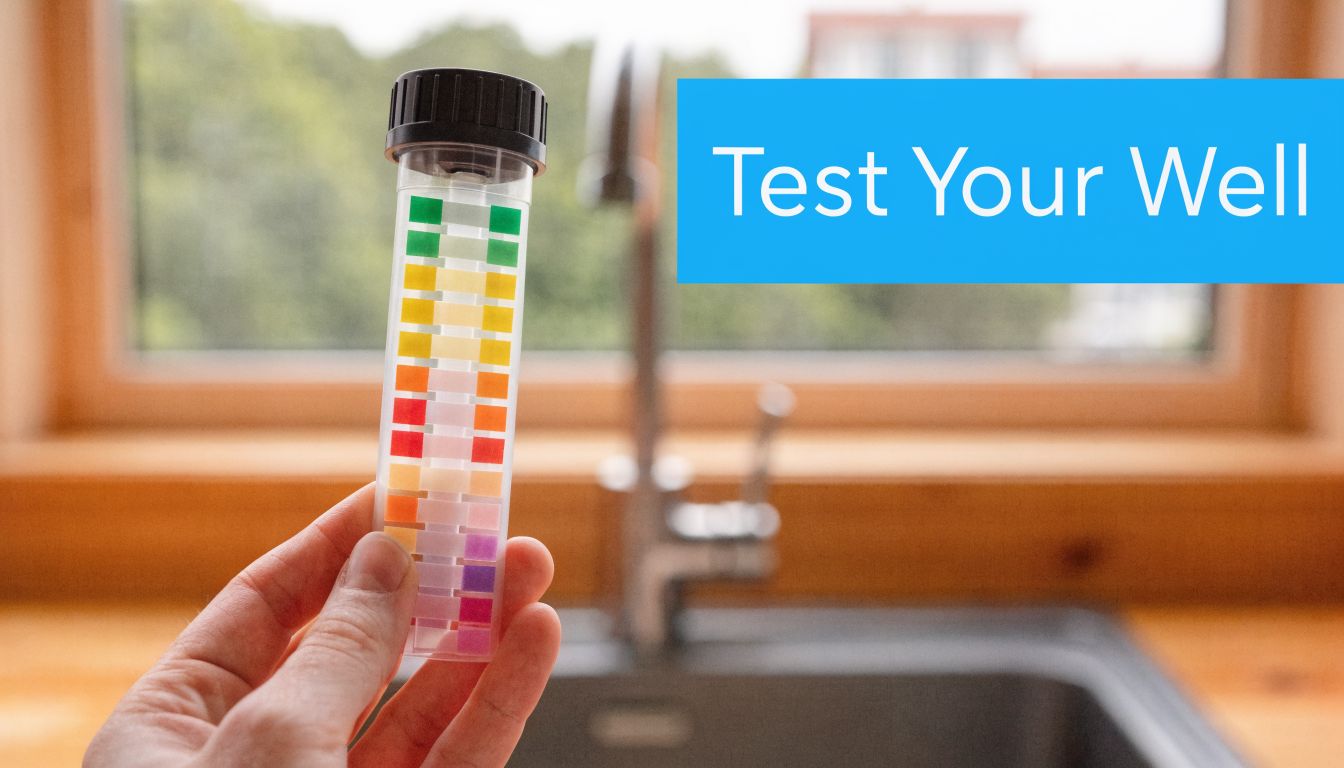
A hand holding a water test strip container in front of a kitchen sink faucet.

A quick strip test can help you spot a broad issue, but it is not enough to choose equipment with confidence. Well water needs a lab report or a reliable local water analysis that shows what is entering the house. Homeowners who want help reading those results can use Water Filter Advisor's advice library as a starting point before they compare systems.

What to test for first

Start with the contaminants that shorten filter life or point to the wrong treatment method.

  • Sediment and turbidity. Sand, silt, and fine particulate plug cartridges early and can foul RO components fast.
  • Iron and manganese. These cause staining, metallic taste, dark residue, and heavy loading on any under-sink filter.
  • Hardness minerals. Scale can reduce performance and increase maintenance.
  • Nitrates. Many homeowners assume any drinking water filter will reduce them. That is a costly assumption.
  • Microbial contamination. Coliform or other bacteria concerns change the equipment plan immediately.

Those results do more than identify contaminants. They tell you whether an under-sink unit can handle final polishing, or whether the water needs treatment upstream first.

Why the report matters more than the product page

Product pages are written to sell broad compatibility. Well water rarely behaves that way. A carbon filter that performs well on taste and odor can clog quickly if the actual issue is sediment and oxidized iron. A system that improves flavor may do very little for nitrates. A good-looking under-sink unit also does not solve a bacteria problem by itself.

That is why I recommend buying in this order. Test first. Then decide on pre-filtration. Then choose the under-sink unit that fits the treated water reaching the kitchen. That sequence usually saves money because it prevents premature cartridge changes and protects the more expensive components.

This is also where long-term cost starts to become clear. A filter rated for a certain lifespan on cleaner water may reach that limit much sooner on a well with grit, iron, or seasonal swings. The box does not tell you how fast your cartridges will load up if the incoming water is unstable. Your test report gives you the best clue.

Lab test first, video second

Many homeowners want to know what a proper water testing process looks like before paying for one. This walkthrough is a helpful primer.

A simple testing checklist

Use this before you buy anything:

  1. Pull a current sample. Do not rely on an old inspection report or a neighbor’s water test.
  2. Request a well-focused panel. Include sediment indicators, iron, manganese, hardness, nitrates, and bacteria.
  3. Note what you see and smell. Staining, rotten egg odor, cloudiness, and seasonal changes help explain the lab numbers.
  4. Shop with the report in hand. Choose equipment that answers the actual findings, not generic claims.

If the lab report and the marketing copy disagree, trust the lab report.

Comparing Under Sink Filtration Technologies for Wells

A clear lab report usually narrows the field fast. For well water under the sink, choices are carbon block, reverse osmosis, and UV paired with filtration. Each solves a different problem. The expensive mistake is expecting one cartridge or one compact unit to handle every well issue by itself.
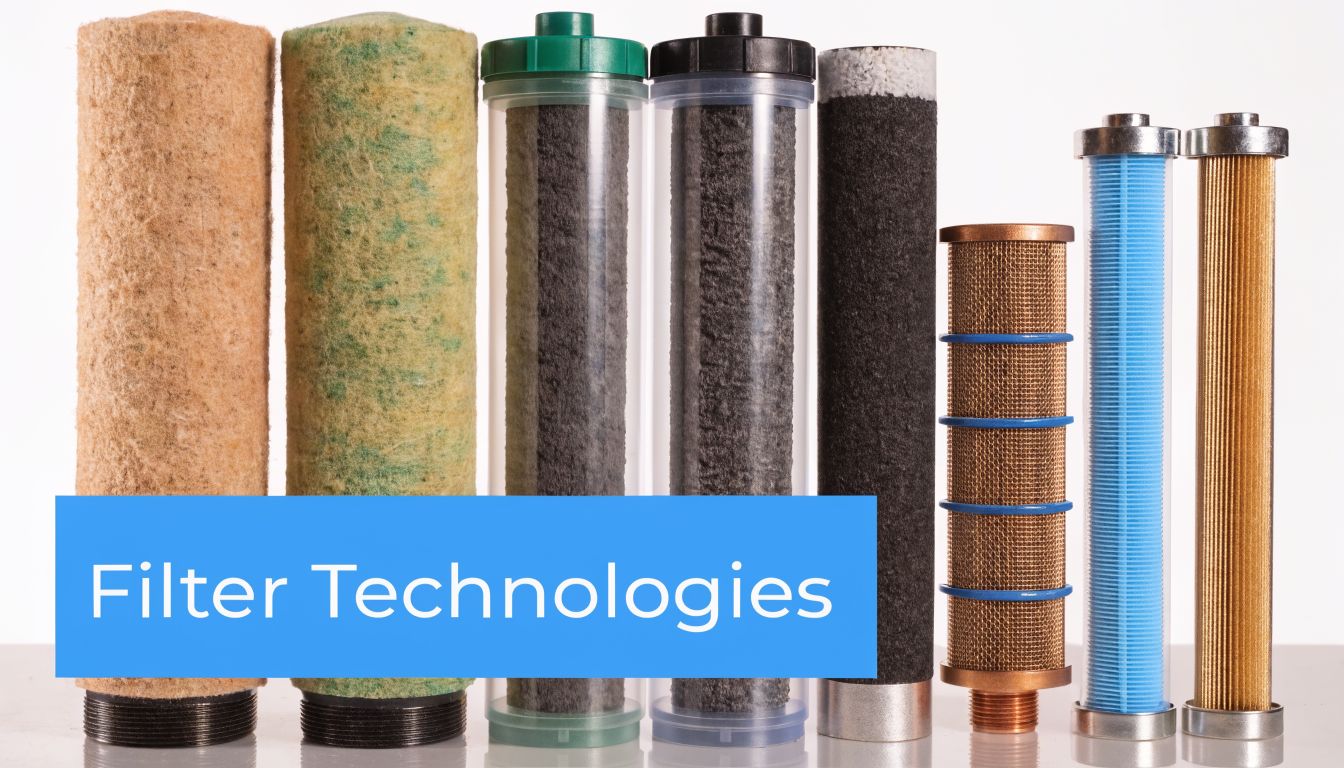
Various industrial and residential water filter cartridges standing in a row against a plain white background.

On city water, an under-sink filter often works as a standalone upgrade. On a well, it usually works best as the last stage in a treatment chain. That difference matters because iron, sediment, sulfur odor, and bacteria can overwhelm the wrong technology long before the rated filter life on the box.

Carbon block systems

Carbon block systems are often the easiest to live with. They keep normal faucet flow, do not waste water, and usually need less maintenance than RO. They also do a good job improving taste and odor and reducing many chemical contaminants, which makes them a strong finishing filter after the water has already been cleaned up upstream.

For well owners, that last part is the key trade-off. Carbon can polish water very well, but it does not like heavy sediment, iron loading, or active bacterial problems. If raw well water hits the carbon first, pressure drops early, cartridges foul faster, and replacement costs climb.

I install carbon block systems most often on wells that already have the big problems handled. That includes sediment control at minimum, and often separate treatment for iron or sulfur if those are present.

Carbon block works best on well water that is already reasonably clean by the time it reaches the kitchen sink.

Reverse osmosis systems

Reverse osmosis is the strongest under-sink option for dissolved contaminants. If the report shows nitrates, arsenic, sodium, fluoride, or a broad mix of dissolved solids, RO usually gives the homeowner the best chance of getting the drinking water where it needs to be.

It also has the most conditions attached to it. RO membranes are fine filters. Fine filters clog. On well water, that means shortened membrane life if sediment or iron gets through, more frequent prefilter changes, slower production, and wastewater that some homeowners do not expect until after installation. The water quality can be excellent. The operating cost can also be higher than online roundups suggest, especially on a well with seasonal swings.

For many wells, RO is the right drinking water core, but only if the incoming water has already been stabilized enough that the membrane is not doing everyone else’s job.

UV systems

UV belongs in the conversation any time the well has a bacteria history, a shallow casing, flooding risk, or a test result that points to microbial contamination. It treats a problem carbon and RO are not designed to solve on their own.

UV also has strict limits. It does not remove iron, manganese, sediment, hardness, or sulfur odor. It does not improve taste by itself. It needs clear water to work properly because suspended particles can shield microbes from the light. In practice, UV is an add-on disinfection stage, not a substitute for filtration.

Which technology fits which well problem

Technology Good fit for Weak fit for Best use on well water
Carbon block Taste, odor, many chemical reduction goals Heavy sediment, iron, bacteria concerns Final polishing stage after upstream treatment
RO Dissolved contaminants such as nitrates, arsenic, and high TDS Untreated well water with grit or iron fouling risk Drinking water filter after feed water is cleaned up
UV Bacteria control on clarified water Sediment, metals, odor, taste by itself Final disinfection step in a complete system

Mixed results are common on private wells. A water test might show sediment, iron staining, and bacteria risk all at once. In that case, the right answer is a matched system, not brand loyalty to one under-sink unit. That approach costs more upfront in some homes, but it usually costs less over time because the expensive filters last closer to their intended service life.

The Critical Pre-Filter Your Well Water Demands

A homeowner buys a premium under-sink system, installs it on a Friday night, and likes the taste right away. A few weeks later, flow slows down, cartridges look filthy, and the replacement schedule suddenly gets expensive. On well water, that pattern usually points to a setup problem, not a bad brand.
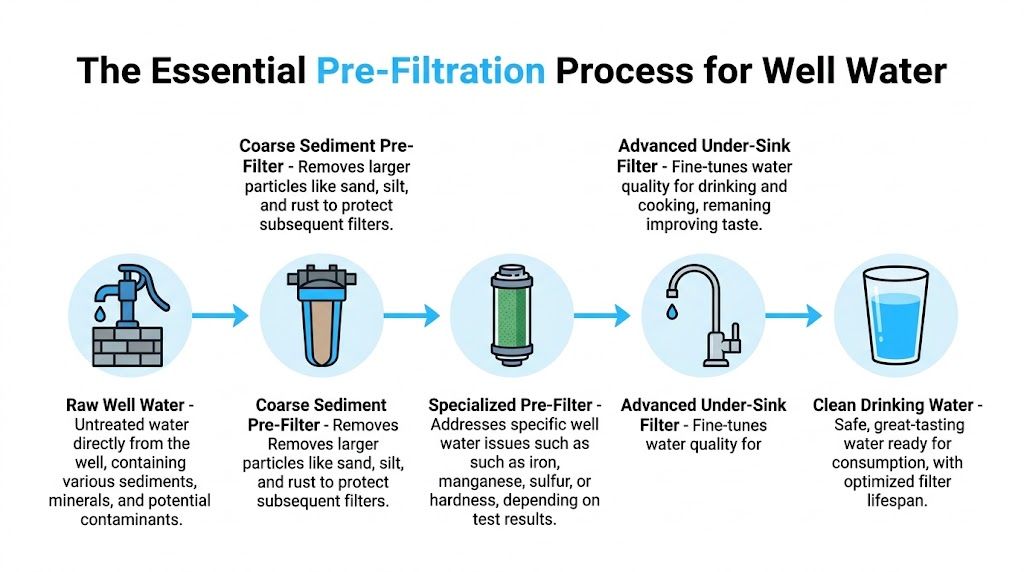
A diagram illustrating the essential pre-filtration process for cleaning well water from raw source to drinkable state.

Why under-sink units burn through filters on well water

Under-sink filters are finishing filters. They are built to polish water that has already had the rough work handled upstream.

Well water often arrives with sand, silt, iron particles, oxidized manganese, or fine debris stirred up by pump cycling. Feed that directly into a carbon block or RO system and the expensive stage becomes the first dirt catcher in the line. Flow drops faster. Pressure falls off. RO membranes foul sooner. Carbon cartridges load up long before their rated life.

I see this mistake all the time in homes with light staining or occasional cloudy water. The owner assumes the under-sink unit will "handle it." It will, for a while. Then the eventual cost shows up in short cartridge life and inconsistent performance.

Under-sink filters last longer on wells when they polish water instead of trying to clean raw well water by themselves.

What the pre-filter needs to do

A proper pre-filter protects the expensive equipment and gives the under-sink unit a cleaner, steadier feed. For many wells, that starts with sediment control. The exact micron rating depends on how dirty the water is and how much pressure loss the home can tolerate, but the job is the same. Catch the grit before it reaches the finer stages.

Some wells need more than a sediment cartridge.

If testing or clear symptoms point to iron, manganese, sulfur odor, or hardness, add treatment for that problem before the under-sink filter. At this point, many homeowners overspend. They keep replacing specialty under-sink cartridges that were never meant to carry iron or sulfur treatment on their own.

A complete setup works better and usually costs less over time

The most reliable approach is a staged system:

  1. Sediment pre-filtration first for sand, silt, rust, and other particles.
  2. Problem-specific treatment next if the well has iron, manganese, sulfur, or hardness.
  3. Under-sink filtration last for drinking water taste, odor, and any targeted reduction the water report calls for.

That order matters. It protects flow rate, reduces fouling, and helps the final cartridges reach something close to their expected service life.

How to match the pre-filter to the problem

Use your water test and what you see in the house.

  • Visible grit or cloudy water: Start with sediment pre-filtration before any under-sink unit.
  • Orange, brown, or black staining: Plan for iron or manganese treatment upstream. A kitchen filter alone is usually the wrong tool.
  • Rotten egg smell: Address sulfur before the water reaches the under-sink system.
  • Scale and soap issues: Hardness may need treatment before fine filtration if you want better filter life.
  • Mixed well problems: Build the system in stages instead of asking one under-sink product to solve everything.

A sleek tankless unit under the sink can still be part of a good well-water setup. It just should not be the whole setup. On private wells, the best results usually come from pairing the under-sink filter with the right pre-treatment so you are paying for clean drinking water, not constant replacements.

Top Filtration Approaches and Recommended Systems

The best under sink water filter for well water depends on what your report shows and what kind of maintenance you're willing to live with. I don't like generic top-five lists for wells because they blur together very different problems. A better method is to choose an approach, then pick a system type that fits.

Here’s the quick comparison.

Filtration Approach Best For Key Weakness Estimated 3-Year Cost
Sediment pre-filter + multi-stage carbon under-sink Wells with sediment, taste issues, staining concerns, and no major nitrate or microbial issue May not solve dissolved contaminant problems that call for RO Varies by filter change frequency and pre-treatment needs
Sediment pre-filter + under-sink RO Wells with broad dissolved contaminant concerns Membranes can suffer if iron and sediment control is weak Usually higher because of filter replacements, water waste, and add-ons
Sediment pre-filter + specialized treatment + under-sink carbon Wells with iron, manganese, sulfur, or hardness patterns plus taste/odor complaints More components to size and maintain Can be efficient long term if pre-treatment prevents premature cartridge loss
Clarification + UV + under-sink finishing filter Wells with microbial risk and drinking-water polishing needs UV alone won't fix particles, metals, or taste issues upstream Depends on lamp service, pre-filtration, and finishing filter schedule

Approach for sediment, staining, and everyday drinking water improvement

If your water report points to sediment, iron-related nuisance issues, or general taste problems, but not a major dissolved-contaminant or bacterial challenge, I usually prefer a sediment pre-filter plus a high-performance multi-stage carbon system under the sink.

For such applications, systems like Clearly Filtered make sense. The available lab data shows strong performance on uranium, chloroform, copper, barium, and strontium in treated well-water testing, and the flow rate remains practical for kitchen use. That kind of filter works best when it isn't being fed raw grit and oxidized debris all day.

A setup like this tends to fit homeowners who want:

  • Better taste and cooking water
  • No RO wastewater
  • A simpler faucet experience
  • Less concern about stripping minerals

The catch is that this approach isn't the answer if nitrates or microbes are the true problem. A polished glass of water can still be the wrong glass of water if the technology doesn’t match the report.

Approach for nitrates, arsenic concerns, and broad dissolved contaminant reduction

If the lab report points toward dissolved contaminants that call for stronger reduction, an under-sink RO paired with sediment pre-filtration is often the safer bet. Models frequently recommended in this lane include systems like Waterdrop G3P800, Cloud RO, and Aquasana SmartFlow.

I treat these as high-performance tools with strict feed-water expectations. They can be excellent if pre-filtration is done properly. They can also become maintenance magnets when homeowners skip that step and let dirty well water hit the membrane directly.

This approach usually makes sense when:

  • You need broader dissolved-contaminant reduction than carbon alone can provide.
  • You accept slower production and some wastewater.
  • You have room for maintenance and possible add-ons like remineralization.

If you're drawn to RO because it feels like the strongest option, make sure the pre-filtering is just as strong. Otherwise the membrane becomes an expensive sediment catcher.

Approach for iron, manganese, sulfur, or hardness patterns

Some wells are less about one dangerous contaminant and more about ugly, stubborn chemistry. Orange staining, black residue, sulfur odor, recurring scale, and filter cartridges that slime up early usually point to this category.

In those homes, the under-sink unit should be the last piece of the plan, not the first. The better approach is:

  • a sediment stage,
  • a specialized treatment stage chosen from the report,
  • then an under-sink carbon or RO unit for drinking water.

A system like Aquasana Claryum can make sense as the final under-sink stage in a broader setup because non-RO carbon filtration preserves minerals and avoids wastewater. But I wouldn't ask it to solve a raw iron problem alone. That’s where well owners waste money.

Approach for bacteria risk

If the report shows microbial concern, the system design changes again. You need a treatment train that includes clarification before disinfection, and many homeowners end up pairing filtration with UV.

A practical sequence is:

  1. particle reduction,
  2. any needed well-specific pre-treatment,
  3. UV or another appropriate microbial barrier,
  4. under-sink finishing filter for taste and use at the kitchen tap.

This kind of setup takes more planning, but it avoids the false confidence that comes from installing a nice under-sink cartridge while leaving the microbial issue unresolved.

What I’d choose by homeowner type

Homeowner situation Best fit
You want strong drinking-water improvement and your report doesn't point to major nitrate or bacteria issues Sediment pre-filter + multi-stage carbon under-sink
Your report shows dissolved contaminants that need broader reduction Sediment pre-filter + under-sink RO
Your well causes staining, odor, or rapid cartridge fouling Staged pre-treatment + under-sink finishing filter
You have confirmed microbial risk Clarification + UV + final under-sink filter

The winning setup is the one you'll still be happy maintaining a year from now. Well water rewards realistic design, not heroic expectations.

Calculating the True Lifetime Cost for Well Water Filters

A $300 under-sink filter can turn into a high-maintenance system fast if the well water feeding it is full of sediment, iron, or hardness. I see that mistake all the time. The unit itself is not always the expensive part. Keeping it working on well water is.
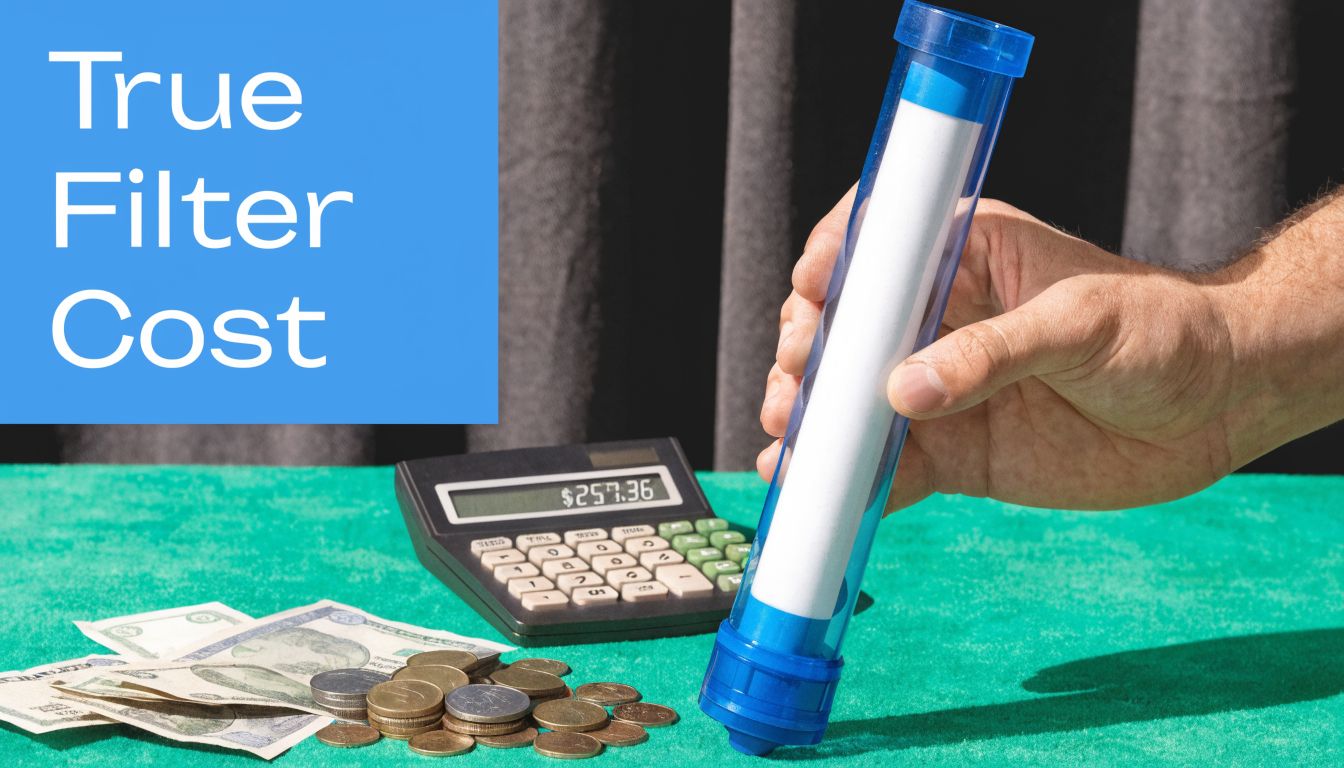
A hand holding a water filter cartridge next to a calculator and loose change on a table.

What the sticker price misses

Retail price tells you what the box costs on day one. It does not tell you what your water will do to that system over the next few years.

On a clean municipal supply, a manufacturer’s replacement schedule may be close to reality. On a private well, that schedule often breaks down. Sediment loads cartridges faster. Iron can blind carbon blocks and foul RO components. Hard water leaves scale where flow paths are narrowest, which is why some homeowners blame the filter when the actual problem is the untreated feed water ahead of it.

That is why I price well-water systems as a package, not a single product. The under-sink unit, the pre-filter stage, replacement cartridges, occasional sanitizing, and any parts that wear early all belong in the same budget.

Build a cost worksheet before you buy

Use a simple formula:

Three-year cost = system price + replacement filters + pre-filter replacements + service items + operating costs

For well water, the pre-filter line matters more than buyers expect. Adding a sediment stage or a better upstream treatment step raises the upfront spend, but it often saves money by protecting the expensive filters under the sink.

Operating costs depend on the technology:

  • RO systems can bring wastewater, slower production, and more frequent service if feed water is rough
  • Carbon systems usually cost less to run, but cartridge life can drop sharply if sediment or iron is not handled first
  • Specialty add-ons such as remineralization cartridges, UV lamps, or pumps add recurring cost and maintenance time

A cheaper unit with no protection in front of it can cost more than a better-designed system by the end of year two.

How I estimate cost in real well-water homes

Start with the water report, then look at the full treatment train. If the under-sink filter is being asked to catch everything, the ownership cost is usually headed the wrong way.

Ask these questions:

  • What reaches the kitchen filter after pre-treatment? Price the final water entering the unit, not the raw well water at the pressure tank.
  • Which cartridge or membrane is the most expensive part to replace? That part usually sets the long-term budget.
  • How easy is the system to service? Filters that are awkward to reach or proprietary to one brand tend to cost more over time.
  • Will low flow trigger early troubleshooting or part swaps? That labor and frustration have a cost, even if you do the work yourself.
  • Are replacement filters sold everywhere, or only through the manufacturer? Limited availability often means higher prices later.

One rule holds up well in the field. Protect expensive filtration with cheaper upstream filtration whenever the water justifies it.

Well water punishes undersized systems and rewards good staging.

Homeowners save the most money when they stop shopping for a single magic filter and start building a complete system. That usually means a modest pre-filter investment up front, fewer surprise replacements, and a kitchen filter that performs closer to its rated life.

Your Final Well Water Filter Decision Checklist

Before you buy, run through this list once. It catches most expensive mistakes.

Water quality match

  • Match the filter to the report. If the lab results point to nitrates, bacteria, or heavy sediment, the system should answer those issues directly.
  • Don't buy for taste alone. Better taste is nice. It isn’t the same as solving the main contaminant problem.

Performance and daily use

  • Check the flow you can live with. A high-performance system that annoys everyone at the sink often becomes a regret purchase.
  • Think about how the filter behaves on well water. Capacity claims are often cleaner and kinder on product pages than in well-water homes.

Certifications and proof

  • Look for relevant certifications. If a system claims reduction for specific contaminants, verify that the certification or test evidence matches the claim.
  • Separate lab data from marketing language. The details matter, especially on wells.

Installation reality

  • Measure the under-sink space. Tankless systems save space, but the plumbing path and service access still matter.
  • Plan the pre-filter location. The under-sink unit may be the final stage, not the first stage.

Maintenance honesty

  • Decide how much upkeep you're willing to do. A technically excellent system is still the wrong choice if you won't keep up with service.
  • Budget for well-water wear. If your water is hard on filters, assume more maintenance, not less.

A good purchase decision usually feels a little less exciting and a lot more solid. That’s the right instinct for well water.

Frequently Asked Questions About Well Water Filters

Can I use a standard pitcher filter on well water

You can, but I wouldn't rely on it as your primary solution. Pitcher filters are fine for minor taste improvement when the water is already fairly clean. They are not built to handle the sediment, iron loading, microbial concerns, or broad contaminant range that many wells bring with them.

Do I need a water softener with an under-sink filter

Sometimes yes, often no. It depends on whether hardness is just a nuisance or part of a larger pattern of scale, staining, and appliance trouble. An under-sink filter helps at the kitchen tap. A softener or other conditioning equipment addresses whole-home hardness behavior. They solve different problems.

Will a UV filter work if my water is cloudy

Not reliably. UV needs water that has already been clarified enough for the light to do its job. If the water carries sediment or visible cloudiness, fix that first with proper pre-filtration. UV should be part of a treatment train, not a shortcut around one.

How do I know when to change cartridges if my schedule keeps drifting

On well water, I tell homeowners to watch performance, not just the calendar. A drop in flow, return of odor, renewed metallic taste, or more visible staining usually means the system is loading up. Keep written dates anyway, but don't assume the printed replacement interval will match your well.

Is reverse osmosis always the best under sink water filter for well water

No. RO is excellent for some dissolved contaminant problems, but it isn't automatically the best choice for every well. If your main challenge is sediment, iron, or sulfur, RO without proper pre-treatment can become a maintenance headache. In some homes, a staged system with sediment protection and a strong carbon block under the sink is the smarter long-term fit.

Can one under-sink system fix all my well-water issues

Usually not by itself. If your well has mixed issues, and many do, the best answer is a staged design. The under-sink unit handles the final drinking-water job. Upstream filtration protects it and handles the rougher work.


If you want help sorting through test results, comparing filter types, or figuring out what a complete well-water setup should look like for your home, Water Filter Advisor is a practical place to start. It’s built for homeowners who want clear, research-driven guidance without the usual confusion around certifications, maintenance, and long-term filter costs.

Water Filter Coliform: Your Ultimate Guide to Safe Drinking Water

Discovering coliform bacteria in your water is like finding a stranger in your house—it's a sign something is seriously wrong with your security. But don't panic. A good water filter for coliform is the best home security system you can buy for your tap water. Technologies like Ultraviolet (UV) light, Reverse Osmosis (RO), or ultrafiltration are incredibly effective at either physically removing these unwanted guests or zapping them into oblivion.

While most coliforms won't harm you, their presence is a giant red flag. It’s your water’s way of screaming that a barrier has been breached, leaving a wide-open door for truly nasty pathogens like E. coli to waltz right in. A certified water filter acts as your home's personal bodyguard, ensuring that what comes out of your faucet is safe and clean, every single time.

What Are Coliform Bacteria in Your Water?

Think of coliforms as nature’s alarm system for your water. Their discovery in a water test is like the check engine light suddenly flashing on your car's dashboard.

The light itself isn't the problem, but it’s telling you something under the hood is seriously wrong. In the same way, most coliform bacteria are harmless, but their presence is a clear signal that the safeguards protecting your water have failed. It means a door has been left open for more dangerous germs to sneak into your pipes.

The Different Types of Coliform Bacteria

When you get a water test report back, you'll likely see a few different names. Understanding what they mean helps you gauge the real risk to your family. Water quality experts break them down into a few key groups, each telling a piece of the story.

There are three main categories you need to know:

  • Total Coliforms: This is a huge, diverse group of bacteria that are all over the place in nature—in soil, on plants, and in lakes and rivers. Finding them in your water suggests that surface contaminants have somehow seeped into your system, but it doesn't automatically mean it's from a hazardous source.
  • Fecal Coliforms: Now we're getting more specific. This is a sub-group of total coliforms, and they come from one place: the intestines and waste of warm-blooded animals (including people). Discovering these is a much more serious warning that your water has been contaminated by sewage or animal feces.
  • Escherichia coli (E. coli): This is the one everyone's heard of. As the most well-known member of the fecal coliform family, finding E. coli is the smoking gun for recent fecal contamination. Certain strains can cause violent gastrointestinal illness, so a positive test requires immediate action.

The U.S. Environmental Protection Agency (EPA) has a zero-tolerance policy for E. coli in drinking water. A single positive sample is considered a violation of safety standards and requires immediate notification and corrective action to protect public health.

Why They Are Called Indicator Organisms

So, why not just test for the dangerous germs directly? Because testing for every single waterborne virus and bacteria out there would be outrageously complicated and expensive. Instead, labs look for coliforms because they're common and easy to find.

They are called indicator organisms for a reason. If these widespread bacteria are present, it’s a powerful sign that the protective barriers around your water source—whether that’s the city treatment plant or your private well casing—have been compromised.

This failure means that the really bad stuff like Giardia, Cryptosporidium, and harmful E. coli strains could have slipped in, too. Coliforms are the canary in the coal mine, warning you of potential danger before anyone gets sick.

How Bacteria Get Into Your Home's Water

It's a bit unsettling to think about, but invisible bacteria can find a way into the water you drink every day. How they get there is a different story depending on where your water comes from—a private well or your city’s municipal supply.

But the core problem is always the same: a tiny breach is all it takes for contamination to start. Think of it like a fortress. Your water system is designed to be sealed and secure, but even the smallest crack in the wall can let intruders in. Figuring out where those weak points are is the key to defending your water with the right filter.

Why Private Wells Are So Vulnerable

If you have a private well, you're the one in charge of security. It's your responsibility to guard against contamination, which means you need to know where to look for trouble. It’s a lot like maintaining the roof on your house; a small, hidden leak can go unnoticed for a long time while causing serious damage.

Most well contamination happens quietly, out of sight.

  • A Broken Seal: A cracked well casing or a loose, improperly sealed well cap is like leaving your front door wide open. Rainwater washes over the ground, picking up bacteria from the soil, and funnels it straight into your well.
  • Nearby Farms: Living in a rural area has its perks, but nearby agricultural activity can be a risk. Runoff from fields treated with manure or fertilizers can soak into the ground, eventually making its way into the aquifer that feeds your well. This risk skyrockets after heavy rain.
  • Bad Septic Systems: A failing septic system—or even a perfectly good one that’s just too close to your well—can leak raw sewage into the surrounding soil. From there, it’s a short trip for dangerous stuff like fecal coliforms and E. coli to migrate through the ground and into your drinking water.

Studies on private wells have shown a direct link between septic systems and water quality. Wells located within 100 feet of a septic drain field were found to be far more likely to test positive for total coliforms and E. coli.

How City Water Can Go Wrong

You’d think being on city water means you’re in the clear, right? While it’s true that municipal water gets treated at a central plant, it still has to travel miles through a massive network of underground pipes to reach your home. And sometimes, that aging infrastructure is where the problems begin.

Picture the city's water main like a major highway. Most of the time, everything runs smoothly. But one bad accident can cause a massive pile-up and create unexpected problems for miles.

Here are the most common ways city water gets contaminated:

  • Old, Crumbling Pipes: Many American cities are relying on water pipes that were put in the ground before your grandparents were born. Over decades, these pipes corrode, rust, and develop cracks. Those cracks become entry points for contaminated groundwater to get sucked into the system.
  • Water Main Breaks: This is the most dramatic failure. When a large water main bursts, the pressure is lost instantly. As water rushes out, a vacuum is created, pulling in surrounding dirt, mud, and bacteria right into the clean water line.
  • Sudden Pressure Drops: You don't need a full-blown break for things to go wrong. A significant drop in pressure—maybe from firefighters hooking up to a hydrant or heavy use in one area—can cause the same vacuum effect. This "negative pressure" can slurp contaminants into the pipes through tiny, pre-existing cracks.

Whether you're on a well or city water, it's clear that contamination can happen. This is exactly why a good water filter for coliform is so important. It acts as your last line of defense, protecting you and your family right at the tap.

The Most Effective Coliform Removal Technologies

Finding out you have coliform bacteria in your water is alarming, but the good news is there are proven, reliable ways to get rid of them. Choosing the right water filter for coliform means understanding how these different systems work to protect your family. Each one tackles bacteria in a unique way, giving you a solid line of defense.

Think of it like hiring different kinds of security for your water supply. Some are like bouncers, physically blocking unwanted guests from getting in. Others are more like high-tech security systems, neutralizing threats before they can cause any harm. Let’s walk through the most effective options out there.

Ultraviolet Purification: A Sunburn for Microbes

One of the most powerful and popular methods for water disinfection is ultraviolet (UV) purification. A UV system doesn't actually remove bacteria from the water; instead, it zaps them and renders them completely harmless. It's basically a high-intensity, concentrated sunburn for microbes.

Here's how it works: your water flows through a chamber that houses a special UV lamp. This lamp emits intense ultraviolet light at a very specific wavelength (254 nanometers) that penetrates the cell walls of bacteria like coliform and E. coli and completely scrambles their DNA. This process, called ultraviolet germicidal irradiation (UVGI), makes it impossible for them to reproduce or make you sick.

One of the biggest wins for UV systems is that they purify water without adding a single chemical. That means the taste, smell, and color of your water don't change at all. You get powerful disinfection that neutralizes 99.99% of harmful bacteria and viruses while keeping your water's natural qualities intact.

Reverse Osmosis: The Nightclub Bouncer

If UV is the silent zapper, Reverse Osmosis (RO) is the exclusive nightclub bouncer with a list he checks twice. It's a physical filtration process that uses your home's water pressure to force water through a special membrane with ridiculously small pores—we're talking as tiny as 0.0001 microns.

This membrane is the ultimate gatekeeper. It's so selective that only pure H2O molecules are small enough to pass through. Everything else—bacteria, viruses, salts, heavy metals, and other contaminants—gets rejected and washed right down the drain. This is what makes RO systems so incredibly good at what they do.

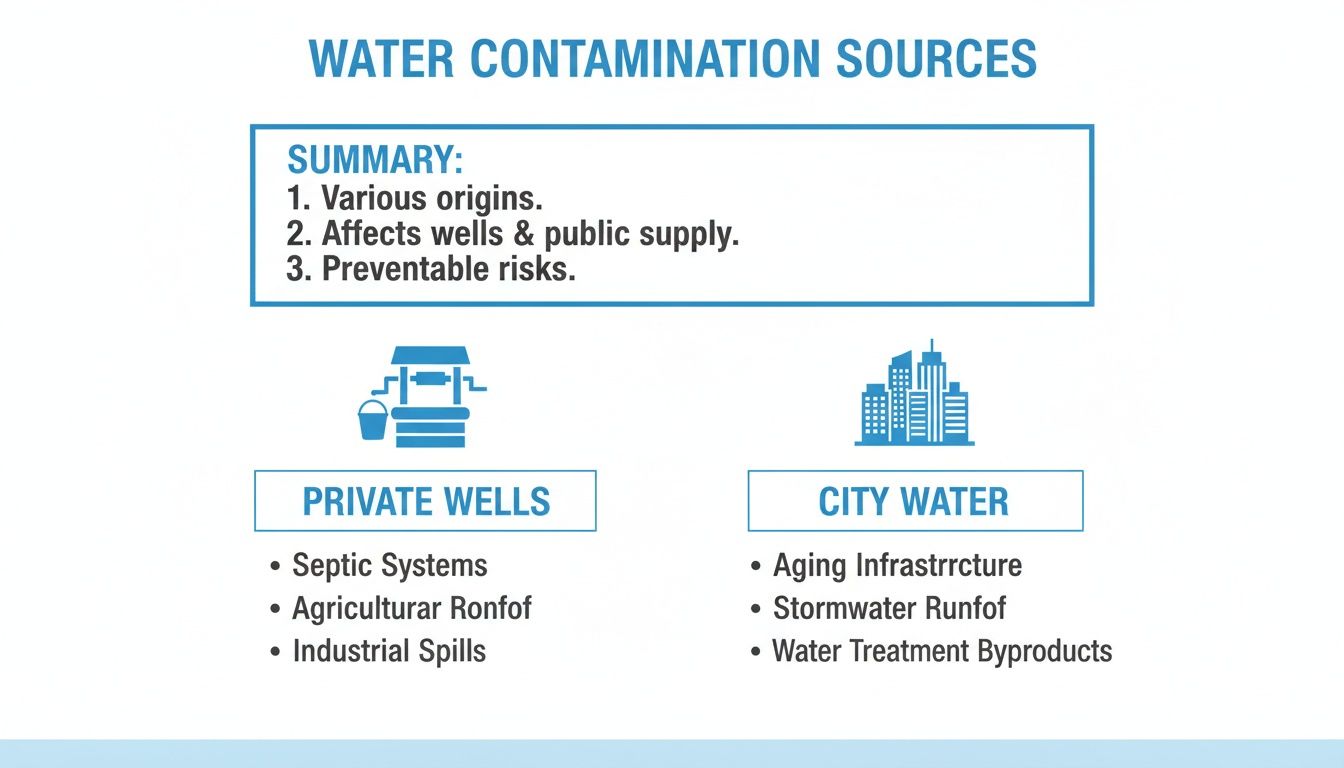
This infographic shows just how easily both private wells and city water systems can get contaminated, which really drives home the need for a final barrier filter in your home.

Infographic detailing water contamination sources for private wells and city water, including septic systems and aging infrastructure.

Whether it’s a leaky well cap or a tiny crack in a city water main, these vulnerabilities show why having a filter at your home—either for the whole house or just at the kitchen sink—is a critical last line of defense.

Ultrafiltration: The Microscopic Net

Ultrafiltration (UF) is another highly effective physical barrier. The best way to picture a UF filter is as a microscopic net woven from thousands of tiny, hollow fibers. The pores in these fibers are bigger than an RO membrane's but still plenty small—around 0.02 microns—to physically block and trap bacteria, protozoa, and even some viruses.

Water is pushed through these hollow fibers, and while the clean water passes through, all the nasty stuff gets caught on the outside. Because UF doesn't remove dissolved minerals, it's a fantastic choice for people who want to keep the natural mineral content of their water while still getting total peace of mind from microbiological threats.

To help you figure out what’s best for your home, I've put together a table comparing these top technologies side-by-side.

Comparing Coliform Removal Technologies

This table compares the most effective water treatment methods for eliminating coliform bacteria, helping you choose the best fit for your home's needs and budget.

Technology How It Works Effectiveness on Coliforms Best For Typical Cost Key Maintenance
UV Purification Uses ultraviolet light to scramble bacterial DNA, preventing reproduction. Excellent (99.99% inactivation) Whole-house disinfection, especially for well water. $300 – $1,500 Annual UV lamp and quartz sleeve replacement.
Reverse Osmosis Forces water through a semipermeable membrane that blocks bacteria. Excellent (99.99%+ removal) Under-sink systems for drinking/cooking water. $200 – $600 Pre-filter changes every 6-12 months; membrane every 2-4 years.
Ultrafiltration Uses a hollow fiber membrane to physically block bacteria and viruses. Very Good (99.9%+ removal) Point-of-use or whole-house where mineral retention is desired. $250 – $1,200 Regular backwashing; cartridge replacement every 1-3 years.
Sub-Micron Filters Traps bacteria in a filter medium with a pore size of 0.2 microns or less. Good (for bacteria, not viruses) Portable filters, emergency use, or as a pre-filter. $50 – $200 Frequent cartridge replacement based on usage.

Each of these systems offers a rock-solid solution if you're dealing with coliforms. Your final decision will come down to things like your water source, how bad the contamination is, your budget, and whether you want to treat every drop of water in your house or just what comes out of the kitchen tap.

Choosing the Right Water Filter for Coliform

Now that you know which technologies can knock out coliform bacteria, how do you pick the right system for your home? Choosing the best water filter for coliform isn't about finding a single "magic bullet" product. It's about matching the right tool to the job, and that job looks very different depending on whether your water comes from the city or a private well.

Your entire decision boils down to one simple question: Are you adding a final line of defense against a potential municipal system failure, or are you building a complete bacterial shield for your own well water? Each scenario requires a totally different game plan.

Solutions for City Water Users

If you're on city water, your main worries are things like aging pipes, sudden water main breaks, or those dreaded boil water advisories. Your goal is simply to create a final, bulletproof barrier right where you use your water most. For this, a point-of-use system is almost always the most practical and effective way to go.

These systems treat the water at a single tap—usually the kitchen sink, where you get all your water for drinking and cooking.

  • Under-Sink Reverse Osmosis (RO) System: An RO unit tucked away under your kitchen sink is a fantastic final barrier. It doesn't just physically block bacteria; it also tackles a huge list of other common contaminants like lead, chlorine, and other dissolved solids.
  • Under-Sink UV Purifier: If your concern is purely microbiological, a dedicated UV system can be installed on the line to your main faucet. This guarantees that any stray bacteria that might have survived the trip from the treatment plant are zapped just seconds before the water hits your glass.

A More Robust Plan for Well Owners

For well owners, the game changes completely. The risk of contamination is much higher and can come from a number of sources. Since you are the sole manager of your water's safety from the ground up, a whole-house solution isn't just a good idea—it's the industry standard. This approach ensures every single tap in your home, from the kitchen to the bathroom shower, delivers microbiologically safe water.

A proper whole-house setup for well water is almost always a multi-stage process:

  1. Sediment Pre-filter: This is always step one. It catches all the dirt, sand, and rust particles. This isn't just for clean-looking water; it's critical because sediment can actually act like a shield for bacteria, protecting them from the UV light and making the whole system less effective.
  2. Whole-House UV Purifier: Right after the pre-filter, a powerful UV system acts as your primary microbiological defense, neutralizing 99.99% of bacteria and viruses as the water enters your home's plumbing.

As you weigh your options, it helps to understand the pros and cons of different types of filtration systems to make a truly informed choice.

Decoding Certifications: Your Seal of Approval

So, how can you be sure a filter actually does what the box says it does? You look for certifications from NSF International (which used to be called the National Sanitation Foundation). Think of an NSF seal as a stamp of approval from a trusted, independent third party that has rigorously tested and verified a product’s claims.

A sobering 2014 global assessment found that 1.8 billion people around the world depend on drinking water sources contaminated with fecal matter. That staggering number is a stark reminder of why a final barrier is so important, even on treated city water where old, cracking pipes can let contaminants back in.

When it comes to bacteria, two standards are absolutely essential:

  • NSF/ANSI 55 (Ultraviolet Microbiological Water Treatment Systems): This standard is broken into two tiers. Class A systems are certified to disinfect water, removing microorganisms like bacteria and viruses, which makes them suitable for treating contaminated water. Class B systems are only certified for "supplemental" treatment on water that's already considered safe, like public tap water.
  • NSF/ANSI 58 (Reverse Osmosis Drinking Water Treatment Systems): This certification confirms that an RO system is effective at reducing a broad spectrum of contaminants, including cysts, which are even larger than bacteria.

Choosing a certified product gives you peace of mind, knowing your investment is backed by real science and independent testing. For more in-depth guidance on finding the perfect system, be sure to check out our extensive advice on water filters.

Your Action Plan for Contaminated Water

Getting a water test back positive for coliform bacteria is definitely jarring. It's okay to feel a moment of shock, but don't panic. Think of it as a clear signal that it's time to take action. With a simple, methodical plan, you can tackle the problem head-on and make your home's water safe again.

We'll break this down into a calm, four-step drill for your water supply: Test, Isolate, Treat, and Retest. Following this process turns a moment of uncertainty into a clear path forward, giving you total control over the health and safety of your family.

Step 1: Confirm the Problem with Testing

First things first, let's make sure we know exactly what we're dealing with. A single positive test is a big red flag, but getting a second, follow-up test from a state-certified lab is absolutely critical. This confirms the initial findings and makes sure you aren't about to spend time and money chasing a false positive.

Your local health department can point you to a list of certified labs in your area. When you collect the sample, follow the lab's instructions to the letter. It’s surprisingly easy to accidentally contaminate the sample from your hands or the faucet, which can completely throw off the results. An accurate diagnosis is the bedrock of an effective solution.

Step 2: Isolate and Protect Your Household

While you're waiting for confirmation or figuring out a treatment plan, your number one priority is protecting everyone in your home. This means immediately stopping the use of your tap water for anything that involves consumption.

Put these safety measures in place right away:

  • Switch to Bottled Water: Use it for everything—drinking, cooking, making ice, and brushing teeth. No exceptions.
  • Issue a Household "Boil Water" Notice: For tasks like washing dishes or rinsing produce, bring a pot of water to a rolling boil for at least one full minute, then let it cool before using. This is a tried-and-true method for killing harmful bacteria.

Taking immediate protective steps is non-negotiable. A positive coliform test means there's a breach in your water's safety barrier. Temporary measures like boiling water are your essential first line of defense until a permanent fix is in place.

Step 3: Treat the Contamination

Now it's time to put a permanent solution in motion. This is where you choose and install the right water filter for coliform based on the technologies we've already covered, whether that's a whole-house UV purifier or an under-sink reverse osmosis system.

The best system for you really depends on your water source and how bad the problem is. A home with well water that has persistent coliform issues, for instance, is a prime candidate for a robust whole-house UV system paired with a sediment pre-filter. That combination ensures effective, long-term disinfection.

Beyond just filters, you need an immediate action plan, especially if you're dealing with a major contamination event. For instance, homeowners facing a worst-case scenario should consult an essential guide to sewage damage clean up to understand the much bigger steps required for severe situations.

Step 4: Retest to Verify the Solution

You've installed your new filtration system and it's up and running. Great! But you're not done just yet. The final, crucial step is to close the loop and verify that your solution actually worked. Wait a few days to a week after installation, then take another water sample and send it back to that certified lab.

This retest is your proof of success. A negative result for both coliform and E. coli is the official all-clear, confirming that your new filter has knocked out the threat and your water is safe to drink again. This final step is what turns a stressful situation into lasting peace of mind.

Maintaining Your Filter for Long-Term Safety

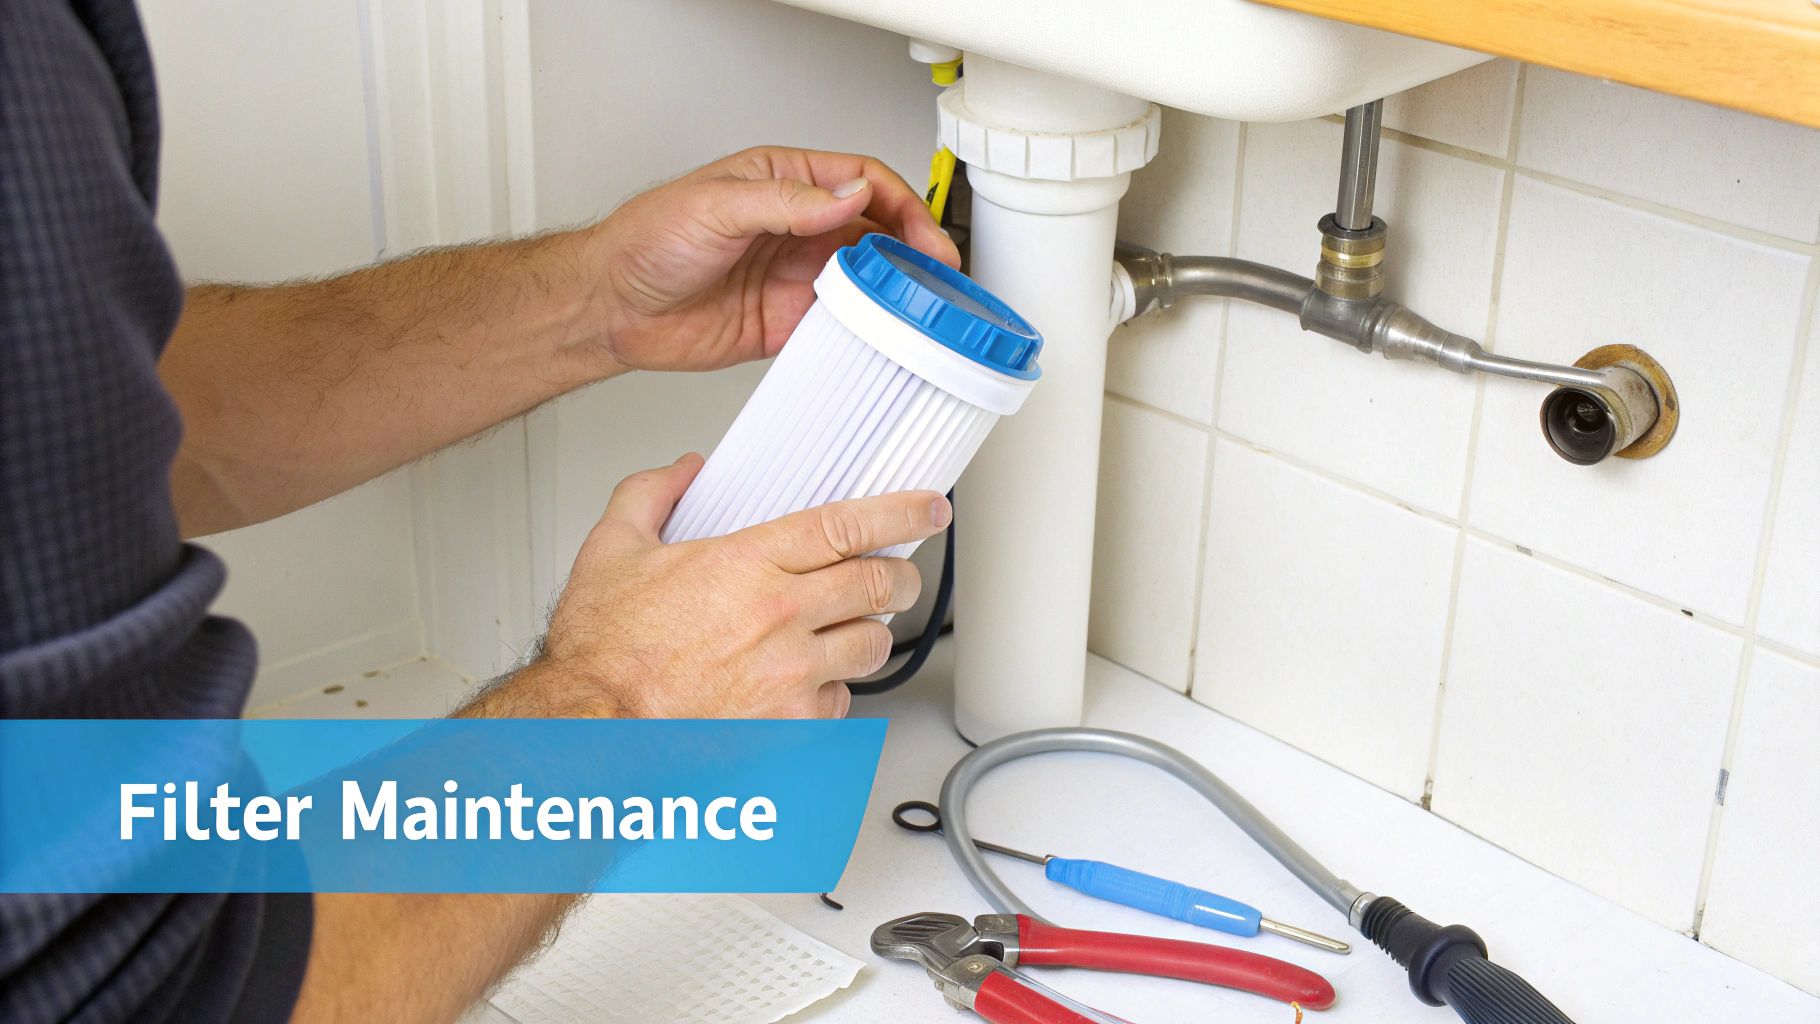
A person's hands are replacing a new water filter cartridge under a kitchen sink, with tools nearby.

Getting a high-quality water filter for coliform installed is a massive step toward making your home's water safe. But the job isn't done. Think of it like a performance car—it needs regular oil changes and tune-ups to keep running like it should.

Consistent maintenance is the single most important thing you can do to make sure your filter keeps protecting your family. A neglected system doesn't just stop working; it can actually become a breeding ground for bacteria, completely undoing all your hard work and investment.

Creating a Practical Maintenance Schedule

The real secret to long-term safety is consistency. Just follow the manufacturer's recommended schedule. It takes all the guesswork out of the process and keeps your system in peak condition. Different filters have different needs, but the basic rhythm of care is usually the same.

Think of your maintenance plan as a roadmap to safe water. It's what ensures every part of the system is doing its job, providing that critical barrier against coliforms and other nasty stuff.

Your schedule should include a few non-negotiable tasks:

  • Pre-Filter Swaps: If your system has sediment pre-filters, these are your first line of defense. They usually need to be replaced every 3 to 6 months. This prevents clogs that tank your water pressure and protects the more sensitive parts of your system down the line.
  • UV Lamp Replacement: The UV lamp is the heart of a UV purification system. It might still light up after a year, but its germ-killing power drops off a cliff. Swapping it out annually is non-negotiable if you want to be sure it’s actually neutralizing bacteria.
  • System Sanitization: Every so often, you need to flush and sanitize your system, especially if it's a reverse osmosis unit. This simple step prevents biofilm from building up and keeps everything clean and effective.

Here's something most people don't know: neglecting filter changes can lead to a problem called "channeling." This is where water literally carves a path around an old, clogged filter instead of passing through it. Contaminants, including bacteria, get a free pass right into your tap. It creates a completely false sense of security.

How to Spot Early Signs of Trouble

Beyond your regular schedule, you need to learn to spot the warning signs that your system needs attention. Catching these things early can stop a small problem from becoming a total failure.

These are the clues your system is asking for a check-up:

  • A Sudden Drop in Water Pressure: This is usually the first and most obvious sign of a clogged filter. If your showerhead starts trickling or your faucets are running slow, it's a dead giveaway that your sediment or carbon pre-filters are maxed out and need to be replaced.
  • Warning Lights or Alarms: Modern UV systems have sensors that watch the lamp's performance. If you see an indicator light or hear an alarm, it means the lamp is no longer effective. It needs to be replaced immediately to ensure disinfection is actually happening.
  • Changes in Water Taste or Odor: Remember that "off" taste or smell that your filter got rid of? If it suddenly comes back, that's a clear sign the filter media (like activated carbon) is spent and can no longer do its job.

Staying on top of this routine maintenance is what turns your water filter from a simple appliance into a reliable, long-term health investment. A well-maintained system gives you the peace of mind that every single drop of water from your tap is as safe as it can possibly be.

Got Questions About Coliform Filters? We've Got Answers.

When you're dealing with something like bacterial contamination in your water, you're bound to have questions. Finding the right water filter for coliform means getting clear, no-nonsense answers to protect your family's health.

Let's cut through the jargon and tackle the most common things homeowners ask when that water test comes back positive.

Will a Brita Pitcher Get Rid of Coliform Bacteria?

No, a standard pitcher filter like a Brita won't touch coliform bacteria. These filters are great for what they're designed for—using activated carbon to make your water taste and smell better by removing things like chlorine.

But their filter pores are way too big to catch microscopic bugs like bacteria. For something that small, you need a certified purification system—think UV, reverse osmosis, or an ultra-fine absolute filter that's specifically built to stop pathogens in their tracks.

How Often Should I Test My Well Water for Coliforms?

For private well owners, testing for total coliforms and E. coli at least once a year is non-negotiable. Think of it as your annual safety check-up.

You'll also want to test your water immediately if certain situations pop up:

  • After a flood or any significant ground disturbance near your wellhead.
  • If you notice any change in your water’s taste, odor, or color.
  • Anytime your well has been repaired or you've had the pump replaced.
  • If anyone in the house has unexplained stomach or gut issues.

Is Shocking My Well with Chlorine a Permanent Fix?

Shock chlorination is a powerful tool, but it's a temporary one. It’s like hitting a reset button—it wipes out the immediate bacterial problem that’s already in your well.

Think of shock chlorination as a one-time deep clean. It sanitizes the well but doesn't fix the leaky window that let the germs in.

The problem is, it doesn't plug the hole that let the bacteria in to begin with. If you have a cracked well casing or a faulty seal, the coliforms will be back. A permanent water filter for coliform, like a whole-house UV purifier, is what provides that constant, 24/7 protection against whatever might get in down the road. It’s the long-term solution, not just a quick fix.


At Water Filter Advisor, we're here to help you find the right filtration solution to keep your family's water safe. For more deep-dive guides, product reviews, and expert advice, come see us at https://www.waterfilteradvisor.com.

Removing Sulphur from Well Water: Your Guide to Odor-Free, Clean Water

So, you have a well, and your water has decided to smell like a science experiment gone wrong. That infamous "rotten egg" aroma is a problem you want to fix—yesterday. The secret to kicking that smell to the curb involves a one-two punch: first, you oxidize the sulfur compounds (using air, chlorine, or even ozone), and then you filter them out.

This oxidize-then-filter strategy is the undisputed champion for knocking out that nasty smell, giving you back the fresh, clean water you deserve.

Why Your Well Water Smells Like Rotten Eggs

A corroded outdoor faucet drips water, illustrating the problem of a 'rotten egg smell'.

When you turn on a tap and get smacked with that rotten egg odor, you've met the culprit: hydrogen sulfide (H₂S). It’s a colorless gas that gets trapped in groundwater, and your nose is exceptionally good at detecting it. That’s why even a tiny amount can turn a relaxing shower into a miserable experience or make a glass of water completely undrinkable.

Where does this stinky gas come from? Sometimes, it's just nature doing its thing, breaking down organic matter deep underground. But often, the problem is turbocharged by some unwelcome microscopic guests living in your well system.

The Role of Bacteria in Sulfur Odors

Let's meet sulfate-reducing bacteria (SRB). These little microbes thrive in oxygen-poor environments like your well, plumbing, and especially your water heater. While they won't make you sick, they have a nasty party trick: they feast on sulfates in the water and burp out hydrogen sulfide gas.

Think of them as tiny, freeloading tenants in your pipes, constantly producing that foul smell. This is precisely why the odor often seems ten times worse from the hot water tap—the warm, cozy spa inside your water heater is their favorite five-star resort.

You can play detective to narrow down the source of the problem:

  • Smell in Hot Water Only? If the funk is exclusively coming from your hot water faucets, you've likely got an SRB colony partying in your water heater. The anode rod inside the tank can also react with the water and create a similar stink.
  • Smell in Both, But Fades? When you smell it in both hot and cold water, but it vanishes after the tap runs for a minute, the H₂S is probably in your well but not at panic-inducing levels.
  • Strong and Constant Smell? A powerful, persistent odor from every tap points to a higher concentration of H₂S in your groundwater, meaning you'll need a serious home water filtration system to win this battle.

Hydrogen sulfide isn't just an annoyance—it's corrosive. At high enough levels, it will tarnish your silverware, leave ugly black stains on fixtures, and slowly eat away at copper and iron pipes.

This is a super common headache for well owners. Both hydrogen sulfide (H₂S) and sulfate (SO₄²⁻) are the main sulfur troublemakers in wells worldwide. To put it in perspective, some U.S. counties report that at least 45% of private wells tested have sulfate levels that exceed EPA secondary standards. You can dig deeper into the data on the prevalence of sulfur in groundwater on journals.sagepub.com.

Figuring out if you're dealing with natural gas, a bacterial rave, or a bit of both is your first mission. Your diagnosis will point you straight to the right filtration strategy for removing the sulfur for good.

Alright, let's crack open that water test report. I know, it looks like it's written in another language, full of weird abbreviations and numbers that don't mean much at first glance. But trust me, figuring this out is the single most important thing you'll do to get rid of that sulfur smell for good.

First things first, you'll probably see parts per million (ppm) and milligrams per liter (mg/L). Don't get hung up on this—for our purposes, they're the same thing. 1 ppm is the same as 1 mg/L. To put that in perspective, 1 ppm is like one drop of ink in a whole sink full of water. A tiny amount, but it can make a huge difference in your water.

Now, your report should show two types of sulfur. Knowing which is which is crucial.

Hydrogen Sulfide vs. Sulfates

The infamous "rotten egg" smell? That’s all hydrogen sulfide (H₂S). It's a gas dissolved in your water, and our noses are incredibly sensitive to it. You can smell H₂S at levels as low as 0.5 ppm. If the smell is what's driving you crazy, this is the number you need to find on that report.

Sulfates (SO₄²⁻) are a different beast. These are sulfur compounds that usually don't smell. Instead, high concentrations give your water a bitter, almost medicinal taste. The bigger issue with sulfates is that at high levels—typically over 250 mg/L—they can have a laxative effect. This is especially something to watch out for if you have infants or young children in the house.

Key Takeaway: If it's the smell you're fighting, zoom in on the hydrogen sulfide (H₂S) level. If it's a bitter taste or health concerns, check the sulfate (SO₄²⁻) concentration.

Don't Forget About Sulfur's Sidekicks

Sulfur rarely shows up to the party alone. Your well is a complex environment, and it's almost a guarantee you have other minerals along for the ride. The two most common culprits are iron and manganese, and you absolutely cannot ignore them. They can completely throw a wrench in your treatment plans.

  • Iron (Fe): If you see those nasty reddish-brown stains on your sinks, toilets, and laundry, you've got iron. A simple carbon filter isn't going to cut it when you have both. You’ll need a system that oxidizes everything, like aeration or ozone.

  • Manganese (Mn): This one leaves behind ugly, greasy-looking black stains. Just like iron, it complicates the sulfur removal process and has to be dealt with.

A lot of people make the mistake of buying a filter just for sulfur, only to find it gets clogged up and fails in a few months because they didn't account for their high iron levels. Your test results tell the whole story, so you can get a system that knocks out all the problems at once.

To help you connect the dots between your test results and a real-world solution, I’ve put together this quick-reference table. It shows what different sulfur levels mean for your home and points you toward the right kind of treatment.

Sulfur Concentration Levels and Recommended Actions

This table is a handy guide to translate your water test numbers into actionable steps. Find your H₂S or sulfate level to see what you're dealing with and which treatment methods are most effective.

Sulfur Level (H₂S/Sulfate) Common Household Impact Primary Treatment Recommendation
Low
H₂S: 0.5 – 1 ppm
Sulfate: < 250 mg/L
Faint "rotten egg" smell, especially in hot water. Water may have a slightly "off" taste. Activated Carbon Filter or a simple Aeration System.
Moderate
H₂S: 1 – 5 ppm
Sulfate: 250 – 400 mg/L
Noticeable, unpleasant odor from all taps. Tarnishing of silverware and yellow/black stains on fixtures. Water has a distinct bitter taste. Oxidizing Filter (e.g., Greensand, Birm) or an Aeration System with a contact tank.
High
H₂S: > 5 ppm
Sulfate: > 400 mg/L
Overpowering rotten egg smell throughout the house. Severe staining and corrosion of pipes. Significant laxative effect from sulfates. Chemical Injection System (Chlorine or Hydrogen Peroxide) followed by filtration, or an Ozone Injection System.

Think of this chart as your starting point. Once you've pinpointed your sulfur level, you'll have a much clearer idea of the type of system you'll need to finally get that clean, odor-free water you're after.

Choosing the Right Sulfur Removal System

Okay, you've got your water test results back. Now the real work begins. We're moving past diagnosis and into finding the right hardware to get that rotten egg smell out of your well water for good. This is all about matching the right filtration technology to your specific water chemistry, your home's daily usage, and, of course, your budget.

There’s no magic bullet here. The system that's perfect for your neighbor might be completely wrong for you, especially if their water doesn't have the same iron content as yours. Let's walk through the most common and effective options so you can pick the right one with confidence.

Aeration Systems: The Natural Approach

Sometimes, the simplest solution is the best. The easiest way to deal with hydrogen sulfide is to expose it to its worst enemy: oxygen. Aeration systems are designed to do just that, forcing air into your water. This triggers a process called oxidation, which converts the dissolved hydrogen sulfide gas into tiny, solid particles of sulfur.

Once it's a solid particle, it's no longer dissolved in the water and can be easily caught by a sediment filter. Think of it this way: aeration makes the invisible, stinky gas visible so a filter can grab it.

You'll generally see two kinds of aeration setups:

  • Air Injection Filters: These are slick, single-tank systems. Air gets injected right into the top of the filter tank. As water passes through, it gets oxidized, and the newly formed sulfur particles are trapped by the filter media—all in one go.
  • Aeration Tanks: If you're dealing with higher sulfur levels, you might need a separate, non-pressurized tank. Water is sprayed into this tank, which lets it mix thoroughly with air and release those trapped gases before it gets re-pressurized and sent on its way to your taps.

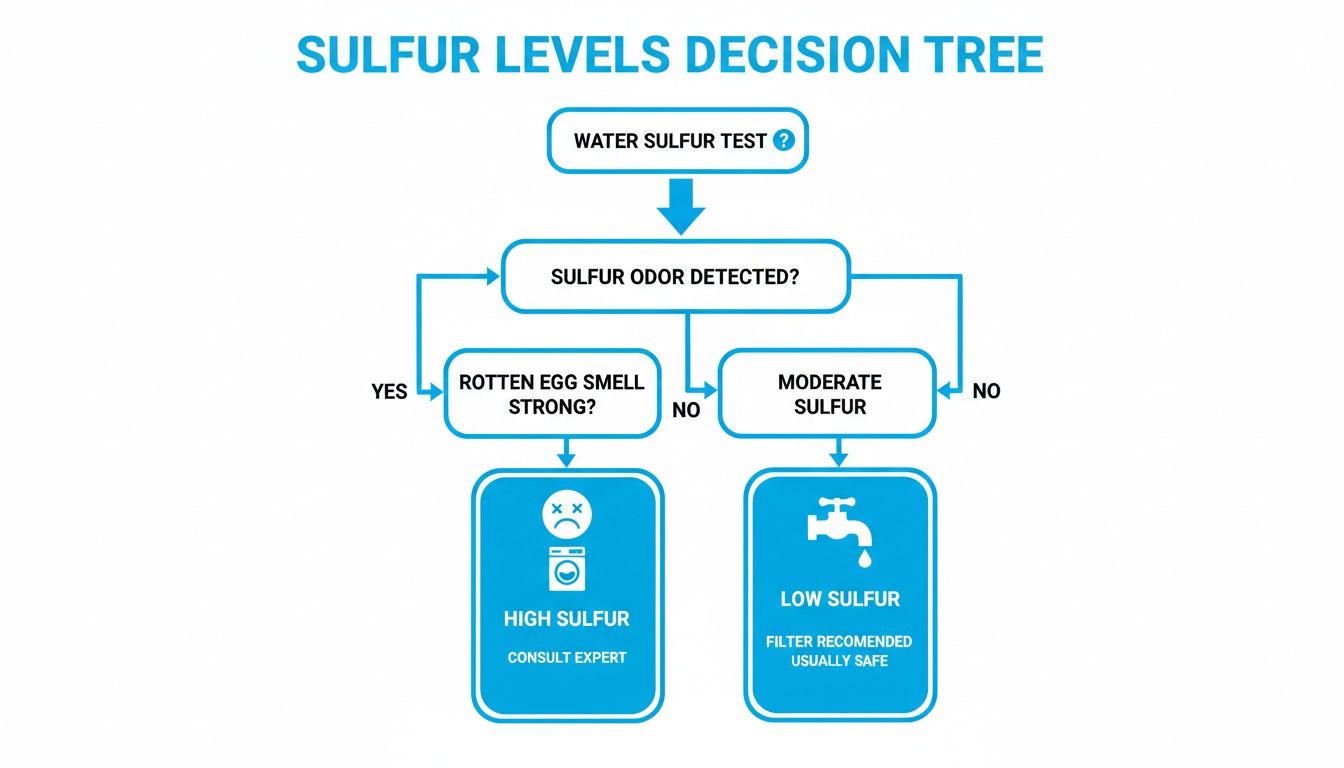
This flowchart can help you visualize how your sulfur level points you toward different solutions.

Decision tree flowchart for assessing water sulfur levels and recommended actions based on odor detection.

As you can see, what works for a faint, annoying odor is a world away from the heavy-duty systems needed to tackle seriously high sulfur concentrations.

Oxidizing Filters: The Heavy Lifters

When you've got moderate-to-high levels of sulfur, especially if it’s teamed up with iron and manganese, you need something with more muscle than simple aeration. Oxidizing filters use a special media coated with an oxidizing agent like manganese dioxide.

This media works like a catalyst, aggressively forcing hydrogen sulfide, iron, and manganese to become solid particles, which are then trapped within the filter bed. Every so often, the system cleans itself with a "backwash" cycle, flushing all those trapped contaminants down the drain to refresh the media.

Pro Tip: You'll hear names like Greensand, Birm, and Filox. Greensand is a classic but needs to be regenerated with potassium permanganate (a messy purple chemical). Newer media like Filox are more powerful and just need a simple backwash, making them far easier to live with.

Activated Carbon Filters: For Minor Odors

If your water test shows just a trace of hydrogen sulfide (usually under 1.0 ppm), a good activated carbon filter might be all you need. Carbon has an incredibly porous surface that's great at adsorbing the gas, effectively trapping the compounds that cause the smell.

But carbon has its weaknesses. It's a poor choice if you also have iron, because the iron will quickly clog the carbon's pores and make it useless. Carbon filters also wear out and need to be replaced, so they’re really only a fit for minor, nuisance-level odors.

Chemical Injection Systems: Maximum Power

For the really tough cases (often over 5-7 ppm of sulfur), it's time to bring in the big guns. Chemical injection systems use a small pump to add a precise dose of a strong oxidant directly into your water line, usually before a holding tank or filter.

Your two main choices here are:

  • Chlorine Injection: This is the old-school, time-tested method. It's extremely effective at wiping out sulfur odors and also kills any iron bacteria lurking in your system. The trade-off? You’ll need a second carbon filter downstream to remove the chlorine taste and smell from your drinking water.
  • Hydrogen Peroxide Injection: This is a fantastic, modern alternative to chlorine. Peroxide is a beast of an oxidant that breaks down into just oxygen and water, so it leaves no chemical aftertaste. Many homeowners prefer it for a "deluxe" solution without the baggage of chlorine.

These heavy-duty methods deliver proven results. When sized correctly, air or chemical injection systems can achieve removal rates exceeding 90% for hydrogen sulfide. A whole-house oxidizing system can run from $1,500 to $6,000 installed—a serious investment, but one that provides a permanent fix.

Comparing Your Top Options

It can feel a bit overwhelming, but looking at your options side-by-side really helps clear things up. As you get closer to a decision, it's always a good idea to seek out more filtration advice available to homeowners.

System Type Best For Initial Cost Ongoing Maintenance Key Drawback
Aeration System Low to moderate H₂S with low iron. Moderate Low (no chemicals) Can struggle with high iron levels or bacteria.
Oxidizing Filter Moderate H₂S with iron/manganese. Moderate-High Low to moderate (media/chemical replacement). Some media types require messy chemicals (potassium permanganate).
Activated Carbon Very low H₂S (<1 ppm), no iron. Low High (frequent cartridge replacement). Easily overwhelmed by moderate sulfur or any iron.
Chemical Injection High to severe H₂S, bacteria issues. High Moderate (replenishing chemical solution). More complex setup; chlorine requires a second filter for taste removal.

In the end, let your water test be your guide. By matching the concentration of sulfur, iron, and other contaminants to the strengths of each system, you can confidently choose a solution that will give you clean, fresh, and odor-free water for years to come.

Getting the Sizing and Installation Right

Picking out the right type of filter is a huge win, but your job isn't done yet. You've got to make sure the system is the right size for your home. This is one of those things people get wrong all the time, and you'll feel the consequences immediately.

Imagine installing your brand-new, powerful sulfur removal system only to find your shower pressure has dropped to a pathetic trickle. That’s exactly what happens when you install a filter that’s too small. An undersized system simply can't keep up with your home's water demand, creating a bottleneck that just kills your water pressure.

Figuring Out Your Home's Peak Water Flow

To avoid that headache, you need to figure out your home's peak water flow rate, measured in gallons per minute (GPM). This number is all about the maximum amount of water your household might use at any given moment—think running the shower, the dishwasher, and a load of laundry all at once.

Your filtration system's flow rate has to handle this peak demand without breaking a sweat. You can get a pretty good estimate yourself:

  • Count your fixtures: Tally up the showers, tubs, sinks, toilets, washing machines, and dishwashers.
  • Assign 1 GPM to each: As a rule of thumb, just count each major fixture as 1 GPM.
  • Add it all up: A home with 3 bathrooms, a kitchen, and a laundry room could easily have 8-10 major fixtures, meaning you're looking at a peak demand of 8-10 GPM.

A more precise way to look at it is to add up the actual GPM ratings of your biggest water users and assume about half might run at the same time. For instance, a modern showerhead uses about 2.5 GPM, a dishwasher needs 2 GPM, and a washing machine pulls another 2.5 GPM. If all three are going, that’s 7 GPM right there.

Always choose a filter with a service flow rate that meets or, even better, slightly exceeds your calculated peak GPM. Sizing it right is the key to making sure your system performs without choking your home's water supply.

Key Installation Tips for a Smooth Setup

While a full step-by-step installation guide is a whole other topic, knowing the key decision points will make a world of difference, whether you’re doing it yourself or hiring a plumber. To get your sulfur removal system running efficiently, a solid grasp of fluid transfer principles is a game-changer for proper sizing and setup.

Here are the non-negotiables for a proper installation:

  • Placement is Everything: Your whole-house filter should always be installed after your well pressure tank but before your water heater and any water softener. This protects the filter from the well pump’s intense pressure cycles and makes sure all your water—hot and cold—gets treated.
  • Install a Bypass Valve: This is absolutely essential. A bypass valve is a simple three-valve setup that lets you reroute water around the filtration system. When it’s time for maintenance, you can just turn the valves to bypass the unit without shutting off water to the whole house.
  • Plan for a Drain: Many sulfur filters, especially oxidizing and chemical injection systems, need to backwash to clean themselves out. This process flushes all the gunk they've trapped, so you must have a proper drain line nearby.

The demand for these solutions is really taking off as more households deal with odor and corrosion. Industry analysts estimated the market for sulphur removal absorbents was worth about $1.5 billion in 2023 and is projected to hit $2.6 billion by 2032, with home-scale systems becoming a bigger piece of the pie.

Arming yourself with this knowledge helps you ask a plumber the right questions and ensures your investment in clean water pays off with years of hassle-free performance.

Keeping Your System Running and Fixing Common Glitches

A technician crouches, performing system maintenance on outdoor water pipes with a gauge and valves.

So, you've invested in a system for removing sulphur from well water, and that rotten egg smell is finally a memory. Great! But the job isn't quite done.

Think of your water filter like your car—it needs a regular tune-up to perform its best. If you ignore it, you’re just asking for that sulfur smell to come creeping back in.

Proper maintenance isn't a huge chore, but it's absolutely essential. A system you take care of will give you clean, odor-free water for years. A neglected one? It could fail you in just a few months. Sticking to a schedule is how you protect your investment and keep your water fresh.

To stay on top of things, you might find it helpful to use something like a preventive maintenance schedule template. It's a simple way to track tasks so nothing gets forgotten.

Your Essential Maintenance Checklist

Breaking it down into monthly, semi-annual, and yearly tasks makes it all feel less overwhelming. Here’s a basic schedule that works for most common sulfur removal systems.

  • Monthly Checks (5-10 minutes):

    • Chemical Levels: If you have a chemical injection system (chlorine or peroxide), peek at the solution tank. Is it getting low? As a rule of thumb, I never let mine drop below a quarter full.
    • Visual Inspection: Just give the whole setup a quick look-over. See any drips or leaks? Are all the connections tight? Catching a tiny drip now saves you from a big watery mess later.
  • Semi-Annual Tasks (30-45 minutes):

    • Clean Injection Points: On chemical feed systems, that little injector fitting is notorious for getting gunked up with mineral deposits. Just disconnect it and let it soak in a descaling solution to keep things flowing freely.
    • Test Your Water: Grab a simple test strip. Is the system still knocking out the sulfur? It’s a fast, easy way to confirm everything is working like it should.
  • Annual Service (1-2 hours):

    • Media Replacement: Activated carbon and other filter media don't last forever. Dig out your manual and check the replacement schedule. For carbon, it's typically every 1-3 years. For a heavy-duty catalytic media like Filox, it can be much longer.
    • Professional Tune-Up: Honestly, it’s smart to have a water treatment pro give your system a once-over every year. They can service the control valves, recalibrate pumps, and spot little issues you might not notice.

Troubleshooting Common Problems

Even with perfect maintenance, stuff happens. But before you pick up the phone and call for backup, here are a couple of common issues you can probably diagnose and fix yourself.

The Rotten Egg Smell Is Back

This is hands-down the most common—and annoying—problem. If that all-too-familiar sulfur smell starts making a comeback, it's time to do some detective work.

Likely Causes:

  1. Chemical Solution is Empty: It sounds basic, but we’ve all done it. Your chlorine or peroxide tank simply ran dry.
  2. Clogged Injector: The pump is working, but a mineral clog is blocking the oxidant from getting into the water.
  3. Backwash Cycle Failed: Your oxidizing filter missed its cleaning cycle. Now the media is saturated and fouled with sulfur particles.
  4. A Change in Your Well: A heavy rain or a change in the water table can alter your well's chemistry, cranking up the sulfur level beyond what your system is set to handle.

First Steps: Check your chemical tank first. If it's full, try manually starting a backwash or regeneration cycle on your filter. If the smell is still there after the cycle finishes, your next move is to clean that injector.

My Water Pressure Suddenly Dropped

A sudden nosedive in water pressure across the whole house is a classic symptom of a bottleneck in your filtration system. The water is having a hard time pushing through.

Likely Causes:

  1. Clogged Sediment Pre-filter: This is the #1 culprit. That little cartridge filter right before your main system is probably choked with dirt and sediment.
  2. Filter Stuck in Backwash: It's possible the control valve on your main filter has malfunctioned and is stuck in the backwash position, which severely restricts normal water flow.
  3. Severely Fouled Media: If the filter media hasn't been backwashing correctly, it can get so packed with iron and sulfur that water can barely squeeze through.

Always start with the easiest fix: check that sediment pre-filter. If a new one doesn't solve it, use the bypass valve on your main unit to see if your pressure comes back. If it does, you know the problem is inside the main filter. Regular maintenance is the best way to prevent these little headaches, ensuring your system for removing sulphur from well water keeps delivering the clean, great-tasting water you expect.

A Few More Questions About Getting Rid of Sulfur

Once you've got a game plan for tackling that rotten egg smell, a few common questions always seem to pop up. We hear them all the time from folks just like you. Let's get them answered.

Can I Just Boil the Water to Get Rid of the Smell?

That's a definite no. While boiling is a great way to handle certain bacteria, it does absolutely nothing for hydrogen sulfide. In fact, you might find it does the opposite—heating the water can actually make the gas release faster, giving you an even stronger whiff of sulfur for a little while. The only real fix is filtration.

Will a Water Softener Help With the Sulfur Odor?

A standard water softener is built for one job: removing hardness minerals like calcium and magnesium. It's simply not designed to handle sulfur. You might notice a very slight, temporary improvement, but the sulfur and any associated iron bacteria will quickly foul up the softener's resin bed.

Think of it this way: using a softener for sulfur is like using a rake to shovel snow. It's the wrong tool for the job and you'll likely damage the resin and create a perfect breeding ground for sulfur-reducing bacteria. You really need a dedicated oxidation system.

How Is Sulfur Hurting My Appliances?

Hydrogen sulfide is no friend to your home's plumbing and appliances. It's corrosive. Over time, you'll see it tarnish your silverware, leave ugly black stains in toilets and on fixtures, and even start to eat away at copper and iron pipes.

Your big-ticket appliances are especially at risk.

  • Dishwashers: You'll start to notice black stains inside and a nasty smell that just won't go away.
  • Washing Machines: Don't be surprised if your clothes, especially after a hot wash cycle, come out smelling like sulfur.
  • Water Heaters: The warm, dark tank is the ideal home for sulfur-reducing bacteria, which is why the smell is often much stronger when you turn on the hot water.

Is There Any Kind of Temporary Fix?

If you're stuck waiting for a full system to be installed, you have a couple of short-term options. An activated carbon pitcher filter can make a small amount of drinking water taste and smell better. For your water heater, a plumber can "shock chlorinate" the tank, but this is just a temporary band-aid—the bacteria and the smell will be back.

These are just quick fixes. The only way to permanently solve the problem of removing sulphur from well water is to install a properly sized filtration system that gets to the root cause. It's a smart investment that protects your home and gives you back your peace of mind.


At Water Filter Advisor, we're here to help you find that perfect, long-term solution for your water. Dig into our detailed guides and reviews to make a choice you can feel good about at https://www.waterfilteradvisor.com.

Removing Sulfur Smell from Well Water: Your Guide to Clean, Odor-Free Taps

So, your well water smells like rotten eggs. Welcome to the club! It’s one of the most common—and let’s be honest, most gag-worthy—complaints from homeowners with private wells. The good news? You can absolutely fix it. Getting rid of that sulfur stench comes down to one thing: picking the right home water filtration system.

But before you start shopping, you need to play detective. Is the smell coming from a harmless gas in your groundwater, or is a colony of funky bacteria having a party in your pipes? Once you know the villain, you can choose the perfect hero—like aeration, oxidation, or a carbon filter—to save your water for good.

Why Your Well Water Smells Like Rotten Eggs

When you turn on the faucet and get hit with that unmistakable rotten egg odor, you're getting a big, smelly clue that your water chemistry is off. The culprit behind this olfactory assault is almost always a gas called hydrogen sulfide (H₂S).

Just a tiny amount of this stuff can make a glass of water undrinkable and a hot shower unbearable. The first and most critical step in your mission to reclaim your water is figuring out where that gas is coming from.

Water pours from a kitchen faucet into a glass, with a 'ROTTEN EGG SMELL' sign overhead.

In the world of well water, hydrogen sulfide usually comes from one of two places. It's crucial to identify which one you're dealing with because the filtration solutions are completely different.

The Two Main Culprits

One possibility is that H₂S is a natural feature of your local groundwater. This is common in areas with geological formations like shale or sandstone. As groundwater seeps through these layers, it picks up the gas and carries it right into your well. If this is your situation, you have a constant source of smelly water that needs a powerful, whole-home filtration system to treat it 24/7.

The second cause—and the one we see most often—is biological. We're talking about sulfur-reducing bacteria (SRBs). These microscopic critters thrive in oxygen-free environments, like the inside of your well casing, plumbing, or hot water heater. They aren't harmful to your health, but they have a nasty habit of munching on sulfates in the water and "exhaling" hydrogen sulfide gas. Voilà, instant rotten egg smell.

Key Takeaway: You're not just fighting a smell. You're either treating the water as it enters your home or evicting a colony of tiny organisms from your water system. Figuring out which it is will lead you to the right filtration fix.

A Quick At-Home Diagnostic Test

Before you spend a dime on professional testing, you can run a simple sniff test to get a huge clue about the source of the smell.

Grab two clean glasses. Fill one from the cold tap and the other from the hot tap. Now, walk them into another room (away from any stinky sink drains) and give them a sniff.

  • Smell only in the hot water? Bingo! The problem is almost certainly your water heater. The anode rod inside can react with sulfates to create H₂S gas, and the tank itself is a warm, cozy spa for sulfur-reducing bacteria.
  • Smell in both, but it fades after a minute? If the smell is strong at first but vanishes as you let the water run, the bacteria are likely living in your well or plumbing system.
  • Smell is constant in both hot and cold? A persistent stink that never goes away, no matter how long the water runs, points directly to hydrogen sulfide being naturally present in your groundwater.

This isn't just about an annoying odor. High sulfate levels that lead to hydrogen sulfide are a global issue. A 2025 study estimated that 194 million people live in areas where sulfate in drinking water exceeds WHO recommendations, which can lead to digestive issues. This makes proper filtration a health essential, not a luxury. You can read more about these global water quality findings on ScienceDaily.com.

Once you've narrowed down the source, you're ready to pick the right home filtration system and banish that rotten egg smell for good.

Getting to the Bottom of Your Sulfur Problem

When it comes to water filtration, guessing is the most expensive game you can play. Before you even think about buying a filter to fix that rotten egg smell, you need to know exactly what’s in your well water.

It's like going to a doctor: you want a diagnosis before you get a prescription. Throwing money at fancy equipment without hard data is the fastest way to get frustrated and end up right back where you started—with stinky water.

A comprehensive water analysis is your roadmap to success. It goes beyond confirming "yep, it smells" and gives you the complete chemical breakdown of your water. This is a non-negotiable step because other contaminants often tag along with hydrogen sulfide. These unwanted guests can clog or ruin certain types of filters, making one system a perfect match and another a total waste of money.

What You Absolutely Need to Test For

When you get your water tested, don't just ask them to check for "sulfur." You need specifics to choose the right home filtration system.

Make sure your report includes precise measurements for:

  • Hydrogen Sulfide (H₂S): This is the gas causing the rotten egg smell. You need to know the exact concentration.
  • Sulfates: This is the "food" for the sulfur-reducing bacteria that create the gas.
  • Iron & Manganese: These two are notorious for fouling up sulfur filters. If you have them, your filtration system needs to be able to handle them.
  • pH Level: Your water's acidity or alkalinity dramatically affects how well certain filtration methods, especially oxidation, will work.
  • Total Dissolved Solids (TDS): A high TDS level can signal other issues that might need a pre-filter or a more robust system.

With these numbers, you can confidently choose a home filtration system that’s perfectly tailored to your well's unique chemistry.

DIY Test Strips vs. a Real Lab Analysis

I know it’s tempting. You see those DIY water test kits at the hardware store and think, "Easy peasy." But for sizing a whole-home filtration system, they have serious limitations.

My Two Cents: DIY strips are fine for a ballpark guess on things like water hardness. But for hydrogen sulfide? They're notoriously unreliable. The gas can literally escape from the water sample before the strip even gets an accurate reading.

A certified lab analysis is an investment in getting it right the first time. You get precise, accurate results that allow you to buy the correct filtration equipment from the start, saving you the massive headache of installing an expensive system that can't do the job.

This detail is critical. Sulfate levels in groundwater can be all over the place. According to research from the EPA, some wells might have sulfate concentrations as low as 10 mg/L, while others can spike to over 1,000 mg/L. Without a real test, you're just flying blind.

Choosing the Right Sulfur Filtration System for Your Home

Alright, armed with your water test results, it's time for the main event: choosing a whole-house filtration system to permanently solve your rotten egg problem. This isn't a temporary patch; it's a long-term upgrade that delivers fresh, odor-free water to every faucet in your house.

Diving into the world of water filters can feel overwhelming, but for sulfur issues, it really boils down to a few proven technologies. The best one for you depends entirely on what your water test revealed. The concentration of hydrogen sulfide (H₂S), along with other party-crashers like iron and bacteria, will point you straight to the perfect system.

Flowchart showing two options for water testing: DIY with test tubes and professional lab test with a microscope.

Whether you used a home kit for a preliminary check or got a full lab analysis, this data is your guide to selecting the right hardware for your home.

Air Injection Oxidizing (AIO) Filters

One of the most popular and effective solutions is the Air Injection Oxidizing (AIO) filter. Think of it as the chemical-free workhorse of sulfur removal. This all-in-one system uses a simple, brilliant trick: it pulls in oxygen from the air and mixes it with your water as it enters the tank.

This kicks off a natural process called oxidation, which instantly converts the dissolved hydrogen sulfide gas into tiny solid particles. These particles are then easily trapped by a specialized media bed inside the tank. Every few days, the system automatically backwashes, flushing all the trapped sulfur and iron down the drain. It’s a clean, efficient, and low-maintenance solution.

I often recommend an AIO system when a water test shows low to moderate hydrogen sulfide—up to around 6-8 ppm—especially if there's also some iron. For most homeowners, it's a true "set it and forget it" solution.

Catalytic Carbon Filters

If you're dealing with a milder sulfur odor, a catalytic carbon filter can be an excellent and straightforward fix. These are best for H₂S levels under 1-2 ppm. While they look like standard carbon filters, the media inside has a special catalytic coating that dramatically speeds up the oxidation process.

As water flows through, H₂S gas is converted to solid sulfur and absorbed by the carbon. They’re simple, effective for slight smells, and don't use any chemicals. The only catch is that the carbon media will eventually need to be replaced, typically every couple of years.

Chemical Feed Pump Systems

Now, if your water test came back with some truly scary numbers—we're talking high hydrogen sulfide (10 ppm or more), iron bacteria, or other nasty microorganisms—it's time to bring in the heavy artillery. That’s where a chemical feed system, usually using chlorine, comes into play.

This setup injects a precise amount of chlorine into your water, which then flows into a holding tank. Chlorine is a powerful oxidizer that obliterates hydrogen sulfide and kills bacteria on contact. After the holding tank, a large carbon filter removes any leftover chlorine and sulfur particles, leaving you with completely purified, odor-free water.

This is the undisputed champion for severe water problems, but it does require more hands-on maintenance, like keeping the chemical solution tank filled. For a deeper dive into different filter types, our guides and advice section has a ton of great information and reviews.

Comparing Home Filtration Systems for Sulfur Smell Removal

Choosing the right system is a balancing act between performance, cost, and maintenance. What's perfect for your neighbor's well might be all wrong for yours. This side-by-side comparison should help clarify your decision.

Filtration Method Effective H₂S Range (PPM) Initial Cost Ongoing Maintenance Best For
AIO Filter 1 – 8 PPM Moderate Low (No chemicals) Moderate H₂S & iron
Catalytic Carbon 0.3 – 2 PPM Low-Moderate Moderate (Media change) Low H₂S, simple installs
Chemical Feed 6+ PPM High High (Refill chemicals) High H₂S & bacteria

By matching your lab results to the capabilities of each system, you can confidently invest in a home filtration solution that will finally kick that rotten egg smell to the curb.

Short-Term Fixes for Immediate Odor Relief

While you're deciding on the perfect long-term filtration system, you don't have to suffer through smelly showers. There are some powerful, immediate steps you can take to clear the air—and your water.

Think of these as your emergency first-aid kit for stinky water. They provide fast, welcome relief.

The two most common hotspots for a sudden sulfur smell are sulfur-reducing bacteria partying in your well or a similar colony that has checked into the warm, cozy spa of your water heater. Luckily, there are targeted ways to deal with both situations right now. And sometimes, if bacteria are your only problem, these fixes might even solve it for good.

Shock Chlorinating Your Well

If you've traced the odor back to bacteria in your well or plumbing, the most effective quick fix is shock chlorination. This is exactly what it sounds like: you're giving your well a sanitizing shock with a strong chlorine solution to kill off the bacteria producing that awful hydrogen sulfide gas.

It's a deep clean for your entire water system and an incredibly effective way to remove sulfur smell from well water when bacteria are the root cause. You just have to follow the steps carefully to do it safely.

Here’s the basic game plan:

  • Calculate the Dose: The amount of unscented household bleach you need depends on your well's depth and diameter. A common guideline is 2-3 pints of bleach for every 100 gallons of water in the well.
  • Mix and Circulate: Dilute the bleach in a bucket of water and pour it directly into the well. Then, connect a garden hose to an outdoor spigot and run water back into the well for at least an hour to circulate the chlorine.
  • Flush the System: Let the chlorine sit in the well for 8-24 hours. Then, go to every faucet in your house (hot and cold), run it until you smell chlorine, and shut it off. Finally, run an outdoor hose away from any landscaping or septic systems until the chlorine smell is completely gone.

Pro Tip: Shock chlorination can often keep the smell away for several months. If it comes back, you've confirmed a persistent bacteria problem. That’s your signal that a permanent filtration solution, like an AIO filter or a chemical feed system, is the next step.

Addressing the Water Heater Problem

What if your sniff test revealed the smell is only coming from the hot water? This is a dead giveaway that your water heater is the culprit. It’s a perfect breeding ground for sulfur bacteria—warm, dark, and oxygen-poor.

The anode rod inside the tank, designed to prevent rust, can sometimes make things worse. A standard magnesium rod can react with sulfates in the water, creating hydrogen sulfide gas as a byproduct.

Fortunately, the fix is pretty straightforward and doesn't involve your well at all.

You'll need to drain and flush the water heater to clear out the smelly, bacteria-filled water. For a more lasting solution, replace the standard magnesium anode rod with an aluminum-zinc alloy rod. This type of rod is much less reactive and helps prevent odor-causing bacteria from growing back. This simple swap can completely eliminate a hot-water-only sulfur smell.

While tackling your water, it never hurts to think about the bigger picture of home freshness. You can explore general strategies for eliminating common household odors to complement your efforts.

Installing and Maintaining Your Filtration System

You’ve done the heavy lifting—you tested your water, researched your options, and picked the perfect filtration system to banish that rotten egg smell for good. But the job isn't quite done. Proper installation and routine upkeep are what will make your investment pay off for years to come.

Getting this last part right is the difference between flawless, fresh water and future headaches.

First, decide whether to DIY the installation or call in a pro. Many modern systems, like a catalytic carbon filter, are designed for a handy homeowner. But for more complex setups like a chemical feed system, having an expert handle the plumbing and initial setup is money well spent.

A person's hands are replacing a water filter in a home filtration system during maintenance.

Hiring a Professional Installer

If you go the pro route, don’t just hire the first name you find. A true water treatment specialist understands how to optimize your system for your specific water chemistry.

Before you commit, ask a few key questions:

  • Do you have experience with my specific type of system? An expert with AIO filters might not be the best choice for a chlorine injection pump.
  • Can you provide references from recent installations? Hearing from other homeowners is the best way to gauge reliability and quality.
  • What kind of warranty do you offer on your installation? You want to know you’re covered if a leak appears after they leave.
  • Will you program the system based on my water test results? This is critical. A properly set regeneration cycle ensures top performance and prevents water waste.

Getting solid answers here ensures your system is installed right from day one.

Long-Term Maintenance Your System Needs

Okay, your new system is humming along, and the water is glorious. Now what? A little routine maintenance is all it takes to keep it removing sulfur smell from well water effectively. Ignoring it is like never changing the oil in your car—eventually, you'll have a big, expensive problem.

A Quick Analogy: Think of your filtration system like a garden. You can't just plant it and walk away. It needs regular, simple care to thrive and keep producing that fresh, clean water you love.

Staying on top of maintenance stops small issues from becoming big, smelly ones.

Your Essential Maintenance Checklist

The exact tasks depend on your system, but here’s a practical checklist for the most common sulfur removal setups. Set a recurring reminder on your phone for these—it's easy to forget!

For Air Injection Oxidizing (AIO) Systems:

  • Check the Air Injector (Every 6-12 months): This tiny part can get clogged with iron or sediment, preventing the system from drawing in air. A quick cleaning is usually all it takes.
  • Inspect the Control Valve (Annually): Just listen to the backwash cycle. Make sure it sounds right and that the valve is moving through its positions smoothly.

For Chemical Feed Pump Systems:

  • Replenish the Solution Tank (As needed): This is your most frequent task. Keep an eye on the chemical level (usually chlorine) and top it off.
  • Clean the Injection Point (Annually): Mineral scale can clog the injection fitting where the chemical enters your water line, stopping your system cold. A quick check and clean will prevent this.

For Catalytic Carbon and Media Filters:

  • Replace the Media (Every 2-3 years): This is a bigger job, but infrequent. You’ll know it’s time when that faint rotten egg smell starts to creep back. That’s your signal that the media is saturated and needs to be replaced.

Following a simple schedule like this will ensure you get clean, odor-free water for years, protecting both your investment and your nose.

Common Questions About That Rotten Egg Smell

Even after diving into the science and solutions for that sulfur smell, it’s normal to have a few questions left. Sorting through home filtration systems can feel like a lot, but getting clear answers is the last step before you can choose a solution with total confidence.

Let's tackle the most common questions homeowners ask when they're battling the rotten egg beast.

Will a Water Softener Get Rid of the Sulfur Smell?

This is probably the biggest myth in water treatment. The short answer? No.

A standard water softener is a one-trick pony: it removes hardness minerals like calcium and magnesium. It is simply not designed to capture a dissolved gas like hydrogen sulfide.

In fact, the resin beads inside a softener can become a breeding ground for sulfur-reducing bacteria, which can make the rotten egg odor even worse. If you have a sulfur problem, you need a dedicated system for removing sulfur smell from well water.

Why Does My Water Smell Worse at Certain Times?

A sulfur smell that comes and goes can be maddening. This fluctuation usually points to a few common culprits.

  • Changes in the Water Table: Heavy rain or a dry spell can alter the groundwater chemistry, causing the smell to flare up.
  • Bacterial Activity: If bacteria are the cause, their activity level isn't always constant. It can ebb and flow, making the smell seem intermittent.
  • Water Stagnation: When water sits in your pipes or hot water heater, hydrogen sulfide gas concentrates. This is why the smell is often strongest when you first turn on a faucet after it's been off for a while.

Here's the key takeaway: an inconsistent smell still points to a consistent problem. Even if the odor vanishes for a day, the underlying cause is still there and needs a permanent filtration solution.

Is It Safe to Drink Water That Smells Like Sulfur?

At the low levels typically found in homes, the smell itself isn't considered a direct health hazard. But you absolutely shouldn't ignore it. Think of that rotten egg smell as your water’s built-in alarm system.

It’s a huge red flag that your water quality is compromised. It can signal the presence of bacteria or high levels of sulfates, which can cause digestive issues like diarrhea—especially for young children or guests. The smell is your water telling you it's time to get it tested and find the right filtration plan.

How Long Does Shock Chlorination Last?

This all depends on the source of your sulfur problem.

If the smell was caused by bacteria colonizing your well, a thorough shock treatment could solve the problem for several months, or in some cases, for good.

But if hydrogen sulfide is naturally present in your aquifer, the smell will always return as new, untreated water is drawn into the well. In that case, shock chlorination is just a temporary fix. It’s a great way to get immediate relief, but it also confirms that you need a permanent filtration system for a true, long-term solution.


At Water Filter Advisor, we're dedicated to helping you find the perfect, lasting solution for your well water. Explore our expert guides and reviews to make a confident choice for your home at https://www.waterfilteradvisor.com.