A Guide to the Best Ceramic Candle Water Filter for 2026

A neighbor once brought me a countertop ceramic filter and asked why it had become painfully slow. The answer was sitting right on the outside of the candle: a thin layer of trapped dirt doing exactly what the filter was built to do.

The Enduring Simplicity of Ceramic Water Filtration

A century ago, a family could set a clay filter on the counter, pour in cloudy water, and wait. No outlet, no app, no moving parts. The same basic appeal still draws homeowners to ceramic filtration today.

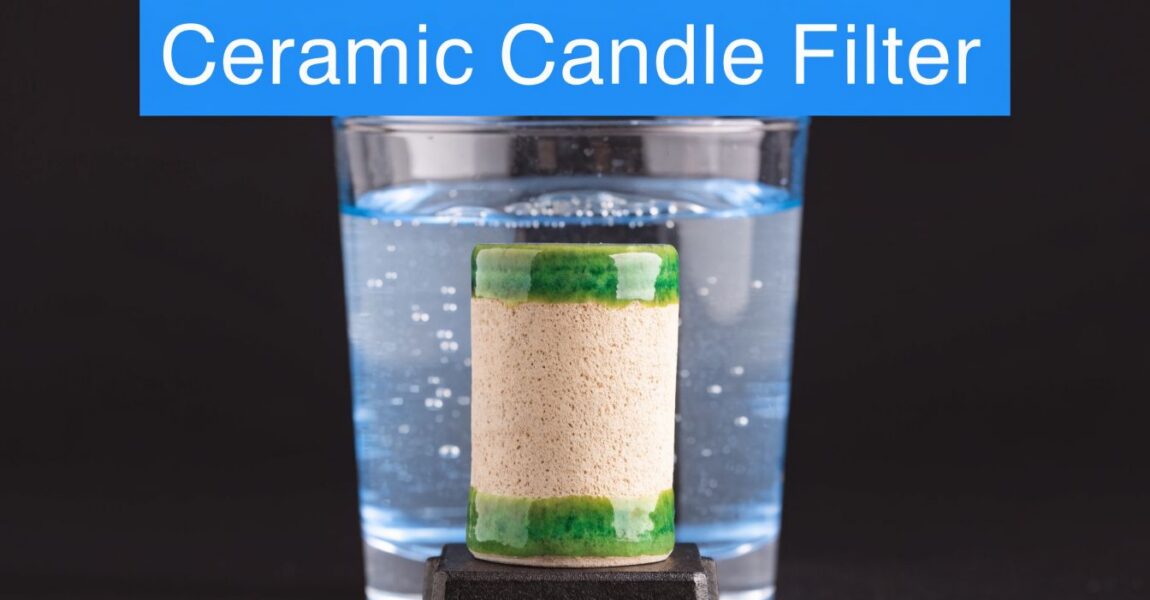
A ceramic candle water filter is simple by design. A porous, candle-shaped element sits inside a housing, and water passes through it slowly under gravity. The pace is part of the bargain. You get a filter that keeps working during a power outage, asks very little from the user, and is easy to understand with your own eyes and hands.

That simplicity is why ceramic filters have lasted so long. They solve a narrow set of problems well. If your main concern is visible dirt, cloudiness, or microbe reduction in a low-tech setup, a ceramic unit can be a practical fit. It works a bit like an old cast-iron pan in the kitchen. Slow, plain, dependable, and still useful because the basic job has not changed.

The trade-off matters.

A ceramic candle is not a fast, all-purpose treatment system. It usually produces water gradually, so it suits daily drinking and cooking better than whole-house demand. It also does not cover every contamination risk. Some dissolved chemicals, salts, and very small contaminants can pass through, which means the best choice depends on what is in your water, not just what you can see.

That is where many homeowners get tripped up. Clear water is not always fully treated water. Ceramic filtration earns its reputation by being reliable, repairable, and affordable to maintain, but its strengths are specific, not unlimited.

Used for the right job, it is one of the most sensible filter designs around. Used for the wrong job, it can give a false sense of security.

How a Ceramic Candle Turns Murky Water Clear

A homeowner fills the upper chamber with cloudy well water before bed. By morning, the lower chamber holds water that looks noticeably cleaner. The change can feel almost too simple to trust, especially because nothing buzzes, spins, or doses the water with chemicals.

What is happening is straightforward. A ceramic candle cleans by microfiltration. Its wall is full of tiny pores, and those pores act as a physical barrier. Water moves through. Larger particles and many microbes do not.
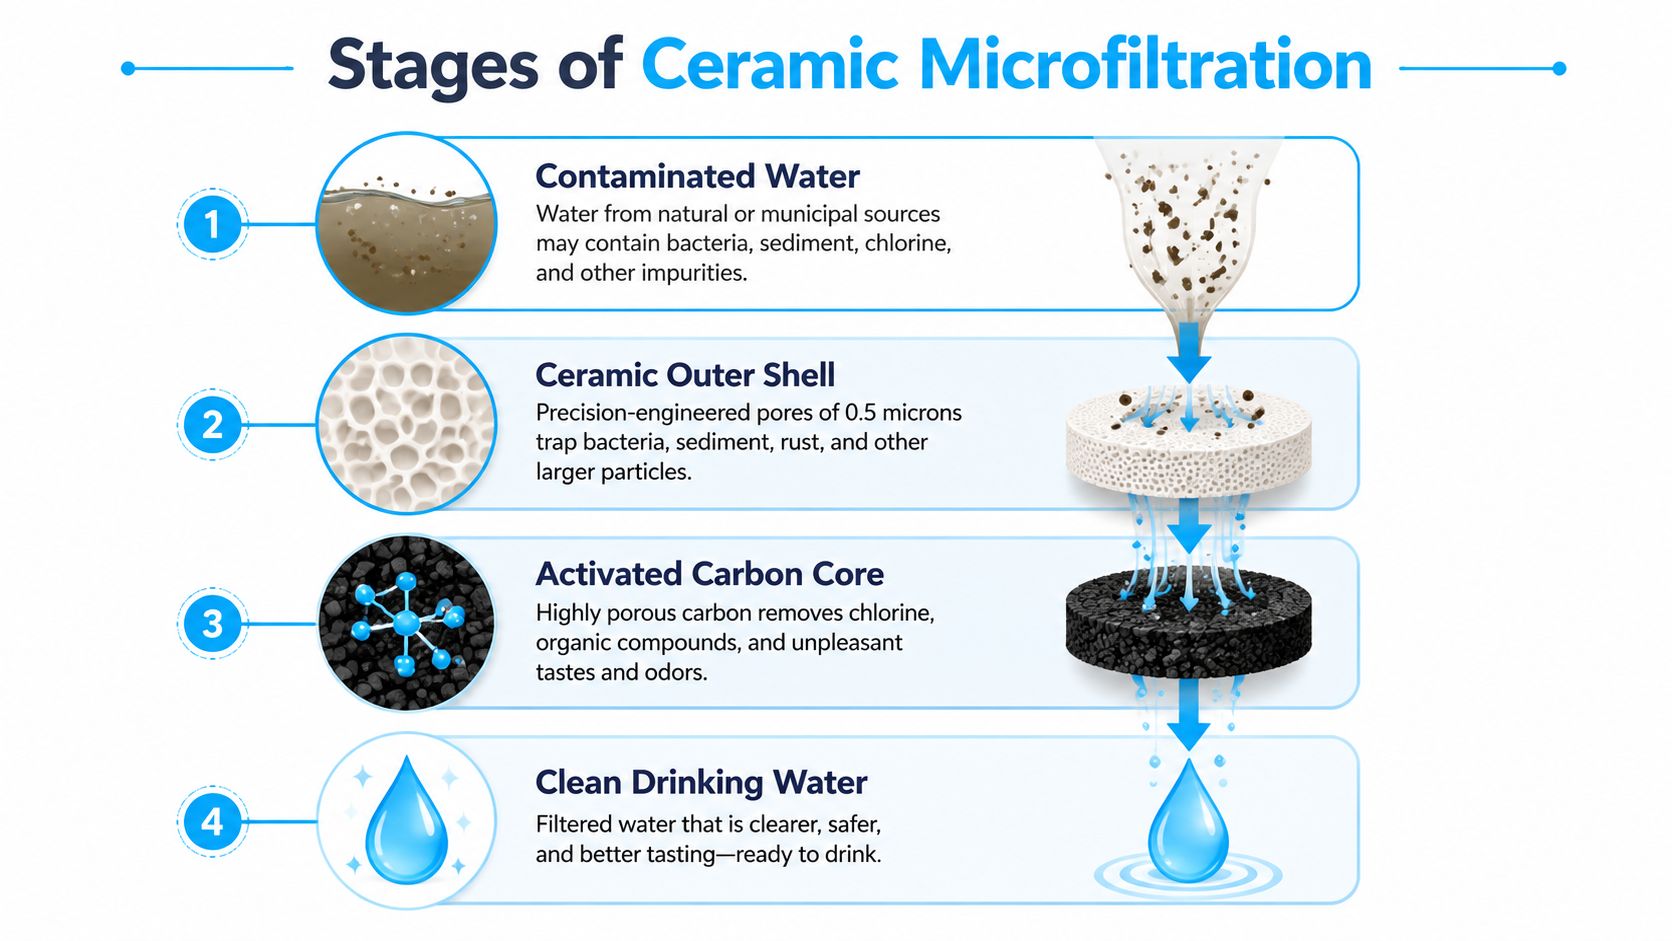
A diagram illustrating the four stages of a ceramic microfiltration water filter process, from contaminated water to clean water.

A coffee filter is a useful comparison for the first step of understanding. It separates liquid from visible solids. A ceramic candle does the same job at a much finer scale, catching material that is far too small to see clearly with the naked eye.

That is why murky water often clears up so well. The cloudiness usually comes from suspended sediment, silt, rust, or organic matter. As water passes across and through the ceramic surface, much of that material gets strained out and stays behind on the outside of the candle.

Here is the process in plain language:

  1. Untreated water surrounds the ceramic shell
    Gravity or household pressure pushes water toward the porous wall.

  2. The ceramic surface screens out larger contaminants
    Sediment and other suspended particles collect first on the outer surface, much like lint collecting on a dryer screen.

  3. Some particles lodge within the pore network
    The filter does not work only at the skin. It also traps material within its fine passages as water moves through.

  4. Filtered water reaches the inner core and exits cleaner
    In some candle designs, the water then passes through added media such as carbon for extra taste and odor improvement.

If you have ever noticed a used candle turning brown or gray, that discoloration is evidence of the job it is doing. The dirt is not disappearing. It is staying on the filter.

Pore size is the key idea that makes the whole system easier to understand. A ceramic candle is selective by size. It is very good at removing what is larger than its pore openings and far less dependable for contaminants that are dissolved in water or much smaller than the pores. That practical limit matters as much as the cleaning effect you can see in the reservoir.

Flow rate is the trade-off you feel every day. Water has to squeeze through a rigid maze of tiny passages, so production is gradual. Ceramic units work more like a slow drip coffee maker than a kitchen tap. That slow pace is part of why they are reliable and power-free, but it also means they are better suited to drinking and cooking water than to high-demand jobs.

People sometimes assume a slower filter is a failing filter. Often, the opposite is true. With ceramic candles, steady flow usually means the barrier is doing real physical work. If flow drops too far, the usual cause is buildup on the surface, which is why routine cleaning matters.

What Ceramic Filters Remove and What They Miss

A ceramic candle is often easiest to judge by the water it improves most clearly. If the problem is cloudy water, grit, or many larger microbes, it can do a very good job. If the problem is viruses, fluoride, or dissolved chemicals, a plain ceramic shell has clear limits.
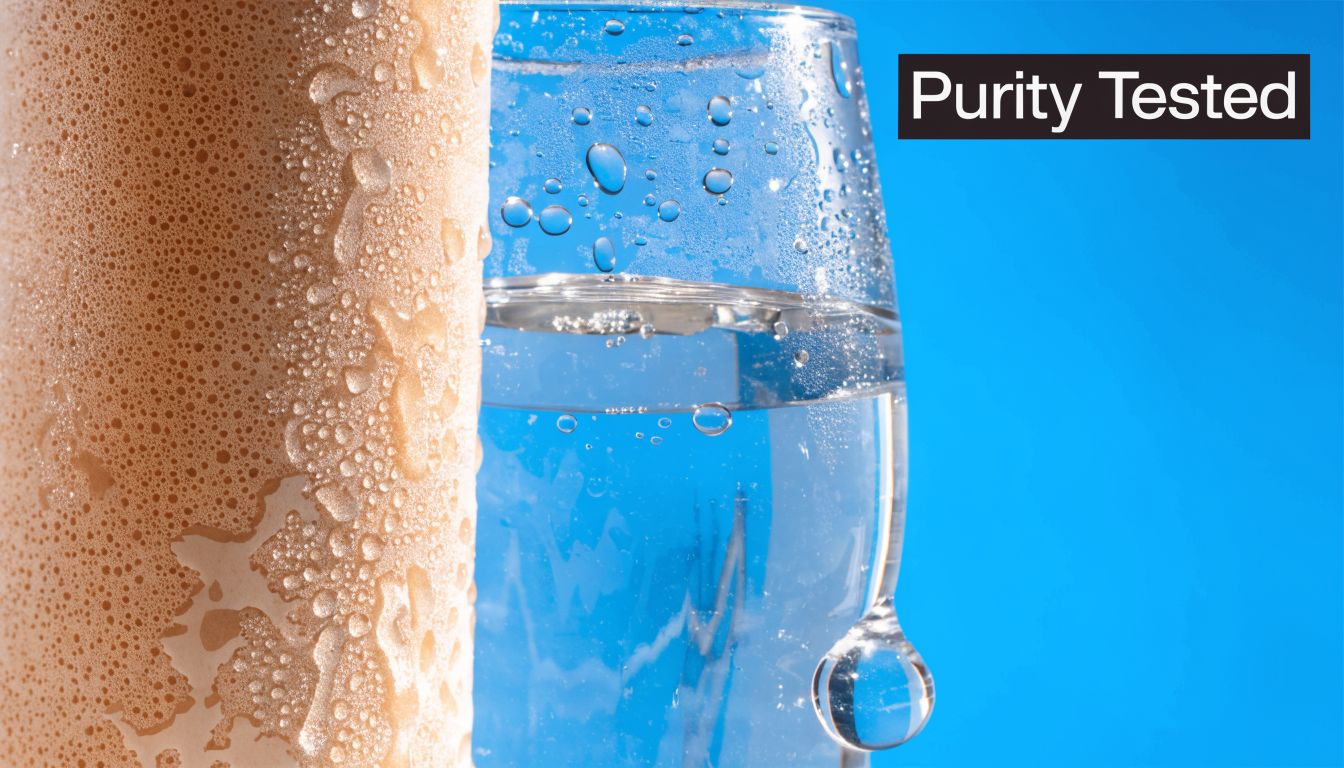
A ceramic candle water filter showing condensation on its textured surface next to a glass of water.

That trade-off is why ceramic filtration has lasted so long. It is simple, durable, and easy to understand. But simple does not mean it handles every water problem.

Where ceramic candles perform well

Ceramic works like a very fine coffee filter for suspended material. It strains out what is physically larger than its pores, so it is well suited to water issues you can often see or that travel as particles.

In everyday home use, that usually means:

  • Sediment and turbidity
    If water looks muddy or hazy, ceramic candles are a strong match because they trap the fine material causing that cloudiness.

  • Many bacteria
    Bacteria are often large enough to be reduced effectively by a properly made and well-maintained ceramic element.

  • Protozoa and cysts
    These are larger targets than bacteria, so ceramic filters are often a good fit for this category too.

A good way to frame it is this. Ceramic candles are strongest when the contamination behaves like particles that can be screened out.

Where homeowners can get a false sense of safety

Cleaner-looking water can invite overconfidence.

A review from IRC on household ceramic filters notes that real-world microbiological performance can vary, and some commercial candles tested in older evaluations did not consistently produce water of acceptable bacteriological quality as standalone treatment devices (IRC review of household ceramic filter performance). That matches what water professionals see in practice. Ceramic filters can improve water significantly, but the result depends on the filter design, the condition of the candle, and the quality of the source water.

Clear water is not the same as fully treated water.

This matters most for private wells, stored rainwater, surface water, and emergency use. If the source may carry sewage-related contamination or outbreak-related pathogens, a ceramic candle alone may not give you enough protection.

The biggest gap is usually viruses

Viruses are much smaller than bacteria and protozoa. That is where the size-based strength of ceramic becomes a weakness.

For a homeowner, the practical question is simple. Could your water source be exposed to fecal contamination from failing septic systems, floodwater, livestock runoff, or poor sanitation upstream? If the answer might be yes, a ceramic candle should be treated as one part of a system, not the whole system.

That is why many households pair ceramic with disinfection, such as UV or boiling during higher-risk periods. You give up some simplicity, but you gain a wider safety margin.

Dissolved contaminants need different media

Ceramic is much less useful for contaminants that are dissolved into the water itself. Once a substance is dissolved, it is no longer acting like a particle that can be screened out by pore size alone.

Fluoride is a common example. Standard ceramic candles usually do not reduce it well unless the filter includes media made for that purpose (fluoride-specific ceramic candle example). The same caution applies to many dissolved chemicals and some metals. If the product does not list a dedicated treatment media for those contaminants, do not assume the ceramic shell is handling them.

Taste and odor follow the same pattern. A plain ceramic candle may make water look cleaner, but chlorine taste, musty smells, and many organic compounds are usually better handled by carbon. If you want a simple explanation of that pairing, this guide to how carbon block filters improve taste and chemical reduction is useful.

A plain-English scorecard

Water issue Ceramic candle alone
Cloudiness and visible sediment Strong fit
Bacteria Often a good fit, but performance depends on design, condition, and source water
Protozoa and cysts Strong fit
Viruses Weak fit
Fluoride Usually not effective unless specially enhanced
Taste and odor from chlorine Better handled when carbon is added
Broad dissolved chemical reduction Usually needs added media or different technology

The practical lesson is straightforward. A ceramic candle water filter earns its place when you want low-tech, power-free filtration for sediment and many larger microbes. It is a weaker choice when the main concern is viral contamination or dissolved pollutants.

Enhancing Filtration with Carbon Silver and UV

A ceramic candle is a strong first barrier, but it is only one barrier. That matters in real homes, because the problems in water do not all behave the same way. Mud, chlorine taste, bacterial growth inside the filter, and viruses each call for a different tool.

The practical question is simple. What are you trying to fix, and what trade-off are you willing to accept? Adding carbon, silver, or UV can make a ceramic system more capable, but each upgrade solves a specific problem rather than turning the unit into an all-purpose purifier.

What carbon adds

Carbon handles a different job from ceramic. Ceramic works like a coffee filter for sediment and larger organisms. Activated carbon acts more like a sponge at the molecular level, holding onto many compounds that affect taste, odor, and some chemical concerns.

That is why a ceramic filter with a carbon core often feels better to use day to day. Water may already look clear after passing through ceramic, yet still smell like chlorine or have a stale taste. Carbon is the part that usually improves that experience. If you want a plain-language explanation of why this pairing is so common, this guide to how carbon block filters improve taste and chemical reduction is a helpful reference.

There is a trade-off. Carbon has a finite capacity, and performance depends on the contact time, the type of contaminant, and how the cartridge is built. It can improve water noticeably, but it does not remove every dissolved pollutant.

What silver is actually doing

Silver is often misunderstood.

In a ceramic candle, silver is generally used to limit bacterial growth on or within the filter media itself. In practical terms, it helps the filter stay more sanitary between cleanings and during routine use. That supports reliability, especially in slow gravity systems that hold water for hours at a time.

Homeowners sometimes read "silver" and assume broad disinfection. That is too much credit. Silver supports the filter. It does not replace proper filtration, and it does not guarantee protection against every microbe in the source water.

When UV makes sense

UV works at the end of the treatment train, after the water is already clear enough for the light to do its job well. It does not remove grit, and it does not improve taste. Its role is disinfection, especially in setups where microbial risk goes beyond what a ceramic pore barrier can reliably address.

This is often the point where trade-offs become clear. A plain gravity ceramic unit is simple, quiet, and power-free. Add UV, and you gain another layer against microorganisms, but you also add cost, electricity dependence, lamp replacement, and a need for correct sizing and maintenance.

For some households, that is a smart exchange. If your water comes from a well, a rainwater system, surface-influenced storage, or an emergency reserve, UV can be a sensible partner for ceramic. If your main complaint is chlorine taste in treated municipal water, carbon may solve the problem without the extra complexity.

A layered system gives you a more targeted result because each part covers a weakness in the others. Ceramic handles sediment and many larger microbes. Carbon improves taste and addresses some chemicals. UV adds a disinfection step for risks that physical filtration alone may miss.

That same logic shows up in other home maintenance decisions. You do not judge one tool by asking it to do every job. The process of comparing professional cleaners in Northern Arizona follows the same common-sense approach. Match the method to the problem, then decide whether the added effort is worth the added protection.

For many homeowners, that is the best way to judge upgrades to a ceramic candle water filter. Keep the system simple if your water problem is simple. Add carbon, silver, or UV only when the water quality goal clearly calls for it.

Maintaining Your Ceramic Filter for Peak Performance

A ceramic candle often looks worst right before it reminds you why people still trust it. The outside turns brown or gray. Flow slows to a trickle. It can look like the filter is failing, when in many cases it is loaded with what would otherwise be in your drinking water.

That visible buildup is part of the trade-off. Ceramic filtration is simple and dependable because it works as a physical barrier, much like a very fine coffee filter for grit and suspended matter. The same barrier that catches sediment also clogs over time, so maintenance is the price you pay for that simplicity.
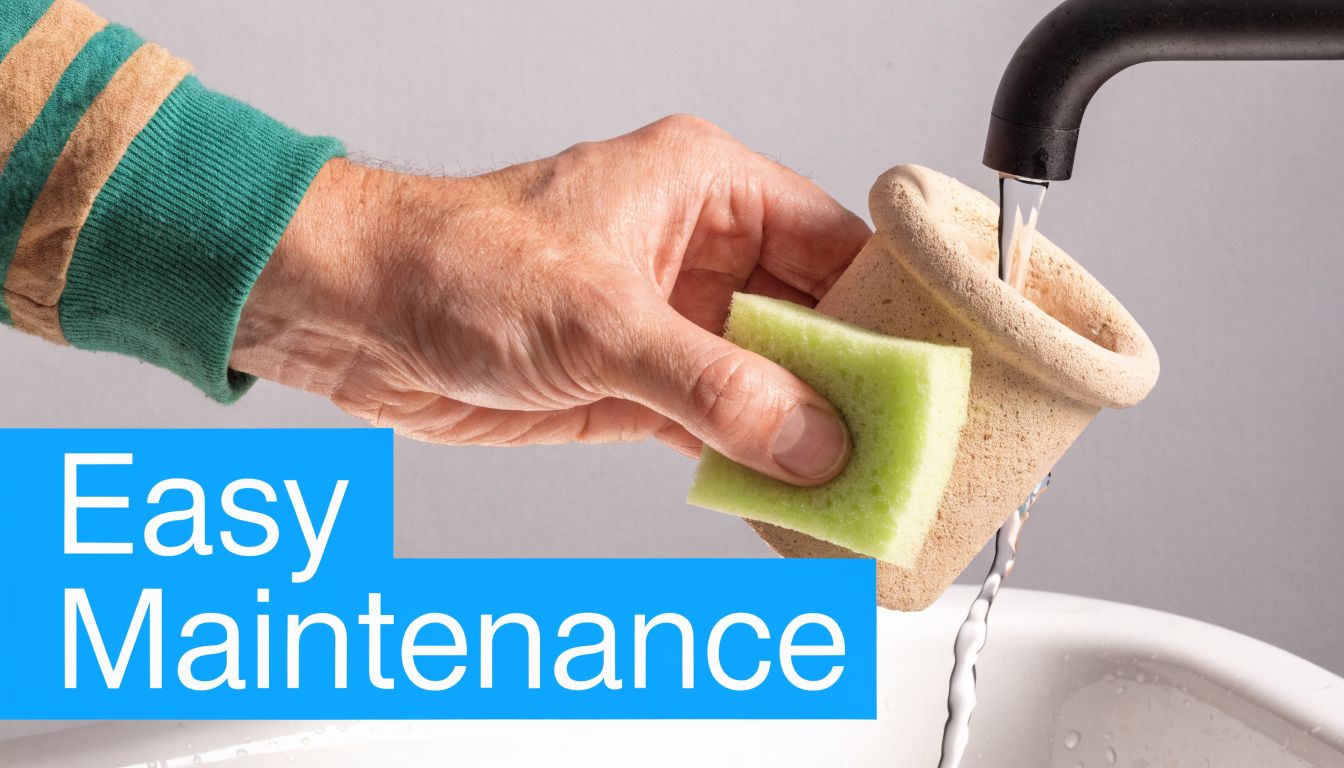
A hand washes a porous ceramic candle water filter element with a sponge under running tap water.

Why the outside gets dirty

Water meets the outer wall of the candle first. As water passes inward through tiny pores, larger particles stay behind on the surface. Over days or weeks, that coating gets thicker and flow drops.

That is usually normal.

The key point is to read the filter correctly. A stained exterior often means the candle has been catching sediment and other particulate matter as intended. Clearer source water usually means slower buildup. Silty well water, rainwater with fine debris, or stored emergency water can foul the surface much faster.

A simple cleaning routine

Ceramic maintenance is low-tech, but it still rewards care. Scrubbing too hard can wear away useful material. Handling the clean side with dirty hands can undo the benefit of cleaning in the first place.

Use a routine like this:

  • Wash your hands first
    Start clean so you do not transfer contamination to the filter body, threads, or lower chamber.

  • Remove the candle carefully
    Ceramic is durable in use but brittle if knocked against a sink or countertop.

  • Scrub only the outer surface
    A soft brush or non-aggressive pad works well for loosening the film of trapped material.

  • Rinse with clean water
    Flush away the loosened residue before reinstalling the candle.

  • Check washers and seals during reassembly
    A good filter element cannot protect you if water slips around it instead of through it.

For a broader maintenance checklist that applies across filter types, this guide on how to clean water filters gives a useful framework for handling cartridges, housings, and hygiene.

The logic is the same as routine cleaning elsewhere in the home. Regular light maintenance usually works better than waiting for a bigger problem. If you have ever looked into comparing professional cleaners in Northern Arizona, you have seen the same pattern. Consistent care preserves performance.

Watch the flow, not just the calendar

Calendar reminders help, but flow rate is often the better clue. A ceramic candle rarely stops all at once. It usually gets slower in stages.

Treat that slowdown as feedback. If a cleaning brings flow back to a useful level, the candle is still doing its job. If flow stays poor after proper cleaning, the pores may be too fouled, the element may be wearing thin from repeated scrubbing, or the candle may be at the end of its service life.

This is one of the practical trade-offs with ceramic systems. They give you a visible, understandable maintenance signal. You can often see the buildup and feel the slowdown. In return, you give up the set-and-forget convenience people expect from some enclosed cartridge systems.

Here's a practical visual walk-through of the process:

Signs it's time to replace the candle

Cleaning extends service life, but it does not make a ceramic element last forever. Replace the candle if you notice any of the following:

  • Flow remains very slow after cleaning
    That usually means buildup is no longer limited to the surface, or the element has reached the end of useful life.

  • Cracks, chips, or hairline damage
    Even a small fracture can create a path for untreated water to pass.

  • Changes in taste or odor in ceramic-carbon models
    The ceramic shell and the carbon media age differently. The carbon portion may be spent even if the outer ceramic still looks usable.

  • Repeated cleaning removes more material than buildup
    If the candle is getting noticeably thinner, replacement is safer than trying to stretch its life.

A ceramic candle should age gradually. Sudden changes in clarity, flow, or taste deserve a close inspection.

Maintenance keeps a ceramic candle water filter honest. It also helps you decide whether this simple system still matches your water. If cleaning becomes too frequent or performance remains inconsistent, the issue may not be the candle alone. Your source water may need a prefilter, a second treatment step, or a different setup altogether.

Choosing the Right Ceramic Filter Setup for Your Home

A homeowner with cloudy well water usually asks two questions first. Will this make the water look and taste better, and will it fit into daily life without becoming a chore? Those questions point you toward the right ceramic setup faster than any brand comparison.

A ceramic candle filter works best when the setup matches your routine, your water source, and your tolerance for slow flow. The practical trade-off is simple. You gain reliability, low-tech operation, and modest ongoing cost. You give up speed, and you may still need another treatment step if your water has viral risk or dissolved contaminants.
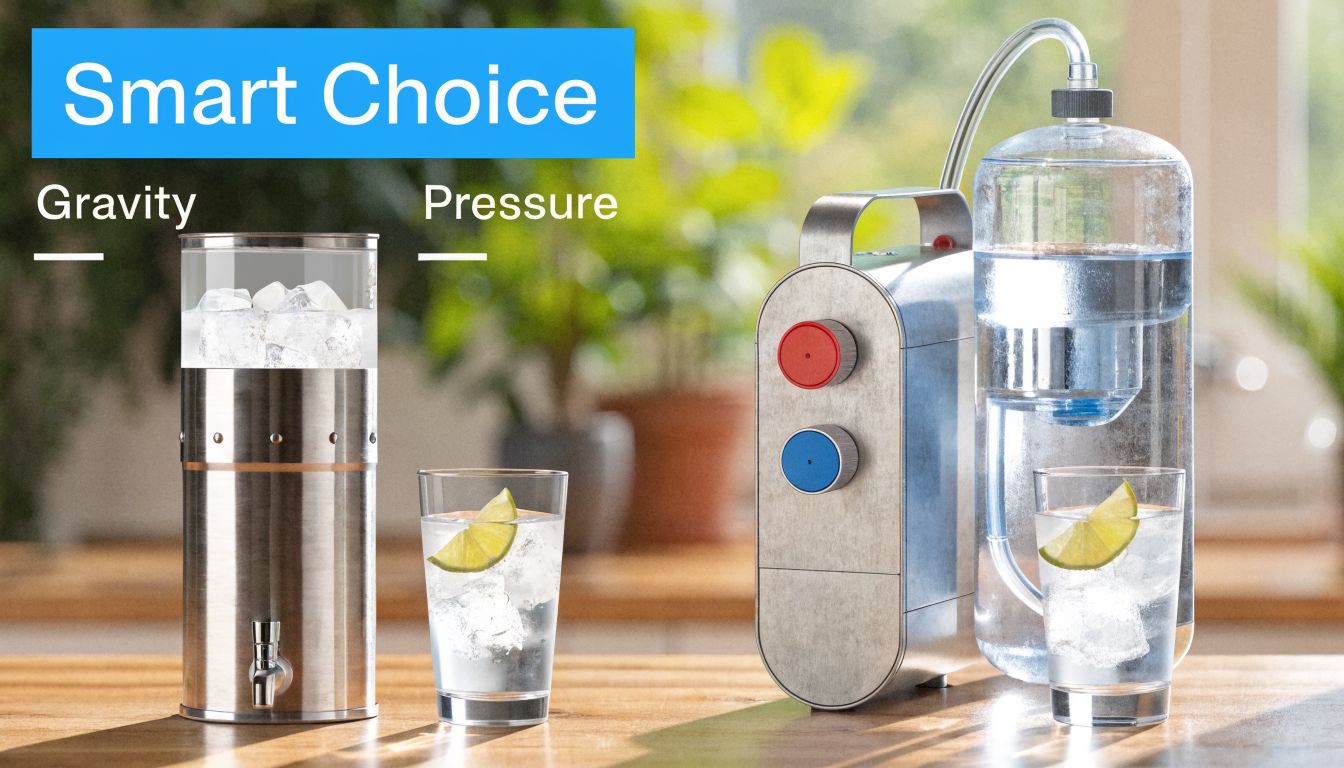
A side-by-side comparison of a gravity-fed water dispenser and a pressure-based water filtration system on a counter.

Gravity-fed countertop units

Gravity-fed units are the simplest version to live with. You pour water into the top chamber, gravity pulls it through the ceramic candles, and treated water collects below. It works much like letting coffee drip through a filter cone. The process is easy to see, easy to explain, and easy to troubleshoot.

This setup fits renters, cabins, emergency backup plans, and homes that do not want plumbing changes. It also suits people who value independence from electricity and moving parts.

The trade-off is output. These systems are slow by design, so they reward planning. If your household fills bottles in the morning and keeps a reserve ready, that pace often feels perfectly acceptable. If several people expect filtered water on demand from a tap, the slowness can become frustrating.

Pressurized and plumbed systems

Pressurized ceramic systems place the element inside an under-sink or faucet-connected housing. They feel more natural in a busy kitchen because filtered water comes from a tap where you already wash produce, fill pots, and pour drinking water.

They also give you more room to build a staged system. A sediment prefilter can protect the ceramic element from heavy dirt load. Carbon can help with taste and some chemicals. UV can add a disinfection step where microbiological risk is higher.

The trade-off here is maintenance discipline. A ceramic candle may be simple, but the full system includes housings, seals, fittings, and sometimes several cartridges with different replacement schedules. If you want the easiest possible ownership experience, a countertop gravity unit usually wins.

A side-by-side decision guide

Home situation Better ceramic setup
Apartment or rental Gravity-fed countertop unit
Power outage backup Gravity-fed countertop unit
Minimal installation hassle Gravity-fed countertop unit
Daily cooking and drinking at the sink Pressurized under-sink setup
Layered treatment with multiple stages Pressurized setup
Frequent moves Portable gravity unit

Cost and ownership

Ceramic often appeals to homeowners who dislike disposable, high-turnover filter systems. A good candle can last a long time with proper cleaning, and replacement costs are often manageable compared with more complex systems. Another practical advantage is that ceramic filtration does not remove the full mineral content of water the way reverse osmosis does, which some households prefer for taste.

That said, low operating cost only holds true when the filter matches the job. Very dirty source water can clog a candle quickly and turn a low-maintenance system into a frequent cleaning project. In that case, adding a simple prefilter can make the entire setup easier to own.

When ceramic is the right primary filter

A ceramic candle water filter makes the most sense when:

  • Your main concerns are visible sediment, cloudiness, and many larger microbes
  • You want a filtration method that works without electricity
  • You prefer equipment you can inspect, clean, and understand without special tools
  • You want a practical daily-use filter or a reliable backup option

When you should look beyond ceramic alone

Ceramic alone is usually the wrong tool if your main concern is something you cannot strain out physically. Dissolved contaminants do not behave like grit in water, and viruses are smaller than the pore sizes many ceramic candles are designed to block.

Choose another technology, or pair ceramic with other treatment, if you are dealing with:

  • Possible viral contamination
  • Fluoride reduction
  • A wide range of dissolved contaminants
  • High daily water demand where slow flow will feel limiting

A good buying rule is to match the filter claim to the problem in your water. If a product promises reduction of a specific contaminant, check for clear testing or certification for that contaminant, not just general marketing language.

Is a Ceramic Candle Filter Your Best Choice?

For many households, the answer is yes. A ceramic candle water filter is one of the most practical ways to improve water when your priorities are simplicity, reliability, low running cost, and freedom from electricity.

It's especially appealing if you want a countertop or portable solution that handles sediment, cloudiness, and many larger microbes without turning your kitchen into a plumbing project. It also earns points for long service life and easy cleaning when used within its limits.

But those limits matter. Ceramic is not the best standalone answer for viruses. It's also not the right tool if your main goal is aggressive reduction of fluoride or a broad range of dissolved contaminants. In those cases, ceramic works better as part of a multi-barrier setup than as a solo hero.

If your water challenges are mostly physical and microbiological, ceramic may be exactly the right fit. If your risks are more complex, use ceramic as the sturdy first stage and let other technologies handle the rest.


If you're comparing filter types, replacement costs, or home setups, Water Filter Advisor is a helpful place to research practical options for kitchens, whole-house systems, and ongoing filter maintenance.

What Are Trihalomethanes in Water? A Home Filter Guide

You sit down with your annual water quality report, skim past the chemical names, and then one abbreviation grabs your attention: TTHM. It looks technical, a little ominous, and not at all homeowner-friendly.

That reaction is normal. You probably don't spend your weekends thinking about disinfection byproducts, chlorine chemistry, or vapor exposure from a hot shower. You just want to know whether your water is safe, what the term means, and whether you need a filter.

If you've been searching what are trihalomethanes in water, the short answer is this: they're chemical byproducts that can form after water is disinfected. The more useful answer is what they mean for your home, your family, and the type of filter that works. That's where things get practical.

That Funny Acronym on Your Water Report

You open your water report at the kitchen counter, spot TTHM, and suddenly a routine document feels a lot more personal. If you have kids, if you drink tap water, or if someone in your house takes long hot showers, that little acronym stops looking abstract very quickly.

Trihalomethanes, or THMs, are chemicals that can form after a water utility disinfects water. On many reports, you will see TTHMs, which means total trihalomethanes. That term is the combined measurement of the main THMs being tracked in the water supply.

TTHMs work like the total on a grocery receipt. You may buy four separate items, but the number that catches your eye is the combined cost at the bottom. A water report does the same thing by grouping four related chemicals into one total:

  • Chloroform
  • Bromodichloromethane
  • Dibromochloromethane
  • Bromoform

A lot of homeowners assume this kind of result means the treatment plant made a mistake. In reality, TTHMs usually show up because disinfection happened. Utilities use disinfectants such as chlorine or chloramine to reduce the risk from bacteria, viruses, and other pathogens. THMs are one of the byproducts that can form during that process.

That does not mean you should ignore the number.

The reason TTHMs matter in a home is broader than a glass of tap water. People often focus on drinking water first, which makes sense, but THM exposure can also happen when warm water turns them into vapor in a shower or bath. That detail changes the question from “Do I need a filter on my sink?” to “How much of my daily exposure happens throughout the house?”

Why the term sounds more confusing than it is

“TTHM” sounds technical because it is a lab and regulatory term. For a homeowner, the plain-English meaning is much simpler. It is a summary number used to show how much of these related disinfection byproducts are present together.

Water utilities monitor that total because regulators set limits for it. If you see TTHMs listed on a Consumer Confidence Report, you are looking at a standard water quality category, not some strange one-off contaminant that appeared out of nowhere.

Why homeowners pay attention

You are reading the report for one reason. You want to know whether this number calls for action in your home.

That is a reasonable question, especially because THM exposure is not limited to what you swallow. A pitcher filter may improve the water you drink, but it does nothing for the steam you breathe in during a hot shower or for the air released from bathwater. For households concerned about THMs, that full exposure picture often points toward whole-house treatment rather than a kitchen-only fix.

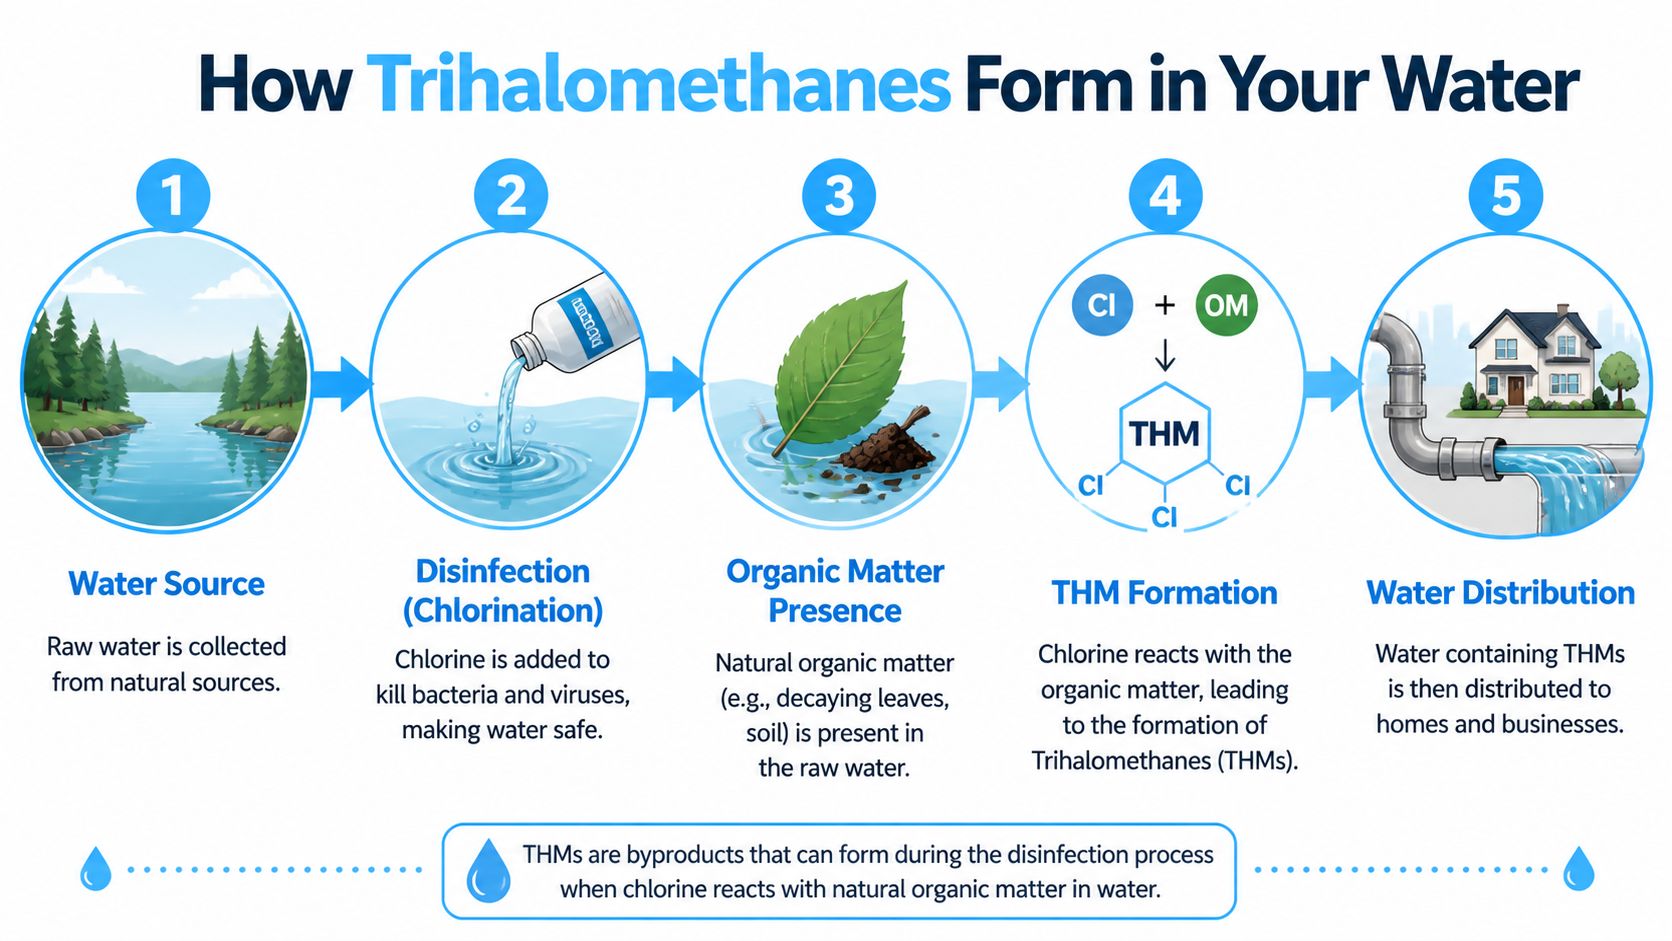
How THMs Get Into Your Water

Your water utility adds chlorine for a good reason. It kills bacteria, viruses, and other microbes that can make people sick as water travels from the treatment plant to your home.

THMs form because chlorine does not stop reacting once the germs are handled.

It also reacts with naturally occurring organic material already in the source water, such as decaying leaves, algae, and small bits of plant matter. That chemical reaction creates a group of compounds called disinfection byproducts. Trihalomethanes are one of the most common examples homeowners see on a water report.

A simple way to understand the chemistry

A helpful comparison is a treatment plant working with raw ingredients that are never perfectly clean. The utility needs to disinfect the water to make it safe, but the same chlorine can also combine with leftover organic material and create byproducts. In plain English, THMs are the unintended chemical leftovers from that safety step.

An infographic showing the five-step process of how trihalomethanes form in water supplies through chlorine and organic matter.

The four chemicals behind the name

The four primary THMs are:

  • Chloroform, often the dominant one
  • Bromodichloromethane
  • Dibromochloromethane
  • Bromoform

The exact mix changes from one water system to another. Source water matters. Treatment methods matter too. That is why two towns can both disinfect with chlorine and still end up with different THM profiles.

Why levels change through the year

THM levels can rise in summer and fall in cooler months because warmer water speeds up the reactions that form them. Time in the pipes matters too. The longer disinfected water sits in the distribution system, the more opportunity chlorine has to keep reacting with organic material.

Ohio Watersheds at Ohio State explains that trihalomethanes form when chlorine or chloramines react with naturally occurring organic matter, and notes that warmer conditions can increase formation. That same reference also describes treated-water concentrations reaching 189.52 μg/L, with chloroform as the dominant species in the research discussed there.

Utilities may also see temporary increases after repairs, water main breaks, or periods when they raise disinfectant levels to control microbial risk. From a public health standpoint, that tradeoff makes sense. For a homeowner, it helps explain why THM levels are not always static.

This matters for more than drinking water. Once THMs are in the water, they do not stay limited to your kitchen tap. Warm water in showers and baths can release some of them into the air, which is one reason a sink filter may address only part of your household exposure.

Health Risks of Trihalomethane Exposure

A homeowner usually notices THMs on a water report long before they notice any symptom. That is part of what makes this topic confusing. The main concern is not a one-time exposure. It is repeated exposure over many years.

Health agencies have linked long-term exposure to high trihalomethane levels with a higher risk of bladder cancer. Researchers have also examined possible links to colon and rectal cancers, along with developmental effects during pregnancy. In plain terms, THMs are less like an immediate poison and more like a low-level stressor your body would rather avoid over time.

A hand holding a glass of clear water with bubbles against a blurred indoor background.

The safety benchmark homeowners should know

The EPA limit for total trihalomethanes, often listed as TTHMs on a water report, is 80 micrograms per liter. That number is the reference point utilities use to show whether their system is staying within federal standards.

For a homeowner, that limit is best understood as a warning line, not a comfort guarantee. A water system can meet the legal standard and still leave you wanting lower exposure in your own home, especially if your family takes long hot showers, has small children, or already uses filtration for other contaminants.

How to interpret the risk without panic

It helps to separate two questions that often get mashed together.

First, why is chlorine used at all? Because disinfected water protects households from bacteria, viruses, and other microbes that can cause immediate illness. Second, why pay attention to THMs? Because the same disinfection process can leave behind byproducts that raise concern over the long run.

A simple analogy helps here. Chlorine works like a strong cleaning tool that does an important job, but the cleanup process can leave residue behind. THMs are part of that residue. The practical goal at home is to keep the protection from disinfection while reducing your contact with the leftover byproducts.

Why this section matters for the rest of your house

Many homeowners hear "health risk" and think only about the glass in their hand. That is only part of the picture.

THMs can enter the body through drinking water, through the skin, and through the air once warm water releases them indoors. That airborne route is one reason families concerned about THMs often end up looking beyond sink filters and start thinking about whole-house treatment and even improving indoor air quality in Tucson.

The practical takeaway is simple. Repeated high THM exposure deserves attention, and the complete exposure picture goes beyond what you drink at the kitchen tap.

The Hidden Risk From Your Shower and Bath

It is often assumed that water exposure starts and ends with what one drinks. For THMs, that’s an incomplete picture.

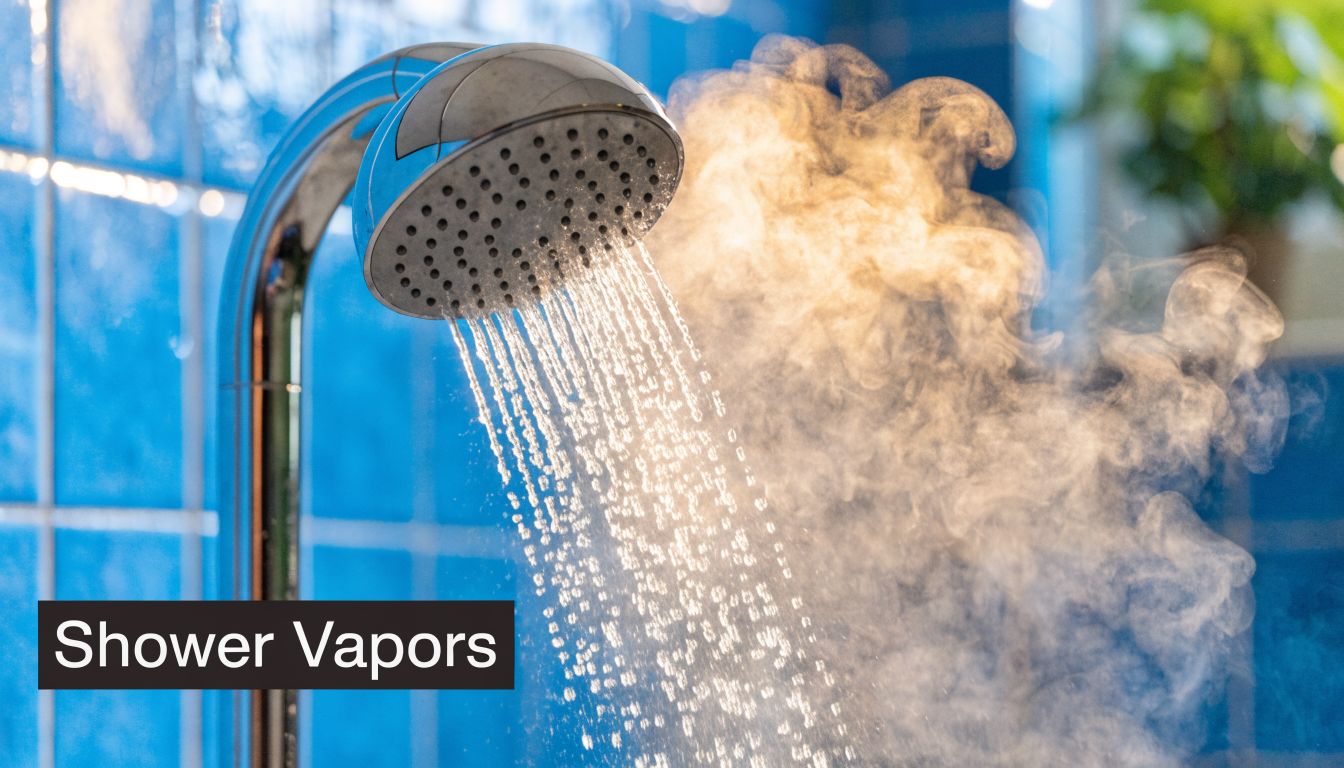
These compounds are volatile, which means they can move from water into air. In a hot shower or bath, that matters. The steam in the room isn't just warm moisture. It can also carry vaporized THMs, which you then breathe in, and your skin is in contact with the water the entire time.

A close-up view of a shower head releasing hot water spray with visible steam in a bathroom.

Why the bathroom changes the equation

A kitchen filter only treats the water you drink or cook with. It does nothing for steam rising off a shower head.

That’s the blind spot with THMs. The Nova Scotia overview on THMs states that, due to their volatility, dermal and inhalation exposure during showering and bathing can result in “significantly higher” blood concentrations than ingestion alone. The same reference also notes that human bladder cancer risk rises by 59% at exposures greater than 50 ppb via all routes, citing the WHO.

For homeowners, the message is straightforward. If your concern is THMs, an under-sink filter solves only part of the problem.

What this means for filter choice

Filtration strategy requires more serious consideration.

A pitcher filter or faucet filter may help reduce what ends up in your glass. But if your family takes long showers, bathes children nightly, or spends a lot of time in steamy bathrooms, your exposure isn't limited to drinking water. That's why many households end up looking beyond point-of-use systems.

Three common approaches make sense:

  • Shower filter for renters or single-bathroom homes that want a quick improvement at one fixture
  • Under-sink system for households focused mainly on drinking and cooking water
  • Whole-house carbon filtration for homes that want to reduce THM exposure across taps, tubs, and showers

The bathroom air piece is often overlooked in broader home health conversations too. If you're already thinking about reducing airborne chemical exposure indoors, this guide on improving indoor air quality in Tucson is a useful companion read because it helps connect water-related vapor exposure with the bigger indoor air picture.

A short explainer may help you visualize why shower exposure matters:

The strongest case for whole-house filtration

If a contaminant stays mostly in cold drinking water, a kitchen filter can be enough. THMs don't behave that way.

They move through the entire house. They can affect the water you drink, the water your kids bathe in, and the air in the bathroom during a hot shower. That doesn't mean every home needs the biggest system available. It does mean your filter decision should match your exposure pattern, not just your water bottle filling routine.

A THM problem is often a whole-home exposure problem disguised as a drinking water problem.

How to Test Your Water for THMs

Testing for THMs is one of those jobs where the smartest first step is usually free. Before you buy any gear, look up your local utility’s Consumer Confidence Report and find the TTHM entry.

That report gives you the official compliance picture. It won't answer every question, but it tells you whether your system has reported TTHMs near or above the regulatory threshold and whether there have been recent issues in the distribution system.

Start with the water report

Look for terms such as TTHM, Total Trihalomethanes, running annual average, or individual sampling site results. If the numbers feel abstract, compare them to the EPA benchmark already discussed earlier.

This step is especially important because THM levels are not consistent from place to place. Research summarized in the PMC report on geographic and seasonal variation notes that some U.S. cities have recorded levels over 300 ppb, nearly four times the EPA limit in that context, and identifies Louisiana, Oklahoma, and Texas as the states with the highest number of cities facing contamination issues among the most-affected municipalities studied.

Use a home kit for a snapshot

If you want a faster, more immediate sense of your household water, a home testing kit can help. The key word is snapshot.

A kit is useful when:

  • You want current conditions, not last year’s utility average
  • Your water smells more chlorinated than usual
  • Recent repairs or flushing happened in your neighborhood

If you're comparing options, this overview of essential water quality tests gives a practical framework for deciding when an at-home screen is enough and when a lab test makes more sense.

Get a certified lab test when the decision matters

If you’re about to invest in a whole-house system, or if your utility report leaves you uneasy, a state-certified laboratory gives you the clearest answer. That’s the route I’d take if the result will affect a major filter purchase.

Timing matters too. Seasonal variation can change your results. Some systems peak in warmer summer months, while others can spike in colder periods depending on local conditions, treatment practices, and infrastructure patterns, as noted in the earlier PMC source. If your area has a history of higher readings, testing once during a lower period may give you false confidence.

A simple testing plan works well for most homeowners:

  1. Read the CCR first for the official baseline.
  2. Use a home kit if you want a household-level snapshot.
  3. Confirm with a lab before spending serious money on a treatment system.

Your Complete Guide to Removing THMs

Removing THMs gets easier once you match the filter to the way your family uses water.

If your only goal is better-tasting drinking water, a kitchen filter may be enough. If your concern includes long showers, hot baths, and steamy bathrooms, the answer often shifts toward whole-house treatment because THMs are part of your water use beyond the glass.

Activated carbon is the main tool homeowners use for THM reduction. It works like a sponge with millions of tiny pores. As water moves through that carbon, THM compounds stick to the surface instead of continuing on to the tap, showerhead, or tub faucet.

Performance depends on design details. Carbon type, contact time, flow rate, cartridge size, and replacement schedule all affect results. The performance of a tiny, uncertified cartridge is not comparable to a properly designed carbon block or GAC system.

Why certification matters

Marketing language can make weak products sound capable. For THMs, the shortcut is simple. Look for a clear claim for THM reduction and check whether the system is certified to NSF/ANSI 53 for that purpose.

That label matters because THM reduction is more specific than basic taste-and-odor improvement. Some filters are built mainly to reduce chlorine or improve flavor, which can leave homeowners assuming they solved a bigger problem than they did.

For practical help comparing filter types, installation limits, and upkeep, the articles in Water Filter Advisor’s water treatment advice library can help you narrow the options.

Comparing THM Water Filtration Methods

Filter Type THM Removal Effectiveness Average Cost (System and Annual) Best For
Pitcher with activated carbon Can help, but capacity and contact time are limited Varies by brand and cartridge schedule Renters, low-commitment trial use
Faucet-mounted carbon filter Covers one tap and offers moderate improvement when certified for THM reduction Varies by model and replacement interval Small households focused on kitchen tap water
Under-sink carbon system Strong option for drinking and cooking water Higher than faucet or pitcher systems Homeowners who want dedicated kitchen treatment
Shower filter with carbon media Can reduce exposure at one shower, but only at that fixture Varies by cartridge life and design Renters or homeowners focused on one bathroom
Whole-house GAC system Treats water before it reaches taps, showers, and tubs Highest upfront and maintenance commitment Families addressing whole-home THM exposure

Which option makes sense for your home

A pitcher or faucet unit can be reasonable if you rent and your main concern is drinking and cooking water. An under-sink system makes more sense if your household uses a lot of kitchen water and you want longer contact time with better filter media.

A shower filter can help in one bathroom, especially when a whole-house install is not realistic. But it does not address the rest of the home. You still have untreated water at other showers, bath faucets, and taps.

Whole-house GAC deserves a close look when your concern includes inhalation and skin contact during bathing. That setup treats the water before it spreads through the house, which gives you broader coverage where THMs often get overlooked most.

One practical rule helps many homeowners: if the contaminant matters in steam and vapor, not just in a glass, point-of-use drinking water filters only solve part of the problem.

Maintenance decides whether a good system stays good. Carbon has a working life. Once it is spent, removal drops off, so follow the replacement schedule, keep a simple service record, and choose a system you will realistically maintain.

Frequently Asked Questions About THMs

Does boiling water remove trihalomethanes

Boiling isn’t my first recommendation for THMs. Because these compounds are volatile, heating water changes how they behave, and boiling also reduces the volume of water left in the pot. That can make DIY “fixes” unreliable for household treatment.

For THMs, a properly selected activated carbon filter is the more practical home solution.

Are Brita-style or refrigerator filters enough

Sometimes, but not automatically. The deciding factors are the filter media, the size of the cartridge, and whether the product is certified for THM reduction under NSF/ANSI 53. Some basic refrigerator filters focus more on taste and odor than on broad contaminant reduction.

Read the spec sheet, not just the box front.

Do private well owners need to worry about THMs

Usually, THMs are more closely associated with disinfected water supplies, especially municipal systems that use chlorine or chloramines. If a private well isn't being chemically disinfected, THMs are often less central than issues like bacteria, iron, sulfur odors, or nitrate.

But if well water is chlorinated for treatment or shock disinfection, byproducts can become part of the conversation.

Should I buy a shower filter or a whole-house filter

That depends on your housing situation and how complete a solution you want.

A shower filter makes sense when installation needs to be simple or temporary. A whole-house carbon system makes more sense when you want one approach for showers, baths, sinks, and appliances. If your concern is what are trihalomethanes in water and how do I reduce my family’s overall exposure, whole-house treatment is usually the most complete answer.

What’s the smartest first move

Check your water report, then decide whether you need a home test or lab confirmation. Don’t buy filtration based on fear alone, but don’t ignore a pattern of high TTHMs either.

The best filter decisions come from matching the contaminant, the exposure route, and the home setup.


If you’re ready to compare practical filtration options without the jargon, Water Filter Advisor can help you sort through whole-house, under-sink, faucet, shower, and portable filters so you can choose a system that fits your water and your home.

What Is TDS in Drinking Water? A Homeowner’s Guide

Your water probably got your attention before the term TDS ever did.

Maybe your ice cubes look cloudy. Maybe your coffee tastes dull one day and oddly salty the next. Maybe your dishwasher leaves a chalky film on glasses no matter how much rinse aid you use. Some homeowners first notice it in the shower, where soap won’t lather well and fixtures collect white crust. Others hear it in the utility room when a tank starts acting up, and a problem like a water heater making hissing noise turns out to be tied to scale buildup from mineral-heavy water.

Those little frustrations often point back to one simple idea. Something is dissolved in the water.

That “something” is what people mean when they talk about what is tds in drinking water. TDS stands for Total Dissolved Solids, and while the phrase sounds technical, the everyday effect is familiar. Water picks up minerals and salts as it moves through rock, soil, plumbing, and sometimes polluted areas. You don’t usually see those dissolved materials floating around like dirt in a glass. They’re invisible, but they still affect taste, spots, scaling, and filter choice.

A lot of online advice makes TDS sound like a pass-or-fail score. It isn’t. A higher number can mean ordinary minerals like calcium and magnesium. It can also be a warning sign that something less welcome may be in the water. That’s why homeowners get confused. They buy a cheap meter, see a number, and still don’t know what to do next.

The useful question isn’t just “Is my TDS high?” It’s “So what does that mean for my house, my drinking water, and the kind of filter I need?”

The Mystery of Spotty Glasses and Funny-Tasting Water

A homeowner fills a glass from the kitchen tap. It looks clean enough. Then the glass dries on the counter and a ring of white spots appears. The next morning, the same water goes into a kettle, and after a few weeks there’s a crusty layer inside. Coffee tastes different than it did at the last house. Ice cubes come out cloudy.

That’s usually where the TDS story starts.

Small clues around the house

Individuals rarely notice dissolved solids directly. They notice the clues:

  • On dishes: white film or spotting after washing
  • In hot water appliances: mineral scale in kettles, coffee makers, and water heaters
  • In taste: water that seems metallic, salty, bitter, or just “heavy”
  • In appearance: cloudy ice cubes or residue around faucets

None of those signs proves the water is unsafe. They do tell you the water is carrying dissolved material that stays behind when the water evaporates or heats up.

Practical rule: If water keeps leaving something behind, there’s a good chance dissolved solids are part of the story.

Why this matters for filtration

Homeowners often jump straight to buying a filter, but the right choice depends on what’s causing the symptoms. A carbon pitcher may help with chlorine taste, but it won’t do much if the underlying issue is a high load of dissolved minerals. A whole-house sediment filter won’t solve cloudy ice cubes caused by dissolved salts. A softener can help with hardness, but it doesn’t automatically fix every TDS problem.

That’s why TDS matters. It gives you a quick way to understand whether the trouble is mostly about taste and mineral buildup, or whether the water needs closer investigation before you decide on a filter.

TDS isn’t the whole water-quality picture. But for a homeowner trying to solve annoying, recurring water problems, it’s often the first clue that turns a mystery into a manageable decision.

What Exactly Are Total Dissolved Solids

Total Dissolved Solids means the combined amount of dissolved material in water. That includes inorganic salts such as calcium, magnesium, sodium, potassium, carbonates, nitrates, bicarbonates, chlorides, and sulfates, plus small amounts of organic matter. TDS is measured in milligrams per liter (mg/L) or parts per million (ppm). In everyday home water use, those units are treated much the same.

A clear glass filled with water against a bright blue background with the text What is TDS.

Think of sugar in tea

Stir sugar into hot tea and the grains disappear. They’re still there. They’ve just dissolved.

TDS works the same way. The water can look crystal clear while carrying minerals and salts you can’t see. That’s why clear water isn’t always low-TDS water, and why “looks fine” doesn’t tell you much.

Some dissolved solids are completely normal. In fact, a lot of drinking water gets its character from natural minerals picked up underground or along the distribution system.

What’s usually in the water

In homes, TDS often comes from naturally occurring minerals. Calcium and magnesium are common in hard water. Sodium, chlorides, sulfates, and bicarbonates can also show up depending on the source. Well water often contains more dissolved material than treated city water because it spends more time in contact with rock and soil.

Water source matters a lot. According to the Los Angeles Public Library water quality overview, rainwater can be as low as 5 to 30 ppm, typical U.S. municipal tap water ranges from 100 to 500 ppm, shallow wells can run from 200 to 1500 ppm, and deep aquifers can reach 500 to 5000 ppm in some cases (water source TDS ranges explained here).

What ppm means in plain English

You don’t need to love chemistry to understand ppm.

A ppm reading is a way of saying, “How much dissolved stuff is in this water?” Higher ppm means more dissolved material. Lower ppm means less.

Here’s the homeowner version:

TDS reading What it usually suggests
Lower reading Fewer dissolved minerals and salts
Mid-range reading Common for many tap water supplies
Higher reading More minerals, more chance of taste issues, scaling, or a need for closer testing

TDS doesn’t tell you exactly which dissolved substances are present. It tells you how much total dissolved material is there. That distinction matters a lot when you’re deciding whether you need a carbon filter, a softener, an RO system, or a proper lab test.

When TDS Is a Health Concern Versus Just a Taste Issue

Most homeowners get stuck. They see a TDS number and want one clean answer. Good or bad. But TDS doesn’t work that way.

A moderate reading may reflect normal mineral content that affects taste and scale more than safety. A high reading can still be mostly natural minerals. But a high reading can also be a warning that dissolved contaminants are present, especially if the level changes suddenly or the water has a new taste, odor, or staining problem.

Two clear glasses of water sitting on a table against a vibrant blue background with text overlay.

What official guidelines actually say

The World Health Organization classifies drinking water palatability by TDS level. Water is considered excellent below 300 mg/L, good from 300 to 600 mg/L, and poor from 900 to 1200 mg/L. The U.S. EPA sets a secondary standard of 500 ppm, mainly for aesthetic concerns such as taste and staining rather than direct health risk (WHO palatability ranges and EPA secondary standard).

That EPA point is easy to miss. A secondary standard is not the same as a health-based limit. It’s guidance about what water may taste like, look like, or do to plumbing and appliances.

When high TDS is mostly an aesthetic issue

If your water tastes mineral-heavy, leaves white spots, or scales up the kettle, the problem may be mostly practical:

  • Taste changes: water may seem salty, bitter, or flat
  • Residue: glasses, faucets, and shower doors show mineral spotting
  • Appliance wear: scale builds up in kettles, coffee makers, and heaters
  • Soap performance: washing and bathing can feel less satisfying

In those cases, the TDS number helps explain the symptoms. It doesn’t automatically mean the water is dangerous.

Water with dissolved minerals can be annoying long before it becomes a health discussion.

When TDS becomes a red flag

TDS is often misunderstood because it combines the good and the bad into one number. Natural calcium and magnesium raise TDS. So can less desirable dissolved substances.

That matters because high TDS can signal that harmful contaminants may also be present. The verified guidance for this topic notes that high TDS can indicate contaminants such as iron, manganese, sulfate, bromide, or arsenic, especially where runoff, wastewater discharge, aging plumbing, or other pollution sources affect the water.

Here’s the part many sales pitches skip. A TDS meter cannot tell you which dissolved substances are in the water. It can’t separate harmless mineral content from a contamination problem.

A practical way to think about it

Use TDS as a first clue, not a final verdict.

Situation What it may mean Best next step
Spots, scale, off taste, but no other warning signs Often a mineral or aesthetic issue Consider targeted filtration based on the symptom
Sudden jump in TDS or new strange taste Possible source change or contamination issue Test for specific contaminants
Well water with persistently high TDS Could be natural geology, could include unwanted dissolved substances Pair TDS screening with a broader water test
Low TDS reading Not proof of purity Check for specific contaminants if you have reason to worry

If you’re deciding whether to buy a filter, this distinction is the whole game. If the problem is mainly taste and chlorine, carbon filtration may be enough. If dissolved solids themselves are the issue, you need a technology that removes them. If contamination is the concern, don’t rely on TDS alone. Test for the specific contaminant you suspect.

How to Test Your Water's TDS Level at Home

A TDS meter is one of the easiest water tools to use. Dip it into a sample of water, wait a moment, and it gives you a ppm reading. That speed is what makes it useful for homeowners. It turns a vague suspicion into a real number.

A hand holds a digital TDS meter testing the water quality in a clear glass of water.

What the meter is actually measuring

A digital TDS meter doesn’t directly count every dissolved particle. It measures electrical conductivity (EC) and converts that reading to ppm. For accurate readings in fresh water, it’s best to use a meter with a conversion factor around 0.7 and to calibrate it periodically so the reading stays reliable (how TDS meters use EC and why calibration matters).

That’s an important detail. If you compare two cheap meters, they may not display the exact same number if they use different conversion settings or haven’t been calibrated.

How to take a reading

Use a clean glass and test cold water from the tap you care about most, usually the kitchen sink.

  1. Rinse the glass first. You don’t want soap residue affecting the sample.
  2. Fill the sample with tap water. Let the water run briefly so you aren’t measuring stale water from the plumbing line.
  3. Turn on the meter and dip the probe. Keep the sensor in the water without touching the sides.
  4. Wait for the number to settle. Most meters stabilize quickly.
  5. Record the result. If you’re troubleshooting a problem, test more than one location in the house.

A short video can make the process even clearer:

How to read the number without overreacting

The number matters, but context matters more.

Your reading What it suggests
Below 300 Usually falls in the WHO “excellent” taste range
300 to 600 Often still tastes acceptable to many people
Around or above 500 Reaches the EPA secondary benchmark where taste, staining, or scaling may be more noticeable
900 to 1200 Often tastes poor
Very high or suddenly changed Worth investigating beyond TDS alone

Quick caution: A normal TDS reading doesn’t prove the water is free of harmful contaminants, and a high reading doesn’t prove it’s unsafe.

Best home testing habits

A single reading is helpful. A pattern is better.

  • Test the cold kitchen tap: That’s usually the water you drink most.
  • Compare before and after filtration: This shows whether your system changes dissolved solids.
  • Retest when taste changes: A shift in flavor, scale, or spotting is a good reason to check again.
  • Keep notes: Date, location, and reading help you spot trends over time.

For filtration decisions, the meter gives you direction. If the reading is moderate and your problem is mostly chlorine taste, a carbon filter may be enough. If the reading is high and scale is everywhere, you may need stronger treatment. If the reading is puzzling or changes sharply, move on to specific water testing instead of guessing.

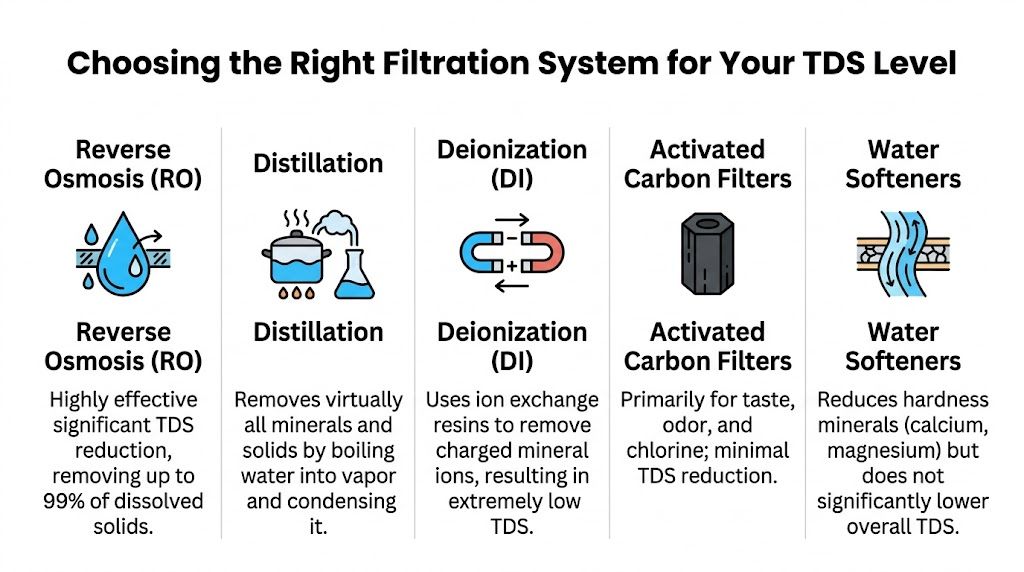
Choosing the Right Filtration System for Your TDS Level

A lot of filters improve water. Far fewer reduce TDS.

That distinction saves people from buying the wrong system. If your concern is chlorine smell, many common filters can help. If your concern is dissolved minerals, salts, or other dissolved solids showing up in the TDS reading, you need a technology designed for that job.

A chart illustrating five water filtration methods and their effectiveness in reducing total dissolved solids levels.

What each filter type actually does

Here’s the simple version homeowners need:

Filter type Best for TDS reduction
Reverse osmosis Drinking water with high dissolved solids Strong
Distillation Very low-mineral water at point of use Very strong
Deionization Specialized low-TDS applications Strong, but less common for household drinking water
Activated carbon Taste, odor, chlorine, some chemicals Minimal
Water softener Hardness problems from calcium and magnesium Doesn’t significantly lower overall TDS

Carbon filters and softeners are especially misunderstood. A carbon block may make water taste much better while leaving the TDS number nearly unchanged. A softener swaps hardness minerals in a way that addresses scaling, but it’s not the same as broad dissolved-solids removal.

When reverse osmosis makes the most sense

For homeowners focused on drinking water, reverse osmosis is usually the most practical TDS-reduction tool. A typical household RO system can reduce TDS by 90 to 99%, and water entering the system at 500 ppm may come out at 5 to 50 ppm. Many modern systems add a remineralization stage that puts back 20 to 100 ppm of calcium and magnesium to improve taste.

That matters because very low-TDS water can taste flat. A remineralization cartridge helps solve that without giving up the main benefit of RO.

RO is a strong fit when:

  • Your TDS reading is high and the taste is unpleasant
  • Your kettles and coffee makers scale up constantly
  • You use well water with heavy mineral content
  • You want a dedicated drinking-water solution at the kitchen sink

When a different filter may be enough

Not every TDS issue calls for an RO system.

If your water tastes bad because of disinfectants or odors, an activated carbon filter may be the better first move. If your main problem is hard-water scale across the whole house, a water softener may improve daily life more than a drinking-water unit alone. If you want ultra-low-mineral water for a special use, distillation or deionization can play a role, though they’re less common as the best all-around household answer.

Choose the filter to match the problem, not the marketing claim on the box.

A simple homeowner decision guide

Use this practical framework:

  • Low to moderate TDS, but bad taste from chlorine or odor: start with carbon filtration.
  • Noticeable scale, spots, and mineral-heavy taste: look at a softener for whole-house comfort and RO for drinking water.
  • High TDS at the kitchen tap: RO is usually the strongest point-of-use option.
  • Concerned about hidden contaminants: order targeted testing first, then match the filter to those results.

If you split time between home and travel, it also helps to think about filtration by setting. RV owners, for example, often need portable setups designed around changing campground water conditions. A guide to the best RV water filter system can help you compare that very different use case.

If you want broader guidance on matching water problems to filter types, this water filtration advice library is a useful place to compare common home setups without guessing from product labels.

Maintaining Your Filter for Lasting Water Quality

Installing a filter feels like the finish line. It isn’t. It’s the start of a maintenance job.

A neglected system can lose performance imperceptibly. Water may still flow, but the filter may no longer be doing what you bought it to do. That’s how homeowners end up trusting a system that’s overdue for service.

Why maintenance matters more than most people think

Filters don’t fail in dramatic ways every time. More often, performance fades. Taste creeps back. Flow slows down. Scaling starts showing up again. The water seems “mostly fine,” so replacement gets postponed.

That’s risky because each filter stage has a specific job. Sediment cartridges protect downstream components. Carbon stages handle taste and certain chemicals. RO membranes handle dissolved solids. If the early stages clog or expire, the later stages can wear out faster or stop performing properly.

A simple upkeep routine

You don’t need a complicated spreadsheet. You do need a habit.

  • Check the replacement schedule: Follow the manufacturer’s guidance for each cartridge and stage.
  • Retest after a filter change: A fresh TDS reading or taste check helps confirm the system is working as expected.
  • Watch for warning signs: slower flow, renewed spotting, odd taste, or return of scale usually means something needs attention.
  • Keep spare cartridges on hand: waiting too long because you forgot to reorder is one of the most common maintenance failures.

Pay extra attention to RO systems

RO systems reward maintenance and punish neglect. If pre-filters clog, the membrane has a harder job. If the membrane ages, TDS reduction drops. If a remineralization stage is spent, the water may lose the taste balance you liked when the system was new.

A filter only protects your water when the parts inside it are still capable of doing their job.

For homeowners, the smartest move is simple. Pick a system you’ll realistically maintain. The best filter on paper isn’t the best filter in your house if replacement parts are hard to find or the service routine is so annoying that you put it off.

Your Simple Path to Cleaner Better-Tasting Water

TDS sounds technical, but the homeowner takeaway is straightforward. It’s a measure of the dissolved material in your water, and that helps explain why water may taste off, leave spots, or cause scale in appliances.

The key is not to treat TDS like a complete safety score. A higher reading can mean ordinary minerals. It can also mean you need to dig deeper with specific contaminant testing. That’s the “so what” behind what is tds in drinking water. The number matters because it helps you decide your next step.

If your problem is mostly taste or odor, a carbon filter may be enough. If dissolved solids are the issue, reverse osmosis is usually the strongest home option for drinking water. If the reading seems unusually high or changes suddenly, don’t guess. Test for the contaminants that TDS can’t identify.

Good water decisions usually happen in this order. Notice the symptom. Test the water. Match the filter to the actual problem. Keep the system maintained.

That’s how you move from cloudy ice cubes and spotty glasses to water you trust.


If you want help comparing filters, understanding test results, or choosing a system that fits your home, Water Filter Advisor offers practical guides that make water filtration easier to evaluate without the usual confusion.

DIY Water Softener Installation A Homeowner’s Guide to Pure Water

Taking on a DIY water softener installation is one of the best home filtration upgrades you can make, and you can conquer this project in just a few hours. This is a totally manageable mission for a handy homeowner. Modern systems come in plug-and-play kits that can save you a bundle on plumber fees.

Your Guide To Winning The War On Hard Water

If you're sick of the chalky white spots on your faucets, stiff laundry, and the ghost of soap scum haunting your shower doors, you've come to the right place. The villain in this story is hard water, which is loaded with minerals like calcium and magnesium. It might not be a health risk, but it's a real menace to your home's plumbing and appliances.

Close-up of a kitchen sink and faucet heavily covered in hard water stains and mineral deposits.

A water softener is the permanent fix. By installing one yourself, you're not just getting better water—you're protecting your big-ticket investments. Mineral buildup clogs pipes, guts the efficiency of your water heater, and sends dishwashers and washing machines to an early grave.

Why DIY Is The Ultimate Home Filtration Hack

DIY water softener jobs are booming, and for good reason. Today's salt-based and salt-free systems usually include complete kits, letting you sidestep a professional plumber and save anywhere from $500 to $1,000 on the install. The global market for these home water filtration systems reflects this trend.

This guide is here to walk you through the entire process, so you know exactly what you're getting into. We’ll cover the two main types of systems you’ll be looking at:

  • Salt-Based Ion Exchange Systems: The traditional workhorses. They are the heavyweight champions of water filtration, pulling hardness minerals out of your water and swapping them with sodium ions. The result is truly soft water.
  • Salt-Free Water Conditioners: These don't actually remove the minerals. Instead, they use a process called Template Assisted Crystallization (TAC) to change the mineral structure so it won't stick to surfaces and build up as scale.

When you install a water softener yourself, you gain a deep understanding of your home's water filtration system. You'll be ready for any future maintenance and can be proud you fixed the problem on your own.

We'll give you clear, actionable steps for a successful installation, from planning it out to firing it up. If you want to check out other home water filtration strategies, take a look at our broader https://www.waterfilteradvisor.com/advice/ section. Let's get started on bringing pure, soft water to every tap in your house.

Laying the Groundwork for Your Install

A successful water softener installation is all about the prep work. Honestly, what you do before you even unbox the unit is what separates a smooth Saturday project from a frustrating, leaky mess.

Get these first few steps right, and you'll end up with the right filtration system for your house without any nasty surprises down the road.

First thing's first: you need to know exactly what you're up against. That means testing your water to find out its hardness, measured in grains per gallon (GPG). Don't guess. Grab a simple water hardness test kit online or from the hardware store.

This single number is the most critical piece of the puzzle. It's the secret code that tells you everything you need to know to size your new filtration system correctly.

Choosing Your Water Softener Type

Before you get too deep into sizing, you need to decide which type of system is right for you. The two main players in home water filtration are traditional salt-based softeners and salt-free conditioners. Each has its pros and cons depending on your water, budget, and even local rules.

This table breaks down the key differences to help you make the right call.

Feature Salt-Based (Ion Exchange) Salt-Free (TAC Conditioners)
How It Works Physically removes hardness minerals (calcium & magnesium) through ion exchange. A true water filtration process. Crystallizes minerals so they can't stick to pipes and surfaces. It doesn't actually remove them.
Feel of Water Creates a noticeably "slippery" or "silky" feel. No change in the water's feel.
Maintenance Requires regular salt refills and uses water/power for regeneration cycles. Virtually maintenance-free. No salt, no electricity, no wastewater.
Best For Very hard water (over 10 GPG); when you want to eliminate scale buildup completely. Moderately hard water; areas with brine discharge restrictions; those on low-sodium diets.
Environmental Impact Discharges salt brine into the sewer or septic system. No salt or chemical discharge, making it more eco-friendly.

Ultimately, if you're battling seriously hard water and want that classic soft water feel, a salt-based system is your best bet. If you have moderate hardness and prefer a low-maintenance, eco-friendly option that still protects your pipes, a salt-free conditioner is a fantastic choice.

Getting the Sizing Right

Once you know your GPG, you need to figure out your home's daily water demand. A good, solid estimate is to multiply the number of people in your house by 75 gallons per day.

So, a family of four will use roughly 300 gallons of water each day (4 people x 75 gallons/person).

Now, let's put those two numbers together to find out how much filtration work the softener needs to do daily. The math is easy:

Daily Gallons Used × Water Hardness (GPG) = Daily Grains to Remove

Let's stick with our family of four, and say their water tested at 15 GPG:

300 gallons × 15 GPG = 4,500 grains per day

This tells you that you need a softener that can handle at least 4,500 grains of hardness between its cleaning (regeneration) cycles. Softeners are sold by their total capacity, which usually falls between 24,000 to 64,000 grains. A standard 32,000-grain unit would work perfectly here, needing to regenerate about once a week (32,000 ÷ 4,500 ≈ 7 days).

My advice? It's always better to go slightly bigger than you think you need. An undersized unit has to regenerate constantly, which just wastes salt and water and wears out the system faster. Think of it as buying a filtration system with room to grow.

Finding the Right Spot for Your System

With your capacity figured out, it's time to play scout and find the perfect home for your new unit. For any DIY water softener installation, you want to place it as close as you can to where the main water line enters your house. Crucially, it must be installed before the pipe splits off to your water heater.

This makes sure you get filtered, soft water for both your hot and cold taps (we usually leave outdoor faucets on hard water). A basement, garage, or utility closet is your best bet. Make sure the spot has:

  • Enough Room: You need space for both the main resin tank and the separate brine (salt) tank, plus room to walk around them for maintenance.
  • Power Nearby: Most softeners need a standard 110V GFCI outlet to run the control valve.
  • A Place to Drain: The softener has to flush out salty water during regeneration. A floor drain, laundry sink, or standpipe are all good options.

A Quick Check on Local Rules

Last but not least, do yourself a favor and check your local plumbing codes before you buy anything. This is especially important for salt-based systems, as some towns have rules about discharging brine into the sewer or a septic tank.

A quick phone call to your city's building department will clear up any questions. Getting this sorted out now saves a massive headache later and ensures your home filtration project isn't just done right, but done legally.

Assembling Your Tools And Materials

A successful DIY water softener installation all comes down to good prep. Trust me, nothing kills your weekend project faster than having to make multiple runs back to the hardware store for a single fitting you forgot. Let's get everything you need laid out before you even think about cutting a pipe.

Think of it like this: a clean cut, a solid wrench, and good thread sealant are the three pillars of any home filtration plumbing job. Get these right, and you're already halfway to a leak-free installation.

Essential plumbing tools process showing a pipe cutter, wrench, and teflon tape icons.

Must-Have Tools For The Job

Let's sort out the absolute non-negotiables. You simply won’t be able to finish the job without these items in your toolkit.

Core Tool Checklist:

  • Pipe Cutters: Make sure you have a cutter specifically for your pipe type—PEX, copper, or PVC. A clean, straight cut is everything for a good seal.
  • Adjustable Wrenches (x2): You absolutely need two. One wrench holds the fitting in place while the other does the tightening. A couple of 10-inch or 12-inch wrenches are perfect.
  • Tape Measure: The old rule holds true: measure twice, cut once. Getting your pipe lengths right from the start saves a lot of headaches.
  • Bucket and Towels: Water is going to spill when you drain the lines. It's just a fact. Having a bucket underneath to catch the initial flow and towels for cleanup is just working smart.
  • Teflon Tape: Also called plumber's tape, it’s essential for sealing threaded connections. I always grab two rolls. It's cheap, and running out mid-job is the worst.

If you're working with PEX tubing, you’ll also need a dedicated PEX crimping tool and the right size crimp rings. These are specialized, but they're the only way to create a secure connection that will pass inspection and last for years.

Gathering Your Plumbing Materials

Most softener kits will give you the main components: the control head, mineral tank, brine tank, and the bypass valve. That bypass valve is a crucial piece—it lets you shut off the softener for maintenance without turning off water to the entire house.

What the kit won't include is the plumbing to connect that bypass valve to your main water line. The exact pieces you need depend entirely on what's already in your house.

A hard-won personal tip: always buy a few extra fittings than you think you need. Having an extra elbow or connector on hand can turn a potential showstopper into a minor inconvenience.

When you're shopping, you’ll see different pipe materials. Knowing the pros and cons of PPR vs PVC vs CPVC is helpful if you're running new lines, but for this job, you'll mainly need adapters.

  • Flexible Water Heater Connectors: These braided stainless steel hoses are a DIYer's best friend. Their flexibility makes it so much easier to line up the softener with your existing pipes. Check the fitting size you need—usually ¾-inch or 1-inch.
  • Pipe-Specific Fittings: You'll need the right adapters to go from your home's pipes (copper, PEX, PVC) to the softener's connections. For a no-solder option on copper or PEX, SharkBite fittings are fantastic. They just push to connect and create a surprisingly strong seal.
  • Drain Tubing: The kit probably includes a length of this, but unroll it and check. Make sure it's long enough to reach your floor drain or utility sink without any sharp bends or kinks that could block the flow.

Alright, you've got your tools, unboxed the new softener, and picked the perfect spot. Now for the main event: the installation itself. Don't let the plumbing intimidate you. We'll walk through this step-by-step, with some real-world advice to keep things dry and straightforward.

A man installs a white water softener system, adjusting brass fittings in a utility room.

Think of it like minor surgery on your water lines. The plan is to shut everything down, make a few clean connections, and then bring it all back online. Just take your time and check every connection twice.

Safety First: Shut Down and Drain

Before you even think about touching a pipe cutter, kill the water supply to your house. Find the main shutoff valve—it’s usually in the basement, a crawlspace, or near where the water line enters your home from the outside. Crank it all the way off.

Now, you have to get the water out of the pipes. Head to the lowest faucet in your house (maybe a basement sink or an outdoor spigot) and the highest one (like an upstairs shower) and open them both up. This lets air into the system and helps every last drop drain out. This is a non-negotiable step if you want to avoid a surprise shower the second you cut into a pipe.

Making the Cut

With the system drained, it’s time to get to work on the main water line. Grab your tape measure and mark out the section of pipe you’ll be removing to install the bypass valve. Always remember the old rule: measure twice, cut once.

Stick a bucket right underneath where you plan to cut. No matter how well you think you've drained the pipes, there’s always a little water left. Use your pipe cutter to make two clean, straight cuts and remove the section. A clean cut is absolutely critical for getting a perfect, leak-free seal later.

Installing the Bypass Valve

The bypass valve is the nerve center of your new setup. It’s what lets you shut off water to the softener for maintenance without cutting off water to the entire house. Trust me, you’ll be glad you have it.

Most kits come with a bypass valve that attaches right to the softener's control head. Pay close attention to the arrows that show the direction of water flow. This part is crucial:

  • The INLET side connects to the pipe bringing water from your main supply.
  • The OUTLET side connects to the pipe that feeds the rest of your house and the water heater.

Pro Tip: When you install the bypass valve, make sure the handles are easy to get to. Don't face them toward a wall where you can't reach them. A little bit of planning here will save you a ton of hassle down the road when it's time for maintenance.
Now, connect the valve to your main lines using whatever fittings you chose. If you're using flexible braided lines, get them hand-tight and then give them one last quarter-turn with a wrench. For push-to-connect fittings like SharkBites, make sure the pipe end is clean and push it in firmly until you hear and feel it click home.

Connecting the Softener Tanks

Next, it’s time to hook the main mineral tank up to the bypass valve. Attach your flexible hoses to the inlet and outlet ports on the control head. Again, follow the arrows to make sure water flows in through the hard water side and out through the soft water side.

This is where your type of home filtration system really matters. A traditional salt-based system has two tanks, while a salt-free conditioner is usually just a single unit.

  • For Salt-Based Systems: You'll have a separate brine tank. Connect the small brine line tube from the control head over to the port on the brine tank. This little tube is what pulls the salt solution into the main tank during the regeneration cycle.
  • For Salt-Free Conditioners: No brine tank, no problem. You can skip that step entirely. Just connect your inlet and outlet, and your plumbing work is almost finished.

This all sounds more complicated than it is. For most DIYers, connecting the valves and tanks is a straightforward job that takes just 2-3 hours. The payoff is huge, often leading to a 99% reduction in hardness down to less than 7 grains per gallon. For a family in a hard-water area, that can mean saving around $200 a year on soaps and energy. You can dig into more data on the water softening market to see just how big an impact these home water filtration systems have.

Running the Drain and Overflow Lines

A salt-based softener has to flush out all the hardness minerals and salty brine it collects during regeneration. To do that, you need to run two lines to a drain.

First is the main drain line. This flexible tube runs from the control head to a floor drain, standpipe, or utility sink. It's critical to leave an air gap of at least 1.5 inches between the end of the tube and the drain. This prevents any contaminated water from being siphoned back into your fresh, filtered system.

Second is the brine tank overflow tube. This is purely a safety measure. If the brine tank ever gets too full, this tube directs the excess water to the same drain, stopping a salty flood before it starts. Use zip ties or a clamp to make sure both tubes are secure and won't pop out of the drain.

Once all your connections are solid and the drain lines are secure, you're officially done with the hardest part of your DIY water softener installation. Step back and admire your handiwork before we move on to the final checks and startup.

Bringing Your New System Online

A hand adjusts the digital control panel of a blue water softener system, displaying 'SYSTEM STARTUP'.

Alright, the pipes are all connected and you’ve double-checked every fitting. This is the moment you've been working toward. It's time to fire up your new water softener and program the brains of the operation.

The tough part is behind you. Now let's get this filtration system commissioned the right way.

The Slow Introduction of Water

Don't just crank the main water valve all the way open. You never want to slam a new system with a sudden blast of high-pressure water. That's a good way to stress the connections or even damage the softener's guts. Slow and steady is the name of the game here.

First, make sure the softener's bypass valve is still set to "bypass." This lets water flow to the house while keeping the softener isolated for now.

Slowly turn your main water shutoff valve about a quarter-turn open. Go run a faucet somewhere in the house to confirm you have flow, then head back and inspect all your new plumbing for any drips.

If it's all dry, you can now slowly move the bypass valve toward the "service" position. Listen closely—you should hear the big mineral tank start to fill with water. This is your most important leak check. Get a flashlight and get a good look at every single connection you made. Look for the smallest bead of water.

I always give it a solid 15-20 minutes after the tank fills before I call it leak-free. I've seen slow seeps take their time to show up, and finding one now is much better than finding a puddle later.

Programming the Control Head

Once you're positive everything is watertight, go ahead and plug in the control head. This is where you'll tell the softener just how hard your water is and set up its cleaning schedule. The digital display might look a little intimidating, but the process is usually pretty simple.

Your most important job is to enter the water hardness number (in GPG) from your water test. This one setting is the key to the whole operation, as it tells the unit how often it needs to regenerate.

Next, you'll set the time of day and the regeneration time. I always recommend setting it for a time when no one is using water, like 2:00 AM. This way, the regeneration cycle won't interrupt a shower with hard water or cause a drop in water pressure. Some newer softeners have smart features that track your water usage and only regenerate when needed, which is a great way to save on salt and water.

While this is a DIY guide, getting different perspectives on installing water softeners can give you extra tips on programming and what to expect long-term.

Kicking Off the First Regeneration

With the programming done, you have to manually start the very first regeneration cycle. This is a critical step. It flushes out any leftover dust or debris from the manufacturing process and, more importantly, it gives the resin beads their initial charge by soaking them in brine.

Pour a few gallons of water directly into the brine tank first, then add one or two bags of good-quality softener salt. Check your manual to find the "Manual Regeneration" button—you'll usually need to press and hold it to get the cycle started.

This first cycle can take up to two hours to complete. It will run through a few key stages:

  • Backwash: Loosens up the resin bed and washes out any sediment.
  • Brine Draw: Sucks the salty water from the brine tank to "recharge" the resin.
  • Slow Rinse: Pushes the brine solution completely through the resin.
  • Rapid Rinse: Flushes all the excess salt and hardness minerals out to the drain line.
  • Brine Refill: Adds water back to the brine tank to dissolve salt for the next cycle.

Once that's finished, your system is officially up and running. Congratulations, you're now making beautifully filtered, soft water!

A Simple Maintenance Schedule

Your DIY water softener installation might be complete, but a little bit of care will keep it running smoothly for years to come. The good news is, there isn't much to it.

Your Long-Term Checklist:

  1. Check Salt Levels Monthly: This is your main job. Just peek in the brine tank once a month and make sure it's at least one-third full of salt.
  2. Use the Right Salt: Stick to high-purity salt pellets or crystals. You want to avoid rock salt; it's full of dirt and impurities that can eventually clog your filtration system.
  3. Clean the Brine Tank Annually: About once a year, let the salt level get low and then clean out the bottom of the brine tank. This gets rid of any "salt mush" or sediment and prevents a "salt bridge"—a hard crust that can form and stop the softener from making brine.

Common Questions About DIY Installation

Even after you've followed a guide, questions will pop up. A DIY water softener installation has a lot of moving parts, and it’s totally normal to hit a snag or two.

We get calls all the time about these exact situations. Here are the most common questions we hear, with answers to get you through the finish line.

Can I Install A Water Softener On A Well System?

Absolutely. In fact, if you have well water, you probably need a softener more than most. The main thing to know is that well water often comes with extra baggage—sediment, sand, and sometimes a lot of iron. All that gunk can destroy a new softener.

Your best move is to install a sediment pre-filter right before the water softener's inlet. Think of it as a bodyguard for your softener. It catches all the debris before it can clog up the resin bed. If you skip this, the resin gets fouled, its filtration efficiency tanks, and you’ll be replacing the whole unit way sooner than you should.

What Should I Do If I Notice A Small Leak After Installation?

First, don't panic. A small drip is almost always an easy fix.

Hit the bypass valve first. This is exactly why you installed it. You can shut off water to the softener and keep it running for the rest of the house.

Now, find the leak. Most of the time, it’s a threaded connection that isn't quite sealed.

  • Shut off the water to the unit and drain any pressure.
  • Unscrew the fitting that's dripping.
  • Clean all the old Teflon tape off the threads.
  • Wrap the male threads with fresh Teflon tape. Give it a good 3-4 wraps, going in the same direction you'll be tightening the fitting.
  • Screw it back together. Get it snug, but don’t go crazy, especially with plastic parts. Over-tightening is a great way to crack a fitting.

Slowly turn the water back on and check your work. That extra tape usually does the trick.

Does My Whole House Need Soft Water?

That’s a great question, and the practical answer is no, probably not. Soft water is incredible for your showers, appliances, and laundry, but your lawn and garden won’t be fans. The sodium in softened water isn't great for plants long-term.

For that reason, standard practice for a DIY water softener installation is to plumb the system so it treats all the water after your outdoor spigots. This gives you the best of both worlds: your indoor plumbing and appliances are protected by superior water filtration, and your garden stays happy.

Why Is My Water Pressure Lower After Installation?

A big drop in water pressure is not normal. It's a red flag that something went wrong during the install.

Start with the simple stuff: check that every single valve is fully open. The main shutoff, the bypass valve, all of them. It's surprisingly easy to leave one only halfway open.

If the valves are good, look for a kink in one of the flexible connector hoses or even the drain line. Also, make sure you didn't install the unit backward—if the water is flowing against the intended direction, it will choke off your pressure. Finally, this can happen if the home filtration system is too small for your house, which is why getting the sizing right from the very beginning is so important.


Water Filter Advisor is your go-to resource for making sense of home water filtration. From in-depth guides to unbiased reviews, we provide the clarity you need to choose the best solutions for your family's health and comfort. Explore our resources today at https://www.waterfilteradvisor.com.

What Is a Micron Rating? A Fun Guide to Cleaner Home Water

Think of your water filter's micron rating like a VIP bouncer at the hottest club in town. It's got a super-strict guest list, deciding which grubby particles get in and which get tossed out on the curb. Simply put, this number tells you the size of the microscopic party-crashers a filter is designed to block, ensuring the water flowing from your tap is as pure and refreshing as possible.

Your Quick Guide to Micron Ratings and Cleaner Water

When you flip on the kitchen faucet, you expect clean, safe water. But all sorts of invisible riff-raff can hitch a ride from the treatment plant to your glass, messing with everything from your water's taste to your family's health. This is why knowing what is a micron rating is so critical for any homeowner looking to upgrade their H2O. It's the single most important number on any water filter's label.

Picture this: you're at your sink, about to fill a glass, and you have that nagging thought—what’s really in my water? That’s where the micron rating heroically steps in. It acts as the gatekeeper for your water filter, measuring the size of the pores in the filter media. The unit of measurement is a micrometer (μm), which is so mind-bogglingly small it's about 1/25,000th of an inch. This rating tells you the smallest particle the filter can reliably stop, making it your secret weapon against sediment, rust, or even nasty microscopic critters.

Why This Tiny Number is a Big Deal

A micron rating isn’t just some tech-nerd spec; it's a practical tool that directly impacts your water quality. Think of it as a spectrum of protection. A larger number, like a 50-micron filter, is a great bouncer for keeping out the big, clumsy oafs like sand and rust flakes. A much smaller number, like a tiny 1-micron filter, is the elite bodyguard built to stop microscopic troublemakers.

The right micron rating acts as your first line of defense, targeting the specific villains lurking in your water supply. It empowers you to move beyond generic solutions and choose a filter that’s tailor-made for your home's needs.

Getting this right is fundamental to building an effective home filtration strategy. You wouldn't use a giant fishing net to catch minnows, right? The same logic applies here. Picking the correct rating helps you:

  • Banish Cloudy Water: Filters rated between 5 and 20 microns are fantastic at grabbing the fine sediment that makes water look murky and unappetizing.
  • Improve Taste and Smell: Smaller micron ratings, especially when teamed up with activated carbon, trap the particles that cause funky tastes and odors. Say goodbye to that swimming pool smell!
  • Guard Your Health: If you're concerned about microscopic organisms like certain cysts, an "absolute" 1-micron filter is the industry standard for providing reliable protection.

Achieving truly pure water isn't just about the filter itself. It also means practicing good hygiene, like regularly maintaining hydration systems you rely on every day.

Ultimately, understanding what a micron rating is gives you control. It turns you from a passive water user into an informed homeowner who can make smart, confident decisions for your family. For more expert insights into your water quality, you can check out our guide on common water issues.

Seeing the Unseen: Just How Small Is a Micron Anyway?

To really become a water filtration whiz, you first need to wrap your head around just how ridiculously tiny a micron is. It’s easy to throw around terms like "one-millionth of a meter," but that's a bit abstract. So let's bring it down to a scale you can actually visualize.

Think about a single strand of your hair. The average human hair is about 70 microns thick. Now, picture something 70 times smaller than that—that's one single micron. We're talking about a world completely invisible to the naked eye, but it’s precisely at this microscopic level where the most important battles for your water quality are won.

Putting Water Contaminants into Perspective

The junk we want to get out of our water comes in all shapes and sizes. Some particles, like sand or rust flakes, are the big bullies you can actually see. But many others, including some of the most harmful ones, are microscopic ninjas. Knowing who you're up against is the first step to picking the right filter for the job.

Let's look at some common water villains and their typical sizes to put it all into context:

  • Fine Beach Sand: Measures around 100 microns. You can definitely see and feel this.
  • Human Hair: As we mentioned, it clocks in at about 70 microns.
  • Silt and Sediment: These are the fine particles that make water look cloudy, often ranging from 5 to 20 microns.
  • Red Blood Cells: A single one is only about 7-8 microns.
  • Cysts (Giardia, Cryptosporidium): These nasty protozoa that can ruin your week are typically between 2 and 10 microns.
  • Common Bacteria: Many types of bacteria, like E. coli, are even smaller, usually in the 1-2 micron range.

This simple diagram shows how a water filter works as a physical barrier, letting clean water molecules breeze through while trapping contaminants based on their size.

A concept map illustrating the micron rating for water filtration, from contaminated source to clean water.

As you can see, the filter is the gatekeeper. It's the critical component standing between the mystery water coming into your home and the clean, safe water you and your family deserve.

To really drive this home, let’s compare the sizes of these common particles. This chart shows what a typical 5-micron filter—a very common size for whole-house sediment filters—can and can't handle.

Contaminant Size Comparison Chart

Contaminant Typical Size in Microns (μm) Can a 5-Micron Filter Capture It?
Fine Sand 100+ μm Yes
Human Hair 70 μm Yes
Silt / Sediment 5-20 μm Yes
Red Blood Cell 7-8 μm Some, but not all
Giardia Cyst 2-10 μm Potentially, but many will sneak through
E. coli Bacteria 1-2 μm No
Most Viruses 0.005-0.3 μm No

Looking at the table, it becomes obvious that a 5-micron filter is fantastic for clearing up cloudy water caused by silt and sand, but it's not going to reliably stop microscopic bugs like Giardia or bacteria.

This is why understanding the numbers is so important. A filter's micron rating isn't just a piece of technical jargon; it's a direct measure of its power to protect you from specific contaminants. You have to match the filter's pore size to the problem you're trying to solve.

Absolute vs. Nominal: What Your Filter Really Catches

When you're shopping for a water filter, you’ll see a micron rating on the package. But not all ratings tell the same story. This is where you run into two critical terms that can dramatically change a filter's performance: absolute and nominal.

Understanding this difference is like knowing the secret handshake—it’s the key to making sure your filter actually does what you expect it to.

Think of it like a fishing net. A nominal rating is like a net with a "best-effort" promise. A nominal 5-micron filter, for instance, is designed to capture most of the particles that are 5 microns or larger. Its efficiency isn't a guarantee, though.

The industry standard for a nominal rating is often around 85% efficiency. This means that while it will stop about 85 out of every 100 particles at its rated size, a sneaky 15 will slip right through. This is perfectly fine for general sediment removal, but it’s not the right choice when your health is on the line.

The Absolute Guarantee of Purity

On the other hand, an absolute micron rating is a certified guarantee. It's like a high-tech fishing net with precisely laser-cut openings, certified to catch all the fish of a specific size, every single time. An absolute-rated filter has to remove a minimum of 99.9% of particles at its specified micron size.

This level of precision is why it's often referred to as a "beta ratio of 5000," which is just a fancy way of saying that for every 5,000 particles sent its way, only one gets through. This distinction isn't just technical jargon; it has real-world consequences for your family's health.

When it comes to microscopic organisms like Giardia and Cryptosporidium—which can cause serious gastrointestinal illness—an absolute-rated filter is non-negotiable. These cysts are typically between 2 and 10 microns, and only an absolute 1-micron filter provides the certified protection needed to reliably remove them.

When to Choose Nominal vs. Absolute

So, which one do you need? The answer comes down to your water quality and your filtration goals. There’s no reason to overspend on an absolute-rated filter if your main problem is just cloudy water.

  • Choose a Nominal Filter for:
    • General Sediment Removal: Perfect as a whole-house pre-filter to catch sand, silt, and rust that make water look dirty.
    • Protecting Appliances: A nominal filter can extend the life of water heaters and other downstream filters by removing larger debris.
    • Improving Water Clarity: Excellent for clearing up cloudy or murky water from both city and well sources.

When selecting a water filter, it's not always about chasing the lowest number. There's smart science behind choosing the right one. Data from filtration experts shows that a nominal 5-micron filter can capture 85% of particles at that size, making it an ideal first-stage sediment trap in a whole-house system.

  • Choose an Absolute Filter for:
    • Targeting Cysts: Essential for removing Giardia and Cryptosporidium from untreated water sources like wells or lakes. The CDC recommends an absolute 1-micron filter for this purpose.
    • Final Polishing: Used as a final "polishing" filter in an under-sink or drinking water system to ensure the highest purity right at the tap.
    • Peace of Mind: Provides an extra layer of security for households with immunocompromised individuals or young children.

By reading the label and understanding these terms, you can confidently choose a filter that truly delivers on its promises.

The Trade-Off: Filter Purity vs. Your Shower Pressure

A metal faucet with water flowing into an outdoor white sink, with 'Flow vs Purity' text in a blue banner.

When you're picking out a water filter, it’s easy to think a smaller micron rating is automatically the best choice. After all, who doesn't want the absolute purest water? But the reality of home water filtration is a delicate balancing act. You're constantly walking a tightrope between how fine the filter is and how well your shower actually works.

A good way to think about it is like airport security. A quick check for obviously oversized items keeps the line moving fast. A super-detailed, multi-step screening process is far more thorough, but it will slow everyone down to a crawl. In the same way, a lower micron rating creates more resistance, forcing water to work much harder to get through.

This extra resistance leads to two big headaches in your home. First, it can seriously slash your water pressure and flow rate, which we measure in gallons per minute (GPM). Second, it makes the filter clog up way faster, especially if your water is full of sediment.

Finding the Sweet Spot for Water Flow

Just imagine installing an ultra-fine, absolute 1-micron filter for your entire house. Sure, it would deliver incredibly pure water, but it could also turn your powerful showerhead into a sad, disappointing trickle. Trying to run the dishwasher while someone else takes a shower might become a test of your patience.

The real goal is to find the "sweet spot" for your home’s water. This is the micron rating that gets rid of your target contaminants without completely crippling your water flow. A well-chosen filter means you get both clean water and enough pressure to keep up with your family's daily needs.

The most common mistake we see homeowners make is over-filtering. Choosing a filter with a micron rating that’s too low for your specific water conditions will lead to constant filter changes and an ongoing battle with low water pressure.

For instance, if your main problem is visible gunk like sand or rust flakes, a 20-30 micron nominal filter for your whole house is often a perfect fit. It will clear up the water and protect your appliances without you ever noticing a drop in pressure. That’s a much smarter starting point than jumping straight to a 5-micron filter.

How Micron Rating Affects Filter Lifespan

A finer filter doesn’t just slow down your water; it also gets packed with contaminants much more quickly. The tighter the pores, the more junk it pulls out of the water passing through. If your water source is heavy with sediment, a 5-micron filter might be totally clogged in just a few weeks, while a 20-micron filter in the same system could last for months.

This is a huge factor in the long-term cost and maintenance of your filtration setup. Nobody wants to be constantly buying and replacing clogged filters—it's expensive and a hassle. This is exactly why a staged filtration approach, where you use a larger micron filter to catch the big stuff before it hits a finer one, is such a smart strategy.

Ever wondered why your refrigerator's water filter, which makes your water taste so crisp, seems to slow to a drip after just a few months? It often comes down to its micron rating. Home filtration technology has come a long way since the 1970s, when pitcher filters started using media in the 0.5 to 5 µm range. Today, many filters, like those in ice machines, might have an absolute 1-micron rating that provides a 99.9% block on certain particles. But that same high-performance filter can sometimes cut the water flow in half, causing problems like misshapen ice cubes and forcing you to change it more often. You can find more details on how different ratings impact flow in this guide to water filter pressure.

Understanding this relationship between purity, pressure, and filter life is the key. It lets you design a system that works with your home's plumbing, not against it, giving you the clean water you want without all the frustration.

Matching the Right Micron Rating to Your Home Water

Three outdoor water filter cartridges in a staged filtration system next to a house.

Alright, we’ve covered the technical side of micron ratings. Now it’s time for the fun part: putting that knowledge to work in your own home. Picking the right filter isn't about chasing the smallest number you can find. It’s about being a savvy homeowner and matching the filter to your water source and the specific issues you're trying to fix.

This practical approach is what saves you money, protects your pipes and appliances, and gets you the clean, clear water you’re after.

The two big scenarios we see every day are homeowners trying to clean up city water and folks trying to tame a private well. Each one has its own set of problems and requires a totally different game plan to get things right.

City Water Filtration Strategies

If your water comes from the city, it’s already been treated to be safe from a biological standpoint. Your main headaches are usually the stuff it picks up after leaving the treatment plant—like junk from old pipes or the chemicals used to disinfect it. For most people on city water, the mission is simply to "polish" what you've got for better taste, smell, and clarity.

You’re mainly focused on tackling:

  • Fine Sediment: Old municipal pipes can shed tiny bits of rust, sand, and other debris that make water look cloudy or hazy.
  • Chlorine Taste and Odor: Chlorine is great for killing germs, but it can make your tap water taste and smell like a public swimming pool.
  • Potential Contaminants: In some areas, there are valid concerns about lead leaching from old plumbing pipes or solder joints.

For a general, whole-house upgrade on city water, a nominal 5-micron sediment filter is a fantastic place to start. It’s tight enough to catch the fine particles that cause cloudiness but won’t kill your water pressure. If you combine that with a good carbon block filter to grab the chlorine, you'll be amazed at the difference in taste and smell.

Well Water Filtration Solutions

Well water is a whole different beast. Because it’s untreated raw water, it often carries a much heavier load of natural gunk like sand, silt, and clay. These bigger, abrasive particles can absolutely wreck your appliances and plumbing fixtures if you don't stop them first.

With well water, your first line of defense is always a robust sediment filter. Its job is to capture the larger particles before they can clog finer, more expensive downstream filters or damage your water heater and washing machine.

A solid starting point for most wells is a 20 to 50-micron whole-house filter. This rating is coarse enough to keep water flowing freely while still trapping the sand and heavy grit that cause the most damage. I see it all the time—people with sediment-heavy wells jump straight to a 5-micron filter, and it's a recipe for constant, frustrating filter changes.

The Power of Staged Filtration

For a truly effective and low-maintenance system, especially with challenging well water, the pros use a method called staged filtration. It’s exactly what it sounds like: you line up multiple filters in a series, starting with a larger micron rating and getting progressively smaller.

Think of it like sorting a pile of rocks and sand. You wouldn't use a tiny kitchen sieve to get the big boulders out first, right? You’d use a wide screen for the big rocks, then a finer screen for the pebbles, and then the sieve for the sand. This layered approach is way more efficient.

A classic staged setup for a home might look like this:

  1. Stage 1 (Pre-Filter): A 25-micron nominal filter goes right where the water enters the house. It does the heavy lifting, catching sand, big rust flakes, and grit. This protects everything downstream.
  2. Stage 2 (Polishing Filter): Next in line could be a 5-micron filter. This one grabs the finer silt and sediment that slipped past stage one, making your water crystal clear.
  3. Stage 3 (Point-of-Use): Finally, at the kitchen sink, a 1-micron absolute filter can provide the final polish. This is where you get drinking and cooking water that’s free from microscopic cysts.

This strategy is brilliant because it makes every filter last longer. The cheap 25-micron pre-filter takes all the abuse, letting the finer, more expensive filters do their specialized jobs without getting clogged right away. It's the secret to getting high-purity water without sacrificing your water flow or your wallet.

Recommended Micron Ratings for Home Water Issues

Here's a quick cheat sheet to help you match your specific water problem with the most effective micron rating for your filter.

Water Source / Issue Common Contaminants Recommended Micron Rating Filter Type
City Water (General) Fine sediment, some rust 5 to 10 micron Whole-House Sediment
Well Water (Heavy Sediment) Sand, silt, rust, dirt 20 to 50 micron Whole-House Pre-Filter
Cloudy or Murky Water Fine silt, clay 5 micron Sediment Filter
Protecting Appliances Sand, large particles 20 micron or higher Whole-House Pre-Filter
Drinking Water Purity Giardia, Cryptosporidium 1 micron (Absolute) Under-Sink or Countertop

Use this as a starting point. Every home’s water is unique, but these recommendations will put you on the right track for solving the most common water quality headaches.

Common Micron Rating Misconceptions Debunked

Trying to sort through water filtration specs can feel like taking a pop quiz in a subject you never studied. When you’re trying to understand what is a micron rating, it's all too easy to stumble into a few common traps that lead to frustrating and expensive mistakes. Let's clear the air and bust some of the biggest myths out there.

The most common myth? That a smaller micron number is always better. It seems to make sense—tighter pores should mean cleaner water, right? Well, not exactly. While an ultra-fine filter does remove more particles, it often comes at a price your home's plumbing has to pay.

Myth 1: Smaller Is Always Better

Going with a super-low micron rating, like a 1-micron filter for your whole house, can seriously choke your water flow. This is what leads to weak showers and appliances that take forever to fill. It also means the filter cartridge will clog up way faster, forcing you to replace it constantly—especially if you're on well water with a lot of sediment.

A much smarter strategy is to match the filter's rating to the actual problem you're trying to solve. If you just want to get rid of the visible gunk making your water cloudy, a 20-micron filter is often a far more practical and effective choice than a 5-micron one.

The goal isn’t to chase the lowest number. It’s about finding that sweet spot between effective filtration and keeping your water pressure strong. Over-filtering is a very common and costly mistake.

Myth 2: The Micron Rating Is the Only Thing That Matters

Another huge misconception is thinking the micron rating is the be-all and end-all of water quality. While it's absolutely critical for grabbing physical particles like sand, silt, and rust, it tells you zero about a filter's ability to tackle chemical contaminants or things dissolved in the water.

If your main complaint is the chlorine taste and smell from city water, or if you have concerns about lead from older plumbing, a low micron rating on its own won't do a thing. Those issues require a completely different type of filtration technology.

This is where the filter material itself becomes the star of the show:

  • Activated Carbon: This is your workhorse for adsorbing chemicals like chlorine, pesticides, and those volatile organic compounds (VOCs) that create nasty tastes and odors.
  • KDF (Kinetic Degradation Fluxion): This special media is fantastic at reducing chlorine and heavy metals such as lead, mercury, and iron.
  • Ion Exchange: This is the process used inside water softeners specifically to grab the hard minerals like calcium and magnesium that cause scale buildup.

A top-notch carbon block filter might have a 5-micron rating, but its main job is chemical adsorption, not just physically straining particles. The micron rating is there to make sure sediment doesn't clog up the carbon and stop it from working. So, always look at both the micron rating and the filter media to get the full story.

A Few Final Questions on Micron Ratings

Once you get a handle on the basics of what a micron rating is, a few practical questions almost always pop up. Let's run through the most common ones to make sure you’re ready to pick the right filter for your home.

Will a Micron Filter Get Rid of Salt or Minerals?

This is a great question, and the short answer is no. A standard micron filter is essentially a very fine strainer, designed to physically block solid particles like sand, silt, and flecks of rust. Dissolved solids, like salt or the calcium and magnesium that cause hard water, are simply too small and will pass right through.

To tackle those dissolved minerals, you need a completely different approach. A reverse osmosis (RO) system is the go-to for removing salt and a wide range of other dissolved solids. For hard water, a water softener uses a process called ion exchange to specifically target and remove calcium and magnesium.

How Do I Know When It’s Time to Change My Sediment Filter?

The clearest sign is a drop in your home's water pressure. As the filter does its job and collects gunk, it naturally gets clogged, which slows down the water flowing through it. You'll probably first notice it when you're taking a shower or filling up the tub.

A sudden dip in water pressure is your filter's way of saying it's full and can't work effectively anymore. It’s always smart to keep a spare filter cartridge on hand so you can swap it out right away.

While many filters suggest a replacement timeline, like every 3-6 months, your water quality is the real determining factor. If you've got a lot of sediment, you might be changing filters every month. If your water is relatively clean, you could go much longer.

Should I Get a Sub-Micron Filter for City Water?

For most people on a municipal water supply, it's usually not necessary. City water is already treated to be biologically safe, so you don't have to worry about harmful bacteria and cysts. A solid 5-micron sediment filter paired with a good carbon filter is typically all you need to make your water taste and smell great.

That said, choosing a sub-micron filter (rated at 1 micron or less) can add another layer of protection. An absolute 1-micron filter is certified to block protozoan cysts like Giardia and Cryptosporidium, which have been known to slip through municipal treatment on rare occasions. It’s a popular choice for families with young kids or anyone who just wants that extra peace of mind.


Here at Water Filter Advisor, our mission is to give you clear, straightforward advice for safer, better-tasting water. We cut through the noise with in-depth buying guides and maintenance tips, helping you make choices you can feel good about. To find your ideal filtration setup, check out all our resources at https://www.waterfilteradvisor.com.

Why Your House Smells Like a Pool and How to Fix It With Water Filtration

Ever turn on your faucet and get hit with a smell that whisks you away to the local swimming pool? That powerful, chemical scent is almost always chlorine, and it’s coming straight from your tap.

It’s the number one reason people complain about a smell of chlorine in house, and it’s a direct result of how your city keeps its water supply safe for everyone. But just because it's common doesn't mean you have to live with it. The secret to kicking that smell to the curb lies in your water.

So, Why Is My House Suddenly a Chlorine Zone?

Tap water filling a glass from a modern kitchen faucet, with visible bubbles, implying chlorine presence.

So, why is this pool chemical in your drinking water in the first place? For more than 100 years, chlorine has been the world's go-to disinfectant for public water systems. It’s incredibly cheap and brutally effective at wiping out the nasty germs that can make you sick.

Think of it this way: water has a long, winding journey from the treatment plant to your home. As it travels through miles and miles of pipes, it needs a bodyguard to keep it pure. Chlorine is that bodyguard, creating a protective barrier that kills off bacteria and viruses along the way. Your home is the final stop on its tour.

Why Does the Smell Suddenly Get Stronger?

Have you ever noticed the chlorine smell is way more potent some days than others? You're not just imagining it. A few different things can cause the chlorine concentration in your water to spike temporarily.

  • Recent Heavy Rainfall: After a big storm, all that runoff can wash more contaminants into the water source. To combat this, treatment plants often have to bump up the chlorine levels to keep the water safe.
  • Water Main Maintenance: When the city flushes or repairs the water lines in your area, they often use a higher dose of chlorine to disinfect the pipes and make sure everything is clean.
  • Living Close to the Source: If your home is just a short hop from the water treatment facility, you might get water with more chlorine in it. It simply hasn't had as much time to dissipate on its journey to you.

The amount of chlorine in your water is carefully monitored. According to EPA standards, the maximum level allowed is 4.0 mg/L, but what you typically get at home is somewhere between 0.2–3.0 mg/L. For a lot of us, even the low end of that range is enough to cause that distinct, bleach-like smell. Discover more insights about chlorine in drinking water on frizzlife.com.

To help you narrow down where that smell is coming from, here’s a quick guide to common trouble spots.

Quick Guide to Chlorine Smell Sources in Your Home

This table can help you quickly figure out what's causing that chlorine odor by matching the location with common activities.

Source Location Common Activity Why It Smells Stronger Here
Kitchen Sink Washing dishes, filling a pot The aeration from the faucet releases dissolved chlorine gas.
Bathroom Shower Taking a hot shower Hot water and steam cause chlorine to vaporize, concentrating the smell in a small space.
Washing Machine Doing a load of laundry The agitation and hot water used in a wash cycle can release a strong chlorine odor.
Dishwasher Running a cleaning cycle High-temperature water jets spray chlorinated water, releasing the gas inside the machine.

This shows that while the source is always the water, certain activities and appliances can make the problem much more noticeable.

It's More Than Just a Bad Smell

The problem isn’t just about an unpleasant odor in your drinking glass. When you do something like take a hot shower or run the dishwasher, the heat and steam work together to turn that dissolved chlorine into a gas.

This process, known as volatilization, releases chlorine straight into the air inside your home.

All of a sudden, the issue isn't confined to your water. It’s in the air you and your family are breathing in the bathroom and kitchen, which can really impact your home's air quality and overall comfort. For anyone with sensitivities, this airborne chlorine can be especially irritating. The smell is the most obvious sign, but it’s really a signal that your water could be affecting your daily life in ways you haven't even considered. A simple water filter can fix this.

The Hidden Costs of That Chlorine Smell

That swimming pool smell you're noticing isn't just a weird quirk of your tap water—it's your home's way of telling you something is off. While the smell of chlorine in the house is the most obvious sign, the effects ripple out into your daily life in ways that might surprise you, creating hidden costs and constant little annoyances.

Ever get out of the shower and immediately feel like you need to slather on lotion? That tight, itchy feeling isn't your imagination. Chlorine is fantastic at its job, but it can't tell the difference between bad stuff in the water and the natural oils that keep your skin and hair healthy. The result is chronic dryness, brittle hair, and irritated skin.

Your laundry is another victim. That same chemical slowly but surely bleaches the life out of your clothes. If you've noticed your vibrant colors looking dull and faded way too soon, the chlorine in your wash water is likely the culprit, forcing you to replace favorite items more often.

From Your Shower to Your Lungs

Things get a lot more interesting when you turn up the heat. A hot shower is the perfect environment for chlorine to go airborne, turning from a liquid into a gas you can inhale. As your bathroom fills with steam, you're breathing in more than just water vapor.

For anyone in your family with asthma, allergies, or other respiratory issues, that vaporized chlorine can be a real irritant to their airways.

Here's something else to consider: the issue isn’t always just the chlorine itself. When chlorine mixes with the tiny bits of organic matter that are naturally in water, it can create a whole new class of compounds called disinfection byproducts (DBPs). Your water utility works hard to keep these within safe limits, but many people prefer to add their own layer of protection at home.

This is where filtering your water comes in. A whole-house water filter doesn't just get rid of the annoying smell—it tackles the root cause of dry skin, faded laundry, and those airborne irritants all at once. It’s a single move that brings comfort and peace of mind back to your entire home.

Uncovering a Sneaky Chlorine Smell Imposter

So you’ve noticed that distinct smell of chlorine in house, and your first instinct is to blame the tap water. You might be right, but it's not always the whole story. Often, an unexpected partner in crime is lurking right under your sink: your everyday household cleaners.

Think about it. Many of the most common all-purpose sprays, disinfectants, and toilet bowl cleaners are bleach-based. When you start cleaning and mix these with other products—especially anything with a citrus scent like lemon or orange—you can accidentally kick off a chemical reaction right in your home. This reaction can release airborne particles that make that chlorine smell feel way more intense.

The Cleaner Conundrum

This is where things get tricky. Your tap water might be contributing a baseline level of chlorine, but your cleaning routine can act like a powerful amplifier, making it nearly impossible to figure out what's really causing the smell. You end up pointing the finger solely at the water when your cleaning products are actually making the problem much worse.

It turns out there's some real science behind this. A fascinating study from Bucknell University found that when bleach fumes meet citrus compounds (the technical term is limonene) under normal indoor light, they create what are called secondary organic aerosols. These are tiny particles that can really irritate your eyes, nose, and throat. The smell threshold for chlorine is already super low, but this chemical mix can make the odor you perceive—and the potential for irritation—much stronger. You can read more about the study on common cleaners and its interesting findings.

This is exactly why a whole-house water filter can be such a game-changer. By stripping the chlorine out of your water right where it enters your home, you completely eliminate that baseline chemical odor. Suddenly, it becomes much easier to tell if other things, like your cleaning supplies or even your HVAC unit, are the real culprits behind any lingering smells. If you're trying to track down a strange scent, it’s worth understanding why your AC smells and how different issues can sometimes be mistaken for one another.

Once you have clean, chlorine-free water, managing these secondary sources is a breeze. Just improving your ventilation by cracking open a window or switching on an exhaust fan while you clean can make a world of difference. It's a simple habit that helps disperse any chemical fumes, leaving your home feeling—and smelling—much fresher.

Simple Steps to Diagnose Your Chlorine Problem

Before you can fix that lingering smell of chlorine in house, you need to put on your detective hat. Pinpointing the exact source is the crucial first step. It ensures you’re tackling the real issue instead of just taking a wild guess.

Thankfully, you don't need a forensics lab—a few simple DIY tests can give you all the clues you need.

The easiest place to start is what I call the "glass test." Just fill a clean glass with water from the faucet you suspect is the problem. Then, take the glass and walk into a different room, well away from the sink area. Now, give the water a sniff. This simple move isolates the water's scent from anything else that might be going on, like drain odors or leftover cleaning spray in the sink.

Hot Versus Cold Water Clues

Next up, let's see if temperature makes a difference. Test your hot and cold water taps one at a time. First, run the cold water for about a minute and smell it. Then, do the exact same thing with the hot water.

Is the chlorine smell way more intense from the hot tap? That's a huge clue. Hot water makes it easier for dissolved chlorine to turn into a gas (a process called "volatilization"), which concentrates that swimming pool smell, especially in a small space like a shower.

If the odor is only strong on the hot side, it could point to a problem inside your water heater. Sediment buildup at the bottom of the tank can sometimes react with the chlorine in your water and make the smell worse. But if the smell is equally strong from both hot and cold taps, the culprit is almost certainly the water coming from your city's supply.

Sometimes, what your nose registers as chlorine is actually an imposter. In older homes, a musty, chemical-like odor can come from mold compounds that trick you into thinking you're smelling chlorine. When you're trying to track down a mysterious smell, getting accurate info from something like a guide for an air quality testing kit can be a big help. In fact, some Swedish studies of homes built before 1980 found that specific "mold odors" can easily be mistaken for chlorine.

This flowchart can help you trace that chemical smell back to its origin.

A flowchart explaining the potential sources of chlorine smell, whether airborne or in water.

As you can see, the process helps you figure out if the smell is real, if it's a "smell-alike" like mold, or if it’s definitely coming from your water.

Getting Concrete Data with Water Tests

If you're ready to move past the sniff test and get some hard numbers, a home water testing kit is your best friend. These kits are incredibly simple to use and will tell you the exact concentration of free chlorine in your water.

You’ll generally find two types:

  • Test Strips: You just dip a strip into a water sample, and the color change tells you the chlorine level when you match it to a chart. They give you a quick, ballpark reading.
  • Digital Testers: For more accuracy, these handheld electronic gadgets give you a precise numerical reading of chlorine levels. There's no guesswork involved.

Once you run these simple diagnostics, you’ll have the evidence you need. Knowing for sure that chlorine is in your water—and at what level—gives you the power to move forward with confidence. From there, the next step becomes obvious: finding the right water filtration system to get rid of it for good.

The Ultimate Guide to Chlorine Removal Filters

Under-sink water filter system for chlorine removal with multiple cartridges and a separate faucet.

Alright, you've pinpointed the source of that pesky chlorine smell. Now, let's talk about the most effective way to get rid of it for good: a solid water filtration system.

When it comes to battling chlorine, one material is the undisputed champ: activated carbon.

Think of activated carbon as a highly porous sponge, but on a microscopic level. It has an enormous surface area packed into a small space. As water passes through, the carbon uses a process called adsorption to essentially grab and hold onto chlorine molecules, trapping them so they can't get through to your tap. It’s a simple but incredibly powerful method that zaps that chemical taste and odor, leaving you with nothing but clean, great-tasting water.

Choosing Your Filtration Strategy

Not all filters are built the same, and the best one for you really boils down to your budget, whether you own or rent, and just how thoroughly you want to tackle the chlorine issue.

You’ve got two main paths you can take: a point-of-entry system that treats every drop of water in your home, or a point-of-use filter that focuses on a specific faucet or outlet.

A whole-house system is the all-in-one solution. It’s installed right where your main water line enters your house, meaning every faucet—from the kitchen sink and washing machine to every shower—gets purified water. This is the top choice for homeowners who are serious about protecting their skin, hair, and even their appliances from chlorine's harsh, drying effects.

On the other hand, if you’re renting or just need a more targeted, budget-friendly fix, point-of-use filters are a fantastic option. You can install one under your kitchen sink for clean drinking and cooking water, or even attach a filter directly to your showerhead. That last one is a game-changer for anyone tired of breathing in chlorine steam during a hot shower.

The Gold Standard of Certification
When you're shopping for a filter, keep an eye out for the NSF/ANSI 42 certification. This is an independent seal of approval. It proves the filter has been put through its paces and is guaranteed to reduce aesthetic issues like chlorine taste and odor. Think of it as your peace of mind that the product actually does what it claims.

Choosing the Right Water Filter to Remove Chlorine

To help you find the perfect match, let's compare the most common types of filters. Each offers a different mix of coverage, cost, and convenience.

Filter Type Best For Chlorine Removal Effectiveness Typical Cost Range Installation
Whole-House Filter Homeowners wanting a complete, set-it-and-forget-it solution for every tap. Very High (Typically removes 97% or more of chlorine from all water) $500 – $1,500+ Professional installation is often recommended.
Under-Sink Filter Renters or homeowners who want purified water for drinking and cooking at the kitchen sink. High (Excellent removal for a single, targeted faucet) $150 – $400 DIY-friendly for most people with basic plumbing skills.
Showerhead Filter Anyone wanting to protect their skin and hair from chlorine's drying effects. High (Specifically designed to remove chlorine from hot shower water) $30 – $100 Very easy DIY installation; usually just screws on.

Ultimately, picking the right filter comes down to what you’re trying to achieve. Do you just want better-tasting drinking water? Or are you looking to get rid of chlorine everywhere, from your laundry to your shower? Our experts have put together more detailed advice on all kinds of water filtration topics, which can help you find the best solution for your needs.

By weighing these options, you can confidently invest in a filter that brings that fresh, clean feeling back to your home.

Keeping Your Home Chlorine-Free for Good

Putting in a water filter is a huge win against the smell of chlorine in your house, but don't hang up your toolbelt just yet. The job isn’t quite finished.

Think of your filter as a hardworking gatekeeper. If it gets overloaded, it simply can’t do its job effectively. Regular, consistent maintenance is the real secret to keeping that clean, fresh water flowing for years to come.

The single most important task is changing the filter cartridges on schedule. This isn’t a friendly suggestion—it’s absolutely essential for the system to perform as it should. Over time, the activated carbon inside gets completely saturated with chlorine and all the other gunk it's been pulling out of your water. Eventually, it just can't trap anything else.

A clogged filter doesn't just stop working; it can become a breeding ground for bacteria or even release concentrated bursts of the very contaminants it was meant to remove. Sticking to a schedule is non-negotiable for safe, odor-free water.

A Simple Maintenance Plan

Different types of filter media, like granular activated carbon (GAC) and carbon block, have different lifespans. These typically range from six months to a year, so check the manufacturer's recommendation.

The easiest way to stay on top of it? The moment you install a new cartridge, pull out your phone and create a calendar reminder for the replacement date. Simple as that.

For bigger jobs, like installing a whole-house system, calling in a professional plumber is always the smartest move. And if that chlorine smell ever comes back out of the blue, take it as a clear signal from your system that it’s time for a professional check-up.

Your Questions About Chlorine Smell Answered

Even after you've pinpointed the source of that chemical smell, a few questions might still be nagging you. Let's get you some clear, straightforward answers so you can finally knock out that smell of chlorine in your house for good.

Why Does the Chlorine Smell Get Worse in Winter?

It's not just your imagination—that chemical odor often ramps up in the winter, and it's usually because we're using more hot water. When you heat chlorinated water for a shower or to do dishes, you're speeding up the process where chlorine turns into a gas. This gas gets released right into the steamy, enclosed air of your bathroom or kitchen.

On top of that, the colder, drier air in winter can actually make our sense of smell a bit more sensitive to these chemicals. A whole-house water filter tackles this problem at the source, removing chlorine before it gets to your water heater. That means even the longest, steamiest winter shower will be free of that harsh chemical smell.

Will a Water Softener Get Rid of the Chlorine Smell?

Nope, a standard water softener isn't built for that job. Water softeners are fantastic at removing hardness minerals like calcium and magnesium through a process called ion exchange, but that process does absolutely nothing to dissolved chlorine.

The real hero for getting rid of chlorine smell is a filtration system that uses activated carbon. Think of carbon as a sponge for chlorine—it adsorbs and traps the molecules, completely neutralizing both the taste and odor.

You can find some great modern systems that actually combine both softening and carbon filtration into a single unit. This gives you a one-two punch, solving both hard water spots and that nasty chlorine smell at the same time.

I Have a Filter, but I Still Smell Chlorine. What's Wrong?

This is a common one, and there are a couple of likely culprits. First, if you're using a point-of-use filter, like one that screws onto a single faucet, it's only treating the water at that one spot. You'll still get that chlorine smell from your showerhead and every other tap in the house.

If you already have a whole-house filter and the smell has come back, it's almost a sure bet that your filter cartridge is done and needs to be replaced. Over time, that carbon media gets clogged up and can't grab onto any more chlorine. Keeping up with a regular replacement schedule is the key to making sure your filter keeps doing its job, giving you fresh, odor-free water everywhere in your home.


At Water Filter Advisor, we're all about giving you in-depth guides and honest reviews to help you find the right water filtration solution. Check out our expert advice and take the first step toward pure, clean water today at https://www.waterfilteradvisor.com.

8 Sneaky Symptoms from Your Tap Water & How a Filter Can Fix It

That crystal-clear glass of H2O from your kitchen faucet looks innocent enough, but it could be a Trojan horse, smuggling in a microscopic army of troublemakers. We often blame stress, diet, or bad luck for those nagging headaches, surprise stomach bugs, or skin that just won't behave. But what if the real culprit is flowing right out of your pipes? Recognizing the sneaky symptoms of drinking contaminated water is the first step to reclaiming your health and turning your tap into a trusted source of pure refreshment.

Think of this guide as your "whodunit" for water-related woes. We're about to uncover eight tell-tale signs that your water might be working against you. From tummy troubles that strike out of nowhere to hair and skin issues that defy all logic, we'll connect the dots between how you feel and what’s really in your water. We’ll be looking at the usual suspects: bacteria, viruses, parasites, heavy metals, and pesky chemicals.

But this isn't just about doom and gloom—it's about empowerment. The hero of our story? The humble home water filter. We’ll show you how installing the right filtration system is like hiring a microscopic bodyguard for every faucet, effectively kicking those harmful contaminants to the curb. By the end, you'll be a water detective, ready to spot the signs and choose the perfect filter to ensure every drop in your home is delightfully clean and safe.

1. Gastrointestinal Distress and Diarrhea

The most classic and fastest-acting symptom is a full-blown mutiny in your gut. Stomach cramps, nausea, vomiting, and diarrhea are your body’s emergency alarm bells, screaming, "Get this out of me, now!" When you unknowingly sip on water contaminated with party-crashers like E. coli, Salmonella, Norovirus, or parasites like Giardia, your digestive system goes into full-on eviction mode.

Water flows from a faucet into a glass in a kitchen sink, with 'DIGESTIVE DISTRESS' text.

These unwelcome symptoms can pop up within hours or lie in wait for a few days, making it tricky to pinpoint your tap water as the villain. For a deeper dive into what makes your stomach churn, check out what causes viral gastroenteritis. This isn't just a day-ruiner; it can lead to serious dehydration, especially for kids and the elderly.

Your Home Filtration Fix

Think your water is waging war on your stomach? It's time to fight back with a smart filtration strategy.

  • Become a Symptom Detective: If you suspect your water, keep a log. Does your stomach act up after drinking from the tap? Does the whole family feel it? This is your evidence.
  • Install a Multi-Stage Guardian: A system that combines activated carbon and sediment filters is a fantastic first line of defense. It traps many bacteria, parasites, and chemical yuck. For fortress-level security, a whole-house filter protects every tap.
  • Bring in the Special Forces: For microscopic assassins, Reverse Osmosis (RO) and Ultraviolet (UV) purifiers are the ultimate solution. A UV filter acts like a bouncer, zapping the DNA of bacteria and viruses so they can't cause harm.
  • Test, Don't Guess: Grab a home water testing kit. It’s the easiest way to see what's really going on in your pipes, especially if you have well water.

With the right home water filter, you transform your faucet from a source of potential misery into a fountain of pure, safe hydration. For expert help choosing your system, check out this treasure trove of water filter advice.

2. Skin Rashes and Irritation

Beyond what’s happening inside, your skin can be the billboard that announces your water is contaminated. That itchy, red, or angry rash that appeared out of nowhere could be your skin's reaction to bathing in or drinking water laced with irritants. The culprits are often chemicals like chlorine, pesticides, or heavy metals, but pesky bacteria can also be to blame.

A person's arm with a visible red skin rash over a bathroom sink, labeled 'SKIN Irritation'.

The signs can range from simple redness and itching to full-blown hives or dermatitis. Unlike an instant stomach ache, skin problems can develop over time or show up only on areas that get wet in the shower. This delay makes it easy to blame your soap or lotion, but your tap water could be the secret saboteur.

Your Home Filtration Fix

If unexplained skin issues are making you miserable, it's time to put your water quality under the microscope. The right filter can remove the specific troublemakers causing the irritation.

  • Target the Shower: If your skin feels worse after a shower, a dedicated showerhead filter is a game-changer. These are specifically designed to remove chlorine and other common chemical irritants, often providing instant relief.
  • Protect the Whole House: For total peace of mind, a whole-house filtration system ensures that the water you drink, cook with, and bathe in is pure. It’s the ultimate defense against a wide array of chemical invaders.
  • Trap the Chemicals: Activated carbon filters are the superheroes of chemical removal. They excel at absorbing chlorine, pesticides, and other organic compounds that are notorious for causing skin reactions.
  • Test for Certainty: Use a home water testing kit to check for specific culprits like heavy metals (lead, arsenic) and high chlorine levels. Knowing your enemy helps you choose the most effective filtration weapon.

By filtering out the source of the irritation, you can protect your family's skin and turn every shower into a soothing, safe experience instead of a risky gamble.

3. Headaches and Fatigue

If you're constantly battling headaches and a sense of fatigue that coffee can't fix, your tap water might be playing a sneaky neurological game. This isn't your typical "I need more sleep" tiredness. It's a profound lack of energy and persistent head pain that could signal the presence of heavy metals like lead or arsenic, nitrates, or other toxins that mess with your body's systems. These symptoms are particularly tricky because they build up slowly and are easy to dismiss as just a part of modern life.

Symptoms can vary from a dull, throbbing headache to intense migraines, paired with a bone-deep weariness. Because these signs are so vague, a family might drink contaminated water for months or even years before connecting the dots, which is why treating your water filter as an essential home appliance is so critical.

Your Home Filtration Fix

If brain fog, headaches, and fatigue have become the norm in your house, it's time to investigate your water supply. Targeted filtration isn't just a solution; it's a path back to feeling your best.

  • Become a Symptom Detective: Keep a diary. Does your headache get worse at home? Do you feel more energetic when you're away or drinking bottled water? These clues are vital.
  • Install a Heavy Metal Shield: To capture contaminants like lead and arsenic, you need specialized filters. Look for systems that use activated carbon, ion exchange resin, or KDF media—these are designed specifically to trap and remove dangerous heavy metals.
  • Go for the Gold Standard: A Reverse Osmosis (RO) system is one of the most powerful defenses available for your home. It uses pressure to force water through a super-fine membrane, blocking a massive range of contaminants, including the heavy metals and nitrates that can cause neurological issues. An under-sink RO unit for your kitchen is a fantastic investment in your family's health.
  • Test, Don't Guess: You can't fight an invisible enemy. Use a high-quality home kit or a professional service to test specifically for lead, arsenic, mercury, and nitrates. This is non-negotiable for anyone with a private well.

4. Nausea and Vomiting

When your body forcefully rejects something, it’s not being subtle. Nausea and vomiting are your system’s most dramatic and unmistakable signs that you’ve consumed something toxic. This is a direct, often violent, response to water contaminated with pathogens, chemicals, or bacterial toxins. Your body’s self-preservation instincts kick in, triggering an immediate expulsion to stop the toxins from being absorbed. The onset can be terrifyingly fast, making these some of the scariest symptoms of drinking contaminated water.

This reaction is far more than just unpleasant; it can rapidly lead to dehydration and dangerous electrolyte imbalances. For young children, the elderly, or anyone with a compromised immune system, this can become a medical emergency in a very short time. If these symptoms hit after drinking tap water, treat it as a five-alarm fire.

Your Home Filtration Fix

If sudden nausea and vomiting strike your family, your water supply should be treated as "guilty until proven innocent." Swift, decisive action with filtration can prevent a bad situation from getting worse.

  • Stop Drinking Immediately: Rule number one: stop drinking the tap water. Switch everyone to bottled water for both drinking and cooking until you've figured out the problem.
  • Call for Backup: Contact your local health department to report the issue. A professional water test is essential to identify the specific pathogen or chemical culprit.
  • Deploy an Emergency Filter: As a first-aid measure, a high-quality countertop filter or an under-sink reverse osmosis (RO) system can remove a huge spectrum of contaminants, from bacteria and viruses to chemical toxins.
  • Secure Your Castle: For ultimate, long-term protection, a whole-house filtration system is the answer. A setup with multi-stage filters—including sediment, activated carbon, and a UV purifier—creates a fortress around your home's water. UV purification is especially brilliant, as it destroys the DNA of microorganisms, making them completely harmless.

5. Musculoskeletal Pain and Joint Aches

Some symptoms of contaminated water are sprinters, hitting you fast and hard. Others are marathon runners, causing damage slowly over time. Chronic muscle pain and aching joints fall into the second category. Long-term exposure to certain contaminants, especially heavy metals like lead or excessive minerals like fluoride, can cause them to build up in your body, triggering inflammation and interfering with your bone and nerve health.

This kind of pain develops so gradually that you'd almost never think to blame your tap water. Lead can cause inflammation that shows up as muscle and joint pain. Too much fluoride can lead to skeletal fluorosis, a painful condition that stiffens joints. Arsenic is also linked to inflammatory conditions that directly impact your muscles and joints. It's a silent attack that you might only notice after years of damage.

Your Home Filtration Fix

If you're dealing with persistent aches and pains with no obvious cause, it's time to investigate your water. The only way to stop this slow-motion assault is to filter out the contaminants at the source.

  • Test for the Heavy Hitters: Don't rely on your senses; heavy metals are invisible. Get your water tested by a certified lab specifically for lead, arsenic, cadmium, and fluoride. This is especially crucial if you have well water or live in a home with old pipes.
  • Install a Targeted Defense: To remove heavy metals, a whole-house system that combines activated carbon with an ion exchange medium is a powerful solution. This setup is designed to capture dissolved metal contaminants before they even enter your home.
  • Purify Your Drinking Water: For the water you actually consume, a Reverse Osmosis (RO) system is the undisputed champion. It removes an incredibly wide range of dissolved minerals and heavy metals, offering the highest level of protection.
  • Track Your Progress: After installing a filter, keep a health journal. A noticeable decrease in your aches and pains over time is strong evidence that your water was the culprit.
  • Stay Vigilant with Maintenance: A filter is only as good as its last cartridge change. Follow the replacement schedule and test your water every year or two to make sure your system is still doing its job.

6. Fever and Chills

When you suddenly get the chills and your temperature spikes, your body is screaming that it's at war with an invader. A fever is one of the most serious systemic symptoms of drinking contaminated water, indicating that an infection has taken hold and your immune system is in an all-out battle. Drinking water contaminated with powerful bacteria like Salmonella or viruses like Hepatitis A triggers this response, as your body raises its internal temperature to try and cook the pathogens out.

A fever, especially a high one (over 103°F/39.4°C), is a major red flag that a waterborne illness is getting serious. It's often paired with other symptoms like stomach issues or muscle aches and means you need to take action fast. This isn't something to ignore; it’s a clear and present danger signal from your body.

Your Home Filtration Fix

A fever demands a two-pronged attack: immediate medical attention for the person who is sick, and an immediate lockdown of your water supply to protect everyone else.

  • See a Doctor: First things first, a fever with other severe symptoms requires a trip to the doctor. At the same time, stop all use of tap water and switch to bottled or boiled water.
  • Report and Test: Alert your local health department about the suspected contamination. To find out exactly what you're fighting, get a professional water test that can identify specific bacteria, viruses, and parasites.
  • Use Emergency Measures: While you wait for results, boil all drinking water for at least one minute or use a portable water filter certified for pathogen removal.
  • Install an Advanced Purifier: To permanently eliminate the threat, you need a serious purification system. Ultraviolet (UV) purification is a fantastic choice, as it uses light to scramble the DNA of bacteria and viruses, making them harmless without adding chemicals. A Reverse Osmosis (RO) system also provides an excellent barrier against microscopic pathogens.

By installing a robust, multi-stage filtration system with UV or RO, you can transform your home's water from a potential threat into a source of pure, life-giving refreshment.

7. Hair Loss and Brittle Nails

Hair thinning and nails that constantly break or peel are frustrating beauty issues, but they can also be subtle signs that your body is dealing with long-term toxic exposure from your water. Chronic consumption of water containing heavy metals like arsenic, lead, or thallium can cause these toxins to accumulate in your system. They disrupt the vital processes your body uses to build strong hair and nails, leading to noticeable thinning, hair loss, and weak, discolored nails.

Because these symptoms develop slowly over months, it’s easy to overlook the connection to your tap water. However, the good news is that unlike some other chronic health issues, these symptoms can often be reversed once you remove the source of contamination by filtering your water.

Your Home Filtration Fix

If you're noticing more hair in your brush than on your head, it's time to give your tap water a hard look. The right filtration system can stop the exposure and help your body get back to building healthy hair and nails.

  • Track the Evidence: Take photos of your hair and nails. This gives you a clear baseline to compare against after you've installed a water filter and can be a powerful motivator.
  • Install a Heavy Metal Blocker: A whole-house system using KDF media and activated carbon is excellent at removing a wide range of heavy metals like lead and mercury from every single tap in your home.
  • Purify What You Drink: For the water you ingest, a Reverse Osmosis (RO) system is the gold standard. It’s powerful enough to strip out even the tiniest dissolved heavy metal ions, giving you the purest possible drinking water.
  • Test for Specific Villains: Don't just guess what's in your water. Order a professional test that specifically looks for a panel of heavy metals, including arsenic, lead, and thallium, to confirm your suspicions.

8. Respiratory Issues and Coughing

We think of water contamination as something we drink, but sometimes the danger is in the air we breathe at home. A persistent cough, wheezing, or shortness of breath can be surprising symptoms linked to contaminated water—specifically, water you inhale. When you take a hot, steamy shower, chemicals and pathogens in the water can become aerosolized, turning your bathroom into a delivery system for airborne threats.

A shower head sprays water, with a blurred person in the background appearing to cough, accompanied by the text 'RESPIRATORY RISK'.

The number one offender here is the Legionella bacteria, which causes the severe pneumonia known as Legionnaires' disease. It loves to grow in warm water environments like hot water heaters and pipes. Chemicals like chlorine and volatile organic compounds (VOCs) can also turn into a gas in hot water, irritating your lungs and causing symptoms that mimic asthma, especially in a poorly ventilated bathroom.

Your Home Filtration Fix

Protecting the air you breathe during your daily shower is just as important as purifying the water you drink. A combination of smart filtration and maintenance is your best defense.

  • Install a Shower Filter: This is your first and easiest line of defense. A quality showerhead filter with KDF media and activated carbon can significantly reduce chlorine and help inhibit the growth of bacteria right where you need it most.
  • Turn Up the Heat: Make sure your hot water heater is set to at least 131°F (55°C). This temperature is hot enough to kill off Legionella bacteria lurking inside the tank.
  • Consider a UV Purifier: For whole-house protection against germs, a UV purification system is a brilliant solution. As water flows past the UV light, it zaps the DNA of bacteria and viruses, making them harmless.
  • Flush and Ventilate: If you have a guest bathroom that's rarely used, run the taps and shower for a few minutes each week to prevent water from stagnating. And always, always use the exhaust fan during and after a shower to clear the air.

Contaminated Water: 8-Symptom Comparison

Symptom 🔄 Implementation Complexity ⚡ Resource Requirements ⭐ Expected Outcomes 📊 Ideal Use Cases 💡 Key Advantages / Tips
Gastrointestinal Distress and Diarrhea Moderate — point‑of‑use + UV/RO or whole‑house multi‑stage Moderate — RO/UV units, testing kits, possible medical care High ⭐ — rapid reduction in pathogens and acute illness with proper filtration Households facing bacterial/viral/parasitic contamination; wells, boil‑water alerts Install RO/UV or multi‑stage carbon filters; keep test kits and use bottled water in emergencies
Skin Rashes and Irritation Low–Moderate — shower/faucet filters or whole‑house chemical removal Low–Moderate — shower filters, carbon cartridges, water tests Moderate ⭐ — quick symptom improvement after removing chemical irritants Homes with high chlorine/heavy metals or chemical exposure affecting skin Use KDF/activated carbon shower filters and whole‑house carbon; test for chlorine and metals
Headaches and Fatigue Moderate — whole‑house heavy‑metal removal; professional testing advised Moderate–High — lab testing, RO, ion exchange, long‑term filtration Moderate–High ⭐ — gradual cognitive/energy improvement after contaminant removal Areas with suspected heavy metals, nitrates, or chronic low‑level exposure Get certified testing; prioritize under‑sink RO for drinking water and whole‑house metal filters
Nausea and Vomiting High — fast emergency response plus long‑term system upgrade Moderate — emergency bottled/boiled water, portable filters, RO/UV High ⭐ — immediate relief when water source removed; prevents dehydration Acute outbreaks from bacterial toxins or rapid‑onset contaminants Stop tap use, switch to bottled/boiled water; contact health dept and install emergency filtration
Musculoskeletal Pain and Joint Aches High — long‑term remediation, pipe replacement and heavy‑metal filtration High — certified lab tests, whole‑house RO/ion exchange, possible plumbing work Moderate ⭐ — slow improvement; some damage may be irreversible if prolonged Regions with chronic heavy metals or excess fluoride in groundwater Test for metals/fluoride; install ion exchange/RO and consider replacing corroded pipes
Fever and Chills High — urgent medical management and pathogen elimination (UV/RO) Moderate — medical care, professional water testing, UV/RO systems High ⭐ — fever resolution with treatment and pathogen removal; serious if delayed Suspected systemic infections (typhoid, Legionella, hepatitis A) Seek immediate medical care; discontinue tap use, report to authorities, use UV/RO and boiling as interim
Hair Loss and Brittle Nails Moderate–High — targeted heavy‑metal removal and sustained filtration Moderate — lab testing, RO, ion exchange, nutritional support Moderate ⭐ — visible recovery over months after contaminant removal Chronic heavy‑metal exposure in wells or industrial areas Test for arsenic/thallium; use RO/ion exchange and document improvement with photos
Respiratory Issues and Coughing High — building system remediation, shower filtration and temperature controls Moderate–High — shower filters, UV, system flushing, HVAC/temperature maintenance High ⭐ — can prevent aerosolized pathogen transmission with proper controls Hot water systems, showers, buildings with Legionella or chemical aerosols Install Legionella‑resistant shower filters, maintain hot‑water temps >55°C (131°F), flush unused lines and use UV purification

Your Next Step: From Symptoms to Solutions with Filtration

Recognizing the diverse symptoms of drinking contaminated water is your superpower. We've seen how everything from an upset stomach and skin rashes to headaches and even a cough could be traced back to your tap. These symptoms are your body's way of sending an SOS, signaling that the water you depend on every day might be doing more harm than good.

But waiting for these alarms to go off is a risky game. Now that you're armed with this knowledge, you can switch from playing defense to playing offense. The most reliable and empowering solution to this invisible threat is a high-quality home water filtration system.

Your Action Plan for Pure Water

Realizing your fatigue could be linked to your faucet is a lightbulb moment. Now, it’s time to take action and turn that awareness into a safer home environment.

Your game plan is simple:

  1. Confirm the Enemy: Symptoms are clues, but a water test is the smoking gun. Testing reveals exactly what's in your water—be it bacteria, chemicals, or heavy metals. This intel is vital for choosing the right weapon.
  2. Choose Your Shield: With your test results in hand, you can confidently select your filtration system. A whole-house system is like a force field, protecting every drop of water in your home. For targeted, high-purity defense, an under-sink reverse osmosis unit for drinking water is an unbeatable choice.
  3. Maintain Your Defenses: A filter isn't a "set it and forget it" appliance. Regular maintenance is key. Understanding the importance of regularly changing your water filter is crucial. An old, clogged filter can stop working or even become a breeding ground for bacteria, undoing all your hard work.

The Ultimate Payoff: Peace of Mind

Investing in a water filtration system is one of the best investments you can make in your family's health. It ends the guessing game. Instead of wondering if your water is safe, you can drink, cook, and shower with the absolute confidence that you are protected from a whole host of contaminants.

Key Takeaway: A water filter isn't just another gadget; it's a preventative health tool for your home. It's your 24/7 bodyguard, stopping threats at the source so you don't have to deal with the symptoms later.

By taking this step, you're filtering out much more than just lead or chlorine. You're filtering out worry. You're creating a healthier home where your water actively supports your well-being instead of secretly undermining it. This shift from reactive worry to proactive confidence is the ultimate win, ensuring every glass of water is pure, safe, and delicious.


Ready to find the perfect filtration system to eliminate the root cause of these symptoms? The experts at Water Filter Advisor provide unbiased, in-depth reviews and guides to help you navigate the options. Visit Water Filter Advisor to compare systems, understand certifications, and make a confident choice for your home's water safety.