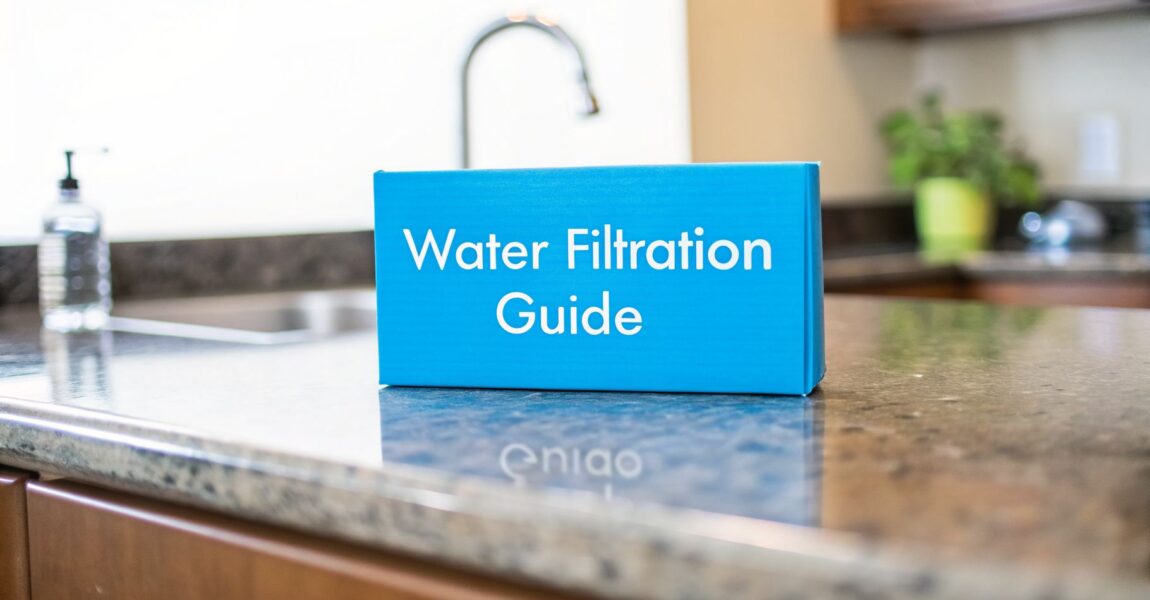
Types of water filtration methods: A Homeowner’s Guide to Cleaner Water
Ever look at a glass of tap water and wonder what's really in there? If you're tired of funny tastes, funky smells, or just the thought of i ...
Ever look at a glass of tap water and wonder what's really in there? If you're tired of funny tastes, funky smells, or just the thought of i ...

When you're searching for the best countertop reverse osmosis system, you're not just buying an appliance; you're upgrading your home&# ...
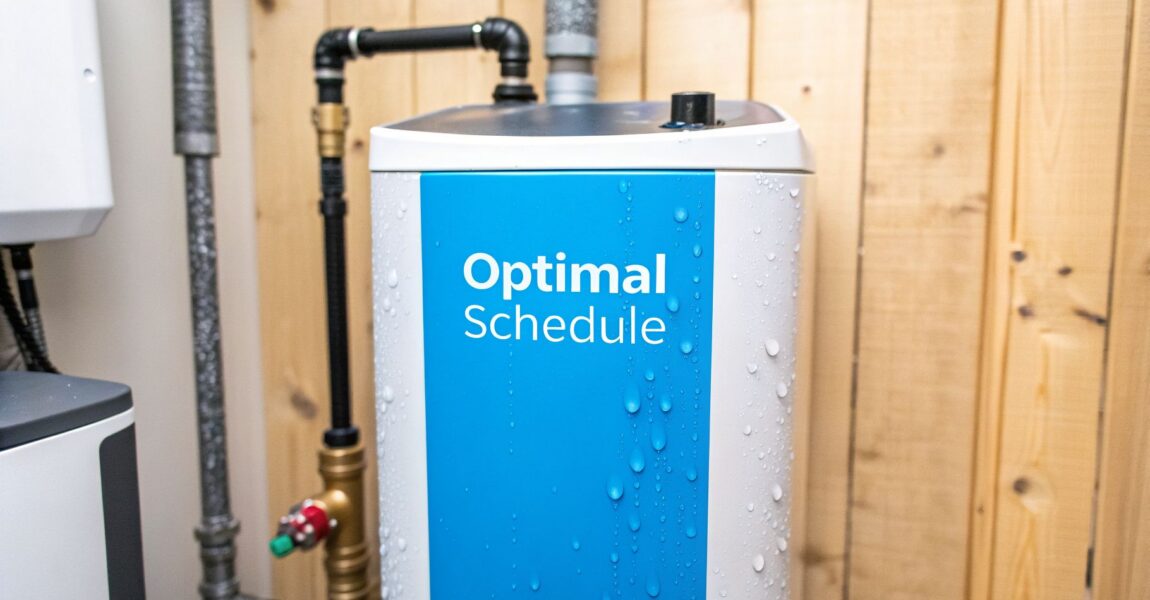
Most water softeners run their regeneration cycle about every 4 to 7 days, but don't take that as a hard-and-fast rule. The right schedule for your home is a custom recipe based on your water hardness, how much water your family uses, and the size of your softener. Getting this balance right is the secret to keeping your home's water feeling luxuriously soft and clean.
Think of your water softener's resin bed as a super-powered mineral magnet. Its one job is to snatch hard minerals like calcium and magnesium from all the water entering your house. But just like any magnet, it eventually gets completely covered and can't hold anymore. Regeneration is just the process of washing that magnet with a salt brine solution to "recharge" it, getting rid of all the collected minerals so it can get back to work.
If your system doesn't run this reset, you’ll start seeing the old signs of hard water creep back in. You'll get those chalky spots on your glasses, find it impossible to get a good lather with your soap, and your laundry will feel stiff and scratchy. Dialing in the right water softener regeneration frequency is everything for consistent, high-quality soft water.

Most softeners are set to regenerate in the middle of the night, usually around 2 AM, so you don't even notice it's happening. While every home's water situation is a little different, there are some pretty common benchmarks for a home filtration setup.
For a correctly sized system, you're typically looking at a regeneration cycle every 3 to 5 days. This seems to be the sweet spot for balancing performance with salt and water usage. For instance, a standard 30,000-grain capacity softener dealing with fairly hard water at 25 GPG (Grains Per Gallon) will treat around 1,200 gallons before it needs to regenerate. For a family of four, that works out to about every 4 days. You can find more specific examples and calculations over at ProAquaWater.com.
It all boils down to a few key factors:
To give you a better idea, here's a quick look at how these factors play out with a standard 32,000-grain water softener for your home.
The table below shows how often a typical 32,000-grain unit might need to regenerate based on your home's specific conditions.
| Water Hardness (GPG) | Household Size (People) | Approximate Regeneration Frequency |
|---|---|---|
| 10 (Slightly Hard) | 2 | Every 11-12 Days |
| 10 (Slightly Hard) | 4 | Every 5-6 Days |
| 20 (Very Hard) | 2 | Every 5-6 Days |
| 20 (Very Hard) | 4 | Every 2-3 Days |
| 30 (Extremely Hard) | 2 | Every 3-4 Days |
| 30 (Extremely Hard) | 4 | Every 1-2 Days |
Keep in mind, these are just estimates to give you a starting point. Your actual household usage will determine the perfect setting.
A properly set water softener shouldn't need to regenerate every single day, but it also shouldn't go much longer than a week. The ideal frequency matches your home's real-world water use, which is what saves you money on salt and water in the long run.
Ever heard your water softener making some strange whirring or swishing sounds in the middle of the night? Don’t worry, it's not a ghost in the machine. That’s the sound of the regeneration cycle, the crucial “recharging” process that keeps your home's water consistently soft. This is where the magic really happens, making sure your system is always ready to protect your home from hard water minerals.
Think of the resin beads inside your softener tank like tiny, powerful magnets that are purpose-built to grab onto hardness minerals—namely calcium and magnesium. As your water passes through the tank, these beads snatch the minerals right out, allowing soft water to flow to your faucets. But just like any magnet, they eventually get completely covered and can't hold onto anything else.
Once the resin is saturated, the system has to clean itself off. That's where the brine tank, filled with salt and water, enters the picture. The regeneration process uses this salty solution to strip the collected calcium and magnesium off the resin beads, washing them harmlessly down the drain. After the beads are clean and "recharged" with sodium ions, they’re ready to get back to work pulling hardness out of your water.
The whole thing is a surprisingly efficient, multi-step operation. It might sound complicated, but it's really just a simple cleaning dance that takes place inside the tank.
Key Takeaway: Regeneration isn't just a side task; it's the core function that makes a water softener actually work. It’s an automatic reset that cleans the mineral-trapping resin, guaranteeing a continuous flow of soft water for your home.
Getting to know the regeneration cycle helps pull back the curtain on how your softener operates. Most modern systems follow a similar four-stage process that usually takes about 70 to 90 minutes from start to finish.
Brine Draw: This is the main event. The system slowly sips the concentrated salt water (brine) from the brine tank and pulls it into the resin tank. This salty solution flows over the resin beads, forcing the attached calcium and magnesium ions to let go. In their place, sodium ions from the salt latch onto the resin, effectively recharging the beads.
Slow Rinse: After the brine has worked its magic, the system follows up with a slow rinse. This step gently pushes any leftover brine through the entire resin bed, making sure every last bead is fully regenerated. The deliberate, slow pace is what makes the salt so effective.
Fast Rinse: Next up is a powerful, fast rinse using fresh water. This has two jobs. First, it completely flushes out all the remaining brine and the released hardness minerals, sending them down the drain. Second, it compacts the resin bed, which gets fluffed up during the cycle, settling the beads back down for normal water flow.
Refill: In the final step, the control valve adds a measured amount of water back into the brine tank. This water dissolves the salt to create the brine solution needed for the next regeneration cycle. Once that's done, the softener shifts back into "service" mode, ready to soften water again.
To really get your water softener dialed in, you need to get a handle on three key pieces of information. It's like a recipe—get one part wrong, and the whole batch is off. You’ll either end up wasting salt and water on cycles you don’t need or, even worse, see those chalky hard water spots start creeping back.
Let's break them down one by one.
First, and most important, is your home’s water hardness. This is measured in Grains Per Gallon (GPG), which is simply a number that tells you how much dissolved calcium and magnesium is floating around in your water. The higher that GPG number, the "harder" the water, and the more your softener has to work.
You can usually find this number on your city’s annual water quality report, which is often posted online. If you're on a well or just want a dead-on accurate number, a simple water test kit will give you a precise GPG reading in just a few minutes.
Next up is how much water your family actually uses. This one’s pretty straightforward: the more water that flows through your pipes, the faster the softener's resin beads get coated with those hardness minerals. That means you need a good idea of how many gallons your household consumes each day.
A good rule of thumb is about 75 gallons per person, per day. For a family of four, you're looking at a daily usage of around 300 gallons (4 people x 75 gallons). That covers everything from showers and laundry to dishwashing and flushing toilets. Of course, if you've got teenagers who practically live in the shower, you might want to nudge that number up a bit.
This flowchart gives you a great visual of how the resin beads, hard minerals, and saltwater brine all work together during a regeneration cycle.

The resin essentially grabs onto the hard minerals as water passes by. Once it’s full, it uses the saltwater to wash itself clean, sending all those collected minerals down the drain.
Finally, you need to know your system’s capacity. When you see a water softener advertised as a "32,000-grain" or "48,000-grain" unit, that’s its capacity. This number tells you exactly how many grains of hardness the system can pull out of your water before it’s maxed out and has to regenerate.
Think of it like the size of the gas tank in your car. A bigger tank (a higher grain capacity) means you can go longer between "fill-ups" (regeneration cycles). This is exactly why getting the right size softener for your home's hardness level and water usage is so important for running an efficient system.
Technology has come a long way here. The earliest softeners often regenerated every single day. By the 1980s, smarter demand-initiated systems came along that could process anywhere from 15,000 to 45,000 grains—or about 500 to 1,500 gallons of water—before needing a cycle. As you can learn more about these historical changes on SoftProWaterSystems.com, it was a massive improvement.
By mastering these three factors—your water hardness (GPG), your daily water usage, and your system's grain capacity—you gain complete control over your softener. You can program it with precision, ensuring it only regenerates when necessary, saving you a significant amount on salt and water costs over time.
Tired of guessing when your softener should run? Let's ditch the guesswork. While it might seem like a black box, figuring out the perfect water softener regeneration frequency is just some simple math. You don't need a PhD in water chemistry to dial in your home filtration system.
This formula is all you really need to take charge of your softener’s schedule.
This calculation tells you exactly how many days your softener can treat your water before it needs to clean itself. It’s based on three things: your system's capacity, your water's hardness, and your family's daily water use.
Here's the formula:
(System Capacity ÷ Water Hardness) ÷ Daily Water Usage = Days Between Cycles
Let's break down what each part means:
Once you plug in your numbers, you’ll know the exact number of days to program between regeneration cycles. This stops you from wasting salt on cycles that are too frequent or, worse, dealing with hard water because you waited too long.
Seeing the math in action with real numbers makes it click. Let's look at how two very different households would calculate their schedules.
This table shows a suburban family on city water versus a rural family on a private well. It’s the perfect illustration of why a "one-size-fits-all" setting for home water filtration just doesn't cut it.
| Variable | Household A (Suburban Family) | Household B (Rural Family) |
|---|---|---|
| System Capacity | 32,000 Grains | 48,000 Grains |
| Water Hardness | 15 GPG (Moderately Hard) | 30 GPG (Very Hard) |
| Household Size | 3 People | 5 People |
| Daily Water Usage | 225 Gallons (3 x 75) | 375 Gallons (5 x 75) |
Now, we just run the numbers for each one.
Household A Calculation:
(32,000 Grains ÷ 15 GPG) ÷ 225 Gallons = 9.4 Days
This family can set their softener to regenerate every 9 days. Easy.
Household B Calculation:
(48,000 Grains ÷ 30 GPG) ÷ 375 Gallons = 4.2 Days
With five people and much harder water, this family needs their system to regenerate every 4 days to keep up.
As you can see, knowing your specific numbers is key. A few minutes with a calculator is all it takes to get your softener working efficiently, giving you consistent soft water without wasting salt or water.
Not all water softeners are created equal. The type you have in your home makes a huge difference in how efficiently it runs and how much it costs you. The two main players are timer-based and metered systems, and it's a classic battle of an old-school schedule versus smart home water filtration.
A timer-based water softener is like an old alarm clock—it goes off at the same time every day, no matter what. You set it to regenerate on a fixed schedule, say every three days, and it will run that cycle like clockwork.
The problem? It regenerates even if you haven't used any water. If your family is on vacation for a week, that softener is still running its cycles, wasting salt, water, and your money. It's a simple system, but often a very inefficient one for a modern home.
A metered water softener, also called a demand-initiated regeneration (DIR) system, is the smart home device for your water. It doesn't run on a rigid schedule. Instead, it has a built-in meter that keeps track of how much water your household actually uses.
This system knows exactly how many gallons have passed through it. It only kicks off a regeneration cycle when the resin inside is actually getting full and needs to be cleaned. It adjusts to your life, whether you have a house full of holiday guests or you're gone for the weekend.
By regenerating only when necessary, a metered softener gets the most out of every drop of water and every grain of salt. For any homeowner looking to cut costs and waste, it’s the clear winner.
The numbers back this up. Metered water softeners regenerate 20-40% less often than the old timer-based models. For an average family, that efficiency can save $150-300 every year on salt and water bills, especially in places with very hard water. Even with longer 3-5 day intervals, these systems still maintain over 95% softening efficiency. You can dig into more of these performance details by reading the insights on RayneWater.com.
Bottom line, a metered system takes all the guesswork out of the equation. You get perfectly soft water while using the least amount of resources possible.
Your house has a way of talking to you. If your water softener's regeneration schedule is off, you'll get clear signals from your faucets, your dishes, and even your skin. The trick is knowing how to listen.
Learning to spot these clues is the key to troubleshooting your home water filtration system and getting back to that perfectly soft water you love.

It’s incredibly frustrating to invest in a water softener, only to see the very problems you were trying to fix start creeping back in. These issues are almost always the first sign that your system isn't regenerating often enough to keep up.
When your softener waits too long between cycles, its resin bed gets completely maxed out. At that point, it can't grab any more hardness minerals, so hard water starts flowing right into your home.
You'll know this is happening if you see these old, familiar signs pop up again:
If you spot these classic hard water indicators, it's a sure bet you need to check your settings and shorten the time between regenerations.
On the flip side, a system that regenerates too often is just being wasteful. This is a common issue with older, timer-based models, but it can also happen if a modern metered system is programmed with the wrong numbers.
Your salt bag is the biggest clue here. A properly set softener for an average family of four will usually go through about one 40-pound bag of salt per month. If you’re flying through salt much faster than that, your unit is almost certainly regenerating too often.
You might also hear the softener running its cycle way more than it should, maybe even every single night. Not only does this waste hundreds of gallons of water and pounds of salt over the course of a year, but it also puts unnecessary wear and tear on the softener itself. If this sounds familiar, it's time to program a longer interval between cycles.
Here are answers to the most frequent questions homeowners ask about their water softener's regeneration cycle. Use this to manage your system and understand the details of its regeneration frequency.
This is the factory default time for most softeners. It is scheduled for a time of low water use, which prevents hard water from getting into your home's plumbing while the system is cleaning itself.
A standard regeneration cycle will use between 6 and 10 pounds of salt. The precise amount is based on your softener's grain capacity and its programmed efficiency settings. A properly set up system avoids salt waste.
Can I Start a Regeneration Cycle Myself?
Yes. Most modern water softeners include a "Manual Regeneration" or "Regen Now" button. This is useful when you have guests, after refilling an empty salt tank, or if you see signs of hard water before the next scheduled cycle.
You can find more general home water filtration advice on maintaining your systems.
While this guide addresses common issues, some installation problems or ongoing performance trouble might require a professional. If you are unable to resolve an issue, consider getting help from expert water filtration system services.

It’s a moment every well owner dreads. You turn on the tap for a clear glass of water and get a stream of murky, brown liquid instead. It's alarm ...
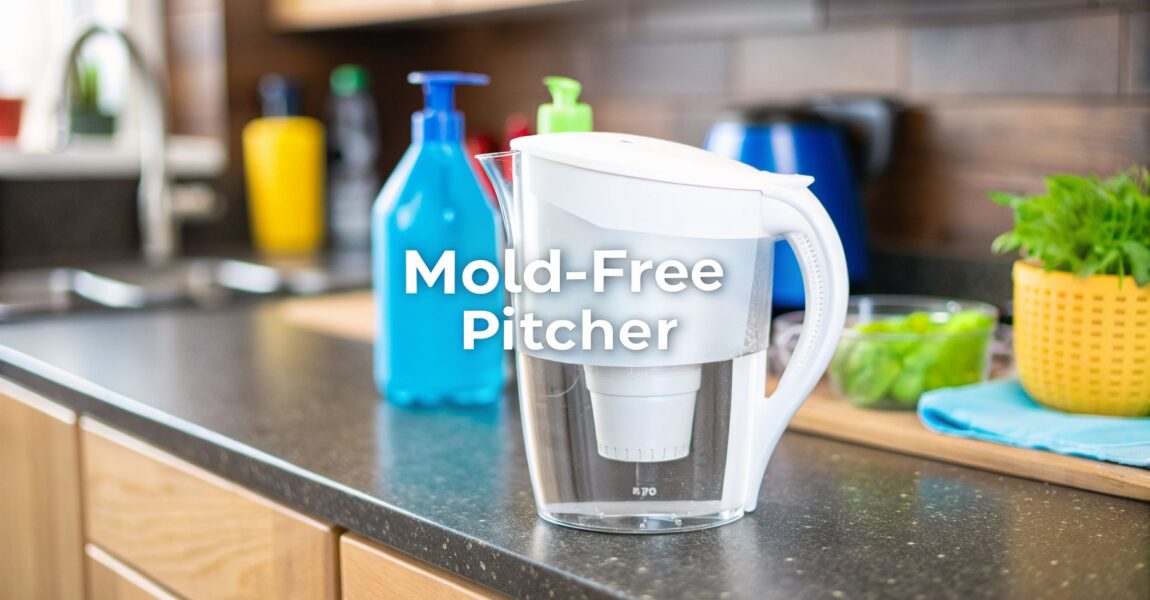
You reach for your water filter pitcher, anticipating a glass of pure, crisp water, only to be greeted by an unwelcome guest. Perhaps it’s a cluster of tiny black specks or a slick, pinkish film clinging to the inside wall. It's a jarring sight, but the truth is, mold can grow in your Brita pitcher. The very device you trust for water purification can, if neglected, become a habitat for unwanted microbes.

It seems counterintuitive, right? A water filter… growing things? But from a microbe’s perspective, a pitcher is a luxury apartment with all utilities included. It offers the perfect trifecta for growth: constant moisture, a steady food supply, and a stable, sheltered environment. This is why discovering mold in a Brita pitcher is a surprisingly common home water filtration issue.
The primary ingredient is, of course, constant moisture. Let’s be honest—no one thoroughly dries their pitcher between every single refill. This means water is almost always present in the reservoir, in the hidden crevices of the lid, and around the filter housing. This perpetually damp setting is exactly what mold needs to get a foothold and thrive.
So, where does the "food" come from? Your tap water. While your pitcher's filter is a champion at removing chlorine and certain heavy metals, it also acts as a net, trapping organic debris and particles. Over time, this captured organic matter accumulates within the filter and pitcher, essentially creating a free buffet for any airborne mold spores that happen to land inside.
Leaving your pitcher on the kitchen counter accelerates this process. The warmer, room-temperature air acts as an incubator, speeding up microbial growth. Storing it in the refrigerator helps, but it won't stop mold entirely if the other conditions—moisture and food—are present.
Think of your pitcher as a high-tech petri dish. The dark, damp interior, combined with a steady supply of trapped particles from your tap water, creates a perfect breeding ground. This isn't a reflection of your home's cleanliness; it's simply the science of how these home filtration systems operate.
The gunk you're seeing might not be just one thing. Several common offenders love to set up shop inside a water filter. You're most likely dealing with one of these:
Realizing your water filter is its own tiny ecosystem is the first step. The presence of mold in a Brita pitcher isn’t a sign of a faulty product; it’s a clear signal that your maintenance routine needs a tune-up to keep your home's water pure.
Discovering that fuzzy black or pink slime in the very device you rely on for clean water is more than just unpleasant—it can be a genuine health concern. It’s tempting to think a quick rinse will fix it, but let's dive into what’s really happening and why it matters for the water your family drinks.
When you spot mold in a Brita pitcher, you're looking at a living fungal colony. These colonies don't just sit there; they release microscopic spores into your water and even into the air every time you open the lid. For a healthy adult, accidentally drinking a glass might not cause immediate drama. But for others, the risk is much higher.
Not everyone reacts to mold in the same way. Certain people are far more sensitive, and what might be a non-issue for one person could be a serious trigger for another.
The most vulnerable groups include:
It's not just the mold you can see. The hidden danger often lies in mycotoxins—toxic compounds produced by certain types of mold. These can linger in the water even after you've scrubbed the visible gunk away, which is why a simple rinse just doesn't cut it.
The symptoms from drinking contaminated water can be tricky to diagnose. You might blame a persistent cough, stuffy nose, or irritated throat on a common cold, never suspecting your water pitcher is the source of the problem.
Drinking water from a moldy pitcher can sometimes lead to an upset stomach, while simply opening the lid and inhaling the spores can cause respiratory trouble. If you want to get a fuller picture of the risks, this article on the 10 Health Effects of Mold Exposure is a pretty comprehensive resource.
At the end of the day, your water filter is supposed to improve your water quality, not introduce new hazards. Recognizing the health risks is the first step. Now you can take the right action to get your pitcher truly clean and ensure every glass you pour is safe and pure.
Finding mold in a Brita pitcher is a surprisingly common—and frankly, unappetizing—home filtration problem. But don't just toss the whole thing in the trash. As long as the plastic isn't cracked or permanently stained, a thorough deep clean will restore it to safe, working order.
Your first move is always the same: take the entire pitcher apart. This means separating the lid, the reservoir (the top part you pour water into), and the pitcher body. And most importantly, throw that old filter away. Never try to clean a filter. It's a dense, porous maze, and you'll never truly sanitize it.
For your regular weekly upkeep or if you just spot a hint of slickness, a good old-fashioned wash with soap and water is all you need. This is the simplest way to stop mold before it ever gets a chance to grow.
Now for the most critical part: let everything air dry completely. Don't use a dish towel. It will always leave a little bit of moisture behind in the corners and seams, which is exactly what mold needs to come roaring back. Place all the pieces upside down on a drying rack so air can circulate all around them.
If you’ve got some visible slime or a faint musty smell, it's time to bring in the vinegar. Plain old white vinegar works wonders as a natural disinfectant. Its acetic acid is great at killing mold and bacteria without resorting to harsh chemicals.
Mix up a solution of one part white vinegar to two parts warm water. Take your disassembled pitcher parts and let them soak in this solution for about an hour. That gives the vinegar enough time to break down any gunk.
After the soak, grab your brush and scrub away any lingering residue. You'll probably find that the slime comes off much easier now. Give everything a final, thorough rinse with plain water to get rid of the vinegar smell and, once again, let it air dry completely before putting it back together.
Vinegar is the perfect middle-ground cleaner. It's way more effective than soap for tackling early-stage mold, but it's not as intense as bleach. It's my go-to for a monthly sanitizing routine.
The risk here is real. Mold spores in the water you're supposed to be filtering can get into your system and cause problems, as this diagram shows.

When mold is in your pitcher, you're either drinking the spores directly or inhaling them every time you open the lid. For anyone with allergies or a sensitive immune system, that's a recipe for trouble.
To help you decide which method is right for your situation, I've put together a quick comparison of the three main cleaning options.
| Method | Best For | Effectiveness | Safety Notes |
|---|---|---|---|
| Dish Soap & Water | Weekly routine cleaning and preventing buildup. | Good for surface grime and light oils. Not effective for killing existing mold. | Very safe. Just be sure to rinse all the soap off thoroughly. |
| White Vinegar Solution | Monthly sanitizing or tackling light slime and musty odors. | Great for killing early-stage mold and bacteria naturally. | Safe, but requires a thorough rinse to remove the odor. |
| Diluted Bleach Solution | Serious mold outbreaks (visible black or green spots). | The most powerful option for completely killing stubborn mold and sanitizing. | Use one teaspoon of unscented bleach per gallon of water. Work in a ventilated area and rinse meticulously. |
Each of these methods has its place. You wouldn't use bleach every week, but soap and water alone won't cut it when you have a real mold problem.
Alright, if you're looking at a serious colony of black or green mold, it's time to bring out the big guns. A properly diluted bleach solution is the only way to be 100% sure you've killed everything. It sounds intense, but it's perfectly safe when you do it right.
This bleach method is only for a serious mold in a Brita pitcher situation, not your everyday cleaning. And please, make sure you're in a room with good airflow when you're handling bleach. Follow these steps, and you can confidently bring your pitcher back from the brink and enjoy clean, safe water again.
So you've found mold in your Brita pitcher. The first question that probably pops into your head is, "Can I just clean the filter and save a few bucks?" It's a fair question. After all, if the pitcher itself is salvageable, why toss a filter that might still have some life in it?
Here’s the short and non-negotiable answer: no. Trying to salvage a mold-contaminated filter is a bad idea, and it’s critical to understand why from a water filtration perspective.
Your Brita filter isn't a simple screen. It’s a tightly packed cartridge of activated carbon and ion-exchange resin. This material is incredibly porous by design, creating a massive internal surface area to trap things like chlorine, copper, and other impurities. Think of it as a super-dense sponge filled with millions of microscopic pockets.
When mold spores find their way in, they don’t just hang out on the surface. They get lodged deep inside that complex structure. You could soak it in vinegar, bleach, or anything else you can think of, but you'll never reach every single spore hidden within. Attempting to "clean" it is a losing battle that only risks damaging the filter media and leaving a hidden mold colony ready to bloom again.
It gets worse. It’s not just mold you have to worry about. An overused or contaminated filter doesn't just stop filtering effectively—it can become a breeding ground for bacteria. All the organic gunk it pulls out of your tap water becomes a perfect food source for microbes, creating an environment where they can multiply like crazy.
Don't just take my word for it. Research has shown how quickly a filter can turn against you. One study on home water filters found that in an astonishing 70.6% of household filters, the bacterial counts in the filtered water were significantly higher than in the original tap water.
Tests confirmed that bacteria levels in filtered water could shoot past tap water levels in as little as one week. You can see the full findings yourself in the 1996 study on bacterial growth in water filters.
The most important rule of home water filtration is this: The filter is a disposable component. Once it’s been exposed to a mold colony, its integrity is gone. It can no longer be trusted to purify your water.
So, what’s the right move? The moment you spot mold in your Brita, that filter has to go in the trash. No exceptions. It's the only way to be 100% sure you’ve removed the source of the problem and aren't just pouring your "clean" water through a hidden mold farm.
It breaks down like this:
Go ahead and give your pitcher a deep clean. Scrub it, soak it, and dry it completely. But finish the job by popping in a brand-new, fresh filter. It's a small price to pay for total peace of mind and the guarantee that your home's water is truly clean.

While a deep clean can definitely rescue a moldy pitcher, the best strategy is always prevention. It's far less work to stop mold from starting than it is to battle an established colony.
The whole game is to deny mold the damp, stagnant environment it needs to survive. A few small, consistent habits will disrupt the conditions that lead to finding mold in a Brita pitcher, keeping your water fresh and your pitcher clean.
Think of your water pitcher like any other kitchen appliance—it needs regular cleaning. A quick weekly wash is absolutely essential for keeping things fresh.
One of the most common mistakes I see is not drying the pitcher properly. Never, ever reassemble a damp pitcher. After washing, lay all the parts upside down on a drying rack and let them air dry completely. A towel can just push moisture and lint into corners where mold loves to hide.
Beyond a cleaning schedule, how you use your pitcher day-to-day makes a massive difference. These small adjustments are your best defense against microbial growth in your home filtration system.
The biggest mistake is "topping off" the reservoir. When you just add new water to old water that’s been sitting out, you’re creating the perfect stagnant breeding ground for bacteria. Get in the habit of emptying any leftover water before you refill.
Your refrigerator is your best friend in the fight against pitcher mold. Mold and bacteria thrive in warmth. Storing your Brita in the cold drastically slows down their growth, keeping your water fresher for longer.
Another key habit is changing the filter on schedule. A standard Brita filter is designed for about 40 gallons or two months of use. Pushing it past its prime means it's not filtering effectively, and all the gunk it has trapped becomes a food source for any mold spores in the water.
To make it even easier, here's a simple checklist. Following this will help you stay on top of maintenance and keep your pitcher mold-free.
| Frequency | Task | Pro Tip |
|---|---|---|
| Weekly | Disassemble and wash all parts with soap and warm water. | Pay extra attention to the spout and the area where the lid sits. |
| Weekly | Allow all parts to air dry completely before reassembly. | Place components upside down on a drying rack for the best airflow. |
| Monthly | Sanitize the pitcher, reservoir, and lid in a vinegar-water solution. | A 1-hour soak is plenty to neutralize lurking microbes. |
| Every 2 Months | Replace the filter (or as directed by the manufacturer). | Set a recurring calendar reminder on your phone so you don't forget. |
| Daily | Empty leftover water before refilling the reservoir. | Never "top off" old water. Always start fresh. |
| Daily | Store the pitcher in the refrigerator. | Cold temperatures are your strongest ally against mold and bacteria. |
Turning these simple actions into habits is the real secret. This focus on a clean, dry environment isn’t just for your pitcher, either. For a deeper dive into home-wide strategies, this guide on Understanding Mold Prevention provides excellent insights.
And for more practical advice on all your home water systems, be sure to explore our advice library.
https://www.waterfilteradvisor.com/advice/
We get a lot of questions about dealing with mold in a Brita pitcher. Here are answers to some of the most frequent concerns people have about their home water filtration.
Finding small black specks in your pitcher is a common issue, but it's rarely mold. Most often, these specks are activated carbon dust that has escaped from the filter cartridge. This is harmless and usually happens with a new filter that wasn't rinsed thoroughly before use.
You can typically tell the difference by appearance. Carbon dust will look like very fine, hard particles, almost like coffee grounds. Mold, however, tends to be softer, sometimes fuzzy, and may appear in clumps or as part of a slimy film. A musty odor is another key sign of mold. If your filter is several months old, the likelihood of it being mold increases.
If you see mold, wiping it away is not enough. This is a common mistake. The visible spot you can clean off is just the surface growth. Microscopic mold spores and roots have almost certainly spread across the plastic surfaces and, more importantly, contaminated the filter media itself.
Wiping away a spot of mold is like cutting the top off a weed. You haven't removed the root, and the problem will return. It also fails to address the contamination you can't see.
When mold is present, a full deep cleaning of the pitcher is necessary. The current filter must be discarded and replaced.
Yes, without question. Two of the best habits for mold prevention are filling your pitcher with cold tap water and always storing it in the refrigerator. Mold and bacteria grow best in warm, still water. Keeping the water cold significantly inhibits their growth.
A pitcher left on a counter at 70°F (21°C) provides an ideal environment for microbes. In contrast, a refrigerator at 37°F (3°C) creates a hostile environment for mold, keeping your water fresher and your pitcher cleaner. This one change makes a significant impact.
For expert guidance on all your home water filtration needs, from choosing the right system to keeping it running perfectly, trust Water Filter Advisor. Explore our in-depth reviews and practical guides at https://www.waterfilteradvisor.com to ensure every drop your family drinks is clean and safe.
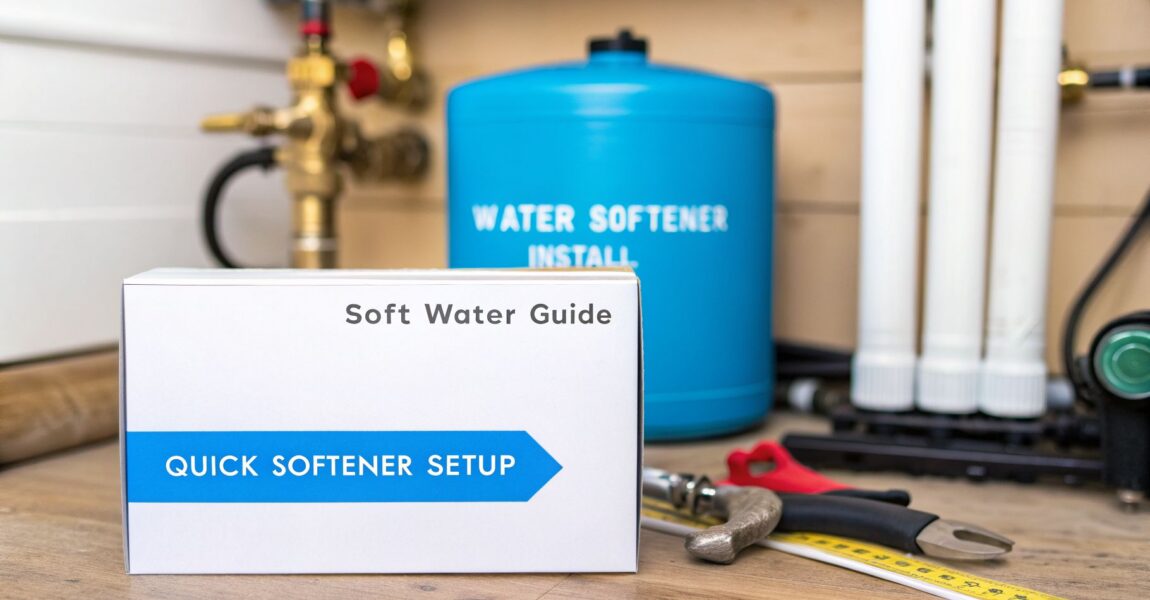
Tired of your glassware looking like it was washed in milk? Fed up with laundry that feels like sandpaper and faucets coated in a ghostly white film? You're not just imagining it—you're living the hard water nightmare. Let's embark on a weekend quest to install a water softener system and totally transform your home's water from a villain into a hero. This isn't just a DIY project; it's a guide to reclaiming your home, protecting your appliances, and maybe even saving some cash along the way.

Before you even dream of picking up a wrench, let's talk about the incredible payoff. Deciding to install a water softener is more than a home improvement chore; it’s an investment in your castle and your family's daily comfort.
Hard water isn't a rare beast; it plagues over 85% of households in the U.S. alone. This makes installing a top-notch water filtration system a true game-changer for millions. Making this one upgrade can extend the lifespan of your water-loving appliances like your water heater by up to 50%. You can get a better sense of why this is becoming so common by reading the latest water softener market analysis.
The most glaring villain of hard water is limescale. It’s that chalky, white crud that encrusts your shower doors, faucets, coffee maker, and dishes, forcing you into a never-ending battle with harsh chemicals just to keep things looking decent.
Soft water filtration kicks out the minerals that create this scaly horror show. What does that mean for you? Your fixtures stay gleaming, your glassware emerges from the dishwasher looking like crystal, and you spend far less of your precious time scrubbing. It’s a simple fix that makes your kitchen and bathrooms look like they have a professional cleaning crew on retainer.
The most immediate victory homeowners report is the vanishing act of scale. It feels less like a home improvement project and more like liberating yourself from the shackles of endless cleaning.
That mineral gunk you see on the outside? It’s also staging a hostile takeover inside your pipes and appliances. This internal scale buildup forces your water heater, washing machine, and dishwasher to work harder, leading to higher bills and a tragically short lifespan. It’s the silent assassin that costs a fortune in the long run.
A water softener acts like an invisible force field for your home's vital systems by intercepting those damaging minerals. Your appliances will operate at peak efficiency, which means lower energy bills and fewer distress calls to the repairman. It's a proactive move that truly pays for itself over time.
The benefits don't stop with your hardware; they extend to your personal care and your bank account. The minerals in hard water are notorious for sabotaging soap and shampoo, preventing them from creating a rich lather and leaving a sticky residue on your skin and hair.
Once you install your water filtration system, the difference is legendary:
I’ve seen it a hundred times—the difference between a smooth weekend victory and a soul-crushing saga of endless hardware store trips boils down to one thing: preparation. Nail this part, and the rest is a cakewalk. It’s all about finding the perfect HQ for your new filtration system and having every single tool and part at the ready before you make the first cut.
Let's start by finding a home for your new appliance. Your water softener has three basic needs: it must connect to your main water line, it requires a standard electrical outlet, and it needs a place to drain.
Finding a spot that checks all three boxes can feel like a bit of a treasure hunt, but most homes have a few obvious places to look first.
Before you commit to a location, grab a tape measure. Mark out the softener's footprint on the floor. You need to leave at least a foot of clear space around it for future maintenance, plus enough headroom to comfortably pour those heavy salt bags into the brine tank.
Once you've picked your spot, it's time to gear up. Assembling your arsenal now means you won't have to make a panicked run to the store with your water shut off.
Your exact shopping list will vary depending on your home's plumbing—whether you have copper, PEX, or CPVC pipes. But the core set of tools you’ll need is pretty much the same for any mission.
Essential Tools for the Job:
Core Materials You'll Likely Need:
Here's the most common rookie mistake: buying the wrong size fittings. Before you go anywhere, confirm the diameter of your main water pipe. It’s almost always ¾-inch or 1-inch. Getting this right the first time will save you a world of frustration.
Alright, this is where the adventure truly begins. We're about to get hands-on and tap directly into your main water line to connect the softener. It’s the most critical part of the job, but don't sweat it. We’ll walk through it step-by-step.
Before you even think about cutting a pipe, there’s some essential prep work. This infographic lays out the groundwork perfectly.

As you can see, getting the location right, gathering your tools, and prepping the space are the first three things you need to nail down before moving on.
First things first: shut off the water to the entire house. You’ll find the main shut-off valve where the water line enters your home—usually in the basement, a utility closet, or the garage. Crank it all the way to the "off" position.
Next, you need to drain the pipes. Open the faucet at the lowest point in your house (like a basement sink) and the highest one (maybe an upstairs shower). This lets air in and drains the remaining water out, which will save you from a surprise shower when you make your first cut. Still, keep a bucket and a few old towels nearby. There’s always a little water left behind.
Here's a tip I’ve learned the hard way: after you think the water is off, try turning on a faucet. If you get more than a slow drip, your main valve isn't sealing properly. You'll want to get that fixed before you go any further.
Time to make the cut. Carefully measure the section of your main water line where the new bypass valve assembly will go. This valve is your best friend—it lets you send water around the softener for maintenance without turning off the water to the whole house.
Double-check your measurements, then grab your pipe cutter and make two clean, straight cuts. A good, square cut is everything for getting a leak-free seal. Once that piece of pipe is out, use a deburring tool to clean up the inside and outside edges of the pipes. It’s a small step, but it protects the O-rings in your new fittings from getting sliced up.
Now, you’ll install the bypass valve. How you do this depends on your pipes:
Pay close attention here. Your bypass valve will have a marked inlet and an outlet. This isn't a suggestion—it's mandatory. The inlet must connect to the pipe coming from your water supply, and the outlet connects to the pipe feeding the rest of your house.
If you get this backward, the softener simply won't work, and you risk damaging the unit. Most valves have big arrows molded right into the plastic to make it almost foolproof. Water has to flow in, through the resin beads to get softened, and then back out to your faucets.
Most homes use one of three types of pipe, and your connection method will change for each.
A full DIY setup can be knocked out in an afternoon, letting you bypass plumber fees that can easily run from $500 to $1,500. As the team at Water Filter Advisor often points out, always look for systems certified to NSF/ANSI 44 standards to ensure they actually do what they claim. To see what's popular, you can even check out a market analysis of home water softeners and see how these systems are trending.
With the main plumbing connections behind you, the toughest part of the job is done. Now it's time to hook up the drain and brine lines so the softener can flush out the hardness minerals it collects and regenerate itself.
Think of it this way: your filtration system traps minerals, and during its cleaning cycle (regeneration), it needs to dump that mineral-rich water somewhere. That's the drain line's job. The brine tank provides the salt solution needed for that cleaning process.
Your system comes with a flexible drain tube that runs from the control valve to a suitable drain. The destination you choose is important for a safe, reliable setup.
You have a few solid options here:
No matter which option you choose, you absolutely must include an air gap. This is a physical space of about 1.5 to 2 inches between the end of your drain tube and the drain opening itself.
An air gap is a non-negotiable safety measure. It prevents contaminated drain water from ever being siphoned back into your home's clean water supply. Never seal the drain line directly into a pipe—it's a serious health hazard and a plumbing code violation.
Make sure you secure the tubing with a clamp or zip tie. The water comes out with a surprising amount of force during the backwash cycle, and a loose hose can make a huge mess.
The brine tank is the shorter, wider tank that holds the salt. Your task here is to connect the small brine line from the softener's control valve to the safety float assembly inside this tank.
That safety float is a clever little mechanism. It works just like the float in your toilet, shutting off the water when the tank is full to prevent a salty, messy overflow.
Connecting it is straightforward. The brine tank itself is a tough plastic container; if you want some general tips on handling this kind of material, this guide on how to install a polyethylene tank can be helpful.
Simply run the thin brine tube from the control valve over to the fitting on the safety float. Most systems use simple compression fittings that you can just tighten by hand.
Finally, connect the overflow tube. This is a larger emergency hose that attaches to a port near the top of the brine tank. If the safety float ever fails, this tube will direct any excess water to your floor drain instead of all over the floor. Route this tube to the same drain you're using for the main unit, making sure its end sits lower than the softener's main drain connection.

Alright, the heavy lifting is over and all your pipes are connected. You’re in the home stretch now, turning this plumbing project into a fully functional home water filtration system. There are just a few key things left to do: get the salt ready, program the brains of the operation, and run a test cycle.
First up, let’s deal with the brine tank. Grab a bucket and pour about three to four gallons of water right into the tank itself. This initial water is essential—it’s what the softener will use to mix up the very first batch of brine for its first regeneration cycle.
Now for the salt. Go ahead and fill the brine tank with your water softener salt pellets. A good rule of thumb is to stop about four to six inches from the top. Don’t be tempted to fill it to the brim; overfilling can lead to “salt bridging,” which is a nasty, hard crust of salt that forms inside and stops your system from working right.
With the salt and water sorted, plug the control valve into a standard electrical outlet. You should see the display light up, which means you're ready to get programming.
The control valve is the command center for your entire system, and getting the settings right is what makes it all run on autopilot. Don’t let the digital display and buttons intimidate you—it’s actually pretty straightforward.
Your user manual is going to be your best guide here, but virtually all modern softeners need the same three pieces of information:
Water Hardness: This is the big one. You’ll need to input your water’s hardness level, which is measured in grains per gallon (GPG). If you don’t have this number, you can find it with a simple home test kit or by checking your local water utility’s annual report online.
Current Time: Just like any other clock, set it to the current time of day. This is crucial for making sure the regeneration cycle runs when you want it to.
Regeneration Time: The softener needs to clean itself every so often, and you want this to happen when no one is using water. The factory default is usually 2:00 a.m., and honestly, that’s the perfect time for most homes.
Getting the hardness level right is critical. If you set it too low, your water won't be fully softened. Set it too high, and you'll just be wasting salt and water by regenerating more often than you need to. If you’re not sure, it’s always better to round up slightly.
Once it's programmed, you'll want to kick off a manual regeneration cycle right away. This initial run does two important things: it purges all the air out of the resin tank and gives you a chance to confirm everything is working perfectly before you let soft water flow into your home.
Look for a button labeled "Regen" or "Regenerate" on the control valve. You'll probably need to press and hold it for a few seconds. You'll hear the motor start to turn as the valve clicks through its cycles—backwash, brine draw, rinse, and so on.
This is your moment to play inspector. Listen and watch as the unit runs. Make sure you see water flowing out of the drain line during the backwash and rinse cycles. It's also a great time to double-check that brine line connection for any sneaky leaks.
More and more homeowners are taking on this project themselves. In fact, after 2020, nearly 70% of U.S. owners chose whole-house units. While hiring a pro can cost anywhere from $800 to $2,000, a quality DIY kit can slash that bill in half. For many, it's a simple valve swap that only takes a few hours. You can dig into more industry stats by checking out the global market for water softeners.
After that first regeneration cycle finishes, you’re ready for the grand finale. Head back to the bypass valve you installed earlier. Now, slowly—and I mean slowly—turn the handle to let water back into your home’s main supply line.
Going slowly is key to preventing "water hammer," which is a loud, jarring bang in your pipes that can cause real damage. Once the valve is all the way open, walk to the faucet closest to the softener and turn on the cold water. Let it run for a few minutes until the stream is clear and you don’t see any more air bubbles. Then, do the same with a hot water faucet to clear the air out of your water heater.
Do one final walk-around, meticulously checking every connection point for drips. That’s it! Your install water softener system project is officially a wrap. Your home is now set to enjoy all the benefits of soft water.
Even after you've tightened the last fitting and checked for leaks, it’s totally normal to have a few questions pop up. Getting used to a new water softener takes a little time. Let's walk through some of the most common things people ask right after they install a water softener system.
Getting this setting right is everything for your softener's efficiency. You have to tell the system exactly how hard your water is so it knows when to run a cleaning cycle, or "regenerate." The most accurate way to find this number is by using a water test kit, which measures hardness in grains per gallon (GPG).
No test kit? No problem. Check the annual water quality report from your local water utility. Most municipalities post these online, and you can usually find the hardness level listed there. Nailing this number prevents you from wasting salt or, even worse, letting hard water sneak back into your pipes.
Think of it like a recipe. If you don’t measure the main ingredient correctly, the final dish won't turn out right. Setting the hardness too low results in partially softened water, while setting it too high causes the system to regenerate too often, wasting salt and water.
So, if your test comes back at 15 GPG, that's the number you'll punch into your control valve. For anyone on a private well, testing is non-negotiable since hardness levels can change over time.
How often you'll be lugging those heavy bags depends on two things: how hard your water is and how much of it you use. For a typical family of four dealing with moderately hard water, you might find yourself adding a 40-pound bag of salt every month or two.
This is where a modern, high-efficiency softener really shines. These units use what's called "demand-initiated regeneration." In simple terms, they only clean themselves after a set amount of water has been used, not just on a timer. This smart feature can slash your salt use by up to 50% compared to older, timer-based models.
Get into the habit of peeking inside the brine tank once a month. You just want to make sure the salt level is always a few inches above the water line. Whatever you do, don't let it run completely dry.
Absolutely, but there’s often an extra step involved. Well water is notorious for containing more than just hardness minerals like calcium and magnesium; it can also be high in iron and sediment.
A standard water softener can handle small amounts of iron—usually around 1-3 parts per million (PPM). Anything more than that can clog up the resin beads and eventually wreck the control valve.
If your well has significant iron, the best practice is to install a dedicated iron filter before the water softener. This pre-treatment step acts as a bodyguard for your softener, protecting your investment and letting it do what it does best: fight hardness. For more on this, you can find a ton of expert advice on our blog.
That’s a common question, and the answer is almost always a firm "no." There’s really no upside to watering your lawn, washing your car, or filling the kiddie pool with softened water. In fact, the sodium a softener adds can actually harm your plants over the long haul.
For this exact reason, most professional plumbers will set up the system to bypass your outdoor spigots completely. The whole point is to soften the water inside your house—the water that runs through your appliances, showers, and faucets.

When you're hunting for the best RO system, it really boils down to one thing: finding a unit that wages war on the specific junk in your water, fits your home, and doesn't make your wallet cry. The best systems out there are the ones that give you total confidence in every single glass.

It doesn't matter if your water comes from the city or a private well—you can never be too sure what's hitching a ride in it. City water is treated, sure, but that doesn't stop it from tasting like a swimming pool or carrying disinfection byproducts. Worse, ancient pipes can leach lead into your water long after it leaves the treatment plant.
If you're on well water, you've got a whole different cast of characters to worry about. Farm runoff can spike nitrate levels, and natural elements like arsenic or radium can be hiding in your water with no taste or smell to warn you. These are the invisible troublemakers that have families searching for something stronger than a basic pitcher filter.
Reverse osmosis (RO) is considered the top-tier solution for home water purification for a good reason—it’s a ruthless contaminant-killer. An RO system works by forcing water through a special membrane that strips out up to 99% of total dissolved solids (TDS). It catches an enormous range of contaminants that other filters just can't handle:
More and more people are turning to this technology. The global RO system market, valued at USD 9.26 billion in 2025, is expected to hit USD 14.81 billion by 2034. That growth is all about people wanting to take control of their water quality. You can see the data yourself in market research on reverse osmosis systems.
Think of an RO system as the final line of defense inside your home. It’s a reliable guard against a huge list of impurities, giving you peace of mind that the water your family drinks and cooks with is truly clean.
This guide will walk you through everything you need to know to pick the best RO system for your house. We'll break down the tech, compare the different types of units, and point out the features that really matter so you can make a solid choice.
You've probably heard of reverse osmosis, and it might sound a little like science fiction. But the idea behind it is actually pretty simple. Imagine a filter so ridiculously fine that it only lets pure water molecules pass through, leaving virtually everything else behind. That's RO in a nutshell.
The core of any RO system is its semipermeable membrane. This isn't your average filter; its pores are incredibly tiny, about 0.0001 microns wide. For perspective, a single human hair is about 75 microns thick. Only water can squeeze through these microscopic openings. Unwanted guests like heavy metals, salts, and other dissolved solids are physically too large to pass and get unceremoniously flushed away.
This is why RO is the gold standard for home water purification. It removes a massive range of impurities that standard filters just can't touch—we're talking lead, arsenic, fluoride, dissolved salts, and even some bacteria and viruses. It’s a physical barrier that separates the good stuff (pure H₂O) from the bad.
Of course, that powerful membrane doesn't work alone. A good RO system is a multi-stage team, with each filter playing a specific role to protect the membrane and deliver the best possible water.
Sediment Pre-Filter: This is the bouncer at the door. Its job is to catch the big stuff—rust, dirt, sand, and any other sediment floating in your water. Taking this debris out first is crucial to prevent the more sensitive filters down the line from getting clogged up.
Carbon Pre-Filter: After the sediment filter, water moves through at least one carbon filter. Carbon is a superstar at grabbing chemicals, especially the chlorine and chloramines that cities use for disinfection. This step is vital because chlorine will absolutely destroy a delicate RO membrane over time. As a bonus, it also gets rid of foul tastes and odors.
The RO Membrane: Here's where the real magic happens. With the path cleared by the pre-filters, water is forced through the RO membrane. This is the stage that rejects up to 99% of all total dissolved contaminants, washing them right down the drain. Bye-bye, bad guys.
Post-Filter/Polishing Filter: Once the water leaves the storage tank, it gets one last pass through a final "polishing" filter. This is usually another carbon filter that mops up any residual tastes or odors the water might have picked up in the tank. The result is exceptionally crisp, clean water that’s a joy to drink.
As you shop for a system, you'll see terms like "TDS" and "rejection rate" thrown around. Total Dissolved Solids (TDS) is just a measure of everything dissolved in your water—minerals, salts, metals, you name it. A high TDS reading doesn't automatically mean your water is dangerous, but it's a good indicator that there's a lot of stuff in there you probably don't want to drink.
The rejection rate tells you exactly how much of that TDS is being removed. This is where the thin-film composite (TFC) membrane shines. It’s so good at its job that it has completely changed the game for home filtration. In fact, TFC membranes powered over 91% of the RO market in 2022 because they can achieve rejection rates of up to 99.9% for nasty contaminants like lead and arsenic. You can see more on the RO membrane industry's impressive growth in recent reports.
A high rejection rate is the ultimate proof of performance. It's a direct measure of how well the system protects your family, turning unpredictable tap water into a consistently pure and safe source of hydration.
Alright, let's get practical. Knowing the science behind RO is one thing, but picking the right unit for your kitchen is where it really counts. Forget about finding one single “best” model—the best RO system is the one that fits your home, your water, and your life.
We're looking at three main players here: under-sink, countertop, and whole-house systems. Each one is built to solve a different problem, whether you’re short on space or dealing with seriously troubled water straight from the source. Let's walk through some real-world situations to see which one makes sense for you.
The right choice for a family of four who owns their home is going to be totally different from what a student in a small apartment needs. A homeowner wrestling with nasty well water contaminants needs a heavy-duty solution, while someone in the city might just want their tap water to taste better.
Let's break down who each system is really for. This quick decision tree can help you visualize where you fall.

As you can see, a couple of quick questions about your space and how permanent you want the setup to be can point you in the right direction fast.
For most homeowners and families, an under-sink RO system is the undisputed champ. These units get tucked away neatly inside your kitchen cabinet, hooking directly into your cold-water line. You get pure, filtered water on-demand from a separate, dedicated faucet right on your sink.
It's the perfect "set it and forget it" option. You get an endless supply of top-quality water for drinking and cooking without cluttering up your counters. If you're planning a kitchen remodeling project, that’s the ideal time to install one, since the plumbing work can be done along with everything else.
What if you can't go drilling holes or messing with plumbing? If you're renting, living in a dorm, or just have zero space under your sink, a countertop RO system is your new best friend. These are completely self-contained units that work right out of the box.
Just plug it in, fill the tank with tap water, and it does the rest. It’s the ultimate choice for anyone who needs portability or can’t make permanent changes to their plumbing. You get all the filtration power of a bigger system with the convenience of a coffee maker. They take up a bit of counter space, sure, but you can take it with you when you move.
For those facing major water quality headaches across the entire house, only a whole-house RO system will do. We're not just talking about drinking water here—this is about protecting your pipes, dishwasher, washing machine, and even your skin and hair from hard water, iron, sulfur, and other harsh contaminants.
These are serious, large-scale systems installed where your main water line enters the house. Every single tap, from the kitchen to the shower, will deliver purified water. Because they process so much water, they almost always need a large storage tank and a booster pump to maintain strong, steady water pressure throughout your home. This is the best RO system for anyone on problematic well water or in a city with exceptionally poor water quality.
To put it all together, this table gives you a clear, side-by-side look at how these systems stack up. Use it to quickly match your needs with the right technology.
| Factor | Under-Sink RO System | Countertop RO System | Whole-House RO System |
|---|---|---|---|
| Ideal User | Homeowners, families | Renters, apartment dwellers, students | Homeowners with severe water issues |
| Installation | DIY-friendly; requires plumbing connections | None, plug-and-play | Professional plumber required |
| Footprint | Hidden in a cabinet | Takes up counter space | Large, requires dedicated space (garage, basement) |
| Water Output | Dedicated faucet for drinking/cooking | Batches of purified water | Purified water at every tap in the home |
| Portability | Permanent installation | Highly portable | Not portable; a permanent home fixture |
At the end of the day, picking the right system comes down to knowing your own situation. Once you understand your water quality, living arrangement, and budget, you can make a choice with confidence. For more targeted help with a wide range of water concerns, you might find the helpful advice at Water Filter Advisor useful.

When you start shopping for an RO system, the spec sheets can get confusing fast. But here's the bottom line: finding the best RO system isn't about getting the most features. It's about finding the right features to fix your specific water problems.
Let's cut through the marketing fluff. This is the no-nonsense buyer's checklist, focusing on the criteria that actually make a difference in the performance and safety of your drinking water.
An RO system’s main job is to pull contaminants out of your water. You shouldn’t have to just trust a manufacturer’s claims. That’s where third-party certifications from groups like the NSF (National Sanitation Foundation) and ANSI (American National Standards Institute) come in. They're not optional; they're proof.
Think of these certifications as a guarantee that the system has been put through its paces and performs as stated. They provide a clear, objective benchmark for what you're buying.
NSF/ANSI 58: This is the big one for reverse osmosis systems. It verifies the system’s ability to reduce nasty stuff like lead, arsenic, fluoride, and overall TDS (Total Dissolved Solids). If a system has this certification, you know it works.
NSF/ANSI 42: This standard deals with aesthetics—taste and smell. It certifies that the system effectively removes chlorine and other things that make tap water unpleasant. It's less about health and more about getting that crisp, clean flavor.
A system without these certifications is a gamble. The best RO system will always have its performance backed by a reputable third party.
How much pure water do you actually need in a day? Your answer points you to the right system capacity, which is measured in Gallons Per Day (GPD). This number tells you the maximum amount of water a system can produce in 24 hours under perfect conditions.
If you live alone, a 50 GPD system might be plenty. But for a big family that's always cooking, you’ll want to look at 75 GPD or even higher. It's important to know that GPD isn't the same as flow rate—the speed water comes out of your faucet depends more on water pressure and the system's tank.
Think of GPD like a car's top speed—it's an indicator of the machine's overall power. A higher GPD just means the system can refill its storage tank faster, so you're less likely to run out of pure water when you're filling pots or have guests over.
You'll have to choose between a classic RO system with a storage tank and a newer, tankless model. This decision affects everything from how much space you lose under the sink to how fast your glass fills up.
Traditional Tank Systems:
These are the tried-and-true workhorses. They store a few gallons of purified water in a pressurized tank so it's ready the moment you open the faucet. They're reliable, don't need electricity, and usually cost less upfront. The tradeoff is the bulky tank taking up cabinet space and the time it takes to refill once emptied.
Tankless RO Systems:
Also known as "on-demand" systems, these sleek units use a booster pump to purify water as you need it. This gets rid of the storage tank, which is a massive win for saving space. You get a continuous flow of freshly filtered water, and they're often more efficient. The downsides? They cost more and require electricity, so no filtered water during a power outage.
The RO process works by pushing pure water through a membrane and flushing the leftover contaminants down the drain. The ratio of wastewater to pure water is a major factor in a system's efficiency. Older systems were notoriously bad, with some wasting 4 gallons for every 1 gallon of pure water produced (a 1:4 ratio).
Thankfully, modern systems are much better. You can now find units with waste ratios of 1:2 or even 1:1.
In areas with high water costs, a more efficient system can pay for its higher price tag over time through water savings alone.
Reverse osmosis is so effective it strips out nearly everything—including healthy minerals like calcium and magnesium that give water a good taste. Without them, the water can taste "flat" or slightly acidic. To fix this, many of the best RO systems now include a remineralization stage.
This is a final filter that adds a small amount of beneficial minerals back into the water after purification. It does two things: it dramatically improves the taste, making it similar to premium bottled water, and it raises the water's pH to make it less acidic. If taste is a top concern for you, definitely look for a system with a remineralization filter.
It’s easy to get hung up on the sticker price when you're shopping for an RO system. But the real cost—the total cost of ownership—is what truly matters. This includes what you'll spend on filters, the water that goes down the drain, and maybe even installation.
Looking at these long-term costs upfront means no nasty surprises later. A cheap system might look like a great deal, but if it wastes tons of water or needs pricey filters, you could end up paying more in the long run. Let's break it down so you can budget smart.
The biggest recurring cost for any RO system is replacing the filters. These are the parts doing all the heavy lifting, and they don't last forever. You'll need to schedule and budget for replacements to keep your water quality high.
Here’s a common replacement schedule to give you an idea:
For a standard under-sink system, you can expect to spend about $75 to $150 a year on filters. It’s an extra cost, for sure, but it’s a small price for pure water on demand and usually much cheaper than buying bottled water all year.
"A year worth of filters cost us roughly $150, which for us has been worth it. Compared to the effort of constantly refilling jugs or buying bottled water, maintenance feels minimal."
Reverse osmosis works by flushing away contaminants, which creates wastewater. This "brine" water goes right down the drain, and the amount can add up on your water bill. A system's efficiency is measured by its pure-water-to-wastewater ratio.
For instance, an older, inefficient system might have a 1:4 ratio. That means for every one gallon of pure water you get, four gallons are wasted. Modern, high-efficiency systems, however, can hit a 1:1 ratio, which cuts that waste dramatically.
Think about it: if your family uses three gallons of RO water a day, switching from a 1:4 system to a 1:1 system can save you over 3,000 gallons of water every single year.
The last piece of the puzzle is installation. If you're handy, most under-sink and countertop RO systems are designed for a straightforward DIY install. With a few basic tools, you can probably get it done in a couple of hours and save some cash.
But if you’re not comfortable with plumbing or you need to drill a new hole in a granite or quartz countertop, calling a pro is the way to go. A plumber will typically charge between $150 and $300 to install an under-sink system. It gives you a leak-free setup and total peace of mind.
For a big whole-house system, professional installation isn't optional—it's a must, and the cost will be higher.
Deciding on an RO system is a big step. It’s common to have a few last-minute questions before you commit. We'll cover the most frequent concerns homeowners run into, giving you clear, direct answers so you can make the right choice.
Let's clear up any final doubts about mineral content, filter changes, and installation.
One of the first questions people ask is whether reverse osmosis strips out beneficial minerals like calcium and magnesium. The answer is yes. The membrane is designed to remove nearly everything from the water, which includes healthy minerals. This is why some people find pure RO water tastes "flat."
However, the mineral content from water is minimal compared to what you get from food. If you're concerned about taste or mineral loss, many modern RO systems now come with a remineralization filter stage.
A remineralization filter adds small, controlled amounts of minerals like calcium and magnesium back into the water after purification. This improves the flavor—making it taste more like premium bottled water—and also raises the pH, so the water is less acidic.
Replacing filters is the main ongoing maintenance for any RO system. The exact schedule depends on your water quality and usage, but following the manufacturer's guidelines is the best way to keep your system running correctly.
A typical replacement schedule for an under-sink RO system looks like this:
Many new systems now have filter life indicators—a light or an alert—that tell you exactly when a change is needed, taking out all the guesswork.
This concern depends entirely on which type of system you choose. An under-sink or countertop RO unit will not lower the water pressure in your kitchen sink, shower, or other faucets. These are point-of-use systems that work independently and use their own dedicated faucet, which will have a slower flow because of the intensive filtration process.
A whole-house RO system, on the other hand, is a different story. Since it’s installed on your main water line, it can definitely reduce your home's overall water pressure. To solve this, these systems are almost always installed with a booster pump and a large storage tank to guarantee strong, consistent pressure at every tap.
Yes, absolutely. Most under-sink systems and all countertop models are designed for DIY installation. They come with color-coded tubing, quick-connect fittings, and step-by-step instructions. If you're comfortable with basic home projects, you can probably get it done in an afternoon.
The major exception is a whole-house RO system. These are complex installations that involve cutting into your main water line and doing electrical work for the booster pump. A job this big should always be left to a licensed plumber to ensure it's done safely and meets all local codes.
At Water Filter Advisor, we're here to help you find the right water filtration solution. We provide in-depth guides and unbiased reviews to give you the expert insight needed for a confident decision. Explore our resources to get safer, better-tasting water at home. Learn more at Water Filter Advisor.

Ever wonder what’s actually in your water? A sediment filter acts as a physical gatekeeper, stopping party crashers like sand, silt, rust, and other debris from getting into your home's water. You can think of it as the bouncer for your water supply, catching all the big, visible gunk before it has a chance to cause any real trouble. It’s the crucial first piece of the puzzle in most home water filtration setups.

If your home water system was a football team, the sediment filter would be the hard-working defensive lineman. Its job isn't flashy, but it's absolutely essential. Before your water ever gets to the more specialized filters—like carbon blocks that tackle chlorine taste or reverse osmosis systems that purify down to the molecule—it has to get past this checkpoint first.
This pre-filtration step is a must-have for protecting your entire plumbing ecosystem. Without it, those larger particles would quickly clog up and ruin the more sensitive and expensive filters down the line. That means your other filters would wear out fast, and your appliances could take a beating from all that grit and grime.
A sediment filter works just like a screen door or a kitchen colander. It physically stops any particles that are too big to squeeze through its pores. The main job here is to get rid of suspended solids—all that gritty, insoluble stuff you might see floating in a glass of tap water.
This simple mechanical process does a few key things for your home:
You don't have to just take our word for it—the market shows how important this first stage of filtration is. The global sediment filter market is on track to become a $15.8 billion industry by 2025. This growth is mostly driven by homeowners who want to protect their appliances and enjoy better water quality. You can discover more insights about these market trends on datainsightsmarket.com.
It's crucial to know what a sediment filter is designed to do—and what it's not. It has one job, and it does it very well: capturing physical particles. It's not built to handle invisible chemical or biological contaminants.
Here’s a simple breakdown to help you see the difference.
| What It Removes (Physical Particles) | What It Does NOT Remove (Dissolved Contaminants) |
|---|---|
| Sand, dirt, and grit from wells or aging city pipes | Chlorine and chloramine (chemicals used for disinfection) |
| Silt and clay that cause cloudy water (turbidity) | Lead, mercury, and other heavy metals |
| Rust flakes from corroded plumbing | Bacteria, viruses, and other microorganisms |
| Small organic matter like tiny plant debris or insect fragments | Pesticides, herbicides, and Volatile Organic Compounds (VOCs) |
| Scale particles that break off from pipes and water heaters | Dissolved minerals that cause water hardness (calcium and magnesium) |
Think of the sediment filter as the bouncer that keeps the obvious troublemakers out of the club, letting your other filtration systems focus on the more specialized work of purifying your water.

It seems almost magical how a sediment filter can catch so much sand, rust, and silt without completely blocking your water flow. But it's not magic—it’s just smart engineering. The whole process boils down to two simple approaches: filtering like a sieve or filtering like a sponge.
Getting a handle on these two methods will show you exactly how your filter is keeping your water clean and help you choose the right one for your home.
First up is surface filtration. This is your classic sieve. Think of a pleated sediment filter, with its large, folded surface area. It works just like a screen door.
When water flows through, any particles bigger than the filter's tiny pores get stuck on the outside. The water passes right through, but the sand, dirt, and rust can't. It’s a simple, effective way to grab larger sediment without causing a big drop in water pressure right away.
One of the best things about this "sieve" design is that a lot of pleated filters are reusable. Since all the junk is just sitting on the surface, you can often just take the filter out, spray it clean with a hose, let it dry, and pop it back in. This makes them a great choice if you have a lot of visible sediment and want to keep your water flowing strong.
The other approach is depth filtration. This method is less like a screen and much more like a sponge. Instead of one flat surface, these filters use a thick web of fibers, like you'd find in a spun polypropylene or string-wound cartridge.
Picture water pushing its way through a dense, fibrous mat. There's no single barrier. Instead, particles get tangled up and trapped throughout the entire thickness of the filter. The bigger chunks get caught near the outside, while finer particles get lodged deeper inside.
This layered trapping is what makes depth filters so good at capturing a whole range of particle sizes. They create a 3D maze that sediment gets lost in.
The trade-off? Once this "sponge" is full, it's full for good. You can't clean it; you just have to replace it. You'll know it's time when you notice your water pressure starting to drop. That's your sign that the filter has done its job and is clogged with all the gunk it has successfully removed from your water.
At the end of the day, both the sieve and the sponge have the same mission: to physically block particles from getting into your home's water. The only difference is how they catch the debris, which in turn affects your water pressure and whether you can clean the filter or need to toss it.
Choosing the right sediment filter can feel a bit like cracking a secret code. The single most important clue you need to look at is the micron rating. This number tells you exactly how fine a particle the filter is designed to catch.
So, what’s a micron? It’s incredibly small—one-millionth of a meter.
To give you some real-world perspective, a single strand of human hair is about 70 microns thick. The smallest thing you can see with your naked eye is around 40 microns. Anything smaller than that is totally invisible unless you’ve got a microscope. Nailing down this scale is the key to matching a filter to your specific water problems.
Micron ratings on sediment filters aren't just arbitrary numbers; they translate directly to how that filter will perform in your home. A larger number means larger pores in the filter material, which lets more through. A smaller number means a much tighter filter that’s built to capture finer, almost invisible particles.
Here’s a quick guide to what these common micron ratings will actually pull out of your water:
Choosing the right micron rating is all about efficiency. You don't want to use a 1-micron filter to catch large grains of sand that a 50-micron filter could handle with ease. The finer filter will just clog up way too fast and crush your water pressure.
As you compare filters, you’ll bump into two terms that sound alike but have very different meanings: nominal and absolute. Getting this right is critical to making sure you're actually buying the level of protection you think you are.
A nominal 5-micron filter, for example, is rated to remove most particles that are 5 microns or larger. It might be designed to capture around 85% of particles at that size, meaning some 5-micron particles (and even a few slightly larger ones) might still slip through. Think of it as "mostly" getting the job done.
Absolute-rated filters offer a much higher level of certainty. An absolute 5-micron filter is guaranteed to remove at least 99.9% of all particles that are 5 microns or larger. No guesswork, no exceptions.
If you’re just trying to keep sand out of your sprinkler system, a nominal filter will do the job just fine. But if you're trying to protect a sensitive and expensive reverse osmosis system, an absolute-rated filter provides the guaranteed protection you need. This kind of pre-filtration isn't just a "nice-to-have." Unfiltered sediment can slash the life of an RO membrane from 3-5 years down to just 6-12 months. For the 15 million U.S. homes on private wells, a 5-10 micron sediment filter is often essential for making water safe and pleasant.
Once you understand micron ratings and the difference between nominal and absolute, you can cut through the technical jargon and make a smart choice. You're no longer just buying a filter; you're picking the exact level of protection your home's water system needs to run its best.
Alright, now that you’ve got a handle on how these filters work and what those micron numbers actually mean, let’s meet the main players. Walking into the world of sediment filters can feel a bit like wandering down the tool aisle—there are a bunch of different models, and each one is designed for a specific job.
They’re all built with different materials and designs, making them better suited for certain types of water, budgets, and how much maintenance you’re willing to do.
We’ll break down the four most common types you’re going to run into: Spun Polypropylene, String-Wound, Pleated, and Spin-Down filters. Knowing their strengths and weaknesses is the key to picking a filter that doesn't just work, but works perfectly for your home.
Think of a spun polypropylene filter as the trusty, all-purpose disposable option. These are made by melting and blowing polypropylene fibers into a dense, multi-layered cylinder. This creates a depth filter—that "sponge" we talked about earlier—which traps particles all the way through its core.
The outer layers are a bit looser to catch the big stuff, while the inner layers are packed tight to grab the finer silt. This gradient design is great because it can hold a lot of gunk before it finally clogs up.
String-wound filters are the rugged, old-school workhorses of the sediment world. They’re made by winding a cord—usually polypropylene or cotton—very tightly around a central core. The crisscrossing pattern creates a tough depth filter that’s exceptionally good at trapping all sorts of sediment sizes.
Their durable build makes them a go-to for more challenging water, especially from wells that can kick up a random mix of sand, silt, and rust. They also tend to handle higher temperatures better than some of their counterparts.
We often recommend string-wound filters for well owners because they offer a fantastic balance of high filtration capacity and pure structural integrity. They're built to handle the tough, unpredictable stuff that wells can dish out.
To give you a sense of scale for what these filters are up against, this chart shows just how tiny these particles are.

As you can see, a filter rated to stop silt is capturing particles that are many, many times smaller than a single human hair. It really shows the precision involved in getting your water clean.
Pleated filters work more like a "sieve," using a large, folded sheet of material to catch particles on its surface. The accordion-like folds give them way more surface area than a standard filter of the same size. This design lets water flow through with less resistance, which means you get better flow rates and less of a drop in water pressure.
The biggest perk for most homeowners? They’re often reusable. Since all the sediment is just sitting on the outside surface, you can usually take the cartridge out, give it a good spray with a hose, and pop it right back in.
Spin-down filters are really in a class of their own. They use centrifugal force to create a vortex inside the filter housing, which slings the heavier sediment to the outside wall where it collects at the bottom. The cleaner water in the middle then passes through a screen (usually stainless steel) for a final polish.
The "set it and forget it" appeal comes from their super easy cleaning. You don’t have to shut off the water or take anything apart. You just open a little valve at the bottom, and the collected sediment flushes right out. This makes them a lifesaver for homes with very heavy sediment, like those on well water.
Choosing the right filter isn't just about convenience; it's a major public health decision. Sediment filters directly tackle turbidity, a risk factor the WHO has identified in the water supplies of 1.8 billion people. By capturing 98-99.9% of these particles, they help prevent health issues that can arise from cloudy, contaminated water. You can read more on the global importance of filtration at gminsights.com.
To make it even easier to decide, we’ve put together a quick comparison table breaking down the most common options for homeowners.
| Filter Type | How It Works | Best For | Pros | Cons |
|---|---|---|---|---|
| Spun Polypropylene | Depth filter; traps particles throughout its multi-layered core. | General city or well water with fine sediment. | Very affordable, widely available, good all-around performance. | Single-use only; creates ongoing replacement costs and waste. |
| String-Wound | Depth filter; a wound cord creates a durable structure to trap varied sediment sizes. | Challenging well water with mixed sediment (sand, silt, rust). | Very durable, handles high flow and temperature well. | Can be less precise with micron ratings than spun filters. |
| Pleated | Surface filter; large, folded surface area catches particles on the outside. | Homes needing high flow rates and minimal pressure drop. | Reusable (can be cleaned), excellent flow, lower long-term cost. | Higher initial price, can clog with very fine or slimy sediment. |
| Spin-Down | Centrifugal force spins out heavy debris before water passes through a screen. | Water with very heavy, large sediment (like sand from a well). | Self-cleaning (just flush the valve), minimal maintenance. | Highest upfront cost, mainly for larger particles. |
Ultimately, the best filter is the one that matches your water source and your lifestyle. Whether it's a cheap and easy disposable filter or a reusable, heavy-duty model, there’s a solution that will keep your water clear and your pipes protected.
Your sediment filter is a quiet workhorse, but it's not a "set-it-and-forget-it" part of your home. Just like the oil filter in your car, it eventually gets clogged with all the gunk it’s pulling from your water. Letting it go for too long can cause more headaches than the sediment you were trying to fix in the first place.
Manufacturers usually suggest swapping the filter out every 3 to 6 months, but that's just a starting point. The real factor is your water quality. If you're on a private well, for instance, sediment levels can swing wildly with the seasons. Luckily, your home gives you some pretty clear signals when it's time for a change.
This is the big one. It's the most common and annoying sign that your filter has clocked out. If your morning shower suddenly feels like a weak drizzle or it takes ages to fill a pot at the sink, a clogged filter is almost always the culprit.
Think of it this way: a new filter is like a freshly paved, wide-open highway for your water. As it traps sand, dirt, and rust, it’s like closing down lanes one by one. Eventually, you've got a full-blown traffic jam, and only a trickle of water can squeeze through. That's what causes that frustrating pressure drop you feel all over the house.
A clogged sediment filter literally chokes off your home’s water supply. This isn't just an inconvenience; it’s a direct sign the filter is so packed with debris that it has become the main bottleneck in your plumbing.
Remember why you got the filter in the first place? To get rid of that nasty, cloudy water. If you start seeing little floaties in your glass again or find a film of silt at the bottom of your toilet bowl, your filter has probably thrown in the towel.
Once a filter cartridge is completely saturated with sediment, a couple of things can happen, and neither is good:
This completely defeats the purpose of having a filter. You'll end up with clogged faucet aerators and gummed-up showerheads, which are just another chore to clean.
A standard sediment filter isn't built to remove chemicals like chlorine. Its job is to trap physical particles, including fine organic matter like dirt and silt.
When all that organic stuff gets trapped and sits in a wet, clogged filter, it can start to decay. This can breed a musty, earthy, or even swampy taste and smell in your water. If your water starts tasting "off" and you've ruled out other issues, your dirty filter is the likely source. It’s become a breeding ground for the very junk it was meant to remove.

Knowing how to install or change your own sediment filter can save you both time and a service call fee. Whether you're a seasoned DIYer or just want to know what the plumber is doing, it's a simple skill that puts you in control of your home’s water quality.
Most often, you'll find a sediment filter set up as a whole-house system at the point of entry—that's right where the main water line comes into your house. This is a great setup because it protects every single tap, shower, and appliance from grit and other gunk. Swapping out the cartridge in these systems is a quick job you can easily master.
When your filter is spent, it’s time for a change-out. This is the most basic part of keeping your system running right. The exact steps might change a little depending on the brand, but the process is pretty much the same across the board.
Here's how to get your water flowing clean again.
Turn Off the Water: Find the main shut-off valve for your water line and crank it closed. This stops water from flowing into the system while you're working.
Relieve the Pressure: This is a crucial step! Look for a red pressure-relief button on top of the filter housing. Push it down and hold it until you don't hear any more hissing. Releasing this trapped pressure makes the housing way easier to unscrew.
Unscrew the Housing: Grab the filter wrench that came with your system and use it to get the housing (the big canister part) loose. After a good turn, you should be able to unscrew it the rest of the way by hand. Keep a bucket handy to catch the water that will spill out.
Swap the Filters: Pull out the old, dirty filter and toss it. It's a good idea to give the inside of the housing a quick rinse to get rid of any sediment that's settled at the bottom.
Inspect and Lube the O-Ring: At the top of the housing threads, you'll see a black rubber O-ring. This is what creates the seal. Check it for cracks or damage. A light coat of food-grade silicone grease will help it seal perfectly and make it easier to open next time.
Install the New Filter: Pop the new filter cartridge into the housing. Make sure it sits straight and is centered on the post at the bottom.
Tighten and Check for Leaks: Screw the housing back on by hand until it's snug. Then, give it one last quarter-turn with the wrench—be careful not to overtighten! Slowly turn your water back on. Press the relief button one more time to let any trapped air escape. Now, just watch for any drips around the seal to make sure it's tight.
Pro Tip: Keep a spare O-ring on hand. They’re cheap and can be a real lifesaver if the old one gets stretched or nicked during a filter change, saving you from a surprise leak.
This simple job is the key to keeping your filter system working perfectly. Following these steps will ensure your sediment filter provides clean, clear water for your whole house.
Even after you’ve got the basics down, a few questions always seem to pop up. Sediment filtration sounds simple enough, but the practical side of things is what really matters for your home. Here are the straight answers to the questions we get asked all the time.
No, and this is the most important thing to get straight. A sediment filter is a mechanical filter. All it does is grab physical junk like dirt, sand, and rust. Think of it like a bouncer at a club who only stops the people who look like they're going to cause a scene.
What it doesn't do is remove dissolved chemicals like chlorine or lead. It also can't touch microorganisms like bacteria or viruses. To get truly safe, drinkable (potable) water, your sediment filter needs to be the first step in a multi-stage system. That means pairing it with something like an activated carbon filter and a UV purifier or a reverse osmosis system.
In most cases, yes, you absolutely do. It's a huge myth that city water arrives at your faucet perfectly clean. Sure, it gets treated at a municipal plant, but then it has to travel through miles of old underground pipes to get to you.
On that journey, it’s all too easy for the water to pick up rust from old iron pipes, sediment from a water main break, or all sorts of other debris.
Think of a sediment filter as an inexpensive insurance policy. It protects your pricey appliances—dishwashers, washing machines, and water heaters—from getting wrecked by that hidden grit. That little filter can save you a ton of money on repairs down the road.
Letting a clogged filter sit in the housing is a bad idea. Forgetting about it can lead to two big problems, and you might end up with water that's even worse than having no filter at all.
First, you'll notice a serious drop in water pressure all over the house. Your shower will feel weak and faucets will trickle. That’s because the filter is so jammed with gunk that water can barely squeeze through.
Second, a filter can get so overloaded that it might tear or "unload" all that trapped sediment back into your pipes in one big burst. This sends a concentrated shot of filth into your faucet aerators and showerheads, clogging them up. Keeping up with filter changes is a key part of any good home maintenance plan. If you want to stay on top of everything, an ultimate annual home maintenance checklist can be a lifesaver.
It really depends on what’s causing the issue. If your water has an earthy or musty taste from actual dirt or silt particles, then yes, a sediment filter will probably help a lot by removing the physical source of the taste.
However, it won't do a thing for chemical tastes or odors. It has zero effect on:
To tackle those problems, you’ll need an activated carbon filter. It’s designed specifically to adsorb those taste and odor compounds, which is why carbon filters are almost always placed right after the sediment filter in a complete system.
At Water Filter Advisor, our goal is to empower you with the knowledge to make confident decisions about your home's water quality. From choosing the right micron rating to understanding maintenance, we're here to provide clear, research-driven guidance. Explore our in-depth guides and reviews to find the perfect filtration solution for your family at https://www.waterfilteradvisor.com.

It usually starts with the water pressure dropping off. That sad little trickle from your faucet is more than just a morning annoyance—it’s a neon sig ...
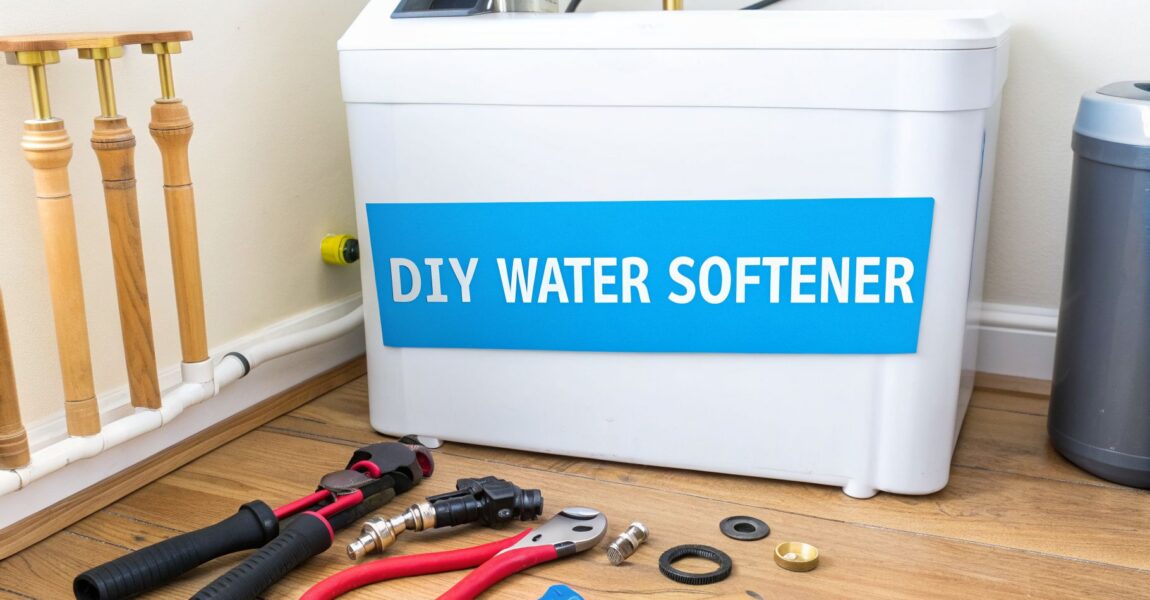
Taking on a DIY water softener installation is one of the best home filtration upgrades you can make, and you can conquer this project in just a few hours. This is a totally manageable mission for a handy homeowner. Modern systems come in plug-and-play kits that can save you a bundle on plumber fees.
If you're sick of the chalky white spots on your faucets, stiff laundry, and the ghost of soap scum haunting your shower doors, you've come to the right place. The villain in this story is hard water, which is loaded with minerals like calcium and magnesium. It might not be a health risk, but it's a real menace to your home's plumbing and appliances.

A water softener is the permanent fix. By installing one yourself, you're not just getting better water—you're protecting your big-ticket investments. Mineral buildup clogs pipes, guts the efficiency of your water heater, and sends dishwashers and washing machines to an early grave.
DIY water softener jobs are booming, and for good reason. Today's salt-based and salt-free systems usually include complete kits, letting you sidestep a professional plumber and save anywhere from $500 to $1,000 on the install. The global market for these home water filtration systems reflects this trend.
This guide is here to walk you through the entire process, so you know exactly what you're getting into. We’ll cover the two main types of systems you’ll be looking at:
When you install a water softener yourself, you gain a deep understanding of your home's water filtration system. You'll be ready for any future maintenance and can be proud you fixed the problem on your own.
We'll give you clear, actionable steps for a successful installation, from planning it out to firing it up. If you want to check out other home water filtration strategies, take a look at our broader https://www.waterfilteradvisor.com/advice/ section. Let's get started on bringing pure, soft water to every tap in your house.
A successful water softener installation is all about the prep work. Honestly, what you do before you even unbox the unit is what separates a smooth Saturday project from a frustrating, leaky mess.
Get these first few steps right, and you'll end up with the right filtration system for your house without any nasty surprises down the road.
First thing's first: you need to know exactly what you're up against. That means testing your water to find out its hardness, measured in grains per gallon (GPG). Don't guess. Grab a simple water hardness test kit online or from the hardware store.
This single number is the most critical piece of the puzzle. It's the secret code that tells you everything you need to know to size your new filtration system correctly.
Before you get too deep into sizing, you need to decide which type of system is right for you. The two main players in home water filtration are traditional salt-based softeners and salt-free conditioners. Each has its pros and cons depending on your water, budget, and even local rules.
This table breaks down the key differences to help you make the right call.
| Feature | Salt-Based (Ion Exchange) | Salt-Free (TAC Conditioners) |
|---|---|---|
| How It Works | Physically removes hardness minerals (calcium & magnesium) through ion exchange. A true water filtration process. | Crystallizes minerals so they can't stick to pipes and surfaces. It doesn't actually remove them. |
| Feel of Water | Creates a noticeably "slippery" or "silky" feel. | No change in the water's feel. |
| Maintenance | Requires regular salt refills and uses water/power for regeneration cycles. | Virtually maintenance-free. No salt, no electricity, no wastewater. |
| Best For | Very hard water (over 10 GPG); when you want to eliminate scale buildup completely. | Moderately hard water; areas with brine discharge restrictions; those on low-sodium diets. |
| Environmental Impact | Discharges salt brine into the sewer or septic system. | No salt or chemical discharge, making it more eco-friendly. |
Ultimately, if you're battling seriously hard water and want that classic soft water feel, a salt-based system is your best bet. If you have moderate hardness and prefer a low-maintenance, eco-friendly option that still protects your pipes, a salt-free conditioner is a fantastic choice.
Once you know your GPG, you need to figure out your home's daily water demand. A good, solid estimate is to multiply the number of people in your house by 75 gallons per day.
So, a family of four will use roughly 300 gallons of water each day (4 people x 75 gallons/person).
Now, let's put those two numbers together to find out how much filtration work the softener needs to do daily. The math is easy:
Daily Gallons Used × Water Hardness (GPG) = Daily Grains to Remove
Let's stick with our family of four, and say their water tested at 15 GPG:
300 gallons × 15 GPG = 4,500 grains per day
This tells you that you need a softener that can handle at least 4,500 grains of hardness between its cleaning (regeneration) cycles. Softeners are sold by their total capacity, which usually falls between 24,000 to 64,000 grains. A standard 32,000-grain unit would work perfectly here, needing to regenerate about once a week (32,000 ÷ 4,500 ≈ 7 days).
My advice? It's always better to go slightly bigger than you think you need. An undersized unit has to regenerate constantly, which just wastes salt and water and wears out the system faster. Think of it as buying a filtration system with room to grow.
With your capacity figured out, it's time to play scout and find the perfect home for your new unit. For any DIY water softener installation, you want to place it as close as you can to where the main water line enters your house. Crucially, it must be installed before the pipe splits off to your water heater.
This makes sure you get filtered, soft water for both your hot and cold taps (we usually leave outdoor faucets on hard water). A basement, garage, or utility closet is your best bet. Make sure the spot has:
Last but not least, do yourself a favor and check your local plumbing codes before you buy anything. This is especially important for salt-based systems, as some towns have rules about discharging brine into the sewer or a septic tank.
A quick phone call to your city's building department will clear up any questions. Getting this sorted out now saves a massive headache later and ensures your home filtration project isn't just done right, but done legally.
A successful DIY water softener installation all comes down to good prep. Trust me, nothing kills your weekend project faster than having to make multiple runs back to the hardware store for a single fitting you forgot. Let's get everything you need laid out before you even think about cutting a pipe.
Think of it like this: a clean cut, a solid wrench, and good thread sealant are the three pillars of any home filtration plumbing job. Get these right, and you're already halfway to a leak-free installation.

Let's sort out the absolute non-negotiables. You simply won’t be able to finish the job without these items in your toolkit.
Core Tool Checklist:
If you're working with PEX tubing, you’ll also need a dedicated PEX crimping tool and the right size crimp rings. These are specialized, but they're the only way to create a secure connection that will pass inspection and last for years.
Most softener kits will give you the main components: the control head, mineral tank, brine tank, and the bypass valve. That bypass valve is a crucial piece—it lets you shut off the softener for maintenance without turning off water to the entire house.
What the kit won't include is the plumbing to connect that bypass valve to your main water line. The exact pieces you need depend entirely on what's already in your house.
A hard-won personal tip: always buy a few extra fittings than you think you need. Having an extra elbow or connector on hand can turn a potential showstopper into a minor inconvenience.
When you're shopping, you’ll see different pipe materials. Knowing the pros and cons of PPR vs PVC vs CPVC is helpful if you're running new lines, but for this job, you'll mainly need adapters.
Alright, you've got your tools, unboxed the new softener, and picked the perfect spot. Now for the main event: the installation itself. Don't let the plumbing intimidate you. We'll walk through this step-by-step, with some real-world advice to keep things dry and straightforward.

Think of it like minor surgery on your water lines. The plan is to shut everything down, make a few clean connections, and then bring it all back online. Just take your time and check every connection twice.
Before you even think about touching a pipe cutter, kill the water supply to your house. Find the main shutoff valve—it’s usually in the basement, a crawlspace, or near where the water line enters your home from the outside. Crank it all the way off.
Now, you have to get the water out of the pipes. Head to the lowest faucet in your house (maybe a basement sink or an outdoor spigot) and the highest one (like an upstairs shower) and open them both up. This lets air into the system and helps every last drop drain out. This is a non-negotiable step if you want to avoid a surprise shower the second you cut into a pipe.
With the system drained, it’s time to get to work on the main water line. Grab your tape measure and mark out the section of pipe you’ll be removing to install the bypass valve. Always remember the old rule: measure twice, cut once.
Stick a bucket right underneath where you plan to cut. No matter how well you think you've drained the pipes, there’s always a little water left. Use your pipe cutter to make two clean, straight cuts and remove the section. A clean cut is absolutely critical for getting a perfect, leak-free seal later.
The bypass valve is the nerve center of your new setup. It’s what lets you shut off water to the softener for maintenance without cutting off water to the entire house. Trust me, you’ll be glad you have it.
Most kits come with a bypass valve that attaches right to the softener's control head. Pay close attention to the arrows that show the direction of water flow. This part is crucial:
Pro Tip: When you install the bypass valve, make sure the handles are easy to get to. Don't face them toward a wall where you can't reach them. A little bit of planning here will save you a ton of hassle down the road when it's time for maintenance.
Now, connect the valve to your main lines using whatever fittings you chose. If you're using flexible braided lines, get them hand-tight and then give them one last quarter-turn with a wrench. For push-to-connect fittings like SharkBites, make sure the pipe end is clean and push it in firmly until you hear and feel it click home.
Next, it’s time to hook the main mineral tank up to the bypass valve. Attach your flexible hoses to the inlet and outlet ports on the control head. Again, follow the arrows to make sure water flows in through the hard water side and out through the soft water side.
This is where your type of home filtration system really matters. A traditional salt-based system has two tanks, while a salt-free conditioner is usually just a single unit.
This all sounds more complicated than it is. For most DIYers, connecting the valves and tanks is a straightforward job that takes just 2-3 hours. The payoff is huge, often leading to a 99% reduction in hardness down to less than 7 grains per gallon. For a family in a hard-water area, that can mean saving around $200 a year on soaps and energy. You can dig into more data on the water softening market to see just how big an impact these home water filtration systems have.
A salt-based softener has to flush out all the hardness minerals and salty brine it collects during regeneration. To do that, you need to run two lines to a drain.
First is the main drain line. This flexible tube runs from the control head to a floor drain, standpipe, or utility sink. It's critical to leave an air gap of at least 1.5 inches between the end of the tube and the drain. This prevents any contaminated water from being siphoned back into your fresh, filtered system.
Second is the brine tank overflow tube. This is purely a safety measure. If the brine tank ever gets too full, this tube directs the excess water to the same drain, stopping a salty flood before it starts. Use zip ties or a clamp to make sure both tubes are secure and won't pop out of the drain.
Once all your connections are solid and the drain lines are secure, you're officially done with the hardest part of your DIY water softener installation. Step back and admire your handiwork before we move on to the final checks and startup.

Alright, the pipes are all connected and you’ve double-checked every fitting. This is the moment you've been working toward. It's time to fire up your new water softener and program the brains of the operation.
The tough part is behind you. Now let's get this filtration system commissioned the right way.
Don't just crank the main water valve all the way open. You never want to slam a new system with a sudden blast of high-pressure water. That's a good way to stress the connections or even damage the softener's guts. Slow and steady is the name of the game here.
First, make sure the softener's bypass valve is still set to "bypass." This lets water flow to the house while keeping the softener isolated for now.
Slowly turn your main water shutoff valve about a quarter-turn open. Go run a faucet somewhere in the house to confirm you have flow, then head back and inspect all your new plumbing for any drips.
If it's all dry, you can now slowly move the bypass valve toward the "service" position. Listen closely—you should hear the big mineral tank start to fill with water. This is your most important leak check. Get a flashlight and get a good look at every single connection you made. Look for the smallest bead of water.
I always give it a solid 15-20 minutes after the tank fills before I call it leak-free. I've seen slow seeps take their time to show up, and finding one now is much better than finding a puddle later.
Once you're positive everything is watertight, go ahead and plug in the control head. This is where you'll tell the softener just how hard your water is and set up its cleaning schedule. The digital display might look a little intimidating, but the process is usually pretty simple.
Your most important job is to enter the water hardness number (in GPG) from your water test. This one setting is the key to the whole operation, as it tells the unit how often it needs to regenerate.
Next, you'll set the time of day and the regeneration time. I always recommend setting it for a time when no one is using water, like 2:00 AM. This way, the regeneration cycle won't interrupt a shower with hard water or cause a drop in water pressure. Some newer softeners have smart features that track your water usage and only regenerate when needed, which is a great way to save on salt and water.
While this is a DIY guide, getting different perspectives on installing water softeners can give you extra tips on programming and what to expect long-term.
With the programming done, you have to manually start the very first regeneration cycle. This is a critical step. It flushes out any leftover dust or debris from the manufacturing process and, more importantly, it gives the resin beads their initial charge by soaking them in brine.
Pour a few gallons of water directly into the brine tank first, then add one or two bags of good-quality softener salt. Check your manual to find the "Manual Regeneration" button—you'll usually need to press and hold it to get the cycle started.
This first cycle can take up to two hours to complete. It will run through a few key stages:
Once that's finished, your system is officially up and running. Congratulations, you're now making beautifully filtered, soft water!
Your DIY water softener installation might be complete, but a little bit of care will keep it running smoothly for years to come. The good news is, there isn't much to it.
Your Long-Term Checklist:
Even after you've followed a guide, questions will pop up. A DIY water softener installation has a lot of moving parts, and it’s totally normal to hit a snag or two.
We get calls all the time about these exact situations. Here are the most common questions we hear, with answers to get you through the finish line.
Absolutely. In fact, if you have well water, you probably need a softener more than most. The main thing to know is that well water often comes with extra baggage—sediment, sand, and sometimes a lot of iron. All that gunk can destroy a new softener.
Your best move is to install a sediment pre-filter right before the water softener's inlet. Think of it as a bodyguard for your softener. It catches all the debris before it can clog up the resin bed. If you skip this, the resin gets fouled, its filtration efficiency tanks, and you’ll be replacing the whole unit way sooner than you should.
First, don't panic. A small drip is almost always an easy fix.
Hit the bypass valve first. This is exactly why you installed it. You can shut off water to the softener and keep it running for the rest of the house.
Now, find the leak. Most of the time, it’s a threaded connection that isn't quite sealed.
Slowly turn the water back on and check your work. That extra tape usually does the trick.
That’s a great question, and the practical answer is no, probably not. Soft water is incredible for your showers, appliances, and laundry, but your lawn and garden won’t be fans. The sodium in softened water isn't great for plants long-term.
For that reason, standard practice for a DIY water softener installation is to plumb the system so it treats all the water after your outdoor spigots. This gives you the best of both worlds: your indoor plumbing and appliances are protected by superior water filtration, and your garden stays happy.
A big drop in water pressure is not normal. It's a red flag that something went wrong during the install.
Start with the simple stuff: check that every single valve is fully open. The main shutoff, the bypass valve, all of them. It's surprisingly easy to leave one only halfway open.
If the valves are good, look for a kink in one of the flexible connector hoses or even the drain line. Also, make sure you didn't install the unit backward—if the water is flowing against the intended direction, it will choke off your pressure. Finally, this can happen if the home filtration system is too small for your house, which is why getting the sizing right from the very beginning is so important.
Water Filter Advisor is your go-to resource for making sense of home water filtration. From in-depth guides to unbiased reviews, we provide the clarity you need to choose the best solutions for your family's health and comfort. Explore our resources today at https://www.waterfilteradvisor.com.