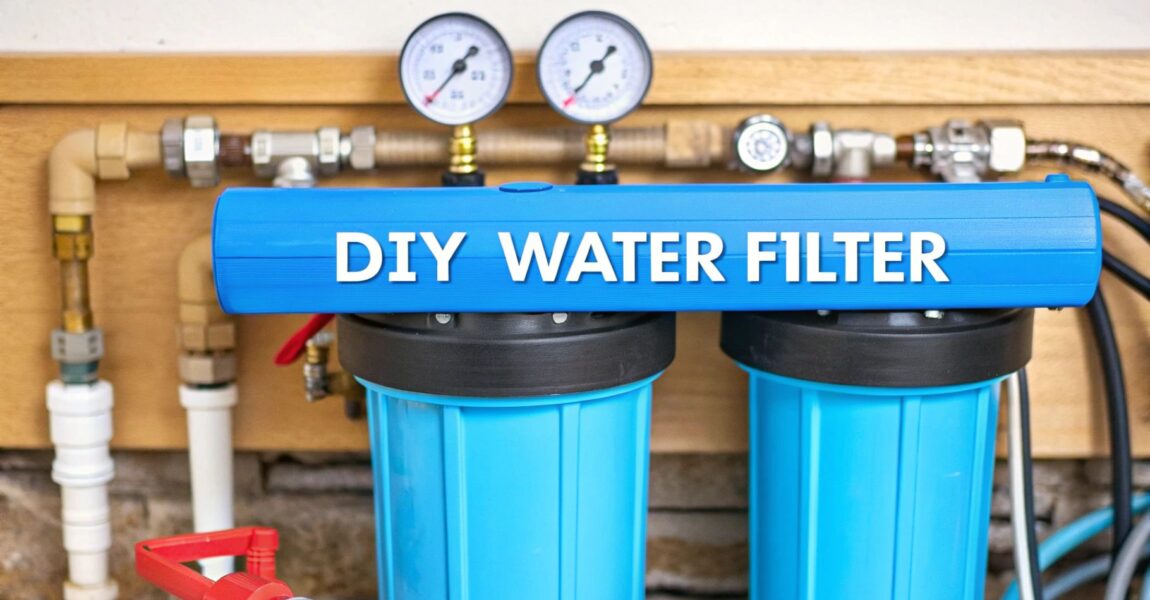
So, you've decided to install a whole-house water filter. Fantastic choice! You're on the verge of upgrading every single drop of water in your home. But before you start dreaming of pristine showers and crystal-clear drinking water, let's talk about the real secret to success: the prep work.
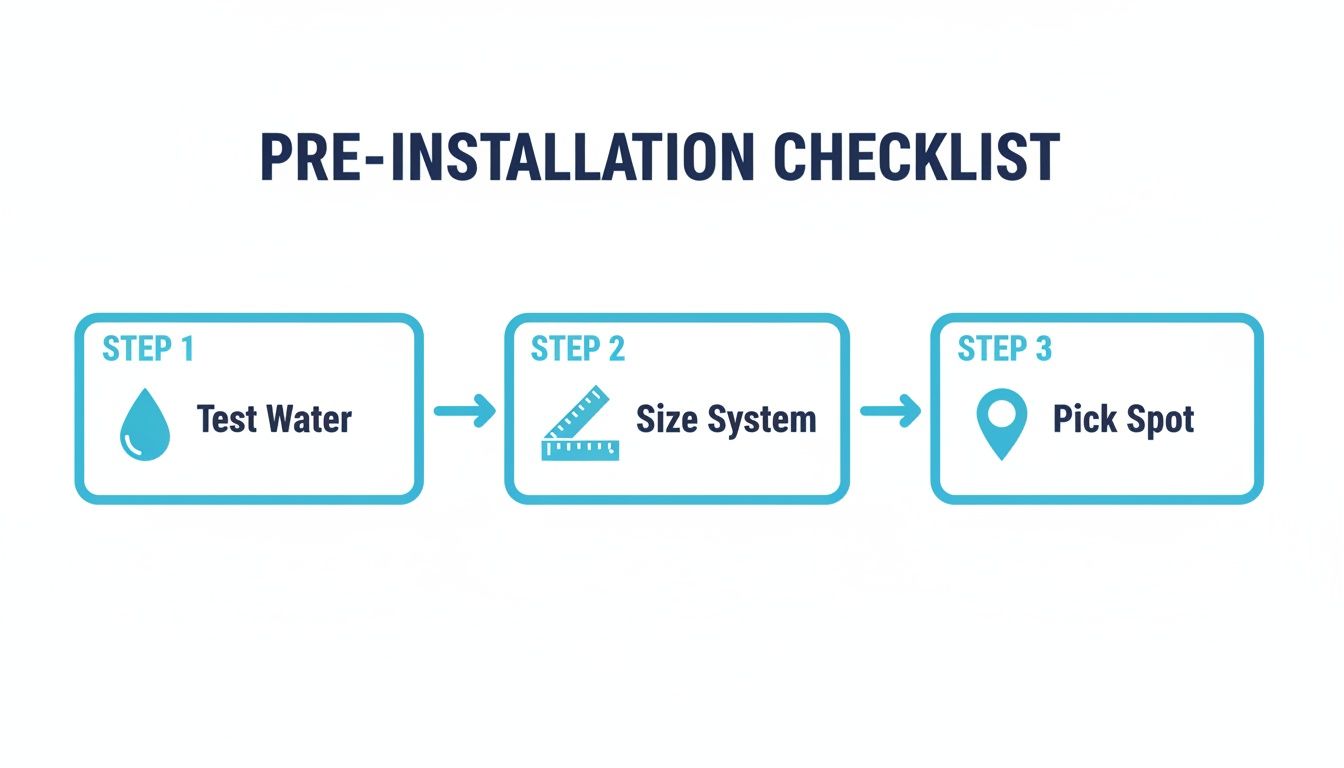
Getting this part right is the difference between a smooth Saturday project and a frantic call to the plumber. It all boils down to three non-negotiable steps: testing your water, sizing the system like a pro, and picking the perfect spot for your new water guardian.
Your Pre-Installation Checklist for Flawless Filtration
More and more homeowners are taking control of their water. It’s no surprise that the market for these systems is booming. Technavio projects the household water purifier filter market will grow by a staggering USD 2,102.2 million between 2025 and 2029. That's a huge shift, showing just how many people want to protect their homes from contaminants right at the source. You can dive into the numbers in Technavio's full report.
Let's make sure your project is a success from the start. Getting this planning phase right isn't just about avoiding a headache later—it's about making sure your investment actually delivers that liquid gold you're after.
First Things First: Know Your Water
Would you take medicine without knowing what you're treating? Of course not. The same logic applies here. Installing a filter without testing your water is like playing darts in the dark. You might hit something, but it probably won't be the bullseye. You could end up with a system that’s total overkill or, far worse, one that doesn’t even touch your main water problems.
A good water test is your strategic roadmap. It tells you exactly what kind of villain you're fighting.
- City Water: Your local utility provides an annual Consumer Confidence Report (CCR), which is a decent starting point. But remember, it measures water quality at the treatment plant, not what it picks up on its journey through ancient pipes to your tap. A simple home test kit can give you the real story on chlorine, hardness, and sediment levels.
- Well Water: If you have a well, testing is non-negotiable. You are the captain of this ship, solely responsible for your water's safety. A professional lab test is the only way to go. It will hunt down the invisible culprits like bacteria, nitrates, iron, manganese, and pH levels—things a simple home kit will miss entirely.
Armed with this intel, you can choose a system that’s truly tailored to your home's needs, whether it's a simple sediment filter or a multi-stage beast for tricky well water.
Size Matters: Avoiding the Dreaded Pressure Drop
One of the biggest complaints after a DIY filter installation is a sudden, soul-crushing drop in water pressure. This almost always happens when the filter system is too small for the home's water demand. Sizing isn't just about how many bathrooms you have; it's all about flow rate.
Flow rate is measured in gallons per minute (GPM). Think about it: a shower guzzles about 2.5 GPM, a dishwasher needs around 2 GPM, and a running faucet sips about 1.5 GPM. It adds up faster than you think when the whole family is home.
Your whole house filter must have a GPM rating that meets or exceeds your home's peak demand. For a typical family of four, that means you need a system rated for at least 10-15 GPM to avoid a pressure-less purgatory when the shower, dishwasher, and washing machine are all going.
Doing your homework upfront is critical. It's a lot like choosing the right water filter system for an RV—you have to match the equipment to your specific needs.
Location, Location, Location
Where you put the filter is just as important as which one you buy. The ideal spot is indoors, right after your main water shutoff valve but before your water heater. This strategic placement ensures that every single drop of water in your home, both hot and cold, gets the five-star filtration treatment.
Here's what to look for when scouting the perfect real estate for your filter:
- Easy Access: You will need to change the filters. Don't wedge the unit into a crawlspace or a tight corner where you'll need the flexibility of a contortionist to get a wrench on it. Give yourself plenty of room to work.
- Freeze Protection: The location must be safe from freezing temperatures. A frozen and cracked filter housing is a recipe for a catastrophic indoor swimming pool.
- Drain and Power: Some systems, like water softeners or iron filters, need to backwash. This requires a nearby drain. If your system has a UV light or an electronic brain, you'll also need a GFCI outlet close by.
Alright, this is where the rubber meets the road. All that planning is about to pay off. I know, cutting into your home's main water line sounds pretty daunting, but trust me, if you’re methodical about it, it’s completely manageable. Think of it less like major surgery and more like a precise, planned upgrade to your home’s plumbing.
Before you even think about picking up a pipe cutter, let's just quickly recap the prep work. This isn't just busywork; it's what separates a smooth Saturday project from a weekend-long headache.
Getting these three things right—testing your water, sizing the system correctly, and finding the perfect spot—is the foundation for everything that comes next.
Creating a Safe and Dry Workspace
First things first: shut the water off to the entire house. Find your main shutoff valve, which is usually tucked away in the basement, a crawlspace, or near your water meter. Turn it all the way off. For a ball valve, that means turning the lever so it's perpendicular to the pipe. If you have an older gate valve, you'll turn the round handle clockwise until it stops.
Next, you've got to drain the lines. Open up a faucet on the highest floor of your house (like a second-floor bathroom) and another one on the lowest level (a basement sink is perfect). This lets air in and allows gravity to do its thing, draining the pipes. Keep a bucket handy right under where you’ll be working—there's always a little water left that will spill out.
Pro Tip: Don't even think about cutting until you're 100% sure the water is off. After closing the main valve, go turn on a faucet. If you get a trickle that peters out, you're golden. If it keeps running, your main shutoff might be shot, and that's a whole other problem you need to fix first.
Making the Cut: Your Pipe Type Matters
The kind of plumbing in your house determines the tools for the job. You need a clean, square cut for a solid, leak-proof connection, and each pipe material has its own best practice.
- Copper Pipe: A simple tubing cutter is your best friend here. It clamps on and you just rotate it, tightening the wheel a little with each turn until it pops right through. This gives you a perfect edge without deforming the pipe.
- PEX (Cross-linked Polyethylene): PEX is a dream to work with. A dedicated PEX cutter works like a pair of scissors and gives you a clean, straight slice in seconds. The key is to cut perfectly straight, not on an angle, so your fittings seal properly.
- PVC/CPVC: For these plastic pipes, a ratchet-style PVC cutter is the way to go. It gives you the leverage to cut through cleanly without risking a crack. You can use a hacksaw in a pinch, but you’ll need a steady hand to keep it straight and will have to deburr the edges with some sandpaper afterward.
Installing a Bypass Loop—Don't Skip This!
Before you hook up the filter itself, you’re going to install a bypass loop. This is basically a little detour for your water, made up of three valves that let you send water around the filter instead of through it. Why bother? Because when it's time to change a filter or service the unit, you can do it without shutting off water to the whole house. It’s an absolute lifesaver.
Most filter kits come with the parts you need. You'll put a shutoff valve on the pipe going into the filter (inlet), one on the pipe coming out (outlet), and a third valve connecting the two. Normally, the inlet/outlet valves are open and the bypass is closed. For maintenance, you just reverse that.
Connecting to the Filter Unit
Time to make the final connections. How you do this really depends on your pipe type and your comfort level with plumbing.
- Push-to-Connect Fittings: These are fantastic for DIYers. They work on copper, PEX, and CPVC. Just clean up the pipe end and push it into the fitting until it clicks. An O-ring and some little metal teeth inside create a surprisingly tough, watertight seal. No special tools needed.
- Compression Fittings: Another great no-solder option. You slide a nut and a little brass ring (called a ferrule) over the pipe. When you tighten the nut, it squishes the ferrule against the pipe, creating the seal. Simple and effective.
- Sweat Soldering (Copper Only): This is the old-school, professional method. It involves cleaning and fluxing the joint, heating it with a torch, and melting solder into the gap. It creates a permanent, rock-solid connection, but it definitely takes some practice and a healthy respect for open flames.
No matter which route you take, read the instructions that came with your filter and your fittings. Pay close attention to the arrows on the filter head that show the direction of water flow (IN and OUT). Hooking it up backward means it won't work, and you could even damage it.
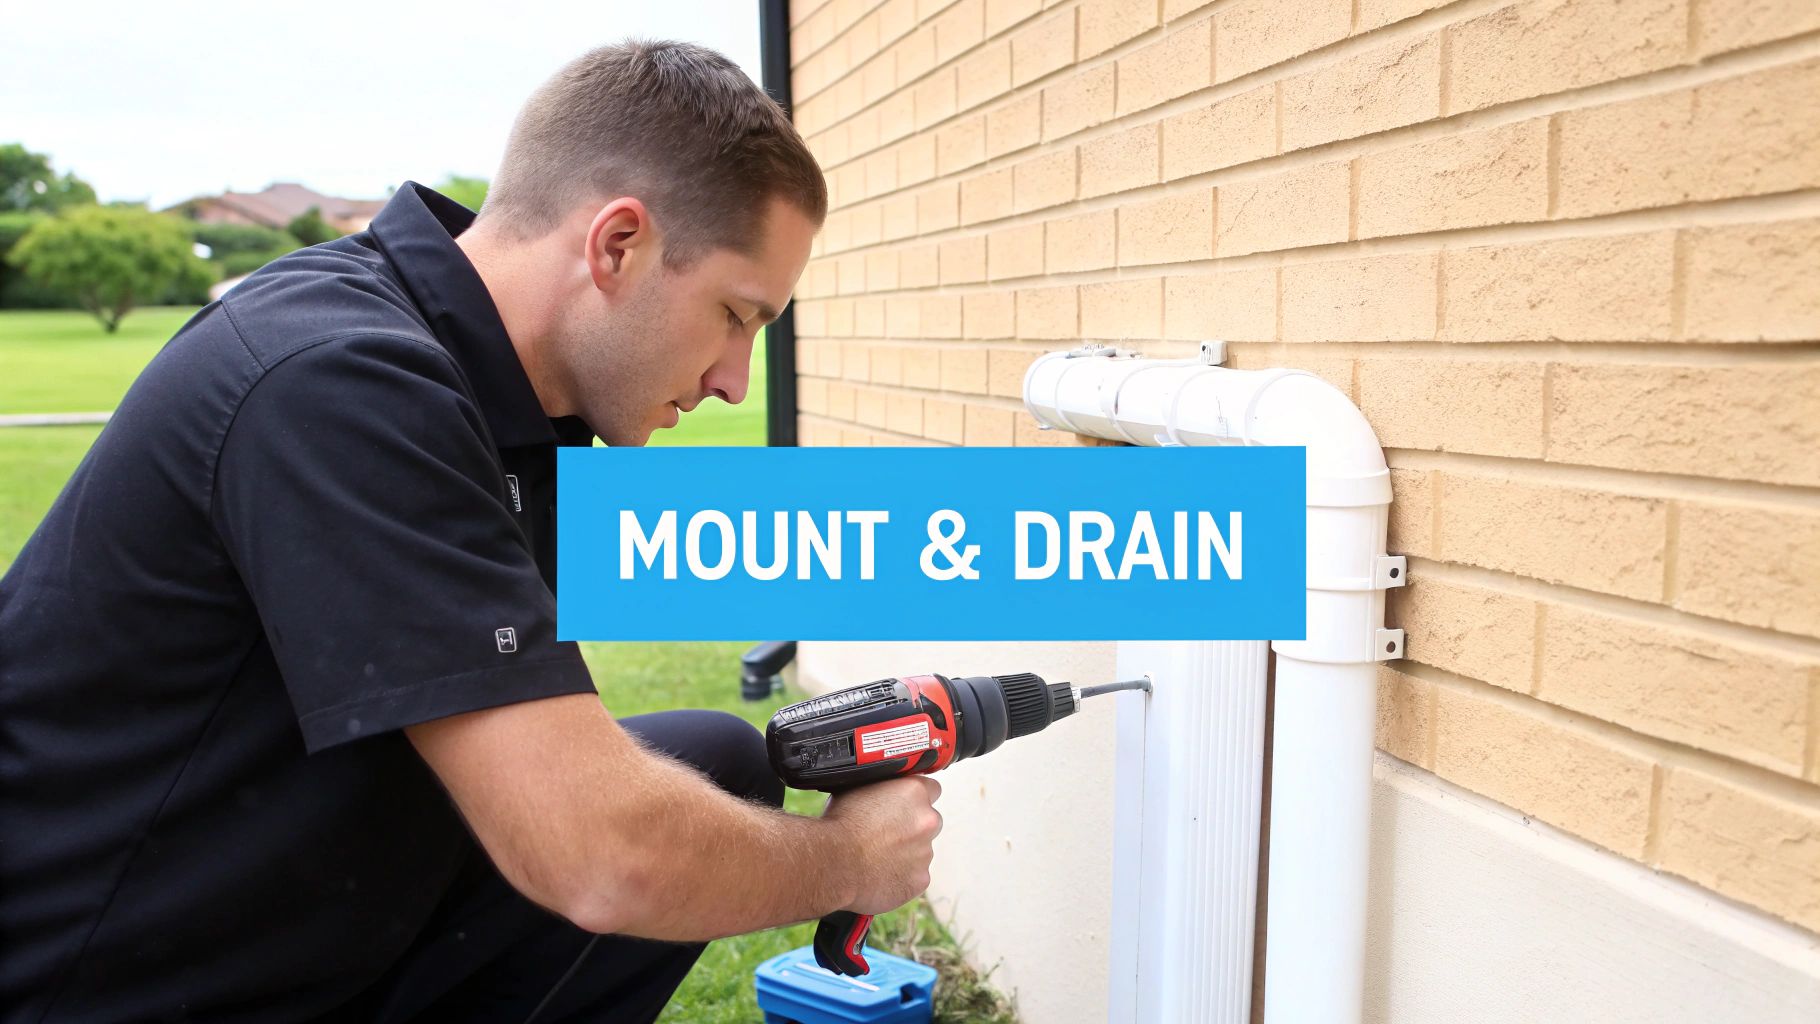
Mounting the System and Managing Drainage
With your pipes cut and the bypass loop ready, it's time to give your filtration system a permanent, stable home. This isn't just about hanging hardware on the wall; a secure mounting job prevents vibrations, protects your plumbing from stress, and makes future maintenance a whole lot easier. Think of it as the foundation for your entire setup.
This focus on point-of-entry (POE) systems is driving some serious market growth. The water filter market as a whole is expected to jump from US$48.2 billion in 2025 to US$84.2 billion by 2032. Whole-home systems are a huge part of that surge, largely because they protect every single appliance and fixture in your house, which can extend their lifespan by a whopping 30-50%. You can dig deeper into these trends in this detailed market research from Persistence Market Research.
Securing the Filter Housing
Your filter system is heavy, and once it's full of water, it's really heavy. Just screwing it into drywall is asking for trouble. You absolutely have to anchor the mounting bracket directly to wall studs or a solid surface like a concrete wall.
Grab a stud finder and locate two adjacent studs where you want to install the filter. Hold the mounting bracket up, place a level on top to make sure it's perfectly horizontal, and mark your drill holes. If the system isn't level, it puts uneven stress on the pipe connections—a leading cause of those annoying, slow leaks down the road.
Pro Tip: Don't forget about clearance! Before you drill a single hole, hold the filter housing up to the bracket and check that you have enough room below it to unscrew the sump and swap out the cartridge. A good rule of thumb is to leave at least the height of the housing itself as empty space underneath.
Setting Up the Drain Line for Backwashing Systems
If you've got a simple sediment or carbon block filter, you can skip this part. But for water softeners, iron filters, or certain multi-stage media filters, a backwash cycle is critical. This process flushes out all the gunk the filter has trapped, and that wastewater needs a place to go.
Getting the drain setup right is non-negotiable for these systems.
- Find a suitable drain: The easiest choice is a utility sink or a floor drain. You can sometimes tap into a vertical drain pipe (like the one for your washing machine), but you'll want to check your local plumbing codes first to make sure it's allowed.
- Create an air gap: This is the most important part of the drain setup. The end of your drain hose must never be submerged in the wastewater. It needs to terminate at least 1.5 inches above the flood level of the sink or drain. This physical gap is what prevents contaminated water from being siphoned back into your clean water supply if the pressure in your lines changes.
- Secure the line: Use a clamp to firmly attach the drain tubing. The backwash cycle can be pretty high-pressure, and the last thing you want is the hose whipping around spraying dirty water all over your utility room.
Electrical Considerations for Advanced Systems
Many of today's systems need power to run digital control heads, flow sensors, or UV purification lamps. When you install a whole house water filter that needs to be plugged in, safety is everything.
Any electrical outlet near your plumbing must be a Ground Fault Circuit Interrupter (GFCI) outlet. These are designed to instantly shut off the power if they detect a ground fault—like if water splashes into the outlet—preventing a very dangerous electrical shock.
If you don't have a GFCI outlet nearby, you have a couple of options:
- Hire a licensed electrician: This is the safest and best route. They can run a new line or swap out an existing outlet to bring everything up to code.
- Use a GFCI adapter: These are plug-in adapters that can provide protection for a single device. They work, but a professionally installed GFCI outlet is a much more reliable, long-term solution.
Whatever you do, never use a standard extension cord as a permanent power source. They just aren't rated for the damp environment of a utility room and can become a serious fire and shock hazard. Unless you really know what you're doing with electrical work, this is one area where it’s not worth taking the risk.
Firing It Up: The Moment of Truth
You've done the hard work. The filter is mounted, the plumbing is connected, and your new system is sitting there, looking impressive. Now for the moment of truth. Bringing the system online isn't as simple as yanking the main valve open and hoping for the best. It’s a deliberate, careful process to protect both your home and your new investment.
This final step is crucial, and the effort is absolutely worth it. These systems are a frontline defense against America's aging water infrastructure. In fact, the demand for home water purification is projected to jump from USD 7.09 billion in 2025 to over USD 10.35 billion by 2032.
Why the surge? It's driven by real concerns. Aging municipal pipes can contaminate up to 20% of homes with lead or PFAS, and the CDC connects poor water quality to an astonishing 7 million illnesses in the US every year. You can get a deeper dive into the home water purification market to see the trends.
The Slow and Steady Startup
First things first, let's use that bypass loop you worked so hard to install. Make sure the filter’s main inlet and outlet valves are closed, but the bypass valve is open. Now, head back to your main water shutoff and open it very slowly—just a quarter turn will do for now.
You’ll hear the pipes start to fill. Let them pressurize for a minute. This gentle approach prevents a nasty "water hammer," a pressure shockwave that can wreak havoc on pipes and fittings.
Once things quiet down, take a walk along the line and look for any big, obvious leaks. If it all looks dry, go ahead and slowly open the main valve the rest of the way. Your house now has water again, it's just bypassing the filter for the moment.
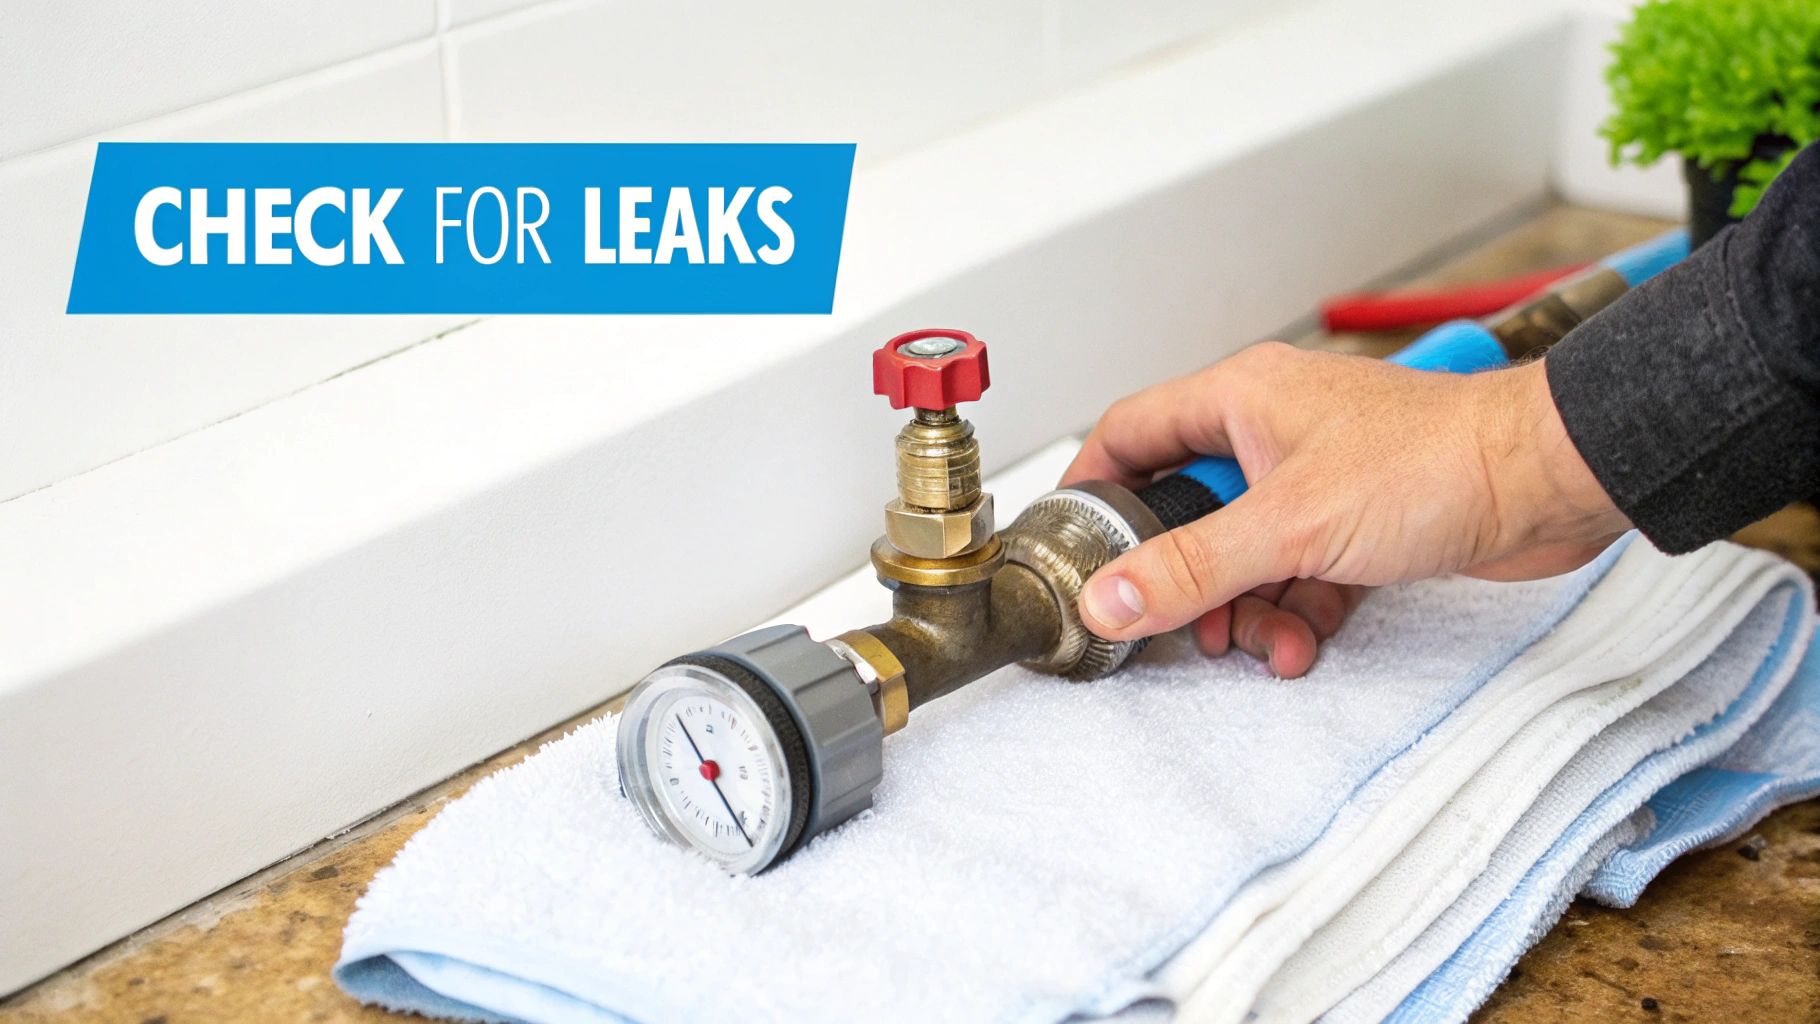
Pressure Testing Every Single Connection
With the bypass active and your plumbing re-pressurized, it's time to introduce water to the filter itself. Go to the filter's inlet valve and crack it open just a hair. You should hear the filter housing begin to fill.
This is where you need to be on high alert. Grab a dry paper towel and a flashlight. Now, meticulously check every single connection you made:
- The joint from the main pipe to the filter's inlet valve.
- The connection from the inlet valve into the filter head.
- The fitting from the filter head to the outlet valve.
- And finally, the joint connecting the outlet valve back to your house's plumbing.
Wipe each one down with the paper towel. Even the tiniest bead of moisture will show up instantly. If you find a drip, shut the inlet valve immediately, hit the red pressure-relief button on the filter housing, and give the fitting a tiny tighten—a quarter turn is usually all it takes. Be careful not to overtighten, as that can crack plastic fittings and make things much worse.
Once you're confident the inlet side is bone dry, slowly open the outlet valve to pressurize the rest of the system. Repeat the entire paper towel test on the outlet side until you are 100% certain every joint is completely watertight.
The All-Important First Flush
Congratulations, you've confirmed a leak-free installation! But hold on, you’re not quite done. The very last step before you can pour that first glass of clean water is the first flush. New carbon filters, in particular, are packed with "fines"—tiny, harmless particles of carbon dust from manufacturing. You have to flush them out to prevent them from showing up in your water or clogging your faucet aerators.
Here’s how to do it:
- Make sure the bypass valve is now fully closed.
- Check that the filter’s inlet and outlet valves are both fully open.
- Find a large bathtub or an outdoor spigot (one without a screen) and turn the cold water on full blast.
- Just let it run. Give it a good 10-15 minutes.
You’ll probably see the water run gray or even black for a bit. Don't panic; this is completely normal. It’s just all those carbon fines washing out. Once the water runs perfectly clear, your system is officially online. You’ve successfully managed to install a whole house water filter, and every tap in your home is now delivering clean, purified water.
Dodging Common Installation Pitfalls
Even the most carefully planned DIY project can go sideways. When it comes to installing a whole-house water filter, a few classic mistakes can quickly turn a productive afternoon into a weekend-long headache. Knowing what to watch out for is half the battle.
One of the most common blunders I see is simply over-tightening the fittings. It feels like the right thing to do, but putting all your muscle into cranking down on plastic threads is a one-way ticket to a leak. You can easily cause tiny, hairline cracks in the filter housing that lead to those slow, maddening drips you can never quite pinpoint.
Here's a plumber's mantra worth remembering: hand-tight plus a quarter turn with a wrench. That’s almost always enough to get a perfect, watertight seal without putting dangerous stress on the plastic parts.
Another classic slip-up is installing the filter backward. It sounds almost silly, but when you're focused on cutting pipes and applying Teflon tape, it’s an easy mistake to make. The filter head will always have "IN" and "OUT" arrows stamped on it for a reason—the water has to flow through the media in the intended direction. Get it wrong, and you've basically installed a very expensive and useless piece of pipe.
The Headaches of Poor Planning
Beyond the immediate plumbing work, a little foresight goes a long way. The biggest planning mistake? Forgetting about your future self who has to do the maintenance. You might find a spot that’s just perfect for the install, but if you can't get a bucket and a wrench under the unit later, you'll curse yourself every time a filter change is due.
- Plan for Access: Always leave enough vertical space below the filter housing so you can easily unscrew the sump and pull the old cartridge straight down.
- Think About the Mess: Changing a filter means water is going to spill. Make sure you have enough room to work without soaking everything and avoid installing the unit directly over finished floors or sensitive electronics if you can help it.
A few extra minutes thinking about these things during the installation will save you a world of frustration down the road.
Knowing When to Call a Professional
There's no shame in calling for backup. While installing a whole-house filter is a totally achievable DIY for many homeowners, some situations are clear signs to put down the tools and call a licensed plumber. Pushing forward when you're out of your depth can lead to thousands in water damage and serious safety issues.
It's time to pick up the phone if you run into any of these red flags:
- Old or Corroded Pipes: If your home has old galvanized steel or visibly corroded copper pipes, cutting into them can be like opening Pandora's box. A pro knows how to work with these delicate materials without causing leaks elsewhere in your system.
- Complex Local Plumbing Codes: Some areas have very strict rules about backflow preventers, drain line air gaps, or the specific types of fittings you're allowed to use. A professional will guarantee your installation is up to code.
- No Main Shutoff Valve: Can't find a working main water shutoff for your house? Stop right there. A plumber will need to install one before you can even think about starting the project.
- Major Pipe Rerouting: If your ideal spot requires moving a lot of pipes around, it's a job best left to someone with the experience to do it right.
Hiring a professional isn't giving up; it's making the smart call to protect your home and your new investment. To help you decide, here’s a quick look at how the two options stack up.
DIY vs Professional Installation Cost and Time Comparison
| Factor | DIY Installation | Professional Installation |
|---|---|---|
| Upfront Cost | $50 – $150 for tools & materials (PEX, fittings, cutter, etc.) | $400 – $800+, depending on labor rates and job complexity. |
| Time Commitment | 3 – 6 hours for a straightforward install. Can be a full weekend for first-timers. | 2 – 4 hours for an experienced plumber. |
| Skill Level | Basic plumbing skills (cutting pipe, using fittings, leak testing). | Licensed professional with extensive experience and knowledge of local codes. |
| Tools Required | You'll need to own or buy specific tools like pipe cutters, crimpers, wrenches, etc. | The plumber arrives with a full set of professional-grade tools. |
| Risk Factor | High. A mistake like a hidden leak can cause thousands in water damage. | Low. The work is insured and guaranteed. Any issues are their responsibility to fix. |
Ultimately, the choice comes down to your comfort level, budget, and the complexity of your home's plumbing. A successful DIY install is incredibly rewarding, but a stress-free professional job provides peace of mind that's often worth the price.
Your Whole House Filter Installation Questions Answered
So, you’ve got your new whole house filter installed and running. Fantastic! But even after the tools are put away, a few questions usually pop up about keeping the system in top shape. Let's walk through some of the most common things people ask.
The big one is always about changing the filters. How often do you really have to do it? Honestly, it’s not a one-size-fits-all answer. A basic sediment filter might need a swap every 3-6 months, while the main carbon filter could go for 6-12 months.
But those numbers are just a starting point. The real schedule depends on your home:
- Your Water Quality: If you’re dealing with a lot of sediment or high chlorine, your filters are working overtime and will clog up faster.
- Your Household Size: A family of five puts a much bigger demand on the system than a couple, meaning filters hit their limit sooner.
Reading the Signs Your Filter Gives You
Instead of just circling a date on the calendar, get in the habit of listening to your system. A filter that’s getting clogged will almost always give you a heads-up.
The most common clue is a gradual drop in water pressure. When your shower starts to feel a bit weak or it takes longer to fill the coffee pot, that’s a tell-tale sign the filter is saturated and holding back water flow. You might also notice that old chlorine taste or smell creeping back in. That’s your carbon media waving the white flag, telling you it’s absorbed all it can.
Remember, a filter doesn't just stop working; its performance degrades over time. Timely changes are crucial for consistent protection and to prevent strain on your plumbing system from excessive backpressure.
What If My Water Pressure Drops Right After Installation
Now, a sudden pressure drop right after you install a whole house water filter is a completely different story. That points to an installation snag, not a spent filter. The first thing to do is double-check that all your valves are fully open—the main shutoff, and the inlet and outlet valves on the filter unit itself. It's a simple mistake that's easy to make.
If the valves are wide open, the issue might be the system's size. If the filter's Gallon Per Minute (GPM) rating is too low for your home's needs, you'll feel it in the flow. This is exactly why getting the sizing right before you buy anything is so important. For more hands-on troubleshooting tips, you can find a lot of helpful advice for water filter owners.
Finally, don't forget any specialty filters you might have. If you've got cartridges for things like iron or specific chemicals, they'll have their own replacement schedule, sometimes lasting up to 24 months. Always check the manufacturer's guide for each part of your system to build a maintenance plan that’s right for your water.
Ready to stop worrying and start enjoying pure, clean water from every tap? The team at Water Filter Advisor has the expert reviews and in-depth guides to help you find the perfect system for your home. Explore our resources and make your next water filter decision with total confidence. Visit us at https://www.waterfilteradvisor.com.
- December 14, 2025
- 0
- Uncategorized