Best Refrigerator Water Filter Brands of 2026

You’re probably here because the filter light on your fridge is on, the water tastes a little flat, or you’ve seen two cartridges online that look identical except one costs a lot more. That’s the usual moment people realize refrigerator filters are weirdly confusing for such a small part.

They don’t need to be.

The best refrigerator water filter brands aren’t just selling “better taste.” They’re solving three practical problems at once: contaminant reduction, appliance compatibility, and long-term cost. Get the brand choice right and your water stays clear, your ice tastes clean, and your fridge keeps dispensing without drama. Get it wrong and you may end up with leaks, poor flow, fake certifications, or a filter your refrigerator refuses to recognize.

Why Your Refrigerator Filter Matters More Than You Think

A refrigerator water filter sits in an odd category. It looks like a convenience item, but in real use it acts more like a small point-of-use treatment device. Users often only think about it when the change light starts blinking. By then, they’re already shopping backward, focused on cartridge shape and model number before they’ve asked the more important question: what is this filter supposed to remove?

A glass of cold, sparkling clean water sitting on a granite countertop in a modern kitchen.

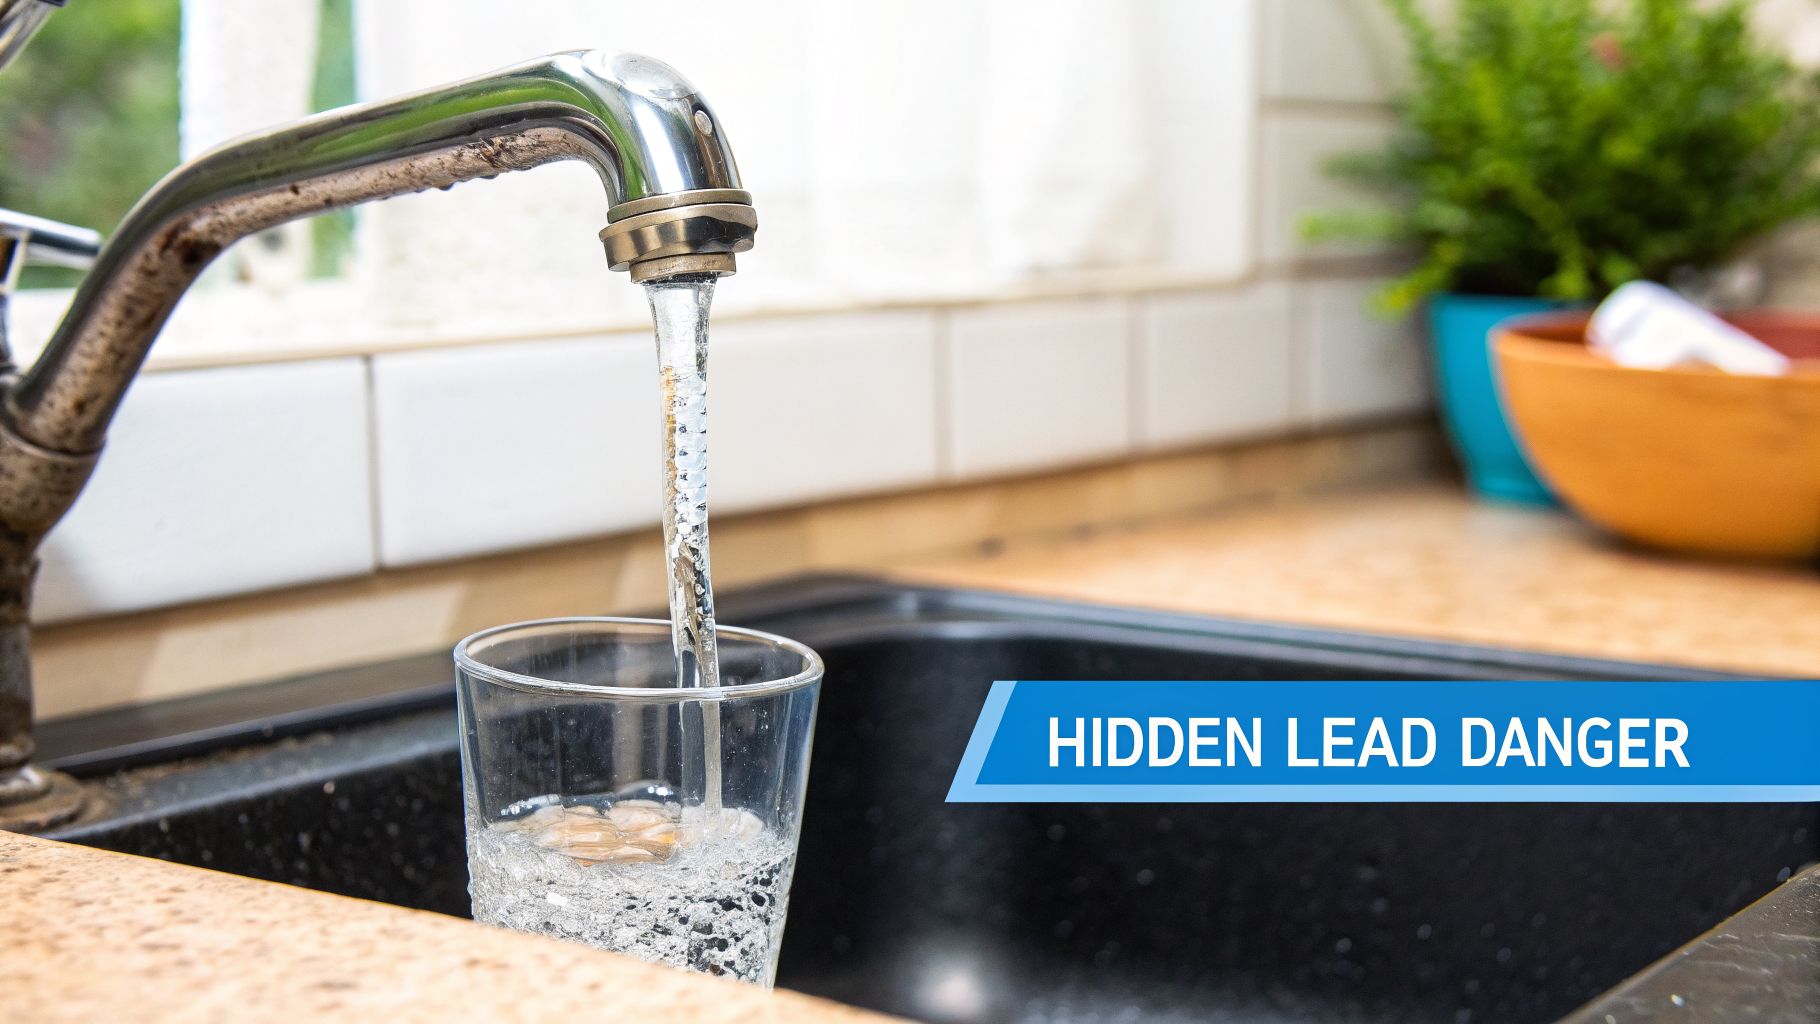
That matters because treated tap water isn’t the same thing as flawless tap water. Municipal treatment does a lot of heavy lifting, but the water reaching your glass can still carry chlorine taste, sediment, and in some areas, lead concerns from aging infrastructure. That’s why the better refrigerator filters earn their place. According to Tap Water Data’s refrigerator filter testing overview, leading refrigerator water filter brands have shown 99.6% lead removal and over 97% chlorine reduction in NSF-certified lab tests. The same source notes that over 90% of US households rely on treated tap water, and the EPA estimates 6-10% of water systems are affected by lead.

Taste is only part of the job

If a filter only improves taste, that’s useful. If it also cuts down contaminants tied to health concerns, that’s a different category of value. This is why I tell homeowners not to shop by brand logo first. Shop by certification, then compatibility, then cost.

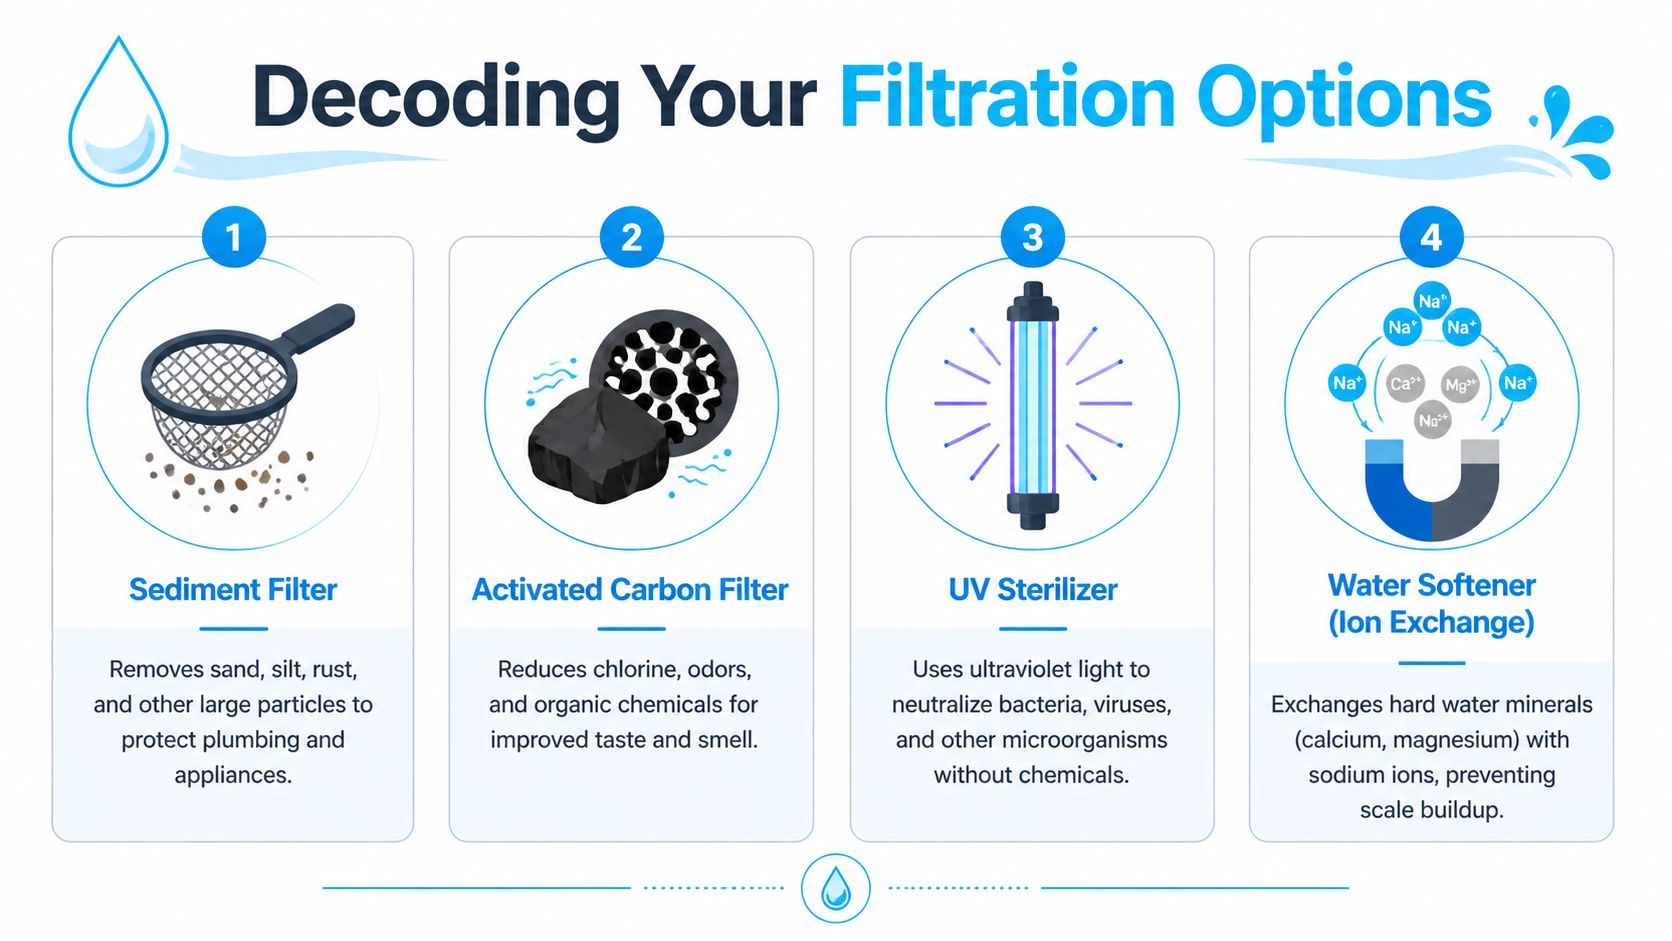
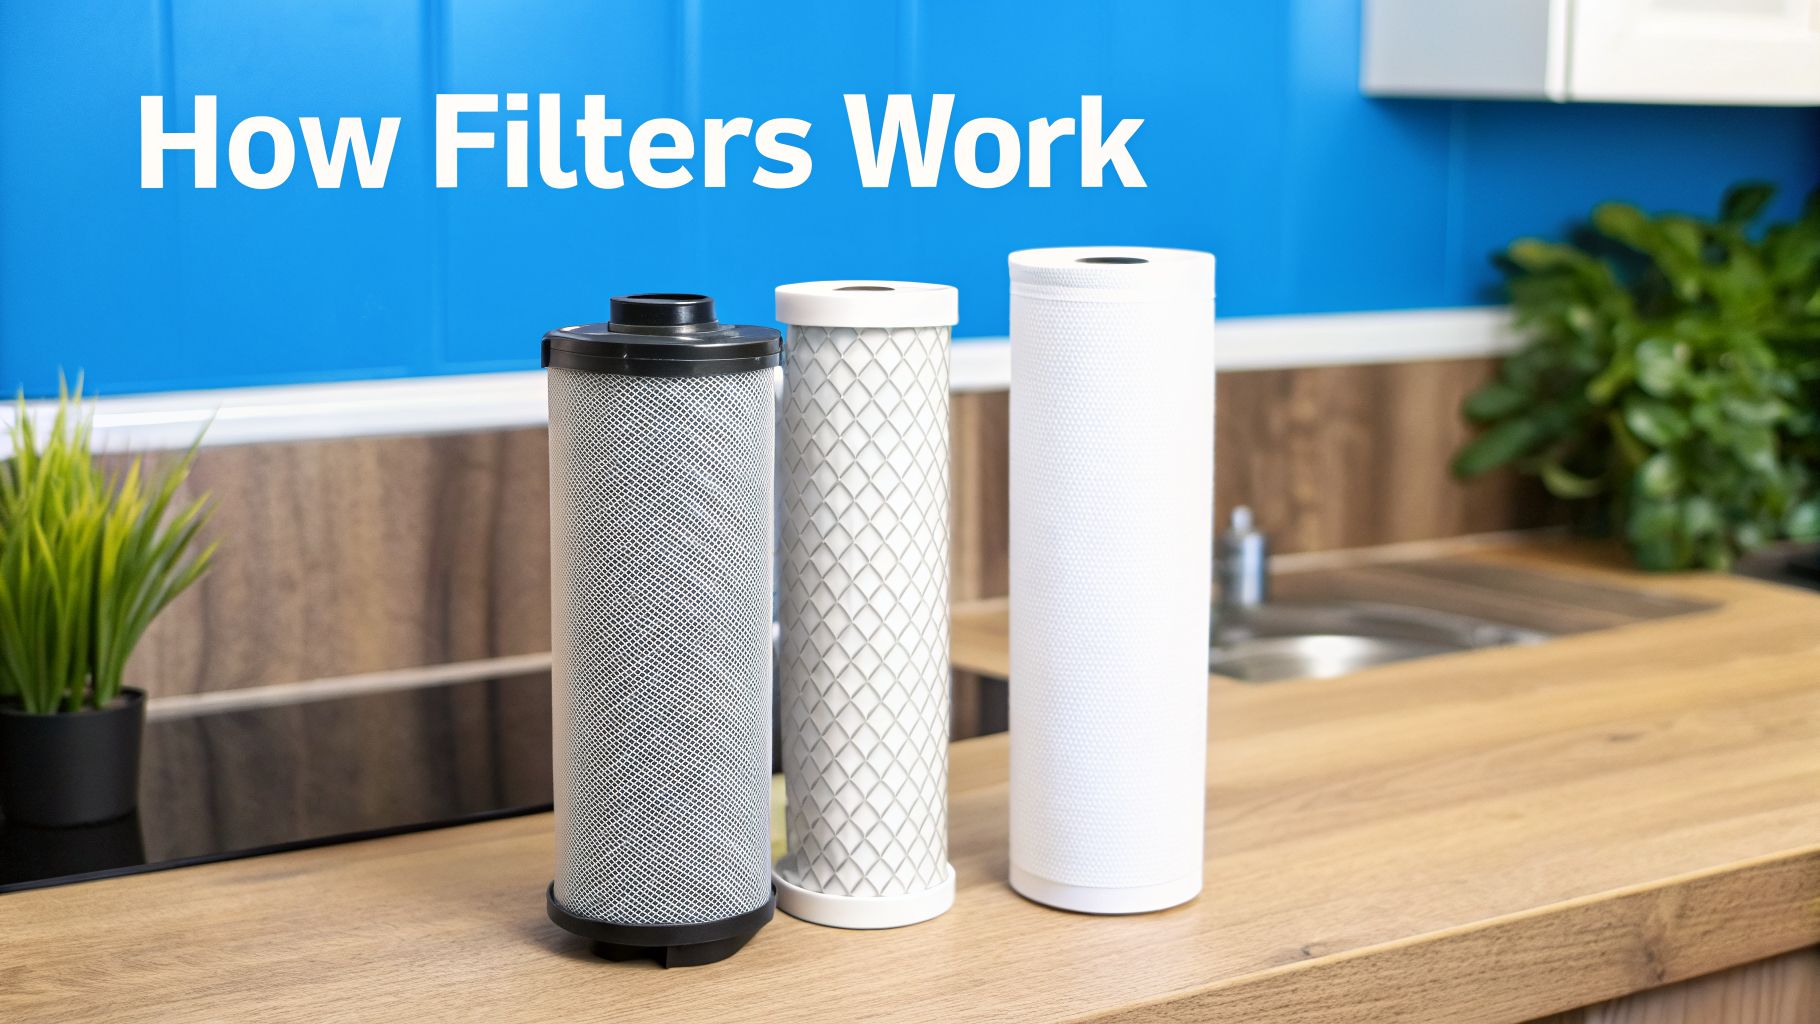
The biggest mistake I see is assuming all filters with activated carbon work the same. They don’t. Some are built mainly for chlorine and odor. Others are certified for tougher jobs such as lead or cyst reduction. Marketing copy usually blurs that difference because “fresh, clean water” sounds better than “this model mainly addresses aesthetics.”

A refrigerator filter should earn trust with certification marks, not pretty packaging.

What the NSF numbers mean in plain English

You don’t need to memorize standards, but you do need to know what they signal.

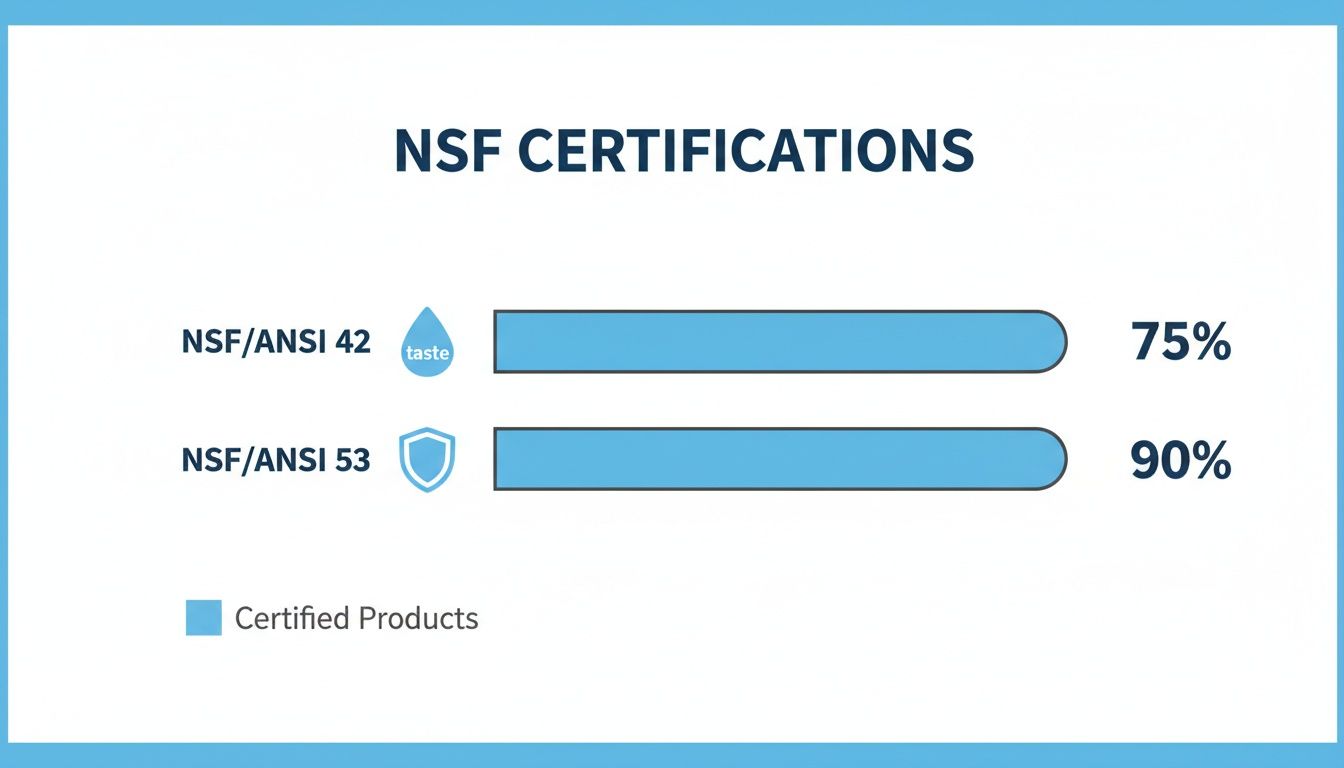
  • NSF/ANSI 42 means the filter is certified for aesthetic issues like chlorine taste and odor.
  • NSF/ANSI 53 matters more for health-related contaminants such as lead and cysts.
  • NSF/ANSI 372 addresses lead-free construction in the filter materials themselves.

When you see those numbers on a legitimate product listing, you’re no longer relying on vague promises. You’re looking at a filter that has been tested against a defined standard.

For homeowners who want to get sharper about comparing claims, this library of water filtration advice and buying guidance is useful because it helps translate specs into real-world decisions instead of leaving you stuck in product jargon.

Why brand still matters

Certification tells you what a filter is supposed to do. Brand tells you how often that promise holds up in actual kitchens. The best refrigerator water filter brands usually separate themselves in four ways:

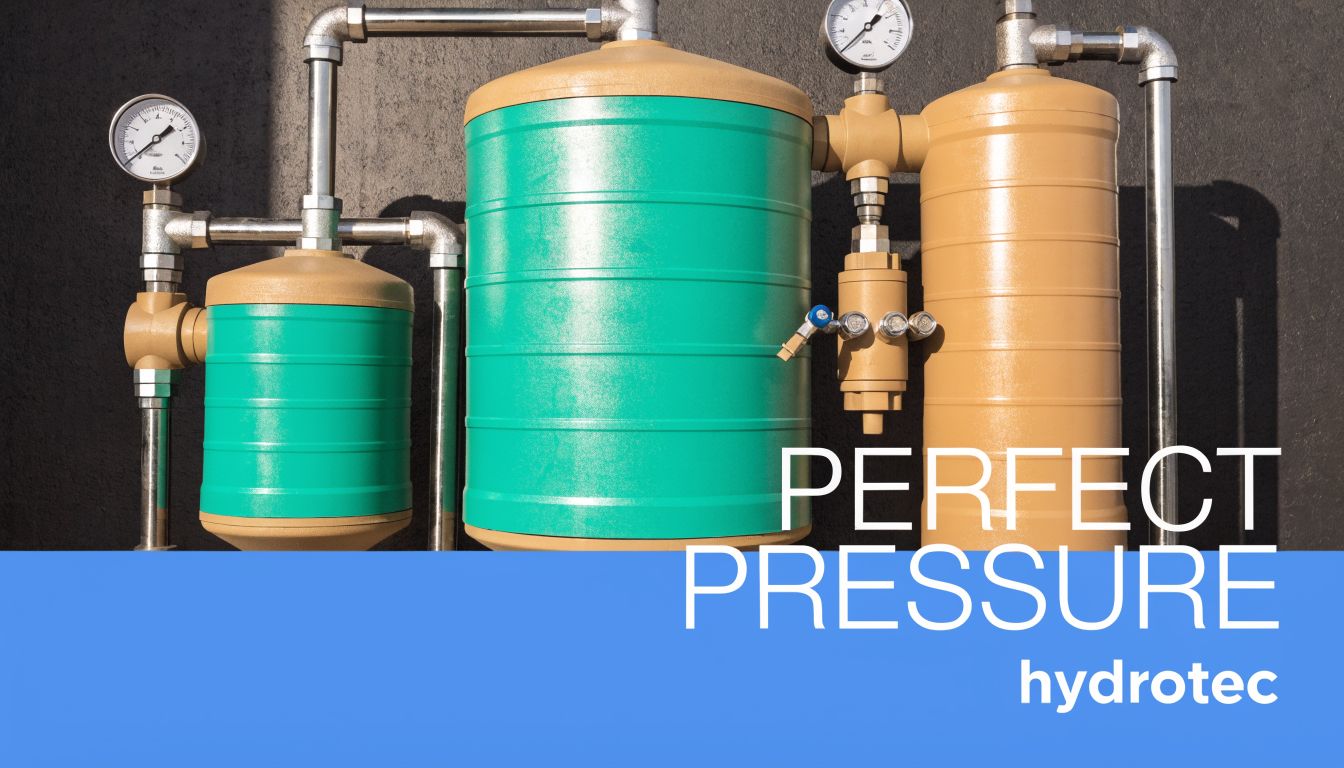
  • Fit and seal quality so the cartridge installs cleanly and doesn’t drip.
  • Consistent flow so water pressure doesn’t collapse halfway through the cartridge life.
  • Clear compatibility labeling so you don’t buy the wrong part.
  • Reliable sourcing so you’re less likely to get a counterfeit or mislabeled unit.

That last point gets overlooked. A cheap filter from an unknown seller can cost more than an expensive one if it causes poor taste, short life, or a failed fit. In home filtration, boring reliability is a feature.

The Top Brands A Quick Comparison

Brand matters here for a practical reason. Two filters can claim the same refrigerator compatibility, yet one slides in cleanly, keeps flow steady for months, and tastes normal from day one. The other feels loose, slows to a trickle halfway through its life, or leaves homeowners wondering whether the water is being filtered at all.

That gap usually comes down to three things: how tightly the cartridge matches the fridge housing, whether the certification applies to the exact model you are buying, and how consistent the brand is from one production run to the next.

A useful way to sort the market is by role. OEM brands supply the original filter or an officially approved replacement for the refrigerator maker. Aftermarket brands build third-party cartridges that fit the same slot. Both can be good. The main difference is how much fit certainty you want, how much money you want to save, and how carefully you are willing to verify the model details before you buy.

Brand Type Key Certifications Filter Life (Gallons) Est. Cost per Gallon
EveryDrop OEM-approved replacement NSF/ANSI 42, 53, 372 200-300 gallons Higher than certified aftermarket
Samsung OEM NSF-certified models with strong lead reduction performance 200-300 gallons Higher than certified aftermarket
Whirlpool OEM NSF-certified models with strong lead reduction performance 200-300 gallons Higher than certified aftermarket
LG OEM NSF-certified models, noted for NSF/ANSI 372 lead-free construction 200 gallons Higher than certified aftermarket
GE OEM NSF-certified models, replacement commonly at 6 months 200-300 gallons Higher than certified aftermarket
Frigidaire OEM NSF/ANSI 42-certified chlorine reduction in key models 200-300 gallons Mid to high
Waterdrop Aftermarket NSF/ANSI 42, 53, 372 on certified models 200-300 gallons Lower than OEM
ICEPURE PLUS Aftermarket Certified aftermarket positioning across multiple brands Varies by model Lower than OEM
Filterlogic Aftermarket NSF-certified options for Whirlpool-compatible models Varies by model Lower than OEM

The brands most homeowners should start with

For a short list, start with EveryDrop, Samsung, Whirlpool, LG, and GE. Those brands stay at the top because they are tied to major refrigerator platforms, and that matters more than flashy marketing copy. A refrigerator filter is not a general water pitcher cartridge. It has to match a specific housing, valve, and flow design inside the fridge.

That is why the market is better understood as a set of refrigerator ecosystems, not a single race for first place. If you own an LG fridge, LG-compatible filters deserve a harder look than a random “universal” substitute. If you own a Whirlpool-family unit, EveryDrop and Whirlpool-approved options usually give you the least trouble.

OEM brands and what they do well

Samsung is usually the conservative choice for Samsung owners. The fit is predictable, installation is usually clean, and the performance claims are easier to verify because the brand controls the compatibility chain.

Whirlpool stays strong for one reason I see constantly in real kitchens: broad compatibility across Whirlpool-related models and a dependable replacement process. Homeowners who want fewer surprises often end up here.

EveryDrop earns its reputation because it covers a wide slice of the Whirlpool, Maytag, KitchenAid, JennAir, and Amana universe without feeling like a generic substitute. In practice, it often lands in the sweet spot between official approval and easy availability.

LG tends to appeal to buyers who read the fine print. The company has a cleaner track record than many off-brand sellers for matching model numbers and maintaining build quality.

GE needs the most model-by-model attention. Some GE refrigerators accept replacements without drama. Others are pickier, especially if the fridge uses filter identification features that limit third-party choices.

Aftermarket brands and where they make sense

Aftermarket filters make sense for homeowners who want to cut annual filter cost without accepting mystery performance. The category has plenty of weak products, but it also has a handful of brands that take certification and compatibility seriously.

  • Waterdrop is one of the better-known aftermarket names because it offers certified options across several refrigerator platforms and usually explains model fit better than low-end marketplace sellers.
  • ICEPURE PLUS is worth a look if you are shopping across multiple fridge brands and want a lower-cost replacement from a company that competes in refrigerator filtration, not just generic replacement parts.
  • Filterlogic often shows up as a value option for Whirlpool-compatible systems, especially for buyers who want lower cartridge cost and are willing to verify exact model matching.

The trade-off is simple. Good aftermarket filters can save money. Bad ones often fail in less dramatic but more annoying ways, poor taste, shorter life, weaker flow, or a cartridge that never feels fully seated.

What works and what doesn’t

What works is disciplined buying. Match the exact refrigerator model. Confirm that the certification applies to the specific filter model, not just the brand name. Buy from a reputable seller so you are not sorting through counterfeit or relabeled stock.

What fails is buying on price alone. “Compatible with” is not the same as “tested to the same standard,” and a refrigerator filter that fits loosely or performs inconsistently is not a bargain.

Homeowners usually make the best decision when they stop comparing filters as simple accessories and start comparing them as replacement parts with water treatment built in. That mindset cuts through a lot of the noise.

OEM vs Aftermarket The Real Cost of Clean Water

Most buying decisions are grounded in reality. Not theoretical. Not “best value” in a review list. Reality, as in what you’ll spend each year and whether your fridge will accept the cartridge without a fight.

The easiest version of the argument is wrong. OEM is not always worth the premium. Aftermarket is not always a gamble. The right answer depends on your refrigerator model, your tolerance for risk, and whether the replacement is certified.

A comparison chart outlining the pros and cons of choosing OEM versus aftermarket refrigerator water filters.

Where OEM earns its higher price

OEM filters win on predictability. They’re designed for the exact housing, flow requirements, and locking mechanism in the refrigerator. They also make warranty conversations simpler because the manufacturer can’t point to a third-party cartridge and start asking questions.

You’re also more likely to get clean compatibility labeling and a cartridge that installs with the correct seal pressure. That sounds minor until you’ve dealt with a slow drip inside the fridge.

OEM is often the safer move if:

  • Your refrigerator is still under warranty and you want zero gray area.
  • Your model has proprietary lockout behavior such as RFID checks.
  • You don’t want to vet third-party certifications yourself.
  • You prefer manufacturer-backed consistency over cost savings.

Where aftermarket makes financial sense

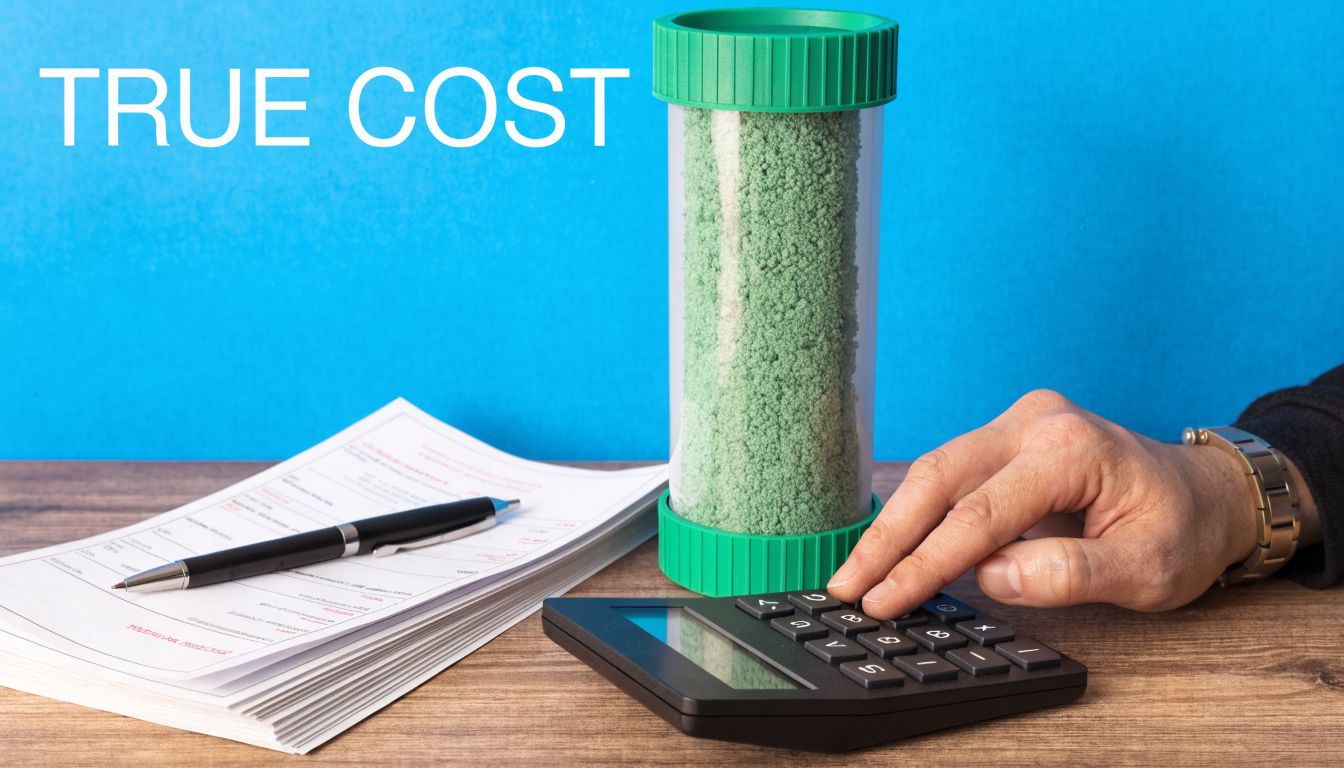
The cost difference over time is not small. According to Consumer Reports’ refrigerator water filter analysis, some third-party alternatives such as Maxblue for GE refrigerators showed double the useful lifespan of the OEM GE RPWFE filter, which could cut annual replacement cost from $50-60/year to $25-30/year. The same source notes that switching to certified third-party filters could save a high-usage household over $100 annually.

That’s the kind of number that changes behavior. Not because people suddenly love generic parts, but because the total ownership math starts to matter more than the logo.

Practical rule: If a certified aftermarket filter fits your refrigerator properly and doesn’t trigger compatibility issues, it can be the smarter long-term purchase.

The trade-off most people miss

The actual trade-off isn’t “expensive versus cheap.” It’s certainty versus verification work.

With OEM, you pay more and think less. With aftermarket, you pay less but need to check certification, exact fit, seller quality, and whether your refrigerator has any anti-third-party quirks. That work is worth it for some households and annoying for others.

A few examples:

  • Whirlpool-family refrigerators are often a friendlier place to use approved or certified alternatives.
  • Samsung-compatible aftermarket filters can be excellent if they’re from a proven certified brand.
  • GE refrigerators require extra caution because some models are far less flexible than others.

RFID changes the equation

Some GE owners learn this the hard way. Certain refrigerators use RFID-restricted filters, which means a third-party cartridge may physically fit but still fail to work properly. In that case, “compatible” can mean very little in practice.

If your GE model is one of the affected ones, don’t buy on optimism. Confirm whether your fridge accepts aftermarket filters before you order. If it doesn’t, OEM is no longer a preference. It’s the price of having a working dispenser.

My bottom-line view

For most households, certified aftermarket filters make sense after the warranty period if the refrigerator model accepts them cleanly. OEM makes sense when compatibility is touchy, the unit is new, or you don’t want to troubleshoot.

The wrong move is the middle ground people fall into most often. They skip OEM pricing but also skip certified aftermarket brands and buy the cheapest “replacement” they can find. That’s where leaks, weak flow, odd taste, and premature replacement usually start.

Decoding NSF Certifications What to Look For

A lot of refrigerator filter shopping goes wrong because buyers focus on phrases like “premium filtration” or “advanced carbon technology.” Those phrases are decoration unless the filter also lists meaningful certifications.

The short version is this. If you want to evaluate best refrigerator water filter brands like someone who’s been doing it for years, you start with the NSF marks and only then look at price.

A hand holding a clear Wellspring water filter cartridge with blue filter pellets inside near a book.

NSF 42 and NSF 53 are the practical baseline

These are the first two numbers I look for on a refrigerator filter listing.

NSF/ANSI 42 covers aesthetic reduction. Think chlorine taste and odor. If your water tastes like a swimming pool, this is the certification that addresses that problem.

NSF/ANSI 53 covers health-related contaminant reduction. Under this standard, lead and cyst claims matter. If a filter doesn’t show NSF 53 and the listing still talks broadly about “safer water,” I get skeptical fast.

According to independent benchmark discussion of certified aftermarket refrigerator filters, certified aftermarket options such as Waterdrop and ICEPURE PLUS can rival OEMs. That same source reports Waterdrop showing 99.2-99.6% lead reduction and 99.99% cyst reduction, with the note that prioritizing NSF/42 + 53 certified filters is the best way to verify marketing claims.

NSF 372 matters for the filter itself

A lot of buyers miss this one. NSF/ANSI 372 doesn’t describe what the filter removes from water. It addresses lead-free construction in the materials used to make the filter.

That matters because the cartridge itself shouldn’t become part of the contamination problem. It’s not the flashy certification, but it’s a sign the manufacturer is paying attention to the basics.

If a listing talks loudly about taste but says little about certification, keep scrolling.

How to read a product page without getting fooled

Look for these details in the listing, packaging, or spec sheet:

  • Exact model compatibility. Not just “fits many refrigerators.”
  • Named certifications such as NSF/ANSI 42, 53, or 372.
  • Specific contaminant categories tied to those certifications.
  • Replacement interval guidance tied to time or volume.

Be cautious when a product page leads with words like “comparable,” “premium,” or “high-efficiency” but stays vague about standards. Good filter manufacturers usually make the standards easy to find because that’s their proof.

For a quick visual explanation of how certifications connect to actual filter performance, this overview is worth watching:

A simple buying filter for filters

If you want an easy rule that works in most homes, use this:

  1. Start with exact refrigerator compatibility.
  2. Require NSF/ANSI 42 and 53.
  3. Treat NSF/ANSI 372 as a quality signal for materials.
  4. Ignore inflated wording that isn’t backed by certification.

That approach cuts through most of the nonsense in this category.

Our Top Refrigerator Water Filter Picks for 2026

A homeowner with a perfectly good refrigerator can still end up with bad-tasting water, a slow dispenser, or a filter warning that never clears. The problem usually is not the fridge. It is choosing the wrong cartridge for the water issues in that home and the way that refrigerator is built.

That is why I do not rank these filters like smartphones or vacuums. The right pick depends on three things: exact fit, the certifications that match your water concerns, and whether paying OEM prices delivers real value.

Best for broad household confidence

EveryDrop is the easiest recommendation for many Whirlpool, Maytag, KitchenAid, JennAir, and Amana refrigerators. In real-world ownership, that matters. Homeowners usually want a filter that installs cleanly, resets without a fight, and does what the label says without turning replacement day into a research project.

EveryDrop earns its place because it keeps the buying decision simple for the refrigerators it was designed to serve. If you own a compatible Whirlpool-family model and want a low-risk choice, this is usually where I’d start.

Best for:

  • Whirlpool-family refrigerator owners
  • Buyers who want straightforward replacement
  • Households that prefer approved compatibility over experimentation

Watch-outs:

  • Usually costs more than good aftermarket filters
  • A poor value if your fridge can use a less expensive certified alternative

Best for maximum confidence in lead-focused filtration

Samsung OEM filters remain a strong option for Samsung owners who want exact fit and fewer surprises. That is especially true in homes where the priority is contaminant reduction claims backed by recognized certification, not just better taste.

Samsung’s original filters are rarely the cheapest route. They are often the cleanest route if you want to avoid questions about sealing, flow rate, and whether the fridge will recognize the cartridge properly.

Best for:

  • Samsung refrigerator owners
  • Buyers who want exact-fit simplicity
  • Homes where contaminant reduction matters more than minimizing annual cost

Potential downside:

  • Higher replacement cost over time

Best budget-friendly certified alternative

Waterdrop is one of the better aftermarket names for shoppers trying to cut yearly filter spend without dropping into the risky bargain bin. That distinction matters because the aftermarket category is crowded with filters that look similar on the outside and differ a lot in documentation, consistency, and actual certification support.

I recommend Waterdrop only when the exact refrigerator model is confirmed and the listing clearly identifies the relevant certifications. If those two boxes are checked, it can be a sensible middle ground between OEM pricing and no-name uncertainty.

Best for:

  • Homeowners past the warranty period
  • Buyers who want lower ongoing cost
  • Shoppers willing to verify model compatibility before ordering

What to watch:

  • Exact model matching still matters
  • Quality can vary across listings and platforms if you buy carelessly

If price is the main pressure point, buy the lowest-cost filter with certifications you can verify, not the lowest-cost filter in the search results.

Best for LG owners who care about construction quality

LG OEM filters make sense for owners who want predictable fit and strong manufacturing consistency. LG also gets attention from buyers who look past marketing language and pay attention to material standards, including lead-free construction.

That does not mean every LG owner needs to stay OEM forever. It means LG’s original filters are a smart baseline. If an aftermarket option wants to beat them, it should beat them on documented standards, not vague promises about premium performance.

Best for:

  • LG refrigerator owners
  • Buyers who want polished fit and finish
  • Homes where replacement should stay simple and predictable

The only sensible pick for some GE refrigerators

For some GE refrigerators with RFID-style filter restrictions, the practical answer is GE OEM. This is one of the few cases where brand loyalty and bargain hunting matter less than whether the refrigerator will accept the cartridge at all.

I have seen homeowners waste money trying to outsmart a protected system with third-party filters that physically fit but fail at recognition or reset. If your GE model is one of the stricter ones, OEM is usually the cheaper decision in the long run because it avoids returns, leaks, and repeat purchases.

Best for:

  • GE owners with confirmed filter-recognition restrictions
  • Newer GE models with picky compatibility behavior

Downside:

  • Less flexibility on price

How I would choose from this list

Start with the refrigerator model. Then match the filter to the problem you are trying to solve.

If your priority is the fewest headaches, OEM usually wins. If your priority is reducing yearly cost, a certified aftermarket filter from a known brand can be a good buy. If your local water raises bigger concerns about lead or other health-related contaminants, the safest move is the filter with the clearest documentation, even if it costs more.

Water filters do not fail only on performance. They also fail on fit, seal quality, and weak documentation. That is the part spec sheets rarely make entertaining, but it is what separates a good purchase from a frustrating one.

Water choices also connect to bigger home-comfort decisions, especially in multigenerational households. Families comparing accessibility products often look at related resources too, including this roundup of expert advice on lift chairs, because safe water access and easier daily living often get planned together.

Installation and Maintenance Made Easy

Buying the right filter is only half the job. A great cartridge installed badly still gives you bad results.

Most refrigerator filter replacements are simple once you know which mechanism your fridge uses. The common types are twist-in, push-in, and drop-down or cover-access designs. The exact steps vary, but the habits that prevent problems are almost always the same.

The replacement routine that avoids most headaches

Use this sequence and you’ll avoid the majority of leaks, air pockets, and “why does my water look cloudy?” moments.

  1. Confirm the exact filter model. Don’t rely on appearance alone. Many cartridges look similar.
  2. Remove the old filter slowly. If it feels stuck, don’t force it at an angle.
  3. Seat the new filter fully. Most bad installs happen because the cartridge is almost locked, not securely locked.
  4. Flush the new filter thoroughly. New carbon filters often release harmless fines at first, which can make the initial water look gray or cloudy.
  5. Reset the filter indicator light. This is a maintenance reminder, not a performance sensor.

Installation tips by filter style

  • Twist-in filters usually need a firm turn until they stop naturally. If you have to muscle it, something is off.
  • Push-in filters should click cleanly into place. If they spring back out or sit crooked, remove and reinstall.
  • Cover-access filters often work smoothly only when the cartridge is aligned precisely with the guide rails or housing notch.

Maintenance habits that actually help

The best thing you can do is replace on schedule and pay attention to changes in taste, odor, and flow. Refrigerator filters don’t fail dramatically in most cases. They drift downward. Water flow slows. Ice loses clarity. The crisp taste gets dull.

A few smart habits:

  • Write the install date on the cartridge box or in your phone so the next change doesn’t rely on memory.
  • Buy the next replacement before you need it. Waiting until the light comes on usually leads to rushed shopping.
  • Check the housing O-ring area for drips after installation. A quick glance saves a lot of frustration.

Most post-install issues come from wrong model selection or an incomplete lock, not from a defective filter.

Common mistakes to avoid

The biggest one is skipping the flush. People install a new filter, pour a glass immediately, see cloudiness, and assume the cartridge is bad. Usually it’s just carbon fines and trapped air working their way out.

Another common mistake is using a “close enough” replacement. Refrigerator filters are not one-size-fits-all. Even small design differences in the head, seal, or valve engagement can create poor flow or leaks.

Frequently Asked Questions About Refrigerator Filters

Will an aftermarket filter void my refrigerator warranty

Not automatically. The issue is whether the filter caused a problem. In practice, many homeowners still use OEM filters during the warranty period because it reduces arguments and keeps the paper trail clean.

How do I find the correct filter model number

Start with the refrigerator model number on the appliance label, then check the owner’s manual or the manufacturer’s parts lookup. Don’t assume the old cartridge is the original one. Previous owners and even retail installers sometimes swap in the wrong replacement.

What should I do if water tastes strange after changing the filter

Flush the new cartridge thoroughly first. If the taste still seems off, confirm the filter is seated correctly and that you bought a legitimate compatible model. If the dispenser area itself needs attention, it also helps to maintain your fridge water dispenser so residue and grime around the outlet don’t affect the drinking experience.

How should I dispose of an old refrigerator filter

Check whether the brand offers a mail-back or recycling option. If not, follow local disposal guidance. The practical takeaway is simple: don’t keep used cartridges under the sink for two years “just in case.”

How do I know when a filter needs replacement if the light isn’t reliable

Use a calendar-based routine and pay attention to water flow and taste. Filter lights are helpful reminders, but they don’t know everything about your home’s water use or local water conditions.


If you want a reliable place to compare filters, understand certifications, and choose the right system for your home, visit Water Filter Advisor. It’s a practical resource for sorting through refrigerator filters and the wider world of home water treatment without getting buried in marketing jargon.

Affordable Whole House Water Filter: A 2026 Buyer’s Guide

You’re probably here because your water is doing at least one annoying thing every day.

Maybe the shower smells a little like a pool. Maybe your coffee tastes flat even when the beans are good. Maybe new glasses come out of the dishwasher with spots, or your faucets keep collecting crusty buildup. And even when the water looks clear, you still wonder what’s riding along in it when your family drinks, cooks, showers, and washes clothes.

That’s where an affordable whole house water filter starts to make sense. Instead of treating just one sink, it treats the water as it enters the home, so the kitchen tap, shower, laundry, and bathroom all benefit. The smart way to shop, though, isn’t by sticker price alone. A filter that looks cheap on day one can get expensive fast once replacement cartridges, service, and pressure problems show up.

Why Your Tap Water Needs an Upgrade

You notice it on an ordinary Tuesday. The kids fill water glasses at the sink. The shower leaves your skin feeling tight. The coffee tastes a little off, even though you bought the good beans. None of those problems feels dramatic on its own, but together they are a sign that the water coming into your house is doing more than you want.

That matters because your plumbing works like your home’s circulatory system. If the incoming water carries chlorine, sediment, hardness minerals, or other unwanted material, those issues do not stay in one place. They show up in the shower, on clean laundry, inside appliances, and on the dishes you put back in the cabinet.

The whole-home difference

A pitcher filter helps with one glass at a time. A faucet filter helps at one sink. A whole-house system treats water at the entry point, so the water reaching your bathrooms, kitchen, laundry room, and water-using appliances starts cleaner from the start.

That wider coverage changes the value calculation. You are not just paying for better-tasting drinking water. You may also be reducing chlorine smell during showers, cutting sediment that can clog fixtures, and slowing the scale buildup that makes water heaters and dishwashers work harder over time. If you want more plain-English guidance on comparing systems, the articles in this home water filtration advice library can help.

Practical rule: If the problem shows up in more than one room, treating one tap usually leaves the bigger problem in place.

Seen problems and unseen problems

Some water issues announce themselves right away. Rust-colored stains, white crust on faucets, cloudy glasses, rotten-egg odor, or grit in the tub are hard to ignore.

Other issues are quieter. Chlorine can affect taste and smell without making water look dirty. Dissolved minerals can shorten appliance life even when the water looks clear. That is one reason shoppers get confused. Clear water is not always problem-free water.

You will also see technical terms that sound more important than they really are. One common example is TDS, or total dissolved solids. TDS is a broad measurement, not a safety verdict. It can help you understand how much material is dissolved in your water, but it does not tell you which substances are present or whether a whole-house filter alone is the right fix. For a simple walkthrough, read What Is TDS in Water.

Upgrade the water, not just the purchase price

A lot of homeowners start with the question, “What is the cheapest system I can buy?” That is understandable, but it is not the best starting point.

A better question is, “What will this system cost me to own?” A low-priced unit can act like an inexpensive printer that burns through costly ink. The tank or housing looks affordable on day one, then the replacement cartridges, service visits, pressure loss, or extra pre-filters raise the actual cost month after month. In other words, the tap water may need an upgrade, but your buying strategy does too.

That is why an affordable whole-house water filter should be judged by what it solves across the house and what it costs to keep running over several years, not just by the number on the box.

Decoding Your Filtration Options

Water filter shopping gets messy because brands love stacking buzzwords on the box. Multi-stage. Catalytic. KDF. Anti-scale. Advanced media. Most homeowners don’t need a chemistry degree. They need a plain-language translation.

Here’s the simplest way to think about it. Different filter types do different jobs. One catches grit. Another absorbs chlorine and odors. Another tackles hardness. Another deals with microbes. A good whole-house setup is often a team, not a single magic tank.

An infographic titled Decoding Your Filtration Options illustrating four common water filtration and treatment technologies.

The bouncer, the sponge, and the specialist

A sediment filter is the bouncer at the door. It stops bigger particles before they get inside the system. Sand, silt, rust, and debris are its main targets. Sediment doesn’t just look bad; it can clog other media and wear down appliances.

An activated carbon filter is more like a sponge. It grabs chlorine, bad tastes, odors, and many organic chemicals. This is usually the core technology for city water homes. If your complaint is “my water smells like a swimming pool,” carbon is usually where the conversation starts.

A water softener isn’t really a filter in the usual sense. It changes the water by swapping hardness minerals for sodium ions. That helps prevent scale buildup on pipes, water heaters, shower doors, and fixtures. If your main complaint is crusty residue and spotted dishes, filtration alone may not be enough.

A UV sterilizer uses light rather than media. It’s useful when microbial control matters, especially for some well-water homes. It doesn’t remove sediment or chlorine. It handles microorganisms, so it’s usually an add-on, not a stand-alone answer.

Where catalytic carbon and KDF fit

Some systems use upgraded media instead of plain carbon. One example is the SpringWell CF, which uses a 4-stage filtration design with media such as catalytic carbon and KDF to increase contact time between water and the filter bed. That setup supports over 95% reduction in chlorine and THMs at a 12 GPM flow rate with minimal pressure drop, based on the product specifications and performance details from SpringWell’s whole-house filter page.

That “contact time” language trips people up, so here’s the plain version. Water needs enough time touching the media for the media to do its job. If water blasts through too fast, performance can drop. Better designs slow and distribute the water inside the tank without making your shower weak.

Better media can matter as much as extra stages. A two-stage system with the right media can outperform a crowded stack of mediocre cartridges.

Filter types compared

Filter Type Primary Target Best For Average Lifespan
Sediment filter Sand, silt, rust, debris Homes with visible particles or as a prefilter Usually shorter-term and replaced more often
Activated carbon filter Chlorine, taste, odor, many chemicals Municipal water homes Often long-life in tank systems, shorter in cartridges
UV sterilizer Bacteria, viruses, microorganisms Well water or homes needing microbial control Ongoing bulb maintenance
Water softener (ion exchange) Hardness minerals Scale, spots, and hard-water buildup Resin-based service life varies with use and water quality

For a deeper library of plain-English buying help, Water Filter Advisor’s advice section is a handy place to compare filter types without getting buried in marketing language.

Matching the technology to the problem

Don’t start with brands. Start with symptoms and test results.

  • Chlorine smell and bad taste: Carbon filtration is usually the lead player.
  • Visible grit or cloudy water: Add sediment filtration first, so downstream media doesn’t get overloaded.
  • Scale and white crust on fixtures: You’re in softener or conditioner territory.
  • Iron staining or rotten-egg odor: You likely need specialty media, not just a standard carbon tank.
  • Microbial worries on well water: UV may belong in the system after proper prefiltration.

A lot of disappointment comes from buying a good filter for the wrong problem. The hardware may be fine. The match is what fails.

Sizing Your System for Perfect Pressure and Flow

People spend hours comparing contaminants and almost no time checking flow rate. Then the system gets installed and the shower pressure tanks every time the washing machine starts.

That’s a sizing problem, not a filtration problem.

Industrial whole house water filtration system with pressure gauges mounted on a gray concrete wall

What GPM and PSI actually mean

GPM means gallons per minute. Think of it as how much water your system can deliver during busy moments, not just over a full day. If two showers, a toilet refill, and the dishwasher overlap, your filter has to keep up.

PSI means pounds per square inch. That’s your water pressure. You don’t need to become an engineer here. You just need to know that a filter can be “effective” on paper and still annoy you if it restricts flow too much.

Some affordable whole-house systems are built to avoid that tradeoff. For example, certain tank-style units are designed to maintain strong pressure with very low pressure drop, while running enough flow for multi-bathroom homes. That’s a big reason they feel better in daily life than undersized cartridge setups.

A simple way to estimate your home’s demand

Use your busiest realistic moment. Don’t overthink the whole day.

Make a quick checklist:

  • Count bathrooms: More bathrooms usually means more chances for overlapping use.
  • Note simultaneous fixtures: Two showers at once changes the math fast.
  • Add utility loads: Washing machines and dishwashers matter if they often run during morning or evening routines.
  • Look at family habits: A house with one bathroom can still need stronger flow if everyone gets ready at once.

A lot of affordable whole-house systems operate in the range that works well for small to larger homes. The right fit depends less on square footage and more on how many water events happen at the same time.

If your current pressure already feels borderline, don’t buy the smallest filter your budget can survive. Buy the smallest one that can still handle your busiest hour.

Why homeowners get this wrong

Many buyers see “whole-house” and assume it will naturally support the whole house. Not always. Some entry-level systems are better suited to lighter demand. Others are fine on paper but become restrictive as cartridges load up with sediment.

That’s especially important if your home also relies on a booster setup, a well pump, or pressure-sensitive plumbing. In those situations, general system health matters along with filtration. If you’re troubleshooting weak performance at the same time, a practical guide to pump repair, service, and maintenance can help you separate a filtration bottleneck from a pump issue.

Pressure problems usually look like this

  • Morning shower drops off: The filter is too small for overlapping use.
  • Water starts strong, then weakens over time: The media or cartridge may be loading with sediment.
  • One bathroom is fine, two is not: The service flow rate likely doesn’t match peak demand.
  • Pressure was already poor before the filter: The problem may be upstream of the filter.

A good affordable whole house water filter should disappear into the background. You notice the cleaner water, not the system struggling to keep up.

Calculating the True Cost of Ownership

A filter can look like a bargain on checkout day and still turn into the pricier choice by year three.

That happens because the price tag only shows the entry fee. The important number to care about is total cost of ownership, or TCO. A whole-house filter works more like a car than a pitcher filter. You do not judge a car by the down payment alone. You also look at fuel, maintenance, repairs, and how long it stays useful.

A person calculates expenses next to a document and a container filled with green sand filtration media.

Four costs that decide whether a system is affordable

Start with purchase price. That is the number every seller puts front and center. Entry-level cartridge systems usually win this round because the box costs less on day one.

Then look at installation. Some setups are simple enough for a confident DIY homeowner with basic plumbing tools. Others need a plumber, shutoff planning, fittings, and enough wall space to service the unit later. That can change the first-year cost fast, even before the filter has cleaned a gallon.

Third is replacement cost. Many low-priced systems lose their advantage concerning this aspect. A cheap housing with expensive cartridges is a little like buying an inexpensive printer and paying a premium for ink every few months.

Fourth is ongoing effort. Time counts. If you need to track replacement dates, order parts often, open messy housings, and troubleshoot pressure drop, that labor belongs in the budget even if no invoice shows it.

The maintenance trap

A lot of affordable systems stay affordable only if you stop the math too early.

Budget cartridge models often ask for regular replacement filters. Mid-range tank systems usually cost more upfront but can go much longer before the media needs attention. Over a five-year stretch, that difference can flip the ranking. The cheaper system at checkout can end up costing more to own.

That is the core TCO idea in plain English. Do not compare filters by sticker price alone. Compare what they cost to keep running for the years you plan to live with them.

Wallet test: If the system is cheap to buy but expensive to keep fed with cartridges, it is not a low-cost system. It is a delayed-cost system.

A plain-English five-year comparison

Here are two common paths.

Path one: lower upfront cost. You buy a cartridge-based system because the initial bill feels manageable. Installation may be easier too. But replacements keep showing up like subscription charges. One purchase turns into a string of purchases.

Path two: higher upfront cost. You spend more on a tank-style system. That can sting at first. But if the media lasts much longer and maintenance is lighter, you may spend less across five years and deal with fewer interruptions.

The easiest way to picture this is to compare it to light bulbs. A cheap bulb costs less today, but if it burns out again and again, the long-life bulb can be the better value even with the higher shelf price.

Here’s a quick visual break if you want a general overview before doing your own math:

What to include in your own TCO math

Use a notebook, phone note, or spreadsheet. Then total these pieces over five years:

  • System price: The cost of the unit itself.
  • Install cost: DIY materials or plumber labor.
  • Replacement schedule: Every cartridge, prefilter, or media refill the system will need.
  • Maintenance effort: How often you will be servicing it, cleaning housings, or ordering parts.
  • Length of ownership: A long-term homeowner and a renter may value the same filter very differently.

If a seller does not make replacement timing and replacement part pricing easy to find, treat that as a warning sign.

A smarter way to shop

Ask each brand the same set of questions so you can compare apples to apples.

  • What part needs replacing first?
  • How often does that happen in normal household use?
  • What does each replacement cost?
  • Does the quoted lifespan assume ideal water conditions?
  • How much maintenance does the homeowner handle personally?

Clear answers usually point to a company that expects you to keep the system for years. Vague answers often hide the long-term bill.

An affordable whole house water filter is the one that stays reasonable to own after the first install, the first cartridge change, and the second year of use. That is why TCO matters more than the lowest number on the product page.

How to Read Certifications and Avoid Marketing Hype

The water filter industry loves broad promises. “Removes contaminants.” “Delivers pure water.” “Advanced protection.” Those phrases sound reassuring, but they don’t tell you what was tested, what was reduced, or whether anyone outside the brand checked the claim.

That’s where certifications matter.

A magnifying glass inspecting an NSF certified label on a blue water filtration pitcher.

What the common NSF standards mean

NSF/ANSI 42 usually relates to aesthetic issues such as chlorine, taste, and odor. If your goal is making water smell and taste better, this is a meaningful standard to look for.

NSF/ANSI 53 is more important when a brand is talking about health-related contaminants like lead or PFAS. Here, shoppers should slow down and read carefully, because many products imply broad protection without carrying the certification that supports the claim.

Some systems are also marketed around emerging contaminants. That’s not automatically bad. It just means the paperwork matters even more.

Why the certification gap matters

Affordable systems are starting to address newer concerns, but the gap is still big. As of 2026, only 10% to 15% of sub-$1,000 systems carry NSF/ANSI 53 certification for health contaminants like lead or PFAS, compared with over 70% of higher-priced systems. That matters more now because EPA PFAS regulations affect over 100 million US households, according to the contaminant and certification overview on Aquasana’s whole-house water filter page.

That doesn’t mean every affordable system is weak. It means you can’t assume that chlorine reduction and health-contaminant reduction are the same thing. They aren’t.

A filter can be good at taste and odor and still not be the right answer for lead or PFAS.

Marketing phrases worth side-eyeing

Use your baloney detector when you see these:

  • “Removes all contaminants” because no system removes everything.
  • “Lab tested” without saying what was tested, under which standard, or by whom.
  • “Equivalent to certified” because equivalent is not certified.
  • “Military-grade,” “space-age,” or “premium media” when there’s no performance document behind the wording.

What to check before you buy

A careful buyer looks for evidence that’s specific.

  • Named certifications: Not “meets standards,” but actual NSF/ANSI numbers.
  • Contaminant list: The system should say what it targets.
  • Test conditions: Flow rate and operating conditions affect real performance.
  • Replacement requirements: Certification only matters if the filter is maintained properly.

This is one place where spending a little more can buy clarity, not just hardware. A system that clearly states what it does is easier to trust than one that relies on glowing adjectives.

Budget Breakdowns Three Real-World Scenarios

Advice gets easier when you can see yourself in it. Here are three common households and how the numbers and tradeoffs play out when they shop for an affordable whole house water filter.

The urban renters

They live in a smaller home with city water. Their biggest complaints are chlorine smell and bad-tasting tap water. They don’t want a major install, and they may move before long, so portability matters almost as much as filtration.

A cartridge-based whole-house option can fit this situation. Systems like the RKIN CBS 5 have a relatively low upfront cost of about $776 and are DIY-friendly, according to this whole-house filter review roundup. That kind of setup works best when the goal is accessibility and simple installation.

The catch is the annual replacement cost of $120 to $300. For renters, that may still be acceptable because the lower commitment and easier install matter more than perfect long-term economics. They’re buying flexibility.

Renters often value “easy to install and easy to leave behind” more than the lowest five-year cost.

The suburban family

They own their home, have multiple bathrooms, and want cleaner water throughout the house without turning filter maintenance into a hobby. They care about taste, odor, skin comfort, and plumbing protection.

At this point, a budget tank system usually starts making more sense. The SoftPro Upflow Carbon Filter starts at $847+ and can process 600,000 to 1,000,000 gallons before media replacement is needed, based on the same review source linked above. That’s a very different ownership profile from a cartridge setup that needs frequent replacements.

For this family, the mid-range route often feels better in daily life. Fewer maintenance interruptions. Better long-term value. Less chance of replacement fatigue. They spend more upfront but often spend less emotional energy and less money over time.

The rural homesteaders

Their water comes from a private well. They’re dealing with sediment first, and maybe also iron staining or sulfur smell. Their needs are less about “nice taste” and more about protecting the rest of the system from rough water.

A cartridge or sediment-heavy setup can make sense at the front end here, especially when high sediment is the main enemy. The same RKIN category is useful for homes where easy access to sediment control matters. If they own the home and plan to stay, though, they often benefit from pairing sediment prefiltration with a longer-life primary treatment system instead of living forever on replacement cartridges.

The decision here depends on what the water test shows. For some well homes, sediment is only the first chapter. Iron, sulfur, and specialty treatment can drive the final design.

What each household is really choosing

These three homes aren’t just choosing products. They’re choosing a maintenance lifestyle.

  • Urban renters pick convenience and low commitment.
  • Suburban families pick lower long-term hassle.
  • Rural well users pick problem-specific treatment, often starting with sediment protection.

If your home ownership horizon is short, a lower-entry cartridge system can be rational even if the long-term math is weaker. If you plan to stay put, the budget tank path often looks better because it spreads the cost over much longer service life.

The common mistake is copying someone else’s ideal setup. The best affordable whole house water filter is the one that matches your water, your home, and how long you expect to live with the decision.

Frequently Asked Affordability Questions

Is a whole-house filter cheaper than bottled water

For many households, it can be more cost-effective over time, especially because it treats water for the whole home instead of just drinking water. I’d still compare based on your actual habits rather than assuming a universal answer. The key advantage is that a whole-house system also protects plumbing, fixtures, and appliances, which bottled water can’t do.

Does a cheap system always save money upfront

At checkout, yes. Over time, not always. Systems with frequent cartridge changes can keep asking for money long after the initial purchase. A more durable setup often costs more on day one and less over the ownership period.

Should renters avoid whole-house filtration

Not necessarily. Renters just need to weigh portability and installation effort more heavily. If moving is likely, a DIY-friendly cartridge system may be the more practical choice even if it isn’t the strongest long-term value on paper.

Is professional installation always worth paying for

It depends on the system and your plumbing confidence. Some setups are straightforward, while others are better left to a pro. If the home has older plumbing, pressure issues, or a pump-related setup, paying for clean installation can prevent bigger headaches later.

Can a whole-house filter help appliances last longer

Often, yes. Cleaner water can reduce sediment exposure and help limit the wear that rough water causes inside the home. The exact benefit depends on what’s in your water and whether the chosen system targets that issue.

What’s the safest way to choose without overspending

Start with a water test. Match the filter type to the problem. Then compare total ownership cost, not just the sale price. If a brand can’t explain replacement needs clearly, move on.


If you want help comparing systems, understanding certifications, or figuring out which setup fits your budget and water source, Water Filter Advisor is a solid place to keep researching. It’s especially useful when you want practical guidance instead of marketing fluff, whether you’re choosing your first whole-house filter or trying to avoid a costly upgrade mistake.

Ultimate Guide to Membrane Water Filtration Systems

You fill a glass from the kitchen tap, take a sip, and pause. Maybe it tastes flat. Maybe it smells faintly like a swimming pool. Maybe your shower leaves reddish stains, or your kettle grows scale faster than you can scrub it. Most homeowners don’t stand at the sink thinking about pore size, pressure, and membrane fouling. They just want water that feels safe to drink and pleasant to use.

That’s where membrane water filtration systems come in. They’re the class of filters that do the fine-detail work. While a simple sediment filter catches grit and a carbon filter improves taste and odor, a membrane acts more like a precision barrier. It separates water from particles, microbes, and in some cases dissolved material that other home filters can’t reliably handle.

The catch is that membrane systems can also surprise people. A unit may promise cleaner water, but its performance depends on the water entering it. If your home has iron, heavy sediment, or stubborn organic matter, the membrane may need protection long before you think about replacing it. That hidden side of ownership matters just as much as the contaminant list on the box.

Why Membrane Water Filtration Systems Matter

You notice the problem in everyday routines first. The coffee has a flat, mineral taste. Ice picks up an odd smell from the freezer. A rusty ring shows up in the tub again, and the kettle starts building scale long before it should.

Those clues all point to the same question. What, exactly, is in the water, and what kind of filter can separate it out?

Why membranes stand apart

Membrane systems matter because they do more than make water taste better. They act like very fine screening layers that sort water from unwanted material based on particle size and, with some membranes, dissolved content. That gives them a different job from a basic sediment cartridge or a carbon block.

For homeowners, that difference can be practical, not academic. A sediment filter is good at catching grit. Carbon is good at reducing many taste and odor problems. A membrane is often the stage that handles the smaller, harder-to-catch material that slips through those earlier steps.

Reverse osmosis, or RO, is the example many people know best. It is used when the concern goes beyond cloudiness and into dissolved salts, metals, or other contaminants that simpler filters may not reduce well. If your only problem is visible sediment, an aggressive membrane may be more system than you need. If your concern includes what is dissolved in the water, membranes start to make much more sense.

Why homeowners are paying attention

Analysts at Fortune Business Insights report that the global membrane filtration market, valued at roughly USD 19 to 20 billion in 2025, is projected to grow sharply by the mid-2030s, with water and wastewater treatment as the largest application area. Those figures are relevant to homeowners because they show membrane filtration is no longer a specialty tool used only in industrial settings. It has become a common answer to real water quality problems.

That popularity can create a false sense of simplicity.

A membrane system may look like a tidy box under a sink or beside a pressure tank, but ownership often involves more than replacing one filter on a schedule. Feed water quality affects membrane life. Some homes need pretreatment to control sediment, iron, hardness, or chlorine before water even reaches the membrane. Some systems need periodic flushing or backwashing. Those upkeep steps add cost, waste water in some designs, and determine whether the system keeps performing or starts clogging early.

A good membrane setup can solve the right problem with impressive precision. A poorly matched one can turn into an expensive lesson in fouling, short cartridge life, and surprise maintenance. That is why membranes matter. They are powerful tools, but they work best when homeowners understand both the filtration benefits and the hidden demands that come with them.

Understanding the Key Concepts of Membrane Filtration

Think of membrane filtration like a set of kitchen strainers arranged from coarse to very fine. One catches pebbles. Another catches sand. Another catches flour dust. The last one is so selective that it starts separating dissolved material from water itself.

That’s the big idea behind the four membrane categories homeowners hear about most often: microfiltration, ultrafiltration, nanofiltration, and reverse osmosis.

A diagram comparing four membrane water filtration technologies: Microfiltration, Ultrafiltration, Nanofiltration, and Reverse Osmosis.

The four membrane types in plain language

Microfiltration

Microfiltration is the coarse screen of the membrane family. It’s useful when water contains visible particles, sediment, or larger suspended matter. In home systems, MF often acts as a bodyguard for finer stages downstream.

If your water looks cloudy after plumbing work or carries fine grit from a well, MF may be part of the answer. It’s usually not the final answer for dissolved contaminants.

Ultrafiltration

Ultrafiltration sits in the middle ground. It’s much finer than MF, but it usually runs at lower pressure than RO. That makes it attractive for whole-house use where homeowners want broad particle and microbe reduction without the heavier demands of reverse osmosis.

According to WCP Online’s discussion of membrane filtration standards, UF systems filter particles down to 25 to 100 nanometers, typically with a molecular weight cut-off of 10,000 to 100,000 daltons, and operate at 200 to 700 kPa, or 30 to 100 psi. The same source explains that UF is commonly built as hollow-fiber modules.

That hollow-fiber design sounds exotic, but the concept is manageable. Picture a bundle of very thin drinking straws. Water either moves from the inside of each straw outward, or from the outside inward. The membrane wall is the filtering surface.

Nanofiltration

Nanofiltration is the less famous sibling. Homeowners usually hear about it when hardness, some organic compounds, or selective ion reduction enters the conversation. It doesn’t go as far as RO, but it can be a smart middle option when full demineralization would be excessive.

NF often appears in conversations about water softening alternatives or systems that need more selectivity than UF but less intensity than RO.

Reverse osmosis

RO is the precision specialist. It uses pressure to push water through an extremely selective membrane. That’s why it’s so often chosen for drinking water systems when dissolved contaminants are the main concern.

It also asks more from the homeowner. More pressure. More pretreatment. More attention to maintenance.

Pressure and pore size confuse people most

A straightforward explanation is as follows:

Membrane type Best mental model What it mainly handles at home
Microfiltration Fine screen Sediment and larger particles
Ultrafiltration Very fine screen Smaller particles, some microbes, humic material
Nanofiltration Selective barrier Hardness-related and smaller dissolved material
Reverse osmosis Near-total barrier Dissolved solids and broad contaminant reduction

A smaller pore or more selective barrier usually means the system needs more driving force. In real life, that often means more pressure, more complexity, and more maintenance sensitivity.

Why UF gets used before RO

One of the most practical ideas in home filtration is using a less extreme membrane to protect a more extreme one. WCP Online notes that UF pretreatment before RO can improve RO recovery from 75% to 85% by reducing SDI from greater than 5 to less than 3, cutting replacement costs by 30% over 5 years in whole-house systems, based on the source’s practical benchmark and standards discussion.

That matters because membranes don’t fail only from age. They fail because water keeps delivering debris and foulants to the surface.

A membrane isn’t a magic wall. It’s a working surface. If you keep throwing dirt at it, it clogs.

The same source notes that without pretreatment, fouling can reduce flux by 20% to 50% within weeks. That’s a useful reality check for homeowners who think the membrane alone does all the heavy lifting.

How Membranes Remove Water Contaminants

A membrane doesn’t “clean” water in the way soap cleans a plate. It separates. The most important habit for homeowners is to ask, what is this membrane separating out, and how?

Three ideas make most of the process easier to understand: size exclusion, selective passage, and surface interaction.

Size exclusion is the easiest one to picture

Start with a colander in the sink. Pasta stays behind, water passes through. Membrane filtration works on the same principle, just at a much smaller scale.

If your water contains sand-like sediment, rust flakes, or suspended particles, a coarser membrane can block them because they’re physically too large to fit through the openings. That’s the basic logic behind microfiltration and much of ultrafiltration.

For homeowners, this explains why a system can make cloudy water look clear. The particles are still in the incoming water. The membrane just refuses to let them continue downstream.

Selective passage matters more as contaminants get smaller

Once contaminants become tiny, the explanation gets less like a kitchen sieve and more like a checkpoint. Reverse osmosis is the classic example. It doesn’t just stop obvious particles. It separates water from dissolved material that is mixed into the water at a much finer level.

That’s why RO is so often chosen when people worry about total dissolved solids, salty taste, or dissolved metals. The membrane is selective enough that many dissolved substances don’t cross with the water.

A useful everyday comparison is brewed coffee. A paper coffee filter catches grounds, but the dissolved coffee compounds still pass through into your cup. If you wanted to separate the dissolved compounds too, you’d need something far more selective than a coffee filter. RO plays that role in water treatment.

Surface interaction and chemistry complicate the story

Some membranes do more than act like a size gate. Their material and operating conditions influence what passes and what doesn’t. Charge, pressure, and the chemistry of the water all matter.

This is one reason homeowners get frustrated when they read contaminant charts too strictly. A membrane might perform very well under one set of conditions and struggle under another. Water from a treated municipal line behaves differently from well water carrying iron, organic matter, or fine silt.

Homeowner takeaway: Don’t ask only, “What does this membrane remove?” Ask, “What kind of water was it tested against, and what protects it upstream?”

Matching contaminants to membrane types

The easiest way to think about removal is to group contaminants by form.

Larger suspended material

This includes visible sediment, grit, and rust particles. These are usually the simplest targets. Coarser membranes or prefilters handle them well.

Microbiological material

Ultrafiltration becomes relevant when the concern shifts to bacteria-sized or virus-adjacent material. According to the WCP Online standards discussion cited earlier, UF can remove all microbiological species captured by MF and can provide partial removal of bacteria, some viruses, and humic materials. The same source notes that standards evidence shows greater than 99.99% removal of particles larger than 0.02 μm in water reclamation contexts.

That doesn’t mean every home UF unit performs identically in every kitchen or basement. It does show why UF earns attention in whole-house treatment where homeowners want finer biological protection than a sediment filter offers.

Dissolved solids and salts

RO earns its reputation in this area. Dissolved material is what makes two glasses of water look equally clear while tasting completely different. If one glass has high dissolved solids, a carbon filter may improve odor but won’t necessarily solve the underlying issue. RO is built for that finer separation.

Small organic chemicals

Homeowners often overestimate membranes here. Some membrane systems struggle with very small organic chemicals unless they’re paired with other treatment stages. If pesticides or similar compounds are part of the concern, a hybrid approach may be more realistic than relying on a membrane alone.

Why one membrane rarely solves everything

A complete home setup often looks more like a team than a single superstar.

  • A sediment stage protects the finer membrane.
  • Carbon media can help with taste, odor, and chemicals that membranes may not target well.
  • UF or RO does the fine separation work.
  • Post-treatment may polish the water or adapt it for use at a specific tap.

That layered design is why shopping by one headline claim can backfire. “Removes X” sounds simple. Actual water treatment rarely is.

Comparing Tradeoffs Across Membrane Types

Homeowners often ask which membrane type is best. The honest answer is that each one asks you to trade something for something else.

You might trade broad contaminant reduction for easier maintenance. You might trade lower pressure needs for less chemical removal. You might trade a lower sticker price for a system that needs more cleaning and protection later.

A lineup of various industrial membrane water filtration system types displayed as cross-section column samples.

A practical side-by-side view

Membrane type Main strength Main limitation Best fit at home
MF Handles sediment with modest demands Limited against dissolved contaminants Prefiltration and particle control
UF Stronger microbiological and fine-particle barrier Still not a full dissolved-solids solution Whole-house treatment and RO pretreatment
NF Selective reduction without full RO intensity More specialized and less familiar to buyers Homes needing a middle option
RO Broad dissolved contaminant reduction Higher pressure, more upkeep sensitivity Drinking water and high-purity applications

Why cheap membranes can cost more later

A membrane system can look affordable on day one and become irritating by month six. The usual culprit is fouling, which is the gradual buildup of unwanted material on the membrane surface.

The newer antifouling membrane discussion is interesting. According to Northwestern University’s coverage of membrane investment research, high-performing antifouling membranes can reduce cost, energy consumption, and greenhouse gas emissions over their lifetimes, and the same piece notes that 65% of desalination plants already use membrane technology.

For homeowners, the headline isn’t “buy the fanciest membrane.” It’s simpler than that. Sometimes the bargain option is only cheaper if you ignore cleaning, earlier performance decline, and shorter useful life.

Tradeoffs that matter in real homes

Maintenance tolerance

If you want the least demanding system, MF or a modest UF setup may feel more manageable than RO. RO often brings tighter operating requirements and more sensitivity to what enters the membrane.

Water source

City water and well water don’t punish membranes in the same way. Well water with iron or heavy sediment can be rough on a membrane if pretreatment is weak. Municipal water may bring disinfectant byproducts, taste issues, or a contaminant profile that pushes homeowners toward RO for drinking water.

Energy and pressure

RO is powerful because it is demanding. The finer the separation, the harder the system has to work. That’s not automatically a reason to avoid it. It just means the strongest membrane isn’t always the smartest whole-house choice.

Better filtration on paper isn’t always better filtration in a basement utility room. The right system is the one your water and maintenance habits can support.

A smarter way to compare systems

When you’re judging membrane water filtration systems, use these questions instead of chasing marketing language:

  • What problem am I solving first? Taste, sediment, microbes, dissolved solids, or a combination?
  • What will protect the membrane? Prefilters, carbon stages, softening, or another pretreatment step.
  • How much upkeep can I realistically do? A neglected premium system often performs worse than a simpler system that gets maintained properly.
  • Is lifecycle value better than purchase price? Antifouling designs may make more sense if your source water tends to foul standard membranes.

Typical Household Applications for Membrane Systems

Membrane water filtration systems show up in homes for very different reasons. One family wants better-tasting drinking water. Another wants cleaner shower water and less staining in the bathroom. A third is trying to protect appliances from dirty well water while still getting polished water at the kitchen tap.

Those are not the same job, so they usually don’t call for the same setup.

A clear glass of ice water sits on a wooden counter next to a home water filtration system.

Under-sink drinking water systems

The most familiar home application is the under-sink RO unit. This setup treats water where people care most about taste and direct consumption, usually at a dedicated faucet near the kitchen sink.

A homeowner on municipal water might notice a chlorine smell in tea or coffee and dislike the taste of plain tap water. In that case, an RO system with suitable pretreatment can make sense because it focuses treatment where the family drinks and cooks.

This approach is often more practical than trying to run highly purified water to every toilet, shower, and hose bib.

Whole-house treatment for comfort and protection

Whole-house membrane setups often lean toward UF rather than RO. The reason is practical. Many homeowners want broader treatment for bathing, laundry, and fixture protection without the heavier complexity of whole-house reverse osmosis.

A family on a private well might use a layered system like this:

  • Sediment prefiltration to catch grit
  • An iron-focused treatment stage if needed
  • UF as a fine barrier for suspended material and microbiological concerns
  • Point-of-use RO at the kitchen sink for drinking water

That arrangement respects the strengths of each technology. The whole house gets cleaner utility water, and the kitchen gets the most aggressive polishing where it matters most.

When a middle-ground membrane makes sense

Nanofiltration often works best in the homes people don’t hear about on social media. These are the households with water that isn’t awful, but isn’t pleasant either.

If hardness or selective dissolved material is the issue, NF can sit in the useful middle. It can provide more finesse than UF without going all the way to RO. It’s not the default recommendation for every home, but it can be a smart match when full RO would be more than the situation requires.

A quick visual walkthrough can help if you’re comparing system styles and installation layouts:

Common household scenarios

City water with taste and odor complaints

A carbon stage may help, but some homeowners still want stronger reduction of dissolved material or byproducts. Under-sink RO is often the focused solution.

Well water with staining or particles

This water usually needs pretreatment first. Throwing a membrane straight at untreated well water is like sending a vacuum robot into a muddy garage and expecting it to stay happy. Sediment and iron control become part of the plan before the membrane does its job.

Homes that want cleaner showers and laundry water

A whole-house UF system can make sense when the goals are reduced cloudiness, lower suspended matter, and better water feel throughout the house. People often choose it when they’re trying to improve daily use, not just drinking water.

Some of the best home systems are hybrids. They don’t force one membrane to do every job. They assign each stage the job it does best.

Installation and Maintenance for Home Filtration

The hidden truth about membrane systems is that buying one is the easy part. Keeping it working well requires considerable skill.

A membrane has to be installed in the right place, protected from the right threats, and maintained on the right schedule. If any one of those pieces is missing, performance can slide fast.

A professional technician wearing a plaid shirt installs a water filtration system unit with a metal wrench.

Where installation goes wrong

Most installation mistakes happen before the first drop of water ever reaches the membrane.

Common trouble spots include:

  • Poor placement that leaves no room to service housings or access shutoff valves
  • Missing pretreatment even though the incoming water carries sediment, iron, or organics
  • Pressure mismatch between the membrane design and the home’s actual plumbing conditions
  • Drain and backwash planning that gets treated like an afterthought

If you’re dealing with a whole-house setup, tight utility-room plumbing, or older pipework, it’s sensible to bring in a qualified installer. If you need help evaluating the plumbing side, professional plumbing services can be useful as a reference point for what a proper installation scope should include.

Pretreatment is not optional

This is the part homeowners most often underestimate.

According to the review on membrane fouling and treatment challenges in PMC, pretreatment is an absolutely essential step for protecting membranes from rapid fouling, flux reduction, and rising operating costs. The same review notes that UF and MF systems may require backwashing as often as 2 to 4 times per hour, depending on feed water quality and flux.

That sounds extreme until you picture what the membrane is doing. It is constantly collecting rejected material on its surface. Without regular clearing and proper upstream conditioning, the membrane gradually turns into its own blockage.

Maintenance reality: A membrane doesn’t just filter water. It also collects what it rejects. Your system needs a plan for getting that rejected material off the membrane again.

A homeowner checklist for ongoing care

Before installation

Check your water quality first. The right membrane depends on what is in the water, not what you suspect.

Leave service space around housings, valves, and any storage components. Filters that are impossible to reach usually become filters that don’t get changed on time.

During setup

Install pretreatment in the right order. Sediment and adsorption-based stages often protect the membrane from the foulants most likely to shorten its life.

Confirm that the system has a realistic path for backwash, flushing, or reject flow. A membrane system that can’t clear itself properly is already in trouble.

After startup

Watch for pressure changes, slower flow, unusual taste shifts, or more frequent service needs. Those are often the first clues that fouling has started building.

For additional homeowner guidance on troubleshooting and general filter care, this practical library of advice at https://www.waterfilteradvisor.com/advice/ is a useful reference.

The upkeep people don’t see on the sales page

Consumer guides often focus on “what it removes” and skip “what it demands.” But membrane ownership includes routine attention to cleaning cycles, pretreatment media, and signs of fouling.

Some homeowners are comfortable with that. Others would rather have a simpler, less demanding system. Neither choice is wrong. The mistake is buying a membrane setup without understanding that upkeep is part of the technology, not a side issue.

Evaluating Cost and Certifications for Membrane Systems

The total cost of a membrane system isn’t the number on the product page. It’s the total of the unit, the support stages around it, the replacement parts, and the effort required to keep it working as designed.

That’s why two systems that look similar on a retailer’s shelf can feel completely different to own.

Think in lifecycle costs, not sticker price

A homeowner comparing membrane water filtration systems should ask four cost questions.

Cost area What to check
Initial hardware Is the membrane the whole system, or do you still need pretreatment and fittings?
Consumables Are replacement filters standard or proprietary?
Maintenance burden Will the system need frequent backwashing, flushing, or cleaning attention?
Operating demands Does it rely on higher pressure or a more complex setup to perform well?

This is also where antifouling membrane options deserve serious thought. A cheaper standard membrane may look attractive at checkout, but if your water tends to foul membranes quickly, the low purchase price can hide a more expensive ownership experience.

Certifications tell you what claims to trust

Certification language can feel dry, but it protects buyers from guesswork. A membrane system should never be judged only by broad marketing promises such as “pure,” “advanced,” or “laboratory-grade.”

The labels homeowners often look for include:

  • NSF/ANSI 42 for chlorine reduction and aesthetic effects
  • NSF/ANSI 53 for certain health-related contaminant claims
  • NSF/ANSI 58 for reverse osmosis systems
  • NSF/ANSI 61 for materials safety

These labels matter because they help connect a product claim to a recognized testing framework. If a system promises lead reduction, dissolved contaminant performance, or RO-specific treatment, the certification details help you see whether the claim is grounded in formal standards.

Buying signals that matter more than flashy claims

Match the system to the job

If you only need drinking water improvement, a point-of-use membrane system may be the sensible move. If your showers, laundry, and fixtures are suffering, a broader treatment strategy may make more sense.

Read the replacement path

A membrane system is easier to live with when replacement parts are easy to identify, easy to access, and easy to order. If the maintenance path feels murky before purchase, it usually gets worse after purchase.

Look for clear contaminant language

Good manufacturers say what the system is designed to address and under what standard or certification framework. Vague promises usually mean the burden of interpretation falls back on you.

Buy the system you can maintain, not the system with the most dramatic ad copy.

A simple rule for budgeting wisely

If a membrane seems affordable only because it excludes pretreatment, service parts, or realistic upkeep, it is not affordable. It’s incomplete.

The strongest buyers treat the membrane as one part of a treatment train. That mindset helps you compare systems accurately and avoid the common mistake of underestimating what it takes to own one successfully.

Making the Right Choice for Your Home

The best membrane water filtration systems are the ones that match your water, your goals, and your patience for upkeep. That’s the whole game.

If your main issue is cloudy water or sediment, a lighter-touch membrane strategy may be enough. If you’re worried about dissolved solids or broad drinking water purification, RO often becomes the more logical choice. If your water is tough on equipment, pretreatment matters just as much as the membrane itself.

Homeowners usually get into trouble when they skip one of three steps:

  • Testing the water
  • Planning pretreatment
  • Being honest about maintenance

A membrane can be a brilliant tool. It can also become an expensive, frustrating box under the sink if it’s asked to treat the wrong water with the wrong support.

Start with the problem you have. Taste and odor. Sediment. Iron. Dissolved material. Whole-house comfort. Safer drinking water at one tap. Once that’s clear, the filter choice gets much easier.

If you’re still deciding, compare systems by three standards. What they remove, what they require, and what they cost to keep running. That approach is less exciting than marketing slogans, but it leads to better water and fewer surprises.


If you want help comparing options, understanding certifications, and choosing a system that fits your home’s actual water problems, visit Water Filter Advisor. It’s a practical place to research filters, replacement needs, and maintenance before you buy.

Mastering Water Softener Hardness Settings

A lot of homeowners run into the same aggravating moment. The softener is installed, the salt tank is full, the display is lit up, and yet the shower door still spots up, the dishes still dry cloudy, and the faucets still grow that chalky crust.

In most cases, the machine is not broken. The water softener hardness settings are wrong.

That setting controls how the softener interprets your water, how much resin capacity it expects to use, and when it decides to regenerate. Get the number wrong and the whole system behaves wrong. Set it too low and hardness slips through. Set it too high and the unit burns through salt and water for no good reason.

The fix is usually straightforward once you stop treating the softener like a sealed black box. Test the water. Adjust for iron if needed. Program the actual number. Then fine-tune for how your home uses water and how your family wants it to feel.

Why Your New Water Softener Might Not Be Working

A new softener can fail in a very ordinary way. It is doing exactly what you told it to do, but you told it the wrong thing.

The hardness setting is the system’s decision-maker. It tells the control valve how hard the incoming water is, how quickly the resin will be used up, and when regeneration needs to happen. If that number does not match reality, the softener either underperforms or overworks.

Most of the symptoms point back to that one problem:

  • Spots on dishes: Hardness is still leaking through.
  • Scale on fixtures: The setting is often too low, or iron was never included.
  • Heavy salt use: The setting may be too high.
  • Soft water only some of the time: Regeneration timing or capacity assumptions are off.

A lot of homeowners assume the installer, factory setting, or quick-start guide already handled this. Sometimes that is true. Often it is not. City water can vary by neighborhood. Well water can change with season, rainfall, and iron content. A “standard” hardness number is just a placeholder until the water is tested.

What works is a simple, practical approach. Start with the actual hardness reading. Build in compensation for iron where needed. Program the valve carefully. Then watch how the house responds for a week or two.

Practical rule: If a brand-new softener still leaves hard water symptoms, check the settings before you blame the resin, the salt, or the plumbing.

If you want broader home treatment guidance beyond softeners, the advice library at https://www.waterfilteradvisor.com/advice/ is a useful place to compare common water quality issues and treatment approaches.

Decoding Your Water Hardness Number

Your hardness number is one piece of information you cannot guess.

Without it, programming a softener turns into trial and error. With it, the rest of the setup becomes much more predictable.

Infographic

Where to get the number

For most homes, there are three practical ways to find hardness.

  1. Utility report

    If you are on municipal water, your local water utility may publish hardness in its water quality report. This is the easiest starting point. It gives you a broad picture of the supply, though it may not reflect variation at your exact address.

  2. DIY test kit

    A home hardness kit is the fast route. It is useful when you want a same-day answer before programming a new unit or checking whether your current setting is off.

  3. Certified lab

    This is the best option for well water, mixed water problems, or any home where iron and manganese may be part of the story. A lab report gives you the cleanest data for setup.

The method matters less than one thing. You need a hardness result you trust.

GPG and PPM are not the same

Most water softeners use grains per gallon, usually written as GPG. Some water reports use parts per million, or PPM.

The standard conversion is simple. One grain per gallon equals 17.14 parts per million, according to HomeWater101’s hard water numbers guide.

If your report gives hardness in PPM, convert it before programming the softener. If your softener menu asks for GPG and you enter a PPM number by mistake, the setting will be wildly off.

Hardness scale in plain English

This is the framework most homeowners need:

Classification Grains per Gallon (GPG) Parts per Million (PPM)
Soft 0–3 0–51.42
Moderately hard 3–7 51.42–119.98
Hard to very hard Over 7 Over 119.98

That same source classifies 0–3 GPG as soft, 3–7 GPG as moderately hard, and water over 7 GPG as hard to very hard, which is where treatment often becomes necessary to limit buildup and appliance wear.

Those categories line up with what homeowners notice. At the lower end, you may just see a little spotting. Higher up, you start seeing crusty faucets, shower film, dishwasher residue, and scale in the water heater.

If those symptoms sound familiar, a good side resource on cleaning visible deposits is this guide to hard water stains. It is useful after the softener is corrected, because old buildup does not disappear on its own.

Why precision matters

A rough estimate is better than nothing, but an accurate number protects you from two expensive mistakes.

  • Underestimating hardness: The softener treats less than it should and minerals keep passing through.
  • Overestimating hardness: The unit regenerates more aggressively than needed and wastes salt.

Key takeaway: The display setting should reflect the water entering the softener, not your best guess based on a neighbor’s house or an old installer sticker.

Calculating Your True Hardness Setting with Iron

The hardness result from your test is only the starting number.

For many homes on city water, that tested hardness may be close to the final programming value. For many homes on well water, it is not. Iron changes the math, and ignoring it is one of the most common reasons a softener seems to “sort of” work but never really fixes the problem.

A hand holds a water hardness test strip next to a calculator with the number 532 displayed.

Why iron changes the setting

A softener resin bed does not experience iron the same way it experiences calcium and magnesium. Iron fouls resin beds 4 to 5 times faster than calcium, and ignoring iron is linked to up to 70% of service calls for residual spotting, according to Water Filter Guru’s water softener hardness setting guide.

That matters in homes because a softener can be “correct” on paper for hardness alone and still run short on usable capacity. The resin gets burdened by iron, the bed loses efficiency sooner than expected, and hardness begins leaking through before the next regeneration.

Seasoned installers talk about compensated hardness instead of raw hardness.

The essential formula

Use this formula when iron is present:

Compensated hardness = base hardness in GPG + 4 GPG for every 1 PPM of iron

That is the number you program into the softener.

If manganese is part of your lab report, some manufacturers also compensate for that, but the critical homeowner error is usually missing iron. If you know iron is present, do not skip this step.

Worked examples

These examples show how the math changes depending on your water source.

City water with no iron

If your municipal water tests at 12 GPG and iron is not present, your compensated hardness is still 12 GPG.

No extra adjustment is needed. This is the easy case.

Well water with moderate iron

If your water tests at 15 GPG and 2 PPM iron, the compensated hardness becomes:

  • Base hardness = 15 GPG
  • Iron compensation = 2 × 4 GPG
  • Total = 23 GPG

That exact example is the standard one used in the source. A softener programmed to 15 in this case will behave undersized even if the equipment itself is adequate.

Water with mixed minerals

If your hardness looks only moderately high but the home still gets rust staining, metallic smell, or orange-brown rings, treat that as a warning sign. The raw hardness number may not explain the whole load on the resin. In the field, homeowners often keep turning the softener up and down without solving the core issue because iron was never measured.

What homeowners usually get wrong

Some mistakes show up over and over:

  • Using the city report without testing the house: The report may be close, but not exact for your line.
  • Programming raw hardness on well water: This is the classic iron miss.
  • Assuming staining is separate from hardness: In softener setup, it often is not.
  • Chasing comfort before performance: Get the compensated hardness right first. Then fine-tune for feel later.

Tip: If your dishes spot, your toilets ring, and your softener seems to use salt normally, check iron before replacing parts. The setting may be wrong even when the machine is functioning.

A simple decision guide

Water situation What to use for programming
City water, no iron present Tested hardness number in GPG
Well water, iron present Hardness number plus 4 GPG per 1 PPM iron
Unclear water quality Get a test that includes hardness and iron before changing settings repeatedly

The practical takeaway

A softener does not care what label is on the water source. It cares what mineral load enters the resin.

That is why two houses with the same softener can perform very differently. One owner programs the tested hardness. The other owner programs compensated hardness with iron included. The second system usually behaves like it was sized and installed by someone who understands the water, not just the equipment.

Programming Your Water Softener Control Valve

Once you have the right number, the job becomes mechanical. You need to put that number into the valve correctly.

Most modern residential softeners follow the same basic logic even if the brand names differ. Fleck, Clack, and many private-label systems all rely on a digital control head that lets you move through settings with a few buttons.

A close-up of a person's finger adjusting the digital settings on a home water softener control panel.

What to look for on the display

The hardness field may be labeled in several ways:

  • H
  • Hardness
  • DH

The exact label changes, but the purpose does not. Here, the unit learns the incoming water load you calculated earlier.

Most systems use a mix of Up, Down, and Set or Regen buttons. Some require holding two buttons to enter programming mode. Others place user settings and master settings in separate menus.

Your owner’s manual still matters here. Do not guess your way through advanced menus if the softener also asks for capacity, reserve, or cycle timing.

The settings that matter most

A lot of displays show many values, but homeowners usually need to focus on three.

Hardness

Enter the compensated hardness number you calculated. This is the core setup value.

If the display was factory-set to a generic number, overwrite it. Factory defaults are for shipping convenience, not for your specific water.

Regeneration time

Set regeneration for a time when the home is not using water. Overnight is the usual choice.

That keeps hard water from slipping through during the cleaning cycle and avoids interruptions when showers, laundry, or dishwashing are happening.

Regeneration type

A key difference between old and new softeners lies in their regeneration types.

  • Timed regeneration: The system regenerates on a schedule, whether the capacity was used or not.
  • Metered or demand-initiated regeneration: The system regenerates based on actual water use.

For most homes, metered control is the better setup. It matches regeneration to real household consumption rather than a fixed calendar.

A practical programming sequence

This is the order I recommend for homeowners doing a first setup:

  1. Confirm service position

    Make sure the bypass is not engaged. Many “bad settings” complaints turn out to be a bypass valve left in the wrong position.

  2. Enter the hardness value

    Use the compensated number, not the raw test result if iron is part of the water.

  3. Check the clock

    If the internal clock is wrong, regeneration may happen at the wrong time of day.

  4. Set regeneration timing

    Choose a low-use period.

  5. Verify regeneration mode

    If your unit supports metered operation, use it unless the manufacturer specifies otherwise for your system.

A short visual walkthrough can help if your valve interface is unfamiliar:

What not to touch casually

Some homeowners go deep into installer menus and change values they do not understand. That can create more trouble than the original problem.

Be careful with settings tied to:

  • Capacity
  • Reserve
  • Cycle durations
  • Backwash or brine draw timing

Those are not impossible for a homeowner to understand, but they should be changed with the manual in hand and a clear reason. If you only need to correct water softener hardness settings, stick to the hardness field and basic regeneration options first.

Good practice: Make a quick note of every original setting before you change anything. If performance gets worse, you will know exactly what changed.

After programming

Do not expect instant proof at every faucet the second you hit save. The softener may need to regenerate before the corrected settings fully affect the house, especially if the resin was already near exhaustion.

Then monitor the obvious signs. Dishes should improve. Soap should rinse differently. Fixtures should stop collecting fresh scale. If the setting is still off, the clues will show up quickly.

Fine-Tuning for Salt Efficiency and Seasonal Changes

A softener that is set correctly once is not always set correctly forever.

Many homes drift out of tune at this point. The original setup may have been close, but the water changes. Municipal blending changes. Well water shifts. Iron spikes. Household usage changes. The softener keeps following the old instructions until someone notices the dishes are spotting again or the salt bin empties faster than expected.

A person's hand adjusting a blue dial on top of a black and white water treatment device.

Seasonal shifts are real

Some municipal reports show a 20% to 50% variance between summer and winter, and well water can vary even more because iron may spike along with hardness, according to SoftPro’s discussion of ideal hardness setting.

That matters because a number that worked in winter may undershoot summer water. The reverse can also happen. If you program for peak hardness all year, you may be protecting the house but wasting salt. The same source notes that homeowners in high-variability regions should re-test and recalibrate at least twice a year to avoid up to 30% more salt waste or residual scaling.

How to handle changes without chasing the display

You do not need to stand in front of the control valve every week.

A practical homeowner routine looks like this:

  • Spring test: Check hardness and iron as warmer weather begins.
  • Fall test: Check again when source conditions shift.
  • After obvious changes: Re-test if you suddenly see new spotting, rusty staining, or unusual salt use.

For stable municipal water, that may be enough. For a private well with known iron issues, pay closer attention after seasonal transitions or heavy changes in groundwater conditions.

Salt efficiency is not just about using less salt

Softener performance depends on balancing hardness removal with how aggressively the system regenerates.

According to the NSF/ANSI 44 benchmarks cited by Culligan, a salt dosage of 6 to 15 lbs per regeneration is associated with 90% efficiency in a properly calibrated system. That is a useful technical range, but it is not a command to push every machine to the lowest setting possible.

Lower salt use can be smart. Too little regeneration support can also leave the resin under-cleaned. The right choice depends on your water load and how the unit was designed.

A better way to think about optimization

Use these questions instead of aiming blindly for “maximum efficiency”:

If you notice this The likely issue
Salt use jumps but water quality is fine Setting may be higher than necessary
Scale returns between regenerations Setting may be too low, or seasonal hardness has increased
Rust stains return on a well system Iron level may have changed, not just hardness
Water quality changes after family size changes Metered demand assumptions may no longer fit usage

City water and well water need different habits

Municipal supply

City water usually changes more gradually. You can often tune once, verify a couple of times a year, and leave it alone unless symptoms return.

Well water

Well water asks more of the owner. If iron and manganese move around, the softener does not get a vote. It just reacts to what enters the tank. That means well owners should think in terms of monitoring, not one-time setup.

Field advice: If you have well water and your setting was perfect six months ago, that does not mean it is perfect today.

The homeowners who get the best long-term results are not constantly tinkering. They are willing to test on a schedule and make deliberate changes when the water tells them to.

Troubleshooting Common Hardness Setting Problems

When a softener underperforms, the symptoms usually look mysterious for about a day. After that, they become pretty readable.

The important thing is not to jump straight to replacing resin, buying additives, or blaming the whole system. Most complaints track back to setup.

White spots still show up

If dishes, shower glass, or faucets keep collecting mineral film, the first suspect is a hardness setting that is too low.

That can happen in three common ways:

  • The incoming hardness was guessed.
  • The original test is outdated.
  • Iron was present but never included in the programmed number.

If the house is on a private well, that third mistake is especially common. If the house is on municipal water, check whether the supply has shifted since the original setup.

The softener burns through salt

A machine that uses a lot of salt is not always “working harder.” Sometimes it is programmed too aggressively.

When the hardness number is pushed too high, the valve assumes the resin is carrying a heavier mineral load than it really is. That can drive unnecessary regeneration. If your water quality is good but your salt use feels excessive, review the programmed number against current test results.

The water feels slimy

The complaint often catches new softener owners off guard.

Soft water changes how soap behaves on your skin. Many people describe properly softened water as slippery or slick at first. That sensation does not necessarily mean anything is wrong.

Still, preference matters. According to ProAqua’s discussion of ideal water softener level, many people aim for 0 GPG, but some prefer a post-softening target of 2 to 3 GPG, or roughly 35 to 50 PPM, to avoid the slippery feel and keep a bit of mineral character in the water.

That trade-off can make sense for homeowners who dislike ultra-soft feel but still want scale protection.

A practical comfort adjustment

If the system is performing well but the water feels too soft for your taste, you can fine-tune for comfort rather than chasing absolute zero.

Try this approach:

  1. Confirm the softener is solving the hard water problem.
  2. Make only a small adjustment.
  3. Live with it for several days.
  4. Watch for the return of spotting or scale.

You are not trying to make the water hard again. You are trying to land at a point where appliances stay protected and the family likes the feel.

Balanced target: Many households are happiest when the water is soft enough to prevent visible buildup but not pushed so far that every shower feels unfamiliar.

When the problem is not the setting

If the number is right and symptoms continue, check the basics before assuming the valve is failing:

  • Salt supply: The tank needs usable salt, not just a crusted bridge.
  • Bypass position: The unit must be in service.
  • Recent regeneration: The corrected settings may need a regeneration cycle before results show fully.

A lot of “bad softener” calls turn out to be a decent machine with one wrong number or one simple oversight.

Frequently Asked Questions on Water Softener Settings

How often should I re-test my water?

For homes where hardness is known to vary, twice-yearly testing is the most practical habit. That is especially important on well water and in regions where municipal hardness changes with the season.

If your water is stable and your softener performance stays consistent, you can be less reactive. Still, any sudden return of spots, scale, or staining is a good reason to test again.

Should I set my softener to zero hardness?

Not necessarily.

Many systems are calibrated to deliver very low residual hardness, and NSF/ANSI 44 performance targets call for less than 1 GPG of hardness leakage in a properly calibrated system, according to Culligan’s technical guide on the right amount of soft.

But homeowner comfort is part of the practical answer. Some people prefer a little residual hardness for feel and taste, as discussed earlier. The right target depends on your priorities. Appliance protection, personal comfort, and water character do not always point to the exact same setting.

How does salt dose relate to the hardness number?

They work together, but they are not the same control.

The hardness number tells the softener how much mineral load to expect. Salt dose affects how the resin is regenerated. In the same technical benchmark, 6 to 15 lbs per regeneration is the cited range for 90% efficiency.

If the hardness setting is wrong, changing salt dose will not fix the root problem. Get the hardness number right first. Then adjust salt strategy only if your system manual supports it and you understand the trade-off.

What are the main technical benchmarks for a good setup?

A well-calibrated residential system should generally show a few signs of health:

  • Low hardness leakage: Proper calibration should achieve less than 1 GPG leakage under the NSF/ANSI 44 benchmark in the cited source.
  • Reasonable salt use: Salt dose should fall within the design range for the valve and resin setup.
  • Stable performance: The home should not swing between soft water and hard water symptoms.

If your setup misses those marks, the machine may still be salvageable with better programming.

What mistakes cause repeated regenerations?

Iron errors are a major one. The same source states that incorrect iron adjustments account for 40% of premature regenerations.

That is why well owners often think the softener is undersized when the core issue is bad compensation math. The resin is being asked to carry a load the controller never accounted for.

Can I just turn the hardness setting way up to be safe?

That usually backfires.

The same benchmark notes that setting hardness above 50 GPG can lead to resin exhaustion and system failure in 25% of cases. More is not safer. It is just a different kind of wrong.

The right setting is the tested number, adjusted correctly for iron where needed. Not the highest number the keypad allows.

What should I check first if my system seems off?

Use this order:

  1. Test current water hardness
  2. Check iron if you are on well water or seeing rust-related signs
  3. Confirm the programmed hardness value
  4. Verify bypass position and salt condition
  5. Look at regeneration timing and mode

That sequence solves a surprising number of service headaches without replacing a single part.


If you want help comparing softeners, test kits, iron filters, and whole-house treatment options, visit Water Filter Advisor. It is a practical resource for homeowners who want clear guidance on choosing and maintaining better water treatment at home.

Best Under Sink Water Filter Comparison 2026

You fill a glass from the kitchen tap, hold it to the light, and take a cautious sip. Maybe it tastes faintly like a swimming pool. Maybe it is fine one day and off the next. Maybe your local water report leaves you with more questions than answers.

Many individuals start there. Not with a grand home upgrade plan. Just a nagging feeling that the water they drink every day could taste better, smell cleaner, or carry fewer things they do not want in it.

Pitchers and refrigerator filters help in some homes, but they often feel like partial fixes. They improve convenience. They do not always deliver the broad contaminant reduction people assume they do. An under sink system is different. It hides out of sight, feeds a dedicated faucet or your cold-water line, and can make a noticeable change every single day.

A good under sink water filter comparison should not stop at what looks best on the box. Day 1 performance matters. Day 365 matters more. The right choice depends on your water, your space, your tolerance for maintenance, and what you aim to remove.

The Quest for Better Tap Water

Dinner is on the stove, the kettle is heating, and the tap water has that familiar chlorine smell again. Or the coffee tastes flat, even with fresh beans. Or the water looks clear but leaves scale in the kettle and a lingering question in the back of your mind about what is coming through the line.

That is usually what starts this search. Not a renovation plan. A daily annoyance, a health concern, or a growing sense that the kitchen tap should be doing a better job.

A person looking thoughtful while holding a glass of clear water in front of a blurry background.

Municipal-water households often notice chlorine, inconsistent taste, or concern about contaminants such as lead, PFAS, and disinfection byproducts. Well-water households face a different problem. The utility is your own property, which means testing, treatment, and follow-through all land on you.

Why small fixes often disappoint

Pitchers, fridge filters, and faucet attachments have a place. They are easy to try and cheap to start with.

They also have limits that show up fast in real kitchens.

  • Pitchers: fine for a few glasses, less practical when you cook often or have a full household
  • Fridge filters: convenient for cold water, but usually tied to lower flow and a narrow use case
  • Faucet filters: quick to install, but they add bulk at the sink and do not always handle a broad range of contaminants

The bigger issue is long-term performance. A low-cost filter can look attractive on day 1 and turn expensive by month 12 if cartridges are small, flow drops early, or replacement filters are hard to find. That is where many buyers get frustrated. They solved one problem, then inherited another.

Why under sink systems become the serious option

An under sink system fits how people use water. It keeps the counter clear, gives you filtered water close to where you fill pots and glasses, and usually offers more treatment capacity than the smaller options above.

A well-chosen under sink system feels less like an accessory and more like a plumbing upgrade. It works reliably in the background, and you stop thinking about it because the water tastes right and the flow still feels usable months later.

That last point matters. Advertised performance is only part of the story. Ownership includes cartridge life under your water conditions, replacement cost, pressure loss as filters load up, and whether maintenance is simple enough to happen on time.

Here is a quick side-by-side view before getting into the filter types.

Filter Type Best For Key Contaminants Removed Typical Flow Rate Avg. Lifetime Cost
Single-stage carbon Better taste and odor in decent municipal water Chlorine, some sediment, some taste and odor compounds Usually strong at the faucet Lowest
Multi-stage under sink filter Homes needing broader reduction without full RO complexity Chlorine byproducts, lead, VOCs, and more depending on media and certification Moderate to strong Medium
Reverse osmosis system Maximum contaminant reduction, including dissolved solids Broad-spectrum reduction including dissolved contaminants Slower than standard carbon systems unless high-capacity design Highest

A good comparison weighs all of that together. Removal claims matter. So do cartridge prices, filter change intervals, water waste in RO systems, and how the unit performs after months of normal use. The right choice is the one that still makes sense on day 365, not just the one with the most impressive box.

How Under Sink Water Filters Work

Open the cabinet under a kitchen sink after a filter has been in service for months, and its true performance shows up fast. Flow has slowed. One cartridge is carrying too much of the load. The water may still taste better than raw tap, but not as good as it did right after installation. Under sink filters work as a chain of treatment steps, and each step affects how the next one performs on day 365, not just day 1.

Each stage has a specific job. One removes visible particles. One reduces chlorine, odors, and some chemical contaminants. In some systems, a membrane also separates water from many dissolved substances that carbon alone cannot catch.

A cutaway view of a multi-stage water filter cartridge demonstrating its layered filtration technology against a black background.

Sediment filtration catches the obvious physical stuff

Many under sink systems start with a mechanical prefilter.

This stage works like a very fine sieve. It traps sand, rust, silt, and other suspended particles that can cloud water or plug up downstream media. Sediment filtration does not remove dissolved chemicals, but it protects the more expensive stages that follow.

That protection has a direct cost impact. If sediment reaches a carbon block or RO membrane too early, flow drops sooner and cartridge life often shortens. Buyers sometimes blame the whole system when the problem is a neglected prefilter.

Carbon handles taste, odor, and many chemical issues

Carbon is the stage that many homeowners notice first because it often delivers the biggest improvement in taste and smell.

Activated carbon removes contaminants through adsorption. Compounds stick to the carbon surface as water passes through. Chlorine, many odor-causing compounds, and a range of organic chemicals can be reduced this way.

The carbon format matters in real use.

  • Granular activated carbon: Water flows through loose granules. This can work well for taste improvement, but channeling can reduce contact between water and media over time.
  • Solid carbon block: Water passes through a denser block with more consistent contact. In practice, this usually means better reduction performance and steadier filtration as the cartridge ages.

Those differences matter because they let you compare systems on more than branding. A filter that tastes great in week one but loses flow or performance early can become expensive fast if replacement cartridges are costly.

Reverse osmosis is the selective membrane stage

Reverse osmosis, or RO, adds a membrane that removes many dissolved contaminants standard carbon filters cannot address well.

The membrane allows water through while rejecting a broad range of dissolved substances. That is why RO is often the better fit for households dealing with dissolved solids, fluoride, nitrates, heavy metals, or multiple water quality concerns at once.

The trade-offs are practical. RO systems usually produce water more slowly than standard carbon filters. They have more parts to maintain. Many also send some water to drain during treatment. Over time, that affects both ownership cost and day-to-day convenience, especially in busy kitchens.

Post-filters and polishing stages refine the final result

Many systems finish with a polishing stage, often a small carbon post-filter.

Its job is straightforward. It removes any lingering taste before the water reaches the faucet. In a well-designed system, this final pass is why filtered water tastes clean instead of slightly stale after sitting in a storage tank or moving through multiple filter stages.

Why stage order matters in real kitchens

Stage order is not just a design detail. It determines how evenly the system wears.

A common sequence looks like this:

  1. Sediment first: Protects downstream media from physical debris.
  2. Carbon next: Reduces chlorine and organics that can foul later stages.
  3. RO membrane after pretreatment: Works better and often lasts longer when sediment and chlorine have already been reduced.
  4. Polishing stage last: Improves final taste at the tap.

Poor sequencing can shorten cartridge life, reduce flow, and raise maintenance costs. Good sequencing spreads the workload so no single stage gets overwhelmed too early. That is one of the clearest differences between a system that performs well in the first month and one that still makes sense a year later.

A Detailed Filter Type Comparison

Saturday morning, you fill a pot for coffee and catch that pool-like chlorine smell again. By Tuesday, you are reading filter boxes under the sink and trying to figure out why one cartridge costs a fraction of another, why some systems promise everything, and why two units that look similar can age very differently in real use.

The practical way to compare under sink filters is to start with the problem in your water and the cost of keeping the system performing well over time. Day-one performance matters. So does cartridge life, flow six months in, and whether maintenance stays simple enough that you keep up with it.

Infographic

Single-stage carbon filters

Single-stage carbon filters fit a narrow job well. They are usually the right pick when municipal water is safe overall but tastes chlorinated, smells off, or carries light sediment.

In a real kitchen, their biggest advantage is consistency with very little fuss. Installation is usually easy. The footprint is small. Flow often feels close to normal. Replacement costs also stay low, which matters if you want a filter you will not resent buying cartridges for a year from now.

What works:

  • Taste and odor improvement: Strong choice for chlorine taste and smell.
  • Simple ownership: One cartridge usually means fewer missed maintenance steps.
  • Lower yearly cost: Replacement parts and install demands are usually modest.
  • Good fit for limited space: Helpful in small cabinets or rental units.

What does not:

  • Limited treatment range: A single carbon stage will not cover every dissolved contaminant concern.
  • Performance drops can sneak up on you: Taste often worsens gradually, so some households run cartridges longer than they should.
  • Less margin for difficult water: Heavy sediment, lead concerns, or broad chemical reduction usually call for more than one stage.

A single-stage unit works best when the target is clear and the expectation is realistic.

Multi-stage under sink filters

Multi-stage systems cover the widest middle ground. For many households on city water, they offer the best balance between treatment range, flow, and long-term cost.

These systems combine media for different jobs. One stage may catch sediment. Another may handle chlorine, odor, and organic compounds. A specialty cartridge may target lead or specific chemical categories. That layered approach usually holds up better over time than asking one cartridge to do everything from the start.

Real-world wear matters here. A well-designed multi-stage system often degrades more gracefully because each stage carries part of the load. A poorly designed one can become expensive fast if replacement cartridges are proprietary, unevenly sized, or rated in a way that sounds generous on the box but falls off quickly in use.

Here is how the main filter types usually compare:

Filter Type Best For Key Contaminants Removed Typical Flow Rate Avg. Lifetime Cost
Single-Stage Carbon Chlorine taste and odor in otherwise decent tap water Chlorine, some sediment, some organics depending on certification Strong Lowest
Multi-Stage Broader municipal-water concerns without going all-in on RO Chlorine byproducts, lead, VOCs, additional contaminants depending on design Moderate to strong Medium
Reverse Osmosis (RO) Maximum reduction and broadest target list Dissolved solids and a wide range of contaminants Varies, often slower unless high-capacity system Highest

What works:

  • Broader coverage: Better fit for households with several concerns instead of one.
  • Better long-term balance: Many keep stronger flow than older RO designs while treating more than a basic carbon filter.
  • More flexible system matching: Easier to pair with common city-water issues.

What does not:

  • Stage count can mislead: Three well-chosen stages often outperform five weak ones.
  • Replacement costs vary a lot: Some systems look affordable upfront and become expensive once proprietary cartridges enter the picture.
  • Performance depends on the full design: Media quality, cartridge size, and certification matter more than marketing labels.

A short visual walkthrough can help before deciding which type suits your kitchen:

Reverse osmosis systems

RO systems are usually the strongest option when the concern goes beyond taste and odor. They make the most sense for households that want broad contaminant reduction, including dissolved substances that standard carbon filters may not address well.

They also change the ownership equation more than other filter types. RO brings more parts, more scheduled maintenance, and a higher upfront price. Even when the water quality result is excellent, the better question is whether the system still feels worth owning after a year of cartridge replacements, membrane care, and daily use.

What works:

  • Broad reduction capability: Strongest candidate for difficult water problems and wide contaminant lists.
  • High reassurance value: Useful when the goal is reducing uncertainty, not just improving taste.
  • Stronger fit for complex source water: Helpful where carbon alone is too limited.

What does not:

  • Higher cost of ownership: Upfront purchase price is only part of the bill.
  • More maintenance points: Prefilters, membranes, and post-filters all have their own replacement schedule.
  • Water chemistry can change in ways buyers do not expect: Some households notice differences in taste profile compared with straight carbon filtration.
  • Performance depends heavily on upkeep: A neglected RO system rarely delivers the same results it had when first installed.

I usually tell homeowners to be honest about maintenance habits here. If cartridge changes get delayed in your house, a simpler filter that gets serviced on time often performs better over a full year than an RO system that looked better on paper.

Which filter type fits which water problem

Use this rule of thumb:

  • Chlorine taste and odor only: Start with single-stage carbon.
  • Several city-water concerns: Look at a well-certified multi-stage system.
  • Lead concerns, dissolved contaminants, or broad reduction goals: RO is usually the strongest candidate.
  • Very limited cabinet space: Compact carbon units or compact tankless systems are easier to live with.
  • Low tolerance for maintenance: Fewer stages usually mean fewer missed replacement cycles.
  • Tight long-term budget: Compare cartridge pricing before you compare feature lists.

No filter type wins every household. The best choice is the one that matches your water problem, your cabinet space, and the cost and maintenance level you will still accept on day 365.

Decoding Certifications and Performance Metrics

A homeowner buys a filter that promises to remove a long list of contaminants, installs it on Saturday, and feels good about the purchase. Six months later, the flow is slower, the taste is only a little better, and nobody in the house is sure what the certifications on the box proved. That is where careful reading saves money.

Certification language helps separate verified performance from marketing copy. For an under sink system, that matters because the filter you can trust on day 1 is usually the filter you can budget and maintain properly through day 365.

What the main NSF and ANSI standards tell you

The standard number matters more than the slogan on the packaging.

Here is the practical shorthand:

  • NSF/ANSI 42: Usually covers aesthetic issues such as chlorine taste and odor.
  • NSF/ANSI 53: Usually covers specific health-related contaminant reduction claims.
  • NSF/ANSI 58: Common for reverse osmosis systems.
  • NSF/ANSI 372: Covers low-lead material compliance.
  • NSF/ANSI 401: Often applies to certain emerging contaminants.

These numbers help you compare systems on something firmer than branding.

One caution. “Tested to NSF standards” is not the same as certified to an NSF or ANSI standard by an independent body. A company can test internally or cite narrow lab conditions and still use language that sounds stronger than it is. Buyers should look for actual certification details, not broad wording.

Why claim count can mislead

A long contaminant list can create a false sense of coverage.

Some systems advertise many reductions, but only part of that list is backed by independent certification. Others make fewer claims and support them more clearly. In practice, I trust the second type more. Clear, narrower proof usually beats a crowded box front full of loosely supported promises.

That trade-off matters over time. A system with honest, specific certification is easier to evaluate, easier to maintain properly, and less likely to disappoint after the first few months.

The longer the marketing list, the more carefully you should verify the certification behind each claim.

What to check before you buy

The front label is only the start. Check the certification sheet, performance data sheet, or product listing from the certifier.

Look for:

  • The exact standard number: “NSF certified” is not enough without the number.
  • The contaminant named in the certification: Lead, cysts, chlorine, and PFAS are different claims.
  • The rated capacity: Certifications apply over a stated cartridge life.
  • The tested flow rate: Performance at a trickle may not feel good at the sink.
  • Whether the whole system or one component is certified: Marketing often blurs that distinction.

That last point gets missed all the time.

A cartridge may carry a certification, while the ad copy makes the complete system sound broader or more capable than the paperwork supports. For a homeowner comparing long-term value, that distinction affects confidence, replacement planning, and whether the system is likely to perform the way the box suggests.

Performance metrics that matter at the sink

Certifications tell you what a filter has been verified to reduce. They do not tell you everything about daily use.

Pay attention to these metrics too:

  • Flow rate: Good reduction claims mean less if filling a pot becomes annoying.
  • Rated capacity: A higher gallon rating can lower yearly operating cost if the replacement filters are reasonably priced.
  • Pressure drop over time: Some filters feel fine at first and become frustrating well before the official change date.
  • Cartridge change method: A quick, clean swap increases the odds that replacements happen on schedule.
  • Physical size under the cabinet: A bulky housing can turn routine service into a chore.

Routine service can become a chore, and real-world performance separates products here. Two filters can look similar on paper, yet one keeps acceptable flow and taste much closer to the end of its service life. The other starts slipping early, which means the practical cost is higher even if the official replacement interval looks the same.

A better way to read the specs

Buyers usually focus on what the filter removes. Experienced buyers also ask how long it removes it well, at what flow, and under what conditions.

When I compare under sink systems, I put more weight on clear independent certification, realistic capacity, and signs of stable performance over the full cartridge life than on stage count or oversized marketing claims. A simpler filter with specific proof often turns out to be the better purchase, especially for households that care about predictable cost, dependable taste, and fewer surprises over the first year.

Calculating the True Cost and Maintenance Burden

The cheapest system on the shelf can become the expensive one under your sink.

That happens when the unit is affordable but the cartridges are frequent, difficult, or easy to forget. It also happens when a system performs nicely for the first stretch and then starts slipping before the official replacement date.

Total cost of ownership

A useful buying decision includes more than the purchase price.

Think in five buckets:

  1. Initial hardware cost
    The system itself, fittings, faucet, and any accessories in the box.

  2. Installation burden
    Some homeowners install a basic carbon unit in an afternoon. Others pay a plumber because the sink area is cramped, the lines are old, or the drain connection for RO is awkward.

  3. Replacement cartridge cost
    Many budget systems become premium systems over time due to ongoing expenses.

  4. Replacement frequency
    A filter that needs attention more often can cost more in money, time, and annoyance even if each cartridge is not expensive.

  5. Performance drift between changes
    This is the hidden category. If water quality or flow degrades before the official change date, the effective cost goes up because you are either replacing early or drinking lower-quality water.

Why the schedule on the box is only a starting point

Manufacturers usually give a neat replacement interval. Real homes are not neat.

A verified gap in current guidance is that content rarely explains how water quality and usage affect real cartridge lifespan beyond the manufacturer claim. Lab-tested 2026 data highlighted strong initial performance in systems such as the Epic Smart Shield and Cloud RO, yet no source explained what happens at 80% filter saturation, how flow degradation shows up month to month, or when homeowners should replace based on performance cues rather than preset schedules (Frizzlife guide noting the knowledge gap).

That gap matters because filters do not all age gracefully.

What makes filters wear out faster

In the field, several things commonly shorten useful life:

  • Sediment-heavy water: Prefilters clog faster and starve the rest of the system.
  • High daily use: Big households push cartridges harder.
  • Challenging source water: Well water, seasonal shifts, or unusual chemistry can stress a filter sooner.
  • Skipped prefiltration: Downstream media pays the price.
  • Inconsistent maintenance: One overdue cartridge can drag down the entire system.

Signs your filter is fading before the official date

You do not always need a lab report to know something changed.

Watch for:

  • Slower faucet flow
  • Taste or odor creeping back
  • A change in coffee, tea, or ice flavor
  • Noises from a system that used to run without notice
  • More frequent cycling in systems with storage

If your water starts tasting like the old water, the calendar is no longer the most important signal.

Which filter types usually cost more to live with

The pattern is predictable even without quoting prices for every model.

Filter Type Upfront Cost Ongoing Maintenance Space Burden Risk of Surprise Costs
Single-stage carbon Lower Lower Low Low to moderate
Multi-stage Medium Medium Medium Moderate
RO Higher Higher Medium to high Moderate to high

Single-stage carbon is easiest to budget for. Multi-stage systems can be reasonable if replacement parts are common and simple to access. RO systems often deliver the biggest treatment jump, but they also ask you to stay organized.

The practical buying rule

If two systems look close on day 1, choose the one you are more likely to maintain correctly.

A high-performance system with awkward cartridges, poor access, and confusing replacement timing often loses to a slightly simpler model that a homeowner will service on time. Reliability in a kitchen is not just filtration media. It is user behavior.

Your Personal Filter Selection Checklist

A focused approach, rather than more options, leads to a cleaner decision.

Use this checklist to match the filter to your home rather than to a marketing pitch.

A person writing a checklist about home plumbing maintenance while sitting by exposed water pipes.

Start with the water problem you have.

Ask the first question candidly.

Is your issue mostly taste and odor, or are you trying to reduce a broader set of contaminants?

  • If the answer is chlorine taste, mild odor, and generally decent city water, a single-stage carbon filter is often enough.
  • If the answer is lead worries, chemical concerns, or multiple issues at once, move toward a multi-stage or RO system.
  • If you use well water or have unpredictable source water, lean toward a stronger treatment setup and consider whether prefiltration is necessary.

Check your kitchen before you check the product page

Cabinet space changes what is realistic.

A compact unit that fits cleanly and leaves room for normal kitchen storage may serve you better than a bigger system you resent every time you reach for dish soap. Also look at faucet options, drain access, and whether you are comfortable installing tubing and fittings.

Be honest about maintenance habits

This one matters more than buyers like to admit.

  • Low-maintenance personality: Simpler carbon systems tend to fit better.
  • Comfortable with cartridges and schedules: Multi-stage or RO can be a strong match.
  • You want alerts, guides, and upkeep help: Read practical homeowner resources before buying, such as the advice library at Water Filter Advisor.

Choose your likely best fit

Here is the short version.

Choose single-stage carbon if your water is already decent and you mainly want better flavor with minimal fuss.

Choose multi-stage if you want stronger contaminant reduction than a simple taste filter but do not necessarily need the full complexity of an RO system.

Choose RO if broad reduction is your top priority and you are willing to trade some space, complexity, and maintenance for that extra level of treatment.

The best system is the one that matches your water, fits your sink cabinet, and still feels worth maintaining after the new-purchase excitement is gone.

Frequently Asked Questions About Under Sink Filters

Can I install an under sink filter myself

Often, yes. Basic carbon systems are usually the easiest DIY option. Multi-stage systems take more time. RO is the most involved because it may require a dedicated faucet, drain connection, and more tubing. If your plumbing is old, cramped, or unfamiliar, hiring help is money well spent.

Will an under sink filter reduce water pressure

Sometimes. Carbon systems usually preserve a more natural faucet feel. Multi-stage systems can reduce flow somewhat depending on design. RO systems are the most likely to feel slower unless they are built for higher output. Good installation and timely cartridge changes make a big difference.

Do under sink filters remove healthy minerals

Some do, some do not. Basic carbon filters usually focus more on taste, odor, and selected contaminants. RO systems remove a much broader range of dissolved material, which can change the mineral profile of the water. Whether that matters depends on your preferences and the specific system design.

How do I know when to change the filters

Start with the manufacturer schedule, but do not stop there. Watch the sink. If flow slows, taste changes, odors return, or the system behaves differently, inspect it early. Real replacement timing depends on your water quality and how much water your household uses.

Are under sink filters worth it if I already have a fridge filter

Often, yes. A fridge filter is convenient, but it is usually not the same as a dedicated under sink treatment system. If you want filtered water for cooking, faster filling, and broader treatment choices, under sink systems are usually the stronger long-term solution.


If you want help narrowing the field, Water Filter Advisor publishes practical guidance for comparing systems, understanding certifications, and staying ahead of filter maintenance before performance slips.

Best Reverse Osmosis System for Home: Your 2026 Guide to Pure Water

If you're hunting for the best reverse osmosis system for your home, let me cut to the chase. Based on expert reviews and some serious lab testing, modern tankless models are leading the pack. A system like the Waterdrop G3P800 is a standout for its powerful filtration and instant water flow—perfect for families who want pure water without a bulky tank gobbling up precious under-sink real estate.

Why a Reverse Osmosis System Is Your Home's Best Upgrade

Under-sink reverse osmosis water filtration system installed in a modern kitchen cabinet.

Ever pause mid-sip and wonder what’s actually coming out of your faucet? You’re not alone. Between the swimming-pool tang of chlorine and genuine worries about lead, PFAS "forever chemicals," and other invisible nasties, getting clean water at home has become a big deal. A reverse osmosis (RO) system is, simply put, the heavyweight champion of home water purification, acting as a multi-stage bodyguard against a massive list of contaminants.

Think of it this way: a basic pitcher filter is like a friendly bouncer at a club, politely asking the obvious troublemakers to leave. An RO system, however, is a microscopic special agent with a VIP list, a velvet rope, and a semi-permeable membrane that blocks impurities on a molecular level. Only pure water molecules get past the checkpoint, while up to 99% of dissolved solids are unceremoniously shown the door (or, in this case, the drain).

What to Expect From This Guide

I know that navigating the world of RO systems can feel like trying to assemble IKEA furniture in the dark. You’ve got different types, technical jargon, and a dozen features to sort through. My mission here is to torch the confusion and give you clear, straightforward advice. We’ll break down everything you need to know to find the right reverse osmosis system for your home, from how the technology works to a direct comparison of the top models on the market.

For instance, lab tests from 2026 put the Waterdrop G3P800 at the top of the list for its incredible 99.99% filtration efficiency. It’s a tankless model that pumps out water at a solid 0.6 gallons per minute (GPM), so your family won’t be left waiting. Compare that to a traditional tank model like the APEC ROES-50, which still hits around 99% efficiency but eats up a lot more cabinet space. For most homeowners, the G3P800’s compact design is a huge win. You can find more deep-dives from these kinds of home water filtration reviews over at hellawater.com.

The real benefit of a reverse osmosis system is confidence. It's the peace of mind you get knowing, without a doubt, that the water your family drinks and cooks with is clean and safe from the worst contaminants found in both city and well water.

Top-Rated RO Systems at a Glance

To give you a quick lay of the land, this table breaks down how the leading RO systems stack up. We’ll get into the nitty-gritty later, but this gives you a fast look at their key differences and where they shine.

Model System Type Key Feature Best For
Waterdrop G3P800 Tankless Under-Sink On-demand flow and high efficiency (0.6 GPM) Families needing fast, continuous pure water with limited space
APEC ROES-50 Tank-Based Under-Sink Reliable, multi-stage filtration with storage Budget-conscious households with average water needs
iSpring RCC7AK Tank-Based Under-Sink Includes a remineralization filter for taste Users who prefer the taste of mineral water
Kinetico K5 Station Whole-House Point-of-entry system purifies all house water Homes on well water or those seeking total-home protection

This chart is just a starting point. As you'll see, the "best" system really depends on your water source, how much water you use, and how much space you have to work with.

How Reverse Osmosis Makes Your Water Pure

A transparent reverse osmosis water filtration system demonstrating how it works, with water dripping.

You might hear "reverse osmosis" and picture a vast, humming industrial complex, but the process happening under your sink is elegantly simple. Think of it as a multi-step cleanup crew for your tap water, where each stage targets a different set of problems.

First, your water hits a sediment pre-filter. Its only job is to get rid of the big stuff—the visible gunk that makes water look cloudy. This includes rust flakes from old city pipes, sand, silt, and any other grit that's crashed the party.

Next, the water moves through one or more carbon filters. These are the chemical warfare specialists. They use adsorption to snatch things like chlorine, which municipalities use for disinfection but which can leave your water with that tell-tale chemical taste and smell.

The Heart Of The System: The RO Membrane

With the large debris and chlorine out of the way, the water is ready for the star of the show: the reverse osmosis membrane. This is what does the real heavy lifting.

The membrane is a sheet of material with pores so ridiculously small they measure about 0.0001 microns. To put that in perspective, a single human hair is roughly 70 microns thick. Your home's water pressure provides the muscle, shoving water molecules through these tiny openings while almost everything else gets rejected.

This is the critical difference between an RO system and a standard water filter. It doesn’t just trap particles; it physically forces pure water through a barrier, leaving a huge range of dissolved contaminants behind. It's not a net; it's a nearly impenetrable wall.

This process is incredibly effective at removing tough contaminants that other filters simply can't touch. All the rejected gunk and dissolved solids are washed away into your drain line, so only the cleanest water remains.

  • Heavy Metals: Lead, arsenic, mercury, and chromium are stopped cold.
  • Dissolved Solids: It drastically cuts down the Total Dissolved Solids (TDS) in your water, which includes salts, nitrates, and fluoride.
  • Emerging Contaminants: RO is one of the very few residential filter types proven to remove PFAS, often called "forever chemicals," which are a growing concern in water supplies nationwide.

The Final Polish

After passing through the membrane, the purified water usually gets one last pass through a carbon "polishing" filter. This is a final quality check to catch any faint tastes or odors the water might have picked up along the way. The result is exceptionally crisp, clean water that tastes like… well, nothing at all. Just pure hydration.

Many modern systems also add a remineralization filter at the very end. Because RO is so thorough, it strips out healthy minerals like calcium and magnesium right along with the bad stuff. This final stage puts those beneficial minerals back in, not only getting rid of the "flat" taste some people notice in RO water but also raising its pH to be less acidic.

Key Factors for Evaluating RO Systems

Picking the right reverse osmosis system isn’t about grabbing the most popular box off the shelf. You need to look past the marketing and match the hardware to your home's water, your family's needs, and your budget. Get this right, and you'll have a system that works for you for years.

This decision tree breaks down the first few questions to ask. It’s a simple way to see if your situation points toward a smaller under-sink unit or a larger whole-house system.

Flowchart guiding the selection of an RO system based on household size, water use, and budget.

Use it to get a quick handle on which category you should be shopping in. From there, we can dig into the details that really matter.

Decoding Contaminant Removal Claims

An RO system's main job is pulling contaminants out of your water. But talk is cheap. You need proof, and that comes from NSF/ANSI certifications. These aren't marketing fluff; they are independent, third-party tests that prove a system performs as advertised.

Here are the two big ones to look for:

  • NSF/ANSI 58: This is the gold standard for reverse osmosis. It confirms the system can reduce tough contaminants like lead, fluoride, arsenic, and nitrates. A system carrying this seal has passed strict tests for filtration performance, structural integrity, and material safety.
  • NSF/ANSI 401: Think of this as an extra layer of defense against modern pollutants. This standard certifies the reduction of up to 15 "emerging contaminants," which can include certain pesticides, herbicides, and even trace amounts of pharmaceuticals. If you live near farmland or just want maximum peace of mind, this certification is worth its weight in gold.

If a system doesn't have these certifications, you're just taking the manufacturer's word for it. Always look for the NSF seal.

Matching Flow Rate To Your Household

Flow rate, measured in Gallons Per Day (GPD), tells you how fast a system makes purified water. This number directly affects your daily life. Go too small, and you'll be staring at a trickling faucet while waiting for a pot to fill.

For a one or two-person home, a 50–75 GPD system usually does the trick. But for a family of four or more—or if you're a home chef who cooks with a lot of filtered water—you'll be much happier with a system rated for 100 GPD or more.

Pro Tip: GPD is a lab-tested ideal. Real-world factors like low household water pressure or very cold tap water can slow things down. It's a smart move to buy a system with a slightly higher GPD rating than your bare minimum to ensure you're never left high and dry.

Evaluating Water Waste And Efficiency

Older RO systems were notoriously wasteful, dumping gallons of "brine" water down the drain for every gallon of pure water they produced. Thankfully, modern systems are much, much better. High-efficiency models now have waste-to-pure water ratios of 2:1 or even an impressive 1:1.

When you compare models, look for the "waste ratio" or "efficiency ratio." A lower number means less wasted water, which is good for the planet and your water bill.

For those wanting purified water at every faucet, some experts like contractor Mike Holmes recommend whole-house solutions. Systems like the Kinetico K5, for example, can be configured to target specific local issues like chloramine and deliver clean water everywhere. You can learn more about picking the right system on Make It Right.

The Importance Of Remineralization

Here's the one "catch" with RO filtration: it's so thorough that it strips out healthy minerals like calcium and magnesium right along with the bad stuff. This can leave the water tasting sterile and slightly acidic.

The fix is a remineralization filter. Many of the best home reverse osmosis systems now include this as a final stage to add a small amount of beneficial minerals back into the water.

This one step does two important things:

  1. Improves Taste: It brings back a clean, natural flavor. No more "flat" water.
  2. Balances pH: It makes the water less acidic, raising it to a more neutral or slightly alkaline pH.

If you care about the taste of your water or want the benefits of those minerals, make sure the system you choose has a remineralization stage. It makes a huge difference.

Comparing Tank vs Tankless RO Systems

Comparison of tank and tankless water filtration systems, black and white units, with a glass of water.

When you’re ready to get an RO system, the first big fork in the road is deciding between a model with a tank or one that's tankless. This isn't a small detail—it completely changes how you use your water, how much space you lose under the sink, and how fast you can fill a glass.

Let's dig into this crucial choice.

The traditional RO system, the kind that's been around for decades, uses a pressurized storage tank. Because reverse osmosis takes time, the system slowly fills this tank with pure water, creating a reserve you can draw from instantly. It’s a reliable, time-tested design.

Tankless RO systems are the modern answer. They use powerful internal pumps and beefier membranes to purify water on the spot, as soon as you turn on the faucet. No bulky tank needed, which is a huge win for anyone tight on cabinet space.

The Flow Rate Reality

The most obvious difference you’ll notice day-to-day is the flow of water. A tank-based system gives you a strong stream of water, but only until the tank runs out. Once it’s empty, you’re stuck waiting for it to slowly refill, which is a real headache when you're trying to fill a big pot for pasta or have guests over.

Tankless systems, on the other hand, deliver an endless supply. Their flow rate is steady and consistent, often measured in Gallons Per Day (GPD). A good tankless unit can push out 400–800 GPD, meaning you literally can't out-demand it.

The Bottom Line: If you have a large, busy family that’s always in the kitchen, a tankless system's non-stop flow is a massive quality-of-life upgrade. For smaller households or couples, a standard tank system will probably do the job just fine.

The Battle for Under-Sink Space

For many, this is the deciding factor. A traditional RO setup is a space hog. It needs room for the filter cartridges and a storage tank that can be as big as a small propane tank. If you have a garbage disposal or a deep sink, good luck fitting it all in.

This is where tankless systems clean up. Getting rid of the tank leaves you with a sleek, compact unit that fits neatly in almost any cabinet. You get to keep your storage space for cleaning supplies, which is a game-changer in apartments, condos, or any kitchen where space is at a premium.

Purity, Waste, and Upkeep

Both systems will give you incredibly pure water, but there are a few subtle differences. Water can sit in a storage tank for hours or even days, which can sometimes lead to a slightly stale taste. With tankless, the water is purified just seconds before it hits your glass, so it's as fresh as it gets.

Water efficiency is another key battleground. Older tank systems were notorious water wasters, often flushing 4 or 5 gallons of brine down the drain for every gallon of pure water produced. Modern tankless systems are far more efficient, with many achieving a 1:1 or 2:1 waste-to-pure-water ratio. That saves a lot of water and money over time.

Maintenance is also a bit different. Both require regular filter changes, but tank systems have the extra step of sanitizing the tank itself every year or so to prevent any bacterial buildup. Tankless systems are simpler—just twist off the old filters and twist on the new ones.

To make the choice clearer, here’s a direct comparison of how these two types of systems stack up across the most important factors.

Tank vs. Tankless RO Systems Head-to-Head

Feature Tank-Based RO System Tankless RO System Recommendation Context
Water Flow Strong initial flow, but limited by tank size. Can run out during high use. Continuous, on-demand flow. Can't run out. Tankless wins for large families or anyone who uses a lot of filtered water at once.
Footprint Large. Requires significant space for both filters and the storage tank. Compact and sleek. Fits easily under most sinks, saving valuable space. Tankless is the clear choice for small kitchens, apartments, or crowded cabinets.
Water Freshness Good. Water is stored, which can lead to a stale taste if not used quickly. Excellent. Water is filtered seconds before you drink it, ensuring maximum freshness. If taste is your absolute top priority, go tankless.
Water Waste Varies. Older models are very inefficient (4:1+). Newer models are better. Highly efficient. Most modern systems are 1:1 or 2:1 (waste-to-pure). Tankless is more eco-friendly and saves money on your water bill over the long run.
Initial Cost Generally lower upfront cost. A more budget-friendly entry point. Higher upfront investment due to the pump and advanced technology. If budget is tight, a tank-based system is a solid start.
Maintenance Requires periodic filter changes and annual tank sanitization. Simple twist-and-lock filter changes. No tank to clean. Tankless offers simpler, more straightforward maintenance.

Ultimately, there's no single "best" choice for everyone. A traditional tank-based system is a proven, affordable option that works well for many homes with average water needs and enough space.

But if you value on-demand convenience, want to save every inch of cabinet space, and prefer the freshest possible water with minimal waste, a tankless system is definitely the way to go in 2026.

Calculating The Real Cost Of An RO System

An RO system is a fantastic investment in your family’s health, but let's talk turkey: what’s the real long-term cost? To find the right reverse osmosis system, you have to look past the sticker price. The true cost includes the unit itself, ongoing maintenance, and even the impact on your utility bills.

Let's break down the numbers so you can budget accurately and avoid any nasty surprises down the road.

Beyond The Initial Purchase Price

The upfront price for an RO system can be anything from a couple of hundred dollars for a basic model with a tank to over a thousand for a high-end, tankless one. But that's just the start. Your biggest ongoing expense will be filter replacements.

Most systems use several filters that you'll have to replace on different schedules. Here’s what you can generally expect:

  • Sediment & Carbon Pre-filters: Plan on replacing these every 6 to 12 months.
  • RO Membrane: This is the workhorse of the system and should last 2 to 5 years.
  • Post-filter/Remineralization Filter: These are typically changed every 12 months.

Before you buy, do the math on the annual cost of these filters. A system that looks cheap upfront might cost you more over five years if the filters are pricey or need changing all the time.

Installation And Utility Bill Impact

Are you going to install the system yourself or call a plumber? A DIY job is free if you're handy with a wrench, but a professional will likely charge between $150 and $400, depending on how complex the installation is. If you're not comfortable drilling into your counter or tapping into water lines, you need to factor this cost in.

Water waste is another big one. Old RO systems were notoriously inefficient, but newer models are much better. According to EPA data, older units could waste as much as 10 gallons of water for every one gallon of pure water they produced. Today, new WaterSense-labeled models can get that down to just 2.3 gallons or less. That could save a household over 3,100 gallons of water a year. Top-tier systems can even hit an impressive 1:1 waste-to-pure water ratio. You can find more details on these efficiency standards from the EPA's page on reverse osmosis systems.

Choosing a water-efficient model isn't just about being green; it saves you cold, hard cash. The savings on your water bill can be huge over time.

Don't forget to count the savings from kicking the bottled water habit for good. If your family spends $30 a month on bottled water, you’ll save $360 a year. That’s often enough to cover your annual filter costs and pay off the system itself in just a couple of years. When you add it all up, an RO system is usually a very smart financial move.

RO System Installation And Maintenance Tips

So, you’ve picked out your reverse osmosis system. Before you can enjoy that first glorious glass of pure, clean water, you have to get it installed and figure out a maintenance plan. Getting these two steps right is the key to making sure your system works like a dream for years to come.

First up is the installation. You have two real options: do it yourself or call a plumber. Many of the newer RO systems are designed for DIY, coming with color-coded tubes and good instructions. If you know your way around basic plumbing, like shutting off the water and using a drill, you can probably get it done in an afternoon and save a couple hundred bucks.

But if the thought of drilling into a granite countertop or cutting into a drain pipe makes you break into a cold sweat, hiring a pro is money well spent. They'll make sure nothing leaks and the whole setup is optimized from the get-go.

Professional vs DIY Installation

If you're remodeling, checking a smart kitchen planning guide can help you figure out the best spot for your system so it fits seamlessly.

  • DIY Installation: This is a great option if you're handy with tools and feel comfortable with plumbing basics. The kits give you everything you need, but you have to follow the instructions to the letter to avoid leaks.
  • Professional Installation: Go this route if you have expensive counters, not much space under the sink, or just want the job done right without the stress. A plumber can also handle any weird plumbing quirks they might find.

Your Long-Term Maintenance Checklist

An RO system needs regular attention to keep working properly. If you skip filter changes, you're not just risking water quality—you could ruin the RO membrane itself.

Think of your RO maintenance schedule like getting an oil change for your car. The pre-filters protect the more expensive and critical parts—in this case, the RO membrane—from premature failure. Sticking to the schedule is the single best thing you can do to extend your system's life.

Here's a general schedule you can follow, but always double-check the guide that came with your specific system.

  1. Sediment and Carbon Pre-filters: These filters take the biggest hits, grabbing sediment and chlorine. You'll need to change them every 6-12 months to keep the RO membrane safe.
  2. RO Membrane: This is the core of the whole system. If you take care of it, it can last 2 to 4 years. If your water flow starts to slow down to a trickle, that's a good sign it's time for a replacement.
  3. Carbon Post-filter/Remineralization Filter: This is the last step that makes your water taste great. Replace it every 12 months so your water stays crisp and fresh.
  4. System Sanitization: It's a good habit to sanitize the storage tank (if you have one) and lines when you do your annual filter change. This prevents any bacteria from building up over time.

Common Issues And Quick Fixes

Even the best RO systems can act up sometimes. The good news is that most problems are pretty simple to fix yourself.

  • Slow Water Flow: This is the number one complaint. First, make sure the water supply valve is all the way open. If it is, your pre-filters are likely clogged, or the air pressure in your storage tank is low.
  • Strange Noises: A bit of gurgling is usually normal—that's just the sound of the system working and flushing wastewater. But if you hear a loud, constant noise, it could be a water pressure problem or a filter that isn't seated correctly.
  • Leaks: As soon as you spot a drip, shut off the water to the RO system. Leaks almost always happen at the connection points. Double-check that all the tubes are pushed in tight and the filter housings are snug (but don't crank on them too hard).

For more detailed guides on fixing these issues, check out our collection of water filtration advice. Keeping on top of this simple maintenance will ensure you get a long life out of your RO system.

Your RO System Questions Answered

We get a lot of questions from homeowners who are close to choosing a reverse osmosis system but have a few final concerns. Here are the answers to the most common ones.

A big question is about minerals: “Does reverse osmosis remove healthy minerals?” Yes, it does. The RO membrane is so effective it removes beneficial minerals like calcium and magnesium right along with the contaminants. This can leave the water tasting "flat" or sterile to some people.

That’s why many modern systems include a remineralization filter.

Remineralization and Water Waste

The best RO systems today add a final stage that puts a small amount of healthy minerals back into the water right before it comes out of your tap.

This final step accomplishes two things:

  • Improves taste: It brings back a crisp, natural taste to the water.
  • Raises pH: It makes the water slightly alkaline, which many people prefer to the slightly acidic water that comes directly from an RO membrane.

Another concern is water waste. Older RO systems were known for being inefficient, but today's models are much better. High-efficiency systems have significantly cut down on the wastewater, with the best units achieving a 1:1 pure-to-waste water ratio.

The "waste ratio" is a key spec to check. A lower number means less water is wasted, which saves you money on your water bill.

How Long Will An RO System Last?

With proper maintenance, a good reverse osmosis system will last 10 to 15 years. The main unit is built to be durable, but its lifespan really comes down to how well you take care of it.

The single most important maintenance task is changing the filters on schedule. Following the manufacturer's timeline for replacing the sediment, carbon, and remineralization filters is crucial. This not only keeps your water pure but also protects the RO membrane—the most expensive part of the system—from getting clogged and failing prematurely. In colder areas, it’s also a good idea to know how to winterize your home's plumbing to protect your entire system. If you stay on top of maintenance, your RO system will deliver clean water for years.


At Water Filter Advisor, we help you understand water filtration. Our reviews and guides are made to give you the confidence to choose, install, and maintain the right system for your home. See our resources to find the best water solution for your family at https://www.waterfilteradvisor.com.

How to Choose a Water Softener in 2026

Are you tired of playing detective, trying to figure out which water softener is the one for your home? It can feel like you’re lost in a funhouse of complicated specs and confusing claims. But here's the good news: you can cut through the noise by focusing on what really matters. The quest for the perfect water softener boils down to three key clues: how hard your water actually is, how much water your family uses, and which type of system is the right sidekick for your home.

Let's crack the code together, so you can make a brilliant choice without getting lost in the technical jargon.

Your Quick Guide to the Right Water Softener

A white water softener dispensing clean water into a sink, with a glass of water nearby.

If you're in a constant battle with chalky white buildup on your faucets, soap scum that laughs at your cleaning efforts, and laundry that feels more like sandpaper, you've met the villain of our story: hard water. And you’re definitely not alone. The vast majority of American homes are dealing with water that’s loaded with mineral freeloaders like calcium and magnesium.

A water softener is your home's superhero. It's a whole-house water filter that swoops in to remove those minerals, protecting your pipes, appliances, and even your skin and hair from their damaging effects. But with all the different types, sizes, and brands out there, picking one can feel like a chore.

First Things First: Know Your Numbers

The absolute first step on this adventure is to discover your water's hardness level. This single number is the treasure map that will guide almost every other decision you make.

According to the U.S. Geological Survey, water hardness is measured in grains per gallon (GPG). Anything over 10.5 GPG is considered 'very hard,' and this affects more than 85% of U.S. households, where water typically exceeds 7 GPG. That kind of scale buildup on your water heater's elements can drive up energy bills by 20-30%. You can learn more about finding the right solution for your specific situation over at HomeWater101.com.

Once you have your GPG number, you can start zeroing in on the right system.

Key Water Softener Decision Factors at a Glance

To make this easier, here's a quick table summarizing the most important things to consider. Use it as a checklist to match a system to your home's needs.

Decision Factor What to Look For Why It Matters
Water Hardness (GPG) Your home's specific GPG number from a water test. This number determines the softener's required grain capacity. A higher GPG needs a higher capacity system.
Household Size & Usage The number of people in your home and your average daily water consumption. A larger family requires a higher-capacity unit to avoid running out of soft water between regeneration cycles.
Technology Type Salt-based ion exchange vs. salt-free conditioners. Salt-based systems physically remove minerals. Salt-free conditioners alter them to prevent scale buildup but don't create "soft" water.
Long-Term Costs Initial purchase price plus ongoing expenses for salt and water. The cheapest unit upfront isn't always the most economical. Factor in operating costs for a true comparison.

This table should give you a solid framework. Now let’s look a little closer at a few of these key factors.

Other Factors to Guide Your Search

Beyond your hardness level, a few other details will help you narrow down the field.

  • Household Size and Water Usage: A couple living in a small home has very different needs than a family of five. We’ll get into the exact math later, but for now, just think about how many people use water in your house daily.

  • Technology Type: The big debate is usually between traditional salt-based systems and salt-free conditioners. Salt-based units truly remove the hard minerals, giving you that slick, soft water feel. Salt-free conditioners change the mineral structure to stop them from forming scale, but the minerals are still present.

  • Long-Term Costs: Don’t just look at the sticker price. You have to factor in the ongoing cost of salt (for salt-based systems), the water used during regeneration cycles, and any potential maintenance down the road.

The goal isn't just to buy a water softener. It’s to invest in the right one that works efficiently, protects your home, and gives you great water for years to come.

This guide will walk you through each of these points, giving you the practical know-how to choose with confidence. For more general guidance on all types of water filters, you can also check out our extensive advice section.

Testing Your Water for Hardness and Contaminants

A hand holds a water testing strip over a glass of water on a kitchen counter for quality analysis.

Before you even think about buying a water softener, you have to know what you’re up against. You can’t solve a problem you don’t understand. This isn't just about softening; it's about comprehensive home water filtration.

If you’re seeing stubborn white spots on your faucets and shower doors, that’s a dead giveaway you have hard water. Those crusty deposits are limescale, and they’re a pain. We’ve even got a great guide on understanding and removing hard water stains if you want to tackle the mess you already have.

But what you can see is only half the story. To choose the right equipment, you need real data. Buying a water softener without testing your water is like getting a prescription without seeing a doctor—you’re just guessing.

DIY Testing vs. Professional Lab Analysis

You’ve got two main options for figuring out your water's chemistry: a quick DIY test or a full professional lab analysis.

DIY Water Test Kits are the fast and cheap route.

  • You can grab these simple test strips or liquid drop kits at any home improvement store.
  • They give you an immediate, ballpark reading of your water hardness, and sometimes chlorine and pH.
  • The big downside? They aren't always super accurate and won't tell you about other critical issues like iron or manganese that can destroy a softener.

Professional Lab Analysis is the gold standard.

  • You simply collect a sample from your tap and mail it to a certified lab.
  • In return, you get a highly accurate and detailed report covering not just hardness but also iron, manganese, pH, total dissolved solids (TDS), and other contaminants that affect your home's water quality.
  • It costs more and takes a bit longer, but the information is priceless.

For anyone on well water, I always recommend a professional lab test. It's a small investment that prevents you from buying the wrong thousand-dollar system. Get it right the first time.

Demystifying Your Water Test Results

Once you have your results, a few key numbers will jump out at you. This is where you get the exact information needed to size your whole-house filtration system correctly.

The most important number is your water hardness. It’s usually measured in one of two ways:

  1. Grains Per Gallon (GPG): This is what the water softener industry uses in the U.S. It’s the number you’ll need to do your calculations.
  2. Parts Per Million (PPM) or Milligrams per Liter (mg/L): These two are the same thing and are common on lab reports.

Converting is simple. Just divide your PPM number by 17.1 to get your GPG.

Let's say your lab report shows 200 PPM of hardness.

200 PPM / 17.1 = 11.7 GPG

That 11.7 GPG tells you your water is officially "very hard," and it's the exact figure you'll use to size your system.

But don’t stop at hardness. Look for other troublemakers, especially iron. If your report shows iron levels at or above 0.3 PPM, a standard softener is going to struggle. The iron will foul the resin beads, choking the system and drastically shortening its life. In that case, you’ll need to look at either a dedicated iron filter or a softener specifically built to handle high iron—a true multi-stage water filtration approach.

Sizing Your Water Softener: How to Get It Just Right

Choosing the right size water softener is a lot more than just a guess. Get it wrong, and you're in for some frustration. This is the heart of effective home water filtration.

A system that’s too small is a classic rookie mistake. It will struggle to keep up, constantly running regeneration cycles and still leaving you with hard water when you need soft water the most. On the flip side, an oversized unit is just plain wasteful. It will burn through salt and water, regenerating long before it needs to.

So, how do you find that perfect fit? It’s not about how big your house is or even just how many bathrooms you have. The key is calculating your household's actual daily softening needs based on your water hardness and how much water your family uses.

The Only Formula You Need

Let’s get right to it. There's a straightforward bit of math that will give you the most critical number for choosing a softener: the total grains of hardness your system needs to remove each week.

Here's the formula:

(# of People in Home) x (Daily Gallons Per Person) x (Your Water Hardness in GPG) x (7 Days)

This calculation gives you your weekly hardness load, which is the number you’ll use to match with a softener's grain capacity.

What Goes Into the Calculation

To use this formula, you just need to plug in three numbers.

  • Number of People: Simple enough. Just count everyone living in your home.

  • Daily Water Use: This one requires a good estimate. While everyone's habits are different, the industry standard for these calculations is 75 to 80 gallons per person per day. This figure covers everything from showers and laundry to flushing toilets and washing dishes.

  • Water Hardness (GPG): This is the number you got from your water test. It tells you exactly how much mineral content the softener has to tackle in every gallon.

Once you have those figures, you're ready to calculate the grain capacity your home demands. An incorrectly sized system can lead to real waste—an oversized unit might use 25% more water and salt than necessary, while an undersized one will leave you with hard water. If you want to dive deeper into system features, Whirlpool Water Solutions has a great guide on what to look for.

The Bottom Line: Sizing a softener isn't guesswork. It's about matching the machine's capacity to your home's specific demand, which is a direct product of your family's size and your water's mineral content.

A Real-World Example

Let's walk through a quick scenario to see how this plays out.

Imagine a family of four whose water test came back at 15 GPG—moderately hard.

  1. First, we find their total daily water use:

    • 4 people x 75 gallons/person = 300 gallons per day
  2. Next, we calculate the daily hardness load:

    • 300 gallons x 15 GPG = 4,500 grains of hardness per day
  3. Finally, we find the weekly requirement:

    • 4,500 grains/day x 7 days = 31,500 grains per week

For this family, a softener needs to remove at least 31,500 grains of hardness between regeneration cycles.

This makes a 32,000-grain capacity water softener the ideal choice. It's perfectly matched to handle a full week's worth of water before it needs to regenerate, making it incredibly efficient.

What happens if they choose poorly? A smaller, 24,000-grain unit would be forced to regenerate more frequently, wasting salt and water. A huge 48,000-grain system would be overkill, going too long between cycles, which can be inefficient and lead to other problems. The 32,000-grain system hits that sweet spot for consistent performance and optimal efficiency.

Comparing Water Softener Technologies

When you start shopping, you'll quickly realize the term "water softener" gets thrown around a lot. But not all of these home water filtration systems are created equal. The technology inside can be wildly different, and that's where a lot of homeowners get tripped up.

You're really looking at two main camps: salt-based ion exchange softeners and salt-free water conditioners. They approach hard water from completely different angles. Getting the results you want—whether it's silky-smooth water or just protecting your pipes—starts with understanding this fundamental difference.

The Classic: Salt-Based Ion Exchange Softeners

This is the tried-and-true method, the only technology that actually removes the hard minerals from your water. If you want truly soft water, an ion exchange system is the undisputed champion of home water filtration.

Think of it like this: the system's main tank is filled with tiny resin beads that are loaded with sodium ions. As your hard water passes through, the calcium and magnesium—the culprits behind scale and soap scum—get pulled out of the water and stick to the resin. In their place, a sodium ion is released. It's a simple, effective trade.

The end result? Genuinely soft water. It’s what gives you that signature "slick" feel in the shower, makes your soap and shampoo lather up like crazy, and stops scale in its tracks.

Of course, there's a trade-off. Eventually, that resin fills up with hard minerals and needs to be cleaned. That’s the regeneration cycle, where a saltwater brine solution washes the resin, sending all the collected minerals down the drain. This means you’ll have the ongoing task of adding salt to the brine tank and it will use some extra water.

The Low-Maintenance Option: Salt-Free Conditioners

Here’s where we need to be really clear. A salt-free conditioner is not a water softener. A better name for it is a scale-reduction system. It's a different kind of water filtration hero.

These systems use a fascinating technology called Template Assisted Crystallization (TAC). Instead of removing the calcium and magnesium, the TAC media changes their structure. It acts as a template that forces the mineral ions to form into tiny, harmless micro-crystals.

These little crystals are inert and won't stick to anything. They flow right through your plumbing without building up as scale on your pipes, faucets, or hot water heater element.

The key takeaway is this: the minerals are still in your water. A TAC system just crystallizes them so they can’t cause scale damage. You won’t get the slick feel or sudsing benefits of soft water, but you get powerful scale protection.

The big win for salt-free conditioners is that they are completely passive. Set it and forget it. No salt bags to haul, no electricity to run a control valve, and no wastewater from regeneration. They’re a fantastic choice for anyone who wants a zero-maintenance water filtration solution or lives in an area where salt-based softeners are banned.

This flowchart can help you visualize how your home’s specific needs line up with the right system size and type.

Flowchart guiding water softener size selection based on household size, water usage, and water hardness.

Simply trace your path from household size and water hardness, and it will point you toward the right capacity for your home.

Water Softener vs. Water Conditioner Comparison

To make the choice even clearer, let's put these two water filtration technologies side-by-side. This table breaks down exactly what you get (and what you don't) with each system.

Feature Salt-Based Ion Exchange Softener Salt-Free Water Conditioner (TAC)
Primary Function Removes hard minerals (calcium & magnesium) from water. Conditions minerals to prevent scale buildup; does not remove them.
Resulting Water Genuinely soft water. You'll feel the "slickness" and see better lather. Water with scale-causing potential neutralized. Minerals remain present.
Scale Prevention 100% scale elimination by removing the source minerals. Excellent scale prevention (up to 99%) on pipes and appliances.
Maintenance Requires you to add salt regularly. Uses water and electricity for regeneration. Virtually zero maintenance. No salt, no electricity, no wastewater.
Ongoing Costs Salt bags, water for regeneration, minor electricity use. No ongoing operational costs. Media may need replacement every 3-6 years.
Best For Homeowners who want all benefits of soft water (softer skin, less soap, no scale). Homeowners focused on protecting plumbing and appliances with a hands-off system.
Environmental Impact Discharges salt brine (chloride) into wastewater systems. No environmental impact; adds nothing to the water and produces no waste.

Ultimately, choosing between a salt-based softener and a salt-free conditioner comes down to your primary goal. One isn't better than the other—they just do different jobs.

So, Which Technology Is Right For You?

It really boils down to what you want to achieve with your water treatment.

  • Go with a Salt-Based Softener if: You want the full soft-water experience. We're talking no more scale, using less soap, having brighter clothes, and feeling that difference on your skin and hair. You're okay with the simple task of adding salt every few months.

  • Go with a Salt-Free Conditioner if: Your number one priority is protecting your home's pipes and expensive appliances from scale damage. You want a system you can install and forget about, and you don't mind that the minerals technically remain in the water. This is also your only option if your local municipality has put a ban on brine discharge.

Both are great home water filtration technologies. The secret is simply matching the right tool to your specific job.

Don't Forget the Long-Term Costs

Water softener control unit, stacked salt bags, and a blue sign reading 'SAVE SALT & WATER'.

When you’re shopping for a whole-house water filter, it’s easy to get tunnel vision on the price tag. But the real cost? That shows up on your utility bills and in your salt purchases for years to come. How much salt, water, and electricity a system uses over its lifetime is what really determines its value.

All of these ongoing costs come down to one critical process: regeneration. This is how a salt-based system cleans and “recharges” itself, and understanding the different ways they do it is the key to not getting stuck with a resource-guzzling machine.

Smart Regeneration vs. Outdated Timers

Think of it like this: some systems are smart, and some are… well, not. The old-school approach is a timer-based softener. It’s a simple concept—the softener regenerates on a fixed schedule, like every three days at 2 AM, no matter what.

  • Timer-Based Systems: These are often cheaper upfront, but they’re incredibly wasteful. If you go on vacation, it regenerates anyway, wasting salt and water. If you have a house full of guests, it might not regenerate soon enough, leaving you with hard water when you need soft water most.

The modern, and much smarter, approach is a demand-initiated (or metered) softener. This type of system has a small water meter inside that tracks your actual water usage. It only triggers a regeneration cycle when it knows the resin beads are almost saturated.

  • Demand-Initiated Systems: This “on-demand” method is the only way to go in 2026. It adapts to your household’s unique rhythm, preventing needless regeneration cycles and saving a ton of salt and water in the process.

Choosing the right regeneration style can slash your running costs by up to 50%. A metered system regenerates only when needed, saving 30-40% on salt compared to an old timer model. For a typical family, that can cut annual salt use from 200-300 lbs down to a much more manageable 100-150 lbs.

What About Water Pressure? Don't Underestimate Flow Rate

We’ve all experienced it: you're in the shower, someone flushes a toilet, and the water pressure suddenly vanishes. A water softener that's too small for your home can create that same annoying problem, but for every faucet. That's where flow rate becomes a huge deal.

Measured in Gallons Per Minute (GPM), flow rate tells you how much softened water the system can deliver at any given moment. To avoid pressure drops, you need a softener that can keep up with your family’s peak demand.

Think about what might be running at the same time on a busy morning:

  • A standard shower needs about 2.5 GPM.
  • A dishwasher running a cycle uses 2 GPM.
  • Your washing machine could be pulling 3-4 GPM.

If you've got a couple of those going at once, you’re already at 7 GPM or more. For a typical 3-4 bathroom home, I always recommend looking for a system with a flow rate of at least 10-12 GPM. You can find this number, usually called the "service flow rate," on the manufacturer’s spec sheet. Don't skip checking it.

Look for Independent Proof of Performance

With so many brands making big claims, how can you be sure a softener actually does what it says? You look for a third-party certification seal.

The most important one by far is NSF/ANSI 44. This is the gold standard for whole-house water filtration. It’s an independent certification that proves the softener has been rigorously tested to meet specific performance criteria. An NSF/ANSI 44 certification tells you three crucial things:

  • The system truly reduces water hardness to the level it claims.
  • It is built with materials that are safe for contact with your drinking water.
  • The manufacturer's salt and water efficiency ratings are accurate and verified.

Getting a certified system is your best insurance against slick marketing and poor performance. And while you're focused on efficiency, remember that the softener is just one part of your home. To find more ways to lower your utility bills, check out these practical energy efficiency tips that can lead to significant savings across the board.

Frequently Asked Questions on Water Softeners

Common questions about home water filtration and softeners. Get clear answers to help you choose a system with confidence.

How Much Sodium Does a Water Softener Add?

The amount of sodium added depends directly on your water’s hardness level. It's often less than people think.

For water with a hardness of 10 Grains Per Gallon (GPG), the softening process adds about 75 milligrams (mg) of sodium per quart. For comparison, one slice of white bread can have over 150 mg of sodium.

For those on a strict low-sodium diet, an under-sink reverse osmosis (RO) system is a great addition. This point-of-use filter removes the added sodium from your drinking and cooking water.

Can I Install a Water Softener Myself?

Yes, if you have solid plumbing skills. A DIY installation is possible if you can confidently cut into pipes and follow detailed instructions. Most modern units can be installed in several hours.

The critical step is cutting into your home's main water supply line. If you are not comfortable with this, hire a professional plumber. A professional install guarantees it is leak-free, meets local codes, and functions correctly. A pro installation typically costs between $400 and $800.

What Kind of Salt Should I Use?

You will find two main types of salt for water softeners:

  • Solar Salt: Created from evaporated seawater. It is less expensive but may contain insolubles that can build up in the brine tank over time.
  • Evaporated Salt: A much purer salt, often 99.9% pure. This is the cleanest option, reducing the risk of "salt bridging" or "mushing" in the tank.

Evaporated salt pellets are recommended for most high-efficiency softeners. They dissolve cleanly and help your system run with less maintenance.

How Long Does a Water Softener Last?

A quality, well-maintained salt-based water softener should last 10 to 20 years.

The lifespan of this whole-house water filter is determined by the control valve and resin tank quality. The resin beads inside the tank, which perform the softening, generally need replacement every 10 to 15 years. High iron or chlorine levels in your water can shorten the resin's life. Salt-free conditioners have a similar lifespan, though their media often requires replacement every 3 to 6 years.

Will a Water Softener Reduce My Water Pressure?

A correctly sized water softener will not cause a noticeable drop in your water pressure. If you experience pressure loss, the system is likely too small for your home's water demand.

Check the flow rate, measured in Gallons Per Minute (GPM), before buying. This indicates how much softened water the system can produce at once. A typical home needs a flow rate of at least 10-12 GPM to support a shower and dishwasher running at the same time. Always confirm the "service flow rate" on the unit’s specifications.


Ready for soft water? Water Filter Advisor provides in-depth reviews and maintenance information. We help you find the perfect water filtration system for your home. Explore our guides at https://www.waterfilteradvisor.com to get started.

The Best Water Filter Pitcher for Pure and Simple Hydration in 2026

When you're hunting for the best water filter pitcher, you'll find heavy hitters like Brita, PUR, and Clearly Filtered all vying for your attention. But let's be real: the right pitcher isn't about brand loyalty. It's the one that's a perfect match for your specific water quality and your daily life.

Why a Pitcher is Your First Step to Better Water

Let's talk about the magic of turning your tap water into crisp, clean hydration, straight from your fridge. With a growing list of concerns about what's really in our tap water—from the swimming pool perfume of chlorine to invisible intruders like lead and PFAS—a water filter pitcher is more than just a kitchen gadget. It's your home's first line of defense.

This simple tool puts the power back in your hands. It demands zero installation, fits into any home, and makes an immediate, noticeable difference in your water's taste and quality. For most of us, it’s the easiest and most accessible way to start the journey to better home water filtration.

A Practical Solution for Common Concerns

A water filter pitcher delivers peace of mind without a hefty investment or a complicated setup. It's the hero of home hydration.

Here’s what you're signing up for:

  • A Taste and Odor Revolution: The most dramatic change you'll notice is the banishment of chlorine. It's essential for disinfecting city water but leaves behind that distinct "public pool" taste and smell. A good filter erases it.
  • Serious Contaminant Reduction: A certified pitcher isn't just making water taste good; it can significantly reduce a wide array of harmful contaminants, including heavy metals, pesticides, and insidious emerging chemicals.
  • A Win for Your Wallet: Using a pitcher costs a fraction of buying bottled water. You get a continuous supply of clean water and can save hundreds of dollars a year.

A pitcher is a proactive step toward better health and a more sustainable lifestyle. It bridges the gap between uncertainty about your tap water and the pure, clean hydration you crave.

This guide is your roadmap. We’ll dive into the science happening inside the filter and break down the real-world costs. This is a booming market, valued at USD 3.5 billion in 2024 and projected to hit USD 5.4 billion by 2030. That growth tells a story: households are ditching single-use plastics and embracing smarter, in-home solutions. You can find more data on water filtration market trends here.

By the end of this guide, you'll be an expert, ready to choose the best water filter pitcher for your home, your budget, and your family's health.

How Pitcher Filters Turn Tap Water Into Clean Water

Ever stare at a water filter pitcher and wonder what sorcery is happening inside? It’s not magic, but it is some seriously clever engineering. Think of the filter as a microscopic obstacle course, precision-designed to trap the bad guys while letting only pure, clean water molecules pass through.

The whole show is powered by good old gravity. When you fill the top reservoir, water begins its slow descent through the filter cartridge. This deliberate drip is crucial—it gives the filter media inside enough contact time to work its purification magic.

An illustration showing the clean water process: tap water goes into a pitcher, then into a glass. Simple and refreshing.

The Workhorse: Activated Carbon

The undisputed MVP of almost every pitcher filter is activated carbon. Picture it as a super-porous sponge on a molecular level. This carbon, often derived from coconut shells, is treated to create an astronomical internal surface area packed with microscopic nooks and crannies. To put it in perspective, just one gram of activated carbon can have the surface area of a football field.

As water meanders through, this vast surface acts like a chemical magnet, trapping contaminants in a process called adsorption. It’s like flypaper for the unwanted stuff in your water.

Activated carbon is the champion of improving taste and smell. It’s responsible for tackling:

  • Chlorine: The number one offender behind tap water that tastes and smells like it came from the local Y. Activated carbon is exceptional at neutralizing it, leading to a massive improvement in flavor.
  • Volatile Organic Compounds (VOCs): A broad class of industrial and commercial chemicals that can find their way into water sources.
  • Bad Tastes and Odors: Carbon traps the organic compounds that cause musty, earthy, or just plain weird smells, leaving your water tasting crisp, fresh, and like… well, nothing.

The Specialist: Ion-Exchange Resins

While activated carbon is the all-star for taste and odor, higher-end filters deploy a second, specialized unit: ion-exchange resins. Think of these as tiny, microscopic commandos on a mission to target specific contaminants that carbon alone can't handle.

These are tiny resin beads engineered to perform a very specific trade. They attract certain dissolved metals and minerals, swapping them for something harmless.

This ion-swap is the secret sauce that separates a basic taste-and-odor filter from one that can remove serious health-related contaminants. It's the key technology behind filters certified to reduce nasty things like lead and mercury.

Here’s the trade: The resin beads come loaded with harmless ions, like sodium or potassium. When water containing a heavy metal like lead flows past, the resin has a stronger chemical attraction to the lead. It snags the lead ion and releases one of its harmless ions in its place. It's a one-for-one swap that makes your water significantly safer. This process is brilliant for reducing heavy metals like lead, mercury, and copper. As an added bonus, it can also reduce the minerals that cause limescale, making your kettle happy.

When you're staring at a shelf full of water filter pitchers, the marketing claims can be a tidal wave of confusion. How do you cut through the noise and figure out which one actually delivers on its promises?

The answer is third-party certifications. Specifically, you want to be on the lookout for the NSF International seal.

Think of it like a crash-test rating for a car. You wouldn't trust a vehicle that hasn't been independently verified for safety. The same logic applies to the water you drink every day. These NSF standards aren't just marketing fluff; they are tough, legally enforceable benchmarks that prove a filter can do what it says it does.

NSF 42, 53, and 401 water filter certifications displayed next to a pitcher.

NSF 42: The Taste and Odor Standard

You'll see NSF/ANSI 42 on nearly every pitcher. This is the foundational certification for "aesthetic effects"—things that impact the way your water tastes, smells, and looks.

A filter certified to NSF 42 is proven to reduce:

  • Chlorine: This is the big one. It's what your city adds for disinfection and what gives tap water that "swimming pool" vibe. NSF 42 guarantees a significant reduction.
  • Particulates: This covers the tiny bits of sediment and rust that can make water look cloudy.

If your main goal is simply to make your tap water taste better and more inviting, NSF 42 is your starting point. It’s the baseline for improving your water’s drinkability.

NSF 53: The Health Effects Standard

For serious, health-focused protection, you need to look for NSF/ANSI 53. While NSF 42 is about taste, this standard is all about health and safety. Filters bearing this seal have endured much more rigorous testing to prove they remove specific contaminants that can pose a genuine health risk.

An NSF 53 mark on a filter means it has proven it can reduce specific health-related contaminants to a level deemed safe. This isn't about preference; it's about protection.

Now, here's the crucial detail: manufacturers must specify exactly which contaminants their filter is certified for under this standard. You need to check the packaging or the fine print. Common NSF 53 certifications include:

  • Lead: Reduces lead that can leach from old pipes and plumbing.
  • Mercury: Removes this dangerous heavy metal.
  • Cysts: Filters out nasty microorganisms like Giardia and Cryptosporidium.
  • Volatile Organic Compounds (VOCs): Tackles a range of industrial chemicals.

Just because a filter is NSF 53 certified for lead doesn't mean it's also certified for VOCs. Always verify it targets your specific water concerns.

NSF 401: The Emerging Contaminants Standard

Finally, we have NSF/ANSI 401. This is a newer standard for "emerging contaminants"—things like prescription drugs, herbicides, and chemicals that aren't yet regulated by the EPA but are being detected in our water supplies.

This standard covers trace amounts of substances like:

  • Certain prescription and over-the-counter drugs
  • Common herbicides and pesticides
  • Chemicals like Bisphenol A (BPA)

An NSF 401 certification offers an extra layer of confidence that your filter is tackling some of the modern pollutants finding their way into our water. Public awareness of these issues is exploding. After the Flint water crisis in 2014, pitcher sales shot up 25% in the area. Today, with PFAS—"forever chemicals"—found in the blood of 99% of Americans according to the CDC, filters certified for their removal are in high demand. You can learn more about the trends driving the water filter pitcher market and why these certifications matter more than ever.

To make this easier, the table below helps you match common water issues to the certification you should be looking for.

Common Contaminants and Corresponding NSF Certifications

This table helps you match your water quality concerns with the specific NSF/ANSI certification that guarantees a filter's effectiveness against that contaminant.

Contaminant Type Examples Primary Concern Relevant NSF/ANSI Standard
Aesthetic Chlorine, Particulates Bad taste, "pool" smell, cloudy water NSF 42
Heavy Metals Lead, Mercury, Cadmium Neurological damage, developmental issues NSF 53
Microbiological Cysts (Giardia, Cryptosporidium) Gastrointestinal illness ("beaver fever") NSF 53
Organic Chemicals Benzene, Pesticides (VOCs) Cancer risk, organ damage NSF 53
Emerging Pharmaceuticals, BPA, Herbicides Endocrine disruption, unknown long-term effects NSF 401
"Forever Chemicals" PFOA, PFOS (types of PFAS) Cancer risk, immune system effects NSF 53 (for PFOA/PFOS)

Ultimately, a filter is only as good as what it's proven to remove. By cross-referencing with these specific NSF certifications, you can be confident you're buying a product that will actually protect your health and deliver cleaner, safer water.

Matching a Pitcher to Your Lifestyle and Budget

Powerful filtration is essential, but the best water filter pitcher is the one you’ll actually use every single day. After you’ve pinpointed the right certifications for your water, it’s time to get practical. A pitcher that’s too slow, too small, or too expensive to maintain will just end up as a dusty relic in the back of a cupboard.

Let’s look beyond the contaminant removal stats and explore the real-world factors that make a pitcher fit seamlessly into your life. We'll cover size, design, and the true cost of ownership to help you find a model that feels like it was made for your home.

Three water filter pitchers of various sizes, in white and blue, on a kitchen counter with a glass.

Finding the Right Size and Capacity

Water filter pitchers are typically measured by the number of cups of filtered water they hold. Choosing the right size boils down to your household’s daily water habits and the number of people you're hydrating.

For solo dwellers or a couple in a cozy apartment, a small pitcher (5–6 cups) is a perfect fit. Its slim profile won't dominate your fridge, but be ready for frequent refills if you're a big water drinker.

A standard pitcher (8–10 cups) is the sweet spot for a family of three or four. This size provides enough filtered water for drinking and cooking without feeling like you're chained to the sink. It's the most common size, giving you the widest variety of options.

If you have a large family or chug water like it's your job, consider an extra-large dispenser (18+ cups). These countertop or fridge-shelf models feature a handy spigot, offering a large, chilled reservoir of filtered water on demand.

Don't Overlook Design and Ergonomics

It’s the small design details that make the biggest difference in your daily experience. Before you fall in love with a pitcher, imagine yourself actually handling it day in and day out.

Keep an eye out for these practical features:

  • Easy-Fill Lid: Can you fill it without removing the entire lid? A simple flip-top or a small opening is a surprisingly significant quality-of-life improvement.
  • Comfortable Handle: Picture carrying a full, heavy pitcher from the sink to the fridge. A solid, ergonomic handle prevents spills and makes pouring a breeze.
  • Spout Design: A well-designed spout delivers a smooth, drip-free pour. Some even have a cover to keep dust and stray fridge odors out of your pristine water.
  • Filter Change Indicator: Most pitchers come with some kind of reminder—from a simple sticker to a digital timer—to tell you when it's time to swap the filter. This is crucial for ensuring your filter is always performing at its peak.

The little conveniences are what separate a pitcher you tolerate from one you love. A pitcher that's a pain to fill or pour is one you're less likely to use consistently.

Calculating the True Cost of Ownership

The price on the box is just the opening act. The real cost of a water filter pitcher is the ongoing expense of replacement filters. A cheap pitcher with pricey, short-lived filters can easily end up costing you more over a year than a more expensive model with long-lasting, affordable filters.

To unearth the best long-term deal, you need to calculate the cost-per-gallon.

It's a simple, powerful formula:
Filter Price ÷ Gallons Filtered = Cost Per Gallon

For example, a filter that costs $7 and is rated for 40 gallons comes out to 17.5 cents per gallon. But what if another brand offers a $15 filter rated for 120 gallons? That one costs only 12.5 cents per gallon. Over the course of a year, the second option is the clear winner for your wallet.

Always check the filter's price and its rated gallon capacity before you commit to a pitcher.

Understanding the Trade-Offs Between Speed and Power

When you start exploring water filter pitchers, you'll quickly encounter a fundamental choice: do you want speed, or do you want power? Getting both is the holy grail, but it's a tough one to find. This is arguably the most important trade-off you’ll have to make.

Think of it this way. A simple filter that just removes chlorine is like a four-lane highway—water flows through quickly and easily. But a high-performance filter certified to remove lead, PFAS, and other serious contaminants? That's more like a winding country road with multiple security checkpoints. The journey is much slower, but the screening process is far more thorough.

The Speed vs. Safety Dilemma

So why does a filter certified for lead pour with the urgency of a sloth compared to one that just makes your water taste better? It all comes down to the filter's internal architecture. To trap stubborn contaminants like heavy metals, the filter needs a much more complex and dense structure, often combining activated carbon with ion-exchange resins.

This dense media creates significant resistance, which naturally slows the water down. This isn't a bug; it's a critical feature. This increased contact time is what gives the filter media enough time to actually grab onto and neutralize those tougher contaminants.

  • Fast Flow Filters: These are fantastic if you just want to improve the taste and smell of your tap water. If your only mission is to get rid of that chlorine taste for better coffee, a basic, fast-filtering model will serve you well.
  • Slow Flow Filters: These are engineered for health and safety. You absolutely need one if your water has known issues with lead, mercury, or those infamous "forever chemicals" like PFAS.

The flow rate is a direct clue to the filter's power. A slow drip isn't a design flaw; it's a sign that the filter is working diligently to provide a higher level of purification.

For instance, a standard Brita filter does a great job on chlorine and can fill your pitcher in just a few minutes. But a pitcher from a brand like Clearly Filtered, which is engineered to remove over 365 contaminants, is going to take considerably longer. We're talking 15-20 minutes or even more to filter the same volume of water.

Cost Versus Capability

The other major trade-off is cost versus what the filter can actually remove. It's a straightforward equation: filters that remove a wider, more serious range of contaminants will cost you more. That applies to both the pitcher itself and the replacement cartridges. The real question is, do you need to pay for a filter that can tackle things like fluoride or pharmaceuticals?

The answer depends entirely on your priorities and, more importantly, what’s in your local water. If your city’s water report is squeaky clean, a basic filter with an NSF 42 certification for chlorine might be all you need.

But if you’re concerned about "forever chemicals"—which have been found in the tap water of nearly half of all Americans—investing in a more powerful filter is a wise move. A recent Duke University study highlighted that a brand like AquaTru, while pricier, achieved non-detect levels for all the PFAS chemicals they tested.

Let’s consider two scenarios:

  • Pitcher A: Costs $25, and replacement filters are $7. It's fast, and by removing chlorine, it makes water taste great.
  • Pitcher B: Costs $70, and replacement filters are $15. It's slow, but it's certified to remove 99% of lead and also reduces PFAS.

If you live in a home with older plumbing, the peace of mind from Pitcher B is worth every penny and every extra minute of filtration time. Choosing the right pitcher is all about balancing what you value most: speed, safety, or your budget.

Your Action Plan for Choosing the Right Pitcher

You now understand how filters work, what certifications matter, and the performance trade-offs. It's time to channel that knowledge into a simple, actionable framework for choosing the perfect water filter pitcher for your home.

This is your step-by-step checklist to make a confident, informed decision.

Step 1 Identify Your Water Concerns

First things first: you need to become an expert on your own tap water. The best way to do this is by getting a copy of your local water quality report.

Every community water supplier in the U.S. is required to provide an annual Consumer Confidence Report (CCR). This document lists the contaminants detected in your water supply and at what levels. You can usually find it with a quick online search for "[Your City Name] water quality report". If you're on a private well, you'll need to arrange for independent water testing.

As you review the report, look for red flags:

  • High chlorine levels, which are the primary cause of bad taste and odor.
  • The presence of lead, a common concern in homes with older plumbing.
  • Any mention of PFAS, VOCs, or other industrial chemicals.

Step 2 Match Concerns to Certifications

With your water report in hand, you can now play matchmaker between your concerns and the right NSF certifications. This crucial step ensures you get a filter that solves your specific problems without overpaying for features you don't need.

  • For taste and odor (chlorine): An NSF 42 certification is the baseline standard you need.
  • For health contaminants (lead, mercury, PFAS): An NSF 53 certification is non-negotiable. It's critical to check the fine print to confirm which specific contaminants the filter is certified to remove.
  • For emerging contaminants (pharmaceuticals, BPA): Look for NSF 401 certification for an added layer of protection against modern pollutants.

Think of it like this: The water report is your diagnosis. The NSF certification is the specific prescription. If they don't match, the filter won't be effective for your needs.

Step 3 Calculate Your Household Needs

Next, be realistic about your daily water usage. A pitcher that’s too small will become a constant source of refill-related frustration.

  • 1-2 people: A slim 5- to 6-cup model is often sufficient.
  • 3-4 people: A standard 8- to 10-cup pitcher is the most common and versatile choice.
  • Large families or high consumption: An 18-cup dispenser is a more convenient, set-it-and-forget-it option.

Also, consider the design ergonomics. Do you need a flip-top lid for one-handed refills? Is the handle comfortable when the pitcher is full and heavy? These small details have a huge impact on daily satisfaction.

Step 4 Compare Long-Term Costs

The initial purchase price is just the cover charge. The true cost of ownership lies in the replacement filters. To make a financially savvy choice, calculate the cost-per-gallon.

Divide the price of one replacement filter by the number of gallons it's rated to filter. For example, a $15 filter rated for 120 gallons costs just 12.5 cents per gallon. That's a much better long-term value than a $7 filter rated for only 40 gallons, which costs 17.5 cents per gallon.

Don't let a low-cost pitcher lure you into a high-cost maintenance trap. For more expert insights, check out the in-depth water filter advice from Water Filter Advisor.

Water Filter Pitcher Selection Checklist

Use this checklist to crystallize your needs and guide your selection. Go through each step to build a clear profile of your ideal pitcher.

Consideration Your Requirement/Preference Notes
Primary Contaminants e.g., Lead, Chlorine, PFAS List the top 1-3 contaminants from your water report.
Required Certifications e.g., NSF 53 for Lead, NSF 42 Match the contaminants to NSF standards (42, 53, 401).
Household Size e.g., 2 people How many people will use the pitcher daily?
Daily Water Usage e.g., ~1 gallon/day Estimate your total daily drinking water consumption.
Ideal Pitcher Capacity e.g., 8-10 cups Based on size and usage, what's the minimum capacity?
Filter Lifespan Goal e.g., 3+ months How often are you willing to change the filter?
Budget (Long-Term) e.g., <$0.20 per gallon Calculate the cost-per-gallon for your top choices.
Must-Have Features e.g., Easy-fill lid, ergonomic handle What design features are non-negotiable for you?

Using this checklist will demystify the process, narrow your choices, and lead you to the perfect pitcher for your specific needs and budget.

Common Questions About Water Filter Pitchers

You've got the pitcher. Now you've got questions. Here are the straight answers to the most common queries, so you can use your new filter like a pro.

How Often Should I Really Change My Filter?

Follow the manufacturer's guidelines religiously. For most standard pitchers, that means replacing the filter every 40 gallons or roughly every two months, whichever comes first.

If you push a filter past its expiration date, it stops being effective. Even worse, an old, saturated filter can become a breeding ground for bacteria and may even release some of the contaminants it previously captured. Use the pitcher’s indicator if it has one, but also set a recurring reminder on your phone. Don't leave it to guesswork.

Can I Run Hot Water Through My Pitcher Filter?

Absolutely not. Never use hot water in your pitcher filter. These systems are designed for cold or room-temperature water only.

Hot water will damage the filter media—both the activated carbon and the ion-exchange resins. It can destroy the filter's carefully engineered internal structure and could even cause it to flush out contaminants it has already trapped right into your "clean" water.

Ever see those little black specks in the water when your filter is brand new? That's just harmless carbon dust. It's perfectly safe and is the reason you're instructed to soak and flush a new cartridge before use—it clears out any loose particles from shipping.

Does Keeping My Pitcher in the Fridge Make the Filter Last Longer?

It's a fantastic idea for having chilled, delicious water ready to go, but it will not extend the filter's life. Refrigeration has no effect on the filter's capacity.

A filter's lifespan is determined by volume—how many gallons of water pass through it. Time and temperature don't change that equation. However, keeping the pitcher in the fridge does help slow down any potential bacteria growth in the filtered water reservoir, so it's still a highly recommended practice.


At Water Filter Advisor, we provide the expert guidance you need to choose, use, and maintain the perfect filtration system for your home. Explore our comprehensive buying guides to find your ideal solution.

Is Well Water Safe to Drink? A Homeowner’s Guide to Flawless Filtration

So, is your well water safe to drink? Here’s the fun-sized answer: it’s entirely up to you. Unlike city water, which is babysat by public authorities, your private well is the wild west of water. You're the sheriff, the mayor, and the town doctor all rolled into one.

This means you could be sipping on a cocktail of hidden contaminants and have no idea. But don't panic! This is where the magic of home water filtration comes in.

The Unfiltered Truth About Your Well Water

Relying on an untested well is like getting a mystery box delivered every day—it might be full of treasure, or it might be full of… well, things you don’t want in your water. This unregulated reality makes you the official water manager for your home.

Being proactive about testing and choosing the right filtration system isn't just a smart move—it’s the secret to unlocking pure, delicious water and total peace of mind.

A man in denim clothes crouches to test a water well faucet near a house.

You Are Your Own Water Company

When a city-dweller opens their tap, that water has already passed more tests than a medical student. But when you turn on your well-fed faucet, you’re getting water straight from the ground—along with any freeloaders it picked up on its journey.

The responsibility that comes with this is massive. In the United States, nearly 17% of the population—that's about 43 million people—rely on private wells that aren't regulated by the government. In fact, research from the CDC shows that 1 in 5 private wells tested had unhealthy levels of contaminants like arsenic, nitrates, or bacteria. You can learn more by checking out the CDC’s resources on the importance of well water safety.

The biggest myth about well water is thinking "natural" automatically means "safe." It can be wonderfully pure, but it can also hide invisible party crashers that only a proper filtration system can kick out.

Municipal Water vs. Private Well Water A Quick Comparison

Looking at the differences between public water and your own private well really drives home why filtration is the superhero well owners need. Your role instantly changes from being a passive water user to the active guardian of your home's water quality.

Here’s a quick breakdown:

Aspect Municipal Water System Private Well Water
Regulation Governed by the EPA's Safe Drinking Water Act. Unregulated by federal law; regulation is up to the homeowner.
Testing Mandatory, frequent testing by the public water utility. Responsibility of the well owner; recommended annually.
Treatment Treated at a central facility to remove contaminants. Untreated unless a home filtration system is installed.
Responsibility The utility is responsible for water quality up to your home. The homeowner is 100% responsible for safety and quality.

As you can see, the buck stops with you. While municipal water users pay a utility to handle testing and treatment, well owners get to take control with the ultimate home upgrade: a tailored filtration system.

What Is Hiding in Your Well Water

The romance of drawing fresh, clean water right from your own land is undeniable. But here’s the plot twist: just because your well water looks clear doesn't mean it's pure. To really know if your well water is safe to drink, you have to know which uninvited guests might be hitching a ride from the ground to your glass.

These aren't just bits of dirt. We're talking about invisible, tasteless, and odorless threats that a good home filtration system is built to trap and eliminate.

A glass of water outdoors with multiple virus icons and a 'Hidden Contaminants' banner.

Microbial Invaders: The Fast and Furious Threat

Let's start with the fast-acting troublemakers. Microbial contaminants are living organisms that can make you sick in a hurry—sometimes just hours after you drink contaminated water. This is a huge reason why annual testing and filtration are non-negotiable for well owners.

These biological baddies usually sneak in from failing septic systems, farm runoff, or surface water seeping into a poorly sealed well.

Common microbial invaders include:

  • Bacteria: Nasty organisms like E. coli and Coliform are major red flags. Their presence often means your water has been contaminated by sewage or animal waste, bringing a risk of severe stomach cramps and other gastrointestinal nightmares.
  • Viruses: Tiny pathogens like Rotavirus and Norovirus can also get into your water supply. They're infamous for causing the stomach flu and are especially risky for kids and the elderly.
  • Protozoa: Parasites such as Giardia and Cryptosporidium are tough little organisms that can resist chlorine and cause serious digestive issues. They often wash into wells from surface water.

A UV purification system is your secret weapon against these bugs. It acts like a bouncer at the door, using powerful light to neutralize 99.99% of them without adding any chemicals to your water.

Inorganic Contaminants: The Silent Saboteurs

While microbes are a sprint, inorganic contaminants are a marathon. They build up in your body over months and years, posing serious long-term health risks without you ever tasting or smelling them. This makes a reliable filtration system your only real defense.

These chemicals and heavy metals typically leach into groundwater from natural mineral deposits or from agricultural and industrial pollution.

The most dangerous threats in well water are often the ones you can't see, taste, or smell. Heavy metals and chemicals accumulate slowly, causing chronic health issues that only appear after years of exposure.

For instance, lead in well water doesn't taste bad—it just silently accumulates, contributing to high blood pressure and increased cancer risks over decades. In the US, between 15-17% of people—that's over 43 million—get their water from private wells, which aren't covered by the EPA regulations that protect city water. As a startling example, arsenic in private US wells is linked to 500 deaths from ischemic heart disease and nearly 500 fatal cancers every single year, hitting rural communities the hardest. You can dig into the full list of these common well water intruders on the EPA's informational page about private wells.

Some of the key inorganic culprits are:

  • Arsenic: A toxic heavy metal that can seep into groundwater from natural rock formations.
  • Lead: Usually comes from old plumbing parts like pipes or the solder used to connect them.
  • Nitrates: A common problem in farming areas due to fertilizer runoff seeping into the ground.
  • Pesticides & Herbicides: Runoff from farms and even golf courses can carry these chemicals into the water table, and some studies have shown links to higher health risks for people living nearby.

A reverse osmosis system is one of the most effective ways to remove this wide range of silent saboteurs from the water you drink every day, giving you water that’s as pure as it gets.

Aesthetic Nuisances: The Annoying Intruders

Finally, you have the contaminants that are more annoying than dangerous. While they don't usually pose a direct health threat, these "aesthetic nuisances" can ruin your water's vibe and cause real damage to your plumbing and appliances.

  • Iron: The culprit behind those ugly reddish-brown stains in your sinks, tubs, and laundry. It also gives water a metallic taste, like you're drinking from a rusty tin can.
  • Manganese: Leaves behind blackish stains and can also make your water taste off.
  • Hydrogen Sulfide: This is what causes that unmistakable "rotten egg" smell that can make your water completely undrinkable.
  • Hardness Minerals: Calcium and magnesium are the minerals that cause limescale buildup, slowly strangling your pipes and water heater, killing their efficiency and shortening their lifespan.

These are exactly the kinds of problems that water softeners and specialized iron filters are designed to fix, transforming your water from a problematic pest to a pristine resource.

How to Test Your Well Water and Read the Results

Alright, you know the potential villains that can sneak into your well water. But the big question is, are they in your water? The only way to know for sure is to test it.

Testing isn't just a good idea; it's your first mission. Without a water test, buying a filter is a complete shot in the dark. With a test, you get a treasure map that leads you directly to the perfect filtration system for your home.

Finding a Lab and Choosing Your Tests

Your first move is to find a state-certified laboratory. Just search online for "[Your State] certified water testing lab" to get a list of options. Using a certified lab is key because they use proper methods to get you results you can trust.

The lab will mail you a special collection kit with very specific instructions. Follow them to the letter! This is especially critical for bacteria tests, where even a tiny mistake can contaminate the sample and give you a false positive. It usually means sterilizing your tap, letting the water run for a bit, and getting the sample back to the lab quickly.

So, what should you even test for?

  • Annual Essentials: At a bare minimum, test your well once a year for coliform bacteria, nitrates, and pH levels. These give you a quick snapshot of the most common health risks and whether your water is corrosive.
  • Local Concerns: Play detective and test for problems common in your area. If you're near farms, it's smart to test for pesticides. In regions with specific rock formations, checking for arsenic and radon is a must. Your local health department can usually tell you what to look out for.

To get a solid handle on what you're testing, it helps to understand the essential water quality testing methods that labs use for different chemical and microbial threats. Knowing the basics helps you pick the right tests for your well.

This simple decision guide lays out the whole process, from finding a lab to treating your water.

A well water testing decision guide flowchart showing steps from finding a lab to treating water.

As you can see, figuring out what's in your water is a straightforward process that puts you in control.

Decoding Your Water Test Report

When you get your results back, the report might look a little intimidating. Don't worry, it's simpler than it looks. The report lists each contaminant, how much was found, and the unit of measurement.

Here’s a quick rundown of what you’ll see:

  • mg/L (milligrams per liter): This is just another way of saying parts per million (ppm). It’s used for things like minerals, nitrates, and most metals.
  • µg/L (micrograms per liter): This is parts per billion (ppb). It’s for contaminants like lead or arsenic that are dangerous even in tiny amounts.
  • ND (Not Detected): This is what you want to see! It means the contaminant wasn't found in your sample.
  • Coliform Bacteria: This is usually a simple "present" or "absent." If it's "present," that’s a red flag telling you that surface water might be getting into your well.

The most critical step is to compare your numbers to the Maximum Contaminant Level (MCL) set by the EPA. The MCL is the safety standard for public water, and it's the best yardstick you have for your own well.

Your water test report is your battle plan. Every contaminant over the EPA’s limit is a problem pointing directly to a specific type of filter. High bacteria? You need a UV purifier. High arsenic? An RO system is your hero. Too much iron? An iron filter or water softener will save the day. This is how you stop guessing and start getting clean water.

Choosing the Right Home Filtration System for Your Well

Alright, this is where the action begins. You’ve got your water test results, which means you can finally stop worrying and start solving. Think of those results as a specific blueprint for building your home's ultimate water defense system.

A multi-stage water filtration system on a kitchen counter next to a stainless steel sink.

Let's turn that lab report into a simple shopping list. We'll walk through exactly how to match the right filter to the right problem, so you can gear up with the perfect filtration tech for your family’s health.

Matching the Filter to the Foe

Every water issue has a specific fix. The biggest mistake people make is grabbing a generic, one-size-fits-all filter and hoping for the best. Instead, you need to target the unique contaminants your test uncovered with laser precision.

Here’s a quick guide on how your test results point to the right hardware:

  • Bacteria and Viruses: If your report flagged Coliform bacteria or other microbes, disinfection is your top priority. A UV purification system is the modern gold standard. It uses powerful ultraviolet light to zap bacteria and viruses, sterilizing them instantly without adding a single chemical to your water.
  • Arsenic, Nitrates, and Heavy Metals: For these invisible health threats, you need the heavy artillery. A Reverse Osmosis (RO) system is the ultimate weapon, forcing water through a special membrane that strips out an incredible range of contaminants like arsenic, lead, and nitrates.
  • Iron, Manganese, and Hardness: Seeing those tell-tale reddish-brown stains or battling crusty scale on your faucets? That’s iron, manganese, and hardness minerals at work. A dedicated iron filter or a good water softener is built specifically to knock these out, protecting your pipes and appliances from a slow, crusty death.
  • "Rotten Egg" Smell: That unmistakable sulfur smell comes from hydrogen sulfide gas. You can banish it with an oxidation filter or a quality carbon filter, which will dramatically improve your water’s taste and smell, making it enjoyable again.

The best filtration setups are often multi-stage. You might need a whole-house water softener to handle hardness, followed by a UV light for microbial safety. It's all about layering your defenses based on what your water test tells you.

Point of Entry vs. Point of Use Systems

Once you know what to filter, you have to decide where to filter it. This comes down to a fundamental choice: treat all the water entering your house, or just the water you plan to drink and cook with? This is the Point-of-Entry (POE) versus Point-of-Use (POU) decision.

Point-of-Entry (POE) systems, or whole-house filters, are installed right where your main water line enters your home. They treat every single drop of water going to your taps, showers, and appliances. This is the way to go for issues that affect your entire home, like:

  • Hardness minerals causing scale buildup in your pipes and water heater.
  • Iron that’s staining your sinks, tubs, and laundry.
  • Sediment that clogs faucets and wears down your appliances.

Point-of-Use (POU) systems are smaller and treat water at a single spot, usually the kitchen sink. These are perfect for zeroing in on health-related contaminants in the water you'll be consuming. Under-sink RO systems and simple countertop filters are common POU options. They're cheaper and easier to install, but they don't protect the rest of your home from aesthetic issues.

If you're trying to figure out what's best for your situation, our team at Water Filter Advisor has put together a ton of great resources. You can read more advice and tips on selecting the right type of filter for your needs here.

Well Water Filtration Methods Compared

Picking the right technology can feel overwhelming, but it gets much clearer when you see what each system is designed to do. This table breaks down the most common filtration methods to help you match them to your needs.

Filtration Method Primary Contaminants Targeted Best For Maintenance Level
Reverse Osmosis (RO) Arsenic, Lead, Nitrates, Fluoride, Dissolved Solids Highest-purity drinking water at a single tap (POU). High (Membrane/filter changes)
UV Purification Bacteria, Viruses, Protozoa (E. coli, Giardia) Whole-house disinfection (POE) without chemicals. Low (Annual bulb change)
Water Softener Calcium, Magnesium (Hardness Minerals) Protecting pipes and appliances from scale (POE). Medium (Adding salt regularly)
Iron/Manganese Filter Iron, Manganese Preventing rust stains and metallic taste (POE). Medium (Backwashing cycles)
Activated Carbon Filter Chlorine, Pesticides, Odors, Bad Taste Improving taste and smell at a specific tap (POU) or for the whole house (POE). Low (Cartridge changes)

At the end of the day, making sure your well water is safe is an ongoing mission, not a one-time fix. By using your water test as your guide and knowing your filtration options, you can build a reliable system that delivers clean, safe water for years to come.

Maintaining Your Well and Filtration System

Getting a powerful water filtration system installed is a fantastic first step. But it’s not a "set it and forget it" appliance. Think of it like a high-performance car—you wouldn't skip an oil change and expect it to win a race. Your water system needs the same kind of TLC to keep it running flawlessly.

Regular, consistent maintenance is the secret sauce. It's what ensures your system keeps delivering pure, safe water day after day, protecting both your family and your investment.

Your Well Maintenance Checklist

Before we even touch the filters, let's talk about the well itself. A well-maintained wellhead is your first line of defense, making it much harder for contaminants to sneak into your water in the first place.

A few times a year, just take a walk out and do a quick visual inspection. Check for cracks in the well casing and make sure the cap is on tight. Is the ground around the well sloped so that rainwater runs away from it, not toward it? This simple five-minute check can stop a contamination problem before it starts.

Proper maintenance isn't just about protecting your equipment; it's about safeguarding your health. A clogged filter or a failing UV bulb means your water is no longer protected, reintroducing the very risks you sought to eliminate.

Part of your overall system's health is the plumbing that carries the water into your home. This includes basic home maintenance like preventing burst water pipes, which can cause massive damage and let contaminants flood your supply.

A Practical Filtration Upkeep Schedule

Every filtration system has parts that are designed to wear out. They absorb and block gunk, so eventually, they get full. Sticking to a replacement schedule isn't just a suggestion; it’s what keeps your water safe. Put these on your calendar right now.

  • Sediment Pre-Filters: These are the bouncers, catching all the sand, dirt, and rust. They need to be checked monthly and replaced every 3-6 months. If your water is particularly gritty, you’ll be on the 3-month schedule.

  • Carbon Filters: These are the taste and smell specialists, grabbing chlorine, pesticides, and other yucky stuff. Plan on changing them every 6-12 months. Once the carbon is saturated, it stops working, and those contaminants sneak right through.

  • UV Purifier Bulbs: This is your germ warfare unit. The crucial thing to know is that UV bulbs lose their killing power long before they burn out. You must replace the bulb annually to ensure it's actually disinfecting your water. While you're at it, clean the quartz sleeve that houses the bulb.

  • Reverse Osmosis (RO) Membranes: This is the heart of your RO system. The pre- and post-filters will need changing every 6-12 months, but the high-tech membrane itself is tougher. It generally lasts 2-3 years.

  • Water Softener Salt: If you have a softener, your only real job is to keep the brine tank topped up with salt. Just check the level once a month. Without salt, your softener is just a big, useless tank taking up space.

Staying on top of this schedule means your answer to "is my well water safe?" will always be a confident "yes." If you let it slide, your expensive system becomes little more than a good luck charm, giving you a false sense of security while letting problems flow right to your faucet.

Your Top Questions on Well Water Safety

Once you dive into the world of water filtration, you're bound to have more questions. Let's tackle some of the most common ones we hear from homeowners ready to take control of their well water.

My Well Water Tastes and Smells Fine. Do I Still Need to Test It?

Yes, absolutely! This is one of the most dangerous assumptions. The most harmful contaminants—like arsenic, lead, nitrates, and many bacteria—are completely tasteless, odorless, and invisible.

Relying on your senses is a huge gamble. The only way to know for sure what's in your water is to get it tested by a state-certified lab at least once a year. Think of it as an annual check-up for your water.

What's the Difference Between a Water Softener and a Water Filter?

Great question, as they solve two totally different problems.

A water softener is a specialist. It only targets "hardness" minerals—calcium and magnesium. These are the culprits behind scaly buildup in your pipes and appliances but aren't considered a health risk. It's all about protecting your home's plumbing and fixtures.

A water filter is a guardian. It's built to remove dangerous contaminants. A reverse osmosis system will go after lead and arsenic, while a UV purifier is designed to kill bacteria and viruses. Many well owners need both: a softener to protect the plumbing and a filtration system to protect their health.

Can I Install a Whole-House Filtration System Myself?

An under-sink filter? Sure, many handy homeowners can tackle that. But a whole-house (or Point-of-Entry) system is a much bigger project. It involves cutting into your main water line, which demands real plumbing skills. Some systems, like UV purifiers, also need electrical work.

We always recommend hiring a licensed plumber or certified water professional for a whole-house system. A bad installation can cause massive leaks, void your warranty, and—worst of all—it might not even work correctly, leaving your water unprotected. It's worth the investment to have it done right.

How Often Should I Shock My Well?

Shock chlorination is like calling in a SWAT team for your well. It's an emergency fix you use after a bad bacteria test, after well maintenance, or if floodwater gets in. It's a heavy dose of chlorine meant to disinfect the entire system.

Some folks do it annually as a "just in case" measure. But if you're constantly shocking the well because of recurring bacteria, you have a bigger problem. Shocking is a band-aid. You need a permanent fix like a UV purification system to provide constant, 24/7 protection against contamination.


At Water Filter Advisor, we cut through the noise to give you clear, straightforward advice for your home's water. Check out our guides and product reviews at https://www.waterfilteradvisor.com.

The Best Water Filter for Lead Removal: A 2026 Homeowner’s Guide

When it comes to getting lead out of your water, your best bets are a reverse osmosis (RO) system or a solid carbon block filter that is officially NSF/ANSI 53 certified. These are the heavyweights, the technologies proven to slash lead by over 95%, giving you the most reliable final defense for your home's drinking water.

The Hidden Danger Lurking in Your Tap Water

A kitchen faucet fills a glass with water in a dark sink, next to a banner reading 'HIDDEN LEAD DANGER'.

You probably turn on your tap without a second thought. But even if your city’s water treatment is top-notch, the real trouble can start in the labyrinth of pipes that bring that water to your home.

The problem isn't usually the water source. It's the journey it takes.

Millions of homes are still connected to the water main with old lead service lines. Add to that older plumbing, brass fittings, and lead-based solder hiding inside your walls, and you've created a perfect storm for contamination right at the tap.

Why Municipal Reports Are Not Enough

Sure, your local utility sends out an annual water quality report. The catch? That report shows water tested at the treatment plant, not from your faucet.

Lead contamination is a "last-mile" problem. It happens when water sits in or flows through aging pipes. This means your water can be perfectly fine when it leaves the plant but pick up dangerous levels of lead just before it fills your glass.

Even tiny changes in water chemistry can cause old pipes to corrode and leach lead. That's why city-wide tests just can't guarantee the water coming out of your specific tap is safe.

Key Insight: The U.S. Environmental Protection Agency (EPA) says there is no safe level of lead in drinking water. Their goal is zero. This is especially critical for children and pregnant women, who are most vulnerable to its devastating effects.

The Scope of the Problem

This isn't a small-town issue. Research from the Natural Resources Defense Council (NRDC) found that water systems serving over 112.3 million Americans had lead levels at or above the 5 parts per billion (ppb) limit set for bottled water.

It's a clear sign that our aging infrastructure is a persistent threat. For families, this means even water that technically passes some standards could pose serious, irreversible health risks. You can get more details on these findings directly from the NRDC website.

Here's a quick breakdown of the usual suspects for how lead gets into your water supply.

Contamination Source How It Affects Your Water
Lead Service Lines These are the main pipes connecting your home to the water main. They're the single biggest source of lead.
Household Plumbing Older homes might have lead pipes. Even newer homes can have copper pipes joined with lead-based solder.
Brass Fixtures Faucets and valves made before 2014 could legally contain up to 8% lead, which can leach into your water.

You can't see, taste, or smell lead in your water. It's an invisible invader. The only way to know your family is protected is to take matters into your own hands.

Installing the best water filter for lead removal acts as that final, crucial barrier. It's the only way to get real peace of mind that every glass you pour is pure and safe.

How Water Filters Actually Remove Lead

Three white and grey water filters stand on a wooden kitchen counter in front of a blue wall.

To pick the right filter, you need to know what’s really going on inside that plastic housing when you turn on the tap. It’s not magic—it's a fascinating mix of physics and chemistry. Different filters use entirely different strategies to get the lead out, and understanding them is the key to finding what works for your home.

It’s important to know that lead shows up in two main forms: particulate lead (tiny physical flakes) and dissolved lead (which is chemically bonded to the water molecules). A truly effective filter has to be a master of handling both.

Let’s dive into the core technologies that actually do the heavy lifting.

Reverse Osmosis: The Gatekeeper

You can think of Reverse Osmosis (RO) as the most aggressive bouncer in the water filtration world. This process uses your home's water pressure to force water through a special semipermeable membrane with pores so tiny, they make a germ look gigantic.

Just how small? These pores are typically around 0.0001 microns. For comparison, a single human hair is about 70 microns thick. This microscopic barrier lets pure water molecules squeeze through but physically blocks almost everything else, including those stubborn dissolved lead ions.

Because it’s a physical barrier, RO is exceptionally thorough. A quality system can remove up to 99% of lead, not to mention a whole host of other difficult contaminants like arsenic, salts, and fluoride. It’s the closest you can get to pure H₂O straight from your tap.

Activated Carbon: The Magnet

Activated carbon is one of the most widely used materials in water filtration, and for good reason. It works through a process called adsorption, where contaminants are pulled from the water and stick to the carbon's surface, much like a powerful magnet grabbing metal filings.

The secret to its success is its mind-bogglingly massive internal surface area. The carbon is processed to create a network of countless microscopic pores and channels. Just a single gram of activated carbon can have a surface area larger than a football field. As water passes through, this huge, porous surface grabs onto lead, chlorine, pesticides, and other organic chemicals, trapping them inside the filter.

A huge plus for activated carbon is its ability to reduce both dissolved and particulate forms of lead. High-quality solid carbon block filters are especially effective at this, making them one of the most reliable choices for lead reduction.

Keep in mind, though, that not all carbon filters are created equal. For serious lead removal, you need a filter with a dense carbon block and a fine micron rating—this is where looking for official certification really matters.

Ion Exchange: The Trader

Ion exchange is a bit more clever, working on a "trade" principle. The filter contains a special resin material that is pre-loaded with harmless ions, typically sodium or potassium.

When water containing dissolved lead flows over this resin, a chemical swap meet happens. The resin has a stronger attraction to the lead ions than the harmless ions it's holding. It effectively grabs the lead from the water and releases a harmless sodium or potassium ion in its place.

  • What it targets: Primarily dissolved heavy metals like lead, cadmium, and mercury.
  • Common Use: You'll often find ion exchange media paired with activated carbon in multi-stage filters, like those in pitchers or faucet mounts. This combination provides a more well-rounded defense.

This technology is fantastic for specifically targeting those invisible dissolved metals that a simple mechanical filter might miss.

Kinetic Degradation Fluxion: The Converter

Kinetic Degradation Fluxion (KDF) is a unique filtration media made from a high-purity copper-zinc alloy. As water passes through, it creates a tiny electrochemical reaction, a process known as redox (short for oxidation-reduction).

This reaction actually changes harmful contaminants into substances that are harmless. When it comes to lead, KDF has a two-pronged attack:

  1. It causes dissolved lead to plate directly onto the surface of the KDF media, effectively removing it from the water supply.
  2. The electrochemical environment it creates inhibits the growth of bacteria, algae, and fungi within the filter, which helps keep the filter running effectively for longer.

You'll rarely see KDF used by itself. It's a team player, best used as a partner to an activated carbon filter, where it protects the carbon from bacterial growth and boosts its performance in removing lead and other contaminants. A system that combines both is a very smart approach to ensuring safer water.

Decoding Certifications That Guarantee Lead Removal

When it comes to water filters, talk is cheap. Manufacturers love to slap impressive claims on their packaging, but proof is what really matters. How can you be sure a filter actually removes lead?

The only way is to look for an independent, third-party certification. It’s your guarantee of real-world performance.

For lead removal, one certification is king: NSF/ANSI 53. Think of this as the gold standard for any filter meant to handle health-related contaminants.

This isn’t some rubber-stamp approval. To get the NSF 53 seal, a filter goes through brutal, standardized testing to prove it reduces specific contaminants to levels deemed safe by the EPA.

What NSF/ANSI 53 Really Means

So, what’s in the “53”? This number is what you need to look for. The standard is officially for “Drinking Water Treatment Units – Health Effects.”

It verifies that a filter can reduce contaminants with known health risks. This includes heavy metals like lead and mercury, parasites like Cryptosporidium, and certain industrial chemicals.

The testing is intense. Here’s a look at what a filter has to endure:

  • It's hit with water containing lead at 150 parts per billion (ppb). That's ten times the EPA's action level of 15 ppb.
  • It must consistently cut lead levels down to below 10 ppb for its entire rated filter life.
  • The tests are run at different pH levels, ensuring the filter performs no matter your water chemistry.

This process confirms the filter doesn’t just work on day one. It protects you and your family right up until it’s time to swap it out.

Key Takeaway: If a filter isn't certified to NSF/ANSI 53 for lead reduction, you have zero independent proof it can remove this dangerous neurotoxin. For protecting your home, this is non-negotiable.

Don't Confuse It with NSF 42

It's easy to get these numbers mixed up. You’ll often see another certification, NSF/ANSI 42, on filter packaging.

This standard only covers "Aesthetic Effects." A filter with an NSF 42 certification is proven to make your water taste and smell better, usually by reducing chlorine.

Better taste is nice, but NSF 42 says nothing about a filter's ability to remove lead or other dangerous contaminants. Many basic pitchers only have this certification. Don't be fooled—for lead protection, you must see NSF/ANSI 53 on the label.

The global impact of lead is staggering, making these certifications critical. Lead poisoning is tied to about 1% of the global disease burden, which means millions of life years lost. In the U.S. alone, costs from lead-related cognitive issues in children top $50 billion annually. You can read more on these global health findings from the World Health Organization.

You can and should verify any product's certification for yourself. Just use the official NSF certification database to look it up.

The NSF's online tool lets you search by brand or standard number. It’s the easiest way to cut through the marketing hype and confirm the filter you’re buying has passed the tests to protect your family.

Comparing the Top Lead Filtration Systems

Now that we’ve covered the tech and certifications, it's time to put the most common home filtration systems side-by-side. The best water filter for lead removal isn’t a one-size-fits-all answer. It really comes down to finding the right fit for your home, your budget, and your day-to-day life.

We're going to break down the practical trade-offs between four main players: under-sink reverse osmosis, high-performance carbon block filters, faucet-mounted units, and specialized water filter pitchers. My goal is to help you see the pros and cons of each so you can make a decision you feel good about.

Under-Sink Reverse Osmosis Systems

If you're looking for the absolute highest level of protection, Reverse Osmosis (RO) systems are the heavy hitters. These multi-stage units get plumbed right into your cold water line, feeding a dedicated faucet on your sink for purified water whenever you need it.

The core of an RO system is a semipermeable membrane that physically blocks contaminants, removing up to 99% of dissolved lead. But it's a team effort—most systems also have sediment and carbon pre-filters that catch larger gunk and chemicals, which protects the main membrane and polishes the water quality even further.

  • Lead Removal Effectiveness: Excellent. RO systems are the gold standard because they reliably remove both dissolved and particulate lead.
  • Cost & Maintenance: Expect a higher upfront cost, usually between $250 and $600. Annual upkeep, which involves replacing filter cartridges and the RO membrane itself every 2-4 years, will run you about $100 to $200 per year.
  • Installation: This is more of a project. It requires some basic plumbing know-how (or a professional), space under your sink, and possibly drilling a hole in your countertop for the new faucet.
  • Water Flow: The purification process is slow, so these systems store purified water in a small tank. The flow from the dedicated faucet will be slower than your main tap.

An RO system is the top choice for anyone who wants maximum assurance and is ready to invest in a permanent solution for their drinking and cooking water.

High-Performance Carbon Block Filters

If a full RO setup seems like overkill, an under-sink carbon block filter is a fantastic and powerful alternative. These systems also connect to your cold water line but use your existing kitchen faucet, making them a much simpler option to install and use.

The magic is in the high-density solid carbon block. Water is forced through a tight, complex path, maximizing the time it spends in contact with the carbon. This process, called adsorption, is incredibly effective at grabbing and holding onto lead. Just make sure you get a model certified to NSF/ANSI 53 for proven performance.

Situational Insight: For many people, a quality under-sink carbon block filter is the perfect sweet spot. It delivers impressive lead removal (often 99% or better) while maintaining a strong flow rate, which is far more convenient for daily tasks like filling a large pot of water than a slower RO system.

These are a great fit for families wanting serious, certified lead protection straight from their main faucet, but without the water waste or slower flow of reverse osmosis.

When you're shopping, understanding the certifications on the box is crucial. This chart shows the two you'll see most often.

Bar chart showing 75% NSF/ANSI 42 (taste) and 90% NSF/ANSI 53 (protection) certified products.

As you can see, NSF 42 is about making water taste and smell better. For protection from health contaminants like lead, you absolutely need to look for NSF 53.

Faucet-Mounted Filters

For renters or anyone needing an easy, temporary fix, faucet-mounted filters are a great starting point. These little units attach right onto your kitchen faucet in a matter of minutes, no tools needed.

Most have a switch that lets you toggle between filtered and unfiltered water, which is a handy feature for making the filter cartridge last longer. Inside, they typically use activated carbon and other media to trap contaminants.

  • Lead Removal Effectiveness: Good to Very Good. The key is to be picky—only choose a model that is explicitly NSF/ANSI 53 certified for lead reduction. A certified model can remove over 99% of lead.
  • Cost & Maintenance: The initial cost is very low, usually just $30 to $50. You'll need to replace the filters more often, about every 2-3 months, which adds up to around $40 to $60 annually.
  • Installation: Incredibly easy. They just screw onto the end of most standard faucets.
  • Water Flow: The flow is definitely slower than your regular tap but usually a bit faster than waiting for a pitcher to fill.

This is the perfect choice for people in apartments, college students, or anyone who wants a simple and affordable way to get lead-free water without touching their plumbing.

Specialized Water Filter Pitchers

While standard water filter pitchers are mostly for improving taste, a new class of specialized pitchers is engineered for serious contaminant removal. These models use advanced filters that are NSF/ANSI 53 certified to reduce lead.

You have to read the packaging carefully here. For example, with a brand like Brita, only specific filters like their blue "Longlast+" model are certified for lead. The standard white filters are not.

To help you see how these options stack up, here’s a direct comparison of the key factors for each filter type.

Lead Removal Filter Comparison by Type

This table directly compares the most common home water filter types based on lead removal effectiveness, cost, and maintenance to help you choose the right solution for your home.

Filter Type Typical Lead Removal Rate Initial Cost Annual Maintenance Cost Best For
Reverse Osmosis Up to 99% $250 – $600 $100 – $200 Homeowners wanting maximum, comprehensive protection.
Carbon Block Over 99% (certified) $100 – $300 $80 – $150 Those seeking high performance with strong water flow.
Faucet-Mount Over 99% (certified) $30 – $50 $40 – $60 Renters and anyone needing an easy, budget-friendly option.
Pitcher 99% (certified models) $20 – $40 $60 – $80 Single users, portability, or very low-volume needs.

This table makes it clear that while you can get excellent lead removal across the board (as long as you choose a certified product), the real differences come down to cost, convenience, and how much water you need.

Water filter pitchers offer ultimate portability but have their limits. The small capacity and slow filtering speed make them best for a single person's drinking water, not for cooking or filling large water bottles.

Which Lead Water Filter Is Right for Your Home?

There's no single "best" lead water filter. The right choice for you comes down to your home, your budget, and how you actually use your water.

To get straight to the point, let's look at a few common situations. Find the one that matches your life, and you'll know which filter to choose.

Scenario 1: The Renter in an Older Apartment

Imagine you're Sarah. She rents in a classic old building, but she's worried about what's in the pipes. Since she can't start ripping out plumbing, she needs a fix that's effective, cheap, and temporary.

Ideal Solution: A faucet-mounted filter.

Why it works: For any renter, a non-permanent option is the only option. A faucet filter just screws onto your existing tap. No tools, no damage, no problem with the landlord.

  • Effectiveness: You must get a model certified to NSF/ANSI 53 for lead reduction. A good one will remove over 99% of lead.
  • Convenience: There's usually a little lever to switch between filtered water (for drinking) and unfiltered water (for dishes). This makes the filter cartridges last much longer.
  • Budget: This is the cheapest way to get certified lead removal. The initial cost is typically under $50.

This gives Sarah instant protection without a big investment or breaking her lease.

Scenario 2: The Family in the Suburbs

Now, think about the Millers. They own their home, have two young kids, and want the best possible protection. They're ready to invest in a permanent, high-performance system for their busy family.

Ideal Solution: An under-sink reverse osmosis (RO) system.

Why it works: When it comes to total purification, an RO system is the top of the line.

RO systems are the gold standard because they don't just target lead; they remove up to 99% of hundreds of other contaminants, including arsenic, fluoride, and dissolved solids. This creates water that is exceptionally pure.

The system fits under the kitchen sink and feeds a separate, dedicated faucet. This gives you a constant supply of purified water for drinking and cooking without affecting the flow from your main tap. While it costs more upfront, the peace of mind is worth it for a family. If you're weighing your options, our team provides additional advice on choosing the right filter for your household's specific needs.

Scenario 3: The Budget-Conscious First-Time Homeowner

Last up is Tom. He's a new homeowner who just found out his area has old service lines. He needs solid lead protection now but is on a tight budget and wants to avoid the complexity of a full RO system.

Ideal Solution: An NSF 53-certified under-sink carbon block filter.

Why it works: This is the perfect middle ground. You get powerful filtration that's simpler and cheaper to install than an RO system.

  • High Performance: A quality solid carbon block filter certified to NSF 53 is a workhorse. It can remove over 99% of lead and also gets rid of chlorine, drastically improving taste and smell.
  • Great Water Flow: Unlike RO, these filters tap directly into your main cold water line and use your existing faucet. You get a strong, fast flow of certified lead-free water—perfect for filling big pots or pitchers without waiting.
  • Value: For lead removal, its performance is on par with RO but at a much better price. It’s an excellent choice for any homeowner who wants serious protection without the high cost and complex installation.

Installing and Maintaining Your Filtration System

Picking the right water filter is half the battle. Making sure it actually works day-in and day-out comes down to two things: proper installation and religious maintenance.

Even the highest-rated filter is useless if it's installed wrong. A tiny leak in an under-sink system or a bad seal on a faucet filter can let contaminated water sneak right past the filter media. You end up with a false sense of security, thinking your water is clean when it isn’t.

Getting the setup right from the start is non-negotiable.

Key Installation Tips

A proper install means your system is leak-free and that every drop of water you drink has passed through the filter. This is especially true for under-sink systems, which offer some of the best water filter for lead removal performance when set up correctly.

Don't skip these critical steps:

  • Flush New Filters: Before you use it, always flush new filter cartridges for a few minutes. This gets rid of any loose carbon dust (that harmless black powder) and gets the filter media ready to work.
  • Check for Leaks: Once everything is connected, run the water and check every single connection point for drips. A little plumber's tape on threaded connections goes a long way toward creating a solid, watertight seal.
  • Use the Dedicated Faucet: If you bought a Reverse Osmosis system, you must use the small, dedicated faucet that comes with it. This is what keeps your ultra-purified water completely separate from your regular, unfiltered tap water.

Pro Tip: The only way to be 100% sure your system is working is to test it. After your new filter has been running for a few days, grab a water test kit or send a sample to a certified lab. This confirms that lead is being removed right at your tap.

A Straightforward Maintenance Guide

Filters work by trapping contaminants. Eventually, they get full. If you don't change them, they stop working.

Forgetting to replace a filter isn't just ineffective; it can make things worse. An old, clogged filter can cause your water pressure to drop. Even more concerning, it can hit a point called "breakthrough," where it starts releasing the lead and other junk it already captured back into your water.

Stick to a simple maintenance schedule to make sure your filter keeps you protected.

Filter Type Typical Replacement Schedule Maintenance Tip
Pitcher Filters Every 2-3 months Stick to the schedule. Many have a sticker or indicator to remind you.
Faucet-Mount Filters Every 2-3 months Change it as soon as the indicator light comes on or you notice the water flow slowing down.
Under-Sink Filters Every 6-12 months Set a calendar reminder for these. They're out of sight and easy to forget.
RO Membranes Every 2-4 years The pre-filters and post-filters on an RO unit need changing more often, usually every year.

When you swap out the old filter, take a minute to clean the housing. A quick wipe with a mild, food-safe sanitizer will keep any gunk from building up. Follow these simple rules, and your filter will keep delivering safe, clean water for years.

Frequently Asked Questions About Lead Water Filters

Picking the right water filter for lead can feel overwhelming, but it doesn't have to be. Let's cut through the noise and get straight answers to some of the most common questions homeowners ask.

Will a Standard Brita Pitcher Remove Lead?

This is a big one. The answer is no—your standard white Brita filter won't remove lead. Those are only certified for taste and odor (NSF/ANSI 42).

To get lead protection from a pitcher, you have to buy a specialized model. Look for the Brita 'Longlast+' (the blue one), which is specifically certified under NSF/ANSI 53 to reduce lead by over 99%. Always, always check the box for that NSF/ANSI 53 certification.

Does Boiling Water Get Rid of Lead?

Absolutely not. In fact, boiling water makes lead contamination worse.

When you boil water, pure H₂O turns to steam and evaporates, but the lead gets left behind. This means the lead concentration in the remaining water actually goes up. The only way to get lead out is with a filter that’s certified to do the job.

Crucial Safety Note: Never boil water to try and remove lead. It makes the water more dangerous, not less. Use a filter certified for lead removal.

What About My Whole House Water Softener?

A water softener will not protect you from lead. It’s just not what they’re built for.

Softeners use ion exchange to remove hardness minerals like calcium and magnesium, which prevents scale buildup in your pipes and appliances. They aren't designed or certified to remove heavy metals like lead. You'll need a separate system certified under NSF/ANSI 53 for that.

How Can I Test My Home's Water for Lead?

The only way to know for sure if you have a lead problem is to test your water. You've got two solid options:

  • Contact your local water utility: Many offer free or low-cost lead testing programs, especially if you live in an area with older infrastructure.
  • Use a state-certified lab: You can buy a test kit online, take a sample yourself, and mail it to a professional lab. This gives you the most accurate and detailed breakdown of what's in your water.

Remember, a filter is only as good as its installation and maintenance. Many local pros offer services for water filtration systems to ensure everything is installed correctly and running effectively for the long haul.


At Water Filter Advisor, our mission is to provide the clear, expert guidance you need to protect your family's health. We cut through the confusion to help you find the right water filtration solution. Explore our in-depth reviews and guides at https://www.waterfilteradvisor.com.