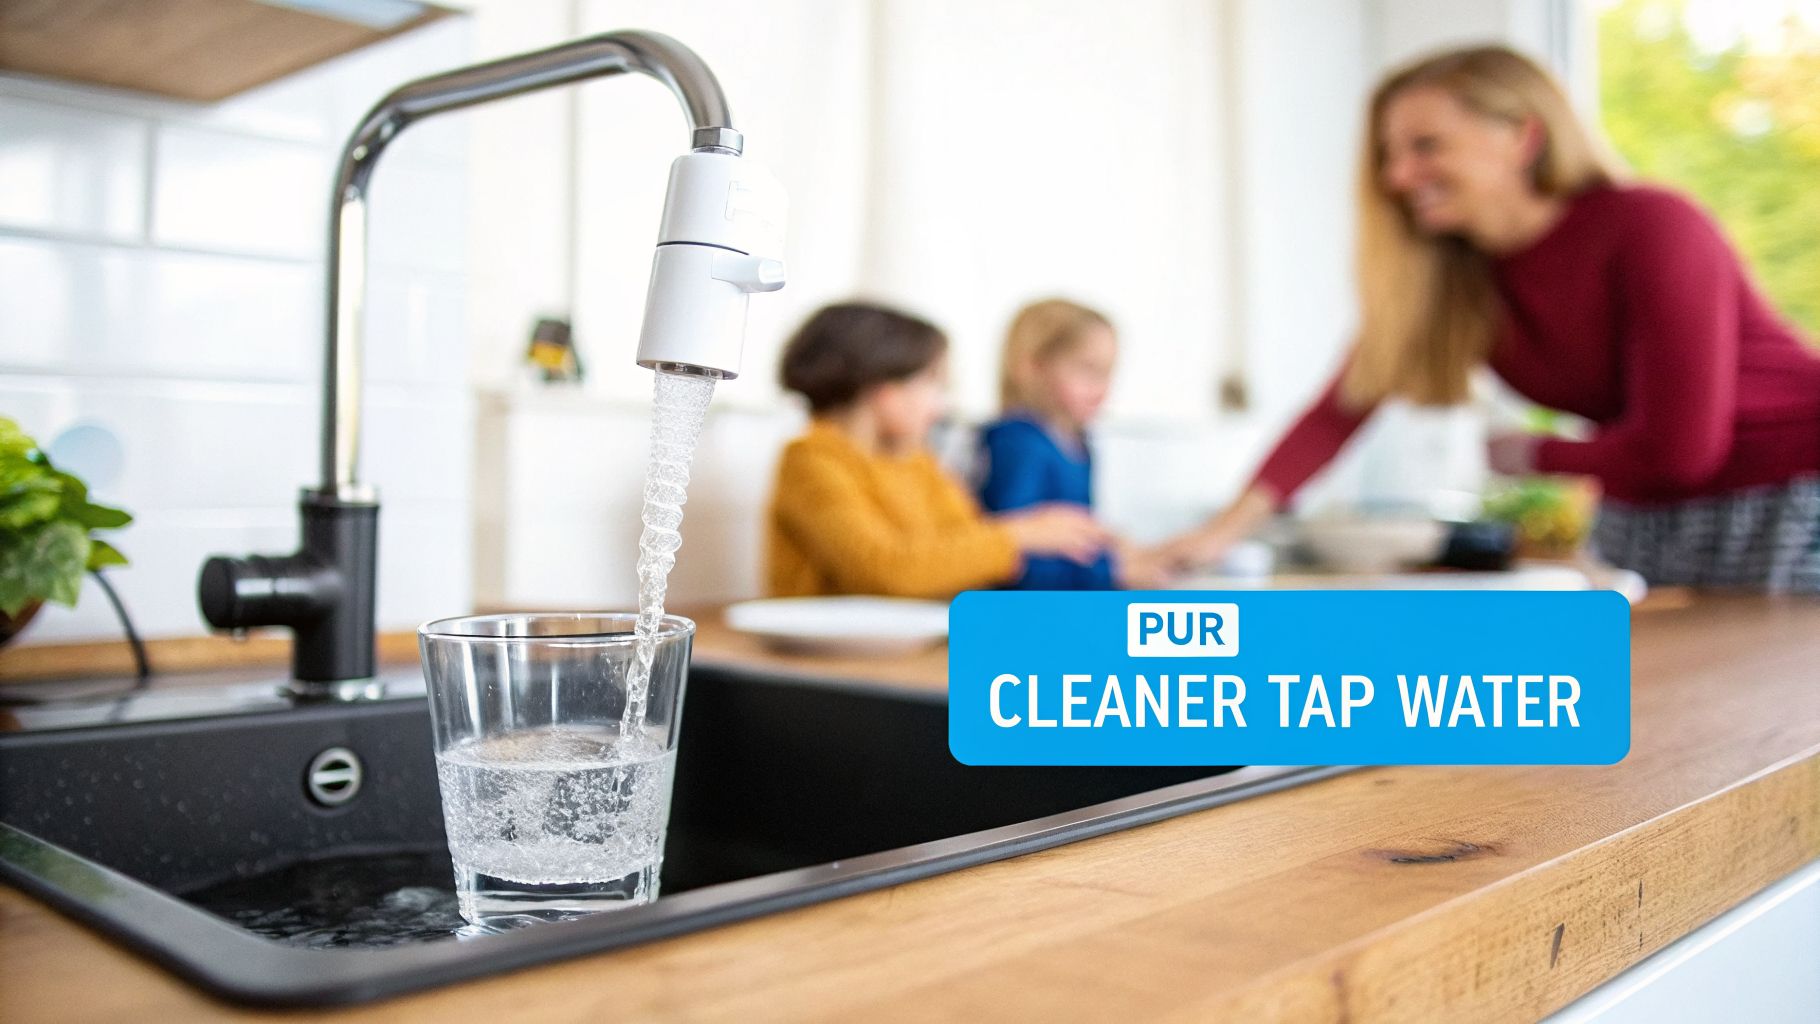
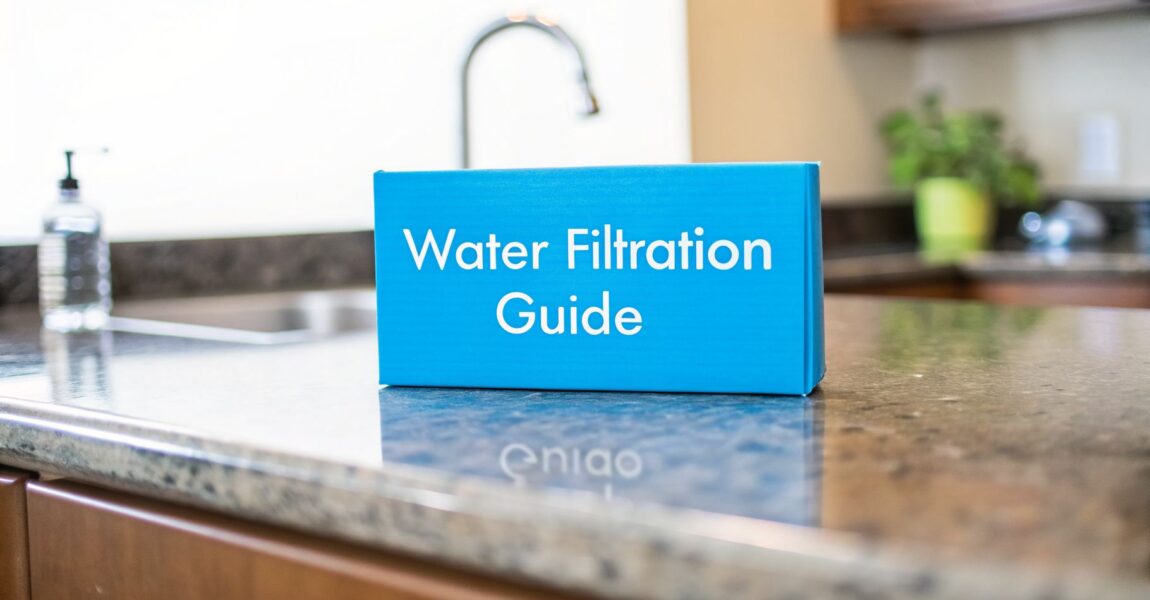
Your Guide to Digital TDS Meters & Finding the Best Water Filter

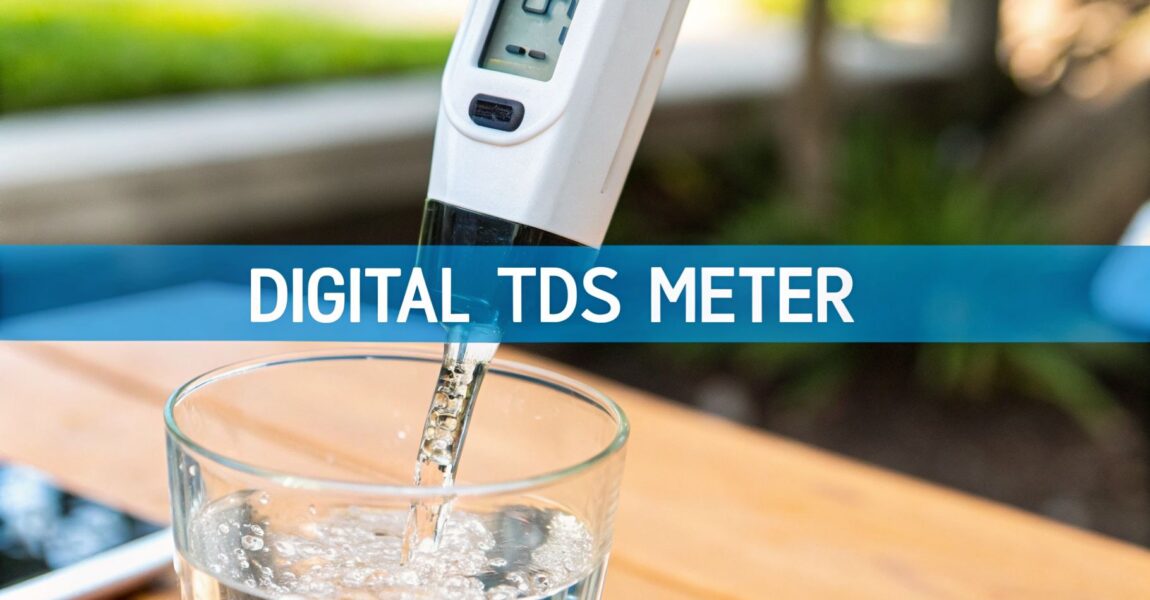
Ever get that nagging feeling you don’t really know what’s in your tap water? A digital TDS meter is your new best friend. This little gadget is a pocket-sized detective that gives you an instant score for all the invisible stuff dissolved in your water. It measures Total Dissolved Solids (TDS)—a fancy term for the combined amount of minerals, salts, and metals floating around.

Think of it as the first, crucial step to becoming the boss of your home's water quality and finding the perfect filter for your needs.

What Is a Digital TDS Meter and Why Does It Matter for Your Home?

A white digital TDS meter stands next to a glass of water on a kitchen counter with a 'KNOW YOUR WATER' sign.

Beyond what you can see, your water carries a hidden load of dissolved substances from its long journey to your faucet. These are what we call Total Dissolved Solids, or TDS.

Imagine your water is a big pot of clear broth. The TDS is all the salt, spices, and other flavorings mixed in. You can’t see them, but they completely change the final product. A digital TDS meter is the super-simple tool that instantly tells you how much "stuff" is in your water, helping you decide if you need to filter it and what kind of filter to use.

What Your TDS Number Tells You

So, why should this number matter to you? A TDS reading is your secret weapon for connecting the dots on common household water woes and figuring out your filtration game plan.

Your reading can help explain things like:

  • Weird Taste or Smell: High levels of certain minerals can make your water taste metallic, bitter, or salty. A TDS meter puts a number to that funky flavor, telling you it's time for a filter.
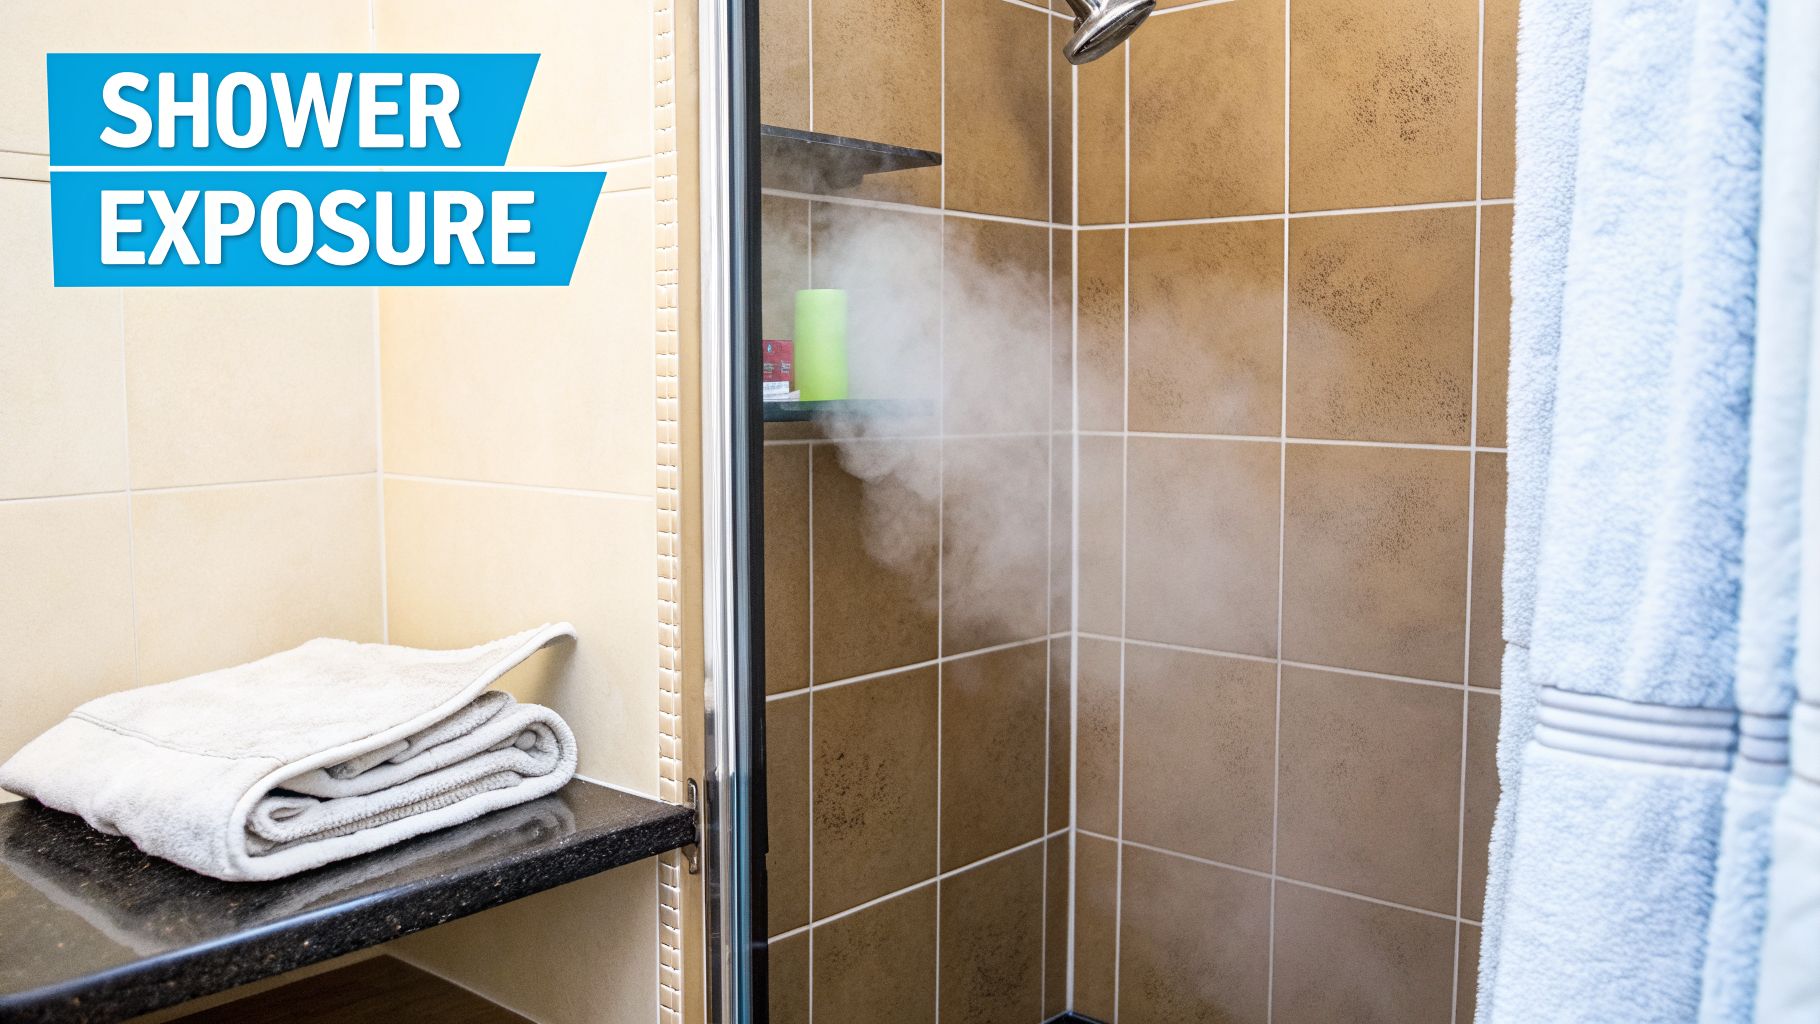
  • Hard Water Headaches: The main culprits behind hard water—calcium and magnesium—are a big part of your TDS score. A high reading is a giant red flag that you're battling scale buildup on appliances and soap scum in the shower.
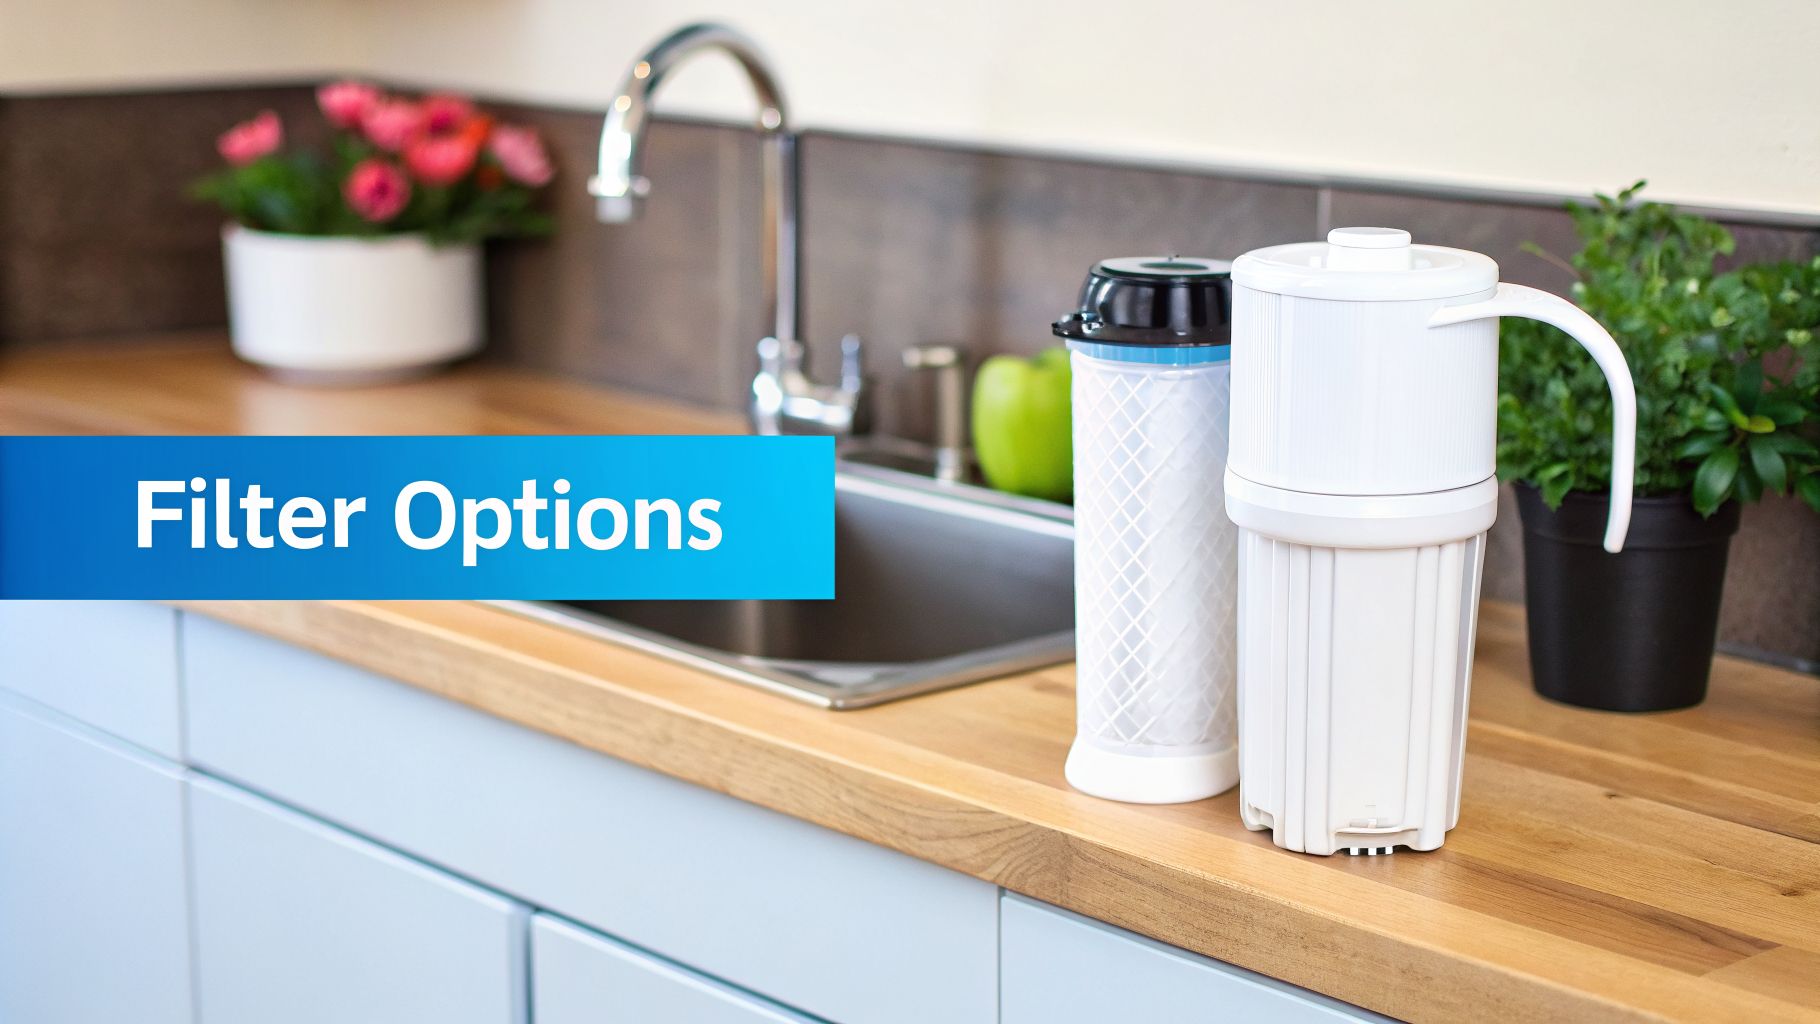
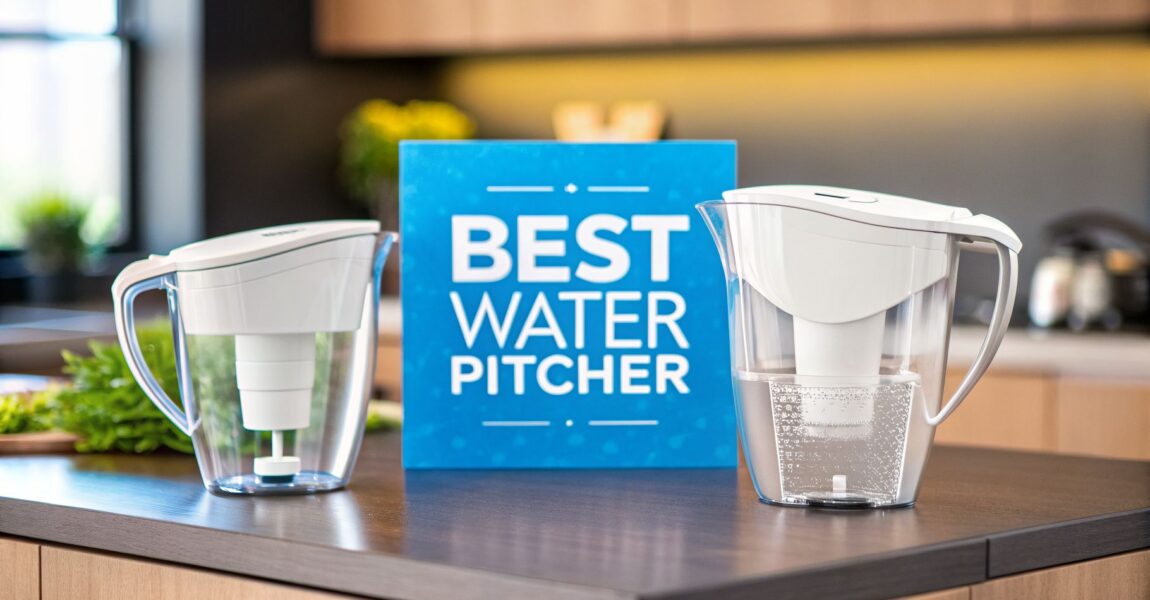
  • Choosing the Right Filter: Knowing your starting TDS is key to picking the right water filter. If your number is sky-high, you'll know a simple pitcher filter won't cut it, and you might need a heavy-hitter like a reverse osmosis system.

The Bottom Line: A TDS meter won’t tell you exactly which contaminants are in your water. What it does is give you a vital big-picture measurement of your water’s overall purity. It's the starting point for any homeowner serious about getting clean, great-tasting water.

Understanding TDS Levels in Your Home

To get a better sense of what your TDS reading means, it helps to see how it compares to other common water sources. A number that's perfectly normal for well water might be a red flag if you're expecting pure, filtered water.

This quick-reference table gives you a general idea of what to expect from your taps.

TDS Levels at a Glance: What to Expect from Your Water

Water Source Typical TDS Range (PPM) Common Characteristics
Reverse Osmosis Water 0 – 50 PPM The gold standard of purity; almost all minerals are removed.
Filtered Tap Water 50 – 200 PPM Clean, crisp taste; carbon filters remove chlorine but leave healthy minerals.
Typical Tap Water 200 – 400 PPM Varies by region; generally safe, but filtration can improve taste and quality.
Hard Water / Mineral Springs 400 – 700+ PPM Noticeable mineral taste; causes scale buildup. A prime candidate for filtration.
Well Water 300 – 1,000+ PPM Highly variable; often rich in minerals like iron and calcium that need filtering.

Use these ranges as a guide. Your own reading will give you a powerful clue about your water's journey and what kind of filtration might be best for your home.

The Growing Demand for Better Water

You're not the only one thinking about this. The market for home water testing tools is booming as more people question the quality of their municipal and well water.

In fact, one market analysis valued the global digital TDS meter market at $245 million in 2024, with projections for major growth. This isn't surprising. People are more aware than ever of how dissolved solids affect taste, plumbing, and health. If you want to dig into the numbers, the report from Archive Market Research about the digital TDS meter market has more details.

Ultimately, a TDS meter puts the power in your hands. It gives you the hard data you need to understand what's in your water and make smart decisions to protect your family and your home with the right filtration system.

How a TDS Meter Actually Tests Your Water

To really get what your digital TDS meter is telling you, it helps to understand what it’s actually doing. The science is pretty straightforward, and you definitely don't need a chemistry degree to get it.

Think of your TDS meter as a traffic cop, not a census taker. It doesn't count every single particle in your water. Instead, it just checks how easily an electrical current can pass through it. This is called electrical conductivity (EC).

The Science of Conductivity

Pure, distilled water on its own is a very poor conductor of electricity. There’s nothing in it to carry a charge. But when minerals and salts—like calcium, magnesium, and sodium—dissolve, they break apart into charged particles called ions.

These ions are what allow electricity to flow. The more ions you have, the higher the water’s conductivity. A digital TDS meter works by sending a very small, safe electrical current between two metal probes (electrodes) on its tip.

It measures how easily that current travels through the water. The higher the conductivity, the more dissolved solids are present. The meter then uses a built-in conversion factor to estimate the Total Dissolved Solids and show you that final reading in parts per million (PPM).

A digital TDS meter is basically an electrical conductivity tester. It doesn't identify what the solids are, just that there are electrically charged solids present.

What a TDS Meter Can and Cannot See

This is the most important part to understand as a homeowner. Knowing what your meter can detect—and what it’s completely blind to—is key to using it to make smart filtration choices.

A TDS Meter Is Great at Detecting:

  • Salts: Common compounds like sodium chloride (table salt) and potassium chloride.
  • Minerals: This includes the "hard water" minerals like calcium and magnesium, which clog up your appliances.
  • Some Metals: Dissolved metals that carry a charge, like iron, will register on the meter.

Basically, if it dissolves in water and creates an electrical charge, your TDS meter is going to pick it up. This is why they are so useful for checking the performance of a reverse osmosis system, which is designed to remove these exact types of contaminants.

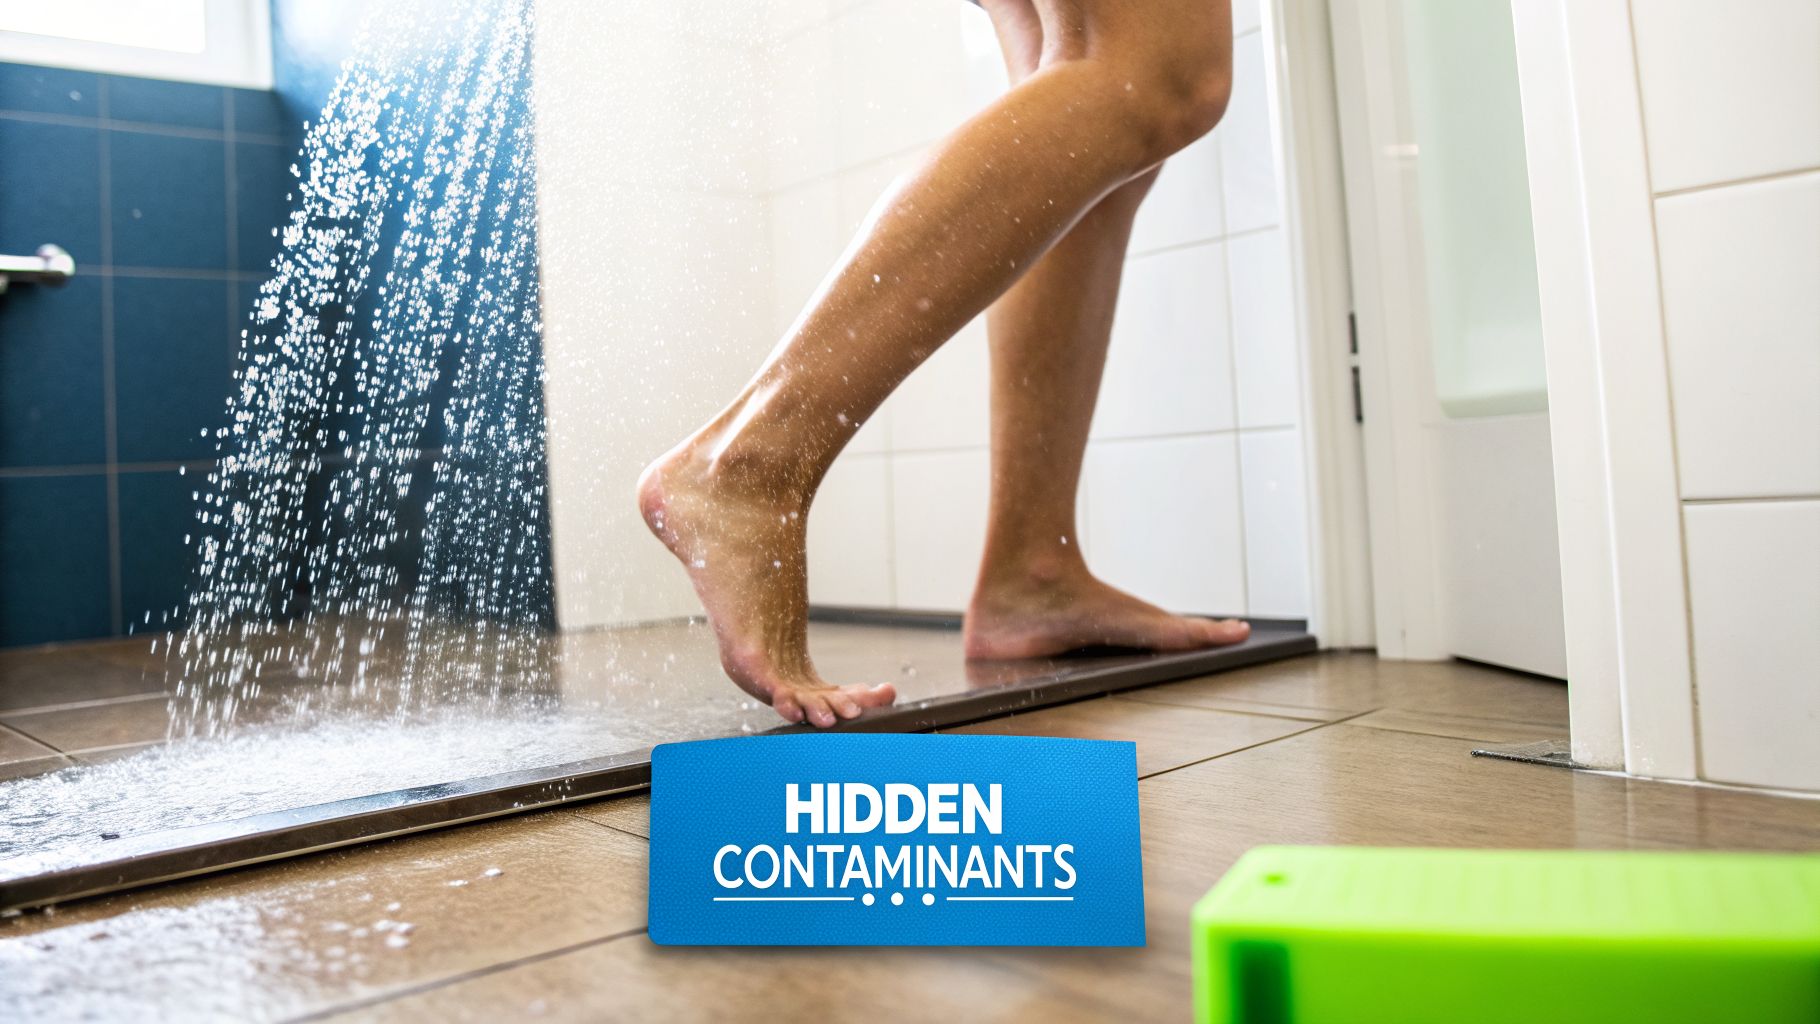
Hidden Dangers Your Meter Misses

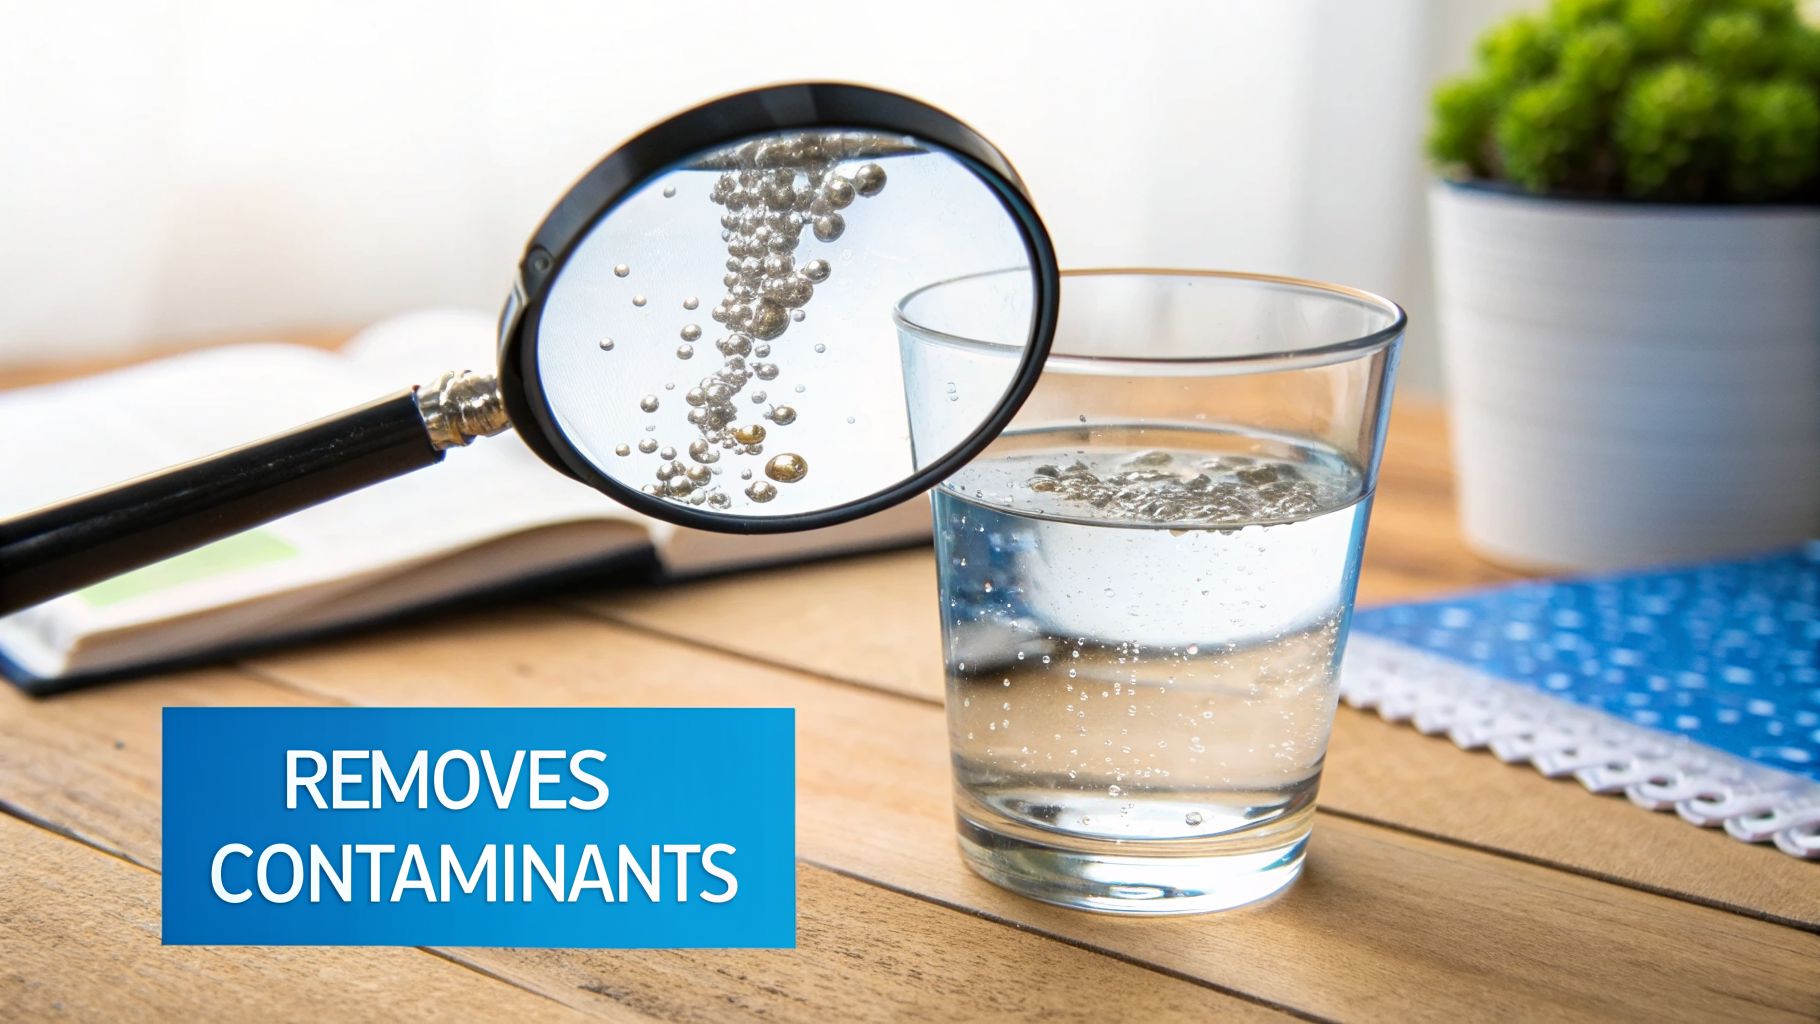
However, a TDS meter's biggest weakness is that it can only see things with an electrical charge. Many of the most serious water contaminants are invisible to it.

A TDS Meter Cannot Detect:

  • Many Organic Chemicals: Things like pesticides, herbicides, and certain pharmaceuticals often have no charge and won't affect the TDS reading at all.
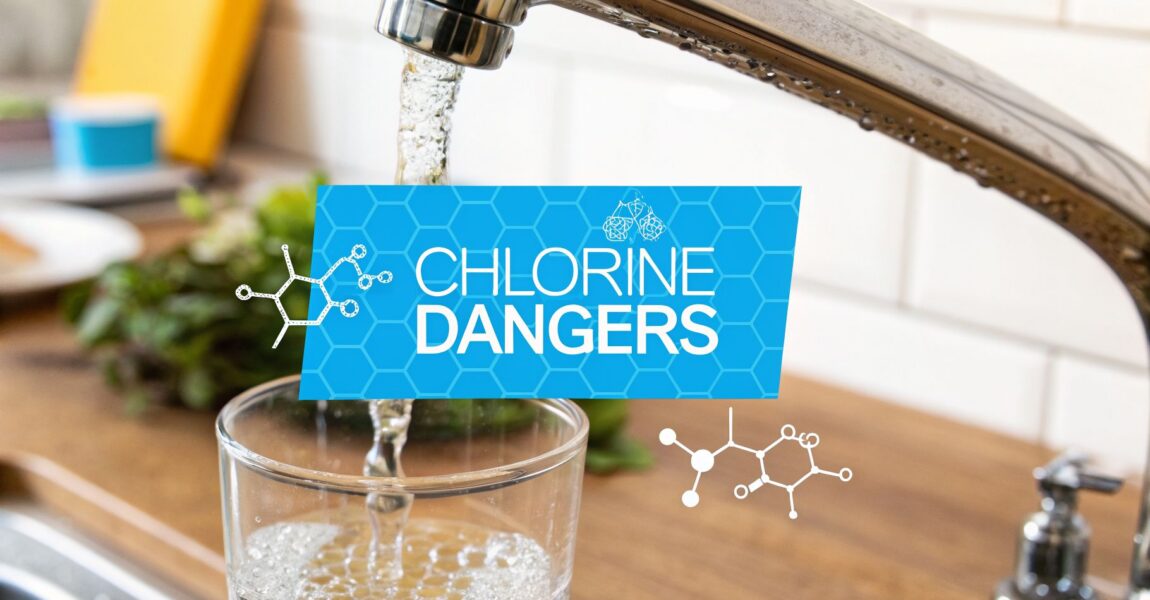
  • Chlorine and Chloramine: The disinfectants your city uses to treat water are not detected by a standard TDS meter.
  • Bacteria and Viruses: These are living organisms and don’t contribute to electrical conductivity.
  • Heavy Metals like Lead: This is a big one. Lead can exist as tiny, uncharged particles that a TDS meter will not reliably pick up.

This is why a reading of 0 PPM doesn’t mean your water is 100% pure or safe. It just means it's free of electrically charged ions. A digital TDS meter is a fantastic tool for one specific job, but it’s not a substitute for a full lab test. It gives you one piece of the puzzle, helping you make smarter decisions about water filtration for your home.

What Your TDS Reading Means for Your Home

You’ve got a number on your TDS meter. So what does it actually mean? Is your water good, bad, or somewhere in between? Let's turn that number into a clear action plan for your home's water filtration.

Think of a TDS reading as a starting point, not a final verdict. The real goal is to use that number to make a smart decision about filtering your water.

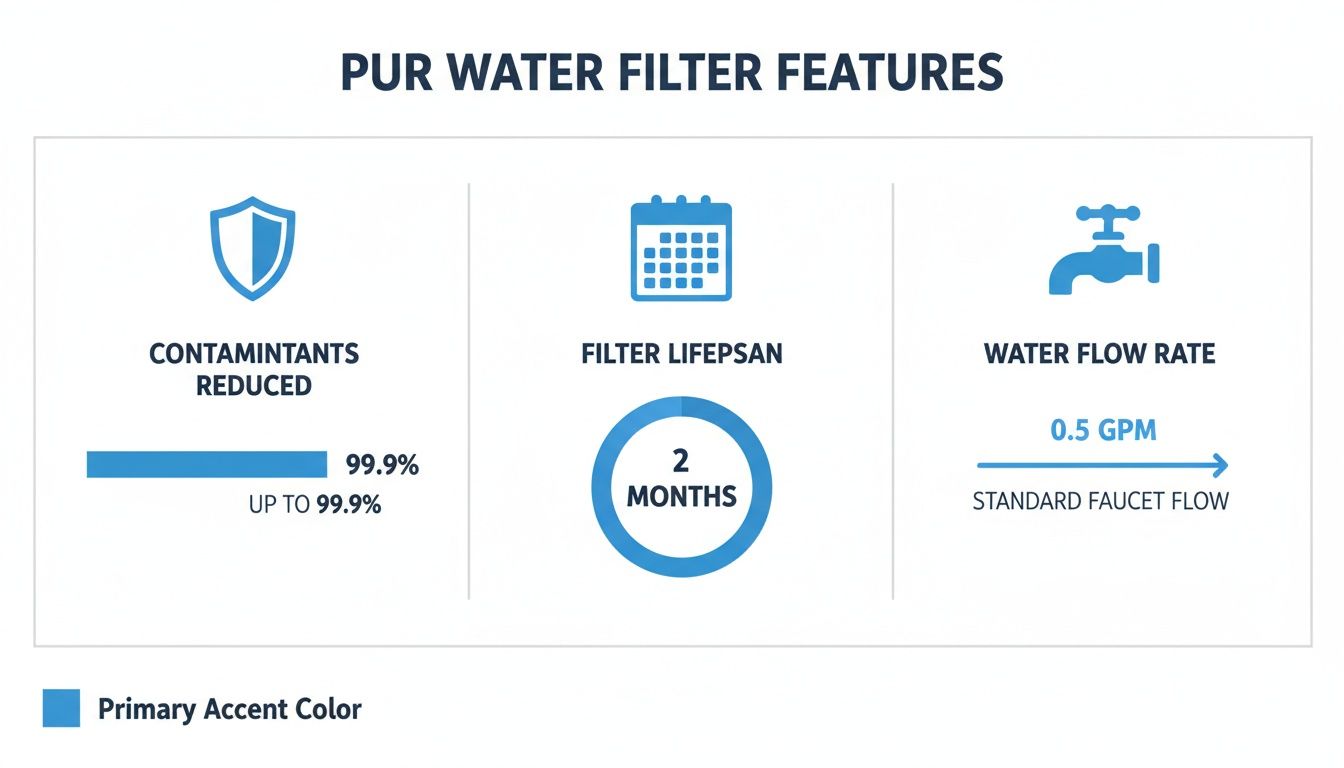
This chart shows you exactly what a TDS meter can and can't tell you.

Diagram illustrating how a TDS meter measures water quality, showing inputs, readings, and interpretations.

As you can see, the meter is great for spotting dissolved minerals and salts. But it can’t see dangerous contaminants like lead, pesticides, or bacteria—you’ll need different tests for those.

Putting Your TDS Number in Context

First, let's look at the numbers. The EPA recommends drinking water stay below 500 PPM (parts per million). Generally, though, a lower number is better for taste and keeps your appliances happy.

Here’s a quick guide to what the numbers usually mean for your filtration strategy.

  • Under 50 PPM: This is extremely pure water, like what you get from a reverse osmosis system or distillation. It has a very clean, crisp taste since most minerals are gone.
  • 50 – 300 PPM: This is a great range for most tap water. It has enough minerals for a pleasant taste without causing major scale buildup. Often, a simple carbon filter for chlorine is all you need.
  • 300 – 500 PPM: The water is still fine to drink, but you might notice a mineral taste. This is where you start seeing white scale forming in kettles and on faucets, signaling it's time to consider a filter.
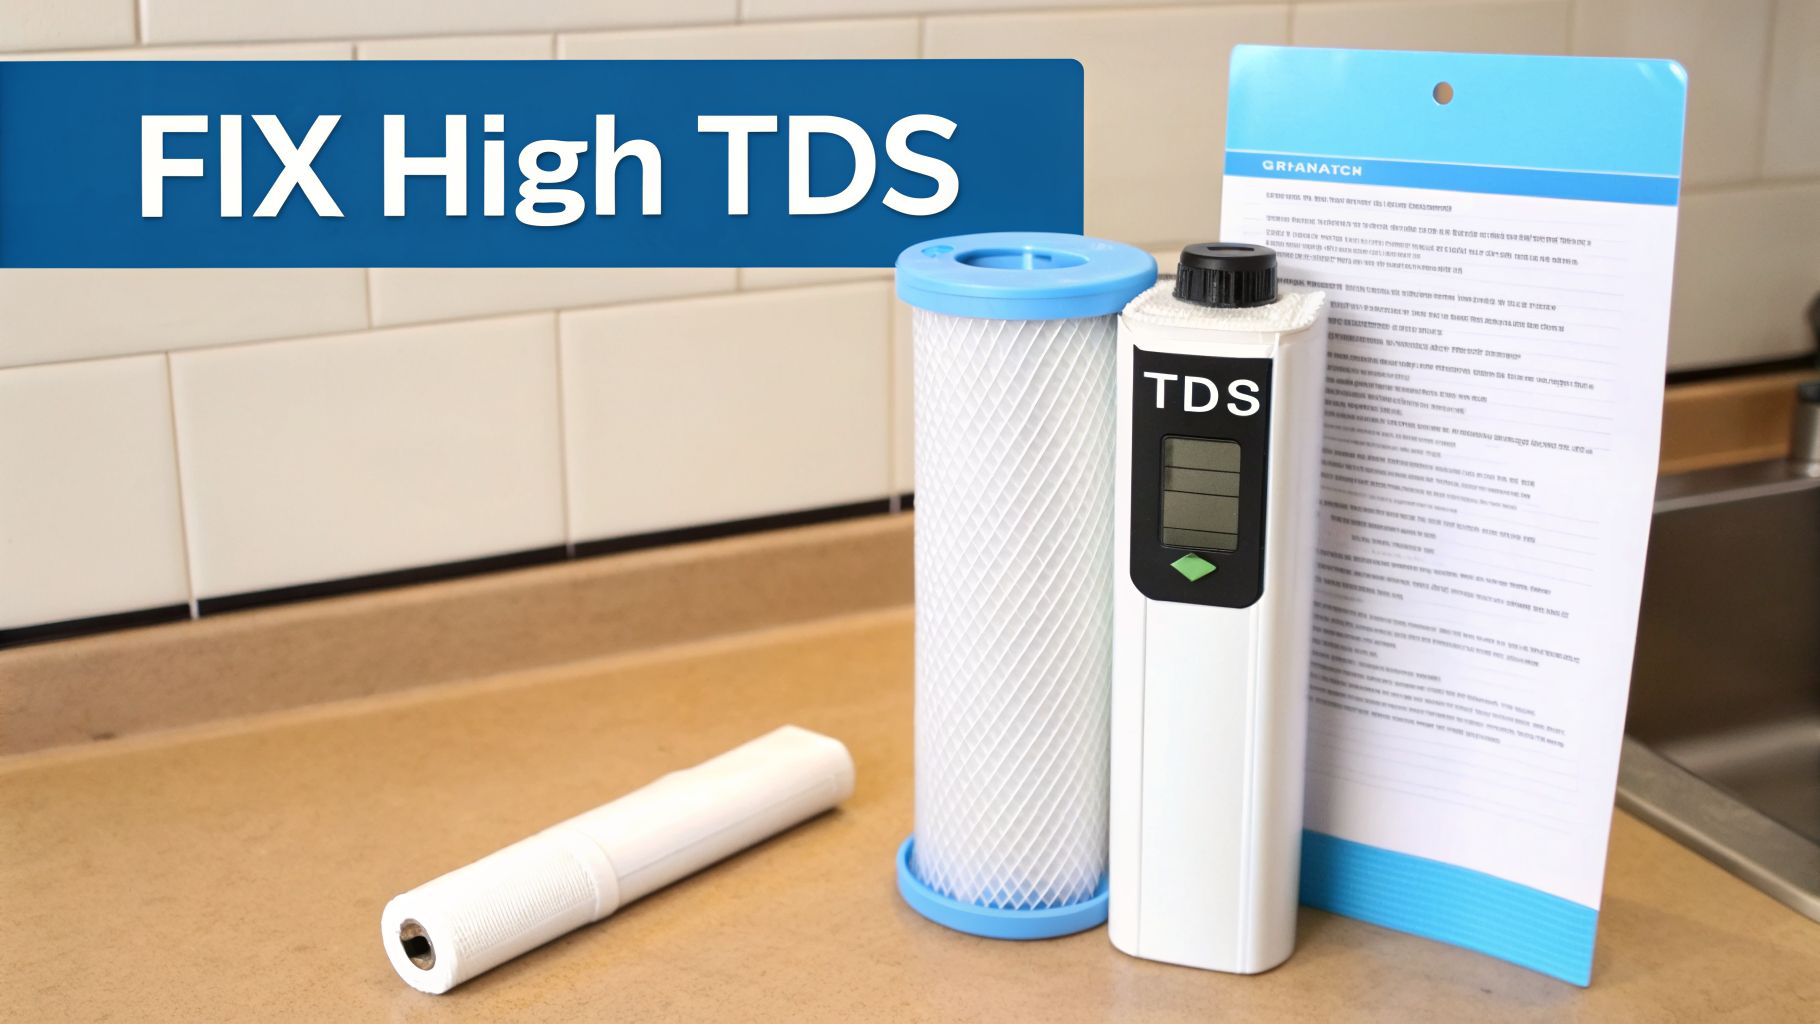
  • Above 500 PPM: Once your reading is over 500, it's time to get serious about filtration. The water is likely very hard, which is tough on appliances, and might taste bitter or salty.

Remember, a TDS meter measures the quantity of dissolved stuff, not the quality. A 400 PPM reading could be harmless calcium, but the number is your signal to investigate and choose a filter that can handle it.

Matching Your Reading to the Right Filter

Your TDS reading helps you pick the right filter without wasting money. Don't buy a whole-house system if all you need is a simple pitcher filter.

Here’s how to match the filter to your water’s needs.

  • Low to Moderate TDS (Under 300 PPM): If you just want better-tasting water without chlorine, a carbon filter is perfect. You’ll find them in pitchers and faucet-mounted filters. They won't lower your TDS much, but they make a huge difference in taste and smell.
  • High TDS (300 – 1,000+ PPM): When a high reading is from hard water minerals (calcium and magnesium), a classic water softener is the best way to protect your plumbing and appliances. A softener swaps hardness minerals for sodium, so your TDS reading will actually stay the same or even go up while solving the scale problem.
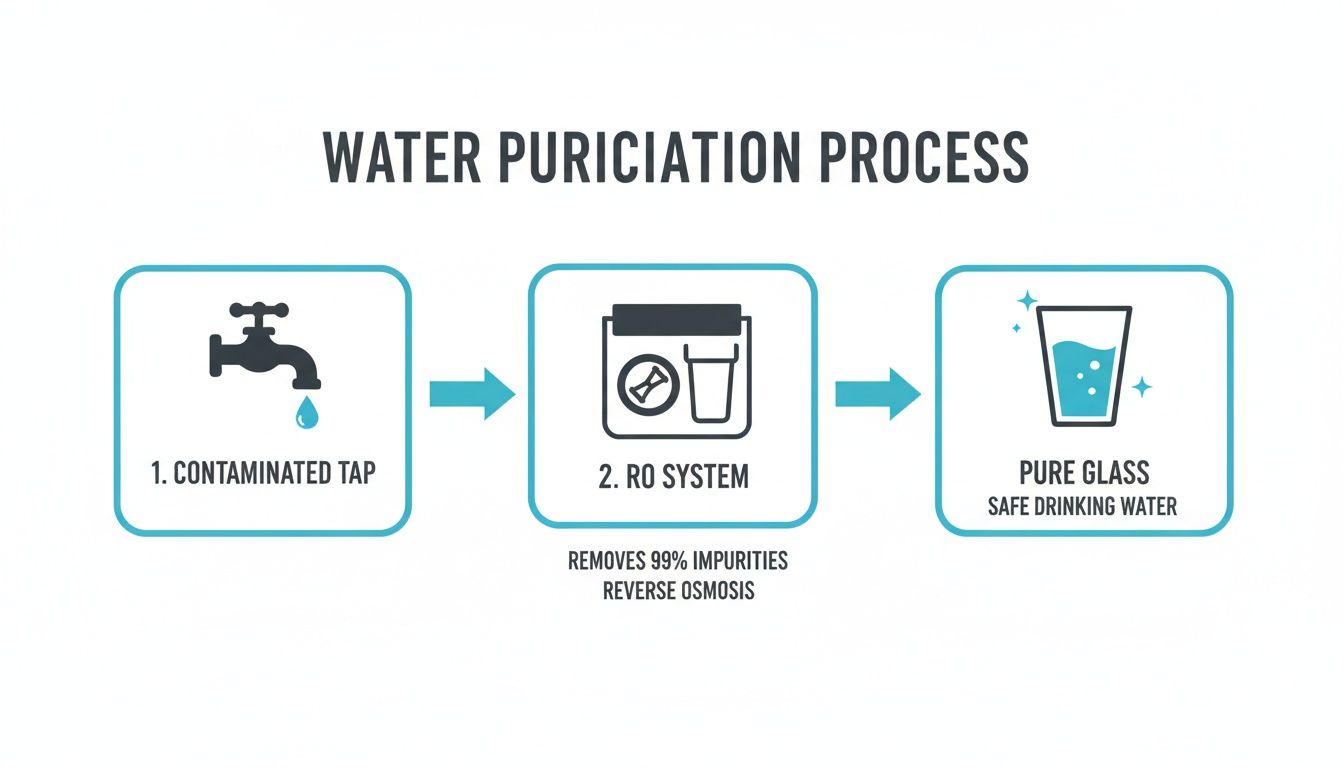
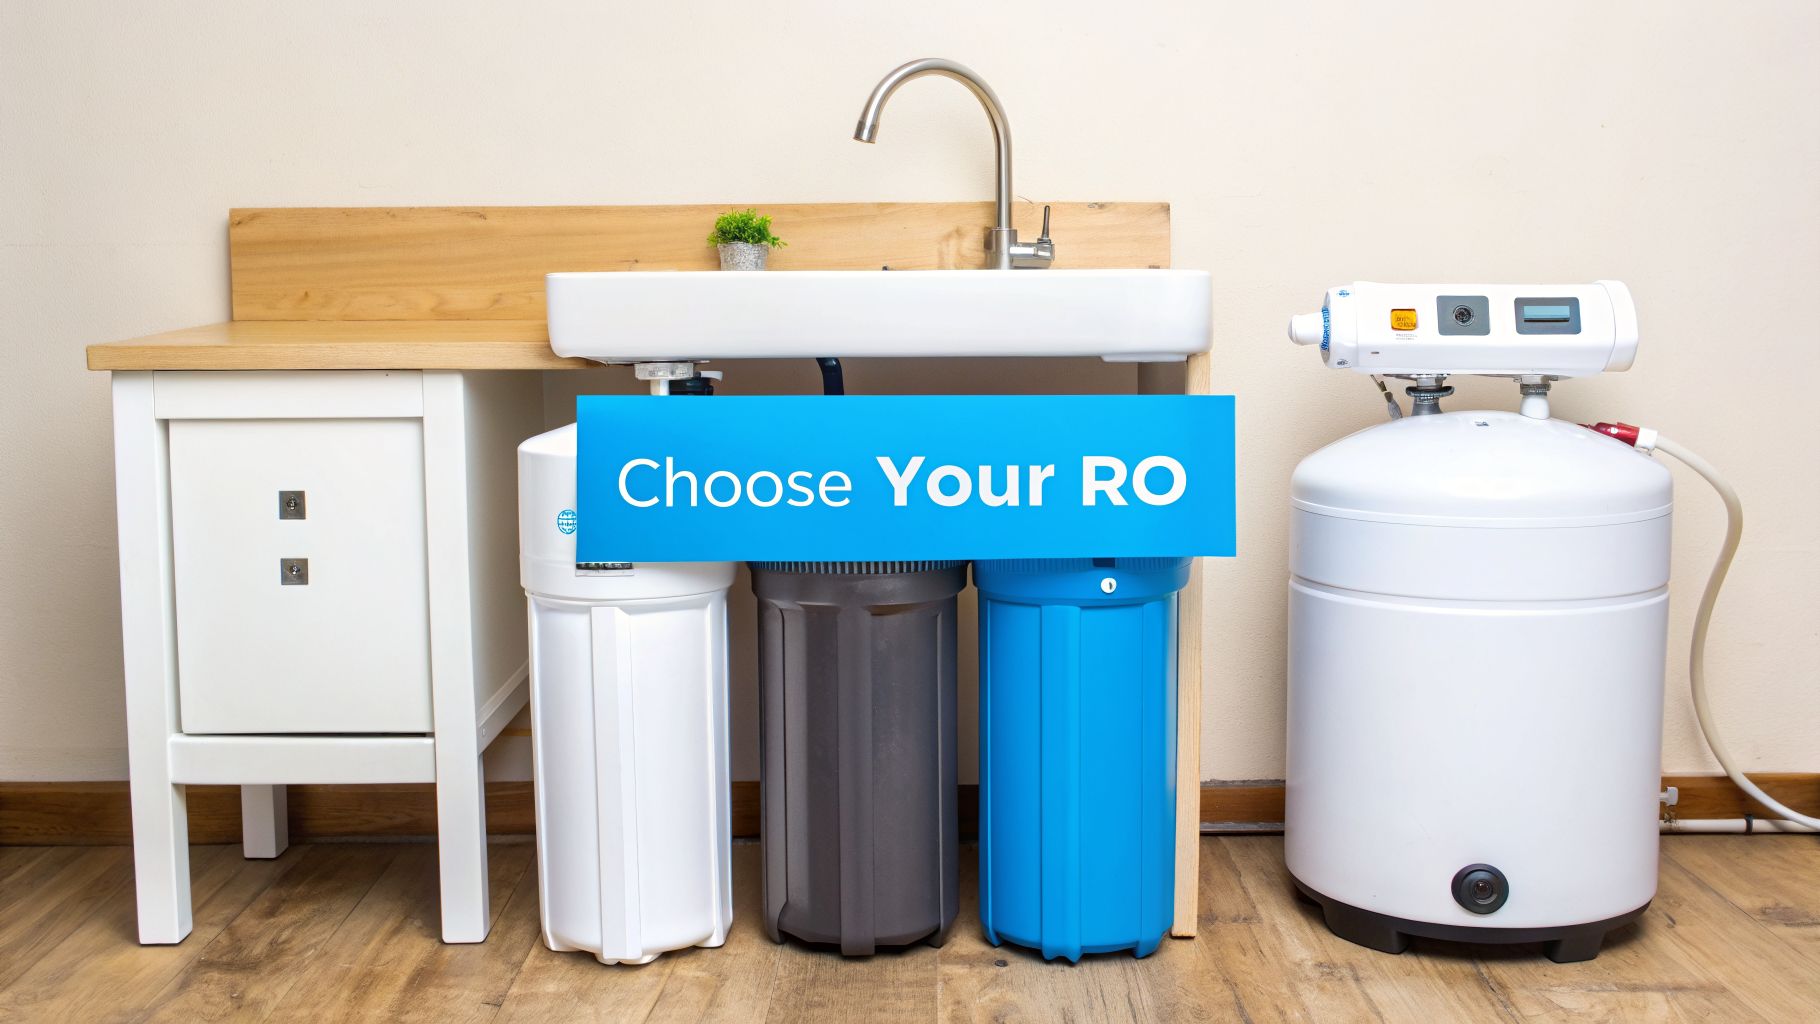
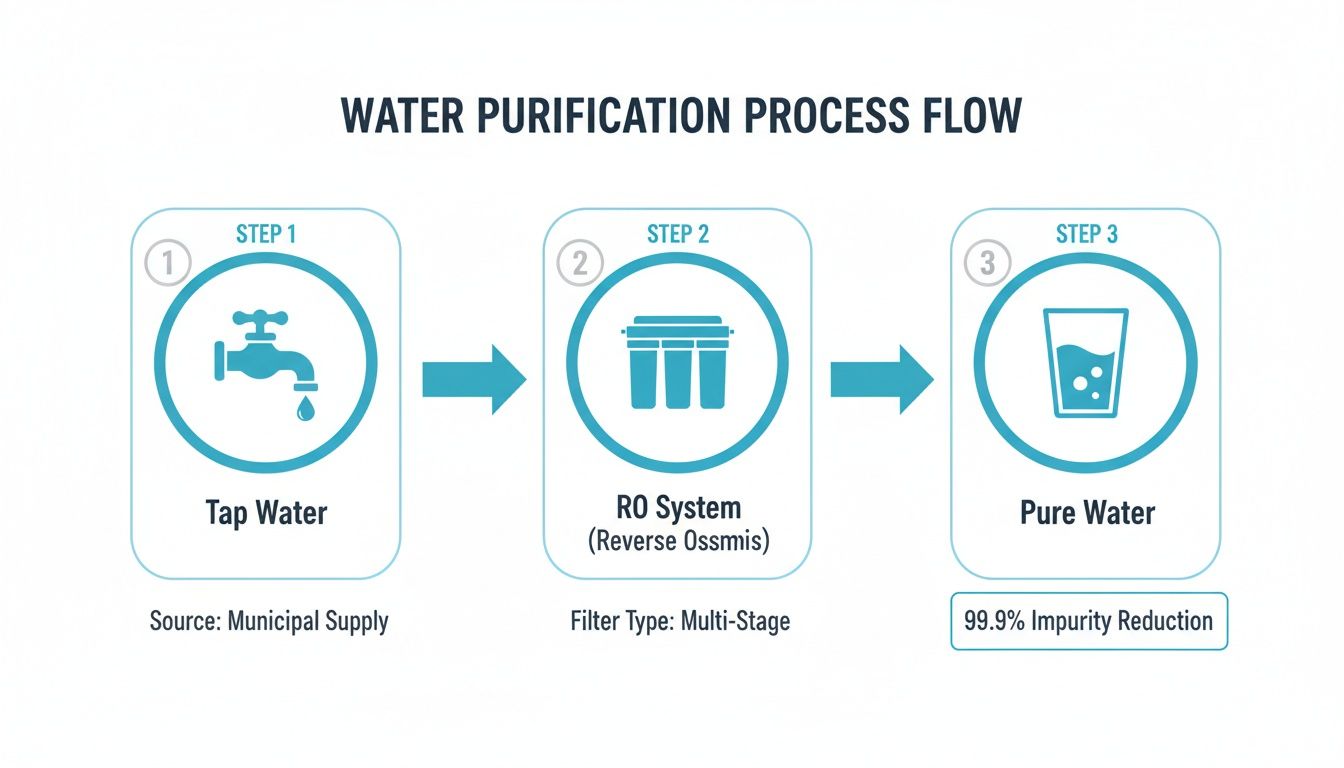
  • Very High TDS & Purity Concerns (500+ PPM): To remove the absolute widest range of contaminants, you need a reverse osmosis (RO) system. An RO system can slash TDS by over 90%, getting rid of salts, minerals, and other unwanted solids. It's the top choice for anyone who wants the purest drinking water possible.

Growing concerns about water quality have made these tools more popular than ever. In India, for example, where groundwater TDS can top 1,000 PPM, sales have jumped 40% since 2020. This global trend means more affordable, high-quality meters are available to everyone. You can learn more about the global trends in the digital TDS meter market on Dataintelo.com.

Choosing the Best Digital TDS Meter for Your Needs

Shopping for a digital TDS meter can feel overwhelming, but don't worry. You don't need a complicated, lab-grade instrument to get a good handle on your home's water quality. The real goal is to find a reliable tool that gives you the data you need to make smart choices about water filtration.

Let's walk through what really matters so you can find the right meter and avoid paying for bells and whistles you'll never use.

The Non-Negotiable Feature: Automatic Temperature Compensation

If a TDS meter is missing this one thing, just put it back on the shelf. Automatic Temperature Compensation (ATC) is absolutely critical for getting an accurate reading. Here’s why: the electrical conductivity of water—which is what the meter actually measures—changes dramatically with its temperature.

This means testing cold water versus room-temperature water can give you two completely different PPM numbers, even if the amount of dissolved solids hasn't changed at all. Without ATC, your readings are just a wild guess. With it, the meter automatically adjusts for temperature, giving you a consistent, trustworthy measurement every time.

Accuracy and Convenience Features

For everyday home use, you don't need scientific precision, but you do need consistency. Look for a meter with a stated accuracy of +/- 2%. That’s more than enough to track how well your water filters are working or to monitor your tap water over time.

Beyond that, a few simple features can make a big difference in how easy the meter is to use:

  • Hold Button: This lets you freeze the reading on the screen after you’ve pulled the meter out of the water. It’s a huge help, as trying to read a tiny screen while it’s still submerged is a real pain.
  • Backlit Display: A screen that lights up is a lifesaver if you're testing in a poorly lit spot, like under the kitchen sink. No more squinting or using a flashlight.
  • Auto-Off Function: To keep you from draining the battery, find a meter that shuts itself off after a few minutes of not being used. It’s a small thing, but it ensures your meter is ready to go when you need it.

Technological innovations in digital TDS meters have revolutionized home water testing. Today, over 70% of new models include Bluetooth and automatic temperature compensation, allowing users to track TDS trends via smartphones, which is essential as temperature fluctuations can skew readings by 20-30%. For Water Filter Advisor readers, this means easily verifying that a whole-house system is reducing TDS from an incoming 400 PPM to under 100 PPM post-filtration, preventing scale that can hike energy bills by 15-20% in water heaters. You can find more on this in a report about the TDS measuring instrument market on VerifiedMarketReports.com.

What to Expect at Different Price Points

A higher price doesn't always mean a better tool for what you need. It’s all about finding that sweet spot between cost and performance. Here’s a simple breakdown of what your money gets you.

Which Digital TDS Meter Is Right for You?

This table compares the common tiers of TDS meters to help you decide which one makes the most sense for your home.

Feature Basic Model (~$15) Mid-Range Model (~$30) Advanced Model (~$50+)
ATC Often included, but verify Standard Standard
Accuracy +/- 3-5% +/- 2% (Ideal) +/- 1-2%
Display Basic LCD LCD with Backlight Large, easy-to-read screen
Extra Features Basic hold button Hold button, auto-off Bluetooth, multi-parameter
Build Quality Standard plastic More durable, splash-proof Waterproof, rugged design
Best For Quick spot-checks Reliable home testing Tech-savvy users, specific needs

For most homeowners, a mid-range model is the perfect choice. It gives you the best mix of accuracy and must-have features without the extra cost of things like Bluetooth connectivity, which most people don't need for basic filter checks.

How to Use Your TDS Meter for Accurate Results

A person tests water quality with a white digital TDS meter in a glass, with another glass and towel nearby.

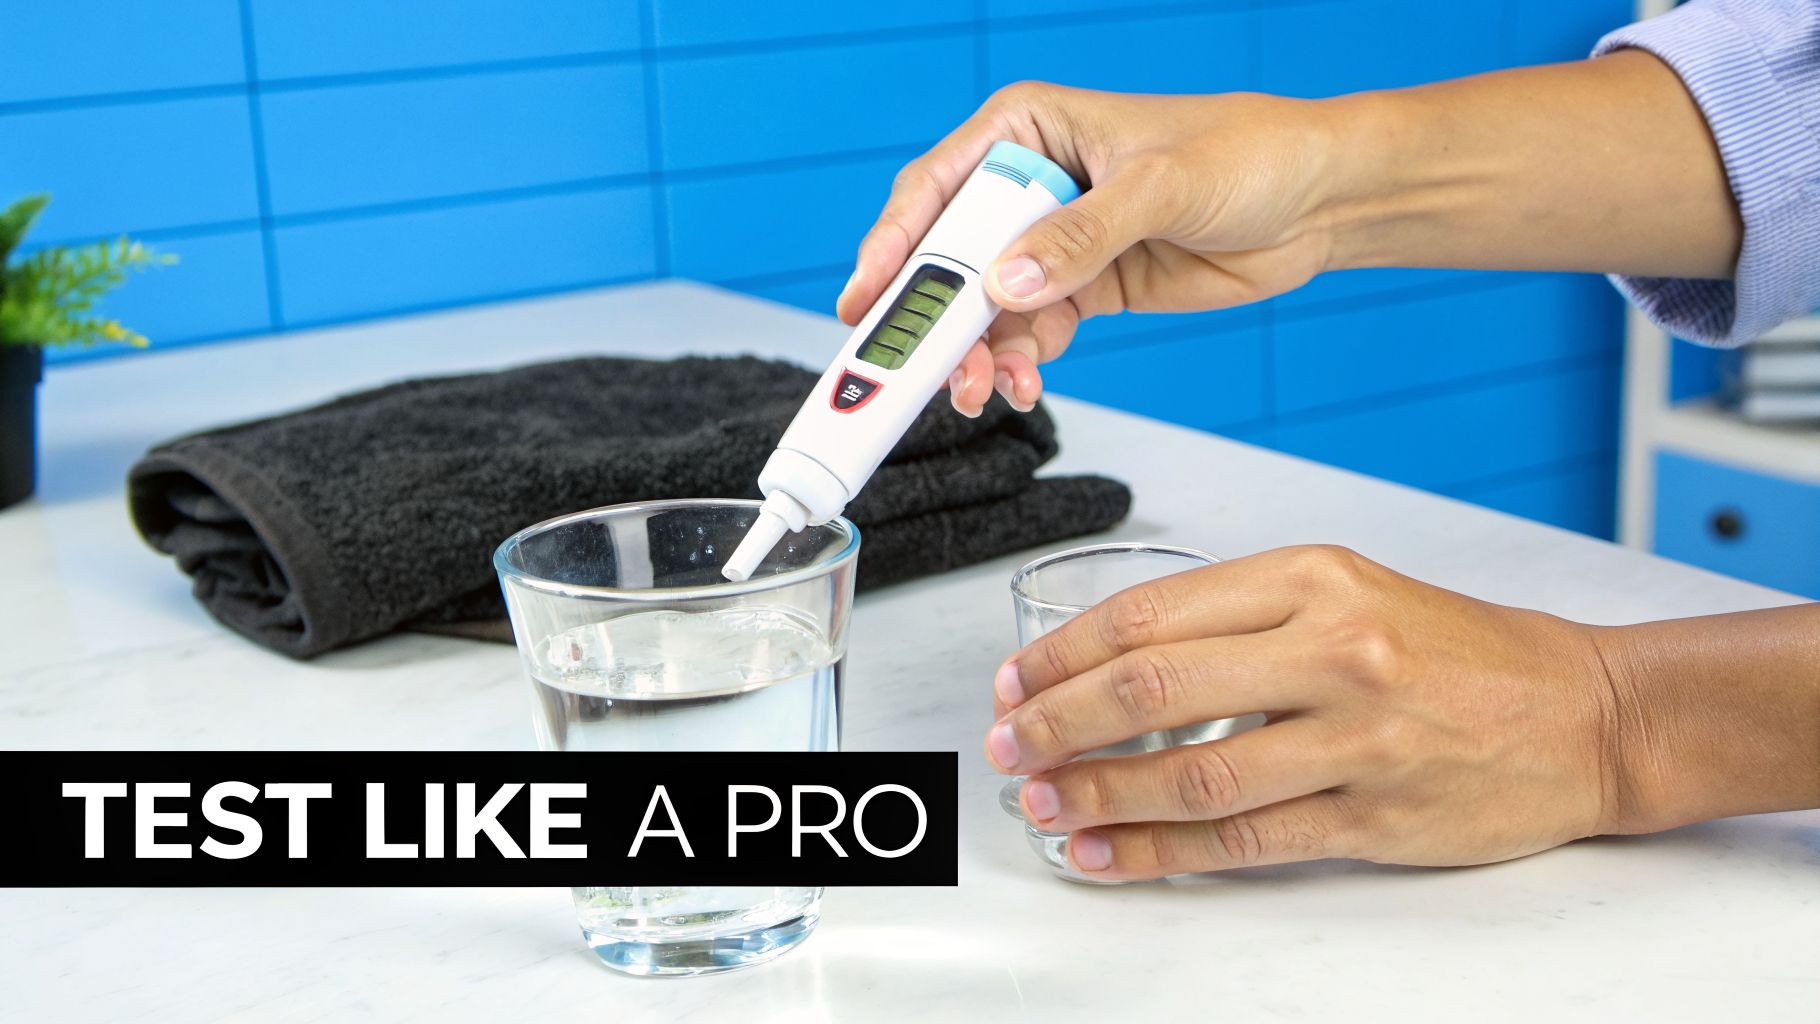
Getting good numbers from your digital TDS meter is all about technique. A sloppy test gives you a useless reading, but if you take a minute to do it right, you can trust the results every single time.

Think of it like taking your temperature. You can’t just wave the thermometer in the air and expect an accurate reading. The same goes for your water. Let's walk through the right way to get a reading you can count on.

The Simple Guide to a Perfect Water Test

A consistent routine is your best friend for accurate measurements. This whole process takes less than a minute, but it makes all the difference.

  1. Rinse Your Gear: First things first, rinse out your testing glass and the meter's probe with the water you're about to test. If you just tested your hard tap water, leftover minerals can easily mess up the reading for your filtered water. A quick rinse prevents that.

  2. Get a Fresh Sample: Use a clean, dry glass and fill it with about an inch of water. You don't need much—just enough to completely cover the meter's electrodes on the tip.

  3. Let It Sit: Give the water about 30 seconds to settle. This lets any tiny air bubbles escape. Bubbles clinging to the probes can interfere with the electrical reading and give you a wonky number.

  4. Test and Swirl: Power on your meter, pop off the cap, and stick the probe in the water. Give it a gentle swirl for a second or two to knock off any stubborn bubbles.

  5. Wait for the Reading to Settle: Keep the meter in the water and just watch the display. If your meter has Automatic Temperature Compensation (ATC), the number might jump around for a few seconds while it adjusts. Just wait for it to stabilize.

  6. Lock It In: Once the number is steady, hit the "Hold" button. This freezes the reading on the screen, so you can pull the meter out and easily read the result.

Following these steps ensures every test is as accurate as the last. It’s the only way to reliably track the performance of your water filters. For more general help with water treatment options, you can check out our other articles for https://www.waterfilteradvisor.com/advice/.

Essential Care for Long-Term Accuracy

A TDS meter is a measuring tool, and like any tool, a little care goes a long way. If you want it to stay accurate for years, you have to keep it clean and store it properly.

A well-maintained meter is a reliable one. Rinsing and drying the probe after each use prevents mineral buildup that can coat the electrodes and cause inaccurate readings over time.

Think of that mineral scale like a little insulating jacket on the probes. It blocks the electrical current, which can make your meter give you a TDS reading that’s way lower than the real number.

Simple Maintenance Tips:

  • Rinse and Dry: After every test, rinse the probe with distilled or reverse osmosis (RO) water. If you don't have any, your filtered water will do. Shake off the extra water and wipe the meter’s body dry with a cloth.
  • Always Use the Cap: That protective cap is there for a reason. It keeps the electrodes from getting scratched, dirty, or damaged. Get in the habit of putting it back on right away.
  • Give It a Deep Clean: If you see gunk building up on the probes, you can clean them. Just dip the probe end into a bit of isopropyl (rubbing) alcohol and swirl it around. Rinse it well with pure water and let it air dry completely.

These small habits will make sure your meter stays a trustworthy tool. And if you’re managing water chemistry elsewhere, like a hot tub, pairing these tests with a good hot tub water testing log sheet can help you keep everything perfectly balanced.

Common Questions About TDS Meters and Home Water Filters

Once you have a TDS meter in hand, you'll probably have a few questions as you start testing the water around your house. Let's run through the most common ones so you can get clear, simple answers and start making sense of your readings.

Think of this as your go-to guide for real-world water testing.

Can I Use a TDS Meter to Know When to Change My Filter Cartridge?

Yes, and this is one of the most practical uses for your meter. It takes the guesswork out of filter changes, letting the data tell you when it's time.

Here's the simple process:

  1. First, test your unfiltered tap water. Write that number down—it's your baseline.
  2. Next, install the new filter and test the water coming out of it. This much lower number is your "clean" reading.
  3. Every few weeks, test the filtered water again.

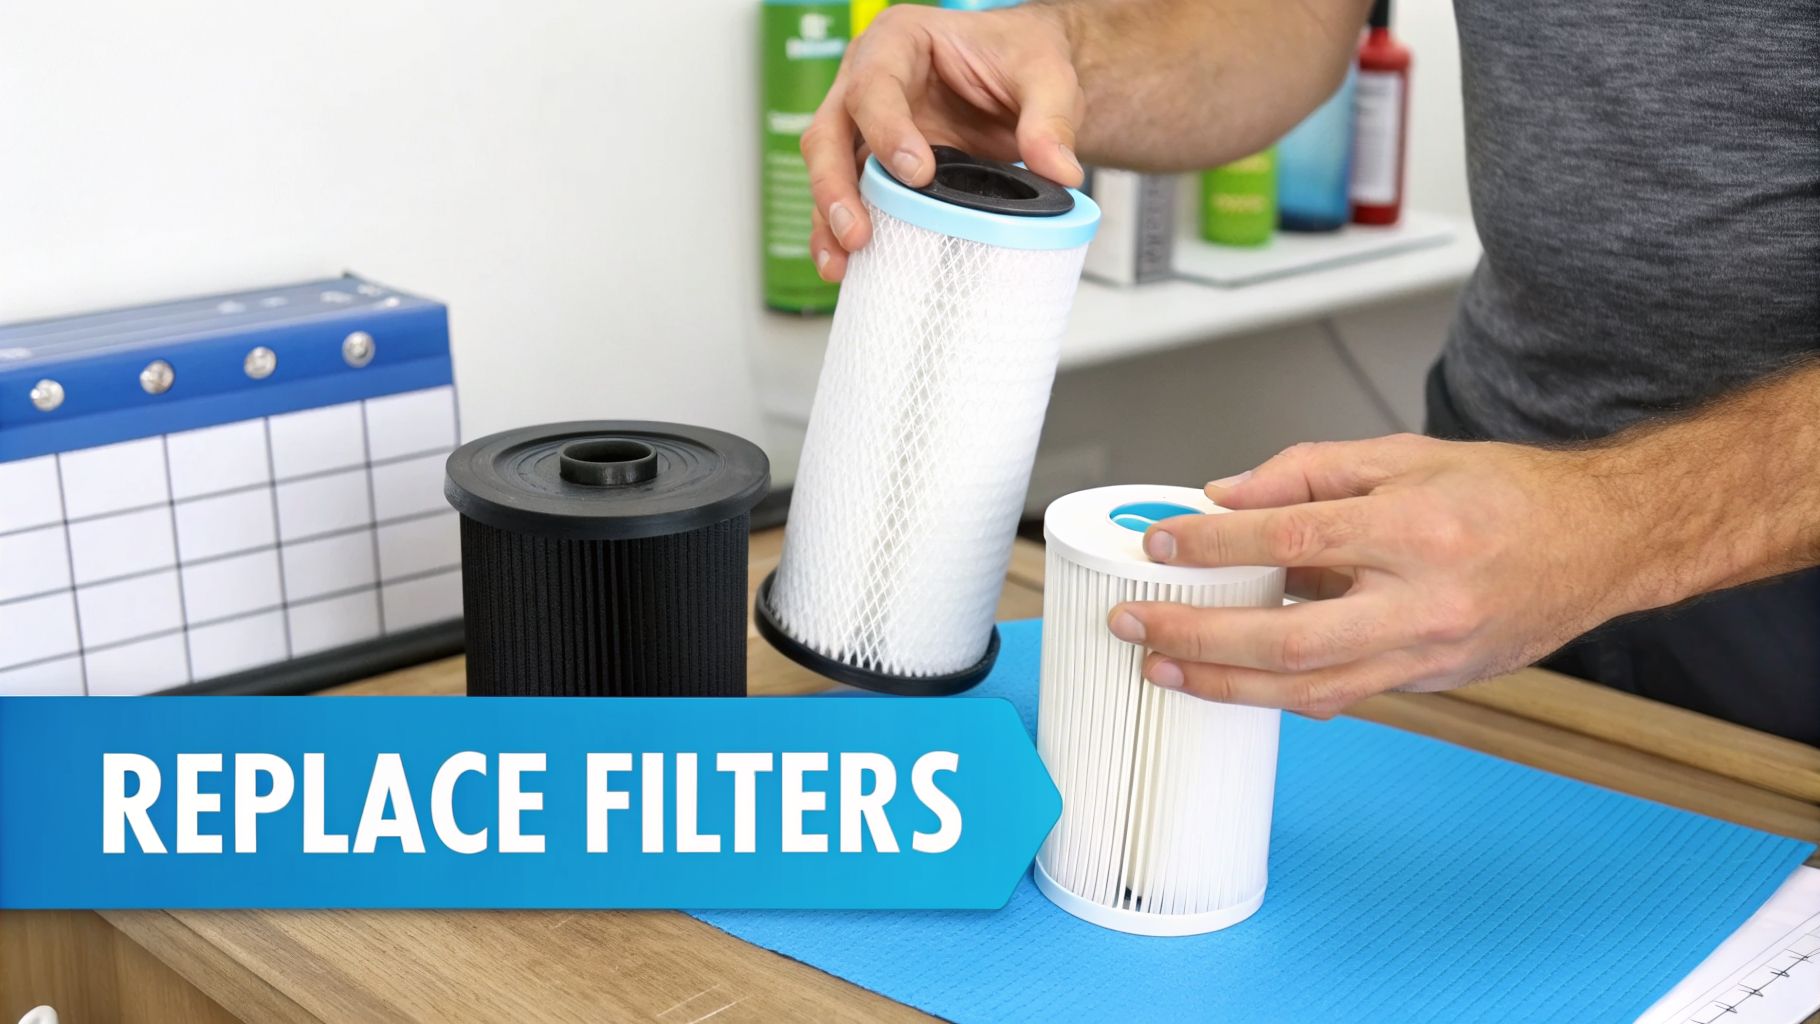
As the filter does its job, it fills up with contaminants. Over time, you'll notice the TDS reading from your filtered water will start to slowly climb back up. We call this "TDS creep."

When the filtered water's TDS reading starts climbing closer to your original tap water number, it's a clear, reliable sign that the filter media is saturated and no longer working effectively. This TDS creep is your cue to order and install a replacement cartridge.

My TDS Meter Shows 0 PPM After My RO Filter, Is My Water Pure?

Seeing a reading of 0 PPM (or something very low like 1-10 PPM) after your reverse osmosis (RO) system is a great sign! It means the RO membrane is working perfectly, removing an enormous amount of dissolved solids like salts and minerals.

But is the water "perfectly pure"? Not necessarily. Remember, a TDS meter only detects dissolved solids that have an electrical charge. It cannot see uncharged contaminants.

Things a TDS meter misses include:

  • Certain pesticides and industrial chemicals (VOCs)
  • Disinfectants like chlorine and chloramine
  • Bacteria, viruses, and other microorganisms

So while a 0 PPM reading doesn't guarantee your water is 100% free of every possible contaminant, it's the gold standard for RO performance. It's a strong confirmation that your system is doing its job exceptionally well.

Why Is My TDS Reading Different from My Neighbor’s?

This is a great question. Even if you and your neighbor get water from the same municipal supply, a few things can cause your readings to be different.

The biggest factor is your home's plumbing. Older homes with copper pipes (and lead-based solder) or galvanized steel pipes can add small amounts of metals into the water as it flows to your tap. Newer plumbing, like PEX, won't affect the TDS count.

Another common reason is a water softener. A softener works by swapping "hard" minerals like calcium and magnesium for sodium or potassium ions. Your digital TDS meter reads these new ions, too. It's very common for softened water to have a higher TDS reading than the hard water that went into it.

Is a High TDS Level Dangerous to My Health?

Usually, no. The EPA classifies TDS as a Secondary Drinking Water Contaminant. This means it mostly affects aesthetics—like taste, smell, or color—not your health. In fact, many expensive bottled mineral waters are prized for their very high TDS levels, which come from beneficial minerals.

However, a very high TDS reading (especially over 500 PPM in city water) is a red flag. It’s not a sign of danger, but a signal to look closer. A spike in TDS could point to:

  • Extreme Water Hardness: This can cause major scale buildup that damages dishwashers, water heaters, and pipes.
  • Bad Taste: High levels of chlorides or sulfates can make water taste salty, bitter, or metallic.
  • Possible Contamination: For well owners, a sudden jump in TDS might mean contamination from septic systems or agricultural runoff.

A high TDS reading is like a check-engine light. It doesn't mean the car is broken, but it definitely means it's time to find out what's going on with your water and find the right filter for the job.

If you have more questions about water quality, testing, or wish to delve deeper into related topics, you might find valuable resources on their water technology blog.


Ready to take control of your home’s water quality? At Water Filter Advisor, we provide the expert guides and unbiased reviews you need to find the perfect filtration solution. From simple pitcher filters to whole-house systems, we help you make confident decisions for healthier, better-tasting water. Explore our resources at https://www.waterfilteradvisor.com today.

PUR Water Filter Faucet Reviews: The Ultimate Guide to Cleaner Home Drinking Water

Ever found yourself typing pur water filter faucet reviews into your search bar, hoping for a straight answer? You're not alone, and you've probably noticed a trend: PUR is a heavyweight champ for anyone craving a simple, reliable filter. Homeowners and renters alike flock to these filters for one big reason: they deliver. They transform questionable tap water into something crisp and clean, pulling out unwelcome guests like lead and chlorine, giving you instant confidence in every sip.

Why a PUR Faucet Filter Belongs in Your Home

When you're on a mission to purify your tap water, PUR is a name that inevitably bubbles to the surface. What’s the big secret? It’s a perfect storm of easy installation, certified filtration technology, and a design built for real people, not professional plumbers. For anyone harboring even a tiny doubt about their water quality, PUR offers a direct path to safer, better-tasting water without the drama of renovating the plumbing under your sink.

A PUR water filter on a kitchen tap fills a glass with clean water in a sink, with a family in the background.

The brand solidified its reputation by solving a very real problem for modern households. Their faucet filters are designed to be installed by anyone, offering an immediate and effective upgrade right where you need it most. This commitment to no-fuss, no-muss filtration is a huge reason they’ve become a fixture in so many kitchens.

The Power of Proven Performance

The real muscle behind PUR's reputation is its certified filtration. These filters aren't just making empty promises—they are rigorously tested and certified by NSF International, an independent organization dedicated to public health. That third-party certification gives you a level of trust that slick marketing campaigns just can't buy.

The magic of a PUR filter is the improvement you notice on day one. It’s that "aha!" moment when you no longer smell chlorine in your glass and feel genuinely good about giving that water to your family.

This performance is backed by serious market presence. As a key player in Clorox's portfolio, the PUR water filter faucet commands a 13% share of the competitive North American market. Digging into the stats, PUR filters are certified against NSF/ANSI standards 42 and 53. They are proven to reduce 96% of chlorine (that funky "pool" taste and smell) and 99% of lead. You can explore more data on the faucet purifier market to see how PUR compares.

Unpacking the User Experience

Certifications are crucial, but the day-to-day experience is what truly converts people into fans. Talk to any PUR owner, and they’ll almost always praise the ridiculously simple, tool-free installation. It's a recurring theme in reviews—in 2024, over 80% of Amazon users gave models like the FM-3333B four stars or more, specifically shouting out the easy setup.

This hassle-free approach extends to daily life. Here’s what makes PUR a practical choice for filtering your home's water:

  • Immediate Gratification: The first thing you'll notice is the taste. It elevates tap water you might otherwise avoid into something crisp, clean, and genuinely refreshing.
  • On-Demand Purity: Forget the chore of refilling a pitcher. A faucet filter gives you pristine water on demand for drinking, filling the coffee pot, or rinsing produce.
  • A Win for Your Wallet: When you pit it against the relentless cost of bottled water, a PUR filter emerges as a much cheaper and more eco-friendly way to get clean water daily.
  • Effortless Maintenance: Changing the filter is a simple twist-and-click operation. A handy indicator light even tells you when it’s time, eliminating all guesswork.

Ultimately, choosing PUR means you’re investing in a trusted, no-nonsense filter that delivers on its core promises. It’s an accessible entry point into home water filtration that brings both better water and invaluable peace of mind.

Understanding Key PUR Filtration Features

Before we get into the nitty-gritty of model reviews, let's demystify the technical jargon. You need to know what you’re looking at on the box to make an informed choice.

Think of this as your quick-start guide to PUR's language. Once you grasp these core features, you can slice through the marketing fluff and choose a filter that truly serves your home's needs.

You'll see a lot of NSF/ANSI certifications on the packaging. These aren't just for show. They're independent, verifiable proof of what the filter can do—telling you exactly which contaminants it's certified to kick out of your water.

Decoding NSF and ANSI Certifications

These certifications are the single most important factor for any water filter's credibility. They are managed by NSF International, a public health organization that tests and verifies product performance. Here’s what they mean for your tap water.

  • NSF/ANSI 42: This one is all about aesthetics—taste and odor. It certifies the filter's ability to reduce things like chlorine, which is the primary culprit behind that "public pool" smell in municipal water.

  • NSF/ANSI 53: This is the heavyweight certification for health. A filter bearing this mark is proven to reduce specific health-related contaminants. Think heavy metals like lead and mercury or nasty parasites such as giardia and cryptosporidium.

  • NSF/ANSI 401: This standard addresses emerging contaminants. It verifies that the filter can reduce trace amounts of things you definitely don't want to be drinking—like pharmaceuticals, herbicides, and pesticides that have found their way into the water supply.

If a filter boasts all three, you're getting comprehensive, multi-layered protection for your home's water.

Filter Lifespan and Flow Rate Explained

Beyond what a filter removes, two factors will impact your day-to-day use: how long each cartridge lasts and how quickly the filtered water flows.

Most PUR filter cartridges are rated for 100 gallons of water. For an average family, that translates to roughly two to three months of use. Of course, your mileage may vary depending on your household's water consumption and the amount of sediment in your local supply.

Don't ignore the filter change light. It’s not just a simple timer. It’s usually tied to an internal meter that tracks water usage. When that light flashes red, the filter has done its duty and can no longer effectively remove contaminants. It's time for a change.

Finally, there's the water flow rate, measured in gallons per minute (GPM). Most PUR faucet filters operate at about 0.5 GPM.

Yes, that’s slower than your unfiltered tap. It has to be. A slower flow gives the water more contact time with the filter media inside, which is absolutely essential for trapping all those unwanted contaminants. It might take a few extra seconds to fill your glass, but that's the trade-off for significantly cleaner, safer water.

A Detailed Comparison of Top PUR Faucet Filters

Alright, let's get down to brass tacks. We're putting PUR's leading faucet filters head-to-head to see which one truly deserves a spot on your kitchen sink. We'll cut through the marketing and zero in on what really matters for your home's water quality.

This is all about real-world performance. We’ll cover everything from contaminant reduction and flow rate to build quality and long-term durability. By the end, you'll know exactly which model is the right fit for you.

To start, this graphic illustrates the core functions of a PUR faucet filter—what it removes, how long it lasts, and the water flow you can expect.

Infographic displaying PUR water filter features: contaminants reduced up to 99.9%, 2-month filter lifespan, and 0.5 GPM water flow rate.

As you can see, there's a necessary trade-off. To remove up to 99.9% of certain contaminants, the filter requires a specific flow rate and has a defined lifespan.

The Workhorse: PUR PLUS Faucet Filtration System

The PUR PLUS is what most people visualize when they think of a PUR filter. It's the classic for a reason—it’s a reliable, no-frills performer that simply gets the job done. You'll often see it listed under model numbers like FM-3700 or PFM400H.

It screws directly onto your standard faucet and features a simple switch to toggle between filtered and unfiltered water. The design is compact and typically available in chrome, white, or black finishes to blend in with most kitchen decor.

This model is certified to NSF/ANSI standards 42, 53, and 401. For you, that means proven reduction of over 70 contaminants, including an impressive 99% reduction in lead, 96% in mercury, and 92% in certain pesticides. If you're on city water, it's particularly effective at removing chlorine, which makes a world of difference in taste and smell.

The PUR PLUS strikes an excellent balance. You get robust, certified filtration against the most common waterborne threats without a hefty price tag or a complicated installation. It’s the ideal starting point for most households.

The Upgrade: PUR Advanced Faucet Filtration System

The next step up is the PUR Advanced, featuring models like the PFM800HX. At first glance, it looks a lot like the PLUS. It shares the same core certifications and removes the same list of 70+ contaminants. So, what's the difference?

The primary distinction is in build quality and user experience. The Advanced models often feature a more durable, metallic housing instead of the predominantly plastic body of the standard PLUS. This lends it a more premium feel and helps it withstand the bumps and knocks of a busy sink.

Another small but welcome upgrade is the filter life indicator. While both systems have an electronic light, the Advanced models sometimes utilize a more detailed gauge, giving you a clearer visual representation of your filter's remaining lifespan.

Now, let's put these models side-by-side to see how their specs stack up.

PUR Faucet Filter Model Comparison (2026)

This table breaks down the key differences between PUR's most popular faucet-mounted filters.

Model Key Contaminants Removed Filter Lifespan (Gallons) Flow Rate (GPM) Filter Change Indicator Best For
PUR PLUS Lead, Mercury, Chlorine, Pesticides (70+ total) 100 0.5 3-Stage LED Light First-time users and those prioritizing value
PUR Advanced Lead, Mercury, Chlorine, Pesticides (70+ total) 100 0.5 3-Stage LED Light or Gauge Users wanting a more durable build and premium finish

As you can see, the core filtration performance is identical. The choice really boils down to the unit's construction and your personal aesthetic preference.

Performance Under Pressure: Contaminant Reduction

When choosing a filter, what it removes is paramount. Both the PUR PLUS and Advanced systems are certified to the same high standards, but it's helpful to know what that means for your specific water situation.

  • For Older Homes: If your house was built before 1986, lead pipes are a genuine concern. Both PUR systems are certified to remove 99% of lead, providing an essential safeguard for your family.
  • For City Water: Municipal water is typically treated with chlorine, which can impart that "pool water" taste and smell. The 96% chlorine reduction from these filters completely transforms the quality of your tap water.
  • For Agricultural Areas: Runoff from nearby farms can introduce pesticides and herbicides into the water supply. The NSF/ANSI 401 certification confirms these filters are effective at reducing those emerging contaminants.

While the performance is the same on paper, remember that very hard water or water with high sediment levels might clog your filters a bit faster, regardless of which model you choose.

Flow Rate and Filter Lifespan

Every PUR faucet filter is rated for 100 gallons, which works out to about 2-3 months of use for a typical household. The filtered water flow rate is approximately 0.5 gallons per minute (GPM).

This slower flow is intentional. It's necessary to give the water sufficient contact time with the filter media to effectively capture those contaminants. You may notice the flow rate diminishes slightly as the filter nears the end of its life—that’s a normal sign that it's full of particles and has done its job well.

Making the Right Choice for Your Home

So, which one should you buy? The decision truly comes down to budget, durability, and aesthetics.

Choose the PUR PLUS if:

  • You're new to faucet filters and want an affordable, effective entry point.
  • Performance is your main priority, and you don't mind a standard plastic housing.
  • You want the best bang for your buck on certified filtration.

Choose the PUR Advanced if:

  • You desire a more durable, premium feel with metal components.
  • The overall look of your kitchen fixtures is important to you.
  • You appreciate small quality-of-life upgrades like a more detailed filter indicator.

Ultimately, both systems use the exact same replacement filter cartridges, so your water quality will be identical. The difference lies in the housing that sits on your faucet. For most people, the PUR PLUS delivers everything they need, making it a top choice for home water filtration.

Real-World Performance and Benefits

Certifications are one thing, but what’s the water actually like to use every day? This is what a PUR water filter faucet review really boils down to—how those laboratory results translate into better-tasting, healthier water from your own tap.

The first thing everyone notices is the dramatic improvement in taste and smell, especially for those on municipal water. That "pool water" aroma from chlorine is a common grievance. While necessary for disinfection, it doesn't make for an appetizing drink.

A PUR filter is certified to slash chlorine by 96%, and the result is immediate. That chemical smell and taste vanish. For many, this simple change is enough to encourage them to drink more water and ditch sugary beverages.

Beyond Taste: The Health and Wellness Perks

Great-tasting water is a fantastic perk, but the health advantages are the true reason to filter. Removing lead from your drinking water is a top priority, but the benefits don't end there.

Consider this: you use tap water for more than just drinking. You wash your produce with it and rinse your face with it. Filtering out chlorine can make a significant difference for people with sensitive skin, often reducing the dryness and irritation that chlorinated water can exacerbate.

The data supports this. A 2023 study revealed that families using PUR filters saw a 62% decrease in skin irritation issues—a massive win for anyone with children or conditions like eczema. You can see the full report for yourself by checking out the complete market research on filtered water systems.

Calculating the Cost-Benefit Value

One of the most compelling arguments for switching to a PUR filter is the money you'll save. If your family relies on bottled water, you're not only spending a fortune but also contributing to a mountain of plastic waste. A faucet filter is a smarter, more sustainable alternative.

Let's do the math:

  • Average Cost of a PUR Faucet System: About $30 – $40 for the unit.
  • Cost of Replacement Filters: Around $15 for a filter that processes 100 gallons.
  • Cost Per Gallon with PUR: This works out to a mere $0.15 per gallon.

Now, compare that to bottled water. A typical 24-pack costs about $5.00 and provides just over 3 gallons of water. That means you’re paying over $1.60 per gallon—more than 10 times what PUR-filtered water costs.

By switching from bottled water to a PUR faucet filter, a family that drinks just one gallon of water a day could save over $500 per year. The initial investment in the filter pays for itself in less than a month.

The numbers are undeniable. You're not just buying a filter; you're making a savvy financial decision that reduces plastic waste and saves you a significant amount of money over time. This impressive return on investment is a recurring theme in positive PUR water filter faucet reviews. For a small upfront cost, you get healthier water and big savings.

Installation, Maintenance, and Lifetime Cost

A water filter isn't a "set it and forget it" appliance. Let's walk through what it really takes to own a PUR faucet filter, from the initial setup to the long-term running costs. This is the practical information you need to ensure you get safe, great-tasting water day in and day out.

Hands using a specialized tool to install a new faucet in a white bathroom sink, with an 'Easy Install' card.

One of the standout features of PUR filters is their incredibly simple installation. You don't need any special tools or plumbing expertise—the entire process takes just a few minutes.

The Tool-Free Installation

Most standard faucets are compatible, and PUR includes everything you need right in the box.

  1. Remove the Aerator: Simply unscrew the small screen at the end of your faucet spout. It should come off by hand.
  2. Find the Right Adapter: Your filter comes with several plastic adapters. Find the one that matches the threads on your faucet and screw it on.
  3. Attach the Filter: Screw the main PUR filter unit onto the adapter until it feels snug. Be careful not to overtighten and strip the plastic threads.
  4. Flush the System: Turn on the cold water and let it run for about five minutes. This activates the new filter cartridge and gets it ready for use. That's it—you're all set for filtered water.

It’s this simple, no-fuss setup that consistently earns PUR positive reviews. Anyone can do it.

What's the Real Lifetime Cost?

The price on the box is just the beginning. The true cost of any filter system lies in the replacement cartridges.

PUR replacement filters typically cost between $12 and $18 each. They are certified for 100 gallons, which works out to about $0.12 to $0.18 per gallon of filtered water. When you compare that to bottled water, which can easily exceed $1.00 per gallon, the savings accumulate quickly.

After the Flint water crisis, public awareness about tap water quality skyrocketed. PUR sales surged by 35% in 2015 as consumers sought reliable filtration. When you consider that a family can save over $400 a year by ditching bottled water, it's easy to understand their enduring popularity. You can learn more about the faucet water purifier market.

A Quick and Easy Maintenance Routine

Keeping your PUR filter in peak condition is straightforward. There are just a few simple habits to maintain.

  • Filter Changes: This is the most crucial step. When the indicator light turns red, it's time for a new cartridge—typically every two to three months.
  • Weekly Wipe-Down: Use a damp cloth to wipe the exterior of the filter housing once a week. This prevents kitchen grime and hard water spots from building up.
  • Leak Check: Each time you change the filter, give the connection a quick glance to ensure there are no drips. A leak usually just means the unit needs to be tightened slightly or the adapter isn't seated perfectly.

Following these simple steps will ensure your filter continues to deliver clean, safe water for years to come. If you want to dive deeper into water system care, check out our general water filter advice.

Answering Your Top PUR Faucet Filter Questions

Let's cut to the chase. Here are the real-world questions we hear constantly from people using—or considering—a PUR faucet filter. These are the practical details that arise once you get the filter home.

Do PUR Faucet Filters Remove Fluoride

This is a very common question: No, PUR's standard faucet filters do not remove fluoride. Their primary mission is to tackle contaminants that affect your water's taste and smell, like chlorine, and harmful substances like lead and mercury.

Removing fluoride is a more complex process that requires different technology, typically reverse osmosis (RO). If fluoride removal is your main objective, you'll need to explore an under-sink RO system or specific pitchers designed for that purpose. Always check a filter's performance data sheet to see exactly what it's certified to handle.

Can I Run Hot Water Through a PUR Faucet Filter

Absolutely not. You should never run hot water through a PUR filter. The filter media inside, primarily activated carbon, is engineered to work only with cold water.

Forcing hot water through it will damage the filter's internal structure and render it useless. Even worse, you could flush the contaminants it has already captured right back into your water stream. That's why every PUR unit includes a bypass switch—use it for unfiltered hot water when you're washing dishes. It's the single most important rule to protect your filter and ensure its longevity.

We see it in reviews all the time: running hot water through the filter is the quickest way to destroy a cartridge. Adhering to the cold-water-only rule is non-negotiable for performance.

Properly using your filter is just one part of keeping your system healthy. It also ties into some essential plumbing maintenance tips that prevent extra stress on your faucet and its connections.

Why Is My Filter Light Flashing Red So Soon

That little indicator light isn't just a simple timer. It's designed to track usage, but how quickly it turns red is heavily influenced by how dirty your local tap water is.

If your water is high in sediment, rust, or minerals, the filter will clog much faster than the typical two-to-three-month lifespan. This blockage slows down the water flow, which can trigger the light to flash red well ahead of schedule.

Here’s a quick diagnostic you can perform:

  • Check the Flow: Is the filtered water trickling out slower than it used to? If so, the filter is clogged and has done its job. It's time to replace it, regardless of how long it's been in use.
  • Do a Taste Test: If the flow seems fine but you can suddenly taste chlorine again, the activated carbon is exhausted. That's another clear signal that you need a new cartridge.

Bottom line: When the light turns red, it’s always best to trust the indicator and replace the cartridge.

Will a PUR Filter Fit My Pull-Out Faucet

No, PUR faucet filters are not designed for pull-out, pull-down, or handheld sprayer faucets. They are built to screw onto standard faucets that have a removable aerator at the tip.

Attempting to attach it to one of these sprayer-style faucets will result in leaks and an improper seal. Before you buy, unscrew the very end of your faucet to confirm it has the standard threads required for the adapter. If you have a pull-out faucet, a countertop or under-sink filter system is a much better option for your home.


Water Filter Advisor helps you navigate these choices with expert guides and unbiased reviews, ensuring you find the perfect filtration solution for your home's unique needs. To explore more options and deepen your knowledge, visit https://www.waterfilteradvisor.com.

The Dark Side of Chlorine: What’s Really Lurking in Your Tap Water?

Think about that glass of water from your kitchen tap. It looks perfectly clean, right? You’ve been drinking it your whole life without a second thought. But what if the very chemical added to keep your water safe is creating a hidden problem? Welcome to the complicated truth about chlorine in our water, and why a good water filter isn't a luxury—it's your home's last line of defense.

For over a century, chlorine has been the superhero of public health, wiping out nasty waterborne diseases like cholera and typhoid. But like any good superhero story, there’s a twist. The real danger isn't the hero itself, but the mess it leaves behind.

The Hidden Dangers Lurking in Your Tap Water

That glass of water from your kitchen tap looks perfectly fine, right? It's clear, doesn't have much of a smell, and you've been drinking it your whole life without a second thought. But what if the very chemical added to keep it safe is creating a hidden problem? This is the complicated reality of chlorine in our drinking water.

For more than a century, chlorine has been the unsung hero of public health. It’s an incredibly powerful disinfectant that practically wiped out devastating waterborne diseases like cholera and typhoid, saving countless lives in the process. Its main job is to kill dangerous microorganisms, and it does that job extremely well.

The Unintended Consequences of Disinfection

But the story doesn't stop there. After chlorine neutralizes the bad guys in the water, it doesn't just vanish. It continues to react with whatever else is in the water—specifically, naturally occurring organic matter like bits of decaying leaves and soil. This reaction creates an entirely new group of compounds known as disinfection byproducts (DBPs).

It's a bit like a security guard who, after stopping a break-in, accidentally sets off a series of small, invisible fires throughout the building. The immediate threat is gone, but a new, smoldering danger has taken its place. The most common and well-researched of these DBPs are Trihalomethanes (TTHMs), which are recognized carcinogens.

The real issue isn't the chlorine itself, but what it turns into after it has done its job. These disinfection byproducts are the true source of the long-term health concerns that experts worry about. A home water filter is your best tool for dealing with them.

A Problem in Every Home

This isn’t some rare, isolated problem affecting a few unlucky households. It's a sobering fact that a huge portion of residential water in the U.S. contains measurable levels of chlorine and its byproducts. That means millions of homes are unknowingly dealing with these compounds every single day.

The tricky part is that you can’t see, smell, or taste most of these harmful DBPs. They are silent passengers in the water you use for everything:

  • Drinking and cooking
  • Bathing and showering
  • Washing your clothes and dishes

Your local water utility does the essential job of making water biologically safe enough to reach your tap, but their responsibility pretty much ends at your property line. It’s now up to you, the homeowner, to take that final, crucial step. Dealing with the chemical risks that are created by the treatment process itself becomes a personal responsibility. This guide will walk you through exactly how to protect your family by filtering out these hidden dangers, turning your tap water from a source of worry into a source of clean, safe hydration.

How Chlorine Byproducts Silently Impact Your Health

While chlorine does a great job killing off immediate biological threats in our water, the real health concerns start after its work is done. The problem isn’t the chlorine itself, but what it leaves behind. The solution? Filtering it out before it ever reaches your glass.

When chlorine mixes with the natural organic stuff in water—think tiny bits of leaves or soil—it creates a new class of chemicals called disinfection byproducts (DBPs). The most well-known and concerning of these are Trihalomethanes (THMs).

This simple chemical reaction has some pretty complex consequences for our water supply.

Flowchart illustrating chlorination of water: chlorine is added to water, forming disinfection byproducts (DBPs).

As you can see, adding a disinfectant to water unintentionally creates new, potentially harmful substances that travel right through the pipes to your tap. The only way to stop them is to catch them with a filter right before you use the water.

The Carcinogenic Cocktail in Your Tap

Unlike the distinct smell of chlorine, THMs are typically tasteless, odorless, and invisible. You can’t rely on your senses to know if they’re in your water, which is what makes them so dangerous. This is why "just trusting your nose" is a bad idea and why a reliable filter is so critical.

The U.S. Environmental Protection Agency (EPA) specifically regulates Total Trihalomethanes (TTHMs) in drinking water for a reason: long-term exposure is directly linked to an increased risk of cancer.

When you drink water containing these compounds, they don’t just pass through. Your organs that process and store waste, like the bladder and rectum, end up with the most concentrated and prolonged exposure.

The primary danger in your tap water isn’t always the germ it’s designed to kill, but the chemical byproduct created in the process. A quality filter acts as a final checkpoint, removing these hidden threats before they enter your body.

This extended contact gives these carcinogenic compounds a greater chance to damage the cells in those organs, which can eventually lead to cancer. The risk builds up day by day, glass by glass, over a lifetime.

Unpacking the Alarming Statistics

This isn't just a theory; it's backed by serious research. A major meta-analysis found a direct line from long-term consumption of chlorinated water to about 4,200 bladder cancer cases and 6,500 rectal cancer cases in the U.S. every single year.

That accounts for a shocking 9% of all bladder cancers and 18% of all rectal cancers annually. You can read the full research on these toxic water findings for a deeper dive into the data.

These numbers show the real, human cost of "chlorine water side effects." It’s a powerful reminder that the final, critical step of water protection—filtration—needs to happen inside your home.

Heightened Dangers for Vulnerable Groups

While everyone is at risk from long-term exposure, some people are far more vulnerable to the effects of DBPs—especially pregnant women.

Studies have documented a disturbing link between high THM levels in drinking water and serious pregnancy complications, including:

  • Increased risk of miscarriage, particularly in the first trimester.
  • Low birth weight.
  • Potential for birth defects, such as neural tube defects.

A developing fetus is incredibly sensitive to toxins, and these chemicals can pass from mother to child with profound consequences. For expecting parents, ensuring water purity isn’t just a good idea; it’s an urgent priority. A quality home water filter becomes a critical tool for protecting the health of the whole family, starting with its most vulnerable members.

The Risks Beyond Your Drinking Glass

When you think of chlorine side effects, you probably picture a glass of water. But what if I told you the biggest dose you get all day isn't from drinking, but from your morning shower? This is where whole-house filtration becomes a game-changer.

That long, hot shower feels great, but it can create a concentrated dose of airborne chemicals right in your bathroom. The heat and steam vaporize chlorine and its byproducts, turning them into a gas you breathe.

A steamy shower stall with beige and brown tiles, a shower head, and folded towels on a shelf.

This process is called volatilization. It turns your shower stall into a mini gas chamber of chlorine and disinfection byproducts (DBPs) like chloroform. When you inhale that steam, these chemicals go directly into your lungs and bloodstream, completely bypassing your digestive system.

Skin Deep and Deeper

Your skin is your body’s largest organ, and it’s surprisingly porous. While it serves as a barrier, it also absorbs chemicals from your shower water.

A hot shower opens your pores, making it even easier for your skin to absorb chlorine. This direct contact is why so many people notice immediate side effects after showering in chlorinated water. A good shower filter or whole-house system is the only way to stop this.

These common problems are often the first sign a filter is needed:

  • Dry, Itchy Skin: Chlorine strips the natural oils (sebum) that moisturize and protect your skin. This is what causes that tight, dry, and flaky feeling after a shower.
  • Brittle, Dull Hair: Just as it does to your skin, chlorine strips the natural oils from your hair. This leaves it dry, brittle, and more likely to break. It can also cause color-treated hair to fade much faster.
  • Eye and Nose Irritation: The same chemicals that bother your skin can lead to red, stinging eyes and an irritated nose, especially in an enclosed, steamy shower.

Think of it this way: a 10-minute hot shower can expose your body to as many, if not more, volatile chemicals as drinking eight glasses of the same water. This is why focusing only on drinking water is a half-measure. To be fully protected, you need a filtration strategy for your shower too.

From the Shower to the Swimming Pool

The respiratory effects of inhaling chlorine aren't just limited to your bathroom. They are even more pronounced in places with high concentrations of chlorinated water, like swimming pools.

When chlorine mixes with organic material from swimmers—sweat, oils, and urine—it creates a class of volatile DBPs called chloramines. These are the compounds responsible for that "pool smell" and for irritating the respiratory tract.

Studies show that swimming in chlorinated pools can trigger respiratory problems, particularly in children and competitive swimmers with frequent exposure. Constant inhalation of these airborne DBPs is linked to lung inflammation and a higher risk of developing asthma. Even a backyard or community pool could be contributing to chronic respiratory issues. You can discover more about the health findings from chlorinated pools and their impact on lung health.

This highlights a critical point: protecting yourself from chlorine side effects requires more than just filtering your drinking water. To be fully protected, you need to address the water in your entire home—especially your shower, where the risks from absorption and inhalation are highest.

How to Identify the Threats in Your Own Water

To protect your home from the side effects of chlorine, you have to stop guessing what's in your water. The first step is to get the facts. This knowledge is what empowers you to pick the right filtration solution, and you don’t need a science degree to do it.

Your investigation starts with a document called your local water utility’s Consumer Confidence Report (CCR). Every community water system is required to give this annual water quality report to its customers.

Think of the CCR as a report card for your tap water. It lists what contaminants they found, at what levels, and if those levels break any federal rules. You can usually find it on your water utility’s website or by searching online for “[Your City Name] water quality report”.

Decoding Your Water Report

Once you pull up your CCR, you’ll see a lot of data. You want to zero in on the important stuff. Look for a section called "Disinfection Byproducts" or for specific chemicals like "Total Trihalomethanes (TTHMs)" or "Haloacetic Acids (HAA5)."

The report will show a number next to these contaminants, usually in parts per billion (ppb). The U.S. Environmental Protection Agency (EPA) sets the maximum contaminant level (MCL) for TTHMs at 80 ppb.

It's critical to know that the EPA's legal limit isn't a "safe" limit. It's a regulatory balancing act between public health and the cost of water treatment. Many health experts agree there is no truly safe level of exposure to carcinogens. This means even legally compliant water should be filtered to remove these compounds.

If you see TTHM levels in your report getting close to that 80 ppb limit, that’s your signal. It's clear proof that your water has significant levels of these chemicals, turning a national issue into a personal one and giving you a solid reason to look into home filtration.

Going Beyond the Report with Home Testing

A CCR provides a great overview, but it’s based on averages or samples from different points in the system. It doesn’t tell you exactly what’s coming out of your specific faucet. For that, you need to test it yourself.

You’ve got a few options, each with different costs and levels of detail:

  • DIY Chlorine Test Strips: These are cheap and simple. You just dip a strip into your water, and it changes color to give you a basic reading of the "free chlorine" level. It’s a quick way to confirm the disinfectant is there, signaling the need for a filter.
  • Comprehensive Mail-In Lab Kits: For a full analysis, use a professional water testing service. You take a sample from your tap, mail it to a certified lab, and get back a detailed report on dozens of contaminants, including the exact levels of TTHMs, chlorine, and more. This data is the ultimate guide to choosing the perfect filter.

Once you have this data—either from your CCR or a home test—you're no longer in the dark. You now have the evidence you need to take the most important step: choosing the right water filter to protect your family from these hidden threats.

Your Guide to Choosing the Right Water Filter

Two water filters on a kitchen counter near a sink, with 'Filter Options' text.

Alright, you know what's in your water. Now it's time to build your defense. Picking the right water filter can feel like a chore, but it really doesn't have to be. Let’s cut through the noise and break down the most practical home filtration options into a simple "Good, Better, Best" approach.

This guide will help you find the perfect shield for your family against chlorine and its tricky disinfection byproducts (DBPs), like Trihalomethanes (THMs). By matching the right technology to your needs, you can turn your tap from a source of concern into a source of clean, safe hydration.

Good: Starting With Simple Solutions

If you're new to water filtration, renting your home, or just working with a tight budget, point-of-use filters are a fantastic place to start. They’re designed to be affordable, incredibly easy to set up, and do a solid job of removing the main culprits behind bad-tasting water.

The two most popular "Good" options are:

  • Water Pitcher Filters: The definition of simplicity. Just fill the pitcher from the tap, and let the water trickle through a filter cartridge. They’re perfect for improving the taste of your drinking water and a great fit for small households or even a dorm room.
  • Faucet-Mounted Filters: These little gadgets attach right onto your kitchen faucet. A quick flip of a switch lets you toggle between filtered water for drinking and cooking, and regular tap water for things like washing dishes.

Both of these options rely on activated carbon. Think of activated carbon as a super-porous sponge. Its huge surface area is packed with millions of microscopic nooks and crannies that are perfect for trapping chlorine molecules, which is why they dramatically improve the taste and smell of your water.

But here’s the trade-off. While they’re great for chlorine, their ability to snag smaller, more complex chemicals like THMs is often limited. They also don't do anything to address the chlorine you’re exposed to in the shower.

Better: Upgrading Your Kitchen Sink

Want a more permanent and powerful solution for your kitchen? An under-sink filter is the next logical step up. These systems are tucked away neatly under your sink, delivering a constant stream of filtered water through a separate, dedicated faucet. No countertop clutter.

Under-sink systems are a serious upgrade in filtration muscle. They use larger, more advanced multi-stage filter cartridges that can last anywhere from six months to a year, which is far more convenient than a pitcher filter.

The technology here gets more sophisticated, often using several stages:

  1. Sediment Pre-filter: This first line of defense catches bigger particles like rust, sand, and silt.
  2. Activated Carbon Block: This is a more compressed and potent form of carbon, offering superior chlorine and taste removal.
  3. Catalytic Carbon: A specialized type of carbon specifically engineered to capture chloramine, a tough chlorine-ammonia disinfectant used by many cities that standard carbon struggles with.

These multi-stage systems are far more effective at grabbing a wider range of contaminants, including a good portion of THMs. By installing an under-sink system, you get high-quality filtered water on demand for all your drinking and cooking needs.

Best: The Ultimate Whole-House Protection

For homeowners who want to completely eliminate the effects of chlorine from every single tap, faucet, and showerhead, a whole-house water filtration system is the ultimate solution. We call this the "Best" option because it's the only one that tackles both the water you drink and the water you shower in.

A whole-house system is installed right where the main water line enters your home, purifying every drop you use. That means cleaner water for drinking, cooking, bathing, and even doing laundry.

These are robust systems, typically using large tanks packed with high-grade filter media, such as:

  • High-Capacity Catalytic Carbon: This provides comprehensive removal of both chlorine and stubborn chloramine, along with the dangerous byproducts they create.
  • KDF (Kinetic Degradation Fluxion) Media: This unique media uses a chemical reaction to convert chlorine into a harmless chloride, boosting chlorine removal and preventing bacteria from growing inside the filter itself.

Filtering all the water in your home eliminates your exposure in the shower, where those volatile chemicals can be inhaled or absorbed through your skin. The result? Softer skin, healthier hair, and the peace of mind that comes from knowing your entire home is protected.

To help you weigh your options, we've put together a quick comparison table.

Home Water Filter Comparison for Chlorine and THM Removal

This table breaks down the common home filtration systems, showing how they stack up against chlorine and its byproducts, along with practical things like cost and maintenance.

Filter Type Chlorine Removal Effectiveness THM Removal Effectiveness Protects Showers Typical Cost Best For
Pitcher / Faucet Good Low No $20 – $50 Renters, small budgets, improving drinking water taste.
Under-Sink Excellent Good to Very Good No $150 – $400 Homeowners wanting high-quality drinking/cooking water without countertop clutter.
Whole-House Excellent Excellent Yes $800 – $2,500+ Homeowners wanting to protect the entire home from chlorine, including showers.
Shower Filter Excellent Low Yes $30 – $100 Anyone looking for a targeted, affordable solution to reduce chlorine in their shower.

Choosing the right filter is about matching the technology to your specific goals and home. For more detailed reviews and buying guides, you might be interested in checking out our guide on selecting the right filtration system for your needs.

A Few Common Questions We Hear About Chlorine

It's completely normal to have questions. The whole story of chlorine in our water—being both a lifesaver and a potential health risk—is a lot to take in. You're weighing the pros and cons, trying to figure out the best way forward for your family.

Let's tackle some of the most frequent questions and clear up any confusion about chlorine, its side effects, and how filtration really works. My goal is to give you the confidence to make the right call for your home.

If Chlorine Is So Bad, Why Do Cities Even Use It?

This is probably the most common—and logical—question we get. The answer really boils down to a single word: priority. Your city's top priority is stopping deadly waterborne diseases like cholera and typhoid from making a comeback. And for that job, chlorine is a champ. It's powerful, it's cheap, and it does an incredible job of killing dangerous germs on the long journey from the treatment plant to your faucet.

Think of it this way: your water utility is focused on preventing immediate, acute threats. Their job is essentially done once that water is biologically safe. But that very process creates chemical byproducts that pose long-term risks. That’s where your responsibility begins—filtering out those chemicals to ensure the water is truly clean for your family.

The main active ingredient doing the heavy lifting is often a form of sodium hypochlorite. This is what gives chlorine its disinfection power, but it's also what reacts with organic materials in the water to create the byproducts we’ve been discussing.

My Water Doesn't Smell Like a Pool, So It's Safe, Right?

This is a really common and dangerous assumption. Trusting your nose is a sure way to get a false sense of security. Here’s the hard truth: the most harmful chlorine byproducts, like the known carcinogen Trihalomethane (THM), are completely odorless, colorless, and tasteless.

That "pool smell" you might notice is often from a different compound called chloramine. But just because you don't smell it doesn't mean your water is free from danger. The invisible chemical threats are the ones we really worry about.

You simply can't trust your senses to detect the most serious risks in chlorinated water. The only way to know for sure is to get the facts—either by testing your water or reading your utility's official water quality report. This is why investing in the right filter is a decision based on science, not scent.

Getting the data takes all the guesswork out of the equation.

Is Bottled Water a Better Option Than Just Filtering My Tap?

Not really. It might feel like an easy fix, but bottled water opens up a whole new can of worms. For starters, the EPA actually has stricter regulations for municipal tap water than the FDA has for the bottled water industry. Some of the most popular brands are literally just filtered tap water sold back to you at a massive markup.

And that’s just the beginning. You also have to consider:

  • The Cost: Buying bottled water for a whole family adds up incredibly fast. It's far more expensive over the long haul than a good home filter.
  • The Waste: All those single-use plastic bottles create a staggering amount of pollution, ending up in our landfills and oceans.
  • The Microplastics: Studies keep finding that plastic bottles can shed tiny particles, known as microplastics, directly into the water you're about to drink.

A quality, certified home water filter is a much more reliable, affordable, and environmentally friendly choice. It gives you direct control over your water quality day in and day out.

What's the Deal with Chloramine? Is It Better?

Chloramine is another disinfectant that's gaining popularity with city water departments. It's a compound made by mixing chlorine with ammonia. The big advantage for utilities is that it’s more stable, so its disinfectant power lasts longer in the water pipes.

While chloramine might produce fewer THMs, it can create other disinfection byproducts that scientists are still studying. For you, the homeowner, the most important thing to know is this: chloramine is much more difficult to remove than chlorine.

A standard activated carbon filter does a great job on chlorine, but it's not very effective against chloramine. To get rid of it, you need a specialized filter media called catalytic carbon. This is exactly why you need to check your water report. Knowing whether your city uses chlorine or chloramine is the key to buying a filter that will actually solve your problem and give you safe, clean water.


Here at Water Filter Advisor, we live and breathe this stuff. Our mission is to cut through the noise and give you clear, research-backed advice. We have in-depth guides and reviews to help you pick the perfect filtration system, so your family gets the safest water possible. Feel free to explore your options and find the right solution at https://www.waterfilteradvisor.com.

Carbon Filtered Shower Head: Is Your Shower Water Secretly Sabotaging Your Skin and Hair?

A carbon filtered shower head is a simple device that screws onto your shower pipe, designed to remove chlorine and other chemical contaminants before the water hits your skin and hair. Think of it as a personal bodyguard for your bathroom, turning your daily shower into a purer, healthier rinse by filtering out invisible troublemakers.

Your Daily Shower Is Dirtier Than You Think

A person steps out of a shower with water spraying, highlighting hidden contaminants.

We all love the idea of stepping into a cascade of pure, clean water every morning. But let’s be honest: that’s rarely what’s actually happening. The water flowing into your home is treated with chlorine to make it safe to drink—a necessary process—but that chemical doesn’t just magically disappear on its journey to your bathroom.

This chlorine, which is a hero for killing bacteria in the water supply, becomes a bit of a villain once it reaches your shower. When you crank up the heat for a relaxing, steamy shower, its less-than-charming side effects become much more noticeable.

The Invisible Problem in Your Water

Inside a hot, enclosed shower, chlorine can easily vaporize into a gas that you breathe in. It's a shocking thought, but a short 10-minute shower can lead to a measurable increase in chloroform—a nasty byproduct of chlorine—in a person's lungs. This is a big deal because our lungs absorb chemicals far more efficiently than our stomachs do.

When you breathe in chlorine steam, it gets a direct pass into your bloodstream. Over time, this exposure can lead to airway irritation, a nagging cough, or that scratchy feeling in your throat that just won't go away.

But it’s not just about what you’re breathing. These same chemicals are dousing your body’s largest organ: your skin. The very same chlorine that’s so effective at disinfecting water is also stripping away the natural oils that keep your skin soft and your hair from feeling like straw.

What’s Really in Your Shower Stream?

The issue goes far beyond just chlorine. Your municipal water can carry a whole cocktail of unwanted guests that a standard shower head does absolutely nothing to stop. These often include:

  • Volatile Organic Compounds (VOCs): These are synthetic chemicals that love to turn into vapor in hot shower steam, which can tank your home's indoor air quality.
  • Disinfection Byproducts (DBPs): When chlorine gets frisky with tiny bits of organic matter in the water, it creates a whole new class of chemicals like trihalomethanes (THMs).
  • Sediment and Odors: Fine particles of rust and leftover chemical residues can give your water a funky smell and an unpleasant, gritty feel.

This is where a carbon filtered shower head comes to the rescue. It acts as a bouncer at the club door of your shower, catching these unwelcome contaminants before they can ruin your day. This isn't just a luxury—it's a practical, health-focused upgrade for any home.

How Carbon Filters Cleanse Your Shower Water

So, what’s the secret sorcery happening inside a carbon filtered shower head to snatch all those unwanted chemicals out of your water? The magic is a process called adsorption, and it all comes down to the incredible power of activated carbon.

Think of the activated carbon in your filter as a microscopic coral reef, but instead of providing a home for fish, its millions of nooks and crannies are designed to trap pollutants. This carbon, often made from humble coconut shells, is super-heated and treated with oxygen to create a mind-bogglingly vast internal surface area.

How vast? A single gram of activated carbon can have a surface area the size of a football field. This massive, craggy landscape is what makes it a chemical-trapping superstar.

The Power of Adsorption Explained

As water rushes through the filter cartridge, it’s forced to navigate this porous carbon maze. Contaminants like chlorine and other organic chemicals get snagged on its surface.

Adsorption is a process where molecules, like chlorine, physically stick to the surface of another material, like activated carbon. This is different from absorption, where one substance is drawn into another (like a sponge soaking up water). With adsorption, the unwanted chemicals are trapped on the carbon’s surface, like flies on flypaper.

This "stickiness" is driven by weak chemical forces. The carbon’s immense surface area provides an almost endless number of parking spots for chlorine, volatile organic compounds (VOCs), and other synthetic chemicals that cause foul odors and skin irritation. Once they stick, they’re out of the game, leaving you with purer water.

The effectiveness of this process is driving huge demand. The shower filter market was valued at USD 1.12 billion in 2024 and is on track to nearly double by 2033. This growth is largely thanks to rising awareness about disinfection byproducts like trihalomethanes (THMs), which are carcinogenic. Activated carbon is a champ here, adsorbing over 99% of free chlorine and many organic compounds. You can explore more data about the growing shower filter market and why it matters for home water quality.

Granular Carbon vs. Solid Carbon Blocks

Not all activated carbon filters are created equal. For shower heads, you’ll typically find two main types of carbon, each with its own strengths and weaknesses for this specific job.

  • Granular Activated Carbon (GAC): This is the rockstar of shower filters. It’s made of loose carbon granules, like coarse black sand. Water flows easily around the granules, which is perfect for a shower where you need to maintain that glorious water pressure. GAC gives you a fantastic balance of filtration performance and a high flow rate.

  • Solid Carbon Blocks: These are made from carbon powder that’s been compressed into a solid, brick-like form. This dense structure has much smaller pores, forcing water through a more torturous path. While this can offer slightly better filtration, it almost always causes a noticeable drop in water pressure—the arch-nemesis of a good shower.

For a carbon filtered shower head, GAC is the undisputed champion. It’s the ideal compromise, delivering excellent chemical adsorption without murdering your water pressure. The loose granules allow water to move through quickly while still providing enough contact time for adsorption to grab onto chlorine and VOCs, leaving you with a shower that feels both powerful and pure.

Carbon Filters Vs. Other Filtration Technologies

Not all shower filters are built the same. While a carbon filtered shower head is a fantastic choice for pulling chlorine and organic chemicals out of your water, it's not the only game in town. The world of water filtration has several different players, each with its own special skills. Knowing the difference is how you pick the right defense for your specific water problems.

This simple diagram shows you exactly how activated carbon works its magic.

A diagram illustrating the water filtration process where contaminated water passes through activated carbon to become clean water.

As you can see, contaminated water flows in, the carbon grabs onto the nasty stuff, and cleaner, purer water flows out. It's a straightforward but powerful process.

KDF Filters: The Heavy Metal Champion

A very common alternative to carbon is the KDF (Kinetic Degradation Fluxion) filter. You can think of KDF media as a tiny chemical reactor. It's a special blend of high-purity copper and zinc that creates a small electrochemical charge as water passes over it. This reaction, called redox, is incredibly good at targeting specific contaminants.

One of KDF's best features is that it works great in hot water, which is an area where some carbon filters can start to lose their edge. It's a real workhorse for:

  • Neutralizing free chlorine by turning it into harmless chloride.
  • Reducing heavy metals like lead, mercury, and iron.
  • Slowing bacterial growth, since the environment it creates is tough for microbes to survive in.

While KDF is a superstar against minerals and bacteria, it doesn't do much for the organic chemicals and VOCs that carbon filters are so good at grabbing. This makes KDF an excellent pick for anyone on well water or in a home with older pipes where heavy metal contamination is the main worry.

Vitamin C Filters: A Neutralizing Specialist

Next up, we have Vitamin C filters. This technology uses ascorbic acid (that’s just Vitamin C) to instantly neutralize both chlorine and its stubborn relative, chloramine. Many city water systems use chloramine as a disinfectant, and it can be much harder for standard carbon or KDF filters to remove.

The big selling point for Vitamin C is how fast and thoroughly it works on chloramine. A tiny amount of Vitamin C can completely dechlorinate a huge volume of water in a split second.

This high performance does come at a cost, though. Vitamin C cartridges tend to have a much shorter lifespan than carbon or KDF, so you'll be swapping them out more often. They are a fantastic, targeted fix if your main goal is simply getting rid of chlorine and chloramine, but they won't touch other things like heavy metals or sediment.

Multi-Stage Filters: The All-In-One Solution

Why pick just one technology when you can have them all? Multi-stage filters are designed to give you the best of every world. These filters pack several different types of media into one cartridge, creating a comprehensive purification team. A typical multi-stage filter might include:

  • Activated Carbon: To soak up chlorine, VOCs, and bad smells.
  • KDF Media: To fight heavy metals and bacteria in hot water.
  • Calcium Sulfite: Another fast-acting agent that excels at removing chlorine in high temperatures.
  • Sediment Layers: To catch rust, dirt, and other larger particles before they can clog the other media.

This layered approach means your water has to pass through a gauntlet of specialized defenses, with each stage targeting a different set of impurities. This move toward combined technologies is a huge reason the global shower filter market is set to grow at a CAGR of 6% between 2024 and 2030. The fact that these systems are so effective at reducing skin and hair problems—which can affect 70-80% of people in hard water areas—is a major driver. You can learn more about the growth of the shower filter market and how it’s changing home wellness.

To help you sort through the options, here’s a quick comparison of the most common filter types.

Shower Filter Media Comparison

Filter Type Primary Contaminants Removed Best For Average Lifespan
Activated Carbon Chlorine, VOCs, pesticides, bad odors General-purpose chlorine and chemical removal. 4-6 months
KDF (Kinetic Degradation Fluxion) Chlorine, heavy metals (lead, mercury), bacteria, scale Hot water performance and homes with heavy metal concerns. 6-12 months
Vitamin C Chlorine and chloramine Specifically targeting and neutralizing chloramine effectively. 1-3 months
Multi-Stage All of the above (chlorine, metals, chemicals, sediment) Comprehensive, all-around water purification. 4-6 months

As you can see, there's no single "best" filter—it all comes down to what's in your water and what you want to remove.

Alright, you're sold on the idea of a carbon filter. Now comes the fun part: picking the right one for your shower.

It's easy to get lost in all the options, but finding a great filter isn't about guesswork. It’s about knowing what to look for on the box and matching it to what you actually need. Let's break down the key things that matter.

Finding The Perfect Carbon Filtered Shower Head

Two water filters and a shower head on a wooden shelf in a bathroom with a buyer checklist banner.

Think of this as a simple buyer’s checklist. Once you know these four things, you can confidently choose a filter that will perform well and give you real value for your money.

Check the Filter Capacity

The first number to hunt for is filter capacity, which is almost always measured in gallons. This tells you exactly how much water the filter can clean before the carbon is maxed out and needs to be replaced.

A bigger number here means the filter lasts longer. Simple as that.

For instance, many filters are rated for 10,000 gallons. If you've got a family of four taking an 8-minute shower each day, that filter will last you about six months. Don't just trust the "lasts 6 months" claim on the box—always compare the gallon rating for a true sense of its lifespan.

A filter's capacity is its lifespan. A 12,000-gallon filter will last 20% longer than a 10,000-gallon one under the same usage conditions, giving you a better long-term value.

Looking at the gallon capacity helps you spot those "cheap" filters that burn a hole in your pocket with constant replacements. It’s the best way to judge the real cost of owning one.

Balance Flow Rate and Water Pressure

Nobody wants a weak, drizzly shower. The power of your shower's spray is all about its flow rate, measured in Gallons Per Minute (GPM). To save water, federal rules say new shower heads can't go above 2.5 GPM. A good carbon filter is designed to work within that limit without ruining your water pressure.

  • Low-Flow Models (Below 2.0 GPM): Great if you're focused on saving water, but they can feel a bit weak if you're used to a stronger spray.
  • Standard Models (2.0-2.5 GPM): This is the sweet spot. Most filters land here, giving you a solid, satisfying spray that doesn't waste water.
  • High-Pressure Designs: Some clever designs use special nozzles that make a 2.5 GPM flow feel much more powerful. You get the best of both worlds.

Look for models that specifically say they maintain water pressure. A well-made filter cleans your water without leaving you shivering under a trickle.

Look for Independent Certification

How do you know if a filter actually does what it promises? The easiest way is to check for third-party certification. For shower filters, the gold standard is NSF/ANSI 177.

This isn't just some fancy sticker. It's proof from an independent lab that the filter really does reduce free available chlorine. When you see that NSF/ANSI 177 mark, you know its claims have been tested and verified. While a lot of uncertified filters do a decent job, this certification gives you peace of mind.

Calculate the True Cost of Ownership

Finally, don't just look at the price tag on the shelf. The real cost of a carbon filtered shower head is the initial price plus the cost of all the replacement cartridges you'll buy later. A cheap head with pricey, short-lived filters can cost you a lot more over a year or two.

The market for these things is exploding—it's expected to hit $2.5 billion by 2025 because everyone wants healthier water. Innovators are making multi-stage filters that combine activated carbon with other media to remove over 95% of chlorine. These often use cartridges that cost under $20 and last three to six months. You can see more on the filtered shower head market's growth if you're curious about industry trends.

To find the best deal, just do some quick math: divide the replacement cartridge cost by its gallon capacity. That gives you the cost-per-gallon and shows you which option is actually the most affordable in the long run.

Easy Installation and Simple Maintenance Guide

One of the best parts about upgrading to a carbon filtered shower head is that there's no need to call a plumber. Seriously. This is a five-minute DIY project that almost anyone can handle with just their hands.

The whole process is about as complicated as changing a lightbulb. You just unscrew your old shower head, and then twist the new filtered one on in its place.

Most homes in the US and Canada have a standard 1/2-inch thread on the shower arm—that’s the pipe coming out of the wall. This means pretty much any filtered shower head you buy will fit right out of the box, no adapters needed.

A Step-by-Step You Can Handle

Ready to get started? Here’s a quick walkthrough of just how simple it is. Your kit should come with everything you need, including a small roll of plumber's tape.

  1. Get the Old Head Off: Turn the old shower head counter-clockwise. If it's a bit stubborn, you might need a little muscle, but it should unscrew by hand.
  2. Clean the Threads: Use a cloth to wipe off any old gunk or tape residue from the shower arm's threads. A clean surface is key for a good, tight seal.
  3. Apply New Tape: Wrap the plumber's tape clockwise around the threads three or four times. This is the secret weapon against annoying drips.
  4. Screw On the New Filter: Twist your new carbon filtered shower head onto the arm clockwise until it feels snug. Hand-tight is all you need—don't go crazy and overtighten it.

And you're done! Turn on the water and check for any leaks at the connection. If you see a drip, just give it one more gentle turn. While the shower head itself is simple, anyone planning a bigger bathroom remodel might want to learn how to install a curbless shower for some broader project tips.

Keeping Your Filter in Top Shape

Once it's installed, the maintenance is just as simple. The filter cartridge won't last forever, so knowing when to swap it out is key to keeping your water clean. Over time, the carbon inside gets saturated with all the contaminants it has pulled out.

You don’t have to guess or set a calendar reminder, though. Your shower will give you some obvious clues.

The biggest sign is a drop in water pressure. If your once-strong spray has become a weak drizzle, the filter is likely clogged with sediment and ready for a change.

Another dead giveaway is the return of that chlorine smell. Once the activated carbon is full, it can’t grab any more chemicals, so they’ll start passing right through into your shower. If your bathroom starts smelling like a public pool again, it’s time for a fresh cartridge. If you're looking for more general tips on water filters, you can explore additional advice here.

The Real-World Benefits For Your Skin And Hair

A woman with wet hair wrapped in a white towel, looking refreshed and smiling, with "Softer Skin & Hair" text.

Okay, you know the science behind how a carbon filtered shower head works. But what does that actually mean for you? It’s not just about what’s being taken out of the water; it’s about what you’ll feel every single day.

For most people, the first thing they notice is their skin. Chlorine is great for disinfecting city water, but it’s harsh. It strips away your skin’s natural oils (the sebum), which is often the real reason for constant dryness, itching, and irritation.

When you install a filter that pulls out that chlorine, you’re giving your skin a chance to breathe. It can finally hang on to its natural moisture, which is why many people feel a difference almost right away. If you have sensitive skin or deal with something like eczema, getting rid of that daily chemical blast can be a game-changer.

Healthier Hair Is Just A Shower Away

The change in your hair can be even more dramatic. Just like with your skin, chlorine strips the natural oils from your hair and scalp, leaving it brittle, dry, and looking dull. A carbon filtered shower head helps put a stop to that.

Once the harsh chemicals are gone, you’ll probably see a few things happen:

  • Less Frizz, More Shine: When your hair keeps its natural moisture, the cuticle lays flat. That means smoother, shinier hair that isn't as prone to frizz.
  • Color-Treated Hair Lasts Longer: Chlorine is a bleach. It will absolutely fade your salon color, meaning more trips to the stylist. Filtered water helps keep that color looking fresh for weeks longer.
  • A Happier Scalp: An itchy, flaky scalp is often just an irritated one. Take away the chemical irritants, and you can help restore balance and cut down on dandruff and discomfort.

Honestly, a lot of people find they don't need to use as much conditioner or pricey shine serums because their hair is just healthier to begin with.

The All-Important Distinction: Purification vs. Softening

Now, it’s really important to understand one key difference. A carbon filter is a pro at purification, but it does not "soften" water in the technical sense.

A carbon filter removes chemical contaminants like chlorine and VOCs. It does not remove the dissolved minerals—like calcium and magnesium—that are responsible for water hardness.

This is a big deal when it comes to setting expectations. The mineral content in your water will be exactly the same. So, a carbon filter alone isn't going to stop hard water spots on your glass shower door or prevent limescale buildup in your pipes.

Even so, you'll hear people say their water feels softer, and they're not wrong. That feeling comes from your skin and hair not being dried out by chlorine. If you're looking into the logistics of fitting a shower for a remodel, knowing this helps you plan for your specific water type.

At the end of the day, a carbon filtered shower head is one of the easiest and most noticeable upgrades you can make. You’re not just taking a shower—you’re getting rid of the invisible chemical load and giving your skin and hair a much-needed break.

Common Questions About Carbon Shower Filters

It's smart to have questions before you decide to upgrade your shower. Even after you know how they work, a few common concerns tend to pop up. Let's get those answered so you can feel confident about your choice.

One of the first things people ask is about performance. After all, nobody wants to trade a powerful shower for filtered water.

Will A Filter Ruin My Water Pressure?

Not if you get a well-made filter. Quality manufacturers design their shower filters to work perfectly with standard home water pressure, so you won't lose that satisfying flow. Most are built to deliver water right at or near the federal maximum of 2.5 gallons per minute (GPM).

If you do notice the pressure start to drop over time, that’s actually a good sign. It means the filter is full of sediment and has done its job—and it's your cue that it's time for a replacement cartridge.

How Often Do I Need To Change The Cartridge?

You'll often hear the "six-month" rule, and it's a decent starting point. But in reality, how long a cartridge lasts really comes down to your water and how you use it. A few things can shorten a filter's life:

  • Water Hardness: If you have hard water, the filter will clog up with minerals and sediment much faster.
  • Household Size: A filter serving a family of four is going to work a lot harder than one used by a single person.
  • Usage Frequency: The more showers taken, the quicker you'll hit the filter's total gallon capacity.

Your best bet is to pay attention to the signs. When the pressure drops or you start to smell chlorine again, it's time for a change, regardless of what the calendar says.

Can A Shower Filter Help With Hair Loss?

A carbon shower filter isn't a medical treatment for hair loss, but it absolutely can create a better environment for healthy hair. By filtering out chlorine and other chemical irritants, you cut down on the scalp inflammation and dryness that makes hair brittle and prone to breaking.

Think of it this way: a filter improves the "soil" so your hair has the best possible conditions to grow. It supports scalp health by removing stressors, but it won't fix underlying genetic or medical causes of hair loss.

Are Carbon Filters Effective Against Chloramine?

This is a key question. Standard activated carbon is a champion at removing chlorine, but it's not very effective against chloramine. Chloramine is a tougher, more stable disinfectant that many cities now use.

To properly deal with chloramine, you need a filter with catalytic carbon. This is a special type of carbon engineered specifically to break the strong chemical bonds in chloramine. You'll find that many of the best multi-stage filters include a catalytic carbon layer for exactly this reason.


At Water Filter Advisor, we're committed to providing the clear, research-driven information you need to make confident decisions for your home. From understanding contaminants to choosing the right filter, we help you navigate the world of water purification. Explore our in-depth guides and reviews at https://www.waterfilteradvisor.com to find the perfect solution for your family.

AquaBliss Shower Filter Review: Is It The Ultimate Home Water Filtration Upgrade?

Do you ever step out of a steamy shower only to find your skin feels tighter and drier than a forgotten sponge? You're not alone. In this deep-dive AquaBliss shower filter review, we’re going to find out if this simple gadget is the hero your home's water system needs to combat common issues like dry skin, brittle hair, and color-treated hair that fades way too fast.

Why Your Shower Water Might Be Sabotaging You

That glorious, hot spray you crave every day could be a double agent. While it feels fantastic, the water flowing through your pipes isn’t just pure H₂O—it’s a chemical cocktail. Water treatment plants use disinfectants like chlorine to make our water safe, which is great for preventing illness. But that safety comes at a cosmetic cost.

Chlorine is a powerhouse killer of bad bacteria, but it doesn't know when to stop. It also attacks the natural oils that keep your skin supple and your hair shiny. When those oils are stripped away, you're left with:

  • Dry, Itchy Skin: Stripping the skin's protective moisture barrier leaves it irritated, tight, and begging for lotion.
  • Dull, Brittle Hair: Your hair’s natural oils provide shine and strength. Without them, you get a frizzy, lifeless mess.
  • Faded Hair Color: Since chlorine is a bleaching agent, it's no surprise it can yank the vibrance right out of your expensive dye job.

Then there's "hard water," a term for water high in minerals like calcium and magnesium. These minerals leave a film on everything they touch—including you. Hard water is a notorious culprit behind frustrating hair issues. For instance, it’s a key reason many people find their blonde hair turning brassy due to hard water.

Ever notice that "squeaky clean" feeling after a shower? That's not a good thing. It's a red flag that hard water minerals have stripped away your skin's protective oils, leaving it vulnerable to dryness.

This is where a shower filter enters the chat. Think of it as a bouncer for your bathroom, stopping these unwanted party crashers at the door. By targeting chlorine and other impurities, a good filter can transform your daily shower from a skin-drying chore into a true home spa experience.

AquaBliss Shower Filter At a Glance

So, where does the AquaBliss filter fit into your home filtration strategy? Here’s a quick rundown of what it brings to the bathroom.

Feature Benefit
Multi-Stage Filtration A dream team of media like KDF-55, calcium sulfite, and activated carbon targets a whole squad of contaminants.
Universal Fit Designed to connect to any standard shower arm in minutes, no tools or tears required.
Replaceable Cartridge Easy maintenance; you only swap the inside filter, not the entire unit.
Cost-Effective An affordable ticket into the world of shower filtration without a major investment.
For Urban & Well Water Built to tackle both chemical disinfectants in city water and some minerals from wells.

Ultimately, the AquaBliss positions itself as an accessible, all-around solution for anyone looking to improve their home water quality without a complicated or expensive setup.

We'll get into how different filter media work their magic later on, but if you're looking for broader guidance on water filtration for your home, you can learn more here. For now, let’s find out if the AquaBliss shower filter is the effective, affordable fix you've been searching for.

How the Multi-Stage Filtration System Works

The real genius of an AquaBliss shower filter isn't in one single material—it's in its teamwork. Think of it less like a simple strainer and more like an obstacle course for your water. Each layer inside the filter has a specific job, and as water rushes through, it gets progressively cleaner and purer.

This layered, multi-stage design is its secret weapon. A single-layer filter would get overwhelmed quickly or only catch a narrow set of contaminants. By stacking different materials, AquaBliss builds a comprehensive defense against everything from chlorine to sediment, turning your tap water into something much kinder.

For many homes, this level of water filtration isn't a luxury; it's a necessity. The water coming out of your pipes can directly contribute to common issues like dull hair and itchy skin.

Infographic illustrating the progression of unfiltered shower water to dull hair and dry skin.

As you can see, filtering water right at the source can make a world of difference for your entire home.

The Core Filtration Trio

While there are many layers at play, a few key components do the heavy lifting. Understand these, and you’ll see how the filter transforms your water quality.

  • KDF-55 (Kinetic Degradation Fluxion): This is your front line of defense against chlorine and heavy metals. KDF-55 is a granular blend of high-purity copper and zinc that starts a chemical reaction called redox. This process zaps harsh free chlorine and converts it into a harmless, water-soluble chloride long before it reaches your skin or hair. It also helps prevent bacteria and algae from setting up camp inside the filter.

  • Activated Carbon: Think of this as a super-sponge with a massive surface area. It’s fantastic at grabbing and trapping organic chemicals and other contaminants that cause bad tastes and odors, especially the funky disinfection byproducts often found in city water.

  • Calcium Sulfite: This material is a chlorine-killing specialist, and it truly shines in hot water. Where other media can start to get lazy as the temperature rises, calcium sulfite keeps on working. It can remove up to 99% of chlorine, which is why your shower starts feeling so much cleaner and fresher.

When you combine these three, you get a powerful synergistic effect. What one layer might miss, the next one is designed to catch. It’s a much more thorough approach to home water filtration than any single material could ever achieve on its own.

Beyond the Basics: Layers for Total Care

The AquaBliss filter doesn't stop there. It includes several other layers that are all about refining the water and improving how it feels on your skin.

For example, you’ll find mineralized balls designed to infuse the water with trace minerals and help balance its pH. Other layers, like zeolite and tourmaline, work to pull out even more impurities and actually change the water’s texture. This is what creates that "softer" water sensation, even though it's not a traditional water softener.

This layered design is a big reason why AquaBliss has become a major player in a fast-growing market. After its 2023 upgrade, the filter really stood out in the filtered shower head category, which is on track to become a $2.5 billion market by 2025. Lab data shows its 15-stage design captures 99% of sediments and cuts down hydrogen sulfide (that rotten egg smell) by over 90%. You can dig into the numbers behind the industry's growth with these market statistics from AB Newswire.

All this complex science packed into a small canister is what turns a routine shower into a genuinely better experience for your home.

Real-World Performance and Water Pressure

All the talk about filtration layers and redox reactions is great, but it doesn't mean much until you actually step into the shower. What you really want to know is: how does the AquaBliss perform day-to-day in a real home?

The first thing you'll likely notice is the smell—or rather, the lack of it. That "public pool" funk from chlorine is one of the first things to go, thanks to the KDF-55 and calcium sulfite media doing their job. Your shower stops feeling like a chemical treatment and starts feeling like a pure, clean rinse.

It also tackles the effects of hard water minerals. While this isn't a full-blown water softener, it does an admirable job of inhibiting scale. That means less of that chalky buildup on your glass doors and shower walls. You'll also feel it on your skin, which tends to feel less dry and tight right after you get out.

Chlorine and Contaminant Reduction

At its core, a shower filter's main job is to get rid of chlorine, and AquaBliss excels here. The multi-stage design is built for high-efficiency removal, which makes a huge difference not only for your skin but also for the steam you're breathing in during a hot shower.

The numbers back this up. AquaBliss filters became a household name because they work, with 2023 market reports showing over 95% reduction in chlorine and certain heavy metals. The real trick is that they manage to do this while keeping your water pressure strong—a common pitfall for lesser filters.

The difference is often noticeable from the very first use. People often describe the water as feeling "silky" or "smoother," which is the direct result of stripping out all those harsh disinfectants and minerals that lead to dry skin and irritation.

Maintaining Strong Water Pressure

Let's be real: nobody wants a filter that turns their powerful shower into a sad little trickle. It's a valid concern. Anytime you add something to your home's plumbing line, you introduce resistance. Thankfully, the AquaBliss was engineered to keep this to a minimum.

For most homes with standard water pressure, usually somewhere between 40 and 80 PSI, you probably won’t notice a difference. The filter keeps the flow rate above the 2.5 gallons per minute (GPM) standard, so your shower should feel just as invigorating as before.

Here’s a general guide:

  • Standard Pressure (40-80 PSI): You'll likely experience no noticeable change in flow.
  • High Pressure (80+ PSI): The filter might actually tame the flow a bit, which can help save water without feeling weak.
  • Low Pressure (Below 40 PSI): If your pressure is already low, you might see a small drop. Any filter will create some resistance.

If your home has a weak flow to begin with, it’s worth looking into how to fix low water pressure before installing any filter. But for the majority of people, the AquaBliss does an excellent job of giving you cleaner water without sacrificing a satisfying shower.

The Impact on Your Skin and Hair Health

Let's get to the fun part. The specs and flow rates are important, but the real reason you're looking at a home shower filter is for what you can see and feel. Will it actually make a difference for your skin and hair? This isn't just about filtering water; it's about giving your personal care routine a serious upgrade.

The science is simple: when you remove the harsh chemicals and minerals from your water, your body's natural moisture can finally do its job.

A woman with wet hair and water droplets on her back in a shower, promoting softer skin and hair.

Think about it this way: showering in chlorinated water is like giving your skin and hair a daily bath in a mild bleaching agent. That chlorine aggressively strips away the natural oils (sebum) that protect your skin. This constant stripping action leads to the familiar cycle of dryness, itchiness, and irritation. Over time, it can even contribute to premature signs of aging, like fine lines.

When the AquaBliss filter takes that chlorine out of the equation, your skin can finally hold onto its own moisture. It’s common for users to notice an immediate drop in that tight, itchy feeling after a shower. For some, it even brings welcome relief from ongoing dry skin conditions like eczema.

Restoring Your Hair’s Natural Radiance

That same stripping effect that’s so tough on your skin is just as bad for your hair. Chlorine and hard water minerals rough up the hair cuticle—the outermost layer of each strand. That’s the villain behind hair that feels coarse, looks frizzy, and is a nightmare to manage.

Filtered water lets that hair cuticle lie flat and smooth again. This simple change unlocks several benefits you’ll notice right away:

  • Increased Softness and Shine: When your cuticles are smooth, they reflect light better and feel silky soft.
  • Reduced Frizz and Tangles: Without mineral buildup gumming things up, your hair becomes more cooperative and less prone to tangles.
  • Better Product Performance: Shampoos and conditioners can finally work the way they're supposed to on hair that's truly clean.

A shower filter isn't just another plumbing fixture; it's a beauty tool. By providing cleaner water, it creates the ideal foundation for healthier skin and hair, allowing your other products to deliver the results they promise.

This is an absolute game-changer if you color-treat your hair. Chlorine is infamous for making expensive dye jobs fade incredibly fast. By filtering it out, you can keep your color looking vibrant for much longer, which means fewer trips to the salon and more money in your pocket. From platinum blondes fighting off brassiness to brunettes keeping their rich tones, a quality shower filter like the AquaBliss is a non-negotiable part of their home hair care.

A Foundation for Better Wellness

At the end of the day, this is the most important takeaway for our AquaBliss shower filter review. The noticeable improvements to your skin and hair are what make this product so compelling. It turns a daily chore into a proactive step for your overall wellness.

The filter isn’t adding some magic potion to your water. It’s simply taking out the bad stuff, letting your body get back to its natural, hydrated state. The difference is often so stark that people say they can't imagine going back. Softer skin, shinier hair, and longer-lasting color aren't just cosmetic perks—they're clear signs that you've successfully improved your home water quality right where it matters most.

Easy Installation and Long-Term Maintenance

Let’s be honest, nobody wants a home upgrade that turns into a weekend-long project requiring a panicked call to the plumber. The best thing about the AquaBliss shower filter? You can get it set up in minutes, seriously. No toolbox, no special skills, no headaches.

It’s designed to be a universal fit for any standard shower arm, which means it works in pretty much any home or apartment. For renters, this is a huge win since you can’t make permanent changes to the plumbing. The process is as simple as changing a lightbulb: just unscrew your shower head, screw the AquaBliss filter on, and then screw your shower head back onto the filter. Done.

Hands easily installing a white shower filter onto a shower hose connection in a tiled bathroom.

This dead-simple setup is a big reason AquaBliss has made such a splash in the home water filtration market. The global demand for shower filters is massive—estimated at USD 1.12 billion in 2024—and a lot of that growth comes from people who just want a quick, effective solution without any fuss. You can dig into more stats on this growing home filtration trend over at DataHorizzon Research.

Long-Term Costs and Cartridge Replacement

Once it's installed, you can pretty much forget about it. The only "maintenance" you’ll ever do is swapping out the filter cartridge. If you can replace the filter in a Brita pitcher, you can handle this.

AquaBliss suggests a new cartridge every 4 to 6 months. Your mileage will vary, of course. If your home's water is extra hard or loaded with chlorine, you’ll probably find yourself on the shorter end of that, closer to the 4-month mark.

Replacing the cartridge is just as straightforward as the initial install:

  1. Unscrew the two halves of the filter housing.
  2. Pull out the old, used-up cartridge.
  3. Pop the fresh one in.
  4. Screw it all back together. That’s it.

This is what makes the filter so practical for any home. There are no service calls or complicated parts. You just get a steady supply of filtered water with a few minutes of effort twice a year.

And what about the cost? The replacement cartridges are very affordable, making this a smart, budget-friendly choice for long-term home water filtration. When you spread that cost over a cartridge that lasts up to six months, you're talking pennies per shower. It’s the perfect combination of easy setup, zero-hassle upkeep, and low ongoing costs.

Our Final Verdict on the AquaBliss Filter

So, what's the bottom line here? After putting the AquaBliss shower filter through its paces, we can say it’s a seriously effective and easy-to-use solution for any home wanting better shower water. Its main mission is to tackle chlorine and other contaminants, and it absolutely delivers on that promise.

This isn't just about lab reports. We're talking about real, noticeable changes—the kind you can actually feel. Users consistently rave about having softer skin and shinier hair, and finally banishing that harsh "pool" smell from their bathroom. The tool-free installation makes it a fantastic option for just about everyone, whether you own your home or rent an apartment. Plus, swapping the cartridge is a piece of cake, so keeping it running is never a hassle. For those of us fighting the endless battle with hard water, it also does a great job slowing down scale buildup.

Who Is This Filter For?

The AquaBliss is a great all-arounder, but it’s a real game-changer for a few specific groups of people looking to improve their home water filtration.

  • City and Suburban Dwellers: If your home gets city water, you’re showering in chlorine every single day. This filter is one of the best ways to stop it right at the showerhead, saving your skin and hair from its drying effects.

  • Those with Sensitive Skin or Hair: Anyone struggling with dryness, itchiness, eczema, or trying to protect brittle, color-treated hair will feel a huge difference. By stripping out the chemical irritants, the AquaBliss helps create a much gentler, more soothing shower.

  • Anyone Seeking an Affordable First Step: If you're new to the world of home water filtration and just want to see a real improvement without dropping a ton of cash, this is your perfect starting point. It gives you proven results without breaking the bank.

Our final verdict in this AquaBliss shower filter review is that it offers exceptional value. It successfully bridges the gap between high performance and affordability, making it a highly recommended investment for a healthier, more comfortable shower experience in your home.

Of course, no filter is without its trade-offs. The main thing to keep in mind is the ongoing cost of replacement cartridges, which you'll need to change out every 4-6 months. But when you weigh that against the benefits—and the money you might save on specialty hair and skin products—it’s a very reasonable price to pay for a daily wellness upgrade. If you want a dependable filter that’s simple to use and does exactly what it says it will, the AquaBliss is a confident buy.

Frequently Asked Questions

Still have a few questions on your mind? You’re not the only one. Let's wrap up this AquaBliss review by answering the most common questions we hear about this popular home water filtration device.

How Will I Know When to Change the Filter Cartridge?

AquaBliss suggests a new cartridge every 4-6 months to keep your water filtration system running smoothly. Honestly, your senses will tell you when it’s time for a change.

If that familiar chlorine smell starts creeping back into your shower, or you feel the water pressure drop off a bit, those are sure signs your filter has done its job and needs replacing.

Will an AquaBliss Filter Lower My Home's Water Pressure?

For most homes with standard water pressure (around 40-80 PSI), you won’t notice a difference. The AquaBliss is built to keep your shower flow strong.

If your home already struggles with very low water pressure, any filter will add a little resistance, so you might see a small decrease.

Think of it like this: the filter is designed for high performance with minimal impact. For the vast majority of users, the change in pressure is so negligible that the benefits of clean, filtered water far outweigh it.

Is This a True Water Softener for Hard Water?

While this filter does a great job fighting the annoying effects of hard water—like scaly buildup and that dry, itchy feeling on your skin—it isn't a true, salt-based water softener.

It works by inhibiting scale, but it doesn't actually remove the calcium and magnesium minerals that define hard water. It definitely makes hard water feel much better on your skin and hair, but technically, it conditions the water rather than "softening" it, making it a great addition to any home dealing with hard water issues.


At Water Filter Advisor, we're committed to helping you find the best solutions for your home's water quality. Explore our in-depth guides and reviews to make a confident choice for your family's health and comfort. Learn more at https://www.waterfilteradvisor.com.

Your Ultimate Guide to an Osmosis Water Filter System

An osmosis water filter system is the heavyweight champion of home water purification. Think of it as a bouncer for your pipes, using a high-tech membrane to physically block up to 99% of unwanted contaminants like lead, chlorine, and even pesky microplastics from ever reaching your glass.

The system works by using your home’s water pressure to force tap water through this ultra-fine filter. All the impurities get left behind, and you get exceptionally clean, delicious-tasting water from a dedicated faucet. It’s the ultimate gatekeeper for your family's drinking water.

Why Your Tap Water Needs an Upgrade

Have you ever poured a glass of water and smelled chlorine, like you're at the city pool? Or maybe you're more concerned about the invisible freeloaders you can't see or taste, like lead from old plumbing or pesticides that have found their way into the water supply.

These are valid worries. The hard truth is, even the best municipal treatment plant can't guarantee what comes out of your specific faucet is perfectly pure. An old pipe a mile away could be leaching contaminants into your water long after it leaves the treatment facility.

An osmosis water filter system, most commonly called a reverse osmosis (RO) system, acts as your last line of defense right where you use your water most—your kitchen sink. This isn't just another pitcher filter; it’s a full-blown purification powerhouse that gets to the root of water quality problems.

The Bouncer for Your Pipes

Imagine the reverse osmosis membrane as a microscopic bouncer at an exclusive club, and only pure water molecules are on the guest list.

Anything else trying to sneak in—the whole crowd of unwanted contaminants—is turned away at the door and flushed down the drain. This includes:

  • Heavy Metals: Lead, arsenic, mercury, and cadmium are blocked.
  • Chemicals: Chlorine, fluoride, and pesticides are rejected.
  • Dissolved Solids: Salts, nitrates, and other gunk that makes water taste bad are removed.
  • Microscopic Threats: Bacteria, viruses, and tiny microplastics are stopped cold.

This process takes your questionable tap water and transforms it into something you can trust, no questions asked. The result is water that’s not just safer, but tastes incredibly clean and refreshing.

This level of performance is exactly why reverse osmosis is so popular. In fact, RO systems are expected to capture a massive 44% of the U.S. water purifier market share by 2026. This isn't surprising, given their unique power to remove a huge range of impurities that other filters just can't touch. You can learn more about the technology's effectiveness in this detailed report.

When you install an osmosis water filter, you take full control over your home's water quality. Before we dive deeper into how this tech works, the table below gives a quick snapshot of the problems an RO system can solve for you.

Reverse Osmosis At a Glance: Problems Solved and Benefits Gained

This table breaks down common water issues and shows exactly how a reverse osmosis system tackles them, giving you clear benefits for your home.

Common Water Problem How Reverse Osmosis Solves It Key Benefit for Your Home
Bad taste or odor (e.g., chlorine, sulfur) The membrane and carbon filters remove chlorine and dissolved solids causing foul tastes and smells. Fresh, clean, and delicious-tasting water right from the tap.
Worry about invisible contaminants like lead The semipermeable membrane blocks heavy metals, arsenic, and other toxic elements. Peace of mind knowing your family is safe from harmful substances.
Cloudy water or visible sediment Multi-stage filtration removes sediment, silt, and other total dissolved solids (TDS). Crystal-clear drinking water and ice cubes without floating particles.
Concerns about bacteria, viruses, or cysts The membrane's microscopic pores are too small for microbiological threats to pass through. Protection against waterborne illnesses from microscopic pathogens.
High cost of bottled water Provides an unlimited supply of purified water for a fraction of the cost of buying bottles. Significant savings over time and less plastic waste.

As you can see, a reverse osmosis system is a comprehensive solution that improves your water's taste, safety, and clarity all at once.

How Reverse Osmosis Filtration Actually Works

So, how does an osmosis water filter system take your regular tap water and make it so incredibly pure? It’s not magic, but a highly effective, multi-step process. The best way to think about it is like an assembly line for water purification, where each stage has one specific job to do before passing the water to the next.

This isn't a one-and-done deal. Your water has to get through a couple of crucial pre-filters before it ever reaches the main event—the reverse osmosis membrane itself. This team-based approach is exactly why these systems are so good at what they do.

This diagram shows you the path your water takes, from the tap, through the RO system, and into your glass.

Diagram illustrating the water purification process from contaminated tap water to safe drinking water using an RO system.

As you can see, the system acts as a gatekeeper, intercepting your water and transforming it before it ever hits your lips.

The Opening Act: The Pre-Filters

The first stop for your water is a set of pre-filters. These are the workhorses of the system, designed to get rid of the biggest, most obvious contaminants first. Their job is to clear the path for the more sensitive stages that come later.

First up is the sediment filter. Its purpose is simple: catch the big stuff. We're talking about the visible grit and grime that can make water look cloudy. This includes things like:

  • Rust flakes from older plumbing
  • Sand and silt
  • Dirt and other floating debris

By trapping these larger particles, the sediment filter keeps the rest of the system from getting clogged, which is key for making sure everything runs smoothly and lasts as long as it should.

Next, the water moves through one or more carbon filters. These filters are all about tackling chemicals. They use activated carbon, which works like a magnet for certain contaminants, pulling them out of the water. Their primary target is anything that makes your water taste or smell bad—especially chlorine, a chemical disinfectant used in almost all city water supplies.

The pre-filters are absolutely essential for protecting your investment. By removing sediment and chlorine, they shield the delicate RO membrane from getting torn up by debris or degraded by chemicals. Without them, you’d be replacing the most expensive part of your system in no time.

The Main Event: The Reverse Osmosis Membrane

Now we get to the heart of the whole operation: the reverse osmosis (RO) membrane. Once the pre-filters have done their job clearing out the gunk and chemicals, the water is pushed toward the main stage. This is where the heavy-duty purification happens, removing contaminants so small you can't see them.

The RO membrane is what’s known as a semipermeable barrier. That’s just a technical way of saying it has incredibly tiny pores—around 0.0001 microns. That’s so small that only water molecules can fit through.

Your home's water pressure provides the force needed to push water against this membrane. The pure water molecules get squeezed through to the clean side, while almost everything else is rejected. Those leftover contaminants are then flushed out of the system and down the drain. This is how RO systems can remove such a massive list of dissolved solids and other invisible pollutants.

The Final Polish: The Post-Filter

After the water passes through the RO membrane, it’s stored in a small tank under your sink, ready to go. When you turn on the RO faucet, that water makes one final pass through the post-filter, also known as a “polishing” filter.

This final stage is typically another carbon filter. Its job is to do a last-minute quality check, getting rid of any faint tastes or odors the water might have picked up while sitting in the tank. It’s the finishing touch that guarantees every glass is as fresh and clean as possible.

Some systems offer a couple of optional upgrades at this final stage:

  • Alkaline Remineralization Filter: Because the RO process is so thorough, it also removes beneficial minerals. This filter adds back healthy minerals like calcium and magnesium, which can improve the taste and balance the water's pH.
  • UV Sterilizer: If you're on well water or have concerns about bacteria and viruses, a UV light sterilizer is a great add-on. It zaps any microorganisms that might have slipped through, giving you an extra layer of protection.

What an Osmosis Filter Removes from Your Water

So, what does an osmosis water filter system actually pull out of your water? You’ll often hear claims like “removes 99% of contaminants,” but what does that really mean for your glass? This is where the reverse osmosis membrane flexes its muscles, acting like a microscopic sieve for your water.

The whole process works by pushing water through this special membrane. Its pores are incredibly tiny—around 0.0001 microns—so only pure water molecules can squeeze through. Anything larger, from minerals to metals, gets blocked and flushed down the drain.

A magnifying glass highlights bubbles in a glass of water on a wooden table, with text 'REMOVES CONTAMINANTS'.

This level of purification is exactly why the global water filter market is taking off, jumping to USD 15.26 billion in 2024 and on track to hit USD 28.05 billion by 2033. We're seeing it firsthand in North America, where sales of whole-house RO systems have climbed 35% since 2020 as more people deal with well water contamination and other local water issues. If you want to see the numbers, you can review the full market analysis.

The Nasty Stuff RO Systems Remove

An osmosis water filter system is built with multiple stages, so it's ready to tackle a long list of things you don't want in your glass.

  • Heavy Metals: This is a big one. RO is fantastic at getting rid of lead, arsenic, mercury, chromium-6, and cadmium that can come from old city pipes or the ground itself.
  • Dissolved Solids (TDS): This covers all the salts, nitrates, and other inorganic stuff that makes water taste salty, bitter, or just plain weird.
  • Chemicals: The carbon filters in the system handle chlorine and chloramine, while the RO membrane takes care of tougher chemicals like fluoride, pesticides, and herbicides.
  • Emerging Contaminants: RO is one of the only home filtration methods proven to remove things like PFOA/PFAS (often called "forever chemicals") and tiny microplastics that are becoming more common in our water.

What an Osmosis Filter Leaves Behind

Because reverse osmosis is so good at its job, it doesn't just pull out the bad stuff. It also strips out naturally occurring minerals like calcium and magnesium. This leaves you with water that’s incredibly pure, but it can also be slightly acidic and taste a bit "flat" to some people.

That’s a common discussion point, but it's also an easy fix. Some folks actually prefer the clean taste of demineralized water. But if you want those minerals back, there’s a simple solution.

Optional Upgrade: The Remineralization Filter
Lots of modern osmosis systems now offer a final filter stage for remineralization. After the water has been completely purified, this filter adds back a healthy balance of minerals like calcium, magnesium, and potassium. Not only does this bring back a more natural taste, but it also raises the water's pH to a more alkaline state.

Prove It to Yourself with a TDS Meter

One of the coolest things about getting an RO system is seeing the results for yourself. All you need is a cheap and easy-to-use tool called a Total Dissolved Solids (TDS) meter.

TDS is just a measure of all the dissolved stuff in your water. While not all of it is harmful, a high TDS reading usually means more unwanted contaminants and a worse taste.

Here’s a quick test you can do:

  1. Test Your Tap Water: Get a glass of water straight from your tap and use the TDS meter. Depending on where you live, you might see a number between 200-500 ppm (parts per million), or even higher.
  2. Test Your RO Water: Now, do the same with water from your RO faucet. The reading will likely drop to just 10-25 ppm.

That massive drop is your proof. It shows the osmosis water filter system is doing exactly what it’s supposed to—stripping out nearly everything and leaving you with nothing but clean, great-tasting water.

Choosing the Right Osmosis System for Your Home

An under-sink reverse osmosis water filter system with multiple canisters and a storage tank, featuring a 'Choose Your RO' banner.

Alright, now that you understand how an osmosis water filter system works its magic, let's figure out which one actually fits in your home. These systems aren't all the same; they’re designed for different spaces, different needs, and different levels of plumbing confidence.

The right choice really comes down to your situation. Are you a homeowner ready for a permanent upgrade, or a renter who needs something you can pack up and take with you?

We’ll walk through the three main types you'll encounter: under-sink, countertop, and whole-house systems. Each one has its own job, from cleaning up the water at your kitchen tap to purifying every single drop that comes into your house.

Under-Sink RO Systems: The Homeowner Favorite

When you hear "osmosis water filter system," this is probably what you picture. Under-sink models are the go-to, classic choice for homeowners who want a clean, built-in source of pure water for drinking and cooking.

These systems get installed right under your kitchen sink, where they tap into the cold water line. The purified water comes out of a separate, dedicated faucet that sits right on your sink deck. This keeps all the tanks and filters tucked away out of sight, so your kitchen stays looking sharp.

Installation does involve some light plumbing, but it’s a totally doable weekend project for most folks. Once it’s in, you have an unlimited supply of pure water right where you need it most.

Countertop RO Systems: Perfect for Renters

Living in an apartment? Don't want to touch the plumbing? This is where a countertop reverse osmosis system comes in. These are compact, self-contained units that just sit on your counter and get to work—no installation needed.

You just fill the reservoir with tap water, and the machine handles the rest, filtering the water and storing it in a clean tank. It's like a supercharged water pitcher that gives you RO-level purity. They’re portable, convenient, and ideal for anyone who needs top-notch filtration without making any permanent changes.

The real beauty of a countertop model is its freedom. You can take it with you when you move, use it in a college dorm, or even bring it along in an RV. It gives you the full power of an osmosis water filter system with none of the commitment.

Whole-House RO Systems: The Ultimate Solution

For homeowners who want the absolute best water quality everywhere, a whole-house reverse osmosis system is the top-tier answer. Unlike systems that just treat water at one sink, a whole-house unit connects to your main water line.

This means you get purified water from every single tap—for drinking, showering, doing laundry, and everything else. It’s a major project that requires a professional plumber, a big storage tank, and a booster pump to keep your water pressure strong.

It’s a serious investment, but a whole-house osmosis water filter system delivers purity that protects your plumbing from scale and gives your family the cleanest possible water. If you need more guidance on what system fits your situation, check out our expert advice on choosing water filters.

Which RO System Is Right for You? A Homeowner's Comparison

Still weighing your options? This table breaks down the key differences between the three main types of RO systems to help you find the perfect match for your home and lifestyle.

System Type Best For Installation Typical Cost Key Advantage
Under-Sink Homeowners wanting dedicated drinking water Moderate DIY (1-3 hours) $200 – $600 Hidden, permanent, and great value for high-quality water at the sink.
Countertop Renters, small apartments, or offices None (plug and play) $300 – $500 Portable, no installation required, and provides RO water anywhere.
Whole-House Homeowners wanting pure water everywhere Professional installation required $5,000 – $15,000+ Purifies all water in the home, protecting plumbing and appliances.

Each system offers a powerful solution for clean water. By matching the system type to your living situation and water quality goals, you can find the ideal setup that works for you.

Understanding Installation, Maintenance, and Costs

Buying an osmosis water filter system is a big step. But what happens after you get it home? Let's break down what it really takes to install one, keep it running smoothly, and what the costs look like over time.

For most people, an under-sink model is the way to go, and it's a project you can definitely tackle yourself. Don't be put off by the thought of plumbing work. Most modern kits come with everything you need, including color-coded tubes and quick-connect fittings that just snap into place.

The basic idea is to hook up an adapter to your cold water line, drill a small hole in the sink's drainpipe for the wastewater, and mount a new, dedicated faucet. As you map out the connections, keep in mind that the right size tubing, like a 1 inch hose, is important for making sure the system runs efficiently.

A Typical DIY Installation Overview

Here’s a quick rundown of what it takes to install a standard under-sink RO system.

  1. Turn Off Water & Mount the Faucet: First things first, shut off the cold water supply valve under your sink. If you don't have a spare hole for the new RO faucet (from a soap dispenser, for example), you'll need to drill one.
  2. Connect the Water Supply: Next, you'll attach the feed water adapter that came with your kit to your cold water line. This little piece diverts tap water into the RO system.
  3. Install the Drain Saddle: Clamp the drain saddle onto your sink's drainpipe. You’ll drill a small hole into the pipe, which gives the wastewater (brine) a place to exit.
  4. Connect the Tubing: This is where the color-coding helps. Run the tubes from the water supply to the main RO unit, from the unit to the storage tank, from the tank up to the new faucet, and finally from the RO unit over to the drain saddle.
  5. Flush the System: With everything connected, turn the water back on. Follow the manufacturer's directions for flushing the system and the new filters before you start drinking the water.

While a lot of people can get this done in an afternoon, there's absolutely nothing wrong with calling a plumber. If you aren't comfortable with drilling or messing with plumbing, a professional will get it done right and give you peace of mind.

Ongoing Maintenance and Annual Costs

If you want your system to last and keep producing pure water, you have to do the maintenance. It's just like changing the oil in your car—the filters do the heavy lifting, and they will get clogged.

Regular filter replacement isn't just a suggestion; it's essential for maintaining water quality and flow rate. A clogged filter not only stops working effectively but can also strain the entire system, potentially damaging the delicate RO membrane.

Here's a typical replacement schedule you can expect:

  • Sediment & Carbon Pre-Filters: These take the first hit and need to be replaced every 6-12 months.
  • RO Membrane: This is the core of the system and is much more durable, usually lasting 2-4 years.
  • Carbon Post-Filter: This is the final polishing step. You should change it every 12 months to keep the water tasting crisp and fresh.

This regular upkeep is your main long-term cost. It's a big part of the global water purification filters market, which was valued at USD 44.22 billion in 2024. For many systems, replacement filters can make up 60-70% of what you'll spend over a three-year period.

But the savings are real. For an average family, an osmosis water filter pays for itself in just 2-3 years because you'll no longer be buying bottled water. You can find more data by reviewing these market insights on water purification filters.

Common Questions About Osmosis Water Filter Systems

Alright, you've got a handle on how these systems work, but it's completely normal to have a few more questions rattling around before you pull the trigger. An osmosis water filter is a real investment in your home's water quality, so let's get every last detail ironed out.

We've heard all the common worries and questions from homeowners over the years. Let's walk through them so you can feel 100% confident in your decision.

Does a Reverse Osmosis System Waste a Lot of Water?

This is probably the number one question we get, and it's a fair one. The short answer is: they used to, but modern systems are much, much better.

Here’s the deal: to push contaminants out, the reverse osmosis membrane needs a stream of water to flush them away to the drain. This wastewater is often called "brine." Without this flushing process, the membrane would clog up and fail in no time.

But technology has come a long way. Older, inefficient systems could waste several gallons for every single gallon of pure water they made. Today, you can easily find high-efficiency systems with waste-to-pure-water ratios as low as 1:1.

To get a low-waste system, look for these features:

  • Permeate Pumps: A brilliant little non-electric device. It uses the energy from the wastewater to help push clean water into the storage tank, which speeds up the process and cuts down on waste.
  • Booster Pumps: If you have low water pressure (under 45 PSI), an electric booster pump is a must-have. It gets the system running at its best, which dramatically improves efficiency and reduces wasted water.
  • High-Efficiency Membranes: Some manufacturers now produce special membranes engineered specifically to produce less wastewater.

When you do the math, the slight increase in your water bill is almost always a drop in the bucket compared to the cost—both financially and environmentally—of constantly buying bottled water.

Will an RO System Lower My Water Pressure?

No, an under-sink osmosis water filter system won't affect the water pressure from your main kitchen faucet, your shower, or anywhere else in the house. It's a self-contained unit that connects to its own dedicated drinking water faucet.

Now, you will notice that the flow from that dedicated RO faucet is a bit gentler than your main tap. That’s totally normal. The water is being purified on demand and pushed out of a storage tank, so the process is naturally more deliberate than just yanking open a main water line.

A quick note on whole-house RO systems: those are a different beast. They are always installed with a large storage tank and a powerful booster pump to make sure you have strong, steady water pressure at every single tap and appliance in your home.

Do I Need a Special Certification Like NSF/ANSI 58?

Yes, absolutely. Think of NSF/ANSI certifications as your proof of performance. These aren't just marketing stickers; they are independent, third-party verifications that a system can actually do what the company claims.

For an osmosis water filter system, the gold standard is NSF/ANSI 58. This certification specifically confirms the system's ability to effectively reduce a long list of tough contaminants, including:

  • Lead
  • Arsenic
  • Fluoride
  • Nitrates
  • Total Dissolved Solids (TDS)

Another one to watch for is NSF/ANSI 372, which certifies that the system's parts are lead-free. When you see these certifications, you get real peace of mind. It’s your guarantee that the system you're putting in your home is truly protecting your family's health.


At Water Filter Advisor, our goal is to give you the clear, unbiased information you need to find the best water filtration solution for your home. From in-depth guides to honest product reviews, we're here to help you achieve safer, better-tasting water. Explore our resources today at https://www.waterfilteradvisor.com.

2026 Faucet Water Filter Reviews: The Ultimate Home Guide

Tired of tap water that tastes like it came from a swimming pool or smells a bit… funky? A faucet-mounted filter is one of the fastest, cheapest ways to get delicious, clean water right from your kitchen sink. Our faucet water filter reviews are diving deep into what really matters: what junk they pull out, if they're certified to do it, what they'll cost you long-term, and how they survive the chaos of a busy kitchen.

Your Guide to Choosing the Best Faucet Filter

A modern kitchen with a shiny chrome faucet over a double sink and a plant on the windowsill.

Picking the right faucet filter shouldn't feel like a high-stakes guessing game. It all boils down to a few key factors. This guide is designed to help you see past the flashy packaging and pick a filter based on what it actually does. The mission is simple: get clean, great-tasting water straight from your tap, without the hassle and plastic waste of bottled water.

These nifty gadgets attach directly to your kitchen faucet, giving you purified water with a simple flick of a switch. It's why they're a smash hit in homes and apartments alike. They are engineered to tackle the common water quality gremlins that sabotage both the safety and taste of your H2O.

What Really Matters in a Faucet Filter

Before we start naming names, let's talk about what separates a champion filter from a dud. We've zeroed in on the most critical things to look for.

  • Contaminant Removal: This is the filter's whole reason for being. The best models are certified to yank out villains like lead, chlorine, mercury, and even some pesticides.
  • Certifications: Always, always look for NSF/ANSI certifications. These are independent, third-party tests that prove a filter walks the walk, not just talks the talk.
  • Long-Term Cost: The price on the box is just the cover charge. The real cost of admission is the price of replacement cartridges and how long they last.
  • Flow Rate and Usability: A filter shouldn't slow your water to a sad trickle. It also needs to be a breeze to install and simple enough for daily use without a second thought.

When you focus on these pillars, you can tune out the marketing noise and find a filter that delivers real value and confidence in every glass.

A filter's true worth isn't just in the water it provides, but in the contaminants it removes. Independent certifications like NSF/ANSI 53 for lead reduction are your best guarantee of safety and performance.

We’ll use these core principles to pit the top filters on the market against each other. The table below gives you a quick snapshot of how different filter types stack up.

Feature Faucet Filters Water Pitchers Under-Sink Systems
Convenience Instant access Requires filling/waiting Instant access
Installation Simple, no tools None More complex
Cost Low initial cost Very low initial cost Higher initial cost
Filter Lifespan ~100 gallons ~40 gallons ~500+ gallons

Why Faucet Filters Are an Essential Home Upgrade

Turning on your tap should be a simple act of trust. You expect clean, safe water. But with aging city pipes and a growing list of "what-ifs," that trust has eroded for many of us. This is why home water filtration is exploding in popularity—it’s not just about better taste, it's about taking back control.

A great faucet filter is your personal bodyguard for your water, right where you need it most. It’s an instant, effective solution for common tap water woes, from that chlorinated pool taste to more serious, invisible threats.

The Hidden Risks in Your Tap Water

Just because your water looks crystal clear doesn't mean it's pure. That water quality report from your city is a snapshot taken at the treatment plant, miles away. It says nothing about the nasty hitchhikers your water can pick up on its journey through pipes—some of which are older than your grandparents—to your kitchen.

A faucet filter is built to battle these very issues:

  • Lead: A serious health risk, especially for kids, that often leaches from old pipes and plumbing fixtures.
  • Chlorine: It’s used to disinfect our water, but it leaves behind an unpleasant chemical taste and smell.
  • Trihalomethanes (TTHMs): These are nasty byproducts that form when chlorine parties with organic matter in the water, and they carry potential health risks.
  • Sediment and Particulates: Little bits of rust, sand, and other gunk that can make water cloudy and taste "earthy."

A reliable filter gives you direct authority over what ends up in your glass, serving up peace of mind every time you hydrate.

The real value of a faucet filter is simple: it instantly turns uncertain tap water into a source of clean, trustworthy hydration. It's a small change that makes a huge difference in your health and daily routine.

Smart Economics and Environmental Impact

The case for faucet filters goes way beyond health. Financially and environmentally, it’s a slam dunk. One filter cartridge can replace hundreds—sometimes thousands—of single-use plastic water bottles. You’re not just slashing your plastic waste; you’re saving a boatload of money over time. The cost per gallon for filtered tap water is a tiny fraction of what you'd shell out for bottled water.

This shift to filtering at the tap is a full-blown movement. The market for filtered water systems was valued at USD 12.72 billion in 2023 and is projected to skyrocket to USD 25.2 billion by 2032. It’s proof that households are choosing filtration to cut costs and waste. If you're a data nerd, you can dive into the full filtered water faucets market analysis to see the numbers. It confirms that making the switch is a smart and popular decision.

Understanding Filter Certifications and Performance

When you're shopping for faucet filters, you'll be bombarded with claims. But how do you separate marketing magic from real-world muscle? The answer is certifications—the independent, third-party proof that a filter actually does what it claims.

Trying to decode water filtration can feel a bit like science class, but mastering these certifications is the single most important thing you can do. Without them, you're just crossing your fingers and hoping for the best.

Decoding the NSF/ANSI Standards

The most important certifications come from NSF International. When a filter is NSF certified, it means it has been put through a grueling, standardized wringer to prove it removes the specific contaminants the company claims it does.

For faucet filters, you really only need to know about two key standards:

  • NSF/ANSI 42 (Aesthetic Effects): This one is all about taste and smell. If your main gripe is that your tap water has a pungent chlorine aroma, a filter certified to Standard 42 is your champion.
  • NSF/ANSI 53 (Health Effects): This is the heavyweight champion of health and safety. Filters with this certification are proven to reduce specific health-related contaminants like lead, mercury, asbestos, cysts (like Giardia), and certain chemicals (VOCs).

A filter can be certified for one or both. If a filter is certified to Standard 53 for lead, for example, it has been scientifically proven to remove a specific amount of lead, giving you verifiable protection.

When you pick a filter certified to NSF/ANSI 53, you're not just buying a product. You're getting a scientifically proven safeguard for your family's health. It's the only way to be certain that dangerous contaminants like lead are actually being removed from your water.

Why Certification Is Non-Negotiable

Any company can slap "reduces lead" on a box, but without that NSF/ANSI 53 certification, it's just empty words. Certification means the company is held accountable. It proves the entire system—the filter media, the housing, everything—works in harmony to get the job done right, from the first glass to the last.

This is exactly why savvy shoppers now make certification their top priority. The game has changed.

A recent survey revealed that 92% of buyers now look for independently certified filters before making a purchase. People want proof, especially when it comes to specific contaminants. The best models, for example, demonstrate up to 99.3% lead reduction—and not surprisingly, those are the same filters that score the highest for taste improvement. You can see how this has become a massive factor for shoppers by checking out the latest water filter market trends.

Ultimately, these standards put the power in your hands. They let you look right past the slick ads and focus on what really counts: proven, data-backed performance. By checking for those NSF/ANSI certifications, you can be sure your faucet filter is a true tool for cleaner, safer water.

Detailed Faucet Water Filter Comparison for 2026

Alright, let's get to the main event: our faucet water filter reviews. Forget the marketing hype. We're running the top models through a real-world gauntlet to see how they stack up head-to-head. We’re judging them on what actually matters in your kitchen: contaminant removal, true cost over time, water flow, and the all-important taste test.

Our mission here is to lay out the pros and cons for each filter, plain and simple. This will help you see past the feature lists and find the perfect match for your sink, your family, and your wallet.

This chart breaks down the key performance data that separates a good filter from a great one. We're looking at certifications, lead removal capability, and how users rate the final taste.

A bar chart displaying a water filter performance report, showing certification, lead removal, and taste rating.

As you can see, the top performers don't just talk a big game—they deliver outstanding lead removal and earn high marks on taste, all backed by independent certification.

To give you a clearer picture, this table provides a side-by-side look at how leading faucet filters compare on the metrics that define performance and long-term value.

Faucet Water Filter Head-to-Head Comparison

Model Key Certifications Removes Lead? Filter Lifespan (Gallons) Average Cost Per Gallon Best For
Model A NSF/ANSI 42 No 100 $0.20 Basic taste and odor improvement
Model B NSF/ANSI 42 & 53 Yes, >99% 100 $0.28 Health protection, families with children
Model C NSF/ANSI 42, 53, 401 Yes, >99% 120 $0.25 Comprehensive removal of emerging contaminants
Model D NSF/ANSI 42 No 200 $0.15 Budget-conscious users focused on chlorine

This comparison highlights the critical trade-offs. While some models boast a lower cost per gallon, they often sacrifice the power to remove dangerous contaminants like lead. For true peace of mind, investing in a filter with NSF/ANSI 53 certification is the only way to go.

Contaminant Removal Efficacy

First things first: a water filter's primary mission is to make your tap water safer. When you're comparing faucet filters, nothing is more important than what they take out of your water. We always hunt for NSF/ANSI 53 certification first, as this is the standard that covers health-related baddies like lead, mercury, and cysts.

Let's see how two different types of filters handle this job:

  • Model A (Basic Filtration): This filter is certified to NSF/ANSI 42. That means it does a bang-up job removing chlorine, the main culprit behind water that tastes and smells like a swimming pool. If that's your only issue, it's a solid choice. But it won't touch lead or other heavy metals.
  • Model B (Advanced Filtration): This is the one you want for real protection. It carries both NSF/ANSI 42 and 53 certifications. It banishes chlorine just like the other model, but it's also proven to reduce lead by over 99%, along with other nasty stuff. If you live in a home with older plumbing or have young kids, this level of filtration isn't a luxury—it's essential.

The bottom line is simple. For better-tasting water, Model A works. For safer water, Model B is the only choice.

Real-world impact is everything. A filter that only makes water taste better without removing harmful contaminants is a job half-done. Prioritizing NSF/ANSI 53 certification for lead is the most critical step you can take to protect your family's health.

Filter Lifespan and Long-Term Cost

Don't be fooled by a low sticker price. The true cost of a faucet filter is all about the replacement cartridges—how much they cost and how often you have to buy them. A cheap filter can easily become a money pit if its cartridges are expensive and don't last.

Let's do some quick kitchen-table math on the cost per gallon:

  • Filter System X: The unit costs $30 upfront and includes one filter that lasts for 100 gallons. A replacement cartridge costs $20. If you use 300 gallons in a year, your cost per gallon is about $0.23.
  • Filter System Y: This one is $50 upfront. The replacement cartridges come in a two-pack for $45, and each one is good for 100 gallons. For that same 300 gallons of use, your cost per gallon jumps to around $0.32.

A $0.09 difference per gallon might not sound like much, but it adds up fast. For a family of four, that could be an extra $50-$60 a year. Always calculate the long-term cost. Sometimes, paying a little more upfront saves you a lot more down the road.

Impact on Water Flow

One of the biggest gripes about faucet filters is a drop in water pressure. Nobody has time to wait forever just to fill a pot of pasta water. The flow rate, measured in gallons per minute (GPM), is the spec you need to watch. Your regular unfiltered faucet likely runs around 2.2 GPM.

A decent faucet filter should give you a flow rate of at least 1.0 to 1.5 GPM when you're using it. But keep in mind, that number will change over the life of the filter.

As a filter cartridge fills up with sediment and contaminants, it naturally starts to clog, and the water flow will slow down. This isn't a defect; it's a sign that the filter did its job and it's time for a new one. Some of the better-designed models manage this slowdown more gracefully, holding a steady flow for longer.

When you're reading faucet water filter reviews, look for comments about the flow rate after a month or two. That gives you a much more honest picture of daily performance than the "brand-new" specs on the box.

Real-World Taste and Odor Improvement

Certifications tell you what a filter removes, but the ultimate proof is in the glass. Does the water actually taste and smell better? We've found that the answer often depends on the quality of the activated carbon inside the filter. For instance, many people find that filters using coconut shell carbon produce a crisper, cleaner taste than those with standard carbon blocks.

Think about these real-world scenarios:

  1. The Coffee Enthusiast: If you're serious about your coffee, you know water quality is everything. Tap water loaded with chlorine can make even the best beans taste bitter and "off." A filter that’s a beast at chlorine removal (NSF/ANSI 42) can completely transform your morning brew, letting the coffee's true flavors sing.
  2. The City Dweller: Living in an old building often means dealing with water that has a funky, metallic, or musty taste from aging pipes. A comprehensive filter (NSF/ANSI 53) doesn't just fix the taste—it gives you the confidence of knowing you're also removing lead and other junk from those old pipes.

Taste is subjective, but it’s a huge deal. The filters that consistently get 4.5-star ratings or higher for taste are almost always the ones using higher-grade materials. It proves that not all carbon is created equal, and it's what separates water that's just "fine" from water that tastes genuinely great.

Our Top Picks for Every Household and Budget

After all the testing and research, one thing is crystal clear: there's no single "best" faucet filter for everyone. The right one for you depends on your water, your home, and what you care about most. Our faucet water filter reviews are all about matching the right filter to the right problem.

Instead of a generic top-ten list, we've broken down our top picks by the real-world situations they solve. Whether you're a parent worried about old pipes or a renter just trying to get better-tasting water on a budget, we'll point you to the filter that gets the job done.

Best for Families Concerned with Lead

If you have young children or live in a home built before the 1980s, lead safety is non-negotiable. Your first and only priority should be a filter certified to NSF/ANSI 53 for lead reduction. These are the only models proven to remove over 99% of lead, creating an essential firewall between your plumbing and your family.

The model we recommend for this job also happens to be a fantastic all-around filter. It nails the critical lead protection while also doing an excellent job on chlorine, so your water is both safer and tastes noticeably better. Yes, the upfront cost and replacement filters are a bit more, but the peace of mind is priceless.

For families, choosing a filter with an NSF/ANSI 53 certification for lead isn't just a bonus feature—it's the entire reason to buy one.

Best Budget-Friendly Option for Renters

When you're renting, you need a simple, affordable fix that won't require a call to the landlord. The best choice for a renter is a filter that snaps on in seconds, has a low cost per gallon, and targets the number one complaint about city water: chlorine.

Our top pick for renters fits the bill perfectly. It's certified to NSF/ANSI 42, your guarantee that it will dramatically improve the taste and smell of your water. The replacement filters are cheap and easy to find, bringing the cost down to just pennies per gallon. It’s the smartest, easiest upgrade you can make to a rental kitchen.

Best for Superior Taste and Odor Removal

Are you the person who can taste the difference in your coffee or tea depending on the water? If your main goal is absolutely pristine flavor, you need a filter that goes beyond basic chlorine removal. The top-tier filters for taste usually rely on high-grade activated carbon, like coconut shell carbon, which is incredibly porous and grabs all sorts of compounds that make water taste "off."

Our choice for the taste purist stands out for a reason. It holds both NSF/ANSI 42 and 53 certifications, but what really matters is what people say about the water it produces: exceptionally crisp and clean. Coffee tastes richer, tea is brighter, and a simple glass of water is genuinely refreshing. This filter proves that the quality of the filter media is just as important as the certifications on the box.

Most Durable Long-Term Investment

For homeowners who just want a reliable filter that lasts, durability is king. You need a unit that can handle the daily chaos of a busy kitchen without cracking or springing a leak. The best long-term picks almost always have stainless steel components and a much tougher filter housing.

Our pick for durability is built like a tank. It might have a higher price tag upfront, but its solid construction will save you from the hassle and hidden cost of replacing leaky plastic models every year or two. These tougher filters often come with a longer warranty, too, which shows the manufacturer stands behind their build quality.

Installation and Maintenance Made Simple

Close-up of hands installing a new water filter system onto a modern kitchen faucet over a white sink.

Let's be honest, a huge part of the appeal of faucet filters is how ridiculously simple they are. You shouldn't have to hire a plumber or break out a toolbox just to get clean water. In most cases, you can have one of these installed and running in just a few minutes.

The key is getting that installation right from the start. A good seal means no leaks and ensures every drop of water is forced through the filter media as intended.

Most faucet filters today use a simple twist-on design. Your kit will include a few different adapters to fit the threads on your kitchen faucet. Just find the one that matches, screw it on, and then attach the main filter unit. A firm hand-tight twist is usually all it takes.

If you notice any drips from your faucet's original hardware during this process, it might be a good time to learn how to fix a leaky faucet. A solid, leak-free fixture is the foundation for a properly working filter.

Your Long-Term Maintenance Checklist

Keeping your filter working at its best is incredibly straightforward. A little routine maintenance goes a long way.

  • When to Change the Cartridge: That little indicator light is just a timer. The real signal is your water flow. As the filter fills up with trapped gunk, the flow rate will drop. When you notice a real slowdown, it’s time for a new cartridge.

  • Clean the Housing: Every time you swap out the cartridge, take a minute to wipe the inside and outside of the plastic housing with a damp cloth. This prevents any grime or mineral scale from building up.

  • Maximize Filter Life: If you have hard water or a lot of sediment, your filter is working overtime. A simple trick is to run the tap on the unfiltered setting for a few seconds first. This can flush out larger particles before you switch over to the filtered stream, giving your cartridge a little more life.

A filter's performance and lifespan are directly tied to your local water quality. If your tap water has high levels of sediment or total dissolved solids (TDS), it can clog a cartridge in under two months, no matter what the box says.

Knowing how your local water affects your filter is crucial. We're seeing a shift towards smarter filters that help with this. In some areas, connected filters that send replacement reminders have helped people achieve 90% on-time cartridge changes. In those same homes, lead exposure has plummeted by an incredible 80%.

For more hands-on tips to keep your home's water systems running smoothly, head over to our complete guide on water filter advice.

Common Questions About Faucet Filters

Even after digging through reviews and comparing models, you probably still have a few practical questions. It's totally normal. Let's clear up the most common concerns so you can buy with total confidence.

Will This Thing Actually Fit My Faucet?

This is the number one worry we hear, but it's rarely a problem. Faucet filters are designed to work with the vast majority of standard kitchen faucets. The easiest way to check is to simply unscrew the little screen at the tip of your faucet (that’s the aerator) and look at the threads.

Your new filter will come with a small bag of multiple adapters. These are little threaded rings that bridge the gap between your faucet and the filter mount. Whether your faucet has threads on the outside (male) or inside (female), one of those adapters will almost certainly give you a tight, leak-free seal. Just know that these are not designed for pull-out, pull-down, or sprayer-style faucets.

Is My Water Pressure Going to Drop?

Yes, and that's actually a good thing. When you switch to the filtered stream, you'll see a slower flow. This is on purpose. A slower flow rate gives the water more "contact time" with the filter media inside, which is crucial for grabbing contaminants. Don't worry, it should be a steady, usable stream—not a frustrating drip.

Think of a slow flow rate as proof your filter is doing its job. When the water starts getting too slow, it's not broken. It means the filter has trapped so many impurities that it's full and ready to be replaced.

Are Faucet Filters Better Than a Pitcher?

"Better" really depends on your lifestyle and what you need. Each one has its own clear advantages.

  • Faucet Filters: The big win here is convenience. You get filtered water instantly, right from the tap. No waiting. They also last longer, typically filtering around 100 gallons before needing a change.
  • Water Filter Pitchers: These are great for their simplicity and portability. No installation needed, and you can keep one in the fridge for cold, filtered water. They're a solid choice for one person or if you don't use a ton of filtered water. Pitcher filters usually last for about 40 gallons.

For a busy family or anyone who does a lot of cooking with filtered water, a faucet filter is almost always the more practical and life-changing pick.


At Water Filter Advisor, we're here to give you the straight facts you need to choose the right water filter for your home. You can find more expert guides and reviews over at our main site, https://www.waterfilteradvisor.com.

Your TDS Meter RO Guide: The Ultimate Check-Up for Your Home Water Purifier

A TDS meter for your RO (Reverse Osmosis) system is your secret weapon for knowing if your water filter is actually doing its job. Think of it as a pocket-sized truth detector for your drinking water. It spits out a single, hard number—the Total Dissolved Solids—so you can stop guessing and start knowing just how pure your water really is.

This little gadget measures all the invisible stuff dissolved in your water—minerals, salts, and metals—and confirms your pricey RO system is earning its keep. With a TDS meter, you gain total confidence in every single glass you pour.

What Your TDS Meter Reveals About Your Home RO System

Your TDS meter is like a water translator. It takes the invisible world of dissolved particles floating around in your water and turns it into a simple number, measured in parts per million (PPM).

That one number tells the entire story of your water's journey: from the city treatment plant, through your home's aging pipes, and finally through the gauntlet of filters in your RO system.

So what exactly are these "Total Dissolved Solids" or TDS? They're simply the collection of minerals and inorganic compounds water picks up on its travels. Common culprits include calcium, magnesium, sodium, and even traces of metals from old plumbing.

A tds meter ro setup helps you see what your reverse osmosis system is kicking out. While many dissolved solids are harmless (some even give water a nice taste), high levels can make your water taste funky, create scaly buildup in your coffee maker, and sometimes hint at unwanted contamination.

Defining Good and Bad TDS Levels

So, what's a "good" number? It all depends on where you're testing. Your tap water, for example, is the "before" picture, and your purified RO water is the "after."

The EPA suggests a maximum of 500 ppm for drinking water, though many find the best-tasting water is somewhere between 300–500 ppm. If you want to dive deeper, you can learn more about how TDS standards have evolved and what they mean for your home on wisewell.com.

Your unfiltered tap water could be anywhere from 100 ppm to well over 500 ppm. After a trip through a healthy RO system, that number should nosedive. A fantastic RO water reading is anything below 50 ppm, with many top-tier systems getting it down under 25 ppm.

Here’s a quick cheat sheet to help you make sense of the numbers you might see on your meter.

Interpreting TDS Readings in Your Home Water

TDS Level (PPM) Water Quality Interpretation Common Source or Condition
0-50 Excellent Reverse osmosis, deionized, or distilled water. The gold standard for purity.
50-150 Good High-quality spring water or carbon-filtered tap water.
150-300 Fair Standard tap water in many areas. Generally acceptable but could be better.
300-500 Poor Hard water with high mineral content. Still safe but may have an off taste or leave spots.
500+ Unacceptable Exceeds EPA guidelines. Water may taste salty or metallic. A prime candidate for filtration.

This table gives you a solid baseline for understanding the quality of your water, both before and after it runs through your RO system. The goal is to see a dramatic drop from the "Fair" or "Poor" range right down to "Excellent."

The All-Important Rejection Rate

The most critical number your TDS meter helps you find is the rejection rate. This percentage tells you exactly how effective your RO membrane is at kicking all those dissolved solids to the curb.

Key Takeaway: A high-performing home RO system should have a rejection rate of 95% or higher. If your tap water is 400 ppm and your RO water is a cool 20 ppm, your system is crushing it.

If you test your water and find that rejection rate is dipping below 90%, it's a huge red flag. It could be clogged pre-filters, but more often than not, it means the RO membrane itself is getting tired and needs to be replaced. Checking this rate regularly is the best way to know precisely when your system needs a tune-up.

How to Accurately Test Your RO System Water

Getting a reliable reading from your TDS meter is all about clean, consistent technique. Think of it like a science experiment in your kitchen.

If you're sloppy, you'll get junk numbers, and you won't know if your reverse osmosis system is actually protecting you. But follow a simple process, and you’ll get data you can trust every single time.

Don't sweat calibration. Most digital TDS meters come pre-calibrated from the factory, and for home use, they rarely need adjusting. If you have a pro-grade meter or just feel like your readings are way off, the manual will walk you through dialing it in with a calibration solution.

The Three-Point Water Quality Check

To really get the scoop on your RO system's performance, you can't just test the water coming out of that fancy little faucet. A full diagnostic means checking your water at three key points.

This is how you play detective and pinpoint exactly where a problem is hiding—whether it's your incoming tap water, the RO membrane itself, or a filter further down the line.

A diagram illustrating a three-step water purification process from tap water to pure water.

As you can see, each stage of filtration dramatically changes the water, and that's exactly what your TDS meter is built to measure.

Grab three squeaky clean glasses. And I mean it—perfectly clean. Even a single drop of tap water in your RO sample glass will skew your readings and ruin your experiment.

  • Test 1: The Raw Tap Water: Fill a glass with your regular, cold tap water. This is your "before" photo, your baseline. It tells you what your RO system is up against.

  • Test 2: The Membrane-Only Water: This is the most crucial test for checking your RO membrane’s health. To get this sample, you'll need to disconnect the tube that runs from the membrane housing to your post-filter or storage tank. Let that water flow directly into a clean glass. This reading isolates the membrane and tells you how well it's working on its own.

  • Test 3: The Final RO Faucet Water: Now, fill your third glass from the dedicated RO faucet on your sink. This number shows you the quality of the water you're actually drinking after it has passed through all the post-filters and sat in the storage tank.

If you see a big jump in TDS between the membrane-only water (Test 2) and the final faucet water (Test 3), your problem is likely a worn-out post-filter or a contaminated storage tank. If Test 2 already shows high TDS, the membrane itself is the prime suspect.

Pro Tips for Flawless Testing

For the most accurate numbers, always let the water run for at least 15-20 seconds before you collect a sample. This flushes out any water that's been sitting in the lines.

Water that sits can sometimes pick up extra dissolved solids, a little phenomenon we call "TDS creep." Following these steps ensures your tds meter ro readings are a true reflection of your system's real-time performance.

If you're looking for more general system maintenance tips, there are plenty of expert guides out there. For instance, the folks at Water Filter Advisor have a ton of practical information you might find helpful.

Making Sense of Your TDS Results

Okay, you've got your numbers. So what do they actually mean? This is where your TDS meter RO test transforms from a simple reading into a powerful diagnostic tool for your home water filtration system.

Those PPM (Parts Per Million) figures tell you everything about how hard your RO system is working.

The most important number to figure out is your system's rejection rate. This percentage is your system's report card—it shows you exactly how much junk your RO membrane is pulling out of your water.

Calculating Your System's Rejection Rate

Don't worry, the math is simple. No calculus required.

Here’s the formula:

Rejection Rate % = (Tap Water TDS – RO Water TDS) / Tap Water TDS * 100

Let's say your unfiltered tap water measures 400 PPM. Then, you test the purified water from your RO faucet and get a crisp reading of 20 PPM.

Here's how that breaks down:

  • (400 – 20) / 400 = 0.95
  • 0.95 * 100 = 95% Rejection Rate

That's a fantastic result. A rejection rate of 95% or higher means your RO system is in peak condition and the membrane is doing its job perfectly.

What a Low Rejection Rate Tells You

But what if the numbers are trending in the wrong direction? Let's imagine you test again a few months later. Your tap water is still 400 PPM, but your RO water has crept up to 60 PPM.

Running the numbers again:

  • (400 – 60) / 400 = 0.85
  • 0.85 * 100 = 85% Rejection Rate

That drop from 95% down to 85% is your flashing warning light. It tells you performance has slipped and something needs your attention. This is exactly why using a tds meter ro setup is so vital; you can catch a problem long before you'd ever taste it.

While 85% might not sound terrible, today's RO systems are capable of so much more. It's not unusual for a standard household system to hit rejection rates over 99%, especially with tap water under 1,000 PPM. You can learn more about the critical role of TDS in RO system design to see just how effective this technology is.

A lower rejection rate isn't just a number. It's a sign that the barrier protecting your drinking water is weakening. It means it's time to play detective.

Troubleshooting High TDS Readings in Your RO Water

So you tested your RO water and the TDS reading is high. What gives? You bought this system for pure water, after all. A high reading doesn't mean your system is a dud; it’s usually just a maintenance light telling you one part needs some TLC.

With a little bit of troubleshooting, you can figure out what's going on and get those numbers back down to the super-low levels you expect.

A TDS meter, two water filter cartridges, and a document on a counter with 'FIX High TDS' text.

Check Your Filters First

Don't jump straight to blaming the expensive membrane. Nine times out of ten, the problem starts with your humble sediment and carbon filters.

Your pre-filters are the bouncers at the club, protecting the VIP (the RO membrane) from chlorine and sediment. When they get clogged, they can't do their job. This lets all the riff-raff through, overloading the membrane and causing your TDS levels to spike. A quick look at your filter change schedule is the easiest first step.

The same goes for your post-filter. If it's old and spent, it can actually leach solids back into your clean water, raising the TDS right before it hits your glass.

Is It Just TDS Creep?

Ever test the very first glass of water in the morning and see a high TDS number, only for it to be much lower later in the day? That’s something called TDS creep, and it’s completely normal.

When your RO system sits idle, dissolved solids can literally "creep" across the membrane from the high-TDS side to the clean side, concentrating in the first bit of water produced.

To get a true reading, let the RO faucet run for about 30 seconds before you take a sample. This flushes out that initial high-TDS water. If the number drops way down, you're just seeing TDS creep, not a real system problem. Phew!

The RO Membrane Health Check

If you've got fresh filters and you've already ruled out TDS creep, it’s time to look at the heart of the system—the RO membrane itself. These workhorses typically last 2 to 4 years, but it all depends on your local water quality and how much water you use.

Two things can go wrong here:

  • Improper Seating: If you recently changed filters, it's possible the membrane housing isn't sealed right. A loose cap or a twisted O-ring can let tap water sneak past the membrane, which will send your TDS reading through the roof.
  • Membrane Failure: Membranes just wear out over time. If your rejection rate has been slowly dropping and is now under 90%, that’s a sure sign the membrane has fought its last battle and needs to be replaced.

A worn-out membrane is the most common reason for consistently high readings from a tds meter ro test. To know for sure, test the water coming directly from the membrane housing's "pure" water line. If that water's TDS is high, you've found your culprit.

When to Replace Your RO Membrane and Filters

Figuring out when to swap your RO system's filters and membrane shouldn't be a guessing game. A lot of people just circle a date on the calendar, but using your TDS meter RO testing data is a much smarter, more scientific approach. It's the only way to know for sure when a part has truly given up the ghost.

This strategy saves you real money and stops you from changing parts too early. More importantly, it lets you catch a drop in water quality before you can even taste it, protecting your family and the investment you made in your RO system.

A person's hands are holding two water filters, while other filters and a calendar are on a wooden table.

When to Replace the RO Membrane

The reverse osmosis membrane is the MVP of your system. It’s also the priciest part to replace, so you definitely don’t want to swap it out too soon—or too late. The single best measure of its health is your TDS rejection rate.

Key Rule of Thumb: If your system's rejection rate consistently drops below 90%, it's a clear sign the RO membrane is on its way out and needs replacing.

Let’s say your tap water is 500 PPM and your RO water measures 25 PPM. That gives you a fantastic 95% rejection rate. But if you test a few months later and your RO water has crept up to 60 PPM, your rejection rate has fallen to 88%. That's your signal to order a new membrane before performance gets any worse.

A healthy membrane can last 2-4 years, but your specific water conditions will determine its actual lifespan. Your TDS meter gives you the hard data to make the right call at the right time.

Why Pre-Filters and Post-Filters Matter

While the membrane gets all the glory, your pre- and post-filters are the unsung heroes of the system. If you ignore them, you're practically guaranteed to destroy a perfectly good membrane.

  • Pre-Filters (Sediment and Carbon): Think of these as the membrane's bodyguards. They shield it from big particles like silt and harsh chemicals like chlorine. They need to be changed every 6-12 months. If you let them get clogged, all that gunk slams directly into the delicate membrane, causing it to fail much, much faster.

  • Post-Filter (Polishing Filter): This is the final touch, removing any stray tastes or odors the water might pick up in the storage tank. If your TDS reading is low but your water tastes a bit flat or stale, a worn-out post-filter is usually the culprit. Just like the pre-filters, plan on replacing it every 6-12 months.

By using your TDS meter RO test results to keep an eye on performance and sticking to a simple replacement schedule for your other filters, you'll get the most life out of your entire system. This means you’ll always have pure, great-tasting water on tap without wasting money on parts you don't need yet.

Common Questions About TDS Meters and RO Systems

You've got the basics down, but a few questions always pop up when you start testing your home RO system with a TDS meter. Let's tackle them with some straight answers.

Is Zero TDS Water the Best to Drink?

You'd think so, but not really. A reading of 0-10 PPM is a fantastic sign that your RO system is working like a champion, but it doesn't make for the best drinking water.

When you strip out all the dissolved solids, you also remove the natural minerals that give water its taste. The result is often water that tastes "flat" or just empty. Ultra-pure water can also be a bit "aggressive," meaning it might try to leach minerals from your plumbing over time.

What Is the Perfect TDS Level for Drinking Water?

The sweet spot for crisp, clean, and refreshing drinking water is somewhere between 50 and 150 PPM. This range gives you the best of both worlds.

  • Purity: You know the water is exceptionally clean and free from the vast majority of unwanted contaminants.
  • Taste: It keeps just enough of the good minerals, like calcium and magnesium, to have a balanced, pleasant flavor.

If your RO water tastes flat, look into a remineralization filter. Many modern RO systems have one, and it’s an easy add-on for those that don't. It's designed specifically to add those healthy minerals back in after purification, bumping the TDS into that ideal taste range.

Expert Insight: If your RO water reads below 50 PPM and tastes flat, a remineralization cartridge is a simple and effective upgrade. It restores the minerals that create a more pleasant, natural taste.

Can I Use a TDS Meter to Check for All Contaminants?

No. This is a big one. A TDS meter is a fantastic tool for what it does, but it's critical to know what it can't do. It measures the total amount of dissolved solids but tells you absolutely nothing about what those solids are.

Your meter won't detect many of the most dangerous contaminants because they don't conduct electricity. This includes nasty stuff like:

  • Pesticides
  • Herbicides
  • Many pharmaceuticals
  • Lead (especially at low but still very harmful levels)
  • Bacteria and viruses

Think of your TDS meter like a pressure gauge for your system—it gives you a great snapshot of its general performance and efficiency. For a full picture of your water's safety, a comprehensive lab test is the only way to be 100% certain.


Ready to take control of your home's water quality? Water Filter Advisor provides expert reviews, in-depth guides, and practical maintenance tips to help you choose and maintain the perfect filtration system for your family. Explore our resources and make confident decisions about your water. Visit us at https://www.waterfilteradvisor.com.