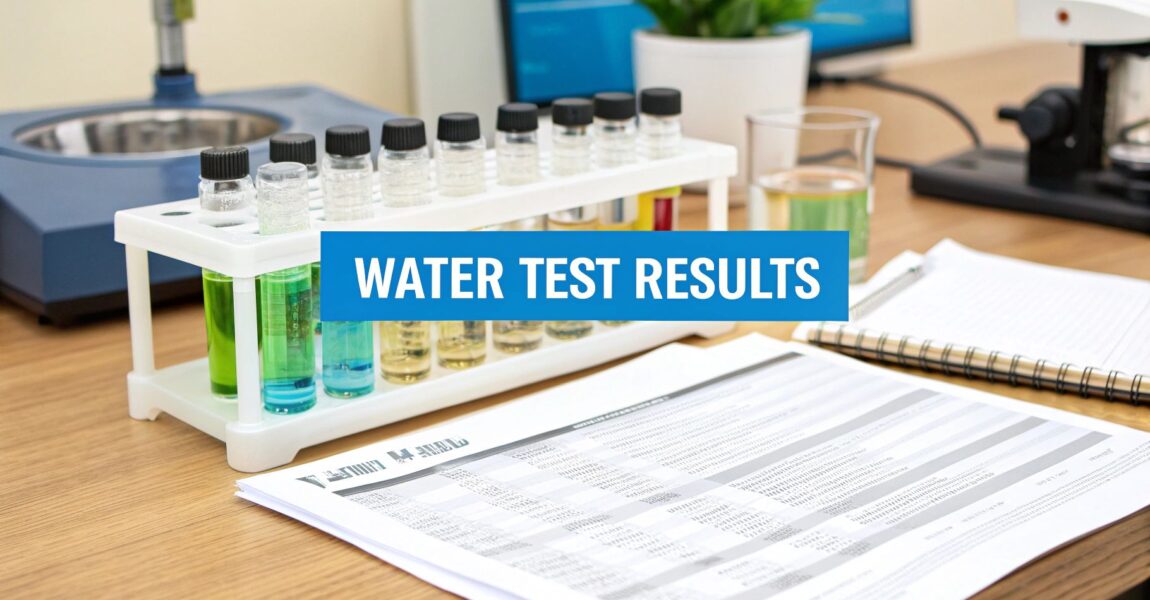
How to Read Water Test Results: Your Ultimate Guide to Choosing a Filter

So, the lab sent back your water test results. Now what? You’re staring at a wall of acronyms, chemical names, and numbers that look like they were written in a secret code. Don't sweat it. That piece of paper is your secret weapon, the treasure map that leads directly to safe, fantastic-tasting water right from your tap.

A person examining a water test result report with various charts and numbers, indicating a focus on data analysis.

Think of it as a personalized health check-up for your pipes. The trick is to stop seeing it as one overwhelming document and start looking at it as a simple Q&A. The only question that really matters is: "Is anything in my water at a level that could harm my family, wreck my appliances, or just taste plain gross?"

To answer that, you just need to find two columns on your report:

  • Your Results: This shows the actual amount of a substance found in your water sample.
  • The Safety Limit: This is the benchmark. It might be labeled MCL (Maximum Contaminant Level) or an Action Level, but its job is to give you the government-recommended maximum for safe drinking water.

Your job is to play a matching game. Find any line where "Your Results" are higher than the "Safety Limit." Those are your red flags, and they tell you exactly what kind of home water filtration you actually need. No more guesswork, no more buying filters that don’t solve your problem. This report is your roadmap to the perfect system.

Decoding the Language of Water Quality

To really get the full picture, you need to speak the language of the report. The results are often broken down into different categories like microbiologicals, chemical parameters, or physical characteristics, and each has its own red line.

For instance, seeing any coliform bacteria is a major red flag that requires immediate action, usually a UV purification system. It’s a serious issue, and a global one at that. The World Health Organization reported back in 2022 that at least 1.7 billion people are using a drinking water source contaminated with feces. It’s a stark reminder of why those microbial tests are so critical. You can dig into the WHO's findings on their global drinking water safety page.

A water test isn't just a pass/fail grade; it’s a detailed guide to choosing the right filter. It tells you exactly what you need to filter out, so you can choose a system that solves your specific problems instead of wasting money on a generic one.

To help you out, I've put together a quick cheat sheet for the most common terms you'll see.

Key Terms on Your Water Report Explained

This table breaks down the jargon into plain English, so you know what you're looking at and why it matters for your pipes, appliances, and health.

Term / Acronym What It Means Why It Matters for Your Home
MCL Maximum Contaminant Level. The highest level of a contaminant allowed in drinking water by the EPA. This is the most critical safety benchmark. If your result is above the MCL, you need a targeted filtration solution.
PPM Parts Per Million. A unit of concentration (1 PPM = 1 mg/L). Used for common minerals like calcium or contaminants like nitrates. Helps you gauge the amount of something in your water.
PPB Parts Per Billion. A smaller unit of concentration (1 PPB = 1 µg/L). Often used for trace metals like lead or arsenic where even tiny amounts are a health concern.
NTU Nephelometric Turbidity Unit. A measure of water cloudiness or haziness. High turbidity can interfere with disinfection and hide bacteria. It’s an aesthetic issue that can also signal a bigger problem.
Action Level The concentration of a contaminant which, if exceeded, triggers treatment or other requirements. Think of it as an early warning system. For lead and copper, exceeding this level means you need to act, even if it's not a strict MCL violation.

Hopefully, this little glossary makes reading that report feel a lot less intimidating. Once you can translate the terms, you hold all the power to pick the perfect filter.

Identifying Common Contaminants in Your Water

A close-up of clear water with bubbles, representing the purity and quality of filtered water.

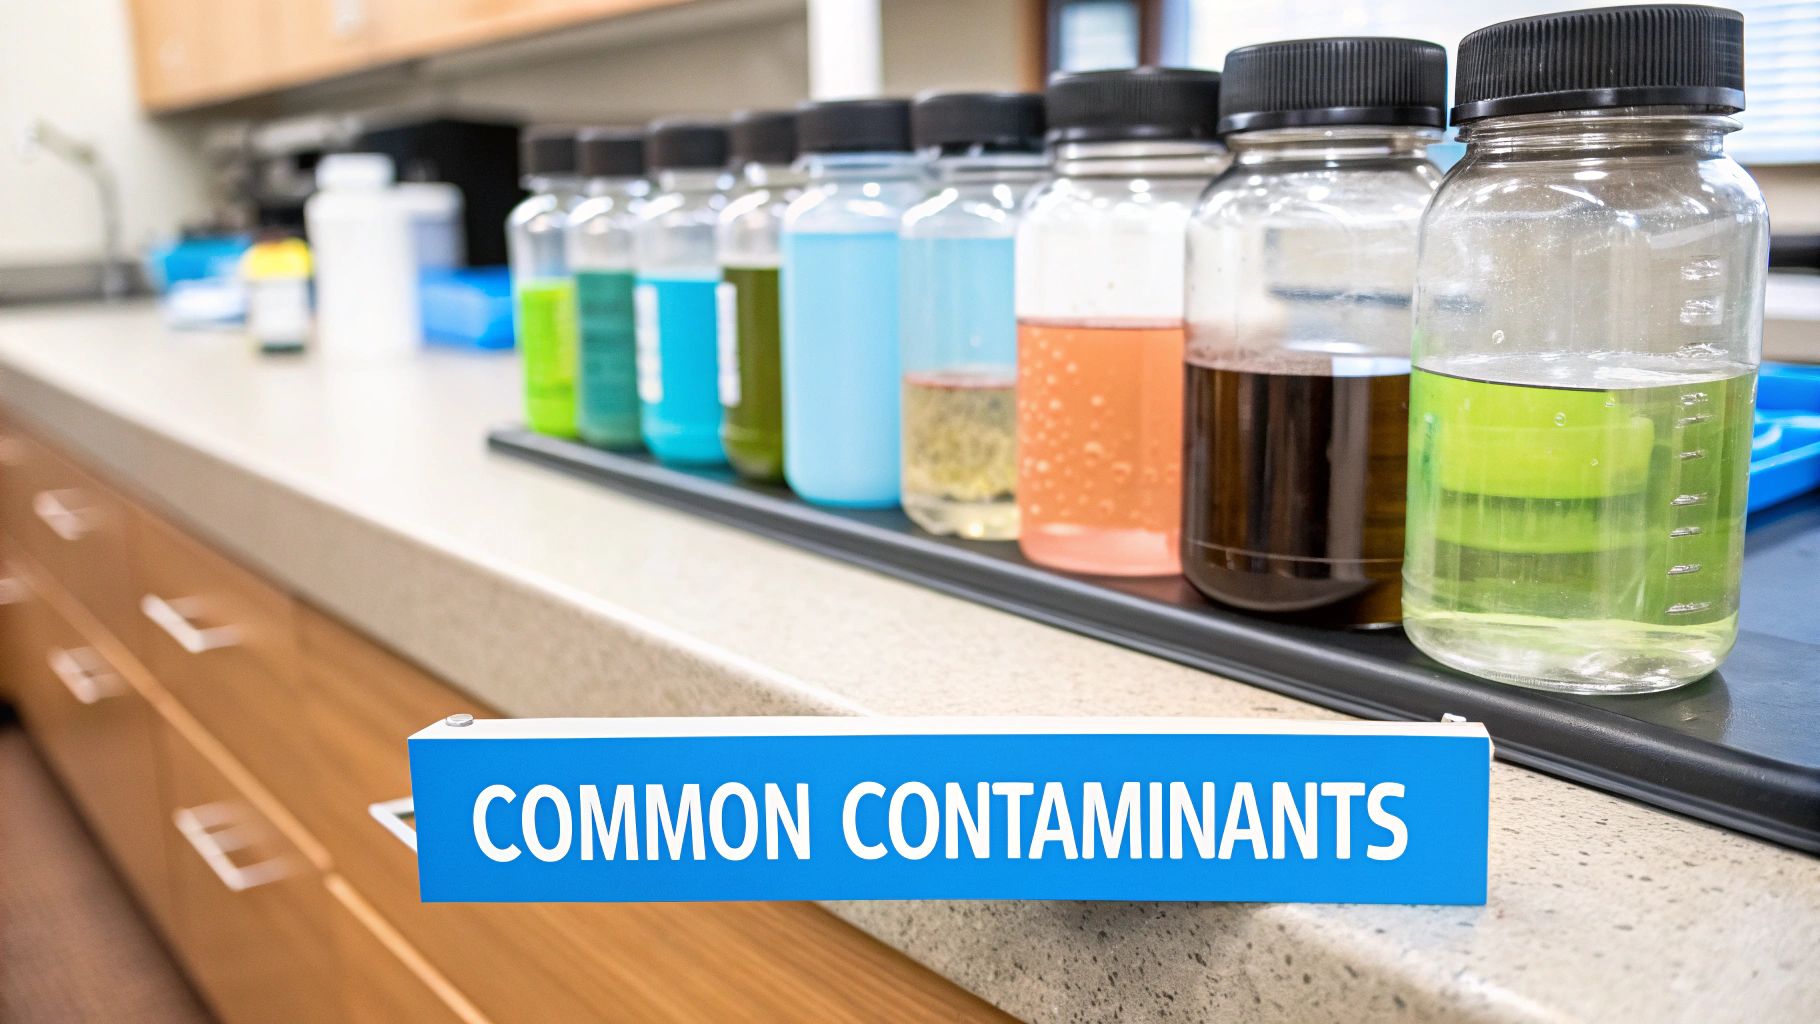
Alright, you’ve got the report in hand and you know what the terms mean. Now let's dive into the usual suspects you'll find lurking in your water. Learning how to read water test results is really about recognizing that different contaminants fall into distinct groups. Each group tells a unique story about your water and, more importantly, points you directly to the right kind of filtration fix for your home.

First up are the physical characteristics—the stuff you can often see, taste, or feel. Your report might mention Turbidity, which is just a fancy way of saying your water is cloudy or murky. If that number is high, a simple sediment filter is almost always the first line of defense.

Then you have Total Dissolved Solids (TDS). This is a catch-all measurement for all the minerals, salts, and metals floating around in your water. High TDS isn't automatically a health concern, but it's often the culprit behind water that tastes metallic or just plain "off," and a clear sign you might want a more advanced filter.

Chemical Contaminants and Hardness

The chemical analysis section is usually where things get interesting (and detailed). This is where you'll find common additives like chlorine. Most municipal water systems use it as a disinfectant to keep the water safe on its journey to your tap. It does its job, but that swimming-pool taste and smell are exactly why so many people install a good carbon filter.

This section also flags heavy metals like lead, a serious concern that typically comes from the corrosion of old plumbing pipes and solder joints. With lead, there is no safe level. If you see any amount detected, a high-powered system like reverse osmosis is what I'd strongly recommend for ultimate peace of mind.

Water hardness is another big one you'll see here, caused by dissolved calcium and magnesium. While these minerals are perfectly fine to drink, they can be a nightmare for your home. They're the reason you see that crusty white limescale buildup in your pipes and on your fixtures, which kills the efficiency of appliances like your water heater. It's also why you might need to learn how to remove mineral deposits from your toilet bowl. For this problem, a dedicated water softener is the only real solution.

Microbiological Red Flags

Finally, we get to the most critical part of the report: the microbiological results. This is the section that tests for living organisms in your water.

The presence of any Total Coliforms or, more specifically, E. coli, is an immediate red flag. These bacteria indicate that your water may be contaminated with fecal matter and could cause serious illness.

If your report comes back positive for either of these, it means your water source has a breach and is not safe to drink as-is. This is a particularly urgent issue for anyone on a private well. A UV purification system is the most effective final barrier against these invisible threats. A positive micro test isn't something to ignore—it requires an immediate filtration solution to protect your health.

Understanding Safe Levels and Health Risks

So, you've got your water test results back, and it looks like a list of chemicals. Don't panic. Just because a substance shows up on your report doesn’t mean your water is unsafe. The real key to understanding how to read water test results is all about context—comparing your numbers to the established safety benchmarks to decide which home water filter is right for you.

The big one you need to know is the Maximum Contaminant Level (MCL). This is a standard set by the U.S. Environmental Protection Agency (EPA) and represents the highest level of a contaminant legally allowed in public drinking water. Think of it as the absolute ceiling; you don’t want to be at or above this number. If you are, a filtration system is a must.

But not everything has a hard-and-fast legal limit. Some contaminants are governed by Secondary Maximum Contaminant Levels (SMCLs). These are non-enforceable guidelines for things that cause aesthetic issues—bad taste, funky odors, or weird colors. A classic example is iron. High iron levels probably won't harm you, but they will absolutely leave rusty orange stains all over your sinks, toilets, and laundry, making a targeted iron filter a smart investment.

From Warning Signs to Action Levels

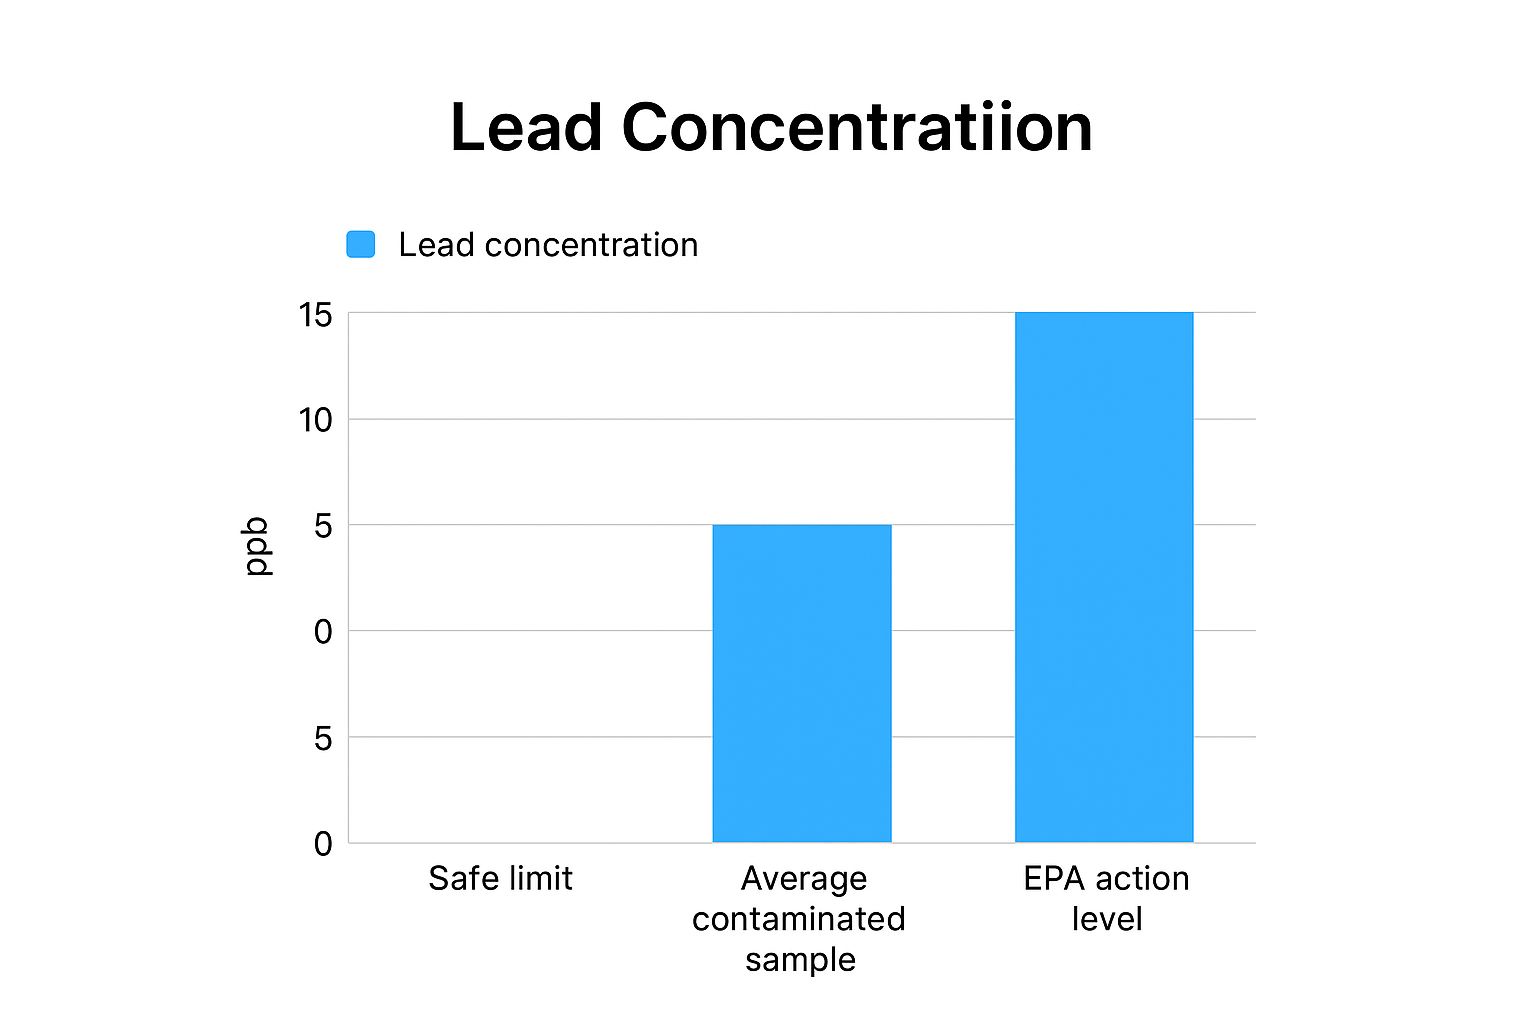
Then you have Action Levels. These are critical thresholds that, if exceeded, require your water system to take specific steps to fix the problem.

Lead is the most common one here, with an Action Level of 15 parts per billion (ppb). If your water hits that number, it’s not just a suggestion to get a filter. It's a major red flag that you need to find the source of the contamination, which is very often the plumbing inside your own home. A point-of-use reverse osmosis system is an excellent final barrier in this case.

Some things have a zero-tolerance policy. If your report shows any detectable level of coliform bacteria, for instance, that requires immediate action. It’s a sign that harmful pathogens could be getting into your water supply, and a UV purifier should be at the top of your shopping list.

To set these standards, the EPA relies on an enormous database called the Water Quality Portal (WQP), which holds over 430 million water quality records from countless monitoring programs. This massive collection of data is what helps them determine the benchmarks you see on your report. You can actually dig into the data yourself and learn more about the national water quality monitoring efforts on the EPA's website.

This infographic gives you a quick side-by-side look at a few common contaminant thresholds you might find.

Infographic about how to read water test results

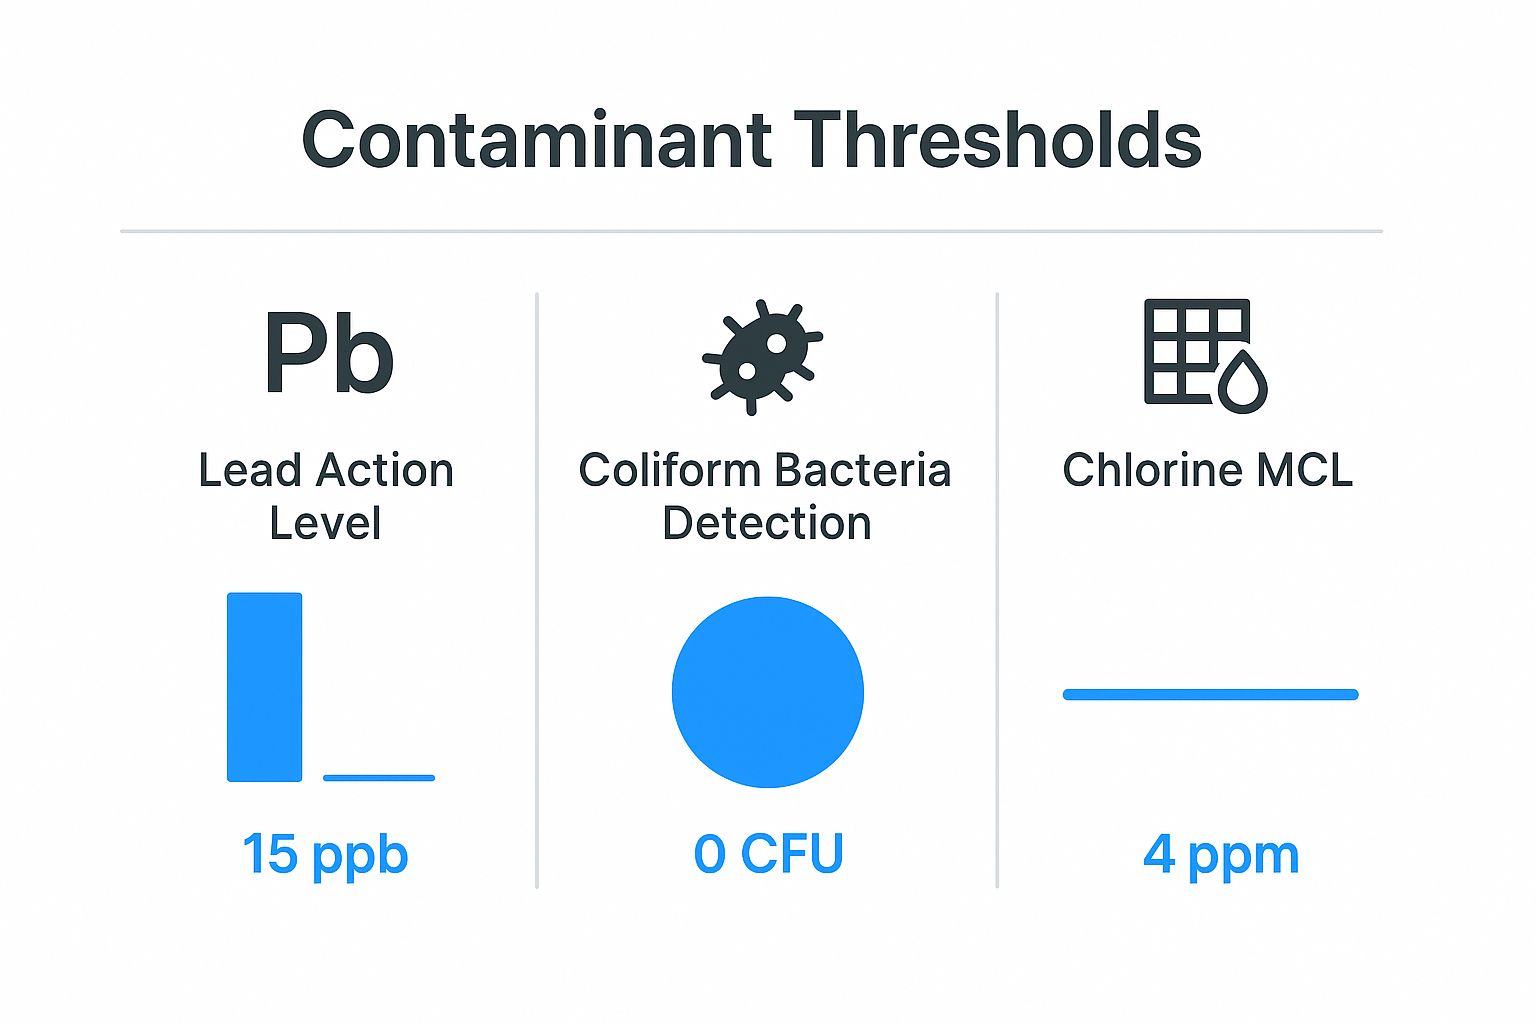
As you can see, every contaminant is treated differently, from a hard Action Level for lead to a strict zero-tolerance rule for bacteria. Knowing these distinctions is the first step in picking the right water filtration system for your home.

Matching Your Results to the Right Filtration System

A person holding a glass of clear, clean water, symbolizing the outcome of choosing the right filtration system.

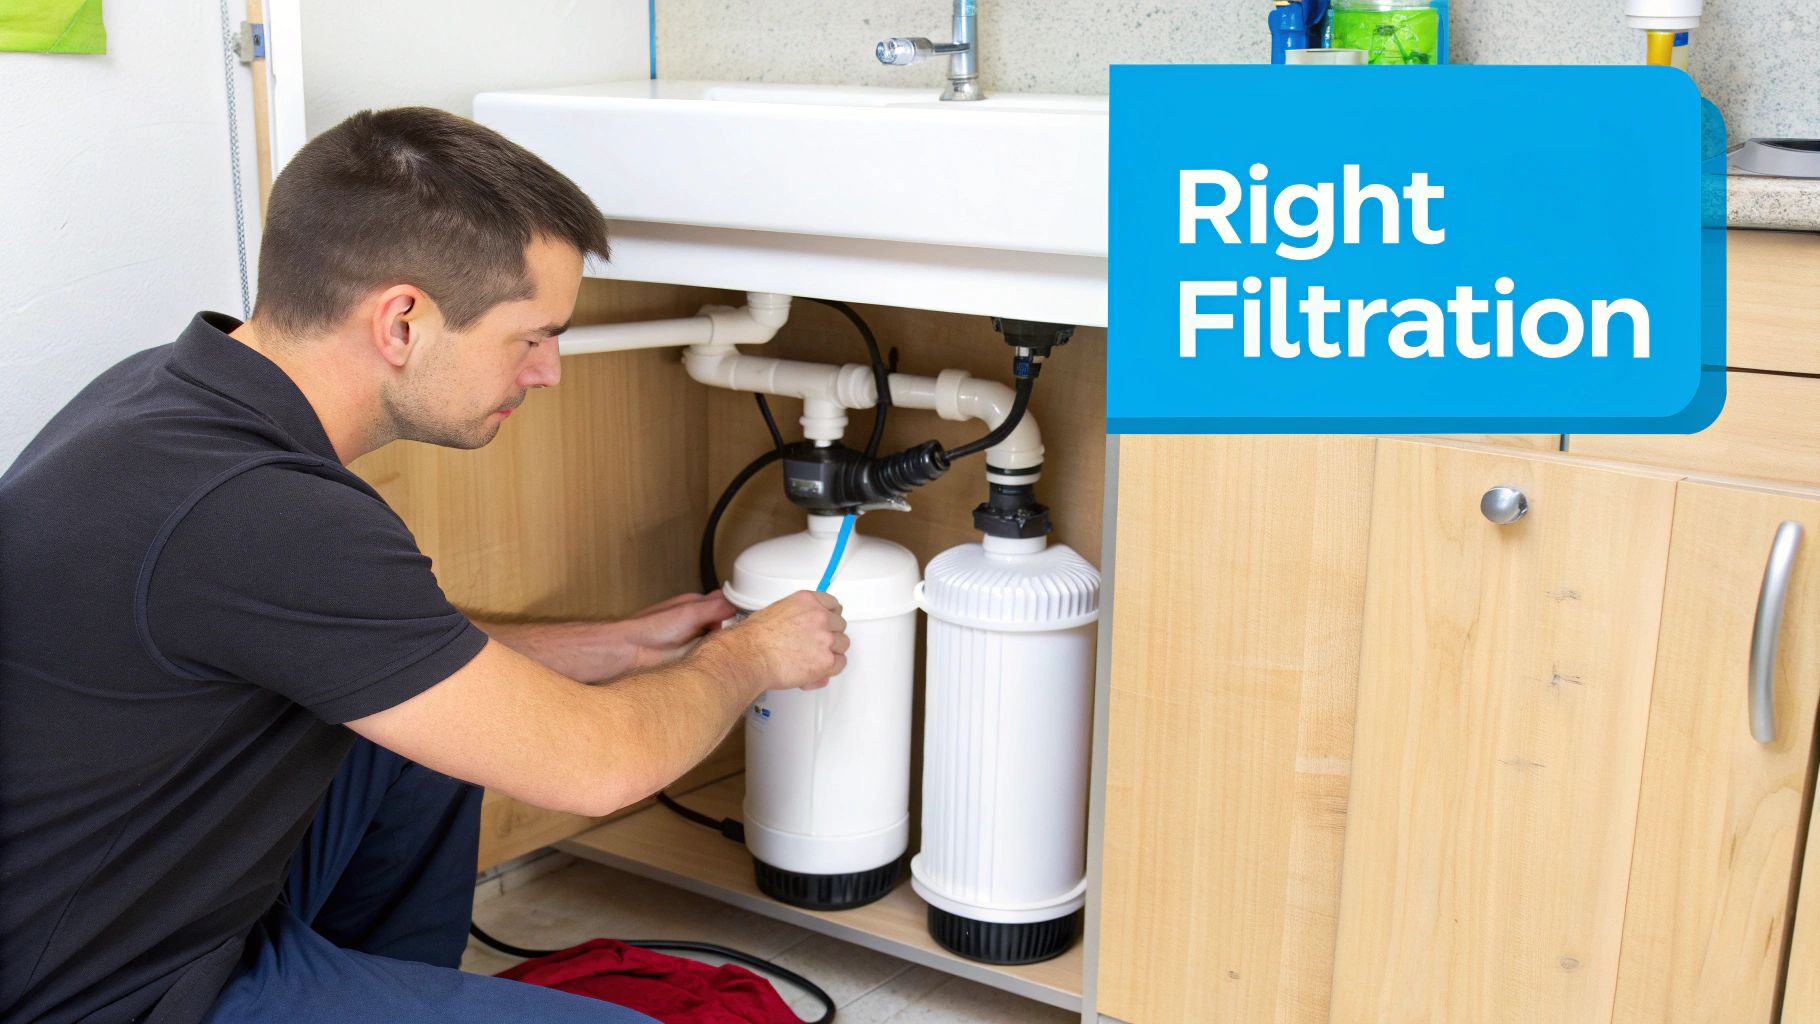
Alright, this is where the rubber meets the road. You’ve waded through the technical jargon on your water report and now you know exactly what’s lurking in your pipes. The next step is to put that knowledge to work by pairing your specific water problems with the right filtration technology.

Think of it this way: you wouldn't use a hammer to fix a leaky pipe. Likewise, knowing how to read water test results is the first step, but choosing the right tool for the job is what actually solves the problem. Let’s get into which filters fix which issues.

Solutions for Chemical and Physical Issues

Let's start with some of the most common complaints. Did your report show high levels of chlorine and a lot of sediment (also called turbidity)? If so, your water probably has that distinct "public pool" smell and might even look a little cloudy.

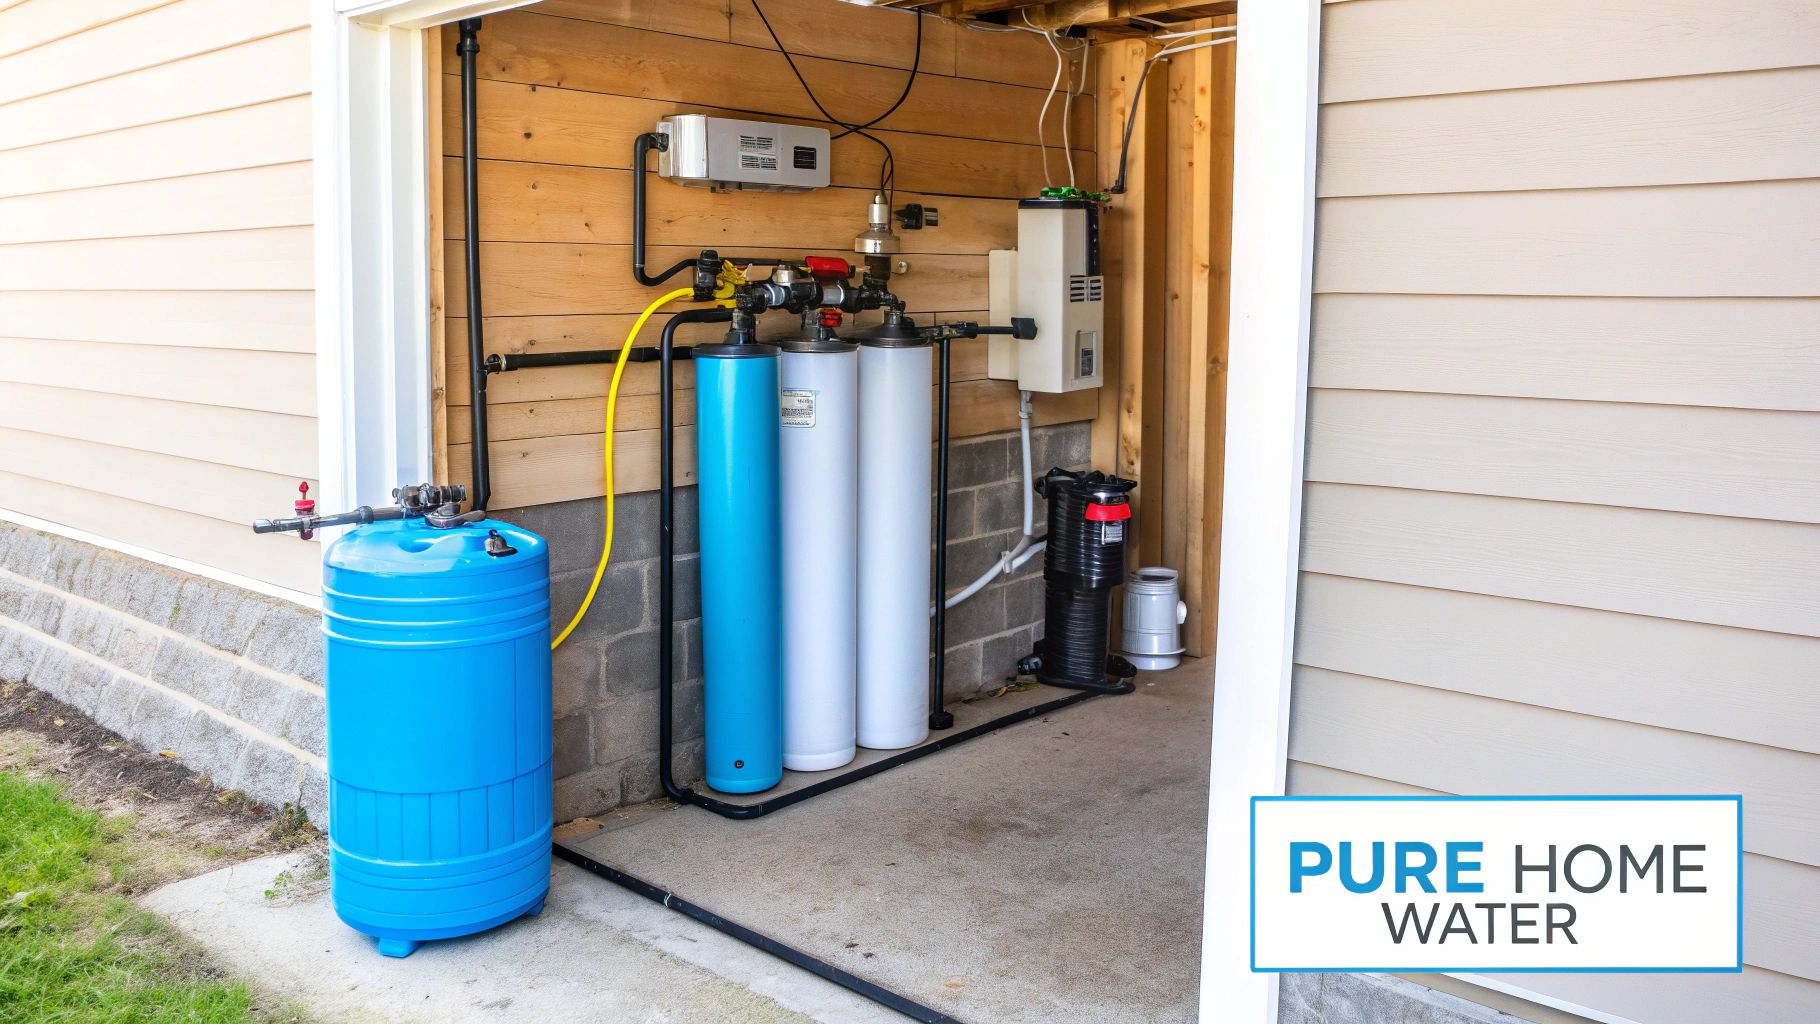
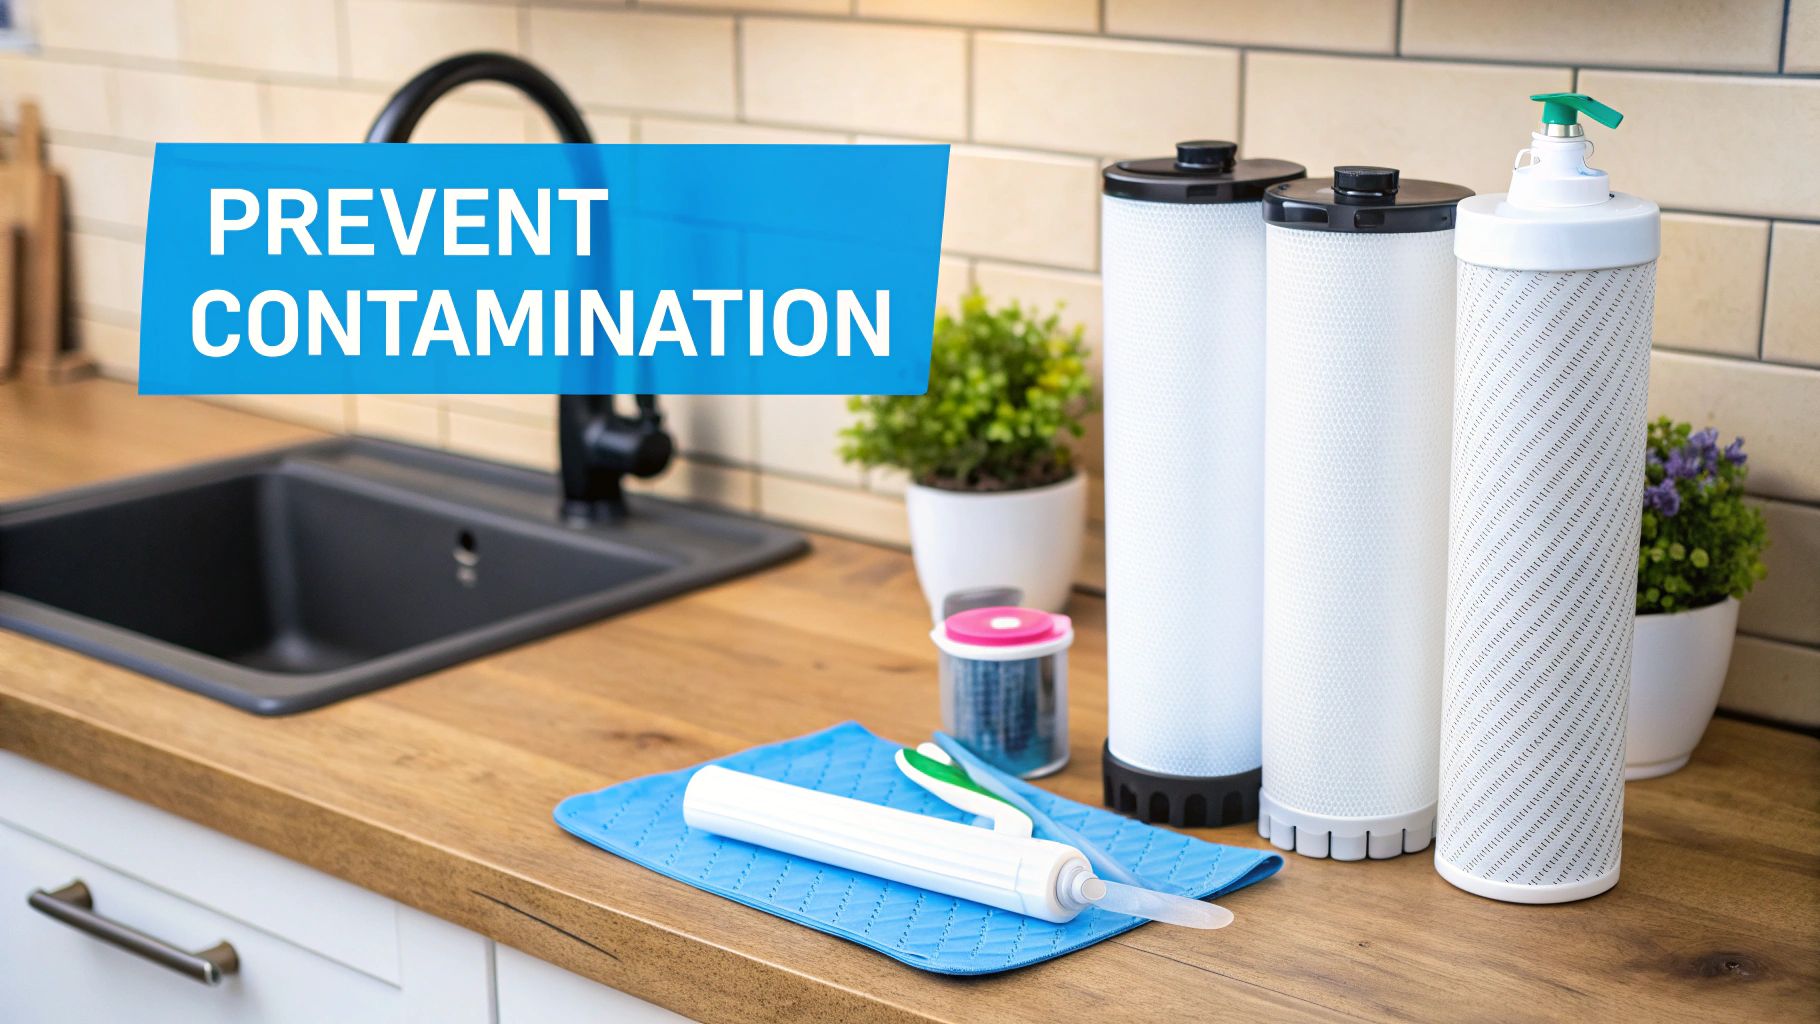
Fortunately, this is a pretty straightforward fix. A whole-house system that combines a sediment pre-filter with an activated carbon block filter is your best bet here.

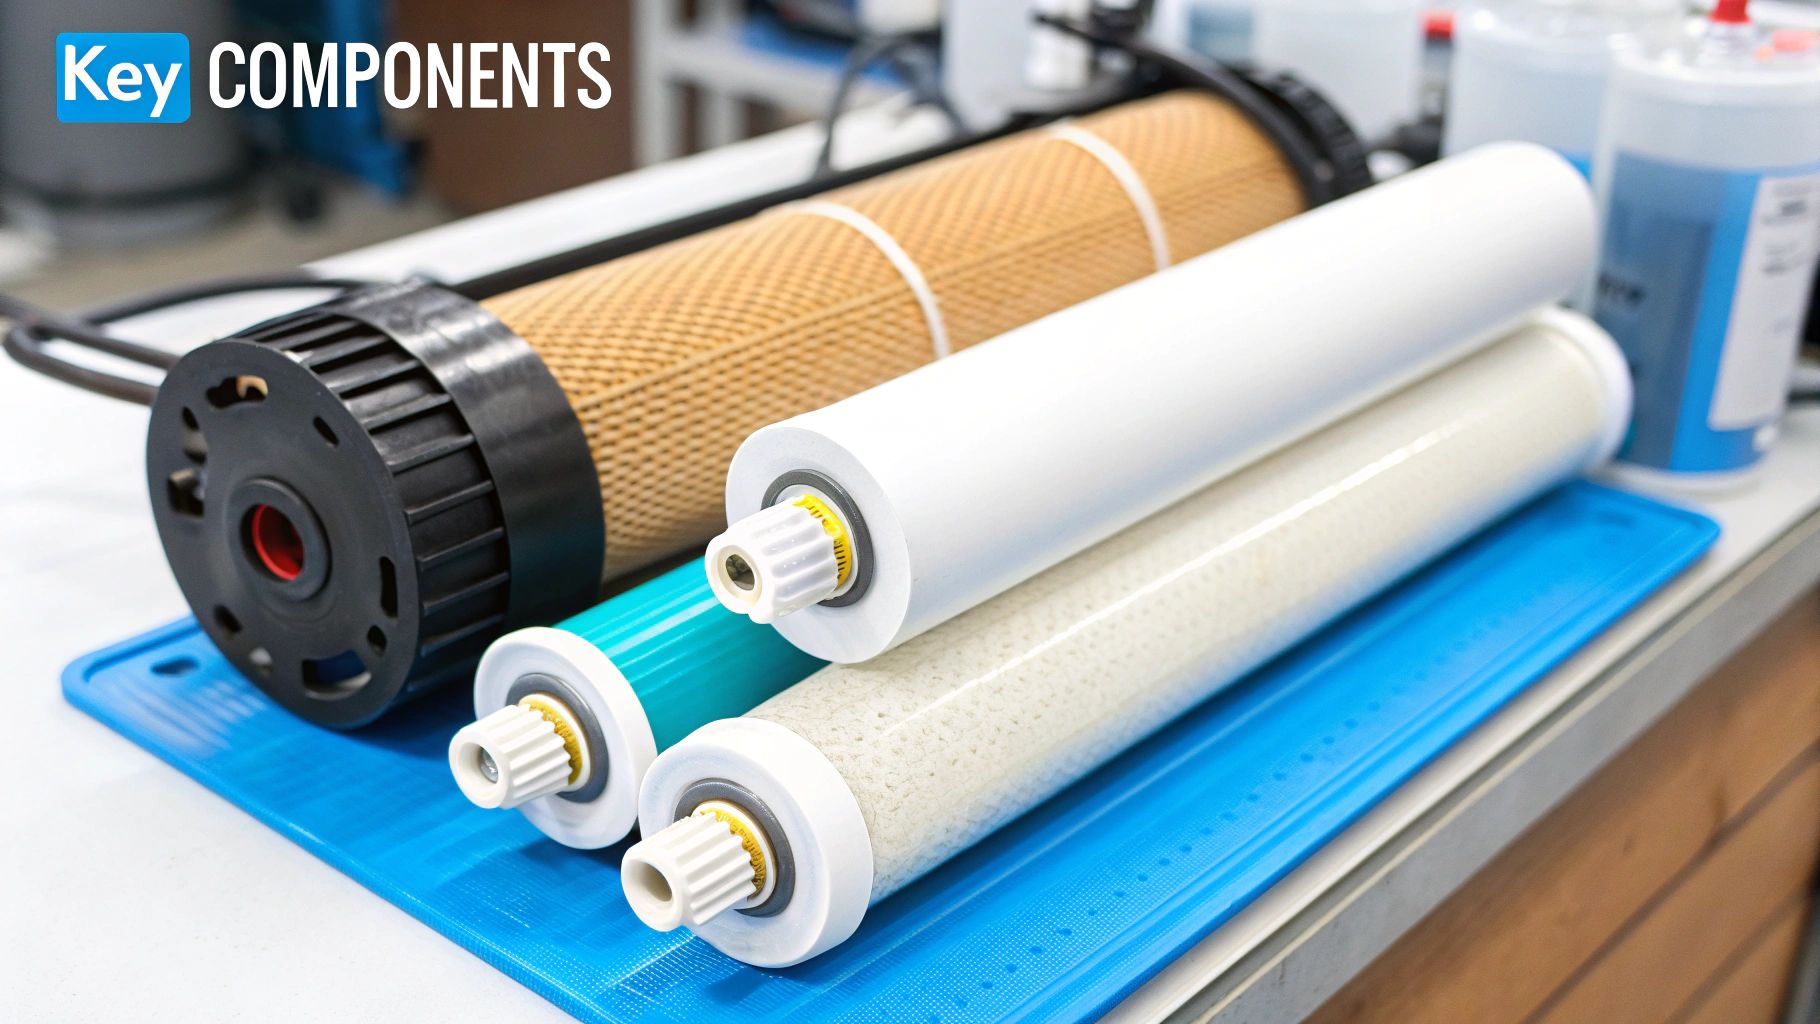
  • Sediment Filter: This is your frontline defense. It physically catches the dirt, sand, rust, and other particles that cloud your water and can quickly clog up more sensitive filters down the line.
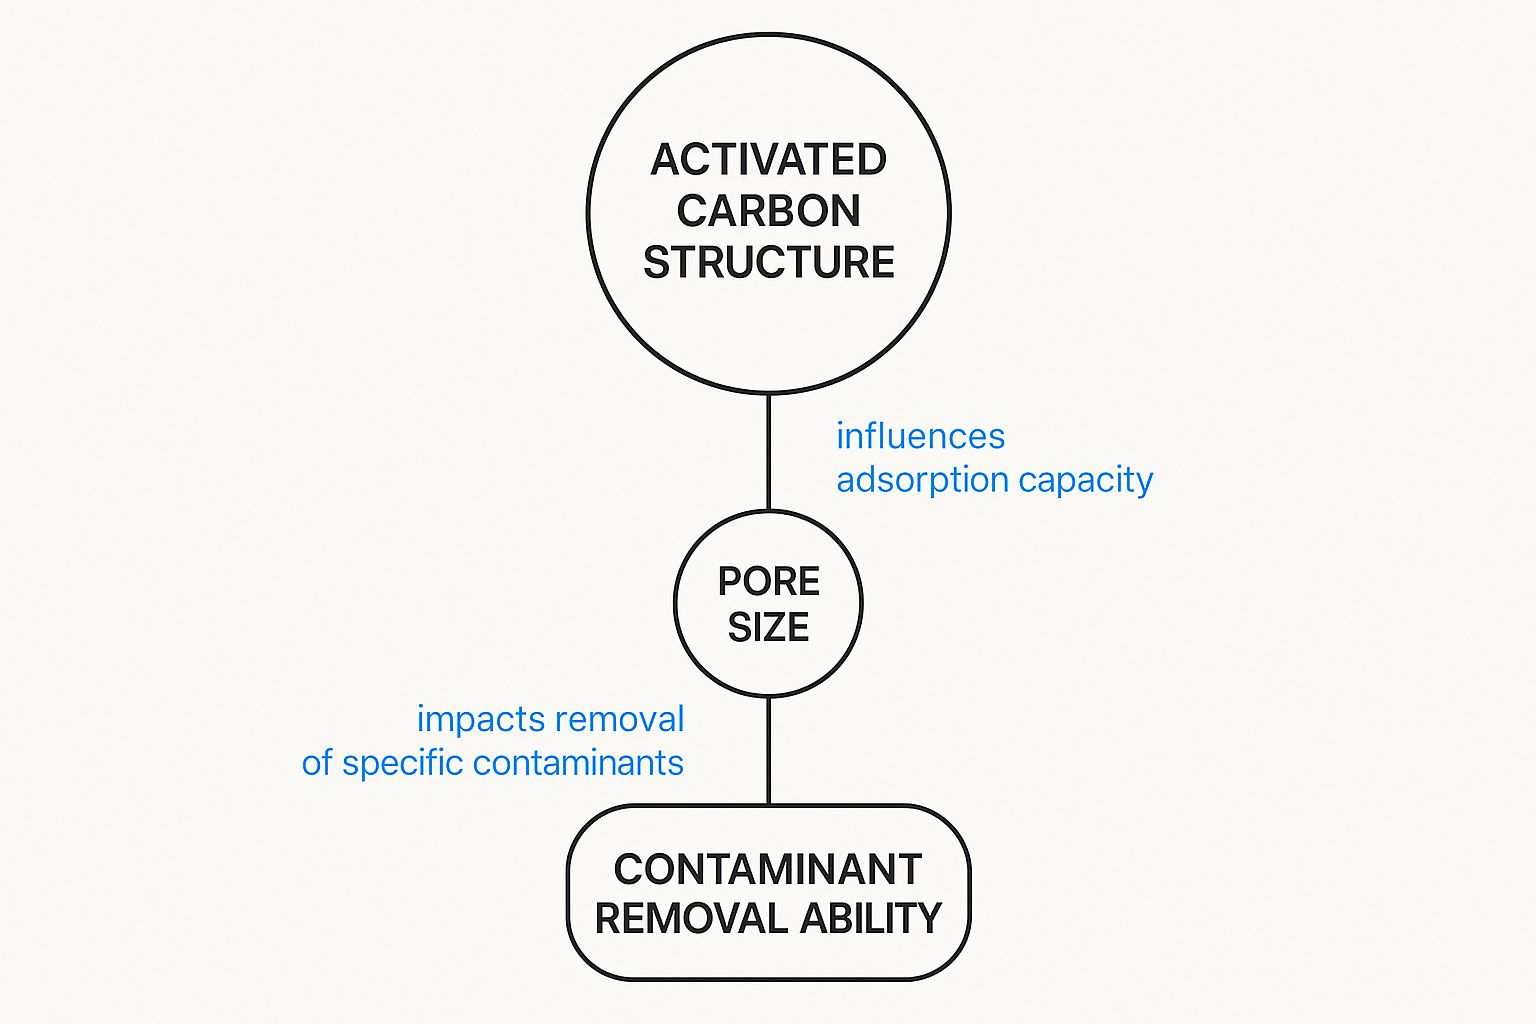
  • Activated Carbon Filter: This is the workhorse for getting rid of nasty tastes and smells. It works through a process called adsorption, grabbing onto chemicals like chlorine, chloramines, and pesticides, which vastly improves your water's quality.

If you want to explore all the different technologies out there, this collection of water filter advice and guides is a great resource for breaking things down even further.

Tackling Hard Water and Heavy Metals

But what if your report flagged something else entirely? Say your issue is high levels of calcium and magnesium—the minerals that cause hard water. An activated carbon filter won't do a thing to stop that chalky scale from building up on your fixtures and ruining your appliances. For that, you need a dedicated water softener.

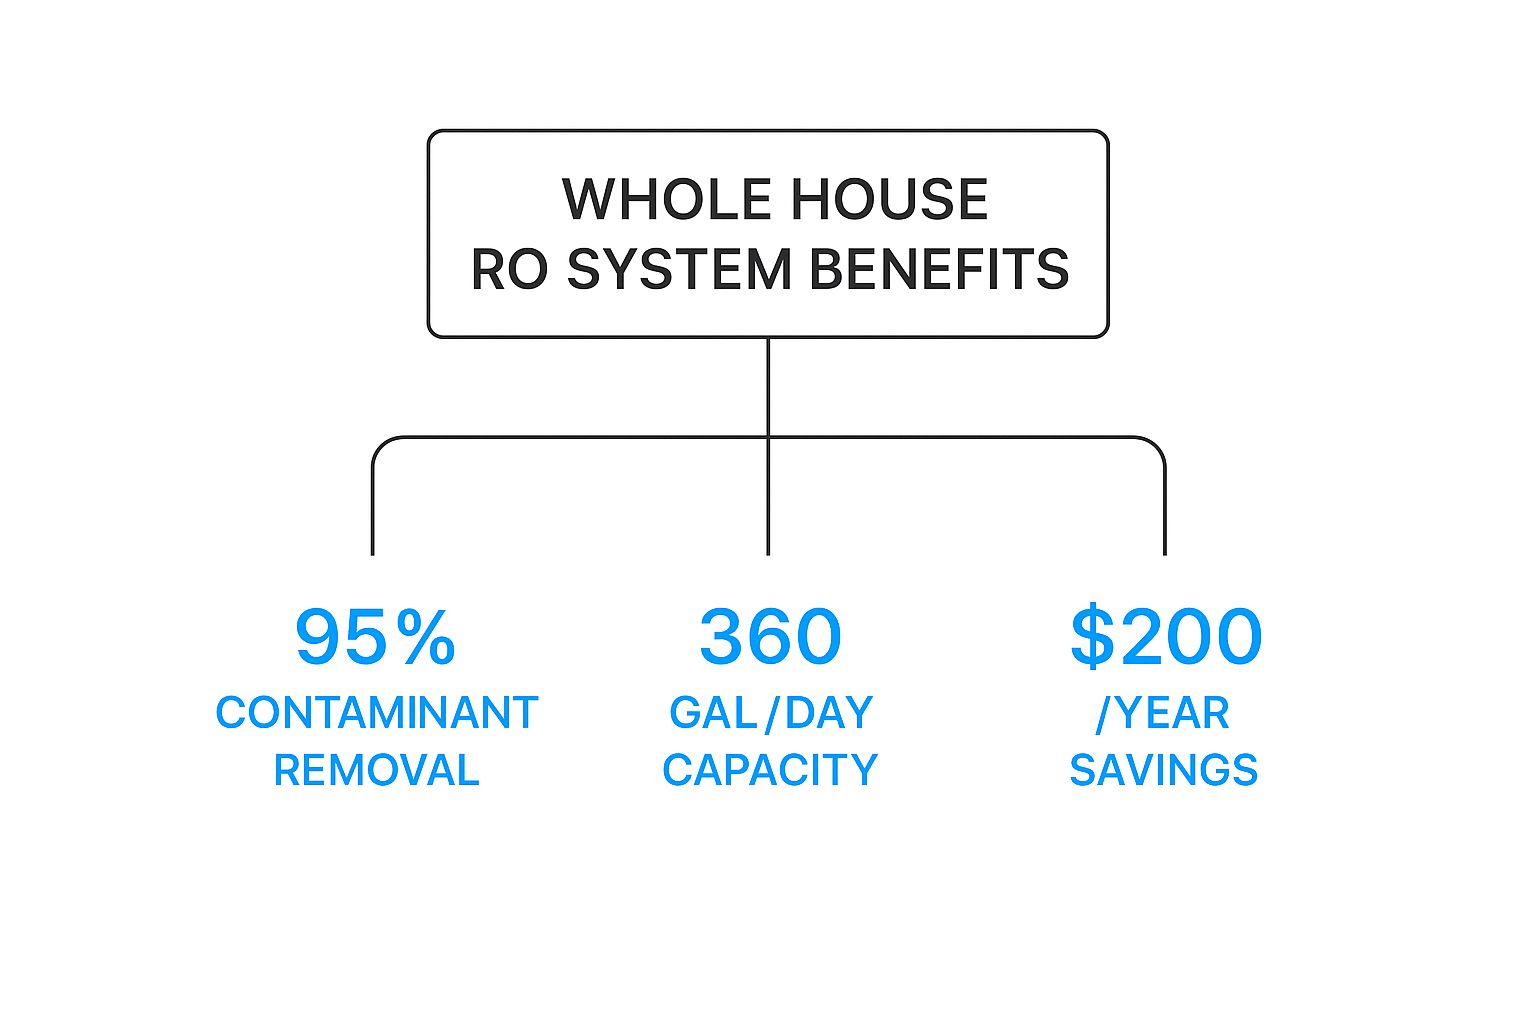
Now, if your test results showed the presence of more serious contaminants like lead, arsenic, or high levels of nitrates, you need to call in the big guns: a reverse osmosis (RO) system. An RO system uses a special membrane to force water through at a microscopic level, leaving nearly all contaminants behind.

RO systems are incredibly effective, often removing over 99% of all dissolved solids. They are the gold standard for dealing with health-related contaminants and ensuring every drop from your tap is as safe as it can possibly be.

To make this even simpler, here's a quick cheat sheet for matching common problems to the right solutions.

Filtration Solutions for Common Water Problems

Problem Identified in Test Primary Contaminants Recommended Filtration System Best For
Bad Taste/Smell, Cloudiness Chlorine, Sediment, Volatile Organic Compounds (VOCs) Activated Carbon Filter with Sediment Pre-filter Improving general water quality, taste, and odor for the whole house.
Hard Water Scale Buildup Calcium, Magnesium Water Softener (Ion Exchange) Protecting appliances, pipes, and fixtures from mineral buildup.
Heavy Metals, Health Concerns Lead, Arsenic, Nitrates, Fluoride, Cysts Reverse Osmosis (RO) System Ultimate purification for drinking and cooking water at a specific tap.
Bacterial or Viral Contamination E. coli, Giardia, Cryptosporidium, Viruses UV Purifier Disinfecting water from private wells or areas with boil water advisories.

By matching your specific test results to this table, you can move forward confidently, knowing you’re investing in a system that truly addresses your home's unique water needs.

When to Retest and Monitor Your Water Quality

Figuring out how to read a water test report is a massive win, but don't hang up your hat just yet. Think of your water quality as a moving target—it can shift with the seasons, react to aging city pipes, or even be affected by a construction project miles away. This is exactly why water safety should be a regular part of your home maintenance routine, not a one-and-done task.

A good rule of thumb is to test your water at least once a year. This is especially true if you're on a private well. For well owners, annual testing for nitrates and coliform bacteria is absolutely non-negotiable. It’s the best way to catch common issues like agricultural runoff or septic system problems before they become a real headache.

Key Triggers for an Immediate Retest

Beyond your yearly check-up, certain events should set off alarm bells and prompt an immediate retest. These are red flags telling you it's time for a closer look to make sure your water is still safe and your filtration system is doing its job.

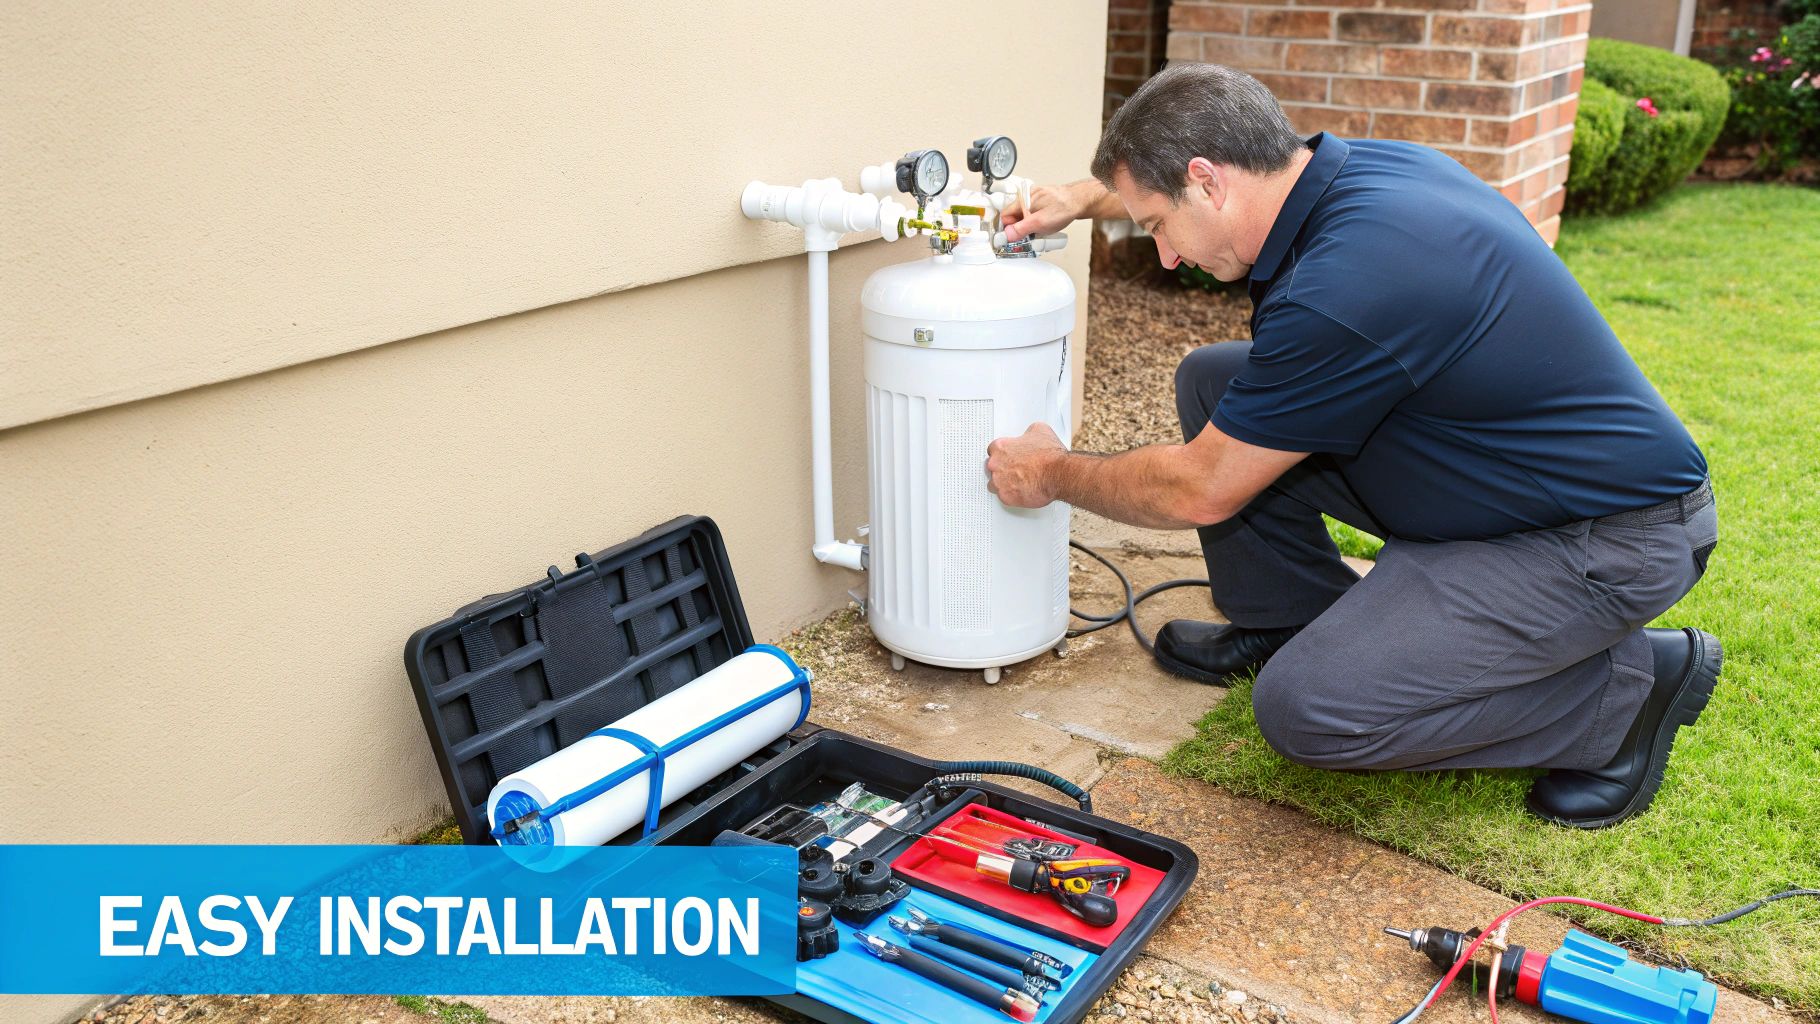
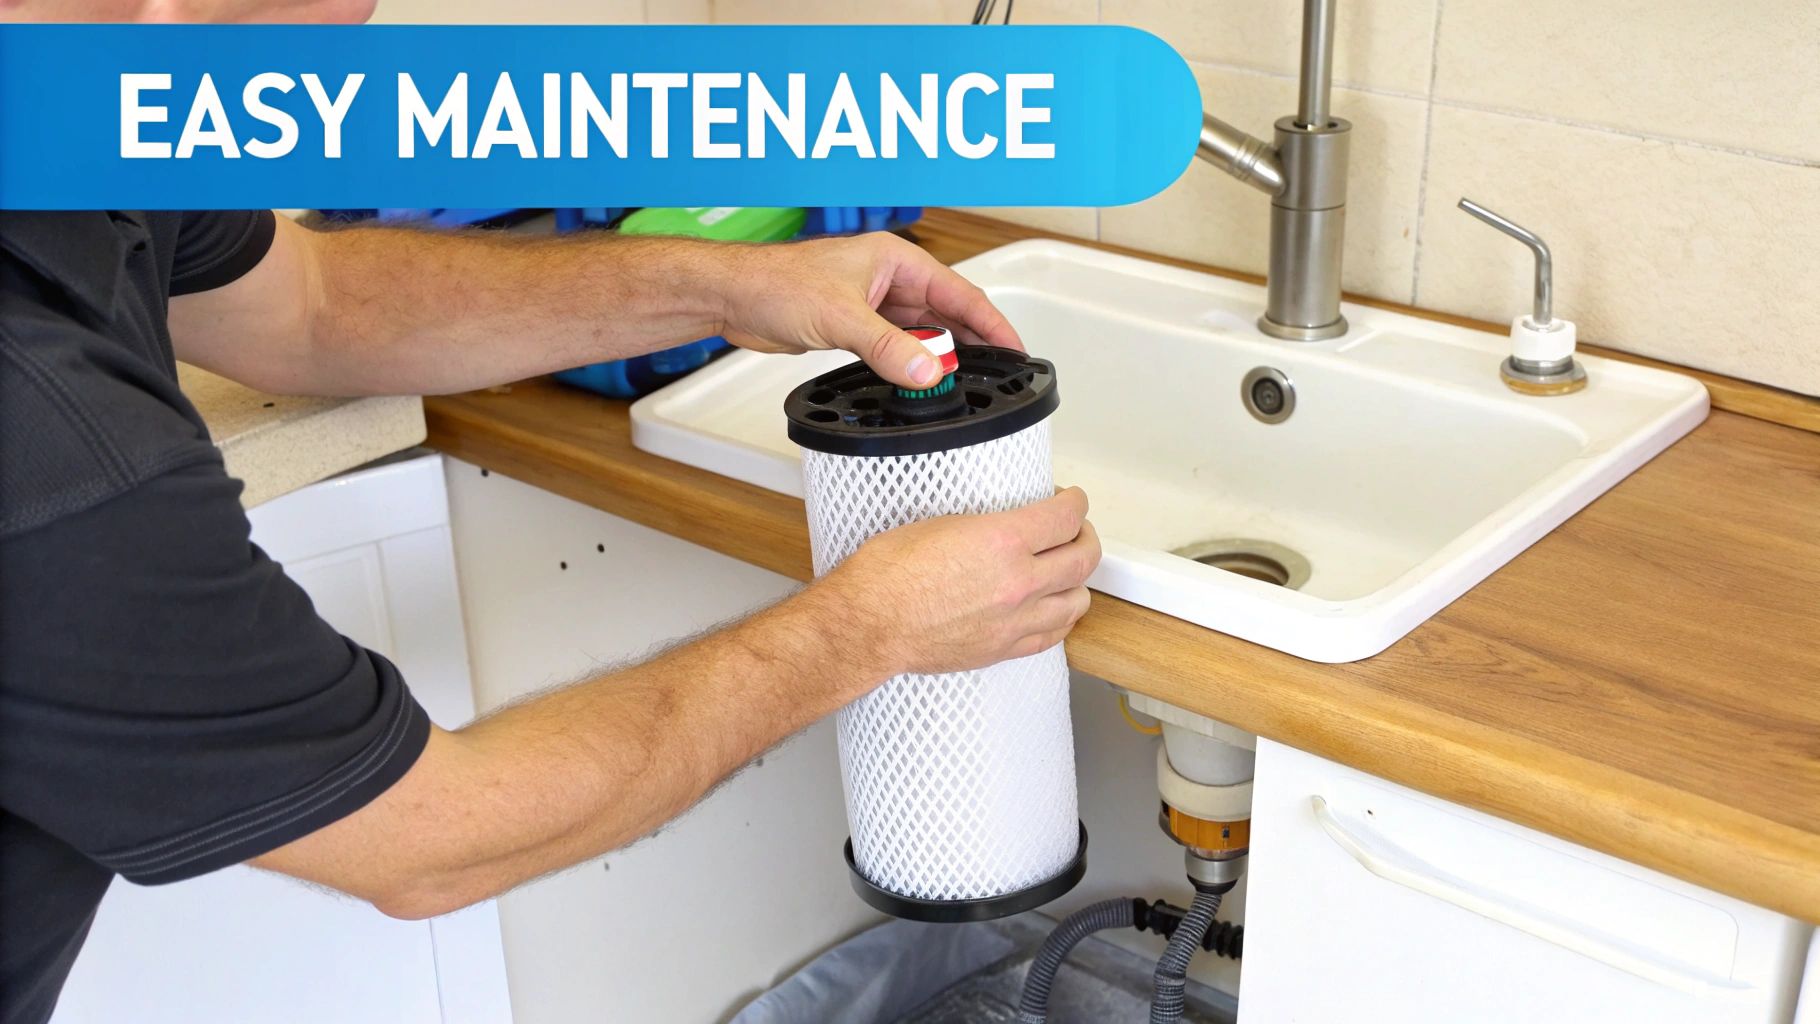
For starters, you should always perform a follow-up test 30 to 60 days after installing a new filtration system. This is the only real proof you have that your investment is actually working and has successfully knocked down the contaminants you were worried about.

Other critical times to schedule a new test include:

  • Noticeable Changes: If your water suddenly starts to taste, smell, or look different, that's a crystal-clear sign something in your supply has changed. Don't ignore it.
  • Local Disruptions: Big events in your area like flooding, a water main break, or even a prolonged drought can seriously mess with the composition of your local water source.
  • Household Health Issues: Are family members dealing with recurring stomach bugs or other gastrointestinal issues? A water test can quickly help rule out (or confirm) bacterial contamination as the culprit.

This proactive approach to monitoring is more crucial than ever. The global water testing market is projected to shoot up from USD 26.2 billion in 2025 to a whopping USD 51.0 billion by 2035. This boom is driven by a huge increase in public health awareness and tougher regulations. You can learn more about the growing demand for precise water analysis here. Staying ahead of potential problems is the best way to ensure your filtration system continues to provide the protection your family needs.

Frequently Asked Questions About Water Reports

Even after you've gone through your report, it's totally normal to still have a few questions pop up. I get these all the time from homeowners, so I've put together some of the most common ones. The answers are all geared toward helping you figure out what it all means for choosing the right water filter for your house.

What Is the Difference Between a Water Test and a Water Quality Report?

I like to use a doctor's visit analogy here.

The water test is the actual analysis done on your water sample at the lab—think of it as the bloodwork. The water quality report is the document you get back with all the results, showing contaminant levels and other data. It’s like the chart the doctor hands you, which you then use to decide what to do next, like picking out a filtration system.

My City Water Is Safe So Why Do I Need a Filter?

This is a great question. Municipal water is treated to meet minimum federal standards (MCLs), but "safe" doesn't always mean "ideal." It can still have legal amounts of contaminants like chlorine, which is what gives tap water that distinct taste and can dry out your skin.

More importantly, contaminants like lead can leach into the water from old pipes on its journey from the treatment plant to your tap. A home filter acts as your final, personalized barrier, tackling specific issues and providing a much higher quality of water than the minimum standard.

How Long Does It Take to Get Water Test Results Back?

It really depends on the lab and the complexity of the test you ordered. A basic test looking at things like chlorine or bacteria might only take a few business days.

If you've opted for a comprehensive analysis for a wider range of chemicals, pesticides, or heavy metals, expect it to take a bit longer, usually around one to two weeks.

Can I Use a DIY Test Kit From a Hardware Store?

Those DIY test strips can be a decent starting point. They're good for getting a quick snapshot and identifying major issues, like extremely hard water or very high chlorine levels.

However, if you want accurate, reliable numbers for health-related contaminants—things like lead, nitrates, or bacteria—a certified laboratory test is the only way to go. Lab reports give you the precise, quantitative measurements you need to choose the most effective filtration system to protect your home and family.


At Water Filter Advisor, we're committed to helping you make sense of your results and find the perfect filtration solution. Explore our in-depth guides and reviews to get started. Find out more at https://www.waterfilteradvisor.com.

Choosing the Right Types of Home Water Filters for Your Home

That glass of water from your tap looks pristine, but it’s been on a long, wild journey to get to your kitchen. Along the way, it can pick up some invisible hitchhikers. Most types of home water filters are designed to be the final, bouncer-at-the-door, grabbing these unwanted passengers—everything from the chlorine that makes your water smell like a public pool to microscopic party-crashers you’d never even see.

Figuring out what might be in your water is the first step to picking the perfect filtration sidekick for your home.

What's Really Lurking in Your Tap Water?

Think of your water supply like a cross-country road trip. It starts its journey at a treatment plant where it gets a basic cleaning, but it still has miles of pipes to navigate before it reaches your faucet. Some of these pipes might be older than your favorite classic rock band. It’s during this trip that all sorts of substances can hop aboard.

The point isn't to scare you into drinking nothing but sparkling water, but to arm you with knowledge. Once you understand the usual suspects, you'll see why a good home water filter is like a VIP checkpoint, making sure the water your family drinks is as clean and refreshing as it looks.

Common Contaminants on the Water Highway

Your tap water is more than just H₂O; it’s a cocktail of minerals, disinfectants, and sometimes, things you’d rather not be sipping. Here are some of the usual suspects that home water filters are built to tackle:

  • Chlorine: This is the chemical bodyguard most cities use to kill bacteria in the water supply. It does a fantastic job, but it can leave behind a chemical taste and smell that’s, well, pretty off-putting.
  • Lead and Heavy Metals: If you live in a home with vintage plumbing, there's a chance that lead from old pipes and solder could be leaching into your water. Other metals like mercury can also sneak into the water supply from industrial or environmental sources.
  • Microplastics: This is a newer, and frankly, weirder concern. These tiny bits of plastic are popping up in tap water worldwide, coming from larger plastic items breaking down over time. Scientists are still studying the long-term health effects.

This infographic breaks down these common contaminants, showing where they come from and just how common they are.

As you can see, contaminants can be anything from the byproducts of disinfection to pollutants from our environment, and they can enter the water at any point along its journey.

The Growing Demand for Cleaner Water

It’s not just about what you drink, either. The quality of your tap water can have a real impact on your appliances. For example, learning how tap water quality affects dishwasher performance can save you a lot of headaches from hard water spots and chalky buildup. This kind of awareness is a big reason why more people are looking into home filtration.

As people learn more about what's in their water, the demand for good filtration systems is skyrocketing. It’s all part of a bigger shift toward being more proactive about health and wellness at home.

The global market for home water filters is projected to hit about $28 billion by 2033, all because people want to live healthier lives. It really shows that for many families, a water filter isn’t a luxury anymore—it’s a non-negotiable part of a healthy household.

A Quick Guide to Filtration Technologies

Stepping into the world of home water filters can feel a bit like trying to read a menu in a foreign language. With so many terms and technologies floating around, it's easy to get lost. Before we dive into specific models, let’s get to know the core technologies that do all the heavy lifting.

Think of it like this: each filtration method is a specialist with a unique skill set. Most systems you'll find for your home use one of three main technologies: Activated Carbon, Reverse Osmosis (RO), or Ultraviolet (UV) Purification.

The Big Three of Water Filtration

Let's break down what each of these powerhouses does.

Activated carbon is the crowd-pleaser, great for improving the general taste and smell of your water by grabbing things like chlorine. Reverse osmosis is the perfectionist, using a super-fine membrane to strip out an incredible range of dissolved solids and contaminants. And UV purifiers? They're the silent bodyguards, using light to neutralize nasty microorganisms without adding a single chemical to your water.

You wouldn't use a spatula to hammer a nail, right? The same logic applies here. You've got to match the right filtration tool to the specific problem lurking in your water.

If your city water just has a funky chlorine taste, a simple carbon filter will probably do the trick. But if you're on well water and worried about bacteria, a UV system is a non-negotiable part of the setup. It's all about diagnosing the problem first.

Home Water Filter Technology at a Glance

To give you a clearer picture, let's put these technologies side-by-side. The table below is a great cheat sheet to quickly see what each filter type is designed to do, what it removes, and what kind of budget you'll need.

Filter Type Primary Function Removes Best For Average Cost
Activated Carbon Adsorption (traps contaminants) Chlorine, pesticides, bad taste & odor Improving taste and smell of city water $ (Low)
Reverse Osmosis Pushes water through a fine membrane Heavy metals, fluoride, salts, bacteria Maximum purity and removing a wide range of contaminants $$$ (High)
UV Purifier Neutralizes microorganisms with light Bacteria, viruses, protozoa Disinfecting well water or microbiologically unsafe water $$ (Medium)

Use this as your starting point. Seeing it all laid out like this really helps narrow down which filtration path makes the most sense for your home and your water.

Activated Carbon Filters: The Everyday Contaminant Magnet

If there's an MVP in the world of home water filtration, it’s the activated carbon filter. This is the technology you'll find in almost everything, from the simple pitcher in your fridge to more advanced under-sink systems.

Why is it so common? Because it nails one job perfectly: making your tap water taste and smell a whole lot better.

Think of activated carbon as a microscopic sponge with an enormous appetite. Thanks to millions of tiny pores, a single gram of the stuff can have more surface area than a football field. These pores act like magnets for certain contaminants as water flows past.

This isn't your typical filter that just strains out particles. The process is called adsorption, which means contaminants literally stick to the carbon's surface like static cling. It’s fantastic at grabbing onto things like chlorine, pesticides, herbicides, and other volatile organic compounds (VOCs) that give water that funky chemical flavor.

Two Forms: Granular vs. Block

When you start shopping, you’ll see activated carbon filters in two main styles. Knowing the difference will help you pick the right one for your setup.

  1. Granular Activated Carbon (GAC): This is just what it sounds like—loose granules of carbon packed into a cartridge. They're great at knocking down chlorine and improving taste, which is why they're the go-to for water pitchers and refrigerator filters where a fast flow rate matters.

  2. Carbon Block: These filters are made from finely powdered carbon that's been compressed into a solid block. This dense structure forces water through a much more winding path, giving it more contact time with the carbon. Because of this, carbon block filters are usually more powerful and can snag a wider range of contaminants, sometimes even heavy metals like lead. They also act as a physical barrier, filtering out sediment down to a certain micron level.

The real job of an activated carbon filter is to make your water more enjoyable to drink. It tackles the sensory stuff—the bad tastes and weird smells—that make so many people reach for bottled water instead of using the tap.

This makes it a perfect, wallet-friendly starting point for anyone on city water who just wants a simple upgrade.

The Strengths of Activated Carbon

For a huge number of households, an activated carbon filter is all they really need to completely transform their drinking water experience. The benefits are obvious right away.

  • Amazing Taste and Odor Removal: Nothing beats it for getting rid of that swimming-pool chlorine smell and taste, which is hands-down the most common complaint about tap water.
  • Super Affordable: Carbon filters are everywhere and are some of the most budget-friendly options you can buy.
  • Easy to Use: Whether it's a pitcher or a faucet attachment, these filters are almost always a breeze to install and replace.

Knowing Its Limits

It's just as important, though, to know what activated carbon can't do. It’s a specialist, not a cure-all. For a really good technical breakdown, check out this a comparison of carbon filters with other filtration types.

These filters will not remove:

  • Dissolved minerals (like the calcium and magnesium that cause hard water)
  • Fluoride
  • Nitrates
  • Bacteria or viruses

So, if your water worries go beyond just taste and smell—like if you're dealing with high levels of lead or potential microbial threats from a private well—you'll need to level up to a more advanced system. We'll get into those next.

Reverse Osmosis Systems for Maximum Purity

When just improving taste and smell isn't quite cutting it, you’ll eventually find your way to Reverse Osmosis (RO). If you're after the highest level of purification you can get in your home, this is the technology to look at. RO is the gold standard for stripping out the widest possible range of contaminants, leaving you with exceptionally pure water.

The secret sauce is the semipermeable membrane. Think of it like a microscopic nightclub bouncer with a very, very strict guest list. It lets the tiny, pure water molecules pass right through but turns nearly everything else away at the door—dissolved salts, heavy metals, fluoride, even bacteria.

This kind of performance puts RO systems in a class of their own, especially for anyone dealing with specific water quality issues that simpler filters just can't touch.

How the Multi-Stage Process Works

An RO system isn't just one filter; it's a whole team working in perfect harmony. It's a multi-stage process where each component preps the water for the next step, all leading up to that final, pure result.

  1. Sediment Pre-Filter: This is the first line of defense, catching all the big stuff like dirt, rust, sand, and silt. Its main job is to protect the more sensitive filters down the line from getting clogged up.
  2. Carbon Pre-Filter: Next up, the water hits an activated carbon filter. This stage is crucial for grabbing chlorine and other chemicals that could damage the delicate RO membrane.
  3. The RO Membrane: This is the heart of the whole operation. Your home's water pressure forces the water through this tightly wound membrane. Here, up to 99% of total dissolved solids (TDS) are separated out and flushed away.
  4. Carbon Post-Filter: As a final step, the now-purified water gets a "polishing" pass through one last carbon filter. This gets rid of any lingering tastes or odors the water might have picked up from its storage tank, making sure what comes out of your tap is crisp and clean.

The Unmatched Purity of RO Water

The biggest draw of a reverse osmosis system is its sheer filtration power. It's one of the few technologies that can remove an incredibly long list of contaminants you really don't want in your glass.

  • Heavy Metals: It's incredibly effective at reducing lead, arsenic, mercury, and chromium.
  • Dissolved Solids: Say goodbye to salts, nitrates, and fluoride.
  • Microorganisms: The membrane's pores are so fine that they block bacteria and viruses.

The real power of an RO system is the peace of mind it gives you. If your water report shows contaminants that have you worried, no other system offers this level of thorough removal.

Its effectiveness is a big reason why RO technology dominates the market. In 2021, the global home water filtration market was valued at $10.85 billion, and RO-based filters made up over 38% of global revenue. That tells you just how many homeowners trust RO for ultimate purity. You can dive deeper into the market trends over at Grand View Research.

The Trade-Offs to Consider

While RO systems deliver amazing results, they aren't perfect. It's important to understand the trade-offs before deciding if it's the right fit for your home.

The most common criticism is water waste. To separate the pure water, the system has to flush the contaminants away with what's called "brine" or wastewater. Older models were notorious for this, wasting several gallons for every one gallon of clean water they produced. Thankfully, modern systems have gotten much more efficient.

Another thing to know is that the RO membrane is so good that it also removes beneficial minerals like calcium and magnesium. While we get most of these minerals from food, some people find demineralized water tastes a bit "flat." To fix this, many RO systems now come with an optional remineralization stage that adds a healthy balance of minerals back into the water right before it hits your glass.

Finally, these systems are more complex than your average pitcher filter and require more maintenance. You'll need to swap out the pre- and post-filters every 6-12 months and the RO membrane itself every 2-5 years.

UV Purifiers: A Guardian Against Germs

So we've covered how activated carbon gets rid of nasty tastes and how reverse osmosis tackles dissolved solids. But what about the invisible threats? Microscopic bugs like bacteria, viruses, and cysts can easily slip through a standard filter. To deal with them, you need a different kind of guardian: an Ultraviolet (UV) purifier.

Unlike filters that physically trap contaminants, a UV system attacks on a microbiological level. It zaps the water with a powerful lamp that emits UV-C light, a very specific wavelength of ultraviolet light that’s absolutely lethal to microorganisms.

Think of it like giving germs a targeted, terminal sunburn. This intense UV-C radiation blasts through the cell walls of bacteria, viruses, and other pathogens, completely scrambling their DNA. They can't reproduce, they can't make you sick—they're effectively neutralized on the spot.

It's a Purifier, Not a Filter

This is a really important distinction. UV systems are purifiers, not filters. They don’t actually remove anything from the water—not sediment, not chlorine, not heavy metals. Their one and only job is to make your water microbiologically safe to drink.

Because a UV system only deals with living organisms, it’s almost always installed as the final piece of a larger filtration puzzle. The UV light needs a clear shot at the germs, and any murkiness or sediment in the water can create tiny shadows for them to hide in, making the system less effective.

That's why you'll almost always see a UV system installed after a sediment filter and often a carbon filter, too. Those pre-filters handle the dirty work of clearing out particles, giving the UV light an unobstructed path to zap every last potential threat.

Who Really Needs a UV Purifier?

So, do you need this level of protection? While it's great for peace of mind in any home, for some folks, it’s downright essential.

  • Homes with Well Water: Private wells aren't treated by a city, leaving them vulnerable to contamination from farm runoff or septic tanks. A UV purifier is your 24/7 defense against bacteria like E. coli and other viruses.
  • Areas with Boil Water Advisories: If your town is constantly issuing boil water notices, a UV system is a far more convenient and reliable way to ensure your tap water is always safe.
  • Immune-Compromised Individuals: For households with anyone who has a weakened immune system, a UV purifier adds a critical layer of protection against dangerous waterborne illnesses.

Benefits and Upkeep of UV Systems

The biggest win for UV is that it disinfects without chemicals. You get no chlorine taste and no weird disinfection byproducts. They’re also incredibly good at their job, wiping out 99.9% of harmful microorganisms when they're running properly.

Maintenance is simple but non-negotiable. That UV lamp has a limited lifespan, usually about a year of continuous operation. Even if the bulb still turns on after a year, its germ-killing power has faded significantly. To keep your water protected, you absolutely must replace the UV bulb annually.

Beyond the Sink: Whole House and Specialty Filters

Getting great-tasting water from your kitchen tap is one thing, but what about the water you shower in, wash your clothes with, and run through your expensive appliances? That’s where the conversation shifts to a much bigger-picture solution.

We're talking about point-of-entry (POE) systems, more commonly known as whole house filters.

Instead of treating water at a single faucet, these systems are installed right where the main water line enters your home. Think of it as a gatekeeper for your entire plumbing system. Every single drop that flows into your house—for the shower, the dishwasher, the washing machine—gets cleaned first.

This isn't just about better drinking water. It's about protecting your home's entire plumbing infrastructure from scale and corrosion, helping your appliances last longer, and getting softer skin and hair because you’re not showering in chlorinated water anymore.

First Line of Defense: Sediment Filters

Before you can even think about microscopic contaminants, you have to deal with the grit and grime you can actually see. This is where sediment filters come in. They are the unsung heroes of any serious water treatment setup.

They act like a bouncer at the door, catching all the obvious troublemakers:

  • Sand and silt
  • Rust flakes from aging city pipes
  • Dirt and other random gunk

By grabbing all this physical debris right away, a sediment filter keeps your more sophisticated (and more expensive) filters downstream from getting clogged up. They are an absolute must-have pre-filter that makes the rest of your system run better and last longer.

Solving Hard Water Woes: Water Softeners

If you're tired of seeing chalky white spots on your glassware and fighting a never-ending battle with soap scum, you have hard water. The solution isn't a typical filter, but a specialty system called a water softener.

A water softener is more of a water conditioner. It uses a process called ion exchange to literally swap out the "hard" minerals like calcium and magnesium for "soft" sodium ions. These hard minerals are the culprits behind all that nasty limescale buildup.

The result? Water that actually lathers up, is kinder to your appliances, and leaves your dishes sparkling clean. It’s a perfect example of a targeted system designed to solve one of the most common and annoying water problems out there.

The Ultimate Purity: Water Distillers

For those who want to get as close to pure H₂O as possible, water distillers are the gold standard. This method mimics nature’s own purification cycle: it boils water to create steam, leaving contaminants behind, and then condenses that pure steam back into clean liquid water.

Distillation is incredibly thorough, removing nearly everything—heavy metals, minerals, bacteria, and viruses. It’s a slower and more energy-intensive process, but the purity of the final product is unmatched.

It’s clear that people are thinking more seriously about their water quality. The residential water purifier market is expected to jump from $24.88 billion in 2025 to a whopping $76.61 billion by 2034. This boom is all about a growing awareness of what’s in our water and the desire for real solutions at home. You can dig deeper into these trends in the full report on residential water purifier market growth.

Answering Your Top Water Filter Questions

Alright, now that we’ve walked through everything from carbon filters to UV purifiers, you probably have a few practical questions bubbling up. Let's tackle those common "what about this?" and "how do I…?" thoughts to clear up any confusion and get you ready to choose the right system with total confidence.

How Do I Know Which Water Filter I Really Need?

Picking the right filter always starts with one thing: knowing what’s actually in your water. The best first step is to get your hands on your local water quality report, which your utility provider should offer for free. Think of it as a report card for your tap water—it tells you exactly what you’re dealing with.

If your biggest complaint is just a chlorine taste or that swimming pool smell, a simple activated carbon filter is a great, wallet-friendly fix. But if that report flags bigger issues like lead, fluoride, or a cocktail of other contaminants, then you need a heavy-hitter: a reverse osmosis system is going to give you the most complete purification.

And for anyone on private well water? A UV purifier isn't just a nice-to-have; it's a must. You'll almost always want to pair it with a sediment pre-filter to make sure it can do its job effectively against nasty bacteria and viruses.

How Often Should I Change My Water Filters?

There's no single, universal schedule for changing filters. It really boils down to the type of filter you have and how much water your family uses. Following the manufacturer's timeline is non-negotiable, because an old, gunked-up filter doesn't just stop working—it can turn into a breeding ground for bacteria.

As a rough guide, here’s what you can generally expect:

  • Pitcher Filters: These little guys usually need a swap every 2 months.
  • Faucet Filters: Plan on replacing these about every 3 months.
  • Under-Sink Carbon Filters: The larger cartridges give you more time, typically lasting 6 to 12 months.
  • RO Systems: The initial pre-filters need changing every 6-12 months, but the main RO membrane is the long-haul champ, lasting 2 to 5 years.

Remember, a filter's job is to trap contaminants. If you don't change it on time, you're essentially forcing your water through a collection of the very things you wanted to remove in the first place.

Will a Water Filter Remove Healthy Minerals?

That's a fantastic question, and the answer is: it depends entirely on the technology.

The most powerful systems, like reverse osmosis and distillation, are so thorough they strip out nearly everything—and that includes beneficial minerals like calcium and magnesium. Now, most of our minerals come from food, but some people simply prefer the taste of mineral water. If you want to dive deeper into this, you can find a ton of great resources offering in-depth water filter advice.

To get the best of both worlds, many modern RO systems now come with an optional remineralization stage. This cool feature adds those healthy minerals right back into the water after it’s been purified. On the flip side, filters like activated carbon, sediment, and UV are designed to leave all those good minerals completely alone.

Is Bottled Water a Better Option Than a Filter?

While it’s easy to grab a bottle of water on the go, it comes with some serious baggage. For starters, it’s way more expensive per gallon than filtered tap water, and it creates a mountain of plastic waste. Plus, studies have shown that some bottled water is just filtered municipal water anyway, and many popular brands have been found to contain microplastics.

Investing in one of the many types of home water filters gives you clean, great-tasting water on tap for a tiny fraction of the cost. It’s also a much more sustainable and environmentally friendly way to stay hydrated.


At Water Filter Advisor, our goal is to help you cut through the noise and find the perfect water solution for your home. Our detailed guides and honest reviews are here to give you the clarity you need for safer, better-tasting water. Explore all our resources today at https://www.waterfilteradvisor.com.

Your Guide to a Whole House Reverse osmosis System

Imagine turning on any faucet in your house—the shower, the kitchen sink, even the washing machine—and getting wonderfully pure, crisp water. Not just from a special little tap, but from everywhere. A whole house reverse osmosis system makes this dream a reality. It acts like a central purification fortress for your home's entire water supply, ensuring every single drop that flows through your pipes is spectacularly clean.

Why Whole Home Water Purity Matters

Are you tired of those chalky white spots making your glass shower doors look permanently foggy? Or maybe you're worried about the invisible party of contaminants potentially crashing your family's drinking water. These are common frustrations, and they're exactly why so many homeowners start hunting for a real solution. A simple pitcher filter is a fine start, but let's be honest—it only tackles a tiny fraction of the water you use every single day.

A whole house reverse osmosis system is a whole different beast. Think of it as a microscopic, hyper-vigilant security guard posted right where water enters your home. It uses immense pressure to force water through an incredibly fine membrane that blocks almost everything else—minerals, chemicals, and other unwanted guests—letting only pristine water molecules pass through. This isn't just about brewing a better-tasting cup of coffee; it's about fundamentally transforming the water you use for everything.

Image

Beyond the Drinking Glass

The ripple effects of whole-home purification go way beyond what you pour into a glass. You'll start noticing the difference in ways you probably haven't even considered.

This powerful filtration approach wages a multi-front war on water woes:

  • Hard Water Annoyances: Say goodbye to hard water stains for good. The minerals that cause that filmy buildup on your dishes and fixtures are filtered out, leaving everything sparkling clean with less effort.
  • Appliance Longevity: Scale buildup is a silent assassin for appliances like water heaters, dishwashers, and washing machines. Purified water protects these expensive investments from choking on mineral deposits, helping them live longer, more efficient lives.
  • Hidden Contaminants: Even municipally treated water can carry dissolved solids, chlorine, fluoride, and traces of other chemicals. A whole house RO system is precision-engineered to target and remove them.

By treating water right at the source, you're putting a protective shield around everything it touches. Showers feel luxuriously softer on your skin and hair. Your laundry comes out cleaner and brighter because detergents can finally work their magic without battling harsh minerals.

Setting the Stage for Purer Water

Installing a whole house reverse osmosis system is a serious upgrade. You're moving past temporary fixes and installing a permanent solution for superior water quality. It's a true investment in your home and your family's well-being.

In this guide, we’ll walk you through everything you need to know. We'll demystify the science, cover what to look for when you're shopping, and explore all the tangible benefits you'll enjoy every day. Let's dive in.

How Reverse Osmosis Makes Your Water Pure

At the heart of every whole house reverse osmosis system is a mind-boggling piece of technology that acts like a microscopic bouncer for your water. It’s not magic, but it’s astonishingly close. The entire process uses pressure to shove your home's water through a special barrier called a semipermeable membrane.

Think of this membrane as the world's most sophisticated strainer. Its pores are unbelievably tiny—around 0.0001 microns. To put that in perspective, a single human hair is about 80 microns wide. This ridiculously tight structure allows pure water molecules to slip right through but physically blocks up to 99% of dissolved salts, chemicals, and other microscopic troublemakers. It’s a physical blockade, not a chemical treatment, which means only the cleanest water gets past the velvet rope.

Image

The Bodyguards of the System: Pre-Filters

Before your water ever gets to meet that high-tech membrane, it has to get through a crucial warm-up act. Think of the pre-filters as the bodyguards for the main star of the show—the RO membrane itself. The membrane is powerful, no doubt, but it’s also delicate. It can easily get clogged or damaged by larger gunk.

This is where the pre-filtration stages step in:

  1. Sediment Filter: This is your first line of defense. It’s designed to trap bigger particles like dirt, rust, sand, and silt that would otherwise gum up the works and torpedo the system's efficiency.
  2. Carbon Filter: Next up, the water flows through one or more carbon filters. These are non-negotiable for snagging chlorine and chloramines—chemicals commonly used in city water treatment that can literally eat away at the RO membrane. As a fantastic bonus, they also make your water taste and smell a whole lot better.

By taking out these bigger threats first, the pre-filters let the reverse osmosis membrane focus on what it does best: tackling the tiniest dissolved impurities. This teamwork extends the membrane’s life and keeps the whole system running like a well-oiled machine.

The Heart of the Operation: The RO Membrane

Once the water gets past its bodyguards, it’s ready for the main event. This is where high pressure is applied, pushing that pre-treated water hard against the semipermeable membrane. The real separation happens right here.

While pure water molecules are squeezed through the membrane’s microscopic pores, a concentrated stream of rejected contaminants—including fluoride, arsenic, lead, salts, and PFAS—is left behind. This waste stream, known as brine, is flushed away down the drain, leaving behind exceptionally pure water.

This process is so ridiculously effective it’s become the gold standard for water purification across the globe. The demand speaks for itself; the reverse osmosis system market was valued at around USD 7.15 billion in 2021 and is expected to hit USD 8.8 billion by 2025. A big driver of that growth is the development of advanced thin-film composite membranes, which are known for their incredible efficiency. You can dig into more data on the global RO system market to see the full picture.

The Finishing Touch: Polishing with Post-Filters

The journey isn't quite over yet. After the RO membrane does its heavy lifting, the purified water usually chills out in a large storage tank, ready for you. When you turn on a faucet, this water takes one final trip through a post-filter.

This last stage, usually another carbon filter, is all about polishing. It gets rid of any stray tastes or odors the water might have picked up while sitting in the tank. Some systems even add a remineralization filter here, which puts back beneficial minerals like calcium and magnesium. This not only improves the taste but also raises the pH a bit. It’s this multi-stage approach that guarantees the water coming out of your tap is not just ridiculously pure, but also crisp and refreshing.

An Inside Look at Your RO System Components

A whole house reverse osmosis system might look complicated on the outside, but it’s really just a team of specialized parts working in perfect harmony. Think of it like a high-tech purification assembly line for your water—each station has a very specific job to get done. Figuring out what each part does is the key to understanding how these systems deliver such pristine water to every faucet in your home.

This diagram gives you a quick snapshot of the real-world benefits you get from a complete system, from contaminant removal and water output to potential long-term savings.

Image

As you can see, a top-tier system can strip out over 95% of contaminants, churn out hundreds of gallons of pure water daily, and even save you a good chunk of change each year. Every single component below plays a critical role in hitting those impressive numbers.

The First Line of Defense: Pre-Filters

Before the real magic happens, your water has to get through a crucial prep stage handled by the pre-filters. These act as the system's bodyguards, protecting the more delicate and expensive parts down the line from getting gummed up or damaged.

  • Sediment Filter: This is the bouncer at the front door. Its only job is to trap bigger, clunky particles like sand, dirt, rust, and silt. Without this guy, those abrasive materials would quickly clog up the more sensitive components.
  • Carbon Block Filter: Next up, the water flows through at least one carbon filter. These are absolutely essential for grabbing chlorine and chloramines—common city water disinfectants that can literally eat away at the RO membrane. As a bonus, they also make the water taste and smell a whole lot better by absorbing other funky organic compounds.

The Heart of the System: The RO Membrane

After the initial cleanup, the water finally reaches the heart of the whole operation: the semipermeable membrane. This is where the heavy-duty purification takes place.

This membrane is a marvel of engineering, packed with microscopic pores just 0.0001 microns in size. They're so incredibly tiny that only pure water molecules can squeeze through.

Under intense pressure, water is forced against the membrane. The pure H₂O molecules get pushed through to the "clean" side, while up to 99% of dissolved contaminants—things like salts, heavy metals, fluoride, and arsenic—are left behind and flushed down the drain.

This is the component that does almost all of the work, separating the good stuff from the bad at a molecular level. It's easily the single most important piece of the entire system.

The Support Crew: Storage Tank and Delivery Pump

Making water this pure isn't a fast process. Because reverse osmosis is slow and methodical, the system needs a way to store up the purified water so it's ready the instant you turn on the tap.

That's where the storage tank comes in. It's a large, pressurized tank that holds dozens or even hundreds of gallons of RO water, ensuring you always have a massive supply ready for showers, laundry, or cooking without any lag time. When you open a faucet, the tank delivers the water right away.

Working hand-in-hand with the tank is the delivery pump (or booster pump). Its job is to make sure the purified water travels from the tank and through your pipes with strong, consistent pressure. Without a good pump, you could end up with a disappointingly weak flow at your showerheads and faucets.

The demand for these powerful pumps is on the rise as more homes install high-performance purification systems. The global market for RO pumps was valued at USD 9.14 billion in 2025 and is expected to climb to USD 15.35 billion by 2035. If you're interested, you can discover more insights about RO pump market growth on futuremarketinsights.com.

The Final Polish: Post-Filters

Just before the water reaches your glass, it makes one last pass through a post-filter. This final stage is all about giving the water a last-minute polish to make sure it tastes absolutely perfect.

Most of the time, this is another carbon filter designed to catch any lingering tastes or odors the water might have picked up while sitting in the storage tank. Some systems also add a remineralization filter here. This component adds healthy minerals like calcium and magnesium back into the water, which can improve the taste and raise its pH for a more natural feel.

To pull it all together, here's a quick look at each component and how often you'll need to give it some attention.

Whole House RO System Component Breakdown

Component Primary Function Typical Maintenance Schedule
Sediment Pre-Filter Removes large particles like sand, dirt, and rust. Replace every 6-12 months
Carbon Pre-Filter Removes chlorine, chloramines, and improves taste/odor. Replace every 6-12 months
RO Membrane Separates pure water from dissolved contaminants. Replace every 2-4 years
Storage Tank Stores purified water for on-demand use. Check pressure annually
Delivery Pump Ensures strong water pressure throughout the home. Inspect annually
Carbon Post-Filter "Polishes" the water, removing any final tastes or odors. Replace every 12 months
Remineralization Filter (Optional) Adds beneficial minerals back to the water. Replace every 12 months

Keeping up with this simple maintenance schedule is the best way to ensure your system continues to produce incredibly pure water for years to come.

The Everyday Benefits of Pure Water at Home

So, we've talked about the hardware and the filtration stages, but what does a whole house reverse osmosis system really do for your family every single day? It's a total upgrade to the water in your home, and you'll notice the difference immediately—in what you taste, feel, and see. This isn't just about taking stuff out of your water; it's about what you get back in your daily life.

Think about that first cup of coffee or tea in the morning. With RO water, the pure, rich flavor of the coffee beans or tea leaves finally comes through. It's not hidden behind the taste of chlorine or other minerals anymore. That same pure taste transforms your cooking, too, letting the real flavors of your food shine.

Image

Even a simple glass of water or a tray of ice cubes becomes a whole new experience. Say goodbye to cloudy, strange-smelling ice. RO systems give you crystal-clear ice that won't leave behind any weird residue or aftertaste when it melts in your drink.

Experience a Softer, Healthier Clean

The perks of a whole house RO system go way beyond the kitchen. The first time you step into the shower, you'll feel it. The chlorine and hard minerals that parch your skin and make your hair feel brittle and dull are gone.

What you get instead is a shower that feels incredibly soft and clean. People often find their skin is less irritated and holds moisture better. Their hair gets shinier and is much easier to manage without being constantly attacked by harsh chemicals. It’s like showering in bottled-quality water every day.

  • Softer Skin: Your skin can finally hold onto its natural moisture without drying minerals and chlorine getting in the way.
  • Healthier Hair: With no mineral gunk coating your hair, it feels softer, looks brighter, and is way easier to style.
  • Cleaner Laundry: Your clothes will come out of the wash feeling softer and looking brighter because the detergent can finally do its job properly in pure water.

When you remove all the gunk that causes irritation and buildup, a whole house RO system basically turns every single faucet in your house into a source of gentle, purified water. It completely elevates your daily routine.

Protecting Your Home and Your Wallet

Here's one of the biggest long-term wins: protecting your home's plumbing and appliances. Those hard water minerals create scale—that crusty, white buildup you see inside your pipes, on your faucets, and, more importantly, inside your expensive appliances.

That scale buildup makes things like your water heater, dishwasher, and washing machine work way harder than they should. This leads to higher energy bills and a much shorter lifespan for your appliances. By filtering out these minerals right where the water enters your home, a whole house reverse osmosis system acts like a shield, stopping that expensive damage before it even starts. You'll be making fewer repair calls and your appliances will last longer, saving you hundreds, if not thousands, of dollars down the road.

Plus, with an unlimited supply of amazing water right from the tap, you can finally ditch single-use plastic water bottles for good. You'll not only shrink your environmental footprint but also cross a regular expense off your grocery list. Those savings really add up over the year.

How to Choose the Right System for Your Family

Picking the right whole house reverse osmosis system can feel like a huge task, but it’s actually pretty straightforward if you break it down. Don't get bogged down in technical jargon. The best place to start is with what you know: your family and your home. It’s all about matching the system's power to your specific needs.

Your first step is to nail down two key numbers: how much water your household uses daily and what’s actually in your water. These two facts will steer all your other decisions and keep you from buying a system that’s overkill or one that just can’t keep up.

Calculate Your Daily Water Demand

First things first, let’s figure out how much filtered water your family actually needs. This is measured in Gallons Per Day (GPD). A system’s GPD rating tells you the maximum amount of pure water it can produce over 24 hours.

Figuring out your usage is easier than you might think. You don't need to track every drop. Instead, just think about your busiest moments—like a typical morning when the shower is running, the laundry is going, and the dishwasher kicks on. A good whole house reverse osmosis system needs a big enough storage tank to handle all that at once without your water pressure taking a nosedive.

  • Small household (1-2 people): A system rated for 200-400 GPD should do the trick.
  • Average family (3-4 people): Look for something in the 400-800 GPD range.
  • Larger families (5+ people): You’ll probably need a system that can produce over 800 GPD to keep everyone happy.

Understand Your Water Quality

Next up, you need to know exactly what you’re trying to filter out. The key metric here is Total Dissolved Solids (TDS), which is just a measure of all the minerals, salts, and metals dissolved in your water. You can often find this in your city's annual water report, but for a truly accurate number, a cheap handheld TDS meter is the way to go.

Why does TDS matter so much? Because the more "stuff" in your water, the harder the RO system has to work. If your TDS is high (over 500 ppm), you'll need a stronger system, and probably a booster pump, to push water through the membrane effectively.

Think of your TDS level as a roadmap. It tells you exactly how tough the filtration job is going to be, which points you directly to the right kind of equipment.

Consider Essential System Features

Once you know your GPD and TDS numbers, you can start zeroing in on the features that make sense for your home.

One of the biggest factors is your home's water pressure. You can learn more about understanding your home's water pressure, but the bottom line is this: if your pressure is below 40-50 PSI, a booster pump isn't optional. It's essential. It provides the muscle needed to force water through the RO membrane.

If you’re on well water, a UV filter is another must-have. While RO membranes are fantastic at removing dissolved solids, they aren't designed to kill living organisms. A UV light acts as a final line of defense, zapping any bacteria or viruses to make sure your water is completely safe to drink.

Balancing Cost and Efficiency

Finally, let's talk budget and long-term costs. A huge factor here is the system's wastewater ratio—how much water goes down the drain for every gallon of pure water produced. Older systems were notoriously wasteful, sometimes with ratios as high as 4:1. Modern, high-efficiency models can get that down to 1:1, which saves a massive amount of water over the year.

The initial investment for a whole house reverse osmosis system can range from USD 1,000 to USD 4,000, with most homeowners spending around USD 2,500 for the equipment and installation. Typically, about 89% of that cost is for the parts and materials, while the other 11% covers professional labor. By figuring out your needs ahead of time, you can pick a system that delivers pure, clean water without a shocking price tag.

A Homeowner's Guide to Installation and Upkeep

https://www.youtube.com/embed/7tdKkeNClPE

So you've picked out the perfect whole house reverse osmosis system. Now for the fun part: getting it set up and running in your home. This really breaks down into two stages—the initial installation and the simple, ongoing maintenance that keeps your investment working hard for you. Get these two things right, and you'll be enjoying pure, clean water for years.

The first big question you need to answer is whether you'll hire a pro or tackle the installation yourself. There's no single right answer here; it really comes down to your own comfort level with plumbing and how much time you have.

Professional Installation vs DIY

Hiring a licensed plumber definitely brings peace of mind. They've seen it all before, know how to handle any surprises that might pop up, and will make sure every connection is leak-free. It's usually the best way to go if you have a complex setup or just want the assurance that the job is done right from the start.

On the flip side, a DIY install can be a really satisfying project—and save you some money—if you know your way around a toolbox. To pull it off, you'll need to be comfortable cutting into your main water line, possibly soldering pipes, and carefully following the system's instructions. Keep in mind, if any part of the job requires electrical work, it's crucial to prioritize safety by finding a trusted electrician.

Creating a Simple Maintenance Schedule

Don't let the word "maintenance" intimidate you. For these systems, it's mostly just a predictable schedule of changing filters and doing a quick check-in. This simple upkeep is the secret to getting the best performance and avoiding bigger problems later on.

Think of maintenance as a tune-up for your home’s water supply. A few simple steps each year ensure the entire system—from the powerful membrane to the final polishing filter—is working in perfect harmony to deliver the purest water possible.

Your long-term care plan boils down to just a few easy tasks. Once you get into a rhythm, it'll become second nature, and your water quality will thank you for it. If you want to dive deeper into general upkeep, you can find more water filtration advice to round out your knowledge.

Your Routine Upkeep Checklist:

  • Pre-Filters (Every 6-12 Months): These are the workhorses, catching all the sediment and chlorine before they can do any damage. Swapping them out is the most important thing you can do to protect the RO membrane.
  • Post-Filter (Every 12 Months): This final filter gets changed out once a year. It's what removes any lingering tastes the water might pick up from the storage tank, keeping it tasting crisp and fresh.
  • RO Membrane (Every 2-4 Years): This is the heart of your whole system. How long it lasts depends on your water quality and how much you use it, but planning for a replacement every few years is a good rule of thumb.
  • Annual System Check: Once a year, just take a quick look over everything. Check the air pressure in the storage tank and scan all the connections for any signs of leaks.

That's really all there is to it. Following this straightforward routine will keep your whole house reverse osmosis system running like a dream, delivering incredible water to every tap in your home.

Got Questions About Whole House RO Systems? Let's Clear Things Up.

Even after you’ve seen the benefits, it’s smart to have a few questions before you commit to a whole house reverse osmosis system. Let's walk through some of the most common things people ask, so you can feel totally confident in your decision.

What About Water Waste?

This is probably the number one concern we hear. It's true, older RO systems weren't exactly efficient, but today's technology is a completely different story.

Modern, high-efficiency systems have gotten that wastewater ratio way down—some are as low as 1:1. That means for every gallon of pure water you get, only one gallon goes down the drain. Some of the most advanced units even have brine-reclaim features to cut down on waste even more.

Does It Strip Out Healthy Minerals?

Another big question is about minerals. Since reverse osmosis is so thorough, it does remove beneficial minerals like calcium and magnesium right along with all the nasty stuff. But there's an easy fix.

We almost always recommend adding a post-remineralization filter. This is the last stop for your water before it hits the tap, adding a healthy blend of minerals back in. This not only makes the water healthier but also improves the taste and alkalinity.

You really get the best of both worlds: pure water with up to 99% of contaminants gone, plus the good minerals you want for balanced, great-tasting water.

What's the Upkeep Like?

Finally, how much maintenance are we talking about? You might be surprised. The main RO membrane—the heart of the system—is built to last. Depending on how hard your water is and how much you use, you’ll typically only need to replace it every 2 to 4 years.

The pre-filters need a bit more attention, usually a swap every 6-12 months. But it’s a simple job that protects that more expensive membrane, making sure your system runs at its best for years to come.


For more expert guidance on choosing the right water filtration solutions for your home, explore the in-depth reviews and practical advice from our team at Water Filter Advisor. Find your perfect water filter system today.

Carbon Block Filters Water: Your Guide to Purer, Better-Tasting Water

If your tap water has a weird taste or a faint chemical smell, a carbon block filter is one of the easiest and most affordable ways to fix the problem. Think of it as a super-powered Brita for your entire kitchen. These surprisingly simple devices use activated carbon to grab onto contaminants like chlorine, leaving you with cleaner, better-tasting water straight from the tap.

Let's dive into exactly how this clever technology works and find the perfect filter for your home.

Your Journey to Better Tasting Water Starts Here

Image

Ever notice your water tastes a bit like a swimming pool? That’s usually chlorine. Water treatment plants use it as a disinfectant to make sure the water is safe on its way to your house. It does a critical job, but nobody really wants to taste it when they pour a glass.

This is where a carbon block filter really shines. You can think of it like a super-powered sponge, made specifically to soak up all the junk you don't want in your water. It's a straightforward but incredibly effective way to make your daily drinking water much more enjoyable, without needing a complex or expensive system.

Why Carbon Filtration is a Popular Choice

It's no secret that people are paying more attention to what's in their water, and that's made carbon filtration a go-to for millions of homes. The market for these filters is booming, all part of a bigger global push for better water quality and health.

So what's the big deal? Why are these filters so common? It really boils down to a few major wins for your home:

  • Better Taste and Smell: They are fantastic at pulling out chlorine and other things that give water an "off" taste.
  • Contaminant Reduction: Carbon is great at targeting a whole range of organic chemicals, including certain pesticides and VOCs (volatile organic compounds).
  • Affordable and Easy to Find: Whether you want a simple pitcher or an under-sink system, there’s a carbon filter out there for just about any home and budget.

A carbon block filter works in two ways at once: it’s a gatekeeper and a magnet. It physically stops sediment from passing through, while its huge internal surface area chemically attracts and traps contaminants, pulling them right out of your water.

For an even more complete approach to your home's water, you can look into complementary treatments like water softening solutions such as Harvey Salt Blocks.

In this guide, we're going to break down the science behind how these filters work, show you exactly what they remove, and help you figure out the best system for your family. By the time you're done reading, you'll know exactly how to choose, install, and maintain a filter that completely transforms your tap water.

The Science Behind Carbon Block Water Filtration

To really get why a carbon block filters water so effectively, think of it as a microscopic maze with a magnetic personality. Water gets pushed through, but all the nasty stuff gets trapped, unable to find an exit. It's a simple idea, but it’s powered by two potent scientific principles working in tandem to clean up every single drop.

This isn't just a one-trick pony. The filter pulls double duty. First, it acts as a physical gatekeeper, kind of like a sieve, blocking bigger particles. At the very same time, it uses a powerful chemical attraction to snatch dissolved impurities right out of the water, making sure they never reach your glass.

The Power of Physical Filtration

The first job of a carbon block is just straightforward mechanical filtering. The carbon is packed into a dense, solid block that's riddled with incredibly tiny pores. These pores are measured in microns, and most home filters have a rating between 0.5 to 5 microns. To give you some perspective, a single human hair is about 70 microns thick.

As water is forced through this tight-knit structure, any particle larger than the pores gets stopped in its tracks. We're talking about things like silt, sand, rust, and even some microorganisms. It’s like a bouncer at a club door, only letting the water molecules and smaller, dissolved goodies pass through to the next stage. This first step is absolutely crucial for clearing up cloudy water and setting the stage for the deeper cleaning to come.

This image really shows the link between the carbon's structure, its pore size, and its knack for removing contaminants.

Image

As you can see, that huge internal structure and those tiny pores are what give activated carbon its incredible power.

Adsorption: The Secret to Purity

Now, this is where the real magic happens, down at the microscopic level. It’s a process called adsorption. Be careful not to mix this up with absorption—that’s when something soaks up liquid like a sponge. Adsorption is different. It’s when contaminants chemically stick to the outside of the carbon, like little magnets snapping onto a refrigerator door.

To make this happen, the carbon has to be “activated.” This is done by superheating carbon-rich materials (like coconut shells or coal) in a low-oxygen chamber. This process blasts open millions upon millions of tiny pores, which dramatically increases the carbon's total surface area.

It's hard to wrap your head around, but just one gram of activated carbon can have a surface area of over 3,000 square meters. That means the little carbon block in your filter might have an internal surface area the size of a football field.

This massive, porous landscape is what makes adsorption so brutally effective. As water winds its way through the filter's maze, contaminants like chlorine, volatile organic compounds (VOCs), and other chemicals that cause bad tastes and smells are electrochemically drawn to the carbon's surface. They get stuck in the pores and are taken out of the water for good.

Why Contact Time Matters

The performance of a carbon block filter really hinges on contact time—basically, how long the water gets to hang out with the carbon. The solid block design is far better than loose carbon bits (often called GAC) because it prevents "channeling." That’s where water finds an easy way through, carving a little path and bypassing most of the filter material.

A carbon block forces water to take the scenic route, a long and winding path through its dense structure. This maximizes contact time. The slower the water flows, the more chances the carbon has to grab onto those impurities. This is why filters come with a recommended flow rate; they're designed to ensure contaminants have enough time to get stuck to the carbon before the water hits your tap. This careful engineering is how a carbon block filters water so thoroughly, giving you that clean, fresh result you’re looking for.

What Contaminants Carbon Block Filters Remove

Image

So, we've covered the science of adsorption. Now, let's get down to what really matters: what is a carbon block filter actually pulling out of your water?

Think of it as a smart gatekeeper for your tap. It's incredibly good at targeting the specific impurities that make water taste and smell off, while also tackling certain invisible chemicals. Its main job is to go after organic compounds and the disinfectants used by city water systems.

Knowing what it targets helps you figure out if it's the right solution for your home. If your water has that "swimming pool" odor, you're in luck. A carbon block filters water by going straight for the source of that smell, along with a whole list of other things you'd rather not be drinking.

The Chlorine and Chloramine Busters

The #1 reason people get a carbon filter is to get rid of chlorine. Municipal water suppliers use it to kill off bacteria and viruses, which is great for public health. But by the time the water gets to your kitchen, that chlorine has done its job and often leaves behind a chemical taste and smell. Carbon is a superstar at adsorbing chlorine, which is why filtered water just tastes so much cleaner.

But what if your city uses chloramine? Many municipalities are switching to this more stable disinfectant, which is a mix of chlorine and ammonia. A standard carbon filter will remove some of it, but a special type known as catalytic carbon is way more effective. If your water bill says they use chloramines, look for a filter with catalytic carbon to get the best-tasting water.

Tackling Volatile Organic Compounds (VOCs)

Beyond just improving taste and odor, carbon filters are a powerful defense against a group of chemicals called Volatile Organic Compounds (VOCs). These are carbon-based chemicals that can seep into water supplies from things like industrial runoff, pesticides, and solvents.

VOCs include a wide range of substances, some of which are linked to health concerns. Carbon block filters are certified to reduce many of them, including benzene, toluene, and trihalomethanes (THMs)—a nasty byproduct of chlorine disinfection.

Other Contaminants on the Hit List

That massive internal surface area makes carbon a real workhorse. It’s skilled at grabbing onto plenty of other unwanted guests, too.

  • Pesticides and Herbicides: If you live near agricultural areas, runoff can carry these chemicals into the water system. Carbon is excellent at adsorbing them.
  • Bad Tastes and Odors: Carbon deals with all sorts of organic compounds that create musty, earthy, or even fishy smells, bringing your water back to a clean, neutral state.
  • Lead Reduction: While not all carbon filters can handle heavy metals, many modern carbon blocks are beefed up with special media (like KDF) designed specifically to reduce lead.

What Carbon Filters Do Not Remove

It's just as important to know what a carbon filter can't do. These filters aren't a cure-all for every single water problem out there. By design, they are selective—they leave some things in and can't touch others.

For instance, carbon filters won't remove healthy dissolved minerals like calcium, magnesium, and potassium. This is a good thing! These minerals are beneficial for your health and actually contribute to good-tasting water. They also generally don't remove fluoride, nitrates, arsenic, or microorganisms like bacteria and viruses. For those contaminants, you'd need a different kind of system, like reverse osmosis or a UV purifier.

This handy table breaks down what a typical carbon block filter can and can't handle.

Carbon Block Filter Contaminant Removal Guide

Contaminant Category Effectively Removed Generally Not Removed
Aesthetics Chlorine, bad tastes, and odors Hardness minerals (calcium, magnesium)
Chemicals VOCs, pesticides, herbicides Fluoride, nitrates, arsenic
Heavy Metals Lead (with special media) Mercury, cadmium (without special media)
Microbiological Cysts (with <1 micron rating) Bacteria, viruses

Ultimately, understanding this list helps you match the right filter to your specific water quality concerns, ensuring you get the performance you need.

Decoding Filter Performance and Certifications

When you're trying to compare different carbon block filters, the technical specs on the box can look like they're written in another language. But trust me, figuring out what these key metrics mean is the secret to picking a filter that actually works as advertised. Once you know what to look for, you can cut right through the marketing fluff and choose a filter with confidence.

These numbers tell you the whole story. They show you how fine the filter's "sieve" is, how fast you'll get clean water, and exactly how long it will run before you need to swap it out. Learning to read these specs is the single most important step in finding a reliable filter for your home.

Key Performance Metrics to Understand

When you're sizing up a filter, you'll see three main specs over and over: the micron rating, flow rate, and filter capacity. Each one gives you a critical piece of the puzzle.

  • Micron Rating: This tells you the size of the particles the filter can physically block. It’s simple: a smaller number means finer filtration. A 1-micron filter, for instance, will trap much smaller contaminants than a 5-micron one. If you're trying to get rid of things like tiny cysts (think Giardia and Cryptosporidium), you'll want a filter rated at 1 micron or less.

  • Flow Rate (GPM): This is measured in gallons per minute (GPM) and tells you how quickly water will move through the filter. A higher GPM is great for whole-house systems or your main kitchen faucet where you don't want to stand around waiting. Just keep in mind that slower is often better for contaminant removal, as it gives the water more contact time with the carbon.

  • Filter Capacity (Gallons): This is the total number of gallons the filter can clean before it’s clogged up and needs to be replaced. A little refrigerator filter might be rated for 200 gallons, while a beefier under-sink system could handle 600 gallons or more.

The Gold Standard: NSF Certifications

While the performance numbers are a great start, the real proof of a filter's effectiveness comes from third-party certifications. The most respected and common ones come from NSF International (formerly the National Sanitation Foundation), an independent group that tests and verifies product claims.

An NSF certification isn't just a sticker on a box; it's a guarantee that the filter has been rigorously tested and proven to remove the specific contaminants it claims to. It's the highest level of assurance you can get.

Looking for NSF/ANSI standards is the easiest shortcut to know you're buying a quality product. The two you'll see most often for carbon block filters water treatment are:

  • NSF/ANSI 42 Aesthetic Effects: This one confirms the filter can make your water taste and smell better. It's specifically tested on its ability to reduce things that are more of an annoyance than a danger, like chlorine and other particulates that give water a bad odor or cloudy look.

  • NSF/ANSI 53 Health Effects: This is a much tougher standard to meet. To earn this certification, a filter has to be proven to reduce specific health-related contaminants like lead, mercury, cysts, and a long list of VOCs. If you're worried about more than just taste, this is the certification you need to look for.

The demand for high-performance home filters is strong, partly because of solid regulatory standards and consumers who know what to look for. The compressed design of carbon block filters, which lets them remove a huge range of contaminants like lead and VOCs, has made them a dominant force in the home water filtration market. You can dig deeper into commercial water filter trends to see how this technology is evolving. By checking for these certifications, you can be sure your chosen filter meets the highest standards for both safety and performance.

Choosing the Right Carbon Filter for Your Home

Image

Alright, you can now read a filter’s spec sheet like an old pro. Now comes the fun part—matching a system to your actual life. From simple pitchers to whole-house units that treat every drop, there’s a carbon block filter solution for just about everyone.

The goal isn't to find the single "best" filter on the market, but the one that's the best for you. It really boils down to your budget, how much water you use daily, and how comfortable you are with a little installation work. Let's break down the most common types of home filters to see which one checks all your boxes.

Simple and Portable Water Filter Pitchers

If you're just dipping your toes into water filtration, a pitcher is the easiest place to start. They couldn't be simpler: fill the top, let gravity do the work, and pour yourself a glass of crisp, clean water. They’re cheap, require zero setup, and are a great fit for renters or anyone who just wants to improve the taste of their drinking water without any commitment.

Of course, there are some trade-offs. Pitchers are slow and don't hold much water, so you’ll find yourself at the sink refilling them often. The small filters also need to be swapped out more frequently than bigger systems, and that cost can add up.

  • Best For: Individuals, renters, or anyone looking for a low-cost, no-fuss option for drinking water.
  • Pros: Super affordable, totally portable, and no installation required.
  • Cons: Small capacity, slow filtering speed, and more frequent filter changes.

Convenient Refrigerator and Faucet Filters

Want filtered water on tap without a big project? Refrigerator and faucet-mounted filters are a fantastic middle ground. Fridge filters are built right into your water and ice dispenser, giving you chilled, clean water instantly. They're a true "set it and forget it" solution, usually needing a new cartridge only every six months.

Faucet filters screw directly onto your kitchen tap, letting you switch between filtered and regular water on the fly. This is a neat trick for extending the filter's life, since you can use unfiltered water for things like washing dishes. Both are a huge step up from pitchers in convenience and capacity.

These are what we call point-of-use (POU) systems. They’re designed to treat water right where you use it most—your kitchen sink. They strike a great balance between performance and convenience without needing to call a plumber.

High-Performance Under-Sink Systems

For those who want serious filtration power hidden away, an under-sink system is the gold standard for the kitchen. These units are installed discreetly in the cabinet below and connect right to your cold water line. They feed a separate, dedicated faucet, giving you a steady stream of pure water.

Because these systems use much larger carbon block filters, they have a higher capacity and last a lot longer than pitchers or faucet mounts. They cost more upfront and might require some basic plumbing know-how to install, but you get top-tier contaminant removal and fast-flowing water. It's a great long-term investment for a family.

Comprehensive Whole-House Systems

If your goal is better water from every single tap—showers, laundry, bathrooms, and all—then a whole-house system is the ultimate answer. Also called a point-of-entry (POE) system, this unit is installed right where the main water line enters your home.

This approach doesn't just protect your family's drinking water; it protects your pipes and appliances from the harsh effects of chlorine and sediment. While it's the most expensive option and typically requires a professional plumber to install, it delivers a seamless, whole-home solution. You'll even notice the difference in the shower, with softer skin and hair free from chlorine's drying effects.

Simple Installation and Maintenance Tips

One of the best things about modern carbon block water filters is that most are designed for easy, DIY installation. The idea of fiddling with your home’s plumbing can be a little nerve-wracking, but you don’t need to be a pro to get most systems up and running.

For example, swapping out a refrigerator filter is usually as simple as twisting out the old one and popping in the new—no tools needed. Under-sink systems might look more complicated, but many kits today come with everything you need, including clear instructions and quick-connect fittings that just snap into place.

Of course, while many setups are perfect for a weekend project, some complex whole-house systems or tricky plumbing situations are best left to the experts. If you hit a snag or just don't feel comfortable, it’s always a good call to bring in professional plumbing services to make sure it’s done right.

Why Timely Maintenance is Non-Negotiable

Getting your filter installed is just step one. The real key to consistently great-tasting water is keeping up with maintenance.

Think of your filter cartridge as a highly specialized sponge. Once it's completely full of trapped contaminants, it simply can’t absorb any more. Worse yet, the pressure of water flowing through can actually start to push some of those trapped impurities back into your water supply.

When you forget to change your filter, you’re basically turning your purifier off. The carbon becomes saturated and can’t grab any more contaminants, meaning all that nasty chlorine and other junk starts flowing right back out of your tap.

A clogged filter doesn't just stop working—it can become a breeding ground for bacteria. The trapped organic material creates a perfect environment for microorganisms to multiply, potentially making your water quality worse than it was before filtration.

Knowing When It's Time for a Change

So, how can you tell when your filter has reached the end of the line? Your system will give you a few clear signals that it's time for a replacement.

You should change your filter if you notice:

  • A Drop in Water Pressure: This is the classic tell-tale sign. As the filter’s pores get clogged with gunk and sediment, it becomes much harder for water to push through. The result is a weak, slow flow from your faucet or dispenser.
  • Return of Bad Tastes and Odors: If that familiar chlorine taste or musty smell starts creeping back into your water, you know the carbon’s job is done. Its adsorption capacity is maxed out, and it’s no longer pulling out the chemicals that ruin the flavor.
  • The Filter Indicator Light: Many modern refrigerators and under-sink systems take the guesswork out of it with a handy indicator light that alerts you when the filter is nearing its expiration date.

A good rule of thumb is to replace most refrigerator and under-sink filters every six months. But always double-check the manufacturer’s guidelines, as every filter is different. For more tips on keeping your system in top shape, check out this great advice from water filtration experts.

A simple trick? Set a recurring reminder on your phone or calendar. It’s an easy way to make sure you never miss a filter change.

Your Top Questions About Carbon Block Filters, Answered

As you narrow down your options for the perfect filter, it's totally normal to have a few last-minute questions. Getting those final details sorted is what helps you feel confident you're making the right call for your family.

So, let's dive into some of the most common things people ask about carbon block filters, from how long they last to how they stack up against other types.

How Long Do Carbon Block Water Filters Typically Last?

There’s no single answer here—a filter's lifespan really depends on its size, how much water you use every day, and the quality of your local water.

As a rule of thumb, a standard under-sink or refrigerator filter usually needs to be replaced every 6 to 12 months. A larger whole-house filter might go for a year or even longer. Your best bet is always to check the manufacturer's guidelines to keep your filter working like it should.

Will a Carbon Block Filter Reduce My Water Pressure?

When you first install a new carbon block filter, you might notice a tiny drop in water pressure, but it’s usually so small you won’t even feel it.

If you suddenly see a major drop in your water pressure, that’s the number one sign your filter is clogged with gunk and it's time for a change. It’s your system’s way of saying, "Hey, I'm full!" A new filter will get the flow back to normal and keep your water pure.

Are Carbon Block Filters Better Than GAC Filters?

Both use activated carbon, but yes, carbon block filters generally do a better job than Granular Activated Carbon (GAC) filters. The key is in the design. A carbon block is a solid, compressed brick of carbon.

This solid structure forces every drop of water to twist and turn through a dense maze, so it can't just find an easy path and sneak past the filter media. This gives the water much more contact time with the carbon.

It also means carbon blocks can be made with much smaller pores, allowing them to reliably filter out tiny contaminants like lead, certain cysts, and VOCs that loose GAC granules might miss. This level of performance is why the demand for these filters is soaring, with the global market expected to hit USD 10.3 billion by 2030. You can get more details on the global carbon block filter market trends to see what's driving this growth.


Ready to find the perfect filtration solution for your home? At Water Filter Advisor, we provide in-depth reviews, buying guides, and expert advice to help you choose with confidence. Explore our resources today at https://www.waterfilteradvisor.com.

How to Remove Lead from Water: A Home Filtration Guide

So, you're wondering how to remove lead from water. It’s a smart question, but before you can zap it, you have to know if that invisible heavy metal is crashing your party in the first place. Since you can't see, smell, or taste lead, the only way to know for sure is to test your water.

Step 1: Confirming Lead is in Your Water

The idea of testing might sound like a science project, but it's really just a simple choice: a quick DIY kit from the hardware store, or sending a sample to the pros at a certified lab. Let's break down which one is worth your time.

DIY Test Kits vs. Professional Lab Analysis

Those do-it-yourself test strips are tempting. They’re cheap, and you get an answer in minutes. Just dip the strip in some water, and it changes color if lead is present. It's like a magic trick for your tap water.

The problem? Most of them aren't very good magicians. They often miss low levels of lead that are still a health risk, and they won't tell you how much lead you have. They’re a simple yes/no tool, but to pick the right filter, you need to know the specific number in parts per billion (ppb).

That's where professional lab testing steals the show. It's the gold standard for a reason. You'll get a collection kit from a state-certified lab with crystal-clear instructions. A lab report gives you the exact concentration of lead, leaving no room for doubt.

The Importance of the First-Draw Sample

How you collect your water sample is just as important as where you send it. For the most accurate reading, you need to capture a "first-draw" sample.

This just means collecting water from your kitchen tap first thing in the morning, before anyone uses any water in the house—no showers, no flushing toilets, no running the dishwasher. This water has been sitting in your pipes all night, giving it the maximum amount of time to absorb any lead from old plumbing.

A first-draw sample shows you the worst-case scenario for your daily lead exposure. If that sample comes back with high lead levels, you know you have a problem to solve.

Getting the sample is easy, but you have to do it right:

  • Don't run any water at all before collecting. Go straight to the kitchen sink.
  • Always use cold water. Hot water can pull more lead from pipes, but cold water is the standard for testing what you'll be drinking.
  • Fill the bottle immediately. Just turn on the tap and fill the collection bottle from the lab right away.

Understanding Your Test Results

Your lab report will give you a number in parts per billion (ppb). The EPA has an "action level" of 15 ppb, but don't get too hung up on that number.

That 15 ppb figure isn't a health-based safety standard; it's a trigger that requires public water systems to take action. The reality, according to the U.S. Centers for Disease control and Prevention (CDC) and other health experts, is that no level of lead exposure is safe, particularly for children. If your test shows any detectable lead, it's time to get serious about filtration.

Step 2: Choosing the Right Water Filter for Lead Removal

Okay, your test results are in, and they show lead. The good news is you can absolutely do something about it. The right water filter is your most powerful weapon in the fight for safer water.

But when you start looking, it's easy to get overwhelmed. The market is flooded with options, and every company promises perfectly pure, safe water. The real trick is to cut through the marketing fluff and find a filter that actually works on a heavy metal like lead.

Image

This chart puts things into perspective. The Environmental Protection Agency (EPA) goal for lead is zero. Any amount is a real concern, which is why effective filtration is so important.

The Gold Standard: NSF/ANSI 53 Certification

Before you even think about pitchers versus under-sink systems, there's one thing you absolutely must look for: NSF/ANSI 53 certification.

Think of this as an independent, third-party guarantee. It’s proof that a filter has been rigorously tested and can actually reduce lead and other health-related contaminants, just like it says on the box. If a filter doesn't have this specific certification for lead reduction, you have no real assurance that it’s protecting your family.

Never buy a filter for lead removal unless you can confirm it's certified to NSF/ANSI 53 standards. This seal is the single most reliable sign of a filter that does what it claims.

A Breakdown of Common Filter Types

With that critical certification in mind, let's walk through the most common types of home water filters. Each has its own set of pros and cons, so the right choice for you will depend on your budget, your living situation, and how much water you need to treat.

Comparing Home Water Filters for Lead Removal

Choosing the right filter is all about balancing effectiveness, convenience, and cost. This table breaks down the key differences to help you decide which system is the best fit for your home.

Filtration Type Lead Removal Effectiveness Installation Average Annual Cost Best For
Water Pitcher Moderate (if NSF 53 certified) None $60 – $120 Single users, renters, and budget-conscious households.
Faucet-Mounted Good (if NSF 53 certified) DIY, very easy $50 – $100 Kitchen use in rental properties or small apartments.
Under-Sink Excellent DIY or Professional $150 – $500 Homeowners wanting dedicated, high-quality drinking water at one tap.
Whole-House Excellent Professional Required $500 – $2000+ Homes with known lead service lines or widespread contamination issues.

As you can see, the options range from simple, portable solutions to comprehensive, whole-home systems.

Water Pitcher and Faucet-Mounted Filters

These are the entry-level options for a reason—they're affordable and incredibly easy to use. A pitcher can live in your fridge, while a faucet-mounted unit screws onto your kitchen tap in minutes.

  • How They Work: Most use a block of activated carbon. As water flows through, the carbon's huge, porous surface area adsorbs contaminants like lead.
  • Best For: Renters, people in small apartments, or anyone looking for a simple, budget-friendly starting point.
  • The Catch: Their filter capacity is pretty small. You’ll be changing cartridges every 40 to 100 gallons, and the flow rate can be slow. Plus, they only treat water at a single point.

Under-Sink Filtration Systems

If you're looking for something more permanent and powerful for your kitchen sink, an under-sink system is a fantastic upgrade. These are installed out of sight and connect directly to your cold water line, usually feeding a separate, dedicated faucet for pure, filtered water.

They also tend to use more advanced technology. Some rely on high-grade activated carbon, but many use reverse osmosis (RO), which is one of the most effective methods out there. You can learn more about RO system water purifiers to get a better handle on the tech, but basically, they use a special membrane to block nearly everything—lead, arsenic, nitrates, you name it.

Whole-House Filtration Systems

What if your test results show high lead levels throughout your home, or you know you have a lead service line? That’s when you should consider a whole-house, or "point-of-entry," system.

This is the most comprehensive solution. It’s installed where your main water line enters your home, meaning every single tap—from the kitchen sink to the bathroom shower—delivers clean, filtered water. While it provides total peace of mind, it's also the biggest investment and almost always requires a professional plumber to install correctly.

Step 3: Installing and Maintaining Your Water Filter

Image

So you’ve done your homework and picked out a solid, certified filter to remove lead. Fantastic. But the job isn't quite done. A high-quality filter is only as good as its installation and maintenance. Getting the setup right and being disciplined about upkeep is what truly protects your family.

Think of it this way: your filter is a gatekeeper for your water. If it’s not installed correctly or you let it get old and clogged, that gatekeeper can’t do its job.

Getting the Installation Right

The setup really depends on what kind of filter you bought. Simple systems, like the ones that mount directly on your faucet, are usually a piece of cake. You can often get them on in just a few minutes with no tools, just make sure you get a tight, leak-free seal.

Under-sink systems, however, are a bit more involved. While plenty are designed for a confident DIYer, you absolutely have to follow the manufacturer's instructions to the letter. No skipping steps.

A Quick Checklist for Under-Sink Filters:

  • Kill the Water Supply: First thing's first. Find the cold water shutoff valve under your sink and turn it off completely.
  • Secure Your Connections: Use the fittings and hoses that came in the box. Take a moment to double-check that every connection is snug. A slow, hidden drip can cause a world of water damage down the road.
  • Flush the New Filter: Before you even think about drinking the water, you have to flush the system. This means running cold water through it for a few minutes. It clears out any loose carbon dust (which is harmless but can make the water look cloudy) and gets the filter media activated and ready to work.

The most common mistake people make is skipping that initial flush. It’s not optional. This one step ensures your filter works like it’s supposed to from the very first glass.

Why Filter Replacement is Non-Negotiable

Let me be blunt: an old, expired filter is worse than no filter at all. As a filter cartridge does its job, it fills up with the contaminants it has captured. Once it reaches capacity, it can’t remove any more lead. Simple as that.

What’s worse is a phenomenon called "dumping," where a totally saturated filter can actually release a concentrated burst of the very junk it was supposed to be catching. This is precisely why changing your filter on schedule is the single most important part of this whole process. This focus on filtration is part of a much larger public health story, and you can learn more about the global fight for safe water from the World Health Organization.

Creating a Foolproof Maintenance Schedule

When a filter is tucked away under a sink, it’s easy to forget about it. "Out of sight, out of mind" can be a real problem here, so you need a system that doesn't rely on memory alone.

  • Calendar It: The moment you install a new cartridge, put the replacement date on your kitchen calendar or, better yet, set a recurring event on your phone.
  • Use the Sticker: Most filters come with a little sticker for a reason. Write down the date you installed it and the date it needs to be replaced. Stick it right on the filter housing or inside the cabinet door where you’ll see it.
  • Heed the Light: Many pitchers, refrigerators, and faucet filters now have an indicator light. These are great, but think of them as a backup reminder. Your calendar is your primary system.

Spotting the Signs of an Expired Filter

Beyond your schedule, the filter itself will often give you clues that it’s on its last legs.

The most obvious sign is a significant drop in water pressure. If the flow from your dedicated filter faucet has slowed to a trickle, that’s a dead giveaway. The filter is clogged with sediment and everything else it has captured, making it hard for water to get through. This is its way of telling you its ability to remove lead is compromised. Time for a change—immediately.

Bonus Tip: Simple Habits to Further Reduce Lead Exposure

Image

While your certified water filter is doing the heavy lifting, a few smart daily habits can add another powerful layer of protection. Think of these as the supporting players, working alongside your filtration system to keep your family’s contact with lead to an absolute minimum.

These simple, no-cost practices are all about turning your kitchen into a safer space.

Master the Morning Flush

When water sits in your pipes overnight or while you're at work, it has more time to pick up lead from old plumbing. The fix is surprisingly simple: flush your pipes. Before you use any water for drinking or cooking, just let the cold tap run for a minute or two.

You'll know you've flushed the line when the water turns noticeably colder. This quick step pushes out the stagnant water and pulls in fresh, cleaner water from the main before it even hits your filter.

The Golden Rule: Never Use Hot Tap Water for Cooking

It’s tempting to grab hot water from the tap to get a head start on boiling pasta, but this is one kitchen shortcut you need to skip. Hot water is far more corrosive than cold water and dissolves lead from pipes and old solder much more efficiently.

Always start with cold water for cooking and drinking. Heat it on the stove or in a kettle instead. This one change is a critical part of any home strategy for how to remove lead from water.

By following this rule, you’re ensuring you start with the lowest possible lead concentration before you even begin to cook.

Common Questions About Removing Lead From Water

Even after you've picked a filter and tested your water, a few questions might still be nagging you. That's completely normal. Let's tackle some of the most common things people ask about getting lead out of their water.

Will Boiling Water Remove Lead?

This is probably the biggest and most dangerous myth out there, and the answer is a firm no. Boiling is fantastic for getting rid of things like bacteria and viruses, but it does absolutely nothing for lead.

In fact, it can make things worse. When water boils, some of it turns to steam and escapes, but the lead stays behind. This means the lead concentration in the water left in the pot actually goes up. Always, always stick to a certified filter to handle lead.

How Do I Know My Filter Is Certified for Lead?

Time to become a label detective. You have to look for one very specific code on the product packaging or its official documentation: NSF/ANSI 53. This isn't just marketing fluff; it’s a certification from an independent organization that has put the filter through rigorous testing to verify it reduces lead to safe levels.

Don't just take a company's word for it. If a filter doesn't clearly state it's certified to NSF/ANSI 53 for lead reduction, you simply can't trust it to protect your family. It's the only real guarantee you have.

Vague promises like "cleaner water" don't cut it. For lead, this specific certification is non-negotiable.

Is It Safe to Shower in Water with Lead?

Finally, a bit of good news. The health risk from showering or taking a bath in water that contains lead is extremely low. Your skin doesn't absorb lead, so the real danger comes from drinking it.

The main thing to watch out for, especially with little kids, is making sure they don't swallow a bunch of bathwater. But for the most part, you don't need a massive whole-house filter just to make bathing safe. This allows you to focus your efforts and budget on point-of-use filters for the water you drink and cook with.

My City Water Report Is Clean. Should I Still Test My Tap?

Yes, without a doubt. This is a critical point that trips a lot of people up. Your city's water report shows the quality of the water as it leaves the treatment plant, which could be miles away.

Lead contamination is a "last-mile" problem. It almost always happens somewhere between the city main and your faucet. The usual suspects are an old lead service line running to your house or even your own plumbing—things like old pipes, lead-based solder, or certain brass fixtures. The only way to know what's actually coming out of your kitchen tap is to test it right there. Your city's report can't see inside your walls.

Article created using Outrank