You notice it the second the hot water hits. The steam carries that chemical smell, your skin feels tight before you even towel off, and your hair never quite feels clean and soft at the same time.
A shower filter is a simple fix, but the install goes better when you treat it like real plumbing instead of product packaging. Some setups thread on in minutes. Others fight back because the old shower arm is corroded, the factory washer is missing, or the house uses chloramine-treated water and the new cartridge needs a proper flush before anyone showers in it.
That part gets skipped in a lot of “tool-free” guides. It should not be. A clean, leak-free install is what turns a filter from a gadget into an upgrade you feel on your skin and hair every day.
If you want better water in the bathroom, start with the shower. Then use solid water treatment advice to match the filter and install method to your plumbing, especially if you live in an older home: practical water filtration guidance for homeowners.
Why Your Shower Water Needs an Upgrade
You feel bad shower water before you know what is in it. Skin feels tight after a rinse. Your scalp gets itchy. Hair turns rough, dull, or harder to manage. If the steam carries a bleach-like smell, that is another common clue.
In real bathrooms, the problem is often disinfectants in the water, especially chlorine or chloramine, plus the wear and tear of the plumbing feeding the shower. I see this a lot in older homes. The filter matters, but so does the condition of the shower arm, the threads, and any mineral buildup sitting behind the old showerhead. A good install starts with understanding that you are improving water quality at the fixture, not fixing every issue upstream.
What people usually notice first
The first signs show up on your body and hair, not on a water test report.
- Skin feels dry fast: You step out of the shower and already want lotion.
- Hair feels rough or frizzy: Color-treated, curly, and fine hair usually shows the change first.
- Steam smells chemical-heavy: Hot water makes that smell more obvious.
- Sensitive skin gets irritated more easily: Water can meet municipal standards and still feel harsh in daily use.
Hot water makes all of this more noticeable.
That is why a shower filter can make such a big difference. It improves the water at the exact point where it hits your skin and hair every day. In homes served by chloramine-treated water, this also means you need to follow the manufacturer's flushing steps after installation instead of jumping straight into a shower. Skip that, and people often think the filter is not working when the cartridge has not been flushed properly yet.
There is also a comfort piece people miss. If you are already improving flow and spray performance with things like savings and comfort with low-flow shower heads, cleaner-feeling water makes that upgrade feel complete.
Why this upgrade makes sense
A shower filter is a targeted fix. You do not need to open walls or commit to a whole-house system just to make one of your daily routines feel better.
It is also one of the few bathroom upgrades you can usually feel right away. Better water on your skin. Less chemical smell in the steam. Hair that feels cleaner instead of stripped. The catch is simple. The result depends on choosing the right filter for your water and installing it carefully, especially if old threads, corrosion, or hard-water scale are part of the job.
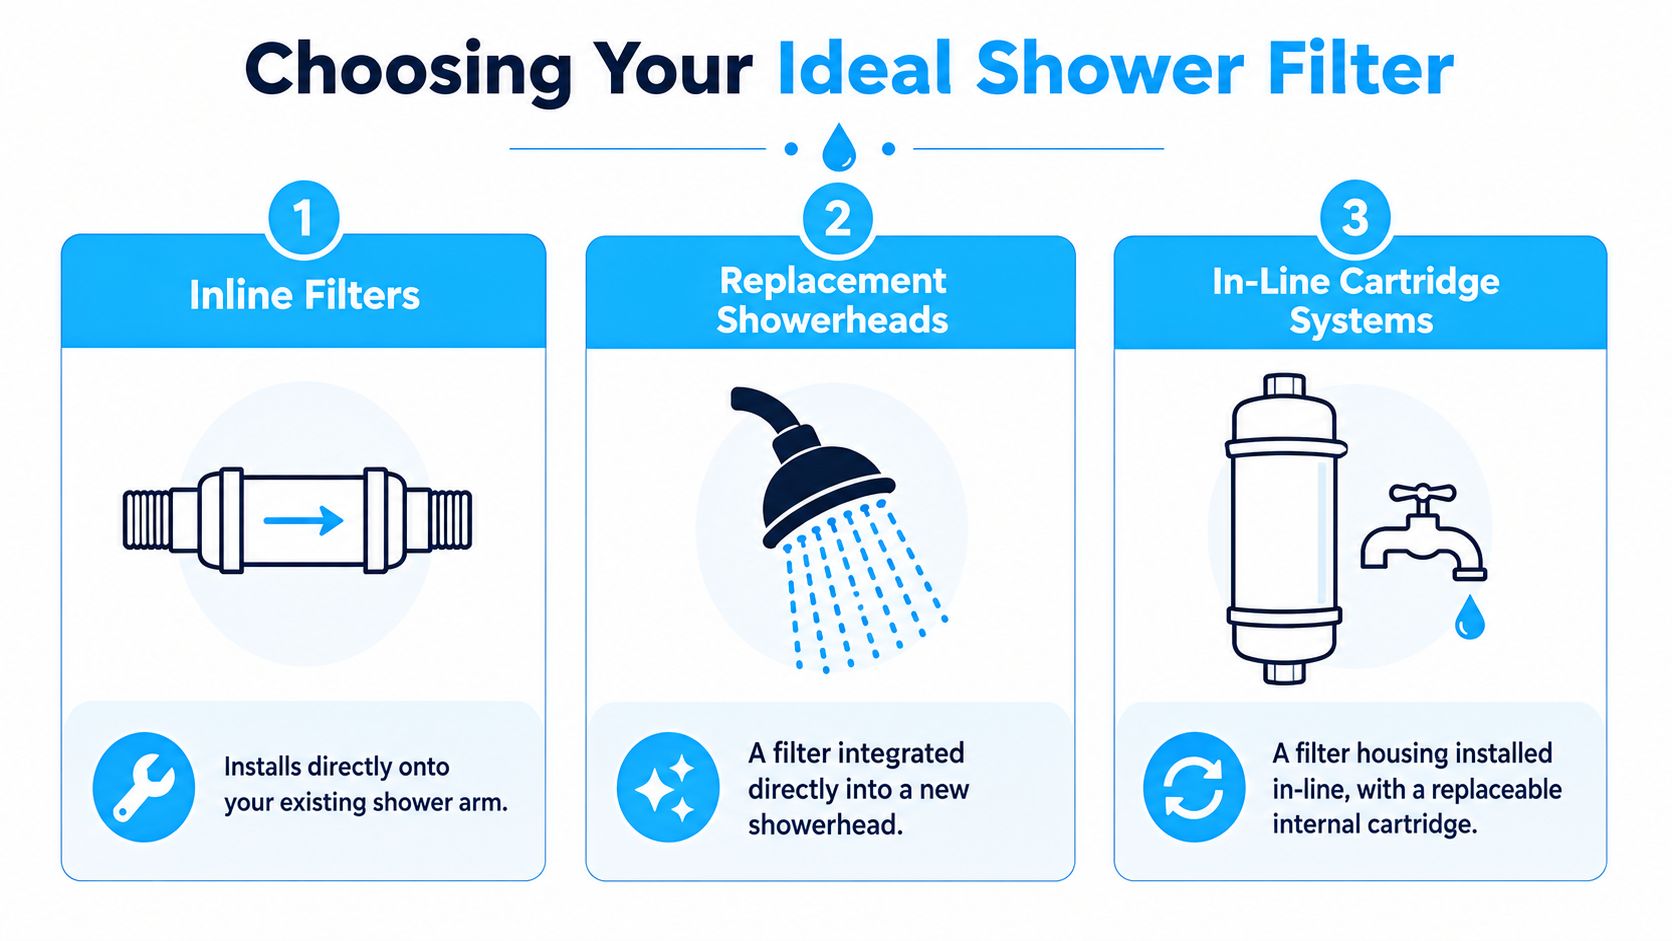
Choosing Your Ideal Shower Filter Type
A lot of installation problems start here, at the buying stage. Someone orders a filter because the box says universal, then finds out the unit is too bulky for a low-mounted arm, the showerhead no longer clears the wall, or the cartridge media is a poor match for local water treatment.
Choose the filter for your plumbing first, then for the marketing claims on the package. That approach saves returns, cuts down on leaks, and gives you a better shot at the result you want: shower water that feels better on skin and leaves hair less dry and dull.
The three common filter styles
Inline filters thread between the shower arm and your current showerhead. I recommend these when you already like your showerhead and want to keep its spray pattern, finish, and flow feel. They are also the easiest fit in many rentals, as long as there is enough space between the wall and the head.
Replacement showerheads combine the filter and the head in one unit. They make sense when the old head is worn out, scaled up, or not worth saving. One swap improves water quality and the shower experience at the same time.
In-line cartridge systems use a separate housing with a replaceable cartridge inside. These are often easier to service later, but they can look bulkier and may put more weight on an older shower arm.
How to choose without getting burned
If your current showerhead works well, an inline unit is usually the smartest buy.
If the old head sprays unevenly, has heavy mineral buildup, or looks rough, replace the whole thing.
If you care most about simple cartridge changes, a cartridge housing is easier to maintain, but check clearance carefully before you buy.
| Filter Type | Best For | Installation Ease | Key Feature |
|---|---|---|---|
| Inline Filter | Keeping your existing showerhead | Easy | Mounts between shower arm and current head |
| Replacement Showerhead | Full shower refresh | Easy | Filter is built into a new head |
| In-Line Cartridge System | Easy cartridge servicing | Moderate | Replaceable internal filter cartridge |
What actually matters
Stage count gets too much attention. In real bathrooms, fit, cartridge availability, thread quality, and water chemistry matter more.
That last point gets missed all the time. If your city uses chloramine instead of free chlorine, make sure the filter is rated for it and follow the flushing instructions exactly after installation. A quick rinse is not always enough. With chloramine-treated water, some cartridges need a more thorough flush before the water smells and feels right. If you want a broader comparison of shower filters and other home options, Water Filter Advisor's filtration advice library is a good reference.
Older homes need extra caution. Corroded threads, short shower arms, and mineral buildup can limit what style fits cleanly. A bulky cartridge housing that looks fine online can turn into a leak point if the arm is worn or the head ends up hanging at an awkward angle. General fixture-fit guidance from Bulls Eye Repair's home maintenance resources is also useful if your bathroom hardware has not been touched in years.
Buy the filter that matches your water, your space, and the condition of the shower arm. That is what makes installation go smoothly.
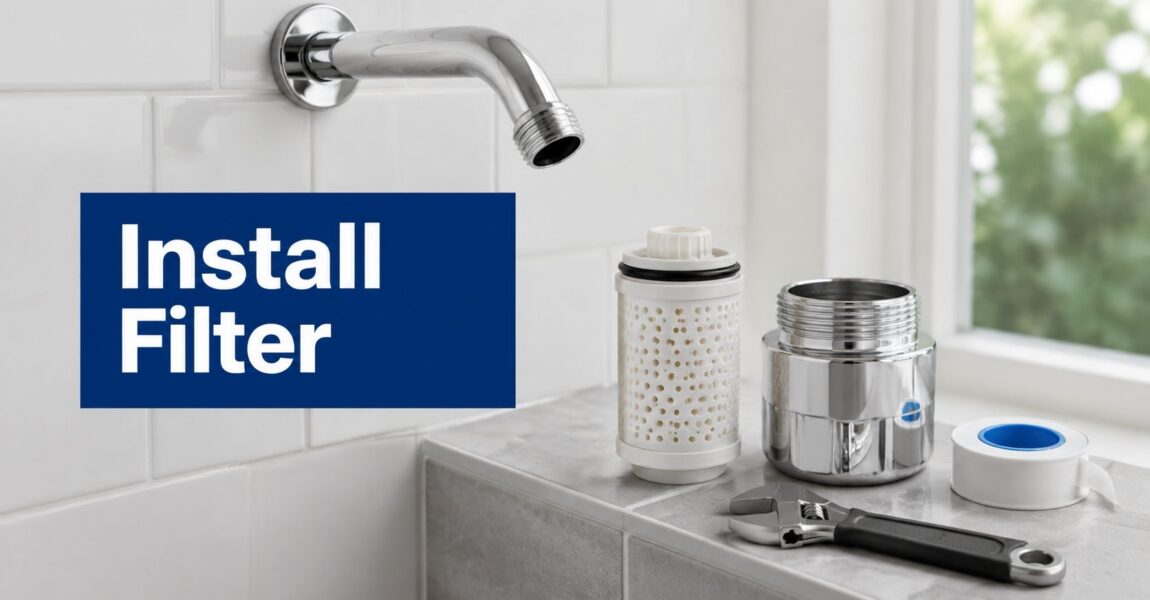
Your Pre-Installation Checklist and Tools
You find out what kind of shower filter install you really have after the old showerhead comes off. In a newer bathroom, the threads are usually clean and the filter goes on with little fuss. In an older home or rental, mineral scale, old tape, and corrosion at the shower arm can turn a "tool-free" job into a leak chase.

I keep this part simple. Set out a few basic items before you touch the old head, and the install goes faster and cleaner.
- Your shower filter kit: Confirm the housing, cartridge, washer, O-ring, and any adapter are in the box.
- Fresh plumber's tape: Use new tape every time. Old tape or half-dried scraps cause bad seals.
- Adjustable wrench: Helpful for stuck showerheads and for snugging connections without overdoing it.
- Soft cloth or rag: Wrap finished surfaces before using the wrench so you do not scratch chrome, nickel, or painted parts.
- Old toothbrush or small nylon brush: Good for cleaning thread grooves.
- Small bowl or towel: Catch grit, old tape, and drips so they do not end up down the drain.
The toothbrush earns its place. Dirty threads are one of the most common reasons a new filter drips right after installation. If old tape, scale, or white mineral crust stays in the grooves, the new tape cannot seat properly and the filter body may tighten crooked.
Check the shower arm before you install anything new. Look closely at the threaded end, not just the finish around it.
- Damaged threads: Flattened, bent, or partially stripped threads can cause slow leaks no matter how good the filter is.
- Corrosion: Light discoloration is usually fine. Heavy rust, pitting, or flaky metal means you need to slow down and tighten with care.
- Leftover sealant: Remove every bit of old tape or pipe dope.
- Washer fit: Make sure the washer or O-ring sits flat in the filter connection before tightening.
One more real-world point gets missed in a lot of "easy install" guides. If your water utility uses chloramine, some filters need a longer flush than the quick rinse printed on generic packaging. Keep a bucket or towel nearby and plan a proper flush after installation so the cartridge media clears fully and the water smells normal sooner.
If the shower arm already shows staining inside the wall escutcheon, damp drywall, or other signs of hidden leaks, inspect that before adding a filter. A new filter improves water quality for skin and hair, but it will not fix a failing threaded connection behind the wall.
Clean threads, fresh tape, the right washer, and a wrench within reach. That is what makes this job go smoothly, especially in older bathrooms where corrosion decides how "easy" the install will be.
The Step-by-Step Shower Filter Installation
A shower filter install feels easy until the old showerhead refuses to budge or the new filter starts threading on crooked. In newer homes, this can be a five-minute swap. In older bathrooms with mineral buildup or light corrosion, the same job takes a little more patience. The payoff is worth it. Once the filter is in and flushed properly, the water is usually much kinder to dry skin, irritated scalps, and color-treated hair.
Remove the old showerhead
Start with the shower off and the area dry so you can spot leaks later.
Turn the old showerhead counterclockwise. If it comes off by hand, fine. If it fights you, wrap the fitting with a soft cloth and use an adjustable wrench with steady pressure. Pulling hard to one side can twist the shower arm inside the wall, and that turns a simple filter install into a repair job.
On stubborn fittings, a little patience beats more force. Short, controlled pressure usually works better than muscling it.
Clean the threads properly
With the old head removed, clean the shower arm threads until the grooves are fully visible. Strip off old tape, old pipe dope, and any grit sitting in the threads.
This step decides how the rest of the install goes. If debris stays behind, the filter can bind early, sit crooked, or leak even when it feels tight.
A dry rag, an old toothbrush, or a nylon brush usually does the job.
Apply thread seal tape the right way
Wrap fresh thread seal tape clockwise so it tightens with the filter instead of bunching up underneath it. Use enough tape to fill the threads cleanly without creating a bulky lump.
A good rule is 5 to 8 full wraps, overlapped neatly and pressed into the grooves with your fingers, followed by the manufacturer's flushing steps after installation, as noted in Aquasana's installation guidance.
Neat tape matters. Sloppy tape causes more leaks than people expect.
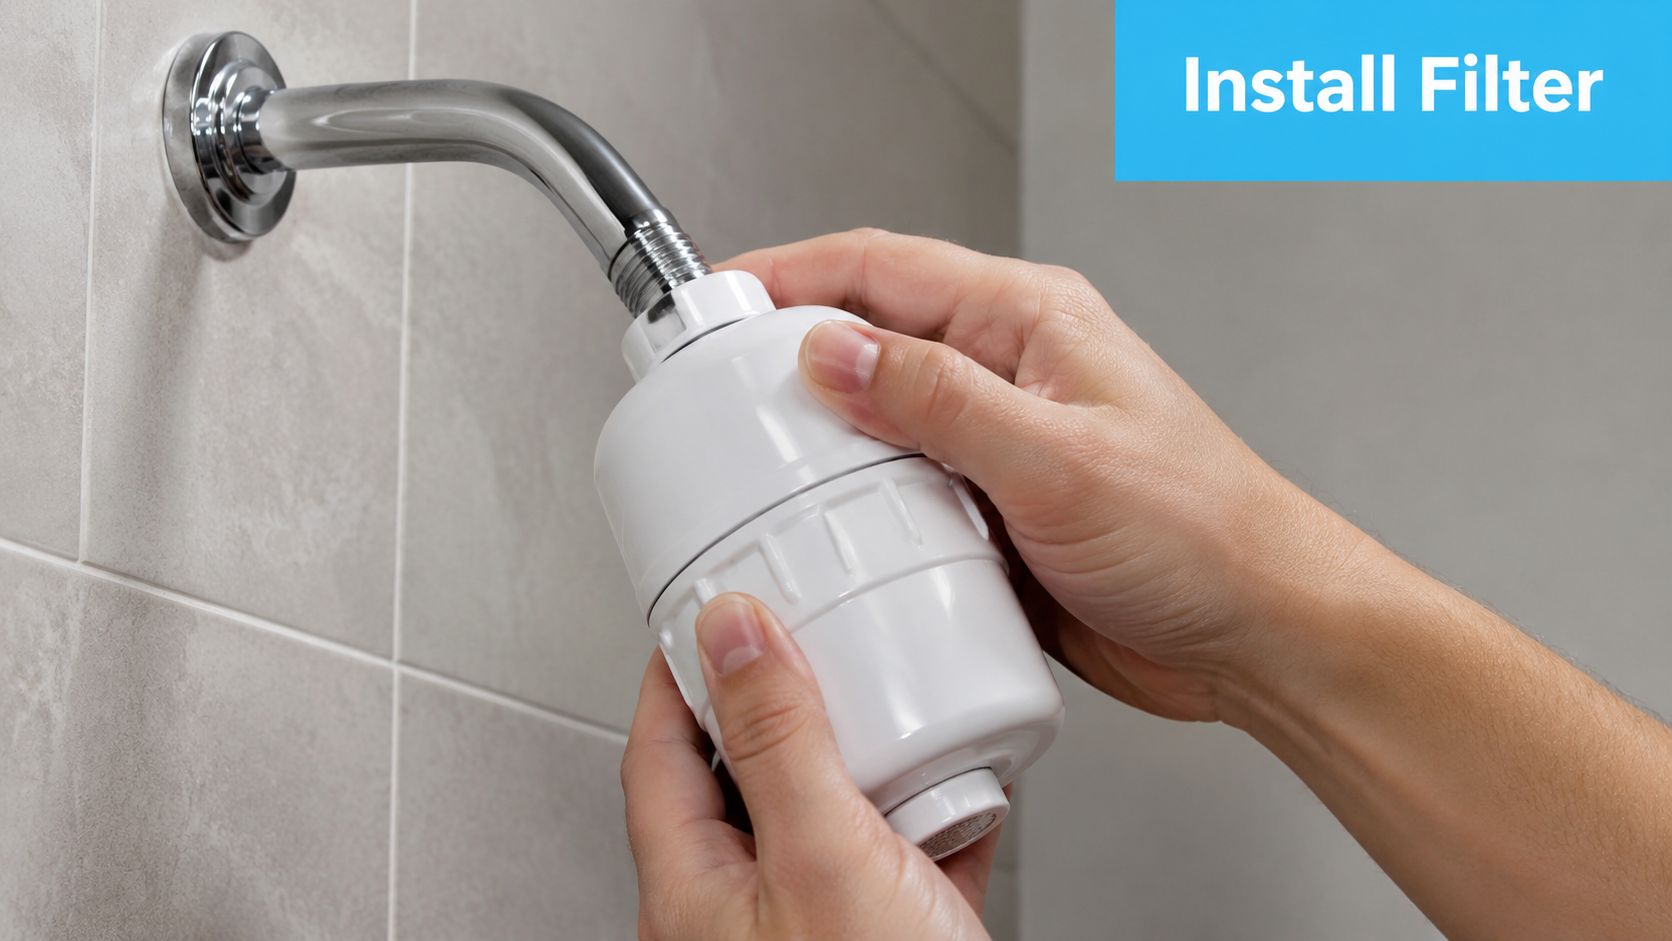
Install the washer and thread on the filter
Set the rubber washer or O-ring flat inside the filter connection before you thread anything on. Then start the filter by hand and keep it straight from the first turn.
If it does not spin on smoothly, stop and back it off. Cross-threading usually starts in the first turn or two, especially on older shower arms with worn threads.
Hand-tight is often enough on a clean connection with a properly seated washer. If needed, give it a small extra turn with pliers or a wrench over a cloth. Keep that final snug-up gentle. Plastic housings and plated fittings do not like over-tightening.
If you are installing an inline model, reattach the showerhead after the filter body is secure. If the filter and showerhead are one piece, you are already at the final connection.
Flush the filter before first use
Run cold water through the new filter before you shower. New media often sheds a little harmless carbon dust at startup, and flushing clears that out before it hits your hair and skin.
For many filters, a short flush is enough. For chloramine-treated water, I recommend being more thorough than the quick rinse some boxes suggest. Let it run, cycle the water on and off a few times if the manufacturer calls for it, and keep flushing until the water runs clear and the initial carbon smell settles down. That extra minute or two prevents a lot of false alarm moments later.
For readers who like watching the sequence before touching a wrench, this short install demo helps with the hand positions and fitting order:
What a good installation looks like
A proper install is easy to judge. The filter sits straight, the showerhead points where it should, and every visible connection stays dry during the first run.
Check the joint with dry fingers or a tissue. Even a slow seep needs attention right away because it rarely fixes itself once hot water and vibration get involved.
If you want a broader DIY reference for bathroom fixture work, Bulls Eye Repair's home maintenance resources are worth browsing. Shower filters are simpler than many fixture swaps, but the same habits matter. Clean threads, correct tape direction, a flat washer, and careful tightening.
Quick install summary
- Turn off the shower and remove the old showerhead
- Clean the shower arm threads completely
- Wrap fresh tape clockwise with 5 to 8 neat turns
- Seat the washer and thread the filter on by hand
- Snug it gently if needed, then flush it thoroughly
That is the whole job. A leak-free install usually comes down to thread prep, a straight hand-threaded start, and a proper flush at the end.
Troubleshooting Leaks and Other Common Issues
You finish the install, turn the water on, and spot a drip at the fitting or a burst of dark water from the head. That does not mean the filter is faulty. In my experience, post-install problems usually come from thread prep, washer placement, or a flush that was too short for the way your local water is treated.
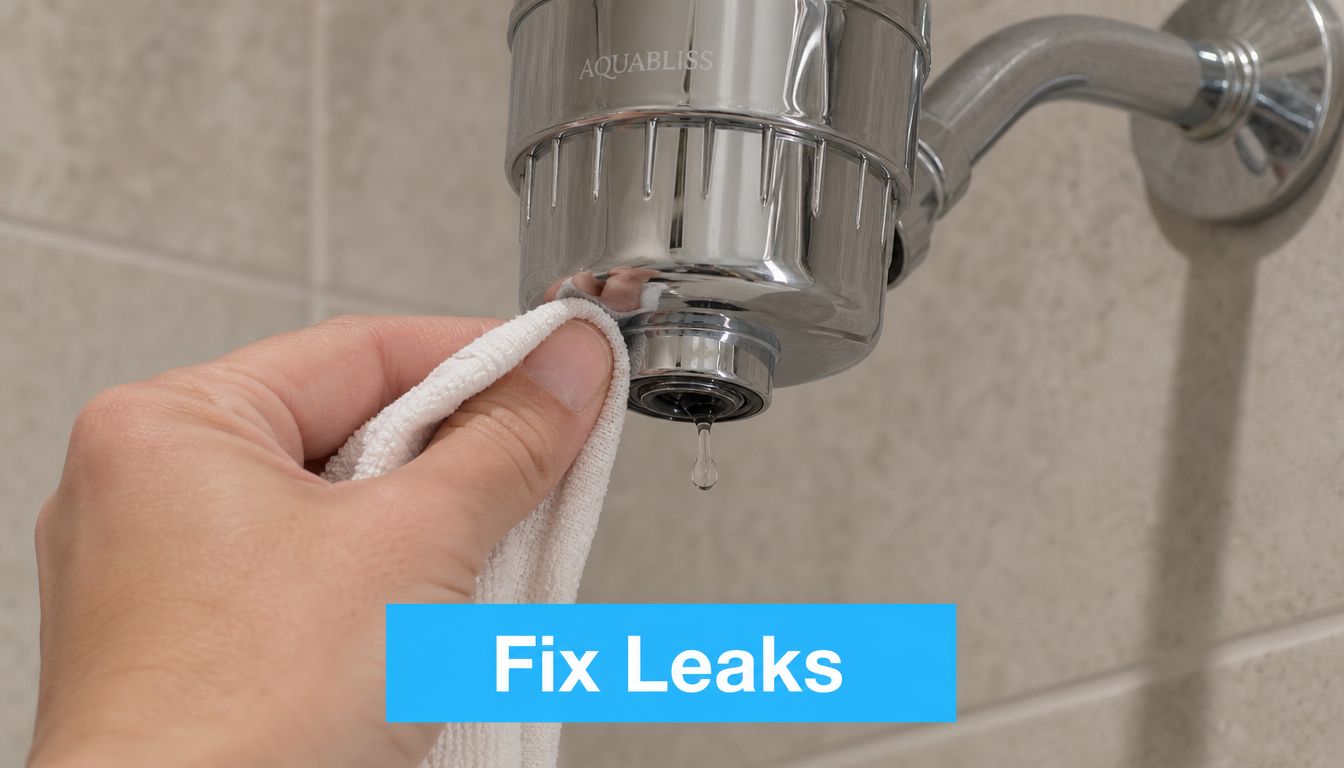
Start with the leak before you start blaming the filter body. A threaded shower connection only has a few places to fail, and each one has a straightforward fix. What causes trouble is over-tightening. I see that a lot in older homes where the shower arm threads are already worn or slightly corroded. More force on damaged threads rarely seals the joint. It usually makes alignment worse.
If water drips from the threaded joint
Work through these checks in order:
- Washer missing, twisted, or pinched: Remove it and seat it flat.
- Tape wrapped the wrong way: Rewrap it clockwise so it stays in place as the fitting tightens.
- Too little tape on older threads: Add a few neat wraps so shallow or worn threads can seal.
- Cross-threaded fitting: Back it off and restart by hand. It should spin on smoothly for the first turns.
- Mineral buildup on the shower arm: Clean the threads fully. Old scale can stop the filter from seating square.
If the drip seems to be coming from somewhere behind the visible connection or from the wall area, it's smart to learn the broader signs of hidden leaks so you don't mistake a larger plumbing problem for a bad shower filter install.
If the water looks cloudy or dark at first
That is usually carbon fines washing out of a new cartridge. It looks alarming, but it is common on first start-up.
Flush the filter longer than the box suggests if your water supplier uses chloramine. The short, tool-free marketing version of this job skips over that detail, but chloramine systems often need a more deliberate flush with warm water and a few on-off cycles before the media settles and performance levels out. If the filter seems disappointing right away, I would question the flush first.
If pressure drops and stays low
A small change in flow during the first run can happen while the cartridge saturates. Weak pressure that continues means something is restricting the path.
- Check the inlet screen: New installs often catch loose sediment from the pipe.
- Make sure the cartridge is seated correctly: If it sits crooked, flow drops fast.
- Inspect the showerhead itself: An old head full of scale can get blamed on the new filter.
- Look at the shower arm in older homes: Rust flakes and debris can break loose during installation and lodge in the filter or head.
One good reset solves a lot of these issues. Take the unit back off, clean the threads, confirm the washer is flat, reinstall it by hand, and flush it properly. A careful reinstall beats brute force every time.
Maintaining Your Filter for Pure Water Year-Round
A shower filter only helps your skin and hair if the cartridge inside it is still doing its job. I see plenty of installs that were done right once, then ignored until the water starts smelling like a pool again. Good maintenance is what keeps the chlorine reduction, softer feel, and better shower experience going.
Cartridges do not all age at the same pace. A house with heavy use, sediment, or chloramine-treated water will usually burn through media faster than the box implies. In older homes, rust and scale from the supply line can shorten cartridge life too, especially after the first install shakes loose debris inside the shower arm.
Signs it's time to change the cartridge
You usually get warning signs before the filter is fully spent.
- The chlorine smell returns: If that treated-water smell comes back, the media is likely near the end of its service life.
- Skin feels tighter or hair feels dull: This is often the first thing people notice, even before they notice odor.
- Water flow drops off: Sediment, scale, or a loaded cartridge can restrict flow.
- The cartridge has been in place longer than the manufacturer recommends: Calendar reminders work better than guesswork.
How to replace it without creating leaks
Replacement is simple if you stay methodical. Shut the shower off fully, let the fixture cool if you have been using hot water, then unscrew the housing carefully so you do not pinch the O-ring or cross-thread the body on reassembly.
Set the old cartridge aside, wipe out the housing, and check the washer and threads while it is open. If you live in an older home, look for rust flakes or mineral grit inside the filter body. That debris can keep the new cartridge from seating properly and cause a slow drip that gets blamed on the filter itself.
Install the new cartridge in the correct direction, hand-tighten the housing, and flush it before showering. If your water utility uses chloramine, give the new cartridge a longer flush than the quick-start instructions suggest. Warm water and a few on-off cycles usually help settle the media and clear carbon fines more thoroughly.
On-time cartridge changes are what keep the improvement real. The housing is reusable. The media inside is the working part.
If you want help comparing shower filters, replacement cartridges, and other home water treatment options without digging through marketing claims, Water Filter Advisor is a solid place to start. It's especially useful when you're deciding between a basic shower upgrade and a bigger filtration plan for the whole home.
- July 4, 2026
- Uncategorized