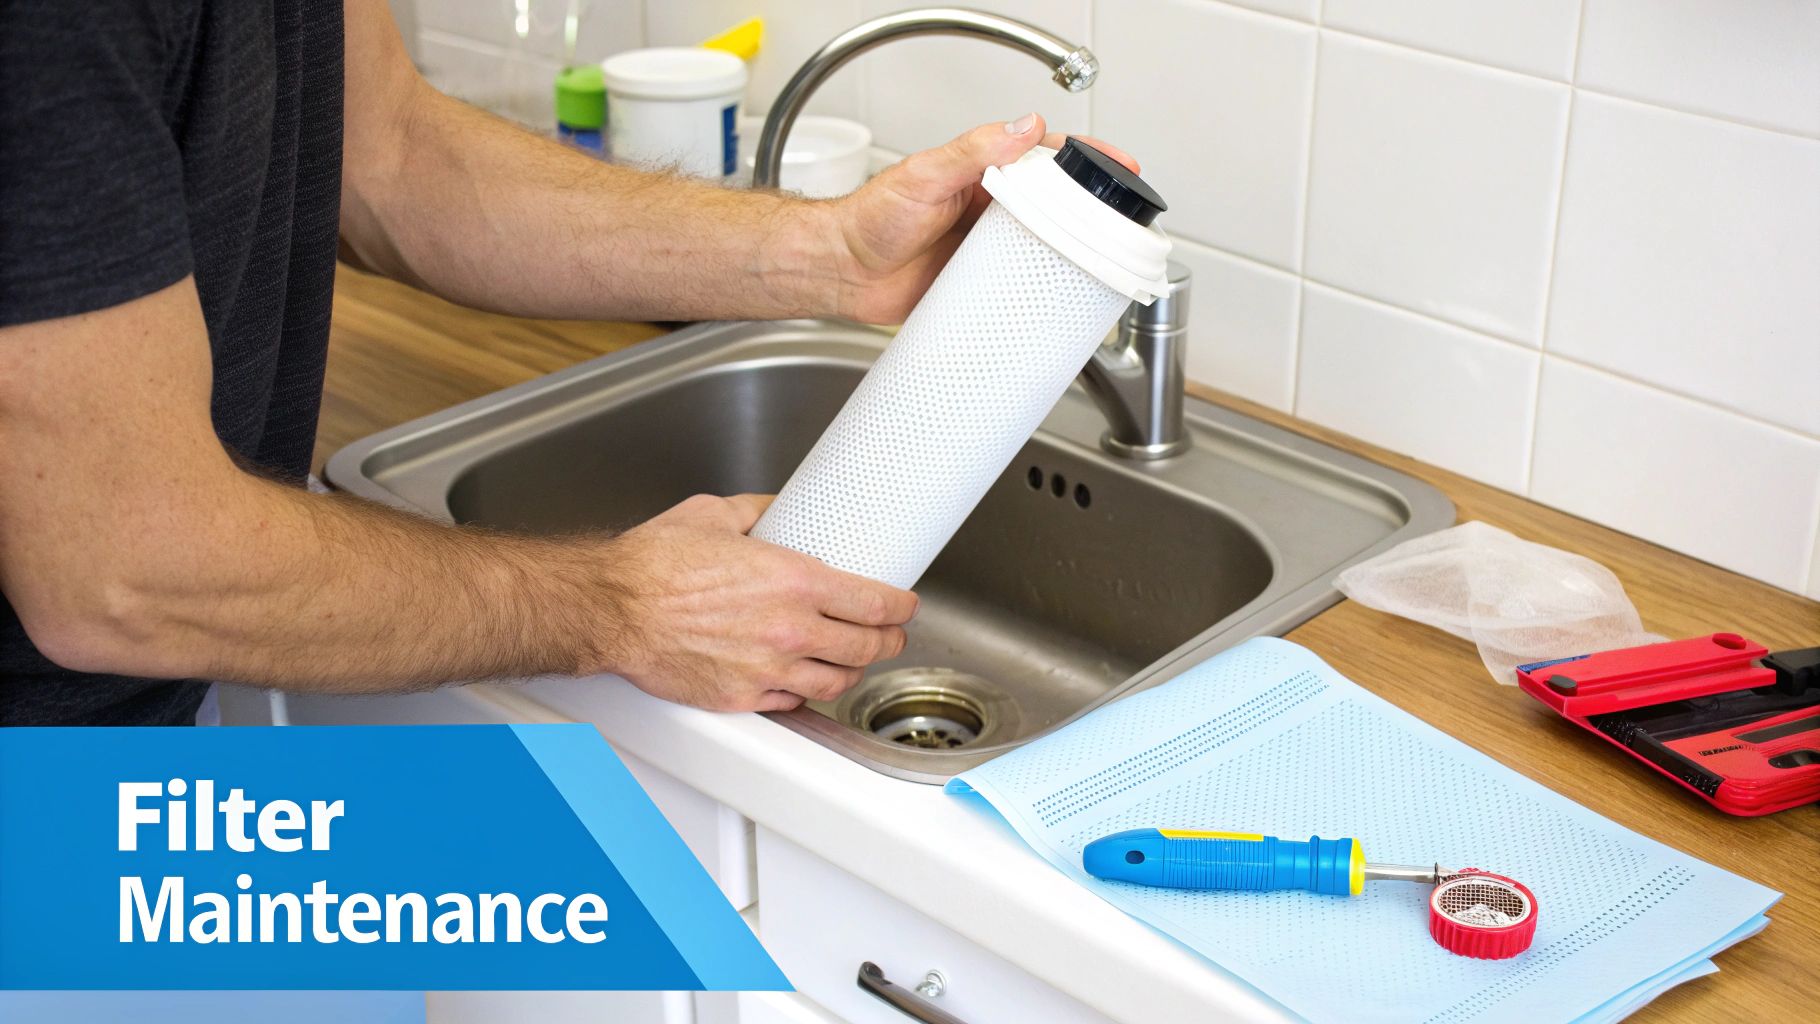
Master How to Install Shower Filter: Quick 2026 DIY Guide

You notice it the second the hot water hits. The steam carries that chemical smell, your skin feels tight before you even towel off, and your hair never quite feels clean and soft at the same time.

A shower filter is a simple fix, but the install goes better when you treat it like real plumbing instead of product packaging. Some setups thread on in minutes. Others fight back because the old shower arm is corroded, the factory washer is missing, or the house uses chloramine-treated water and the new cartridge needs a proper flush before anyone showers in it.

That part gets skipped in a lot of “tool-free” guides. It should not be. A clean, leak-free install is what turns a filter from a gadget into an upgrade you feel on your skin and hair every day.

If you want better water in the bathroom, start with the shower. Then use solid water treatment advice to match the filter and install method to your plumbing, especially if you live in an older home: practical water filtration guidance for homeowners.

Why Your Shower Water Needs an Upgrade

You feel bad shower water before you know what is in it. Skin feels tight after a rinse. Your scalp gets itchy. Hair turns rough, dull, or harder to manage. If the steam carries a bleach-like smell, that is another common clue.

In real bathrooms, the problem is often disinfectants in the water, especially chlorine or chloramine, plus the wear and tear of the plumbing feeding the shower. I see this a lot in older homes. The filter matters, but so does the condition of the shower arm, the threads, and any mineral buildup sitting behind the old showerhead. A good install starts with understanding that you are improving water quality at the fixture, not fixing every issue upstream.

What people usually notice first

The first signs show up on your body and hair, not on a water test report.

  • Skin feels dry fast: You step out of the shower and already want lotion.
  • Hair feels rough or frizzy: Color-treated, curly, and fine hair usually shows the change first.
  • Steam smells chemical-heavy: Hot water makes that smell more obvious.
  • Sensitive skin gets irritated more easily: Water can meet municipal standards and still feel harsh in daily use.

Hot water makes all of this more noticeable.

That is why a shower filter can make such a big difference. It improves the water at the exact point where it hits your skin and hair every day. In homes served by chloramine-treated water, this also means you need to follow the manufacturer's flushing steps after installation instead of jumping straight into a shower. Skip that, and people often think the filter is not working when the cartridge has not been flushed properly yet.

There is also a comfort piece people miss. If you are already improving flow and spray performance with things like savings and comfort with low-flow shower heads, cleaner-feeling water makes that upgrade feel complete.

Why this upgrade makes sense

A shower filter is a targeted fix. You do not need to open walls or commit to a whole-house system just to make one of your daily routines feel better.

It is also one of the few bathroom upgrades you can usually feel right away. Better water on your skin. Less chemical smell in the steam. Hair that feels cleaner instead of stripped. The catch is simple. The result depends on choosing the right filter for your water and installing it carefully, especially if old threads, corrosion, or hard-water scale are part of the job.

Choosing Your Ideal Shower Filter Type

A lot of installation problems start here, at the buying stage. Someone orders a filter because the box says universal, then finds out the unit is too bulky for a low-mounted arm, the showerhead no longer clears the wall, or the cartridge media is a poor match for local water treatment.
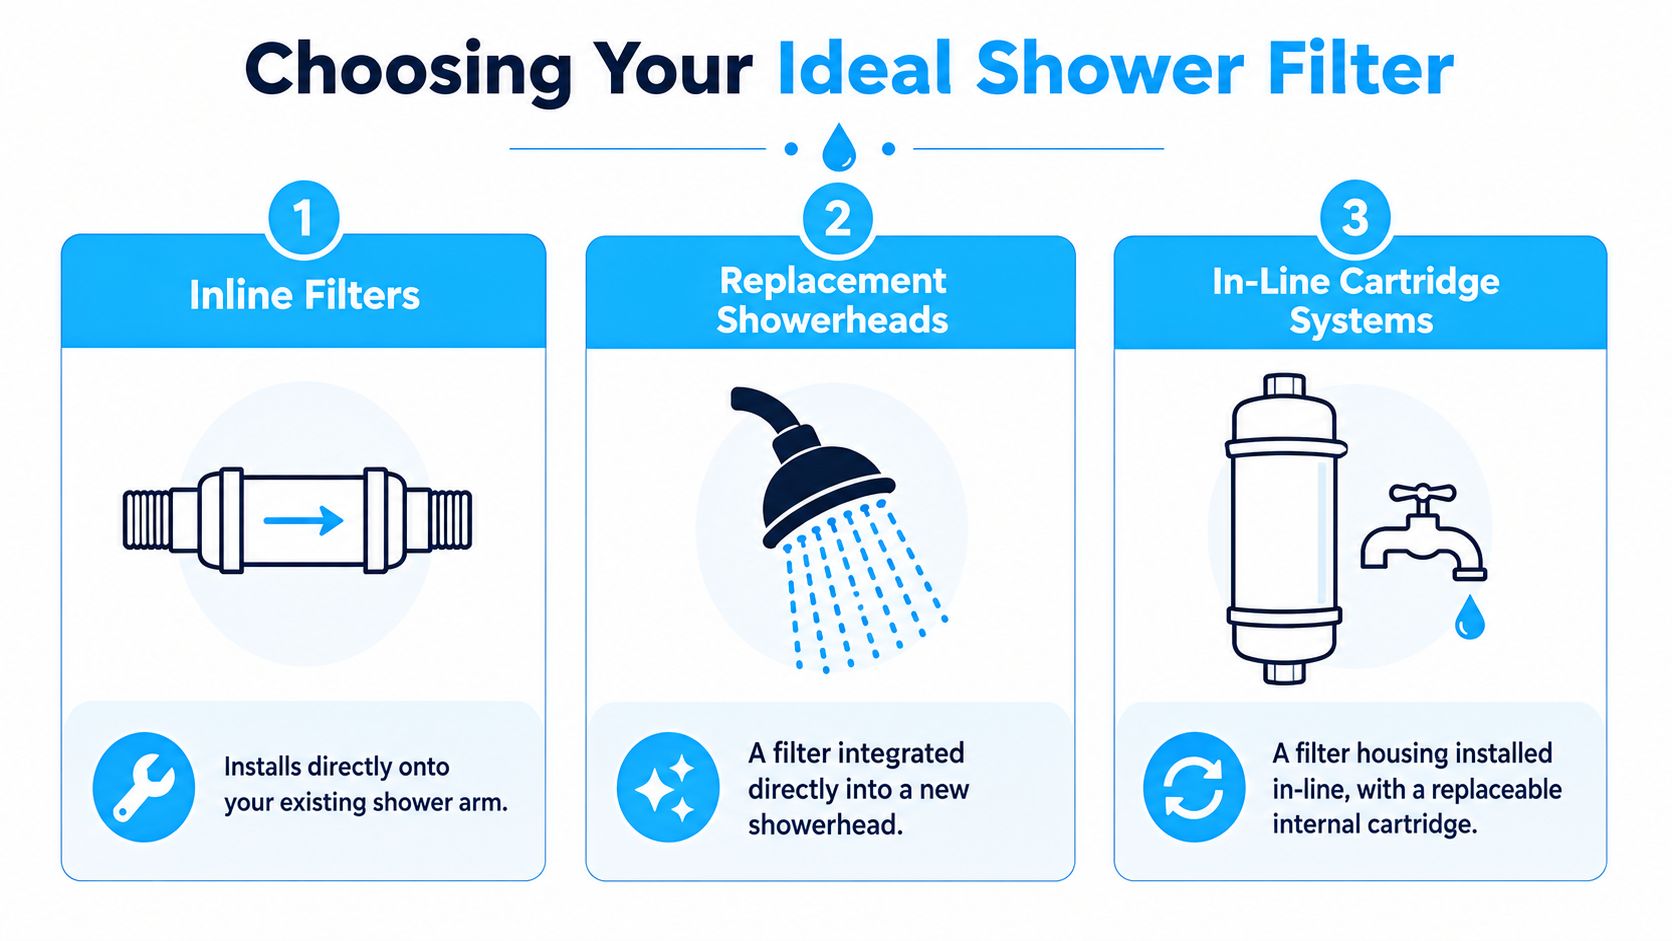
A guide on how to choose the right shower filter, showing three types of filtration systems.

Choose the filter for your plumbing first, then for the marketing claims on the package. That approach saves returns, cuts down on leaks, and gives you a better shot at the result you want: shower water that feels better on skin and leaves hair less dry and dull.

The three common filter styles

Inline filters thread between the shower arm and your current showerhead. I recommend these when you already like your showerhead and want to keep its spray pattern, finish, and flow feel. They are also the easiest fit in many rentals, as long as there is enough space between the wall and the head.

Replacement showerheads combine the filter and the head in one unit. They make sense when the old head is worn out, scaled up, or not worth saving. One swap improves water quality and the shower experience at the same time.

In-line cartridge systems use a separate housing with a replaceable cartridge inside. These are often easier to service later, but they can look bulkier and may put more weight on an older shower arm.

How to choose without getting burned

If your current showerhead works well, an inline unit is usually the smartest buy.

If the old head sprays unevenly, has heavy mineral buildup, or looks rough, replace the whole thing.

If you care most about simple cartridge changes, a cartridge housing is easier to maintain, but check clearance carefully before you buy.

Filter Type Best For Installation Ease Key Feature
Inline Filter Keeping your existing showerhead Easy Mounts between shower arm and current head
Replacement Showerhead Full shower refresh Easy Filter is built into a new head
In-Line Cartridge System Easy cartridge servicing Moderate Replaceable internal filter cartridge

What actually matters

Stage count gets too much attention. In real bathrooms, fit, cartridge availability, thread quality, and water chemistry matter more.

That last point gets missed all the time. If your city uses chloramine instead of free chlorine, make sure the filter is rated for it and follow the flushing instructions exactly after installation. A quick rinse is not always enough. With chloramine-treated water, some cartridges need a more thorough flush before the water smells and feels right. If you want a broader comparison of shower filters and other home options, Water Filter Advisor's filtration advice library is a good reference.

Older homes need extra caution. Corroded threads, short shower arms, and mineral buildup can limit what style fits cleanly. A bulky cartridge housing that looks fine online can turn into a leak point if the arm is worn or the head ends up hanging at an awkward angle. General fixture-fit guidance from Bulls Eye Repair's home maintenance resources is also useful if your bathroom hardware has not been touched in years.

Buy the filter that matches your water, your space, and the condition of the shower arm. That is what makes installation go smoothly.

Your Pre-Installation Checklist and Tools

You find out what kind of shower filter install you really have after the old showerhead comes off. In a newer bathroom, the threads are usually clean and the filter goes on with little fuss. In an older home or rental, mineral scale, old tape, and corrosion at the shower arm can turn a "tool-free" job into a leak chase.
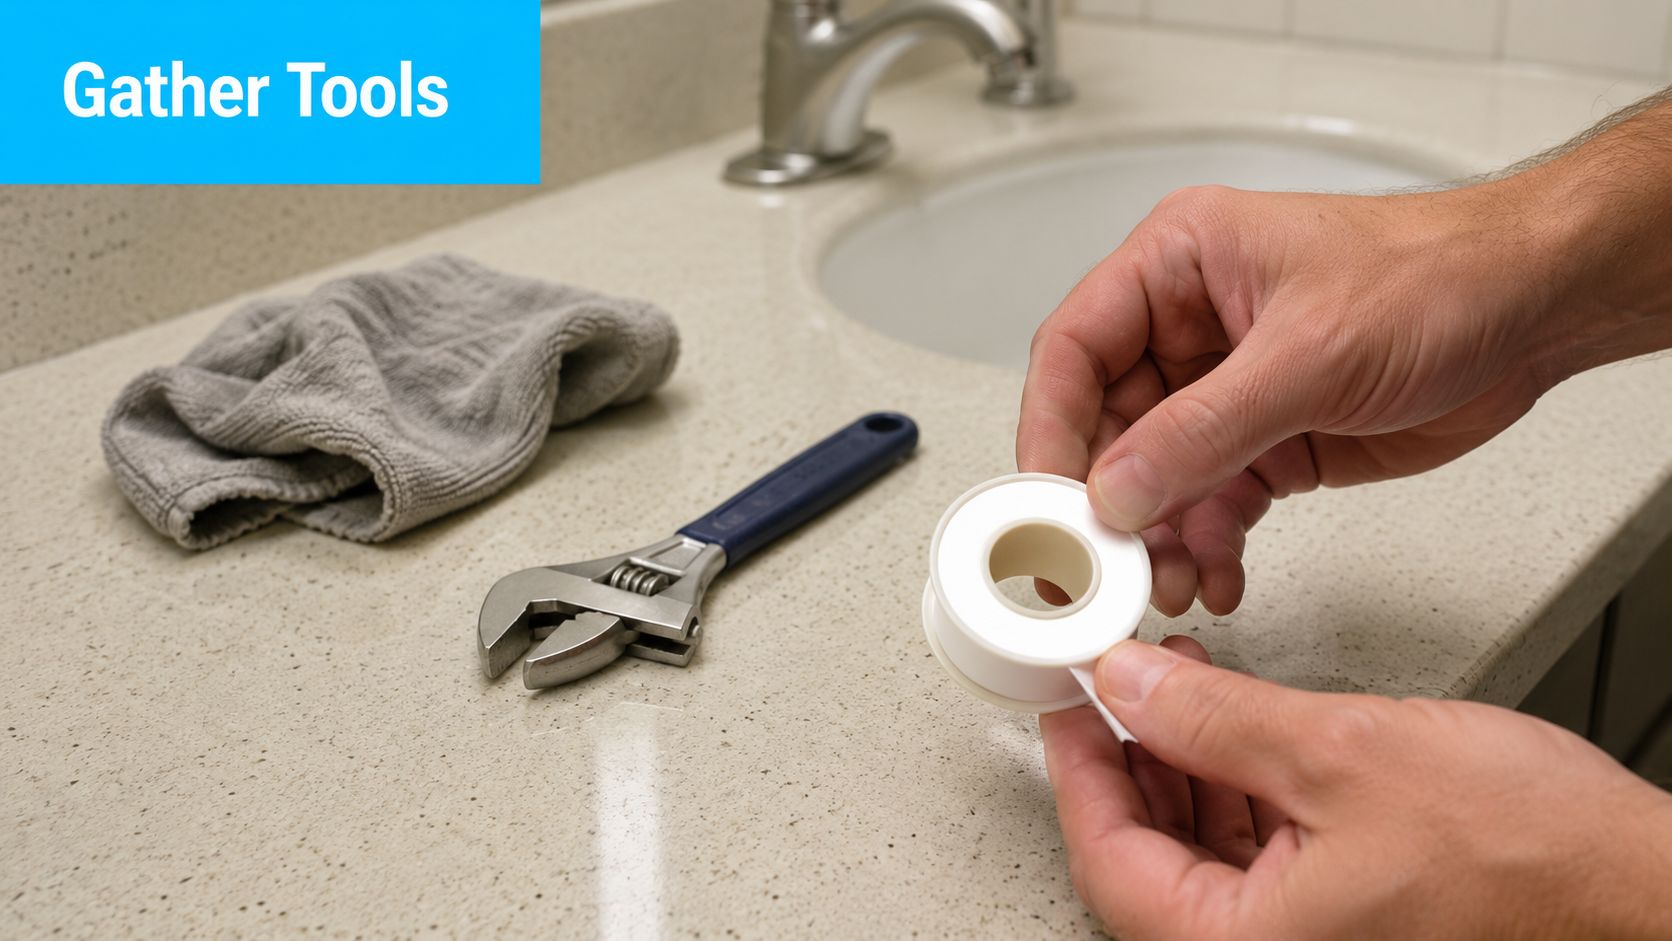
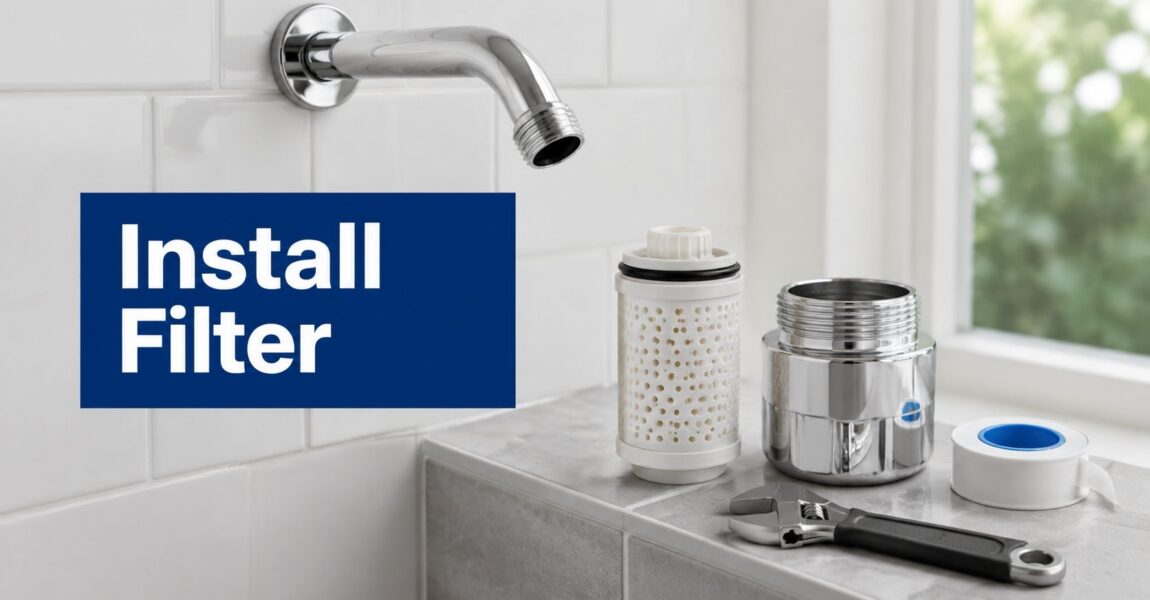
A person preparing to install plumbing fixtures with a wrench and plumber's tape on a bathroom counter.

I keep this part simple. Set out a few basic items before you touch the old head, and the install goes faster and cleaner.

  • Your shower filter kit: Confirm the housing, cartridge, washer, O-ring, and any adapter are in the box.
  • Fresh plumber's tape: Use new tape every time. Old tape or half-dried scraps cause bad seals.
  • Adjustable wrench: Helpful for stuck showerheads and for snugging connections without overdoing it.
  • Soft cloth or rag: Wrap finished surfaces before using the wrench so you do not scratch chrome, nickel, or painted parts.
  • Old toothbrush or small nylon brush: Good for cleaning thread grooves.
  • Small bowl or towel: Catch grit, old tape, and drips so they do not end up down the drain.

The toothbrush earns its place. Dirty threads are one of the most common reasons a new filter drips right after installation. If old tape, scale, or white mineral crust stays in the grooves, the new tape cannot seat properly and the filter body may tighten crooked.

Check the shower arm before you install anything new. Look closely at the threaded end, not just the finish around it.

  • Damaged threads: Flattened, bent, or partially stripped threads can cause slow leaks no matter how good the filter is.
  • Corrosion: Light discoloration is usually fine. Heavy rust, pitting, or flaky metal means you need to slow down and tighten with care.
  • Leftover sealant: Remove every bit of old tape or pipe dope.
  • Washer fit: Make sure the washer or O-ring sits flat in the filter connection before tightening.

One more real-world point gets missed in a lot of "easy install" guides. If your water utility uses chloramine, some filters need a longer flush than the quick rinse printed on generic packaging. Keep a bucket or towel nearby and plan a proper flush after installation so the cartridge media clears fully and the water smells normal sooner.

If the shower arm already shows staining inside the wall escutcheon, damp drywall, or other signs of hidden leaks, inspect that before adding a filter. A new filter improves water quality for skin and hair, but it will not fix a failing threaded connection behind the wall.

Clean threads, fresh tape, the right washer, and a wrench within reach. That is what makes this job go smoothly, especially in older bathrooms where corrosion decides how "easy" the install will be.

The Step-by-Step Shower Filter Installation

A shower filter install feels easy until the old showerhead refuses to budge or the new filter starts threading on crooked. In newer homes, this can be a five-minute swap. In older bathrooms with mineral buildup or light corrosion, the same job takes a little more patience. The payoff is worth it. Once the filter is in and flushed properly, the water is usually much kinder to dry skin, irritated scalps, and color-treated hair.
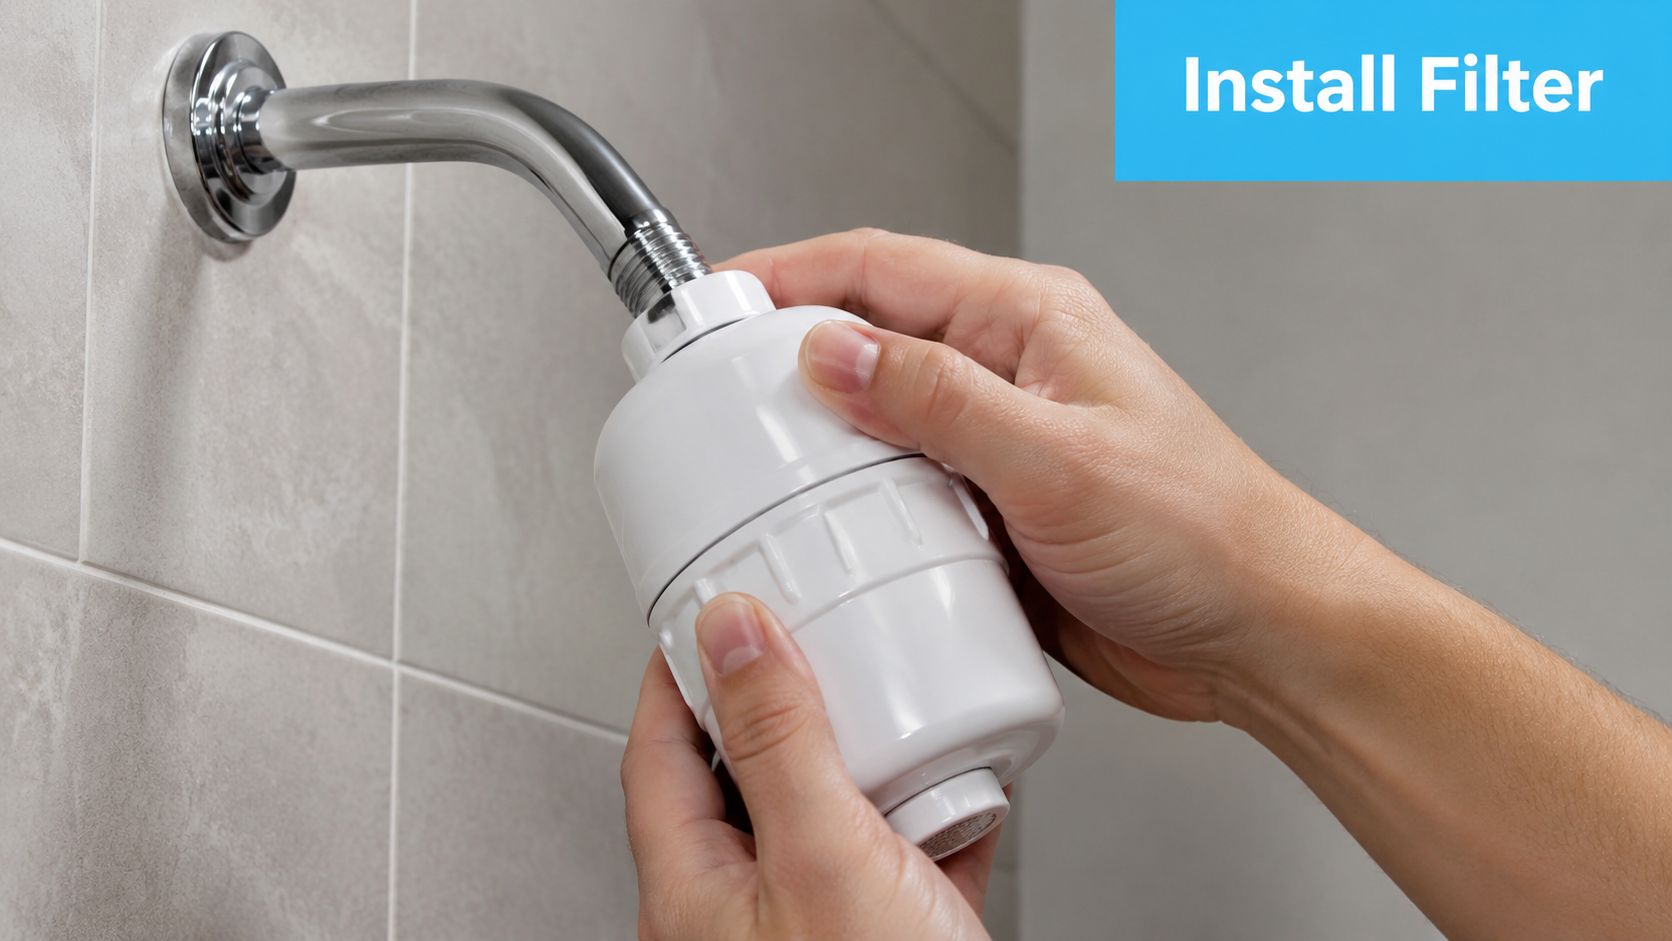
A pair of hands screwing a white shower filter unit onto a wall-mounted shower arm pipe.

Remove the old showerhead

Start with the shower off and the area dry so you can spot leaks later.

Turn the old showerhead counterclockwise. If it comes off by hand, fine. If it fights you, wrap the fitting with a soft cloth and use an adjustable wrench with steady pressure. Pulling hard to one side can twist the shower arm inside the wall, and that turns a simple filter install into a repair job.

On stubborn fittings, a little patience beats more force. Short, controlled pressure usually works better than muscling it.

Clean the threads properly

With the old head removed, clean the shower arm threads until the grooves are fully visible. Strip off old tape, old pipe dope, and any grit sitting in the threads.

This step decides how the rest of the install goes. If debris stays behind, the filter can bind early, sit crooked, or leak even when it feels tight.

A dry rag, an old toothbrush, or a nylon brush usually does the job.

Apply thread seal tape the right way

Wrap fresh thread seal tape clockwise so it tightens with the filter instead of bunching up underneath it. Use enough tape to fill the threads cleanly without creating a bulky lump.

A good rule is 5 to 8 full wraps, overlapped neatly and pressed into the grooves with your fingers, followed by the manufacturer's flushing steps after installation, as noted in Aquasana's installation guidance.

Neat tape matters. Sloppy tape causes more leaks than people expect.

Install the washer and thread on the filter

Set the rubber washer or O-ring flat inside the filter connection before you thread anything on. Then start the filter by hand and keep it straight from the first turn.

If it does not spin on smoothly, stop and back it off. Cross-threading usually starts in the first turn or two, especially on older shower arms with worn threads.

Hand-tight is often enough on a clean connection with a properly seated washer. If needed, give it a small extra turn with pliers or a wrench over a cloth. Keep that final snug-up gentle. Plastic housings and plated fittings do not like over-tightening.

If you are installing an inline model, reattach the showerhead after the filter body is secure. If the filter and showerhead are one piece, you are already at the final connection.

Flush the filter before first use

Run cold water through the new filter before you shower. New media often sheds a little harmless carbon dust at startup, and flushing clears that out before it hits your hair and skin.

For many filters, a short flush is enough. For chloramine-treated water, I recommend being more thorough than the quick rinse some boxes suggest. Let it run, cycle the water on and off a few times if the manufacturer calls for it, and keep flushing until the water runs clear and the initial carbon smell settles down. That extra minute or two prevents a lot of false alarm moments later.

For readers who like watching the sequence before touching a wrench, this short install demo helps with the hand positions and fitting order:

What a good installation looks like

A proper install is easy to judge. The filter sits straight, the showerhead points where it should, and every visible connection stays dry during the first run.

Check the joint with dry fingers or a tissue. Even a slow seep needs attention right away because it rarely fixes itself once hot water and vibration get involved.

If you want a broader DIY reference for bathroom fixture work, Bulls Eye Repair's home maintenance resources are worth browsing. Shower filters are simpler than many fixture swaps, but the same habits matter. Clean threads, correct tape direction, a flat washer, and careful tightening.

Quick install summary

  1. Turn off the shower and remove the old showerhead
  2. Clean the shower arm threads completely
  3. Wrap fresh tape clockwise with 5 to 8 neat turns
  4. Seat the washer and thread the filter on by hand
  5. Snug it gently if needed, then flush it thoroughly

That is the whole job. A leak-free install usually comes down to thread prep, a straight hand-threaded start, and a proper flush at the end.

Troubleshooting Leaks and Other Common Issues

You finish the install, turn the water on, and spot a drip at the fitting or a burst of dark water from the head. That does not mean the filter is faulty. In my experience, post-install problems usually come from thread prep, washer placement, or a flush that was too short for the way your local water is treated.
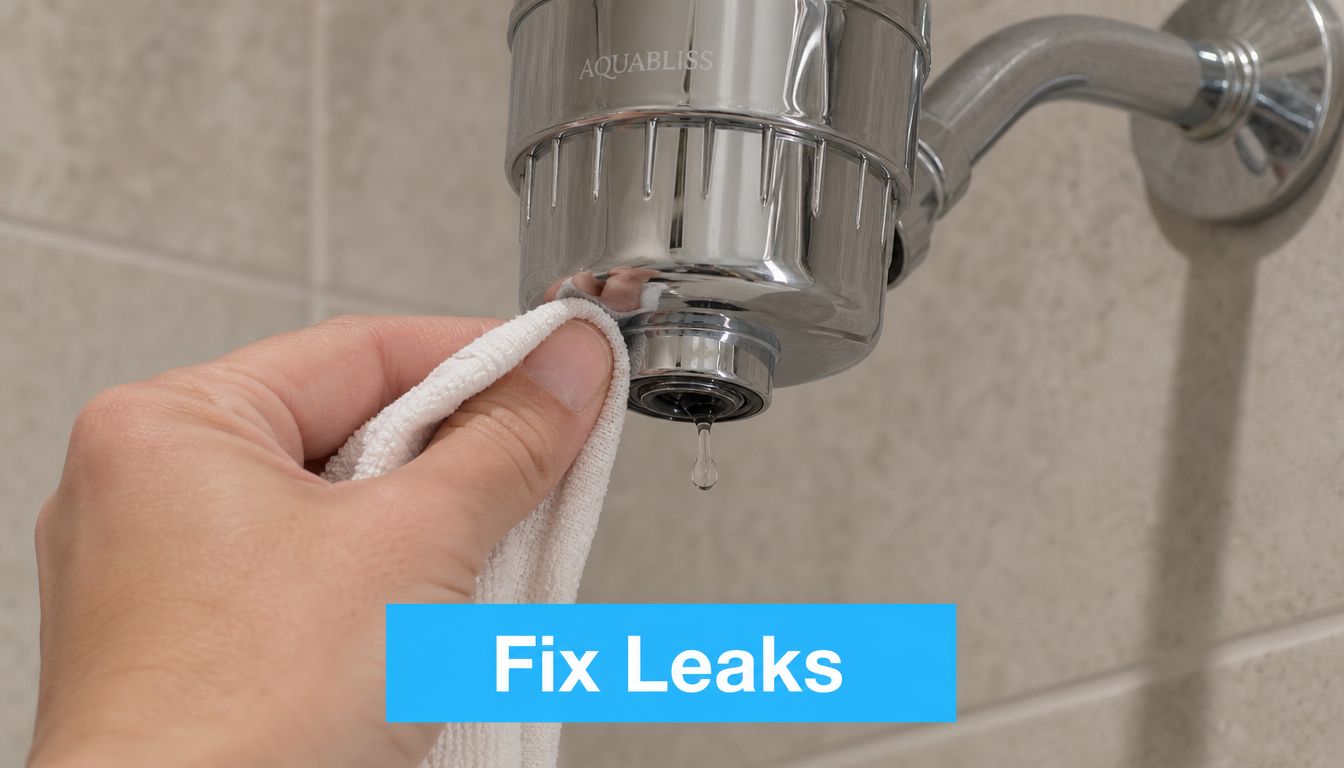
A hand holds a white cloth under a leaking chrome Aquabliss shower filter in a tiled bathroom.

Start with the leak before you start blaming the filter body. A threaded shower connection only has a few places to fail, and each one has a straightforward fix. What causes trouble is over-tightening. I see that a lot in older homes where the shower arm threads are already worn or slightly corroded. More force on damaged threads rarely seals the joint. It usually makes alignment worse.

If water drips from the threaded joint

Work through these checks in order:

  • Washer missing, twisted, or pinched: Remove it and seat it flat.
  • Tape wrapped the wrong way: Rewrap it clockwise so it stays in place as the fitting tightens.
  • Too little tape on older threads: Add a few neat wraps so shallow or worn threads can seal.
  • Cross-threaded fitting: Back it off and restart by hand. It should spin on smoothly for the first turns.
  • Mineral buildup on the shower arm: Clean the threads fully. Old scale can stop the filter from seating square.

If the drip seems to be coming from somewhere behind the visible connection or from the wall area, it's smart to learn the broader signs of hidden leaks so you don't mistake a larger plumbing problem for a bad shower filter install.

If the water looks cloudy or dark at first

That is usually carbon fines washing out of a new cartridge. It looks alarming, but it is common on first start-up.

Flush the filter longer than the box suggests if your water supplier uses chloramine. The short, tool-free marketing version of this job skips over that detail, but chloramine systems often need a more deliberate flush with warm water and a few on-off cycles before the media settles and performance levels out. If the filter seems disappointing right away, I would question the flush first.

If pressure drops and stays low

A small change in flow during the first run can happen while the cartridge saturates. Weak pressure that continues means something is restricting the path.

  • Check the inlet screen: New installs often catch loose sediment from the pipe.
  • Make sure the cartridge is seated correctly: If it sits crooked, flow drops fast.
  • Inspect the showerhead itself: An old head full of scale can get blamed on the new filter.
  • Look at the shower arm in older homes: Rust flakes and debris can break loose during installation and lodge in the filter or head.

One good reset solves a lot of these issues. Take the unit back off, clean the threads, confirm the washer is flat, reinstall it by hand, and flush it properly. A careful reinstall beats brute force every time.

Maintaining Your Filter for Pure Water Year-Round

A shower filter only helps your skin and hair if the cartridge inside it is still doing its job. I see plenty of installs that were done right once, then ignored until the water starts smelling like a pool again. Good maintenance is what keeps the chlorine reduction, softer feel, and better shower experience going.

Cartridges do not all age at the same pace. A house with heavy use, sediment, or chloramine-treated water will usually burn through media faster than the box implies. In older homes, rust and scale from the supply line can shorten cartridge life too, especially after the first install shakes loose debris inside the shower arm.

Signs it's time to change the cartridge

You usually get warning signs before the filter is fully spent.

  • The chlorine smell returns: If that treated-water smell comes back, the media is likely near the end of its service life.
  • Skin feels tighter or hair feels dull: This is often the first thing people notice, even before they notice odor.
  • Water flow drops off: Sediment, scale, or a loaded cartridge can restrict flow.
  • The cartridge has been in place longer than the manufacturer recommends: Calendar reminders work better than guesswork.

How to replace it without creating leaks

Replacement is simple if you stay methodical. Shut the shower off fully, let the fixture cool if you have been using hot water, then unscrew the housing carefully so you do not pinch the O-ring or cross-thread the body on reassembly.

Set the old cartridge aside, wipe out the housing, and check the washer and threads while it is open. If you live in an older home, look for rust flakes or mineral grit inside the filter body. That debris can keep the new cartridge from seating properly and cause a slow drip that gets blamed on the filter itself.

Install the new cartridge in the correct direction, hand-tighten the housing, and flush it before showering. If your water utility uses chloramine, give the new cartridge a longer flush than the quick-start instructions suggest. Warm water and a few on-off cycles usually help settle the media and clear carbon fines more thoroughly.

On-time cartridge changes are what keep the improvement real. The housing is reusable. The media inside is the working part.

If you want help comparing shower filters, replacement cartridges, and other home water treatment options without digging through marketing claims, Water Filter Advisor is a solid place to start. It's especially useful when you're deciding between a basic shower upgrade and a bigger filtration plan for the whole home.
The Dark Side of Chlorine: What’s Really Lurking in Your Tap Water?

Think about that glass of water from your kitchen tap. It looks perfectly clean, right? You’ve been drinking it your whole life without a second thought. But what if the very chemical added to keep your water safe is creating a hidden problem? Welcome to the complicated truth about chlorine in our water, and why a good water filter isn't a luxury—it's your home's last line of defense.

For over a century, chlorine has been the superhero of public health, wiping out nasty waterborne diseases like cholera and typhoid. But like any good superhero story, there’s a twist. The real danger isn't the hero itself, but the mess it leaves behind.

The Hidden Dangers Lurking in Your Tap Water

That glass of water from your kitchen tap looks perfectly fine, right? It's clear, doesn't have much of a smell, and you've been drinking it your whole life without a second thought. But what if the very chemical added to keep it safe is creating a hidden problem? This is the complicated reality of chlorine in our drinking water.

For more than a century, chlorine has been the unsung hero of public health. It’s an incredibly powerful disinfectant that practically wiped out devastating waterborne diseases like cholera and typhoid, saving countless lives in the process. Its main job is to kill dangerous microorganisms, and it does that job extremely well.

The Unintended Consequences of Disinfection

But the story doesn't stop there. After chlorine neutralizes the bad guys in the water, it doesn't just vanish. It continues to react with whatever else is in the water—specifically, naturally occurring organic matter like bits of decaying leaves and soil. This reaction creates an entirely new group of compounds known as disinfection byproducts (DBPs).

It's a bit like a security guard who, after stopping a break-in, accidentally sets off a series of small, invisible fires throughout the building. The immediate threat is gone, but a new, smoldering danger has taken its place. The most common and well-researched of these DBPs are Trihalomethanes (TTHMs), which are recognized carcinogens.

The real issue isn't the chlorine itself, but what it turns into after it has done its job. These disinfection byproducts are the true source of the long-term health concerns that experts worry about. A home water filter is your best tool for dealing with them.

A Problem in Every Home

This isn’t some rare, isolated problem affecting a few unlucky households. It's a sobering fact that a huge portion of residential water in the U.S. contains measurable levels of chlorine and its byproducts. That means millions of homes are unknowingly dealing with these compounds every single day.

The tricky part is that you can’t see, smell, or taste most of these harmful DBPs. They are silent passengers in the water you use for everything:

  • Drinking and cooking
  • Bathing and showering
  • Washing your clothes and dishes

Your local water utility does the essential job of making water biologically safe enough to reach your tap, but their responsibility pretty much ends at your property line. It’s now up to you, the homeowner, to take that final, crucial step. Dealing with the chemical risks that are created by the treatment process itself becomes a personal responsibility. This guide will walk you through exactly how to protect your family by filtering out these hidden dangers, turning your tap water from a source of worry into a source of clean, safe hydration.

How Chlorine Byproducts Silently Impact Your Health

While chlorine does a great job killing off immediate biological threats in our water, the real health concerns start after its work is done. The problem isn’t the chlorine itself, but what it leaves behind. The solution? Filtering it out before it ever reaches your glass.

When chlorine mixes with the natural organic stuff in water—think tiny bits of leaves or soil—it creates a new class of chemicals called disinfection byproducts (DBPs). The most well-known and concerning of these are Trihalomethanes (THMs).

This simple chemical reaction has some pretty complex consequences for our water supply.

Flowchart illustrating chlorination of water: chlorine is added to water, forming disinfection byproducts (DBPs).

As you can see, adding a disinfectant to water unintentionally creates new, potentially harmful substances that travel right through the pipes to your tap. The only way to stop them is to catch them with a filter right before you use the water.

The Carcinogenic Cocktail in Your Tap

Unlike the distinct smell of chlorine, THMs are typically tasteless, odorless, and invisible. You can’t rely on your senses to know if they’re in your water, which is what makes them so dangerous. This is why "just trusting your nose" is a bad idea and why a reliable filter is so critical.

The U.S. Environmental Protection Agency (EPA) specifically regulates Total Trihalomethanes (TTHMs) in drinking water for a reason: long-term exposure is directly linked to an increased risk of cancer.

When you drink water containing these compounds, they don’t just pass through. Your organs that process and store waste, like the bladder and rectum, end up with the most concentrated and prolonged exposure.

The primary danger in your tap water isn’t always the germ it’s designed to kill, but the chemical byproduct created in the process. A quality filter acts as a final checkpoint, removing these hidden threats before they enter your body.

This extended contact gives these carcinogenic compounds a greater chance to damage the cells in those organs, which can eventually lead to cancer. The risk builds up day by day, glass by glass, over a lifetime.

Unpacking the Alarming Statistics

This isn't just a theory; it's backed by serious research. A major meta-analysis found a direct line from long-term consumption of chlorinated water to about 4,200 bladder cancer cases and 6,500 rectal cancer cases in the U.S. every single year.

That accounts for a shocking 9% of all bladder cancers and 18% of all rectal cancers annually. You can read the full research on these toxic water findings for a deeper dive into the data.

These numbers show the real, human cost of "chlorine water side effects." It’s a powerful reminder that the final, critical step of water protection—filtration—needs to happen inside your home.

Heightened Dangers for Vulnerable Groups

While everyone is at risk from long-term exposure, some people are far more vulnerable to the effects of DBPs—especially pregnant women.

Studies have documented a disturbing link between high THM levels in drinking water and serious pregnancy complications, including:

  • Increased risk of miscarriage, particularly in the first trimester.
  • Low birth weight.
  • Potential for birth defects, such as neural tube defects.

A developing fetus is incredibly sensitive to toxins, and these chemicals can pass from mother to child with profound consequences. For expecting parents, ensuring water purity isn’t just a good idea; it’s an urgent priority. A quality home water filter becomes a critical tool for protecting the health of the whole family, starting with its most vulnerable members.

The Risks Beyond Your Drinking Glass

When you think of chlorine side effects, you probably picture a glass of water. But what if I told you the biggest dose you get all day isn't from drinking, but from your morning shower? This is where whole-house filtration becomes a game-changer.

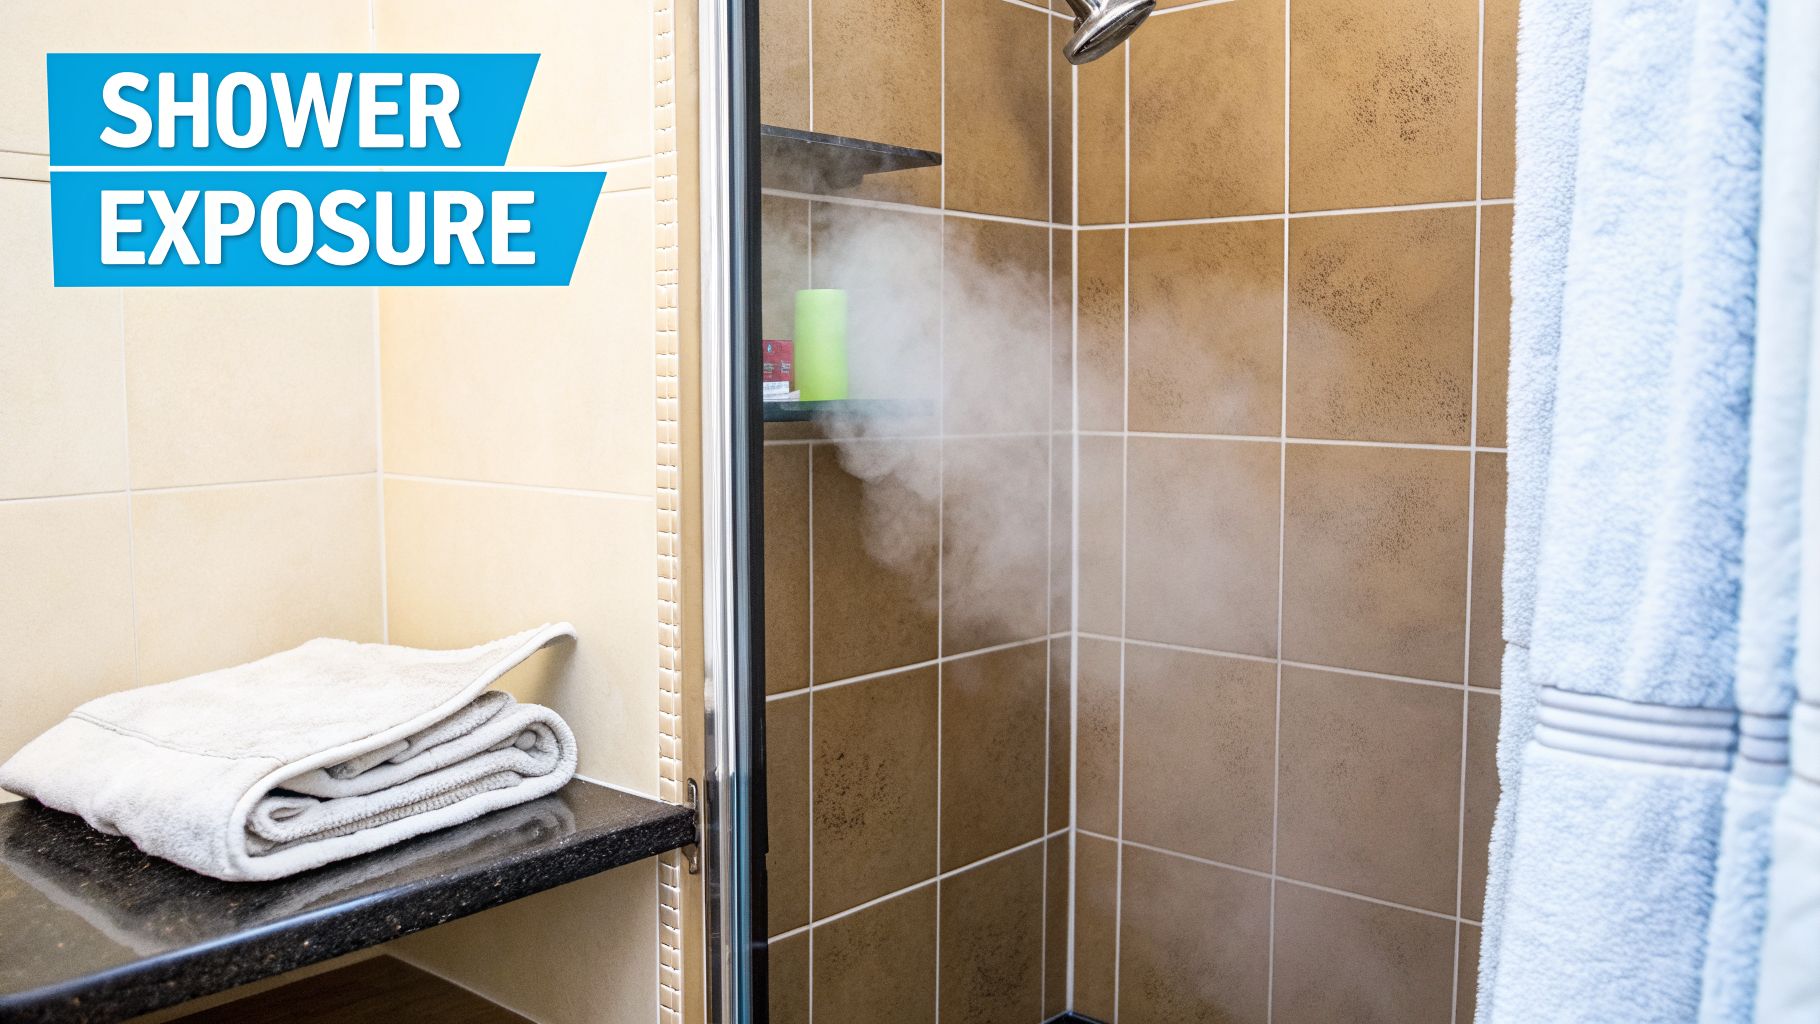
That long, hot shower feels great, but it can create a concentrated dose of airborne chemicals right in your bathroom. The heat and steam vaporize chlorine and its byproducts, turning them into a gas you breathe.

A steamy shower stall with beige and brown tiles, a shower head, and folded towels on a shelf.

This process is called volatilization. It turns your shower stall into a mini gas chamber of chlorine and disinfection byproducts (DBPs) like chloroform. When you inhale that steam, these chemicals go directly into your lungs and bloodstream, completely bypassing your digestive system.

Skin Deep and Deeper

Your skin is your body’s largest organ, and it’s surprisingly porous. While it serves as a barrier, it also absorbs chemicals from your shower water.

A hot shower opens your pores, making it even easier for your skin to absorb chlorine. This direct contact is why so many people notice immediate side effects after showering in chlorinated water. A good shower filter or whole-house system is the only way to stop this.

These common problems are often the first sign a filter is needed:

  • Dry, Itchy Skin: Chlorine strips the natural oils (sebum) that moisturize and protect your skin. This is what causes that tight, dry, and flaky feeling after a shower.
  • Brittle, Dull Hair: Just as it does to your skin, chlorine strips the natural oils from your hair. This leaves it dry, brittle, and more likely to break. It can also cause color-treated hair to fade much faster.
  • Eye and Nose Irritation: The same chemicals that bother your skin can lead to red, stinging eyes and an irritated nose, especially in an enclosed, steamy shower.

Think of it this way: a 10-minute hot shower can expose your body to as many, if not more, volatile chemicals as drinking eight glasses of the same water. This is why focusing only on drinking water is a half-measure. To be fully protected, you need a filtration strategy for your shower too.

From the Shower to the Swimming Pool

The respiratory effects of inhaling chlorine aren't just limited to your bathroom. They are even more pronounced in places with high concentrations of chlorinated water, like swimming pools.

When chlorine mixes with organic material from swimmers—sweat, oils, and urine—it creates a class of volatile DBPs called chloramines. These are the compounds responsible for that "pool smell" and for irritating the respiratory tract.

Studies show that swimming in chlorinated pools can trigger respiratory problems, particularly in children and competitive swimmers with frequent exposure. Constant inhalation of these airborne DBPs is linked to lung inflammation and a higher risk of developing asthma. Even a backyard or community pool could be contributing to chronic respiratory issues. You can discover more about the health findings from chlorinated pools and their impact on lung health.

This highlights a critical point: protecting yourself from chlorine side effects requires more than just filtering your drinking water. To be fully protected, you need to address the water in your entire home—especially your shower, where the risks from absorption and inhalation are highest.

How to Identify the Threats in Your Own Water

To protect your home from the side effects of chlorine, you have to stop guessing what's in your water. The first step is to get the facts. This knowledge is what empowers you to pick the right filtration solution, and you don’t need a science degree to do it.

Your investigation starts with a document called your local water utility’s Consumer Confidence Report (CCR). Every community water system is required to give this annual water quality report to its customers.

Think of the CCR as a report card for your tap water. It lists what contaminants they found, at what levels, and if those levels break any federal rules. You can usually find it on your water utility’s website or by searching online for “[Your City Name] water quality report”.

Decoding Your Water Report

Once you pull up your CCR, you’ll see a lot of data. You want to zero in on the important stuff. Look for a section called "Disinfection Byproducts" or for specific chemicals like "Total Trihalomethanes (TTHMs)" or "Haloacetic Acids (HAA5)."

The report will show a number next to these contaminants, usually in parts per billion (ppb). The U.S. Environmental Protection Agency (EPA) sets the maximum contaminant level (MCL) for TTHMs at 80 ppb.

It's critical to know that the EPA's legal limit isn't a "safe" limit. It's a regulatory balancing act between public health and the cost of water treatment. Many health experts agree there is no truly safe level of exposure to carcinogens. This means even legally compliant water should be filtered to remove these compounds.

If you see TTHM levels in your report getting close to that 80 ppb limit, that’s your signal. It's clear proof that your water has significant levels of these chemicals, turning a national issue into a personal one and giving you a solid reason to look into home filtration.

Going Beyond the Report with Home Testing

A CCR provides a great overview, but it’s based on averages or samples from different points in the system. It doesn’t tell you exactly what’s coming out of your specific faucet. For that, you need to test it yourself.

You’ve got a few options, each with different costs and levels of detail:

  • DIY Chlorine Test Strips: These are cheap and simple. You just dip a strip into your water, and it changes color to give you a basic reading of the "free chlorine" level. It’s a quick way to confirm the disinfectant is there, signaling the need for a filter.
  • Comprehensive Mail-In Lab Kits: For a full analysis, use a professional water testing service. You take a sample from your tap, mail it to a certified lab, and get back a detailed report on dozens of contaminants, including the exact levels of TTHMs, chlorine, and more. This data is the ultimate guide to choosing the perfect filter.

Once you have this data—either from your CCR or a home test—you're no longer in the dark. You now have the evidence you need to take the most important step: choosing the right water filter to protect your family from these hidden threats.

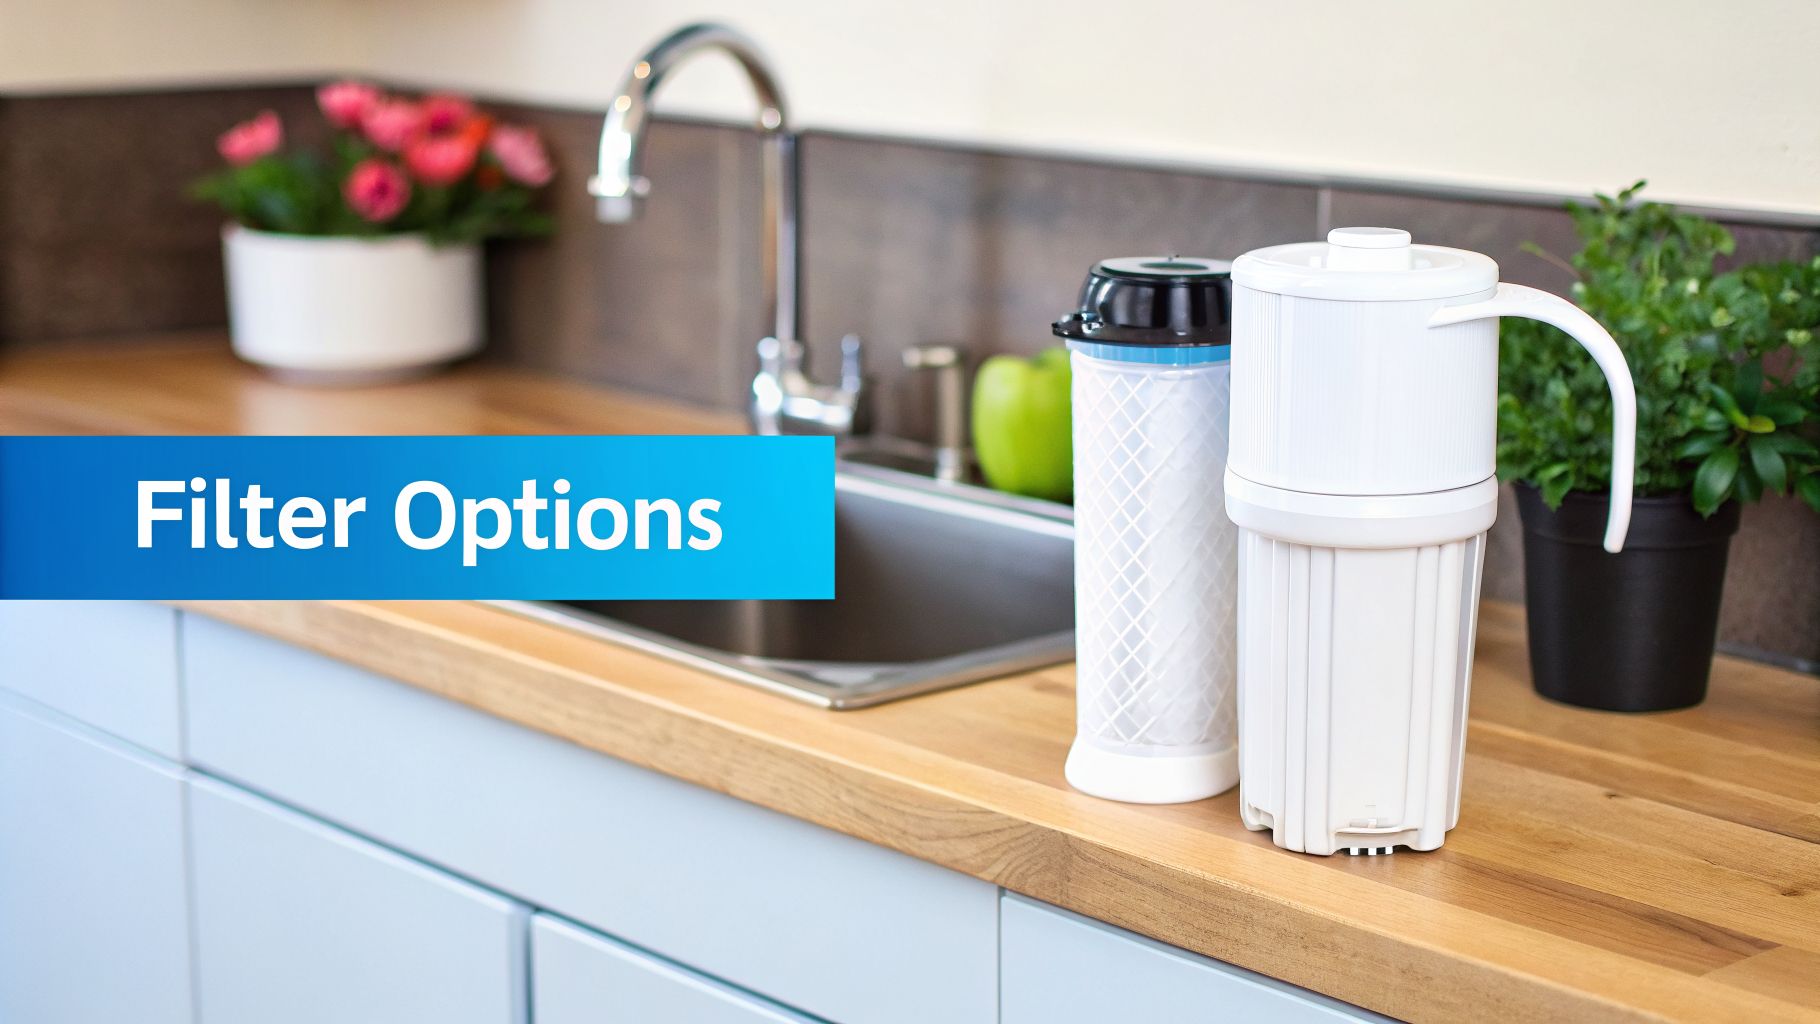
Your Guide to Choosing the Right Water Filter

Two water filters on a kitchen counter near a sink, with 'Filter Options' text.

Alright, you know what's in your water. Now it's time to build your defense. Picking the right water filter can feel like a chore, but it really doesn't have to be. Let’s cut through the noise and break down the most practical home filtration options into a simple "Good, Better, Best" approach.

This guide will help you find the perfect shield for your family against chlorine and its tricky disinfection byproducts (DBPs), like Trihalomethanes (THMs). By matching the right technology to your needs, you can turn your tap from a source of concern into a source of clean, safe hydration.

Good: Starting With Simple Solutions

If you're new to water filtration, renting your home, or just working with a tight budget, point-of-use filters are a fantastic place to start. They’re designed to be affordable, incredibly easy to set up, and do a solid job of removing the main culprits behind bad-tasting water.

The two most popular "Good" options are:

  • Water Pitcher Filters: The definition of simplicity. Just fill the pitcher from the tap, and let the water trickle through a filter cartridge. They’re perfect for improving the taste of your drinking water and a great fit for small households or even a dorm room.
  • Faucet-Mounted Filters: These little gadgets attach right onto your kitchen faucet. A quick flip of a switch lets you toggle between filtered water for drinking and cooking, and regular tap water for things like washing dishes.

Both of these options rely on activated carbon. Think of activated carbon as a super-porous sponge. Its huge surface area is packed with millions of microscopic nooks and crannies that are perfect for trapping chlorine molecules, which is why they dramatically improve the taste and smell of your water.

But here’s the trade-off. While they’re great for chlorine, their ability to snag smaller, more complex chemicals like THMs is often limited. They also don't do anything to address the chlorine you’re exposed to in the shower.

Better: Upgrading Your Kitchen Sink

Want a more permanent and powerful solution for your kitchen? An under-sink filter is the next logical step up. These systems are tucked away neatly under your sink, delivering a constant stream of filtered water through a separate, dedicated faucet. No countertop clutter.

Under-sink systems are a serious upgrade in filtration muscle. They use larger, more advanced multi-stage filter cartridges that can last anywhere from six months to a year, which is far more convenient than a pitcher filter.

The technology here gets more sophisticated, often using several stages:

  1. Sediment Pre-filter: This first line of defense catches bigger particles like rust, sand, and silt.
  2. Activated Carbon Block: This is a more compressed and potent form of carbon, offering superior chlorine and taste removal.
  3. Catalytic Carbon: A specialized type of carbon specifically engineered to capture chloramine, a tough chlorine-ammonia disinfectant used by many cities that standard carbon struggles with.

These multi-stage systems are far more effective at grabbing a wider range of contaminants, including a good portion of THMs. By installing an under-sink system, you get high-quality filtered water on demand for all your drinking and cooking needs.

Best: The Ultimate Whole-House Protection

For homeowners who want to completely eliminate the effects of chlorine from every single tap, faucet, and showerhead, a whole-house water filtration system is the ultimate solution. We call this the "Best" option because it's the only one that tackles both the water you drink and the water you shower in.

A whole-house system is installed right where the main water line enters your home, purifying every drop you use. That means cleaner water for drinking, cooking, bathing, and even doing laundry.

These are robust systems, typically using large tanks packed with high-grade filter media, such as:

  • High-Capacity Catalytic Carbon: This provides comprehensive removal of both chlorine and stubborn chloramine, along with the dangerous byproducts they create.
  • KDF (Kinetic Degradation Fluxion) Media: This unique media uses a chemical reaction to convert chlorine into a harmless chloride, boosting chlorine removal and preventing bacteria from growing inside the filter itself.

Filtering all the water in your home eliminates your exposure in the shower, where those volatile chemicals can be inhaled or absorbed through your skin. The result? Softer skin, healthier hair, and the peace of mind that comes from knowing your entire home is protected.

To help you weigh your options, we've put together a quick comparison table.

Home Water Filter Comparison for Chlorine and THM Removal

This table breaks down the common home filtration systems, showing how they stack up against chlorine and its byproducts, along with practical things like cost and maintenance.

Filter Type Chlorine Removal Effectiveness THM Removal Effectiveness Protects Showers Typical Cost Best For
Pitcher / Faucet Good Low No $20 – $50 Renters, small budgets, improving drinking water taste.
Under-Sink Excellent Good to Very Good No $150 – $400 Homeowners wanting high-quality drinking/cooking water without countertop clutter.
Whole-House Excellent Excellent Yes $800 – $2,500+ Homeowners wanting to protect the entire home from chlorine, including showers.
Shower Filter Excellent Low Yes $30 – $100 Anyone looking for a targeted, affordable solution to reduce chlorine in their shower.

Choosing the right filter is about matching the technology to your specific goals and home. For more detailed reviews and buying guides, you might be interested in checking out our guide on selecting the right filtration system for your needs.

A Few Common Questions We Hear About Chlorine

It's completely normal to have questions. The whole story of chlorine in our water—being both a lifesaver and a potential health risk—is a lot to take in. You're weighing the pros and cons, trying to figure out the best way forward for your family.

Let's tackle some of the most frequent questions and clear up any confusion about chlorine, its side effects, and how filtration really works. My goal is to give you the confidence to make the right call for your home.

If Chlorine Is So Bad, Why Do Cities Even Use It?

This is probably the most common—and logical—question we get. The answer really boils down to a single word: priority. Your city's top priority is stopping deadly waterborne diseases like cholera and typhoid from making a comeback. And for that job, chlorine is a champ. It's powerful, it's cheap, and it does an incredible job of killing dangerous germs on the long journey from the treatment plant to your faucet.

Think of it this way: your water utility is focused on preventing immediate, acute threats. Their job is essentially done once that water is biologically safe. But that very process creates chemical byproducts that pose long-term risks. That’s where your responsibility begins—filtering out those chemicals to ensure the water is truly clean for your family.

The main active ingredient doing the heavy lifting is often a form of sodium hypochlorite. This is what gives chlorine its disinfection power, but it's also what reacts with organic materials in the water to create the byproducts we’ve been discussing.

My Water Doesn't Smell Like a Pool, So It's Safe, Right?

This is a really common and dangerous assumption. Trusting your nose is a sure way to get a false sense of security. Here’s the hard truth: the most harmful chlorine byproducts, like the known carcinogen Trihalomethane (THM), are completely odorless, colorless, and tasteless.

That "pool smell" you might notice is often from a different compound called chloramine. But just because you don't smell it doesn't mean your water is free from danger. The invisible chemical threats are the ones we really worry about.

You simply can't trust your senses to detect the most serious risks in chlorinated water. The only way to know for sure is to get the facts—either by testing your water or reading your utility's official water quality report. This is why investing in the right filter is a decision based on science, not scent.

Getting the data takes all the guesswork out of the equation.

Is Bottled Water a Better Option Than Just Filtering My Tap?

Not really. It might feel like an easy fix, but bottled water opens up a whole new can of worms. For starters, the EPA actually has stricter regulations for municipal tap water than the FDA has for the bottled water industry. Some of the most popular brands are literally just filtered tap water sold back to you at a massive markup.

And that’s just the beginning. You also have to consider:

  • The Cost: Buying bottled water for a whole family adds up incredibly fast. It's far more expensive over the long haul than a good home filter.
  • The Waste: All those single-use plastic bottles create a staggering amount of pollution, ending up in our landfills and oceans.
  • The Microplastics: Studies keep finding that plastic bottles can shed tiny particles, known as microplastics, directly into the water you're about to drink.

A quality, certified home water filter is a much more reliable, affordable, and environmentally friendly choice. It gives you direct control over your water quality day in and day out.

What's the Deal with Chloramine? Is It Better?

Chloramine is another disinfectant that's gaining popularity with city water departments. It's a compound made by mixing chlorine with ammonia. The big advantage for utilities is that it’s more stable, so its disinfectant power lasts longer in the water pipes.

While chloramine might produce fewer THMs, it can create other disinfection byproducts that scientists are still studying. For you, the homeowner, the most important thing to know is this: chloramine is much more difficult to remove than chlorine.

A standard activated carbon filter does a great job on chlorine, but it's not very effective against chloramine. To get rid of it, you need a specialized filter media called catalytic carbon. This is exactly why you need to check your water report. Knowing whether your city uses chlorine or chloramine is the key to buying a filter that will actually solve your problem and give you safe, clean water.


Here at Water Filter Advisor, we live and breathe this stuff. Our mission is to cut through the noise and give you clear, research-backed advice. We have in-depth guides and reviews to help you pick the perfect filtration system, so your family gets the safest water possible. Feel free to explore your options and find the right solution at https://www.waterfilteradvisor.com.

How to Remove Chlorine from Drinking Water: A Guide to Home Filtration

Ever pour a glass of tap water and get hit with that unmistakable "public pool" smell? You're not imagining it. That distinct chemical scent is chlorine, and figuring out how to remove chlorine from drinking water usually comes down to one fantastic solution: water filtration, especially the activated carbon systems designed to make your home’s water taste amazing.

Why Your Tap Water Smells Like a Swimming Pool

That chlorine smell is actually a sign of a public health success story that’s been running for over a century. Your local water treatment plant adds chlorine for one very important reason: to wipe out nasty bacteria, viruses, and other pathogens that could make you seriously sick. It's a rock-solid disinfectant that keeps our water safe as it travels through miles of pipes to get to your tap.

This simple practice has been a game-changer for public health. In fact, after Jersey City, New Jersey, became the first U.S. city to chlorinate its entire water system back in 1908, deaths from diseases like typhoid fever plummeted. It was a massive leap forward, and you can read more about the history of water chlorination from the EPA.

Glass of clear drinking water on kitchen counter with text overlay saying smells like pool

Chlorine vs. Chloramine: Know Your Opponent

Here’s where it gets a little more technical. While chlorine is effective, many water suppliers now use chloramine—a compound made by mixing chlorine with ammonia—because it’s more stable. Knowing which one is in your water is key, as they don't filter out the same way.

Let's break it down:

  • Chlorine: This is a gas that works fast but also fades pretty quickly. It's the easier of the two to get rid of. Basic carbon filters are chlorine’s kryptonite.
  • Chloramine: This stuff is designed to last longer, providing protection all the way through the distribution system. That stability, however, makes it a lot tougher to remove. You'll typically need a more advanced filter, like catalytic carbon, to get it out.

So, while that chlorine smell means your water is safe from germs, it definitely doesn't do any favors for taste and odor. On top of that, chlorine can react with organic stuff in the water and create what are known as disinfection byproducts (DBPs), like trihalomethanes (THMs). Concerns over long-term exposure to DBPs are a big reason why so many people decide to filter their water at home.

The goal of home water filtration isn't to second-guess your city's water safety. It's about taking that safe water and making it exceptional—improving the taste, smell, and overall quality right before you drink it.

Understanding the "why" behind the pool smell is your first step. The chlorine did its job, but its journey can end at your faucet. Now you can take over and turn safe water into truly clean, fantastic-tasting water for your family.

Finding the Right Home Water Filtration System

While boiling water or letting it sit out works in a pinch, those aren't exactly practical long-term solutions for getting fresh, chlorine-free water on demand. When you're ready to banish that "public pool" smell from your kitchen for good, it's time to look at home water filtration. These systems act as the final barrier, turning your already-safe municipal water into something truly exceptional right at the tap.

The real workhorse behind most chlorine removal is a material called activated carbon. You can think of it as a sort of chemical sponge. Each tiny granule has an incredibly porous surface that snags and holds onto chlorine molecules in a process known as adsorption. It’s not just straining particles; it's a chemical reaction that locks the chlorine away so it never makes it into your glass.

Point-of-Use Filters: Your First Line of Defense

For most people, especially renters or anyone just dipping their toes into water filtration, "point-of-use" systems are the perfect place to start. These are devices that treat water at a single spot, like your kitchen sink or a pitcher you keep in the fridge. They're affordable, a breeze to set up, and focus on filtering the water you actually drink and cook with.

You've got a few common options, and each one fits a different lifestyle:

  • Water Filter Pitchers: This is as simple as it gets. A pitcher with a carbon filter inside is perfect for one person or a small family in an apartment. Just fill it from the tap, stick it in the fridge, and you’ve got cold, clean water waiting for you. A college student wanting to improve their dorm's tap water without any installation is a classic example.
  • Faucet-Mounted Filters: These little gadgets clip right onto your kitchen faucet. With the flip of a lever, you can switch between filtered water for drinking and plain tap water for washing dishes, which is a great way to make the filter cartridge last longer. Think of a family renting a house who wants filtered water on-demand but can't make permanent plumbing changes.
  • Under-Sink Filters: This is a more tucked-away solution. These systems are installed in the cabinet under your kitchen sink and feed a separate, smaller faucet. They usually have bigger, more robust carbon filters than pitchers or faucet mounts, so they last longer and do a more thorough job.

Now, while these carbon-based filters are champs at removing standard chlorine and making your water taste great, you need to know if your municipality uses chloramine instead. That's a different beast.

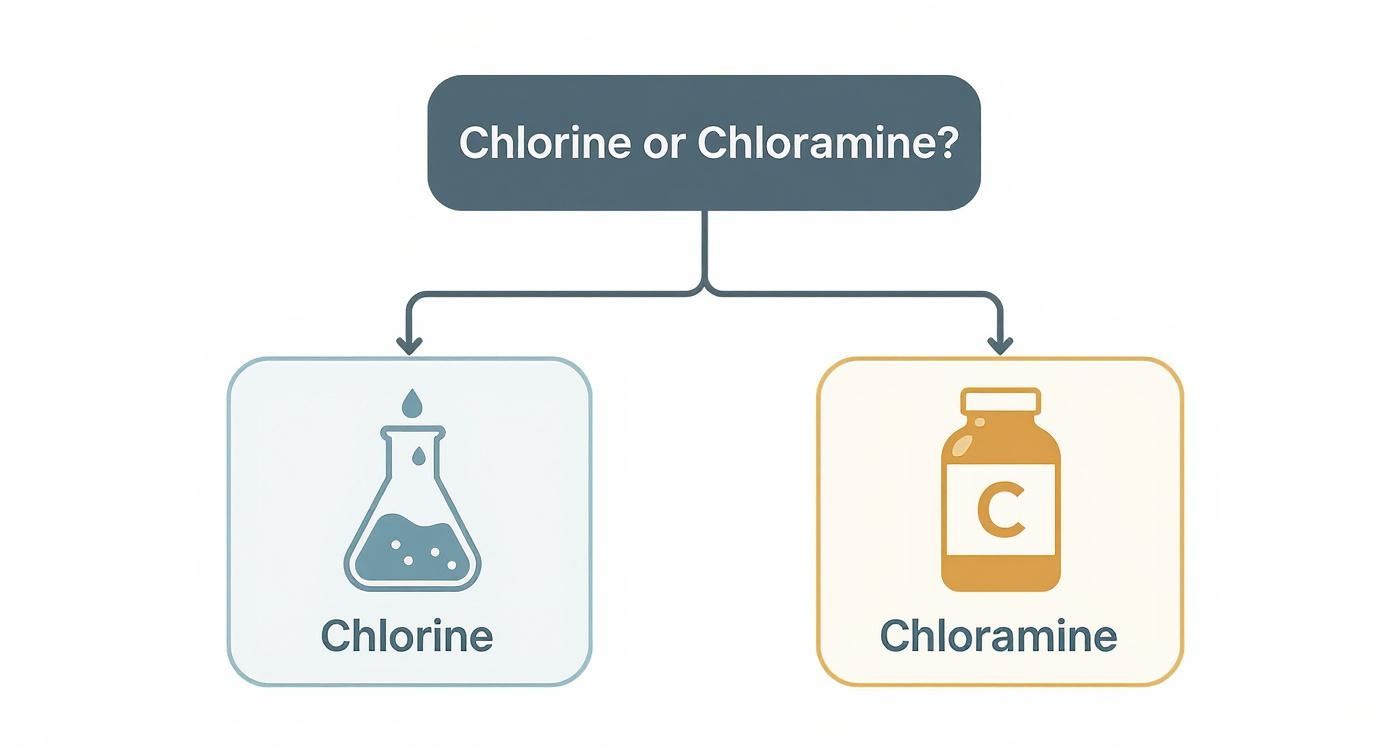
First, you have to figure out what's actually in your water. This diagram can help you sort it out.

Diagram comparing chlorine chemical compound with flask and chloramine supplement bottle with letter C

The big takeaway? Standard activated carbon handles chlorine just fine, but chloramine is tougher and often requires a special type of carbon (catalytic carbon) or one of the more advanced systems we'll get into next.

Leveling Up with Reverse Osmosis Systems

If you're aiming to remove more than just chlorine, a Reverse Osmosis (RO) system is a major upgrade. These are the heavyweights of under-sink filtration, capable of stripping out a huge list of potential contaminants. An RO system uses pressure to force water through a very fine membrane, removing not just chlorine and chloramine, but also things like heavy metals, salts, and other dissolved solids.

The process is pretty thorough and usually involves a few steps:

  1. A pre-filter catches sediment like silt and rust.
  2. An activated carbon filter removes the chlorine/chloramine to protect the delicate RO membrane.
  3. The RO membrane does the real work, filtering out the vast majority of everything else.
  4. A final post-filter, often another carbon filter, gives the water a final "polish" to ensure it tastes crisp and clean.

An RO system is the go-to for a health-conscious family that wants total peace of mind, knowing they've removed the widest possible range of impurities from their water, far beyond just the taste and smell of chlorine.

It’s worth remembering that water disinfectants are used for a very important reason: public safety. The U.S. Environmental Protection Agency and the CDC have established that chlorine or chloramine levels up to 4 parts per million (ppm) are safe to drink, a standard based on a ton of research.

Home Filtration Methods for Chlorine Removal

To make sense of the options, here's a quick rundown of the most common home filtration methods and what they're best at.

Filtration Method Effectiveness (Chlorine) Effectiveness (Chloramine) Initial Cost Ongoing Cost Best For
Activated Carbon Filter Excellent Fair to Poor Low Low Basic taste/odor improvement, renters, single-tap use (pitchers, faucet filters).
Catalytic Carbon Filter Excellent Good to Excellent Moderate Moderate Homes with chloramine-treated water, under-sink or whole-house systems.
Reverse Osmosis (RO) Excellent Excellent Moderate to High Moderate Maximum purity, removing a wide range of contaminants beyond chlorine.
Whole-House Carbon Excellent Good (if catalytic) High Low to Moderate Treating all water in the home for drinking, showering, and appliances.

Choosing the right one really comes down to whether your city uses chlorine or chloramine, your budget, and whether you want to treat just your drinking water or every tap in the house.

Whole-House Systems: The Ultimate Solution

For anyone who wants chlorine-free water everywhere—from the kitchen to the shower to the washing machine—a whole-house filtration system is the end-game. Sometimes called a "point-of-entry" system, this is a large unit installed right where the main water line enters your home. From that point on, every drop of water you use is filtered.

The perks go way beyond just better-tasting water. Showers without chlorine can lead to softer skin and hair because you're not stripping away their natural oils. Your clothes might fade less, and water-using appliances like your coffee maker and dishwasher are protected from chlorine's corrosive effects over the long haul.

These systems typically use large tanks of activated or catalytic carbon and can go for years before needing the filter media replaced. When you start looking into a major upgrade like a whole-house system, it's a good idea to seek out comprehensive plumbing services for a professional installation. And for more general guidance on all your filter options, you can find a lot of great advice available on Water Filter Advisor.

Ultimately, picking the right system depends on your home, budget, and water quality goals, but a dedicated filter is hands-down the most effective way to say goodbye to chlorine for good.

The Hidden Benefits of a Chlorine-Free Home

Getting rid of that chemical swimming pool taste is usually what kicks off the search for how to remove chlorine from drinking water. But once you start looking into home filtration, you quickly find out that better-tasting water is just the beginning. The real magic happens when you filter chlorine out of your entire home’s water supply. It changes everything.

The kitchen is where you'll notice the first big win. Chlorine has a way of muting delicate flavors. Brew your morning coffee or tea with filtered water, and the real notes of the beans or leaves come alive. The same goes for food that soaks up water during cooking—think pasta, rice, and soups. They just taste cleaner and more authentic.

Softer Skin and Healthier Hair

You might not drink your shower water, but the perks of filtering it are just as noticeable. Chlorine is a fantastic disinfectant because it's a strong oxidizer. The problem is, it doesn’t know the difference between bad bacteria and the natural oils that keep your skin and hair healthy.

Showering in chlorinated water day after day can strip those protective oils, often leading to:

  • Dry, Itchy Skin: If you have sensitive skin or conditions like eczema, chlorinated showers can be a real nightmare, making irritation worse. Removing the chlorine helps your skin hang on to its natural moisture, leaving it feeling softer and less inflamed.
  • Brittle, Dull Hair: Chlorine is rough on hair, leaving it weak, dry, and prone to breaking. Filtered shower water keeps your hair's natural oils where they belong, making it shinier, healthier, and way more manageable.

The feeling after a shower in chlorine-free water is something you really have to experience for yourself. So many people say their skin feels less tight and their hair is noticeably softer almost immediately—no new fancy products needed.

Beyond just comfort, filtering out chlorine gives a deeper sense of well-being. It cuts down your family's daily exposure to disinfection byproducts (DBPs), which form when chlorine mixes with organic stuff in the water. While tap water is treated to meet safety standards, a lot of people choose whole-house filtration simply to reduce their contact with these compounds.

This isn't just some household trend, either. It’s been done on a massive scale. The Netherlands, for instance, led the way in shifting its public water systems away from chlorine. Concerned about DBPs, they mandated that all drinking water had to be chlorine-free by 2005. It just goes to show that high-quality, safe water is totally possible without needing residual disinfectants at the tap. You can read about the Dutch approach to water treatment and see how they made it work.

A Quick Word on Safety and Maintenance

Of course, you have to be smart about this. When you take chlorine out of your home's water, you're also removing the very thing that keeps bacteria from growing in your pipes. For most modern homes where water is constantly flowing, this isn't a huge deal, but it brings up a critical point.

Removing that safety net makes your filter system's maintenance absolutely non-negotiable. If you neglect your filter, it can become a breeding ground for the very bacteria you're trying to avoid. That defeats the whole purpose.

Regularly replacing filter cartridges according to the manufacturer's schedule is essential. You have to do it to make sure your water stays both chlorine-free and safe. Don't think of a filter as a one-and-done purchase. It's an ongoing commitment to your water quality. The benefits are amazing, but they completely depend on you keeping the system in top shape.

Keeping Your Filtration System Running Smoothly

Putting in a water filter is a great first move, but it's definitely not a "set it and forget it" kind of deal. Think of it like changing the oil in your car—if you want clean water and a system that actually works, routine maintenance isn't optional. Skipping it can pretty much undo all the good your filter was supposed to do in the first place.

A clogged or old filter doesn't just get less effective; it can actively work against you. The activated carbon gets totally saturated, which means it can’t grab onto any more chlorine. Worse, the filter itself can turn into a perfect home for bacteria, potentially making your water quality even sketchier than the tap water you started with.

Person replacing cylindrical water filter cartridge above kitchen sink during routine maintenance procedure

Your Filter Replacement Checklist

The single most important thing you can do is stick to a replacement schedule. These timelines are all over the map depending on your specific system and how much water your family goes through. Always check the manufacturer's guide, but here are some solid rules of thumb to get you started.

  • Pitcher & Faucet Filters: These are the little guys doing a big job. Their small cartridges fill up fast, so plan on swapping them out every 2 to 3 months or after about 40 gallons.
  • Under-Sink & Countertop Filters: With bigger cartridges, these units have more staying power. You can usually get a good 6 to 12 months out of them before they need to be replaced.
  • Reverse Osmosis (RO) Systems: These are more involved, with multiple filter stages. The sediment and carbon pre-filters need changing every 6 to 12 months, but the main RO membrane is the long-distance runner, lasting 2 to 4 years.
  • Whole-House Systems: Maintenance for these workhorses really depends on the model. Big sediment filters might need an annual change, while the giant carbon media tanks can go anywhere from 3 to 10 years before the carbon itself needs to be replaced.

Keep in mind, these are just averages. If your water has a lot of sediment or extra-high chlorine levels—or if you have a big family—you'll probably be changing filters on the shorter end of these estimates.

Key Maintenance Tasks Beyond Replacement

Beyond just swapping cartridges, a little extra TLC can make a big difference. Keeping the whole system clean ensures you’re always getting top-tier water quality.

For starters, always flush a new filter cartridge before you use it. New carbon filters often release a fine, harmless carbon dust (sometimes called "fines") at first. Just run some water through the new filter for a few minutes until it’s clear. This washes those particles out so they don't end up in your glass.

It's also a great habit to sanitize the filter housing periodically. When you're changing a cartridge, take that opportunity to wash the pitcher, canister, or housing with warm, soapy water. This gets rid of any biofilm or gunk that might have started growing inside.

Troubleshooting Common Filter Problems

So, how can you tell if your filter needs a change before its scheduled date? Your water will usually drop some heavy hints. If you spot any of these signs, it's time to take a look.

A sudden drop in water pressure from your filtered faucet is the classic sign of a clogged filter. As it traps more gunk, it gets harder for water to get through, leading to that weak, slow flow.

Likewise, if that all-too-familiar chlorine taste or smell starts creeping back in, that’s a dead giveaway. Your carbon filter has hit its limit and can't absorb any more chlorine. It’s absolutely time for a new one.

To give your home's plumbing complete protection, you might also look into smart water leak detectors that can catch small issues before they become disasters. Ultimately, staying on top of maintenance is how you make sure your investment keeps paying off with clean, great-tasting water for years to come.

Your Top Questions About Chlorine Removal, Answered

Even after weighing all the options, you probably have a few questions rolling around. Picking the right water solution for your home is a big deal, so let's clear up some of the most common things people ask.

Do Fridge Filters Actually Remove Chlorine?

Yes, they do. Most of the filters built into refrigerator water and ice dispensers use activated carbon, which is fantastic at grabbing chlorine. It's the reason water from the fridge dispenser usually tastes so much better than what you get straight from the tap.

The catch? These filters are small and need to be replaced on a strict schedule, usually every six months. If you let it go, its ability to pull out chlorine plummets, and it can even become a breeding ground for bacteria. They're a nice perk, but only for the water coming out of your fridge.

Is Chlorine-Free Water Really Better?

While water treated with low levels of chlorine is considered safe by municipalities, getting rid of it can bring some real, noticeable benefits. For anyone with sensitive skin or conditions like eczema, showering in chlorine-free water can mean less dryness and irritation. It also stops stripping the natural oils from your hair, leaving it feeling softer.

The choice to remove chlorine often boils down to personal preference. It's about taking water that's already safe and making it taste, smell, and feel amazing.

And, of course, there's the taste. Taking out chlorine and its byproducts can completely change the flavor of everything from a simple glass of water to your morning coffee.

Does a Water Softener Get Rid of Chlorine?

This is a huge point of confusion for a lot of homeowners. A water softener has one very specific job: it removes hardness minerals like calcium and magnesium. It does not remove chlorine.

In fact, chlorine is actually bad for the resin beads inside your water softener. Over time, it will degrade them and shorten the life of your system. This is why a proper whole-house setup almost always includes a carbon filter before the water softener. The carbon filter takes out the chlorine (protecting the softener) while the softener handles the hard water.


Ready to enjoy the crisp, clean taste of chlorine-free water in your home? At Water Filter Advisor, we provide expert reviews and straightforward guides to help you find the perfect filtration system for your needs. Explore your options and make a confident choice for healthier, better-tasting water today at https://www.waterfilteradvisor.com.

Carbon Block Filters Water: Your Guide to Purer, Better-Tasting Water

If your tap water has a weird taste or a faint chemical smell, a carbon block filter is one of the easiest and most affordable ways to fix the problem. Think of it as a super-powered Brita for your entire kitchen. These surprisingly simple devices use activated carbon to grab onto contaminants like chlorine, leaving you with cleaner, better-tasting water straight from the tap.

Let's dive into exactly how this clever technology works and find the perfect filter for your home.

Your Journey to Better Tasting Water Starts Here

Image

Ever notice your water tastes a bit like a swimming pool? That’s usually chlorine. Water treatment plants use it as a disinfectant to make sure the water is safe on its way to your house. It does a critical job, but nobody really wants to taste it when they pour a glass.

This is where a carbon block filter really shines. You can think of it like a super-powered sponge, made specifically to soak up all the junk you don't want in your water. It's a straightforward but incredibly effective way to make your daily drinking water much more enjoyable, without needing a complex or expensive system.

Why Carbon Filtration is a Popular Choice

It's no secret that people are paying more attention to what's in their water, and that's made carbon filtration a go-to for millions of homes. The market for these filters is booming, all part of a bigger global push for better water quality and health.

So what's the big deal? Why are these filters so common? It really boils down to a few major wins for your home:

  • Better Taste and Smell: They are fantastic at pulling out chlorine and other things that give water an "off" taste.
  • Contaminant Reduction: Carbon is great at targeting a whole range of organic chemicals, including certain pesticides and VOCs (volatile organic compounds).
  • Affordable and Easy to Find: Whether you want a simple pitcher or an under-sink system, there’s a carbon filter out there for just about any home and budget.

A carbon block filter works in two ways at once: it’s a gatekeeper and a magnet. It physically stops sediment from passing through, while its huge internal surface area chemically attracts and traps contaminants, pulling them right out of your water.

For an even more complete approach to your home's water, you can look into complementary treatments like water softening solutions such as Harvey Salt Blocks.

In this guide, we're going to break down the science behind how these filters work, show you exactly what they remove, and help you figure out the best system for your family. By the time you're done reading, you'll know exactly how to choose, install, and maintain a filter that completely transforms your tap water.

The Science Behind Carbon Block Water Filtration

To really get why a carbon block filters water so effectively, think of it as a microscopic maze with a magnetic personality. Water gets pushed through, but all the nasty stuff gets trapped, unable to find an exit. It's a simple idea, but it’s powered by two potent scientific principles working in tandem to clean up every single drop.

This isn't just a one-trick pony. The filter pulls double duty. First, it acts as a physical gatekeeper, kind of like a sieve, blocking bigger particles. At the very same time, it uses a powerful chemical attraction to snatch dissolved impurities right out of the water, making sure they never reach your glass.

The Power of Physical Filtration

The first job of a carbon block is just straightforward mechanical filtering. The carbon is packed into a dense, solid block that's riddled with incredibly tiny pores. These pores are measured in microns, and most home filters have a rating between 0.5 to 5 microns. To give you some perspective, a single human hair is about 70 microns thick.

As water is forced through this tight-knit structure, any particle larger than the pores gets stopped in its tracks. We're talking about things like silt, sand, rust, and even some microorganisms. It’s like a bouncer at a club door, only letting the water molecules and smaller, dissolved goodies pass through to the next stage. This first step is absolutely crucial for clearing up cloudy water and setting the stage for the deeper cleaning to come.

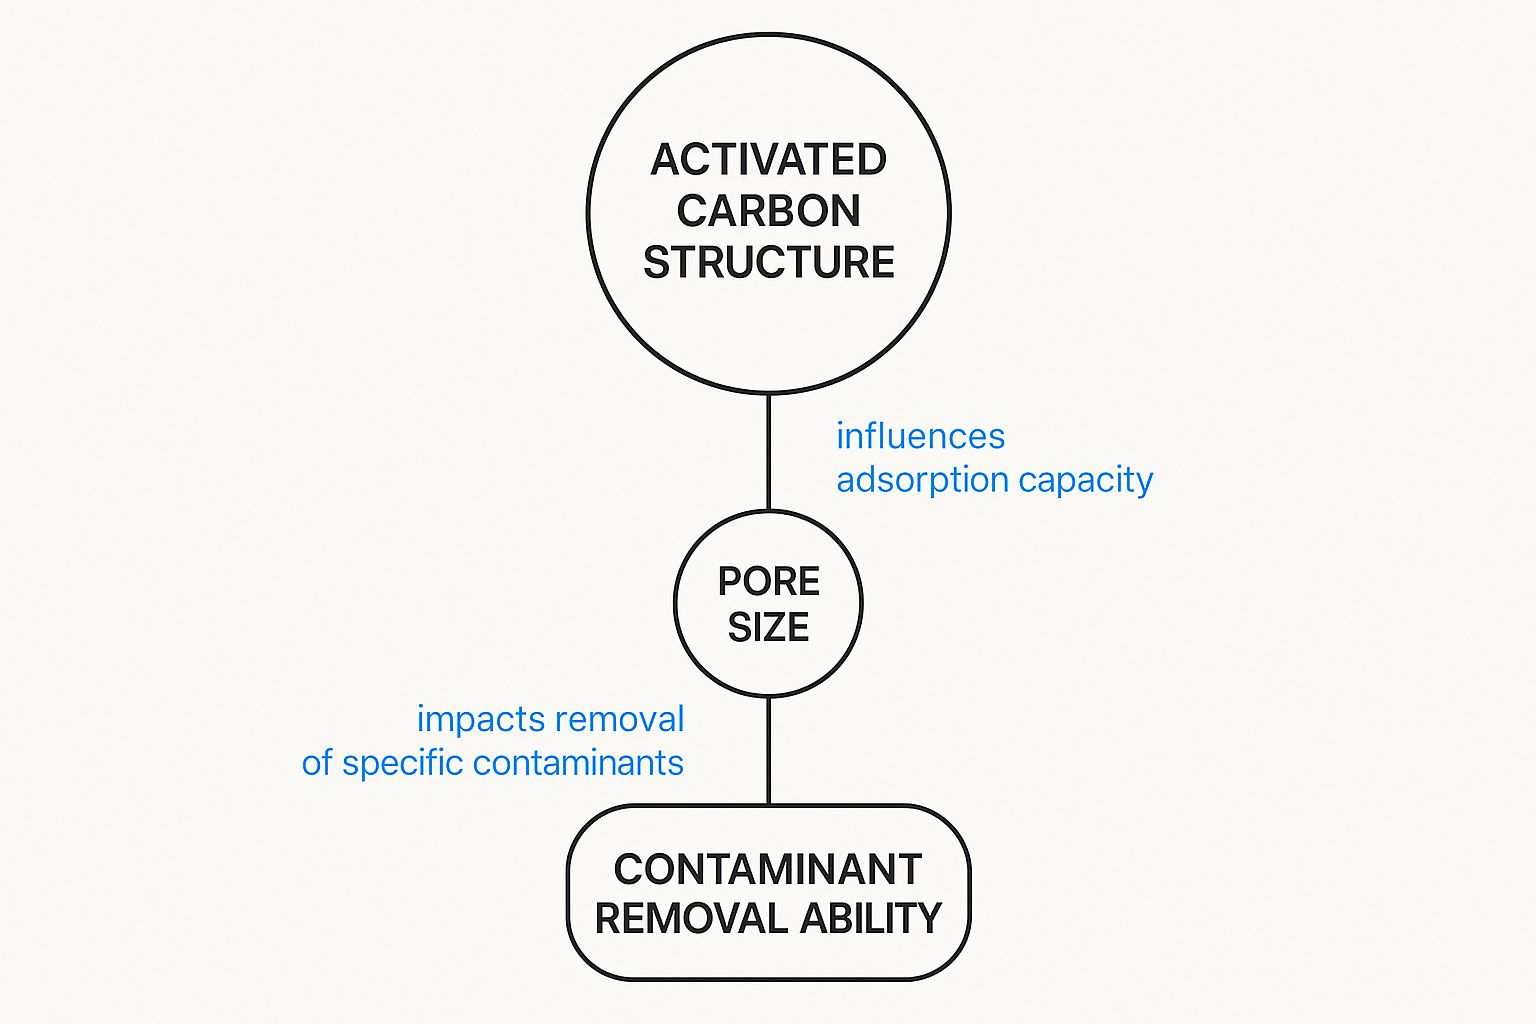
This image really shows the link between the carbon's structure, its pore size, and its knack for removing contaminants.

Image

As you can see, that huge internal structure and those tiny pores are what give activated carbon its incredible power.

Adsorption: The Secret to Purity

Now, this is where the real magic happens, down at the microscopic level. It’s a process called adsorption. Be careful not to mix this up with absorption—that’s when something soaks up liquid like a sponge. Adsorption is different. It’s when contaminants chemically stick to the outside of the carbon, like little magnets snapping onto a refrigerator door.

To make this happen, the carbon has to be “activated.” This is done by superheating carbon-rich materials (like coconut shells or coal) in a low-oxygen chamber. This process blasts open millions upon millions of tiny pores, which dramatically increases the carbon's total surface area.

It's hard to wrap your head around, but just one gram of activated carbon can have a surface area of over 3,000 square meters. That means the little carbon block in your filter might have an internal surface area the size of a football field.

This massive, porous landscape is what makes adsorption so brutally effective. As water winds its way through the filter's maze, contaminants like chlorine, volatile organic compounds (VOCs), and other chemicals that cause bad tastes and smells are electrochemically drawn to the carbon's surface. They get stuck in the pores and are taken out of the water for good.

Why Contact Time Matters

The performance of a carbon block filter really hinges on contact time—basically, how long the water gets to hang out with the carbon. The solid block design is far better than loose carbon bits (often called GAC) because it prevents "channeling." That’s where water finds an easy way through, carving a little path and bypassing most of the filter material.

A carbon block forces water to take the scenic route, a long and winding path through its dense structure. This maximizes contact time. The slower the water flows, the more chances the carbon has to grab onto those impurities. This is why filters come with a recommended flow rate; they're designed to ensure contaminants have enough time to get stuck to the carbon before the water hits your tap. This careful engineering is how a carbon block filters water so thoroughly, giving you that clean, fresh result you’re looking for.

What Contaminants Carbon Block Filters Remove

Image

So, we've covered the science of adsorption. Now, let's get down to what really matters: what is a carbon block filter actually pulling out of your water?

Think of it as a smart gatekeeper for your tap. It's incredibly good at targeting the specific impurities that make water taste and smell off, while also tackling certain invisible chemicals. Its main job is to go after organic compounds and the disinfectants used by city water systems.

Knowing what it targets helps you figure out if it's the right solution for your home. If your water has that "swimming pool" odor, you're in luck. A carbon block filters water by going straight for the source of that smell, along with a whole list of other things you'd rather not be drinking.

The Chlorine and Chloramine Busters

The #1 reason people get a carbon filter is to get rid of chlorine. Municipal water suppliers use it to kill off bacteria and viruses, which is great for public health. But by the time the water gets to your kitchen, that chlorine has done its job and often leaves behind a chemical taste and smell. Carbon is a superstar at adsorbing chlorine, which is why filtered water just tastes so much cleaner.

But what if your city uses chloramine? Many municipalities are switching to this more stable disinfectant, which is a mix of chlorine and ammonia. A standard carbon filter will remove some of it, but a special type known as catalytic carbon is way more effective. If your water bill says they use chloramines, look for a filter with catalytic carbon to get the best-tasting water.

Tackling Volatile Organic Compounds (VOCs)

Beyond just improving taste and odor, carbon filters are a powerful defense against a group of chemicals called Volatile Organic Compounds (VOCs). These are carbon-based chemicals that can seep into water supplies from things like industrial runoff, pesticides, and solvents.

VOCs include a wide range of substances, some of which are linked to health concerns. Carbon block filters are certified to reduce many of them, including benzene, toluene, and trihalomethanes (THMs)—a nasty byproduct of chlorine disinfection.

Other Contaminants on the Hit List

That massive internal surface area makes carbon a real workhorse. It’s skilled at grabbing onto plenty of other unwanted guests, too.

  • Pesticides and Herbicides: If you live near agricultural areas, runoff can carry these chemicals into the water system. Carbon is excellent at adsorbing them.
  • Bad Tastes and Odors: Carbon deals with all sorts of organic compounds that create musty, earthy, or even fishy smells, bringing your water back to a clean, neutral state.
  • Lead Reduction: While not all carbon filters can handle heavy metals, many modern carbon blocks are beefed up with special media (like KDF) designed specifically to reduce lead.

What Carbon Filters Do Not Remove

It's just as important to know what a carbon filter can't do. These filters aren't a cure-all for every single water problem out there. By design, they are selective—they leave some things in and can't touch others.

For instance, carbon filters won't remove healthy dissolved minerals like calcium, magnesium, and potassium. This is a good thing! These minerals are beneficial for your health and actually contribute to good-tasting water. They also generally don't remove fluoride, nitrates, arsenic, or microorganisms like bacteria and viruses. For those contaminants, you'd need a different kind of system, like reverse osmosis or a UV purifier.

This handy table breaks down what a typical carbon block filter can and can't handle.

Carbon Block Filter Contaminant Removal Guide

Contaminant Category Effectively Removed Generally Not Removed
Aesthetics Chlorine, bad tastes, and odors Hardness minerals (calcium, magnesium)
Chemicals VOCs, pesticides, herbicides Fluoride, nitrates, arsenic
Heavy Metals Lead (with special media) Mercury, cadmium (without special media)
Microbiological Cysts (with <1 micron rating) Bacteria, viruses

Ultimately, understanding this list helps you match the right filter to your specific water quality concerns, ensuring you get the performance you need.

Decoding Filter Performance and Certifications

When you're trying to compare different carbon block filters, the technical specs on the box can look like they're written in another language. But trust me, figuring out what these key metrics mean is the secret to picking a filter that actually works as advertised. Once you know what to look for, you can cut right through the marketing fluff and choose a filter with confidence.

These numbers tell you the whole story. They show you how fine the filter's "sieve" is, how fast you'll get clean water, and exactly how long it will run before you need to swap it out. Learning to read these specs is the single most important step in finding a reliable filter for your home.

Key Performance Metrics to Understand

When you're sizing up a filter, you'll see three main specs over and over: the micron rating, flow rate, and filter capacity. Each one gives you a critical piece of the puzzle.

  • Micron Rating: This tells you the size of the particles the filter can physically block. It’s simple: a smaller number means finer filtration. A 1-micron filter, for instance, will trap much smaller contaminants than a 5-micron one. If you're trying to get rid of things like tiny cysts (think Giardia and Cryptosporidium), you'll want a filter rated at 1 micron or less.

  • Flow Rate (GPM): This is measured in gallons per minute (GPM) and tells you how quickly water will move through the filter. A higher GPM is great for whole-house systems or your main kitchen faucet where you don't want to stand around waiting. Just keep in mind that slower is often better for contaminant removal, as it gives the water more contact time with the carbon.

  • Filter Capacity (Gallons): This is the total number of gallons the filter can clean before it’s clogged up and needs to be replaced. A little refrigerator filter might be rated for 200 gallons, while a beefier under-sink system could handle 600 gallons or more.

The Gold Standard: NSF Certifications

While the performance numbers are a great start, the real proof of a filter's effectiveness comes from third-party certifications. The most respected and common ones come from NSF International (formerly the National Sanitation Foundation), an independent group that tests and verifies product claims.

An NSF certification isn't just a sticker on a box; it's a guarantee that the filter has been rigorously tested and proven to remove the specific contaminants it claims to. It's the highest level of assurance you can get.

Looking for NSF/ANSI standards is the easiest shortcut to know you're buying a quality product. The two you'll see most often for carbon block filters water treatment are:

  • NSF/ANSI 42 Aesthetic Effects: This one confirms the filter can make your water taste and smell better. It's specifically tested on its ability to reduce things that are more of an annoyance than a danger, like chlorine and other particulates that give water a bad odor or cloudy look.

  • NSF/ANSI 53 Health Effects: This is a much tougher standard to meet. To earn this certification, a filter has to be proven to reduce specific health-related contaminants like lead, mercury, cysts, and a long list of VOCs. If you're worried about more than just taste, this is the certification you need to look for.

The demand for high-performance home filters is strong, partly because of solid regulatory standards and consumers who know what to look for. The compressed design of carbon block filters, which lets them remove a huge range of contaminants like lead and VOCs, has made them a dominant force in the home water filtration market. You can dig deeper into commercial water filter trends to see how this technology is evolving. By checking for these certifications, you can be sure your chosen filter meets the highest standards for both safety and performance.

Choosing the Right Carbon Filter for Your Home

Image

Alright, you can now read a filter’s spec sheet like an old pro. Now comes the fun part—matching a system to your actual life. From simple pitchers to whole-house units that treat every drop, there’s a carbon block filter solution for just about everyone.

The goal isn't to find the single "best" filter on the market, but the one that's the best for you. It really boils down to your budget, how much water you use daily, and how comfortable you are with a little installation work. Let's break down the most common types of home filters to see which one checks all your boxes.

Simple and Portable Water Filter Pitchers

If you're just dipping your toes into water filtration, a pitcher is the easiest place to start. They couldn't be simpler: fill the top, let gravity do the work, and pour yourself a glass of crisp, clean water. They’re cheap, require zero setup, and are a great fit for renters or anyone who just wants to improve the taste of their drinking water without any commitment.

Of course, there are some trade-offs. Pitchers are slow and don't hold much water, so you’ll find yourself at the sink refilling them often. The small filters also need to be swapped out more frequently than bigger systems, and that cost can add up.

  • Best For: Individuals, renters, or anyone looking for a low-cost, no-fuss option for drinking water.
  • Pros: Super affordable, totally portable, and no installation required.
  • Cons: Small capacity, slow filtering speed, and more frequent filter changes.

Convenient Refrigerator and Faucet Filters

Want filtered water on tap without a big project? Refrigerator and faucet-mounted filters are a fantastic middle ground. Fridge filters are built right into your water and ice dispenser, giving you chilled, clean water instantly. They're a true "set it and forget it" solution, usually needing a new cartridge only every six months.

Faucet filters screw directly onto your kitchen tap, letting you switch between filtered and regular water on the fly. This is a neat trick for extending the filter's life, since you can use unfiltered water for things like washing dishes. Both are a huge step up from pitchers in convenience and capacity.

These are what we call point-of-use (POU) systems. They’re designed to treat water right where you use it most—your kitchen sink. They strike a great balance between performance and convenience without needing to call a plumber.

High-Performance Under-Sink Systems

For those who want serious filtration power hidden away, an under-sink system is the gold standard for the kitchen. These units are installed discreetly in the cabinet below and connect right to your cold water line. They feed a separate, dedicated faucet, giving you a steady stream of pure water.

Because these systems use much larger carbon block filters, they have a higher capacity and last a lot longer than pitchers or faucet mounts. They cost more upfront and might require some basic plumbing know-how to install, but you get top-tier contaminant removal and fast-flowing water. It's a great long-term investment for a family.

Comprehensive Whole-House Systems

If your goal is better water from every single tap—showers, laundry, bathrooms, and all—then a whole-house system is the ultimate answer. Also called a point-of-entry (POE) system, this unit is installed right where the main water line enters your home.

This approach doesn't just protect your family's drinking water; it protects your pipes and appliances from the harsh effects of chlorine and sediment. While it's the most expensive option and typically requires a professional plumber to install, it delivers a seamless, whole-home solution. You'll even notice the difference in the shower, with softer skin and hair free from chlorine's drying effects.

Simple Installation and Maintenance Tips

One of the best things about modern carbon block water filters is that most are designed for easy, DIY installation. The idea of fiddling with your home’s plumbing can be a little nerve-wracking, but you don’t need to be a pro to get most systems up and running.

For example, swapping out a refrigerator filter is usually as simple as twisting out the old one and popping in the new—no tools needed. Under-sink systems might look more complicated, but many kits today come with everything you need, including clear instructions and quick-connect fittings that just snap into place.

Of course, while many setups are perfect for a weekend project, some complex whole-house systems or tricky plumbing situations are best left to the experts. If you hit a snag or just don't feel comfortable, it’s always a good call to bring in professional plumbing services to make sure it’s done right.

Why Timely Maintenance is Non-Negotiable

Getting your filter installed is just step one. The real key to consistently great-tasting water is keeping up with maintenance.

Think of your filter cartridge as a highly specialized sponge. Once it's completely full of trapped contaminants, it simply can’t absorb any more. Worse yet, the pressure of water flowing through can actually start to push some of those trapped impurities back into your water supply.

When you forget to change your filter, you’re basically turning your purifier off. The carbon becomes saturated and can’t grab any more contaminants, meaning all that nasty chlorine and other junk starts flowing right back out of your tap.

A clogged filter doesn't just stop working—it can become a breeding ground for bacteria. The trapped organic material creates a perfect environment for microorganisms to multiply, potentially making your water quality worse than it was before filtration.

Knowing When It's Time for a Change

So, how can you tell when your filter has reached the end of the line? Your system will give you a few clear signals that it's time for a replacement.

You should change your filter if you notice:

  • A Drop in Water Pressure: This is the classic tell-tale sign. As the filter’s pores get clogged with gunk and sediment, it becomes much harder for water to push through. The result is a weak, slow flow from your faucet or dispenser.
  • Return of Bad Tastes and Odors: If that familiar chlorine taste or musty smell starts creeping back into your water, you know the carbon’s job is done. Its adsorption capacity is maxed out, and it’s no longer pulling out the chemicals that ruin the flavor.
  • The Filter Indicator Light: Many modern refrigerators and under-sink systems take the guesswork out of it with a handy indicator light that alerts you when the filter is nearing its expiration date.

A good rule of thumb is to replace most refrigerator and under-sink filters every six months. But always double-check the manufacturer’s guidelines, as every filter is different. For more tips on keeping your system in top shape, check out this great advice from water filtration experts.

A simple trick? Set a recurring reminder on your phone or calendar. It’s an easy way to make sure you never miss a filter change.

Your Top Questions About Carbon Block Filters, Answered

As you narrow down your options for the perfect filter, it's totally normal to have a few last-minute questions. Getting those final details sorted is what helps you feel confident you're making the right call for your family.

So, let's dive into some of the most common things people ask about carbon block filters, from how long they last to how they stack up against other types.

How Long Do Carbon Block Water Filters Typically Last?

There’s no single answer here—a filter's lifespan really depends on its size, how much water you use every day, and the quality of your local water.

As a rule of thumb, a standard under-sink or refrigerator filter usually needs to be replaced every 6 to 12 months. A larger whole-house filter might go for a year or even longer. Your best bet is always to check the manufacturer's guidelines to keep your filter working like it should.

Will a Carbon Block Filter Reduce My Water Pressure?

When you first install a new carbon block filter, you might notice a tiny drop in water pressure, but it’s usually so small you won’t even feel it.

If you suddenly see a major drop in your water pressure, that’s the number one sign your filter is clogged with gunk and it's time for a change. It’s your system’s way of saying, "Hey, I'm full!" A new filter will get the flow back to normal and keep your water pure.

Are Carbon Block Filters Better Than GAC Filters?

Both use activated carbon, but yes, carbon block filters generally do a better job than Granular Activated Carbon (GAC) filters. The key is in the design. A carbon block is a solid, compressed brick of carbon.

This solid structure forces every drop of water to twist and turn through a dense maze, so it can't just find an easy path and sneak past the filter media. This gives the water much more contact time with the carbon.

It also means carbon blocks can be made with much smaller pores, allowing them to reliably filter out tiny contaminants like lead, certain cysts, and VOCs that loose GAC granules might miss. This level of performance is why the demand for these filters is soaring, with the global market expected to hit USD 10.3 billion by 2030. You can get more details on the global carbon block filter market trends to see what's driving this growth.


Ready to find the perfect filtration solution for your home? At Water Filter Advisor, we provide in-depth reviews, buying guides, and expert advice to help you choose with confidence. Explore our resources today at https://www.waterfilteradvisor.com.