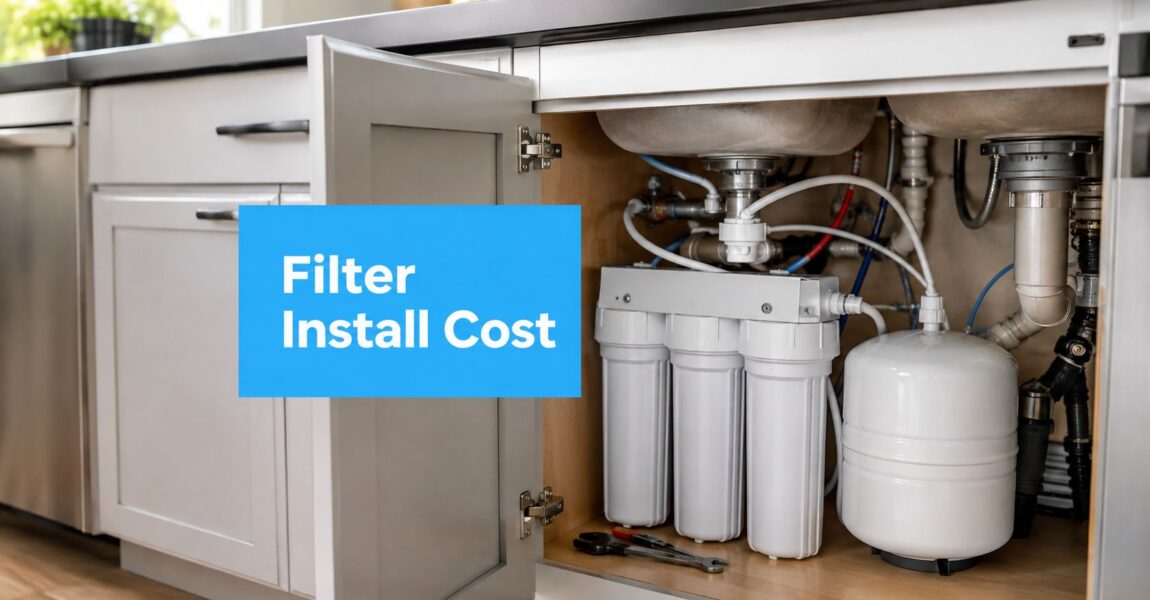
A standard under-sink water filter installation typically costs $170 to $580, while a reverse osmosis installation commonly reaches $450 to $1,600. The filter itself is only part of the bill, because labor, countertop drilling, faucet installation, drain connections, and difficult cabinet access can shift the final price sharply.
That's why two homeowners can buy the same filter and receive quotes hundreds of dollars apart. A compact carbon unit connected to an accessible cold-water line is a straightforward plumbing job. A reverse osmosis system may need a dedicated faucet, storage tank, drain saddle, new fittings, and leak testing. The right way to budget is to treat installation as a small construction project, not a product purchase.
What You'll Pay to Install an Under Sink Water Filter
A standard carbon block installation usually produces a total bill of $170 to $580, including the unit and labor. That range comes from the filter, the plumbing connection, cabinet access, and any sink modification, not from the cartridge alone. A broader 2026 estimate places the average under-sink installation near $550, with a national range of $100 to $3,000, depending on the system and required work, according to this 2026 under-sink filter installation cost guide.
Reverse osmosis requires a larger project budget. The storage tank, dedicated faucet, drain saddle, membrane, extra tubing, and leak testing give installers more line items to price. A fully installed system can cost $450 to $1,600, based on Angi's reverse osmosis installation cost guidance.
| System Type | Low End | Typical | High End |
|---|---|---|---|
| Standard carbon filtration | $170 | About $170 to $580 total | $580 |
| Reverse osmosis | $450 | About $450 to $1,600 total | $1,600 |
The largest quote differences usually come from labor and modifications. A cramped cabinet, stone countertop, seized shutoff valve, or missing faucet hole can put two quotes for the same filter $250 or more apart. Ask whether the price includes drilling, new fittings, valve replacement, drain work, connection testing, and cleanup. Those details explain where a low initial quote can grow.
Use fast budget-friendly plumbing when the job also includes broader plumbing repairs rather than a filter-only appointment. A filter installation needs a supply connection and housing. Reverse osmosis adds a membrane, tank, faucet, drain connection, and more leak points. Budget by the work required under the sink, not by the box price printed on the system.
How Under Sink Filtration Works and the Main System Types
An under-sink filter is plumbing furniture. The cold-water supply is the front door into the system. A tee fitting or saddle-style valve creates a side entry for filtered water, the filter housing acts like a drawer that holds the treatment stages, and the dedicated faucet becomes a new fixture on the countertop.
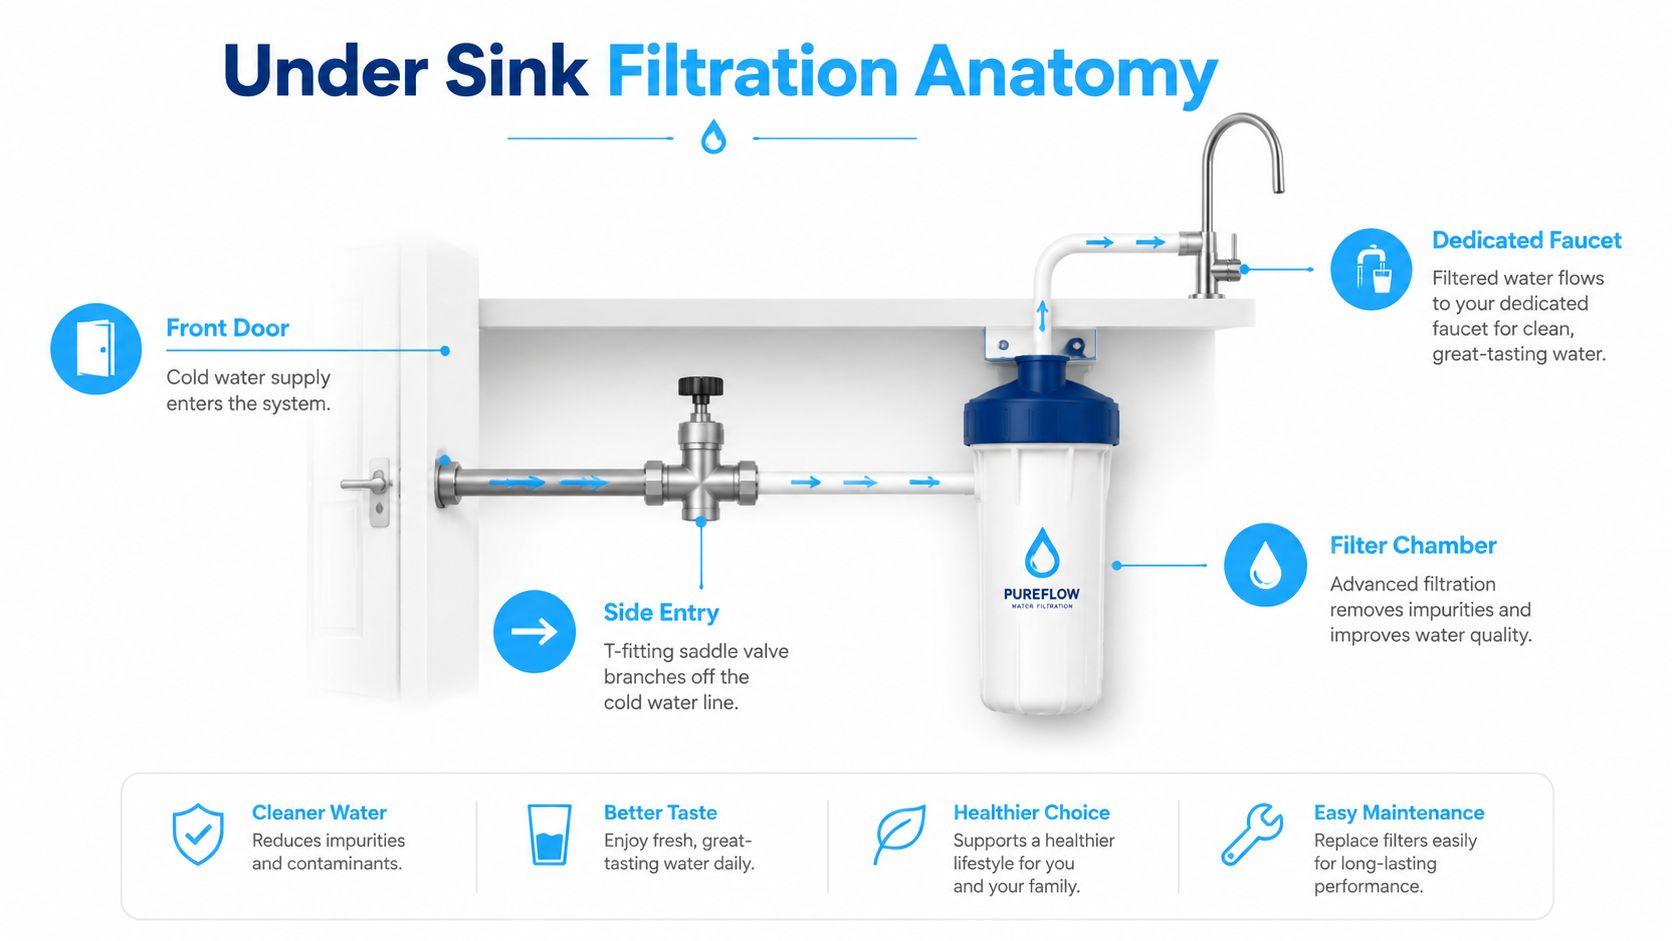
Start with the water path:
- Cold-water feed: The installer shuts off the supply and branches a line toward the filter. A tee fitting is usually cleaner and more dependable than forcing an unsuitable connection onto an old valve.
- Filter housing: Water passes through one or more cartridges. The housing needs enough clearance for cartridge changes, so a system that fits on paper may still be frustrating inside a crowded cabinet.
- Filtered outlet: A separate tube carries treated water to a faucet or dispenser. Some inline systems send filtered water through the existing faucet, while many dedicated systems use a smaller drinking-water faucet.
- Waste connection: Reverse osmosis sends rejected water to the drain through a saddle or another approved drain connection.
The three families buyers usually choose
A single-stage carbon block filter is the simplest option. It primarily targets chlorine taste and odor, with performance depending on the specific cartridge and its claims. It usually has the smallest cabinet footprint and the least complicated installation.
A multi-stage carbon system adds sediment filtration before carbon polishing. That arrangement gives the carbon stage cleaner water to treat and creates a broader treatment sequence without adding the tank and waste line associated with RO.
Reverse osmosis adds a semipermeable membrane, pressurized storage tank, and drain line. It can produce water more slowly at the faucet because the system fills and stores treated water. The tank improves availability, but it also consumes cabinet space. A dedicated faucet is common for RO, while compact inline carbon units may use the existing countertop dispenser.
Practical rule: Choose the treatment method from your water concern first, then choose the cabinet layout and faucet arrangement. Buying the cheapest unit that won't fit or won't address the problem wastes the entire installation budget.
Comparing System Types by Price and What You Get
The price difference between filtration families reflects hardware, not marketing decoration. A single-stage carbon unit has one main housing and a short connection path. Multi-stage filtration adds cartridges and brackets. Reverse osmosis adds the most plumbing, the largest footprint, and the most opportunities for a quote to grow.
The following planning figures are editorial budget ranges supplied for this comparison. They separate equipment from the completed installation so you can see where the money goes.
| System Type | Unit Price | Installed Total | Components Under Sink |
|---|---|---|---|
| Single-stage carbon | $40 to $120 | $130 to $260 | One canister or compact inline housing |
| Multi-stage carbon | $150 to $400 | $230 to $520 | Two or three stacked cartridges |
| Reverse osmosis | $200 to $600 | $450 to $1,600 | Membrane housing, storage tank, drain saddle, tubing |
Single-stage carbon
This is the sensible choice for a homeowner who wants a compact system and a cleaner connection path. The cabinet usually holds one canister, and the installer connects it to the cold-water line and either the existing faucet or a small dedicated dispenser. Labor stays lower because there's less mounting and fewer connection points to test.
Multi-stage filtration
Multi-stage systems occupy more space but give the installer a more structured treatment path. A sediment pre-filter can sit before carbon, followed by another polishing stage. Expect more bracket work, more tubing, and more cartridge clearance when planning the cabinet.
Reverse osmosis
RO is the premium installation because it adds a membrane housing, tank, faucet, and drain connection. The tank can dominate the cabinet floor, while the drain saddle must sit at a workable angle on the waste line. This is the configuration that most often requires a new faucet hole, especially when the sink has no usable soap-dispenser opening.
Don't buy a reverse osmosis kit until you've measured the cabinet and identified the drain connection. The unit price may look attractive, but the physical layout determines whether installation stays routine.
The Line Items That Make Up Your Installation Quote
A professional estimate should look like a project budget, not one unexplained total. Ask the installer to separate the filter system, labor, faucet work, supply connection, drain work, drilling, replacement plumbing, and disposal. Two quotes for the same filter can differ by hundreds of dollars because the labor and modification lines are different.
| Line Item | What's Included | Typical Range |
|---|---|---|
| Filter system | Housing, cartridges, brackets, included fittings | Varies by system |
| Standard labor | Mounting, supply connection, faucet connection, testing | $100 to $300 |
| RO labor | Tank, membrane, drain line, faucet, leak testing | $200 to $900 |
| Dedicated faucet | New drinking-water faucet and connection hardware | Varies by kit |
| Tee or saddle connection | Branch from the cold-water supply | Varies by plumbing |
| Shutoff valve | Removal and replacement of a faulty valve | Quote separately |
| Drain connection | RO waste tubing and drain saddle or approved fitting | Quote separately |
| Countertop drilling | Hole through stone, porcelain, or another hard surface | Quote separately |
| Tubing and fittings | Supply tubing, compression fittings, adapters | Varies by material |
| Mounting hardware | Bracket, screws, anchors, cabinet installation | Often included |
| Trip or permit charge | Service call or local compliance requirement | Ask before scheduling |
The labor line is only the starting point. Routine filtration work commonly falls around $100 to $300, while RO labor can reach $200 to $900 when the installer must drill, add a water line, or fit a drain saddle, according to neutral plumbing installation cost references.
Check whether the quote includes the dedicated faucet, a usable sink hole, the shutoff valve, and removal of an old system. A kit may include a faucet, but its hardware may not fit every sink or countertop. A seized valve or corroded connection can turn a routine hookup into replacement plumbing.
Many under-sink kits require a 1-inch faucet hole when no soap-dispenser opening is available. Their installation guidance also directs installers to use Teflon tape on external threads when addressing threaded leaks, as shown in the manufacturer installation instructions.
Before approving the work, ask for written prices for drilling, valve replacement, drain modification, extra tubing, and disposal. Confirm whether mounting hardware, testing, and the first system flush are included. “Installation included” is too vague to protect your budget.
The quote usually balloons when a basic connection requires countertop drilling, a replacement shutoff valve, or changes to the drain. Those modifications, not the filter housing alone, explain why two installers can price the same equipment very differently.
DIY Installation Versus Hiring a Professional
DIY works for a cooperative plumbing setup, not every filter project. Choose it when the shutoff valve closes fully, the cabinet offers clear access, the sink already has a usable faucet hole, and the system is a basic carbon unit without a drain connection. The work then centers on disconnecting the supply, routing tubing correctly, installing the cartridge, flushing the unit, and checking for leaks.
| Factor | DIY | Professional |
|---|---|---|
| Cost | Avoids installation labor | Adds labor to equipment cost |
| Time | Reserve several hours | Usually one appointment |
| Tools | Wrench, tubing cutter, drill, bits, tape | Installer supplies specialized tools |
| Skill floor | Requires plumbing and fitting judgment | Technician handles difficult connections |
| Main risk | Leaks, countertop damage, warranty disputes | Service-call limits or added charges |
| Best fit | Accessible carbon setup | RO, hard countertop, old or corroded plumbing |
The labor line is only part of the decision. A professional installation can cost more upfront, but it can prevent a flooded cabinet and identify failed valves or damaged connections before they cause further trouble. Ask whether the quote covers testing and leak checks, rather than judging it by labor alone.
A basic carbon system favors DIY when the cold-water valve works and no drilling is needed. Hire a professional for reverse osmosis, especially when the drain saddle, storage tank, and dedicated faucet must be coordinated. Those added connections create more opportunities for leaks and make a low equipment price less meaningful.
A cheap installation is only cheap if the connection stays dry after the installer leaves.
Call a professional if you find corrosion, brittle tubing, a valve that will not shut off, or a granite, quartz, or porcelain countertop. Drilling those materials with the wrong bit can cause chips or cracks and turn a filter installation into a countertop repair. Get a written price for any valve work, drilling, drain changes, or extra fittings before approving the job.
Tools Time and Steps for a DIY Install
Gather everything before shutting off the water. You'll want an adjustable wrench, basin wrench, tubing cutter, drill with the correct bit, Teflon tape, a replacement shutoff valve if the existing one is unreliable, a saddle tee or compression tee, and the manufacturer's hardware kit.
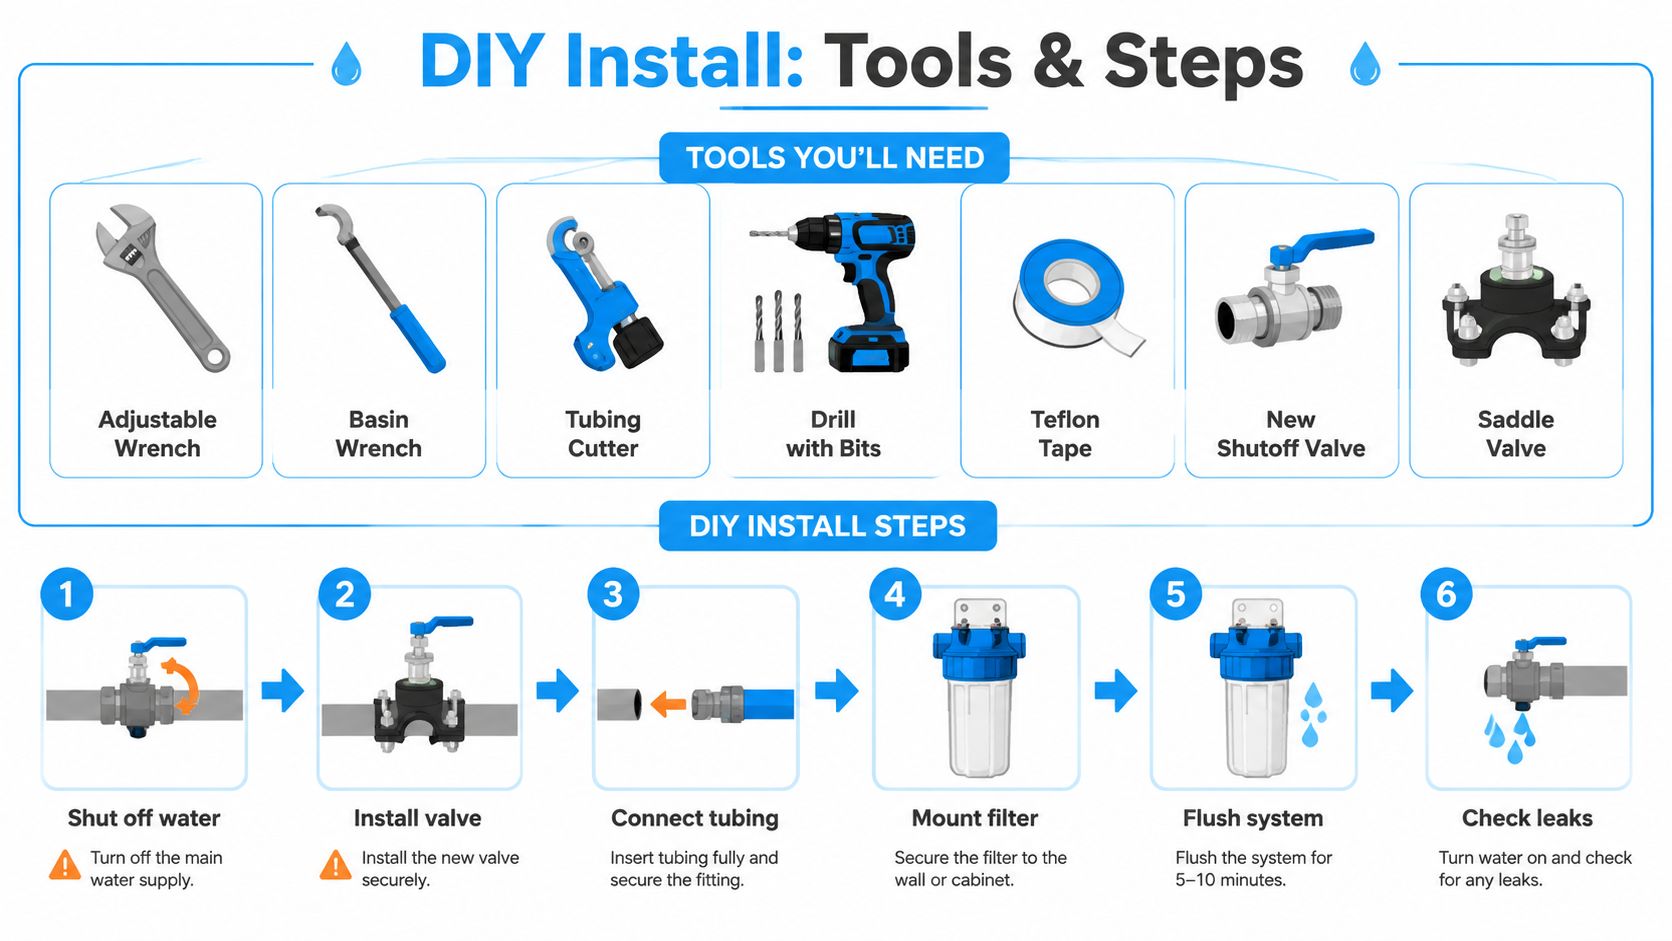
The installation sequence
- Shut off the water: Close the cold-water valve, then open the faucet to release pressure. If water continues flowing, stop. The valve needs repair before you continue.
- Install the supply connection: Fit the tee or approved adapter to the cold-water line. Don't force mismatched compression fittings.
- Prepare the faucet: Use an existing opening when possible. If drilling is required, confirm the countertop material and the kit's hole size before touching the drill.
- Mount the filter: Secure the bracket where cartridges can be removed without dismantling the cabinet.
- Connect tubing: Cut clean, square tube ends and push or compress them fully into the fittings. A crooked cut can create a slow leak.
- Install cartridges and flush: Follow the manufacturer's order, open the supply slowly, and flush the system as directed.
- Check every connection: Dry the fittings with a paper towel, run the faucet, and inspect again after the cabinet has been closed.
A basic carbon installation commonly takes 2 to 4 hours, while a full RO installation can take 4 to 6 hours, assuming the cabinet and plumbing present no surprises, according to the supplied installation benchmarks. Beginners usually stall at the countertop, compression fittings, and RO drain saddle angle.
For a visual walkthrough of the process, this installation video shows the sequence in a practical format:
Don't skip the final leak check. Leave the cabinet dry and inspect the connections again after the system has operated, because a fitting can remain dry during assembly and seep once the line is pressurized.
Maintenance Filter Replacement and Total Cost of Ownership
The purchase price is a down payment. A filter that sits under the sink still needs cartridges, sanitation, tubing, and occasional faucet hardware. The least expensive installation can become the costlier ownership choice if replacement parts are difficult to find or the system uses several expensive stages.
The supplied maintenance benchmarks put sediment pre-filters around $15 to $30 every 6 to 12 months, carbon cartridges around $25 to $60 annually, and RO membranes plus polishing filters around $40 to $120 every 12 to 24 months. Annual sanitization may cost $20 in vinegar for a homeowner or $80 to $150 when a professional handles it.
| System Type | Filters/Year | 3-Year Total | 5-Year Total | 10-Year Total |
|---|---|---|---|---|
| Standard carbon | Sediment and carbon replacements | Qualitatively, low ongoing spend | Qualitatively, moderate cumulative spend | Near $300 to $500 |
| Multi-stage carbon | Several cartridge stages | Higher than single-stage | Builds with each replacement stage | Depends on cartridge pricing and usage |
| Reverse osmosis | Prefilters, post-filter, membrane | Higher maintenance burden | Includes periodic membrane replacement | Can exceed $1,200 in filters alone |
The ten-year planning figures above come from the supplied ownership guidance. A basic unit can land near $300 to $500 over a decade, while a full RO system can exceed $1,200 in filters alone, before labor or water charges enter the calculation.
RO also carries non-filter expenses. It sends roughly 3 to 4 gallons of water to the drain for every gallon produced, according to the reverse osmosis cost guide. UV add-ons consume electricity, and a replacement dedicated faucet can cost $25 to $70 if the original develops a leak or cracks.
Maintenance that protects the installation
Replace cartridges on the manufacturer's schedule, sanitize the housings when required, and inspect tubing whenever you change a filter. If the cabinet floor shows moisture, don't wait for the next maintenance date. Shut off the system and find the leak before water reaches the cabinet base or flooring.
The ownership math favors the simplest system that addresses the actual water problem. Don't pay for an RO tank and membrane if a properly selected carbon unit meets your needs, but don't choose carbon solely because the initial installation looks cheaper.
When to DIY When to Hire and How to Budget Smartly
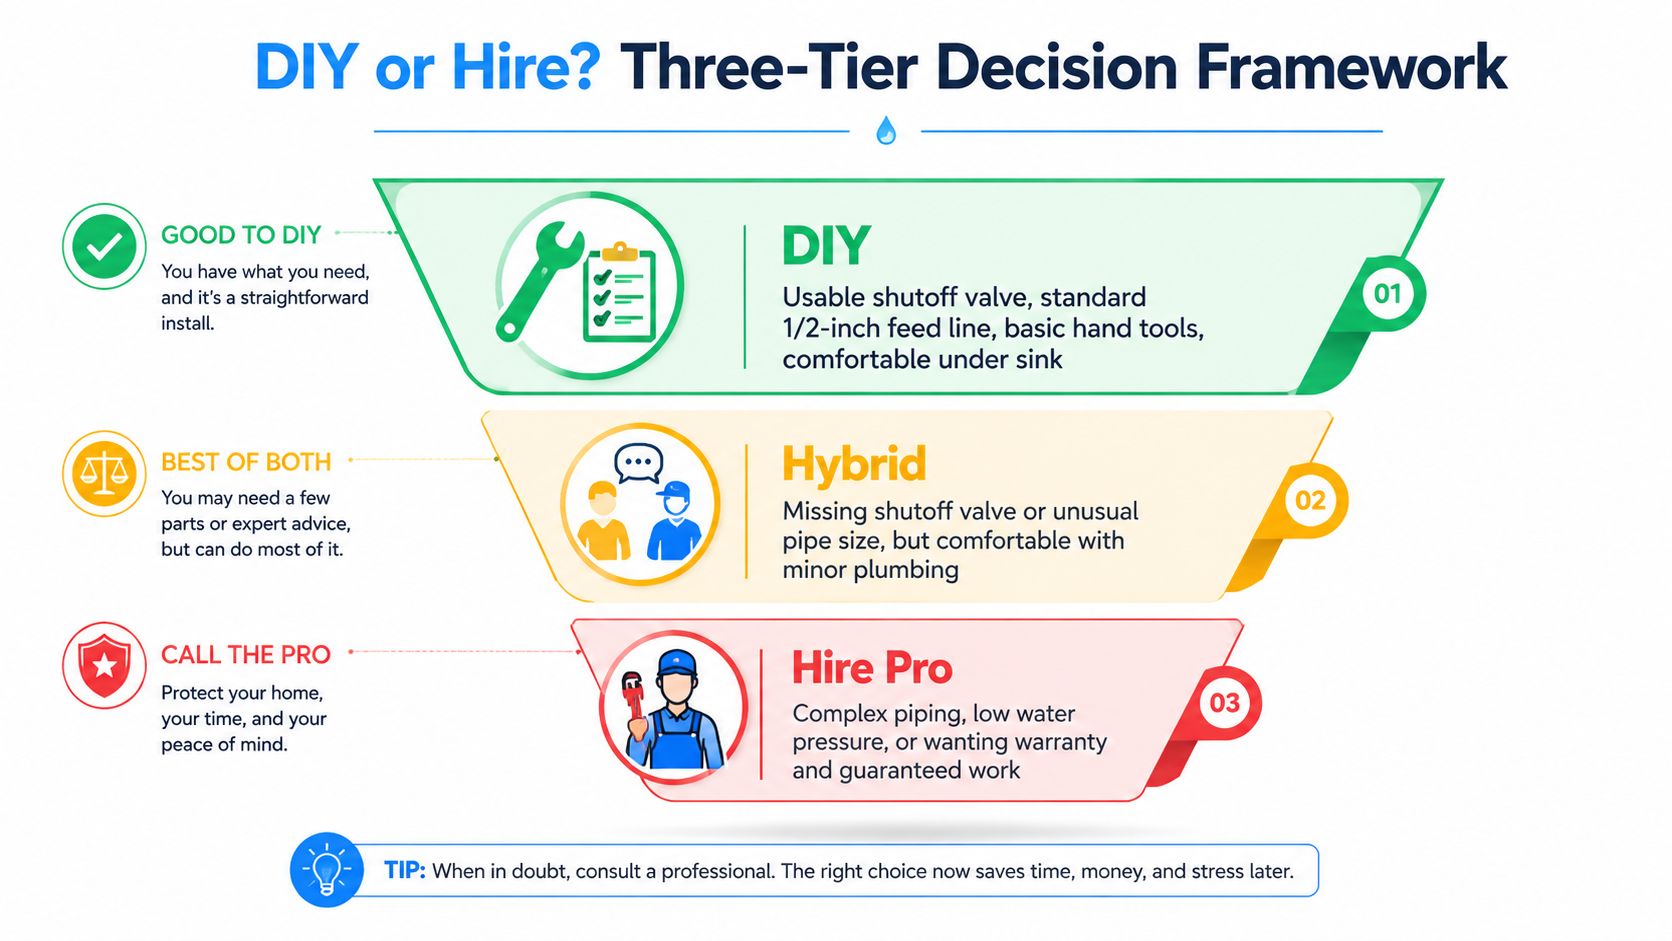
Use a three-tier decision instead of guessing.
DIY is appropriate when the cold-water shutoff works, the feed line is a standard 1/2-inch connection, the cabinet is accessible, and the countertop doesn't require difficult drilling. A homeowner who already owns the basic tools can keep the job simple and avoid routine labor charges.
A handyman fits the middle ground when the installation is straightforward but the cabinet is tight or the homeowner lacks the tools. This is a practical choice for a standard carbon unit, provided the handyman can identify incompatible fittings and knows when to stop.
Hire a licensed plumber when the shutoff valve is missing or corroded, the supply line is brittle, the countertop is granite or quartz, or the RO drain connection must tie into ABS or cast iron. A permit or pressure test requirement also moves the job out of casual DIY territory.
For broader guidance on choosing and maintaining filtration equipment, the Water Filter Advisor advice center is a useful reference alongside the manufacturer's installation manual.
Five ways to keep the quote under control
- Get two written quotes: Make installers price the same equipment and scope.
- Demand an itemized breakdown: Separate labor, faucet work, drilling, valves, fittings, and drain work.
- Watch subscriptions: Bundled replacement-filter plans can make a low equipment price expensive over time.
- Coordinate with a remodel: If the sink or countertop is already being changed, absorb faucet drilling and plumbing work into that project.
- Skip unnecessary hardware: Don't buy a separate dedicated faucet when the included dispenser or air-gap hardware fits the sink.
My recommendation is straightforward. Choose standard carbon for a simple taste and chlorine project, choose multi-stage filtration when the water calls for more treatment stages, and choose RO only when its added hardware and maintenance make sense for your water concerns. Then pay for the installation complexity you have, not the complexity printed on a sales page.
Water Filter Advisor helps homeowners compare under-sink, reverse osmosis, faucet, whole-home, and replacement-filter options while explaining installation, maintenance, certifications, and water testing. Visit Water Filter Advisor before you buy, compare your project against the cost drivers above, and make a filter decision that fits both your water and your cabinet.
- August 25, 2026
- Uncategorized
