A Homeowner’s Guide on How to Raise pH in Water

So, you've discovered your home's water has the personality of a grumpy lemon. What's the plan? Before you do anything, you need an accurate pH reading. From there, your two main battle plans are using alkaline additives like baking soda for a quick, "help-me-now" fix in a pitcher, or installing a whole-home pH neutralizing filter to solve the problem for good. These methods work by telling the acidity in your water to take a hike, bringing its chemistry back into a happy, balanced state.

Why Your Home's Water pH Matters

Ever notice those sneaky blue-green stains in your sink or bathtub? That’s not a quirky design choice from your plumbing—it's a cry for help. It’s the first big warning sign of acidic water, and it's a much bigger problem than a bit of discoloration.

When your water has a low pH, it gets aggressive. It becomes corrosive, silently munching away at your plumbing from the inside out. This isn't just about aesthetics; it's a direct threat to your home's circulatory system. Corroding copper pipes can leach metal into your drinking water, and if you live in an older home, you could be facing lead contamination from old solder. Yikes.

Beyond the serious health concerns, acidic water is a bully to your expensive appliances. It can cause premature failure in water heaters, washing machines, and dishwashers. Tackling low pH isn't just about making your water taste better; it's about protecting your castle from a slow-motion, expensive disaster. That's why testing is the critical first step.

Getting an Accurate pH Reading

You wouldn't start randomly replacing parts in your car without a diagnostic, and the same logic applies to your water. Guessing your pH is a recipe for frustration and wasted money. Luckily, you've got a few solid options to get a reliable measurement.

Which method you choose really comes down to what you need. If you just want a quick "Is everything okay in here?" check, test strips are fine. But if you're about to invest in a whole-home filtration system, you need the hard numbers that only a digital meter or a lab test can provide.

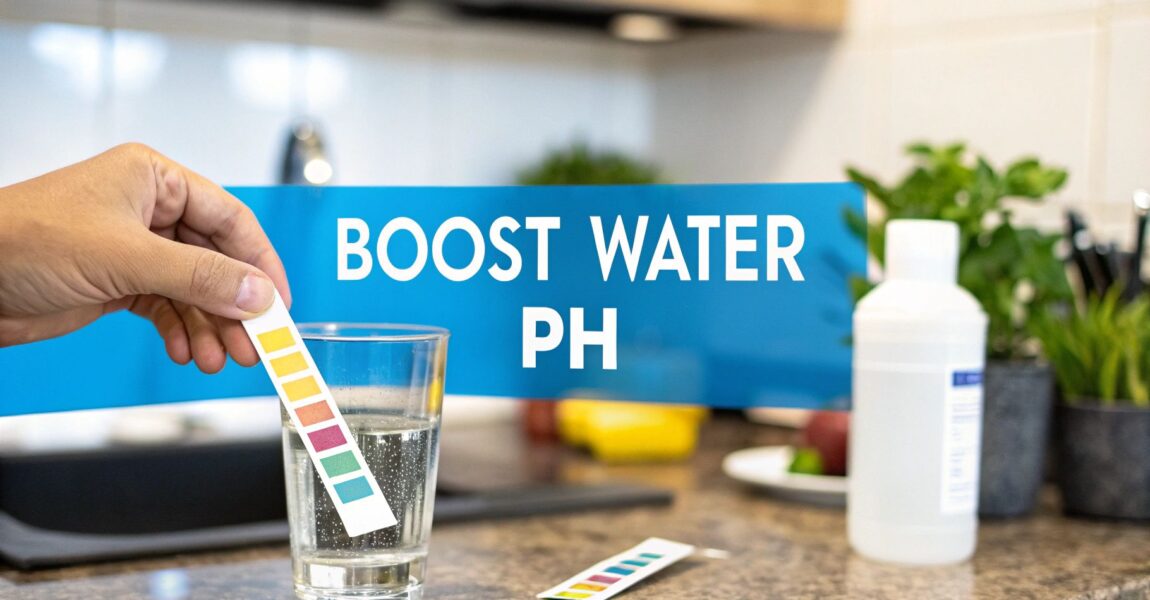
  • pH Test Strips: These are the cheap-and-cheerful option. Just dip a strip in your water, watch it do a color-changing magic trick, and match it to the chart. They’re great for getting a ballpark idea but aren't precise enough for making serious treatment decisions.
  • Digital pH Meters: For a much more accurate reading, a digital meter is the way to go. These cool little gadgets give you a specific number, often down to one or two decimal places. They need to be calibrated now and then, but that accuracy is exactly what you need to properly size and configure a water treatment system.
  • Professional Lab Testing: If you suspect other villains are crashing the party (like heavy metals) or you just want the most comprehensive analysis possible, sending a sample to a certified lab is your best bet. They'll give you a pinpoint-accurate pH level and a full report card on a whole range of other contaminants.

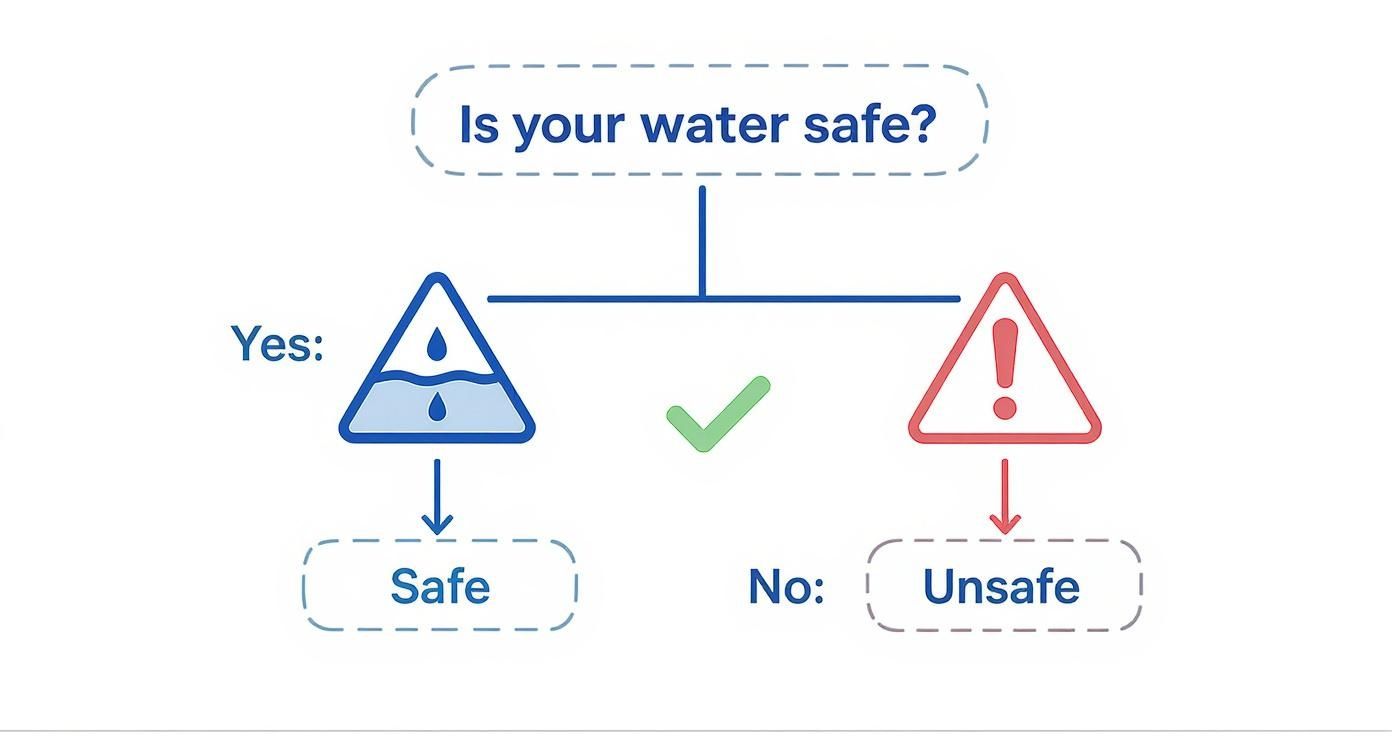
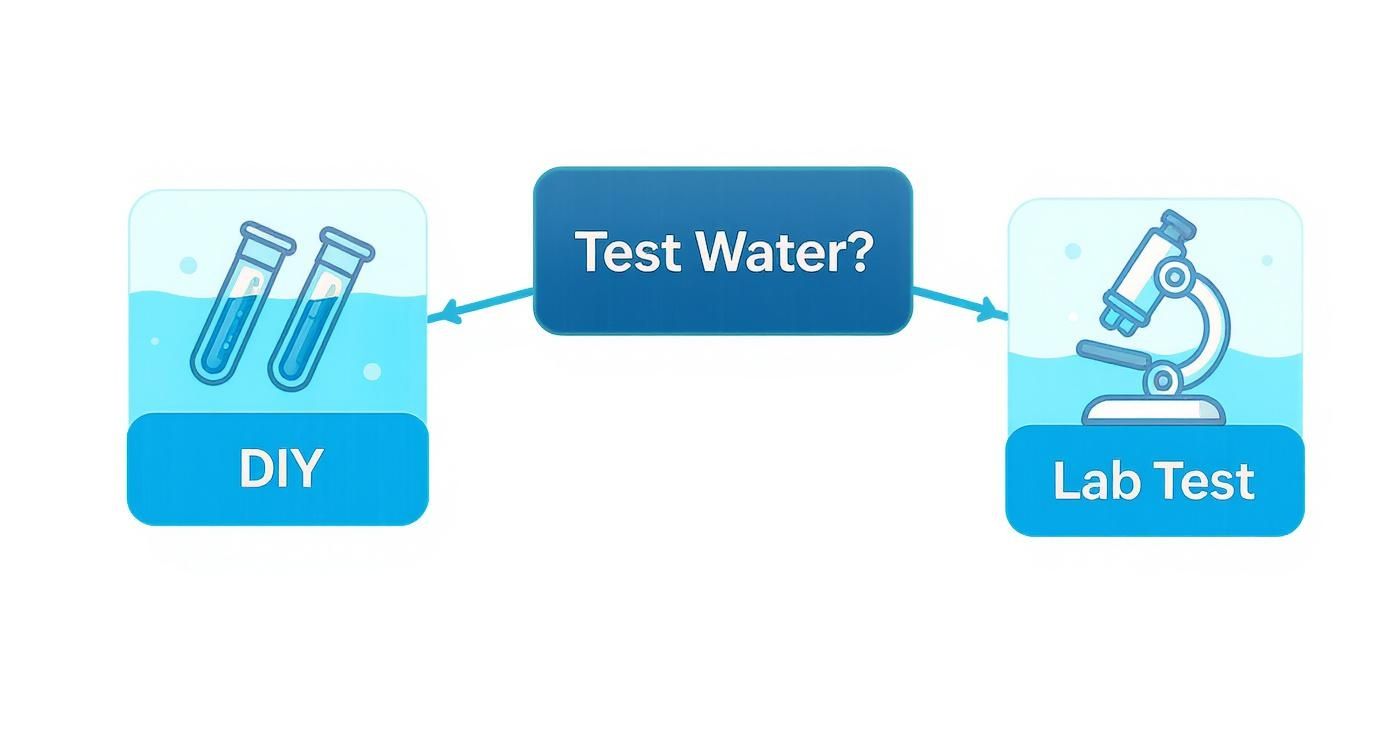
This flowchart breaks down how to choose the right testing method, whether you need a quick spot-check or a highly detailed analysis.
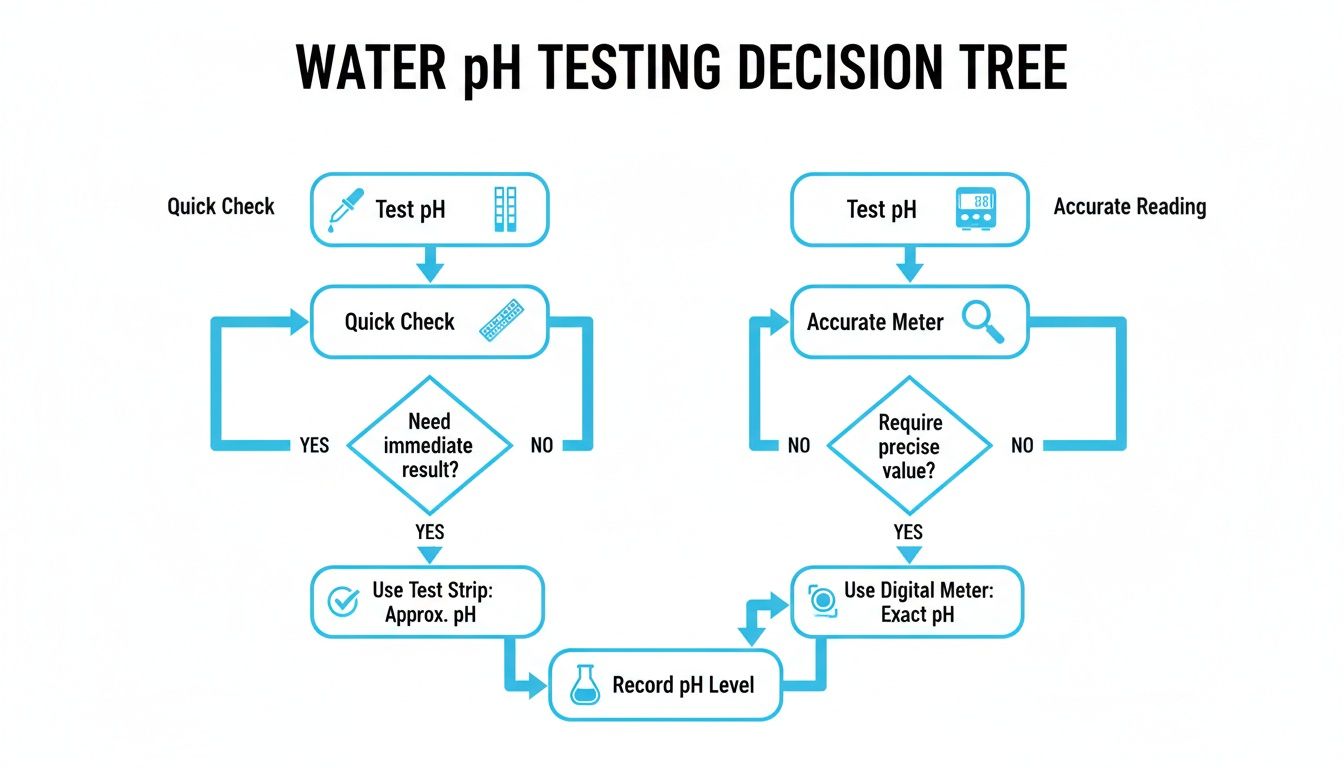
Decision tree flowchart illustrating different methods for water pH testing, from quick checks to accurate readings.

As you can see, while strips are handy for a quick peek, a digital meter is really the minimum you'll want for accuracy when planning any kind of water filtration strategy.

Comparing Home Water pH Testing Methods

To make it even simpler, here's a quick rundown of the most common home testing methods. This should help you decide which tool is the right one for your mission.

Testing Method Accuracy Cost Best For
pH Test Strips Low Low Quick, "just curious" checks and getting a general idea.
Digital pH Meter High Medium Accurate readings needed for sizing filtration systems.
Professional Lab Test Very High High Comprehensive analysis for complex issues or total peace of mind.

Ultimately, investing in a good digital meter or a lab test upfront can save you a ton of guesswork and money down the road.

Understanding the pH Scale in Your Home

You probably remember the pH scale from science class—it runs from 0 to 14 and measures how acidic or alkaline something is. In your home's water, anything below a pH of 7.0 is acidic, and anything above is alkaline.

Modern testing has become incredibly precise. Post-1993 guidelines, for example, have tightened potentiometric uncertainty to less than 0.02 pH units. That level of accuracy is a game-changer for the 80% of the global population that relies on treated water sources.

For most household water, you're aiming for a pH between 6.5 and 8.5. If your water drops below 6.5, it’s corrosive enough to start damaging your pipes. If it creeps above 8.5, you'll start seeing scale buildup on fixtures and might notice a bitter taste.

Knowing your water's exact pH is key because the solution depends entirely on how grumpy your water is. Mildly acidic water might be happy with a simple calcite filter, but extremely low pH levels will demand a more powerful setup. For a broader look at how this fits into your home's water quality, check out our general water filtration advice.

Quick Fixes Using Common Household Additives
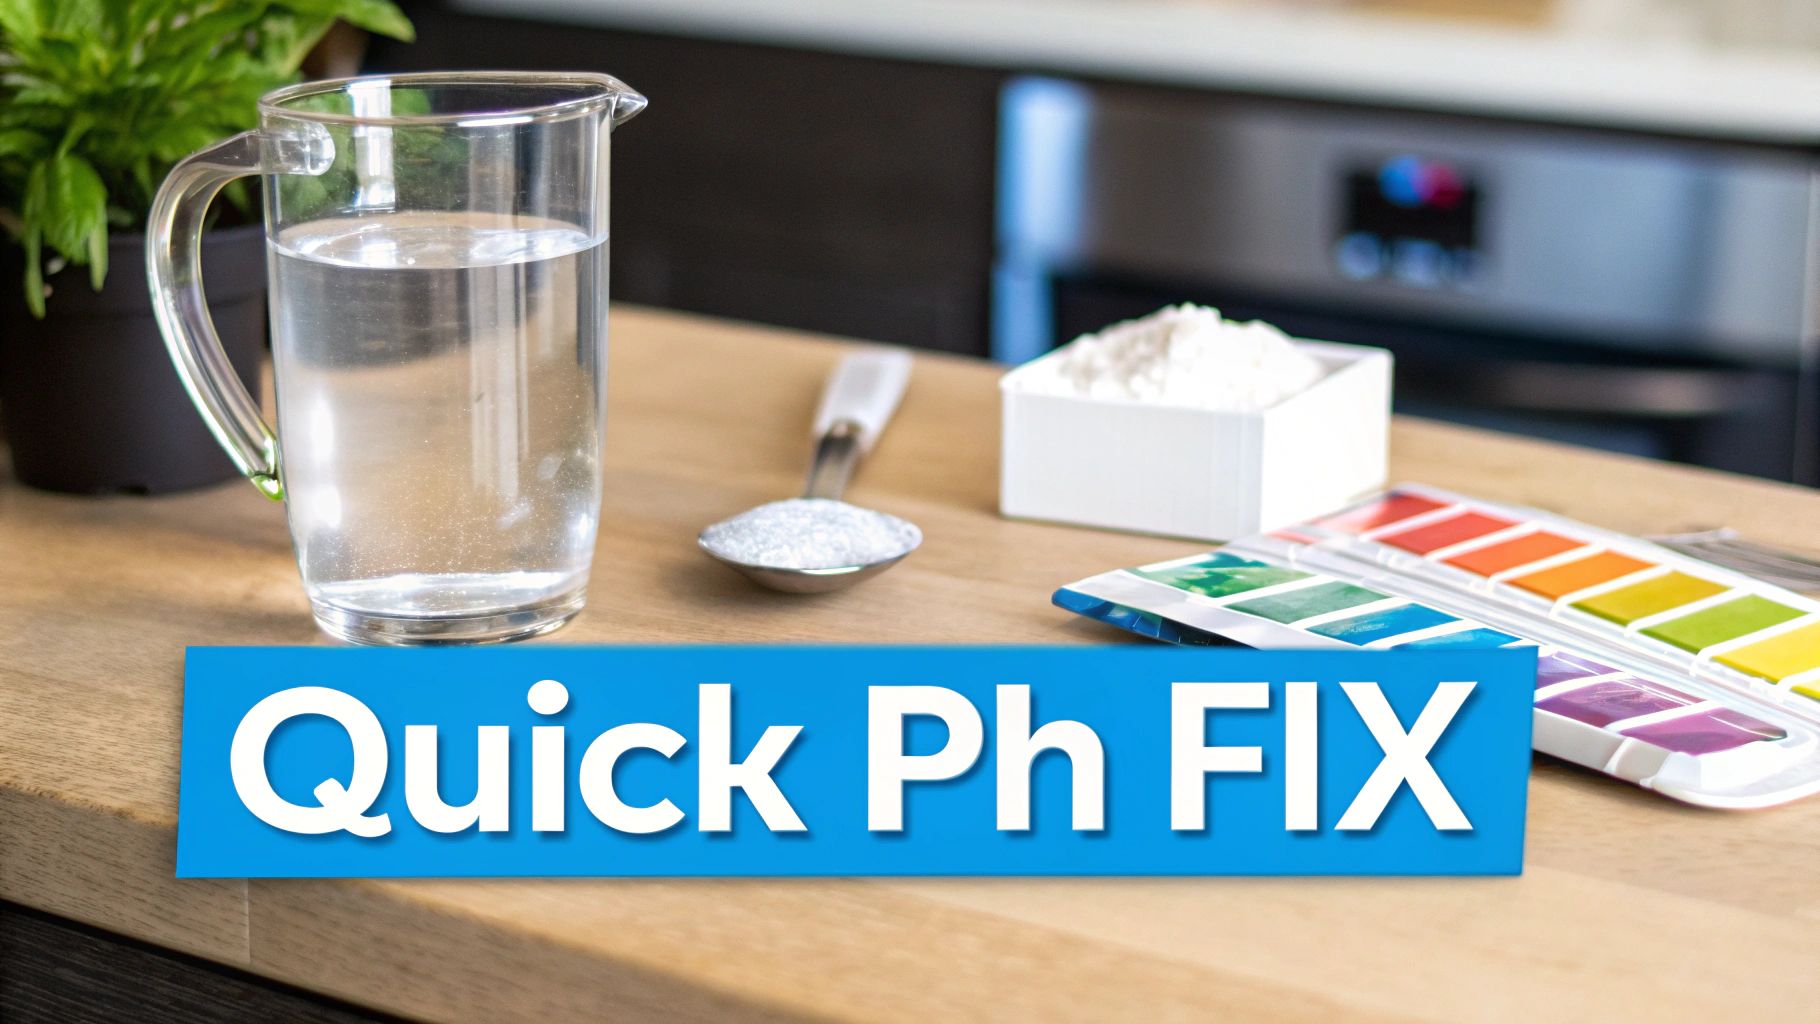
A pitcher of water, white powder, spoon, and a pH test strip chart on a kitchen counter for a quick pH fix.

So you've tested your water and confirmed it's on the acidic side. Your mind might jump straight to complex, expensive filtration systems, but hold on. For small, immediate tweaks, the solution might be sitting right in your kitchen pantry.

These simple household additives are perfect for neutralizing acidity in small batches, like a single pitcher of drinking water. It's crucial to understand these are temporary band-aids. They won't do a thing to protect your pipes or appliances from the long-term corrosion party happening throughout your home. Think of this as first aid, not a cure.

Using Baking Soda: The Go-To Neutralizer

The easiest and most common additive is sodium bicarbonate, which you know as good old baking soda. It's a mild alkaline substance that gently raises both pH and total alkalinity. This is great because it also helps stabilize the water chemistry and prevents wild pH swings.

Think of it as an antacid for your water. It calms the acidity down and nudges it back toward neutral. Because it’s so gentle, it’s the perfect place to start. A tiny pinch in a gallon of drinking water can often be enough to get rid of that slightly metallic taste that comes with low pH.

A Word of Caution: Baking soda adds sodium to your water. If you’re watching your sodium intake for health reasons, you’ll want to use this method sparingly for drinking water.

Dosing for Small Batches

When you're adding anything to your water, precision is everything. Just dumping in a spoonful is a surefire way to send the pH skyrocketing, creating a whole new problem. The mantra is: start small, test, and then adjust.

Here are some real-world starting points for using baking soda:

  • For a Gallon of Drinking Water: Start with just 1/8 teaspoon. Stir it until it’s fully dissolved, give it 30 minutes to settle, and then test the pH again.
  • For a Small Aquarium (10 gallons): A good first dose is 1/4 teaspoon. Always dissolve it in a separate cup of tank water before you slowly pour it in. This prevents shocking your fish.

These are just guidelines. The golden rule here is to add less than you think you need. You can always add a little more, but you can’t take it out.

When to Use a Stronger Solution

If your water is more than just slightly acidic, you might need to bring out the bigger guns. Soda ash (sodium carbonate) is a much more concentrated alkaline powder. It packs a bigger punch and will raise pH much more dramatically than baking soda, so you have to handle it carefully. You’ll use a lot less soda ash than baking soda to get the same result.

It’s interesting to think about how what we do in our kitchen mirrors larger-scale environmental chemistry. Just like agricultural runoff can raise the pH in rivers, we’re doing the same thing by adding these mineral-based powders. Research on water quality often shows how elements like calcium play a huge role in elevating pH, which is the exact principle we're using. You can actually explore a full study on physicochemical factors influencing water pH to see how these concepts apply on a global scale.

Ultimately, these quick fixes are handy in a pinch, but they're not a practical whole-home solution. If you’re dealing with acidic water throughout your entire house, a permanent, automated filtration system is always the smarter long-term investment.

Choosing the Right pH Neutralizing Filter for Your Home
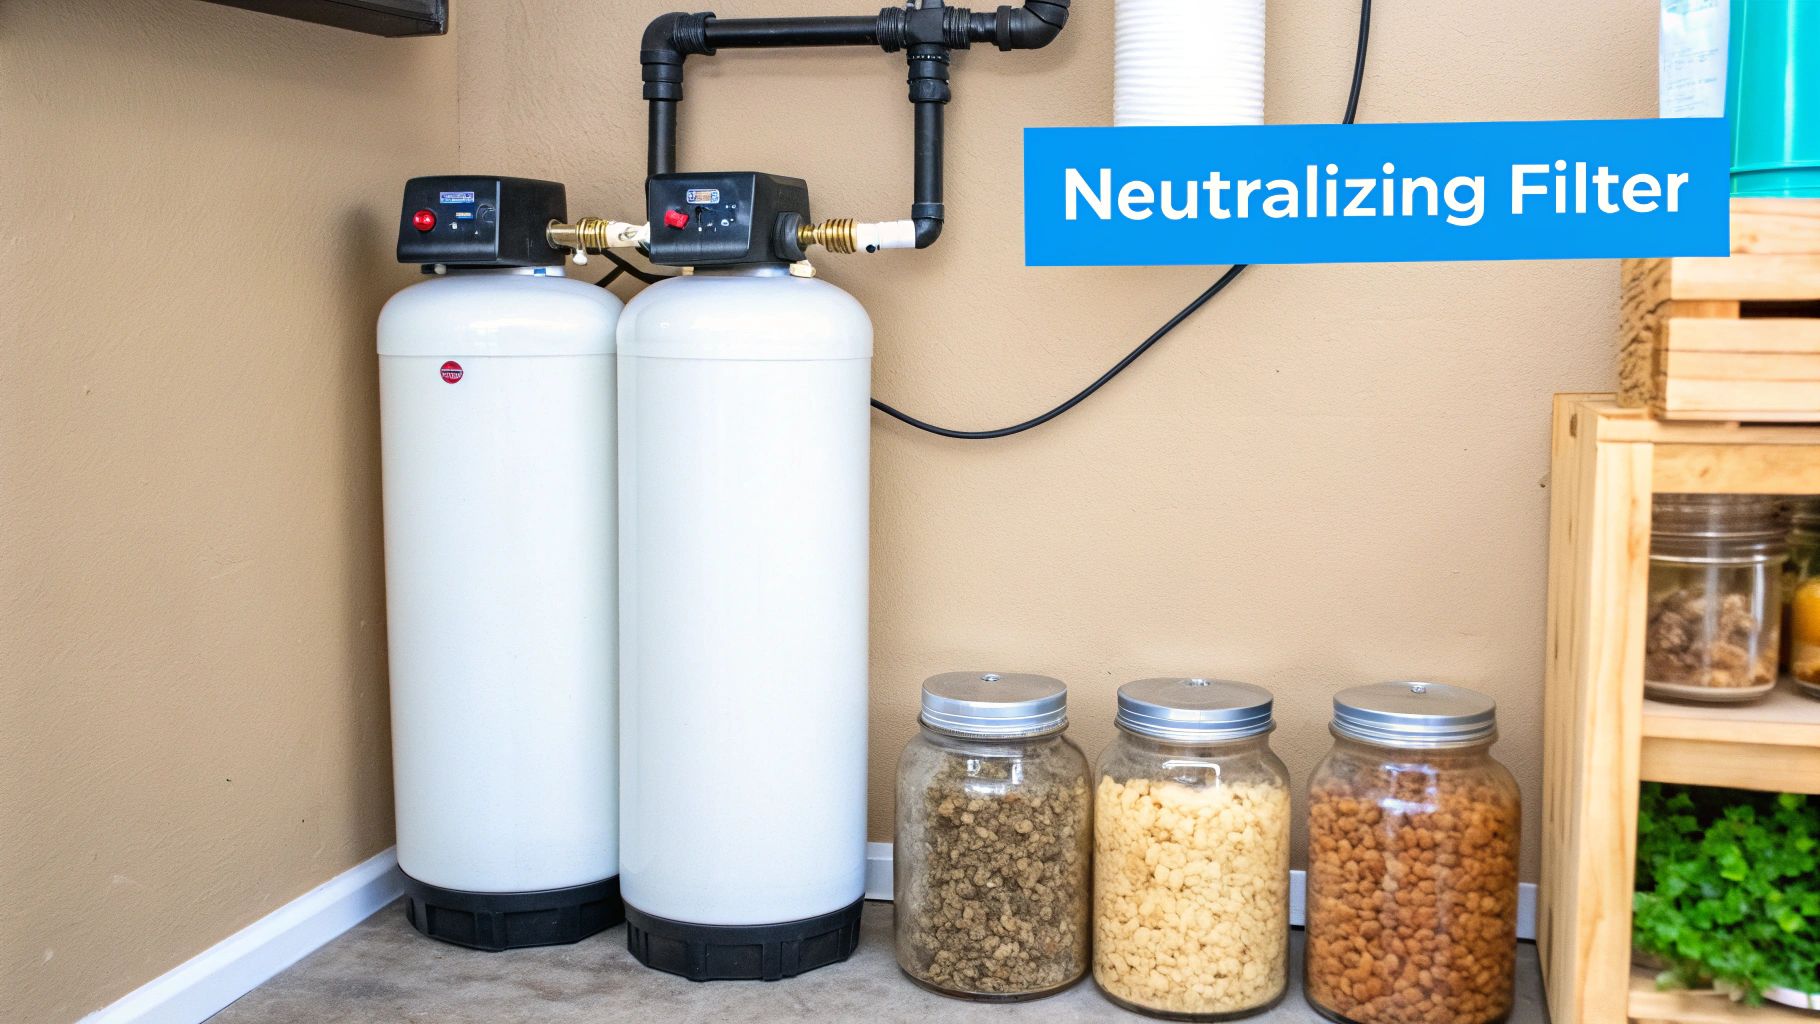
Two white water neutralizing filters with black pipes installed in a home utility room next to food jars.

Sure, quick fixes like baking soda can help in an emergency, but they aren't a real strategy for protecting your home. That approach does nothing to stop the acidic water that’s silently eating away at your pipes and appliances. For a permanent, "set it and forget it" solution, a dedicated neutralizing filter is the gold standard of home water treatment.

These systems get installed right where your main water line enters your house, treating every last drop of water before it ever reaches a faucet or shower. They act as a constant guardian, using a special mineral media to raise the pH and bring your water chemistry back into a safe, non-corrosive zone. The real beauty here is that these filters are self-regulating. They’re the workhorses of residential water treatment, and understanding the two main types is key to picking the right one.

The Gentle Workhorse: Calcite Filters

The most common type of neutralizing filter uses calcite. Think of it as a super pure, ground-up form of calcium carbonate—basically limestone or marble. When acidic water flows through a tank full of this calcite media, it slowly dissolves the calcium, neutralizing the acid and bumping up the pH.

The process is naturally self-limiting. Calcite will only dissolve until the water hits a neutral pH of around 7.0. Because of this, it's almost impossible to "overcorrect" and make your water too alkaline. This makes calcite a fantastic choice for homes with mildly acidic water, usually in the pH range of 6.0 to 6.9.

A calcite filter is like a slow-release capsule for your water system. It provides a steady, gentle dose of alkalinity that solves the corrosion problem without a lot of fuss or risk of overshooting your target pH.

One thing to know is that this process does add some hardness to your water since you're introducing calcium minerals. For most folks, that's a very minor trade-off for protecting thousands of dollars in plumbing and appliances.

The Heavy Hitter: Corosex Filters

So, what if your water is more than just a little bit acidic? If you've got a pH below 6.0, calcite alone might struggle to keep up. This is where Corosex enters the picture.

Corosex is a specially processed form of magnesium oxide, and it's far more reactive than calcite. It can neutralize acidity much more aggressively—in fact, it can raise the pH up to 100 times more than the same amount of calcite.

That power comes with a serious warning: Corosex is not self-limiting. If water sits in the tank too long (say, overnight), it can push the pH way too high. For this reason, you'll almost always see Corosex used in a blend with calcite, typically a ratio of 80-90% calcite to 10-20% Corosex. This mix gives you the best of both worlds: the gentle, steady action of calcite with an extra kick from Corosex to handle more severe acidity.

Comparing Your Filter Options

Deciding between calcite, Corosex, or a blend all comes down to what your water test results say. Getting a precise pH reading is non-negotiable for making the right call. To help you choose, let's put these two filter media options head-to-head.

Calcite vs Corosex: Which Neutralizing Filter Is for You?

Feature Calcite (Calcium Carbonate) Corosex (Magnesium Oxide)
Best For Mildly acidic water (pH 6.0 – 6.9) Severely acidic water (pH below 6.0)
Effectiveness Gentle, slow-acting, and self-limiting Highly reactive and powerful, not self-limiting
Risk of Overcorrection Very low; naturally stops at a neutral pH High if used alone; best when blended with calcite
Maintenance Media must be refilled annually as it dissolves Dissolves faster and requires more frequent refilling
Impact on Hardness Adds calcium hardness to the water Adds magnesium hardness to the water

Ultimately, your water test will point you in the right direction. A pH of 6.5? Calcite is your friend. A pH of 5.5? You'll need a calcite/Corosex blend to get the job done right.

Installation and Long-Term Value

Most neutralizing filters are whole-house systems, which means they'll need to be installed by a professional plumber. While there's an upfront cost, the long-term value is undeniable. You're not just getting better drinking water; you're safeguarding your entire plumbing network. A one-time investment in a neutralizing filter can prevent catastrophic and expensive headaches. Maintenance is pretty straightforward, too. You'll just need to top off the tank with new media about once a year.

When You Might Need a Chemical Injection System

Sometimes, standard neutralizing filters just don't have the muscle for the job. If your water's pH is extremely low, or if your household has a really high water flow rate, a typical calcite filter can struggle to keep up. This is where you bring in the heavy artillery: a chemical injection system.

Think of it as the precision tool for serious water chemistry problems. Instead of letting water flow over a dissolving media, this system actively injects a neutralizing solution right into your water line. It gives you a level of control that passive filters simply can't match, making it the go-to for really challenging water.

How These Systems Work

At its heart, a chemical injection system is a proactive approach for when other methods of raising water pH just fall short. The system has a few key parts working together:

  • Solution Tank: This is where you mix your neutralizing agent—usually soda ash (sodium carbonate)—with water to create a liquid solution.
  • Dosing Pump: This small electric pump is the brains of the operation. It pulls the solution from the tank and injects a tiny, precisely measured dose into your main water line.
  • Flow Switch or Meter: This device tells the pump when to work. The moment you turn on a faucet, the switch kicks the pump on. Turn the faucet off, and the pump stops.

This setup delivers an incredibly accurate and consistent pH level throughout your home. It doesn't matter how much water you're using; the system adds the perfect amount of solution to keep everything balanced.

Scenarios That Call for an Injection System

While a neutralizing filter is great for mildly acidic water, an injection system becomes the clear winner in more extreme cases. This method is often the only real choice for homes with a water pH that drops below 5.5. With acidity that aggressive, a standard filter would dissolve its media so fast that maintenance would become a constant headache.

High water demand is another key factor. Large families or homes with high-flow fixtures can send water through a filter tank too quickly for the media to do its job. A chemical pump injects its solution instantly, ensuring complete neutralization no matter the flow rate.

Why Professional Calibration is So Important

Unlike a calcite filter that more or less self-regulates, a chemical injection system needs to be calibrated perfectly. The dosing pump's injection rate has to be fine-tuned based on your water's starting pH, your flow rate, and the concentration of your soda ash solution. Get this balance wrong, and you could overcorrect and send the pH way too high, leading to a bitter taste and nasty scale buildup. Because of this, professional setup and calibration are critical to get the chemistry just right.

Maintaining Your Balanced Water System
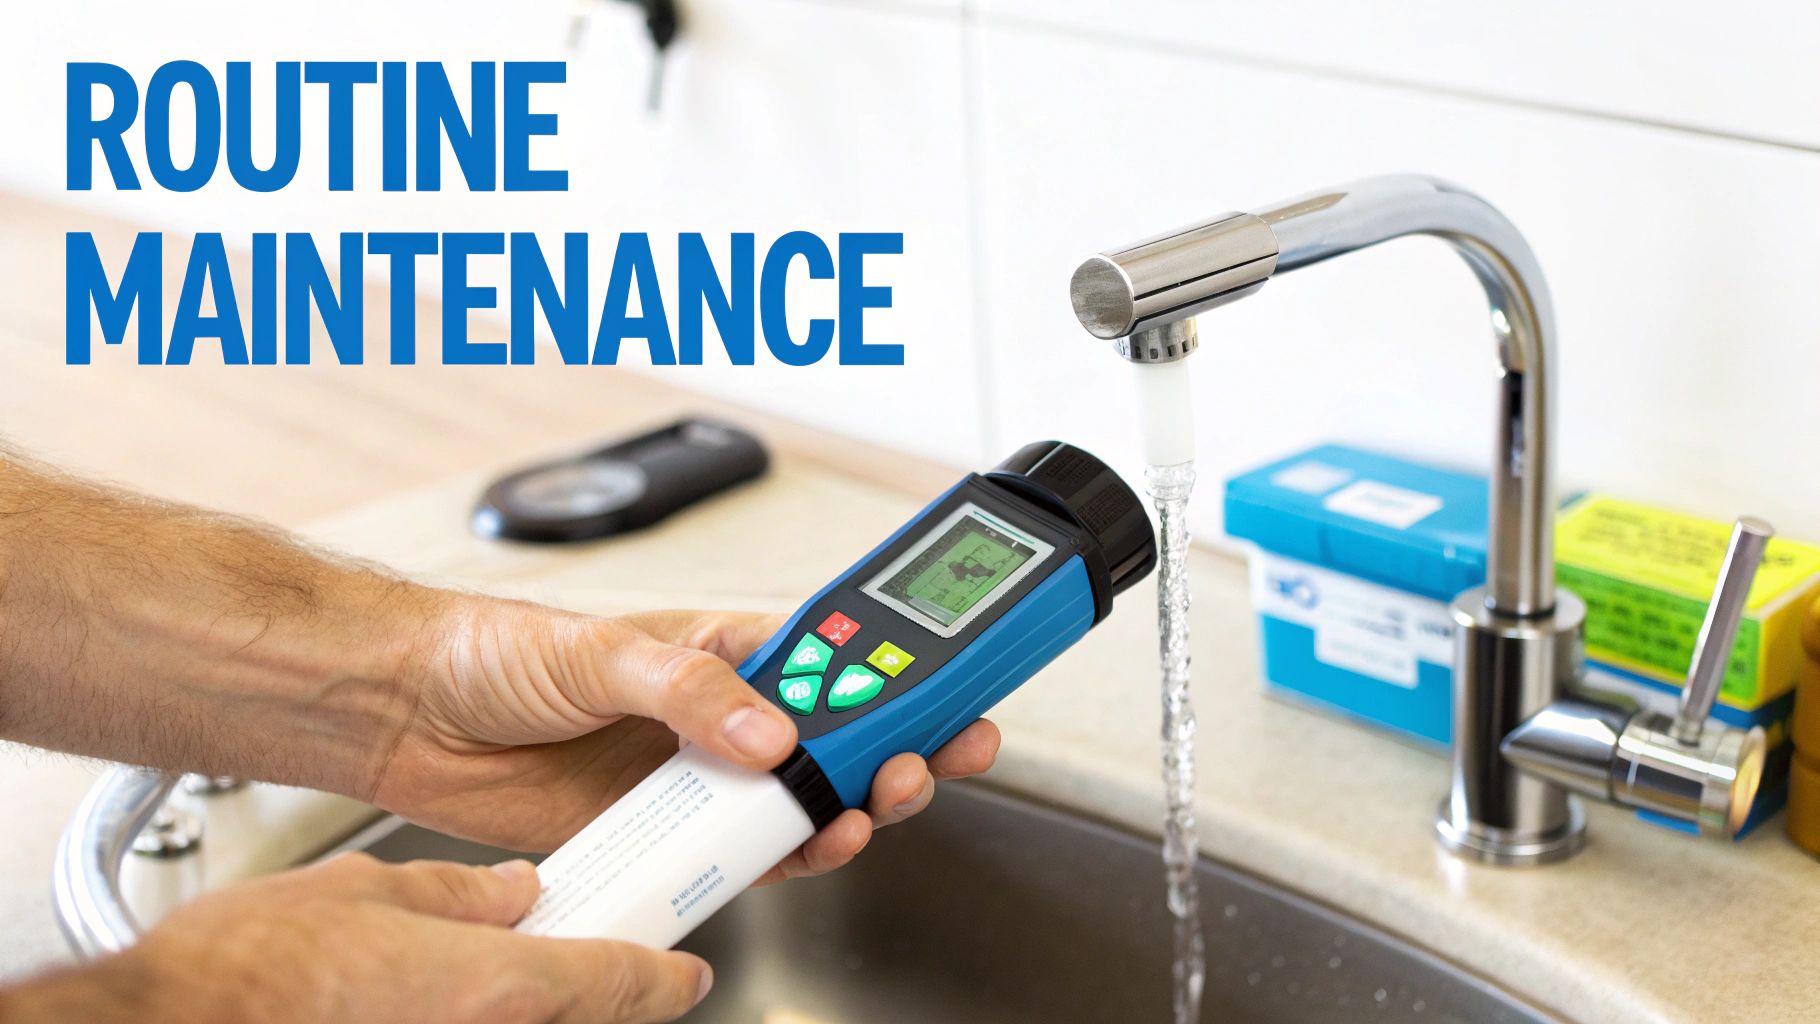
Hands hold a water testing device under a running kitchen faucet during routine maintenance.

Getting your home's water pH into that perfect neutral zone is a huge win, but the job isn't quite finished. Think of your water treatment setup like any other major home system—it needs a little ongoing attention to keep performing at its best. This isn't about creating more work. It's about a smart, simple maintenance plan that ensures your filtration investment continues to protect your home.

Creating a Realistic Testing Schedule

The golden rule of water filtration is to never just assume your system is working. Regular testing is the only way you know for sure, and it's how you catch small issues before they snowball into big problems.

  • Initial Follow-Up: Right after you install your new filter, test the water weekly for the first month to confirm the pH has stabilized.
  • Quarterly Checks: Once things look good, switch to testing once every three months. This is frequent enough to notice if your filter media is getting low or if your water source's chemistry has changed.
  • Annual Deep Dive: At least once a year, it's a good idea to do a more thorough test, especially if you notice any changes in water taste or see stains reappearing.

This regular feedback loop is your best defense against surprises.

Hands-On Maintenance for Your System

The actual maintenance you'll need to do depends on the kind of filter system you chose. For neutralizing filters that use calcite or a calcite/Corosex blend, your main job is topping off the media. This mineral bed is designed to slowly dissolve, so it will need to be replenished. A good rule of thumb is to check the media level every 6 months and plan to add more roughly once a year.

If you're running a chemical injection system, your routine will center around the solution tank. You'll have to mix a new batch of soda ash solution whenever the tank runs low. Getting into the habit of checking the level monthly is smart.

Don’t forget the simple stuff. No matter what system you have, give the filter tank or solution pump a quick visual inspection every few months. Look for leaks, listen for unusual noises, and just make sure everything looks clean and operational.

Watching for Signs of Trouble

Even with a great system, things can sometimes drift off-course. One of the most common issues is overcorrection, where the water becomes too alkaline (pH over 8.5).

Keep an eye out for these signs of overcorrection:

  • Water that feels slippery or almost slimy to the touch.
  • A bitter or "chemical" taste.
  • The return of scale—that white, chalky buildup on faucets and showerheads.

Another thing to be aware of is increased water hardness. Since calcite filters work by adding calcium minerals, they will naturally make your water harder. This is a normal trade-off. If the hardness becomes a nuisance, you might consider adding a water softener after your neutralizing filter for the ultimate one-two punch.

Interestingly, the principles we use to manage water chemistry in our homes are the same ones being considered for our oceans. Since pre-industrial times, global surface ocean pH has dropped from 8.11 to 8.04. One proposed solution involves adding calcium carbonate to boost alkalinity—the exact same principle your calcite filter uses. You can learn more about the science behind counteracting acidification on a global scale.

This ongoing vigilance ensures your journey of learning how to raise pH in water ends with a stable, long-term filtration solution, not a whole new set of problems.

Common Questions About Raising Water pH

Even with the best plan, you're bound to have some questions pop up when you're figuring out how to raise the pH in your water. Let's be honest, tweaking your home's water chemistry can feel a little intimidating. We'll walk through some of the most common questions we hear from homeowners to help you feel good about your next steps.

Can a Water Pitcher Filter Raise My Water's pH?

This is a big point of confusion for a lot of people. While you can find specialized (and usually pricey) alkaline water pitchers designed to bump up pH, your standard carbon pitcher from a brand like Brita isn't going to do it. The main job of those filters is to get rid of things like chlorine to make your water taste and smell better, not to fix a core chemistry issue like low pH.

Think of a regular pitcher filter like a strainer—it catches the big stuff. It just doesn't contain the right kind of filter media to actually neutralize acid. So, while it might improve the taste, it offers zero protection for your home’s plumbing against the corrosive damage that acidic water causes.

Will Raising the pH Make My Water Hard?

Yes, it often will, and it’s a really important trade-off to get your head around. The most common whole-house filtration fixes for low pH—calcite and Corosex filters—work by dissolving minerals like calcium carbonate and magnesium oxide into your water. Those happen to be the exact same minerals that cause water hardness.

This process is great for solving the acidity problem and saving your pipes. The flip side is you might start seeing the classic signs of hard water, like soap scum in the shower or chalky scale on your faucets. For most people, that's a much easier problem to deal with than corroding pipes.

Pro Tip: If the new hardness is driving you crazy, the best setup is to install a water softener after the pH neutralizing filter. That combination gives you the best of both worlds: water that’s non-corrosive and soft all through the house.

Is It Safe to Drink Water with Baking Soda Added?

For a one-off, small adjustment, adding a tiny, carefully measured pinch of baking soda to a pitcher of drinking water is generally considered fine. But it is absolutely not a healthy or sustainable long-term solution for your daily drinking water.

Doing this every day can add a lot of sodium to your diet, which is a real concern if you're watching your blood pressure. Even more critical, it’s just a spot treatment. It does absolutely nothing to protect all the plumbing that brings the water to your tap. A proper neutralizing filter that adds beneficial minerals like calcium is a far safer and more effective way to treat your whole home.

How Do I Know If My Water Is Too Alkaline?

Just like acidic water causes headaches, so does water that's swung too far the other way. If your pH is consistently testing above 8.5, you've likely overcorrected. The signs are usually pretty obvious and can become a whole new set of frustrations.

Here’s what you should be looking out for:

  • A slippery or almost "slimy" feel to the water when you wash your hands.
  • A bitter, unpleasant taste, which is distinct from the metallic taste of acidic water.
  • Scale buildup on fixtures and inside appliances, which can happen even faster with high alkalinity.
  • Your water heater seems less effective, often because scale has built up on the heating elements.

The only way to know for sure is to test your water again after your treatment system has been running. If you find the pH is way too high, you’ll need to adjust your system, which might mean dialing back the feed rate on a chemical injection pump or calling a pro to adjust your filter's bypass valve.


At Water Filter Advisor, we believe every homeowner deserves access to safe, clean, and balanced water. Navigating the world of pH correction and filtration can be complex, but our in-depth guides and unbiased reviews are here to help you make confident decisions. Explore our resources to find the perfect solution for your home at https://www.waterfilteradvisor.com.

How to Banish Cloudy Tap Water with the Magic of Home Filtration

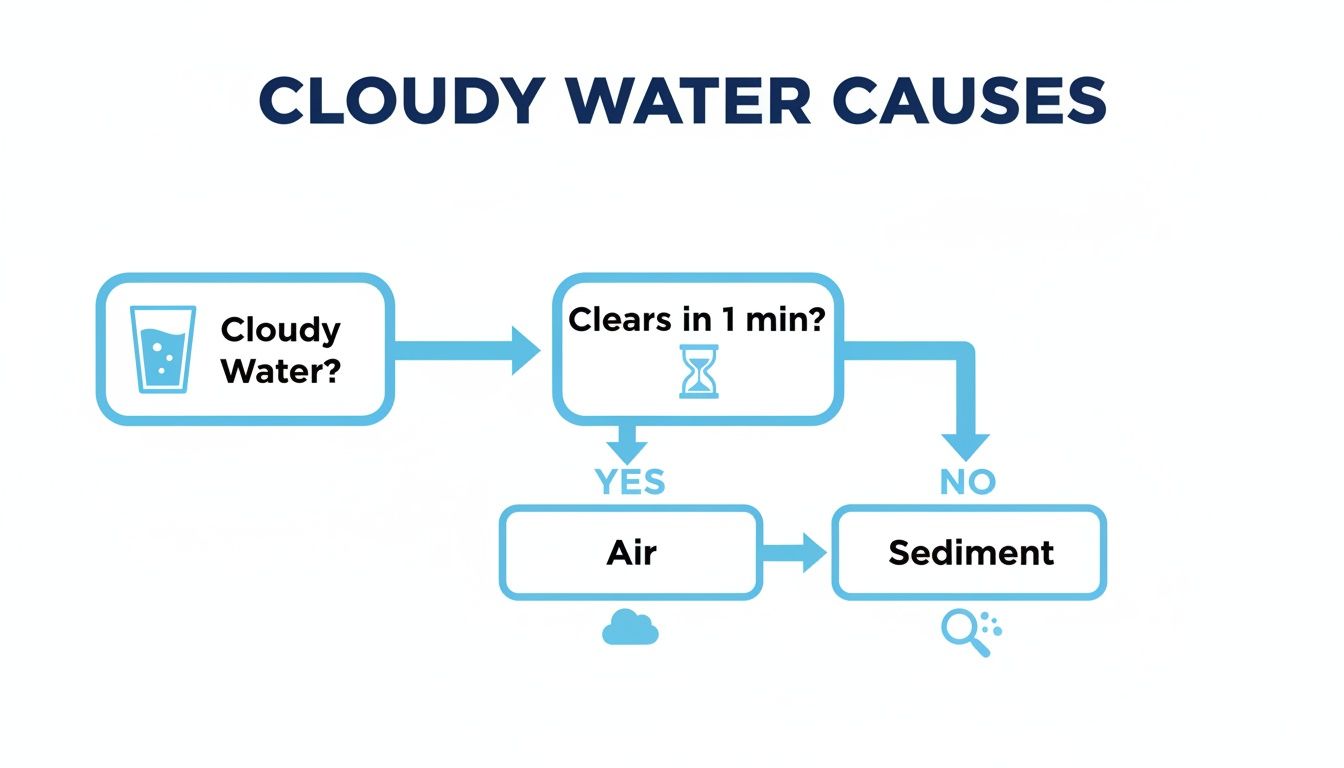
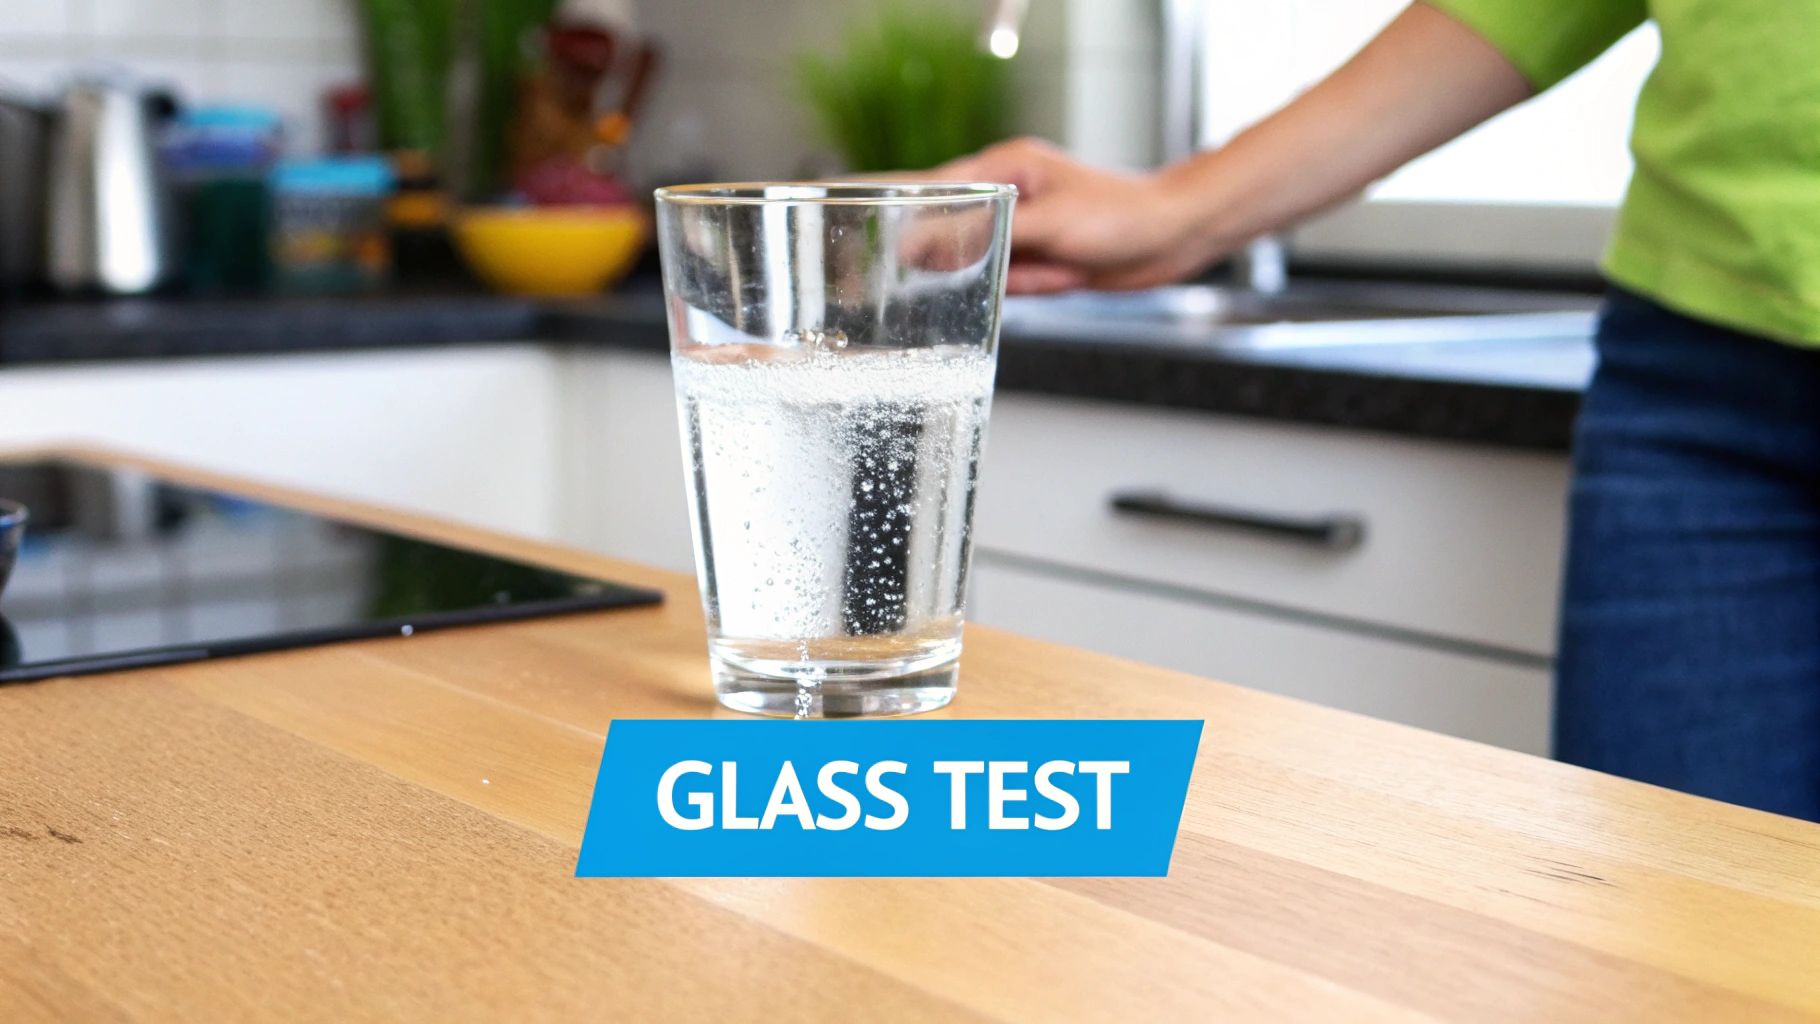
Stared into a glass of milky tap water and wondered if a tiny ghost has taken up residence in your pipes? Don’t panic! More often than not, it’s just tiny, harmless air bubbles throwing a party under pressure. The classic trick is to let a glass of water sit for a minute—if it magically clears from the bottom up, it’s just air, and you’re in the clear.

But if that ghostly haze sticks around, it’s pointing a cloudy finger at sediment. And that, my friend, means a home water filter might just be the hero your home needs.

What Is Your Cloudy Water Really Telling You?

It’s a little unsettling to turn on the faucet and get a glass of what looks like skim milk. Before you start planning a water exorcism, there's a quick one-minute diagnostic you can perform right in your kitchen. We call it the "glass test," and it's your first step to becoming a water wizard.

Just fill a clear glass with that cloudy concoction and let it sit on the counter. Watch it for about sixty seconds. If the cloudiness starts to vanish from the bottom up, what you're seeing is just aeration. It’s the water equivalent of a soda fizzing—completely harmless and usually caused by tiny air bubbles trapped by changes in water pressure or temperature.

Cloudy Water Quick Diagnosis Guide

This simple table is your cheat sheet to figuring out what's really going on with your water.

Symptom Most Likely Cause Filtration Fix
Clears from bottom up in 1-2 mins Aeration (Air Bubbles) No filter needed! Just let it sit before sipping.
Particles settle to the bottom Sediment (Sand, Silt, Rust) Your new best friend is a sediment filter.
Remains cloudy and doesn't clear Hard Minerals (Total Dissolved Solids) A water softener or Reverse Osmosis system is the answer.
Has a distinct color (brown, yellow) Corrosion or Contaminants Stop drinking immediately. Call a pro, this is a job for a specialized filter.

Basically, how the water behaves in that glass is the biggest clue to solving this cloudy mystery.

When Air Bubbles Are the Culprit

Air trapped in the pipes is a super common reason for cloudy water, especially after the city has done some maintenance or if there are big swings in water pressure. It's almost always due to aeration after utility crews work on a nearby water main. This is a temporary guest in your water, and no filter is required to show it the door.

When It's Something More

So, what if the water doesn't clear up? If you see tiny particles doing a slow-motion dance or settling at the bottom of the glass, your water is signaling a different issue. This lasting haze is often a sign of microscopic sediment, also known as total suspended solids (TSS).

These little party crashers can come from a few places:

  • Old Plumbing: Aging galvanized or copper pipes can start shedding tiny flakes of rust or minerals.
  • Water Main Work: Recent construction or flushing in your area can stir up sediment that’s been chilling in the municipal lines for years.
  • Well Water Issues: If you're on a private well, it's not uncommon for silt, sand, or clay to hitch a ride into your water supply.

This decision tree gives you a good visual of how to diagnose what's going on.

A flowchart explaining how to determine if cloudy tap water is caused by air or sediment.

The big takeaway here is that the one-minute glass test is your most reliable first step. It helps you quickly tell the difference between harmless air and sediment that a good filter can easily handle. Sometimes, the problem is closer to home, like in your building’s water tank. This practical guide on how to clean your water tank can be a huge help. Once you know the cause, you can find the right filtration fix.

Simple Fixes You Can Try Before Installing a Filter

Before you dive headfirst into the world of whole-house filtration systems, let's take a beat. More often than not, the fix for cloudy tap water is surprisingly simple and won't cost you much at all. A few easy checks can often solve the problem right away, no plumber required.

A glass of cloudy tap water on a wooden kitchen counter with 'GLASS TEST' overlay.

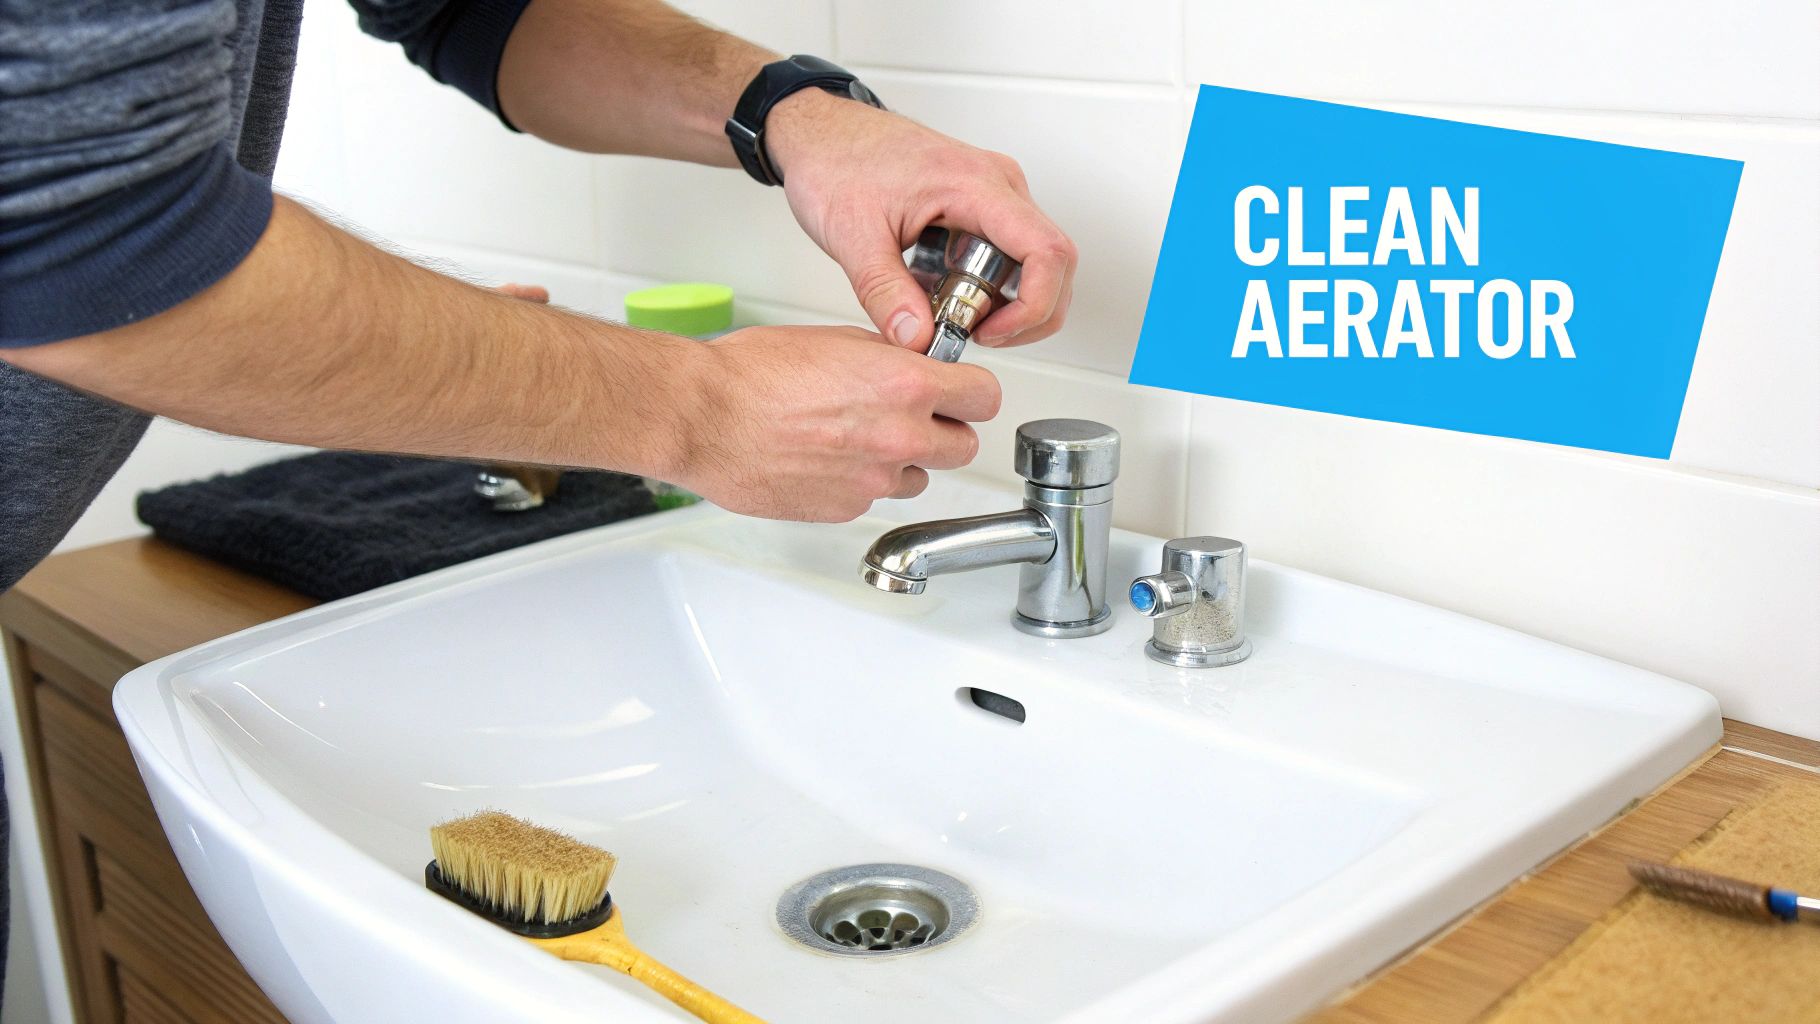
Sometimes, the issue isn't in your main water supply but in the last few inches the water travels. That little screen at the tip of your faucet, called an aerator, is a common culprit. It's there to catch sediment, but it can get clogged over time, causing both cloudiness and wonky pressure.

Tackle the Faucet Aerator First

Cleaning your aerator is a five-minute job that can make a world of difference. Most can be unscrewed by hand. If it's being stubborn, wrap a cloth around it and use pliers so you don't scratch the finish.

Once it's off, you’ll probably see a collection of tiny particles and mineral gunk. Here’s how to clean it out:

  • Disassemble: Carefully take the screen and washer apart. Pro tip: do this over a towel so you don’t lose any of the small pieces down the drain.
  • Scrub: An old toothbrush is your best friend here. Scrub away any loose debris from the screen.
  • Soak: For the really stubborn buildup, let the parts chill out in a small bowl of white vinegar for about 30 minutes.

This quick vinegar spa treatment is surprisingly effective—it can dissolve most of the scale causing the issue. After its soak, give it a final rinse, put it back together, and screw it back onto the faucet. Turn on the water and see if your cloudiness has vanished.

Flush Your Home Plumbing System

If you suspect the cloudiness is from sediment stirred up in your pipes (this happens a lot after your local utility does work), flushing the system is a fantastic next step. This process helps boot any loose particles sitting in your home's plumbing right out the door.

A full system flush is particularly effective for dislodging sediment that has been sitting stagnant in your pipes. It's a proactive step that can immediately improve water clarity without any special tools.

To flush your pipes properly, start by turning on all the cold water taps in your house. Begin with the faucet highest up (like a second-floor bathroom) and work your way down to the lowest one (like a basement sink). Let them all run for about 10-15 minutes. This creates a powerful, one-directional flow that helps carry sediment right out of your system.

So, you’ve cleaned the aerators and flushed the pipes, but the water still isn’t quite right. When the simple fixes don't cut it, it might be time to bring in the big guns for that cloudy tap water. A good home water filtration system isn't just a patch—it’s a long-term solution that ensures every glass you pour is crystal clear and delicious.

The trick is matching the filter to the problem. Think of it like this: you wouldn't use a butterfly net to catch a whale. The same logic applies here. Whether your issue is fine sediment, dissolved minerals, or something else entirely, there’s a system designed to handle it.

A person's hands are cleaning a faucet aerator over a white sink, with a brush nearby.

Let's break down the most common and effective options that turn cloudy water into a distant memory.

Whole-House Sediment Filters: Your First Line of Defense

If you're seeing cloudiness from sand, silt, rust, or other bits of debris in your water, a whole-house sediment filter is a fantastic investment. These systems are installed right where the main water line enters your home, acting as a bouncer for your entire plumbing system, letting only the pure H2O past the velvet rope.

It's about more than just clear drinking water. This filter protects your pipes, water heater, and appliances from sediment buildup that can shorten their lifespan and drain their efficiency. It’s a proactive approach that tackles the problem at the source, meaning clearer water from every single faucet in your house.

Pro Tip: When you’re shopping for a whole-house sediment filter, keep an eye on the micron rating. A lower number means it traps smaller particles. For most homes, a filter rated between 5 and 20 microns does an excellent job of knocking out the suspended solids causing that cloudy look.

Point-of-Use Filters for Targeted Clarity

Maybe the cloudiness isn't a house-wide Armageddon, or you're just looking for a more budget-friendly starting point. In that case, point-of-use (POU) filters are your go-to champs. They treat the water right where you use it most—typically the kitchen sink.

You've got a few solid choices here:

  • Faucet-Mounted Filters: These little gadgets attach right to your faucet and are a breeze to install. Most use activated carbon to trap sediment and make your water taste like it came from a mountain spring.
  • Under-Sink Filters: Hidden away under the kitchen sink, these multi-stage systems pack more of a filtration punch than faucet filters. They’re built to handle a wider range of issues that cause cloudy water.
  • Countertop Filters: These units sit on your counter and connect to the faucet, giving you an effective filtration solution without any permanent plumbing changes.

These are perfect for renters or anyone who wants to zero in on a specific tap without overhauling their home's plumbing.

Reverse Osmosis for the Ultimate Purification

When your cloudy water is from extremely fine particles or high levels of total dissolved solids (TDS), a reverse osmosis (RO) system is the undisputed heavyweight champion of filtration. RO technology uses a special membrane to push water through, leaving nearly everything else behind—including the microscopic particles that make water look hazy.

An RO system can remove up to 99% of dissolved solids, delivering water that's exceptionally pure and clear. They’re usually installed under the sink and dispense water from a separate, dedicated faucet. It’s more than an aesthetic upgrade; it’s peace of mind, knowing you're removing a huge spectrum of substances that simpler filters can't even touch.

Choosing the right filter can feel daunting, but breaking it down by the cause of your cloudy water makes it much simpler. To help you compare your options, here’s a quick-glance table.

Home Filtration Options for Cloudy Water

Filter Type Best For Maintenance Typical Cost
Whole-House Sediment Widespread cloudiness from sand, silt, rust, and larger particles. Replace cartridge every 3-12 months. $100 – $400+
Faucet-Mounted Minor sediment or taste issues at a single tap. Great for renters. Replace cartridge every 2-3 months. $20 – $50
Under-Sink Moderate sediment and other contaminants at the kitchen sink. Replace cartridges every 6-12 months. $100 – $300+
Reverse Osmosis (RO) Very fine particles, high TDS, and a broad range of contaminants. Replace multiple filters/membrane on a schedule (6 months to 2+ years). $150 – $600+

Ultimately, the best system is one that fits your home's specific needs and your budget.

If you want to explore these methods in more detail, you can find a lot of great, practical advice for your water filter needs on waterfilteradvisor.com.

When to Suspect a Deeper Plumbing Problem

Most of the time, cloudy water is a simple fix. But every once in a while, that persistent haze is your plumbing’s way of waving a red flag. Slapping a filter on it might clear up the water, but it won't touch the root cause. Knowing how to spot the real warning signs can save you a world of hurt—and a ton of cash—down the line.

Various water filter options, including blue, white, and black units, displayed on a kitchen counter next to a sink, with an overlay text 'Filter Options'.

If your cloudy water has a distinct reddish or brown tint, rust is almost certainly the culprit. This is a classic issue in older homes with galvanized steel pipes. After decades of use, these pipes start corroding from the inside, flaking off tiny bits of iron oxide that turn your water cloudy and can leave nasty stains on sinks and laundry. While a filter can catch this, it's a sign of a bigger plumbing issue.

Is Your Water Softener the Culprit?

A faulty water softener can also be the secret source of your cloudy water mystery. These systems are filled with tiny resin beads that do the heavy lifting of grabbing hard minerals. But if an internal part like a screen or valve gives out, those beads can escape into your pipes, clouding the water and clogging up your faucets.

Keep an eye out for these dead giveaways of a softener problem:

  • You spot tiny, amber-colored beads in your faucet aerators or settled at the bottom of a glass.
  • The water pressure suddenly takes a nosedive all over the house.
  • The softener seems to be running its regeneration cycle way more (or less) than it usually does.

If you see this happening, it’s time to get your softener looked at by a pro. Filtering the beads out is just a temporary fix for a failing unit.

Here’s a critical distinction to make: is the problem inside your house or coming from the street? If it's just one faucet, the issue is isolated. But if every tap is running cloudy, you're likely dealing with something affecting your main line, water heater, or the city's supply.

When the Problem Is Beyond Your Property Line

Sometimes, the source of cloudy, sediment-filled water is completely out of your hands. A water main break in the neighborhood can shove a massive amount of sand, silt, and other gunk into the supply lines, overwhelming even the best whole-house sediment filters.

This is a huge issue with aging infrastructure. If your water suddenly gets incredibly murky and you see utility crews working down the street, it’s a safe bet the two are related. The best thing to do is wait until the repairs are done, then give your home’s plumbing a thorough flush. If it’s still cloudy long after they’ve packed up, a whole-house filter is your best defense. For those in remote areas, persistent cloudiness might point to more complex issues where understanding off-grid plumbing considerations becomes really important.

Staying on Top of Filter Maintenance for Clear Water

Putting in a water filter is a fantastic first step to dealing with cloudy water, but it's definitely not a "set it and forget it" kind of deal. Think of it like changing the oil in your car—it’s the routine maintenance that keeps everything working the way it should. If you skip this part, your filter will eventually clog up, stop working effectively, and that cloudy water will be back for an encore performance.

A little bit of upkeep protects your investment and makes sure your water stays pristine. A forgotten filter doesn't just stop working; it can turn into a breeding ground for bacteria or, even worse, release a concentrated burst of all the gunk it's collected right back into your pipes. That could make your water quality worse than it was to begin with.

When to Swap Out Your Filter Cartridges

The single most important job is changing out old filter cartridges. Every filter has a different lifespan, so it's a good idea to mark your calendar the day you install a new one. Following the manufacturer's replacement schedule is the only way to prevent a drop in performance and keep your water tasting great.

Here’s a rough timeline for the most common types of filters:

  • Whole-House Sediment Filters: These are the workhorses of filtration and usually need a new cartridge every 3 to 12 months. The exact timing really depends on how much sediment is in your water. A noticeable drop in your home's water pressure is a dead giveaway that it's time for a change.
  • Under-Sink and Faucet Filters: Because they’re smaller and filter a lower volume of water, these need a bit more attention. Plan on swapping the cartridges every 2 to 6 months to keep them filtering at their best.
  • Reverse Osmosis (RO) Systems: These systems are a bit more involved since they have multiple stages. The sediment and carbon pre-filters will typically need to be replaced every 6 to 12 months, but the RO membrane itself is the long-hauler, often lasting 2 to 3 years.

A filter can only hold so much sediment and debris. Once it hits its limit, it can’t grab any more particles. Worse yet, the pressure of your water can actually force all that trapped gunk right through the filter and back into your clean water supply, undoing all the good work it did.

Keeping Your Whole-House System in Shape

If you’ve got a bigger whole-house system with a media tank—like an oxidizing filter or a backwashing sediment filter—then you need to know about backwashing. This is a crucial cleaning cycle where the system reverses the flow of water, flushing all the trapped sediment and contaminants out of the filter media and sending them down the drain.

Most modern systems handle this automatically, but it's smart to check the settings every so often. If you see cloudy water making a comeback, you can manually trigger a backwash cycle. It’s like hitting a reset button that cleans and revitalizes the filter media, extending its life and making sure it’s ready for whatever comes its way. A little proactive care is the best way to fix cloudy tap water for good and keep your system running smoothly.

Cloudy Water FAQs

After running through the usual suspects, you might still have a few lingering questions about cloudy tap water. Let's dig into some of the most common ones we hear from homeowners trying to get a permanent filtration fix.

Can a Faucet Filter Really Fix Cloudy Water?

Believe it or not, yes—for certain issues, a simple faucet-mounted filter can make a world of difference. If the cloudiness is from fine sediment or little rust particles kicked up inside your home's pipes, these filters are a great last line of defense right where you pour your glass.

Most of them use activated carbon, which is fantastic at grabbing the tiny particles that make your water look hazy. They won't solve a sediment problem for your whole house, but for a quick and budget-friendly fix for your drinking and cooking water, they're a great place to start.

Is Cloudy Well Water a Different Beast Than City Water?

It definitely can be. City water cloudiness often traces back to air in the lines or sediment from old municipal pipes. Well water, on the other hand, can have more complicated sources. Wells sometimes pull in super-fine silt, sand, or clay, which gives the water a murky look that never seems to clear up on its own.

For well owners, we usually recommend a two-pronged filtration attack:

  • Spin-Down Sediment Filter: This acts as a pre-filter to catch the bigger stuff like sand. The best part is you can just flush it clean.
  • Cartridge Sediment Filter: This is your second stage, trapping the finer silt and clay that sneaks past the first filter.

Using both in combination protects not just your drinking water but your entire home's plumbing and any other filters you have down the line.

If the Cloudiness Goes Away On Its Own, Do I Still Need a Filter?

That's a sharp question. If your water clears from the bottom up in a minute or two, that’s just air bubbles, and you don’t need a filter for that. But if the cloudiness is from sediment that eventually settles at the bottom of the glass, then yes, a filter is an excellent idea.

Here's why: just because the water in your glass clears doesn't mean the problem is solved. Those same particles are still coursing through your pipes, your water heater, and your appliances, causing slow but steady damage. Think of a whole-house sediment filter as an investment in protecting your entire plumbing system, not just a way to get a clearer glass of water.

Will a Water Softener Clear Up My Cloudy Water?

Probably not. In a weird twist, a water softener that's on the fritz can actually cause cloudy water if its resin beads start escaping into your pipes. Water softeners are built to remove dissolved minerals that cause hardness—things like calcium and magnesium—not the suspended particles that make water look cloudy.

If sediment is your main problem, a dedicated sediment filter is the right tool for the job. You'd actually install that filter before the water softener to keep it from getting clogged up with gunk, which helps both systems do their jobs properly.


At Water Filter Advisor, we're all about helping you get clear, great-tasting water right from your tap. Our detailed guides and honest reviews are here to help you navigate your options and find the perfect filtration system for your home. To see our reviews and compare systems, check us out at https://www.waterfilteradvisor.com.
Your Ultimate Guide to the Micron Water Filter Chart

A micron water filter chart is your secret weapon for transforming murky tap water into the crystal-clear stuff you actually want to drink. It helps you match common water contaminants—like sneaky sediment or nasty cysts—to the right filter needed to kick them to the curb. The logic is simple: a smaller micron rating means the filter's pores are tinier, allowing it to trap microscopic gunk and make your water cleaner, safer, and tastier.

This guide will demystify the numbers and help you pick a winner for your home.

Your Quick Guide to Micron Ratings

Diving into the world of water filtration can feel like you need a science degree, but it all comes down to one tiny unit of measurement: the micron. A micron, or micrometer, is just one-millionth of a meter. To put that in perspective, a single strand of your hair is a whopping 50 microns thick. Water filters are engineered with microscopic pores, and their micron rating tells you the size of the party crashers they can reliably block from your water supply.

This measurement is the key to picking the right filter for your house. Since different contaminants are different sizes, you have to match the filter’s micron rating to your specific water woes to get the job done right.

A Starting Point for Common Water Issues

Before we jump into a detailed chart, let's connect some common household water problems to the filter ratings that solve them. Think of this as your cheat sheet for clean water.

  • Cloudy Water or Visible Floaties: Seeing sand, rust, or other bits of grit swimming in your glass? You're dealing with larger sediment. A filter rated between 20 to 50 microns is your perfect bouncer at the door, tossing out the big troublemakers.
  • Fine Silt and Murkiness: If your water looks hazy but you can't see distinct particles, you need to bring in a specialist. A 5-micron filter is the industry go-to for clearing up this kind of cloudiness and is a fantastic way to protect your pipes and appliances from getting gunked up.
  • Health Concerns from Cysts: Microscopic villains like Giardia and Cryptosporidium can cause serious stomach trouble. To safely evict them, you absolutely need a filter rated at 1 micron or smaller. This is non-negotiable for your family's health.
  • Funky Tastes and Smells: While an activated carbon filter is the real hero for zapping weird tastes and odors (like chlorine from the city), a 5-micron pre-filter helps it work much better by clearing out the physical junk first.

The basic rule is simple: the smaller the micron number, the smaller the bad guys it can catch. Just be careful—if you have a ton of large sediment and you install a super-fine filter, it’s going to clog up faster than a highway at rush hour. This is why matching the filter to your actual water problem is so critical.

What a Micron Rating Really Tells You

When you're staring at a micron water filter chart, the numbers can feel a bit abstract. But a micron rating is a very real measurement that tells you just how good a filter is at physically stopping contaminants. A micron is simply one-millionth of a meter—a scale so small it's tough to wrap your head around.

Let's put it in perspective. A single human hair is about 50 microns thick. Your eye can't even see anything smaller than around 40 microns without a microscope. This means a standard 5-micron sediment filter is trapping particles eight times smaller than what you can even see, pulling fine silt and rust flakes right out of your water.

Nominal vs Absolute: The Two Types of Ratings

Here’s where things get important: not all micron ratings are created equal. This is a detail that trips up a lot of people. A filter’s performance is described in one of two ways: nominal or absolute. Getting this distinction right is crucial for picking a filter that actually protects your home.

Think of a nominal rating like a fishing net with slightly different-sized holes. It’s an average measurement. The filter is designed to catch a high percentage of particles at or above its stated size, but it's not a perfect guarantee.

  • Nominal Rating: This is what you'll find on most general-purpose filters. A 5-micron nominal filter will block most particles 5 microns and larger—usually about 85% of them. It’s great for getting rid of sediment and making water look clean.
  • Absolute Rating: This is a much tougher standard, like a fortress wall. An absolute-rated filter is guaranteed to remove at least 99.9% of particles at its specified micron size. This level of precision is non-negotiable for serious health-related contaminants.

For example, to be certified for removing nasty cysts like Giardia and Cryptosporidium, a filter must have an absolute rating of 1 micron. A nominal 1-micron filter just doesn't provide that same level of guaranteed safety.

Why This Distinction Matters for Your Home

Choosing between nominal and absolute isn't just about technical specs—it’s about matching the filter's real-world capability to your water problems. If you just want to stop sediment from clogging your dishwasher or making your water look cloudy, a cost-effective 5-micron nominal filter is a perfect choice. It gets the job done without choking your water flow.

But if your water source could be contaminated with microscopic pathogens, you really need to invest in a filter with a 1-micron absolute rating. It's the only way to be sure. Understanding this difference lets you see past the marketing hype and choose a filter based on proven performance, so the water in your home is as clean as you expect it to be.

The Complete Micron Water Filter Contaminant Chart

This is where the rubber meets the road. Think of a micron water filter chart as your roadmap, connecting the size of all those invisible contaminants in your water to the exact filter rating needed to stop them. Getting this right is the single most important step in picking a filter that actually solves your water problems.

This chart is your go-to reference. It’s laid out by contaminant size, starting with the bigger stuff you might see and working down to the microscopic organisms that can make you sick. Once you know how big a contaminant is, you can confidently pick a filter with the right-sized pores to block it.

First, a quick but crucial point: the difference between a "nominal" rating and an "absolute" rating. Nominal catches most particles, but absolute guarantees it.

As you can see, a nominal filter is more like a sieve. For anything that could impact your health, you need the solid barrier of an absolute filter.

Large Contaminants (Greater than 10 Microns)

These are the particles you can often see or feel—the stuff that makes your water look cloudy. They're the easiest to filter out and should always be the first thing you target in any filtration setup. Why? To keep them from clogging up the finer, more expensive filters downstream.

  • Sand, Silt, and Rust Flakes: Ranging from 20-100+ microns, these often come from old pipes, well water, or even a disturbance in the city water main. A simple 20-50 micron sediment filter is your perfect first line of defense.
  • Scale and Debris: Usually around 10-40 microns, these are the mineral bits and other gunk that clog up your faucets and showerheads. A 10-20 micron filter will handle these effectively.

Medium Contaminants (1 to 10 Microns)

Once you’ve removed the big stuff, the next step is targeting the finer particles that cause that persistent cloudy look. This is the sweet spot for most general-purpose home water filters.

A 5-micron filter is pretty much the industry standard for getting crystal-clear water throughout your house. It does a fantastic job of grabbing fine silt and suspended solids that make water murky. It's a great balance, giving you solid filtration without killing your water pressure.

Small and Microscopic Contaminants (Less than 1 Micron)

Now we get into the critical zone for health and safety. The contaminants here are invisible, but they can pose serious health risks. Removing them requires a filter with a verified absolute micron rating. No exceptions.

Capturing nasty protozoan cysts like Giardia and Cryptosporidium is non-negotiable. These bugs are typically 1-5 microns in size and require a filter with an absolute rating of 1 micron to guarantee they're gone.

For even more peace of mind, a 0.5-micron filter adds another layer of security. It's even better at reducing cysts and some of the larger bacteria. Just be aware that this tighter filtration might slow down your water flow a bit more.

Detailed Contaminant Size and Required Filtration Chart

To make it simple, here’s a quick-reference chart breaking down common contaminants and what it takes to get rid of them.

Contaminant Typical Size (Microns) Common Sources & Effects Recommended Absolute Micron Rating
Sand & Silt 20 – 2,000 µm Well water, old pipes. Causes cloudy water and clogs appliances. 20 – 50 µm
Rust Flakes 10 – 50 µm Corroding iron pipes. Leads to discolored, metallic-tasting water. 10 – 20 µm
Fine Sediment 5 – 10 µm Municipal water mains, runoff. Creates murky or hazy water. 5 µm
Giardia & Crypto 1 – 5 µm Animal waste, contaminated water sources. Cause severe gastrointestinal illness. 1 µm (Absolute)
Most Bacteria 0.2 – 2 µm Contamination in wells or pipes. Can cause a range of diseases. 0.5 µm (or lower)

This table lays it all out, helping you match your water quality concerns with the right filter solution.

Choosing the Right Micron Filter for Your Home

Now that you have a detailed micron water filter chart in hand, you're set to make a smart choice. The real key is matching the filter's performance directly to the specific problems in your home's water. It all starts with getting to know what's actually floating around in there.

First things first: figure out your water source. If your home is on a municipal supply, you can usually get a Consumer Confidence Report (CCR) from your local utility. For those of us on well water, however, a professional lab test is non-negotiable. You need to know exactly what you're up against, whether it's sediment, iron, or bacteria.

The Power of Multi-Stage Filtration

A rookie mistake we see all the time is trying to solve every problem with a single, ultra-fine filter. That's a surefire way to get clogged filters and a serious drop in water pressure. A far better approach is multi-stage filtration, where you layer filters from the coarsest down to the finest.

It’s a bit like setting up a security team. The bigger micron filter is your first line of defense, catching all the heavy-duty sediment before it gums up the works. This frees up the finer, more expensive filters downstream to do their real job, like zapping cysts or getting rid of bad tastes.

  • Pre-Filter (20-50 microns): This is your system’s workhorse. It grabs sand, rust, and other large debris, protecting everything that comes after it.
  • Secondary Filter (5 microns): This filter steps in to catch finer silt and sediment that managed to sneak past the pre-filter, leaving your water looking crystal clear.
  • Polishing Filter (1 micron or less): This is the final boss. It targets microscopic stuff like Giardia and Cryptosporidium for total peace of mind.

This layered setup doesn't just give you cleaner water; it also makes each filter cartridge last longer, which saves you money and a lot of headaches down the road.

Balancing Filtration with Water Flow

Here’s the thing about water filtration: there's always a trade-off. The smaller the micron rating, the more it's going to restrict your water flow. A 0.5-micron filter does an incredible job, but it also puts up more resistance, which can lead to a noticeable drop in pressure at the tap.

This is especially true if your water has a lot of sediment or if your home’s water pressure is low to begin with. The goal is to hit that sweet spot where you're knocking out the contaminants you need to without turning your powerful shower into a disappointing trickle.

Key Takeaway: Don't just grab the lowest micron rating you can find. The "best" filter is the one that targets your specific contaminants without killing your home's water pressure.

If you're dealing with a complex setup or just want to be certain you're making the right call for your home, it never hurts to consult a qualified plumber.

People are more aware of water quality than ever, and that's pushing filtration technology forward in a big way. The global market for water filtration systems—which includes micron filters built to remove particles from 0.5 to 10 microns—was valued around USD 14.23 billion in 2025. By 2034, that number is expected to jump to USD 35.18 billion, showing just how much people want safe, clean drinking water. This really underscores how vital good home filtration has become.

For more helpful tips and information, you can check out our general water filter advice.

Understanding Filter Types and Certifications

A micron chart is a great starting point, but the real magic happens when you connect those numbers to the actual filters on the shelf. The filter's material and how it's built have a massive impact on its performance. Knowing these differences is what separates a good purchase from a great one.

Remember, not all filters are created equal, even if they have the same micron rating.

Different filter types are designed for very different jobs. For instance, a basic spun polypropylene sediment filter is fantastic at catching dirt and holds a lot of gunk, making it a super cost-effective first-stage filter. But a pleated polyester filter, on the other hand, gives you way more surface area, which means it lasts longer and doesn't choke off your water flow as quickly.

Common Household Filter Technologies

Let's break down the most common filter types you'll run into. Each has its own typical micron range and is built to tackle specific problems. This is how you go from a chart of numbers to a real-world solution for your home.

  • Sediment Filters: These are your workhorses, the first line of defense against physical gunk like sand, rust, and silt. They usually have a rating between 1 and 50 microns and are absolutely crucial for protecting the more expensive, finer filters you might have down the line.
  • Carbon Block Filters: Famous for making water taste and smell great. These filters use activated carbon to absorb chemicals like chlorine. They also work as a physical filter, often rated between 0.5 and 10 microns, which is good enough to snag some nasty cysts.
  • Ceramic Filters: These have a super-fine pore structure, typically 0.2 to 1 micron (and that's an absolute rating). This makes them champs at removing bacteria and cysts without chemicals, though you'll often see a slower flow rate with these.

The need for good filtration is blowing up globally, mostly because urbanization and industry are dirtying our water sources. The water filter market was valued at an estimated USD 15.88 billion in 2024 and is expected to jump to USD 26.42 billion by 2032. This just goes to show how much we rely on technologies like micron filters to keep our water clean. You can dig into more details about this growing market on Data Bridge Market Research.

Decoding Filter Certifications

So, how do you really know if a filter does what the box says it does? That’s where third-party certifications come in. They’re an independent seal of approval that proves a filter meets certain standards, cutting right through all the marketing fluff.

The gold standard in water filtration is NSF International (which used to be the National Sanitation Foundation). If you see an NSF mark on a product, it means it’s been through the wringer with testing to meet serious public health standards.

When you're shopping, keep an eye out for these two key certifications:

  • NSF/ANSI 42 Aesthetic Effects: This one confirms a filter can reduce things that affect taste and odor, like chlorine. It’s all about making your water more pleasant to drink.
  • NSF/ANSI 53 Health Effects: This is the big one. It's a much tougher standard to meet. A filter with this certification has been proven to reduce specific health-related contaminants like lead, mercury, and cysts such as Cryptosporidium and Giardia.

When you see a filter is certified to NSF/ANSI 53 for cyst reduction, you can trust it's been tested and verified to remove those harmful little critters. That independent proof gives you real peace of mind, turning marketing claims into proven protection for your family.

Keeping Your Filters Working Their Best

So, you've picked out the perfect filter system using a micron water filter chart. Great! But the job isn't done. The real secret to clean water is keeping that system in top shape. Over time, every filter cartridge gets loaded down with all the gunk it's been pulling out of your water, and eventually, it just can't keep up.

Forgetting to swap out an old filter is probably the biggest mistake homeowners make. A clogged filter doesn't just stop working; it can actually turn into a breeding ground for bacteria. Suddenly, your water quality could be even worse than when you started.

How to Tell When Your Filter is Clogged

Your house will usually give you a few dead giveaways that a filter needs changing. The most common sign is a sudden drop in water pressure. If your shower head starts to feel a bit weak or the kitchen faucet isn't flowing like it used to, a clogged filter is the first thing you should check.

You might also notice a change in the water itself. Does it taste or smell off? Maybe that chlorine scent is back, or the water looks a little cloudy. That's your filter telling you it's officially reached its limit.

Crucial Tip: Don't wait for your water to taste bad before changing a filter. The best move is to stick to a regular schedule to keep your water consistently clean and safe.

A Simple Maintenance Routine That Works

Keeping up with filter changes is easy once you have a routine. Every filter has a different lifespan, so you'll want to check the manufacturer's guidelines for each part of your system.

  • Sediment Pre-filters (5-50 microns): These guys catch the big stuff, so they usually need to be replaced every 3-6 months.
  • Carbon Block Filters (0.5-10 microns): These typically go for 6-12 months, but it really depends on how much chlorine is in your water and how much you use it.
  • Specialty Filters (e.g., Ceramic): Some of these can be cleaned and put back in, but you have to follow the specific instructions for your model.

Just set a reminder on your phone or use a marker to write the replacement date right on the filter housing. Easy. And if you’re dealing with flow issues all the time, it might be worth learning how to fix water pressure for your whole house.

This kind of simple home maintenance is part of a much bigger picture. The global market for water purification systems was valued at over USD 56.38 billion in 2024, and it's only getting bigger. As people focus more on health, the demand for solid home filtration just keeps growing. Regular upkeep ensures your system gives you the performance you paid for.

Common Questions About Micron Filters

It's one thing to look at a micron chart, but another to apply it to your own home. Let's tackle some of the most common questions people ask when they're trying to pick the right filter.

This is your quick guide to getting it right.

What’s the Best Micron Filter for Well Water?

There’s no magic number here, because what works for one well might not work for another. It all comes down to what's actually in your water. That said, a great place to start for most well water setups is a multi-stage system.

A typical approach looks like this:

  1. Start with a 20-micron pre-filter to catch the big stuff—sand, rust, and heavy sediment.
  2. Follow it up with a 5-micron secondary filter to handle the finer silt and make your water clearer.

This setup does two things: it protects the more delicate filters further down the line and helps keep your water pressure from dropping. Always, always get your well water tested first. That's the only way to know if you also need to tackle things like bacteria or heavy metals.

Can a 5-Micron Filter Get Rid of Bacteria?

Nope. A 5-micron filter is way too coarse to stop bacteria. Most common bacteria measure between 0.2 and 2 microns, so they'll sail right through a 5-micron filter.

While that filter is great for sediment, it does nothing for microbial contaminants. To actually remove bacteria, you need an absolute-rated filter of 0.5 microns or less. For total peace of mind, most folks pair their sediment filters with an ultraviolet (UV) purification system, which is designed specifically to neutralize bacteria and viruses.

Will a Finer Micron Filter Lower My Water Pressure?

Yes, almost certainly. This is the biggest trade-off in water filtration. The tighter the filter media (i.e., the smaller the micron rating), the harder your water has to work to get through. This is called pressure drop.

A 1-micron filter will cause a much bigger drop in pressure than a 20-micron filter. If you already have low water pressure (anything under 40 PSI), slapping on a super-fine filter without a booster pump might leave you with a disappointing trickle from your showerhead.

How Often Should I Change My Filter?

This really depends on three things: the micron rating, the type of filter, and the quality of your incoming water. But for a typical home, here are some solid guidelines:

  • 20-50 Micron Pre-Filters: Plan on swapping these out every 3-6 months. They catch the most gunk, so they clog up the fastest.
  • 5-10 Micron Secondary Filters: These usually last 6-9 months.
  • 1 Micron or Carbon Block Filters: You can often get 9-12 months out of these.

Your best clue, though, is your water pressure. The moment you notice the flow starting to weaken, it's time for a change, no matter what the calendar says. Don't wait until the water looks or tastes off—by that point, the filter has already failed.


Ready to find the perfect filtration solution for your home? The experts at Water Filter Advisor provide unbiased reviews, in-depth guides, and practical advice to help you achieve safer, better-tasting water. Explore our resources and make your next water filter decision a confident one at https://www.waterfilteradvisor.com.
How to Banish Hard Water for Good: Your Guide to Removing Calcium

If you’re waging a never-ending war against crusty white buildup on your faucets and fixtures, you've met the villain of this story: calcium. The two most powerful heroes in the fight against hard water are a whole-house water softener or a targeted reverse osmosis (RO) system. Think of them as the ultimate tag team for stopping that chalky limescale from ever showing up to the party.

Your Quick Guide to Solving Hard Water Nightmares

Let's be real—if your shower doors look permanently cloudy and your soap stubbornly refuses to lather, you’ve got hard water. The culprit is an excess of dissolved calcium, and it’s more than just an eyesore. Over time, that scaly buildup is like cholesterol for your home's arteries, choking the life out of your appliances and clogging your pipes.

It's a frustrating, soap-scum-covered problem, but you don't have to live with it. I've seen countless homeowners reclaim their homes from the clutches of calcium by choosing the right filtration strategy. And it almost always boils down to one of two battle plans.

Choosing Your Filtration Strategy

The first, and most comprehensive, fix is a whole-house water softener. This bad boy gets installed right where your main water line enters your house, treating every single drop you use. It works through a clever bit of chemistry called ion exchange, where it essentially tricks the "hard" calcium and magnesium ions into swapping places with "soft" sodium ions. This protects your entire plumbing infrastructure—from the water heater you never see to the coffee maker you use every morning.

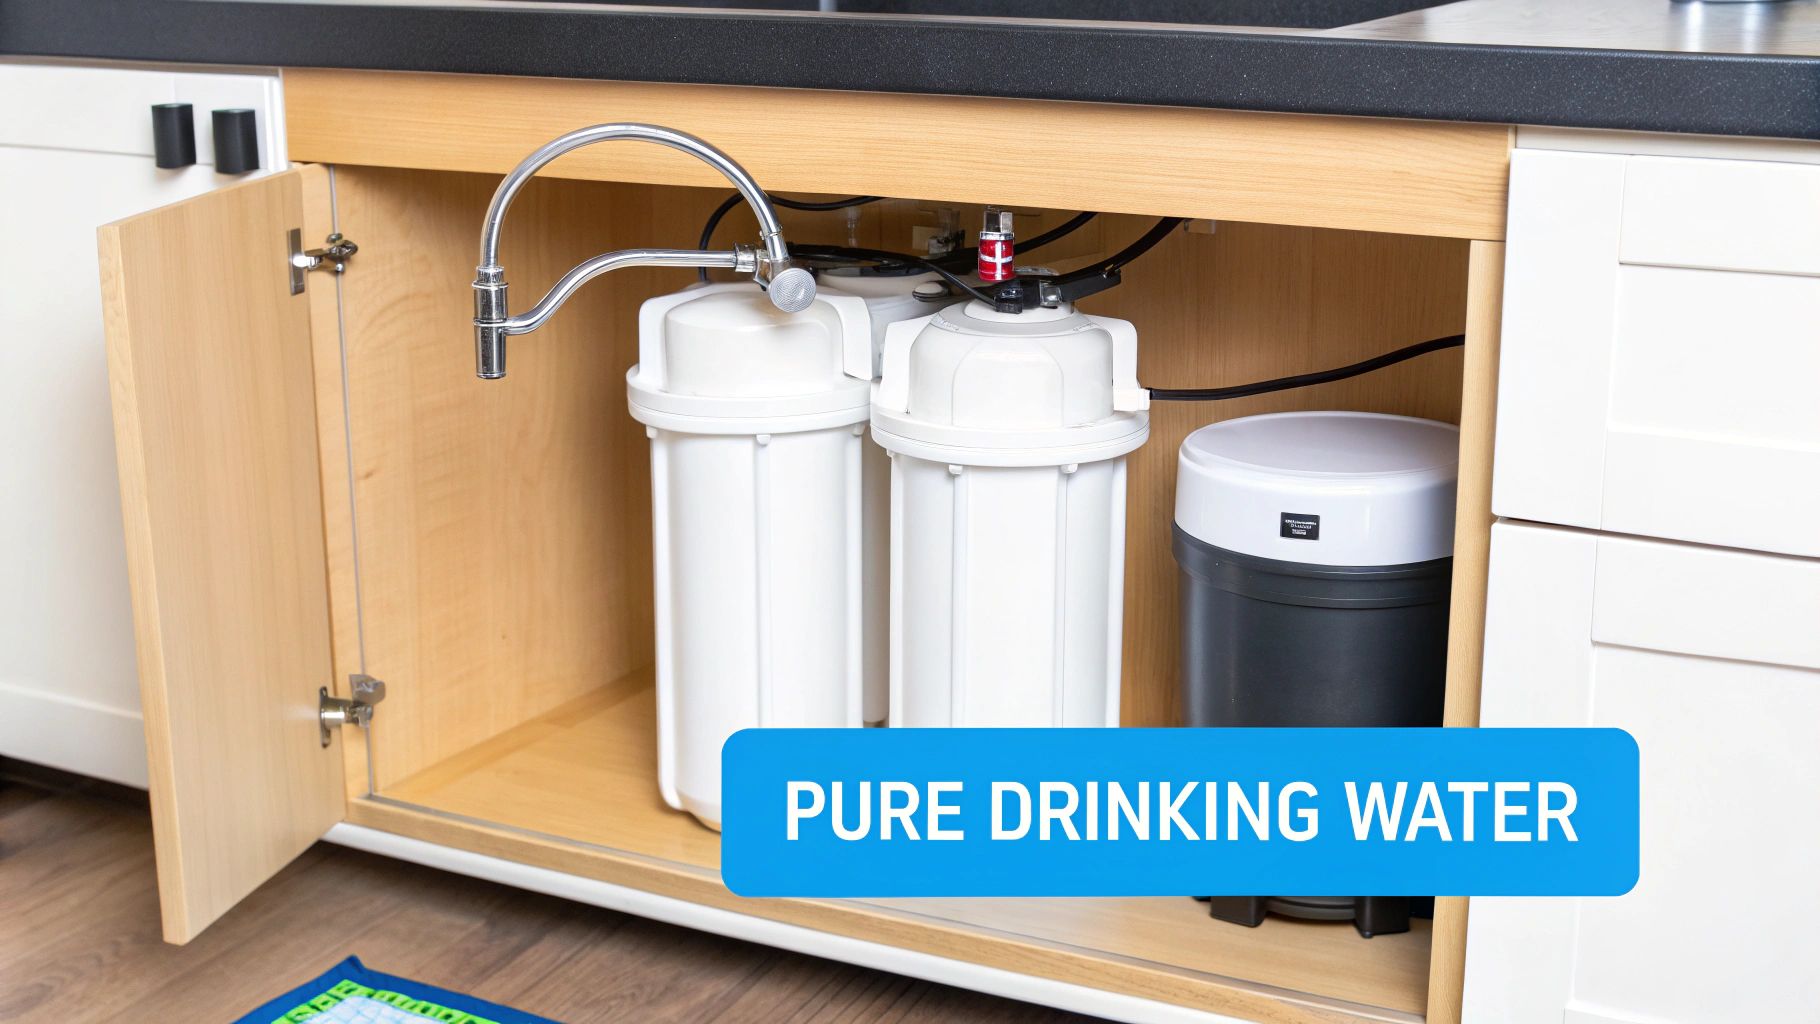
Now, if your main headache is the funky taste of your tap water or the film on your cooked veggies, a point-of-use system like reverse osmosis is a fantastic option. These are typically installed right under the kitchen sink. An RO system is the overachiever of water filters, pushing water through a special membrane that strips out a ridiculously high percentage of contaminants—calcium included. For more in-depth info, you can find tons of professional advice on water filtration to help you weigh your options.

The decision often comes down to this: Are you looking to protect your entire home's plumbing and appliances, or do you crave ultra-pure water at a specific tap for drinking and cooking?

This simple decision tree can help you visualize which path is right for your home.

A flowchart showing the process of calcium removal from water, involving a water softener.

As you can see, the scope of your problem—whether it’s a house-wide menace or a kitchen-specific annoyance—points you directly to the most logical solution. While these systems prevent future issues, if you're already dealing with existing spots on your glass surfaces, a good guide on how to get hard water spots off windows can help you clean up the existing mess.

Comparing Calcium Removal Methods at a Glance

To make things even clearer, I put together a quick table comparing the top methods for kicking calcium to the curb. It breaks down what each is best for, the typical cost you can expect, and the main benefit you'll get.

Method Best For Typical Cost Range Primary Benefit
Water Softener Whole-house protection for all pipes and appliances $800 – $3,000+ Prevents limescale buildup everywhere in the home
Reverse Osmosis Purifying drinking and cooking water at a single tap $250 – $900 Removes up to 99% of all dissolved solids for pure taste

This table gives you a solid starting point. Think about your budget and your biggest hard water frustration, and the right choice should become pretty clear.

Pinpointing Your Home's Hard Water Severity

Before you can declare war on hard water, you need to know the strength of your enemy. Guessing at your water’s hardness is like trying to bake a cake without a recipe—you might end up with something edible, but it’s definitely not going to be perfect. Nailing down the specifics is the essential first step to choosing the right filtration system for your home.

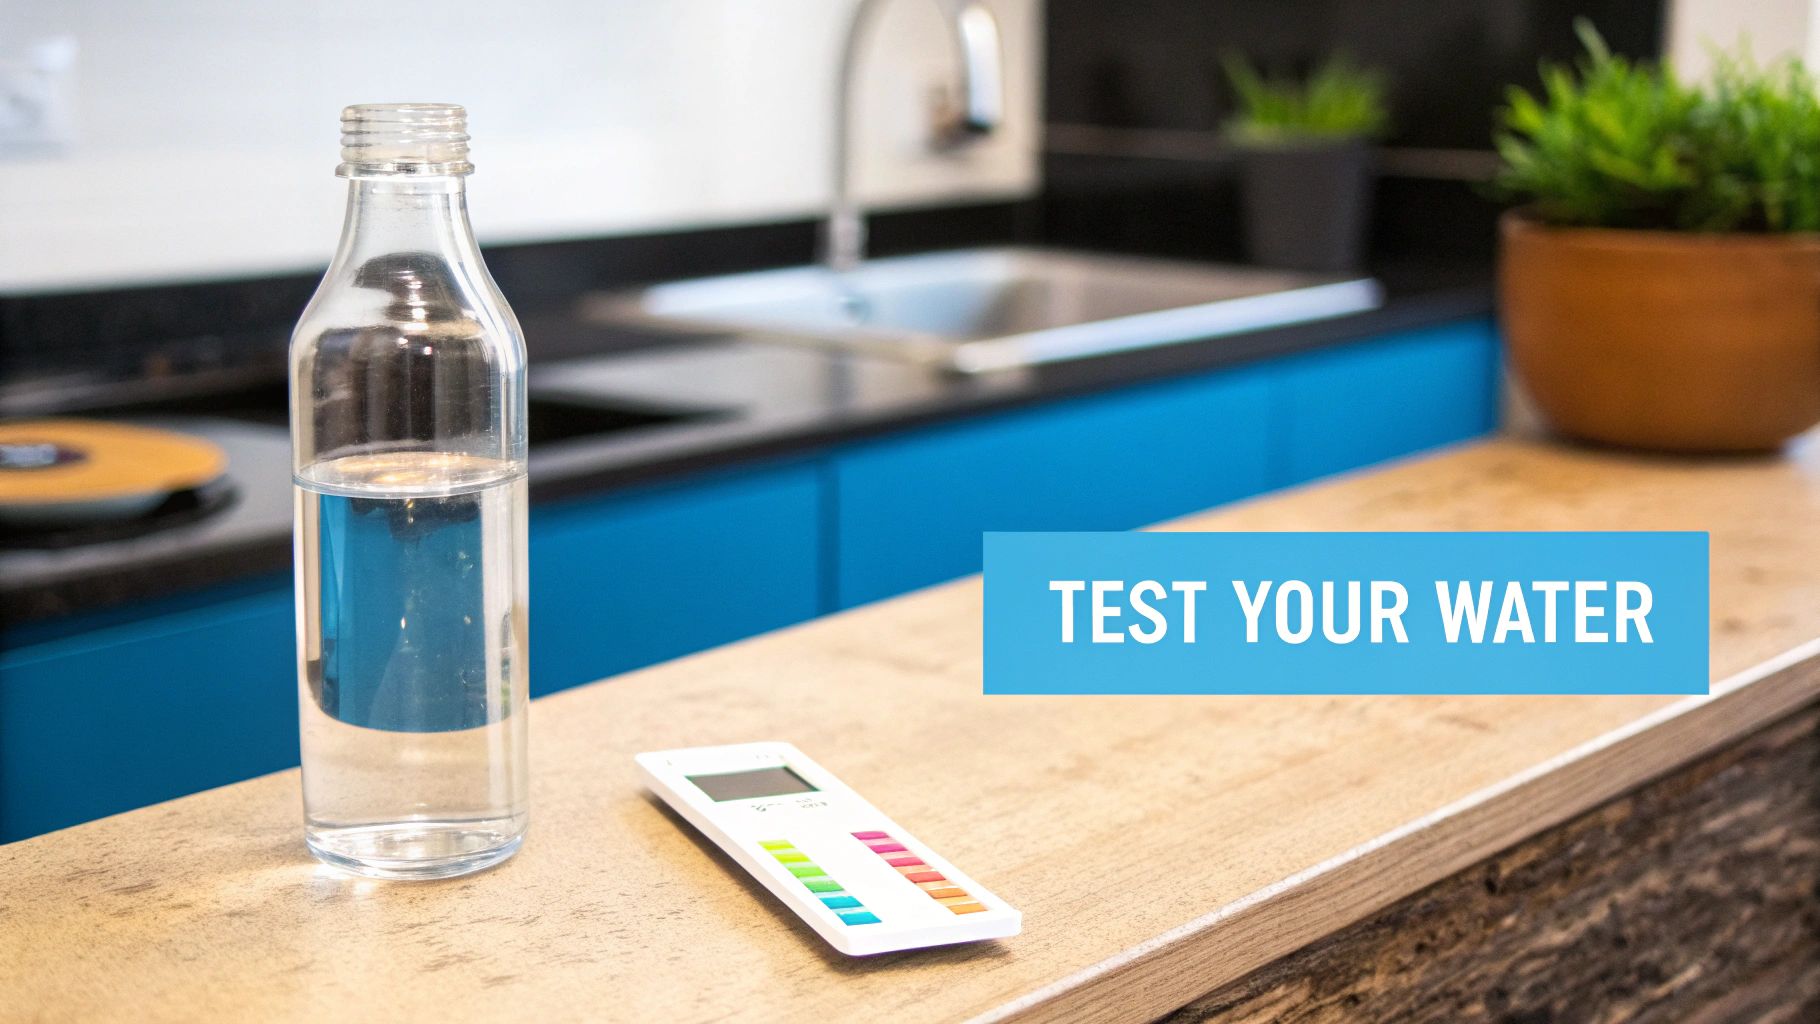
The good news? You don't need a Ph.D. in chemistry to figure this out. A simple at-home test can give you a pretty good idea of what's going on with your water, confirming your suspicions before you commit to a solution.

A water bottle and a testing strip on a kitchen counter with a 'Test Your Water' banner.

The Simple Soap Suds Test

Think of this as your five-minute hard water detective work. It's not perfectly scientific, but it’s a surprisingly good indicator that can tell you if you're on the right track.

Here's how to do it:

  1. Grab a clean, clear water bottle with a cap that seals tightly.
  2. Fill it about one-third of the way with your cold tap water.
  3. Add 10 drops of a pure liquid soap, like a basic Castile soap. Don't use detergents; many are designed to create suds even in the hardest water.
  4. Shake it like you mean it for about 15 seconds.

Now, observe the results. If the bottle is brimming with fluffy, rich suds and the water underneath is clear, congratulations—you likely have soft water. But if you’re looking at a sad, scummy film with just a few pathetic bubbles and cloudy water, you've got hard water. The soap has reacted with the calcium to create gross soap scum instead of a luxurious lather.

Getting a Precise Reading with Test Kits

The soap test tells you there's a problem, but it doesn't tell you the scale of it. To properly size a water softener or select the right filter, you need an actual number. That’s where water hardness test kits come in—they’re cheap, easy to find, and even simpler to use.

Most kits come with test strips that you just dip into a sample of your tap water. After a moment, the strip changes color. You then match that color to a chart to get a specific measurement of your water's hardness.

Pro Tip: For the most accurate reading, test cold water straight from a faucet that has no existing filtration. Your outdoor spigot or a utility sink is perfect. This gives you a true baseline of the water coming into your house before it's been treated in any way.

Understanding the Numbers: GPG vs PPM

Your test kit will show results in one of two units: grains per gallon (GPG) or parts per million (PPM). Don't let the terms intimidate you; they're just different ways of measuring the exact same thing.

  • Parts Per Million (PPM): This is the same as milligrams per liter (mg/L). It simply tells you how many milligrams of calcium carbonate are present in one liter of water.
  • Grains Per Gallon (GPG): This is the industry standard for water softeners in the U.S. For context, one GPG is equal to 17.1 PPM.

If your kit only shows a PPM reading, just divide that number by 17.1 to get your GPG. That GPG number is the golden ticket you'll need when you start shopping for a water softener.

The U.S. Geological Survey uses these numbers to classify water hardness, giving us a clear set of benchmarks.

Water Hardness Level Grains Per Gallon (GPG) Parts Per Million (PPM)
Soft 0 – 3.5 0 – 60
Moderately Hard 3.5 – 7.0 61 – 120
Hard 7.0 – 10.5 121 – 180
Very Hard Over 10.5 Over 180

Once you have your GPG, you’ve got the most critical piece of the puzzle. Generally, if your water tests at 7 GPG or higher, investing in a system to remove calcium is going to make a noticeable, life-improving difference in your home.

Whole-House Water Softeners: The Ultimate Calcium Defense

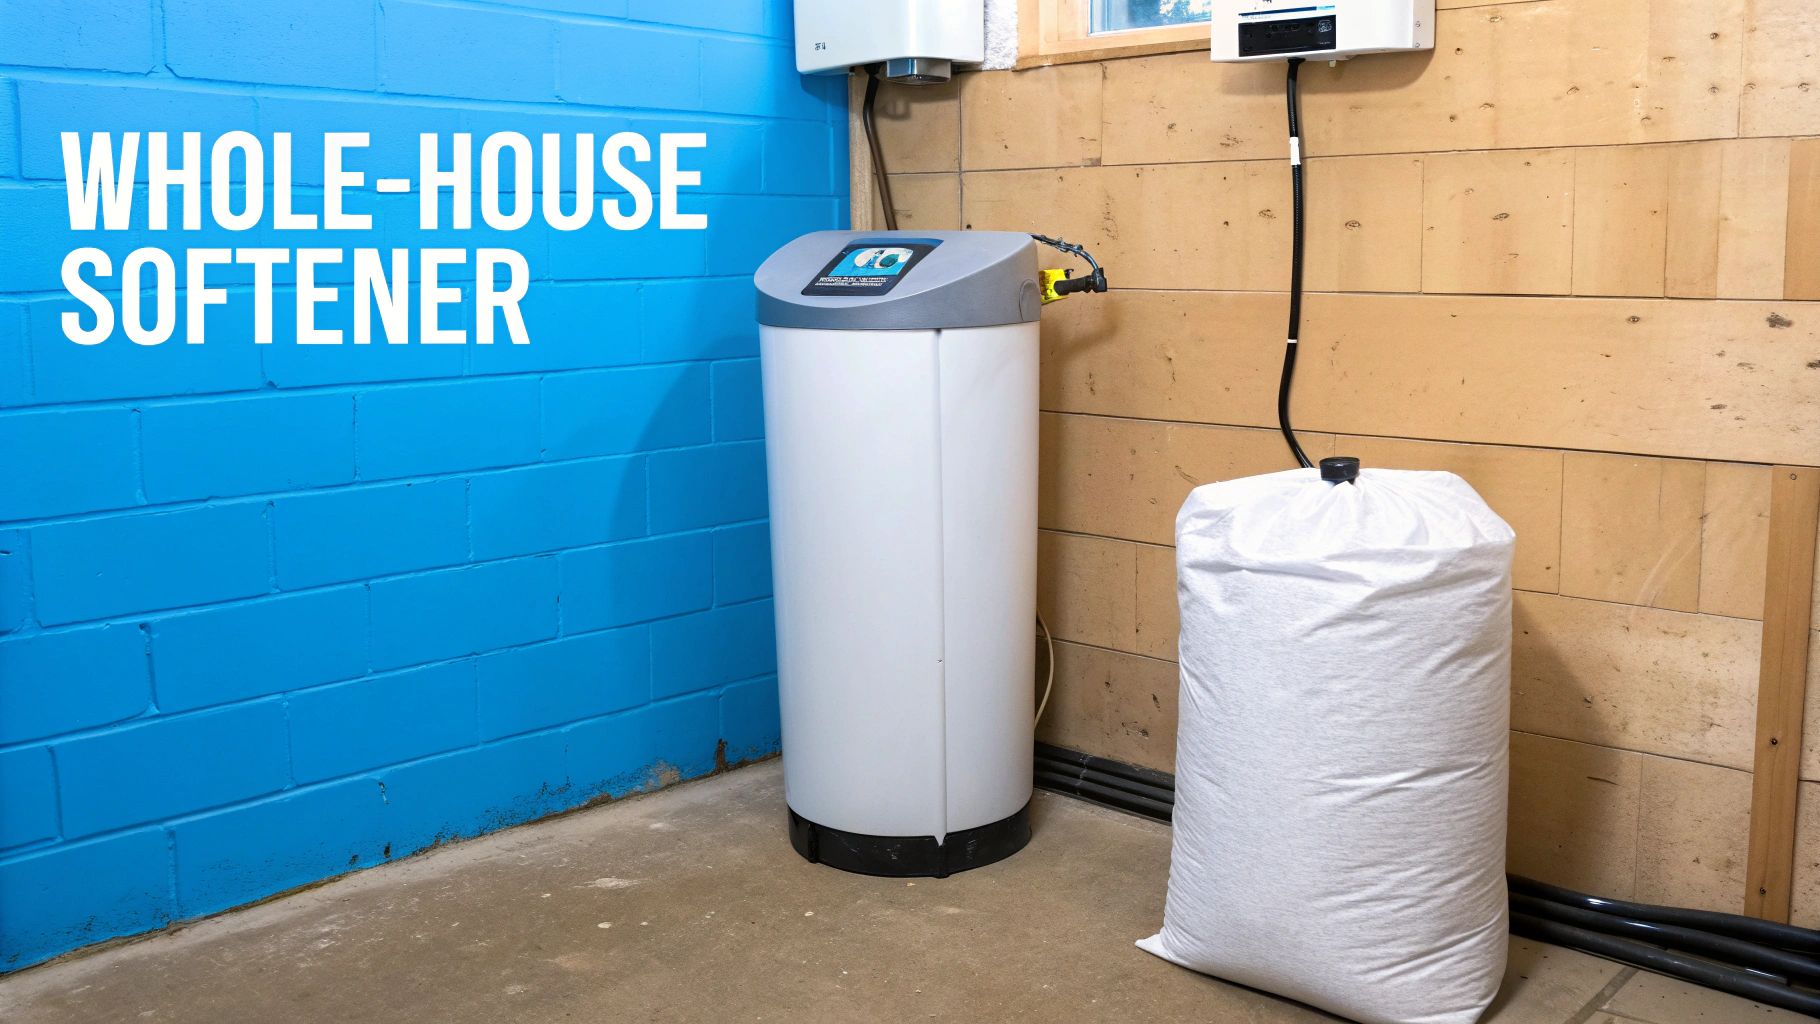
If you're sick of fighting a losing battle against hard water in every single room, it's time to stop playing defense and bring in the heavy artillery. For a truly comprehensive, set-it-and-forget-it solution, nothing beats a whole-house water softener. This is the undisputed champion of hard water treatment, installed right where your main water line enters your home to shield every pipe, faucet, and appliance from the tyranny of scale buildup.

Think of it as a bouncer for your entire plumbing system. Its one job is to catch the troublemakers—calcium and magnesium ions—and swap them out for something far more civilized before they can cause any problems. This process is called ion exchange, and it's the gold standard for a reason.

A water softener and salt bag in a basement with blue concrete block walls and wood paneling.

So, How Does This Ion Exchange Magic Work?

Inside every salt-based water softener is a tank packed with thousands of tiny resin beads. These beads come pre-loaded with harmless sodium ions. As your hard water flows through this tank, the calcium and magnesium ions—which carry a stronger positive charge—are magnetically drawn to the resin beads.

They literally kick the sodium ions off the beads and take their place. The newly "softened" water, now carrying the sodium ions, flows right on into your house. It’s a simple, elegant trade that happens millions of times as water passes through the system.

This process continues until the resin beads are completely saturated with calcium and magnesium, with no more sodium left to trade. At that point, the softener kicks into a self-cleaning mode called regeneration.

The Regeneration Cycle: What to Expect

Regeneration is just the softener’s way of hitting the reset button. The system automatically flushes the resin tank with a brine solution—a mix of salt and water from a separate tank. This concentrated saltwater bath washes away all the captured calcium and magnesium, sending them harmlessly down the drain.

This process recharges the beads with a fresh supply of sodium ions, getting them ready to soften more water. It’s usually programmed to happen in the middle of the night, based on your water hardness and how much water your family uses.

Your only job? Keep the brine tank topped up with water softener salt. Depending on your system and water quality, you might only need to add a new bag of salt every month or two. It’s a tiny bit of maintenance for total home protection.

Sizing Your System for Peak Performance

Picking the right size softener is absolutely critical. If it’s too small, it will constantly be regenerating, wasting salt and water. If it's too big, you’ve overspent, and it can lead to other issues.

Sizing boils down to two key numbers:

  • Your Water Hardness: Measured in grains per gallon (GPG), which you found with your water test.
  • Your Daily Water Usage: A solid estimate is 75 gallons per person, per day. A family of four would use about 300 gallons daily.

To figure out your daily softening needs, just multiply those two numbers.

Here’s a quick example:
Let's say a family of four has water with 15 GPG of hardness.
4 people x 75 gallons/person = 300 gallons per day
300 gallons x 15 GPG = 4,500 grains of hardness to remove daily.

This number tells you how much work the softener has to do each day. Softeners are rated by their grain capacity (e.g., 32,000-grain), which is how many grains they can remove before needing to regenerate. A perfectly sized system should only need to regenerate about once a week.

Investing in a whole-house system is a big move, but it provides a definitive answer to the hard water problem. For those wanting to dig deeper, exploring guides on the best whole house water filtration system for your home can provide even more context. A properly chosen softener will protect your home, save you money on appliance repairs, and improve your daily life—from softer skin to cleaner, brighter clothes.

Targeted Purity with Point-of-Use Filtration

What if your biggest headache isn't protecting your entire plumbing system, but just getting a great-tasting, clean glass of water from the kitchen sink? Maybe you're renting and can't install a big whole-house system, or perhaps you just don't see the point in treating the water you use to flush toilets.

This is exactly where point-of-use (POU) filtration shines.

Instead of a broad, house-wide approach, POU systems are like sharpshooters. They focus on a single faucet—usually in the kitchen—to give you exceptionally pure water right where you need it for drinking and cooking. When the goal is specifically how to remove calcium from water you're going to consume, the hands-down winner is a reverse osmosis system.

An under-sink water filtration system provides pure drinking water from a chrome faucet in a kitchen cabinet.

Reverse Osmosis: The Under-Sink Powerhouse

A reverse osmosis (RO) system is a multi-stage workhorse that typically lives in the cabinet right under your kitchen sink. This isn't your average pitcher filter; it's in a whole different league.

The magic happens at its semi-permeable membrane. Think of it as a microscopic bouncer at an exclusive club—the pores are so tiny that only water molecules are on the VIP list.

When your tap water is pushed against this membrane, the water molecules squeeze through to the clean side. Everything else—calcium, magnesium, lead, chlorine, and a whole host of other dissolved solids—gets rejected and washed down the drain. The result is stunningly pure water, with up to 99% of all contaminants stripped away.

Reverse osmosis doesn't just soften water; it purifies it. A water softener simply swaps calcium ions for sodium ions. An RO system physically removes the calcium completely, along with nearly everything else.

This makes RO the perfect fix if your goal is bigger than just fighting limescale. You get water that's not only free from hardness minerals but also tastes incredibly crisp and clean because all the other gunk affecting flavor and odor is gone, too.

How an RO System Works Under Your Sink

It helps to know what's going on inside the unit to appreciate its power. A typical under-sink RO system follows a few key steps:

  • Pre-Filters: Before the water even gets near the main membrane, it flows through sediment and carbon pre-filters. These are the bodyguards, catching big stuff like rust, dirt, and chlorine, which protects the delicate RO membrane from getting clogged or damaged.
  • The RO Membrane: This is where the real heavy lifting happens. Water pressure forces H₂O molecules through the membrane, leaving the calcium ions and other impurities behind to be flushed away.
  • Storage Tank: The RO process is slow and steady, so the purified water collects in a small pressurized tank. This gives you a ready supply of clean water the moment you open the tap.
  • Post-Filter: As a final touch, water from the tank passes through one last carbon filter on its way to your glass. This "polishing" filter removes any potential lingering tastes or odors from the tank.

All of this is hooked up to a sleek, dedicated faucet right on your sink. It’s the perfect setup for filling a water bottle, making coffee, or cooking pasta with water you know is as clean as it gets.

What About Water Distillers?

Another POU method that gets rid of calcium is distillation. A water distiller works by boiling water into steam, which leaves all the minerals and contaminants behind. The steam is then cooled and condensed back into pure liquid water.

Distillation is incredibly effective—it produces some of the purest water you can get. For day-to-day use in a home, though, distillers have some real-world drawbacks compared to RO systems.

Feature Reverse Osmosis (RO) Water Distiller
Speed Instant access from a tap Slow; takes hours to make a gallon
Convenience On-demand water Batch process; you have to fill it
Energy Use Uses water pressure Needs electricity to boil water
Installation Under-sink plumbing Sits on your countertop

While distillation is a great technology, its slow, batch-by-batch process just isn't practical for a busy kitchen that needs clean water now. For most homeowners who want to remove calcium for drinking and cooking, the on-demand convenience of a quality RO system makes it the obvious choice.

Getting It Installed and Keeping It Running

Choosing your water filtration system is the first big win, but the job isn't done yet. Proper installation and a little bit of upkeep are what will give you years of hassle-free, calcium-free water. It's like buying a fantastic new car; you still have to change the oil to keep it running smoothly.

This is your game plan for getting everything set up correctly and keeping it in top shape, whether you're a weekend DIY warrior or you'd rather hand the job to a pro. A little effort now saves you from major headaches down the road.

Setting Up Your Water Softener

A whole-house water softener is a serious piece of equipment, and its installation is more involved than, say, a new toaster. It needs to be plumbed directly into your main water line, usually between your water meter and your water heater. This is key because it ensures every drop of water entering your home gets treated.

If you've got solid plumbing skills, you can definitely tackle this yourself. But if you're even a little hesitant, call a plumber. A pro can get it done in a few hours, guaranteeing no leaks and a perfect setup from the start.

Once it's in, your most important job is to program the regeneration schedule. This is the automatic cleaning cycle where the system flushes out the collected minerals and recharges itself. Most modern softeners have a simple digital interface where you'll enter two numbers:

  • Your Water Hardness (GPG): That number you got from your water test.
  • The Number of People in Your Home: This helps the system estimate your daily water use.

With that info, the softener figures out the best time to regenerate—usually in the dead of night. Nailing this setting is critical for efficiency. It keeps the system from wasting salt and water by regenerating too often, or worse, not regenerating enough and letting hard water sneak through.

The Simple Routine of Softener Upkeep

After that initial setup, you’ll be pleasantly surprised by how low-maintenance a water softener is. Your main responsibility is just keeping the brine tank topped up with the right kind of salt.

  • Check Salt Levels: Once a month, just pop the lid and take a peek. As a rule of thumb, you always want the salt level to be higher than the water level.
  • Watch for "Salt Bridges": Every now and then, a hard crust can form over the top of the salt pile. This "bridge" stops the salt from dissolving into the water below. If the salt level hasn't budged in a while, give the side of the tank a gentle whack or use a broom handle to break up the crust.

And that’s about it. A well-maintained softener can easily last 15 years or more, quietly protecting your pipes and appliances from the shadows.

Pro Tip: Check your softener’s manual for its preferred salt type. Some newer high-efficiency models work best with purer salt pellets, while others are perfectly happy with the less expensive salt crystals.

Installing and Maintaining an RO System

Putting in an under-sink reverse osmosis (RO) system is a much more common DIY project. The kits usually come with everything you need and clear instructions. You’ll be tapping into your cold water line, drilling a small hole in your countertop for the dedicated RO faucet, and connecting the various filter housings and the storage tank.

The most important part of owning an RO system is sticking to the filter replacement schedule. An RO system is only as good as its filters, and if they get clogged, performance will plummet.

Filter Type Typical Replacement Schedule What It Does
Sediment Pre-Filter Every 6-12 months Catches the big stuff like rust, sand, and dirt.
Carbon Pre-Filter Every 6-12 months Removes chlorine, which can destroy the RO membrane.
RO Membrane Every 2-4 years This is the heart of the system; it removes the calcium.
Carbon Post-Filter Every 12 months Gives the water a final "polish" for a clean taste.

Put these dates on your calendar or set a reminder on your phone. Swapping filters on time is the number one thing you can do to ensure your RO system keeps delivering pure, great-tasting water. If you notice the water pressure from your RO faucet starting to drop, that's a classic sign a filter change is overdue.

Got Questions About Getting Rid of Calcium? We've Got Answers.

Even after doing your research, a few questions can still bubble up. That’s completely normal. When you’re dealing with something as vital as your home’s water, you want to be 100% sure you're making the right call. Let's tackle some of the most common things homeowners ask when they're figuring out how to remove calcium from their water.

Getting straight answers now means you won't have any surprises later. You can move forward feeling confident you’ve picked the best solution for your house and family.

Will a Water Softener Make My Water Taste Salty?

This is probably the number one concern we hear, but the short answer is no. The ion-exchange process adds a very small amount of sodium, not table salt (sodium chloride). The amount is directly tied to your water's hardness—the harder the water, the more sodium is needed to soften it.

Honestly, for most people, the amount of sodium is less than what’s in a single slice of white bread. The vast majority of people never even notice a change in taste.

Worried because you're on a strict low-sodium diet? You've got options. You can use potassium chloride pellets instead of sodium chloride. Another popular route is to pair your softener with an under-sink reverse osmosis system for drinking and cooking water, which will remove that added sodium anyway.

Can I Just Use a Standard Water Filter Pitcher to Remove Calcium?

It’s a great question, but unfortunately, those popular fridge pitchers are the wrong tool for this job. They typically use activated carbon filters, which are fantastic for making water taste and smell better by removing things like chlorine.

But they do absolutely nothing to remove dissolved hard minerals like calcium and magnesium. To really get rid of the minerals causing that crusty limescale, you need a system specifically designed for it, like an ion-exchange water softener or a reverse osmosis filter.

Is It Bad for Me to Drink Hard Water with Calcium in It?

Health-wise, drinking hard water is perfectly safe. In fact, your body needs essential minerals like calcium and magnesium to function properly. The whole reason for removing calcium from water has nothing to do with health—it's all about protecting your home and making your life easier.

The real problems caused by hard water are mechanical and cosmetic:

  • Limescale buildup that ruins appliances and clogs up your pipes.
  • Annoying spots and a filmy residue on your dishes, shower doors, and faucets.
  • Dry, itchy skin and hair that feels dull and brittle because of soap scum.

At the end of the day, people install these systems to stop expensive damage to their homes and to make daily tasks like cleaning and showering a whole lot more enjoyable.


Figuring out the world of water filtration can seem like a lot, but Water Filter Advisor is here to keep it simple. We create clear, research-backed guides to help you land on the perfect solution for your home's unique water needs. Check out our in-depth reviews and expert advice at https://www.waterfilteradvisor.com to get safer, better-tasting water today.

Reverse Osmosis vs Filtered Water: Which System is Right for Your Home?

So, you’re staring at your kitchen faucet, wondering if the water coming out is as good as it could be. Welcome to the great reverse osmosis vs. filtered water showdown! It’s a common homeowner head-scratcher, but it really boils down to one simple question: what uninvited guests are crashing the party in your tap water?

If you’re just looking to kick that swimming-pool chlorine taste to the curb, a standard carbon filter is your quick, budget-friendly hero. But if your local water report reads like a science experiment gone wrong—we’re talking lead, fluoride, or other nasty contaminants—then a reverse osmosis system brings a level of purification that most filters can only dream of.

Fresh water flows from a tap into a glass on a kitchen counter, with a 'BEST WATER CHOICE' sign.

Choosing Your Best Home Water Solution

Picking the right water system for your home can feel like a huge deal, but let’s make it easy. It all starts with figuring out what you’re trying to remove from your water. Not all filters are created equal, and knowing the difference is the secret to making a smart choice for your family’s hydration station.

For most folks on city water, the main goal is just making it taste and smell better. This is where common filtered water options, especially carbon filters, absolutely shine. However, if you’re dealing with specific health contaminants or you just want water so pure it’s practically a liquid diamond, then reverse osmosis (RO) is the heavy-hitter you’re looking for.

A Quick Comparison

Here’s a fun way to think about it. A standard water filter is like a friendly bouncer at a club—it stops the obvious troublemakers like chlorine from ruining the vibe. A reverse osmosis system, on the other hand, is like a top-tier security checkpoint with laser beams and a velvet rope, scrutinizing every last molecule that tries to get in.

This difference in approach is what makes each system a champ in its own right.

The core distinction between reverse osmosis and standard filtration is the size of the particles they can remove. An RO system can filter out contaminants down to a mind-bogglingly small 0.0001 microns, while a typical carbon filter is effective for particles around 0.5 to 1 micron—a massive difference in filtration power.

To help you see the differences clearly, here's a high-level overview comparing the primary methods.

At-a-Glance Comparison of Water Filtration Methods

This table gives you a quick snapshot to help you identify the best fit for your home's needs without getting lost in the technical jargon.

Filtration Method Best For Effectively Removes Retains
Reverse Osmosis (RO) Removing the widest range of contaminants for ultimate purity. Dissolved solids, heavy metals (lead, arsenic), fluoride, nitrates, salts. Very few minerals; water is purified to its simplest state.
Filtered Water (Carbon) Improving taste, smell, and removing common chemicals. Chlorine, pesticides, VOCs, sediment, some cysts. Healthy minerals like calcium and magnesium.

As you can see, the right choice isn't about which one is "better" in general—it's about what's better for you.

How Reverse Osmosis Delivers Ultra-Pure Water

When people talk about reverse osmosis vs filtered water, it's easy to think of RO as just another filter. It’s not. A reverse osmosis system is a full-blown, multi-stage purification plant for your kitchen, engineered to strip out contaminants that other filters can't even see.

The whole process is a journey. Your tap water embarks on an epic quest through several distinct stages, each one targeting a specific group of impurities.

A clear glass fills with filtered water from an ultra-pure water system in a modern kitchen.

It all starts with a couple of workhorse pre-filters. These initial stages are like the opening act, warming up the crowd and protecting the main event—the RO membrane.

First, a sediment filter grabs the bigger stuff like rust, sand, and dirt. Think of it as the bouncer that throws out the rowdy, obvious troublemakers. Right after that, a carbon pre-filter gets to work adsorbing chlorine and chloramines. This is a critical step because chlorine is harsh stuff and can literally eat away at the delicate membrane, so getting rid of it first helps the whole system last much longer.

The Semipermeable Membrane: The Heart of the Operation

Once the water is pre-filtered, it’s ready for the main event: the reverse osmosis membrane. This is where the real magic happens.

The membrane is an incredibly fine sheet of material, wound up like a scroll, with pores so tiny they’re measured in fractions of a micron—down to 0.0001 microns to be exact. To put that into perspective, that's about 500 times smaller than what many standard carbon filters can catch.

Your home’s water pressure is all that’s needed to force water molecules through this microscopic maze. It’s an exclusive club, and only pure H₂O is on the guest list. Contaminants are simply too big to get in and are unceremoniously shown the door.

This single stage is powerful enough to remove up to 99% of all total dissolved solids (TDS). We’re talking about a massive list of hard-to-remove contaminants that most other filters just wave through, resulting in exceptionally clean water.

What an RO Membrane Actually Removes

The list of what an RO membrane can reject is long and impressive. It tackles many of the most serious health concerns you might find in your home’s tap water.

  • Heavy Metals: Lead, arsenic, mercury, and chromium are effectively blocked.
  • Dissolved Salts: Sodium, chloride, and sulfate get flushed away.
  • Chemicals: Common contaminants like fluoride and nitrates are removed.
  • Microplastics: Even these tiny plastic particles are too large to pass through.

This incredible rejection rate is why reverse osmosis technology is a dominant force in the global water purification market. In fact, it's on track to capture around 36% of the market value by 2025. This is largely thanks to its unmatched ability to remove dissolved salts, heavy metals, and fluoride from both city and well water sources. You can read more about the global water filter market trends to see just how important this technology has become.

After purification, the water chills out in a small storage tank. Before it gets to your glass, it passes through one final carbon "post-filter." This last step is like a final polish, removing any slight tastes or odors the water might have picked up from the tank. The result? Water that isn’t just pure, but tastes crisp and clean, too.

What is Filtered Water, Anyway?

It's easy to get excited about reverse osmosis, but before you dive into a full reverse osmosis vs filtered water debate, you need to meet the other players on the field. The truth is, many highly effective water filters can tackle specific problems in your home, often with a much smaller price tag and less installation hassle.

Let's break down the workhorse technologies you'll find in everything from a simple pitcher to a robust under-the-sink system.

Activated Carbon: The Taste and Odor Champion

If you've ever poured a glass of water from a Brita pitcher or a faucet-mounted filter, you've met activated carbon. It's the undisputed king of improving water's taste and smell, making it the most common filter material you can buy for your home.

The best way to picture an activated carbon filter is as a super-porous sponge with a ridiculously large surface area. It works through a clever process called adsorption—not to be confused with absorption. As water flows through, specific chemical contaminants are drawn to the carbon's surface and literally stick to it, getting yanked out of your water.

This is why activated carbon is a rockstar at removing:

  • Chlorine: This is its main claim to fame. It completely zaps that "swimming pool" odor and taste you get from city-treated water.
  • Volatile Organic Compounds (VOCs): This is a broad category of industrial chemicals and solvents that can sometimes creep into water supplies.
  • Pesticides and Herbicides: Carbon does a great job of grabbing many common chemicals used in agriculture.

What’s the secret sauce? The massive internal network of pores. A single gram of activated carbon can have a surface area the size of a football field, giving contaminants countless places to get trapped.

This targeted approach makes activated carbon a fantastic choice if you're on city water and your main goal is simply better-tasting, better-smelling water. Just keep in mind its limitations: it won't touch dissolved solids like heavy metals, salts, or nitrates.

Sediment Filters: Your Home's First Line of Defense

Your water travels a long way to get to your tap, and it picks up a lot of junk along the way. Sediment filters are like the bouncers at the front door of your home's plumbing, keeping all the riff-raff out.

These filters have one job, and they do it exceptionally well: they catch physical gunk. Usually installed right where the water line enters your house (a point-of-entry system), they screen out all the larger particles that can wreak havoc on your home.

A good sediment filter will stop things like:

  • Flakes of rust from old city pipes
  • Sand, silt, and dirt, which is a huge issue for well water users
  • Any other suspended solids floating around

By catching this stuff early, a sediment filter protects your expensive appliances like water heaters, washing machines, and dishwashers from damaging buildup. It also keeps your faucet aerators and showerheads from getting clogged. It’s no surprise that a sediment filter is the crucial first stage in almost any multi-stage system, including reverse osmosis.

UV Purifiers: The Microbiological Guardian

For some homes, especially those on well water, the biggest worry isn't chlorine or rust—it's what's living in the water. That's where Ultraviolet (UV) purifiers come in, offering a completely different approach to water safety. A UV system isn't a filter at all; it's a sterilizer.

It uses a high-intensity UV lamp to zap microorganisms as they pass by. This blast of UV light scrambles their DNA, making it impossible for them to reproduce and cause illness. It’s an incredibly effective, chemical-free way to neutralize nasty bugs like bacteria, viruses, and protozoa (like Giardia and Cryptosporidium) without changing your water’s taste one bit.

Head-to-Head: What Do They Actually Remove?

When you’re weighing reverse osmosis vs filtered water, the most important question is simple: what does it actually take out of my water? This is where the two technologies go in completely different directions.

It's like picking the right tool for a job. You wouldn't use a screwdriver to hammer a nail, and you can't expect a basic carbon filter to do the heavy lifting of a reverse osmosis system. To make the right call for your family, you have to match the filter’s strengths to the specific contaminants you're worried about.

Let’s put them head-to-head.

The Chlorine and Taste Challenge

If you're on city water, your biggest complaint is probably the swimming-pool taste and smell of chlorine. This is where activated carbon filters really shine. They're designed for one primary job: adsorption, a process where contaminants like chlorine stick to the carbon’s surface.

A simple carbon filter, whether it’s in a pitcher or under your sink, will make your tap water taste and smell much better. They're also pretty good at grabbing certain pesticides and volatile organic compounds (VOCs). But that's pretty much where their job ends.

A reverse osmosis system also removes chlorine, but it's just the first step. An RO unit has a carbon pre-filter that gets rid of chlorine before the water even touches the main RO membrane. So while both get the job done, for an RO system, it's just a warm-up for the real purification work.

The Heavy Metal and Dissolved Solids Problem

This is where the difference becomes crystal clear. Common—and dangerous—contaminants like lead, arsenic, nitrates, and fluoride are dissolved in water, meaning a standard carbon filter is completely blind to them. They'll sail right through its pores without a problem.

Here's where the reverse osmosis membrane becomes the hero. Its pores are unbelievably small—down to 0.0001 microns—and they physically block these dissolved troublemakers from getting through.

An RO system is like a molecular bouncer at the door. It lets pure water molecules in but kicks out the larger molecules of heavy metals, salts, and chemicals. This is something carbon filters just can't do.

If your local water report shows any lead, high fluoride, or nitrates (a big problem in farming areas), a reverse osmosis system isn't just a nice-to-have; it's a must-have for truly clean water. Activated carbon alone simply won't protect you from these health risks.

The Battle Against Emerging Contaminants

We're constantly learning about new things in our water we'd rather not drink. "Emerging contaminants" like microplastics, leftover pharmaceuticals, and trace industrial chemicals are a growing concern for a lot of people.

Activated carbon might trap some of these, but you can't really count on it—its performance is all over the place. Reverse osmosis, on the other hand, is a much stronger line of defense. That ultra-fine membrane is extremely effective at stopping these tiny particles and complex molecules in their tracks.

This is why RO is trusted technology worldwide. Its ability to remove up to 99% of contaminants—including bacteria, viruses, and emerging pollutants—is why the global water treatment systems market relies on it so heavily.

To see it all laid out, let's break it down side-by-side.

Performance Showdown: RO vs. Activated Carbon Filters

This table gives you a clear look at how Reverse Osmosis and Activated Carbon filters stack up against common water contaminants. I recommend pulling up your local water quality report and using this as a checklist.

Contaminant Reverse Osmosis (RO) Activated Carbon Filter Decision-Making Insight for Homeowners
Chlorine Excellent (Removed by carbon pre-filter) Excellent Both are great for taste/odor, but this is the primary job of a carbon filter.
Lead & Arsenic Excellent (Removes >95%) Poor / Ineffective If heavy metals are a concern, RO is the only reliable choice.
Fluoride & Nitrates Excellent (Removes >90%) Poor / Ineffective These dissolved solids require a membrane; carbon filters can't remove them.
Bacteria & Viruses Excellent Poor / Ineffective RO provides a physical barrier; carbon filters can sometimes become breeding grounds for bacteria.
Microplastics Excellent Fair / Variable RO's tiny pores effectively block microplastics. Carbon's effectiveness is limited.
Dissolved Salts Excellent Poor / Ineffective Only RO can desalinate water, significantly reducing Total Dissolved Solids (TDS).

At the end of the day, the choice between reverse osmosis vs filtered water boils down to what you need removed. If you just want better-tasting water without that chlorine smell, an activated carbon filter is a great, affordable option.

But if your goal is true purification—getting rid of the tough, dangerous stuff—then a reverse osmosis system is, without a doubt, the superior technology.

Evaluating Cost, Installation, and Maintenance

When you’re weighing reverse osmosis vs. filtered water, the price tag on the box is only chapter one. To really understand the financial side of things, you need to look at the total cost of ownership—from the day you bring it home to the ongoing costs needed to keep clean water flowing. Let’s get practical and break down what you can expect to spend over the long haul with each option.

This diagram shows how different filtration methods go after specific contaminants in your tap water.

Diagram illustrating water filtration methods: Reverse Osmosis removing lead and Carbon Filter removing salt from tap water.

As you can see, carbon filters are great for common problems like chlorine. But reverse osmosis gives you a much wider shield, catching things that are harder to remove, like lead and salts.

The Financial Commitment of Reverse Osmosis

Let's be upfront: a reverse osmosis system is a serious investment in your home's water quality. The initial purchase is just the first part of the story, so it’s smart to budget for the full installation and the upkeep it'll need down the road.

The biggest hurdle for many people considering RO is the initial cash outlay and the recurring cost of replacement cartridges. This is a key factor in the global water purifier market, especially for budget-conscious homeowners.

Here’s a realistic look at what you’ll be spending on an RO system:

  • Upfront Unit Cost: A good-quality under-sink RO system will typically run you between $200 and $500. Fancier models with extra features like remineralization can definitely cost more.
  • Installation Fees: A lot of these systems are made for DIY installation, but not everyone is comfortable drilling holes in their countertops or messing with plumbing. If you call in a pro, expect to add another $150 to $300 to get a solid, leak-free setup.
  • Filter Replacements: This is where the ongoing costs live. RO systems usually have 3 to 5 filter stages. The pre-filters and post-filters will need to be swapped out every 6 to 12 months, which usually costs about $50 to $100 a year.
  • Membrane Replacement: The RO membrane is the heart of the system. It’s built to last longer but costs more to replace. Plan on changing this out every 2 to 4 years for $50 to $100.

When you add it all up, you’re looking at a total maintenance cost for a standard RO system of around $100 to $200 per year. That might sound like a lot, but if you do the math, the cost-per-gallon is almost always way cheaper than buying bottled water.

Cost and Maintenance of Standard Water Filters

Standard water filters, especially the ones using activated carbon, are much easier on the wallet to get started. But be careful—their long-term costs can sneak up on you, particularly with those cheap filter pitchers.

For instance, you can grab a water filter pitcher for just $30, but you’ll be replacing that filter every 40 gallons (or about every two months). At around $15 a pop, you could easily be spending $90 a year just on replacements. Suddenly, the cost-per-gallon doesn't look so low.

A much better comparison to an RO system is an under-sink carbon filter. These strike a nice balance between the initial price and ongoing expenses.

  • Initial Cost: A solid under-sink carbon filter system usually costs between $100 and $200.
  • Installation: This is often a much simpler job than installing an RO system. There’s no drain line or storage tank to worry about, making it a project most homeowners can tackle themselves.
  • Maintenance: Your only recurring cost is the replacement cartridges. You’ll need to change them every 6 to 12 months, and they typically run between $40 and $80. This makes the annual upkeep a bit more affordable than a multi-stage RO system.

When you look at the total cost of ownership, the choice boils down to balancing your budget with how pure you want your water to be. RO systems cost more upfront and over time, but they deliver water that’s incredibly clean. Under-sink carbon filters are a more budget-friendly way to get much better-tasting water, making them a great practical choice for most homes with city water.

Making the Final Decision for Your Household

Choosing between reverse osmosis vs filtered water really comes down to knowing your water and what you want to fix about it. After wading through all the technical specs, let's boil it all down to a few simple, real-world scenarios to help you pick the right system for your home with confidence.

The entire decision hinges on one key question: are you just trying to make your water taste better, or are you trying to remove specific, known contaminants for health reasons? Your honest answer to that question is the first step toward a smart investment.

Simple Scenarios to Guide Your Choice

Let's forget the jargon for a minute and look at real-life situations. See which one of these sounds most like your house, and the best choice should become pretty obvious.

An under-sink carbon filter is probably your best bet if:

  • You live in a city or town with professionally treated municipal water.
  • Your biggest complaint is that your tap water tastes or smells like a swimming pool (chlorine).
  • You want something you can install yourself without calling a plumber.
  • You're on a tight budget and need an effective, affordable solution.

You should go with a reverse osmosis system if:

  • Your local water report shows high levels of Total Dissolved Solids (TDS).
  • You know there are specific health contaminants in your water, like lead, arsenic, fluoride, or nitrates.
  • Someone in your home has a compromised immune system and needs the cleanest water possible.
  • Your main goal is to get the absolute highest level of water purity you can achieve at home.

Think of it this way: a carbon filter is like a bouncer at a club, kicking out the obvious troublemakers like chlorine. An RO system is a full-blown security detail that vets every single molecule, ensuring nothing harmful gets past the velvet rope.

A Quick Decision-Making Checklist

Getting closer? Just run through this final checklist to make sure you've covered all the bases in the great reverse osmosis vs filtered water debate.

  1. Check Your Water Report: First thing's first—get a copy of your local Consumer Confidence Report (CCR). If you see red flags like lead, nitrates, or high TDS, an RO system is the way to go. If the only real issue is chlorine, a good carbon filter will do the trick.

  2. Define Your #1 Goal: Are you fighting a bad taste, or are you fighting invisible health threats? Be clear about your mission. Better taste is a job for carbon; total purification demands RO.

  3. Be Real About Your Budget: Look at the whole picture—the upfront cost and the yearly maintenance. An under-sink carbon filter has a lower initial price and cheaper, simpler filter changes. An RO system costs more to buy and maintain, but you're paying for a much higher level of protection.

  4. Consider Space and Installation: Do you have enough room under your sink for an RO system's storage tank? And are you up for a more involved installation, or do you need a quick and easy setup? Under-sink carbon filters are almost always a simpler, faster install.

By walking through these questions, you can cut through the confusion. The "best" system isn't always the most expensive or complicated one—it's the one that solves your water problems, fits your budget, and gives you peace of mind every time you fill up a glass.

Answering Your Water Filtration Questions

Even after comparing reverse osmosis vs filtered water, you might still have a few questions. That's perfectly normal. Let's dig into some of the most common things homeowners ask, so you can feel totally confident about your decision.

These are the kinds of details that usually seal the deal one way or the other.

Does Reverse Osmosis Remove Healthy Minerals?

Yes, it does, and it's a critical point to understand. The super-fine membrane in an RO system is great at catching nasty contaminants like lead, but it also pulls out beneficial minerals like calcium and magnesium.

Now, most of us get plenty of these minerals from food, so it's not a health concern. The bigger issue for many is the taste—demineralized water can taste a bit flat. That’s why a lot of modern RO systems include a remineralization filter. It adds a small amount of healthy minerals back into the water right before it hits your glass, which really improves the taste.

How Much Water Does an RO System Waste?

Older RO systems were pretty notorious for being water hogs, sometimes flushing several gallons down the drain for every one gallon of purified water they made. Thankfully, that's changed.

Today’s high-efficiency models are way better. It’s pretty common to see systems with a 1:1 or 2:1 ratio, meaning they only waste one or two gallons for every gallon of pure water produced. If you’re focused on water conservation, just look for a unit that’s advertised as having a low brine or low waste ratio.

That "wasted" water is often called brine, and it's just concentrated tap water. It's carrying all the junk the RO membrane filtered out and safely flushing it all away.

Is a Carbon Filter Enough to Make My Water Safe?

For most homes with city water, a good activated carbon filter does the trick. It makes your water safe, clean, and tasty. Its main job is getting rid of chlorine, and the difference in taste and smell is huge.

But a carbon filter is not a total purifier. It isn't built to handle things like heavy metals, nitrates, fluoride, or dissolved salts. The only way to know for sure if a carbon filter is all you need is to look at your local water quality report. For help making sense of it, check out our expert advice on how to choose the right water filter.


At Water Filter Advisor, we're here to help you nail down the perfect water solution for your house. Whether it’s a simple carbon filter or a full-on reverse osmosis system, our guides are designed to make the choice easy. Check out our resources today at https://www.waterfilteradvisor.com.
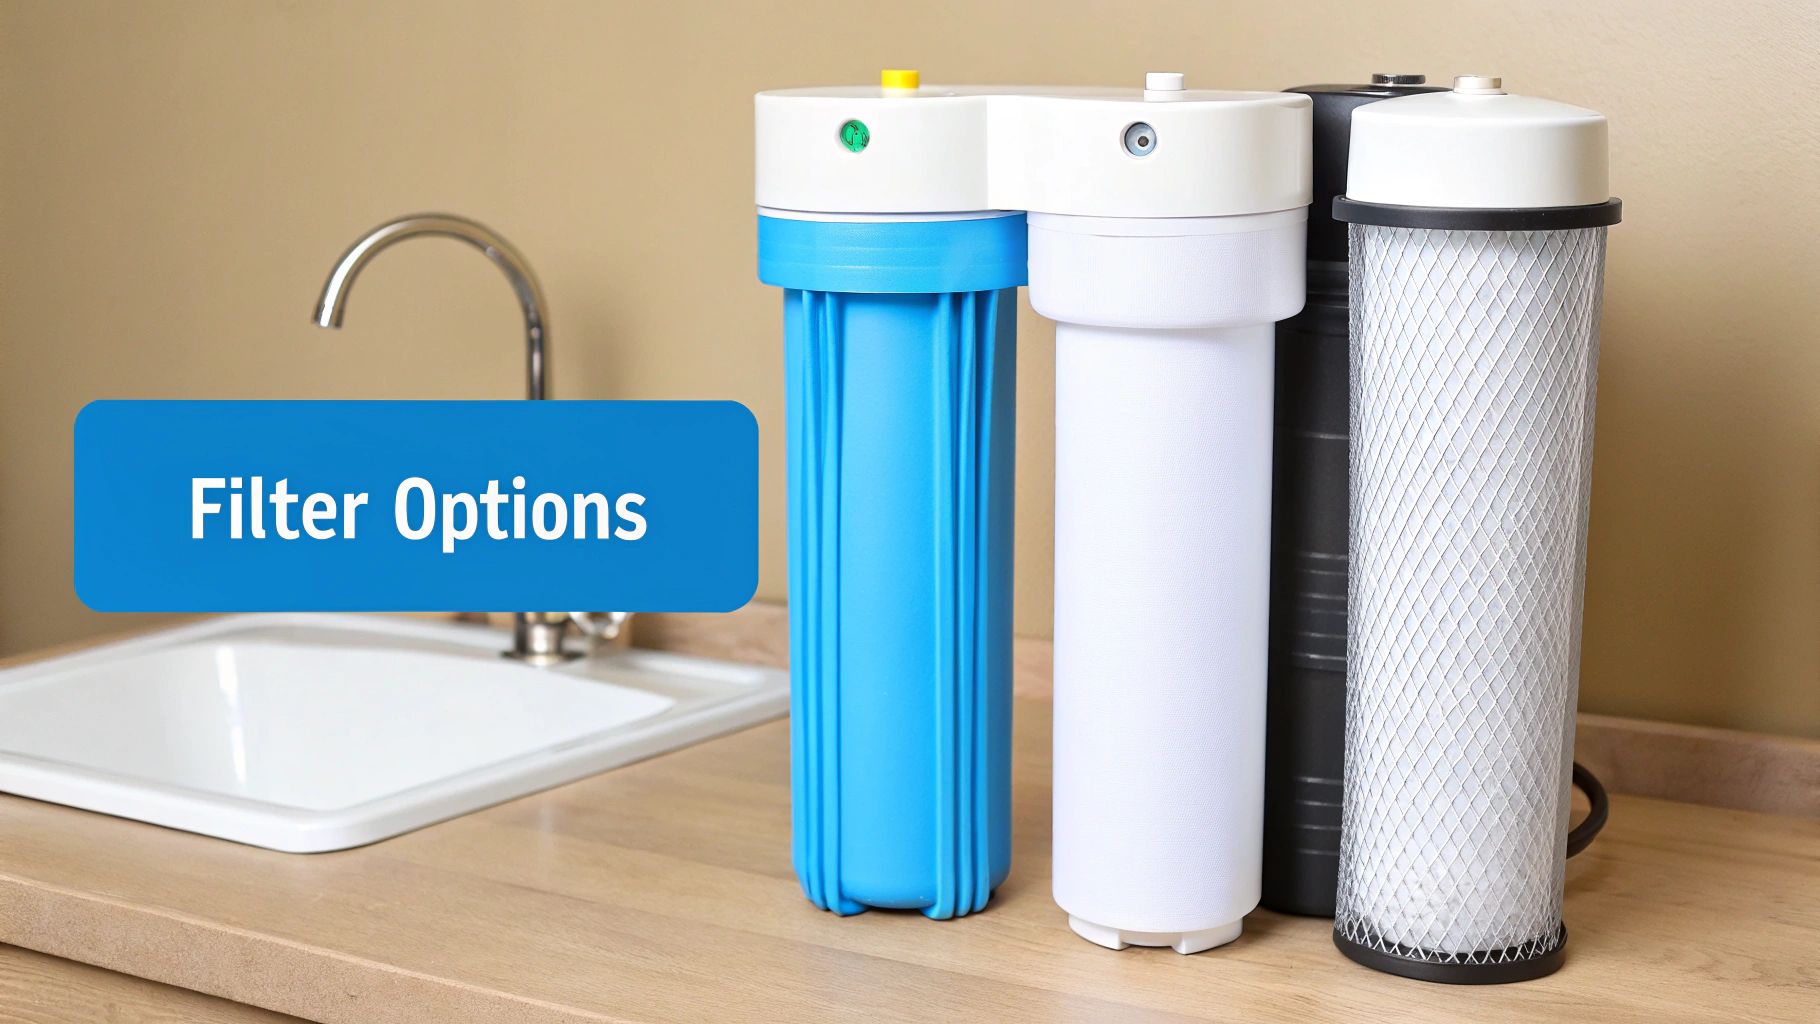
How to Remove Nitrates from Well Water for a Safer Home

If you've got nitrates in your well water, a standard pitcher filter just isn't going to cut it. You need a dedicated system to tackle this specific problem. For home use, the two most reliable technologies are reverse osmosis and ion exchange. Both are fantastic at physically removing or swapping out the nitrate ions, bringing your water back into a safe range and giving you peace of mind.

Why Nitrates in Your Well Water Are a Silent Problem

That glass of water from your well might look perfectly clear and refreshing, but it could be hiding a dangerous secret. Nitrates are one of the most common contaminants found in groundwater, and you'd never know they were there—they have no color, taste, or smell. This makes them a silent but serious issue for millions of well owners.

Unlike city water, which is constantly tested and treated, a private well is 100% the homeowner's responsibility. The buck stops with you when it comes to ensuring your family's water is safe to drink.

Where Do Nitrates Come From?

Nitrates (NO₃⁻) are just nitrogen compounds that dissolve easily in water. While they occur naturally at low levels, human activity can cause their concentration in groundwater to skyrocket. Think of the ground as a giant sponge; anything put on the surface can eventually seep down into the very water your well taps into.

The most common culprits behind high nitrate levels are:

  • Agricultural Runoff: Nitrogen-based fertilizers are a primary source. When farmers apply more fertilizer than crops can use, the excess washes away with rain or irrigation, filtering down into the groundwater.
  • Septic Systems: An old, failing, or poorly placed septic tank can leak untreated waste into the surrounding soil, releasing a steady stream of nitrates.
  • Livestock Manure: Runoff from large farms and animal feedlots is loaded with nitrogen from animal waste, which can contaminate nearby wells.

Ultimately, tackling nitrate contamination at its source means looking at how the land around us is managed. Practices focused on improving soil quality naturally play a huge role in preventing nitrates from leaching into our water supplies in the first place.

The Hidden Health Risks

For most healthy adults, a little nitrate in their water isn't a huge deal. But for vulnerable groups, it’s a completely different story. The biggest danger is a condition called methemoglobinemia, better known as "blue baby syndrome."

When infants under six months drink water high in nitrates, their bodies convert those nitrates into nitrites. This messes with the blood's ability to carry oxygen, which can be fatal.

The U.S. Environmental Protection Agency (EPA) set the safe drinking water limit for nitrates at 10 milligrams per liter (mg/L)—or 10 parts per million (ppm). This standard was put in place specifically to protect infants from blue baby syndrome.

Pregnant women and people with certain health conditions like anemia or heart disease are also at greater risk. Because the threat is so severe, figuring out how to remove nitrates from your well water is absolutely essential for your family's safety.

Your Options for Nitrate Removal

The good news is that there are proven home filtration technologies that can solve this problem. Just know that your Brita filter or standard water softener won't touch nitrates. And whatever you do, don't boil the water! Boiling only makes the problem worse by increasing the nitrate concentration as the water evaporates.

Effective solutions target nitrates directly. This problem is more widespread than you might think; the USGS estimates that about 7% of domestic wells in the U.S. have nitrate levels above the safe limit. You can dig into the data from the USGS water quality assessment yourself.

To get you started, here’s a quick rundown of the most effective technologies we'll cover in this guide.

Quick Guide to Home Nitrate Removal Methods

This table summarizes the best filtration methods for getting rid of nitrates in your well water, so you can see at a glance how they work and what they're best used for.

Filtration Method How It Works Best For
Reverse Osmosis Uses high pressure to force water through a semipermeable membrane, blocking nitrates and other contaminants. Point-of-use systems for drinking and cooking water; also removes a wide range of other contaminants.
Ion Exchange Employs a special resin that captures nitrate ions from the water and replaces them with harmless chloride ions. Whole-house (point-of-entry) systems where all water in the home needs treatment for nitrates.
Distillation Boils water to create steam, leaving nitrates and other impurities behind, then condenses the steam back into pure water. Smaller, countertop batches of highly purified water; effective but slow and energy-intensive for daily use.

Each of these systems has its own set of pros and cons, which we'll dive into next to help you pick the right one for your home.

First Things First: Get a Real Number on Your Nitrate Levels

Before you even think about buying a filter, you need to know exactly what you’re dealing with. When it comes to your family’s health, guessing is not an option. Nitrates are sneaky—you can't see them, taste them, or smell them. Testing is the only way to find out if they're in your well water and at what concentration.

If you're on a private well, this is all on you. Unlike city water, which is tested regularly by law, your well's safety is your responsibility. Think of it as a crucial first step in taking control of your water quality.

From a Quick Check to a Certified Analysis

You've got a couple of ways to go about testing. The one you pick really just depends on if you need a quick ballpark number or a precise figure you can bank on.

  • DIY Test Strips: These are the fast and cheap route. Dip a strip in your water, wait a second, and match the color to a chart. They're perfect for a quick spot-check or for making sure your filter is still working down the road. Just know they give you a range, like 10-20 mg/L, not a hard number.

  • Professional Lab Analysis: This is the undisputed champ for accuracy. You'll grab a water sample following their instructions and mail it off to a state-certified lab. The report you get back will be dead-on precise, giving you the exact nitrate concentration. This is the data you need to choose and size a treatment system correctly.

While those DIY strips are handy, I always tell people to start with a professional lab test. It's the only way to know your starting point for sure.

So, what do the numbers on the report actually mean? You'll see nitrates listed as either milligrams per liter (mg/L) or parts per million (ppm). Don't let it confuse you—they're the exact same thing. 10 mg/L is identical to 10 ppm.

What to Do With Your Test Results

Once that report is in your hands, the magic number you're looking for is 10 mg/L. That's the Maximum Contaminant Level (MCL) set by the EPA. If your number is at or above 10 mg/L, you need to take action, especially if you have infants or pregnant women in the house.

Let me give you a real-world example. I worked with a family out in a rural area who were getting nervous about all the farming nearby. They’d never tested their well before. The lab report came back with a nitrate level of 15 mg/L—a full 50% over the safety limit.

That one number changed everything. It took their vague worry and turned it into a concrete problem with a clear solution. Armed with that 15 mg/L figure, they knew they needed a serious system like reverse osmosis or a dedicated anion exchange filter. That's the power of good data; it removes the uncertainty and puts you on a clear path to safe water.

Your Guide to the Best Nitrate Filtration Systems

Okay, you've got your water test results in hand and a hard number for your nitrate levels. Now for the fun part: picking your weapon.

When it comes to removing nitrates from well water, three technologies consistently rise to the top: Reverse Osmosis (RO), Ion Exchange, and Distillation. Each one gets the job done differently, and the best fit for your home really comes down to your specific needs, your budget, and how you use your water.

Let's dig into these workhorse methods and see what makes them tick.

Reverse Osmosis: The All-Around Contaminant Blocker

Think of a filter so ridiculously fine it can stop individual ions in their tracks. That's the magic behind reverse osmosis.

An RO system uses your home's water pressure to force water through a special, semipermeable membrane. This membrane acts like a super-strict bouncer at a nightclub—it lets pure water molecules slip through but slams the door on larger molecules. That includes dissolved salts, heavy metals, and, most importantly for us, nitrates.

Because it’s a beast at removing a whole slew of contaminants (often 90-98% of them), RO is a very popular choice. The purified water gets stored in a small tank under your sink, ready to go from a dedicated faucet. This makes it a perfect "point-of-use" (POU) system that treats just the water you'll be drinking and cooking with.

The trade-off? RO systems do produce wastewater, often called brine, which carries all those rejected contaminants down the drain. For every gallon of pure water you get, a few gallons get flushed. Modern systems are much better about this, but it's something to keep in mind. They also strip out everything, even beneficial minerals, which can make the water taste a bit "flat."

Ion Exchange: The Targeted Nitrate Swapper

If RO is a broad-spectrum shield, ion exchange is more like a heat-seeking missile aimed squarely at nitrates. This approach uses a tank packed with millions of tiny resin beads that have been "charged" with harmless chloride ions.

As your well water flows through this resin bed, a pretty clever swap takes place. The resin is more attracted to the nitrate ions in your water than the chloride ions it's holding. So, it snatches the nitrates out of the water and releases an equal amount of chloride to take their place. It’s a clean, efficient, and highly effective trade.

This efficiency makes ion exchange a great choice for "point-of-entry" (POE), or whole-house systems, treating every single drop of water coming into your home. The system does need to "regenerate" every so often. This involves flushing the resin with a saltwater brine to wash away all the captured nitrates and recharge the beads with fresh chloride.

Heads Up: An ion exchange system for nitrates uses a special anion resin to target negatively charged ions like nitrates (NO₃⁻). This is not the same as a standard water softener, which uses a cation resin to go after positively charged hardness minerals like calcium.

Distillation: The Original Water Purifier

Distillation is basically nature's purification process, condensed into a countertop appliance. A distiller works by boiling your water, turning it into pure steam. When the water evaporates, it leaves everything else behind—nitrates, minerals, heavy metals, you name it.

That pure water vapor is then collected and cooled in a separate chamber, where it condenses back into liquid. What you're left with is exceptionally pure water, free from pretty much all impurities. It’s a bulletproof method for getting rid of nitrates.

The catch is that distillation is slow. It works in batches and uses a fair amount of electricity to do its thing. It’s just not practical for treating all the water in your home or for getting a quick glass of water on demand. It’s really best for making smaller amounts of ultra-pure water for drinking, cooking, or maybe for medical devices. You can see similar principles at work in high-purity lab water purifier systems.

What you decide to do with your water test results is the most critical step.

A flowchart asking 'Is your water safe?' leading to 'Safe' for clean water and 'Unsafe' for polluted water.

This decision tree shows the simple path from testing your water to confirming it's safe. An "unsafe" result means it's time to take action.

Nitrate Removal System Comparison: Reverse Osmosis vs. Ion Exchange vs. Distillation

Trying to pick the right system can feel like a lot. To make things a little easier, we’ve put the top three methods side-by-side to see how they stack up on the things that matter most to a homeowner.

Feature Reverse Osmosis Ion Exchange Distillation
Primary Use Point-of-Use (drinking water) Point-of-Entry (whole-house) Countertop (small batches)
Effectiveness Excellent (90-98% removal) Excellent (90-95% removal) Near total removal (99%+)
Other Contaminants Removes a wide range Only removes specific anions Removes nearly everything
Installation Cost Low to Moderate Moderate to High Low (no installation)
Operating Cost Moderate (filter changes) Moderate (salt, water) High (electricity)
Maintenance Regular filter/membrane changes Refill salt, occasional resin care Regular cleaning/descaling
Water Taste Can taste "flat" or "empty" May have slightly salty taste Very pure, flat taste

So, what's the bottom line? For most families just wanting to ensure their drinking and cooking water is safe, a point-of-use reverse osmosis system hits the sweet spot of performance, cost, and convenience. If you need to treat every faucet in your house, a dedicated nitrate-selective ion exchange system is the way to go. Distillation remains a solid, if niche, choice for those who need the absolute highest purity in smaller quantities.

Choosing the Right System Setup for Your Home

Alright, you’ve done the hard part. You understand the tech behind reverse osmosis and ion exchange and have a feel for their strengths and weaknesses. Now it's time to bring it home—literally. This isn't just about picking a product off a shelf; it's about matching the right hardware to your family's daily life and the unique plumbing of your house.

The whole decision really hinges on one simple question: do you need to treat every drop of water in your house, or just the water you drink and cook with? Your answer will point you straight to the perfect setup.

Point-of-Use vs. Point-of-Entry Systems

The first fork in the road is deciding between a Point-of-Use (POU) and a Point-of-Entry (POE) system. I like to think of it as the difference between a scalpel and a floodlight—one is for precision work, the other for broad coverage.

A Point-of-Use (POU) system gets the job done right where you need it most. The classic example is an under-sink reverse osmosis unit that feeds a special, dedicated faucet right next to your main kitchen tap.

  • Who it's for: Frankly, most households dealing with nitrates. The health risk is all about ingestion, so zeroing in on your drinking and cooking water is an incredibly smart and budget-friendly approach.
  • What it looks like in practice: You'll fill your water bottle, coffee maker, and pasta pots from this dedicated faucet. Water for washing hands or dishes at the main sink, along with every other tap in the house, will still be your regular, untreated well water.

On the other hand, a Point-of-Entry (POE) system is the full-house solution. We install this beast right where the main water line comes into your home, treating every single drop of water that flows past it.

  • Who it's for: This is for homes with seriously high nitrate levels or other water quality problems you want gone everywhere. It’s the comprehensive, no-compromise option.
  • What it looks like in practice: This is a much bigger job, both in terms of equipment and installation. Because of the high flow rates needed to run a whole house, ion exchange is the go-to technology for POE nitrate removal.

For the vast majority of families I work with, a POU system is the clear winner for nitrates. It tackles the actual health risk head-on without the cost and complexity of a whole-house installation.

Let me give you a real-world example. A family finds their well water has nitrate levels around 12-15 mg/L. They install an under-sink RO system. This gives them total confidence in the water they drink, while they continue to use untreated well water for showering and laundry, where nitrates pose zero risk. It's the perfect balance.

Sizing Your System for Your Family

Once you've picked your approach (POU or POE), you have to make sure the system can actually keep up with your household's demand. It all comes down to capacity and flow rate.

For a POU reverse osmosis system, the magic number is Gallons Per Day (GPD). A standard under-sink unit might be rated at 50 to 75 GPD. That doesn't mean you'll use 50 gallons in a day, but it tells you how fast the system can produce purified water to refill its little storage tank. For a family of four, a 50 GPD system is almost always plenty for all your drinking and cooking needs.

For a POE ion exchange system, we're talking about flow rate, measured in Gallons Per Minute (GPM). You need a system that won’t leave you with a dribbling shower just because the dishwasher kicked on. A pro will calculate your home's peak demand, but for reference, a typical family home usually requires a system that can handle 10-15 GPM without breaking a sweat.

Pre-Filters and Post-Treatments: The Unsung Heroes

A top-tier nitrate removal system is rarely a solo act. To protect your main unit and get water that actually tastes great, you absolutely need to think about what happens before and after the heavy lifting.

Pre-filtration is non-negotiable with well water. Period. Your well can kick up sediment, sand, and rust that will shred a delicate RO membrane or gum up the resin beads in an ion exchange system in no time.

  • Sediment Filter: This is your system’s bodyguard. It’s a simple cartridge that grabs all the physical gunk before it can do any damage to the expensive parts downstream.
  • Carbon Filter: If you've got any "earthy" or chemical tastes and odors in your water, a carbon pre-filter is fantastic for absorbing them before they get to the main unit.

Post-treatment is all about polishing the water to perfection right before it hits your glass. This is especially crucial for reverse osmosis.

  • Remineralization Filter: RO is so effective it strips out everything, including beneficial minerals like calcium and magnesium. This can leave the water tasting sterile and "flat." A remineralization filter adds a touch of these healthy minerals back, which makes a world of difference in taste and can slightly balance the water's pH.
  • UV Purifier: If your water test also flagged any bacteria or viruses, a UV light is the perfect final security checkpoint. Added after the main system, it zaps any lingering microorganisms to ensure total safety.

Putting these pieces together means you’re not just buying a filter—you’re building a complete system that will run efficiently, last for years, and deliver consistently safe and delicious water.

Keeping Your Water Safe with Smart System Maintenance

A person holding a maintenance checklist, inspecting an under-sink water filtration system and pipes in a cabinet.

Putting in a new filtration system is a great first move, but it's definitely not a "set it and forget it" kind of deal. Think of it like a new car—you wouldn't skip the oil changes, right? Regular maintenance is what keeps that system running smoothly and protecting your family for years to come.

If you let it slide, even the best system will eventually stop working effectively. Filters clog, membranes get fouled, and resin beds get worn out. This isn't just a performance issue; it directly impacts the safety of your water.

Your Reverse Osmosis Maintenance Checklist

Reverse osmosis systems are the go-to for nitrate removal, but their multi-stage setup means you need to pay attention to a few different parts. Each component has a specific job and, more importantly, a limited lifespan.

Your system’s manual is the best guide, but here’s a general schedule to keep in mind:

  • Sediment & Carbon Pre-filters: These are the gatekeepers, protecting the delicate RO membrane from grit and chlorine. You'll want to replace these every 6 to 12 months.
  • RO Membrane: This is the core of your system. If you take care of the pre-filters, the membrane itself can last 2 to 3 years. A classic sign it’s failing is a noticeable drop in how much water it produces.
  • Carbon Post-filter: This last filter is what polishes the water for taste. Swap it out every 12 months to keep things tasting fresh and clean.

Keeping Your Ion Exchange System Regenerating

An ion exchange system is pretty low-maintenance, but it has one critical need: salt. The salt in the brine tank is what recharges the resin beads, allowing them to keep grabbing nitrates out of your water.

Think of the salt as fuel for your nitrate removal engine. If you let the brine tank run dry, the system can't recharge, and nitrates will start slipping right through into your taps.

Pop the lid on your brine tank at least once a month. A good rule of thumb is to always keep it at least half-full. The good news? The resin bed itself is a real workhorse, often lasting 10 years or more with proper care.

The Simple Care for Distillation Units

If you went with a distiller, you’ve got the easiest maintenance routine of the bunch. Because distillers boil water, their main enemy is the mineral buildup (or scale) that gets left behind. This limescale can coat the heating element and make the whole unit less efficient.

Just plan on cleaning it every few weeks or once a month, depending on how hard your water is. It's usually a simple process involving a cleaning cycle with some white vinegar or a descaling solution. Let it soak, give it a rinse, and you’re back in business.

The Non-Negotiable Annual Re-Test

No matter what system you have, this is the one maintenance step you can't skip: re-testing your well water every year. It’s the only way to know for sure that your system is still doing its job.

Well chemistry can change. It can be affected by seasonal shifts, nearby farming, or even a failing septic system. An annual lab test confirms your filter is handling the current nitrate levels and will catch any new issues before they become a real problem.

This is especially critical since high nitrate levels over the 10 mg/L limit are a serious health concern, linked to "blue baby syndrome" and other risks. If you want to dig deeper, you can learn more about the global impact of nitrate contamination and see why staying on top of it is so important.

This yearly check-up gives you true peace of mind. It’s the final step in knowing you’ve successfully removed the nitrates from your well water—and that they’re staying out.

Common Questions About Nitrates in Well Water

Even with all the facts, some questions always pop up when you're trying to figure out how to handle nitrates in your well water. Let's run through the most common ones I hear to get you on the right track.

Can I Just Boil My Water to Get Rid of Nitrates?

This is a huge, and frankly dangerous, mistake. Never boil water to remove nitrates. Boiling is great for killing bacteria, but it actually makes your nitrate problem worse.

As the water boils, some of it turns to steam and escapes, but the nitrates get left behind. This means you end up with the same amount of nitrates in less water, which shoots their concentration way up.

If you start with water at 10 mg/L, a good boil can easily push that to 15 mg/L or more. That's a big jump into a more dangerous zone, especially for infants.

Will a Regular Water Softener or Pitcher Filter Work?

Nope, sorry. A standard water softener is a type of ion exchange system, but it’s only built to grab positively charged things like the calcium and magnesium that cause hard water. Nitrates are negatively charged, so a softener just lets them slide right by.

Same deal with that carbon filter in your fridge pitcher. It’s a champ at getting rid of chlorine and making your water taste better, but it physically can't trap dissolved nitrates. You need a specific tool for the job, like reverse osmosis or a special nitrate-selective ion exchange filter.

Is an Under-Sink System Really Enough?

For most families, absolutely. A point-of-use (POU) system that sits right under your kitchen sink is usually the perfect fit. The real health risk from nitrates comes from drinking the water or using it to mix baby formula or cook.

A POU unit, like a reverse osmosis system, treats just the water you’ll actually consume. This makes it a super effective and affordable way to solve the problem. Going with a whole-house system is usually overkill unless your nitrate levels are off the charts or you're dealing with a bunch of other water quality problems at the same time. For more general tips on home setups, you can find a lot of good water filtration advice to see what might work for you.

My Neighbor's Well Is Fine, So Mine Should Be Too, Right?

I wouldn't bet on it. It’s amazing how different well water can be, even from one yard to the next.

Things like the depth of your well, the local geology, which way the groundwater is flowing, and how close you are to a septic tank or a fertilized field can create totally different conditions. The only way to know for sure what's in your water is to get your own test done.


At Water Filter Advisor, our goal is to help you find the right fix for your home's water. Check out our guides and reviews to make a smart choice for your family's health over at https://www.waterfilteradvisor.com.
Removing Sulfur Smell from Well Water: Your Guide to Clean, Odor-Free Taps

So, your well water smells like rotten eggs. Welcome to the club! It’s one of the most common—and let’s be honest, most gag-worthy—complaints from homeowners with private wells. The good news? You can absolutely fix it. Getting rid of that sulfur stench comes down to one thing: picking the right home water filtration system.

But before you start shopping, you need to play detective. Is the smell coming from a harmless gas in your groundwater, or is a colony of funky bacteria having a party in your pipes? Once you know the villain, you can choose the perfect hero—like aeration, oxidation, or a carbon filter—to save your water for good.

Why Your Well Water Smells Like Rotten Eggs

When you turn on the faucet and get hit with that unmistakable rotten egg odor, you're getting a big, smelly clue that your water chemistry is off. The culprit behind this olfactory assault is almost always a gas called hydrogen sulfide (H₂S).

Just a tiny amount of this stuff can make a glass of water undrinkable and a hot shower unbearable. The first and most critical step in your mission to reclaim your water is figuring out where that gas is coming from.

Water pours from a kitchen faucet into a glass, with a 'ROTTEN EGG SMELL' sign overhead.

In the world of well water, hydrogen sulfide usually comes from one of two places. It's crucial to identify which one you're dealing with because the filtration solutions are completely different.

The Two Main Culprits

One possibility is that H₂S is a natural feature of your local groundwater. This is common in areas with geological formations like shale or sandstone. As groundwater seeps through these layers, it picks up the gas and carries it right into your well. If this is your situation, you have a constant source of smelly water that needs a powerful, whole-home filtration system to treat it 24/7.

The second cause—and the one we see most often—is biological. We're talking about sulfur-reducing bacteria (SRBs). These microscopic critters thrive in oxygen-free environments, like the inside of your well casing, plumbing, or hot water heater. They aren't harmful to your health, but they have a nasty habit of munching on sulfates in the water and "exhaling" hydrogen sulfide gas. Voilà, instant rotten egg smell.

Key Takeaway: You're not just fighting a smell. You're either treating the water as it enters your home or evicting a colony of tiny organisms from your water system. Figuring out which it is will lead you to the right filtration fix.

A Quick At-Home Diagnostic Test

Before you spend a dime on professional testing, you can run a simple sniff test to get a huge clue about the source of the smell.

Grab two clean glasses. Fill one from the cold tap and the other from the hot tap. Now, walk them into another room (away from any stinky sink drains) and give them a sniff.

  • Smell only in the hot water? Bingo! The problem is almost certainly your water heater. The anode rod inside can react with sulfates to create H₂S gas, and the tank itself is a warm, cozy spa for sulfur-reducing bacteria.
  • Smell in both, but it fades after a minute? If the smell is strong at first but vanishes as you let the water run, the bacteria are likely living in your well or plumbing system.
  • Smell is constant in both hot and cold? A persistent stink that never goes away, no matter how long the water runs, points directly to hydrogen sulfide being naturally present in your groundwater.

This isn't just about an annoying odor. High sulfate levels that lead to hydrogen sulfide are a global issue. A 2025 study estimated that 194 million people live in areas where sulfate in drinking water exceeds WHO recommendations, which can lead to digestive issues. This makes proper filtration a health essential, not a luxury. You can read more about these global water quality findings on ScienceDaily.com.

Once you've narrowed down the source, you're ready to pick the right home filtration system and banish that rotten egg smell for good.

Getting to the Bottom of Your Sulfur Problem

When it comes to water filtration, guessing is the most expensive game you can play. Before you even think about buying a filter to fix that rotten egg smell, you need to know exactly what’s in your well water.

It's like going to a doctor: you want a diagnosis before you get a prescription. Throwing money at fancy equipment without hard data is the fastest way to get frustrated and end up right back where you started—with stinky water.

A comprehensive water analysis is your roadmap to success. It goes beyond confirming "yep, it smells" and gives you the complete chemical breakdown of your water. This is a non-negotiable step because other contaminants often tag along with hydrogen sulfide. These unwanted guests can clog or ruin certain types of filters, making one system a perfect match and another a total waste of money.

What You Absolutely Need to Test For

When you get your water tested, don't just ask them to check for "sulfur." You need specifics to choose the right home filtration system.

Make sure your report includes precise measurements for:

  • Hydrogen Sulfide (H₂S): This is the gas causing the rotten egg smell. You need to know the exact concentration.
  • Sulfates: This is the "food" for the sulfur-reducing bacteria that create the gas.
  • Iron & Manganese: These two are notorious for fouling up sulfur filters. If you have them, your filtration system needs to be able to handle them.
  • pH Level: Your water's acidity or alkalinity dramatically affects how well certain filtration methods, especially oxidation, will work.
  • Total Dissolved Solids (TDS): A high TDS level can signal other issues that might need a pre-filter or a more robust system.

With these numbers, you can confidently choose a home filtration system that’s perfectly tailored to your well's unique chemistry.

DIY Test Strips vs. a Real Lab Analysis

I know it’s tempting. You see those DIY water test kits at the hardware store and think, "Easy peasy." But for sizing a whole-home filtration system, they have serious limitations.

My Two Cents: DIY strips are fine for a ballpark guess on things like water hardness. But for hydrogen sulfide? They're notoriously unreliable. The gas can literally escape from the water sample before the strip even gets an accurate reading.

A certified lab analysis is an investment in getting it right the first time. You get precise, accurate results that allow you to buy the correct filtration equipment from the start, saving you the massive headache of installing an expensive system that can't do the job.

This detail is critical. Sulfate levels in groundwater can be all over the place. According to research from the EPA, some wells might have sulfate concentrations as low as 10 mg/L, while others can spike to over 1,000 mg/L. Without a real test, you're just flying blind.

Choosing the Right Sulfur Filtration System for Your Home

Alright, armed with your water test results, it's time for the main event: choosing a whole-house filtration system to permanently solve your rotten egg problem. This isn't a temporary patch; it's a long-term upgrade that delivers fresh, odor-free water to every faucet in your house.

Diving into the world of water filters can feel overwhelming, but for sulfur issues, it really boils down to a few proven technologies. The best one for you depends entirely on what your water test revealed. The concentration of hydrogen sulfide (H₂S), along with other party-crashers like iron and bacteria, will point you straight to the perfect system.

Flowchart showing two options for water testing: DIY with test tubes and professional lab test with a microscope.

Whether you used a home kit for a preliminary check or got a full lab analysis, this data is your guide to selecting the right hardware for your home.

Air Injection Oxidizing (AIO) Filters

One of the most popular and effective solutions is the Air Injection Oxidizing (AIO) filter. Think of it as the chemical-free workhorse of sulfur removal. This all-in-one system uses a simple, brilliant trick: it pulls in oxygen from the air and mixes it with your water as it enters the tank.

This kicks off a natural process called oxidation, which instantly converts the dissolved hydrogen sulfide gas into tiny solid particles. These particles are then easily trapped by a specialized media bed inside the tank. Every few days, the system automatically backwashes, flushing all the trapped sulfur and iron down the drain. It’s a clean, efficient, and low-maintenance solution.

I often recommend an AIO system when a water test shows low to moderate hydrogen sulfide—up to around 6-8 ppm—especially if there's also some iron. For most homeowners, it's a true "set it and forget it" solution.

Catalytic Carbon Filters

If you're dealing with a milder sulfur odor, a catalytic carbon filter can be an excellent and straightforward fix. These are best for H₂S levels under 1-2 ppm. While they look like standard carbon filters, the media inside has a special catalytic coating that dramatically speeds up the oxidation process.

As water flows through, H₂S gas is converted to solid sulfur and absorbed by the carbon. They’re simple, effective for slight smells, and don't use any chemicals. The only catch is that the carbon media will eventually need to be replaced, typically every couple of years.

Chemical Feed Pump Systems

Now, if your water test came back with some truly scary numbers—we're talking high hydrogen sulfide (10 ppm or more), iron bacteria, or other nasty microorganisms—it's time to bring in the heavy artillery. That’s where a chemical feed system, usually using chlorine, comes into play.

This setup injects a precise amount of chlorine into your water, which then flows into a holding tank. Chlorine is a powerful oxidizer that obliterates hydrogen sulfide and kills bacteria on contact. After the holding tank, a large carbon filter removes any leftover chlorine and sulfur particles, leaving you with completely purified, odor-free water.

This is the undisputed champion for severe water problems, but it does require more hands-on maintenance, like keeping the chemical solution tank filled. For a deeper dive into different filter types, our guides and advice section has a ton of great information and reviews.

Comparing Home Filtration Systems for Sulfur Smell Removal

Choosing the right system is a balancing act between performance, cost, and maintenance. What's perfect for your neighbor's well might be all wrong for yours. This side-by-side comparison should help clarify your decision.

Filtration Method Effective H₂S Range (PPM) Initial Cost Ongoing Maintenance Best For
AIO Filter 1 – 8 PPM Moderate Low (No chemicals) Moderate H₂S & iron
Catalytic Carbon 0.3 – 2 PPM Low-Moderate Moderate (Media change) Low H₂S, simple installs
Chemical Feed 6+ PPM High High (Refill chemicals) High H₂S & bacteria

By matching your lab results to the capabilities of each system, you can confidently invest in a home filtration solution that will finally kick that rotten egg smell to the curb.

Short-Term Fixes for Immediate Odor Relief

While you're deciding on the perfect long-term filtration system, you don't have to suffer through smelly showers. There are some powerful, immediate steps you can take to clear the air—and your water.

Think of these as your emergency first-aid kit for stinky water. They provide fast, welcome relief.

The two most common hotspots for a sudden sulfur smell are sulfur-reducing bacteria partying in your well or a similar colony that has checked into the warm, cozy spa of your water heater. Luckily, there are targeted ways to deal with both situations right now. And sometimes, if bacteria are your only problem, these fixes might even solve it for good.

Shock Chlorinating Your Well

If you've traced the odor back to bacteria in your well or plumbing, the most effective quick fix is shock chlorination. This is exactly what it sounds like: you're giving your well a sanitizing shock with a strong chlorine solution to kill off the bacteria producing that awful hydrogen sulfide gas.

It's a deep clean for your entire water system and an incredibly effective way to remove sulfur smell from well water when bacteria are the root cause. You just have to follow the steps carefully to do it safely.

Here’s the basic game plan:

  • Calculate the Dose: The amount of unscented household bleach you need depends on your well's depth and diameter. A common guideline is 2-3 pints of bleach for every 100 gallons of water in the well.
  • Mix and Circulate: Dilute the bleach in a bucket of water and pour it directly into the well. Then, connect a garden hose to an outdoor spigot and run water back into the well for at least an hour to circulate the chlorine.
  • Flush the System: Let the chlorine sit in the well for 8-24 hours. Then, go to every faucet in your house (hot and cold), run it until you smell chlorine, and shut it off. Finally, run an outdoor hose away from any landscaping or septic systems until the chlorine smell is completely gone.

Pro Tip: Shock chlorination can often keep the smell away for several months. If it comes back, you've confirmed a persistent bacteria problem. That’s your signal that a permanent filtration solution, like an AIO filter or a chemical feed system, is the next step.

Addressing the Water Heater Problem

What if your sniff test revealed the smell is only coming from the hot water? This is a dead giveaway that your water heater is the culprit. It’s a perfect breeding ground for sulfur bacteria—warm, dark, and oxygen-poor.

The anode rod inside the tank, designed to prevent rust, can sometimes make things worse. A standard magnesium rod can react with sulfates in the water, creating hydrogen sulfide gas as a byproduct.

Fortunately, the fix is pretty straightforward and doesn't involve your well at all.

You'll need to drain and flush the water heater to clear out the smelly, bacteria-filled water. For a more lasting solution, replace the standard magnesium anode rod with an aluminum-zinc alloy rod. This type of rod is much less reactive and helps prevent odor-causing bacteria from growing back. This simple swap can completely eliminate a hot-water-only sulfur smell.

While tackling your water, it never hurts to think about the bigger picture of home freshness. You can explore general strategies for eliminating common household odors to complement your efforts.

Installing and Maintaining Your Filtration System

You’ve done the heavy lifting—you tested your water, researched your options, and picked the perfect filtration system to banish that rotten egg smell for good. But the job isn't quite done. Proper installation and routine upkeep are what will make your investment pay off for years to come.

Getting this last part right is the difference between flawless, fresh water and future headaches.

First, decide whether to DIY the installation or call in a pro. Many modern systems, like a catalytic carbon filter, are designed for a handy homeowner. But for more complex setups like a chemical feed system, having an expert handle the plumbing and initial setup is money well spent.

A person's hands are replacing a water filter in a home filtration system during maintenance.

Hiring a Professional Installer

If you go the pro route, don’t just hire the first name you find. A true water treatment specialist understands how to optimize your system for your specific water chemistry.

Before you commit, ask a few key questions:

  • Do you have experience with my specific type of system? An expert with AIO filters might not be the best choice for a chlorine injection pump.
  • Can you provide references from recent installations? Hearing from other homeowners is the best way to gauge reliability and quality.
  • What kind of warranty do you offer on your installation? You want to know you’re covered if a leak appears after they leave.
  • Will you program the system based on my water test results? This is critical. A properly set regeneration cycle ensures top performance and prevents water waste.

Getting solid answers here ensures your system is installed right from day one.

Long-Term Maintenance Your System Needs

Okay, your new system is humming along, and the water is glorious. Now what? A little routine maintenance is all it takes to keep it removing sulfur smell from well water effectively. Ignoring it is like never changing the oil in your car—eventually, you'll have a big, expensive problem.

A Quick Analogy: Think of your filtration system like a garden. You can't just plant it and walk away. It needs regular, simple care to thrive and keep producing that fresh, clean water you love.

Staying on top of maintenance stops small issues from becoming big, smelly ones.

Your Essential Maintenance Checklist

The exact tasks depend on your system, but here’s a practical checklist for the most common sulfur removal setups. Set a recurring reminder on your phone for these—it's easy to forget!

For Air Injection Oxidizing (AIO) Systems:

  • Check the Air Injector (Every 6-12 months): This tiny part can get clogged with iron or sediment, preventing the system from drawing in air. A quick cleaning is usually all it takes.
  • Inspect the Control Valve (Annually): Just listen to the backwash cycle. Make sure it sounds right and that the valve is moving through its positions smoothly.

For Chemical Feed Pump Systems:

  • Replenish the Solution Tank (As needed): This is your most frequent task. Keep an eye on the chemical level (usually chlorine) and top it off.
  • Clean the Injection Point (Annually): Mineral scale can clog the injection fitting where the chemical enters your water line, stopping your system cold. A quick check and clean will prevent this.

For Catalytic Carbon and Media Filters:

  • Replace the Media (Every 2-3 years): This is a bigger job, but infrequent. You’ll know it’s time when that faint rotten egg smell starts to creep back. That’s your signal that the media is saturated and needs to be replaced.

Following a simple schedule like this will ensure you get clean, odor-free water for years, protecting both your investment and your nose.

Common Questions About That Rotten Egg Smell

Even after diving into the science and solutions for that sulfur smell, it’s normal to have a few questions left. Sorting through home filtration systems can feel like a lot, but getting clear answers is the last step before you can choose a solution with total confidence.

Let's tackle the most common questions homeowners ask when they're battling the rotten egg beast.

Will a Water Softener Get Rid of the Sulfur Smell?

This is probably the biggest myth in water treatment. The short answer? No.

A standard water softener is a one-trick pony: it removes hardness minerals like calcium and magnesium. It is simply not designed to capture a dissolved gas like hydrogen sulfide.

In fact, the resin beads inside a softener can become a breeding ground for sulfur-reducing bacteria, which can make the rotten egg odor even worse. If you have a sulfur problem, you need a dedicated system for removing sulfur smell from well water.

Why Does My Water Smell Worse at Certain Times?

A sulfur smell that comes and goes can be maddening. This fluctuation usually points to a few common culprits.

  • Changes in the Water Table: Heavy rain or a dry spell can alter the groundwater chemistry, causing the smell to flare up.
  • Bacterial Activity: If bacteria are the cause, their activity level isn't always constant. It can ebb and flow, making the smell seem intermittent.
  • Water Stagnation: When water sits in your pipes or hot water heater, hydrogen sulfide gas concentrates. This is why the smell is often strongest when you first turn on a faucet after it's been off for a while.

Here's the key takeaway: an inconsistent smell still points to a consistent problem. Even if the odor vanishes for a day, the underlying cause is still there and needs a permanent filtration solution.

Is It Safe to Drink Water That Smells Like Sulfur?

At the low levels typically found in homes, the smell itself isn't considered a direct health hazard. But you absolutely shouldn't ignore it. Think of that rotten egg smell as your water’s built-in alarm system.

It’s a huge red flag that your water quality is compromised. It can signal the presence of bacteria or high levels of sulfates, which can cause digestive issues like diarrhea—especially for young children or guests. The smell is your water telling you it's time to get it tested and find the right filtration plan.

How Long Does Shock Chlorination Last?

This all depends on the source of your sulfur problem.

If the smell was caused by bacteria colonizing your well, a thorough shock treatment could solve the problem for several months, or in some cases, for good.

But if hydrogen sulfide is naturally present in your aquifer, the smell will always return as new, untreated water is drawn into the well. In that case, shock chlorination is just a temporary fix. It’s a great way to get immediate relief, but it also confirms that you need a permanent filtration system for a true, long-term solution.


At Water Filter Advisor, we're dedicated to helping you find the perfect, lasting solution for your well water. Explore our expert guides and reviews to make a confident choice for your home at https://www.waterfilteradvisor.com.
DIY Guide to Installing a Whole House Water Filter

Installing a whole house water filter is one of the best upgrades you can make for your home, providing clean, pure water from every single tap. Like any good home project, success starts with a solid plan. Before you even think about cutting a pipe, you need to nail down two things: the installation location and what kind of plumbing you're dealing with.

Getting this right from the start saves a ton of headaches and ensures your new water filtration system works like a charm for years to come.

Your Game Plan for Flawless Home Water Filtration

Ready to transform your home's water? This guide is your no-nonsense roadmap to installing a whole house water filter. Forget the technical jargon—we're here to give you clear, practical steps to seriously upgrade every drop of water in your home, from what you drink to what you shower in.

Man crouching, measuring an area with a tape measure, planning a plumbing installation next to a white wall.

It’s no surprise these systems are becoming so popular. The home water filtration market is on a major upswing, projected to grow from USD 20.8 billion in 2025 to a massive USD 35.7 billion by 2035. Whole house units are a huge part of that because they treat water right where it enters your home, protecting you and your appliances.

Finding the Perfect Installation Spot

First things first, let's find the best home for your new filter. You’re looking for the spot where the main water line enters your house. This is usually in the basement, garage, or a utility closet.

The key is to install the filter before the main line splits off to your water heater or any other fixtures.

Why does this matter so much? By placing the filter at this "point of entry," you guarantee that every tap—hot and cold—delivers clean, filtered water. This is about more than just better-tasting water; it’s about protecting your entire plumbing system and every water-using appliance from sediment, chlorine, and other gunk.

When you're scouting locations, keep a few things in mind:

  • Accessibility: You need room to work, but more importantly, you need space to change the filter cartridges down the road. I always recommend leaving at least a foot of clearance below the filter housing to make swapping filters easy.
  • Drain Access: If your system has a backwashing feature, you'll need to run a line to a nearby drain. Plan for this now.
  • A Solid Mount: These systems get heavy once they're full of water. Make sure you have a sturdy wall stud or a solid backer board to mount it to securely.

Identifying Your Pipe Type

Alright, next up is getting to know your plumbing. The material of your main water line will dictate the exact tools and fittings you'll need to buy. Take a good look at the pipe where you plan to make your cuts.

Pro Tip: Don't just guess your pipe size. Most homes have either 3/4-inch or 1-inch main lines. The size is often stamped right on the pipe or the existing fittings. Using the wrong size is the #1 cause of frustrating, slow leaks.

Here are the usual suspects you'll find in most homes:

  • Copper: The classic. It's a rigid, reddish-brown metal pipe known for being incredibly durable.
  • PEX: This is a flexible plastic tubing you'll see in a lot of newer homes. It’s usually red for hot water and blue for cold.
  • PVC: A rigid plastic pipe, typically white or off-white. It's very common for main water lines coming into a house.

Taking the time to get this planning phase right is absolutely crucial for a smooth, leak-free installation. For more general tips and tricks on all things water filtration, check out the comprehensive advice available from our experts.

Getting Your Plumbing Ready for the Filter

Alright, you've got your plan and your shiny new filter. Now it's time to get your hands dirty. This is where the real work begins, and trust me, a bit of prep now will save you from a major headache (and a major mess) later.

Before you even think about cutting a pipe, you absolutely have to shut off the water to your entire house. This is non-negotiable. It’s the first rule of plumbing: take control of the water.

Find and Shut Off the Main Water Valve

First things first, you need to locate your home's main water shut-off valve. This is the master switch for all the water coming into your house. If you don't know where it is, don't sweat it—most people don't until they have to.

Here are the usual suspects for its location:

  • In the basement, typically near the front wall where the water line enters.
  • Tucked away in a utility closet or garage, often hanging out near the water heater.
  • Outside in a buried service box near the street (this is the city's shutoff, but it works in a pinch).

Found it? Great. Turn the handle or wheel clockwise all the way until it stops. To be 100% sure the water is off, go open a faucet in your basement and another one in an upstairs bathroom. If the flow trickles to a stop, you're golden. This also has the added benefit of draining most of the water out of the pipes, which will prevent a surprise shower when you make your first cut.

Measure and Mark—Twice

With the water off and the pipes drained, it's time to mark your territory. This is the classic "measure twice, cut once" moment, and it really matters here.

Grab your filter housing and hold it up against the pipe where you plan to install it. You need to account for the total length of the filter and any other fittings you're adding, like shut-off valves or unions on each side.

Use a permanent marker to draw clear lines on the pipe showing exactly where to cut. I always suggest giving yourself a tiny bit of extra room between the marks. It's way easier to trim a pipe down a little more than it is to magically add a piece back on.

A rookie mistake I see all the time is measuring only for the filter body. Don't forget to add the length of your inlet and outlet fittings! Forgetting this turns a simple job into a frustrating jigsaw puzzle where the last piece doesn't fit.

Do Yourself a Favor: Build a Bypass Loop

Before you reach for the pipe cutters, let's talk about a pro move that your future self will thank you for: building a bypass loop.

A bypass is just a small section of parallel pipe with a valve that lets water go around the filter instead of through it. It might seem like extra work, but it's a total game-changer for maintenance down the road.

Think about it. When it's time to change the filter cartridge, you don't want to shut off water to the whole house just to do a five-minute job. With a bypass, you simply:

  1. Close the valves on the inlet and outlet of the filter.
  2. Open the valve on the bypass pipe.
  3. Swap out your filter without anyone in the house even knowing. The water keeps flowing.

It just takes a couple of extra T-fittings and one more ball valve, but the convenience is worth every penny. The core principles of creating secure, serviceable water lines are universal, whether on land or at sea; a solid setup requires good planning. For a deeper dive into the fundamentals, it can be helpful understanding boat plumbing systems, as many of the same concepts apply. Getting your plumbing prepped right is the foundation for a flawless installation.

Connecting Your Filter to Different Pipe Types

Alright, now we get to the fun part—actually tying the filter system into your home's plumbing. This is where the magic happens, and the right approach depends entirely on what kind of pipes you're working with. Don't sweat it; we'll walk through the most common types so you can handle this like a pro.

Once the pipe is prepped, you're ready to make the final connections. The first three steps are universal, no matter what kind of pipes you have.

You absolutely must shut the water off, drain the lines, and make your cut before doing anything else. It's a non-negotiable foundation for a safe, dry installation.

Working with Copper Pipes

Copper is the old standard in plumbing for a reason. You've got two solid options here, and your choice really boils down to traditional technique versus modern speed.

First up is sweat soldering. This is the classic plumber's method: use a torch to heat the pipe and fitting, then apply solder to create a permanent, bulletproof joint. It takes some practice, a torch, flux, and solder, but a well-soldered joint is second to none for reliability.

The other route, which is getting more popular by the day, is using push-to-connect fittings (think SharkBite). These things are a DIYer's best friend. You just clean up the end of the pipe, push the fitting on until it clicks, and you’ve got a watertight seal. They do cost more, but they can cut your installation time way down.

I’ve used both methods more times than I can count. My take? If you have the tools and know-how, soldering is rock-solid and cheap. For most homeowners, though, the speed and sheer simplicity of push-to-connect fittings are worth every extra penny for the peace of mind.

Tackling Threaded Galvanized Pipes

If you’re looking at older, silver-gray galvanized steel pipes, you'll be dealing with threaded connections. The secret here isn't brute force; it's all in the prep work. Old threads are often gunked up or corroded, and that will kill your seal.

Grab a wire brush and give the male threads a thorough cleaning. You want to see sharp, clean grooves. Once they're clean and dry, it's time for pipe thread sealant tape (you probably know it as Teflon tape).

Here's the right way to apply it:

  • Wrap Clockwise: Always wrap the tape in the same direction you'll be tightening the fitting—clockwise. This keeps the tape from bunching up or unraveling.
  • Don't Overdo It: 3-5 full wraps are usually perfect. Pull it snug so it settles into the threads.
  • Skip the First Thread: Start your wrap on the second thread from the end. This prevents little bits of tape from shearing off and getting into your brand-new filter.

Once it's wrapped, thread the fitting on by hand, then give it a couple of final turns with a pipe wrench to make it snug.

Mastering PEX Tubing Connections

PEX, that flexible plastic tubing, is a staple in modern homes and is probably the easiest material to work with. You'll typically use either crimp or clamp connections, and both create a fantastic seal.

Crimp connections involve sliding a copper crimp ring over the PEX, inserting a barbed fitting, and then squeezing the ring with a special crimp tool. You’ll need a "go/no-go" gauge to double-check your work.

Clamp connections are very similar but use a stainless steel cinch clamp. A cinch clamp tool tightens a single tab on the clamp, which many people find a bit more forgiving.

Both methods require a dedicated tool, but they're incredibly fast and reliable, making them a great choice for a DIY filter install in a newer house.

The move towards these user-friendly connection methods is part of a bigger picture. The global water filter market is projected to grow from USD 48.2 billion in 2025 to USD 84.2 billion by 2032, largely because more people want clean water and are willing to install systems themselves. When dealing with PVC, a secure connection is just as critical; you might get some useful ideas from this guide on connecting a hose adapter to PVC.

Mounting the System and Making Final Connections

With your pipes prepped and waiting, it's time to give that filter a permanent home. Getting the mounting right isn't just about aesthetics; it’s about preventing long-term stress on your plumbing. A rock-solid installation also means changing the filter cartridge later is a simple task, not a frustrating wrestling match.

A whole house water filter system is mounted securely on the side of a beige house.

This step ensures the full weight of the unit—which gets surprisingly heavy once full of water—is supported by the wall itself, not your pipes. This stability is a huge part of installing a whole house water filter that will last for years.

Securing the Mounting Bracket

First things first, find a solid place to anchor this thing. Never mount a filter system directly to drywall. It simply won't hold the weight. Grab a stud finder and locate a wall stud right where you want to install it.

What if a stud isn't in the perfect spot? The pro move is to install a backer board. Just take a piece of 3/4-inch plywood and screw it securely across two studs. Now you’ve got a solid mounting surface anywhere you need it, giving you a ton of flexibility.

Hold the mounting bracket against the wall at your desired height. A good rule of thumb is to leave at least a foot of clearance below the housing. You'll thank yourself later when you have plenty of room to unscrew the sump for filter changes. Put a level on the bracket to make sure it's perfectly horizontal, then mark your drill holes with a pencil.

Drill some pilot holes into the stud or plywood, then drive in the lag screws that came with your kit. Give the bracket a good, firm tug to make sure it’s not going anywhere.

Hanging the Filter and Aligning Pipes

Now you can hang the main filter head assembly right onto the bracket. It should just slide or clip into place. With the head mounted, you can finalize the plumbing alignment.

Carefully bring your inlet and outlet pipes up to the filter's ports. This is where leaving a little extra pipe comes in handy. You want the pipes to meet the filter connections naturally, without you having to force or bend them into place.

Critical Check: Look closely at the filter head. You'll see arrows or labels marking "IN" and "OUT." This indicates the direction of water flow. Hooking it up backward is the most common DIY mistake, and it will keep the filter from working at all. Double-check this now. It’s a simple thing that can save you a massive headache.

Once everything is lined up perfectly, go ahead and make your final connections, whether that means tightening threaded fittings, soldering your copper, or snapping on push-to-connect fittings.

Your Final Pre-Flight Checklist

Before you even think about turning that main valve back on, stop and run through this quick list. This is your last chance to catch a small mistake before it turns into a big, wet problem.

  • Bracket Security: Is the bracket totally solid? Give it another wiggle. No movement? Good.
  • Filter Housing: Is the sump (the big canister part) hand-tightened onto the filter head? Don't use a wrench on it yet.
  • Flow Direction: You checked it once, check it again. Is the "IN" pipe going to the "IN" port and "OUT" to "OUT"?
  • Bypass Valves: If you installed a bypass, make sure the valves leading to the filter are OPEN and the main bypass valve is CLOSED.
  • All Connections: Are all your fittings snug and tightened down properly?

Take a step back and admire your work. A good installation looks clean, professional, and feels solid. Once you've gone through this checklist, you’re ready for the moment of truth.

Commissioning Your System and Hunting for Leaks

This is the moment of truth. All your planning and hard work comes down to these next few minutes. The goal is a perfect, leak-free installation, and the key is patience.

How you reintroduce water to the system is the difference between a smooth finish and a frantic dash back to the shut-off valve.

https://www.youtube.com/embed/k_YdNIGuWD8

Head back to your main water shut-off and crack it open just a quarter turn. You’ll hear a gentle hiss as water starts to fill the pipes and filter housing. Don't be tempted to open it all the way just yet.

This slow trickle does two things: it prevents a damaging pressure surge called water hammer, and it gives you a crucial window to start hunting for leaks.

The Paper Towel Test

Now it’s time to play detective. Your best tool for this job is a simple, dry paper towel.

Go to every single connection you made—every fitting, joint, and valve on both the inlet and outlet sides of the filter. Touch the bottom of each one with the paper towel.

Even the smallest bead of moisture will show up immediately. Pay close attention to these spots:

  • Where your pipes connect to the filter's inlet and outlet.
  • Any unions or valves you installed, especially on a bypass loop.
  • The main seal where the filter sump screws into the head.

If you find a drip, don't panic. Just shut the water off, drain the pressure, and fix it. A threaded fitting might just need another turn with the wrench or fresh plumber's tape. For a push-to-connect fitting, make sure the pipe is seated all the way in.

Once you're sure it's fixed, turn the water on slowly and test it again.

Purging Air and Flushing the System

With all your connections confirmed to be bone dry, you can open the main water valve completely. Your system is now under full pressure, but there's still air trapped inside that needs to get out.

Look for the small red or black pressure relief button on top of the filter housing. Press it down until the hissing stops and a steady little stream of water squirts out. That’s how you know the air is purged.

The final step is absolutely critical for water quality. New filter cartridges, especially carbon ones, are full of fine particles left over from manufacturing. Flushing them is not optional if you want clean, great-tasting water from the start.

Find the nearest cold water faucet—a utility sink or outdoor spigot works great—and turn it on full blast. Let it run for at least 10-15 minutes, or whatever your filter’s manual recommends.

The water might look cloudy or even dark at first. This is completely normal; it’s just harmless carbon fines washing out. Once the water runs crystal clear, your system is officially commissioned. You've successfully completed the process of installing a whole house water filter.

The demand for these systems is growing fast. The global household water purifier filter market is projected to expand by about USD 2.1 billion between 2025 and 2029, as more people seek cleaner water for their entire home. You can find more details in the latest market analysis from Technavio.

Common Questions About Whole House Filter Installation

Even with the best guide in front of you, it’s natural to have a few last-minute questions before you start cutting pipe. Let's tackle some of the most common things people ask right before they dive into installing a whole house water filter.

How Long Does a Filter Installation Take?

For a handy DIYer who's done some basic plumbing before, you can expect the job to take anywhere from 2 to 5 hours. Honestly, it all comes down to your specific setup.

If your main water line is sitting right out in the open in your garage and you're using push-to-connect fittings, you could be finished in a couple of hours. But if you’re sweating copper pipe, building a three-valve bypass, or working in a cramped crawl space, you should probably block off an entire afternoon.

A word of advice from experience: Rushing is what causes those tiny mistakes that turn into big, leaky headaches. A pro plumber can usually knock this out in 1 to 3 hours because they have all the right tools and have done it a hundred times.

What Are the Most Common Installation Mistakes?

I've seen my share of installations, and a few simple mistakes pop up over and over again. If you can avoid these, you're well on your way to a perfect, leak-free system.

  • Installing the Filter Backward: Always—and I mean always—double-check the "IN" and "OUT" arrows on the filter head. It’s a simple thing, but getting it wrong means the filter won't do its job.
  • Overtightening Plastic Fittings: It feels right to really crank down on plastic threads, but that's the fastest way to cause a hairline crack. Just remember the rule: hand-tight, then just a quarter-turn more with a wrench. That’s it.
  • Forgetting About Future Maintenance: Don't box the filter into a corner. You need to leave enough room underneath it to unscrew the sump and change the cartridge later. A foot of clearance is a good rule of thumb.
  • Sloppy Pipe Prep: This one gets a lot of people. If you don't clean, deburr, and completely dry the ends of your pipes before connecting them, you're asking for a slow, nagging drip that will drive you crazy trying to find later.

When Should I Hire a Professional Plumber?

Putting in a whole house filter is a great DIY project, but there are definitely times when calling a pro is the smart play. It’s not about giving up; it’s about protecting your home from water damage.

Think about hiring a licensed plumber if:

  1. The thought of cutting into your home's main water supply makes you break out in a cold sweat.
  2. You're dealing with old, fragile plumbing or pipes made of a material you don't recognize.
  3. You aren't 100% confident you can make a connection (especially a soldered one) that won't leak.
  4. Your local building codes require a licensed professional for any work on the main water line.

Paying for a pro buys you peace of mind, a warranty on the work, and insurance against the massive cost of a leak gone wrong.

How Often Do I Need to Change the Filter Cartridge?

That’s a great question, and there’s no single right answer. It really depends on the type of filter, your family's water usage, and just how "dirty" your incoming water is.

As a general guideline, here’s what you can expect:

  • Basic Sediment Filters: These are your first line of defense for sand, silt, and rust. They usually need to be swapped out every 3-6 months.
  • Carbon Block Filters: These bigger filters handle things like chlorine and chemicals and typically last 6-12 months. Many are also rated for a certain gallon capacity, like 100,000 gallons.

Your best bet is to start with the manufacturer's recommendation. But your house will tell you when it's time for a change. Look for two dead giveaways: a noticeable drop in water pressure at your faucets or the return of any tastes or smells the filter was getting rid of. If you spot either of those, it’s time for a new cartridge.


At Water Filter Advisor, our goal is to empower you with the knowledge to achieve safer, better-tasting water at home. Whether you're a DIY pro or just starting your research, we have the resources you need. Explore our in-depth guides and unbiased reviews at https://www.waterfilteradvisor.com.

Whole House Water Filtration: Your Ultimate Guide to Cleaner, Safer Water at Home

Ever wonder what's really in your tap water? When you start exploring ways to improve it, you'll quickly run into the great debate: whole house water filtration vs water softener. But here’s the secret: they're not really in competition. One is about creating the healthiest, best-tasting water imaginable, and the other is a specialized tool for a very specific plumbing problem.

Let's focus on the star of the show: the whole house water filter. Think of it as a personal bodyguard for every drop of water that enters your home. Its mission? To purify your water by removing a whole host of unwanted contaminants, giving you healthier, tastier water from every single tap. On the other hand, a water softener is more like a plumber's assistant, designed solely to remove hard minerals that clog up your pipes.

Depending on your water, you might need one, the other, or even both. But understanding the power of filtration is the first step to truly transforming your home's water.

What Problem Are You Really Trying to Solve?

Let's cut through the jargon. What's the real difference between a filter and a softener?

Imagine a water filter is a high-tech security system for your body, while a water softener is an insurance policy for your pipes.

A white water filter cartridge, a glass of water, and a kitchen sink with a 'FILTER VS SOFTENER' sign.

A whole-house water filter is all about your health, safety, and senses. Its job is to be an uncompromising gatekeeper, trapping and removing a wide range of impurities. We're talking about things that can make your water unsafe, smell like a swimming pool, or taste like dirt. It’s the hero your water deserves.

A water softener, by contrast, is a one-trick pony—a very useful one, but still a specialist. Its single, focused mission is to combat "hard water," which is water loaded with minerals like calcium and magnesium. These minerals are harmless to drink but are absolutely brutal on your pipes, faucets, and appliances.

The Core Mission of Filtration

To put it plainly, you get a filter to protect your family's health. You get a softener to protect your financial investment in your home. A filter targets the quality of the water you drink, cook with, and bathe in; a softener deals with the destructive consequences of your water's mineral content.

This is the critical takeaway. A filter won't soften your water, and a softener won't remove chlorine, lead, or pesticides. Each is a specialized tool for a specific task, but filtration is the one that directly impacts your well-being.

Here's the simplest way to remember it: Filtration is for consumption and health, while softening is for plumbing and appliance preservation. Once you get that, you're on your way to diagnosing your water woes and finding the perfect solution.

Let's break it down side-by-side to make it even clearer.

Feature Whole House Water Filtration Water Softener
Primary Goal Purification: To remove contaminants from water. Protection: To remove hardness minerals from water.
What It Removes Chlorine, sediment, pesticides, lead, VOCs, and other chemicals. Calcium, magnesium, and sometimes small amounts of iron.
Key Benefit Improves water taste, odor, and safety for drinking and bathing. Prevents scale buildup, extending appliance life and improving efficiency.

Ultimately, it’s not always an either/or choice. Many homes—especially those on well water—are stuck with both hard water and other contaminants. For them, the ultimate setup involves both systems working in tandem to deliver genuinely clean, problem-free water from every faucet.

How a Whole House Filter Cleans Your Water

Think of a whole house water filtration system as a dedicated security checkpoint for your home's entire water supply. Installed right where the main water line enters your house, its sole job is to stop an army of contaminants before they ever reach your taps. This isn't just a simple strainer; it's a multi-stage purification process designed to give your water a serious upgrade from the ground up.

Your water embarks on a journey through different layers of specialized filter media, with each layer targeting specific impurities. It’s a comprehensive strategy that ensures every single drop—whether for drinking, cooking, or showering—is cleaner, safer, and tastes amazing.

Water pouring from a modern kitchen faucet into a clear glass on a wooden countertop.

This is the heart of the whole house water filtration vs water softener discussion. While softeners tackle minerals, filtration systems are engineered to purify water by removing the things that impact its taste, smell, and safety.

The Unsung Heroes: Filter Media

The real magic happens inside the filter tanks, where different types of filter media team up to form a powerful line of defense against common water contaminants.

  • Sediment Pre-Filters: This is stage one, the bouncer at the door. These filters catch the big stuff—sand, silt, rust, and dirt. Removing this gunk not only makes your water look clearer but also protects the more advanced filter stages from getting clogged and worn out prematurely.

  • Activated Carbon Filters: This is the brains of the operation. Activated carbon is an incredibly porous material with a massive surface area, making it a rockstar at trapping chemical contaminants through a process called adsorption. It effectively grabs onto chlorine, pesticides, herbicides, and volatile organic compounds (VOCs), which is why your water suddenly starts tasting and smelling fantastic.

Think of activated carbon as a powerful magnet for chemicals. As water flows through, unwanted contaminants stick to the carbon's surface, letting wonderfully pure water flow into your home. This is exactly how that "public pool" smell from chlorinated city water vanishes.

Whole house filters are designed to capture a wide array of contaminants that municipal treatment plants might not completely remove. They can handle everything from chlorine and its byproducts to heavy metals like lead. In fact, real-world tests show just how effective they are, with some systems reducing lead levels to 0.0007 ppm and eliminating disinfection byproducts entirely. For a closer look at what these filters remove, this whole-home water filtration system guide is a great resource.

The Real-World Health Perks

By removing this cocktail of contaminants, a whole house filter does far more than improve your water's taste. It’s a direct investment in your family's health and well-being.

Filtering water at the point of entry means you’re protected from contaminants in the water you drink and the water you shower in. Your skin is your body's largest organ, and it can absorb chemicals like chlorine directly from shower water. By eliminating these substances, a great filtration system can lead to softer skin, healthier hair, and even better indoor air quality by reducing chemical vapors released during a hot shower.

At the end of the day, a whole house filtration system delivers unparalleled peace of mind. You can trust that the water from every tap is consistently clean and safe, tackling potential health concerns at the source.

How Water Softeners Protect Your Home

If a whole-house filter is the guardian of your family's health, a water softener is the bodyguard for your home's plumbing and appliances. It’s designed to fight a single, destructive enemy: hard water.

Hard water is just water that’s loaded with dissolved minerals, mostly calcium and magnesium. While these minerals won't hurt you to drink, they can absolutely wreck your home from the inside out.

A water softener has one job and one job only: stop those minerals before they can cause any damage. This is the fundamental difference to keep in mind when comparing whole-house water filtration vs. water softener systems. One is for broad-spectrum contaminant removal, and the other is a specialist, surgically targeting the minerals that lead to expensive problems.

A white water filter system on a blue mat next to a kitchen sink with clean glasses.

This distinction matters because hard water is everywhere. More than 85% of homes in the U.S. deal with it. The fallout is significant—scale buildup from hard water can drive up a home's energy costs by as much as 29% and slash the lifespan of your appliances by 30%.

The Science of Ion Exchange Explained Simply

The magic behind a salt-based water softener is a process called ion exchange. Think of it as a simple trade. The main tank of the softener is filled with tiny resin beads that are covered in sodium ions.

When hard water flows over these beads, the calcium and magnesium ions—which have a stronger electrical charge—are drawn to the resin. They literally bump the weaker sodium ions off and take their place. The sodium flows out with the water, leaving you with "soft" water that's free of those damaging minerals.

It’s a simple swap, but it completely changes how your water behaves. The system works automatically until the resin beads are full of hardness minerals. Then, it runs a "regeneration" cycle to wash the minerals away and recoat the beads with fresh sodium.

Solving Everyday Hard Water Annoyances

You’ll see the benefits of this mineral swap almost right away. Soft water makes a huge difference in daily chores and eliminates all those frustrating hard water symptoms.

Here’s what you can expect:

  • Soap That Actually Lathers: Hardness minerals kill suds. With soft water, you’ll find yourself using way less soap, shampoo, and detergent to get a rich, cleansing lather.
  • Spotless Dishes and Glassware: That annoying cloudy film on your glasses? It’s mineral residue. Soft water rinses completely clean, leaving dishes and glassware sparkling.
  • Brighter, Softer Laundry: The same minerals that spot your dishes also get trapped in your clothing fibers, making them feel stiff and look dull. Soft water helps detergent work better, keeping colors vibrant and fabrics feeling soft.

A water softener’s primary job is to stop scale buildup before it starts. By removing calcium and magnesium, it protects the expensive, hard-working parts of your home's plumbing from the inside out.

Protecting Your Home's Most Valuable Assets

Beyond the daily perks, a water softener offers critical long-term protection for your home. The biggest threat from hard water is limescale—that hard, chalky gunk that clogs up pipes, faucets, and appliances.

Scale acts like cholesterol in your home’s arteries. It restricts water flow and makes your appliances work much harder than they should, eventually causing them to fail. Hard water can also cause other malfunctions, like the ones covered in this list of common reasons your dishwasher might not be getting water.

By preventing scale from ever forming, a water softener extends the life and efficiency of your most expensive appliances—like your water heater, dishwasher, and washing machine. It saves you a fortune in premature replacement costs and frustrating repair bills.

Comparing Filtration and Softening Head-to-Head

So, when it comes down to the whole house water filtration vs water softener choice, you need to look past the sales pitch and get into the practical, day-to-day realities. How do they actually work? What’s the upkeep really like? What will they cost you over the long haul?

Let's put these two systems side-by-side and break down how they perform in the areas that actually matter to a homeowner. This isn’t just about what’s getting pulled out of your water; it’s about what it’s like to live with each of these systems.

Primary Function: Health vs. Protection

The biggest difference between these two is their fundamental mission. A whole-house water filter is all about your health. Its job is to purify your water by taking out a wide range of nasty contaminants to improve the safety, taste, and smell of the water you drink and use every day.

A water softener, on the other hand, is basically a protection plan for your home. It does one thing and one thing only: it removes the hard minerals—calcium and magnesium—that wreck your pipes and appliances. Its purpose is to stop that destructive scale buildup before it starts, saving you a fortune in repairs and replacements.

Here’s the simplest way to think about it: A filter cleans water for your body. A softener conditions water for your house. They aren't interchangeable.

Installation and Space Requirements

Both of these systems get installed right where your main water line enters your house, but the space they take up can be surprisingly different.

  • Whole House Filters: These are often the more compact option, especially the newer cartridge or single-tank carbon setups. You’re usually looking at one or two tanks or housings you can mount right on the wall or sit on the floor, so they don’t demand a huge amount of real estate.

  • Water Softeners: Your typical salt-based softener is a bit more of a space hog. You've got the main mineral tank (where the magic happens) plus a separate, pretty bulky brine tank for the salt. This two-tank setup almost always needs more floor space than a filtration system.

Maintenance Routines: Salt vs. Filters

This is where your life as a homeowner really changes depending on which system you choose. The ongoing maintenance couldn't be more different.

With a whole house filtration system, your main job is changing out filters. Depending on your water quality and usage, you might swap a pre-filter every few months, but the main carbon media can last anywhere from 5 to 10 years. It’s a pretty clean and predictable task.

A salt-based water softener requires a lot more muscle. You’ll be buying and lugging 40-50 pound bags of salt to dump into the brine tank, probably once a month. You also have to keep an eye on it to make sure it’s regenerating properly and that you don't get a "salt bridge" clogging things up.

Long-Term Operational Costs

Don't just look at the price tag on the box. The real cost of any water treatment system is what you pay to keep it running year after year.

For a whole house filter, your ongoing costs are almost entirely for replacement filters. It’s a straightforward expense you can easily budget for. They also use very little electricity and don’t waste water, unless you have a model that backwashes occasionally.

For a water softener, you’re looking at a few different running costs:

  1. Salt: This is the big one. You’ll be buying salt for the life of the system.
  2. Water: Every time the softener regenerates to clean itself, it flushes a good amount of water down the drain.
  3. Electricity: The control valve needs power to run the regeneration cycles.

These costs add up over time, which is why a softener is generally more expensive to operate than a filter.

Water Filtration vs. Water Softener At A Glance

To make it even clearer, here’s a quick-glance table breaking down the core differences. This should help you see exactly where each system shines.

Feature Whole House Water Filtration Water Softener
Main Purpose Removes contaminants for health, taste, and odor. Removes hardness minerals to protect plumbing and appliances.
Targets Chlorine, pesticides, lead, sediment, VOCs. Calcium and magnesium.
Primary Benefit Safer, better-tasting water from every tap. Prevents limescale buildup and extends appliance life.
Typical Footprint More compact; often one or two tanks. Larger; requires both a mineral tank and a brine tank.
Maintenance Change filters periodically (months to years). Regularly add heavy bags of salt (monthly).
Operating Costs Replacement filters. Ongoing purchases of salt, plus water and electricity for regeneration.

This side-by-side look makes it obvious: these are two very different tools for two very different jobs. One isn't better than the other—it's all about what problem you're trying to solve with your water.

Choosing the Right System for Your Home

Deciding between whole house water filtration vs water softener really comes down to diagnosing your specific water issues. Instead of taking a guess, let the water itself tell you what it needs. Think of it like being a detective—the clues are right there in your home.

Start with your senses. Does your tap water smell like a swimming pool? That’s a clear sign of chlorine, which is a job for a filter. If you notice a metallic taste or that "rotten egg" smell, those are also classic signs that a whole house filter is what you need to remove those contaminants.

The evidence for hard water is more visual and tactile. Are you tired of scrubbing that stubborn white scale off your faucets and showerheads? Is your glassware always cloudy, even right after a wash? These are the telltale signs of excess minerals, pointing you straight toward a water softener.

When a Filter Is Your Priority

If your main concern is the safety and quality of the water you drink and bathe in, a filtration system should be your first consideration. It’s the go-to solution for improving the overall health of your water.

You should make a whole house filter your top priority if you're dealing with:

  • Noticeable Odors: A strong chlorine or chemical smell is a dead giveaway that your water needs to be purified.
  • Unpleasant Taste: If your water tastes metallic, earthy, or just "off," a filter will target the contaminants causing it.
  • Concerns About Contaminants: For anyone worried about invisible threats like lead, pesticides, or VOCs, a high-quality filtration system provides critical peace of mind.

This infographic breaks down the core functions: filters are for health, while softeners are for protection.

Two icons separated by a line: a blue water drop for Health and a gray shield for Protection.

The image makes the distinction clear: filtration improves the water you consume, while softening protects your home’s plumbing and appliances.

When a Softener Is the Answer

If your biggest headaches are home maintenance and extending the life of your appliances, a water softener is the specialized tool for the job. It directly solves the expensive and annoying problems caused by mineral buildup.

A water softener is the right call if your home has:

  • Visible Limescale: That chalky white residue on fixtures, shower doors, and in your coffee maker is the most obvious sign of hard water.
  • Poor Soap Performance: If soap and shampoo just don't lather well and you find yourself using more and more detergent, hardness minerals are the culprit.
  • Appliance Issues: Frequent breakdowns or the early death of your water heater, dishwasher, or washing machine often traces back to scale.

The Common Scenario When You Need Both

For many people, especially those on well water, the problems aren't so clear-cut. You might have hard water that also smells like sulfur and is full of sediment. In these common cases, picking just one system means you’re leaving a big problem unsolved.

The best solution for total water treatment is often a combined system. This setup delivers the best of both worlds: pure, great-tasting water for your family and mineral-free water to protect your home.

When you install both, the order is crucial. The whole house water filter is always installed first, right after the main water line enters your home. This lets it strip out chlorine, sediment, and chemicals that can ruin the sensitive resin beads inside a water softener, making it last longer and work better. The softener comes second, treating the already-filtered water to remove the hardness minerals.

This two-stage setup ensures every tap in your house delivers clean, safe, and soft water. For more detailed guides on specific water problems, you can find tons of practical water filter advice to help you figure out exactly what you need. When looking at your home's water system, also consider if you need water storage solutions like Vertical Water Storage Tanks as part of a complete setup.

Common Questions About Water Treatment Systems

Diving into the world of home water treatment can feel like a lot, especially when you're just trying to solve a specific problem like hard water spots or weird-tasting tap water. As you weigh the pros and cons in the whole house water filtration vs water softener debate, the same handful of questions pop up again and again. Getting clear answers is the key to making a smart investment.

Let’s tackle the most common questions we hear from homeowners. We'll clear up the confusion and give you the straightforward details you need to choose the right system for your family.

Can A Whole House Filter Also Soften Water?

This is probably the number one question we get, and the short answer is a firm no. A standard whole house water filter is a purifier, not a softener. Its job is to grab contaminants like chlorine, sediment, pesticides, and other chemicals that make your water taste and smell bad.

These systems use media like activated carbon, which is fantastic at adsorbing chemicals but simply doesn't interact with the dissolved minerals—calcium and magnesium—that cause hard water. Some devices might claim to reduce scale, but they aren't true softeners and won’t give you the same results as a dedicated ion exchange system.

Think of it this way: a filter is like a sieve catching silt and debris, but the salt dissolved in the water flows right through. You need a completely different tool to deal with dissolved minerals.

If I Get Both Systems, Which One Is Installed First?

When you need both to get the job done, the installation order is absolutely critical. The rule of thumb is simple: the whole house water filtration system always goes first, right after the main water line enters your home. The water softener comes second.

The logic here is all about protecting your equipment. City water is treated with chlorine or chloramines, which are great for killing bacteria but are absolute murder on the resin beads inside a water softener. By putting the filter first, you strip out those harsh chemicals before they can destroy the softener’s resin, which dramatically extends its lifespan.

On top of that, the filter also catches any sediment or grit that could clog the small, precise parts in the softener’s control valve, saving you from a costly repair call down the road.

Are There Health Concerns With Softened Water?

The main thing people wonder about is the sodium that salt-based softeners add to the water. In the ion-exchange process, the hard minerals (calcium and magnesium) get swapped for sodium ions. For the vast majority of people, the amount of sodium added is tiny and poses no health risk—often less than what's in a single slice of bread.

However, if you or someone in your family is on a strict low-sodium diet for a medical reason like hypertension, it’s a valid consideration. The good news is, you have options:

  • Use Potassium Chloride: You can use potassium chloride pellets instead of sodium chloride salt. It works the same way but swaps hardness for potassium.
  • Install a Reverse Osmosis System: An RO filter at your kitchen sink is a perfect companion to a softener. It removes the added sodium (along with virtually everything else) to give you purified water for drinking and cooking.
  • Choose a Salt-Free Conditioner: Also called descalers, these systems don't remove hard minerals or add sodium. Instead, they crystallize the minerals so they can't stick to your pipes and fixtures.

How Do I Test My Water To Know What I Need?

You can't fix a problem if you don't know what it is. Testing your water is the only way to move forward with confidence. Guessing is a great way to waste money on the wrong equipment and still be stuck with the same water issues.

You have two main paths for testing:

  1. DIY Test Kits: You can grab an inexpensive test kit from a hardware store for a quick read on the basics. These strips will give you a ballpark figure for hardness (measured in Grains Per Gallon, or GPG), chlorine, and pH.
  2. Certified Laboratory Testing: If you’re worried about things like lead, bacteria, arsenic, or industrial chemicals (VOCs), a professional lab test is non-negotiable. It's the only way to get accurate results you can trust. Check with your local health department for a list of state-certified labs.

A full lab report gives you the hard data you need to make an informed decision. It eliminates all the guesswork and ensures you invest in a system that’s perfectly matched to your water’s unique chemistry.


At Water Filter Advisor, we believe every family deserves access to clean, safe water. Our in-depth guides and unbiased reviews are designed to help you understand your water and choose the best solution with confidence. Explore our resources to find the perfect system for your home at https://www.waterfilteradvisor.com.