How to Choose a Water Softener in 2026

Are you tired of playing detective, trying to figure out which water softener is the one for your home? It can feel like you’re lost in a funhouse of complicated specs and confusing claims. But here's the good news: you can cut through the noise by focusing on what really matters. The quest for the perfect water softener boils down to three key clues: how hard your water actually is, how much water your family uses, and which type of system is the right sidekick for your home.

Let's crack the code together, so you can make a brilliant choice without getting lost in the technical jargon.

Your Quick Guide to the Right Water Softener
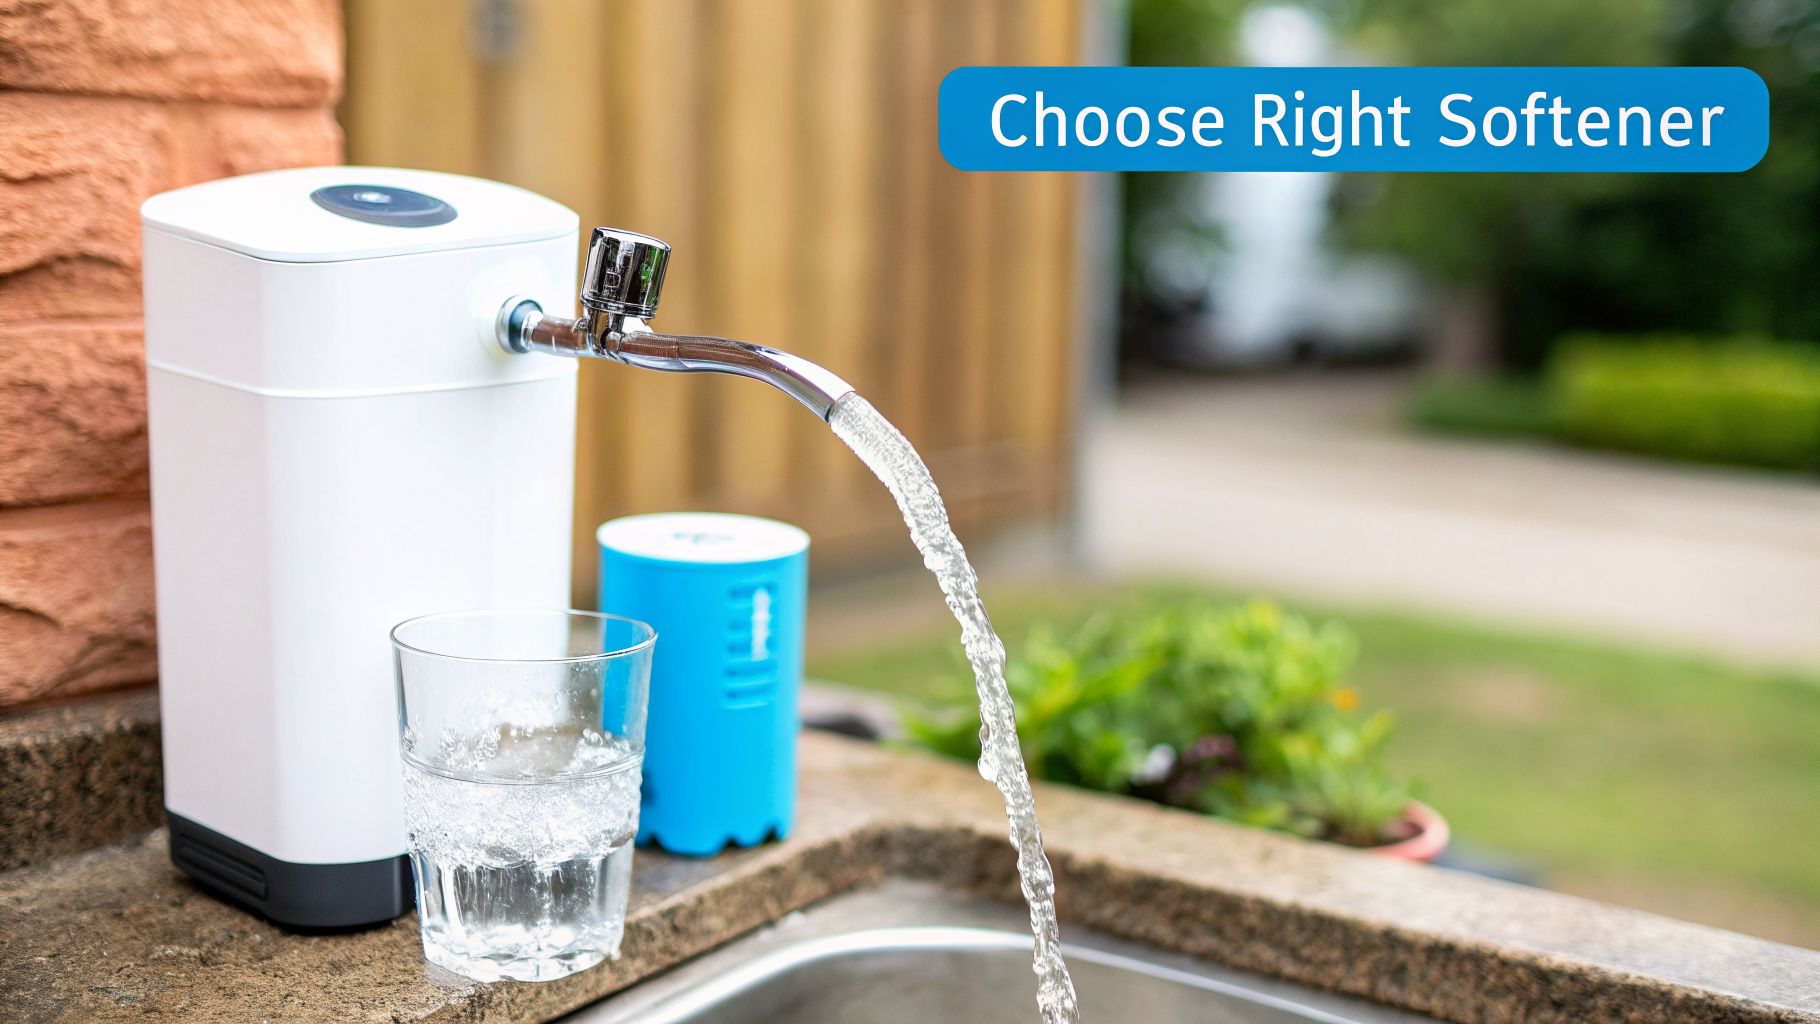
A white water softener dispensing clean water into a sink, with a glass of water nearby.

If you're in a constant battle with chalky white buildup on your faucets, soap scum that laughs at your cleaning efforts, and laundry that feels more like sandpaper, you've met the villain of our story: hard water. And you’re definitely not alone. The vast majority of American homes are dealing with water that’s loaded with mineral freeloaders like calcium and magnesium.

A water softener is your home's superhero. It's a whole-house water filter that swoops in to remove those minerals, protecting your pipes, appliances, and even your skin and hair from their damaging effects. But with all the different types, sizes, and brands out there, picking one can feel like a chore.

First Things First: Know Your Numbers

The absolute first step on this adventure is to discover your water's hardness level. This single number is the treasure map that will guide almost every other decision you make.

According to the U.S. Geological Survey, water hardness is measured in grains per gallon (GPG). Anything over 10.5 GPG is considered 'very hard,' and this affects more than 85% of U.S. households, where water typically exceeds 7 GPG. That kind of scale buildup on your water heater's elements can drive up energy bills by 20-30%. You can learn more about finding the right solution for your specific situation over at HomeWater101.com.

Once you have your GPG number, you can start zeroing in on the right system.

Key Water Softener Decision Factors at a Glance

To make this easier, here's a quick table summarizing the most important things to consider. Use it as a checklist to match a system to your home's needs.

Decision Factor What to Look For Why It Matters
Water Hardness (GPG) Your home's specific GPG number from a water test. This number determines the softener's required grain capacity. A higher GPG needs a higher capacity system.
Household Size & Usage The number of people in your home and your average daily water consumption. A larger family requires a higher-capacity unit to avoid running out of soft water between regeneration cycles.
Technology Type Salt-based ion exchange vs. salt-free conditioners. Salt-based systems physically remove minerals. Salt-free conditioners alter them to prevent scale buildup but don't create "soft" water.
Long-Term Costs Initial purchase price plus ongoing expenses for salt and water. The cheapest unit upfront isn't always the most economical. Factor in operating costs for a true comparison.

This table should give you a solid framework. Now let’s look a little closer at a few of these key factors.

Other Factors to Guide Your Search

Beyond your hardness level, a few other details will help you narrow down the field.

  • Household Size and Water Usage: A couple living in a small home has very different needs than a family of five. We’ll get into the exact math later, but for now, just think about how many people use water in your house daily.

  • Technology Type: The big debate is usually between traditional salt-based systems and salt-free conditioners. Salt-based units truly remove the hard minerals, giving you that slick, soft water feel. Salt-free conditioners change the mineral structure to stop them from forming scale, but the minerals are still present.

  • Long-Term Costs: Don’t just look at the sticker price. You have to factor in the ongoing cost of salt (for salt-based systems), the water used during regeneration cycles, and any potential maintenance down the road.

The goal isn't just to buy a water softener. It’s to invest in the right one that works efficiently, protects your home, and gives you great water for years to come.

This guide will walk you through each of these points, giving you the practical know-how to choose with confidence. For more general guidance on all types of water filters, you can also check out our extensive advice section.

Testing Your Water for Hardness and Contaminants
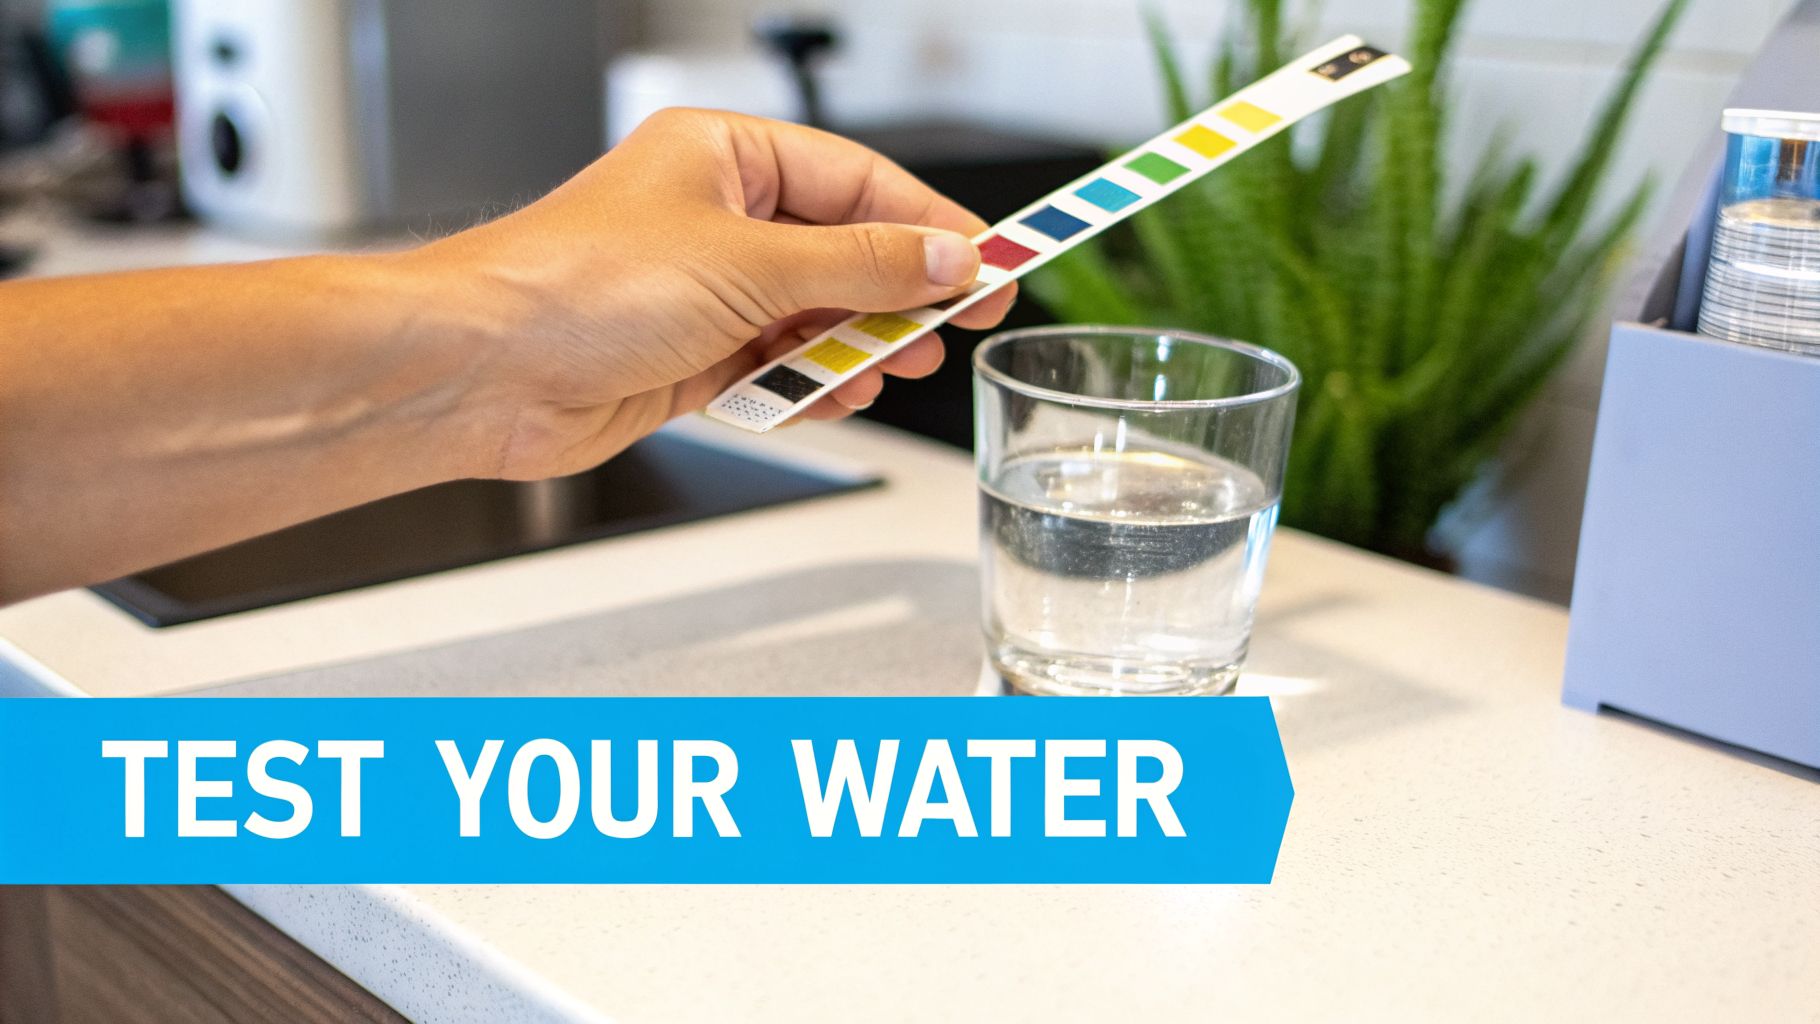
A hand holds a water testing strip over a glass of water on a kitchen counter for quality analysis.

Before you even think about buying a water softener, you have to know what you’re up against. You can’t solve a problem you don’t understand. This isn't just about softening; it's about comprehensive home water filtration.

If you’re seeing stubborn white spots on your faucets and shower doors, that’s a dead giveaway you have hard water. Those crusty deposits are limescale, and they’re a pain. We’ve even got a great guide on understanding and removing hard water stains if you want to tackle the mess you already have.

But what you can see is only half the story. To choose the right equipment, you need real data. Buying a water softener without testing your water is like getting a prescription without seeing a doctor—you’re just guessing.

DIY Testing vs. Professional Lab Analysis

You’ve got two main options for figuring out your water's chemistry: a quick DIY test or a full professional lab analysis.

DIY Water Test Kits are the fast and cheap route.

  • You can grab these simple test strips or liquid drop kits at any home improvement store.
  • They give you an immediate, ballpark reading of your water hardness, and sometimes chlorine and pH.
  • The big downside? They aren't always super accurate and won't tell you about other critical issues like iron or manganese that can destroy a softener.

Professional Lab Analysis is the gold standard.

  • You simply collect a sample from your tap and mail it to a certified lab.
  • In return, you get a highly accurate and detailed report covering not just hardness but also iron, manganese, pH, total dissolved solids (TDS), and other contaminants that affect your home's water quality.
  • It costs more and takes a bit longer, but the information is priceless.

For anyone on well water, I always recommend a professional lab test. It's a small investment that prevents you from buying the wrong thousand-dollar system. Get it right the first time.

Demystifying Your Water Test Results

Once you have your results, a few key numbers will jump out at you. This is where you get the exact information needed to size your whole-house filtration system correctly.

The most important number is your water hardness. It’s usually measured in one of two ways:

  1. Grains Per Gallon (GPG): This is what the water softener industry uses in the U.S. It’s the number you’ll need to do your calculations.
  2. Parts Per Million (PPM) or Milligrams per Liter (mg/L): These two are the same thing and are common on lab reports.

Converting is simple. Just divide your PPM number by 17.1 to get your GPG.

Let's say your lab report shows 200 PPM of hardness.

200 PPM / 17.1 = 11.7 GPG

That 11.7 GPG tells you your water is officially "very hard," and it's the exact figure you'll use to size your system.

But don’t stop at hardness. Look for other troublemakers, especially iron. If your report shows iron levels at or above 0.3 PPM, a standard softener is going to struggle. The iron will foul the resin beads, choking the system and drastically shortening its life. In that case, you’ll need to look at either a dedicated iron filter or a softener specifically built to handle high iron—a true multi-stage water filtration approach.

Sizing Your Water Softener: How to Get It Just Right

Choosing the right size water softener is a lot more than just a guess. Get it wrong, and you're in for some frustration. This is the heart of effective home water filtration.

A system that’s too small is a classic rookie mistake. It will struggle to keep up, constantly running regeneration cycles and still leaving you with hard water when you need soft water the most. On the flip side, an oversized unit is just plain wasteful. It will burn through salt and water, regenerating long before it needs to.

So, how do you find that perfect fit? It’s not about how big your house is or even just how many bathrooms you have. The key is calculating your household's actual daily softening needs based on your water hardness and how much water your family uses.

The Only Formula You Need

Let’s get right to it. There's a straightforward bit of math that will give you the most critical number for choosing a softener: the total grains of hardness your system needs to remove each week.

Here's the formula:

(# of People in Home) x (Daily Gallons Per Person) x (Your Water Hardness in GPG) x (7 Days)

This calculation gives you your weekly hardness load, which is the number you’ll use to match with a softener's grain capacity.

What Goes Into the Calculation

To use this formula, you just need to plug in three numbers.

  • Number of People: Simple enough. Just count everyone living in your home.

  • Daily Water Use: This one requires a good estimate. While everyone's habits are different, the industry standard for these calculations is 75 to 80 gallons per person per day. This figure covers everything from showers and laundry to flushing toilets and washing dishes.

  • Water Hardness (GPG): This is the number you got from your water test. It tells you exactly how much mineral content the softener has to tackle in every gallon.

Once you have those figures, you're ready to calculate the grain capacity your home demands. An incorrectly sized system can lead to real waste—an oversized unit might use 25% more water and salt than necessary, while an undersized one will leave you with hard water. If you want to dive deeper into system features, Whirlpool Water Solutions has a great guide on what to look for.

The Bottom Line: Sizing a softener isn't guesswork. It's about matching the machine's capacity to your home's specific demand, which is a direct product of your family's size and your water's mineral content.

A Real-World Example

Let's walk through a quick scenario to see how this plays out.

Imagine a family of four whose water test came back at 15 GPG—moderately hard.

  1. First, we find their total daily water use:

    • 4 people x 75 gallons/person = 300 gallons per day
  2. Next, we calculate the daily hardness load:

    • 300 gallons x 15 GPG = 4,500 grains of hardness per day
  3. Finally, we find the weekly requirement:

    • 4,500 grains/day x 7 days = 31,500 grains per week

For this family, a softener needs to remove at least 31,500 grains of hardness between regeneration cycles.

This makes a 32,000-grain capacity water softener the ideal choice. It's perfectly matched to handle a full week's worth of water before it needs to regenerate, making it incredibly efficient.

What happens if they choose poorly? A smaller, 24,000-grain unit would be forced to regenerate more frequently, wasting salt and water. A huge 48,000-grain system would be overkill, going too long between cycles, which can be inefficient and lead to other problems. The 32,000-grain system hits that sweet spot for consistent performance and optimal efficiency.

Comparing Water Softener Technologies

When you start shopping, you'll quickly realize the term "water softener" gets thrown around a lot. But not all of these home water filtration systems are created equal. The technology inside can be wildly different, and that's where a lot of homeowners get tripped up.

You're really looking at two main camps: salt-based ion exchange softeners and salt-free water conditioners. They approach hard water from completely different angles. Getting the results you want—whether it's silky-smooth water or just protecting your pipes—starts with understanding this fundamental difference.

The Classic: Salt-Based Ion Exchange Softeners

This is the tried-and-true method, the only technology that actually removes the hard minerals from your water. If you want truly soft water, an ion exchange system is the undisputed champion of home water filtration.

Think of it like this: the system's main tank is filled with tiny resin beads that are loaded with sodium ions. As your hard water passes through, the calcium and magnesium—the culprits behind scale and soap scum—get pulled out of the water and stick to the resin. In their place, a sodium ion is released. It's a simple, effective trade.

The end result? Genuinely soft water. It’s what gives you that signature "slick" feel in the shower, makes your soap and shampoo lather up like crazy, and stops scale in its tracks.

Of course, there's a trade-off. Eventually, that resin fills up with hard minerals and needs to be cleaned. That’s the regeneration cycle, where a saltwater brine solution washes the resin, sending all the collected minerals down the drain. This means you’ll have the ongoing task of adding salt to the brine tank and it will use some extra water.

The Low-Maintenance Option: Salt-Free Conditioners

Here’s where we need to be really clear. A salt-free conditioner is not a water softener. A better name for it is a scale-reduction system. It's a different kind of water filtration hero.

These systems use a fascinating technology called Template Assisted Crystallization (TAC). Instead of removing the calcium and magnesium, the TAC media changes their structure. It acts as a template that forces the mineral ions to form into tiny, harmless micro-crystals.

These little crystals are inert and won't stick to anything. They flow right through your plumbing without building up as scale on your pipes, faucets, or hot water heater element.

The key takeaway is this: the minerals are still in your water. A TAC system just crystallizes them so they can’t cause scale damage. You won’t get the slick feel or sudsing benefits of soft water, but you get powerful scale protection.

The big win for salt-free conditioners is that they are completely passive. Set it and forget it. No salt bags to haul, no electricity to run a control valve, and no wastewater from regeneration. They’re a fantastic choice for anyone who wants a zero-maintenance water filtration solution or lives in an area where salt-based softeners are banned.

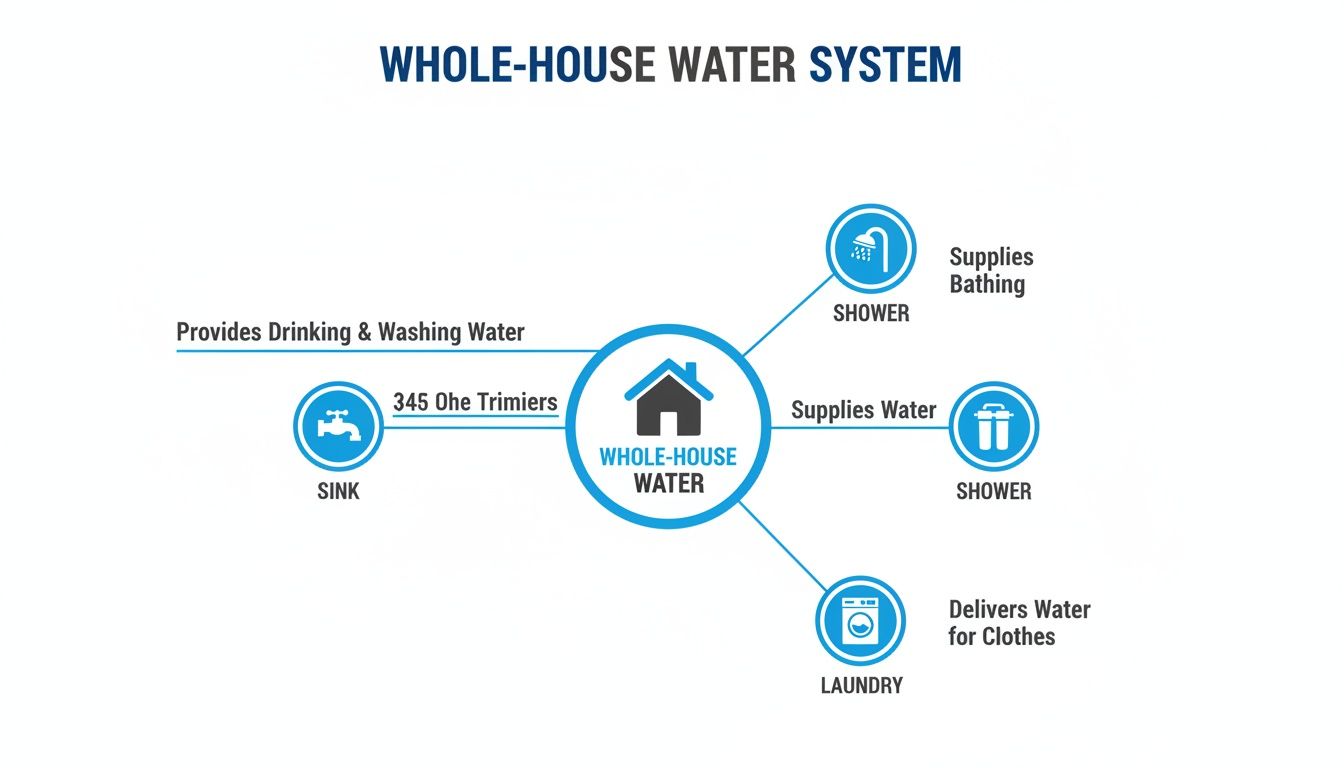
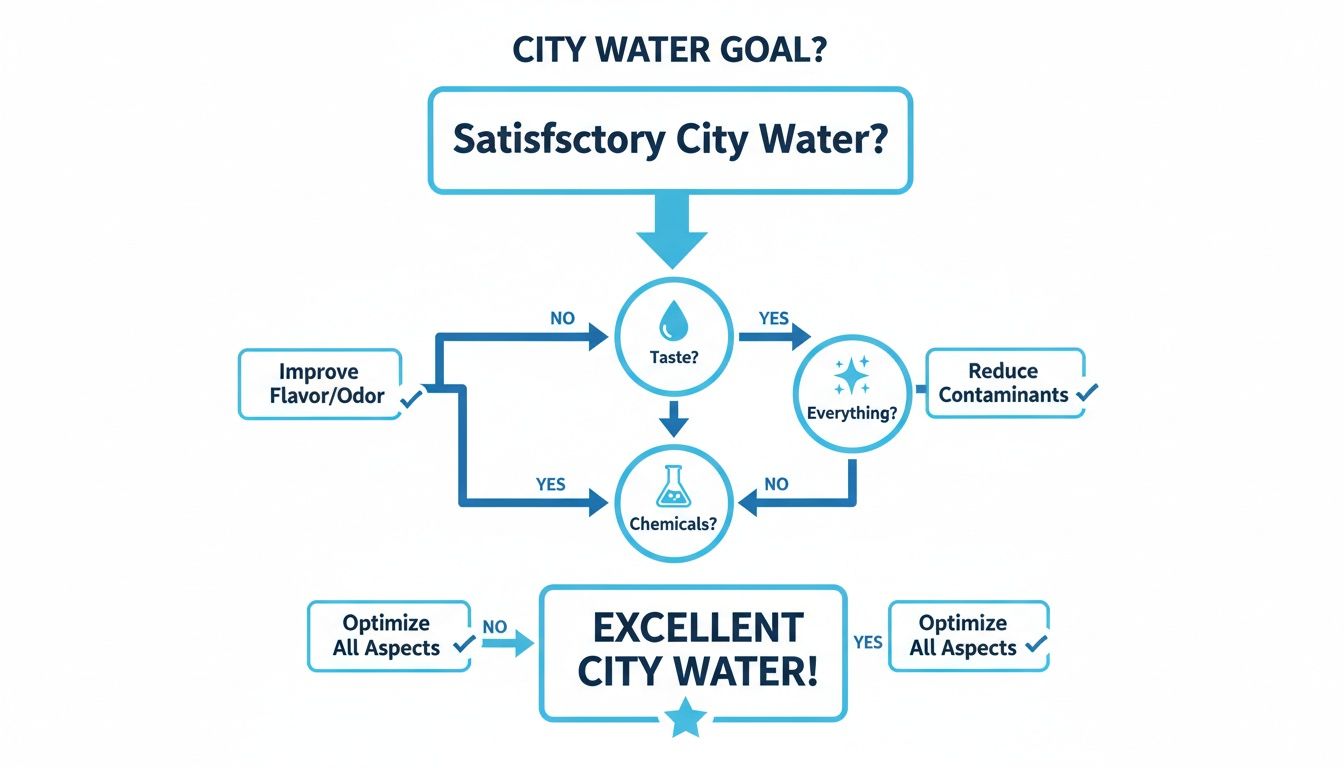
This flowchart can help you visualize how your home’s specific needs line up with the right system size and type.
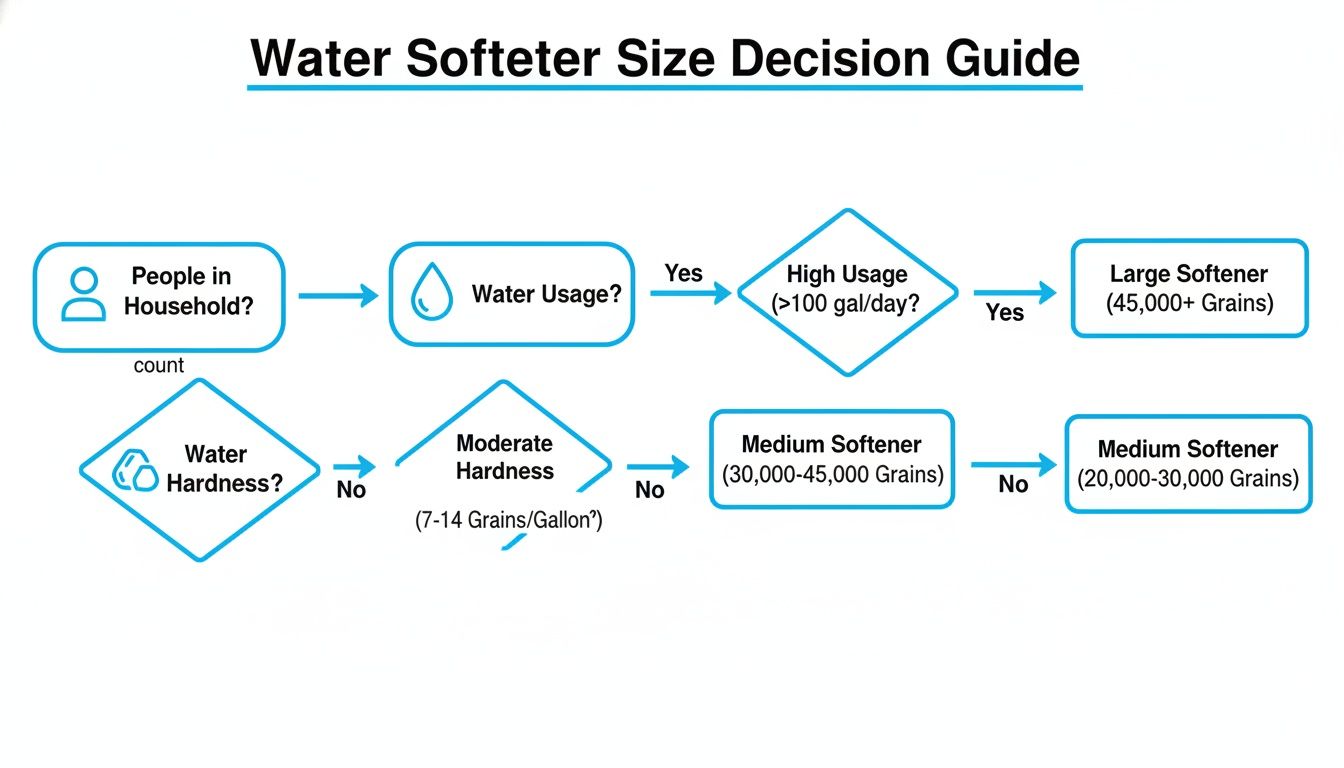
Flowchart guiding water softener size selection based on household size, water usage, and water hardness.

Simply trace your path from household size and water hardness, and it will point you toward the right capacity for your home.

Water Softener vs. Water Conditioner Comparison

To make the choice even clearer, let's put these two water filtration technologies side-by-side. This table breaks down exactly what you get (and what you don't) with each system.

Feature Salt-Based Ion Exchange Softener Salt-Free Water Conditioner (TAC)
Primary Function Removes hard minerals (calcium & magnesium) from water. Conditions minerals to prevent scale buildup; does not remove them.
Resulting Water Genuinely soft water. You'll feel the "slickness" and see better lather. Water with scale-causing potential neutralized. Minerals remain present.
Scale Prevention 100% scale elimination by removing the source minerals. Excellent scale prevention (up to 99%) on pipes and appliances.
Maintenance Requires you to add salt regularly. Uses water and electricity for regeneration. Virtually zero maintenance. No salt, no electricity, no wastewater.
Ongoing Costs Salt bags, water for regeneration, minor electricity use. No ongoing operational costs. Media may need replacement every 3-6 years.
Best For Homeowners who want all benefits of soft water (softer skin, less soap, no scale). Homeowners focused on protecting plumbing and appliances with a hands-off system.
Environmental Impact Discharges salt brine (chloride) into wastewater systems. No environmental impact; adds nothing to the water and produces no waste.

Ultimately, choosing between a salt-based softener and a salt-free conditioner comes down to your primary goal. One isn't better than the other—they just do different jobs.

So, Which Technology Is Right For You?

It really boils down to what you want to achieve with your water treatment.

  • Go with a Salt-Based Softener if: You want the full soft-water experience. We're talking no more scale, using less soap, having brighter clothes, and feeling that difference on your skin and hair. You're okay with the simple task of adding salt every few months.

  • Go with a Salt-Free Conditioner if: Your number one priority is protecting your home's pipes and expensive appliances from scale damage. You want a system you can install and forget about, and you don't mind that the minerals technically remain in the water. This is also your only option if your local municipality has put a ban on brine discharge.

Both are great home water filtration technologies. The secret is simply matching the right tool to your specific job.

Don't Forget the Long-Term Costs
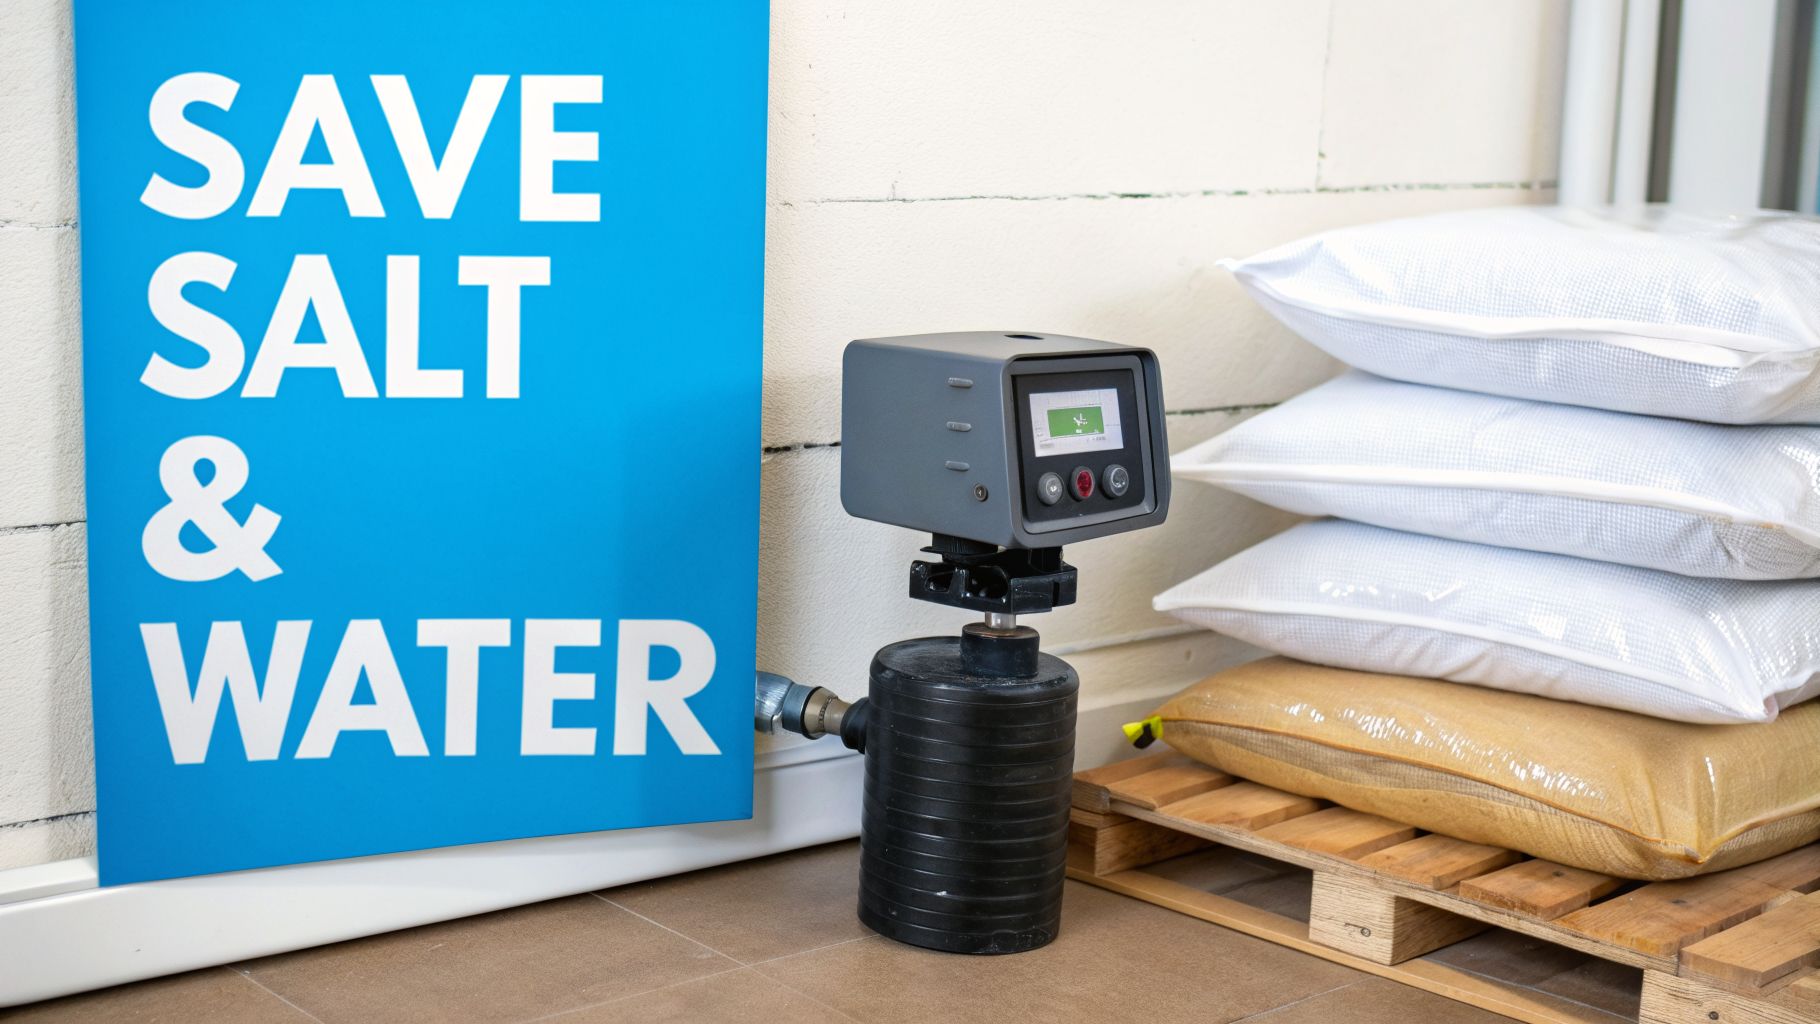
Water softener control unit, stacked salt bags, and a blue sign reading 'SAVE SALT & WATER'.

When you’re shopping for a whole-house water filter, it’s easy to get tunnel vision on the price tag. But the real cost? That shows up on your utility bills and in your salt purchases for years to come. How much salt, water, and electricity a system uses over its lifetime is what really determines its value.

All of these ongoing costs come down to one critical process: regeneration. This is how a salt-based system cleans and “recharges” itself, and understanding the different ways they do it is the key to not getting stuck with a resource-guzzling machine.

Smart Regeneration vs. Outdated Timers

Think of it like this: some systems are smart, and some are… well, not. The old-school approach is a timer-based softener. It’s a simple concept—the softener regenerates on a fixed schedule, like every three days at 2 AM, no matter what.

  • Timer-Based Systems: These are often cheaper upfront, but they’re incredibly wasteful. If you go on vacation, it regenerates anyway, wasting salt and water. If you have a house full of guests, it might not regenerate soon enough, leaving you with hard water when you need soft water most.

The modern, and much smarter, approach is a demand-initiated (or metered) softener. This type of system has a small water meter inside that tracks your actual water usage. It only triggers a regeneration cycle when it knows the resin beads are almost saturated.

  • Demand-Initiated Systems: This “on-demand” method is the only way to go in 2026. It adapts to your household’s unique rhythm, preventing needless regeneration cycles and saving a ton of salt and water in the process.

Choosing the right regeneration style can slash your running costs by up to 50%. A metered system regenerates only when needed, saving 30-40% on salt compared to an old timer model. For a typical family, that can cut annual salt use from 200-300 lbs down to a much more manageable 100-150 lbs.

What About Water Pressure? Don't Underestimate Flow Rate

We’ve all experienced it: you're in the shower, someone flushes a toilet, and the water pressure suddenly vanishes. A water softener that's too small for your home can create that same annoying problem, but for every faucet. That's where flow rate becomes a huge deal.

Measured in Gallons Per Minute (GPM), flow rate tells you how much softened water the system can deliver at any given moment. To avoid pressure drops, you need a softener that can keep up with your family’s peak demand.

Think about what might be running at the same time on a busy morning:

  • A standard shower needs about 2.5 GPM.
  • A dishwasher running a cycle uses 2 GPM.
  • Your washing machine could be pulling 3-4 GPM.

If you've got a couple of those going at once, you’re already at 7 GPM or more. For a typical 3-4 bathroom home, I always recommend looking for a system with a flow rate of at least 10-12 GPM. You can find this number, usually called the "service flow rate," on the manufacturer’s spec sheet. Don't skip checking it.

Look for Independent Proof of Performance

With so many brands making big claims, how can you be sure a softener actually does what it says? You look for a third-party certification seal.

The most important one by far is NSF/ANSI 44. This is the gold standard for whole-house water filtration. It’s an independent certification that proves the softener has been rigorously tested to meet specific performance criteria. An NSF/ANSI 44 certification tells you three crucial things:

  • The system truly reduces water hardness to the level it claims.
  • It is built with materials that are safe for contact with your drinking water.
  • The manufacturer's salt and water efficiency ratings are accurate and verified.

Getting a certified system is your best insurance against slick marketing and poor performance. And while you're focused on efficiency, remember that the softener is just one part of your home. To find more ways to lower your utility bills, check out these practical energy efficiency tips that can lead to significant savings across the board.

Frequently Asked Questions on Water Softeners

Common questions about home water filtration and softeners. Get clear answers to help you choose a system with confidence.

How Much Sodium Does a Water Softener Add?

The amount of sodium added depends directly on your water’s hardness level. It's often less than people think.

For water with a hardness of 10 Grains Per Gallon (GPG), the softening process adds about 75 milligrams (mg) of sodium per quart. For comparison, one slice of white bread can have over 150 mg of sodium.

For those on a strict low-sodium diet, an under-sink reverse osmosis (RO) system is a great addition. This point-of-use filter removes the added sodium from your drinking and cooking water.

Can I Install a Water Softener Myself?

Yes, if you have solid plumbing skills. A DIY installation is possible if you can confidently cut into pipes and follow detailed instructions. Most modern units can be installed in several hours.

The critical step is cutting into your home's main water supply line. If you are not comfortable with this, hire a professional plumber. A professional install guarantees it is leak-free, meets local codes, and functions correctly. A pro installation typically costs between $400 and $800.

What Kind of Salt Should I Use?

You will find two main types of salt for water softeners:

  • Solar Salt: Created from evaporated seawater. It is less expensive but may contain insolubles that can build up in the brine tank over time.
  • Evaporated Salt: A much purer salt, often 99.9% pure. This is the cleanest option, reducing the risk of "salt bridging" or "mushing" in the tank.

Evaporated salt pellets are recommended for most high-efficiency softeners. They dissolve cleanly and help your system run with less maintenance.

How Long Does a Water Softener Last?

A quality, well-maintained salt-based water softener should last 10 to 20 years.

The lifespan of this whole-house water filter is determined by the control valve and resin tank quality. The resin beads inside the tank, which perform the softening, generally need replacement every 10 to 15 years. High iron or chlorine levels in your water can shorten the resin's life. Salt-free conditioners have a similar lifespan, though their media often requires replacement every 3 to 6 years.

Will a Water Softener Reduce My Water Pressure?

A correctly sized water softener will not cause a noticeable drop in your water pressure. If you experience pressure loss, the system is likely too small for your home's water demand.

Check the flow rate, measured in Gallons Per Minute (GPM), before buying. This indicates how much softened water the system can produce at once. A typical home needs a flow rate of at least 10-12 GPM to support a shower and dishwasher running at the same time. Always confirm the "service flow rate" on the unit’s specifications.


Ready for soft water? Water Filter Advisor provides in-depth reviews and maintenance information. We help you find the perfect water filtration system for your home. Explore our guides at https://www.waterfilteradvisor.com to get started.
Your Guide to the Best Whole House Salt Free Water Softener of 2026

If you're fed up with the relentless assault of hard water, a whole house salt-free water softener—more accurately called a water conditioner—is a modern, low-hassle way to stop scale from building up in your home's plumbing and appliances. Forget the days of hauling heavy salt bags. These systems use clever filtration technology to neutralize hard water minerals, preventing them from causing expensive damage.

Tired of Hard Water? Here's the Salt-Free Solution

Let's be real—that chalky film on your dishes, the scratchy feel of your towels, and the constant worry about your water heater's lifespan are major headaches. If you've looked for a fix that doesn't involve lugging 40-pound salt bags from the store every few weeks, you're in the right place. It's time to outsmart hard water, not just fight it.

Unlike old-school salt-based softeners that strip calcium and magnesium from your water, a whole-house salt-free conditioner works very differently. It "conditions" the water by changing the physical structure of these hard minerals.

Think of it this way: the minerals are still there, but they've been neutralized so they can't stick to surfaces and create destructive scale buildup. It’s a completely different approach to home water filtration.

An Eco-Friendly Alternative on the Rise

This technology is more than just a novelty; it’s a major shift in how we filter water at home. Salt-free conditioners have been gaining ground since the early 2000s, especially as environmental rules get stricter.

In fact, some cities like San Francisco and Santa Fe have banned traditional salt-based softeners entirely. Why? Because the salty brine they discharge harms local water supplies and soil. For the 85% of U.S. households dealing with hard water, these systems offer real protection without the environmental baggage. You can see a full breakdown of salt-based vs. salt-free systems on lifesourcewater.com.

This approach offers some huge upsides for any homeowner who wants a set-it-and-forget-it filtration solution:

  • No More Salt Bags: Say goodbye to the recurring cost and physical labor of buying and adding hundreds of pounds of salt each year.
  • Appliance Protection: Stops limescale from clogging pipes and destroying the efficiency and lifespan of your water heater, dishwasher, and washing machine.
  • Eco-Friendly Operation: These systems don't waste any water and don't add salt or chemicals to the environment, making them a truly sustainable choice.
  • Healthier Water: Healthy minerals like calcium and magnesium are kept in your water, which most people prefer for drinking.

The core idea is simple: A salt-free system protects your home's plumbing and expensive appliances from scale damage, all without that slippery water feel or the constant maintenance of a traditional softener.

This guide will walk you through exactly how they work, what you should expect, and how to pick the right one for your home. But first, let’s get a quick side-by-side comparison.

Salt-Free Conditioner vs. Salt-Based Softener at a Glance

This table breaks down the key differences between the two main types of whole-house hard water treatment. It’s a quick way to see which filtration approach might be a better fit for your home and lifestyle.

Feature Salt-Free Water Conditioner Salt-Based Water Softener
Primary Function Prevents scale buildup by crystallizing minerals Removes hardness minerals (calcium & magnesium)
Water Feel Normal, not slippery "Slippery" or "silky" feel
Minerals Removed? No, beneficial minerals are retained Yes, replaces them with sodium
Ongoing Costs None, except occasional media replacement (every 6-10 years) Regular salt purchases (monthly/bi-monthly)
Maintenance Virtually maintenance-free Requires regularly adding salt (40-50 lb bags)
Water Waste None Wastes water during regeneration (backwashing)
Environmental Impact Eco-friendly, no salt discharge Discharges salt brine into wastewater systems
Electricity Required? No Yes, for control valve and regeneration cycles

As you can see, the choice isn't just about performance—it's also about maintenance, cost, and environmental responsibility. Each system has its place depending on your specific water chemistry and personal preferences.

How Salt-Free Conditioners Neutralize Scale

So, how does a whole house salt free water softener actually stop scale without using salt? The science behind this filtration method is clever but straightforward. It’s all about changing the physical behavior of the hard water minerals, not removing them.

Think of the dissolved calcium and magnesium in your water as being "sticky." In their natural state, they want to cling to each other and to any surface they find—like your pipes, faucets, and the inside of your water heater. That’s what creates limescale.

A salt-free conditioner works by changing those minerals so they can't stick anymore. The minerals are still there, but they are rendered harmless and simply flow through your plumbing.

The Magic of Template Assisted Crystallization

The core technology in most modern salt-free systems is called Template Assisted Crystallization (TAC). You might also see it called Nucleation Assisted Crystallization (NAC). This isn't a filter in the traditional sense; it’s a conditioner that works on a microscopic level.

When water enters the conditioner, it flows through a tank filled with a special media. This media is covered in tiny "template sites" that act as a seed point for mineral crystals.

As a hard water mineral ion passes over one of these templates, it triggers a reaction. The template provides the perfect surface for that dissolved mineral to latch onto and form a stable, microscopic crystal.

The key takeaway is this: The minerals are transformed from a dissolved, "sticky" state into a crystallized, "non-stick" state. They become inert, harmless particles that remain suspended in the water.

These new crystals are tiny—nanometer-sized—and have a smooth, stable surface. They no longer carry the electrical charge that made them want to stick to things. Instead, they just travel with the water, passing right through your home and down the drain.

What This Filtration Means for Your Home

This process has a big impact on protecting your plumbing and appliances from scale buildup.

  • Appliance Protection: Your water heater element, dishwasher, and washing machine are protected from scale that kills efficiency. Studies show scale can slash a water heater's efficiency by up to 24%.
  • Plumbing Integrity: Your pipes stay clear. This prevents the pressure drops and blockages that heavy scale causes over the years.
  • Easier Cleaning: You might still see some light, powdery mineral residue on a shower door (the minerals are still in the water, after all). But it will be easy to wipe away, not the hard, crusty scale that needs chemicals to remove.

The conditioner media itself is built to last. The template sites are catalysts, meaning they are not used up in the process and can trigger this reaction again and again. That's why the media in a whole house salt free water softener can go for 5 to 7 years or more before needing a replacement. It’s a simple, physical process with no salt, no chemicals, no electricity, and no wasted water.

Understanding Their Real-World Performance

So, let's get right to it. Does a whole house salt-free water softener actually stop scale? Yes, it does—but you have to know what to expect in a real-world setting. Let's cut through the marketing noise and talk about how this filtration performs in an actual home.

For most homes with moderately hard water, these systems work incredibly well. A salt-free conditioner doesn't "soften" water like a salt-based system. It "conditions" it. That's the key difference, and it defines how it performs.

You will not get that slick, "can't-rinse-the-soap-off" feeling in the shower. Your water will feel completely normal, but the minerals in it will behave differently. Their ability to form destructive, crusty scale will be neutralized.

What to Expect on Your Surfaces

What does this look like in your daily life? You’ll see a massive reduction in the hard, white scale that builds up on shower doors, faucets, and countertops. Instead of cement-like deposits that need harsh chemicals to remove, you might see a fine, powdery white residue every now and then.

This powder is just the crystallized minerals left behind when water evaporates. Since the minerals aren't "sticky" anymore, they don't bond to your fixtures. A simple wipe with a cloth is all you need to clean it up, making your cleaning routine much, much easier.

The Performance Goal: A salt-free system is designed to stop new scale from forming inside pipes and appliances. It also makes any mineral spots you can see simple to wipe away. It protects what you can't see and simplifies cleaning what you can.

This is where a whole house salt free water softener really delivers. For the 70-80% of homes with moderate water hardness, these systems are proven to prevent 85-95% of new scale. They work by crystallizing calcium and magnesium instead of removing them, which means the water's natural Total Dissolved Solids (TDS) level stays the same—something many people prefer. You can find more on the effectiveness of salt-free systems at softprowatersystems.com.

Matching Flow Rate to Your Home

Performance isn't just about water chemistry; it's about water pressure. You have to pick a system with the right flow rate to make sure your home's water pressure never takes a hit. Flow rate is measured in gallons per minute (GPM) and tells you how much conditioned water the unit can deliver at one time.

Getting this wrong is a classic mistake. An undersized system creates a bottleneck, and you'll see a big pressure drop when you run the shower and the kitchen sink at the same time.

Here are the general numbers for sizing your system:

  • 1-3 Bathrooms: An 8-12 GPM system is typically enough for an average family home.
  • 4+ Bathrooms or High-Demand Households: Go with a 15 GPM system or higher to handle those peak usage times.

Always pick a system with a GPM rating that meets or slightly exceeds your home's needs. This is the key to ensuring your dishwasher, washing machine, and showers can all run at once without a problem. It’s a simple step that makes all the difference in how the system performs for you day-to-day.

Salt-Free vs. Salt-Based Systems: A Head-to-Head Comparison

When you’re staring down the barrel of a hard water problem, picking between a salt-free conditioner and a traditional salt-based softener can feel like a huge decision. And honestly, it is. These two systems tackle scale and mineral buildup from completely different directions, and knowing how they differ is the key to getting the right filtration for your home.

So, let's put them side-by-side. We’ll go beyond the sales pitches and look at what really matters to you as a homeowner: how they actually stop scale, what they cost you in the long run, their impact on the environment, and even how the water feels when you're taking a shower. This is the no-nonsense comparison you need to make a confident choice.

How They Stop Scale

The biggest difference, right off the bat, is how each system deals with the hard water minerals. This one distinction changes everything, from your weekend chores to your water bill.

A traditional salt-based water softener uses a process called ion exchange. Think of it as a bouncer at a club—it grabs the "hard" minerals like calcium and magnesium and swaps them out for "soft" sodium ions. The result is water that’s chemically soft because the minerals that cause all that limescale are literally gone.

On the other hand, a whole house salt-free water softener (which is really a conditioner) doesn't remove a thing. Instead, it uses a special filtration media to change the physical shape of the hardness minerals, a process called Template Assisted Crystallization (TAC). It forces them into tiny, stable crystals that won't stick to your pipes or faucets. The minerals are still there, but they’ve been neutralized and just flow right on by.

Water Feel and Health Factors

This difference in method leads directly to a very different experience at the tap. Because salt-based systems remove minerals and add a small amount of sodium, they produce water with a distinct "slippery" or "silky" feel. Some people absolutely love it; others complain they can never seem to rinse the soap off.

Salt-free conditioned water? It feels just like regular water. Since the minerals are still present (just in a different form), you won't get that slippery feeling at all. For many, this comes down to simple personal preference.

For anyone on a low-sodium diet, the choice gets a lot clearer. A salt-based softener will add some sodium to your water. A salt-free system adds zero sodium, keeping your water's natural mineral content and taste exactly as it was.

Maintenance and Long-Term Ownership

This is where the two systems really go their separate ways. The "set it and forget it" nature of a whole house salt-free conditioner is a huge part of its appeal.

  • Salt-Free Systems: These are about as low-maintenance as it gets. You're not buying salt, you're not lifting heavy bags, and you're not messing with any digital controls. The only task is swapping out the media inside the tank, and that’s usually only every 5-7 years.

  • Salt-Based Systems: These demand your regular attention. You’ll be on a constant mission to buy and haul heavy bags of salt (often 40-50 lbs a pop) to feed the brine tank. You also have to keep an eye on the regeneration settings to make sure it's running correctly.

That ongoing need for salt isn't just a chore; it's a constant expense. A typical family might spend $150-$300 a year just on salt, which really adds up over the decade or more you'll own the system.

Environmental Impact and Water Waste

If you're looking for the eco-friendly choice, this one's a landslide. A whole house salt-free conditioner is the clear winner.

They use zero water and create zero waste. Most don't even use electricity. They just sit there, passively preventing scale.

A salt-based softener, however, has a real environmental footprint. To clean itself out (a process called regeneration), it flushes hundreds of gallons of salt-filled brine down the drain every month. This chloride-heavy wastewater is a major headache for municipal water treatment plants and can damage local streams. In fact, some towns and cities have even banned them for this very reason. For homes with a septic system, flushing all that salt into your drain field can cause serious problems, too.

Detailed Feature Comparison Salt-Free vs. Salt-Based

To make the decision even clearer, let's break down the key features in a simple table. This will help you weigh the pros and cons based on what’s most important for your family and your home.

Factor Whole House Salt-Free Conditioner Traditional Salt-Based Softener
Scale Prevention Method Neutralizes minerals (TAC) so they can't stick Removes minerals (ion exchange) and replaces with sodium
Water Feel Feels like normal tap water, no slippery sensation "Silky" or "slippery" feel, can be hard to rinse soap
Minerals Removed? No, beneficial minerals remain in the water Yes, calcium and magnesium are removed
Sodium Added? No Yes, a small amount is added during ion exchange
Ongoing Maintenance Virtually none; replace media every 5-7 years Regular; must add 40-50 lb bags of salt frequently
Ongoing Costs None, until media replacement every 5-7 years Continuous salt purchases ($150-$300+ per year)
Water Waste None Wastes 200-400+ gallons per month during regeneration
Electricity Use None Yes, powers the control head and regeneration cycles
Environmental Impact Eco-friendly; no salt or brine discharge Brine discharge can harm septic systems and local ecosystems
Best For Preventing scale buildup while keeping water natural Homes with extremely hard water (11+ GPG) and where a "soft" feel is desired

Ultimately, this table shows two very different paths to solving a hard water problem. One is a passive, eco-friendly approach focused purely on scale prevention, while the other is a more aggressive, hands-on method that fundamentally changes the chemistry of your water.

Calculating the True Cost of a Salt-Free System

That higher sticker price doesn't always mean a higher total cost. When you're picking out a home water filtration system, you have to look past the number on the box. Let's break down the real financial picture over a decade to see how a whole house salt free water softener stacks up against a traditional salt-based unit.

While salt-free systems often cost more upfront, the savings start adding up right away. It's the classic "pay a bit more now to save a lot more later" scenario. The real value shows up when you realize you're not constantly paying for the upkeep that salt softeners demand.

The Hidden Costs of Salt-Based Systems

With a salt-based softener, the day you buy it is just the start of the spending. These systems have a whole list of ongoing costs that quietly eat away at your budget, year after year.

Let’s run the numbers.

  • The Never-Ending Salt Run: The most obvious cost is the salt itself. A typical family will spend $150 to $300 a year hauling those heavy, 40-pound bags home from the store.
  • Wasted Water: Every time a salt softener regenerates, it flushes hundreds of gallons of salty water down the drain. You’ll see this show up on your water bill.
  • Electricity Bill: These systems need power to run their control heads and trigger those regeneration cycles, adding another small but constant expense.

Over 10 years, these "little" costs can easily add up to thousands of dollars—expenses that salt-free systems just don't have.

The Long-Term Savings of a Salt-Free System

Now, let's look at the salt-free conditioner. Their "set it and forget it" design is where you really start to see the financial win. Once it’s installed, the ongoing costs are few and far between.

Cost analyses show that a whole house salt-free water softener is the better long-term value for most homes. Yes, the initial purchase might be 50-100% more than a salt-based unit. But the total cost of ownership drops fast because you're not buying salt—saving you $1,000 to $2,000 over ten years. Maintenance is almost zero, with no electricity needed and simple filter cartridge changes costing just $100 to $300 every 3 to 6 years. For a deeper dive into these benefits, you can explore a comprehensive guide on frizzlife.com.

The total cost of ownership (TCO) is where a salt-free system shines. By eliminating the need for salt, electricity, and wasted water, these systems often provide a faster return on investment and a lower overall cost.

For example, the 5-year TCO for a salt-free system in a standard three-bathroom house can be around $1,500. A salt-based system for the same home? It could easily top $2,500 once you add up all the ongoing expenses. As you weigh your options, it's also smart to understand the costs of other systems, and you can find good information on the reverse osmosis system installation cost.

The numbers don't lie: the upfront investment in a salt-free model typically pays for itself through years of hassle-free, cost-free operation.

Alright, you've done your homework and are ready to get this project moving. Let's walk through choosing and installing the right whole house salt-free water softener for your home.

This is the part where you turn your research into reality—clean, conditioned water running through every pipe.

First things first: test your water. This isn't a step you can skip. You absolutely need to know your water's hardness, which is measured in grains per gallon (GPG). That one number will tell you if a salt-free system is even a viable filtration option for you.

This decision tree gives you a clear visual on how to weigh the investment over the long haul.

While the sticker price might be higher upfront, the real savings come over time. No salt bags, no regeneration cycles—that's where salt-free systems often win out financially.

Sizing Your System Correctly

So, your water chemistry is a good match. Great. Now you need to size the unit properly to avoid any headaches with water pressure down the line. It comes down to two simple things.

  • Household Size: How many people are using water in your home? The more people, the higher the demand.
  • Pipe Diameter: Go check your main water line where the unit will be installed. Most homes have either ¾-inch or 1-inch pipes. Your system must match that diameter.

Get the sizing right, and you'll ensure the conditioner keeps up even when the dishwasher is running during a shower.

DIY vs Professional Installation

The next question is whether you should install it yourself or call in a plumber. Going the DIY route can definitely save you a couple of hundred bucks, but you need to be confident in your plumbing skills.

If cutting pipes and sweating fittings isn't your idea of a fun Saturday, just hire a professional. A licensed plumber will get it done right, guarantee no leaks, and ensure the system runs perfectly from the start. They'll also install a bypass valve, which is a must-have for any future maintenance.

When you're making your final choice, look for this certification: NSF/ANSI 61. This is the gold standard, confirming that the materials touching your water are safe. Don't buy a system without it.

Maintenance and Certifications

One of the best things about a whole house salt-free water softener is how little you have to mess with it. Forget hauling heavy salt bags or programming a control head. Your job is pretty simple.

  • Pre-Filter Changes: If your setup has a sediment pre-filter, plan on swapping it out every 12-24 months. This keeps sediment from fouling the main conditioning media.
  • Media Replacement: The conditioner media itself is the workhorse. You'll only need to replace it every 5-7 years in most cases.

It’s about as low-maintenance as it gets. If you're looking for more tips and general water treatment info, our water filtration advice section has you covered.

Frequently Asked Questions

Still have a few questions about salt-free filtration systems? Here are some straightforward answers to the most common things homeowners ask.

Do Salt-Free Systems Really Work?

Yes, but it's important to know they "condition" water instead of "softening" it. They use a method called Template Assisted Crystallization (TAC) to change hard minerals into tiny, stable crystals that won't form scale on your pipes or in your appliances.

This filtration process gives you up to 95% scale prevention without stripping healthy minerals out of your water.

Will I Still See Water Spots?

You might. Because minerals like calcium are still present in the water, you may notice some faint, powdery white residue on surfaces like glass shower doors after water evaporates.

These spots are not the same as the crusty, hard-to-remove limescale you're used to. They wipe away easily with a cloth.

You may still see some mineral residue, but it won't be the destructive, hard-to-clean scale you're used to. The system’s main job is protecting the pipes and appliances you can't see.

Is This a True Water Softener?

Not in the classic sense. A traditional "water softener" uses an ion exchange process to physically remove hardness minerals and swap them for sodium. This is what creates that slick, "slippery" feel in the water.

A whole house salt free water softener is more accurately called a water conditioner. It neutralizes the minerals so they can't cause damage, but it doesn't remove them.

What Maintenance Is Required?

This is one of their biggest benefits—the maintenance is incredibly low. Unlike salt-based softeners that need constant refilling with heavy bags of salt, these systems are mostly "set it and forget it."

  • Pre-Filter Changes: If your system has a sediment pre-filter, plan on replacing it every 12-24 months.
  • Media Replacement: The conditioning media in the main tank has a long lifespan, typically lasting 5 to 7 years before it needs to be replaced.

There are no salt bags to haul, no electricity needed, and no backwash cycles that waste water.


At Water Filter Advisor, our goal is to give you the clear, unbiased information you need to choose the perfect water filtration solution for your home. Explore our buying guides and reviews to find the best system for your family's needs at Water Filter Advisor.

Your Guide to the Best Water Filtration System for Well Water

When you have a private well, you're not just a homeowner—you're your own water manager. A water filtration system for well water is a combination of technologies that removes contaminants, improves taste, and makes your water safe. It's your home's personal water treatment plant.

Your Guide to Pure and Safe Well Water

A smiling person fills a clear glass with pure, safe water from a kitchen tap.

Owning a home with a private well means you don’t have to deal with municipal water bills or the chemicals used in city treatment. But this also means you carry a critical responsibility: ensuring the water from your taps is safe and clean.

Unlike city water, no public utility is monitoring your well. The quality is entirely in your hands. This guide gives you the expert information you need to turn your well into a reliable source of pure water.

What This Guide Covers

We're here to give you the knowledge to make the right decisions for your water. We will show you how to solve the most common issues well owners face.

  • Safety: We’ll show you how to identify and get rid of harmful bacteria, viruses, and chemicals you can’t see, smell, or taste.
  • Taste and Odor: Learn how to eliminate "rotten egg" smells from sulfur or the metallic tastes that make water unpleasant.
  • Staining and Damage: Find out how to stop minerals like iron and manganese from leaving ugly orange or black stains on sinks, tubs, and laundry.

A well water filtration system should use a multi-barrier approach. Think of it as layers of defense. Different stages work together to stop different threats before they get to your faucet.

The Multi-Barrier Approach

No single filter can solve every water problem. A complete system uses a team of filters working in sequence.

One filter might remove large particles like sand and sediment. Another filter might be a specialist, targeting specific chemicals or minerals. A final stage, like a UV light, can neutralize any bacteria or viruses that got through the other defenses.

This guide will walk you through this strategic approach. We will help you build a system that matches your water's specific chemistry. By the end, you'll have the confidence to choose, install, and maintain the right equipment to protect your family, your plumbing, and your peace of mind.

Understanding What's Really in Your Well Water

Let’s pull back the curtain on the world hiding inside your well water. Unlike city water that gets tested and treated before it ever reaches your faucet, well water is a direct pipeline from the ground to your glass. That means you’re getting water in its most natural state—which can also include a whole cast of uninvited guests.

This isn't to scare you; it’s to empower you. Knowing exactly what you’re up against is the first step in choosing a filtration plan that actually works for your home. You're not alone in this—over 13 million households across the country rely on private wells. That’s a huge number of families who could be dealing with contaminants that sneak into groundwater from all sorts of places. If you want to dive deeper, you can explore Frizzlife's complete 2026 guide for well water filters.

The "Nuisance Crew": Annoying but Mostly Harmless

Some contaminants are more of an annoyance than a real danger. I call them the "Nuisance Crew," and you'll know they're around by the headaches they cause. They’re often the reason you started looking for a water filtration system for well water in the first place.

  • Iron: The classic rusty stain artist. If you’re seeing reddish-brown streaks in your sinks, toilets, and even on your laundry, you’ve met iron. It also gives your water a distinct metallic taste.
  • Manganese: Think of manganese as iron's darker cousin. It leaves behind blackish or dark brown stains and can make your water taste bitter or metallic.
  • Hydrogen Sulfide: This is the prankster of the group, responsible for that unmistakable rotten-egg smell. While the smell is awful, the gas itself is typically not a health risk at the low levels found in residential wells.
  • Hardness Minerals: This is the duo of calcium and magnesium that causes hard water. They don’t stain like iron, but they leave behind a chalky scale buildup on faucets, showerheads, and inside your appliances, which slowly strangles their efficiency and shortens their lifespan.

The Invisible Invaders: The Real Health Threats

Much more serious are the contaminants you can’t see, smell, or taste. I call these the "Invisible Invaders" because they pose genuine health risks, and their presence is the number one reason why testing your water is non-negotiable.

The most dangerous contaminants are often undetectable by your senses. Relying on clear, good-tasting water as a sign of safety is a gamble. Professional testing is the only way to be certain.

These invaders can come from anywhere. Agricultural runoff can introduce nitrates and pesticides. A neighbor’s failing septic system can leach bacteria into the groundwater. Even the natural geology of your area can be a source of heavy metals. To grasp the severity, it's useful to know what professionals consider truly contaminated water—like Category 3 water damage, also known as 'black water', which illustrates the worst-case scenarios that good filtration helps you avoid.

Here are the main threats you need to be aware of:

  • Bacteria and Viruses: Pathogens like E. coli and coliform bacteria are major red flags. Their presence usually means sewage or animal waste has contaminated your water, and they can cause serious gastrointestinal illnesses.
  • Nitrates: Often found in agricultural areas from fertilizer runoff, high levels of nitrates are especially dangerous for infants and pregnant women.
  • Heavy Metals: Arsenic and lead are two of the most concerning. They can leach into groundwater from natural mineral deposits or old industrial sites and are linked to severe, long-term health problems.

To make this easier to spot, I've put together a quick reference table. It connects the dots between what you're seeing, smelling, or tasting and what might be causing it.

Common Well Water Contaminants and Their Telltale Signs

Contaminant Potential Sign Primary Concern
Iron Rusty/orange stains, metallic taste Staining, pipe buildup, metallic taste
Manganese Black/dark brown stains, bitter taste Staining, appliance damage, unpleasant taste
Hydrogen Sulfide Rotten egg smell Unpleasant odor and taste
Hardness (Calcium & Magnesium) White, chalky scale; soap scum Appliance inefficiency, pipe blockage
Bacteria (e.g., E. coli) Often no sign (sometimes slight odor) Gastrointestinal illness, serious infection
Nitrates No sign (tasteless, odorless, colorless) Developmental issues in infants ("Blue Baby Syndrome")
Arsenic No sign (tasteless, odorless, colorless) Long-term health effects, including cancer
Lead No sign (tasteless, odorless, colorless) Neurological damage, developmental delays

Remember, this table is a starting point. While these signs are good clues, the only way to know for sure what's in your water is to get it professionally tested.

Know Your Water Before You Filter

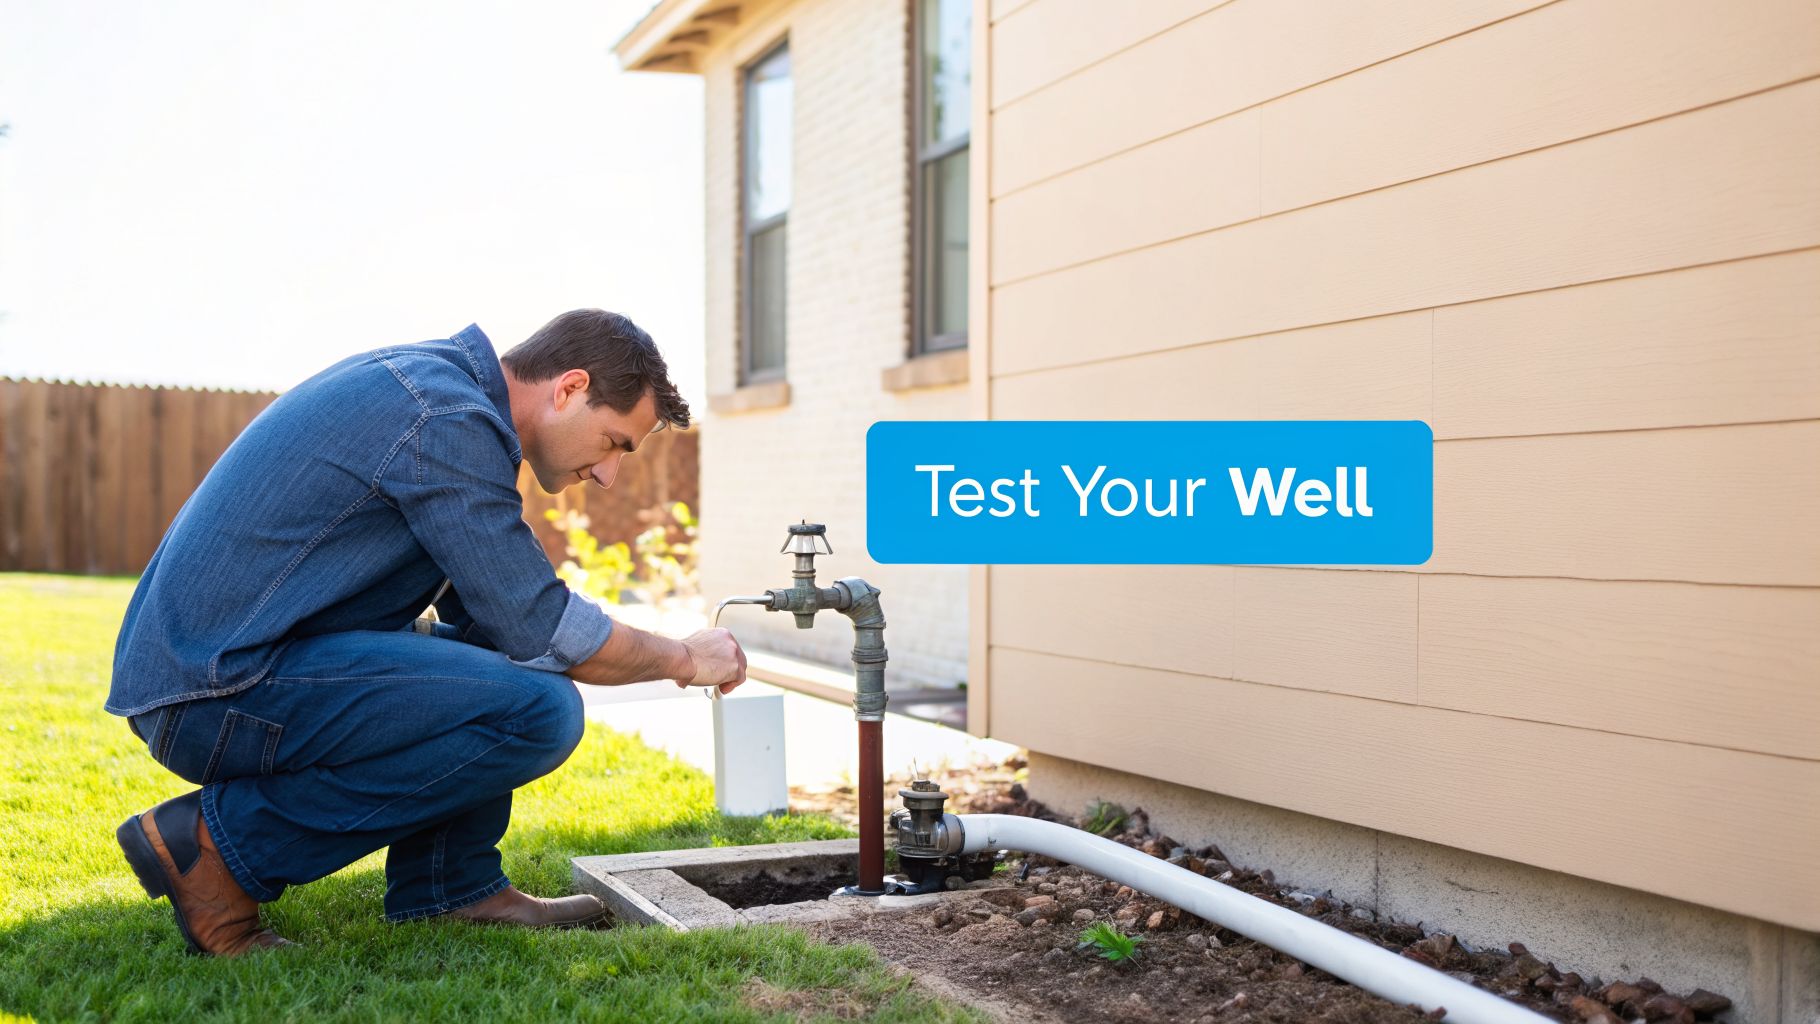
You can't choose the right water filtration system for well water until you know what's in your water.

Buying a filter without a water test is a guess. This is the first and most important step to getting clean, safe water from your well.

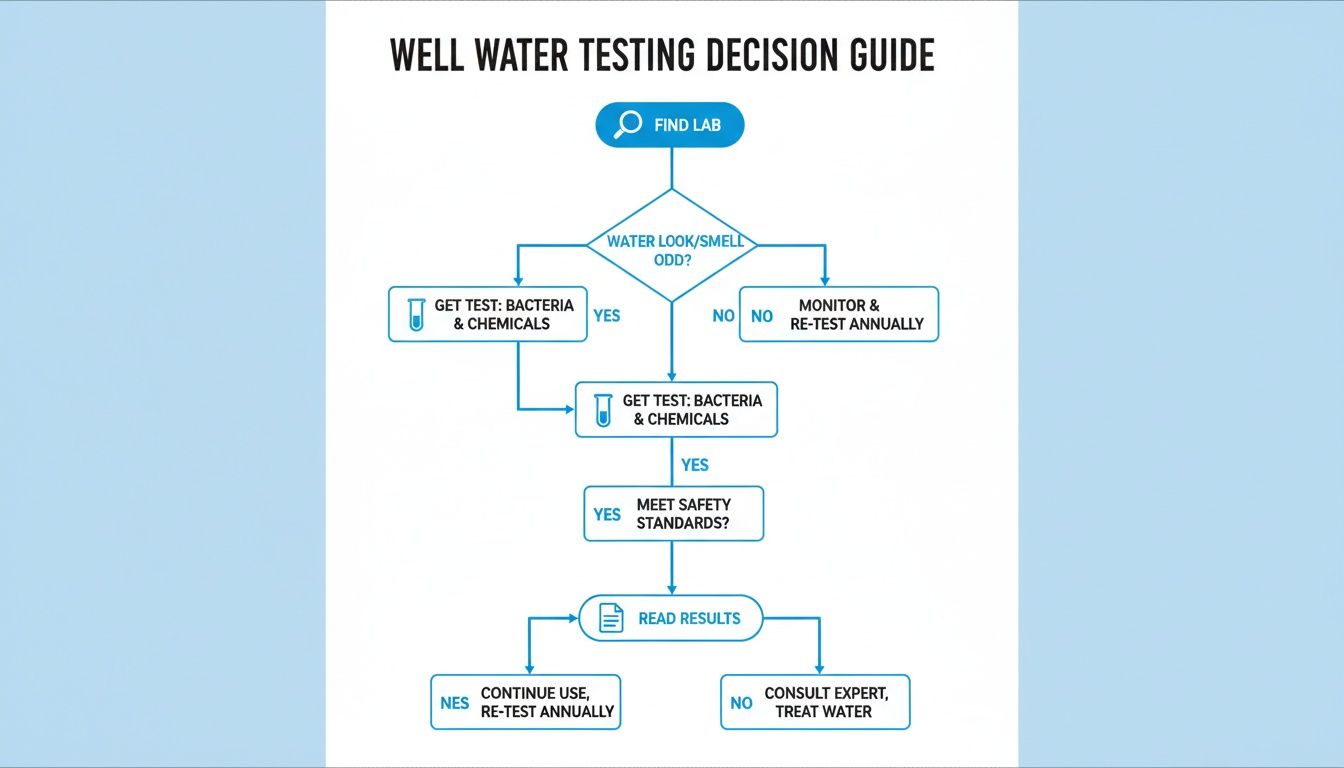
A water test gives you a detailed report on every contaminant in your well.

DIY Strips vs. Professional Lab Testing

You have two options for testing. They serve different purposes.

  1. DIY Test Strips: These give you a quick look. You can buy them at hardware stores or online. Dip them in water for instant results on basics like pH, hardness, and chlorine. They are good for a quick check but are not accurate enough to base your filtration system choice on.

  2. Professional Lab Testing: This is a full diagnosis and is non-negotiable for well owners. A state-certified lab provides a highly accurate, detailed analysis. This is the only way to find dangerous contaminants like bacteria, arsenic, lead, and volatile organic compounds (VOCs).

A professional lab report is the blueprint for your entire water filtration system. Without it, you are buying a system blind and may not be removing the most serious threats in your water.

How to Use a Certified Lab

Getting a professional test is a straightforward process.

First, find a state-certified laboratory. Search online for "[Your State] certified water testing lab" or check your state's Department of Environmental Protection (DEP) or Department of Health website for a list.

Next, request the right tests for a well owner. This should include:

  • Total Coliform and E. coli: Checks for bacterial contamination.
  • Nitrates/Nitrites: Important for wells near agricultural areas.
  • pH Level and Hardness: Tells you if your water is acidic or alkaline and the level of minerals like calcium and magnesium.
  • Iron and Manganese: These are what cause staining on fixtures and laundry.
  • Lead and Arsenic: Critical tests for heavy metals with serious health risks.

The lab will give you a special collection kit with strict instructions. Follow them exactly. Use their bottles, do not touch the inside of the cap, and return the sample to the lab quickly. This ensures your results are accurate.

Your report will show results with terms like "mg/L" (milligrams per liter) or "CFU/100mL" (colony-forming units per 100 milliliters). The report will list your results next to the EPA’s maximum contaminant levels (MCLs). If your water exceeds an MCL, you need to address it. This data will point you directly to the correct filtration solution.

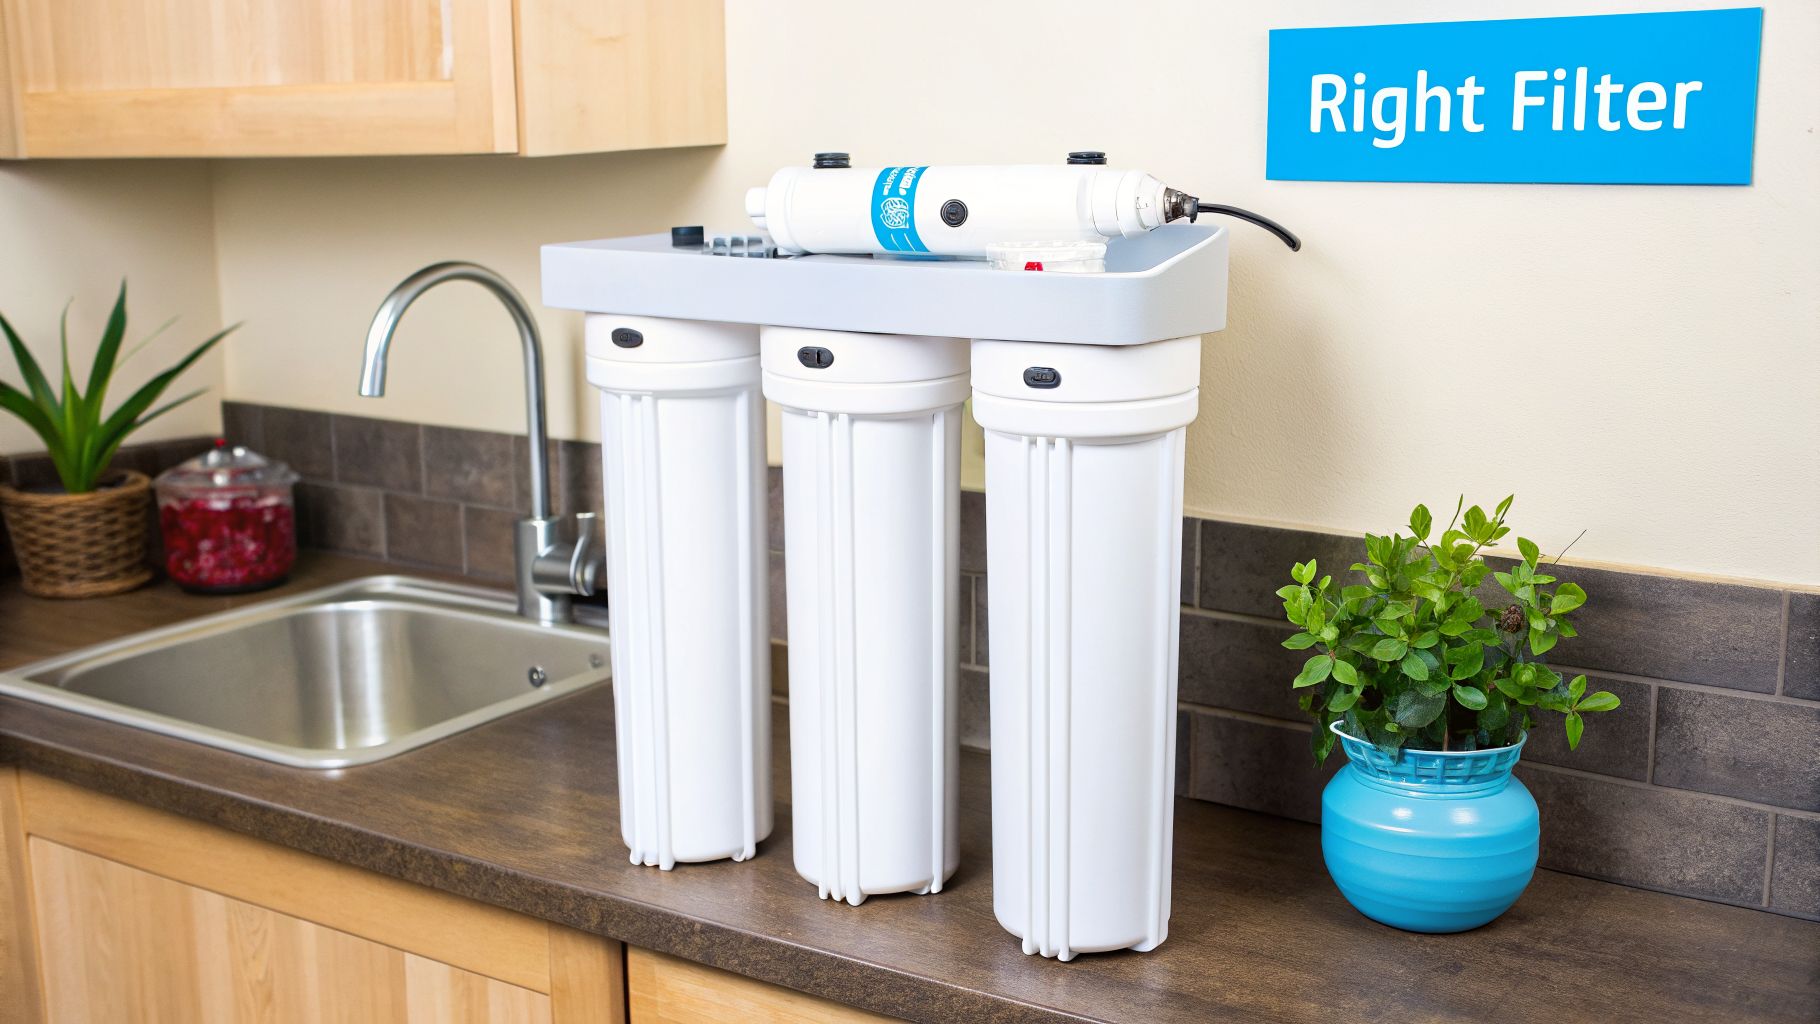
Assembling Your Filtration Dream Team

Choosing the right water filtration system for well water isn't about finding one magic bullet. It’s more like building a team where every player has a key role. No single filter can solve every problem, so the goal is to create a strategic lineup that guarantees pure, safe water for your home.

Your lab report is your playbook. It tells you exactly what you’re up against—sediment, iron, bacteria, you name it. Now, let’s go over the key players you can recruit for your home's water defense.

The Bouncer at the Door: Sediment Filters

Every great system starts with a solid front line. For water filtration, that's your sediment filter. It's almost always the very first stage in a whole-house system for a good reason: its job is to act as a bouncer.

Think of it this way: your water is a stream carrying all sorts of debris. The sediment filter is the screen that catches all the big stuff—dirt, sand, rust, and silt. It doesn't handle dissolved chemicals or bacteria, but it stops the grit that clouds your water and would otherwise clog up every other filter down the line.

  • How It Works: A physical barrier, often a pleated or wound-string cartridge, uses microscopic pores to trap physical particles.
  • Pros: Protects all your other filters and appliances, makes water clearer, and is cheap to install and maintain.
  • Cons: Doesn't remove anything you can't see, like dissolved contaminants, bad tastes, odors, or bacteria.

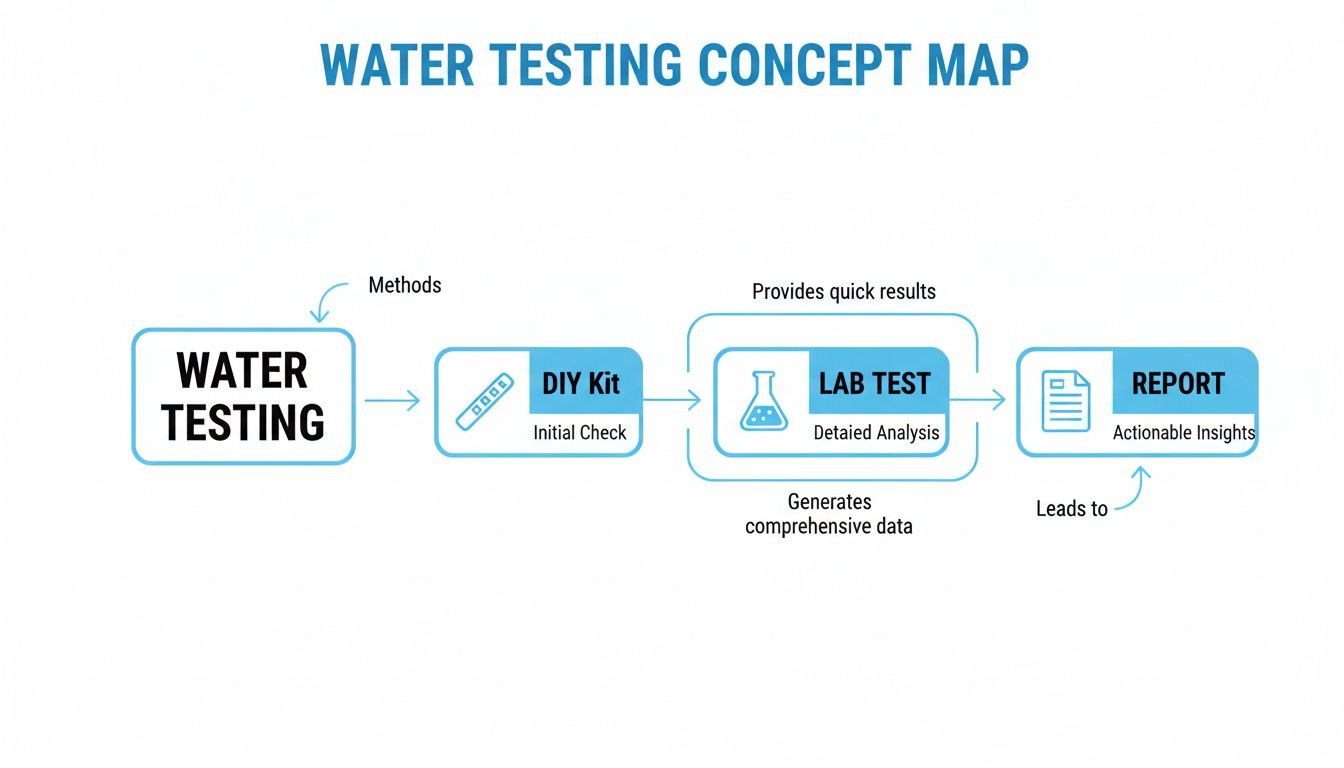
This is how you go from suspecting a problem to knowing exactly what to fix. From a simple DIY test to a full lab analysis, you get the data you need to build the right filtration plan.

A water testing concept map illustrating DIY kit initial checks, detailed lab analysis, and actionable reports.

Once you have that detailed lab report, you can start picking the right players for your team.

The Chemical Sponge: Activated Carbon Filters

Next up is your team's workhorse, the activated carbon filter. The best way to picture it is as a massive sponge with millions of tiny, porous pockets. Its job is to grab all the things that make your water taste and smell off.

Activated carbon uses a process called adsorption, where contaminants literally stick to its surface. It's incredibly effective against chemicals like chlorine, pesticides, and many volatile organic compounds (VOCs). This is the filter that takes water with a funky chemical or earthy smell and makes it taste crisp and clean.

The Heavy Lifters: Water Softeners and Iron Filters

Some problems just need brute force. That's where water softeners and iron filters come in—they are the heavy-lifters on your team, built to tackle the minerals that cause the most obvious headaches around the house.

A water softener goes after one thing: hardness minerals like calcium and magnesium. Through a process called ion exchange, it swaps out those scale-forming minerals for sodium ions. This is what stops that chalky buildup that destroys appliances and leaves spots all over your dishes.

An iron filter is even more specialized. It's designed specifically to get rid of iron. It oxidizes the dissolved iron in your water, turning it into a solid particle that can then be easily filtered out. This is your go-to defense against those ugly rusty-orange stains that plague so many homes with well water.

The Silent Assassin: UV Purifiers

For the threats you can't see, you need a silent assassin. A UV purifier is your final line of defense against the nasty biological stuff. It's unique because it doesn’t add any chemicals to the water, nor does it remove anything.

Instead, a UV light chamber bombards the water with powerful ultraviolet rays, scrambling the DNA of bacteria, viruses, and protozoa like E. coli and Giardia. This neutralizes them, making it impossible for them to reproduce and make your family sick. It’s a simple, set-it-and-forget-it solution for microbiological safety.

A UV purifier is a must-have for well owners. Bacteria can get into your well without changing the water's taste or smell, and a UV system provides a constant guard against illness-causing pathogens.

The Perfectionist: Reverse Osmosis (RO) Systems

Finally, for the absolute purest drinking water right from the tap, you bring in the perfectionist: a reverse osmosis (RO) system. This is typically a point-of-use system installed right under your kitchen sink.

An RO system works by forcing water through a special semi-permeable membrane, which strips out up to 99% of all dissolved solids at a molecular level. We’re talking about nitrates, arsenic, lead, fluoride, and so much more. For the 15% of Americans on private wells, this technology can be a lifesaver. In the Flint water crisis, for instance, certified RO filters reduced lead to safe levels, with filtered water showing over 20 times less lead than unfiltered tap water. For well owners, an RO system is the final word in purity.

Getting a system like this installed properly is key to making sure it works right from day one. If you're not comfortable doing it yourself, finding a qualified plumber is a smart investment to protect your system and your home.

Alright, you've gotten your water test results back and you have an idea of what needs to be filtered out. Now comes the big decision: choosing the right hardware for the job.

Picking the best water filtration system for well water isn't about buying the most expensive gear you can find. It’s about matching the right equipment to your well, your home, and your family. The goal is to get clean, safe water without creating new headaches, like a sudden drop in water pressure every time someone starts the dishwasher.

Let's break down the technical specs you'll see on the box and translate them into what they actually mean for your day-to-day life. This way, you can feel confident you’re getting a system that’s a perfect fit.

Matching Flow Rate to Your Family's Needs

Have you ever been the last one to get in the shower, only to have the water pressure drop to a pathetic trickle? That’s what an undersized filtration system can feel like—all the time. This is why flow rate is the first thing you need to get right.

Flow rate, measured in gallons per minute (GPM), is simply how much water can move through the filter at once. If your system's GPM is too low, it creates a bottleneck for your entire home.

To figure out what you need, think about your family's busiest time of day. A shower might use 2.5 GPM, a dishwasher 1.5 GPM, and a washing machine 2 GPM. If all those are running during the morning rush, you need a system that can keep up.

A good rule of thumb is to budget 3-5 GPM for each person in your house. For a family of four, that means you should be looking for a system that can handle at least 12-15 GPM. This ensures you have plenty of water pressure, even when life gets hectic.

Filtration System Comparison for Well Water

With so many types of filters on the market, it can be tough to keep them straight. This table breaks down the most common options for well water, showing what they target, what they typically cost upfront, and what kind of maintenance you can expect.

System Type Primary Target Contaminants Typical Cost Range (Initial) Ongoing Maintenance
Sediment Filter Sand, silt, dirt, rust particles $50 – $500 Cartridge replacement every 3-12 months.
Carbon Filter Chlorine, pesticides, herbicides, VOCs, bad taste/odor $100 – $1,500 Cartridge replacement every 6-12 months or based on gallon rating.
Water Softener Hardness minerals (calcium, magnesium) $800 – $3,000+ Replenishing salt regularly (monthly); resin media lasts 10-15 years.
Iron/Manganese Filter Iron, manganese, hydrogen sulfide (rotten egg smell) $1,000 – $3,500+ Backwashing (automatic); media replacement every 5-10 years.
Reverse Osmosis (RO) Salts, lead, arsenic, fluoride, nitrates, cysts $200 – $1,000 (POU) Pre/post filter changes (6-12 mos); membrane change (2-4 yrs).
UV Purifier Bacteria, viruses, protozoa (E. coli, Giardia) $400 – $1,500+ UV lamp replacement annually; quartz sleeve cleaning.

Use this as a starting point. Your water test results will point you toward the right column, and from there you can begin to weigh the initial cost against the long-term upkeep.

Decoding Filter Capacity and Long-Term Costs

The sticker price is just the beginning. To understand the true cost of a system, you have to look at its filter capacity and lifespan. This is what determines how often you'll be pulling out your wallet for maintenance.

  • Filter Capacity: This tells you how much water a filter can clean before it's "full" and needs to be replaced. You'll often see this measured in gallons. For example, a whole-house carbon filter might be rated for 100,000 gallons.

  • Lifespan: This is the manufacturer's estimate of how long a filter or media will last, usually given in months or years. For systems that clean themselves, like backwashing iron filters or water softeners, this refers to the media inside the tank, which can last 5 to 10 years or even longer.

A cheap system with a filter you have to swap out every three months can easily end up costing more over time than a more expensive unit with a high-capacity filter that lasts a full year. Do the math on the long-term costs before you buy.

The Importance of NSF/ANSI Certifications

With well water, you can't just hope a filter is doing its job—you need proof. That’s where certifications from organizations like the NSF (National Sanitation Foundation) and ANSI (American National Standards Institute) come in. These aren't just fancy logos; they are a guarantee that the product performs as advertised.

Think of an NSF/ANSI certification as a promise that’s been independently verified. It means the filter has gone through rigorous testing to prove it removes the specific contaminants listed on the box, down to the percentages claimed.

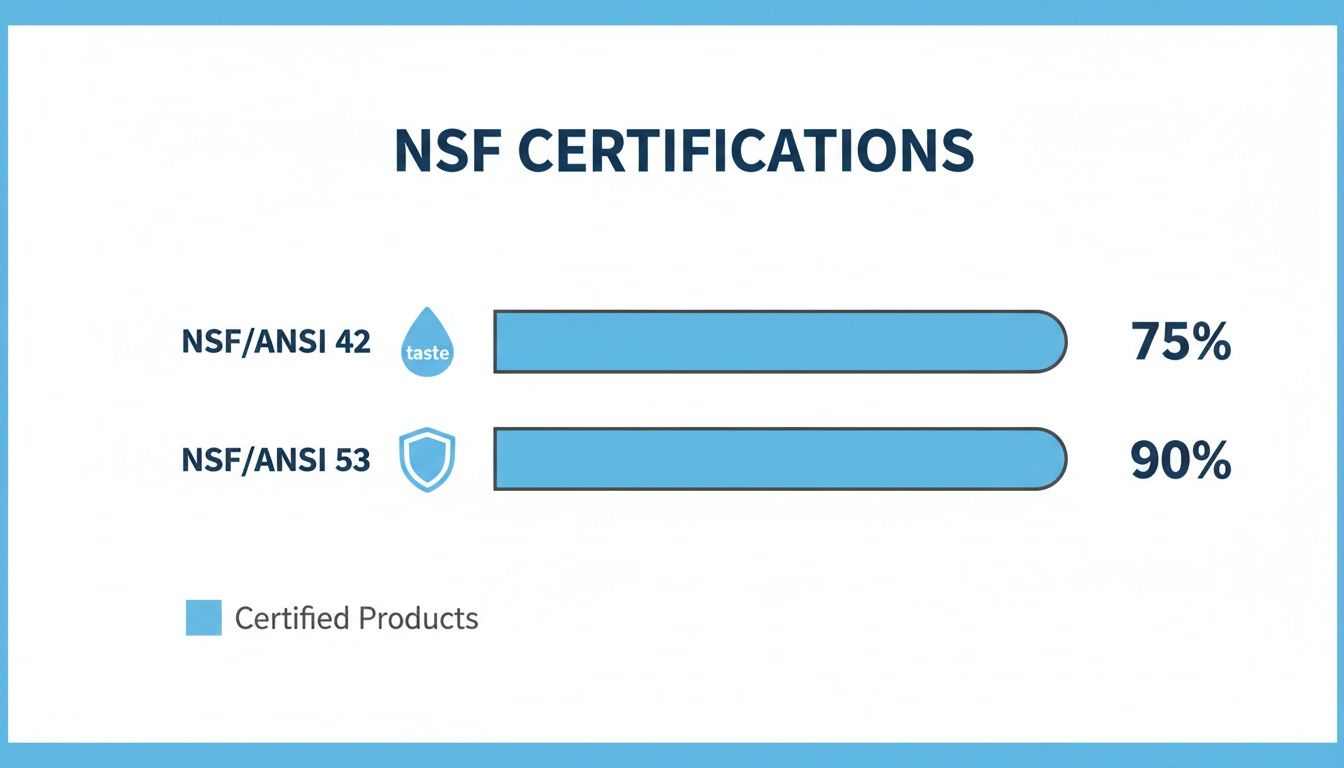
For example, a filter with an NSF/ANSI 53 certification is certified to reduce health-related contaminants like lead or cysts. A filter with NSF/ANSI 42 is certified for aesthetic issues, like improving bad taste from chlorine. For any well owner, choosing a certified water filtration system for well water is the only way to be absolutely certain your family is getting the protection they need.

Keeping Your System Running Smoothly

A person replacing a filter, following a maintenance checklist for a system.

Putting in a water filtration system for well water is a great move for any well owner. But it's not a "set it and forget it" kind of appliance. You have to think of it like your car—it needs regular, simple tune-ups to keep it performing at its best for years.

Consistent upkeep is what protects your investment and makes sure your family's water stays pure and safe. The good news is, most of this maintenance is straightforward and something any homeowner can handle.

DIY Tasks vs. Professional Help

Not every maintenance job requires a phone call to a pro. Some are quick DIY tasks you can do in minutes, while others are best left to a plumber to avoid a simple job turning into a costly mistake.

Most of the routine stuff is designed to be user-friendly. For instance, swapping a sediment or carbon cartridge is usually as simple as unscrewing a filter housing, popping in the new filter, and screwing it back on. That’s a perfect DIY job.

But for the bigger jobs—like replacing the filtration media inside a large backwashing tank or troubleshooting a finicky control valve—you’ll want an expert. If a task involves cutting pipes or messing with complex wiring, calling a pro is always the safer and smarter choice.

Your Fridge-Worthy Maintenance Checklist

The secret to staying on top of maintenance is a simple schedule. No need to memorize it all. Use this checklist as your guide and pop some reminders in your phone's calendar to stay on track.

  • Every 3-6 Months: Swap Your Sediment Filter
    This filter is your first line of defense against sand, silt, and grit. How often you change it really depends on how much sediment your well kicks up, but checking it every three months is a great habit to get into.

  • Every 6-12 Months: Replace Your Carbon Filter
    The carbon filter is what gets rid of bad tastes and smells, but it has a limited capacity. Once it's "full" of contaminants, it can't absorb any more. Most whole-house carbon filters are good for about a year.

  • Monthly: Check Your Water Softener Salt Level
    If you have a water softener, it's useless without salt. Just pop the lid once a month and make sure the brine tank is at least half-full. It’s a two-second job that prevents hard water from coming back.

Consistent maintenance does more than just keep your system running; it ensures the water quality you paid for. A clogged filter can't remove contaminants effectively, and an expired UV lamp offers a false sense of security against bacteria.

Annual System Check-Up

Once a year, it's time for a more thorough check-in. This is a critical part of keeping your system in top shape for the long haul.

  1. Replace Your UV Lamp: This is non-negotiable. A UV lamp’s power to kill germs fades over time, even if the light still looks like it's on. You must replace the lamp every year to guarantee it's actually killing bacteria and viruses.

  2. Clean the UV Quartz Sleeve: While you have the lamp out, take a minute to gently clean the glass sleeve it sits in. Any mineral buildup on the sleeve will block the UV light and make it less effective.

Following a simple schedule like this will keep your water filtration system for well water working perfectly for a decade or more. It’s a small bit of effort that delivers huge returns in water quality, appliance life, and your own peace of mind. For more expert tips, you can find helpful advice on all types of water filters to keep your home's water pure.

Frequently Asked Questions About Well Water Filtration

Here are answers to the most common questions from well owners about water filtration. Use this information to choose, install, and maintain the right system for your home.

Do I Really Need a Whole House System or Is an Under Sink Filter Enough?

For well water, a whole-house system is almost always the best choice. Under-sink filters like reverse osmosis systems are designed for a single faucet, primarily for drinking water.

A whole-house system protects your entire plumbing infrastructure. It is the only way to guard appliances like water heaters, washing machines, and dishwashers from sediment, iron, and hard water minerals. It also provides cleaner water for showering and laundry, preventing skin irritation and stains on clothes. An under-sink unit cannot provide this level of comprehensive protection.

How Often Should I Test My Well Water?

The CDC recommends a professional lab test for your well at least once a year. The annual test should check for total coliform and E. coli bacteria, nitrates, pH levels, and total dissolved solids (TDS).

Do not wait for the annual test if you notice any changes. You should test your water immediately if:

  • You notice a change in taste, smell, or color.
  • A household member has recurring gastrointestinal illness.
  • A flood, chemical spill, or major construction has occurred nearby.
  • You have performed any maintenance on the well, like replacing the pump.

Annual testing is the best way to identify problems before they become health risks. Many dangerous contaminants are undetectable by taste, smell, or sight.

Can I Install a Well Water Filtration System Myself?

Installation depends on the system type and your skill level. A simple single-cartridge sediment or carbon filter can be a straightforward DIY project with basic tools.

Complex multi-tank systems—including backwashing iron filters, water softeners, or UV purifiers—are different. These require precise plumbing work, and UV systems also involve electrical wiring. Incorrect installation can cause leaks, void the system’s warranty, or make the filter ineffective. When in doubt, hiring a qualified, insured professional is the safest investment.

What Does an NSF Certification Mean and Why Does It Matter for Wells?

NSF certification is independent, third-party proof from the National Sanitation Foundation that a filter performs as advertised. An NSF/ANSI mark means the system was tested against strict public health and safety standards.

This certification is critical for well owners. With the variable quality of well water, an NSF seal provides peace of mind. For example, a filter certified to NSF/ANSI 53 is proven to reduce specific health-related contaminants like lead or cysts. Choosing a certified product ensures your system is protecting your family from the specific contaminants found in your water test.


At Water Filter Advisor, we help you make decisions with clarity. Our guides and reviews are here to support you from understanding your water test to choosing the right system. Explore our resources at https://www.waterfilteradvisor.com to get started.
The Best Water Filter Pitcher for Pure and Simple Hydration in 2026

When you're hunting for the best water filter pitcher, you'll find heavy hitters like Brita, PUR, and Clearly Filtered all vying for your attention. But let's be real: the right pitcher isn't about brand loyalty. It's the one that's a perfect match for your specific water quality and your daily life.

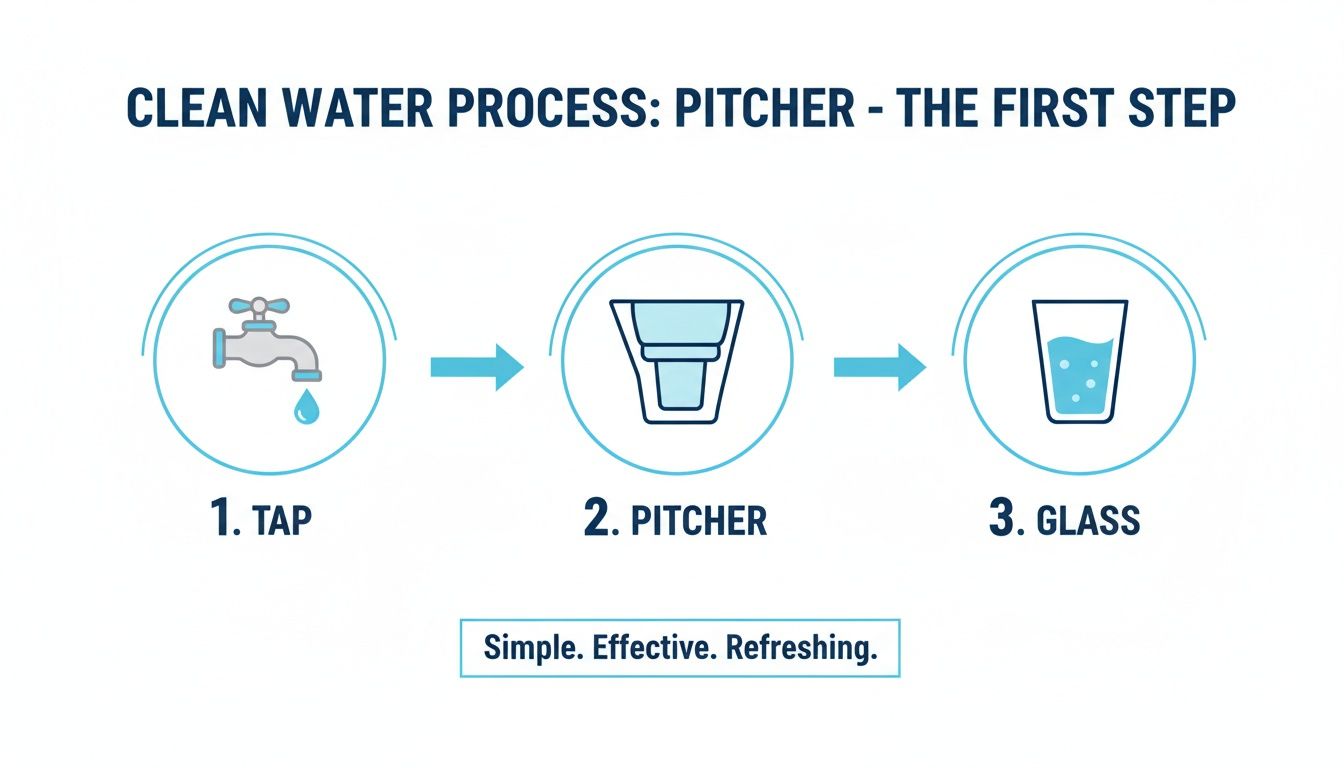
Why a Pitcher is Your First Step to Better Water

Let's talk about the magic of turning your tap water into crisp, clean hydration, straight from your fridge. With a growing list of concerns about what's really in our tap water—from the swimming pool perfume of chlorine to invisible intruders like lead and PFAS—a water filter pitcher is more than just a kitchen gadget. It's your home's first line of defense.

This simple tool puts the power back in your hands. It demands zero installation, fits into any home, and makes an immediate, noticeable difference in your water's taste and quality. For most of us, it’s the easiest and most accessible way to start the journey to better home water filtration.

A Practical Solution for Common Concerns

A water filter pitcher delivers peace of mind without a hefty investment or a complicated setup. It's the hero of home hydration.

Here’s what you're signing up for:

  • A Taste and Odor Revolution: The most dramatic change you'll notice is the banishment of chlorine. It's essential for disinfecting city water but leaves behind that distinct "public pool" taste and smell. A good filter erases it.
  • Serious Contaminant Reduction: A certified pitcher isn't just making water taste good; it can significantly reduce a wide array of harmful contaminants, including heavy metals, pesticides, and insidious emerging chemicals.
  • A Win for Your Wallet: Using a pitcher costs a fraction of buying bottled water. You get a continuous supply of clean water and can save hundreds of dollars a year.

A pitcher is a proactive step toward better health and a more sustainable lifestyle. It bridges the gap between uncertainty about your tap water and the pure, clean hydration you crave.

This guide is your roadmap. We’ll dive into the science happening inside the filter and break down the real-world costs. This is a booming market, valued at USD 3.5 billion in 2024 and projected to hit USD 5.4 billion by 2030. That growth tells a story: households are ditching single-use plastics and embracing smarter, in-home solutions. You can find more data on water filtration market trends here.

By the end of this guide, you'll be an expert, ready to choose the best water filter pitcher for your home, your budget, and your family's health.

How Pitcher Filters Turn Tap Water Into Clean Water

Ever stare at a water filter pitcher and wonder what sorcery is happening inside? It’s not magic, but it is some seriously clever engineering. Think of the filter as a microscopic obstacle course, precision-designed to trap the bad guys while letting only pure, clean water molecules pass through.

The whole show is powered by good old gravity. When you fill the top reservoir, water begins its slow descent through the filter cartridge. This deliberate drip is crucial—it gives the filter media inside enough contact time to work its purification magic.

An illustration showing the clean water process: tap water goes into a pitcher, then into a glass. Simple and refreshing.

The Workhorse: Activated Carbon

The undisputed MVP of almost every pitcher filter is activated carbon. Picture it as a super-porous sponge on a molecular level. This carbon, often derived from coconut shells, is treated to create an astronomical internal surface area packed with microscopic nooks and crannies. To put it in perspective, just one gram of activated carbon can have the surface area of a football field.

As water meanders through, this vast surface acts like a chemical magnet, trapping contaminants in a process called adsorption. It’s like flypaper for the unwanted stuff in your water.

Activated carbon is the champion of improving taste and smell. It’s responsible for tackling:

  • Chlorine: The number one offender behind tap water that tastes and smells like it came from the local Y. Activated carbon is exceptional at neutralizing it, leading to a massive improvement in flavor.
  • Volatile Organic Compounds (VOCs): A broad class of industrial and commercial chemicals that can find their way into water sources.
  • Bad Tastes and Odors: Carbon traps the organic compounds that cause musty, earthy, or just plain weird smells, leaving your water tasting crisp, fresh, and like… well, nothing.

The Specialist: Ion-Exchange Resins

While activated carbon is the all-star for taste and odor, higher-end filters deploy a second, specialized unit: ion-exchange resins. Think of these as tiny, microscopic commandos on a mission to target specific contaminants that carbon alone can't handle.

These are tiny resin beads engineered to perform a very specific trade. They attract certain dissolved metals and minerals, swapping them for something harmless.

This ion-swap is the secret sauce that separates a basic taste-and-odor filter from one that can remove serious health-related contaminants. It's the key technology behind filters certified to reduce nasty things like lead and mercury.

Here’s the trade: The resin beads come loaded with harmless ions, like sodium or potassium. When water containing a heavy metal like lead flows past, the resin has a stronger chemical attraction to the lead. It snags the lead ion and releases one of its harmless ions in its place. It's a one-for-one swap that makes your water significantly safer. This process is brilliant for reducing heavy metals like lead, mercury, and copper. As an added bonus, it can also reduce the minerals that cause limescale, making your kettle happy.

When you're staring at a shelf full of water filter pitchers, the marketing claims can be a tidal wave of confusion. How do you cut through the noise and figure out which one actually delivers on its promises?

The answer is third-party certifications. Specifically, you want to be on the lookout for the NSF International seal.

Think of it like a crash-test rating for a car. You wouldn't trust a vehicle that hasn't been independently verified for safety. The same logic applies to the water you drink every day. These NSF standards aren't just marketing fluff; they are tough, legally enforceable benchmarks that prove a filter can do what it says it does.

NSF 42, 53, and 401 water filter certifications displayed next to a pitcher.

NSF 42: The Taste and Odor Standard

You'll see NSF/ANSI 42 on nearly every pitcher. This is the foundational certification for "aesthetic effects"—things that impact the way your water tastes, smells, and looks.

A filter certified to NSF 42 is proven to reduce:

  • Chlorine: This is the big one. It's what your city adds for disinfection and what gives tap water that "swimming pool" vibe. NSF 42 guarantees a significant reduction.
  • Particulates: This covers the tiny bits of sediment and rust that can make water look cloudy.

If your main goal is simply to make your tap water taste better and more inviting, NSF 42 is your starting point. It’s the baseline for improving your water’s drinkability.

NSF 53: The Health Effects Standard

For serious, health-focused protection, you need to look for NSF/ANSI 53. While NSF 42 is about taste, this standard is all about health and safety. Filters bearing this seal have endured much more rigorous testing to prove they remove specific contaminants that can pose a genuine health risk.

An NSF 53 mark on a filter means it has proven it can reduce specific health-related contaminants to a level deemed safe. This isn't about preference; it's about protection.

Now, here's the crucial detail: manufacturers must specify exactly which contaminants their filter is certified for under this standard. You need to check the packaging or the fine print. Common NSF 53 certifications include:

  • Lead: Reduces lead that can leach from old pipes and plumbing.
  • Mercury: Removes this dangerous heavy metal.
  • Cysts: Filters out nasty microorganisms like Giardia and Cryptosporidium.
  • Volatile Organic Compounds (VOCs): Tackles a range of industrial chemicals.

Just because a filter is NSF 53 certified for lead doesn't mean it's also certified for VOCs. Always verify it targets your specific water concerns.

NSF 401: The Emerging Contaminants Standard

Finally, we have NSF/ANSI 401. This is a newer standard for "emerging contaminants"—things like prescription drugs, herbicides, and chemicals that aren't yet regulated by the EPA but are being detected in our water supplies.

This standard covers trace amounts of substances like:

  • Certain prescription and over-the-counter drugs
  • Common herbicides and pesticides
  • Chemicals like Bisphenol A (BPA)

An NSF 401 certification offers an extra layer of confidence that your filter is tackling some of the modern pollutants finding their way into our water. Public awareness of these issues is exploding. After the Flint water crisis in 2014, pitcher sales shot up 25% in the area. Today, with PFAS—"forever chemicals"—found in the blood of 99% of Americans according to the CDC, filters certified for their removal are in high demand. You can learn more about the trends driving the water filter pitcher market and why these certifications matter more than ever.

To make this easier, the table below helps you match common water issues to the certification you should be looking for.

Common Contaminants and Corresponding NSF Certifications

This table helps you match your water quality concerns with the specific NSF/ANSI certification that guarantees a filter's effectiveness against that contaminant.

Contaminant Type Examples Primary Concern Relevant NSF/ANSI Standard
Aesthetic Chlorine, Particulates Bad taste, "pool" smell, cloudy water NSF 42
Heavy Metals Lead, Mercury, Cadmium Neurological damage, developmental issues NSF 53
Microbiological Cysts (Giardia, Cryptosporidium) Gastrointestinal illness ("beaver fever") NSF 53
Organic Chemicals Benzene, Pesticides (VOCs) Cancer risk, organ damage NSF 53
Emerging Pharmaceuticals, BPA, Herbicides Endocrine disruption, unknown long-term effects NSF 401
"Forever Chemicals" PFOA, PFOS (types of PFAS) Cancer risk, immune system effects NSF 53 (for PFOA/PFOS)

Ultimately, a filter is only as good as what it's proven to remove. By cross-referencing with these specific NSF certifications, you can be confident you're buying a product that will actually protect your health and deliver cleaner, safer water.

Matching a Pitcher to Your Lifestyle and Budget

Powerful filtration is essential, but the best water filter pitcher is the one you’ll actually use every single day. After you’ve pinpointed the right certifications for your water, it’s time to get practical. A pitcher that’s too slow, too small, or too expensive to maintain will just end up as a dusty relic in the back of a cupboard.

Let’s look beyond the contaminant removal stats and explore the real-world factors that make a pitcher fit seamlessly into your life. We'll cover size, design, and the true cost of ownership to help you find a model that feels like it was made for your home.

Three water filter pitchers of various sizes, in white and blue, on a kitchen counter with a glass.

Finding the Right Size and Capacity

Water filter pitchers are typically measured by the number of cups of filtered water they hold. Choosing the right size boils down to your household’s daily water habits and the number of people you're hydrating.

For solo dwellers or a couple in a cozy apartment, a small pitcher (5–6 cups) is a perfect fit. Its slim profile won't dominate your fridge, but be ready for frequent refills if you're a big water drinker.

A standard pitcher (8–10 cups) is the sweet spot for a family of three or four. This size provides enough filtered water for drinking and cooking without feeling like you're chained to the sink. It's the most common size, giving you the widest variety of options.

If you have a large family or chug water like it's your job, consider an extra-large dispenser (18+ cups). These countertop or fridge-shelf models feature a handy spigot, offering a large, chilled reservoir of filtered water on demand.

Don't Overlook Design and Ergonomics

It’s the small design details that make the biggest difference in your daily experience. Before you fall in love with a pitcher, imagine yourself actually handling it day in and day out.

Keep an eye out for these practical features:

  • Easy-Fill Lid: Can you fill it without removing the entire lid? A simple flip-top or a small opening is a surprisingly significant quality-of-life improvement.
  • Comfortable Handle: Picture carrying a full, heavy pitcher from the sink to the fridge. A solid, ergonomic handle prevents spills and makes pouring a breeze.
  • Spout Design: A well-designed spout delivers a smooth, drip-free pour. Some even have a cover to keep dust and stray fridge odors out of your pristine water.
  • Filter Change Indicator: Most pitchers come with some kind of reminder—from a simple sticker to a digital timer—to tell you when it's time to swap the filter. This is crucial for ensuring your filter is always performing at its peak.

The little conveniences are what separate a pitcher you tolerate from one you love. A pitcher that's a pain to fill or pour is one you're less likely to use consistently.

Calculating the True Cost of Ownership

The price on the box is just the opening act. The real cost of a water filter pitcher is the ongoing expense of replacement filters. A cheap pitcher with pricey, short-lived filters can easily end up costing you more over a year than a more expensive model with long-lasting, affordable filters.

To unearth the best long-term deal, you need to calculate the cost-per-gallon.

It's a simple, powerful formula:
Filter Price ÷ Gallons Filtered = Cost Per Gallon

For example, a filter that costs $7 and is rated for 40 gallons comes out to 17.5 cents per gallon. But what if another brand offers a $15 filter rated for 120 gallons? That one costs only 12.5 cents per gallon. Over the course of a year, the second option is the clear winner for your wallet.

Always check the filter's price and its rated gallon capacity before you commit to a pitcher.

Understanding the Trade-Offs Between Speed and Power

When you start exploring water filter pitchers, you'll quickly encounter a fundamental choice: do you want speed, or do you want power? Getting both is the holy grail, but it's a tough one to find. This is arguably the most important trade-off you’ll have to make.

Think of it this way. A simple filter that just removes chlorine is like a four-lane highway—water flows through quickly and easily. But a high-performance filter certified to remove lead, PFAS, and other serious contaminants? That's more like a winding country road with multiple security checkpoints. The journey is much slower, but the screening process is far more thorough.

The Speed vs. Safety Dilemma

So why does a filter certified for lead pour with the urgency of a sloth compared to one that just makes your water taste better? It all comes down to the filter's internal architecture. To trap stubborn contaminants like heavy metals, the filter needs a much more complex and dense structure, often combining activated carbon with ion-exchange resins.

This dense media creates significant resistance, which naturally slows the water down. This isn't a bug; it's a critical feature. This increased contact time is what gives the filter media enough time to actually grab onto and neutralize those tougher contaminants.

  • Fast Flow Filters: These are fantastic if you just want to improve the taste and smell of your tap water. If your only mission is to get rid of that chlorine taste for better coffee, a basic, fast-filtering model will serve you well.
  • Slow Flow Filters: These are engineered for health and safety. You absolutely need one if your water has known issues with lead, mercury, or those infamous "forever chemicals" like PFAS.

The flow rate is a direct clue to the filter's power. A slow drip isn't a design flaw; it's a sign that the filter is working diligently to provide a higher level of purification.

For instance, a standard Brita filter does a great job on chlorine and can fill your pitcher in just a few minutes. But a pitcher from a brand like Clearly Filtered, which is engineered to remove over 365 contaminants, is going to take considerably longer. We're talking 15-20 minutes or even more to filter the same volume of water.

Cost Versus Capability

The other major trade-off is cost versus what the filter can actually remove. It's a straightforward equation: filters that remove a wider, more serious range of contaminants will cost you more. That applies to both the pitcher itself and the replacement cartridges. The real question is, do you need to pay for a filter that can tackle things like fluoride or pharmaceuticals?

The answer depends entirely on your priorities and, more importantly, what’s in your local water. If your city’s water report is squeaky clean, a basic filter with an NSF 42 certification for chlorine might be all you need.

But if you’re concerned about "forever chemicals"—which have been found in the tap water of nearly half of all Americans—investing in a more powerful filter is a wise move. A recent Duke University study highlighted that a brand like AquaTru, while pricier, achieved non-detect levels for all the PFAS chemicals they tested.

Let’s consider two scenarios:

  • Pitcher A: Costs $25, and replacement filters are $7. It's fast, and by removing chlorine, it makes water taste great.
  • Pitcher B: Costs $70, and replacement filters are $15. It's slow, but it's certified to remove 99% of lead and also reduces PFAS.

If you live in a home with older plumbing, the peace of mind from Pitcher B is worth every penny and every extra minute of filtration time. Choosing the right pitcher is all about balancing what you value most: speed, safety, or your budget.

Your Action Plan for Choosing the Right Pitcher

You now understand how filters work, what certifications matter, and the performance trade-offs. It's time to channel that knowledge into a simple, actionable framework for choosing the perfect water filter pitcher for your home.

This is your step-by-step checklist to make a confident, informed decision.

Step 1 Identify Your Water Concerns

First things first: you need to become an expert on your own tap water. The best way to do this is by getting a copy of your local water quality report.

Every community water supplier in the U.S. is required to provide an annual Consumer Confidence Report (CCR). This document lists the contaminants detected in your water supply and at what levels. You can usually find it with a quick online search for "[Your City Name] water quality report". If you're on a private well, you'll need to arrange for independent water testing.

As you review the report, look for red flags:

  • High chlorine levels, which are the primary cause of bad taste and odor.
  • The presence of lead, a common concern in homes with older plumbing.
  • Any mention of PFAS, VOCs, or other industrial chemicals.

Step 2 Match Concerns to Certifications

With your water report in hand, you can now play matchmaker between your concerns and the right NSF certifications. This crucial step ensures you get a filter that solves your specific problems without overpaying for features you don't need.

  • For taste and odor (chlorine): An NSF 42 certification is the baseline standard you need.
  • For health contaminants (lead, mercury, PFAS): An NSF 53 certification is non-negotiable. It's critical to check the fine print to confirm which specific contaminants the filter is certified to remove.
  • For emerging contaminants (pharmaceuticals, BPA): Look for NSF 401 certification for an added layer of protection against modern pollutants.

Think of it like this: The water report is your diagnosis. The NSF certification is the specific prescription. If they don't match, the filter won't be effective for your needs.

Step 3 Calculate Your Household Needs

Next, be realistic about your daily water usage. A pitcher that’s too small will become a constant source of refill-related frustration.

  • 1-2 people: A slim 5- to 6-cup model is often sufficient.
  • 3-4 people: A standard 8- to 10-cup pitcher is the most common and versatile choice.
  • Large families or high consumption: An 18-cup dispenser is a more convenient, set-it-and-forget-it option.

Also, consider the design ergonomics. Do you need a flip-top lid for one-handed refills? Is the handle comfortable when the pitcher is full and heavy? These small details have a huge impact on daily satisfaction.

Step 4 Compare Long-Term Costs

The initial purchase price is just the cover charge. The true cost of ownership lies in the replacement filters. To make a financially savvy choice, calculate the cost-per-gallon.

Divide the price of one replacement filter by the number of gallons it's rated to filter. For example, a $15 filter rated for 120 gallons costs just 12.5 cents per gallon. That's a much better long-term value than a $7 filter rated for only 40 gallons, which costs 17.5 cents per gallon.

Don't let a low-cost pitcher lure you into a high-cost maintenance trap. For more expert insights, check out the in-depth water filter advice from Water Filter Advisor.

Water Filter Pitcher Selection Checklist

Use this checklist to crystallize your needs and guide your selection. Go through each step to build a clear profile of your ideal pitcher.

Consideration Your Requirement/Preference Notes
Primary Contaminants e.g., Lead, Chlorine, PFAS List the top 1-3 contaminants from your water report.
Required Certifications e.g., NSF 53 for Lead, NSF 42 Match the contaminants to NSF standards (42, 53, 401).
Household Size e.g., 2 people How many people will use the pitcher daily?
Daily Water Usage e.g., ~1 gallon/day Estimate your total daily drinking water consumption.
Ideal Pitcher Capacity e.g., 8-10 cups Based on size and usage, what's the minimum capacity?
Filter Lifespan Goal e.g., 3+ months How often are you willing to change the filter?
Budget (Long-Term) e.g., <$0.20 per gallon Calculate the cost-per-gallon for your top choices.
Must-Have Features e.g., Easy-fill lid, ergonomic handle What design features are non-negotiable for you?

Using this checklist will demystify the process, narrow your choices, and lead you to the perfect pitcher for your specific needs and budget.

Common Questions About Water Filter Pitchers

You've got the pitcher. Now you've got questions. Here are the straight answers to the most common queries, so you can use your new filter like a pro.

How Often Should I Really Change My Filter?

Follow the manufacturer's guidelines religiously. For most standard pitchers, that means replacing the filter every 40 gallons or roughly every two months, whichever comes first.

If you push a filter past its expiration date, it stops being effective. Even worse, an old, saturated filter can become a breeding ground for bacteria and may even release some of the contaminants it previously captured. Use the pitcher’s indicator if it has one, but also set a recurring reminder on your phone. Don't leave it to guesswork.

Can I Run Hot Water Through My Pitcher Filter?

Absolutely not. Never use hot water in your pitcher filter. These systems are designed for cold or room-temperature water only.

Hot water will damage the filter media—both the activated carbon and the ion-exchange resins. It can destroy the filter's carefully engineered internal structure and could even cause it to flush out contaminants it has already trapped right into your "clean" water.

Ever see those little black specks in the water when your filter is brand new? That's just harmless carbon dust. It's perfectly safe and is the reason you're instructed to soak and flush a new cartridge before use—it clears out any loose particles from shipping.

Does Keeping My Pitcher in the Fridge Make the Filter Last Longer?

It's a fantastic idea for having chilled, delicious water ready to go, but it will not extend the filter's life. Refrigeration has no effect on the filter's capacity.

A filter's lifespan is determined by volume—how many gallons of water pass through it. Time and temperature don't change that equation. However, keeping the pitcher in the fridge does help slow down any potential bacteria growth in the filtered water reservoir, so it's still a highly recommended practice.


At Water Filter Advisor, we provide the expert guidance you need to choose, use, and maintain the perfect filtration system for your home. Explore our comprehensive buying guides to find your ideal solution.

Your Ultimate Guide to a Whole House Water Filter System for 2026

Ever caught a whiff of chlorine in your morning shower and felt like you were back at the community pool? Or maybe you've waged a losing war against the chalky white stains that haunt your dishes and faucets. Sometimes, the water from your tap just has a funky, "off" taste you can’t quite name.

These aren't just random quirks; they're clues about what’s flowing through your pipes. A whole house water filter system, also known as a point-of-entry (POE) system, is your ticket to fixing these issues once and for all, turning every tap in your home into a source of pure, refreshing water.

The Ultimate Upgrade for Your Home's Water

Picture a whole-house filter as a diligent gatekeeper for your home’s entire water supply. We install it right where the main water line enters your house, so it cleanses and purifies the water before it even has a chance to journey through your plumbing.

This is a massive leap from a simple pitcher or a faucet-mounted filter. Those are point-of-use (POU) filters, meaning they only treat the water at that one, single spot. A whole house water filter system is a game-changer.

Comprehensive Protection for Your Entire Home

A kitchen filter is great for the water you drink, but what about the water you use to bathe, wash your clothes, or run your appliances? A whole-house system protects everything. Here are the immediate benefits you'll notice:

  • Water That Tastes and Smells Amazing: It kicks chlorine, sulfur, and other culprits to the curb, eliminating foul tastes and odors from every single faucet.
  • Healthier Skin and Hair: By filtering out harsh chemicals like chlorine, you’ll step out of the shower with skin that feels less dry and hair that’s softer and more manageable.
  • Appliance Life Extension: It stops sediment, rust, and scale from building up inside your water heater, washing machine, and dishwasher. That means they'll last longer and run more efficiently.

An Investment in Your Peace of Mind

Getting a house filtering system is more than a luxury upgrade; it's a savvy investment in your family’s well-being and the longevity of your home. People are wising up to what's in their water, and it shows. The global market for water filtration was valued at $10.5 billion in 2025 and is expected to skyrocket to $19.0 billion by 2029. That’s a crystal-clear sign that homeowners everywhere are taking control. Discover more insights on the growing water filtration market.

When you purify water at the source, you aren't just making your drinking water taste better. You're creating a healthier environment for everything water touches in your home, from your laundry to your morning coffee.

Ultimately, installing a full-scale filtration system gives you true peace of mind. You don't have to wonder what's lurking in your water anymore. You can just turn on the tap and trust that every drop is as clean and pure as it can be.

How Water Filtration Actually Works

At its core, a house filtering system is like an obstacle course for your water, pushing it through layers of filter media. Each layer is engineered to stop or trap specific contaminants. Think of it as a multi-stage security checkpoint where only pure H₂O gets the all-clear.

Every part has a mission. Together, they ensure only clean, safe water enters your home. A sediment filter, for example, is your first line of defense, a bouncer that stops big troublemakers like sand, dirt, and rust flakes. Then you have the activated carbon filter, a master of disguise that uses a process called adsorption to snatch chemicals like chlorine and VOCs that cause bad tastes and smells.

Each filter medium is a specialist, designed to solve a different problem. The goal? To restore your water to its natural, pristine state of clarity, taste, and safety.

Common Filter Media And What They Remove

Here’s a cheat sheet for the most common filter materials and the water quality villains they're built to defeat.

Filtration Media Primary Target Contaminants Best For
Sediment Filter Sand, silt, rust, dirt, large particles Protecting downstream filters, improving water clarity
Activated Carbon Chlorine, chloramines, pesticides, herbicides, VOCs Removing bad tastes and odors, chemical reduction
Reverse Osmosis (RO) Dissolved salts, lead, arsenic, fluoride, viruses Maximum purification, removing a wide range of dissolved solids
KDF (Kinetic Degradation Fluxion) Chlorine, heavy metals (lead, mercury), bacteria, scale Extending carbon filter life, targeting specific metals
Water Softener Resin Calcium, magnesium (hardness minerals) Preventing scale buildup in pipes and appliances

By cleverly combining these different media, you can assemble a custom system that perfectly targets the specific contaminants revealed in your water test report.

The Two Main Principles: Sifting and Sticking

At the end of the day, water filtration boils down to two simple ideas: physical blocking and chemical attraction.

  • Physical Interception: This is sifting, plain and simple. A sediment filter is a porous material with holes measured in microns. Water zips through, but anything larger than the micron rating gets caught. A 5-micron filter nabs fine silt, while a 20-micron filter stops larger, visible debris.
  • Adsorption: This is the "sticking" part, and it's where things get cool. Media like activated carbon has a mind-bogglingly vast surface area with tons of microscopic pores. As water flows past, certain chemicals are irresistibly drawn to the carbon's surface and stick like velcro, effectively pulling them out of your water.

This diagram shows how a point-of-entry system delivers clean water to every tap in your house.

house filtering system

As you can see, a single system means you get glorious, filtered water everywhere—the kitchen sink, the shower, and the laundry room.

Building A Multi-Stage Defense

One filter is good. A multi-stage system is an all-star team. These setups layer different filters to create a comprehensive solution, with each stage excelling at a specific job.

A standard multi-stage system works like this:

  1. Sediment Pre-Filter: The opening act. It gets rid of large particles like dirt and sand. This clears up the water and, more importantly, protects the more expensive filters down the line from getting clogged.
  2. Carbon Block Filter: This is your taste-and-odor champion. It uses activated carbon to adsorb chlorine, chloramines, and other chemicals that make water smell or taste like it came from a chemistry experiment.
  3. Specialty Media Filter: If you’re battling specific foes like iron or hard water, a third stage can be added. This might be KDF media to remove heavy metals or a water softener to tackle calcium and magnesium.

The genius of a multi-stage system is its efficiency. Get the big, clumsy contaminants out first. This allows your finer, more specialized filters to focus on their jobs and last much longer.

When you're digging into the details, it helps to understand the engineering behind different filtration technologies like sand filters and cartridge filters.

This layered approach is why the water purification market is booming. Valued at $64.9 billion in 2025, the global market is projected to hit $134.2 billion by 2034. Reverse osmosis (RO) systems are a huge part of that, holding a dominant 55% market share in 2025 thanks to their ability to remove a massive range of contaminants.

Once you understand how these stages work together, you can look at a system's specs and know if it’s the right hero for your water's unique challenges. You're not just buying a filter; you're commissioning a targeted solution.

Choosing the Right Size and Flow Rate

A kitchen counter with a chrome water tap, an open notebook, a pencil, and a flow rate gauge.

It’s easy to get mesmerized by the high-tech filtration magic when shopping for a house filtering system. But two other factors are just as crucial for a happy outcome: size and flow rate. Get these wrong, and you’ll be filled with regret every time you turn on the shower.

When we talk about "size," we’re not talking about the unit's physical dimensions. It’s all about matching the system's capacity to your family's water consumption.

Think of it like an air conditioner. One that’s too small for the room will run constantly and never quite cool it down. An undersized water filter has the same problem—it just can't keep up. You'll suffer through weak showers and faucets that trickle pathetically. On the flip side, a system that’s way too big for your needs is an over-investment in both the unit and its pricier replacement filters.

Understanding Water Flow Rate (GPM)

The magic number you need to know is the flow rate, measured in gallons per minute (GPM). This tells you exactly how much water can pass through the filter at any given moment without a significant pressure drop.

Most residential whole-house systems have a GPM rating between 10 to 25 GPM. Your mission is to pick a system with a GPM that meets, or ideally, slightly exceeds your home's peak water usage. This is your insurance policy against a frustrating drop in water pressure, even when the whole family is using water at once.

With a correctly sized system, you shouldn't notice any change in your water pressure. If you see a pressure drop of more than 10–15 psi across your filter, it's a flashing red light that the system is too small or the filters are clogged and screaming for a replacement.

How to Calculate Your Home's Peak Demand

To figure out the right GPM for your home, you'll need to conduct a quick "water audit." Don't worry, it's painless. Just add up the flow rates for all the fixtures you might realistically run at the exact same time.

Here are some typical flow rates to get you started:

  • Kitchen or Bathroom Faucet: 1.0 – 1.5 GPM
  • Standard Showerhead: 2.5 GPM
  • High-Efficiency Showerhead: 1.5 – 2.0 GPM
  • Dishwasher: 1.5 – 2.5 GPM
  • Washing Machine: 2.0 – 3.0 GPM
  • Toilet: 1.6 – 3.5 GPM (per flush)

Let's paint a picture of a typical chaotic morning. Someone's in the shower (2.5 GPM), the dishwasher is running its cycle (1.5 GPM), and someone else is brushing their teeth at the sink (1.0 GPM).

Example Calculation: 2.5 GPM (shower) + 1.5 GPM (dishwasher) + 1.0 GPM (faucet) = 5.0 GPM Peak Demand

Based on that math, you’d need a system rated for at least 5 GPM. But it's always wise to build in a buffer. A system rated for 7-10 GPM will give you plenty of headroom, ensuring strong water pressure even if someone flushes a toilet while all that is going on.

Matching Sizing to Your Household

Besides peak demand, the number of people in your home is a huge factor. This also ties directly into how long a filter will last before you have to replace it, which is often measured in thousands of gallons.

Here are some good rules of thumb for sizing:

  1. For 1-2 People: A system rated for 7-10 GPM is usually more than enough. Look for a filter capacity around 100,000 gallons.
  2. For 3-4 People: Aim for the 10-15 GPM range. This will comfortably handle a shower, a faucet, and an appliance running simultaneously.
  3. For 5+ People: You'll want a larger system rated for 15 GPM or more to avoid any pressure loss during rush hour. These systems often come with higher-capacity filters that last longer, even under heavy use.

Taking a few minutes to calculate your peak demand and household size is the single best thing you can do to choose a system that delivers pure, delicious water without a hitch. It's a simple step that guarantees your investment pays off in satisfaction, not frustration.

Should You DIY the Install or Call a Pro?

Two men working on home repairs, illustrating the choice between DIY and professional services.

You’ve done the research, calculated the flow rate, and have the perfect system boxed up and ready to go. Now for the final showdown: getting it installed. This is where you face the classic homeowner's dilemma—do you roll up your sleeves and tackle this yourself, or do you call in a professional plumber?

It really comes down to what you value more: saving some cash upfront, or saving yourself time, stress, and a potentially catastrophic headache.

What a DIY Install Really Means

If you’re a seasoned DIY warrior, the siren song of self-installation is hard to resist. But let's be crystal clear: this isn't like changing a lightbulb or even screwing in a new showerhead. This is a real-deal plumbing project. You will be cutting into your home's main water supply line—the artery of your entire house.

That means shutting off water to every faucet, draining the pipes, and making a clean, precise cut. From there, you’ll be installing new fittings—often with modern push-to-fit connectors like SharkBite or traditional compression fittings—to loop your new filter into the system.

The DIY Readiness Checklist

Before you dash to the hardware store for a pipe cutter, have an honest conversation with yourself. Are you really ready for this?

  • Real Plumbing Skills: Have you done this before? Not just fixing a drippy faucet, but cutting and joining pipes? Do you know if your pipes are PEX, copper, or PVC, and how to work with them?
  • The Right Tools: You'll need a pipe cutter, a deburring tool, pipe wrenches, and Teflon tape at a minimum. If you have older copper pipes, you might even need a blowtorch for soldering. Are these tools already in your garage?
  • Code Awareness: A sloppy, non-compliant installation could become a major roadblock when you try to sell your home. Are you familiar with your local plumbing codes?
  • Time and Patience: This project will take a solid 3-5 hours, and that’s assuming nothing goes wrong. A tiny mistake, a stubborn fitting, or an unexpected leak can easily turn your afternoon project into a weekend-long emergency with no running water.

If you’re hesitating on any of these points, that’s your answer. It doesn't mean you're not capable, but it's a strong signal that hiring a pro is the smarter, safer, and infinitely less stressful path to clean water.

The Case for Calling a Professional

Yes, it costs more initially, but hiring a professional plumber is an insurance policy on your investment.

A licensed plumber has done this job hundreds, if not thousands, of times. What takes you a whole Saturday, they can likely knock out in a couple of hours. More importantly, they assume all the risk. The threat of a botched job or a surprise leak is their problem, not yours.

Honestly, the biggest benefit you're paying for is peace of mind. Knowing your filter is installed to code, is guaranteed not to leak, and will work flawlessly from day one is worth every single penny.

And here’s the kicker: many manufacturers will void the warranty on your house filtering system if it isn’t installed by a licensed professional. A successful DIY job could still leave you paying out of pocket if the unit fails prematurely. A plumber ensures every connection is solid, the system is properly mounted, and your home is protected.

Understanding the True Cost of Ownership

When you're shopping for a house filtering system, it’s incredibly easy to get fixated on the sticker price. But that upfront number is just the first chapter of the story. The real cost of ownership is a long-term commitment—it’s the initial purchase, the installation, and the perpetual expense of replacement filters all rolled into one.

A system that seems like a bargain today can quickly morph into a money pit. This often happens when a cheaper unit devours filters or demands expensive, proprietary cartridges to keep the water flowing clean. To make a truly smart purchase, you have to look at the entire financial picture.

Breaking Down the Initial System Cost

The upfront price for a whole-house system can be all over the map, from a few hundred bucks to several thousand dollars. What you pay is directly tied to the system's complexity, the brand's reputation, and the specific filter media packed inside. A simple two-stage sediment and carbon filter will always be more affordable than a multi-stage behemoth designed to handle UV purification and water softening.

Here’s what to keep an eye on when looking at the price tag:

  • Filtration Stages: Simply put, more stages usually mean more money. A system built to remove specific contaminants like heavy metals or bacteria will cost more than one that just makes your water taste less like a swimming pool.
  • Brand and Certifications: You might pay a premium for a system certified by an organization like the NSF, but that stamp of approval means you're getting a product that has been rigorously tested and proven to do what it claims.
  • Included Components: Check what's in the box! Does it come with everything you need for the install—mounting brackets, O-rings, a filter wrench? Those small, missing parts can add up in both cost and frustration.

Factoring in Installation Fees

As we’ve discussed, you have two main routes for installation: going it alone or calling in a pro. A DIY install will save you on labor costs, no question. But hiring a plumber buys you their expertise and, frankly, some peace of mind. Professional installation can run anywhere from $300 to over $1,000, depending on your location and the complexity of your plumbing setup.

While going the DIY route might save a few hundred dollars at first, a professional installation protects your warranty and ensures the system works perfectly from day one. That can save you from a world of headaches, like costly leaks or poor performance down the road.

The Ongoing Expense of Replacement Filters

This is the big one. Replacement filters are the single most significant recurring cost of owning a house filtering system. How often you change them and how much they cost is completely dependent on your system and your water quality. Some filters last a few months; others can go for years.

Here’s a rough guide for what to expect from a typical multi-stage setup:

  • Sediment Pre-Filters: These are your front-line soldiers and get replaced most often. You'll likely be swapping these out every 3-6 months.
  • Carbon Block Filters: These are the workhorses for taste and odor. They generally last 6-12 months, depending on the chlorine levels in your water.
  • High-Capacity Media Tanks: The big tanks filled with carbon or KDF media can last 3-5 years or even longer, but replacing that media is a bigger, though less frequent, expense.

So, let's see how these ongoing costs can stack up over time. The table below gives a sample breakdown to help you plan.

Estimated Long-Term Costs for Filter Components

Filter Component Typical Lifespan Estimated Replacement Cost 3-Year Ownership Cost Example
Sediment Filter 3-6 months $10 – $25 $60 – $300
Carbon Block Filter 6-12 months $30 – $70 $90 – $420
UV Lamp 12 months $50 – $100 $150 – $300
Large Carbon Tank Media 3-5 years $200 – $500+ $200 – $500

This table makes it abundantly clear how a system with cheap but short-lived filters could easily end up costing more over three years than one with a higher initial price but more durable components. Always do the math on the annual filter cost before you commit. If you plan for these recurring expenses, you can enjoy clean, clear water without any nasty financial surprises.

Your Checklist for Choosing the Perfect System

Deciding on a house filtering system can feel like a monumental task, but it becomes simple if you break it down into a logical, step-by-step process. This checklist will guide you to the perfect fit for your home.

1. Test Your Water

First things first: you have to know what you’re up against. A water quality test is non-negotiable. It’s the diagnostic tool that tells you exactly which contaminants are in your supply, whether it's city-added chlorine or iron from your private well. Without testing, you're flying blind and just guessing.

2. Calculate Your Flow Rate

Next, ensure your system can keep up with your household's demands. If the flow rate is too low, you'll be doomed to frustratingly weak water pressure. Add up the gallons per minute (GPM) for all the fixtures you might realistically run at the same time—think a shower, the kitchen sink, and the dishwasher—to determine your peak demand.

3. Choose Your Filtration Stages

Armed with your water test results, you can now pick your weapons. Each filtration stage targets a specific problem.

  • Got chlorine and bad tastes? You need an activated carbon filter.
  • Dealing with dirt, rust, and sediment? A sediment pre-filter is your essential first line of defense.
  • If you have hard water causing scale buildup, a dedicated water softener stage is a must-have.

Match the filter technology to the problems identified in your water report. That’s the secret to getting a system that delivers noticeable results.

A great house filtering system is a customized solution, not a one-size-fits-all product. The right combination of filter stages directly addresses your water's unique chemistry, delivering results you can taste and feel.

4. Compare Certified Systems

Once you know what you need, start browsing models from reputable brands. Always prioritize systems that are certified by third-party organizations. To narrow down your options, guides comparing the best whole home water filtration systems are a massive help. For more pro tips, check out our other advice for selecting the right water filter.

5. Plan for Installation and Maintenance

Decide whether you’re brave enough to DIY the installation or smart enough to call a plumber. Don’t forget to factor that cost into your budget. You also need to investigate the ongoing maintenance and the price of replacement filters to understand the true long-term cost of ownership.

6. Set Your Final Budget

Finally, pull all this information together to establish a realistic budget. Factor in the system's purchase price, installation fees, and the projected cost of replacement filters for the next few years. This gives you the complete financial picture needed to make a smart, confident investment.

Frequently Asked Questions

Jumping into the world of water filtration can feel like learning a new language. We get it. To make things crystal clear, we’ve put together answers to the questions we hear most often from homeowners just like you.

How Do I Know If I Need a Whole House Water Filter?

A lot of the time, your own senses will be the first to tell you. If your water tastes metallic, smells vaguely like a swimming pool, or just has an "off" quality, those are classic tell-tale signs.

Other clues are pretty obvious once you know what to look for:

  • Chalky buildup: Look for those stubborn white stains on your faucets and glass shower doors. That's a classic sign of hard water minerals.
  • Dry, irritated skin after a shower? That could be chlorine and other chemicals stripping your skin's natural oils.
  • Visible grit: If you pour a glass of water and see tiny specks of rust, sand, or other particles floating around, you need a sediment filter, full stop.

But what about the invisible villains you can't see, taste, or smell? A simple water test report can uncover hidden contaminants like lead or VOCs. It’s always better to know exactly what’s in your water so you can protect your home’s plumbing and, more importantly, your family’s health.

Will a House Filtering System Reduce My Water Pressure?

This is a huge concern for many people, but here's the bottom line: a correctly sized and properly maintained system will have a negligible impact on your water pressure. It all comes down to matching the system's flow rate (in gallons per minute, or GPM) to your home's peak water usage.

If you do notice a serious drop in pressure after installation, something is wrong. It usually means the system is too small for your home's needs or, more commonly, the filters are clogged and overdue for a change. A pressure drop of more than 10–15 psi is a flashing red light that it's time for some maintenance.

How Long Do Whole House Water Filters Last?

This is a two-part answer. You have to think about the lifespan of the system itself and the lifespan of the filter cartridges that go inside it. The main hardware—the tanks, housings, and valves—is built to be durable. With proper care, you can expect it to last for 10 years or even more.

The filter cartridges, however, are a different story. They are the consumable components, the heroes that do the dirty work and get used up in the process. How long they last depends entirely on the type of filter and the quality of your incoming water.

Here’s a general idea:

  • Sediment pre-filters: These workhorses usually need to be swapped out every 3-6 months.
  • Carbon block filters: You can expect these to last anywhere from 6-12 months.
  • Large media tanks: The high-capacity carbon or KDF media in these big tanks can go for several years before needing to be replaced.

Sticking to a regular replacement schedule is the absolute key to making sure your house filtering system keeps performing at its peak, delivering an uninterrupted supply of clean, great-tasting water for years to come.


At Water Filter Advisor, we're here to help you nail this decision. Check out our expert reviews and detailed guides to find the perfect filtration setup for your home. Learn more at Water Filter Advisor.

Is Well Water Safe to Drink? A Homeowner’s Guide to Flawless Filtration

So, is your well water safe to drink? Here’s the fun-sized answer: it’s entirely up to you. Unlike city water, which is babysat by public authorities, your private well is the wild west of water. You're the sheriff, the mayor, and the town doctor all rolled into one.

This means you could be sipping on a cocktail of hidden contaminants and have no idea. But don't panic! This is where the magic of home water filtration comes in.

The Unfiltered Truth About Your Well Water

Relying on an untested well is like getting a mystery box delivered every day—it might be full of treasure, or it might be full of… well, things you don’t want in your water. This unregulated reality makes you the official water manager for your home.

Being proactive about testing and choosing the right filtration system isn't just a smart move—it’s the secret to unlocking pure, delicious water and total peace of mind.

A man in denim clothes crouches to test a water well faucet near a house.

You Are Your Own Water Company

When a city-dweller opens their tap, that water has already passed more tests than a medical student. But when you turn on your well-fed faucet, you’re getting water straight from the ground—along with any freeloaders it picked up on its journey.

The responsibility that comes with this is massive. In the United States, nearly 17% of the population—that's about 43 million people—rely on private wells that aren't regulated by the government. In fact, research from the CDC shows that 1 in 5 private wells tested had unhealthy levels of contaminants like arsenic, nitrates, or bacteria. You can learn more by checking out the CDC’s resources on the importance of well water safety.

The biggest myth about well water is thinking "natural" automatically means "safe." It can be wonderfully pure, but it can also hide invisible party crashers that only a proper filtration system can kick out.

Municipal Water vs. Private Well Water A Quick Comparison

Looking at the differences between public water and your own private well really drives home why filtration is the superhero well owners need. Your role instantly changes from being a passive water user to the active guardian of your home's water quality.

Here’s a quick breakdown:

Aspect Municipal Water System Private Well Water
Regulation Governed by the EPA's Safe Drinking Water Act. Unregulated by federal law; regulation is up to the homeowner.
Testing Mandatory, frequent testing by the public water utility. Responsibility of the well owner; recommended annually.
Treatment Treated at a central facility to remove contaminants. Untreated unless a home filtration system is installed.
Responsibility The utility is responsible for water quality up to your home. The homeowner is 100% responsible for safety and quality.

As you can see, the buck stops with you. While municipal water users pay a utility to handle testing and treatment, well owners get to take control with the ultimate home upgrade: a tailored filtration system.

What Is Hiding in Your Well Water

The romance of drawing fresh, clean water right from your own land is undeniable. But here’s the plot twist: just because your well water looks clear doesn't mean it's pure. To really know if your well water is safe to drink, you have to know which uninvited guests might be hitching a ride from the ground to your glass.

These aren't just bits of dirt. We're talking about invisible, tasteless, and odorless threats that a good home filtration system is built to trap and eliminate.

A glass of water outdoors with multiple virus icons and a 'Hidden Contaminants' banner.

Microbial Invaders: The Fast and Furious Threat

Let's start with the fast-acting troublemakers. Microbial contaminants are living organisms that can make you sick in a hurry—sometimes just hours after you drink contaminated water. This is a huge reason why annual testing and filtration are non-negotiable for well owners.

These biological baddies usually sneak in from failing septic systems, farm runoff, or surface water seeping into a poorly sealed well.

Common microbial invaders include:

  • Bacteria: Nasty organisms like E. coli and Coliform are major red flags. Their presence often means your water has been contaminated by sewage or animal waste, bringing a risk of severe stomach cramps and other gastrointestinal nightmares.
  • Viruses: Tiny pathogens like Rotavirus and Norovirus can also get into your water supply. They're infamous for causing the stomach flu and are especially risky for kids and the elderly.
  • Protozoa: Parasites such as Giardia and Cryptosporidium are tough little organisms that can resist chlorine and cause serious digestive issues. They often wash into wells from surface water.

A UV purification system is your secret weapon against these bugs. It acts like a bouncer at the door, using powerful light to neutralize 99.99% of them without adding any chemicals to your water.

Inorganic Contaminants: The Silent Saboteurs

While microbes are a sprint, inorganic contaminants are a marathon. They build up in your body over months and years, posing serious long-term health risks without you ever tasting or smelling them. This makes a reliable filtration system your only real defense.

These chemicals and heavy metals typically leach into groundwater from natural mineral deposits or from agricultural and industrial pollution.

The most dangerous threats in well water are often the ones you can't see, taste, or smell. Heavy metals and chemicals accumulate slowly, causing chronic health issues that only appear after years of exposure.

For instance, lead in well water doesn't taste bad—it just silently accumulates, contributing to high blood pressure and increased cancer risks over decades. In the US, between 15-17% of people—that's over 43 million—get their water from private wells, which aren't covered by the EPA regulations that protect city water. As a startling example, arsenic in private US wells is linked to 500 deaths from ischemic heart disease and nearly 500 fatal cancers every single year, hitting rural communities the hardest. You can dig into the full list of these common well water intruders on the EPA's informational page about private wells.

Some of the key inorganic culprits are:

  • Arsenic: A toxic heavy metal that can seep into groundwater from natural rock formations.
  • Lead: Usually comes from old plumbing parts like pipes or the solder used to connect them.
  • Nitrates: A common problem in farming areas due to fertilizer runoff seeping into the ground.
  • Pesticides & Herbicides: Runoff from farms and even golf courses can carry these chemicals into the water table, and some studies have shown links to higher health risks for people living nearby.

A reverse osmosis system is one of the most effective ways to remove this wide range of silent saboteurs from the water you drink every day, giving you water that’s as pure as it gets.

Aesthetic Nuisances: The Annoying Intruders

Finally, you have the contaminants that are more annoying than dangerous. While they don't usually pose a direct health threat, these "aesthetic nuisances" can ruin your water's vibe and cause real damage to your plumbing and appliances.

  • Iron: The culprit behind those ugly reddish-brown stains in your sinks, tubs, and laundry. It also gives water a metallic taste, like you're drinking from a rusty tin can.
  • Manganese: Leaves behind blackish stains and can also make your water taste off.
  • Hydrogen Sulfide: This is what causes that unmistakable "rotten egg" smell that can make your water completely undrinkable.
  • Hardness Minerals: Calcium and magnesium are the minerals that cause limescale buildup, slowly strangling your pipes and water heater, killing their efficiency and shortening their lifespan.

These are exactly the kinds of problems that water softeners and specialized iron filters are designed to fix, transforming your water from a problematic pest to a pristine resource.

How to Test Your Well Water and Read the Results

Alright, you know the potential villains that can sneak into your well water. But the big question is, are they in your water? The only way to know for sure is to test it.

Testing isn't just a good idea; it's your first mission. Without a water test, buying a filter is a complete shot in the dark. With a test, you get a treasure map that leads you directly to the perfect filtration system for your home.

Finding a Lab and Choosing Your Tests

Your first move is to find a state-certified laboratory. Just search online for "[Your State] certified water testing lab" to get a list of options. Using a certified lab is key because they use proper methods to get you results you can trust.

The lab will mail you a special collection kit with very specific instructions. Follow them to the letter! This is especially critical for bacteria tests, where even a tiny mistake can contaminate the sample and give you a false positive. It usually means sterilizing your tap, letting the water run for a bit, and getting the sample back to the lab quickly.

So, what should you even test for?

  • Annual Essentials: At a bare minimum, test your well once a year for coliform bacteria, nitrates, and pH levels. These give you a quick snapshot of the most common health risks and whether your water is corrosive.
  • Local Concerns: Play detective and test for problems common in your area. If you're near farms, it's smart to test for pesticides. In regions with specific rock formations, checking for arsenic and radon is a must. Your local health department can usually tell you what to look out for.

To get a solid handle on what you're testing, it helps to understand the essential water quality testing methods that labs use for different chemical and microbial threats. Knowing the basics helps you pick the right tests for your well.

This simple decision guide lays out the whole process, from finding a lab to treating your water.

A well water testing decision guide flowchart showing steps from finding a lab to treating water.

As you can see, figuring out what's in your water is a straightforward process that puts you in control.

Decoding Your Water Test Report

When you get your results back, the report might look a little intimidating. Don't worry, it's simpler than it looks. The report lists each contaminant, how much was found, and the unit of measurement.

Here’s a quick rundown of what you’ll see:

  • mg/L (milligrams per liter): This is just another way of saying parts per million (ppm). It’s used for things like minerals, nitrates, and most metals.
  • µg/L (micrograms per liter): This is parts per billion (ppb). It’s for contaminants like lead or arsenic that are dangerous even in tiny amounts.
  • ND (Not Detected): This is what you want to see! It means the contaminant wasn't found in your sample.
  • Coliform Bacteria: This is usually a simple "present" or "absent." If it's "present," that’s a red flag telling you that surface water might be getting into your well.

The most critical step is to compare your numbers to the Maximum Contaminant Level (MCL) set by the EPA. The MCL is the safety standard for public water, and it's the best yardstick you have for your own well.

Your water test report is your battle plan. Every contaminant over the EPA’s limit is a problem pointing directly to a specific type of filter. High bacteria? You need a UV purifier. High arsenic? An RO system is your hero. Too much iron? An iron filter or water softener will save the day. This is how you stop guessing and start getting clean water.

Choosing the Right Home Filtration System for Your Well

Alright, this is where the action begins. You’ve got your water test results, which means you can finally stop worrying and start solving. Think of those results as a specific blueprint for building your home's ultimate water defense system.

A multi-stage water filtration system on a kitchen counter next to a stainless steel sink.

Let's turn that lab report into a simple shopping list. We'll walk through exactly how to match the right filter to the right problem, so you can gear up with the perfect filtration tech for your family’s health.

Matching the Filter to the Foe

Every water issue has a specific fix. The biggest mistake people make is grabbing a generic, one-size-fits-all filter and hoping for the best. Instead, you need to target the unique contaminants your test uncovered with laser precision.

Here’s a quick guide on how your test results point to the right hardware:

  • Bacteria and Viruses: If your report flagged Coliform bacteria or other microbes, disinfection is your top priority. A UV purification system is the modern gold standard. It uses powerful ultraviolet light to zap bacteria and viruses, sterilizing them instantly without adding a single chemical to your water.
  • Arsenic, Nitrates, and Heavy Metals: For these invisible health threats, you need the heavy artillery. A Reverse Osmosis (RO) system is the ultimate weapon, forcing water through a special membrane that strips out an incredible range of contaminants like arsenic, lead, and nitrates.
  • Iron, Manganese, and Hardness: Seeing those tell-tale reddish-brown stains or battling crusty scale on your faucets? That’s iron, manganese, and hardness minerals at work. A dedicated iron filter or a good water softener is built specifically to knock these out, protecting your pipes and appliances from a slow, crusty death.
  • "Rotten Egg" Smell: That unmistakable sulfur smell comes from hydrogen sulfide gas. You can banish it with an oxidation filter or a quality carbon filter, which will dramatically improve your water’s taste and smell, making it enjoyable again.

The best filtration setups are often multi-stage. You might need a whole-house water softener to handle hardness, followed by a UV light for microbial safety. It's all about layering your defenses based on what your water test tells you.

Point of Entry vs. Point of Use Systems

Once you know what to filter, you have to decide where to filter it. This comes down to a fundamental choice: treat all the water entering your house, or just the water you plan to drink and cook with? This is the Point-of-Entry (POE) versus Point-of-Use (POU) decision.

Point-of-Entry (POE) systems, or whole-house filters, are installed right where your main water line enters your home. They treat every single drop of water going to your taps, showers, and appliances. This is the way to go for issues that affect your entire home, like:

  • Hardness minerals causing scale buildup in your pipes and water heater.
  • Iron that’s staining your sinks, tubs, and laundry.
  • Sediment that clogs faucets and wears down your appliances.

Point-of-Use (POU) systems are smaller and treat water at a single spot, usually the kitchen sink. These are perfect for zeroing in on health-related contaminants in the water you'll be consuming. Under-sink RO systems and simple countertop filters are common POU options. They're cheaper and easier to install, but they don't protect the rest of your home from aesthetic issues.

If you're trying to figure out what's best for your situation, our team at Water Filter Advisor has put together a ton of great resources. You can read more advice and tips on selecting the right type of filter for your needs here.

Well Water Filtration Methods Compared

Picking the right technology can feel overwhelming, but it gets much clearer when you see what each system is designed to do. This table breaks down the most common filtration methods to help you match them to your needs.

Filtration Method Primary Contaminants Targeted Best For Maintenance Level
Reverse Osmosis (RO) Arsenic, Lead, Nitrates, Fluoride, Dissolved Solids Highest-purity drinking water at a single tap (POU). High (Membrane/filter changes)
UV Purification Bacteria, Viruses, Protozoa (E. coli, Giardia) Whole-house disinfection (POE) without chemicals. Low (Annual bulb change)
Water Softener Calcium, Magnesium (Hardness Minerals) Protecting pipes and appliances from scale (POE). Medium (Adding salt regularly)
Iron/Manganese Filter Iron, Manganese Preventing rust stains and metallic taste (POE). Medium (Backwashing cycles)
Activated Carbon Filter Chlorine, Pesticides, Odors, Bad Taste Improving taste and smell at a specific tap (POU) or for the whole house (POE). Low (Cartridge changes)

At the end of the day, making sure your well water is safe is an ongoing mission, not a one-time fix. By using your water test as your guide and knowing your filtration options, you can build a reliable system that delivers clean, safe water for years to come.

Maintaining Your Well and Filtration System

Getting a powerful water filtration system installed is a fantastic first step. But it’s not a "set it and forget it" appliance. Think of it like a high-performance car—you wouldn't skip an oil change and expect it to win a race. Your water system needs the same kind of TLC to keep it running flawlessly.

Regular, consistent maintenance is the secret sauce. It's what ensures your system keeps delivering pure, safe water day after day, protecting both your family and your investment.

Your Well Maintenance Checklist

Before we even touch the filters, let's talk about the well itself. A well-maintained wellhead is your first line of defense, making it much harder for contaminants to sneak into your water in the first place.

A few times a year, just take a walk out and do a quick visual inspection. Check for cracks in the well casing and make sure the cap is on tight. Is the ground around the well sloped so that rainwater runs away from it, not toward it? This simple five-minute check can stop a contamination problem before it starts.

Proper maintenance isn't just about protecting your equipment; it's about safeguarding your health. A clogged filter or a failing UV bulb means your water is no longer protected, reintroducing the very risks you sought to eliminate.

Part of your overall system's health is the plumbing that carries the water into your home. This includes basic home maintenance like preventing burst water pipes, which can cause massive damage and let contaminants flood your supply.

A Practical Filtration Upkeep Schedule

Every filtration system has parts that are designed to wear out. They absorb and block gunk, so eventually, they get full. Sticking to a replacement schedule isn't just a suggestion; it’s what keeps your water safe. Put these on your calendar right now.

  • Sediment Pre-Filters: These are the bouncers, catching all the sand, dirt, and rust. They need to be checked monthly and replaced every 3-6 months. If your water is particularly gritty, you’ll be on the 3-month schedule.

  • Carbon Filters: These are the taste and smell specialists, grabbing chlorine, pesticides, and other yucky stuff. Plan on changing them every 6-12 months. Once the carbon is saturated, it stops working, and those contaminants sneak right through.

  • UV Purifier Bulbs: This is your germ warfare unit. The crucial thing to know is that UV bulbs lose their killing power long before they burn out. You must replace the bulb annually to ensure it's actually disinfecting your water. While you're at it, clean the quartz sleeve that houses the bulb.

  • Reverse Osmosis (RO) Membranes: This is the heart of your RO system. The pre- and post-filters will need changing every 6-12 months, but the high-tech membrane itself is tougher. It generally lasts 2-3 years.

  • Water Softener Salt: If you have a softener, your only real job is to keep the brine tank topped up with salt. Just check the level once a month. Without salt, your softener is just a big, useless tank taking up space.

Staying on top of this schedule means your answer to "is my well water safe?" will always be a confident "yes." If you let it slide, your expensive system becomes little more than a good luck charm, giving you a false sense of security while letting problems flow right to your faucet.

Your Top Questions on Well Water Safety

Once you dive into the world of water filtration, you're bound to have more questions. Let's tackle some of the most common ones we hear from homeowners ready to take control of their well water.

My Well Water Tastes and Smells Fine. Do I Still Need to Test It?

Yes, absolutely! This is one of the most dangerous assumptions. The most harmful contaminants—like arsenic, lead, nitrates, and many bacteria—are completely tasteless, odorless, and invisible.

Relying on your senses is a huge gamble. The only way to know for sure what's in your water is to get it tested by a state-certified lab at least once a year. Think of it as an annual check-up for your water.

What's the Difference Between a Water Softener and a Water Filter?

Great question, as they solve two totally different problems.

A water softener is a specialist. It only targets "hardness" minerals—calcium and magnesium. These are the culprits behind scaly buildup in your pipes and appliances but aren't considered a health risk. It's all about protecting your home's plumbing and fixtures.

A water filter is a guardian. It's built to remove dangerous contaminants. A reverse osmosis system will go after lead and arsenic, while a UV purifier is designed to kill bacteria and viruses. Many well owners need both: a softener to protect the plumbing and a filtration system to protect their health.

Can I Install a Whole-House Filtration System Myself?

An under-sink filter? Sure, many handy homeowners can tackle that. But a whole-house (or Point-of-Entry) system is a much bigger project. It involves cutting into your main water line, which demands real plumbing skills. Some systems, like UV purifiers, also need electrical work.

We always recommend hiring a licensed plumber or certified water professional for a whole-house system. A bad installation can cause massive leaks, void your warranty, and—worst of all—it might not even work correctly, leaving your water unprotected. It's worth the investment to have it done right.

How Often Should I Shock My Well?

Shock chlorination is like calling in a SWAT team for your well. It's an emergency fix you use after a bad bacteria test, after well maintenance, or if floodwater gets in. It's a heavy dose of chlorine meant to disinfect the entire system.

Some folks do it annually as a "just in case" measure. But if you're constantly shocking the well because of recurring bacteria, you have a bigger problem. Shocking is a band-aid. You need a permanent fix like a UV purification system to provide constant, 24/7 protection against contamination.


At Water Filter Advisor, we cut through the noise to give you clear, straightforward advice for your home's water. Check out our guides and product reviews at https://www.waterfilteradvisor.com.

The Best Water Filter for Lead Removal: A 2026 Homeowner’s Guide

When it comes to getting lead out of your water, your best bets are a reverse osmosis (RO) system or a solid carbon block filter that is officially NSF/ANSI 53 certified. These are the heavyweights, the technologies proven to slash lead by over 95%, giving you the most reliable final defense for your home's drinking water.

The Hidden Danger Lurking in Your Tap Water

A kitchen faucet fills a glass with water in a dark sink, next to a banner reading 'HIDDEN LEAD DANGER'.

You probably turn on your tap without a second thought. But even if your city’s water treatment is top-notch, the real trouble can start in the labyrinth of pipes that bring that water to your home.

The problem isn't usually the water source. It's the journey it takes.

Millions of homes are still connected to the water main with old lead service lines. Add to that older plumbing, brass fittings, and lead-based solder hiding inside your walls, and you've created a perfect storm for contamination right at the tap.

Why Municipal Reports Are Not Enough

Sure, your local utility sends out an annual water quality report. The catch? That report shows water tested at the treatment plant, not from your faucet.

Lead contamination is a "last-mile" problem. It happens when water sits in or flows through aging pipes. This means your water can be perfectly fine when it leaves the plant but pick up dangerous levels of lead just before it fills your glass.

Even tiny changes in water chemistry can cause old pipes to corrode and leach lead. That's why city-wide tests just can't guarantee the water coming out of your specific tap is safe.

Key Insight: The U.S. Environmental Protection Agency (EPA) says there is no safe level of lead in drinking water. Their goal is zero. This is especially critical for children and pregnant women, who are most vulnerable to its devastating effects.

The Scope of the Problem

This isn't a small-town issue. Research from the Natural Resources Defense Council (NRDC) found that water systems serving over 112.3 million Americans had lead levels at or above the 5 parts per billion (ppb) limit set for bottled water.

It's a clear sign that our aging infrastructure is a persistent threat. For families, this means even water that technically passes some standards could pose serious, irreversible health risks. You can get more details on these findings directly from the NRDC website.

Here's a quick breakdown of the usual suspects for how lead gets into your water supply.

Contamination Source How It Affects Your Water
Lead Service Lines These are the main pipes connecting your home to the water main. They're the single biggest source of lead.
Household Plumbing Older homes might have lead pipes. Even newer homes can have copper pipes joined with lead-based solder.
Brass Fixtures Faucets and valves made before 2014 could legally contain up to 8% lead, which can leach into your water.

You can't see, taste, or smell lead in your water. It's an invisible invader. The only way to know your family is protected is to take matters into your own hands.

Installing the best water filter for lead removal acts as that final, crucial barrier. It's the only way to get real peace of mind that every glass you pour is pure and safe.

How Water Filters Actually Remove Lead

Three white and grey water filters stand on a wooden kitchen counter in front of a blue wall.

To pick the right filter, you need to know what’s really going on inside that plastic housing when you turn on the tap. It’s not magic—it's a fascinating mix of physics and chemistry. Different filters use entirely different strategies to get the lead out, and understanding them is the key to finding what works for your home.

It’s important to know that lead shows up in two main forms: particulate lead (tiny physical flakes) and dissolved lead (which is chemically bonded to the water molecules). A truly effective filter has to be a master of handling both.

Let’s dive into the core technologies that actually do the heavy lifting.

Reverse Osmosis: The Gatekeeper

You can think of Reverse Osmosis (RO) as the most aggressive bouncer in the water filtration world. This process uses your home's water pressure to force water through a special semipermeable membrane with pores so tiny, they make a germ look gigantic.

Just how small? These pores are typically around 0.0001 microns. For comparison, a single human hair is about 70 microns thick. This microscopic barrier lets pure water molecules squeeze through but physically blocks almost everything else, including those stubborn dissolved lead ions.

Because it’s a physical barrier, RO is exceptionally thorough. A quality system can remove up to 99% of lead, not to mention a whole host of other difficult contaminants like arsenic, salts, and fluoride. It’s the closest you can get to pure H₂O straight from your tap.

Activated Carbon: The Magnet

Activated carbon is one of the most widely used materials in water filtration, and for good reason. It works through a process called adsorption, where contaminants are pulled from the water and stick to the carbon's surface, much like a powerful magnet grabbing metal filings.

The secret to its success is its mind-bogglingly massive internal surface area. The carbon is processed to create a network of countless microscopic pores and channels. Just a single gram of activated carbon can have a surface area larger than a football field. As water passes through, this huge, porous surface grabs onto lead, chlorine, pesticides, and other organic chemicals, trapping them inside the filter.

A huge plus for activated carbon is its ability to reduce both dissolved and particulate forms of lead. High-quality solid carbon block filters are especially effective at this, making them one of the most reliable choices for lead reduction.

Keep in mind, though, that not all carbon filters are created equal. For serious lead removal, you need a filter with a dense carbon block and a fine micron rating—this is where looking for official certification really matters.

Ion Exchange: The Trader

Ion exchange is a bit more clever, working on a "trade" principle. The filter contains a special resin material that is pre-loaded with harmless ions, typically sodium or potassium.

When water containing dissolved lead flows over this resin, a chemical swap meet happens. The resin has a stronger attraction to the lead ions than the harmless ions it's holding. It effectively grabs the lead from the water and releases a harmless sodium or potassium ion in its place.

  • What it targets: Primarily dissolved heavy metals like lead, cadmium, and mercury.
  • Common Use: You'll often find ion exchange media paired with activated carbon in multi-stage filters, like those in pitchers or faucet mounts. This combination provides a more well-rounded defense.

This technology is fantastic for specifically targeting those invisible dissolved metals that a simple mechanical filter might miss.

Kinetic Degradation Fluxion: The Converter

Kinetic Degradation Fluxion (KDF) is a unique filtration media made from a high-purity copper-zinc alloy. As water passes through, it creates a tiny electrochemical reaction, a process known as redox (short for oxidation-reduction).

This reaction actually changes harmful contaminants into substances that are harmless. When it comes to lead, KDF has a two-pronged attack:

  1. It causes dissolved lead to plate directly onto the surface of the KDF media, effectively removing it from the water supply.
  2. The electrochemical environment it creates inhibits the growth of bacteria, algae, and fungi within the filter, which helps keep the filter running effectively for longer.

You'll rarely see KDF used by itself. It's a team player, best used as a partner to an activated carbon filter, where it protects the carbon from bacterial growth and boosts its performance in removing lead and other contaminants. A system that combines both is a very smart approach to ensuring safer water.

Decoding Certifications That Guarantee Lead Removal

When it comes to water filters, talk is cheap. Manufacturers love to slap impressive claims on their packaging, but proof is what really matters. How can you be sure a filter actually removes lead?

The only way is to look for an independent, third-party certification. It’s your guarantee of real-world performance.

For lead removal, one certification is king: NSF/ANSI 53. Think of this as the gold standard for any filter meant to handle health-related contaminants.

This isn’t some rubber-stamp approval. To get the NSF 53 seal, a filter goes through brutal, standardized testing to prove it reduces specific contaminants to levels deemed safe by the EPA.

What NSF/ANSI 53 Really Means

So, what’s in the “53”? This number is what you need to look for. The standard is officially for “Drinking Water Treatment Units – Health Effects.”

It verifies that a filter can reduce contaminants with known health risks. This includes heavy metals like lead and mercury, parasites like Cryptosporidium, and certain industrial chemicals.

The testing is intense. Here’s a look at what a filter has to endure:

  • It's hit with water containing lead at 150 parts per billion (ppb). That's ten times the EPA's action level of 15 ppb.
  • It must consistently cut lead levels down to below 10 ppb for its entire rated filter life.
  • The tests are run at different pH levels, ensuring the filter performs no matter your water chemistry.

This process confirms the filter doesn’t just work on day one. It protects you and your family right up until it’s time to swap it out.

Key Takeaway: If a filter isn't certified to NSF/ANSI 53 for lead reduction, you have zero independent proof it can remove this dangerous neurotoxin. For protecting your home, this is non-negotiable.

Don't Confuse It with NSF 42

It's easy to get these numbers mixed up. You’ll often see another certification, NSF/ANSI 42, on filter packaging.

This standard only covers "Aesthetic Effects." A filter with an NSF 42 certification is proven to make your water taste and smell better, usually by reducing chlorine.

Better taste is nice, but NSF 42 says nothing about a filter's ability to remove lead or other dangerous contaminants. Many basic pitchers only have this certification. Don't be fooled—for lead protection, you must see NSF/ANSI 53 on the label.

The global impact of lead is staggering, making these certifications critical. Lead poisoning is tied to about 1% of the global disease burden, which means millions of life years lost. In the U.S. alone, costs from lead-related cognitive issues in children top $50 billion annually. You can read more on these global health findings from the World Health Organization.

You can and should verify any product's certification for yourself. Just use the official NSF certification database to look it up.

The NSF's online tool lets you search by brand or standard number. It’s the easiest way to cut through the marketing hype and confirm the filter you’re buying has passed the tests to protect your family.

Comparing the Top Lead Filtration Systems

Now that we’ve covered the tech and certifications, it's time to put the most common home filtration systems side-by-side. The best water filter for lead removal isn’t a one-size-fits-all answer. It really comes down to finding the right fit for your home, your budget, and your day-to-day life.

We're going to break down the practical trade-offs between four main players: under-sink reverse osmosis, high-performance carbon block filters, faucet-mounted units, and specialized water filter pitchers. My goal is to help you see the pros and cons of each so you can make a decision you feel good about.

Under-Sink Reverse Osmosis Systems

If you're looking for the absolute highest level of protection, Reverse Osmosis (RO) systems are the heavy hitters. These multi-stage units get plumbed right into your cold water line, feeding a dedicated faucet on your sink for purified water whenever you need it.

The core of an RO system is a semipermeable membrane that physically blocks contaminants, removing up to 99% of dissolved lead. But it's a team effort—most systems also have sediment and carbon pre-filters that catch larger gunk and chemicals, which protects the main membrane and polishes the water quality even further.

  • Lead Removal Effectiveness: Excellent. RO systems are the gold standard because they reliably remove both dissolved and particulate lead.
  • Cost & Maintenance: Expect a higher upfront cost, usually between $250 and $600. Annual upkeep, which involves replacing filter cartridges and the RO membrane itself every 2-4 years, will run you about $100 to $200 per year.
  • Installation: This is more of a project. It requires some basic plumbing know-how (or a professional), space under your sink, and possibly drilling a hole in your countertop for the new faucet.
  • Water Flow: The purification process is slow, so these systems store purified water in a small tank. The flow from the dedicated faucet will be slower than your main tap.

An RO system is the top choice for anyone who wants maximum assurance and is ready to invest in a permanent solution for their drinking and cooking water.

High-Performance Carbon Block Filters

If a full RO setup seems like overkill, an under-sink carbon block filter is a fantastic and powerful alternative. These systems also connect to your cold water line but use your existing kitchen faucet, making them a much simpler option to install and use.

The magic is in the high-density solid carbon block. Water is forced through a tight, complex path, maximizing the time it spends in contact with the carbon. This process, called adsorption, is incredibly effective at grabbing and holding onto lead. Just make sure you get a model certified to NSF/ANSI 53 for proven performance.

Situational Insight: For many people, a quality under-sink carbon block filter is the perfect sweet spot. It delivers impressive lead removal (often 99% or better) while maintaining a strong flow rate, which is far more convenient for daily tasks like filling a large pot of water than a slower RO system.

These are a great fit for families wanting serious, certified lead protection straight from their main faucet, but without the water waste or slower flow of reverse osmosis.

When you're shopping, understanding the certifications on the box is crucial. This chart shows the two you'll see most often.

Bar chart showing 75% NSF/ANSI 42 (taste) and 90% NSF/ANSI 53 (protection) certified products.

As you can see, NSF 42 is about making water taste and smell better. For protection from health contaminants like lead, you absolutely need to look for NSF 53.

Faucet-Mounted Filters

For renters or anyone needing an easy, temporary fix, faucet-mounted filters are a great starting point. These little units attach right onto your kitchen faucet in a matter of minutes, no tools needed.

Most have a switch that lets you toggle between filtered and unfiltered water, which is a handy feature for making the filter cartridge last longer. Inside, they typically use activated carbon and other media to trap contaminants.

  • Lead Removal Effectiveness: Good to Very Good. The key is to be picky—only choose a model that is explicitly NSF/ANSI 53 certified for lead reduction. A certified model can remove over 99% of lead.
  • Cost & Maintenance: The initial cost is very low, usually just $30 to $50. You'll need to replace the filters more often, about every 2-3 months, which adds up to around $40 to $60 annually.
  • Installation: Incredibly easy. They just screw onto the end of most standard faucets.
  • Water Flow: The flow is definitely slower than your regular tap but usually a bit faster than waiting for a pitcher to fill.

This is the perfect choice for people in apartments, college students, or anyone who wants a simple and affordable way to get lead-free water without touching their plumbing.

Specialized Water Filter Pitchers

While standard water filter pitchers are mostly for improving taste, a new class of specialized pitchers is engineered for serious contaminant removal. These models use advanced filters that are NSF/ANSI 53 certified to reduce lead.

You have to read the packaging carefully here. For example, with a brand like Brita, only specific filters like their blue "Longlast+" model are certified for lead. The standard white filters are not.

To help you see how these options stack up, here’s a direct comparison of the key factors for each filter type.

Lead Removal Filter Comparison by Type

This table directly compares the most common home water filter types based on lead removal effectiveness, cost, and maintenance to help you choose the right solution for your home.

Filter Type Typical Lead Removal Rate Initial Cost Annual Maintenance Cost Best For
Reverse Osmosis Up to 99% $250 – $600 $100 – $200 Homeowners wanting maximum, comprehensive protection.
Carbon Block Over 99% (certified) $100 – $300 $80 – $150 Those seeking high performance with strong water flow.
Faucet-Mount Over 99% (certified) $30 – $50 $40 – $60 Renters and anyone needing an easy, budget-friendly option.
Pitcher 99% (certified models) $20 – $40 $60 – $80 Single users, portability, or very low-volume needs.

This table makes it clear that while you can get excellent lead removal across the board (as long as you choose a certified product), the real differences come down to cost, convenience, and how much water you need.

Water filter pitchers offer ultimate portability but have their limits. The small capacity and slow filtering speed make them best for a single person's drinking water, not for cooking or filling large water bottles.

Which Lead Water Filter Is Right for Your Home?

There's no single "best" lead water filter. The right choice for you comes down to your home, your budget, and how you actually use your water.

To get straight to the point, let's look at a few common situations. Find the one that matches your life, and you'll know which filter to choose.

Scenario 1: The Renter in an Older Apartment

Imagine you're Sarah. She rents in a classic old building, but she's worried about what's in the pipes. Since she can't start ripping out plumbing, she needs a fix that's effective, cheap, and temporary.

Ideal Solution: A faucet-mounted filter.

Why it works: For any renter, a non-permanent option is the only option. A faucet filter just screws onto your existing tap. No tools, no damage, no problem with the landlord.

  • Effectiveness: You must get a model certified to NSF/ANSI 53 for lead reduction. A good one will remove over 99% of lead.
  • Convenience: There's usually a little lever to switch between filtered water (for drinking) and unfiltered water (for dishes). This makes the filter cartridges last much longer.
  • Budget: This is the cheapest way to get certified lead removal. The initial cost is typically under $50.

This gives Sarah instant protection without a big investment or breaking her lease.

Scenario 2: The Family in the Suburbs

Now, think about the Millers. They own their home, have two young kids, and want the best possible protection. They're ready to invest in a permanent, high-performance system for their busy family.

Ideal Solution: An under-sink reverse osmosis (RO) system.

Why it works: When it comes to total purification, an RO system is the top of the line.

RO systems are the gold standard because they don't just target lead; they remove up to 99% of hundreds of other contaminants, including arsenic, fluoride, and dissolved solids. This creates water that is exceptionally pure.

The system fits under the kitchen sink and feeds a separate, dedicated faucet. This gives you a constant supply of purified water for drinking and cooking without affecting the flow from your main tap. While it costs more upfront, the peace of mind is worth it for a family. If you're weighing your options, our team provides additional advice on choosing the right filter for your household's specific needs.

Scenario 3: The Budget-Conscious First-Time Homeowner

Last up is Tom. He's a new homeowner who just found out his area has old service lines. He needs solid lead protection now but is on a tight budget and wants to avoid the complexity of a full RO system.

Ideal Solution: An NSF 53-certified under-sink carbon block filter.

Why it works: This is the perfect middle ground. You get powerful filtration that's simpler and cheaper to install than an RO system.

  • High Performance: A quality solid carbon block filter certified to NSF 53 is a workhorse. It can remove over 99% of lead and also gets rid of chlorine, drastically improving taste and smell.
  • Great Water Flow: Unlike RO, these filters tap directly into your main cold water line and use your existing faucet. You get a strong, fast flow of certified lead-free water—perfect for filling big pots or pitchers without waiting.
  • Value: For lead removal, its performance is on par with RO but at a much better price. It’s an excellent choice for any homeowner who wants serious protection without the high cost and complex installation.

Installing and Maintaining Your Filtration System

Picking the right water filter is half the battle. Making sure it actually works day-in and day-out comes down to two things: proper installation and religious maintenance.

Even the highest-rated filter is useless if it's installed wrong. A tiny leak in an under-sink system or a bad seal on a faucet filter can let contaminated water sneak right past the filter media. You end up with a false sense of security, thinking your water is clean when it isn’t.

Getting the setup right from the start is non-negotiable.

Key Installation Tips

A proper install means your system is leak-free and that every drop of water you drink has passed through the filter. This is especially true for under-sink systems, which offer some of the best water filter for lead removal performance when set up correctly.

Don't skip these critical steps:

  • Flush New Filters: Before you use it, always flush new filter cartridges for a few minutes. This gets rid of any loose carbon dust (that harmless black powder) and gets the filter media ready to work.
  • Check for Leaks: Once everything is connected, run the water and check every single connection point for drips. A little plumber's tape on threaded connections goes a long way toward creating a solid, watertight seal.
  • Use the Dedicated Faucet: If you bought a Reverse Osmosis system, you must use the small, dedicated faucet that comes with it. This is what keeps your ultra-purified water completely separate from your regular, unfiltered tap water.

Pro Tip: The only way to be 100% sure your system is working is to test it. After your new filter has been running for a few days, grab a water test kit or send a sample to a certified lab. This confirms that lead is being removed right at your tap.

A Straightforward Maintenance Guide

Filters work by trapping contaminants. Eventually, they get full. If you don't change them, they stop working.

Forgetting to replace a filter isn't just ineffective; it can make things worse. An old, clogged filter can cause your water pressure to drop. Even more concerning, it can hit a point called "breakthrough," where it starts releasing the lead and other junk it already captured back into your water.

Stick to a simple maintenance schedule to make sure your filter keeps you protected.

Filter Type Typical Replacement Schedule Maintenance Tip
Pitcher Filters Every 2-3 months Stick to the schedule. Many have a sticker or indicator to remind you.
Faucet-Mount Filters Every 2-3 months Change it as soon as the indicator light comes on or you notice the water flow slowing down.
Under-Sink Filters Every 6-12 months Set a calendar reminder for these. They're out of sight and easy to forget.
RO Membranes Every 2-4 years The pre-filters and post-filters on an RO unit need changing more often, usually every year.

When you swap out the old filter, take a minute to clean the housing. A quick wipe with a mild, food-safe sanitizer will keep any gunk from building up. Follow these simple rules, and your filter will keep delivering safe, clean water for years.

Frequently Asked Questions About Lead Water Filters

Picking the right water filter for lead can feel overwhelming, but it doesn't have to be. Let's cut through the noise and get straight answers to some of the most common questions homeowners ask.

Will a Standard Brita Pitcher Remove Lead?

This is a big one. The answer is no—your standard white Brita filter won't remove lead. Those are only certified for taste and odor (NSF/ANSI 42).

To get lead protection from a pitcher, you have to buy a specialized model. Look for the Brita 'Longlast+' (the blue one), which is specifically certified under NSF/ANSI 53 to reduce lead by over 99%. Always, always check the box for that NSF/ANSI 53 certification.

Does Boiling Water Get Rid of Lead?

Absolutely not. In fact, boiling water makes lead contamination worse.

When you boil water, pure H₂O turns to steam and evaporates, but the lead gets left behind. This means the lead concentration in the remaining water actually goes up. The only way to get lead out is with a filter that’s certified to do the job.

Crucial Safety Note: Never boil water to try and remove lead. It makes the water more dangerous, not less. Use a filter certified for lead removal.

What About My Whole House Water Softener?

A water softener will not protect you from lead. It’s just not what they’re built for.

Softeners use ion exchange to remove hardness minerals like calcium and magnesium, which prevents scale buildup in your pipes and appliances. They aren't designed or certified to remove heavy metals like lead. You'll need a separate system certified under NSF/ANSI 53 for that.

How Can I Test My Home's Water for Lead?

The only way to know for sure if you have a lead problem is to test your water. You've got two solid options:

  • Contact your local water utility: Many offer free or low-cost lead testing programs, especially if you live in an area with older infrastructure.
  • Use a state-certified lab: You can buy a test kit online, take a sample yourself, and mail it to a professional lab. This gives you the most accurate and detailed breakdown of what's in your water.

Remember, a filter is only as good as its installation and maintenance. Many local pros offer services for water filtration systems to ensure everything is installed correctly and running effectively for the long haul.


At Water Filter Advisor, our mission is to provide the clear, expert guidance you need to protect your family's health. We cut through the confusion to help you find the right water filtration solution. Explore our in-depth reviews and guides at https://www.waterfilteradvisor.com.

Find the Best Water Filter for City Water: A Splash Course in Purity

Let’s be honest, you probably think the water gushing from your tap is as pure as a mountain spring. And while your city puts in a heroic effort to treat it, the long, winding journey to your home isn't always a clean one. A good water filter for city water acts as your personal bouncer, catching uninvited guests from old pipes and leftover treatment chemicals before they crash your party and end up in your glass.

Is Your City Water as Clean as You Think?

It's a common assumption: treated municipal water equals perfectly safe drinking water. But let's get real. Think of it like a package delivery. Your water leaves the "warehouse"—the city treatment plant—in pristine condition. But then it travels through miles of ancient, underground pipes to get to your front door.

Along the way, it can pick up some travel companions you definitely didn't order. Just like a package can get dented or smudged in transit, your water can gather a whole host of contaminants before it gracefully pours from your faucet.

Clear water fills a glass from an outdoor tap, promoting 'CHECK YOUR TAP'.

Common Intruders Crashing Your Tap Water Party

Even after the city's best efforts, a few uninvited guests tend to show up. The most obvious one is the distinct swimming-pool aroma of chlorine, the workhorse disinfectant used to slay bacteria. It does its job, but let's face it, it can make your morning coffee taste like a trip to the local YMCA.

Then there are the stealthy troublemakers. Older homes and city plumbing can have lead pipes or solder, which can leach this dangerous heavy metal right into your water. You also have to worry about disinfection byproducts (DBPs), like TTHMs. These are nasty little compounds that form when chlorine has a chemical mixer with organic stuff in the water.

The bottom line is this: your tap water is more than just H₂O. It’s a complex cocktail that can carry everything from disinfectants to metals from the pipes themselves. Taking control of that final few feet with a home filter is the only way to be certain the water your family drinks is genuinely, refreshingly clean.

These concerns are why so many of us are turning to home filtration. In fact, point-of-use filters, like the ones that go under your sink or on your faucet, now make up 40% of residential sales in the U.S. and Europe. This isn't surprising, especially when you see reports linking millions of gastrointestinal illnesses to tap water each year. You can dig into the numbers in the full global market report on water filters.

Pinpointing Your Water Problems

Figuring out what’s actually funky with your water is the first step to a flawless fix. Sure, you can taste, smell, or see some issues, but what about the invisible stuff? Your local water report is a great start, but you also need to consider your own home's plumbing. For instance, understanding backflow prevention basics to keep your drinking water safe is a crucial piece of the home water safety puzzle.

To make things easier, I've put together a quick guide to match the most common city water complaints with the right filter technology.

Your Quick Guide to City Water Problems and Filter Fixes

This table gives you a simple, at-a-glance look at how to tackle your specific water woes and get back to enjoying clean, safe water right from your tap.

Common Problem Likely Culprit Best Filter Solution
Chlorine taste & smell Municipal disinfection Activated Carbon, KDF
Cloudy or murky water Sediment, Silt Sediment Filter, Whole-House System
Metallic taste Lead, Copper, Iron Reverse Osmosis, KDF, Ion Exchange
"Rotten egg" smell Hydrogen Sulfide Activated Carbon, KDF, Oxidation
Hard water stains Calcium, Magnesium Water Softener, Ion Exchange

With this chart, you can quickly diagnose the likely cause of your water problem and see exactly what kind of filter is engineered to solve it. It’s your first step toward making a choice with confidence.

How to Read Your Local Water Quality Report (Without a Chemistry Degree)

Before you can choose the right water filter for city water, you have to know what you’re fighting.

By law, your local water utility must send you an annual water quality report card. It's officially called a Consumer Confidence Report (CCR), but think of it as the "nutrition label" for your tap water.

It’s a complete breakdown of everything detected in your water over the last year, showing whether those levels meet legal safety standards. It’s your secret weapon.

Close-up of hands holding a water report guide document with a pen, laptop, and plant on a wooden desk.

Finding Your Report

Getting your hands on this document is usually a breeze.

  • Check Your Mail: Many utilities still mail a paper copy directly to your home.
  • Go Online: The fastest method is to check your local water provider's website. Look for a "Water Quality" or "Consumer Confidence Report" link.
  • Use the EPA's Tool: If you're struggling to find it, the Environmental Protection Agency (EPA) has a search tool to locate your local CCR online.

These reports look dense, but you only need to focus on a few key sections to get the intel you need.

Decoding Key Terms

The most critical part of the CCR is the data table listing detected contaminants. Here are the two columns you need to understand.

MCLG (Maximum Contaminant Level Goal): This is the dream goal. It's the contaminant level where there is no known health risk. Think of this as the "perfect score."

MCL (Maximum Contaminant Level): This is the legally enforceable limit. It’s the highest level of a contaminant allowed in public drinking water. The MCL is set as close to the MCLG as is practical with current treatment tech.

Here's the kicker: Your water can be legally "safe" (below the MCL) but still contain contaminants far above the ideal health goal (the MCLG). That gap is where a good water filter for city water becomes your family’s hero.

What to Look For

When you scan the report, keep your eyes peeled for these common culprits that often appear in municipal water supplies.

1. Disinfectants & Disinfection Byproducts (DBPs):

  • Chlorine/Chloramine: The report will show the disinfectant levels used. If your tap water has a strong chemical or pool-like smell, this is your guy.
  • Total Trihalomethanes (TTHMs) & Haloacetic Acids (HAA5): These are DBPs created when chlorine reacts with organic matter. Long-term exposure is linked to health issues, making them a top priority for filtration. For example, one city report showed radium levels at 9.7 pCi/L, nearly double the EPA's maximum, which prompted many residents to seek robust filtration.

2. Inorganic Contaminants:

  • Lead & Copper: These metals typically don't come from the water source but leach from older pipes and fixtures. Your report will often list the "90th Percentile" result, showing if high levels are a widespread issue in your area.
  • Nitrate/Nitrite: These usually come from agricultural runoff (fertilizers) and are a particular health concern for infants.

Once you’ve identified which of these are in your water, you're ready for the fun part: matching them to a filtration system designed to knock them out.

Alright, you’ve got your water quality report in hand. Now you know exactly what’s in your tap water.

The next job is to match those specific contaminants to the right filtration technology. This is the most important step. Not all filters do the same thing, and picking the right one is the only way to get the clean, safe water you’re after.

Think of it this way: different filters are like different tools in a toolbox. You wouldn’t use a hammer to turn a screw. Same idea here.

The Workhorse: Activated Carbon

If you’ve ever used a simple filter pitcher, you’re already familiar with activated carbon. It’s the superstar of the filtration world for a good reason. Picture a microscopic sponge with a massive internal surface area, covered in millions of tiny pores.

These pores grab onto certain chemicals through a process called adsorption—basically, they act like a magnet for the stuff that makes your water taste and smell bad.

Activated carbon is the champ for:

  • Chlorine: This is its main gig. If your water tastes or smells like a swimming pool, a carbon filter will fix it, and you'll notice the delicious difference immediately.
  • Volatile Organic Compounds (VOCs): This includes things like pesticides, herbicides, and industrial solvents.
  • Bad Tastes and Odors: Carbon is fantastic at trapping the organic compounds that cause musty or funky smells.

But here’s the catch: standard activated carbon on its own won't touch things like lead, nitrates, or other dissolved solids. It's a fantastic first step for making city water taste better, but for more serious health contaminants, you'll need to call in the specialists.

The Gatekeeper: Reverse Osmosis

When you need the highest level of purification, reverse osmosis (RO) is the undisputed king.

Think of it as the ultimate bouncer for your water. It uses a special membrane with pores so ridiculously small that only pure water molecules can squeeze through. Everything else—lead, heavy metals, salts, disinfection byproducts, you name it—gets rejected and flushed down the drain.

The power of reverse osmosis is its ability to remove contaminants down to 0.0001 microns. At that level, almost nothing but H₂O can pass through, giving you exceptionally pure drinking water.

It's no surprise that RO systems are driving huge growth in the home water purifier market. They are on track to make up about 55% of the market by 2026 precisely because they are so effective at removing tough contaminants like TTHMs and lead. You can dig into more of the numbers in this detailed market analysis.

Catalytic Carbon and KDF Media

So what do you do if your city uses chloramine instead of chlorine? Chloramine, a mix of chlorine and ammonia, is tougher to remove, and standard carbon filters just can't keep up.

That’s where catalytic carbon steps in. It’s a special type of activated carbon that’s been supercharged to break the chemical bond in chloramine, effectively neutralizing it.

Another key player is KDF (Kinetic Degradation Fluxion) media. This is a blend of high-purity copper and zinc that creates a tiny electrochemical reaction. This process is excellent for:

  • Tackling Chlorine and Chloramine: KDF is another great option for neutralizing disinfectants.
  • Reducing Heavy Metals: It can reduce water-soluble metals like lead, mercury, and iron.
  • Stopping Bacteria Growth: The environment it creates prevents bacteria and algae from growing inside your filter, which helps the filter last longer.

To give you a clearer picture of how these technologies stack up, we've put together a comparison table.

Filtration Technology Performance Showdown

This table breaks down which filter technology is best for tackling the most common city water problems. Use it to quickly see which "tool" you need for the job.

Filtration Technology Removes Chlorine Taste Removes Chloramine Reduces Lead and Metals Reduces TTHMs and VOCs Ideal Use Case
Activated Carbon Excellent Poor No Good Improving basic taste and odor from chlorine.
Catalytic Carbon Excellent Excellent No Good Targeting chloramine-treated city water.
KDF Media Good Good Good No Reducing chlorine/chloramine and some heavy metals.
Reverse Osmosis (RO) Excellent Good Excellent Excellent Maximum purification of drinking water at a single tap.

As you can see, there’s no single "best" filter—only the best filter for a specific contaminant.

Many of the top-tier water filters for city water will actually combine these technologies. For example, a whole-house system might use a sediment pre-filter, followed by a tank of KDF and catalytic carbon. An under-sink RO system will almost always include carbon pre-filters.

By understanding what each one does, you can choose a system that truly solves your water problems instead of just guessing.

Choosing Your Ideal Home Water Filter System

Alright, you've figured out what's in your city water and you know which technologies can get rid of it. Now for the fun part: picking the right filter system that actually fits your life. The best water filter for city water isn't just about what it removes; it's about matching the system to your home, your daily routine, and your budget.

I like to think of it like choosing a sound system. Do you want music in every single room? That’s your whole-house system. Or do you just want incredible, high-fidelity sound in your favorite listening chair? That’s more like an under-sink system. Sometimes, all you need is a portable speaker you can grab and go—that’s your countertop or faucet filter. Each one has its place.

Whole-House Water Filters: The All-In-One Solution

A whole-house water filter—also called a point-of-entry (POE) system—gets installed right where the main water line enters your house. This is the big-picture solution. It treats every single drop of water you use, from the kitchen tap to every showerhead.

This is the way to go if you’re dealing with problems that go beyond just your drinking water. If your city water is loaded with chlorine or chloramine, you've probably noticed it can lead to dry, itchy skin and brittle hair. A whole-house system with the right carbon filter media tackles those irritants, making your showers a whole lot more comfortable.

Here’s a real-world example: A family brings home a new baby and finds that bath time leaves the little one with red, irritated skin. They check their city's water report and see high levels of chloramine. By putting in a whole-house filter, they solve the problem at the source. Now, even the bathwater is gentle and free from those harsh chemicals.

Under-Sink Water Filters: The Drinking Water Powerhouse

An under-sink water filter, known as a point-of-use (POU) system, lives right under your kitchen sink. It’s all about delivering the absolute best water for drinking and cooking, usually from its own dedicated faucet.

This is where heavy-hitter technologies like reverse osmosis really get to work. While you can get a whole-house RO system, they're usually overkill and pretty expensive for most homes. An under-sink RO, on the other hand, gives you incredible purification right where you need it most, zeroing in on everything from lead and arsenic to nitrates and TTHMs.

This is the perfect setup for someone who's seen their water report and is worried about specific health-related contaminants. They want total peace of mind knowing their drinking water is as pure as possible, without spending the money to treat the water that just flushes the toilet.

For top-tier drinking water, an under-sink system is the most popular choice. It hits that sweet spot between powerful, targeted filtration and affordability, making it the go-to for health-conscious families.

To make the choice a little clearer, this decision tree can help you visualize the best path forward based on what you're trying to achieve.

A flowchart detailing steps and questions to achieve excellent city water quality, focusing on taste, chemicals, and contaminants.

As you can see, your main goal—whether it's just better taste, getting rid of specific chemicals, or aiming for total purity—points you directly to the right type of system for your home.

Countertop and Faucet Filters: The Convenient Choice

For renters, or really anyone who wants a simple, no-plumbing-required solution, countertop filters and faucet-mounted filters are fantastic. You can set them up in minutes.

  • Faucet Filters: These just screw onto your existing faucet. A small switch lets you flip between filtered and unfiltered water. They're perfect for quickly making chlorinated water taste and smell better.
  • Countertop Filters: These systems sit on your counter and connect to your faucet with a small hose. They’re usually a bit bigger than faucet filters, which means they can hold more advanced filter cartridges for better performance.

Think about a college student moving into their first apartment. They can't make any permanent changes but are sick of buying bottled water. A simple faucet filter gives them better-tasting water on the spot, and they can just unscrew it and take it with them when they move out.

These systems are a huge and growing market. Advanced filters designed for city water contaminants hit a market value of USD 33.62 billion in 2023 and are projected to reach USD 113.7 billion by 2034, growing at an impressive 14.5% CAGR.

If you're looking for more specific recommendations, it's worth diving into the pros and cons of each type. Check out our guide on filtration advice for more detailed comparisons.

Making Sense of Filter Certifications and Performance

You’ve got a few filters in mind that look promising. But let's be honest, how do you really know if they'll do what the company claims? In the water filter game, marketing can be all flash, but performance comes down to one thing: independent, third-party testing.

This is where certifications save the day. They're your best shot at cutting through the sales pitches and picking a filter based on hard facts. A certification mark means the product was put through the wringer against a national standard to prove it removes the exact contaminants it says it does.

The Gold Standard: NSF/ANSI Certifications

The most trusted names in the business are the NSF (National Sanitation Foundation) and ANSI (American National Standards Institute). An NSF/ANSI certification is like a brutally honest audit of a water filter. It's not a one-and-done deal, either—manufacturers have to keep up with regular testing and inspections to hold onto that seal of approval.

If you’re shopping for a water filter for city water, you need to know three key standards. They tell you exactly what a filter is built to handle.

  • NSF/ANSI 42: Aesthetic Effects. This one is all about taste and smell. If a filter has this certification, it's proven to reduce things like chlorine, giving you water that actually tastes crisp and clean.
  • NSF/ANSI 53: Health Effects. Now we're getting serious. This is a much tougher standard for contaminants that pose a health risk. Filters with this stamp are certified to reduce lead, mercury, asbestos, and nasty things like certain cysts or VOCs.
  • NSF/ANSI 401: Emerging Compounds. This standard tackles those "incidental contaminants" you hear about—trace amounts of pharmaceuticals, over-the-counter drugs, and other chemicals showing up in our water.

Quick tip: Look for the specific NSF/ANSI numbers on the box or in the filter's specs. A vague claim like "tested to NSF/ANSI standards" is not the same as being "certified to NSF/ANSI standards." Certification is what really counts.

How to Read a Performance Data Sheet

Beyond the big certifications, any legit filter will have a Performance Data Sheet. Think of this as the filter's resume. It lists every single contaminant the filter is certified to reduce and, just as importantly, by what percentage.

This is where you match your water report to the filter. Say your city's report showed high lead levels. Here's what you'd look for on the data sheet:

  1. Contaminant: It should clearly state "Lead Reduction."
  2. Certification: It should list NSF/ANSI 53 right next to it.
  3. Percentage: It will give you the reduction rate, which is often 99% or higher for lead.

This is how you make a decision you can feel good about. If a company makes it hard to find their performance data sheet, take that as a major red flag. Good companies are transparent. By matching your water quality needs to a filter's certified performance, you can buy with confidence, knowing you're getting the clean, safe water your family deserves.

Calculating the True Cost of Your Clean Water

Choosing a water filter for city water is a fantastic move for your family's health. But what’s the real financial picture? It’s easy to get fixated on the price tag, but that's just the tip of the iceberg.

To make a smart decision, you have to look at the total cost of ownership. This means adding up the upfront price, the cost of replacement filters, and any installation fees. It might seem like a lot to track, but it's the only way to see the true value you’re getting.

Uncovering the Total Cost of Ownership

Let's break down the actual expenses. The numbers will vary, of course, but the cost categories are always the same.

  • Initial System Cost: This is what you pay for the unit itself. It can be as low as $30 for a basic faucet model or climb to $1,500 or more for a top-of-the-line whole-house or reverse osmosis system.
  • Installation Costs: Many filters, like countertop or faucet-mounted ones, are designed for easy DIY installation, costing you nothing but a few minutes. For under-sink or whole-house systems, you might want to call in a plumber. That could add $150 to $600 to your startup cost.
  • Filter Replacement Costs: This is the big one for the long haul. Filters don't last forever. You have to swap them out regularly to keep the system running right.

Here’s a good rule of thumb: always check the annual cost of replacement filters. A system that looks cheap upfront can end up costing you more over time if its filters are expensive and need to be changed often. Sometimes, a higher-quality system with longer-lasting cartridges is the more affordable choice in the long run.

The Real Math: Filtration vs. Bottled Water

Now, let's put a home filtration system head-to-head with the alternative many people turn to: bottled water. The numbers here might just shock you. A 2022 study found that the average household that buys bottled water spends around $1,368 per year.

Let's run a quick comparison using a common mid-range under-sink reverse osmosis (RO) system as our example.

Example Scenario: Under-Sink RO System

  • Initial Cost: $400
  • Installation: $200 (if you hire a pro)
  • Annual Filter Cost: $150
  • Total First-Year Cost: $750

Comparing the First Year:

  • Under-Sink Filter: $750
  • Bottled Water: $1,368

Even in the very first year, when you're paying for the system and professional installation, the RO filter saves you more than $600.

From the second year on, your only real cost is the $150 for new filters. That means you're saving over $1,200 every single year.

The financial case is a slam dunk. And that's not even getting into the massive environmental benefit of ditching all those single-use plastic bottles. Investing in a home water filter isn't just a one-time purchase; it’s a long-term plan for healthier water, serious savings, and a greener lifestyle.

Your Top Questions About City Water Filters, Answered

Jumping into the world of water filters can feel a little overwhelming. I get it. You've got questions, and you need straight answers. Let's tackle some of the most common things homeowners ask when picking out a filter for city water.

How Often Do I Really Need to Change My Filter Cartridges?

This really comes down to the specific filter you own and how much water your household uses. As a general rule, you can expect to change most under-sink or whole-house cartridges every 6 to 12 months, but that's just a ballpark.

Your manufacturer’s guide is the best place to look for a solid recommendation, which is usually based on the number of gallons the filter can treat. I always tell people to set a reminder on their phone or calendar to order new ones ahead of time—there's nothing worse than needing a filter and not having one on hand.

Pro Tip: Your system will give you clues. If you notice your water pressure dropping, or if that old chlorine taste and smell starts creeping back in, it’s time for a change. Don't wait for the calendar if your filter is telling you it's done.

Will My City Water Filter Work if I Move to a Home with Well Water?

I wouldn't count on it, and you definitely shouldn't use it without getting your new well water tested first. Think of it this way: city water and well water are two completely different beasts.

A filter designed for municipal water is a specialist—it's built to target chlorine, chloramine, and the byproducts left over from the disinfection process. Well water brings a totally different set of challenges, like bacteria, iron, nitrates, sediment, and sometimes even heavy metals like arsenic. Those require entirely different types of filtration.

Before you even think about filtering well water, you must get a sample tested by a certified lab. Only then can you find a system that’s actually equipped to handle what's in your water.

Can I Install a Water Filter System Myself, or Do I Need a Pro?

This all depends on the type of system you choose and how comfortable you are with some basic plumbing tasks.

  • DIY Friendly: Things like faucet filters, countertop units, and many of the simpler under-sink filters are made for easy installation. You can usually get these set up in just a few minutes with no special tools.
  • Consider a Pro: Whole-house systems and more complex under-sink setups (like reverse osmosis) often require cutting into your main water line. If you're a seasoned DIYer, you might be fine. But for most people, hiring a plumber for $150 to $600 is a smart investment for the peace of mind that it’s done right.

My City Uses Chloramine. Do I Need a Special Kind of Filter?

Yes, you absolutely do. This is a critical point many people miss. Your standard activated carbon filter does a fantastic job removing chlorine, but it's almost useless against chloramine.

To effectively remove chloramine, you need a filter with catalytic carbon. This is a special type of carbon media specifically designed to break the strong chemical bond between chlorine and ammonia. When you're shopping, look for "chloramine reduction" on the filter's performance data sheet to be sure it can handle the job.


At Water Filter Advisor, our goal is to give you the clear research and honest advice you need to protect your family's water. To learn more, explore our guides and reviews to make a confident choice at https://www.waterfilteradvisor.com.

Your Guide to Digital TDS Meters & Finding the Best Water Filter

Ever get that nagging feeling you don’t really know what’s in your tap water? A digital TDS meter is your new best friend. This little gadget is a pocket-sized detective that gives you an instant score for all the invisible stuff dissolved in your water. It measures Total Dissolved Solids (TDS)—a fancy term for the combined amount of minerals, salts, and metals floating around.

Think of it as the first, crucial step to becoming the boss of your home's water quality and finding the perfect filter for your needs.

What Is a Digital TDS Meter and Why Does It Matter for Your Home?

A white digital TDS meter stands next to a glass of water on a kitchen counter with a 'KNOW YOUR WATER' sign.

Beyond what you can see, your water carries a hidden load of dissolved substances from its long journey to your faucet. These are what we call Total Dissolved Solids, or TDS.

Imagine your water is a big pot of clear broth. The TDS is all the salt, spices, and other flavorings mixed in. You can’t see them, but they completely change the final product. A digital TDS meter is the super-simple tool that instantly tells you how much "stuff" is in your water, helping you decide if you need to filter it and what kind of filter to use.

What Your TDS Number Tells You

So, why should this number matter to you? A TDS reading is your secret weapon for connecting the dots on common household water woes and figuring out your filtration game plan.

Your reading can help explain things like:

  • Weird Taste or Smell: High levels of certain minerals can make your water taste metallic, bitter, or salty. A TDS meter puts a number to that funky flavor, telling you it's time for a filter.
  • Hard Water Headaches: The main culprits behind hard water—calcium and magnesium—are a big part of your TDS score. A high reading is a giant red flag that you're battling scale buildup on appliances and soap scum in the shower.
  • Choosing the Right Filter: Knowing your starting TDS is key to picking the right water filter. If your number is sky-high, you'll know a simple pitcher filter won't cut it, and you might need a heavy-hitter like a reverse osmosis system.

The Bottom Line: A TDS meter won’t tell you exactly which contaminants are in your water. What it does is give you a vital big-picture measurement of your water’s overall purity. It's the starting point for any homeowner serious about getting clean, great-tasting water.

Understanding TDS Levels in Your Home

To get a better sense of what your TDS reading means, it helps to see how it compares to other common water sources. A number that's perfectly normal for well water might be a red flag if you're expecting pure, filtered water.

This quick-reference table gives you a general idea of what to expect from your taps.

TDS Levels at a Glance: What to Expect from Your Water

Water Source Typical TDS Range (PPM) Common Characteristics
Reverse Osmosis Water 0 – 50 PPM The gold standard of purity; almost all minerals are removed.
Filtered Tap Water 50 – 200 PPM Clean, crisp taste; carbon filters remove chlorine but leave healthy minerals.
Typical Tap Water 200 – 400 PPM Varies by region; generally safe, but filtration can improve taste and quality.
Hard Water / Mineral Springs 400 – 700+ PPM Noticeable mineral taste; causes scale buildup. A prime candidate for filtration.
Well Water 300 – 1,000+ PPM Highly variable; often rich in minerals like iron and calcium that need filtering.

Use these ranges as a guide. Your own reading will give you a powerful clue about your water's journey and what kind of filtration might be best for your home.

The Growing Demand for Better Water

You're not the only one thinking about this. The market for home water testing tools is booming as more people question the quality of their municipal and well water.

In fact, one market analysis valued the global digital TDS meter market at $245 million in 2024, with projections for major growth. This isn't surprising. People are more aware than ever of how dissolved solids affect taste, plumbing, and health. If you want to dig into the numbers, the report from Archive Market Research about the digital TDS meter market has more details.

Ultimately, a TDS meter puts the power in your hands. It gives you the hard data you need to understand what's in your water and make smart decisions to protect your family and your home with the right filtration system.

How a TDS Meter Actually Tests Your Water

To really get what your digital TDS meter is telling you, it helps to understand what it’s actually doing. The science is pretty straightforward, and you definitely don't need a chemistry degree to get it.

Think of your TDS meter as a traffic cop, not a census taker. It doesn't count every single particle in your water. Instead, it just checks how easily an electrical current can pass through it. This is called electrical conductivity (EC).

The Science of Conductivity

Pure, distilled water on its own is a very poor conductor of electricity. There’s nothing in it to carry a charge. But when minerals and salts—like calcium, magnesium, and sodium—dissolve, they break apart into charged particles called ions.

These ions are what allow electricity to flow. The more ions you have, the higher the water’s conductivity. A digital TDS meter works by sending a very small, safe electrical current between two metal probes (electrodes) on its tip.

It measures how easily that current travels through the water. The higher the conductivity, the more dissolved solids are present. The meter then uses a built-in conversion factor to estimate the Total Dissolved Solids and show you that final reading in parts per million (PPM).

A digital TDS meter is basically an electrical conductivity tester. It doesn't identify what the solids are, just that there are electrically charged solids present.

What a TDS Meter Can and Cannot See

This is the most important part to understand as a homeowner. Knowing what your meter can detect—and what it’s completely blind to—is key to using it to make smart filtration choices.

A TDS Meter Is Great at Detecting:

  • Salts: Common compounds like sodium chloride (table salt) and potassium chloride.
  • Minerals: This includes the "hard water" minerals like calcium and magnesium, which clog up your appliances.
  • Some Metals: Dissolved metals that carry a charge, like iron, will register on the meter.

Basically, if it dissolves in water and creates an electrical charge, your TDS meter is going to pick it up. This is why they are so useful for checking the performance of a reverse osmosis system, which is designed to remove these exact types of contaminants.

Hidden Dangers Your Meter Misses

However, a TDS meter's biggest weakness is that it can only see things with an electrical charge. Many of the most serious water contaminants are invisible to it.

A TDS Meter Cannot Detect:

  • Many Organic Chemicals: Things like pesticides, herbicides, and certain pharmaceuticals often have no charge and won't affect the TDS reading at all.
  • Chlorine and Chloramine: The disinfectants your city uses to treat water are not detected by a standard TDS meter.
  • Bacteria and Viruses: These are living organisms and don’t contribute to electrical conductivity.
  • Heavy Metals like Lead: This is a big one. Lead can exist as tiny, uncharged particles that a TDS meter will not reliably pick up.

This is why a reading of 0 PPM doesn’t mean your water is 100% pure or safe. It just means it's free of electrically charged ions. A digital TDS meter is a fantastic tool for one specific job, but it’s not a substitute for a full lab test. It gives you one piece of the puzzle, helping you make smarter decisions about water filtration for your home.

What Your TDS Reading Means for Your Home

You’ve got a number on your TDS meter. So what does it actually mean? Is your water good, bad, or somewhere in between? Let's turn that number into a clear action plan for your home's water filtration.

Think of a TDS reading as a starting point, not a final verdict. The real goal is to use that number to make a smart decision about filtering your water.

This chart shows you exactly what a TDS meter can and can't tell you.

Diagram illustrating how a TDS meter measures water quality, showing inputs, readings, and interpretations.

As you can see, the meter is great for spotting dissolved minerals and salts. But it can’t see dangerous contaminants like lead, pesticides, or bacteria—you’ll need different tests for those.

Putting Your TDS Number in Context

First, let's look at the numbers. The EPA recommends drinking water stay below 500 PPM (parts per million). Generally, though, a lower number is better for taste and keeps your appliances happy.

Here’s a quick guide to what the numbers usually mean for your filtration strategy.

  • Under 50 PPM: This is extremely pure water, like what you get from a reverse osmosis system or distillation. It has a very clean, crisp taste since most minerals are gone.
  • 50 – 300 PPM: This is a great range for most tap water. It has enough minerals for a pleasant taste without causing major scale buildup. Often, a simple carbon filter for chlorine is all you need.
  • 300 – 500 PPM: The water is still fine to drink, but you might notice a mineral taste. This is where you start seeing white scale forming in kettles and on faucets, signaling it's time to consider a filter.
  • Above 500 PPM: Once your reading is over 500, it's time to get serious about filtration. The water is likely very hard, which is tough on appliances, and might taste bitter or salty.

Remember, a TDS meter measures the quantity of dissolved stuff, not the quality. A 400 PPM reading could be harmless calcium, but the number is your signal to investigate and choose a filter that can handle it.

Matching Your Reading to the Right Filter

Your TDS reading helps you pick the right filter without wasting money. Don't buy a whole-house system if all you need is a simple pitcher filter.

Here’s how to match the filter to your water’s needs.

  • Low to Moderate TDS (Under 300 PPM): If you just want better-tasting water without chlorine, a carbon filter is perfect. You’ll find them in pitchers and faucet-mounted filters. They won't lower your TDS much, but they make a huge difference in taste and smell.
  • High TDS (300 – 1,000+ PPM): When a high reading is from hard water minerals (calcium and magnesium), a classic water softener is the best way to protect your plumbing and appliances. A softener swaps hardness minerals for sodium, so your TDS reading will actually stay the same or even go up while solving the scale problem.
  • Very High TDS & Purity Concerns (500+ PPM): To remove the absolute widest range of contaminants, you need a reverse osmosis (RO) system. An RO system can slash TDS by over 90%, getting rid of salts, minerals, and other unwanted solids. It's the top choice for anyone who wants the purest drinking water possible.

Growing concerns about water quality have made these tools more popular than ever. In India, for example, where groundwater TDS can top 1,000 PPM, sales have jumped 40% since 2020. This global trend means more affordable, high-quality meters are available to everyone. You can learn more about the global trends in the digital TDS meter market on Dataintelo.com.

Choosing the Best Digital TDS Meter for Your Needs

Shopping for a digital TDS meter can feel overwhelming, but don't worry. You don't need a complicated, lab-grade instrument to get a good handle on your home's water quality. The real goal is to find a reliable tool that gives you the data you need to make smart choices about water filtration.

Let's walk through what really matters so you can find the right meter and avoid paying for bells and whistles you'll never use.

The Non-Negotiable Feature: Automatic Temperature Compensation

If a TDS meter is missing this one thing, just put it back on the shelf. Automatic Temperature Compensation (ATC) is absolutely critical for getting an accurate reading. Here’s why: the electrical conductivity of water—which is what the meter actually measures—changes dramatically with its temperature.

This means testing cold water versus room-temperature water can give you two completely different PPM numbers, even if the amount of dissolved solids hasn't changed at all. Without ATC, your readings are just a wild guess. With it, the meter automatically adjusts for temperature, giving you a consistent, trustworthy measurement every time.

Accuracy and Convenience Features

For everyday home use, you don't need scientific precision, but you do need consistency. Look for a meter with a stated accuracy of +/- 2%. That’s more than enough to track how well your water filters are working or to monitor your tap water over time.

Beyond that, a few simple features can make a big difference in how easy the meter is to use:

  • Hold Button: This lets you freeze the reading on the screen after you’ve pulled the meter out of the water. It’s a huge help, as trying to read a tiny screen while it’s still submerged is a real pain.
  • Backlit Display: A screen that lights up is a lifesaver if you're testing in a poorly lit spot, like under the kitchen sink. No more squinting or using a flashlight.
  • Auto-Off Function: To keep you from draining the battery, find a meter that shuts itself off after a few minutes of not being used. It’s a small thing, but it ensures your meter is ready to go when you need it.

Technological innovations in digital TDS meters have revolutionized home water testing. Today, over 70% of new models include Bluetooth and automatic temperature compensation, allowing users to track TDS trends via smartphones, which is essential as temperature fluctuations can skew readings by 20-30%. For Water Filter Advisor readers, this means easily verifying that a whole-house system is reducing TDS from an incoming 400 PPM to under 100 PPM post-filtration, preventing scale that can hike energy bills by 15-20% in water heaters. You can find more on this in a report about the TDS measuring instrument market on VerifiedMarketReports.com.

What to Expect at Different Price Points

A higher price doesn't always mean a better tool for what you need. It’s all about finding that sweet spot between cost and performance. Here’s a simple breakdown of what your money gets you.

Which Digital TDS Meter Is Right for You?

This table compares the common tiers of TDS meters to help you decide which one makes the most sense for your home.

Feature Basic Model (~$15) Mid-Range Model (~$30) Advanced Model (~$50+)
ATC Often included, but verify Standard Standard
Accuracy +/- 3-5% +/- 2% (Ideal) +/- 1-2%
Display Basic LCD LCD with Backlight Large, easy-to-read screen
Extra Features Basic hold button Hold button, auto-off Bluetooth, multi-parameter
Build Quality Standard plastic More durable, splash-proof Waterproof, rugged design
Best For Quick spot-checks Reliable home testing Tech-savvy users, specific needs

For most homeowners, a mid-range model is the perfect choice. It gives you the best mix of accuracy and must-have features without the extra cost of things like Bluetooth connectivity, which most people don't need for basic filter checks.

How to Use Your TDS Meter for Accurate Results

A person tests water quality with a white digital TDS meter in a glass, with another glass and towel nearby.

Getting good numbers from your digital TDS meter is all about technique. A sloppy test gives you a useless reading, but if you take a minute to do it right, you can trust the results every single time.

Think of it like taking your temperature. You can’t just wave the thermometer in the air and expect an accurate reading. The same goes for your water. Let's walk through the right way to get a reading you can count on.

The Simple Guide to a Perfect Water Test

A consistent routine is your best friend for accurate measurements. This whole process takes less than a minute, but it makes all the difference.

  1. Rinse Your Gear: First things first, rinse out your testing glass and the meter's probe with the water you're about to test. If you just tested your hard tap water, leftover minerals can easily mess up the reading for your filtered water. A quick rinse prevents that.

  2. Get a Fresh Sample: Use a clean, dry glass and fill it with about an inch of water. You don't need much—just enough to completely cover the meter's electrodes on the tip.

  3. Let It Sit: Give the water about 30 seconds to settle. This lets any tiny air bubbles escape. Bubbles clinging to the probes can interfere with the electrical reading and give you a wonky number.

  4. Test and Swirl: Power on your meter, pop off the cap, and stick the probe in the water. Give it a gentle swirl for a second or two to knock off any stubborn bubbles.

  5. Wait for the Reading to Settle: Keep the meter in the water and just watch the display. If your meter has Automatic Temperature Compensation (ATC), the number might jump around for a few seconds while it adjusts. Just wait for it to stabilize.

  6. Lock It In: Once the number is steady, hit the "Hold" button. This freezes the reading on the screen, so you can pull the meter out and easily read the result.

Following these steps ensures every test is as accurate as the last. It’s the only way to reliably track the performance of your water filters. For more general help with water treatment options, you can check out our other articles for https://www.waterfilteradvisor.com/advice/.

Essential Care for Long-Term Accuracy

A TDS meter is a measuring tool, and like any tool, a little care goes a long way. If you want it to stay accurate for years, you have to keep it clean and store it properly.

A well-maintained meter is a reliable one. Rinsing and drying the probe after each use prevents mineral buildup that can coat the electrodes and cause inaccurate readings over time.

Think of that mineral scale like a little insulating jacket on the probes. It blocks the electrical current, which can make your meter give you a TDS reading that’s way lower than the real number.

Simple Maintenance Tips:

  • Rinse and Dry: After every test, rinse the probe with distilled or reverse osmosis (RO) water. If you don't have any, your filtered water will do. Shake off the extra water and wipe the meter’s body dry with a cloth.
  • Always Use the Cap: That protective cap is there for a reason. It keeps the electrodes from getting scratched, dirty, or damaged. Get in the habit of putting it back on right away.
  • Give It a Deep Clean: If you see gunk building up on the probes, you can clean them. Just dip the probe end into a bit of isopropyl (rubbing) alcohol and swirl it around. Rinse it well with pure water and let it air dry completely.

These small habits will make sure your meter stays a trustworthy tool. And if you’re managing water chemistry elsewhere, like a hot tub, pairing these tests with a good hot tub water testing log sheet can help you keep everything perfectly balanced.

Common Questions About TDS Meters and Home Water Filters

Once you have a TDS meter in hand, you'll probably have a few questions as you start testing the water around your house. Let's run through the most common ones so you can get clear, simple answers and start making sense of your readings.

Think of this as your go-to guide for real-world water testing.

Can I Use a TDS Meter to Know When to Change My Filter Cartridge?

Yes, and this is one of the most practical uses for your meter. It takes the guesswork out of filter changes, letting the data tell you when it's time.

Here's the simple process:

  1. First, test your unfiltered tap water. Write that number down—it's your baseline.
  2. Next, install the new filter and test the water coming out of it. This much lower number is your "clean" reading.
  3. Every few weeks, test the filtered water again.

As the filter does its job, it fills up with contaminants. Over time, you'll notice the TDS reading from your filtered water will start to slowly climb back up. We call this "TDS creep."

When the filtered water's TDS reading starts climbing closer to your original tap water number, it's a clear, reliable sign that the filter media is saturated and no longer working effectively. This TDS creep is your cue to order and install a replacement cartridge.

My TDS Meter Shows 0 PPM After My RO Filter, Is My Water Pure?

Seeing a reading of 0 PPM (or something very low like 1-10 PPM) after your reverse osmosis (RO) system is a great sign! It means the RO membrane is working perfectly, removing an enormous amount of dissolved solids like salts and minerals.

But is the water "perfectly pure"? Not necessarily. Remember, a TDS meter only detects dissolved solids that have an electrical charge. It cannot see uncharged contaminants.

Things a TDS meter misses include:

  • Certain pesticides and industrial chemicals (VOCs)
  • Disinfectants like chlorine and chloramine
  • Bacteria, viruses, and other microorganisms

So while a 0 PPM reading doesn't guarantee your water is 100% free of every possible contaminant, it's the gold standard for RO performance. It's a strong confirmation that your system is doing its job exceptionally well.

Why Is My TDS Reading Different from My Neighbor’s?

This is a great question. Even if you and your neighbor get water from the same municipal supply, a few things can cause your readings to be different.

The biggest factor is your home's plumbing. Older homes with copper pipes (and lead-based solder) or galvanized steel pipes can add small amounts of metals into the water as it flows to your tap. Newer plumbing, like PEX, won't affect the TDS count.

Another common reason is a water softener. A softener works by swapping "hard" minerals like calcium and magnesium for sodium or potassium ions. Your digital TDS meter reads these new ions, too. It's very common for softened water to have a higher TDS reading than the hard water that went into it.

Is a High TDS Level Dangerous to My Health?

Usually, no. The EPA classifies TDS as a Secondary Drinking Water Contaminant. This means it mostly affects aesthetics—like taste, smell, or color—not your health. In fact, many expensive bottled mineral waters are prized for their very high TDS levels, which come from beneficial minerals.

However, a very high TDS reading (especially over 500 PPM in city water) is a red flag. It’s not a sign of danger, but a signal to look closer. A spike in TDS could point to:

  • Extreme Water Hardness: This can cause major scale buildup that damages dishwashers, water heaters, and pipes.
  • Bad Taste: High levels of chlorides or sulfates can make water taste salty, bitter, or metallic.
  • Possible Contamination: For well owners, a sudden jump in TDS might mean contamination from septic systems or agricultural runoff.

A high TDS reading is like a check-engine light. It doesn't mean the car is broken, but it definitely means it's time to find out what's going on with your water and find the right filter for the job.

If you have more questions about water quality, testing, or wish to delve deeper into related topics, you might find valuable resources on their water technology blog.


Ready to take control of your home’s water quality? At Water Filter Advisor, we provide the expert guides and unbiased reviews you need to find the perfect filtration solution. From simple pitcher filters to whole-house systems, we help you make confident decisions for healthier, better-tasting water. Explore our resources at https://www.waterfilteradvisor.com today.