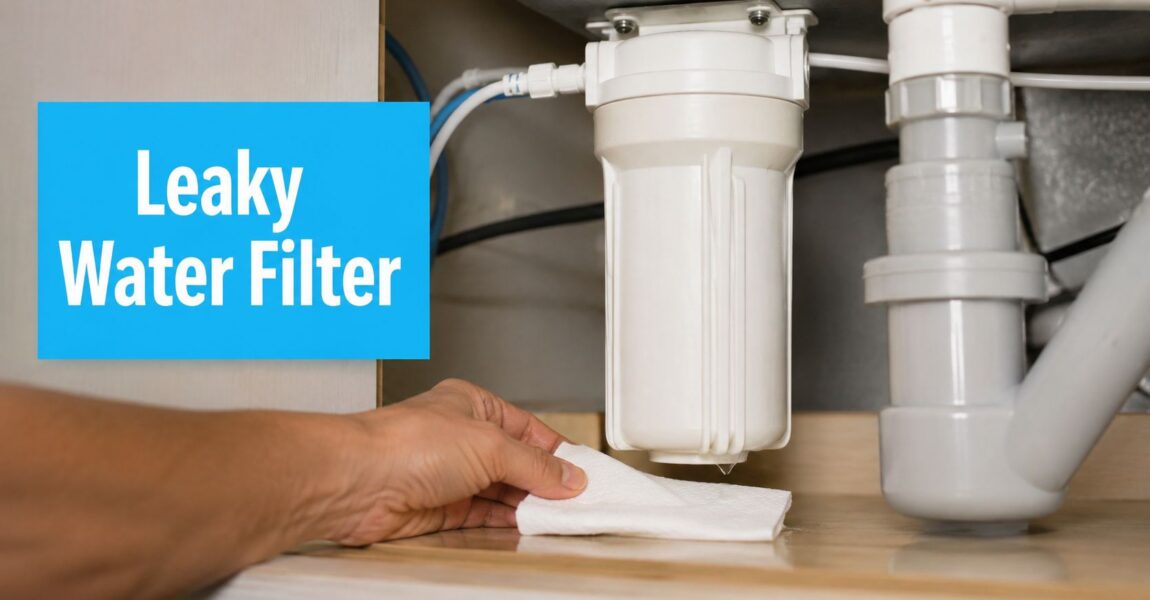
A water filter leak usually starts the same way. You reach under the sink for dish soap and feel a damp cabinet floor, or you walk past the basement filter and notice a dark ring spreading under the housing, or the fridge line leaves a fresh bead on the tile again. It looks simple. Tighten something, swap a cartridge, move on.
That's why these leaks waste so much time. A home filter packs several seals, fittings, and pressure points into a small space, and water rarely drips from the exact place where it starts. On under-sink systems, it can run along the housing and drop off the lowest elbow. On whole-house setups, it can track down the cap and make the sump look guilty when the problem sits at the inlet fitting.
The best fix starts with diagnosis, not with a parts order. That matters because a water filter leaking at home isn't always a bad O-ring, and it definitely isn't always a cracked housing.
You Spotted a Drip. Now What
Under the kitchen sink, the usual reaction is panic first, guessing second. Homeowners often grab channel locks, crank the housing tighter, and hope the drip stops. In the basement, they do the same thing with a whole-house canister. At the fridge, they push the filter in and out a few times and call it troubleshooting.
Sometimes that works. Often it makes the problem harder to find.
Why the leak looks simpler than it is
A filter system has stacked connection points in a cramped footprint. There's the inlet, the outlet, the housing seam, the cap O-ring, the cartridge seat, and sometimes quick-connect tubing. Water can creep along any of those surfaces before it finally falls. The puddle tells you where gravity won, not where the leak began.
Practical rule: Don't replace the first part you suspect. Find the highest point where moisture begins.
That's especially true with small leaks. The U.S. Environmental Protection Agency says the average home wastes more than 10,000 gallons of water per year from leaks and drips, and 10% of homes have leaks wasting 90 gallons or more per day. The same EPA guidance says household leaks together waste more than 1 trillion gallons annually nationwide, roughly the annual water use of more than 11 million homes. Even a filter drip that looks minor can become part of that bigger problem if it stays hidden under pressure day after day, as noted in this EPA-related leak guidance.
Don't treat the cabinet floor and the filter as separate problems
If the leak has already spread beyond the filter area, you may end up dealing with more than the filter itself. Wet flooring, swollen kickboards, and stained drywall need attention too. If that side of the problem has started, practical guides on how to fix bathroom water leaks can help you think through water migration, surface damage, and where moisture tends to hide after a slow leak.
A good repair starts with one question. Where does the first bead appear?
The Five Places Filters Leak and What Each One Looks Like
Most home filter leaks fall into a handful of patterns. The trick is matching the pattern you see to the part that's failing.
Threaded inlet or outlet connections
This one usually shows up as a slow weep where the fitting meets the filter head or manifold. You won't always get a dramatic drip. More often you'll see a damp ring, mineral crust, or a glossy patch that reforms after you wipe it dry.
On whole-house systems, this is common after someone cross-threaded a plastic fitting or overdid the sealant. Under the sink, it often appears where a threaded adapter meets the prefilter head.
Housing seam leaks
A seam leak doesn't always look like a seam leak. Instead of a drip from the joint itself, you often see the outside of the sump uniformly wet, then water collecting at the bottom edge. Many people blame the canister body, but the seam is usually telling you the seal failed before the housing failed.
One troubleshooting guide notes that housing leaks are more often tied to seal and connection failures than cracked components, and it recommends a simple workflow: dry the entire assembly and watch for the first point of moisture. The same guide says common fixes include O-ring inspection, reseating, silicone lubricant, trimming damaged tube ends, and adding 5 to 7 clockwise wraps of PTFE tape on threaded joints. It also reports that worn O-rings are the most frequent culprit and advises replacing them every 2 to 3 filter changes in systems that repeatedly seep at the housing seam. Those practical details come from this water filter troubleshooting guide.
O-ring at the cap
This one often shows up right after a cartridge change. The housing may feel snug, but water tracks down the outside wall of the canister. A pinched, twisted, dry, or dirty O-ring can do that every time.
If you're seeing a leak after maintenance, suspect the seal before you suspect the cartridge.
Cartridge body or cartridge seating
A bad cartridge leak can fool people because the water often exits at the housing seam anyway. A cracked cartridge, an incompatible cartridge, or one that bottoms out badly against the retainer can distort how the housing closes. Fridge filters are especially sensitive to fit. If the filter doesn't seat correctly, the housing can leak even when the rest of the system is sound.
Quick-connect tubing and push-fit fittings
These leaks are sneaky. They may drip only when pressure changes, when the icemaker calls for water, or when the RO tank cycles. You'll usually see a bead forming right at the collar, or a tubing line that looks dry until the system runs.
Five Common Filter Leak Points Compared
| Leak Point | What It Looks Like | Usual Cause |
|---|---|---|
| Threaded inlet or outlet | Damp fitting, slow weep, mineral tracks | Loose fit, poor thread seal, cross-threading |
| Housing seam | Wet canister exterior, water collecting at bottom lip | Mis-seated seal, uneven tightening |
| Cap O-ring | Water trails down housing after filter change | Pinched, dry, twisted, or dirty O-ring |
| Cartridge or cartridge seat | Leak appears after cartridge install, housing won't seat right | Cracked or incompatible cartridge, poor seating |
| Push-fit or quick-connect fitting | Intermittent bead at tubing collar, worsens during flow changes | Damaged tube end, incomplete insertion, worn fitting |
How to Pinpoint the Leak Source Before You Touch Anything
Start by shutting off the filter's inlet valve. Then relieve pressure through the nearest filtered faucet, dispenser, or relief button on the housing if your unit has one. Don't skip that part. A pressurized housing can hide the source until you loosen the wrong connection.
Now dry everything. Not just the obvious drip point. Dry the cap, sump, threaded ports, tubing, nearby wall, mounting bracket, and the floor under the unit. A shop towel works better than a casual wipe because you want the whole area reset to zero.
Dry first, then watch
Turn the water back on slowly and watch the system under pressure. Focus on the first bead of moisture, not the puddle below. Water will travel along housings and fittings before it falls, so the floor is the last clue, not the first one.
A flashlight helps, especially in the back corner of an under-sink cabinet or behind a whole-house head mounted close to the wall. I also like using a folded strip of dry paper towel pressed against suspect joints. It wicks out hidden moisture faster than your eye catches shine on plastic.
Water almost always tells the truth at the highest wet point. Everything below that is just runoff.
Give it time under pressure
Don't declare victory after twenty seconds. Some leaks show up only after the housing equalizes or the line flexes slightly. Leave the system pressurized and keep watching for a while.
This is also where painter's tape helps. Mark the first suspect joint, then the second if needed. Once you've named the exact leak point, the fix usually gets obvious fast. Seam problem, seal problem. Push-fit problem, tubing end. Threaded fitting problem, thread engagement or sealing.
A lot of unnecessary disassembly happens because people start wrenching before they know which of those they're dealing with.
Hands-On Fixes for Connections, O-Rings, and Housings
The physical repair should feel controlled, not forceful. If you're muscling a filter back together, you're usually heading toward a return leak, a cracked sump, or stripped threads.
Here's the repair flow I use most often on home systems:
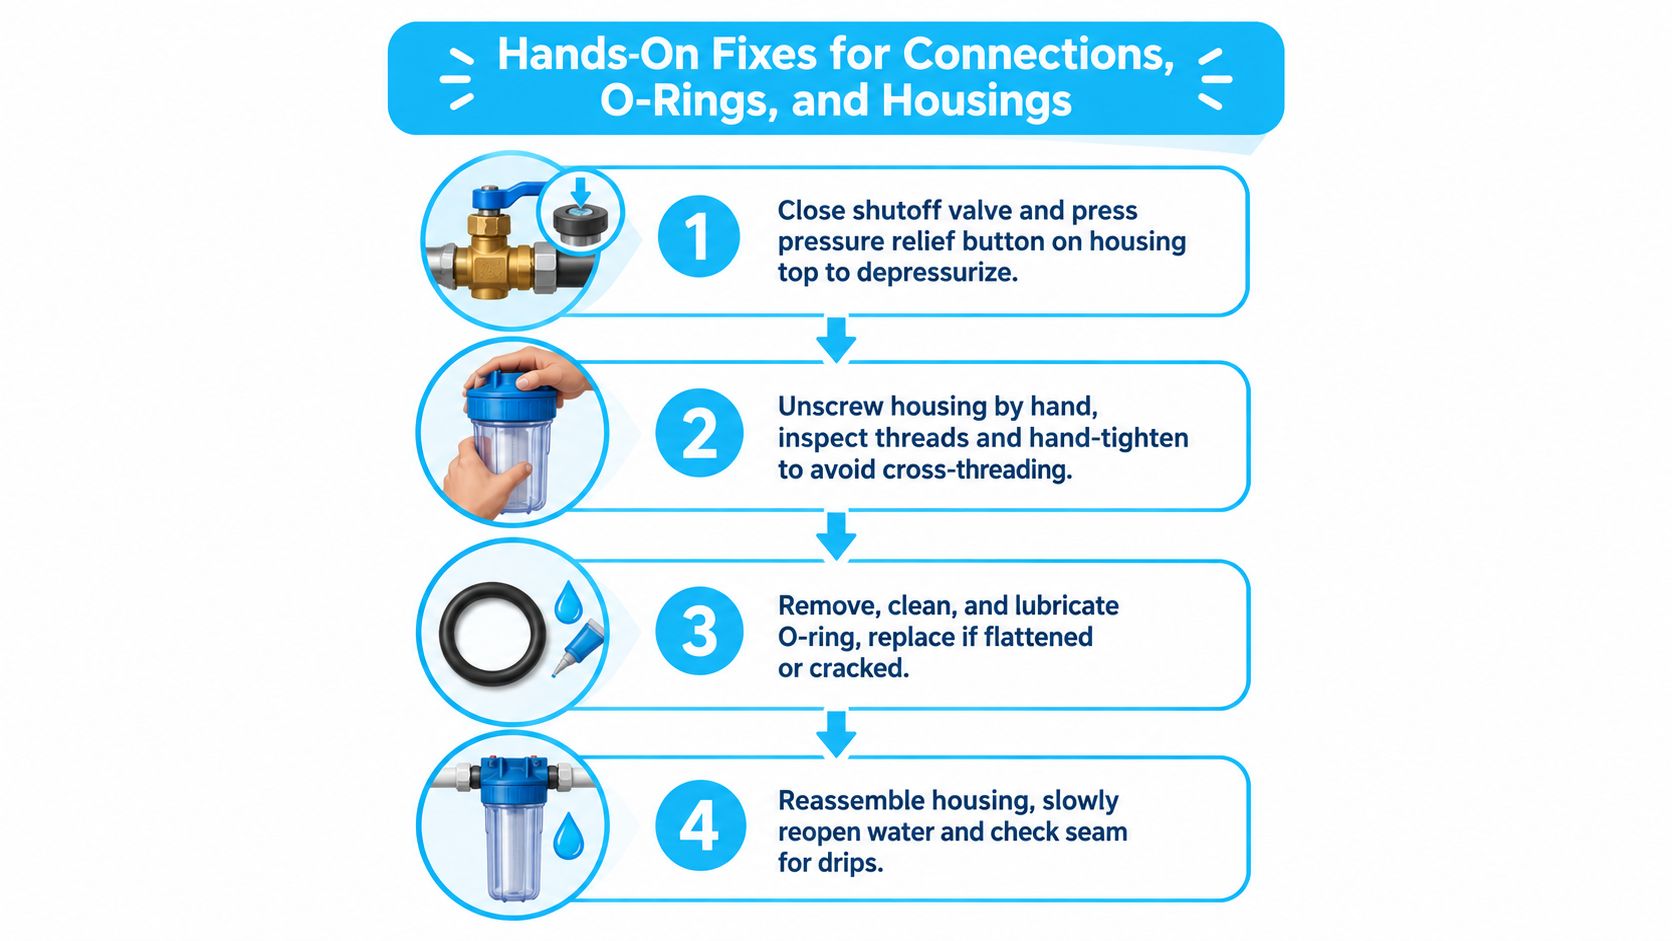
Start at the shutoff and relieve pressure
Close the supply feeding the filter. Open the filtered faucet or press the housing relief button if the unit has one. On a whole-house canister, make sure the line is depressurized before you start loosening the sump. If you rush this, you can unseat parts violently and misread what was leaking.
Manufacturer troubleshooting for a whole-house unit points to three direct installation-related causes: a damaged O-ring at the filter head, a damaged O-ring on the cartridge, or defective tubing at the inlet or outlet. The same instructions call for shutting off the incoming water, depressurizing the system, and cutting at least 3/8 inch (6.4 mm) from the tubing end so the seal is square and positive, as shown in this whole-house filter manual.
Fix threaded connections without overdoing them
If the leak is at an inlet or outlet fitting, remove the fitting and inspect the threads. Plastic heads are easy to cross-thread if someone started with a wrench instead of by hand. Reinstall by hand first. If it doesn't spin on smoothly, back it out and start again.
For thread sealing, PTFE tape is the usual fix. Keep the wraps neat and clockwise so the tape doesn't bunch when you thread the fitting in. Too much tape can stop the fitting from seating correctly just as easily as too little can.
Service the O-ring correctly
Pull the O-ring out and inspect the full circle, not just the section that looks wet. Look for nicks, flat spots, twist marks, hardening, or grit stuck in the groove. Clean the groove too. A perfect O-ring sitting on debris still leaks.
Use food-grade silicone lubricant, never petroleum grease. Silicone helps the seal seat evenly and prevents pinching. If the O-ring looks stretched or flattened, replace it. Reusing a deformed seal is one of the easiest ways to guarantee that you'll be back under the sink tomorrow.
Shop habit: If the O-ring comes out looking shiny, flattened, or slightly oval, I don't argue with it. I replace it.
Check the housing body before blaming the seal again
Hairline cracks can hide until the housing is dry. Wipe the sump completely and press a dry paper towel around the body while it's under light pressure. Fine cracks usually reveal themselves as a thin wet line. If the housing is cracked, stop trying to save it. Replace it.
This is a good place to remember that structural integrity under pressure matters. NSF states that drinking-water systems and some components, including housings intended for direct connection to water service, undergo pressure testing to confirm they won't crack or leak when installed on a pressurized water line, according to this NSF water systems FAQ.
A short video walkthrough can help if you want to see the reseating and tightening sequence in motion.
Repressurize slowly and verify
Reassemble the housing, center it in the bracket if needed, and reopen the water supply slowly. Listen for the air-to-water transition. Then watch the seam and fittings while pressure builds. Don't call it fixed until it stays dry under normal operating pressure.
When the Leak Is Really a Pressure or Clog Problem
A lot of recurring leaks get mislabeled as bad parts. The homeowner replaces the O-ring, tightens the cap, maybe even swaps the housing, and the drip comes back. That usually means the seal wasn't the root cause. It was the first weak point.
The missed culprit is often pressure
Independent appliance and consumer guidance keeps pointing to the same failure modes: loose inlet or outlet fittings, degraded or missing O-rings, cracked housings or heads, and tubing that's cut unevenly or not fully inserted. But the more useful point is what drives those failures to show up. High water pressure and clogged cartridges can increase backpressure at seals, making a marginal connection start dripping even when the system otherwise looks intact. The same guidance also flags incompatible or non-OEM refrigerator filters as a fit risk because they may not seat correctly and can leak at the housing. Those failure patterns are summarized in this consumer leak diagnosis guide.
What pressure trouble looks like in the field
Pressure-related leaks tend to have a personality. They worsen at certain times, disappear after you disturb the housing, then return later. You may also notice:
- Leak gets worse after a fresh cartridge install because the system is seeing full pressure against a newly disturbed seal
- Spitting or uneven flow at the faucet which can point to pressure fluctuation or trapped air combined with a marginal seal
- Hammering when another appliance shuts off which can stress filter housings and push-fit fittings
- Whole-house housing seeps despite repeated reseating because the cartridge is loaded and backpressure keeps forcing water toward the weak spot
Multiple sources also flag clogged cartridges, kinked lines, or high pressure as causes of leakage, including stress cracks and even bursting in RO storage tanks. That pressure-first framing appears in this pressure and clog focused guide.
Pressure and Clog Symptoms vs. Likely Cause
| Symptom | Likely Cause | Quick Check |
|---|---|---|
| Leak keeps returning after O-ring replacement | Pressure is too high | Check system behavior at different times of day and during appliance cycling |
| Housing leaks more after cartridge changes | Seal disturbed, plus pressure spike or alignment issue | Recheck seating and reopen supply slowly |
| Push-fit leak appears only during water use | Backpressure or poor tube insertion | Inspect tube end and observe during active flow |
| Whole-house canister keeps weeping | Loaded cartridge increasing restriction | Check cartridge age and replace if overdue |
| Fridge filter leaks right after install | Poor seating or incompatible filter fit | Remove and reinstall the correct compatible cartridge |
If a leak returns after a clean reseat, stop buying seals for a minute and start thinking about pressure and restriction.
Maintenance Habits That Prevent the Next Leak
The best leak prevention routine isn't glamorous. It's a rhythm. Quick checks through the year, then a more deliberate teardown before parts get stiff, dirty, or distorted enough to fail.
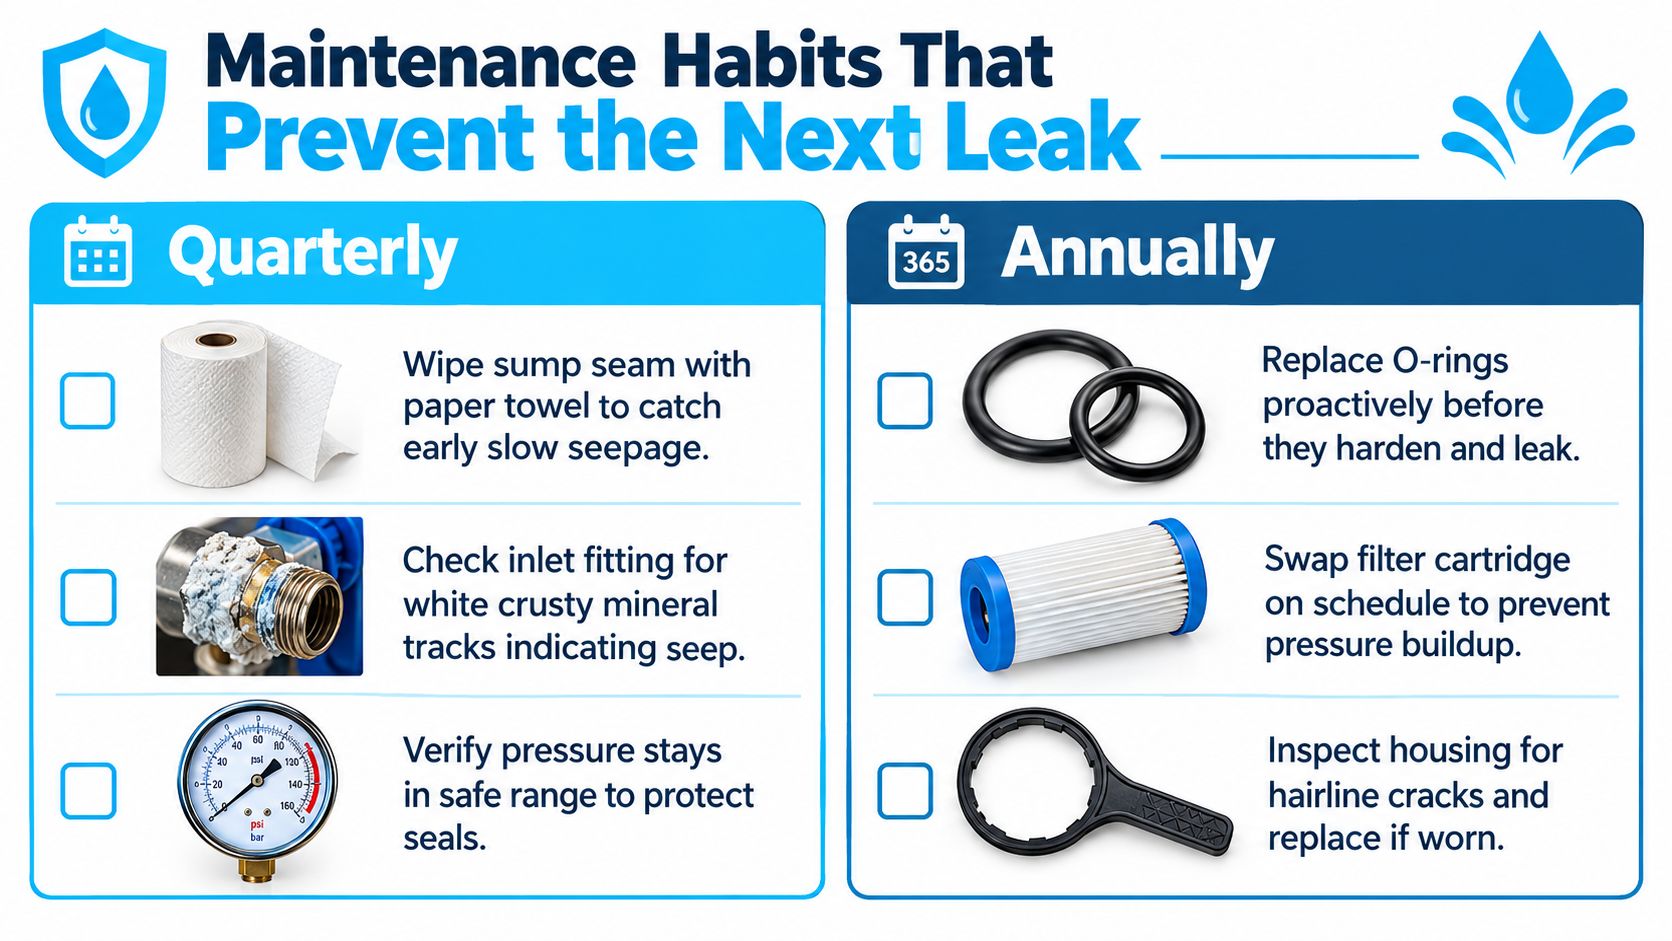
Quarterly habits that catch the early seep
Use a paper towel and wipe around the sump seam and cap area. A slow leak shows up on paper before it becomes a puddle on the cabinet floor. Look at the inlet fitting too. White or chalky mineral tracks often show that a fitting has been weeping for a while.
A marked housing helps more than people expect. A small white paint-pen line near the seam makes fresh moisture easier to spot on a dark sump.
Annual work that prevents repeat repairs
Once a year, tear the housing down fully. Replace the O-ring on schedule instead of waiting for it to leak. Inspect the bracket for rust, verify the housing still sits square, and check for fine cracks around the cap and threads.
EPA guidance for home filters says to use only the cartridge compatible with the filter and to follow the manufacturer's installation and maintenance instructions exactly. It also notes that some filters have indicator lights while others require the homeowner to track days or gallons used and set a reminder for cartridge replacement. The same EPA document recommends removing and rinsing a faucet aerator and, if water has been sitting in pipes, running water separately from the filter to improve water quality and help maintain the system. That's all in this EPA home water filter maintenance guide.
For readers who want filter-specific maintenance guidance beyond a general schedule, Water Filter Advisor keeps a library of troubleshooting and upkeep material in its water filtration advice section.
Keep a simple maintenance log
- Write the install date: Put the cartridge change date on the housing or in a note on your phone.
- Record the cartridge brand and model: That makes fit problems easier to spot later.
- Note any leak pattern: “Seeped at seam after change” is useful information next time.
- Flush briefly after service: A short flush after a cartridge swap helps settle the system before full use.
Prevention is just early diagnosis. You're catching the weak point before the floor does.
Your Leak-Response Checklist and When to Call a Pro
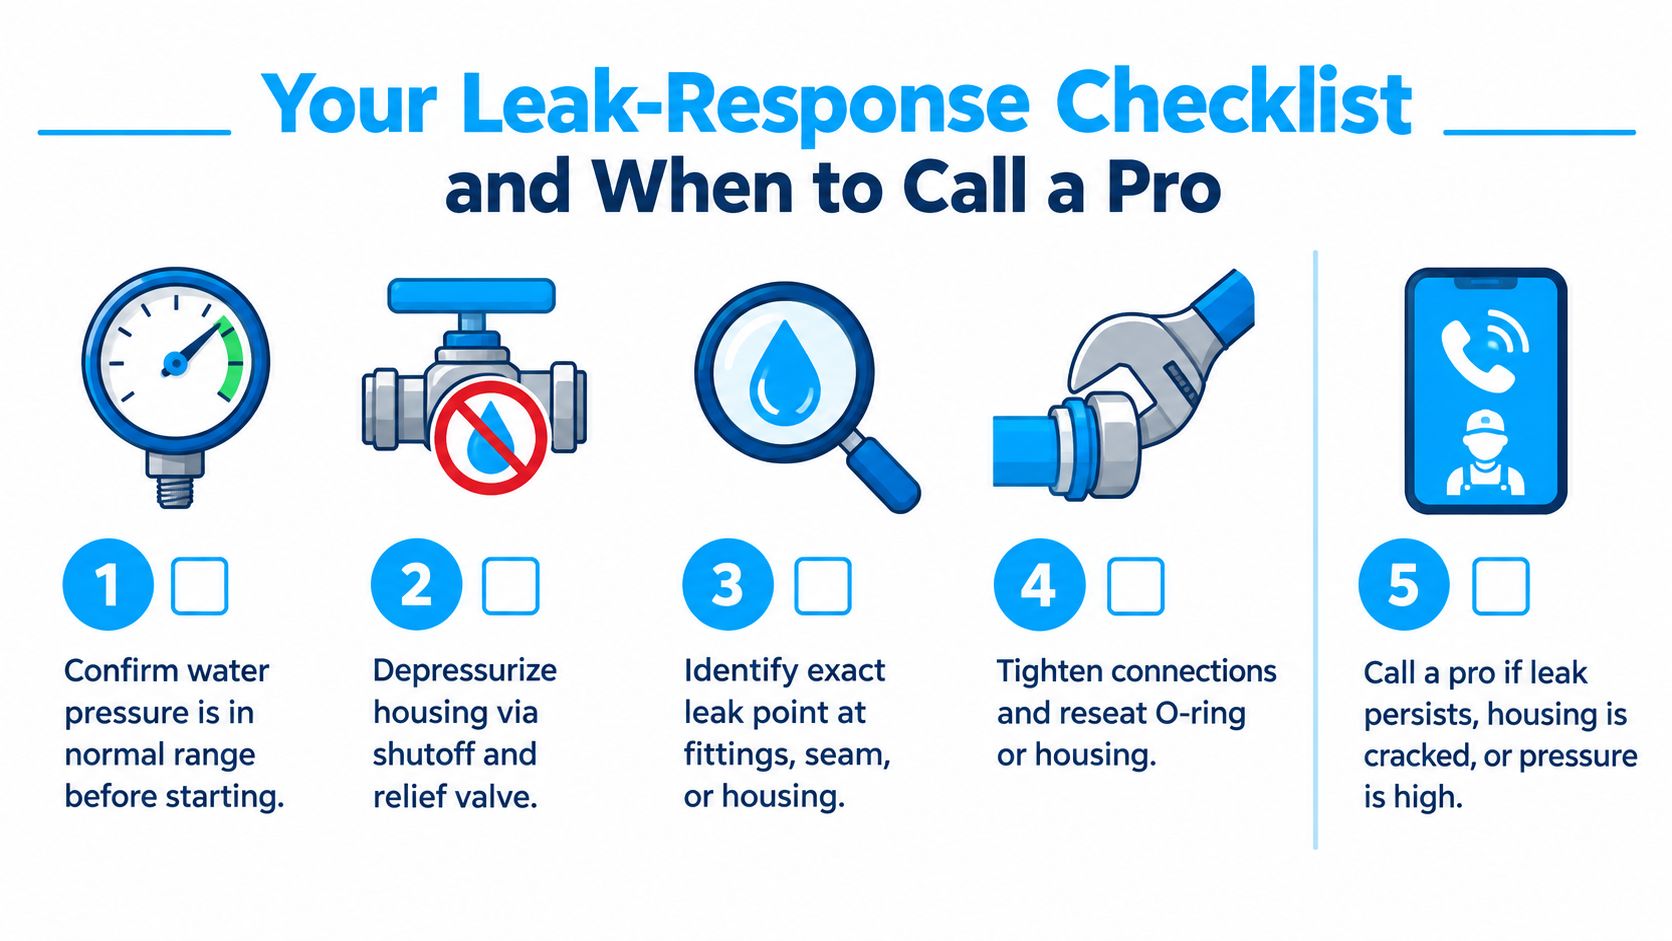
A clean leak response follows the order the system fails, not the order people usually react. First ask whether pressure is behaving normally. Then shut the water off and depressurize the housing. After that, identify the exact leak point and match the repair to that part.
Use this order when the leak starts
- Pressure first: If the leak keeps returning after a proper reseat, suspect pressure or restriction before replacing more parts.
- Shutoff next: Close the supply and relieve pressure before loosening anything.
- Name the leak point: Fitting, seam, O-ring area, cartridge seat, or push-fit tube.
- Apply the matching fix: Retape threads, trim and reinsert tubing, clean and lubricate the O-ring, or replace a cracked housing.
- Verify under pressure: Reopen slowly and watch the first few minutes carefully.
Know when DIY stops being the smart move
Water damage from leaking appliances isn't a small category. One insurance-focused source reports that water damage and freezing made up 27.6% of U.S. homeowners insurance claims across 2018 to 2022, at a frequency of 1.61 claims per 100 insured homes, with an average claim cost of $13,954, according to this under-sink leak cost overview. That's why I tell homeowners to stop improvising once the leak crosses from nuisance into risk.
Call a licensed plumber or contact the filter manufacturer if you find active water near electrical wiring, visible housing cracks, sweating copper joints that still won't stop after reseating, signs of old flooding behind the wall, or a sudden pressure drop that suggests the pressure-reducing valve upstream is failing. If the repair is drifting beyond basic DIY, practical handyman services for homeowners can also help with the surrounding cabinet, trim, and access issues that a filter leak often leaves behind.
Water Filter Advisor helps households troubleshoot leaks, compare replacement parts, and maintain home filtration systems without guessing. If your water filter is leaking and you want clear guidance on cartridges, housings, seals, or system fit, visit Water Filter Advisor for practical water filtration advice built around real home setups.
- September 21, 2026
- Uncategorized
