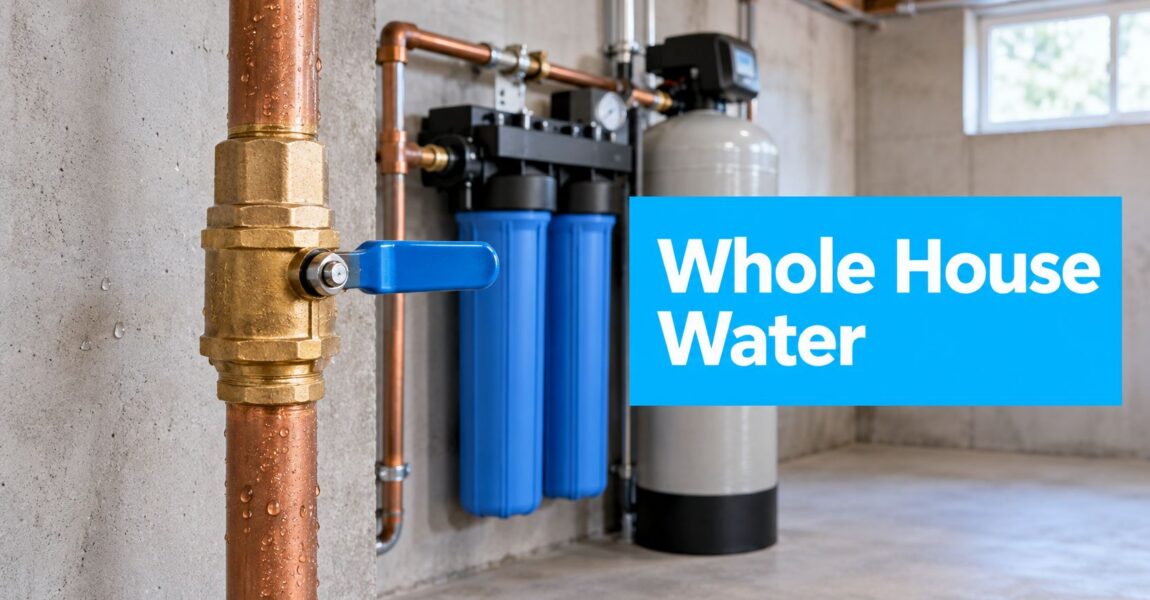
Well Water Filter System Diagram: Your Home Guide

You turn on the kitchen tap and the water smells off. The bathtub picks up a rusty ring. White crust forms on fixtures. Maybe the water looks clear one day and dull the next, which is what makes well water so frustrating. The problem isn't just that something's in the water. It's that the fix depends on exactly what that “something” is.

That's where most homeowners get steered wrong by a generic well water filter system diagram. They find one neat picture online, buy the boxes it shows, and install them in that order. Sometimes they get lucky. Often they build a system that fights itself.

A good diagram is less like a universal blueprint and more like a road map drawn around your water test. If your well has sediment and iron, one sequence makes sense. If low pH is driving corrosion, the order may need to change. If odor is the main issue, the layout can shift again. The parts matter, but the order matters just as much.

Your Roadmap to Crystal Clear Well Water

Bad well water has a way of becoming part of the house. You see it in laundry stains, smell it at the tap, and hear about it when guests ask why the water tastes different. Homeowners often start by shopping for a filter, but what they really need first is the right map.

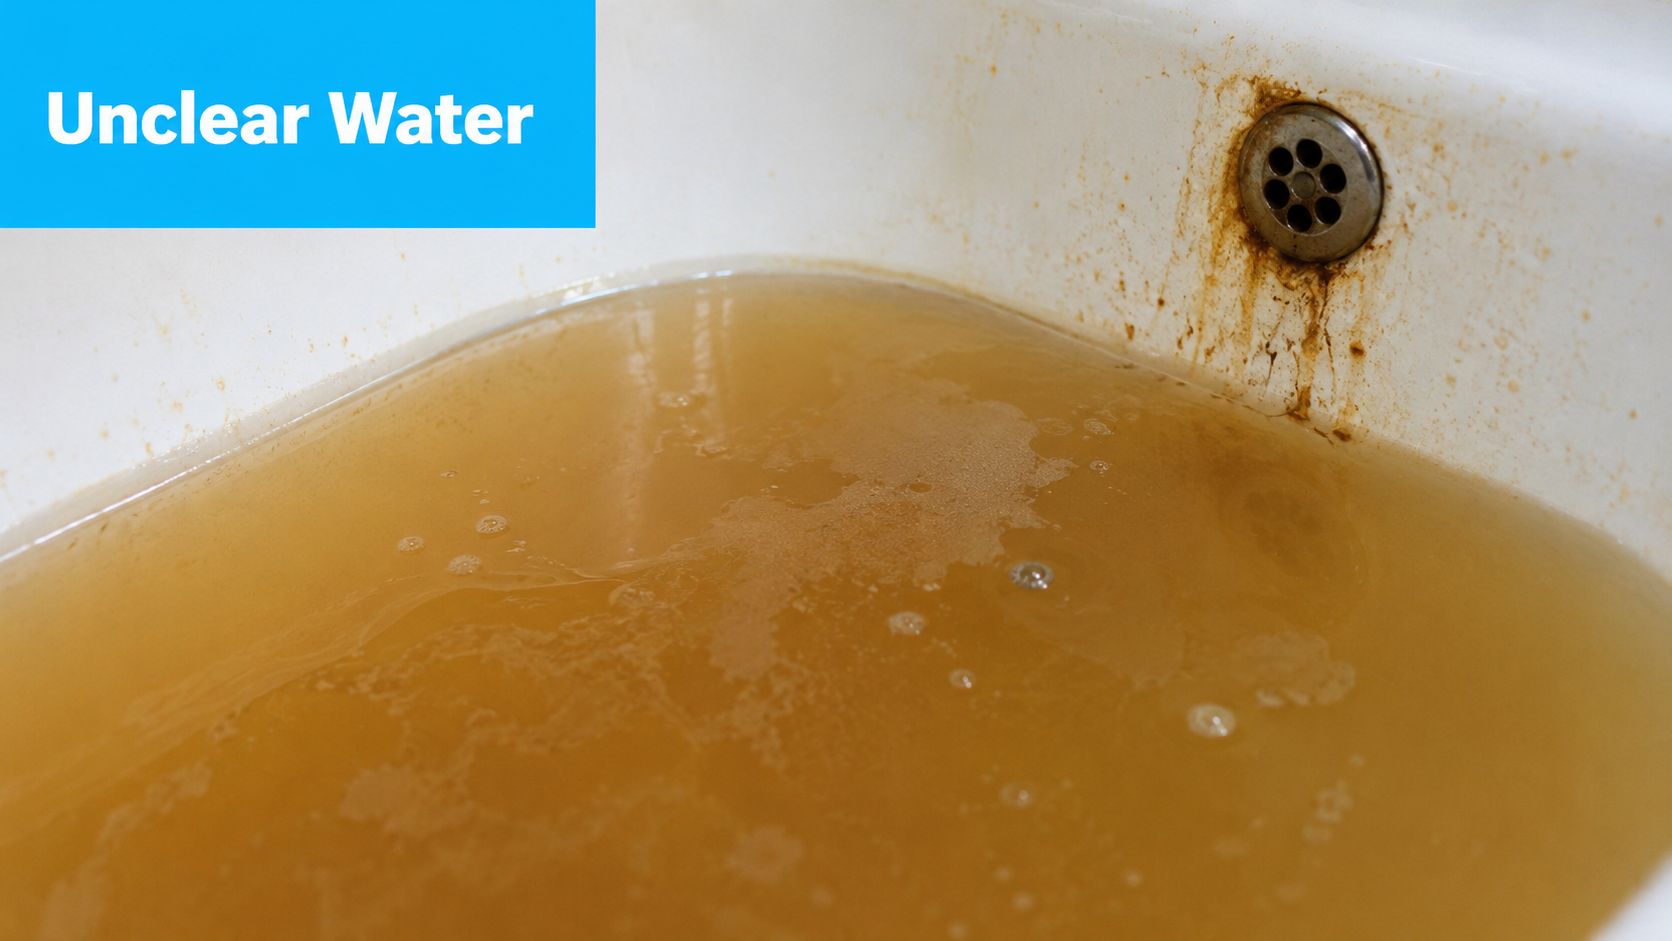
A dirty, stained bathtub filled with murky brown, contaminated water indicating poor plumbing or water quality issues.

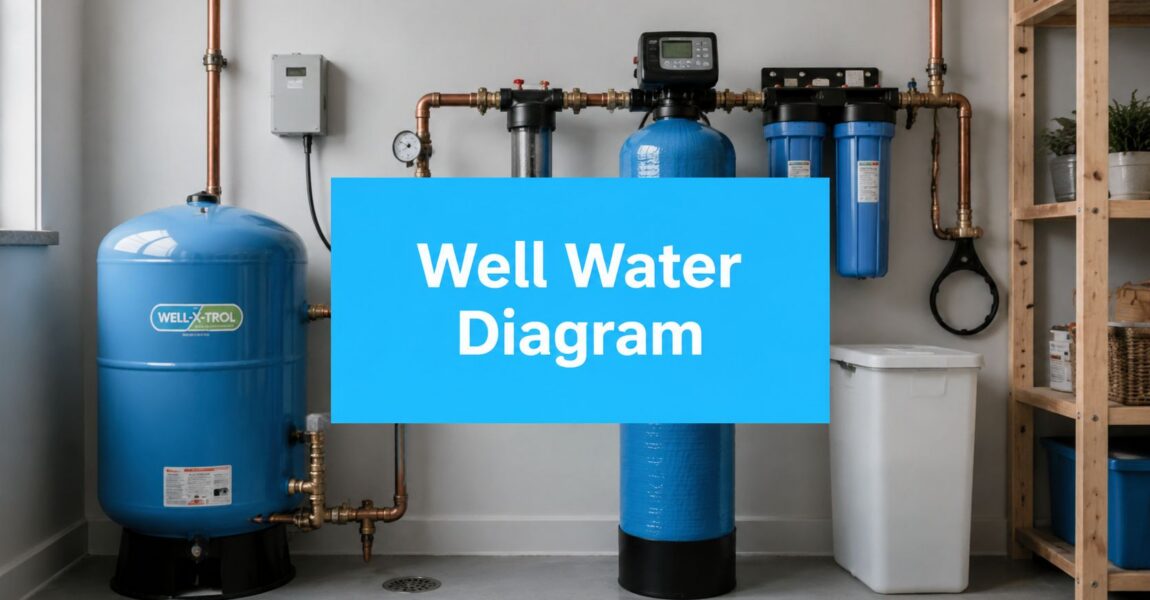
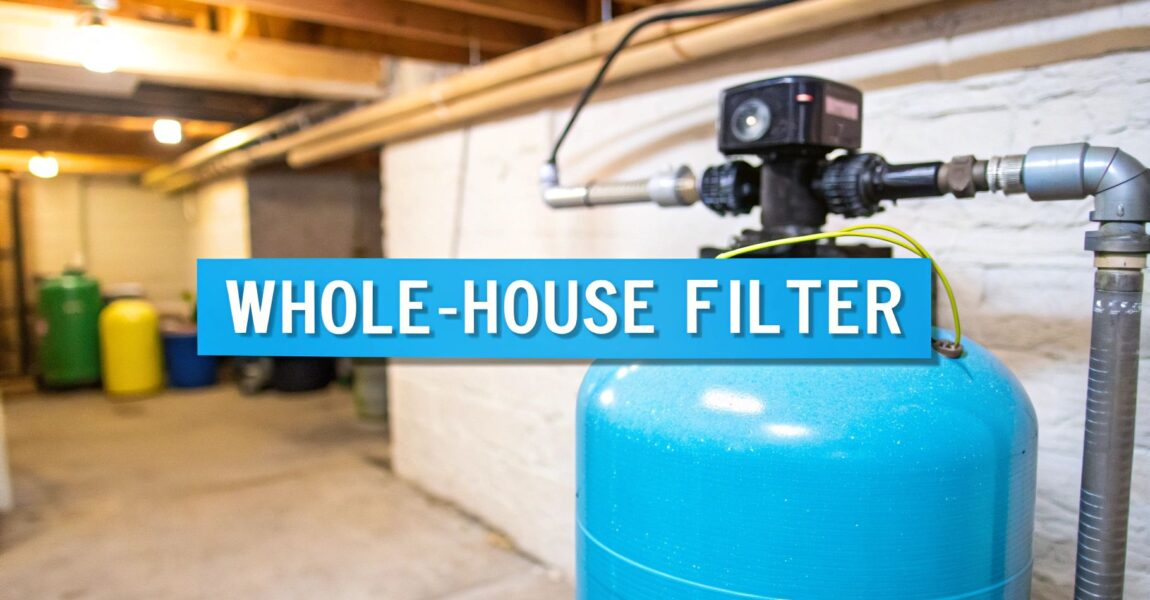
A well water filter system diagram should show the path water takes from the well to the tap, and why each component sits where it does. Consider the analogy of lining up workers on a jobsite. If the wrong worker shows up first, the whole crew slows down. A UV unit can't disinfect cloudy water well. A softener doesn't like being asked to handle heavy iron. A sediment filter placed carelessly can clog fast and starve the rest of the system.

Practical rule: The best diagram isn't the prettiest one online. It's the one that matches your test results and your home's actual plumbing layout.

You may also be chasing plumbing symptoms that overlap with water quality issues. If banging pipes are part of the headache, Platinum Heating & Cooling water hammer tips are worth a look because pressure behavior and treatment equipment often affect each other in real homes.

The goal is simple. You want water that doesn't stain, doesn't smell, doesn't attack plumbing, and doesn't leave you guessing what failed. That starts with understanding the pieces in the system before deciding on the order.

Decoding the Diagram The Cast of Components

Before a diagram makes sense, the hardware has to make sense. Each treatment stage has a job. Some remove particles. Some change water chemistry. Some polish. Some disinfect. If you ask one component to do another component's work, you get poor performance and a lot more maintenance.

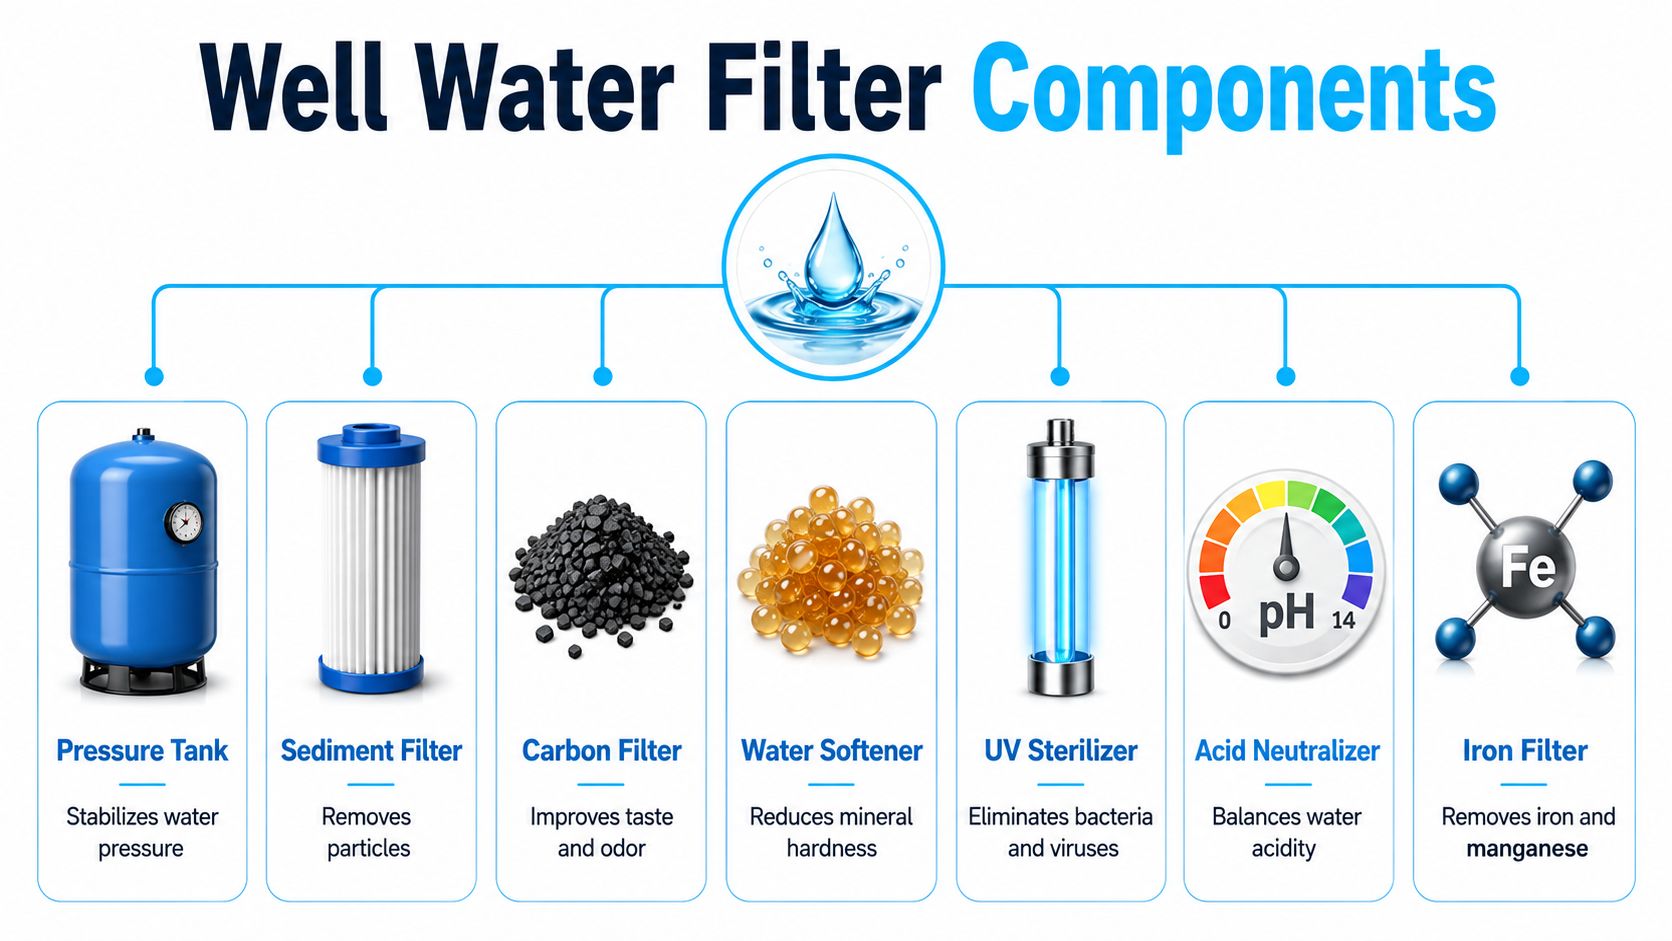
A diagram illustrating the seven essential components of a well water filtration and treatment system.

The front end of the system

The pressure tank is the traffic controller. It stabilizes water delivery and provides the pressure needed for equipment to operate correctly, including backwashing filters. Without stable pressure, even good media can't clean itself properly.

The sediment filter is the bouncer at the door. It catches dirt, sand, and other physical debris before those particles jam control valves or load up downstream media. According to benchmark discussion and field guidance summarized in this Water Treatment thread on well water treatment diagrams, pleated sediment filters provide 30–50% higher flow rates than standard solid filters and last longer because their larger surface area spreads out the dirt load.

The problem solvers in the middle

The iron filter handles staining minerals and sulfur-related odor issues when the chemistry is right for that technology. A common example is a Fleck 2510AIO paired with Katalox Light media. In the verified guidance, that type of setup is described as suitable for up to 30 ppm iron, 15 ppm manganese, and 10 ppm H₂S. That doesn't make it universal. It means the unit has to be matched to the test and placed where it can do its work.

The acid neutralizer corrects low pH. If your water is acidic, it can corrode pipes and leave blue-green staining. This stage isn't cosmetic. It protects plumbing and can determine whether downstream equipment works at all.

The water softener removes hardness. It also cleans up excess hardness added by a neutralizer. That's why the softener often belongs after pH correction. In real installations, this pairing is common because neutralizing media can solve corrosion and create a hardness side effect at the same time.

Clear water and soft water aren't the same thing. One fixes particles and staining. The other fixes scale.

The finishing stages

The carbon filter is the polisher. It improves taste, reduces odors, and removes certain chemicals. It belongs late in the chain because cleaner, softer water lets carbon focus on polishing instead of acting like a dirt trap.

The UV purifier is the final guard. It disinfects, but only after the water is already clear. Verified data notes that UV systems can achieve a 99.9% pathogen kill rate when the water is properly pre-treated and sediment is controlled. If particles or hardness remain, they can shield microorganisms from the light.

Here's the quick-read version:

Component Main job What goes wrong if misplaced
Pressure tank Stabilizes pressure Backwash and flow problems
Sediment filter Traps dirt and sand Valves clog, media loads up
Iron filter Removes iron, manganese, sulfur odor in-range Softeners foul, staining remains
Acid neutralizer Raises pH Corrosion continues
Water softener Removes hardness Resin can foul if iron hits it first
Carbon filter Improves taste and odor Carbon plugs early if used too soon
UV purifier Disinfects clear water Poor kill performance in dirty water

The Standard Well Water Filter System Diagram Explained

Most whole-house well systems start from a familiar baseline. That baseline is useful, but only if you treat it as a default, not a law.

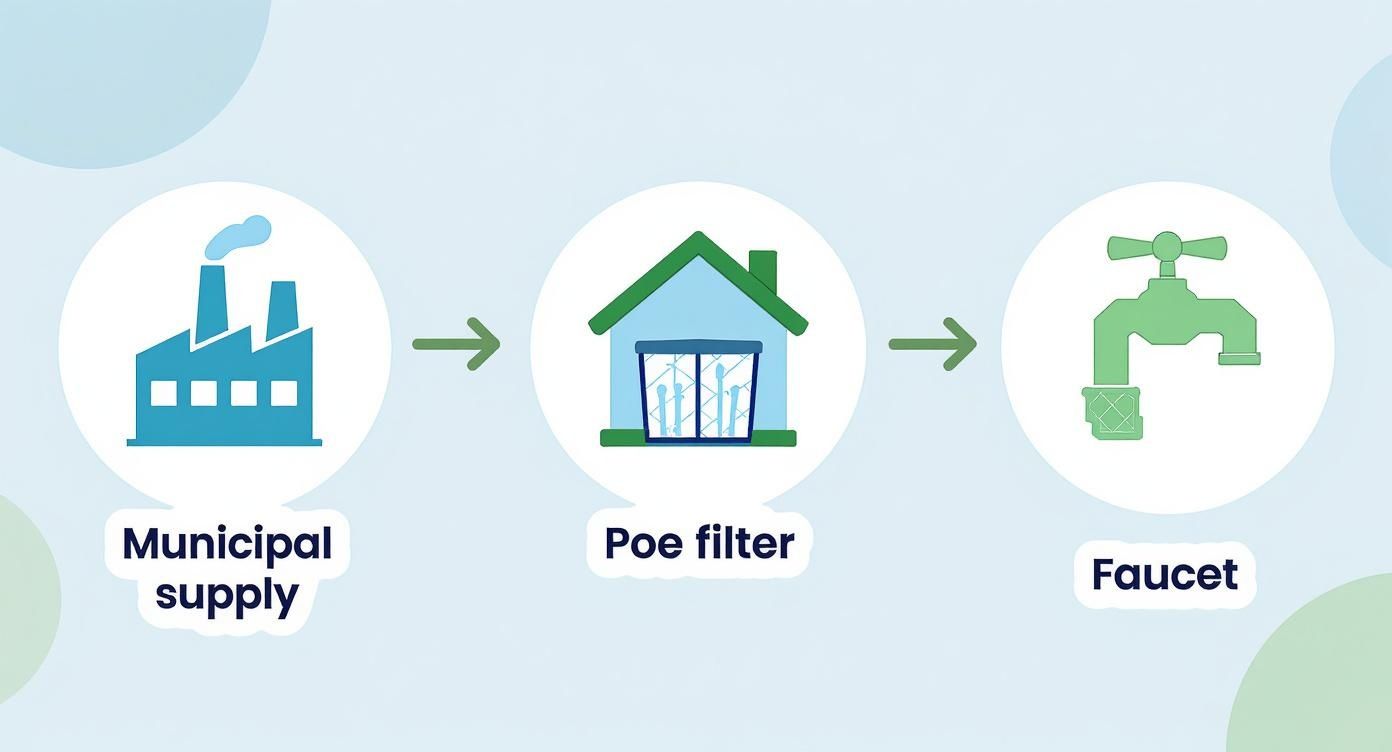
The common sequence follows a simple logic. Water leaves the well, enters the pressure tank, and then moves through treatment stages that get progressively more specialized. Big physical debris gets handled first. Chemistry corrections happen in the middle. Final polishing and disinfection happen last.

The default sequence that usually makes sense

A verified installation guide from Mid Atlantic Water's complete guide to well water filtration systems states that a complete system should follow this order:

  1. Pressure tank
  2. Sediment filter
  3. Iron filter
  4. Acid neutralizer
  5. Water softener
  6. Carbon filter
  7. UV purifier

That order isn't arbitrary. The sediment stage protects downstream control heads. The iron filter goes ahead of the softener because softener resin is a poor place to dump heavy iron. The neutralizer comes before the softener because it raises pH and can add hardness that the softener then removes. Carbon sits near the end for polishing. UV comes last because disinfection works best on clear, conditioned water.

A useful detail from the same verified guidance is that placing a 5-micron sediment filter after a softener can be acceptable, because the resin bed itself acts as a filter. Placing that kind of cartridge before the right upstream stages can be ineffective and may lead to premature clogging.

What the standard diagram gets right

The standard layout works well when water problems line up with the assumptions behind it. You have particulate matter that needs screening, iron that responds to the selected media, acidity that needs correction, hardness that belongs in a softener, and a need for final taste improvement or microbial control.

This walkthrough helps visualize the flow in a real installation:

Put a softener before an iron filter in high-iron water and you're asking the softener resin to do the dirty work. That's how systems get expensive fast.

Where homeowners misread the standard diagram

Trouble starts when people treat the default sequence as a universal answer. A standard diagram is a starting point. It is not permission to skip testing. If the water chemistry doesn't match the assumption built into that order, one stage can cripple the next.

Why One Diagram Does Not Fit All Customizing Your System

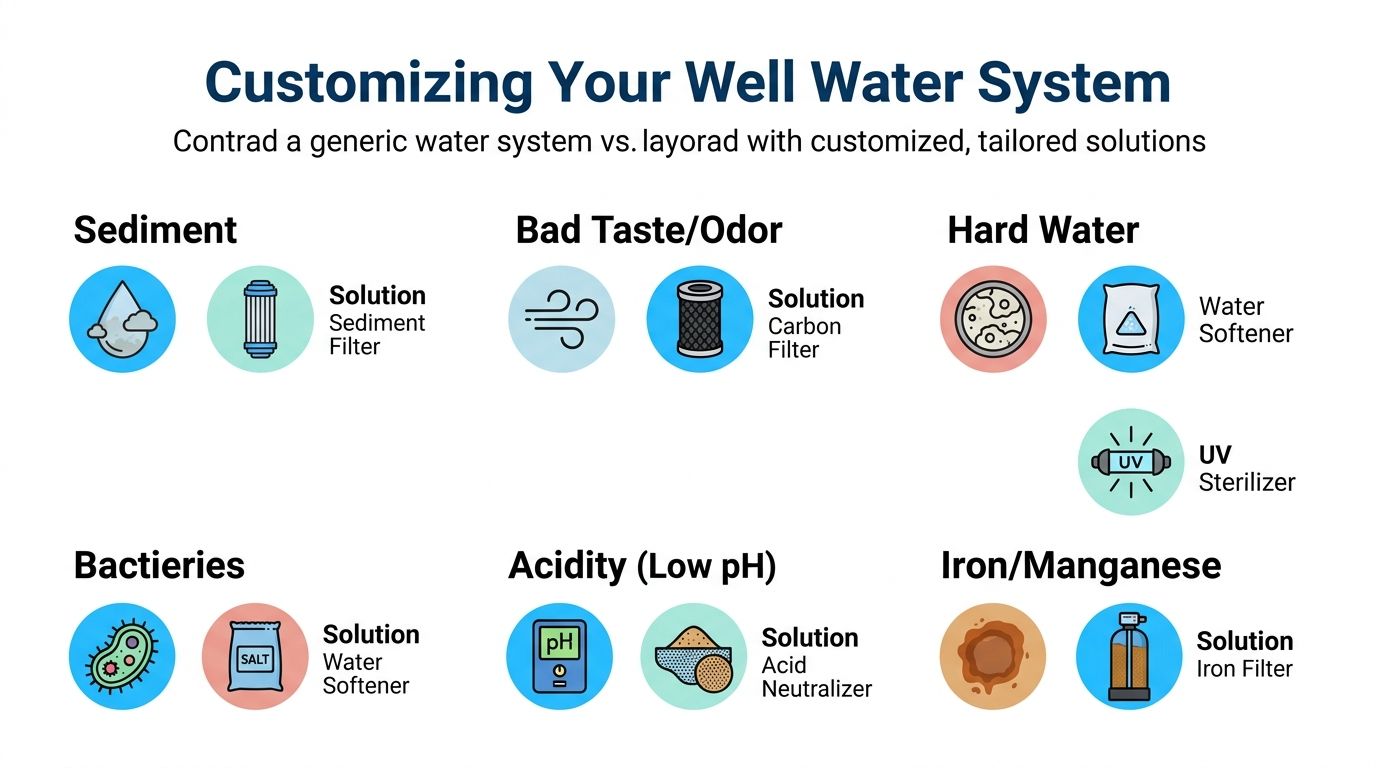
The biggest mistake in home well filtration is assuming there's one correct well water filter system diagram for every house. There isn't. The right order depends on what dominates your water chemistry.

A diagram illustrating customized water treatment solutions for common well water issues like sediment, odor, and hardness.

Verified data makes the problem plain. 78% of DIY well owners install systems in a standard order without prior water testing, leading to 60% premature filter clogging or recontamination. It also states that 92% of retail diagrams fail to show alternative ordering, and 70% of system failures trace back to incorrect sequencing. Those numbers explain why so many homeowners buy decent equipment and still hate the result.

When low pH changes the order

Acidic water can interfere with iron treatment. In some wells, the pH has to be corrected before iron removal works the way it should. That means the standard order gets rearranged.

A practical custom sequence for that water profile often looks like this:

  • Pressure tank
  • Sediment filter
  • Acid neutralizer
  • Iron filter
  • Water softener
  • Carbon filter
  • UV purifier

Why the swap? Because the iron filter may need a friendlier pH environment to perform well. If you leave the neutralizer too late, the iron stage may underperform and pass trouble downstream.

When sulfur becomes the main issue

Hydrogen sulfide changes the conversation again. In the verified guidance, sulfur-dominant wells are called out as a major reason static diagrams fail. If hydrogen sulfide is the primary issue, it may need to be removed before pH adjustment to avoid acid generation that can corrode downstream piping.

That leads to a different logic:

Water problem driving the design Order logic
Low pH blocks effective iron treatment Neutralize before iron removal
Hydrogen sulfide dominates Remove sulfur before pH adjustment
Heavy sediment load Protect every valve and media bed early

This is why a one-size chart misleads people. Two homes can both have “well water problems” and require different treatment order because one is staining and corrosive while the other is odorous and reactive.

A water test doesn't just tell you what to buy. It tells you what must go first.

The myth of the universal online diagram

A lot of online diagrams are clean, simple, and wrong for somebody's well. They show the same lineup every time because it's easier to publish one picture than to explain branching logic. The result is a homeowner staring at a nice visual that doesn't match the chemistry in the basement.

Here are the warning signs that the generic diagram in front of you may not fit your house:

  • It never mentions pH: Low-pH wells can demand a different sequence.
  • It treats sulfur as an afterthought: Odor-first wells often need their own layout logic.
  • It never asks for a test result: If the diagram starts with shopping instead of testing, it's skipping the step that drives the design.
  • It assumes every home needs every stage: Some homes need the full chain. Others need fewer stages, but in the right order.

Build the diagram from the test, not from the catalog

The right way to customize is simple in principle, even if the details get technical. Start with the contaminants that can damage equipment or block later treatment. Then place the chemistry-correction stages where they support the next filter, not where a generic image says they belong. Finish with polishing and disinfection.

That's the shift homeowners need to make. Don't copy a diagram. Diagnose the water, then assemble the order.

Practical Layouts Point of Use vs Whole House

Once the order is right, the next decision is scope. Do you want to treat every gallon entering the house, or only the water used for drinking and cooking?

Whole-house treatment

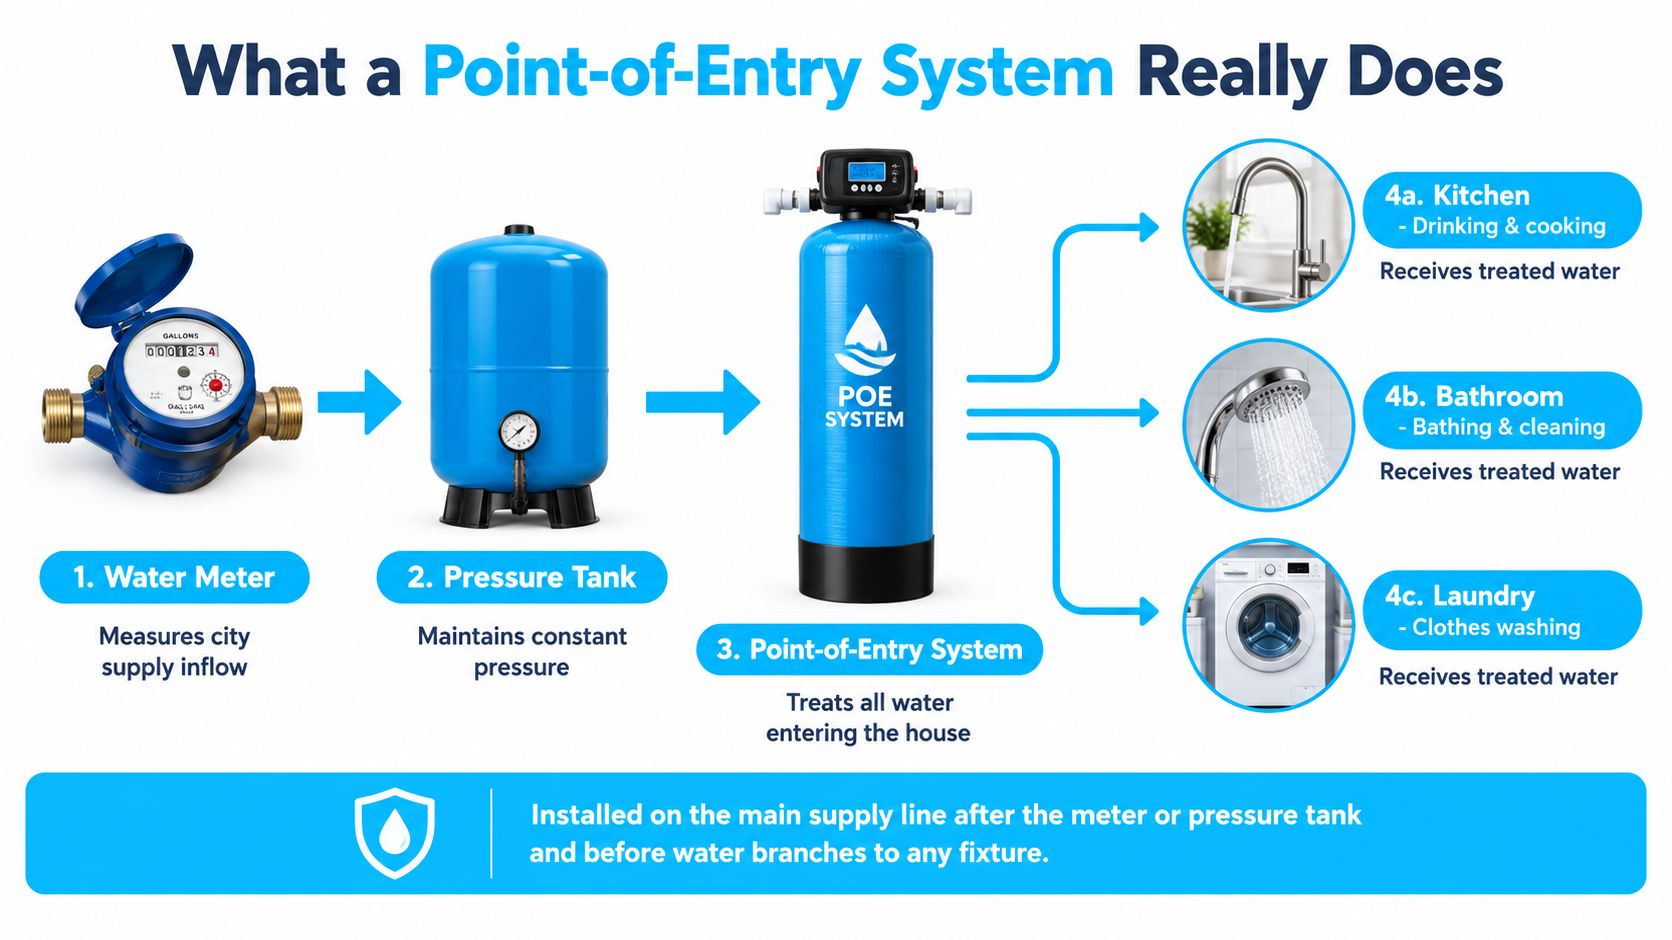
A point-of-entry system treats water where it enters the home. This is the right layout when the problems affect plumbing, appliances, bathing, laundry, and fixtures. Iron stains on toilets, scale on water heaters, and sulfur odor in showers are whole-house problems, so they usually need whole-house treatment.

This layout is also the only sensible path when the system includes equipment like an acid neutralizer, iron filter, softener, or UV stage meant to protect the entire home. If the issue follows water to every tap, isolating treatment to one sink won't solve much.

Under-sink treatment

A point-of-use system treats water at a single fixture, usually the kitchen sink. This makes sense when your main concern is drinking water taste or a targeted contaminant at one tap, while the rest of the house water is acceptable.

A point-of-use layout is simpler, smaller, and often easier for a handy homeowner to install. But it won't stop iron stains in the shower or scale in the dishwasher. It won't protect the water heater. And it won't fix corrosive water attacking plumbing in the walls.
A practical comparison

Layout Best for Not ideal for
Whole house Stains, odor through the home, hardness, low pH, broad protection Homeowners who only want to improve drinking water
Point of use Drinking and cooking water at one tap Fixture staining, appliance protection, whole-home odor or scale

If you're weighing options and want a broader consumer-style comparison, this roundup of top water filter systems for home can help frame the categories. Just remember that category choice comes after you decide whether your water problem lives at one faucet or across the entire house.

Installation Essentials Bypass Loops and Maintenance Access

A clean diagram on paper can still become a miserable install if nobody leaves room to service it. Good water treatment has to be maintainable. That means bypass valves, access space, drains where needed, and a way to test before and after treatment.

The bypass loop is not optional

A bypass loop lets you isolate the treatment train without shutting water off to the whole house. When a filter needs service, you can route water around the equipment temporarily. That matters on routine maintenance days and on the bad days when a valve sticks or a tank needs repair.

Build for testing and servicing

Verified data notes that the lack of maintenance-focused planning is a major failure point. 95% of well system failures stem from neglected maintenance, and 82% of owners skip backwashing, causing 70% of iron filter failures. Accessible valves and gauges help prevent that by making routine service visible and easier to do.

Use this checklist during layout:

  • Add sample taps: One before treatment and one after treatment let you confirm performance.
  • Leave working room: Cartridges need clearance below housings. Softeners need room for salt loading.
  • Keep drains practical: Backwashing equipment needs a reliable place to discharge.
  • Label the valves: A bypass is only useful if someone can operate it correctly during a rushed repair.
  • Plan maintenance paths: Helpful service guidance from Water Filter Advisor's advice section can make ongoing care easier to track.

Service access is part of treatment design. If you can't reach it, test it, or bypass it, you don't have a finished system.

Beyond the Diagram A Living System

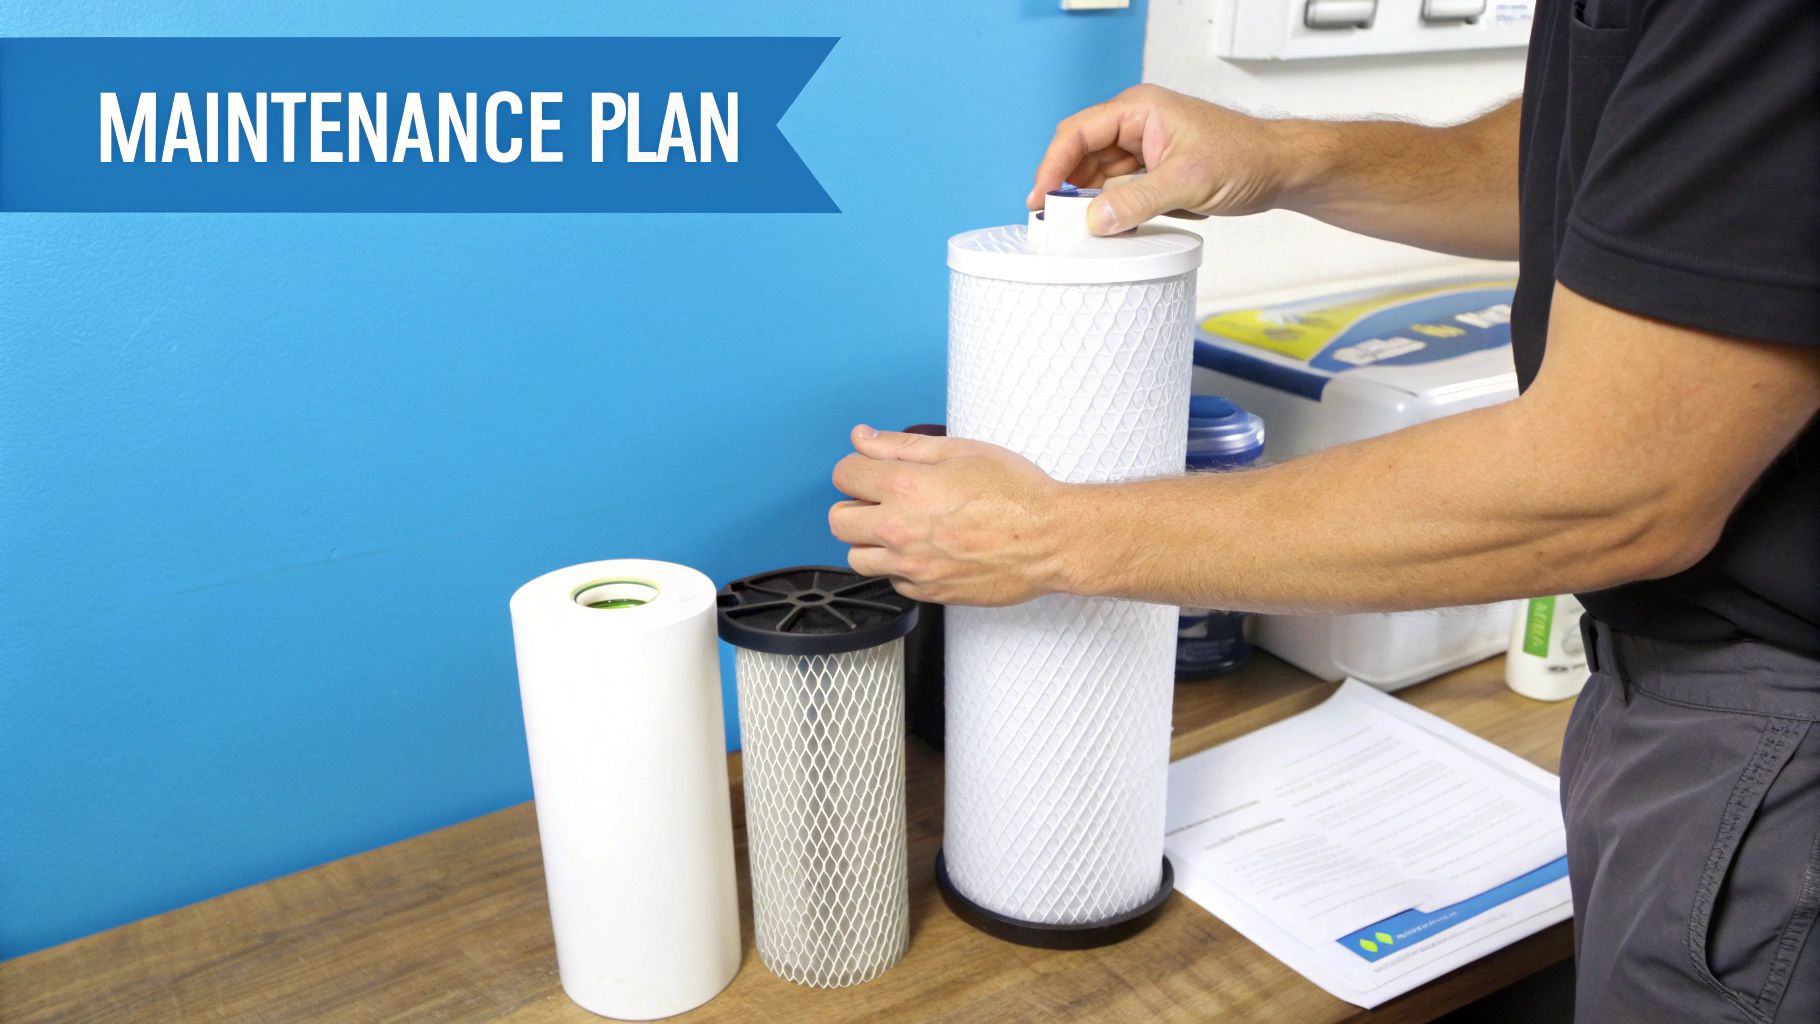
A well water filter system diagram shouldn't end the day the plumber leaves. It should stay useful afterward as a maintenance map. Sediment stages load up. Iron filters need proper backwashing. Softeners need salt and correct settings. Carbon eventually loses polishing power. UV units need clean conditions and routine attention.

The homeowners who do best with well water usually treat the system like a piece of working equipment, not a decorative appliance. They know what each stage does, what symptoms show up when it falls behind, and which valve to turn when service day arrives.

If there's one step that separates a smart install from an expensive guess, it's the water test. That test tells you whether the standard order fits, whether the order needs to flip, and whether you need the full chain at all. Start there, and the diagram stops being confusing. It becomes accurate.


For homeowners who want help choosing, comparing, and maintaining the right filtration setup, Water Filter Advisor is a useful next stop. It's a practical resource for sorting out whole-house systems, under-sink options, replacement filters, and maintenance questions so you can turn a confusing water problem into a plan that works.

Water Filter for Rotten Egg Smell: Solutions for 2026

You turn on the kitchen tap, fill a glass, and catch that sharp sulfur smell before the water even reaches your lips. Then the shower starts to smell the same way. Laundry picks up a faint funk. Suddenly a normal part of home life feels off.

If that sounds familiar, you're not dealing with “bad tasting water” in some vague sense. You're dealing with a specific water problem that usually has a specific fix. The trick is choosing the right one. A water filter for rotten egg smell has to match the cause and the strength of the contamination, or you'll waste money on a system that never had a fair chance.

That Unmistakable Rotten Egg Smell in Your Water

Most homeowners notice it the same way. One day the water seems fine. Then a faucet runs, and the room gets hit with an odor that smells like a carton of eggs forgotten in the sun. You rinse a dish and wonder if the sink drain is the problem. You take a sip and realize it's the water itself.

That smell often points to hydrogen sulfide, the contaminant behind the classic rotten egg odor in household water. It's common in homes on private wells, but the location of the smell matters just as much as the smell itself. Some houses have odor in every tap. Others only notice it in hot water. Those are not the same problem, and they shouldn't get the same treatment.

A lot of people make the same first mistake. They buy a basic taste-and-odor filter, install it under one sink, and hope for the best. Then the bathroom still smells. The shower still smells. The washing machine still gets smelly water. That's like trying to stop a roof leak with a towel on the floor. You're treating the symptom where you notice it, not the source.

Practical rule: Rotten egg odor is usually fixable, but only when the filter matches the actual source and concentration of the sulfur problem.

The good news is that this is a very solvable issue. You don't need to become a chemist. You just need a simple way to diagnose where the smell comes from, understand why one filter works at one sulfur level and fails at another, and pick a system that fits your home instead of guessing.

Why Your Water Smells Like a Science Experiment

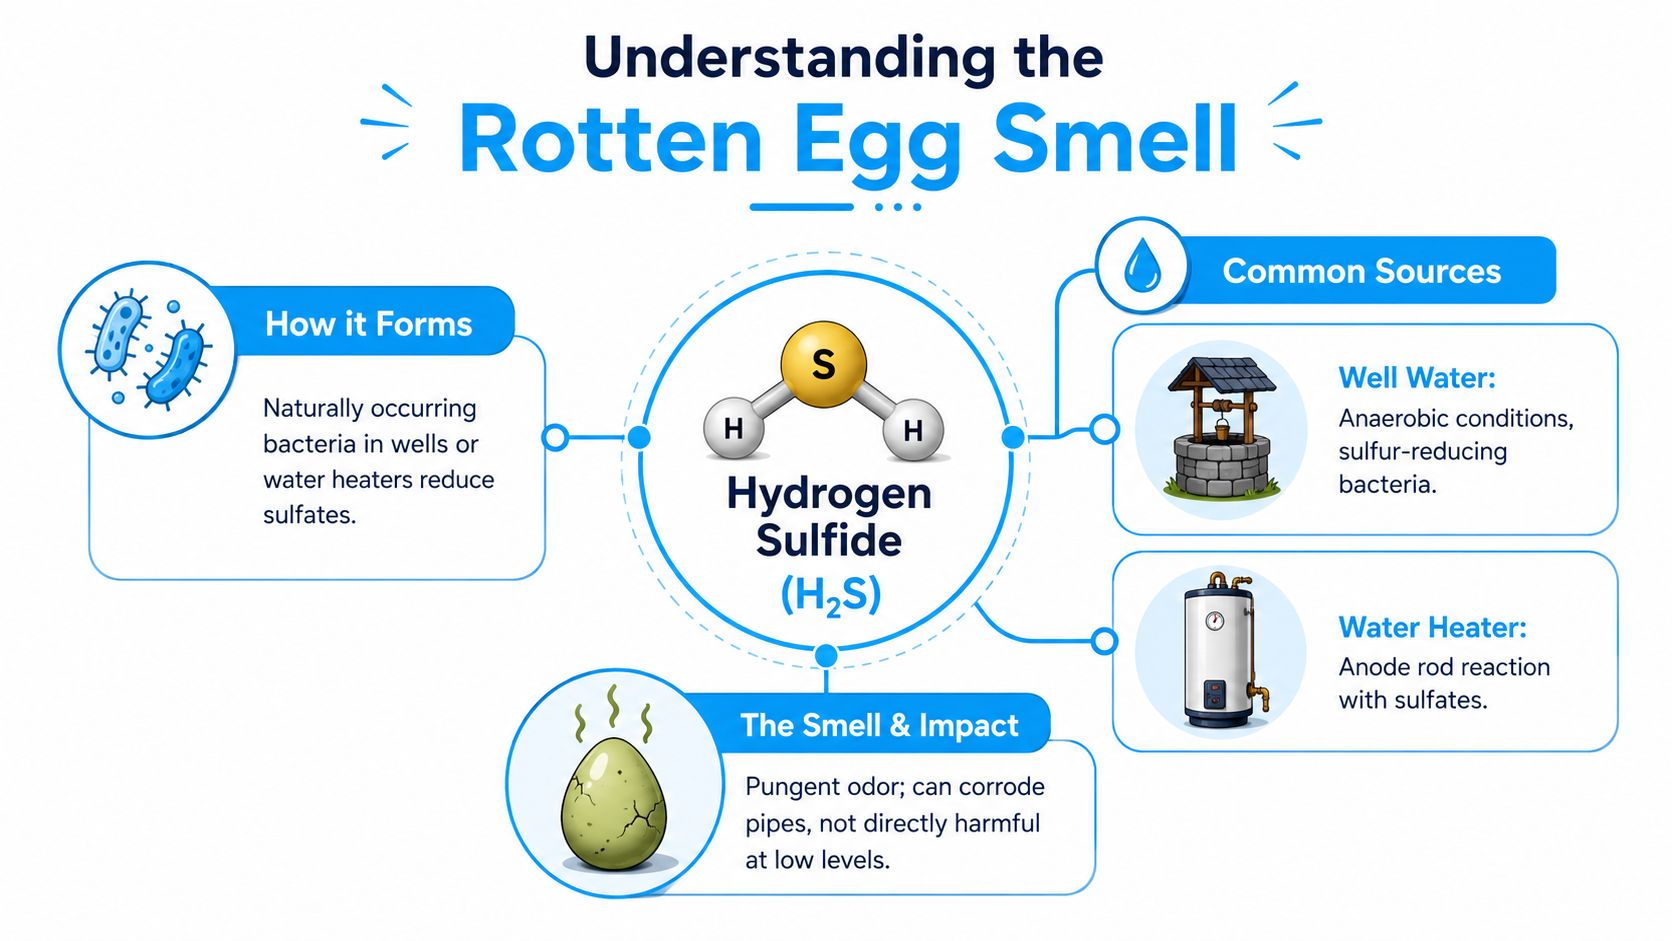
Hydrogen sulfide gas, written as H2S, is usually the reason water smells like rotten eggs. The smell can start underground before the water ever reaches your house, or it can develop inside plumbing equipment after the water gets there.

An infographic explaining that hydrogen sulfide gas causes the rotten egg smell in home water supplies.

How hydrogen sulfide forms

Here's what is happening in plain English. In places with little oxygen, such as parts of a well system or inside a water heater, sulfur-related bacteria can convert naturally occurring sulfur compounds into hydrogen sulfide gas. That gas dissolves into the water while it sits under pressure. Once the water comes out of the faucet, some of the gas escapes into the air, and your nose catches it fast.

Heat makes that process more obvious. Warm water releases dissolved gas more readily, the same way a warm soda goes flat faster once opened. That is why showers, dishwashing, and hot tap water often make the odor seem stronger even when the water looks perfectly clear.

The important part is this. Smell strength gives you a clue about treatment size. A faint odor can sometimes be handled by a simple adsorptive filter. A stronger or persistent odor usually needs a system that changes the hydrogen sulfide first, then removes the byproducts. That is the difference between a fix that lasts and a filter that disappoints after a short time.

Two common sources inside a home

The source usually falls into one of two categories.

  • Incoming well or supply water. Sulfur is already present before the water enters the house, so the smell can show up throughout the plumbing system.
  • The water heater. Conditions inside the heater can create or worsen hydrogen sulfide, especially when the anode rod and sulfur-related bacteria interact.

That distinction matters because the same smell can come from very different chemistry. If the heater is the only source, replacing parts or disinfecting the heater may solve it. If the well water carries the sulfur, the treatment usually belongs at the point where water enters the house.

Why the right filter depends on sulfur level

Filter choice makes more sense when you match it to how much hydrogen sulfide is in the water. A light-duty carbon filter can sometimes reduce a low level of sulfur odor, much like using a small kitchen fan to clear a little smoke. If the concentration is higher, carbon gets used up quickly because it is trying to catch too much at once.

At that point, oxidation becomes the better tool. Oxidizing media or air-injection systems convert hydrogen sulfide into a form the filter can remove more effectively. In practical terms, low sulfur levels may respond to carbon, while moderate to higher levels usually call for oxidation followed by filtration.

The goal is not to buy the strongest system on the market. The goal is to choose a system that matches your actual hydrogen sulfide level, so you do not overspend on heavy equipment or under-treat a serious odor problem.

That is why sulfur treatment is more diagnostic than decorative. Different filters solve different ranges of contamination, and the concentration of hydrogen sulfide is what tells you which tool belongs in your home.

Pinpointing the Source of the Sulfur Smell

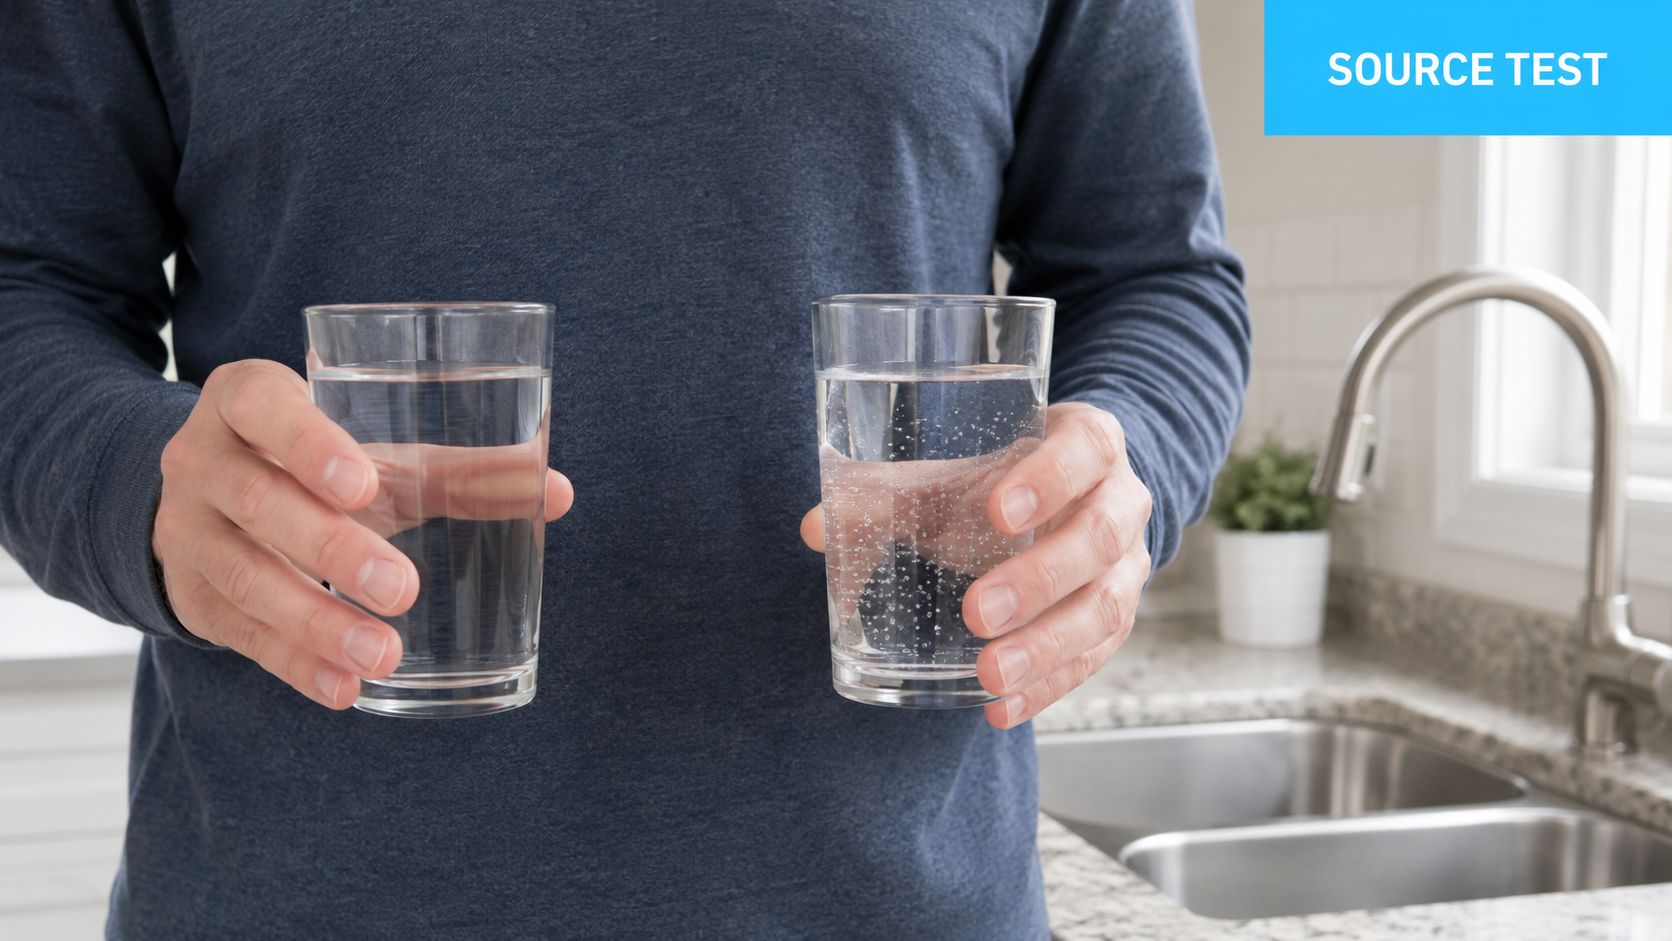
Before you buy anything, do a little detective work. The goal is to answer one question first: Is the smell coming from the water heater, or from the water entering the house?

A person holding a glass of clear water alongside a glass of bubbly water in a kitchen.

Start with the hot-versus-cold test

Pour one glass of cold water and one glass of hot water from the same faucet. Smell each one.

  • Only the hot water smells. The water heater is the first place to inspect.
  • Both hot and cold smell. The issue is more likely in the well or incoming water.
  • The smell shows up at some taps but not others. Plumbing location, stagnant lines, or fixture-specific issues may be making the problem seem bigger or smaller than it is.

This quick test saves people from buying the wrong system all the time.

Use your nose, but don't stop there

You can also note when the odor is strongest.

  • At first draw in the morning can suggest water sitting in plumbing.
  • During hot showers often makes sulfur more noticeable because heat releases gas.
  • At every faucet in the house points toward whole-house treatment, not a kitchen-only fix.

A short walkthrough can tell you a lot. Check the kitchen sink, a bathroom sink, the tub, and an outdoor spigot if you have one.

For a visual walkthrough of common causes and treatment approaches, this video is a useful starting point:

Get the number before you choose the filter

If the smell is in the incoming water, the next step is water testing. You want the hydrogen sulfide concentration, usually reported in mg/L or ppm. For this contaminant, those units are commonly treated as roughly equivalent in practical home filtration discussions.

That number matters because filter selection depends on it. Without it, choosing a sulfur filter is a little like buying eyeglasses without an eye exam. You might get lucky, but you probably won't.

Best habit: Test first, buy second. Sulfur treatment works best when it's sized to a measured problem, not a guessed one.

Matching the Filter to Your Water Problem

A rotten egg smell at one sink can tempt you to buy the first sulfur filter you find. That is how homeowners end up paying for a system that is too small to keep up, or far more equipment than the water needs.

The smarter approach is to match the treatment to the measured hydrogen sulfide level. The concentration tells you how hard the system has to work. A light odor and a heavy sulfur problem may smell similar at first, but they do not call for the same tool.

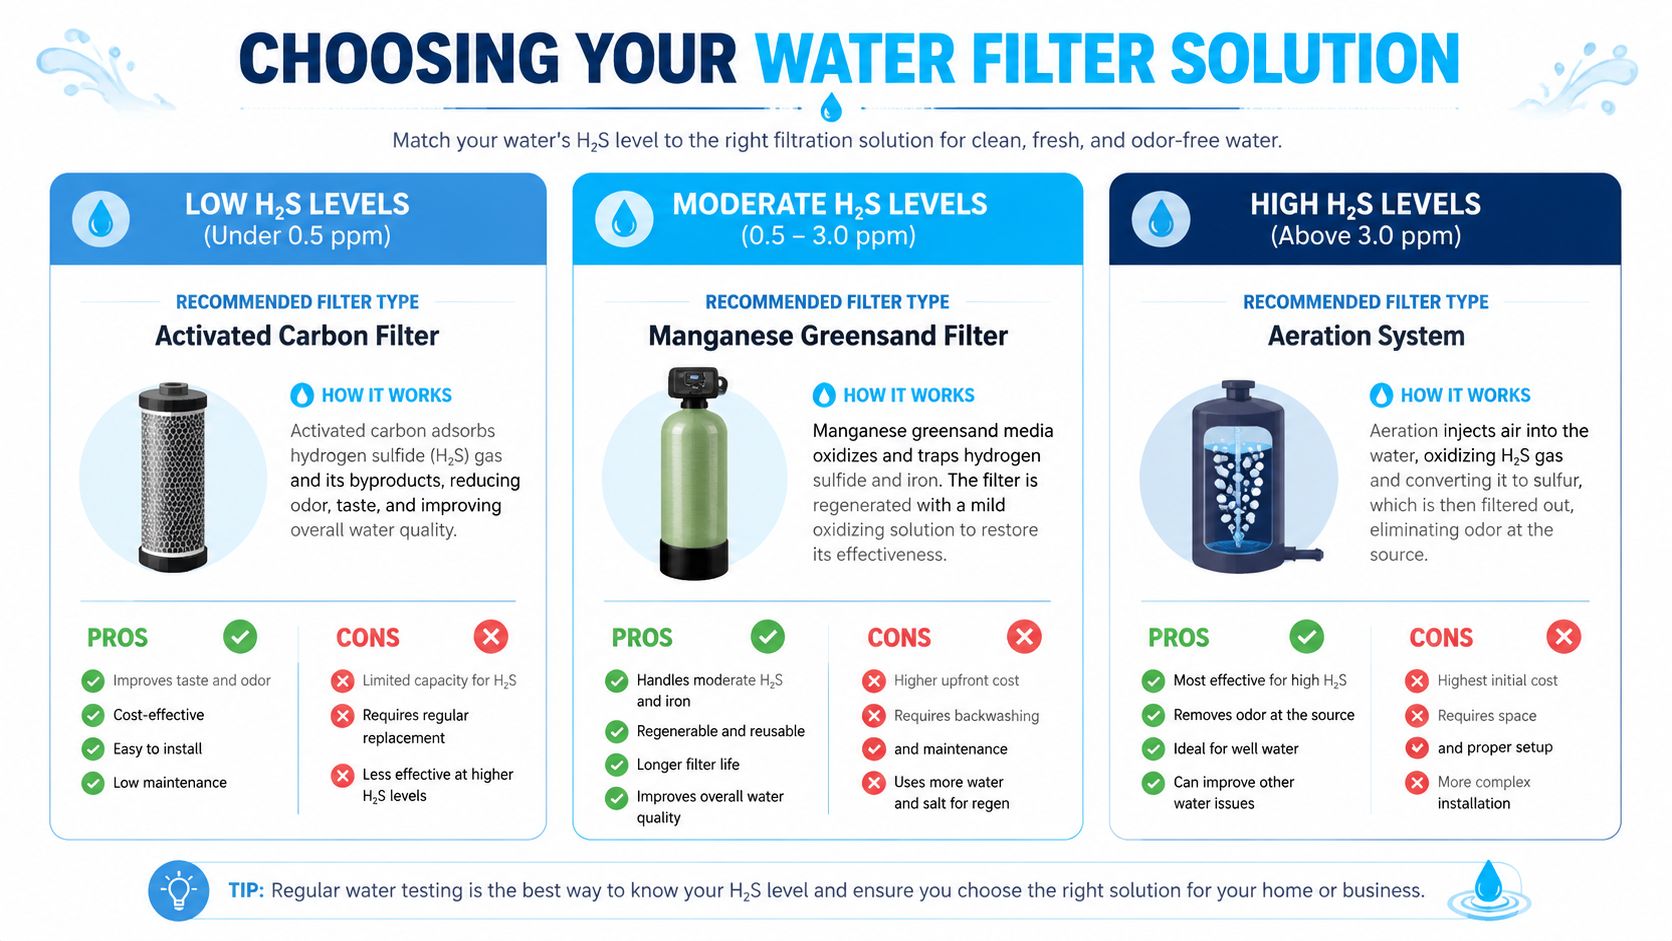
A guide showing the best water filtration systems for different hydrogen sulfide levels in household water.

Low sulfur levels

If your test result is below 1.0 mg/L, activated carbon is often enough.

Carbon works best when the sulfur level is mild because it removes odor by holding contaminants on its surface. That is useful for a lighter sulfur load, but it has limits. If hydrogen sulfide is too high, the media gets used up too quickly and performance drops sooner than many homeowners expect.

This range is often a good fit for a properly sized whole-house carbon system, especially if your main goal is odor control rather than heavy chemical treatment. If you are comparing whole-house housings and setups, filtration for your entire home can help you picture what that equipment category looks like.

Moderate sulfur levels

If testing lands between 1.0 mg/L and 6.0 mg/L, standard carbon usually stops being the best choice.

At this point, you usually need an oxidizing media filter, such as manganese greensand. These systems do two jobs in sequence. First, they change dissolved hydrogen sulfide into solid sulfur particles. Then they trap those particles in the filter bed.

That two-step process matters. Carbon is mainly a holding media. Oxidizing media actively changes the contaminant before removal, which is why it holds up better when sulfur levels move past the mild range.

High sulfur levels

If hydrogen sulfide is above 6.0 mg/L, treatment needs to be more aggressive. Continuous chlorination followed by filtration is the common answer in this range, as noted earlier.

The reason is straightforward. At higher concentrations, sulfur odor is no longer a small nuisance that a simple media bed can handle easily. You need a method that can oxidize the sulfur consistently and then clean up the byproducts before the water reaches your fixtures.

Why the number matters so much

A low reading points you toward a simpler, lower-cost fix. A moderate reading points you toward oxidation media. A high reading calls for chemical feed and follow-up filtration.

That is the part many buying guides skip. They list products, but they do not explain why one filter works at one concentration and struggles at another. Choosing by test result helps you avoid under-treating the water, and it also helps you avoid overspending on equipment meant for a problem you do not have.

Aeration is a good example. It can help in lighter sulfur situations, but once levels climb, relying on air alone often leaves odor behind. The filter has to match the actual sulfur load, not just the smell in your memory from the tap.

Water Filter Options for Rotten Egg Smell

Treatment Method Effective H2S Range (mg/L) How It Works Typical Maintenance
Activated carbon filtration Below 1.0 Adsorbs hydrogen sulfide onto carbon media Replace media or cartridges as performance drops
Manganese greensand or similar oxidizing media 1.0 up to 6.0 Oxidizes hydrogen sulfide into sulfur particles, then filters them out Periodic regeneration with potassium permanganate
Continuous chlorination followed by filtration Exceeds 6.0 Chlorine oxidizes hydrogen sulfide, then filtration removes the byproducts Refill chemical feed and maintain downstream filtration
Air injection with catalytic activated carbon Higher-capacity sulfur treatment in some applications Uses aeration and catalytic carbon to oxidize and filter sulfur Monitor media condition and system performance

If you want more side-by-side help comparing treatment styles, maintenance demands, and sizing questions, the guides in Water Filter Advisor's advice library are a useful next step.

Advanced and Whole-House Sulfur Removal Systems

A small under-sink filter can help one faucet. A whole-house sulfur problem needs equipment at the main line, where all water enters the home. That is the difference between treating a symptom and fixing the source for every shower, sink, toilet, and appliance.

The right system depends on why the smell is happening and how much hydrogen sulfide your water test found. That number matters. A light sulfur problem can often be handled with simpler oxidation and filtration. Higher concentrations usually need a system that can oxidize more sulfur, hold more media, and clean itself through backwashing so it does not clog and lose performance.

Air injection oxidation systems

Air injection oxidation systems, often called AIO systems, add a pocket of air inside the treatment tank. As water passes through, the oxygen reacts with dissolved hydrogen sulfide. The smell-causing gas is changed into sulfur particles, and the filter media traps those particles.

AIO works like pre-soaking a stained shirt before washing it. The air does the prep work so the media can finish the job.

This type of setup makes sense when sulfur odor shows up throughout the house and your test results point to a moderate sulfur load that can be handled without chemical feed equipment. It is also a practical fit for homeowners who want one central system instead of replacing cartridges at several taps.

Catalytic carbon and combination media

Catalytic carbon is a stronger version of standard carbon for sulfur control. Standard activated carbon is better suited to lighter odor issues. Catalytic carbon does more. It helps speed up oxidation while also filtering out the byproducts, which is why it is often paired with air injection in whole-house systems.

That pairing is useful in the middle range, where basic carbon cartridges are too small and too limited, but a chemical injection system may be more than the water requires. If your hydrogen sulfide level sits in that middle ground, catalytic carbon can be the right-sized tool instead of an expensive overcorrection.

Some combination media go a step further by targeting sulfur, iron, and manganese together. That matters because these contaminants often travel as a group in well water. If you only treat the sulfur smell and ignore iron or manganese, you may still end up with staining, media fouling, or shortened filter life.

High-capacity systems for mixed water problems

Specialty backwashing media systems are built for heavier work. They are often chosen when sulfur odor is strong, the measured hydrogen sulfide concentration is higher, or the water test also shows iron and manganese. In that situation, a single-tank backwashing system can make more sense than stacking several smaller filters that each handle only part of the problem.

A good comparison helps here. A cartridge housing is like a kitchen strainer. It catches what reaches it, but it fills up fast. A backwashing sulfur filter is closer to a self-cleaning yard drain. It is designed to handle a larger load and flush itself on schedule.

If you're comparing whole-house layouts and want a simple example of filtration for your entire home, it helps to see how entry-level whole-house housings differ from sulfur-specific backwashing systems. They may both connect to the main water line, but they solve very different problems.

Bigger equipment only helps when the water chemistry calls for it. The goal is not the largest tank. The goal is enough oxidation capacity and enough media for your measured sulfur level and household flow rate.

Chemical injection systems

When hydrogen sulfide levels are high, chemical injection systems are often the next step. These systems feed an oxidant, commonly chlorine or hydrogen peroxide, into the water before filtration. The oxidant reacts with the sulfur gas first. A downstream filter then removes the oxidized material.

This approach is often chosen because strong sulfur loads can overwhelm simpler systems. It also gives more treatment control when the smell is severe or when multiple nuisance contaminants are present.

Hydrogen peroxide gets attention from homeowners who want an oxidant that does not create the same taste concerns people sometimes associate with chlorine. Chlorine systems remain common because they are familiar, widely available, and can also disinfect when the water has a bacteria concern. The better choice depends on the test results and on whether your problem is odor alone or odor plus microbial risk.

For a homeowner, the practical takeaway is simple. Low sulfur levels can often be handled by smaller systems. Moderate levels often point toward air injection and catalytic carbon. Higher levels, or sulfur combined with iron and manganese, usually justify backwashing specialty media or chemical injection. Match the system to the measured concentration, and you avoid paying for treatment power you do not need or living with a system that never fully solves the smell.

Installation and Long-Term Maintenance Tips

A sulfur filter can be perfectly chosen on paper and still disappoint in real life if it is installed in the wrong spot or maintained like an afterthought. Homeowners often blame the equipment first. The setup is just as important.

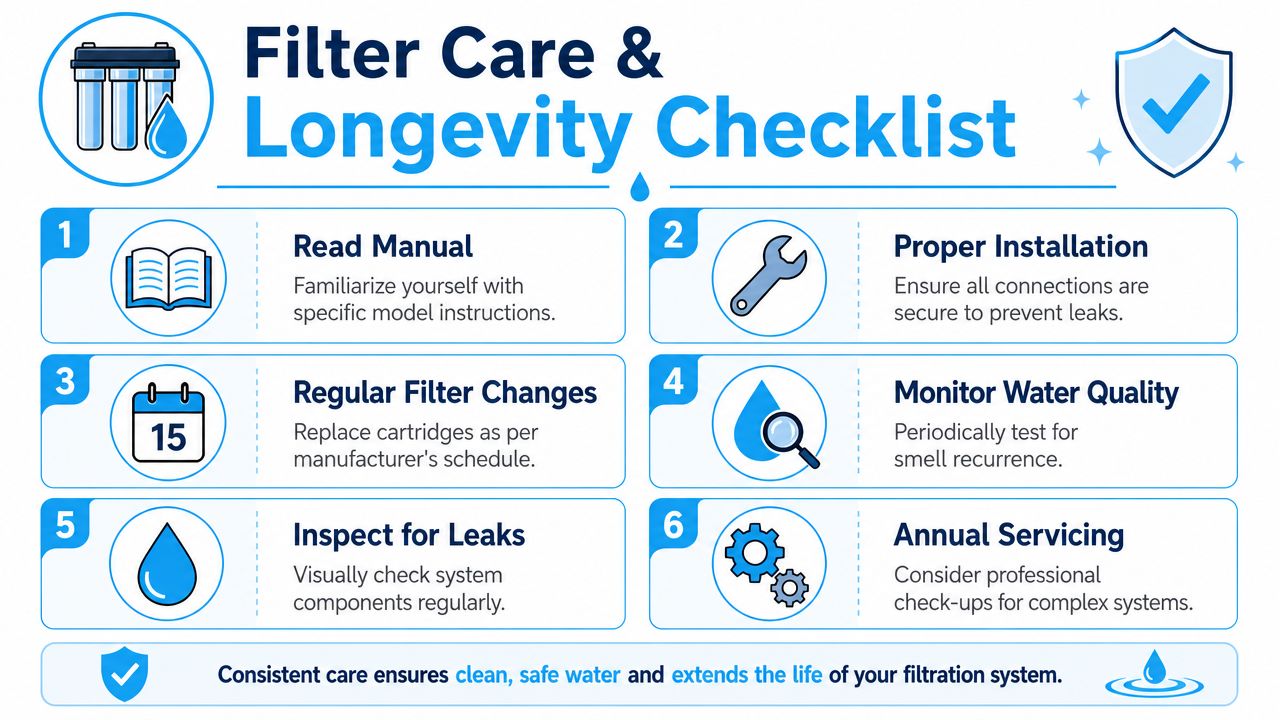
An infographic titled Filter Care and Longevity Checklist providing six tips for maintaining water filtration systems.

What to check before installation

Start with placement and sizing, not the box label.

A sulfur system has to match three things at once. Your water chemistry, your household flow rate, and the kind of maintenance you will keep up with. A good comparison is a furnace filter. The right filter still fails if the airflow is wrong or nobody changes it.

Before installing anything, check these practical points:

  • Flow rate for backwashing. Backwashing filters need enough water volume to lift and clean the media bed. If the well pump or plumbing cannot deliver that flow, the media can foul early and lose performance.
  • Space and drain access. Air injection, oxidizing filters, and other whole-house systems usually need tank clearance, a power outlet, and a place to send backwash water.
  • Measured sulfur level. This matters more than many homeowners realize. A system sized for a light odor can struggle if hydrogen sulfide is much higher, and an oversized system can cost more than you need to spend.
  • Iron and manganese in the same water. These contaminants often travel with sulfur. They can clog media, stain fixtures, and change which filter media makes sense.
  • Where the smell shows up. One sink may call for a local fix. Odor in showers, laundry, and every faucet points to whole-house treatment.
  • Your maintenance tolerance. Some systems ask for little more than periodic checks. Others require solution refills, regeneration chemicals, or valve programming.

Why maintenance changes results so much

Two homes can install the same carbon filter and get very different results. The reason is simple. The filter is doing a workload, and that workload depends on how much hydrogen sulfide is in the water, how much water the family uses, and what else is competing for the media.

Carbon works like a sponge for odor compounds, but a sponge fills up. If your sulfur level is low, carbon may last a reasonable amount of time. If the sulfur level is higher, or iron and manganese are also present, that same carbon can load up fast. That is why matching the system to the tested concentration matters not just at purchase, but for the long haul. It helps you predict maintenance instead of being surprised by it.

This is also where homeowners overspend or under-treat. A heavier-duty system is not automatically better. It is better only when the sulfur load calls for it.

A simple maintenance calendar mindset

Put maintenance on the calendar and treat odor return as a clue, not a mystery.

  • Carbon systems. Replace cartridges or media before odor fully returns. Waiting for a strong smell usually means the media has been spent for a while.
  • Backwashing sulfur filters. Check that backwash cycles are happening on schedule and that the drain line is clear.
  • Manganese greensand systems. Keep regeneration supplies topped off and confirm the control valve settings are still correct.
  • Chemical injection systems. Refill the oxidant solution, inspect the feed pump, and make sure the injection point and retention components stay clean.
  • Any whole-house system. Watch for pressure drop, leaks, unusual sounds, or bypass valves left in the wrong position after service.

A sulfur filter rarely fails without a reason. The usual causes are exhausted media, missed maintenance, changing water conditions, or an installation that never matched the home's flow needs.

DIY or professional install

A basic cartridge setup is often manageable for a confident DIY homeowner. Whole-house sulfur treatment is a different tool altogether. Backwashing filters and injection systems usually involve plumbing changes, drain connections, startup settings, and a few details that affect performance for years.

Professional installation often makes sense when the system is tied closely to a measured hydrogen sulfide level and a target flow rate. If the setup is off, the filter may look fine but never treat the water properly. Paying for correct installation once is often cheaper than replacing media early, chasing odor complaints, or buying a second system to fix the first one.

Frequently Asked Questions About Sulfur Odor

Is rotten egg smell in water dangerous

In many homes, sulfur odor is a water quality nuisance more than an immediate health threat. The smell usually comes from hydrogen sulfide gas, and even small amounts can make a glass of water unpleasant to drink or cook with.

That said, smell alone is a poor measuring tool. Two people can notice the same odor very differently. Testing matters because sulfur odor can appear alongside iron, manganese, bacteria, or corrosion problems, and the right fix depends on what is present in the water.

Will a water softener fix sulfur smell

Usually, no.

A water softener is built to remove hardness minerals such as calcium and magnesium. It is the wrong tool for dissolved hydrogen sulfide, much like using a broom when the problem calls for a mop. If your test shows sulfur as the main issue, choose a sulfur treatment system sized for that measured level instead of expecting the softener to do a job it was not designed to do.

Why does only my hot water smell

A hot-water-only sulfur smell often points to the water heater. Warm conditions inside the tank can encourage reactions that create or release that rotten egg odor, even when the cold water seems normal.

A simple check helps narrow it down. Run cold water at the same faucet, then hot water. If the smell appears only on the hot side, the heater is a likely suspect. If both smell, the source is more likely in the incoming water.

What's the cheapest water filter for rotten egg smell

The cheapest option that works depends on your hydrogen sulfide level.

Low sulfur levels may respond to catalytic carbon. Higher levels usually need a stronger approach, such as an oxidizing filter or an injection system. Many homeowners, however, waste money. They buy the lowest-cost filter first, but if it is undersized for the contamination level, the odor returns, media wears out faster, and the second purchase ends up costing more than the right system would have in the first place.

The smart question is not “What is the cheapest filter?” It is “What filter matches my test result?”

Is hydrogen peroxide injection a real option

Yes, for some wells it is a practical choice. Hydrogen peroxide works by oxidizing hydrogen sulfide so the smell can be removed more effectively downstream. It can be a good fit when sulfur levels are too high for simple carbon alone, or when water conditions change enough that a stronger treatment method makes sense.

It also asks more from the homeowner. You have to keep the solution filled, check the feed equipment, and make sure the rest of the system is set up to handle the oxidized sulfur properly. As noted earlier, some homeowners use it as an alternative to periodic chlorination, but its success depends on matching the setup to the water test, not just installing a pump and hoping for the best.

If you're ready to stop guessing, Water Filter Advisor is a solid place to compare filter types, understand sulfur treatment options, and find a water filter for rotten egg smell that fits your home's water conditions.

Water Conditioner for House: The Ultimate 2026 Guide

You wipe the bathroom faucet, and two days later that chalky crust is back. Your dishwasher leaves spots. The shower door looks cloudy no matter how much glass cleaner you use. Soap seems lazy, as if it gave up halfway through the job.

That’s the daily grind of hard water.

A lot of homeowners start searching for a water conditioner for house setups because they want relief without hauling salt bags, adding drain lines, or turning the basement into a mini treatment plant. That’s reasonable. But this topic gets confusing fast, mostly because stores and manufacturers often blur the line between conditioning, softening, and filtering.

That blur causes expensive mistakes. Many people buy a conditioner expecting silky-soft shower water, then feel disappointed when their water still behaves like hard water in some ways. Others buy a softener when all they really wanted was scale protection on fixtures and appliances.

The good news is that the right choice becomes much simpler once you know what each system does.

Tired of Hard Water? An Introduction to Water Conditioners

Hard water is one of those home problems that rarely feels dramatic, but it nags at you every day. It leaves white marks on faucets, stiffens up laundry, and turns glassware into a spot collection. It also works imperceptibly inside your plumbing, where you can’t see it.

That hidden part is what worries most homeowners. Scale can collect in water heaters, pipes, and appliances over time. If you’ve ever dealt with hardness issues in other systems, even outside the house, you already know how frustrating mineral balance can be. This hot tub water hardness guide is a good example of how the same basic mineral problem shows up in different water environments.

What a conditioner is trying to solve

A whole-house water conditioner is designed to reduce the damage caused by hard water minerals, mainly calcium and magnesium. The key word is damage.

A conditioner’s main job isn’t to make water feel silky. It’s to help stop minerals from sticking where they shouldn’t, such as:

  • Inside water heaters where scale can collect on heating surfaces
  • On fixtures where white crust builds around taps and showerheads
  • In appliances like dishwashers, coffee makers, and washing machines
  • Along plumbing lines where mineral deposits can gradually narrow passageways

Why people get confused

The word “conditioner” sounds like a softer, friendlier version of “softener.” That’s where the trouble starts. In everyday conversation, people use them almost interchangeably. In water treatment, they are not the same thing.

Practical rule: If your main complaint is crusty scale and you want a lower-maintenance option, a conditioner may fit. If you want water that feels soft on skin and helps soap lather better, you’re probably looking for a softener instead.

That distinction matters more than any brand name on the box.

The Great Water Debate Conditioner vs Softener vs Filter

Most water treatment confusion comes from one mistaken assumption. People think all whole-house systems are just different versions of the same machine.

They’re not.

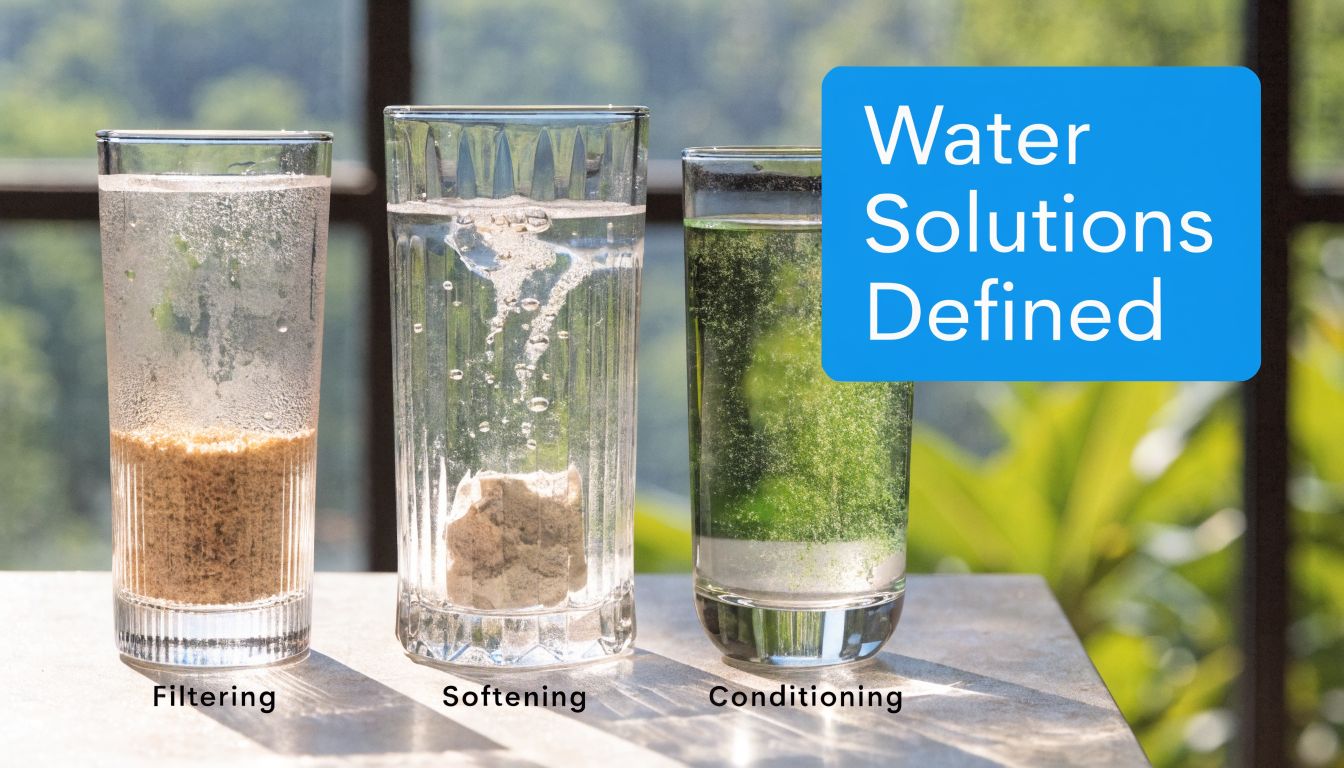
Three glasses showing water treatment concepts labelled as Filtering with sand, Softening with minerals, and Conditioning with algae.

A simple way to think about it is this:

  • A filter is a gatekeeper
  • A softener is a removal service
  • A conditioner is a transformer

Each one solves a different problem.

What a filter does

A whole-house water filter targets contaminants such as sediment, chlorine, odor-causing compounds, or other unwanted substances, depending on the media inside it. A filter is not built to deal with hardness in the same way a softener or conditioner is.

If your water smells like a swimming pool, tastes off, or carries visible particles, a filter is usually part of the answer. But a filter alone won’t stop classic hard-water scale.

What a softener does

A water softener removes hardness minerals from the water. That’s why softened water feels different in the shower and usually works better with soap.

If you want the slippery, soft-water feel, fewer soap issues, and actual hardness removal, this is the category that matches that goal. It’s also why softeners are still the standard choice for many homes with serious hardness problems.

The market reflects how strong that demand remains. The global household water softener system market was valued at USD 1.51 billion in 2025 and is projected to reach USD 2.40 billion by 2033, with North America holding 36% revenue share in 2025. Salt-based systems held 61.5% market share in 2025, according to Data Bridge Market Research on the household water softener system market.

What a conditioner does

A water conditioner for house use tackles hardness from a different angle. It doesn’t remove the minerals. It changes how they behave.

Salt-free water conditioners use Template Assisted Crystallization (TAC) technology to convert hardness minerals into microscopic crystals that remain suspended in water. Unlike salt-based softeners, they do not remove the minerals, which is why the water may still feel hard and may not lather soap as effectively, even while scale buildup is prevented, as explained in Aquasure’s guide to salt-free water conditioners.

That one point saves people from the most common buying mistake.

If you buy a conditioner expecting “soft water,” the product didn’t fail. The expectation did.

The everyday analogy that helps

Think of your kitchen after a busy dinner.

  • A filter is the person standing at the door, stopping unwanted guests from entering.
  • A softener is the cleanup crew that removes the mess entirely.
  • A conditioner is the organizer who keeps the mess from sticking to everything.

All three are useful. They just do different jobs.

Why this matters before you shop

Many product pages throw around terms like “descaler,” “conditioner,” “salt-free softener,” and “whole-house treatment system.” That wording makes different technologies sound interchangeable.

They aren’t. Before you compare brands, know what result you want:

  1. Scale protection only
    A conditioner may be enough.

  2. Soft-feeling water and mineral removal
    A softener is the better fit.

  3. Chlorine, sediment, or taste issues
    You likely need a filter, possibly alongside one of the systems above.

If you want a quick visual explanation before reading deeper, this short video gives useful context.

How a Water Conditioner Transforms Your Water

A good conditioner can seem mysterious because the water coming out of the tap still looks exactly the same. Nothing dramatic happens. No sudsy magic. No obvious change in taste. Yet scale problems can ease up.

That makes more sense once you stop thinking about conditioning as removal and start thinking about it as mineral behavior control.

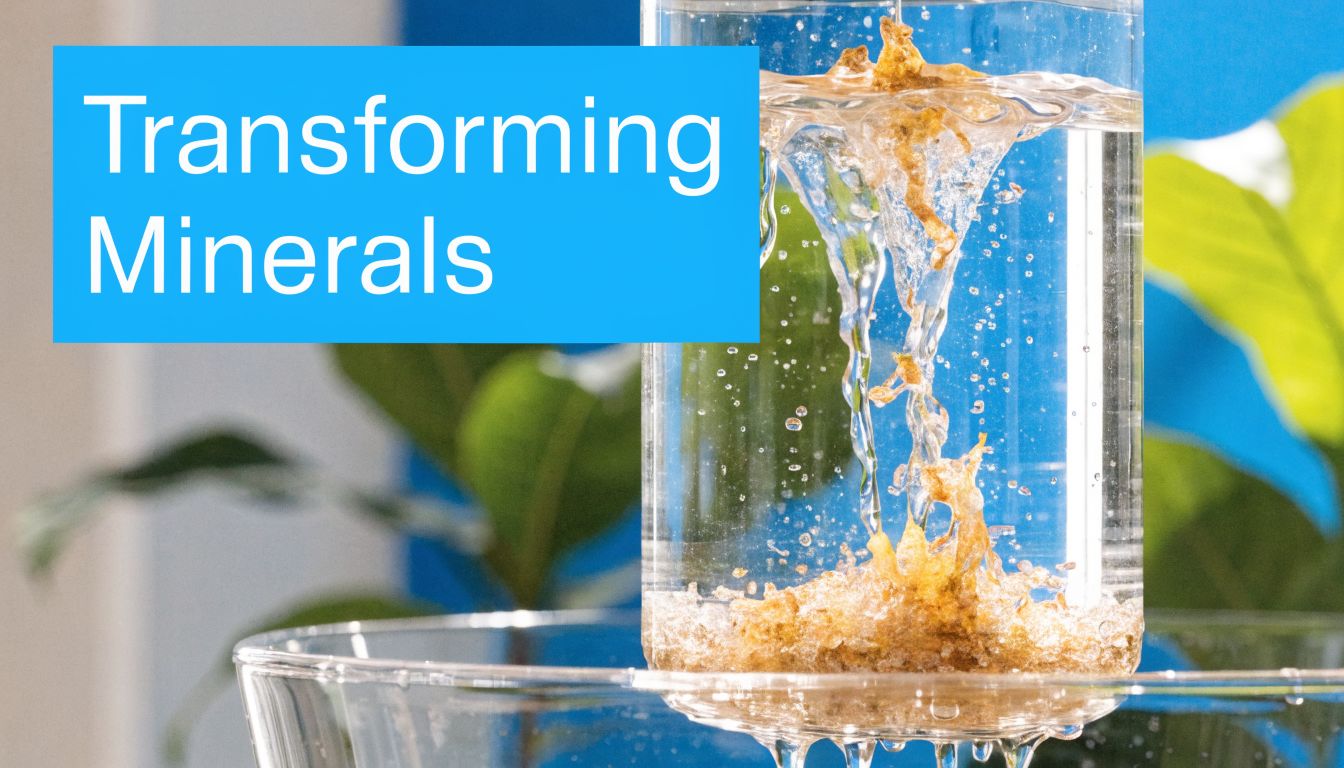
A close-up of mineral-rich water flowing through a cylindrical filter, symbolizing water purification processes.

TAC in plain English

The best-known salt-free approach uses TAC media. Inside the tank, the media acts like a staging surface. As hard-water minerals pass through, they’re encouraged to form tiny crystals.

A simple mental picture helps. Hardness minerals in untreated water behave like sticky snowflakes. They land on hot surfaces, pipe walls, and fixtures, then pile up. TAC turns them into tiny ball bearings. They’re still present, but they’re less likely to stick.

That’s why a conditioner can help protect equipment while leaving the water chemically hard.

What that means in the home

When minerals are less likely to attach to surfaces, you can see fewer scale-related headaches in places like:

  • Water heaters
  • Dishwashers
  • Tankless heating elements
  • Showerheads and faucet aerators
  • Coffee machines and kettles

Scale isn’t just cosmetic. Technical guidance for residential softening equipment notes that hard water can reduce appliance heat transfer efficiency by 20% to 30%, and effective systems are designed to operate within common household conditions such as 0.2 to 0.6 MPa supply pressure with only 0.03 to 0.06 MPa pressure drop, according to this technical specification guide for water softeners.

What about electronic or magnetic units

Some systems use an electronic or magnetic approach rather than media inside a tank. These products aim to influence mineral behavior through an electromagnetic field around the pipe.

The appeal is obvious. They’re compact, often easier to install, and don’t involve salt or regeneration. But they also tend to raise more questions from homeowners because the process is less visible and less intuitive than water passing through a media tank.

A tank-based conditioner gives many homeowners a clearer mental model: water flows through media, minerals are altered, scale is reduced.

That doesn’t make every electronic unit ineffective. It just means you should pay extra attention to water conditions, installation instructions, and realistic expectations.

Conditioning is not filtration

This is another place where people trip up. A conditioner doesn’t usually remove chlorine, sediment, lead, or other drinking-water contaminants. If those are concerns, you’ll need filtration designed for those jobs.

A conditioner is more like a specialist. It focuses on hardness-related scale behavior. That specialization can be useful, but it’s not broad-spectrum treatment.

Exploring Types of Whole House Water Conditioners

Walk through enough product listings and you’ll see a messy mix of labels. “Descaler.” “Salt-free softener.” “Conditioner.” “Anti-scale system.” Some are legitimate categories. Some are marketing shortcuts.

The easiest way to sort them is by how they try to manage hardness.

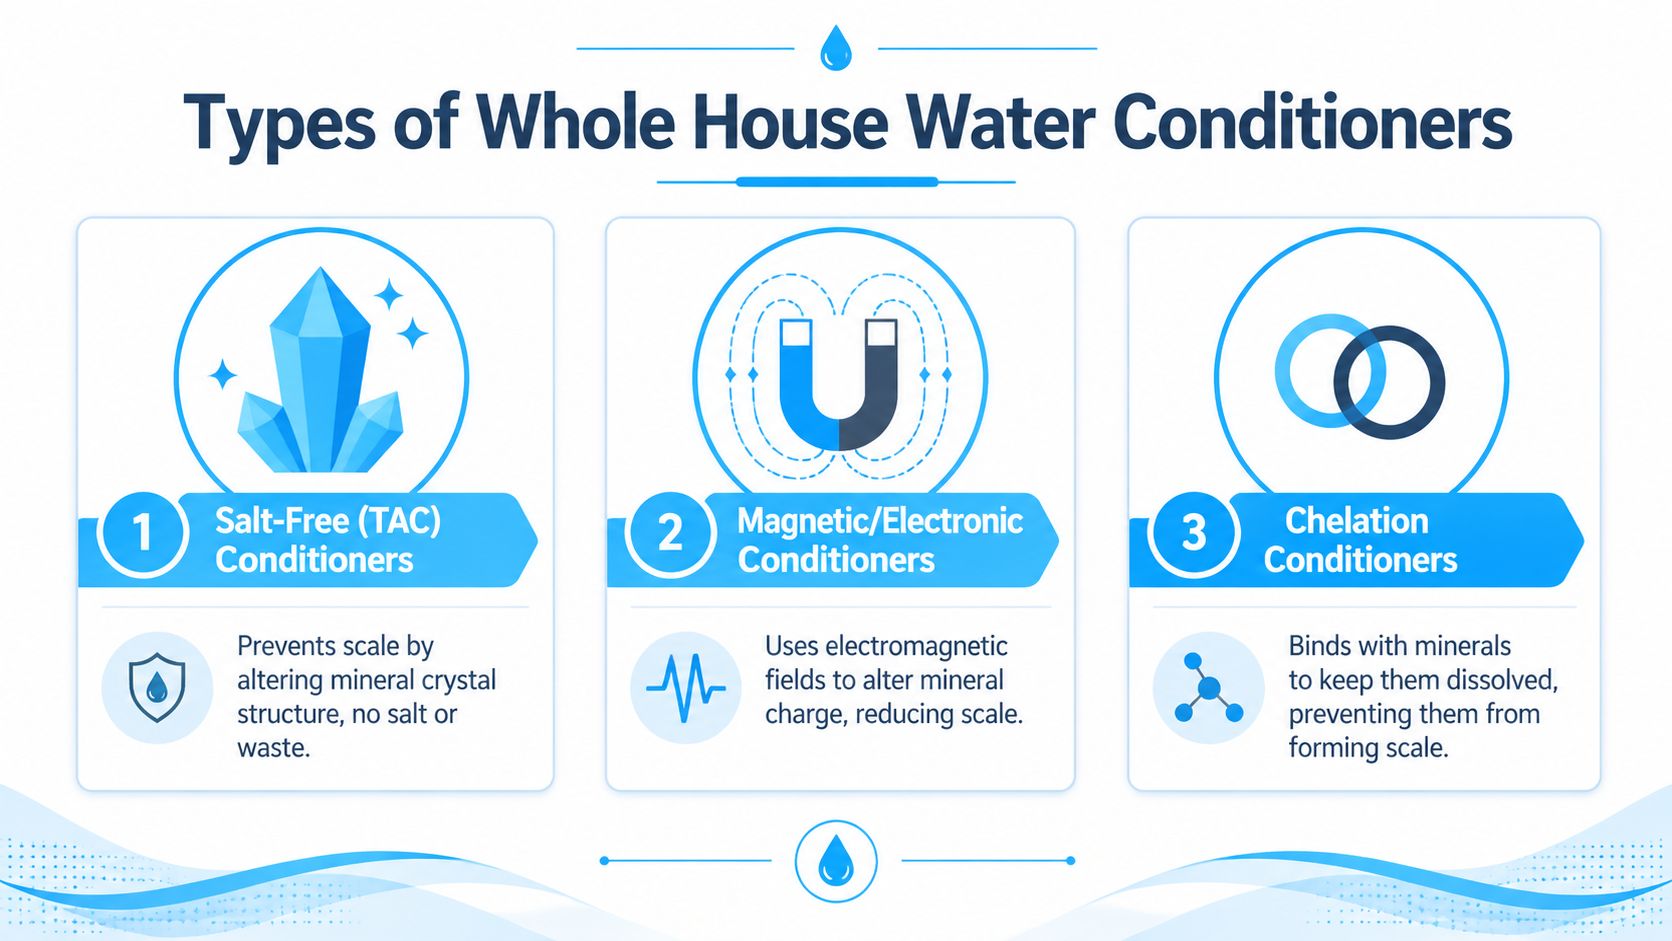
An infographic showing three different types of whole house water conditioners, including salt-free, magnetic, and chelation options.

Salt-free TAC conditioners

These are the systems most homeowners mean when they search for a water conditioner for house use. They rely on media inside a tank to alter how hardness minerals form and deposit.

Their strongest selling point is straightforward. They target scale without salt, drain lines, or regeneration cycles.

In performance tests across 12 homes, salt-free conditioners were 92% effective in scale prevention, while premium salt-based softeners removed up to 98% of hardness minerals, according to water softener performance testing from Quality Water Treatment. That’s the trade-off in one sentence. Conditioners shine at scale prevention. Softeners do a better job if you want actual mineral removal.

Best fit for TAC systems

  • Homes focused on appliance protection
  • Owners who want low routine upkeep
  • People avoiding salt handling
  • Municipal-water homes where hardness is the main headache

Possible frustration points

  • Water won’t feel fully soft
  • Soap may still behave like it does in hard water
  • Spotting can still happen
  • Other contaminants still require separate filtration

Electronic and magnetic descalers

These systems usually mount on or around the pipe rather than using a large treatment tank. They aim to reduce scale formation through electromagnetic influence.

Their biggest advantage is convenience. They’re attractive to people with limited install space or those who don’t want to cut into plumbing as much as a tank system may require.

Their challenge is predictability. Real-world performance can be more dependent on plumbing layout, water characteristics, and proper installation. For homeowners who want the most familiar and established whole-house anti-scale format, tank-style TAC systems often feel less abstract.

Chelation-style conditioners

Some products use chelation concepts, meaning they bind with minerals to keep them dissolved and less likely to form scale. In homeowner conversations, this category gets less attention than TAC or electronic systems, but you may still see it in the market.

The key thing to remember is the same core principle. This is still conditioning, not softening. The goal is scale control, not complete removal of calcium and magnesium.

Why softeners belong in this comparison

A softener is not technically a conditioner, but it belongs in this conversation because it’s the product many people actually need when they think they want one.

If your priority list includes better soap performance, a softer shower feel, or true hardness removal, comparing only conditioners will steer you wrong. You need the contrast.

Water Conditioner and Softener Comparison

System Type How It Works Primary Benefit Removes Minerals? Maintenance Avg. Cost
Salt-Free TAC Conditioner Alters hardness minerals so they are less likely to stick as scale Scale prevention without salt No Low routine upkeep, but media replacement may be needed over time Varies by brand and size
Electronic or Magnetic Conditioner Uses an electromagnetic field to reduce mineral scaling tendency Compact anti-scale option No Usually light routine attention Varies by brand and installation needs
Chelation Conditioner Binds with minerals to keep them from forming scale deposits Scale control in specific applications No Depends on design and any added media stages Varies by brand
Salt-Based Softener Uses ion exchange to remove calcium and magnesium True soft water and hardness removal Yes Regular salt refills and periodic service needs Varies by brand and capacity

A practical way to narrow the field

Ask one question first: Do I want scale control, or do I want soft water?

If the answer is scale control, TAC and similar conditioner options deserve a serious look. If the answer is soft water, stop shopping conditioners and move into softener territory.

The wrong system often comes from answering the wrong question, not from choosing the wrong brand.

Benefits and Realistic Expectations for Your Home

A conditioner can be a smart upgrade. It can also disappoint people who expect it to behave like a softener. Both things are true.

The primary value of a water conditioner for house use is mostly about protection. You’re trying to reduce scale trouble where water flows, heats, sprays, and dries.

What homeowners often like

A well-matched conditioner can help with the kinds of day-to-day annoyances that make a house feel older than it is.

  • Less scale buildup on fixtures means less scrubbing around faucets and showerheads.
  • Appliance protection can matter for water heaters, dishwashers, and other equipment that hates mineral crust.
  • Lower-maintenance operation appeals to homeowners who don’t want regular salt refills.
  • No salt discharge is attractive for people focused on simpler, more environmentally conscious operation.

For many homes, that’s enough. If your biggest complaint is “I’m tired of cleaning white crust off everything,” a conditioner may solve the right problem.

What it probably won’t do

Here, honesty matters.

A conditioner usually won’t give you that slippery soft-water feel after a shower. It may not make soap lather dramatically better. It also won’t replace a carbon filter if your water smells chlorinated or tastes strange.

That’s why some homeowners love conditioners and others think they bought a dud. They were measuring success by completely different standards.

Buy a conditioner for scale prevention. Buy a softener for soft water. Buy a filter for contaminants.

Don’t ignore long-term ownership

Some salt-free systems are marketed as “maintenance-free” and may have lifespans up to 10 years, but long-term cost still matters. You may need pre-filters, post-filters, replacement media cartridges after the initial lifespan, or in some cases an entire unit replacement, as noted by APEC’s salt-free water conditioner overview.

That doesn’t mean conditioners are a bad deal. It means “no salt” is not the same as “no future cost.”

The honest homeowner test

A conditioner is a strong candidate if you’re saying:

  • “I want less scale on appliances and fixtures.”
  • “I don’t need the feel of softened water.”
  • “I want a simpler whole-house setup.”

It’s the wrong fit if you’re saying:

  • “I want my skin and hair to feel different.”
  • “I want soap to work better.”
  • “I want the water to test soft.”

Sizing Installing and Maintaining Your System

At this stage, a lot of promising systems go sideways. Homeowners spend weeks comparing technologies, then undersize the unit, install it in the wrong place, or forget about maintenance until performance slips.

A water conditioner for house use works best when it matches your plumbing reality, not just your online wish list.

A person measures a vertical stainless steel water treatment tank with a blue ruler for system planning.

Start with hardness and flow

If you’re sizing a traditional salt-based softener, the benchmark formula is (# people × 82 gal/day × GPG) × 3. For a 4-person home at 10 GPG, that points to a 32,000-grain unit. For salt-free conditioners, the bigger issue is matching the system to your home’s peak flow rate, with 8 to 12 GPM being important for a 1 to 3 bath home, according to the U.S. Department of Energy’s guide to purchasing and maintaining a water softener.

That distinction matters. Softeners are usually discussed in grain capacity. Conditioners are more often selected by flow handling and plumbing fit.

A simple sizing routine

Use this order when planning:

  1. Check your water hardness
    Municipal users can review their local report or test at home. Well owners should test directly.

  2. Count simultaneous water use
    Think about what happens during busy hours. Two showers, a washing machine, and a dishwasher can push demand fast.

  3. Match the conditioner to real flow needs
    A unit that looks fine on paper can feel disappointing if it restricts flow during peak use.

  4. Look at install space
    Measure width, height, and service clearance before you buy.

Field advice: The prettiest system in the catalog is useless if you can’t service it comfortably after installation.

DIY or plumber

Some electronic units are friendly to confident DIY homeowners. Tank-based systems often require more planning because they become part of the main water line.

DIY can make sense if you already know how to:

  • Shut down and drain your main line
  • Cut and reconnect plumbing cleanly
  • Add bypass valves if needed
  • Support the unit securely and keep access open

Hire a plumber when:

  • Your plumbing layout is tight or awkward
  • You’re mixing a conditioner with pre-filtration
  • You need to preserve warranty compliance
  • You’re working with older pipe materials
  • You’re unsure where the unit should sit relative to shutoffs and other equipment

If you’re sourcing parts locally in the UK, these London plumbing shop recommendations can help you find fittings, valves, and install supplies without guessing.

Maintenance is still part of the deal

Conditioners often need less attention than softeners, but “less” doesn’t mean “none.”

A sensible maintenance plan includes:

  • Inspecting the unit periodically for leaks, loose fittings, or bypass issues
  • Replacing media when the manufacturer recommends if you have a TAC-style system
  • Checking any pre-filter stage if your setup includes one
  • Reviewing performance signs like renewed scaling around fixtures or appliances
  • Keeping your water records handy so future troubleshooting is easier

For broader homeowner troubleshooting and maintenance reading, the practical guides in the Water Filter Advisor advice center are useful when you’re comparing system layouts and upkeep demands.

Your Decision Checklist Before You Buy

You don’t need to memorize every water-treatment term to choose well. You just need to answer the right questions in the right order.

The five-point checklist

  • Test your water first
    Don’t buy based on guesswork. Hardness level shapes the whole decision.

  • Name your real goal
    If you want to stop scale, a conditioner may work. If you want the feel and performance of soft water, shop for a softener instead.

  • Think beyond purchase price
    Look at future media changes, filter replacements, service access, and any plumber costs.

  • Check your space and plumbing setup
    Measure the install area and think about bypass valves, shutoff access, and whether you may add filtration later.

  • Match the technology to the problem
    Conditioner for scale behavior. Softener for mineral removal. Filter for contaminants.

Two questions that settle most decisions

Ask yourself these and the answer often becomes obvious:

  1. Do I care more about how the water feels, or what it leaves behind?
  2. Am I solving hardness, contamination, or both?

If you care more about shower feel, soap performance, and soft water, a conditioner won’t scratch that itch. If you mostly want to protect fixtures and appliances from mineral crust without dealing with salt, a conditioner may be exactly right.

The best system is the one that solves your actual complaint, not the one with the most impressive label.

Frequently Asked Questions about Water Conditioners

Will a water conditioner help my skin and hair

Sometimes a little, but usually not in the same way a softener does.

A conditioner may reduce some scale-related effects in the plumbing system, but it doesn’t remove hardness minerals from the water. Because of that, many people won’t notice the same change in shower feel, soap rinsing, or hair texture that softened water can provide. If skin and hair comfort is your top priority, a softener is usually the closer match.

Does a water conditioner filter chlorine lead or sediment

No, not by default.

A conditioner’s job is to reduce hardness-related scaling behavior. That’s different from filtration. If you’re worried about chlorine taste, odor, sediment, lead, iron, or other contaminants, you need a filter designed for those specific issues. Many homes benefit from combining technologies rather than asking one device to do everything.

Are electronic descalers real or just hype

They’re real products, but they require careful expectations.

Some homeowners choose them because they’re compact and easier to install than tank-based systems. Their performance can be more dependent on installation quality, water characteristics, and application details. If you want the clearest and most familiar whole-house anti-scale approach, tank-style salt-free conditioners often feel easier to evaluate.

Will a conditioner make my water test soft

No.

That’s one of the most important points in this whole topic. Conditioners don’t remove the calcium and magnesium the way a softener does, so hardness tests usually still show those minerals are present. The aim is not to erase hardness from the water. The aim is to make those minerals less likely to form scale on surfaces.

Is a conditioner enough for well water

Sometimes, but well water often needs a closer look.

Well water can bring hardness together with sediment, iron, sulfur, or other issues. In those cases, a conditioner may be only one part of the final setup. Many well owners need pre-treatment or targeted filtration before adding any anti-scale equipment.

What’s the safest way to avoid buying the wrong system

Get a water test and write down your top complaint in one sentence.

If your sentence starts with “I want water to feel soft,” buy with that goal in mind. If it starts with “I want less scale,” a water conditioner for house use deserves a serious look.


If you’re comparing whole-house systems and want clear, no-hype guidance, Water Filter Advisor is a strong place to keep researching. The site helps homeowners sort out water filters, softeners, conditioners, testing, and maintenance so you can choose a setup that fits your water and your home.

Ultimate Guide to Membrane Water Filtration Systems

You fill a glass from the kitchen tap, take a sip, and pause. Maybe it tastes flat. Maybe it smells faintly like a swimming pool. Maybe your shower leaves reddish stains, or your kettle grows scale faster than you can scrub it. Most homeowners don’t stand at the sink thinking about pore size, pressure, and membrane fouling. They just want water that feels safe to drink and pleasant to use.

That’s where membrane water filtration systems come in. They’re the class of filters that do the fine-detail work. While a simple sediment filter catches grit and a carbon filter improves taste and odor, a membrane acts more like a precision barrier. It separates water from particles, microbes, and in some cases dissolved material that other home filters can’t reliably handle.

The catch is that membrane systems can also surprise people. A unit may promise cleaner water, but its performance depends on the water entering it. If your home has iron, heavy sediment, or stubborn organic matter, the membrane may need protection long before you think about replacing it. That hidden side of ownership matters just as much as the contaminant list on the box.

Why Membrane Water Filtration Systems Matter

You notice the problem in everyday routines first. The coffee has a flat, mineral taste. Ice picks up an odd smell from the freezer. A rusty ring shows up in the tub again, and the kettle starts building scale long before it should.

Those clues all point to the same question. What, exactly, is in the water, and what kind of filter can separate it out?

Why membranes stand apart

Membrane systems matter because they do more than make water taste better. They act like very fine screening layers that sort water from unwanted material based on particle size and, with some membranes, dissolved content. That gives them a different job from a basic sediment cartridge or a carbon block.

For homeowners, that difference can be practical, not academic. A sediment filter is good at catching grit. Carbon is good at reducing many taste and odor problems. A membrane is often the stage that handles the smaller, harder-to-catch material that slips through those earlier steps.

Reverse osmosis, or RO, is the example many people know best. It is used when the concern goes beyond cloudiness and into dissolved salts, metals, or other contaminants that simpler filters may not reduce well. If your only problem is visible sediment, an aggressive membrane may be more system than you need. If your concern includes what is dissolved in the water, membranes start to make much more sense.

Why homeowners are paying attention

Analysts at Fortune Business Insights report that the global membrane filtration market, valued at roughly USD 19 to 20 billion in 2025, is projected to grow sharply by the mid-2030s, with water and wastewater treatment as the largest application area. Those figures are relevant to homeowners because they show membrane filtration is no longer a specialty tool used only in industrial settings. It has become a common answer to real water quality problems.

That popularity can create a false sense of simplicity.

A membrane system may look like a tidy box under a sink or beside a pressure tank, but ownership often involves more than replacing one filter on a schedule. Feed water quality affects membrane life. Some homes need pretreatment to control sediment, iron, hardness, or chlorine before water even reaches the membrane. Some systems need periodic flushing or backwashing. Those upkeep steps add cost, waste water in some designs, and determine whether the system keeps performing or starts clogging early.

A good membrane setup can solve the right problem with impressive precision. A poorly matched one can turn into an expensive lesson in fouling, short cartridge life, and surprise maintenance. That is why membranes matter. They are powerful tools, but they work best when homeowners understand both the filtration benefits and the hidden demands that come with them.

Understanding the Key Concepts of Membrane Filtration

Think of membrane filtration like a set of kitchen strainers arranged from coarse to very fine. One catches pebbles. Another catches sand. Another catches flour dust. The last one is so selective that it starts separating dissolved material from water itself.

That’s the big idea behind the four membrane categories homeowners hear about most often: microfiltration, ultrafiltration, nanofiltration, and reverse osmosis.

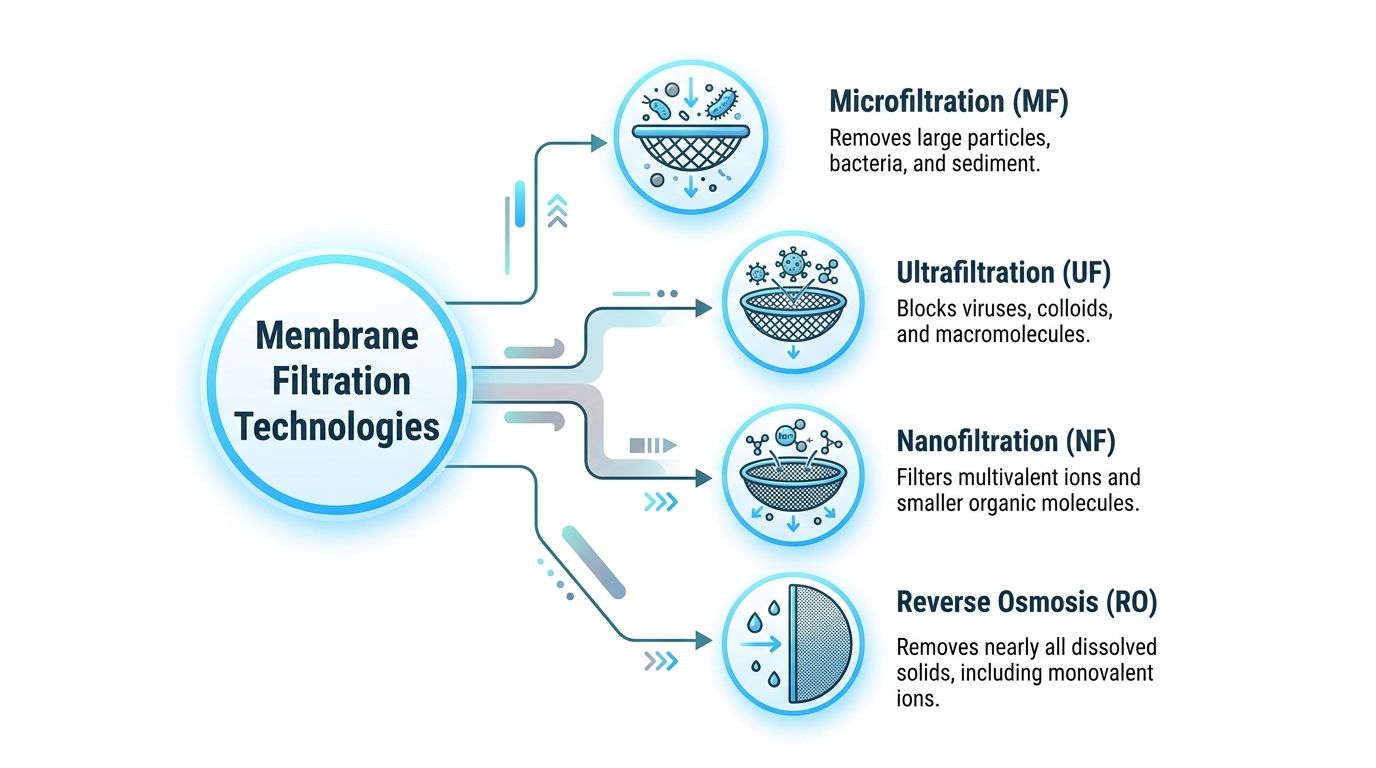
A diagram comparing four membrane water filtration technologies: Microfiltration, Ultrafiltration, Nanofiltration, and Reverse Osmosis.

The four membrane types in plain language

Microfiltration

Microfiltration is the coarse screen of the membrane family. It’s useful when water contains visible particles, sediment, or larger suspended matter. In home systems, MF often acts as a bodyguard for finer stages downstream.

If your water looks cloudy after plumbing work or carries fine grit from a well, MF may be part of the answer. It’s usually not the final answer for dissolved contaminants.

Ultrafiltration

Ultrafiltration sits in the middle ground. It’s much finer than MF, but it usually runs at lower pressure than RO. That makes it attractive for whole-house use where homeowners want broad particle and microbe reduction without the heavier demands of reverse osmosis.

According to WCP Online’s discussion of membrane filtration standards, UF systems filter particles down to 25 to 100 nanometers, typically with a molecular weight cut-off of 10,000 to 100,000 daltons, and operate at 200 to 700 kPa, or 30 to 100 psi. The same source explains that UF is commonly built as hollow-fiber modules.

That hollow-fiber design sounds exotic, but the concept is manageable. Picture a bundle of very thin drinking straws. Water either moves from the inside of each straw outward, or from the outside inward. The membrane wall is the filtering surface.

Nanofiltration

Nanofiltration is the less famous sibling. Homeowners usually hear about it when hardness, some organic compounds, or selective ion reduction enters the conversation. It doesn’t go as far as RO, but it can be a smart middle option when full demineralization would be excessive.

NF often appears in conversations about water softening alternatives or systems that need more selectivity than UF but less intensity than RO.

Reverse osmosis

RO is the precision specialist. It uses pressure to push water through an extremely selective membrane. That’s why it’s so often chosen for drinking water systems when dissolved contaminants are the main concern.

It also asks more from the homeowner. More pressure. More pretreatment. More attention to maintenance.

Pressure and pore size confuse people most

A straightforward explanation is as follows:

Membrane type Best mental model What it mainly handles at home
Microfiltration Fine screen Sediment and larger particles
Ultrafiltration Very fine screen Smaller particles, some microbes, humic material
Nanofiltration Selective barrier Hardness-related and smaller dissolved material
Reverse osmosis Near-total barrier Dissolved solids and broad contaminant reduction

A smaller pore or more selective barrier usually means the system needs more driving force. In real life, that often means more pressure, more complexity, and more maintenance sensitivity.

Why UF gets used before RO

One of the most practical ideas in home filtration is using a less extreme membrane to protect a more extreme one. WCP Online notes that UF pretreatment before RO can improve RO recovery from 75% to 85% by reducing SDI from greater than 5 to less than 3, cutting replacement costs by 30% over 5 years in whole-house systems, based on the source’s practical benchmark and standards discussion.

That matters because membranes don’t fail only from age. They fail because water keeps delivering debris and foulants to the surface.

A membrane isn’t a magic wall. It’s a working surface. If you keep throwing dirt at it, it clogs.

The same source notes that without pretreatment, fouling can reduce flux by 20% to 50% within weeks. That’s a useful reality check for homeowners who think the membrane alone does all the heavy lifting.

How Membranes Remove Water Contaminants

A membrane doesn’t “clean” water in the way soap cleans a plate. It separates. The most important habit for homeowners is to ask, what is this membrane separating out, and how?

Three ideas make most of the process easier to understand: size exclusion, selective passage, and surface interaction.

Size exclusion is the easiest one to picture

Start with a colander in the sink. Pasta stays behind, water passes through. Membrane filtration works on the same principle, just at a much smaller scale.

If your water contains sand-like sediment, rust flakes, or suspended particles, a coarser membrane can block them because they’re physically too large to fit through the openings. That’s the basic logic behind microfiltration and much of ultrafiltration.

For homeowners, this explains why a system can make cloudy water look clear. The particles are still in the incoming water. The membrane just refuses to let them continue downstream.

Selective passage matters more as contaminants get smaller

Once contaminants become tiny, the explanation gets less like a kitchen sieve and more like a checkpoint. Reverse osmosis is the classic example. It doesn’t just stop obvious particles. It separates water from dissolved material that is mixed into the water at a much finer level.

That’s why RO is so often chosen when people worry about total dissolved solids, salty taste, or dissolved metals. The membrane is selective enough that many dissolved substances don’t cross with the water.

A useful everyday comparison is brewed coffee. A paper coffee filter catches grounds, but the dissolved coffee compounds still pass through into your cup. If you wanted to separate the dissolved compounds too, you’d need something far more selective than a coffee filter. RO plays that role in water treatment.

Surface interaction and chemistry complicate the story

Some membranes do more than act like a size gate. Their material and operating conditions influence what passes and what doesn’t. Charge, pressure, and the chemistry of the water all matter.

This is one reason homeowners get frustrated when they read contaminant charts too strictly. A membrane might perform very well under one set of conditions and struggle under another. Water from a treated municipal line behaves differently from well water carrying iron, organic matter, or fine silt.

Homeowner takeaway: Don’t ask only, “What does this membrane remove?” Ask, “What kind of water was it tested against, and what protects it upstream?”

Matching contaminants to membrane types

The easiest way to think about removal is to group contaminants by form.

Larger suspended material

This includes visible sediment, grit, and rust particles. These are usually the simplest targets. Coarser membranes or prefilters handle them well.

Microbiological material

Ultrafiltration becomes relevant when the concern shifts to bacteria-sized or virus-adjacent material. According to the WCP Online standards discussion cited earlier, UF can remove all microbiological species captured by MF and can provide partial removal of bacteria, some viruses, and humic materials. The same source notes that standards evidence shows greater than 99.99% removal of particles larger than 0.02 μm in water reclamation contexts.

That doesn’t mean every home UF unit performs identically in every kitchen or basement. It does show why UF earns attention in whole-house treatment where homeowners want finer biological protection than a sediment filter offers.

Dissolved solids and salts

RO earns its reputation in this area. Dissolved material is what makes two glasses of water look equally clear while tasting completely different. If one glass has high dissolved solids, a carbon filter may improve odor but won’t necessarily solve the underlying issue. RO is built for that finer separation.

Small organic chemicals

Homeowners often overestimate membranes here. Some membrane systems struggle with very small organic chemicals unless they’re paired with other treatment stages. If pesticides or similar compounds are part of the concern, a hybrid approach may be more realistic than relying on a membrane alone.

Why one membrane rarely solves everything

A complete home setup often looks more like a team than a single superstar.

  • A sediment stage protects the finer membrane.
  • Carbon media can help with taste, odor, and chemicals that membranes may not target well.
  • UF or RO does the fine separation work.
  • Post-treatment may polish the water or adapt it for use at a specific tap.

That layered design is why shopping by one headline claim can backfire. “Removes X” sounds simple. Actual water treatment rarely is.

Comparing Tradeoffs Across Membrane Types

Homeowners often ask which membrane type is best. The honest answer is that each one asks you to trade something for something else.

You might trade broad contaminant reduction for easier maintenance. You might trade lower pressure needs for less chemical removal. You might trade a lower sticker price for a system that needs more cleaning and protection later.

A lineup of various industrial membrane water filtration system types displayed as cross-section column samples.

A practical side-by-side view

Membrane type Main strength Main limitation Best fit at home
MF Handles sediment with modest demands Limited against dissolved contaminants Prefiltration and particle control
UF Stronger microbiological and fine-particle barrier Still not a full dissolved-solids solution Whole-house treatment and RO pretreatment
NF Selective reduction without full RO intensity More specialized and less familiar to buyers Homes needing a middle option
RO Broad dissolved contaminant reduction Higher pressure, more upkeep sensitivity Drinking water and high-purity applications

Why cheap membranes can cost more later

A membrane system can look affordable on day one and become irritating by month six. The usual culprit is fouling, which is the gradual buildup of unwanted material on the membrane surface.

The newer antifouling membrane discussion is interesting. According to Northwestern University’s coverage of membrane investment research, high-performing antifouling membranes can reduce cost, energy consumption, and greenhouse gas emissions over their lifetimes, and the same piece notes that 65% of desalination plants already use membrane technology.

For homeowners, the headline isn’t “buy the fanciest membrane.” It’s simpler than that. Sometimes the bargain option is only cheaper if you ignore cleaning, earlier performance decline, and shorter useful life.

Tradeoffs that matter in real homes

Maintenance tolerance

If you want the least demanding system, MF or a modest UF setup may feel more manageable than RO. RO often brings tighter operating requirements and more sensitivity to what enters the membrane.

Water source

City water and well water don’t punish membranes in the same way. Well water with iron or heavy sediment can be rough on a membrane if pretreatment is weak. Municipal water may bring disinfectant byproducts, taste issues, or a contaminant profile that pushes homeowners toward RO for drinking water.

Energy and pressure

RO is powerful because it is demanding. The finer the separation, the harder the system has to work. That’s not automatically a reason to avoid it. It just means the strongest membrane isn’t always the smartest whole-house choice.

Better filtration on paper isn’t always better filtration in a basement utility room. The right system is the one your water and maintenance habits can support.

A smarter way to compare systems

When you’re judging membrane water filtration systems, use these questions instead of chasing marketing language:

  • What problem am I solving first? Taste, sediment, microbes, dissolved solids, or a combination?
  • What will protect the membrane? Prefilters, carbon stages, softening, or another pretreatment step.
  • How much upkeep can I realistically do? A neglected premium system often performs worse than a simpler system that gets maintained properly.
  • Is lifecycle value better than purchase price? Antifouling designs may make more sense if your source water tends to foul standard membranes.

Typical Household Applications for Membrane Systems

Membrane water filtration systems show up in homes for very different reasons. One family wants better-tasting drinking water. Another wants cleaner shower water and less staining in the bathroom. A third is trying to protect appliances from dirty well water while still getting polished water at the kitchen tap.

Those are not the same job, so they usually don’t call for the same setup.

A clear glass of ice water sits on a wooden counter next to a home water filtration system.

Under-sink drinking water systems

The most familiar home application is the under-sink RO unit. This setup treats water where people care most about taste and direct consumption, usually at a dedicated faucet near the kitchen sink.

A homeowner on municipal water might notice a chlorine smell in tea or coffee and dislike the taste of plain tap water. In that case, an RO system with suitable pretreatment can make sense because it focuses treatment where the family drinks and cooks.

This approach is often more practical than trying to run highly purified water to every toilet, shower, and hose bib.

Whole-house treatment for comfort and protection

Whole-house membrane setups often lean toward UF rather than RO. The reason is practical. Many homeowners want broader treatment for bathing, laundry, and fixture protection without the heavier complexity of whole-house reverse osmosis.

A family on a private well might use a layered system like this:

  • Sediment prefiltration to catch grit
  • An iron-focused treatment stage if needed
  • UF as a fine barrier for suspended material and microbiological concerns
  • Point-of-use RO at the kitchen sink for drinking water

That arrangement respects the strengths of each technology. The whole house gets cleaner utility water, and the kitchen gets the most aggressive polishing where it matters most.

When a middle-ground membrane makes sense

Nanofiltration often works best in the homes people don’t hear about on social media. These are the households with water that isn’t awful, but isn’t pleasant either.

If hardness or selective dissolved material is the issue, NF can sit in the useful middle. It can provide more finesse than UF without going all the way to RO. It’s not the default recommendation for every home, but it can be a smart match when full RO would be more than the situation requires.

A quick visual walkthrough can help if you’re comparing system styles and installation layouts:

Common household scenarios

City water with taste and odor complaints

A carbon stage may help, but some homeowners still want stronger reduction of dissolved material or byproducts. Under-sink RO is often the focused solution.

Well water with staining or particles

This water usually needs pretreatment first. Throwing a membrane straight at untreated well water is like sending a vacuum robot into a muddy garage and expecting it to stay happy. Sediment and iron control become part of the plan before the membrane does its job.

Homes that want cleaner showers and laundry water

A whole-house UF system can make sense when the goals are reduced cloudiness, lower suspended matter, and better water feel throughout the house. People often choose it when they’re trying to improve daily use, not just drinking water.

Some of the best home systems are hybrids. They don’t force one membrane to do every job. They assign each stage the job it does best.

Installation and Maintenance for Home Filtration

The hidden truth about membrane systems is that buying one is the easy part. Keeping it working well requires considerable skill.

A membrane has to be installed in the right place, protected from the right threats, and maintained on the right schedule. If any one of those pieces is missing, performance can slide fast.

A professional technician wearing a plaid shirt installs a water filtration system unit with a metal wrench.

Where installation goes wrong

Most installation mistakes happen before the first drop of water ever reaches the membrane.

Common trouble spots include:

  • Poor placement that leaves no room to service housings or access shutoff valves
  • Missing pretreatment even though the incoming water carries sediment, iron, or organics
  • Pressure mismatch between the membrane design and the home’s actual plumbing conditions
  • Drain and backwash planning that gets treated like an afterthought

If you’re dealing with a whole-house setup, tight utility-room plumbing, or older pipework, it’s sensible to bring in a qualified installer. If you need help evaluating the plumbing side, professional plumbing services can be useful as a reference point for what a proper installation scope should include.

Pretreatment is not optional

This is the part homeowners most often underestimate.

According to the review on membrane fouling and treatment challenges in PMC, pretreatment is an absolutely essential step for protecting membranes from rapid fouling, flux reduction, and rising operating costs. The same review notes that UF and MF systems may require backwashing as often as 2 to 4 times per hour, depending on feed water quality and flux.

That sounds extreme until you picture what the membrane is doing. It is constantly collecting rejected material on its surface. Without regular clearing and proper upstream conditioning, the membrane gradually turns into its own blockage.

Maintenance reality: A membrane doesn’t just filter water. It also collects what it rejects. Your system needs a plan for getting that rejected material off the membrane again.

A homeowner checklist for ongoing care

Before installation

Check your water quality first. The right membrane depends on what is in the water, not what you suspect.

Leave service space around housings, valves, and any storage components. Filters that are impossible to reach usually become filters that don’t get changed on time.

During setup

Install pretreatment in the right order. Sediment and adsorption-based stages often protect the membrane from the foulants most likely to shorten its life.

Confirm that the system has a realistic path for backwash, flushing, or reject flow. A membrane system that can’t clear itself properly is already in trouble.

After startup

Watch for pressure changes, slower flow, unusual taste shifts, or more frequent service needs. Those are often the first clues that fouling has started building.

For additional homeowner guidance on troubleshooting and general filter care, this practical library of advice at https://www.waterfilteradvisor.com/advice/ is a useful reference.

The upkeep people don’t see on the sales page

Consumer guides often focus on “what it removes” and skip “what it demands.” But membrane ownership includes routine attention to cleaning cycles, pretreatment media, and signs of fouling.

Some homeowners are comfortable with that. Others would rather have a simpler, less demanding system. Neither choice is wrong. The mistake is buying a membrane setup without understanding that upkeep is part of the technology, not a side issue.

Evaluating Cost and Certifications for Membrane Systems

The total cost of a membrane system isn’t the number on the product page. It’s the total of the unit, the support stages around it, the replacement parts, and the effort required to keep it working as designed.

That’s why two systems that look similar on a retailer’s shelf can feel completely different to own.

Think in lifecycle costs, not sticker price

A homeowner comparing membrane water filtration systems should ask four cost questions.

Cost area What to check
Initial hardware Is the membrane the whole system, or do you still need pretreatment and fittings?
Consumables Are replacement filters standard or proprietary?
Maintenance burden Will the system need frequent backwashing, flushing, or cleaning attention?
Operating demands Does it rely on higher pressure or a more complex setup to perform well?

This is also where antifouling membrane options deserve serious thought. A cheaper standard membrane may look attractive at checkout, but if your water tends to foul membranes quickly, the low purchase price can hide a more expensive ownership experience.

Certifications tell you what claims to trust

Certification language can feel dry, but it protects buyers from guesswork. A membrane system should never be judged only by broad marketing promises such as “pure,” “advanced,” or “laboratory-grade.”

The labels homeowners often look for include:

  • NSF/ANSI 42 for chlorine reduction and aesthetic effects
  • NSF/ANSI 53 for certain health-related contaminant claims
  • NSF/ANSI 58 for reverse osmosis systems
  • NSF/ANSI 61 for materials safety

These labels matter because they help connect a product claim to a recognized testing framework. If a system promises lead reduction, dissolved contaminant performance, or RO-specific treatment, the certification details help you see whether the claim is grounded in formal standards.

Buying signals that matter more than flashy claims

Match the system to the job

If you only need drinking water improvement, a point-of-use membrane system may be the sensible move. If your showers, laundry, and fixtures are suffering, a broader treatment strategy may make more sense.

Read the replacement path

A membrane system is easier to live with when replacement parts are easy to identify, easy to access, and easy to order. If the maintenance path feels murky before purchase, it usually gets worse after purchase.

Look for clear contaminant language

Good manufacturers say what the system is designed to address and under what standard or certification framework. Vague promises usually mean the burden of interpretation falls back on you.

Buy the system you can maintain, not the system with the most dramatic ad copy.

A simple rule for budgeting wisely

If a membrane seems affordable only because it excludes pretreatment, service parts, or realistic upkeep, it is not affordable. It’s incomplete.

The strongest buyers treat the membrane as one part of a treatment train. That mindset helps you compare systems accurately and avoid the common mistake of underestimating what it takes to own one successfully.

Making the Right Choice for Your Home

The best membrane water filtration systems are the ones that match your water, your goals, and your patience for upkeep. That’s the whole game.

If your main issue is cloudy water or sediment, a lighter-touch membrane strategy may be enough. If you’re worried about dissolved solids or broad drinking water purification, RO often becomes the more logical choice. If your water is tough on equipment, pretreatment matters just as much as the membrane itself.

Homeowners usually get into trouble when they skip one of three steps:

  • Testing the water
  • Planning pretreatment
  • Being honest about maintenance

A membrane can be a brilliant tool. It can also become an expensive, frustrating box under the sink if it’s asked to treat the wrong water with the wrong support.

Start with the problem you have. Taste and odor. Sediment. Iron. Dissolved material. Whole-house comfort. Safer drinking water at one tap. Once that’s clear, the filter choice gets much easier.

If you’re still deciding, compare systems by three standards. What they remove, what they require, and what they cost to keep running. That approach is less exciting than marketing slogans, but it leads to better water and fewer surprises.


If you want help comparing options, understanding certifications, and choosing a system that fits your home’s actual water problems, visit Water Filter Advisor. It’s a practical place to research filters, replacement needs, and maintenance before you buy.

Your Complete Guide to Point of Entry Water Filters

Picture this: you turn on any tap in your house—the kitchen sink for a glass of water, the shower after a long day, the bathroom faucet to brush your teeth—and out comes pure, clean, refreshing water. Every. Single. Time. That isn't a far-off dream; it's the reality a point-of-entry (POE) water filter delivers. Think of it as hiring a top-notch security guard for your home's entire water supply, inspecting and purifying every drop the moment it steps onto your property.

This isn't about slapping a filter onto a single faucet. A POE system is a comprehensive solution that cleans all your water at its source, protecting not just your family's health, but your expensive appliances from a whole rogues' gallery of unwanted contaminants.

What Are Point of Entry Water Filters?

A point-of-entry filter, known in the biz as a whole-house water filter, is a system plumbed directly into your main water line. It's the ultimate gatekeeper. Before a single drop of water can make its way to your shower, washing machine, or that fancy coffee maker, it has to pass inspection through this central filtration fortress.

This setup ensures that every drop you use for bathing, cooking, cleaning, and drinking is purified. Instead of playing whack-a-mole with water quality issues from room to room, a POE system provides one powerful, all-encompassing solution. These systems are true workhorses, built to handle a serious volume of water, easily purifying thousands of gallons a day without ever making your home's water flow skip a beat.

Why Whole-House Filtration Is a Big Deal

The quest for cleaner water is more than just a trend; it's a growing necessity. It's estimated that in the U.S. alone, over 7.1 million Americans fall ill each year from waterborne contaminants. That's a staggering public health issue, and it's prompting more and more homeowners to take a hard look at what's really flowing through their pipes.

This rising awareness is fueling a massive market shift. In fact, the demand for point-of-entry systems is projected to explode into an USD 18.15 billion industry by 2035. You can dive deeper into the data behind this trend over at Spherical Insights & Consulting.

By treating every drop entering your home, these systems solve a wide array of problems that affect your daily life, and the benefits extend far beyond just better-tasting water.

A point of entry system isn't just about purifying drinking water; it's about elevating the quality of life throughout your entire home. It protects your health, preserves your appliances, and enhances your daily routines, from showering to doing laundry.

Key Benefits for Your Home

Installing a point-of-entry water filter in your home brings a cascade of immediate and long-term perks:

  • Luxurious Showers and Baths: By removing chlorine and other harsh chemicals, the water becomes gentler on your skin and hair, reducing that annoying dryness and irritation. Hello, spa day at home!
  • Appliance Life Support: Sediment, minerals, and chlorine are the arch-nemeses of water-using appliances like dishwashers, washing machines, and water heaters. Filtered water helps them live longer, more efficient lives.
  • Better-Tasting Water, Everywhere: Enjoy the peace of mind that comes with clean, delicious water from every single faucet in the house—not just the one in the kitchen.
  • Brighter, Softer Laundry: When you eliminate the contaminants that make fabrics feel dingy and stiff, your clothes emerge from the wash brighter, softer, and cleaner than ever.

How a Whole House Filter Actually Works

To truly appreciate what a point-of-entry water filter does, you need to peek inside the tank. Don't imagine a simple screen; picture a highly coordinated team of filtration specialists, each with a specific mission to purify your water. When water flows in from your main line, it isn't just passing through a single barrier. It’s embarking on a journey through several sophisticated layers of filter media.

This multi-stage gauntlet is what makes these systems so formidable. Each layer is engineered to target and eliminate different types of impurities. By the time the water exits the tank, it has been thoroughly scrubbed, ensuring that one system can tackle a huge range of issues, from dirt and chemicals to heavy metals.

This graphic provides a clear visual of how a POE filter acts as the gatekeeper for your home's entire water supply, treating it before it ever reaches your faucets.

Infographic about point of entry water filters

As you can see, the filter is a central checkpoint. It guarantees that every tap—from your kitchen sink to your shower—delivers purified water.

The First Line of Defense: The Sediment Filter

The journey always begins with the sediment filter. Think of it as the bouncer at an exclusive club. Its sole job is to stop the big, obvious troublemakers from getting past the velvet rope. This initial stage snags physical debris like sand, dirt, silt, and rust that can make water cloudy and wreak havoc on your plumbing fixtures over time.

It's essentially a high-tech colander for your water. This simple but absolutely crucial first step prevents larger particles from clogging up the more delicate, specialized filter media that comes next. By clearing the path, the sediment filter protects the rest of the system, helping it perform better and last longer.

The Chemical Sponge: Activated Carbon

Once the water is free of sediment, it moves on to meet the undisputed champion of chemical removal: activated carbon. Now, this isn't the same charcoal you use for grilling. It's an incredibly porous material with a mind-boggling surface area—a single gram can have the surface area of an entire football field.

Activated carbon uses a process called adsorption, where chemical contaminants literally stick to its surface like tiny magnets. It’s a beast at grabbing things like chlorine, pesticides, herbicides, and those nasty volatile organic compounds (VOCs) that give your water weird tastes and smells. This is exactly why it’s a non-negotiable part of nearly every top-tier point-of-entry water filter.

By yanking out chlorine and its byproducts, activated carbon doesn’t just make your water taste and smell fantastic. It also makes it much kinder to your skin and hair when you shower.

The Elite Specialists: Advanced Media for Tough Contaminants

Some homes face water challenges that require more than just the basics. For those dealing with more stubborn or specific contaminants, advanced filtration media provides that next level of protection. These are highly engineered materials designed to tackle the tough stuff that standard carbon filters might miss.

To give you an idea of the available arsenal, we’ve put together a table breaking down the most common types of filter media and their specific targets.

Common Filtration Media and Their Targets

Filtration Media Primary Function Removes Contaminants Like…
Sediment Physical Particulate Removal Sand, silt, rust, dirt, and other suspended solids.
Activated Carbon Adsorption of Chemicals Chlorine, pesticides, herbicides, VOCs, and improves taste/odor.
KDF (Kinetic Degradation Fluxion) Redox Reactions & Bacteriostatic Heavy metals (lead, mercury, iron), chlorine, and inhibits bacteria/algae growth.
Catalytic Carbon Catalytic Conversion Chloramine (a persistent chlorine/ammonia disinfectant), hydrogen sulfide.
Oxidation Media (e.g., Manganese Greensand) Oxidation and Filtration Iron, manganese, and hydrogen sulfide (rotten egg smell).

These advanced stages work in concert with the sediment and carbon layers. Each one builds on the last, systematically stripping away impurities until only clean, safe water is left to flow through your home. This teamwork is the real secret behind a truly effective whole-house system.

Choosing the Right System for Your Home

A close-up of a point of entry water filter system installed on a wall.

When you're picking out a point-of-entry water filter, it's not about finding the biggest, most expensive unit you can. The best system is the one that fits your home's unique water needs like a glove.

It’s a bit like buying a car. You wouldn't get a tiny two-seater sports car for a family of six, right? And you probably wouldn't commute to the office every day in a massive RV. Your water filter needs to be the right fit for your household, and that comes down to three things: sizing, flow rate, and performance certifications. Nail these, and you'll have clean, reliable water without any headaches.

Sizing Your System for Your Household

First things first, you need a handle on how much water your family actually uses. A system that’s too small will constantly struggle to keep up. You'll end up with clogged filters way too soon and, even worse, a drop in water pressure. On the flip side, an oversized system is just money down the drain.

To get a solid estimate, just look at two key factors:

  • Number of People: The classic rule of thumb is that each person uses somewhere between 75 and 100 gallons of water a day. That covers everything from showers and laundry to flushing the toilet.
  • Number of Bathrooms: A house with more bathrooms means more fixtures that can all be running at once. Think about those chaotic weekday mornings! A four-bathroom house is going to have a much higher peak demand than a one-bathroom apartment.

So, a family of four in a three-bathroom home has very different needs than a couple living in a two-bathroom condo. Sizing your system correctly ensures it can handle your busiest moments without skipping a beat. For more detailed help, you can find a ton of professional advice over at https://www.waterfilteradvisor.com/advice/.

Understanding Flow Rate and Water Pressure

Ever been enjoying a hot shower when someone flushes a toilet, and suddenly your water pressure tanks? That’s what a poor flow rate feels like. Flow rate is measured in gallons per minute (GPM), and it basically tells you how much water can pass through your filter at one time.

A point of entry water filter's flow rate must be high enough to meet your home's peak demand. This is the amount of water needed when multiple appliances and faucets are running simultaneously, like the shower, dishwasher, and a sink.

A standard shower head uses about 2.5 GPM, a dishwasher needs around 2 GPM, and a kitchen faucet runs at about 1.5 GPM. If your family often has all these going at once, your peak demand could easily be 6 GPM or more. You need to pick a system with a GPM rating that meets—or even better, exceeds—that number to keep the water pressure strong and steady everywhere in the house.

Why Certifications Matter

So, how can you be sure a filter actually does what the box says it does? This is where you look for certifications from independent organizations like the NSF (National Sanitation Foundation) and ANSI (American National Standards Institute). They’re your best friend in this process.

These certifications aren't just clever marketing. They are cold, hard proof that a third-party lab has put the system through its paces to make sure it really removes the contaminants it claims to.

For example, NSF/ANSI 42 certifies that a filter makes your water taste and smell better by reducing chlorine. NSF/ANSI 53, on the other hand, is a much more serious certification confirming it can remove health-related contaminants like lead or cysts. If you're building a new home, it's a good idea to review some essential questions to ask a custom home builder to ensure they plan for plumbing that can accommodate certified filtration systems.

Always check for these certification marks when you're shopping around. They give you an unbiased guarantee of performance and peace of mind that you're making a solid investment in your family's water quality.

Whole House vs Single Faucet Filters

So, you're trying to figure out if you need a big whole-house system or just something small for the kitchen sink. It can feel like a tough choice, but there's a simple way to think about it.

A whole-house filter is like your home's central air conditioning—it treats every single room, providing consistent comfort everywhere. A single-faucet filter, on the other hand, is like a portable window AC unit. It does an amazing job cooling one specific room, but the rest of the house is on its own.

Both are great at what they do. The right one for you really comes down to what you're trying to fix, your budget, and how much of your home you want to cover. Let's break down the differences.

The Point of Entry Advantage: Comprehensive Coverage

A point of entry (POE) system, also known as a whole-house filter, is the ultimate "set it and forget it" solution for your water. It gets installed right where the main water line enters your house, so it filters every single drop of water before it ever reaches a tap.

This means you get filtered water for everything, not just drinking. Think about it:

  • Better Showers: Less chlorine and other chemicals means softer skin and hair. No more that dry, itchy feeling after a shower.
  • Longer-Lasting Appliances: Your dishwasher, washing machine, and water heater are shielded from sediment and scale buildup that can cause damage over time.
  • Cleaner Laundry: Your clothes will feel softer and look brighter without all those harsh minerals and chemicals.

The biggest plus is peace of mind. You never have to wonder which faucet is safe—they all are. The trade-off? These systems have a higher upfront cost and usually need a professional to install them correctly.

The Point of Use Approach: Targeted and Affordable

Point-of-use (POU) filters are the sharpshooters of water filtration. These are your under-sink systems or faucet-mounted units that treat water at a single spot, usually the kitchen sink. They are fantastic for making sure the water you drink and cook with is as pure as possible.

To get a better idea of how these fit in, it helps to understand the various types of kitchen faucets where you'd typically install a POU filter. Their popularity comes from being affordable and pretty easy to install yourself.

In fact, the global water filter market is expected to reach USD 48.2 billion by 2025, and POU systems account for a huge chunk of that—almost 44.8% of total revenue. People love them because they're a low-cost, effective way to get great-tasting water right where they need it most.

The bottom line is this: POE systems give you complete, home-wide protection. POU filters give you high-purity water for drinking and cooking at a much lower cost, but they leave the rest of your home’s water untreated.

To give you a clearer picture, here’s a quick side-by-side comparison of the two approaches.

Whole-House vs. Single-Faucet Filter Comparison

Feature Point of Entry (Whole-House) Point of Use (Single-Faucet)
Coverage Treats all water entering the home. Treats water at a single tap (e.g., kitchen sink).
Protection Protects plumbing and all water-using appliances. Protects only the specific faucet it's attached to.
Installation Typically requires professional plumbing. Often a simple DIY installation.
Upfront Cost Higher initial investment ($500 – $3,000+). Lower initial investment ($50 – $500).
Maintenance Less frequent filter changes (e.g., 6-12 months or longer). More frequent filter changes (e.g., 2-6 months).
Best For Widespread issues like chlorine, sediment, or hard water. Targeted removal of contaminants for drinking water.

This table helps illustrate the core trade-offs. It's not about one being "better," but about which one is the right tool for your specific job.

Finding the Best of Both Worlds

For a lot of homeowners, the perfect setup isn't an "either/or" decision. It’s a "both/and" strategy. You can actually combine both types of systems to create a powerful, multi-layered defense against any water contaminant.

Here’s how it usually works: You install a whole-house carbon filter to take care of the big stuff—chlorine, sediment, and general chemicals—at every tap. Then, you add a specialized POU system, like a reverse osmosis unit, under the kitchen sink to get rid of the really tough contaminants like lead, fluoride, or arsenic.

This hybrid approach gives you the absolute best of both worlds. You get general protection for your appliances, pipes, and skin, plus surgical precision for the water you and your family actually drink. It's a comprehensive solution that leaves no stone unturned.

Installation, Maintenance, and Long-Term Costs

A plumber working on installing a point of entry water filter system in a residential setting.

Buying a whole-house water filter is a bit like buying a car. The sticker price is just the beginning. To really understand the investment, you have to factor in the installation, the regular maintenance, and the total cost over its lifetime. Think of it as the fuel, oil changes, and tune-ups that keep it running smoothly for years.

Planning for these things from the start means you’ll get the clean, safe water you paid for without any nasty surprises down the road. It turns a simple purchase into a smart, long-term investment in your home and your family's health.

Getting Your System Up and Running

So, you’ve picked out the perfect point of entry water filter. Now what? The first step is getting it installed, which usually means cutting into your home's main water line. It’s a job that demands a steady hand and a solid understanding of plumbing.

You’ve got two options here: DIY or hire a pro. Going the DIY route can definitely save you some money on labor, but it’s a serious project. One slip-up could lead to leaks, a drop in water pressure, or a system that isn't even filtering properly. For most people, hiring a licensed plumber is the way to go. It ensures the job is done right, meets local codes, and keeps your warranty intact.

Professional installation for a whole house system can run anywhere from $300 to over $1,000, depending on how complex your plumbing is and the going rates in your area. It's an extra cost, sure, but the peace of mind is often worth every penny.

Creating a Clear Maintenance Roadmap

Your whole-house filter is a workhorse, but it’s not a “set it and forget it” appliance. To keep it working at peak performance and maintain strong water pressure, you'll need to do some regular upkeep. The good news is the schedule is predictable and pretty easy to manage.

Maintenance mostly boils down to swapping out the filter media. How often you do this depends on the specific part and just how "gunky" your water is to begin with.

Here’s a general idea of what to expect for a replacement schedule:

  • Sediment Pre-filter: This is your first line of defense, and it catches the most stuff. Plan on replacing it every 3 to 12 months.
  • Carbon Pre/Post-filter: If your system has separate carbon block filters, they typically last about 6 to 12 months.
  • Main Media Bed: This is the heart of the system, where the heavy lifting happens with a big tank of activated carbon or KDF. This core component has a much longer lifespan, usually needing a replacement every 5 to 10 years or after filtering a huge volume of water, like 1,000,000 gallons.

Understanding the Total Cost of Ownership

To budget properly, you need to look past the initial price tag and think about the total cost of ownership over the filter's entire life. This gives you a clear, honest picture of what you'll be spending over time.

Let's break down the costs you can expect with a point of entry water filter:

  1. Initial System Cost: This is the price of the unit itself, which can be anywhere from $500 for a basic setup to $3,000+ for a beefy, multi-stage system.
  2. Installation Fee: As we mentioned, getting it installed professionally is a key part of that initial investment.
  3. Recurring Filter Replacements: This will be your main ongoing expense. You’ll want to budget for the annual sediment and carbon filter changes, plus the big, less frequent main media replacement down the line.
  4. Operational Costs: Most standard systems don’t use any electricity. However, if you get a model with a UV purifier or an automatic backwashing valve, you’ll see a small bump in your utility bill.

When you add it all up, you get a realistic picture of your investment. A little foresight here means you can enjoy great-tasting, clean water without any financial stress.

Answering Your Top POE Filter Questions

Even after you've got a handle on how these systems work, it's totally normal to have some practical questions pop up. Think of this section as your personal FAQ, where we'll tackle the common worries and head-scratchers we hear about all the time.

We've pulled together the top questions from homeowners just like you. Let's get you some answers.

Will a Whole House Filter Lower My Water Pressure?

This is probably the number one concern we hear, and for good reason. Nobody wants a weak shower. The short answer is no—a properly sized and installed system should have almost no noticeable effect on your home's water pressure.

If you do see a significant drop in pressure, it's a big red flag that something's wrong. The usual suspects are a system that’s too small for your house's needs or, more commonly, a filter cartridge that's clogged and way past its replacement date. Keeping up with the maintenance schedule is the single best way to keep your water flowing strong.

Do I Still Need a Water Softener?

This is a common mix-up. A whole-house water filter and a water softener are two completely different tools for two different jobs. Most POE filters are rockstars at pulling out things like chlorine, sediment, and other chemical contaminants. What they don't do is remove the dissolved minerals—calcium and magnesium—that cause hard water scale and soap scum.

So, the bottom line is yes, if you have hard water, you will likely still need a separate water softener. Many people opt for an integrated setup that combines both filtration and softening into one seamless system. It's the best way to get a complete fix for both water quality and hardness.

The only way to know for sure what's in your water is to test it. A good starting point is your local water utility's annual Consumer Confidence Report, which is free. For a much closer look, you can grab an at-home test kit or send a sample to a certified lab. The results will point you directly to the contaminants you need to address.

What Is the Average Lifespan of a POE System?

A good quality point-of-entry system is a long-term investment. The main tank and valve head—the core hardware—can easily last 10 to 15 years, or even longer if you take care of it.

The part that needs regular replacement is the filter media inside the tank. That's the stuff doing all the heavy lifting, and it eventually gets used up.

Here’s a general idea of the replacement timeline:

  • Sediment Pre-filters: These catch the big stuff and take the most abuse. Expect to change them every 3 to 12 months.
  • Main Media Bed: This is the big tank of carbon or other specialized media. It will typically last 5 to 10 years, but this can vary a lot based on your water quality and how much you use.

When you look at the system's longevity alongside its maintenance needs, you get a much clearer picture of what you're investing in for the long haul.


At Water Filter Advisor, we're committed to helping you find the perfect water filtration solution for your home. Explore our in-depth guides and unbiased reviews to make a confident decision for your family's health. Learn more at https://www.waterfilteradvisor.com.

How to make effective DIY Water filter? Free drinking water for the family

How to make effective DIY Water filter? Free drinking water for the family


Today I’ll share with you one of our lessons on how to make a slow sand biochar filter that treats 300 litres of pond or rain water per day. Can I make swamp water drinkable? How do I purify water? How do I make dirty water clean? How do I make water drinkable? Water filter for drinking. Water filter with charcoal. How to make water filter for home?

Join our telegram channel. 😊
★ TELEGRAM // t.me/bio_veda

Check out our online courses:
★ WATER COURSE // www.bioveda.co/water
★ DOME HOME COURSE // www.bioveda.co/domehome
★ ECO HOME FOR COLD CLIMATE // www.bioveda.co/wautillarium

water filter, DIY water filter, how to make a water filter, how to purify water, how to purify water with sand, how to purify water with charcoal, how to make clean water, clean water, purified water, purify water with charcoal, how to make drinking water, how to filter water for drinking, homemade water filter, how to filter water, water filter DIY, water filtration system, water purifier, water filter system for home, how to make water filter, filter water, filtering water, how to clean water, natural water filter,water purification

Original Video Source

Water Filtration Fundamentals

Water Filtration Fundamentals


Learn the basic fundamentals of water treatment filtration. Contact us today for more information.

Chem-Aqua® is a registered trademark of Chem-Aqua, Inc. and its affiliates.
Copyright © 2021, Chem-Aqua, Inc.

All rights reserved. This video or any portion thereof may not be reproduced or used in any manner whatsoever without the express written permission of the publisher except for the use of brief quotations in reviews. Individuals are solely responsible for operating, maintaining, cleaning, and repairing their systems and equipment and for taking any appropriate actions based upon the information contained herein. Chem-Aqua disclaims any liabilities associated with this information or any health risks or waterborne bio hazards.

Our websites and/or business services are primarily designed and intended for business purposes and therefore intended for adults and teens (age 16 and older) only, and not directed to children under age 16. In accordance with the applicable children privacy regulation, such as for example Children’s Online Privacy Protection Act (COPPA) and the General Data Protection Regulations (GDPR), we do not knowingly collect or store any personal information about children under age 16, and our business websites are not designed to collect personal information from children under age 16. Where local law imposes higher age thresholds, we will comply with such requirements. If we become aware that information has been collected, we are committed to taking appropriate steps to remove the information.

Original Video Source