Health Effects of Lead in Drinking Water

The most popular advice about lead in drinking water is also the least reassuring: check your city's annual water report and assume your glass is covered. That report describes the utility's water and its regulatory sampling program. It doesn't guarantee that water arriving through an aging service line, brass fitting, solder joint, or faucet is free of lead by the time you drink it.

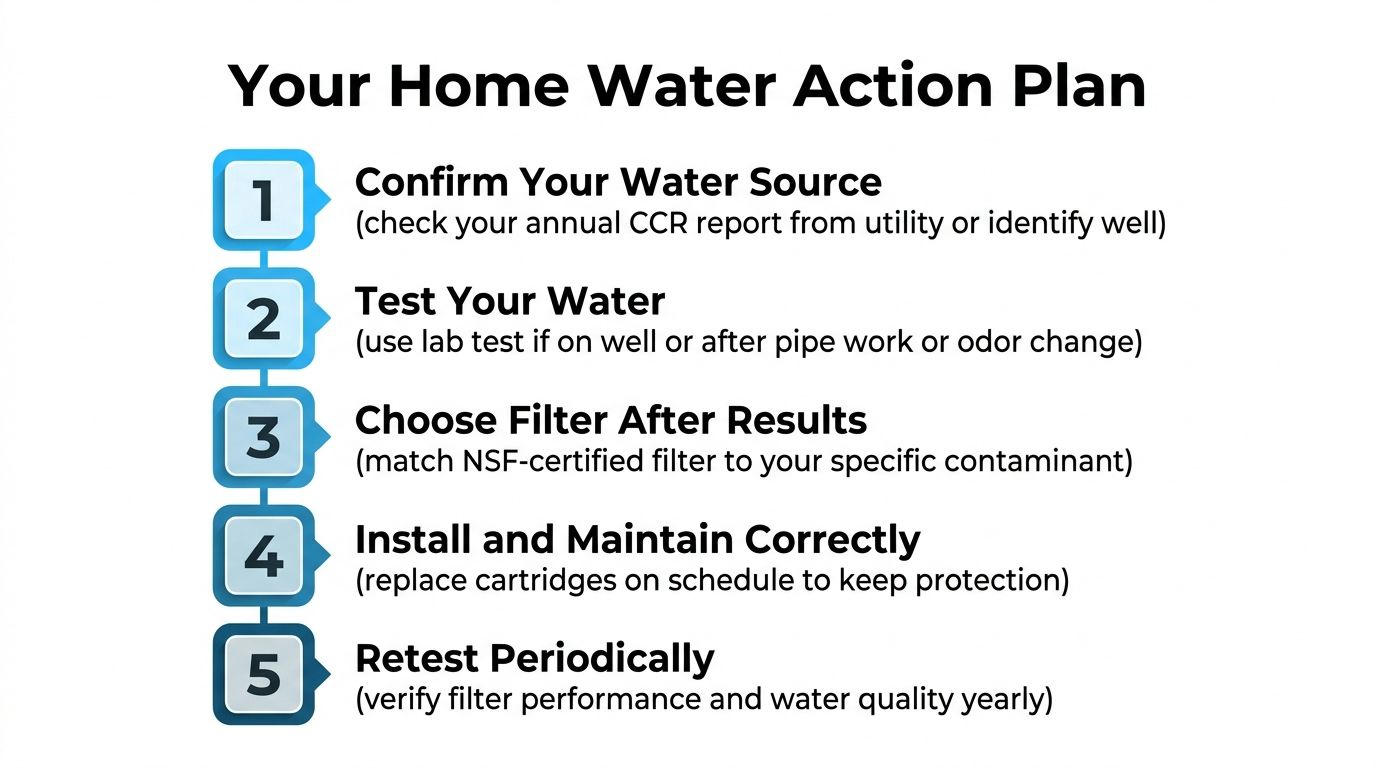
Lead is a household plumbing problem as much as a municipal treatment problem. The practical response is to test at the tap, filter the water you consume, and maintain that filter without excuses. A passing utility result can coexist with exposure inside your home, while a properly certified point-of-use system gives you control over the water used for drinking, cooking, and infant formula.

The Hidden Threat Behind Your Kitchen Tap

Your water utility can treat source water effectively, control corrosion in the distribution system, and still have limited control over what happens inside your property. Water travels from the main through a service line, enters household plumbing, passes through fittings and valves, and finally sits in contact with the faucet before it reaches your glass. Each transition creates another opportunity for lead to enter the water.

The EPA's explanation of lead in drinking water makes the health concern clear: there's no known safe level of lead in a child's blood, and even low exposure can contribute to behavior and learning problems, lower IQ, hyperactivity, slowed growth, hearing problems, and anemia. Children are more vulnerable because these effects can occur at lower exposure levels than in adults.

The gap between the main and the faucet

A utility report is useful, but it's not a substitute for a household sample. Public systems test selected locations under defined procedures. Your home may have different plumbing materials, different water-use patterns, and a different amount of time during which water stands in the pipes.

Lead can come from service lines, older solder, brass components, and fixtures. A faucet can look modern while older plumbing behind the wall remains untouched. Even a property without a lead service line can have contamination introduced by interior fittings or particles collected in an aerator.

Practical rule: Treat the water at the point where your family drinks it, not only at the point where the utility manages it.

Why filtration belongs at the kitchen

A whole-home system can reduce exposure at multiple outlets, but drinking water deserves special attention because it goes directly into the body and is also used for cooking. An under-sink reverse osmosis system or a certified lead-reduction carbon block filter can provide a dedicated barrier at the kitchen tap. A certified faucet-mounted filter can serve renters who can't alter plumbing.

Use filtered cold water for drinking, cooking, and formula. Don't assume a shower filter protects the kitchen, and don't assume a general-purpose pitcher removes lead unless its certification specifically includes lead reduction. The city report tells you about the system. A tested filter protects the glass in front of you.

How Lead Enters Your Home Water Supply

Lead usually reaches household water through contact, not because a treatment plant intentionally sends lead into the distribution network. Water sits against a service line, solder joint, fitting, or fixture. If the chemistry allows corrosion, small amounts of lead can dissolve into the water or detach as particles.

Think of the water as a liquid moving through a metal pathway. Stable water leaves that pathway relatively undisturbed. More corrosive water acts like a slow solvent, wearing away susceptible materials over time. pH and mineral balance influence how aggressively water interacts with plumbing, which is why the same type of fitting can behave differently in different water systems.
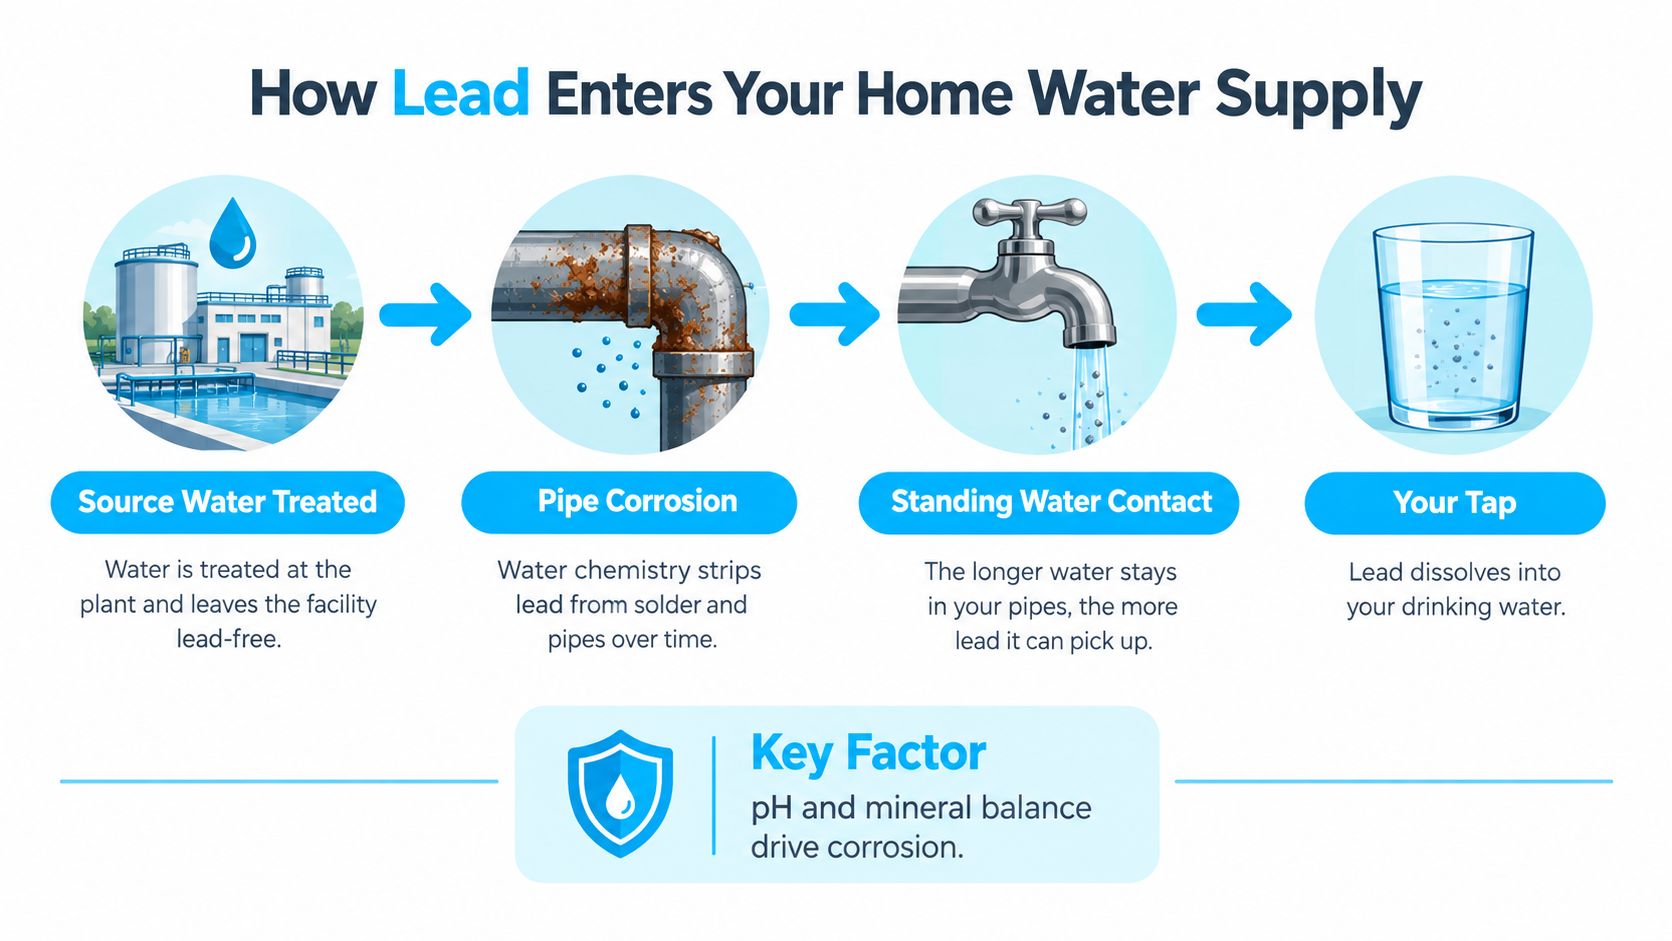
A diagram illustrating how lead enters household drinking water through pipe corrosion and standing water contact.

The contact points that matter

Start with the route into your house. A lead service line can connect the street main to the building. Inside, older solder can join copper pipes, while brass valves, faucets, and fittings can contribute lead under some conditions. A property's age can provide clues, but it can't replace a water test because renovations and replacements often create mixed plumbing systems.

Standing time matters too. Water that remains motionless in a pipe has more opportunity to interact with the pipe wall and fittings. The first water from a morning tap can therefore tell you more about overnight contact than water collected after extensive flushing.

What to do with this information

Don't try to identify risk from appearance alone. Lead plumbing can be hidden, and a clean-looking faucet says nothing about the service line beneath the property. Ask the utility about service-line materials, inspect accessible plumbing with a qualified professional, and test water from the faucet used for drinking.

Until you've tested and installed an appropriate filter, use cold tap water for consumption. Hot water can dissolve lead more readily, and boiling doesn't remove lead. A filter must be installed on the water path your household uses, with the cartridge replaced on the manufacturer's schedule.

For a visual explanation of corrosion, contact time, and household exposure, use this lead contamination process video as a companion to your plumbing inspection.

Health Effects of Lead Exposure Across Different Ages

Lead doesn't affect every household member in the same way, but no family should treat exposure as harmless. The strongest evidence concerns neurodevelopmental harm in children and fetuses. The World Health Organization's lead background document identifies children up to age 6, the fetus, and pregnant women as especially susceptible groups, while also connecting lead exposure with impaired kidney function, hypertension, adverse pregnancy outcomes, and reduced fertility.

Infants and pregnancy require the strictest control

Formula preparation makes water filtration particularly important during infancy. A pediatric research review cited by the European scientific committee estimated that drinking water accounts for about 20% of total lead exposure in the United States, with the share reaching as high as 60% in infants because formula is often mixed with tap water. Those figures appear in the European scientific committee's review of lead exposure and health effects.

That makes an unfiltered kitchen tap a poor place to take chances. Pregnant people should use a certified lead-reduction filter for drinking and cooking water, and families preparing formula should use properly filtered cold water. If a child may have been exposed, discuss blood testing with a healthcare professional. Filtration prevents further intake, but it can't diagnose or reverse an existing health effect.

Children face developmental and behavioral consequences

The same European review cited a 3 to 4 point IQ loss for each 10 µg/dL increase in children's blood lead and reported measurable IQ declines and attention or behavior problems below 5 µg/dL. These are blood-lead findings, not a direct conversion from a tap-water result, so homeowners shouldn't use them to calculate personal risk from a single sample. They do show why “low” exposure deserves serious attention.

A family may notice no immediate symptom while exposure still affects development. For adults who want background on nonspecific concerns such as fatigue brain fog heavy metal signs, a medical resource can help organize questions for a clinician, but symptoms alone cannot identify lead from water.

Adults are part of the risk picture

Adults can experience kidney problems and raised blood pressure from lead exposure. WHO also identifies cardiovascular and reproductive effects, which means the filtration decision shouldn't focus only on babies. Older adults and people already managing hypertension or kidney disease deserve a conservative household approach.

A filter is not a luxury upgrade when vulnerable people drink the water. It's an exposure-control measure.

Install a certified lead filter at the kitchen tap first. If lead may be present throughout the building, or if household members consume water from several outlets, evaluate whole-home treatment while preserving dedicated point-of-use protection for drinking and cooking.

Understanding EPA Action Levels and Compliance Gaps

An action level is a regulatory trigger, not proof that water below it is harmless. Under the U.S. Lead and Copper Rule, public water systems must take additional corrosion-control measures if more than 10% of sampled taps exceed 15 parts per billion, or 0.015 mg/L, as described in the EPA's lead drinking water guidance. The rule measures system performance through sampling. It does not establish a safe amount of lead for every person or household.

The EPA has scheduled a revised lead action level of 0.010 mg/L to take effect on November 1, 2027. That is a future regulatory benchmark, not a present household guarantee. Regulatory thresholds can change as health protections and measurement practices receive further review.

Compliance is not the same as zero exposure

A water system can meet its action level while an individual tap still contains lead. Utility sampling covers selected homes and locations, while your plumbing may use different materials or face different corrosion conditions. Water can also change after it leaves the utility's monitored network.

The Michigan EGLE press release on Flint's tenth year of lead-testing compliance illustrates the communication problem. Flint's water tested below both Michigan's tighter 12 ppb standard and the federal 15 ppb action level in 2025–2026, yet experts continued to emphasize that no level of lead is safe. The Michigan EGLE update on Flint's lead-testing compliance shows why compliance should not end a homeowner's questions.

Use compliance data as a starting point

Read the utility report, ask about your service line, and request available sampling information. Then control exposure at home with filtration. A certified filter protects the water your household uses, while municipal compliance data describes a broader system.

  • Choose point-of-use treatment: Protect the kitchen tap used for drinking, cooking, and formula preparation.
  • Consider whole-home treatment: Use it when multiple outlets matter or plumbing conditions indicate broader exposure.
  • Keep testing: A result can guide filter selection, but plumbing changes and filter exhaustion can reduce protection over time.

If your test shows lead, install filtration without waiting for a regulatory violation. The practical question is whether the water your family drinks contains a contaminant health authorities recognize as harmful. Use compliance reports for context, then rely on point-of-use or whole-home treatment to address the risks inside your own plumbing.

Testing Your Home Water for Lead Contamination

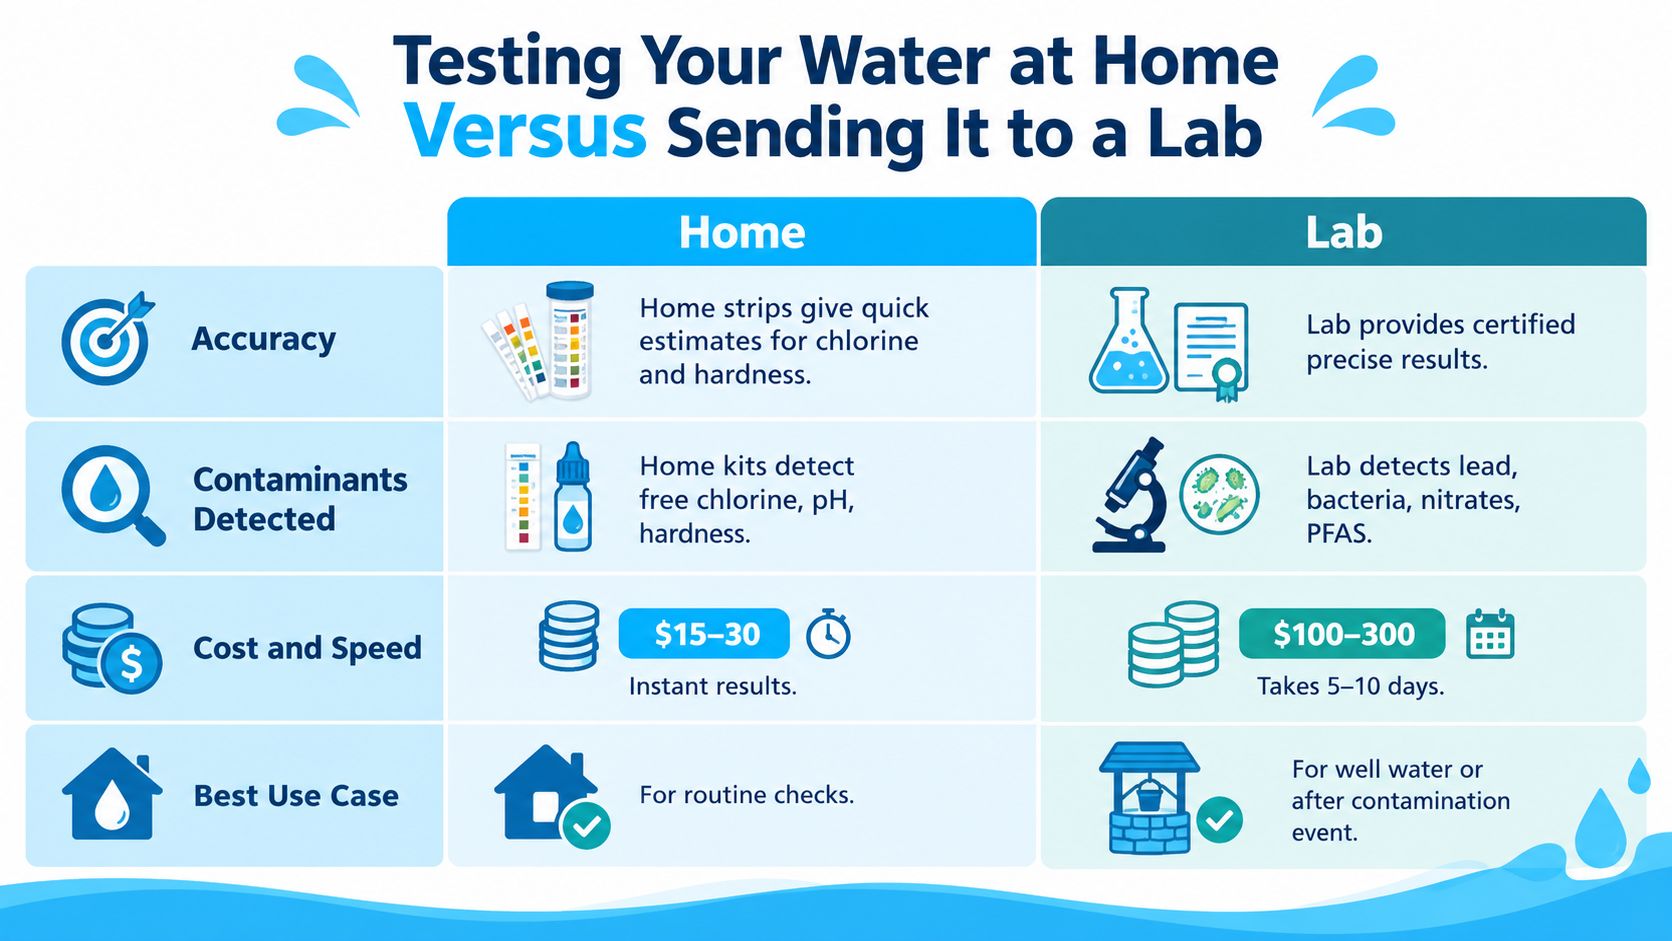
A city water report cannot show what happens inside your house. Test the water at the tap your family uses, then choose filtration based on that result rather than a generic product claim or a color-changing strip. Laboratory testing gives you a sound basis for deciding filter placement, capacity, and treatment technology.

Follow a first-draw sampling routine

First-draw sampling measures water that has remained in contact with household plumbing. Use the drinking-water faucet, remove its aerator if the kit instructs you to, and do not run the tap before collecting the sample. Most accredited lead sampling kits require 6 to 8 hours of no tap use before collection. Check the kit's instructions and follow the laboratory's exact timing instead of estimating.
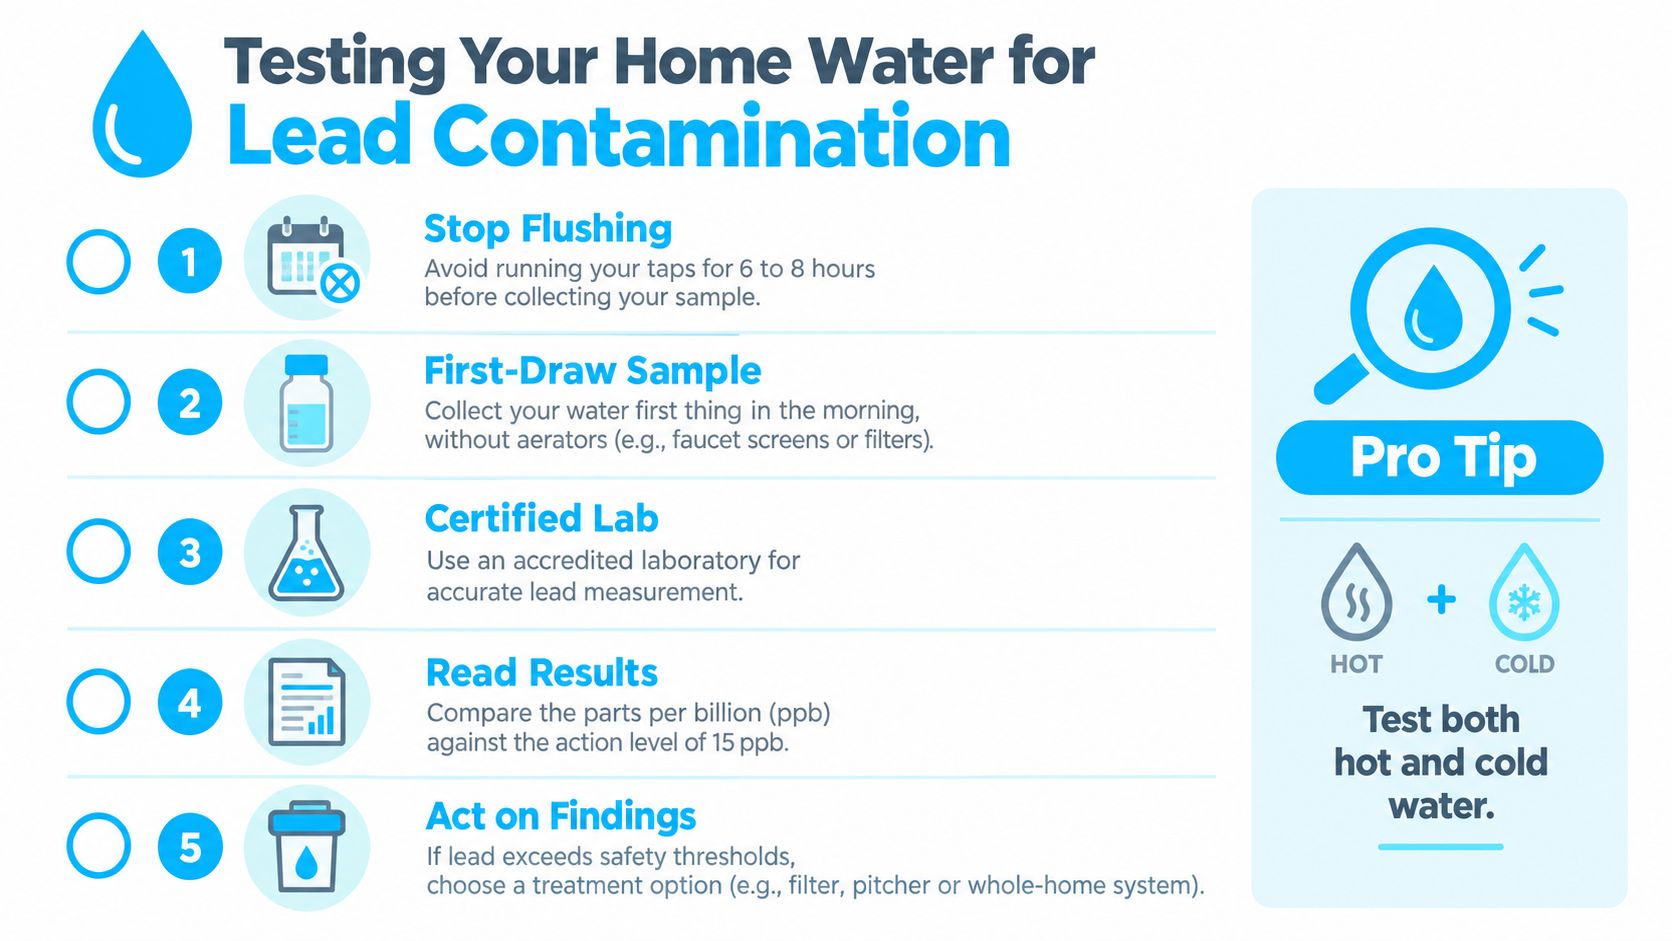
An infographic showing a five-step process for testing residential tap water for potential lead contamination.

Use this sequence:

  1. Stop flushing: Leave the water undisturbed for the period specified by the sampling kit.
  2. Collect the first draw: Fill the laboratory bottle directly from the cold tap before running any other water.
  3. Use an accredited laboratory: Select a laboratory qualified to measure lead in drinking water accurately.
  4. Read the result: Review the reported parts per billion and compare it with the applicable action-level context, including the federal 15 ppb benchmark discussed earlier.
  5. Act on the finding: Select a certified filter and install it at the outlet used for drinking and cooking.

Test strategically, not randomly

Test cold and hot water when investigating household plumbing, but never use hot tap water for drinking or cooking. Sample other drinking outlets if your home has multiple kitchens, an accessory dwelling, or a long plumbing run. Ask the laboratory whether it also wants a flushed sample. First-draw and flushed samples answer different questions about plumbing-related exposure.

DIY strips can flag a concern, but laboratory measurement should guide treatment decisions for infants, pregnancy, or known plumbing risks. Keep the laboratory report with your filter records. It establishes a baseline for checking whether the installed system continues to perform as expected. If the result shows lead, treat the affected tap rather than waiting for a municipal report to resolve the household risk.

Choosing the Right Home Water Filtration System for Lead

Lead filtration starts with the certification, not the shape of the device. A pitcher, faucet filter, under-sink cartridge, or whole-home unit can be useful only if the specific model is tested and certified for lead reduction under its stated conditions.

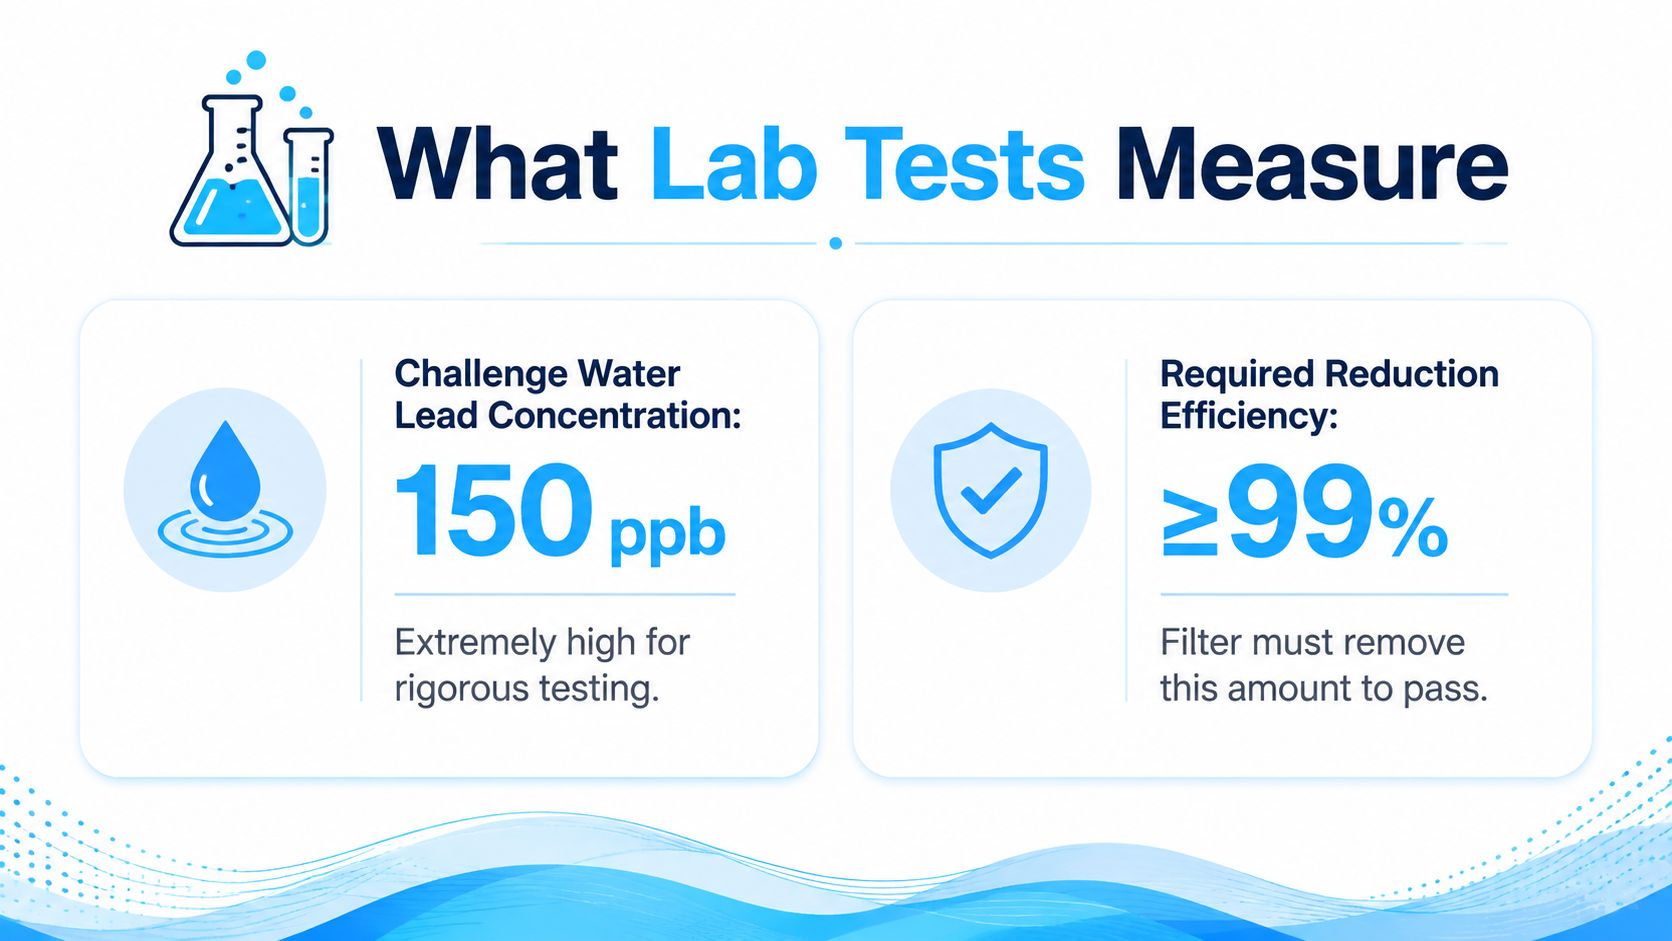
NSF-certified lead-reduction filters are evaluated with water containing 150 ppb of lead, 10 times the EPA's maximum allowable level in drinking water. That challenge demonstrates performance against severe contamination rather than marginal exposure, as shown in the NSF listing for certified lead-reduction filters.

Compare the main options

Filter Type Installation Point Lead Reduction Capability Best For
Activated carbon block Pitcher, faucet, or under-sink Can reduce lead when the exact product carries lead-reduction certification Renters and households wanting targeted kitchen protection
Reverse osmosis Usually under-sink, with a dedicated faucet Strong lead-reduction option when the system is certified for lead and maintained correctly Families seeking robust drinking and cooking-water treatment
Distillation Countertop or dedicated appliance Can separate lead from water, but output and operating practicality vary by device Households willing to manage slower, batch-style treatment
Whole-home treatment Main entry point Can address water used throughout the property when the system is certified and correctly sized Homes with broad outlet exposure or uncertain plumbing risks

Activated carbon blocks are compact and convenient, but certification must name lead, not merely chlorine or taste. Reverse osmosis usually demands more installation space and maintenance, yet it's a strong candidate for a dedicated drinking-water line. Distillation treats batches rather than every faucet, so it may not suit households that need continuous kitchen supply.

Match placement to the exposure

A pitcher is easy to install but protects only the water you pour through it. An under-sink system offers higher convenience for cooking and filling bottles, while a faucet-mounted filter is practical where plumbing changes aren't allowed. Whole-home treatment can reduce exposure at multiple outlets, but it shouldn't replace a certified point-of-use system when drinking-water protection is the priority.

Review Water Filter Advisor's home filtration guidance alongside the laboratory result, plumbing layout, and manufacturer data. Look for a clear lead-reduction claim, an independent certification, replacement instructions, and a rated cartridge life. Avoid relying on vague wording such as “purifies water” or “improves quality.”

Buy the certification claim you need, not the marketing category you recognize.

Maintaining Your Filter and Long-Term Prevention Strategy

A lead filter is a controlled treatment device, not a permanent shield. The cartridge captures or reduces contaminants only while water passes through a functioning system within its rated conditions. Once capacity is exhausted, performance can decline, and a neglected housing can create its own hygiene problems.

Write the installation date on the cartridge or filter housing. Set a calendar reminder based on the manufacturer's replacement schedule, then replace the cartridge earlier if flow drops sharply, taste changes, the filter reaches its rated capacity, or testing shows the system isn't delivering the expected result. Never stretch a cartridge just because the water still looks clear. Lead is invisible.

Build a maintenance routine

Use a short checklist that every household member can follow:

  • Replace on schedule: Keep spare certified cartridges available so replacement doesn't get delayed.
  • Inspect the housing: Look for leaks, cracks, loose connections, or unusual discoloration.
  • Sanitize as directed: Follow the manufacturer's cleaning instructions during cartridge changes.
  • Keep hot water out: Use the filter with cold water unless the system is specifically designed and certified for another condition.
  • Record test results: Compare occasional post-filter samples with the original baseline.

Clean faucet aerators regularly. Sediment and particles can collect in the screen, and cleaning removes a place where contamination may accumulate. Also flush stagnant water before drinking after extended periods of nonuse, following local utility guidance where available.

Treat prevention as a layered system

Filtration is the central defense, but it works better alongside plumbing awareness. Ask whether the service line is lead, identify older solder and fixtures, and replace suspect components through a qualified plumber. If the utility confirms a lead service line, point-of-use filtration should remain in place while replacement or other corrective work is evaluated.

Don't use boiling as a lead-control method. Boiling can reduce microbes in appropriate circumstances, but it doesn't remove lead from water. Don't use untested filters, and don't let a whole-home softener or sediment cartridge create false confidence. Each device needs a contaminant-specific performance claim.

The health effects of lead in drinking water justify a strict routine because the risk is preventable at the household tap. Test first, install a certified lead-reduction system, use filtered cold water for consumption, and replace the cartridge before performance becomes uncertain.


Water Filter Advisor offers practical comparisons and maintenance guidance for under-sink, faucet, whole-home, and portable filtration systems, including advice on lead-reduction technologies and certifications. Visit Water Filter Advisor to compare a treatment setup that fits your plumbing, household needs, and testing results.
How to Remove Hard Water Stains from Sink Safely at Home

You clean the sink at night, wake up in the morning, and there it is again. A chalky ring around the drain. A white outline at the faucet base. Tiny cloudy spots that make an otherwise clean bathroom or kitchen look like nobody touched it.

That cycle frustrates people because hard water stains look like ordinary grime, but they don't behave like grime. You can scrub harder and still get nowhere. If your home water is mineral-heavy, the sink keeps telling on it. Cleaning matters, but water filtration and softening matter more because they deal with the cause instead of the symptom.

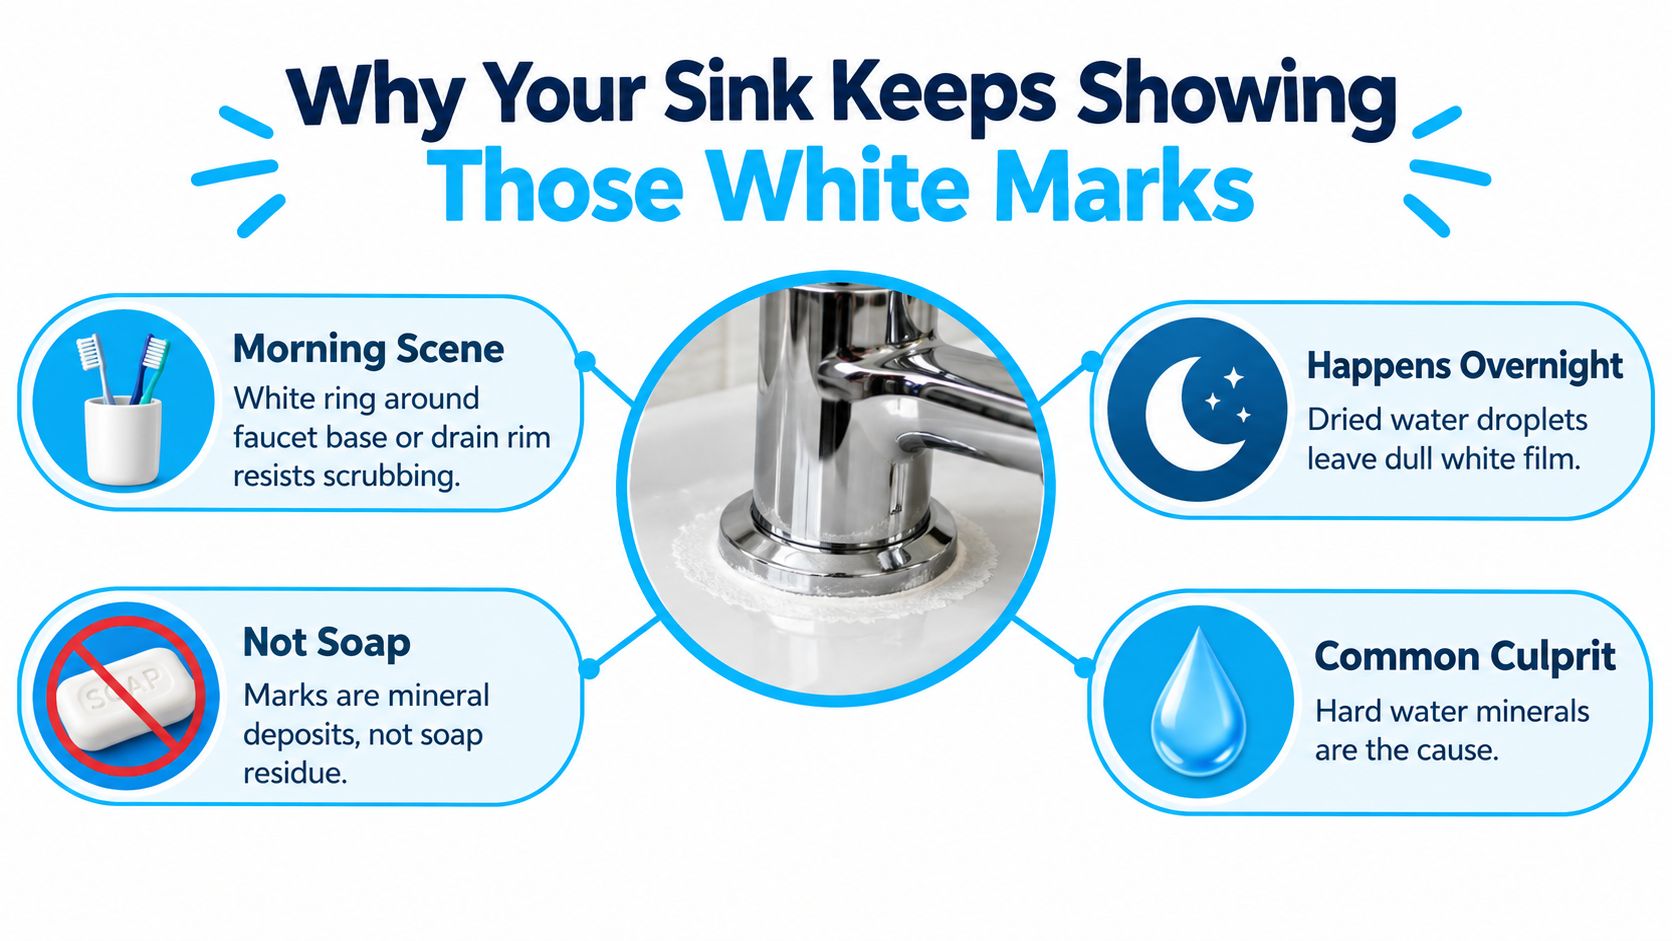
Why Your Sink Keeps Showing Those White Marks

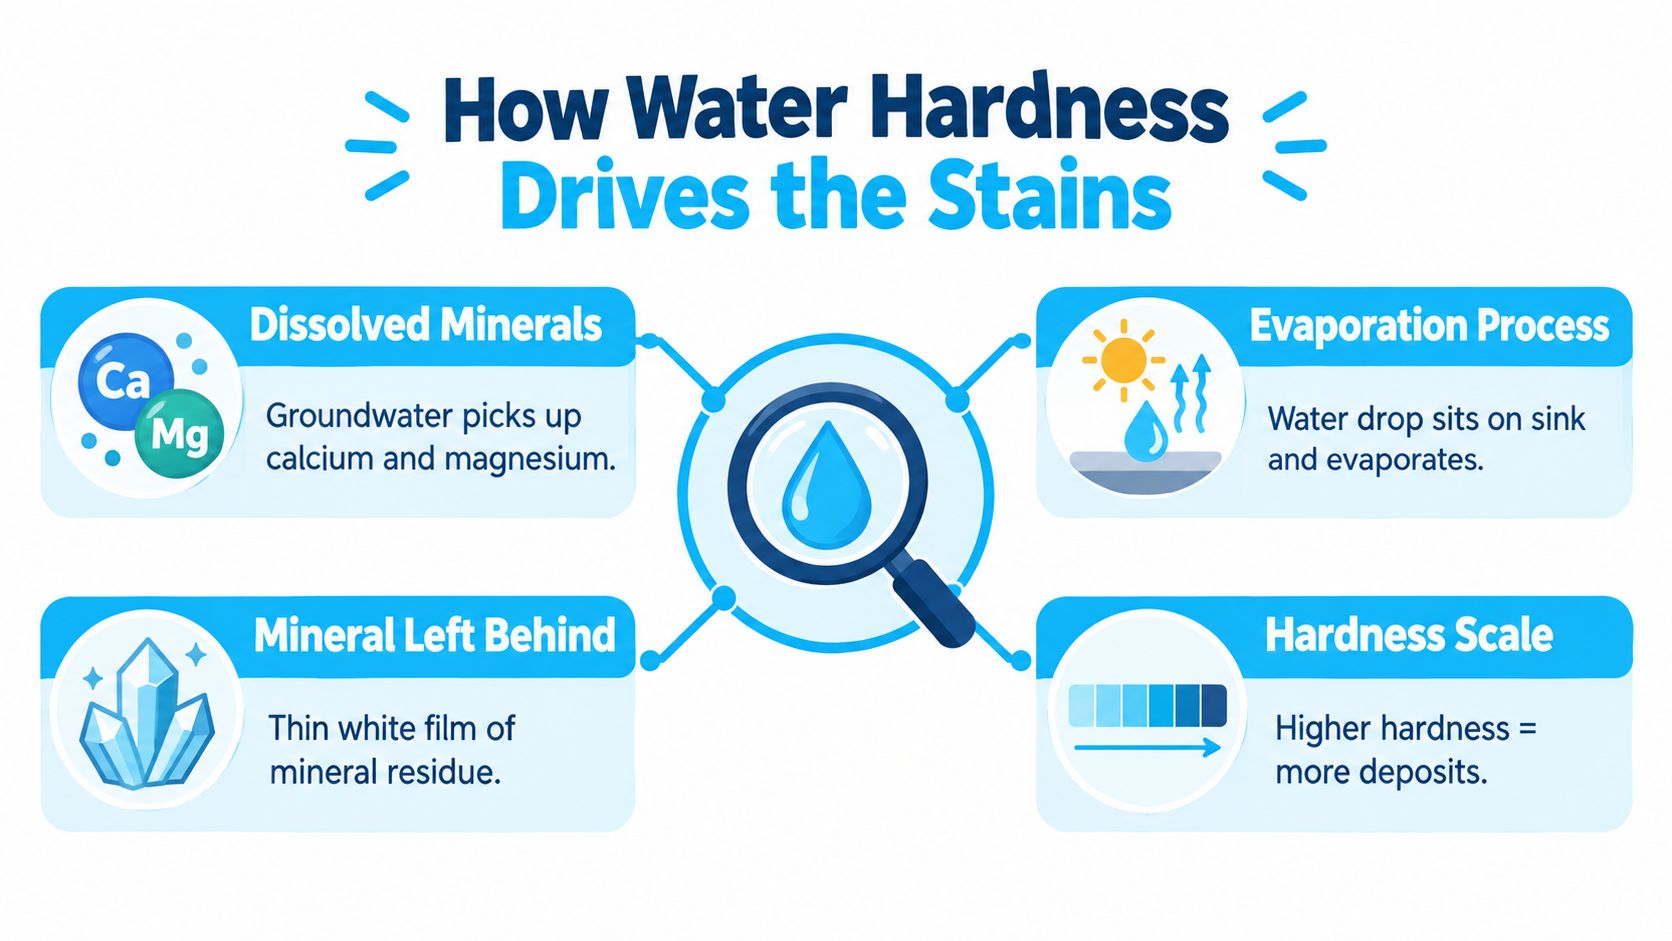
That dull white film on the sink usually isn't leftover soap. It's mineral deposit buildup from water that dried on the surface. Hard water carries dissolved calcium and magnesium, and those minerals stay behind when the water evaporates. One sink-cleaning guide describes these stains as mostly calcium and magnesium compounds, especially calcium carbonate, which is why mild acids can break them down (hard water stain cleaning guidance).

An infographic explaining that white marks on sink faucets are caused by mineral deposits from hard water.

What hard water means in everyday terms

Water hardness is just a measure of how much dissolved mineral your water carries. Once hardness rises into the hard range above about 120 mg/L, scale and soap-scum problems become more common, and very hard water above roughly 180 mg/L often points people toward treatment to reduce recurring fixture buildup (water hardness and softening ranges).

If that describes your home, the sink is often the first place you notice it.

  • Faucet base rings show up where splashes sit and dry.
  • Drain rims collect residue because water lingers there.
  • Toothbrush holders and soap dishes leave ghostly outlines on the counter and basin.

Stain or surface damage

Not every cloudy mark is the same.

A removable hard water stain sits on top of the finish. It feels rough or chalky, and acids usually loosen it. True etching is different. Etching changes the surface itself, so the area may stay dull even after the mineral crust is gone. That's more common on acid-sensitive materials.

Practical rule: If the spot softens when kept wet with a sink-safe acid treatment, you're usually dealing with deposit buildup, not permanent finish damage.

Hard water stains on sink surfaces can be solved with a short cleaning routine that tackles the visible problem. But if you keep seeing the same white marks every few days, the bigger issue isn't your effort. It's the water feeding the sink.

Vinegar Method Step by Step

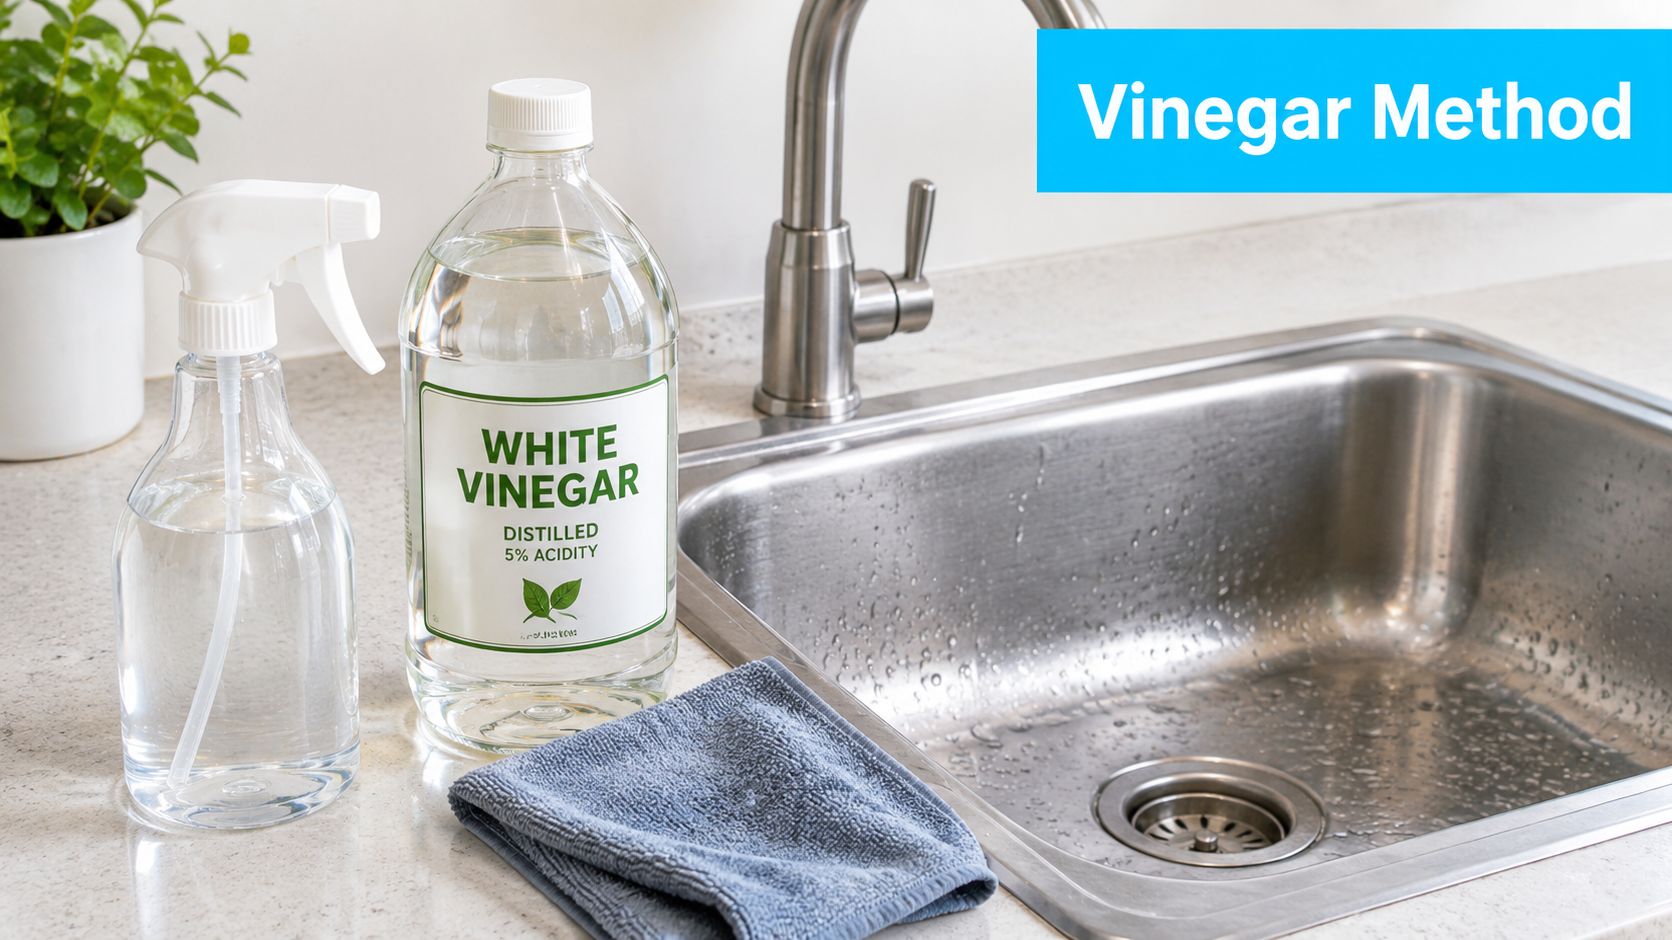
Vinegar is the method many homeowners reach for first because it matches the chemistry of the stain. White distilled vinegar contains about 5% acetic acid, which is strong enough to dissolve alkaline mineral deposits when the surface stays wet for 15 to 30 minutes (vinegar chemistry for hard water stains).

Start simple.

Screenshot from https://example.com/screenshots/vinegar-sink-cleaning-step.jpg

The basic routine

Independent sink-cleaning guidance suggests using white vinegar directly or a 50/50 vinegar-and-water mix, leaving it on the stained area for about 10 to 30 minutes before scrubbing and rinsing (sink cleaning with vinegar).

Here's the routine I use on compatible surfaces:

  1. Clear the sink first. Remove soap residue, hair, food bits, or loose grit with warm water.
  2. Apply the vinegar solution. For normal spotting, use the 50/50 mix. For thicker buildup, use undiluted white vinegar.
  3. Keep it wet. Lay a paper towel or soft cloth over the stain so the vinegar doesn't run off too fast.
  4. Wait through the dwell time. Give it enough contact to soften the mineral crust.
  5. Scrub gently. Use a non-scratch sponge or microfiber cloth in small circles.
  6. Rinse thoroughly. Wash away dissolved residue and leftover acid.

The part skip is the last one.

Drying is part of the cleaning

If rinse water evaporates on the surface, it can leave dissolved minerals behind and start the cycle all over again. That's why practical sink-cleaning instructions often pair acid cleaning with immediate rinsing and thorough drying (why drying prevents re-depositing).

Use a microfiber cloth and dry the basin, drain rim, and faucet base right away.

A sink isn't really finished until it's dry.

For a visual walkthrough, this video helps show the pace and pressure that work best on everyday buildup.

Safety and common mistakes

A few rules matter more than any shortcut:

  • Ventilate the room. Even mild acids smell strong in small bathrooms.
  • Never mix vinegar with bleach or ammonia.
  • Use soft tools only. A rough scrub pad can trade white stains for scratch marks.
  • Skip vinegar on acid-sensitive materials. Some sink finishes and stone surfaces don't handle it well.

If the white ring barely changes after a careful vinegar treatment, don't lean harder on the sponge. Change methods instead.

Citric Acid, Baking Soda, Pumice, and Commercial Options

Once vinegar has done what it can, the next step is choosing a cleaner based on what is sitting on the sink. Hard water buildup behaves a lot like chalk on a sidewalk. Fresh marks dissolve fairly easily. Older deposits harden in layers and often need either a stronger acid, a mild abrasive, or both.

Citric acid for low-odor mineral removal

Citric acid is a practical next option when you want an acid cleaner without the strong vinegar smell. It is commonly used for dissolving mineral scale, and in real sink cleaning it tends to work best on cloudy film, faucet-base rings, and the crust that collects where water dries again and again.

Mix citric acid with warm water according to the product directions, apply it to the stained area, and let it sit briefly before wiping with a soft cloth or non-scratch sponge. If the deposit softens but does not fully lift, repeat once instead of scrubbing harder. That usually protects the finish better, especially on sinks that already have light wear.

Other options and where they fit

Baking soda is the mildest tool in this group. It works more like a polishing paste than a scale remover, so use it for a thin haze or for final cleanup after an acid has loosened the minerals. On thick white crust, baking soda alone usually just burns time.

Pumice is more specialized. It can remove stubborn deposits from some porcelain and vitreous china surfaces if both the stone and the sink stay wet the whole time. Used on the wrong material, it can scratch the finish fast. Commercial descalers are the heavy-duty option. They are useful when the stain has built up for months, especially around drains and overflow openings, but they only make sense if the label clearly approves your sink material.

If you have a marble vanity or trim near the sink, it helps to learn how to protect polished marble surfaces before you start treating nearby spots. For natural-stone care, guidance from the Natural Stone Institute warns against acidic cleaners on marble and other acid-sensitive stone because they can etch the surface rather than just remove the mineral deposit (Natural Stone Institute care guidance).

Side-by-Side Comparison of Hard Water Stain Removal Methods

Method Best For Safe Surfaces Dwell Time Approx. Cost Effort
Citric acid solution Moderate mineral film and routine descaling Many common sink surfaces when used with soft tools Short soak Low Moderate
Baking soda paste Light haze and finishing cleanup Stainless steel and porcelain with gentle pressure Short contact Low Moderate
Pumice stone Thick crust on compatible glazed surfaces Porcelain and vitreous china when kept wet Very brief contact Low Higher
Commercial descaler Heavy, stubborn limescale Only surfaces approved on the label Follow label instructions Medium Lower physical effort, higher care needed

A good rule is to soften first, then lift. Acid loosens the mineral bond. Gentle wiping or light abrasion removes what the acid has already weakened.

That approach treats the stain you can see. If the same white marks keep returning a few days later, the bigger problem is usually the water itself, not the cleaning method.

Matching the Method to Your Sink Material

The same white crust can behave very differently depending on what is underneath it. Hard water leaves mineral deposits on all kinds of sinks, but the safe way to remove that buildup changes with the surface. A method that cleans stainless steel nicely can leave stone dull, and a tool that helps on porcelain can scratch glass.

Consumer cleaning guidance often suggests mild acids such as vinegar for common hard water stains, especially on surfaces like chrome and glass, while also warning readers to check finish compatibility before using stronger or longer treatments (Good Housekeeping's hard water stain advice).

Start with the sink material, not the cleaner bottle.

For stainless steel, use the gentlest option that will dissolve the film, then wipe with the grain using microfiber or a soft non-scratch pad. Stainless usually handles short contact with vinegar or citric acid well, but it still shows scratches if you get impatient and reach for steel wool or a harsh scrubber. The goal is to loosen the minerals, not scour the metal.

For porcelain and enameled cast iron, mild acid cleaners can remove the chalky layer, but the finish deserves a softer hand than the stain does. If you scrub aggressively with gritty powders, you can trade a white mark for a dull patch that catches the next round of buildup even faster.

For chrome faucets and trim, keep contact short and controlled. Chrome tends to look better after a brief spot treatment, a rinse, and a dry buff. Leaving an acidic wrap on too long can affect the finish, especially around edges and worn spots.

For glass basins, the problem is usually visibility as much as buildup. Even a light mineral film makes clear glass look cloudy. A mild acid wash followed by a full rinse and immediate drying works better than repeated rubbing on a dry surface, which can leave fine scratches.

For granite composite, natural stone, and specialty matte finishes, slow down and check the manufacturer's care instructions first. Some of these surfaces tolerate very little acidity. Hard water is still the cause of the stain, but the fix often needs to be a pH-balanced or brand-approved cleaner instead of the usual vinegar routine.

Safe Cleaning Methods by Sink Material

Sink Material Best Method Use With Caution Avoid
Stainless steel Mild acid cleaning with microfiber, then dry and buff with the grain Baking soda with light pressure Steel wool and harsh abrasives
Porcelain Vinegar or citric acid with soft cloth or non-scratch pad Pumice on suitable glazed surfaces with water Aggressive abrasive powders
Chrome Short acid contact on mineral spots, then rinse and dry Soaked wraps left on for extended contact Harsh scrubbing tools
Glass Citric-acid cleaning and a clean squeegee or microfiber dry Repeated spot polishing in one area Scratchy pads
Granite composite or stone-based finishes pH-balanced or manufacturer-approved cleaners Any acidic cleaner unless the manufacturer approves it Straight vinegar and abrasive tools

If you are not sure what the sink is made from, check the product paperwork, the manufacturer's site, or the listing from when the fixture was installed. Five minutes of checking is cheaper than trying to fix etching, haze, or scratches later.

This is also where the bigger pattern starts to show. If every safe method works for a few days and the white marks keep coming back, your cleaning choice is only part of the story. The minerals in the water are feeding the problem, and some sink materials show that buildup faster than others.

When Basic Cleaning Is Not Enough

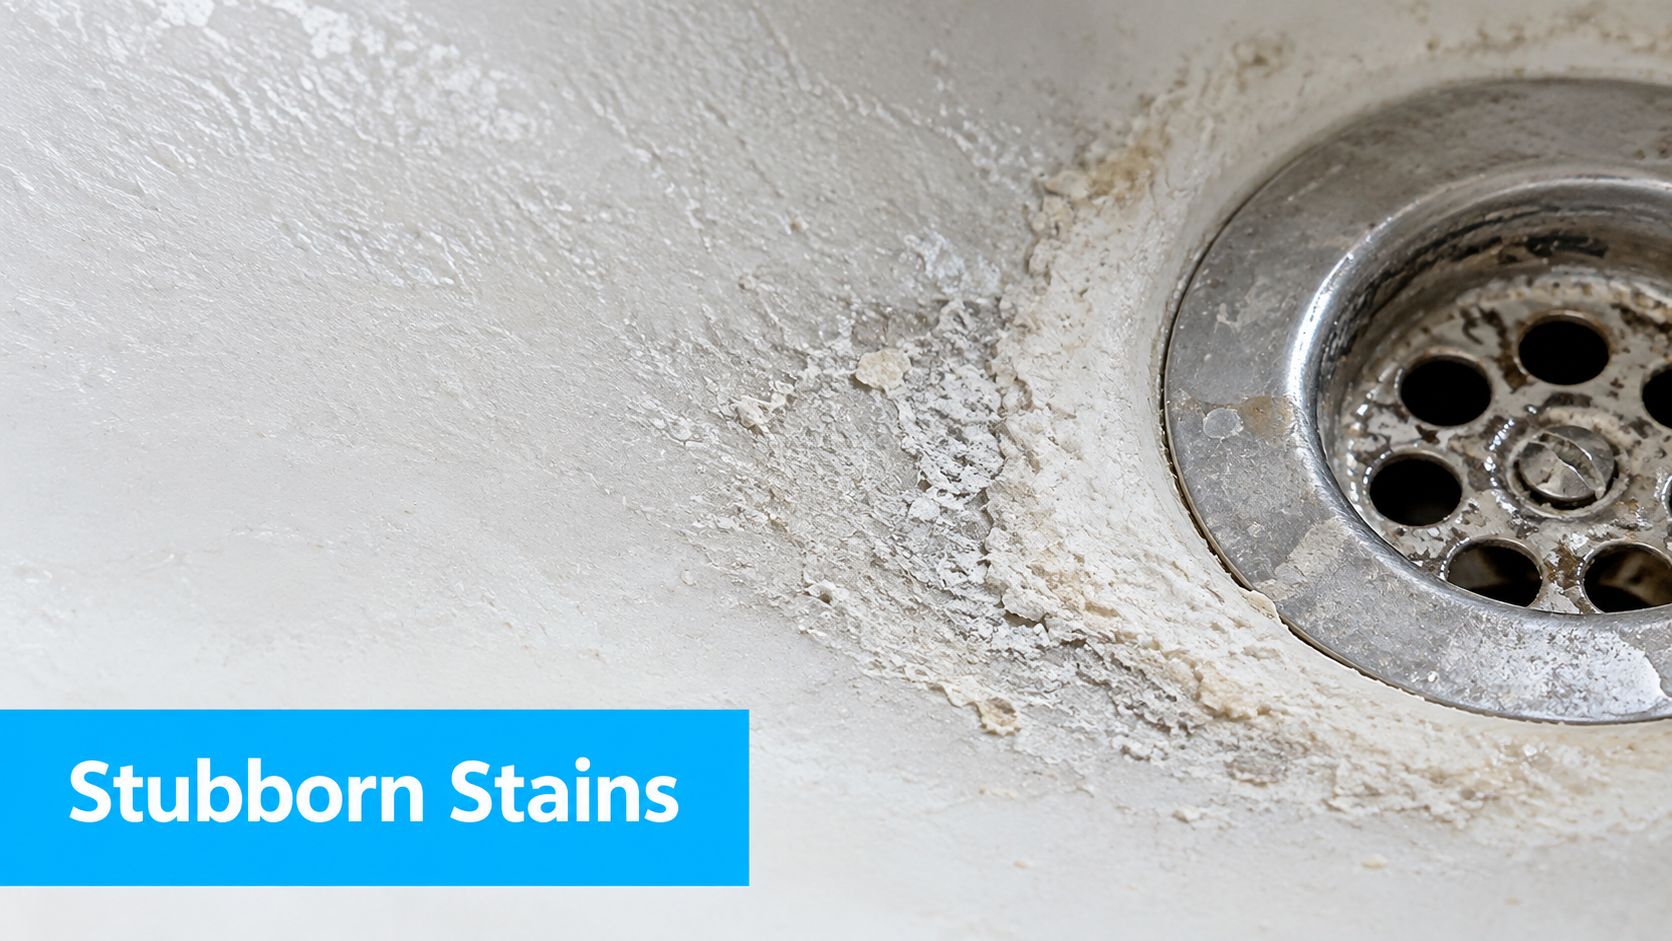
Some hard water stains stay powdery and wipe away with the usual routine. Others turn into a crust that clings to the drain, the overflow opening, or the faucet base like it belongs there. Those are the spots that usually fool people into thinking they need a harsher chemical right away.

They don't always. They often need more time and less force.

Close-up of a bathroom sink drain covered in white, crusty hard water mineral deposits and stains.

Use the soften-then-lift approach

For heavier deposits, sink-cleaning guidance often recommends a two-step process. First soften the scale with an acid treatment, then use a non-abrasive sponge or soft brush to lift the loosened residue because the dissolved calcium carbonate layer can still cling to the surface (two-step removal approach).

That method looks like this in real life:

  • Lay the soak where the crust is thickest. A paper towel soaked in warm vinegar solution stays put around the drain rim or faucet base.
  • Wait instead of scrubbing early. Let the acid work on the deposit underneath.
  • Lift with a soft tool. A non-scratch pad or other material-safe tool removes the loosened layer with less risk.
  • Repeat the soak if needed. A second cycle is safer than pushing harder.

Stubborn scale usually gives way to patience before it gives way to muscle.

Know when to stop

If two careful cycles barely change the spot, or if the surface looks pitted, dulled, or etched, it's time to stop DIY cleaning. At that point, you may be dealing with finish damage, not just mineral residue. A plumber or stone-care specialist can tell you whether the problem is surface buildup, fixture wear, or a larger water issue showing up in the sink first.

How Water Hardness Drives the Stains

Every hard water stain starts long before the sink. The minerals are already in the water when it enters the house. By the time the drop lands on the basin and dries, the chemistry has done most of the work.

A diagram explaining how hard water minerals cause mineral residue stains on surfaces through evaporation.

Cleaning treats the symptom

You can learn how to remove hard water stains from sink surfaces and get solid results. But no cleaning routine can stop the next dried droplet from leaving another trace if the incoming water still carries the same mineral load.
That's why water filtration and softening deserve more attention in this conversation.

  • Whole-house softening addresses hardness at the point of entry, which helps reduce recurring scale on sinks, faucets, shower glass, and fixtures throughout the home.
  • Point-of-use filtration can help in smaller spaces or rentals, especially when a whole-house system isn't practical.
  • Testing first helps you decide whether you're dealing mostly with hardness, or whether iron and other issues are adding to the staining pattern.

For readers comparing options, Water Filter Advisor's guidance library covers home filtration, maintenance, and treatment categories that relate directly to recurring fixture buildup.

Prevention starts upstream

This is the part many people skip because a bottle of cleaner feels faster than a water treatment decision. But if your sink develops fresh white marks every few days, the sink isn't the main problem. The water is.

Root-cause view: A cleaned sink stays cleaner longer when the home water carries fewer hardness minerals in the first place.

Once you start thinking that way, stain removal becomes maintenance. Filtration and softening become the long game.

A Simple Weekly Routine That Keeps Stains Away

A clean sink doesn't stay clean by accident. It stays clean because you interrupt the mineral-drying cycle before the residue hardens.

The highest-impact habit is also the least exciting: dry the sink every evening. If water doesn't sit and evaporate, minerals don't get the chance to leave a visible ring.

A low-effort weekly checklist

This is the kind of routine that sticks because it doesn't ask for much time.

Task Frequency Tool or Product
Dry the basin, drain rim, and faucet base after last use Daily Microfiber cloth
Wipe faucet handles and aerator area Midweek Soft cloth with a light vinegar mist on compatible surfaces
Wash the whole basin Weekly Warm water, gentle soap, soft sponge
Dry and buff the full sink area Weekly Clean towel or microfiber cloth
Spot-treat returning mineral marks As needed Sink-safe acid cleaner or citric acid solution

What makes the routine work

  • Keep the cloth nearby. If the towel lives in another room, you won't use it.
  • Treat tiny spots early. Fresh haze is easier than chalky buildup.
  • Watch the repeat zones. Drain flanges, faucet bases, and overflow openings usually need attention first.
  • Think beyond cleaning. If the marks come back fast, consider whether a softener or filtration upgrade belongs on your list.

Most sink advice stops at scrubbing. The better approach is half cleaning, half water strategy. That's what keeps the job from repeating itself all week.


If your sink keeps collecting white marks no matter how often you wipe it down, you're probably dealing with a water problem as much as a cleaning problem. Water Filter Advisor helps homeowners compare filtration and softening options, understand water testing, and choose practical systems that reduce recurring mineral buildup throughout the house.

Removing Bleach Smell from Water That Actually Works

You pour a glass first thing in the morning, lift it toward your face, and get that sharp, swimming-pool, almost-bleach hit before you even take a sip. One might assume something got into the water. In homes I've looked at over the years, the more common answer is simpler. The smell is usually part of the water treatment itself.

That matters because removing bleach smell from tap water is rarely a cleaning problem. It's a chlorine chemistry problem, and the fix depends on whether you're dealing with free chlorine, chloramine, or a plumbing setup that makes the odor seem stronger than it is. If you treat it like a mystery stain, you'll waste money on the wrong filter, the wrong cartridge, or a trick that only masks the smell for a few hours.

Why Your Tap Water Smells Like Bleach

You turn on the kitchen tap first thing in the morning, fill a glass, and catch that sharp pool-like smell before the water even reaches your mouth. I see the same pattern in homes with city water all the time, especially after the water has been sitting in the pipes for a few hours.

A person filling a clear glass with water from a stainless steel kitchen faucet.

In most homes, that bleach smell comes from disinfectant left in the water to keep it safe in the distribution system. Annoying, yes. Automatically dangerous, no.

What matters here is the source of the odor, because each source points to a different fix. Water that smells strongest at one faucet calls for a different response than water that smells the same at every tap in the house.

Why the smell seems stronger at certain times

First-draw water often smells harsher because it has been sitting in your home's plumbing, picking up warmth and airflow conditions that make the odor easier to notice. The same thing can happen after nearby main work, hydrant flushing, or a temporary treatment adjustment by the utility.

Fixtures can exaggerate it too. A dirty aerator, mineral buildup on a faucet screen, or an older branch line can make the smell seem concentrated right at the sink, even when the rest of the house is less noticeable.

That is why bleach odor is usually a filtration and plumbing diagnosis problem, not a surface-cleaning problem. If the smell is in the water stream, wiping down the sink or replacing a pitcher lid will not solve much.

Practical rule: If the odor is strongest in the first few seconds, treat it as a water delivery clue first.

When it is mostly an odor issue, and when to look deeper

People can notice chlorine-like odor well before a utility would consider the water out of spec. Strong smell alone does not tell you whether you need a simple flush, a point-of-use carbon filter, a catalytic carbon system for chloramine, or a plumbing repair.

A few patterns help narrow it down fast:

  • Only hot water smells: check the water heater before buying a drinking water filter.
  • Only one faucet smells: inspect that aerator, faucet body, and branch line.
  • Every tap smells all day: look at incoming water conditions or whole-house treatment.
  • Smell shows up with discoloration, sediment, or a utility alert: call the water provider before treating it as a basic taste-and-odor issue.

The goal is to match the odor source to the right fix. That saves money, avoids the wrong cartridge, and usually gets rid of the smell faster.

What Causes That Bleach Odor in Home Water

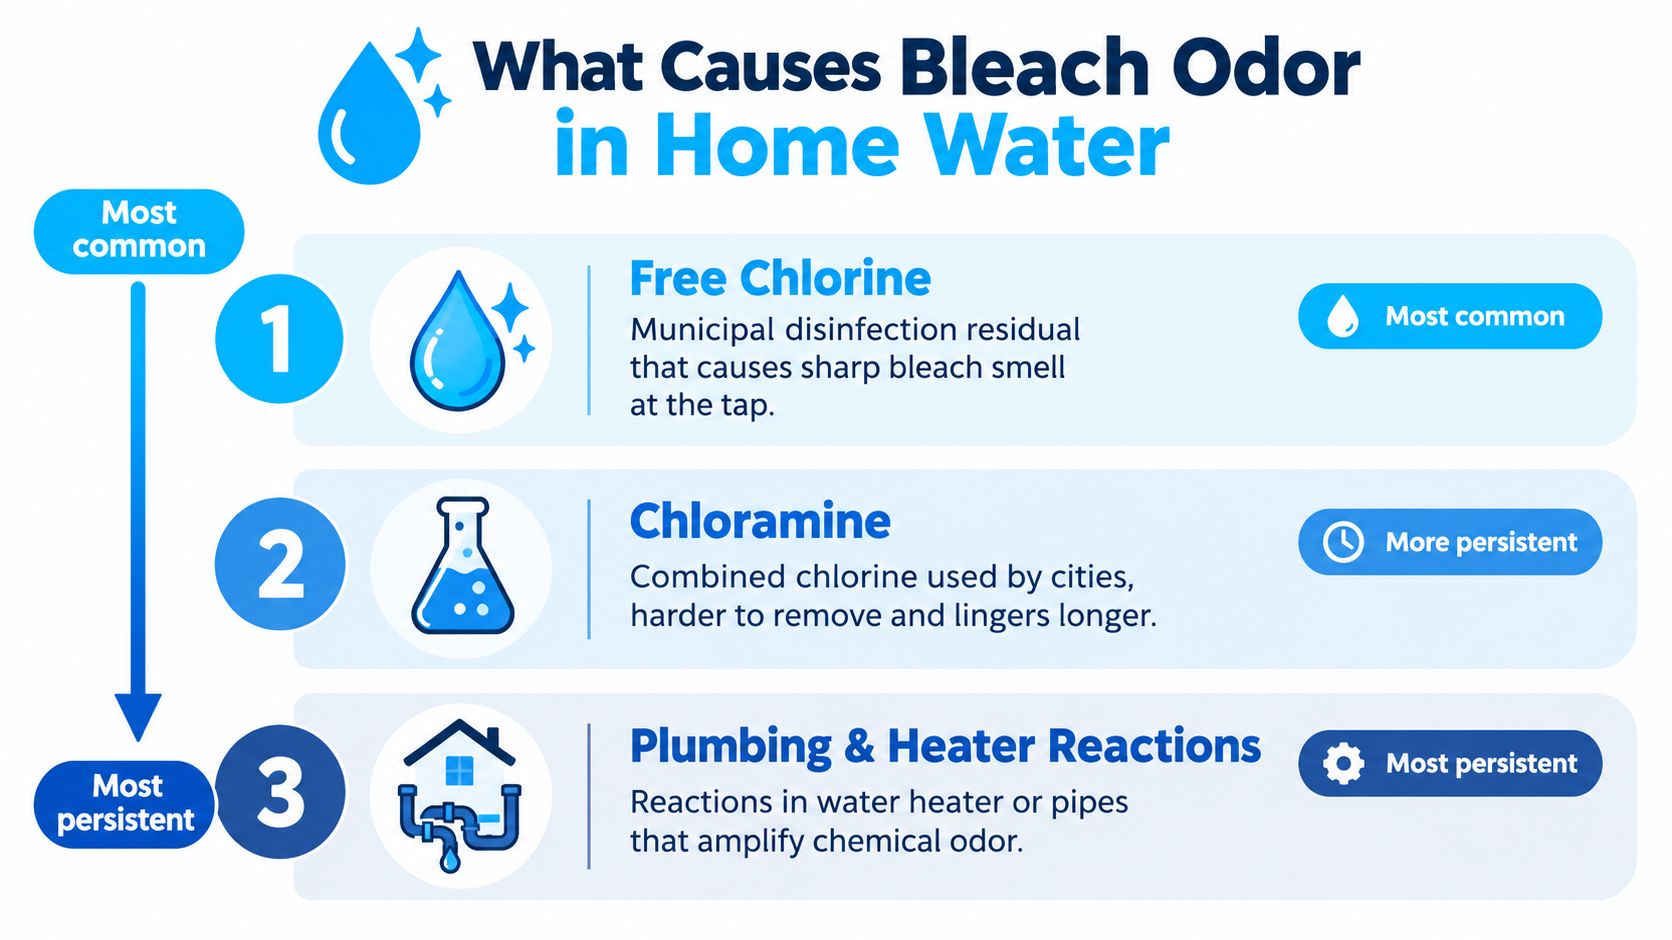
A bleach smell at the tap usually starts with chlorine chemistry, then gets shaped by what happens in your plumbing. That distinction matters because the fix for free chlorine is often simple, while chloramine usually takes a different filter media and more contact time.

An infographic showing three main causes for bleach odor in home water, ordered by commonality and persistence.

Free chlorine is the most common cause

In many homes, the smell comes from free chlorine residual left in the water after municipal disinfection. People describe it as a bleach odor because the smell is familiar, but what they are noticing is usually chlorine in the water, not cleaning product contamination.

That smell can seem stronger than the actual concentration suggests. As noted earlier, chlorine is detectable by smell at very low levels, long before it reaches the kind of airborne level people associate with irritation. In practice, that is why a glass of water can smell sharp even when the utility is still delivering compliant disinfected water.

Chloramine lasts longer and is harder to remove

Some utilities use chloramine instead of free chlorine because it stays in the distribution system longer. From a filtration standpoint, that persistence is the whole story. It tends to be more stubborn at the tap.

I've seen homeowners waste money here by buying a standard carbon pitcher for a chloramine problem, then assuming all filtration is ineffective. Free chlorine often comes out readily with ordinary activated carbon. Chloramine usually needs catalytic carbon or more contact time, and chloramine reduction is treated separately from basic chlorine reduction under NSF/ANSI 42 in this guide to NSF water filter certifications. If a filter only claims chlorine taste and odor reduction, that does not automatically mean it will handle chloramine well.

Later in the section, it's helpful to hear a quick visual explanation:

Plumbing and water heaters can make the odor seem worse

The incoming disinfectant is only part of the picture. House plumbing can intensify the smell, especially after water sits in a branch line, passes through a water heater, or hits a faucet aerator with buildup on it. That is why two houses on the same street can get the same utility water but have very different odor complaints.

Water treatment has used chlorine for a long time because the public health trade-off is favorable. One early milestone came in 1897, when bleach solution was used to disinfect a water main in Maidstone, Kent, after a typhoid outbreak, as described in the NCBI history of water chlorination. The modern version of that same trade-off is simple. Utilities need a disinfectant residual that survives the trip to your house. Homeowners want that protection without the smell.

The useful question is not “how do I clean away the bleach smell?” It is “which chlorine source am I dealing with, and which filtration method is built to remove it?”

How to Find the Source Before You Filter

A bleach smell at the sink does not automatically mean you need a better drinking water filter. It often means you need to identify where chlorine is showing up, where it is concentrating, or where your plumbing is making it more noticeable. That distinction saves money.

I've seen three expensive mistakes over and over. People buy an under-sink unit when the odor only shows up in hot water. They install a whole-house system when one dirty faucet aerator is the culprit. Or they replace filters that were never designed for chloramine in the first place.

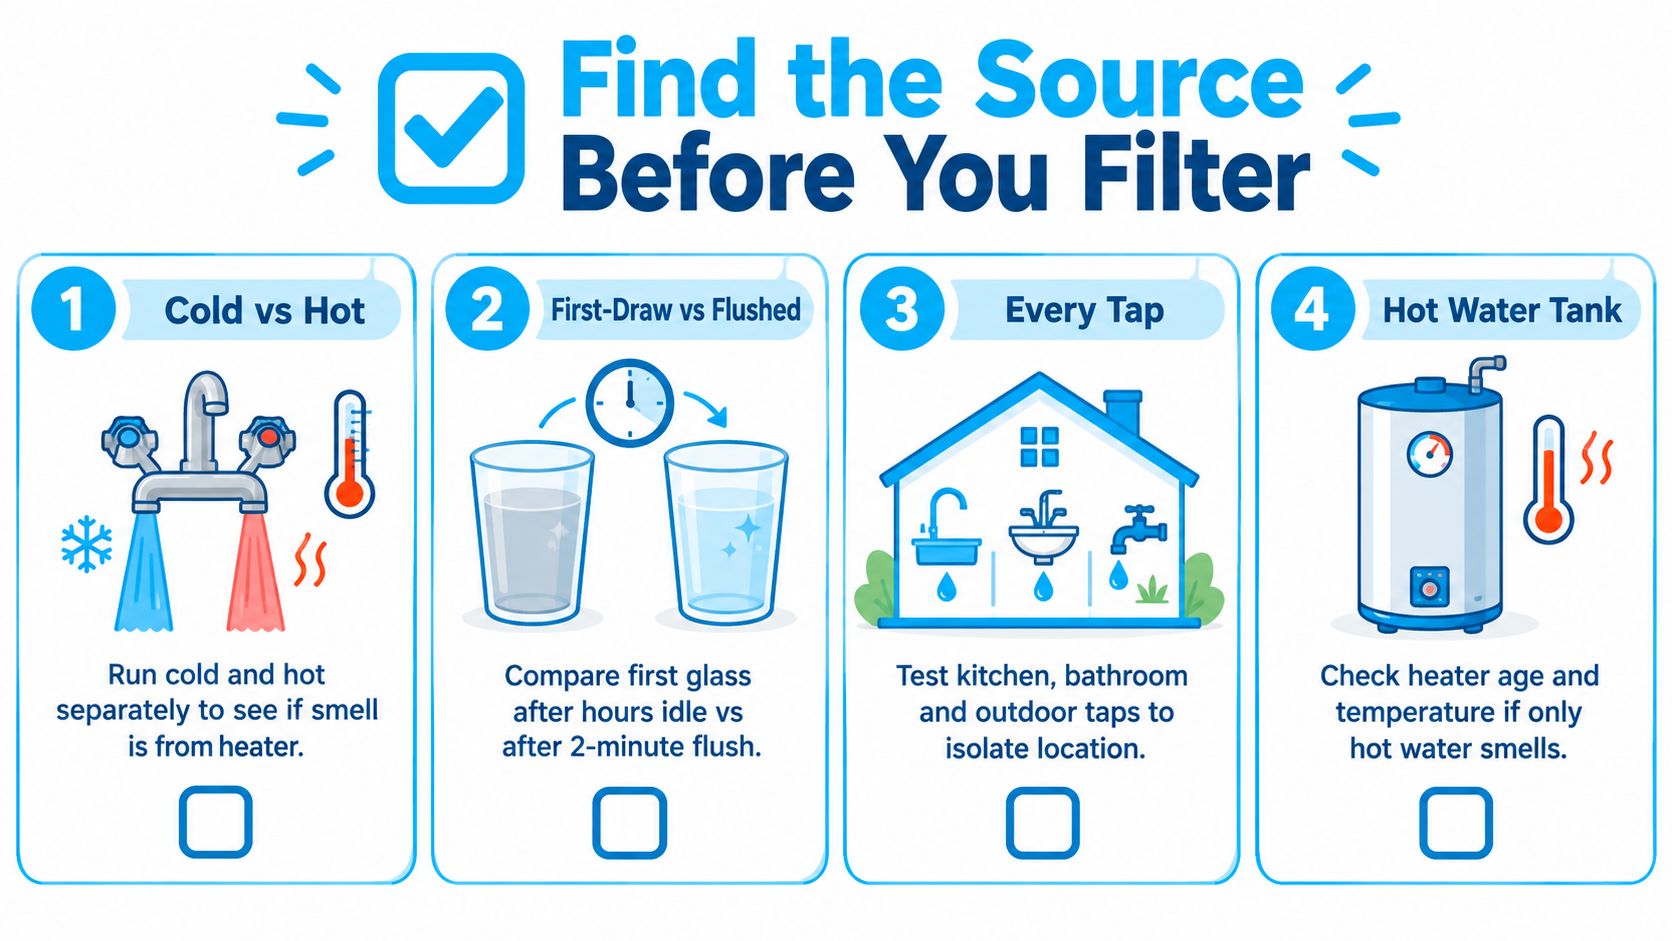
An infographic showing four steps to identify the source of water odor before installing a filter.

Run these checks in order

Start with plain cold water in clean glasses. Avoid ice, soap residue, or a recently washed cup, because all three can throw off a smell test.

  1. Cold versus hot
    Fill one glass from the cold side and one from the hot side. Smell them right away. If the odor is much stronger in hot water, check the water heater, not the filter under the kitchen sink.

  2. First draw versus flushed
    Fill one glass as soon as you turn on the cold tap. Then run the cold water briefly and fill a second glass. If the second sample smells better, the issue is partly water sitting in the pipes, not just the incoming supply.

  3. One faucet versus every faucet
    Compare the kitchen sink, a bathroom faucet, and an outdoor spigot if you have one. One bad tap usually points to a local plumbing or fixture problem. The same smell everywhere points to disinfectant in the incoming water or a whole-house treatment issue.

  4. Morning pattern versus all-day pattern
    Pay attention to timing. A strong odor after the water sits overnight often points to household plumbing conditions. A smell that stays consistent all day usually points upstream, or to filter media that is spent and no longer removing chlorine effectively.

Confirm the pattern before you buy equipment

A simple chlorine test strip helps separate chlorine residual from a vague odor complaint. It is not lab testing, but it is useful for deciding whether you are dealing with disinfectant in the water or chasing the wrong problem entirely.

Utility information helps too. Check your annual water quality report or call and ask a direct question: do you disinfect with free chlorine or chloramine? That answer matters because the right fix changes. Standard activated carbon usually handles chlorine well. Chloramine often needs more contact time, catalytic carbon, or a filter that specifically claims chloramine reduction.

Here's the decision tree I use in real homes:

  • The smell drops after flushing. Start with simple use changes or point-of-use treatment.
  • The smell is present at every cold tap. Look at a whole-house carbon system or a properly certified drinking water filter, depending on whether the problem affects only taste and odor or also showers and laundry.
  • The smell is mostly in hot water. Inspect the heater, anode rod, and hot-side plumbing before you spend money on filtration.
  • The smell remains after installing a filter. Check whether the cartridge is exhausted, whether the system is certified for chlorine but not chloramine, or whether the smell is coming from plumbing reactions rather than the utility water itself.

If you can pinpoint where the bleach smell starts, you can match the chlorine problem to the right filtration fix instead of buying hardware that never had a fair shot at solving it.

Simple Ways to Remove Bleach Smell Without a Filter

You fill a glass from the kitchen tap, take one sip, and get that pool-water note in the back of your throat. If you need a same-day fix, a few no-filter methods can help, but they only work well when the smell is coming from free chlorine. They are much less useful for chloramine, and none of them replace proper treatment if the odor shows up every day.

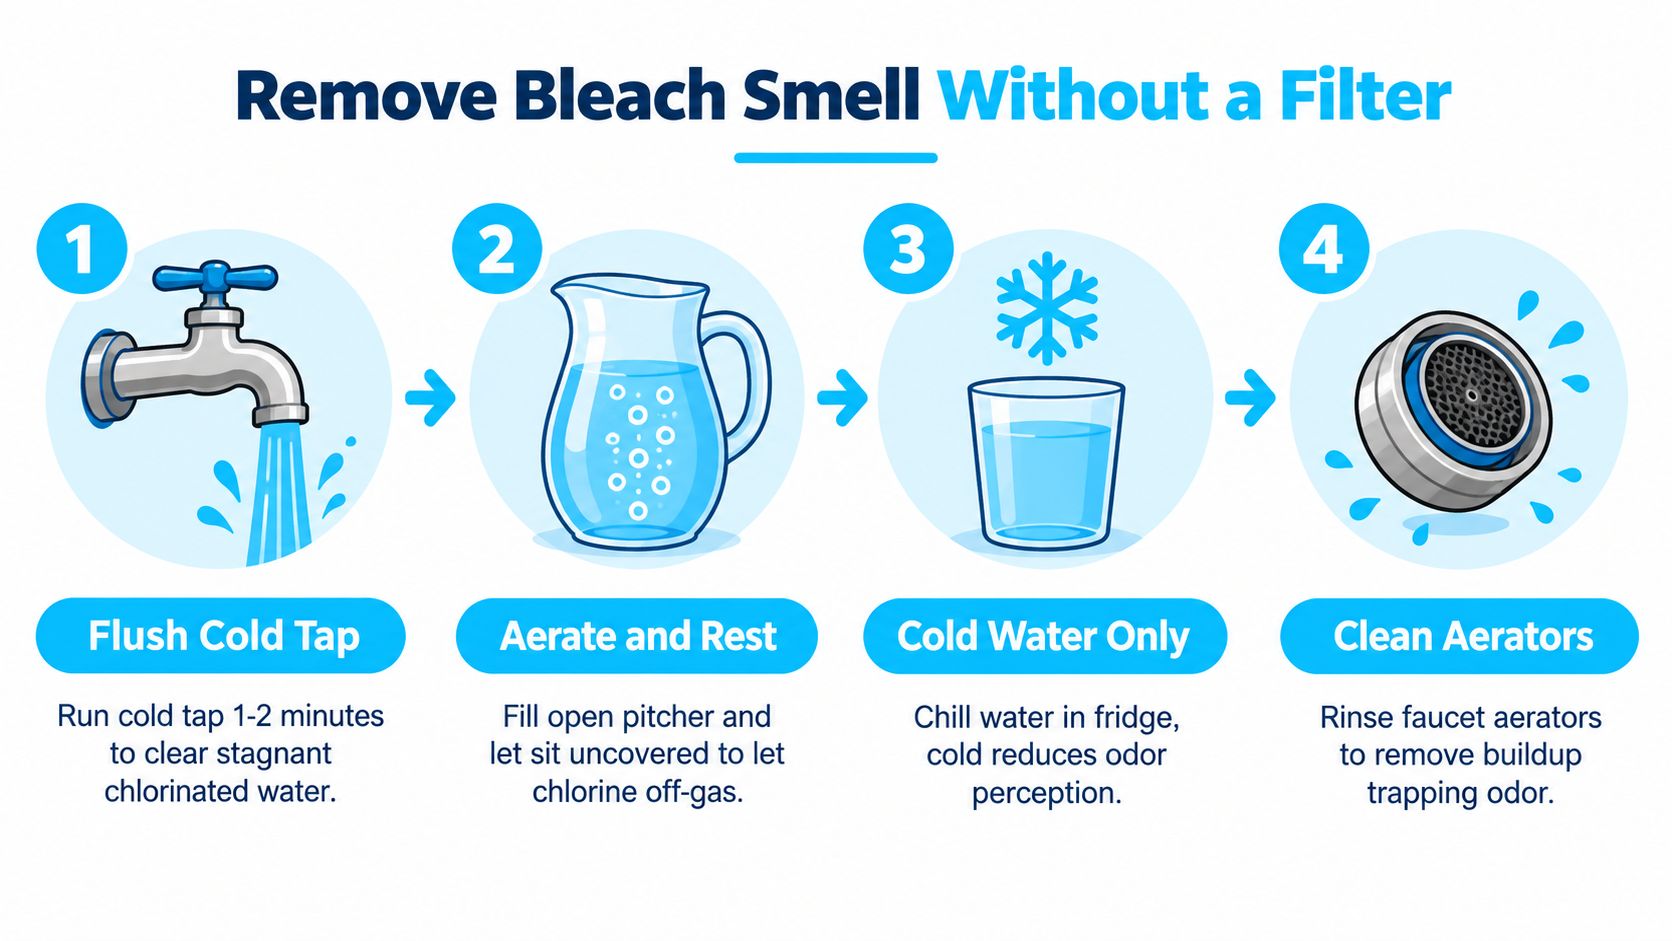
A four-step infographic showing how to remove bleach smell from tap water without using a filter.

The quick fixes that actually help

Start with the simplest option first. Pour a glass, smell it, then let the cold tap run briefly and try again. If the odor eases up, stagnant water in the plumbing was part of the problem, and flushing before drinking or cooking may be enough for now.

For drinking water, an open pitcher in the fridge still works better than many people expect. Free chlorine can dissipate when water sits exposed to air, and the EPA notes that chlorine taste may be reduced by storing water in an uncovered pitcher in the refrigerator overnight in the EPA home treatment FAQ.

Boiling is stronger, but less convenient. It can drive off chlorine faster than simple resting, which makes it useful for soup, pasta, tea, or baby formula water when the smell is hard to ignore. I rarely suggest boiling as a long-term habit because it takes time, heats up the kitchen, and only treats a small batch at once.

Vitamin C is the fast chemical option. It neutralizes chlorine directly, so it can knock down the bleach smell almost immediately. That can be handy for a pitcher of drinking water, but it is still a workaround, not a house-wide answer.

What each method is actually doing

These approaches are solving a chlorine chemistry problem in small batches.

  • Flushing replaces water that has been sitting in household pipes.
  • Resting water uncovered gives free chlorine time to dissipate.
  • Boiling speeds that process up.
  • Vitamin C neutralizes chlorine instead of waiting for it to fade.

The trade-off is simple. They help most with free chlorine and much less with chloramine. If your utility uses chloramine, you can spend a lot of time resting and boiling water for modest improvement.

What wastes money or solves the wrong problem

A few common fixes sound reasonable but do very little for bleach odor:

  • Sediment filters catch grit and rust, not chlorine residual.
  • Uncertified carbon products may help, or may barely touch the smell. If the package does not state what it reduces, assume very little.
  • Lemon slices, closed containers, or chilling alone can make water seem nicer to drink, but they do not reliably remove the disinfectant causing the odor.

That distinction matters. If the smell source is chlorine in the water, covering it up is different from removing it.

One safety warning people skip

Bleach smell around sinks and pitchers can overlap with cleaning residue, especially in kitchens and laundry areas. Independent cleaning guidance warns not to mix vinegar with bleach residue because it can release harmful chlorine gas, and recommends rinsing and ventilation first in this bleach odor safety article.

For drinking water, stay with flushing, open-air resting, boiling, or the right filtration. If those quick fixes barely change the smell, the next step is choosing treatment that matches the disinfectant your water supplier is using.

Choosing the Right Water Filtration for Lasting Odor Removal

Once the smell becomes routine, temporary fixes get old fast. At that point, you want filtration that matches the way you use water in the house.

Start with the certification, not the brand story

For household chlorine taste and odor complaints, NSF/ANSI 42 is the benchmark to look for. It covers aesthetic chlorine reduction, including taste and odor claims, rather than health-hazard contaminants, as outlined in this overview of NSF/ANSI Standard 42.

If you're buying for free chlorine, NSF/ANSI 42 is the first box to check. If you suspect chloramine, read deeper into the media type and test claims. Standard carbon may not be enough.

Nebraska Extension also notes that activated carbon is a core home treatment method for chlorine-related taste and odor issues and may also reduce chloramines and some disinfection byproducts, but it is not effective for metals, nitrate, microbial contaminants, or other inorganic contaminants in its home water treatment guidance. That's a useful reminder to keep the problem narrow. Don't buy chlorine treatment expecting it to solve every water issue in the house.

Matching Filtration Type to Bleach Odor Needs

Filter Format Best For Chlorine vs Chloramine Handling Certification to Look For
Pitcher filter Renters, light kitchen use, occasional odor Good fit for free chlorine if carbon is certified. Limited for stubborn chloramine unless specifically designed for it NSF/ANSI 42
Faucet-mounted filter Easy install at one sink Usually suitable for chlorine. Check media and flow limits before expecting chloramine control NSF/ANSI 42
Under-sink carbon system Daily drinking and cooking water Better contact time than many faucet units. Can be configured for chloramine with the right carbon media NSF/ANSI 42, plus chloramine-specific claim if needed
Whole-house carbon system Odor at every tap, showers, laundry, general household comfort Strong option for chlorine across the home. For chloramine, look for catalytic carbon and proper sizing NSF/ANSI 42 and clear chloramine performance language

What works in the field

For free chlorine, certified activated carbon is the standard move. Consumer guidance commonly describes chlorine reduction in the 95 to 99% range for activated-carbon treatment, but that depends on media type, contact time, and replacing cartridges before they're spent, according to this guide on carbon treatment for chlorine taste and odor.

That last part matters more than most buyers realize. When carbon is undersized or exhausted, the smell comes back even though water still flows normally.

Field note: If a carbon filter “used to work fine” and the bleach smell suddenly returns, the cartridge is often the first suspect, not the city water.

If you're comparing formats, Water Filter Advisor's filtration guides are one practical place to sort pitcher, faucet, under-sink, and whole-house options by use case and maintenance requirements.

Keep Your Water Fresh and Know When to Get Help

The easiest way to keep bleach odor from coming back is boring, but it works. Flush taps after the house has been sitting empty, chill drinking water if you store it, and replace carbon cartridges on schedule instead of waiting for the smell to remind you.

Whole-house carbon systems need the same discipline. Media eventually runs out of useful capacity, and point-of-use cartridges don't last forever just because water still passes through them. If you have chloramine service, stay alert to media compatibility when you replace anything.

A few signals mean it's time to stop tweaking and start asking questions:

  • Persistent odor after certified carbon treatment
  • Discoloration or unusual changes in taste
  • Only hot water smells after other taps are fine
  • Utility notices about flushing, maintenance, or treatment changes

If the odor issue extends beyond drinking water and into damp building materials, fabrics, or rooms after a water event, a broader odor-remediation resource like Eagle Restoration Marion County can help you think through non-plumbing odor sources separately from tap-water treatment. That distinction matters because room odor and water odor often get lumped together when they shouldn't.

For home water, the right sequence is simple. Identify the source, match the filter to the disinfectant, and maintain the media before performance drops.


Water Filter Advisor helps households compare real filtration options for chlorine, chloramine, and other common water problems without guessing from packaging claims. If you're dealing with removing bleach smell and want help choosing between a pitcher, faucet unit, under-sink setup, or whole-house carbon system, visit Water Filter Advisor.

Shower Head Filter Cartridge Guide for Home Filtration

You step into the shower expecting relief, then notice the familiar chemical odor. After drying off, your skin feels tight, your scalp is irritated, and your hair seems less manageable than it did before the rinse. A shower head filter cartridge can be a practical home filtration upgrade, but only when its media, flow rating, and replacement schedule match the water coming through your pipes.

Shower filtration is no longer a niche bathroom accessory; independent market estimates valued the global shower water filters market at approximately USD 2.5 billion in 2025 and project it to reach about USD 4.5 billion by 2033 at a 7% CAGR (market estimate). More households are buying replaceable cartridges, yet many still rely on a generic calendar interval instead of considering household size, disinfectant chemistry, water temperature, and flow.

Introduction to Shower Head Filter Cartridges

A cartridge sits inside a housing connected to the shower supply, or inside a filtered showerhead. As water passes through the media, the cartridge can reduce targeted substances such as free chlorine, depending on its design and verified performance. It won't solve every water problem, and it won't turn hard water into soft water, but the right model can address odor and chlorine exposure at the point where you shower.

The practical challenge is that two homes can use the same cartridge and get very different service life. A lightly used guest bathroom may preserve its media longer than a busy family bathroom, while water treated with chloramine may require entirely different media from water treated with free chlorine.

The useful question isn't “How many months does this last?” It's “How much treated water will this household send through the media?”

This guide covers how a cartridge works, how activated carbon, KDF, vitamin C, ceramic, and mixed-media designs differ, how to match flow and capacity to your shower, and how to replace the cartridge without creating leaks. If you're planning the broader bathroom layout as well, a resource on choosing your primary bath shower can help you think through shower placement and equipment before installation.

Understanding How Shower Head Filter Cartridges Work

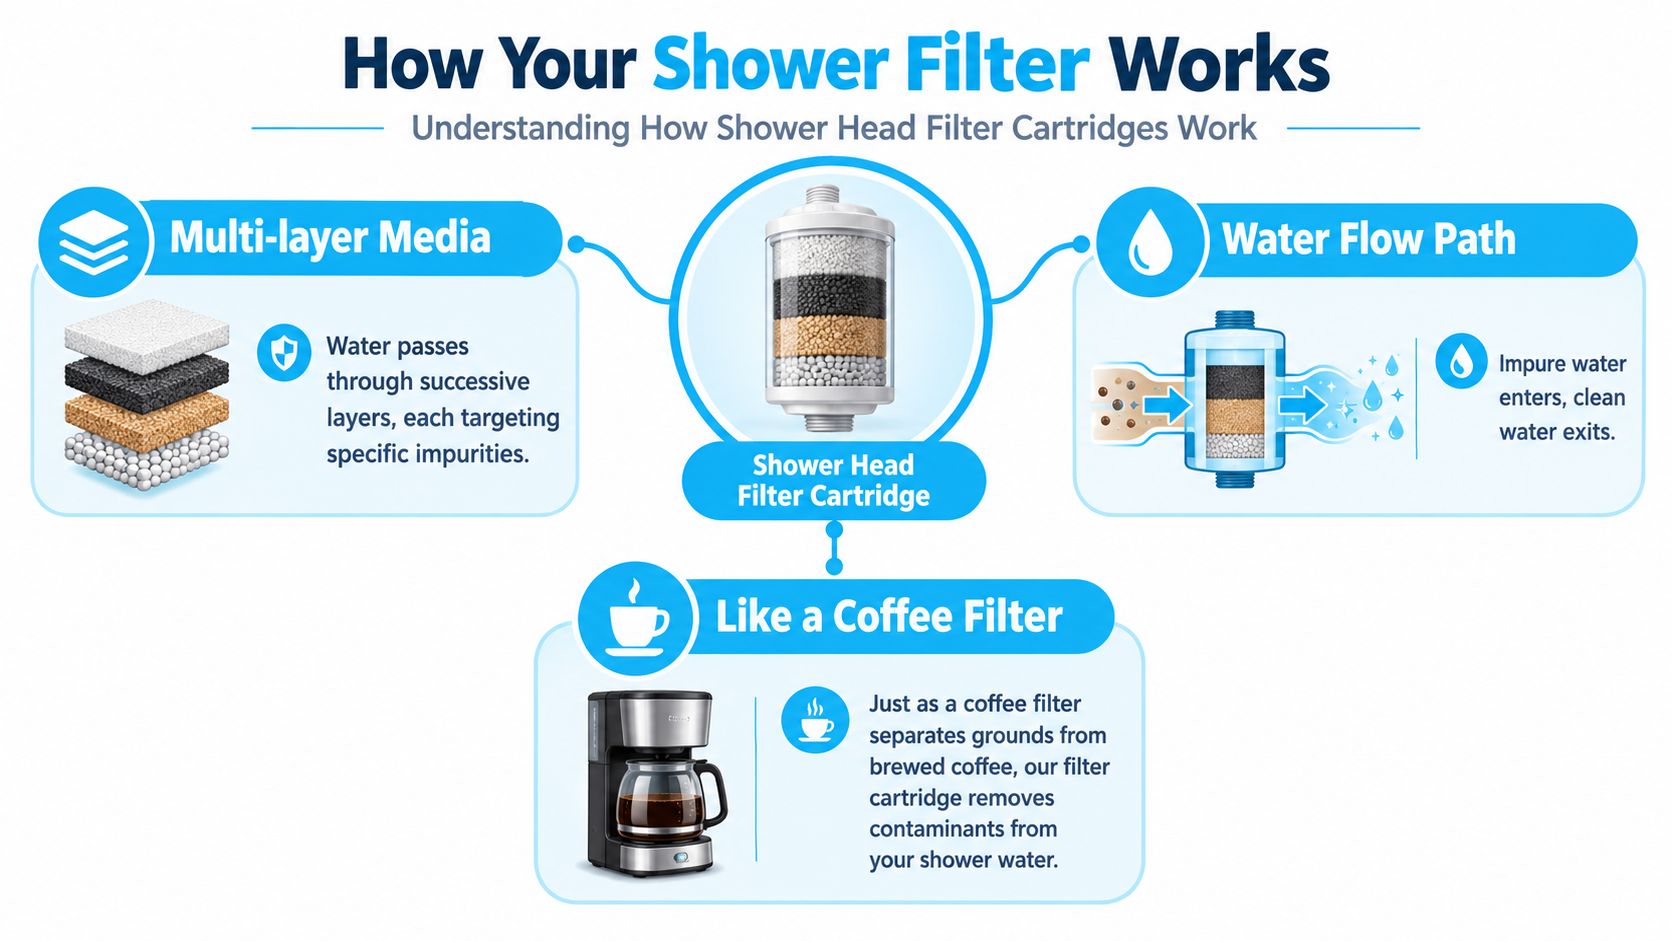
A cartridge is easier to understand if you compare it with a coffee maker. Water enters the coffee filter, moves through the grounds, and exits after contacting several materials. A shower head filter cartridge follows the same basic principle, except the internal media is selected to trap particles, adsorb chemicals, or trigger a chemical reaction.

An infographic explaining how a multi-layer shower head filter cartridge cleans water, similar to a coffee filter process.

The parts inside the housing

Most replaceable systems have three practical parts:

  • Outer housing: The canister holds the media and directs water through the intended path.
  • Sealing O-rings: These rubber seals prevent water from escaping at threaded connections or around the cartridge.
  • Internal media pack: Granular media, blocks, screens, or layered materials perform the actual treatment.

Some cartridges also include a sediment screen or mesh layer. That layer catches loose particles before they reach the finer media, which can help preserve flow. It won't remove dissolved chlorine or chloramine, because those substances pass through a simple physical screen.

Hydraulically, untreated water enters through the inlet, travels across or through the media bed, and exits through the outlet toward the showerhead. The cartridge must provide enough contact between water and media to support reduction, while still allowing the shower to maintain usable pressure. If water moves too quickly through a small media bed, treatment can suffer. If the media is packed too tightly, pressure can fall.

Why replaceable cartridges matter

Integrated filtered showerheads combine the head and filter in one unit. They're convenient, but replacing the entire head can create unnecessary waste and restrict your choice of spray pattern. A modular cartridge system lets you keep the showerhead you prefer and replace only the exhausted treatment component.

The patent history reflects that progression. U.S. Patent 6,325,930 for a filtered showerhead was published in 2001, while later patents specifically naming modular replaceable showerhead filter cartridge assemblies appeared in 2018 (patent history). Earlier shower filter assembly filings from 1992 and 1996 also show that the basic concept has been developing for decades.

Comparing Filtration Media and Contaminants Removed

The media determines what a cartridge can realistically do. A long list of “stages” isn't useful unless you know what those stages contain and which substances they target.

Activated carbon works mainly through adsorption. Its porous surface attracts certain chemicals responsible for chlorine odor and related taste or smell concerns. Standard carbon can be useful for free chlorine, but it isn't automatically effective against chloramine.

KDF media, generally a copper-zinc alloy, uses an oxidation-reduction process. It can support free-chlorine reduction and may address some dissolved metals, but it shouldn't be treated as a universal solution. Vitamin C, or ascorbic acid, chemically neutralizes chlorine and can be useful as a finishing stage, particularly when free chlorine is the main concern. Its usefulness against chloramine depends on the formulation and test evidence.

Ceramic or mesh components primarily support particle control. They can catch sediment and protect downstream media, but they don't replace a chemical treatment stage. Mixed-media cartridges combine several approaches so that one layer handles particles while another targets disinfectants or odors.

Media Type Removable Contaminants
Activated carbon Free chlorine, odor-causing compounds, and some organic contaminants
Catalytic carbon Free chlorine and chloramine, where supported by testing
KDF copper-zinc media Free chlorine and some dissolved metals
Vitamin C, ascorbic acid Free chlorine and, in suitable formulations, chloramine
Ceramic or mesh Sediment and larger suspended particles
Mixed-media blend A broader combination of particles, disinfectants, odors, and selected metals

The standard benchmark for many shower cartridges is NSF/ANSI 177. Certified shower filters must reduce free available chlorine by at least 50% when challenged with water containing 2 mg/L free available chlorine (NSF certified listings). That benchmark applies to free chlorine. It doesn't prove that the cartridge removes chloramine, hardness, lead, or every other contaminant.

A cartridge that passes a free-chlorine test isn't automatically a chloramine cartridge.

Check your utility's water report or arrange testing before choosing media. If you're also evaluating household materials, you can discover safe flooring for indoor air quality separately, but don't confuse indoor-material decisions with water-treatment performance. For the shower, the media and its test documentation remain the deciding factors.

Choosing the Right Cartridge Size and Lifespan

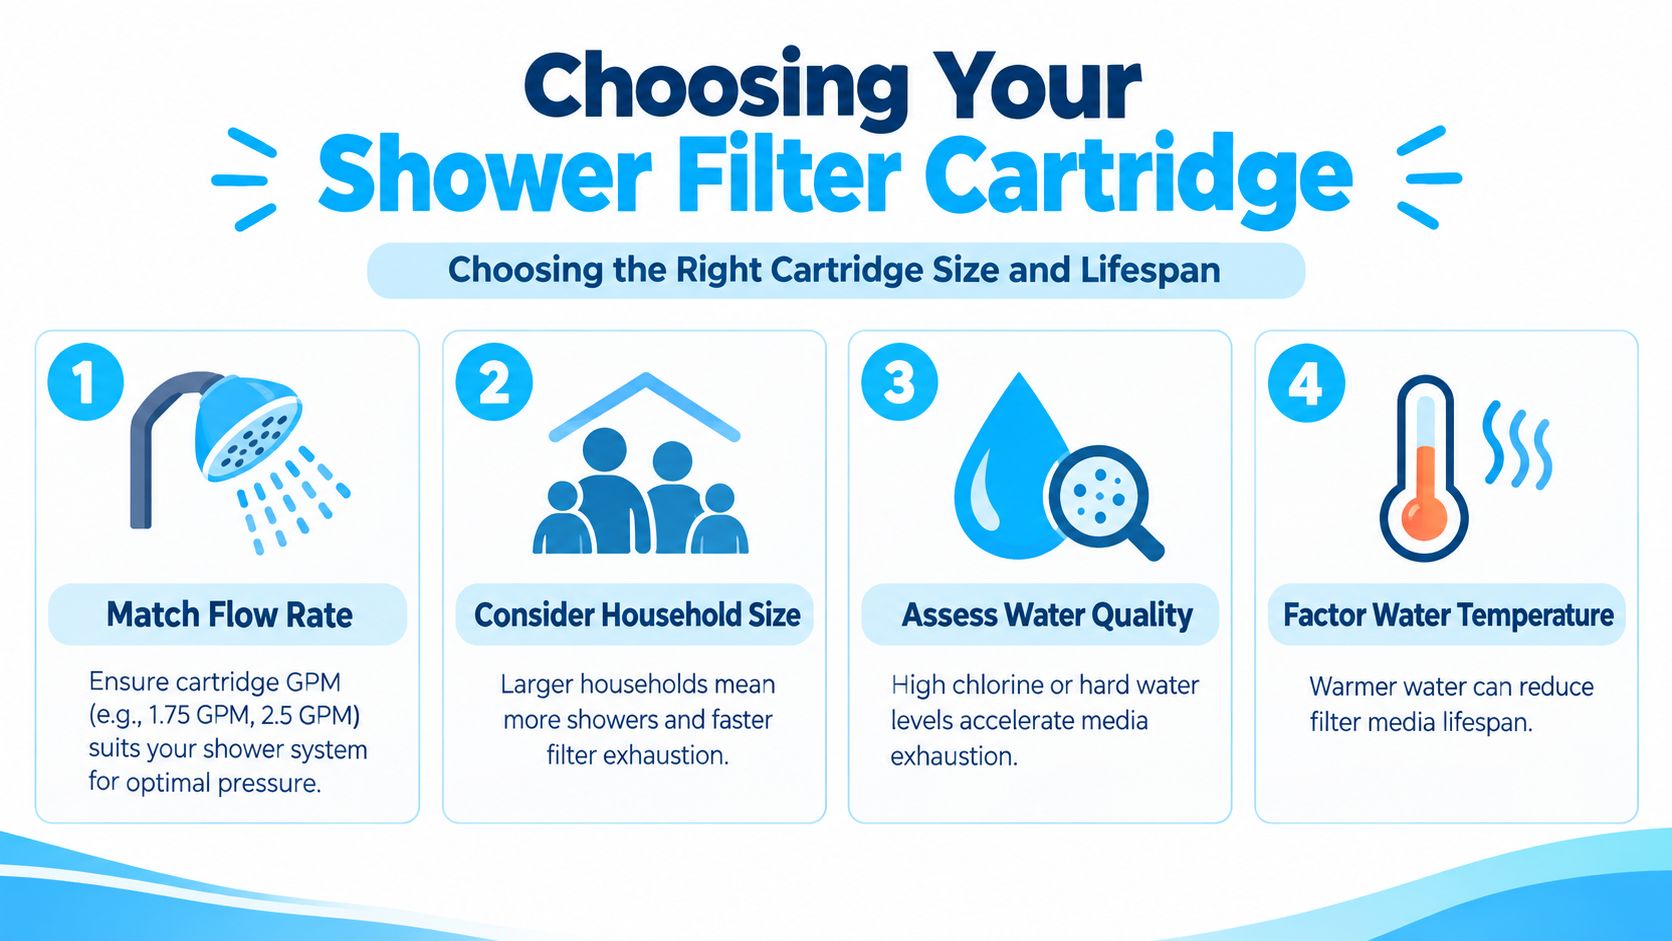
A cartridge's flow rating must suit the shower system. Published examples include cartridges rated at 1.75 GPM and others rated at 2.5 GPM, so compare the cartridge rating with the flow your showerhead requires. A restrictive cartridge may reduce pressure, while an undersized media bed may offer less contact time.

Published specifications commonly place service life around 3 to 12 months or 5,000 to 25,000 gallons, depending on media chemistry and cartridge format (service-life specifications). Those ranges aren't interchangeable promises. They describe different designs operating under different water conditions.

Calculate usage instead of guessing

A two-person household with short, occasional showers may use a cartridge far more slowly than a four-person household with frequent, longer showers. Higher disinfectant residuals, warmer water, sediment, and greater flow all increase the workload placed on the media.

One independent guidance document notes replacement windows from about 3 to 6 months and estimates that a four-person household can exhaust a cartridge in roughly 3.5 months, even when a general six-month schedule is advertised (household usage guidance). Treat the manufacturer's gallon rating as a capacity limit, then adjust your expectation for actual household demand.

An infographic detailing four key factors for choosing the right shower filter cartridge and its lifespan.

Record the installation date, note how many people use the bathroom, and watch for returning odor or declining pressure. A calendar reminder is useful, but it should support, not replace, usage-based judgment.

Replacing and Maintaining Shower Head Filter Cartridges

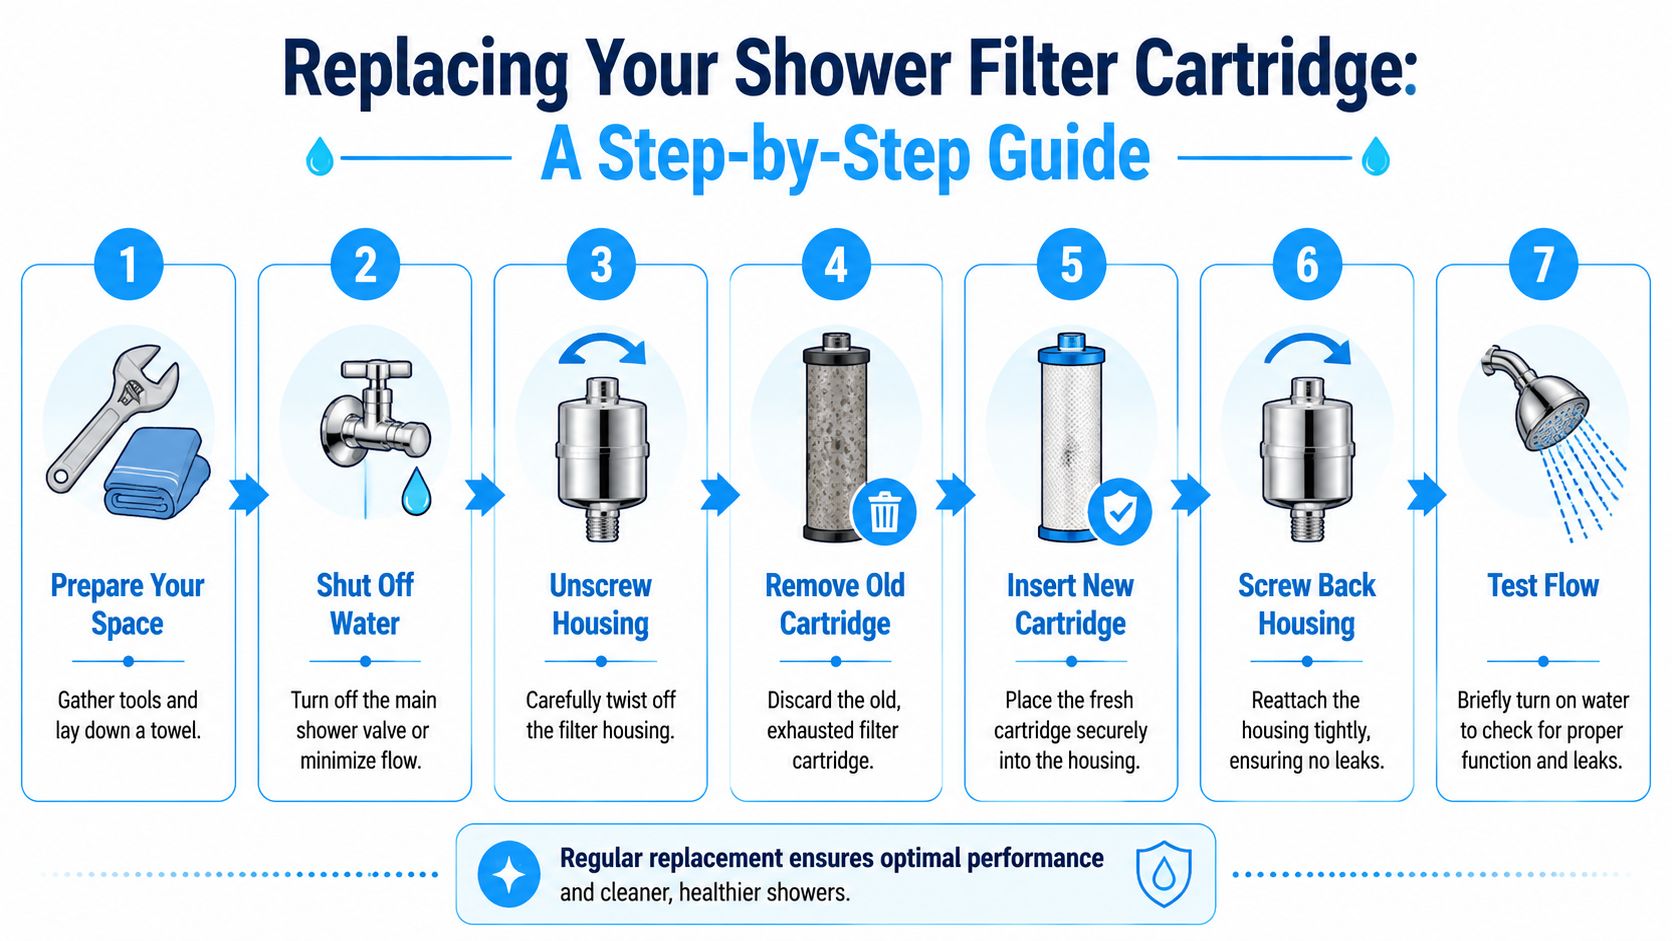
Replacing a cartridge is usually a straightforward plumbing task, but rushing the seal inspection creates most avoidable leaks. Put a towel under the housing before you begin, and keep the replacement cartridge, a wrench, and food-grade silicone grease nearby.

  1. Prepare the work area. Remove loose items from the shower and place the towel under the connection.
  2. Stop or minimize flow. Close the shower valve or reduce water flow so the housing isn't pressurized.
  3. Open the housing. Unscrew the canister carefully. Use a wrench only where the manufacturer permits it, because excessive force can damage plastic threads.
  4. Remove the old cartridge. Note its orientation before discarding it. Some cartridges have a defined inlet and outlet.
  5. Inspect the seals. Clean the O-ring and groove. Replace a cracked, flattened, or brittle seal rather than trying to compensate with extra tightening.
  6. Install the fresh cartridge. Seat it firmly in the correct direction, ensuring it isn't tilted or obstructing the outlet.
  7. Reassemble and test. Apply a thin film of food-grade silicone grease to the O-ring, hand-tighten the housing, then turn on the water slowly and check every joint.

An instructional infographic detailing the seven-step process for replacing a shower head filter cartridge safely and effectively.

Flush a new cartridge according to the manufacturer's instructions. Initial carbon fines can make the water look gray or produce temporary specks, and flushing helps clear them before normal showering. Periodically wipe the housing and inspect the threaded connections, especially if the bathroom has visible sediment.

For broader installation and maintenance guidance, the Water Filter Advisor advice library provides additional filter-care resources.

Use testing when the result matters. A simple chlorine test can confirm whether a fresh cartridge is performing as expected, while repeated odor or pressure problems may indicate a plumbing restriction rather than exhausted media.

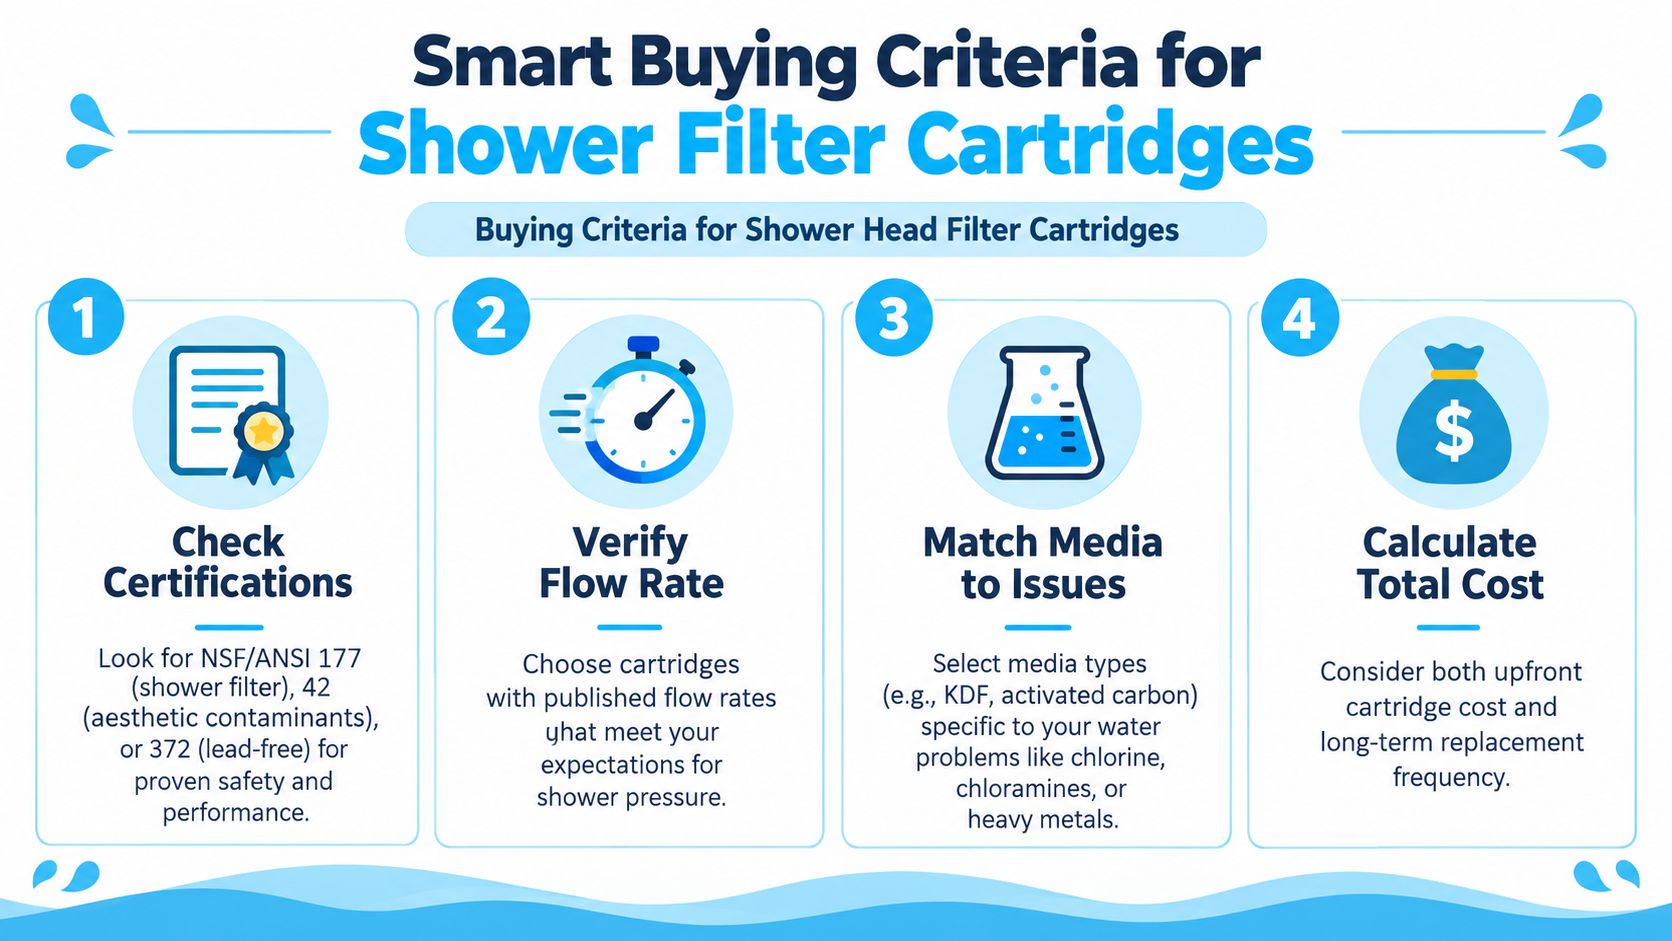
Buying Criteria for Shower Head Filter Cartridges

Buy the cartridge for your water, not for the largest stage count printed on the package. A cartridge with a clearly identified media bed, a published flow rating, and verifiable testing is usually a safer choice than one that lists numerous unnamed layers.

Start with certification and test conditions

NSF/ANSI 177 is the key shower-filter standard for free available chlorine reduction. Some products may also reference NSF/ANSI 42 for aesthetic contaminants or NSF/ANSI 372 for lead-free material requirements, but each designation addresses a different issue. Read the actual certification scope rather than assuming one certification covers every contaminant.

A useful performance sheet pairs a reduction result with operating conditions. One independently published sheet rated a cartridge at 2.5 gal/min, or 9.46 L/min, at 80 psi, while reporting an average 94.8% free-chlorine reduction under NSF/ANSI 177 test conditions. The standard's minimum pass criterion was at least 50% reduction at 2 mg/L influent free available chlorine (performance sheet).

Use a practical buying checklist

  • Identify the target contaminant: Decide whether the problem is free chlorine, chloramine, sediment, odor, or selected metals.
  • Confirm physical fit: Check thread compatibility, housing dimensions, cartridge orientation, and replacement availability.
  • Verify flow performance: Compare the rated GPM and inlet pressure with your shower's expected pressure.
  • Review certification documents: Confirm what was tested, under which standard, and whether the claim applies to free chlorine or another substance.
  • Calculate ownership cost: Include the replacement cartridge price, shipping, and how often your household is likely to replace it.

The EPA's drinking-water rules set a Maximum Residual Disinfectant Level of 4.0 mg/L for chlorine and 4.0 mg/L for chloramines (EPA disinfectant limits). That regulatory threshold doesn't tell you which cartridge to buy, but it explains why disinfectant chemistry is relevant. EPA compliance also uses measurements over time, rather than relying on a single snapshot, as described in the federal rule (EPA compliance rule).

An infographic detailing four key buying criteria for selecting the best shower head filter cartridges for your home.

Troubleshooting Common Shower Head Filter Cartridge Problems

Low pressure doesn't always mean the cartridge has reached the end of its life. First check the showerhead screen, inlet washer, sediment pre-filter, and housing for blockage. A new cartridge may also need flushing before it reaches normal flow.

Discolored water after installation often comes from carbon fines or disturbed sediment. Flush the cartridge according to the product instructions, then inspect the housing if the discoloration persists. A strange odor can point to exhausted media, stagnant water, or a water-supply issue rather than a defective cartridge.

Reduced chlorine removal deserves a chemistry check. Testing shows that many ordinary carbon and KDF cartridges struggle with chloramine, while catalytic carbon and ascorbic-acid media provide more consistent chloramine reduction (chloramine testing and review). If your utility uses chloramine, replacing a standard carbon cartridge with the same design may repeat the problem.

Conclusion and Next Steps for Filter Cartridge Care

A dependable shower head filter cartridge starts with diagnosis. Identify the disinfectant in your water, choose media suited to that chemistry, match the flow rating to your shower, and track household usage rather than relying on a generic replacement interval. Heavy use, sediment, and demanding water chemistry can shorten cartridge life and increase replacement costs.

Protect performance with routine care. Record the installation date, flush each new cartridge, inspect O-rings, clean the housing, and replace the media before odor or pressure problems become severe. If hardness is the main concern, a shower cartridge cannot replace a whole-house softener or conditioner.

Water Filter Advisor provides consumer guidance on shower, whole-house, under-sink, faucet, refrigerator, and portable filtration. Its material covers cartridge maintenance, media selection, certifications, and water testing, helping readers compare options based on performance rather than packaging claims.

Use the maintenance and buying guidance to choose a compatible cartridge, set a changeout schedule based on actual use and water conditions, and avoid paying for media that does not match your water.

Drinking Water Contaminants Every Home Filters Can Solve

You fill a glass at the kitchen sink, take a sip, and notice something slightly metallic. The water looks clear, but that doesn't answer the question that suddenly matters: what else is in the glass?

A drinking water contaminant can be a microbe, a dissolved metal, a chemical left behind after disinfection, or a compound that traveled from soil into groundwater. It can enter through a municipal supply, a private well, or the pipes inside your own home. The practical answer isn't to panic or buy the most complicated filter on the shelf. It's to identify the source, consider who needs protection, and match the treatment to the actual problem.

The Glass of Water You Never Think Twice About

Tap water is trusted until a small detail interrupts the routine. Maybe the water has a faint metallic flavor after sitting overnight. Maybe a glass smells like a swimming pool, leaves a cloudy film on the kettle, or tastes different after nearby plumbing work. Those clues don't prove that a drinking water contaminant is present, but they're reasonable reasons to investigate.

Water safety is also bigger than taste and odor. The World Health Organization explains that, in 2022, 6 billion people used safely managed drinking-water services, while 2.2 billion people still did not. Among those without safely managed services, 1.5 billion had basic services, 292 million relied on limited services, and 296 million collected water from unprotected wells and springs. The same source links contaminated drinking water to about 485,000 diarrhoeal deaths each year, showing that contamination is a public-health concern, not merely a question of whether water tastes pleasant.

For a household, “contaminant” doesn't mean one scary chemical. It includes microbial contamination, pollution at the water source, and problems created during distribution, storage, or contact with plumbing. A municipal treatment plant may make source water safe, yet water can still pick up lead from a service line or faucet fitting before it reaches your glass.

Treat your plumbing like a shared mailbox

Think of the water system as a neighborhood mailbox. The utility, the street pipes, your service line, the house plumbing, and the faucet all contribute to what arrives. You don't control every message placed in that box, but you can inspect your part of the delivery route and add treatment where it makes sense.

Three questions keep the process manageable:

  • What is present? Start with a consumer confidence report for municipal water or a properly selected test for a private well.
  • Who needs the most protection? Infants, pregnant people, immunocompromised adults, and people with kidney problems may require more careful decisions.
  • Which technology solves that contaminant? A carbon filter behaves like a sponge for some chemicals, while reverse osmosis works more like a very fine barrier. Neither is automatically right for every problem.

You don't need to know chemistry before you begin. You only need to avoid treating every filter as a universal solution.

What Counts as a Drinking Water Contaminant

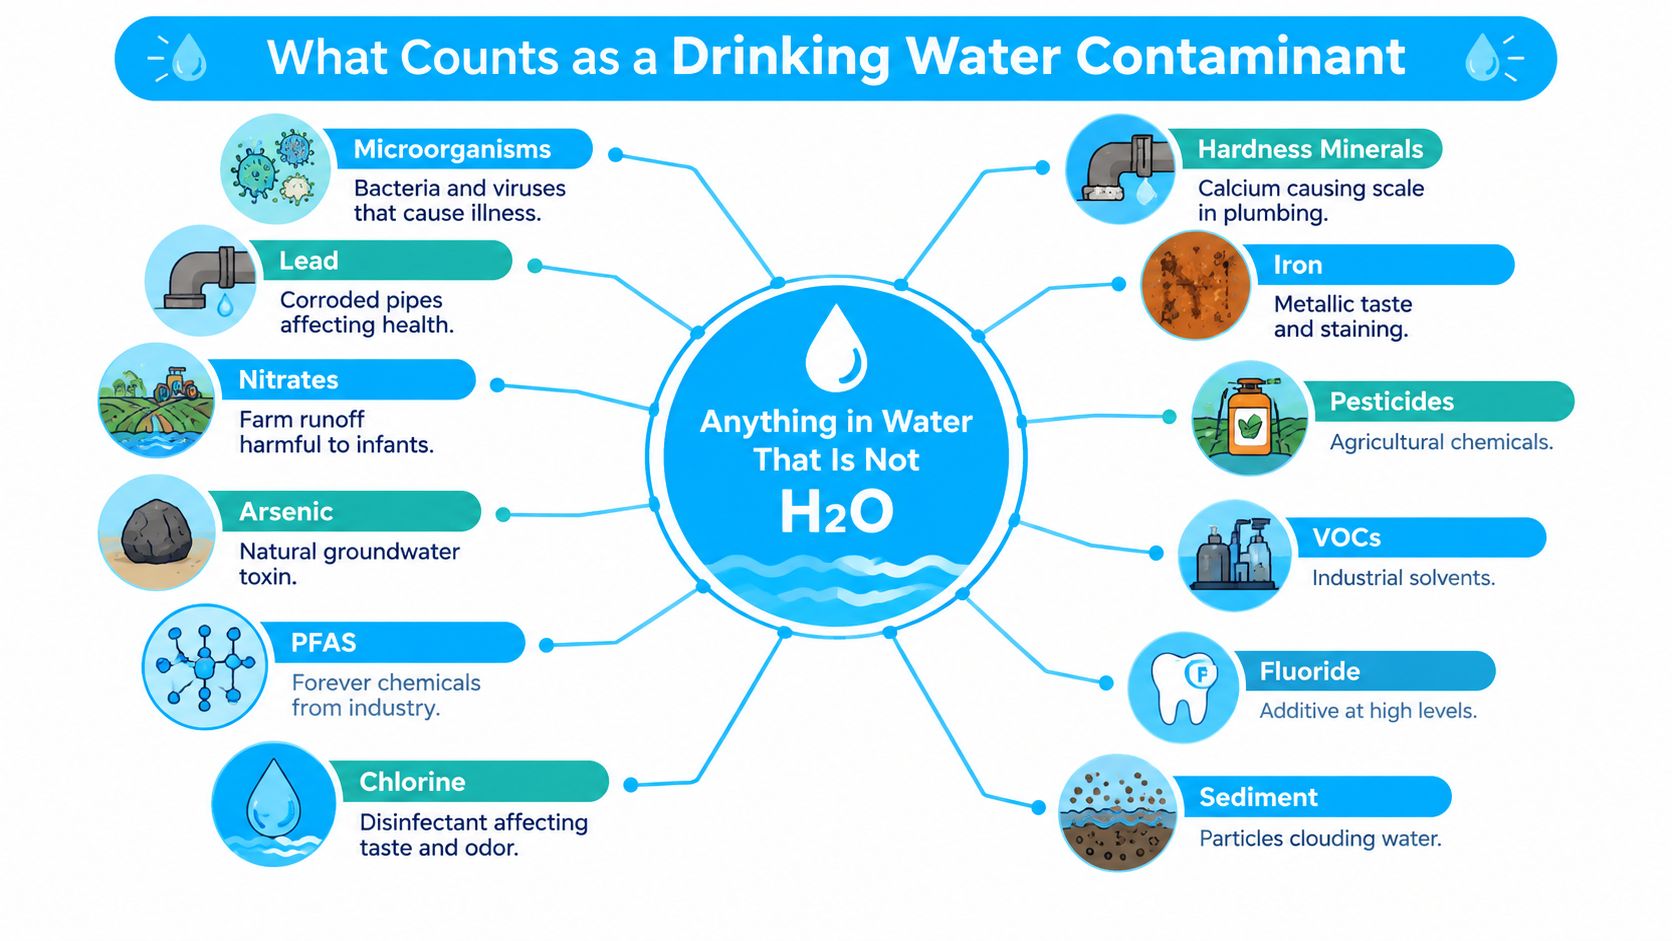
A drinking water contaminant is anything in water besides H2O that can affect health, taste, odor, or plumbing. The word doesn't automatically mean “dangerous.” Risk depends on the substance, its concentration, how long exposure continues, and the sensitivity of the person drinking it.

A useful way to sort the possibilities is to think of contaminants as different kinds of unwanted neighbors.

An infographic showing various substances that count as drinking water contaminants, such as lead, pesticides, and PFAS.

Heavy-metal neighbors

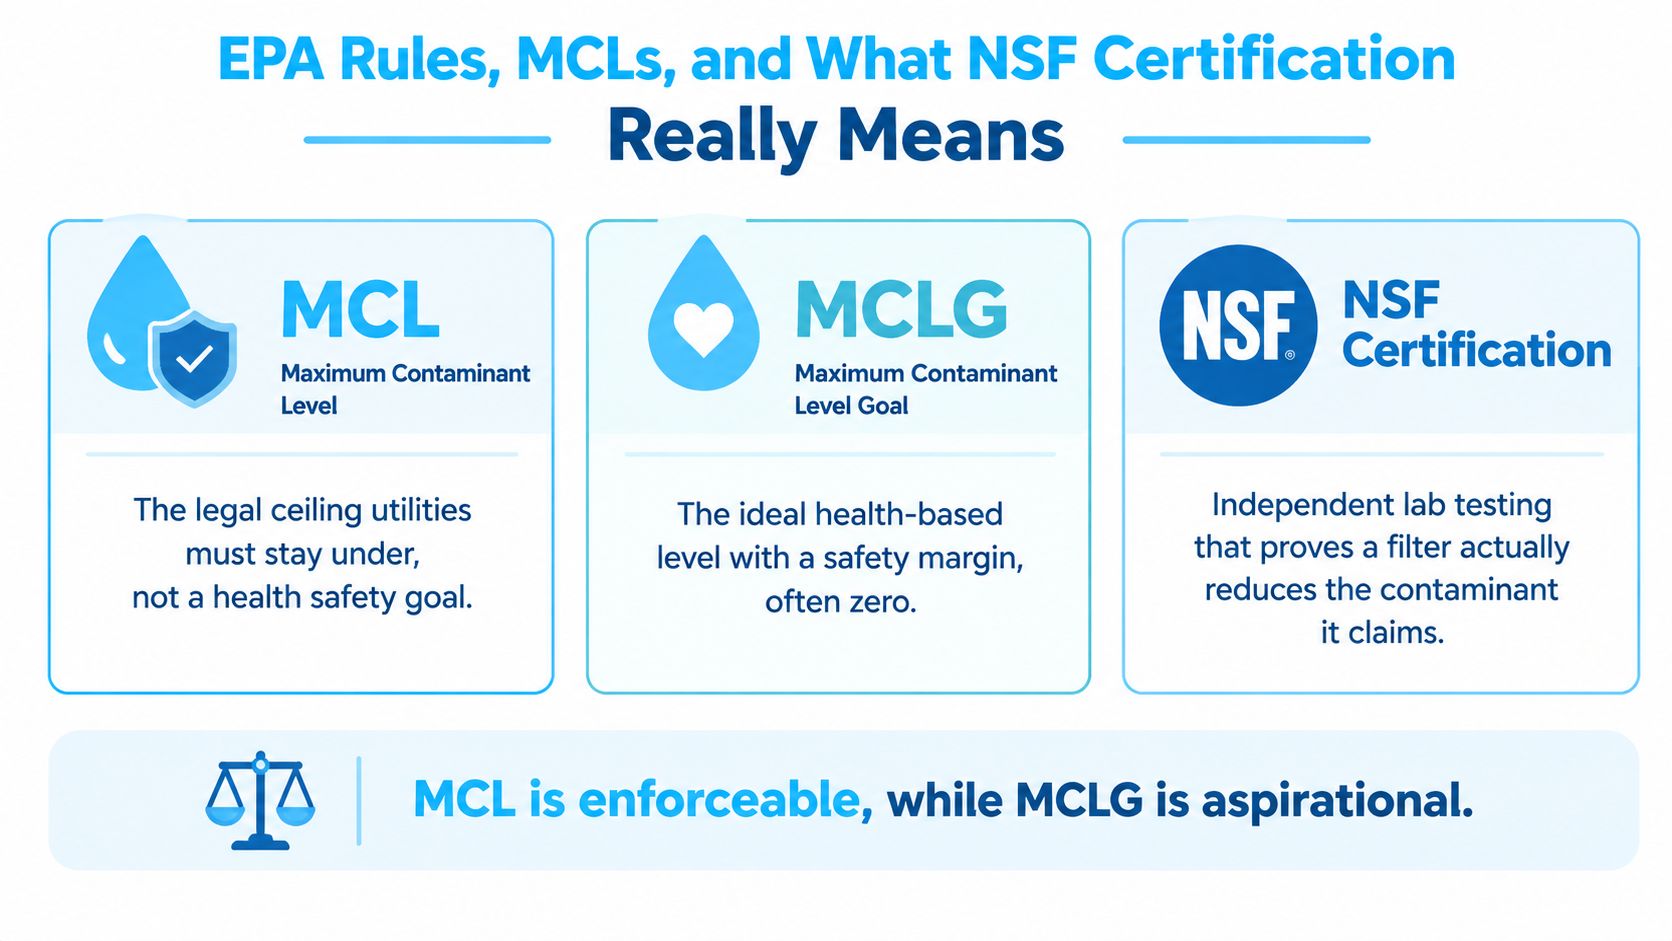
Lead can enter through aging service lines, solder, brass, and fixtures. The EPA says the maximum contaminant level goal for lead is zero, because there's no safe level of exposure. Children are especially vulnerable to developmental effects, while adults can experience kidney or blood-pressure impacts. Lead is mainly a plumbing concern in municipal systems, although well water can also contact lead-containing household components.

Arsenic often comes from natural rock and groundwater. Long-term exposure can harm health, making it especially important for private-well owners and communities whose water source has naturally higher levels. Iron is more commonly a taste, staining, and plumbing nuisance, though it can signal a water chemistry problem that deserves testing.

Chemical byproducts

Chlorine and chloramine protect municipal supplies from microbes, but they can affect taste and odor. Disinfection can also create TTHMs, a group of chemical byproducts that utilities monitor and manage. These substances generally concern municipal water more than untreated wells. Infants, pregnant people, and people with existing health concerns may reasonably prefer treatment that reduces exposure, but the correct response depends on test results and local reports.

Runoff and industrial compounds

Nitrates can enter groundwater from agricultural fertilizer and pose a particular concern for infants. Pesticides may follow agricultural or industrial runoff. PFAS, sometimes called “forever chemicals,” can come from industrial activity and firefighting materials and may travel through groundwater. These contaminants can affect both municipal and private-well users, depending on the source.

Microbial intruders

Bacteria, viruses, and protozoa such as Giardia and Cryptosporidium are biological contaminants. They can cause gastrointestinal illness and are especially concerning for infants, immunocompromised adults, and people with serious health conditions. Municipal water is disinfected, while private wells can be vulnerable after surface water enters the well area.

A final group includes aesthetic nuisances such as hydrogen sulfide, which creates a rotten-egg smell. It may make water unpleasant without proving that the water is unsafe, but persistent odor still deserves investigation because the treatment depends on the source and concentration.

How Contaminants Sneak Into Your Tap

Water doesn't travel directly from a source to your glass. It moves through a chain of places, and each place can change its chemistry. Think of the system as a long garden hose. Anything touching the inside wall, from a well screen to a faucet aerator, has an opportunity to affect the water.

For municipal supplies, the journey often begins in a river, lake, or reservoir. A treatment plant removes particles and disinfects the water, commonly with chlorine or chloramine. The treated water then travels through distribution mains, service lines, and household plumbing. Aging cast-iron or lead service lines can contribute metals, while solder, brass fittings, and fixtures can release lead when corrosion conditions allow it. Water that sits overnight may have more contact time with those materials.

Private wells follow a different route. Fertilizer can seep into groundwater as nitrate. Arsenic can dissolve naturally from certain rock formations. Heavy rain can carry surface contamination toward a poorly protected well, creating bacterial risk. PFAS from industrial sites or firefighting-foam use can migrate through aquifers and reach wells far from the original source.

The points you can control

You can't change the municipal treatment plant or the geology beneath a private well. You can investigate your service line, replace problematic fixtures, install point-of-entry treatment, or treat the kitchen tap with a certified point-of-use system. That distinction matters because a filter may reduce what reaches your glass without fixing the plumbing source.

Contaminant Typical Entry Point Municipal vs. Well
Lead Service lines, solder, brass, and fixtures Both, especially where plumbing is old
Chlorine or chloramine Added during municipal disinfection Mostly municipal
TTHMs Formed during disinfection when source-water chemistry allows Mostly municipal
Nitrates Fertilizer and agricultural runoff entering groundwater Both, with strong well relevance
Arsenic Natural dissolution from rock and aquifer materials Especially private wells, also some municipal sources
PFAS Industrial areas, firefighting materials, and contaminated groundwater Both
Bacteria Surface-water intrusion, poor well protection, or distribution problems Both
Iron and hydrogen sulfide Groundwater geology and reducing conditions Commonly wells, sometimes buildings

A faucet aerator can collect sediment and biofilm, but cleaning it won't solve a contaminated aquifer or lead service line. The filter location should follow the entry point. Treat the whole home when the contaminant affects bathing, laundry, plumbing, or every fixture. Treat one drinking tap when the concern is limited to consumption.

Matching Contaminants to the Right Filter

The cheapest effective fix is the one that matches the contaminant and the water's path. A coffee filter catches visible grounds, but it won't remove dissolved sugar. A window screen blocks insects, but it won't stop smoke. Home filtration works the same way. A filter's appearance tells you almost nothing about its certified performance.

Contaminant Best Filter Technology Notes
Lead Certified activated carbon or reverse osmosis Choose a unit specifically certified for lead reduction. Also investigate corroding plumbing.
Chlorine Activated carbon Carbon improves taste and odor and reduces chlorine when properly sized and maintained.
Chloramine Catalytic carbon Standard carbon may not be sufficient. Confirm the performance claim.
TTHMs Activated carbon or reverse osmosis Carbon can adsorb many organic compounds. RO may help when dissolved contaminants are mixed.
Nitrates Anion exchange or reverse osmosis A basic carbon cartridge isn't the right tool for nitrate removal.
Arsenic Reverse osmosis or specialized media The correct method depends on arsenic form and water chemistry. Test first.
PFAS Certified activated carbon or reverse osmosis Check the exact claim and replacement schedule. A broad “purification” label isn't enough.
Bacteria UV, chlorination, or microbiological treatment UV needs clear water and reliable power. Disinfection doesn't remove dissolved chemicals.
Viruses Chlorination, UV, or reverse osmosis in suitable systems Verify the system's microbial claim rather than assuming a sediment filter works.
Giardia and Cryptosporidium Certified fine filtration or reverse osmosis Look for a cyst-reduction claim. UV can also address microbes when properly designed.
Iron Oxidation and filtration, often whole-house Treatment varies with dissolved iron, pH, and other water chemistry.
Hydrogen sulfide Oxidation, aeration, or specialized carbon Whole-house treatment is usually more practical when odor affects several fixtures.

Activated carbon adsorbs chlorine and many organic compounds. Reverse osmosis pushes water through a membrane that reduces dissolved solids and a broad range of contaminants. Ion exchange swaps selected ions, such as nitrate or hardness minerals, for other ions held by the resin. UV light disrupts microbial DNA, while chlorination disinfects water and can help manage microbial growth in a system.

No single home cartridge solves every mixed-exposure scenario. PFAS, metals, nitrate, microbes, and taste compounds belong to different chemical or biological families. A combined system may be appropriate, but only after testing identifies the mixture. More stages can add maintenance without adding useful protection if none of those stages is certified for the actual contaminant.

EPA Rules, MCLs, and What NSF Certification Really Means

Regulatory language often sounds more reassuring than it is. A Maximum Contaminant Level, or MCL, is an enforceable limit that a public water system must meet. It isn't a guarantee that water contains nothing below that limit, and it isn't always the same as a zero-risk target.

An MCLG, or Maximum Contaminant Level Goal, is a health-based goal. The EPA sets the lead MCLG at zero, because lead is toxic even at low exposure levels. The EPA's drinking-water regulations explain that lead is managed through a treatment technique and an action level of 0.010 mg/L, formerly expressed by EPA as 15 parts per billion in its lead guidance. If more than 10% of tap samples exceed the action level, the water system must take additional steps, including corrosion-control measures.

State rules can also include variances under specific conditions. That doesn't mean a higher limit is automatically ideal for every household. It means the regulatory system may allow a different requirement while the utility addresses technical, economic, or source-water circumstances.

An infographic explaining EPA Rules, MCLs, MCLGs, and NSF certification for water quality standards.

Read the filter claim, not the front of the box

The Lead and Copper Rule focuses heavily on corrosion control because lead often enters water from plumbing rather than the source itself. The Unregulated Contaminant Monitoring Rule helps utilities gather information about substances that don't yet have enforceable limits. PFAS regulation has also developed, including federal MCLs finalized in 2024, but local implementation and household exposure still require careful interpretation.

NSF/ANSI standards help translate a product claim into something testable:

  • NSF/ANSI 42 generally covers aesthetic issues such as chlorine, taste, odor, and some particulates.
  • NSF/ANSI 53 covers health-related reduction claims, including lead, cysts, VOCs, mercury, and asbestos.
  • NSF/ANSI 58 applies to reverse osmosis systems.
  • NSF/ANSI 55 relates to ultraviolet treatment.
  • NSF/ANSI 401 addresses certain emerging contaminants.

The NSF certification guidance explains why a chlorine filter shouldn't be assumed to remove lead. Look for the contaminant name, the relevant standard, and the specific model listing. A compliant utility report also isn't the same as contaminant-free water at your tap, particularly when household plumbing contributes exposure.

Testing Your Water at Home Versus Sending It to a Lab

Home test strips are useful for quick checks. They can help you monitor free chlorine, pH, or total hardness and notice whether a treatment system is behaving differently. They're closer to a dashboard warning light than a complete mechanical inspection.

Color-change kits become less dependable when the question involves lead, arsenic, bacteria, or PFAS. Those contaminants may require laboratory methods such as ICP-MS for metals or EPA Method 533 for PFAS. A kit can suggest that something deserves attention, but a laboratory result is the stronger basis for choosing a treatment system.

Testing Option Useful For Main Limitation
Home strips Free chlorine, pH, and hardness Fast estimates, not a full contaminant profile
Color-change kits Screening and routine comparisons Results can be affected by technique and water chemistry
Certified laboratory panel Lead, arsenic, bacteria, nitrate, and PFAS Costs more and requires careful sampling

Basic home kits commonly cost $15 to $40, while state-certified lab panels commonly cost $100 to $400, according to the testing guidance specified for this comparison. Those figures are practical ranges, not guarantees. The panel you need depends on whether you use municipal water, a private well, or a treatment system.

A comparison chart showing the differences between home water testing kits and professional laboratory water testing services.

A municipal household should start with its annual water-quality report and test after plumbing work, a major odor change, or a local incident. A private-well household should establish a baseline with a certified laboratory and repeat testing when the well, land use, or household risk changes. Move-in day, nearby construction, a boil notice, or the arrival of a new baby or immunocompromised resident are sensible moments to choose laboratory testing rather than relying on strips.

This short video can help make the testing process less mysterious:

Choosing and Maintaining a Home Filtration System

Choose the treatment location before choosing the brand. A whole-house, or point-of-entry system, makes sense when iron, hydrogen sulfide, or chlorine affects multiple fixtures, damages plumbing, or creates an odor throughout the home. A point-of-use system is usually more efficient when the concern is drinking and cooking water, particularly for arsenic, lead, nitrates, or PFAS at the kitchen tap.

For practical buying guidance and maintenance advice, homeowners can compare system types through Water Filter Advisor's filtration advice. Treat that resource as one comparison point, then verify the certification and contaminant claim for the exact product you're considering.

System Type Price Range Replacement Interval Best For
Pitcher filter $20 to $50 40 gallons or two months Taste, odor, and selected certified reductions
Faucet-mount filter $30 to $60 Follow the model's rated capacity A renter-friendly drinking-water upgrade
Countertop or under-sink RO $150 to $600 installed RO membrane every 2 to 3 years Dissolved contaminants at one kitchen tap
Whole-house unit $800 to $3,500 Depends on media and water chemistry Iron, hydrogen sulfide, chlorine, and whole-home treatment

Don't buy based on the number of cartridges alone. A five-stage system with no certified claim for your contaminant is less useful than a simpler system with the right certification. Check for NSF/ANSI 42, 53, 58, 55, or 401 only when the standard matches the problem you identified.

Maintenance is part of filtration, not an optional chore. Replace pitcher cartridges at their rated capacity, change carbon blocks on schedule, replace RO membranes as specified, and replace UV lamps every 12 months. A forgotten sediment pre-filter can clog and starve an RO membrane, while an overdue carbon cartridge can become a source of poor flow and disappointing performance.

Your Home Water Action Plan and Common Questions

Use this order:

  1. Confirm your source. Read the municipal consumer confidence report or identify your private well.
  2. Test strategically. Use a certified lab after an incident, plumbing work, or when well conditions change.
  3. Choose after results. Match the contaminant to a certified technology.
  4. Install at the right point. Treat the whole home or only the drinking tap based on where the problem matters.
  5. Log maintenance. Record cartridge, membrane, media, and lamp replacement dates.

A five-step guide labeled Your Home Water Action Plan for identifying, testing, and filtering home drinking water.

Is bottled water safer than filtered tap? Not automatically. Compare the source, testing information, packaging, and the performance claim of a certified home filter. Start with your local report and a targeted test.

Does an RO tank refill instantly? No. It refills gradually as the membrane produces treated water. Follow the manufacturer's flow and storage guidance, and don't treat a slow tank as proof that the system is broken until you check pressure, filters, and the shutoff valve.

Does boiling remove lead or PFAS? No. Boiling can address some microbial concerns, but it doesn't remove dissolved chemical contaminants such as lead or PFAS. Use a treatment certified for the contaminant.

Can a renter install under-sink RO? Ask the landlord before modifying plumbing, and choose a non-permanent connection if required. Get written approval, then use a certified installer or follow the lease-approved method.


Water Filter Advisor helps households compare contaminant-specific filtration options, certifications, replacement needs, and testing considerations. Visit Water Filter Advisor to turn your water report or lab result into a practical home filtration decision.

Whole House Iron Filter System: A Homeowner’s Guide

A whole house iron filter system sits on the main water line and treats water before it reaches showers, sinks, laundry equipment, and water heaters. That sounds straightforward until a system performs well on installation day, then starts sending orange water into the bathtub weeks later. The difference usually comes from three things working together, oxidation chemistry, filter media, and household operating conditions.

Iron treatment isn't just a matter of trapping “rust.” Dissolved ferrous iron may be invisible at the faucet, while ferric iron arrives as visible particles. Manganese, hydrogen sulfide, tannins, sediment, hardness, and iron bacteria can change which technology works and how much maintenance the equipment needs. The right system begins with a water report, not a product label.

The Morning Your Water Tells You Something Is Wrong

The first clue may appear before breakfast. An orange streak runs down the new toilet bowl. The bathtub tap releases brown water after the well pump cycles, and coffee has a faint metallic tang that wasn't there before. By laundry day, pale clothing carries rusty spots, the dishwasher leaves a dull film, and a thin rust ring has formed around the sink drain.

That household isn't dealing with a problem limited to appearance. Iron deposits can foul aerators, valves, appliances, and plumbing while changing water color, flavor, and odor. The World Health Organization's historical iron guidance explains that iron is mainly treated as an aesthetic concern, with visible staining becoming a practical issue above 0.3 mg/L. The same guidance says noticeable taste is usually absent below that level, while higher concentrations can stain laundry and plumbing fixtures.

A bathroom tub and toilet filled with rusty, contaminated water indicating poor home water quality issues.

Two forms of trouble at the tap

Clear-water iron often looks harmless when it leaves the faucet. It can remain dissolved until the water sits in a toilet, washing machine, glass, or sink and meets oxygen. Then it oxidizes and leaves the familiar orange or reddish-brown residue.

Red-water iron behaves differently. It has already oxidized before reaching the fixture, so the water may pour visibly yellow, orange, or brown. That particulate iron can lodge in faucet screens, toilet fill valves, and small passages before a homeowner sees the full extent of the problem.

Installer's observation: A clean-looking glass doesn't prove the water is iron-free. It may only mean the iron hasn't oxidized yet.

A proper diagnosis connects the stain to the chemistry underground and inside the pipes. Testing reveals whether the system needs oxidation, physical filtration, disinfection, pH correction, or a combination of treatments.

How Iron Gets Into Water and What It Does Inside Your Home

Groundwater often picks up iron as it moves through iron-bearing soil and rock. In private wells, low-oxygen conditions can keep iron dissolved as ferrous iron, Fe²⁺. Aging cast-iron mains, well components, or household plumbing can also release ferric iron, Fe³⁺, which is already oxidized and travels as particles.

The easiest analogy is sugar and sand. Ferrous iron behaves more like sugar dissolved in water. You can't remove it with a simple screen because there isn't a visible particle to catch. Ferric iron behaves more like sand in a glass. It can settle, clog, and collect in places where water slows down.

What happens after the water enters the house

Oxygen and chlorine can convert dissolved ferrous iron into insoluble ferric particles. Those particles may stain porcelain, collect in aerators, clog toilet valves, and build deposits around water-heater components. Clear water can therefore cause a delayed orange stain, while ferric water can create an immediate brown plume.

A basic inspection helps, but it can't replace laboratory testing:

  1. Observe the water immediately. Fill a clear glass and watch for color, cloudiness, or particles.
  2. Let a sample stand. Clear water that develops orange color points toward oxidation of dissolved iron.
  3. Use a screening strip or kit. This can flag iron, but it won't identify every related issue.
  4. Order a laboratory analysis. Ask for iron, pH, hardness, manganese, tannins, and other relevant well-water parameters.

An infographic illustrating how iron from natural sources travels through water systems to cause household problems.

A single iron number isn't enough to select media. Low pH can prevent some oxidation media from working correctly. Manganese may need a more demanding chemistry window. Tannins can consume oxidants and interfere with filtration. Hydrogen sulfide creates a rotten-egg odor that points to a gas problem, not merely more iron.

If hydrogen sulfide is part of the complaint, maintenance knowledge from practical gas monitor upkeep tips can also help homeowners understand why gas detection and treatment equipment require regular attention.

The Main Technologies Whole House Iron Filters Use

Iron-removal technologies don't compete in a universal ranking. Each one changes the water in a different way, and each has a failure point that appears when the chemistry falls outside its operating window.

Oxidizing media, including Birm and manganese greensand, converts or catalyzes dissolved iron so the resulting particles can be captured in the media bed. Greensand-style systems need periodic regeneration with an oxidant. Birm-style systems depend on pH and dissolved oxygen, and the Birm operating guidance specifies water free of oil and hydrogen sulfide, organic matter below about 4 to 5 ppm, dissolved oxygen at least 15% of the iron content, and pH of 6.8 or higher for iron removal.

Air-injection and aeration systems introduce air before filtration. The air supplies oxygen, allowing ferrous iron to form particles in a tank or contact space. These systems can reduce chemical handling, but they still need effective filtration and backwashing. Hydrogen sulfide, manganese, low pH, and limited contact time can push performance outside the practical window.

Chemical oxidation uses chlorine, potassium permanganate, or hydrogen peroxide to convert dissolved contaminants into filterable solids. It can be useful when iron bacteria, manganese, hydrogen sulfide, or heavier iron loading complicates air oxidation. The tradeoff is chemical storage, feed control, residual management, and possible damage when an oxidant is overfed.

Catalytic carbon is usually a polishing or dechlorination stage rather than a complete iron solution. It can help with taste, odor, and residual chlorine after oxidation, but iron particles can clog the bed. Homeowners comparing fine sediment stages can also review practical 0.22 micron filter tips to understand why pore size alone doesn't solve dissolved iron.

Salt-based softeners can exchange limited ferrous iron along with hardness. They aren't a dependable answer for substantial iron, ferric particles, iron bacteria, or water with conditions that foul resin. If iron reaches the softener first, resin can lose useful capacity and require more attention.

Phosphate and polyphosphate sequestrants hold iron in solution rather than remove it. That may reduce visible staining in some applications, but the iron remains in the water. Heat and changing chemistry can also weaken sequestration, especially around water heaters and hot-water fixtures.

Technology How It Treats Iron Best Operating Window Common Failure Mode
Birm-style media Catalyzes oxidation and captures particles Adequate oxygen, pH at or above the media requirement, low oil and sulfide Iron passes through when oxygen or pH is inadequate
Manganese greensand Oxidizes or adsorbs iron, then releases it during backwash and regeneration Managed oxidant feed, suitable pH, controlled iron and manganese load Media exhausts or regeneration is missed
Air injection Adds oxygen before filtration Dissolved ferrous iron with enough contact and a capable filter bed Incomplete oxidation or fouled air components
Chemical oxidation Converts dissolved contaminants into solids Feed rate matched to iron, manganese, sulfide, and biology Overfeed, underfeed, or residual chemical problems
Catalytic carbon Polishes taste, odor, and some residuals Downstream of suitable oxidation and sediment control Clogging and premature exhaustion
Softener or sequestrant Exchanges limited iron or keeps it dissolved Low ferrous iron or nuisance-control applications Resin fouling or iron remaining in the water

How the System Actually Works Day to Day

A backwashing iron filter is a working chemical process, not a passive tank of gravel. Untreated water enters the mineral tank, contacts the media, and undergoes oxidation. Ferrous iron becomes ferric particles, and the bed holds those solids until the control valve sends water upward through the tank and out to a drain.

A diagram illustrating the five-step daily cycle of a whole house iron filter system water filtration process.

The cleaning cycle

The exact sequence depends on the equipment, but the practical logic is consistent:

  • Service: Water flows downward through the media and treated water leaves the tank.
  • Backwash: Water flows upward, expands the bed, and carries trapped iron to the drain.
  • Air or oxidant restoration: An air-injection or chemical stage restores the media's ability to oxidize iron.
  • Rinse: The valve settles and clears the bed before normal service resumes.

One chemical-free iron-filter manual describes a four-step cycle, backwash, air draw, rapid rinse, and service, with backwash requiring at least 30 psi inlet pressure and the full cycle taking about 15 minutes. During backwash, the upward flow is the cleaning mechanism, not an optional accessory. The cited iron-filter manual provides those operating details.

Backwash flow matters because the bed must expand enough to release trapped solids. Too little flow leaves iron behind and creates channeling. Excessive flow can carry media toward the drain. The pump, drain line, control valve, and tank size must therefore work as one assembly.

A greensand-style unit may regenerate with potassium permanganate or chlorine. One technical sheet lists normal potassium permanganate use at about 1 to 2 ounces per cubic foot of media, with practical treatment limits of 15 ppm iron, 5 ppm manganese, and 2 ppm hydrogen sulfide for that system design. Those figures come from the greensand technical sheet, and they shouldn't be treated as universal ratings for every media bed.

Watch the drain during a cycle. Dark or orange water at the beginning, followed by clearer discharge, usually indicates that the bed is releasing captured material. A creeping pressure drop, weak flow, or recurring color after regeneration suggests the schedule, backwash rate, or chemistry needs attention.

Why Some Iron Filters Fail Before Their Time

Most early failures begin with a mismatch between the water report and the media's operating window. The tank may be sound, the valve may be functional, and the installation may look tidy, yet the system still can't oxidize or remove the contaminant load arriving at the inlet.

Birm illustrates the problem clearly. Low dissolved oxygen, unsuitable pH, oil, hydrogen sulfide, or organic matter can shut down the chemistry the media depends on. Greensand has a different vulnerability. It can work effectively when regeneration is controlled, but missed oxidant dosing, excess loading, or poor backwash leaves the bed progressively less capable.

Iron bacteria create a separate category of failure. Pentair installation guidance warns that iron bacteria can cause frequent service, shorten system life, and require chlorine or other bacterial control before filtration works properly. Slimy deposits can form mounds inside the tank and pipes, forcing water around the media instead of through it.

The costliest mistake is treating biology as if it were only chemistry.

A unit sized for a quiet household can also struggle in a busy home. If the control valve backwashes only by time, the system may receive more iron and manganese than the schedule accounts for. Irrigation, frequent laundry, and simultaneous showers add demand that a showroom demonstration doesn't reveal.

Failure Cause Water Chemistry Trigger Symptom at Home
Incomplete oxidation Low dissolved oxygen, unsuitable pH, or inadequate contact Clear water turns orange after treatment
Media exhaustion Heavy iron, manganese, sulfide, or organic loading Staining returns before the next cycle
Iron bacteria Slimy biological growth and deposits Frequent service, odors, channeling, or pressure loss
Poor regeneration Missed oxidant feed or insufficient backwash Dark drain water and weak treated flow
Chemical overfeed Excess chlorine or another oxidant Media damage, taste, or residual chemical
Undersizing Household or irrigation demand exceeds design Pressure drop and early breakthrough

The Health Canada technical document describes oxidation followed by filtration as a common groundwater approach and identifies point-of-entry oxidizing filters such as greensand at residential scale. The lesson is practical: choose the treatment sequence around the actual water chemistry, not the brand name printed on the tank.

Sizing a Whole House Iron Filter Without Buying the Wrong One

Sizing starts with two separate flow questions. Service flow is what the home needs while fixtures operate. Backwash flow is what the tank needs to clean itself. A filter can meet the first requirement and still fail because the well pump or drain cannot deliver the second.

Count the fixtures that may run together during the busiest routine. A shower, toilet refill, washing machine, and outdoor use can overlap. Irrigation deserves special caution because it can consume water continuously rather than in short household bursts.

A practical sizing checklist

  1. Measure peak household demand. Use the home's simultaneous fixture demand, not the average daily flow.
  2. Verify the pump and pressure. Compare available inlet pressure and pump output with the filter's service and backwash requirements.
  3. Review contaminant load. Iron concentration, manganese, sulfide, and tannins all affect how quickly the bed loads.
  4. Match bed depth and tank diameter. The media needs enough depth for contact and enough surface area for the required flow.
  5. Confirm the drain path. A generous drain route is easier to provide before installation than after a tank is already in a finished basement.

A checklist for sizing a whole house iron filter system with three key steps and a pro tip.

Don't confuse a manufacturer's maximum service flow with a recommended continuous flow for a home using irrigation. Continuous demand can exhaust media faster and interfere with effective oxidation. A qualified installer should calculate the loading between regeneration cycles, then check whether the well and drain can support the required backwash.

One residential manual warns that heavy iron and manganese loading can reduce pressure and flow when too much water passes between backwash cycles. It recommends shortening the interval to every other day or even daily in extreme cases, and says the system shouldn't operate more than 3 days between backwashes. The residential backwash manual also describes systems preset to backwash every third day, with a complete regeneration cycle lasting about 50 minutes and untreated water available during that period.

Real Cost, Maintenance, and Lifespan of a Whole House Iron Filter System

The purchase price is only one part of iron treatment. A whole-house installation may also need bypass plumbing, a drain connection, electrical power, a sediment stage, pH correction, an air pump, or chemical-feed equipment. A low-maintenance design can cost more initially while reducing chemical handling, whereas a chemically regenerated bed may demand more supplies and closer monitoring.

Media maintenance depends on the technology. Manganese greensand needs regeneration with an oxidant, while Birm depends on proper pH and oxygen and still needs regular backwashing. Catalytic carbon may serve as a downstream polishing stage, but iron breakthrough and sediment can shorten its useful service.

What belongs in the ownership budget

  • Equipment: Mineral tank, control valve, media, air or chemical components, and any required prefilters.
  • Installation: Main-line cutting, bypass plumbing, drain routing, electrical work, and commissioning.
  • Consumables: Potassium permanganate, chlorine, peroxide, salt, replacement cartridges, or bacterial-control supplies.
  • Water and drainage: Backwash cycles consume water and require a drain that can accept the discharge.
  • Service time: Testing, valve inspection, media checks, and cleaning after iron bacteria or heavy sediment.

Don't accept a media-life promise without asking what water chemistry supports it. Iron concentration, manganese, sulfide, tannins, household demand, and skipped backwashing can all shorten service life. A service log should record test results, backwash dates, chemical additions, pressure changes, and the date when staining first reappears.

Cost and Maintenance Comparison by Iron Filter Type Filter Type Media Replacement Annual Operating Cost Typical Lifespan
Oxidizing media Birm or greensand-style tank Depends on chemistry, loading, and regeneration Backwash plus any required oxidant Depends on maintenance and water conditions
Air-injection system Air-treatment and filtration components Depends on media fouling and service Electricity, backwash, and component service Depends on pump, chemistry, and cleaning
Chemical-feed system Oxidation stage plus filter media Depends on oxidant exposure and contaminant load Chemical supply, power, backwash, and service Depends on feed control and maintenance
Catalytic carbon stage Carbon bed Replaced when exhausted or fouled Replacement media and backwash where applicable Depends on chlorine, sediment, and iron exposure
Softener or sequestrant Resin or injection media Depends on iron loading or media exhaustion Salt or dosing supplies and maintenance Depends on iron contact and operating conditions

The EPA's secondary iron standard is 0.3 mg/L, or 300 µg/L, and addresses aesthetic issues such as taste, odor, and staining rather than health protection. That threshold helps explain why homeowners often pay for treatment when the first priority is protecting fixtures and reducing nuisance maintenance.

Matching the Right System to Your Home and Water

Start with a laboratory water test that includes iron, pH, hardness, manganese, and tannins. Add testing for hydrogen sulfide and bacteria when odor, slime, or recurring deposits suggest they may be present.

Low ferrous iron with suitable pH may fit Birm or air injection. Lower pH, higher loading, manganese, sulfide, or iron bacteria may point toward greensand, chemical oxidation, or a layered design. Hardness can call for a softener after iron removal, because iron should be treated before resin whenever both problems exist.

Your household determines the next filter. Check peak flow, bathrooms, irrigation, pump capacity, drain access, and whether you prefer chemical handling or a more equipment-intensive salt-free approach. For installation planning, ShamFix's guide to finding plumbers offers useful advice on evaluating a qualified professional.

Use Water Filter Advisor's water filtration advice to compare treatment stages, media, testing considerations, and maintenance questions. Choose by water chemistry first, household demand second, and maintenance tolerance third. That sequence is much more reliable than choosing a tank because its label promises the highest iron capacity.


Water Filter Advisor helps homeowners compare whole-house iron filters, understand media and certification claims, and plan maintenance around real water conditions. Visit Water Filter Advisor to turn your laboratory report and household demands into a treatment decision you can maintain.

Best Water Filter for Nitrates: A Practical Guide

You test your well and the report comes back at 14 mg/L nitrate. The water looks clear, smells normal, and tastes fine, so the result feels more alarming than the glass in your hand. It should. Nitrate is invisible, and a filter that improves taste won't necessarily remove it.

The best water filter for nitrates isn't automatically the most expensive system or the biggest whole-house unit. It's the system that consistently brings your treated water below the U.S. EPA maximum contaminant level of 10 mg/L nitrate-nitrogen, while fitting your plumbing, household demand, water chemistry, and tolerance for wastewater or salt handling. The EPA's nitrate guidance gives the health benchmark, but your test results determine what equipment makes sense.

Why Nitrates in Drinking Water Are a Real Concern

Nitrates are nitrogen-and-oxygen compounds found naturally in soil and water. Fertilizer runoff, manure, septic leakage, and other human activities can raise nitrate levels in drinking-water supplies. Nitrites are related compounds, not the same contaminant, and the body can convert nitrate to nitrite.

The immediate health concern is reduced oxygen transport in the blood. The EPA set a 10 mg/L nitrate limit, measured as nitrogen, to protect infants from methemoglobinemia, commonly called blue baby syndrome, and later reaffirmed that health-based standard in the 1990s. EPA documentation describes the standard and its history.

Who needs the most protection

Bottle-fed babies face the clearest household risk because formula mixed with contaminated water can create repeated exposure during a sensitive period. Pregnant women also warrant a conservative approach. People with reduced stomach acid may be more vulnerable because those conditions can change how the body handles nitrate and nitrite.

Adults should not ignore a positive test because infant risk receives the most attention. Continued exposure makes it important to identify the source, retest when appropriate, and choose treatment with a verified nitrate-reduction claim. Research has also examined possible links between nitrate exposure and colorectal problems in adults, but the practical response stays the same: measure the water and treat contamination rather than waiting for a taste or odor warning.

Practical rule: If nitrate is elevated, treat drinking and cooking water first. A standard carbon cartridge is not a nitrate solution.

Nitrate offers no dependable color, taste, or odor warning. Sediment filters remove particles, while activated carbon can improve chlorine taste, but neither reliably removes nitrate. Start with a certified laboratory test, then match the treatment method to the result, plumbing, and household use.

How Nitrates Get Into Home Water and What Safe Levels Mean

Private wells carry the most changeable nitrate risk because groundwater reflects nearby land use. Common routes include agricultural fertilizer runoff, septic-system leaching, livestock waste, and lawn chemicals. Shallow wells, along with wells near active farms or new residential development, deserve closer monitoring. Any private well can require testing.

Municipal water follows a different risk pattern. Standard treatment may leave nitrate in the supply, so customers can receive water affected by source conditions. Distribution issues, contamination events, or operational changes can make a point-of-use safeguard sensible, especially when a household wants a dependable barrier for drinking and cooking water.

The benchmark that matters

The EPA maximum contaminant level is 10 mg/L when reported as nitrate-nitrogen. That equals 44.2 mg/L when reported as nitrate ion, according to Water Quality Association guidance on nitrate and nitrite measurement. Check the reporting basis on your laboratory report before comparing the result with a filter label.

Contaminant EPA MCL Health Goal (MCLG) At-Risk Limit
Nitrate, reported as nitrogen 10 mg/L The EPA benchmark is 10 mg/L Infants require the most conservative protection

The EPA advises households with nitrate above the MCL to use a safe alternative supply or treatment that removes nitrate, including reverse osmosis or distillation. Follow its guidance for elevated nitrate in household water when deciding what to do immediately.

Practical rule: If nitrate levels are above the safe limit, protect drinking and cooking water first, and don't rely on a standard carbon cartridge.

Test private wells annually, after flooding, and after nearby land-use changes. City-water customers should review the utility's Consumer Confidence Report, then add point-of-use treatment if they want another drinking-water barrier. For help connecting a supply problem with household plumbing and equipment, contact WhatsDemand for help.

Filtration Technologies That Remove Nitrates

Nitrate is dissolved in water, so ordinary sediment cartridges and activated carbon do not solve the problem. They can improve clarity or taste, but they do not remove nitrate. For a household system, focus on reverse osmosis, anion exchange, distillation, or specialized biological treatment. The right choice depends on your source water, plumbing, flow needs, and tolerance for wastewater or salt handling.

An infographic showing four common filtration technologies for removing nitrates from water, including reverse osmosis and distillation.

Reverse osmosis

RO forces water through a semipermeable membrane. It is usually my first choice for a kitchen tap because it reduces nitrate along with many other dissolved contaminants. Performance varies with membrane design, pressure, temperature, and water chemistry, as explained in EPA and Water Quality Association material.

The tradeoff is concentrate water. Rejected contaminants leave through a waste stream, the unit needs adequate pressure, and an under-sink storage tank is common. Choose RO when drinking and cooking water are the priority, particularly for municipal water or a private well with moderate flow demands.

Anion exchange

Anion exchange uses nitrate-selective resin. Chloride attached to the resin swaps with nitrate in the water, and the resin eventually becomes exhausted. Hardness and other competing ions reduce its capacity, so size the system from a real water analysis, not a generic household estimate.

Ion exchange can suit smaller systems where water recovery and operating cost matter. University of California Agriculture and Natural Resources guidance describes potential advantages over RO, including lower first and operating costs, reliability, and better water recovery. The price is salt regeneration and brine disposal. That makes anion exchange a better fit for households prepared to manage salt than for buyers seeking a low-maintenance drinking-water unit.

Distillation and biological treatment

Distillation boils water and condenses the vapor, leaving nitrate behind with many other dissolved contaminants. It is dependable at the point of use, but slow, energy-intensive, and limited in output. Use it for a small drinking-water demand, not as the default solution for a busy household.

Biological denitrification converts nitrate to nitrogen gas through bacterial activity. It can serve larger systems, but requires carbon feed, biological control, and periodic media attention. I would not make it the first recommendation for an ordinary home.

For most buyers, the practical shortlist is clear: RO for the kitchen tap, anion exchange for higher-throughput well treatment, and distillation when low volume matters more than convenience. If arsenic also appears on the report, evaluate that contaminant separately with effective filters for arsenic removal. A nitrate claim does not prove arsenic removal.

What Real-World Nitrate Removal Numbers Look Like

RO performance depends on the water entering the system, not just the percentage printed on the box. A documented Minnesota assessment of in-home RO systems found an average nitrate reduction of 79.1%. Source water ranged from 0.1 to 26 mg/L, while treated water ranged from nondetectable to 9.1 mg/L. The Minnesota assessment provides those field results.
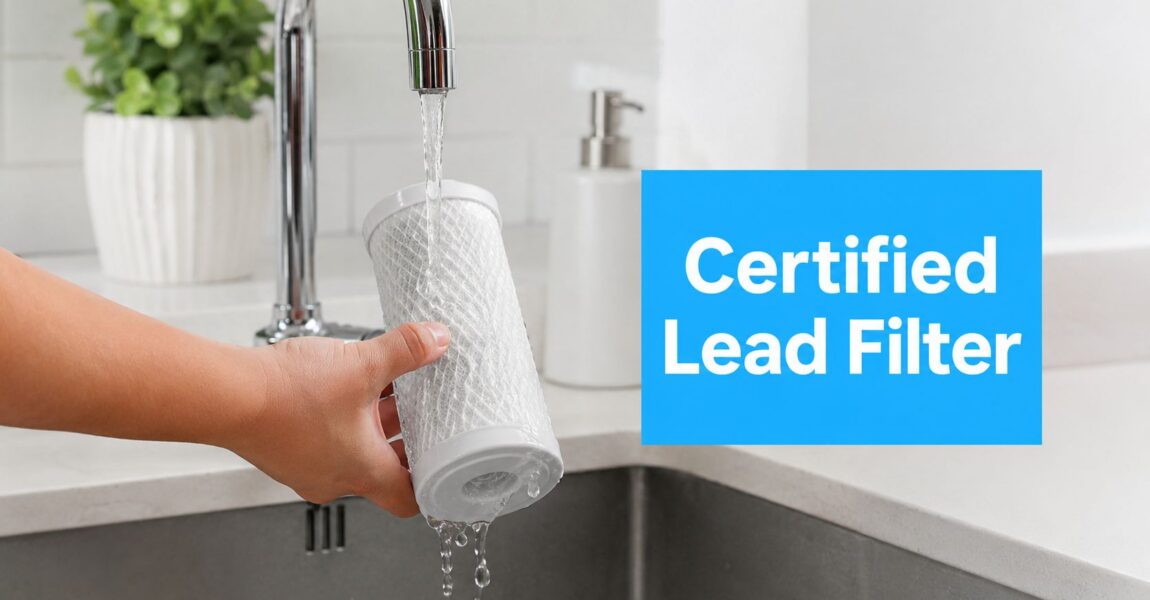
Other RO research reported 93% to 97% nitrate rejection across recovery rates from 35% to 83%. A separate process study found 96% to 98% removal at 50% recovery and 13.75 bar transmembrane pressure. Those results show why membrane design and operating conditions matter in a real home.

The math buyers often miss

A 95% reduction sounds decisive, but the starting concentration determines the treated result. Water containing 100 mg/L would fall to 5 mg/L, below the EPA benchmark. At 50 mg/L, the same reduction leaves 2.5 mg/L. At 20 mg/L, it leaves 1 mg/L.

Those calculations do not guarantee identical performance at your tap. Low pressure, an exhausted membrane, high influent concentration, competing ions, and poor maintenance can all reduce removal. A 2024 systematic review reported average RO removal of 85.03%, with inlet nitrate around 145.7 mg/L reduced to 20.8 mg/L, still above the 10 mg/L benchmark. That review shows why a strong percentage can produce an unacceptable result when the starting concentration is high.

Technology Influent 20 mg/L Influent 50 mg/L Influent 100 mg/L Meets 10 mg/L Standard
Reverse osmosis at 95% rejection 1 mg/L 2.5 mg/L 5 mg/L Yes, if performance is sustained
Reverse osmosis at 85.03% average removal About 3 mg/L About 7.5 mg/L About 15 mg/L Not reliably at 100 mg/L
Anion exchange Depends on resin capacity and competing ions Depends on resin capacity and competing ions Depends on resin capacity and competing ions Requires testing and capacity control
Distillation Designed to leave nitrate behind Designed to leave nitrate behind Designed to leave nitrate behind Verify treated water
Biological denitrification Depends on biological control Depends on biological control Depends on biological control Verify treated water

The right buying question is not “What percentage does this filter claim?” Ask whether treated water remains below 10 mg/L, including near the end of a membrane or resin service cycle. That answer connects the chemistry to your household's pressure, maintenance habits, and tolerance for replacement or regeneration.

Testing Your Water and Choosing the Right System Size

If a private well changes after heavy rain, a filter sized from one old test can miss the actual nitrate load. Confirm the contaminant first. Order a certified laboratory panel that reports nitrate and identifies whether the result is nitrate-nitrogen or nitrate ion. Test strips suit quick checks, and a colorimeter gives a more controlled field reading, but neither replaces laboratory testing for health decisions or system sizing.

Rainfall, flooding, pumping patterns, nearby land use, and well depth can change the sample. Retest seasonally when readings vary. Test again after flooding or a major land-use change.

A checklist infographic titled Testing Your Water and Choosing a System with five steps for managing nitrates.

Match capacity to actual use

Treat only the water that needs nitrate removal. A kitchen RO system fits households that need treated water for drinking and cooking. It avoids processing shower and toilet water and keeps the waste stream tied to household consumption.

Choose point-of-entry anion exchange when nitrate affects the whole home, the well requires higher flow, and the household accepts salt handling. Renters may use a pitcher-style product, but only when its manufacturer provides nitrate-specific performance data and a clear replacement schedule.

Record occupancy, peak flow in gallons per minute, daily drinking and cooking demand, incoming pressure, hardness, and nitrate concentration. Use Water Filter Advisor advice to compare installation and maintenance factors. Then check the system's tested capacity against your peak demand and the highest nitrate result, not an average reading. A system that fits the chemistry but cannot keep up with household flow is the wrong system.

Cost, Maintenance, and Certification Tradeoffs to Weigh

Sticker price is the least useful way to compare nitrate systems. The actual cost includes replacement membranes or resin, laboratory retesting, electricity, water sent to drain, salt, service calls, and the inconvenience of losing treatment capacity at the wrong time.

RO generally has a manageable maintenance routine at the point of use, but it creates concentrate water and needs membrane replacement. Its waste ratio can range from 3 to 20 gallons per treated gallon, according to the stated technology comparison in this guide's performance brief. That ratio makes pressure, recovery design, and drain setup part of the ownership decision, not minor installation details.

Ion exchange can serve more water and may offer better water recovery than RO, but nitrate-selective resin has finite capacity. Hardness and competing ions shorten useful capacity, while regeneration creates brine that must be discharged responsibly. A low purchase price doesn't help if the household can't manage salt delivery or wastewater.

Distillation avoids resin exhaustion and membrane rejection variability, but electricity and slow production become the ongoing burden. Biological treatment adds operational complexity because the biological process needs carbon feed and control.

Technology Upfront Cost Annual Maintenance 5-Year Total Key Tradeoff
Reverse osmosis Compare certified under-sink or pump-driven systems Prefilters, membrane, sanitization, and testing Depends on replacements, water waste, and service Strong point-of-use performance, but creates concentrate
Anion exchange Sized from nitrate, hardness, and flow data Salt, resin service, brine handling, and testing Depends on resin capacity and regeneration frequency Better for throughput, but chemistry and disposal matter
Distillation Countertop or dedicated distiller Cleaning, energy, and component replacement Depends on electricity and production needs Broad treatment, but slow and energy-intensive
Biological denitrification Whole-house equipment and controls Carbon feed, media, monitoring, and service Depends on operating complexity Useful at larger scale, rarely the simplest home choice

Certification is not decoration

For RO, look for NSF/ANSI 58 certification or an equivalent third-party performance record that specifically includes nitrate. For ion exchange, look for credible WQA testing or certification tied to nitrate reduction, not merely a general “water softener” label.

A warranty matters, but replacement media availability matters more. Ask how you'll verify performance, how often the manufacturer expects service, and what happens when the membrane or resin approaches exhaustion. If a seller won't provide a nitrate-specific test claim, don't treat the system as a nitrate solution.

Matching the Best Nitrate Filter to Your Household

The right nitrate filter depends on three facts: your water source, where protection is needed, and how much waste or salt handling your household accepts.

Well-water homes above 10 mg/L should start with anion exchange or RO, not carbon. Select whole-house anion exchange when nitrate affects every fixture, household flow is substantial, and you can manage salt regeneration and brine disposal. Select RO at the kitchen tap when drinking and cooking protection comes first, especially if the household also needs to reduce other dissolved contaminants.

Municipal customers with low background nitrate generally do not need treatment at every fixture. A certified under-sink RO system is the practical default for drinking and cooking, provided incoming pressure and water chemistry suit the membrane. Require an NSF/ANSI 58 nitrate claim, rather than a vague statement that the unit “purifies” water.

Recommendations by household

Household Type Recommended Filter System Type Key Tradeoff
Private well with nitrate above 10 mg/L Nitrate-selective anion exchange or verified RO Point-of-entry or point-of-use Whole-home protection versus salt or concentrate handling
Municipal water user Certified under-sink RO Point-of-use Treats selected taps, not every fixture
Renter Certified countertop RO or nitrate-specific exchange option Portable point-of-use Limited output and replacement dependence
Small household with limited drinking demand RO or distillation Point-of-use Lower treated volume, but less whole-home coverage
Household with high nitrate plus complex chemistry Water-treatment design based on a full lab panel Staged treatment More equipment and closer maintenance control

Skip carbon-only filters, refrigerator cartridges without a nitrate claim, and ordinary pitchers that promise better taste without addressing nitrate. Chlorine reduction does not prove nitrate reduction.

Keep the system working

  • Retest the source and treated water: Confirm the system keeps nitrate below the EPA benchmark, particularly after seasonal changes or service.
  • Replace cartridges on schedule: An exhausted prefilter can reduce RO performance, while depleted nitrate resin can allow breakthrough.
  • Sanitize as directed: Follow the manufacturer's procedure for tanks, housings, lines, and membranes.
  • Check pressure and flow: RO requires suitable feed pressure, and whole-house equipment needs enough capacity for peak demand.
  • Track salt and brine handling: Ion exchange ownership includes regeneration and disposal, not only resin installation.

Water Filter Advisor provides consumer guidance for choosing, comparing, testing, and maintaining home filtration equipment, including cartridges, media, certifications, and system types. Visit Water Filter Advisor to compare nitrate-treatment options, then match the equipment to your lab report instead of buying by brand size or marketing language.

How to Clean Copper Tubing for Safer Home Water

You've found green crust around a copper pipe, noticed a dull brown surface near the water heater, or cut a tube for a new fitting and wondered whether a quick scrub is enough. Those jobs look similar, but they aren't. A copper tube that only needs to look presentable requires a gentle polish, while a tube being soldered needs a clean, oxide-free joint. A line connected to household drinking water may need diagnosis, flushing, filtration, or replacement rather than another round of scrubbing.

The safest approach to how to clean copper tubing starts with the intended use. Cleaning can improve appearance and joining reliability, but the wrong abrasive or acid can damage thin-wall copper, leave residue, or distract you from a water-quality problem.

What You Are Actually Cleaning the Copper Tubing For

Most homeowners combine three different jobs under one phrase, cleaning copper tubing. The first is cosmetic brightening, where the goal is to improve the appearance of visible pipe. The second is soldering or compression preparation, where the surface must be clean enough for a fitting to seat and, for soldering, for molten solder to wet the copper. The third is troubleshooting green patina, blue stains, or recurring buildup on a line already connected to the home's water system.

Those jobs need different end points. A visible pipe may only need a clean, dry surface with less tarnish. A solder joint needs bright metal on the tube and inside the fitting cup, followed by prompt flux application because exposed copper re-oxidizes quickly. The Copper Tube Handbook guidance on soldered joints stresses applying flux as soon as possible after cleaning. Copper cleaning also has a formal role in oxygen-service systems, where ASTM G93 covers copper tubing, fittings, and gauges alongside other metals.

An infographic titled The 3 Jobs of Cleaning Copper Tubing, highlighting cosmetic brightening, solder preparation, and troubleshooting.

Match the method to the job

Mixing those purposes causes common DIY errors. Scrubbing an installed drinking-water line with acid may remove surface color while leaving the cause untouched, and aggressive abrasion can remove metal. Chemical residue must also be rinsed completely before a line returns to service.

  • Only dull or tarnished: Use a soft cloth and mild paste on accessible exterior copper.
  • Preparing a new joint: Use sand cloth or a nylon abrasive pad on the tube, plus a correctly sized fitting brush.
  • Green or blue staining on an installed line: Shut off water, drain the section, inspect for leaks and pitting, then consider water chemistry and filtration.

A plumbing business also has to coordinate diagnosis, repair, and customer communication efficiently, which is why resources on how plumbers manage calls with Mercateer can be useful for understanding the service side of these decisions. For a homeowner, the practical rule is simpler: skip to the job you have instead of treating every copper surface as a polishing project.

Mechanical Cleaning Before Soldering or Reuse

Mechanical preparation is usually the safest starting point when a copper tube will be soldered or reused. Begin with a dry wipe to remove grit, dust, and loose particles. If the tube was freshly cut, use a deburring tool or reamer lightly on the inside edge, then ease the outside edge without removing more copper than necessary.

For the tube end, use sand cloth, emery cloth, or a nylon abrasive pad. Work over the area that will sit inside the fitting, extending slightly beyond the fitting-cup depth, and rub around the circumference until the copper looks bright and uniform. A properly sized fitting brush cleans the inside of the fitting cup. For example, a brush made for nominal one-half-inch tube should match that fitting size rather than being forced into a larger or smaller cup.

Practical rule: Clean the tube and fitting separately, inspect both surfaces, and keep them apart from dirt until assembly.

The copper.org soldered-joint cleaning guidance specifically advises using sand cloth or nylon abrasives on the tube, an abrasive pad or fitting brush inside the cup, and avoiding contact with bare hands or oily gloves. Skin oils can interfere with solder wetting. Touching the prepared area after cleaning defeats the purpose and can contribute to a weak joint that leaks later.

Keep thin-wall copper round

Avoid aggressive wire wheels on thin-wall Type M tubing. A power wheel can remove material unevenly, scratch the surface, or oval the tube so the fitting no longer seats correctly. If the tube becomes visibly flattened, severely scored, or distorted, cleaning won't restore its original geometry.

Mechanical cleaning handles oxidation, light tarnish, and ordinary handling residue. It may not remove heavy carbon from overheating, baked-on flux, or stubborn chemical deposits. Those conditions call for controlled chemical cleaning, followed by thorough rinsing and drying, rather than more force with an abrasive tool.

Chemical Cleaning With Citric and Dilute Muriatic Acid

Chemical cleaning has a place when abrasion leaves oxide scale, solder burn-off, or heavy tarnish. It should be treated as a controlled process, not a shortcut for installed domestic water lines. Copper-cleaning guidance commonly uses citric acid or dilute hydrochloric acid because these acids dissolve copper oxides under controlled conditions. A citric acid cleaning guide can help with general solution handling, but the tube's intended service must decide which chemistry is appropriate.

Start with citric acid for removable parts or tubing that can be fully rinsed and verified. Use warm solution, keep the exposure controlled, and inspect rather than assuming longer contact is better. For stubborn contamination on a drainable or non-potable line, NWMES describes approximately 10% muriatic acid as a workshop benchmark that may be left soaking overnight to remove most contaminants. The NWMES copper-parts cleaning note also explains that citric acid dissolves copper oxides.

Wear acid-resistant gloves and eye protection, provide ventilation, and never pour water into acid. Keep a suitable neutralizing material available for spills, while following the product's safety instructions. After cleaning, rinse the tube thoroughly with clean water, repeat the rinse, and dry it with a clean rag or compressed air. Prompt drying matters because exposed copper re-oxidizes quickly, especially before flux is applied.

Property Citric Acid, 4 to 6 oz/gal Dilute Muriatic Acid, approximately 10%
Best use Controlled oxide removal on removable or drainable parts Stubborn contamination on non-potable or fully drainable tubing
Action Dissolves copper oxides with comparatively mild handling More aggressive oxide and contaminant removal
Exposure Short, controlled contact with inspection Overnight soaking is a benchmark for stubborn contamination in the NWMES guidance
Main concern Residue if rinsing is incomplete Copper etching, wall thinning, fumes, and unsafe potable-water use

Muriatic acid can etch copper slightly and may thin a wall if the process is repeated or poorly controlled. Keep it off installed potable-water lines. For any tube that will carry drinking water, the safer decision is often replacement or professional cleaning rather than trying to make a questionable surface bright again.

Gentle Household Methods for Visible Tarnish

For accessible copper that only looks dull, start with the least aggressive method. Mix baking soda with water into a thick paste, apply it with a soft cloth, and rub gently in circles. Rinse with clean water, then dry immediately and buff with a separate cloth. Drying prevents fresh water spots from becoming the next layer of tarnish.

An infographic showing four steps for brightening copper piping using a DIY baking soda paste.

For slightly heavier verdigris, a vinegar-and-salt paste can work on exterior surfaces. Keep contact brief, under 10 minutes, then rinse thoroughly and dry. A lemon-juice and cream-of-tartar mixture offers another mild acidic option, but it still shouldn't sit on thin-wall copper. These recipes brighten the outside. They don't remove internal scale, carbon deposits, or a developing leak.

Independent copper corrosion-cleaning guidance also recommends weak-acid paste methods followed by thorough rinsing and immediate drying. Treat that advice as cosmetic maintenance, not as a treatment for water chemistry.

Use the mild method only when

  • The pipe is exposed and dry: Don't use a paste where moisture can remain behind insulation, inside a wall, or around an electrical connection.
  • The surface is uniformly dull: Patchy crust, pitting, or recurring blue-green deposits need inspection.
  • The tube isn't being soldered: Household pastes aren't a substitute for bright, residue-free joint preparation.

Clean It or Replace It? Reading Green Corrosion and Water Quality

Green copper isn't automatically dirt. It can be a surface patina, evidence of persistent moisture, or a warning that the tube or fitting is deteriorating. A uniform, thin green film on exposed copper may be cosmetic, especially where condensation or low flow has left the surface damp. Blotchy blue-green crust with white powdery edges is more concerning because it often accompanies an active leak or residue drying around a joint.

Raised deposits at fittings deserve particular attention. The fitting may be failing even if the straight tube looks sound. Cleaning the color away can hide the evidence without correcting the leak, and a recurring deposit means the system needs diagnosis rather than another polishing cycle.

Corrosion Pattern Likely Cause Clean or Replace
Uniform, thin green patina Surface oxidation or persistent exterior moisture Clean only if dry and stable, then monitor
Blue-green crust with white edges Active seepage, residue, or unfavorable water chemistry Find the leak, assess the tube, and replace damaged sections
Raised green nodules at a joint Fitting or joint deterioration Inspect closely, repair or replace when the joint is compromised
Pitting or pinhole leakage Localized metal loss Replace the affected section, don't keep scrubbing

Low pH, elevated chloride, flux residue, and stray electrical current can all be relevant causes, but a visual inspection alone can't identify which one is present. Shut off the supply and drain the line before cleaning an installed section. If staining returns, test the water and inspect the system, especially around heaters, grounding connections, filtration equipment, and dissimilar-metal fittings.

Use certification to frame the water decision

Copper products used in potable-water applications have a recognized health-effects certification path. The NSF/ANSI 61 certification information for copper pipe explains that the mark addresses drinking-water contact and health effects, not merely performance claims. Any repair or replacement should preserve appropriate potable-water compliance and avoid introducing cleaners or contaminants into the line.

If dissolved copper is the concern at the tap, scrubbing the exterior won't solve it. NSF-certified filters under NSF/ANSI 53 are tested with an influent copper level of 3,000 ppb, or 3 mg/L, and must reduce copper to 1,300 ppb, or 1.3 mg/L, or lower, the U.S. EPA action level cited by NSF's copper drinking-water guidance. That benchmark helps homeowners compare a filtration claim with the actual problem. For broader treatment decisions, homeowners can also use the water-quality advice from Water Filter Advisor to decide whether testing, point-of-use filtration, or whole-house treatment fits the situation.

When water treatment is part of the answer, local service expertise can matter too. Homeowners dealing with conditioning equipment may find San Antonio water softener repairs useful as an example of the kind of specialist assessment that goes beyond surface cleaning.

Flushing and Commissioning the Cleaned Line

A tube isn't ready for service just because its outside looks clean. Cleaning can loosen grit, paste, scale, and acid residue, so commissioning must remove what the brush or chemical bath released. Before cutting or reaming pipe, push a clean rag through the tube where possible. It can catch chips, burrs, solder beads, and debris before those materials travel toward a valve, filter, or faucet.

After assembly, cap the far end and pressure-check the new or cleaned section with air to 40 psi before introducing water. Keep people clear of unrestrained fittings, use equipment rated for the test, and follow local plumbing requirements. If the section doesn't hold pressure, find the mechanical problem before flushing it into service.

Build enough flushing flow

The Copper Tube Handbook commissioning guidance recommends flushing the completed system with water at a minimum velocity of 3 feet per second before service. The same guidance describes flushing until discharge water runs completely clear as a practical cleanliness indicator.

Pipe diameter affects the flow needed to reach that velocity, so don't judge the result solely by how open a faucet sounds. Flush from a suitable outlet, direct discharge safely, and continue until the water is visibly clear and free of loosened debris. A newly cleaned line feeding a filter should be flushed before the filter cartridge is put into normal use, because residue can load the media unnecessarily.

Use a cold-water flush for at least 15 minutes, then flush hot water if the line serves a heater. Check the final water for unusual taste, odor, and pH before declaring the line ready. If an acid smell, metallic taste, cloudiness, or abnormal pH remains, stop using the line and investigate instead of assuming more flow will solve it.

Quick Checklist for Cleaning Copper Tubing Safely

Identify the goal first, choose the least aggressive method that can achieve it, then verify the water-quality result. Cosmetic brightening, joint preparation, and installed-line troubleshooting don't share the same risk profile.

A quick decision guide infographic for cleaning copper tubing showing steps for soldering, leaks, and dullness.

Before you touch the tube

  • Choose the job: Use a soft paste for dull exterior copper, abrasive preparation for a new joint, and inspection plus testing for green or blue deposits on an installed line.
  • Protect the joint: Deburr freshly cut tubing lightly, clean the fitting cup with a correctly sized brush, and keep prepared surfaces away from bare hands and oily gloves.
  • Protect thin walls: Avoid steel wool, aggressive wire wheels, and prolonged acid exposure on thin-wall copper.
  • Control chemical cleaning: Rinse acid-cleaned tubing twice with clean water, dry it promptly, and apply flux soon after preparation when soldering.
  • Keep acid out of domestic lines: Don't use muriatic acid on installed potable-water tubing. Use replacement or professional assessment when the line can't be removed and fully rinsed.
  • Commission deliberately: Push a clean rag through the tube before cutting when practical, complete the pressure check, and flush at a minimum velocity of 3 feet per second using the commissioning guidance cited above.
  • Check the treatment claim: If the line feeds drinking water or a filtration point, consider NSF/ANSI 61 for materials and NSF/ANSI 53 for copper-reduction claims.

Green patina doesn't prove that a tube is safe, and a shiny exterior doesn't prove that the water is clean. Visible pitting, pinhole leaks, or persistent blue-green staining at joints means replacement, not another cleaning cycle.


Water Filter Advisor helps homeowners connect copper-pipe concerns with practical water testing, filter selection, certification checks, and maintenance decisions. Visit Water Filter Advisor to compare filtration options and choose the next step based on your home's actual water-quality needs.

Certified Lead Water Filter: Understanding Standards

Does a filter that says “lead-reducing” give you the same protection as a certified lead water filter? Not necessarily. The difference can sit in a small line of packaging, a model number, or a laboratory listing that most shoppers never check.

A practical buyer should treat certification as a specific, verifiable performance claim, not as a general badge of quality. The right filter must match the contaminant, the installation point, and the standard used to test it. A certified filter can reduce lead in the water that passes through it, but it isn't a substitute for solving every lead problem in a home's plumbing.

The Difference Between Lead-Reducing and Certified Lead Filters

How can two faucet filters make similar claims while offering different evidence? One package may say “reduces lead.” Another may say “certified to NSF/ANSI 53 for lead reduction.” The wording points to different levels of verification.

“Lead-reducing” can refer to a manufacturer's internal test or a broad performance statement. By itself, it may not identify the laboratory, the tested model, the lead concentration used in testing, or whether the result applies to the complete filter rather than one cartridge or material.

Certification connects the claim to a defined standard and an independent evaluation. For household lead filtration, NSF/ANSI Standard 53 covers point-of-use systems for health contaminant reduction, while NSF/ANSI 58 covers reverse osmosis systems, as summarized by Virginia Commonwealth University's lead water management guidance.

A comparison graphic showing the difference between unverified lead-reducing filters and NSF certified lead water filters.

What the label should tell you

A claim you can check should identify:

  • The exact model: Certification belongs to a listed product. It does not automatically cover every filter from the same brand.
  • The testing body: Look for an accredited third-party certifier, then confirm the entry independently.
  • The applicable standard: NSF/ANSI 53 and NSF/ANSI 58 apply to different system types.
  • The named contaminant: Certification for taste, odor, or chlorine does not establish lead reduction.
  • The performance threshold: Current lead-reduction benchmarks focus on reducing lead to 5 parts per billion, or ppb, or less, as shown in the NSF product listings. Readers can use the NSF certified lead-reduction product listings to check a product's entry.

A filter may display an NSF mark for one claim without holding certification for lead. The logo alone therefore cannot answer whether the product addresses your concern.

Practical rule: Read the standard and contaminant claim together. “Certified” without “lead reduction” may not answer the question you're asking.

The U.S. Environmental Protection Agency's consumer tool directs shoppers toward point-of-use and pitcher filters evaluated by an accredited third party for lead reduction to 5 ppb or less. The exact certification record provides stronger evidence than a prominent badge on a retail page, and it gives you details to compare against the model in the box.

Understanding NSF/ANSI Standard 53 and 58

Which certification standard applies to the filter you are considering? NSF/ANSI 53 and NSF/ANSI 58 both address lead filtration, but they cover different types of equipment.

NSF/ANSI 53 generally covers point-of-use drinking-water systems that reduce health-related contaminants. Under-sink filters, faucet-mounted units, countertop systems, and pitchers can fall under this standard when the specific product has been tested and listed for lead reduction.

NSF/ANSI 58 covers reverse osmosis systems. An RO unit pushes water through a membrane and supporting treatment stages under pressure. Because the certification evaluates the complete RO product, check the exact model and confirm that its record includes a lead-reduction claim.

The standard number works like a label on a plumbing component. It identifies the type of system being evaluated, not every contaminant the system might remove. A conventional under-sink carbon-block filter may be evaluated under NSF/ANSI 53, while a reverse osmosis unit may be evaluated under NSF/ANSI 58. Neither standard allows you to assume that the product removes all contaminants.

Why the number on the standard matters

A product page may say “tested to NSF standards.” That wording does not carry the same weight as an independently verifiable certification listing. The NSF explanation of lead-filter testing describes certification testing with challenge water containing 150 ppb of lead, while the U.S. EPA action level is 15 ppb.

Newer lead-reduction requirements use a finished-water benchmark of 5 ppb or less. Certification therefore refers to a defined test protocol and measurable result, rather than serving as a general marketing symbol.

What to inspect What it answers
NSF/ANSI 53 Is this point-of-use system evaluated for a health contaminant claim?
NSF/ANSI 58 Is this reverse osmosis system evaluated under the RO standard?
Lead-reduction listing Does the certification specifically cover lead?
Exact model number Does the listing apply to the product you're buying?
Rated use Is the system intended for the drinking-water fixture you need to protect?

Certification isn't a universal removal promise

A certification supports only the claims shown in the record. A system certified for lead reduction may not address other contaminants. A system certified for chlorine, taste, odor, or another contaminant may not reduce lead.

The EPA Lead and Copper Rule information provides context for interpreting water reports. The rule uses a 15 ppb lead action level, measured at the 90th percentile of tap samples from a public water system. That level triggers utility action when the required sampling conditions are met, but it does not guarantee that an individual home's water contains no lead.

How to Verify Certification in the NSF Database

Could a certification logo cover something other than lead reduction? The product record answers that question. Begin with the filter's full model number, found on the housing, cartridge, manual, performance data sheet, or retailer listing. A product family name is not precise enough.

Screenshot from https://www.waterfilteradvisor.com

A practical verification process

  1. Record the exact model. Similar cartridges may have different certifications.
  2. Open the NSF certified-product search. Start with the lead-reduction listings and search by brand or model.
  3. Compare every character. A listing for another size, cartridge, or generation does not automatically cover the product in your hand.
  4. Read the standard entry. Confirm whether the record names NSF/ANSI 53 or NSF/ANSI 58.
  5. Check the contaminant claim. Look for lead reduction specifically, rather than chlorine, taste, odor, or particulate reduction.
  6. Review status and details. Read the product information and the claim the certification permits.

Use the NSF lead-reduction database as the record of reference, not a shortened retailer description. It connects the certification to a specific product. If the exact model is missing, pause the purchase and ask the manufacturer to explain why.

“Uses NSF-certified materials” describes components that contact water. It does not by itself prove that the complete filter has certified lead-reduction performance. Verify the whole treatment system and the stated lead claim, much as you would check both a replacement cartridge and the housing it fits.

The following video may help visual learners read certification information and filter claims:

Save a screenshot or copy of the listing when buying replacement cartridges. Model names, packaging, and configurations can change, so your record helps confirm that a replacement still matches the certified system.

What Laboratory Testing Measures

How can a laboratory show that a lead filter will keep working beyond one sample? Certification uses challenge water, prepared with a known contaminant concentration that places the filter under demanding conditions. For lead-reduction certification, that water contains 150 ppb of lead.

That concentration is 10 times the EPA action level of 15 ppb. The comparison matters because a controlled test provides a clear reference, while a casual demonstration may leave the water quality, flow rate, and test conditions unknown.

An infographic detailing water filter lead removal standards with a 150 ppb concentration and 99 percent efficiency.

The test is about more than one sample

A credible evaluation checks whether the complete system can deliver its stated reduction under intended operating conditions. The protocol considers how water moves through the treatment media, how the system is used, and when lead may begin passing through.

Read the laboratory documents for answers to these questions:

  • What entered the filter? Challenge water establishes a known lead concentration.
  • What left the filter? The finished water is measured against the applicable benchmark.
  • Can the system maintain performance? Testing may examine operation through the product's rated capacity, rather than relying on one early sample.
  • Does flow affect treatment? The cartridge must work at its intended rate, not only when water moves unusually slowly.
  • When does breakthrough occur? Media can lose effectiveness as its capacity is used, which explains why replacement instructions matter.

The laboratory challenge is a controlled stress test, not a prediction that every home receives water with the same lead concentration. A product that meets the required benchmark under those conditions gives stronger evidence than one supported only by a manufacturer's general “lead-reducing” wording.

Why a high-stress test helps at home

Household plumbing varies. Water can sit in pipes, fixtures can differ, and installation can change contact time and flow. Certification does not remove those variables, but it gives homeowners a documented performance reference before they install the filter.

The laboratory record is therefore more useful than a package claim alone. Check the contaminant, challenge conditions, operating rate, capacity, and endpoint in the actual report or certification documentation. Those details show what was tested and define the limits of the claim. A certified result supports confidence in the tested configuration, while correct installation and timely cartridge replacement still determine how the system performs in daily use.

Real-World Performance vs. Certification Claims

Can a certified lead water filter deliver the same protection in a kitchen that it showed during testing? Field performance depends on the connection, installation, water use, and cartridge replacement. Certification provides a tested reference, while daily operation determines whether water passes through that certified treatment.

A review of field performance found strong results across certified products. In a Denver Water challenge study, five NSF/ANSI 42 and 53 certified pitcher filters achieved more than 94% lead removal, and all distributed filters reduced lead below the EPA Action Level of 15 ppb except one sample. These findings add practical support to the certification record, but they do not turn a point-of-use device into whole-home protection.

Another finding cited in Virginia Tech work examined Flint homes with lead levels up to 4,080 µg/L. EPA testing found all point-of-use devices reduced lead to below 1 µg/L. Such results show why certification documents matter: they connect a product's claim to defined testing, rather than leaving “lead-reducing” as a vague package description.

A person holding a glass under a kitchen faucet equipped with a certified lead water filter.

Point of use is the key limitation

A pitcher, faucet filter, or under-sink system treats only the water that flows through it. Water from an unfiltered bathroom faucet, shower, laundry connection, or refrigerator line remains outside that device's certified claim.

Choice What it can address What it doesn't establish
Certified point-of-use filter Lead reduction at the treated fixture Whole-home protection
Uncertified “lead-reducing” filter A manufacturer's stated claim Independent verification
Certified RO system Lead reduction when the exact RO model carries the claim Removal of every contaminant
Whole-house filter without lead certification Other treatment goals, depending on its listing Certified lead treatment

Installation can also change the outcome. A cartridge installed backward, a poorly seated housing, a bypassed filter, or a replacement that is overdue can undermine the protection shown in certification records. Follow the manufacturer's instructions, confirm that the model matches the documented claim, and use filtered water for drinking and cooking at the connected fixture.

Certification tells you what the product demonstrated. Correct use determines whether your household receives that treatment.

Common Misconceptions About Lead Filtration

Myth one, a whole-house system automatically solves lead. It doesn't. NSF's water-filter FAQ states that no whole-house systems are currently NSF certified for lead treatment. Certified point-of-use systems may be installed at a main drinking-water source, but they still treat only the water that flows through that fixture.

Myth two, the EPA action level is a safe-home threshold. The EPA explains that the 15 ppb action level is a treatment-technique trigger for public water systems, not a health-based guarantee for an individual home, in its Lead and Copper Rule factsheet. A result below that level doesn't mean a household should ignore a lead concern.

Myth three, certification covers every contaminant. It doesn't. Check the exact standard, model, and contaminant claim. A certification for lead reduction doesn't automatically establish performance against other substances.

Read the fact sheet before installing

Look for the rated capacity, flow instructions, installation diagram, replacement guidance, and the specific lead-reduction statement. Keep the model number visible in your records, and replace the cartridge according to the manufacturer's schedule rather than waiting for taste or odor to change.

The federal Safe Drinking Water Act doesn't require consumers to use point-of-use filters or require every consumer filter to undergo certification, so third-party verification remains an important purchasing safeguard. A certified filter is one layer of risk reduction, not a replacement for lead service-line replacement or other plumbing strategies where they're available.

For practical guidance on selecting and maintaining home filtration equipment, consult Water Filter Advisor's filtration advice, then verify any shortlisted product in the certifier's database before purchase.


Water Filter Advisor offers consumer-focused guides, comparisons, and maintenance advice for home filtration systems, including certification details and replacement considerations. Visit Water Filter Advisor to compare filtration options and choose a certified lead water filter that matches the fixture you use for drinking and cooking.

What Is Tannin in Water and How to Filter It at Home

You turn on the kitchen faucet and the water looks faintly yellow. A glass left on the counter takes on the color of weak tea, the laundry comes out with yellow marks, and the water carries an earthy smell. If you rely on a private well, your first thought may be contamination. In many homes, the color comes from tannins, natural organic material that water picks up as it moves through soil and vegetation.

That explanation is reassuring, but it shouldn't end the investigation. Tannins are usually an aesthetic water-filtration problem, yet their presence can point to surface-water influence around a shallow well or spring. The right response is to identify the chemistry, test related water-quality indicators, and then choose filtration media that matches the complete water report.

Understanding Tannins in Your Home Water Supply

A clear glass may reveal the problem before any test does. The water looks yellow or tea-colored, becomes darker after a storm or seasonal change, and leaves marks on light fabrics, porcelain, fixtures, or laundry. Some homeowners also notice a tangy taste or a musty, earthy odor.

So, what is tannin in water? Tannin is natural organic material formed when water moves through peaty soil and decaying vegetation. Tea provides a useful comparison. Tea leaves release soluble compounds that tint water, and leaves, roots, peat, and other plant matter can do something similar as rainwater and groundwater pass through the environment.

A hand holds a glass of yellow-tinted water against a bright window, illustrating tannin contamination.

Why the water looks and smells different

Tannins are also described as humic or fulvic acid, terms for naturally occurring dissolved organic material. They stay dispersed in the water instead of settling like sand or rust particles, so a basic sediment filter often leaves the color largely unchanged.

The shade may be barely yellow or strongly tea-like. Color helps describe the complaint, but it cannot identify every substance present or show whether the supply has a broader water-quality issue.

Practical rule: Yellow water isn't automatically dangerous, and clear water isn't proof that every water-quality concern is absent.

Aesthetic doesn't mean irrelevant

Tannins are generally treated as an aesthetic issue rather than a health risk. The immediate concerns are usually color, taste, odor, staining, and reduced confidence in the household supply. Those effects still matter. They can change drinking habits and interfere with laundry, bathing, and routine household use.

Tannin color can also act as a source-water clue. It may reflect organic material entering the supply, so homeowners should not treat appearance alone as a complete diagnosis. Test the water for related indicators, such as iron, manganese, acidity, and possible surface-water influence, before selecting equipment. A filter may improve appearance while leaving another problem untouched.

Record when the color, odor, and taste change, then compare those observations with well conditions, weather, and equipment performance. Homeowners who already keep maintenance records can apply the same method to water quality. Forge Reliability maintenance insights provide useful context for inspection records and preventive maintenance.

Where Tannins Come From and Why Your Water Is Affected

A well beside wetlands may produce tea-colored water after rain, while a deeper well in stable groundwater can remain clear. Rivers and lakes face greater contact with decaying leaves, peat, and other organic material that can release tannins. The surrounding environment often explains why two nearby homes experience different water color.

Water follows available pathways. Rain moves through leaf litter and peat, dissolves organic compounds, then reaches shallow groundwater. Marshy, low-lying, or coastal properties may therefore see more tannin-related discoloration than homes in dry, higher-altitude settings. Shallow wells and surface supplies commonly face this influence more than deeper wells.

A diagram explaining the natural environmental sources of tannins found in water supplies and ground water.

Why location changes the treatment problem

The same tea color can come from different water conditions. One supply may contain dissolved organic material as the main concern. Another may contain tannins along with iron, manganese, low pH, or conditions that increase the chance of bacterial contamination. Color describes the symptom, not the full chemistry.

Tannins are generally treated as a secondary aesthetic concern, rather than a federally regulated primary drinking-water contaminant in the United States. The U.S. EPA secondary standard for color is not federally enforced, according to ATS Environmental's tannin guidance. A supply can therefore remain discolored without the color itself being classified as a direct health hazard.

That distinction should not end the investigation. Removing tannin color may improve appearance and taste, yet it will not correct low pH, metals, bacteria, or a problem with the well's construction. The broader pattern matters: recurring color after storms, changing odor, or sudden shifts in taste can indicate source-water influence that deserves testing beyond an aesthetic filter.

Surface influence deserves a closer look

Tannin color can be a source-water clue. Organic material entering a shallow well or a system affected by both surface water and groundwater may share a pathway with microorganisms. Tannins are not necessarily pathogens, but their presence can support the case for microbiological testing and a wider review of well conditions.

For a visual explanation of natural organic material and water movement, this water-treatment video connects the area around a home with the chemistry found at the tap. Record changes in color, odor, and taste alongside rainfall, well conditions, and equipment performance. Those observations help a laboratory or water-treatment professional determine whether the home needs tannin treatment alone or a broader water-quality response.

Testing Your Water for Tannins and Related Contaminants

A clear glass can reveal a pattern, but it cannot identify the cause. Fill one with water and leave it undisturbed overnight, following the observation described in this home tannin-filter guidance. Check for settling, a visible color change, or a tint that stands out more clearly against a white background.

Treat this as a screening observation. It can help you describe the problem to a laboratory or water-treatment professional, but it cannot separate tannins from iron, manganese, sediment, or other sources of discoloration.

Use color as a description, not a diagnosis

A practical concentration guide groups visible color into these bands:

  • Less than 0.05 ppm: A faint yellow tinge.
  • 0.05 to 2.0 ppm: Darker golden-yellow water.
  • About 3 ppm: Light tea-colored water.
  • 5 ppm: Dark tea-colored water.

These visual ranges come from Crystal Quest's tannin concentration guide. They help you describe severity, much like using a paint sample to explain a wall color. A laboratory result is more useful for choosing equipment because treatment depends on the water's full chemistry.

A chart showing tannin levels in water ranging from safe to heavy staining with testing instructions.

Test beyond tannins

If your well water shows tannin color, request testing for tannins or color, iron, manganese, pH, and bacteria. Iron can cause rust-like staining, manganese can affect treatment, and pH influences oxidation and media performance. Bacteria testing addresses the source-water question that color alone cannot answer.

The important question isn't only whether tannins are toxic. Ask whether the discoloration shows that your well is vulnerable to surface-water influence.

Private wells and systems combining surface water with groundwater deserve extra attention because tannins may occur alongside wider quality problems. Color that appears after heavy rain, changes with the seasons, or comes with turbidity or unusual odor should prompt testing. Follow the laboratory's instructions for collecting a clean sample, then choose treatment from the results rather than from color alone.

Comparing Home Filtration Options for Tannin Removal

Tannins behave like dissolved natural organic matter, so the most suitable equipment usually relies on adsorption, ion exchange, or specialized media rather than simple particle filtration. A whole-house system may be appropriate when every fixture has yellow water, while a point-of-use carbon filter may be enough when the concern is limited to drinking water.

A manufacturer markets a whole-house tannin system to reduce tannins up to 3 ppm, as stated on Pentair's whole-house tannin filtration page. That figure is a product claim for a particular system, not a universal promise for every home. Actual performance depends on flow, water chemistry, media condition, and co-contaminants.

Method Best For Limitations
Whole-house tannin filtration Homes with color, taste, or staining at multiple fixtures Requires sizing and media selection based on the water report
Activated carbon Polishing taste, odor, and some dissolved organic material Can perform poorly when the organic load or competing contaminants are high
Specialized tannin removal media Dissolved tannins that need targeted whole-house treatment May require pretreatment, regeneration, and ongoing service
Oxidation plus carbon Water containing iron and tannins together More complex installation and control of oxidation conditions
Sediment filtration Visible particles accompanying the discoloration Doesn't reliably remove dissolved tannin color

Match the process to the chemistry

Activated carbon is attractive because it can improve taste and odor while reducing some organic compounds. It isn't a universal tannin solution, especially when iron or manganese also occupies treatment capacity or creates fouling. Specialized tannin media can provide more targeted removal, but it still needs correct sizing and maintenance.

The treatment-engineering literature on tannin-based coagulants and dissolved organic matter describes tannins as removable through coagulation and flocculation in potable and industrial applications. That approach is generally more relevant to engineered treatment plants than a typical household cartridge, but it reinforces an important point: color removal is a chemistry problem, not a matter of adding a finer screen.

For homeowners, the best choice follows the report. If tannins are the only finding, specialized media or a properly designed whole-house system may be sensible. If iron and manganese accompany them, plan for pretreatment and a process that addresses each contaminant instead of expecting one cartridge to do everything.

Why Tannin Filters Fail and How to Avoid Common Mistakes

A tannin filter may produce clear water at first and then lose performance after a short operating period. That doesn't necessarily mean the equipment was useless. It may mean the media was exposed to more dissolved organic material, iron, manganese, or flow than the design could handle.

The common mistake is to treat every yellow-water complaint as a stand-alone tannin problem. Iron can foul media, manganese can require oxidation conditions that a simple tannin system doesn't provide, and changes in pH can alter how the treatment process works. The EPA training material on iron and manganese control notes that control can require specific oxidation targets and that sequestration is ineffective when manganese is present at high levels.

Why early success can be misleading

A new bed of media often has substantial capacity. Once that capacity is reduced, color can break through even though water still looks acceptable at the filter outlet during brief checks. If the system lacks a proper backwash, receives excessive flow, or treats water with a higher organic load than expected, the service life can shrink.

The same EPA material discusses treatment targets that aim for very low residual manganese levels. That matters because manganese isn't another version of tannin. A system designed to capture dissolved organic color may not oxidize and remove manganese effectively.

A comparison chart outlining the initial advantages and long-term disadvantages of using a tannin water filter.

Build treatment in stages when needed

When iron and tannins coexist, recent industry guidance points to two-step treatment that combines oxidation with activated carbon. The logic is straightforward. Oxidation changes dissolved iron into a form that can be filtered, while carbon addresses organic taste, odor, and color after the heavier contaminant burden has been reduced.

Avoid choosing equipment based only on a product label. Ask these questions before installation:

  • What was tested: Does the report include tannin or color, iron, manganese, pH, and bacteria?
  • What is the process: Does the system use ion exchange, adsorption, oxidation, carbon, or a combination?
  • What happens during backwash: Can the home supply the required flow and dispose of the wastewater?
  • What is the maintenance plan: How will you know when media is exhausted or fouled?

A filter that “worked for a month” may have exposed a design mismatch, not a mysterious failure. Correct diagnosis prevents repeated cartridge purchases and points toward a system that treats the complete water chemistry.

Maintaining Your Tannin Filtration System for Long-Term Performance

Tannin filtration is not a set-it-and-forget-it project. Dissolved organic material can consume media capacity, and seasonal changes can alter the water reaching a well or treatment system. Maintenance begins with a record of the installation date, media type, valve settings, observed color, taste, odor, and any laboratory results.
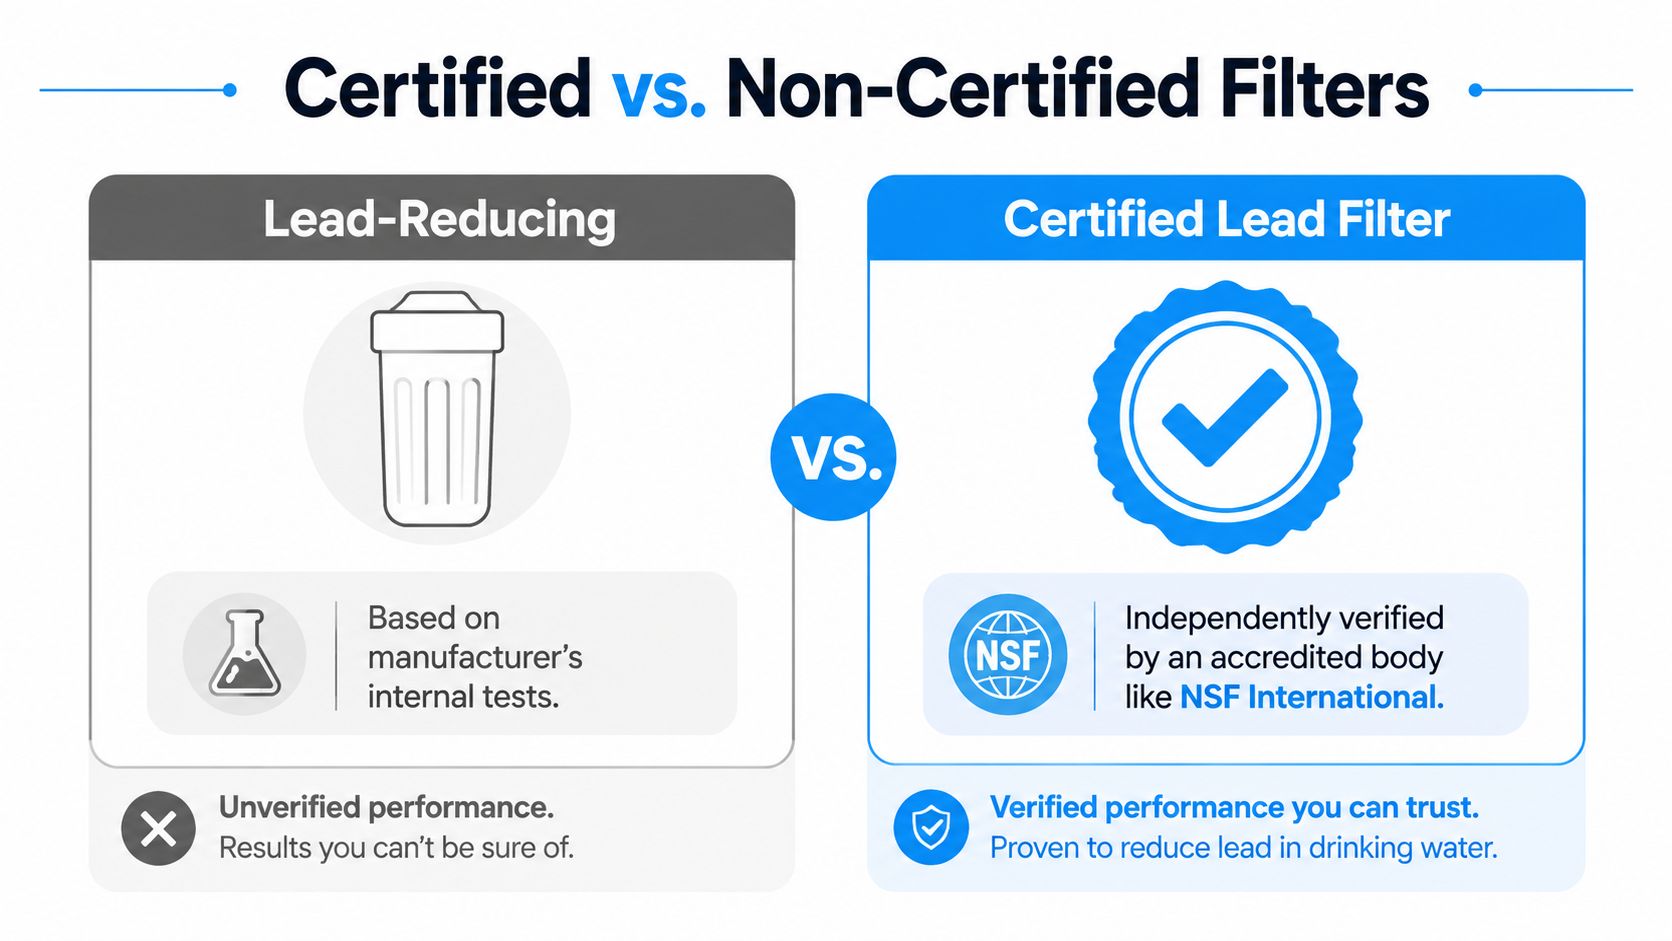
Watch the water and the equipment

A gradual return of yellow color is the clearest warning, but it isn't the only one. Pay attention to renewed staining, changes in taste or odor, reduced flow, unusual pressure behavior, and backwash problems. Inspect housings for leaks and confirm that automatic controls complete their cycles.

Media replacement schedules should come from the equipment manufacturer or installer because service life varies with concentration, flow, water use, and competing contaminants. A fixed calendar chosen without testing can lead to premature replacement or delayed maintenance.

Use a simple monitoring routine:

  1. Record appearance: Compare a clear sample against a white background.
  2. Check after maintenance: Confirm that the water improves at the tap, not only immediately after the filter.
  3. Retest periodically: Repeat laboratory testing when water conditions change or performance declines.
  4. Track total ownership: Include media, cartridges, salt or regenerant where applicable, backwash water, testing, repairs, and professional service.

A clear faucet sample is the result to verify. A clean-looking tank isn't proof that the media still has capacity.

Homeowners can usually handle visual checks, cartridge changes, leak inspection, and recordkeeping. Call a water-treatment professional when the system needs sizing, oxidation control, valve adjustment, media replacement, unusual plumbing changes, or interpretation of conflicting test results. If bacteria are detected or a well appears vulnerable to surface intrusion, involve an appropriate certified laboratory and qualified water professional rather than relying on filtration maintenance alone.
Making the Right Decision for Your Home Water Quality

Tea-colored water gives you a starting clue, not a complete diagnosis. Use this decision path:

  1. Notice discoloration: Collect observations about color, odor, taste, staining, and when the change occurs.
  2. Test broadly: Include tannins or color, iron, manganese, pH, and bacteria.
  3. Classify the problem: Treat it as aesthetic when tannins are isolated, source-related when the well shows surface-water vulnerability, or both when co-contaminants appear.
  4. Select the process: Choose specialized tannin media, carbon, oxidation, sediment removal, or a staged combination according to the report.
  5. Plan maintenance: Confirm backwash, media replacement, retesting, and service requirements before buying.

The most useful answer to “what is tannin in water?” includes both chemistry and context. Tannins are generally not considered harmful to human health, but discoloration in a private well can justify microbiological testing because the same pathway may expose the supply to pathogens. For practical guidance on comparing filtration equipment and water-treatment decisions, consult the Water Filter Advisor advice library.

If your results show only tannins, focus on effective aesthetic filtration. If iron, manganese, low pH, or bacteria also appear, don't let a clear glass hide the larger treatment requirement. A qualified professional can match pretreatment, media, flow capacity, and maintenance to your actual water test.


Water Filter Advisor helps households compare home filtration systems, understand treatment media, and plan replacement and maintenance around real water-quality results. Visit Water Filter Advisor to review guidance for tannin-related discoloration, whole-house filtration, water testing, and long-term system care before you choose equipment.