Changing Brita Filter: Easy Steps for Cleaner Water

You fill the pitcher, take a sip, and something feels off. The water isn't terrible, but it's not as clean-tasting as it was a few weeks ago. Maybe there's a faint chlorine note. Maybe the flow through the reservoir has slowed down enough that you notice it every morning. Or maybe that little light on the lid has been blinking at you long enough that it's become part of the kitchen scenery.

That's usually when changing Brita filter instructions are needed. They don't just want the basic steps. They want to know if the light is right, if the black specks are normal, if the filter has to be soaked, and whether they're about to snap a plastic lid trying to remove a stuck cartridge.

A Brita filter swap is simple once you understand what the filter is doing. These cartridges rely on activated carbon and related media to improve taste and reduce certain contaminants over time. When the media gets used up, performance drops. So the primary task isn't just replacing a part. It's keeping the pitcher working the way it was designed to work.

That Moment You Know the Filter Is Done

It usually starts with a small clue.

A homeowner changes nothing about the water they buy, the sink they use, or the pitcher's location on the counter, but the taste shifts anyway. One day the water still seems crisp. A few days later it tastes flatter, or the chlorine smell is back when the glass gets close to your face. The filter often doesn't fail dramatically. It fades.

Another common trigger is the indicator light. A lot of people ignore it because the water still looks clear, and clear water can fool you. A pitcher filter isn't there just to make water look nice. It's there to reduce chlorine taste and odor, and with some filter types, reduce additional contaminants when used on schedule. If you wait too long, you're still pouring water through the cartridge, but you're not getting the same job from it.

The usual signs people notice first

  • Taste changes first: Water that once tasted neutral starts tasting like tap water again.
  • Odor creeps back in: A light chlorine smell is often the clue that gets people moving.
  • Filtration slows down: The upper reservoir drains more slowly than normal.
  • The lid starts nagging you: A blinking or color-changing indicator is easy to ignore until it isn't.

Practical rule: If your water tastes worse and the indicator agrees, don't overthink it. Change the filter.

I've found that most trouble comes from putting the swap off because the pitcher still “kind of works.” That's the maintenance trap with simple water filtration. Since the unit doesn't shut down, people assume it's fine. It isn't always fine. A tired filter still passes water. It just may not be doing the same level of taste and contaminant reduction it did when it was fresh.

The good news is that Brita replacements are quick. The better news is that once you understand the timing, the filter types, and the reset process, the whole job stops feeling vague.

Decoding When to Change Your Brita Filter

The cleanest way to decide when to replace a Brita filter is to use three signals together. Follow the built-in indicator if your model has one, keep the expected lifespan of your filter type in mind, and pay attention to what your water is telling you.

Brita's schedule isn't one-size-fits-all. According to Medical News Today's summary of Brita filter timing and lifespan, standard pitcher filters are typically changed every 2 months, while Brita says its filters generally last 2 to 6 months depending on the pitcher or dispenser type. In practical use, that works out to about 40 to 120 gallons before replacement, and Brita says the Longlast+ now called Elite lasts 6 months, while the standard filter lasts about 2 months.

An infographic showing four signs to change your Brita water filter including time, taste, flow, and indicators.

Time matters because the filter media wears out

That replacement window isn't random. Activated carbon and ion-exchange media become less effective as they saturate. So if you want the pitcher to keep reducing chlorine taste and odor properly, schedule matters.

A lot of people treat the filter like a battery that works perfectly until the exact minute it dies. In practice, it's better to consider it as any maintenance item that gradually loses effectiveness. That's why the idea behind what is condition based maintenance fits so well here. You use a mix of timing and condition signals, not blind guesswork.

What the indicator is really telling you

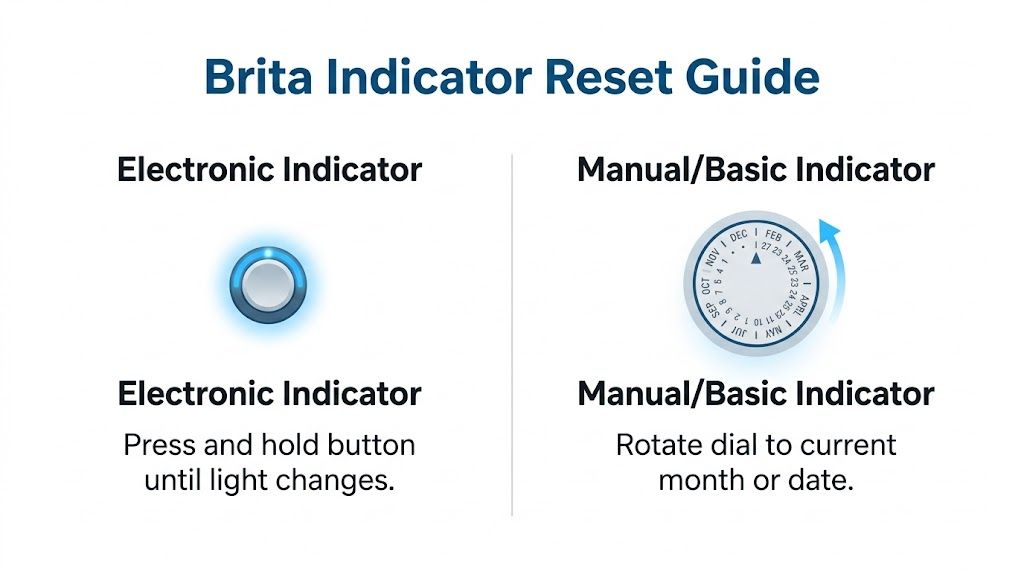
On newer pitchers, the electronic indicator is your easiest prompt. It's there to keep your replacement timing consistent with the filter the lid is tracking. If it changes color or starts blinking, take it seriously, but don't treat it like magic. It only helps if it was reset correctly after the last filter change.

Older pitchers may use a simpler sticker or manual date dial. That system is less fancy, but it works if you set it when you install the cartridge. Most missed filter changes happen because someone says they'll remember, then life happens.

If the indicator wasn't reset after the last swap, the light may be warning you about the wrong filter age.

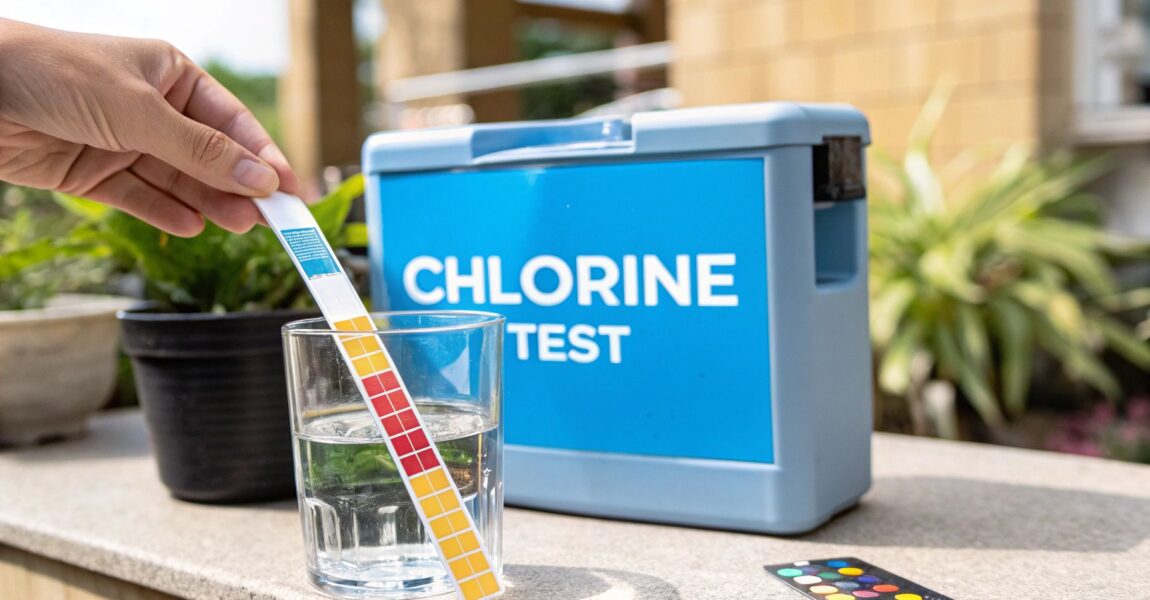
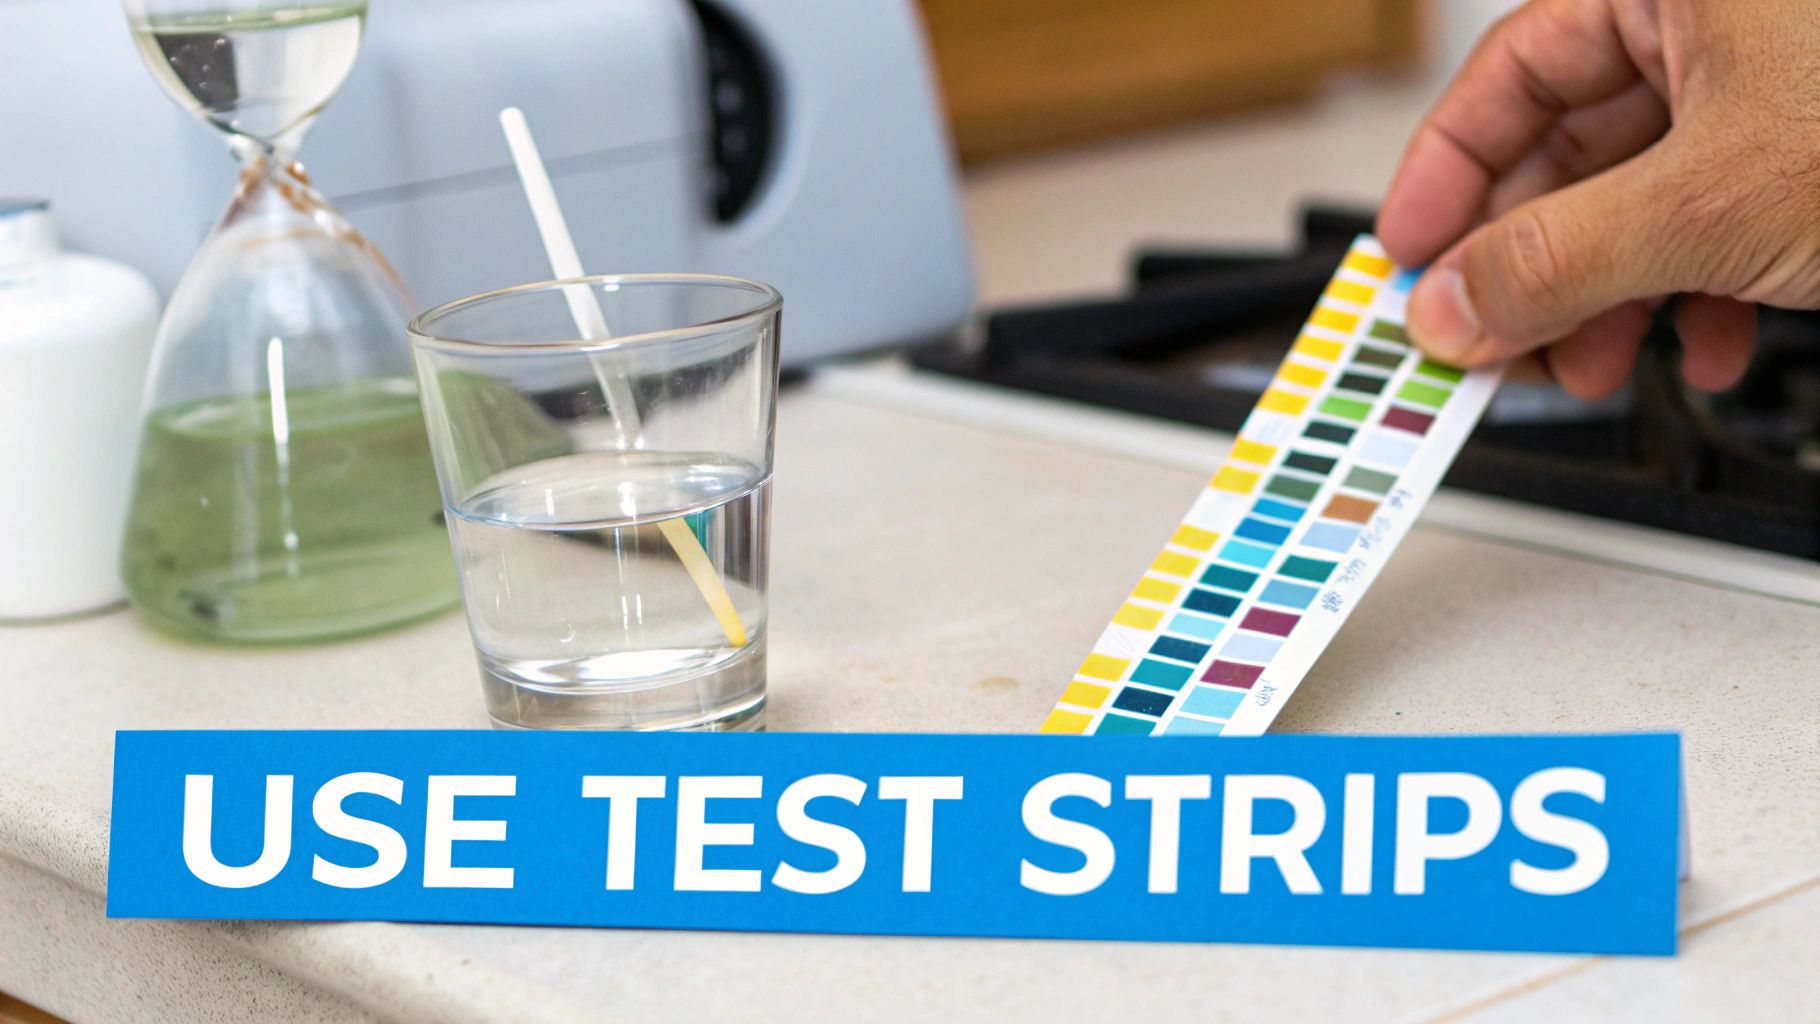
Your senses still matter

Even with an electronic lid, taste and smell are worth trusting. If chlorine odor comes back or the water tastes off before the indicator says it's time, I pay attention. Indicators are useful. Your mouth and nose are useful too.

A slow filter is another clue. Not every slow pitcher means the cartridge is spent, but a noticeable drop in flow often means something has changed inside the media or around the fit of the filter. If your usual refill routine suddenly drags, that's worth checking.

Here's the simplest way to read the signals:

Signal What it usually means Best response
Indicator changes or blinks Replacement timing has likely been reached Check filter type and replace if due
Water tastes or smells off Reduction performance may be fading Replace sooner rather than later
Flow gets much slower Filter may be clogging or seated poorly Reseat or replace
You lost track entirely Maintenance drift Replace the filter and reset properly

When people ask me which signal is most reliable, I say this: time gives you the schedule, the indicator gives you the reminder, and taste gives you the reality check.

The Filter Swap Process for Any Brita Model

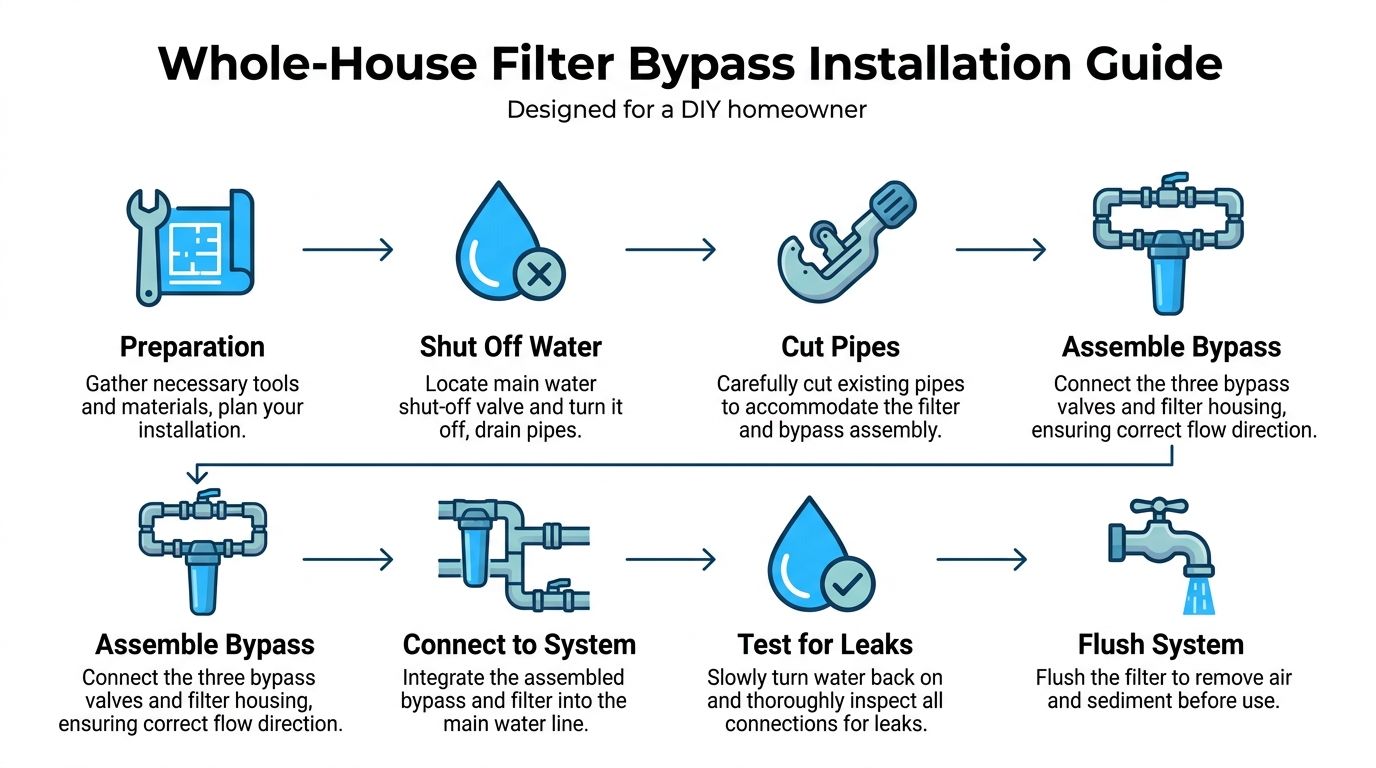
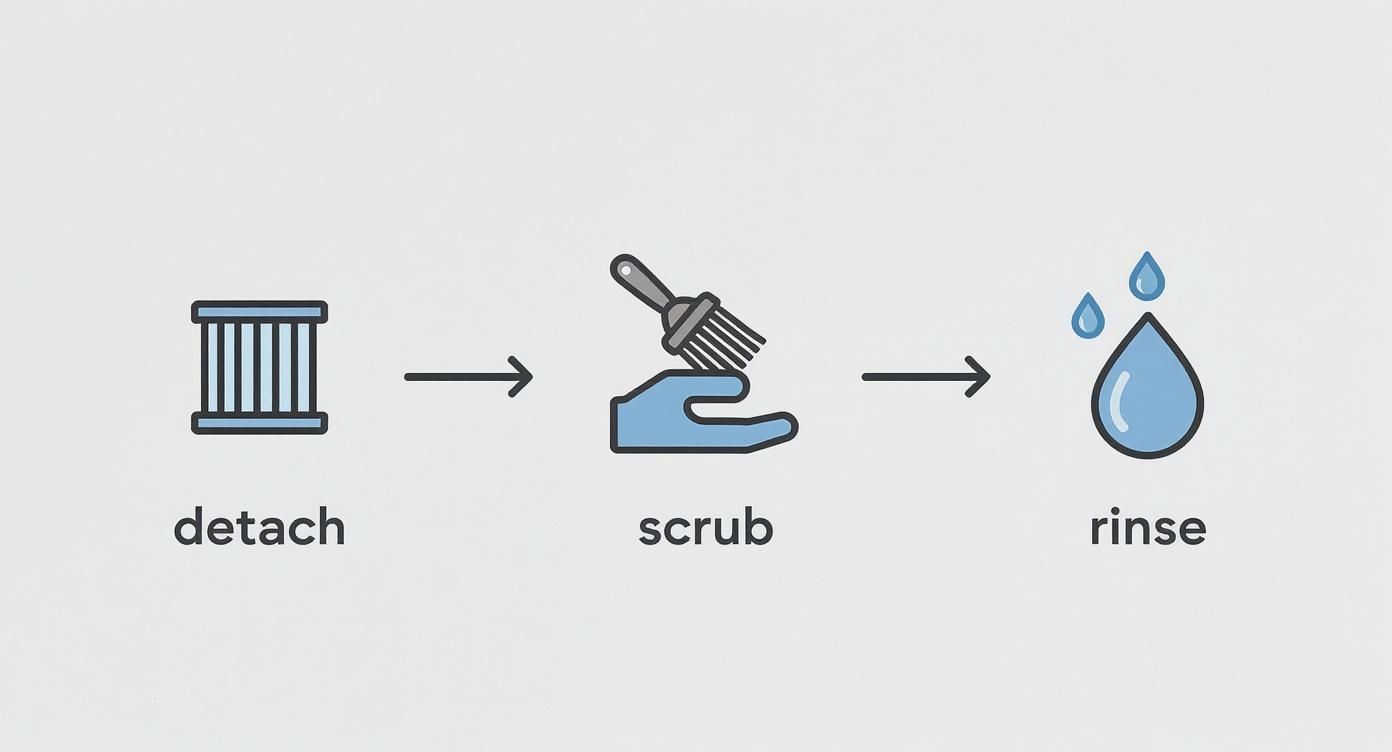
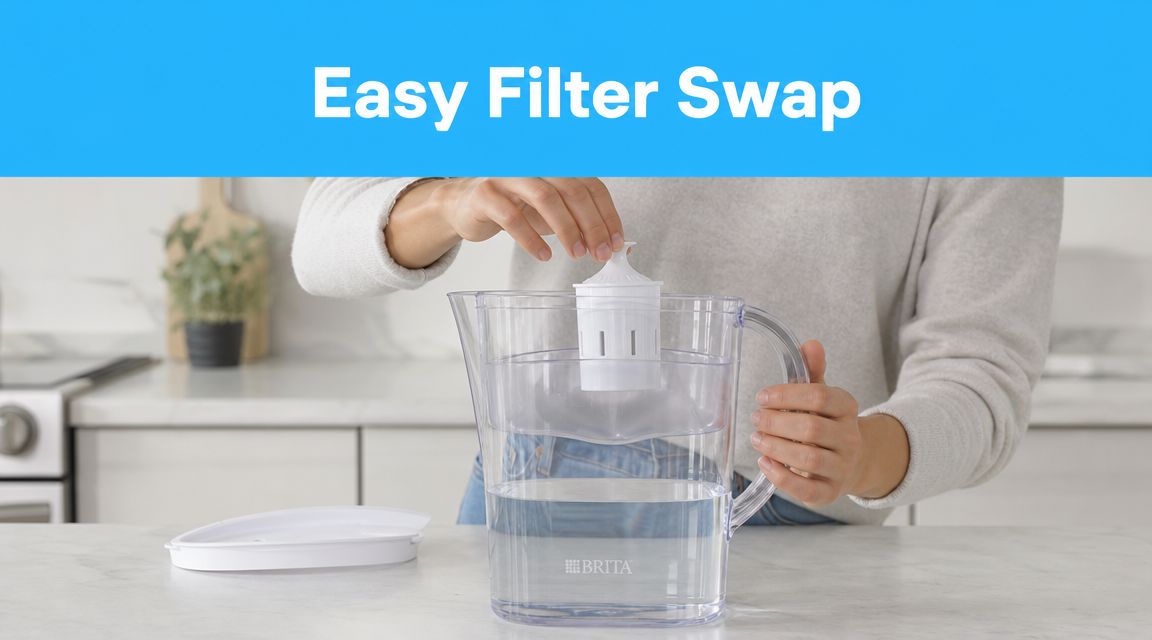
A clean filter change takes only a few minutes, but the order matters. The job goes smoother when you think in four moves: remove, prep, install, reset.

A person placing a white replacement water filter into a clear Brita water pitcher on a counter.

Brita's own support guidance for replacement filters says the key workflow is to remove the old cartridge, pre-condition the new one, flush it, and reset the indicator. Brita says to rinse new filters under running water for 15 seconds, insert them firmly until seated or clicked, and for some models hold the STATUS button for 6 seconds until the green Elite light blinks three times. That same guidance is the reason I tell people not to skip prep. Most of the annoying first-use problems come from rushing.

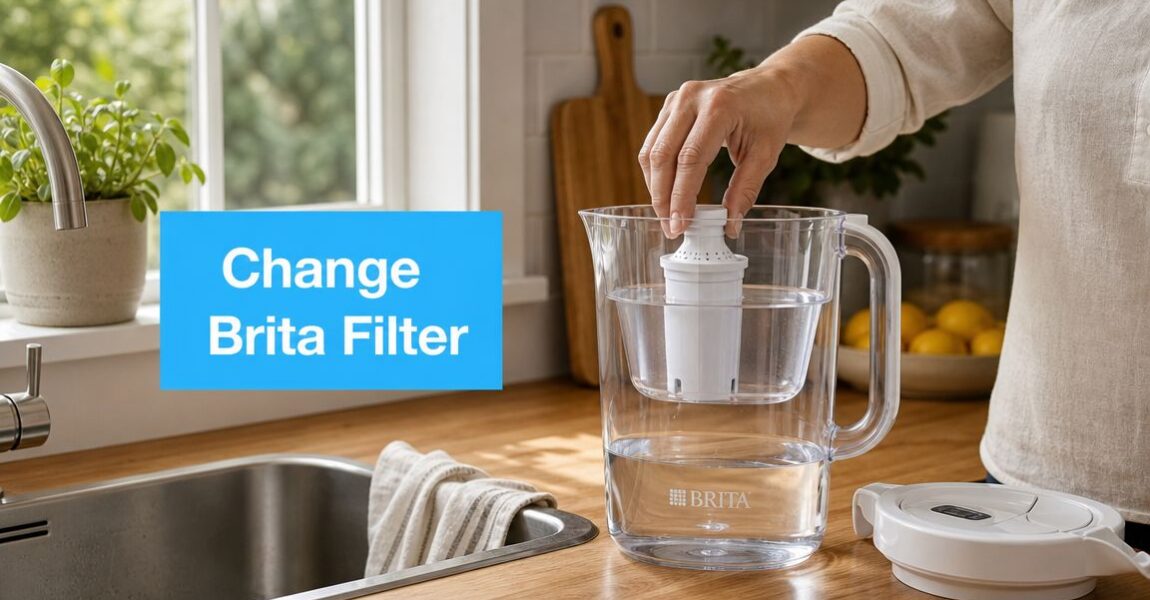
Pitchers and dispensers

Start by emptying the reservoir and taking the lid off. Pull the old filter straight out. If it's stuck, grip it low and wiggle gently instead of yanking the top edge. A filter can bind a little when it has been sitting in place for a while, especially if mineral residue or moisture has made the fit tight.

Before the new cartridge goes in, give the pitcher a quick wash with mild soap and rinse it well. This is one of the easiest ways to keep the whole system tasting clean. If you only ever change the cartridge and never wash the body, the filter gets blamed for problems the pitcher caused.

Why the rinse step matters

Brita says to rinse the new filter under running water for 15 seconds. That step isn't busywork. It helps pre-condition the media and wash away loose carbon fines that can show up as tiny black specks in the first water you pour.

Those specks worry people, but in most cases they're just residual carbon fines from a new filter. The rinse and initial flush handle that.

Use this rhythm:

  1. Remove the old cartridge and discard it according to your local recycling or disposal option.
  2. Rinse the new cartridge under cool running water for the full recommended time.
  3. Insert it firmly until it feels properly seated. On many models, you'll feel or hear a click.
  4. Fill and flush the first batch of water through the filter.
  5. Reset the indicator before you walk away.

A loose filter is one of the sneakiest problems. If the cartridge isn't fully seated, water can bypass the fit you're counting on.

What works and what doesn't

Some habits help. Some just create extra mess.

  • Works well: Cleaning the reservoir while it's empty.
  • Works well: Pressing the filter down firmly so it seals properly.
  • Works well: Flushing the first pitcher if you see carbon dust.
  • Doesn't work: Dropping the filter in casually and assuming gravity will seat it.
  • Doesn't work: Forgetting the reset and trusting yourself to remember the date later.
  • Doesn't work: Blaming the new filter for bad taste when the pitcher itself needs washing.

If you like seeing the process before doing it, this walkthrough is useful:

If your filter seems stuck or crooked

A stuck old cartridge usually comes out with patient side-to-side movement. Don't pry hard against the plastic housing with a knife or screwdriver. That's how lids get gouged and reservoirs crack.

If the new filter sits unevenly, remove it and try again. The right fit should feel deliberate, not questionable. Water filtration parts are simple, but seal quality matters. If something looks crooked, fix it before you fill the tank.

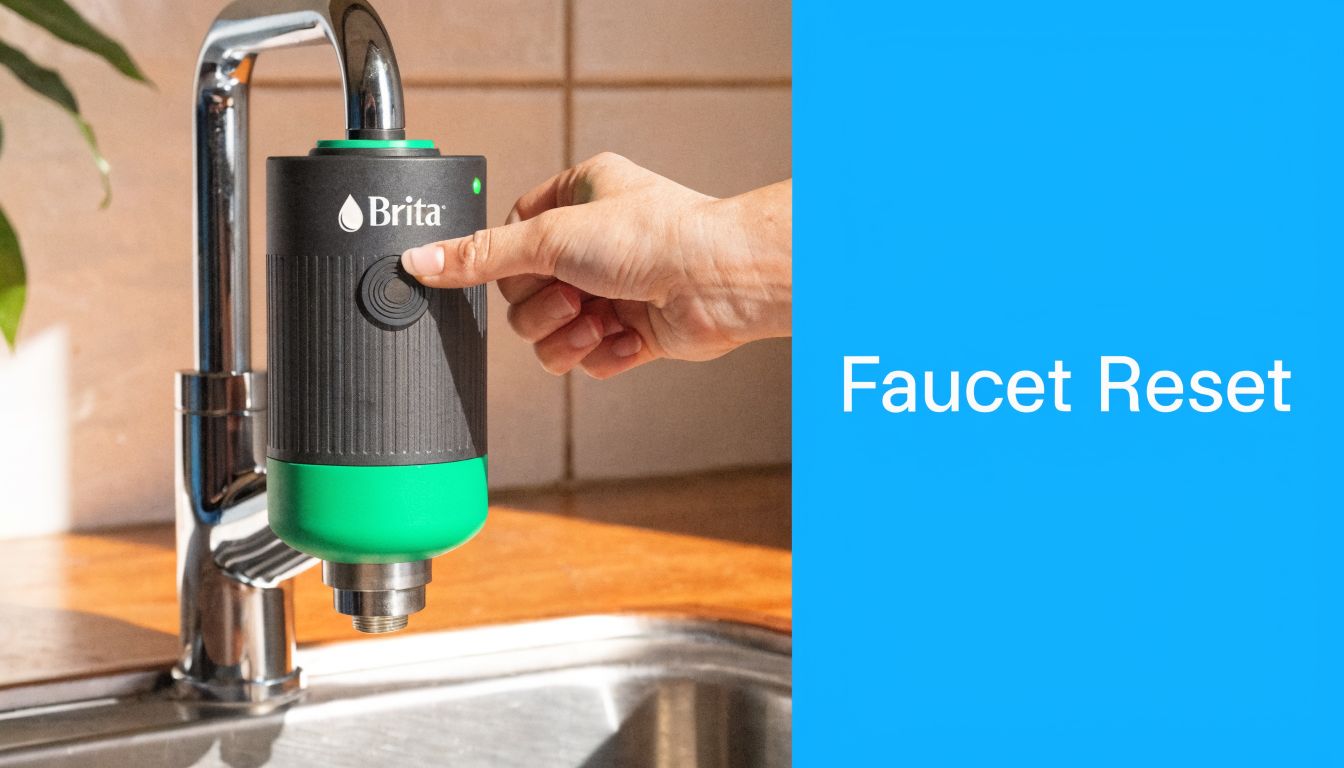
A note on faucet mount systems

Brita faucet systems aren't swapped exactly like pitcher cartridges. The idea is similar, but the housing and cartridge design are different, and the model-specific instructions matter more. With faucet units, I always recommend following the cartridge alignment marks on the system itself and checking for a proper seat before running filtered water.

The general principle still holds. Don't force the cartridge, don't skip the flush, and don't assume a blinking indicator means the new filter automatically registered itself. Faucet systems can be less forgiving if the cartridge is installed slightly off.

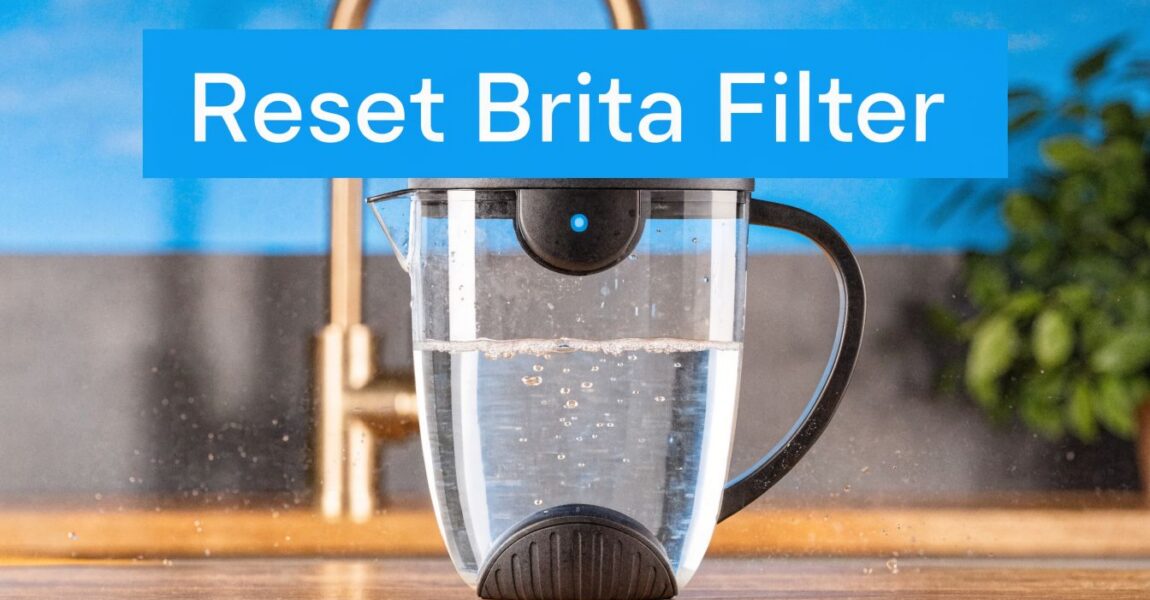
Resetting Your Indicator and Final Checks

Physical installation is only half the job. If the indicator isn't synced to the new cartridge, you've set yourself up for confusion later.

A close-up view of a finger pressing the reset button on a Brita water pitcher indicator.

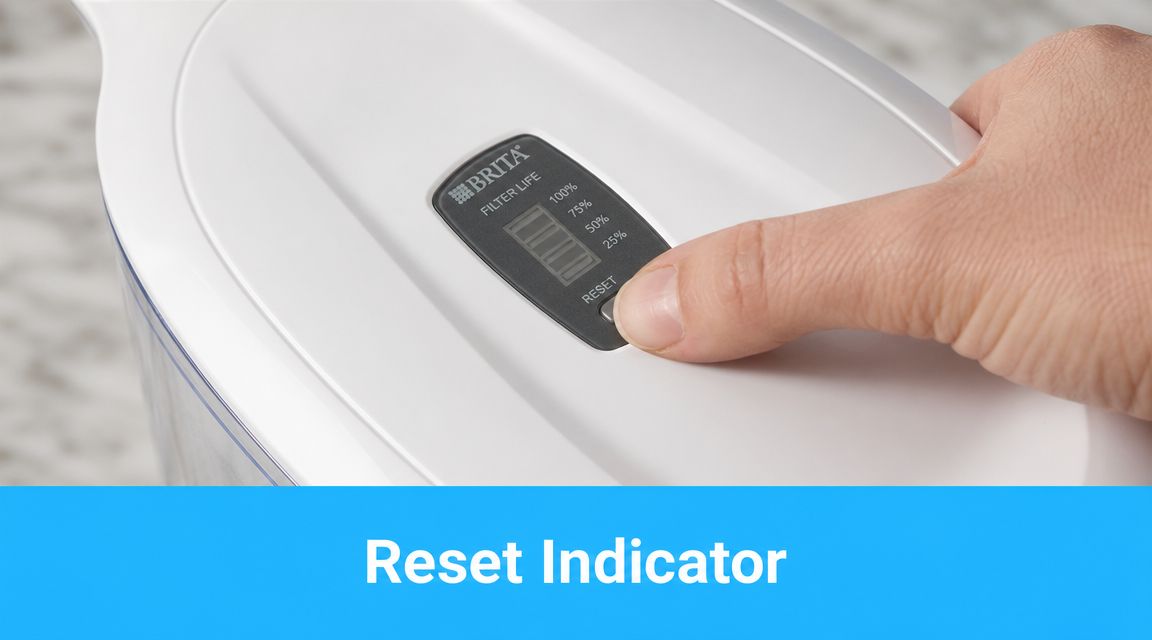
How to reset without guessing

On some Brita pitchers, the reset is straightforward. Press and hold the STATUS button until the indicator responds. For some models, the confirmation is the green Elite light blinking three times after holding the button for 6 seconds, as noted in Brita's support instructions mentioned earlier.

That blinking matters because it tells you the lid accepted the reset. If you press too briefly, nothing may change. If the light sequence doesn't appear, do it again before you refill and forget about it.

For readers who want a model-by-model walkthrough, this guide on how to reset a Brita filter indicator is a handy reference.

Sticker indicators and manual tracking

Some older pitchers use a sticker or dial instead of electronics. Those systems work fine if you update them the moment the filter goes in. Don't set the date later. Later usually turns into never.

A manual system is simple, and that's its strength. It can't glitch, but it also can't remind you unless you've marked it clearly.

Final checks before you call it done

Run through these quick checks:

  • Look at the fit: The cartridge should sit straight and secure.
  • Check the water: If you see a few black flecks at first, flush another batch.
  • Watch the indicator: Confirm the reset registered.
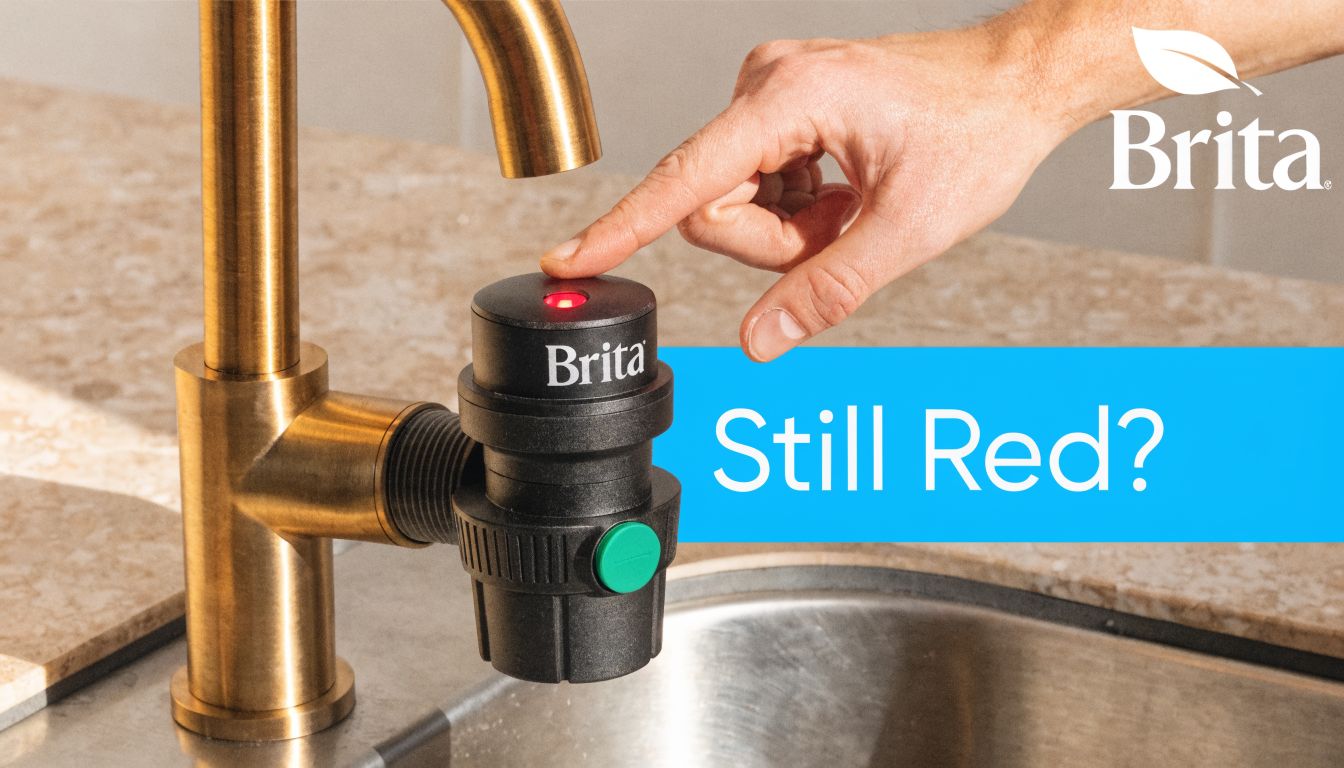
  • Taste the water: It should return to that cleaner, neutral profile you expect.

If the light is still acting like the old filter is installed, the issue is usually the reset step, not the cartridge.

When people say a new filter “didn't work,” I often find one of two problems. The filter wasn't fully seated, or the indicator never got reset, so they assumed something was wrong when the lid kept warning them.

Smart Tips for Brita Filter Maintenance

Good Brita maintenance is mostly about consistency. You don't need a complicated system. You need a routine that keeps the pitcher clean, the replacement schedule visible, and the right filter on hand before the old one is overdue.

Brita says that all of its filters reduce chlorine taste and odor, and that the Elite filter removes 99% of lead, reduces more contaminants than earlier pour-through systems, and lasts 3 times longer than the original standard filter according to Brita's product overview for better water. That matters when you're deciding what to keep in the pantry. A standard filter may suit households that don't mind more frequent changes. An Elite filter makes sense for people who want fewer swap days and a longer service interval.

An infographic showing five helpful tips for maintaining a Brita water filter pitcher for optimal performance.

Buy smarter, not just cheaper

Filter packs are one of those boring purchases that reward planning. If you know you'll keep using the same pitcher, buying multi-packs usually makes life easier because you're less likely to put off a replacement while waiting to reorder.

The better value isn't always the cheapest box on the shelf. It depends on the filter type you use, how often you change it, and whether you prefer lower up-front cost or fewer maintenance events.

Set reminders outside the pitcher

Electronic indicators are helpful, but I still like a backup. A calendar reminder on your phone keeps you from relying on memory alone. If you want a simple system for automating recurring tasks, that approach works well for filter changes too, especially in busy households where no one remembers who last touched the pitcher.

Troubleshooting the three most common annoyances

These are the issues I hear about most often:

  • Black specks in the first fill: Usually carbon fines from a new cartridge. Flush another pitcher or two.
  • Slow draining water: Check that the filter is fully seated and that the reservoir isn't clogged with debris or buildup.
  • Odd taste after replacement: Wash the pitcher body and lid, then flush again. Sometimes the cartridge is new but the problem is the container.

For households using the longer-life cartridge, this guide on using a Brita Longlast filter to reduce the risk of lead in drinking water is worth reading.

Clean water habits are small habits. Rinse the filter correctly. Wash the pitcher regularly. Reset the indicator every time. That's what keeps the simple system working.

A final practical point on storage. Keep spare filters sealed and stored in a cool, dry place. Don't toss them loose under the sink where they can pick up odors or get damaged by other supplies. And if a filter package looks torn or crushed, I'd skip it.


If you want more practical help choosing, replacing, and comparing home water filtration options, visit Water Filter Advisor. It's a solid resource for households that want clearer guidance on pitchers, faucet filters, under-sink systems, and long-term maintenance.

Bypass Water Filter: A Complete How-To & When-To Guide

You know the moment. The filter light starts blinking, water pressure seems a little off, and you remember that changing the cartridge means shutting water off, opening a housing that never comes loose gracefully, and dealing with the splash that somehow always lands in the wrong place.

That’s where the bypass water filter setup earns its keep.

A bypass isn’t glamorous. It doesn’t improve taste by itself, and it doesn’t remove contaminants. But it does something every homeowner appreciates. It keeps water moving through the house while you service the system, isolate a problem, or protect a filter from a job that doesn’t need treatment. Used properly, it’s one of the smartest parts of a home filtration layout. Used casually, especially on refrigerator and point-of-use systems, it can undo the very protection you paid for.

The key is understanding the trade-off. A bypass is a tool, not a free pass. In some situations it saves wear, time, and hassle. In others, it puts untreated water right back into your drinking glass.

Your Filter's Secret Weapon The Bypass Valve

Most homeowners think about the cartridge, the media, or the big blue housing on the wall. The bypass valve gets ignored until the day it saves the job.

A bypass valve is a way to reroute water around the filter for a short period. It functions as a road detour around a construction zone. Water still reaches the house, but it skips the treatment equipment while you change a cartridge, inspect a leak, or troubleshoot low flow.

Why it matters in a real home

On a whole-house setup, that detour can be the difference between a clean maintenance job and a miserable one. If your system has no bypass, a basic cartridge change can mean shutting off the house, draining lines, opening the housing, and hoping nobody flushes a toilet halfway through. With a bypass, you isolate the filter and keep the rest of the plumbing usable.

That’s why plumbers like to see one built in from day one. It’s not an accessory. It’s part of a serviceable system.

Practical rule: If a filter can’t be isolated cleanly, maintenance gets delayed. Delayed maintenance turns a good filter into a bad one.

What a bypass does and what it does not do

A bypass valve does two jobs well:

  • Keeps water available: You can still wash hands, flush toilets, or run a faucet while the filter is out of service.
  • Protects the filter during service: You don’t force water through an open or partially disassembled housing.

What it does not do is provide treatment. Once water is on bypass, the filtration step is out of the loop. That’s fine when you’re changing a sediment cartridge in the basement. It’s a different story when the water you’re bypassing was supposed to improve taste, reduce odor, or address drinking water concerns at the kitchen tap.

That difference matters more than most DIY guides admit.

When to Use the Bypass and When to Think Twice

You notice the filter needs service on a Saturday morning. The house still needs water, the kids still need showers, and the temptation is to flip the bypass and leave it there until later. That is exactly where good maintenance can turn into a water quality problem.

A bypass is safest as a short-term tool with a specific purpose and a clear end point. The right use depends on what the filter was installed to do in the first place. Skipping a whole-house sediment stage for an hour is one decision. Skipping a drinking water filter for a week is a different one.

A person looking thoughtful while considering the settings of a bypass water filter valve system.

Good reasons to use a bypass

For a whole-house system, bypass mode is often part of normal service. It keeps water available while you change a cartridge, clean a housing, replace an O-ring, or confirm whether a clogged filter is causing pressure loss. On jobs like these, the bypass saves time and keeps the plumbing usable.

There are also cases where sending every gallon through a filter is hard to justify. Lawn watering, driveway washdown, and other heavy utility use can burn through cartridge life quickly, especially on sediment or carbon stages that were installed to improve indoor water use, not outdoor hose work.

Short-term matters here.

If the filter protects appliances from grit, stains, or scale-related debris, leaving it bypassed longer than necessary means the rest of the house starts seeing untreated water again.

Situations that deserve caution

The bigger risk shows up at fixtures where people drink the water. Under-sink systems and refrigerator filters are easy to dismiss because water still comes out of the faucet or dispenser. Flow is not treatment.

That trade-off gets ignored in a lot of DIY advice. If the filter was installed to reduce chlorine taste, odor, lead concerns, or hard-to-pronounce contaminants such as PFAS, bypassing it puts those concerns back at the tap immediately. The U.S. Geological Survey reported widespread PFAS detection in U.S. tap water, which is exactly why bypass decisions deserve more care than they usually get.

A bypass does not fail slowly. It removes the filtration step all at once.

Whole-house versus drinking water bypass

These choices are not equal, and I tell homeowners to judge them by exposure, not convenience.

System type Bypass usually makes sense when Main trade-off
Whole-house sediment or prefilter Filter changes, service work, troubleshooting, heavy non-potable utility use Dirt, sediment, or other untreated water can reach fixtures and appliances during the bypass period
Under-sink drinking water filter Brief cartridge replacement or filter-head service Drinking and cooking water quality drops right away
Refrigerator filter Diagnosing flow issues or keeping the ice maker running until the correct filter arrives Water and ice still dispense, but the filter media is no longer reducing taste, odor, and contaminant load

That last row causes the most confusion. Homeowners see normal flow and assume the system is “basically working.” It is not. It is only passing water.

The refrigerator filter trap

Official bypass plugs and bypass cartridges have a real use. They help confirm whether a blocked filter is causing low flow, and they can keep a refrigerator running while you wait for the right replacement. I use them for diagnosis, not as a long-term fix.

The trade-off is simple. You get water delivery back, but you give up the treatment the refrigerator filter was there to provide. In practical terms, that often means the chlorine taste returns first. If the filter was part of your plan for reducing lead or PFAS exposure at the dispenser, bypassing it undercuts that plan completely.

For homeowners weighing pressure loss, cartridge cost, and contaminant concerns, practical home water treatment guidance helps sort out whether bypassing is the right short-term move or a sign the system needs a different fix.

A simple way to decide

Use the bypass for maintenance, diagnosis, or limited utility use where untreated water is an acceptable short-term compromise.

Reconsider bypassing any filter that serves drinking water. If that filter was installed for taste, odor, lead, chlorine, or PFAS concerns, bypass should last hours or days, not become the new normal.

Installing a Whole-House Water Filter Bypass

A whole-house bypass solves a very practical problem. You need to change a cartridge, service a leaking housing, or diagnose a pressure issue, and the house still needs water. Done right, the bypass lets you keep showers, toilets, and laundry running while the filter is offline. Done poorly, it becomes the weak point in the system.

That trade-off matters more than many DIY guides admit. A bypass on a whole-house sediment or carbon filter is often reasonable for short maintenance windows. A bypass on a system installed to reduce a known contaminant problem changes the risk immediately. If your filter is part of your plan for PFAS, chlorine byproducts, or other source-water concerns, the bypass should be treated like a temporary service position, not normal operation.

The standard layout is a three-valve bypass. One valve sits on the inlet side, one on the outlet side, and one bridges the two through a short bypass loop.

In service mode, water goes through the filter. In bypass mode, you close the inlet and outlet valves to isolate the housing and open the center valve so water travels around it.

A step-by-step infographic showing how to install a whole-house water filter bypass system for DIYers.

Tools and materials to gather first

Set everything out before you cut into the main line. For most installations, that includes:

  • Ball valves: Full-port valves matched to your pipe size
  • Pipe and fittings: Tees, elbows, unions, nipples, and the short section that forms the bypass loop
  • Thread seal materials: PTFE tape or an approved thread sealant for threaded joints
  • Cutting tools: A copper cutter, PEX cutter, or the correct tool for your plumbing material
  • Wrenches: Two adjustable wrenches or two pipe wrenches so you can hold back while tightening
  • Mounting hardware: A bracket and screws if the housing or manifold needs wall support
  • Bucket and towels: Always needed, even on clean installs

Heat needs extra care around plastic housings, valve parts, and nearby trim pieces. Midmark's installation document for bypass-equipped water treatment assemblies shows support hardware, union use, and orientation requirements, and it reinforces a rule every plumber learns fast: keep open flame work away from plastic components whenever possible, especially once the assembly is mocked into place (Midmark installation document).

Plan the layout before you cut

A clean layout is easier to maintain and less likely to leak later.

Leave enough space below the housing to drop the sump and remove the cartridge without fighting the floor or wall. Give yourself hand room around each valve handle. Dry-fit the tees, valves, and housing before making the first cut.

I see the same mistake over and over. The piping is technically correct, but the sump cannot be unscrewed without hitting the wall, or the bypass handle ends up tucked behind the housing where no one can reach it.

Basic valve positions

Before you install anything, know the finished valve positions:

Mode Inlet valve Outlet valve Bypass valve
Service Open Open Closed
Bypass Closed Closed Open

Label the valves after installation. A tag or marker saves confusion when somebody else has to shut it down during a leak or filter change.

Here’s a visual walkthrough that pairs well with the written steps below.

Step 1 shut off water and drain the line

Shut off the main supply. Open a downstream faucet to relieve pressure and drain the section you plan to cut.

Put towels down early if the filter is near finished walls, flooring, or electrical equipment. Water always finds the one spot you did not protect.

Step 2 mark the filter and bypass footprint

Hold the housing and bypass loop in position and mark your cut points. Confirm spacing for the housing ports, both tees, the center valve, and future service access.

Too tight, and the housing becomes miserable to maintain. Too spread out, and the pipe puts extra strain on the head and fittings.

Step 3 cut the pipe cleanly

Cut the main line with the right tool for the material and keep the cuts square.

Deburr as needed. Sharp edges can damage seals and cause push-fit connections to seat badly.

Step 4 pre-assemble the bypass loop

Build as much of the assembly as you can on a bench or floor. Usually that means the two tees, the short bypass section, and the center valve.

Then confirm the housing orientation and branch connections with a dry fit. This allows you to catch backward heads, awkward handle positions, and missing clearance before the system is glued, pressed, or threaded together.

Step 5 support the assembly

Mount the bracket firmly if your system uses one. Use unions where they make future service easier, especially on common residential sizes.

This step gets skipped in a lot of homeowner installs. The pipe ends up carrying the housing weight, the housing shifts every time someone changes the cartridge, and the threaded ports start weeping months later.

Step 6 check flow direction before final assembly

Some housings, valve bodies, and control components are directional. Follow the flow arrow on every part that has one.

This matters on simple filter heads and it matters even more on systems with accessories such as shutoff components or specialty controls. If the body is installed backward, you can get poor flow, bad sealing, or service problems that look like a defective filter.

Step 7 connect the assembly to the plumbing

Install the filter and bypass into the main line. On threaded joints, use two wrenches so you do not twist the housing head or rack the existing plumbing.

Use thread sealant only where the fitting type calls for it. Compression, push-fit, solvent-weld, PEX crimp, and threaded joints each have their own rules. Mixing methods out of convenience is how small leaks turn into callbacks.

Step 8 install the cartridge and check seals

Insert the cartridge, seat the O-ring correctly, and tighten the housing the way the manufacturer specifies. Clean the O-ring groove first and inspect the seal for nicks, flattening, or grit.

A dirty or pinched O-ring often gets blamed on the bypass because the leak shows up after the installation. The actual problem is usually at the sump.

Step 9 pressurize slowly and test for leaks

Bring the water back on slowly. With the bypass valve closed and the inlet and outlet valves in service position, crack the main supply just enough to fill the housing without a hard rush.

Check every joint, union, valve, and housing connection. A dry paper towel is better than your eyes for finding a small seep.

Step 10 flush the filter before normal use

Flush the cartridge according to the filter manufacturer's instructions. That clears trapped air, fines, and installation debris.

A little sputtering at first is normal while the air purges. Steady flow is the goal.

Common mistakes that create callbacks

These are the problems I run into most often:

  • Valve handles blocked by the layout: The bypass works on paper but cannot be operated easily.
  • No support under the housing: The assembly moves during cartridge changes and stresses the ports.
  • Not enough sump clearance: The filter cannot be opened without removing other plumbing.
  • Torch work too close to plastic parts: Housings, valve seats, and trim get damaged by heat.
  • No unions where service requires them: Future repairs become harder than they need to be.
  • Bypass left open by accident: Untreated water feeds the entire house and the filter appears to be "working" because flow is normal.

That last mistake deserves attention. On a whole-house sediment filter, the main consequence may be dirt getting through fixtures and appliances. On a whole-house carbon or specialty treatment system, bypassing can re-expose the home to the very contaminants the system was installed to reduce. If the household chose treatment because of taste alone, that is one problem. If the choice was driven by PFAS concerns or another drinking-water issue, bypass is a short-term maintenance position and should be treated that way.

A good bypass installation feels simple in use. The valves are easy to reach, the housing comes apart without a fight, and the system returns to service without leaks or guesswork.

Bypassing Under-Sink and Refrigerator Filters

You pull the refrigerator filter because flow has slowed to a trickle, snap in a bypass plug, and the water comes back strong. That feels like a fix. In practice, it only proves the filter was restricting flow. It also means the water is now passing through with little or no treatment.

That distinction gets missed all the time. With whole-house systems, a bypass usually sends water around the equipment through separate piping. Under-sink units and refrigerators often do it inside the filter head or by replacing the cartridge with a pass-through part. The hardware is simpler. The drinking-water trade-off is easier to overlook.

A person uses their finger to push the red button on a blue and black water filter.

Under-sink systems usually use a built-in bypass

Most under-sink filter heads are built for quick service. A lever, push button, or auto-shutoff in the head lets you remove the cartridge without shutting down the entire home. On a good design, cartridge changes are clean and fast.

Use the feature the way the manufacturer intended:

  1. Shut off the feed if your model requires it.
  2. Open the faucet to relieve pressure.
  3. Engage the release or service position.
  4. Remove the old cartridge.
  5. Seat the new cartridge fully.
  6. Return the head to filter mode and flush the faucet.

Correct seating matters more than many homeowners expect. If the cartridge is cocked, half-locked, or forced past a keyway, you can get leaks, poor flow, or a partial internal bypass that lets untreated water slip past the media.

Refrigerator filters use plugs or bypass cartridges

Refrigerators handle bypass differently. Many models need a bypass plug or bypass cartridge installed when the filter is removed. Without that insert, the dispenser or ice maker may slow down, stop, or behave erratically because the filter head is designed to stay mechanically engaged.

Manufacturers sell those parts for troubleshooting and short-term use. GE and other major brands provide model-specific bypass inserts that keep water moving through the refrigerator while the filter housing remains properly actuated. That proves a useful point for diagnosis. If flow improves the moment the bypass goes in, the old filter was clogged, installed incorrectly, or failing internally.

What it does not prove is that the water is still being treated.

Side-by-side trade-offs

Feature Under-sink bypass Refrigerator bypass plug
How it works Built into filter head or manifold Replaces the cartridge with a pass-through part
Main use Quick cartridge changes or service Troubleshooting or temporary operation
Best use case Brief maintenance window Waiting for the right replacement filter
Main downside Easy to forget system isn’t filtering if left in bypass Water flows, but treatment for taste and chemicals is lost

What works and what doesn’t

These bypass options are useful during maintenance, diagnosis, or a short wait for the correct replacement filter. I use them for exactly that.

Problems start when a temporary bypass becomes normal operation. A refrigerator bypass plug is not a filter. An under-sink head left in service position is not filtering either. If the original cartridge was there for chlorine taste, odor, lead reduction, or PFAS reduction, bypassing can put those contaminants back into the drinking water stream at whatever level the incoming supply contains.

PFAS is the part many DIY guides skip. If a household installed an under-sink filter because they were trying to reduce long-lasting contaminants, bypassing that unit takes them back to untreated source water. The same logic applies to refrigerators. Many fridge filters are mainly used for taste and odor improvement, but some households rely on them as a last point-of-use barrier for chemicals they do not want in drinking water or ice.

You can often taste the difference fast. More chlorine bite. More pool smell. Sometimes no obvious taste change at all, which is why bypass can be misleading. A lot of contaminants do not announce themselves in the glass.

Treat under-sink and refrigerator bypasses as service tools, not operating modes. That keeps the convenience without forgetting the reason the filter was installed in the first place.

Smart Alternatives to a Standard Bypass

Not every home starts with a neat three-valve bypass. Older installs often have a filter housing plumbed straight into the main line with no isolation at all. That’s when homeowners start looking for workarounds.

Some of those workarounds are solid. Some create more pressure loss and more service headaches than the original problem.

Two practical retrofit options

The first option is an isolation-style retrofit. Instead of a full classic bypass from the start, you add shutoff valves on either side of the filter and build a controlled path around it. This can be a good fix when access is tight or when you want to improve serviceability without rebuilding the whole area.

The second option is a temporary jumper for maintenance. In some situations, especially on PEX systems, a plumber can isolate the filter, disconnect a section, and create a short temporary pass-through using compatible tubing and fittings while the filter assembly is repaired or replaced. That’s a practical service method, not something to leave in place forever.

Flow loss matters more than people expect

A bypass layout can solve one problem and create another if the components are undersized or poorly chosen. Homeowners who install a DIY 3-way ball valve bypass using 3/4-inch NPT fittings need to be aware that it can reduce water flow by 15% to 20%, while factory bypasses designed for the application may preserve up to 95% of the original flow rate, according to this discussion of whole-house bypass trade-offs.

That’s the kind of issue people feel in the shower or when two bathrooms run at once. The system still “works,” but the house feels starved.

Which alternative fits which situation

  • Use a temporary maintenance jumper when the goal is to keep water on during a short repair.
  • Use isolation valves when you want easier service access but don’t need a full redesign.
  • Use a factory-made bypass assembly when preserving flow and compatibility matters more than shaving initial cost.

A bypass that kills pressure isn’t a clever hack. It’s just a different problem.

What about smart bypass valves

Some newer systems use app-controlled or automated bypass functions, especially on equipment that backwashes or cycles through service modes. Those can be useful in complex setups, but for most homes, simplicity still wins. A clearly labeled manual bypass with quality valves is easier to understand and easier to repair.

The smartest alternative is usually the one the next homeowner, the next plumber, or the next family member can operate without guessing.

Troubleshooting Common Bypass Problems

Bypass problems usually announce themselves in plain ways. A drip. A stuck handle. A sudden pressure drop. The trick is separating a valve problem from a filter problem, because they can look similar from across the basement.

A close-up view of a person's hands repairing or adjusting a bypass water filter valve system.

Quick diagnosis table

Symptom Likely cause What to do
Slow drip at valve handle Packing nut or internal seal issue Gently tighten the packing nut if the valve design allows. If it still drips, replace seals or the valve.
Valve won’t turn Mineral buildup, age, or lack of use Don’t force it. Shut down the line and service or replace the valve.
Pressure is low after returning to service Filter is clogged, valve not fully open, or housing issue Confirm valve positions first, then inspect the cartridge and housing seal.
Water still seems untreated Filter bypassing internally or poor seal at the housing Inspect the cartridge seating and O-ring before blaming the valve.

The problem may be the filter seal

One of the most overlooked causes of poor performance is leakage around the filter rather than through it. Research on filter bypass flow shows that even a 1 mm gap can allow about 1% to 2% of flow to bypass the media, and bypass can rise to nearly 40% with larger gaps or as a filter gets clogged, according to this California Energy Commission research document.

That matters because the symptoms mimic a faulty bypass valve. Water quality drops. Pressure acts strangely. The homeowner assumes the valve is partly open, yet the underlying problem is a bad seal, warped frame, or misseated cartridge.

Simple checks before you call for service

  • Verify handle positions: A half-turned valve can create confusing flow behavior.
  • Inspect the housing O-ring: Clean it and make sure it sits flat.
  • Look for frame or cartridge damage: A bent cartridge or worn seat can let water sneak around the media.
  • Cycle the bypass slowly: Sometimes a valve that sat untouched for years needs careful movement to reseat fully.

Don’t diagnose from the handle alone. The bypass path might be closed while the filter is still leaking around its own seal.

If you see cracked housings, heavily corroded valves, or fittings that move when touched, stop there and bring in a plumber. Water under pressure punishes wishful thinking.

Frequently Asked Questions About Water Filter Bypasses

Will installing a bypass void my filter warranty

It can, depending on the equipment and the parts used. Manufacturer-approved bypass components are always the safer route when warranty protection matters. On refrigerators especially, an official bypass cartridge is very different from a homemade workaround. If you’re unsure, check the filter or appliance documentation before modifying anything.

Is it okay to leave a bypass water filter on all the time

Usually, no. A bypass is meant for service, troubleshooting, or another short-term reason. If you leave the system in bypass, you’ve removed the treatment stage from the water path. On a whole-house system that may mean taste, odor, or sediment issues returning. On a drinking-water system, it means the water at the faucet or dispenser is no longer being treated as intended.

How do I keep bypass valves from seizing up

Operate them occasionally and do it gently. A valve that never moves is the one most likely to freeze in place when you need it. Turn the handles through their positions during routine maintenance, then return them to normal service mode. If a valve feels rough or gritty, don’t muscle it harder. That’s when stems snap and leaks begin.

How do I know whether low pressure is from the bypass or the filter

Start with the simple checks. Confirm the valve positions, then compare flow in service mode versus bypass mode if your system allows it. If pressure improves when bypassed, the cartridge may be loaded or the housing may have a sealing problem. If pressure stays poor either way, the restriction may be elsewhere in the plumbing.

When should I call a professional

Call for help if the bypass leaks at the body, not just the handle, if the housing threads are damaged, if the valve won’t move without force, or if you’re dealing with a complicated setup that includes directional parts or electrical controls. It’s also worth calling a pro if you’re not fully certain which water lines feed drinking fixtures versus utility lines. That’s where bypass mistakes become household water-quality mistakes.


If you’re sorting out a bypass water filter decision and want clearer guidance on replacement filters, whole-house setups, under-sink systems, and what helps with chlorine, lead, iron, or odor, Water Filter Advisor is a strong next stop. It’s built for homeowners who want practical, research-driven help choosing and maintaining the right filtration system without getting lost in marketing claims.

How to Reset Brita Filter Indicator: Your 2026 Guide

You changed the filter. You filled the pitcher. Then that little light starts blinking again like you did something wrong.

That’s where users often get annoyed with Brita. I’ve seen this happen a dozen times in real kitchens. Someone swaps in a fresh filter, taps the button quickly, and a week later the light is acting like the filter is spent. The usual reaction is to blame the filter. Most of the time, the issue is the reset.

The fix is simple once you know what the indicator is doing. And that’s the important part. If you only learn how to make the red light disappear, you’ll still be guessing. If you understand how the counter works, you can manage your filter properly, waste less, and keep your drinking water tasting the way it should.

That Blinking Light Is Back Again

The classic Brita problem goes like this. You replace the cartridge, snap the lid back on, press a button for a second, and walk away. A few refills later, the light looks wrong. Green never settled in, or red came back too soon.

That doesn’t usually mean the new filter failed. It usually means the indicator never got a clean reset.

Brita pitchers and dispensers are common because they’re easy to live with. But the reset process trips people up because it changes by model and by filter type. A standard white filter isn’t reset the same way as a long-life navy filter. If you mix up those hold times, the lid can start counting on the wrong schedule.

I’ve also seen people chase the light and ignore the basics. They forget to rinse the new cartridge, seat it crooked in the reservoir, or skip the first flush cycles. Then they blame the reset when the actual problem is installation.

A good reset routine is simple:

  • Prep the filter first: Install it correctly before touching the indicator.
  • Match the reset to the filter type: White and navy filters don’t use the same button hold.
  • Treat the light like a reminder: It helps, but it isn’t testing the water in real time.

Practical rule: If the light behaves strangely right after a filter change, check the reset method before you assume the cartridge is bad.

That’s the difference between random button pressing and knowing how to reset brita filter systems the right way.

What Your Brita's Blinking Light Really Means

It is often assumed the indicator is measuring water quality. It isn’t.

On many Brita models, the light is basically a counter, not a sensor. Brita notes that the system tracks refills through lid-open detection, requiring the lid to stay open for 10+ seconds, rather than measuring gallons directly or testing water quality. Brita also states official capacities of 40 gallons and 120 gallons depending on the filter, while noting that this can lead to premature red lights for small households. The same guidance also notes that third-party testing found standard filters can retain 70% efficacy post-indicator at low flows, which is why manual tracking can help in some homes (Brita resident support).

A blue Brita water pitcher filled with water sits on a wooden kitchen counter with plants.

Why that matters in real homes

If you live alone and only fill the pitcher a little at a time, the light can turn red before the filter has done much real work.

If you’ve got a busy household, people may refill constantly. In that case, the counter may line up better with actual use, but it’s still estimating. It doesn’t know whether your tap water is easy or hard on the filter. It doesn’t know what your chlorine level tastes like that week.

That’s why I tell people to stop treating the light like a lab instrument. It’s a maintenance reminder.

What the light does well and what it doesn't

The indicator is useful when you understand its limits.

  • What it does well: It gives you a consistent prompt to think about replacement.
  • What it doesn’t do: It doesn’t test for chlorine, copper, lead, or taste changes in the moment.
  • What smart users do instead: They use the light plus a little common sense about refill habits, water taste, and household usage.

The blinking light is a convenience feature. It isn't a water-quality verdict.

Once you get that, Brita becomes a lot less mysterious. You’re no longer reacting to a blinking lid. You’re managing a simple filter system the way it was meant to be managed.

How to Reset Brita Pitcher and Dispenser Indicators

Most reset mistakes happen here. The key is to identify which filter you installed before you touch the button.

Brita’s official guidance for pitchers and dispensers says a standard white filter is rated for 40 gallons and should be reset by holding the STATUS button for 2 seconds until the green light blinks 3 times. A long-life navy filter is rated for 120 gallons and uses a hold time of about 6 seconds. Brita also notes that rinsing a new filter for 15 seconds helps remove carbon fines, which prevents black specks in 90% of unrinsed setups, and that using the wrong hold time causes reset failures in up to 15% of cases (Brita water dispenser support).

A graphic guide explaining how to reset both electronic and manual Brita water filter indicators.

Electronic indicator models

If your pitcher or dispenser has a button on the lid, do it in this order.

  1. Rinse the new filter
    Hold it under cold water for the recommended rinse before installation.

  2. Install it firmly
    Line up the groove and notch, then press it in so it seals properly.

  3. Reset based on filter type
    For a white standard filter, hold STATUS for 2 seconds.
    For a navy long-life filter, hold it for about 6 seconds.

  4. Watch the light
    On standard mode, you’re looking for the green light to blink three times.

That timing matters more than people think. A quick tap often doesn’t register. A too-long hold can set the wrong cycle on some lids.

Manual indicator models

Some older or simpler Brita pitchers don’t have electronics at all. They use a manual date wheel or sticker.

Those are easy. You rotate or set the reminder to the current month and count forward based on the filter you’re using. There’s no battery, no button sequence, and no electronic counter to fight with.

Brita Pitcher and Dispenser Reset Quick Guide

Filter Type Rated Capacity Reset Action Visual Cue
Standard white filter 40 gallons Hold STATUS/RESET for 2 seconds Green light blinks 3 times
Long-life navy filter 120 gallons Hold STATUS/RESET for about 6 seconds Indicator confirms long-life reset
Manual/basic indicator Manual reminder only Set dial or sticker to current month Date reminder aligned manually

What works and what doesn't

Here’s the field-tested version.

  • What works: Holding the button deliberately, counting the seconds, and watching for the light response.
  • What doesn’t: Tapping the button once and assuming the lid figured it out.
  • Another mistake: Resetting before the filter is properly seated. If the install is sloppy, people often end up troubleshooting the wrong problem.

If you can’t remember which cartridge you bought, look at the filter color first. That single detail decides the reset method.

For most homes, this is the whole answer to how to reset brita filter pitchers and dispensers without frustration.

Resetting Your Brita Faucet Filter System

Pitcher logic doesn’t carry over cleanly to faucet units. A faucet-mounted Brita is a different animal. The housing, cartridge fit, and indicator setup are different, so don’t go hunting for a pitcher-style STATUS button.

A hand presses the reset button on a Brita faucet-mounted water filtration system over a kitchen sink.

On most faucet systems, the routine is mechanical and straightforward. After you replace the cartridge, you look for a small reset point or switch near the filter housing. Depending on the model, you may press it firmly with a pen tip or flip a reset switch and return it to the normal position.

A simple faucet reset routine

  • Shut off the filtered setting first: Replace the old cartridge with the water off or diverted according to your unit’s design.
  • Seat the cartridge fully: If it isn’t locked in place, the reset can seem faulty when the issue is fit.
  • Use the built-in reset control: That may be a recessed button or a small switch.
  • Check the indicator response: If the light doesn’t behave normally after reset, remove and reseat the cartridge before assuming the electronics failed.

Where people go wrong

The most common faucet mistakes are forcing the cartridge, cross-installing it, or pressing the wrong part of the housing. I’ve seen people mash every button on the unit except the actual reset point.

If your faucet model seems unresponsive, check your owner instructions for that exact unit. Faucet systems vary more than pitchers, and the reset hardware can be tucked into awkward spots. The right process is usually easy once you find the correct control.

Troubleshooting Common Brita Reset Problems

The complaint I hear most often is simple. “I reset it, but the light is still red.”

A hand touching a Brita faucet-mounted water filter with a red light blinking, indicating a filter replacement.

That usually comes down to one of three things. Wrong hold time. Incomplete install. A lid that didn’t register the reset.

Brita states that standard filters are rated for 40 gallons, and that failing to reset the indicator properly after replacement can trigger premature red light alerts. Brita also reports that following the reset process correctly helps users get the full 40 gallons and can reduce annual household costs by 20-30% compared with overuse or replacing filters too early (Brita pitcher FAQ).

When the light stays red

Start with the obvious. Remove the lid, confirm the filter is seated properly, then try the reset again carefully.

Use a clock if you need to. People count fast when they’re annoyed. Two seconds should feel deliberate. If you’re using a long-life filter, the longer hold matters even more.

When the light turns red too early

This is often a usage-pattern issue, not a failure. If you top off the pitcher all day in small amounts, the counter may behave differently than you expect because it’s tracking refill behavior rather than reading the water itself.

That’s why some households burn through indicator cycles faster than others. The lid can only count what it’s designed to count.

A quick visual walkthrough can help if your lid is being stubborn:

A short checklist that fixes most reset headaches

  • Retry the reset calmly: Hold the button for the full required time.
  • Check the cartridge fit: A crooked install causes all kinds of false troubleshooting.
  • Look at the lid condition: If the indicator won’t respond at all, the lid electronics may be the issue.
  • Don’t replace the filter too soon: A bad reset can waste a good cartridge.

A lot of “bad filter” complaints are really “bad reset” complaints in disguise.

Proactive Maintenance for Better Tasting Water

A reset is only half the job. Good-tasting water starts with how you prep the cartridge before that first refill.

If I had to pick one habit that separates smooth Brita ownership from constant annoyance, it’s this. Treat a new filter like media that needs to be activated, not like a plug-and-play plastic part.

According to the installation guidance in this Brita filter replacement walkthrough on Instructables, soaking a new filter in cold water for 15 minutes can expand the media and boost initial flow by 20-30%. The same guide says rinsing for 15 seconds removes 95% of loose carbon fines, and discarding the first 2-3 full reservoirs helps activate the ion-exchange resin, reaching 90% of its lead and copper removal capacity in the first cycle.

A better replacement routine

  • Soak first: Let the media saturate before installation.
  • Rinse second: This helps clear loose carbon so you don’t get black flecks in the first pours.
  • Flush the first batches: Run the first full reservoirs through and discard them.
  • Reset last: Once the filter is ready to work, then set the indicator.

That same logic shows up in larger commercial-style systems too. If you want a useful parallel, Allied Drinks Systems has a solid walkthrough on flushing your Brita Professional filter. The equipment is different, but the maintenance principle is the same. New filter media performs better when you flush it properly.

Why this matters more than the blinking light

The indicator only tracks usage. It doesn’t make the filter perform better. Prep work does.

If you want cleaner-tasting water from day one, this is the part that deserves your attention. And if you want more home filtration guidance beyond Brita, the maintenance advice at https://www.waterfilteradvisor.com/advice/ is a useful place to keep reading.


If you want practical help choosing, maintaining, or troubleshooting home water filters, visit Water Filter Advisor. It’s built for households that want clearer answers on filtration, replacement schedules, and better-tasting water without the marketing fluff.

Water Filtration System Cost: A Clear Guide to Your Home’s H2O Upgrade

So, you've decided to upgrade your tap water. Fantastic! But as you start shopping for a water filter, you'll find prices are all over the map. You could spend $30 on a simple pitcher or go all-in with a $3,000+ whole-house system that treats every drop in your home. The final water filtration system cost really boils down to the type of filter, how tricky the installation is, and what it costs to keep it humming with fresh cartridges.

Your Quick Guide to Water Filtration System Costs

Diving into the world of water filters can feel like stepping onto a car lot. You've got your no-frills, get-you-from-A-to-B models (hello, water pitchers!) and your fully-loaded, luxury SUVs with all the bells and whistles (we're looking at you, whole-house systems). Each serves a different purpose and, naturally, comes with a very different price tag. This guide is your friendly salesperson, here to cut through the noise and give you a crystal-clear look at what you can expect to pay for better water at home.

First, let's take a quick snapshot of the typical price ranges for the most common home systems. Think of this as your cheat sheet—a way to get a feel for the market before you get lost in a sea of technical jargon. After all, the best filter is one that solves your water woes without springing a leak in your budget.

Finding the Right Fit for Your Wallet

The true cost of a water filter isn't just the number on the box. It’s a cocktail of three key ingredients: the upfront price of the system, the ongoing maintenance (mostly filter swaps), and the specific water problem it’s built to solve. If you're a renter who just wants your tap water to taste less like a swimming pool, a simple faucet filter is a brilliant, low-cost fix. But for a homeowner trying to shield their pipes and appliances from the tyranny of hard water, a whole-house system is a much more significant, long-term investment.

This chart breaks down those core costs so you can see exactly where your money goes.

A bar chart visually breaking down filter costs, showing upfront, annual maintenance, and per-use expenses.

As you can see, the systems with a higher price tag upfront often treat more water and can sometimes have lower annual costs relative to their output. On the other hand, the simpler filters are cheap to get started with but need more frequent attention.

To lay it all out, here's a quick comparison of the most popular types of home water filters. This table breaks down what you'll pay initially, what you can expect to spend each year to keep it running, and who each system is really for.

The real water filtration system cost isn't just the initial purchase. It’s the total you'll invest over its entire life, including the hardware, any installation help, and all the replacement filters.

Use this table as a quick reference to match a filter to your needs and budget.

Home Water Filter Costs at a Glance

Filter Type Upfront Cost Range Annual Maintenance Cost Best For
Pitcher/Dispenser $20 – $80 $60 – $180 Renters and individuals looking for basic taste and odor improvement for drinking water.
Faucet-Mounted $30 – $100 $50 – $150 Easy, tool-free filtration for drinking and cooking water directly from the kitchen tap.
Under-Sink $150 – $1,200 $100 – $300 Homeowners wanting advanced, multi-stage filtration for drinking water, hidden from view.
Whole-House $500 – $4,000+ $75 – $500 Homeowners aiming to treat all water entering the house to protect plumbing and appliances.

This at-a-glance view should give you a solid idea of which categories make the most sense for you to explore further.

Decoding the Upfront Price of Different Filter Types

Ever wonder why a whole-house system can set you back thousands while a simple faucet filter costs less than dinner for two? The upfront water filtration system cost is a lot like comparing home security. A basic door alarm is great for one entry point, but a fully integrated smart system protects the entire property.

Each filter type is engineered for a different mission, and its price tag reflects that—from its complexity and capacity to its raw power to yank out contaminants.

An under-sink water filtration system with multiple filters and a separate faucet in a kitchen cabinet.

Let's start with the heavy hitters and work our way down. Knowing what you're paying for is the first step to making a smart investment in your home's water quality.

Whole-House Systems: The Ultimate Home Protection

Whole-house water filters are the undisputed champions of home water treatment—and they have the price tag to prove it. Plumbed in right where your main water line enters your home, these systems treat every single drop you use, from the kitchen sink to the shower and washing machine.

Their price reflects their beefy construction and massive capacity. You aren't just buying a filter; you're investing in a serious piece of equipment designed to process tens of thousands of gallons.

  • Carbon-Based Systems ($500 – $1,500): Think of these as the all-stars for great-tasting water. They're fantastic for kicking out chlorine, sediment, and chemicals that cause funky tastes and smells.
  • Water Softeners ($800 – $3,000): Built specifically to fight the scourge of hard water, these use ion exchange to remove minerals like calcium and magnesium, stopping that crusty scale buildup in its tracks.
  • Multi-Stage Systems ($1,500 – $4,000+): These are the all-in-one powerhouses. They combine sediment filters, carbon filters, and sometimes even UV purifiers to tackle a whole mess of issues, from dirt and chemicals to bacteria and viruses.

That high upfront cost covers durable tanks, complex valve heads, and huge beds of filter media that are built to last for years.

Under-Sink Systems: The Hidden Powerhouse

For anyone who wants targeted, high-purity drinking water without a major plumbing overhaul, under-sink filters are a fantastic middle ground. Tucked away in a cabinet, these systems hook right into your cold water line and give you filtered water through a separate, dedicated faucet.

An under-sink system's price is mostly about its filtration tech. A simple two-stage carbon filter might run you $150, but a more advanced reverse osmosis (RO) system can easily jump past $500.

Reverse osmosis systems are wildly popular for a reason—they offer one of the most thorough filtration methods you can get at home. By forcing water through a super-fine membrane, they can remove up to 99% of dissolved solids, including nasty stuff like fluoride, lead, and arsenic.

The demand for these powerful systems is booming. The global water treatment market is expected to rocket from USD 45.15 billion in 2025 to USD 91.39 billion by 2034. Reverse osmosis units already grab a huge 29% share of that market, with home setups typically costing between $300 and $1,200. You can dig into the numbers and trends in this detailed analysis about global water treatment system growth on precedenceresearch.com.

Point-of-Use Filters: Affordable and Accessible

Let's be real—not everyone needs or can afford a big, permanent system. Point-of-use filters are your friendly neighborhood heroes, offering an easy, budget-friendly way to get clean water right where you use it most. These devices are all about convenience and a low initial cost.

Their simplicity is their superpower, and it's what keeps them cheap. They use smaller, less complicated parts and are usually designed for you to install yourself, which saves you a plumber's fee.

Here’s a quick look at the most common types:

  • Faucet Filters ($30 – $100): These little gadgets attach right to your kitchen faucet, letting you switch between filtered and unfiltered water with the flick of a lever. They're perfect for renters or anyone who wants a quick upgrade for cooking and drinking.
  • Countertop Filters ($50 – $200): Sitting next to your sink, these systems pull water from the faucet through a separate filtration unit. They usually have bigger filters than the faucet-mounted kind, which means fewer changes.
  • Showerhead Filters ($25 – $75): These are specifically made to get chlorine and other chemicals out of your shower water. By doing so, they can help cut down on dry skin and hair, making them a cheap and easy investment in your daily routine.

While the upfront cost is low, just remember their smaller filters need to be swapped out more often—we'll get into that in the next section on maintenance.

The Hidden Costs of Filter Maintenance and Upkeep

Buying a water filtration system is a lot like adopting a pet—the initial price is just the beginning. The real, long-term water filtration system cost comes from the ongoing care and feeding. It's the filter changes, occasional tune-ups, and other little expenses that you really have to budget for over its lifetime.

This is where you'll find the lifetime expenses you need to plan for. From replacement cartridges and plumbing fees to the subtle costs of extra water or electricity, knowing these factors helps you figure out the true cost of ownership before you commit.

Household water filtration system components including filters, a faucet, and a tank, highlighting upfront costs.

The Never-Ending Story of Replacement Filters

The biggest recurring expense for any water filter is, without a doubt, the replacement cartridge. Think of it as a subscription for clean water. The filters are the unsung heroes, trapping all the gunk, but eventually they fill up and have to be swapped out to keep your water safe and delicious.

How often you do this—and how much it costs—varies wildly. A cheap water pitcher might seem like a bargain, but its small filters usually need replacing every 1-2 months. That can add up to $60 to $180 per year. On the other hand, a big whole-house system might only need a new filter once every 12 months or even longer, with annual costs running from $75 to $500.

Here’s a quick look at what to expect:

  • Pitcher Filters: Every 40 gallons (about every 2 months).
  • Faucet Filters: Every 100 gallons (roughly every 3 months).
  • Under-Sink Filters: These have multiple stages. Expect to change sediment filters every 6-12 months, carbon filters annually, and the RO membrane every 2-4 years.
  • Whole-House Sediment Filters: Typically every 3-6 months.
  • Whole-House Carbon Tanks: The carbon media inside can last 3-5 years or more before it needs to be replaced.

Putting off a filter change is a bad idea. Not only does it stop working well, but an old, clogged filter can actually become a breeding ground for bacteria. It can even release all the junk it trapped right back into your water, making it worse than when you started.

Professional Installation and Setup Fees

While you can install many smaller filters yourself, bigger systems like whole-house filters and some under-sink units are best left to a professional plumber. This is a one-time cost, but it's a big one, often adding $300 to $1,500 to your initial investment.

That fee covers the expertise needed to cut into your main water line, install the right valves, and make sure everything is leak-free and up to code. Sure, a DIY job can save you cash, but one mistake could lead to thousands in water damage. For complex jobs, a pro is worth every penny.

The Cost of Checking Your Work: Water Testing

How do you know if your filter is actually doing its job? You have to test your water. While it’s not a direct maintenance cost for the filter itself, it's the only way to be sure you're getting the clean water you're paying for.

You've got a few options here:

  1. DIY Test Strips: These are cheap ($20-$40) and give you a quick read on basics like chlorine, pH, and hardness.
  2. Mail-in Lab Kits: For around $100-$300, you can send a sample to a certified lab for a deep dive into contaminants like lead, arsenic, and VOCs.

My advice? Test your water before you buy a filter, and then re-test it once a year to make sure your system is still on its A-game, especially if you're on well water.

Hidden Utility Costs: Water and Electricity

Finally, don't forget that some systems use water and electricity to run. Reverse osmosis (RO) systems are famous for being incredibly effective, but they also create wastewater. For every gallon of pure water you get, an RO system might send 3-4 gallons of concentrated, contaminated water down the drain. It's a necessary part of the process, but it will show up on your water bill.

Systems with UV purifiers or booster pumps will also draw a small but constant amount of electricity. It's not much, but it's another small piece of the total cost puzzle. A standard residential RO unit, for example, might run $200 to $800 upfront, with another $50 to $150 per year for filters.

For folks in the U.S., systems with official NSF testing offer peace of mind, and their lifetime costs can be 30% lower than buying bottled water over five years. With growing health concerns, U.S. households spent a whopping $15 billion on bottled water in 2023, which is driving more people to home filtration. You can dive deeper into this trend in the full market analysis on water purifiers from fortunebusinessinsights.com.

Calculating Your Return on Investment

So, is a water filter actually worth the money? After looking at the upfront price tags and long-term upkeep, it’s easy to get lost in the numbers. Let’s shift the conversation from just cost to real-world value. Think of a filtration system less as an expense and more as a smart investment in your home.

The easiest way to see this is by looking at your wallet. The return on investment (ROI) is a fancy term for a simple idea: comparing what you spend on the system to what you save over time. For most people, the biggest and fastest savings come from finally kicking the bottled water habit.

Two water filters, a calendar, and a notebook titled 'Maintenance Costs' on a blue mat, planning expenses.

Let's break down how quickly a filter can pay for itself and start putting cash back into your budget.

The Financial Payback Period

Picture a family that spends about $50 a month on cases of bottled water. That habit adds up to a surprising $600 per year. When you stack that annual cost against a one-time purchase of a filtration system, the benefits become pretty clear.

  • Faucet Filter Example: A simple $50 faucet filter with maybe $100 in replacement cartridges for the year brings your total first-year cost to $150. That little gadget would pay for itself in just three months, saving the family $450 in that first year alone.

  • Under-Sink System Example: Let's say you go for a more serious under-sink unit that costs $400 upfront, plus $150 for the first year's filters. Your total is $550. Even at that price, it pays for itself in just under a year. After that, it’s pure savings, year after year.

This quick ROI is getting easier to achieve. For homeowners who are comfortable with a little DIY, a $400 investment in a good under-sink system can cancel out a $600-a-year bottled water habit in as little as eight months. Plus, recent water treatment system advancements on precedenceresearch.com show that new materials have caused a 25% drop in filtration media costs since 2015, making bottled-quality water at home more affordable than ever.

The core idea is simple: you are shifting your spending from a disposable product (bottled water) to a durable home asset. Once the initial water filtration system cost is covered, your ongoing expense for clean water drops dramatically, often to just pennies per gallon.

Beyond the Bank Account: The 'Soft' Returns

While saving money is great, the true value of a water filter goes way beyond your budget. These are the "soft" returns—the daily quality-of-life upgrades you'll start to notice almost immediately.

It’s kind of like buying a really good mattress. You don’t just do it to save on future chiropractor bills; you do it for the immediate reward of better sleep and feeling great every morning. A water filter delivers similar, everyday perks.

Healthier Skin and Hair

Ever get out of the shower and your skin feels tight and itchy? Or your hair feels dry and brittle? The culprit is often chlorine, the standard disinfectant used in city water. A simple showerhead filter or a whole-house system removes that chlorine before it even gets to you.

The difference is immediate:

  • Softer, more hydrated skin that doesn't need as much lotion.
  • Shinier, healthier-looking hair that's less frizzy and easier to style.
  • Less irritation for anyone with sensitive skin or conditions like eczema.

Better Tasting Food and Drinks

Think about it—your morning coffee is over 98% water. So is your tea, your soup, and the water you use to boil pasta. If your tap water tastes a little "off" because of chlorine or other chemicals, that flavor is going straight into everything you cook and drink.

With filtered water, you get:

  • A cleaner, smoother cup of coffee where you can actually taste the notes of the bean.
  • Tea that tastes pure and refreshing, without any weird chemical aftertaste.
  • Food that tastes the way it's supposed to, without picking up funky flavors from the water.

In the end, calculating the ROI isn't just a spreadsheet exercise. It’s about recognizing that a water filtration system is a powerful investment in your home’s comfort, your family’s health, and your long-term financial well-being.

How to Save Money on Your Water Filtration System

Getting clean, great-tasting water flowing from your taps shouldn't mean draining your bank account. The initial water filtration system cost can definitely look intimidating, but there are plenty of smart ways to chip away at both the upfront price and those pesky long-term expenses.

With a bit of planning, you can make a savvy financial choice without ever having to compromise on your family’s water quality. Think of it like grocery shopping—you could pay full price, or you can stack sales, coupons, and smart choices to get the exact same quality for a lot less. It’s all about knowing where to look.

Hunt for Deals and Seasonal Sales

Your first stop should always be a hunt for discounts. Manufacturers and big-box retailers are constantly running promotions, especially around holidays like Black Friday, Memorial Day, and Labor Day. A quick sign-up for a few brand newsletters can also give you a heads-up on flash sales or exclusive offers.

As you're zeroing in on a system, keep an eye out for coupons or promotional offers from both manufacturers and installers. A simple search can sometimes turn up a percentage-off deal or a rebate that takes a real bite out of the purchase price.

Prioritize Certified Systems

This one might feel a little backward, but spending a little more on a certified product can absolutely save you money down the road. You want to see systems that have been independently tested and certified by organizations like the NSF (National Sanitation Foundation) or ANSI (American National Standards Institute).

These certifications are your proof that a filter actually does what the box says it does. A cheap, uncertified filter might claim to remove lead and chlorine, but without that NSF/ANSI stamp, you’re just taking their word for it. Paying for performance you aren't actually getting is the quickest way to throw money away.

When you choose a certified system, you’re not just buying a filter; you’re buying confirmed results and avoiding overpaying for empty promises. If you need more in-depth guidance on finding the right system for your specific water issues, you can find a ton of resources and advice for water filters on waterfilteradvisor.com.

Consider DIY Installation for Simpler Systems

One of the biggest cost drivers is installation. While a big whole-house system is almost always a job for a professional plumber, a lot of the smaller filters are designed for an easy DIY install.

  • Good for DIY: Faucet filters, countertop systems, showerhead filters, and most under-sink units can be up and running in under an hour with just a few basic tools. This can easily save you $200 to $500 in labor fees.
  • Call a Pro: Leave the whole-house systems and some of the more complex reverse osmosis units to the experts. These often involve cutting into your main water line, and one mistake there could lead to a very expensive water damage problem. A plumber is a worthwhile investment here.

Explore Filter Subscription Services

Let's be honest, the biggest long-term cost is replacing the filters. To make this easier on the wallet, a lot of companies now offer subscription services. Signing up often gets you a nice discount (usually 10-15%) on replacement cartridges, and they’ll show up at your door right when it’s time for a change.

This not only saves you money but also takes the guesswork out of maintenance, ensuring your system keeps running at peak performance.

To help you keep track of all the ways you can save, here’s a quick checklist you can use.

Your Cost-Saving Checklist for Water Filtration

Use this table to pinpoint the best strategies for your budget and needs. A little effort upfront can lead to significant savings over the life of your system.

Strategy Potential Savings Effort Level
Shop Holiday & Seasonal Sales 15-30% off initial purchase price Low
Search for Manufacturer Coupons $25 – $100 or more off upfront cost Low
Choose NSF/ANSI Certified Filters Avoids wasted money on ineffective products Medium
DIY Installation (for simple systems) $200 – $500 in professional labor fees Medium
Sign Up for Filter Subscriptions 10-15% off all replacement filters Low
Buy Multi-Packs of Filters 5-10% discount compared to single packs Low
Perform Regular Maintenance Prevents costly repairs and extends system life Medium

By combining a few of these tips, you can make a huge dent in the total cost of ownership. Smart shopping and a little bit of planning go a long way.

Making the Right Financial Choice for Your Home

So, what's the bottom line? Picking the best water filter isn't about grabbing the cheapest option you can find. It’s about matching a system to your home's specific water, your family's needs, and—of course—your budget.

Making a smart call means looking past the initial price tag. The real water filtration system cost shows up over years of use, once you factor in filter replacements and any ongoing maintenance. A simple pitcher is cheap to buy, but those filter swaps add up. A whole-house system is a bigger investment upfront, but it protects every tap in your home with less frequent upkeep. You just have to match the solution to the problem.

From Cost to Investment

Think of a quality filter system as a proactive investment in a healthier home. For many people, it pays for itself a lot faster than you'd think.

For example, a solid reverse osmosis system can pay for itself in just 2-3 years by cutting out bottled water completely. With households spending an average of $300 on bottled water in 2023, the savings are real. As our water sources get more stressed, a good filtration system also protects you from potential price hikes down the road.

Ultimately, choosing the right system is just one part of a bigger plan to master your household monthly expenses and keep your finances in good shape for the long haul.

Here's the most important takeaway: the upfront price is just the first chapter. The total cost of ownership is what really impacts your wallet and your peace of mind.

Now that you know what to look for, your first step is simple: get your water tested. Once you know exactly what’s in your water, you can choose the right system with confidence and without wasting a dime.

Got Questions About Filtration Costs? We’ve Got Answers.

Still have a few things you're wondering about? You're not the only one. When it comes to the cost of a water filtration system, the same handful of questions tend to pop up. Let's clear the air and give you the straightforward answers you need.

Here are some of the most common questions we hear from homeowners.

What’s the Real Cost to Install a Whole House Water Filter?

Getting a whole-house water filter professionally installed will typically run you somewhere between $300 and $1,500. Where you land in that range really depends on a few things: how complicated your plumbing setup is, the type of system you bought, and what plumbers charge in your neck of the woods.

A basic, single-tank carbon filter, for instance, will be on the lower end of that scale. But if you're installing a beefier, multi-stage system that includes a water softener, expect the price to creep toward that $1,500 mark. Sure, you can save that cash by doing it yourself, but unless you're confident in your plumbing skills, it's a risky move that could lead to some very pricey leaks.

Is a Water Filter System Actually Cheaper Than Buying Bottled Water?

In the long run? Absolutely, and it's not even close. The initial cost of a filtration system might seem steep, but it almost always beats a bottled water habit over time. Think of it as paying a bit more upfront to save a whole lot more down the road.

Let's do the math. A family spending just $30 a month on bottled water is shelling out $360 a year. A simple faucet filter or under-sink system will pay for itself in well under a year. Even a high-end whole-house system will give you a solid return on your investment within a few years, all while delivering clean water from every tap in your house.

Do I Really Need a More Expensive Filter for My Well Water?

More often than not, yes. Unlike city water that's been treated, well water is raw and can carry a much wider, and wilder, range of contaminants. You could be dealing with everything from heavy sediment and iron to bacteria that municipal water plants would have zapped long before it reached a home.

This means you’ll likely need a more powerful, multi-stage filtration system to get your well water clean and safe—and that naturally costs more. The single most important thing you can do is get your well water professionally tested first. Those test results will give you a perfect roadmap, showing you exactly what contaminants you need to target so you can buy the right system and not a penny more.

Can I Save Money by Using Generic Replacement Filters?

You can, but you have to be careful. Generic or third-party filter cartridges are usually a lot cheaper than the brand-name ones, which is obviously tempting. The catch is that they might not have the same quality, performance, or—most importantly—the certifications (like NSF/ANSI) that come with the manufacturer's own filters.

You could end up with a filter that barely removes contaminants or, worse, one that could damage your system. If you're going to try generic filters, do your homework first. Dig into the brand, check for any independent certifications, and read a ton of user reviews to make sure it's a safe and effective choice for your system.


At Water Filter Advisor, our goal is to help you find the right filtration solution for your home and your budget. Check out our in-depth guides and reviews to make a smart, confident decision for your family's health. Learn more at https://www.waterfilteradvisor.com.

Your Complete Guide to Whole House Filtration System Costs

Let's talk water. When you start digging into the world of whole-house water filtration systems, the price tag can look a little scary. But here’s the good news: for most homeowners, the total all-in cost lands somewhere between $1,000 and $4,000. That ballpark figure usually covers the system itself, professional installation, and all the initial parts you'll need to transform your home’s water.

For an average-sized home, you can expect to land right in the middle of that range, turning every tap into a source of pure, clean water.

What Is The Real Cost Of Clean Water At Home?

Before we dive into the nitty-gritty of different filter types, let's zoom out. Think of this less as buying a new gadget and more as a fundamental upgrade to your home’s circulatory system. This is an investment that impacts every single drop of water you use, from the water you drink to the water you shower in.

The final bill is really a trio of key parts: the system itself, the professional installation, and the ongoing filter replacements. If you overlook any one of these, you could be in for some surprise costs down the road.

Breaking Down The Core Expenses

To budget like a pro, you need to know exactly where your money is going. The cost isn't just about the shiny new tank that shows up on your doorstep. It’s a mix of a few crucial factors:

  • The Filtration System: This is the heart of the operation. The price here can swing wildly depending on the technology used to purify your water, the system's capacity, and the brand's reputation.
  • Professional Installation: While the DIY spirit is tempting, calling in a professional plumber is a seriously smart move. It protects your warranty and ensures everything is set up for leak-free, high-performance operation.
  • Ongoing Maintenance: This is mostly about swapping out old filters for new ones. It’s the essential tune-up that keeps your water pristine and the system running like a dream.

To put a real number on it, a complete installation for a family of 4-5 people often lands around $2,500. That typically includes the system itself (which might be in the $652 to $734 range), the plumber's time, and the small but crucial fittings needed to connect everything correctly. As you can find out in guides about water filtration, having a pro handle the install ensures all the important connections are rock-solid.

A whole house water filtration system is an investment in your home’s health. It protects your pipes and appliances from scale and sediment while delivering better-tasting, safer water to every single faucet.

To give you an even clearer picture right from the start, let's break down what you can expect to pay for each major component.

Estimated Cost Breakdown For A Typical Whole House System

This table gives you a quick summary of the potential costs you'll run into when buying and installing a standard whole-house water filter for an average-sized home.

Cost Component Low-End Estimate High-End Estimate Key Details
Filtration Unit $500 $2,000+ Price depends on filtration technology, size, and brand.
Installation Labor $400 $1,500 Varies based on plumbing complexity and local labor rates.
Annual Maintenance $100 $500+ Primarily covers replacement filters and potential service calls.

As you can see, the numbers can vary quite a bit. The specific system you choose and the complexity of your home's plumbing will be the biggest factors in determining your final cost. Don't forget to check out some of our other articles for more specific advice on picking the right system for your needs.

Decoding The Price Tag: How System Types Impact Your Budget

The biggest chunk of your whole-house filtration system cost is, you guessed it, the system itself. But what are you actually paying for when you buy that big tank that gets installed in your garage or basement? It’s not just a fancy container; it’s a specific piece of technology designed to go to war with whatever is messing up your water.

Think of it like hiring a specialist. You wouldn't call a plumber to fix your roof. In the same way, you don't buy a chlorine filter if your real problem is hard water scale that's clogging up your showerhead. The type of system you need is dictated entirely by the contaminants you're trying to get rid of, and that choice is the single biggest factor in your upfront cost.

This breakdown shows exactly where your money goes—it's more than just the initial purchase.

As you can see, the system is just the starting line. Installation and the ongoing cost of replacement filters complete the financial picture.

Activated Carbon Filters: The Chlorine Sponge

If you're on city water, an activated carbon filter is your most straightforward and affordable line of defense. Picture the inside of the tank filled with a material that acts like a giant, porous magnet for chemicals. As your water flows through, the carbon's huge surface area literally grabs onto chlorine and chloramine—the stuff that makes your tap water smell and taste like a swimming pool.

  • Best For: Municipal water with that classic chlorine taste and odor.
  • Typical Price Range: $500 – $1,500 for the unit itself.

These systems are fantastic for making your water just plain better. Your coffee tastes cleaner, your shower feels nicer, and you can fill a glass from the tap without that chemical cringe.

Multi-Stage Systems: The All-In-One Solution

When your water has a cocktail of issues, a single-focus filter just won't cut it. That's where multi-stage systems come in. These are like having a team of water-purifying superheroes working together in one unit. The first stage might be a simple sediment filter to catch rust and grit, followed by a carbon stage for chlorine, and maybe a KDF media stage to tackle heavy metals like lead.

These units are so effective because they layer different technologies to target a whole spectrum of contaminants. Naturally, this comprehensive approach means they're a bigger investment than a simple carbon filter.

Choosing a multi-stage system is an investment in broad-spectrum protection. It ensures that from the initial sediment filter to the final carbon block, your water is being purified at multiple levels before it reaches any tap in your home.

Water Softeners: The Hardness Eliminator

Are you constantly fighting a losing battle with white, chalky spots on your dishes, faucets, and shower doors? That’s hard water, and a water softener is the specialized tool for that job. These systems don't "filter" in the traditional sense. Instead, they use a clever process called ion exchange to swap out the "hard" minerals (calcium and magnesium) for "soft" sodium ions.

  • Best For: Homes plagued by hard water that causes scale buildup in appliances and plumbing.
  • Typical Price Range: $800 – $2,500.

By getting rid of those minerals, a softener protects your expensive appliances like water heaters and dishwashers from getting choked with scale. It's an investment that can save you a ton of money on repairs down the road.

UV Purifiers: The Microbe Guardian

For anyone on a private well, microbial safety is a huge deal. A UV purifier acts like a silent, microscopic bouncer for your water supply. It uses a powerful ultraviolet light to zap bacteria, viruses, and other nasty microorganisms like E. coli and Giardia. The UV light essentially scrambles their DNA, making it impossible for them to reproduce and make you sick.

It's a brilliant, chemical-free way to disinfect your water. But here's the catch: UV light can't penetrate cloudy water. That's why these systems are almost always installed after another filter (like a sediment or carbon filter) that clears the water first. This two-part setup is why the total cost can be higher.

  • Best For: Well water users who need a defense against bacteria and viruses.
  • Typical Price Range: $700 – $2,000, plus the cost of a required pre-filter.

Ultimately, picking the right system boils down to one simple question: what’s in your water? Getting a professional water test is the absolute best first step. It takes the guesswork out of the equation, lets you match the right technology to your specific needs, and helps you accurately budget your whole-house filtration system cost.

Understanding Installation Costs: More Than Just Nuts and Bolts

So, you've picked out the perfect filtration system. That's a huge step, but it's really only half the battle. Now comes the installation—the part where a box of parts actually becomes a functional, protective layer for your home's water.

It's easy to dismiss installation as just another line item on the bill, but it's so much more. Think of it as an investment in your home's plumbing, your system's lifespan, and frankly, your own sanity.

A botched installation can lead to a whole host of headaches. We're talking about everything from a frustrating drop in water pressure to tiny, slow leaks that can cause thousands in water damage before you even notice them. Worse yet, most manufacturers will only honor their warranty if the system is installed by a licensed and insured plumber. One wrong cut during a DIY attempt could mean you're on the hook for any future repairs.

A man in a cap installing a blue whole-house water filtration system, with 'INSTALLATION COST' overlay.

What You're Really Paying For in a Professional Quote

When a plumber hands you a quote, you're not just paying for a few hours of their time. You're paying for their expertise, their specialized tools, and the guarantee that the job is done right and up to code. It's a full-service job that ensures the filter is integrated seamlessly right where your water main enters the house.

A professional quote for your whole house filtration system cost will typically break down into a few key areas:

  • Plumber's Hourly Rate: This is the baseline, and it can vary a lot depending on where you live and the plumber's experience. A master plumber costs more than an apprentice, but their know-how can prevent problems you didn't even know you could have.
  • Job Complexity and Time: A simple setup in a wide-open basement with easy access to the main line might only take a couple of hours. But if the plumber has to squeeze into a tight crawl space, cut through drywall, or reroute pipes, that's going to add time and cost to the job.
  • Essential Parts and Materials: The quote also includes all the necessary plumbing bits and pieces—copper or PEX piping, shut-off valves, pressure gauges, and various fittings. A true pro will also install a bypass loop, which is a lifesaver. It lets you "go around" the filter for maintenance without having to turn off the water to your entire house.

The Real Cost: DIY vs. Professional Work

I get it. The temptation to save a few hundred bucks by doing it yourself is strong. But with plumbing, the risks often shoot past the potential rewards. What looks like a simple cut-and-connect job can quickly turn into a nightmare if you make a small mistake.

On average, you can expect installation costs for a whole house system to run anywhere from $300 to $1,000. The final price tag depends on how complex your system is and the quirks of your home's plumbing. While a DIY approach might shave 20-40% off that labor cost, you're taking a massive gamble with your warranty. In fact, some industry numbers suggest that up to 70% of self-installs run into problems like bad seals or connection errors.

"A professional plumber doesn't just install a filter; they integrate it. They ensure proper flow, prevent leaks, and set up a bypass for future maintenance. This foresight is what protects your home and your investment."

If you're building a new home, thinking about the plumbing for a filter system is similar to the detailed planning needed for custom home building services. Both require careful planning, adherence to codes, and professional skill to ensure everything works safely and lasts for the long haul.

At the end of the day, hiring a professional plumber isn't an "extra" expense—it's a fundamental part of the total whole house filtration system cost. It's the only way to be sure the system you invested in works correctly and safely for years, all while keeping your warranty intact. Getting it done right the first time is always the cheapest option in the long run.

Budgeting For The Long Haul: Maintenance And Filter Costs

The upfront cost to buy and install your system is a big part of the equation, but it's not the whole story. You need to think of your whole house filtration system less like a countertop appliance and more like your car—it needs regular tune-ups to keep running at its best.

This long-term upkeep is a critical piece of the total cost of ownership. Budgeting for it from the get-go means you won't get hit with any unpleasant financial surprises down the line. Most of these ongoing costs come down to one thing: replacing the filter cartridges or media. These are the workhorses of your system, and just like a kitchen sponge, they eventually get saturated with all the gunk they’ve pulled from your water. If you wait too long to change them, the system becomes less effective, and you might even notice a drop in your home's water pressure.

Desk with two filters, a calculator, a notebook, and a 'Maintenance Budget' banner.

The Filter Replacement Schedule

Not all filters are built the same, and their lifespans can be wildly different. A typical multi-stage system usually has a few different filters, each with its own replacement schedule.

For instance, your basic sediment pre-filter is the first line of defense, grabbing the big stuff like sand and rust. Because it works so hard, you’ll probably need to swap it out every 3 to 6 months.

On the other hand, the main carbon media tucked inside that large tank can go for much, much longer—often 5 to 10 years before it needs a full replacement. Getting a handle on this staggered schedule is the secret to creating a realistic annual maintenance budget.

Neglecting filter changes is like driving a car and never changing the oil. It might seem fine for a bit, but eventually, performance will nosedive, and you could end up damaging the entire system.

How Water Quality And Usage Affect Costs

The replacement timelines you see from manufacturers are really just ballpark estimates. The two biggest things that will dictate your actual filter lifespan are the quality of your water and how much of it your family uses.

If your water is loaded with sediment or other contaminants, your filters are going to clog up a lot faster. That means more frequent changes and higher annual costs. Likewise, a big family will run through a filter's capacity much quicker than a couple living in the same home. It's not uncommon for a family of five to replace filters twice as often as a two-person household.

To give you a clearer picture, here’s a breakdown of what to expect for common filter types.

Typical Replacement Filter Costs And Schedules

This table compares the estimated replacement frequency and cost for common filter components in a whole house system, helping you plan for long-term maintenance.

Filter Type Typical Lifespan Estimated Cost Per Replacement Annual Cost Estimate
Sediment Pre-Filter 3-9 Months $20 – $60 $80 – $240
Carbon Block Filter 6-12 Months $50 – $150 $100 – $300
Granular Carbon Media 3-5+ Years $200 – $500 $40 – $150 (averaged over life)
UV Lamp Bulb 12 Months $70 – $150 $70 – $150

As you can see, different parts contribute to your long-term whole house filtration system cost in different ways. This helps you budget for everything from quick, simple swaps to those bigger, less frequent media replacements.

Beyond The Standard Filters

Depending on your specific setup, you might have a few other recurring costs to keep in mind. It's smart to factor these into your budget for a complete financial picture.

  • Salt for Water Softeners: If your system has a water softener component, you'll need to keep the brine tank topped up with salt. A typical family often goes through one or two 40-pound bags of salt per month, which usually runs about $10 to $20.
  • UV Lamp Replacements: If you're on well water and use a UV purifier, that ultraviolet lamp needs to be replaced every single year to stay effective. This is a non-negotiable—the lamp's intensity fades over time, even if it still lights up.
  • Professional Servicing: While you can easily handle most filter changes yourself, you might want to call in a pro for more complex jobs, like swapping out the media in a huge carbon tank. This could be an extra cost to plan for every few years.

By planning for these recurring expenses right from the start, you can ensure your system keeps delivering clean, safe water for your family without any surprise hits to your wallet. It's how you turn a water filtration system into a truly sustainable, stress-free investment.

Is The Investment In Clean Water Worth It?

After running the numbers, it’s fair to ask whether the whole house filtration system cost is actually worth it. The upfront price tag can seem steep, but thinking of it as just another purchase doesn't quite capture the full picture. It’s much more of a long-term upgrade to your home's core infrastructure—and to your family's daily life.

The payoff shows up in ways you can both see on your bank statement and feel every day. The most obvious financial win is saying goodbye to bottled water for good. A typical family can easily burn through hundreds of dollars a year on plastic bottles, an expense that a whole house system completely wipes out.

Protecting Your Home's Most Expensive Appliances

Beyond just saving on water bottles, filtered water acts as a silent guardian for your plumbing and appliances. Hard water minerals and sediment are public enemy number one for any machine that uses water. Over time, this gunk builds up into scale, forcing your appliances to struggle, work harder, and run less efficiently.

This scale buildup is particularly nasty for your big-ticket equipment:

  • Water Heater: Scale acts like an insulator on the heating element, forcing it to burn more energy just to heat your water. This drives up your utility bills and can eventually cause the unit to fail altogether.
  • Dishwasher: Hard water is the culprit behind those chalky spots on your glasses. It also clogs up the internal parts, like spray arms and pumps, leading to breakdowns.
  • Washing Machine: Scale can destroy the heating element and block intake valves, leading to expensive service calls and a much shorter lifespan for your washer.

By filtering your water right where it enters your home, you're not just getting better water to drink. You're actively preventing costly repairs and avoiding the premature replacement of appliances that can set you back thousands. To get a better sense of how this fits into your overall home finances, you might want to look at some general home renovation budgeting and investment tips.

The Invaluable Benefits You Can Feel

While the financial arguments are compelling, some of the biggest returns on this investment won't ever appear on a spreadsheet. These are the small but significant upgrades to your daily life.

You’ll notice it right away. Your first cup of coffee made with pure, chlorine-free water will taste richer and smoother, without that slightly bitter edge. Food cooked with filtered water simply tastes like it's supposed to, free from any weird chemical aftertaste.

The real value of a whole house system is the peace of mind. It’s knowing that every single drop of water in your home—from the kitchen tap to the showerhead—is clean and safe. It just removes that background worry about what might be flowing through the pipes.

This benefit extends to your shower, too. When you bathe in filtered water, you’re no longer dousing yourself in chlorine and other harsh, drying chemicals. The result is skin and hair that feels noticeably softer and healthier, without the irritation that hard or treated water often causes.

Ultimately, the investment goes far beyond money. It's about creating a healthier, more comfortable home. It’s the confidence you get from knowing the water your family drinks, cooks with, and bathes in is as pure as it can possibly be.

Even after you've nailed down a budget, a few questions about the total whole house filtration system cost are probably still rattling around in your head. Let's tackle them head-on. This section is all about giving you direct, no-fluff answers to the most common questions we get from homeowners, so you can feel confident moving forward.

Can I Install A Whole House Water Filter Myself To Save Money?

This is easily the most tempting corner to cut, but going the DIY route is a minefield. You might save a few hundred bucks on labor right out of the gate, but the risks can quickly eclipse those savings. For starters, most manufacturers are very clear: their warranty is void unless the system is installed by a licensed and insured plumber.

Beyond losing your warranty, a simple installation mistake can spiral into a costly disaster. An improperly sealed connection can lead to a slow, hidden leak that causes thousands in water damage over time. Setting it up wrong can also create a bottleneck in your plumbing, leaving you with a frustrating drop in water pressure all over the house.

A pro plumber does a lot more than just connect two pipes. They’re ensuring the system works seamlessly with your plumbing, including essentials like a bypass valve. That little valve is a total lifesaver, letting you change filters without having to shut off water to the entire house.

When you weigh the potential cost of fixing a DIY mess—from mold remediation to buying a whole new system without a warranty—that initial savings disappears fast. Professional installation is really an investment in getting it done right the first time.

How Much More Does A System For Well Water Cost?

If your home is on a private well, be prepared for a bigger investment compared to a system for city water. This isn't an upsell; it's a reflection of the job at hand. Municipal water is already treated, so a home filter is mostly just doing a final polish to remove things like chlorine, chloramine, and sediment.

Well water is a different beast entirely. It’s raw, untreated, and can come with a cocktail of contaminants you just don't see in city water.

  • Iron and Manganese: The culprits behind those ugly orange and black stains on your sinks, toilets, and laundry.
  • Sulfur: The source of that distinct "rotten egg" smell.
  • Bacteria and Viruses: Things like E. coli can be a serious health risk.
  • Heavy Sediment: Sand, silt, and other grit can wreck your pipes and appliances.

Because of this, a well water system needs a much more robust, multi-stage strategy. You might need a dedicated iron filter, a water softener, and a UV sterilizer all working together. That extra equipment and complexity means a proper well water solution can easily cost 50% to 200% more than a standard system designed for city water.

Does The Size Of My House Affect The System Cost?

Yes, but maybe not how you'd expect. The cost isn't really about your home's square footage. It’s all about water demand, which comes down to two things: how many bathrooms you have and how many people live with you.

The magic number here is the system's flow rate, measured in gallons per minute (GPM). A system with a low GPM simply can't keep up with a busy household. The minute someone starts a shower while the dishwasher and washing machine are running, you’ll notice a major drop in water pressure.

To prevent that, a larger household needs a system with a higher flow rate. These high-capacity systems are physically bigger, hold more filter media, and are built to handle more volume without choking your water pressure. Naturally, they cost more. Installation in larger homes with more complex plumbing can also drive up labor costs a bit.

Are There Financing Options Or Rebates Available?

The good news is you don't always have to pay the full cost upfront. Many professional plumbers and manufacturers get that this is a big purchase, so they offer financing plans to make it more manageable. You can often find everything from low-interest loans to simple monthly payment plans that spread the cost out.

Rebates are a bit less common for water filters compared to things like energy-efficient HVAC systems, but it never hurts to check. Contact your local water utility and ask if they offer any incentives for installing water quality systems. In very rare cases, if a community is dealing with a specific, known contamination issue, you might find health-related grants available to help homeowners cover the cost.


At Water Filter Advisor, our goal is to help you find the perfect filtration solution for your home and your budget. Dig into our in-depth guides and reviews to make a smart, informed decision. https://www.waterfilteradvisor.com

How to Clean Your Water Filter: A Not-So-Boring Guide for Your Home

Is the water from your faucet slowing to a trickle? Does it have a slightly "off" taste? Congratulations, you've spotted the classic signs that your water filter is screaming for a little TLC.

Here's a little secret: the key to truly clean water isn't just swapping out the old filter cartridge. You need to get in there and thoroughly clean the housing and all the components. Think of it like this: you wouldn't put clean clothes in a dirty washing machine, right? This is the only way to banish nasty clogs, prevent a bacterial slumber party, and restore your water flow to its gushing glory.

Your Quest for Pure Water Starts with a Clean Filter

A person cleaning a home water filter system over a sink, demonstrating the importance of maintenance.

Popping in a new cartridge is a fantastic first step, but the filter's performance and your family's safety depend on cleaning the entire system. This guide will take you beyond the snooze-fest of the user manual, giving you practical, real-world advice on why a deep clean is completely non-negotiable for your water quality and the filter's lifespan.

When you neglect this simple chore, your filter can transform from a protective hero into a villain's lair—a breeding ground for bacteria and slimy biofilm. All the gunk it's supposed to trap just builds up, creating a hotspot that could potentially make your water even worse than what's coming straight from the tap.

Why a Clean Filter Matters More Than You Think

It's all about performance. A study on household water filter usage found that filters clogged with sediment can slash water flow by up to 30-40% in just three months. That’s a serious clog! This really shows how critical regular maintenance is to keep your system running at its best. You can find more insights on water filter performance over at https://www.waterfilteradvisor.com/advice/.

This performance drop hits every kind of home filtration system, so no one gets a pass:

  • Water Pitchers: The reservoir can develop that gross, slimy film if you don't scrub it out regularly.
  • Faucet Filters: Sediment is notorious for clogging the aerator, leading to that sad, weak stream pressure.
  • Under-Sink Systems: The canister housing is a prime spot for buildup that a new cartridge simply can't fix on its own.
  • Whole-House Filters: A clogged system puts a major strain on your home's entire plumbing network.

A clean water filter isn't just about better-tasting water; it's a fundamental part of home health and safety. The housing, lines, and spouts are just as important as the cartridge itself.

Think about the standards for commercial water filtration systems—the same principles of meticulous cleaning apply in your home, just on a smaller scale. Now, let's roll up our sleeves and get into the steps that will bring your filter back to full power.

Assembling Your Filter Cleaning Dream Team

A collection of filter cleaning supplies including a soft brush, a bowl of white vinegar, and a lint-free cloth arranged on a clean countertop.

Before you even think about twisting a filter housing or taking apart your pitcher, it's a brilliant idea to get all your supplies in one place. Trust me, spending a few minutes on prep will make the whole process go a lot smoother.

The best part? You almost certainly have everything you need already lurking in a kitchen cabinet. Having it all laid out and ready to go means you won't be scrambling for a brush while holding a dripping filter canister. Think of it like a chef's mise en place—it just makes the job easier and keeps you from losing small parts like O-rings or gaskets.

Your Essential Cleaning Checklist

You don't need a high-tech lab to get the job done right. A few simple household items are all it takes to safely evict that gunk and buildup without causing any damage.

Here’s what I always have on hand:

  • A Soft-Bristle Brush: An old toothbrush is perfect for this. It has just enough scrubbing power to get into tight spots without scratching the plastic.
  • Unscented Dish Soap: This is a big one. You need a mild soap without any perfumes. Scented versions can leave behind a chemical residue that makes your water taste like a flower garden.
  • White Vinegar: Your best friend for tackling hard water scale. If you see that chalky white buildup, a quick soak in vinegar will dissolve it right off.
  • Lint-Free Cloths: Microfiber towels are great for this. You want to dry every part completely without leaving behind any tiny fibers that could clog your system.

Quick tip: Stay away from harsh chemicals. I can't stress this enough. Never use bleach, abrasive scouring pads, or steel wool on your filter components. They can permanently wreck the plastic, eat away at the rubber seals (hello, leaks!), and leave nasty residues in your drinking water.

Crucial Safety Preparations

Now, if you're working with any kind of installed system—like an under-sink or whole-house filter—safety is non-negotiable.

The absolute first thing you must do is shut off the water supply to the filter. It’s the only way to prevent a miniature flood in your kitchen.

Just find the shutoff valve, which is usually a small knob or lever on the pipe leading to the filter unit. Turn it off, then open the filter's dedicated faucet to let out any pressure still trapped in the line. Once the water stops, you're good to go.

Mastering Pitcher and Faucet Filter Cleaning

For most people, pitcher and faucet filters are their first foray into filtering their own water at home. They’re simple and convenient, but that simplicity also means they’re incredibly easy to forget about. And let's be honest, just swapping out the cartridge is only doing half the job.

If you want that consistently pure, crisp-tasting water, you’ve got to give the whole unit a proper cleaning. It's one of those tasks that's easy to push off, but if you let it go too long, you'll end up with bigger headaches. A neglected filter pitcher can get a nasty, slimy biofilm on the inside. A faucet filter? It can get so caked with hard water scale that your water flow slows down to a disappointing trickle.

Keeping Your Water Pitcher Pristine

A water pitcher seems straightforward, but there are a few different parts that need your attention. I'm talking about the reservoir, the lid, and especially the spout—all spots that get pretty grimy if you're only thinking about the cartridge. Getting into the habit of giving it a deep clean every time you change the filter (or at least once a month) is your best bet.

First, take the whole thing apart. Pop off the lid, pull out the reservoir where you pour the water, and set the old filter aside to be tossed. Now, just wash every single piece with warm water and a bit of unscented dish soap. Grab your soft-bristle brush and get into the corners of that reservoir. Pay extra attention to the inside of the spout; from my experience, that’s a favorite hiding spot for mildew.

Seeing those stubborn, chalky white stains from hard water? Don’t worry, a little white vinegar is your secret weapon.

  • Make a simple solution: Just mix one part white vinegar with one part water.
  • Let it soak: Fill the pitcher with the solution and let the reservoir and lid sit in it for about 20 minutes.
  • Scrub and rinse away: After the soak, that scale should scrub right off with your brush. Make sure to rinse everything really well with cool water to get rid of any vinegar taste.

Let all the parts air dry completely before you put it back together with a new filter. This simple step prevents any trapped moisture, which is what causes that funky, musty smell.

Tackling Faucet-Mounted Filters

Your faucet-mounted filter takes a bit more of a beating from things like sediment and hard water minerals. You’ll want to clean the housing every single time you swap out the cartridge. Most of these units just twist or click right off the faucet adapter.

Once it's off, take out the old cartridge. Just like with the pitcher, scrub the inside and outside of the housing with your soft brush and some mild soap. Look closely at the small screen or aerator where the water comes out—sediment loves to get stuck there, which is a common cause of poor water pressure.

I’ve seen filters that have been forgotten for months, and the mineral buildup can be pretty intense. If soap and water aren't cutting it, a quick 15-minute soak in that same vinegar-water solution will dissolve most of the scale. It'll look and work like new again.

This need for regular maintenance is something more and more people are dealing with. The global market for water filtration systems is exploding and is expected to hit a massive $35 billion by 2034. But our habits haven't quite caught up. Surveys have shown that around 60% of urban households don't have a consistent schedule for cleaning their filters, which points to a real gap in knowing how to care for these things. You can explore more data on the growing importance of water filtration and market trends to see the bigger picture.

After a good cleaning, rinse the housing thoroughly, let it dry, and then pop in the new cartridge before reattaching it to your faucet. Just remember to run cold water through it for a few minutes to flush the new filter, and you're good to go.

A Practical Guide to Cleaning Under-Sink Systems

Jumping into the world of under-sink and whole-house filters might seem like a big job, but it's a lot more straightforward than you'd think. These systems are the real workhorses of home water filtration, and a little routine cleaning is all it takes to keep them running at peak performance. With a few simple moves, you can make sure they keep delivering that pure, clean water to every tap in your house.

The biggest difference between this and just cleaning a pitcher filter is that you have to shut off your water supply first. Don't let that scare you; it’s not nearly as complicated as it sounds. Once you get the hang of it, this kind of maintenance will feel like second nature, helping you prevent leaks and keep your system in top-notch condition.

Prepping for Success

Before you even think about unscrewing anything, the absolute first step is to shut off the water. Find the small valve on the cold water line that feeds into your filter system and give it a clockwise turn until it stops.

Next up, you have to get the pressure out of the lines. Just turn on the filter's dedicated faucet and let the water run. It'll eventually slow down to a small drip, and that's when you know the pressure is gone.

Now, grab a bucket or a couple of old towels and stick them right under the filter housing. This simple step will catch any water that spills out when you open it up. Trust me, having everything ready to go makes the whole job much cleaner and a lot less stressful.

Here's a quick visual that breaks down the main actions for cleaning the filter housing.

Infographic about how to clean water filter

As you can see, it really boils down to three physical steps: taking the unit apart, scrubbing it clean, and giving it a good rinse before putting it all back together.

The Cleaning Process Unlocked

Okay, water's off and the pressure is relieved—it's time to open this thing up. Most of these systems come with a plastic filter wrench, which is specifically designed to give you the leverage you need to loosen the main canister (sometimes called the sump or housing).

Slide that wrench up onto the housing and turn it counter-clockwise. It might feel a bit tight, but some steady pressure is all you need. Once it breaks loose, you can usually unscrew it the rest of the way by hand.

Pro Tip: If that canister is really stuck, don't try to force it with anything other than the wrench it came with. Overtightening is a super common mistake. Instead, try running some warm water over the housing; the slight expansion of the plastic can sometimes be just enough to help it loosen up.

With the housing off, go ahead and dump out any water left inside and pull out the old filter cartridge. Now for the fun part: give the inside of that canister a really good scrub with warm water, a bit of unscented dish soap, and a soft-bristle brush.

The All-Important O-Ring Inspection

This is the step that so many people skip, but it is the absolute secret to a leak-free reinstallation.

Carefully pry out the large, black rubber O-ring that sits in the groove at the top of the housing. Wipe it down with a clean, lint-free cloth and take a close look at it. You're searching for any signs of damage—cracks, flat spots, or stretching.

If it looks worn out or damaged in any way, you must replace it. An old, compromised O-ring is the #1 cause of leaks after a filter change.

If it’s still in good shape, just apply a very thin layer of food-grade silicone grease to it. This helps create a perfect seal and, as a bonus, makes it way easier to unscrew the housing next time you do this.

  • Sanitize the Housing: If you want an extra deep clean, you can mix one teaspoon of regular household bleach into a gallon of water. Swirl this solution around inside the canister, let it sit for about two minutes, and then rinse it out completely.
  • Seat the New Filter: Pop your new filter cartridge into the sump. Make sure it's sitting nice and centered over the standpipe at the bottom.
  • Reassemble with Care: Screw the housing back on by hand until it feels snug. Then, just give it a final quarter-turn with the wrench. That's it! Overtightening can actually damage the O-ring and make it a nightmare to remove later.

Last but not least, slowly turn the water back on. Keep an eye on the unit for a few minutes and watch for any drips. If you see a leak, turn the water back off and double-check that the O-ring is seated properly. Once you're confident it's leak-free, you are good to go.

Specialized Care for RO and Refrigerator Filters

Reverse Osmosis (RO) systems and that filter tucked away in your refrigerator are filtration powerhouses, but they need a unique kind of attention. Unlike a simple pitcher, these setups have multiple components and water lines where problems can hide. Proper care here is less about scrubbing and more about sanitizing and flushing the entire system correctly.

For these more complex units, learning how to clean the water filter system as a whole is crucial for both performance and health. If you neglect them, you don't just get bad-tasting water; you can compromise the very safety net you installed in the first place.

Sanitizing Your Reverse Osmosis System

Your RO system is a multi-stage marvel, but its storage tank and lines can become a breeding ground for biofilm if left alone for too long. An annual sanitization is the key to keeping it pristine. This isn't a quick scrub—it's a process of flushing the whole system to make sure every part is clean.

Most manufacturers recommend a dedicated sanitizing solution, usually a non-bleach, food-grade product. The process generally involves shutting off the water, draining the storage tank completely, and then introducing the sanitizing solution into the system before the membrane. You’ll let it sit for the recommended time to work its magic, cleaning the tank, lines, and filter housings.

The most important thing to remember with RO systems is that some parts are meant for replacement, not cleaning. You should never attempt to scrub the RO membrane itself. It's an incredibly delicate component, and any abrasive contact will permanently damage it, rendering your system useless.

Taming Your Refrigerator Filter

When it comes to your refrigerator's water dispenser, the focus shifts from the filter cartridge to the surrounding parts. The filter itself is a disposable component that should always be replaced, not cleaned. However, the housing where it sits and the water line it feeds are a different story.

After you twist out the old filter, take a moment to wipe down the inside of the filter housing with a soft cloth and a mild soap solution. This removes any potential gunk before you install the new one. The most critical step, however, comes right after you pop in the new cartridge.

You need to flush the line thoroughly. Run at least two gallons of water through the dispenser. This does two essential things:

  • Clears Carbon Fines: New activated carbon filters often release harmless but unsightly black carbon particles. Flushing pushes them all out.
  • Purges Trapped Air: Air pockets in the line are the number one cause of sputtering dispensers and strange humming noises after a filter change.

This flushing process ensures a smooth, quiet flow and crystal-clear water from the very first glass.

The importance of keeping these systems clean is backed by extensive data. Historical research shows a direct link between filter maintenance and health, with one major study reporting that consistent filter care can reduce certain waterborne gastrointestinal illnesses by up to 40%. You can learn more about the global impact of water filtration and its connection to public health.

Your Top Water Filter Cleaning Questions Answered

Even after going through the steps, you might still have a few questions rattling around. That’s perfectly normal. Let's dig into some of the most common things people ask, so you can feel totally confident tackling your filter maintenance.

Think of this as the final polish—clearing up any lingering confusion so you know the why just as well as the how.

How Can I Tell My Water Filter Needs Cleaning?

Your filter is pretty good at sending signals when it needs attention; you just have to know what to look for. The most glaring sign is a sudden drop in water pressure. If your kitchen faucet has gone from a steady stream to a disappointing trickle, a clogged filter is the likely culprit.

A change in your water's taste or smell is another huge giveaway. The moment that faint chlorine flavor comes back or you notice a musty odor, it’s a clear sign the activated carbon is maxed out and can no longer do its job. Some systems have indicator lights, which are nice, but nothing beats these real-world clues.

Is It Safe to Use Bleach on My Filter Housing?

I'd steer clear of bleach unless the manufacturer’s instructions explicitly give you the green light. Harsh chemicals like bleach can break down the plastic housing and rubber O-rings over time. That’s a fast track to cracks and annoying leaks down the road.

Even more critical, any bleach residue that gets left behind can end up in your drinking water. A much safer bet is a simple solution of unscented dish soap and warm water. For sanitizing, a diluted white vinegar mix works wonders. Just remember to rinse everything completely before you put it back together.

What Happens If I Don’t Clean My Water Filter?

Skipping a filter cleaning isn't a great idea and can cause a couple of big problems. First, the filter will eventually get so packed with sediment that your water flow will slow to a crawl, essentially making it useless. This added strain can also wear out the whole system faster.

Second, all that trapped organic gunk becomes a breeding ground for bacteria and mold. A slimy film, called a biofilm, can form inside the housing, meaning your filter could actually start adding contaminants back into your water. Beyond the filter itself, many people also wonder about their dispenser. You can find out how to clean a water dispenser to ensure your entire setup is hygienic.


For more expert guides and unbiased reviews to help you choose and maintain the perfect filtration system, trust the team at Water Filter Advisor. Explore our resources at https://www.waterfilteradvisor.com.

How to Test Chlorine in Your Home’s Water

So, you want to know how much chlorine is in your tap water? You've got a few solid options for playing detective right at home: test strips, DPD kits, or even digital readers. Test strips are the quick and dirty route—just a simple color match. For a bit more accuracy, DPD kits use a cool chemical reaction that feels like a mini science experiment. And if you want to get super precise, lab-quality numbers without leaving your kitchen, a digital reader is your high-tech hero.

Why Bother Testing Chlorine for Your Home Filter?

Ever installed a brand-new water filter and just crossed your fingers, hoping it was working? Checking your water's chlorine level is how you pull back the curtain and see the magic happen. Chlorine is the unsung hero that keeps our municipal water safe from nasty bugs, but the amount hitting your tap can swing wildly day to day.

Those fluctuations have a direct impact on your water's taste and smell—goodbye, swimming pool vibes! More importantly, they affect how long your precious filter lasts.

Getting a handle on your home's chlorine levels is the first real step toward becoming a water filtration genius. Think of it less like a chore and more like protecting your investment. For example, if you have a whole-house carbon filter, its entire job is to pull that chlorine out. If your tap water is swimming in higher-than-average chlorine, that filter is working overtime and will burn out much faster, forcing you into more frequent and costly replacements.

The Double-Edged Sword of Chlorine

Chlorine has been a public health champion for over a century, first used in a big way back in 1897 in Maidstone, UK, to stop a deadly typhoid outbreak. It's a powerful disinfectant, which is why it’s still the standard today.

To see why managing chlorine is so important for your filter, it helps to understand how potent a chemical we're dealing with. A properly prepared disinfectant solution bleach can obliterate all sorts of nasty contaminants. Your home filter is working hard around the clock to remove that very same chemical from every drop of water you use. Knowing exactly what it's up against helps you keep it running like a well-oiled machine.

The ultimate "Aha!" moment is testing your chlorine levels before and after installing a filter. This isn't just a fun party trick; it's hard proof that your system is earning its keep and doing what you paid for.

Taking just a few minutes to test empowers you to:

  • Verify filter performance: Get concrete proof that your system is successfully kicking chlorine to the curb.
  • Optimize your filter changes: Swap out cartridges based on real-world data, not just a generic calendar reminder from the manufacturer.
  • Get better water: Finally banish that "public pool" smell and taste for good and enjoy crisp, clean water.

Testing puts you back in the driver's seat of your home's water quality. For more tips on keeping your system in top shape, check out our other water filter advice.

So, you're ready to figure out what's really in your tap water? When it comes to testing for chlorine at home, you've basically got three solid options. Each one has its place, depending on how much accuracy you crave, what your budget is, and how much time you're willing to invest.

Think of it like choosing the right tool for a job—you wouldn't use a sledgehammer to hang a picture frame. This decision tree can point you in the right direction fast.

This guide helps you decide based on a couple of key questions: Are you just curious about your tap water, or are you trying to confirm a new filter is actually doing its job? Let’s walk through the options.

To help you choose, here's a quick comparison of the three main methods for testing chlorine at home. This should make it easy to see which one fits your specific needs and budget.

Comparing Home Chlorine Testing Methods

Method Best For Accuracy Cost
Test Strips Quick, simple checks and "Is there chlorine?" questions. Low $
DPD Kits Reliable results for tracking your filter's performance. Medium $$
Digital Readers Lab-quality precision for troubleshooting and total peace of mind. High $$$

As you can see, there's a clear trade-off between cost and precision. For most homeowners looking after a filtration system, the DPD kit hits that sweet spot of value and reliability. But let's get into the nitty-gritty of each one.

Quick Checks with Test Strips

If you just want a fast, ballpark figure, test strips are your best friend. They are super cheap and give you an answer in about 15 seconds. You just dip a strip in your water, watch the color bloom, and match it to the chart on the bottle. Easy peasy.

This is the perfect way to do a quick annual check-up or see if you can spot a "before and after" difference with that new faucet filter you just screwed on. Just remember, their accuracy is limited. Think of it as getting a general idea, not a laser-precise number to live by.

Better Accuracy with DPD Kits

When you need a more trustworthy result, especially after investing in a new whole-house filtration system, a DPD (N,N-diethyl-p-phenylenediamine) kit is the way to go. These kits have you add a reagent—either a little tablet or liquid drops—to a water sample, which magically turns the water a shade of pink.

The deeper the pink, the more chlorine is crashing the party. You compare that color to a more detailed chart that comes with the kit. It takes a couple more minutes than a test strip, but the boost in accuracy is well worth it for anyone who wants to seriously track how well their filter is performing over time.

For most homeowners trying to manage their filtration system, a DPD kit offers the best mix of affordability and precision. It’s what a lot of pros use for field testing because it delivers results you can count on without needing pricey equipment.

Precision with Digital Readers

For the data nerds and anyone who needs definitive, lab-quality numbers, a digital colorimeter or photometer is the top-tier tool. These slick handheld gadgets take all the guesswork out of matching colors by eye. You still use a DPD reagent to create the pink reaction, but instead of squinting at a color chart, you pop the vial into the reader.

The device shines a beam of light through the sample and gives you an exact digital readout of the chlorine concentration. They're definitely the most expensive option, but for anyone who has to monitor their filter’s performance closely or troubleshoot a tricky problem, the precision is unmatched.

Getting an Accurate Reading with Test Strips

Test strips are by far the fastest and simplest way to figure out the chlorine levels in your water. While they're known for giving a quick answer, there's definitely a right way and a wrong way to use them. Doing it right is the difference between a wild guess and a result you can actually use to check on your filter.

Person holding a chlorine test strip next to a color chart on the bottle.

The directions on the bottle can be pretty sparse, so here are a few pro tips that will make your readings much more accurate. First off, always grab a clean glass for your water sample. Never just stick the strip under a running faucet—that's a surefire way to get a wonky reading.

Instead, let the cold water run for about 30 seconds first. This flushes out any water that's been sitting in your pipes and gets you a true sample of what’s coming from your main line, which is exactly what your filter is dealing with. Then, fill your glass.

Free Chlorine vs. Total Chlorine

When you look at the color chart on the bottle, you’ll almost always see two separate pads for chlorine: free chlorine and total chlorine. Knowing what these mean is the secret to figuring out if your water filter is actually earning its keep.

  • Free Chlorine: This is the active, germ-killing chlorine that keeps your water safe. It's also the main villain that most carbon-based water filters are designed to vanquish.
  • Total Chlorine: This number represents the free chlorine plus something called chloramines (chlorine that has bonded with ammonia). Some water treatment plants use chloramines because they provide a longer-lasting disinfectant shield.

A high-quality carbon filter should knock your free chlorine down to almost zero. If you test your filtered water and still get a high reading for total chlorine, it’s a big clue you might have chloramines. To get rid of those, you'll need a special catalytic carbon filter designed for this tougher challenge.

When it comes to reading the strip, timing is everything. You can't just let it sit there. Check the instructions and read the result at the exact moment it specifies—usually between 15 and 30 seconds. If you wait too long, the colors can bleed or get darker, giving you a falsely high reading.

Finally, hold the strip right up against the color chart in good, natural light if possible. This little trick helps you avoid shadows and makes it way easier to get a perfect color match. It's a simple step that helps you make confident decisions about your water filter's performance.

Using a DPD Kit for More Precise Results

When a simple ballpark estimate from a test strip just won't cut it, it's time to level up to a DPD kit. Think of it as the gold standard for home chlorine testing, giving you the reliable data you need to truly manage your home filtration.

These kits are your best bet for checking if that expensive whole-house filtration system is actually doing its job. The process itself is pretty straightforward, but a little attention to detail goes a long way.

A person using a DPD chlorine test kit with vials and a color comparator.

At the heart of every DPD kit is a chemical reagent. It usually comes as either liquid drops or a small tablet that you add to your water sample. This reagent reacts specifically with chlorine, turning the water a certain shade of pink.

It's a simple visual cue: the deeper the pink, the higher the chlorine concentration. You then hold your sample up to the color comparator chart that came with the kit to get your reading in parts per million (ppm).

Acing the DPD Test

To make sure your results are spot-on, there are a couple of small habits that make a huge difference. These are the little things that separate a good-enough test from a great one.

  • Rinse, Rinse, Rinse: Before you even start, rinse the testing vial a few times with the tap water you're about to test. This quick step gets rid of any dust or residue from a previous test that could throw off your reading.
  • Handle Reagents with Care: If your kit uses tablets, try not to touch them with your bare fingers. The natural oils on your skin can actually interfere with the chemical reaction. For liquid drops, always hold the bottle perfectly vertical over the vial. This ensures every drop is the same size, giving you maximum accuracy.

Here's the real power of a DPD kit: it gives you a clear, hard number. A test strip might just say "low," but a DPD kit will tell you the level is 0.5 ppm. That's a specific piece of data you can use to track your filter's health and performance over time.

Don't forget about proper storage, either. To keep the reagents from going bad, store your kit in a cool, dark place away from direct sunlight. Once you're done testing, just follow the manufacturer's instructions for disposal—it usually just involves flushing the tested water down the drain with plenty of running water.

What Your Chlorine Test Results Mean

You’ve dipped the strip or swirled the vial, and now you have a number. So, what does a result of 0.5 ppm versus 3.0 ppm actually tell you about your tap water? More importantly, what does it say about your filtration system? This is where a simple test transforms into actionable knowledge for your home.

Think of your activated carbon filter like a sponge. A higher chlorine reading—let’s say anything above 2.0 ppm—means that sponge has to work a lot harder. It’s soaking up more disinfectant with every drop of water that passes through. This directly shortens its lifespan, forcing you to swap out filter cartridges more often to keep your water tasting fresh and clean.

On the flip side, a very low reading might mean your filter is coasting, and you can stick to a less frequent replacement schedule, saving you some money in the long run.

Turning PPM into Practical Decisions

Understanding your parts per million (ppm) result lets you fine-tune your entire filtration strategy. That number isn't just a grade; it's a guide. For example, if your unfiltered tap water tests consistently come back high, it might be time to upgrade to a more robust, higher-capacity carbon filter designed for challenging water conditions.

Your test result is the single best indicator of your filter's real-world workload. It takes the guesswork out of maintenance and helps you get the most value from your investment, ensuring your water is always crisp and clean.

It’s also important to remember that chlorine levels are managed for public health. The World Health Organization (WHO) and other health bodies set guidelines for chlorine, and municipal water plants follow strict rules to keep water safe. You can discover more insights about these global water safety standards.

Here’s a quick breakdown of how to use specific results from your unfiltered tap water:

  • Below 1.0 ppm: Your current filter is likely having an easy time. You can probably stick to the manufacturer's standard replacement schedule.
  • Between 1.0 and 2.5 ppm: This is a pretty common range. Your filter is working steadily. Keep an eye on its performance and consider replacing it on the earlier side of the recommended window.
  • Above 2.5 ppm: Your water is highly chlorinated. You may need a heavy-duty filter and should definitely plan for more frequent changes to prevent that chlorine taste from breaking through.

Got Questions About Water Testing?

Even with the right gear, you'll probably have a few questions when you first start testing. Here are some quick answers to the most common ones we hear from homeowners focused on their filtration systems.

How Often Should I Test My Water for Chlorine?

For most folks with a filtration system, testing your water every 3-6 months is a solid plan. This is frequent enough to keep an eye on your filter’s performance as it ages and to notice any big seasonal changes from your city's water supply.

Just installed a new filter? It's a great idea to test both filtered and unfiltered water weekly for the first month. This helps you establish a baseline and confirms the system is working perfectly right out of the box.

What if My Filtered Water Still Has Chlorine in It?

First, don't panic. A brand new, high-quality filter should reduce chlorine to undetectable levels (below 0.1 ppm). If you're seeing a reading over 0.2 ppm in your filtered water, it's time to investigate. Run the test again just to be sure. If you get the same result, it most likely means your filter cartridge is exhausted and needs to be replaced.

If you have a brand-new filter and you're still seeing chlorine, you might be dealing with chloramines. These tricky compounds require a special catalytic carbon filter to be removed effectively.

A common rookie mistake is not flushing a new filter cartridge long enough before you use it. Always run cold water through a new filter for at least five minutes. This activates the carbon media and clears out any harmless fine particles before you take your first test sample.


Ready to take control of your home's water quality? Water Filter Advisor provides expert reviews and practical guides to help you choose the best filtration system for your needs. Explore your options at https://www.waterfilteradvisor.com.