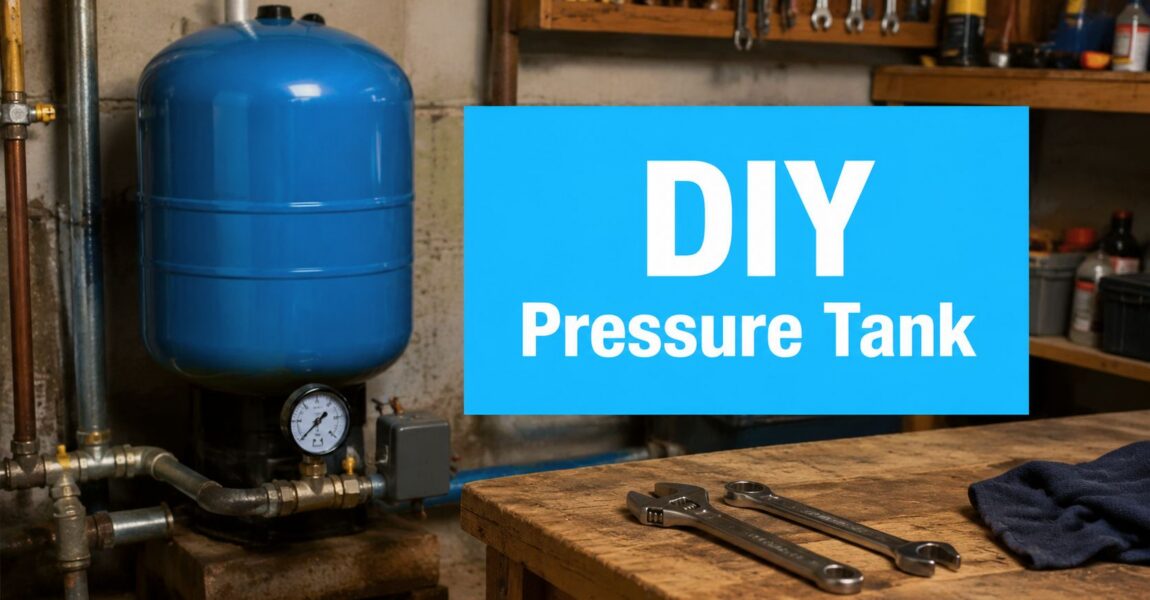
The usual starting point is a kitchen faucet that spits air, then runs strong, then fades for no obvious reason. Or it's the shower that feels fine until someone flushes a toilet and the pressure falls off a cliff. Often, the pump is blamed first. A lot of the time, the pressure tank is the part asking for attention.
That matters for more than comfort. In a home with well water treatment, steady pressure helps the whole system behave the way it should. A pressure tank buffers demand so the pump doesn't kick on every time someone cracks a tap, and it also gives downstream equipment a steadier supply. Whole-house sediment filters, carbon filters, softeners, and reverse osmosis systems all work better when the water feeding them isn't surging and collapsing.
A bad tank can show up as nuisance symptoms all over the house. Filter housings rattle. A softener seems inconsistent. An RO faucet dribbles more than usual. You replace cartridges and still don't love the results. Meanwhile, the underlying issue is upstream. The house pressure isn't stable enough to support the equipment you paid for.
Replacing a well pressure tank is a very doable project for a capable DIYer, but it's not a casual one. Water, air charge, plumbing layout, and electrical safety all have to line up. If you want to learn how to install well pressure tank systems the right way, treat the job as both a repair and a performance tune-up for your home's water quality setup.
Your Sputtering Faucet Is Trying to Tell You Something
A pressure tank is one of those pieces homeowners rarely think about until the system starts acting strange. You hear the pump click more often. The sink pulses. The shower swings from decent to disappointing. If you have filtration equipment, the signs can get muddier because the symptoms don't always point neatly to the tank.
What the tank is really doing
The pressure tank stores water under pressure and gives the system some breathing room between pump cycles. That helps protect the pump from rapid on-off operation and gives the house a more even supply. When the tank is set up wrong, or when its internal bladder fails, the pump can cycle too often and household pressure gets jumpy.
For a filtration-focused home, that unstable delivery has ripple effects:
- Sediment filters can see bursts of flow followed by pressure sag.
- Carbon filters work best when the system feeding them feels controlled, not erratic.
- Water softeners don't benefit from a pressure supply that lurches every time demand changes.
- Reverse osmosis units are especially sensitive to weak or inconsistent feed pressure.
A pressure tank isn't just a pump accessory. In a treated well-water home, it's part of the foundation under every filter and fixture.
Why homeowners misdiagnose it
When water quality and pressure problems show up together, people often chase the wrong part first. They swap cartridges, clean aerators, and suspect iron or sediment buildup. Those steps aren't foolish, but they don't solve a failing tank.
The clue is usually inconsistency. If the issue comes and goes, especially with a clicking pump or pressure swings between fixtures, the tank deserves a hard look. A healthy setup supports the entire house. An unhealthy one creates noise in the system that makes every downstream device look guilty.
There's another practical reason to take this seriously. A replacement tank isn't just about getting the shower back. It's about protecting the pump and restoring steady operating conditions to the filters that make your well water usable day after day.
Pre-Installation Prep Sizing Tools and Location
Most bad pressure tank jobs go wrong before the old tank is even disconnected. The installer picks a cramped corner, reuses mismatched fittings, or buys a tank without thinking about service access. Then the leaks, awkward wiring, and pressure issues start.
Plan the tank around the system, not the room
A pressure tank should sit on a stable, level base with enough room around it to read the gauge, service the tank tee, and reach the pressure switch without standing on your head. Dry and accessible beats hidden and clever every time. If the only available location is vulnerable to freezing, solve that problem before the tank goes in.
That's even more important when you have filtration equipment nearby. Filter housings need clearance for cartridge changes. Softeners need room to bypass and service. A crowded install encourages skipped maintenance, and skipped maintenance is how a simple tank swap turns into a messy whole-system headache.
A useful planning habit is to stand where your hands will go later. Can you remove the pressure switch cover safely? Can you attach a hose to the drain? Can you isolate nearby treatment equipment if you need to troubleshoot? If not, change the layout now.

Size the plumbing details correctly
One manufacturer support guide recommends that the plumbing and tank tee match the tank connection size and targets water velocity of about 5 feet per second, and it also says the pressure gauge full-scale rating should be about two times the intended operating pressure so the needle stays in the gauge's most accurate range (installation guidance on pressure tanks).
That sounds picky, but it isn't. Undersized fittings create restriction. Restriction creates lousy system behavior. In a house with filtration, that can show up as pressure drop where you least want it, especially when multiple fixtures run at once.
Practical rule: Don't choke the tank with smaller fittings just because they're already on the shelf. Matching the tee to the tank connection size avoids creating a bottleneck at the heart of the system.
Tools and materials that earn their place
Some jobs only need a wrench and optimism. This isn't one of them.
| Item | Category | Pro Tip |
|---|---|---|
| Pipe wrenches | Plumbing tool | Use two when breaking stubborn threaded joints so you're not twisting adjacent piping. |
| Adjustable wrench | Plumbing tool | Handy for smaller fittings on the tank tee assembly. |
| Tire pressure gauge | Setup tool | Use it only when the tank is empty of water. |
| Thread seal tape | Sealant | Wrap clean male threads neatly. Don't bunch it at the start of the thread. |
| Pipe joint compound | Sealant | Many installers use it with tape on threaded metal joints for a better seal. |
| Hose | Drainage | Run it where discharge won't flood the work area. |
| New tank tee assembly | System hardware | Include the gauge, relief valve, and drain setup from the start. |
| Pressure gauge | Monitoring | Pick a gauge suited to the system so the needle reads in the middle range, not pinned low. |
| Pressure relief valve | Safety hardware | Don't skip it because the old setup didn't have one. |
| Voltage tester | Electrical safety | Verify power is actually off before touching the pressure switch. |
If the project has expanded beyond a simple tank swap, such as moving the tank, reworking nearby filtration plumbing, or correcting old mistakes, it may help to explore home project financing before you start cutting pipe. For water-treatment planning beyond the tank itself, the guidance at Water Filter Advisor advice is useful for thinking through how pressure, filtration, and maintenance fit together.
The Main Event Draining Plumbing and Mounting
This is the part where patience beats speed. A clean sequence keeps the work safe and gives you a much better shot at a dry startup.
Start dead and empty
A professional installation sequence calls for shutting off power at the breaker, draining the system completely, disconnecting the main union, setting the new tank on a level base, and reconnecting with a tank tee that includes a drain valve, pressure relief valve, and pressure gauge for future service (professional tank swap sequence).
That sequence works because each step clears the way for the next. Kill power first so the pump can't surprise you. Drain completely so the old tank is as light and predictable as it's going to get. Disconnect at the union so you're not turning half the basement into a pretzel.

Removing the old tank without making a bigger problem
Old tanks can be awkward, even when they're drained. If the floor is slick or the tank sits under shelving, give yourself room before you break anything loose. Move what needs moving. Put towels or a pan where leftover water will land. Don't count on “mostly drained” being good enough.
A few practical habits help here:
- Use a hose early: Open the drain and let the system empty fully before loosening major fittings.
- Support nearby pipe: If rigid piping has no give, hold back with one wrench while turning with the other.
- Watch the union faces: A damaged or dirty union surface can fool you into chasing leaks later.
- Stage the new tank nearby: Don't leave yourself carrying a tank across a wet floor with fittings in hand.
If you're unsure which threaded standard your fittings use, check before forcing mismatched parts together. A quick reference on how to measure NPT threads can save a wasted trip and a lot of aggravation.
Here's a good visual walkthrough before you start tightening fittings and moving hardware around:
Mounting and reconnecting the new tank
Set the new tank on a firm, level surface. If the floor is uneven or soft, correct that now. A tank that rocks will eventually tell on you through stress at the fittings.
Install the tank tee and related components deliberately. This is not the moment for random leftovers from the old setup. A serviceable installation includes the gauge, relief valve, and drain where you can use them later.
Good installs look boring. Straight piping, accessible valves, readable gauge, no strain on the tank connection.
When you tighten threaded joints, keep the tank body stable and avoid over-torquing small brass components. Leak-free joints come from clean threads, proper sealant, and alignment. Force is not a substitute for fit.
Wiring the Pressure Switch Safely
Plumbing mistakes usually get you wet. Electrical mistakes can do far worse. A pressure switch sits at the point where your well system's control logic meets line voltage, and that deserves full attention.
This is not optional. Verify the breaker is off and confirm with a voltage tester before removing the switch cover or touching any terminal.
Know what you're looking at

Inside a typical pressure switch, you'll usually see terminals for the incoming power and terminals for the outgoing pump leads, plus a ground connection. The exact arrangement depends on the switch model, so the markings on the actual device matter more than habit or memory.
In plain terms:
- Line terminals take power from the breaker.
- Load terminals send power onward to the well pump.
- Ground bonds the switch and associated metal parts for safety.
If the old wiring was messy, don't assume messy means correct. Take a photo before disconnecting anything, label wires if needed, and compare the actual terminal markings on the new switch.
What a careful DIYer does
Tight, clean terminations matter. Loose wires can arc, overheat, or create maddening intermittent problems. Strip only as much insulation as needed, seat the conductor properly under the terminal, and tighten firmly without damaging the wire.
The switch should also be mounted so it stays dry and accessible. If condensation, drips, or splash risk are part of your setup, fix that before energizing the circuit. Water treatment rooms and basements often collect exactly the kind of moisture electrical components hate.
For homeowners who are comfortable with plumbing but less certain about line-voltage work, it helps to read up on how electricians approach appliance circuits and dedicated equipment. Even though the application is different, the safety mindset in this guide to professional hot tub electrical setup is a good reminder that energized water equipment is no place for guesswork.
If there's any doubt about wire identification, grounding, or switch compatibility, stop and bring in a licensed electrician or well contractor. That's not surrender. That's judgment.
Charging Your Tank and Testing the System
A lot of tank replacements fail at the finish line. The piping is neat, the wiring is back on, and then someone skips the pre-charge check because the tank is “new from the factory.” Don't do that.
Set the air charge before adding water
A pressure tank is properly pre-charged to 2 psi below the pressure switch cut-in setting. For a common 30/50 psi setup, that means the empty tank should be at 28 psi before startup, which helps prevent short-cycling and lets the tank use its drawdown correctly (pre-charge rule and 30/50 example).
That check happens with the tank empty of water, using a tire pressure gauge at the air valve. If the reading is off, add or release air until it matches the target for your switch.

The reason this matters is simple. If the pre-charge is wrong, the tank won't operate in the same pressure band as the switch. You can get unstable delivery, poor drawdown, and a pump that cycles more often than it should. In a house with filters and softening equipment, that bad behavior shows up everywhere downstream.
Bring the system back online in a controlled way
Once the air charge is set, close the drain and open a nearby faucet. Then restore power and watch the system come up to pressure. Keep your eyes on the gauge and your ears open for the switch click and any signs of water hammer, chatter, or rapid cycling.
Use this startup sequence:
- Open a faucet nearby so trapped air has somewhere to go.
- Restore power and let the pump fill the system.
- Watch the gauge as pressure rises.
- Inspect every joint around the tank tee, gauge, relief valve, and union.
- Run water at fixtures and see whether pressure delivery feels smooth and consistent.
If a connection looks dry at startup, check it again after the pump has cycled and the piping has settled. Tiny leaks often show up a little later.
What good performance feels like
You're looking for smooth pressure, normal pump cycling, and no seepage at the new joints. Faucets should stop sputtering once air clears. Filter housings should stay quiet. If you have a whole-house filter or softener, this is a good moment to verify bypass valves are back where they belong and that any pre-existing pressure drop is still what you'd expect from the treatment equipment, not from the tank install.
A properly charged and correctly mounted pressure tank doesn't call attention to itself. That's the win. The whole house just feels steady again.
Troubleshooting and Long Term Maintenance
The first day after installation tells you whether the job is basically sound. The next months tell you whether the setup will stay that way. Pressure tanks don't need constant attention, but they do reward occasional checks.
What to check when something feels off
If the pump turns on and off too often, recheck the air charge first. One field reference notes that troubleshooting should start by verifying pre-charge against the switch cut-in pressure, with 2 psi below as the standard target. In a 40/60 setup, that would typically mean about 38 psi (troubleshooting pre-charge against cut-in).
Short-cycling after a fresh install often points to one of a few causes:
- Incorrect pre-charge: The tank and switch aren't operating in the same range.
- A hidden leak: A small drip on the plumbing side can keep the system from holding pressure properly.
- Switch issues: Dirty contacts or an aging switch can create odd cycling behavior.
- Layout problems: Restrictive plumbing near the tank can make the system feel worse than it is.
If you hear banging pipes, don't blame the tank automatically. Water hammer can come from fast-closing valves, unsupported piping, or sudden pressure changes elsewhere in the house. The tank may be part of the picture, but it's not always the villain.
Maintenance that actually matters
You don't need a complicated service calendar. A simple routine catches most preventable issues.
- Check the tank exterior: Look for corrosion, sweating, or signs of a slow leak around the tank base and fittings.
- Inspect the gauge and relief valve: Make sure the gauge is readable and the relief valve outlet area is dry.
- Verify pressure behavior: Pay attention to whether fixtures feel consistent during normal use.
- Review nearby filtration equipment: A new restriction at a sediment or carbon filter can look like a tank problem, so inspect the whole pressure path.
For homes focused on water treatment, think of the pressure tank as part of the filtration support system. If your softener suddenly seems less effective, or your reverse osmosis faucet output changes, don't only check media and membranes. Check whether the house pressure behavior has changed with them.
Know when to stop DIY work
Some symptoms mean it's time to call a pro:
- Visible leakage from the tank body
- Persistent electrical uncertainty at the switch
- A pump that won't start after confirmed correct setup
- Major corrosion on fittings or piping that may fail during repair
- Unclear code or layout requirements for your location
A smart DIYer knows the difference between adjustment and diagnosis. Swapping a tank, setting the charge, and repairing straightforward plumbing is one thing. Chasing a deeper pump control problem, code conflict, or electrical fault is another.
If your goal is better water quality at home, stable pressure is part of the equation, not a side issue. The tank, pump, and filters all depend on each other more than is often understood.
For homeowners trying to get cleaner, better-behaving well water from every tap, Water Filter Advisor is a solid next stop. It's a practical resource for comparing filtration options, understanding common contaminants, and figuring out which whole-house, under-sink, or specialty filter setups make sense once your pressure system is working the way it should.
- June 15, 2026
- Uncategorized
