You notice it while filling the kettle. The water smells faintly metallic, the ice tastes different, or a cloudy glass leaves you wondering whether the problem is your plumbing, your municipal supply, or the filter under the sink. The obvious reaction is to search for a new water filter and order the first system promising cleaner, fresher water.
That's backwards. Water testing is the diagnostic step that tells you what filtration should do, which technology fits the problem, and whether the finished system works. Buy the test before you buy the filter, especially if you're considering a whole-house softener, carbon system, or reverse osmosis unit.
Why Testing Must Come Before Filtration
A homeowner with hard water may blame a strange taste on chlorine and install a carbon cartridge. Another may see orange staining, buy a softener, and discover that the underlying issue is iron rather than hardness. A sulfur smell can send someone toward a general-purpose filter when the first priority should be identifying the source of the odor and checking for related water-quality concerns.
Those mistakes happen because appearance and taste are clues, not diagnoses. Cloudiness doesn't identify a contaminant, and a metallic taste doesn't tell you which filtration media will remove it. A test gives you a starting point for choosing treatment instead of forcing you to shop by promise, packaging, or sales language.
Match the result to the treatment
Use the test to separate problems that look similar at the tap:
- Chlorine taste and odor: A properly selected activated carbon filter is usually the logical starting point.
- Hardness: Calcium and magnesium call for a water softener, not a carbon cartridge.
- Dissolved contaminants: Reverse osmosis may be appropriate when the report identifies contaminants within its treatment scope.
- Bacteria: Disinfection, source investigation, and professional follow-up matter more than adding a taste-and-odor filter.
- Iron or sulfur-related odor: The treatment choice depends on the measured chemistry and the condition of the well or plumbing.
A test also helps size the system. Hardness results influence softener capacity, while flow demands and contaminant levels affect the design of whole-house treatment. An underpowered system can exhaust media quickly, and an oversized system can add unnecessary cost and maintenance.
Practical rule: Test untreated water before selecting equipment. Test treated water afterward when you need to verify performance.
If hardness is the central concern, a local installation resource such as Stultz Plumbing water softener information can help you understand what professional sizing and installation involve. The important point remains the same: filtration should respond to measured water conditions, not a guess based on one unpleasant glass.
Comparing DIY Strips and Professional Lab Kits
The right place to buy depends on the question you're trying to answer. A strip can help you monitor a known issue, while a laboratory kit is the better choice when you're deciding whether your family needs a specific treatment system.
Three useful testing tiers
Dip strips are the quickest and least complicated option. You dip the strip, wait according to the instructions, and compare its color with the supplied chart. They're useful for routine screening of properties such as pH, hardness, chlorine, and some nitrate or iron indicators, but color matching is approximate. A strip can flag a change without telling you enough to make a health decision or size equipment precisely.
Color-disk and reagent kits add measured reagents and a visual comparison process. They can be more informative than a simple strip for selected parameters, particularly when the kit gives a clearer color scale. They still depend on careful timing, lighting, sample handling, and the kit's detection range. Treat them as screening tools, not substitutes for laboratory analysis when lead, bacteria, or other serious concerns are involved.
Mail-in laboratory kits provide bottles, collection instructions, and a laboratory analysis of the returned sample. The lab's methods and reporting limits matter more than the number of tests printed on the box. Laboratory testing is the most accurate option, and accredited laboratories are independently evaluated for technical competence, as explained in NSF's drinking-water testing guidance.
Water Testing Methods Compared
| Test Type | Accuracy Level | Typical Cost | Best Used For |
|---|---|---|---|
| Dip strips | Screening level, with visual interpretation | Low-cost retail option | Quick checks of pH, chlorine, hardness, and routine changes |
| Color-disk or reagent kit | Screening to moderate, depending on the method | Retail pricing varies by parameter and kit scope | More deliberate checks of selected chemistry |
| Mail-in lab kit | Quantitative laboratory result, dependent on the lab and method | Varies by panel, laboratory, shipping, and requested analyses | Health-related decisions, well baselines, and filtration selection |
Retail listings show the range clearly. Home Depot lists water-testing products such as strips, digital TDS meters, lead kits, bacteria kits, and multi-parameter kits at roughly $7 to $32 on its category page, while Lowe's water test kit listings show a typical price of about $24, with products ranging from approximately $9 to $259. Those figures describe retail listings, not laboratory services.
Choose by decision, not by package size
Buy strips when you already understand the water and want to monitor a system. For example, a homeowner who has had hardness measured in a laboratory can use strips to watch for a noticeable change between more complete checks.
Choose a lab kit before installing treatment, before investigating a health concern, or whenever the result will determine whether you need reverse osmosis, disinfection, or specialized media. A low-priced test that answers the wrong question is not a bargain.
Where to Buy Water Testing Kits Today
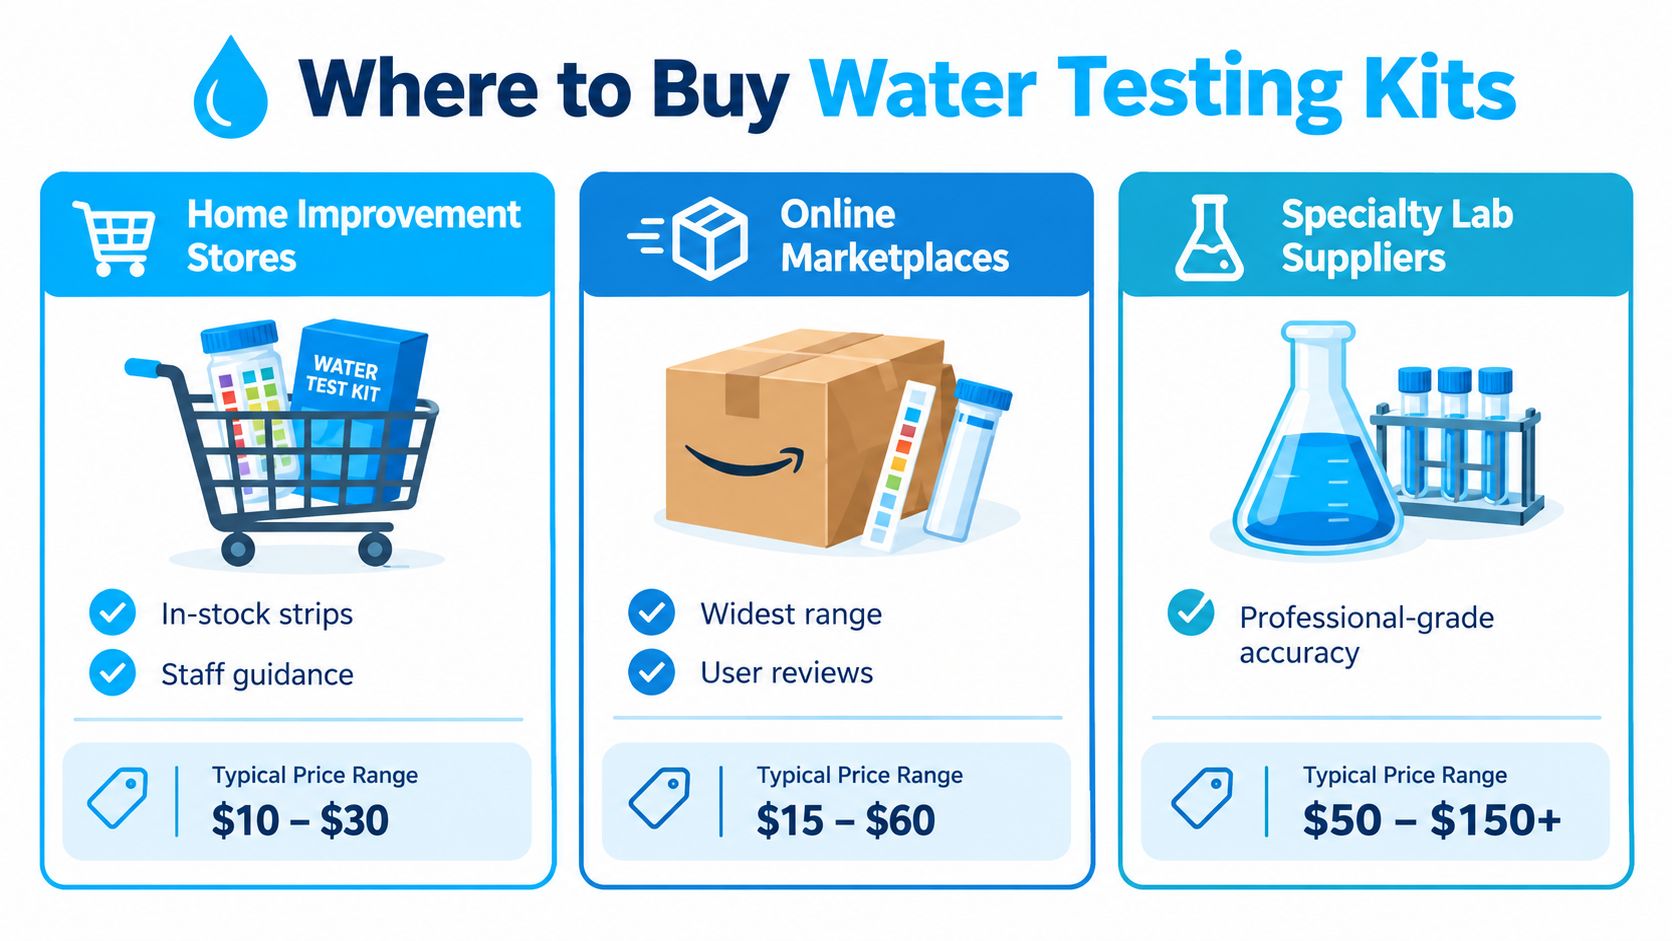
For most homeowners, the best first stop is a major home-improvement retailer. Home Depot and Lowe's offer mainstream access to water test kits, and their category pages make it possible to compare formats, parameters, prices, and pickup options. That's useful when you've noticed a sudden taste or odor change and need a basic screening tool immediately.
Home-improvement stores work especially well for pH, chlorine, hardness, and TDS screening. They're less suitable when you need defensible results for lead, bacteria, nitrates, or a complex well-water treatment decision. Store availability also varies, so check the product details rather than assuming that a kit labeled “complete” covers the contaminant you care about.
Online marketplaces provide the widest assortment. You'll find inexpensive strips, digital meters, specialized kits, and mail-in laboratory panels in one search. The convenience is real, but marketplace listings require more scrutiny. Check the actual parameter list, the manufacturer's instructions, the laboratory receiving the sample, and the reporting limits. A long list of parameters doesn't automatically mean useful testing.
Pick the channel that fits the job
Specialty laboratory suppliers are the right choice for complete well testing, confirmatory work, and filtration decisions that involve health-related contaminants. You're paying for sample containers, preservation requirements, laboratory methods, reporting, and interpretation rather than just buying a color chart.
The market's size explains why all three channels are easy to find. One market estimate places the global water test kit market at $4.8 billion in 2025, projecting $8.2 billion by 2034 and a 7.2% CAGR. The same analysis estimates residential water-testing kit purchases at $892 million in 2025, representing 18.6% of total market revenue and growing at 9.8% annually. A separate industry estimate places testing kits at 42.6% of the broader water-testing market in 2026. These figures come from DataIntelo's water test kit market analysis, and they support a practical conclusion: comparison shopping is realistic because kits are no longer confined to professional distributors.
Use the hardware store for immediate screening, the online marketplace for selection, and the specialty lab for evidence that can guide treatment. This embedded video offers another visual introduction to the testing decision:
What to Test Based on Your Water Source
Your water source determines your first testing list. A private well has no utility department continuously managing the water at your tap, while municipal water has already gone through public treatment but can still be affected by service lines, household plumbing, and fixtures.
Private well checklist
The U.S. EPA advises private well owners to test for coliform bacteria, nitrates, total dissolved solids, pH, and local contaminants of concern, as stated in its home drinking-water testing guidance. Start there, then expand the panel according to local geology, nearby land use, agricultural activity, septic systems, and any change in taste, smell, or appearance.
Use the result to direct treatment:
- Bacteria: Investigate the well and consider disinfection or ultraviolet treatment when appropriate. A standard carbon filter isn't a complete bacteria solution.
- Nitrates: Consider reverse osmosis or an appropriate anion-exchange system, selected for the measured water chemistry.
- Hardness: Use the hardness result to determine whether a softener is justified and how it should be sized.
- pH and total dissolved solids: Treat these as chemistry context. They help explain corrosion, scale, and the performance limits of downstream equipment.
- Local metals and odor compounds: Choose the test panel based on regional risks and the symptoms you're seeing.
If your water has a rotten-egg smell, don't assume the answer is just “buy a filter.” This guide to why water smells like sulfur provides useful context for distinguishing an odor complaint from a treatment diagnosis.
Municipal water checklist
Start with the annual Consumer Confidence Report from your water utility. The EPA recommends using that report to target specific at-home tests rather than buying an unnecessarily broad kit. A tap sample can then investigate what happens between the utility's system and your kitchen faucet.
Prioritize lead and copper when household plumbing is a concern. Check chlorine or chloramine when taste and odor are the issue, and include pH or TDS when you're evaluating corrosion, scale, or reverse osmosis performance. The correct filter depends on the result. Carbon can address disinfectant taste, while lead reduction requires a product certified for that specific performance claim.
Don't sample only after filtration if you're choosing a system. Collect untreated water to understand the incoming problem, then collect finished water later to confirm what the equipment changed.
Checking Certifications and Detection Limits
A test kit's marketing label matters less than its analytical scope. Before buying, identify the exact contaminant, the reported measurement range, and the lowest concentration the method can reliably detect. A kit that claims to test for lead is not useful for a serious lead investigation if its detection limit is too high to identify the level you need to act on.
Look for a defensible testing protocol
NSF's P524-2023 protocol applies to water-quality testing devices used without laboratory equipment and defines validation for real-time or short-wait kits. That gives buyers a meaningful point of comparison when a product listing or package references P524 or an equivalent performance standard.
NSF's certified products and systems information also explains that drinking-water test devices and filtration products are evaluated against recognized standards. The relevant standards include NSF/ANSI 42, 53, 58, 55, and 62, along with the separate NSF P524 protocol for water-quality test devices.
Certification isn't a universal approval of every claim a seller makes. It applies to a defined product, contaminant, test method, and performance scope. Read the listing closely and confirm that the certification covers the function you need.
Read the detection limit
Think of a detection limit as the smallest concentration the method can distinguish with useful confidence. If the kit reports only “low,” “medium,” or “high,” it may be adequate for household screening but not for deciding whether a health-related contaminant requires treatment.
For filtration, compare two separate documents:
- The water test report: This tells you what the untreated or treated sample contains and at what reported level.
- The filter certification: This tells you which contaminant the product has been evaluated to reduce and under what conditions.
NSF/ANSI 53 and NSF/ANSI 58 are not interchangeable. A certified product must be matched to the contaminant and filtration type stated in its performance claim. Never use a TDS reading as proof that water is safe, because TDS measures dissolved material without identifying what that material is.
For high-confidence results, use a state drinking-water laboratory or another appropriately accredited laboratory. That's the sensible route when results may support a property transaction, regulatory question, or major filtration purchase.
Sampling and Storage Best Practices
The sample is part of the test. A carefully designed laboratory method can't rescue water that was collected from the wrong faucet, placed in the wrong bottle, exposed to heat, or shipped after the allowable holding period.
Collect the sample without contaminating it
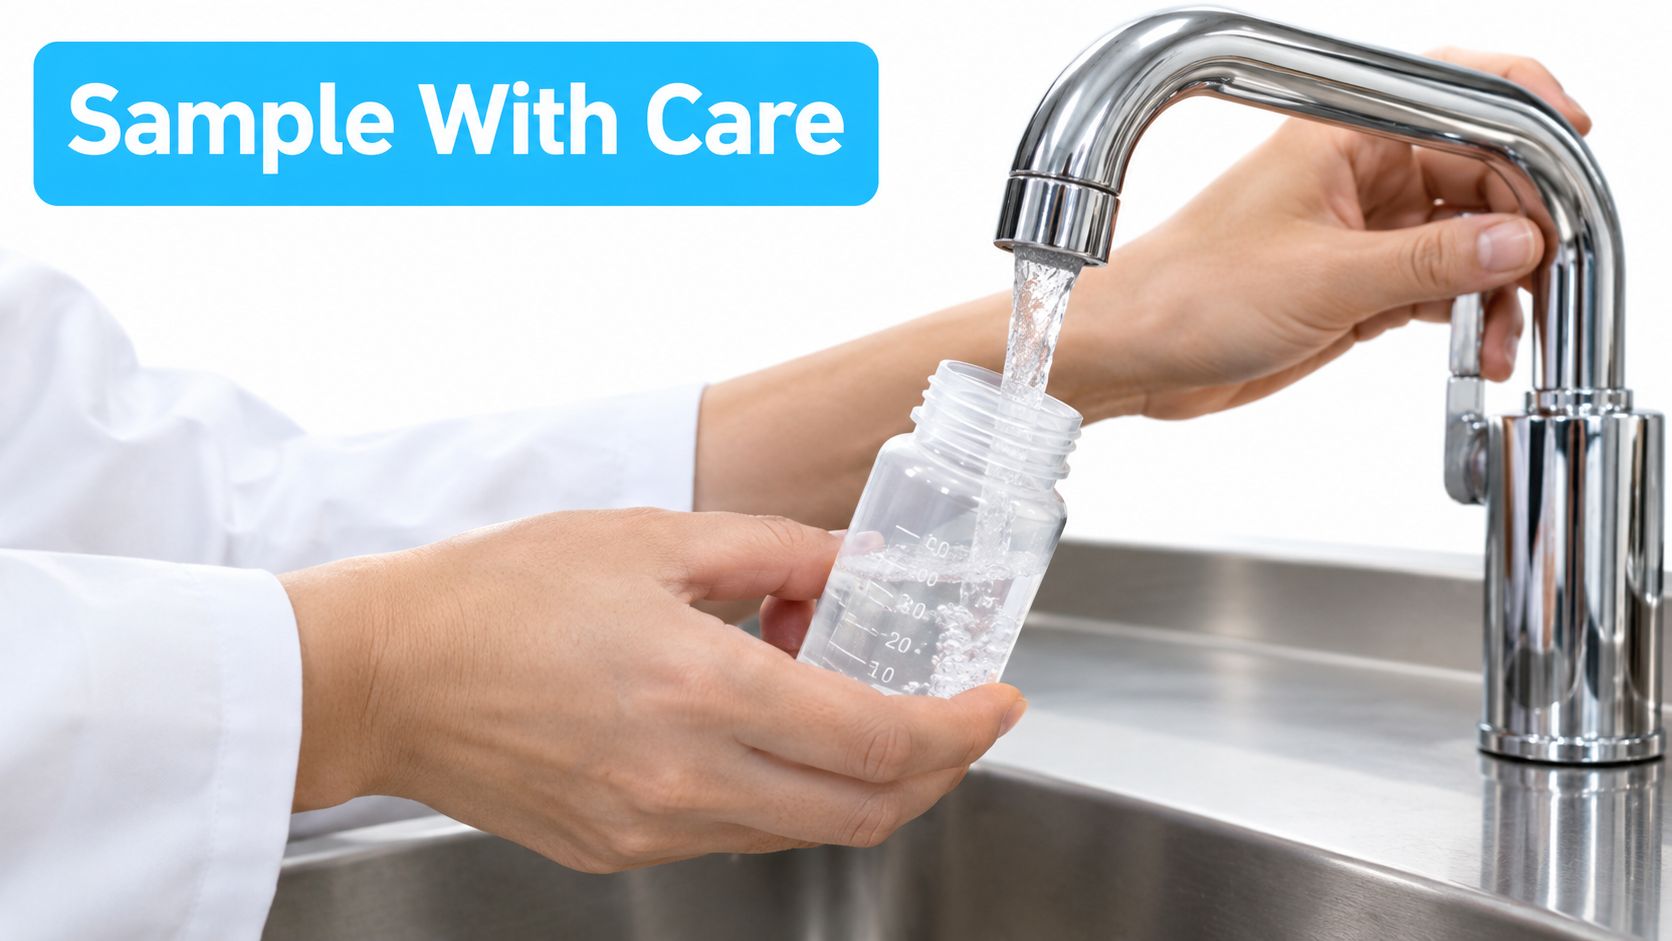
Use the faucet specified by the laboratory, usually the cold-water drinking tap. Remove attachments such as aerators if the instructions require it, let the water run for the stated period, and don't sample from an outdoor spigot unless the lab specifically asks for that location.
Wash your hands before handling bottles, keep the inside of caps and containers untouched, and fill each bottle exactly as instructed. Never rinse a bottle that contains preservative, and don't combine samples from different taps unless the laboratory directs you to do so.
Protect the sample in transit
Different analyses require different containers and handling. Bacteria samples may use sterile bottles with a dechlorinating agent, metals may require preserved bottles, and volatile compounds may require special vials filled without an air gap. Follow the instructions for each container, even when the procedure seems counterintuitive.
Keep samples cool when the kit provides an ice pack or requires refrigeration, and ship them according to the laboratory's schedule. Don't leave a biological sample sitting in a hot mailbox or on a delivery truck longer than the instructions allow. Record the tap location, collection time, and any treatment operating at the time of sampling.
For practical guidance on maintaining filtration equipment and interpreting household water issues, use the Water Filter Advisor advice page. Good maintenance records make test results easier to interpret because you'll know whether the sample represents untreated water, recently serviced equipment, or a system overdue for a cartridge change.
Translating Lab Results into Filtration Solutions
A lab report becomes valuable when it guides a treatment decision. Sort the findings into three groups: contaminants above the relevant comparison threshold, properties that affect equipment operation, and parameters that are present but do not require treatment. This diagnostic step helps you choose and size filtration equipment instead of buying from taste, odor, or sales claims.
Build the treatment list from the result
If chlorine, taste, or odor is the primary issue, compare an activated carbon filter sized for your household flow. For hardness, choose a water softener. A carbon cartridge is not designed to remove hardness.
For nitrate or certain dissolved contaminants, assess reverse osmosis or anion exchange. Reverse osmosis can work well at the point of use when the contaminant falls within the system's certified scope. Anion exchange may fit a whole-house design with different operating requirements. The report determines the target, and the certification determines whether the proposed equipment is credible.
Volatile organic compounds require careful product selection. A standard activated carbon block may lack the contact time or media design needed for a particular compound and concentration. Catalytic carbon may be the better choice when its performance claim covers the contaminant and the intended operating conditions.
Verify the finished water
Collect a baseline sample before selecting equipment. After installation, test treated water at the point your household uses it, such as the kitchen cold tap. To assess performance, compare untreated and treated samples collected under comparable conditions.
Check the actual result, laboratory reporting limit, comparison standard, and sample-quality notes. A “non-detect” does not prove complete absence when the reporting limit exceeds the concentration relevant to your decision. Before ordering, confirm the filter's flow rate, capacity, replacement schedule, and certified contaminant claims.
Water Filter Advisor provides consumer guidance for comparing home filtration systems, replacement cartridges, certifications, and water-testing options. Visit Water Filter Advisor to connect your results with a practical filtration shortlist rather than choosing equipment by guesswork.
Test untreated water first, identify the contaminant requiring attention, and select filtration certified for that specific job. Use Water Filter Advisor to compare treatment options and maintenance guidance, then purchase with a report in hand.
- September 30, 2026
- Uncategorized
