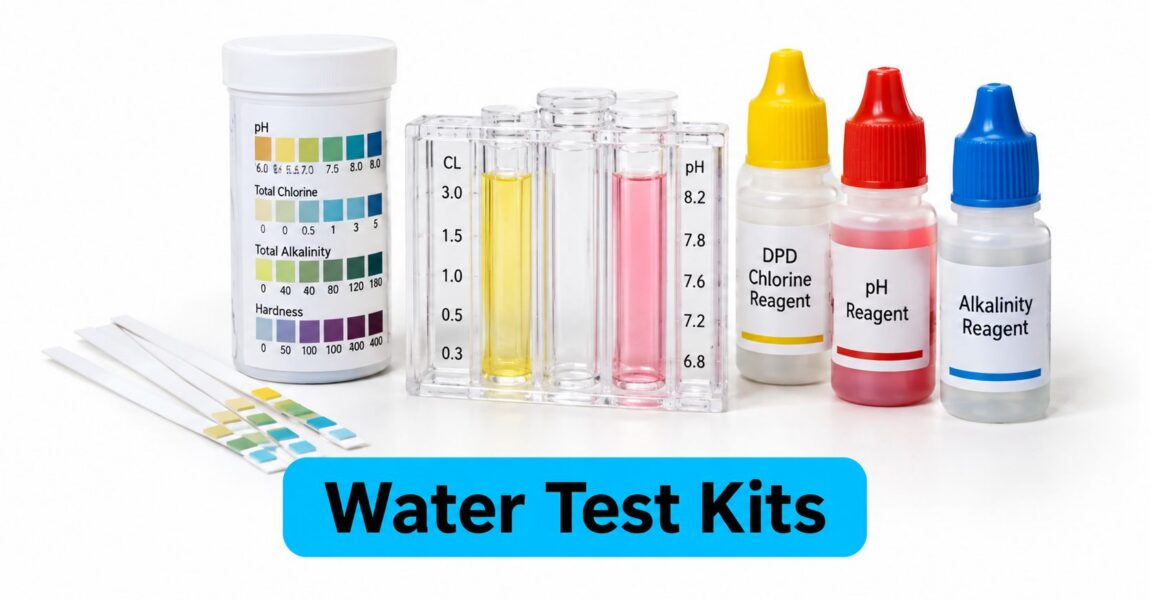
7 Water Testing Kit Reviews: Accuracy and Value Compared
A metallic taste in the morning often sends homeowners straight to the nearest water-testing kit. The first strip may report pH, hardness, chlorine, o ...
A metallic taste in the morning often sends homeowners straight to the nearest water-testing kit. The first strip may report pH, hardness, chlorine, o ...
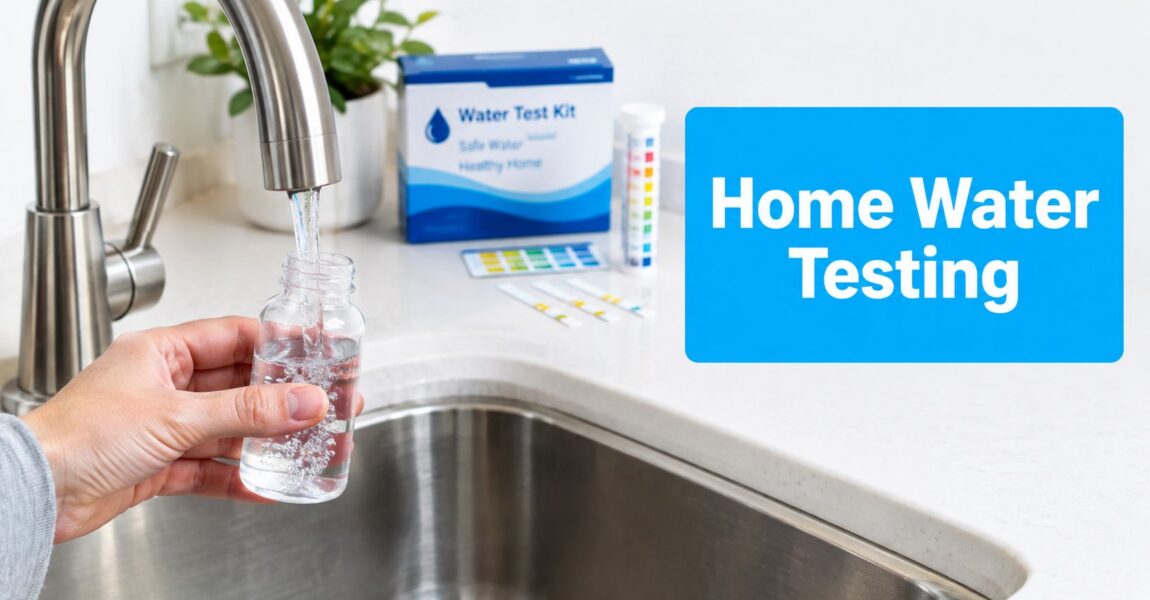
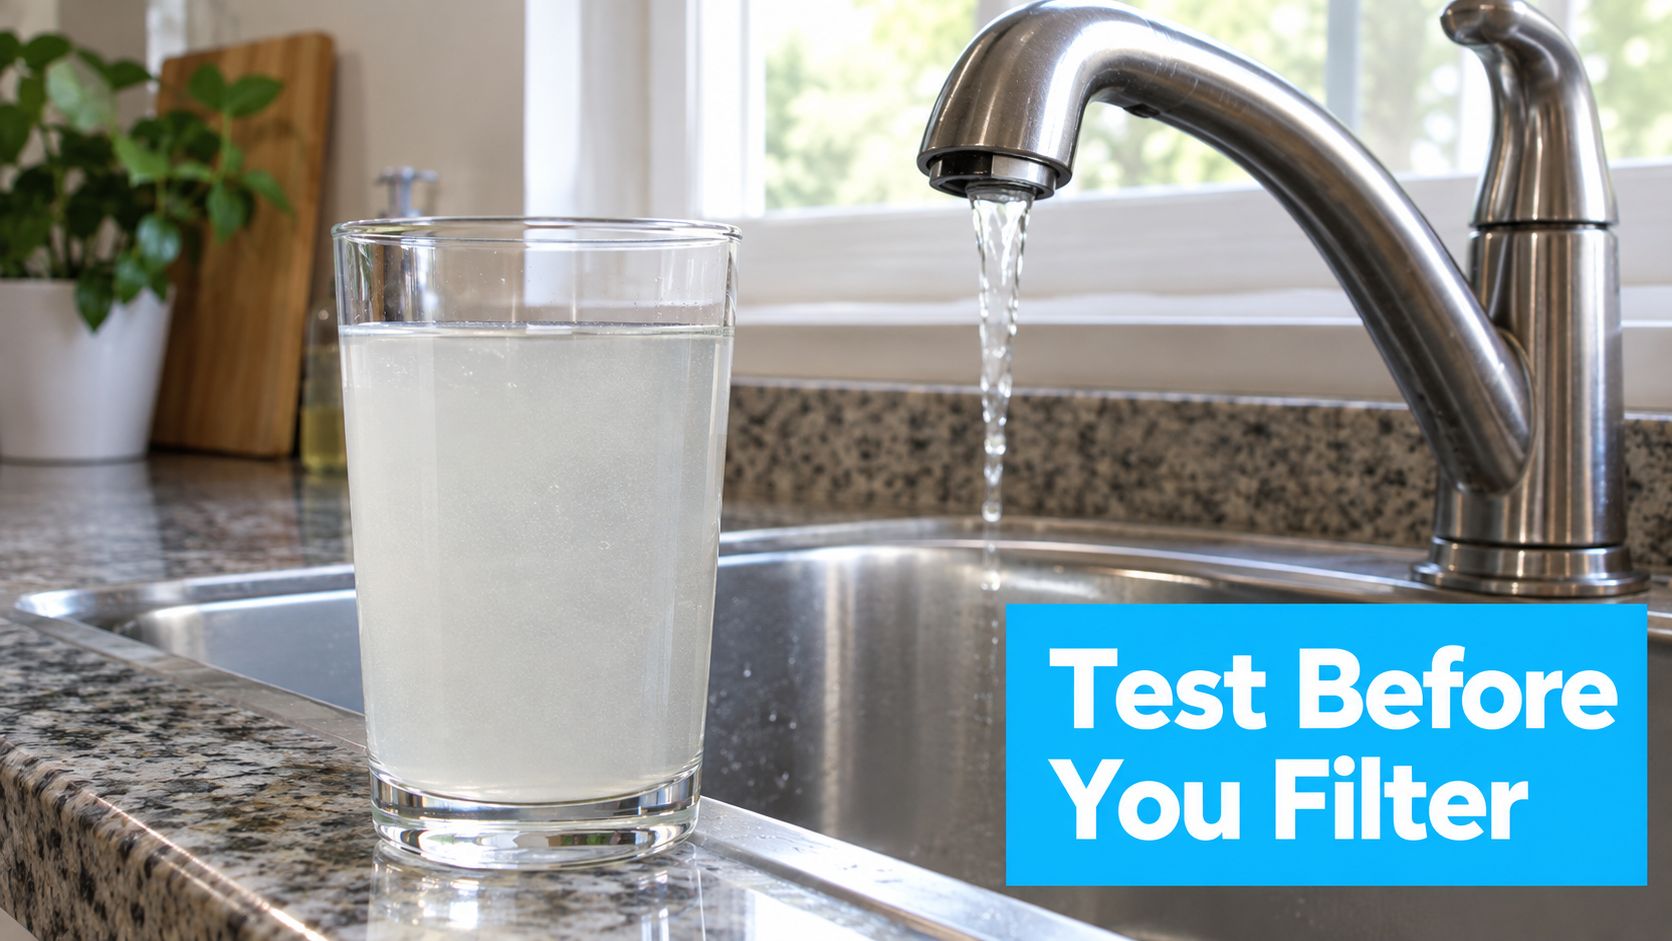
You notice it while filling the kettle. The water smells faintly metallic, the ice tastes different, or a cloudy glass leaves you wondering whether the problem is your plumbing, your municipal supply, or the filter under the sink. The obvious reaction is to search for a new water filter and order the first system promising cleaner, fresher water.
That's backwards. Water testing is the diagnostic step that tells you what filtration should do, which technology fits the problem, and whether the finished system works. Buy the test before you buy the filter, especially if you're considering a whole-house softener, carbon system, or reverse osmosis unit.
A homeowner with hard water may blame a strange taste on chlorine and install a carbon cartridge. Another may see orange staining, buy a softener, and discover that the underlying issue is iron rather than hardness. A sulfur smell can send someone toward a general-purpose filter when the first priority should be identifying the source of the odor and checking for related water-quality concerns.
Those mistakes happen because appearance and taste are clues, not diagnoses. Cloudiness doesn't identify a contaminant, and a metallic taste doesn't tell you which filtration media will remove it. A test gives you a starting point for choosing treatment instead of forcing you to shop by promise, packaging, or sales language.
Use the test to separate problems that look similar at the tap:
A test also helps size the system. Hardness results influence softener capacity, while flow demands and contaminant levels affect the design of whole-house treatment. An underpowered system can exhaust media quickly, and an oversized system can add unnecessary cost and maintenance.
Practical rule: Test untreated water before selecting equipment. Test treated water afterward when you need to verify performance.
If hardness is the central concern, a local installation resource such as Stultz Plumbing water softener information can help you understand what professional sizing and installation involve. The important point remains the same: filtration should respond to measured water conditions, not a guess based on one unpleasant glass.
The right place to buy depends on the question you're trying to answer. A strip can help you monitor a known issue, while a laboratory kit is the better choice when you're deciding whether your family needs a specific treatment system.
Dip strips are the quickest and least complicated option. You dip the strip, wait according to the instructions, and compare its color with the supplied chart. They're useful for routine screening of properties such as pH, hardness, chlorine, and some nitrate or iron indicators, but color matching is approximate. A strip can flag a change without telling you enough to make a health decision or size equipment precisely.
Color-disk and reagent kits add measured reagents and a visual comparison process. They can be more informative than a simple strip for selected parameters, particularly when the kit gives a clearer color scale. They still depend on careful timing, lighting, sample handling, and the kit's detection range. Treat them as screening tools, not substitutes for laboratory analysis when lead, bacteria, or other serious concerns are involved.
Mail-in laboratory kits provide bottles, collection instructions, and a laboratory analysis of the returned sample. The lab's methods and reporting limits matter more than the number of tests printed on the box. Laboratory testing is the most accurate option, and accredited laboratories are independently evaluated for technical competence, as explained in NSF's drinking-water testing guidance.
| Test Type | Accuracy Level | Typical Cost | Best Used For |
|---|---|---|---|
| Dip strips | Screening level, with visual interpretation | Low-cost retail option | Quick checks of pH, chlorine, hardness, and routine changes |
| Color-disk or reagent kit | Screening to moderate, depending on the method | Retail pricing varies by parameter and kit scope | More deliberate checks of selected chemistry |
| Mail-in lab kit | Quantitative laboratory result, dependent on the lab and method | Varies by panel, laboratory, shipping, and requested analyses | Health-related decisions, well baselines, and filtration selection |
Retail listings show the range clearly. Home Depot lists water-testing products such as strips, digital TDS meters, lead kits, bacteria kits, and multi-parameter kits at roughly $7 to $32 on its category page, while Lowe's water test kit listings show a typical price of about $24, with products ranging from approximately $9 to $259. Those figures describe retail listings, not laboratory services.
Buy strips when you already understand the water and want to monitor a system. For example, a homeowner who has had hardness measured in a laboratory can use strips to watch for a noticeable change between more complete checks.
Choose a lab kit before installing treatment, before investigating a health concern, or whenever the result will determine whether you need reverse osmosis, disinfection, or specialized media. A low-priced test that answers the wrong question is not a bargain.
For most homeowners, the best first stop is a major home-improvement retailer. Home Depot and Lowe's offer mainstream access to water test kits, and their category pages make it possible to compare formats, parameters, prices, and pickup options. That's useful when you've noticed a sudden taste or odor change and need a basic screening tool immediately.
Home-improvement stores work especially well for pH, chlorine, hardness, and TDS screening. They're less suitable when you need defensible results for lead, bacteria, nitrates, or a complex well-water treatment decision. Store availability also varies, so check the product details rather than assuming that a kit labeled “complete” covers the contaminant you care about.
Online marketplaces provide the widest assortment. You'll find inexpensive strips, digital meters, specialized kits, and mail-in laboratory panels in one search. The convenience is real, but marketplace listings require more scrutiny. Check the actual parameter list, the manufacturer's instructions, the laboratory receiving the sample, and the reporting limits. A long list of parameters doesn't automatically mean useful testing.
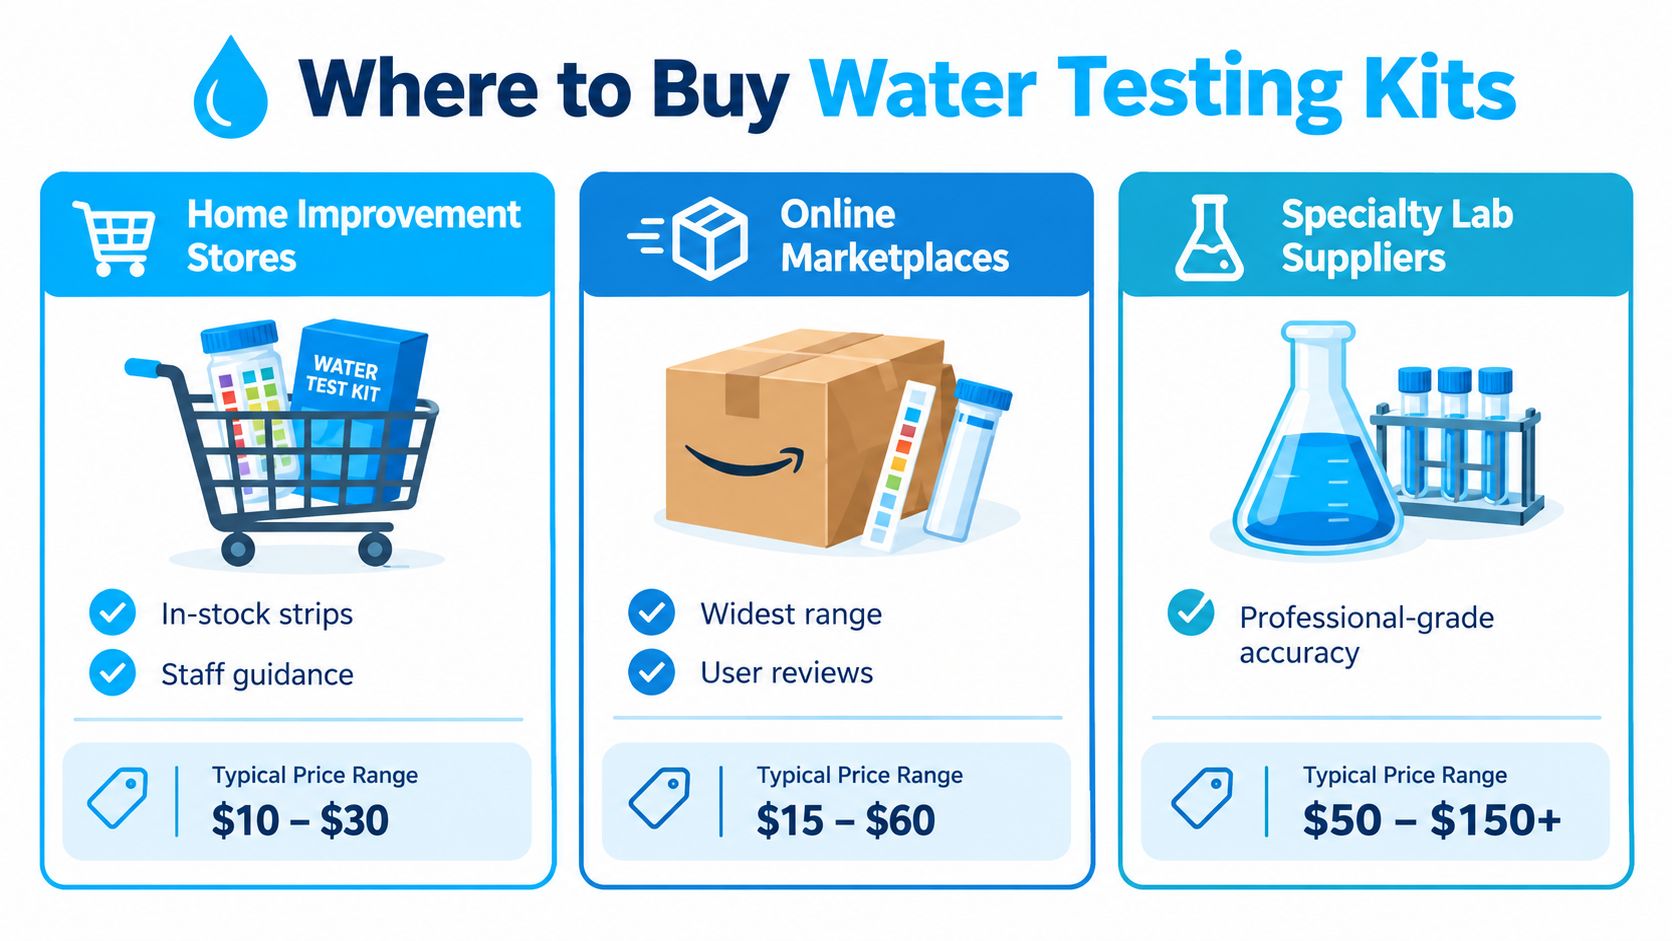
Specialty laboratory suppliers are the right choice for complete well testing, confirmatory work, and filtration decisions that involve health-related contaminants. You're paying for sample containers, preservation requirements, laboratory methods, reporting, and interpretation rather than just buying a color chart.
The market's size explains why all three channels are easy to find. One market estimate places the global water test kit market at $4.8 billion in 2025, projecting $8.2 billion by 2034 and a 7.2% CAGR. The same analysis estimates residential water-testing kit purchases at $892 million in 2025, representing 18.6% of total market revenue and growing at 9.8% annually. A separate industry estimate places testing kits at 42.6% of the broader water-testing market in 2026. These figures come from DataIntelo's water test kit market analysis, and they support a practical conclusion: comparison shopping is realistic because kits are no longer confined to professional distributors.
Use the hardware store for immediate screening, the online marketplace for selection, and the specialty lab for evidence that can guide treatment. This embedded video offers another visual introduction to the testing decision:
Your water source determines your first testing list. A private well has no utility department continuously managing the water at your tap, while municipal water has already gone through public treatment but can still be affected by service lines, household plumbing, and fixtures.
The U.S. EPA advises private well owners to test for coliform bacteria, nitrates, total dissolved solids, pH, and local contaminants of concern, as stated in its home drinking-water testing guidance. Start there, then expand the panel according to local geology, nearby land use, agricultural activity, septic systems, and any change in taste, smell, or appearance.
Use the result to direct treatment:
If your water has a rotten-egg smell, don't assume the answer is just “buy a filter.” This guide to why water smells like sulfur provides useful context for distinguishing an odor complaint from a treatment diagnosis.
Start with the annual Consumer Confidence Report from your water utility. The EPA recommends using that report to target specific at-home tests rather than buying an unnecessarily broad kit. A tap sample can then investigate what happens between the utility's system and your kitchen faucet.
Prioritize lead and copper when household plumbing is a concern. Check chlorine or chloramine when taste and odor are the issue, and include pH or TDS when you're evaluating corrosion, scale, or reverse osmosis performance. The correct filter depends on the result. Carbon can address disinfectant taste, while lead reduction requires a product certified for that specific performance claim.
Don't sample only after filtration if you're choosing a system. Collect untreated water to understand the incoming problem, then collect finished water later to confirm what the equipment changed.
A test kit's marketing label matters less than its analytical scope. Before buying, identify the exact contaminant, the reported measurement range, and the lowest concentration the method can reliably detect. A kit that claims to test for lead is not useful for a serious lead investigation if its detection limit is too high to identify the level you need to act on.
NSF's P524-2023 protocol applies to water-quality testing devices used without laboratory equipment and defines validation for real-time or short-wait kits. That gives buyers a meaningful point of comparison when a product listing or package references P524 or an equivalent performance standard.
NSF's certified products and systems information also explains that drinking-water test devices and filtration products are evaluated against recognized standards. The relevant standards include NSF/ANSI 42, 53, 58, 55, and 62, along with the separate NSF P524 protocol for water-quality test devices.
Certification isn't a universal approval of every claim a seller makes. It applies to a defined product, contaminant, test method, and performance scope. Read the listing closely and confirm that the certification covers the function you need.
Think of a detection limit as the smallest concentration the method can distinguish with useful confidence. If the kit reports only “low,” “medium,” or “high,” it may be adequate for household screening but not for deciding whether a health-related contaminant requires treatment.
For filtration, compare two separate documents:
NSF/ANSI 53 and NSF/ANSI 58 are not interchangeable. A certified product must be matched to the contaminant and filtration type stated in its performance claim. Never use a TDS reading as proof that water is safe, because TDS measures dissolved material without identifying what that material is.
For high-confidence results, use a state drinking-water laboratory or another appropriately accredited laboratory. That's the sensible route when results may support a property transaction, regulatory question, or major filtration purchase.
The sample is part of the test. A carefully designed laboratory method can't rescue water that was collected from the wrong faucet, placed in the wrong bottle, exposed to heat, or shipped after the allowable holding period.
Use the faucet specified by the laboratory, usually the cold-water drinking tap. Remove attachments such as aerators if the instructions require it, let the water run for the stated period, and don't sample from an outdoor spigot unless the lab specifically asks for that location.
Wash your hands before handling bottles, keep the inside of caps and containers untouched, and fill each bottle exactly as instructed. Never rinse a bottle that contains preservative, and don't combine samples from different taps unless the laboratory directs you to do so.
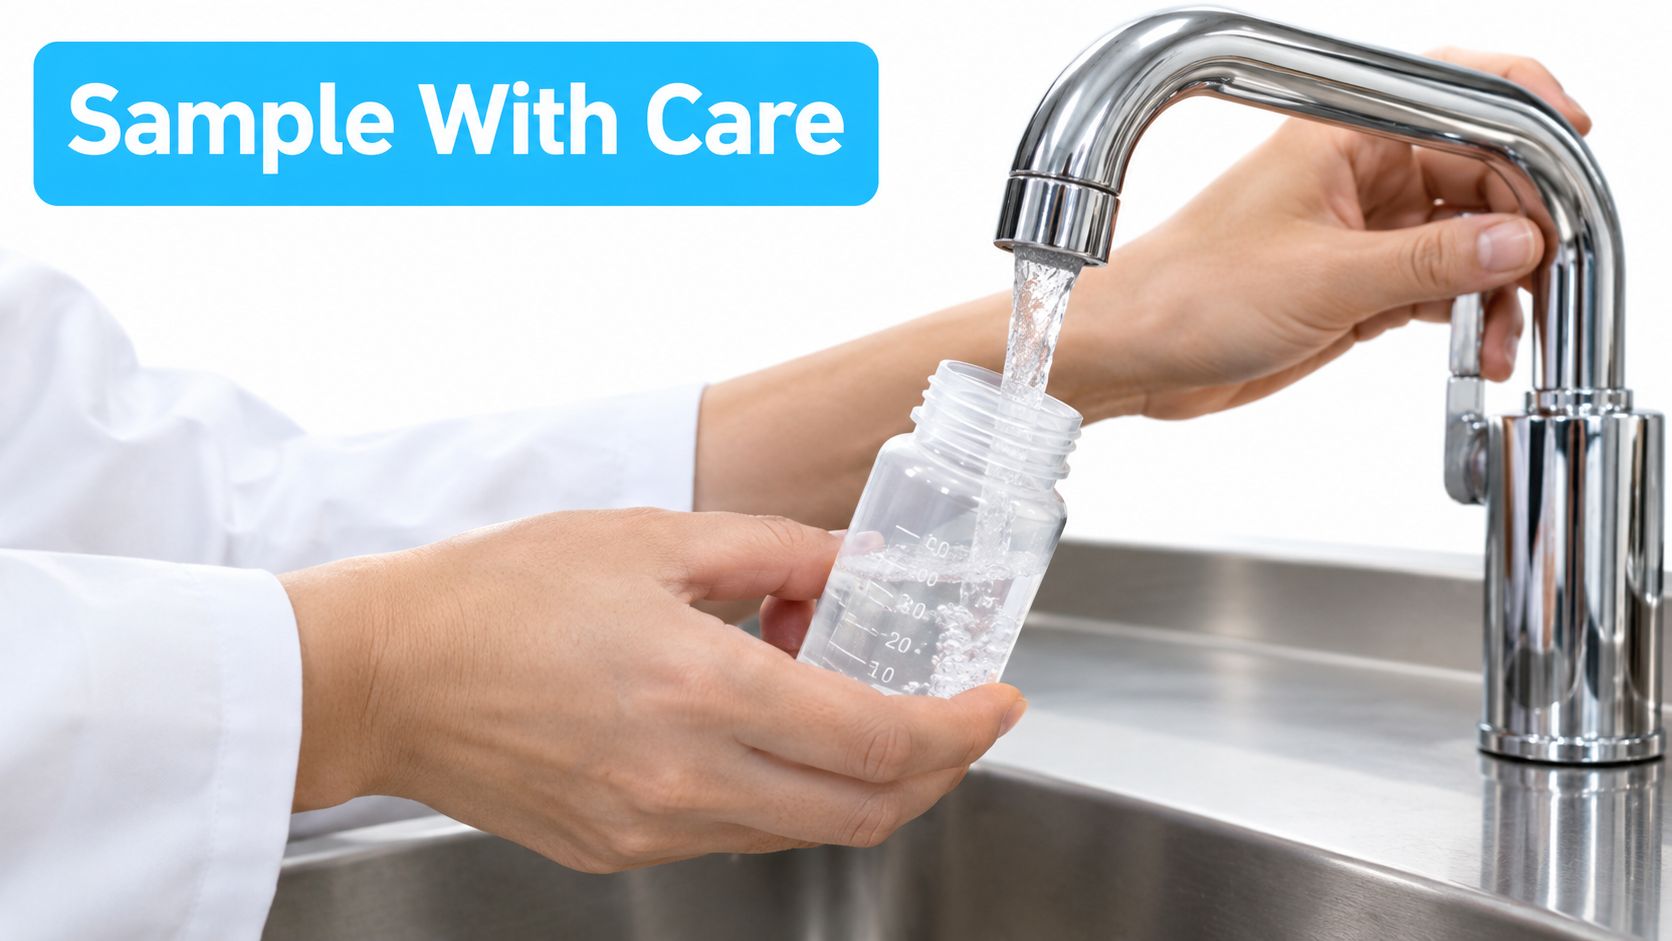
Different analyses require different containers and handling. Bacteria samples may use sterile bottles with a dechlorinating agent, metals may require preserved bottles, and volatile compounds may require special vials filled without an air gap. Follow the instructions for each container, even when the procedure seems counterintuitive.
Keep samples cool when the kit provides an ice pack or requires refrigeration, and ship them according to the laboratory's schedule. Don't leave a biological sample sitting in a hot mailbox or on a delivery truck longer than the instructions allow. Record the tap location, collection time, and any treatment operating at the time of sampling.
For practical guidance on maintaining filtration equipment and interpreting household water issues, use the Water Filter Advisor advice page. Good maintenance records make test results easier to interpret because you'll know whether the sample represents untreated water, recently serviced equipment, or a system overdue for a cartridge change.
A lab report becomes valuable when it guides a treatment decision. Sort the findings into three groups: contaminants above the relevant comparison threshold, properties that affect equipment operation, and parameters that are present but do not require treatment. This diagnostic step helps you choose and size filtration equipment instead of buying from taste, odor, or sales claims.
If chlorine, taste, or odor is the primary issue, compare an activated carbon filter sized for your household flow. For hardness, choose a water softener. A carbon cartridge is not designed to remove hardness.
For nitrate or certain dissolved contaminants, assess reverse osmosis or anion exchange. Reverse osmosis can work well at the point of use when the contaminant falls within the system's certified scope. Anion exchange may fit a whole-house design with different operating requirements. The report determines the target, and the certification determines whether the proposed equipment is credible.
Volatile organic compounds require careful product selection. A standard activated carbon block may lack the contact time or media design needed for a particular compound and concentration. Catalytic carbon may be the better choice when its performance claim covers the contaminant and the intended operating conditions.
Collect a baseline sample before selecting equipment. After installation, test treated water at the point your household uses it, such as the kitchen cold tap. To assess performance, compare untreated and treated samples collected under comparable conditions.
Check the actual result, laboratory reporting limit, comparison standard, and sample-quality notes. A “non-detect” does not prove complete absence when the reporting limit exceeds the concentration relevant to your decision. Before ordering, confirm the filter's flow rate, capacity, replacement schedule, and certified contaminant claims.
Water Filter Advisor provides consumer guidance for comparing home filtration systems, replacement cartridges, certifications, and water-testing options. Visit Water Filter Advisor to connect your results with a practical filtration shortlist rather than choosing equipment by guesswork.
Test untreated water first, identify the contaminant requiring attention, and select filtration certified for that specific job. Use Water Filter Advisor to compare treatment options and maintenance guidance, then purchase with a report in hand.

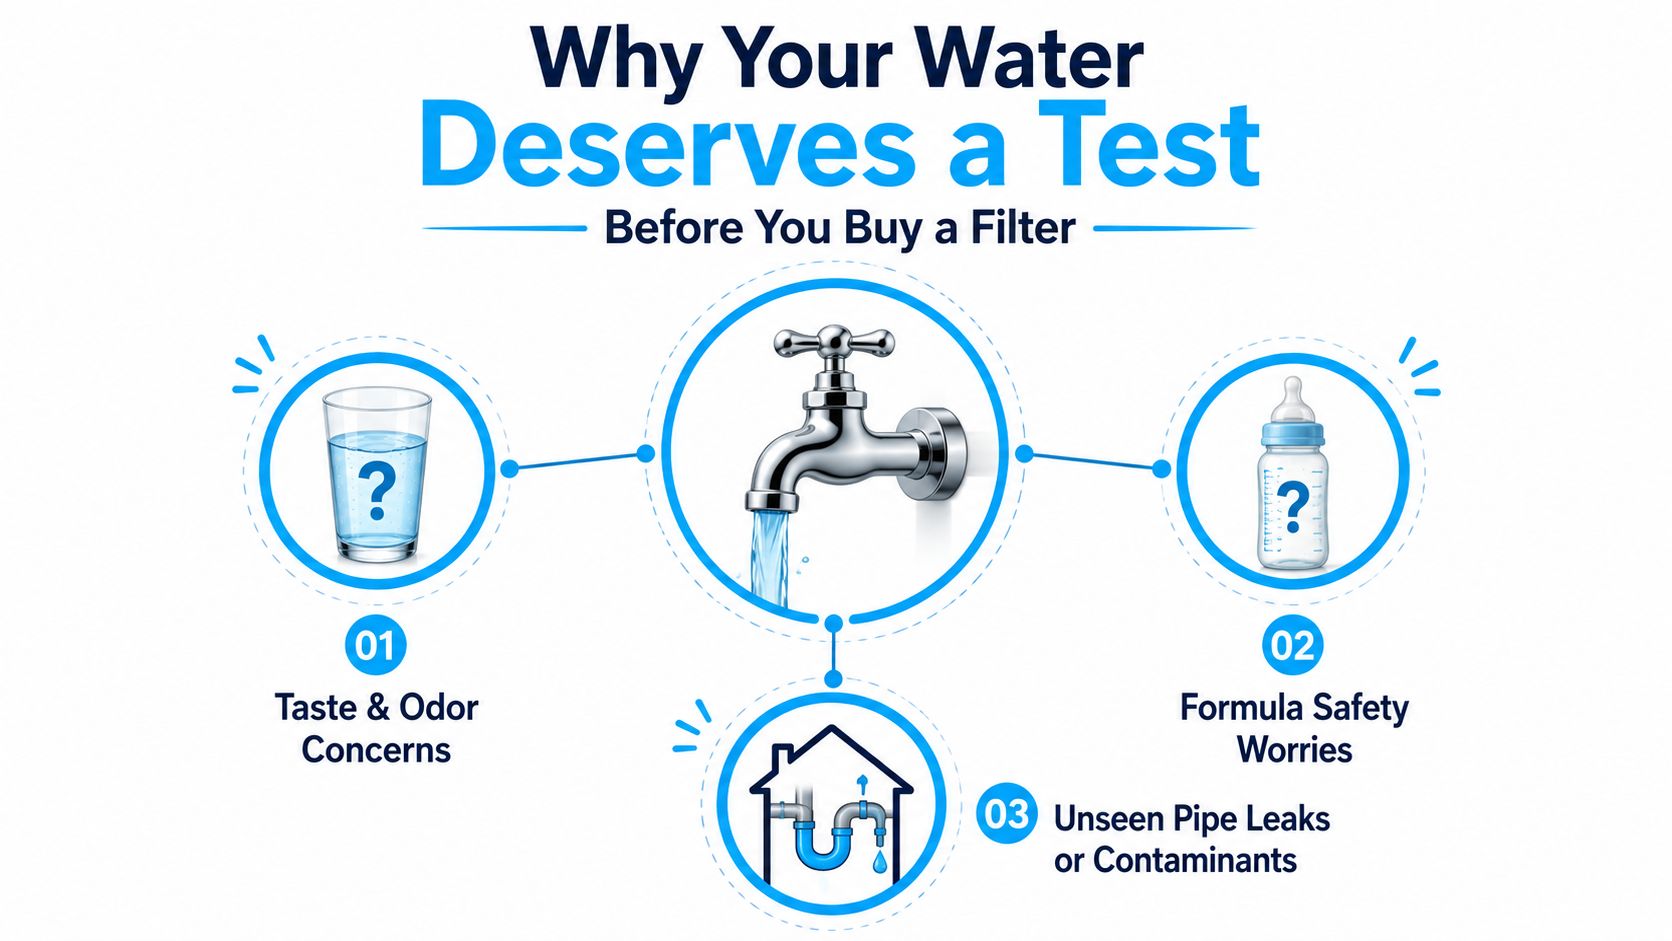
You're standing at the sink with a glass that looks clean, but something's off. Maybe the water smells faintly metallic, maybe the tea tastes flat, or maybe you're mixing formula and you'd rather not guess what's coming out of the tap. That's the exact moment a water testing kit for home stops being a gadget and starts being the first sensible move before you buy a filter.
A filter without a test is a blind purchase. You can spend money on the wrong media, the wrong installation, or a system built for a problem you don't have. The smarter move is simple, test first, then match the filter to the water, not the other way around.
If you want a broader consumer guide to taste and quality issues before you commit to hardware, the PureHQ coffee water quality guide is a useful companion read. For a more filtration-focused overview, the advice hub at https://www.waterfilteradvisor.com/advice/ is worth keeping handy while you sort out what your water needs.
The quickest way to waste money on filtration is to shop by guesswork. A homeowner notices a smell, hears a neighbor complain, or sees a little scale on fixtures, then buys a random cartridge system that claims to fix everything. That usually ends in disappointment, because a filter that handles chlorine will not solve iron staining, and a softener will not address bacteria concerns.
The EPA has long treated home water testing as a routine task, not a panic move. For private wells, it recommends testing every year for total coliform bacteria, nitrates, total dissolved solids, and pH, and every 3 years for sulfate, chloride, iron, manganese, hardness, and corrosion EPA home water testing guidance. It also recommends extra testing after a new well, pipe repairs, or an objectionable taste or smell, which is exactly why a water testing kit for home is a screening tool you keep using, not a one-time novelty.
Practical rule: if the water source changed, the plumbing changed, or the taste changed, test before you treat.
The family-health side gets overlooked too often. The EPA specifically says nitrate should be tested in the early months of pregnancy and again during the first six months of a baby's life. That makes testing especially important for households with infants or pregnancy concerns, because a clean-looking glass tells you nothing about dissolved contaminants EPA home water testing guidance.
A quick test is the cheapest insurance policy in filtration. It tells you whether you need chlorine reduction, softening, iron control, or a higher-confidence lab result before you buy the wrong fix.
If you want a broader consumer guide to taste and quality issues before you commit to hardware, the PureHQ coffee water quality guide is a useful companion read. For a more filtration-focused overview, the advice hub at Water Filter Advisor advice is worth keeping handy while you sort out what your water needs.
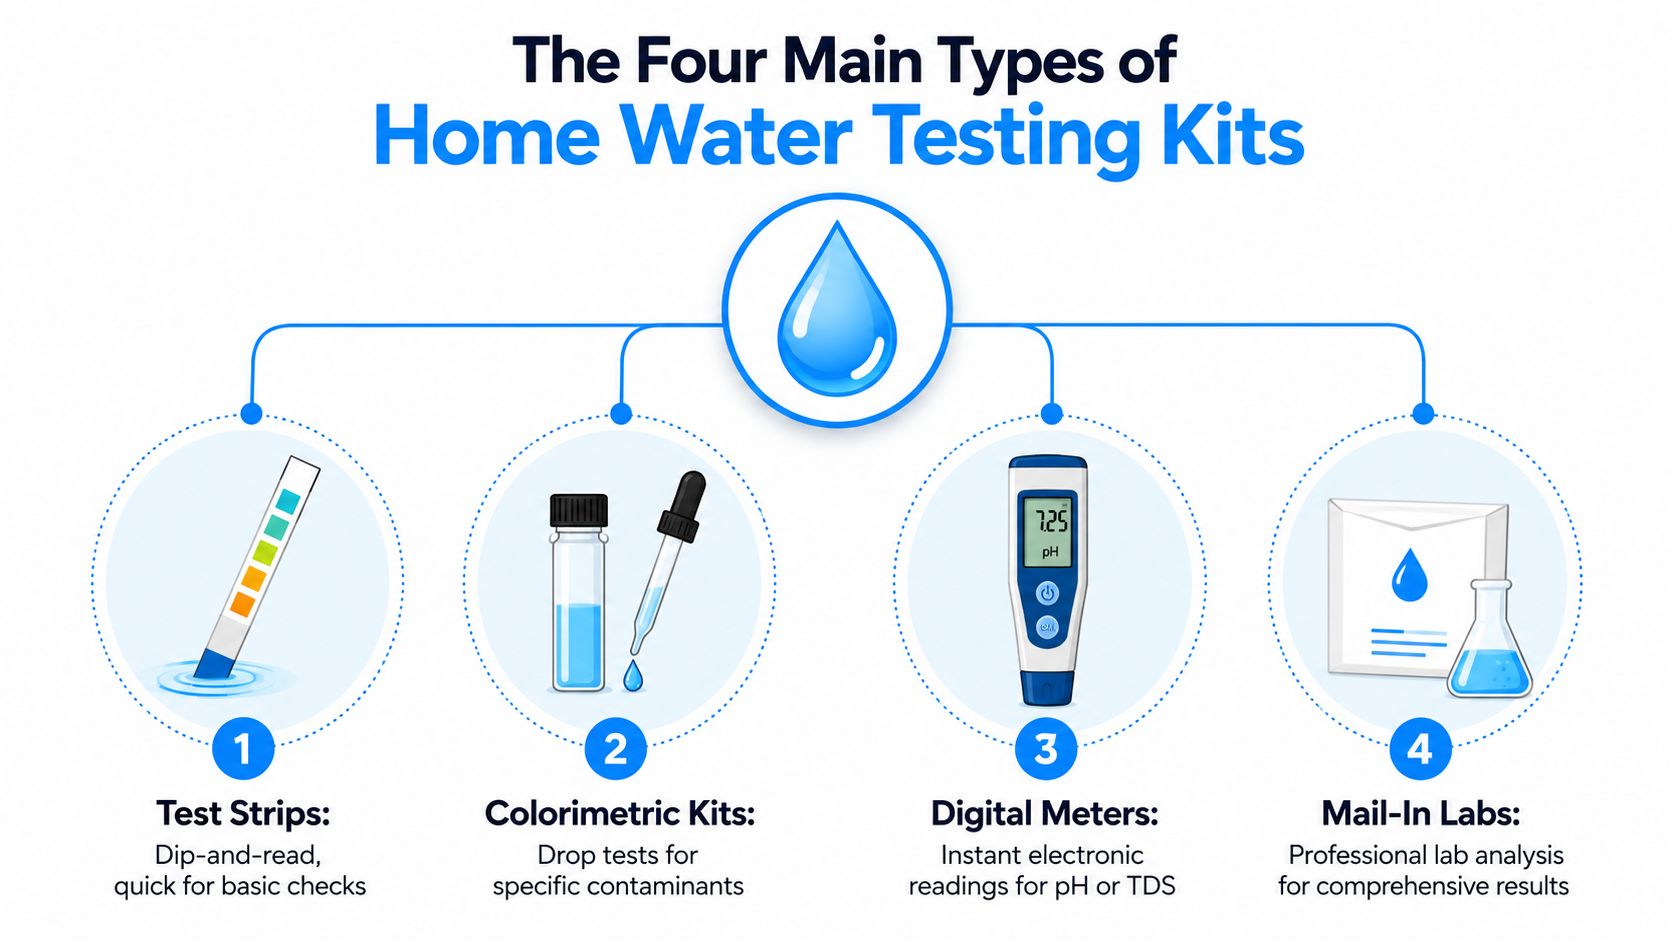
A water testing kit for home usually falls into one of four buckets, and the format matters more than the packaging. Test strips are a fast screen. Drop kits are a little more hands-on and usually more specific. Digital meters give you a number for a narrow measurement. Mail-in labs hand the sample to professionals and give you the broadest picture.
Test strips are the quickest option. You dip them, wait, and compare the color to a chart. They're useful for everyday checks like pH, chlorine, hardness, and sometimes nitrates or iron, but they're not magic and they're definitely not the right tool for every concern.
Drop kits work more like a small home chemistry set. You add reagents to a sample, watch for a color change, and read the result against a chart or vial scale. They usually give you better control than a strip when you're chasing one parameter, especially if you care about a specific nuisance like hardness or chlorine residual.
Digital meters are the blunt, no-drama tools. They're best for narrow readings such as pH or TDS, where you want a number instead of a color guess. They don't cover broad contamination, but for routine monitoring they're easy to live with and faster to read than a strip if you're the kind of person who hates squinting at pale yellow squares.
Mail-in kits are the heavyweight option. You collect the sample at home, ship it out, and get a lab report back. Independent review coverage notes that some of these kits can measure more than 100 contaminants, including metals like lead, mercury, and arsenic, VOCs like chloroform, bacteria, pesticides, and nitrates, while DIY strips stay much narrower Wirecutter review of home water test kits.
| Kit Format | Typical Parameters | Best For | Limits |
|---|---|---|---|
| Test Strips | pH, chlorine, hardness, sometimes nitrates or iron | Quick baseline checks | Narrow coverage, color reading can be fuzzy |
| Colorimetric Kits | Specific contaminants with better visual resolution | Targeted homeowner testing | Still limited to what the kit is built to measure |
| Digital Meters | pH, TDS, and similar narrow readings | Fast numeric tracking | Doesn't tell you much about actual contaminant type |
| Mail-In Labs | Broad panels for metals, VOCs, bacteria indicators, pesticides, nitrates | Serious screening and deeper confidence | Slower turnaround, more hassle, more expensive than strips |
The marketing on the box often oversells convenience and undersells limits. That's a bad trade for homeowners, because the central question isn't how many boxes of color you get. The central question is whether the kit can detect the contaminant you're concerned about at a useful level.
Strips are fine for basics like pH, hardness, chlorine, and sometimes a rough read on nitrates or iron. They're a decent first pass if you want a quick read on whether your softener is working or whether chlorine is present in city water. They are not the right answer when you need action-level confidence on trace metals or bacteria.
Colorimetric kits usually do one thing better than strips, they give you a more controlled read on a chosen parameter. That makes them better for a homeowner who already suspects a specific issue, like scale, low pH, or residual disinfectant. They don't turn into a broad contamination detector just because they look more technical on the counter.
Digital meters are built for narrow measurements, not broad safety screening. They shine when you want repeatable pH or TDS readings and nothing else. Mail-in lab kits, by contrast, are built for wider screening and can include metals, VOCs, bacteria indicators, pesticides, and nitrates, which is why they're the right tool when you need a real map of the water, not a snapshot.
A kit that measures more parameters isn't automatically better. If it can't detect the contaminant you care about at a meaningful level, the extra boxes on the label are just decoration.
| Format | What It Commonly Detects Well | What It Misses |
|---|---|---|
| Test strips | pH, chlorine, hardness, sometimes nitrates or iron | Lead at actionable levels, bacteria, deeper contamination |
| Colorimetric kits | Specific single-issue chemistry with better visual resolution | Broad pathogen screening, many trace contaminants |
| Digital meters | pH, TDS, other narrow numeric readings | Actual contaminant identity, health-risk context |
| Mail-in labs | Wider contaminant panels, including metals, VOCs, bacteria indicators, pesticides, nitrates | Depends on the chosen panel, not all labs test the same list |
The hard truth is that a water testing kit for home can be useful and still be imperfect. A 2025 PubMed-indexed study found home-use drinking water test kits were highly repeatable, but performance varied depending on the contaminant, the water matrix, and the kit used PubMed study on home water test kit performance. That's the detail homeowners need to hear, because repeatable doesn't always mean equally accurate across every contaminant.
The big takeaway is simple. Single-parameter tests tend to be more dependable than multiparameter tests when you care about a specific reading. A 2025 University of Massachusetts Amherst study reported high variability among at-home water kits, and found that none of the multiparameter tests detected low levels of iron while 3 of 4 single-parameter tests did UMass Amherst study coverage. That matters because iron is a common nuisance contaminant that affects taste, staining, and filter choice.
False positives and false negatives are real. Color-matching errors happen when lighting is bad or the user reads the strip too early or too late. Multi-parameter strips also create a trap that shoppers fall into all the time, they assume more paddles on the card means broader truth. It doesn't. It often means more places for the reading to drift.
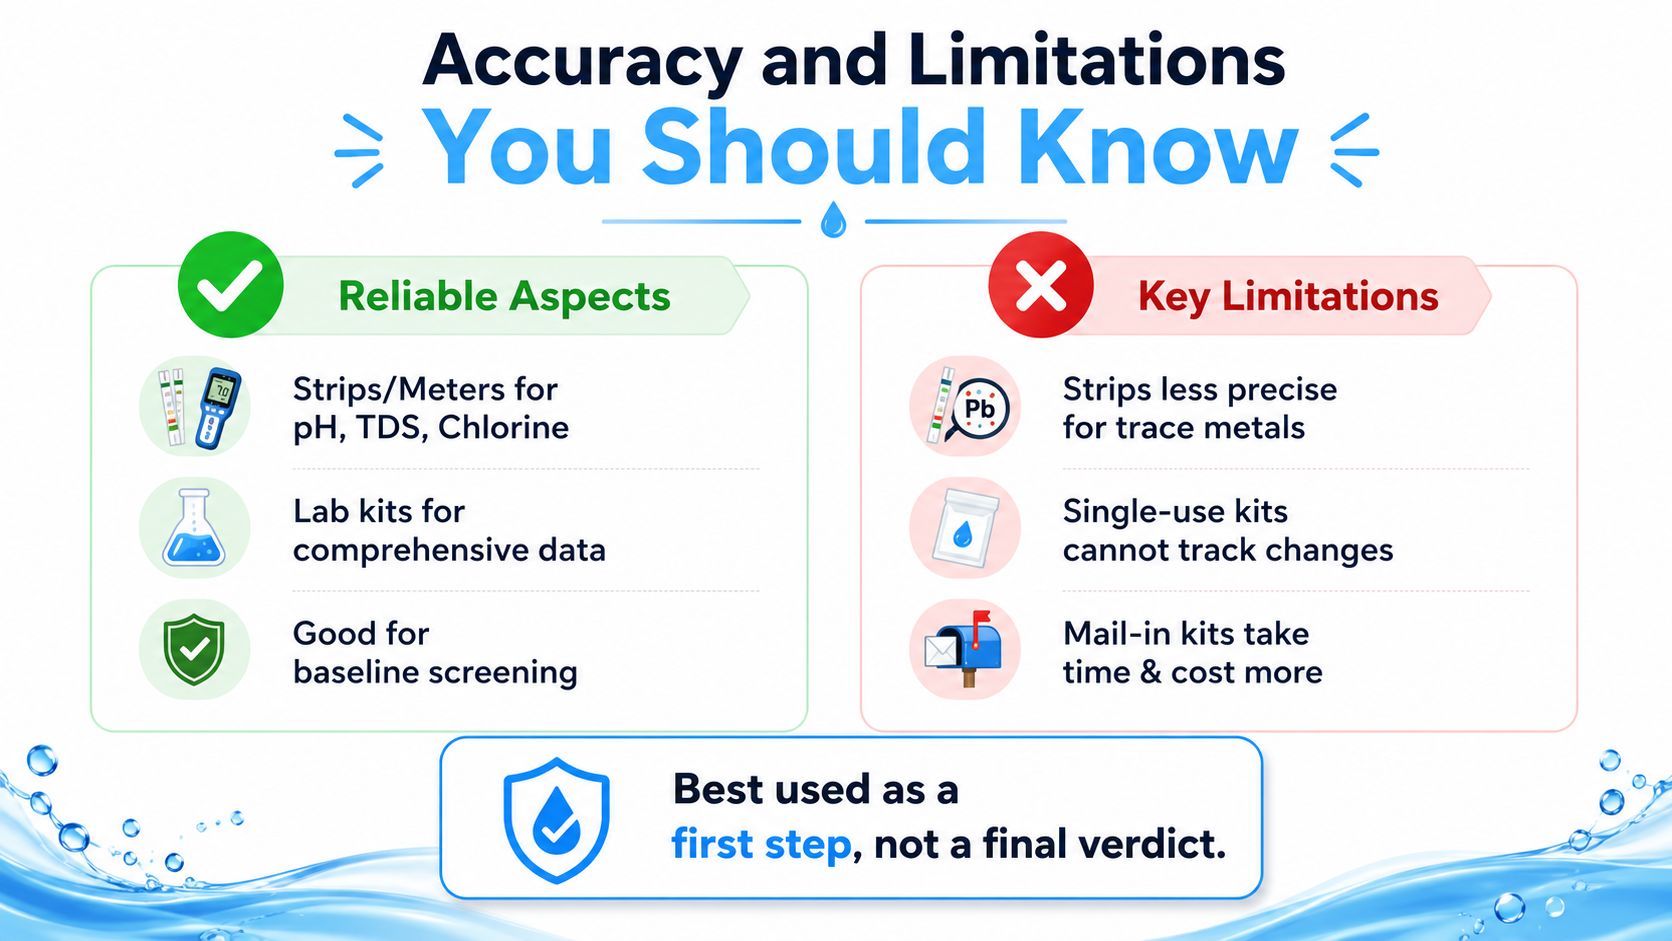
Best use: treat home testing as a first step, not a final verdict, especially when the concern is lead, bacteria, or illness-related.
Accuracy matters, but so does the question you're asking. A kit can be perfectly decent for baseline screening and still be the wrong tool for a health-triggering problem. The goal is not to get an answer fast. The goal is to get the right answer.
Bad sampling ruins good kits. You can buy a solid tester and still get a nonsense result if you pull from the wrong faucet, grab the sample too soon, or touch the reactive end of a strip. Homeowners blame the water when the actual problem is the sample.
Start with the tap that reflects the water you drink. If you're testing household plumbing, use a kitchen cold tap unless the kit says otherwise. If you're testing a well or post-filter water, sample at the point you care about, not somewhere convenient that gives you a distorted reading.
A few habits keep you from contaminating the result:
Do this every time: if you don't flush the line first, you're testing what sat in the pipe, not necessarily what your water source actually contains.
The flush time matters because standing water can pick up copper or lead from plumbing before you ever touch the glass. That's why a first-draw sample and a flushed sample answer different questions. One tells you what sat in the pipe, the other tells you what's coming through the line under normal use.
If you're using a lab kit, follow the kit's bottle order and preservation steps exactly. Those details matter more than people think. A rushed collection turns a useful test into expensive guesswork, and guesswork is how homeowners buy the wrong filter twice.
Numbers mean nothing until you tie them to a decision. A result can be acceptable, worth monitoring, or a sign that you need a different filter or a lab follow-up. The point is not to stare at the chart. The point is to know what the chart is telling you about water quality, plumbing, and taste.
pH tells you whether water leans acidic or alkaline. Low pH can point toward corrosion risk, which matters for plumbing and for any household worried about metals leaching from pipes. Hardness points to scale buildup risk, which is why it changes shower feel, spot residue, and softener selection.
TDS means total dissolved solids, a broad measure that tells you how much dissolved material is in the water, not exactly what the material is. Nitrate is a red-flag screening item for households on well water, especially where agriculture or septic influence is possible. Chlorine tells you whether disinfectant is present in treated municipal water. Iron points to staining and taste issues, and it also changes what kind of filter media makes sense.
If a lab report arrives, don't let the jargon intimidate you. Look for the parameter name, the unit, the detection limit, and whether the result is flagged. A result below the detection limit is not the same as a clean bill of health, it just means the lab couldn't quantify it at that level.
A realistic example helps. If a well-water test shows low pH and iron, the immediate takeaway is not panic. It means you may be looking at corrosion control, stain control, or both, which points you toward the right treatment path instead of a random pitcher filter.
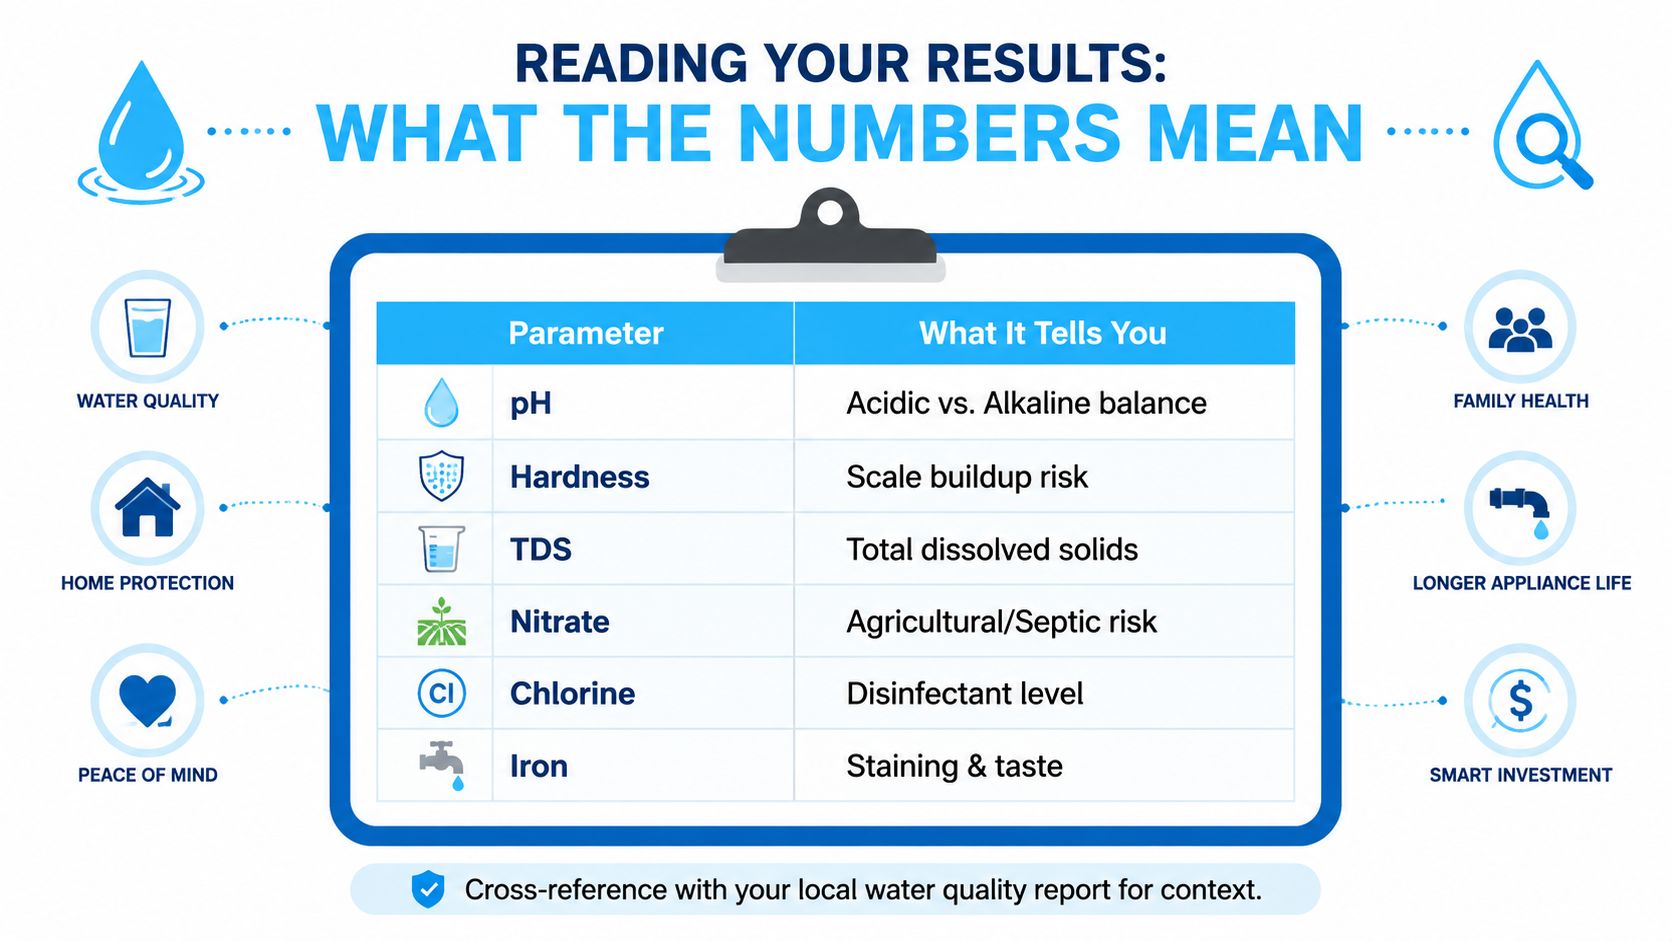
Cross-reference your result with your local water quality report if you have one, but don't use that report as a substitute for the sample in your hand. The report gives context. Your kit tells you what your household sees at the tap.
Homeowners often get themselves into trouble. A casual kit is fine for routine screening, but it's the wrong call when the issue moves from convenience to health concern. If the water smells off after flooding, if a well was just repaired, if plumbing changed, or if someone in the house is sick and water is a suspect, stop guessing and escalate.
The EPA's own guidance draws a line between screening and higher-confidence testing, and it recommends retesting after plumbing changes, flooding, well repairs, or suspected contamination EPA home drinking water testing page. That's the moment to use a state-certified lab or get guidance from your health department, not because home kits are useless, but because the situation is more than a strip can handle.
Here's where I'd push most homeowners toward a lab immediately:
If you need a lab, use a state-certified one and choose the panel based on the concern, not the marketing language. A broad lab panel is worth it when you need confidence, especially for metals, bacteria indicators, or compounds that basic home kits don't handle well. The cost and turnaround are the tradeoff, and they're worth paying when the alternative is buying the wrong treatment or missing a serious issue.
The rule is plain. Screen at home. Confirm at a lab when the problem is health-related, system-related, or oddly persistent.
Start with three questions. Where does the water come from? What are you worried about? How much certainty do you need? Answer those and the right kit type usually picks itself.
If you're on municipal water and your complaint is taste, odor, or scale, a strip, drop kit, or digital meter may be enough for a first screen. If you're on a private well, routine screening matters more, and a mail-in lab or a targeted home kit is the smarter default when you need a broader contaminant view. If you're worried about lead, bacteria, or an illness-linked problem, skip the casual all-in-one strip and go straight to a lab-backed approach.
For routine maintenance, choose the simplest tool that answers the question. For filter selection, match the kit to the contaminant. For health concerns, use home testing as a checkpoint, not the finish line. That approach keeps you from overbuying on false alarms and underbuying when the water really does need serious treatment.
The cleanest strategy is a two-step path. Use a home kit to identify the likely issue, then pair it with a lab test when the reading is unclear, or the source is a well. That's how homeowners stop buying generic filters and start building a filtration setup that fits the water in the house.
If you want a straight answer on filters after you test, Water Filter Advisor breaks down which systems fit different water problems without the marketing fluff. Visit Water Filter Advisor when you're ready to match your test results to the right home filtration setup and avoid buying the wrong kit or the wrong system twice.
You draw a glass from the kitchen tap, take a sip, and pause. Maybe the water tastes flat after a week of heavy rain. Maybe the well cap was disturbed during yard work. Maybe nothing seems wrong at all, and that's the problem. Coliform contamination usually doesn't announce itself with a dramatic smell or color change.
That's why homeowners get tripped up by water testing. They treat one clean result like a lifetime guarantee, or one positive result like proof the whole well has failed. In practice, a coliform bacteria test method is more like a diagnostic tool than a verdict. It tells you what was happening in that sample, at that moment, under those conditions.
For home water filtration, that distinction matters. You can't choose the right fix until you know whether you're dealing with a real contamination issue, a sampling mistake, or a short-term event that showed up after rain, plumbing work, or disturbance in the well system.
A common story goes like this. A homeowner has a private well, the water has always seemed fine, and then a stretch of wet weather rolls through. A few days later, the water feels “off.” Not necessarily dirty. Just different. That's often when coliform testing becomes urgent.
Coliform bacteria are best understood as an indicator. They are the warning light on the dashboard, not the engine problem itself. Their presence suggests there may be a pathway allowing contamination into your water system. That could mean surface water intrusion, a problem at the wellhead, a cracked casing, poor sealing, or contamination introduced somewhere in the home plumbing or filtration setup.
Many homeowners want a simple pass or fail. Water doesn't always cooperate.
A single positive or negative result is merely a “snapshot” that can miss intermittent contamination. Coliforms in wells are most likely to appear during wet weather in late spring or early summer, which means tests taken during drier periods can create a false sense of security, as noted in this home water testing guidance.
Practical rule: If your water source is a well, treat one test result as one photograph, not the whole movie.
That matters for filtration decisions. If you install a treatment system after one bad sample without confirming the pattern, you may spend money solving the wrong problem. If you skip treatment because one winter sample came back clean, you may miss contamination that shows up when rainfall changes the groundwater conditions.
The first good move isn't buying equipment. It's getting a trustworthy sample and understanding what it means for the home system as a whole.
If you're sorting through treatment options, broad homeowner guidance from Water Filter Advisor's water advice library can help you compare next steps after testing, but the test itself is still the starting point. Filtration works best when it's matched to a known problem.
The term coliform refers to a broad group of bacteria, not one single organism. That distinction matters in practice because a lab report with "total coliform," "fecal coliform," or "E. coli" does not mean the same level of risk, and it should not trigger the same response.
What I tell homeowners is simple. Coliform results are less about naming one bad germ and more about locating where the water system may be vulnerable. A positive result can point to a cracked well cap, surface runoff getting where it should not, poor sampling technique, stagnant plumbing, or an actual waste-related contamination event. The label on the report helps sort those possibilities.
Total coliforms are the broadest category. These bacteria are commonly found in soil, decaying vegetation, and other environmental sources, so a positive result does not automatically mean sewage or illness risk. It does mean the water system deserves a closer look.
In practice, total coliform works like a warning light on a dashboard. It tells you something is off, but not exactly which part failed. For a homeowner, that usually means checking the sampling process, inspecting the wellhead or plumbing entry points, and deciding whether a follow-up sample should be taken before spending money on treatment equipment.
This is also where timing causes confusion. A homeowner gets a positive result, shock chlorinates the well the same day, then retests too soon and gets a clean sample because chlorine temporarily suppressed the bacteria. That can hide the original problem rather than prove it is fixed. If a lab or local health authority wants confirmation sampling, follow their timing instructions closely so the retest reflects the water system, not leftover disinfectant.
Fecal coliforms are a smaller subgroup associated more strongly with contamination from human or animal waste. This result raises the level of concern because it suggests a direct contamination pathway, not just a general system weakness.
That changes the response. Source protection and maintenance still matter, but the priority becomes safe water, faster investigation, and careful confirmation testing. I treat this as a signal to look hard at septic setbacks, runoff patterns, flooding history, and any route by which waste could reach the well or plumbing.
E. coli is the clearest high-risk finding in this group. Its presence indicates fecal contamination and should be treated as an immediate health concern until proven otherwise.
Total coliforms warn you to inspect the system. E. coli tells you to stop using the water for drinking and food preparation until you have a safe alternative and a plan.
Home test kits and lab methods often identify E. coli by detecting enzyme activity after incubation, but the technical details matter less to a homeowner than the decision that follows. Use bottled water or another known safe source, contact your local health department or a qualified water professional, and document the sequence carefully if shock chlorination is performed. The order matters. Disinfect too early, or retest at the wrong time, and you can end up with a "good" sample that does not represent the usual condition of the well.
If you want a plain-language refresher on how microbes differ more broadly, including why bacteria behave differently from viruses, VirusFAQ's guide to microbial differences is a useful side read for non-specialists.
A homeowner can get three different coliform tests on the same well and come away with three different levels of confidence. That does not always mean one test was wrong. It often means the methods answer slightly different questions, and all of them are still only a snapshot of the water at the moment you sampled it.
That snapshot problem matters more than many guides admit. If someone shock chlorinates first and tests later, the result may satisfy an immediate need for a cleaner sample, but it may also hide the condition that triggered the concern in the first place. If the goal is diagnosis, test timing matters almost as much as test method.
Membrane filtration is the method I prefer when the question is, "How much contamination are we dealing with, and is it changing?" A measured water sample passes through a very fine filter that traps bacteria. The lab places that filter on selective media and counts the colonies that grow, which gives a direct colony count rather than a statistical estimate, as described in this overview of membrane filtration and coliform enumeration.
That direct count has real value in the field. It helps compare samples before and after repairs, pressure tank work, casing fixes, or treatment changes. If a homeowner is deciding whether the problem was a one-time intrusion or an ongoing pathway, counted results usually give a clearer picture.
The trade-off is cost and handling. This method usually belongs in a certified lab, not on a kitchen counter.
Most Probable Number, or MPN, estimates contamination from growth patterns in broth rather than counting colonies one by one. Presence-absence tests simplify the question even further. Is coliform detected or not?
For routine screening, that simplicity is useful. A homeowner who wants an early warning does not always need colony counts. A positive screening result is enough to stop treating the water as clearly safe and start asking the next question, which is whether the sample should be confirmed by a lab before making a large treatment purchase.
The limitation is resolution. A simple positive result can tell you there is a problem, but it does not show whether the result was barely positive or heavily contaminated. That matters if you are trying to judge severity, check whether corrective work proved effective, or document conditions before and after disinfection.
Defined substrate tests, including products like Colilert-18, use indicator compounds that change color or fluorescence when target bacteria are present. In practice, the homeowner usually sees a straightforward readout, while the chemistry in the tray or vessel sorts total coliform signals from E. coli signals.
These tests are popular for good reason. They are faster and easier to run than older multi-step approaches, and many labs use them as well. For drinking water work, the method is standardized tightly enough that it can be a solid option when sampling and incubation are done correctly.
The caution is overconfidence. A clean result from an easy-to-run test can still be misleading if the sample was taken right after shock chlorination, after heavy flushing, or from a faucet that was not a good stand-in for normal household use. The method may be sound. The sample may still fail to represent the usual condition of the well.
Lab methods are not just "home kits, but better." The difference is control. Sample volume, incubation conditions, media, rinsing steps, and handling are all standardized so the result is more defensible, as shown in EPA Method 1604.
That matters when the result could affect treatment cost, a real estate transaction, a local health department follow-up, or a decision about whether shock chlorination worked. In those cases, I want a method that reduces avoidable error and gives a result I can compare across time.
It also helps with the timing conflict many homeowners miss. After a positive result, people often want to disinfect immediately. Sometimes that is appropriate for safety. But if a local authority, lender, or lab protocol expects a follow-up sample on a specific schedule, chlorinating too soon can muddy the record. You can end up with one sample showing the untreated condition, one sample showing the effect of fresh chlorine, and no clear picture of the baseline problem. Before doing anything, check what retesting timeline will apply.
| Method | Typical Use | Result Type | Time | Typical Cost | Best For |
|---|---|---|---|---|---|
| Membrane Filtration | Certified lab testing, follow-up investigation | Direct colony count (CFU) | Around a day under standard incubation protocols | Usually higher than simple DIY screening | Confirming contamination and comparing results across samples |
| MPN | Basic screening, older lab workflows, some kit formats | Statistical estimate | Slower than the fastest rapid options | Varies | Homeowners who need an initial screen and can accept an estimate |
| Defined Substrate | Rapid screening in labs and kits, including Colilert-style testing | Presence, absence, or color and fluorescence-based interpretation | Fast turnaround compared with many older methods | Moderate | Quick screening when sample collection is done carefully |
Bottom line: Use a screening test to flag a problem quickly. Use a lab method, especially membrane filtration or a well-run defined substrate test, when the result will drive repairs, treatment spending, or post-chlorination confirmation. And treat every single result as a snapshot, not a lifetime guarantee of safe water.
DIY kits can be useful if you treat them like sterile lab work, not a kitchen project. Most in-house residential coliform kits report results within 24 to 48 hours and can include an incubator, pump, filtration manifold, nutrient medium, and sterile filters or pads, as described in this overview of in-house coliform testing kits.
The hard part isn't opening the kit. The hard part is avoiding contamination from your own hands, faucet, or collection point.
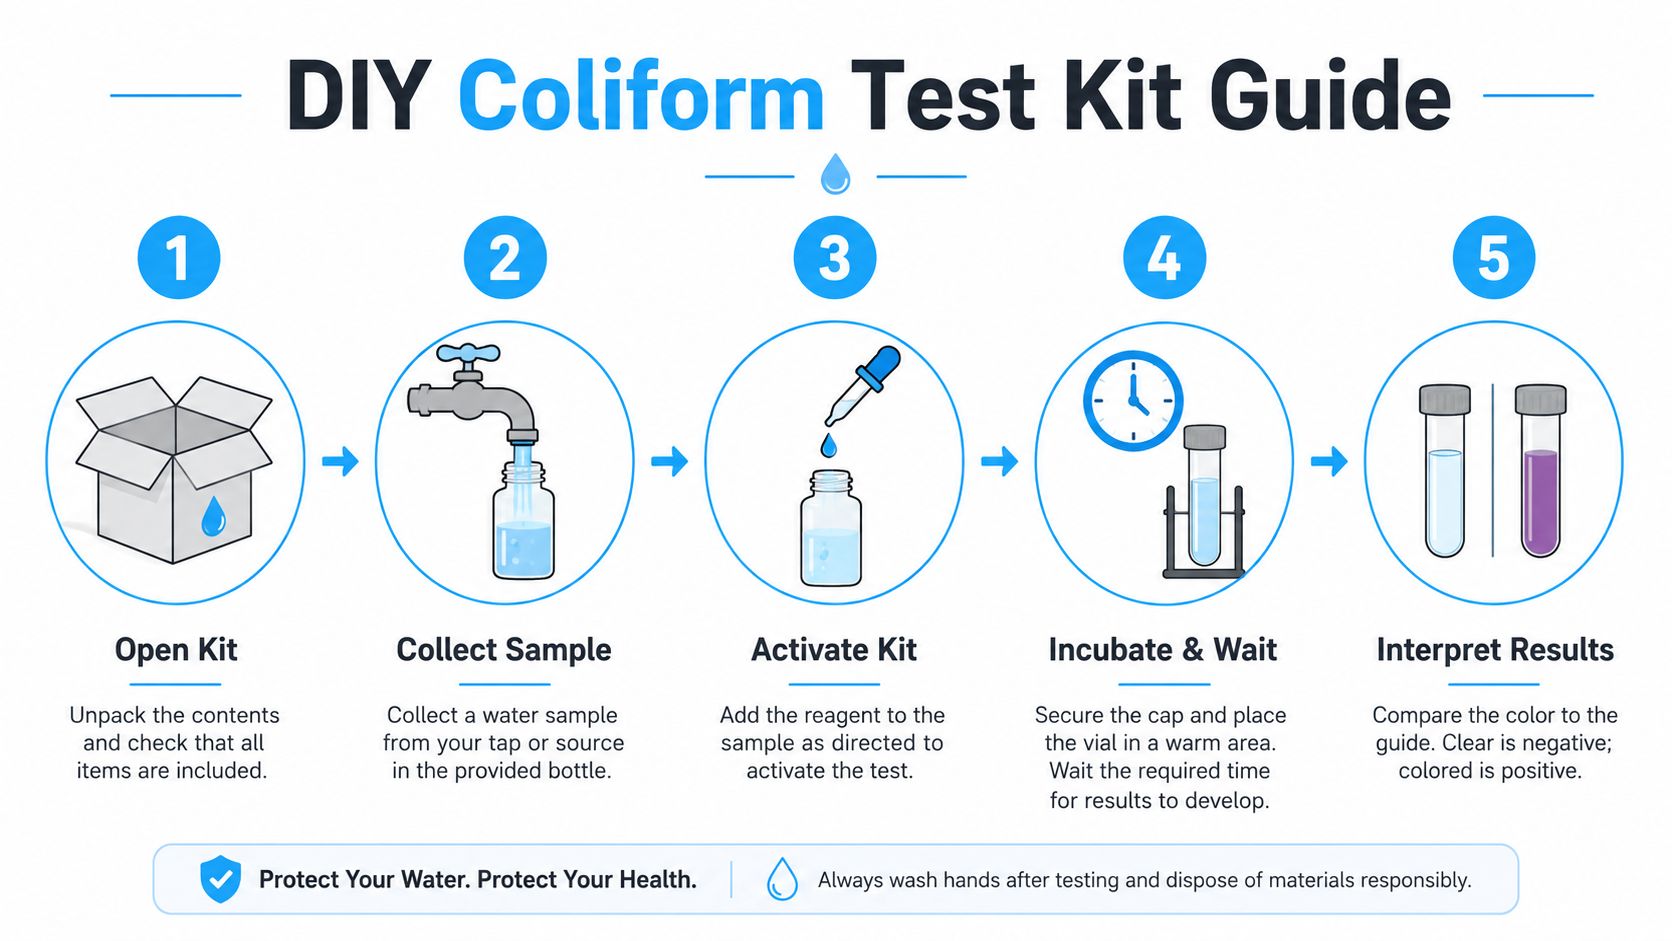
For an accurate sample, water should run for one hour to flush the system. The outlet should be sterilized with an alcohol swab, the sample should be collected from drip water without touching the spigot, and the sample should be refrigerated and delivered to a lab within six hours, according to these home coliform sampling guidelines.
If you're testing filtered water from a gravity system or similar setup, the same discipline applies. Don't touch the inside of the cap. Don't touch the bottle neck. Don't collect from a dirty spigot and assume the result represents the source water.
A short visual walkthrough can help if this is your first time with a kit.
The most common DIY failure isn't the chemistry. It's the sample.
Field note: If the inside of the cap or bottle neck gets touched, the result becomes suspect. That's enough to trigger panic, unnecessary well chlorination, and sometimes the wrong filtration purchase.
If you want a fast screen at home, use the kit. If the result is positive, messy, or hard to trust, move to a certified lab before you commit to a major treatment plan.
A test result only helps if you know what action it should trigger. Homeowners often overreact to one type of positive and underreact to another. The right response depends on which coliform category was detected and how reliable the sample was.
A negative result is good news, but it isn't permanent protection. It means the sample did not show contamination at the time you tested under those conditions.
That's especially important for well owners. Water quality can shift with weather, runoff, repairs, or changes in the home plumbing and filtration train. If your well has a history of variability, a single negative result shouldn't be your only basis for feeling secure.
A total coliform positive is the water equivalent of a check engine light. It doesn't confirm the worst-case scenario, but it says the system deserves inspection.
Look first at the practical causes. Was the sample collected properly? Was the faucet or outlet sterilized? Did heavy rain, flooding, or plumbing work happen recently? In many homes, the next useful move is a careful repeat sample and a closer look at the well cap, casing, vent, pressure tank area, and filtration equipment.
A positive E. coli result is different. Treat that as urgent. Don't keep using the water for drinking until you've switched to a safe source and started a proper follow-up process.
At that point, the question isn't whether you need a response. It's whether your response is organized enough to avoid making the diagnosis harder. Homeowners who jump straight to treatment can blur the evidence and make it tougher to identify where the contamination is entering the system.
A result should change your next decision, not just your stress level.
The smartest homeowners keep simple notes. Test date. Weather. Recent plumbing work. Filter changes. Anything unusual around the wellhead or source.
That log turns random test results into a pattern. For home water filtration, that's powerful. It helps you decide whether you need source correction, point-of-use protection, whole-house disinfection, or just better sampling discipline.
A positive result rattles people, and that's understandable. The mistake is acting fast in the wrong order. I've seen homeowners chlorinate first, ask questions second, and end up with a cleaner-looking sample that hides the original problem.
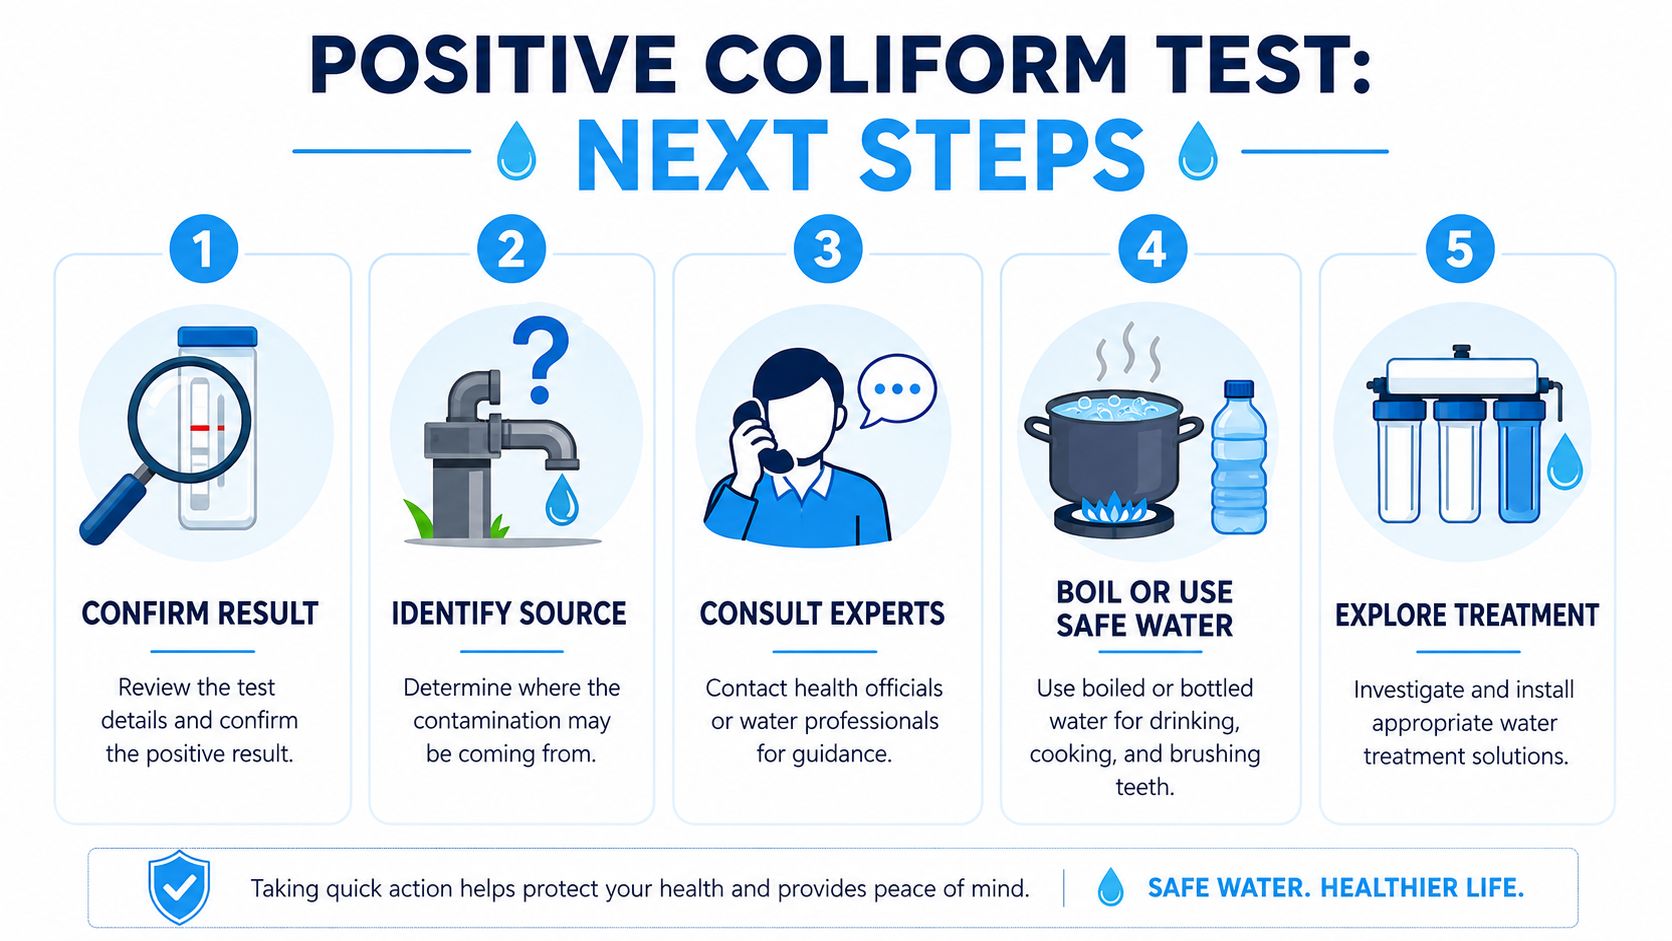
A common mistake is to shock chlorinate a well immediately after a positive test. EPA guidance says that should not happen before required repeat samples because it can skew results and mask the true contamination source, preventing an accurate diagnosis, as explained in EPA Region 8 guidance on positive total coliform or E. coli samples.
This is one of the biggest gaps in homeowner advice online. People hear “positive bacteria result” and assume chlorine is always the immediate next step. For official retesting and source diagnosis, that can be exactly backwards.
Use a calm checklist.
If contamination is confirmed, many homeowners need more than a one-time disinfection event. A filtration and disinfection barrier can provide ongoing protection, especially when the source is vulnerable to runoff or recurring intrusion.
But treatment should fit the cause. If the problem is a bad sample or a loose well cap, buying a large system first won't solve the root problem. If the issue is recurring contamination, relying only on occasional shock chlorination usually won't give a stable long-term answer.
Important: Chlorine can suppress evidence. Diagnosis comes before long-term equipment choices.
Once contamination is confirmed, the conversation shifts from testing to protection. For homeowners, the two practical approaches are physical removal and disinfection. Good systems often use both.
Ceramic microfiltration removes bacteria by physically straining them out. UV systems don't remove organisms from the water. They inactivate them by exposing the water to ultraviolet light. Each approach solves a different part of the problem.
Certified filtration systems can be highly effective. One recent lab result on a ceramic gravity filter showed total coliform dropping from over 23 MPN per 100 mL to less than 1.1 MPN per 100 mL, achieving over 99% removal, provided the source water had low turbidity, as described in this guide to filters that remove coliform bacteria.
A few practical rules hold up well:
If contamination may be tied to a sewage event, backup, or flooding, homeowners should also understand the broader cleanup picture. A service page on sewage cleanup costs in Tampa Bay gives a useful example of how messy and expensive contamination problems can become when water intrusion isn't handled early.
The right filter is the one that fits the actual pathway of contamination, the clarity of your water, and the level of protection your household needs every day.
If you're comparing home water treatment options after a coliform result, Water Filter Advisor is a practical place to start. It helps homeowners sort through filtration types, replacement needs, and real-world setup choices so you can move from a confusing test result to a water filtration plan that makes sense.
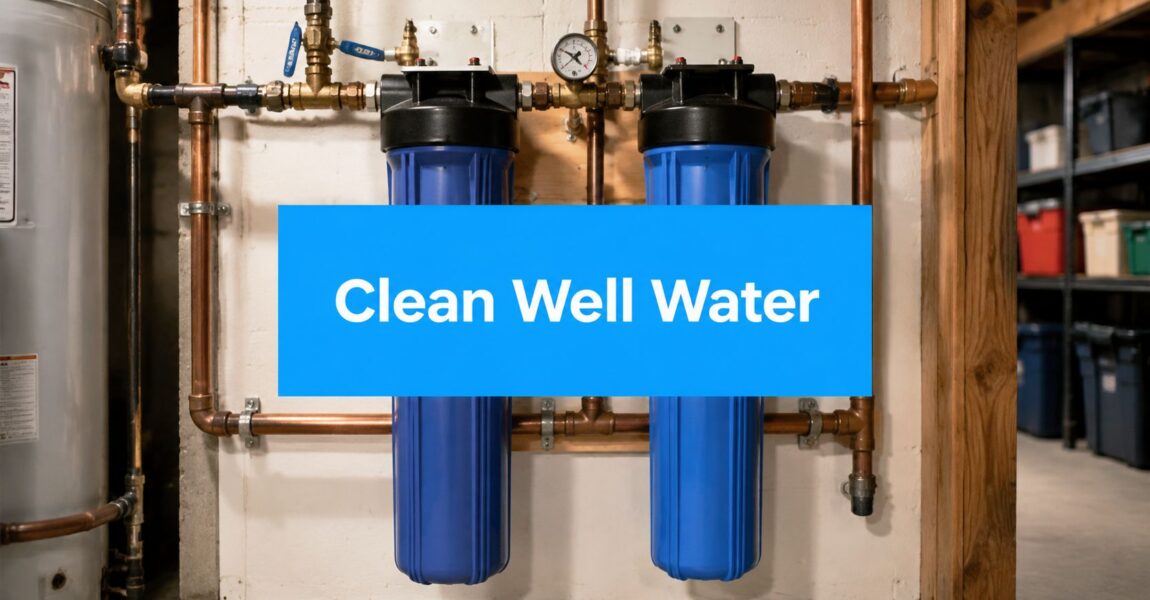
You turn on the kitchen tap, fill a glass, and pause. Maybe it smells a little like rotten eggs. Maybe the sink has orange streaks that keep coming back no matter how hard you scrub. Maybe your laundry feels stiff, your shower glass spots up fast, or your coffee tastes oddly metallic.
If that sounds familiar, your well water is telling you something.
A lot of homeowners assume those quirks are just part of country living. They aren't. They're signs that your water likely needs treatment, and the right well water filter system for home use can fix a lot more than taste. It can protect plumbing, appliances, fixtures, and the people drinking the water every day.
The hard part is that well water doesn't follow a universal script. Two homes on the same road can have completely different water. That's why the biggest mistake I see is buying a filter first and asking questions later. A shiny “whole house” unit from the internet won't help much if it's designed for chlorine and your real problem is iron, sediment, sulfur, low pH, or bacteria.
If you've lived on city water before, well water can feel unpredictable. One week the water looks fine. Then the toilet tank starts staining. The dishwasher leaves film. The bathroom faucet spits a little grit. Somebody in the house says the shower smells off.
That's the nature of private wells. Your home doesn't get the same treatment train that municipal water gets before it reaches the tap. The well pulls water from the ground exactly as it exists on your property, with whatever minerals, gases, particles, or microbes happen to be there.
Some of those issues are mostly household nuisances. Others can affect safety. The trouble is that your eyes and nose can't tell the whole story.
Most homeowners first notice one of these signs:
A good filter system isn't one product. It's a treatment plan. It's similar to fixing a car. If the battery is dead, changing the tires won't help. Water filtration works the same way. You have to match the tool to the actual problem.
Practical rule: Don't shop by symptom alone. “Bad smell” and “orange stain” are clues, not a diagnosis.
That's why the smartest path is simple. Test first. Identify the contaminants. Then build a system in the right order. When homeowners do that, well water becomes much less mysterious and much more manageable.
A lot of well water trouble starts with a bad assumption. Homeowners see one symptom, buy one filter, and expect one box to solve everything. Wells rarely work that way.
Two homes on the same road can need completely different treatment. One may have iron and hardness. The next may have acidic water, bacteria, or nitrates with no obvious warning signs at all. That is why the universal filter idea causes so many expensive mistakes.
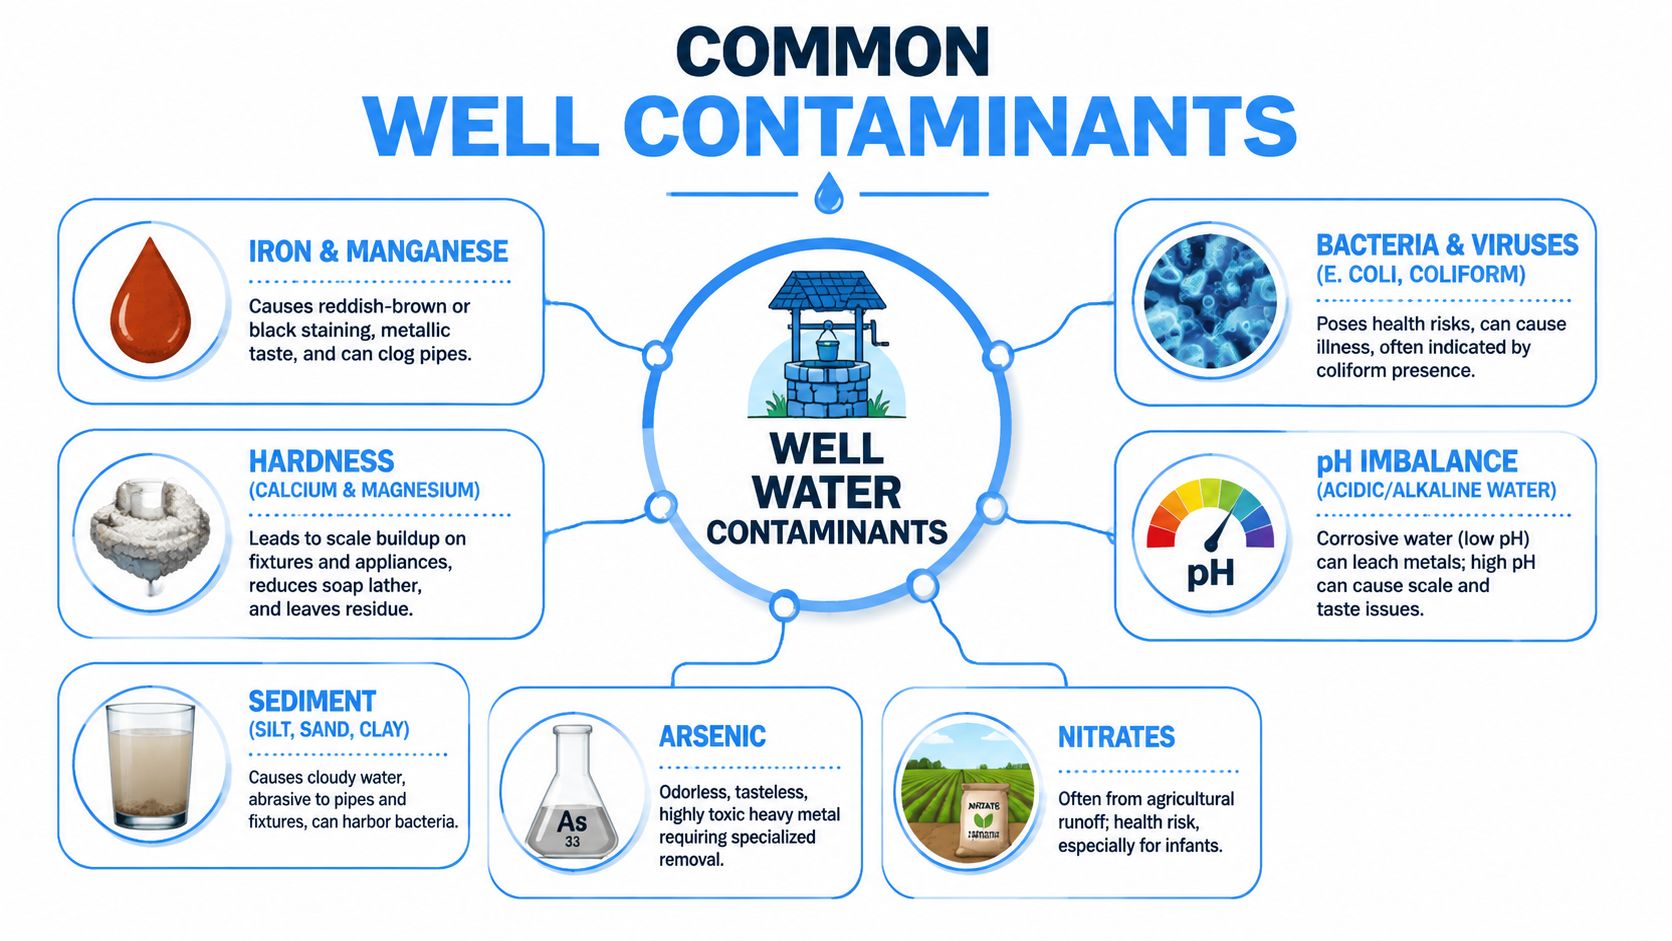
Here's a plain-English look at the contaminants that show up most often in private wells.
| Contaminant | What you notice | Why it matters |
|---|---|---|
| Iron | Orange stains, metallic taste | Stains fixtures, clogs plumbing, fouls appliances |
| Manganese | Dark staining, off taste | Leaves black marks and can build up in plumbing |
| Hydrogen sulfide | Rotten egg smell | Makes water unpleasant and can point to a broader treatment issue |
| Sediment | Cloudiness, grit, dirty filter housings | Wears on valves, faucets, and downstream equipment |
| Hardness minerals | Scale, soap scum, stiff laundry | Reduces appliance efficiency and leaves deposits |
| Low pH | Corrosion signs, blue-green stains in some homes | Acidic water can damage plumbing |
| Bacteria | Often no visible sign | Can create a health concern |
| Nitrates | Usually no smell or color | A health concern, especially for infants |
| Arsenic and other dissolved contaminants | Often invisible | Need specialized treatment, not guesswork |
Some of these are nuisance problems. Some are safety problems. Some are both.
That difference matters because stain-causing water and unsafe water do not always look different at the tap.
Iron is the rust monster.
It leaves orange or reddish-brown stains in sinks, tubs, and toilets. Over time, it can also coat plumbing parts and make appliances work harder.
Manganese often hides beside iron.
It tends to leave dark brown or black staining. Homeowners sometimes blame dirt or old fixtures when manganese is responsible.
Hydrogen sulfide is the rotten egg smell.
Sometimes you notice it only in hot water. Sometimes it shows up at every tap. Either way, smell alone does not tell you whether the fix is oxidation, filtration, water heater service, or a combination.
Sediment is sandpaper in slow motion.
Sand, silt, and clay scrape away at valves, faucet cartridges, and treatment equipment. If sediment is not handled first, the filters behind it often clog early and underperform.
Hardness acts like mineral scale in a teakettle.
It builds layer by layer inside pipes, on fixtures, and inside water-using appliances. You may notice soap that will not lather well, spots on dishes, or stiff laundry.
Low pH means the water is acidic.
Acidic water can slowly eat at plumbing, which may lead to corrosion signs such as blue-green staining in some homes. The water may look clear while it is still causing damage.
Bacteria, nitrates, arsenic, and other dissolved contaminants are the quiet ones.
They often have no taste, color, or smell that a homeowner can trust. That is where guesswork gets risky.
A rotten egg smell does not automatically mean one specific filter will fix the problem. Orange staining does not prove iron is the only issue. Cloudy water may be coarse grit, fine silt, air, or a mix.
Well water is more like a tool kit problem than a single broken part. If you use the wrong tool, you can spend money and still have the same water. A carbon cartridge, for example, may help with certain taste and odor complaints, but it is not a cure-all for iron, manganese, acidity, bacteria, and sediment at the same time.
That is why a one-size-fits-all system often disappoints. The wrong setup can miss the contaminant, treat stages in the wrong order, or create extra maintenance problems that did not need to exist.
If you want a practical starting point, this guide to well water treatment advice and filter planning can help you see how different problems call for different solutions.
Groundwater changes from lot to lot. Soil conditions, rock layers, well depth, nearby land use, plumbing materials, and well construction all affect what ends up at the tap.
So yes, your neighbor's filter may work well for their house and still be completely wrong for yours.
That is the big lesson in this section. Common contaminants follow patterns, but your well still needs its own diagnosis. The smart move is to learn the likely suspects, then confirm them with professional water testing before you buy equipment.
Most bad filtration decisions start with a shortcut.
A homeowner smells sulfur, sees a few stains, and buys the first whole-house filter that promises “clean, pure water.” A month later, the smell is still there, the pressure has dropped, or the filter is clogging constantly. The unit didn't fail. The diagnosis failed.
Most existing content oversimplifies well water filtration by pushing a generic spin-down or whole-house sediment filter without dealing with the specific sediment size your well produces, as noted by National Water Service on why well water needs filtration. That matters because coarse sand and fine silt behave very differently inside a system.
At-home kits can be useful for a quick screen. They're fine if you want an early warning or you're checking one simple issue. But they don't replace a professional lab analysis when you're spending real money on treatment equipment.
A lab report gives you the detail that symptoms can't. It helps answer questions like:
That last point trips up a lot of people. They buy a filter for the obvious problem, then create a second problem because the system was built in the wrong order.
When you contact a certified lab, ask for a report that helps you choose equipment, not just a yes-or-no water check. You want enough detail to identify particles, dissolved contaminants, nuisance problems, and safety issues.
A good test process usually includes:
For homeowners who want a practical next step, this guide to well water testing and filter advice is a useful place to organize questions before you buy.
Spend money on testing before you spend money on tanks. A lab report is cheaper than replacing the wrong system.
The biggest myth in well water treatment is that symptoms equal certainty. They don't. Orange stains suggest iron. A smell suggests sulfur. Cloudiness suggests sediment. But only testing tells you how much, what type, and what has to happen first.
A lab report changes the whole conversation.
Before testing, a lot of homeowners shop by symptom. Rotten-egg smell means buy one thing. Orange stains mean buy another. Cloudy water means grab a sediment filter and hope for the best. That shortcut is exactly how people end up with expensive equipment that never fixes the underlying problem.
The better approach is to match each treatment stage to a confirmed contaminant. Well water is rarely a one-filter problem. It is usually a chain of smaller problems that need to be handled in the right order.
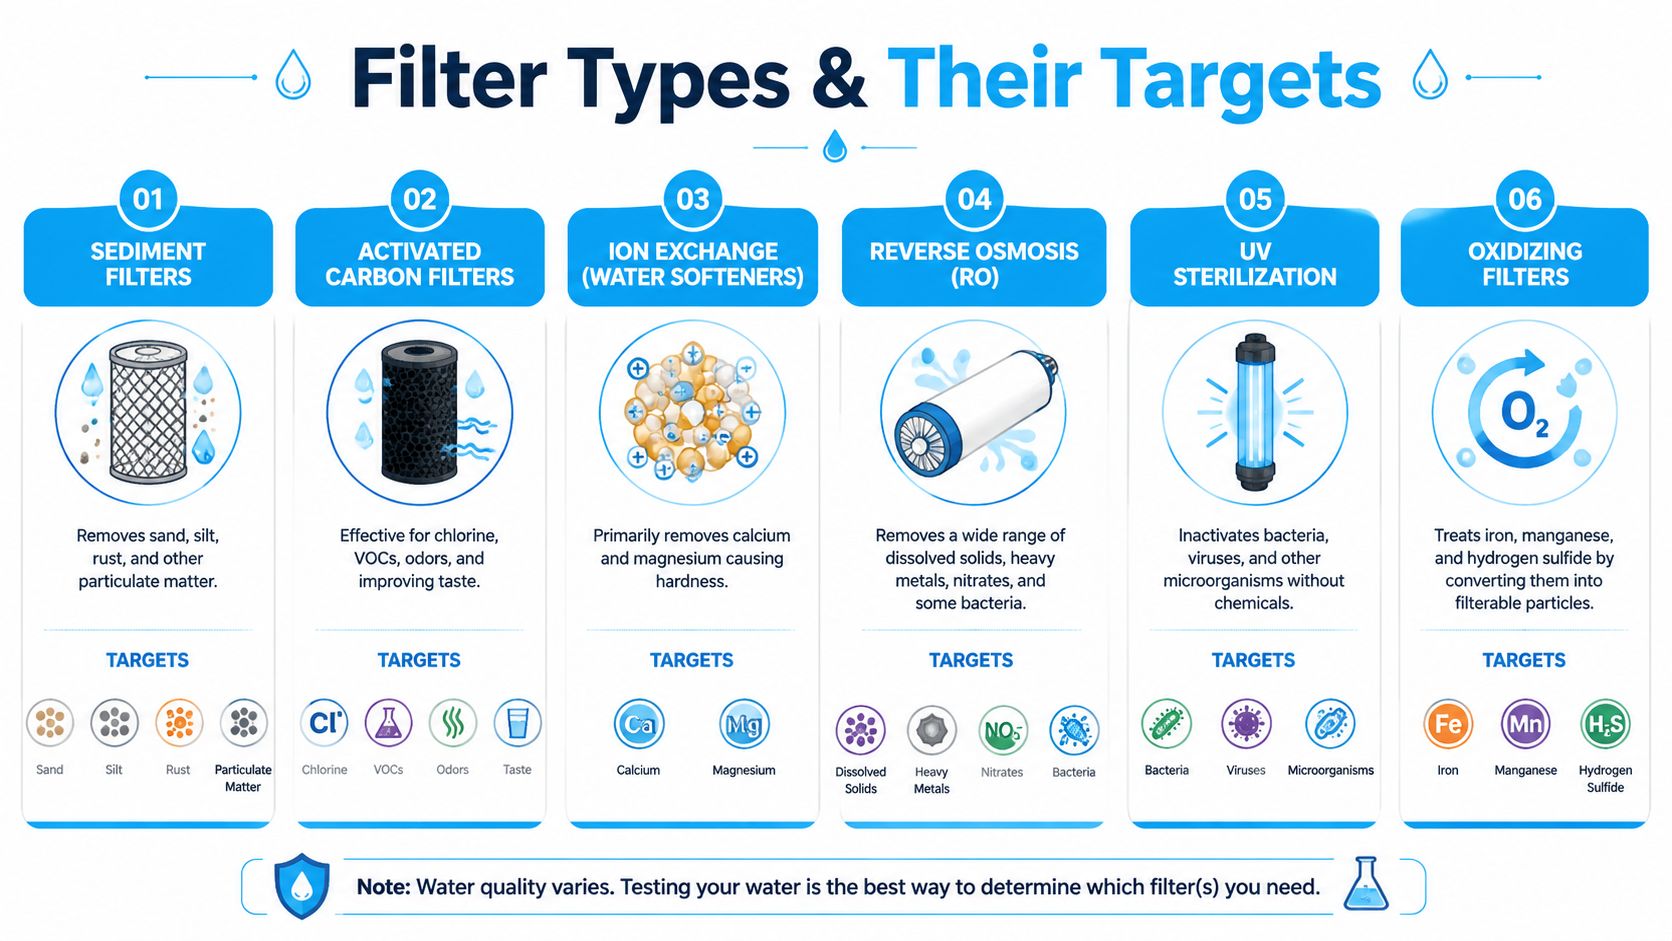
A filter works best when you ask it to do the job it was built for. A coffee filter catches grounds, but it does nothing to dissolved sugar. Water treatment works the same way. Some devices catch particles. Some change the chemistry. Some disinfect.
Here is a practical side-by-side view:
| Filter type | Best for | What it does not do well |
|---|---|---|
| Sediment filter | Sand, silt, rust, particulate matter | Doesn't remove dissolved minerals or disinfect |
| Activated carbon | Taste, odor, some chemical reduction | Not a cure-all for iron, hardness, or bacteria |
| Iron or oxidizing filter | Iron, manganese, sulfur-related nuisance issues | Needs proper pre-treatment and sizing |
| Water softener | Hardness minerals | Doesn't replace sediment or disinfection stages |
| UV purifier | Bacteria and microorganisms | Doesn't remove sediment or dissolved minerals |
| Reverse osmosis | Drinking water purification, dissolved contaminants | Usually not the whole-house answer by itself |
That table matters because the biggest myth in this category is the universal filter myth. Homeowners are often shown one product that claims to handle everything. Real wells do not cooperate with that kind of sales pitch.
A sediment filter works like the doormat at the front door. It catches grit before that grit clogs valves, scratches seals, or blinds more specialized equipment farther down the line.
An activated carbon filter cleans up taste and odor in the right setting. It can also reduce certain chemicals. But on private well water, carbon is not a safe blind guess. If iron, sulfur, or heavy sediment are still present, carbon can foul quickly and stop doing much useful work. Some whole-house carbon systems, such as those described in Aquasana whole-house filter specifications, are built for long service life. That still does not make carbon the right first step for every well.
A UV purifier handles a different job entirely. It disinfects clear water. It does not strain out dirt, remove iron, or fix hardness. If cloudy water reaches a UV chamber, the light can be blocked and treatment can fall short.
Here is a common real-world example. A homeowner smells sulfur, sees orange staining, and buys a carbon tank because the ad says it fixes bad well water. The smell improves for a short time. The staining stays. Flow starts to drop. A few months later, the system is blamed when the actual problem was the match, not just the product.
Iron, manganese, sulfur, low pH, hardness, and sediment often overlap. One treatment stage can also create a new condition that another stage must address. A neutralizer can raise hardness. An oxidizing step can create particles that need filtration. A softener can help with some dissolved iron, but it is not meant to carry the full load when iron is high.
That is why sequence matters as much as filter choice.
A common treatment path looks like this:
For a well with iron, acidic water, and sulfur odor, the order can be the difference between clean water and constant service calls. This treatment sequence demonstration shows how those stages are often arranged so each one supports the next.
The right filter for the wrong contaminant is still the wrong filter.
Reverse osmosis is a specialist, not a whole-house cure.
It is often a strong choice at a drinking water tap when testing shows dissolved contaminants that need a higher level of reduction. It is also one of the technologies commonly used when homeowners want extra protection for drinking and cooking water. As noted earlier, products marketed for health-related reduction claims should be checked carefully for the specific certification tied to the contaminant you need to address, such as NSF 53 or 58 where applicable.
That last part gets skipped too often. Buying RO because it sounds advanced is still guessing. In some homes, RO is a smart finishing step at the kitchen sink. In others, the need is iron treatment, pH correction, sediment removal, or disinfection at the whole-house level first.
Good well water treatment is less like buying one magic gadget and more like building the right lineup for your water. Testing tells you who belongs on the field.
A filter can be the right type and still be the wrong fit. That usually shows up as poor water pressure, short filter life, or a system that can't keep up when two showers and the washing machine are running at the same time.
That's where sizing comes in.
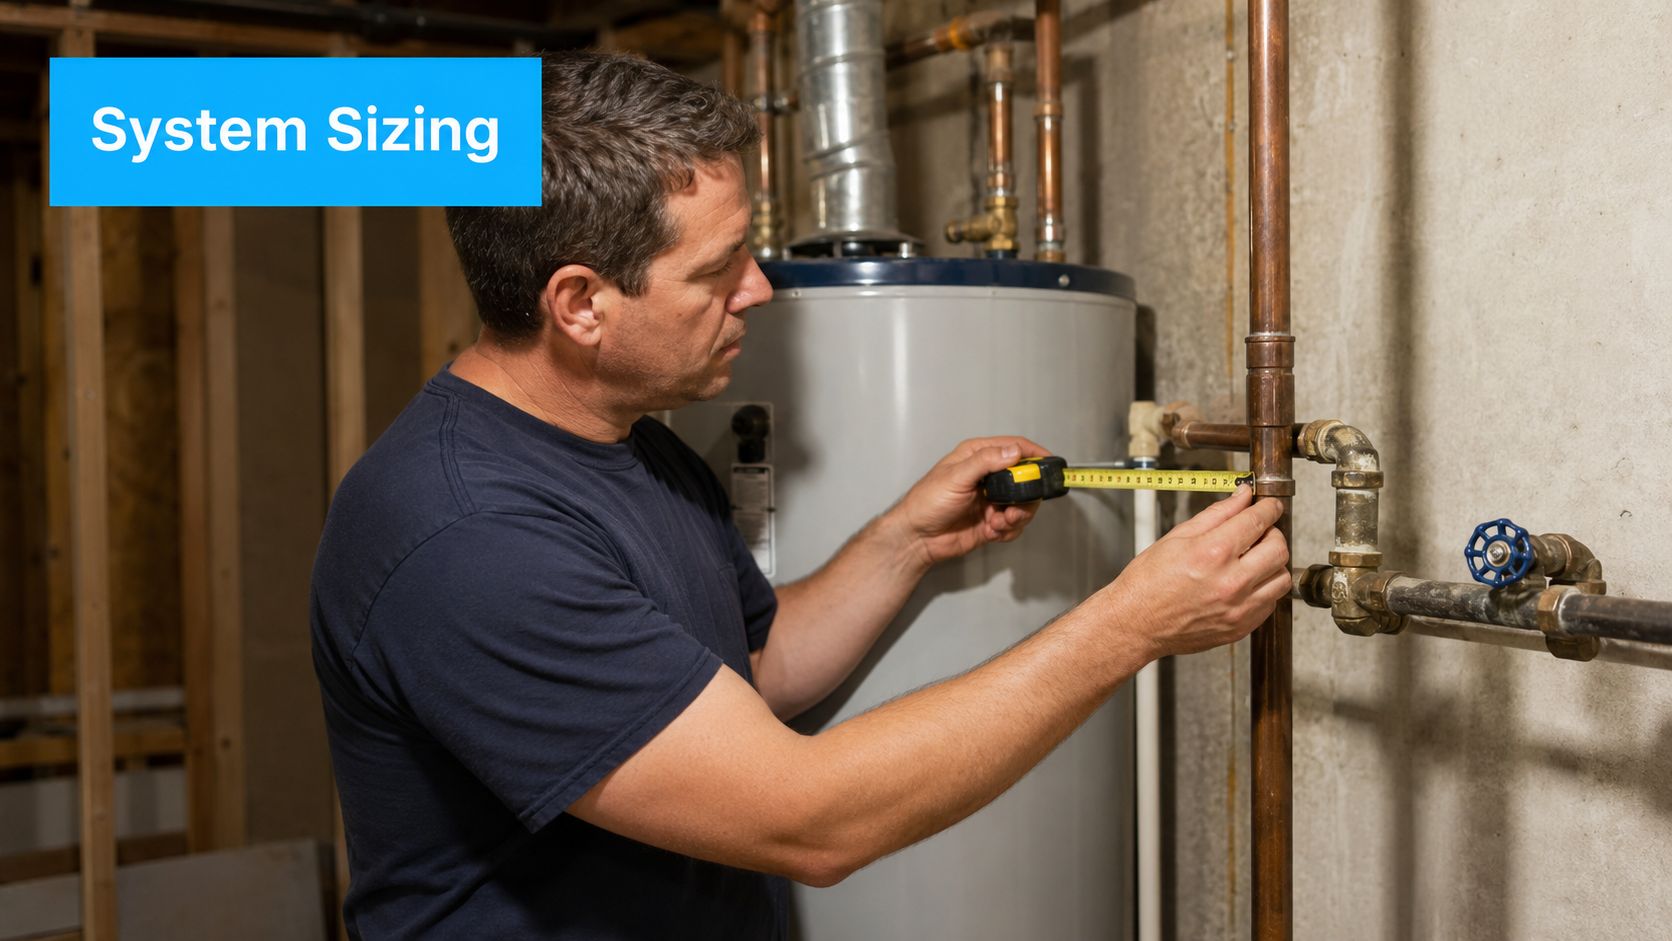
A point-of-entry system treats water as it enters the home. That means showers, sinks, laundry, toilets, and appliances all benefit.
A point-of-use system treats water at one location, such as an under-sink drinking water tap. That's useful when you want extra polishing at the kitchen sink, but it won't stop staining in the bathroom or sediment damage in the water heater.
The choice often comes down to where the problem lives.
For well water, the first stage has to be more than an afterthought. SpringWell states that sediment filters for well systems should be sized to a 20-inch Big Blue housing with 4-inch diameter and use 20-micron filtration as the primary defense to protect downstream equipment, while 5-micron sediment filtration captures sand, silt, and clay; the same source notes catalytic carbon media can remove 97 to 99% of chlorine and chloramine, and system lifespan is 1 year per 100,000 gallons or 10 years for 1 million gallons, according to SpringWell whole-house filter details.
That's a good illustration of a bigger point. Housing size, media type, and micron rating all change how a system performs. A tiny cartridge housing on a sediment-heavy well is like putting a coffee filter in front of a leaf blower. It'll plug fast and frustrate everyone in the house.
You don't need to become a hydraulic engineer. You just need to think practically.
Ask yourself:
If the system is undersized, the family notices it immediately. Showers weaken. Fill times stretch. Appliance performance gets inconsistent.
Here's a useful visual if you want to see how whole-house equipment is commonly laid out in a home plumbing setup:
Some homeowners can install a basic setup. Others are better off hiring a water treatment pro or a plumber who works with wells regularly.
DIY makes sense if you're comfortable with:
Hire a professional if the system includes multiple tanks, pH correction, oxidizing media, UV, drain lines, or any treatment train that needs tuning after installation.
A clean install matters. Filters need room for service, proper shutoffs, and a layout that lets you maintain one stage without tearing apart the whole system.
A lot of homeowners compare systems by sticker price alone. That's a mistake. The better question is, “What will this setup ask from me every year?”
A well water system is more like a furnace than a toaster. It needs periodic attention to keep doing its job.
Some parts need regular replacement. Others last for years. The trick is knowing which is which so you don't overpay or neglect something critical.
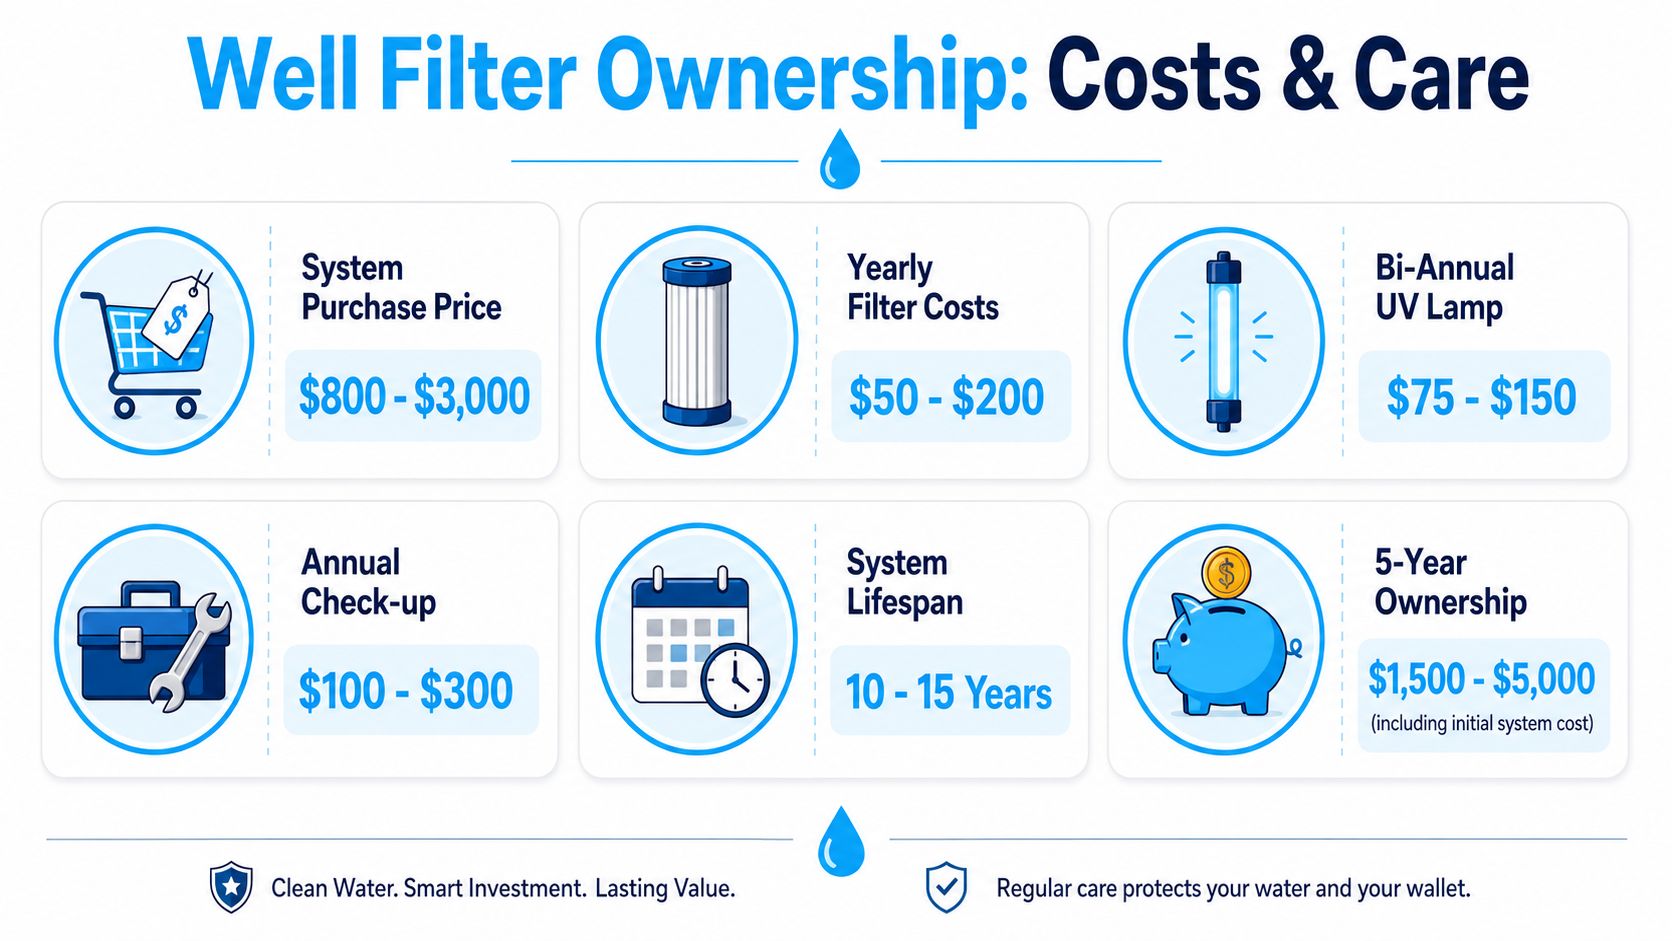
For advanced whole-house systems, long-term operational costs are estimated at $25 to $40 per year for sediment post-filter replacement, typically changed every 6 to 9 months, while the main filtration media can last 6 to 10 years and treat up to 1 million gallons.
That's a useful reminder that the expensive-looking tank in the basement often isn't the part you service most often. The little pre or post filter usually gets the routine attention.
A practical ownership schedule often includes:
The exact schedule depends on your water, not just the box label. A clean, steady well and a muddy seasonal well won't treat filters the same way.
The cheapest system can become the expensive one if it requires constant cartridge changes, can't handle sediment load, or lets iron foul downstream equipment. On the other hand, an oversized or poorly selected setup can lock you into maintenance you never needed.
A smarter way to compare systems is to ask:
| Question | Why it matters |
|---|---|
| How often do the routine filters change? | This affects yearly upkeep and convenience |
| How long does the main media last? | This affects long-term value |
| What happens if my sediment load changes? | Wells can shift with seasons and weather |
| Can I buy replacement parts easily? | Hard-to-source parts become a headache fast |
One more thing. If your system includes neutralization or softening, retesting after installation matters. Treatment can change water balance, and those changes may create a second maintenance need if nobody checks.
By the time you're ready to buy, the goal isn't to find the flashiest system. It's to avoid expensive mismatches.
A good buying checklist keeps you from skipping steps when product pages start making broad promises.
Print this out or keep it on your phone while you compare options.
If a seller claims one tank solves every well water problem, slow down. Complex well water usually needs a staged approach. The more mixed the water issues are, the more important sequencing becomes.
For homeowners who want a broader overview of understanding water treatment options, that resource does a good job of framing how different treatment methods fit different household problems.
Buy the system that matches your test results, your plumbing, and your tolerance for maintenance. Don't buy the system with the best slogan.
That's how you make a confident decision. Not by chasing a universal fix, but by building a setup that fits your well.
A lot of well owners reach this section hoping for one simple answer. One filter. One tank. One fix. That would be nice, but well water rarely behaves that way.
A private well is more like a custom recipe than a standard utility supply. One home deals with iron and sulfur smell. The next fights sediment, low pH, and bacteria risk. That is why the right answer usually starts with, "What did your water test show?"
In most homes, no.
A single filter can target one issue well, or a small group of related issues. It cannot reliably handle every possible well water problem at once. Sediment needs one kind of treatment. Hardness needs another. Iron, sulfur, acidity, and bacteria each call for their own approach, and the treatment order matters too.
The "universal filter" idea sounds convenient because it skips the hard part. The hard part is matching the equipment to the water you have, not the water a product label assumes you have.
Filters wear out, media gets used up, and cartridges clog. That is one common reason.
Another is a poor match between the filter and the contaminant load. A system may look fine on day one but struggle after weeks or months if your well has more sediment, iron, or organic material than the unit was built to handle. It is a bit like using a coffee filter to catch mud. It works for a moment, then plugs up or lets the wrong things pass through.
Some point-of-use systems also create confusion. A carbon filter can improve taste and odor at first, but carbon is not a disinfection method. Guidance from Aquaclear on whole-home filtration considerations notes that treatment plans need to account for bacterial risk, especially in well water setups where carbon media may be part of the system.
Carbon helps with taste, odor, and some chemical reduction. It is not the tool you rely on for bacteria control.
If bacteria is part of the risk, the treatment plan needs a disinfection step. In many homes, that means UV placed after proper prefiltration so the light can do its job. Without that step, a carbon filter may make water taste better while leaving the main safety question unanswered.
They can make sense for drinking and cooking water at one faucet.
They do not solve house-wide problems such as sediment in showers, rust stains in toilets, sulfur smell in hot water, or scale building up in pipes and appliances. If the trouble shows up all around the house, treatment usually needs to start where the water enters the home, not only where you fill a glass.
Salt-free systems are often marketed in ways that blur an important distinction. Conditioning is not the same thing as removing hardness minerals.
If your lab results show mild scaling concerns, a salt-free option may fit some homes. If your well water is hard, do not assume a salt-free device will perform like a conventional softener. Chemistry still sets the rules, no matter how polished the sales pitch sounds.
Yes.
Retesting confirms whether the system is solving the problem you paid to solve. It also catches cases where a system improved one issue but left another one behind. That matters with wells, because water can change with season, rainfall, pump work, or aquifer conditions.
A good installation is a strong start. A follow-up test is the proof.
Buying equipment before getting a proper lab test.
That one mistake leads to a chain of expensive problems. The wrong media. The wrong flow rate. The wrong treatment order. The wrong maintenance plan. Many homeowners are sold a box before anyone has identified what is in the water, and that is how a "deal" turns into years of frustration.
If you're sorting through test results, comparing filter types, or trying to avoid a costly mismatch, Water Filter Advisor is a practical place to start. It helps homeowners compare filtration options, understand maintenance, and make sense of the claims that show up on water treatment product pages.
