Home Water Filter System Near Me: Your Local Buying Guide

You're probably doing what most homeowners do. You notice chlorine taste, orange staining, dry skin after showers, or a nagging doubt about what's coming out of the tap, then you search for a home water filter system near me and start scrolling local listings.

That's usually too early.

The biggest mistake I see is shopping by installer before you know what your water needs. Local companies often sell what they stock, not what your report supports. A clean install on the wrong system is still the wrong system. The smartest buyers slow down, verify the water first, then make installers prove their recommendation fits the facts.

Before You Search Test Your Local Water

You taste chlorine at the kitchen sink, see orange staining in a toilet bowl, or notice scale building up on fixtures. Two houses on the same street can need different fixes. A local search will not sort that out for you.

Start with the water report before you talk systems.
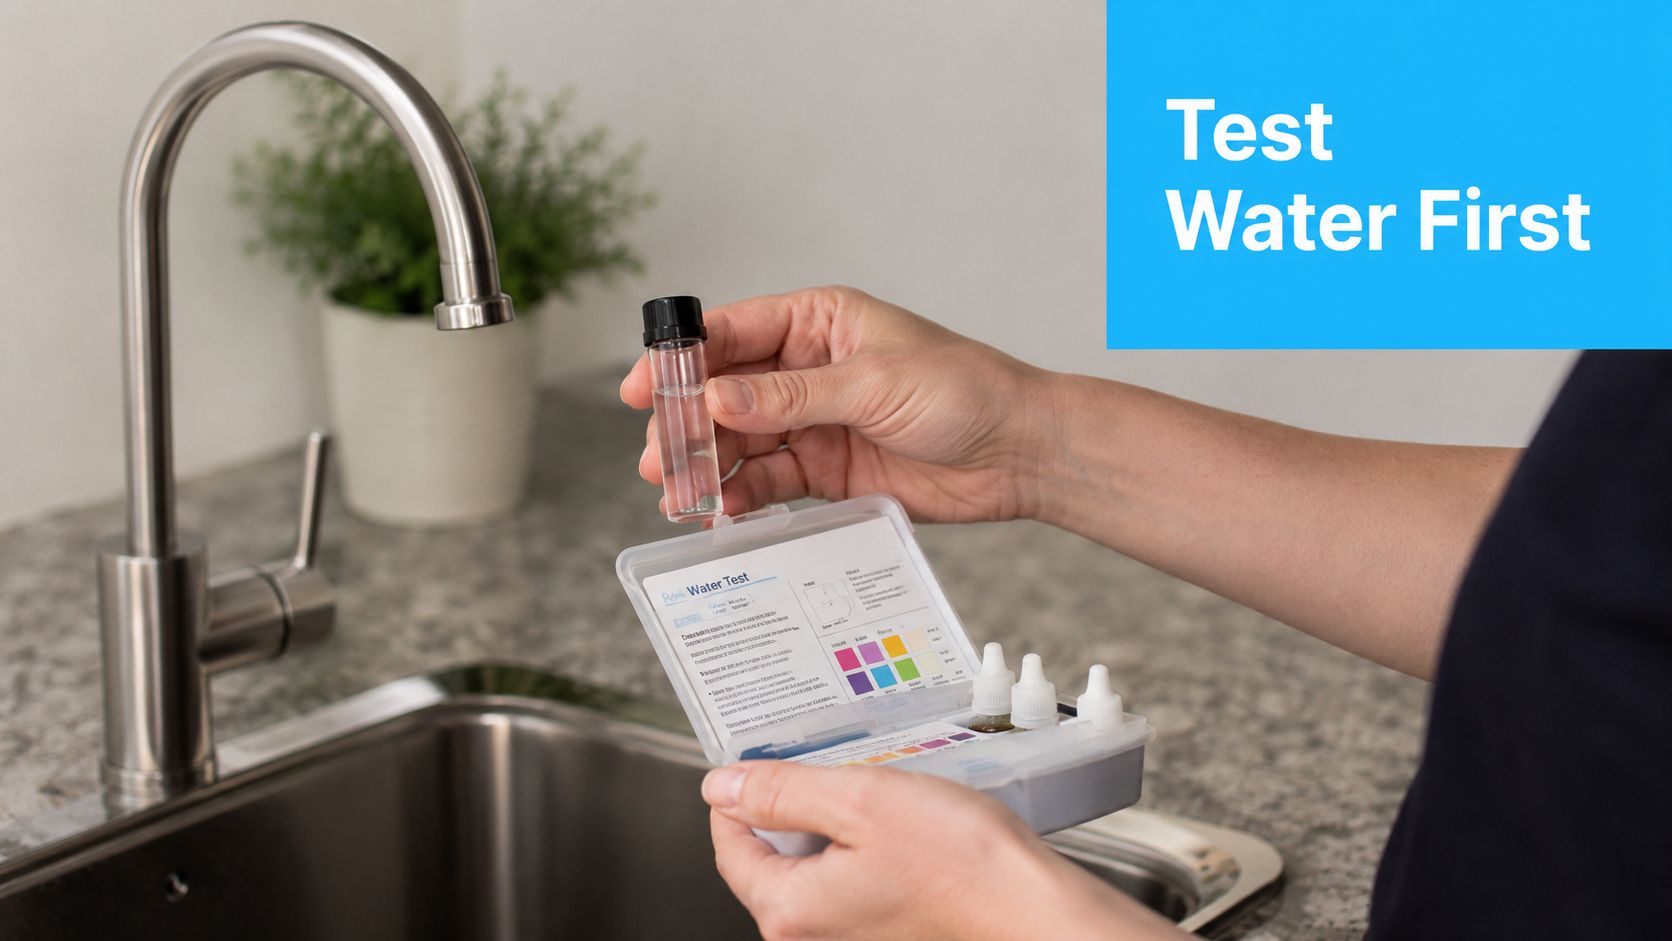
A person preparing to test tap water quality using a professional water testing kit at a kitchen sink.

Start with the source of your water

City water and well water follow different rules, and good installers treat them differently from the first call.

If your home is on municipal water, pull the Consumer Confidence Report first. Green America notes that utilities issue these reports annually, and the report shows what the utility tested for and how those results compare with EPA limits, according to Green America's water filter guidance. That gives you a starting point, not the full picture inside your house. Old interior plumbing, a service line issue, or a problem isolated to one faucet will not always show up clearly in a utility-wide report.

If your home is on a private well, the job is more hands-on. There is no utility report to fall back on. Test the water directly, and retest when taste, odor, color, or nearby ground conditions change.

One rule matters here. Do not accept a recommendation from anyone who has not first asked whether you are on city water or a well.

What competent testing looks like

A proper recommendation starts with three checks:

  1. Source water
    Municipal supply and private well water point to different testing steps and different equipment choices.

  2. The actual problem
    Chlorine taste, sulfur smell, hardness, sediment, lead risk at one tap, and bacterial concerns are separate problems. They do not call for the same filter.

  3. The treatment point
    Drinking water at one sink is a different project from treating every fixture in the house. That decision changes equipment size, replacement costs, and installation labor.

Many local providers cut corners. They show up with a standard package, test for hardness and chlorine with a quick strip, then start pricing equipment. I have seen homeowners spend whole-house money on a problem that only affected drinking water at the kitchen sink. I have also seen the reverse. A cheap under-sink unit did nothing for staining, odor, or scale because the issue was in the incoming supply.

If you want a plain-English reference before talking to contractors, Water Filter Advisor's guidance on test results, certifications, and filter types is a useful place to sort out the basics.

Use the report to guide the estimate

Once you have actual test data, the conversation gets sharper. Ask the installer to tie the recommendation to the report, line by line. What contaminant or condition is the system meant to address? What certification supports that claim? What does it not solve?

That last question matters. Carbon can help with chlorine, odor, and some taste issues. It does not handle every dissolved contaminant. Reverse osmosis can address a different set of problems, but it adds reject water, slower flow at the faucet, and routine membrane service. UV can disinfect, but it does not remove sediment or hardness. Each tool has a lane.

Bring the report to every estimate. If a contractor barely glances at it and goes back to the same package they sell everyone else, keep looking.

Testing also helps you price the job accurately. A targeted under-sink system can be a manageable DIY project if you already have a shutoff valve, enough cabinet room, and basic plumbing skill. A whole-house system is different. You may need a prefilter, bypass valves, drain routing, pressure checks, and enough space to service tanks later. Professional installation costs more upfront, but it can prevent pressure-loss problems, bad drain connections, and expensive rework. The same logic applies to other hidden water issues. If testing or installation raises concerns about concealed plumbing leaks, it is smart to review Georgetown's trusted leak detection companies before the wall damage gets worse.

A water report is not a sales weapon. It is a way to keep the conversation tied to the house, the water, and the actual problem.

Smart Ways to Find Local Water Filter Experts

The first page of local search results usually reflects marketing strength, not filtration skill. A company can dominate map listings and still be weak at sizing systems, reading reports, or handling pressure-loss problems.

I'd rather find the installer backward.

Start with the equipment, then find the installer

If you already know the type of system you likely need, check manufacturer dealer locators and installer networks. That doesn't guarantee perfection, but it does improve the odds that the installer has worked with that valve, housing, bracket spacing, bypass layout, and service schedule before.

Then call a local plumbing supply house. Not the retail aisle. The pro counter. Ask who regularly installs whole-house filtration, under-sink systems, and pressure-sensitive setups without callbacks. Supply houses hear about the failures fast. They know who buys quality parts and who cuts corners.

A third route is neighborhood groups and community forums. Don't ask, “Who's the best water filter company?” That gets you fluff. Ask sharper questions:

  • Did they review your water report first
    If not, the recommendation was probably generic.

  • Did your water pressure change after install
    That answer tells you whether the system was sized properly.

  • Did they explain replacement filters clearly
    A clean install with no maintenance plan becomes a headache later.

  • Did the final invoice match the estimate
    Plumbing surprises happen, but vague pricing is a warning sign.

Watch for adjacent plumbing clues

Sometimes the best lead comes from related trades. If a company is known for careful diagnostic plumbing work, that's often a better sign than a polished filtration ad. For example, homeowners comparing Georgetown's trusted leak detection companies can learn a lot from how those firms communicate about diagnosis, documentation, and repair logic. Those same habits matter when someone is cutting into your main line for a filtration system.

Good installers don't just sell water treatment. They diagnose the house, the plumbing, and the usage pattern.

What to ask on the first phone call

Don't spend twenty minutes listening to a pitch. Use the first call to filter out weak options.

Ask:

  • Do you review CCRs or lab reports before recommending a system
  • Do you install both POE and POU systems
  • How do you size for flow rate and pressure drop
  • Do you service the systems you install
  • Can you explain the maintenance schedule before quoting

If they can't answer those cleanly, they're not your shortlist.

Choosing the Right Water Filtration System

Once you know what's in your water, system selection gets much easier. You're matching a problem to a tool instead of buying the biggest unit with the nicest brochure.

There are two broad paths. Point-of-entry (POE) systems treat water as it enters the house. Point-of-use (POU) systems treat water at a specific tap. Aquasana's explanation of how whole-house water filters work describes whole-house filters as POE systems installed at the main water line, often using a three-step process with sediment filtration, KDF and activated carbon, and a final polishing stage.

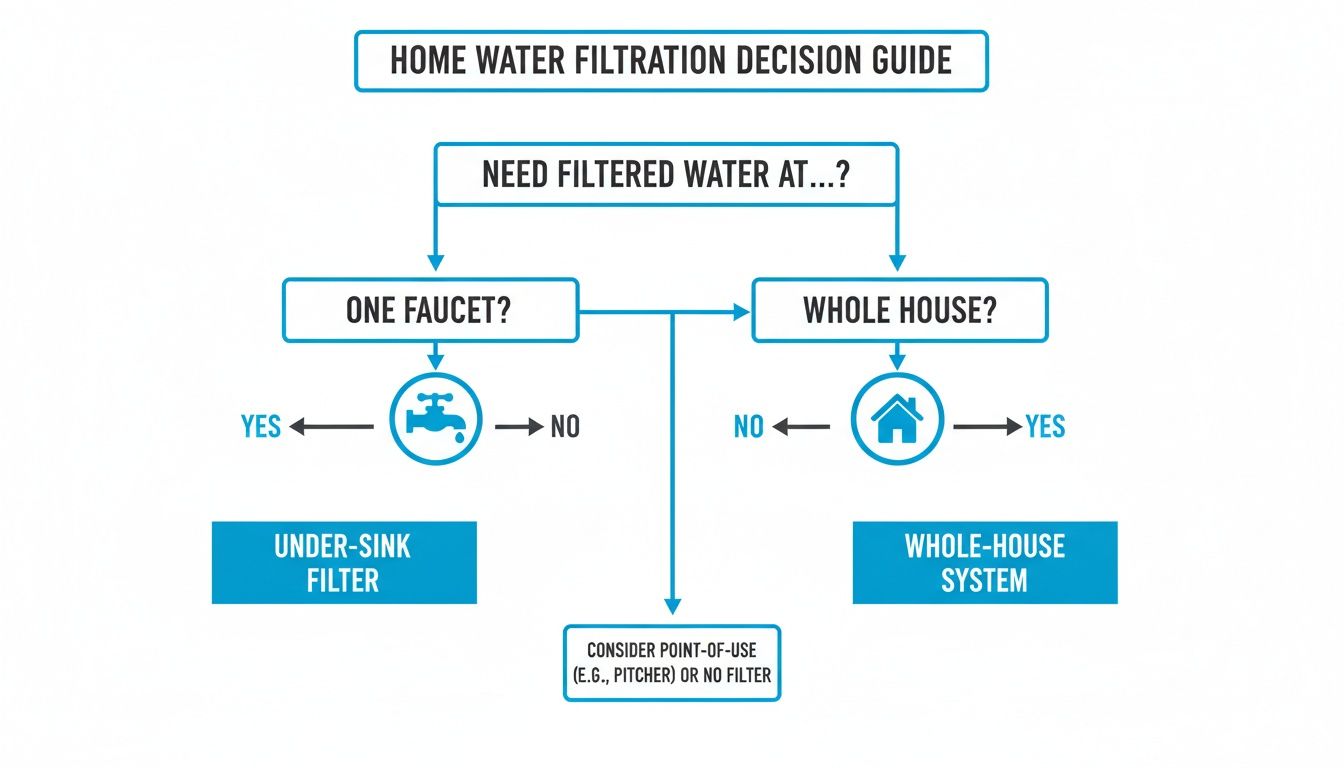
Whole house or single tap

If your issue affects every faucet, shower, and appliance, a POE system makes sense. That includes whole-house chlorine odor, sediment, or water that leaves residue throughout the home.

If the concern is mainly drinking and cooking water, a POU system often gives better value. Lead at one tap, taste complaints at the kitchen sink, or concern about a narrow set of contaminants can often be handled without filtering every gallon used for laundry and toilets.

For a practical homeowner-level read on when a larger setup is worth it, this guide to evaluate whole home water system benefits is useful because it frames the decision around household use, not marketing language.

What the main technologies do well

Not all filter types solve the same problem.

Home Water Filter System Comparison
System Type Best For Removing Typical Cost (System Only) Maintenance Frequency
Activated carbon Chlorine, taste, odor, some chemical issues Varies by system and size Follow manufacturer schedule
Reverse osmosis Broad purification for drinking water Varies by system and size Follow manufacturer schedule
UV filter Microorganisms and disinfection use cases Varies by system and size Follow manufacturer schedule
Whole-house POE system House-wide treatment at every fixture Varies by system and size Pre-filters and media need scheduled replacement
Under-sink POU system Drinking and cooking water at one location Varies by system and size Cartridge or membrane changes required

Where each type fits

Activated carbon is a workhorse for taste and odor issues, especially chlorine and chloramines. It's often the first thing I reach for when homeowners say, “The water smells like a pool,” or “Coffee tastes off.”

Reverse osmosis dominates the installed home market globally with a 62.8% share, according to Industry Research's household water purifier market report. That tracks with what homeowners want from a drinking-water system: broad purification at a single tap. But RO is not a magic answer for everything. It isn't the right response to every whole-house complaint.

UV is for disinfection scenarios. It's useful where microbial control is the issue, but it doesn't replace the need to match the rest of the system to the water chemistry.

For parasite concerns such as Cryptosporidium, the EPA guidance is specific. Use a point-of-use filter with an absolute pore size of 1 micron or smaller and look for certification under NSF 53 or 58 for cyst reduction or removal, as explained in the EPA filtration FAQ.

A filter that “improves taste” is not the same thing as a filter certified for the contaminant you're worried about.

Why certification matters more than branding

Buyers quickly become more informed. 92% of water filter owners say they're more likely to buy filters with an independent certification seal, and they're willing to pay an average premium of 17% more for certified products, according to NSF consumer research on certified water filters.

That behavior makes sense. Certification doesn't mean every product is right for your house. It does mean the claims are easier to verify. I'd rather install a plain-looking certified system that matches the report than a flashy box with vague promises.

A Checklist for Vetting Local Installers

A water filter installer should be able to do more than solder pipe and tighten unions. Their primary job is matching the equipment to the water, the plumbing layout, and the household demand.

Most bad installs don't fail because the wrench work was awful. They fail because the recommendation was lazy.
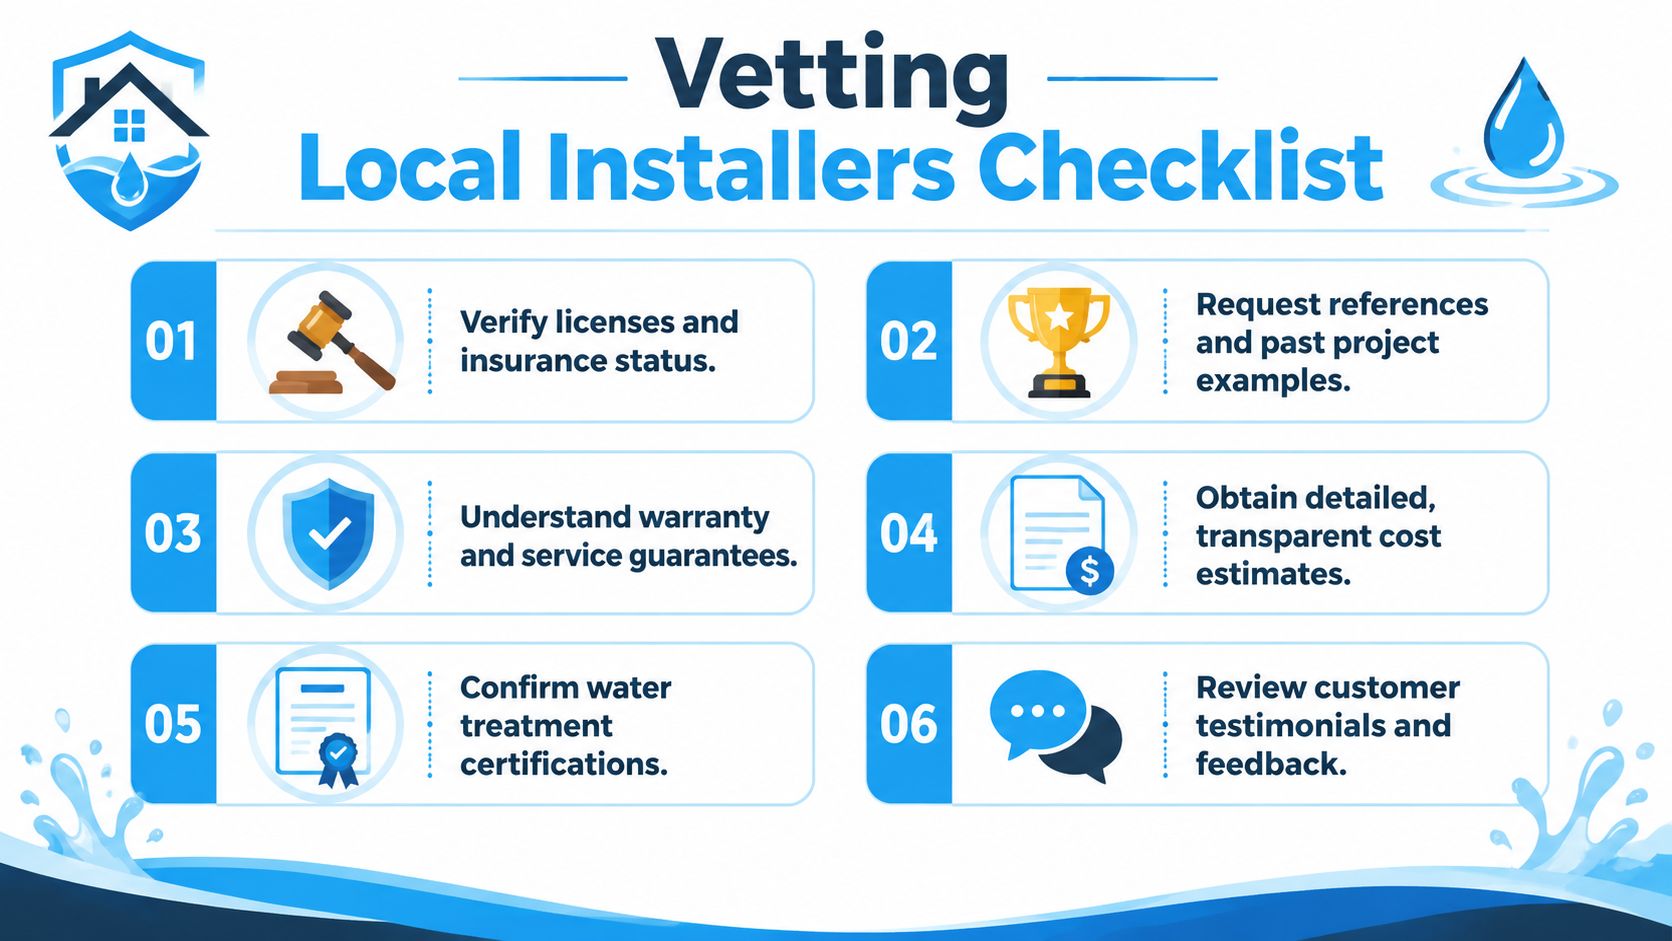
A checklist for vetting local water filter installers including verifying licenses, checking references, and reviewing customer testimonials.

The interview questions that matter

The CDC notes that 77% of U.S. water systems have detected contaminants above health guidelines, and that filter choice depends on the specific contaminants in your water. That's why a Verify Before You Buy approach matters, including making installers review your CCR before they quote, as outlined in the CDC's home water filter guidance.

Ask every installer these questions:

  • Show me how this recommendation fits my report
    If they can't tie the system to your water data, the quote is just a sales package.

  • What happens to pressure and flow after install
    This reveals whether they've thought about household demand, bathroom count, and simultaneous use.

  • What type of plumbing are you tying into
    Copper, PEX, and older mixed-material plumbing each bring different install details.

  • Who handles warranty service
    Some companies install the unit and disappear. Others support the equipment and the labor.

  • What is the exact maintenance schedule
    If they act fuzzy here, expect confusion later when performance drops.

The answers that should make you nervous

You're not only listening for expertise. You're listening for evasion.

Red flags include:

  • “This is the system we put in for everyone.”
    Water conditions aren't one-size-fits-all.

  • “You don't need the report.”
    That's a shortcut that usually benefits the seller.

  • “Pressure should be fine.”
    “Should” is not sizing.

  • “Just change filters when you remember.”
    Maintenance isn't casual if you expect the system to keep working.

If the installer talks more about financing than filtration, you're in a sales appointment, not a diagnostic appointment.

Ask for proof, not confidence

A solid installer should be comfortable showing license information, insurance details, references, and photos of similar installs. I also like asking what they do when the main line location is cramped, or when a customer wants a bypass for easier service. People who've done this work repeatedly answer those questions quickly and specifically.

Confidence is cheap. Clear answers are better.

Understanding Installation Costs and Logistics

Installation costs are where “near me” searches get slippery. Many local pages make the equipment price look clear and the labor feel fuzzy.

That's backwards. Labor, access, and plumbing layout often decide whether the project feels smooth or annoying.
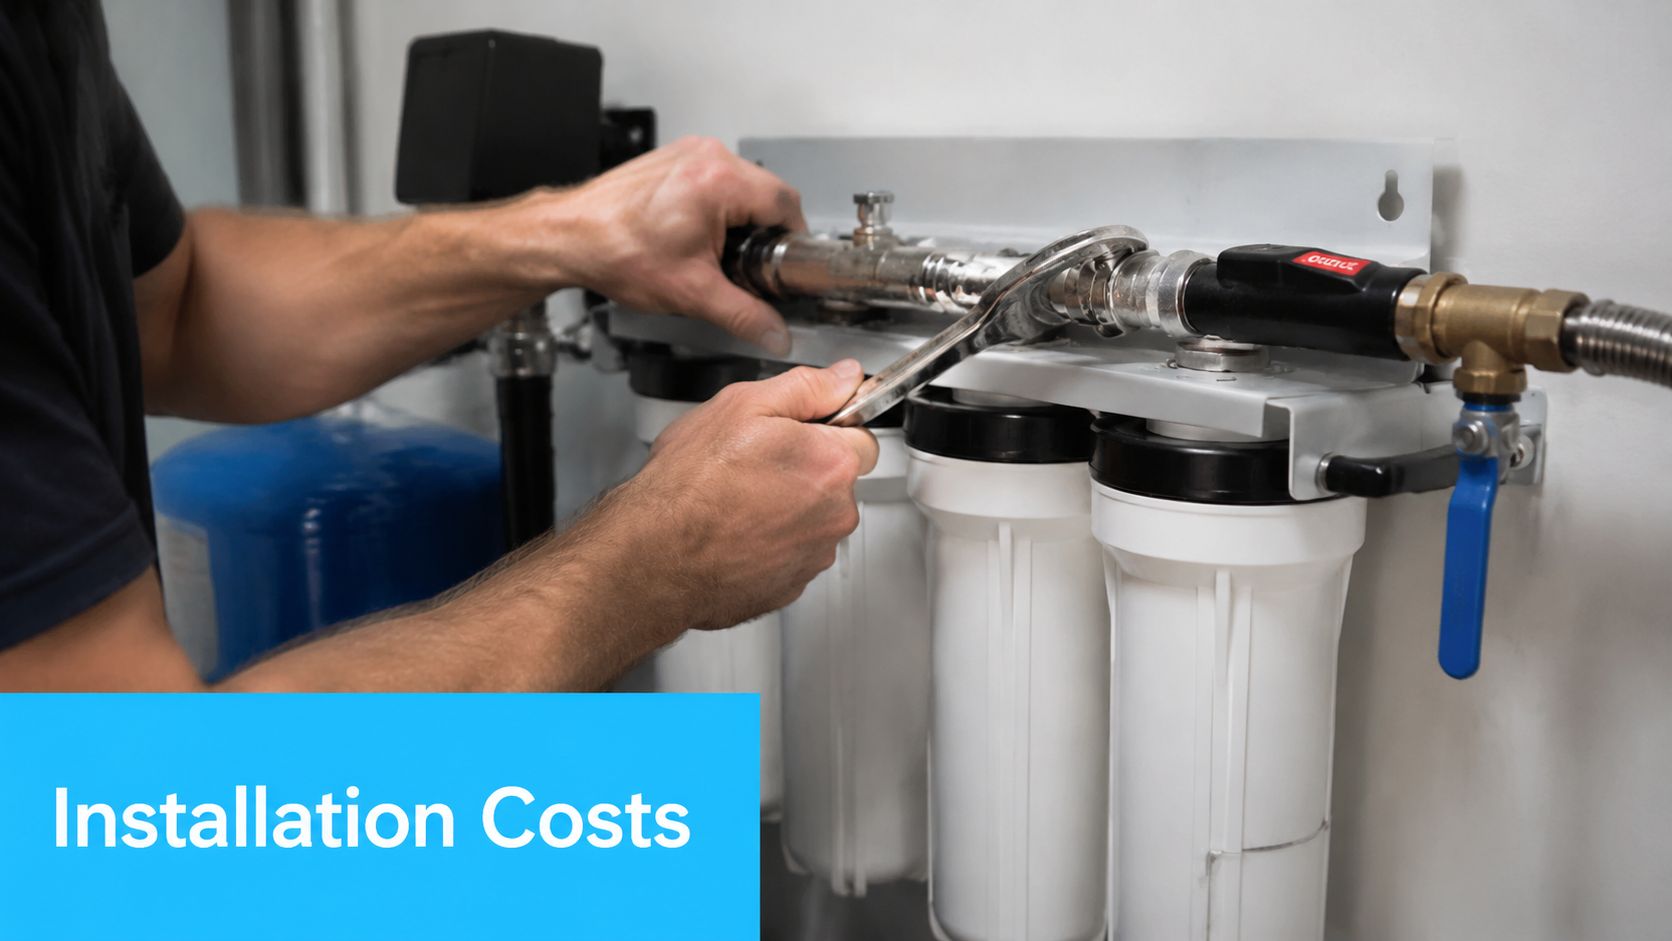
A professional plumber installing or repairing a multi-stage home water filtration system with a wrench.

The real DIY versus pro trade-off

The gap can be bigger than homeowners expect. The typical local search often hides a $300 to $800 markup contractors charge for standard whole-house installations compared with $50 to $150 in DIY parts cost, according to Home Depot's walkthrough on installing a whole-house water filter.

That doesn't mean DIY is always the right move. It means you should understand what you're paying for.

If the main shutoff is accessible, the pipe run is straightforward, and you're experienced with plumbing work, DIY can be realistic. If the line is in a cramped crawlspace, the plumbing is older, or grounding becomes an issue, the cost of getting it wrong can wipe out any savings.

One issue rarely mentioned in local ads is electrical grounding risk. Installing a metal filter housing can interrupt the home's grounding path if it isn't properly bridged. That's not cosmetic. It's a safety problem.

What an installation day actually involves

A normal install usually includes shutting off the water, cutting into the main line for a whole-house unit or tying into a sink supply for a point-of-use unit, mounting brackets or housings, checking for leaks, and flushing the system before use.

Space matters more than people expect. Whole-house systems need room for the body of the unit, clearance to service housings, and enough access that someone can replace filters without dismantling half the setup. Under-sink systems need space around disposal lines, drain connections, and stored household junk that somehow always ends up under the kitchen sink.

For homeowners comparing trade labor in different home systems, these Brisbane hot water system installation insights are worth a look because they show the same broad truth: access, complexity, and code issues drive labor more than the equipment photo suggests.

Here's a useful visual if you want to see the install process before deciding who should handle it.

Questions to settle before work starts

Use the estimate process to pin down logistics:

  • Where will the system go
    Get the exact location, not “near the main line.”

  • Will there be a bypass
    A bypass makes servicing much easier.

  • Who handles permit or code questions if they apply
    You want one clear answer before pipe gets cut.

  • What does labor warranty cover
    Equipment and labor are not always covered the same way.

Cheap installs get expensive when the unit is awkward to service, badly placed, or installed without regard for grounding and access.

Long-Term Maintenance and Local Compliance

The purchase price is only the opening number. Ownership cost lives in the maintenance schedule.

For many whole-house setups, sediment pre-filters need replacement every 3 to 6 months, while carbon or specialty media last 6 to 12 months. If you blow past those intervals, filtration performance can drop hard. Leaf Home notes that failing to stay on schedule can reduce efficacy by over 50% within 6 months after the required replacement point in its advanced filtration maintenance guidance.

Keep a simple service calendar

You don't need fancy software. You need a repeatable habit.

  • Write install dates on the housing
    A marker on the canister beats guessing later.

  • Save model numbers and filter sizes
    Replacement confusion is one of the most common homeowner headaches.

  • Watch pressure and taste changes
    The water often tells you when maintenance is overdue.

Don't ignore sizing and local rules

Flow rate matters. If a whole-house unit is undersized for the home, showers, laundry, and kitchen use can fight each other. That's when homeowners think the brand is bad, when poor sizing was the issue.

Local code and HOA issues are less exciting, but they still matter. Main-line equipment placement, drain routing for certain systems, and service access can all become problems if nobody checks the rules before install day. Ask early, get it in writing, and keep the paperwork with your filter records.

A good system should be easy to live with, not just nice to buy.


If you want a straightforward place to compare filter types, understand certifications, and keep maintenance from turning into guesswork, Water Filter Advisor is a useful resource for homeowners sorting through whole-house, under-sink, shower, and replacement-filter decisions.
What Is TDS in Drinking Water? A Homeowner’s Guide

Your water probably got your attention before the term TDS ever did.

Maybe your ice cubes look cloudy. Maybe your coffee tastes dull one day and oddly salty the next. Maybe your dishwasher leaves a chalky film on glasses no matter how much rinse aid you use. Some homeowners first notice it in the shower, where soap won’t lather well and fixtures collect white crust. Others hear it in the utility room when a tank starts acting up, and a problem like a water heater making hissing noise turns out to be tied to scale buildup from mineral-heavy water.

Those little frustrations often point back to one simple idea. Something is dissolved in the water.

That “something” is what people mean when they talk about what is tds in drinking water. TDS stands for Total Dissolved Solids, and while the phrase sounds technical, the everyday effect is familiar. Water picks up minerals and salts as it moves through rock, soil, plumbing, and sometimes polluted areas. You don’t usually see those dissolved materials floating around like dirt in a glass. They’re invisible, but they still affect taste, spots, scaling, and filter choice.

A lot of online advice makes TDS sound like a pass-or-fail score. It isn’t. A higher number can mean ordinary minerals like calcium and magnesium. It can also be a warning sign that something less welcome may be in the water. That’s why homeowners get confused. They buy a cheap meter, see a number, and still don’t know what to do next.

The useful question isn’t just “Is my TDS high?” It’s “So what does that mean for my house, my drinking water, and the kind of filter I need?”

The Mystery of Spotty Glasses and Funny-Tasting Water

A homeowner fills a glass from the kitchen tap. It looks clean enough. Then the glass dries on the counter and a ring of white spots appears. The next morning, the same water goes into a kettle, and after a few weeks there’s a crusty layer inside. Coffee tastes different than it did at the last house. Ice cubes come out cloudy.

That’s usually where the TDS story starts.

Small clues around the house

Individuals rarely notice dissolved solids directly. They notice the clues:

  • On dishes: white film or spotting after washing
  • In hot water appliances: mineral scale in kettles, coffee makers, and water heaters
  • In taste: water that seems metallic, salty, bitter, or just “heavy”
  • In appearance: cloudy ice cubes or residue around faucets

None of those signs proves the water is unsafe. They do tell you the water is carrying dissolved material that stays behind when the water evaporates or heats up.

Practical rule: If water keeps leaving something behind, there’s a good chance dissolved solids are part of the story.

Why this matters for filtration

Homeowners often jump straight to buying a filter, but the right choice depends on what’s causing the symptoms. A carbon pitcher may help with chlorine taste, but it won’t do much if the underlying issue is a high load of dissolved minerals. A whole-house sediment filter won’t solve cloudy ice cubes caused by dissolved salts. A softener can help with hardness, but it doesn’t automatically fix every TDS problem.

That’s why TDS matters. It gives you a quick way to understand whether the trouble is mostly about taste and mineral buildup, or whether the water needs closer investigation before you decide on a filter.

TDS isn’t the whole water-quality picture. But for a homeowner trying to solve annoying, recurring water problems, it’s often the first clue that turns a mystery into a manageable decision.

What Exactly Are Total Dissolved Solids

Total Dissolved Solids means the combined amount of dissolved material in water. That includes inorganic salts such as calcium, magnesium, sodium, potassium, carbonates, nitrates, bicarbonates, chlorides, and sulfates, plus small amounts of organic matter. TDS is measured in milligrams per liter (mg/L) or parts per million (ppm). In everyday home water use, those units are treated much the same.

A clear glass filled with water against a bright blue background with the text What is TDS.

Think of sugar in tea

Stir sugar into hot tea and the grains disappear. They’re still there. They’ve just dissolved.

TDS works the same way. The water can look crystal clear while carrying minerals and salts you can’t see. That’s why clear water isn’t always low-TDS water, and why “looks fine” doesn’t tell you much.

Some dissolved solids are completely normal. In fact, a lot of drinking water gets its character from natural minerals picked up underground or along the distribution system.

What’s usually in the water

In homes, TDS often comes from naturally occurring minerals. Calcium and magnesium are common in hard water. Sodium, chlorides, sulfates, and bicarbonates can also show up depending on the source. Well water often contains more dissolved material than treated city water because it spends more time in contact with rock and soil.

Water source matters a lot. According to the Los Angeles Public Library water quality overview, rainwater can be as low as 5 to 30 ppm, typical U.S. municipal tap water ranges from 100 to 500 ppm, shallow wells can run from 200 to 1500 ppm, and deep aquifers can reach 500 to 5000 ppm in some cases (water source TDS ranges explained here).

What ppm means in plain English

You don’t need to love chemistry to understand ppm.

A ppm reading is a way of saying, “How much dissolved stuff is in this water?” Higher ppm means more dissolved material. Lower ppm means less.

Here’s the homeowner version:

TDS reading What it usually suggests
Lower reading Fewer dissolved minerals and salts
Mid-range reading Common for many tap water supplies
Higher reading More minerals, more chance of taste issues, scaling, or a need for closer testing

TDS doesn’t tell you exactly which dissolved substances are present. It tells you how much total dissolved material is there. That distinction matters a lot when you’re deciding whether you need a carbon filter, a softener, an RO system, or a proper lab test.

When TDS Is a Health Concern Versus Just a Taste Issue

Most homeowners get stuck. They see a TDS number and want one clean answer. Good or bad. But TDS doesn’t work that way.

A moderate reading may reflect normal mineral content that affects taste and scale more than safety. A high reading can still be mostly natural minerals. But a high reading can also be a warning that dissolved contaminants are present, especially if the level changes suddenly or the water has a new taste, odor, or staining problem.

Two clear glasses of water sitting on a table against a vibrant blue background with text overlay.

What official guidelines actually say

The World Health Organization classifies drinking water palatability by TDS level. Water is considered excellent below 300 mg/L, good from 300 to 600 mg/L, and poor from 900 to 1200 mg/L. The U.S. EPA sets a secondary standard of 500 ppm, mainly for aesthetic concerns such as taste and staining rather than direct health risk (WHO palatability ranges and EPA secondary standard).

That EPA point is easy to miss. A secondary standard is not the same as a health-based limit. It’s guidance about what water may taste like, look like, or do to plumbing and appliances.

When high TDS is mostly an aesthetic issue

If your water tastes mineral-heavy, leaves white spots, or scales up the kettle, the problem may be mostly practical:

  • Taste changes: water may seem salty, bitter, or flat
  • Residue: glasses, faucets, and shower doors show mineral spotting
  • Appliance wear: scale builds up in kettles, coffee makers, and heaters
  • Soap performance: washing and bathing can feel less satisfying

In those cases, the TDS number helps explain the symptoms. It doesn’t automatically mean the water is dangerous.

Water with dissolved minerals can be annoying long before it becomes a health discussion.

When TDS becomes a red flag

TDS is often misunderstood because it combines the good and the bad into one number. Natural calcium and magnesium raise TDS. So can less desirable dissolved substances.

That matters because high TDS can signal that harmful contaminants may also be present. The verified guidance for this topic notes that high TDS can indicate contaminants such as iron, manganese, sulfate, bromide, or arsenic, especially where runoff, wastewater discharge, aging plumbing, or other pollution sources affect the water.

Here’s the part many sales pitches skip. A TDS meter cannot tell you which dissolved substances are in the water. It can’t separate harmless mineral content from a contamination problem.

A practical way to think about it

Use TDS as a first clue, not a final verdict.

Situation What it may mean Best next step
Spots, scale, off taste, but no other warning signs Often a mineral or aesthetic issue Consider targeted filtration based on the symptom
Sudden jump in TDS or new strange taste Possible source change or contamination issue Test for specific contaminants
Well water with persistently high TDS Could be natural geology, could include unwanted dissolved substances Pair TDS screening with a broader water test
Low TDS reading Not proof of purity Check for specific contaminants if you have reason to worry

If you’re deciding whether to buy a filter, this distinction is the whole game. If the problem is mainly taste and chlorine, carbon filtration may be enough. If dissolved solids themselves are the issue, you need a technology that removes them. If contamination is the concern, don’t rely on TDS alone. Test for the specific contaminant you suspect.

How to Test Your Water's TDS Level at Home

A TDS meter is one of the easiest water tools to use. Dip it into a sample of water, wait a moment, and it gives you a ppm reading. That speed is what makes it useful for homeowners. It turns a vague suspicion into a real number.

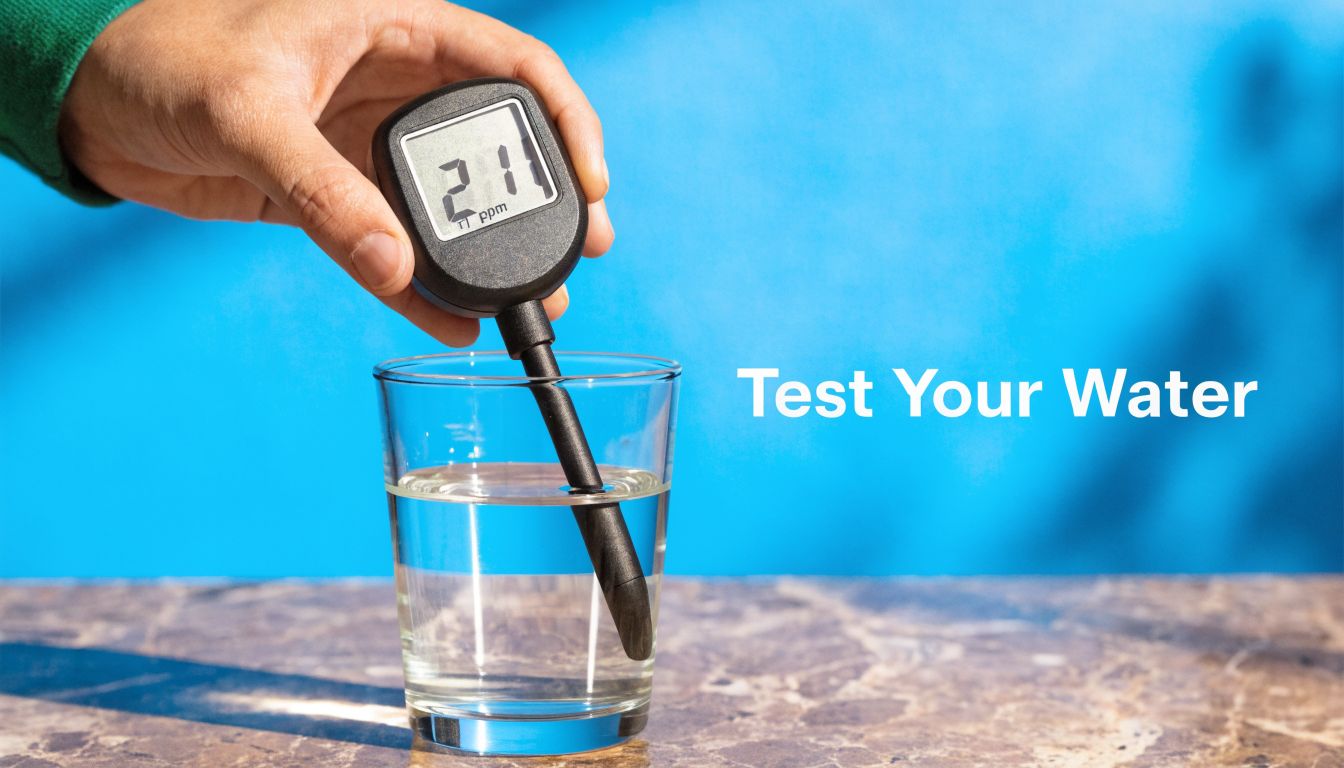
A hand holds a digital TDS meter testing the water quality in a clear glass of water.

What the meter is actually measuring

A digital TDS meter doesn’t directly count every dissolved particle. It measures electrical conductivity (EC) and converts that reading to ppm. For accurate readings in fresh water, it’s best to use a meter with a conversion factor around 0.7 and to calibrate it periodically so the reading stays reliable (how TDS meters use EC and why calibration matters).

That’s an important detail. If you compare two cheap meters, they may not display the exact same number if they use different conversion settings or haven’t been calibrated.

How to take a reading

Use a clean glass and test cold water from the tap you care about most, usually the kitchen sink.

  1. Rinse the glass first. You don’t want soap residue affecting the sample.
  2. Fill the sample with tap water. Let the water run briefly so you aren’t measuring stale water from the plumbing line.
  3. Turn on the meter and dip the probe. Keep the sensor in the water without touching the sides.
  4. Wait for the number to settle. Most meters stabilize quickly.
  5. Record the result. If you’re troubleshooting a problem, test more than one location in the house.

A short video can make the process even clearer:

How to read the number without overreacting

The number matters, but context matters more.

Your reading What it suggests
Below 300 Usually falls in the WHO “excellent” taste range
300 to 600 Often still tastes acceptable to many people
Around or above 500 Reaches the EPA secondary benchmark where taste, staining, or scaling may be more noticeable
900 to 1200 Often tastes poor
Very high or suddenly changed Worth investigating beyond TDS alone

Quick caution: A normal TDS reading doesn’t prove the water is free of harmful contaminants, and a high reading doesn’t prove it’s unsafe.

Best home testing habits

A single reading is helpful. A pattern is better.

  • Test the cold kitchen tap: That’s usually the water you drink most.
  • Compare before and after filtration: This shows whether your system changes dissolved solids.
  • Retest when taste changes: A shift in flavor, scale, or spotting is a good reason to check again.
  • Keep notes: Date, location, and reading help you spot trends over time.

For filtration decisions, the meter gives you direction. If the reading is moderate and your problem is mostly chlorine taste, a carbon filter may be enough. If the reading is high and scale is everywhere, you may need stronger treatment. If the reading is puzzling or changes sharply, move on to specific water testing instead of guessing.

Choosing the Right Filtration System for Your TDS Level

A lot of filters improve water. Far fewer reduce TDS.

That distinction saves people from buying the wrong system. If your concern is chlorine smell, many common filters can help. If your concern is dissolved minerals, salts, or other dissolved solids showing up in the TDS reading, you need a technology designed for that job.

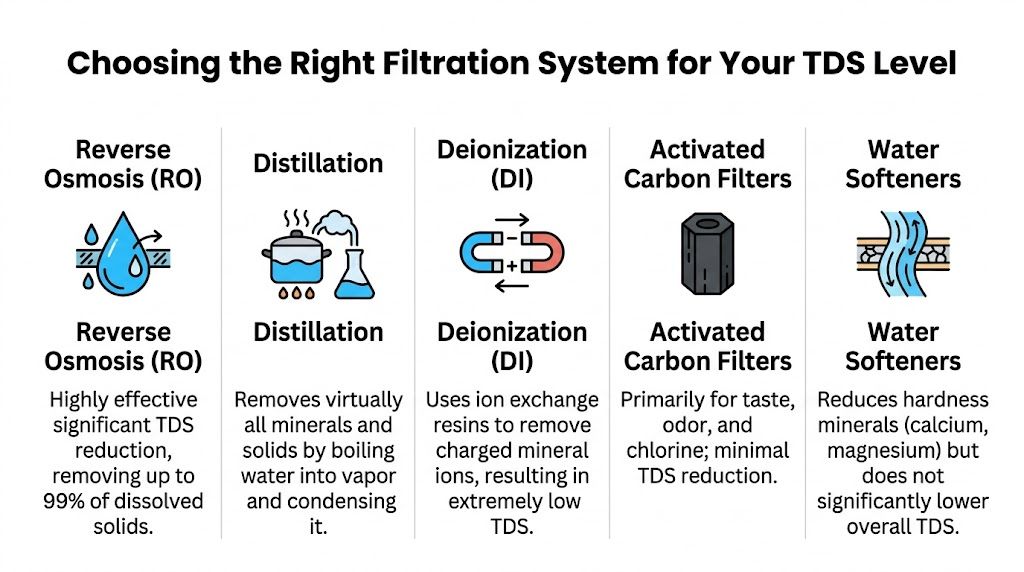
A chart illustrating five water filtration methods and their effectiveness in reducing total dissolved solids levels.

What each filter type actually does

Here’s the simple version homeowners need:

Filter type Best for TDS reduction
Reverse osmosis Drinking water with high dissolved solids Strong
Distillation Very low-mineral water at point of use Very strong
Deionization Specialized low-TDS applications Strong, but less common for household drinking water
Activated carbon Taste, odor, chlorine, some chemicals Minimal
Water softener Hardness problems from calcium and magnesium Doesn’t significantly lower overall TDS

Carbon filters and softeners are especially misunderstood. A carbon block may make water taste much better while leaving the TDS number nearly unchanged. A softener swaps hardness minerals in a way that addresses scaling, but it’s not the same as broad dissolved-solids removal.

When reverse osmosis makes the most sense

For homeowners focused on drinking water, reverse osmosis is usually the most practical TDS-reduction tool. A typical household RO system can reduce TDS by 90 to 99%, and water entering the system at 500 ppm may come out at 5 to 50 ppm. Many modern systems add a remineralization stage that puts back 20 to 100 ppm of calcium and magnesium to improve taste.

That matters because very low-TDS water can taste flat. A remineralization cartridge helps solve that without giving up the main benefit of RO.

RO is a strong fit when:

  • Your TDS reading is high and the taste is unpleasant
  • Your kettles and coffee makers scale up constantly
  • You use well water with heavy mineral content
  • You want a dedicated drinking-water solution at the kitchen sink

When a different filter may be enough

Not every TDS issue calls for an RO system.

If your water tastes bad because of disinfectants or odors, an activated carbon filter may be the better first move. If your main problem is hard-water scale across the whole house, a water softener may improve daily life more than a drinking-water unit alone. If you want ultra-low-mineral water for a special use, distillation or deionization can play a role, though they’re less common as the best all-around household answer.

Choose the filter to match the problem, not the marketing claim on the box.

A simple homeowner decision guide

Use this practical framework:

  • Low to moderate TDS, but bad taste from chlorine or odor: start with carbon filtration.
  • Noticeable scale, spots, and mineral-heavy taste: look at a softener for whole-house comfort and RO for drinking water.
  • High TDS at the kitchen tap: RO is usually the strongest point-of-use option.
  • Concerned about hidden contaminants: order targeted testing first, then match the filter to those results.

If you split time between home and travel, it also helps to think about filtration by setting. RV owners, for example, often need portable setups designed around changing campground water conditions. A guide to the best RV water filter system can help you compare that very different use case.

If you want broader guidance on matching water problems to filter types, this water filtration advice library is a useful place to compare common home setups without guessing from product labels.

Maintaining Your Filter for Lasting Water Quality

Installing a filter feels like the finish line. It isn’t. It’s the start of a maintenance job.

A neglected system can lose performance imperceptibly. Water may still flow, but the filter may no longer be doing what you bought it to do. That’s how homeowners end up trusting a system that’s overdue for service.

Why maintenance matters more than most people think

Filters don’t fail in dramatic ways every time. More often, performance fades. Taste creeps back. Flow slows down. Scaling starts showing up again. The water seems “mostly fine,” so replacement gets postponed.

That’s risky because each filter stage has a specific job. Sediment cartridges protect downstream components. Carbon stages handle taste and certain chemicals. RO membranes handle dissolved solids. If the early stages clog or expire, the later stages can wear out faster or stop performing properly.

A simple upkeep routine

You don’t need a complicated spreadsheet. You do need a habit.

  • Check the replacement schedule: Follow the manufacturer’s guidance for each cartridge and stage.
  • Retest after a filter change: A fresh TDS reading or taste check helps confirm the system is working as expected.
  • Watch for warning signs: slower flow, renewed spotting, odd taste, or return of scale usually means something needs attention.
  • Keep spare cartridges on hand: waiting too long because you forgot to reorder is one of the most common maintenance failures.

Pay extra attention to RO systems

RO systems reward maintenance and punish neglect. If pre-filters clog, the membrane has a harder job. If the membrane ages, TDS reduction drops. If a remineralization stage is spent, the water may lose the taste balance you liked when the system was new.

A filter only protects your water when the parts inside it are still capable of doing their job.

For homeowners, the smartest move is simple. Pick a system you’ll realistically maintain. The best filter on paper isn’t the best filter in your house if replacement parts are hard to find or the service routine is so annoying that you put it off.

Your Simple Path to Cleaner Better-Tasting Water

TDS sounds technical, but the homeowner takeaway is straightforward. It’s a measure of the dissolved material in your water, and that helps explain why water may taste off, leave spots, or cause scale in appliances.

The key is not to treat TDS like a complete safety score. A higher reading can mean ordinary minerals. It can also mean you need to dig deeper with specific contaminant testing. That’s the “so what” behind what is tds in drinking water. The number matters because it helps you decide your next step.

If your problem is mostly taste or odor, a carbon filter may be enough. If dissolved solids are the issue, reverse osmosis is usually the strongest home option for drinking water. If the reading seems unusually high or changes suddenly, don’t guess. Test for the contaminants that TDS can’t identify.

Good water decisions usually happen in this order. Notice the symptom. Test the water. Match the filter to the actual problem. Keep the system maintained.

That’s how you move from cloudy ice cubes and spotty glasses to water you trust.


If you want help comparing filters, understanding test results, or choosing a system that fits your home, Water Filter Advisor offers practical guides that make water filtration easier to evaluate without the usual confusion.

Your Guide to Digital TDS Meters & Finding the Best Water Filter

Ever get that nagging feeling you don’t really know what’s in your tap water? A digital TDS meter is your new best friend. This little gadget is a pocket-sized detective that gives you an instant score for all the invisible stuff dissolved in your water. It measures Total Dissolved Solids (TDS)—a fancy term for the combined amount of minerals, salts, and metals floating around.

Think of it as the first, crucial step to becoming the boss of your home's water quality and finding the perfect filter for your needs.

What Is a Digital TDS Meter and Why Does It Matter for Your Home?

A white digital TDS meter stands next to a glass of water on a kitchen counter with a 'KNOW YOUR WATER' sign.

Beyond what you can see, your water carries a hidden load of dissolved substances from its long journey to your faucet. These are what we call Total Dissolved Solids, or TDS.

Imagine your water is a big pot of clear broth. The TDS is all the salt, spices, and other flavorings mixed in. You can’t see them, but they completely change the final product. A digital TDS meter is the super-simple tool that instantly tells you how much "stuff" is in your water, helping you decide if you need to filter it and what kind of filter to use.

What Your TDS Number Tells You

So, why should this number matter to you? A TDS reading is your secret weapon for connecting the dots on common household water woes and figuring out your filtration game plan.

Your reading can help explain things like:

  • Weird Taste or Smell: High levels of certain minerals can make your water taste metallic, bitter, or salty. A TDS meter puts a number to that funky flavor, telling you it's time for a filter.
  • Hard Water Headaches: The main culprits behind hard water—calcium and magnesium—are a big part of your TDS score. A high reading is a giant red flag that you're battling scale buildup on appliances and soap scum in the shower.
  • Choosing the Right Filter: Knowing your starting TDS is key to picking the right water filter. If your number is sky-high, you'll know a simple pitcher filter won't cut it, and you might need a heavy-hitter like a reverse osmosis system.

The Bottom Line: A TDS meter won’t tell you exactly which contaminants are in your water. What it does is give you a vital big-picture measurement of your water’s overall purity. It's the starting point for any homeowner serious about getting clean, great-tasting water.

Understanding TDS Levels in Your Home

To get a better sense of what your TDS reading means, it helps to see how it compares to other common water sources. A number that's perfectly normal for well water might be a red flag if you're expecting pure, filtered water.

This quick-reference table gives you a general idea of what to expect from your taps.

TDS Levels at a Glance: What to Expect from Your Water

Water Source Typical TDS Range (PPM) Common Characteristics
Reverse Osmosis Water 0 – 50 PPM The gold standard of purity; almost all minerals are removed.
Filtered Tap Water 50 – 200 PPM Clean, crisp taste; carbon filters remove chlorine but leave healthy minerals.
Typical Tap Water 200 – 400 PPM Varies by region; generally safe, but filtration can improve taste and quality.
Hard Water / Mineral Springs 400 – 700+ PPM Noticeable mineral taste; causes scale buildup. A prime candidate for filtration.
Well Water 300 – 1,000+ PPM Highly variable; often rich in minerals like iron and calcium that need filtering.

Use these ranges as a guide. Your own reading will give you a powerful clue about your water's journey and what kind of filtration might be best for your home.

The Growing Demand for Better Water

You're not the only one thinking about this. The market for home water testing tools is booming as more people question the quality of their municipal and well water.

In fact, one market analysis valued the global digital TDS meter market at $245 million in 2024, with projections for major growth. This isn't surprising. People are more aware than ever of how dissolved solids affect taste, plumbing, and health. If you want to dig into the numbers, the report from Archive Market Research about the digital TDS meter market has more details.

Ultimately, a TDS meter puts the power in your hands. It gives you the hard data you need to understand what's in your water and make smart decisions to protect your family and your home with the right filtration system.

How a TDS Meter Actually Tests Your Water

To really get what your digital TDS meter is telling you, it helps to understand what it’s actually doing. The science is pretty straightforward, and you definitely don't need a chemistry degree to get it.

Think of your TDS meter as a traffic cop, not a census taker. It doesn't count every single particle in your water. Instead, it just checks how easily an electrical current can pass through it. This is called electrical conductivity (EC).

The Science of Conductivity

Pure, distilled water on its own is a very poor conductor of electricity. There’s nothing in it to carry a charge. But when minerals and salts—like calcium, magnesium, and sodium—dissolve, they break apart into charged particles called ions.

These ions are what allow electricity to flow. The more ions you have, the higher the water’s conductivity. A digital TDS meter works by sending a very small, safe electrical current between two metal probes (electrodes) on its tip.

It measures how easily that current travels through the water. The higher the conductivity, the more dissolved solids are present. The meter then uses a built-in conversion factor to estimate the Total Dissolved Solids and show you that final reading in parts per million (PPM).

A digital TDS meter is basically an electrical conductivity tester. It doesn't identify what the solids are, just that there are electrically charged solids present.

What a TDS Meter Can and Cannot See

This is the most important part to understand as a homeowner. Knowing what your meter can detect—and what it’s completely blind to—is key to using it to make smart filtration choices.

A TDS Meter Is Great at Detecting:

  • Salts: Common compounds like sodium chloride (table salt) and potassium chloride.
  • Minerals: This includes the "hard water" minerals like calcium and magnesium, which clog up your appliances.
  • Some Metals: Dissolved metals that carry a charge, like iron, will register on the meter.

Basically, if it dissolves in water and creates an electrical charge, your TDS meter is going to pick it up. This is why they are so useful for checking the performance of a reverse osmosis system, which is designed to remove these exact types of contaminants.

Hidden Dangers Your Meter Misses

However, a TDS meter's biggest weakness is that it can only see things with an electrical charge. Many of the most serious water contaminants are invisible to it.

A TDS Meter Cannot Detect:

  • Many Organic Chemicals: Things like pesticides, herbicides, and certain pharmaceuticals often have no charge and won't affect the TDS reading at all.
  • Chlorine and Chloramine: The disinfectants your city uses to treat water are not detected by a standard TDS meter.
  • Bacteria and Viruses: These are living organisms and don’t contribute to electrical conductivity.
  • Heavy Metals like Lead: This is a big one. Lead can exist as tiny, uncharged particles that a TDS meter will not reliably pick up.

This is why a reading of 0 PPM doesn’t mean your water is 100% pure or safe. It just means it's free of electrically charged ions. A digital TDS meter is a fantastic tool for one specific job, but it’s not a substitute for a full lab test. It gives you one piece of the puzzle, helping you make smarter decisions about water filtration for your home.

What Your TDS Reading Means for Your Home

You’ve got a number on your TDS meter. So what does it actually mean? Is your water good, bad, or somewhere in between? Let's turn that number into a clear action plan for your home's water filtration.

Think of a TDS reading as a starting point, not a final verdict. The real goal is to use that number to make a smart decision about filtering your water.

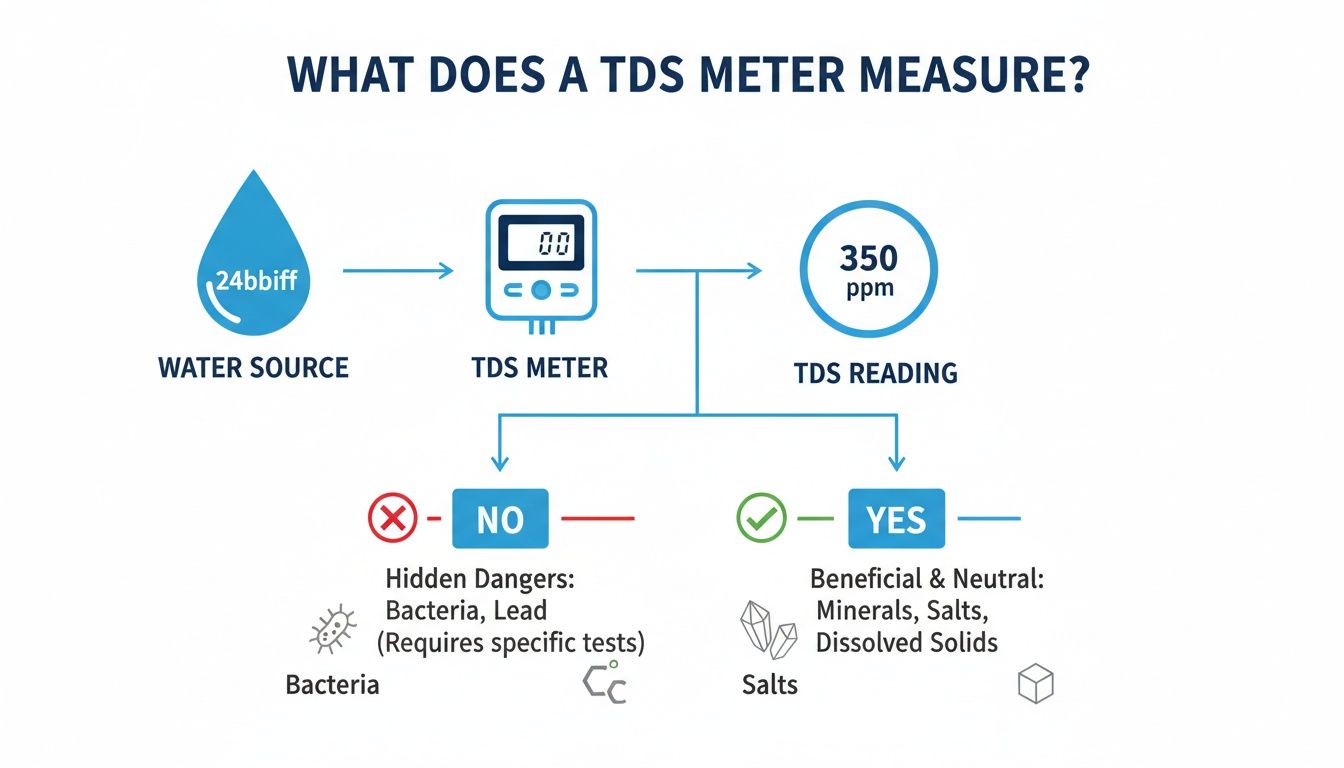
This chart shows you exactly what a TDS meter can and can't tell you.

Diagram illustrating how a TDS meter measures water quality, showing inputs, readings, and interpretations.

As you can see, the meter is great for spotting dissolved minerals and salts. But it can’t see dangerous contaminants like lead, pesticides, or bacteria—you’ll need different tests for those.

Putting Your TDS Number in Context

First, let's look at the numbers. The EPA recommends drinking water stay below 500 PPM (parts per million). Generally, though, a lower number is better for taste and keeps your appliances happy.

Here’s a quick guide to what the numbers usually mean for your filtration strategy.

  • Under 50 PPM: This is extremely pure water, like what you get from a reverse osmosis system or distillation. It has a very clean, crisp taste since most minerals are gone.
  • 50 – 300 PPM: This is a great range for most tap water. It has enough minerals for a pleasant taste without causing major scale buildup. Often, a simple carbon filter for chlorine is all you need.
  • 300 – 500 PPM: The water is still fine to drink, but you might notice a mineral taste. This is where you start seeing white scale forming in kettles and on faucets, signaling it's time to consider a filter.
  • Above 500 PPM: Once your reading is over 500, it's time to get serious about filtration. The water is likely very hard, which is tough on appliances, and might taste bitter or salty.

Remember, a TDS meter measures the quantity of dissolved stuff, not the quality. A 400 PPM reading could be harmless calcium, but the number is your signal to investigate and choose a filter that can handle it.

Matching Your Reading to the Right Filter

Your TDS reading helps you pick the right filter without wasting money. Don't buy a whole-house system if all you need is a simple pitcher filter.

Here’s how to match the filter to your water’s needs.

  • Low to Moderate TDS (Under 300 PPM): If you just want better-tasting water without chlorine, a carbon filter is perfect. You’ll find them in pitchers and faucet-mounted filters. They won't lower your TDS much, but they make a huge difference in taste and smell.
  • High TDS (300 – 1,000+ PPM): When a high reading is from hard water minerals (calcium and magnesium), a classic water softener is the best way to protect your plumbing and appliances. A softener swaps hardness minerals for sodium, so your TDS reading will actually stay the same or even go up while solving the scale problem.
  • Very High TDS & Purity Concerns (500+ PPM): To remove the absolute widest range of contaminants, you need a reverse osmosis (RO) system. An RO system can slash TDS by over 90%, getting rid of salts, minerals, and other unwanted solids. It's the top choice for anyone who wants the purest drinking water possible.

Growing concerns about water quality have made these tools more popular than ever. In India, for example, where groundwater TDS can top 1,000 PPM, sales have jumped 40% since 2020. This global trend means more affordable, high-quality meters are available to everyone. You can learn more about the global trends in the digital TDS meter market on Dataintelo.com.

Choosing the Best Digital TDS Meter for Your Needs

Shopping for a digital TDS meter can feel overwhelming, but don't worry. You don't need a complicated, lab-grade instrument to get a good handle on your home's water quality. The real goal is to find a reliable tool that gives you the data you need to make smart choices about water filtration.

Let's walk through what really matters so you can find the right meter and avoid paying for bells and whistles you'll never use.

The Non-Negotiable Feature: Automatic Temperature Compensation

If a TDS meter is missing this one thing, just put it back on the shelf. Automatic Temperature Compensation (ATC) is absolutely critical for getting an accurate reading. Here’s why: the electrical conductivity of water—which is what the meter actually measures—changes dramatically with its temperature.

This means testing cold water versus room-temperature water can give you two completely different PPM numbers, even if the amount of dissolved solids hasn't changed at all. Without ATC, your readings are just a wild guess. With it, the meter automatically adjusts for temperature, giving you a consistent, trustworthy measurement every time.

Accuracy and Convenience Features

For everyday home use, you don't need scientific precision, but you do need consistency. Look for a meter with a stated accuracy of +/- 2%. That’s more than enough to track how well your water filters are working or to monitor your tap water over time.

Beyond that, a few simple features can make a big difference in how easy the meter is to use:

  • Hold Button: This lets you freeze the reading on the screen after you’ve pulled the meter out of the water. It’s a huge help, as trying to read a tiny screen while it’s still submerged is a real pain.
  • Backlit Display: A screen that lights up is a lifesaver if you're testing in a poorly lit spot, like under the kitchen sink. No more squinting or using a flashlight.
  • Auto-Off Function: To keep you from draining the battery, find a meter that shuts itself off after a few minutes of not being used. It’s a small thing, but it ensures your meter is ready to go when you need it.

Technological innovations in digital TDS meters have revolutionized home water testing. Today, over 70% of new models include Bluetooth and automatic temperature compensation, allowing users to track TDS trends via smartphones, which is essential as temperature fluctuations can skew readings by 20-30%. For Water Filter Advisor readers, this means easily verifying that a whole-house system is reducing TDS from an incoming 400 PPM to under 100 PPM post-filtration, preventing scale that can hike energy bills by 15-20% in water heaters. You can find more on this in a report about the TDS measuring instrument market on VerifiedMarketReports.com.

What to Expect at Different Price Points

A higher price doesn't always mean a better tool for what you need. It’s all about finding that sweet spot between cost and performance. Here’s a simple breakdown of what your money gets you.

Which Digital TDS Meter Is Right for You?

This table compares the common tiers of TDS meters to help you decide which one makes the most sense for your home.

Feature Basic Model (~$15) Mid-Range Model (~$30) Advanced Model (~$50+)
ATC Often included, but verify Standard Standard
Accuracy +/- 3-5% +/- 2% (Ideal) +/- 1-2%
Display Basic LCD LCD with Backlight Large, easy-to-read screen
Extra Features Basic hold button Hold button, auto-off Bluetooth, multi-parameter
Build Quality Standard plastic More durable, splash-proof Waterproof, rugged design
Best For Quick spot-checks Reliable home testing Tech-savvy users, specific needs

For most homeowners, a mid-range model is the perfect choice. It gives you the best mix of accuracy and must-have features without the extra cost of things like Bluetooth connectivity, which most people don't need for basic filter checks.

How to Use Your TDS Meter for Accurate Results

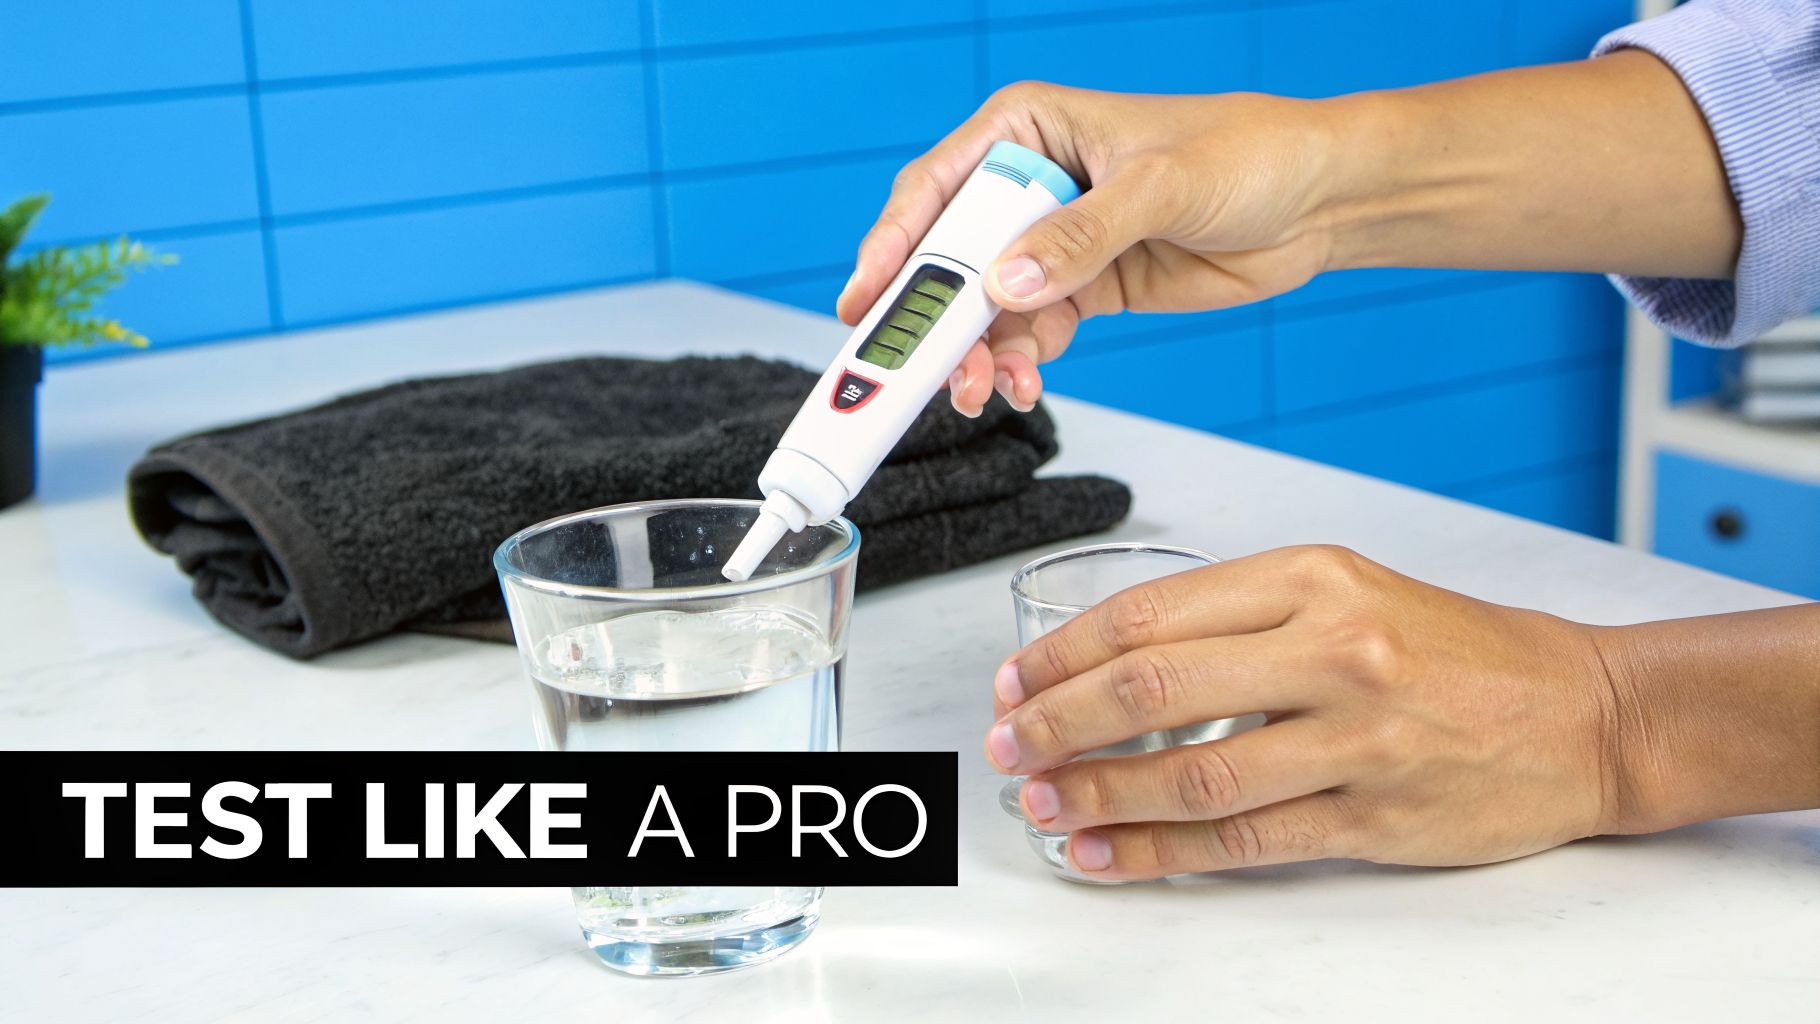
A person tests water quality with a white digital TDS meter in a glass, with another glass and towel nearby.

Getting good numbers from your digital TDS meter is all about technique. A sloppy test gives you a useless reading, but if you take a minute to do it right, you can trust the results every single time.

Think of it like taking your temperature. You can’t just wave the thermometer in the air and expect an accurate reading. The same goes for your water. Let's walk through the right way to get a reading you can count on.

The Simple Guide to a Perfect Water Test

A consistent routine is your best friend for accurate measurements. This whole process takes less than a minute, but it makes all the difference.

  1. Rinse Your Gear: First things first, rinse out your testing glass and the meter's probe with the water you're about to test. If you just tested your hard tap water, leftover minerals can easily mess up the reading for your filtered water. A quick rinse prevents that.

  2. Get a Fresh Sample: Use a clean, dry glass and fill it with about an inch of water. You don't need much—just enough to completely cover the meter's electrodes on the tip.

  3. Let It Sit: Give the water about 30 seconds to settle. This lets any tiny air bubbles escape. Bubbles clinging to the probes can interfere with the electrical reading and give you a wonky number.

  4. Test and Swirl: Power on your meter, pop off the cap, and stick the probe in the water. Give it a gentle swirl for a second or two to knock off any stubborn bubbles.

  5. Wait for the Reading to Settle: Keep the meter in the water and just watch the display. If your meter has Automatic Temperature Compensation (ATC), the number might jump around for a few seconds while it adjusts. Just wait for it to stabilize.

  6. Lock It In: Once the number is steady, hit the "Hold" button. This freezes the reading on the screen, so you can pull the meter out and easily read the result.

Following these steps ensures every test is as accurate as the last. It’s the only way to reliably track the performance of your water filters. For more general help with water treatment options, you can check out our other articles for https://www.waterfilteradvisor.com/advice/.

Essential Care for Long-Term Accuracy

A TDS meter is a measuring tool, and like any tool, a little care goes a long way. If you want it to stay accurate for years, you have to keep it clean and store it properly.

A well-maintained meter is a reliable one. Rinsing and drying the probe after each use prevents mineral buildup that can coat the electrodes and cause inaccurate readings over time.

Think of that mineral scale like a little insulating jacket on the probes. It blocks the electrical current, which can make your meter give you a TDS reading that’s way lower than the real number.

Simple Maintenance Tips:

  • Rinse and Dry: After every test, rinse the probe with distilled or reverse osmosis (RO) water. If you don't have any, your filtered water will do. Shake off the extra water and wipe the meter’s body dry with a cloth.
  • Always Use the Cap: That protective cap is there for a reason. It keeps the electrodes from getting scratched, dirty, or damaged. Get in the habit of putting it back on right away.
  • Give It a Deep Clean: If you see gunk building up on the probes, you can clean them. Just dip the probe end into a bit of isopropyl (rubbing) alcohol and swirl it around. Rinse it well with pure water and let it air dry completely.

These small habits will make sure your meter stays a trustworthy tool. And if you’re managing water chemistry elsewhere, like a hot tub, pairing these tests with a good hot tub water testing log sheet can help you keep everything perfectly balanced.

Common Questions About TDS Meters and Home Water Filters

Once you have a TDS meter in hand, you'll probably have a few questions as you start testing the water around your house. Let's run through the most common ones so you can get clear, simple answers and start making sense of your readings.

Think of this as your go-to guide for real-world water testing.

Can I Use a TDS Meter to Know When to Change My Filter Cartridge?

Yes, and this is one of the most practical uses for your meter. It takes the guesswork out of filter changes, letting the data tell you when it's time.

Here's the simple process:

  1. First, test your unfiltered tap water. Write that number down—it's your baseline.
  2. Next, install the new filter and test the water coming out of it. This much lower number is your "clean" reading.
  3. Every few weeks, test the filtered water again.

As the filter does its job, it fills up with contaminants. Over time, you'll notice the TDS reading from your filtered water will start to slowly climb back up. We call this "TDS creep."

When the filtered water's TDS reading starts climbing closer to your original tap water number, it's a clear, reliable sign that the filter media is saturated and no longer working effectively. This TDS creep is your cue to order and install a replacement cartridge.

My TDS Meter Shows 0 PPM After My RO Filter, Is My Water Pure?

Seeing a reading of 0 PPM (or something very low like 1-10 PPM) after your reverse osmosis (RO) system is a great sign! It means the RO membrane is working perfectly, removing an enormous amount of dissolved solids like salts and minerals.

But is the water "perfectly pure"? Not necessarily. Remember, a TDS meter only detects dissolved solids that have an electrical charge. It cannot see uncharged contaminants.

Things a TDS meter misses include:

  • Certain pesticides and industrial chemicals (VOCs)
  • Disinfectants like chlorine and chloramine
  • Bacteria, viruses, and other microorganisms

So while a 0 PPM reading doesn't guarantee your water is 100% free of every possible contaminant, it's the gold standard for RO performance. It's a strong confirmation that your system is doing its job exceptionally well.

Why Is My TDS Reading Different from My Neighbor’s?

This is a great question. Even if you and your neighbor get water from the same municipal supply, a few things can cause your readings to be different.

The biggest factor is your home's plumbing. Older homes with copper pipes (and lead-based solder) or galvanized steel pipes can add small amounts of metals into the water as it flows to your tap. Newer plumbing, like PEX, won't affect the TDS count.

Another common reason is a water softener. A softener works by swapping "hard" minerals like calcium and magnesium for sodium or potassium ions. Your digital TDS meter reads these new ions, too. It's very common for softened water to have a higher TDS reading than the hard water that went into it.

Is a High TDS Level Dangerous to My Health?

Usually, no. The EPA classifies TDS as a Secondary Drinking Water Contaminant. This means it mostly affects aesthetics—like taste, smell, or color—not your health. In fact, many expensive bottled mineral waters are prized for their very high TDS levels, which come from beneficial minerals.

However, a very high TDS reading (especially over 500 PPM in city water) is a red flag. It’s not a sign of danger, but a signal to look closer. A spike in TDS could point to:

  • Extreme Water Hardness: This can cause major scale buildup that damages dishwashers, water heaters, and pipes.
  • Bad Taste: High levels of chlorides or sulfates can make water taste salty, bitter, or metallic.
  • Possible Contamination: For well owners, a sudden jump in TDS might mean contamination from septic systems or agricultural runoff.

A high TDS reading is like a check-engine light. It doesn't mean the car is broken, but it definitely means it's time to find out what's going on with your water and find the right filter for the job.

If you have more questions about water quality, testing, or wish to delve deeper into related topics, you might find valuable resources on their water technology blog.


Ready to take control of your home’s water quality? At Water Filter Advisor, we provide the expert guides and unbiased reviews you need to find the perfect filtration solution. From simple pitcher filters to whole-house systems, we help you make confident decisions for healthier, better-tasting water. Explore our resources at https://www.waterfilteradvisor.com today.

Your TDS Meter RO Guide: The Ultimate Check-Up for Your Home Water Purifier

A TDS meter for your RO (Reverse Osmosis) system is your secret weapon for knowing if your water filter is actually doing its job. Think of it as a pocket-sized truth detector for your drinking water. It spits out a single, hard number—the Total Dissolved Solids—so you can stop guessing and start knowing just how pure your water really is.

This little gadget measures all the invisible stuff dissolved in your water—minerals, salts, and metals—and confirms your pricey RO system is earning its keep. With a TDS meter, you gain total confidence in every single glass you pour.

What Your TDS Meter Reveals About Your Home RO System

Your TDS meter is like a water translator. It takes the invisible world of dissolved particles floating around in your water and turns it into a simple number, measured in parts per million (PPM).

That one number tells the entire story of your water's journey: from the city treatment plant, through your home's aging pipes, and finally through the gauntlet of filters in your RO system.

So what exactly are these "Total Dissolved Solids" or TDS? They're simply the collection of minerals and inorganic compounds water picks up on its travels. Common culprits include calcium, magnesium, sodium, and even traces of metals from old plumbing.

A tds meter ro setup helps you see what your reverse osmosis system is kicking out. While many dissolved solids are harmless (some even give water a nice taste), high levels can make your water taste funky, create scaly buildup in your coffee maker, and sometimes hint at unwanted contamination.

Defining Good and Bad TDS Levels

So, what's a "good" number? It all depends on where you're testing. Your tap water, for example, is the "before" picture, and your purified RO water is the "after."

The EPA suggests a maximum of 500 ppm for drinking water, though many find the best-tasting water is somewhere between 300–500 ppm. If you want to dive deeper, you can learn more about how TDS standards have evolved and what they mean for your home on wisewell.com.

Your unfiltered tap water could be anywhere from 100 ppm to well over 500 ppm. After a trip through a healthy RO system, that number should nosedive. A fantastic RO water reading is anything below 50 ppm, with many top-tier systems getting it down under 25 ppm.

Here’s a quick cheat sheet to help you make sense of the numbers you might see on your meter.

Interpreting TDS Readings in Your Home Water

TDS Level (PPM) Water Quality Interpretation Common Source or Condition
0-50 Excellent Reverse osmosis, deionized, or distilled water. The gold standard for purity.
50-150 Good High-quality spring water or carbon-filtered tap water.
150-300 Fair Standard tap water in many areas. Generally acceptable but could be better.
300-500 Poor Hard water with high mineral content. Still safe but may have an off taste or leave spots.
500+ Unacceptable Exceeds EPA guidelines. Water may taste salty or metallic. A prime candidate for filtration.

This table gives you a solid baseline for understanding the quality of your water, both before and after it runs through your RO system. The goal is to see a dramatic drop from the "Fair" or "Poor" range right down to "Excellent."

The All-Important Rejection Rate

The most critical number your TDS meter helps you find is the rejection rate. This percentage tells you exactly how effective your RO membrane is at kicking all those dissolved solids to the curb.

Key Takeaway: A high-performing home RO system should have a rejection rate of 95% or higher. If your tap water is 400 ppm and your RO water is a cool 20 ppm, your system is crushing it.

If you test your water and find that rejection rate is dipping below 90%, it's a huge red flag. It could be clogged pre-filters, but more often than not, it means the RO membrane itself is getting tired and needs to be replaced. Checking this rate regularly is the best way to know precisely when your system needs a tune-up.

How to Accurately Test Your RO System Water

Getting a reliable reading from your TDS meter is all about clean, consistent technique. Think of it like a science experiment in your kitchen.

If you're sloppy, you'll get junk numbers, and you won't know if your reverse osmosis system is actually protecting you. But follow a simple process, and you’ll get data you can trust every single time.

Don't sweat calibration. Most digital TDS meters come pre-calibrated from the factory, and for home use, they rarely need adjusting. If you have a pro-grade meter or just feel like your readings are way off, the manual will walk you through dialing it in with a calibration solution.

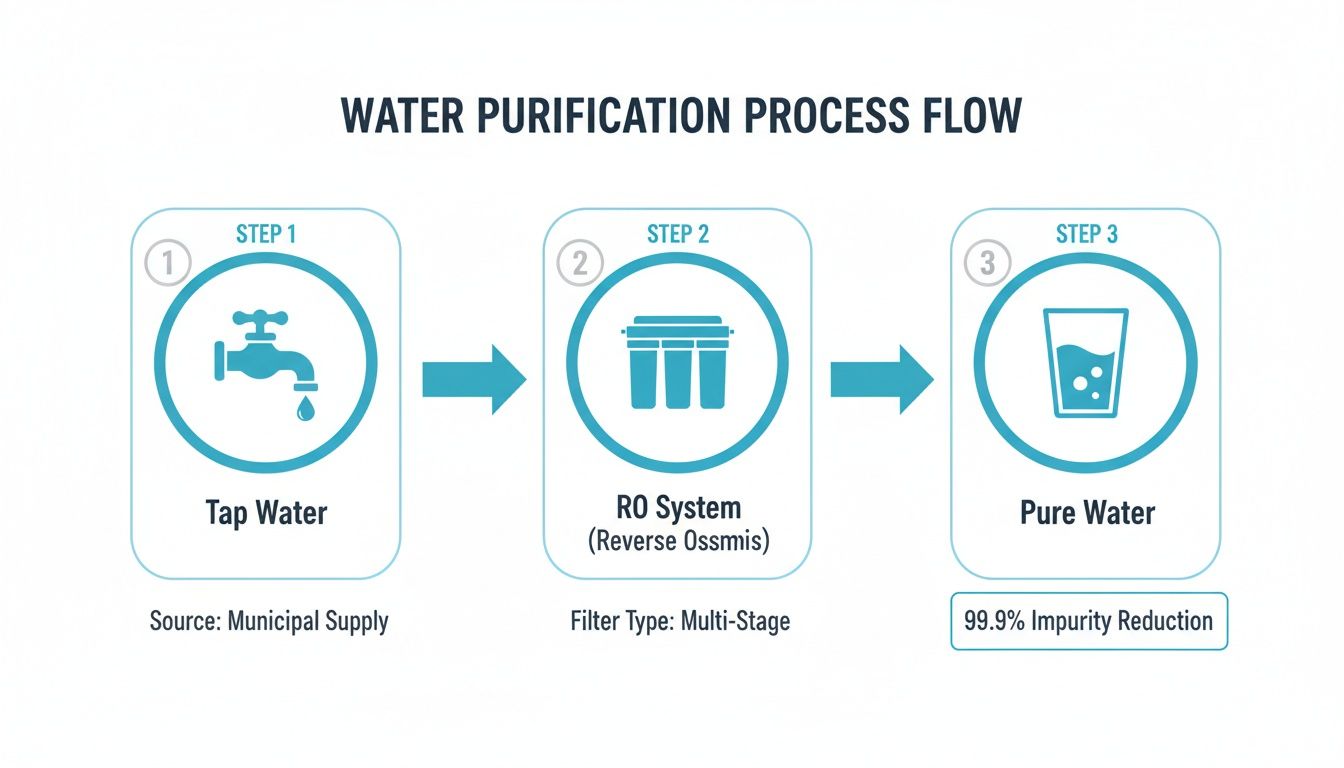
The Three-Point Water Quality Check

To really get the scoop on your RO system's performance, you can't just test the water coming out of that fancy little faucet. A full diagnostic means checking your water at three key points.

This is how you play detective and pinpoint exactly where a problem is hiding—whether it's your incoming tap water, the RO membrane itself, or a filter further down the line.

A diagram illustrating a three-step water purification process from tap water to pure water.

As you can see, each stage of filtration dramatically changes the water, and that's exactly what your TDS meter is built to measure.

Grab three squeaky clean glasses. And I mean it—perfectly clean. Even a single drop of tap water in your RO sample glass will skew your readings and ruin your experiment.

  • Test 1: The Raw Tap Water: Fill a glass with your regular, cold tap water. This is your "before" photo, your baseline. It tells you what your RO system is up against.

  • Test 2: The Membrane-Only Water: This is the most crucial test for checking your RO membrane’s health. To get this sample, you'll need to disconnect the tube that runs from the membrane housing to your post-filter or storage tank. Let that water flow directly into a clean glass. This reading isolates the membrane and tells you how well it's working on its own.

  • Test 3: The Final RO Faucet Water: Now, fill your third glass from the dedicated RO faucet on your sink. This number shows you the quality of the water you're actually drinking after it has passed through all the post-filters and sat in the storage tank.

If you see a big jump in TDS between the membrane-only water (Test 2) and the final faucet water (Test 3), your problem is likely a worn-out post-filter or a contaminated storage tank. If Test 2 already shows high TDS, the membrane itself is the prime suspect.

Pro Tips for Flawless Testing

For the most accurate numbers, always let the water run for at least 15-20 seconds before you collect a sample. This flushes out any water that's been sitting in the lines.

Water that sits can sometimes pick up extra dissolved solids, a little phenomenon we call "TDS creep." Following these steps ensures your tds meter ro readings are a true reflection of your system's real-time performance.

If you're looking for more general system maintenance tips, there are plenty of expert guides out there. For instance, the folks at Water Filter Advisor have a ton of practical information you might find helpful.

Making Sense of Your TDS Results

Okay, you've got your numbers. So what do they actually mean? This is where your TDS meter RO test transforms from a simple reading into a powerful diagnostic tool for your home water filtration system.

Those PPM (Parts Per Million) figures tell you everything about how hard your RO system is working.

The most important number to figure out is your system's rejection rate. This percentage is your system's report card—it shows you exactly how much junk your RO membrane is pulling out of your water.

Calculating Your System's Rejection Rate

Don't worry, the math is simple. No calculus required.

Here’s the formula:

Rejection Rate % = (Tap Water TDS – RO Water TDS) / Tap Water TDS * 100

Let's say your unfiltered tap water measures 400 PPM. Then, you test the purified water from your RO faucet and get a crisp reading of 20 PPM.

Here's how that breaks down:

  • (400 – 20) / 400 = 0.95
  • 0.95 * 100 = 95% Rejection Rate

That's a fantastic result. A rejection rate of 95% or higher means your RO system is in peak condition and the membrane is doing its job perfectly.

What a Low Rejection Rate Tells You

But what if the numbers are trending in the wrong direction? Let's imagine you test again a few months later. Your tap water is still 400 PPM, but your RO water has crept up to 60 PPM.

Running the numbers again:

  • (400 – 60) / 400 = 0.85
  • 0.85 * 100 = 85% Rejection Rate

That drop from 95% down to 85% is your flashing warning light. It tells you performance has slipped and something needs your attention. This is exactly why using a tds meter ro setup is so vital; you can catch a problem long before you'd ever taste it.

While 85% might not sound terrible, today's RO systems are capable of so much more. It's not unusual for a standard household system to hit rejection rates over 99%, especially with tap water under 1,000 PPM. You can learn more about the critical role of TDS in RO system design to see just how effective this technology is.

A lower rejection rate isn't just a number. It's a sign that the barrier protecting your drinking water is weakening. It means it's time to play detective.

Troubleshooting High TDS Readings in Your RO Water

So you tested your RO water and the TDS reading is high. What gives? You bought this system for pure water, after all. A high reading doesn't mean your system is a dud; it’s usually just a maintenance light telling you one part needs some TLC.

With a little bit of troubleshooting, you can figure out what's going on and get those numbers back down to the super-low levels you expect.

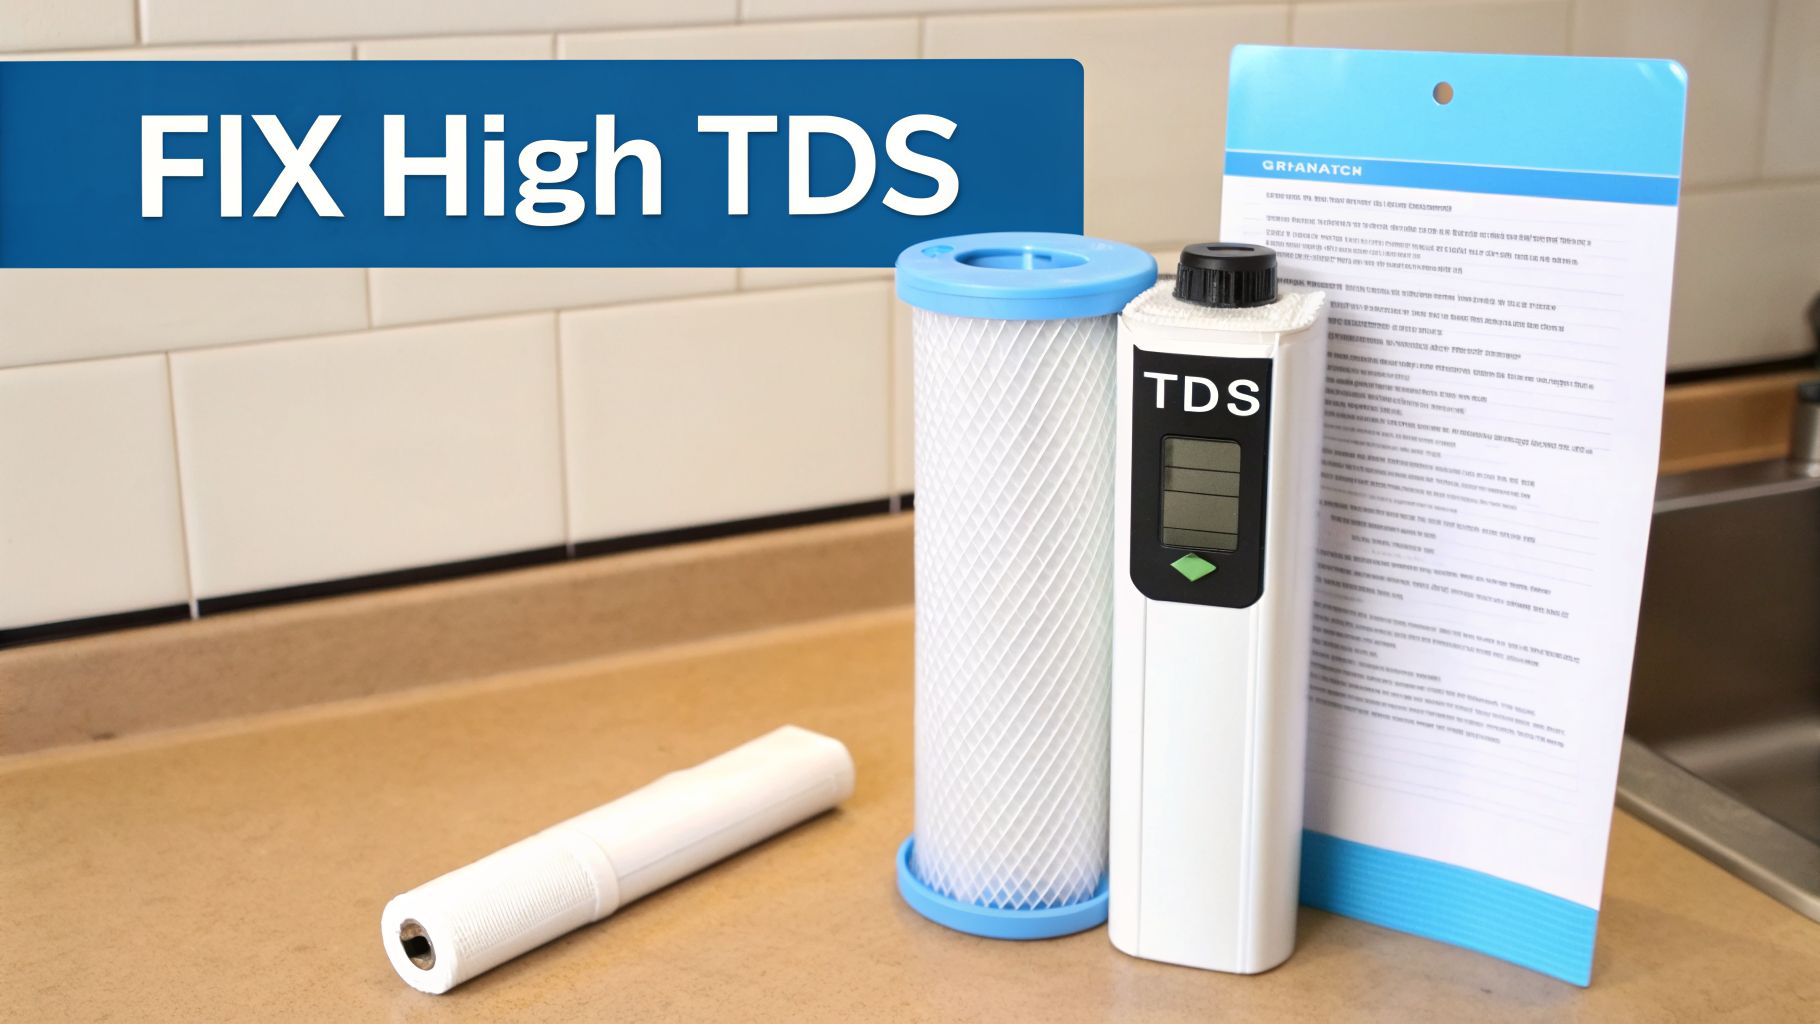
A TDS meter, two water filter cartridges, and a document on a counter with 'FIX High TDS' text.

Check Your Filters First

Don't jump straight to blaming the expensive membrane. Nine times out of ten, the problem starts with your humble sediment and carbon filters.

Your pre-filters are the bouncers at the club, protecting the VIP (the RO membrane) from chlorine and sediment. When they get clogged, they can't do their job. This lets all the riff-raff through, overloading the membrane and causing your TDS levels to spike. A quick look at your filter change schedule is the easiest first step.

The same goes for your post-filter. If it's old and spent, it can actually leach solids back into your clean water, raising the TDS right before it hits your glass.

Is It Just TDS Creep?

Ever test the very first glass of water in the morning and see a high TDS number, only for it to be much lower later in the day? That’s something called TDS creep, and it’s completely normal.

When your RO system sits idle, dissolved solids can literally "creep" across the membrane from the high-TDS side to the clean side, concentrating in the first bit of water produced.

To get a true reading, let the RO faucet run for about 30 seconds before you take a sample. This flushes out that initial high-TDS water. If the number drops way down, you're just seeing TDS creep, not a real system problem. Phew!

The RO Membrane Health Check

If you've got fresh filters and you've already ruled out TDS creep, it’s time to look at the heart of the system—the RO membrane itself. These workhorses typically last 2 to 4 years, but it all depends on your local water quality and how much water you use.

Two things can go wrong here:

  • Improper Seating: If you recently changed filters, it's possible the membrane housing isn't sealed right. A loose cap or a twisted O-ring can let tap water sneak past the membrane, which will send your TDS reading through the roof.
  • Membrane Failure: Membranes just wear out over time. If your rejection rate has been slowly dropping and is now under 90%, that’s a sure sign the membrane has fought its last battle and needs to be replaced.

A worn-out membrane is the most common reason for consistently high readings from a tds meter ro test. To know for sure, test the water coming directly from the membrane housing's "pure" water line. If that water's TDS is high, you've found your culprit.

When to Replace Your RO Membrane and Filters

Figuring out when to swap your RO system's filters and membrane shouldn't be a guessing game. A lot of people just circle a date on the calendar, but using your TDS meter RO testing data is a much smarter, more scientific approach. It's the only way to know for sure when a part has truly given up the ghost.

This strategy saves you real money and stops you from changing parts too early. More importantly, it lets you catch a drop in water quality before you can even taste it, protecting your family and the investment you made in your RO system.

A person's hands are holding two water filters, while other filters and a calendar are on a wooden table.

When to Replace the RO Membrane

The reverse osmosis membrane is the MVP of your system. It’s also the priciest part to replace, so you definitely don’t want to swap it out too soon—or too late. The single best measure of its health is your TDS rejection rate.

Key Rule of Thumb: If your system's rejection rate consistently drops below 90%, it's a clear sign the RO membrane is on its way out and needs replacing.

Let’s say your tap water is 500 PPM and your RO water measures 25 PPM. That gives you a fantastic 95% rejection rate. But if you test a few months later and your RO water has crept up to 60 PPM, your rejection rate has fallen to 88%. That's your signal to order a new membrane before performance gets any worse.

A healthy membrane can last 2-4 years, but your specific water conditions will determine its actual lifespan. Your TDS meter gives you the hard data to make the right call at the right time.

Why Pre-Filters and Post-Filters Matter

While the membrane gets all the glory, your pre- and post-filters are the unsung heroes of the system. If you ignore them, you're practically guaranteed to destroy a perfectly good membrane.

  • Pre-Filters (Sediment and Carbon): Think of these as the membrane's bodyguards. They shield it from big particles like silt and harsh chemicals like chlorine. They need to be changed every 6-12 months. If you let them get clogged, all that gunk slams directly into the delicate membrane, causing it to fail much, much faster.

  • Post-Filter (Polishing Filter): This is the final touch, removing any stray tastes or odors the water might pick up in the storage tank. If your TDS reading is low but your water tastes a bit flat or stale, a worn-out post-filter is usually the culprit. Just like the pre-filters, plan on replacing it every 6-12 months.

By using your TDS meter RO test results to keep an eye on performance and sticking to a simple replacement schedule for your other filters, you'll get the most life out of your entire system. This means you’ll always have pure, great-tasting water on tap without wasting money on parts you don't need yet.

Common Questions About TDS Meters and RO Systems

You've got the basics down, but a few questions always pop up when you start testing your home RO system with a TDS meter. Let's tackle them with some straight answers.

Is Zero TDS Water the Best to Drink?

You'd think so, but not really. A reading of 0-10 PPM is a fantastic sign that your RO system is working like a champion, but it doesn't make for the best drinking water.

When you strip out all the dissolved solids, you also remove the natural minerals that give water its taste. The result is often water that tastes "flat" or just empty. Ultra-pure water can also be a bit "aggressive," meaning it might try to leach minerals from your plumbing over time.

What Is the Perfect TDS Level for Drinking Water?

The sweet spot for crisp, clean, and refreshing drinking water is somewhere between 50 and 150 PPM. This range gives you the best of both worlds.

  • Purity: You know the water is exceptionally clean and free from the vast majority of unwanted contaminants.
  • Taste: It keeps just enough of the good minerals, like calcium and magnesium, to have a balanced, pleasant flavor.

If your RO water tastes flat, look into a remineralization filter. Many modern RO systems have one, and it’s an easy add-on for those that don't. It's designed specifically to add those healthy minerals back in after purification, bumping the TDS into that ideal taste range.

Expert Insight: If your RO water reads below 50 PPM and tastes flat, a remineralization cartridge is a simple and effective upgrade. It restores the minerals that create a more pleasant, natural taste.

Can I Use a TDS Meter to Check for All Contaminants?

No. This is a big one. A TDS meter is a fantastic tool for what it does, but it's critical to know what it can't do. It measures the total amount of dissolved solids but tells you absolutely nothing about what those solids are.

Your meter won't detect many of the most dangerous contaminants because they don't conduct electricity. This includes nasty stuff like:

  • Pesticides
  • Herbicides
  • Many pharmaceuticals
  • Lead (especially at low but still very harmful levels)
  • Bacteria and viruses

Think of your TDS meter like a pressure gauge for your system—it gives you a great snapshot of its general performance and efficiency. For a full picture of your water's safety, a comprehensive lab test is the only way to be 100% certain.


Ready to take control of your home's water quality? Water Filter Advisor provides expert reviews, in-depth guides, and practical maintenance tips to help you choose and maintain the perfect filtration system for your family. Explore our resources and make confident decisions about your water. Visit us at https://www.waterfilteradvisor.com.

10 Signs Your Tap Water Needs a Serious Filter Upgrade

The most obvious signs of contaminated water are the ones that assault your senses—an off-putting flavor, a funky odor, or water that looks like it came from a puddle. These sensory clues are your home's built-in alarm system, screaming that it’s time to stop guessing what’s in your water and start filtering it.

Is Your Tap Water Secretly a Science Experiment?

A young person fills a clear glass with water from a kitchen tap, next to a 'TAP WATER CHECK' sign.

We’ve all been there. You turn on the kitchen tap for a refreshing glass, and something just feels… wrong. Maybe it's a weird smell you can't quite place, or the water looks a little murky. That gut feeling is your first line of defense, telling you to put down the glass and pay attention.

But here’s the catch: the most dangerous stuff is often completely invisible, with no taste or odor. While crystal-clear water looks reassuring, it's no guarantee of purity. The journey from the treatment plant to your tap is a long one, and your water can pick up all sorts of unwanted hitchhikers from aging city pipes or even the plumbing inside your own walls. The only real way to take control is with a home water filtration system.

Quick Reference Guide to Filtration Clues

Before we dive deep, here's a quick, scannable table to help you connect the dots between what you're observing and which filter might be your hero. Think of it as a first-glance diagnostic tool for your home's water woes.

Observable Sign (Taste, Smell, or Look) Potential Problem Source Your First Filtration Thought
Metallic or bitter taste High levels of copper, iron, zinc, or lead A reverse osmosis (RO) system is a powerhouse for this
Chlorine or bleach-like smell Excess chlorine from municipal treatment An activated carbon filter is the perfect chlorine-killer
Rotten egg (sulfur) odor Hydrogen sulfide gas or certain bacteria Look into a specialized iron/sulfur filter or an aeration system
Musty or earthy smell/taste Algae blooms or decaying organic matter A whole-house carbon filter will freshen things right up
Cloudy or milky appearance (turbidity) Air bubbles or suspended solids/silt A sediment pre-filter is your first line of defense
Red, brown, or orange discoloration Rust from iron pipes or sediment An iron filter or a water softener with iron removal is key
Green or blue stains on fixtures High levels of copper, likely from pipe corrosion An acid neutralizer filter can stop corrosion in its tracks
Gritty sediment or floating particles Dirt, rust flakes, or scale from old pipes A sediment filter is a must-have for catching this gunk

This table covers the most common red flags, but remember, it’s a starting point. The only way to know for sure what's in your water is to test it, which will point you to the perfect filtration solution.

Your Senses Are The First Alert System

Long before you order a test kit, your own eyes, nose, and tongue are on the job. Paying attention to these subtle (and not-so-subtle) signals is the first real step toward choosing a filtration system that protects your family’s health and prevents costly damage to your pipes and appliances.

A sudden change in your water's taste, smell, or appearance isn't just a nuisance. It's a clear signal that something has shifted, and it's time to find the right filter to fix it.

Understanding what these signals mean is key. For instance, persistent moisture issues that lead to musty smells can be connected to bigger problems, so it's wise to understand the truth about mold contamination and health risks.

This guide will walk you through exactly what to look for. We'll break down the common signs of contamination, explain the likely causes, and give you clear, actionable steps to get your water back to clean and safe with the right filtration setup.

Unmasking Strange Tastes and Odors

Your nose and taste buds are your home's front-line defense—they’re surprisingly good at detecting when your water is off. If it tastes or smells weird, that’s not something to ignore. It’s a clear warning that something isn’t right, and figuring out what that message means is the first step to choosing the perfect filter to fix it.

A distinct metallic taste is a big red flag for excess metals in your supply. It could be naturally occurring stuff like iron and manganese, or it could be something more serious like copper, zinc, or even lead that's leaching from old pipes. A bitter taste, on the other hand, often points to a high level of dissolved solids.

Either way, your water has picked up some unwanted hitchhikers. Your best bet for a permanent fix is an under-sink reverse osmosis (RO) system. It's a filtration powerhouse, stripping out a huge range of dissolved metals and getting your water back to tasting pure and clean.

What Common Water Odors Are Telling You

Some smells are more common than others, but they're all cause for concern. Knowing where the odor comes from is the key to picking the right filter to get rid of it for good.

Here are the usual suspects:

  • Rotten Eggs or Sulfur: You can't miss this one. It’s caused by hydrogen sulfide gas, which can come from bacteria in a well or even a funky reaction inside your hot water heater. A dedicated iron and sulfur filter or an aeration system will knock this out completely.
  • Swimming Pool or Bleach: This is a dead giveaway for excess chlorine. Your city uses chlorine to keep water safe, but too much of it at the tap is unpleasant. A simple carbon filter is a master at removing chlorine.
  • Earthy, Musty, or Fishy: These smells usually point to organic compounds, often from things like algae blooms in the source water. A whole-house catalytic carbon filter is your best friend for tackling these odors.

A foul odor, especially one like rotten eggs or sewage, is one of the most urgent signs of contamination. It can signal hydrogen sulfide or, in a worst-case scenario, bacterial growth from sewage pollution.

This isn't just a local problem. According to the UN and WHO-UNICEF, a staggering 2.2 billion people don't have access to safely managed drinking water. If you're interested, you can read more about worldwide water scarcity issues to see the global scale of the challenge.

Picking the Right Filter for the Job

The good news? You don’t have to put up with nasty water. Modern filtration systems are built to zero in on these specific problems. You just have to match the filter to the contaminant.

It's like using the right tool for the right task—you wouldn't use a hammer on a screw. A filter that knocks out chlorine might not do a thing for a sulfur smell.

For example, a whole-house catalytic carbon filter is a fantastic choice for tackling odors. It’s a pro at removing chlorine, chloramine (another disinfectant), and those organic compounds that cause musty smells. But if you have a serious hydrogen sulfide problem, you'll probably need a dedicated iron and sulfur filter or an aeration system to completely knock it out.

Ultimately, identifying the specific taste or odor is your most important clue. It points you toward the most effective filtration strategy, ensuring you get a system that actually solves your problem.

Visual Clues Hiding in Your Water Glass

A hand holds a glass of cloudy white liquid with brown sediment at the bottom.

While odd tastes and smells are strong warnings, some of the most common signs of contaminated water are the ones you can see. Clear water isn’t automatically clean, but water that’s cloudy, discolored, or has stuff floating in it is sending a loud and clear message: it’s time to filter.

Think of your water glass as a window into your plumbing. Just like a mechanic can tell a lot about an engine by its exhaust, you can learn a ton just by looking at your water. These visual clues are your first step toward picking the right filter to get it back to crystal clear.

Decoding Cloudy or Milky Water

Ever fill a glass and it looks hazy or milky? That’s called turbidity, a fancy word for water that isn't clear. It’s caused by tiny suspended particles creating a noticeable cloudiness when they band together.

These particles could be anything from harmless air bubbles to silt, sand, or clay. There’s an easy test: fill a glass and let it sit. If the cloudiness clears from the bottom up, it’s just pressurized air bubbles—totally harmless.

If that water is still cloudy after a few minutes, you’ve got suspended solids. This is where a whole-house sediment filter really shines. It acts like a bouncer at the door, catching all those particles before they ever make it to your glass or start clogging up your appliances.

Reading the Colors of Contamination

Discolored water is usually a more dramatic—and often more concerning—sign. The exact color is a huge clue that points you right to the type of contaminant you’re likely dealing with, and therefore, the type of filter you need.

  • Red, Brown, or Orange Water: This rusty color almost always points to iron. This comes from rust flaking off old pipes or from naturally occurring iron in your water source, super common with well water.
  • Yellow Tinge: A pale yellow hue can also be a sign of iron, but it might also indicate tannins. Tannins are harmless organic materials from decaying plants that seep into the water supply.
  • Blue or Green Stains: If you're seeing blue-green stains on your sinks or tub, that’s a classic sign of copper corrosion. This happens when your water is acidic, causing it to eat away at your copper pipes.

Shifts in water color often signal the presence of heavy metals. In the United States, EPA data flags millions of homes with potential lead risks. You can learn more about global water quality goals and statistics to see how widespread these issues really are.

Choosing the Right Filter to Restore Clarity

Once you’ve figured out what you're seeing, you can pick the right filter to fix it. It's just like using a specific cleaner for a rust stain versus a grease spot—you need the right tool for the job.

Solutions for Visual Contaminants:

Visual Sign Likely Contaminant Recommended Filtration Solution
Cloudiness/Turbidity Sediment, Silt, Clay Whole-house sediment pre-filter
Red, Brown, Orange Iron, Rust Specialized iron filter or a water softener with iron removal capabilities
Yellow Tint Iron, Tannins Iron filter or a dedicated tannin removal system
Blue/Green Stains Copper (from acidic water) Acid neutralizer filter followed by a carbon filter

Taking care of these visual signs isn't just about making your water look pretty. It's about protecting your home and your family. An iron filter, for example, doesn't just stop those ugly rust stains; it also makes your water taste better and keeps iron-loving bacteria from growing in your pipes. By paying attention to what you see, you can make a smart, targeted investment in a filtration system that truly solves the problem.

How Your Appliances Signal Water Problems

A severely moldy electric kettle and dirty shower head in a kitchen, with an 'Appliance Warning' sign.

Sometimes, the clearest signs of contaminated water don't show up in your drinking glass. They’re hiding in plain sight, slowly destroying your home’s most valuable appliances. Your plumbing, dishwasher, and water heater will be the first to tell you when your water is waging a secret war on your home. If your water is full of minerals or corrosive elements, a home filtration system isn't a luxury—it's essential protection.

The Slow Creep of Limescale Buildup

If you live in a hard water area, you know all about that chalky white residue. That’s limescale, a crusty deposit of calcium and magnesium that builds up, layer by stubborn layer. It's more than just an ugly nuisance; it’s a silent appliance killer.

Limescale basically suffocates your appliances from the inside. Your showerhead loses pressure because its nozzles get clogged. Your coffee maker sputters and takes forever. The biggest victim? Your water heater.

A study from the Water Quality Research Foundation found that hard water can slash a water heater's efficiency by up to 48%. The scale forces the heating element to work overtime, jacking up your energy bills and drastically shortening the unit's lifespan.

The only real defense here is a whole-house water softener or a scale-reduction filter. By treating water right as it enters your home, you protect every faucet and appliance from this costly mineral assault.

When Water Turns Corrosive

On the other end of the spectrum is water that's too soft or acidic, making it corrosive. This water literally eats away at metal, which is a massive problem for anyone with copper or galvanized steel pipes. You might first notice those blue-green stains we talked about, but the real damage is happening out of sight. Corrosive water can cause tiny pinhole leaks that lead to thousands in water damage behind your walls.

An acid neutralizer filter is the fix. It simply raises the water's pH before it gets a chance to circulate through your pipes, stopping corrosion cold and protecting your plumbing and your health.

Slimy Buildup and Its Unseen Cause

Ever find a slimy, pinkish-orange film inside your toilet tank or around a faucet? That's usually the handiwork of iron-eating bacteria. These little microbes chow down on any iron in your water, leaving behind a nasty slime that clogs up pipes and fixtures.

While this biofilm isn't usually a direct threat, it’s a dead giveaway that you have iron in your water. A dedicated iron filter or a good whole-house system will take care of it easily. By getting rid of their food source, you stop the slime before it even starts.

Confirming Your Suspicions with Water Testing

You’ve seen the signs—the weird smell, the cloudy water, or the scaly buildup choking your showerhead. So, now what? The next step is to move from suspicion to certainty with water testing. This is the most important step before you buy a filtration system. If you just guess, you could easily buy a filter that does absolutely nothing to fix your actual problem. Testing gives you a precise roadmap, showing you exactly which contaminants you need to go after.

Your Two Main Testing Options

When it comes to testing your water, you really have two main paths: the quick-and-easy DIY route or a full-blown professional analysis. Each one has its place.

  • At-Home DIY Test Kits: These are fast, cheap, and great for a quick baseline. They’re perfect for checking things like chlorine, water hardness, pH, and sometimes basic metals like iron and copper.

  • Professional Lab Testing: This is the gold standard for accuracy. A certified lab will give you a detailed report on a huge range of contaminants, including the invisible threats like lead, arsenic, bacteria, pesticides, and volatile organic compounds (VOCs).

If you're noticing obvious issues like a chlorine smell or hard water buildup, a DIY kit might be all you need to confirm your suspicions and choose a basic filter. But if you have a private well, live in an area with known contamination problems, or have young children, a professional lab test is a very smart investment that will point you to the perfect filtration solution.

Choosing the right test is the first step toward the right solution. A lab test is the only way to get a definitive answer about hidden dangers, empowering you to select a filtration system certified to remove your specific contaminants.

From Test Results to a Filtration Plan

Once you have your results, you're officially in the driver's seat. That test report is basically a personalized shopping list for the perfect water filter. If it shows high levels of sediment and iron, you know a whole-house sediment filter combined with an iron filter is your answer. If lead is the problem, then a certified under-sink reverse osmosis system is a non-negotiable.

This data-driven approach takes all the guesswork out of the process. Instead of just buying a generic filter and crossing your fingers, you can confidently pick a system that’s designed to solve your home's unique water quality challenges. For more help matching filters to specific problems, you can find a ton of information in our extensive water filtration advice articles.

Choosing the Right Home Filtration System

Alright, you've done the detective work and spotted the signs of contaminated water in your home. Now it's time to switch hats from investigator to problem-solver. The good news is, all that knowledge you've gathered makes picking a filter a whole lot easier. You can narrow down the millions of options by thinking about two main strategies: spot treatment or a whole-house wash.

Spot Treatment with Point-of-Use Filters

Point-of-Use (POU) systems are your "spot treatments." They filter water right at the specific tap where you need it most, like your kitchen sink or shower. This is the perfect solution if your main concern is getting pure water for drinking and cooking.

POU filters are targeted, effective, and usually don't hit the wallet as hard upfront.

  • Under-Sink Filters: These guys hide away under your kitchen sink, connecting to their own special faucet. They're the workhorses for making sure your drinking and cooking water is top-notch.
  • Faucet-Mounted Filters: Super simple to install, these just screw onto your existing faucet. Most have a little switch so you can flip between filtered and unfiltered water.
  • Showerhead Filters: If your skin and hair feel dry and brittle, chlorine is often the culprit. These filters are made specifically to reduce chlorine, making for a much nicer shower.

These are great for renters or anyone who wants to fix a very specific issue—like getting rid of that chlorine taste—without overhauling their entire plumbing setup.

The Whole-House Wash with Point-of-Entry Systems

Point-of-Entry (POE) systems, often called whole-house filters, are the "full wash cycle" for your home. They get installed right where your main water line comes into the house, meaning they treat every single drop of water heading to every faucet, appliance, and shower.

This is the way to go when you're up against bigger problems like hard water scale, sediment throughout your pipes, or high iron levels that stain everything. A POE system doesn't just protect your family's health; it protects your home. By stopping contaminants at the source, you're preventing scale from killing your water heater and stopping rust from staining your sinks and tubs.

A whole-house system is really an investment in your property. It keeps your appliances running longer, saves your plumbing from expensive damage, and gives you the peace of mind that every tap is delivering clean, safe water.

Matching the Filter to the Foe

Once you've decided between a targeted POU system or a comprehensive POE system, the last step is to match the filter technology to the specific problem you've found.

  • Activated Carbon: This is the undisputed champ for getting rid of chlorine and other gunk that causes funky tastes and smells. Think of it like a super-powered sponge that traps those unwanted particles.

  • Reverse Osmosis (RO): When you need serious filtration power, this is it. An RO system forces water through a special membrane that strips out a huge list of contaminants, including heavy metals like lead and arsenic, salts, and other dissolved solids (TDS).

  • UV Purification: If you’re worried about bacteria, viruses, or other living organisms in your water, a UV filter is a great chemical-free solution. It uses ultraviolet light to zap these microbes, making them harmless.

If your water is cloudy or turbid, the best way to tackle this is often with a multi-stage filter. For example, under-sink reverse osmosis systems can remove 99% of these tiny particles. For a whole-house fix, water softeners are fantastic for preventing the scale buildup that clogs pipes in so many homes. It’s all about picking the right tool for the job.

Common Questions About Water Contamination

Even after you've spotted the signs and started looking at solutions, a few key questions always seem to come up. Let's tackle them head-on so you can feel confident about your home's water quality and pick the right filtration plan.

Can Boiling My Water Make It Safe to Drink?

Boiling is a great go-to for killing biological nasties like bacteria, viruses, and parasites. If your town issues a boil water advisory, it's a solid, short-term fix to make your water safe for drinking.

But here's the catch: boiling does nothing to get rid of chemical contaminants. In fact, it can make things worse. As the water boils off, the concentration of things like lead and pesticides can actually go up. For real, long-term safety, you need a filtration system certified to remove those specific chemicals.

Is My Refrigerator's Water Filter Enough?

That little filter in your fridge is really just for one thing: making your water taste better. It uses a small activated carbon filter to pull out chlorine and other minor impurities that cause weird flavors or smells. It's fantastic for that, but it’s not a serious safety device.

These small filters just aren't designed to handle major health threats like lead, arsenic, or bacteria. To truly protect yourself, you’ll want a more powerful system, like an under-sink reverse osmosis unit or a full-on whole-house filter.

How Often Should I Test My Water?

If you're on a city water supply, testing your water once a year is a smart move. You should test immediately if you ever notice a sudden, weird change in your water's taste, smell, or color.

For those with a private well, the EPA suggests annual testing for bacteria, nitrates, and pH levels. It’s also a good idea to test after big events like a flood or major plumbing work. Understanding the different kinds of water contamination is key, especially when dealing with severe problems like Category 3 water damage.

This flowchart can help you decide whether you need to treat water at a single tap or protect your entire home.

Flowchart detailing home water filtration decisions for a single faucet or whole house.

It all boils down to your goal: are you looking for targeted purity for drinking water, or do you want total protection for every faucet and appliance?

Why Does Water Taste Sweet? Your Home Water Filter Might Be the Answer

You pour a glass of water, expecting that familiar, crisp taste, but instead, you get… sweetness? It’s a strange and often confusing experience. The short answer is that this sweetness usually comes from a few places: naturally occurring minerals, your home’s plumbing, or even your water filter system.

While a sweet taste is often harmless, a sudden change in your water's flavor is your cue to play detective. It’s time to take a closer look at your water quality and what your home filter is—or isn't—doing.

Decoding the Sweet Taste in Your Tap Water

A woman drinking a glass of water, looking thoughtfully at its taste

When you’re thirsty for a neutral, refreshing drink and get a hint of sugar instead, it’s only natural to wonder what’s going on. The reason your water tastes sweet isn't a single issue but more like a puzzle with several possible pieces. Interestingly, your home's water filtration system is a central part of this puzzle, sometimes acting as the cause and other times as the hero.

This guide will walk you through the usual suspects behind sweet-tasting water, with a laser focus on how your home filter fits into the picture. We’ll explore everything from harmless mineral content to the more serious signs of potential contamination, giving you the knowledge to diagnose the cause and find the right filtration fix. Getting that pure, clean taste back is totally achievable—it just starts with understanding your water.

Why Water Taste Matters

How we perceive our water's taste is tied directly to its chemical makeup and where it comes from. This isn't just about personal preference; it can actually impact how much water we drink. For example, a 2018 U.S. study found that about 26% of adults felt their local tap water didn't taste good, which can seriously affect hydration habits.

Getting to the bottom of an "off" taste, like sweetness, is the first step toward installing a home filtration system that solves the problem for good. You can learn more about the study's findings on water taste perceptions.

To get a clearer picture of what might be happening in your pipes, let’s break down the common reasons.

Key Takeaway: A sweet taste in your water can come from its mineral content, your plumbing, or your filter. Figuring out the source is the key to choosing the right home filtration solution to fix it.

The table below is a handy guide to help you start troubleshooting.

Quick Guide to Sweet Tasting Water Causes

Here’s a quick look at the most common reasons your tap water might taste sweet, where the issue likely originates, and whether a home water filter is the solution.

Potential Cause Common Source Filtration Fix?
Natural Minerals High levels of calcium & magnesium in "hard water". Yes (Water Softener/RO)
Plumbing Materials Leaching from old copper or iron pipes. Yes (Reverse Osmosis)
New Filter Cartridge Release of fine particles from new carbon filters. Yes (Flush the new filter)
Contamination Presence of certain organic compounds or lead. Yes (RO/Carbon Filters)
Old Filter Bacteria buildup in an expired filter cartridge. Yes (Replace the filter)

This summary should give you a solid starting point. From here, you can dig deeper into each potential cause to find the perfect home filtration solution.

Natural Minerals and Your Water's Flavor Profile

A clear stream flowing over smooth, multi-colored rocks and minerals

Sometimes, the simplest answer is the right one. The reason your water tastes sweet might have nothing to do with your plumbing or any outside contaminants. It could be coming straight from nature.

Water is a fantastic solvent. As it trickles through underground aquifers and flows over ancient rock formations, it naturally dissolves and picks up a whole host of minerals along the way. That mineral content is often the secret ingredient giving your tap water its unique character. If you live in an area with hard water, your supply is loaded with minerals like calcium and magnesium. While they're perfectly safe to drink, these elements can give the water a subtle, almost earthy sweetness.

Think of it as the water’s terroir, just like with wine. The specific blend of minerals it collects is a direct reflection of your local geology.

The Role of pH and Alkalinity

Beyond the minerals themselves, the pH level of your water is a big player in how it tastes. Water that leans more alkaline (meaning it has a higher pH) is often described as feeling smoother and tasting just a little bit sweeter than more acidic water. This is exactly why some bottled "alkaline waters" have become so popular—people enjoy that smoother taste. Your tap water can be naturally alkaline, too, depending on its source.

A subtle sweetness from minerals and alkalinity is often just the water's natural signature. However, if this natural sweetness just isn't your cup of tea, a home filtration system can easily neutralize it.

How Regional Differences Shape Water Taste

The idea that your local geology changes how your water tastes isn't just a guess—it's a well-documented fact. For example, in areas where water hardness has calcium and magnesium concentrations over 60 mg/L, people often perceive the water as having a softer, sweeter flavor compared to softer water that might be treated with more chlorine.

These mineral profiles are the reason tap water in one city can taste completely different from the next. If you're curious to learn more about the building blocks of our planet's crust, you can check out these fascinating facts about minerals.

Ultimately, if your water's natural sweetness just isn't for you, the good news is you can fix it. A home filtration system like a water softener or a reverse osmosis unit can remove those specific minerals and give you the neutral, crisp taste you're looking for.

When Sweetness Signals a Deeper Problem

A close-up of an old, corroded pipe with water dripping from it

While the light sweetness from natural minerals is typically fine, a sudden, very noticeable sweet taste in your water should raise a red flag. Think of it as your taste buds sending up a flare—something might be seriously wrong with your plumbing. When the flavor changes out of the blue, it's time to stop guessing and start investigating.

This kind of abrupt shift is often the first sign that unwanted contaminants have made their way into your water supply. You can't just ignore it. Some of the most dangerous contaminants, unfortunately, happen to taste sweet. Knowing what these threats are is the first step toward finding a home filtration system that can actually handle them.

The Hidden Danger of Lead and Heavy Metals

One of the most alarming reasons for sweet-tasting water is lead. It’s a heavy metal with a distinctively sweet flavor—which is precisely why it was used in products like paint and even wine for centuries before we fully understood how toxic it is. Lead presents major health risks, especially for children and pregnant women. In fact, there is no safe level of lead exposure.

So where does it come from?

  • Older Pipes: If your home was built before 1986, there’s a good chance it has lead service lines, pipes, or solder joining the pipes to the city’s water main.
  • Corrosion: As these old pipes age and break down, they can corrode, causing lead to leach straight into the water flowing to your tap.
  • Fixtures: Even homes built more recently aren't completely safe. Some brass fixtures and faucets can still contain small amounts of lead.

If you even suspect lead is the problem, don't count on a standard pitcher filter to solve it. You'll need something much more powerful, like a reverse osmosis (RO) system or a filter specifically certified to reduce lead.

Unseen Organic Compounds

Another potential culprit is the presence of certain organic compounds. These substances can get into the water from agricultural runoff, industrial pollution, or even just from decaying organic matter in reservoirs. While not all of them are immediately harmful, some can pose serious long-term health risks.

For example, the chemical structure of some pesticides and herbicides is perceived by our taste buds as sweet. If those chemicals seep into groundwater, they can eventually show up at your faucet. Similarly, certain glycols—often found in antifreeze but also used in food processing—can create a sweet taste if they contaminate the water supply.

A sudden, chemical-like sweetness should never be ignored. It's a clear signal to get your water tested by a certified lab to identify the specific contaminants you're dealing with.

An activated carbon filter is usually your best bet against these kinds of organic compounds. The carbon is incredibly porous, which makes it great at trapping and absorbing these chemicals, stripping them from your water and leaving it with a clean, neutral taste. When you don't know the exact cause of the sweetness, a multi-stage filtration system that combines carbon with other technologies will give you the most comprehensive protection.

Is Your Water Filter Causing the Sweet Taste?

It sounds completely backward, doesn't it? The very thing you installed to guarantee pure, clean water might be the reason it suddenly tastes sweet. This unexpected flavor can pop up for a couple of different reasons, depending on whether your filter is fresh out of the box or has seen better days.

Figuring out the link between your home filtration system and that sweet taste is the first step. It helps you get to the bottom of the issue and make sure you're getting the performance you paid for. Let's dig into how both new and old filters can be the source of the problem.

The New Filter "Break-In" Period

If you've just popped in a new filter cartridge—especially an activated carbon one—you might notice a temporary sweetness. Think of it like breaking in a new pair of leather boots; the filter needs a little time to settle in and start doing its best work.

During this initial "break-in" phase, the filter can release tiny, harmless carbon fines. These are just microscopic dust particles leftover from manufacturing. While they are perfectly safe to drink, these fines can give the water a slightly sweet flavor. This is totally normal and usually goes away on its own after a few gallons of water have run through the system.

Pro Tip: Always flush a new water filter cartridge before you start drinking from it. Just run the water for a few minutes (or whatever the manufacturer's instructions say) to wash away any of those loose carbon fines and get the filter primed for action.

When an Old Filter Turns Against You

Now for the other side of the coin: an old, neglected filter is a much more concerning reason for sweet-tasting water. A water filter isn't a "set it and forget it" kind of deal. It has a limited lifespan and can only capture so many contaminants. Once it's full, it's full.

Worse yet, a saturated filter can turn into a breeding ground for bacteria. As water struggles to pass through the clogged filter media, these bacteria can multiply and release their own byproducts, some of which taste distinctly sweet. At this point, your filter isn't just failing to clean your water—it's actively making it dirtier.

This is exactly why sticking to a regular replacement schedule is absolutely critical for safe, great-tasting water. Here’s a quick checklist to figure out if your filter is the culprit:

  • Check the Date: When was the last time you swapped out the cartridge? If it's been more than three to six months for a standard filter, it's probably time.
  • Notice the Flow: A clogged filter will almost always cause a noticeable drop in your water pressure.
  • Taste the Difference: If the sweet taste showed up gradually and seems to be getting stronger, an old filter is the prime suspect.

Proper filter maintenance is the single most important thing you can do to prevent weird flavors from showing up. By flushing new cartridges and swapping out old ones on time, you make sure your system delivers the pure, refreshing water you expect, not an unwelcome sugary surprise.

Choosing the Right Filtration System for Pure Taste

So, you’ve figured out why your water tastes sweet. Now comes the important part: picking the right tool to fix it. Choosing a home water filtration system isn't about grabbing the first pitcher you see at the store. It's about matching the filter's technology to the specific problem you're dealing with, whether that's excess minerals, weird organic compounds, or something more serious like lead contamination.

When you're up against a funky flavor, the two most effective systems you can get for your home are activated carbon filters and reverse osmosis (RO) systems. They work in completely different ways, and each one is a champ at targeting specific types of contaminants. Getting this choice right is the key to enjoying that pure, crisp water you're after.

Activated Carbon: The Taste and Odor Specialist

Think of an activated carbon filter as a high-tech sponge for your water. The carbon inside is specially treated to create millions of microscopic pores, giving it a massive surface area that traps and soaks up chemical contaminants. This process is called adsorption, and it's what makes these filters so great at getting rid of things that cause weird tastes and smells.

Activated carbon is a fantastic choice for targeting:

  • Organic Compounds: It’s great at removing many of the pesticides and industrial solvents that can give water a chemical-like sweetness.
  • Chlorine: While not sweet, chlorine is a super common additive that messes with your water's overall taste. Carbon filters knock it out of the park.

But you need to know what they can't do. Standard carbon filters won't touch dissolved minerals, salts, or heavy metals like lead. If your sweet taste is coming from hard water, a carbon filter alone isn't going to solve your problem.

This infographic lays out a simple decision tree to help you figure out if your filter itself is the source of the sweetness.

Infographic about why does water taste sweet

As the chart shows, both brand-new and old filters can be the culprit, which really drives home the importance of flushing new cartridges and keeping up with maintenance.

Reverse Osmosis: The Purity Powerhouse

If you have a strong suspicion that the sweet taste is coming from something more serious, like heavy metals or a really high mineral content, you need to bring in the big guns. A reverse osmosis (RO) system is that bigger gun. It works by forcing water through a special membrane packed with microscopic pores—so tiny that it blocks almost everything that isn't a pure water molecule.

RO systems are the undisputed gold standard for removing:

  • Heavy Metals: They are proven to remove over 99% of lead from drinking water.
  • Dissolved Minerals: They completely eliminate the calcium and magnesium that often cause that sweet taste in hard water.
  • A Wide Range of Contaminants: From fluoride to nitrates and tons of other impurities, RO systems get rid of it all.

Because they're so incredibly thorough, RO systems deliver some of the purest drinking water you can get right from your tap.

A consumer study looking into flavored water discovered that 65.7% of people expect their water to have a pleasant, often slightly sweet, taste. This just goes to show how much our perception is shaped by both what's in the water and what we expect. You can read the full research on water taste preferences to dig deeper.

Comparing Home Water Filtration Systems

With different technologies available, it can be tough to decide which filtration system is best for your home. This table breaks down the most common options to help you compare them at a glance, focusing on what they're good at, what they cost, and how much work they are to maintain.

Filtration Type Effective Against Average Cost Maintenance
Activated Carbon Chlorine, organic compounds, pesticides, bad taste & odor. $20 – $150 Replace filters every 2-6 months.
Reverse Osmosis Heavy metals (lead), minerals, salts, nitrates, fluoride. $150 – $500+ Replace pre-filters every 6-12 months; membrane every 2-3 years.
Water Softener Hard water minerals (calcium, magnesium). $500 – $2,000+ Refill salt periodically (every 1-3 months).
UV Purifier Bacteria, viruses, microorganisms. (Does not remove chemicals or minerals). $200 – $600 Replace UV lamp annually.

Ultimately, the best system is the one that targets the specific contaminants causing your sweet taste. For most flavor issues, an activated carbon or RO system will get the job done right. If you need more help deciding, check out our full collection of water filter advice for more in-depth guides.

Got Questions About Your Water's Taste? We've Got Answers.

When something as basic as your tap water starts tasting funny, it's natural to have questions. A sudden sweet taste can be unsettling, and you need clear, direct answers to feel confident about what you're drinking.

Let's cut through the confusion. Here are the most common questions we hear from people dealing with this exact problem, with a focus on how home water filtration provides the solution.

Is It Safe to Drink Water That Tastes Sweet?

This is the big one, and the honest answer is: it depends. A sweet taste from something harmless like calcium is perfectly fine. But that same taste can also signal a serious problem, like lead contamination. The trouble is, you can't tell the difference by taste alone.

If your water suddenly starts tasting sweet, the safest bet is to stop drinking it and get it tested. You just can't risk it. A professional lab test will tell you exactly what’s in there, so you can find a filter certified to remove that specific contaminant.

How Do I Test My Water?

For a surefire answer, send a sample to a state-certified laboratory. They'll run a full analysis and give you a detailed report on everything from minerals and heavy metals to organic compounds. It’s the most reliable way to know what you’re dealing with.

Want a quicker first look? Grab a quality at-home test kit. These can screen for common culprits like lead, high mineral content (water hardness), and pH imbalances. The results can give you a good idea of whether you need to follow up with a professional lab.

When it comes to safety, don't guess. A water test is a small price to pay for peace of mind, and it points you directly to the right filtration solution for your home.

Will a Basic Pitcher Filter Fix This?

It really hinges on what's causing the sweetness. A standard pitcher with an activated carbon filter does a great job of removing chlorine and certain organic compounds that mess with taste and smell. But that's where its power ends. It's not effective against dissolved minerals or heavy metals.

If your water tastes sweet because of high mineral content or, worse, lead, a simple pitcher filter won't solve the problem. For issues like those, you'll need to step up to a more robust system, like an under-sink reverse osmosis unit or a whole-house water softener.

How Often Should I Change My Filter?

Keeping up with filter changes is non-negotiable if you want your system to work right. Always follow the manufacturer's schedule for your specific model—lifespans can vary a lot.

As a general guideline:

  • Pitcher filters: Every 2-3 months.
  • Faucet-mounted filters: Usually 3-4 months.
  • Under-sink and whole-house filters: Can go anywhere from 6 to 12 months.

If you let it go too long, the filter can get clogged or even become a breeding ground for bacteria. When that happens, it can start dumping new, unwanted tastes—including sweetness—right back into your "filtered" water.


At Water Filter Advisor, our mission is to help you get the purest, best-tasting water for your home. Dive into our detailed guides and reviews to find the perfect filtration system for your needs. Visit us at https://www.waterfilteradvisor.com to learn more.