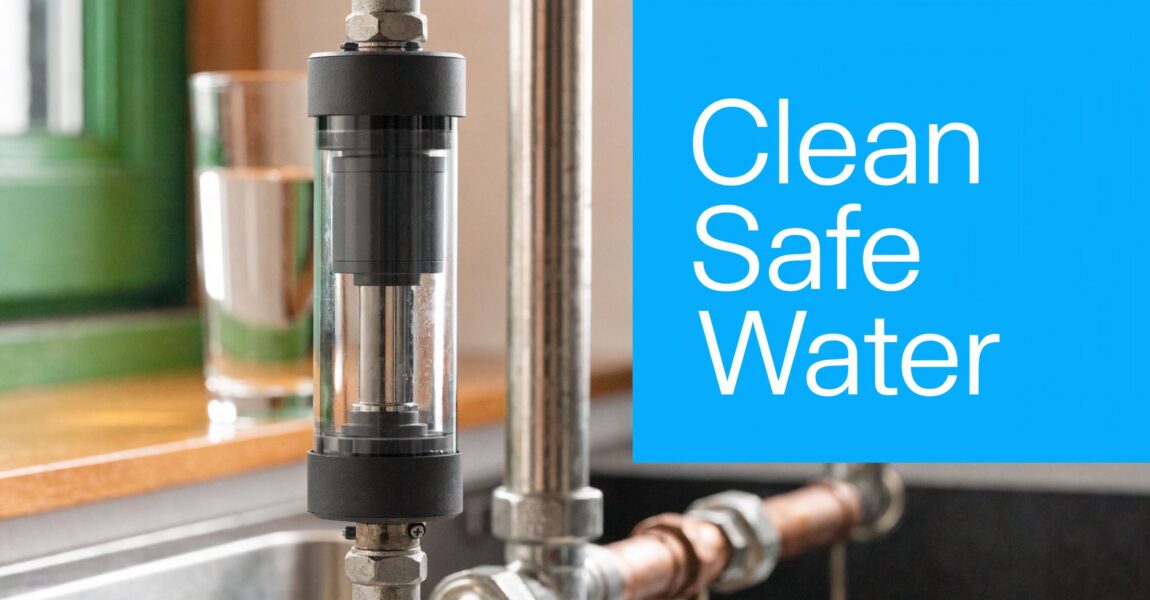
Best Inline Water Filter for Clean, Safe Water
You push the fridge dispenser, fill a glass, and expect cold, clean water. Instead, the first sip tastes faintly like a swimming pool. Then the ice pi ...
You push the fridge dispenser, fill a glass, and expect cold, clean water. Instead, the first sip tastes faintly like a swimming pool. Then the ice pi ...
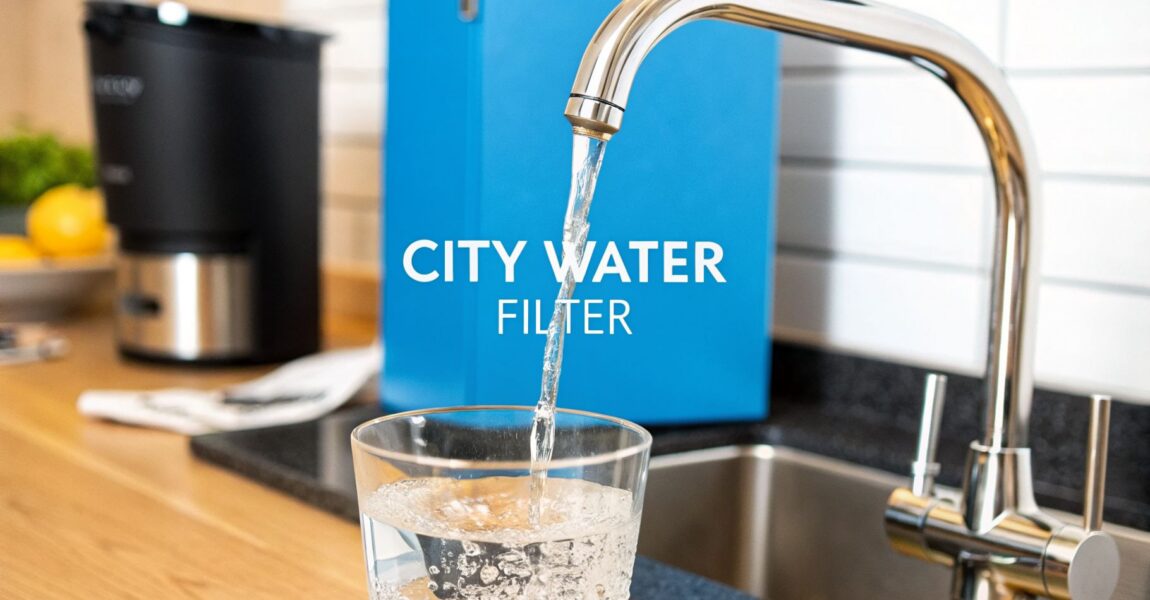
Let’s be honest, you probably think the water gushing from your tap is as pure as a mountain spring. And while your city puts in a heroic effort to treat it, the long, winding journey to your home isn't always a clean one. A good water filter for city water acts as your personal bouncer, catching uninvited guests from old pipes and leftover treatment chemicals before they crash your party and end up in your glass.
It's a common assumption: treated municipal water equals perfectly safe drinking water. But let's get real. Think of it like a package delivery. Your water leaves the "warehouse"—the city treatment plant—in pristine condition. But then it travels through miles of ancient, underground pipes to get to your front door.
Along the way, it can pick up some travel companions you definitely didn't order. Just like a package can get dented or smudged in transit, your water can gather a whole host of contaminants before it gracefully pours from your faucet.

Even after the city's best efforts, a few uninvited guests tend to show up. The most obvious one is the distinct swimming-pool aroma of chlorine, the workhorse disinfectant used to slay bacteria. It does its job, but let's face it, it can make your morning coffee taste like a trip to the local YMCA.
Then there are the stealthy troublemakers. Older homes and city plumbing can have lead pipes or solder, which can leach this dangerous heavy metal right into your water. You also have to worry about disinfection byproducts (DBPs), like TTHMs. These are nasty little compounds that form when chlorine has a chemical mixer with organic stuff in the water.
The bottom line is this: your tap water is more than just H₂O. It’s a complex cocktail that can carry everything from disinfectants to metals from the pipes themselves. Taking control of that final few feet with a home filter is the only way to be certain the water your family drinks is genuinely, refreshingly clean.
These concerns are why so many of us are turning to home filtration. In fact, point-of-use filters, like the ones that go under your sink or on your faucet, now make up 40% of residential sales in the U.S. and Europe. This isn't surprising, especially when you see reports linking millions of gastrointestinal illnesses to tap water each year. You can dig into the numbers in the full global market report on water filters.
Figuring out what’s actually funky with your water is the first step to a flawless fix. Sure, you can taste, smell, or see some issues, but what about the invisible stuff? Your local water report is a great start, but you also need to consider your own home's plumbing. For instance, understanding backflow prevention basics to keep your drinking water safe is a crucial piece of the home water safety puzzle.
To make things easier, I've put together a quick guide to match the most common city water complaints with the right filter technology.
This table gives you a simple, at-a-glance look at how to tackle your specific water woes and get back to enjoying clean, safe water right from your tap.
| Common Problem | Likely Culprit | Best Filter Solution |
|---|---|---|
| Chlorine taste & smell | Municipal disinfection | Activated Carbon, KDF |
| Cloudy or murky water | Sediment, Silt | Sediment Filter, Whole-House System |
| Metallic taste | Lead, Copper, Iron | Reverse Osmosis, KDF, Ion Exchange |
| "Rotten egg" smell | Hydrogen Sulfide | Activated Carbon, KDF, Oxidation |
| Hard water stains | Calcium, Magnesium | Water Softener, Ion Exchange |
With this chart, you can quickly diagnose the likely cause of your water problem and see exactly what kind of filter is engineered to solve it. It’s your first step toward making a choice with confidence.
Before you can choose the right water filter for city water, you have to know what you’re fighting.
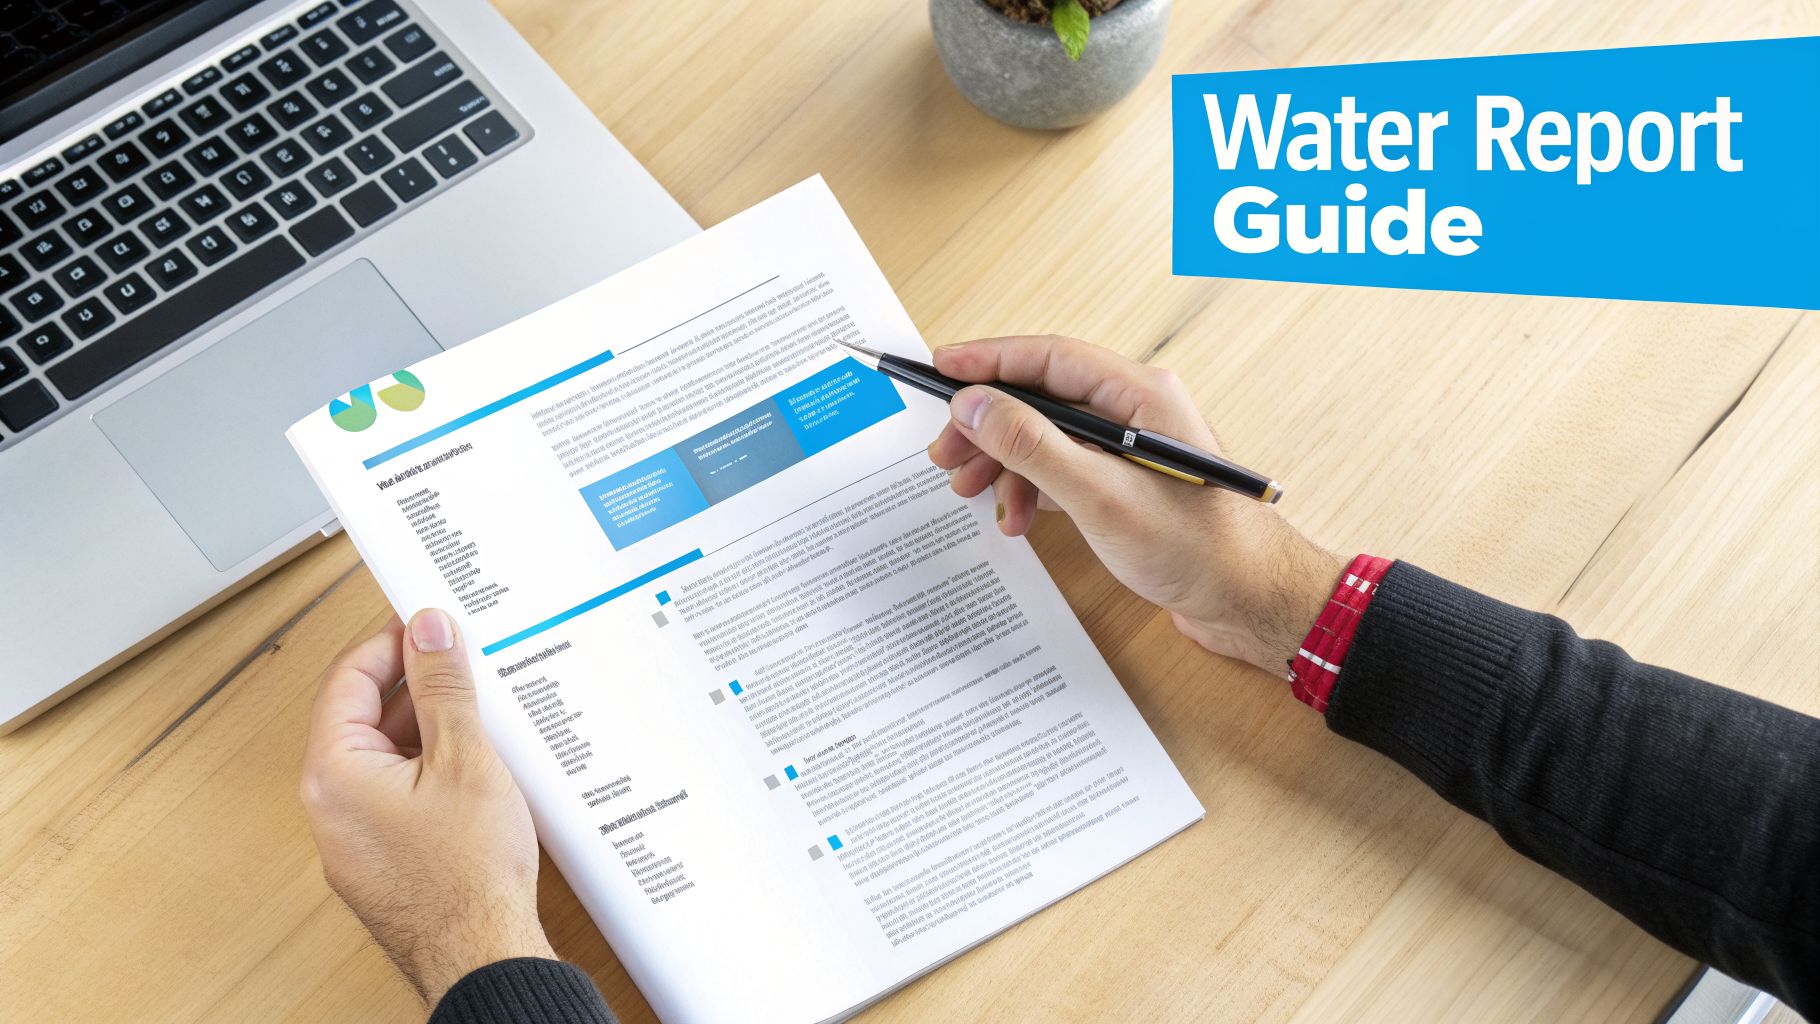
By law, your local water utility must send you an annual water quality report card. It's officially called a Consumer Confidence Report (CCR), but think of it as the "nutrition label" for your tap water.
It’s a complete breakdown of everything detected in your water over the last year, showing whether those levels meet legal safety standards. It’s your secret weapon.
Getting your hands on this document is usually a breeze.
These reports look dense, but you only need to focus on a few key sections to get the intel you need.
The most critical part of the CCR is the data table listing detected contaminants. Here are the two columns you need to understand.
MCLG (Maximum Contaminant Level Goal): This is the dream goal. It's the contaminant level where there is no known health risk. Think of this as the "perfect score."
MCL (Maximum Contaminant Level): This is the legally enforceable limit. It’s the highest level of a contaminant allowed in public drinking water. The MCL is set as close to the MCLG as is practical with current treatment tech.
Here's the kicker: Your water can be legally "safe" (below the MCL) but still contain contaminants far above the ideal health goal (the MCLG). That gap is where a good water filter for city water becomes your family’s hero.
When you scan the report, keep your eyes peeled for these common culprits that often appear in municipal water supplies.
1. Disinfectants & Disinfection Byproducts (DBPs):
2. Inorganic Contaminants:
Once you’ve identified which of these are in your water, you're ready for the fun part: matching them to a filtration system designed to knock them out.
Alright, you’ve got your water quality report in hand. Now you know exactly what’s in your tap water.
The next job is to match those specific contaminants to the right filtration technology. This is the most important step. Not all filters do the same thing, and picking the right one is the only way to get the clean, safe water you’re after.
Think of it this way: different filters are like different tools in a toolbox. You wouldn’t use a hammer to turn a screw. Same idea here.
If you’ve ever used a simple filter pitcher, you’re already familiar with activated carbon. It’s the superstar of the filtration world for a good reason. Picture a microscopic sponge with a massive internal surface area, covered in millions of tiny pores.
These pores grab onto certain chemicals through a process called adsorption—basically, they act like a magnet for the stuff that makes your water taste and smell bad.
Activated carbon is the champ for:
But here’s the catch: standard activated carbon on its own won't touch things like lead, nitrates, or other dissolved solids. It's a fantastic first step for making city water taste better, but for more serious health contaminants, you'll need to call in the specialists.
When you need the highest level of purification, reverse osmosis (RO) is the undisputed king.
Think of it as the ultimate bouncer for your water. It uses a special membrane with pores so ridiculously small that only pure water molecules can squeeze through. Everything else—lead, heavy metals, salts, disinfection byproducts, you name it—gets rejected and flushed down the drain.
The power of reverse osmosis is its ability to remove contaminants down to 0.0001 microns. At that level, almost nothing but H₂O can pass through, giving you exceptionally pure drinking water.
It's no surprise that RO systems are driving huge growth in the home water purifier market. They are on track to make up about 55% of the market by 2026 precisely because they are so effective at removing tough contaminants like TTHMs and lead. You can dig into more of the numbers in this detailed market analysis.
So what do you do if your city uses chloramine instead of chlorine? Chloramine, a mix of chlorine and ammonia, is tougher to remove, and standard carbon filters just can't keep up.
That’s where catalytic carbon steps in. It’s a special type of activated carbon that’s been supercharged to break the chemical bond in chloramine, effectively neutralizing it.
Another key player is KDF (Kinetic Degradation Fluxion) media. This is a blend of high-purity copper and zinc that creates a tiny electrochemical reaction. This process is excellent for:
To give you a clearer picture of how these technologies stack up, we've put together a comparison table.
This table breaks down which filter technology is best for tackling the most common city water problems. Use it to quickly see which "tool" you need for the job.
| Filtration Technology | Removes Chlorine Taste | Removes Chloramine | Reduces Lead and Metals | Reduces TTHMs and VOCs | Ideal Use Case |
|---|---|---|---|---|---|
| Activated Carbon | Excellent | Poor | No | Good | Improving basic taste and odor from chlorine. |
| Catalytic Carbon | Excellent | Excellent | No | Good | Targeting chloramine-treated city water. |
| KDF Media | Good | Good | Good | No | Reducing chlorine/chloramine and some heavy metals. |
| Reverse Osmosis (RO) | Excellent | Good | Excellent | Excellent | Maximum purification of drinking water at a single tap. |
As you can see, there’s no single "best" filter—only the best filter for a specific contaminant.
Many of the top-tier water filters for city water will actually combine these technologies. For example, a whole-house system might use a sediment pre-filter, followed by a tank of KDF and catalytic carbon. An under-sink RO system will almost always include carbon pre-filters.
By understanding what each one does, you can choose a system that truly solves your water problems instead of just guessing.
Alright, you've figured out what's in your city water and you know which technologies can get rid of it. Now for the fun part: picking the right filter system that actually fits your life. The best water filter for city water isn't just about what it removes; it's about matching the system to your home, your daily routine, and your budget.
I like to think of it like choosing a sound system. Do you want music in every single room? That’s your whole-house system. Or do you just want incredible, high-fidelity sound in your favorite listening chair? That’s more like an under-sink system. Sometimes, all you need is a portable speaker you can grab and go—that’s your countertop or faucet filter. Each one has its place.
A whole-house water filter—also called a point-of-entry (POE) system—gets installed right where the main water line enters your house. This is the big-picture solution. It treats every single drop of water you use, from the kitchen tap to every showerhead.
This is the way to go if you’re dealing with problems that go beyond just your drinking water. If your city water is loaded with chlorine or chloramine, you've probably noticed it can lead to dry, itchy skin and brittle hair. A whole-house system with the right carbon filter media tackles those irritants, making your showers a whole lot more comfortable.
Here’s a real-world example: A family brings home a new baby and finds that bath time leaves the little one with red, irritated skin. They check their city's water report and see high levels of chloramine. By putting in a whole-house filter, they solve the problem at the source. Now, even the bathwater is gentle and free from those harsh chemicals.
An under-sink water filter, known as a point-of-use (POU) system, lives right under your kitchen sink. It’s all about delivering the absolute best water for drinking and cooking, usually from its own dedicated faucet.
This is where heavy-hitter technologies like reverse osmosis really get to work. While you can get a whole-house RO system, they're usually overkill and pretty expensive for most homes. An under-sink RO, on the other hand, gives you incredible purification right where you need it most, zeroing in on everything from lead and arsenic to nitrates and TTHMs.
This is the perfect setup for someone who's seen their water report and is worried about specific health-related contaminants. They want total peace of mind knowing their drinking water is as pure as possible, without spending the money to treat the water that just flushes the toilet.
For top-tier drinking water, an under-sink system is the most popular choice. It hits that sweet spot between powerful, targeted filtration and affordability, making it the go-to for health-conscious families.
To make the choice a little clearer, this decision tree can help you visualize the best path forward based on what you're trying to achieve.
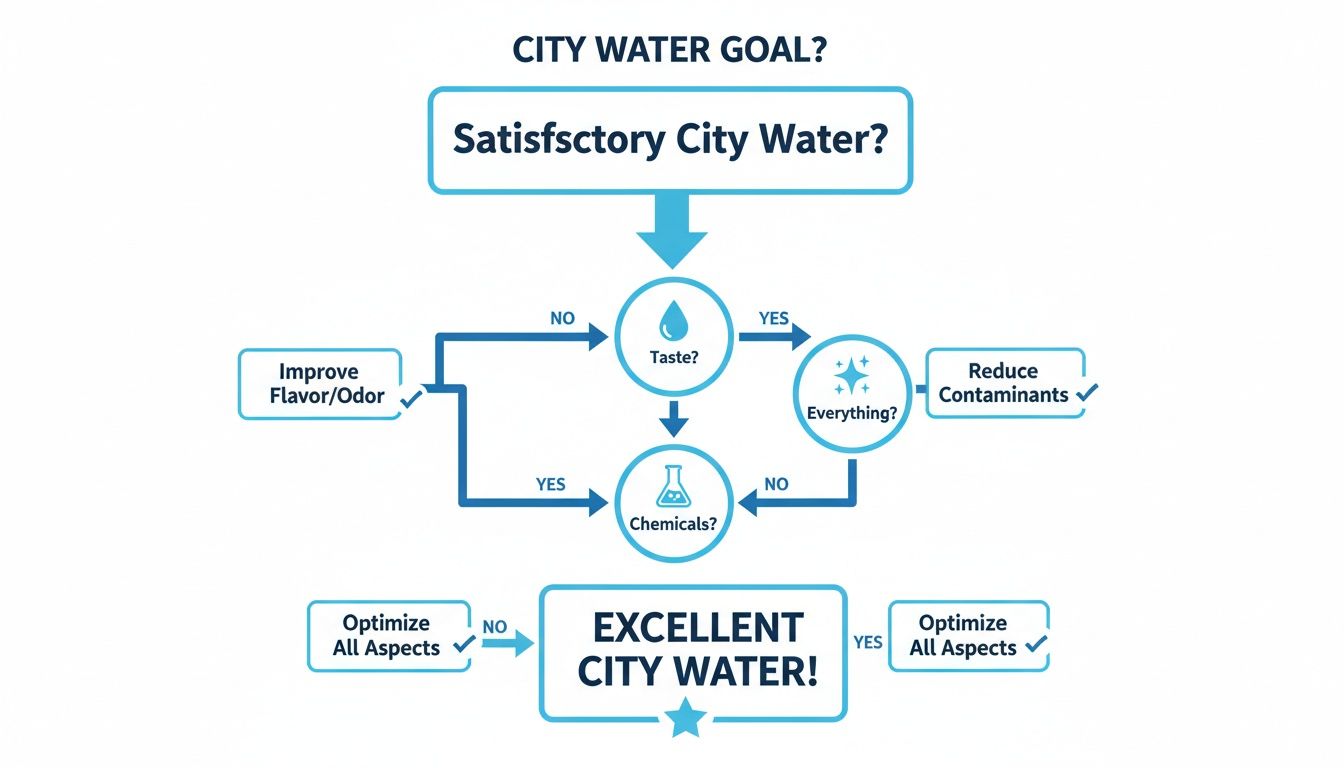
As you can see, your main goal—whether it's just better taste, getting rid of specific chemicals, or aiming for total purity—points you directly to the right type of system for your home.
For renters, or really anyone who wants a simple, no-plumbing-required solution, countertop filters and faucet-mounted filters are fantastic. You can set them up in minutes.
Think about a college student moving into their first apartment. They can't make any permanent changes but are sick of buying bottled water. A simple faucet filter gives them better-tasting water on the spot, and they can just unscrew it and take it with them when they move out.
These systems are a huge and growing market. Advanced filters designed for city water contaminants hit a market value of USD 33.62 billion in 2023 and are projected to reach USD 113.7 billion by 2034, growing at an impressive 14.5% CAGR.
If you're looking for more specific recommendations, it's worth diving into the pros and cons of each type. Check out our guide on filtration advice for more detailed comparisons.
You’ve got a few filters in mind that look promising. But let's be honest, how do you really know if they'll do what the company claims? In the water filter game, marketing can be all flash, but performance comes down to one thing: independent, third-party testing.
This is where certifications save the day. They're your best shot at cutting through the sales pitches and picking a filter based on hard facts. A certification mark means the product was put through the wringer against a national standard to prove it removes the exact contaminants it says it does.
The most trusted names in the business are the NSF (National Sanitation Foundation) and ANSI (American National Standards Institute). An NSF/ANSI certification is like a brutally honest audit of a water filter. It's not a one-and-done deal, either—manufacturers have to keep up with regular testing and inspections to hold onto that seal of approval.
If you’re shopping for a water filter for city water, you need to know three key standards. They tell you exactly what a filter is built to handle.
Quick tip: Look for the specific NSF/ANSI numbers on the box or in the filter's specs. A vague claim like "tested to NSF/ANSI standards" is not the same as being "certified to NSF/ANSI standards." Certification is what really counts.
Beyond the big certifications, any legit filter will have a Performance Data Sheet. Think of this as the filter's resume. It lists every single contaminant the filter is certified to reduce and, just as importantly, by what percentage.
This is where you match your water report to the filter. Say your city's report showed high lead levels. Here's what you'd look for on the data sheet:
This is how you make a decision you can feel good about. If a company makes it hard to find their performance data sheet, take that as a major red flag. Good companies are transparent. By matching your water quality needs to a filter's certified performance, you can buy with confidence, knowing you're getting the clean, safe water your family deserves.
Choosing a water filter for city water is a fantastic move for your family's health. But what’s the real financial picture? It’s easy to get fixated on the price tag, but that's just the tip of the iceberg.
To make a smart decision, you have to look at the total cost of ownership. This means adding up the upfront price, the cost of replacement filters, and any installation fees. It might seem like a lot to track, but it's the only way to see the true value you’re getting.
Let's break down the actual expenses. The numbers will vary, of course, but the cost categories are always the same.
Here’s a good rule of thumb: always check the annual cost of replacement filters. A system that looks cheap upfront can end up costing you more over time if its filters are expensive and need to be changed often. Sometimes, a higher-quality system with longer-lasting cartridges is the more affordable choice in the long run.
Now, let's put a home filtration system head-to-head with the alternative many people turn to: bottled water. The numbers here might just shock you. A 2022 study found that the average household that buys bottled water spends around $1,368 per year.
Let's run a quick comparison using a common mid-range under-sink reverse osmosis (RO) system as our example.
Example Scenario: Under-Sink RO System
Comparing the First Year:
Even in the very first year, when you're paying for the system and professional installation, the RO filter saves you more than $600.
From the second year on, your only real cost is the $150 for new filters. That means you're saving over $1,200 every single year.
The financial case is a slam dunk. And that's not even getting into the massive environmental benefit of ditching all those single-use plastic bottles. Investing in a home water filter isn't just a one-time purchase; it’s a long-term plan for healthier water, serious savings, and a greener lifestyle.
Jumping into the world of water filters can feel a little overwhelming. I get it. You've got questions, and you need straight answers. Let's tackle some of the most common things homeowners ask when picking out a filter for city water.
This really comes down to the specific filter you own and how much water your household uses. As a general rule, you can expect to change most under-sink or whole-house cartridges every 6 to 12 months, but that's just a ballpark.
Your manufacturer’s guide is the best place to look for a solid recommendation, which is usually based on the number of gallons the filter can treat. I always tell people to set a reminder on their phone or calendar to order new ones ahead of time—there's nothing worse than needing a filter and not having one on hand.
Pro Tip: Your system will give you clues. If you notice your water pressure dropping, or if that old chlorine taste and smell starts creeping back in, it’s time for a change. Don't wait for the calendar if your filter is telling you it's done.
I wouldn't count on it, and you definitely shouldn't use it without getting your new well water tested first. Think of it this way: city water and well water are two completely different beasts.
A filter designed for municipal water is a specialist—it's built to target chlorine, chloramine, and the byproducts left over from the disinfection process. Well water brings a totally different set of challenges, like bacteria, iron, nitrates, sediment, and sometimes even heavy metals like arsenic. Those require entirely different types of filtration.
Before you even think about filtering well water, you must get a sample tested by a certified lab. Only then can you find a system that’s actually equipped to handle what's in your water.
This all depends on the type of system you choose and how comfortable you are with some basic plumbing tasks.
Yes, you absolutely do. This is a critical point many people miss. Your standard activated carbon filter does a fantastic job removing chlorine, but it's almost useless against chloramine.
To effectively remove chloramine, you need a filter with catalytic carbon. This is a special type of carbon media specifically designed to break the strong chemical bond between chlorine and ammonia. When you're shopping, look for "chloramine reduction" on the filter's performance data sheet to be sure it can handle the job.
At Water Filter Advisor, our goal is to give you the clear research and honest advice you need to protect your family's water. To learn more, explore our guides and reviews to make a confident choice at https://www.waterfilteradvisor.com.

An osmosis water filter system is the heavyweight champion of home water purification. Think of it as a bouncer for your pipes, using a high-tech membrane to physically block up to 99% of unwanted contaminants like lead, chlorine, and even pesky microplastics from ever reaching your glass.
The system works by using your home’s water pressure to force tap water through this ultra-fine filter. All the impurities get left behind, and you get exceptionally clean, delicious-tasting water from a dedicated faucet. It’s the ultimate gatekeeper for your family's drinking water.
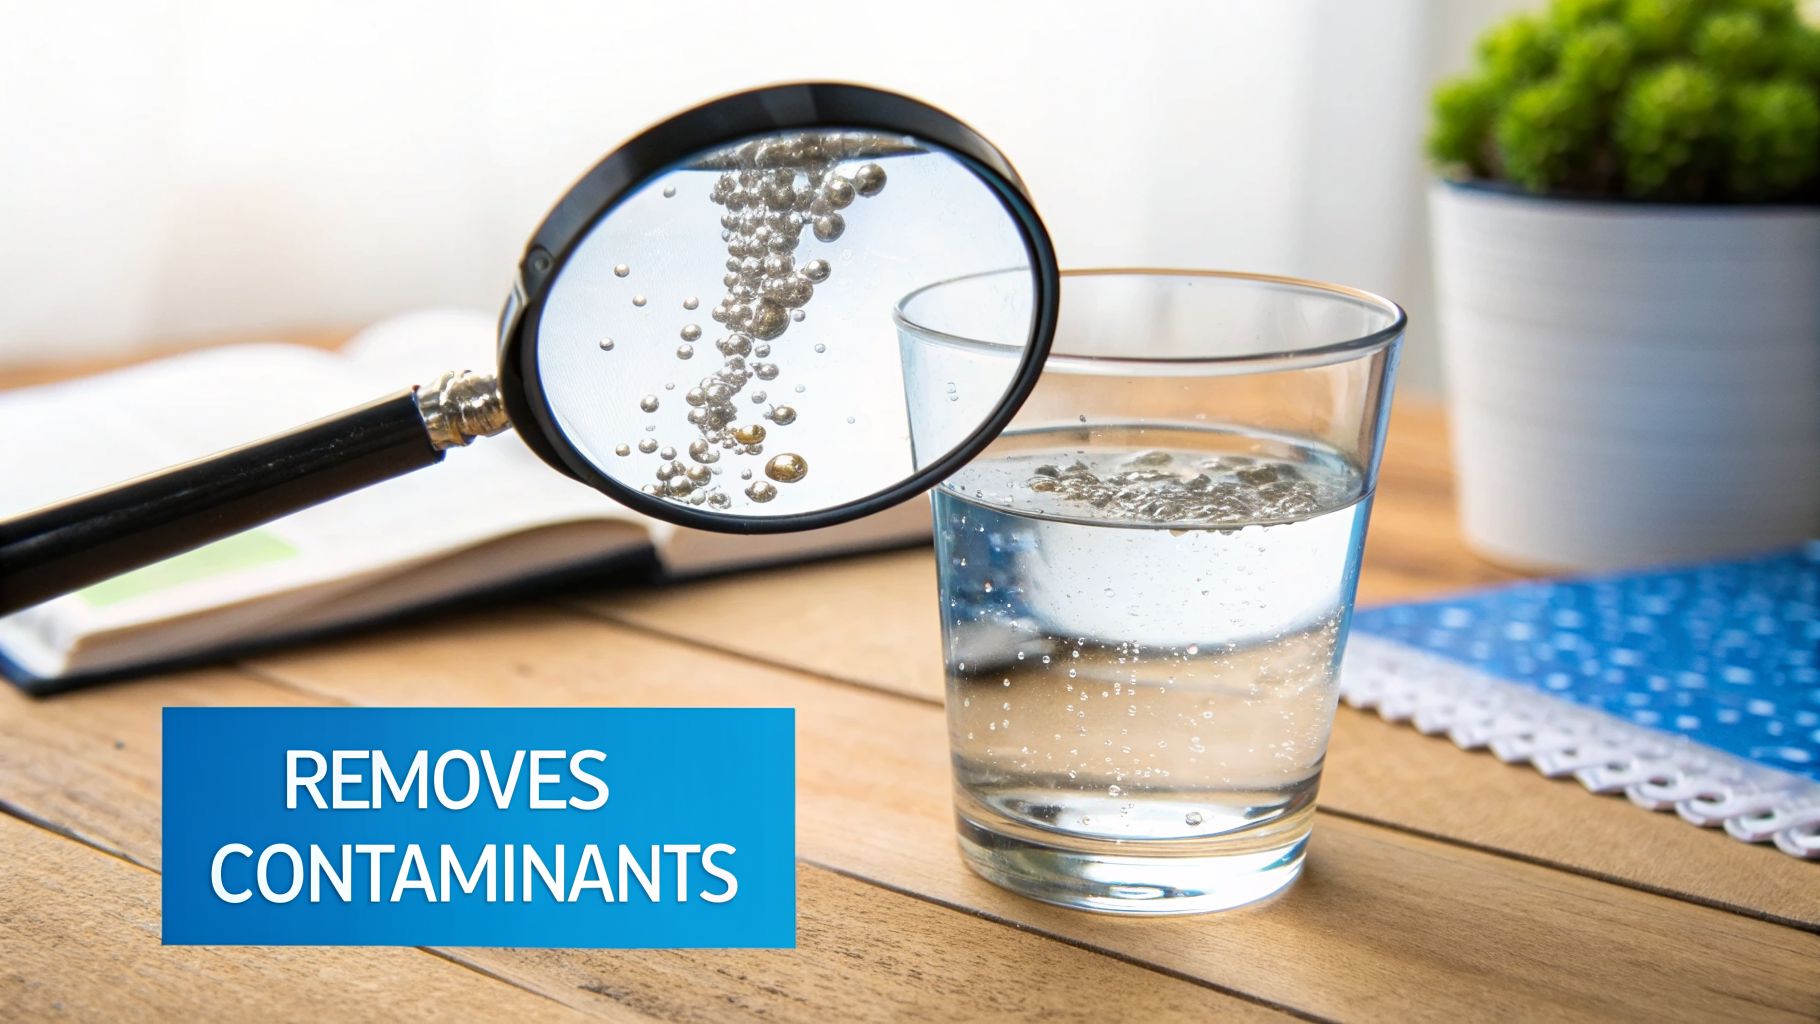
Have you ever poured a glass of water and smelled chlorine, like you're at the city pool? Or maybe you're more concerned about the invisible freeloaders you can't see or taste, like lead from old plumbing or pesticides that have found their way into the water supply.
These are valid worries. The hard truth is, even the best municipal treatment plant can't guarantee what comes out of your specific faucet is perfectly pure. An old pipe a mile away could be leaching contaminants into your water long after it leaves the treatment facility.
An osmosis water filter system, most commonly called a reverse osmosis (RO) system, acts as your last line of defense right where you use your water most—your kitchen sink. This isn't just another pitcher filter; it’s a full-blown purification powerhouse that gets to the root of water quality problems.
Imagine the reverse osmosis membrane as a microscopic bouncer at an exclusive club, and only pure water molecules are on the guest list.
Anything else trying to sneak in—the whole crowd of unwanted contaminants—is turned away at the door and flushed down the drain. This includes:
This process takes your questionable tap water and transforms it into something you can trust, no questions asked. The result is water that’s not just safer, but tastes incredibly clean and refreshing.
This level of performance is exactly why reverse osmosis is so popular. In fact, RO systems are expected to capture a massive 44% of the U.S. water purifier market share by 2026. This isn't surprising, given their unique power to remove a huge range of impurities that other filters just can't touch. You can learn more about the technology's effectiveness in this detailed report.
When you install an osmosis water filter, you take full control over your home's water quality. Before we dive deeper into how this tech works, the table below gives a quick snapshot of the problems an RO system can solve for you.
This table breaks down common water issues and shows exactly how a reverse osmosis system tackles them, giving you clear benefits for your home.
| Common Water Problem | How Reverse Osmosis Solves It | Key Benefit for Your Home |
|---|---|---|
| Bad taste or odor (e.g., chlorine, sulfur) | The membrane and carbon filters remove chlorine and dissolved solids causing foul tastes and smells. | Fresh, clean, and delicious-tasting water right from the tap. |
| Worry about invisible contaminants like lead | The semipermeable membrane blocks heavy metals, arsenic, and other toxic elements. | Peace of mind knowing your family is safe from harmful substances. |
| Cloudy water or visible sediment | Multi-stage filtration removes sediment, silt, and other total dissolved solids (TDS). | Crystal-clear drinking water and ice cubes without floating particles. |
| Concerns about bacteria, viruses, or cysts | The membrane's microscopic pores are too small for microbiological threats to pass through. | Protection against waterborne illnesses from microscopic pathogens. |
| High cost of bottled water | Provides an unlimited supply of purified water for a fraction of the cost of buying bottles. | Significant savings over time and less plastic waste. |
As you can see, a reverse osmosis system is a comprehensive solution that improves your water's taste, safety, and clarity all at once.
So, how does an osmosis water filter system take your regular tap water and make it so incredibly pure? It’s not magic, but a highly effective, multi-step process. The best way to think about it is like an assembly line for water purification, where each stage has one specific job to do before passing the water to the next.
This isn't a one-and-done deal. Your water has to get through a couple of crucial pre-filters before it ever reaches the main event—the reverse osmosis membrane itself. This team-based approach is exactly why these systems are so good at what they do.
This diagram shows you the path your water takes, from the tap, through the RO system, and into your glass.
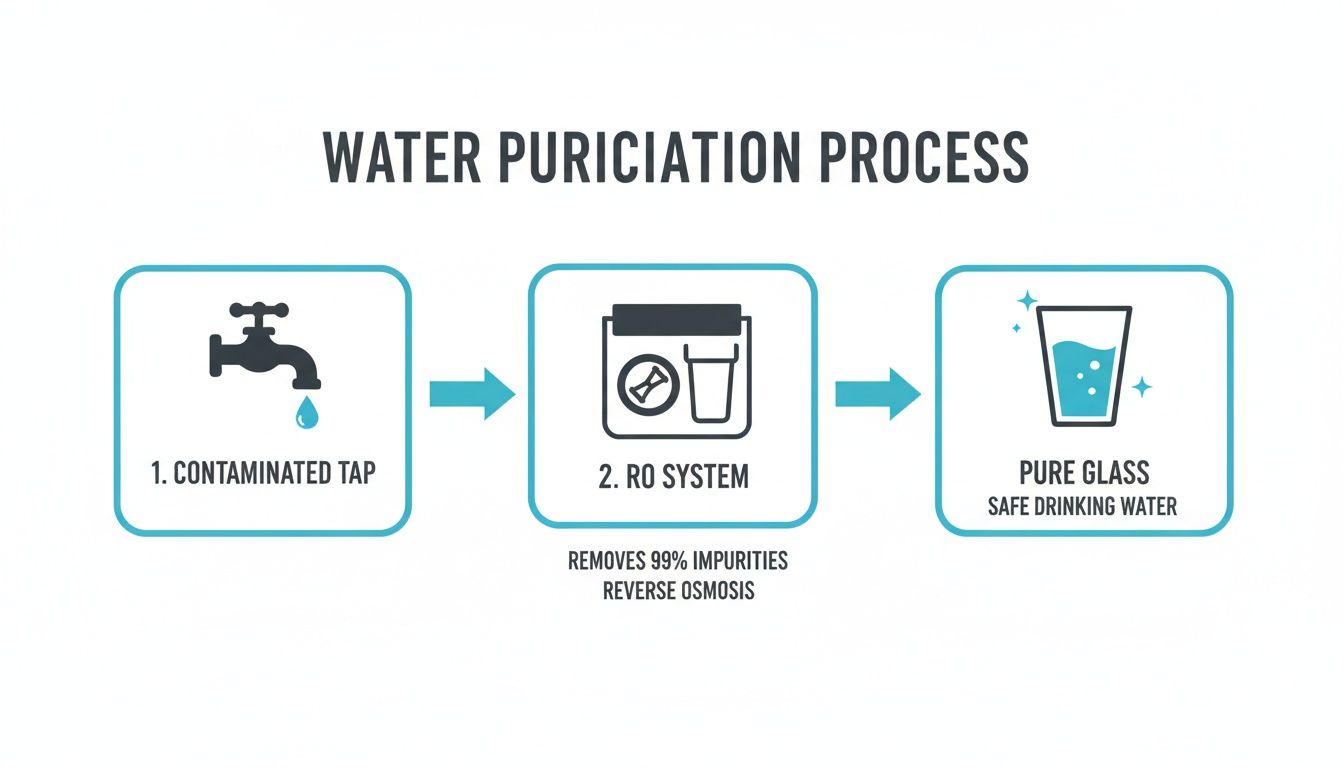
As you can see, the system acts as a gatekeeper, intercepting your water and transforming it before it ever hits your lips.
The first stop for your water is a set of pre-filters. These are the workhorses of the system, designed to get rid of the biggest, most obvious contaminants first. Their job is to clear the path for the more sensitive stages that come later.
First up is the sediment filter. Its purpose is simple: catch the big stuff. We're talking about the visible grit and grime that can make water look cloudy. This includes things like:
By trapping these larger particles, the sediment filter keeps the rest of the system from getting clogged, which is key for making sure everything runs smoothly and lasts as long as it should.
Next, the water moves through one or more carbon filters. These filters are all about tackling chemicals. They use activated carbon, which works like a magnet for certain contaminants, pulling them out of the water. Their primary target is anything that makes your water taste or smell bad—especially chlorine, a chemical disinfectant used in almost all city water supplies.
The pre-filters are absolutely essential for protecting your investment. By removing sediment and chlorine, they shield the delicate RO membrane from getting torn up by debris or degraded by chemicals. Without them, you’d be replacing the most expensive part of your system in no time.
Now we get to the heart of the whole operation: the reverse osmosis (RO) membrane. Once the pre-filters have done their job clearing out the gunk and chemicals, the water is pushed toward the main stage. This is where the heavy-duty purification happens, removing contaminants so small you can't see them.
The RO membrane is what’s known as a semipermeable barrier. That’s just a technical way of saying it has incredibly tiny pores—around 0.0001 microns. That’s so small that only water molecules can fit through.
Your home's water pressure provides the force needed to push water against this membrane. The pure water molecules get squeezed through to the clean side, while almost everything else is rejected. Those leftover contaminants are then flushed out of the system and down the drain. This is how RO systems can remove such a massive list of dissolved solids and other invisible pollutants.
After the water passes through the RO membrane, it’s stored in a small tank under your sink, ready to go. When you turn on the RO faucet, that water makes one final pass through the post-filter, also known as a “polishing” filter.
This final stage is typically another carbon filter. Its job is to do a last-minute quality check, getting rid of any faint tastes or odors the water might have picked up while sitting in the tank. It’s the finishing touch that guarantees every glass is as fresh and clean as possible.
Some systems offer a couple of optional upgrades at this final stage:
So, what does an osmosis water filter system actually pull out of your water? You’ll often hear claims like “removes 99% of contaminants,” but what does that really mean for your glass? This is where the reverse osmosis membrane flexes its muscles, acting like a microscopic sieve for your water.
The whole process works by pushing water through this special membrane. Its pores are incredibly tiny—around 0.0001 microns—so only pure water molecules can squeeze through. Anything larger, from minerals to metals, gets blocked and flushed down the drain.
This level of purification is exactly why the global water filter market is taking off, jumping to USD 15.26 billion in 2024 and on track to hit USD 28.05 billion by 2033. We're seeing it firsthand in North America, where sales of whole-house RO systems have climbed 35% since 2020 as more people deal with well water contamination and other local water issues. If you want to see the numbers, you can review the full market analysis.
An osmosis water filter system is built with multiple stages, so it's ready to tackle a long list of things you don't want in your glass.
Because reverse osmosis is so good at its job, it doesn't just pull out the bad stuff. It also strips out naturally occurring minerals like calcium and magnesium. This leaves you with water that’s incredibly pure, but it can also be slightly acidic and taste a bit "flat" to some people.
That’s a common discussion point, but it's also an easy fix. Some folks actually prefer the clean taste of demineralized water. But if you want those minerals back, there’s a simple solution.
Optional Upgrade: The Remineralization Filter
Lots of modern osmosis systems now offer a final filter stage for remineralization. After the water has been completely purified, this filter adds back a healthy balance of minerals like calcium, magnesium, and potassium. Not only does this bring back a more natural taste, but it also raises the water's pH to a more alkaline state.
One of the coolest things about getting an RO system is seeing the results for yourself. All you need is a cheap and easy-to-use tool called a Total Dissolved Solids (TDS) meter.
TDS is just a measure of all the dissolved stuff in your water. While not all of it is harmful, a high TDS reading usually means more unwanted contaminants and a worse taste.
Here’s a quick test you can do:
That massive drop is your proof. It shows the osmosis water filter system is doing exactly what it’s supposed to—stripping out nearly everything and leaving you with nothing but clean, great-tasting water.
Alright, now that you understand how an osmosis water filter system works its magic, let's figure out which one actually fits in your home. These systems aren't all the same; they’re designed for different spaces, different needs, and different levels of plumbing confidence.
The right choice really comes down to your situation. Are you a homeowner ready for a permanent upgrade, or a renter who needs something you can pack up and take with you?
We’ll walk through the three main types you'll encounter: under-sink, countertop, and whole-house systems. Each one has its own job, from cleaning up the water at your kitchen tap to purifying every single drop that comes into your house.
When you hear "osmosis water filter system," this is probably what you picture. Under-sink models are the go-to, classic choice for homeowners who want a clean, built-in source of pure water for drinking and cooking.
These systems get installed right under your kitchen sink, where they tap into the cold water line. The purified water comes out of a separate, dedicated faucet that sits right on your sink deck. This keeps all the tanks and filters tucked away out of sight, so your kitchen stays looking sharp.
Installation does involve some light plumbing, but it’s a totally doable weekend project for most folks. Once it’s in, you have an unlimited supply of pure water right where you need it most.
Living in an apartment? Don't want to touch the plumbing? This is where a countertop reverse osmosis system comes in. These are compact, self-contained units that just sit on your counter and get to work—no installation needed.
You just fill the reservoir with tap water, and the machine handles the rest, filtering the water and storing it in a clean tank. It's like a supercharged water pitcher that gives you RO-level purity. They’re portable, convenient, and ideal for anyone who needs top-notch filtration without making any permanent changes.
The real beauty of a countertop model is its freedom. You can take it with you when you move, use it in a college dorm, or even bring it along in an RV. It gives you the full power of an osmosis water filter system with none of the commitment.
For homeowners who want the absolute best water quality everywhere, a whole-house reverse osmosis system is the top-tier answer. Unlike systems that just treat water at one sink, a whole-house unit connects to your main water line.
This means you get purified water from every single tap—for drinking, showering, doing laundry, and everything else. It’s a major project that requires a professional plumber, a big storage tank, and a booster pump to keep your water pressure strong.
It’s a serious investment, but a whole-house osmosis water filter system delivers purity that protects your plumbing from scale and gives your family the cleanest possible water. If you need more guidance on what system fits your situation, check out our expert advice on choosing water filters.
Still weighing your options? This table breaks down the key differences between the three main types of RO systems to help you find the perfect match for your home and lifestyle.
| System Type | Best For | Installation | Typical Cost | Key Advantage |
|---|---|---|---|---|
| Under-Sink | Homeowners wanting dedicated drinking water | Moderate DIY (1-3 hours) | $200 – $600 | Hidden, permanent, and great value for high-quality water at the sink. |
| Countertop | Renters, small apartments, or offices | None (plug and play) | $300 – $500 | Portable, no installation required, and provides RO water anywhere. |
| Whole-House | Homeowners wanting pure water everywhere | Professional installation required | $5,000 – $15,000+ | Purifies all water in the home, protecting plumbing and appliances. |
Each system offers a powerful solution for clean water. By matching the system type to your living situation and water quality goals, you can find the ideal setup that works for you.
Buying an osmosis water filter system is a big step. But what happens after you get it home? Let's break down what it really takes to install one, keep it running smoothly, and what the costs look like over time.
For most people, an under-sink model is the way to go, and it's a project you can definitely tackle yourself. Don't be put off by the thought of plumbing work. Most modern kits come with everything you need, including color-coded tubes and quick-connect fittings that just snap into place.
The basic idea is to hook up an adapter to your cold water line, drill a small hole in the sink's drainpipe for the wastewater, and mount a new, dedicated faucet. As you map out the connections, keep in mind that the right size tubing, like a 1 inch hose, is important for making sure the system runs efficiently.
Here’s a quick rundown of what it takes to install a standard under-sink RO system.
While a lot of people can get this done in an afternoon, there's absolutely nothing wrong with calling a plumber. If you aren't comfortable with drilling or messing with plumbing, a professional will get it done right and give you peace of mind.
If you want your system to last and keep producing pure water, you have to do the maintenance. It's just like changing the oil in your car—the filters do the heavy lifting, and they will get clogged.
Regular filter replacement isn't just a suggestion; it's essential for maintaining water quality and flow rate. A clogged filter not only stops working effectively but can also strain the entire system, potentially damaging the delicate RO membrane.
Here's a typical replacement schedule you can expect:
This regular upkeep is your main long-term cost. It's a big part of the global water purification filters market, which was valued at USD 44.22 billion in 2024. For many systems, replacement filters can make up 60-70% of what you'll spend over a three-year period.
But the savings are real. For an average family, an osmosis water filter pays for itself in just 2-3 years because you'll no longer be buying bottled water. You can find more data by reviewing these market insights on water purification filters.
Alright, you've got a handle on how these systems work, but it's completely normal to have a few more questions rattling around before you pull the trigger. An osmosis water filter is a real investment in your home's water quality, so let's get every last detail ironed out.
We've heard all the common worries and questions from homeowners over the years. Let's walk through them so you can feel 100% confident in your decision.
This is probably the number one question we get, and it's a fair one. The short answer is: they used to, but modern systems are much, much better.
Here’s the deal: to push contaminants out, the reverse osmosis membrane needs a stream of water to flush them away to the drain. This wastewater is often called "brine." Without this flushing process, the membrane would clog up and fail in no time.
But technology has come a long way. Older, inefficient systems could waste several gallons for every single gallon of pure water they made. Today, you can easily find high-efficiency systems with waste-to-pure-water ratios as low as 1:1.
To get a low-waste system, look for these features:
When you do the math, the slight increase in your water bill is almost always a drop in the bucket compared to the cost—both financially and environmentally—of constantly buying bottled water.
No, an under-sink osmosis water filter system won't affect the water pressure from your main kitchen faucet, your shower, or anywhere else in the house. It's a self-contained unit that connects to its own dedicated drinking water faucet.
Now, you will notice that the flow from that dedicated RO faucet is a bit gentler than your main tap. That’s totally normal. The water is being purified on demand and pushed out of a storage tank, so the process is naturally more deliberate than just yanking open a main water line.
A quick note on whole-house RO systems: those are a different beast. They are always installed with a large storage tank and a powerful booster pump to make sure you have strong, steady water pressure at every single tap and appliance in your home.
Yes, absolutely. Think of NSF/ANSI certifications as your proof of performance. These aren't just marketing stickers; they are independent, third-party verifications that a system can actually do what the company claims.
For an osmosis water filter system, the gold standard is NSF/ANSI 58. This certification specifically confirms the system's ability to effectively reduce a long list of tough contaminants, including:
Another one to watch for is NSF/ANSI 372, which certifies that the system's parts are lead-free. When you see these certifications, you get real peace of mind. It’s your guarantee that the system you're putting in your home is truly protecting your family's health.
At Water Filter Advisor, our goal is to give you the clear, unbiased information you need to find the best water filtration solution for your home. From in-depth guides to honest product reviews, we're here to help you achieve safer, better-tasting water. Explore our resources today at https://www.waterfilteradvisor.com.

When you’re hunting for the best inline filter for your home, the real question is: what problem are you trying to solve? A filter to stop your refrigerator’s ice from tasting funky has a totally different job than one installed under the kitchen sink to tackle serious contaminants. Think of it as hiring a specialist for a very specific task.
Top-tier options almost always feature multi-stage carbon block filters with a low micron rating—think 0.5 microns—and crucial NSF certifications. Those certifications are your golden ticket, the independent proof that the filter actually does what it claims, like kicking chlorine, lead, and sediment to the curb for water that just tastes, well, like water. Our guide will walk you through the best inline filter choices so you can find the perfect match for your home.

Picture this: crisp, clean water flowing from your fridge or a separate tap, without you ever having to fill a clunky pitcher again. That's the magic of a good inline water filter. It's a small but mighty device that gets spliced directly into your water line, providing targeted filtration right where you need it most.
These filters are the quiet workhorses of home water treatment. They're usually tucked away behind an appliance or under a sink, silently ambushing water before it reaches your glass, ice cube tray, or coffee maker. Their main job is to strip out the uninvited guests—impurities that ruin the taste, smell, and quality of your drinking water.
So, why are these simple filters becoming such a popular home upgrade? It all boils down to their focused, efficient approach. Instead of treating every single gallon of water in your home (including the water your toilet uses), an inline filter concentrates its power on delivering high-quality water for you to drink and cook with.
You’ll notice the benefits right away:
An inline filter is an ideal solution for renters or homeowners who want targeted filtration without major plumbing surgery. It offers a significant step up from a basic pitcher filter with minimal installation hassle.
To help you get started, we've put together a quick comparison table of our top picks for 2026. This chart lays out our favorite filters for the most common uses around the house, highlighting what makes each one a solid choice.
This table highlights our top-rated inline filters for common household uses, allowing you to quickly compare their key specifications and find the best match for your home.
| Model / Type | Best For | Key Feature | Lifespan |
|---|---|---|---|
| EcoPure EP-INL30 | Refrigerator & Icemaker | 5-year/30,000-gallon lifespan | Up to 5 Years |
| CuZn ILFC-200 | Under-Sink (Chloramine) | KDF-55 media for chloramine & heavy metals | Up to 12 Months |
| Woder 10K-Gen3 | Dedicated Faucet (Lead) | Certified for lead, chlorine, and contaminants | Up to 3 Years |
| Culligan IC-EZ-4 | All-Purpose / Easy Install | Twist-on design and NSF 42/53 certification | Up to 6 Months |
This table gives you a high-level overview. Now, let's pull back the curtain and see what makes these filters tick.
Ever wondered what’s going on inside that little tube hooked up to your fridge? It seems simple enough: your regular tap water goes in one end, and clean, crisp water comes out the other. It’s not magic, but it’s a brilliant bit of engineering that targets specific contaminants right at the point of use.
At its core, an inline filter is a tiny, self-contained purification plant. Water from your supply line gets pushed through a sealed cartridge that's packed with filter media. You can picture it as a microscopic maze where water molecules are allowed to pass, but all the unwanted gunk gets trapped.
This simple "point-of-use" convenience is why these filters are taking over. The global market was valued at $2.5 billion back in 2025 and is expected to hit $4.2 billion by 2033. People want an affordable, easy-to-install way to get rid of things like chlorine and lead, and many certified models can slash contaminants like total trihalomethanes (TTHMs) by up to 95%. You can check out the full market analysis on Data Insights Market to see how it’s changing household water quality.
An inline filter might look basic on the outside, but its power comes from what's packed inside. You've got two main parts doing all the work: the housing and the media.
The most common media you’ll find is activated carbon. Think of it as a super-powered sponge. A single gram of this stuff can have a surface area of over 3,000 square meters—that's about half a football field! It works through a process called adsorption, where things like chlorine, pesticides, and VOCs literally stick to its vast surface and are pulled out of the water.
Here’s a simple way to think about it: Activated carbon is like a contaminant magnet. As water rushes past, chemicals like chlorine are drawn to the carbon's surface and trapped, letting cleaner, happier water flow on through to your glass.
Another critical spec is the filter’s micron rating. This number tells you how big the pores in the filter media are. A smaller micron number means smaller holes, which means it can stop tinier particles.
Here’s a quick breakdown:
While a lower micron rating is usually better for purity, there’s a trade-off. Tighter pores can slow down your water flow and clog up faster if your water is heavy with sediment. That's why choosing the right filter is all about balancing your purification goals with your home’s water pressure and quality.
When you’re picking an inline filter, it’s easy to get lost in a sea of marketing jargon. To find the right one, you have to cut through the noise and look at the actual specs. Things like micron ratings, the type of carbon used, and flow rates are what really matter—they tell you if a filter can actually solve your water woes.
This flowchart is a great starting point. It helps you connect a common water problem to the right type of filter technology.

As you can see, different problems point to different solutions. Let's dig into the specs that make those solutions work.
Most inline filters rely on activated carbon to make water taste and smell better, but how that carbon is constructed makes a huge difference. You'll mainly see two types: Granular Activated Carbon (GAC) and Carbon Block.
A GAC filter is just what it sounds like: a cartridge filled with loose carbon granules. Water meanders around the granules, which works well for reducing chlorine and improving taste. Because the media is loose, these filters usually have a higher flow rate.
A Carbon Block filter is different. It’s made of powdered carbon that’s been compressed into a solid brick. This forces water through a dense, torturous path of tiny pores, giving it way more contact time with the carbon.
While both will improve the taste of your water, a carbon block filter offers much more thorough filtration. Its solid form is better at removing a wider array of contaminants and prevents "channeling"—where water carves a lazy path through the loose media and bypasses the filtration process.
For a simple coffee maker where you just want better-tasting coffee, a GAC filter is probably fine. But if you're filtering drinking water from your kitchen tap, a carbon block is the superior choice.
To help you match the right filter spec to your specific water problem, we've put together this quick comparison table. It breaks down what each specification means and what it's best at targeting.
| Specification | What It Means | Best For Targeting… | Good to Know |
|---|---|---|---|
| GAC Media | Loose carbon granules. | Chlorine, bad taste, and odors. | Higher flow rate but can be prone to "channeling." |
| Carbon Block Media | Solid, compressed carbon. | Chlorine, lead, VOCs, cysts, and sediment. | More comprehensive filtration, lower flow rate. |
| 5 Micron Rating | Pores block particles 5 microns or larger. | Sediment, sand, silt, and rust. | Good for pre-filtration, not for health contaminants. |
| 0.5 Micron Rating | Pores block particles 0.5 microns or larger. | Cysts (Giardia, Crypto), asbestos, and particulate lead. | Essential for filtering health-related contaminants. |
| NSF/ANSI 42 | Certified for aesthetic improvements. | Chlorine taste and odor. | Your baseline for better-tasting water. |
| NSF/ANSI 53 | Certified for health-related contaminants. | Lead, mercury, VOCs, cysts, and other specific contaminants. | The gold standard for safe drinking water. |
This table should give you a clear idea of what to look for on a product's spec sheet based on the issues you've identified in your water.
A filter's micron rating tells you the size of its pores, which determines the smallest particle it can stop. A lower number means finer filtration.
A 5-micron filter is great for catching larger particles like sand, rust, and sediment that you might see in your water. But for health-related contaminants, it just won’t cut it.
This is where a 0.5-micron rating becomes non-negotiable. Filters this fine are able to capture microscopic cysts like Giardia and Cryptosporidium, which are notorious for causing stomach illness and are resistant to chlorine. It’s also a must-have for reducing lead, which often exists as tiny particles. A 0.5-micron filter is far more effective at trapping lead than a 1-micron or 5-micron filter.
If the water is for drinking—especially for kids—you need a filter rated at 0.5 microns and certified for lead reduction. Period.
Flow rate, measured in gallons per minute (GPM), is all about how fast water moves through the filter. This might seem like a boring detail, but it's critical for your appliances. A filter that's too slow can cause real problems.
Remember, a finer micron rating usually means a lower flow rate. You have to balance the need for high-level filtration with the flow rate your appliance demands.
A certification from NSF/ANSI is the only way to know for sure that a filter does what it claims. These are independent, third-party tests that verify a manufacturer's performance claims. For inline filters, two standards are key:
Always check the fine print to see exactly what a filter is certified to remove under NSF/ANSI 53. The best inline filter isn’t just one with a lot of marketing claims; it’s one with the specific certifications that match your water test results.

It’s one thing to understand the specs, but where do these filters really prove their worth? Their true value lies in their versatility. You can tuck these compact filters away to fix specific water problems right where they happen.
An inline filter is a simple upgrade with a surprisingly big impact on everything from your morning coffee to the ice in your drink. Let's look at the most common places to install one in your home.
This is probably the #1 reason people start looking for the best inline filter. The filter that comes with your fridge is often absurdly expensive, doesn't last long, and might only handle basic chlorine taste. Even worse, people often forget to change them, leading to cloudy, awful-tasting ice cubes that ruin a perfectly good drink.
Placing an external inline filter on the water line that feeds your fridge is a total game-changer.
Installation is usually a walk in the park. You just cut and splice the filter into the 1/4-inch water line behind your fridge. Most come with quick-connect fittings that just push on, so you don't need a toolbox full of special equipment.
For refrigerators, your main goal is improving taste and odor. You'll want an inline filter with a quality carbon block and an NSF/ANSI 42 certification. A 5-micron rating is plenty for this job.
If you want purified water on tap just for drinking and cooking, an inline filter hooked up to its own dedicated faucet is a fantastic setup. You get a steady supply of clean water without filtering all the cold water you use for washing dishes.
Under-sink systems are perfect for tackling more serious contaminants. Since it's for a dedicated faucet, you can choose a filter with a much finer micron rating (like 0.5 microns) and higher-level certifications without worrying about slowing down your main kitchen faucet.
This is where it really shines for specific water issues:
Installation is a bit more involved here since you have to tap into your cold water line and run a new, smaller line to a separate faucet. The most common connector size is 3/8-inch, but always double-check your plumbing before you buy.
If you're serious about coffee, you already know water quality is everything. The minerals and chemicals in your tap water can completely sabotage the flavor of your expensive, single-origin beans. On top of that, scale buildup from hard water is the number one killer of coffee and espresso machines.
An inline filter is the perfect fix. You can install it on the water line of a plumbed-in machine or simply use it to fill the reservoir of a countertop model. The commercial inline water filters market is growing fast, projected to reach $1.85 billion by 2025. Businesses know that pure water equals happy customers and longer-lasting equipment—a trend largely driven by the $4.78 billion North American market. For more on this, you can review the commercial water filter market insights on Data Insights Market.
For coffee lovers, an inline filter delivers two key victories:
Look for a filter that specifically mentions scale control. These are often the best inline filter choices for protecting both your brew's taste and your appliance's lifespan.
Alright, we've waded through the technical details—micron ratings, certifications, and flow rates. Now it's time to put that knowledge to work and pick the right filter for your home.
Instead of just giving you a list, I'm going to show you which filters make the most sense for specific jobs, like your fridge's icemaker or the tap you use for drinking water. We'll look at the best filter for simply better-tasting water, and the top choice if you're worried about serious contaminants like lead.
There's a reason these little filters are getting so popular. The home water filtration market is projected to hit $7.13 billion by 2026, and inline filters are a huge part of that. They can slash contaminants like hydrogen sulfide by up to 95%, getting rid of that rotten-egg smell instantly. Plus, with replacement costs often 70% lower than whole-house systems, they just make financial sense. For many families, switching from bottled water saves over $1,000 a year. You can dig into the numbers in these home water filtration market trends on Arizton.
When you just want better-tasting water and clearer ice from your fridge, the goal is simple: get rid of chlorine and other funky tastes. You need a filter that lasts a long, long time and doesn't need constant changing.
If your main goal is just getting rid of that chemical taste in your fridge's water and ice, a long-lasting aesthetic filter is your best bet. It saves you from buying expensive, proprietary fridge filters every six months.
If you're dealing with a serious health concern like lead, especially from a dedicated drinking water tap, you have to get serious about your filter choice. Certification and a fine micron rating are non-negotiable here.

Getting the most out of your inline filter really comes down to two things: a solid installation and proper upkeep. The great news? You probably don’t need to call a plumber for this one. Most inline filters are designed for a quick and simple DIY install.
With just a few basic tools and a bit of focus, you can have cleaner, better-tasting water flowing in less than an hour. We’ll walk through the essentials right here, from getting started to handling the long-term care that keeps your water pure and your appliances protected.
Don't just jump in. Taking a few minutes to prep will save you a world of headache and a soggy floor. Make sure you knock these out before you ever think about cutting a water line.
Flushing your new filter is the single best way to avoid cloudy water or a clogged faucet aerator right after installation. It gets rid of all the harmless but messy black carbon fines that are normal in a brand-new filter.
Most inline filters with quick-connect fittings install the same way. The instructions might look a little different from brand to brand, but the core process is simple. Let’s use a standard refrigerator water line as our example.
Step 1: Find Your Spot
Pick a spot on the 1/4" water line behind the fridge where the filter will be easy to get to. Remember, you'll have to change it later, so don't bury it in a spot you can't reach.
Step 2: Cut and Connect
With the water off, use your tube cutter to make a clean, square cut in the plastic tubing. Push one end of the line firmly into the filter's "inlet" port and the other into the "outlet" port. There’s always an arrow on the filter showing the direction of water flow—make sure you follow it.
Step 3: Check for Leaks
Slowly turn the water back on. Now, watch the connection points closely for any signs of a drip. If you spot one, shut the water off again. Usually, it just means the tube isn't pushed in all the way or the cut wasn't perfectly straight.
Even the pros hit a snag now and then. If you run into trouble, it’s almost always one of these two things.
For a deeper dive into filter maintenance and other expert tips, our library has plenty of guides to help you out. You might be interested in our article which provides more water filter advice.
Even after you've done your homework, a few nagging questions can pop up. Let's walk through the most common ones we hear from people trying to pick the right inline filter.
Any filter will cause a tiny drop in pressure, but it should be so small you don't even notice. For a properly sized inline filter, we're talking a drop of only 2-5 PSI. If you suddenly feel like your water is just trickling out, something's wrong.
The usual suspect is a mismatch between the filter and your water. Trying to use a very fine 0.5-micron filter on a line that's heavy with sediment is a classic mistake. The filter just clogs up instantly. Always match the filter's GPM to what your appliance actually needs, and if your water is full of gunk, put a simple sediment pre-filter in front of it.
The timeline on the box? Think of it as a suggestion, not a rule. A filter’s true lifespan comes down to two things: what’s in your water and how much of it you use.
If your city goes heavy on the chlorine, that carbon media is going to get used up fast. The same goes for high sediment levels—they'll clog the works long before the "official" replacement date.
Forget the calendar. Pay attention to your water. The moment you start tasting chlorine again or notice the flow from your fridge slowing down, it’s time for a change.
Not usually. For most jobs, like hooking a filter up to your refrigerator’s 1/4-inch water line, it's a simple DIY project. Most people with quick-connect fittings can get it done in less than an hour.
That said, know your limits. If the job involves cutting into a main copper pipe or if you’re just not comfortable with plumbing, call a pro. A small mistake can cause a huge, expensive mess from water damage. It's always better to be safe than sorry.
Ever wondered what it would be like to have a VIP bouncer for your tap water? That's exactly what an ultra filtration system is. It's the ultimate gatekeeper for your home's water supply, using a high-tech membrane riddled with microscopic pores to physically block nasty intruders like bacteria and viruses from crashing your party. It’s a seriously powerful way to get exceptionally pure water right from your faucet, and it does it all using your home's regular water pressure—no chemicals or funny business required.
You know how a coffee filter lets that beautiful dark liquid through but holds back the gritty grounds? Ultra filtration works on the exact same principle, just on a ridiculously small scale. It's a straightforward but incredibly effective mechanical filtering process that's pure genius in its simplicity.
The real MVP of any ultra filtration (UF) system is its hollow fiber membrane. This isn't just a flat sheet; it's a dense bundle of thousands of tiny, hollow tubes, like a fistful of microscopic straws. The walls of these straws are peppered with pores typically between 0.01 and 0.1 microns wide. To put that in perspective, a single human hair is about 70 microns thick. These pores are so small they act as an impenetrable wall against most waterborne baddies.
When tap water enters the UF system, your home's water pressure shoves it against the outside of these hollow fibers. The tiny water molecules are small enough to do the limbo, squeezing through the pores and into the hollow center of the tubes. They emerge on the other side as sparkling, purified water.
But anything larger gets left behind, physically denied entry. This includes a whole rogue's gallery of things you don't want in your glass:
The beauty of ultra filtration is its brute-force elegance. It's not a complex chemical reaction. It's a physical barrier that separates pure water from the gunk, just like a sieve separates flour from lumps—only on a much, much finer level.
This all happens in real-time, giving you clean water whenever you turn on the faucet without needing a bulky storage tank. And since it runs on normal water pressure, it's about as energy-efficient as it gets.
This effective and efficient technology is really catching on. While it's long been a workhorse in large-scale municipal water treatment, it's becoming the go-to hero for homes and businesses. The global market for these systems shows just how reliable they are, projected to jump from USD 1,987 million in 2025 to USD 3,146 million by 2034. This trend highlights a growing demand for water purification that is both powerful and sustainable. You can discover more insights about this growing market and its applications.
At the end of the day, what's happening inside an ultra filtration system is beautifully simple. It’s a solid physical barrier making sure that what comes out of your tap is just clean, safe water, ready for drinking, cooking, and enjoying.
Trying to pick the right water filter for your home can feel like you've stumbled into the wrong aisle at the hardware store. You're bombarded with technical jargon and a ton of competing claims. To get it right, you need a clear, no-nonsense comparison of how these different technologies actually stack up.
Ultra filtration (UF) systems hold a really unique sweet spot in the world of water purification. They offer a fantastic balance of powerful filtration, efficiency, and health benefits that makes them stand out from the other filters you see on the shelf.
This diagram gives you a quick visual of how it works. Contaminated water goes in, gets squeezed through the UF membrane, and comes out pure. Simple as that.

As you can see, the membrane is a physical gatekeeper. It literally blocks the bad stuff while letting the good, clean water molecules flow right through.
Now, let's break down how UF throws down against the competition.
It's easy to get lost in the specs, so here's a quick cheat sheet comparing the most common filter types you'll find for your home.
| Filtration Method | Removes Bacteria & Viruses | Keeps Healthy Minerals | Wastes Water | Best Use Case |
|---|---|---|---|---|
| Ultra Filtration | Yes | Yes | No | Whole-home or POU for comprehensive microbiological safety without removing minerals. |
| Reverse Osmosis | Yes | No | Yes | POU for removing the widest possible range of contaminants, including salts and minerals. |
| Carbon Filter | No | Yes | No | Improving taste and odor by removing chlorine and chemicals; often used with other filters. |
| Microfiltration | Bacteria Only | Yes | No | Basic microbiological protection, good for sediment and larger bacteria like Giardia. |
This table makes it pretty clear—each filter has its own superpower. The right choice really depends on what's lurking in your water and what you want to kick out.
Think of Reverse Osmosis (RO) as the heavyweight champion of water purification. It's incredibly powerful. RO systems use intense pressure to force water through a membrane with pores so tiny—we're talking 0.0001 microns—that almost nothing else gets through. This process strips out bacteria, viruses, heavy metals, and even dissolved salts.
But that raw power comes with a couple of big downsides for the average home. First, RO wastes a lot of water. To make one gallon of pure water, it might send several gallons of wastewater right down the drain. Second, because the filter is so strict, it also removes beneficial minerals like calcium and magnesium, which give water its taste and have health benefits.
Ultra filtration, with its 0.01 micron pores, strikes a much better balance. It’s small enough to block all the nasty microbiological threats—bacteria, protozoa, and even tiny viruses—but it lets those healthy, dissolved minerals pass right on through. You get water that’s safe from pathogens but still has its natural, healthy mineral content, all without the wasteful habits of an RO system.
Activated carbon filters are everywhere, and for good reason. Imagine a carbon filter as a powerful magnet for chemicals. It works through a process called adsorption, where things like chlorine, pesticides, and VOCs (volatile organic compounds) get stuck to the carbon’s massive surface area. This is why carbon filters are rockstars at making your water taste and smell amazing.
But here’s the catch: they do next to nothing for microbiological safety. A typical carbon filter in a pitcher or on your faucet just can't physically stop bacteria or viruses. The pores are simply too big.
This is where ultra filtration really shines. The UF membrane is a physical barrier that those tiny pathogens simply can't squeeze through. In fact, the best UF systems actually include carbon filters as part of their dream team. This combo gives you the best of both worlds: the carbon removes chemicals and improves taste, while the UF membrane ensures the water is completely free of dangerous microorganisms.
For a homeowner, the goal isn't just to pick one filter type over another. It's about finding a system that combines the right technologies for complete protection. A UF system with carbon stages is a far more robust solution than either one on its own.
Microfiltration (MF) is UF's closest relative. It also uses a physical membrane to block contaminants, but the pores are a bit bigger, usually around 0.1 microns. That's plenty small enough to stop protozoa like Giardia and Cryptosporidium, and it gets most bacteria, too.
The critical difference comes down to viruses. Viruses are so small they can often slip right through a microfiltration membrane. An ultra filtration system, with pores that are ten times smaller, offers a much more reliable defense against viral threats. For families with small children, elderly members, or anyone with a compromised immune system, that extra layer of protection is absolutely essential.
So, you’ve decided that an ultra filtration system is the right move for safer, cleaner water. Fantastic choice! Now comes the fun part: which one is the right fit for your home? The choice really boils down to one simple question—are you looking to purify water for a single tap, or do you want to give the entire house the VIP treatment?

This isn't just about where the filter goes; it’s about tailoring the solution to your family’s needs and your water quality goals. The two main types of residential ultra filtration systems are Point-of-Use (POU) and Point-of-Entry (POE), and they each play a very different role.
Think of a Point-of-Use (POU) system as a precision instrument. It’s designed to deliver highly purified water to one specific spot, which is almost always the kitchen sink. These are compact units that tuck away neatly under the sink and connect to their own dedicated faucet.
The big win with a POU system is getting targeted, top-quality filtration exactly where you need it most—for the water you drink and cook with.
This makes POU systems a fantastic choice for renters, smaller households, or anyone whose main mission is to purify their drinking water from nasty microbiological contaminants.
A Point-of-Entry (POE) system, also known as a whole-house system, is your home's comprehensive bodyguard. It’s installed right where the main water line enters your house, treating every last drop of water that flows through your pipes. That means clean water from the kitchen tap, the showers, the dishwasher, and the washing machine.
Going with a POE system brings the benefits of purified water to every room. This is a game-changer for families dealing with sensitive skin, as it strips out the irritants that can cause problems. To see how these stack up against other options, it's worth comparing them with other whole home water filtration systems.
A POE system offers total peace of mind. It creates a complete barrier that stops contaminants from ever entering your home's plumbing. This isn't just about protecting your health; it's about protecting your pipes and appliances from sediment and other gunk, too.
With a POE system, you're not just drinking clean water—you're bathing in it, washing your clothes in it, and truly living in it.
Once you've decided between POU and POE, you need to look at a couple of key numbers to make sure the system can keep up with your household's daily life.
Flow Rate (GPM): This is measured in Gallons Per Minute and tells you how much filtered water the system can kick out at once. For a POU system at your kitchen sink, a flow rate of 0.5 to 1 GPM is typically plenty. But for a POE system, you'll need a much beefier rate—think 10 to 20 GPM—to run a shower and the dishwasher at the same time without your water pressure dropping to a sad trickle.
Filter Lifespan: This tells you how long the filter cartridges will last before you need to swap them out. Keep in mind, this can vary a lot based on how much water you use and how gunky your local supply is. Always check the cost of replacement filters and factor that into your long-term budget.
The good news is that the market for these filters is booming. The global ultrafiltration market is expected to jump from USD 56.63 billion in 2025 to USD 87.21 billion by 2030. That means more innovation and better prices are on the way for you. Once you've weighed these factors, you can invest with confidence, knowing you've picked the perfect guardian for your home's water. If you're looking for more guidance, check out our page to get more expert water filter advice.
So you've decided an ultra filtration system is the right move for your home's water. Great call. But even the best system in the world won't do you much good if it's not installed correctly and looked after properly.
The awesome news? Keeping these systems running in tip-top shape is surprisingly straightforward. You don't need a plumbing degree to get pure, clean water flowing from your tap.

Whether you're looking at a small under-sink setup or a full whole-house unit, getting a handle on the setup and upkeep is key. It’s what ensures you’ll get great-tasting, safe water for years to come.
One of the first things people ask is, "Can I really install this myself?" It really boils down to two things: which system you bought and how friendly you are with a wrench.
Under-Sink (POU) Systems: These are practically made for the weekend warrior. Most of the time, you're just mounting the unit under the sink, tapping into the cold water line with some simple push-to-connect fittings, and drilling a hole for a dedicated faucet. If you can follow instructions and aren't afraid of a little plumbing, you can knock this out in an afternoon.
Whole-House (POE) Systems: This is a different beast entirely. A whole-house system ties directly into your home's main water line. One wrong move here can mean a serious leak and thousands in water damage. For this reason, we almost always tell people to hire a licensed plumber. It's just not worth the risk.
Let’s be real: while an under-sink system is a perfect DIY project, the peace of mind you get from a pro installing your whole-house system is worth every single penny. You know it’s done right from the start.
When it comes to long-term care, ultra filtration systems are wonderfully low-drama. It’s all about simple, routine check-ups, not complicated repairs. Being proactive here is what keeps your water pure and your system happy. Think of it as a little Planned Preventive Maintenance for your water.
Here’s what a typical schedule looks like:
Sediment & Carbon Pre-Filters (Every 6-12 Months): These guys are the first line of defense, catching big gunk and chlorine before they can reach the main UF membrane. Swapping them out is critical and usually just involves unscrewing the filter housing and popping in a new cartridge. If your water has a lot of sediment, you might be doing this closer to the 6-month mark.
UF Membrane (Every 2-5 Years): The hollow fiber membrane is the heart of the system, and it's built to last. Most systems have a backwashing feature—either automatic or manual—that flushes out the gunk that builds up on the membrane. This self-cleaning process is why the membrane can go for years, often needing replacement only every 2 to 5 years.
System Sanitization (Annually): Once a year, when you're already changing filters, it's a smart idea to sanitize the system. This is a quick step that prevents any nasty bacteria from setting up shop inside the filter housings and keeps your water as fresh as possible.
Stick to this simple routine, and you'll sidestep problems like low water pressure or reduced flow. It's a small bit of effort for a huge payoff: knowing your family’s water is always clean and safe.
When you’re shopping for an ultrafiltration system, the packaging can be a real headache. It’s usually covered in labels, percentages, and acronyms that make you feel like you need a chemistry degree just to figure out what you’re buying.
But cutting through that marketing noise is the single best way to know if a filter will actually walk the walk. The key is to look for independent, third-party certifications.
Think of a certification as a report card from an unbiased expert. These organizations put the filter through its paces under tough, standardized conditions to verify the manufacturer’s claims. The most respected name in the water filtration game is NSF/ANSI (National Sanitation Foundation/American National Standards Institute).
Not all NSF/ANSI certifications are created equal. For home water filters, you’ll mainly see two standards, and they test for completely different things. Knowing the difference is critical.
NSF/ANSI 42 – The "Looks and Tastes Better" Standard: If a filter has this stamp of approval, it’s been proven to improve the aesthetics of your water—its look, taste, and smell. This standard focuses on non-health-related issues, like reducing chlorine or particulates that make water cloudy.
NSF/ANSI 53 – The "Health and Safety" Standard: This is the big one. A system certified to NSF/ANSI 53 has passed rigorous testing for its ability to reduce specific health-related contaminants like lead, cysts (such as Giardia), asbestos, and certain chemicals.
Any ultrafiltration system built for microbiological safety should, at a bare minimum, have performance data showing it can remove tiny living organisms, which is often validated under protocols similar to NSF/ANSI 53.
You'll often see performance claims like “99.99% reduction of bacteria.” In scientific terms, this is called a "log reduction," which is just a simple way to talk about really, really big numbers.
A "log reduction" is a measurement of how thoroughly a filter removes contaminants. Each "log" represents a 90% reduction. So, a 1-log reduction is 90%, a 2-log reduction is 99%, a 3-log is 99.9%, and a 4-log is 99.99%.
When a UF system claims a 4-log reduction of bacteria, it means for every 10,000 bacteria that went into the filter, only one made it out the other side. That’s the kind of proven, high-level performance you need when you’re dealing with microscopic threats.
The quality of the filter membrane is what makes this possible. Today, polymeric ultrafiltration membranes are the industry standard, making up 65.0% of the market because they're both durable and affordable. This technology is a huge deal in the water treatment sector, which itself made up 41.7% of all membrane filtration revenue in 2025. You can find more details about membrane filtration technology and see why it's becoming so important.
By looking for these specific, third-party-verified numbers and certifications, you can confidently choose a system. You're no longer just taking a company's word for it—you're relying on proven, scientific data to protect your home's water.
Even after getting the full scoop on ultra filtration, you probably have a few practical questions kicking around. That's perfectly normal. When you're thinking about an investment in your home's water, you want to be sure about the day-to-day details.
We’ve rounded up the most common questions homeowners ask before taking the plunge. Let's get you some clear, straightforward answers.
On its own, a UF membrane is a physical barrier—it stops particles, not the dissolved stuff like chlorine that can make water taste like a swimming pool.
That's why you'll almost always find high-quality UF systems paired with activated carbon filters. The carbon acts like a sponge for bad tastes and odors, soaking up chlorine and other chemical flavors. The UF membrane handles the germs, but it’s the carbon that delivers that crisp, clean taste.
Any filter will add a little bit of resistance, but a properly sized UF system shouldn't cause a noticeable drop in your water pressure. If your shower suddenly feels weak after installation, it's usually a red flag for one of two things.
First, your filter cartridges might just be clogged and screaming for a change. The second possibility is that the system's flow rate isn't high enough for your home's demand. Whole-house systems are built for high flow, but sticking to the maintenance schedule is key to keeping that pressure strong and steady.
Filter life really depends on your water quality and how much you use, but here’s a good rule of thumb for budgeting. The main ultra filtration membrane is the workhorse and can last anywhere from 2 to 5 years.
The sediment and carbon pre-filters that protect that main membrane need more frequent swaps, typically every 6 to 12 months.
As for cost, you could be looking at around $50 for a set of under-sink pre-filters or up to a few hundred dollars for a whole-house UF membrane replacement. It’s smart to factor these ongoing costs into your decision to see the true long-term price tag.
When comparing systems, look at the total cost of ownership—the upfront price plus the filter replacements over time. A slightly pricier unit with longer-lasting filters might actually be the better deal in the long run.
Absolutely. UF systems are a fantastic line of defense for well water, especially against microbiological threats like bacteria (think E. coli) and general cloudiness from sediment. The membrane is a physical wall these contaminants just can't get through.
But well water can be tricky. It often comes with other issues like hardness minerals, iron, or sulfur that UF won’t touch. That's why getting a comprehensive water test done first is non-negotiable.
More often than not, the best setup for a well is a multi-stage approach—like putting a water softener or an iron filter in front of the UF system. This protects the membrane and tackles all of your water problems at once.
This one trips a lot of people up since both deal with microbiological safety. The main difference is how they do their job.
Ultra Filtration (UF) is a physical barrier. It removes contaminants by blocking them with a fine membrane and flushing them away.
Ultraviolet (UV) Purification is a disinfection process. It uses a special light to inactivate microorganisms, scrambling their DNA so they can't make you sick.
UF also pulls out physical gunk like silt, making the water clearer. UV, on the other hand, only zaps germs and needs other filters to handle anything else.
This is a huge question right now. A standard UF membrane by itself is not effective against PFAS. These "forever chemicals" are dissolved in water and the molecules are just too small to get caught in the UF membrane's pores.
However, top-tier ultra filtration systems solve this by adding other filtration stages.
Bottom line: If a water test shows you have PFAS, make sure the system you choose specifically includes one of these technologies. The UF membrane alone won't get the job done.
Choosing the right water filtration system is a significant step toward a healthier home. At Water Filter Advisor, we are committed to providing the clear, research-driven guidance you need to make the best choice for your family.
Explore our in-depth guides and expert reviews at Water Filter Advisor
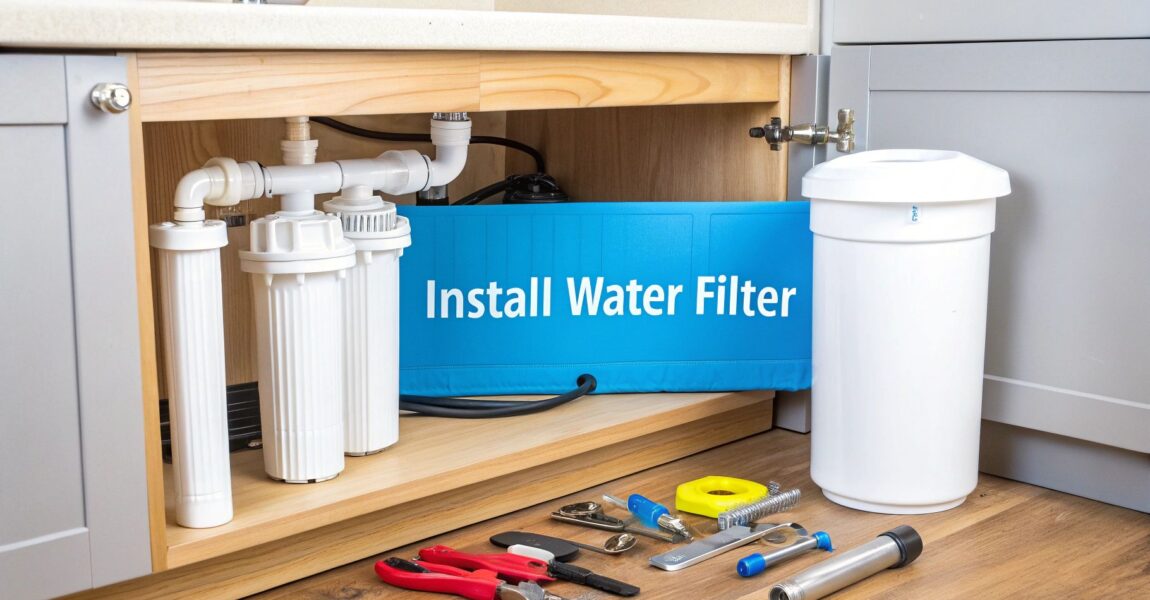
So, you're ready to learn how to install a water filter? Let's start with a splash of reality: not every filter is a perfect match for every home or DIY skill level. What's a dream for a renter in a tiny apartment is a plumbing nightmare for a homeowner battling cloudy well water.
The secret isn't just about plumbing; it's about matching the filter's complexity to your own comfort zone. Let's turn that tap water into liquid gold, one step at a time.
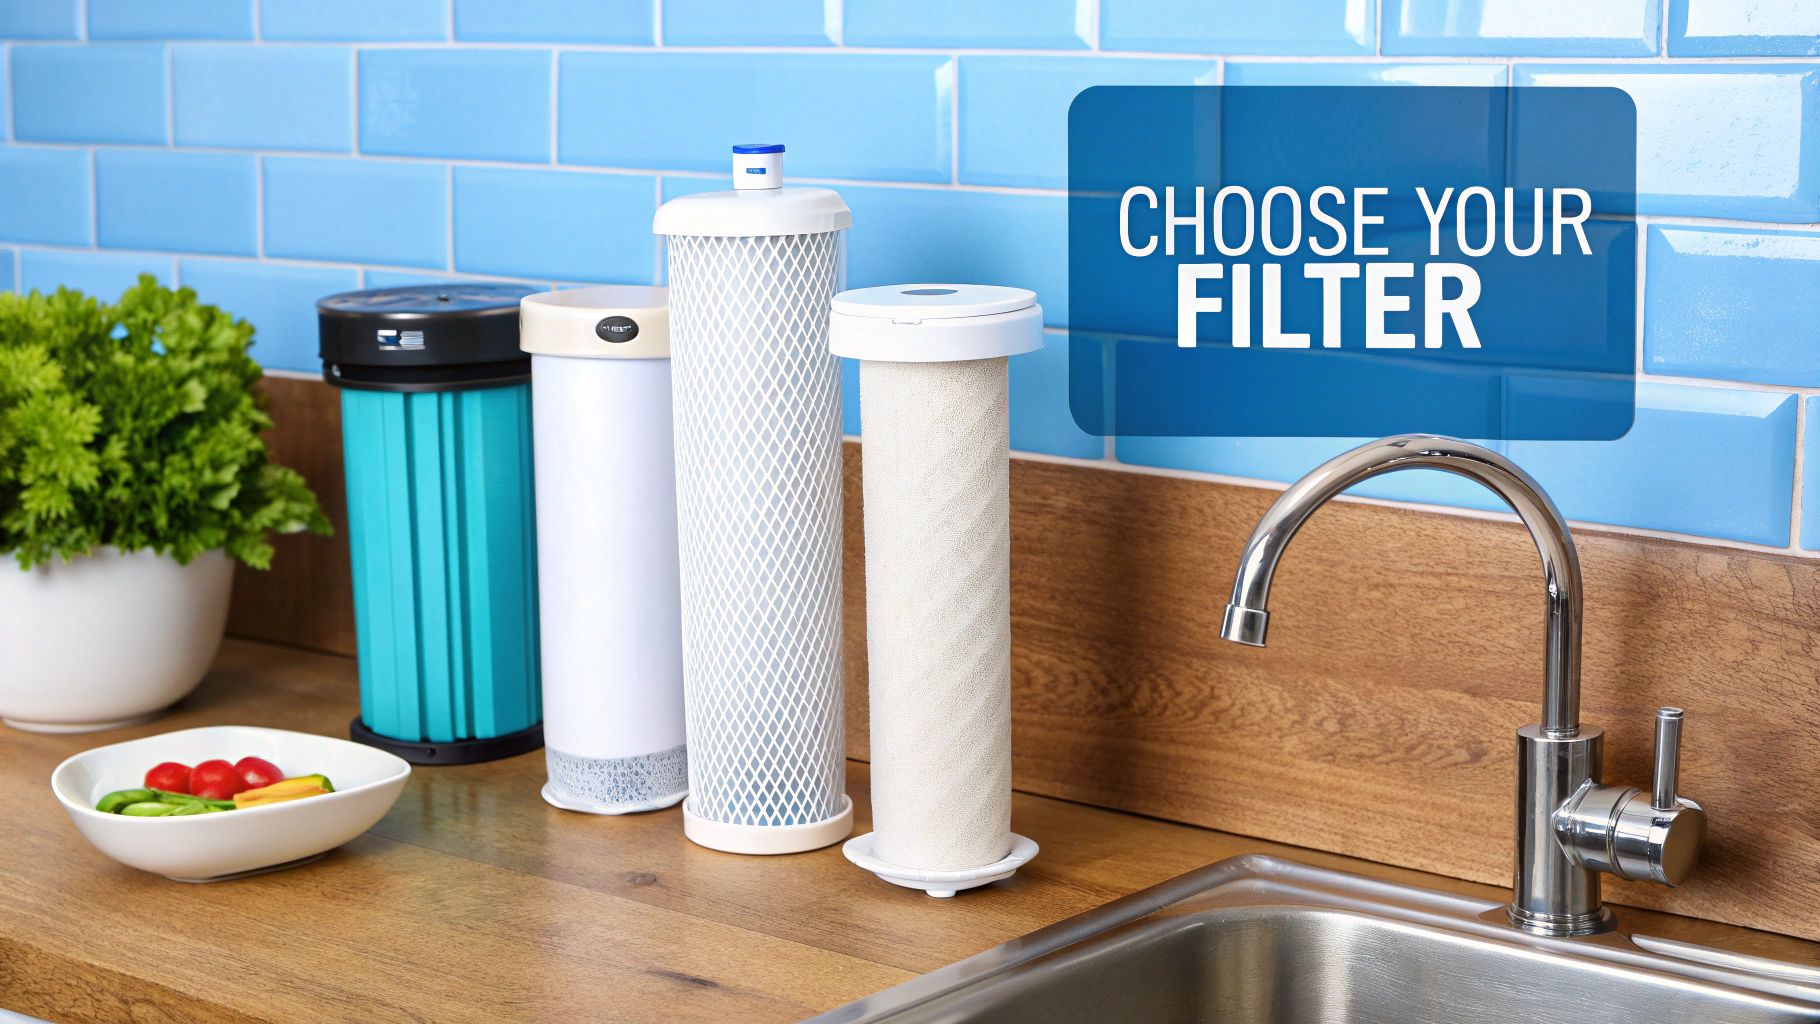
Before you even think about grabbing a wrench, you need to pick your battle. Installing a water filter isn’t a one-size-fits-all mission. The right choice boils down to your living situation, what you’re trying to filter out, and—let's be honest—your willingness to get up close and personal with the pipes under your sink.
It's no secret that the thirst for clean water is real. The global water filter market is projected to swell to an incredible $84.2 billion by 2032, a huge jump from $48.2 billion in 2025. This wave is powered by a growing focus on health and water purity. While this means you have more options than ever, it can also make choosing one feel like navigating a maze.
Let's dive into a couple of common home scenarios.
If you're renting an apartment, making permanent changes to the plumbing is a one-way ticket to losing your security deposit. Your best friends here are a simple faucet-mounted filter or a countertop dispenser. These heroes usually require zero tools and can be set up in minutes, giving you an instant upgrade in taste and odor without any landlord drama.
On the flip side, if you own your home and want to declare war on specific contaminants like lead or chlorine, an under-sink system is your long-term champion. This is a more hands-on adventure. You'll need to shut off the water, possibly drill a hole in your countertop for a dedicated faucet, and ensure every connection is as tight as a drum.
Your goal isn't just to install a filter. It's to conquer a project that leaves you feeling accomplished and delivers delicious, clean water—without accidentally creating an indoor swimming pool. Choose a system that aligns with your skills today, not the master plumber you hope to become someday.
To help you out, here’s a quick comparison table that breaks down the most common home water filter types.
| Filter Type | Installation Difficulty | Common Tools Needed | Best For |
|---|---|---|---|
| Pitcher/Dispenser | Very Easy | None | Individuals, renters, basic taste/odor removal |
| Faucet-Mounted | Easy | None, maybe pliers | Renters, small kitchens, improving tap water taste |
| Under-Sink | Moderate | Wrench, drill, bucket | Homeowners, targeted contaminant removal |
| Whole-House | Difficult | Pipe cutter, wrenches, plumbing tape | Homeowners, treating all water in the house |
This table should give you a clear starting point. A pitcher is a grab-and-go solution, while a whole-house system is a serious commitment—a true weekend warrior project.
To zero in on your perfect match, keep these three key factors in mind:
And remember, if you're eyeing a complex whole-house installation or the thought of touching your main water lines gives you the shivers, there's zero shame in calling in the cavalry. It's always a smart move to consult professional plumbing services when in doubt. Starting with the right filter for your home is the first and most important step to a successful installation.
I’ve seen it a thousand times: a flawless, leak-free water filter installation has less to do with being a plumbing wizard and more to do with what happens before you ever touch a pipe. A little preparation is what separates a smooth DIY victory from a frantic, wallet-draining call to a plumber. It all comes down to having the right gear and a clean battlefield.
Diving in without the proper tools is like trying to bake a cake without an oven—it’s just not going to end well. Ever try to tighten a fitting under the sink with just one wrench? The whole thing just spins around mockingly. That’s why having two adjustable wrenches is my golden rule; one to hold the fort (the fitting), the other to do the tightening.
Beyond the wrenches, a few other items will become your new best friends. You’ll absolutely need a roll of Teflon tape (aka plumber's tape) to create those beautiful, watertight seals on threaded connections. And please, do not underestimate the sheer genius of a good headlamp. It’s a dark, mysterious world under that sink, and a headlamp frees up both your hands for the important work, instead of one holding a flashlight.
Make sure you also have:
This nifty infographic breaks down the whole pre-installation game plan into three simple stages.
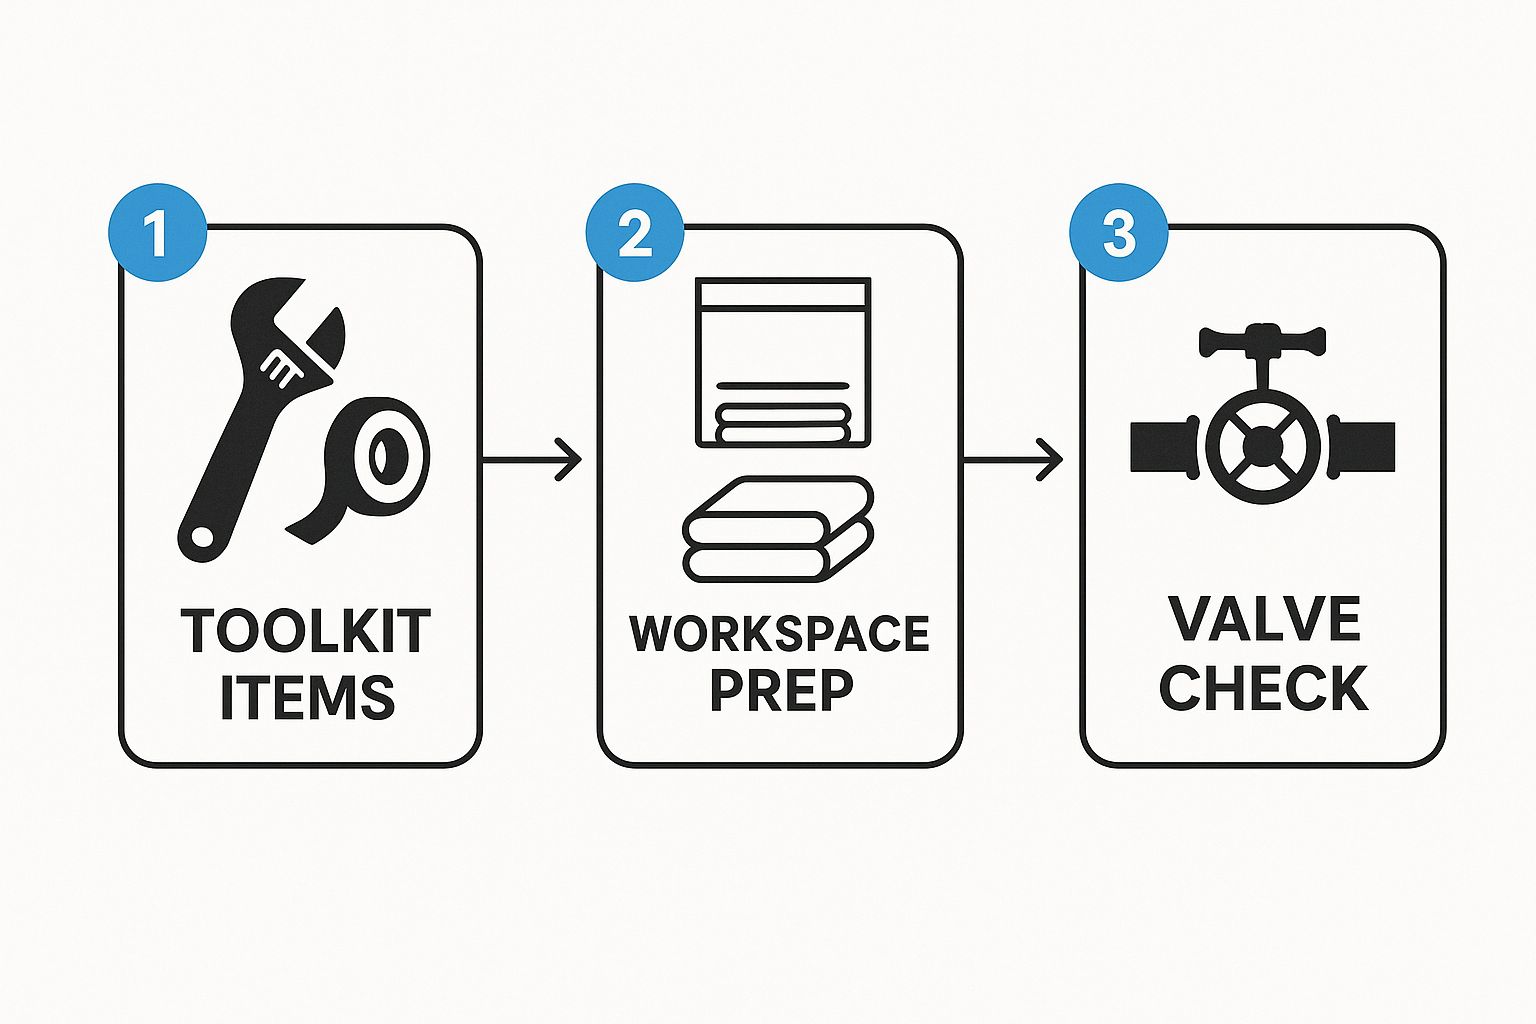
As you can see, a successful job starts with your toolkit, moves to prepping the space, and hinges on one critical action: shutting off the water.
The space you're working in deserves just as much attention as your tools. First things first: completely empty that cabinet under your sink. You need room to maneuver and a clear line of sight to the plumbing. This isn’t just for comfort; it’s to save your cleaning supplies from an unexpected shower.
Here's the most critical tip I can give you: before you disconnect a single thing, find and test the water shut-off valves for your sink. Don't just assume they work. Old valves can seize up like they're frozen in time. Give each handle a gentle turn to make sure it moves freely and actually stops the water flow.
Once the cabinet is clear, lay down your old towels to cover the bottom. This small step is a game-changer, containing any stray water and making cleanup a breeze. With your tools at the ready and your space prepped, you’re officially ready to get started without any nasty surprises.
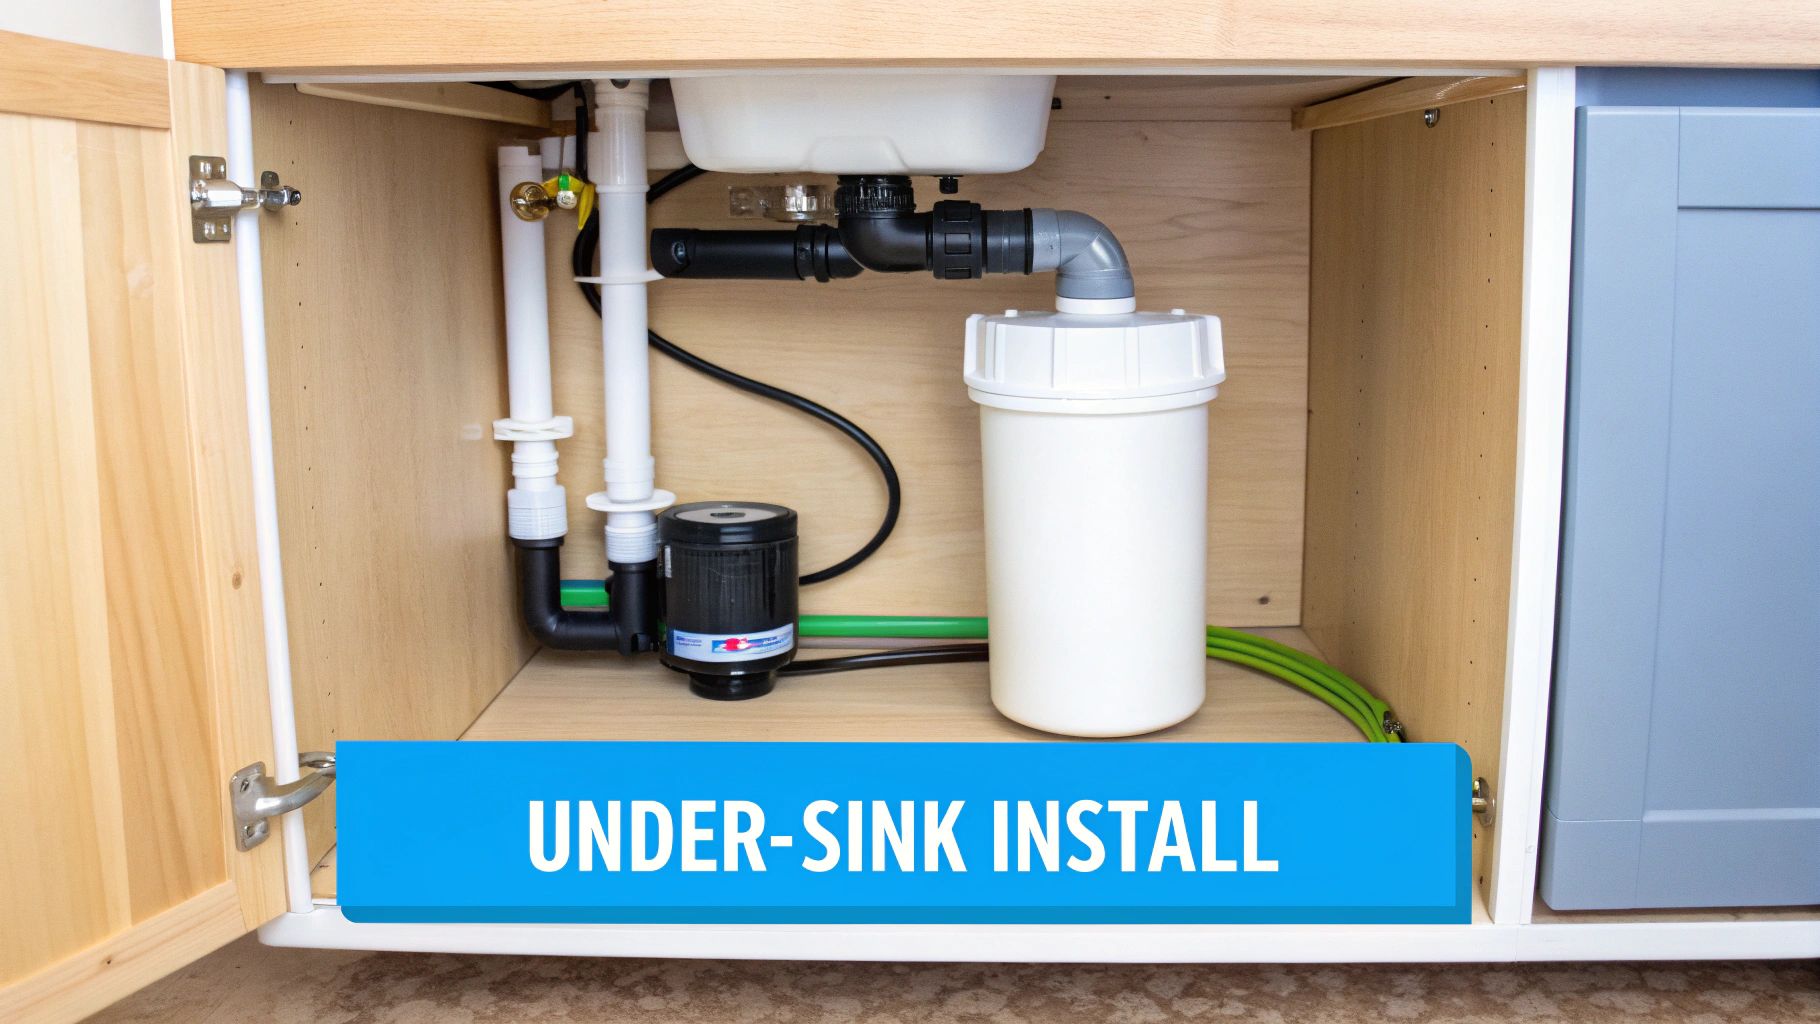
Alright, this is where the magic happens. Installing an under-sink water filter is hands-down one of the most popular and satisfying DIY projects for your home. It feels like a massive kitchen upgrade, but trust me, it’s completely manageable with a little patience. My goal here is to be your guide, walking you through it step-by-step so you end up with a professional, leak-free setup you can brag about.
First, and I cannot shout this from the rooftops enough: shut off the water. Find the cold water shut-off valve under your sink—it's that small, usually oval-shaped handle. Turn it clockwise until it stops. Next, open your kitchen faucet to let the line drain completely. This gets the leftover water out and, more importantly, relieves the pressure so you don’t get a surprise geyser to the face when you disconnect the supply line.
That small T-fitting, sometimes called an adapter valve, is where most people get a little nervous. Don't be. This little piece is the heart of your new system. It brilliantly splits the cold water, sending some to your new filter and the rest along to your main faucet. With the water off, use an adjustable wrench to disconnect the flexible cold water line from the shut-off valve.
Now, screw the T-fitting directly onto the valve. Pro tip: wrap the male threads on the valve with a few layers of Teflon tape to guarantee a watertight seal. Once it's on, reconnect the original faucet supply line to the top of the T-fitting. And just like that, you’ve created a dedicated path for your filter.
A Word of Caution: When tightening the compression fittings on that T-adapter, you're aiming for "snug," not "crushed." If you unleash your inner Hulk and crank down too hard, you can damage the delicate plastic or rubber seals inside. That’s the number one cause of those slow, maddening drips that haunt you later.
With the plumbing rerouted, it’s time to find a forever home for the filter unit. Pick a spot on the cabinet wall where you can easily reach it for future filter changes. Don't banish it to the dark back corner where it can't be seen or reached! Mark your screw locations with a pencil, drill some small pilot holes, and then screw the mounting bracket securely to the cabinet wall.
Next up is the sleek new filter faucet that came with your kit.
This part requires a steady hand, but taking it slow is the secret to avoiding a countertop catastrophe.
The final piece of this puzzle is all about precision. Your kit came with a roll of plastic tubing. You'll use this to connect the T-fitting to the filter's inlet, and then the filter's outlet to the new faucet. The secret to a leak-proof connection here is a perfectly square cut. If the end of the tube is jagged or angled, it won't create a proper seal inside the push-to-connect fittings.
I recommend using a sharp utility knife or, even better, a dedicated tube cutter for a clean, professional edge. Once cut, push the tube firmly into the fitting until you feel a distinct click or feel it bottom out. Give it a gentle tug to make sure it's locked in place. Repeat for all your connections, and you're golden.
This project is a fantastic way to upgrade your home’s water quality on your own terms. Of course, if this installation is part of a larger renovation or you'd just prefer a professional touch, you might want to look into professional kitchen remodeling services to get a seamless integration. But with these tips, you are well on your way to enjoying fresh, filtered water right from your own tap.
While an under-sink filter is a fantastic weekend project, it only purifies the water at one specific tap. If you're looking to go bigger—or even smaller and simpler—you'll encounter two other common players in the home filtration game: the mighty whole-house system and the humble refrigerator filter.
These two could not be more different in difficulty, but understanding them gives you the complete picture of your home water filtration options.
A whole-house filter is the undisputed heavyweight champion of water treatment. It cleans every single drop of water entering your home, meaning better water for your showers, your laundry, and every faucet in between.
But let's be crystal clear: this is a major league step up from an under-sink job. For most homeowners, this is a project best left to a professional plumber.
The process involves locating your main water line, usually hiding in a basement or utility closet, right after the water meter. You have to shut off the water to the entire house, drain all the pipes, and then physically cut into your main copper or PEX supply line. This is the point of no return where most DIYers understandably start to sweat. A mistake here isn't just a small leak under the sink; it's a potential indoor water park.
After the pipe is cut, the filter unit is installed using specialized fittings. These units are heavy, especially when full of water, so they also need to be securely anchored to a wall.
Even if you hire this job out, it pays to understand what's involved. You'll be able to ask your plumber intelligent questions, make sense of their quote, and know exactly what a safe, professional installation should look like.
On the complete opposite end of the spectrum, you have the refrigerator filter. This is likely the simplest filter change you will ever perform in your home.
Most modern fridges with water and ice dispensers have a small, built-in filter that needs to be replaced every six months. If you forget, you'll eventually notice the water flow slowing to a trickle and your ice starting to taste a bit…off.
The manufacturers design this to be a ridiculously easy process:
Modern filtration technology, from complex membranes in reverse osmosis systems to the simple activated carbon in your fridge filter, has given homeowners incredible power over their water quality. As you'd expect, different technologies often need specific installation know-how to function correctly. You can dig deeper into how these advancements are changing the market by checking out recent industry research.
Whether you're tackling a major plumbing overhaul or just a five-minute filter swap, doing it right is the key to getting the clean, great-tasting water you deserve.
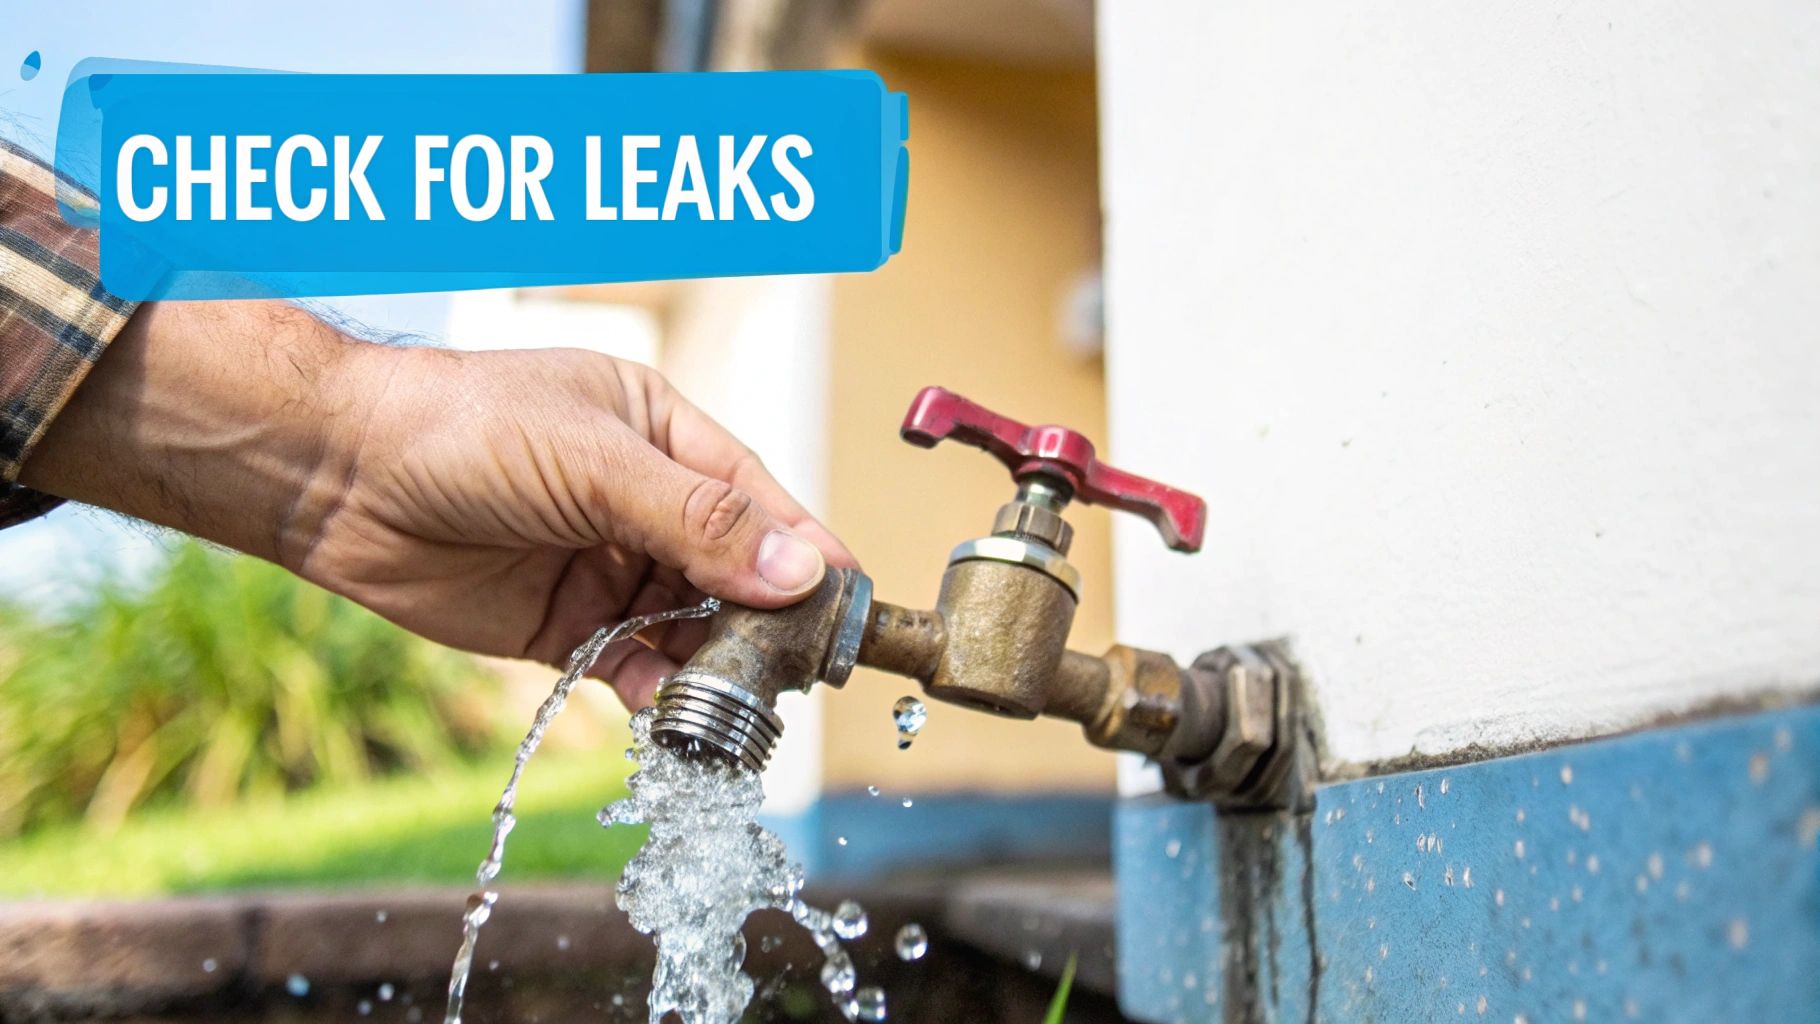
You’ve tightened the last fitting, the filter is mounted, and you're feeling victorious. It feels like you're done, right? Not so fast. These next few minutes are the most critical part of the entire installation. This is where we hunt down and eliminate the tiny drips that grow into big, ugly problems.
The trick is to reintroduce the water slowly. Don’t just crank the shut-off valve open. Crack it just a quarter turn to let the system fill up gently. You’ll hear the filter housing gurgle and sigh as it fills with water.
Now, pause. Just stop and listen for a moment. A hiss or a spray is an immediate red flag. If you hear anything like that, shut the water off instantly and revisit that connection. If all is quiet, you can proceed to the inspection.
This is an old plumber’s trick, and it's absolutely foolproof. Take a completely dry paper towel and wipe down every single connection you touched—the T-fitting, the lines going in and out of the filter, and the base of the new faucet.
Even the sneakiest, slowest seep will show up instantly on that dry paper towel. It’s a dead giveaway for a leak your eyes might have missed. A single drop every few minutes might seem harmless, but over time it’s more than enough to warp and rot the bottom of your cabinet.
A successful DIY job isn't about finishing fast. It's about not having to call a plumber a week later. Taking a few extra minutes for these final checks is your insurance policy against water damage and a world of frustration.
If everything stays bone-dry for a few minutes, you’re in the clear. Go ahead and open the shut-off valve the rest of the way. Now, run your new filter faucet for a while to flush the system out, just like the manufacturer's instructions recommend.
Even when you're careful, a couple of small issues can pop up. Don’t panic; the fixes are almost always surprisingly simple.
By taking the time to perform these final checks, you can pack up your tools with the cool confidence of a pro. This careful finish ensures your hard work pays off with delicious, clean water and a leak-free setup you can count on.
Got your filter installed? Fantastic. But if you’re like most people, a few questions are probably bubbling up right about now. It's totally normal to wonder about maintenance, how long the filter really lasts, and if you’ve set everything up for the best possible results.
Let's dive into some of the most common questions we hear in the world of home water filtration. Think of this as your final check-in to make sure you're ready to enjoy that pristine water with total peace of mind.
This is the number one question, and the honest answer is: it depends. The manufacturer’s guideline—usually every six months—is a solid starting point. They base that on an "average" home with "typical" water.
But your home isn't average; it's yours. Your schedule might need to be different.
Yes, and please don't skip this crucial step! It’s super simple. Over time, the inside of the filter housing can develop a thin, slimy biofilm made of harmless bacteria. When you remove the old cartridge, you have the perfect opportunity to give the housing a quick clean.
All it takes is a little unscented bleach or a dedicated sanitizer solution followed by a thorough rinse. This simple habit ensures that the pure water coming through your brand-new filter actually stays that way.
Taking a moment to sanitize the filter housing is a small investment in maintaining the highest water quality. It prevents the system itself from becoming a source of contamination, ensuring every glass is as pure as the first.
It's no surprise that more and more people are focused on this. The global water purifier market was valued at around $35.25 billion in 2024 and is expected to more than double by 2034. That incredible growth shows just how much people around the world care about water safety at home. You can dig into the numbers and trends by checking out the latest market research on water purifiers.
Absolutely! This is one of our favorite DIY home filtration upgrades. You get pristine, filtered water and ice right from your fridge dispenser without having to buy those pricey, brand-specific refrigerator filters.
You'll just need a T-fitting and some extra quarter-inch tubing. This lets you "split" the filtered water line, sending it to both your new faucet and your fridge's icemaker line. Just double-check that your under-sink system has enough water pressure to run the icemaker properly. Most modern systems can handle it just fine.
At Water Filter Advisor, our goal is to empower you with the knowledge to achieve safer, better-tasting water at home. From choosing the right system to a successful installation, we're here to help every step of the way. Explore our in-depth guides and reviews at https://www.waterfilteradvisor.com.
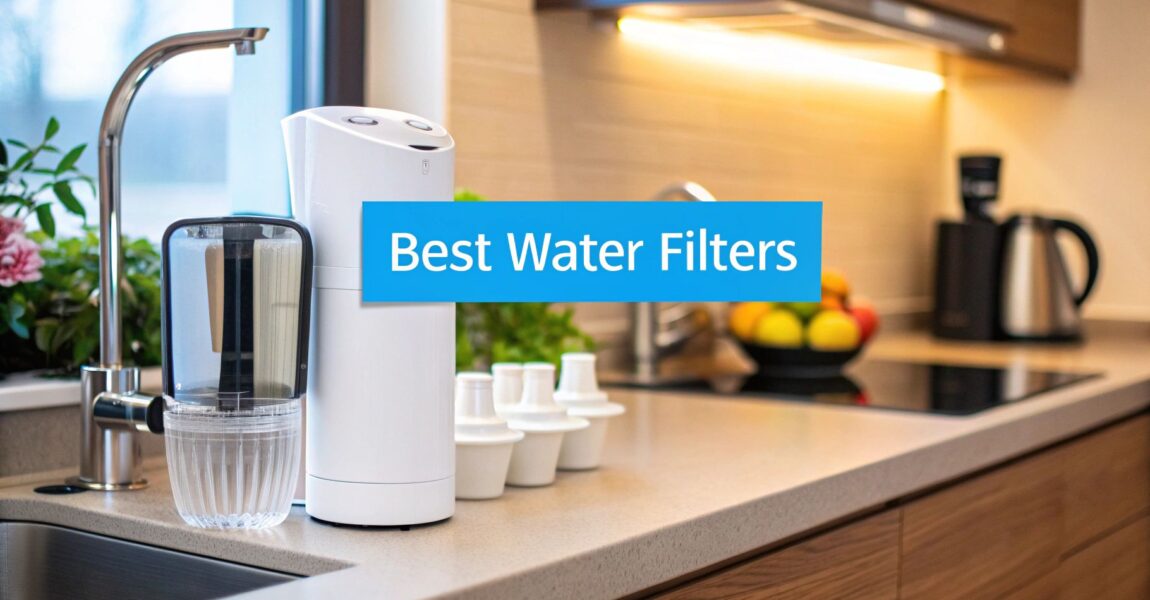
Renting an apartment often means inheriting some questionable tap water. But don't worry, you're not stuck with it. The best water filters for apartments are your secret weapon, and they come in three main flavors: the ultra-simple water pitcher, the convenient faucet-mounted filter, and the powerhouse no-drill under-sink system. Finding your perfect match is about balancing easy, landlord-approved installation with the power to obliterate the specific gunk in your water, giving you crisp, clean hydration without risking your security deposit.
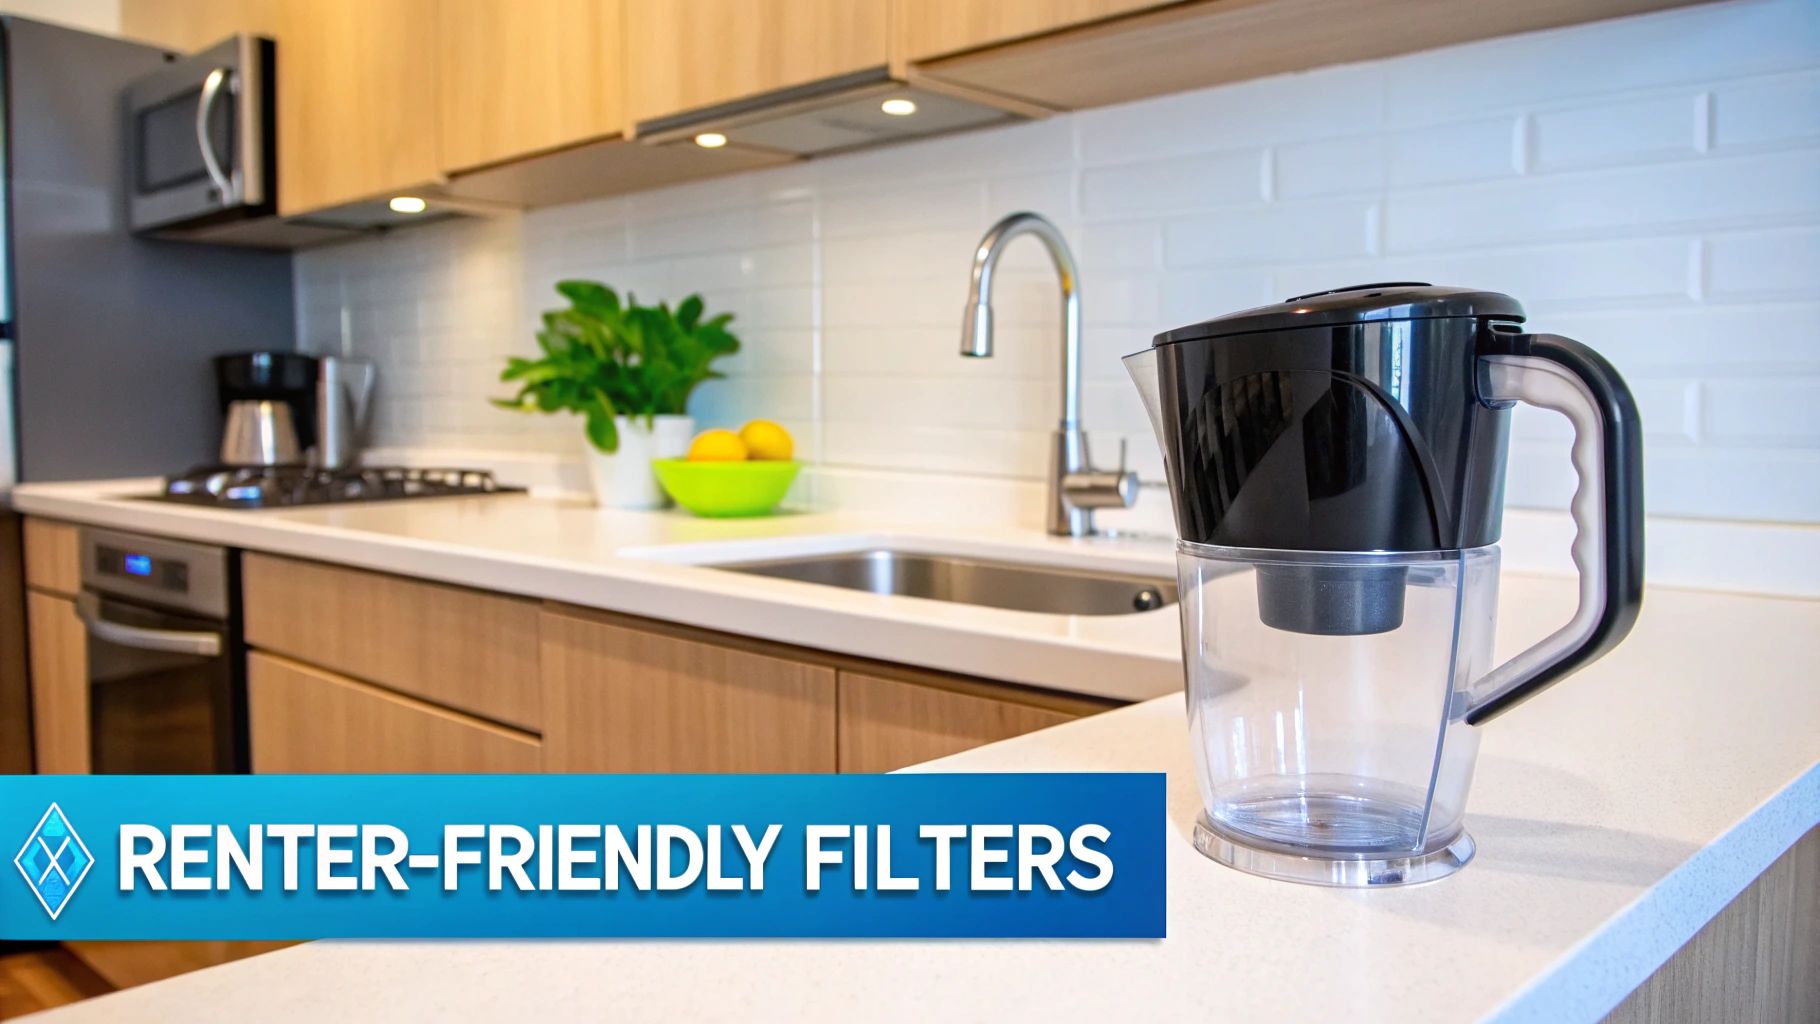
Just because you're renting doesn't mean you have to settle for water that tastes like a swimming pool. I get it, though—the thought of a complicated installation is a total non-starter, especially when your lease has more rules than a board game. Thankfully, the market is overflowing with fantastic, renter-friendly solutions designed for exactly this situation.
These systems deliver the glorious benefits of advanced filtration without needing a plumber or drilling a single hole. As you map out your first apartment essentials checklist, a quality water filter should be right at the top. It’s one of the fastest ways to upgrade your new space and make it feel healthier and more like home.
The secret is finding a filter that matches not only your water's unique "flavor profile" but also the realities of rental life—portability, dead-simple installation, and zero permanent alterations.
Choosing the right filter means you can finally enjoy incredible-tasting water for everything from a simple glass to brewing that perfect, non-chlorinated cup of coffee. If you want to nerd out on the different technologies, you can explore expert advice on water filters to get all the nitty-gritty details.
To cut through the noise, here's a rapid-fire look at the most popular and effective filter types for apartment dwellers. Each is built for a different priority, whether you're focused on a tight budget, saving precious counter space, or unleashing maximum filtration power on your tap water.
This table breaks down which system makes the most sense for your apartment life.
| Best For | Recommended Filter Type | Key Benefit |
|---|---|---|
| Maximum Simplicity & Portability | Water Pitcher Filter | No installation required and ridiculously affordable. |
| On-Demand Filtered Water | Faucet-Mounted Filter | Clicks onto your tap in minutes for instant filtered water. |
| High-Volume Filtration Power | Countertop Filter | Wipes out a wider range of contaminants without plumbing changes. |
| Hidden & Powerful Filtration | Renter-Friendly Under-Sink Filter | Delivers advanced filtration while saving your counter space. |
Think of this as your starting point for deciding what works best for your kitchen, your habits, and your taste buds.
Ever stop and really think about what's jetting out of your apartment faucet?
Sure, the city treatment plant does the heavy lifting to meet federal safety standards. But from that plant to your glass is a long, winding journey, and your water can pick up some unwanted hitchhikers along the way.
This isn't meant to scare you—it's meant to arm you with knowledge. Understanding what you're up against is the first step in picking a water filter that actually solves your specific problem. The mission is simple: water that tastes amazing and gives you total peace of mind.
Many apartment buildings, especially in older cities, are connected to some seriously ancient infrastructure. We're talking miles of pipes, some of which have been underground since your grandparents were kids. They can add things to your water that weren't there when it left the plant. Think of it like a pristine package getting a little roughed up during a very, very long delivery.
That’s precisely why your apartment’s water can taste completely different from your friend’s place just across town. Your building's plumbing, combined with the specific city pipes feeding your street, creates a unique water cocktail.
This infographic gives you a quick glimpse at what most renters are dealing with.
As you can see, chlorine is pretty much a given. And sediment from old pipes? It's a common party crasher for a lot of us.
So, what are these uninvited guests, really? They typically fall into a few main categories, and each one messes with your water in a different way.
The reality is that even treated tap water isn't just pure H₂O. It’s a complex liquid diary of its journey through both natural and man-made environments.
This is a huge reason why the demand for good water filters is exploding. The market is projected to grow like crazy through 2032, largely because people are worried about contaminants like heavy metals and microplastics showing up in city water. With over two billion people still lacking safely managed drinking water, a simple filter you can install yourself is a game-changer for renters who can’t touch their building’s plumbing. You can dig deeper and read the full research on the water filter market.
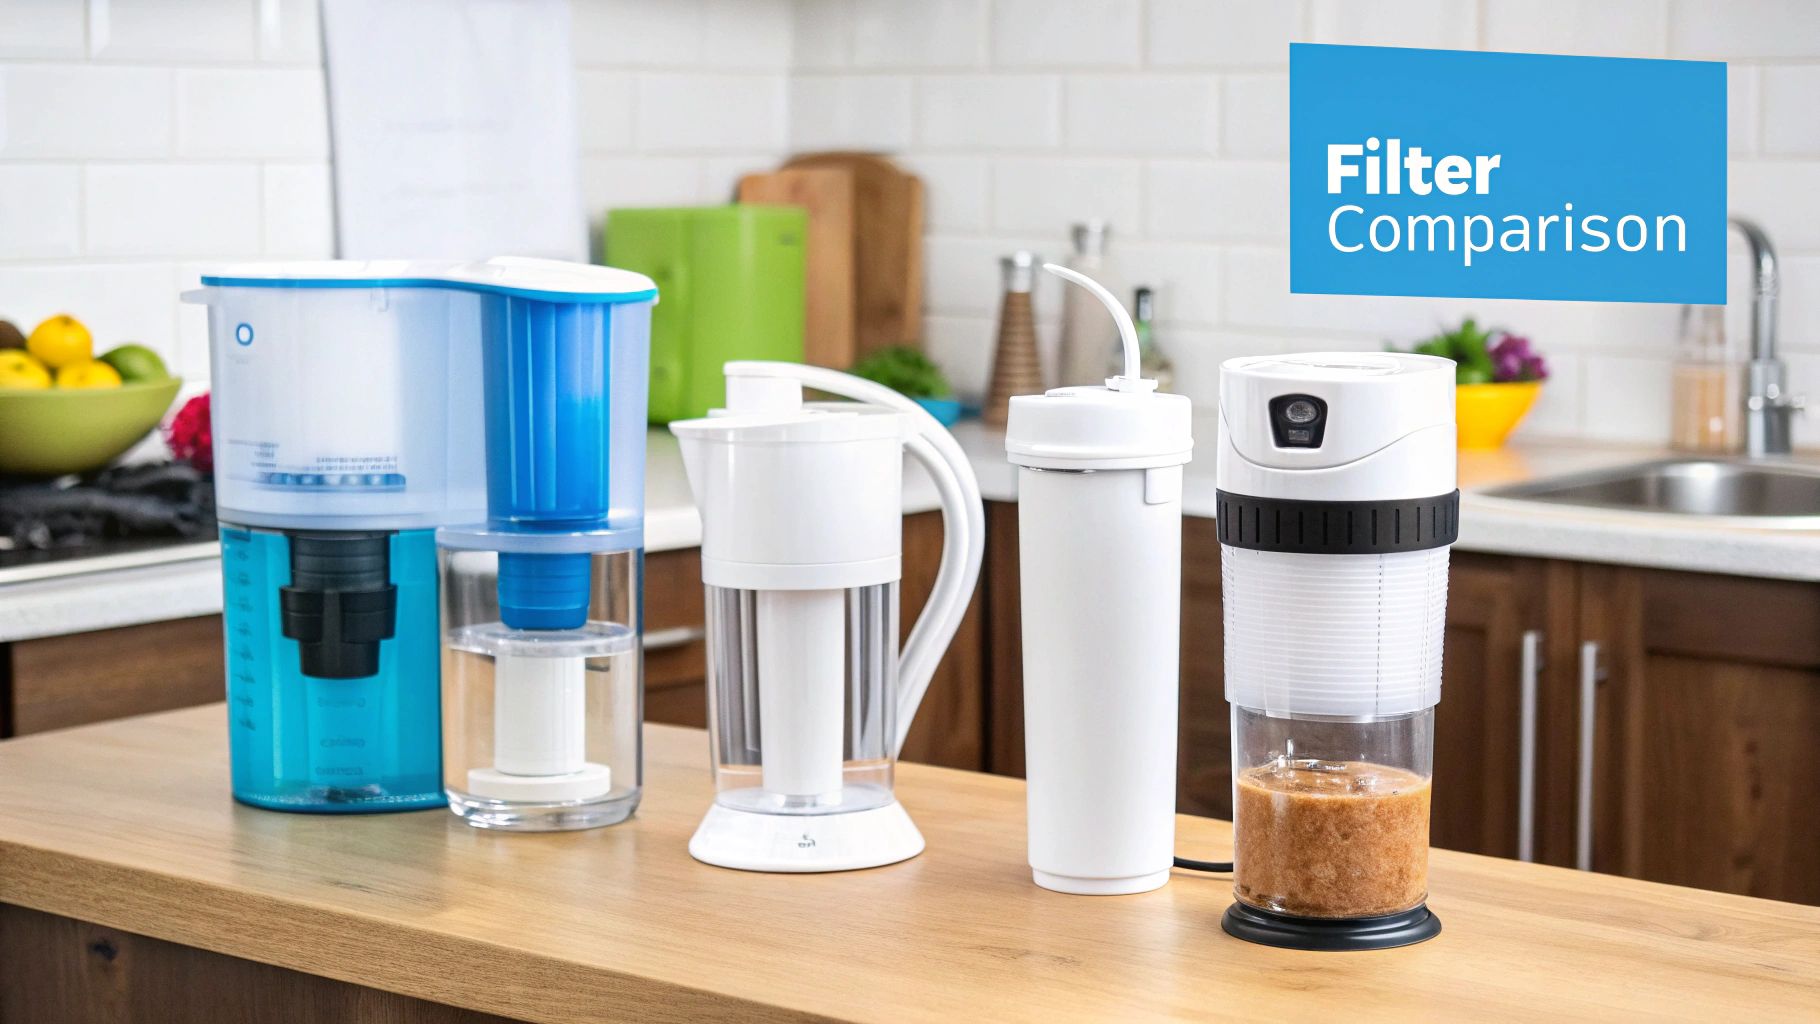
Finding the right filter for your apartment isn't just about raw filtering power. It’s about striking the perfect balance—you need something that cleans your water effectively but also respects your lease, budget, and limited space. The best water filters for apartments are the ones that absolutely nail this compromise.
Let's break down the four most popular options for renters. We'll skip the boring pros and cons and look at how each one actually performs in a real apartment, focusing on what truly matters when you can't make permanent changes.
Water pitchers are the definition of "plug-and-play," if you can even call it that. You fill it, stick it in the fridge, and you're done. No tools, no hookups, no awkward conversations with the landlord. It's the ultimate grab-and-go solution for better-tasting water.
Most pitchers are designed to improve taste and smell by tackling chlorine. Some more advanced (and pricier) models are certified for things like lead, but generally, their filtration power is the most basic you'll find.
For a single person in a studio who just wants to banish that tap water aftertaste, a pitcher is a no-brainer. It costs next to nothing, requires zero setup, and you can toss it in a box when you move.
The main drawback is their tiny capacity. Most hold around 8-12 cups, which sounds fine until you're trying to fill a pot for pasta or your roommate also wants a glass. You'll find yourself standing at the sink refilling it constantly, which gets old fast.
A major step up in convenience, faucet-mounted filters attach directly to the end of your kitchen tap. Installation usually takes minutes, and a simple switch lets you toggle between filtered and unfiltered water on the fly—perfect for saving the filter for drinking and using regular tap for washing dishes.
These units use activated carbon to handle common villains like chlorine, sediment, and often lead. The biggest win here is the continuous flow of clean water—a massive upgrade from the fill-and-wait purgatory of a pitcher.
But there’s a catch: compatibility. Not all kitchen faucets can support a mount, especially fancy pull-down sprayers. They also add some visible bulk to your sink and can slow down the water flow a bit.
If you're serious about filtration but can't touch the plumbing, a countertop system is your champion. These units sit beside your sink and connect to the faucet with a small hose, offering multi-stage filtration that can rival some under-sink models.
Thanks to their larger size, countertop systems can pack in more powerful and diverse filter media. This means they can remove a much wider range of contaminants, including VOCs, heavy metals, and in some cases, even fluoride. They're perfect for renters with specific water quality worries or who need a high volume of pure water for cooking and drinking.
The obvious trade-off is right there in the name: counter space. In a tight galley kitchen, sacrificing that precious real estate can be a deal-breaker. They also have a higher upfront cost than pitchers or faucet filters.
For those who want maximum filtration power without a cluttered kitchen, renter-friendly under-sink filters are the undisputed champs. These systems are specifically designed with simple, no-drill adapters that connect directly to your cold water line, making them completely reversible when you move out.
This is where you'll find some of the most comprehensive filtration available. Multi-stage cartridges can remove everything from chlorine and lead to cysts and pharmaceuticals. And since it's all tucked away in the cabinet, your sink area stays clean and minimalist.
While the installation is designed for renters, it's still the most hands-on of the bunch. You'll need to be comfortable working in that cramped space under the sink for about 30 minutes. The initial investment is also the highest, but because the filters last so long, the cost-per-gallon is often the lowest over time.
To make sense of these trade-offs, it helps to see how the different systems stack up side-by-side. Here’s a breakdown based on the factors that matter most in apartment living.
| Filter Type | Installation Ease | Filtration Power | Cost of Ownership | Best For |
|---|---|---|---|---|
| Water Pitcher | None | Basic (Chlorine, Taste) | Low | Single individuals or couples wanting simple taste improvement. |
| Faucet Mount | Very Easy | Good (Chlorine, Lead) | Low | Renters who need convenient, on-demand filtered water for drinking and cooking. |
| Countertop | Easy | Excellent (Wide Range) | Medium | Anyone with specific contaminant concerns who can spare the counter space. |
| Under-Sink | Moderate | Superior (Comprehensive) | Medium to High | Renters who want the best filtration possible without cluttering their kitchen. |
Ultimately, there's no single "best" filter—it all comes down to your priorities. A faucet mount could be the perfect fit for a couple wanting convenience, while a family concerned about lead might see an under-sink system as a worthwhile investment for their peace of mind.
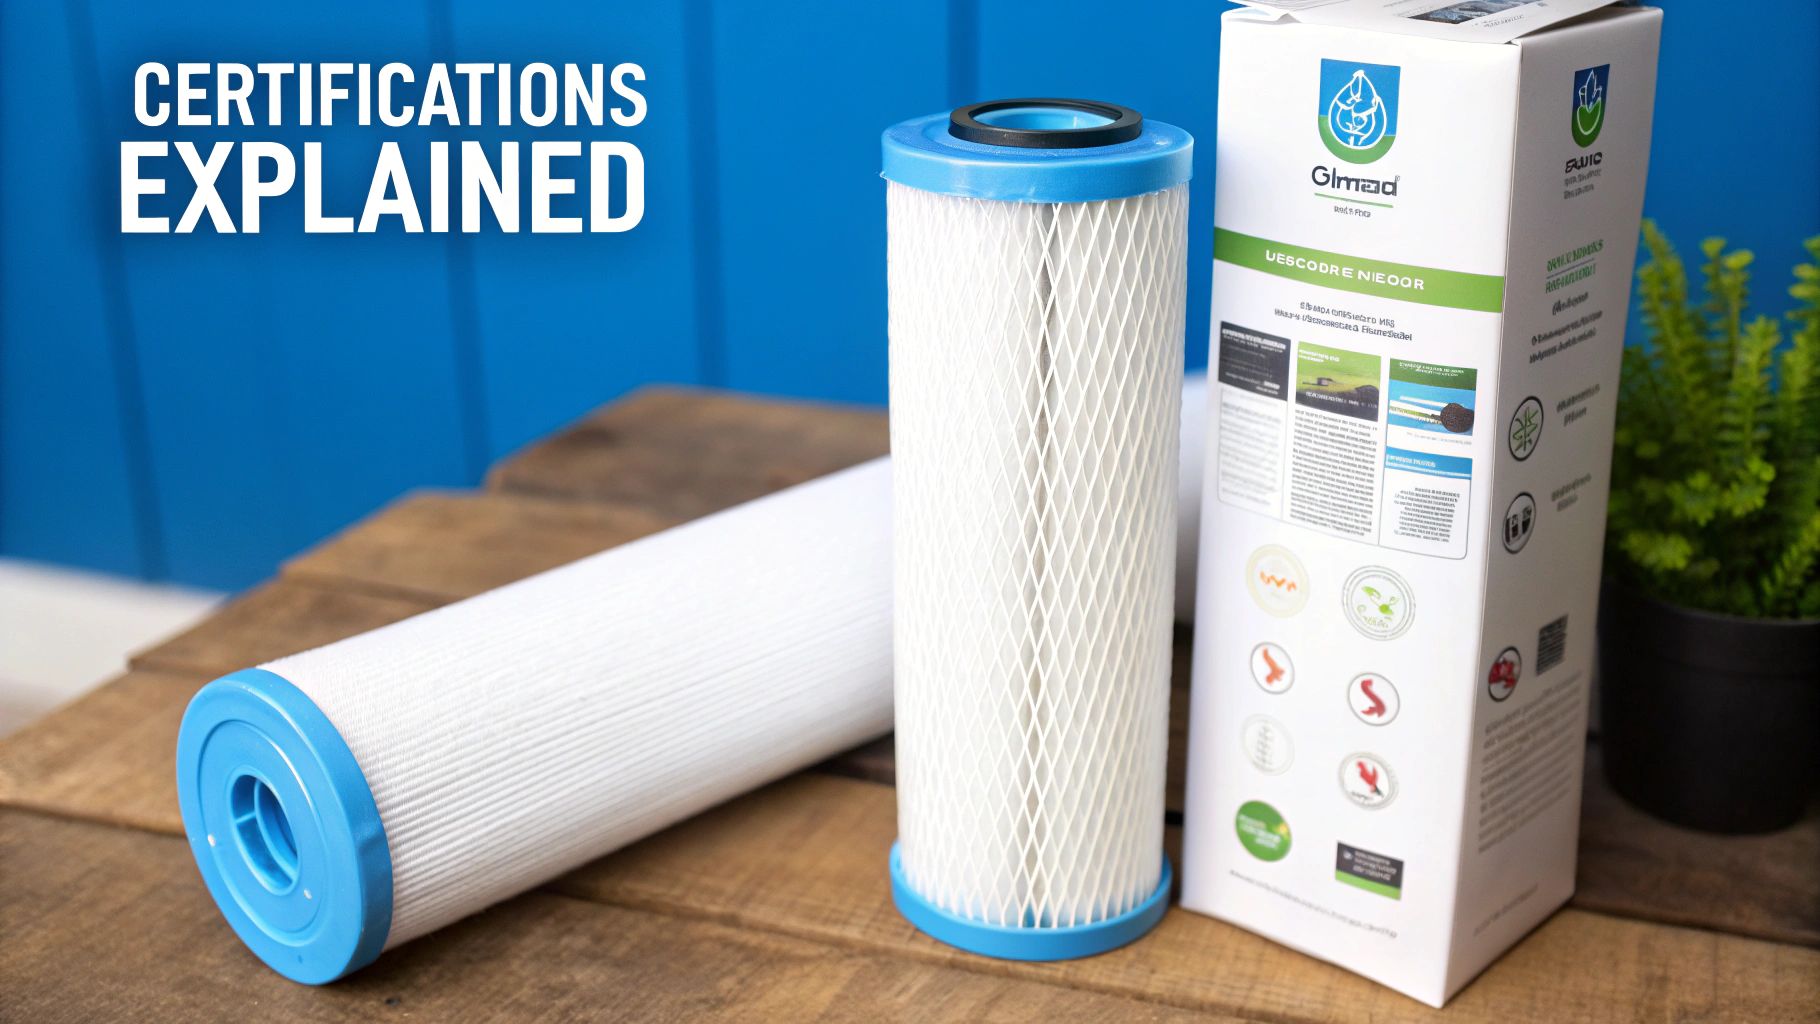
Trying to choose a water filter can feel like deciphering a secret code. You're staring at a wall of boxes plastered with acronyms and bold promises, but what does it all really mean? If you can learn to read these labels, you can pick a filter that actually protects you, not just one with flashy marketing.
The most important things to look for are NSF/ANSI certifications. These are seals of approval from independent, third-party organizations that test and verify a filter actually does what the box says it does. It's basically a performance guarantee.
A filter without a relevant NSF/ANSI certification is just making a promise it hasn't proven. When you're talking about serious contaminants like lead, you want proof, not just a claim on a box.
For most apartment dwellers, two key certifications pop up again and again, and they tackle the most common city water problems.
So, what does this mean for you? If you just want your coffee to taste better, a filter with an NSF 42 certification will do the trick. But if you live in an older building and have legitimate concerns about lead from the pipes, a filter certified to NSF 53 for lead reduction is non-negotiable.
The best filters for apartments today go beyond just certifications. They're being designed with modern life in mind, focusing on sustainability and smart tech that makes things easier. You're seeing incredibly effective technologies like reverse osmosis and activated carbon packed into compact units that actually fit in a small kitchen.
This evolution has brought some practical, user-friendly features that take the guesswork out of maintenance. A simple filter life indicator—usually just a small LED light—is a total game-changer. It ensures you swap out the cartridge right on time, so the filter is always performing at its peak. You should also keep an eye out for sustainable cartridge options that use less plastic or come with recycling programs to cut down on waste.
Some of the newest innovations even include smart monitoring systems that can ping your phone about filter life or changes in water quality. This is a huge benefit in an apartment where you have zero control over the building's plumbing. These little touches provide convenience and, more importantly, confidence in your water quality. You can always discover insights on the global water filtration market to see where the trends are headed. Choosing a filter with these thoughtful features just makes apartment living healthier and a whole lot simpler.
The absolute best water filter isn't the most expensive one or the one with the fanciest tech. It's the one that fits so seamlessly into your life that you forget it’s even there—until you taste that crisp, clean water. The technical specs are important, but how a filter works for you day-to-day is what really matters in an apartment.
Let’s move beyond the charts and see how these filters actually fit into common renter lifestyles. When you can picture how a system will work in your own kitchen, you’re much more likely to pick one you'll love using. This is all about finding the best water filters for apartments based on your daily routine.
If you’re juggling a demanding job and a packed social calendar, convenience is everything. You barely have time to cook, let alone wait around for a filter to do its thing. The last thing you need is another obstacle when you’re just trying to stay hydrated.
Waiting for a pitcher to slowly drip-filter water between Zoom calls just isn't going to cut it.
This lifestyle demands an on-demand solution. A simple faucet-mounted filter is a game-changer here. It clicks onto your faucet in minutes, takes up zero counter space, and delivers filtered water the second you flip a switch. It’s perfect for filling up a water bottle on your way out the door.
Key Takeaway: If your life moves fast, you need instant access to clean water. A faucet filter eliminates the waiting game of pitchers, making it effortless to grab a drink and go.
Is your kitchen the heart of your home? If you’re the type who obsesses over every ingredient, your water shouldn't be an afterthought. You need a high volume of pure water for everything—washing veggies, boiling pasta, brewing coffee, you name it. A small pitcher just can't keep up with your culinary ambitions.
For the serious home cook, a more powerful system is a must.
The initial cost is a bit higher, but for anyone passionate about cooking, the superior performance is well worth it.
When you have a family in an apartment, you're constantly balancing health, your budget, and the precious little space you have. You need a filter that’s strong enough to remove serious contaminants like lead but also won’t take over your already-cramped kitchen.
A renter-friendly under-sink water filter is often the perfect solution.
It stays completely hidden, which frees up valuable counter and fridge real estate—a huge win when you’re dealing with baby bottles and sippy cups. Most importantly, these systems provide some of the best filtration available, giving you peace of mind that your family’s water is truly safe. The setup takes a little more effort upfront, but the long-lasting filters make it a smart, low-maintenance choice for the long haul.
https://www.youtube.com/embed/xTYcPLPvWEE
Even after laying out all the options, a few key questions always seem to pop up. It's totally normal. Let's tackle the most common things renters wonder about so you can feel confident in your final choice.
Yes, you absolutely can. Long gone are the days when under-sink filters meant calling a plumber and making permanent, lease-violating changes to the plumbing.
Many of today's best systems are built specifically for renters. They hook up directly to your existing cold water line using special adapters, so there’s no drilling or damage involved. When it's time to move, you just unhook it and take it with you. For a closer look, this step-by-step guide on how to install a water filter is a fantastic resource.
The biggest misconception is that under-sink filters require a plumber and permanent changes. Renter-friendly models are designed to be a temporary, high-performance upgrade that you can take with you.
This really depends on the type of filter you get and how much water you use. Following the manufacturer’s schedule is crucial—if you don't, you're not getting the protection you paid for.
Here’s a quick rundown of what to expect:
This is a great question, but for the vast majority of apartment-friendly filters, the answer is no.
Your standard pitcher, faucet, and basic under-sink filters rely on activated carbon. This material is a superstar at grabbing contaminants like chlorine, lead, and pesticides, but it leaves beneficial minerals like calcium and magnesium untouched.
Only specialized systems like reverse osmosis (RO) are powerful enough to strip virtually everything—including minerals—from the water. Unless you're specifically buying an RO unit, you can be sure you're keeping all the good stuff in your glass.
At Water Filter Advisor, we provide the expert reviews and straightforward advice you need to find the perfect renter-friendly solution. Explore our in-depth guides at https://www.waterfilteradvisor.com to compare top models and start enjoying better water today.
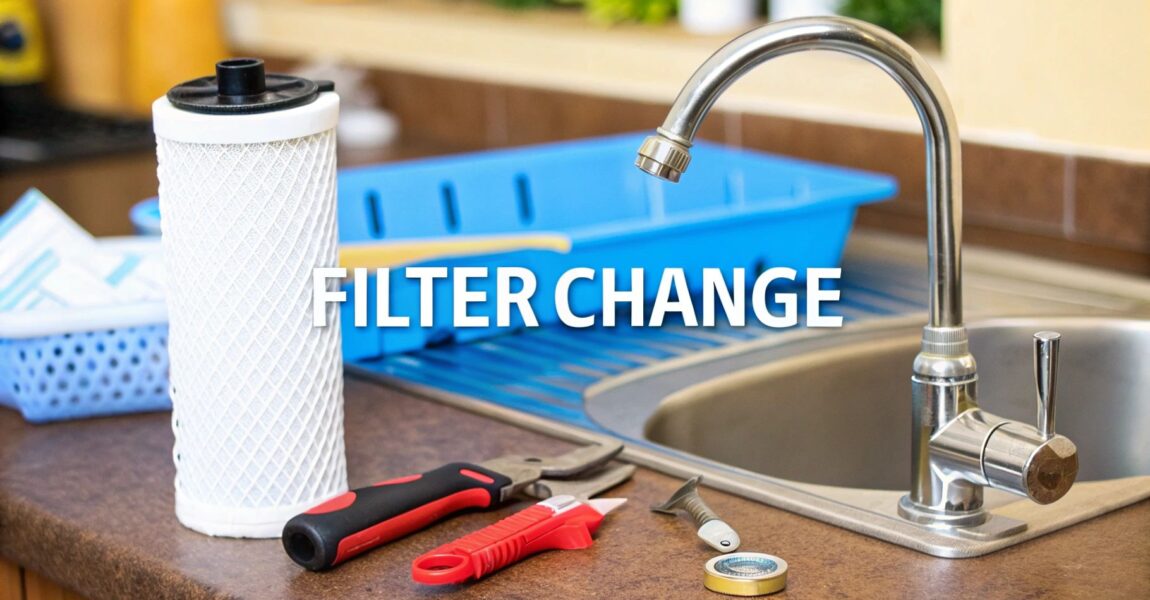
Changing a water filter is one of those home maintenance tasks that feels way more intimidating than it actually is. In most cases, it’s a simple danc ...