Whole House Sediment Filter: Micron Ratings and Replacement

The kitchen tap opens on a Saturday morning and the glass fills cloudy white. Half a minute later the cloudiness drops out from the bottom up, leaving a thin line of grit behind. By midweek you've rinsed sand out of two faucet aerators, and the toilet tank has a pale orange ring that wasn't there last month.

Nobody panics at this stage. The water tastes fine, the coffee tastes fine, and it clears if you let the tap run. But those particles are grinding through valve seats, heater elements, and the inlet screens on your washing machine every time someone calls for hot water.

So the useful question isn't which cartridge to buy. It's where the grit is coming from, how big it is, and which of two very different jobs you need done: protecting the plumbing, or making the water safe to drink. One housing won't do both, and treating them as the same job is where most households waste money.

What a Whole House Sediment Filter Actually Catches

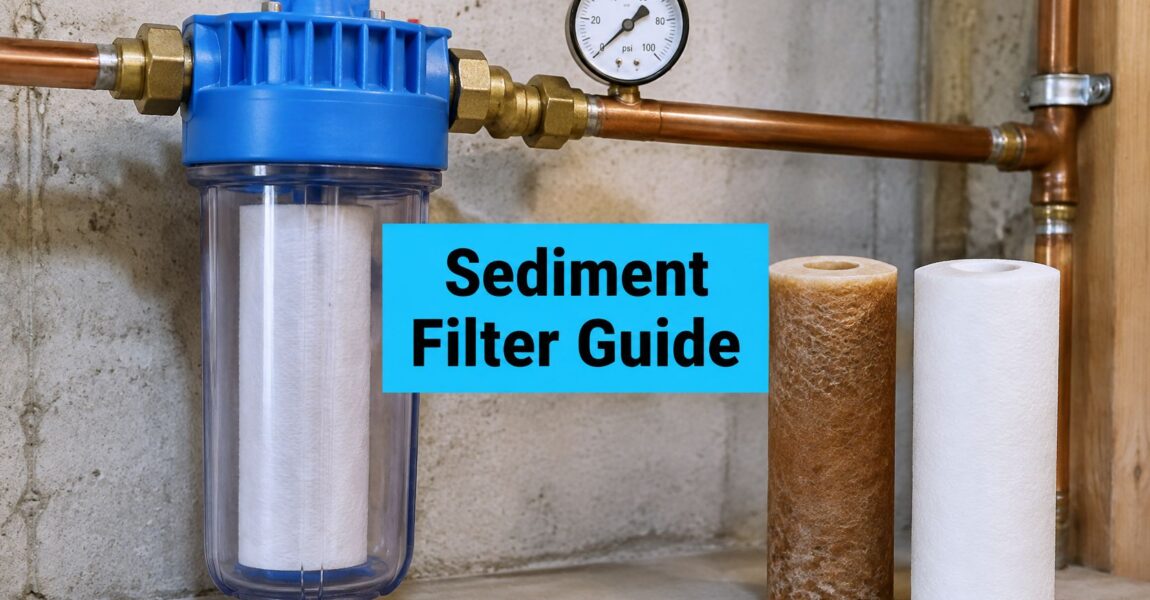
A whole house sediment filter is a coffee filter for the building. One housing sits on the main line where water enters the house, and every drop headed for the water heater, the washing machine, the ice maker and the shower passes through a cartridge or a stainless screen first. Particles that would otherwise settle into valve seats and tank bottoms get trapped in a single place you can see and empty.

That placement is the entire point. The filter is a protective first stage, not a finishing treatment. Clemson University's residential well water treatment guide describes these systems as removing particulate matter and notes that they improve the effectiveness of, and reduce maintenance demands on, later treatment devices.
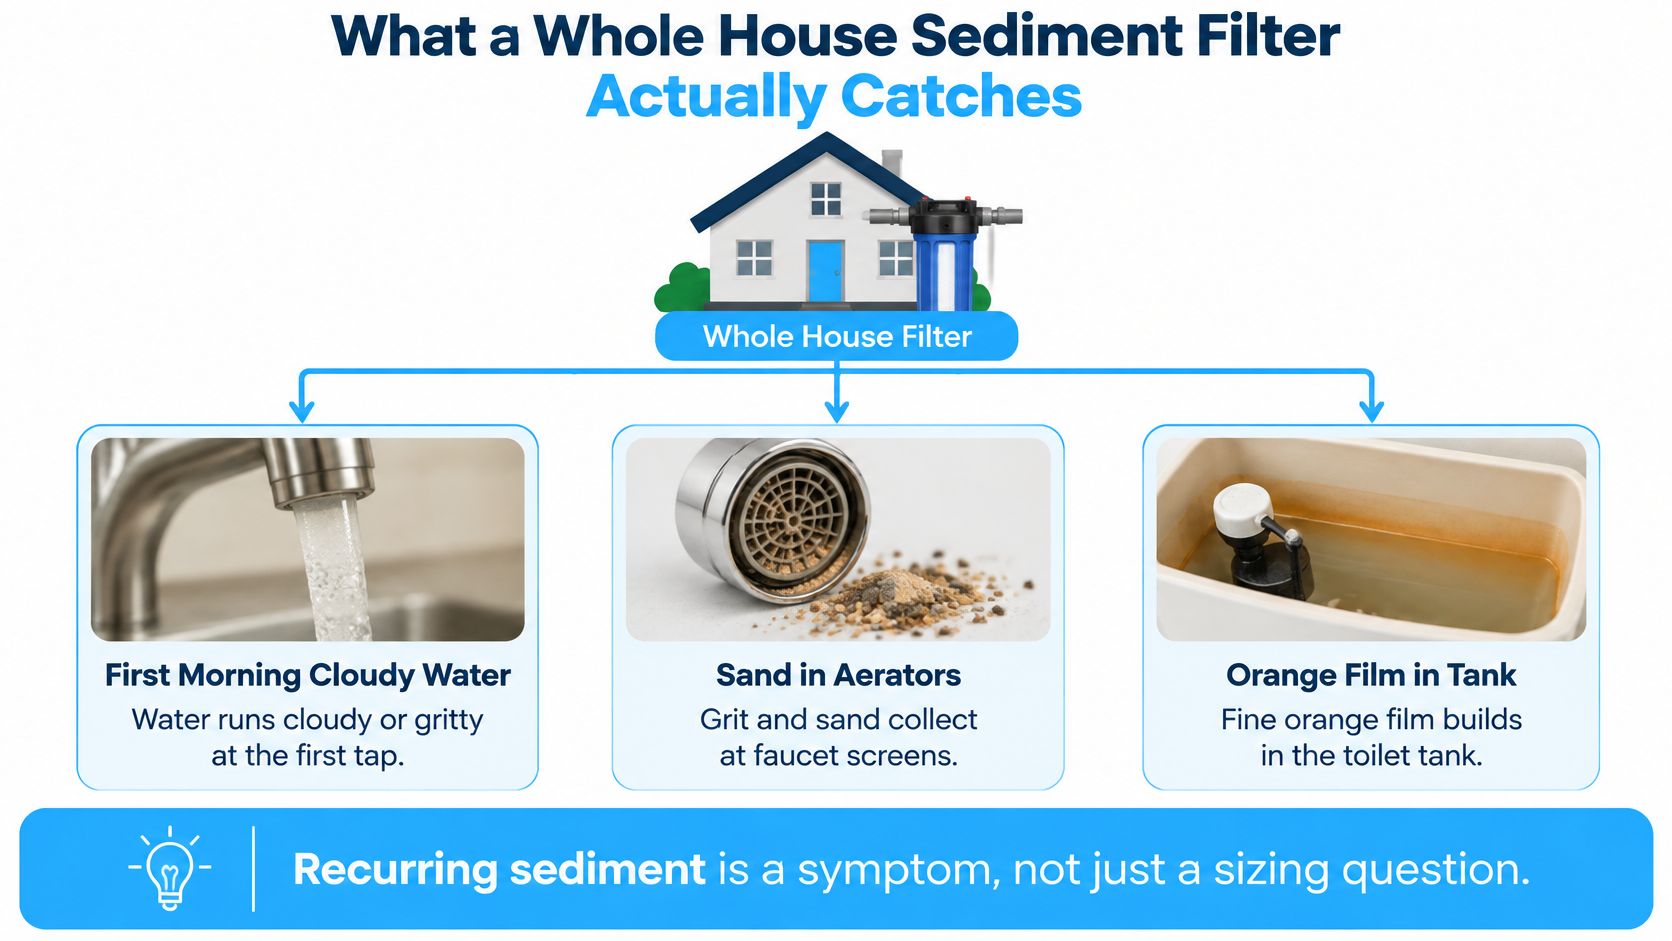
A diagram illustrating what a whole house sediment filter captures, including cloudy water, sand in aerators, and toilet tank residue.

The Particles It Actually Holds

Read the cartridge when you change it and you'll learn more than any spec sheet tells you.

  • Sand and grit: heavy grains that feel like fine beach sand between your fingers and settle to the bottom of a glass in seconds.
  • Silt and clay: the particles that keep water cloudy for minutes or hours, and the reason a cartridge turns brown across its whole face.
  • Rust flakes: orange-brown specks that come from corroding galvanized pipe, an aging pump, or iron in the source water oxidizing as it hits air.
  • Loose debris: bits of pipe dope, solder, mineral scale and biofilm that break free after repairs or a pressure swing.

What all four have in common is size. They're suspended solids, which means a physical barrier can stop them. Anything dissolved, anything living, and anything measured in parts per billion needs a different tool, which is a boundary Clemson keeps explicit: sediment filtration is a protective first stage for homes dealing with sand, silt, rust or other suspended solids, not a complete solution for dissolved contaminants, disinfectants or microorganisms.

The Quick Self Check

If your complaint is visible particles, a sediment filter is the right first purchase and you can shop with confidence. If your complaint is taste, smell, staining, or water that looks clear but leaves you uneasy, the filter is the wrong starting point. Trace the cause first, then size the equipment to what you find. The next sections walk that trace in order, from the well head to the carton on the shelf.

Tracing Sediment to Its Source First

Sediment that appears once is weather. Sediment that appears every month is a diagnosis, and the diagnosis matters more than the micron rating, because recurring grit can mean a damaged well screen, a disturbed aquifer, a failing pump, or a contaminated well rather than a filter-sizing problem.
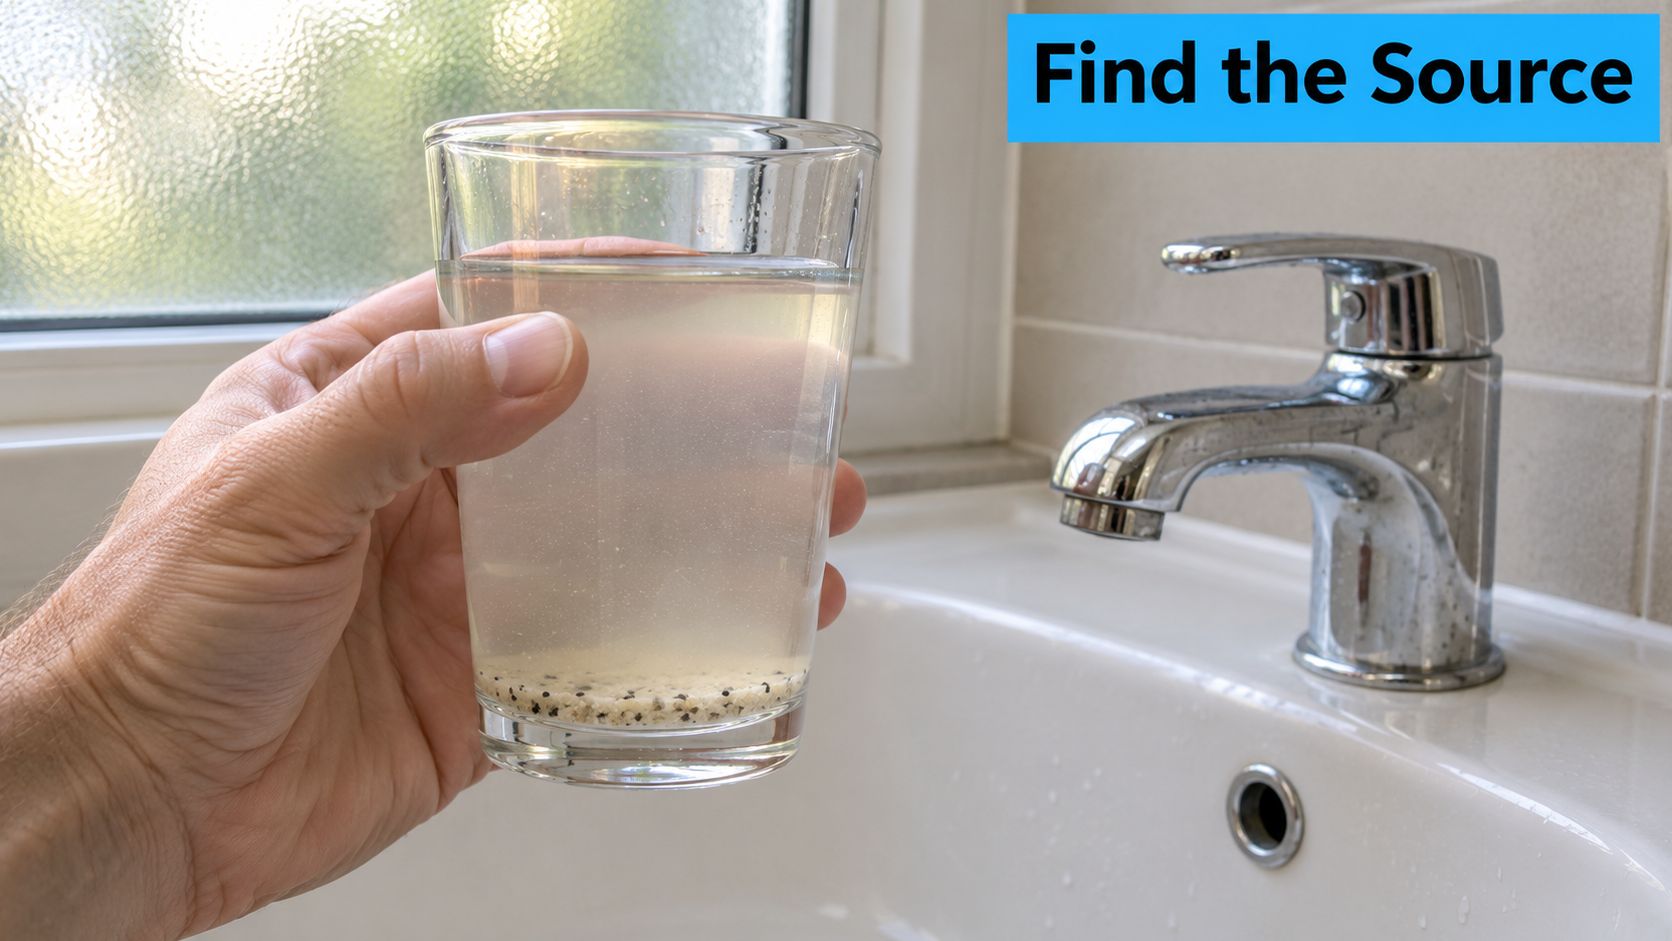
A person holding a glass of cloudy tap water containing visible sand and sediment particles.

Start with chemistry, not hardware. EPA guidance on protecting private well water notes that private wells aren't federally regulated and that owners carry responsibility for water safety, and it recommends annual testing for total coliform bacteria, nitrates, total dissolved solids, and pH, plus keeping records of well maintenance and sediment removal. That panel tells you whether you're dealing with a mechanical annoyance or something with a health dimension.

Reading the Water Before You Buy Anything

Work through these in order. Skipping to step five is how people end up replacing a cartridge every three weeks for a year.

  1. Test the water. The four-parameter panel above is the floor, not the ceiling. Add iron, manganese, hardness and turbidity if the basics come back clean and the water still looks wrong.
  2. Inspect the well itself. A cracked screen, a dropped water level, or a pump that's pulling sand because it sits too close to the formation will keep feeding grit no matter what you install downstream. A well contractor with a downhole camera settles this in an afternoon.
  3. Check the pressure tank. Sediment accumulates in the bottom of the tank, and a waterlogged bladder turns a steady flow into pressure swings that stir that sediment back into suspension. Tap the tank: a dull thud low and a hollow ring high is normal.
  4. Identify the particle. Sand is gritty, sinks fast, and feels like sand because it is. Clay stays suspended for hours. Rust is orange, stains porcelain, and often shows up only on hot water. Biological growth is slimy, smells like a pond, and coats the housing wall rather than the cartridge face.
  5. Match the remedy to the answer. A spin-down separator or washable screen handles heavy sand cheaply. A cartridge handles fine silt that slips past a screen. A repair handles the well itself.

The detail, including how sediment behaves in a well and what each particle type usually points to, is covered in this guide to sediment in well water.

When the Water Turns Muddy After a Storm

Flooding and heavy runoff create the one situation where you should stop filtering rather than buy a finer cartridge. EPA flood guidance notes that silt and sand can damage pumps, and that muddy water should be flushed until it runs clear before normal use returns. A cartridge won't disinfect anything, so a filter installed on flood-affected water gives you clean-looking water with whatever was in the flood still in it.

If the water changes color, odor or taste suddenly, treat the supply as suspect until a test says otherwise. A filter is a clarity tool, not a safety net.

Keep a short written log: test dates, cartridge part numbers, the date each change went in, and any work done on the pump or tank. When something changes six months from now, that page tells you whether it's new or whether you've been slowly losing ground.

Micron Ratings at a Glance

A micron is one millionth of a meter, and a cartridge's micron rating is the particle size it's built to hold back. Lower numbers catch finer particles, clog faster and cost you more pressure. That's the whole trade in one sentence.

Here's the practical map, and the full micron chart for water filters goes deeper if you want to compare specific cartridges.

Micron rating Particles it catches Typical placement
50 micron Sand, grit, large debris First stage on well water with heavy sand
20 micron Fine sand, rust flakes Coarse pre-filter for well or municipal supply
5 micron Silt, fine rust, fine sediment Standard whole-house default
1 micron Fine silt, clay, very small particles Final sediment stage, watch for flow loss

Why You Step Down Instead of Jumping to One Micron

A single 1 micron cartridge on a sandy well is a filter you'll replace in three weeks, and it will starve your shower in the meantime. Finer media pack particles tightly, so the surface loads up fast and the flow path narrows. Coarser media let water through with less resistance but wave the small stuff on to whatever comes next.

The fix is staging: let a coarse cartridge eat the heavy load, then let the finer one polish what's left. Two cartridges in series usually last longer together than one fine cartridge alone, because the fine stage never sees the sand that would have blinded it.

A filter that clogs in a fortnight isn't doing a better job. It's telling you the stage ahead of it is missing.

Matching the Number to Your Water

Decision logic beats brand loyalty here.

Heavy visible sand from a well means a coarse first stage at 20 to 50 micron, ideally a flushable screen, before any cartridge sees the water. Municipal supply with mild sediment from pipe work or a main break usually suits a single 5 micron cartridge. A house with weak pressure is a housing problem before it's a micron problem, and moving to a larger cartridge with more surface area often restores flow better than switching to a coarser rating.

If you're adding an undersink stage as well, Ring Hot Water's cartridge guide walks through how cartridge format and housing type change the choice, which is worth reading before you assume the whole-house number carries over to the kitchen tap.

Capacity and Replacement Schedule by Filter Size

Capacity means two things, and mixing them up is why people buy a housing that's technically correct and practically useless. First, flow capacity: how many gallons per minute the housing can pass before pressure at the fixtures drops. Second, dirt capacity: how much sediment the cartridge holds before it's spent. A big housing with a fine cartridge has plenty of the first and very little of the second.

Housing or cartridge Typical flow rate Replacement interval Change sooner when
10-inch cartridge 3 to 5 GPM 3 to 6 months Well water is muddy or after storms
20-inch cartridge 5 to 10 GPM 6 to 12 months Household has several fixtures running at once
20-inch big blue housing Up to about 20 GPM 6 to 12 months or more Large homes with high peak demand

Size the housing against peak demand, not average use. Count what runs simultaneously on a weekday morning: a shower, the washing machine filling, a dishwasher, an irrigation zone. If those add up to more than the housing can pass, everyone notices it as weak pressure, and no micron rating will fix it.

The Pressure Signal Does the Scheduling for You

EPA consumer guidance on home water filters says to watch for sediment and replace the filter when water pressure becomes noticeably reduced. That's the honest replacement rule for a sediment stage: captured particles restrict flow, flow loss shows up at the tap, and the cartridge is done. The same guidance cautions that ordinary carbon-based home filters may improve taste and odor and remove selected contaminants, but don't remove or destroy bacteria, which is another reason not to judge a sediment cartridge by how the water tastes afterward.

Calendar intervals are a backup, not the trigger. A well that runs muddy in spring may need a change every few weeks through the wet season. City water with light sediment can run six months on one cartridge. If you can't remember when the last change went in, that's your answer.

Install a pressure gauge downstream of the housing. A drop of a few PSI tells you the cartridge is loading up, weeks before the shower starts feeling weak.

Write the install date on the cartridge with a marker, set a phone reminder for the calendar interval, and glance at the gauge monthly. Two minutes of attention beats an emergency call about a pressure switch.

Where to Install It on Your Water Line

Position matters more than brand. The filter belongs on the main line, immediately after the point where water enters the house, or after the pressure tank on a well system, and before any branch takes off to a bathroom or appliance.
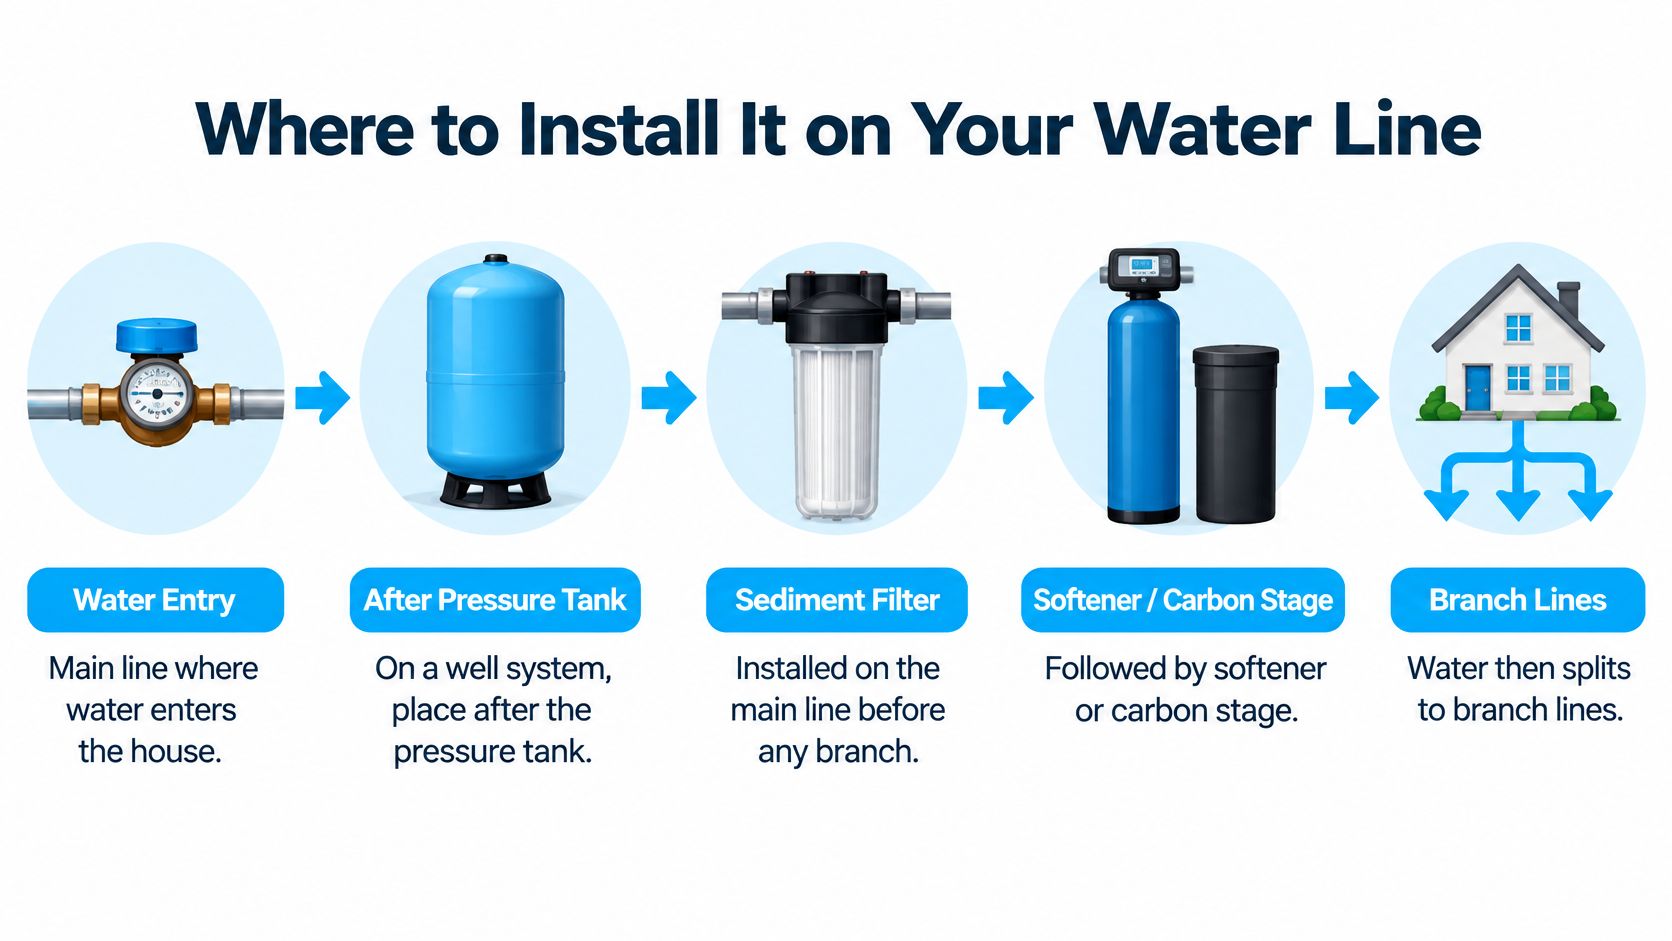
A diagram illustrating the correct installation order for a whole house water filtration system on a residential line.

The Order, and the Reason for Each Position

  1. Water entry or well pump. This is the only place every drop passes through, so anything installed downstream of a branch protects only part of the house.
  2. Pressure tank or main shutoff. On a well, mounting after the tank smooths the pressure swings that stir sediment loose and keeps the housing off the pump's discharge surge.
  3. Sediment filter with a bypass valve. The bypass lets you service the cartridge without shutting water off to the whole house, which matters on a Sunday evening when the housing O-ring fails.
  4. Softener or carbon stage. Grit fouls resin beds and carbon media, so the sediment stage goes first and takes the load off equipment that's expensive to rebuild.
  5. Water heater and fixtures. Keeping sediment upstream of the heater stops it collecting on the tank floor, where it insulates the element and shortens the tank's life.

Mount the housing vertically with the bowl facing down so debris falls away from the seal, leave enough clearance underneath to drop a 20-inch cartridge out, and fit a drain point or pressure relief nearby. Before you cut pipe, confirm the flow arrow on the housing points toward the house and measure the footprint against the wall you're mounting to.

What It Costs to Get It Wrong

HomeGuide's 2026 cost data for well water filtration puts sediment-filter equipment for well-water systems at $50 to $300, with installed costs of $150 to $500. That spread is mostly labor, and it's the reason a $30 housing with the wrong thread, wrong clearance or missing bypass ends up costing more than the plumber would have charged to fit the right one.

What a Sediment Filter Cannot Remove

Clear water feels safe. That's the trap, and it's worth naming plainly: a sediment cartridge removes suspended particles and nothing else. Water can come out of the tap sparkling and still carry bacteria, nitrates, lead, or PFAS.

Cloudiness itself is only a rough signal. The USGS water science school defines turbidity as a measure of how much light passes through water, caused by suspended material such as clay, silt, fine organic and inorganic particles, plankton and microscopic organisms. High turbidity looks bad and can indicate surface contamination reaching groundwater after rainfall, but low turbidity proves nothing about what's dissolved in the water.

The List It Doesn't Touch

  • Bacteria and viruses. Most are far smaller than the pores of a sediment cartridge, and none of the common ratings is a disinfection step.
  • PFAS and other industrial chemicals. EPA's PFAS research program identifies granular activated carbon, ion exchange and reverse osmosis as the technologies studied for PFAS reduction, including at point of use, and notes that effectiveness depends on maintenance. A polypropylene sediment cartridge isn't on that list.
  • Lead and nitrates. Both are dissolved. They pass through a 5 micron cartridge as easily as through an open pipe.
  • Dissolved minerals. Hardness, iron in its clear dissolved form, and manganese all survive filtration and need ion exchange or oxidation to come out.

Certification Is Claim by Claim

Packaging can be misleading. NSF's explanation of water treatment standards notes that residential treatment products have no federal regulation, so voluntary standards set the minimums: NSF/ANSI 42 covers aesthetic effects such as chlorine, taste, odor and particulates, while NSF/ANSI 53 covers specified health-related contaminant reduction claims. Manufacturers choose which contaminants they certify for, and NSF verifies that specific claim. A housing labeled for sediment reduction tells you it was tested for sediment. It says nothing about lead, bacteria or anything else on the box.

Look for the standard number that matches the claim you need, not the biggest logo on the carton.

The practical split follows from all of this. Whole-house sediment treatment earns its place protecting plumbing, appliances and downstream media. Drinking and cooking water deserves a certified point-of-use system sized to whatever your test found. Municipal customers can start with the utility's annual water quality report, which lists detected contaminants and turbidity results. Private well owners need their own independent test, because nobody else is running one for them.

Your Next Step Today

Pick the action that matches your water source and do it before you shop.

On a city supply, pull the utility's annual water quality report, usually a PDF on the utility website, and look at the turbidity and sediment-related entries against the stage you're considering. That report tells you whether you're solving a real problem or buying equipment for a problem your utility already handles.

On a private well, order the four-parameter panel: total coliform bacteria, nitrates, total dissolved solids, and pH. Add iron, manganese and hardness while you're at it, since those three explain most of the staining and cloudiness complaints well owners bring up. Our simple water test kits cover exactly this kind of first check, and our Choosing a Water Filter guide answers how to pick one once the results are in front of you.

Then read the packaging. Find the certification that matches the claim you need, not the claim that sounds most impressive. Compare housings and cartridges on the same three criteria: micron rating, flow at your peak demand, and certified performance claims. A cartridge that wins on one and loses on the other two is a false economy.

The single step worth taking today is the boring one. Test the water, or if you already know your water is clean and merely gritty, write down your current pressure reading at a hose bib. That number is your baseline. When the shower starts to weaken in four months, you'll know exactly how far it has fallen, and you'll know which cartridge to buy based on a measurement instead of a guess.


Water Filter Advisor has been testing and explaining home filtration since 2007, and the whole-house sediment stage is where most households should start, because protecting the plumbing is cheaper than repairing it. If you'd rather compare housings and cartridges side by side before you cut any pipe, visit Water Filter Advisor for buying guides, micron charts, and replacement-cartridge advice written to be read before the purchase, not after the leak.
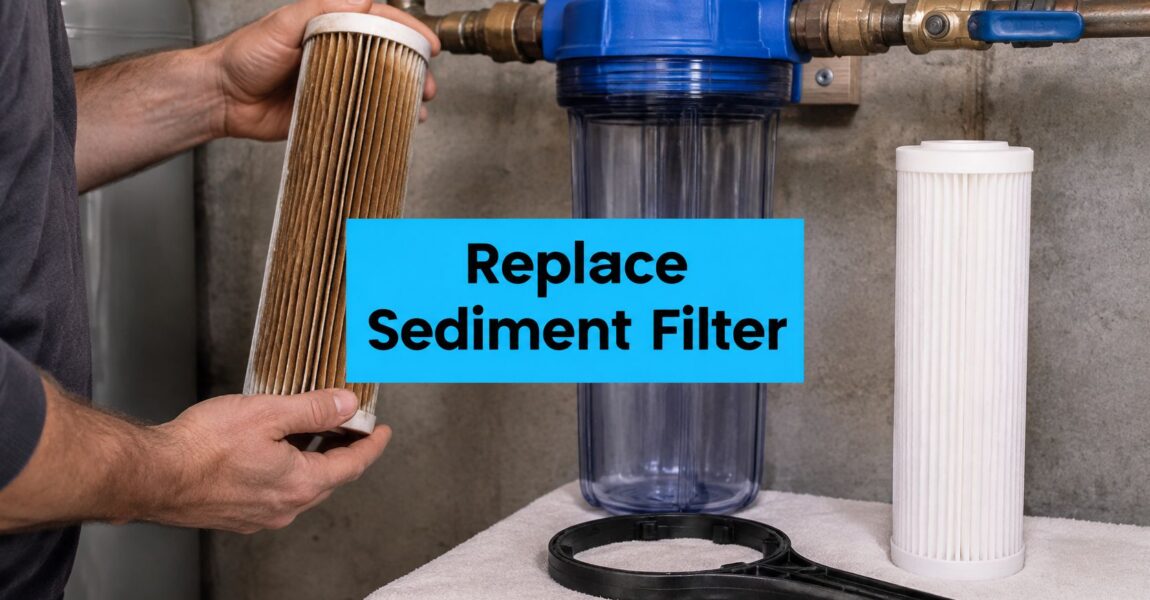
Sediment Water Filter Replacement: A Step-by-Step Guide

Sediment water filter replacement depends on water condition and pressure loss, not just the date on the cartridge sticker. Say you changed the filter on your rural well right on schedule, then found yourself standing under a weak shower a few weeks later. The cartridge may already be packed with sand or iron sediment, even though the calendar says it's practically new.

How Often to Replace a Sediment Filter

The cartridge sticker's date marks the outer limit of the interval. A low-sediment municipal supply and a well that turns cloudy after every storm put very different loads on the same cartridge, so the true trigger is what the filter is doing in your house: how fast pressure decays and what the water looks like.

The Cleanflow cartridge listing gives a typical replacement interval of 3–6 months and a replacement pressure drop of 22 psi. Whichever interval you plan around, replace earlier when pressure falls.

Replacement window by water condition

Water condition Typical replacement window Replace sooner if
Municipal water, low sediment 3–6 months, often toward the longer end Pressure falls or water looks or tastes different
Well water, normal turbidity 3–6 months Pressure drops after heavy rain
Well water with sand or iron Roughly 1–3 months as an initial planning allowance Visible grit at the faucet
Construction or pipe work nearby Check every 2–4 weeks until flow settles Any sudden clog
Four or more people on a well 3–6 months, checked monthly Shower flow noticeably weaker

Treat these windows as planning guidance. Actual cartridge life follows the water. A sand-heavy well that plugs a cartridge every month needs a different pretreatment arrangement rather than an endless supply of disposables. Iron staining deserves its own investigation too, because a sediment cartridge only catches precipitated iron particles; dissolved iron passes straight through.

Use a schedule without ignoring the water

The EPA's water-filter maintenance guide advises following the cartridge manufacturer's instructions and tracking installation days or gallons used when there's no indicator light. That approach gives you a replacement deadline without pretending every household loads the filter equally.

Practical rule: A maintenance reminder tells you when to check. A loaded cartridge tells you when you can't wait.

Read the pressure signal yourself. A gauge on or around the housing shows the differential directly: once the drop across a cartridge climbs well past its fresh baseline, the cartridge is done regardless of age. Without a gauge, the fixtures tell you the same thing. A shower that weakens over a few weeks, or flow that collapses after a storm, is the pressure signal arriving at the tap.

Skip judging life by color. A brown cartridge has captured material, but its shade says little about how much usable flow capacity remains.

Falling pressure, grit at the faucet, a taste change, or sudden flow loss after rain or street maintenance all say pull the housing and look. Treat a taste change as a reason to check the water and any downstream treatment; a fresh sediment cartridge alone won't solve every taste problem.

Picking the Right Micron Rating

Micron rating and what each one catches

Micron rating Particles it targets Typical use
50 micron Sand and coarse grit Coarse stage ahead of finer filtration on wells
20 micron Silt and rust flakes Common first stage on municipal supply with rust
5 micron Fine silt and sediment Standard whole-house or well prefilter
1 micron Very fine silt and fine particles Last sediment stage; clogs fastest under comparable conditions

A micron rating describes the approximate particle size a cartridge is designed to capture, not necessarily a uniform hole size throughout the media. A lower number generally captures finer particles but can restrict flow sooner when cartridge size, construction, and incoming sediment are comparable.

Put a coarse stage ahead of a fine stage when the water carries a broad mix of particles. Let the first cartridge catch the sand rather than burying an expensive fine cartridge in material a coarser filter could have stopped.

Smaller isn't automatically better

A depth cartridge traps particles through its thickness; a pleated cartridge provides a large filtering surface. Their performance won't be identical just because the printed micron numbers match.

Nominal ratings describe approximate capture performance, while absolute ratings need a stated test basis to be meaningful. Use the micron filtration chart to compare particle sizes, then check the cartridge's flow and performance specifications.

Microplastic protection requires more than a small number on the wrapper. A 2025 review published by Springer Nature reports drinking-water-source concentrations ranging from 0.0009 to 391 particles per liter, with major differences in sampling and analysis methods.

Conventional treatment generally removes much of the larger-particle fraction, but that doesn't establish what an individual household cartridge removes. Pore structure, flow rate, depth-loading design, cartridge condition, and seal integrity all affect capture.

A visibly clean cartridge isn't proof of microplastic protection, and a dirty one isn't a microplastic test.

Look for validated reduction claims. Don't replace cartridges prematurely to address a microplastic concern that hasn't been measured or matched to demonstrated filter performance.

Matching the Cartridge to Your Housing

Start with the housing model, not a cartridge that looks about right. Length alone won't confirm diameter, end seals, or whether water can sneak around the media.

Housing type, how it opens and what to buy

Housing type How it opens Cartridge to buy
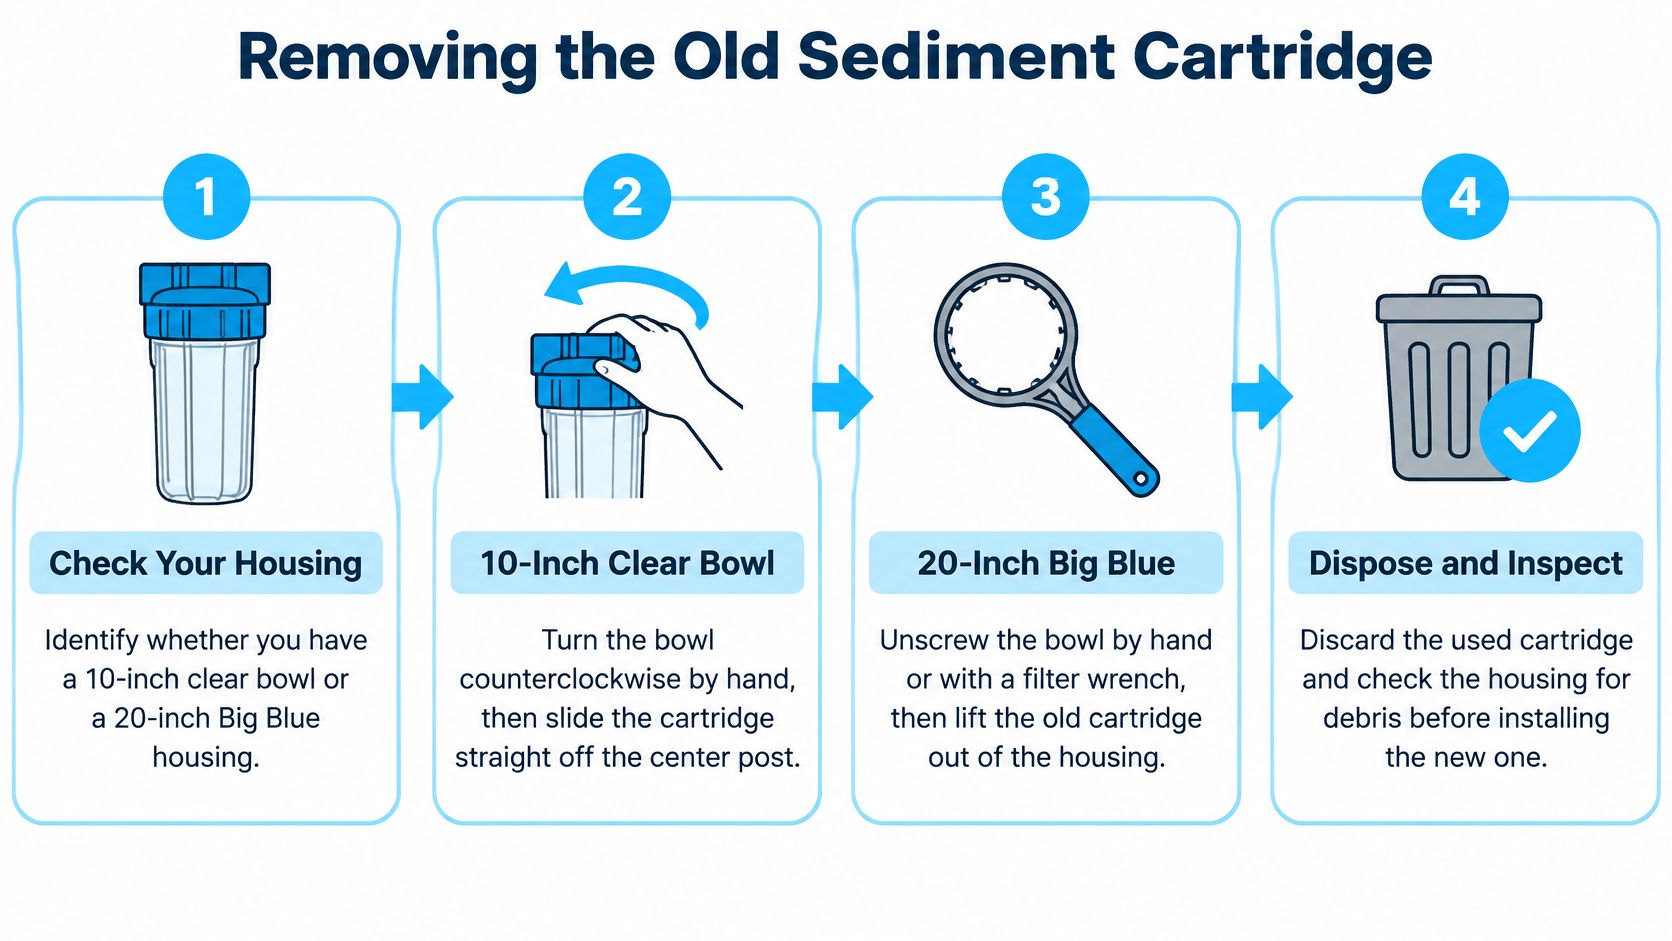
10-inch clear bowl Hand-twist counterclockwise; cartridge slides off center post where fitted Compatible 10-inch cartridge
20-inch Big Blue Bowl unscrews by hand or filter wrench; support its weight Compatible wide-diameter 20-inch cartridge
Spin-down On cap-mounted designs, cartridge stays on cap; lift straight out Spin-down cartridge with matching cap and model compatibility

These are common arrangements, not universal opening instructions. Some spin-down screens detach differently, and some housings lack a center post.

Buy by model number

  1. Read the dimensions and seals. Confirm the cartridge length, end-cap style, diameter, and housing O-ring size from the label or parts diagram.
  2. Confirm your chosen micron rating is available in the correct cartridge format.
  3. Find the pressure-drop specification. Keep the datasheet with your maintenance record.
  4. Check any cartridge flow arrow against the housing's inlet and outlet markings. Some plain sediment cartridges aren't directional.
  5. Buy a compatible spare before opening the system.

A cartridge can fit inside the bowl yet fail to seal against the head. Match the model number and sealing arrangement, not the product photograph.

How to Remove the Old Sediment Cartridge

Close the supply valve feeding the filter, then open a cold tap on the lowest floor to relieve pressure. If the installation has downstream isolation, follow the housing's valve sequence so water can't backfeed into the bowl.

Don't start turning plastic while it's still pressurized. A stopped faucet doesn't always prove the housing is empty of pressure, especially where check valves isolate sections of plumbing.

Isolate before loosening

  1. Verify pressure release. Use the housing's pressure-relief button if fitted, keeping a towel over the discharge area. If pressure won't release or water keeps flowing, stop and resolve the valve problem.
  2. Set a bucket and towels underneath. A full bowl is heavier and messier than it looks.
  3. Support the bowl. Follow the opening arrangement identified under the housing-matching guidance. Turn slowly, using the supplied filter wrench only if the manufacturer permits it.
  4. Lower the bowl without twisting the attached plumbing. Pull the cartridge free, or remove the cap-mounted screen according to the model's instructions.

The illustrated sequence helps identify the parts, but isolation and depressurization must happen before any illustrated opening step.

A four-step infographic illustrating how to remove an old sediment water filter cartridge from the housing.

Never use pliers on a plastic bowl. Concentrated jaw pressure can crack or gouge it, leaving damage that becomes dangerous when the system is repressurized.

Don't stand directly beneath a housing you haven't depressurized. If the bowl won't move, confirm pressure is gone before applying more force; a stubborn housing isn't an invitation to use a longer lever.

Clean and inspect while it's open

Note the old cartridge's installation information and condition before bagging it. Look for a crushed core, distorted end caps, slime, or a dirty track around a seal that suggests bypass.

Wash the bowl with mild soap and warm water, then rinse thoroughly. Don't use hot water, solvents, abrasive pads, or an improvised chemical mixture. If biological fouling is present, use the manufacturer's sanitation procedure rather than assuming a quick rinse makes the housing sanitary.

Lift the O-ring carefully without scratching its groove. Remove grit and inspect the ring for flattening, stretching, cracks, or cuts; replace a damaged seal with the specified part.

Stop-work check: Replace a cracked, crazed, or badly damaged housing bowl. A new cartridge won't make damaged plastic safe.

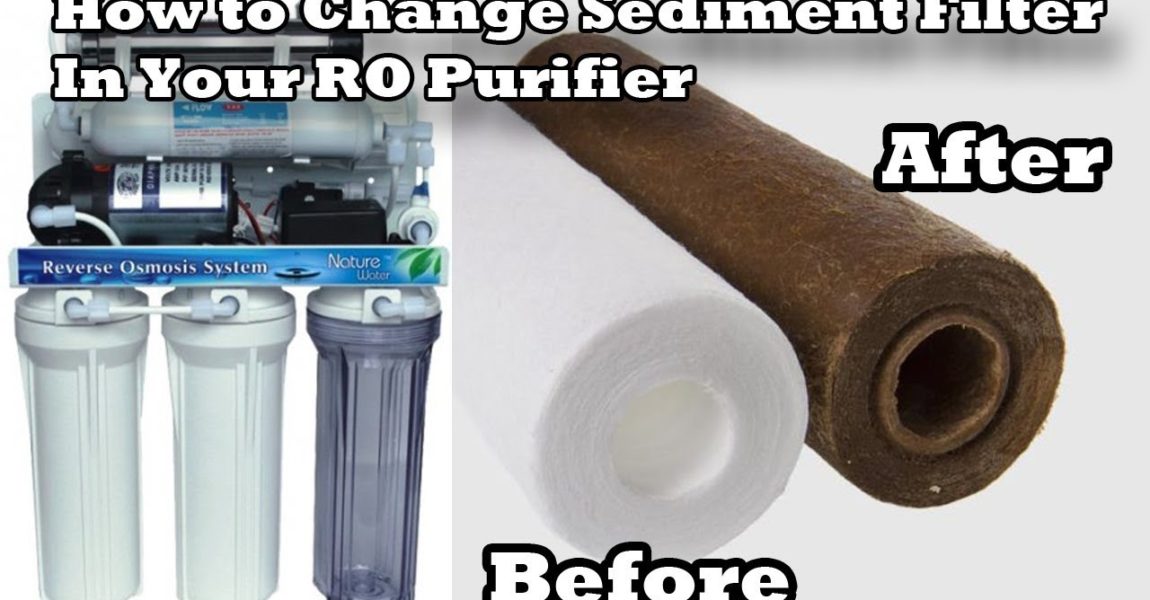
Keep the removed cartridge sealed in a bag. Don't rinse a disposable spun-polypropylene cartridge and return it to service; sediment lodged inside the depth media won't reliably wash out.

How to Install and Flush the New Cartridge

Set the clean bowl, correct cartridge, and inspected O-ring within reach before rebuilding the filter. Keep packaging fragments and dirty tools away from the sealing surfaces.

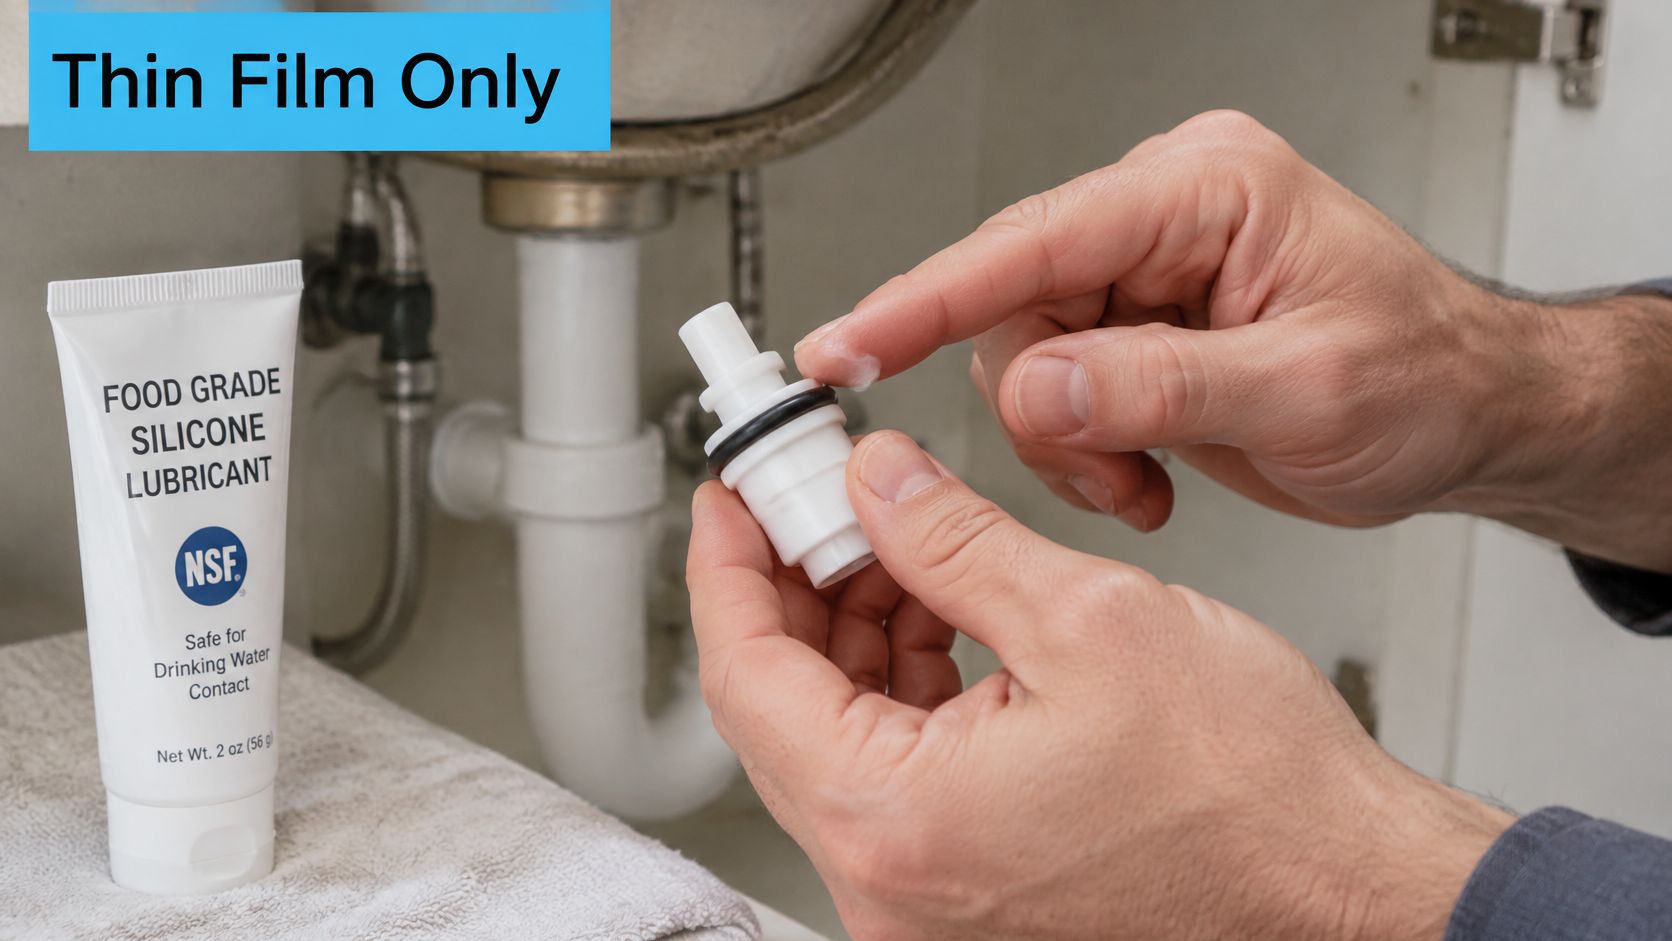
Apply lubricant sparingly, as shown below. The seal needs a thin film, not a mound of grease.

A hand applies a thin film of food-grade silicone lubricant to the rubber O-ring of a plumbing part.

Seat the seal and cartridge

  1. Lubricate the O-ring. Use a thin film of food-grade silicone lubricant approved for the housing. Avoid petroleum jelly, which can damage incompatible seal materials.
  2. Check the housing flow marking and any directional marking on the cartridge.
  3. Seat the cartridge straight. Align it with the center post or end-cap seats without forcing it. Keep the O-ring flat in its clean groove.
  4. Reattach the bowl or cap by hand until snug, following the housing's tightening instructions. Don't use the removal wrench to crank it tight.

The first common leak-maker is an O-ring that rolls or picks up grit during assembly. Extra tightening usually doesn't fix that; it can damage the ring or housing instead.

If the filter's pipework also needs changing, Erica's Plumbing whole-house filter installation guide from Erica's Plumbing, Air Conditioning & Restoration provides context for the broader installation. Cartridge replacement shouldn't require bending pipes or wrestling an unsupported filter head.

Refill slowly and clear the air

Restore the valve arrangement according to the system instructions, then open the supply slowly while watching the bowl seam and fittings. The second common mistake is throwing the valve fully open, which can disturb the cartridge and send trapped air through the line.

Open a cold tap and flush for 2–3 minutes, continuing until the water runs clear and steady, or longer if the cartridge manufacturer specifies it. Use cold water so loose material doesn't enter the water heater, and don't mistake persistent particles for harmless air.

For a visual demonstration of the replacement workflow, use the video alongside your housing's instructions.

Check the housing and fittings again after 15 minutes. Wipe each joint dry first, then use a dry tissue to reveal a small seep that's hard to see.

If it leaks, shut off and depressurize before correcting the seal. Finish by marking the installation date and recording the clean-filter starting pressure and next check reminder.

Diagnosing Low Pressure, Cloudy Water and Leaks

Pressure drop across the housing is the most useful cartridge-loading check. Read gauges installed immediately upstream and downstream while water is flowing, then subtract outlet pressure from inlet pressure.

Compare readings under the same demand, such as the same cold tap opened to the same position. Readings taken with every tap closed won't show the working restriction reliably.

The Axeon SDF cartridge datasheet hosted by Lenntech gives a recommended replacement pressure drop of approximately 21.75 psi (1.5 bar) and a maximum pressure drop of 46.4 psi (3.2 bar) at 20°C. Those are model-specific figures, not universal household targets.

Separate cartridge restriction from supply trouble

Replace the cartridge as its differential approaches its specified replacement limit, not its maximum allowable differential. If both gauges fall together without a substantial increase across the cartridge, investigate the incoming supply, well equipment, or pressure controls instead.

Some listings round replacement values differently. Use the specification for the installed model rather than borrowing a threshold from a similar-looking cartridge.

Symptoms, causes and fixes

Symptom Likely cause Fix
Pressure drops over weeks Cartridge loaded with sediment Replace cartridge and log pressure before and after
Pressure drops suddenly Pipe work, main break or well event Test the water, flush the line, then replace the cartridge
Water cloudy white after a change Trapped air Run the cold tap 2–3 minutes, continuing until clear
Water brown or gritty Bypass, collapsed media or housing leak Shut off, reseat or replace the cartridge and check seals
Drip at the housing Dry, cut or misaligned O-ring Shut off, clean, lubricate and reseat the O-ring; replace it if damaged
Housing rattles or spins Cartridge not seated, bowl loose, or mounting insecure Isolate and depressurize; reseat the cartridge, secure the mounting, and hand-tighten to a snug stop

Know when a cartridge isn't the whole answer

After a main break, flooding, or an unusual well event, stop using questionable water for drinking and follow utility or public-health advice. Arrange appropriate testing, and flush only when advised it's safe; a cartridge swap doesn't establish potability.

A sediment cartridge isn't a dependable treatment for dissolved lead, nitrate, PFAS, chlorine, or microbes. Clear water can still need contaminant-specific treatment.

For a milky glass of water, watch whether it clears from the bottom upward as bubbles escape. Persistent haze, discoloration, or particles need investigation rather than repeated flushing.

If restriction keeps returning, the clogged-water-filter troubleshooting guide can help distinguish loading from sizing and installation problems. Repeated rapid clogs may call for source-water correction, a spin-down separator, or greater filter capacity.

Dispose of the Old Cartridge and Set Your Next Date

Bag the used cartridge and check local disposal rules before choosing a bin. Used polypropylene media isn't automatically accepted with recyclable plastic packaging, and a filter that collected unusual contaminants may need different handling.

For ordinary household sediment cartridges, general waste is often the appropriate route where local rules allow it. Keep the cartridge out of curbside recycling unless the collection program explicitly accepts used filters.

Keep a record that makes the next decision easier

A useful maintenance log fits on a sheet beside the housing or in a phone note. Keep the complete record together rather than scattering dates across packaging and calendar alerts.

  • Cartridge identification: Manufacturer, model number, micron rating, housing model, and specified replacement differential.
  • Installation and removal: Dates installed and removed, plus gallons used where tracked.
  • Pressure history: Clean-filter inlet and outlet readings, ending readings, and the fixture demand used for comparison.
  • Water condition: Sand, rust, discoloration, unusual odor, recent storms, or nearby pipe work.
  • Next action: Check date, replacement deadline, and whether testing or pretreatment needs attention.

Set a phone reminder halfway through the expected service window. Add a check after a major storm, construction disturbance, or plumbing work rather than waiting for the routine reminder.

Buy the next compatible spare before you need it. An open housing is a poor place to discover that the replacement has the wrong end seal.

Don't lengthen the interval indefinitely just because flow remains acceptable. Stay within the manufacturer's service requirements, and use your pressure history to identify when earlier replacement is necessary.

Keep the model number and pressure specification with the spare so another household member can identify it without guessing. Use buying and maintenance guides alongside the manufacturer's compatibility information to confirm the housing fit and chosen rating.


Water Filter Advisor offers cartridge buying guides, filtration comparisons, and maintenance checklists to help you match a replacement to your home's water conditions. Visit Water Filter Advisor to compare compatible options and plan your next sediment filter check around pressure and performance, not just a calendar sticker.