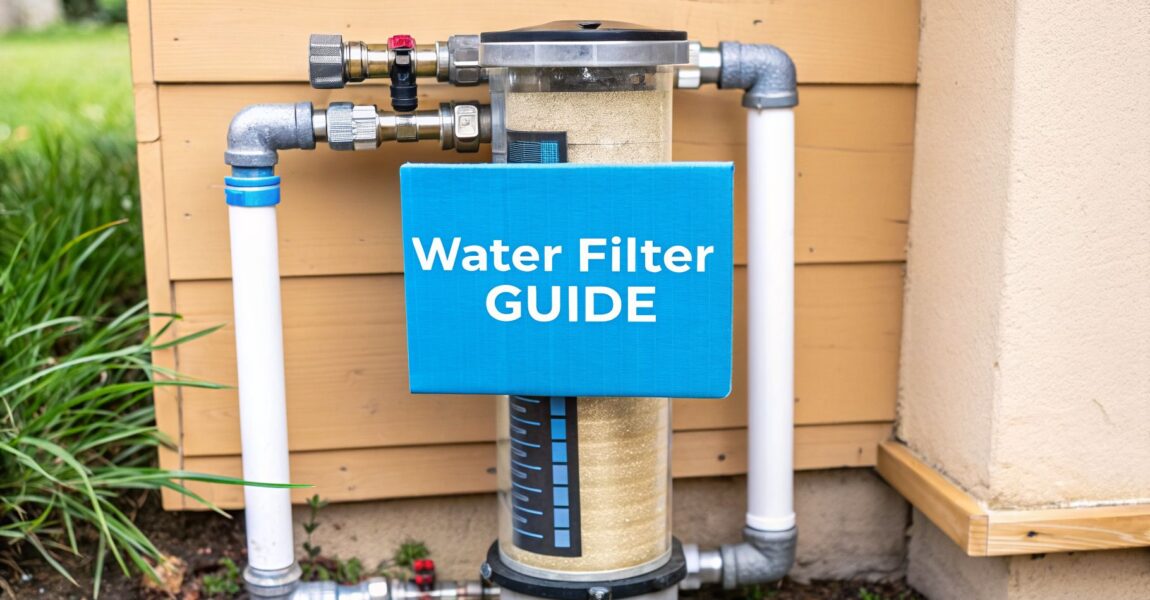
Best Under Sink Water Filter for Well Water (2026 Guide)

If you're shopping for the best under sink water filter for well water, you're probably already annoyed by something at the tap. Maybe the water smells faintly like rotten eggs in the morning. Maybe tea tastes metallic. Maybe the sink develops orange or brown stains no amount of scrubbing seems to fix. Those aren't cosmetic quirks. They usually mean your water needs a system built for well conditions, not a generic city-water filter with better marketing than staying power.

Most under-sink filter roundups miss the part that matters most to well owners. A strong drinking water filter is only half the job. The other half is protecting that filter from the sediment, iron, manganese, and microbial problems that make well water harder on cartridges, membranes, and UV chambers. I’ve seen plenty of homeowners buy an expensive under-sink unit, install it directly on untreated well water, and then wonder why flow drops, taste gets weird again, or replacement costs start stacking up faster than expected.

A good setup for well water usually isn't a single box. It's a complete system. Test the water first. Match the filtration technology to the actual contaminants. Add the right pre-filter so the under-sink unit can do its job. Then price the system based on what well water does to filters over time, not what a product page promises under ideal conditions.

Here’s the side-by-side view before we dig in.

Filtration approach Best for Main strength Main weakness Typical complete-system note
Carbon block under-sink Taste, odor, some metals, general polishing Good usability, no wastewater, usually simpler install Won't solve every dissolved contaminant issue and isn't a bacteria treatment Needs sediment protection on most wells
Reverse osmosis under-sink Dissolved contaminants, broad reduction goals Strong all-around contaminant reduction potential Sensitive to sediment and iron, creates wastewater, slower by design Usually needs pre-filtration before the RO unit
UV paired with filtration Microbial risk after proper pre-treatment Targets bacteria risk without changing taste much Doesn't work well if water is cloudy or full of particles Must be paired with sediment control and usually another filter stage
Complete staged system Most well-water homes with mixed issues Protects filter life and improves consistency More parts to maintain and more planning up front Best fit when the water report shows multiple problems

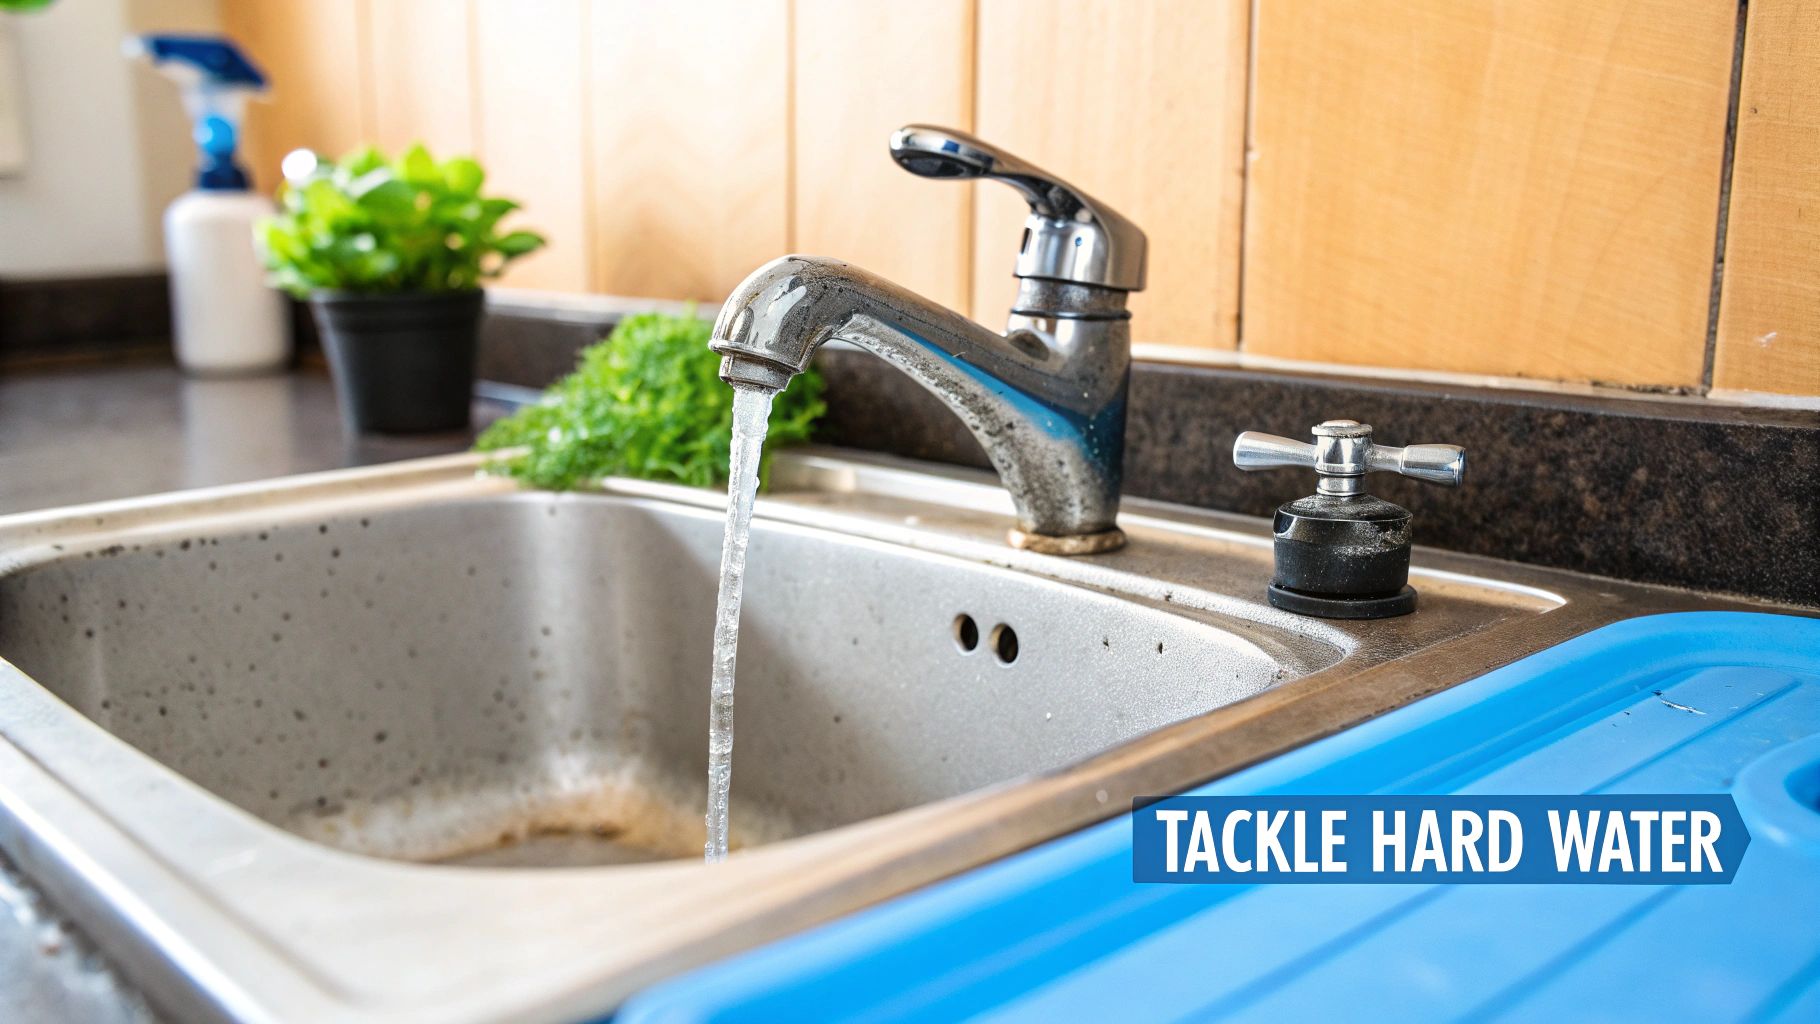
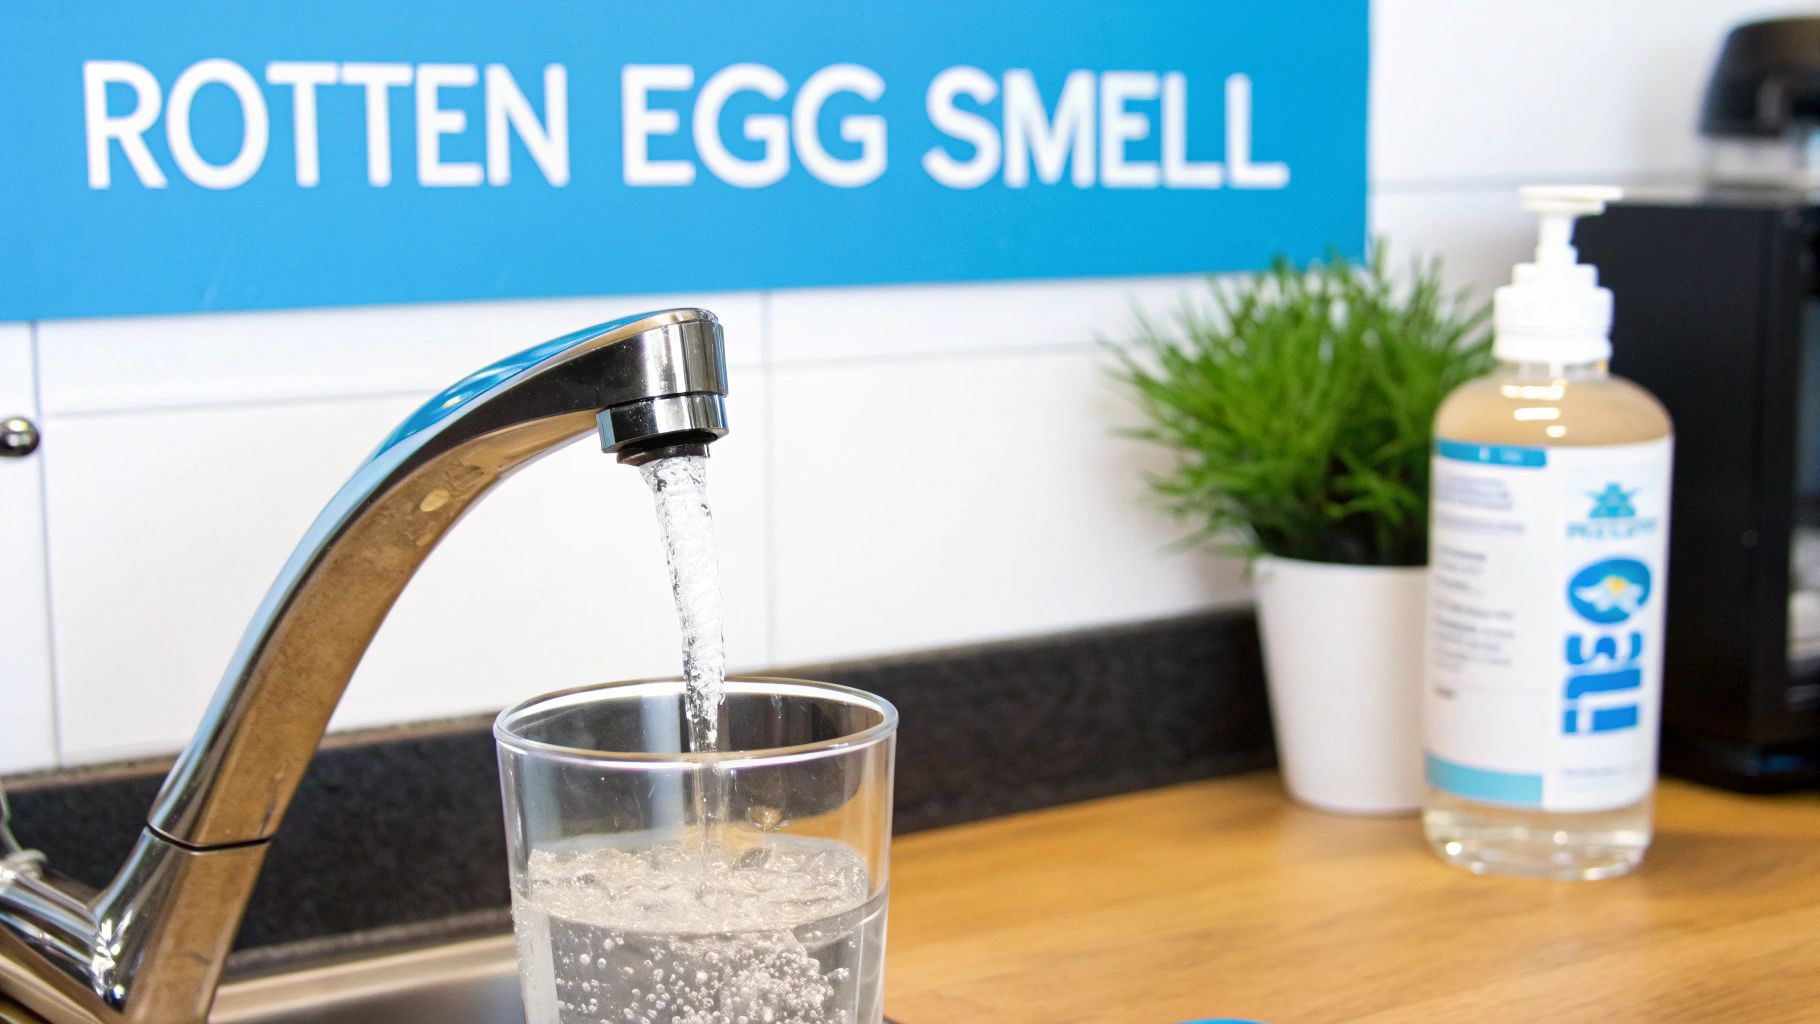
That 'Well Water Smell' Is a Warning Sign

A lot of well water problems start small. You fill a glass and notice a dull metallic finish. The guest bathroom toilet tank stains faster than it should. White laundry starts looking tired. Then the kitchen faucet begins to sputter a little, and suddenly that cheap filter choice from a year ago doesn’t look so cheap anymore.

Private well owners live with a different reality than city-water households. Municipal water is treated and regulated before it reaches the home. Well water isn't. That means your water can carry a shifting mix of sediment, iron, manganese, sulfur compounds, hardness minerals, nitrates, and microorganisms, depending on your geology, recent weather, the condition of the well, and how the plumbing system is set up.

Practical rule: If your water leaves stains, smells off, or changes with the season, treat that as a filtration design problem, not just a nuisance.

The mistake I see most often is buying an under-sink system for the symptom instead of the cause. A homeowner wants better-tasting water, so they install a sleek kitchen filter. But if the actual issue is oxidized iron and grit grinding through cartridges, or bacteria risk that a basic carbon block can't address, the “fix” becomes a short-term patch.

That’s why the best under sink water filter for well water is rarely just the unit under the sink. It’s the combination that works with your well instead of against it. Sometimes that means a carbon block system protected by a sediment stage. Sometimes it means reverse osmosis with a dedicated pre-filter. Sometimes it means you shouldn’t start under the sink at all until the incoming water is stabilized.

Homeowners who get this right usually stop chasing symptoms. Their filter lasts longer. Flow stays consistent. The water tastes better because the system is finally dealing with the actual problem.

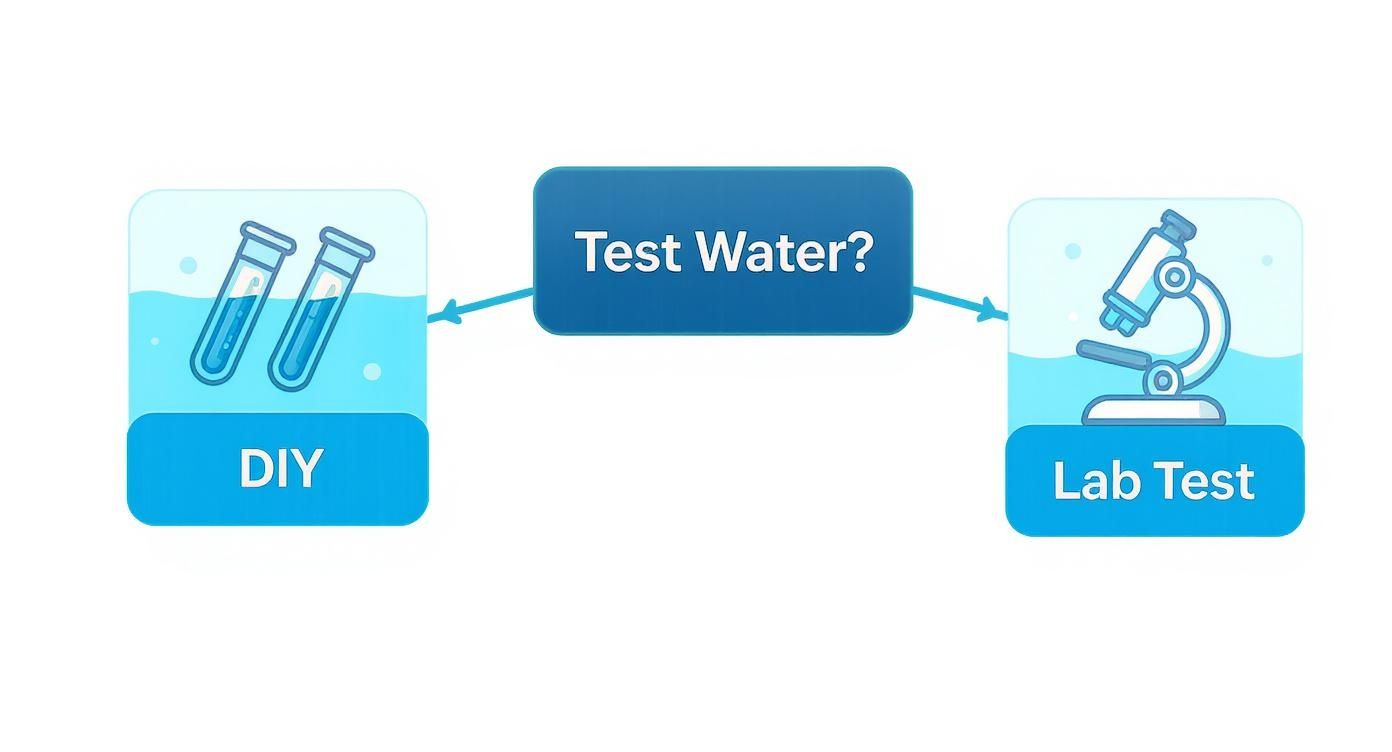
Test Before You Invest in Any Water Filter

A homeowner sees brown staining in the sink, notices a sulfur smell on some mornings, and buys an under-sink filter to fix the drinking water. Six weeks later, flow drops, the cartridges are coated with rust-colored sludge, and the odor is still there. I’ve seen that sequence many times on private wells. The filter was not the first problem. It was the last piece in a system that had not been diagnosed.

A hand holding a water test strip container in front of a kitchen sink faucet.

A quick strip test can help you spot a broad issue, but it is not enough to choose equipment with confidence. Well water needs a lab report or a reliable local water analysis that shows what is entering the house. Homeowners who want help reading those results can use Water Filter Advisor's advice library as a starting point before they compare systems.

What to test for first

Start with the contaminants that shorten filter life or point to the wrong treatment method.

  • Sediment and turbidity. Sand, silt, and fine particulate plug cartridges early and can foul RO components fast.
  • Iron and manganese. These cause staining, metallic taste, dark residue, and heavy loading on any under-sink filter.
  • Hardness minerals. Scale can reduce performance and increase maintenance.
  • Nitrates. Many homeowners assume any drinking water filter will reduce them. That is a costly assumption.
  • Microbial contamination. Coliform or other bacteria concerns change the equipment plan immediately.

Those results do more than identify contaminants. They tell you whether an under-sink unit can handle final polishing, or whether the water needs treatment upstream first.

Why the report matters more than the product page

Product pages are written to sell broad compatibility. Well water rarely behaves that way. A carbon filter that performs well on taste and odor can clog quickly if the actual issue is sediment and oxidized iron. A system that improves flavor may do very little for nitrates. A good-looking under-sink unit also does not solve a bacteria problem by itself.

That is why I recommend buying in this order. Test first. Then decide on pre-filtration. Then choose the under-sink unit that fits the treated water reaching the kitchen. That sequence usually saves money because it prevents premature cartridge changes and protects the more expensive components.

This is also where long-term cost starts to become clear. A filter rated for a certain lifespan on cleaner water may reach that limit much sooner on a well with grit, iron, or seasonal swings. The box does not tell you how fast your cartridges will load up if the incoming water is unstable. Your test report gives you the best clue.

Lab test first, video second

Many homeowners want to know what a proper water testing process looks like before paying for one. This walkthrough is a helpful primer.

A simple testing checklist

Use this before you buy anything:

  1. Pull a current sample. Do not rely on an old inspection report or a neighbor’s water test.
  2. Request a well-focused panel. Include sediment indicators, iron, manganese, hardness, nitrates, and bacteria.
  3. Note what you see and smell. Staining, rotten egg odor, cloudiness, and seasonal changes help explain the lab numbers.
  4. Shop with the report in hand. Choose equipment that answers the actual findings, not generic claims.

If the lab report and the marketing copy disagree, trust the lab report.

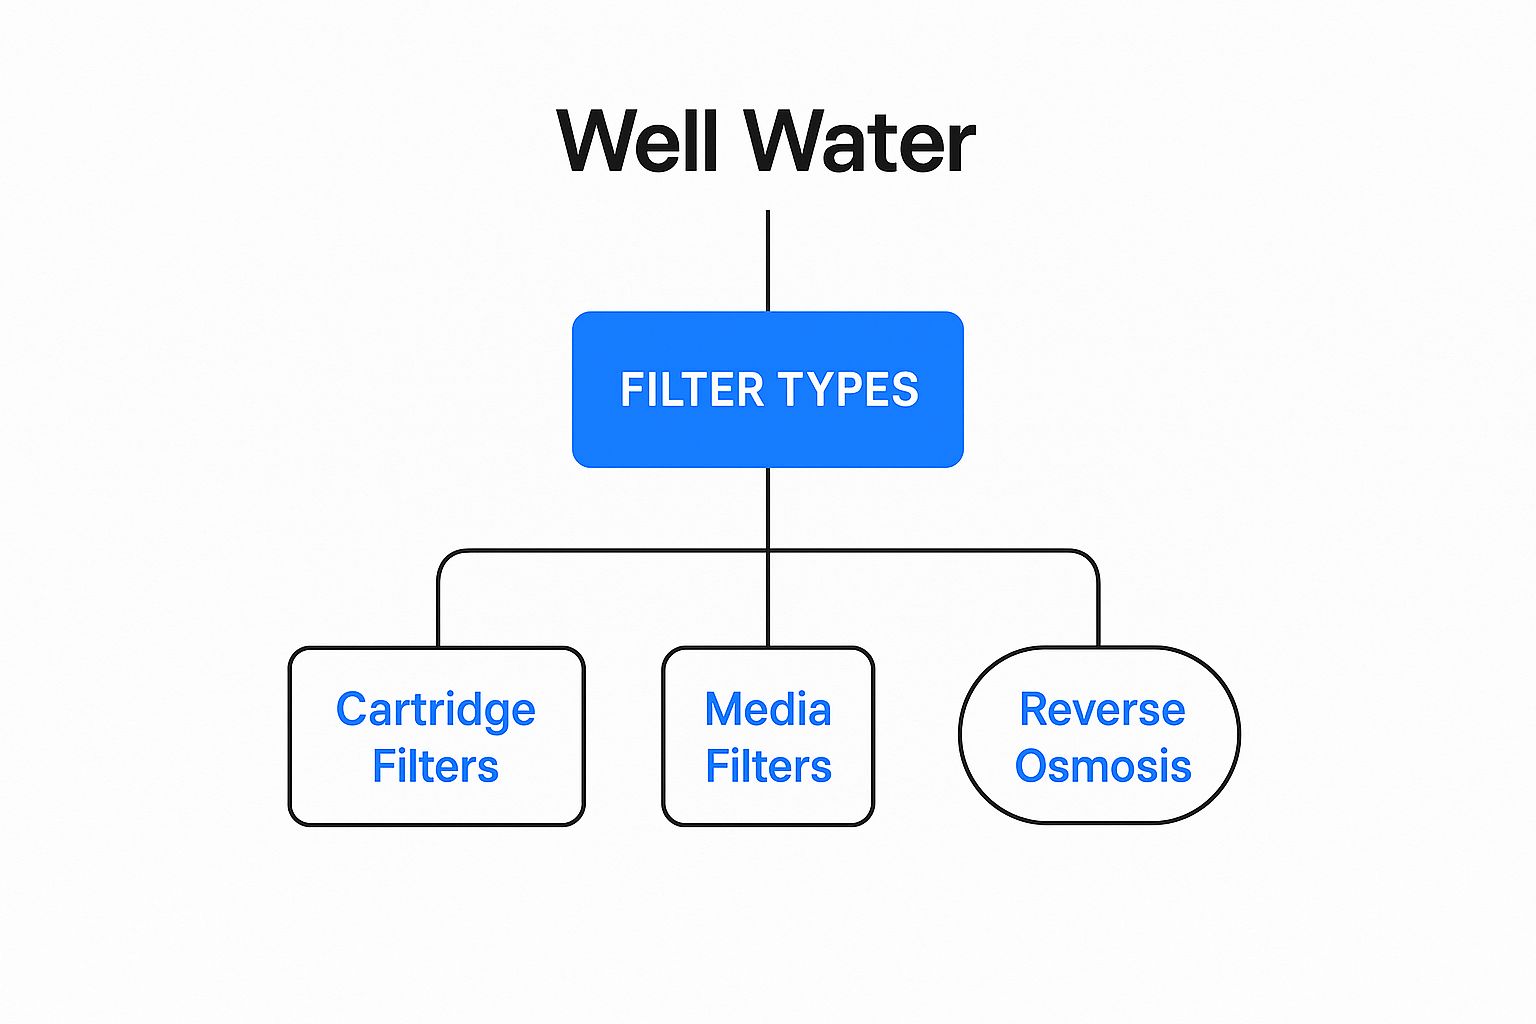
Comparing Under Sink Filtration Technologies for Wells

A clear lab report usually narrows the field fast. For well water under the sink, choices are carbon block, reverse osmosis, and UV paired with filtration. Each solves a different problem. The expensive mistake is expecting one cartridge or one compact unit to handle every well issue by itself.

Various industrial and residential water filter cartridges standing in a row against a plain white background.

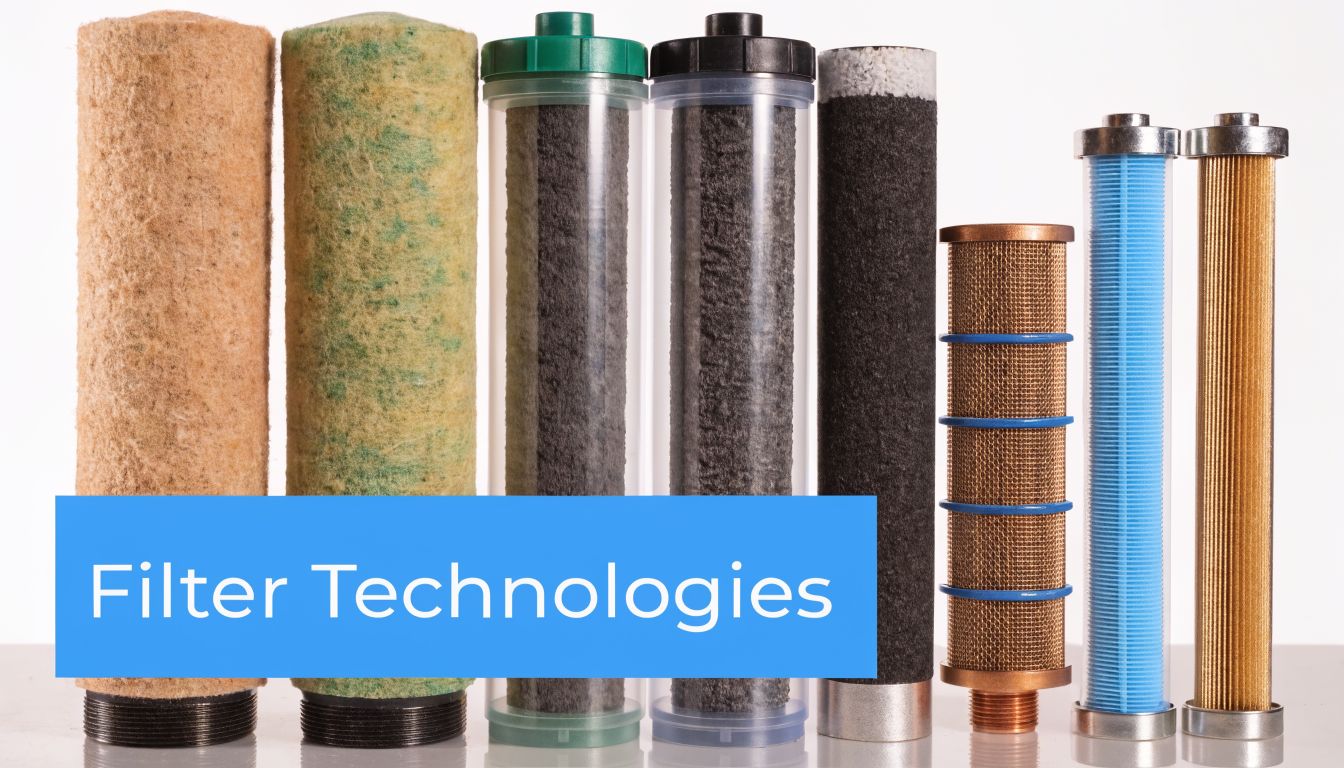
On city water, an under-sink filter often works as a standalone upgrade. On a well, it usually works best as the last stage in a treatment chain. That difference matters because iron, sediment, sulfur odor, and bacteria can overwhelm the wrong technology long before the rated filter life on the box.

Carbon block systems

Carbon block systems are often the easiest to live with. They keep normal faucet flow, do not waste water, and usually need less maintenance than RO. They also do a good job improving taste and odor and reducing many chemical contaminants, which makes them a strong finishing filter after the water has already been cleaned up upstream.

For well owners, that last part is the key trade-off. Carbon can polish water very well, but it does not like heavy sediment, iron loading, or active bacterial problems. If raw well water hits the carbon first, pressure drops early, cartridges foul faster, and replacement costs climb.

I install carbon block systems most often on wells that already have the big problems handled. That includes sediment control at minimum, and often separate treatment for iron or sulfur if those are present.

Carbon block works best on well water that is already reasonably clean by the time it reaches the kitchen sink.

Reverse osmosis systems

Reverse osmosis is the strongest under-sink option for dissolved contaminants. If the report shows nitrates, arsenic, sodium, fluoride, or a broad mix of dissolved solids, RO usually gives the homeowner the best chance of getting the drinking water where it needs to be.

It also has the most conditions attached to it. RO membranes are fine filters. Fine filters clog. On well water, that means shortened membrane life if sediment or iron gets through, more frequent prefilter changes, slower production, and wastewater that some homeowners do not expect until after installation. The water quality can be excellent. The operating cost can also be higher than online roundups suggest, especially on a well with seasonal swings.

For many wells, RO is the right drinking water core, but only if the incoming water has already been stabilized enough that the membrane is not doing everyone else’s job.

UV systems

UV belongs in the conversation any time the well has a bacteria history, a shallow casing, flooding risk, or a test result that points to microbial contamination. It treats a problem carbon and RO are not designed to solve on their own.

UV also has strict limits. It does not remove iron, manganese, sediment, hardness, or sulfur odor. It does not improve taste by itself. It needs clear water to work properly because suspended particles can shield microbes from the light. In practice, UV is an add-on disinfection stage, not a substitute for filtration.

Which technology fits which well problem

Technology Good fit for Weak fit for Best use on well water
Carbon block Taste, odor, many chemical reduction goals Heavy sediment, iron, bacteria concerns Final polishing stage after upstream treatment
RO Dissolved contaminants such as nitrates, arsenic, and high TDS Untreated well water with grit or iron fouling risk Drinking water filter after feed water is cleaned up
UV Bacteria control on clarified water Sediment, metals, odor, taste by itself Final disinfection step in a complete system

Mixed results are common on private wells. A water test might show sediment, iron staining, and bacteria risk all at once. In that case, the right answer is a matched system, not brand loyalty to one under-sink unit. That approach costs more upfront in some homes, but it usually costs less over time because the expensive filters last closer to their intended service life.

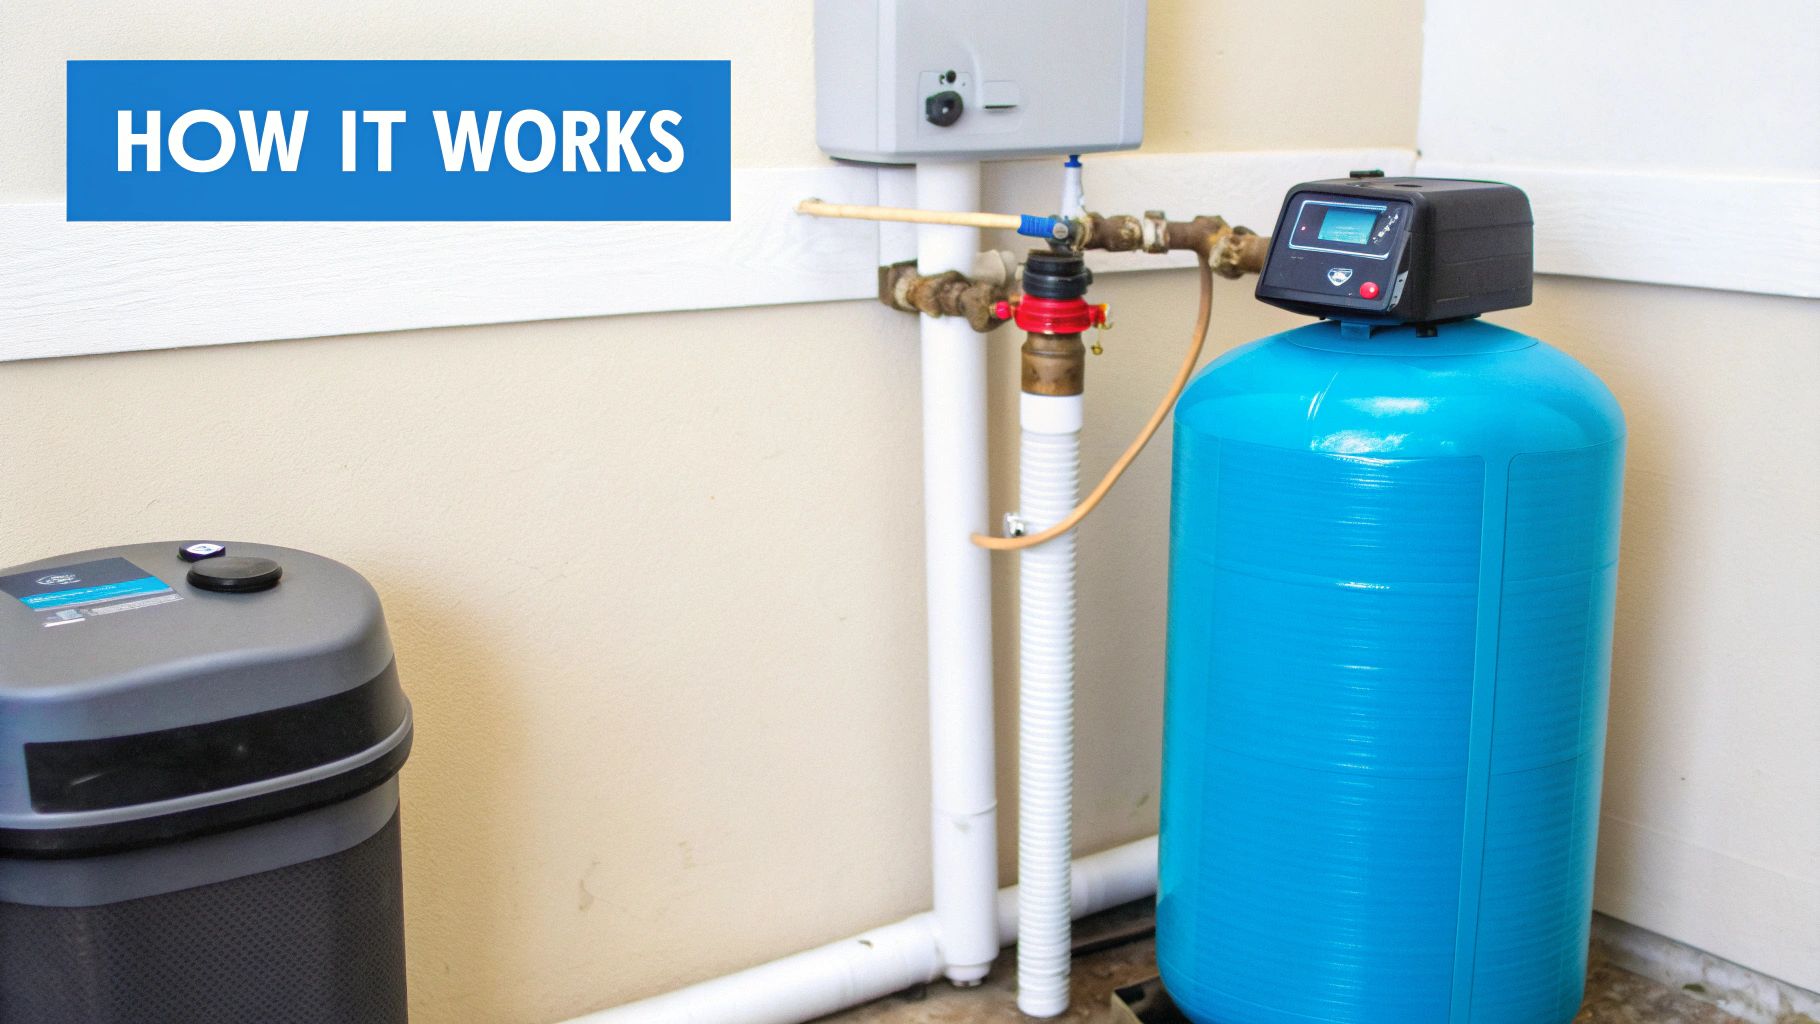
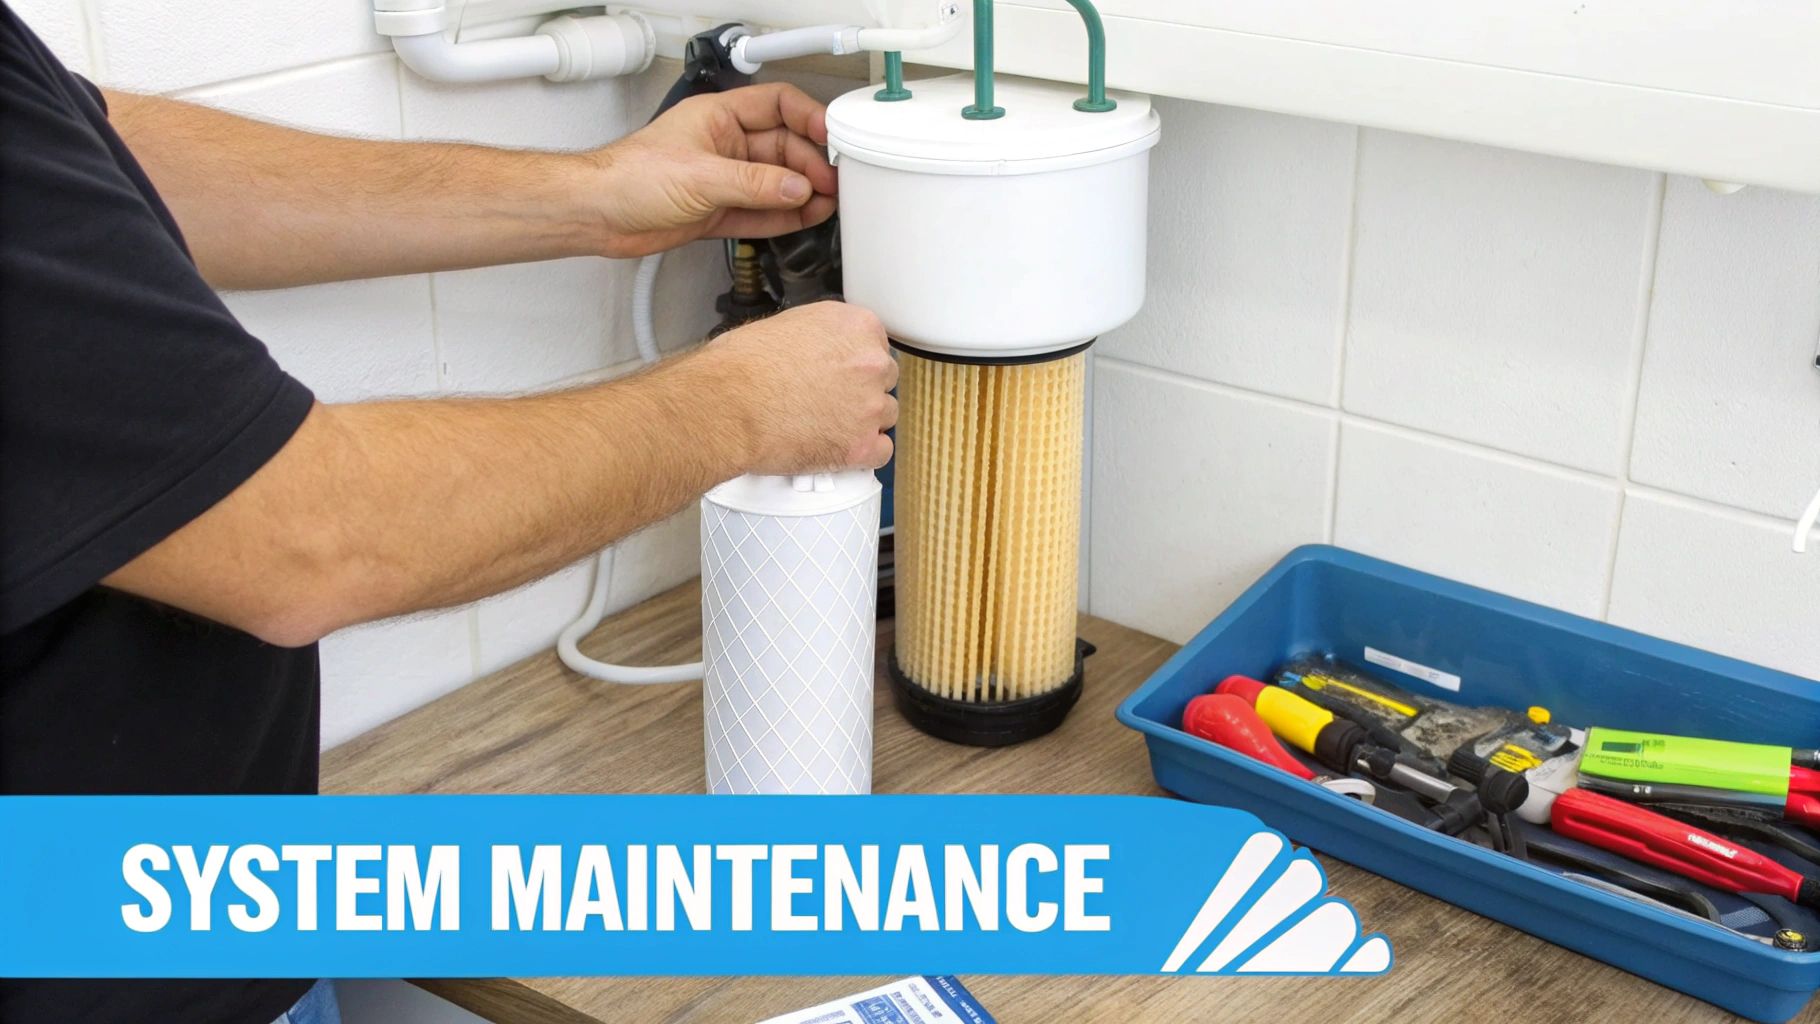
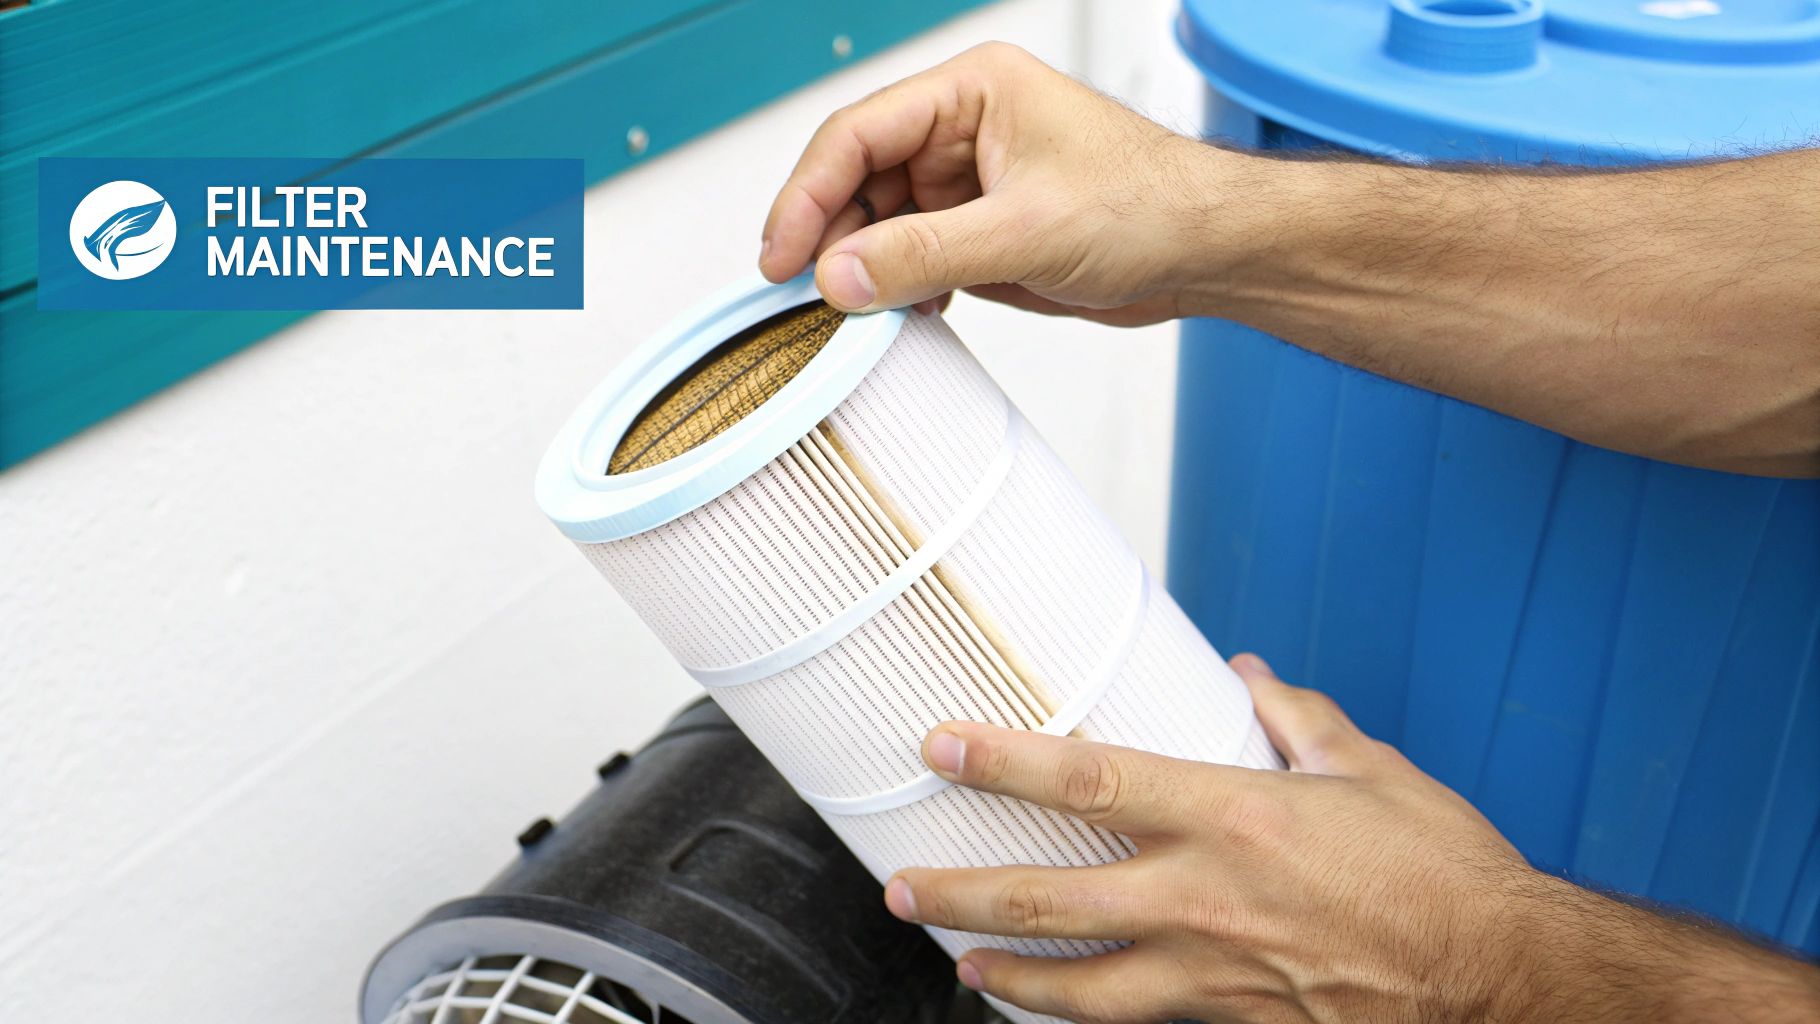
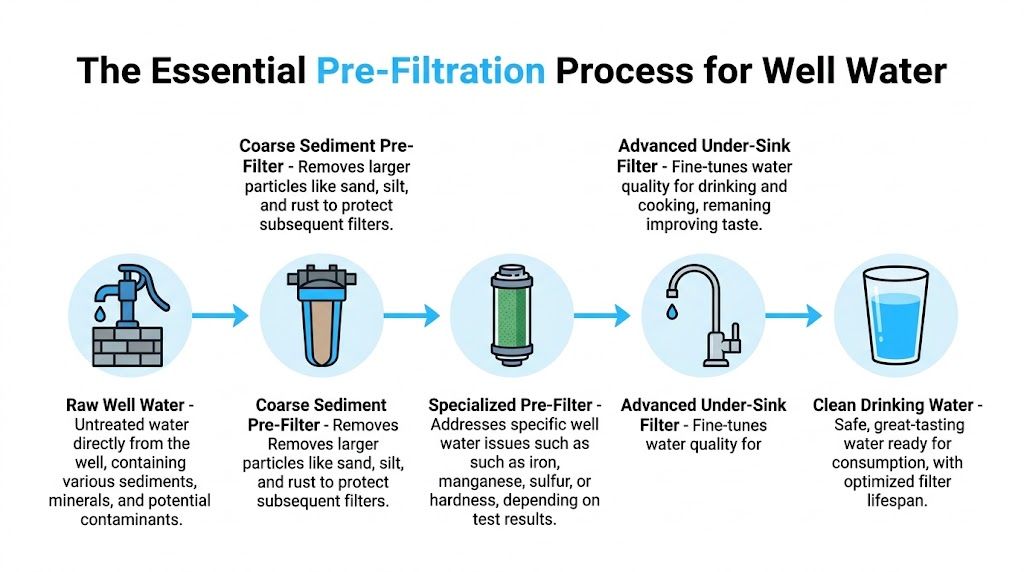
The Critical Pre-Filter Your Well Water Demands

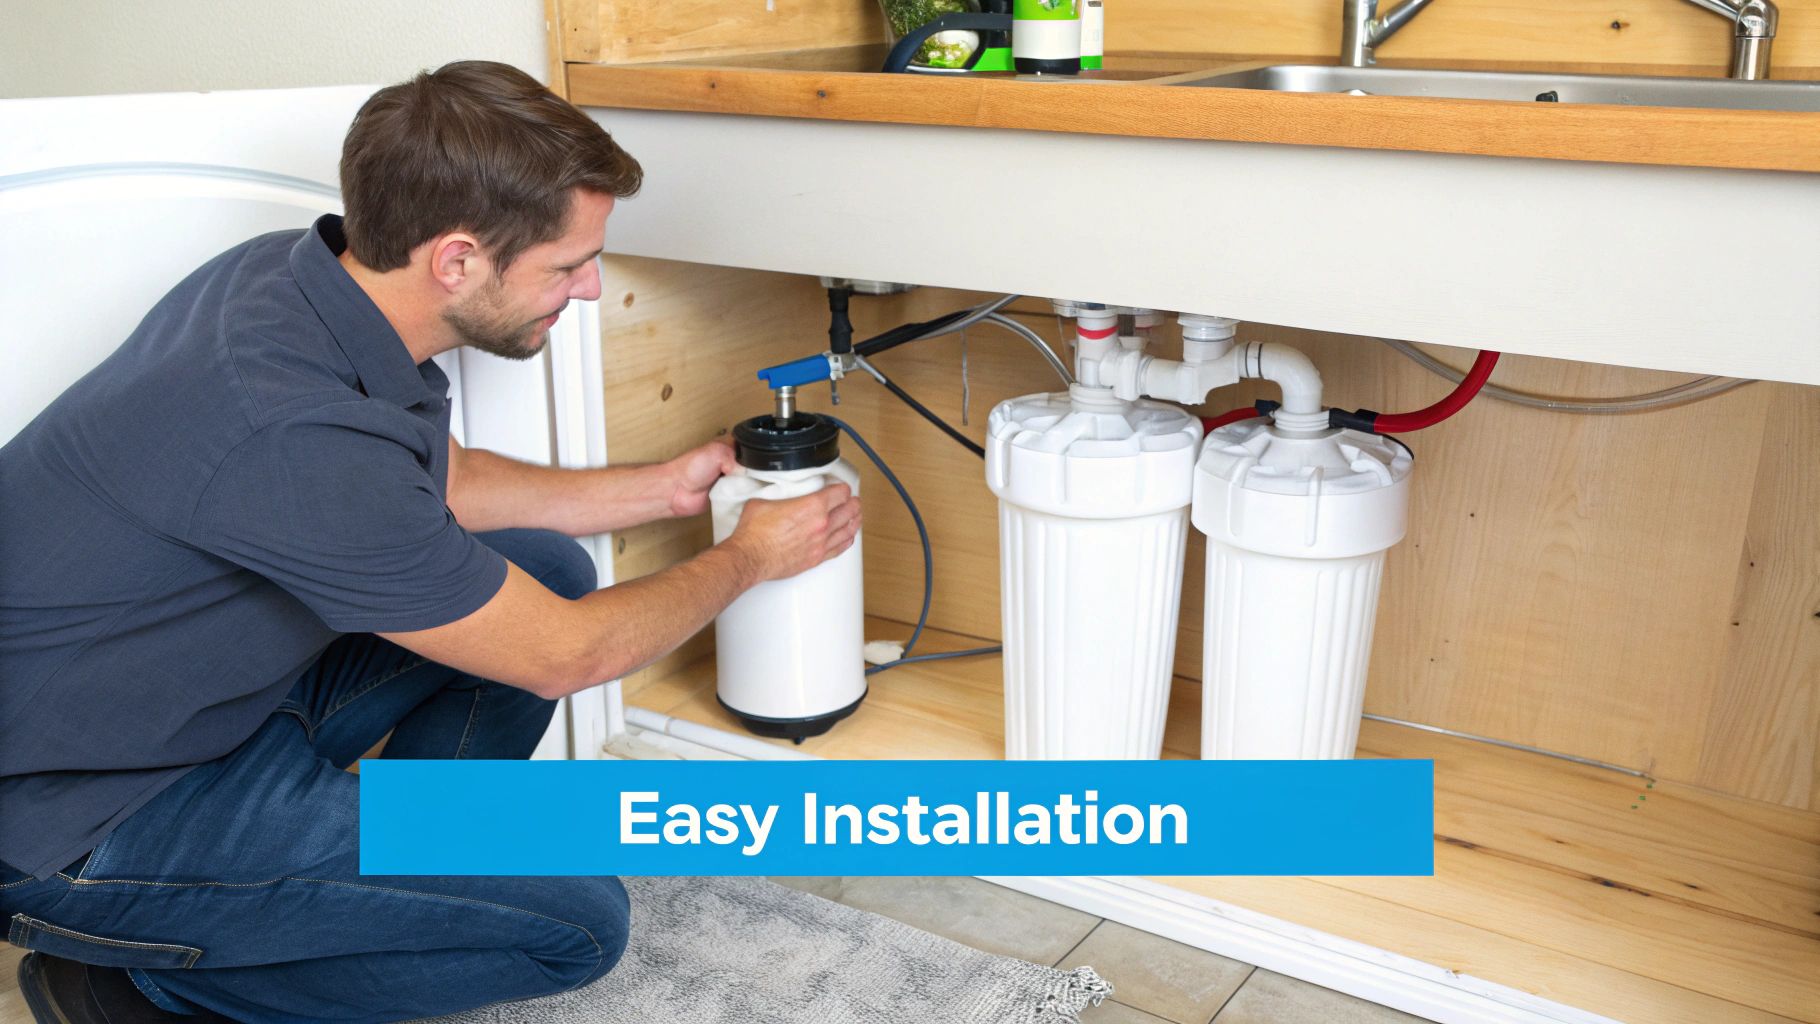
A homeowner buys a premium under-sink system, installs it on a Friday night, and likes the taste right away. A few weeks later, flow slows down, cartridges look filthy, and the replacement schedule suddenly gets expensive. On well water, that pattern usually points to a setup problem, not a bad brand.

A diagram illustrating the essential pre-filtration process for cleaning well water from raw source to drinkable state.

Why under-sink units burn through filters on well water

Under-sink filters are finishing filters. They are built to polish water that has already had the rough work handled upstream.

Well water often arrives with sand, silt, iron particles, oxidized manganese, or fine debris stirred up by pump cycling. Feed that directly into a carbon block or RO system and the expensive stage becomes the first dirt catcher in the line. Flow drops faster. Pressure falls off. RO membranes foul sooner. Carbon cartridges load up long before their rated life.

I see this mistake all the time in homes with light staining or occasional cloudy water. The owner assumes the under-sink unit will "handle it." It will, for a while. Then the eventual cost shows up in short cartridge life and inconsistent performance.

Under-sink filters last longer on wells when they polish water instead of trying to clean raw well water by themselves.

What the pre-filter needs to do

A proper pre-filter protects the expensive equipment and gives the under-sink unit a cleaner, steadier feed. For many wells, that starts with sediment control. The exact micron rating depends on how dirty the water is and how much pressure loss the home can tolerate, but the job is the same. Catch the grit before it reaches the finer stages.

Some wells need more than a sediment cartridge.

If testing or clear symptoms point to iron, manganese, sulfur odor, or hardness, add treatment for that problem before the under-sink filter. At this point, many homeowners overspend. They keep replacing specialty under-sink cartridges that were never meant to carry iron or sulfur treatment on their own.

A complete setup works better and usually costs less over time

The most reliable approach is a staged system:

  1. Sediment pre-filtration first for sand, silt, rust, and other particles.
  2. Problem-specific treatment next if the well has iron, manganese, sulfur, or hardness.
  3. Under-sink filtration last for drinking water taste, odor, and any targeted reduction the water report calls for.

That order matters. It protects flow rate, reduces fouling, and helps the final cartridges reach something close to their expected service life.

How to match the pre-filter to the problem

Use your water test and what you see in the house.

  • Visible grit or cloudy water: Start with sediment pre-filtration before any under-sink unit.
  • Orange, brown, or black staining: Plan for iron or manganese treatment upstream. A kitchen filter alone is usually the wrong tool.
  • Rotten egg smell: Address sulfur before the water reaches the under-sink system.
  • Scale and soap issues: Hardness may need treatment before fine filtration if you want better filter life.
  • Mixed well problems: Build the system in stages instead of asking one under-sink product to solve everything.

A sleek tankless unit under the sink can still be part of a good well-water setup. It just should not be the whole setup. On private wells, the best results usually come from pairing the under-sink filter with the right pre-treatment so you are paying for clean drinking water, not constant replacements.

Top Filtration Approaches and Recommended Systems

The best under sink water filter for well water depends on what your report shows and what kind of maintenance you're willing to live with. I don't like generic top-five lists for wells because they blur together very different problems. A better method is to choose an approach, then pick a system type that fits.

Here’s the quick comparison.

Filtration Approach Best For Key Weakness Estimated 3-Year Cost
Sediment pre-filter + multi-stage carbon under-sink Wells with sediment, taste issues, staining concerns, and no major nitrate or microbial issue May not solve dissolved contaminant problems that call for RO Varies by filter change frequency and pre-treatment needs
Sediment pre-filter + under-sink RO Wells with broad dissolved contaminant concerns Membranes can suffer if iron and sediment control is weak Usually higher because of filter replacements, water waste, and add-ons
Sediment pre-filter + specialized treatment + under-sink carbon Wells with iron, manganese, sulfur, or hardness patterns plus taste/odor complaints More components to size and maintain Can be efficient long term if pre-treatment prevents premature cartridge loss
Clarification + UV + under-sink finishing filter Wells with microbial risk and drinking-water polishing needs UV alone won't fix particles, metals, or taste issues upstream Depends on lamp service, pre-filtration, and finishing filter schedule

Approach for sediment, staining, and everyday drinking water improvement

If your water report points to sediment, iron-related nuisance issues, or general taste problems, but not a major dissolved-contaminant or bacterial challenge, I usually prefer a sediment pre-filter plus a high-performance multi-stage carbon system under the sink.

For such applications, systems like Clearly Filtered make sense. The available lab data shows strong performance on uranium, chloroform, copper, barium, and strontium in treated well-water testing, and the flow rate remains practical for kitchen use. That kind of filter works best when it isn't being fed raw grit and oxidized debris all day.

A setup like this tends to fit homeowners who want:

  • Better taste and cooking water
  • No RO wastewater
  • A simpler faucet experience
  • Less concern about stripping minerals

The catch is that this approach isn't the answer if nitrates or microbes are the true problem. A polished glass of water can still be the wrong glass of water if the technology doesn’t match the report.

Approach for nitrates, arsenic concerns, and broad dissolved contaminant reduction

If the lab report points toward dissolved contaminants that call for stronger reduction, an under-sink RO paired with sediment pre-filtration is often the safer bet. Models frequently recommended in this lane include systems like Waterdrop G3P800, Cloud RO, and Aquasana SmartFlow.

I treat these as high-performance tools with strict feed-water expectations. They can be excellent if pre-filtration is done properly. They can also become maintenance magnets when homeowners skip that step and let dirty well water hit the membrane directly.

This approach usually makes sense when:

  • You need broader dissolved-contaminant reduction than carbon alone can provide.
  • You accept slower production and some wastewater.
  • You have room for maintenance and possible add-ons like remineralization.

If you're drawn to RO because it feels like the strongest option, make sure the pre-filtering is just as strong. Otherwise the membrane becomes an expensive sediment catcher.

Approach for iron, manganese, sulfur, or hardness patterns

Some wells are less about one dangerous contaminant and more about ugly, stubborn chemistry. Orange staining, black residue, sulfur odor, recurring scale, and filter cartridges that slime up early usually point to this category.

In those homes, the under-sink unit should be the last piece of the plan, not the first. The better approach is:

  • a sediment stage,
  • a specialized treatment stage chosen from the report,
  • then an under-sink carbon or RO unit for drinking water.

A system like Aquasana Claryum can make sense as the final under-sink stage in a broader setup because non-RO carbon filtration preserves minerals and avoids wastewater. But I wouldn't ask it to solve a raw iron problem alone. That’s where well owners waste money.

Approach for bacteria risk

If the report shows microbial concern, the system design changes again. You need a treatment train that includes clarification before disinfection, and many homeowners end up pairing filtration with UV.

A practical sequence is:

  1. particle reduction,
  2. any needed well-specific pre-treatment,
  3. UV or another appropriate microbial barrier,
  4. under-sink finishing filter for taste and use at the kitchen tap.

This kind of setup takes more planning, but it avoids the false confidence that comes from installing a nice under-sink cartridge while leaving the microbial issue unresolved.

What I’d choose by homeowner type

Homeowner situation Best fit
You want strong drinking-water improvement and your report doesn't point to major nitrate or bacteria issues Sediment pre-filter + multi-stage carbon under-sink
Your report shows dissolved contaminants that need broader reduction Sediment pre-filter + under-sink RO
Your well causes staining, odor, or rapid cartridge fouling Staged pre-treatment + under-sink finishing filter
You have confirmed microbial risk Clarification + UV + final under-sink filter

The winning setup is the one you'll still be happy maintaining a year from now. Well water rewards realistic design, not heroic expectations.

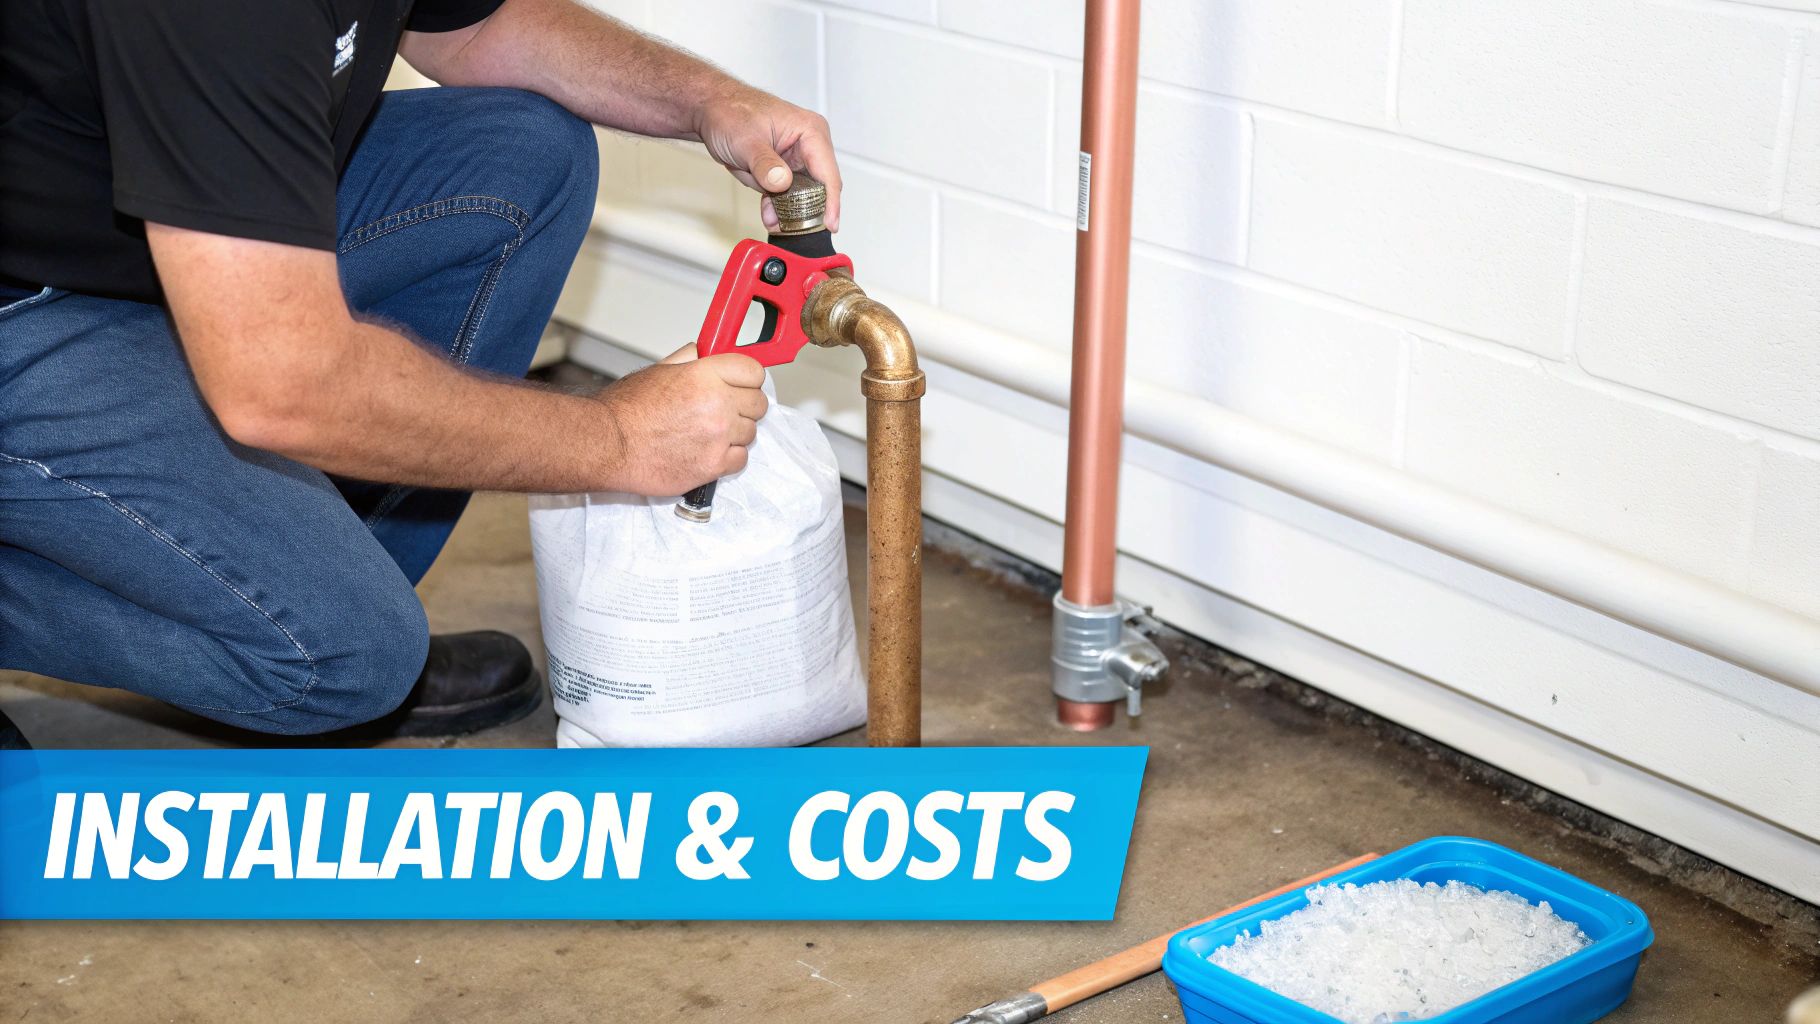
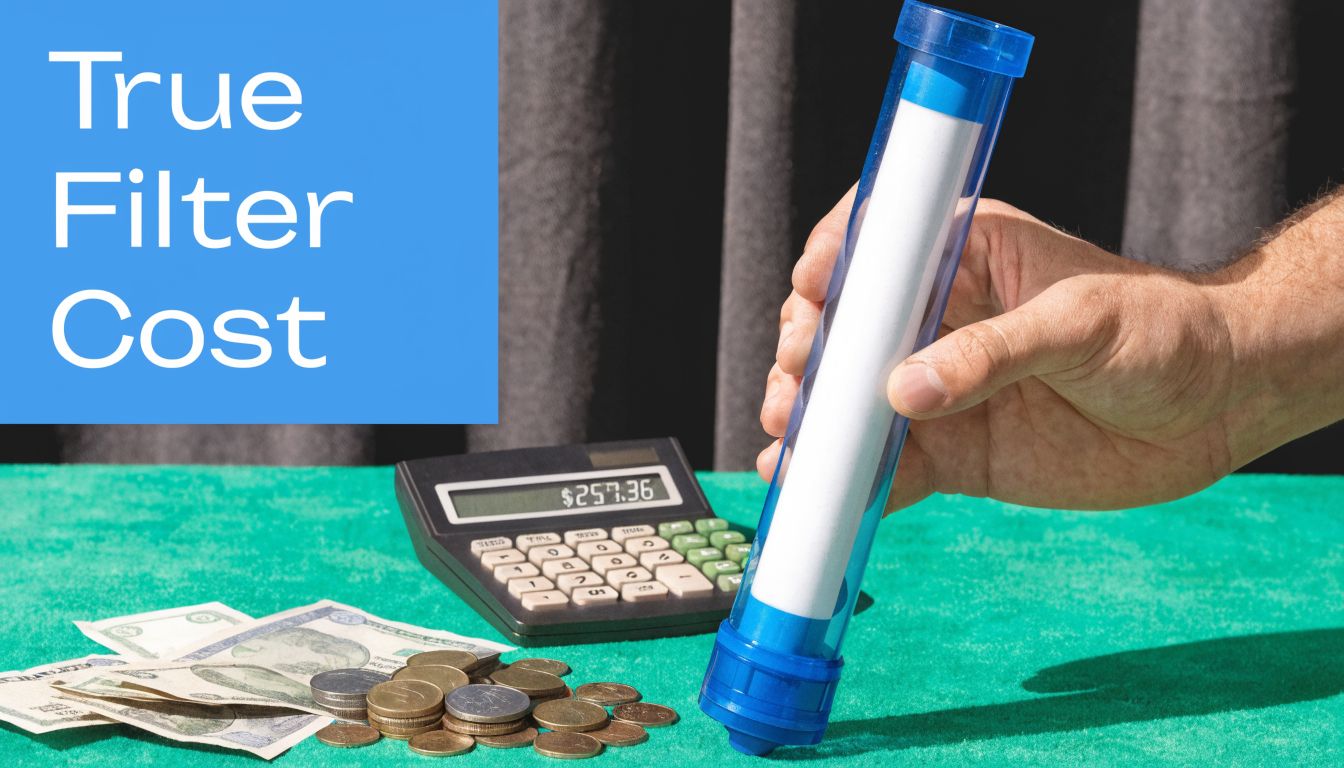
Calculating the True Lifetime Cost for Well Water Filters

A $300 under-sink filter can turn into a high-maintenance system fast if the well water feeding it is full of sediment, iron, or hardness. I see that mistake all the time. The unit itself is not always the expensive part. Keeping it working on well water is.

A hand holding a water filter cartridge next to a calculator and loose change on a table.

What the sticker price misses

Retail price tells you what the box costs on day one. It does not tell you what your water will do to that system over the next few years.

On a clean municipal supply, a manufacturer’s replacement schedule may be close to reality. On a private well, that schedule often breaks down. Sediment loads cartridges faster. Iron can blind carbon blocks and foul RO components. Hard water leaves scale where flow paths are narrowest, which is why some homeowners blame the filter when the actual problem is the untreated feed water ahead of it.

That is why I price well-water systems as a package, not a single product. The under-sink unit, the pre-filter stage, replacement cartridges, occasional sanitizing, and any parts that wear early all belong in the same budget.

Build a cost worksheet before you buy

Use a simple formula:

Three-year cost = system price + replacement filters + pre-filter replacements + service items + operating costs

For well water, the pre-filter line matters more than buyers expect. Adding a sediment stage or a better upstream treatment step raises the upfront spend, but it often saves money by protecting the expensive filters under the sink.

Operating costs depend on the technology:

  • RO systems can bring wastewater, slower production, and more frequent service if feed water is rough
  • Carbon systems usually cost less to run, but cartridge life can drop sharply if sediment or iron is not handled first
  • Specialty add-ons such as remineralization cartridges, UV lamps, or pumps add recurring cost and maintenance time

A cheaper unit with no protection in front of it can cost more than a better-designed system by the end of year two.

How I estimate cost in real well-water homes

Start with the water report, then look at the full treatment train. If the under-sink filter is being asked to catch everything, the ownership cost is usually headed the wrong way.

Ask these questions:

  • What reaches the kitchen filter after pre-treatment? Price the final water entering the unit, not the raw well water at the pressure tank.
  • Which cartridge or membrane is the most expensive part to replace? That part usually sets the long-term budget.
  • How easy is the system to service? Filters that are awkward to reach or proprietary to one brand tend to cost more over time.
  • Will low flow trigger early troubleshooting or part swaps? That labor and frustration have a cost, even if you do the work yourself.
  • Are replacement filters sold everywhere, or only through the manufacturer? Limited availability often means higher prices later.

One rule holds up well in the field. Protect expensive filtration with cheaper upstream filtration whenever the water justifies it.

Well water punishes undersized systems and rewards good staging.

Homeowners save the most money when they stop shopping for a single magic filter and start building a complete system. That usually means a modest pre-filter investment up front, fewer surprise replacements, and a kitchen filter that performs closer to its rated life.

Your Final Well Water Filter Decision Checklist

Before you buy, run through this list once. It catches most expensive mistakes.

Water quality match

  • Match the filter to the report. If the lab results point to nitrates, bacteria, or heavy sediment, the system should answer those issues directly.
  • Don't buy for taste alone. Better taste is nice. It isn’t the same as solving the main contaminant problem.

Performance and daily use

  • Check the flow you can live with. A high-performance system that annoys everyone at the sink often becomes a regret purchase.
  • Think about how the filter behaves on well water. Capacity claims are often cleaner and kinder on product pages than in well-water homes.

Certifications and proof

  • Look for relevant certifications. If a system claims reduction for specific contaminants, verify that the certification or test evidence matches the claim.
  • Separate lab data from marketing language. The details matter, especially on wells.

Installation reality

  • Measure the under-sink space. Tankless systems save space, but the plumbing path and service access still matter.
  • Plan the pre-filter location. The under-sink unit may be the final stage, not the first stage.

Maintenance honesty

  • Decide how much upkeep you're willing to do. A technically excellent system is still the wrong choice if you won't keep up with service.
  • Budget for well-water wear. If your water is hard on filters, assume more maintenance, not less.

A good purchase decision usually feels a little less exciting and a lot more solid. That’s the right instinct for well water.

Frequently Asked Questions About Well Water Filters

Can I use a standard pitcher filter on well water

You can, but I wouldn't rely on it as your primary solution. Pitcher filters are fine for minor taste improvement when the water is already fairly clean. They are not built to handle the sediment, iron loading, microbial concerns, or broad contaminant range that many wells bring with them.

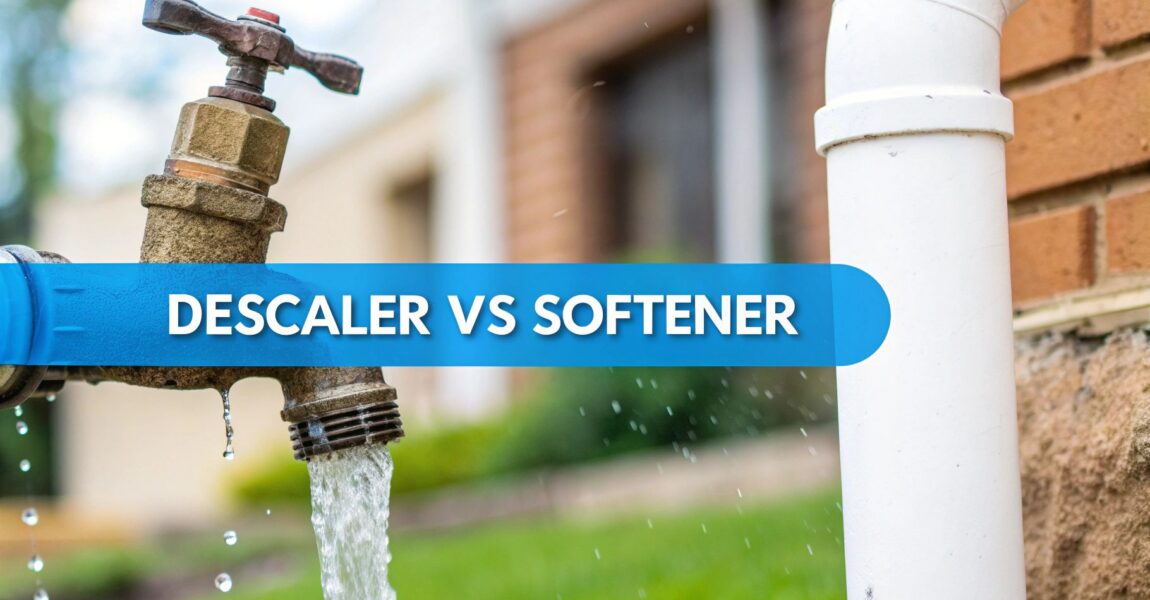
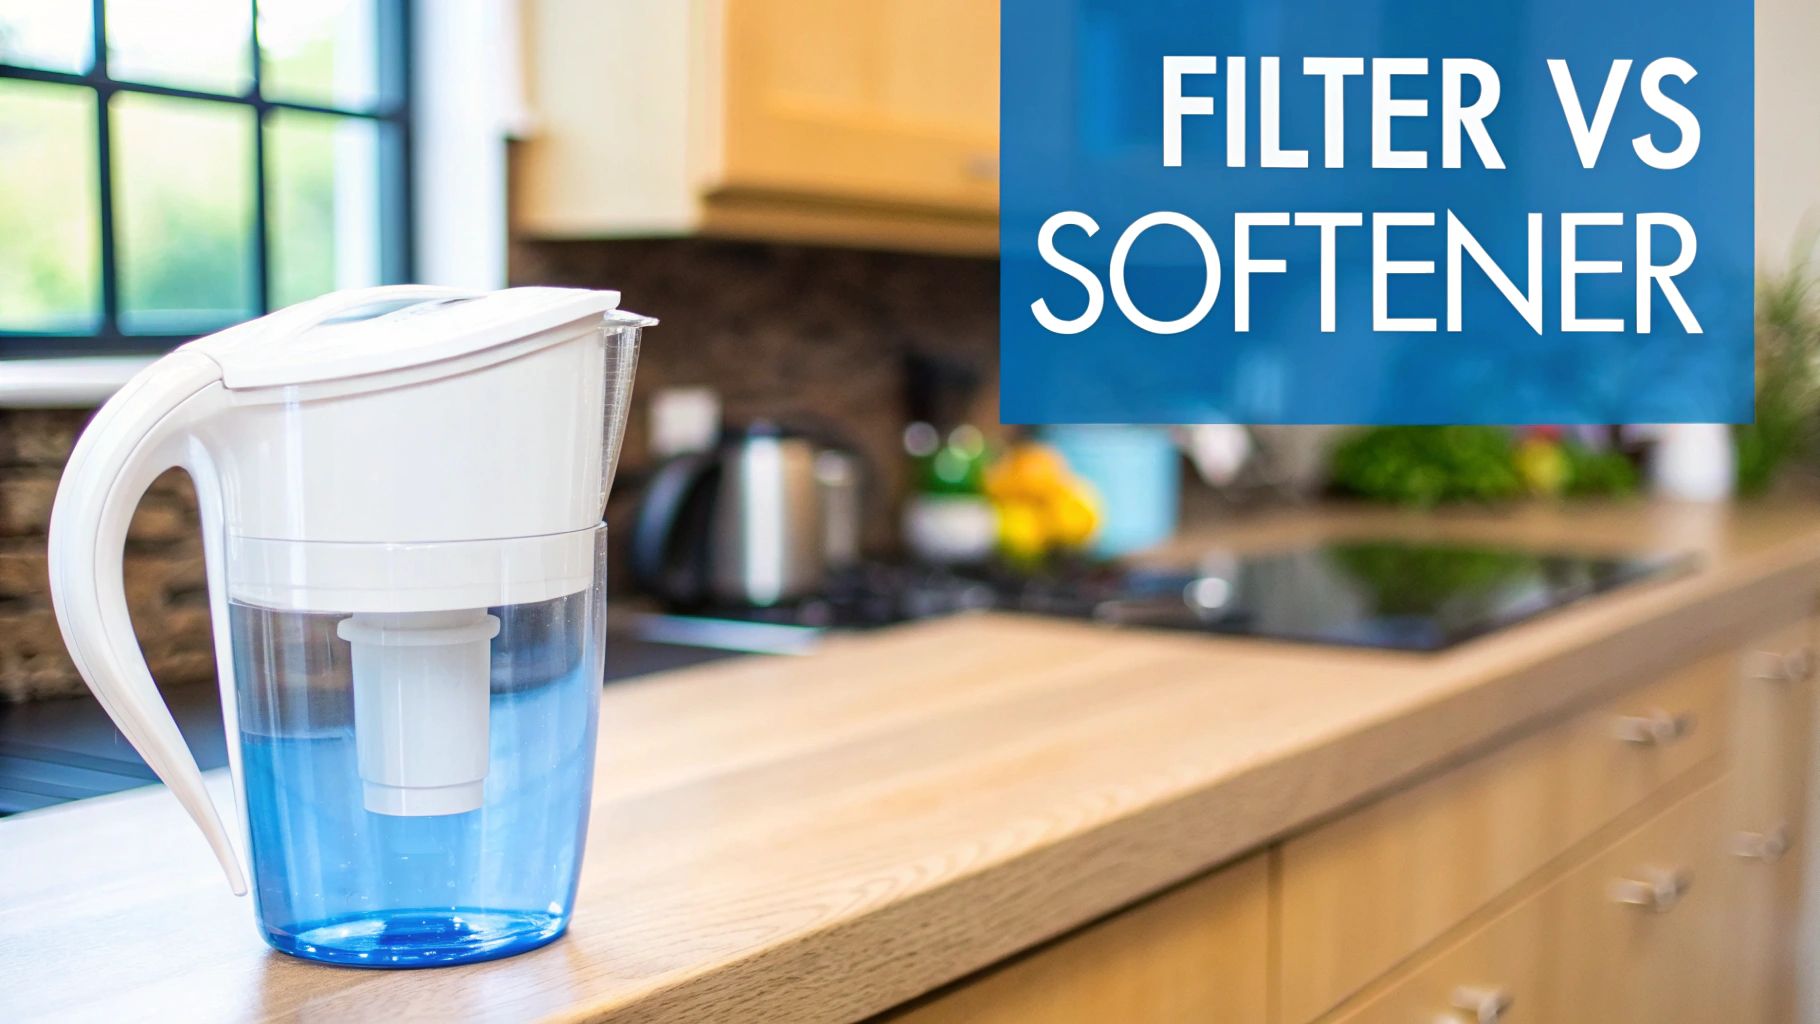
Do I need a water softener with an under-sink filter

Sometimes yes, often no. It depends on whether hardness is just a nuisance or part of a larger pattern of scale, staining, and appliance trouble. An under-sink filter helps at the kitchen tap. A softener or other conditioning equipment addresses whole-home hardness behavior. They solve different problems.

Will a UV filter work if my water is cloudy

Not reliably. UV needs water that has already been clarified enough for the light to do its job. If the water carries sediment or visible cloudiness, fix that first with proper pre-filtration. UV should be part of a treatment train, not a shortcut around one.

How do I know when to change cartridges if my schedule keeps drifting

On well water, I tell homeowners to watch performance, not just the calendar. A drop in flow, return of odor, renewed metallic taste, or more visible staining usually means the system is loading up. Keep written dates anyway, but don't assume the printed replacement interval will match your well.

Is reverse osmosis always the best under sink water filter for well water

No. RO is excellent for some dissolved contaminant problems, but it isn't automatically the best choice for every well. If your main challenge is sediment, iron, or sulfur, RO without proper pre-treatment can become a maintenance headache. In some homes, a staged system with sediment protection and a strong carbon block under the sink is the smarter long-term fit.

Can one under-sink system fix all my well-water issues

Usually not by itself. If your well has mixed issues, and many do, the best answer is a staged design. The under-sink unit handles the final drinking-water job. Upstream filtration protects it and handles the rougher work.


If you want help sorting through test results, comparing filter types, or figuring out what a complete well-water setup should look like for your home, Water Filter Advisor is a practical place to start. It’s built for homeowners who want clear, research-driven guidance without the usual confusion around certifications, maintenance, and long-term filter costs.

Your Ultimate Guide to a Whole House Water Filter System for 2026

Ever caught a whiff of chlorine in your morning shower and felt like you were back at the community pool? Or maybe you've waged a losing war against the chalky white stains that haunt your dishes and faucets. Sometimes, the water from your tap just has a funky, "off" taste you can’t quite name.

These aren't just random quirks; they're clues about what’s flowing through your pipes. A whole house water filter system, also known as a point-of-entry (POE) system, is your ticket to fixing these issues once and for all, turning every tap in your home into a source of pure, refreshing water.

The Ultimate Upgrade for Your Home's Water

Picture a whole-house filter as a diligent gatekeeper for your home’s entire water supply. We install it right where the main water line enters your house, so it cleanses and purifies the water before it even has a chance to journey through your plumbing.

This is a massive leap from a simple pitcher or a faucet-mounted filter. Those are point-of-use (POU) filters, meaning they only treat the water at that one, single spot. A whole house water filter system is a game-changer.

Comprehensive Protection for Your Entire Home

A kitchen filter is great for the water you drink, but what about the water you use to bathe, wash your clothes, or run your appliances? A whole-house system protects everything. Here are the immediate benefits you'll notice:

  • Water That Tastes and Smells Amazing: It kicks chlorine, sulfur, and other culprits to the curb, eliminating foul tastes and odors from every single faucet.
  • Healthier Skin and Hair: By filtering out harsh chemicals like chlorine, you’ll step out of the shower with skin that feels less dry and hair that’s softer and more manageable.
  • Appliance Life Extension: It stops sediment, rust, and scale from building up inside your water heater, washing machine, and dishwasher. That means they'll last longer and run more efficiently.

An Investment in Your Peace of Mind

Getting a house filtering system is more than a luxury upgrade; it's a savvy investment in your family’s well-being and the longevity of your home. People are wising up to what's in their water, and it shows. The global market for water filtration was valued at $10.5 billion in 2025 and is expected to skyrocket to $19.0 billion by 2029. That’s a crystal-clear sign that homeowners everywhere are taking control. Discover more insights on the growing water filtration market.

When you purify water at the source, you aren't just making your drinking water taste better. You're creating a healthier environment for everything water touches in your home, from your laundry to your morning coffee.

Ultimately, installing a full-scale filtration system gives you true peace of mind. You don't have to wonder what's lurking in your water anymore. You can just turn on the tap and trust that every drop is as clean and pure as it can be.

How Water Filtration Actually Works

At its core, a house filtering system is like an obstacle course for your water, pushing it through layers of filter media. Each layer is engineered to stop or trap specific contaminants. Think of it as a multi-stage security checkpoint where only pure H₂O gets the all-clear.

Every part has a mission. Together, they ensure only clean, safe water enters your home. A sediment filter, for example, is your first line of defense, a bouncer that stops big troublemakers like sand, dirt, and rust flakes. Then you have the activated carbon filter, a master of disguise that uses a process called adsorption to snatch chemicals like chlorine and VOCs that cause bad tastes and smells.

Each filter medium is a specialist, designed to solve a different problem. The goal? To restore your water to its natural, pristine state of clarity, taste, and safety.

Common Filter Media And What They Remove

Here’s a cheat sheet for the most common filter materials and the water quality villains they're built to defeat.

Filtration Media Primary Target Contaminants Best For
Sediment Filter Sand, silt, rust, dirt, large particles Protecting downstream filters, improving water clarity
Activated Carbon Chlorine, chloramines, pesticides, herbicides, VOCs Removing bad tastes and odors, chemical reduction
Reverse Osmosis (RO) Dissolved salts, lead, arsenic, fluoride, viruses Maximum purification, removing a wide range of dissolved solids
KDF (Kinetic Degradation Fluxion) Chlorine, heavy metals (lead, mercury), bacteria, scale Extending carbon filter life, targeting specific metals
Water Softener Resin Calcium, magnesium (hardness minerals) Preventing scale buildup in pipes and appliances

By cleverly combining these different media, you can assemble a custom system that perfectly targets the specific contaminants revealed in your water test report.

The Two Main Principles: Sifting and Sticking

At the end of the day, water filtration boils down to two simple ideas: physical blocking and chemical attraction.

  • Physical Interception: This is sifting, plain and simple. A sediment filter is a porous material with holes measured in microns. Water zips through, but anything larger than the micron rating gets caught. A 5-micron filter nabs fine silt, while a 20-micron filter stops larger, visible debris.
  • Adsorption: This is the "sticking" part, and it's where things get cool. Media like activated carbon has a mind-bogglingly vast surface area with tons of microscopic pores. As water flows past, certain chemicals are irresistibly drawn to the carbon's surface and stick like velcro, effectively pulling them out of your water.

This diagram shows how a point-of-entry system delivers clean water to every tap in your house.

house filtering system

As you can see, a single system means you get glorious, filtered water everywhere—the kitchen sink, the shower, and the laundry room.

Building A Multi-Stage Defense

One filter is good. A multi-stage system is an all-star team. These setups layer different filters to create a comprehensive solution, with each stage excelling at a specific job.

A standard multi-stage system works like this:

  1. Sediment Pre-Filter: The opening act. It gets rid of large particles like dirt and sand. This clears up the water and, more importantly, protects the more expensive filters down the line from getting clogged.
  2. Carbon Block Filter: This is your taste-and-odor champion. It uses activated carbon to adsorb chlorine, chloramines, and other chemicals that make water smell or taste like it came from a chemistry experiment.
  3. Specialty Media Filter: If you’re battling specific foes like iron or hard water, a third stage can be added. This might be KDF media to remove heavy metals or a water softener to tackle calcium and magnesium.

The genius of a multi-stage system is its efficiency. Get the big, clumsy contaminants out first. This allows your finer, more specialized filters to focus on their jobs and last much longer.

When you're digging into the details, it helps to understand the engineering behind different filtration technologies like sand filters and cartridge filters.

This layered approach is why the water purification market is booming. Valued at $64.9 billion in 2025, the global market is projected to hit $134.2 billion by 2034. Reverse osmosis (RO) systems are a huge part of that, holding a dominant 55% market share in 2025 thanks to their ability to remove a massive range of contaminants.

Once you understand how these stages work together, you can look at a system's specs and know if it’s the right hero for your water's unique challenges. You're not just buying a filter; you're commissioning a targeted solution.

Choosing the Right Size and Flow Rate

A kitchen counter with a chrome water tap, an open notebook, a pencil, and a flow rate gauge.

It’s easy to get mesmerized by the high-tech filtration magic when shopping for a house filtering system. But two other factors are just as crucial for a happy outcome: size and flow rate. Get these wrong, and you’ll be filled with regret every time you turn on the shower.

When we talk about "size," we’re not talking about the unit's physical dimensions. It’s all about matching the system's capacity to your family's water consumption.

Think of it like an air conditioner. One that’s too small for the room will run constantly and never quite cool it down. An undersized water filter has the same problem—it just can't keep up. You'll suffer through weak showers and faucets that trickle pathetically. On the flip side, a system that’s way too big for your needs is an over-investment in both the unit and its pricier replacement filters.

Understanding Water Flow Rate (GPM)

The magic number you need to know is the flow rate, measured in gallons per minute (GPM). This tells you exactly how much water can pass through the filter at any given moment without a significant pressure drop.

Most residential whole-house systems have a GPM rating between 10 to 25 GPM. Your mission is to pick a system with a GPM that meets, or ideally, slightly exceeds your home's peak water usage. This is your insurance policy against a frustrating drop in water pressure, even when the whole family is using water at once.

With a correctly sized system, you shouldn't notice any change in your water pressure. If you see a pressure drop of more than 10–15 psi across your filter, it's a flashing red light that the system is too small or the filters are clogged and screaming for a replacement.

How to Calculate Your Home's Peak Demand

To figure out the right GPM for your home, you'll need to conduct a quick "water audit." Don't worry, it's painless. Just add up the flow rates for all the fixtures you might realistically run at the exact same time.

Here are some typical flow rates to get you started:

  • Kitchen or Bathroom Faucet: 1.0 – 1.5 GPM
  • Standard Showerhead: 2.5 GPM
  • High-Efficiency Showerhead: 1.5 – 2.0 GPM
  • Dishwasher: 1.5 – 2.5 GPM
  • Washing Machine: 2.0 – 3.0 GPM
  • Toilet: 1.6 – 3.5 GPM (per flush)

Let's paint a picture of a typical chaotic morning. Someone's in the shower (2.5 GPM), the dishwasher is running its cycle (1.5 GPM), and someone else is brushing their teeth at the sink (1.0 GPM).

Example Calculation: 2.5 GPM (shower) + 1.5 GPM (dishwasher) + 1.0 GPM (faucet) = 5.0 GPM Peak Demand

Based on that math, you’d need a system rated for at least 5 GPM. But it's always wise to build in a buffer. A system rated for 7-10 GPM will give you plenty of headroom, ensuring strong water pressure even if someone flushes a toilet while all that is going on.

Matching Sizing to Your Household

Besides peak demand, the number of people in your home is a huge factor. This also ties directly into how long a filter will last before you have to replace it, which is often measured in thousands of gallons.

Here are some good rules of thumb for sizing:

  1. For 1-2 People: A system rated for 7-10 GPM is usually more than enough. Look for a filter capacity around 100,000 gallons.
  2. For 3-4 People: Aim for the 10-15 GPM range. This will comfortably handle a shower, a faucet, and an appliance running simultaneously.
  3. For 5+ People: You'll want a larger system rated for 15 GPM or more to avoid any pressure loss during rush hour. These systems often come with higher-capacity filters that last longer, even under heavy use.

Taking a few minutes to calculate your peak demand and household size is the single best thing you can do to choose a system that delivers pure, delicious water without a hitch. It's a simple step that guarantees your investment pays off in satisfaction, not frustration.

Should You DIY the Install or Call a Pro?

Two men working on home repairs, illustrating the choice between DIY and professional services.

You’ve done the research, calculated the flow rate, and have the perfect system boxed up and ready to go. Now for the final showdown: getting it installed. This is where you face the classic homeowner's dilemma—do you roll up your sleeves and tackle this yourself, or do you call in a professional plumber?

It really comes down to what you value more: saving some cash upfront, or saving yourself time, stress, and a potentially catastrophic headache.

What a DIY Install Really Means

If you’re a seasoned DIY warrior, the siren song of self-installation is hard to resist. But let's be crystal clear: this isn't like changing a lightbulb or even screwing in a new showerhead. This is a real-deal plumbing project. You will be cutting into your home's main water supply line—the artery of your entire house.

That means shutting off water to every faucet, draining the pipes, and making a clean, precise cut. From there, you’ll be installing new fittings—often with modern push-to-fit connectors like SharkBite or traditional compression fittings—to loop your new filter into the system.

The DIY Readiness Checklist

Before you dash to the hardware store for a pipe cutter, have an honest conversation with yourself. Are you really ready for this?

  • Real Plumbing Skills: Have you done this before? Not just fixing a drippy faucet, but cutting and joining pipes? Do you know if your pipes are PEX, copper, or PVC, and how to work with them?
  • The Right Tools: You'll need a pipe cutter, a deburring tool, pipe wrenches, and Teflon tape at a minimum. If you have older copper pipes, you might even need a blowtorch for soldering. Are these tools already in your garage?
  • Code Awareness: A sloppy, non-compliant installation could become a major roadblock when you try to sell your home. Are you familiar with your local plumbing codes?
  • Time and Patience: This project will take a solid 3-5 hours, and that’s assuming nothing goes wrong. A tiny mistake, a stubborn fitting, or an unexpected leak can easily turn your afternoon project into a weekend-long emergency with no running water.

If you’re hesitating on any of these points, that’s your answer. It doesn't mean you're not capable, but it's a strong signal that hiring a pro is the smarter, safer, and infinitely less stressful path to clean water.

The Case for Calling a Professional

Yes, it costs more initially, but hiring a professional plumber is an insurance policy on your investment.

A licensed plumber has done this job hundreds, if not thousands, of times. What takes you a whole Saturday, they can likely knock out in a couple of hours. More importantly, they assume all the risk. The threat of a botched job or a surprise leak is their problem, not yours.

Honestly, the biggest benefit you're paying for is peace of mind. Knowing your filter is installed to code, is guaranteed not to leak, and will work flawlessly from day one is worth every single penny.

And here’s the kicker: many manufacturers will void the warranty on your house filtering system if it isn’t installed by a licensed professional. A successful DIY job could still leave you paying out of pocket if the unit fails prematurely. A plumber ensures every connection is solid, the system is properly mounted, and your home is protected.

Understanding the True Cost of Ownership

When you're shopping for a house filtering system, it’s incredibly easy to get fixated on the sticker price. But that upfront number is just the first chapter of the story. The real cost of ownership is a long-term commitment—it’s the initial purchase, the installation, and the perpetual expense of replacement filters all rolled into one.

A system that seems like a bargain today can quickly morph into a money pit. This often happens when a cheaper unit devours filters or demands expensive, proprietary cartridges to keep the water flowing clean. To make a truly smart purchase, you have to look at the entire financial picture.

Breaking Down the Initial System Cost

The upfront price for a whole-house system can be all over the map, from a few hundred bucks to several thousand dollars. What you pay is directly tied to the system's complexity, the brand's reputation, and the specific filter media packed inside. A simple two-stage sediment and carbon filter will always be more affordable than a multi-stage behemoth designed to handle UV purification and water softening.

Here’s what to keep an eye on when looking at the price tag:

  • Filtration Stages: Simply put, more stages usually mean more money. A system built to remove specific contaminants like heavy metals or bacteria will cost more than one that just makes your water taste less like a swimming pool.
  • Brand and Certifications: You might pay a premium for a system certified by an organization like the NSF, but that stamp of approval means you're getting a product that has been rigorously tested and proven to do what it claims.
  • Included Components: Check what's in the box! Does it come with everything you need for the install—mounting brackets, O-rings, a filter wrench? Those small, missing parts can add up in both cost and frustration.

Factoring in Installation Fees

As we’ve discussed, you have two main routes for installation: going it alone or calling in a pro. A DIY install will save you on labor costs, no question. But hiring a plumber buys you their expertise and, frankly, some peace of mind. Professional installation can run anywhere from $300 to over $1,000, depending on your location and the complexity of your plumbing setup.

While going the DIY route might save a few hundred dollars at first, a professional installation protects your warranty and ensures the system works perfectly from day one. That can save you from a world of headaches, like costly leaks or poor performance down the road.

The Ongoing Expense of Replacement Filters

This is the big one. Replacement filters are the single most significant recurring cost of owning a house filtering system. How often you change them and how much they cost is completely dependent on your system and your water quality. Some filters last a few months; others can go for years.

Here’s a rough guide for what to expect from a typical multi-stage setup:

  • Sediment Pre-Filters: These are your front-line soldiers and get replaced most often. You'll likely be swapping these out every 3-6 months.
  • Carbon Block Filters: These are the workhorses for taste and odor. They generally last 6-12 months, depending on the chlorine levels in your water.
  • High-Capacity Media Tanks: The big tanks filled with carbon or KDF media can last 3-5 years or even longer, but replacing that media is a bigger, though less frequent, expense.

So, let's see how these ongoing costs can stack up over time. The table below gives a sample breakdown to help you plan.

Estimated Long-Term Costs for Filter Components

Filter Component Typical Lifespan Estimated Replacement Cost 3-Year Ownership Cost Example
Sediment Filter 3-6 months $10 – $25 $60 – $300
Carbon Block Filter 6-12 months $30 – $70 $90 – $420
UV Lamp 12 months $50 – $100 $150 – $300
Large Carbon Tank Media 3-5 years $200 – $500+ $200 – $500

This table makes it abundantly clear how a system with cheap but short-lived filters could easily end up costing more over three years than one with a higher initial price but more durable components. Always do the math on the annual filter cost before you commit. If you plan for these recurring expenses, you can enjoy clean, clear water without any nasty financial surprises.

Your Checklist for Choosing the Perfect System

Deciding on a house filtering system can feel like a monumental task, but it becomes simple if you break it down into a logical, step-by-step process. This checklist will guide you to the perfect fit for your home.

1. Test Your Water

First things first: you have to know what you’re up against. A water quality test is non-negotiable. It’s the diagnostic tool that tells you exactly which contaminants are in your supply, whether it's city-added chlorine or iron from your private well. Without testing, you're flying blind and just guessing.

2. Calculate Your Flow Rate

Next, ensure your system can keep up with your household's demands. If the flow rate is too low, you'll be doomed to frustratingly weak water pressure. Add up the gallons per minute (GPM) for all the fixtures you might realistically run at the same time—think a shower, the kitchen sink, and the dishwasher—to determine your peak demand.

3. Choose Your Filtration Stages

Armed with your water test results, you can now pick your weapons. Each filtration stage targets a specific problem.

  • Got chlorine and bad tastes? You need an activated carbon filter.
  • Dealing with dirt, rust, and sediment? A sediment pre-filter is your essential first line of defense.
  • If you have hard water causing scale buildup, a dedicated water softener stage is a must-have.

Match the filter technology to the problems identified in your water report. That’s the secret to getting a system that delivers noticeable results.

A great house filtering system is a customized solution, not a one-size-fits-all product. The right combination of filter stages directly addresses your water's unique chemistry, delivering results you can taste and feel.

4. Compare Certified Systems

Once you know what you need, start browsing models from reputable brands. Always prioritize systems that are certified by third-party organizations. To narrow down your options, guides comparing the best whole home water filtration systems are a massive help. For more pro tips, check out our other advice for selecting the right water filter.

5. Plan for Installation and Maintenance

Decide whether you’re brave enough to DIY the installation or smart enough to call a plumber. Don’t forget to factor that cost into your budget. You also need to investigate the ongoing maintenance and the price of replacement filters to understand the true long-term cost of ownership.

6. Set Your Final Budget

Finally, pull all this information together to establish a realistic budget. Factor in the system's purchase price, installation fees, and the projected cost of replacement filters for the next few years. This gives you the complete financial picture needed to make a smart, confident investment.

Frequently Asked Questions

Jumping into the world of water filtration can feel like learning a new language. We get it. To make things crystal clear, we’ve put together answers to the questions we hear most often from homeowners just like you.

How Do I Know If I Need a Whole House Water Filter?

A lot of the time, your own senses will be the first to tell you. If your water tastes metallic, smells vaguely like a swimming pool, or just has an "off" quality, those are classic tell-tale signs.

Other clues are pretty obvious once you know what to look for:

  • Chalky buildup: Look for those stubborn white stains on your faucets and glass shower doors. That's a classic sign of hard water minerals.
  • Dry, irritated skin after a shower? That could be chlorine and other chemicals stripping your skin's natural oils.
  • Visible grit: If you pour a glass of water and see tiny specks of rust, sand, or other particles floating around, you need a sediment filter, full stop.

But what about the invisible villains you can't see, taste, or smell? A simple water test report can uncover hidden contaminants like lead or VOCs. It’s always better to know exactly what’s in your water so you can protect your home’s plumbing and, more importantly, your family’s health.

Will a House Filtering System Reduce My Water Pressure?

This is a huge concern for many people, but here's the bottom line: a correctly sized and properly maintained system will have a negligible impact on your water pressure. It all comes down to matching the system's flow rate (in gallons per minute, or GPM) to your home's peak water usage.

If you do notice a serious drop in pressure after installation, something is wrong. It usually means the system is too small for your home's needs or, more commonly, the filters are clogged and overdue for a change. A pressure drop of more than 10–15 psi is a flashing red light that it's time for some maintenance.

How Long Do Whole House Water Filters Last?

This is a two-part answer. You have to think about the lifespan of the system itself and the lifespan of the filter cartridges that go inside it. The main hardware—the tanks, housings, and valves—is built to be durable. With proper care, you can expect it to last for 10 years or even more.

The filter cartridges, however, are a different story. They are the consumable components, the heroes that do the dirty work and get used up in the process. How long they last depends entirely on the type of filter and the quality of your incoming water.

Here’s a general idea:

  • Sediment pre-filters: These workhorses usually need to be swapped out every 3-6 months.
  • Carbon block filters: You can expect these to last anywhere from 6-12 months.
  • Large media tanks: The high-capacity carbon or KDF media in these big tanks can go for several years before needing to be replaced.

Sticking to a regular replacement schedule is the absolute key to making sure your house filtering system keeps performing at its peak, delivering an uninterrupted supply of clean, great-tasting water for years to come.


At Water Filter Advisor, we're here to help you nail this decision. Check out our expert reviews and detailed guides to find the perfect filtration setup for your home. Learn more at Water Filter Advisor.

Water Softener Regeneration Frequency: Find Your Optimal Schedule

Most water softeners run their regeneration cycle about every 4 to 7 days, but don't take that as a hard-and-fast rule. The right schedule for your home is a custom recipe based on your water hardness, how much water your family uses, and the size of your softener. Getting this balance right is the secret to keeping your home's water feeling luxuriously soft and clean.

How Often Should a Water Softener Regenerate?

Think of your water softener's resin bed as a super-powered mineral magnet. Its one job is to snatch hard minerals like calcium and magnesium from all the water entering your house. But just like any magnet, it eventually gets completely covered and can't hold anymore. Regeneration is just the process of washing that magnet with a salt brine solution to "recharge" it, getting rid of all the collected minerals so it can get back to work.

If your system doesn't run this reset, you’ll start seeing the old signs of hard water creep back in. You'll get those chalky spots on your glasses, find it impossible to get a good lather with your soap, and your laundry will feel stiff and scratchy. Dialing in the right water softener regeneration frequency is everything for consistent, high-quality soft water.

A white water softener system with a digital display next to a wooden shelf, showing 'Every 4-7 Days'.

Finding Your System's Sweet Spot

Most softeners are set to regenerate in the middle of the night, usually around 2 AM, so you don't even notice it's happening. While every home's water situation is a little different, there are some pretty common benchmarks for a home filtration setup.

For a correctly sized system, you're typically looking at a regeneration cycle every 3 to 5 days. This seems to be the sweet spot for balancing performance with salt and water usage. For instance, a standard 30,000-grain capacity softener dealing with fairly hard water at 25 GPG (Grains Per Gallon) will treat around 1,200 gallons before it needs to regenerate. For a family of four, that works out to about every 4 days. You can find more specific examples and calculations over at ProAquaWater.com.

What Controls the Schedule?

It all boils down to a few key factors:

  • Higher Water Hardness: The harder your water, the faster your resin "magnet" fills up. This means it needs to regenerate more often.
  • Larger Household Size: More people means more showers, more laundry, and more dishes. All that extra water usage forces the system to regenerate sooner.
  • System Capacity: A softener with a higher grain capacity can hold more hardness minerals, so it can go longer between cycles.

To give you a better idea, here's a quick look at how these factors play out with a standard 32,000-grain water softener for your home.

Estimated Regeneration Frequency At a Glance

The table below shows how often a typical 32,000-grain unit might need to regenerate based on your home's specific conditions.

Water Hardness (GPG) Household Size (People) Approximate Regeneration Frequency
10 (Slightly Hard) 2 Every 11-12 Days
10 (Slightly Hard) 4 Every 5-6 Days
20 (Very Hard) 2 Every 5-6 Days
20 (Very Hard) 4 Every 2-3 Days
30 (Extremely Hard) 2 Every 3-4 Days
30 (Extremely Hard) 4 Every 1-2 Days

Keep in mind, these are just estimates to give you a starting point. Your actual household usage will determine the perfect setting.

A properly set water softener shouldn't need to regenerate every single day, but it also shouldn't go much longer than a week. The ideal frequency matches your home's real-world water use, which is what saves you money on salt and water in the long run.

What Happens During a Regeneration Cycle

Ever heard your water softener making some strange whirring or swishing sounds in the middle of the night? Don’t worry, it's not a ghost in the machine. That’s the sound of the regeneration cycle, the crucial “recharging” process that keeps your home's water consistently soft. This is where the magic really happens, making sure your system is always ready to protect your home from hard water minerals.

Think of the resin beads inside your softener tank like tiny, powerful magnets that are purpose-built to grab onto hardness minerals—namely calcium and magnesium. As your water passes through the tank, these beads snatch the minerals right out, allowing soft water to flow to your faucets. But just like any magnet, they eventually get completely covered and can't hold onto anything else.

Recharging the Resin Magnets

Once the resin is saturated, the system has to clean itself off. That's where the brine tank, filled with salt and water, enters the picture. The regeneration process uses this salty solution to strip the collected calcium and magnesium off the resin beads, washing them harmlessly down the drain. After the beads are clean and "recharged" with sodium ions, they’re ready to get back to work pulling hardness out of your water.

The whole thing is a surprisingly efficient, multi-step operation. It might sound complicated, but it's really just a simple cleaning dance that takes place inside the tank.

Key Takeaway: Regeneration isn't just a side task; it's the core function that makes a water softener actually work. It’s an automatic reset that cleans the mineral-trapping resin, guaranteeing a continuous flow of soft water for your home.

The Four Stages of Regeneration

Getting to know the regeneration cycle helps pull back the curtain on how your softener operates. Most modern systems follow a similar four-stage process that usually takes about 70 to 90 minutes from start to finish.

  1. Brine Draw: This is the main event. The system slowly sips the concentrated salt water (brine) from the brine tank and pulls it into the resin tank. This salty solution flows over the resin beads, forcing the attached calcium and magnesium ions to let go. In their place, sodium ions from the salt latch onto the resin, effectively recharging the beads.

  2. Slow Rinse: After the brine has worked its magic, the system follows up with a slow rinse. This step gently pushes any leftover brine through the entire resin bed, making sure every last bead is fully regenerated. The deliberate, slow pace is what makes the salt so effective.

  3. Fast Rinse: Next up is a powerful, fast rinse using fresh water. This has two jobs. First, it completely flushes out all the remaining brine and the released hardness minerals, sending them down the drain. Second, it compacts the resin bed, which gets fluffed up during the cycle, settling the beads back down for normal water flow.

  4. Refill: In the final step, the control valve adds a measured amount of water back into the brine tank. This water dissolves the salt to create the brine solution needed for the next regeneration cycle. Once that's done, the softener shifts back into "service" mode, ready to soften water again.

The Three Factors That Control Regeneration Frequency

To really get your water softener dialed in, you need to get a handle on three key pieces of information. It's like a recipe—get one part wrong, and the whole batch is off. You’ll either end up wasting salt and water on cycles you don’t need or, even worse, see those chalky hard water spots start creeping back.

Let's break them down one by one.

First, and most important, is your home’s water hardness. This is measured in Grains Per Gallon (GPG), which is simply a number that tells you how much dissolved calcium and magnesium is floating around in your water. The higher that GPG number, the "harder" the water, and the more your softener has to work.

You can usually find this number on your city’s annual water quality report, which is often posted online. If you're on a well or just want a dead-on accurate number, a simple water test kit will give you a precise GPG reading in just a few minutes.

Household Water Usage

Next up is how much water your family actually uses. This one’s pretty straightforward: the more water that flows through your pipes, the faster the softener's resin beads get coated with those hardness minerals. That means you need a good idea of how many gallons your household consumes each day.

A good rule of thumb is about 75 gallons per person, per day. For a family of four, you're looking at a daily usage of around 300 gallons (4 people x 75 gallons). That covers everything from showers and laundry to dishwashing and flushing toilets. Of course, if you've got teenagers who practically live in the shower, you might want to nudge that number up a bit.

This flowchart gives you a great visual of how the resin beads, hard minerals, and saltwater brine all work together during a regeneration cycle.

Flowchart illustrating the water softener regeneration cycle, showing interactions between hard minerals, resin beads, saltwater, and waste.

The resin essentially grabs onto the hard minerals as water passes by. Once it’s full, it uses the saltwater to wash itself clean, sending all those collected minerals down the drain.

Your System's Capacity

Finally, you need to know your system’s capacity. When you see a water softener advertised as a "32,000-grain" or "48,000-grain" unit, that’s its capacity. This number tells you exactly how many grains of hardness the system can pull out of your water before it’s maxed out and has to regenerate.

Think of it like the size of the gas tank in your car. A bigger tank (a higher grain capacity) means you can go longer between "fill-ups" (regeneration cycles). This is exactly why getting the right size softener for your home's hardness level and water usage is so important for running an efficient system.

Technology has come a long way here. The earliest softeners often regenerated every single day. By the 1980s, smarter demand-initiated systems came along that could process anywhere from 15,000 to 45,000 grains—or about 500 to 1,500 gallons of water—before needing a cycle. As you can learn more about these historical changes on SoftProWaterSystems.com, it was a massive improvement.

By mastering these three factors—your water hardness (GPG), your daily water usage, and your system's grain capacity—you gain complete control over your softener. You can program it with precision, ensuring it only regenerates when necessary, saving you a significant amount on salt and water costs over time.

Calculate Your Perfect Regeneration Schedule

Tired of guessing when your softener should run? Let's ditch the guesswork. While it might seem like a black box, figuring out the perfect water softener regeneration frequency is just some simple math. You don't need a PhD in water chemistry to dial in your home filtration system.

This formula is all you really need to take charge of your softener’s schedule.

The Go-To Formula for Regeneration

This calculation tells you exactly how many days your softener can treat your water before it needs to clean itself. It’s based on three things: your system's capacity, your water's hardness, and your family's daily water use.

Here's the formula:

(System Capacity ÷ Water Hardness) ÷ Daily Water Usage = Days Between Cycles

Let's break down what each part means:

  • System Capacity: This is the "grain" rating of your unit. You'll see numbers like 32,000, 48,000, or 64,000 grains.
  • Water Hardness: You need this number in Grains Per Gallon (GPG). If you don't know it, a simple water test kit will tell you.
  • Daily Water Usage: This is your household's total gallons used per day. A good rule of thumb is 75 gallons per person.

Once you plug in your numbers, you’ll know the exact number of days to program between regeneration cycles. This stops you from wasting salt on cycles that are too frequent or, worse, dealing with hard water because you waited too long.

Regeneration Calculation Examples

Seeing the math in action with real numbers makes it click. Let's look at how two very different households would calculate their schedules.

This table shows a suburban family on city water versus a rural family on a private well. It’s the perfect illustration of why a "one-size-fits-all" setting for home water filtration just doesn't cut it.

Regeneration Calculation Examples

Variable Household A (Suburban Family) Household B (Rural Family)
System Capacity 32,000 Grains 48,000 Grains
Water Hardness 15 GPG (Moderately Hard) 30 GPG (Very Hard)
Household Size 3 People 5 People
Daily Water Usage 225 Gallons (3 x 75) 375 Gallons (5 x 75)

Now, we just run the numbers for each one.

Household A Calculation:
(32,000 Grains ÷ 15 GPG) ÷ 225 Gallons = 9.4 Days

This family can set their softener to regenerate every 9 days. Easy.

Household B Calculation:
(48,000 Grains ÷ 30 GPG) ÷ 375 Gallons = 4.2 Days

With five people and much harder water, this family needs their system to regenerate every 4 days to keep up.

As you can see, knowing your specific numbers is key. A few minutes with a calculator is all it takes to get your softener working efficiently, giving you consistent soft water without wasting salt or water.

Metered Softeners vs. Timer-Based Models

Not all water softeners are created equal. The type you have in your home makes a huge difference in how efficiently it runs and how much it costs you. The two main players are timer-based and metered systems, and it's a classic battle of an old-school schedule versus smart home water filtration.

The Old-Fashioned Timer-Based Softener

A timer-based water softener is like an old alarm clock—it goes off at the same time every day, no matter what. You set it to regenerate on a fixed schedule, say every three days, and it will run that cycle like clockwork.

The problem? It regenerates even if you haven't used any water. If your family is on vacation for a week, that softener is still running its cycles, wasting salt, water, and your money. It's a simple system, but often a very inefficient one for a modern home.

The Modern Metered Softener

A metered water softener, also called a demand-initiated regeneration (DIR) system, is the smart home device for your water. It doesn't run on a rigid schedule. Instead, it has a built-in meter that keeps track of how much water your household actually uses.

This system knows exactly how many gallons have passed through it. It only kicks off a regeneration cycle when the resin inside is actually getting full and needs to be cleaned. It adjusts to your life, whether you have a house full of holiday guests or you're gone for the weekend.

By regenerating only when necessary, a metered softener gets the most out of every drop of water and every grain of salt. For any homeowner looking to cut costs and waste, it’s the clear winner.

The numbers back this up. Metered water softeners regenerate 20-40% less often than the old timer-based models. For an average family, that efficiency can save $150-300 every year on salt and water bills, especially in places with very hard water. Even with longer 3-5 day intervals, these systems still maintain over 95% softening efficiency. You can dig into more of these performance details by reading the insights on RayneWater.com.

Bottom line, a metered system takes all the guesswork out of the equation. You get perfectly soft water while using the least amount of resources possible.

Signs Your Regeneration Schedule Is Wrong

Your house has a way of talking to you. If your water softener's regeneration schedule is off, you'll get clear signals from your faucets, your dishes, and even your skin. The trick is knowing how to listen.

Learning to spot these clues is the key to troubleshooting your home water filtration system and getting back to that perfectly soft water you love.

A kitchen sink area displaying a dirty glass with hard water spots, a sponge, and a sign 'Signs of Hard Water'.

It’s incredibly frustrating to invest in a water softener, only to see the very problems you were trying to fix start creeping back in. These issues are almost always the first sign that your system isn't regenerating often enough to keep up.

Clues Your System Regenerates Too Infrequently

When your softener waits too long between cycles, its resin bed gets completely maxed out. At that point, it can't grab any more hardness minerals, so hard water starts flowing right into your home.

You'll know this is happening if you see these old, familiar signs pop up again:

  • Chalky Spots and Film: That white, crusty residue starts showing up again on your glassware, shower doors, and chrome fixtures.
  • Poor Soap Lather: Your soap and shampoo just won't work up a good lather. It can leave your skin feeling dry and your hair looking limp and dull.
  • Stiff, Scratchy Fabrics: You might notice your towels feel scratchy and your clothes aren't as bright as they should be, which can be a real headache for your regular laundry care.

If you spot these classic hard water indicators, it's a sure bet you need to check your settings and shorten the time between regenerations.

Telltale Signs of Over-Regeneration

On the flip side, a system that regenerates too often is just being wasteful. This is a common issue with older, timer-based models, but it can also happen if a modern metered system is programmed with the wrong numbers.

Your salt bag is the biggest clue here. A properly set softener for an average family of four will usually go through about one 40-pound bag of salt per month. If you’re flying through salt much faster than that, your unit is almost certainly regenerating too often.

You might also hear the softener running its cycle way more than it should, maybe even every single night. Not only does this waste hundreds of gallons of water and pounds of salt over the course of a year, but it also puts unnecessary wear and tear on the softener itself. If this sounds familiar, it's time to program a longer interval between cycles.

Common Questions About Regeneration

Here are answers to the most frequent questions homeowners ask about their water softener's regeneration cycle. Use this to manage your system and understand the details of its regeneration frequency.

Why Does My Softener Regenerate at 2 AM?

This is the factory default time for most softeners. It is scheduled for a time of low water use, which prevents hard water from getting into your home's plumbing while the system is cleaning itself.

How Much Salt Should My Softener Use?

A standard regeneration cycle will use between 6 and 10 pounds of salt. The precise amount is based on your softener's grain capacity and its programmed efficiency settings. A properly set up system avoids salt waste.

Can I Start a Regeneration Cycle Myself?

Yes. Most modern water softeners include a "Manual Regeneration" or "Regen Now" button. This is useful when you have guests, after refilling an empty salt tank, or if you see signs of hard water before the next scheduled cycle.

You can find more general home water filtration advice on maintaining your systems.

What If I Have More Complex Questions?

While this guide addresses common issues, some installation problems or ongoing performance trouble might require a professional. If you are unable to resolve an issue, consider getting help from expert water filtration system services.

Your Ultimate Guide on How to Reduce Water Hardness at Home

Ever notice those stubborn white spots on your glassware or feel like your “clean” laundry is still stiff and scratchy? You’re not just imagining it—you're dealing with hard water. The fix is a magical thing called water filtration, designed to remove or neutralize the high levels of dissolved minerals—mostly calcium and magnesium—that are wreaking havoc in your home. Think of learning how to reduce water hardness not just as a chore, but as a superhero move to save your plumbing and appliances from a slow, crusty demise.

Why Hard Water Is Waging a Secret War on Your Home

A bathroom sink faucet shows visible mineral deposits, highlighting hard water damage.

If you've ever felt a chalky film on your hands after washing them or wondered why your shampoo just won't lather up, you've met hard water. It's what happens when water travels through rock and soil, picking up mineral hitchhikers along the way. While it's perfectly safe to drink, those minerals can create a surprising amount of chaos around the house.

And this isn't some rare occurrence. According to the U.S. Geological Survey, a staggering 85% of households in the United States have hard water. In big chunks of the country, like the Midwest and Southwest, hardness levels often top 120 mg/L of calcium carbonate—that's well above the 60 mg/L threshold considered even moderately hard.

The Visible Signs Of A Hidden Problem

The most common signs of hard water are the daily cosmetic annoyances. You’ve probably seen them:

  • Soap Scum: Minerals in the water react with soap to create that gross, sticky film that coats your shower doors, tiles, and tubs.
  • Spotted Dishes: That cloudy haze on your glasses and silverware right out of the dishwasher? That’s mineral residue left behind when the water evaporates.
  • Dull, Stiff Fabrics: Those minerals get tangled up in the fibers of your clothes, making them feel rough and causing colors to fade way too quickly.

But these everyday headaches are just the tip of the iceberg. The real damage is happening where you can't even see it.

The real villain here is limescale—a hard, chalky deposit of calcium carbonate. This stuff builds up inside your pipes, fixtures, and appliances, slowly choking off water flow and tanking their efficiency.

To put it simply, what you see on your faucet is also happening inside your home's vital systems. This table breaks down the daily struggles of hard water versus the perks of switching to soft water.

Hard Water Problems vs Soft Water Benefits

Area of Impact Problem with Hard Water Benefit of Soft Water
Plumbing & Pipes Limescale buildup clogs pipes, reducing water flow. Pipes remain clear, maintaining strong water pressure.
Appliances Reduced efficiency and shorter lifespan for water heaters, dishwashers. Appliances run efficiently and last longer.
Kitchenware Cloudy film and spots on glasses and dishes. Sparkling, spot-free dishes and glassware.
Laundry Stiff, scratchy fabrics and faded colors. Softer, brighter clothes that feel and look newer.
Bathroom Surfaces Stubborn soap scum on showers, sinks, and tubs. Easier cleaning with little to no soap scum buildup.
Skin & Hair Dry, itchy skin and dull, brittle hair. Softer skin and smoother, more manageable hair.

As you can see, the benefits go far beyond just looks.

Long-Term Damage And Hidden Costs

Over time, that mineral buildup turns into a real financial drain. Limescale acts like an insulator, forcing your water heater to work much harder and burn more energy just to heat the same amount of water. This drives up your utility bills and can even shorten the appliance's lifespan, pushing you toward a costly replacement sooner than you’d expect.

And it doesn't stop there. Your coffee maker, dishwasher, and washing machine are all on the chopping block. The tiny valves and pipes inside these machines can get clogged, leading to breakdowns and expensive service calls. Another major headache from all this buildup is a drop in water flow, which often leads to frustrating issues like having no water pressure in your house.

Tackling this problem head-on is a wise investment in your home. By learning how to reduce water hardness, you aren't just making your daily life a little easier—you're protecting your most valuable assets from silent, creeping damage.

How to Accurately Test Your Water Hardness

A hand uses a test strip in a glass of water to check quality on a countertop, 'TEST YOUR WATER' banner.

Before you declare war on hard water, you’ve got to know exactly what you’re up against. Think of it like a doctor needing a diagnosis before prescribing a treatment. If you just guess, you might end up spending a ton of money on a system you don't really need or, even worse, buying one that barely makes a dent in the problem.

The good news is that figuring out your water's mineral content is pretty straightforward. You don’t need a fancy chemistry degree to get a solid baseline. There are a few different ways to go about it, from a quick kitchen experiment to a super-precise professional analysis.

The Quick and Simple Soap Test

Let's start with the easiest method of all: the DIY soap test. This is a fantastic first step that gives you a rough idea of your water’s situation in just a few minutes, using stuff you already have lying around.

All you need is a clean, clear bottle with a lid that seals tight (a regular water bottle works great) and some basic liquid soap. Make sure to use a pure soap, not a detergent that has added softeners or perfumes.

  1. Fill the bottle about a third of the way with regular tap water.
  2. Add just a few drops of the liquid soap, screw the cap on, and give it a really good shake for about 15 seconds.
  3. Now, take a look. If your water is soft, you'll see a healthy layer of suds, and the water underneath should be nice and clear.
  4. If you’ve got hard water, you'll find it’s a real struggle to get a good lather. Instead of fluffy bubbles, you’ll likely see a cloudy, milky solution with a scummy film floating on top.

While this test won't give you an exact number, it’s a great initial indicator. If you're seeing almost no suds and a lot of that soap scum, you know you’re dealing with a pretty significant hardness issue.

Using Water Hardness Test Strips

For a more precise, number-based reading, water hardness test strips are your best bet. They’re cheap, easy to find online or at any home improvement store, and incredibly simple to use. These kits give you a quantitative result, which is what you really need to choose the right size and type of water filter.

Using them is a breeze. You just dip a strip into a glass of your tap water for a couple of seconds, pull it out, and wait for the color to develop. After about a minute, you compare the color on the strip to the chart that came with the kit.

The chart will give you a reading in either parts per million (PPM) or grains per gallon (GPG). Just so you know, one GPG is the same as 17.1 PPM of dissolved minerals.

What does GPG mean for you? Here’s a quick breakdown of the water hardness scale:

  • Soft: 0–3.5 GPG
  • Moderately Hard: 3.5–7 GPG
  • Hard: 7–10.5 GPG
  • Very Hard: Over 10.5 GPG

Knowing your exact GPG number is a game-changer. A house with 10 GPG is going to need a much more powerful filtration system than a home with just 4 GPG. This little piece of data helps you avoid overspending and makes sure the system you buy can actually handle the job.

When Professional Lab Testing Is Necessary

For most homeowners who get their water from a city or municipal supply, those simple test strips are more than enough. However, if your water comes from a private well, or if you have a nagging suspicion that there are other contaminants besides just minerals, professional lab testing is the most reliable way to go.

Well water isn't regulated by the EPA, so its quality can be all over the map. A professional test can nail down the exact hardness level and also screen for things like iron, manganese, sulfur, bacteria, and other nasty stuff that might require a more specialized, multi-stage filtration system.

To get a lab test done, you can start by contacting your local health department for recommendations or find a state-certified lab online. They’ll send you a collection kit with simple instructions. It’s the most accurate assessment you can get and gives you the complete picture to make the smartest long-term investment for your home.

Short-Term Fixes for Hard Water Headaches

Jumping straight to a whole-house water filter isn't always in the cards. Maybe you're renting, you're on a tight budget, or you just want to dip your toe in the water—pun intended—before committing to a big installation. The good news? You don't have to put up with the daily grind of hard water while you weigh your options.

There are some really effective, non-permanent ways to get immediate relief from the most annoying hard water problems. These quick fixes target specific issues, from scratchy towels to irritated skin, giving you a way to manage the problem without tearing into your plumbing.

Get Your Laundry Bright and Soft Again

Hard water and your washing machine are not friends. The calcium and magnesium in the water latch onto your detergent, making it way less effective. Instead of cleaning, a chunk of that soap turns into a nasty curd that sticks to your clothes, leaving them stiff, dingy, and dull.

You can fight back. The easiest weapon in your arsenal is a chelating agent, which you might know as a water conditioner. Products like Calgon or even good old-fashioned borax are fantastic for this. They work by grabbing onto those pesky mineral ions and neutralizing them, freeing up your detergent to do its job.

Just add a conditioner to each load, and you’ll see a real difference. Your whites will look brighter, colors won't fade as fast, and your towels will finally lose that crunchy, board-like feeling. It’s a simple, cheap trick for anyone trying to figure out how to soften water just for their laundry.

Give Your Skin and Hair a Break from the Buildup

The daily battle with hard water gets personal in the shower. Those same minerals that leave spots on your glasses also leave a film on your skin and hair. This residue can clog pores, cause breakouts and dryness, and leave your hair feeling brittle, limp, and impossible to style.

A showerhead filter is a brilliant point-of-use solution here. These little devices just screw on between the shower arm and your showerhead—most don't even need tools to install. Inside, they use filtration media like KDF (Kinetic Degradation Fluxion) or activated carbon to specifically target the minerals and chlorine coming through your pipes.

You'll feel the difference almost right away. Your skin will probably feel less tight and itchy post-shower, and your hair will feel softer and look shinier because it's finally getting a clean rinse without a coating of mineral gunk.

Fight Back Against That Crusty Limescale

Those ugly white deposits crusted around your faucets and all over your shower doors are the most obvious calling card of hard water. This stuff, called limescale, is basically rock and regular cleaners just can't cut it.

To get immediate results, you need something acidic to dissolve the mineral buildup. You've got a couple of options:

  • Vinegar Solution: A simple 50/50 mix of white vinegar and water is a powerhouse, non-toxic limescale buster. For really stubborn spots, soak a rag in the solution and wrap it around the fixture for an hour before you start scrubbing.
  • Commercial Descalers: Products made specifically to tackle calcium, lime, and rust are incredibly effective. They use stronger acids to break down those mineral deposits in a hurry.

Making these little changes can help you keep the most visible signs of hard water in check. While these temporary fixes don't solve the problem at its source, they offer targeted relief and make everyday life a lot more comfortable.

Choosing the Right Permanent Water Filtration System

If you're sick of scrubbing soap scum and dealing with scratchy towels, it's time to look past the quick fixes. A permanent, whole-house system is the only way to stop hard water problems at the source, protecting your pipes, appliances, and sanity. This is where the real game-changers come in.

Picking the right technology can feel like a chore, with a dozen different systems all claiming to be the best. Let's walk through the most common and effective options out there. We’ll cover true water softeners that rip minerals out of your water and conditioners that just stop them from making a mess, so you can figure out what truly fits your home and your budget.

The Gold Standard: Ion-Exchange Water Softeners

When most people think of solving hard water, they’re picturing an ion-exchange water softener. This is the classic, time-tested method for actually getting rid of hardness minerals for good. It physically strips the calcium and magnesium from your water, giving you genuinely soft water at every single tap.

These systems work on a pretty clever principle. Your water gets routed into a large tank filled with thousands of tiny resin beads that are coated in sodium (or potassium) ions. As hard water washes over these beads, they act like tiny magnets, grabbing the "hard" minerals and releasing the "soft" sodium ions into the water instead.

This process is incredibly effective. Water softeners can slash water hardness by 95-99%, which is why they’re still the most powerful solution you can buy. This is a huge deal for the millions of households plagued by limescale buildup that wrecks plumbing and appliances.

Of course, those resin beads eventually fill up with all the minerals they’ve collected. That's when the system "regenerates" by automatically flushing itself with a saltwater (brine) solution from a second tank. This bath washes all the gunk off the beads, sends it down the drain, and recharges them with a fresh coat of sodium ions.

Sodium vs. Potassium Systems

You have a choice of what to fill that brine tank with.

  • Sodium Chloride: This is just plain old salt. It's the most common, cheapest, and easiest-to-find option. It’s highly effective and keeps the system humming along without a fuss.
  • Potassium Chloride: If you're on a strict low-sodium diet or just prefer not to add any sodium to your water, potassium chloride is a solid alternative. It works the exact same way but uses potassium instead. Just know that it’s a bit pricier and sometimes harder to track down.

The Low-Maintenance Alternative: Salt-Free Water Conditioners

Maybe you love the idea of preventing scale but hate the thought of lugging 40-pound bags of salt into your basement. If so, a salt-free water conditioner might be exactly what you need. But let's be crystal clear: these systems don't soften the water—they condition it.

What's the difference? They don't remove the calcium and magnesium. Instead, they use a process called Template Assisted Crystallization (TAC). As water flows through the TAC media, the hard minerals are changed into microscopic crystals that can’t stick to surfaces.

These tiny, harmless crystals just flow right through your plumbing without ever building up as limescale on your pipes, faucets, or water heater. You still get the health benefits of drinking mineral-rich water, but you get the massive perk of scale prevention.

Key Takeaway: A salt-free conditioner is a scale-prevention tool, not a water softener. You won't get that slick, "slippery" feeling of truly soft water or see a dramatic change in soap lather. What you will get is protection for your home's plumbing and appliances from destructive limescale.

Reverse Osmosis for Pure Drinking Water

A whole-house system takes care of your showers and laundry, but what about the water you actually drink? A Reverse Osmosis (RO) system is what’s known as a point-of-use filter, usually installed right under the kitchen sink, and it delivers some of the purest water you can get.

RO systems work by forcing water through a special membrane that’s so fine it removes up to 99% of pretty much everything—hardness minerals, chlorine, lead, fluoride, you name it. It's the same technology used to make most bottled water.

A lot of homeowners go for the one-two punch: a whole-house softener to protect the entire home, paired with an under-sink RO system for pristine, amazing-tasting water for drinking and cooking. You can explore our guides for more in-depth advice on building the perfect setup.

This chart can help you quickly find a temporary fix for whatever hard water headache you're dealing with right now.

Flowchart illustrating temporary hard water fixes for laundry, shower, and various surfaces.

As you can see, whether it's your laundry, shower, or kitchen sink, there's always a targeted fix you can use while you figure out a permanent plan.

A Word on Magnetic Descalers

You've probably seen ads for magnetic or electronic "descalers" online. These are little gadgets that you just clip onto your main water line. They claim to use a magnetic field to change the structure of the hardness minerals so they can't form scale.

It sounds fantastic—no salt, no filters, no maintenance. The problem? The science backing these things up is thin, and their performance is highly debated in the industry. Unlike ion-exchange softeners or TAC conditioners, there are no real standards or certifications to prove they actually work. For results you can count on, you’re much better off sticking with proven technology. Even for small appliances, targeted solutions are key, which is why it's worth learning about specific water filters for preventing limescale where it matters most.

Understanding System Installation, Maintenance, and Costs

Picking out a water filtration system is a huge first step, but the journey doesn't end with the price tag. The real commitment comes with installation, ongoing maintenance, and what I call the "total cost of ownership"—what you'll actually spend over the system's entire life.

Figuring this out upfront means no nasty surprises down the road. Let’s walk through what you can realistically expect after you've made your choice, from getting it set up to keeping it running like a champ.

Getting Your System Installed

Once you have your new water softener or conditioner, you've got two roads to take: roll up your sleeves and DIY, or call in a professional plumber. Your decision really boils down to how comfortable you are with basic plumbing and the complexity of the unit you bought.

A DIY install can definitely save you a few hundred bucks if you're handy. Most systems come with pretty good instructions, and the job typically looks something like this:

  • Shut off the main water supply to your house. (Don't forget this part!)
  • Cut into the main water line right where it comes into your home.
  • Plumb the system's inlet and outlet ports into that line.
  • Connect a drain line for the regeneration cycle (this is for traditional softeners).
  • Plug it in and program the control head.

If the thought of cutting pipes gives you a headache, hiring a pro is the stress-free route. A licensed plumber will make sure everything is installed correctly and up to code, which is great for peace of mind. You won't have to worry about leaks or performance problems.

Expect professional installation to run anywhere from $300 to $800, depending on how tricky your plumbing setup is and local labor rates.

The Long-Term Maintenance Checklist

Keeping your system in peak condition is pretty straightforward, but it does need some regular love. The to-do list changes based on what kind of system you have. For a traditional ion-exchange water softener, you'll be the most hands-on.

You’ll want to check the salt level in the brine tank about once a month and top it off as needed. A good rule of thumb is to keep the tank at least one-third full of salt pellets. For a typical family, this usually means adding a 40-pound bag of salt every couple of months.

Beyond just adding salt, it's a smart move to clean out the brine tank once a year. Over time, junk from the salt can create a "salt bridge" or a layer of sludge at the bottom, which can clog things up and stop the system from regenerating properly.

The resin bed—the real heart of the softener—is incredibly tough and can last 15 to 20 years with good care. If you have a lot of iron or chlorine in your water, though, using a special resin cleaner once a year will help it last even longer and work more efficiently.

Salt-free conditioners, on the other hand, are the champs of low maintenance. No salt, no electricity, no drain line. The internal media is built to last for years—often 6 to 10 years—before you even have to think about replacing it.

Calculating the Total Cost of Ownership

To really make a smart decision, you need to look at the whole financial picture. The sticker price is just the starting line. The total cost of ownership includes the unit itself, installation, and all the ongoing expenses.

A quality water softener can cost anywhere from $800 to over $2,500 for the unit alone. Factor in professional installation, and your upfront investment might be closer to $1,200 to $3,300. From there, your main ongoing cost is salt, which will likely run you $100 to $200 per year.

While that might sound like a lot, the payoff is huge. A 2023 study found that a whole-house water softener can cut your soap and detergent use by up to 50%, saving the average family $150 a year. Even better, it can extend the lifespan of appliances like water heaters by 30%, saving you from a premature replacement that could cost over $1,000. If you want to dive deeper into how water quality affects homes, you can explore the full findings on water stress.

Salt-free conditioners have a similar upfront cost but have almost zero ongoing expenses, saving you cash on salt and water. Reverse osmosis systems have their own costs, mainly filter replacements, which can range from $50 to $150 per year. By weighing these lifetime costs, you can pick a system that gives you great water without breaking the bank.

Your Hard Water Questions Answered

Deciding on a water treatment system is a big move, and it's totally normal to have some questions floating around before you commit. Once you start digging into how to fix hard water, you run into all sorts of myths and common worries. Let's tackle them head-on so you can feel good about your decision.

Will My Water Taste Salty?

This is the first thing everyone asks, and I get it. The good news? No, it won't. A properly working water softener uses salt, but only to clean itself. That salty brine solution gets flushed right down the drain during the regeneration cycle—it never makes it to your tap.

A tiny bit of sodium does get swapped for the hard minerals, but we're talking a minuscule amount. To put it in perspective, an 8-ounce glass of softened water has less sodium than a single slice of white bread. Honestly, most people can't taste the difference at all.

Is Softened Water Safe to Drink?

You bet. For the overwhelming majority of people, softened water is perfectly fine for drinking, cooking, and everything else. The only exception might be for someone on a very strict, doctor-ordered, low-sodium diet.

If that's a concern for you, or if you just want the purest water possible, the gold-standard setup is a whole-house softener paired with a reverse osmosis (RO) system under the kitchen sink. The softener protects your pipes and appliances from scale, and the RO filter takes care of the drinking water, removing the trace sodium and just about everything else.

Here's a simple way to think about it: The whole-house softener is for your house. The reverse osmosis system is for your body.

How Do I Pick the Right Size System?

Sizing a softener has nothing to do with your home's square footage. It’s all about two things: how much water you use and how hard that water is. A system that's too small will run itself ragged trying to keep up, regenerating constantly and burning out way too soon. Go too big, and you've just spent more money upfront than you needed to.

To nail the right size, you just need two key numbers:

  • Daily Water Use: A good rule of thumb is 75 gallons per person, per day. So, a family of four will use roughly 300 gallons daily.
  • Water Hardness in Grains Per Gallon (GPG): You'll get this number from your water test kit or a lab report.

Now for the simple math: multiply those two numbers together. For that family of four with water that’s 10 GPG, you'd get 3,000 (300 gallons x 10 GPG). This means you need a system that can remove at least 3,000 grains of hardness each day. Softeners are rated by their total grain capacity (like 32,000-grain or 48,000-grain), which tells you how much hardness they can pull out before they need to regenerate.

Can I Use Softened Water on My Plants and Garden?

This is one area where you need to be a little strategic. Most houseplants and garden veggies aren't big fans of sodium. Over time, watering with softened water can cause salt to build up in the soil, which can stunt their growth or even kill them.

Thankfully, the fix is incredibly simple. When a softener is installed, the plumber should always set it up to bypass the outdoor hose bibs. Most systems also come with a built-in bypass valve. This gives you the best of both worlds: soft water inside for your showers and appliances, and the untreated hard water your garden needs—which still has the calcium and magnesium that plants actually like.


At Water Filter Advisor, our goal is to cut through the confusion and give you clear, practical information to find the right water solution for your home. From our in-depth guides to unbiased reviews, we’re here to help you get safer, better-tasting water. Explore all of our resources today at https://www.waterfilteradvisor.com.

Water Descaler vs Softener: The Ultimate Home Filtration Showdown

So, you're standing at the crossroads of home water treatment, staring down the epic battle of water descaler vs softener. Let's cut through the noise. It all boils down to this: a classic softener yanks out those pesky hard minerals, while a descaler gives them a stern talking-to so they behave and don't wreck your plumbing. Softeners give you that famous silky-smooth water, but descalers are the "set it and forget it" heroes, protecting your pipes and appliances without the drama.

Tackling the Hard Water Villain in Your Home

A close-up of a kitchen sink faucet with running water, showing visible hard water stains.

Hard water is the quiet saboteur of the home. It leaves its calling card everywhere—that crusty white film on faucets, soap scum that just won't quit, and appliances that mysteriously die years before their time. The culprits are simple: water that’s jam-packed with dissolved minerals, mainly calcium and magnesium. They’re like uninvited houseguests that refuse to leave.

While these minerals won't hurt you to drink, they're the building blocks of limescale. That stubborn, rock-like gunk is what clogs your plumbing and strangles your water heater, forcing it to work way harder than it should. To fight back, homeowners have two main weapons in their home filtration arsenal: old-school water softeners and their clever, modern cousins, water descalers.

The Scale of the Problem

Getting a handle on hard water isn't just about sparkling faucets; it’s a big deal with real financial consequences. A mind-boggling 85% of American homes have hard water, making the quest for perfect home water filtration a national pastime.

That limescale can slash the lifespan of your pipes by 2-3 years and jack up your home's energy use by 15-25%. It's no wonder the global market for these treatment systems is expected to hit USD 25.5 billion by 2035.

Descaler vs Softener: A Quick Comparison

Nailing the core difference between these two systems is your first mission. While this guide is all about preventing scale from ever forming, you might also need some effective methods for cleaning hard water stains that have already taken hold.

Here’s a quick tale of the tape.

Feature Comparison Water Descaler (Conditioner) Water Softener (Ion Exchange)
Primary Function Alters mineral structure to prevent scale Physically removes hard minerals
Water Feel Unchanged; no "slippery" feel Silky, "soft" feel
Maintenance None; set it and forget it Requires regular salt refills
Environmental Impact Eco-friendly; no salt or wastewater Creates brine discharge (wastewater)
Best For Scale prevention with minimal upkeep Eliminating all hard water symptoms

The Science Behind Each Water Filtration Method

A water treatment system with a blue tank, control head, pipes, and a gray unit, illustrating 'How It Works'.

When you're trying to solve the "water descaler vs softener" puzzle, you have to get past the sales hype and look at the science. Both systems aim to stop the carnage caused by hard water minerals, but they go about it in completely different ways.

Think of it like this: one is a burly bouncer at a club, physically throwing the troublemakers (calcium and magnesium) out onto the street. The other is more like a wise diplomat, changing their behavior so they don't cause any problems in the first place.

This fundamental difference changes everything—from how your shampoo lathers up to how much work you have to put in and its impact on the planet. Let's lift the hood and see how these home filtration wizards really work.

How Traditional Water Softeners Work: The Ion Exchange Swap

A classic water softener uses a process that’s been the heavyweight champion for decades: ion exchange. This is a chemical magic trick that physically snatches the hardness minerals right out of your water. It’s like a super-specific net that only catches calcium and magnesium.

Inside the main tank is a bed of tiny resin beads loaded with a negative charge. Before you even flip the switch, these beads are covered in "soft" sodium ions. As your hard water flows through, the party starts. The positively charged calcium and magnesium ions are drawn to the negatively charged beads like moths to a flame.

This attraction is so powerful that the hardness minerals literally kick the sodium ions off the beads and take their place. The now-homeless sodium ions flow out with your water, giving you chemically "soft" water all over the house.

The key takeaway: a softener actually changes the chemical recipe of your water. It’s not just stopping scale—it’s creating brand-new water that’s free from the minerals that made it hard in the first place.

This cycle continues until the resin beads are completely saturated with hardness minerals. At that point, the system has to "regenerate." This is just a fancy term for a cleaning cycle where a super-salty solution (brine) from a second tank floods the resin. The rush of sodium ions from the brine pries the trapped calcium and magnesium off, flushing them down the drain. The resin beads are then recharged with fresh sodium, ready for another round.

How Water Descalers Work: The Conditioning Approach

Water descalers—also called water conditioners—take a completely different, almost zen-like approach. Instead of removing the minerals, they change their physical structure to stop them from forming scale. It's a physical transformation, not a chemical one.

There are a few descaler technologies out there, but one of the most proven is Template Assisted Crystallization (TAC). This method uses special media that acts as a template, or a pattern, for the minerals to grow on.

When hard water passes over this media, the calcium and magnesium ions team up and form tiny, harmless "seed crystals." These microscopic crystals are stable and just don't stick to anything—not your pipes, your water heater, or your showerhead.

Here’s what that means for your home:

  • Minerals Stay Put: The beneficial minerals, calcium and magnesium, are still in your water. You just don't have to deal with the scale.
  • Scale Is Prevented: The little crystals just float harmlessly through your plumbing and go right down the drain.
  • No Salt, No Waste: Because nothing is being removed or flushed out, these systems don't need salt and don't create any wastewater.

You might also see electronic or magnetic descalers, which use electric fields or magnets to get a similar result by agitating the minerals so they can't stick together. No matter the tech, the goal is the same: manage the minerals to stop scale without actually taking them out. This is also why you won't get that slick, "slippery" feeling from a descaler that you get with soft water.

Water Descalers vs. Water Softeners: The Showdown

This is where the rubber meets the road. Deciding between a water descaler and a water softener boils down to one question: do you want to manage the hard minerals, or completely eradicate them?

Each path offers a totally different experience for your home and lifestyle. It’s not just a plumbing decision; it affects your morning shower, your monthly bills, and how you maintain your home. The real question is what you value more—getting rid of every single trace of hardness, or a maintenance-free, eco-friendly way to protect your plumbing.

Scale Prevention Effectiveness

Let's be clear: the number one job for both is stopping limescale. A water softener wins with brute force. By yanking calcium and magnesium out of the water, there’s literally nothing left to form scale. It's a time-tested method that’s incredibly effective, especially if your water is rock-hard (think 10 grains per gallon or more).

Water descalers, specifically the Template Assisted Crystallization (TAC) types, are also shockingly good at this. They don't remove minerals but instead change them into microscopic crystals that can't stick to surfaces. Independent studies show these systems can prevent over 95% of scale buildup, putting them in the same league as softeners. The only catch? Electronic or magnetic descalers are a bit of a wild card; their results can be all over the place.

If your water hardness is off the charts, a softener offers a knockout punch. For more moderate hardness, a quality TAC descaler delivers nearly identical scale prevention without messing with your water's chemistry.

Impact on Water Feel and Taste

Here’s where you’ll notice the biggest daily difference. A water softener gives you that distinctively "soft," almost slippery water. Because the hard minerals are gone, soap lathers up like a bubble machine, leaving your skin feeling silky. Some people love it. Others feel like they can never rinse the soap off. Softened water also picks up a slightly salty taste from the ion exchange process, which can be a dealbreaker if you're watching your sodium.

A water descaler, on the other hand, leaves your water completely alone. The minerals are still in there, so you get no change in how your water feels or tastes. It's the same water you've always had, just without the scale-forming downside. You won't get that slippery feeling or mountains of lather. If your only mission is to protect your plumbing and you like your water as-is, a descaler is a perfect match.

Unpacking Maintenance Demands

The long-term ownership experience is a huge factor. A water softener is a bit needy and requires consistent, hands-on attention.

  • Lugging Salt: Get ready to buy and haul heavy bags of salt, usually 40 lbs a pop, to refill the brine tank every month or so.
  • Regeneration Cycles: The system has to clean itself regularly with a brine solution, using up both water and electricity.
  • Tank Cleaning: Every so often, you'll have to clean out the brine tank to prevent "salt bridges" that can shut the whole system down.

A water descaler is the complete opposite. It's the definition of a "set it and forget it" appliance. Once it's installed, you’re done. There's no salt to buy, no wastewater, and most models don't even use electricity. That zero-maintenance reality is a massive perk for anyone who wants a simple, hassle-free filtration solution.

The True Cost of Ownership

When you’re budgeting for home filtration, you have to look past the sticker price. A good descaler and a softener might have similar upfront costs, but their long-term expenses are worlds apart.

To give you a clearer picture, here’s a quick breakdown of how they stack up over time.

Key Differences At a Glance: Descaler vs Softener

Feature Water Descaler (Conditioner) Water Softener (Ion Exchange)
How It Works Alters mineral structure to prevent scale Removes hardness minerals via ion exchange
Scale Prevention Highly effective (TAC models) Extremely effective, total removal
Water Feel No change, feels "hard" "Soft" and silky, sometimes slippery
Maintenance Virtually none ("set and forget") Requires regular salt refills & cleaning
Ongoing Costs None (media may need replacing every 3-5 yrs) Salt, water, and electricity for regeneration
Environmental Impact Eco-friendly, no waste Creates salt-heavy brine discharge
Best For Moderate hardness, eco-conscious homeowners Very hard water, those wanting "soft" water feel

The lifetime cost of a water softener adds up. You're looking at hundreds of dollars a year just for salt, not to mention higher water and electricity bills. A softener can easily waste an extra 25 gallons of water per day—or 3,000 gallons per year—just on regeneration. Over the 10-15 year life of the unit, that's a significant expense. A descaler’s only potential future cost is new TAC media every 3-5 years.

The market shows where people's priorities are. Salt-based water softeners still dominate, holding a whopping 74.18% of the global market share because they are a proven, reliable workhorse. But there's a shift happening. Salt-free systems are projected to have the fastest growth through 2030, a clear sign that homeowners are looking for more sustainable ways to filter their water. You can dig into these trends in recent industry reports on water treatment markets.

How to Choose the Right Filtration System for Your Home

Navigating the water descaler vs softener debate can feel like a chore, but picking the right system for your house is probably easier than you think. It really just boils down to what's in your water, your lifestyle, and what you expect your water filtration system to do.

This isn't about finding the single "best" system. It's about finding the one that’s a perfect match for your specific hard water woes.

The first question to ask yourself is this: are you trying to completely transform how your water feels and behaves, or are you just looking to protect your pipes and appliances from that crusty, destructive limescale? Once you know that, you're halfway there.

Start with a Simple Water Test

Before you even think about shopping, your absolute first step should be to test your water. You can't fight an enemy you don't understand. A water test gives you the hard data you need, telling you your water's hardness level, measured in grains per gallon (GPG).

That one number is your treasure map. It immediately tells you which systems are good options and which would be a waste of money. Without it, you're just guessing.

  • Under 3 GPG: This is soft or just slightly hard water. You can probably skip any treatment.
  • 3-7 GPG: Moderately hard. This is the sweet spot where a quality water descaler really shines.
  • 7-10 GPG: Hard water. At this level, both systems are contenders, and your choice will come down to personal preference.
  • Over 10 GPG: Very hard water. For this level of mineral assault, a traditional salt-based water softener is almost always your best bet.

You can get this info from a simple home test kit or send a sample to a lab. Once you know your GPG, the path forward becomes much clearer.

Scenarios When a Water Softener Is the Clear Winner

A water softener is the right call when your goal is to wipe out all the annoying effects of hard water, not just prevent scale. It works by physically removing the problem minerals, which fundamentally changes your water.

You should be leaning toward a water softener if:

  • Your Water Hardness Is Over 10 GPG. When you're dealing with very hard water, a softener's mineral-removing power offers the most complete protection.
  • You Want That "Soft Water" Feel. If you're after silky-smooth skin, brighter clothes, and soap that lathers like crazy, only a softener can deliver.
  • You Have High Iron Content. Many softeners are also great at removing ferrous iron, the culprit behind those ugly rust stains in your sinks and toilets.

A water softener is an investment in total comfort and mineral removal. It’s the definitive solution for anyone fed up with every single symptom of hard water and willing to do a bit of maintenance to get rid of them for good.

Situations Where a Water Descaler Is Superior

A water descaler is the perfect solution for homeowners focused on preventing scale in an eco-friendly, zero-maintenance way without changing the water itself. It's a modern, set-it-and-forget-it approach to filtration.

A descaler is the better choice for you if:

  • Your Water Hardness Is Moderate (3-7 GPG). Descalers are highly effective in this range, stopping scale buildup before it starts without needing salt or chemicals.
  • You're Watching Your Sodium Intake. Since descalers don't add anything to the water, they're the ideal choice for anyone on a sodium-restricted diet.
  • You Want an Eco-Friendly, No-Fuss System. With no salt bags to haul, no wastewater, and often no electricity, descalers are the ultimate hands-off home filtration solution.

And the market is showing a clear preference for these sustainable options. The global water descaler market was recently valued at $2.1 billion and is projected to hit $3.9 billion by 2034. This huge growth shows that for many people, descalers are a compelling alternative that avoids the hassle of salt, making them a great fit for renters and environmentally conscious families.

This handy flowchart breaks down the decision. You've got the descaler on the left for low-maintenance scale prevention, and the softener on the right for complete mineral removal.

Flowchart guiding the choice between a descaler and water softener for home water systems.

As the chart shows, it really comes down to your water hardness and personal priorities—like how much maintenance you're willing to do. If you're looking for more detailed guidance on different types of home water systems, you can find a lot more information at https://www.waterfilteradvisor.com/advice/.

Installation, Maintenance, and What It Really Costs to Own

A person's hands installing a water treatment device on a brass pipe with a red tool.

When you’re weighing a water descaler vs. a softener, the differences go way beyond how they filter your water. The day-to-day reality of owning one—from setup to upkeep—is a completely different story. Nailing these practical details is key to picking a system you’ll love for years to come.

The initial setup can set the tone. A water softener, for example, is a much bigger job right from the start. It has to be plumbed directly into your home's main water line.

This means a plumber will be cutting pipes, soldering fittings, and running a new drain line for the salty discharge from its regeneration cycles. For most people, this isn't a simple weekend DIY project. If you're leaning toward a softener, getting familiar with the process of water softener installation and repair is a smart move to avoid headaches.

The Simplicity of Descaler Installation

Water descalers, especially the electronic kind, are the complete opposite when it comes to installation. Most of them are designed for an easy DIY setup.

Instead of serious plumbing work, you just wrap some wires or clamp the device onto the outside of your main water pipe. No cutting, no draining, no plumber. This makes them a fantastic fit for renters or anyone who doesn't want to make major changes to their plumbing.

Maintenance: A Tale of Two Systems

The real split between these two systems becomes clear with ongoing maintenance. A water softener needs your constant attention to keep working right. The biggest chore is keeping that brine tank full of salt.

This involves:

  • Constant Salt Runs: You'll be buying heavy, 40-pound bags of salt on a regular basis.
  • Heavy Lifting: Then you have to lug those bags from the store to wherever your softener is located.
  • System Check-ups: You also need to watch out for "salt bridges," which are hard crusts that can form in the tank and stop the whole system from working.

A water descaler, by comparison, is the definition of a "set it and forget it" device. Once it's installed, you're pretty much done.

With a water descaler, you can cross salt bags, tank refills, and system checks off your to-do list for good. This zero-maintenance design is a huge win for homeowners who just want a simple, hassle-free filtration solution.

Calculating the True Cost of Ownership

The sticker price is just the beginning. To get the full financial picture, you have to look at all the ongoing costs over the system's life. A water softener's expenses keep coming long after you've paid for the unit.

Your long-term softener budget needs to account for:

  • Salt: This is the most obvious recurring cost, which can easily run you $100-$300 per year, depending on your water hardness and family size.
  • Water: The regeneration process flushes thousands of gallons of water down the drain each year, which you'll see on your utility bill.
  • Electricity: The system’s control valve and timer are always on, using electricity 24/7.

A water descaler, on the other hand, has almost no running costs. Electronic models use a tiny amount of power, and TAC systems might need a media change every three to five years. But even that is minor compared to the constant cash outlay for a softener, making the descaler a much more predictable and often cheaper choice over its lifetime.

Your Top Questions About Home Water Filtration, Answered

Jumping into the world of water filtration can feel a little overwhelming. When you're stuck between a water descaler and a softener, it’s easy to get lost in the jargon. Let’s clear up the most common questions so you can make a choice you feel great about.

Will a Water Descaler Make My Water Feel Silky and Soft?

Nope, and this is probably the biggest point of confusion in the water descaler vs softener conversation. A descaler won't change how your water feels one bit. You won’t get that classic "slippery" feeling in the shower that’s a dead giveaway of softened water.

That’s because descalers are designed to leave beneficial minerals like calcium and magnesium right where they are. All they do is alter the minerals to stop them from sticking to your pipes as ugly scale buildup. Think of it as a scale prevention device, not a water-feel-changer.

Can I Use a Descaler if I Have Seriously Hard Water?

While descalers are great for moderately hard water, a traditional salt-based softener is almost always the smarter move for very hard water—we're talking anything over 10 grains per gallon (GPG). The same advice holds true if your water has a high iron content.

Softeners are just plain stronger in these tough situations because they physically yank the problem-causing minerals out of the water entirely. This gives your plumbing and expensive appliances far more reliable protection when mineral levels are off the charts.

If your water test comes back in the double digits for hardness, a water softener offers the most complete and effective fix for the long haul. A descaler might not be able to keep up, leaving your home at risk.

Do Water Softeners Add a Ton of Sodium to My Diet?

This is a really common worry, but the amount of sodium a softener adds is usually much smaller than you'd think. The exact amount is tied to how hard your water is—the harder it is, the more sodium is exchanged.

For most people, a full glass of softened water contains less sodium than a single slice of white bread. That said, if you're on a strict, doctor-ordered low-sodium diet, a descaler is the safer choice. Another popular option is to install a reverse osmosis filtration system for your drinking water after the softener, giving you the best of both worlds.

Are All Water Descalers Created Equal?

Definitely not. The performance of water descalers varies wildly depending on the technology inside.

  • Template Assisted Crystallization (TAC): These systems have solid, third-party data to back them up, often preventing over 95% of scale. They're widely seen as the most dependable salt-free option.
  • Electronic and Magnetic Descalers: The results from these gadgets are a lot more debated. Their performance can be hit-or-miss, often depending on your specific water chemistry, pipe material, and water flow rate.

If you’re leaning toward a descaler, looking for one that uses TAC technology is your best bet for results you can actually count on.


Ready to find the perfect water filtration solution for your home? Water Filter Advisor provides expert reviews and in-depth guides to help you compare the best systems on the market. Explore our resources and make a confident choice at https://www.waterfilteradvisor.com.

Water Descaler vs Water Softener: The Ultimate Showdown for Your Home’s Water

What's the real difference between a water descaler and a water softener? It all boils down to a battle with hard water minerals. Think of a water softener as a bouncer that physically removes troublemakers like calcium and magnesium using salt. On the flip side, a water descaler is more like a peacekeeper; it doesn't kick the minerals out, but it changes their behavior so they can't stick to your pipes and cause that destructive limescale.

The Hard Water Dilemma: Time to Pick a Side?

If you're waging war against chalky white buildup on faucets, stiff towels, and glasses that look perpetually cloudy, you're fighting hard water. It’s a super common problem, plaguing an estimated 85% of homes in the U.S.

Hard water is chock-full of dissolved minerals, mainly calcium and magnesium. While they’re perfectly safe to drink, these minerals are absolute villains for your home. They create limescale, that crusty deposit that clogs pipes, sabotages your water heater's efficiency, and dramatically shortens the lifespan of your appliances. The problem isn't about your health—it's about protecting your home's entire water filtration ecosystem. This is where you face the big decision: water descaler vs. water softener.

Understanding the Core Technologies

Picking the right system means getting what makes them tick. It’s not about one being "better," but which one is the right champion for your specific home filtration needs.

  • Water Softeners (Ion Exchange): These are the heavyweights, the classic solution. Their whole mission is to completely remove the minerals that cause hardness. They work by swapping out pesky calcium and magnesium ions for sodium ions, giving you truly "soft" water.
  • Water Descalers (Conditioners): These systems are the clever strategists. They neutralize the minerals' ability to cause damage without actually removing them. Technologies like Template Assisted Crystallization (TAC) convert the minerals into tiny, harmless micro-crystals that just flow right through your plumbing instead of clinging to surfaces.

Here's the bottom line: a softener removes minerals to solve all hard water symptoms, while a descaler conditions them to prevent the most destructive problem—limescale—making it a crucial player in your home filtration setup.

Your choice really hinges on how hard your water is, how much maintenance you’re willing to do, and your personal water philosophy. Here’s a quick tale of the tape.

Feature Water Softener (Ion Exchange) Water Descaler (Conditioner)
Primary Function Physically removes hardness minerals Alters mineral structure to prevent scale
Water Hardness Reduces hardness to near zero Mineral count remains the same
Core Technology Ion exchange using salt and resin Template Assisted Crystallization (TAC)
Feel of Water Silky, slippery feel No noticeable change in water feel
Maintenance Requires regular salt refills Virtually maintenance-free

How Water Softeners Create Truly Soft Water

A white water softener machine filled with salt pellets next to an "ION exchange" sign and a bag of media.

When you want a surefire knockout punch for hard water, the classic salt-based water softener is the reigning champ. Unlike systems that just condition water, a true softener is engineered to physically yank the hardness minerals right out. This isn't a partial fix; it’s a complete solution for everything from crusty scale buildup to stubborn soap scum, making it a cornerstone of many home water filtration systems.

The magic behind it all is a process called ion exchange. It sounds complex, but it's basically a clever swap meet. Imagine your softener's main tank is packed with millions of tiny resin beads, all pre-loaded with sodium ions.

As your hard water flows over this resin bed, the calcium and magnesium minerals—the culprits behind your hard water woes—are drawn to the beads like tiny magnets. The resin has a stronger attraction to these minerals, so it grabs them and, in a simple trade, releases its sodium ions into the water. Voila! The water leaving the tank is now genuinely soft.

The Science of Ion Exchange in Action

This mineral-swapping process is incredibly effective, leaving your water almost entirely free of the gunk that causes limescale, stiff laundry, and spotty dishes. The result is water that feels totally different—many people describe it as silky or even a bit slippery to the touch.

But those little resin beads can't work forever without a refresh. They eventually become saturated with all the calcium and magnesium they've collected. When that happens, it's time for a cleaning process known as the regeneration cycle.

During regeneration, the system hits pause on softening. It pulls a concentrated salt solution, or brine, from a separate tank and uses it to flush the resin bed. The sheer amount of sodium in the brine forces the captured hardness minerals off the beads and sends them down the drain. Once the resin is clean and recharged with fresh sodium ions, the softener is ready to get back to work.

Inputs and Outputs: The Complete Cycle

To truly get how a softener works in your home, you have to look at what goes in and what comes out.

  • Input: The main ingredient is salt (either sodium chloride or potassium chloride). You’ll have to add it to the brine tank regularly to keep the system regenerating.
  • Input: The system also uses water to backwash and rinse the resin bed during the regeneration cycle.
  • Output: The star of the show is softened water, flowing to every faucet and appliance, protecting them from scale buildup.
  • Output: The byproduct is brine wastewater. This is a highly salty discharge containing all the flushed-out hardness minerals, which gets sent down your drain.

The undeniable benefit of this process is the complete elimination of scale. By removing the minerals at the source, water softeners protect your entire plumbing infrastructure, from the water heater to the showerhead, ensuring they operate at peak efficiency.

The numbers back up their effectiveness. Salt-based models command a massive 74.18% market share in 2024 precisely because ion exchange is a proven technology. While the global softener market is expected to hit USD 12.58 billion by 2030, the whole "water descaler vs water softener" conversation is heating up as salt-free alternatives find their place. You can dive deeper into these water softener market trends on Mordor Intelligence. Still, this dominance, especially in the U.S. where hard water plagues millions, shows just how many people trust this technology for a definitive end to their hard water headaches.

The Water Descaler: A Smarter, Salt-Free Approach to Scale

Infographic illustrating the three main benefits of a salt-free descaler: no salt, keeps minerals, and prevents scale.

For homeowners tired of lugging heavy salt bags and worried about salty wastewater, water descalers offer a compelling alternative. You’ll often see them marketed as "salt-free water softeners," but it’s crucial to know they’re technically water conditioners. Their job isn't to remove hard minerals, but to change how they behave.

Instead of yanking calcium and magnesium out of your water, a descaler simply stops them from forming destructive limescale. This means you get the biggest benefit—protecting your pipes and appliances—without actually changing the water's mineral makeup. A water test will show the same hardness level, but those minerals won't be able to stick to surfaces anymore. It's a targeted strike against the worst part of hard water.

The Science of Crystallization

The most trusted and effective technology in this field is Template Assisted Crystallization (TAC). Think of the hardness minerals in your water like tiny, super-sticky Lego bricks that want to clump together on any surface they find.

A TAC system uses a special media with "nucleation sites" that act like a template. As water passes through, these sites grab the calcium and magnesium ions and force them into stable, non-sticky micro-crystals. These harmless, microscopic crystals just flow right through your plumbing without building up. It's a brilliant piece of water filtration science.

Another approach uses magnetic or electronic descalers. These are devices that you wrap around your main water pipe, where they create an electromagnetic field. The idea is that this field changes the electrical charge of the mineral ions, making them repel each other and the pipe walls instead of sticking and forming scale.

Retaining Minerals Without the Mess

One of the coolest things about a descaler is that it leaves beneficial minerals like calcium and magnesium right where they belong—in your water. Since these are essential for a healthy diet, a lot of people prefer not to remove them. A descaler lets you keep the good stuff while neutralizing the bad behavior.

A water descaler neutralizes the threat of limescale while leaving beneficial minerals like calcium and magnesium in your water.

This gives you a great middle-ground option in the water descaler vs water softener debate. You get top-notch scale prevention without needing salt, electricity (for non-electronic models), or the wastewater that comes from a regeneration cycle. It’s pretty much a set-it-and-forget-it solution for your home's water filtration.

This shift toward conditioning water instead of stripping it is making waves in the industry. In the global market for 2024, descalers hold a massive 50% share, leaving traditional water softeners behind at just 30%. This trend shows a clear preference for systems that stop limescale without the environmental footprint of salt and brine. With North America leading the way, projections show descalers could hit a 52% market share by 2025, thanks to their efficiency and eco-friendly design. You can dig into more data on descaler market trends and future opportunities at Cognitive Market Research.

What a Descaler Does Not Do

It's just as important to understand what a descaler can't do. Because the minerals are still in the water, you won't get the other perks that come with truly soft water.

Here’s what you should know:

  • Soap Lather: You won’t notice a big difference in how well your soap lathers up in the shower or washing machine.
  • Water Feel: The water won't have that classic silky, slippery feel you get from soft water.
  • Soap Scum: While it stops scale, you might still see some minor soap scum on surfaces like shower doors.

At the end of the day, a descaler is a highly specialized tool in the water filtration world. It's built to do one thing and do it extremely well: stop limescale from ruining your home’s plumbing and appliances. For homeowners focused on protection and sustainability, it’s a powerful, salt-free alternative.

Comparing Hard Water Solutions Head-to-Head

Trying to choose between a water descaler and a water softener can feel like picking between a sledgehammer and a scalpel. Both are designed to tackle the headaches caused by hard water, but they go about it in fundamentally different ways, leading to very different results and long-term commitments for your home.

Let's break down what really matters for homeowners in this head-to-head comparison. As you weigh your options, it helps to understand the full scope of what's out there. Getting familiar with the various water conditioners on the market will give you a clearer picture of the different technologies available to fight scale.

Effectiveness Against Scale Buildup

The number one reason anyone invests in a home water treatment system is to stop limescale in its tracks. A water softener delivers a complete knockout punch here. It works by physically removing the hard minerals—calcium and magnesium—from your water. With those minerals gone, scale has a 0% chance of forming. This means total protection for your pipes, water heater, and appliances.

A water descaler takes a more tactical approach. It doesn't actually remove the minerals. Instead, it uses technologies like Template Assisted Crystallization (TAC) to change their structure, making them unable to stick to surfaces. It’s incredibly effective at preventing new scale, often reducing it by over 95%. As a bonus, it can even help slowly break down existing buildup over time.

For homes with extremely hard water (anything over 10 GPG), a water softener provides the most reliable and thorough scale prevention. If you're dealing with moderate hardness, a high-quality descaler is an excellent, fuss-free protective measure.

Costs Upfront And Over Time

Your budget will obviously play a big role in this decision. Water softeners typically have a higher upfront cost, usually running between $800 and $2,500 for a decent unit, not including professional installation. The long-term costs also pile up, with regular salt purchases costing around $200-$400 per year, plus the cost of extra water used during regeneration cycles.

Water descalers are generally much easier on the wallet upfront, with most models falling in the $300 to $1,500 range. The real win, though, is their near-zero long-term operational cost. They don't require salt, don't use extra water, and many—like TAC systems—don't even use electricity. They are truly a "set it and forget it" solution.

The infographic below really nails the core, maintenance-free benefits of going salt-free.

It’s a great visual that shows how a descaler prevents scale without salt while leaving healthy minerals right where they belong—in your water.

Environmental And Health Considerations

This is where the two systems couldn't be more different. A water softener’s regeneration cycle flushes a concentrated saltwater solution (brine) down the drain. This salty discharge can be a real problem for local water treatment facilities and has even been banned in some environmentally conscious counties. If you have a septic system, this brine can also disrupt the essential bacterial balance.

From a health standpoint, softeners add a small amount of sodium to the water. It’s usually not enough for most people to notice, but it can be a genuine concern for anyone on a strictly low-sodium diet.

Water descalers, on the other hand, have a minimal environmental footprint.

  • Zero Wastewater: No regeneration cycle means no brine discharge.
  • No Added Sodium: The water's mineral composition isn't altered, so no sodium is introduced.
  • Mineral Retention: They leave beneficial minerals like calcium and magnesium in the water, which are important for our daily diet.

The Feel Of The Water And Daily Use

The final point of comparison is how the water actually feels and affects your daily life. Softened water has a distinct "silky" or even "slippery" feel. This happens because the lack of minerals allows soaps and detergents to lather up like crazy, meaning you'll use less of them. You'll also notice softer skin, smoother hair, and brighter clothes.

A descaler doesn't change the feel of the water at all. Since the minerals are still there, you won't get that slippery sensation or see a huge increase in soap lather. Its benefits are invisible—all the hard work is happening inside your pipes, protecting your home's water system.

Water Descaler Vs Water Softener Feature Comparison

To make the choice a little easier, here is a detailed breakdown comparing the key attributes of water descalers and salt-based water softeners for homeowners.

Feature Water Softener (Ion Exchange) Water Descaler (Conditioner)
Scale Prevention 100% removal of scale-causing minerals. 95%+ prevention by crystallizing minerals.
Ongoing Costs Requires salt, water, and electricity. Virtually zero; no salt or wastewater.
Environmental Impact Produces brine wastewater. Eco-friendly; no waste.
Health Impact Adds sodium to water. Retains healthy, natural minerals.
Water Feel Creates a "silky," slippery feel. No change to water feel.
Maintenance Regular salt refills required. Minimal to no maintenance.

Ultimately, the best choice really comes down to your primary goal. If you want a solution that eliminates every single symptom of hard water—from scale buildup to dry skin and spotty dishes—a water softener is the way to go. But if your main concern is simply protecting your home’s plumbing and appliances with a low-maintenance, eco-friendly solution, then a descaler is the smarter investment for your home filtration strategy.

Which System Is Right for Your Home?

Alright, let's get down to the real question: which of these systems actually makes sense for your home? The water descaler vs. water softener debate isn't just about technical specs; it’s about how a system fits into your life. The right choice depends on your priorities, where you live, and what you’re trying to fix with your home's water.

To make it simple, we’ve broken it down into a few common homeowner situations. Find the one that sounds most like you, and you’ll have your answer.

For the Eco-Conscious Homeowner in a Brine-Restricted Area

If your main goal is sustainability and leaving the smallest environmental footprint, a water descaler is the obvious choice. This is for the person who’s worried about water waste and the impact of salt being flushed into local waterways or their septic system.

A classic water softener's regeneration cycle can dump up to 100 gallons of water down the drain, along with a heavy brine solution. This is such a big deal that some towns have actually banned them. A descaler, especially a Template Assisted Crystallization (TAC) model, is a zero-waste alternative.

  • No Wastewater: It doesn’t produce any brine discharge, so it’s perfectly safe for septic tanks and keeps you compliant with local regulations.
  • No Salt or Chemicals: It operates without adding a single thing to your water or the environment.
  • Energy Efficiency: Many descalers don’t even use electricity, which helps shrink your home's carbon footprint.

Recommendation: For anyone committed to green living, a water descaler is the perfect match. It stops scale buildup without the environmental baggage of a salt-based system.

For the Family Battling Extremely Hard Water

Now, picture a family living in an area where the water hardness is off the charts—we’re talking over 10 grains per gallon (GPG). Their problem is much bigger than just spotty glasses. Appliances are dying early, showerheads are constantly clogged, and everyone's skin and hair feel dry and scratchy.

In this case, the complete mineral removal of a water softener is non-negotiable. A descaler is fantastic for preventing scale, but it does nothing for the other symptoms of seriously hard water, like soap that won't lather and that gross soap scum ring in the tub.

When you're up against severe hard water, a softener's power to physically remove hardness minerals delivers a level of protection and comfort that a descaler simply can't match.

A salt-based softener gives you that slick, "silky" water feel, makes your soaps and detergents work way better, and puts a complete stop to scale. The ongoing cost of salt is a small price to pay for solving every single hard water headache.

Recommendation: A traditional water softener is the only real solution for homes that need full-spectrum relief from extremely hard water.

For the DIYer Who Wants a Zero-Maintenance Solution

If you’re the kind of person who loves a "set it and forget it" solution, the water descaler is your best friend. This is for the homeowner who wants scale protection without ever having to think about maintenance, lugging salt bags, or messing with programming.

Let's be honest, traditional softeners need regular attention. You have to keep an eye on the salt levels, haul those 40-pound bags from the store, and occasionally deal with a regeneration cycle that goes haywire. A TAC-based descaler, on the other hand, gets installed on your main water line and just… works.

While salt-based softeners hold a massive 58.6% of the market in 2025 and require all that upkeep, descalers simply condition the minerals. With over 85% of U.S. households dealing with hard water, descalers also prevent scale in water heaters, which can kill their efficiency by up to 29%. If you're curious how market trends are influencing these choices, you can check out the latest water softener industry analysis from Coherent Market Insights.

Recommendation: A water descaler provides serious scale protection with almost zero effort, making it the perfect choice for a busy, hands-off homeowner. For more general tips on water treatment systems, head over to our water filtration advice page.

Common Questions We Hear About Descalers and Softeners

Even after you've weighed the options, a few last-minute questions always seem to pop up. When you're trying to decide between a water descaler and a water softener, these practical details can make all the difference. We've compiled some of the most common questions we get from homeowners to give you clear, straight answers.

Think of this as your final check-in before you commit to improving your home's water filtration.

Can a Water Descaler Really Get Rid of Old Limescale?

Yes, it can, but think of it as a marathon, not a sprint. A descaler’s main job is to stop new scale from forming by changing the structure of the minerals in your water. But it has a nice side effect.

Over weeks and months, that conditioned water will slowly start to dissolve and break down the existing scale already stuck inside your pipes and on your fixtures. It’s a slow, gentle cleaning process, not a harsh chemical flush, so you'll need to be patient.

Will a Water Softener Make My Water Taste Salty?

This is probably the biggest myth out there, and the answer is almost always no. The ion-exchange process does add a tiny bit of sodium to the water, and how much depends on how hard your water is to begin with. For most people, you'll never even taste it.

That said, the small amount of added sodium can be a real concern for anyone on a strict low-sodium diet. In those cases, a great solution is to keep the water softener for the whole house but add a separate reverse osmosis system under the sink for pure drinking and cooking water.

Key Insight: While softened water is perfectly safe to drink, its sodium content might matter for specific health needs. A descaler adds nothing to the water, completely sidestepping this issue.

Do I Still Need a Filter if I Have a Softener or Descaler?

One hundred percent, yes. This is a critical point that people often misunderstand. Neither a softener nor a descaler is a water filter. Their jobs are very specific: they only deal with hard water minerals to stop scale. They are scale-fighters, not all-purpose purifiers.

They won't touch the common contaminants that ruin your water's taste and safety, like:

  • Chlorine and Chloramine: Chemicals your city uses for disinfection.
  • Lead and Heavy Metals: Nasty stuff that can leach from older pipes.
  • Pesticides and VOCs: Chemicals from runoff that can get into the water supply.
  • Bacteria and Viruses: A major concern, especially for homes on well water.

If you want truly clean, great-tasting water, you absolutely need a dedicated filtration system. This could be a whole-house carbon filter that works in tandem with your softener or descaler, or just an under-sink filter to purify water right at the tap.

Which System Is Better for Well Water with a Lot of Iron?

When you’re on a well, the conversation isn’t just about calcium and magnesium anymore—you’re often dealing with iron. Iron is what causes those ugly reddish-brown stains on your sinks, toilets, and laundry, and gives your water a metallic taste.

For well water with any noticeable amount of iron, a specialized water softener that comes with an iron filter is almost always the right call.

A standard softener can handle trace amounts of dissolved (ferrous) iron, but it gets overwhelmed by higher levels or by oxidized (ferric) iron. That stuff will clog up the resin bed and wreck the system. A dedicated iron filter or an all-in-one softener is built to handle it. Most descalers, especially TAC models, don't treat iron at all, making them a poor choice for this situation. The whole water descaler vs water softener debate gets a lot simpler when iron is in the picture.


At Water Filter Advisor, we believe that every home deserves safe, clean, and great-tasting water. Our in-depth guides and unbiased reviews are designed to help you navigate the world of water filtration with confidence. Explore our resources to find the perfect solution for your family’s needs at https://www.waterfilteradvisor.com.

Removing Sulfur Smell from Well Water: Your Guide to Clean, Odor-Free Taps

So, your well water smells like rotten eggs. Welcome to the club! It’s one of the most common—and let’s be honest, most gag-worthy—complaints from homeowners with private wells. The good news? You can absolutely fix it. Getting rid of that sulfur stench comes down to one thing: picking the right home water filtration system.

But before you start shopping, you need to play detective. Is the smell coming from a harmless gas in your groundwater, or is a colony of funky bacteria having a party in your pipes? Once you know the villain, you can choose the perfect hero—like aeration, oxidation, or a carbon filter—to save your water for good.

Why Your Well Water Smells Like Rotten Eggs

When you turn on the faucet and get hit with that unmistakable rotten egg odor, you're getting a big, smelly clue that your water chemistry is off. The culprit behind this olfactory assault is almost always a gas called hydrogen sulfide (H₂S).

Just a tiny amount of this stuff can make a glass of water undrinkable and a hot shower unbearable. The first and most critical step in your mission to reclaim your water is figuring out where that gas is coming from.

Water pours from a kitchen faucet into a glass, with a 'ROTTEN EGG SMELL' sign overhead.

In the world of well water, hydrogen sulfide usually comes from one of two places. It's crucial to identify which one you're dealing with because the filtration solutions are completely different.

The Two Main Culprits

One possibility is that H₂S is a natural feature of your local groundwater. This is common in areas with geological formations like shale or sandstone. As groundwater seeps through these layers, it picks up the gas and carries it right into your well. If this is your situation, you have a constant source of smelly water that needs a powerful, whole-home filtration system to treat it 24/7.

The second cause—and the one we see most often—is biological. We're talking about sulfur-reducing bacteria (SRBs). These microscopic critters thrive in oxygen-free environments, like the inside of your well casing, plumbing, or hot water heater. They aren't harmful to your health, but they have a nasty habit of munching on sulfates in the water and "exhaling" hydrogen sulfide gas. Voilà, instant rotten egg smell.

Key Takeaway: You're not just fighting a smell. You're either treating the water as it enters your home or evicting a colony of tiny organisms from your water system. Figuring out which it is will lead you to the right filtration fix.

A Quick At-Home Diagnostic Test

Before you spend a dime on professional testing, you can run a simple sniff test to get a huge clue about the source of the smell.

Grab two clean glasses. Fill one from the cold tap and the other from the hot tap. Now, walk them into another room (away from any stinky sink drains) and give them a sniff.

  • Smell only in the hot water? Bingo! The problem is almost certainly your water heater. The anode rod inside can react with sulfates to create H₂S gas, and the tank itself is a warm, cozy spa for sulfur-reducing bacteria.
  • Smell in both, but it fades after a minute? If the smell is strong at first but vanishes as you let the water run, the bacteria are likely living in your well or plumbing system.
  • Smell is constant in both hot and cold? A persistent stink that never goes away, no matter how long the water runs, points directly to hydrogen sulfide being naturally present in your groundwater.

This isn't just about an annoying odor. High sulfate levels that lead to hydrogen sulfide are a global issue. A 2025 study estimated that 194 million people live in areas where sulfate in drinking water exceeds WHO recommendations, which can lead to digestive issues. This makes proper filtration a health essential, not a luxury. You can read more about these global water quality findings on ScienceDaily.com.

Once you've narrowed down the source, you're ready to pick the right home filtration system and banish that rotten egg smell for good.

Getting to the Bottom of Your Sulfur Problem

When it comes to water filtration, guessing is the most expensive game you can play. Before you even think about buying a filter to fix that rotten egg smell, you need to know exactly what’s in your well water.

It's like going to a doctor: you want a diagnosis before you get a prescription. Throwing money at fancy equipment without hard data is the fastest way to get frustrated and end up right back where you started—with stinky water.

A comprehensive water analysis is your roadmap to success. It goes beyond confirming "yep, it smells" and gives you the complete chemical breakdown of your water. This is a non-negotiable step because other contaminants often tag along with hydrogen sulfide. These unwanted guests can clog or ruin certain types of filters, making one system a perfect match and another a total waste of money.

What You Absolutely Need to Test For

When you get your water tested, don't just ask them to check for "sulfur." You need specifics to choose the right home filtration system.

Make sure your report includes precise measurements for:

  • Hydrogen Sulfide (H₂S): This is the gas causing the rotten egg smell. You need to know the exact concentration.
  • Sulfates: This is the "food" for the sulfur-reducing bacteria that create the gas.
  • Iron & Manganese: These two are notorious for fouling up sulfur filters. If you have them, your filtration system needs to be able to handle them.
  • pH Level: Your water's acidity or alkalinity dramatically affects how well certain filtration methods, especially oxidation, will work.
  • Total Dissolved Solids (TDS): A high TDS level can signal other issues that might need a pre-filter or a more robust system.

With these numbers, you can confidently choose a home filtration system that’s perfectly tailored to your well's unique chemistry.

DIY Test Strips vs. a Real Lab Analysis

I know it’s tempting. You see those DIY water test kits at the hardware store and think, "Easy peasy." But for sizing a whole-home filtration system, they have serious limitations.

My Two Cents: DIY strips are fine for a ballpark guess on things like water hardness. But for hydrogen sulfide? They're notoriously unreliable. The gas can literally escape from the water sample before the strip even gets an accurate reading.

A certified lab analysis is an investment in getting it right the first time. You get precise, accurate results that allow you to buy the correct filtration equipment from the start, saving you the massive headache of installing an expensive system that can't do the job.

This detail is critical. Sulfate levels in groundwater can be all over the place. According to research from the EPA, some wells might have sulfate concentrations as low as 10 mg/L, while others can spike to over 1,000 mg/L. Without a real test, you're just flying blind.

Choosing the Right Sulfur Filtration System for Your Home

Alright, armed with your water test results, it's time for the main event: choosing a whole-house filtration system to permanently solve your rotten egg problem. This isn't a temporary patch; it's a long-term upgrade that delivers fresh, odor-free water to every faucet in your house.

Diving into the world of water filters can feel overwhelming, but for sulfur issues, it really boils down to a few proven technologies. The best one for you depends entirely on what your water test revealed. The concentration of hydrogen sulfide (H₂S), along with other party-crashers like iron and bacteria, will point you straight to the perfect system.

Flowchart showing two options for water testing: DIY with test tubes and professional lab test with a microscope.

Whether you used a home kit for a preliminary check or got a full lab analysis, this data is your guide to selecting the right hardware for your home.

Air Injection Oxidizing (AIO) Filters

One of the most popular and effective solutions is the Air Injection Oxidizing (AIO) filter. Think of it as the chemical-free workhorse of sulfur removal. This all-in-one system uses a simple, brilliant trick: it pulls in oxygen from the air and mixes it with your water as it enters the tank.

This kicks off a natural process called oxidation, which instantly converts the dissolved hydrogen sulfide gas into tiny solid particles. These particles are then easily trapped by a specialized media bed inside the tank. Every few days, the system automatically backwashes, flushing all the trapped sulfur and iron down the drain. It’s a clean, efficient, and low-maintenance solution.

I often recommend an AIO system when a water test shows low to moderate hydrogen sulfide—up to around 6-8 ppm—especially if there's also some iron. For most homeowners, it's a true "set it and forget it" solution.

Catalytic Carbon Filters

If you're dealing with a milder sulfur odor, a catalytic carbon filter can be an excellent and straightforward fix. These are best for H₂S levels under 1-2 ppm. While they look like standard carbon filters, the media inside has a special catalytic coating that dramatically speeds up the oxidation process.

As water flows through, H₂S gas is converted to solid sulfur and absorbed by the carbon. They’re simple, effective for slight smells, and don't use any chemicals. The only catch is that the carbon media will eventually need to be replaced, typically every couple of years.

Chemical Feed Pump Systems

Now, if your water test came back with some truly scary numbers—we're talking high hydrogen sulfide (10 ppm or more), iron bacteria, or other nasty microorganisms—it's time to bring in the heavy artillery. That’s where a chemical feed system, usually using chlorine, comes into play.

This setup injects a precise amount of chlorine into your water, which then flows into a holding tank. Chlorine is a powerful oxidizer that obliterates hydrogen sulfide and kills bacteria on contact. After the holding tank, a large carbon filter removes any leftover chlorine and sulfur particles, leaving you with completely purified, odor-free water.

This is the undisputed champion for severe water problems, but it does require more hands-on maintenance, like keeping the chemical solution tank filled. For a deeper dive into different filter types, our guides and advice section has a ton of great information and reviews.

Comparing Home Filtration Systems for Sulfur Smell Removal

Choosing the right system is a balancing act between performance, cost, and maintenance. What's perfect for your neighbor's well might be all wrong for yours. This side-by-side comparison should help clarify your decision.

Filtration Method Effective H₂S Range (PPM) Initial Cost Ongoing Maintenance Best For
AIO Filter 1 – 8 PPM Moderate Low (No chemicals) Moderate H₂S & iron
Catalytic Carbon 0.3 – 2 PPM Low-Moderate Moderate (Media change) Low H₂S, simple installs
Chemical Feed 6+ PPM High High (Refill chemicals) High H₂S & bacteria

By matching your lab results to the capabilities of each system, you can confidently invest in a home filtration solution that will finally kick that rotten egg smell to the curb.

Short-Term Fixes for Immediate Odor Relief

While you're deciding on the perfect long-term filtration system, you don't have to suffer through smelly showers. There are some powerful, immediate steps you can take to clear the air—and your water.

Think of these as your emergency first-aid kit for stinky water. They provide fast, welcome relief.

The two most common hotspots for a sudden sulfur smell are sulfur-reducing bacteria partying in your well or a similar colony that has checked into the warm, cozy spa of your water heater. Luckily, there are targeted ways to deal with both situations right now. And sometimes, if bacteria are your only problem, these fixes might even solve it for good.

Shock Chlorinating Your Well

If you've traced the odor back to bacteria in your well or plumbing, the most effective quick fix is shock chlorination. This is exactly what it sounds like: you're giving your well a sanitizing shock with a strong chlorine solution to kill off the bacteria producing that awful hydrogen sulfide gas.

It's a deep clean for your entire water system and an incredibly effective way to remove sulfur smell from well water when bacteria are the root cause. You just have to follow the steps carefully to do it safely.

Here’s the basic game plan:

  • Calculate the Dose: The amount of unscented household bleach you need depends on your well's depth and diameter. A common guideline is 2-3 pints of bleach for every 100 gallons of water in the well.
  • Mix and Circulate: Dilute the bleach in a bucket of water and pour it directly into the well. Then, connect a garden hose to an outdoor spigot and run water back into the well for at least an hour to circulate the chlorine.
  • Flush the System: Let the chlorine sit in the well for 8-24 hours. Then, go to every faucet in your house (hot and cold), run it until you smell chlorine, and shut it off. Finally, run an outdoor hose away from any landscaping or septic systems until the chlorine smell is completely gone.

Pro Tip: Shock chlorination can often keep the smell away for several months. If it comes back, you've confirmed a persistent bacteria problem. That’s your signal that a permanent filtration solution, like an AIO filter or a chemical feed system, is the next step.

Addressing the Water Heater Problem

What if your sniff test revealed the smell is only coming from the hot water? This is a dead giveaway that your water heater is the culprit. It’s a perfect breeding ground for sulfur bacteria—warm, dark, and oxygen-poor.

The anode rod inside the tank, designed to prevent rust, can sometimes make things worse. A standard magnesium rod can react with sulfates in the water, creating hydrogen sulfide gas as a byproduct.

Fortunately, the fix is pretty straightforward and doesn't involve your well at all.

You'll need to drain and flush the water heater to clear out the smelly, bacteria-filled water. For a more lasting solution, replace the standard magnesium anode rod with an aluminum-zinc alloy rod. This type of rod is much less reactive and helps prevent odor-causing bacteria from growing back. This simple swap can completely eliminate a hot-water-only sulfur smell.

While tackling your water, it never hurts to think about the bigger picture of home freshness. You can explore general strategies for eliminating common household odors to complement your efforts.

Installing and Maintaining Your Filtration System

You’ve done the heavy lifting—you tested your water, researched your options, and picked the perfect filtration system to banish that rotten egg smell for good. But the job isn't quite done. Proper installation and routine upkeep are what will make your investment pay off for years to come.

Getting this last part right is the difference between flawless, fresh water and future headaches.

First, decide whether to DIY the installation or call in a pro. Many modern systems, like a catalytic carbon filter, are designed for a handy homeowner. But for more complex setups like a chemical feed system, having an expert handle the plumbing and initial setup is money well spent.

A person's hands are replacing a water filter in a home filtration system during maintenance.

Hiring a Professional Installer

If you go the pro route, don’t just hire the first name you find. A true water treatment specialist understands how to optimize your system for your specific water chemistry.

Before you commit, ask a few key questions:

  • Do you have experience with my specific type of system? An expert with AIO filters might not be the best choice for a chlorine injection pump.
  • Can you provide references from recent installations? Hearing from other homeowners is the best way to gauge reliability and quality.
  • What kind of warranty do you offer on your installation? You want to know you’re covered if a leak appears after they leave.
  • Will you program the system based on my water test results? This is critical. A properly set regeneration cycle ensures top performance and prevents water waste.

Getting solid answers here ensures your system is installed right from day one.

Long-Term Maintenance Your System Needs

Okay, your new system is humming along, and the water is glorious. Now what? A little routine maintenance is all it takes to keep it removing sulfur smell from well water effectively. Ignoring it is like never changing the oil in your car—eventually, you'll have a big, expensive problem.

A Quick Analogy: Think of your filtration system like a garden. You can't just plant it and walk away. It needs regular, simple care to thrive and keep producing that fresh, clean water you love.

Staying on top of maintenance stops small issues from becoming big, smelly ones.

Your Essential Maintenance Checklist

The exact tasks depend on your system, but here’s a practical checklist for the most common sulfur removal setups. Set a recurring reminder on your phone for these—it's easy to forget!

For Air Injection Oxidizing (AIO) Systems:

  • Check the Air Injector (Every 6-12 months): This tiny part can get clogged with iron or sediment, preventing the system from drawing in air. A quick cleaning is usually all it takes.
  • Inspect the Control Valve (Annually): Just listen to the backwash cycle. Make sure it sounds right and that the valve is moving through its positions smoothly.

For Chemical Feed Pump Systems:

  • Replenish the Solution Tank (As needed): This is your most frequent task. Keep an eye on the chemical level (usually chlorine) and top it off.
  • Clean the Injection Point (Annually): Mineral scale can clog the injection fitting where the chemical enters your water line, stopping your system cold. A quick check and clean will prevent this.

For Catalytic Carbon and Media Filters:

  • Replace the Media (Every 2-3 years): This is a bigger job, but infrequent. You’ll know it’s time when that faint rotten egg smell starts to creep back. That’s your signal that the media is saturated and needs to be replaced.

Following a simple schedule like this will ensure you get clean, odor-free water for years, protecting both your investment and your nose.

Common Questions About That Rotten Egg Smell

Even after diving into the science and solutions for that sulfur smell, it’s normal to have a few questions left. Sorting through home filtration systems can feel like a lot, but getting clear answers is the last step before you can choose a solution with total confidence.

Let's tackle the most common questions homeowners ask when they're battling the rotten egg beast.

Will a Water Softener Get Rid of the Sulfur Smell?

This is probably the biggest myth in water treatment. The short answer? No.

A standard water softener is a one-trick pony: it removes hardness minerals like calcium and magnesium. It is simply not designed to capture a dissolved gas like hydrogen sulfide.

In fact, the resin beads inside a softener can become a breeding ground for sulfur-reducing bacteria, which can make the rotten egg odor even worse. If you have a sulfur problem, you need a dedicated system for removing sulfur smell from well water.

Why Does My Water Smell Worse at Certain Times?

A sulfur smell that comes and goes can be maddening. This fluctuation usually points to a few common culprits.

  • Changes in the Water Table: Heavy rain or a dry spell can alter the groundwater chemistry, causing the smell to flare up.
  • Bacterial Activity: If bacteria are the cause, their activity level isn't always constant. It can ebb and flow, making the smell seem intermittent.
  • Water Stagnation: When water sits in your pipes or hot water heater, hydrogen sulfide gas concentrates. This is why the smell is often strongest when you first turn on a faucet after it's been off for a while.

Here's the key takeaway: an inconsistent smell still points to a consistent problem. Even if the odor vanishes for a day, the underlying cause is still there and needs a permanent filtration solution.

Is It Safe to Drink Water That Smells Like Sulfur?

At the low levels typically found in homes, the smell itself isn't considered a direct health hazard. But you absolutely shouldn't ignore it. Think of that rotten egg smell as your water’s built-in alarm system.

It’s a huge red flag that your water quality is compromised. It can signal the presence of bacteria or high levels of sulfates, which can cause digestive issues like diarrhea—especially for young children or guests. The smell is your water telling you it's time to get it tested and find the right filtration plan.

How Long Does Shock Chlorination Last?

This all depends on the source of your sulfur problem.

If the smell was caused by bacteria colonizing your well, a thorough shock treatment could solve the problem for several months, or in some cases, for good.

But if hydrogen sulfide is naturally present in your aquifer, the smell will always return as new, untreated water is drawn into the well. In that case, shock chlorination is just a temporary fix. It’s a great way to get immediate relief, but it also confirms that you need a permanent filtration system for a true, long-term solution.


At Water Filter Advisor, we're dedicated to helping you find the perfect, lasting solution for your well water. Explore our expert guides and reviews to make a confident choice for your home at https://www.waterfilteradvisor.com.

Does a Water Filter Soften Water in Your Home

Let's dive right in: a standard water filter does not soften water. It's an easy mix-up, but filtration and softening are two completely different ball games, designed to solve entirely different problems in your home's water supply.

Imagine your water filter is the head of security for your drinking glass. Its mission is to spot and block troublemakers like chlorine, funky-tasting sediment, and pesky pesticides. It ensures the water you drink is clean, safe, and doesn't taste like a swimming pool. A water softener, however, is more like a diplomatic negotiator—it specifically targets "hard" mineral ions and swaps them for something less problematic.

Filtration vs. Softening: The Core Difference

Clear water pouring from a kitchen faucet into a glass, symbolizing clean filtered water.

Most of us reach for a water filter to make our tap water safer and more enjoyable. The goal is purification. You want to kick out anything that might be harmful or just plain weird-tasting.

A filter's job is to remove a whole squad of contaminants, from chlorine and heavy metals to VOCs and bacteria. It's all about purity. But the minerals that cause hardness—our old friends calcium and magnesium—usually get a free pass to slide right on through.

Water softening, on the other hand, is on a completely different mission.

Its one and only purpose is to eliminate the minerals responsible for that crusty, white scale buildup in your pipes, on your showerheads, and inside your appliances. That buildup is a silent killer of efficiency and can lead to eye-watering repair bills. Softening is all about protecting the plumbing and appliances you've invested in.

To help you see the difference clearly, here's a quick side-by-side comparison.

Filtration vs. Softening at a Glance

Feature Water Filter Water Softener
Primary Goal Removes contaminants Removes hardness minerals
Improves Water taste, odor, and safety Prevents scale buildup
Targets Chlorine, lead, bacteria, pesticides, etc. Calcium and magnesium
Main Benefit Healthier, better-tasting water Protects pipes & appliances

This table shows that you're not choosing between one or the other; you're choosing which problem you want to solve.

Why You Might Need Both

Because filters and softeners are specialists in different fields, they aren't mutually exclusive. In fact, many homes with hard, contaminated water benefit from having both systems working in tandem.

The filter first removes the nasty stuff, then the softener takes care of the minerals. This dream team ensures your water is not only pure and great-tasting but also won't wage war on your coffee maker.

For anyone looking for a complete fix, a water softener and filter system combo is the way to go. This integrated approach gives you the best of both worlds, and understanding this key difference is the first step toward finding the perfect setup for your home.

Understanding the Problem of Hard Water

So, what is this stuff we call “hard water”? It’s really just water that’s picked up a high concentration of dissolved minerals—mostly calcium and magnesium—on its journey through the ground.

Think of these minerals as microscopic bits of rock hitching a ride in your water. When the water evaporates from a surface, like your shower door or kitchen faucet, it leaves those tiny hitchhikers behind. That’s where all the frustration begins.

A shower head clogged with white mineral scale buildup.

This leftover residue is the culprit behind that chalky film on your glass shower doors, the stubborn white spots on your dishes, and that crusty buildup around your sink fixtures. It’s also the reason your soap and shampoo just won't lather up properly, forcing you to use way more product than you should need to.

More Than Just Annoying Spots

While the visible signs are a nuisance, the real damage is happening where you can't see it. That mineral residue quietly builds up inside your pipes and appliances, forming a hard, rocky coating called limescale.

Limescale acts like plaque in your home's plumbing arteries. It slowly constricts water flow, forcing your entire system to work harder and less efficiently.

This buildup has serious consequences for some of your most expensive household appliances. It can choke the life right out of your water heater, dishwasher, washing machine, and even your coffee maker. In fact, some espresso machine experts claim that unfiltered hard water is directly responsible for over 50% of leak-related problems they see.

The effect on your energy bills is just as bad. Limescale is a terrible heat conductor, so when it coats the heating element in your water heater, the unit has to burn more energy just to get the water to the right temperature. This leads straight to higher utility bills and a much shorter lifespan for the appliance itself.

The Real-World Impact of Scale Buildup

The effects of this silent destroyer pop up all over the house. Over time, you’ll probably start to notice:

  • Reduced water pressure: As scale narrows the inside of your pipes, water flow drops. This means weak showers and sinks that take forever to fill.
  • Dull, stiff laundry: Hardness minerals get trapped in the fibers of your clothes, leaving them feeling rough and making colors fade much faster.
  • Dry skin and hair: Those same minerals that leave a film on your dishes also leave a residue on your body, which can clog pores and leave your skin and hair feeling dry and itchy.
  • Appliance failure: The constant strain and internal damage from scale buildup eventually lead to costly repairs and, all too often, premature appliance replacement.

Ultimately, dealing with hard water isn't just about getting shinier dishes or a better lather from your soap. It’s about protecting your home’s critical infrastructure—your plumbing and major appliances—from slow, expensive, and completely preventable damage. Since a standard water filter doesn't remove these minerals, homeowners often need to look at specific solutions designed to tackle hardness.

How Home Water Filters Actually Work

To get why most filters don't soften water, we have to pop the hood and see how they’re built. Think of water filtration like a series of specialized nets, where each one is designed to catch a different kind of unwanted particle. The size and type of that net dictate what it catches and what it lets slip right on through.

Most of the filters you find in homes are all about purification—getting rid of things that make your water taste, smell, or feel funky. They are fantastic at their jobs, but that job isn't softening.

https://www.youtube.com/embed/-_sr7mzhVsE

The Most Common Filter Types

Let's break down the workhorses of home water filtration. Each has a very specific role, and you'll quickly notice a common theme: they aren't designed to go after hardness minerals.

  • Sediment Filters: These are the simplest of the bunch. They work like a screen door for your water supply, blocking bigger stuff like dirt, sand, rust, and silt before it gets into your plumbing. While they're essential for protecting other filters and appliances, those dissolved hardness minerals just sail right through.

  • Activated Carbon Filters: This is the hero you'll find in pitcher filters, refrigerator filters, and a lot of faucet-mounted systems. Activated carbon has this incredibly porous surface that acts like a magnet for contaminants like chlorine, pesticides, and chemicals that cause bad tastes and smells. But calcium and magnesium ions? They just don't stick to the carbon and keep on flowing.

  • UV Purifiers: Ultraviolet (UV) systems are more like assassins than catchers. They use a powerful UV light to scramble the DNA of bacteria, viruses, and other nasty microorganisms, making them totally harmless. It's a super effective way to handle microbiological threats, but it does absolutely nothing to the mineral content in the water.

An EPA overview of treatment technologies confirms this. While methods like activated carbon are great for organics and chlorine, they don't touch the minerals that cause hardness. For that, the EPA points to cation exchange as a proven method with over 99% removal efficiency for both calcium and magnesium ions.

What About Reverse Osmosis?

Now, there is one major exception in the world of filtration: Reverse Osmosis (RO). An RO system uses an incredibly fine semipermeable membrane to strip out a massive range of dissolved solids from water. We're talking lead, arsenic, and—you guessed it—the calcium and magnesium that make water hard.

So, does a water filter soften water if it’s an RO system? Technically, yes, but only at the specific tap where it’s installed.

Using an RO system for whole-home softening is like using a sniper rifle for a job that needs a bulldozer. RO is perfect for producing highly purified drinking water at your kitchen sink, but it’s not built for the volume and flow rate your entire house demands.

It produces wastewater as part of its process and just can't keep up with showers, laundry, and the dishwasher all running at once.

This distinction is crucial. While a couple of filter types can reduce hardness, their main job is purification. For true, whole-home softening, you need a system that was engineered specifically for that task.

The Science of Making Hard Water Soft

So, if most filters aren’t designed to tackle hard water, what’s the real fix? This is where a dedicated water softener comes into play. These systems are the undisputed heavyweights of hard water treatment, and the science behind them is actually pretty straightforward.

At the core of a traditional water softener is a process called ion exchange. Picture the softener’s main tank filled with millions of tiny, porous resin beads. Right out of the box, these beads are loaded up with sodium ions.

As your home's hard water flows through this tank, the magic happens. The calcium and magnesium minerals—the very things causing all that scale and soap scum—have a stronger positive charge than the sodium ions. Because of this, the resin beads act like powerful little magnets, grabbing the calcium and magnesium right out of the water and releasing the sodium ions to take their place. It's a simple and incredibly effective trade that physically removes the minerals that make water hard.

The Trade-Off: How Ion Exchange Works

This mineral swap is what gives you genuinely soft water, unlocking all the benefits you’ve heard about: no more scale buildup, richer soap lather, and softer skin and hair. Of course, this process can't go on forever.

Eventually, the resin beads become completely saturated with all the calcium and magnesium they’ve pulled from the water. At that point, they can’t grab any more. This is when the softener needs to "regenerate"—it flushes the mineral-packed beads with a concentrated saltwater (brine) solution, washing the hard minerals down the drain and reloading the beads with a fresh supply of sodium ions, ready to start the cycle all over again.

There’s no question about the demand for this technology. The U.S. water softening systems market is a clear indicator of how widespread hard water problems are, with projections showing growth from $763.6 million in 2025 to a staggering $1.19 billion by 2032. This boom is driven by a growing awareness of hard water’s damaging effects, and proven salt-based ion exchange softeners continue to dominate the market. You can discover more about the water softening market's growth and see the trends for yourself.

The Salt-Free Alternative: Water Conditioners

For homeowners who want a lower-maintenance option, there's another player in the game: the salt-free water conditioner, often called a descaler. Now, it's critical to understand that these systems do not actually soften the water. They don’t remove the hard minerals at all.

Instead, they use a clever technology called Template Assisted Crystallization (TAC). This process changes the physical form of the calcium and magnesium minerals, turning them into microscopic crystals that simply won't stick to your pipes, fixtures, or appliances.

Think of it this way: if scale buildup is like LEGOs clicking together to form a solid mass, a water conditioner coats each LEGO piece so it can't connect with the others. The minerals are still present in your water, but they just flow harmlessly through your plumbing without causing that destructive scale. This makes conditioners a fantastic choice for scale prevention, but you won't get those other classic benefits of soft water, like silky-smooth skin or better soap performance.

Choosing the Right Water System for Your Home

So, how do you take all this information and turn it into the right decision for your family? It really just comes down to one simple question: What problem are you trying to solve? The best choice for you is all about your specific goals.

Are you mainly concerned with making your drinking water taste better and getting rid of nasty contaminants? Or are you just plain sick of replacing appliances caked in scale and scrubbing that chalky film off your shower doors? Your answer is the key to figuring out the perfect water treatment plan for your home.

Assess Your Home’s Unique Needs

Before you buy anything, you need to know what you’re working with. A great first step is to grab a simple water hardness test kit. It will tell you exactly how many grains per gallon (GPG) of minerals are in your water. If you see a number over 3 GPG, you've got hard water that’s likely causing problems.

Next, think about your family's priorities and your budget. Are you looking for a whole-house system that protects every pipe and appliance, or is a simple under-sink filter for pure drinking water all you really need? Nailing down what you actually need helps you avoid spending money on a system that's overkill. For some great pointers, check out the expert advice on water filters to explore options that fit your situation.

This handy decision tree makes the choice even simpler, focusing on whether you want to stop scale or completely remove the minerals causing it.

Infographic about does a water filter soften water

As you can see, if your main goal is just to stop scale from building up without messing with the water chemistry, a conditioner is the way to go. But if you want those minerals gone for good, a softener is what you need.

Creating a Hybrid Water Treatment System

For a lot of homeowners, one device just doesn't cut it. The best setups often combine different systems to create a powerful, multi-stage defense against both contaminants and hardness minerals.

Here are a couple of popular combinations that work incredibly well:

  • Ultimate Protection: Combine a whole-house sediment filter with a traditional water softener. Think of the filter as a bodyguard for your softener—it catches all the dirt, sand, and rust that could clog up and damage the softener’s resin, helping it run smoothly for years.
  • Targeted Purity and Scale Prevention: Pair a salt-free water conditioner with an under-sink Reverse Osmosis (RO) system. The conditioner protects your home's entire plumbing system from scale, while the RO unit sits right under your kitchen sink, giving you ultra-pure water for drinking and cooking.

This kind of layered approach means you're no longer just asking, "Does a water filter soften water?" Instead, you’re building a complete system that delivers pure, non-damaging water to every tap in your house.

It's also worth thinking about how your water system fits into your other home improvement goals, like creating energy-efficient smart home solutions. By preventing scale from building up inside your water heater, a softener or conditioner allows it to work more efficiently. That means less energy wasted and lower utility bills, making your water treatment system a smart investment for a more cost-effective home.

Common Questions About Water Filters and Softeners

Diving into the world of water treatment can feel a little overwhelming. Once you realize filters and softeners aren't the same thing, a whole new set of questions usually pops up. We get it.

Here are some straightforward answers to the most common queries we hear from homeowners trying to map out the perfect water strategy for their house.

Will a Reverse Osmosis System Soften My Water?

Yes, a reverse osmosis (RO) system definitely softens water, and it does a fantastic job of it. Its super-fine membrane is a beast, designed to strip out pretty much all dissolved solids, and that includes the calcium and magnesium minerals that make water hard.

But here’s the catch: RO systems are designed for a single faucet, like your kitchen sink. They work slowly, produce a stream of wastewater, and just can't keep up with the demands of an entire house. For whole-house softening, a dedicated water softener is a much more practical and efficient choice.

Is Softened Water Safe to Drink?

For almost everyone, drinking softened water is perfectly safe. The ion exchange process does add a tiny bit of sodium to the water, which is something to be aware of if you're on a strict, doctor-ordered low-sodium diet.

The amount of sodium added depends on how hard your water is to start with—the harder it is, the more sodium gets swapped in. If that’s a concern for you, you've got a couple of easy workarounds:

  • Use potassium chloride pellets in your softener instead of the standard sodium chloride ones.
  • Have your plumber bypass the cold water line to your kitchen sink, so you get unsoftened water for drinking and cooking.

Can I Use a Water Softener and a Water Filter Together?

Absolutely! In fact, combining them is often the best way to get top-tier water quality throughout your home. Think of it as creating a multi-stage defense that tackles a whole range of problems.

A popular and highly effective setup is to install a whole-house sediment pre-filter before the water softener. This filter acts like a bodyguard, grabbing all the dirt, sand, and rust that could clog up and damage the softener's sensitive resin bed. Then, you can add an activated carbon filter after the softener to strip out chlorine, giving you great-tasting, clean-smelling water from every single tap.

This layered approach is the real answer to whether a filter can soften water. It accepts that they are different tools for different jobs, and using them together gives you a complete solution for pure, non-damaging water.

What’s the Difference Between a Water Softener and a Water Conditioner?

This is a really important distinction. A traditional water softener relies on ion exchange to physically pull the hardness minerals out of your water, trading them for sodium ions. The result is truly soft water, with all the benefits you’d expect—great soap lather, no spots on dishes, and softer skin.

A water conditioner, which you might also hear called a descaler, is a salt-free alternative that works completely differently. It doesn't remove the minerals. Instead, it uses a technology like Template Assisted Crystallization (TAC) to change the physical shape of the mineral crystals. This keeps them from sticking to surfaces and forming that destructive limescale in your pipes and appliances.

Here’s a simple way to think about it: a softener removes the troublemakers entirely, while a conditioner just puts them in handcuffs so they can't cause any harm as they pass through. Conditioners are great for preventing scale buildup but won't give you the other perks of genuinely soft water.


At Water Filter Advisor, our mission is to provide clear, research-driven guidance to help you make confident decisions about your home's water quality. Explore our in-depth guides and reviews to find the perfect solution for your family at https://www.waterfilteradvisor.com.

Choosing Well Water Filtration Systems for Your Home

If you're one of the millions of homeowners who gets their water from a private well, you know the freedom that comes with it. No monthly water bill! But you also know the responsibility for that water's quality is 100% on you.

Unlike city water, which is treated before it ever reaches your home, well water is a direct line from the ground to your tap. That means it's up to you to handle whatever comes along for the ride—sediment, iron, nasty bacteria, and even chemicals. A good well water filtration system isn't just a nice-to-have; it's the essential gatekeeper that makes sure your water is safe, clean, and delicious.

Why Your Well Water Needs a Guardian

Image

There's something special about having your own private well. But that independence means you're the one in charge of your water's quality and safety. While the earth does a decent job of filtering water naturally, it’s far from a perfect bouncer.

Whatever is in the ground around your property has a good chance of ending up in your glass. This could be anything from naturally occurring minerals that cause hard water to agricultural runoff or invisible bacteria. This guide is here to give you the know-how to tackle these challenges head-on.

From Murky to Crystal Clear

Think of yourself as becoming your own personal water treatment expert. You’re about to learn the story of your water, from the moment it enters the ground to the second it hits your faucet. We’ll dig into the common culprits behind those frustrating household water problems, like:

  • Aesthetic Issues: Things like that "rotten egg" smell, rust-colored stains ruining your sinks and toilets, or water that just looks cloudy and unappealing.
  • Hidden Dangers: These are the invisible threats you can't see, smell, or taste. We're talking about bacteria, nitrates, arsenic, and other chemicals that can pose serious health risks.
  • Appliance Assassins: Hard water minerals are notorious for building up inside your pipes, water heater, and dishwasher. This limescale buildup chokes their efficiency and shortens their lifespan.

Managing your well water isn't about just buying a random filter. It's about building a custom defense system designed specifically for your water's unique chemistry. This guide is your blueprint.

Once you understand what's really in your well water, you can confidently choose the right well water filtration systems to protect your home and family. We'll walk you through everything—from testing your water to picking, installing, and maintaining the perfect setup—so every drop is pure, safe, and tastes fantastic.

What Is Hiding in Your Well Water?

Before you can even think about choosing a well water filtration system, you first have to know what you’re up against. Think of your well water as its own little ecosystem. While it's mostly pure, it almost always has a few uninvited guests from the surrounding earth, and these intruders fall into a few distinct categories.

Figuring out what's in your water is the most important first step. You wouldn’t buy a home security system without knowing if you’re trying to stop a raccoon or a burglar, right? The same logic applies here. A professional water test is your reconnaissance mission, giving you the intel you need to build the right defense.

The Physical Intruders You Can See

First up are the things you can actually see—the particles and debris that make your water look cloudy or just plain dirty. These are usually the easiest problems to spot and are often the first thing a good filtration setup tackles.

Think of your well as a giant underground reservoir. As rainwater trickles down through soil and rock to fill it, it picks up tiny hitchhikers along the way. These often include:

  • Sediment, Silt, and Sand: These are the fine bits of dirt and rock that cause cloudiness, a quality known as turbidity. They don't just look bad; they can clog up your pipes, wear out appliance parts, and settle at the bottom of your water heater, making it work harder and less efficiently.
  • Rust and Iron Particles: Seeing orange or reddish-brown stains in your sinks, toilets, or laundry? That’s a dead giveaway for iron. It’s a super common mineral in groundwater that can also give your water a metallic taste.

These physical bits are more than just an eyesore. They provide perfect hiding spots for bacteria and can gum up the works for more advanced filters, like UV purifiers. This is exactly why a simple sediment filter is almost always the first component in any well water system.

To help you get a better handle on what might be lurking, here’s a quick guide to connect the dots between what you see, smell, or taste and the likely culprit.

Common Well Water Contaminants and Their Signs

Contaminant Type Common Examples Potential Signs in Your Home
Physical Sediment, Silt, Sand, Rust Cloudy or murky water, orange/brown stains on fixtures and laundry, gritty texture.
Chemical Calcium & Magnesium (Hardness) Soap scum, mineral buildup (limescale) on faucets, poor soap lather, stiff laundry.
Chemical Hydrogen Sulfide A distinct "rotten egg" smell, especially from hot water.
Chemical Heavy Metals (Arsenic, Lead) Often tasteless, colorless, and odorless. Requires a lab test to detect.
Biological Bacteria (E. coli, Coliform) Also tasteless, colorless, and odorless. Can cause stomach issues or illness.

This table is just a starting point. While some issues are obvious, many of the most serious contaminants are completely invisible, which is why a professional lab test is non-negotiable for well owners.

The Invisible Chemical Threats

Next, we have the chemical contaminants. These are dissolved substances you often can't see, taste, or smell, which is what makes them so tricky. They can seep into groundwater from all sorts of places, like farm runoff, industrial pollution, or even just the natural rocks in your area.

For well owners, this is a huge deal. The whole reason filtration became popular was because of concerns over contamination in private water sources. Globally, around 2 billion people drink from sources contaminated with feces, a stark reminder of the health risks of untreated water. Here in the United States, about 15% of the population gets their water from private wells, which aren't regulated by the EPA like city water. This leaves the responsibility for safety squarely on the homeowner. You can discover more insights about the global water filter market and its growth drivers over on openpr.com.

Some of the most common chemical culprits are:

  • Nitrates and Nitrites: These usually come from fertilizers or leaky septic systems. High nitrate levels are a serious health risk, particularly for infants.
  • Heavy Metals: Arsenic, lead, and mercury can leach into groundwater from natural mineral deposits or industrial activity. Long-term exposure can cause severe health problems.
  • Hardness Minerals: Calcium and magnesium are the duo responsible for hard water. While not a health hazard, they cause limescale buildup that wreaks havoc on your pipes, appliances, and even your skin and hair.
  • Hydrogen Sulfide: This is the gas that produces that awful "rotten egg" smell. It's created by harmless bacteria in the ground, but it can make your water completely undrinkable.

A comprehensive water test is the only way to uncover these hidden chemical threats. Without one, you’re just guessing at what your water needs, which can be an expensive and ineffective gamble.

The Biological Contaminants

Finally, we get to the biological contaminants—the living microorganisms that can make you sick. Because well water isn't treated with chlorine like city water, it’s a potential breeding ground for bacteria and viruses that get in from animal waste or failing septic tanks.

These microscopic invaders include:

  • Bacteria: E. coli and coliform bacteria are the big ones. Their presence is a strong indicator that your well has been contaminated with fecal matter, which means other nasty, disease-causing pathogens could be in there too.
  • Viruses and Protozoa: Organisms like Giardia and Cryptosporidium are notorious for causing severe gastrointestinal illness.

You can't see, smell, or taste these organisms, so a specific test for bacteria is absolutely critical. This is the one area you can’t afford to mess around with, making a UV purifier or another disinfection system a must-have for many well owners.

Alright, you've got the results from your water test. Think of that report as a scouting report on the enemy. Now, it's time to build your dream team of filters to defend your home's water supply.

Choosing the right well water filtration systems isn't a one-size-fits-all deal. It's more like putting together a special ops team—each filter has a specific job, a unique skill set designed to take out a particular contaminant. It's rare that a single, magic-bullet filter will solve all your well water woes. That's why the most effective setups are multi-stage, layering different technologies to create an impenetrable defense.

You wouldn't ask the bouncer checking IDs at the door (your sediment filter) to deal with an invisible threat like bacteria, right? You need layers. Each part of the system has its role, working in concert to deliver clean, safe water from the moment it enters your house. This approach guarantees total protection, from chunky sand and silt down to microscopic germs you can't even see.

This diagram gives you a bird's-eye view of the main categories of well water filters, showing how they all fit together.

Image

As you can see, a solid strategy will likely mix and match a few of these types to get the job done right.

The Frontline Defender: Sediment Filters

Every great well water system kicks off with a sediment filter. This is your first line of defense, the bouncer at the door whose job is to stop the big, clumsy invaders before they gum up the works. Its mission is simple but absolutely critical: catch all the physical junk like sand, dirt, silt, and rust flakes.

Think of it like a screen on your window—it lets the fresh air (water) in but keeps the bugs (sediment) out. By trapping all that debris right at the start, a sediment filter not only clears up cloudy water but also acts as a bodyguard for the more delicate and expensive filters down the line. This one simple step can dramatically boost the lifespan and performance of your entire system.

The Taste and Odor Specialist: Carbon Filters

Next in the lineup is the activated carbon filter. This is your specialist, the one you call in to handle chemical contaminants and get rid of funky tastes and smells. If your water has that swimming pool chlorine odor or a weird, earthy taste, this is your hero.

The secret is its ridiculously huge internal surface area, made up of millions of microscopic pores. These pores work like a magnet for chemicals, snagging things like chlorine, pesticides, and volatile organic compounds (VOCs) through a process called adsorption. It’s the MVP for turning murky, smelly water into something that tastes crisp, clean, and refreshing.

The Mineral Manager: Water Softeners

Did your water report come back with high levels of calcium and magnesium? If so, you've got hard water. That's where a water softener steps in. Now, it's not technically a "filter" in the traditional sense; it's more of a water conditioner. Its job is to stop mineral buildup—that crusty limescale that wreaks havoc on your appliances and leaves soap scum all over your shower.

A water softener uses a clever process called ion exchange. It literally swaps out the "hard" mineral ions (calcium and magnesium) for "soft" sodium ions. This simple trade prevents scale from ever forming in your pipes, water heater, and dishwasher.

This system is your best defense against the costly damage hard water can cause, especially to appliances like water heaters, which can fail years ahead of schedule without one.

The Heavy-Duty Brawler: Iron and Sulfur Filters

For those wells cursed with rusty orange stains and that distinct "rotten egg" smell, you need to bring in the heavy hitters. Iron filters and air-injection oxidizing (AIO) systems are the specialized brawlers built to knock out high concentrations of iron, manganese, and hydrogen sulfide gas.

These systems work by oxidizing the dissolved troublemakers, which basically forces them to turn into solid particles. Once they're solid, the filter media can easily grab and flush them away, getting rid of those ugly stains and nasty smells for good. This targeted attack is way more effective than hoping a standard carbon filter or softener can handle a serious iron or sulfur problem.

The Microbial Assassin: UV Purifiers

If your water test flagged bacteria, coliform, E. coli, or other living critters, you need a surefire way to neutralize them. A UV purifier is the silent assassin for these biological threats. The best part? It doesn't add a single chemical to your water or alter its taste.

It uses a powerful ultraviolet lamp that zaps any water flowing past it. This UV light scrambles the DNA of bacteria, viruses, and other microorganisms, making it impossible for them to reproduce and cause harm. It’s a clean, highly effective final barrier that ensures your water is biologically safe to drink.

The Ultimate Purifier: Reverse Osmosis Systems

Finally, when you want the absolute highest level of purity for your drinking and cooking water, you bring in the special forces: reverse osmosis (RO). An RO system uses a super-fine, semi-permeable membrane to strip out up to 99% of all dissolved solids.

It forces water through this membrane, which is so tight it blocks nearly everything that isn't a pure water molecule. We're talking heavy metals like lead and arsenic, plus nitrates, fluoride, and salts. Because this purification process is slow and meticulous, RO systems are usually installed at a single tap—like under the kitchen sink—to provide a dedicated source of incredibly pure water right where you use it most.

How to Choose the Right Filtration System

Image

Alright, you’ve got your water test results back. Now the real fun begins. This is where you put on your detective hat and figure out exactly what your water needs to be clean, safe, and great-tasting.

Choosing the right well water filtration system isn’t about buying the most expensive gear you can find. It’s about a smart, targeted approach based on what’s actually in your water, how much of it you use, and where you need it most. Your water test is your road map—let’s use it to build the perfect solution for your home.

Decode Your Water Test and Match the Filter

Think of your water test as a diagnostic report for your well. It tells you exactly what you’re up against. Are sediment levels high? Is iron turning your fixtures orange? Your job is to match each problem with the right tool.

Here’s a simple way to break it down:

  • High Sediment or Turbidity: If your water looks cloudy, a sediment pre-filter is non-negotiable. This is always your first line of defense, catching all the dirt, sand, and rust before it can clog up the rest of your system.
  • Elevated Iron or Manganese: Seeing those classic orange or black stains? You’ll probably need a dedicated iron filter or an air-injection oxidizing (AIO) system. A water softener alone just can't keep up with heavy iron.
  • Positive for Bacteria (E. coli, Coliform): This is a serious health concern that needs an immediate fix. A UV purification system is your best bet here. It zaps bacteria and viruses with ultraviolet light, making your water biologically safe without adding any chemicals.
  • Hard Water Minerals (Calcium & Magnesium): If you're tired of limescale buildup on your faucets and appliances, a water softener is the clear winner. It's the only way to truly tackle hardness.

Make a checklist from your water report. For every contaminant you find, you'll want a specific filter stage designed to remove it.

Calculate Your Household's Flow Rate

Here's a detail that's easy to miss but can make or break your system: flow rate. Measured in gallons per minute (GPM), this tells you how much water your system can process at once. Get this wrong, and you'll be dealing with a frustrating trickle every time someone flushes a toilet while the shower is running.

You don't want your filter system to become a bottleneck. A system that's too small for your home will choke your water pressure.

To get a rough idea, just add up the GPM of the fixtures you might use at the same time. A shower is about 2.5 GPM, a toilet can be 2.2 GPM, and a sink faucet is around 1.5 GPM. For a typical family of four, a system that can handle 10-15 GPM is a pretty safe bet to keep the pressure strong everywhere.

Picking a system with a flow rate that meets or slightly beats your home's peak demand is the single best way to guarantee you never have to worry about weak water pressure again.

Point of Entry vs. Point of Use Systems

The last big decision is where you need the filtered water. Do you want to treat every drop coming into your house, or just the water at a specific tap? This leads you to two main categories: Point-of-Entry (POE) and Point-of-Use (POU).

Deciding between a whole-house system and a single-tap filter really comes down to the scope of your water problems and your end goals. Are you trying to protect your entire plumbing system or just purify your drinking water? Here's a quick comparison to help you think it through.

Point-of-Entry (POE) vs. Point-of-Use (POU) Systems

Feature Point-of-Entry (Whole House) Point-of-Use (Single Tap)
Location Installed at the main water line. Installed at a single fixture (e.g., under the kitchen sink).
Treatment Scope Treats all water entering the home. Treats water for one specific tap or appliance.
Best For Widespread issues: hardness, sediment, iron, general chemicals. Targeted issues: lead, chlorine, cysts, specific taste/odor problems.
Primary Benefit Protects plumbing, appliances, skin, and hair. Provides highly purified water for drinking and cooking.
Typical Cost Higher initial investment. Lower initial cost.
Maintenance Less frequent, but larger filter changes. More frequent, but smaller and easier filter changes.

Ultimately, a whole-house POE system offers a comprehensive solution, safeguarding your entire home. The global market for these systems was valued at $10.17 billion and is expected to keep growing as more people become aware of well water contaminants.

On the other hand, POU systems like an under-sink reverse osmosis unit are fantastic for getting ultra-pure water right where you need it most—your kitchen. They are an excellent, budget-friendly way to target drinking water quality without overhauling your entire plumbing setup.

Getting It Installed and Keeping It Running

Image

You’ve picked out the perfect filtration system for your well. Awesome. But now comes the part that makes it all work: getting it installed right and setting up a simple plan to keep it that way.

Think of your new system like a car you just drove off the lot. The installation is like making sure the engine is seated correctly, but the routine maintenance—the oil changes and filter swaps—is what keeps it from breaking down on the side of the road. Neglect this part, and you’re just asking for trouble.

DIY vs. Calling in a Pro

First up, you need to decide if you’re going to tackle the installation yourself or hire a professional. It's a big decision. While a lot of us love a good weekend project, a botched plumbing job can quickly turn into leaks, water damage, or a system that doesn't filter anything at all.

Installing a simple under-sink filter is usually something you can handle on your own. But a whole-house system with multiple tanks? That's a whole different ballgame. It means cutting into your main water line, and that requires some serious skill and confidence.

Ask yourself these questions:

  • How complex is this thing? Is it a single filter cartridge, or a multi-stage setup with a UV light that needs wiring?
  • What are my plumbing skills, really? Are you comfortable cutting pipe, sweating copper fittings, and knowing for sure it won't leak?
  • Do I have the right tools? We're talking pipe cutters, multiple wrenches, maybe even PEX crimpers.
  • What does the warranty say? Some manufacturers will void the warranty unless a licensed professional installs the system.

If you’re hesitating on any of those, just call a plumber. The cost of a professional install—often a few hundred to over a thousand dollars—is a small price to pay for the peace of mind that it’s done right.

Your Maintenance Playbook

Once your system is up and running, a little bit of proactive care is your best friend. Filters are designed to catch gunk, which means eventually, they get full. A clogged filter is not only useless, but it can also tank your home’s water pressure.

Think of your maintenance schedule as the playbook for your system's health. It turns these little tasks into simple habits, stopping small issues before they become big, expensive headaches.

The idea is to get into a routine. A good way to stay on top of everything is to use a preventive maintenance schedule template to track what needs to be done and when. No more guessing.

Here’s a general guide for what your schedule might look like:

  1. Sediment Pre-Filter: This is your first line of defense and gets dirty the fastest. Plan on swapping this out every 3-6 months, depending on how much sediment is in your water.
  2. Carbon Filters: These filters typically need to be replaced every 6-12 months. Always double-check the manufacturer's recommendation.
  3. Reverse Osmosis (RO) Membranes: The main RO membrane is a long-hauler and can last 2-5 years. But don't forget its pre-filters and post-filters—those still need to be changed every 6-12 months.
  4. UV Purifier Lamp: A UV bulb needs to be replaced every single year. It might still light up after 12 months, but its germ-killing intensity fades, leaving your water vulnerable.
  5. Water Softener Salt: This isn’t a replacement, just a refill. Peek inside the brine tank once a month and top it off with salt pellets as needed.

Jot these dates down in a calendar or set reminders on your phone. Sticking to a schedule is the single most important thing you can do to protect your investment and keep your water clean and safe for years to come.

Your Top Well Water Filtration Questions Answered

Stepping into the world of well water filtration can feel like learning a new language. You've got questions, and we've got straightforward answers from our years of experience. Let's tackle some of the most common ones homeowners ask.

How Often Should I Test My Well Water?

Think of it like an annual check-up for your water. At a minimum, you should test your well water once a year for the usual suspects like bacteria and nitrates.

But you also have to be your own first line of defense. If you ever notice a sudden change in the taste, smell, or even the color of your water, get it tested right away. It's also a smart move to do a more comprehensive test for things like heavy metals and pesticides every 3-5 years. You never know when something deep in the ground has shifted, and it's always better to be safe.

Can a Single Filter Solve All My Well Water Problems?

That’s a common hope, but unfortunately, it’s not realistic. Well water is rarely a one-problem situation; you're usually dealing with a cocktail of sediment, hard minerals, and maybe even some unseen biological contaminants.

Since most filters are built to do one job really well, a single filter just can't handle that kind of complexity. This is exactly why multi-stage systems are the gold standard. A setup that combines a sediment filter, a carbon filter, and a UV purifier creates a powerful, layered defense that addresses everything in turn.

A layered filtration strategy is the key. Each stage acts as a specialist, working with the others to remove a wide range of contaminants, ensuring the water is thoroughly treated before it reaches your tap.

A properly installed system shouldn't crush your water pressure. If you notice a serious drop, it's almost always one of two things: either your filters are clogged and screaming for a replacement, or the system itself is too small for your home's needs. Always check the flow rate (measured in gallons per minute) and make sure it can keep up with your family’s peak water usage.

Looking for more info? You might find answers in these additional Well Water FAQs.


Ready to ensure every drop from your well is clean and safe? The experts at Water Filter Advisor provide in-depth guides and unbiased reviews to help you confidently choose the perfect system for your home. Explore our resources and make the right decision for your family's water at https://www.waterfilteradvisor.com.

Article created using Outrank