Learn How to Test for Chlorine in Water with This Easy Guide

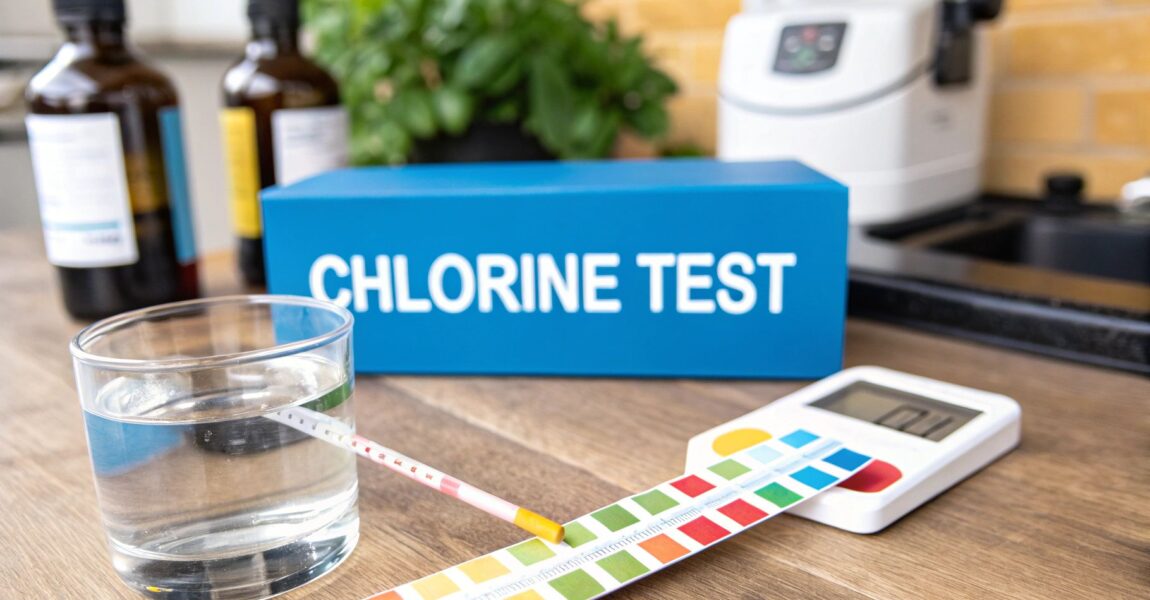
So you want to know what's really in your tap water? Good call. Testing for chlorine is surprisingly simple. You can use test strips, grab a liquid kit, or get fancy with a digital meter. This quick check is your first step to exposing the secrets in your pipes, arming you with the intel needed to pick the right water filtration system. The goal? To finally get that pure, clean taste you've been missing.

Why Bother Testing Your Tap Water for Chlorine?

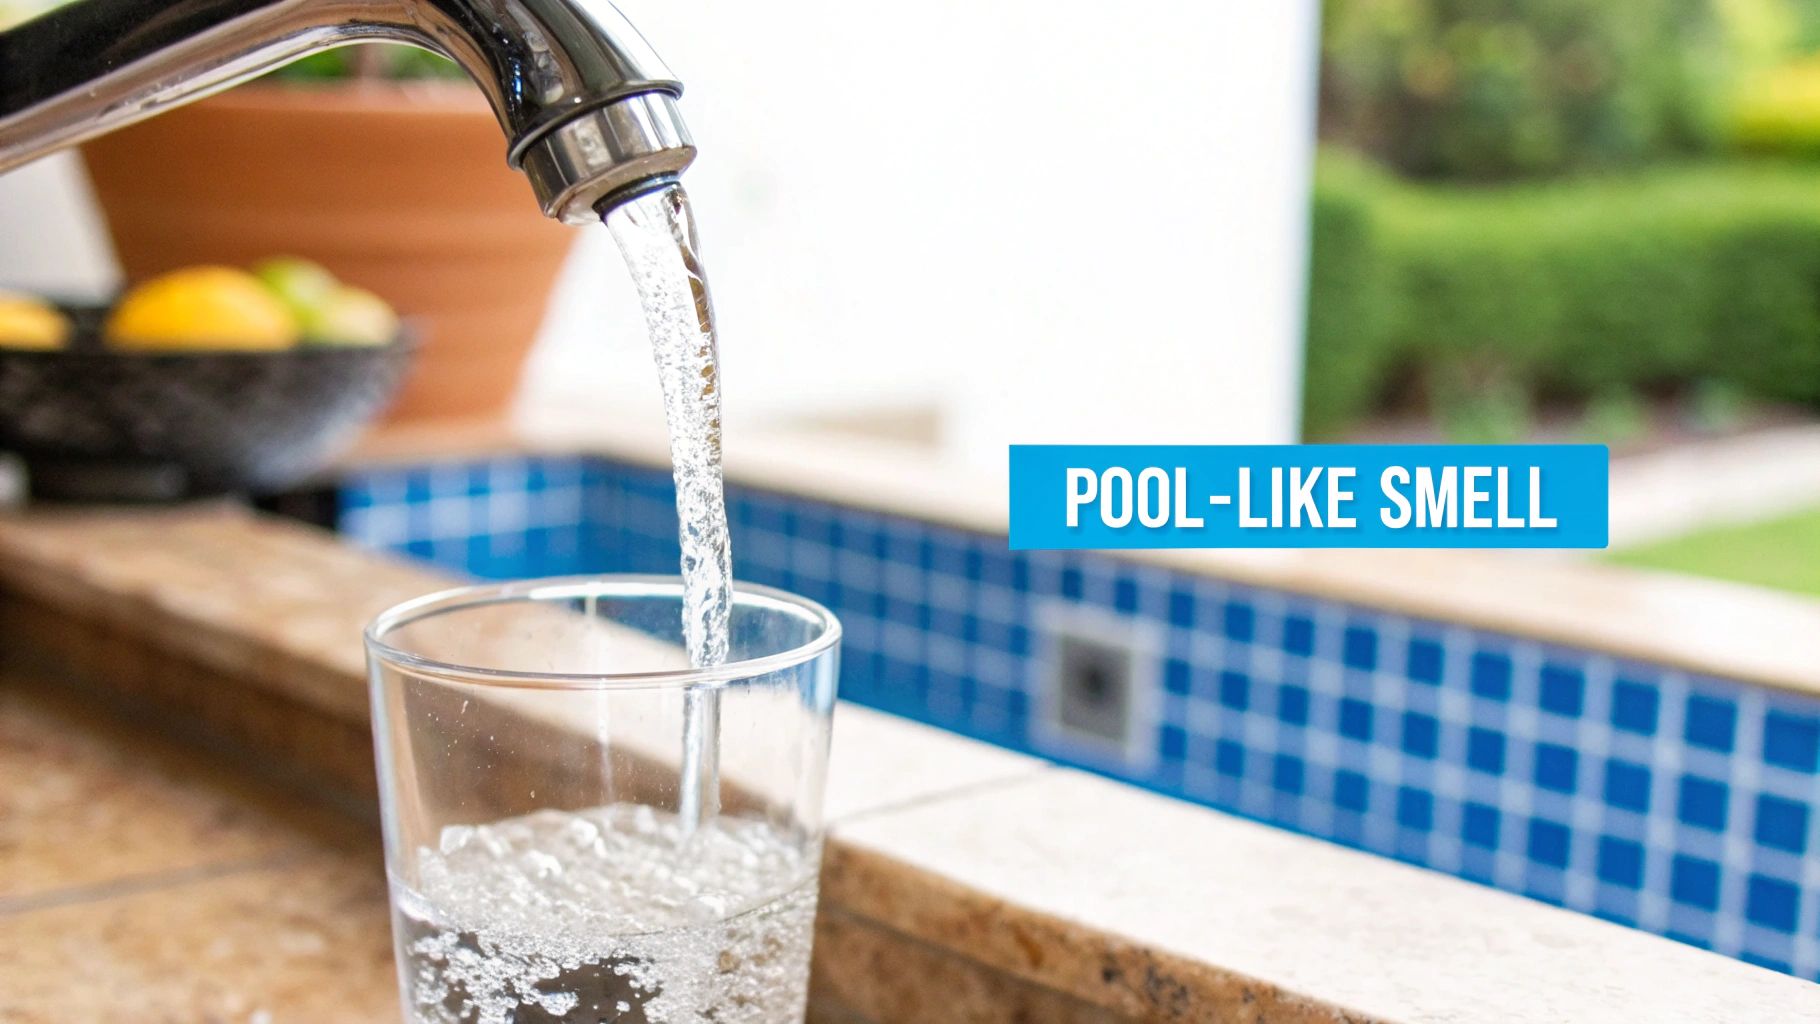
Let's be real—most of us turn on the tap without a second thought. But ever catch a whiff of that faint swimming pool smell? That’s your old friend, chlorine. It's the go-to disinfectant that stops our public water supply from becoming a bacterial free-for-all.

While it's a hero for public health, its job should be over long before that water hits your coffee maker. Knowing the specific chlorine levels in your home's water is the secret to choosing a filter that actually works. This isn't about guesswork; it's about getting hard numbers so you can make a smart move. Think about it—before modern water treatment, cities were constantly fighting off waterborne diseases. The introduction of chlorination was a game-changer, slashing illnesses like typhoid and cholera. But that doesn't mean you want it in your drinking glass.

Free Chlorine vs. Total Chlorine: The Showdown

When you run a test, you're looking for two different villains. Nailing down the difference between them is the key to finding a filter that will actually get the job done.

  • Free Chlorine: This is the active, germ-killing stuff. It's the frontline soldier keeping your water safe as it travels from the treatment plant to your faucet.
  • Total Chlorine: This is the big number that includes both free chlorine and its sneaky sidekicks, chloramines. Chloramines are what you get when chlorine mixes with organic stuff in the water. They are more stubborn and are often the real culprit behind that "chemical" taste and smell you can't stand.

Knowing both figures helps you diagnose the problem. High free chlorine means a strong chemical taste. But high total chlorine points to those pesky chloramines, which many basic filters can't touch.

Testing takes all the guesswork out of buying a water filter. It gives you a clear, data-driven starting point so you can invest in a solution that targets what's actually in your water, instead of just grabbing a generic filter pitcher that might not be up to the task.

This proactive approach puts you in control. Just like you'd want to know what's in your water, it's smart to consider other parts of your home's environment, like the air you're breathing every day. You can learn more about creating a healthier living space with expert air quality tests for a safer home. Ultimately, testing for chlorine empowers you to take charge of your water quality, leading you straight to the perfect filtration strategy.

Finding the Right Chlorine Test Kit for Your Home

Choosing a chlorine test kit can feel a bit overwhelming. Walk into any hardware store and you'll see a wall of options—strips, droppers, and digital readers, all promising to reveal the truth about your water. The trick is to match the tool to your mission. Your home water filtration goals will point you to the right choice.

Think of it this way: if you just snapped a new filter into your pitcher and want a quick thumbs-up that it's working, simple test strips are perfect. They're cheap, fast, and give you a solid ballpark reading in seconds.

But if you're installing a whole-house filtration system or trying to figure out why your tap water tastes a little "off," you're going to need more precision. That’s where liquid reagent kits and digital meters enter the ring. They deliver the detailed data you need to make bigger, more informed decisions about your home's water quality.

Comparing Your Testing Options

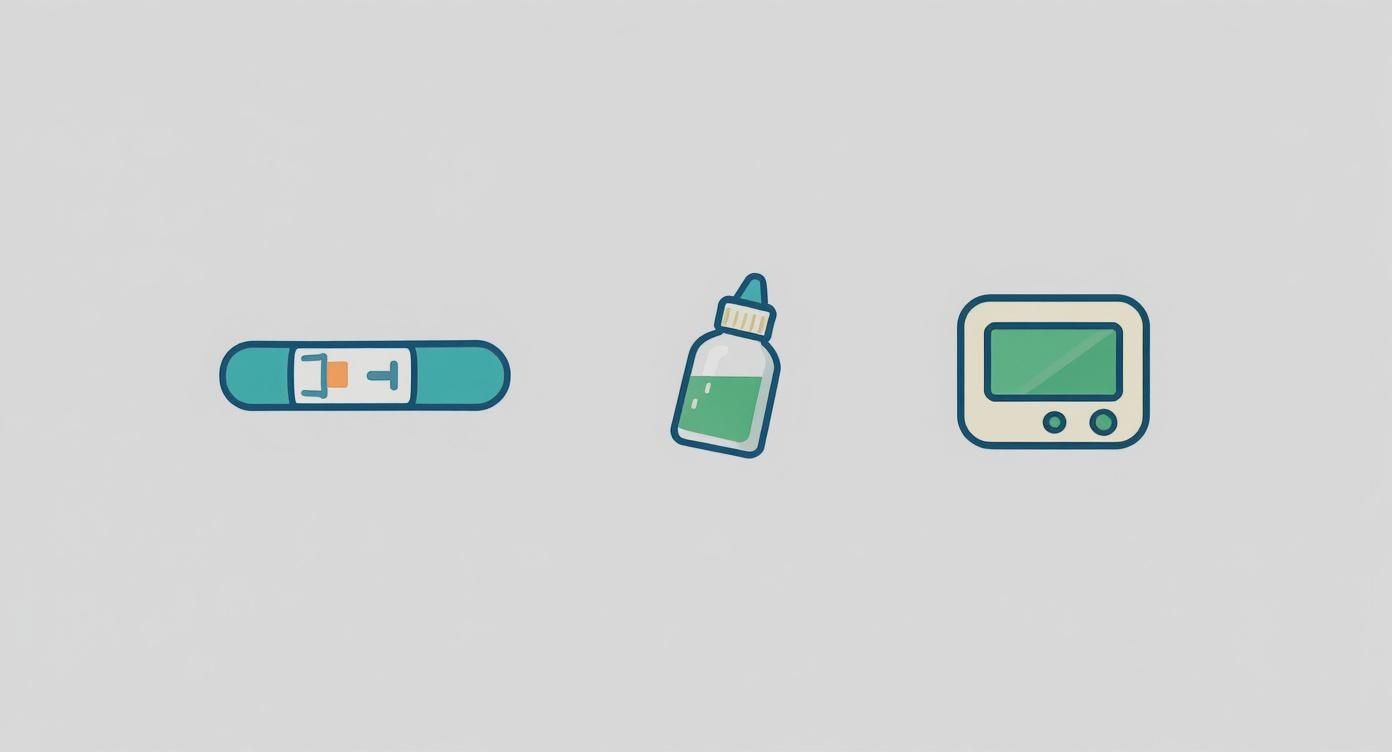
The world of home water testing really boils down to three main players. Each has its own strengths and weaknesses, so there's no single "best" option—it's all about what fits your budget, your patience, and your need for dead-on accuracy.

To make it easier, I've put together a quick comparison of the most common types of chlorine test kits you'll find. This should help you zero in on the best one for your situation.

Comparison of Home Chlorine Test Kits

Test Kit Type Best For Accuracy Ease of Use Average Cost
Test Strips Quick spot-checks & confirming a filter is working Low to Moderate Very Easy $10 – $20
Liquid Reagent Kits Accurate home testing & troubleshooting Moderate to High Moderate $15 – $30
Digital Meters Precise, data-driven analysis & system optimization Very High Easy $50 – $150+

As you can see, you can get started for very little money, but investing a bit more can give you a much clearer picture of what's happening in your pipes—and which filter can fix it.

Let’s break these down a bit more:

  • Test Strips: The speed demons of water testing. You just dip a strip into your water, wait a few seconds, and match the color to a chart. They're fantastic for quick checks and getting that instant gratification that a new filter is doing its job.
  • Liquid Reagent Kits: The reliable workhorse. You add a few drops of a chemical reagent (like DPD) to a vial of water, and it changes color. Compare that hue to a color chart to find the chlorine level. This is a big step up in accuracy from strips without a huge jump in price.
  • Digital Meters (Colorimeters): For the data nerds and precision fanatics. It works like a liquid kit, but instead of you squinting at a color chart, a light sensor measures the color change electronically. This eliminates the guesswork and gives you a precise, numerical reading—perfect for optimizing a high-end filtration system.

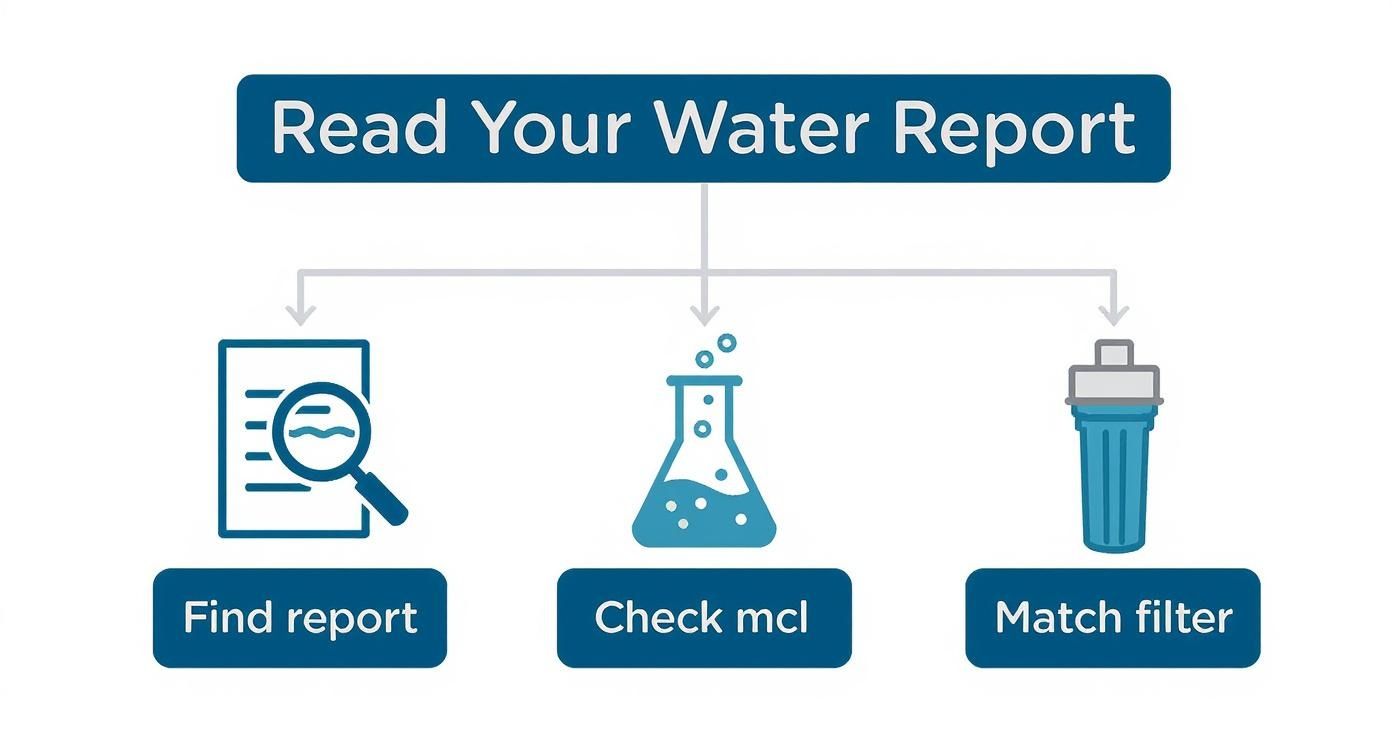
This infographic breaks down the two key measurements you'll be taking when you test for chlorine.
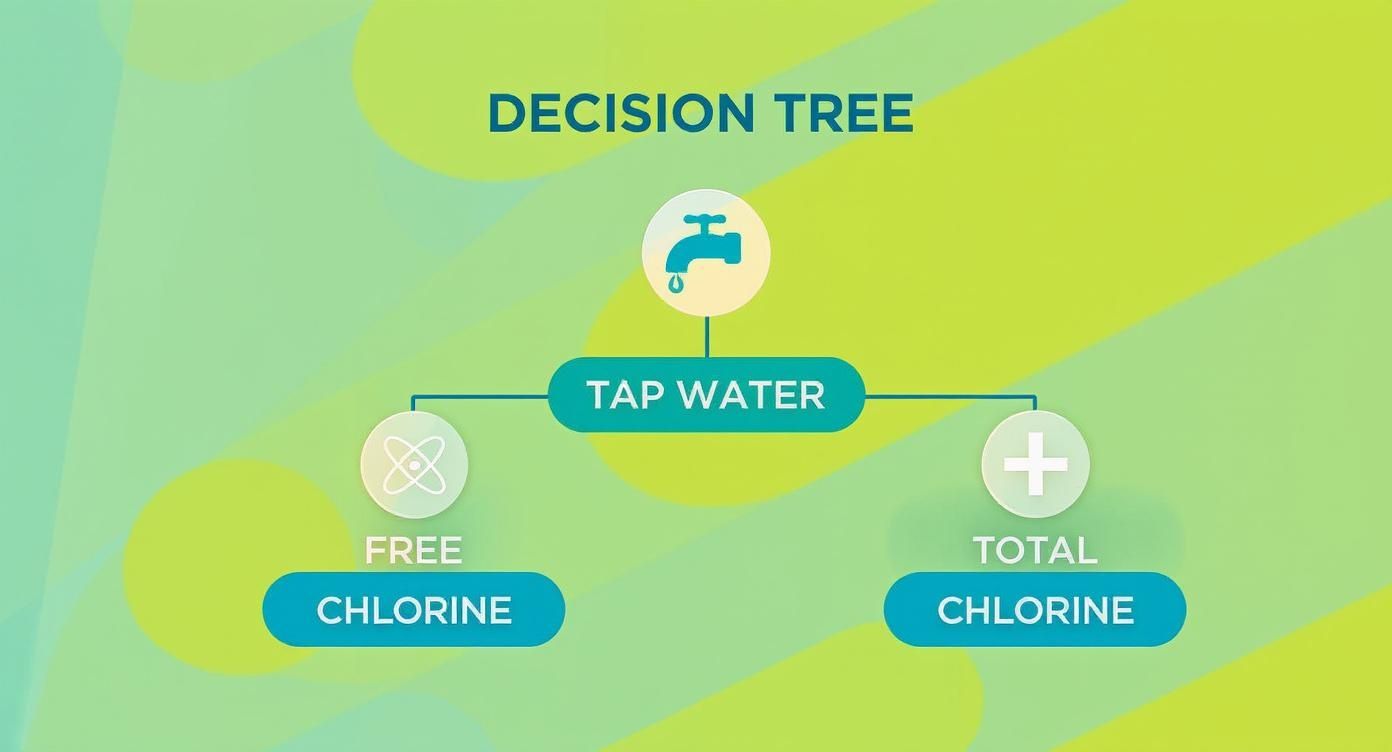
Infographic about how to test for chlorine in water

Understanding both free chlorine and total chlorine is fundamental. These two numbers are the foundation for any smart home filtration strategy.

Matching the Kit to Your Goal

Before you buy anything, ask yourself why you're testing. Are you just curious, or are you on a mission to solve a problem like dry skin after a shower or foul-tasting coffee?

The goal isn't just to get a number; it's to get actionable intel for your filtration strategy. A quick, cheap test is great for confirming a filter works, while a more precise test is essential for choosing and optimizing a whole-house system.

If you're about to invest in a serious filtration setup, you absolutely need an accurate baseline measurement first. For more in-depth guidance on choosing the right filters, check out the expert advice on Water Filter Advisor. Getting good data from the start is the only way to be sure you’re picking a solution that will actually solve your specific chlorine issues.

A Practical Guide to Testing Your Water
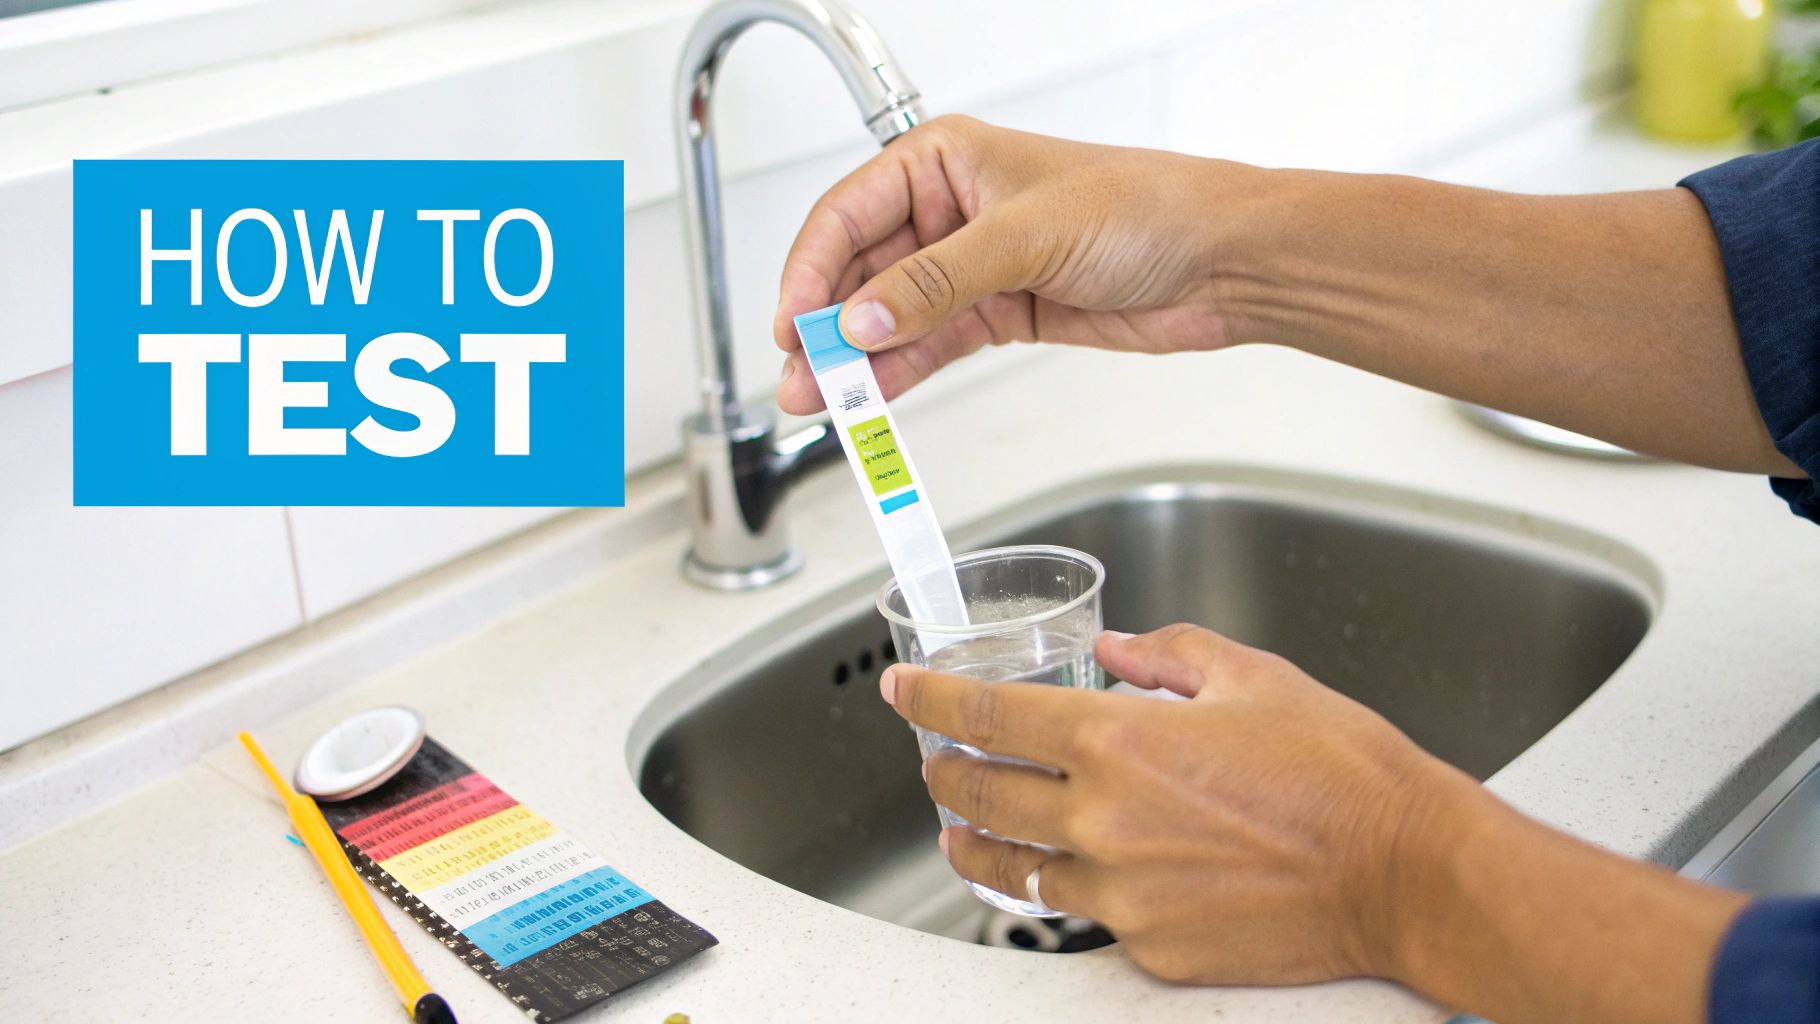
Person using a liquid reagent kit to test tap water for chlorine.

Alright, you've got your test kit. Now for the fun part. Forget the tiny, confusing print on the box for a minute—let's walk through how to actually do this right. Getting an accurate reading is the whole point, and a few simple tricks can make all the difference in choosing the right filter.

First things first: grab your water sample. Don’t just stick the vial under a trickling tap. Let the cold water run for at least 30 to 60 seconds. This flushes out any stagnant water sitting in your pipes, giving you a sample that truly represents what's flowing into your home from the main line.

Mastering Test Strips Without Mistakes

Test strips are the quickest way to get a reading, but their speed can be their downfall if you’re not careful. The most common mistake? Rushing the timing.

If you just dip the strip and immediately check the color, you'll get a faint, inaccurate reading. But if you leave it in too long, the reagents bleed out, also messing up the results. The sweet spot is a quick dip-and-remove, then waiting the recommended time—usually 15 to 30 seconds—before you match the color.

A few pointers to get it right every time:

  • Keep it level: After dipping, hold the strip perfectly horizontal. This stops the colors on the different pads from running into each other and muddying the results.
  • Find good light: Don't try to read the strip in a dim kitchen. Natural daylight is your best friend, as artificial lights can totally change how the colors look.
  • Hands off the pads: The oils on your fingers can contaminate the little reagent pads. Always hold the strip by the plastic end.

Nailing the Liquid Reagent Drop Test

Liquid reagent kits, often using a DPD indicator, give you a nice bump in accuracy. You add a few drops to your water sample and watch for a color change, usually some shade of pink or red. It sounds simple, but the details really matter.

When the instructions say to "mix," they mean a gentle swirl or turning the capped vial over a couple of times. They definitely don't mean a vigorous, bubble-making shake. Shaking too hard dissolves extra oxygen into the water, which can interfere with the chemical reaction and skew your results.

Your goal is an even, consistent color throughout the sample. A gentle swirl is all it takes to mix the reagent completely without adding other variables that could lead you to buy the wrong type of filter.

Here’s another pro tip: hold the vial against a plain white background when you compare it to the color chart. A busy countertop can trick your eyes into seeing a different shade. A simple white piece of paper works perfectly and ensures you’re making an accurate assessment.

This kind of color-based testing has been the backbone of water safety for a long time. Developing reliable methods to test chlorine was a cornerstone of public health for over a century. Early techniques were basic, but modern tech allows treatment plants to keep chlorine levels in that sweet spot—between 0.2 and 2.0 mg/L—to kill germs without ruining the taste. You can learn more about the history of water testing on the USGS website.

Making Sense of Your Chlorine Test Results

So you've done the test, and now you’re staring at a color or a number. What does it actually mean for your water filtration plan? The real trick is translating jargon—like "parts per million" (ppm) or "milligrams per liter" (mg/L)—into a clear course of action.

A test result isn't just data; it's a direct command from your water on which filter to buy. Most city water systems aim to keep chlorine between 0.2 and 2.0 ppm. The EPA sets the absolute maximum at 4.0 ppm, a level your water should never even approach.

Getting these numbers right is a delicate balancing act for water engineers. They need enough chlorine to kill pathogens but not so much that it creates an unpleasant taste or harmful byproducts. You can learn more about how global water safety standards are maintained on ketos.co.

What Your Chlorine Reading Tells You

Honestly, what you do next comes down to your personal goals. Your test result is your personal benchmark for deciding if you need a water filter—and if so, which kind.

Let's break it down with some real-world filtration scenarios:

  • Below 0.5 ppm: This is great news. Your water probably has very little chemical taste. A simple carbon-based pitcher or faucet filter is likely all you need to polish it to perfection.
  • Between 0.5 ppm and 1.5 ppm: This is typical for most city water. You can definitely smell and taste the chlorine here. It might even cause dry skin. This is where a more robust under-sink or countertop filter becomes a smart upgrade.
  • Above 1.5 ppm: At this level, the chlorine is impossible to ignore. Your iced tea tastes funky and your shower feels harsh. You should seriously consider a whole-house filtration system to get the chlorine out of every single tap.

A reading of 1.0 ppm might be perfectly safe according to public health guidelines, but if you're battling dry, itchy skin or can't stand the taste in your morning coffee, your personal standard is what truly matters when choosing a filter.

Free vs. Total Chlorine: What's the Goal for Filtration?

When it comes down to it, for the water you drink and shower in, you want both your free and total chlorine numbers to be as close to zero as possible. A good filtration system makes this happen.

Any reading above zero simply means there's a disinfectant in your water that has already done its job. Your test results give you the exact data you need to choose the right filtration system to get you there, turning a confusing number into a clear plan of action.

Choosing a Water Filter Based on Your Chlorine Levels
Person installing an under-sink water filter.

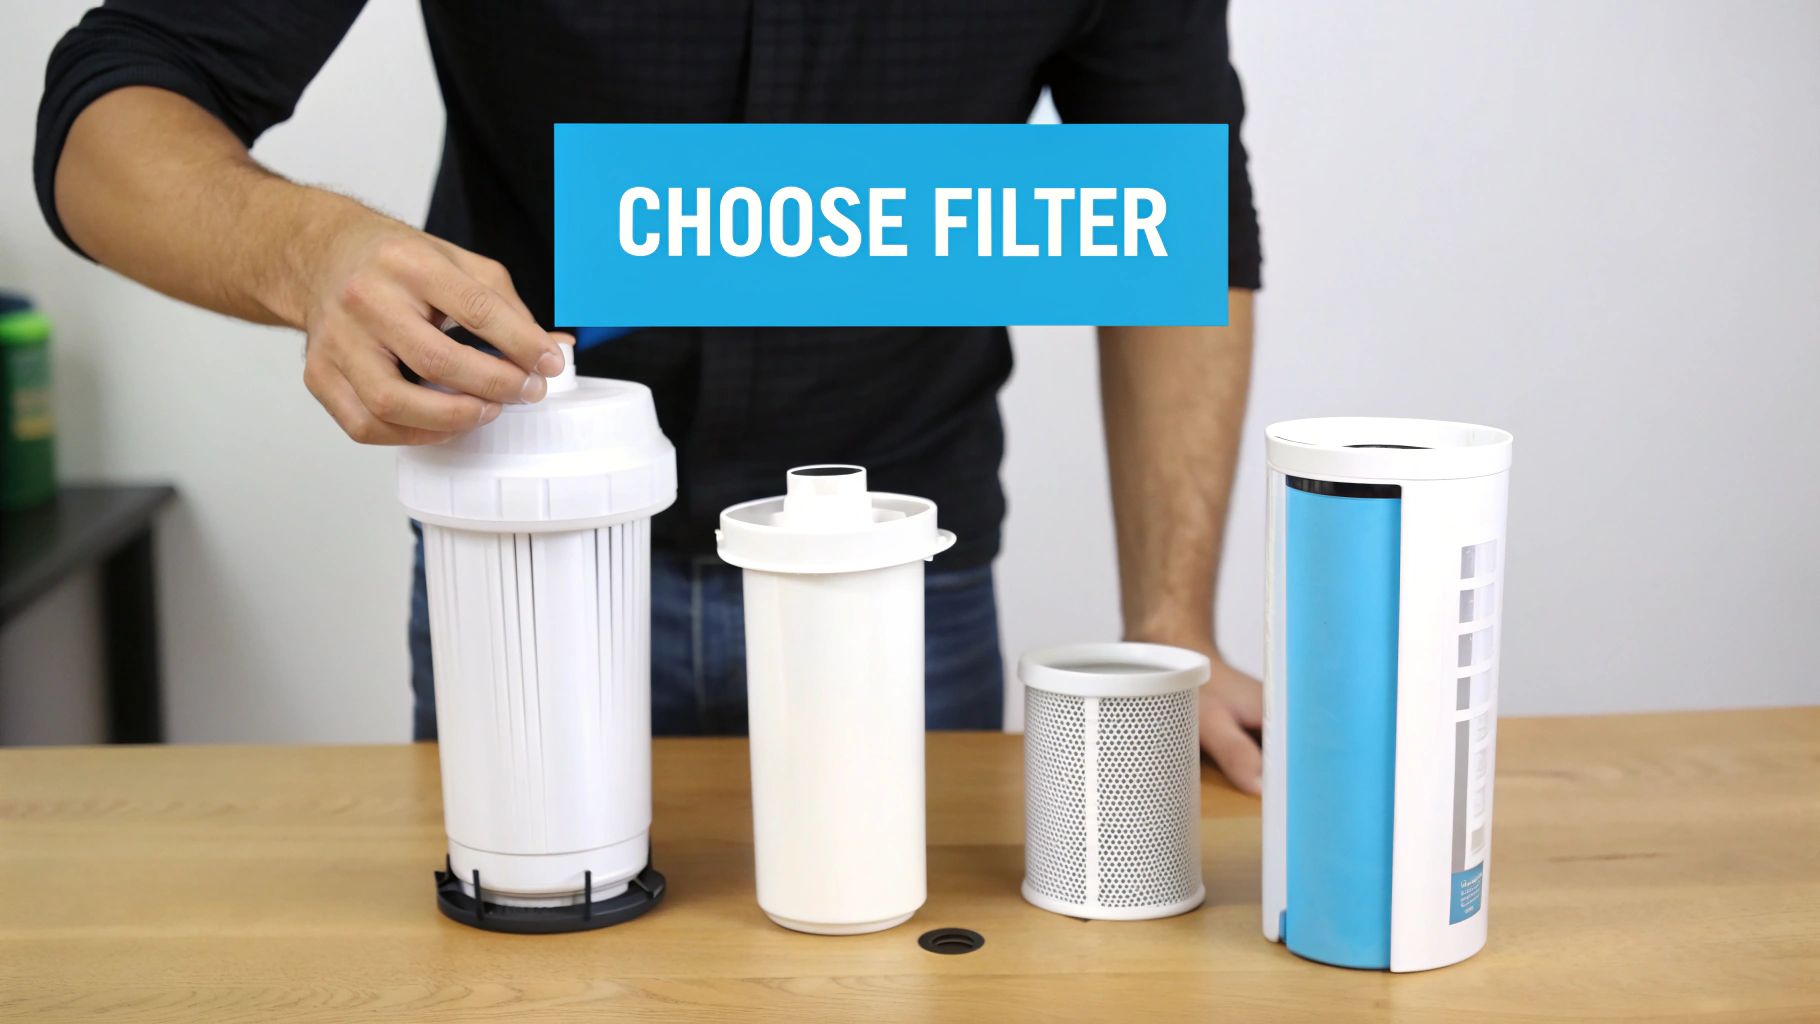
Alright, you've done the detective work. You have your test results. That's the diagnosis; now it's time for the cure. With your chlorine numbers in hand, you can stop guessing and finally pick a filter that solves your specific water problem.

When it comes to chlorine removal, there's one clear champion: activated carbon.

Think of it like a powerful chemical magnet. Through a process called adsorption, it grabs onto chlorine and chloramine molecules, pulling them right out of your water. So, the real question isn't if you need a carbon filter, but which type is the right fit for your home.

Matching the Filter to Your Test Results

Your test results are your personal roadmap to pure water. A high chlorine reading just at the kitchen sink points to a completely different solution than a house-wide issue that makes your skin feel tight and itchy after every shower.

  • Low to Moderate Chlorine (0.5 – 1.5 ppm): If you're mainly looking to improve the taste of your drinking water, a simple point-of-use filter is a great, wallet-friendly choice. This could be a pitcher filter, a faucet-mounted unit, or a countertop system. They're dead simple to install and focus on the water you consume.
  • High Chlorine (>1.5 ppm): When your tests come back high, you feel the effects everywhere. This is when it's time to upgrade to a more serious system. An under-sink filter is a fantastic option for a dedicated stream of purified water, while a whole-house system tackles the problem at the source.

If your tests show high chlorine levels all over the house, a whole-house system is hands-down the best investment. It doesn't just fix the taste of your drinking water—it deals with the chlorine you absorb in the shower and the stuff that’s fading your clothes in the laundry.

Point-of-Use vs. Whole-House Systems

An under-sink system strikes a great balance. It gives you high-performance filtration right where you need it most—the kitchen tap—without the expense and installation of a full whole-house unit. These systems typically use larger, more powerful carbon block filters than what you'd find in a basic pitcher.

But if you’re truly fed up with dry skin, brittle hair, and that swimming pool smell every time you turn on a faucet, only a whole-house carbon filtration system gets to the root of the problem. It's installed at your main water line, transforming every single tap in your home into a source of clean, chlorine-free water.

Your test results gave you the data. Now you can make an informed choice and invest in a solution that will directly fix your water quality issues.

Common Questions About Chlorine Water Testing

Once you start testing, a few common questions almost always pop up. Let's tackle some of the things people wonder about as they dive deeper into their home filtration journey.

How Often Should I Test My Water?

This all comes down to your filtration setup and your goals.

If you have a whole-house carbon filter, checking your water every three to six months is a smart move. This confirms the system is still working hard and gives you a heads-up when a filter change is on the horizon.

Using a simpler pitcher or faucet filter? A quick test right after you install a new cartridge is a great way to confirm it’s working. After that, testing once or twice a year—or anytime the water starts tasting "off"—is plenty.

Why Do Chlorine Levels Change Seasonally?

You're not imagining things if your water seems more chlorinated in the summer. It's a real phenomenon.

When it gets hot, the warmer water in pipes and reservoirs creates a breeding ground for bacteria. To fight this, municipal water suppliers often increase the amount of chlorine they add. This means your filtration system has to work harder in July than in January, which is why regular testing is so important.

Do I Need a Special Kit for Chloramine?

Yes, and this is a big one. It's a critical distinction many people miss.

Most standard chlorine test kits use a DPD reagent that only measures free chlorine. The problem is, they can't properly detect chloramines—a more stable compound of chlorine and ammonia. Testing for chloramine requires a different chemical reaction.

To get the full story, you need a test kit that specifically measures total chlorine. The difference between your total and free chlorine readings reveals the amount of chloramine present. This is vital to know because chloramine is much harder for many standard carbon filters to remove, often requiring a special type of filter called catalytic carbon.

Here's a little pro tip: Don't just toss an expired test strip. While you shouldn't trust it for an exact reading, an old strip can often still give you a basic "yes/no" indication for high chlorine levels. It's handy for a quick, informal check when you don't need a precise number.

Keeping up with testing is what empowers you to make the best decisions for your home's water filtration. It ensures the system you've invested in is actually working as hard as you expect it to.


At Water Filter Advisor, we're dedicated to helping you find the perfect filtration solution based on your specific needs. Explore our in-depth guides and reviews to make a confident, cost-effective decision for safer, better-tasting water at home. Learn more at https://www.waterfilteradvisor.com.
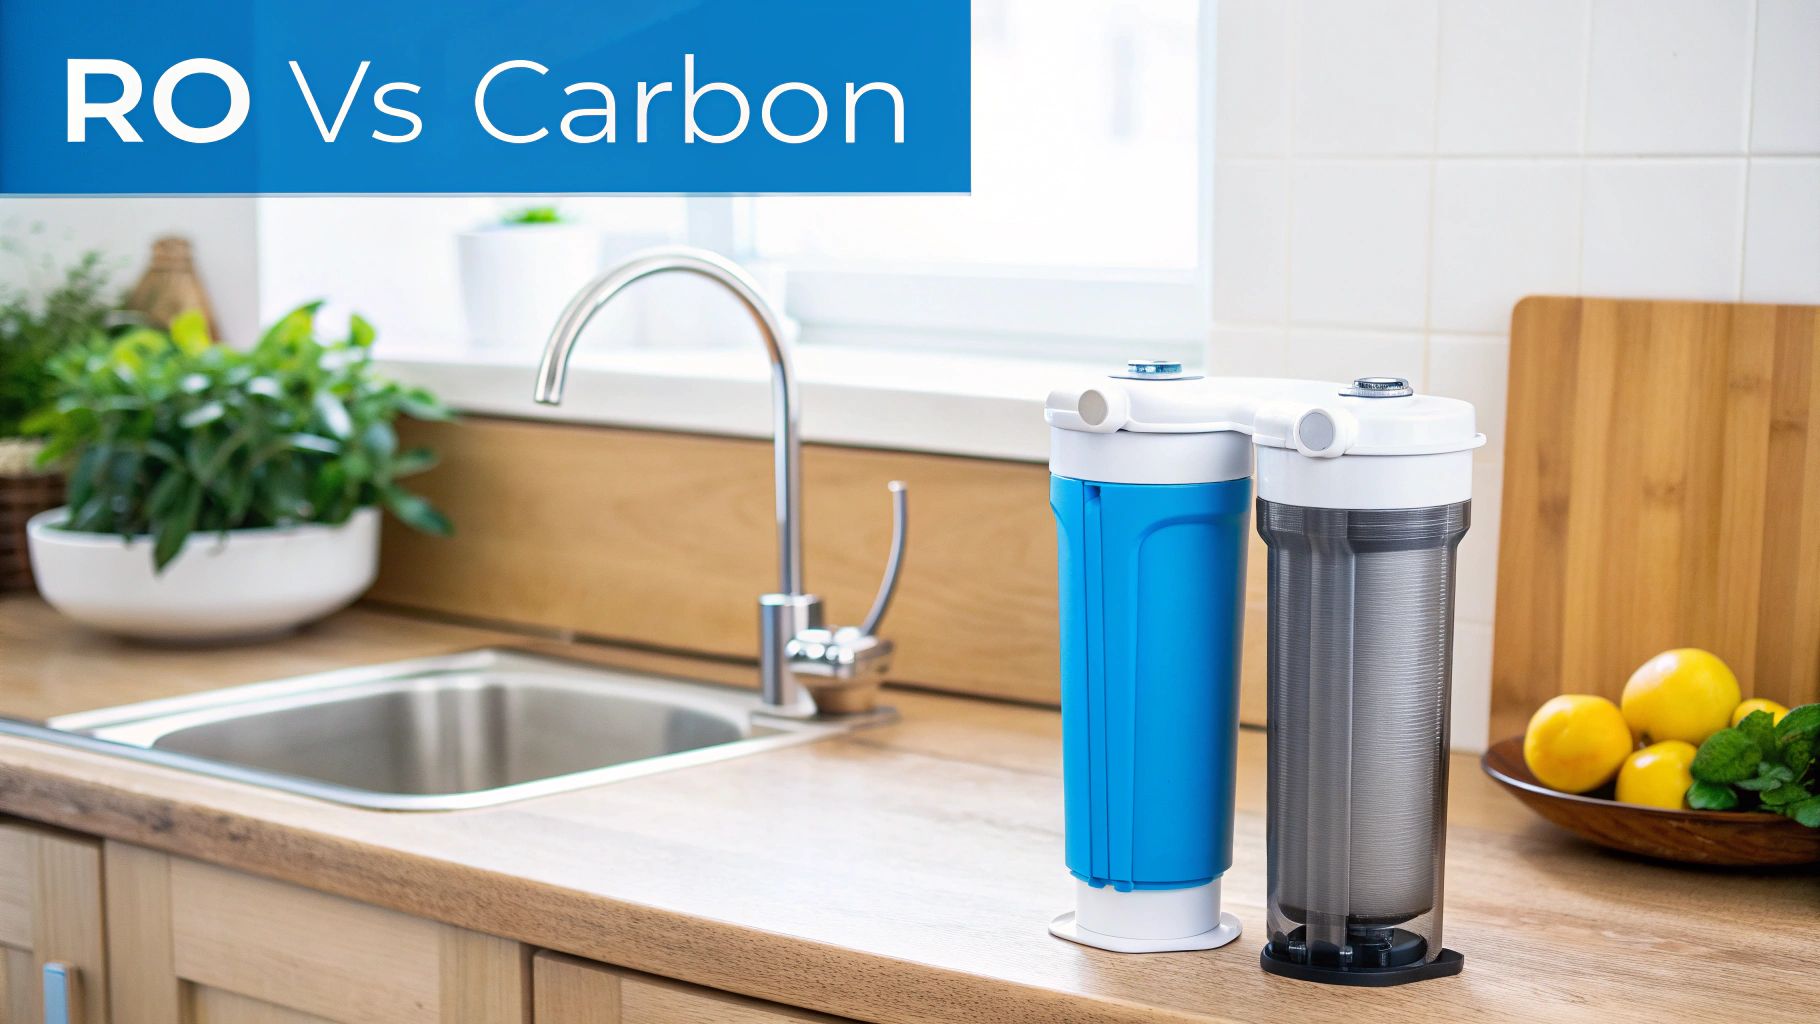
Reverse Osmosis Water Filter vs. Carbon Filter: The Ultimate Showdown

So, you're standing in the water filter aisle (or scrolling through endless web pages), and you’re faced with a choice: reverse osmosis water filter vs carbon filter. It sounds complicated, but it all boils down to one simple question: What kind of superhero does your tap water need?

Are you looking for an all-powerful purifier that zaps nearly everything—from heavy metals to dissolved solids and fluoride—out of existence? Then a Reverse Osmosis (RO) system is your champion. But if you just want to improve the taste and smell of your city tap water by kicking chlorine to the curb, a simple carbon filter is a smart, budget-friendly sidekick.

Understanding the Core Differences

Choosing the right filter for your home shouldn't feel like a chemistry exam. Once you grasp what each technology is built for, the decision gets a lot easier. It’s like picking between a sledgehammer and a scalpel. Both are great tools, but for very different jobs.

Think of a carbon filter as a specialist—a taste-and-smell artist. Its main gig is to make your water more enjoyable by grabbing onto chemicals like chlorine. An RO system, on the other hand, is the all-in-one powerhouse. It's designed for serious purification, removing a much, much wider range of contaminants and giving you water that’s close to pure H₂O.

RO Filter vs Carbon Filter at a Glance

For a quick snapshot, let's lay out the key differences side-by-side. This table really highlights how a reverse osmosis water filter vs carbon filter compares on the things that matter most to homeowners.

Feature Reverse Osmosis (RO) Filter Carbon Filter
Primary Function Water purification (removes up to 99% of contaminants) Water improvement (removes taste & odor impurities)
Key Contaminants Removed Heavy metals, fluoride, dissolved solids, salts, bacteria Chlorine, pesticides, VOCs, sediment
Installation Complexity More involved; usually needs under-sink plumbing Simple; available as pitchers, faucet mounts, or under-sink
Initial Cost Higher Lower
Maintenance Multiple filters and a membrane replaced periodically Single cartridge replaced every few months
Best For Households wanting the highest purity for health concerns Improving the taste and smell of city tap water

After seeing the comparison, it’s clear they serve two distinct needs.

What This Means for Your Home

At the end of the day, the right filter for you depends on where your water comes from and what your standards are. If you’re on city water that’s generally safe but tastes like a swimming pool because of the chlorine, a carbon filter is an excellent, low-cost fix. It's a no-fuss way to get crisp, clean-tasting water right from your faucet.

Image

On the flip side, if you're using well water or are worried about specific contaminants like lead, arsenic, or nitrates, an RO system offers real peace of mind.

An RO system offers a robust defense against a vast array of unseen contaminants, making it an investment in your family's long-term health, not just a solution for better-tasting water.

This basic difference—purification vs. improvement—is the most important thing to remember in the reverse osmosis water filter vs carbon filter debate. As we dig deeper, you'll see how this single distinction affects everything from cost and upkeep to the exact contaminants each system can tackle.

How These Water Filtration Technologies Work

To really settle the reverse osmosis water filter vs carbon filter debate, you have to get under the hood and see how they actually work. They both give you cleaner water, but their approaches are completely different—think a high-tech security gate versus a super-powered sponge. One physically blocks junk from getting through, while the other uses a chemical attraction to grab and hold onto it.

Reverse Osmosis: The Gatekeeper Method

Picture a bouncer at an exclusive club with a list that's impossible to get on. That’s pretty much a reverse osmosis (RO) system. The star of the show is a semipermeable membrane, which is a fancy way of saying it has microscopic holes just barely bigger than a water molecule.

Your home's water pressure does all the work, pushing tap water up against this membrane. The tiny water (H₂O) molecules squeeze through, but nearly everything else gets stopped cold and physically blocked. We’re talking dissolved solids, salts, heavy metals like lead and arsenic, fluoride—even some microorganisms. The good, purified water collects on one side, while all the rejected gunk gets flushed down the drain as wastewater.

This brute-force physical separation is exactly why so many homeowners who want the purest water possible turn to RO. It's a full-on purification process, not just a simple filter.

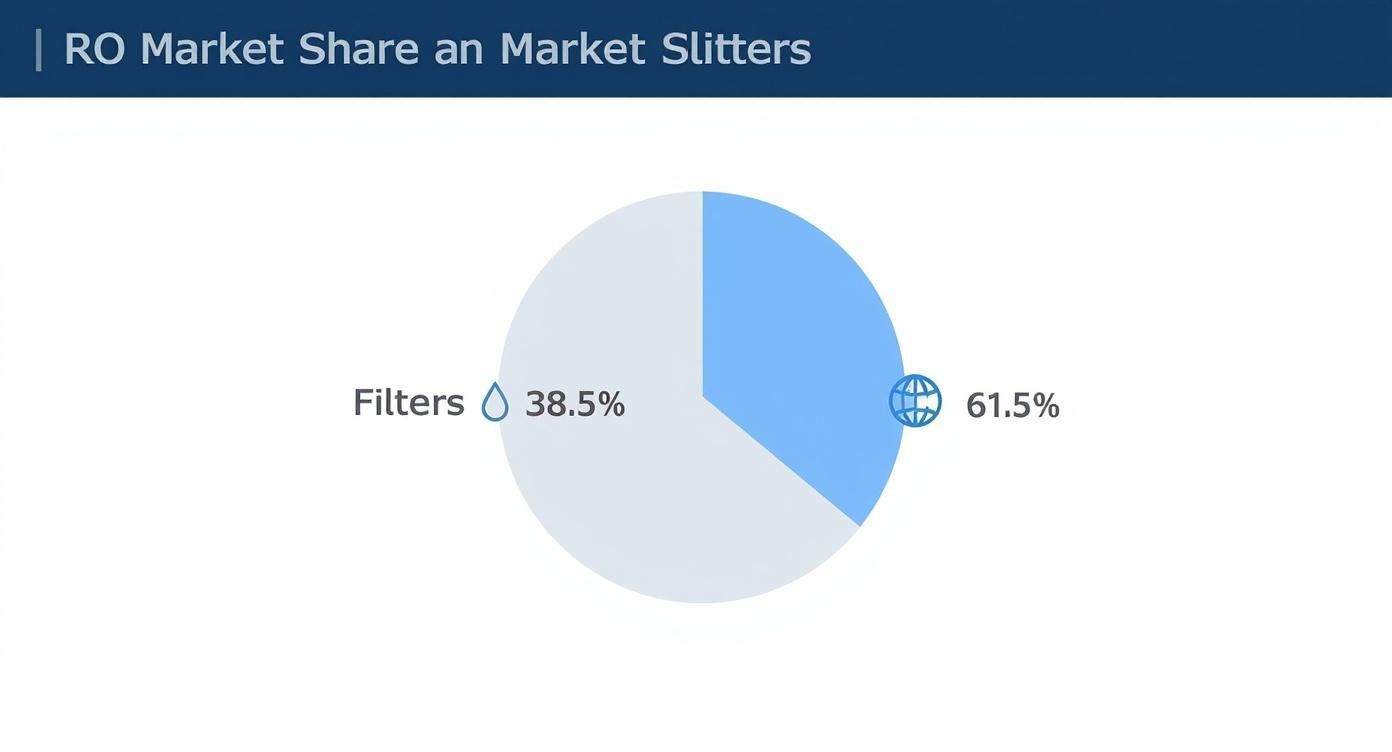
It’s no surprise that RO systems are a huge force in the home water filtration market. The RO segment grabs a massive 38.5% of the global market share, and that's because it's proven to remove up to 99% of dissolved salts, lead, bacteria, arsenic, and other nasty stuff. For families, that kind of performance provides real peace of mind. If you want to dive deeper, you can explore more insights on water filter market trends.

Basically, a reverse osmosis system breaks your tap water down on a molecular level, separating the pure H₂O from almost everything else mixed in. It's the closest thing to getting bottled-water quality straight from your tap.

Carbon Filtration: The Sponge Method

Okay, now let's switch over to carbon filters. If RO is the bouncer, then a carbon filter is like a giant, magnetic sponge. The magic here is a process called adsorption, where impurities literally stick to the filter material instead of being physically strained out.

These filters are packed with activated carbon, which usually comes from something like coconut shells. The carbon is specially treated to give it a ridiculously porous structure and a massive internal surface area. To put it in perspective, a single gram of this stuff can have the same surface area as a football field.

As water flows through, things like chlorine, pesticides, herbicides, and volatile organic compounds (VOCs) are chemically drawn to the carbon's surface and trapped. This is why carbon filters are rockstars at making city water taste and smell better—they're exceptional at pulling out the chlorine that's added for disinfection.

Here’s a quick look at how the adsorption process works:

  • Massive Surface Area: All those pores in the activated carbon create countless spots for contaminants to latch onto.
  • Chemical Attraction: Certain chemicals are naturally attracted to the carbon surface.
  • Contaminant Trapping: The bad stuff sticks to the carbon, and cleaner water flows on through.

This method is fantastic for specific chemical contaminants, but it won't touch dissolved solids, salts, or most heavy metals. It's a targeted tool for improving aesthetics, not a comprehensive purification system, which is a key difference when you’re comparing a reverse osmosis water filter vs a carbon filter.

Contaminant Removal Side by Side

When you put a reverse osmosis filter and a carbon filter in a head-to-head matchup, the real difference is what each one actually pulls out of your water. This isn’t a simple question of which is “better.” It’s about picking the right tool for the job.

Think of it this way: one is a broad-spectrum solution designed to tackle nearly everything, while the other is a specialized treatment for the most common issues that affect taste and smell. The distinction is pretty stark. RO systems are built for maximum purification, while carbon filters are masters of targeted chemical adsorption.

The Heavy Hitters: Heavy Metals and Dissolved Solids

Let's start with the most serious contaminants, like heavy metals and total dissolved solids (TDS). This is where the gap between the two technologies is widest.

A reverse osmosis system is the undisputed champ here. Its semipermeable membrane is the key—it physically blocks particles down to an incredible .0001 microns. This brute-force approach allows it to remove a long list of nasty stuff, including:

  • Lead: A powerful neurotoxin that can leach from old pipes.
  • Arsenic: A common and dangerous contaminant, especially in well water.
  • Fluoride: Intentionally added to many municipal water supplies.
  • Nitrates & Sulfates: Often the result of agricultural runoff seeping into groundwater.
  • Total Dissolved Solids (TDS): This covers all the salts, minerals, and other dissolved inorganic compounds that a carbon filter just can't touch.

A standard carbon filter, on the other hand, just wasn't designed for this kind of work. It can't remove dissolved solids, salts, or the vast majority of heavy metals. While some specialized carbon block filters might reduce lead, they don't come close to the comprehensive removal you get from an RO system.

While a carbon filter makes water taste great, only a reverse osmosis system can reliably remove nitrates and dissolved salts. This is a critical distinction for anyone on well water or in an area with known contamination issues.

Aesthetics: Chlorine, Taste, and Odor

Now, let's talk about the things you can actually taste and smell. This is where the carbon filter really gets to show off and why it's the perfect solution for so many people.

The main reason city water tastes "off" is chlorine, which is added as a disinfectant. An activated carbon filter is an absolute powerhouse at adsorbing chlorine. As water passes through the filter media, the carbon's huge surface area snags and holds onto chlorine molecules, instantly getting rid of that "swimming pool" taste and smell.

Carbon filters also do a fantastic job of removing:

  • Volatile Organic Compounds (VOCs): Nasty industrial chemicals like pesticides and herbicides.
  • Chloramines: A disinfectant sometimes used as an alternative to chlorine.
  • Bad Odors: Caused by various organic compounds that find their way into the water supply.

Even though most RO systems have a carbon pre-filter to protect the sensitive membrane, the carbon filter's main job in any system is improving taste and odor.

Infographic about reverse osmosis water filter vs carbon filter

This infographic shows just how popular RO systems are, holding a massive 38.5% of the market. It really highlights that many consumers are looking for that deeper level of purification that goes far beyond just making the water taste better.

To break it down even further, here's a look at how each filter type stacks up against common contaminants.

Contaminant Removal Efficiency Comparison

Contaminant Type Reverse Osmosis Filter Carbon Filter
Heavy Metals (Lead, Arsenic) Excellent (95-99% removal) Poor to Fair (Specialized filters may reduce lead)
Total Dissolved Solids (TDS) Excellent (90-99% removal) No Removal
Chlorine & Chloramine Good to Excellent (Often has a carbon stage) Excellent (Primary function)
VOCs & Pesticides Good to Excellent (Carbon stage handles this) Excellent (Adsorbs effectively)
Fluoride Excellent (90-97% removal) No Removal
Bacteria & Viruses Very Good (Physical barrier) Poor (Can harbor bacteria if not changed)
Cysts (Giardia, Crypto) Excellent (Physical barrier) Fair to Good (Requires a 0.5-micron rating)

As you can see, the RO system offers a much broader shield against a wider array of potential threats. The carbon filter is more of a specialist, excelling at the aesthetic issues that plague most tap water.

Microorganisms: Bacteria and Viruses

When we get into biological contaminants like bacteria, cysts, and viruses, the lines can get a little fuzzy, but the RO system still comes out on top.

The pores in an RO membrane are so tiny that they physically block most bacteria and viruses from passing through, making it a very effective line of defense. It's worth remembering, though, that most residential RO systems aren't officially certified as microbiological purifiers.

Carbon filters, for the most part, do not remove bacteria or viruses. Worse, an old carbon filter that isn't changed on schedule can actually become a breeding ground for bacteria. Some high-end carbon block filters with a very fine micron rating (like 0.5 microns) can remove larger cysts like Giardia and Cryptosporidium, but they won't stop smaller bacteria or any viruses. For biologically unsafe water, a carbon filter just isn't the right choice.

Because they're so good at fixing the number one complaint about tap water—the taste—carbon filters are incredibly popular. They command a huge share of the market by removing chlorine, sediment, and VOCs, but they can't match the heavy-duty purification of an RO system. You can read the full analysis on the under-sink filter market to dig deeper into the numbers.

Ultimately, the choice comes down to your specific water quality concerns. If you need broad-spectrum protection from a whole host of contaminants, RO is the way to go. If your water is generally safe but just tastes bad, a carbon filter is a simple, effective, and budget-friendly solution.

Comparing Costs, Installation, and Ongoing Maintenance

Beyond just what they remove, the practical side of things—your budget and willingness to do upkeep—is a huge factor in the reverse osmosis water filter vs carbon filter debate. The true cost isn't just the price on the box. You've got to think about installation, filter replacements, and even hidden costs like wastewater. Let's break it down so you can see which system really fits your life and your wallet.

Right off the bat, the initial investment for these two systems is miles apart. Carbon filters are generally much cheaper to get started with, giving you options from simple faucet attachments to more serious under-sink units. An RO system, on the other hand, is a more significant purchase because of its complex, multi-stage setup.

Upfront Purchase and Installation Costs

The financial barrier to entry is probably the clearest difference here. You can pick up a simple under-sink or countertop carbon filter for a pretty low price, often well under $100. Their design is so straightforward that most people can install one themselves in less than an hour with just basic tools.

Reverse osmosis systems are a different story. They typically start in the low hundreds and can climb much higher for high-end models. The installation is also a bigger job. You'll likely need to drill a hole in your countertop for its own special faucet, hook up a drain line to your sink's plumbing, and find space for the storage tank. A confident DIYer can pull it off, but many people just call a plumber, which adds to that initial cost.

  • Carbon Filter: Lower upfront cost and a simple, DIY-friendly installation.
  • RO System: Higher upfront cost with a more complex installation that might require professional help.

Ongoing Maintenance and Filter Replacement

This is where the long-term cost comparison gets a little more nuanced. Carbon filters are cheap to buy, but you'll be buying replacement cartridges, and those costs can add up. This is especially true for the smaller pitcher or faucet-mounted filters that need to be swapped out pretty frequently.

An RO system’s maintenance is more involved but often more predictable. You’re looking at replacing a few different filters on different schedules:

  • Sediment & Carbon Pre-filters: These are the gatekeepers that protect the main membrane. You’ll usually replace them every 6 to 12 months.
  • RO Membrane: This is the core of the whole system. It’s a workhorse and typically lasts 2 to 4 years, though this depends heavily on your water quality.
  • Carbon Post-filter: This last filter gives the water a final "polish" and gets changed about once a year.

While the total annual cost for RO filter replacements might be higher than for a simple carbon filter, the actual cost per gallon of purified water can be surprisingly competitive when you look at it over the system's entire lifespan.

The Hidden Cost of RO Wastewater

One unique expense tied to RO systems is the wastewater. To keep that powerful membrane from clogging up with all the contaminants it removes, the system has to flush them away. This stream of concentrated gunk goes right down the drain along with a good bit of water. Older, less efficient models were notorious for this, wasting as much as 4 or 5 gallons of water for every single gallon of pure water they produced.

Thankfully, technology has come a long way. Modern RO systems are much more efficient, with many wasting only 1 to 2 gallons for every purified gallon. It will add a small amount to your water bill, but it’s a necessary trade-off for how effectively the system purifies your water.

Thinking beyond just the filters, understanding how water quality affects your home's entire plumbing system can help you dodge future problems. Proper upkeep, for example, can save you from a lot of headaches. You can learn more about how to prevent costly plumbing repairs through regular maintenance. Taking this wider view helps ensure your whole water system stays in great shape.

What's the Best Filter for Your Home?

Alright, let's move past the technical jargon. The real question in the reverse osmosis water filter vs. carbon filter showdown is: which one actually makes sense for your kitchen? The answer depends entirely on where you live, what your water is like, and what you’re trying to fix.

Let's walk through a few real-life situations. See which one sounds most like you.

A person pouring a glass of clean water from a kitchen faucet

Scenario 1: The City Apartment Dweller

You live in a city high-rise. The municipal water is technically safe according to the annual reports, but you can’t stand the swimming-pool smell. That chlorine taste ruins your morning coffee and makes a simple glass of water taste… off.

For this, a carbon filter is your best bet. It’s designed specifically to adsorb chemicals like chlorine and other compounds that mess with taste and odor. It’s a simple, affordable fix that gets right to the point without over-complicating things.

  • The Main Problem: Gross-tasting and smelling city tap water.
  • What You're Targeting: Chlorine, chloramines, and some volatile organic compounds (VOCs).
  • The Smart Choice: An under-sink or faucet-mounted carbon filter. It’s cheap, easy to put in, and you'll notice the difference immediately.

Scenario 2: The Rural Family on Well Water

Now, picture a family out in the country with their own private well. Their worries go way beyond just taste. They're concerned about things you can't see or smell—nitrates from nearby farms, naturally occurring heavy metals like arsenic, and even potential bacteria.

Here, a reverse osmosis system isn't just a nice-to-have; it's a critical safety measure. A basic carbon filter won’t touch dissolved solids, heavy metals, or microorganisms. The multi-stage process of an RO system is the only thing that offers the comprehensive protection they need for real peace of mind.

  • The Main Problem: Removing a whole spectrum of potential health hazards from untreated well water.
  • What You're Targeting: Nitrates, sulfates, arsenic, lead, fluoride, bacteria, and total dissolved solids (TDS).
  • The Smart Choice: A multi-stage under-sink reverse osmosis system. Its special membrane is a physical wall that stops the most dangerous contaminants found in well water.

It often just comes down to where your water is from. Public utility? You’re probably just fighting bad taste, so a carbon filter will do. Private well? You need serious purification, and that means reverse osmosis.

Scenario 3: The Health-Conscious Urbanite

Let's go back to the city. This person knows the water is "safe," but they want it to be pristine. They worry about the stuff that standard city tests might miss, like trace pharmaceuticals, microplastics, or the fluoride that’s intentionally added. They’re not just after better flavor; they want truly purified water.

This is another clear-cut case for a reverse osmosis system. While the tap water meets government standards, an RO system goes much further, stripping out up to 99% of all contaminants. It takes water down to nearly pure H₂O, addressing concerns that a simple carbon filter can't even touch.

  • The Main Problem: Getting the absolute purest water possible for health reasons.
  • What You're Targeting: Fluoride, heavy metals, dissolved solids, and other emerging contaminants.
  • The Smart Choice: An RO system, maybe even one with a remineralization filter to add healthy minerals back in for a better taste.

Scenario 4: The Budget-Minded Renter

Last one. Think of a student or anyone renting an apartment. They want cleaner water, but they can't mess with the plumbing. Money is tight, and they need something that works now and can move with them later.

A carbon filter—either in a water pitcher or a simple screw-on faucet attachment—is the perfect solution. There's no installation, the cost is minimal, and it does a great job on the number one complaint: chlorine. When the lease is up, they just pack it and go.

By looking at it this way, the choice becomes much simpler. It’s not about which filter is technically "better," but which one is the right tool for your specific job.

Making the Right Choice for Your Home

Figuring out whether a reverse osmosis or carbon filter system is right for you really just comes down to a few key questions. It’s not about which one is "better" in general, but which one is the right fit for your home and your water.

To make things simple, let's break it down into three critical areas.

Define Your Water Goals

First things first: what are you trying to remove from your water? A great place to start is your local water quality report.

Next, ask yourself if your main goal is simply better-tasting water, or if you need the highest possible level of purity for health and safety. Finally, you have to consider your budget, not just for the system itself but for the ongoing filter replacements.

Answering those questions will point you in the right direction:

  • For Better Taste: If your city water is already treated but has that distinct chlorine taste and smell, a carbon filter is a simple, cost-effective fix.
  • For Maximum Purity: If you're dealing with well water or have serious concerns about contaminants like lead, fluoride, or other total dissolved solids, a reverse osmosis system offers the most complete protection you can get.

The decision really hinges on a single trade-off. If your water is generally safe but just doesn't taste great, a carbon filter is all you need. But if you want total peace of mind with the highest level of purification available, then reverse osmosis is the hands-down winner.

Remember, while a good filter is essential, the cleanliness of your water source matters too. For a more complete picture, take a look at this a comprehensive guide to water tank cleaning.

If you need more personalized guidance on choosing the right filter, our team has put together some excellent resources. Learn more with our expert advice on water filters.

Frequently Asked Questions

When you're trying to choose between a reverse osmosis water filter vs carbon filter, a few questions always seem to pop up. Let's get right into the most common concerns we hear from homeowners.

Do Reverse Osmosis Systems Waste a Lot of Water?

This is probably the number one question we get about RO systems. It’s true that to get incredibly pure water, the system has to flush away all the gunk it removes, and that creates wastewater. Older systems were pretty bad, sometimes wasting many gallons for every one gallon they produced.

But technology has come a long way. Many modern, high-efficiency units now waste only 1 to 2 gallons for every gallon of pure water they make. Some even have a special permeate pump that uses the pressure from the wastewater to work more efficiently, which cuts down on waste and helps the tank fill up faster.

Will an RO Filter Remove Healthy Minerals?

Yes, it will. A reverse osmosis system is a powerhouse designed to strip out nearly everything from the water, which includes beneficial minerals like calcium and magnesium. What you're left with is exceptionally clean, demineralized water.

If you're worried about losing those minerals or just prefer the taste of mineral water, there’s an easy fix. Many RO systems come with a remineralization filter that gets added on at the very end. This puts a small amount of healthy minerals back into the water right before it hits your glass, which can really improve the taste and balance the pH.

While an RO system strips water down to its purest form, adding a remineralization stage gives you the best of both worlds—unmatched purity with the pleasant taste of essential minerals.

Can I Use a Carbon Filter with an RO System?

Not only can you, but you have to. Every single multi-stage reverse osmosis system actually includes at least one carbon filter, sometimes two. They perform a vital job.

The carbon pre-filter is there to remove chlorine and chloramines before the water can get to the delicate RO membrane. These chemicals, used for disinfection by water treatment plants, are really harsh and will literally eat away at the membrane. By taking the hit and absorbing these chemicals, the carbon filter acts like a bodyguard for the most expensive part of your system, making sure it lasts longer and works properly.


At Water Filter Advisor, our goal is to help you find the perfect water filtration solution for your family's needs. We provide clear, research-driven reviews and practical guides to make your decision easy. Explore our resources and find your ideal filter today at https://www.waterfilteradvisor.com.
Why Your Water Smells Like Rotten Eggs (and How a Filter Can Fix It)

If you've ever turned on your tap and been greeted by the unmistakable funk of rotten eggs, you know how quickly it can ruin your day. The culprit behind this nasty odor is almost always hydrogen sulfide (H2S), a dissolved gas that can make your perfectly good water seem completely undrinkable.

But here’s the good news: while that smell is a clear sign something’s not right, it's a problem that a good home water filtration system can solve for good. Let's dive in and banish that stench forever.

What's Causing That Rotten Egg Smell in Your Water?

A person holding a glass of tap water, looking at it with concern.

First, don't panic—that gross smell isn't a sign of dangerous contamination. It's actually the result of a natural process. Think of a swamp, where decaying plants in stagnant, low-oxygen water release smelly gases. A similar thing can happen right inside your plumbing.

The odor comes from tiny organisms called sulfur-reducing bacteria. These little guys thrive in places without much oxygen, like deep wells or even the bottom of your hot water heater. They essentially "breathe" in sulfates, which are common minerals found in water, and then "exhale" smelly hydrogen sulfide gas.

Our noses are incredibly good at picking up this scent. In fact, we can detect it at concentrations as low as 0.0005 parts per million (ppm).

Common Sources in Your Home

Figuring out where the smell is coming from is the first step to getting rid of it. Most of the time, the problem lies in one of two places, and the solution for each is very different:

  • Your Water Source: If you're on a private well, there's a good chance sulfur-reducing bacteria are already living in the groundwater. When this is the case, a whole-house filtration system is your best defense.
  • Your Hot Water Heater: The tank of a water heater is the perfect breeding ground for these bacteria—it's warm, dark, and has very little oxygen. They can also get a boost by reacting with the magnesium or aluminum anode rod inside the tank (the part designed to prevent rust), which supercharges the production of hydrogen sulfide.

Keeping these bacteria from taking over your hot water tank is key. Following some basic hot water maintenance tips can make a huge difference.

To help you start sleuthing, here’s a quick-reference table to pinpoint the most likely source of the smell in your home.

Common Sources of Rotten Egg Smell in Home Water

Source Location Likely Cause Best First Step
Hot Water Only Bacteria in the hot water heater reacting with the anode rod. Check and potentially replace the anode rod; flush the tank.
All Taps (Hot & Cold) Hydrogen sulfide is present in your main water supply (well or municipal). Perform a comprehensive water test to confirm H2S levels.
One Specific Faucet Localized bacteria buildup in the aerator or drain pipe. Clean the faucet aerator and the drain's P-trap thoroughly.

Use this table as your starting point. By identifying whether the smell is in your hot water, cold water, or just one faucet, you can narrow down the cause and get on the right track to solving the problem.

Is Smelly Water Safe for Your Family and Home?

When you turn on the tap and get hit with that awful rotten egg smell, your first thought is probably, "Is this water even safe to drink?" Let's get straight to it: in most homes, the low levels of hydrogen sulfide (H2S) you're smelling are more of an annoyance than a direct health hazard.

Sure, it makes your water taste and smell disgusting, but the concentrations are usually far too low to be considered dangerous. The situation is completely different from an industrial setting where high concentrations of H2S gas can be a serious risk. The levels in your home’s water are typically thousands of times lower.

But don't breathe a sigh of relief just yet. Just because it's not an immediate health emergency doesn't mean you can ignore it. That foul odor is a warning sign that a good filtration system is needed to prevent other problems brewing in your pipes.

The Hidden Costs of Ignoring Smelly Water

Even if the water is technically safe to drink, hydrogen sulfide is incredibly corrosive. If you leave it unchecked, it will slowly eat away at your home's plumbing and appliances, leading to some pretty significant and expensive damage down the road.

  • Pipe Corrosion: H2S is notorious for corroding metal pipes, including copper, iron, and steel. This corrosive action weakens your plumbing system from the inside out, paving the way for leaks and costly repairs.
  • Appliance Damage: Think about all the appliances your water runs through—your water heater, dishwasher, and washing machine are all in the line of fire. The gas can damage their metal components, drastically shortening their lifespan and even tarnishing your silverware.
  • Ugly Stains: Hydrogen sulfide is also the culprit behind those stubborn black or yellow stains you find on sinks, toilets, and even in your laundry. They're a real pain to remove.

Putting it bluntly, ignoring the problem is like letting your home's infrastructure slowly degrade. A whole-house water filtration system designed to specifically remove H2S is the best defense to protect your investment and save yourself from these long-term headaches.

Why Your Nose Isn't a Reliable Safety Gauge

You might be thinking, "I'd definitely notice a smell that strong!" But here's the thing—your nose can play tricks on you. There's a phenomenon called olfactory fatigue, which happens when you’re constantly exposed to a particular scent. Your brain essentially tunes it out, and you stop noticing the odor even though the gas is still there.

This is a critical point. That rotten egg smell is a great initial warning sign, but relying on it long-term is a big mistake. Once you get used to it, you lose your built-in alarm system for knowing if the concentration is getting worse.

Public health advisories back this up. While our noses are sensitive enough to detect the gas at incredibly low levels (as low as 0.03 ppm), our sense of smell becomes unreliable at higher concentrations. This is exactly why you need to address the source of the problem with a proper filtration solution to get real peace of mind. As detailed on the Health WA website, treating the water is about protecting both your family's comfort and your home's plumbing.

Pinpointing the Source of the Sulfur Smell

Before you even think about buying a filter, it's time to play detective. Figuring out exactly where that rotten egg smell is coming from is the most critical first step, and it will point you directly to the right solution.

It's a classic mistake: homeowners rush out and buy an expensive whole-house system only to find out the problem was just in their water heater. That’s a frustrating and costly error you can easily avoid.

The good news is you can run a few simple tests yourself in just a few minutes—no plumber required. Think of this as a quick diagnostic for your home's water system.

All you need to get started is a couple of clean glasses. Let's head to the faucet where the smell is the most noticeable.

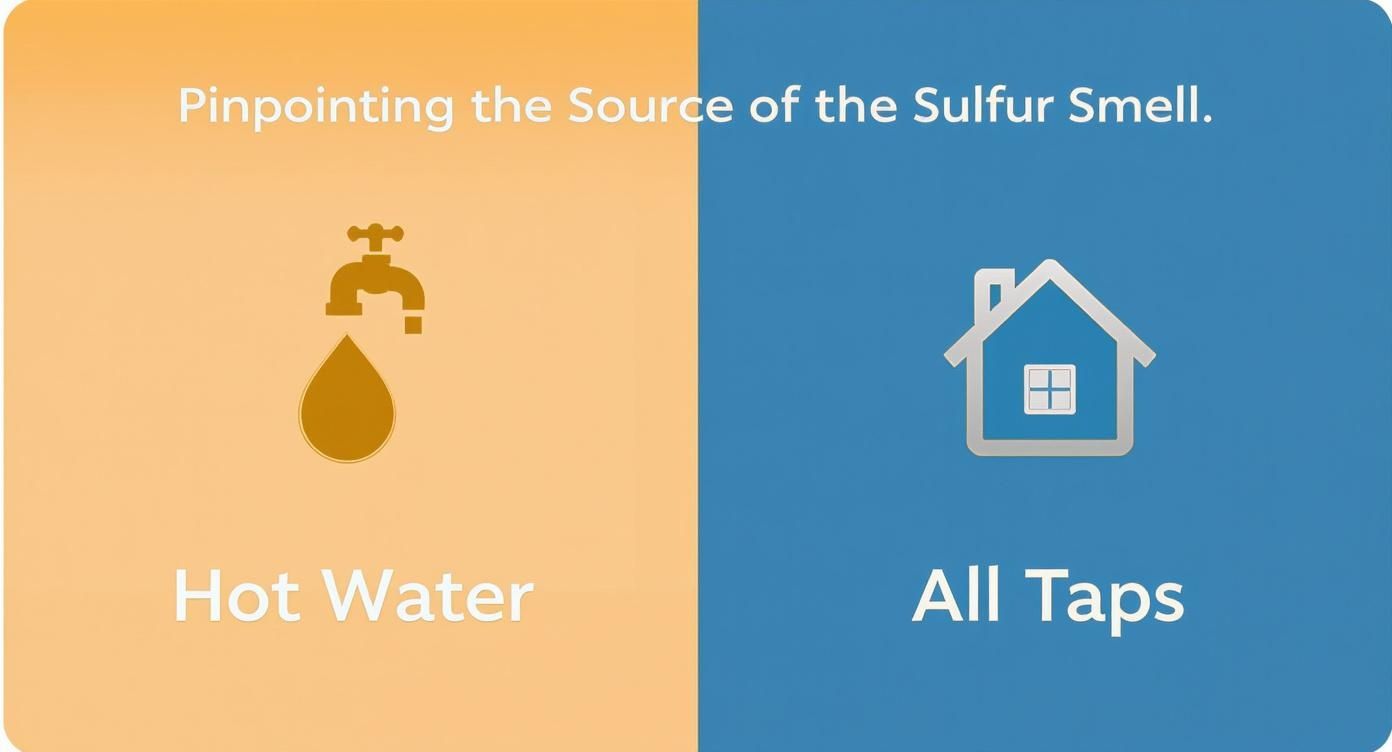
The Hot vs. Cold Water Test

This is the first and most important test. It's simple, fast, and the results will immediately tell you whether the problem is with your water heater or your entire water supply.

Here’s how to do it:

  1. Turn on the cold tap and fill one glass. Take a step away from the sink before you give it a sniff.
  2. Now, run the hot tap and fill a second glass. Again, move away from the drain to smell it.
  3. Compare the two. Is the rotten egg odor in just one of the glasses, or both?

If the cold water smells fine but the hot water stinks, you've almost certainly found the culprit: your hot water heater. The warm, dark environment inside the tank is the perfect place for sulfur-reducing bacteria to thrive. These bacteria interact with the anode rod in the tank, creating the hydrogen sulfide gas that's causing the foul smell.

Key Takeaway: When only the hot water smells, the issue is almost always your water heater. This is great news because it means you probably don't need a whole-house filter. Often, the fix is as simple as flushing the tank and swapping the standard magnesium anode rod for an aluminum/zinc one.

On the other hand, if both glasses of water smell like rotten eggs, the problem starts long before the water ever gets to your heater. This tells you that hydrogen sulfide is already present in your well or municipal supply line.

When that's the case, a point-of-entry (POE), or whole-house, filtration system is going to be your best bet to treat all the water coming into your home. Now that you've narrowed it down, you can start looking at the right filtration options for the job.

Choosing the Right Home Water Filtration System

Alright, you've put on your detective hat and tracked down the source of that nasty rotten egg smell. Great! Now, it's time to find a permanent fix. Choosing the right home water filtration system isn't about grabbing the priciest one off the shelf; it's about matching the right tool to your specific problem.

If you’ve discovered that hydrogen sulfide (H2S) is stinking up your entire water supply, a point-of-entry (POE), or whole-house, system is your best bet. These systems get to work the moment water enters your home, making sure every single tap—from the kitchen sink to the shower—delivers clean, odor-free water.

This infographic lays it all out, helping you visualize the two most common scenarios and pointing you toward the right solution.

Infographic about water smells like rotten eggs

The takeaway here is pretty straightforward: if the smell is only in your hot water, the problem is your water heater. If it's coming from every tap, hot and cold, you're looking at a whole-house solution.

Technologies That Eliminate Rotten Egg Smell

When it comes to getting rid of hydrogen sulfide for good, there are three main technologies that really shine. Each one attacks the problem differently and comes with its own price tag, effectiveness level, and maintenance schedule.

  • Aeration Systems: Think of this as simply giving your water some fresh air. These systems inject oxygen into the water, which forces the dissolved hydrogen sulfide gas to turn into a solid particle. Once it's solid, it can be easily filtered out.
  • Oxidation Filters: These systems use a special filter media, like manganese greensand, to trigger a chemical reaction. This reaction instantly oxidizes the hydrogen sulfide, converting it into harmless sulfur particles that get trapped right in the filter bed.
  • Activated Carbon Filters: Picture a sponge packed with millions of microscopic pores. A large, backwashing activated carbon filter works a lot like that. Its massive internal surface area acts like a magnet, grabbing and holding onto the H2S gas as water flows through. This is usually the go-to for lower levels of H2S.

If you want to take a deeper dive into the world of water filters, there's a ton of helpful water filter advice and guides available to help you make a confident choice.

Comparing Home Water Filtration Methods for H2S Removal

To really help you nail down the right choice, let's look at these systems side-by-side. The best option for you will depend on how much H2S is in your water, what your budget looks like, and how much time you want to spend on upkeep.

Filtration Method How It Works Best For Avg. Initial Cost Maintenance Needs
Aeration Injects oxygen to convert H2S gas into filterable particles. High H2S levels & iron removal. $1,500 – $3,000 Low; periodic system checks.
Oxidizing Filter Uses media like manganese greensand to oxidize H2S. Moderate H2S levels. $1,000 – $2,500 Regular backwashing; media may need regeneration with potassium permanganate.
Activated Carbon Adsorbs H2S gas onto a porous carbon media. Low H2S levels (<1 ppm) and taste/odor improvement. $800 – $1,800 Regular backwashing; carbon media needs replacement every 3-5 years.

The table makes it clear that you have to look beyond just the initial price tag. While an aeration system might seem more expensive at first, its super-low maintenance can make it the cheaper option in the long run, especially if you're dealing with a serious H2S problem.

By understanding how each of these systems works, you can pick the one that will knock out that rotten egg smell for good, not just cover it up.

Keeping Your Water Filter Working Effectively

A technician checking a whole-house water filtration system to ensure it's working properly.

Getting a new water filtration system installed is a fantastic first step to kicking that rotten egg smell to the curb. But the job isn't quite done.

Your filter is a bit like a new car—it needs some basic upkeep to keep it running smoothly. If you just set it and forget it, that nasty sulfur odor will eventually creep back into your home.

This is all about protecting your investment and making sure you have clean, fresh water day in and day out. Every filter has its own needs, but a little routine care is all it takes to keep that foul smell from ever returning. You don't have to be a master plumber, just aware of what your system needs to do its job.

Your Filter Maintenance Playbook

So, what does this "upkeep" actually look like? Let's break down the essential tasks for the most common systems designed to tackle hydrogen sulfide. Following a simple schedule will keep your water fresh and your system performing at its best.

As a general rule, you should plan to check on your system at least twice a year. Some parts, however, will need attention a little more often.

  • Activated Carbon Filters: The carbon media is the heart of this system, but it eventually gets used up. Depending on how much water you use and the sulfur levels, you’ll likely need to replace the carbon media every 3 to 5 years. These systems also need regular backwashing (which is often automated) to clear out trapped gunk and prevent clogging.
  • Oxidizing Filters (Manganese Greensand): To keep working, these filters need to "regenerate" their media. The process usually involves a chemical like potassium permanganate that recharges the greensand. Your main job here is to check the chemical tank periodically and refill it as needed.
  • Aeration Systems: These are usually the most hands-off of the bunch. Just give the system a visual inspection every few months. You're looking to make sure the air injector or pump is running properly and isn't getting clogged with sediment or mineral scale.

Key Insight: Being proactive with maintenance is always cheaper and way less stressful than dealing with a sudden problem. A neglected filter can mean the rotten egg smell comes roaring back, leading to potential plumbing headaches and an expensive emergency service call.

By simply following a maintenance calendar, you can ensure your system remains a reliable guard against smelly water. It's the final, crucial step to getting rid of that sulfur odor for good.

Why Some Water Sources Have More Sulfur

Ever wonder why your water smells like a carton of rotten eggs, but a friend's house just a few miles away has water that's perfectly fine? It’s a common question, and the answer isn't a problem with your pipes—it's a story that starts deep underground.

Your home's water is a direct product of its environment. The smell of sulfur is a natural phenomenon, directly tied to the geology of your area. Some regions just happen to have bedrock loaded with sulfate minerals like gypsum. As groundwater makes its long journey through these rock layers, it dissolves these minerals and picks up a heavy concentration of sulfates. This is the perfect buffet for certain bacteria that, in turn, produce that nasty hydrogen sulfide gas.

A Global Water Quality Issue

This isn’t just a quirky local problem; it's a known water quality issue all over the world. A U.S. Public Health Service sampling, for example, found sulfates in almost all surface and groundwater they tested. The concentrations were all over the map, ranging from less than 1 mg/L to over 770 mg/L. You can dig deeper into this on the Wikipedia page for sulfur water.

That massive variation is exactly why a "one-size-fits-all" filter from the hardware store often doesn't cut it. Your water is unique.

This geographical lottery means that what works for one home might be completely useless for another. For properties in rural areas, like a bathroom renovation on a cattle station in NSW, understanding these local conditions is absolutely critical. Well water, in particular, is highly susceptible to high sulfur levels because it’s in direct contact with the surrounding geology.

The key takeaway is that your smelly water is likely part of a natural process, not a sign of contamination. This perspective underscores why personalized water testing is non-negotiable before investing in a filtration system.

Once you realize that your water’s chemistry is specific to your location, you’re on the right track. A filtration system chosen based on your exact water test results will zero in on the problem, getting rid of that rotten egg smell for good.

Your Questions About Smelly Water Answered

We've covered the why and how behind that rotten egg smell, but you probably still have a few questions. Let's run through some of the most common ones to clear things up.

Will a Standard Pitcher Filter Remove the Smell?

Sorry, but no. While your basic pitcher filter is a champ at removing chlorine and improving taste, it's just not designed to tackle the hydrogen sulfide gas causing that sulfur smell.

The water simply doesn't spend enough time in contact with the small carbon filter. It gets overwhelmed almost immediately. For real, lasting results, you'll need a dedicated whole-house system designed for H2S reduction, like an aeration filter or a large backwashing carbon unit.

Do I Need a Whole-House Filter for Smelly Hot Water?

Not always! This is a great place to save some serious money. If you only notice the smell when you turn on the hot water, the problem is almost certainly your water heater.

It’s usually a reaction between sulfate-reducing bacteria and the anode rod (typically magnesium or aluminum) inside the tank.

Before you spend a dime on a big filtration system, try this fix first: replace the standard anode rod with an aluminum/zinc alloy rod. Flushing the tank thoroughly after the swap often gets rid of the smell completely.

Can the Rotten Egg Smell Go Away On Its Own?

It's very unlikely. The smell might seem to come and go with seasonal changes in groundwater levels, but the source of the problem—either the bacteria or the sulfates—isn't going anywhere.

Putting it off just gives that corrosive gas more time to damage your plumbing. The only real fix is to find the source and install the right filtration system to stop it for good.


At Water Filter Advisor, we provide the expert guidance you need to choose the perfect solution. Explore our in-depth reviews and buying guides to find the right filter and enjoy fresh, clean water every day. Find your ideal system at https://www.waterfilteradvisor.com.
Is Your Tap Water *Really* Clean? The Filtered Truth

We’ve all been there—holding a glass under the tap, pausing for a split second, and wondering, is this stuff actually safe to drink? That moment of hesitation is more common than you think. While our cities do a pretty good job treating our water, what they consider "safe" might not line up with what you consider ideal for your family. Think of municipal treatment as the first draft. A home water filter? That's your final, polished edit.

This guide is all about taking back control. We’re going to dive into why home filtration isn't just a luxury—it's the crucial last step to ensuring the water in your glass is as pure as it can possibly be.

The Unfiltered Truth About Your Tap Water

A clean glass of water being filled from a modern kitchen tap.

Imagine your water is a VIP guest traveling to a gala (your faucet). It leaves the treatment plant looking sharp and clean. But then it has to navigate miles of old, sometimes ancient, underground pipes. Along the way, it can pick up some rather unsavory party crashers.

This is the "last mile" problem. The water was clean when it started its journey, but the trip itself can introduce a whole host of contaminants. That's where a home filtration system steps in, acting like a personal bouncer at your kitchen sink, ensuring only the invited guest—pure water—gets through.

Why Municipal Treatment Is Only Half the Story

Your local water utility is fighting the big battles, neutralizing major threats before they send water into the system. But they can't control the unique conditions of every pipe between their plant and your home. Things like local plumbing integrity and even things like backflow prevention device inspections play a role. A home filter closes that gap.

Think of a home filtration system as your personal quality control manager. It's the final checkpoint that guarantees the water making it into your coffee, your soup, and your drinking glass is nothing but the best.

A Global Thirst for Purity

This isn't just about what's happening in your town. Globally, the quest for clean water is a massive challenge. In 2022, a report from WHO and UNICEF revealed that 1.7 billion people were using drinking water sources contaminated with feces. Even in developed countries, the journey through aging infrastructure means risks remain. It's a powerful reminder that the final say on water quality should happen right at your tap.

What Party Crashers Are Hiding in Your Water?

A magnifying glass held over a glass of water, showing illustrative particles.

Even crystal-clear water can be a crowded party of invisible gatecrashers. Let's meet the usual suspects that your personal filter-bouncer might need to show the door.

Without a filter, you’re essentially trusting that none of these troublemakers hitched a ride into your home. A good filter lets you stop trusting and start knowing.

The Chemical Crew

The most famous member of this group is chlorine. It’s the chemical bouncer hired by the city to kill off dangerous bacteria. It does its job, but it has a bad habit of lingering, leaving behind that "public pool" taste and smell. A simple carbon filter can politely ask it to leave.

But some uninvited chemical guests are far more sinister. Lead is a major villain, often leaching from old pipes and solder. The scary part? There is no safe level of lead exposure. This makes a filter that specifically targets lead an absolute must-have for many homes.

Then there are the stealthier chemicals: pesticides from farm runoff, herbicides, and industrial chemicals known as volatile organic compounds (VOCs). They're the shadowy figures in the corner you definitely don't want sticking around.

Even after a major disaster like a wildfire, toxic chemicals from burnt infrastructure can contaminate the underground pipe network. This can introduce dangerous compounds like benzene into the water supply, posing serious health risks long after the event.

The Gritty Gang

Next up are the physical particles that make your water less than perfect. They might not be a direct health threat, but they're certainly not welcome.

  • Sediment, Silt, and Rust: These are the clumsy party guests who knock things over. They come from old pipes and can make your water cloudy, taste metallic, and even stain your sinks and clothes.
  • Microplastics: This is a growing problem. Tiny plastic fragments from countless sources are now found in tap water around the world. We're still learning about the long-term health effects, but who wants to be a guinea pig? A quality filter is your best bet for keeping them out.

The Biological Bugs

Even with city-level disinfection, there's always a tiny chance of biological contaminants showing up, especially if a pipe breaks. These are the microscopic menaces a filter can stop dead in their tracks.

  • Bacteria and Viruses: Pathogens that can cause nasty, immediate stomach issues.
  • Cysts: Think of these as microbial tanks. Hardy parasites like Giardia and Cryptosporidium are resistant to chlorine and can make you seriously ill.

This rogue's gallery shows why a multi-talented filtration system is so important.

Common Tap Water Contaminants and Their Sources

Contaminant Common Source Potential Impact
Lead Leaching from old pipes, solder, and fixtures Developmental issues, neurological damage
Chlorine Municipal water treatment disinfectant Unpleasant taste and odor
Pesticides/Herbicides Agricultural and urban runoff Potential long-term health risks
VOCs (e.g., Benzene) Industrial pollution, fuel spills, solvents Can increase cancer risk; liver/kidney damage
Sediment/Rust Corrosion of old water mains and plumbing Cloudy water, poor taste, stains fixtures
Microplastics Breakdown of plastic waste, synthetic fibers Health effects are still being studied
Bacteria/Viruses Contamination from sewage or animal waste Gastrointestinal illness (e.g., E. coli)
Cysts (Giardia) Contamination from human/animal feces Severe diarrheal disease ("Beaver Fever")

A home water filter isn't just an appliance; it's a personalized security detail for your drinking water, ensuring it's pure the moment it hits your glass.

How to Decode Your Local Water Quality Report

Every year, your water utility releases a document called a Consumer Confidence Report (CCR). Let's be real: it often looks like a rejected script from a science show, filled with charts and jargon.

But don't throw it away! This report is your secret weapon. It's a report card that tells you exactly what contaminants were found in your water over the past year. You can find it on your utility's website or by searching for "[Your City Name] water quality report."

Translating the Geek-Speak

Once you have the report, you need to know two key terms:

  • Maximum Contaminant Level (MCL): This is the legal limit. It's the highest amount of a substance allowed in drinking water.
  • Maximum Contaminant Level Goal (MCLG): This is the health goal. It's the level where there's no known health risk. This is the perfect-world number.

The most eye-opening part is the gap between the MCL (legal) and the MCLG (ideal). For nasty stuff like lead, the health goal (MCLG) is zero. But the legal limit (MCL) is higher. This creates a "legally acceptable" risk that you might not find acceptable at all.

From Report to Filter: Connecting the Dots

This is where you become the hero of your home's water story. Scan your report for any contaminant with a level above the MCLG, even if it’s below the legal MCL. Those are the specific party crashers that made it past the city's security.

Your report might show trace amounts of lead, pesticides, or disinfection byproducts. Now, the question isn't a vague "is my water safe?" It's a laser-focused "how do I get rid of these specific things?" This insight lets you choose a filter that’s a sharpshooter, targeting your water’s unique problems.

Choosing Your Filtration Champion

Alright, you've unmasked the villains in your water report. Now it's time to choose your champion—the right home water filter for the job. It sounds daunting, but it’s really about matching the filter's superpower to the specific contaminant you want to defeat.

You wouldn't hire a bodyguard who's great at spotting pickpockets if your main threat is a cyber-attack. The same logic applies here. Match the tool to the task.

From Bouncer to Fortress: Know Your Tech

Let's meet the main players. First up, activated carbon filters. These are the friendly bouncers at the door. You’ll find them in pitchers and faucet-mounted filters. They excel at grabbing chlorine, which instantly makes your water taste and smell fantastic. They're an affordable and effective first line of defense.

On the other end of the spectrum is Reverse Osmosis (RO). This is your impenetrable fortress. An RO system, usually installed under the sink, uses a semi-permeable membrane to muscle out nearly everything that isn't pure water. It's a beast, wiping out tough contaminants like lead, arsenic, fluoride, and countless other dissolved solids.

This chart is your treasure map, guiding you from your water report to the right filtration system.

Infographic decision tree for choosing a water filter based on a water quality report.

The key takeaway? Your water report empowers you to make an informed choice, not a wild guess.

The Full Spectrum of Water Warriors

There’s a whole world of options between a simple pitcher and a full-blown RO system. Getting to know them helps you pick the perfect ally for your home.

This table breaks down the most popular filtration technologies, showing what they're best at, what they cost, and how much upkeep they need.

Comparing Home Water Filter Technologies

Filtration Type Best For Removing Average Cost Maintenance Level
Pitcher/Dispenser Filters Chlorine, taste, odor $20 – $70 High (frequent filter changes)
Faucet-Mounted Filters Chlorine, some lead, VOCs $30 – $100 Moderate (replace every 2-3 months)
Countertop Filters Wider range of contaminants than pitchers $50 – $300 Moderate (replace every 6-12 months)
Under-Sink Filters Lead, cysts, chlorine, VOCs, sediment $100 – $500+ Low (replace annually)
Reverse Osmosis (RO) Lead, arsenic, fluoride, TDS, nitrates $200 – $1,000+ Moderate (multiple filters/membrane)
Whole-House Systems Sediment, chlorine, hard water minerals $500 – $3,000+ Low to Moderate (depends on system)

The perfect filter for you is one that balances powerful performance with a price and maintenance schedule you can live with.

Matching Your Filter to Your Foe

So how do you make the final decision? Just line up the problem from your water report with a filter's known strengths. Here are a few scenarios:

  1. Foe: Your water tastes like it came from a swimming pool.

    • Champion: An activated carbon filter (pitcher, faucet, or under-sink) is the perfect, budget-friendly hero.
  2. Foe: Your report shows lead levels are above the zero-tolerance health goal.

    • Champion: A Reverse Osmosis (RO) system is your super-soldier. It offers the highest level of protection against lead.
  3. Foe: You have hard water leaving crusty deposits everywhere, and your water is full of sediment.

    • Champion: A whole-house filtration system, often paired with a water softener, is your all-in-one solution. It protects every tap and appliance in your home.

Choosing a filter is a big deal, but it becomes simple when you focus on solving a specific problem. For a deep dive into models and brands, check out this extensive collection of water filter advice. It’s a fantastic resource for finding the perfect filtration partner for your home.

The Everyday Perks of Filtered Water

Switching to a home water filter does more than just banish invisible contaminants—it delivers an immediate, noticeable upgrade to your daily life. The first thing you'll experience is the taste. It's like switching from standard definition to 4K for your taste buds.

This simple upgrade creates a ripple effect. Your morning coffee is suddenly richer. Your tea is cleaner and brighter. Even simple foods like pasta and steamed vegetables taste purer, free from that subtle chemical background noise you didn't even know was there.

Beyond a Better-Tasting Brew

The benefits go far beyond flavor. By consistently filtering out contaminants like lead, VOCs, and disinfection byproducts, you reduce your family's daily exposure to substances linked to long-term health issues.

It's a proactive health investment. Every glass of filtered water you drink is a small, positive step toward long-term wellness, giving you priceless peace of mind.

It's easy to take clean water for granted. But a staggering 2.1 billion people worldwide still lack access to safely managed drinking water. You can learn more about this global challenge in a report from WHO and UNICEF.

A Win for Your Wallet and the Planet

Let's talk dollars and sense. Yes, there's an upfront cost for a filtration system. But it pays for itself surprisingly quickly once you break free from the endless cycle of buying bottled water.

And the environmental win is huge. Every time you refill a glass from your tap, you're preventing another plastic bottle from ending up in a landfill or the ocean. Filtering at home is a triple win:

  • For Your Health: You're in complete control of your water quality.
  • For Your Wallet: You stop renting your water from beverage companies.
  • For The Planet: You dramatically reduce your plastic waste.

Common Questions About Water Filtration

Even when you're convinced, a few nagging questions can pop up before you pull the trigger on a filtration system. Let's clear the air and tackle the most common concerns.

Getting straight answers is the final step to feeling confident that your tap water isn't just okay—it's awesome.

If My Water Tastes Fine, Do I Really Need a Filter?

This is the biggest myth in the world of water. Great taste is not a guarantee of safety. Many of the most dangerous contaminants—lead, arsenic, pesticides, and VOCs—are completely tasteless, odorless, and invisible.

A filter acts as a safety net, catching the threats you can't detect with your senses. Your taste buds are great, but they're not a science lab.

The only way to know for sure what's in your water is by looking up your local water quality report or having it tested yourself. A filter ensures that even if contaminants are lurking at low levels, they won't end up in your glass.

Are Pitcher Filters Just as Good as Under-Sink Filters?

They're different tools for different jobs. A pitcher filter is a fantastic starting point. It's affordable, portable, and does an excellent job removing chlorine to improve taste and smell.

An under-sink system, however, is a major upgrade. These systems, especially Reverse Osmosis (RO) units, are certified to remove a much longer list of serious contaminants like lead, fluoride, nitrates, and dissolved solids. If your water report shows any of those red flags, an under-sink system is the more powerful and reliable choice.

How Often Do I Actually Have to Change My Filter?

This is non-negotiable. Following the manufacturer's replacement schedule is crucial. An old, clogged filter doesn't just stop working; it can become a breeding ground for bacteria. A neglected filter can actually make your water quality worse than unfiltered tap water.

Here's a quick cheat sheet:

  • Pitcher Filters: Every 2 months or after 40 gallons.
  • Faucet Filters: About every 3 months.
  • Under-Sink & Whole-House Filters: Anywhere from 6 months to a year or more.

Always read the manual for your specific model. It’s the only way to ensure your filter continues to be your champion, protecting you with every drop.


At Water Filter Advisor, our goal is to help you find the right filtration system for your home. Our detailed guides and honest reviews are here to help you protect your family and enjoy cleaner, safer water. Find out more at https://www.waterfilteradvisor.com.
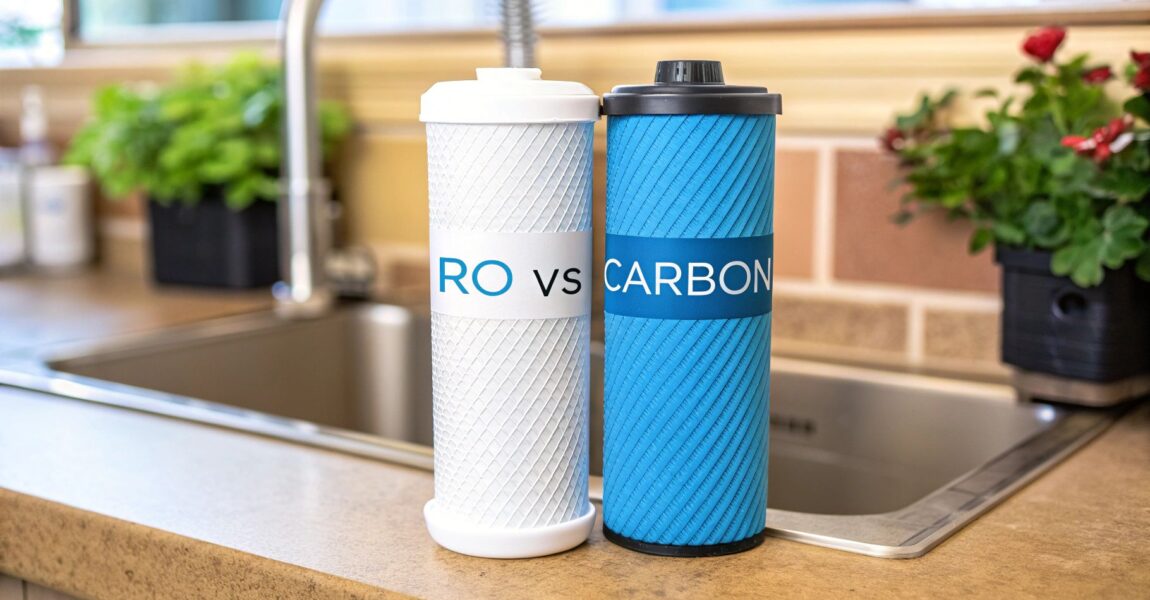
How to Check for Chlorine in Your Water (and Actually Enjoy It)

Ever wonder how to check for chlorine in your water? Good news: you don't need a chemistry degree. The easiest ways involve using test strips, liquid reagent kits, or digital meters. You can grab these just about anywhere, and they’re designed for regular folks, not mad scientists. In just a few minutes, you'll know exactly what's flowing from your faucet and be one step closer to delicious, clean water.

Why Your Tap Water Smells Like a Pool Party

A glass of tap water being filled from a modern kitchen faucet.

That bleach-like, "clean" smell wafting from your kitchen sink isn't just your imagination—it's chlorine, the unsung hero and occasional villain of your tap water. City water treatment plants add it to the public water supply for one glorious reason: to obliterate harmful bacteria, viruses, and other microscopic baddies. It's a fantastic disinfectant that keeps our water safe on its long, winding journey to your house.

Think of it as a bodyguard for your H₂O. It does a knockout job preventing waterborne illnesses, but its ghost tends to stick around long after the mission is complete. This leftover disinfectant is called residual chlorine, and it’s the culprit behind that familiar swimming pool perfume in your drinking glass.

The Chlorine Conundrum

While chlorine is a public health champion, this residual amount isn't always the most pleasant houseguest. The impact goes beyond just a funky taste in your morning coffee or that pot of pasta. Its presence can be a real buzzkill in other ways around the house.

  • Skin and Hair: Chlorine is a master at stripping natural oils. This can leave you with dry, itchy skin and brittle, lackluster hair right after a shower—not exactly the spa-like experience you were hoping for.
  • Household Appliances: Over time, chlorinated water can wage a silent war on the rubber seals and gaskets in your dishwasher and washing machine, potentially sending them to an early retirement.
  • Taste and Odor: This is the most obvious party foul. The chemical taste and smell can make you shun the tap, and it can ruin the delicate flavors of everything from gourmet tea to homemade soup.

When you learn how to check chlorine levels in your water, you take back control. Testing is the first, non-negotiable step. It tells you what you're dealing with so you can choose a home water filtration system that brings back your water's clean, natural taste.

Understanding Safe Chlorine Levels

So, what's a "normal" amount of chlorine? The levels in your municipal water can actually fluctuate wildly depending on the season, recent weather (like a massive rainstorm), and even how far your house is from the treatment plant.

Global health organizations have set guidelines for what's considered safe. The World Health Organization (WHO), for example, suggests that residual chlorine should ideally stay between 0.2 and 0.5 milligrams per liter (mg/L). This is the sweet spot for effective disinfection without going overboard. You can learn more about the WHO's drinking-water guidelines to see how your tap water stacks up.

Knowing the specific chlorine level in your water is the only way to connect the dots. A quick test will tell you if your levels are low, moderate, or hitting the high notes, giving you the intel you need to choose the perfect water filter for your family.

Choosing Your Chlorine Testing Method

Before you can even dream about picking a water filter, you have to know what you're up against. Finding out how to check the chlorine in your water is a simple but super important first step. You've got three main ways to do this, and each one offers a different blend of convenience, accuracy, and cost.

Think of these as your personal water-testing toolkit. You don’t need to be a scientist to use them—just a few minutes and a glass of water from your tap. Let's break them down so you can find your perfect match.

Test Strips: The Quick and Easy Check

Want an answer in less time than it takes to microwave popcorn? Chlorine test strips are your go-to. They couldn't be easier: just dip a strip into your water sample, give it a little swish, and match the color on the strip to the chart on the bottle. It’s a lightning-fast and cheap way to get a general vibe of your chlorine levels.

Test strips are perfect for a quick spot-check. Maybe you just moved into a new place, or you’ve suddenly noticed your water smells a bit "off." A test strip gives you a ballpark reading right away, satisfying your curiosity in seconds. The trade-off for all that speed, though, is precision. They’re great for sniffing out a problem, but not so great for measuring exactly how big that problem is.

Liquid Test Kits: The Reliable Middle Ground

For a more accurate reading that won't make your wallet cry, liquid test kits (sometimes called "dropper kits") are an excellent choice. This is where you'll usually find the DPD method, which is a trusted standard in the water testing world.

With these kits, you add a few drops of a liquid reagent into a small vial of your tap water. The water changes color based on the chlorine content, and you match that color to a printed comparator. This method gives you a much clearer and more detailed result than a test strip, letting you feel a bit like a home scientist.

One of the most common methods is the colorimetric DPD (N,N-diethyl-p-phenylenediamine) approach, which uses a color change to quantify chlorine. Research shows that while test strips are fast, DPD-based photometric equipment is generally preferred for precise chlorine control. You can learn more from these detailed reports on water quality testing methods.

Digital Meters: For Pinpoint Accuracy

When you need the most precise measurement you can get—no ifs, ands, or buts—a digital meter or colorimeter is the tool for the job. These slick handheld electronic devices eliminate all the guesswork of matching colors by eye.

You just pop a water sample into the meter, and it gives you a direct digital reading of the chlorine concentration, often down to two decimal places.

Digital meters are perfect for homeowners who want to geek out on their water quality, especially before and after installing a whole-house filter. They cost more upfront, but for people serious about their water, their accuracy and ease of use are unbeatable.

Comparing Home Chlorine Test Methods

To make it simple, here’s a quick showdown of how the three main methods compare.

Method Best For Accuracy Speed Typical Cost
Test Strips Quick, initial checks and identifying a potential issue. Low to Moderate Very Fast (1 minute) $10 – $20
Liquid Test Kits Balancing accuracy and affordability for regular use. Moderate to High Fast (2-5 minutes) $15 – $30
Digital Meters Getting precise, data-driven results for tracking. Very High Fast (1-3 minutes) $50 – $150+

So, what's the right call? It really depends on your mission. Are you just casually curious, or are you on a quest to solve a specific issue like dry skin or coffee that tastes like it was brewed in a swimming pool? Any of these methods will arm you with the crucial info you need to take the next step: picking a filtration solution that’s a perfect fit for your home.

How to Get Accurate Test Results

Alright, let's get to the main event—actually testing your water. Don't worry, you won't need a lab coat for this. The goal is simple: get a true snapshot of the water quality coming out of your tap. Getting a reliable number you can act on is easier than you think; a few pro tips are all it takes.

We'll walk through the best practices for each testing method, but first, a couple of golden rules apply no matter which kit you have. These simple tricks ensure you're testing what’s flowing through your pipes, not what's been sitting around getting stale.

This visual guide breaks down your three main options for checking chlorine, from simple strips to precise digital readers.

Infographic about how to check chlorine in water

As the infographic shows, there's a clear trade-off between speed and accuracy. Test strips are the fastest, but digital meters give you the most exact reading. It's all about matching the right tool to your needs.

Universal Best Practices for Water Sampling

Before you even crack open your test kit, a couple of quick steps will set you up for success. They seem small, but they make a huge difference in accuracy.

First, let your tap run for about 30-60 seconds before you collect any water. Water that sits in your pipes overnight can have a different chlorine level than the fresh supply from the main line. Running the tap for a minute clears out that old, stagnant water.

Second, always grab a clean container. Any leftover soap, food, or even old water residue can mess with your results. If you’re using a vial that came with your kit, just give it a good rinse with the same tap water you’re about to test.

Mastering the Test Strip Technique

Test strips are all about speed, but there's a right way and a wrong way to use them. Rushing the process is the number one mistake people make, and it can give you a completely bogus reading.

Here's how to nail it:

  • Dip, Don't Soak: Submerge the strip in the water for a second or two, just like the instructions say. Leaving it in longer can make the colors on the reagent pads bleed.
  • A Gentle Swirl: Give the strip a gentle swirl while it's underwater to make sure the pads get fully saturated. No need to create a whirlpool.
  • Hold it Horizontally: Once you pull the strip out, hold it level. This is key—it stops the colors from running into each other and muddying the result.
  • Time it Right: This is critical. The instructions will specify a wait time—usually 15 to 30 seconds—before reading. Don't eyeball it. Use a timer on your phone. Reading too early or too late gives you a false result as the chemical reaction is still developing.

When it's time to read, match the color pads to the chart in good, natural light. It's surprisingly hard to tell the difference between subtle shades of pink in a dimly lit room.

Getting a Clear Result with Liquid Kits

Liquid dropper kits, often using DPD reagent, are a big step up in accuracy. Success here is all about the details. The reagent turns the water a pinkish-purple color when chlorine is present—the deeper the color, the higher the chlorine.

The single best tip for this method is to read the results against a white background. Just hold a plain piece of paper behind the vial when you compare its color to the chart. It makes the color pop and helps you find a much more exact match.

Also, be precise:

  • Fill the test vial exactly to the line. Too much or too little water will dilute or concentrate the reagent, skewing the reading.
  • Hold the reagent bottle perfectly vertical when adding drops. This ensures every drop is the same size.

You might wonder why this matters. Well, city water with chlorine is great for preventing bacteria, but it's a problem for some hobbies. People who ferment foods or keep fish aquariums have to dechlorinate their water first, often by letting it sit out for 24 hours or boiling it for 15 minutes to let the chlorine gas dissipate. For the rest of us, a good filter is a much faster solution.

Calibrating and Using a Digital Meter

If you've opted for a digital meter, you're on your way to the most precise results possible at home. But even these high-tech tools need a little TLC to stay accurate. The most important step is calibration.

Think of it like tuning a guitar. You have to give the meter a reference point so it knows what "zero" looks like. Most meters are calibrated with chlorine-free water, like distilled water. You just put the "blank" sample in the meter and hit the "zero" or "calibrate" button.

Do this regularly, especially if you haven't used the meter in a while or if the readings seem off. Once it's calibrated, the rest is a breeze. You add your tap water, drop in the DPD reagent (it often comes in a little powder packet), and the meter gives you a specific number in parts-per-million (ppm) or milligrams-per-liter (mg/L). No more guesswork.

By following these simple steps, you can trust the number you see. That reliable data is the foundation for figuring out what it all means and choosing the right water filter to reclaim your tap.

Making Sense of Your Chlorine Levels

You’ve done the test, matched the colors, and now you have a number. So what does a reading of 0.8 ppm or 1.5 mg/L actually mean for the water you drink and shower in every day? This is where we turn that number into a story about your daily life.

Understanding your results is less about complex chemistry and more about context. That number on your test strip or digital meter is the concentration of chlorine in your water, measured in parts per million (ppm), which is the same as milligrams per liter (mg/L). It tells you how your water is treated and what you're likely experiencing at home.

The chlorine in your tap water isn't just one thing. It’s a mix of different compounds, and your test kit can help you figure out what’s what. Grasping these two key terms is the first step to truly decoding your results.

Free Chlorine vs. Total Chlorine

When you test your water, you’ll often see options to measure both free chlorine and total chlorine. They sound similar, but the difference between them is crucial for understanding your water quality and choosing the right filter.

  • Free Chlorine: Think of this as the "active-duty" chlorine. It’s the potent disinfectant that’s ready and available to zap bacteria and other pathogens. This is the portion of chlorine that hasn't reacted with anything yet, and it’s what you typically taste and smell.

  • Total Chlorine: This is the sum of free chlorine plus combined chlorine (better known as chloramines). Combined chlorine forms when free chlorine gets tangled up with organic stuff in the water. It’s a less effective disinfectant but hangs around in the system much longer.

If your total chlorine level is way higher than your free chlorine, it means a lot of the disinfectant has already been "used up," creating chloramines. This often creates that potent, unpleasant chemical smell that's even worse than chlorine alone. For home filtration, knowing both numbers helps you choose a filter that can tackle the entire problem.

Key Takeaway: Think of free chlorine as the 'available' soldier ready for battle, and total chlorine as the entire army, including those who have already engaged with contaminants. Both contribute to the overall taste, smell, and feel of your water.

What Is a Normal Chlorine Level?

So, what should your chlorine reading actually be? According to the EPA, the maximum safe level is 4.0 ppm (mg/L). Most city water systems aim to keep it between 0.5 and 2.0 ppm by the time it reaches your faucet.

But "safe" and "pleasant" are two very different things.

Some people have super-senses and can taste or smell chlorine at levels as low as 0.5 ppm. Others might not notice it until it gets closer to 1.5 ppm or higher. This is often the point where you start to feel its effects, like dry, itchy skin after a shower or that distinct bleach-like taste in your drinking water.

It's also important to know that these levels aren't static. Chlorine concentration can swing up or down based on how far your home is from the treatment plant, seasonal changes, or even a recent heavy rainstorm that forces the city to use more disinfectant. This is exactly why you can't just rely on the city's annual water quality report; you need the real-time data from your own tap.

By understanding what a typical reading is and connecting it to your own experience—that dry skin, the flat-tasting coffee—you can decide what to do next. A consistently low reading might mean a simple faucet filter is all you need, while higher readings point toward a more robust whole-house system to protect every tap in your home.

Matching Your Results to the Right Filter

A person smiling as they install an under-sink water filter.

Alright, you've done the testing and you're holding the results. This is the moment where that data transforms into an action plan for getting amazing water in your home. The right filter all comes down to what your tests revealed. Are we talking about a minor taste issue, or are you dealing with a chlorine level that makes your shower feel like a dip in the public pool?

Think of your chlorine reading as a signpost. It points you straight to the most effective and budget-friendly solution for your water. There's no single "best" filter for everyone—the best one is the one that solves the specific problem you just uncovered. Let's turn that PPM number into a home upgrade.

Low to Moderate Chlorine Levels (0.2 to 1.0 ppm)

If your test came back in this range, you're in good company. This is the most common scenario, where the complaints are usually about taste and smell. Maybe your coffee tastes a little funky, your drinking water isn't as crisp as you'd like, or you catch a faint swimming pool scent now and then.

Good news: you don't need a massive, complicated system. The fix here is simple and targeted.

  • Water Pitcher Filters: This is the easiest entry point. A good pitcher with an activated carbon filter will make a huge difference in the taste and odor of your drinking water.
  • Faucet-Mounted Filters: These clip right onto your kitchen tap for instant gratification. They're a nice step up from a pitcher if you want filtered water on demand for cooking and drinking.

Both of these use activated carbon, a ridiculously porous material that acts like a chlorine magnet. As water flows through, chlorine gets trapped on the carbon's massive surface area. It's an incredibly effective and affordable way to get that pure water taste back.

Moderate to High Chlorine Levels (1.0 to 2.5+ ppm)

Once your readings consistently climb over 1.0 ppm, you’re in territory where the effects are more than just a nuisance. This is when you start feeling that tight, dry-skin feeling after a shower or begin to worry about the long-term impact of chlorine and its byproducts.

A simple pitcher just isn't going to cut it for the whole house. It's time to level up with a more comprehensive solution.

  • Under-Sink Filters: Tucked away under the kitchen or bathroom sink, these systems have much higher capacity and power than pitchers. They hook directly into your cold water line and give you purified water from a separate, dedicated faucet.
  • Countertop Filters: These units sit next to your sink and connect to the faucet, delivering serious filtration power without any plumbing work. They're a fantastic option for renters.

Your test results are your guide. A reading of 1.5 ppm or higher, combined with noticeable skin irritation or a strong chemical smell, is a clear signal that a point-of-use or whole-house system is a smart investment in your family's comfort and health.

Very High Chlorine or Whole-Home Concerns

If your chlorine levels are consistently high, or you just want every single tap, shower, and appliance in your house protected, a whole-house water filter is the ultimate solution. These are installed right where the main water line enters your home, meaning every drop of water that flows through your pipes gets treated.

A whole-house system is your best defense against not only chlorine but also its disinfection byproducts, like trihalomethanes (THMs). When you're dealing with really stubborn chlorine issues, you might even look at what the pros use. High-purity facilities often rely on specialized equipment like lab water purifiers for distilled water to get absolute purity.

For your home, a robust whole-house carbon filter delivers that same kind of peace of mind. You're not just improving your drinking water—you're protecting your appliances from wear and your skin and hair from dryness. It's a total home transformation, one filtered drop at a time.

By matching your specific chlorine reading to one of these strategies, you can stop guessing and make a smart choice. You've already done the detective work; now you can pick the right tool for the job with total confidence.

Common Questions About Water Testing

Even with the right gear, a few questions always pop up when you're learning how to check chlorine levels in your water. We’ve rounded up quick answers to the most common queries to clear up any confusion and help you move forward with your filtration plan.

How Often Should I Test My Water?

As a general rule, testing your home’s water every 3 to 6 months is a smart move. Chlorine levels from your city can change with the seasons or after heavy rain, so regular checks keep you informed.

A pro tip: always test right before and after you install a new water filter. This gives you concrete, undeniable proof of how well your new system is working and lets you see (and taste) the difference right away.

Can I Use Pool Test Strips?

It’s tempting, but please don't. Stick to kits made specifically for drinking water. Pool test strips are designed for much higher chlorine concentrations and a completely different water chemistry.

Using pool strips on your tap water will almost certainly give you a wildly inaccurate reading, making it completely useless for choosing a filter. For results you can actually trust, always grab a dedicated drinking water test kit.

If you're looking for more guidance on selecting the right tools and understanding different water contaminants, you can find a wealth of information in our comprehensive water filtration advice section.

My Test Shows Zero Chlorine. Is That Bad?

Not necessarily. If you're on city water, a zero reading might just mean you live far from the treatment plant. The chlorine has simply done its job and faded away by the time the water reaches you.

While that’s great for the taste, it also means the water no longer has that final layer of disinfectant protection. If you're concerned about microbial safety, adding a UV purification system after your main filter is a fantastic, chemical-free way to ensure total peace of mind.

Will a Water Softener Remove Chlorine?

This is a super common mix-up. A standard water softener will not touch chlorine. Softeners are designed for one job: removing hardness minerals like calcium and magnesium through a process called ion exchange. They're all about preventing scale buildup, not improving taste.

To actually get rid of chlorine, you need a filter that uses activated carbon. Many homeowners create the ultimate water dream team by pairing a water softener with a whole-house carbon filter to tackle both hard water and chlorine at the same time.

Why Does Water Taste Sweet? Your Home Water Filter Might Be the Answer

You pour a glass of water, expecting that familiar, crisp taste, but instead, you get… sweetness? It’s a strange and often confusing experience. The short answer is that this sweetness usually comes from a few places: naturally occurring minerals, your home’s plumbing, or even your water filter system.

While a sweet taste is often harmless, a sudden change in your water's flavor is your cue to play detective. It’s time to take a closer look at your water quality and what your home filter is—or isn't—doing.

Decoding the Sweet Taste in Your Tap Water

A woman drinking a glass of water, looking thoughtfully at its taste

When you’re thirsty for a neutral, refreshing drink and get a hint of sugar instead, it’s only natural to wonder what’s going on. The reason your water tastes sweet isn't a single issue but more like a puzzle with several possible pieces. Interestingly, your home's water filtration system is a central part of this puzzle, sometimes acting as the cause and other times as the hero.

This guide will walk you through the usual suspects behind sweet-tasting water, with a laser focus on how your home filter fits into the picture. We’ll explore everything from harmless mineral content to the more serious signs of potential contamination, giving you the knowledge to diagnose the cause and find the right filtration fix. Getting that pure, clean taste back is totally achievable—it just starts with understanding your water.

Why Water Taste Matters

How we perceive our water's taste is tied directly to its chemical makeup and where it comes from. This isn't just about personal preference; it can actually impact how much water we drink. For example, a 2018 U.S. study found that about 26% of adults felt their local tap water didn't taste good, which can seriously affect hydration habits.

Getting to the bottom of an "off" taste, like sweetness, is the first step toward installing a home filtration system that solves the problem for good. You can learn more about the study's findings on water taste perceptions.

To get a clearer picture of what might be happening in your pipes, let’s break down the common reasons.

Key Takeaway: A sweet taste in your water can come from its mineral content, your plumbing, or your filter. Figuring out the source is the key to choosing the right home filtration solution to fix it.

The table below is a handy guide to help you start troubleshooting.

Quick Guide to Sweet Tasting Water Causes

Here’s a quick look at the most common reasons your tap water might taste sweet, where the issue likely originates, and whether a home water filter is the solution.

Potential Cause Common Source Filtration Fix?
Natural Minerals High levels of calcium & magnesium in "hard water". Yes (Water Softener/RO)
Plumbing Materials Leaching from old copper or iron pipes. Yes (Reverse Osmosis)
New Filter Cartridge Release of fine particles from new carbon filters. Yes (Flush the new filter)
Contamination Presence of certain organic compounds or lead. Yes (RO/Carbon Filters)
Old Filter Bacteria buildup in an expired filter cartridge. Yes (Replace the filter)

This summary should give you a solid starting point. From here, you can dig deeper into each potential cause to find the perfect home filtration solution.

Natural Minerals and Your Water's Flavor Profile

A clear stream flowing over smooth, multi-colored rocks and minerals

Sometimes, the simplest answer is the right one. The reason your water tastes sweet might have nothing to do with your plumbing or any outside contaminants. It could be coming straight from nature.

Water is a fantastic solvent. As it trickles through underground aquifers and flows over ancient rock formations, it naturally dissolves and picks up a whole host of minerals along the way. That mineral content is often the secret ingredient giving your tap water its unique character. If you live in an area with hard water, your supply is loaded with minerals like calcium and magnesium. While they're perfectly safe to drink, these elements can give the water a subtle, almost earthy sweetness.

Think of it as the water’s terroir, just like with wine. The specific blend of minerals it collects is a direct reflection of your local geology.

The Role of pH and Alkalinity

Beyond the minerals themselves, the pH level of your water is a big player in how it tastes. Water that leans more alkaline (meaning it has a higher pH) is often described as feeling smoother and tasting just a little bit sweeter than more acidic water. This is exactly why some bottled "alkaline waters" have become so popular—people enjoy that smoother taste. Your tap water can be naturally alkaline, too, depending on its source.

A subtle sweetness from minerals and alkalinity is often just the water's natural signature. However, if this natural sweetness just isn't your cup of tea, a home filtration system can easily neutralize it.

How Regional Differences Shape Water Taste

The idea that your local geology changes how your water tastes isn't just a guess—it's a well-documented fact. For example, in areas where water hardness has calcium and magnesium concentrations over 60 mg/L, people often perceive the water as having a softer, sweeter flavor compared to softer water that might be treated with more chlorine.

These mineral profiles are the reason tap water in one city can taste completely different from the next. If you're curious to learn more about the building blocks of our planet's crust, you can check out these fascinating facts about minerals.

Ultimately, if your water's natural sweetness just isn't for you, the good news is you can fix it. A home filtration system like a water softener or a reverse osmosis unit can remove those specific minerals and give you the neutral, crisp taste you're looking for.

When Sweetness Signals a Deeper Problem

A close-up of an old, corroded pipe with water dripping from it

While the light sweetness from natural minerals is typically fine, a sudden, very noticeable sweet taste in your water should raise a red flag. Think of it as your taste buds sending up a flare—something might be seriously wrong with your plumbing. When the flavor changes out of the blue, it's time to stop guessing and start investigating.

This kind of abrupt shift is often the first sign that unwanted contaminants have made their way into your water supply. You can't just ignore it. Some of the most dangerous contaminants, unfortunately, happen to taste sweet. Knowing what these threats are is the first step toward finding a home filtration system that can actually handle them.

The Hidden Danger of Lead and Heavy Metals

One of the most alarming reasons for sweet-tasting water is lead. It’s a heavy metal with a distinctively sweet flavor—which is precisely why it was used in products like paint and even wine for centuries before we fully understood how toxic it is. Lead presents major health risks, especially for children and pregnant women. In fact, there is no safe level of lead exposure.

So where does it come from?

  • Older Pipes: If your home was built before 1986, there’s a good chance it has lead service lines, pipes, or solder joining the pipes to the city’s water main.
  • Corrosion: As these old pipes age and break down, they can corrode, causing lead to leach straight into the water flowing to your tap.
  • Fixtures: Even homes built more recently aren't completely safe. Some brass fixtures and faucets can still contain small amounts of lead.

If you even suspect lead is the problem, don't count on a standard pitcher filter to solve it. You'll need something much more powerful, like a reverse osmosis (RO) system or a filter specifically certified to reduce lead.

Unseen Organic Compounds

Another potential culprit is the presence of certain organic compounds. These substances can get into the water from agricultural runoff, industrial pollution, or even just from decaying organic matter in reservoirs. While not all of them are immediately harmful, some can pose serious long-term health risks.

For example, the chemical structure of some pesticides and herbicides is perceived by our taste buds as sweet. If those chemicals seep into groundwater, they can eventually show up at your faucet. Similarly, certain glycols—often found in antifreeze but also used in food processing—can create a sweet taste if they contaminate the water supply.

A sudden, chemical-like sweetness should never be ignored. It's a clear signal to get your water tested by a certified lab to identify the specific contaminants you're dealing with.

An activated carbon filter is usually your best bet against these kinds of organic compounds. The carbon is incredibly porous, which makes it great at trapping and absorbing these chemicals, stripping them from your water and leaving it with a clean, neutral taste. When you don't know the exact cause of the sweetness, a multi-stage filtration system that combines carbon with other technologies will give you the most comprehensive protection.

Is Your Water Filter Causing the Sweet Taste?

It sounds completely backward, doesn't it? The very thing you installed to guarantee pure, clean water might be the reason it suddenly tastes sweet. This unexpected flavor can pop up for a couple of different reasons, depending on whether your filter is fresh out of the box or has seen better days.

Figuring out the link between your home filtration system and that sweet taste is the first step. It helps you get to the bottom of the issue and make sure you're getting the performance you paid for. Let's dig into how both new and old filters can be the source of the problem.

The New Filter "Break-In" Period

If you've just popped in a new filter cartridge—especially an activated carbon one—you might notice a temporary sweetness. Think of it like breaking in a new pair of leather boots; the filter needs a little time to settle in and start doing its best work.

During this initial "break-in" phase, the filter can release tiny, harmless carbon fines. These are just microscopic dust particles leftover from manufacturing. While they are perfectly safe to drink, these fines can give the water a slightly sweet flavor. This is totally normal and usually goes away on its own after a few gallons of water have run through the system.

Pro Tip: Always flush a new water filter cartridge before you start drinking from it. Just run the water for a few minutes (or whatever the manufacturer's instructions say) to wash away any of those loose carbon fines and get the filter primed for action.

When an Old Filter Turns Against You

Now for the other side of the coin: an old, neglected filter is a much more concerning reason for sweet-tasting water. A water filter isn't a "set it and forget it" kind of deal. It has a limited lifespan and can only capture so many contaminants. Once it's full, it's full.

Worse yet, a saturated filter can turn into a breeding ground for bacteria. As water struggles to pass through the clogged filter media, these bacteria can multiply and release their own byproducts, some of which taste distinctly sweet. At this point, your filter isn't just failing to clean your water—it's actively making it dirtier.

This is exactly why sticking to a regular replacement schedule is absolutely critical for safe, great-tasting water. Here’s a quick checklist to figure out if your filter is the culprit:

  • Check the Date: When was the last time you swapped out the cartridge? If it's been more than three to six months for a standard filter, it's probably time.
  • Notice the Flow: A clogged filter will almost always cause a noticeable drop in your water pressure.
  • Taste the Difference: If the sweet taste showed up gradually and seems to be getting stronger, an old filter is the prime suspect.

Proper filter maintenance is the single most important thing you can do to prevent weird flavors from showing up. By flushing new cartridges and swapping out old ones on time, you make sure your system delivers the pure, refreshing water you expect, not an unwelcome sugary surprise.

Choosing the Right Filtration System for Pure Taste

So, you’ve figured out why your water tastes sweet. Now comes the important part: picking the right tool to fix it. Choosing a home water filtration system isn't about grabbing the first pitcher you see at the store. It's about matching the filter's technology to the specific problem you're dealing with, whether that's excess minerals, weird organic compounds, or something more serious like lead contamination.

When you're up against a funky flavor, the two most effective systems you can get for your home are activated carbon filters and reverse osmosis (RO) systems. They work in completely different ways, and each one is a champ at targeting specific types of contaminants. Getting this choice right is the key to enjoying that pure, crisp water you're after.

Activated Carbon: The Taste and Odor Specialist

Think of an activated carbon filter as a high-tech sponge for your water. The carbon inside is specially treated to create millions of microscopic pores, giving it a massive surface area that traps and soaks up chemical contaminants. This process is called adsorption, and it's what makes these filters so great at getting rid of things that cause weird tastes and smells.

Activated carbon is a fantastic choice for targeting:

  • Organic Compounds: It’s great at removing many of the pesticides and industrial solvents that can give water a chemical-like sweetness.
  • Chlorine: While not sweet, chlorine is a super common additive that messes with your water's overall taste. Carbon filters knock it out of the park.

But you need to know what they can't do. Standard carbon filters won't touch dissolved minerals, salts, or heavy metals like lead. If your sweet taste is coming from hard water, a carbon filter alone isn't going to solve your problem.

This infographic lays out a simple decision tree to help you figure out if your filter itself is the source of the sweetness.

Infographic about why does water taste sweet

As the chart shows, both brand-new and old filters can be the culprit, which really drives home the importance of flushing new cartridges and keeping up with maintenance.

Reverse Osmosis: The Purity Powerhouse

If you have a strong suspicion that the sweet taste is coming from something more serious, like heavy metals or a really high mineral content, you need to bring in the big guns. A reverse osmosis (RO) system is that bigger gun. It works by forcing water through a special membrane packed with microscopic pores—so tiny that it blocks almost everything that isn't a pure water molecule.

RO systems are the undisputed gold standard for removing:

  • Heavy Metals: They are proven to remove over 99% of lead from drinking water.
  • Dissolved Minerals: They completely eliminate the calcium and magnesium that often cause that sweet taste in hard water.
  • A Wide Range of Contaminants: From fluoride to nitrates and tons of other impurities, RO systems get rid of it all.

Because they're so incredibly thorough, RO systems deliver some of the purest drinking water you can get right from your tap.

A consumer study looking into flavored water discovered that 65.7% of people expect their water to have a pleasant, often slightly sweet, taste. This just goes to show how much our perception is shaped by both what's in the water and what we expect. You can read the full research on water taste preferences to dig deeper.

Comparing Home Water Filtration Systems

With different technologies available, it can be tough to decide which filtration system is best for your home. This table breaks down the most common options to help you compare them at a glance, focusing on what they're good at, what they cost, and how much work they are to maintain.

Filtration Type Effective Against Average Cost Maintenance
Activated Carbon Chlorine, organic compounds, pesticides, bad taste & odor. $20 – $150 Replace filters every 2-6 months.
Reverse Osmosis Heavy metals (lead), minerals, salts, nitrates, fluoride. $150 – $500+ Replace pre-filters every 6-12 months; membrane every 2-3 years.
Water Softener Hard water minerals (calcium, magnesium). $500 – $2,000+ Refill salt periodically (every 1-3 months).
UV Purifier Bacteria, viruses, microorganisms. (Does not remove chemicals or minerals). $200 – $600 Replace UV lamp annually.

Ultimately, the best system is the one that targets the specific contaminants causing your sweet taste. For most flavor issues, an activated carbon or RO system will get the job done right. If you need more help deciding, check out our full collection of water filter advice for more in-depth guides.

Got Questions About Your Water's Taste? We've Got Answers.

When something as basic as your tap water starts tasting funny, it's natural to have questions. A sudden sweet taste can be unsettling, and you need clear, direct answers to feel confident about what you're drinking.

Let's cut through the confusion. Here are the most common questions we hear from people dealing with this exact problem, with a focus on how home water filtration provides the solution.

Is It Safe to Drink Water That Tastes Sweet?

This is the big one, and the honest answer is: it depends. A sweet taste from something harmless like calcium is perfectly fine. But that same taste can also signal a serious problem, like lead contamination. The trouble is, you can't tell the difference by taste alone.

If your water suddenly starts tasting sweet, the safest bet is to stop drinking it and get it tested. You just can't risk it. A professional lab test will tell you exactly what’s in there, so you can find a filter certified to remove that specific contaminant.

How Do I Test My Water?

For a surefire answer, send a sample to a state-certified laboratory. They'll run a full analysis and give you a detailed report on everything from minerals and heavy metals to organic compounds. It’s the most reliable way to know what you’re dealing with.

Want a quicker first look? Grab a quality at-home test kit. These can screen for common culprits like lead, high mineral content (water hardness), and pH imbalances. The results can give you a good idea of whether you need to follow up with a professional lab.

When it comes to safety, don't guess. A water test is a small price to pay for peace of mind, and it points you directly to the right filtration solution for your home.

Will a Basic Pitcher Filter Fix This?

It really hinges on what's causing the sweetness. A standard pitcher with an activated carbon filter does a great job of removing chlorine and certain organic compounds that mess with taste and smell. But that's where its power ends. It's not effective against dissolved minerals or heavy metals.

If your water tastes sweet because of high mineral content or, worse, lead, a simple pitcher filter won't solve the problem. For issues like those, you'll need to step up to a more robust system, like an under-sink reverse osmosis unit or a whole-house water softener.

How Often Should I Change My Filter?

Keeping up with filter changes is non-negotiable if you want your system to work right. Always follow the manufacturer's schedule for your specific model—lifespans can vary a lot.

As a general guideline:

  • Pitcher filters: Every 2-3 months.
  • Faucet-mounted filters: Usually 3-4 months.
  • Under-sink and whole-house filters: Can go anywhere from 6 to 12 months.

If you let it go too long, the filter can get clogged or even become a breeding ground for bacteria. When that happens, it can start dumping new, unwanted tastes—including sweetness—right back into your "filtered" water.


At Water Filter Advisor, our mission is to help you get the purest, best-tasting water for your home. Dive into our detailed guides and reviews to find the perfect filtration system for your needs. Visit us at https://www.waterfilteradvisor.com to learn more.

Distilled vs. Reverse Osmosis: The Ultimate Water Filtration Showdown

So, you're on a quest for pure, delicious water, and you've narrowed it down to two heavy hitters: distillation and reverse osmosis. Welcome to the main event! The real difference between distilled and reverse osmosis water boils down to their very different game plans. Think of it as a science experiment versus a high-tech security checkpoint.

Distillation is like Mother Nature's water cycle, but in a countertop gadget. It boils water, lets the pure steam rise to escape the gunk, and then cools that steam back into pristine liquid. It's a thermal process, using heat to do the dirty work. Reverse osmosis (RO), on the other hand, is a pressure-based filtration process. It's like a bouncer for your water line, using brute force to push water through an absurdly fine membrane that physically blocks troublemakers from passing.

Distilled vs Reverse Osmosis The Homeowner's Quick Guide

When you're standing in the aisle or browsing online for a home water purifier, this is one of the biggest debates you'll encounter. For homeowners, the choice really comes down to what you value most: the absolute, sterile purity you get from distillation, or the convenient, on-demand filtration of a reverse osmosis (RO) system.

Let's be clear: one isn't just flat-out better than the other. The right call depends entirely on your family's needs—what you want your water to taste like, how much hassle you're willing to put up with, and which specific contaminants you're trying to evict from your tap water.

This guide and the table below will give you a quick, at-a-glance feel for the differences in how they work, taste, and fit into your daily life.

A glass of pure water next to a home water filter system.

Key Distinctions at a Glance

Just looking at how these two systems operate tells you a lot about their strengths. A typical home water distiller sits on your countertop, patiently boiling a batch of water, collecting the steam, and condensing it. It’s an incredibly thorough process that’s fantastic at removing things like heavy metals, minerals, and salts. It’s the slow and steady tortoise of the water world.

An RO system is a totally different beast. It's usually tucked away under your sink and spliced right into your plumbing, like a secret agent for your water supply. It works by pushing water through several stages of filters, but the real magic happens at the semipermeable membrane, which does the heavy lifting of blocking a massive range of dissolved solids and pollutants.

The defining difference: Distillation purifies water by turning it into steam to leave contaminants behind. Reverse osmosis purifies water by physically pushing it through a filter that blocks those contaminants.

To make things even simpler, here's a quick table to show you how they stack up side-by-side for typical home use.

Distilled vs Reverse Osmosis An At-A-Glance Comparison

Feature Distilled Water Reverse Osmosis (RO) Water
Purification Method Boiling water into steam & condensing it Pushing water through a semipermeable membrane
Typical Setup Countertop appliance (batch process) Under-sink system (on-demand supply)
Energy Usage Higher (requires electricity to boil water) Lower (uses water pressure)
Taste Profile Often described as "flat" or "bland" Generally crisp, clean, and refreshing
Mineral Removal Removes virtually all minerals Removes most, but some may remain

As you can see, the choice isn't just about which one filters "better." It's about how the system integrates into your home, how much energy it uses, and even what kind of taste you prefer.

How Water Distillation Replicates Nature's Rain Cycle

Ever wondered why the air feels so clean after a good downpour? It's because rain is nature's own purified water, and home distillation basically mimics that process—just a whole lot faster and without the risk of getting struck by lightning.

At its heart, distillation is a beautifully simple thermal process. You start by heating water in a boiling chamber up to 212°F (100°C), where it turns into steam. This jump from liquid to gas is where the magic happens.

A home water distiller on a kitchen counter, showing the process of steam rising and condensing into a clean carafe.

As the pure H₂O vapor rises, it leaves almost everything else behind. Heavier, non-volatile contaminants just can't make the trip. That means things like heavy metals, salts, minerals, and most microbes get left behind as a crusty sediment in the boiling chamber. It's a one-way ticket for water molecules only.

From Steam to Pure Water

Once the steam is separated, it's guided into a cooling channel. A fan typically cools it down, causing the vapor to condense back into liquid. This is your exceptionally pure distilled water, which drips into a clean carafe.

It's just like the steam that rises from a kettle on your stove. The steam itself is pure water, but any scale or residue stays put inside the kettle. A distiller just captures that steam and turns it back into pristine drinking water.

This method results in one of the purest forms of water available, stripped of the vast majority of dissolved solids found in your tap water.

By mimicking nature's cycle of evaporation and precipitation, distillation essentially hits the reset button on your water, leaving you with just H₂O.

What Distillation Removes and What It Misses

Distillation is an absolute powerhouse for removing a specific class of contaminants. Because it physically separates water from solids, it's brilliant at getting rid of:

  • Heavy Metals: Lead, arsenic, mercury, and cadmium have no chance. They're left behind when the water boils.
  • Dissolved Minerals and Salts: It removes calcium, magnesium, sodium, and other inorganic compounds. This is why distilled water is recommended for appliances like irons to prevent mineral buildup.
  • Microbiological Threats: The high heat kills off most bacteria, viruses, and other pathogens, and they can't travel with the steam anyway.

But it’s not a perfect system. The biggest blind spot is with certain volatile organic compounds (VOCs). These are sneaky chemicals with a boiling point at or below water's. When you boil the water, these VOCs can turn to gas right along with the H₂O, travel through the condenser, and end up in your clean water.

To get around this, most modern distillers come equipped with an activated carbon post-filter designed to specifically trap these chemicals. This is a key point to remember when considering the difference between distilled and reverse osmosis, as each technology has its own set of strengths and weaknesses in removing specific contaminants.

How A Reverse Osmosis System Really Works

While a distiller is like a patient scientist, a reverse osmosis (RO) system is a high-tech commando raid on water impurities. It's not just one filter but a whole team of them working together, using high pressure to strip contaminants from your water in a methodical, step-by-step process.

The heart of the whole setup is the semipermeable membrane. You can think of it as a bouncer at an exclusive club, but for water. Its pores are unbelievably small—around 0.0001 microns—so only pure H₂O molecules get past the velvet rope. Everything else, like dissolved salts and lead, is rejected and sent packing down the drain.

But this membrane is delicate. You can't just blast raw tap water at it, or it would clog up and fail in no time. That’s why a home RO system is built with several layers of protection, all designed to safeguard this crucial component.

The Path Water Takes Through An RO System

When water enters a typical under-sink RO system, it goes on a specific journey. Each stage preps it for the next, which is key to getting the purest water possible and making the membrane last.

The whole thing breaks down into three main phases:

  1. Pre-Filtration: First, the water has to get through a couple of "bodyguard" filters. A sediment pre-filter catches the big stuff like rust, dirt, and sand. Then, a carbon block filter grabs chemicals like chlorine, which can eat away at the delicate membrane.
  2. The RO Membrane: With the water now pre-cleaned, it’s forced at high pressure against the semipermeable membrane. This is where you see the biggest difference between distilled and reverse osmosis—RO is a physical separation process, while distillation relies on evaporation. The membrane physically blocks up to 99% of total dissolved solids (TDS), which are then rinsed away into your drain.
  3. Post-Filtration: After passing through the membrane, the purified water sits in a small storage tank under your sink. When you open the RO faucet, the water travels from the tank through one last "polishing" filter, usually another carbon filter. This final touch gets rid of any remaining off-tastes or odors, making sure the water is perfectly crisp when it hits your glass.

An RO system isn't just one filter; it's a team of filters working in concert. The pre-filters protect the membrane, and the post-filter gives the water a final polish for perfect taste.

This multi-stage design is what allows reverse osmosis to tackle such a huge range of contaminants, giving you a steady supply of clean water right from your tap. It’s a smart and highly effective approach for any modern home.

A Head-to-Head Analysis On Contaminant Removal

When you sink your money into a water purification system, the goal is pretty straightforward: make your water safer to drink. The real difference between distilled and reverse osmosis comes down to which contaminants each one is best at removing. Both methods are powerhouses, but they go about it in completely different ways. This makes one a better fit than the other, depending on what’s actually lurking in your water.

Distillation is basically a brute-force approach. You boil the water, catch the steam, and leave nearly everything else behind. This makes it an absolute champion at getting rid of things that have a higher boiling point than water itself.

Reverse osmosis, on the other hand, is more like a highly selective bouncer at a club. It uses a multi-stage process where water is forced through a special membrane that rejects a huge range of dissolved solids based on their size and charge.

How Each Method Handles Common Contaminants

Distillation is almost flawless when it comes to removing heavy metals like lead and arsenic, boasting removal rates of 99.9%. It’s also unmatched for taking out inorganic minerals—think calcium and magnesium—and salts. This is precisely why distilled water has that distinctly "flat" taste. As a bonus, the boiling process kills just about every bacterium and virus.

Reverse osmosis is more of an all-around performer. It’s fantastic at removing dissolved salts, nitrates, and fluoride, typically cutting them down by 95-99%. RO systems also excel at filtering out things like pesticides and chlorine, which makes a huge difference in the taste and smell of your tap water. While it's great against most microbes, it doesn't use heat to sterilize the water.

This infographic gives you a good look at how a typical RO system works, showing how each stage plays a part in cleaning the water.

Infographic showing the three main stages of RO filtration Pre-Filter, RO Membrane, and Post-Filter.

As you can see, an RO system isn't just one filter. It’s a complete process where each stage tackles different impurities, protecting the main membrane and polishing the water before it gets to your glass.

Contaminant Removal Effectiveness Comparison

Let's break down how these two stack up against specific, common water contaminants. This table gives a clear side-by-side look at where each method shines and where it might fall short.

Contaminant Distillation Removal Rate Reverse Osmosis Removal Rate
Heavy Metals (Lead, Arsenic) Excellent (99.9%+) Very Good (95-97%)
Dissolved Minerals & Salts Excellent (99.9%+) Excellent (95-99%)
Chlorine & Chloramine Poor (can be vaporized) Excellent (98%+, with carbon filters)
Fluoride Very Good (90-99%) Excellent (95-97%)
Bacteria & Viruses Excellent (99.9%+) Very Good (99%+, membrane blocks them)
Pesticides & Herbicides Good to Very Good Excellent (97-99%, with carbon filters)
Volatile Organic Compounds (VOCs) Poor (without a carbon filter) Very Good (with carbon filters)

Looking at the numbers, it's clear there's no single "best" for everything. Your choice really hinges on what you're trying to remove.

Key Takeaway: Choose distillation if you’re aiming for the absolute highest purity from minerals, heavy metals, and microbes. Go with reverse osmosis for a broader defense against dissolved chemicals like chlorine, fluoride, and pesticides, which results in better-tasting water for daily drinking.

At the end of the day, your local water quality report is your best guide. If heavy metals or microbiological threats are your main worry, distillation offers almost total peace of mind. But if you’re dealing with a cocktail of city water additives and potential agricultural runoff, a multi-stage RO system is the more well-rounded solution.

Long-Term Costs and Daily Practicality: What to Expect

When you look past the purification numbers, the real decider for most people between distilled and reverse osmosis comes down to two things: money and convenience. It's not just about the upfront cost, but how each system fits into your daily life and your monthly budget.

A countertop distiller might look like the cheaper option on the shelf, and it often is. But that initial price tag doesn't tell the whole story.

The True Cost of Running Your System

Distillation is a power-hungry process. A standard home distiller pulls around 800 watts of electricity and needs a good three to four hours to produce just one gallon of water. That adds up on your utility bill, especially if you have a family that goes through a lot of water. It’s the energy vampire of the water filter world.

Reverse osmosis, on the other hand, runs on your home's existing water pressure. It uses a tiny bit of electricity, but not enough to even notice. The main running cost for an RO system is the wastewater it sends down the drain to keep the membrane clean. Older systems were pretty wasteful, but modern ones have gotten much better, with some hitting a 2:1 or even 1:1 waste-to-pure-water ratio.

Financial Insight: With distillation, you're paying your electric company for every drop you make. With reverse osmosis, you're paying the water company—and water is almost always cheaper than the electricity needed to boil it for hours on end.

Maintenance and Day-to-Day Use

This is where the lifestyle fit really comes into play. A distiller is a batch system. You have to fill it, turn it on, and wait. It also needs to be cleaned constantly to get rid of the gunk—all those minerals and scale left behind in the boiling chamber. That descaling process can be a real chore.

An under-sink RO system is way more hands-off for daily use. You get purified water instantly from a dedicated tap whenever you want it. Maintenance is less frequent but follows a set schedule for replacing the filters and membrane.

  • Pre- and Post-Filters: These usually need swapping every 6 to 12 months.
  • RO Membrane: This is the heart of the system and typically lasts 2 to 3 years.

You just have to remember to order the parts and swap them out on schedule. The difference in practicality is pretty clear when you look at the market. The global reverse osmosis market was valued at around $18.8 billion and is growing fast, while the distilled water market is tiny in comparison. That alone shows you which technology is winning out in homes and cities. You can learn more about these market trends and see just how dominant RO has become.

Making The Right Choice For Your Household's Needs

https://www.youtube.com/embed/DOPweBJInr4

So, how do you decide between distilled water and a reverse osmosis system? There’s really no single “winner” here. The best choice comes down to what you actually need the water for in your home. It’s all about matching the right tool to the right job.

The decision really hinges on one simple question: Are you chasing absolute, near-perfect purity for specific tasks, or do you just want a reliable, on-demand source of fantastic-tasting water for your family?

Choose Distillation For Uncompromising Purity

If your goal is to get water that is as pure as scientifically possible, distillation is the undisputed champ. Nothing else comes close to its ability to remove virtually every last mineral and inorganic compound.

You’ll want to go with a distiller if your needs are very specific:

  • Medical Devices: Things like CPAP machines and home sterilizers need water that’s completely free of minerals. Using anything else can cause damaging scale buildup and compromise sterile operation.
  • Small Appliances: Ever notice that white crust in your steam iron or humidifier? That’s mineral scale. Using distilled water stops that from ever happening, making your appliances last much longer.
  • Compromised Immune Systems: The boiling process is an incredibly effective defense against microbiological threats, offering an exceptional layer of safety for anyone who needs it.

Distillation gives you water that's about as close to pure H₂O as you can get. This makes it the go-to solution for specialized uses where you simply can't have any minerals or contaminants.

Choose Reverse Osmosis For Everyday Convenience And Taste

For most households, a reverse osmosis system hits the sweet spot. It delivers an excellent balance of powerful filtration, on-demand convenience, and—most importantly—great-tasting water. It’s a workhorse built for the modern kitchen.

An RO system is almost certainly your best bet if you’re looking for:

  • Great-Tasting Drinking Water: RO excels at removing chlorine, dissolved solids, and other gunk that gives tap water an off-taste or weird smell. The result is crisp, clean water that actually makes you want to drink more.
  • Convenient On-Demand Supply: An under-sink RO system gives you a steady stream of purified water from its own dedicated faucet. It’s perfect for filling a glass, cooking pasta, or making coffee without a second thought.
  • Broad-Spectrum Contaminant Removal: These systems are fantastic at tackling a huge list of common water worries, from lead and fluoride to pesticides and nitrates.

The final call is about weighing these scenarios against what happens in your home every day. If you want more help figuring out what's right for your tap water, we have a ton of practical advice to help you choose wisely.

Tying Up Loose Ends: Your Top Questions Answered

When you're trying to pick the right water system for your home, the same questions always seem to pop up. Let's get those last few uncertainties cleared up so you can choose between distilled and reverse osmosis with total confidence. Here are the most common things people ask.

Is It Unhealthy to Drink Water Without Minerals?

This is a big one, but the short answer is no, it’s not a problem. While it's true both distillation and reverse osmosis strip out beneficial minerals like calcium and magnesium, the reality is we get almost all of these essential minerals from our food, not our water.

For most folks, the massive health benefit of yanking out harmful contaminants—think lead, chlorine, or pesticides—is far more important than the tiny amount of minerals lost. If it’s still a concern, some reverse osmosis systems even have an optional remineralization filter that adds a bit of healthy mineral content back in, which a lot of people think makes the water taste better anyway.

Which Water Is Better for Just Drinking Every Day?

For grabbing a glass of water or filling up the coffee pot, most people hands-down prefer reverse osmosis water. Distilled water has a famously "flat" or even "bland" taste because there's absolutely nothing in it, and a lot of people just don't like it.

On the other hand, RO water, especially after a final carbon "polishing" filter, tastes crisp and clean. Plus, the convenience of having an on-demand faucet right at your sink makes an under-sink RO system way more practical for daily use.

When it comes to daily use, it really boils down to taste and convenience. Reverse osmosis gives you great-tasting, clean water right when you want it, making it the clear winner for most households.

Do Reverse Osmosis Systems Waste a Ton of Water?

Older RO systems definitely earned a bad rap for being water hogs, but modern, high-efficiency systems are a whole different ballgame. Any RO system has to flush away the contaminants it catches, creating wastewater (called brine) that goes down the drain.

The good news is that many new systems have seriously impressive waste-to-pure-water ratios, with some hitting as low as 1:1. That means for every gallon of pure water you get, only one gallon of wastewater is created. It's a small trade-off for getting such a high level of purification on demand.


Ready to find the perfect filtration system for your home? The team at Water Filter Advisor has done the research for you, with in-depth reviews and practical guides to help you choose with confidence. Explore our expert recommendations at https://www.waterfilteradvisor.com.