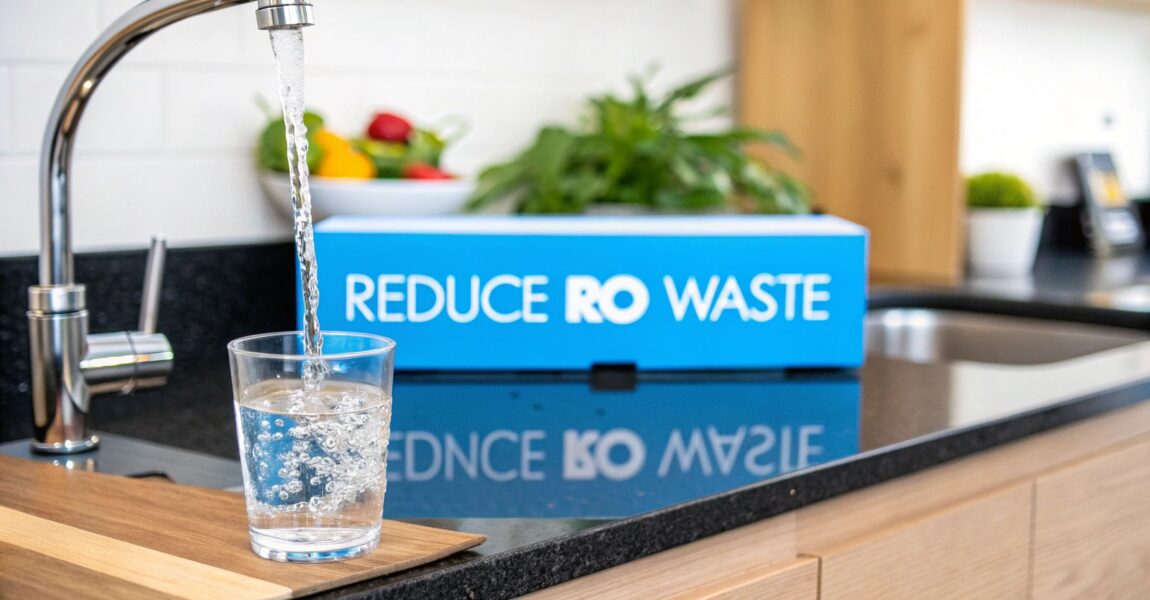
The Gurgling Secret Under Your Sink: Taming Reverse Osmosis System Water Waste

You love the crisp, pure taste of water from your reverse osmosis (RO) system, but have you ever paused to listen to the sound it makes? That quiet gurgling from under the sink is the system's dirty little secret: for every pristine gallon of water you drink, it's sending a whole lot more straight down the drain.

This isn't a sign your system is broken. In fact, it's a critical part of how reverse osmosis works its magic. But it does mean there's a huge opportunity to make your home water filtration a lot smarter and more efficient.

Why Your RO System Wastes So Much Water

Think of the reverse osmosis membrane as the world's most exclusive nightclub for water molecules. It's got a bouncer at the velvet rope, and the guest list is incredibly strict. Only the absolute purest H₂O molecules get inside.

Everyone else—all the dissolved salts, heavy metals, pesticides, and other microscopic party crashers—gets turned away. To keep the entrance from getting clogged with this rowdy crowd of contaminants, a steady stream of water acts like a continuous bouncer, flushing them away from the door and down the drain.

This process is called cross-flow filtration, and it's the very reason you get reverse osmosis system water waste. While some water (the "permeate") pushes through the membrane to become your drinking water, the rest (the "brine") is the cleanup crew, carrying all the rejected impurities away.

The Shocking Reality of RO Water Ratios

So, how much water are we really talking about? Brace yourself, because the numbers might be a little jarring.

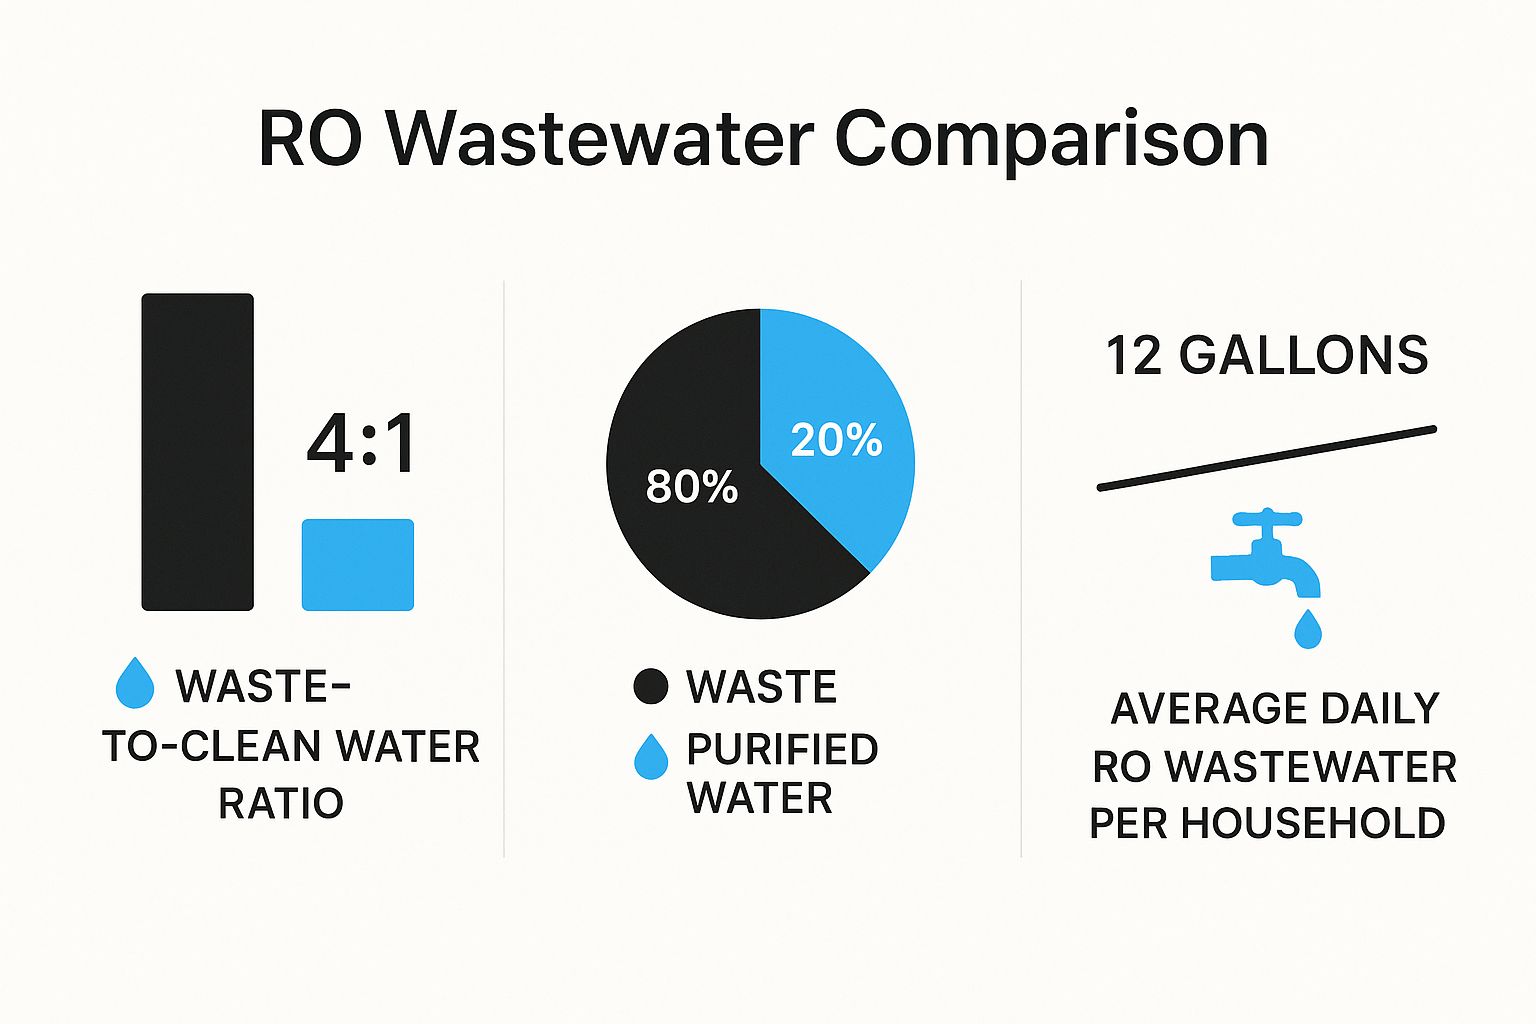
A standard home RO system often has a waste ratio of 3:1 or even 4:1. Let that sink in: for every single gallon of pure water you collect, three to four gallons are sent swirling down the drain. In other words, only about 20-25% of the total water entering the system ever makes it to your glass.

To put that into perspective, here's a quick look at what that means for your pipes.

Standard RO System Water Use at a Glance

This table shows the typical relationship between purified water and wastewater in a standard home RO system, highlighting the efficiency gap.

Metric Typical Amount
Water Purified (Permeate) 1 Gallon
Water Wasted (Brine/Concentrate) 3-4 Gallons
Total Water Used 4-5 Gallons
System Efficiency 20-25%

Seeing that only a quarter of the water becomes drinkable can be a tough pill to swallow. You can learn more about the global context of water use from the World Economic Forum's insights.

But remember, this isn't just waste for waste's sake. The amount of brine your system produces depends heavily on factors like your home's water pressure and just how contaminated your tap water is to begin with.

The key takeaway is this: the wastewater isn't just a byproduct; it’s a crucial part of the machine. It’s the janitor that keeps the filter clean, ensuring the membrane works effectively for years to come.

Fortunately, you're not stuck with a 4:1 ratio. Modern upgrades and a few simple tweaks can dramatically boost your system's efficiency. In this guide, we'll dive into exactly what causes this waste and give you practical solutions to save water, cut down your utility bills, and make your filtration system much more sustainable.

A Look Inside Your RO Filtration System
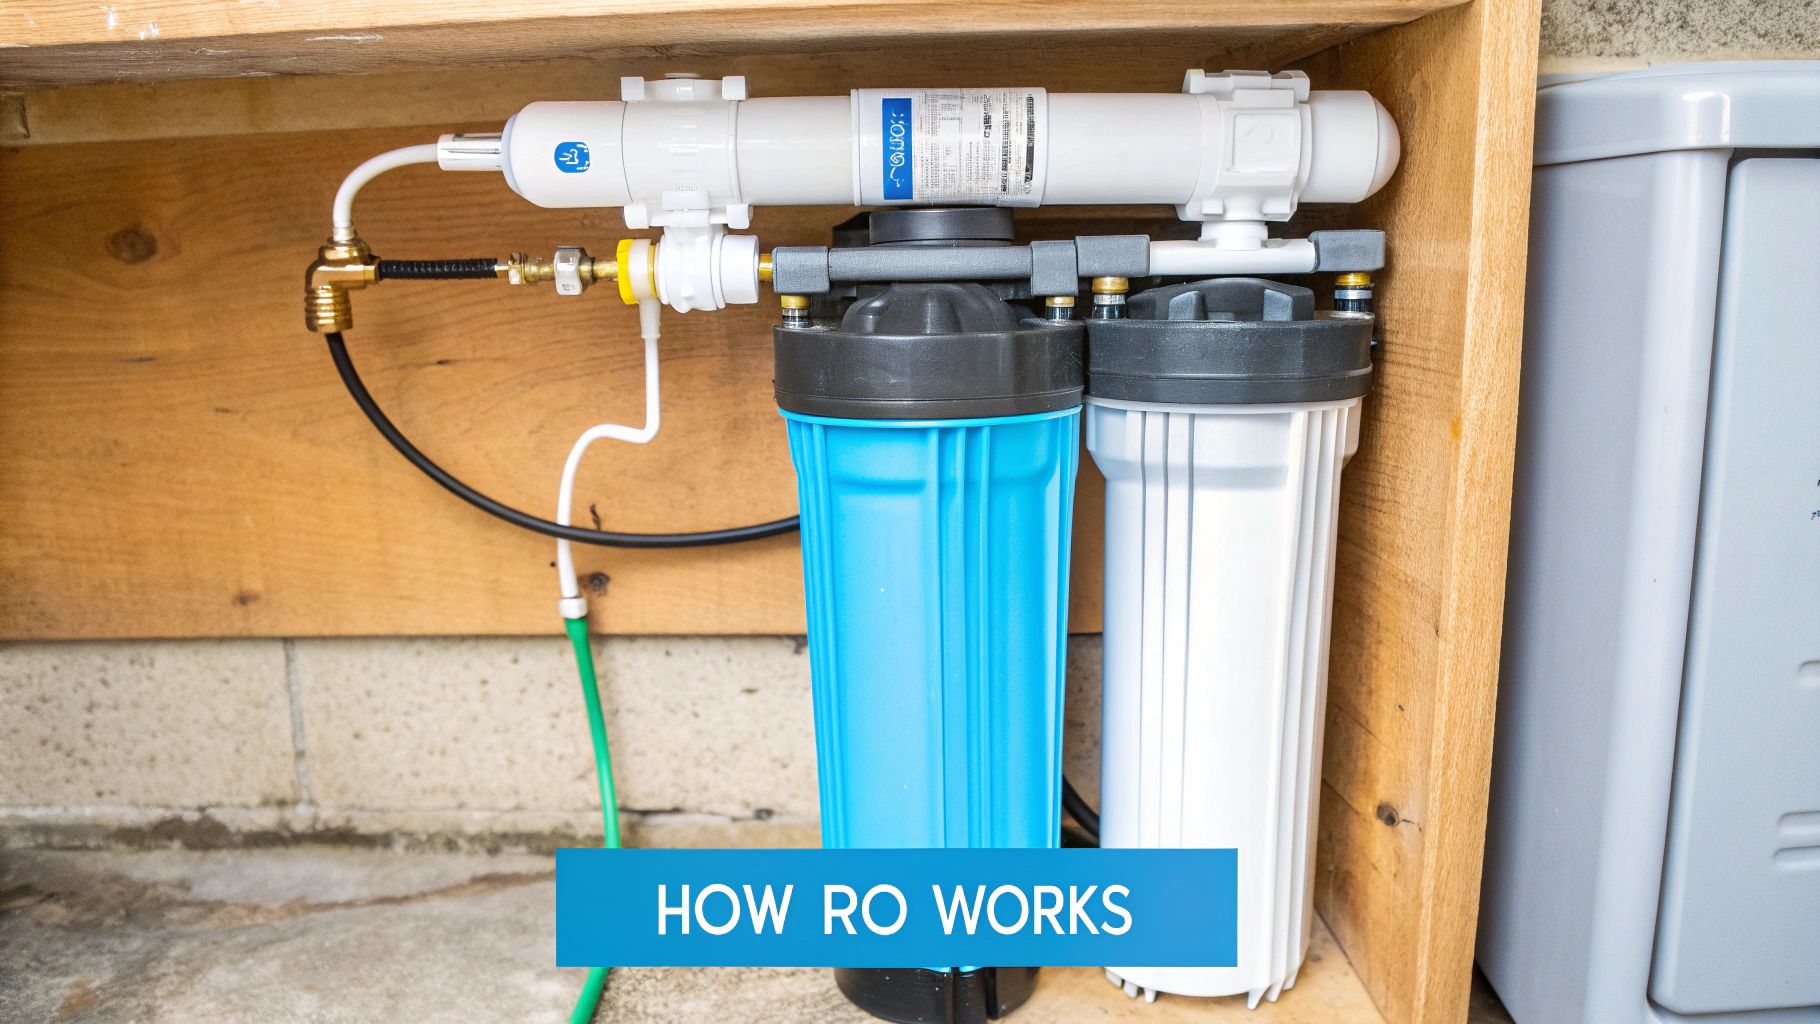
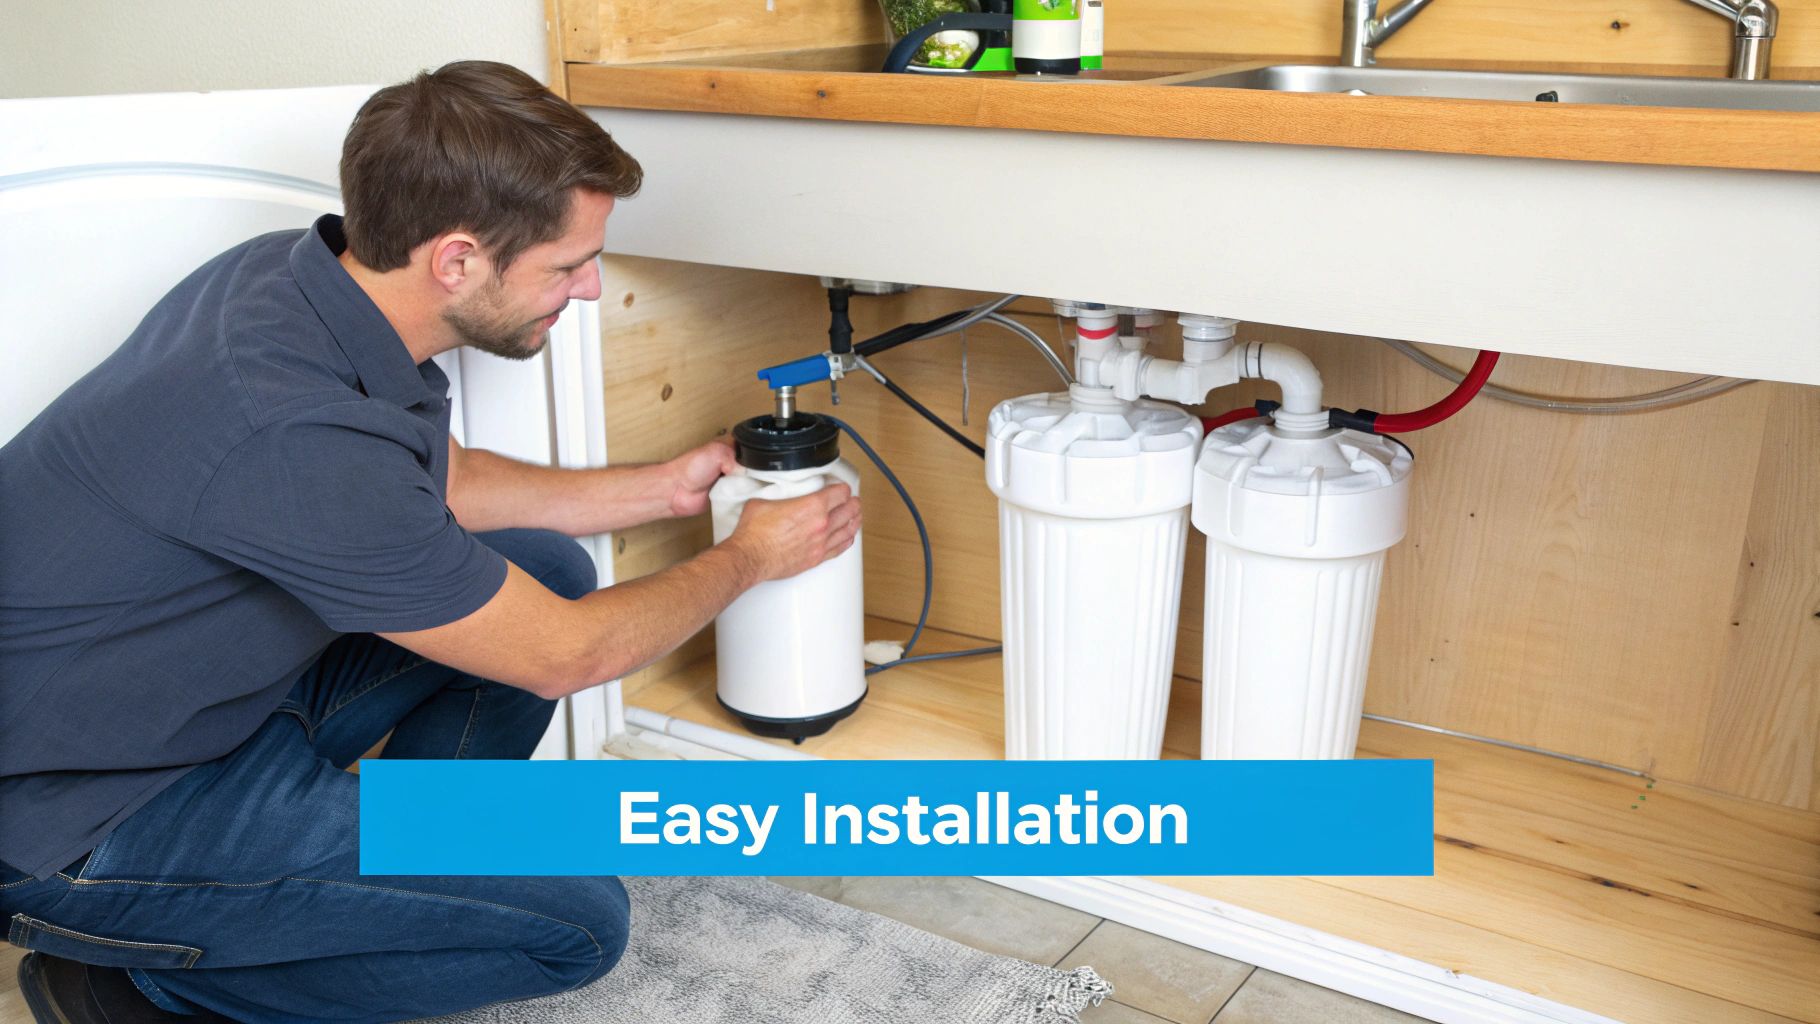
A modern reverse osmosis system installed neatly under a kitchen sink, showing the various filters and tubes.

To really get why RO systems create "waste" water, you have to peek behind the curtain at the clever process happening under your sink. It’s not quite like making coffee, where water just passes through grounds and into your cup.

Reverse osmosis is much smarter, using a technique called cross-flow filtration. This is the secret sauce that makes it so incredibly effective at purifying water, but it's also the reason it sends some water down the drain.

Instead of just catching gunk like a simple screen, an RO membrane is constantly being rinsed. A stream of water flows across the filter's surface, sweeping away all the rejected minerals, salts, and other dissolved junk. This prevents the filter from getting clogged up and failing.

Why That “Waste” Water Is a Feature, Not a Flaw

This self-cleaning action is what produces the wastewater, which is technically called brine or concentrate. This brine is just the vehicle carrying away everything the RO membrane has blocked—nasty stuff like chlorine, arsenic, fluoride, and heavy metals.

Without this constant flushing, the membrane would get fouled almost immediately and stop working.

In short, the wastewater is the system's built-in cleaning crew. It keeps the microscopic pores of the membrane clear so it can keep delivering exceptionally pure water for you and your family.

This process works so well that it's become a global standard for water purification. The market for reverse osmosis parts was worth a staggering $16.9 billion in 2023 and is expected to nearly double by 2029. It’s a testament to how many homes and industries rely on this tech.

The Stages of Purification

A typical under-sink RO system is more than just one filter; it's a multi-stage purification machine. Each stage has a specific job to do, protecting the delicate RO membrane and making sure your water tastes great.

  • Sediment Pre-Filter: This is the bouncer at the front door. It catches bigger particles like rust, sand, and dirt, preventing the more sensitive filters down the line from getting choked with grit.
  • Carbon Pre-Filter: Next, water moves through an activated carbon filter. This is critical for grabbing chlorine and other chemicals that could literally eat away at the RO membrane, shortening its life.
  • The RO Membrane: Here’s the star of the show. High pressure forces water molecules through the semipermeable membrane, which has pores as tiny as 0.0001 microns. Contaminants can't fit through and are washed away by that brine stream we talked about.
  • Post-Filter/Polishing Filter: After leaving the storage tank, the clean water usually gets one final pass through another carbon filter. This "polishing" step removes any lingering tastes or odors, making sure the water that hits your glass is crisp and refreshing.

Getting a handle on how these parts work together is key to understanding water filtration systems as a whole. Once you see how each piece contributes, it becomes clear that the wastewater isn't a flaw—it's just a necessary part of a very sophisticated purification process.

What Determines Your System's Water Efficiency
A person checking the water pressure gauge on a home water filtration system.

You might think every reverse osmosis system wastes the same amount of water, but that's not how it works. The efficiency of your RO unit is actually a moving target, heavily influenced by the unique conditions inside your home’s plumbing. Several key factors can make your system work much harder—and waste a lot more water—than your neighbor's.

Think of it like this: your system has a tough job to do, and these variables determine whether it's having an easy day or struggling through a marathon. By understanding what affects your RO system’s performance, you can pinpoint the exact cause of any inefficiency and get it fixed.

The Impact of Household Water Pressure

The single most important factor is your home's water pressure, which we measure in pounds per square inch (PSI). The "reverse" in reverse osmosis is all about using force to push pure water molecules through the membrane, overcoming the natural direction of flow.

Low water pressure is like trying to squeeze a sponge with just your fingertips. You won't get much water out, and the whole process will be painfully slow and inefficient.

For an RO system to do its job, it needs a good, strong push. If your household pressure drops below 40 PSI, the system really struggles to force water through the membrane. When that happens, a whole lot more water gets diverted down the drain as brine.

Total Dissolved Solids Overload

Another major player is the concentration of Total Dissolved Solids (TDS) in your tap water. TDS is basically a catch-all term for all the invisible minerals, salts, and metals floating around in your water. The higher your TDS level, the more junk the RO membrane has to block and flush away.

If your water is loaded with these impurities, the system has to generate more wastewater just to keep the membrane from getting clogged up. It’s like a bouncer at a crowded club with a very long line of troublemakers to turn away—it takes a lot more effort and time to keep the entrance clear.

Water Temperature Plays a Role

Believe it or not, even the temperature of your water matters. Colder water is denser and more viscous, which makes it physically harder to shove through the tiny pores of an RO membrane.

  • Colder Water: During the winter months, you might notice your system produces pure water more slowly and creates more waste. That’s because the colder, denser water requires more pressure to filter properly.
  • Warmer Water: On the flip side, warmer water flows more easily, which can improve the system's efficiency and cut down on the amount of reverse osmosis system water waste.

Each of these factors—pressure, TDS, and temperature—creates a unique operating environment in your home. By figuring out which one is the primary culprit, you can take targeted steps to make your system run as efficiently as possible.

Practical Ways to Reduce RO Water Waste

So, you know your RO system creates wastewater. It's easy to feel a little guilty about it, but the good news is you're not helpless. You actually have a ton of control over your system’s efficiency.

You can slash the amount of reverse osmosis system water waste your home produces by taking one of two routes: either upgrading the hardware itself or getting a bit clever with reusing the water you already have.

Both strategies work great. The right one for you just depends on your budget and how hands-on you want to get. Let's dive into the most practical solutions out there for homeowners.

Upgrade Your System for Maximum Efficiency

If you're after a long-term, "set it and forget it" solution, upgrading some of your RO system's parts can lead to massive water savings. The technology has come a long way from those old, wasteful 4:1 ratios.

  • Install a Permeate Pump: This is easily one of the best upgrades you can make to an existing system. A permeate pump is a simple, non-electric device that uses the energy from the wastewater to help push the purified water into your storage tank. It’s a game-changer—it can cut down wastewater by up to 80% and helps the tank fill up faster, all without using a single watt of electricity.
  • Choose a High-Efficiency System: If you’re in the market for a new system, keep an eye out for models that specifically advertise a 1:1 waste ratio. These units are designed from the ground up to minimize brine, which means for every gallon of pure water you get, only one gallon goes down the drain.
  • Consider a "Zero-Waste" System: This is the peak of RO efficiency. A "zero-waste" system uses a small pump to redirect the brine (wastewater) into your home’s hot water line. That slightly mineral-heavy water just mixes in with the hot water you use for washing dishes or hands. Absolutely no water gets sent to the drain.

This infographic breaks down just how much water a standard RO system uses, showing the ratio of waste to pure water.
Infographic about reverse osmosis system water waste

As you can see, a typical system sends a whopping 80% of the water it uses right down the drain. That adds up fast, day after day.

Reuse and Repurpose Your Wastewater

For a more budget-friendly approach you can start today, you can simply collect and reuse the brine water.

Think about it: this water has already gone through your sediment and carbon pre-filters, so it’s free of big particles and chlorine. It just has a higher concentration of the dissolved solids the RO membrane rejected.

This makes it perfectly safe for all sorts of non-drinking household jobs. On a bigger scale, initiatives are already exploring this. A project in India, for example, is working to save millions of liters of water every month just by collecting and reusing RO wastewater in local communities.

Setting up your own collection system is surprisingly easy. All you have to do is divert the little brine tube from your drain into a storage container—a bucket or a small water barrel stashed under the sink works perfectly.

Pro Tip: Just remember, this wastewater is a bit more concentrated in minerals than your regular tap water. While it's great for most things, you'll want to avoid using it on delicate, salt-sensitive indoor plants like ferns or azaleas.

Here are a few smart ways to put that "waste" water to good use:

  1. Water Your Garden: It's perfect for most outdoor plants, shrubs, and even your lawn.
  2. Mop Your Floors: Use it for all kinds of general household cleaning.
  3. Wash Your Car: The water is plenty clean to get your vehicle sparkling.
  4. Flush Toilets: Instead of using fresh water from the tank, just pour a bucket of brine water into the toilet bowl for a manual flush.

Choosing the right upgrade or just forming a few new habits can make a huge dent in your home's water consumption. For more expert tips, you can always find great water filtration advice to keep your system running its best.

Comparing Water Waste Reduction Methods

Deciding between an upgrade and a new habit can be tricky. This table breaks down the most common methods to give you a clear, side-by-side look at what each involves.

Method Waste Reduction Potential Estimated Cost Installation Difficulty
Permeate Pump Up to 80% $50 – $150 Moderate
High-Efficiency System Up to 75% $300 – $600+ Moderate to Difficult
"Zero-Waste" System Up to 100% $350 – $700+ Difficult (Plumbing Required)
Wastewater Reuse Up to 100% (if all is used) $0 – $20 Easy

Ultimately, whether you invest in new hardware or simply put a bucket under your sink, you have powerful options to make your RO system much more sustainable.

The True Cost of Wasted Water
A water meter with spinning numbers and a water faucet dripping, symbolizing the cost of wasted water.

You know that quiet gurgling sound coming from under your sink? It's easy to tune out, but it’s the sound of water—and money—constantly heading down the drain. The impact of reverse osmosis system water waste isn't just some abstract concept; it directly connects your kitchen to your wallet and the environment.

The most obvious hit is financial. A few gallons here and there might not sound like much, but it adds up surprisingly fast over the course of a year. Doing the math can be a real eye-opener, turning a vague number into a real line item on your household budget. It makes you wonder: is my system costing me more than it needs to?

Calculating Your Financial Impact

Figuring out the actual cost is simpler than you might think. You just need two things: the rate from your latest water bill and your RO system’s waste ratio. For most standard models, that ratio is about 4:1.

Here’s a quick and easy way to estimate what your system’s inefficiency is costing you each year:

  1. Estimate Daily Pure Water Use: Most people drink about half a gallon of water a day. So, for a family of four, let’s assume you’re using 2 gallons of RO water daily for drinking and cooking.
  2. Calculate Daily Wastewater: With a 4:1 ratio, every 2 gallons of pure water produces 8 gallons of wastewater (2 gallons x 4).
  3. Find Your Annual Waste: Now multiply that daily waste by 365 days. That comes out to a whopping 2,920 gallons of wastewater every single year (8 gallons x 365 days).
  4. Determine the Cost: Grab your utility bill and find the combined water and sewer rate. If it's around $0.015 per gallon, the annual cost for that wasted water is $43.80 (2,920 gallons x $0.015).

This simple math reveals the direct financial drain caused by an inefficient system. While under $50 a year might not break the bank, that’s money you could save with a high-efficiency model or a permeate pump.

The Broader Environmental Strain

Beyond your own bank account, there’s a much bigger community cost to consider. When millions of homes are each sending thousands of extra gallons of water to municipal treatment facilities, it puts a serious strain on our shared resources.

This problem is especially critical in water-scarce regions where every drop truly counts. The widespread use of inefficient RO systems can burden local water supplies, contribute to shortages, and increase the energy needed to treat and distribute water for everyone.

Understanding these financial and environmental costs gives you a powerful reason to look into the water-saving solutions we've talked about. By making your system more efficient, you directly help your budget, shrink your environmental footprint, and do your part for your community's water security.

Common Questions About RO System Waste

https://www.youtube.com/embed/zTWUCHjZQp0

Even after getting the technical details down, you probably still have some practical questions about what reverse osmosis system water waste means for your daily life. It’s one thing to understand the mechanics, but another to live with it.

Let's tackle some of the most common concerns we hear from homeowners who are trying to balance pure water with being water-wise.

Is RO Wastewater Safe for My Home and Garden?

For most uses outside of drinking, absolutely. Think of this "wastewater" (also called brine) as just your regular tap water, only with a slightly higher concentration of the stuff you wanted filtered out in the first place.

Because it's already been through your system's initial sediment and carbon filters, it’s actually pre-cleaned of grit and chlorine. That makes it surprisingly useful around the house.

You can safely use it for:

  • Watering the lawn, trees, and most garden plants.
  • Mopping floors and other household cleaning.
  • Washing your car.
  • Flushing toilets manually to conserve fresh water.

Just a heads-up: If your home's water is naturally salty (common in coastal areas) or you use a water softener, that brine will have a higher salt concentration. Be cautious using it on salt-sensitive plants like azaleas, ferns, or gardenias, as it could harm them.

Do "Zero Waste" Systems Actually Eliminate Waste?

"Zero waste" is a pretty clever marketing term, but it's not magic. These systems don't make the filtered contaminants vanish into thin air. Instead, they find a brilliant way to reuse the brine water so none of it goes down the drain.

Here’s how it works: a small pump takes the wastewater from the RO membrane and reroutes it into your home's hot water line. From there, it mixes in with the water you use for washing dishes, showering, or doing laundry.

The amount of dissolved solids in the brine is so small that once it's diluted in your hot water tank, you'll never notice a difference. So while it's technically not eliminating waste, it's putting it to good use elsewhere. It's the ultimate in-home water recycling.

Will a Water Softener Help Reduce Waste?

Yes, and it’s a fantastic upgrade. A water softener is the perfect partner for an RO system, especially if you have hard water. Softeners are specifically designed to remove minerals like calcium and magnesium.

Those are the two biggest culprits behind scale buildup, a crusty deposit that can clog up the tiny pores of your RO membrane. When the membrane gets scaled up, it has to work much harder and flush itself more often just to produce pure water—which means more waste.

By installing a water softener before the RO system, you remove those scale-forming minerals from the equation. This protects the membrane, helps it last longer, and allows it to run at peak efficiency with far less wastewater.
Your Guide to a Whole House Reverse osmosis System

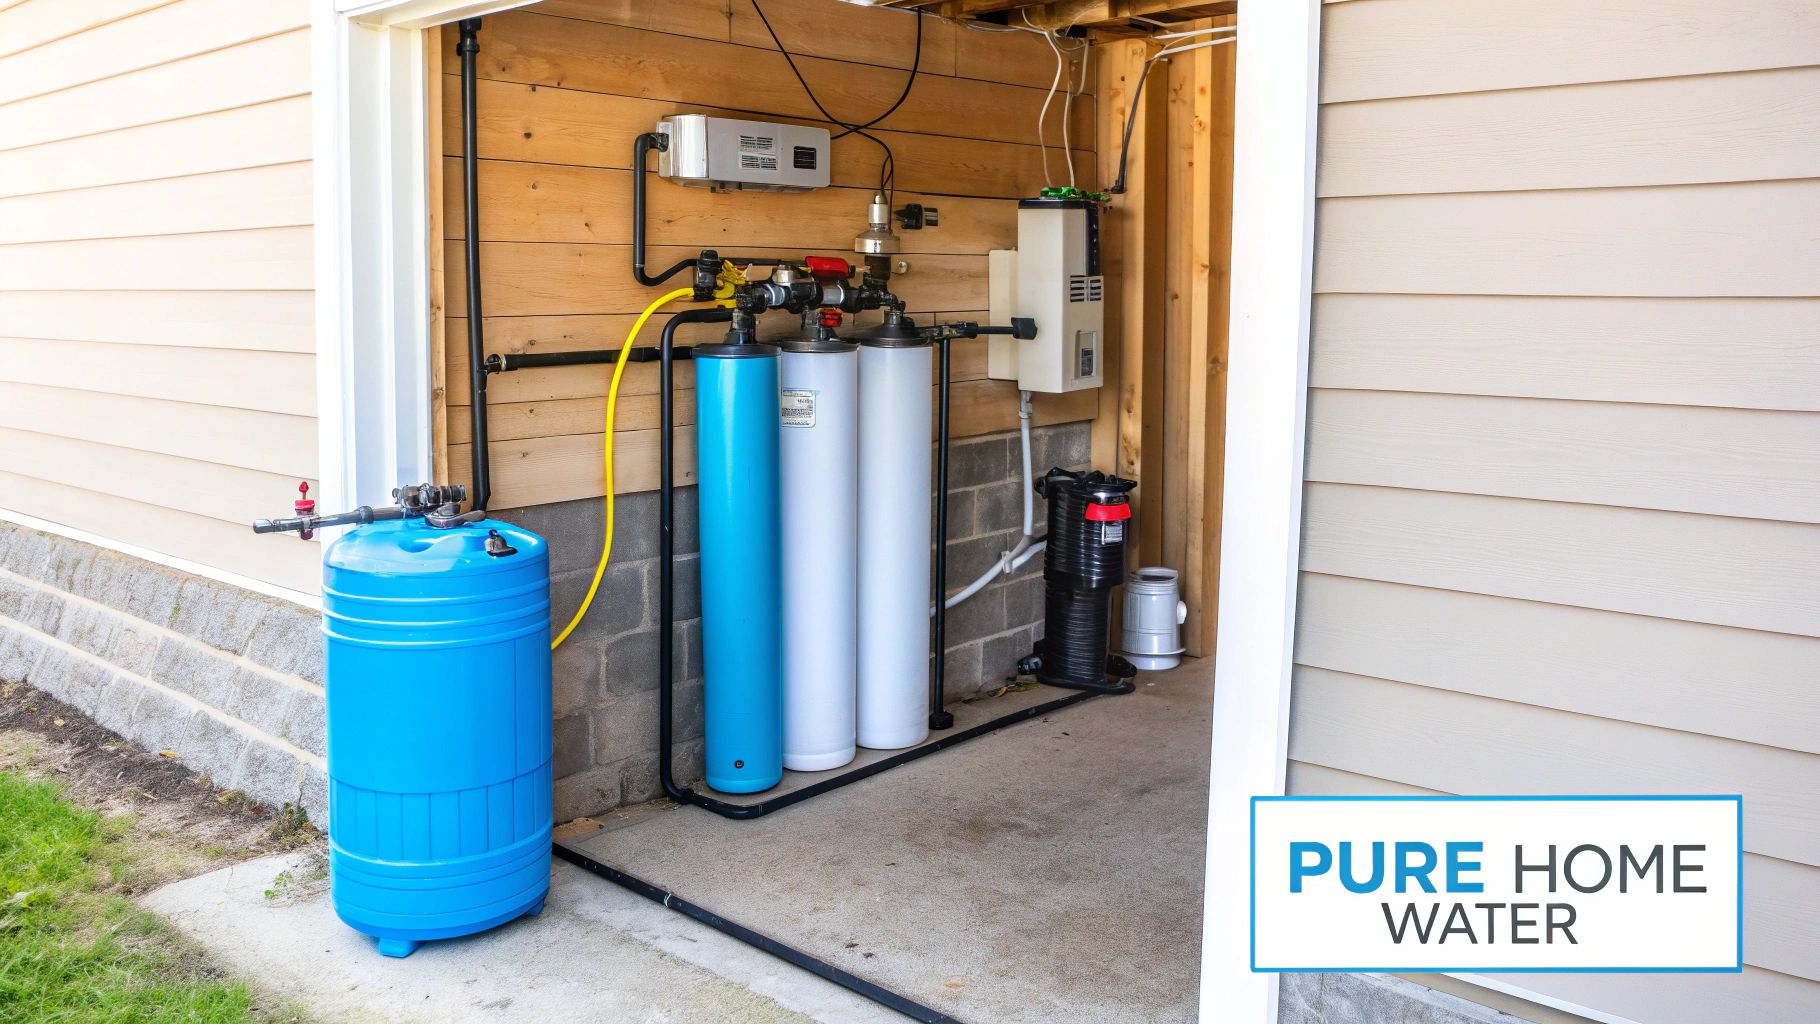
Imagine turning on any faucet in your house—the shower, the kitchen sink, even the washing machine—and getting wonderfully pure, crisp water. Not just from a special little tap, but from everywhere. A whole house reverse osmosis system makes this dream a reality. It acts like a central purification fortress for your home's entire water supply, ensuring every single drop that flows through your pipes is spectacularly clean.

Why Whole Home Water Purity Matters

Are you tired of those chalky white spots making your glass shower doors look permanently foggy? Or maybe you're worried about the invisible party of contaminants potentially crashing your family's drinking water. These are common frustrations, and they're exactly why so many homeowners start hunting for a real solution. A simple pitcher filter is a fine start, but let's be honest—it only tackles a tiny fraction of the water you use every single day.

A whole house reverse osmosis system is a whole different beast. Think of it as a microscopic, hyper-vigilant security guard posted right where water enters your home. It uses immense pressure to force water through an incredibly fine membrane that blocks almost everything else—minerals, chemicals, and other unwanted guests—letting only pristine water molecules pass through. This isn't just about brewing a better-tasting cup of coffee; it's about fundamentally transforming the water you use for everything.

Image

Beyond the Drinking Glass

The ripple effects of whole-home purification go way beyond what you pour into a glass. You'll start noticing the difference in ways you probably haven't even considered.

This powerful filtration approach wages a multi-front war on water woes:

  • Hard Water Annoyances: Say goodbye to hard water stains for good. The minerals that cause that filmy buildup on your dishes and fixtures are filtered out, leaving everything sparkling clean with less effort.
  • Appliance Longevity: Scale buildup is a silent assassin for appliances like water heaters, dishwashers, and washing machines. Purified water protects these expensive investments from choking on mineral deposits, helping them live longer, more efficient lives.
  • Hidden Contaminants: Even municipally treated water can carry dissolved solids, chlorine, fluoride, and traces of other chemicals. A whole house RO system is precision-engineered to target and remove them.

By treating water right at the source, you're putting a protective shield around everything it touches. Showers feel luxuriously softer on your skin and hair. Your laundry comes out cleaner and brighter because detergents can finally work their magic without battling harsh minerals.

Setting the Stage for Purer Water

Installing a whole house reverse osmosis system is a serious upgrade. You're moving past temporary fixes and installing a permanent solution for superior water quality. It's a true investment in your home and your family's well-being.

In this guide, we’ll walk you through everything you need to know. We'll demystify the science, cover what to look for when you're shopping, and explore all the tangible benefits you'll enjoy every day. Let's dive in.

How Reverse Osmosis Makes Your Water Pure

At the heart of every whole house reverse osmosis system is a mind-boggling piece of technology that acts like a microscopic bouncer for your water. It’s not magic, but it’s astonishingly close. The entire process uses pressure to shove your home's water through a special barrier called a semipermeable membrane.

Think of this membrane as the world's most sophisticated strainer. Its pores are unbelievably tiny—around 0.0001 microns. To put that in perspective, a single human hair is about 80 microns wide. This ridiculously tight structure allows pure water molecules to slip right through but physically blocks up to 99% of dissolved salts, chemicals, and other microscopic troublemakers. It’s a physical blockade, not a chemical treatment, which means only the cleanest water gets past the velvet rope.

Image

The Bodyguards of the System: Pre-Filters

Before your water ever gets to meet that high-tech membrane, it has to get through a crucial warm-up act. Think of the pre-filters as the bodyguards for the main star of the show—the RO membrane itself. The membrane is powerful, no doubt, but it’s also delicate. It can easily get clogged or damaged by larger gunk.

This is where the pre-filtration stages step in:

  1. Sediment Filter: This is your first line of defense. It’s designed to trap bigger particles like dirt, rust, sand, and silt that would otherwise gum up the works and torpedo the system's efficiency.
  2. Carbon Filter: Next up, the water flows through one or more carbon filters. These are non-negotiable for snagging chlorine and chloramines—chemicals commonly used in city water treatment that can literally eat away at the RO membrane. As a fantastic bonus, they also make your water taste and smell a whole lot better.

By taking out these bigger threats first, the pre-filters let the reverse osmosis membrane focus on what it does best: tackling the tiniest dissolved impurities. This teamwork extends the membrane’s life and keeps the whole system running like a well-oiled machine.

The Heart of the Operation: The RO Membrane

Once the water gets past its bodyguards, it’s ready for the main event. This is where high pressure is applied, pushing that pre-treated water hard against the semipermeable membrane. The real separation happens right here.

While pure water molecules are squeezed through the membrane’s microscopic pores, a concentrated stream of rejected contaminants—including fluoride, arsenic, lead, salts, and PFAS—is left behind. This waste stream, known as brine, is flushed away down the drain, leaving behind exceptionally pure water.

This process is so ridiculously effective it’s become the gold standard for water purification across the globe. The demand speaks for itself; the reverse osmosis system market was valued at around USD 7.15 billion in 2021 and is expected to hit USD 8.8 billion by 2025. A big driver of that growth is the development of advanced thin-film composite membranes, which are known for their incredible efficiency. You can dig into more data on the global RO system market to see the full picture.

The Finishing Touch: Polishing with Post-Filters

The journey isn't quite over yet. After the RO membrane does its heavy lifting, the purified water usually chills out in a large storage tank, ready for you. When you turn on a faucet, this water takes one final trip through a post-filter.

This last stage, usually another carbon filter, is all about polishing. It gets rid of any stray tastes or odors the water might have picked up while sitting in the tank. Some systems even add a remineralization filter here, which puts back beneficial minerals like calcium and magnesium. This not only improves the taste but also raises the pH a bit. It’s this multi-stage approach that guarantees the water coming out of your tap is not just ridiculously pure, but also crisp and refreshing.

An Inside Look at Your RO System Components

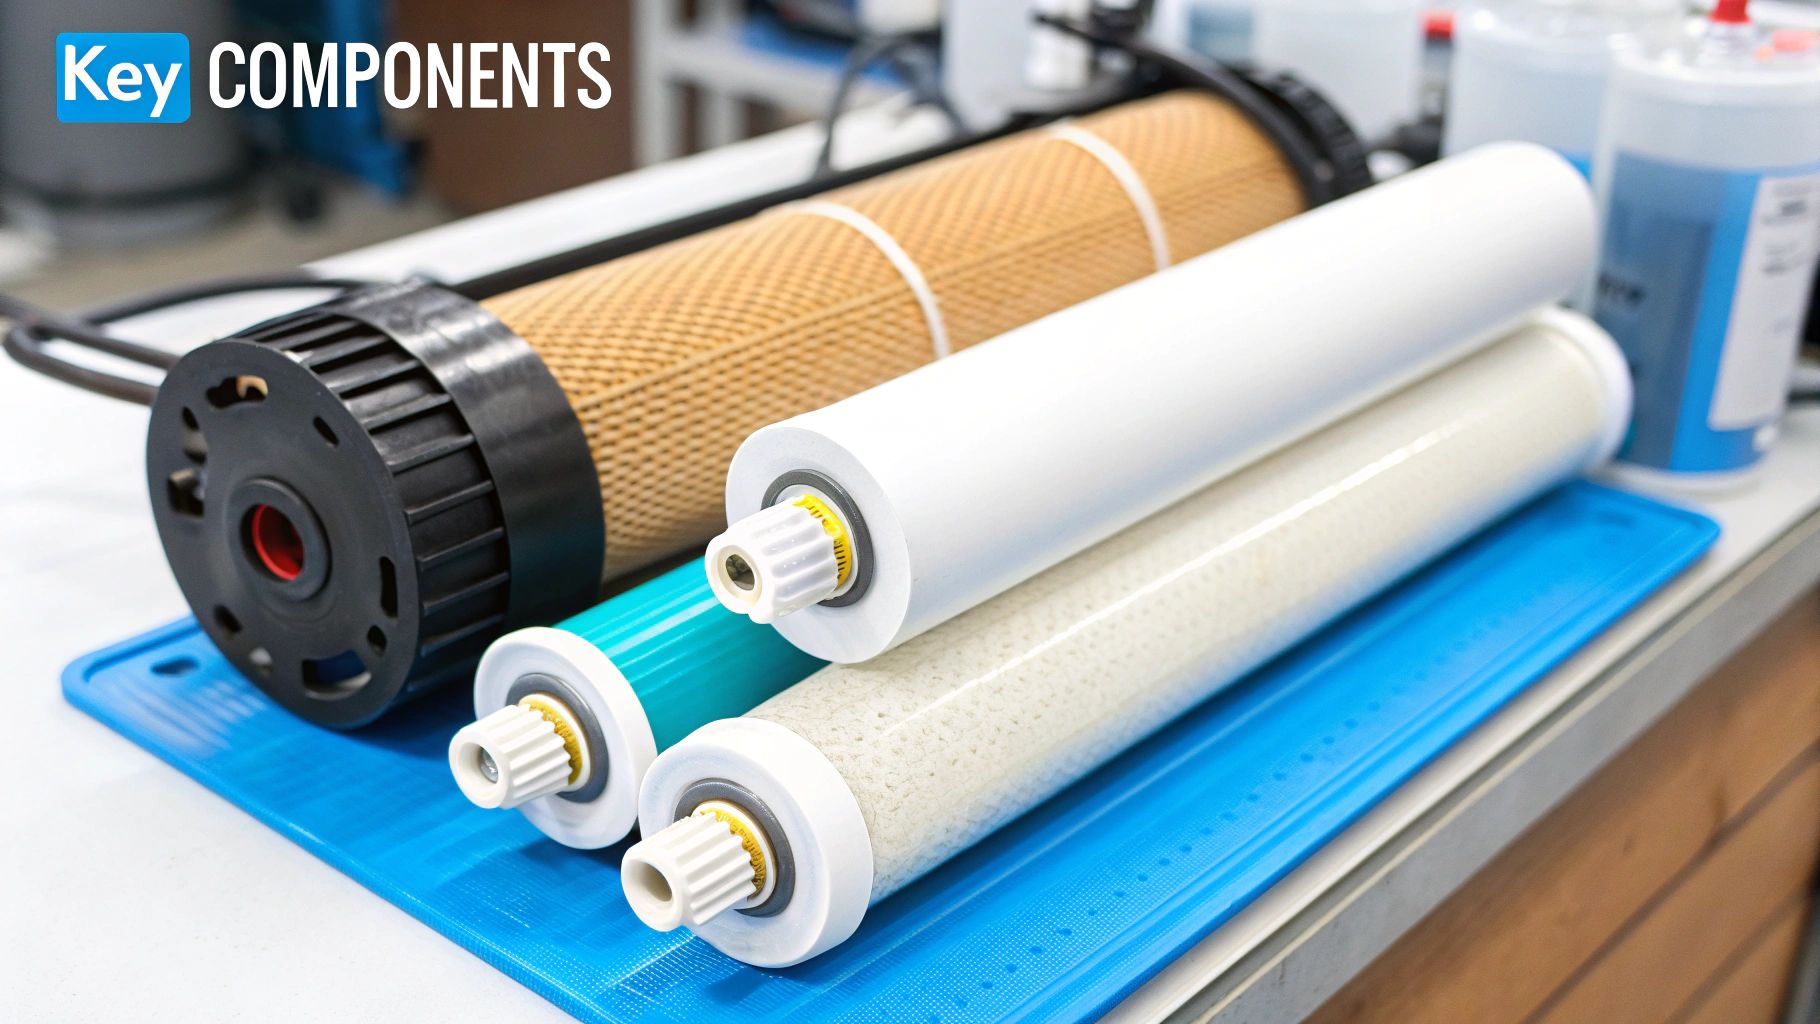
A whole house reverse osmosis system might look complicated on the outside, but it’s really just a team of specialized parts working in perfect harmony. Think of it like a high-tech purification assembly line for your water—each station has a very specific job to get done. Figuring out what each part does is the key to understanding how these systems deliver such pristine water to every faucet in your home.

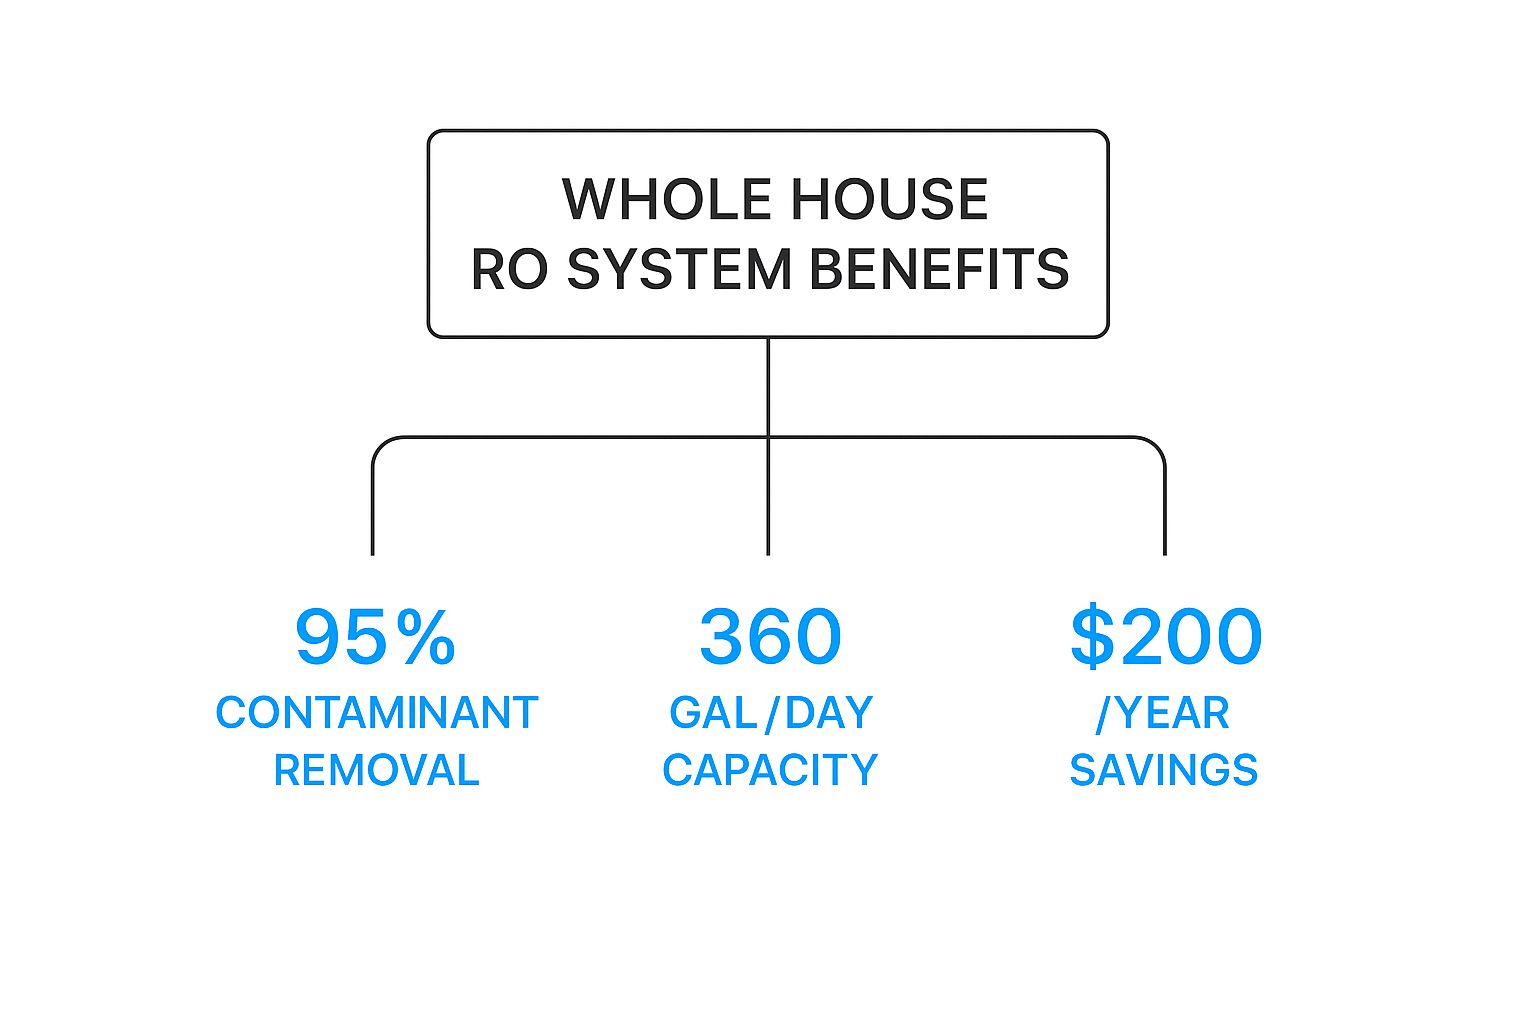
This diagram gives you a quick snapshot of the real-world benefits you get from a complete system, from contaminant removal and water output to potential long-term savings.

Image

As you can see, a top-tier system can strip out over 95% of contaminants, churn out hundreds of gallons of pure water daily, and even save you a good chunk of change each year. Every single component below plays a critical role in hitting those impressive numbers.

The First Line of Defense: Pre-Filters

Before the real magic happens, your water has to get through a crucial prep stage handled by the pre-filters. These act as the system's bodyguards, protecting the more delicate and expensive parts down the line from getting gummed up or damaged.

  • Sediment Filter: This is the bouncer at the front door. Its only job is to trap bigger, clunky particles like sand, dirt, rust, and silt. Without this guy, those abrasive materials would quickly clog up the more sensitive components.
  • Carbon Block Filter: Next up, the water flows through at least one carbon filter. These are absolutely essential for grabbing chlorine and chloramines—common city water disinfectants that can literally eat away at the RO membrane. As a bonus, they also make the water taste and smell a whole lot better by absorbing other funky organic compounds.

The Heart of the System: The RO Membrane

After the initial cleanup, the water finally reaches the heart of the whole operation: the semipermeable membrane. This is where the heavy-duty purification takes place.

This membrane is a marvel of engineering, packed with microscopic pores just 0.0001 microns in size. They're so incredibly tiny that only pure water molecules can squeeze through.

Under intense pressure, water is forced against the membrane. The pure H₂O molecules get pushed through to the "clean" side, while up to 99% of dissolved contaminants—things like salts, heavy metals, fluoride, and arsenic—are left behind and flushed down the drain.

This is the component that does almost all of the work, separating the good stuff from the bad at a molecular level. It's easily the single most important piece of the entire system.

The Support Crew: Storage Tank and Delivery Pump

Making water this pure isn't a fast process. Because reverse osmosis is slow and methodical, the system needs a way to store up the purified water so it's ready the instant you turn on the tap.

That's where the storage tank comes in. It's a large, pressurized tank that holds dozens or even hundreds of gallons of RO water, ensuring you always have a massive supply ready for showers, laundry, or cooking without any lag time. When you open a faucet, the tank delivers the water right away.

Working hand-in-hand with the tank is the delivery pump (or booster pump). Its job is to make sure the purified water travels from the tank and through your pipes with strong, consistent pressure. Without a good pump, you could end up with a disappointingly weak flow at your showerheads and faucets.

The demand for these powerful pumps is on the rise as more homes install high-performance purification systems. The global market for RO pumps was valued at USD 9.14 billion in 2025 and is expected to climb to USD 15.35 billion by 2035. If you're interested, you can discover more insights about RO pump market growth on futuremarketinsights.com.

The Final Polish: Post-Filters

Just before the water reaches your glass, it makes one last pass through a post-filter. This final stage is all about giving the water a last-minute polish to make sure it tastes absolutely perfect.

Most of the time, this is another carbon filter designed to catch any lingering tastes or odors the water might have picked up while sitting in the storage tank. Some systems also add a remineralization filter here. This component adds healthy minerals like calcium and magnesium back into the water, which can improve the taste and raise its pH for a more natural feel.

To pull it all together, here's a quick look at each component and how often you'll need to give it some attention.

Whole House RO System Component Breakdown

Component Primary Function Typical Maintenance Schedule
Sediment Pre-Filter Removes large particles like sand, dirt, and rust. Replace every 6-12 months
Carbon Pre-Filter Removes chlorine, chloramines, and improves taste/odor. Replace every 6-12 months
RO Membrane Separates pure water from dissolved contaminants. Replace every 2-4 years
Storage Tank Stores purified water for on-demand use. Check pressure annually
Delivery Pump Ensures strong water pressure throughout the home. Inspect annually
Carbon Post-Filter "Polishes" the water, removing any final tastes or odors. Replace every 12 months
Remineralization Filter (Optional) Adds beneficial minerals back to the water. Replace every 12 months

Keeping up with this simple maintenance schedule is the best way to ensure your system continues to produce incredibly pure water for years to come.

The Everyday Benefits of Pure Water at Home

So, we've talked about the hardware and the filtration stages, but what does a whole house reverse osmosis system really do for your family every single day? It's a total upgrade to the water in your home, and you'll notice the difference immediately—in what you taste, feel, and see. This isn't just about taking stuff out of your water; it's about what you get back in your daily life.

Think about that first cup of coffee or tea in the morning. With RO water, the pure, rich flavor of the coffee beans or tea leaves finally comes through. It's not hidden behind the taste of chlorine or other minerals anymore. That same pure taste transforms your cooking, too, letting the real flavors of your food shine.

Image

Even a simple glass of water or a tray of ice cubes becomes a whole new experience. Say goodbye to cloudy, strange-smelling ice. RO systems give you crystal-clear ice that won't leave behind any weird residue or aftertaste when it melts in your drink.

Experience a Softer, Healthier Clean

The perks of a whole house RO system go way beyond the kitchen. The first time you step into the shower, you'll feel it. The chlorine and hard minerals that parch your skin and make your hair feel brittle and dull are gone.

What you get instead is a shower that feels incredibly soft and clean. People often find their skin is less irritated and holds moisture better. Their hair gets shinier and is much easier to manage without being constantly attacked by harsh chemicals. It’s like showering in bottled-quality water every day.

  • Softer Skin: Your skin can finally hold onto its natural moisture without drying minerals and chlorine getting in the way.
  • Healthier Hair: With no mineral gunk coating your hair, it feels softer, looks brighter, and is way easier to style.
  • Cleaner Laundry: Your clothes will come out of the wash feeling softer and looking brighter because the detergent can finally do its job properly in pure water.

When you remove all the gunk that causes irritation and buildup, a whole house RO system basically turns every single faucet in your house into a source of gentle, purified water. It completely elevates your daily routine.

Protecting Your Home and Your Wallet

Here's one of the biggest long-term wins: protecting your home's plumbing and appliances. Those hard water minerals create scale—that crusty, white buildup you see inside your pipes, on your faucets, and, more importantly, inside your expensive appliances.

That scale buildup makes things like your water heater, dishwasher, and washing machine work way harder than they should. This leads to higher energy bills and a much shorter lifespan for your appliances. By filtering out these minerals right where the water enters your home, a whole house reverse osmosis system acts like a shield, stopping that expensive damage before it even starts. You'll be making fewer repair calls and your appliances will last longer, saving you hundreds, if not thousands, of dollars down the road.

Plus, with an unlimited supply of amazing water right from the tap, you can finally ditch single-use plastic water bottles for good. You'll not only shrink your environmental footprint but also cross a regular expense off your grocery list. Those savings really add up over the year.

How to Choose the Right System for Your Family

Picking the right whole house reverse osmosis system can feel like a huge task, but it’s actually pretty straightforward if you break it down. Don't get bogged down in technical jargon. The best place to start is with what you know: your family and your home. It’s all about matching the system's power to your specific needs.

Your first step is to nail down two key numbers: how much water your household uses daily and what’s actually in your water. These two facts will steer all your other decisions and keep you from buying a system that’s overkill or one that just can’t keep up.

Calculate Your Daily Water Demand

First things first, let’s figure out how much filtered water your family actually needs. This is measured in Gallons Per Day (GPD). A system’s GPD rating tells you the maximum amount of pure water it can produce over 24 hours.

Figuring out your usage is easier than you might think. You don't need to track every drop. Instead, just think about your busiest moments—like a typical morning when the shower is running, the laundry is going, and the dishwasher kicks on. A good whole house reverse osmosis system needs a big enough storage tank to handle all that at once without your water pressure taking a nosedive.

  • Small household (1-2 people): A system rated for 200-400 GPD should do the trick.
  • Average family (3-4 people): Look for something in the 400-800 GPD range.
  • Larger families (5+ people): You’ll probably need a system that can produce over 800 GPD to keep everyone happy.

Understand Your Water Quality

Next up, you need to know exactly what you’re trying to filter out. The key metric here is Total Dissolved Solids (TDS), which is just a measure of all the minerals, salts, and metals dissolved in your water. You can often find this in your city's annual water report, but for a truly accurate number, a cheap handheld TDS meter is the way to go.

Why does TDS matter so much? Because the more "stuff" in your water, the harder the RO system has to work. If your TDS is high (over 500 ppm), you'll need a stronger system, and probably a booster pump, to push water through the membrane effectively.

Think of your TDS level as a roadmap. It tells you exactly how tough the filtration job is going to be, which points you directly to the right kind of equipment.

Consider Essential System Features

Once you know your GPD and TDS numbers, you can start zeroing in on the features that make sense for your home.

One of the biggest factors is your home's water pressure. You can learn more about understanding your home's water pressure, but the bottom line is this: if your pressure is below 40-50 PSI, a booster pump isn't optional. It's essential. It provides the muscle needed to force water through the RO membrane.

If you’re on well water, a UV filter is another must-have. While RO membranes are fantastic at removing dissolved solids, they aren't designed to kill living organisms. A UV light acts as a final line of defense, zapping any bacteria or viruses to make sure your water is completely safe to drink.

Balancing Cost and Efficiency

Finally, let's talk budget and long-term costs. A huge factor here is the system's wastewater ratio—how much water goes down the drain for every gallon of pure water produced. Older systems were notoriously wasteful, sometimes with ratios as high as 4:1. Modern, high-efficiency models can get that down to 1:1, which saves a massive amount of water over the year.

The initial investment for a whole house reverse osmosis system can range from USD 1,000 to USD 4,000, with most homeowners spending around USD 2,500 for the equipment and installation. Typically, about 89% of that cost is for the parts and materials, while the other 11% covers professional labor. By figuring out your needs ahead of time, you can pick a system that delivers pure, clean water without a shocking price tag.

A Homeowner's Guide to Installation and Upkeep

https://www.youtube.com/embed/7tdKkeNClPE

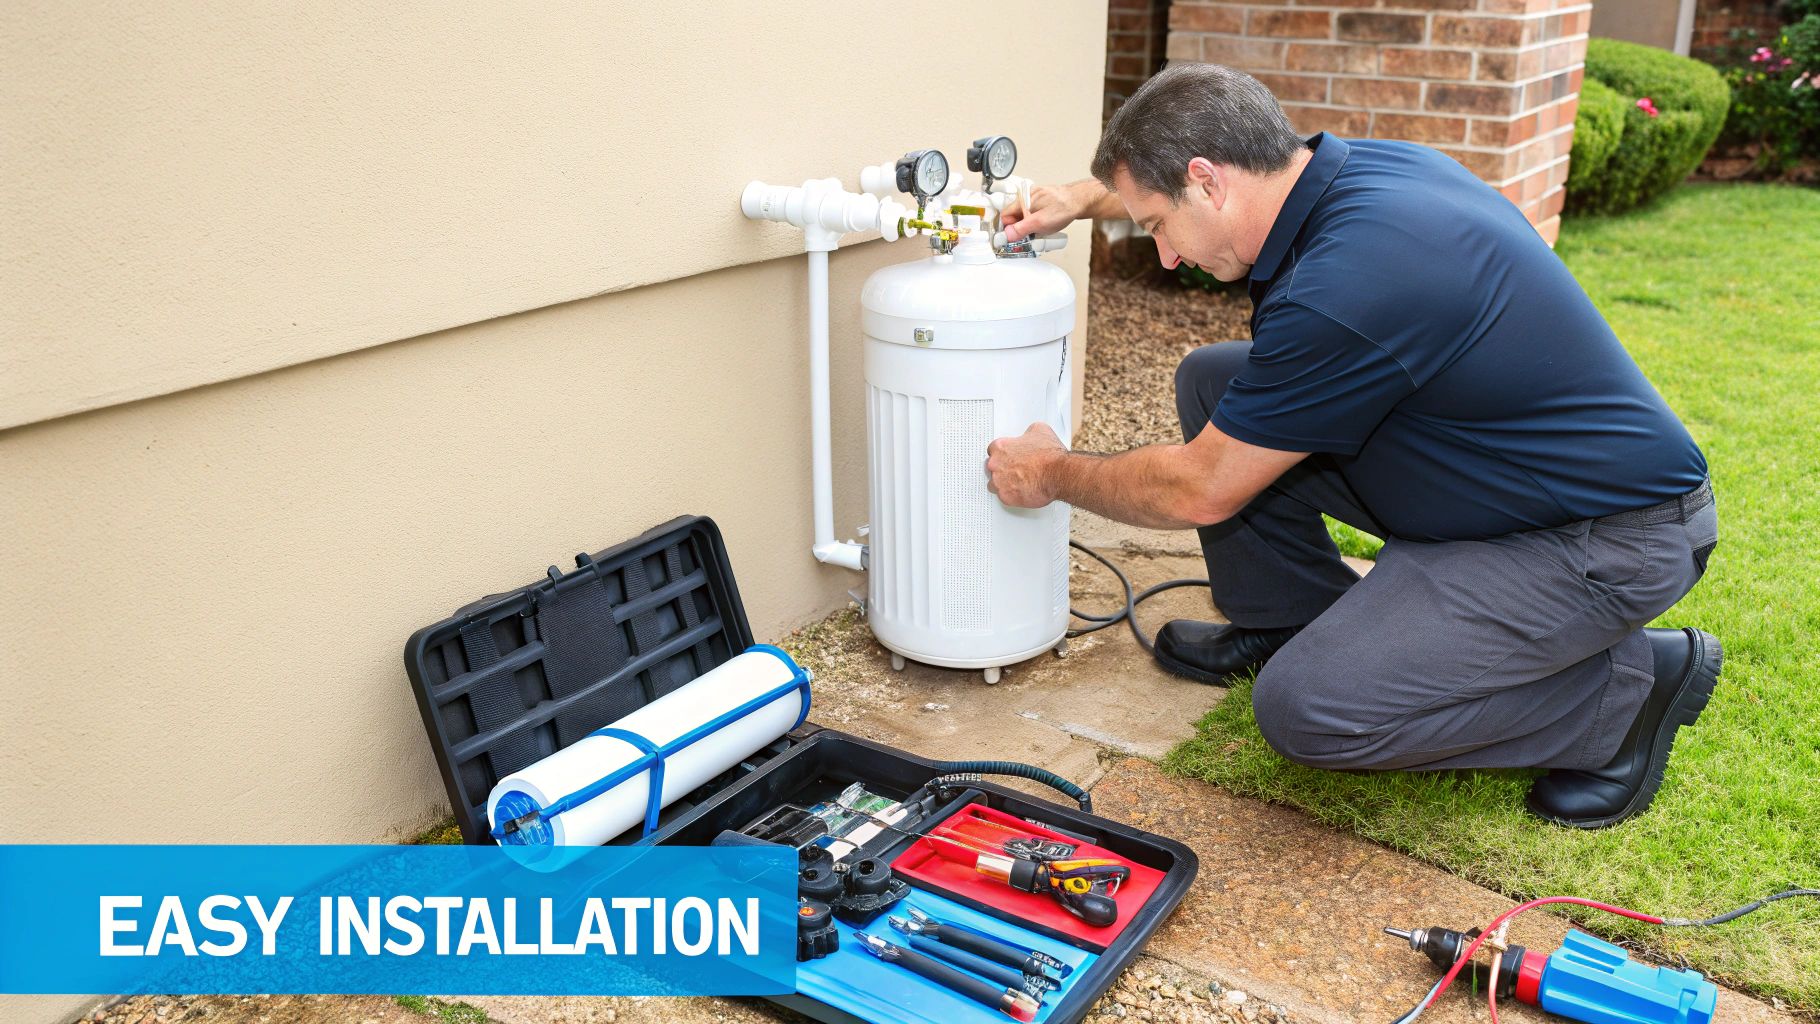
So you've picked out the perfect whole house reverse osmosis system. Now for the fun part: getting it set up and running in your home. This really breaks down into two stages—the initial installation and the simple, ongoing maintenance that keeps your investment working hard for you. Get these two things right, and you'll be enjoying pure, clean water for years.

The first big question you need to answer is whether you'll hire a pro or tackle the installation yourself. There's no single right answer here; it really comes down to your own comfort level with plumbing and how much time you have.

Professional Installation vs DIY

Hiring a licensed plumber definitely brings peace of mind. They've seen it all before, know how to handle any surprises that might pop up, and will make sure every connection is leak-free. It's usually the best way to go if you have a complex setup or just want the assurance that the job is done right from the start.

On the flip side, a DIY install can be a really satisfying project—and save you some money—if you know your way around a toolbox. To pull it off, you'll need to be comfortable cutting into your main water line, possibly soldering pipes, and carefully following the system's instructions. Keep in mind, if any part of the job requires electrical work, it's crucial to prioritize safety by finding a trusted electrician.

Creating a Simple Maintenance Schedule

Don't let the word "maintenance" intimidate you. For these systems, it's mostly just a predictable schedule of changing filters and doing a quick check-in. This simple upkeep is the secret to getting the best performance and avoiding bigger problems later on.

Think of maintenance as a tune-up for your home’s water supply. A few simple steps each year ensure the entire system—from the powerful membrane to the final polishing filter—is working in perfect harmony to deliver the purest water possible.

Your long-term care plan boils down to just a few easy tasks. Once you get into a rhythm, it'll become second nature, and your water quality will thank you for it. If you want to dive deeper into general upkeep, you can find more water filtration advice to round out your knowledge.

Your Routine Upkeep Checklist:

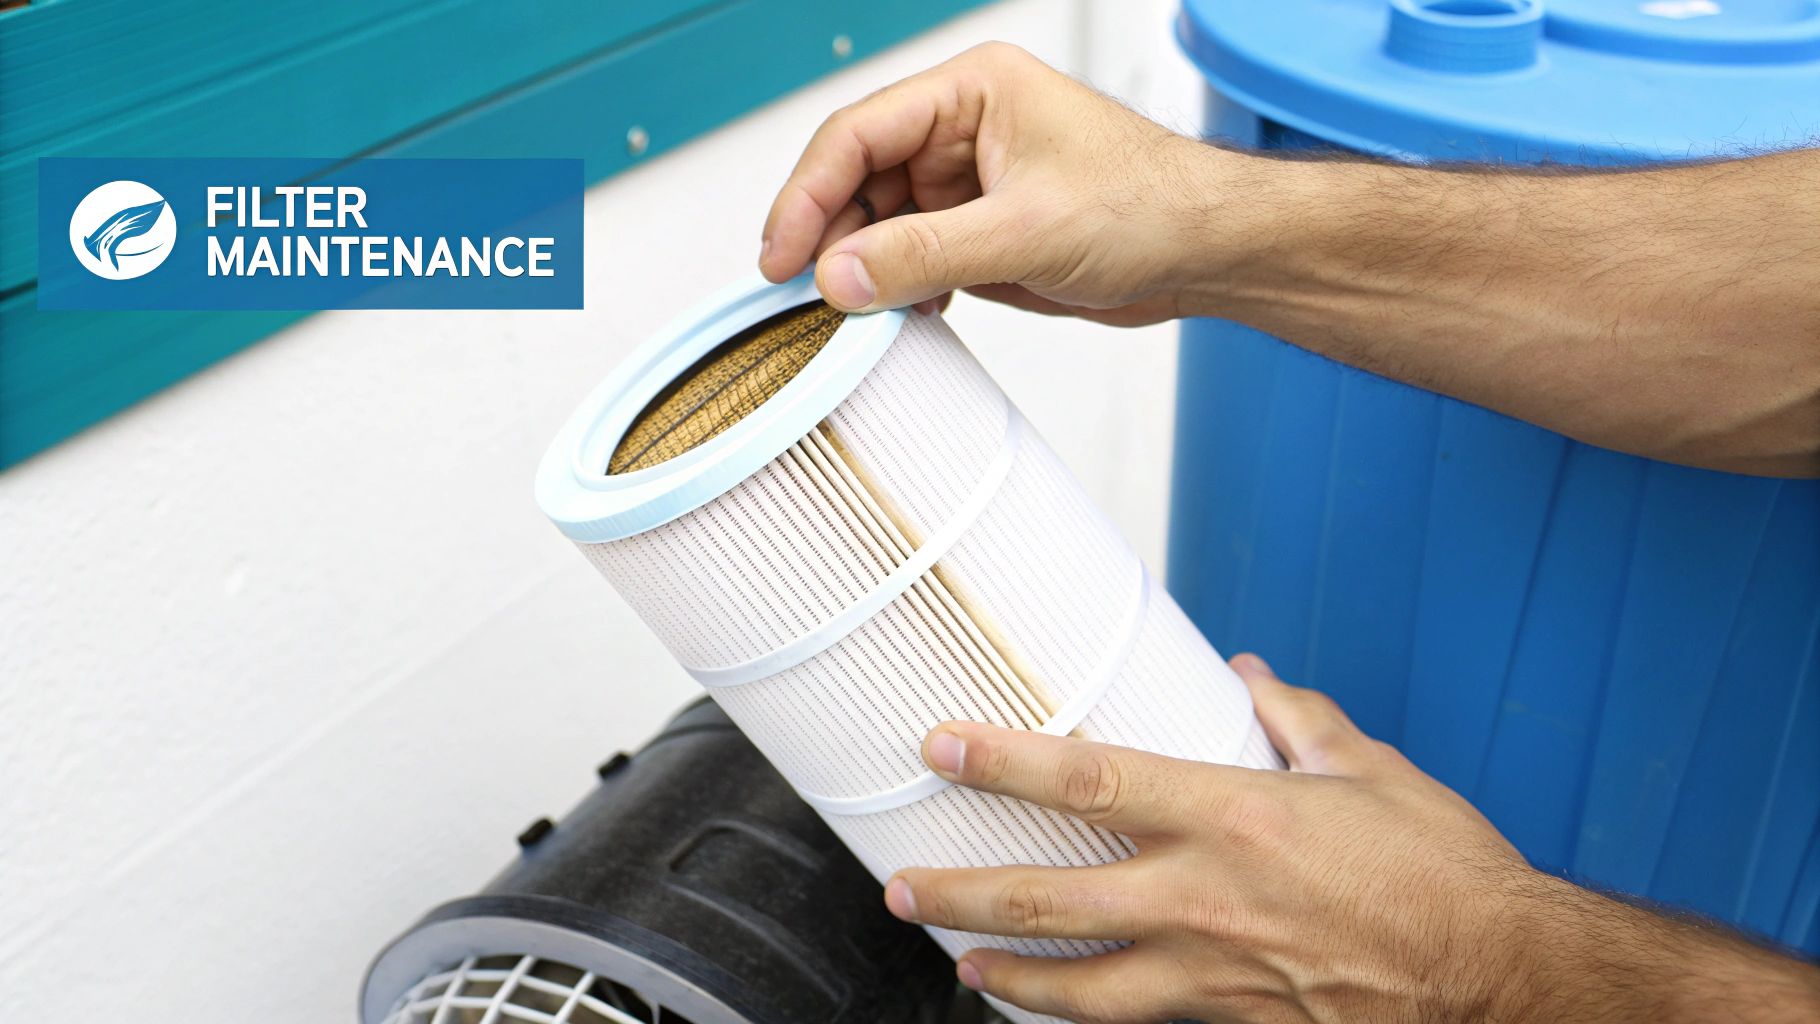
  • Pre-Filters (Every 6-12 Months): These are the workhorses, catching all the sediment and chlorine before they can do any damage. Swapping them out is the most important thing you can do to protect the RO membrane.
  • Post-Filter (Every 12 Months): This final filter gets changed out once a year. It's what removes any lingering tastes the water might pick up from the storage tank, keeping it tasting crisp and fresh.
  • RO Membrane (Every 2-4 Years): This is the heart of your whole system. How long it lasts depends on your water quality and how much you use it, but planning for a replacement every few years is a good rule of thumb.
  • Annual System Check: Once a year, just take a quick look over everything. Check the air pressure in the storage tank and scan all the connections for any signs of leaks.

That's really all there is to it. Following this straightforward routine will keep your whole house reverse osmosis system running like a dream, delivering incredible water to every tap in your home.

Got Questions About Whole House RO Systems? Let's Clear Things Up.

Even after you’ve seen the benefits, it’s smart to have a few questions before you commit to a whole house reverse osmosis system. Let's walk through some of the most common things people ask, so you can feel totally confident in your decision.

What About Water Waste?

This is probably the number one concern we hear. It's true, older RO systems weren't exactly efficient, but today's technology is a completely different story.

Modern, high-efficiency systems have gotten that wastewater ratio way down—some are as low as 1:1. That means for every gallon of pure water you get, only one gallon goes down the drain. Some of the most advanced units even have brine-reclaim features to cut down on waste even more.

Does It Strip Out Healthy Minerals?

Another big question is about minerals. Since reverse osmosis is so thorough, it does remove beneficial minerals like calcium and magnesium right along with all the nasty stuff. But there's an easy fix.

We almost always recommend adding a post-remineralization filter. This is the last stop for your water before it hits the tap, adding a healthy blend of minerals back in. This not only makes the water healthier but also improves the taste and alkalinity.

You really get the best of both worlds: pure water with up to 99% of contaminants gone, plus the good minerals you want for balanced, great-tasting water.

What's the Upkeep Like?

Finally, how much maintenance are we talking about? You might be surprised. The main RO membrane—the heart of the system—is built to last. Depending on how hard your water is and how much you use, you’ll typically only need to replace it every 2 to 4 years.

The pre-filters need a bit more attention, usually a swap every 6-12 months. But it’s a simple job that protects that more expensive membrane, making sure your system runs at its best for years to come.


For more expert guidance on choosing the right water filtration solutions for your home, explore the in-depth reviews and practical advice from our team at Water Filter Advisor. Find your perfect water filter system today.

Carbon Block Filters Water: Your Guide to Purer, Better-Tasting Water

If your tap water has a weird taste or a faint chemical smell, a carbon block filter is one of the easiest and most affordable ways to fix the problem. Think of it as a super-powered Brita for your entire kitchen. These surprisingly simple devices use activated carbon to grab onto contaminants like chlorine, leaving you with cleaner, better-tasting water straight from the tap.

Let's dive into exactly how this clever technology works and find the perfect filter for your home.

Your Journey to Better Tasting Water Starts Here

Image

Ever notice your water tastes a bit like a swimming pool? That’s usually chlorine. Water treatment plants use it as a disinfectant to make sure the water is safe on its way to your house. It does a critical job, but nobody really wants to taste it when they pour a glass.

This is where a carbon block filter really shines. You can think of it like a super-powered sponge, made specifically to soak up all the junk you don't want in your water. It's a straightforward but incredibly effective way to make your daily drinking water much more enjoyable, without needing a complex or expensive system.

Why Carbon Filtration is a Popular Choice

It's no secret that people are paying more attention to what's in their water, and that's made carbon filtration a go-to for millions of homes. The market for these filters is booming, all part of a bigger global push for better water quality and health.

So what's the big deal? Why are these filters so common? It really boils down to a few major wins for your home:

  • Better Taste and Smell: They are fantastic at pulling out chlorine and other things that give water an "off" taste.
  • Contaminant Reduction: Carbon is great at targeting a whole range of organic chemicals, including certain pesticides and VOCs (volatile organic compounds).
  • Affordable and Easy to Find: Whether you want a simple pitcher or an under-sink system, there’s a carbon filter out there for just about any home and budget.

A carbon block filter works in two ways at once: it’s a gatekeeper and a magnet. It physically stops sediment from passing through, while its huge internal surface area chemically attracts and traps contaminants, pulling them right out of your water.

For an even more complete approach to your home's water, you can look into complementary treatments like water softening solutions such as Harvey Salt Blocks.

In this guide, we're going to break down the science behind how these filters work, show you exactly what they remove, and help you figure out the best system for your family. By the time you're done reading, you'll know exactly how to choose, install, and maintain a filter that completely transforms your tap water.

The Science Behind Carbon Block Water Filtration

To really get why a carbon block filters water so effectively, think of it as a microscopic maze with a magnetic personality. Water gets pushed through, but all the nasty stuff gets trapped, unable to find an exit. It's a simple idea, but it’s powered by two potent scientific principles working in tandem to clean up every single drop.

This isn't just a one-trick pony. The filter pulls double duty. First, it acts as a physical gatekeeper, kind of like a sieve, blocking bigger particles. At the very same time, it uses a powerful chemical attraction to snatch dissolved impurities right out of the water, making sure they never reach your glass.

The Power of Physical Filtration

The first job of a carbon block is just straightforward mechanical filtering. The carbon is packed into a dense, solid block that's riddled with incredibly tiny pores. These pores are measured in microns, and most home filters have a rating between 0.5 to 5 microns. To give you some perspective, a single human hair is about 70 microns thick.

As water is forced through this tight-knit structure, any particle larger than the pores gets stopped in its tracks. We're talking about things like silt, sand, rust, and even some microorganisms. It’s like a bouncer at a club door, only letting the water molecules and smaller, dissolved goodies pass through to the next stage. This first step is absolutely crucial for clearing up cloudy water and setting the stage for the deeper cleaning to come.

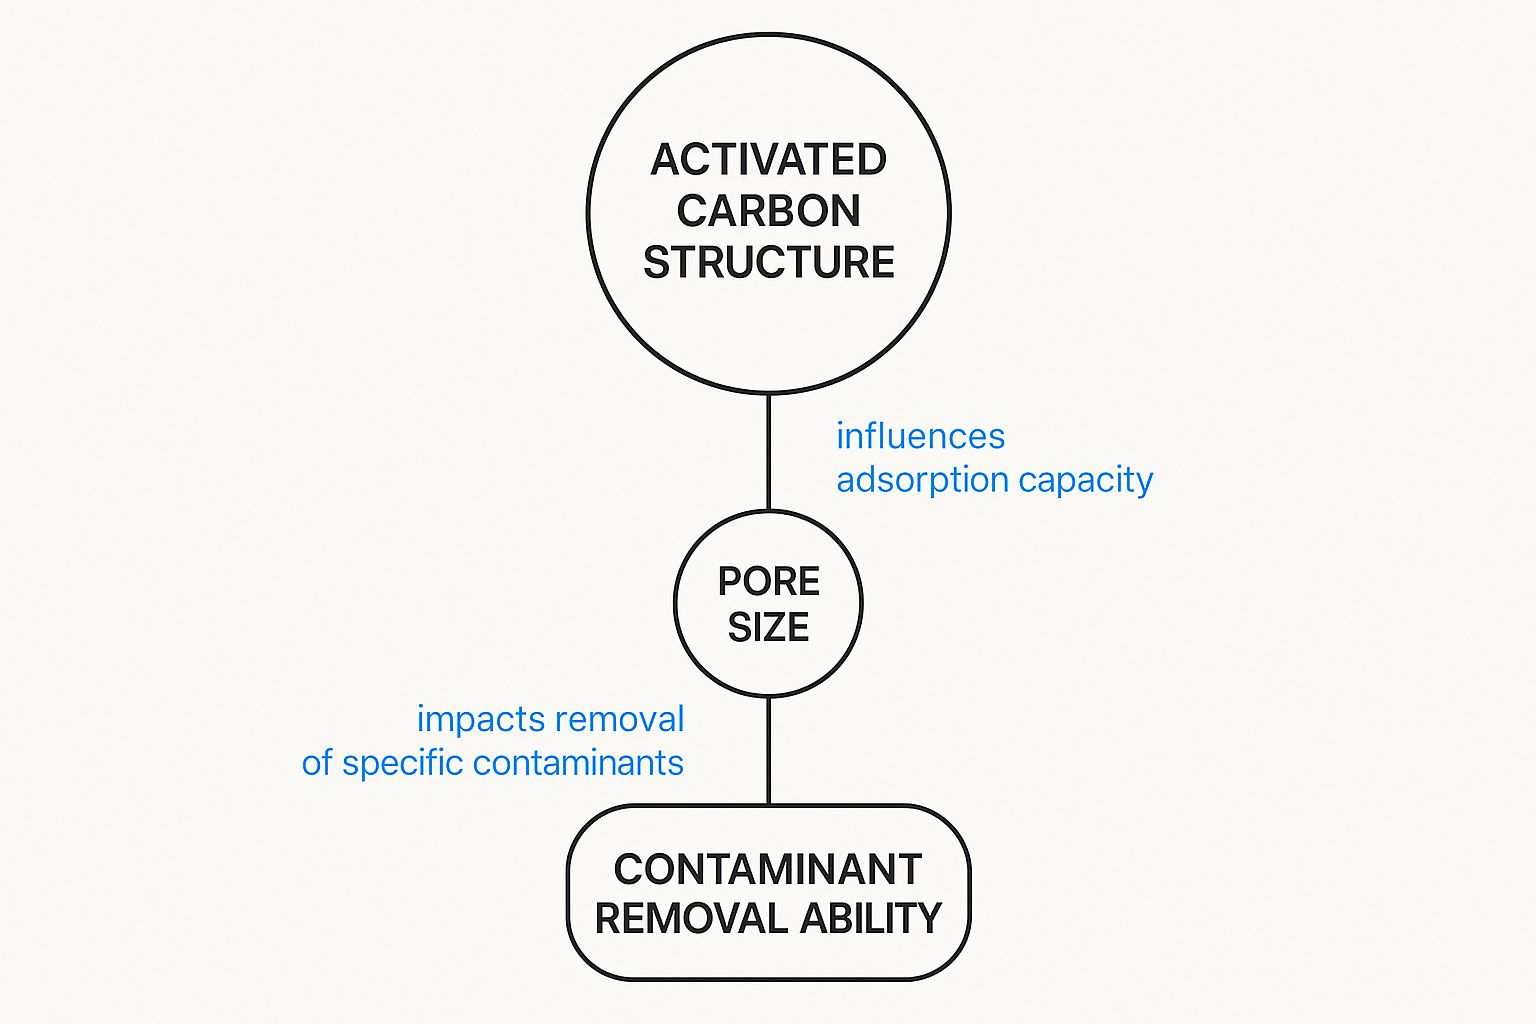
This image really shows the link between the carbon's structure, its pore size, and its knack for removing contaminants.

Image

As you can see, that huge internal structure and those tiny pores are what give activated carbon its incredible power.

Adsorption: The Secret to Purity

Now, this is where the real magic happens, down at the microscopic level. It’s a process called adsorption. Be careful not to mix this up with absorption—that’s when something soaks up liquid like a sponge. Adsorption is different. It’s when contaminants chemically stick to the outside of the carbon, like little magnets snapping onto a refrigerator door.

To make this happen, the carbon has to be “activated.” This is done by superheating carbon-rich materials (like coconut shells or coal) in a low-oxygen chamber. This process blasts open millions upon millions of tiny pores, which dramatically increases the carbon's total surface area.

It's hard to wrap your head around, but just one gram of activated carbon can have a surface area of over 3,000 square meters. That means the little carbon block in your filter might have an internal surface area the size of a football field.

This massive, porous landscape is what makes adsorption so brutally effective. As water winds its way through the filter's maze, contaminants like chlorine, volatile organic compounds (VOCs), and other chemicals that cause bad tastes and smells are electrochemically drawn to the carbon's surface. They get stuck in the pores and are taken out of the water for good.

Why Contact Time Matters

The performance of a carbon block filter really hinges on contact time—basically, how long the water gets to hang out with the carbon. The solid block design is far better than loose carbon bits (often called GAC) because it prevents "channeling." That’s where water finds an easy way through, carving a little path and bypassing most of the filter material.

A carbon block forces water to take the scenic route, a long and winding path through its dense structure. This maximizes contact time. The slower the water flows, the more chances the carbon has to grab onto those impurities. This is why filters come with a recommended flow rate; they're designed to ensure contaminants have enough time to get stuck to the carbon before the water hits your tap. This careful engineering is how a carbon block filters water so thoroughly, giving you that clean, fresh result you’re looking for.

What Contaminants Carbon Block Filters Remove

Image

So, we've covered the science of adsorption. Now, let's get down to what really matters: what is a carbon block filter actually pulling out of your water?

Think of it as a smart gatekeeper for your tap. It's incredibly good at targeting the specific impurities that make water taste and smell off, while also tackling certain invisible chemicals. Its main job is to go after organic compounds and the disinfectants used by city water systems.

Knowing what it targets helps you figure out if it's the right solution for your home. If your water has that "swimming pool" odor, you're in luck. A carbon block filters water by going straight for the source of that smell, along with a whole list of other things you'd rather not be drinking.

The Chlorine and Chloramine Busters

The #1 reason people get a carbon filter is to get rid of chlorine. Municipal water suppliers use it to kill off bacteria and viruses, which is great for public health. But by the time the water gets to your kitchen, that chlorine has done its job and often leaves behind a chemical taste and smell. Carbon is a superstar at adsorbing chlorine, which is why filtered water just tastes so much cleaner.

But what if your city uses chloramine? Many municipalities are switching to this more stable disinfectant, which is a mix of chlorine and ammonia. A standard carbon filter will remove some of it, but a special type known as catalytic carbon is way more effective. If your water bill says they use chloramines, look for a filter with catalytic carbon to get the best-tasting water.

Tackling Volatile Organic Compounds (VOCs)

Beyond just improving taste and odor, carbon filters are a powerful defense against a group of chemicals called Volatile Organic Compounds (VOCs). These are carbon-based chemicals that can seep into water supplies from things like industrial runoff, pesticides, and solvents.

VOCs include a wide range of substances, some of which are linked to health concerns. Carbon block filters are certified to reduce many of them, including benzene, toluene, and trihalomethanes (THMs)—a nasty byproduct of chlorine disinfection.

Other Contaminants on the Hit List

That massive internal surface area makes carbon a real workhorse. It’s skilled at grabbing onto plenty of other unwanted guests, too.

  • Pesticides and Herbicides: If you live near agricultural areas, runoff can carry these chemicals into the water system. Carbon is excellent at adsorbing them.
  • Bad Tastes and Odors: Carbon deals with all sorts of organic compounds that create musty, earthy, or even fishy smells, bringing your water back to a clean, neutral state.
  • Lead Reduction: While not all carbon filters can handle heavy metals, many modern carbon blocks are beefed up with special media (like KDF) designed specifically to reduce lead.

What Carbon Filters Do Not Remove

It's just as important to know what a carbon filter can't do. These filters aren't a cure-all for every single water problem out there. By design, they are selective—they leave some things in and can't touch others.

For instance, carbon filters won't remove healthy dissolved minerals like calcium, magnesium, and potassium. This is a good thing! These minerals are beneficial for your health and actually contribute to good-tasting water. They also generally don't remove fluoride, nitrates, arsenic, or microorganisms like bacteria and viruses. For those contaminants, you'd need a different kind of system, like reverse osmosis or a UV purifier.

This handy table breaks down what a typical carbon block filter can and can't handle.

Carbon Block Filter Contaminant Removal Guide

Contaminant Category Effectively Removed Generally Not Removed
Aesthetics Chlorine, bad tastes, and odors Hardness minerals (calcium, magnesium)
Chemicals VOCs, pesticides, herbicides Fluoride, nitrates, arsenic
Heavy Metals Lead (with special media) Mercury, cadmium (without special media)
Microbiological Cysts (with <1 micron rating) Bacteria, viruses

Ultimately, understanding this list helps you match the right filter to your specific water quality concerns, ensuring you get the performance you need.

Decoding Filter Performance and Certifications

When you're trying to compare different carbon block filters, the technical specs on the box can look like they're written in another language. But trust me, figuring out what these key metrics mean is the secret to picking a filter that actually works as advertised. Once you know what to look for, you can cut right through the marketing fluff and choose a filter with confidence.

These numbers tell you the whole story. They show you how fine the filter's "sieve" is, how fast you'll get clean water, and exactly how long it will run before you need to swap it out. Learning to read these specs is the single most important step in finding a reliable filter for your home.

Key Performance Metrics to Understand

When you're sizing up a filter, you'll see three main specs over and over: the micron rating, flow rate, and filter capacity. Each one gives you a critical piece of the puzzle.

  • Micron Rating: This tells you the size of the particles the filter can physically block. It’s simple: a smaller number means finer filtration. A 1-micron filter, for instance, will trap much smaller contaminants than a 5-micron one. If you're trying to get rid of things like tiny cysts (think Giardia and Cryptosporidium), you'll want a filter rated at 1 micron or less.

  • Flow Rate (GPM): This is measured in gallons per minute (GPM) and tells you how quickly water will move through the filter. A higher GPM is great for whole-house systems or your main kitchen faucet where you don't want to stand around waiting. Just keep in mind that slower is often better for contaminant removal, as it gives the water more contact time with the carbon.

  • Filter Capacity (Gallons): This is the total number of gallons the filter can clean before it’s clogged up and needs to be replaced. A little refrigerator filter might be rated for 200 gallons, while a beefier under-sink system could handle 600 gallons or more.

The Gold Standard: NSF Certifications

While the performance numbers are a great start, the real proof of a filter's effectiveness comes from third-party certifications. The most respected and common ones come from NSF International (formerly the National Sanitation Foundation), an independent group that tests and verifies product claims.

An NSF certification isn't just a sticker on a box; it's a guarantee that the filter has been rigorously tested and proven to remove the specific contaminants it claims to. It's the highest level of assurance you can get.

Looking for NSF/ANSI standards is the easiest shortcut to know you're buying a quality product. The two you'll see most often for carbon block filters water treatment are:

  • NSF/ANSI 42 Aesthetic Effects: This one confirms the filter can make your water taste and smell better. It's specifically tested on its ability to reduce things that are more of an annoyance than a danger, like chlorine and other particulates that give water a bad odor or cloudy look.

  • NSF/ANSI 53 Health Effects: This is a much tougher standard to meet. To earn this certification, a filter has to be proven to reduce specific health-related contaminants like lead, mercury, cysts, and a long list of VOCs. If you're worried about more than just taste, this is the certification you need to look for.

The demand for high-performance home filters is strong, partly because of solid regulatory standards and consumers who know what to look for. The compressed design of carbon block filters, which lets them remove a huge range of contaminants like lead and VOCs, has made them a dominant force in the home water filtration market. You can dig deeper into commercial water filter trends to see how this technology is evolving. By checking for these certifications, you can be sure your chosen filter meets the highest standards for both safety and performance.

Choosing the Right Carbon Filter for Your Home

Image

Alright, you can now read a filter’s spec sheet like an old pro. Now comes the fun part—matching a system to your actual life. From simple pitchers to whole-house units that treat every drop, there’s a carbon block filter solution for just about everyone.

The goal isn't to find the single "best" filter on the market, but the one that's the best for you. It really boils down to your budget, how much water you use daily, and how comfortable you are with a little installation work. Let's break down the most common types of home filters to see which one checks all your boxes.

Simple and Portable Water Filter Pitchers

If you're just dipping your toes into water filtration, a pitcher is the easiest place to start. They couldn't be simpler: fill the top, let gravity do the work, and pour yourself a glass of crisp, clean water. They’re cheap, require zero setup, and are a great fit for renters or anyone who just wants to improve the taste of their drinking water without any commitment.

Of course, there are some trade-offs. Pitchers are slow and don't hold much water, so you’ll find yourself at the sink refilling them often. The small filters also need to be swapped out more frequently than bigger systems, and that cost can add up.

  • Best For: Individuals, renters, or anyone looking for a low-cost, no-fuss option for drinking water.
  • Pros: Super affordable, totally portable, and no installation required.
  • Cons: Small capacity, slow filtering speed, and more frequent filter changes.

Convenient Refrigerator and Faucet Filters

Want filtered water on tap without a big project? Refrigerator and faucet-mounted filters are a fantastic middle ground. Fridge filters are built right into your water and ice dispenser, giving you chilled, clean water instantly. They're a true "set it and forget it" solution, usually needing a new cartridge only every six months.

Faucet filters screw directly onto your kitchen tap, letting you switch between filtered and regular water on the fly. This is a neat trick for extending the filter's life, since you can use unfiltered water for things like washing dishes. Both are a huge step up from pitchers in convenience and capacity.

These are what we call point-of-use (POU) systems. They’re designed to treat water right where you use it most—your kitchen sink. They strike a great balance between performance and convenience without needing to call a plumber.

High-Performance Under-Sink Systems

For those who want serious filtration power hidden away, an under-sink system is the gold standard for the kitchen. These units are installed discreetly in the cabinet below and connect right to your cold water line. They feed a separate, dedicated faucet, giving you a steady stream of pure water.

Because these systems use much larger carbon block filters, they have a higher capacity and last a lot longer than pitchers or faucet mounts. They cost more upfront and might require some basic plumbing know-how to install, but you get top-tier contaminant removal and fast-flowing water. It's a great long-term investment for a family.

Comprehensive Whole-House Systems

If your goal is better water from every single tap—showers, laundry, bathrooms, and all—then a whole-house system is the ultimate answer. Also called a point-of-entry (POE) system, this unit is installed right where the main water line enters your home.

This approach doesn't just protect your family's drinking water; it protects your pipes and appliances from the harsh effects of chlorine and sediment. While it's the most expensive option and typically requires a professional plumber to install, it delivers a seamless, whole-home solution. You'll even notice the difference in the shower, with softer skin and hair free from chlorine's drying effects.

Simple Installation and Maintenance Tips

One of the best things about modern carbon block water filters is that most are designed for easy, DIY installation. The idea of fiddling with your home’s plumbing can be a little nerve-wracking, but you don’t need to be a pro to get most systems up and running.

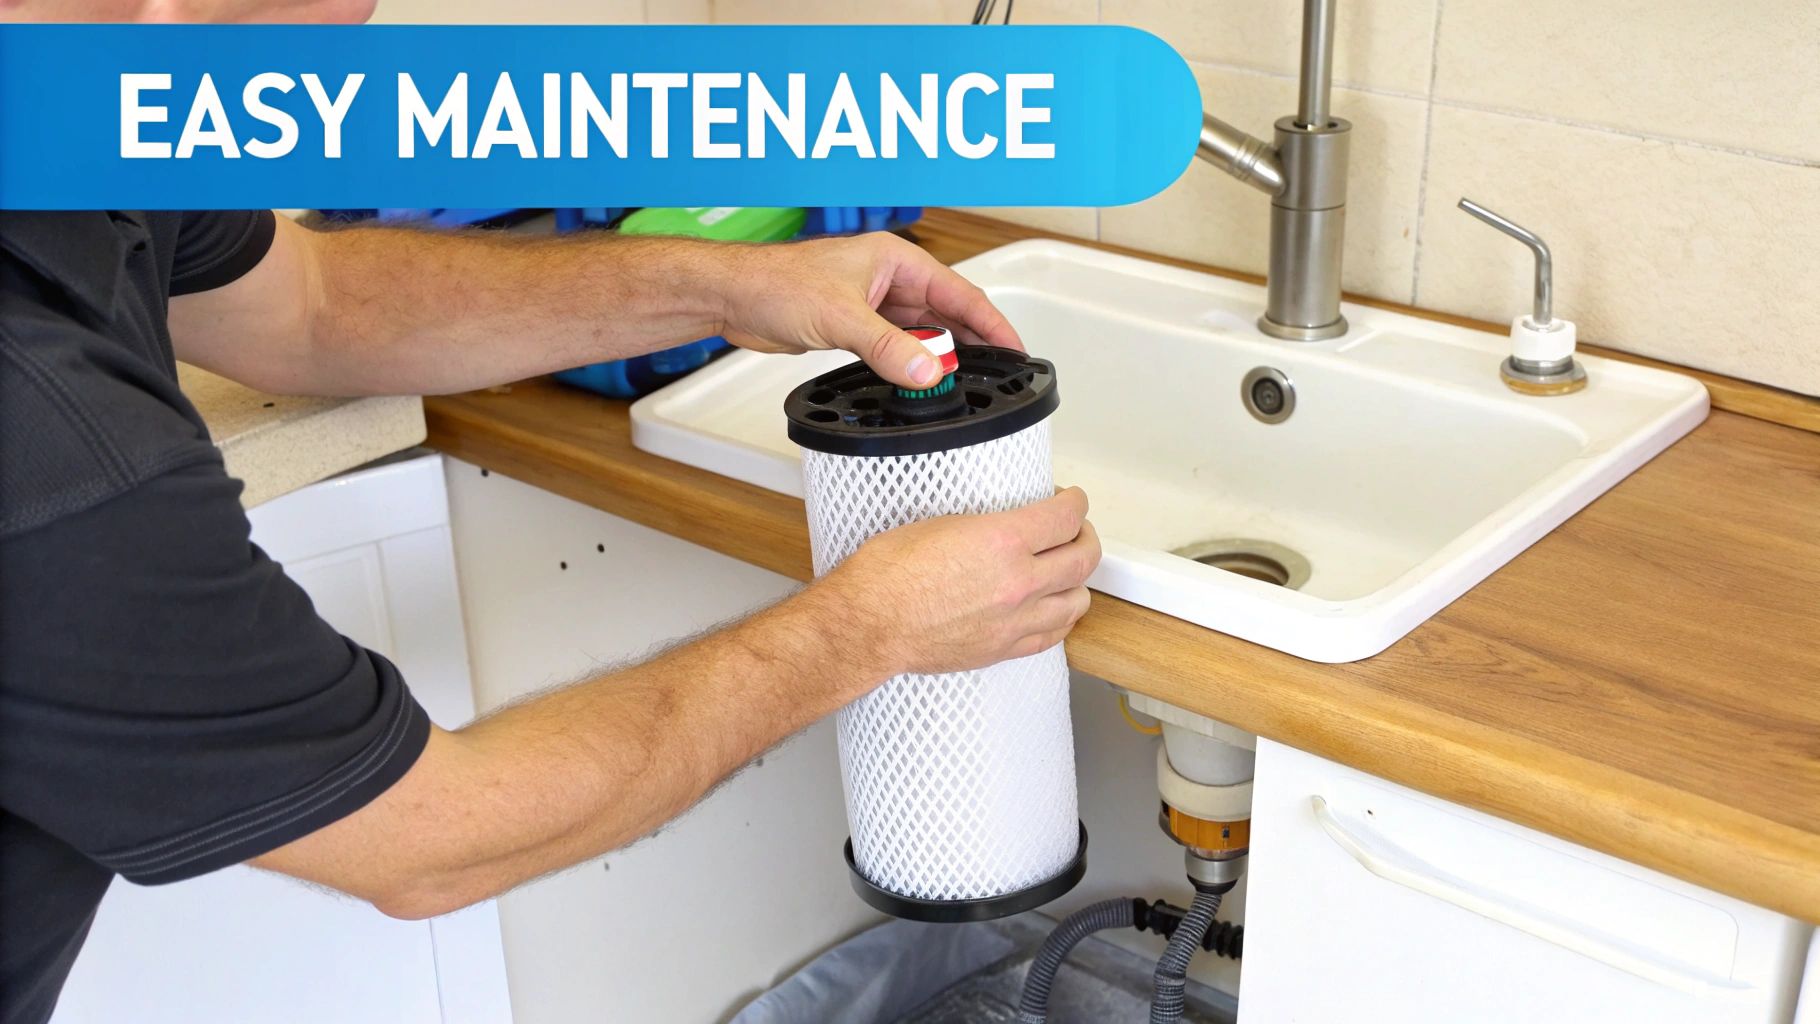
For example, swapping out a refrigerator filter is usually as simple as twisting out the old one and popping in the new—no tools needed. Under-sink systems might look more complicated, but many kits today come with everything you need, including clear instructions and quick-connect fittings that just snap into place.

Of course, while many setups are perfect for a weekend project, some complex whole-house systems or tricky plumbing situations are best left to the experts. If you hit a snag or just don't feel comfortable, it’s always a good call to bring in professional plumbing services to make sure it’s done right.

Why Timely Maintenance is Non-Negotiable

Getting your filter installed is just step one. The real key to consistently great-tasting water is keeping up with maintenance.

Think of your filter cartridge as a highly specialized sponge. Once it's completely full of trapped contaminants, it simply can’t absorb any more. Worse yet, the pressure of water flowing through can actually start to push some of those trapped impurities back into your water supply.

When you forget to change your filter, you’re basically turning your purifier off. The carbon becomes saturated and can’t grab any more contaminants, meaning all that nasty chlorine and other junk starts flowing right back out of your tap.

A clogged filter doesn't just stop working—it can become a breeding ground for bacteria. The trapped organic material creates a perfect environment for microorganisms to multiply, potentially making your water quality worse than it was before filtration.

Knowing When It's Time for a Change

So, how can you tell when your filter has reached the end of the line? Your system will give you a few clear signals that it's time for a replacement.

You should change your filter if you notice:

  • A Drop in Water Pressure: This is the classic tell-tale sign. As the filter’s pores get clogged with gunk and sediment, it becomes much harder for water to push through. The result is a weak, slow flow from your faucet or dispenser.
  • Return of Bad Tastes and Odors: If that familiar chlorine taste or musty smell starts creeping back into your water, you know the carbon’s job is done. Its adsorption capacity is maxed out, and it’s no longer pulling out the chemicals that ruin the flavor.
  • The Filter Indicator Light: Many modern refrigerators and under-sink systems take the guesswork out of it with a handy indicator light that alerts you when the filter is nearing its expiration date.

A good rule of thumb is to replace most refrigerator and under-sink filters every six months. But always double-check the manufacturer’s guidelines, as every filter is different. For more tips on keeping your system in top shape, check out this great advice from water filtration experts.

A simple trick? Set a recurring reminder on your phone or calendar. It’s an easy way to make sure you never miss a filter change.

Your Top Questions About Carbon Block Filters, Answered

As you narrow down your options for the perfect filter, it's totally normal to have a few last-minute questions. Getting those final details sorted is what helps you feel confident you're making the right call for your family.

So, let's dive into some of the most common things people ask about carbon block filters, from how long they last to how they stack up against other types.

How Long Do Carbon Block Water Filters Typically Last?

There’s no single answer here—a filter's lifespan really depends on its size, how much water you use every day, and the quality of your local water.

As a rule of thumb, a standard under-sink or refrigerator filter usually needs to be replaced every 6 to 12 months. A larger whole-house filter might go for a year or even longer. Your best bet is always to check the manufacturer's guidelines to keep your filter working like it should.

Will a Carbon Block Filter Reduce My Water Pressure?

When you first install a new carbon block filter, you might notice a tiny drop in water pressure, but it’s usually so small you won’t even feel it.

If you suddenly see a major drop in your water pressure, that’s the number one sign your filter is clogged with gunk and it's time for a change. It’s your system’s way of saying, "Hey, I'm full!" A new filter will get the flow back to normal and keep your water pure.

Are Carbon Block Filters Better Than GAC Filters?

Both use activated carbon, but yes, carbon block filters generally do a better job than Granular Activated Carbon (GAC) filters. The key is in the design. A carbon block is a solid, compressed brick of carbon.

This solid structure forces every drop of water to twist and turn through a dense maze, so it can't just find an easy path and sneak past the filter media. This gives the water much more contact time with the carbon.

It also means carbon blocks can be made with much smaller pores, allowing them to reliably filter out tiny contaminants like lead, certain cysts, and VOCs that loose GAC granules might miss. This level of performance is why the demand for these filters is soaring, with the global market expected to hit USD 10.3 billion by 2030. You can get more details on the global carbon block filter market trends to see what's driving this growth.


Ready to find the perfect filtration solution for your home? At Water Filter Advisor, we provide in-depth reviews, buying guides, and expert advice to help you choose with confidence. Explore our resources today at https://www.waterfilteradvisor.com.

How to Remove Lead from Water: A Home Filtration Guide

So, you're wondering how to remove lead from water. It’s a smart question, but before you can zap it, you have to know if that invisible heavy metal is crashing your party in the first place. Since you can't see, smell, or taste lead, the only way to know for sure is to test your water.

Step 1: Confirming Lead is in Your Water

The idea of testing might sound like a science project, but it's really just a simple choice: a quick DIY kit from the hardware store, or sending a sample to the pros at a certified lab. Let's break down which one is worth your time.

DIY Test Kits vs. Professional Lab Analysis

Those do-it-yourself test strips are tempting. They’re cheap, and you get an answer in minutes. Just dip the strip in some water, and it changes color if lead is present. It's like a magic trick for your tap water.

The problem? Most of them aren't very good magicians. They often miss low levels of lead that are still a health risk, and they won't tell you how much lead you have. They’re a simple yes/no tool, but to pick the right filter, you need to know the specific number in parts per billion (ppb).

That's where professional lab testing steals the show. It's the gold standard for a reason. You'll get a collection kit from a state-certified lab with crystal-clear instructions. A lab report gives you the exact concentration of lead, leaving no room for doubt.

The Importance of the First-Draw Sample

How you collect your water sample is just as important as where you send it. For the most accurate reading, you need to capture a "first-draw" sample.

This just means collecting water from your kitchen tap first thing in the morning, before anyone uses any water in the house—no showers, no flushing toilets, no running the dishwasher. This water has been sitting in your pipes all night, giving it the maximum amount of time to absorb any lead from old plumbing.

A first-draw sample shows you the worst-case scenario for your daily lead exposure. If that sample comes back with high lead levels, you know you have a problem to solve.

Getting the sample is easy, but you have to do it right:

  • Don't run any water at all before collecting. Go straight to the kitchen sink.
  • Always use cold water. Hot water can pull more lead from pipes, but cold water is the standard for testing what you'll be drinking.
  • Fill the bottle immediately. Just turn on the tap and fill the collection bottle from the lab right away.

Understanding Your Test Results

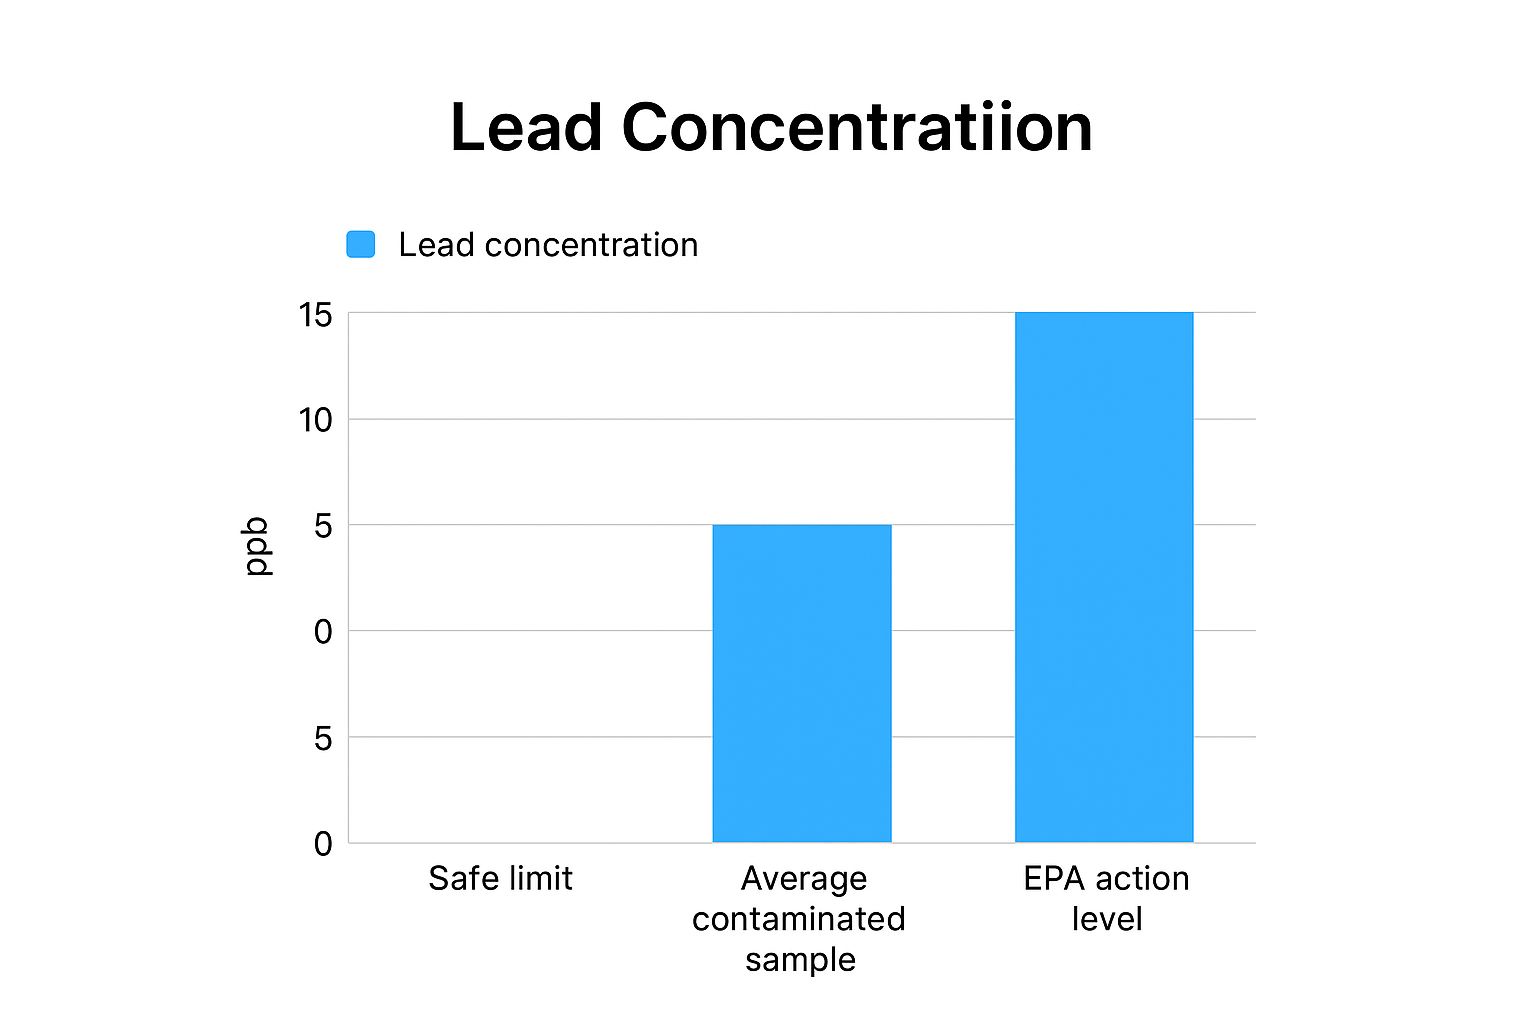
Your lab report will give you a number in parts per billion (ppb). The EPA has an "action level" of 15 ppb, but don't get too hung up on that number.

That 15 ppb figure isn't a health-based safety standard; it's a trigger that requires public water systems to take action. The reality, according to the U.S. Centers for Disease control and Prevention (CDC) and other health experts, is that no level of lead exposure is safe, particularly for children. If your test shows any detectable lead, it's time to get serious about filtration.

Step 2: Choosing the Right Water Filter for Lead Removal

Okay, your test results are in, and they show lead. The good news is you can absolutely do something about it. The right water filter is your most powerful weapon in the fight for safer water.

But when you start looking, it's easy to get overwhelmed. The market is flooded with options, and every company promises perfectly pure, safe water. The real trick is to cut through the marketing fluff and find a filter that actually works on a heavy metal like lead.

Image

This chart puts things into perspective. The Environmental Protection Agency (EPA) goal for lead is zero. Any amount is a real concern, which is why effective filtration is so important.

The Gold Standard: NSF/ANSI 53 Certification

Before you even think about pitchers versus under-sink systems, there's one thing you absolutely must look for: NSF/ANSI 53 certification.

Think of this as an independent, third-party guarantee. It’s proof that a filter has been rigorously tested and can actually reduce lead and other health-related contaminants, just like it says on the box. If a filter doesn't have this specific certification for lead reduction, you have no real assurance that it’s protecting your family.

Never buy a filter for lead removal unless you can confirm it's certified to NSF/ANSI 53 standards. This seal is the single most reliable sign of a filter that does what it claims.

A Breakdown of Common Filter Types

With that critical certification in mind, let's walk through the most common types of home water filters. Each has its own set of pros and cons, so the right choice for you will depend on your budget, your living situation, and how much water you need to treat.

Comparing Home Water Filters for Lead Removal

Choosing the right filter is all about balancing effectiveness, convenience, and cost. This table breaks down the key differences to help you decide which system is the best fit for your home.

Filtration Type Lead Removal Effectiveness Installation Average Annual Cost Best For
Water Pitcher Moderate (if NSF 53 certified) None $60 – $120 Single users, renters, and budget-conscious households.
Faucet-Mounted Good (if NSF 53 certified) DIY, very easy $50 – $100 Kitchen use in rental properties or small apartments.
Under-Sink Excellent DIY or Professional $150 – $500 Homeowners wanting dedicated, high-quality drinking water at one tap.
Whole-House Excellent Professional Required $500 – $2000+ Homes with known lead service lines or widespread contamination issues.

As you can see, the options range from simple, portable solutions to comprehensive, whole-home systems.

Water Pitcher and Faucet-Mounted Filters

These are the entry-level options for a reason—they're affordable and incredibly easy to use. A pitcher can live in your fridge, while a faucet-mounted unit screws onto your kitchen tap in minutes.

  • How They Work: Most use a block of activated carbon. As water flows through, the carbon's huge, porous surface area adsorbs contaminants like lead.
  • Best For: Renters, people in small apartments, or anyone looking for a simple, budget-friendly starting point.
  • The Catch: Their filter capacity is pretty small. You’ll be changing cartridges every 40 to 100 gallons, and the flow rate can be slow. Plus, they only treat water at a single point.

Under-Sink Filtration Systems

If you're looking for something more permanent and powerful for your kitchen sink, an under-sink system is a fantastic upgrade. These are installed out of sight and connect directly to your cold water line, usually feeding a separate, dedicated faucet for pure, filtered water.

They also tend to use more advanced technology. Some rely on high-grade activated carbon, but many use reverse osmosis (RO), which is one of the most effective methods out there. You can learn more about RO system water purifiers to get a better handle on the tech, but basically, they use a special membrane to block nearly everything—lead, arsenic, nitrates, you name it.

Whole-House Filtration Systems

What if your test results show high lead levels throughout your home, or you know you have a lead service line? That’s when you should consider a whole-house, or "point-of-entry," system.

This is the most comprehensive solution. It’s installed where your main water line enters your home, meaning every single tap—from the kitchen sink to the bathroom shower—delivers clean, filtered water. While it provides total peace of mind, it's also the biggest investment and almost always requires a professional plumber to install correctly.

Step 3: Installing and Maintaining Your Water Filter

Image

So you’ve done your homework and picked out a solid, certified filter to remove lead. Fantastic. But the job isn't quite done. A high-quality filter is only as good as its installation and maintenance. Getting the setup right and being disciplined about upkeep is what truly protects your family.

Think of it this way: your filter is a gatekeeper for your water. If it’s not installed correctly or you let it get old and clogged, that gatekeeper can’t do its job.

Getting the Installation Right

The setup really depends on what kind of filter you bought. Simple systems, like the ones that mount directly on your faucet, are usually a piece of cake. You can often get them on in just a few minutes with no tools, just make sure you get a tight, leak-free seal.

Under-sink systems, however, are a bit more involved. While plenty are designed for a confident DIYer, you absolutely have to follow the manufacturer's instructions to the letter. No skipping steps.

A Quick Checklist for Under-Sink Filters:

  • Kill the Water Supply: First thing's first. Find the cold water shutoff valve under your sink and turn it off completely.
  • Secure Your Connections: Use the fittings and hoses that came in the box. Take a moment to double-check that every connection is snug. A slow, hidden drip can cause a world of water damage down the road.
  • Flush the New Filter: Before you even think about drinking the water, you have to flush the system. This means running cold water through it for a few minutes. It clears out any loose carbon dust (which is harmless but can make the water look cloudy) and gets the filter media activated and ready to work.

The most common mistake people make is skipping that initial flush. It’s not optional. This one step ensures your filter works like it’s supposed to from the very first glass.

Why Filter Replacement is Non-Negotiable

Let me be blunt: an old, expired filter is worse than no filter at all. As a filter cartridge does its job, it fills up with the contaminants it has captured. Once it reaches capacity, it can’t remove any more lead. Simple as that.

What’s worse is a phenomenon called "dumping," where a totally saturated filter can actually release a concentrated burst of the very junk it was supposed to be catching. This is precisely why changing your filter on schedule is the single most important part of this whole process. This focus on filtration is part of a much larger public health story, and you can learn more about the global fight for safe water from the World Health Organization.

Creating a Foolproof Maintenance Schedule

When a filter is tucked away under a sink, it’s easy to forget about it. "Out of sight, out of mind" can be a real problem here, so you need a system that doesn't rely on memory alone.

  • Calendar It: The moment you install a new cartridge, put the replacement date on your kitchen calendar or, better yet, set a recurring event on your phone.
  • Use the Sticker: Most filters come with a little sticker for a reason. Write down the date you installed it and the date it needs to be replaced. Stick it right on the filter housing or inside the cabinet door where you’ll see it.
  • Heed the Light: Many pitchers, refrigerators, and faucet filters now have an indicator light. These are great, but think of them as a backup reminder. Your calendar is your primary system.

Spotting the Signs of an Expired Filter

Beyond your schedule, the filter itself will often give you clues that it’s on its last legs.

The most obvious sign is a significant drop in water pressure. If the flow from your dedicated filter faucet has slowed to a trickle, that’s a dead giveaway. The filter is clogged with sediment and everything else it has captured, making it hard for water to get through. This is its way of telling you its ability to remove lead is compromised. Time for a change—immediately.

Bonus Tip: Simple Habits to Further Reduce Lead Exposure

Image

While your certified water filter is doing the heavy lifting, a few smart daily habits can add another powerful layer of protection. Think of these as the supporting players, working alongside your filtration system to keep your family’s contact with lead to an absolute minimum.

These simple, no-cost practices are all about turning your kitchen into a safer space.

Master the Morning Flush

When water sits in your pipes overnight or while you're at work, it has more time to pick up lead from old plumbing. The fix is surprisingly simple: flush your pipes. Before you use any water for drinking or cooking, just let the cold tap run for a minute or two.

You'll know you've flushed the line when the water turns noticeably colder. This quick step pushes out the stagnant water and pulls in fresh, cleaner water from the main before it even hits your filter.

The Golden Rule: Never Use Hot Tap Water for Cooking

It’s tempting to grab hot water from the tap to get a head start on boiling pasta, but this is one kitchen shortcut you need to skip. Hot water is far more corrosive than cold water and dissolves lead from pipes and old solder much more efficiently.

Always start with cold water for cooking and drinking. Heat it on the stove or in a kettle instead. This one change is a critical part of any home strategy for how to remove lead from water.

By following this rule, you’re ensuring you start with the lowest possible lead concentration before you even begin to cook.

Common Questions About Removing Lead From Water

Even after you've picked a filter and tested your water, a few questions might still be nagging you. That's completely normal. Let's tackle some of the most common things people ask about getting lead out of their water.

Will Boiling Water Remove Lead?

This is probably the biggest and most dangerous myth out there, and the answer is a firm no. Boiling is fantastic for getting rid of things like bacteria and viruses, but it does absolutely nothing for lead.

In fact, it can make things worse. When water boils, some of it turns to steam and escapes, but the lead stays behind. This means the lead concentration in the water left in the pot actually goes up. Always, always stick to a certified filter to handle lead.

How Do I Know My Filter Is Certified for Lead?

Time to become a label detective. You have to look for one very specific code on the product packaging or its official documentation: NSF/ANSI 53. This isn't just marketing fluff; it’s a certification from an independent organization that has put the filter through rigorous testing to verify it reduces lead to safe levels.

Don't just take a company's word for it. If a filter doesn't clearly state it's certified to NSF/ANSI 53 for lead reduction, you simply can't trust it to protect your family. It's the only real guarantee you have.

Vague promises like "cleaner water" don't cut it. For lead, this specific certification is non-negotiable.

Is It Safe to Shower in Water with Lead?

Finally, a bit of good news. The health risk from showering or taking a bath in water that contains lead is extremely low. Your skin doesn't absorb lead, so the real danger comes from drinking it.

The main thing to watch out for, especially with little kids, is making sure they don't swallow a bunch of bathwater. But for the most part, you don't need a massive whole-house filter just to make bathing safe. This allows you to focus your efforts and budget on point-of-use filters for the water you drink and cook with.

My City Water Report Is Clean. Should I Still Test My Tap?

Yes, without a doubt. This is a critical point that trips a lot of people up. Your city's water report shows the quality of the water as it leaves the treatment plant, which could be miles away.

Lead contamination is a "last-mile" problem. It almost always happens somewhere between the city main and your faucet. The usual suspects are an old lead service line running to your house or even your own plumbing—things like old pipes, lead-based solder, or certain brass fixtures. The only way to know what's actually coming out of your kitchen tap is to test it right there. Your city's report can't see inside your walls.

Article created using Outrank

Choosing Well Water Filtration Systems for Your Home

If you're one of the millions of homeowners who gets their water from a private well, you know the freedom that comes with it. No monthly water bill! But you also know the responsibility for that water's quality is 100% on you.

Unlike city water, which is treated before it ever reaches your home, well water is a direct line from the ground to your tap. That means it's up to you to handle whatever comes along for the ride—sediment, iron, nasty bacteria, and even chemicals. A good well water filtration system isn't just a nice-to-have; it's the essential gatekeeper that makes sure your water is safe, clean, and delicious.

Why Your Well Water Needs a Guardian

Image

There's something special about having your own private well. But that independence means you're the one in charge of your water's quality and safety. While the earth does a decent job of filtering water naturally, it’s far from a perfect bouncer.

Whatever is in the ground around your property has a good chance of ending up in your glass. This could be anything from naturally occurring minerals that cause hard water to agricultural runoff or invisible bacteria. This guide is here to give you the know-how to tackle these challenges head-on.

From Murky to Crystal Clear

Think of yourself as becoming your own personal water treatment expert. You’re about to learn the story of your water, from the moment it enters the ground to the second it hits your faucet. We’ll dig into the common culprits behind those frustrating household water problems, like:

  • Aesthetic Issues: Things like that "rotten egg" smell, rust-colored stains ruining your sinks and toilets, or water that just looks cloudy and unappealing.
  • Hidden Dangers: These are the invisible threats you can't see, smell, or taste. We're talking about bacteria, nitrates, arsenic, and other chemicals that can pose serious health risks.
  • Appliance Assassins: Hard water minerals are notorious for building up inside your pipes, water heater, and dishwasher. This limescale buildup chokes their efficiency and shortens their lifespan.

Managing your well water isn't about just buying a random filter. It's about building a custom defense system designed specifically for your water's unique chemistry. This guide is your blueprint.

Once you understand what's really in your well water, you can confidently choose the right well water filtration systems to protect your home and family. We'll walk you through everything—from testing your water to picking, installing, and maintaining the perfect setup—so every drop is pure, safe, and tastes fantastic.

What Is Hiding in Your Well Water?

Before you can even think about choosing a well water filtration system, you first have to know what you’re up against. Think of your well water as its own little ecosystem. While it's mostly pure, it almost always has a few uninvited guests from the surrounding earth, and these intruders fall into a few distinct categories.

Figuring out what's in your water is the most important first step. You wouldn’t buy a home security system without knowing if you’re trying to stop a raccoon or a burglar, right? The same logic applies here. A professional water test is your reconnaissance mission, giving you the intel you need to build the right defense.

The Physical Intruders You Can See

First up are the things you can actually see—the particles and debris that make your water look cloudy or just plain dirty. These are usually the easiest problems to spot and are often the first thing a good filtration setup tackles.

Think of your well as a giant underground reservoir. As rainwater trickles down through soil and rock to fill it, it picks up tiny hitchhikers along the way. These often include:

  • Sediment, Silt, and Sand: These are the fine bits of dirt and rock that cause cloudiness, a quality known as turbidity. They don't just look bad; they can clog up your pipes, wear out appliance parts, and settle at the bottom of your water heater, making it work harder and less efficiently.
  • Rust and Iron Particles: Seeing orange or reddish-brown stains in your sinks, toilets, or laundry? That’s a dead giveaway for iron. It’s a super common mineral in groundwater that can also give your water a metallic taste.

These physical bits are more than just an eyesore. They provide perfect hiding spots for bacteria and can gum up the works for more advanced filters, like UV purifiers. This is exactly why a simple sediment filter is almost always the first component in any well water system.

To help you get a better handle on what might be lurking, here’s a quick guide to connect the dots between what you see, smell, or taste and the likely culprit.

Common Well Water Contaminants and Their Signs

Contaminant Type Common Examples Potential Signs in Your Home
Physical Sediment, Silt, Sand, Rust Cloudy or murky water, orange/brown stains on fixtures and laundry, gritty texture.
Chemical Calcium & Magnesium (Hardness) Soap scum, mineral buildup (limescale) on faucets, poor soap lather, stiff laundry.
Chemical Hydrogen Sulfide A distinct "rotten egg" smell, especially from hot water.
Chemical Heavy Metals (Arsenic, Lead) Often tasteless, colorless, and odorless. Requires a lab test to detect.
Biological Bacteria (E. coli, Coliform) Also tasteless, colorless, and odorless. Can cause stomach issues or illness.

This table is just a starting point. While some issues are obvious, many of the most serious contaminants are completely invisible, which is why a professional lab test is non-negotiable for well owners.

The Invisible Chemical Threats

Next, we have the chemical contaminants. These are dissolved substances you often can't see, taste, or smell, which is what makes them so tricky. They can seep into groundwater from all sorts of places, like farm runoff, industrial pollution, or even just the natural rocks in your area.

For well owners, this is a huge deal. The whole reason filtration became popular was because of concerns over contamination in private water sources. Globally, around 2 billion people drink from sources contaminated with feces, a stark reminder of the health risks of untreated water. Here in the United States, about 15% of the population gets their water from private wells, which aren't regulated by the EPA like city water. This leaves the responsibility for safety squarely on the homeowner. You can discover more insights about the global water filter market and its growth drivers over on openpr.com.

Some of the most common chemical culprits are:

  • Nitrates and Nitrites: These usually come from fertilizers or leaky septic systems. High nitrate levels are a serious health risk, particularly for infants.
  • Heavy Metals: Arsenic, lead, and mercury can leach into groundwater from natural mineral deposits or industrial activity. Long-term exposure can cause severe health problems.
  • Hardness Minerals: Calcium and magnesium are the duo responsible for hard water. While not a health hazard, they cause limescale buildup that wreaks havoc on your pipes, appliances, and even your skin and hair.
  • Hydrogen Sulfide: This is the gas that produces that awful "rotten egg" smell. It's created by harmless bacteria in the ground, but it can make your water completely undrinkable.

A comprehensive water test is the only way to uncover these hidden chemical threats. Without one, you’re just guessing at what your water needs, which can be an expensive and ineffective gamble.

The Biological Contaminants

Finally, we get to the biological contaminants—the living microorganisms that can make you sick. Because well water isn't treated with chlorine like city water, it’s a potential breeding ground for bacteria and viruses that get in from animal waste or failing septic tanks.

These microscopic invaders include:

  • Bacteria: E. coli and coliform bacteria are the big ones. Their presence is a strong indicator that your well has been contaminated with fecal matter, which means other nasty, disease-causing pathogens could be in there too.
  • Viruses and Protozoa: Organisms like Giardia and Cryptosporidium are notorious for causing severe gastrointestinal illness.

You can't see, smell, or taste these organisms, so a specific test for bacteria is absolutely critical. This is the one area you can’t afford to mess around with, making a UV purifier or another disinfection system a must-have for many well owners.

Alright, you've got the results from your water test. Think of that report as a scouting report on the enemy. Now, it's time to build your dream team of filters to defend your home's water supply.

Choosing the right well water filtration systems isn't a one-size-fits-all deal. It's more like putting together a special ops team—each filter has a specific job, a unique skill set designed to take out a particular contaminant. It's rare that a single, magic-bullet filter will solve all your well water woes. That's why the most effective setups are multi-stage, layering different technologies to create an impenetrable defense.

You wouldn't ask the bouncer checking IDs at the door (your sediment filter) to deal with an invisible threat like bacteria, right? You need layers. Each part of the system has its role, working in concert to deliver clean, safe water from the moment it enters your house. This approach guarantees total protection, from chunky sand and silt down to microscopic germs you can't even see.

This diagram gives you a bird's-eye view of the main categories of well water filters, showing how they all fit together.

Image

As you can see, a solid strategy will likely mix and match a few of these types to get the job done right.

The Frontline Defender: Sediment Filters

Every great well water system kicks off with a sediment filter. This is your first line of defense, the bouncer at the door whose job is to stop the big, clumsy invaders before they gum up the works. Its mission is simple but absolutely critical: catch all the physical junk like sand, dirt, silt, and rust flakes.

Think of it like a screen on your window—it lets the fresh air (water) in but keeps the bugs (sediment) out. By trapping all that debris right at the start, a sediment filter not only clears up cloudy water but also acts as a bodyguard for the more delicate and expensive filters down the line. This one simple step can dramatically boost the lifespan and performance of your entire system.

The Taste and Odor Specialist: Carbon Filters

Next in the lineup is the activated carbon filter. This is your specialist, the one you call in to handle chemical contaminants and get rid of funky tastes and smells. If your water has that swimming pool chlorine odor or a weird, earthy taste, this is your hero.

The secret is its ridiculously huge internal surface area, made up of millions of microscopic pores. These pores work like a magnet for chemicals, snagging things like chlorine, pesticides, and volatile organic compounds (VOCs) through a process called adsorption. It’s the MVP for turning murky, smelly water into something that tastes crisp, clean, and refreshing.

The Mineral Manager: Water Softeners

Did your water report come back with high levels of calcium and magnesium? If so, you've got hard water. That's where a water softener steps in. Now, it's not technically a "filter" in the traditional sense; it's more of a water conditioner. Its job is to stop mineral buildup—that crusty limescale that wreaks havoc on your appliances and leaves soap scum all over your shower.

A water softener uses a clever process called ion exchange. It literally swaps out the "hard" mineral ions (calcium and magnesium) for "soft" sodium ions. This simple trade prevents scale from ever forming in your pipes, water heater, and dishwasher.

This system is your best defense against the costly damage hard water can cause, especially to appliances like water heaters, which can fail years ahead of schedule without one.

The Heavy-Duty Brawler: Iron and Sulfur Filters

For those wells cursed with rusty orange stains and that distinct "rotten egg" smell, you need to bring in the heavy hitters. Iron filters and air-injection oxidizing (AIO) systems are the specialized brawlers built to knock out high concentrations of iron, manganese, and hydrogen sulfide gas.

These systems work by oxidizing the dissolved troublemakers, which basically forces them to turn into solid particles. Once they're solid, the filter media can easily grab and flush them away, getting rid of those ugly stains and nasty smells for good. This targeted attack is way more effective than hoping a standard carbon filter or softener can handle a serious iron or sulfur problem.

The Microbial Assassin: UV Purifiers

If your water test flagged bacteria, coliform, E. coli, or other living critters, you need a surefire way to neutralize them. A UV purifier is the silent assassin for these biological threats. The best part? It doesn't add a single chemical to your water or alter its taste.

It uses a powerful ultraviolet lamp that zaps any water flowing past it. This UV light scrambles the DNA of bacteria, viruses, and other microorganisms, making it impossible for them to reproduce and cause harm. It’s a clean, highly effective final barrier that ensures your water is biologically safe to drink.

The Ultimate Purifier: Reverse Osmosis Systems

Finally, when you want the absolute highest level of purity for your drinking and cooking water, you bring in the special forces: reverse osmosis (RO). An RO system uses a super-fine, semi-permeable membrane to strip out up to 99% of all dissolved solids.

It forces water through this membrane, which is so tight it blocks nearly everything that isn't a pure water molecule. We're talking heavy metals like lead and arsenic, plus nitrates, fluoride, and salts. Because this purification process is slow and meticulous, RO systems are usually installed at a single tap—like under the kitchen sink—to provide a dedicated source of incredibly pure water right where you use it most.

How to Choose the Right Filtration System

Image

Alright, you’ve got your water test results back. Now the real fun begins. This is where you put on your detective hat and figure out exactly what your water needs to be clean, safe, and great-tasting.

Choosing the right well water filtration system isn’t about buying the most expensive gear you can find. It’s about a smart, targeted approach based on what’s actually in your water, how much of it you use, and where you need it most. Your water test is your road map—let’s use it to build the perfect solution for your home.

Decode Your Water Test and Match the Filter

Think of your water test as a diagnostic report for your well. It tells you exactly what you’re up against. Are sediment levels high? Is iron turning your fixtures orange? Your job is to match each problem with the right tool.

Here’s a simple way to break it down:

  • High Sediment or Turbidity: If your water looks cloudy, a sediment pre-filter is non-negotiable. This is always your first line of defense, catching all the dirt, sand, and rust before it can clog up the rest of your system.
  • Elevated Iron or Manganese: Seeing those classic orange or black stains? You’ll probably need a dedicated iron filter or an air-injection oxidizing (AIO) system. A water softener alone just can't keep up with heavy iron.
  • Positive for Bacteria (E. coli, Coliform): This is a serious health concern that needs an immediate fix. A UV purification system is your best bet here. It zaps bacteria and viruses with ultraviolet light, making your water biologically safe without adding any chemicals.
  • Hard Water Minerals (Calcium & Magnesium): If you're tired of limescale buildup on your faucets and appliances, a water softener is the clear winner. It's the only way to truly tackle hardness.

Make a checklist from your water report. For every contaminant you find, you'll want a specific filter stage designed to remove it.

Calculate Your Household's Flow Rate

Here's a detail that's easy to miss but can make or break your system: flow rate. Measured in gallons per minute (GPM), this tells you how much water your system can process at once. Get this wrong, and you'll be dealing with a frustrating trickle every time someone flushes a toilet while the shower is running.

You don't want your filter system to become a bottleneck. A system that's too small for your home will choke your water pressure.

To get a rough idea, just add up the GPM of the fixtures you might use at the same time. A shower is about 2.5 GPM, a toilet can be 2.2 GPM, and a sink faucet is around 1.5 GPM. For a typical family of four, a system that can handle 10-15 GPM is a pretty safe bet to keep the pressure strong everywhere.

Picking a system with a flow rate that meets or slightly beats your home's peak demand is the single best way to guarantee you never have to worry about weak water pressure again.

Point of Entry vs. Point of Use Systems

The last big decision is where you need the filtered water. Do you want to treat every drop coming into your house, or just the water at a specific tap? This leads you to two main categories: Point-of-Entry (POE) and Point-of-Use (POU).

Deciding between a whole-house system and a single-tap filter really comes down to the scope of your water problems and your end goals. Are you trying to protect your entire plumbing system or just purify your drinking water? Here's a quick comparison to help you think it through.

Point-of-Entry (POE) vs. Point-of-Use (POU) Systems

Feature Point-of-Entry (Whole House) Point-of-Use (Single Tap)
Location Installed at the main water line. Installed at a single fixture (e.g., under the kitchen sink).
Treatment Scope Treats all water entering the home. Treats water for one specific tap or appliance.
Best For Widespread issues: hardness, sediment, iron, general chemicals. Targeted issues: lead, chlorine, cysts, specific taste/odor problems.
Primary Benefit Protects plumbing, appliances, skin, and hair. Provides highly purified water for drinking and cooking.
Typical Cost Higher initial investment. Lower initial cost.
Maintenance Less frequent, but larger filter changes. More frequent, but smaller and easier filter changes.

Ultimately, a whole-house POE system offers a comprehensive solution, safeguarding your entire home. The global market for these systems was valued at $10.17 billion and is expected to keep growing as more people become aware of well water contaminants.

On the other hand, POU systems like an under-sink reverse osmosis unit are fantastic for getting ultra-pure water right where you need it most—your kitchen. They are an excellent, budget-friendly way to target drinking water quality without overhauling your entire plumbing setup.

Getting It Installed and Keeping It Running

Image

You’ve picked out the perfect filtration system for your well. Awesome. But now comes the part that makes it all work: getting it installed right and setting up a simple plan to keep it that way.

Think of your new system like a car you just drove off the lot. The installation is like making sure the engine is seated correctly, but the routine maintenance—the oil changes and filter swaps—is what keeps it from breaking down on the side of the road. Neglect this part, and you’re just asking for trouble.

DIY vs. Calling in a Pro

First up, you need to decide if you’re going to tackle the installation yourself or hire a professional. It's a big decision. While a lot of us love a good weekend project, a botched plumbing job can quickly turn into leaks, water damage, or a system that doesn't filter anything at all.

Installing a simple under-sink filter is usually something you can handle on your own. But a whole-house system with multiple tanks? That's a whole different ballgame. It means cutting into your main water line, and that requires some serious skill and confidence.

Ask yourself these questions:

  • How complex is this thing? Is it a single filter cartridge, or a multi-stage setup with a UV light that needs wiring?
  • What are my plumbing skills, really? Are you comfortable cutting pipe, sweating copper fittings, and knowing for sure it won't leak?
  • Do I have the right tools? We're talking pipe cutters, multiple wrenches, maybe even PEX crimpers.
  • What does the warranty say? Some manufacturers will void the warranty unless a licensed professional installs the system.

If you’re hesitating on any of those, just call a plumber. The cost of a professional install—often a few hundred to over a thousand dollars—is a small price to pay for the peace of mind that it’s done right.

Your Maintenance Playbook

Once your system is up and running, a little bit of proactive care is your best friend. Filters are designed to catch gunk, which means eventually, they get full. A clogged filter is not only useless, but it can also tank your home’s water pressure.

Think of your maintenance schedule as the playbook for your system's health. It turns these little tasks into simple habits, stopping small issues before they become big, expensive headaches.

The idea is to get into a routine. A good way to stay on top of everything is to use a preventive maintenance schedule template to track what needs to be done and when. No more guessing.

Here’s a general guide for what your schedule might look like:

  1. Sediment Pre-Filter: This is your first line of defense and gets dirty the fastest. Plan on swapping this out every 3-6 months, depending on how much sediment is in your water.
  2. Carbon Filters: These filters typically need to be replaced every 6-12 months. Always double-check the manufacturer's recommendation.
  3. Reverse Osmosis (RO) Membranes: The main RO membrane is a long-hauler and can last 2-5 years. But don't forget its pre-filters and post-filters—those still need to be changed every 6-12 months.
  4. UV Purifier Lamp: A UV bulb needs to be replaced every single year. It might still light up after 12 months, but its germ-killing intensity fades, leaving your water vulnerable.
  5. Water Softener Salt: This isn’t a replacement, just a refill. Peek inside the brine tank once a month and top it off with salt pellets as needed.

Jot these dates down in a calendar or set reminders on your phone. Sticking to a schedule is the single most important thing you can do to protect your investment and keep your water clean and safe for years to come.

Your Top Well Water Filtration Questions Answered

Stepping into the world of well water filtration can feel like learning a new language. You've got questions, and we've got straightforward answers from our years of experience. Let's tackle some of the most common ones homeowners ask.

How Often Should I Test My Well Water?

Think of it like an annual check-up for your water. At a minimum, you should test your well water once a year for the usual suspects like bacteria and nitrates.

But you also have to be your own first line of defense. If you ever notice a sudden change in the taste, smell, or even the color of your water, get it tested right away. It's also a smart move to do a more comprehensive test for things like heavy metals and pesticides every 3-5 years. You never know when something deep in the ground has shifted, and it's always better to be safe.

Can a Single Filter Solve All My Well Water Problems?

That’s a common hope, but unfortunately, it’s not realistic. Well water is rarely a one-problem situation; you're usually dealing with a cocktail of sediment, hard minerals, and maybe even some unseen biological contaminants.

Since most filters are built to do one job really well, a single filter just can't handle that kind of complexity. This is exactly why multi-stage systems are the gold standard. A setup that combines a sediment filter, a carbon filter, and a UV purifier creates a powerful, layered defense that addresses everything in turn.

A layered filtration strategy is the key. Each stage acts as a specialist, working with the others to remove a wide range of contaminants, ensuring the water is thoroughly treated before it reaches your tap.

A properly installed system shouldn't crush your water pressure. If you notice a serious drop, it's almost always one of two things: either your filters are clogged and screaming for a replacement, or the system itself is too small for your home's needs. Always check the flow rate (measured in gallons per minute) and make sure it can keep up with your family’s peak water usage.

Looking for more info? You might find answers in these additional Well Water FAQs.


Ready to ensure every drop from your well is clean and safe? The experts at Water Filter Advisor provide in-depth guides and unbiased reviews to help you confidently choose the perfect system for your home. Explore our resources and make the right decision for your family's water at https://www.waterfilteradvisor.com.

Article created using Outrank

Best Shower Filter for Hard Water – Your Guide to Better Skin & Hair

If your skin feels tight, your hair is dull, and soap scum seems to be your bathroom’s permanent resident, you might be blaming the wrong culprit. The secret to a better shower might not be in a new shampoo bottle but in a simple shower filter for hard water. These clever little gadgets attach right to your shower arm, working as a bouncer to block harsh minerals before the water even hits you. Many people feel a dramatic difference from the very first wash.

The Unseen Battle Happening in Your Shower

That constant struggle with brittle hair and itchy skin? It might have nothing to do with your expensive conditioners or lotions. The real problem could be flowing right out of your showerhead. For millions of us, the invisible menace of hard water is turning a refreshing daily ritual into a frustrating battle against dryness and buildup.

This isn't just a niche problem—it's everywhere. Over 60% of households in the United States are showering in hard water, which is loaded with minerals like calcium and magnesium. These minerals are notorious for wreaking havoc on skin and hair, often making dryness worse and even aggravating conditions like eczema. People are catching on, which is why the U.S. shower filter market, valued at $360 million in 2024, is projected to grow. You can find more home water filtration trends on accio.com.

Why Your Shower Routine Might Be Backfiring

Without a filter, every shower can feel like you're washing with "liquid rock." The dissolved minerals in hard water leave a film on your skin and hair, causing a few common problems you might recognize:

  • Dull, Lifeless Hair: Mineral buildup coats every strand, blocking moisture from penetrating. This leaves your hair feeling heavy, brittle, and almost impossible to style.
  • Dry, Irritated Skin: Hard water strips away your skin's natural oils. When this protective barrier is compromised, it can lead to constant dryness, itchiness, and sensitivity.
  • The Never-Ending Cleaning Cycle: See those chalky white spots on your shower doors and fixtures? That's limescale, the calling card of hard water. It also reacts with your soap to create that thick, stubborn soap scum.

A shower filter for hard water acts as a gatekeeper. It intercepts these damaging minerals and contaminants like chlorine before they can disrupt your skin's natural balance or build up on your hair.

Think about it this way: you wouldn't wash your face with dirty water, so why shower with water full of harsh minerals? Adding a filter is a simple upgrade that can transform your shower from a source of irritation into a true sanctuary. It’s the lightbulb moment for anyone tired of fighting the symptoms without ever fixing the root cause.

What Exactly Is Hard Water?

Ever get frustrated that your soap just won’t lather up, or notice a chalky film stubbornly clinging to your shower door? It’s not your cleaning skills—it's almost certainly your water. The term "hard water" might sound technical, but the concept is simple.

Just imagine your water is carrying microscopic, invisible rocks through your pipes.

Image

These "rocks" are dissolved minerals, mostly calcium and magnesium, that the water picks up on its journey through the ground. While they're not harmful to drink, they cause a whole lot of grief in the shower. They interfere with soap's ability to dissolve properly, creating a sticky residue we call soap scum instead of a rich, clean lather.

This reaction doesn’t just stick to your bathroom tiles; it sticks to you, too. The minerals in hard water leave a film on your skin and hair, creating a barrier that can cause all sorts of persistent issues.

The Invisible Culprits in Your Shower

Think of hard water minerals as tiny troublemakers that stop your hair and skin from ever getting truly clean. They leave behind a film that can clog pores, leading to skin irritation and breakouts. At the same time, this residue coats every strand of your hair, weighing it down and blocking moisture from conditioners, leaving it dull, brittle, and just plain unmanageable.

It's a surprisingly common problem, affecting an estimated 85% of American homes. The minerals literally "harden" the water, making it far less effective for washing. For a deeper dive into what hard water is and its potential solutions around your entire home, this resource is a great start.

But it's not just the hardness minerals that are uninvited guests in your shower. Municipal water is almost always treated with disinfectants like chlorine.

While chlorine is essential for killing bacteria and making water safe to drink, it's not so friendly to your skin and hair. In the shower, it acts like a harsh cleanser, stripping away the natural oils that keep your skin hydrated and your hair soft.

This stripping effect can leave your skin feeling tight and itchy and your hair feeling like straw. When you combine that with the mineral buildup from hard water, you've got a one-two punch that sabotages your entire shower routine. A good shower filter for hard water is designed to tackle both problems head-on.

A Closer Look at Common Contaminants

To really understand what you're up against, it helps to see exactly what each contaminant does. While there can be dozens of substances in tap water, a few are notorious for causing problems in the shower.

Here's a quick look at the primary offenders and the damage they do. This really shows why a multi-stage shower filter is so important for protecting your hair, skin, and even your bathroom from daily exposure.

Common Contaminants in Shower Water and Their Effects

Contaminant Effect on Hair & Skin Effect on Bathroom Surfaces
Calcium & Magnesium Leaves a mineral film that clogs pores, dries skin, dulls hair, and can worsen eczema. Creates chalky white limescale on faucets and soap scum buildup on tiles and glass.
Chlorine Strips natural oils, leading to dry, itchy skin, brittle hair, and potential color fading. Can accelerate the tarnishing of metal fixtures over time with prolonged exposure.
Sediment & Rust Can cause skin irritation and discoloration of light-colored hair. Leaves reddish-brown stains in the shower and can clog showerhead nozzles.

As you can see, the issues go beyond just aesthetics. These contaminants directly impact your body and the longevity of your bathroom fixtures, making a quality filter a worthwhile investment.

How Shower Filters Actually Clean Your Water

At first glance, a shower filter seems way too simple to do much of anything. How can that little device you screw onto your shower arm really change your water? The magic is all on the inside, where a mix of different materials wages a tiny war against all the gunk flowing through your pipes.

Think of a good shower filter for hard water as a multi-level obstacle course. It’s designed to trap, zap, and neutralize specific impurities. Each layer inside the filter has its own job, and they all work together to purify the water just before it hits your skin and hair. It's not sorcery—just some clever chemistry and physics working in tandem.

Image

And this process really works. Independent lab tests on popular filters show just how big of a difference they can make. One test, for instance, found a KDF-based filter slashed total water hardness by an incredible 99.94%. It took the water from 128.19 parts per million (PPM) all the way down to just 0.076 PPM.

At the same time, that filter achieved a 100% chlorine removal rate, knocking out the two biggest troublemakers in shower water.

The Powerhouse Players in Water Filtration

While the designs can vary, most filters rely on a handful of proven materials. Each one is a specialist at tackling different problems, which is why the best filters always use a combination. Let's break down the key players you'll usually find inside.

1. KDF (Kinetic Degradation Fluxion)

Think of KDF as a powerful magnet for nasty metals. This special copper-zinc blend creates a tiny electrochemical reaction when water flows over it. This process, called oxidation-reduction (or redox), neutralizes some of the worst stuff in your water.

  • Chlorine Conversion: KDF is a beast when it comes to chlorine. It changes harmful free chlorine into a simple, harmless chloride ion—basically, the same stuff as table salt.
  • Heavy Metal Reduction: It also helps reduce heavy metals like lead, mercury, and iron. It makes them stick to the KDF media, trapping them so they don't end up on you.

2. Activated Carbon

Activated carbon is like a super-sponge with a ridiculously large surface area. Just one gram of it can have the same surface area as a football field. This makes it incredibly good at grabbing onto contaminants through a process called adsorption.

When water passes through this layer, chemicals and organic compounds get stuck to the carbon's surface instead of flowing out of your showerhead. It's especially good at nabbing chlorine, VOCs, and other things that make your water smell funky. It's worth learning more about how common water impurities like chlorine impact your hair to see why getting rid of them matters so much.

Specialized Media for Targeted Results

Beyond those two mainstays, many filters add extra layers to deal with specific issues, from crazy high chlorine levels to stubborn mineral scale. These materials add another layer of polish to the whole process, making sure your shower is as clean as it can be.

Vitamin C Filters

This might sound like something out of a smoothie bar, but Vitamin C (ascorbic acid) is a powerhouse at dechlorinating water. It neutralizes chlorine and chloramine almost instantly. A Vitamin C filter is a fantastic choice if you have really sensitive skin or live somewhere that uses chloramine, which can be tough for other filter types to remove completely.

Calcium Sulfite

This material is a champ at removing chlorine, especially in hot water where activated carbon can start to lose its edge. You'll find a layer of calcium sulfite in many multi-stage filters just to make sure chlorine is getting zapped consistently, no matter how hot you like your showers.

By mixing and matching these different materials, a shower filter for hard water builds a complete defense system. From catching sediment to neutralizing chemicals, each layer does its part to strip away the bad stuff, leaving you with nothing but clean, soft water.

Choosing the Right Shower Filter for Your Home

Now that you understand the science, you're ready to pick the perfect shower filter for hard water for your home. This is about looking past the flashy marketing and zeroing in on what actually affects performance, how long the filter will last, and your daily shower experience.

Think of it like choosing the right tool for a job. You wouldn't use a hammer to drive a screw. In the same way, the best shower filter for you depends on what's in your water and what you want it to do. Are you trying to banish that dry, itchy skin from chlorine, or is the endless buildup of limescale your main enemy?

Decode the Technical Specs

When you're comparing different filters, a few key numbers will tell you almost everything you need to know about how they'll perform. Don't let the technical terms throw you off; they translate directly into real-world results.

  • Flow Rate (GPM): This is measured in Gallons Per Minute and tells you how much water can move through the filter. Most modern showerheads run at 2.0 to 2.5 GPM. A good filter needs to match that rate so you don't feel a big drop in water pressure.

  • Certifications: Keep an eye out for filters certified by the NSF (National Sanitation Foundation). The NSF/ANSI 177 standard is made specifically for shower filters. It confirms that the product actually reduces free available chlorine like it's supposed to. It's a seal of approval you can trust.

  • Cartridge Lifespan: This is usually given in months or gallons (for example, 6 months or 10,000 gallons). To figure out the real cost, just divide the price of a replacement cartridge by how long it's expected to last. A filter that's cheaper upfront might end up costing you more if it needs frequent, pricey replacements.

Match the Filter to Your Needs

To help simplify your choice, we’ve put together a quick guide to help you find the right filter type based on your water hardness and how sensitive your skin is.

Image

As you can see, your personal needs are just as important as your water quality when choosing a filter. Often, a multi-stage filter that combines different media gives the best all-around solution for tackling several problems at once.

To help you compare your options at a glance, we've put together this simple checklist. Think of it as your cheat sheet for matching a filter's specs to your household's needs.

Shower Filter Selection Checklist

Feature What to Look For Why It Matters
Filter Media A combination like KDF, activated carbon, and polyphosphate. Each one targets different problems—chlorine, scale, or heavy metals.
Flow Rate 2.0 to 2.5 GPM. Matches modern showerheads so you don't lose water pressure.
Certifications NSF/ANSI 177 is the gold standard. This proves the filter has been independently tested to reduce chlorine.
Cartridge Lifespan At least 6 months or 10,000 gallons. A longer life means fewer replacements and lower long-term costs.
Installation "Tool-free" or simple screw-on design. You want something you can easily install yourself in minutes.

With this checklist, you can confidently compare models and find one that truly solves your water woes, not just covers them up.

Figuring out your main frustration is the first step. If the strong smell of chlorine and skin irritation is your biggest issue, you need a filter with strong activated carbon and KDF media. But if you're constantly scrubbing away limescale, you'll want a filter with polyphosphate or another scale-inhibiting media designed to stop mineral buildup. If you're looking for more detailed guidance, you might find the various advice articles on water filtration from industry experts helpful.

Your goal is to find a filter that solves your biggest water-related problem. By focusing on your specific needs—be it skin sensitivity, limescale, or chlorine—you can confidently select a model that will deliver a noticeable improvement.

Ultimately, choosing a shower filter for hard water is a small home upgrade that makes a big impact. By checking your water, understanding the key performance numbers, and matching a filter's features to your needs, you can turn every shower into a better experience. It's a smart approach that ensures you get a solution that works for you, giving you softer skin, healthier hair, and a cleaner bathroom.

Getting Your New Filter Installed and Maintained

Alright, you've picked out the perfect shower filter for hard water and it's time to get it hooked up. Don't sweat it—this is probably one of the simplest home upgrades you'll ever do. You won't need a plumber or a big toolbox. Most of these filters are designed for a quick, tool-free installation you can knock out in less than 15 minutes.

The whole idea is to place the filter between the shower arm (the pipe coming out of the wall) and your showerhead. Think of it like a little bouncer for your water, stopping minerals and chlorine right at the door before they can get into your shower.

Image

A Quick Guide to Installation

Most filters follow the same straightforward steps, so what might seem like a plumbing job is actually a quick win. Here’s how it usually goes:

  1. Twist Off the Old Showerhead: Your current showerhead should just unscrew from the shower arm. If it’s a bit stubborn, wrap a cloth around it for a better grip.
  2. Wipe the Threads Clean: Give the threads on the shower arm a quick wipe to get rid of any old plumber's tape or gunk. A clean surface helps create a tight, leak-free seal.
  3. Screw on the Filter: Attach the new shower filter directly onto the shower arm. Hand-tighten it until it feels snug.
  4. Put Your Showerhead Back On: Now, just screw your showerhead onto the other side of the filter. Again, hand-tight should do the trick.
  5. Run a Leak Check: Turn on the water for a moment to see if there are any drips. If you spot a leak, just tighten the connections a little more. You can also use the plumber’s tape that usually comes included in the box.

And that’s all there is to it! In just a couple of minutes, you’ve set up a system that will give you better water for months.

How to Keep Your Filter Working Like New

To keep that soft water flowing and your water pressure strong, a tiny bit of maintenance is all you need. Your filter works hard trapping all those contaminants, and eventually, the cartridge inside gets full. It’s just like a vacuum bag—once it's full, it can't do its job anymore.

Most filter cartridges will last you anywhere from three to six months, which is roughly 10,000 gallons of water. Of course, this can change depending on how hard your water is and how many people are using the shower.

The number one sign that your filter cartridge is ready to be changed is a sudden drop in water pressure. If you stay on top of replacing it, you'll get consistent performance and protection.

Here are a few quick tips to get the most out of your filter:

  • Set a Reminder: Put a note on your calendar or an alert on your phone for every three or six months. It’s the easiest way to remember to check on it.
  • Check the Manual: Always follow the manufacturer's instructions for your specific model's replacement schedule and steps.
  • Watch Your Water Pressure: If your shower starts feeling weak, that's a huge clue the filter is clogged. Go ahead and swap it out to get your flow back.

Replacing the cartridge is just as easy as putting the filter on in the first place. You'll unscrew the housing, pull out the old cartridge, and drop the new one in. A simple habit like this ensures your shower filter for hard water keeps giving you softer skin, healthier hair, and a cleaner shower every single day.

The Real-World Benefits of a Shower Filter

Okay, so we've talked about all the technical stuff—filter types, flow rates, and certifications. But what does a shower filter for hard water actually do for you in the real world? It's not just about taking things out of your water; it’s about what you get back in your daily life. And honestly, you’ll probably notice the difference right away.

The biggest change you'll feel is with your hair and skin. When you remove the harsh minerals and chlorine that strip away your body's natural oils, your hair can finally get the moisture it needs. The result? Hair that’s genuinely softer, shinier, and way easier to manage. Your skin benefits, too, holding onto its natural moisture and feeling less dry and irritated the second you step out of the shower.

A Cleaner Shower and a Happier Home

The perks don't stop with you, either. One of the best side effects is cutting down on your bathroom cleaning time.

  • Less Soap Scum: Without all those minerals reacting with your soap, that annoying film on your shower doors and tile just doesn't build up like it used to.
  • No More Limescale: You can say goodbye to those crusty white deposits that clog your showerhead and stain your fixtures. Everything stays looking clean and new.

More and more people are discovering these benefits, which is why the demand for these filters is on the rise. In fact, the shower filter market was valued at around $561 million in 2025 and is only expected to grow. You can check out the full report on the shower head filter market growth on datainsightsmarket.com if you're curious.

At the end of the day, a shower filter isn't just another gadget. It's a small, easy investment in your home and personal comfort that pays off from the very first time you use it.

Frequently Asked Questions About Shower Filters

Jumping into the world of shower filters can bring up a lot of questions. From performance worries to practical details, it’s smart to get the facts straight before you pick a shower filter for hard water. This section is here to clear up the common confusion and help you choose with confidence.

We've rounded up the questions we hear most often and laid out some clear, simple answers. This way, you'll know exactly what to expect from your new filter and how to get the most out of it.

Will a Shower Filter Reduce My Water Pressure?

This is easily the biggest concern people have, and for good reason—nobody enjoys a weak, trickling shower. The good news is that a quality filter is designed from the ground up to match standard showerhead flow rates, which are typically between 2.0 and 2.5 gallons per minute (GPM). When you first install it, you shouldn't notice any real drop in pressure.

If you do start to feel the flow getting weaker over time, that's almost always a tell-tale sign the filter cartridge has done its job. It's clogged with all the gunk it has trapped, and it's time for a replacement. Sticking to the recommended replacement schedule is the secret to keeping your water pressure strong and steady.

How Do I Know if I Have Hard Water?

The signs of hard water are usually hiding in plain sight. Once you know what to look for, the evidence is everywhere.

Keep an eye out for these classic indicators:

  • Chalky white residue (limescale) building up on your faucets, showerhead, and glass doors.
  • Stubborn soap scum that feels impossible to fully scrub away.
  • Spots on your glassware and dishes, even right after a wash.
  • Skin that feels dry, tight, and itchy the moment you step out of the shower.
  • Hair that looks dull, feels brittle, or just won't cooperate.

If you want a definitive answer, you can always grab an inexpensive hard water test kit online or at a local home improvement store.

Is a Shower Filter the Same as a Water Softener?

Nope, they're two different tools for two different jobs. A whole-house water softener is a major plumbing installation that treats all the water coming into your home. Its main purpose is to remove the calcium and magnesium minerals that make water "hard." It’s a comprehensive solution, but also a much bigger investment.

A shower filter is a point-of-use solution. It’s designed for one specific task: improving the water quality right where you shower. While it can reduce some scale, its main goal is typically to get rid of chlorine, heavy metals, and other contaminants. Think of it as an affordable, targeted upgrade for your daily routine.

How Long Does a Shower Filter Cartridge Last?

The lifespan of a cartridge varies between brands and models, but a good rule of thumb is 3 to 6 months of use. This usually works out to around 10,000 gallons of water. How long it actually lasts for you depends on two key things: how hard your water is and how much water your household uses.

If your water is loaded with minerals or you have a big family showering every day, you'll probably find yourself on the shorter end of that 3-month timeline. Always follow the manufacturer's guidelines to make sure your filter is working at its best.


At Water Filter Advisor, our mission is to give you clear, research-backed advice to help you find the best water filtration solutions for your home. From our in-depth reviews to practical tips, we’re here to help you get safer, better-tasting water. Check out all our resources to make a confident choice at https://www.waterfilteradvisor.com.

Article created using Outrank