
Clogged Water Filter? Restore Peak Water Flow and Quality
It usually starts with the water pressure dropping off. That sad little trickle from your faucet is more than just a morning annoyance—it’s a neon sig ...
It usually starts with the water pressure dropping off. That sad little trickle from your faucet is more than just a morning annoyance—it’s a neon sig ...
Taking on a DIY water softener installation is one of the best home filtration upgrades you can make, and you can conquer this project in just a few hours. This is a totally manageable mission for a handy homeowner. Modern systems come in plug-and-play kits that can save you a bundle on plumber fees.
If you're sick of the chalky white spots on your faucets, stiff laundry, and the ghost of soap scum haunting your shower doors, you've come to the right place. The villain in this story is hard water, which is loaded with minerals like calcium and magnesium. It might not be a health risk, but it's a real menace to your home's plumbing and appliances.

A water softener is the permanent fix. By installing one yourself, you're not just getting better water—you're protecting your big-ticket investments. Mineral buildup clogs pipes, guts the efficiency of your water heater, and sends dishwashers and washing machines to an early grave.
DIY water softener jobs are booming, and for good reason. Today's salt-based and salt-free systems usually include complete kits, letting you sidestep a professional plumber and save anywhere from $500 to $1,000 on the install. The global market for these home water filtration systems reflects this trend.
This guide is here to walk you through the entire process, so you know exactly what you're getting into. We’ll cover the two main types of systems you’ll be looking at:
When you install a water softener yourself, you gain a deep understanding of your home's water filtration system. You'll be ready for any future maintenance and can be proud you fixed the problem on your own.
We'll give you clear, actionable steps for a successful installation, from planning it out to firing it up. If you want to check out other home water filtration strategies, take a look at our broader https://www.waterfilteradvisor.com/advice/ section. Let's get started on bringing pure, soft water to every tap in your house.
A successful water softener installation is all about the prep work. Honestly, what you do before you even unbox the unit is what separates a smooth Saturday project from a frustrating, leaky mess.
Get these first few steps right, and you'll end up with the right filtration system for your house without any nasty surprises down the road.
First thing's first: you need to know exactly what you're up against. That means testing your water to find out its hardness, measured in grains per gallon (GPG). Don't guess. Grab a simple water hardness test kit online or from the hardware store.
This single number is the most critical piece of the puzzle. It's the secret code that tells you everything you need to know to size your new filtration system correctly.
Before you get too deep into sizing, you need to decide which type of system is right for you. The two main players in home water filtration are traditional salt-based softeners and salt-free conditioners. Each has its pros and cons depending on your water, budget, and even local rules.
This table breaks down the key differences to help you make the right call.
| Feature | Salt-Based (Ion Exchange) | Salt-Free (TAC Conditioners) |
|---|---|---|
| How It Works | Physically removes hardness minerals (calcium & magnesium) through ion exchange. A true water filtration process. | Crystallizes minerals so they can't stick to pipes and surfaces. It doesn't actually remove them. |
| Feel of Water | Creates a noticeably "slippery" or "silky" feel. | No change in the water's feel. |
| Maintenance | Requires regular salt refills and uses water/power for regeneration cycles. | Virtually maintenance-free. No salt, no electricity, no wastewater. |
| Best For | Very hard water (over 10 GPG); when you want to eliminate scale buildup completely. | Moderately hard water; areas with brine discharge restrictions; those on low-sodium diets. |
| Environmental Impact | Discharges salt brine into the sewer or septic system. | No salt or chemical discharge, making it more eco-friendly. |
Ultimately, if you're battling seriously hard water and want that classic soft water feel, a salt-based system is your best bet. If you have moderate hardness and prefer a low-maintenance, eco-friendly option that still protects your pipes, a salt-free conditioner is a fantastic choice.
Once you know your GPG, you need to figure out your home's daily water demand. A good, solid estimate is to multiply the number of people in your house by 75 gallons per day.
So, a family of four will use roughly 300 gallons of water each day (4 people x 75 gallons/person).
Now, let's put those two numbers together to find out how much filtration work the softener needs to do daily. The math is easy:
Daily Gallons Used × Water Hardness (GPG) = Daily Grains to Remove
Let's stick with our family of four, and say their water tested at 15 GPG:
300 gallons × 15 GPG = 4,500 grains per day
This tells you that you need a softener that can handle at least 4,500 grains of hardness between its cleaning (regeneration) cycles. Softeners are sold by their total capacity, which usually falls between 24,000 to 64,000 grains. A standard 32,000-grain unit would work perfectly here, needing to regenerate about once a week (32,000 ÷ 4,500 ≈ 7 days).
My advice? It's always better to go slightly bigger than you think you need. An undersized unit has to regenerate constantly, which just wastes salt and water and wears out the system faster. Think of it as buying a filtration system with room to grow.
With your capacity figured out, it's time to play scout and find the perfect home for your new unit. For any DIY water softener installation, you want to place it as close as you can to where the main water line enters your house. Crucially, it must be installed before the pipe splits off to your water heater.
This makes sure you get filtered, soft water for both your hot and cold taps (we usually leave outdoor faucets on hard water). A basement, garage, or utility closet is your best bet. Make sure the spot has:
Last but not least, do yourself a favor and check your local plumbing codes before you buy anything. This is especially important for salt-based systems, as some towns have rules about discharging brine into the sewer or a septic tank.
A quick phone call to your city's building department will clear up any questions. Getting this sorted out now saves a massive headache later and ensures your home filtration project isn't just done right, but done legally.
A successful DIY water softener installation all comes down to good prep. Trust me, nothing kills your weekend project faster than having to make multiple runs back to the hardware store for a single fitting you forgot. Let's get everything you need laid out before you even think about cutting a pipe.
Think of it like this: a clean cut, a solid wrench, and good thread sealant are the three pillars of any home filtration plumbing job. Get these right, and you're already halfway to a leak-free installation.

Let's sort out the absolute non-negotiables. You simply won’t be able to finish the job without these items in your toolkit.
Core Tool Checklist:
If you're working with PEX tubing, you’ll also need a dedicated PEX crimping tool and the right size crimp rings. These are specialized, but they're the only way to create a secure connection that will pass inspection and last for years.
Most softener kits will give you the main components: the control head, mineral tank, brine tank, and the bypass valve. That bypass valve is a crucial piece—it lets you shut off the softener for maintenance without turning off water to the entire house.
What the kit won't include is the plumbing to connect that bypass valve to your main water line. The exact pieces you need depend entirely on what's already in your house.
A hard-won personal tip: always buy a few extra fittings than you think you need. Having an extra elbow or connector on hand can turn a potential showstopper into a minor inconvenience.
When you're shopping, you’ll see different pipe materials. Knowing the pros and cons of PPR vs PVC vs CPVC is helpful if you're running new lines, but for this job, you'll mainly need adapters.
Alright, you've got your tools, unboxed the new softener, and picked the perfect spot. Now for the main event: the installation itself. Don't let the plumbing intimidate you. We'll walk through this step-by-step, with some real-world advice to keep things dry and straightforward.

Think of it like minor surgery on your water lines. The plan is to shut everything down, make a few clean connections, and then bring it all back online. Just take your time and check every connection twice.
Before you even think about touching a pipe cutter, kill the water supply to your house. Find the main shutoff valve—it’s usually in the basement, a crawlspace, or near where the water line enters your home from the outside. Crank it all the way off.
Now, you have to get the water out of the pipes. Head to the lowest faucet in your house (maybe a basement sink or an outdoor spigot) and the highest one (like an upstairs shower) and open them both up. This lets air into the system and helps every last drop drain out. This is a non-negotiable step if you want to avoid a surprise shower the second you cut into a pipe.
With the system drained, it’s time to get to work on the main water line. Grab your tape measure and mark out the section of pipe you’ll be removing to install the bypass valve. Always remember the old rule: measure twice, cut once.
Stick a bucket right underneath where you plan to cut. No matter how well you think you've drained the pipes, there’s always a little water left. Use your pipe cutter to make two clean, straight cuts and remove the section. A clean cut is absolutely critical for getting a perfect, leak-free seal later.
The bypass valve is the nerve center of your new setup. It’s what lets you shut off water to the softener for maintenance without cutting off water to the entire house. Trust me, you’ll be glad you have it.
Most kits come with a bypass valve that attaches right to the softener's control head. Pay close attention to the arrows that show the direction of water flow. This part is crucial:
Pro Tip: When you install the bypass valve, make sure the handles are easy to get to. Don't face them toward a wall where you can't reach them. A little bit of planning here will save you a ton of hassle down the road when it's time for maintenance.
Now, connect the valve to your main lines using whatever fittings you chose. If you're using flexible braided lines, get them hand-tight and then give them one last quarter-turn with a wrench. For push-to-connect fittings like SharkBites, make sure the pipe end is clean and push it in firmly until you hear and feel it click home.
Next, it’s time to hook the main mineral tank up to the bypass valve. Attach your flexible hoses to the inlet and outlet ports on the control head. Again, follow the arrows to make sure water flows in through the hard water side and out through the soft water side.
This is where your type of home filtration system really matters. A traditional salt-based system has two tanks, while a salt-free conditioner is usually just a single unit.
This all sounds more complicated than it is. For most DIYers, connecting the valves and tanks is a straightforward job that takes just 2-3 hours. The payoff is huge, often leading to a 99% reduction in hardness down to less than 7 grains per gallon. For a family in a hard-water area, that can mean saving around $200 a year on soaps and energy. You can dig into more data on the water softening market to see just how big an impact these home water filtration systems have.
A salt-based softener has to flush out all the hardness minerals and salty brine it collects during regeneration. To do that, you need to run two lines to a drain.
First is the main drain line. This flexible tube runs from the control head to a floor drain, standpipe, or utility sink. It's critical to leave an air gap of at least 1.5 inches between the end of the tube and the drain. This prevents any contaminated water from being siphoned back into your fresh, filtered system.
Second is the brine tank overflow tube. This is purely a safety measure. If the brine tank ever gets too full, this tube directs the excess water to the same drain, stopping a salty flood before it starts. Use zip ties or a clamp to make sure both tubes are secure and won't pop out of the drain.
Once all your connections are solid and the drain lines are secure, you're officially done with the hardest part of your DIY water softener installation. Step back and admire your handiwork before we move on to the final checks and startup.

Alright, the pipes are all connected and you’ve double-checked every fitting. This is the moment you've been working toward. It's time to fire up your new water softener and program the brains of the operation.
The tough part is behind you. Now let's get this filtration system commissioned the right way.
Don't just crank the main water valve all the way open. You never want to slam a new system with a sudden blast of high-pressure water. That's a good way to stress the connections or even damage the softener's guts. Slow and steady is the name of the game here.
First, make sure the softener's bypass valve is still set to "bypass." This lets water flow to the house while keeping the softener isolated for now.
Slowly turn your main water shutoff valve about a quarter-turn open. Go run a faucet somewhere in the house to confirm you have flow, then head back and inspect all your new plumbing for any drips.
If it's all dry, you can now slowly move the bypass valve toward the "service" position. Listen closely—you should hear the big mineral tank start to fill with water. This is your most important leak check. Get a flashlight and get a good look at every single connection you made. Look for the smallest bead of water.
I always give it a solid 15-20 minutes after the tank fills before I call it leak-free. I've seen slow seeps take their time to show up, and finding one now is much better than finding a puddle later.
Once you're positive everything is watertight, go ahead and plug in the control head. This is where you'll tell the softener just how hard your water is and set up its cleaning schedule. The digital display might look a little intimidating, but the process is usually pretty simple.
Your most important job is to enter the water hardness number (in GPG) from your water test. This one setting is the key to the whole operation, as it tells the unit how often it needs to regenerate.
Next, you'll set the time of day and the regeneration time. I always recommend setting it for a time when no one is using water, like 2:00 AM. This way, the regeneration cycle won't interrupt a shower with hard water or cause a drop in water pressure. Some newer softeners have smart features that track your water usage and only regenerate when needed, which is a great way to save on salt and water.
While this is a DIY guide, getting different perspectives on installing water softeners can give you extra tips on programming and what to expect long-term.
With the programming done, you have to manually start the very first regeneration cycle. This is a critical step. It flushes out any leftover dust or debris from the manufacturing process and, more importantly, it gives the resin beads their initial charge by soaking them in brine.
Pour a few gallons of water directly into the brine tank first, then add one or two bags of good-quality softener salt. Check your manual to find the "Manual Regeneration" button—you'll usually need to press and hold it to get the cycle started.
This first cycle can take up to two hours to complete. It will run through a few key stages:
Once that's finished, your system is officially up and running. Congratulations, you're now making beautifully filtered, soft water!
Your DIY water softener installation might be complete, but a little bit of care will keep it running smoothly for years to come. The good news is, there isn't much to it.
Your Long-Term Checklist:
Even after you've followed a guide, questions will pop up. A DIY water softener installation has a lot of moving parts, and it’s totally normal to hit a snag or two.
We get calls all the time about these exact situations. Here are the most common questions we hear, with answers to get you through the finish line.
Absolutely. In fact, if you have well water, you probably need a softener more than most. The main thing to know is that well water often comes with extra baggage—sediment, sand, and sometimes a lot of iron. All that gunk can destroy a new softener.
Your best move is to install a sediment pre-filter right before the water softener's inlet. Think of it as a bodyguard for your softener. It catches all the debris before it can clog up the resin bed. If you skip this, the resin gets fouled, its filtration efficiency tanks, and you’ll be replacing the whole unit way sooner than you should.
First, don't panic. A small drip is almost always an easy fix.
Hit the bypass valve first. This is exactly why you installed it. You can shut off water to the softener and keep it running for the rest of the house.
Now, find the leak. Most of the time, it’s a threaded connection that isn't quite sealed.
Slowly turn the water back on and check your work. That extra tape usually does the trick.
That’s a great question, and the practical answer is no, probably not. Soft water is incredible for your showers, appliances, and laundry, but your lawn and garden won’t be fans. The sodium in softened water isn't great for plants long-term.
For that reason, standard practice for a DIY water softener installation is to plumb the system so it treats all the water after your outdoor spigots. This gives you the best of both worlds: your indoor plumbing and appliances are protected by superior water filtration, and your garden stays happy.
A big drop in water pressure is not normal. It's a red flag that something went wrong during the install.
Start with the simple stuff: check that every single valve is fully open. The main shutoff, the bypass valve, all of them. It's surprisingly easy to leave one only halfway open.
If the valves are good, look for a kink in one of the flexible connector hoses or even the drain line. Also, make sure you didn't install the unit backward—if the water is flowing against the intended direction, it will choke off your pressure. Finally, this can happen if the home filtration system is too small for your house, which is why getting the sizing right from the very beginning is so important.
Water Filter Advisor is your go-to resource for making sense of home water filtration. From in-depth guides to unbiased reviews, we provide the clarity you need to choose the best solutions for your family's health and comfort. Explore our resources today at https://www.waterfilteradvisor.com.
When you’re hunting for the best inline filter for your home, the real question is: what problem are you trying to solve? A filter to stop your refrigerator’s ice from tasting funky has a totally different job than one installed under the kitchen sink to tackle serious contaminants. Think of it as hiring a specialist for a very specific task.
Top-tier options almost always feature multi-stage carbon block filters with a low micron rating—think 0.5 microns—and crucial NSF certifications. Those certifications are your golden ticket, the independent proof that the filter actually does what it claims, like kicking chlorine, lead, and sediment to the curb for water that just tastes, well, like water. Our guide will walk you through the best inline filter choices so you can find the perfect match for your home.

Picture this: crisp, clean water flowing from your fridge or a separate tap, without you ever having to fill a clunky pitcher again. That's the magic of a good inline water filter. It's a small but mighty device that gets spliced directly into your water line, providing targeted filtration right where you need it most.
These filters are the quiet workhorses of home water treatment. They're usually tucked away behind an appliance or under a sink, silently ambushing water before it reaches your glass, ice cube tray, or coffee maker. Their main job is to strip out the uninvited guests—impurities that ruin the taste, smell, and quality of your drinking water.
So, why are these simple filters becoming such a popular home upgrade? It all boils down to their focused, efficient approach. Instead of treating every single gallon of water in your home (including the water your toilet uses), an inline filter concentrates its power on delivering high-quality water for you to drink and cook with.
You’ll notice the benefits right away:
An inline filter is an ideal solution for renters or homeowners who want targeted filtration without major plumbing surgery. It offers a significant step up from a basic pitcher filter with minimal installation hassle.
To help you get started, we've put together a quick comparison table of our top picks for 2026. This chart lays out our favorite filters for the most common uses around the house, highlighting what makes each one a solid choice.
This table highlights our top-rated inline filters for common household uses, allowing you to quickly compare their key specifications and find the best match for your home.
| Model / Type | Best For | Key Feature | Lifespan |
|---|---|---|---|
| EcoPure EP-INL30 | Refrigerator & Icemaker | 5-year/30,000-gallon lifespan | Up to 5 Years |
| CuZn ILFC-200 | Under-Sink (Chloramine) | KDF-55 media for chloramine & heavy metals | Up to 12 Months |
| Woder 10K-Gen3 | Dedicated Faucet (Lead) | Certified for lead, chlorine, and contaminants | Up to 3 Years |
| Culligan IC-EZ-4 | All-Purpose / Easy Install | Twist-on design and NSF 42/53 certification | Up to 6 Months |
This table gives you a high-level overview. Now, let's pull back the curtain and see what makes these filters tick.
Ever wondered what’s going on inside that little tube hooked up to your fridge? It seems simple enough: your regular tap water goes in one end, and clean, crisp water comes out the other. It’s not magic, but it’s a brilliant bit of engineering that targets specific contaminants right at the point of use.
At its core, an inline filter is a tiny, self-contained purification plant. Water from your supply line gets pushed through a sealed cartridge that's packed with filter media. You can picture it as a microscopic maze where water molecules are allowed to pass, but all the unwanted gunk gets trapped.
This simple "point-of-use" convenience is why these filters are taking over. The global market was valued at $2.5 billion back in 2025 and is expected to hit $4.2 billion by 2033. People want an affordable, easy-to-install way to get rid of things like chlorine and lead, and many certified models can slash contaminants like total trihalomethanes (TTHMs) by up to 95%. You can check out the full market analysis on Data Insights Market to see how it’s changing household water quality.
An inline filter might look basic on the outside, but its power comes from what's packed inside. You've got two main parts doing all the work: the housing and the media.
The most common media you’ll find is activated carbon. Think of it as a super-powered sponge. A single gram of this stuff can have a surface area of over 3,000 square meters—that's about half a football field! It works through a process called adsorption, where things like chlorine, pesticides, and VOCs literally stick to its vast surface and are pulled out of the water.
Here’s a simple way to think about it: Activated carbon is like a contaminant magnet. As water rushes past, chemicals like chlorine are drawn to the carbon's surface and trapped, letting cleaner, happier water flow on through to your glass.
Another critical spec is the filter’s micron rating. This number tells you how big the pores in the filter media are. A smaller micron number means smaller holes, which means it can stop tinier particles.
Here’s a quick breakdown:
While a lower micron rating is usually better for purity, there’s a trade-off. Tighter pores can slow down your water flow and clog up faster if your water is heavy with sediment. That's why choosing the right filter is all about balancing your purification goals with your home’s water pressure and quality.
When you’re picking an inline filter, it’s easy to get lost in a sea of marketing jargon. To find the right one, you have to cut through the noise and look at the actual specs. Things like micron ratings, the type of carbon used, and flow rates are what really matter—they tell you if a filter can actually solve your water woes.
This flowchart is a great starting point. It helps you connect a common water problem to the right type of filter technology.

As you can see, different problems point to different solutions. Let's dig into the specs that make those solutions work.
Most inline filters rely on activated carbon to make water taste and smell better, but how that carbon is constructed makes a huge difference. You'll mainly see two types: Granular Activated Carbon (GAC) and Carbon Block.
A GAC filter is just what it sounds like: a cartridge filled with loose carbon granules. Water meanders around the granules, which works well for reducing chlorine and improving taste. Because the media is loose, these filters usually have a higher flow rate.
A Carbon Block filter is different. It’s made of powdered carbon that’s been compressed into a solid brick. This forces water through a dense, torturous path of tiny pores, giving it way more contact time with the carbon.
While both will improve the taste of your water, a carbon block filter offers much more thorough filtration. Its solid form is better at removing a wider array of contaminants and prevents "channeling"—where water carves a lazy path through the loose media and bypasses the filtration process.
For a simple coffee maker where you just want better-tasting coffee, a GAC filter is probably fine. But if you're filtering drinking water from your kitchen tap, a carbon block is the superior choice.
To help you match the right filter spec to your specific water problem, we've put together this quick comparison table. It breaks down what each specification means and what it's best at targeting.
| Specification | What It Means | Best For Targeting… | Good to Know |
|---|---|---|---|
| GAC Media | Loose carbon granules. | Chlorine, bad taste, and odors. | Higher flow rate but can be prone to "channeling." |
| Carbon Block Media | Solid, compressed carbon. | Chlorine, lead, VOCs, cysts, and sediment. | More comprehensive filtration, lower flow rate. |
| 5 Micron Rating | Pores block particles 5 microns or larger. | Sediment, sand, silt, and rust. | Good for pre-filtration, not for health contaminants. |
| 0.5 Micron Rating | Pores block particles 0.5 microns or larger. | Cysts (Giardia, Crypto), asbestos, and particulate lead. | Essential for filtering health-related contaminants. |
| NSF/ANSI 42 | Certified for aesthetic improvements. | Chlorine taste and odor. | Your baseline for better-tasting water. |
| NSF/ANSI 53 | Certified for health-related contaminants. | Lead, mercury, VOCs, cysts, and other specific contaminants. | The gold standard for safe drinking water. |
This table should give you a clear idea of what to look for on a product's spec sheet based on the issues you've identified in your water.
A filter's micron rating tells you the size of its pores, which determines the smallest particle it can stop. A lower number means finer filtration.
A 5-micron filter is great for catching larger particles like sand, rust, and sediment that you might see in your water. But for health-related contaminants, it just won’t cut it.
This is where a 0.5-micron rating becomes non-negotiable. Filters this fine are able to capture microscopic cysts like Giardia and Cryptosporidium, which are notorious for causing stomach illness and are resistant to chlorine. It’s also a must-have for reducing lead, which often exists as tiny particles. A 0.5-micron filter is far more effective at trapping lead than a 1-micron or 5-micron filter.
If the water is for drinking—especially for kids—you need a filter rated at 0.5 microns and certified for lead reduction. Period.
Flow rate, measured in gallons per minute (GPM), is all about how fast water moves through the filter. This might seem like a boring detail, but it's critical for your appliances. A filter that's too slow can cause real problems.
Remember, a finer micron rating usually means a lower flow rate. You have to balance the need for high-level filtration with the flow rate your appliance demands.
A certification from NSF/ANSI is the only way to know for sure that a filter does what it claims. These are independent, third-party tests that verify a manufacturer's performance claims. For inline filters, two standards are key:
Always check the fine print to see exactly what a filter is certified to remove under NSF/ANSI 53. The best inline filter isn’t just one with a lot of marketing claims; it’s one with the specific certifications that match your water test results.

It’s one thing to understand the specs, but where do these filters really prove their worth? Their true value lies in their versatility. You can tuck these compact filters away to fix specific water problems right where they happen.
An inline filter is a simple upgrade with a surprisingly big impact on everything from your morning coffee to the ice in your drink. Let's look at the most common places to install one in your home.
This is probably the #1 reason people start looking for the best inline filter. The filter that comes with your fridge is often absurdly expensive, doesn't last long, and might only handle basic chlorine taste. Even worse, people often forget to change them, leading to cloudy, awful-tasting ice cubes that ruin a perfectly good drink.
Placing an external inline filter on the water line that feeds your fridge is a total game-changer.
Installation is usually a walk in the park. You just cut and splice the filter into the 1/4-inch water line behind your fridge. Most come with quick-connect fittings that just push on, so you don't need a toolbox full of special equipment.
For refrigerators, your main goal is improving taste and odor. You'll want an inline filter with a quality carbon block and an NSF/ANSI 42 certification. A 5-micron rating is plenty for this job.
If you want purified water on tap just for drinking and cooking, an inline filter hooked up to its own dedicated faucet is a fantastic setup. You get a steady supply of clean water without filtering all the cold water you use for washing dishes.
Under-sink systems are perfect for tackling more serious contaminants. Since it's for a dedicated faucet, you can choose a filter with a much finer micron rating (like 0.5 microns) and higher-level certifications without worrying about slowing down your main kitchen faucet.
This is where it really shines for specific water issues:
Installation is a bit more involved here since you have to tap into your cold water line and run a new, smaller line to a separate faucet. The most common connector size is 3/8-inch, but always double-check your plumbing before you buy.
If you're serious about coffee, you already know water quality is everything. The minerals and chemicals in your tap water can completely sabotage the flavor of your expensive, single-origin beans. On top of that, scale buildup from hard water is the number one killer of coffee and espresso machines.
An inline filter is the perfect fix. You can install it on the water line of a plumbed-in machine or simply use it to fill the reservoir of a countertop model. The commercial inline water filters market is growing fast, projected to reach $1.85 billion by 2025. Businesses know that pure water equals happy customers and longer-lasting equipment—a trend largely driven by the $4.78 billion North American market. For more on this, you can review the commercial water filter market insights on Data Insights Market.
For coffee lovers, an inline filter delivers two key victories:
Look for a filter that specifically mentions scale control. These are often the best inline filter choices for protecting both your brew's taste and your appliance's lifespan.
Alright, we've waded through the technical details—micron ratings, certifications, and flow rates. Now it's time to put that knowledge to work and pick the right filter for your home.
Instead of just giving you a list, I'm going to show you which filters make the most sense for specific jobs, like your fridge's icemaker or the tap you use for drinking water. We'll look at the best filter for simply better-tasting water, and the top choice if you're worried about serious contaminants like lead.
There's a reason these little filters are getting so popular. The home water filtration market is projected to hit $7.13 billion by 2026, and inline filters are a huge part of that. They can slash contaminants like hydrogen sulfide by up to 95%, getting rid of that rotten-egg smell instantly. Plus, with replacement costs often 70% lower than whole-house systems, they just make financial sense. For many families, switching from bottled water saves over $1,000 a year. You can dig into the numbers in these home water filtration market trends on Arizton.
When you just want better-tasting water and clearer ice from your fridge, the goal is simple: get rid of chlorine and other funky tastes. You need a filter that lasts a long, long time and doesn't need constant changing.
If your main goal is just getting rid of that chemical taste in your fridge's water and ice, a long-lasting aesthetic filter is your best bet. It saves you from buying expensive, proprietary fridge filters every six months.
If you're dealing with a serious health concern like lead, especially from a dedicated drinking water tap, you have to get serious about your filter choice. Certification and a fine micron rating are non-negotiable here.

Getting the most out of your inline filter really comes down to two things: a solid installation and proper upkeep. The great news? You probably don’t need to call a plumber for this one. Most inline filters are designed for a quick and simple DIY install.
With just a few basic tools and a bit of focus, you can have cleaner, better-tasting water flowing in less than an hour. We’ll walk through the essentials right here, from getting started to handling the long-term care that keeps your water pure and your appliances protected.
Don't just jump in. Taking a few minutes to prep will save you a world of headache and a soggy floor. Make sure you knock these out before you ever think about cutting a water line.
Flushing your new filter is the single best way to avoid cloudy water or a clogged faucet aerator right after installation. It gets rid of all the harmless but messy black carbon fines that are normal in a brand-new filter.
Most inline filters with quick-connect fittings install the same way. The instructions might look a little different from brand to brand, but the core process is simple. Let’s use a standard refrigerator water line as our example.
Step 1: Find Your Spot
Pick a spot on the 1/4" water line behind the fridge where the filter will be easy to get to. Remember, you'll have to change it later, so don't bury it in a spot you can't reach.
Step 2: Cut and Connect
With the water off, use your tube cutter to make a clean, square cut in the plastic tubing. Push one end of the line firmly into the filter's "inlet" port and the other into the "outlet" port. There’s always an arrow on the filter showing the direction of water flow—make sure you follow it.
Step 3: Check for Leaks
Slowly turn the water back on. Now, watch the connection points closely for any signs of a drip. If you spot one, shut the water off again. Usually, it just means the tube isn't pushed in all the way or the cut wasn't perfectly straight.
Even the pros hit a snag now and then. If you run into trouble, it’s almost always one of these two things.
For a deeper dive into filter maintenance and other expert tips, our library has plenty of guides to help you out. You might be interested in our article which provides more water filter advice.
Even after you've done your homework, a few nagging questions can pop up. Let's walk through the most common ones we hear from people trying to pick the right inline filter.
Any filter will cause a tiny drop in pressure, but it should be so small you don't even notice. For a properly sized inline filter, we're talking a drop of only 2-5 PSI. If you suddenly feel like your water is just trickling out, something's wrong.
The usual suspect is a mismatch between the filter and your water. Trying to use a very fine 0.5-micron filter on a line that's heavy with sediment is a classic mistake. The filter just clogs up instantly. Always match the filter's GPM to what your appliance actually needs, and if your water is full of gunk, put a simple sediment pre-filter in front of it.
The timeline on the box? Think of it as a suggestion, not a rule. A filter’s true lifespan comes down to two things: what’s in your water and how much of it you use.
If your city goes heavy on the chlorine, that carbon media is going to get used up fast. The same goes for high sediment levels—they'll clog the works long before the "official" replacement date.
Forget the calendar. Pay attention to your water. The moment you start tasting chlorine again or notice the flow from your fridge slowing down, it’s time for a change.
Not usually. For most jobs, like hooking a filter up to your refrigerator’s 1/4-inch water line, it's a simple DIY project. Most people with quick-connect fittings can get it done in less than an hour.
That said, know your limits. If the job involves cutting into a main copper pipe or if you’re just not comfortable with plumbing, call a pro. A small mistake can cause a huge, expensive mess from water damage. It's always better to be safe than sorry.

Think of a countertop RO system as your personal, miniature water purification plant. This compact powerhouse sits right on your kitchen counter, delivering incredibly pure water without a single call to a plumber. It uses a sophisticated process called reverse osmosis to strip out up to 99% of nasty contaminants—we're talking lead, chlorine, pesticides, and more—giving you water that’s as good as any fancy bottled brand, right from your own kitchen.

Picture this: you turn your sketchy tap water into crisp, clean, and totally safe drinking water in mere seconds. That’s exactly what a countertop reverse osmosis system does. For many people, the idea of a major plumbing project to install a filter under the sink is a non-starter. On the other hand, a simple pitcher filter often feels like bringing a squirt gun to a firefight—it just doesn't do enough heavy lifting.
This is where the countertop RO system really shines. It delivers the same powerful, multi-stage filtration you’d get from a traditional under-sink unit, but with the dead-simple setup of a coffee maker. No drills, no calling a plumber, and no permanent changes to your kitchen.
Figuring out the key differences between the most common home water filters is the first step toward making a smart buy. Each type of filter has its own trade-offs, balancing filtration power, convenience, and cost. If you want a wider view of all your choices, you might find our general advice for choosing water filters helpful.
A countertop RO unit is a whole different beast from a basic pitcher. It’s a serious purification machine built for modern life, especially for renters or anyone who wants top-tier filtration without the commitment.
The real magic is how accessible it makes this technology. It brings advanced purification—once reserved for complex, permanent installations—into any home with a simple power outlet.
The market has definitely taken notice. Countertop RO systems are gaining traction for their great mix of performance and affordability, with most units priced between $100 and $500. This makes them a popular first step into serious water purification. In fact, they’re on track to command a massive 37.30% market share among point-of-use filters by 2026, all thanks to their easy setup and effectiveness.
To see how these options stack up at a glance, let's compare them side-by-side.
This table breaks down the main differences between countertop RO systems, their under-sink cousins, and the standard water filter pitcher.
| Feature | Countertop RO System | Under-Sink RO System | Water Filter Pitcher |
|---|---|---|---|
| Filtration Power | Excellent (Removes up to 99% of contaminants) | Excellent (Removes up to 99% of contaminants) | Basic (Reduces chlorine & some metals) |
| Installation | Plug & Play (No plumbing required) | Professional or DIY (Requires drilling) | None (Just fill with water) |
| Cost | Moderate initial cost, low running cost | High initial cost, moderate running cost | Low initial cost, high filter cost |
| Space Requirement | Takes up counter space | Hidden under the sink | Stores in fridge or on counter |
| Best For | Renters & homeowners seeking high purity | Homeowners wanting integrated filtration | Basic taste and odor improvement |
As you can see, the right choice really depends on what you value most: the ultimate purification, seamless integration, or simple convenience.
Ever wondered what's going on inside that little box on your counter? It’s not magic, but it’s close. A countertop RO system puts your tap water through a fascinating, multi-stage purification gauntlet to turn it into something exceptionally pure and clean.
Think of it like an elite cleaning crew for your water. Each filter in the system is a specialist with a very specific job, all working in a precise order. Your tap water goes in one end, gets passed down the line, and comes out the other side transformed.
The journey starts with the sediment pre-filter. This is the system's bouncer, stopping the most obvious troublemakers at the door. It’s responsible for catching all the gritty stuff you can’t always see but definitely don't want to be drinking.
Its main job is to grab physical debris, like:
By snagging these bigger particles first, the sediment filter does more than just an initial clean. It’s also protecting the more sensitive (and expensive) filters down the line, helping the whole system run smoothly for much longer.
After the water is clear of grit, it moves on to the next specialist: the activated carbon filter. This is where the system gets rid of those weird sensory issues that make tap water unpleasant. If your water has ever had that swimming pool smell or a chemical aftertaste, this is the filter that saves the day.
Activated carbon is a workhorse. It's incredibly porous, giving it a massive surface area that acts like a powerful magnet for certain chemical contaminants. It's especially good at adsorbing (trapping) compounds like chlorine, the #1 culprit behind bad-tasting municipal water. The result is water that not only is cleaner but also tastes and smells fresh and neutral.
Okay, now for the main event. Once the pre-filters have cleared the path, the water is forced toward the heart of any RO system: the reverse osmosis membrane. This is where the real heavy lifting happens.
Think of it as a ridiculously picky bouncer for water molecules. The RO membrane is covered in microscopic pores—about 0.0001 microns small—that are so tiny, only pure H₂O can squeeze through. Everything else gets rejected and shown the door.
This semipermeable membrane is the star of the show, removing up to 99% of all total dissolved solids (TDS). We’re talking about a huge list of contaminants that the other filters can't touch.
Some of the biggest offenders removed by the RO membrane include:
The water that gets past the membrane is incredibly pure. All the rejected junk is flushed out with a small stream of wastewater, leaving you with nothing but pristine, clean water.
After that intense purification process, the water is almost ready. Many top-tier systems add one last stage, often called a post-filter or a remineralization filter. It’s the final touch that makes the water perfect.
A carbon post-filter gives the water one last "polish," catching any faint tastes or odors that might have been picked up inside the storage tank. Some systems use a remineralization stage instead, which adds back trace amounts of healthy minerals like calcium and magnesium. This does two things: it slightly improves the water's health profile and, more importantly, enhances the flavor. It gives the water a crisp, refreshing taste that most people prefer over the "flat" taste of totally demineralized water.
Picking the right countertop RO system can feel overwhelming, but it gets a lot easier once you know what to look for. Forget the confusing marketing claims. You really just need to focus on a few key numbers and features that affect your water, your budget, and your daily routine.
Ready to find the perfect fit for your kitchen? Let's break down what actually matters.
First things first, look past the shiny plastic and check the engine under the hood. When you're comparing models, there are three numbers that matter most: the filtration rate, the water efficiency, and the size.
Understanding these specs is how you compare different models fairly. It makes sure you get a system that can keep up with your family's needs.
So, how do you really know a filter removes what it says it does? You look for third-party certifications. The most important one for reverse osmosis is NSF/ANSI 58.
This certification is your independent proof that a system has been properly tested to reduce a whole list of contaminants, including nasty stuff like lead, arsenic, and fluoride. It's the gold standard for RO systems.
When you see that NSF/ANSI 58 seal, you know the company isn't just making promises. They've proven their system works in a certified lab. Think of it as a badge of quality that you can trust.
This whole process works because of multiple filter stages, with each one tackling different types of gunk in your water. This diagram gives you a great visual of the typical three-step journey your water takes.

As you can see, water first hits a sediment and carbon filter to get rid of bigger particles and chlorine. Only then does it get to the RO membrane, which does the heavy lifting on the smallest dissolved contaminants.
Beyond just cleaning the water, many newer countertop systems have cool features that make the water even better. One of the most popular is remineralization.
The RO membrane is so good at its job that it strips out almost everything—even healthy minerals like calcium and magnesium. A remineralization stage adds a healthy mix of these minerals back in. This doesn't just add a tiny nutritional boost; it makes a huge difference in taste. It gives the water a crisp, natural flavor instead of that "flat" taste you can get from overly-purified water.
As you narrow down your choices, it’s a good idea to explore various water purification products to see what other features are out there. Thinking about these extras can help you find a system that makes water you truly love to drink.
Finally, just ask yourself two simple questions to match the system to your life:
By following this simple checklist, you can cut through all the noise and pick a countertop RO system that’s the perfect match for your home, your budget, and your health.

Here’s where countertop RO systems really shine: they are incredibly simple to set up and own. If the idea of hiring a plumber or drilling holes into your beautiful countertops gives you anxiety, you can relax. These systems are truly designed for everyone, especially renters or anyone who isn't exactly a pro with a toolbox.
The biggest draw is the "plug and play" experience. Most models arrive pretty much ready to go right out of the box, saving you from complex diagrams or little bags of mysterious parts. You can get from unboxing to drinking pure water in minutes, not hours.
Honestly, the setup is usually as simple as making a pot of coffee. While the exact steps might differ a tiny bit between brands, the general process is the same and incredibly easy. You won't need a toolbox—just your own two hands.
A typical installation looks something like this:
And that's it. You’ve just installed a high-powered water purification system without making a single permanent change to your kitchen.
The real beauty of a countertop RO system lies in its non-invasive design. It gives you the full power of reverse osmosis filtration with the temporary convenience of a small appliance, making it the perfect solution for modern, flexible living.
The good news continues—maintenance is just as painless as the setup. Forget about wrestling with filter housings and special wrenches. Today’s countertop RO systems are built with you in mind, making upkeep a total breeze.
Your main job will be changing the filters every so often. Most units even have a smart indicator light that tells you exactly when it's time for a change, so there's no guesswork involved.
Changing the filters is usually a simple twist-and-lock deal:
Beyond that, a quick wipe-down of the unit's exterior and maybe an occasional cleaning of the water tank is all you need to keep your countertop RO system in top shape for years. This minimal upkeep means your investment will keep providing pure, great-tasting water day in and day out.

When you’re looking at a new appliance, it’s easy to focus on the sticker price. But that number rarely tells the whole story. A countertop RO system is much more than just another gadget for your kitchen—it's a real investment in your home’s water and your family's health.
To really get a feel for its value, we need to look past the initial purchase and consider the total cost of ownership. This lets us weigh the numbers against the incredible rewards you get from it every single day. Let's break it down and see if it’s the right move for your wallet and your lifestyle.
The biggest hit to your budget is the initial purchase, and most quality countertop RO units fall into a pretty standard price range. But the costs don't just stop there. You've also got to account for filter replacements and electricity.
Luckily, today’s systems are designed with efficiency in mind. Filter packs generally need to be swapped out every 6 to 12 months, making it a predictable and manageable annual cost. And what about your utility bill? The electricity draw is tiny—often about the same as charging a laptop—so you'll hardly notice a difference.
The total cost of ownership is the most honest way to evaluate a purchase. It combines the upfront price with the long-term running costs, giving you a clear, five-year financial forecast.
When you lay it all out, a countertop RO system often turns out to be a surprisingly smart financial choice. Let's put it into perspective and see how it stacks up against the relentless expense of bottled water and the constant filter changes for a basic pitcher.
To see the real financial impact, here’s a quick comparison of the estimated total costs over five years for a few common ways people get their drinking water.
| Method | Initial Cost | Annual Ongoing Cost (Filters/Water) | 5-Year Total Cost |
|---|---|---|---|
| Countertop RO System | $300 – $600 | $80 – $150 | $700 – $1,350 |
| Bottled Water | $0 | $500 – $1,000+ | $2,500 – $5,000+ |
| Water Filter Pitcher | $30 | $100 – $180 | $530 – $930 |
These are just estimates for an average family's use. Your actual costs could vary based on the specific model, brand, and how much water you drink.
Looking at the table, a pitcher might seem like the cheapest option, but it provides far weaker filtration and needs new filters all the time. The real jaw-dropper is bottled water—those "small" purchases add up to thousands of dollars in just a few years. A countertop RO system finds that sweet spot, delivering top-tier purification for a much lower long-term cost than bottled water.
The savings are great, but the real payoff of a countertop RO system is how it becomes a part of your daily life. The benefits go way beyond just having "clean water"—they make everyday things taste and feel better.
Once you make the switch to RO water, you’ll be amazed at how it unlocks a whole new world of flavor.
It’s not just about what you're removing from your water. It’s about what you’re adding to your life: better health, better taste, and the peace of mind that comes with making a smart, sustainable choice.
Picking out a water filter used to be about getting rid of that funky chlorine taste from the tap. These days, it’s about so much more. It's become a core part of a healthy home.
More and more of us are deciding to take control over our water quality instead of just crossing our fingers and hoping for the best. It’s a pretty simple shift, but it’s a powerful one. We're all just a bit more aware of what might be lurking in municipal water supplies, and we want peace of mind.
A countertop RO system is a perfect fit for this new reality. It puts some seriously advanced water purification technology right on your kitchen counter, no plumber required.
Throughout this guide, we've really dug into how these little machines pack such a punch. They give you the best of both worlds: the heavy-duty filtration power of an under-sink system combined with the grab-and-go simplicity of a water pitcher.
No messing with your plumbing. No permanent installation. It’s the perfect solution for anyone who moves around, whether you're renting an apartment or just don't want the hassle.
The rise of the countertop RO system is about empowerment. It gives you the ability to ensure your family is drinking exceptionally pure water, transforming a daily necessity into a conscious act of well-being.
The numbers back this up, too. The global market for these countertop purifiers was valued at USD 13.23 billion in 2024, and it's expected to shoot up to USD 24.78 billion by 2033. That kind of growth only happens when a product really solves a problem for people, delivering on convenience and performance.
Getting to cleaner, safer water doesn’t have to be a huge project. A countertop RO system makes the decision easy by nailing three key things:
On top of the health perks, making the switch is a great step toward a more sustainable kitchen, putting it right alongside other eco-friendly kitchen products. Every time you fill your glass, you're preventing another plastic bottle from ending up in a landfill.
At the end of the day, choosing a countertop RO system is a simple move that has a huge impact on your household. It's an investment in better-tasting water, better health, and a cleaner planet, which is why it’s quickly becoming the new normal.
Even after weighing all the pros and cons, it’s totally normal to have a few questions before you bring a new appliance home. You want to feel confident, especially when it comes to your family's drinking water. Let's tackle some of the most common things people wonder about.
This is a big one, and it comes from the way reverse osmosis works. The first RO systems weren't very efficient, and that reputation has stuck around. But a lot has changed.
Modern countertop units are built specifically to cut down on waste. Many of them boast impressive efficiency ratios, like 1:1 or even 2:1. That means for every two glasses of pure water you get, only one glass of wastewater goes down the drain. It's a massive leap from the old days.
Pro-Tip: Don't just pour that "waste" water out! It's just tap water with a higher concentration of the stuff that got filtered out. It’s perfectly safe to collect for watering your houseplants or for other cleaning jobs around the house.
Yep, this one is true. The RO membrane is so incredibly fine that it catches just about everything, including good-for-you minerals like calcium and magnesium. Most of us get these from food anyway, but removing them can leave the water tasting a little "flat."
That’s why so many of the best countertop RO systems now include a remineralization filter. This filter is usually the very last step in the process.
It works by adding a healthy, balanced mix of minerals and electrolytes back into the purified water. This does two great things:
Here's one of the best features of modern countertop RO systems: you don't have to remember. Forget about trying to mark your calendar or guess if your filter is still doing its job.
Nearly every new model you'll find has smart filter life indicators. These are usually just little LED lights on the display. When a filter is getting close to its expiration date, its specific light will change color or start to blink.
It’s a simple, foolproof system that takes all the guesswork out of maintenance. You can rest easy knowing your system is always working at its best and your water is as pure as it can be. When a light comes on, you just twist the old filter off and twist the new one on. It’s that easy.
At Water Filter Advisor, our goal is to empower you with clear, research-backed information to make the best choice for your family's health. Explore our in-depth guides and reviews to find the perfect water filtration solution for your home.
Think of your water filter's micron rating like a VIP bouncer at the hottest club in town. It's got a super-strict guest list, deciding which grubby particles get in and which get tossed out on the curb. Simply put, this number tells you the size of the microscopic party-crashers a filter is designed to block, ensuring the water flowing from your tap is as pure and refreshing as possible.
When you flip on the kitchen faucet, you expect clean, safe water. But all sorts of invisible riff-raff can hitch a ride from the treatment plant to your glass, messing with everything from your water's taste to your family's health. This is why knowing what is a micron rating is so critical for any homeowner looking to upgrade their H2O. It's the single most important number on any water filter's label.
Picture this: you're at your sink, about to fill a glass, and you have that nagging thought—what’s really in my water? That’s where the micron rating heroically steps in. It acts as the gatekeeper for your water filter, measuring the size of the pores in the filter media. The unit of measurement is a micrometer (μm), which is so mind-bogglingly small it's about 1/25,000th of an inch. This rating tells you the smallest particle the filter can reliably stop, making it your secret weapon against sediment, rust, or even nasty microscopic critters.
A micron rating isn’t just some tech-nerd spec; it's a practical tool that directly impacts your water quality. Think of it as a spectrum of protection. A larger number, like a 50-micron filter, is a great bouncer for keeping out the big, clumsy oafs like sand and rust flakes. A much smaller number, like a tiny 1-micron filter, is the elite bodyguard built to stop microscopic troublemakers.
The right micron rating acts as your first line of defense, targeting the specific villains lurking in your water supply. It empowers you to move beyond generic solutions and choose a filter that’s tailor-made for your home's needs.
Getting this right is fundamental to building an effective home filtration strategy. You wouldn't use a giant fishing net to catch minnows, right? The same logic applies here. Picking the correct rating helps you:
Achieving truly pure water isn't just about the filter itself. It also means practicing good hygiene, like regularly maintaining hydration systems you rely on every day.
Ultimately, understanding what a micron rating is gives you control. It turns you from a passive water user into an informed homeowner who can make smart, confident decisions for your family. For more expert insights into your water quality, you can check out our guide on common water issues.
To really become a water filtration whiz, you first need to wrap your head around just how ridiculously tiny a micron is. It’s easy to throw around terms like "one-millionth of a meter," but that's a bit abstract. So let's bring it down to a scale you can actually visualize.
Think about a single strand of your hair. The average human hair is about 70 microns thick. Now, picture something 70 times smaller than that—that's one single micron. We're talking about a world completely invisible to the naked eye, but it’s precisely at this microscopic level where the most important battles for your water quality are won.
The junk we want to get out of our water comes in all shapes and sizes. Some particles, like sand or rust flakes, are the big bullies you can actually see. But many others, including some of the most harmful ones, are microscopic ninjas. Knowing who you're up against is the first step to picking the right filter for the job.
Let's look at some common water villains and their typical sizes to put it all into context:
This simple diagram shows how a water filter works as a physical barrier, letting clean water molecules breeze through while trapping contaminants based on their size.

As you can see, the filter is the gatekeeper. It's the critical component standing between the mystery water coming into your home and the clean, safe water you and your family deserve.
To really drive this home, let’s compare the sizes of these common particles. This chart shows what a typical 5-micron filter—a very common size for whole-house sediment filters—can and can't handle.
| Contaminant | Typical Size in Microns (μm) | Can a 5-Micron Filter Capture It? |
|---|---|---|
| Fine Sand | 100+ μm | Yes |
| Human Hair | 70 μm | Yes |
| Silt / Sediment | 5-20 μm | Yes |
| Red Blood Cell | 7-8 μm | Some, but not all |
| Giardia Cyst | 2-10 μm | Potentially, but many will sneak through |
| E. coli Bacteria | 1-2 μm | No |
| Most Viruses | 0.005-0.3 μm | No |
Looking at the table, it becomes obvious that a 5-micron filter is fantastic for clearing up cloudy water caused by silt and sand, but it's not going to reliably stop microscopic bugs like Giardia or bacteria.
This is why understanding the numbers is so important. A filter's micron rating isn't just a piece of technical jargon; it's a direct measure of its power to protect you from specific contaminants. You have to match the filter's pore size to the problem you're trying to solve.
When you're shopping for a water filter, you’ll see a micron rating on the package. But not all ratings tell the same story. This is where you run into two critical terms that can dramatically change a filter's performance: absolute and nominal.
Understanding this difference is like knowing the secret handshake—it’s the key to making sure your filter actually does what you expect it to.
Think of it like a fishing net. A nominal rating is like a net with a "best-effort" promise. A nominal 5-micron filter, for instance, is designed to capture most of the particles that are 5 microns or larger. Its efficiency isn't a guarantee, though.
The industry standard for a nominal rating is often around 85% efficiency. This means that while it will stop about 85 out of every 100 particles at its rated size, a sneaky 15 will slip right through. This is perfectly fine for general sediment removal, but it’s not the right choice when your health is on the line.
On the other hand, an absolute micron rating is a certified guarantee. It's like a high-tech fishing net with precisely laser-cut openings, certified to catch all the fish of a specific size, every single time. An absolute-rated filter has to remove a minimum of 99.9% of particles at its specified micron size.
This level of precision is why it's often referred to as a "beta ratio of 5000," which is just a fancy way of saying that for every 5,000 particles sent its way, only one gets through. This distinction isn't just technical jargon; it has real-world consequences for your family's health.
When it comes to microscopic organisms like Giardia and Cryptosporidium—which can cause serious gastrointestinal illness—an absolute-rated filter is non-negotiable. These cysts are typically between 2 and 10 microns, and only an absolute 1-micron filter provides the certified protection needed to reliably remove them.
So, which one do you need? The answer comes down to your water quality and your filtration goals. There’s no reason to overspend on an absolute-rated filter if your main problem is just cloudy water.
When selecting a water filter, it's not always about chasing the lowest number. There's smart science behind choosing the right one. Data from filtration experts shows that a nominal 5-micron filter can capture 85% of particles at that size, making it an ideal first-stage sediment trap in a whole-house system.
By reading the label and understanding these terms, you can confidently choose a filter that truly delivers on its promises.

When you're picking out a water filter, it’s easy to think a smaller micron rating is automatically the best choice. After all, who doesn't want the absolute purest water? But the reality of home water filtration is a delicate balancing act. You're constantly walking a tightrope between how fine the filter is and how well your shower actually works.
A good way to think about it is like airport security. A quick check for obviously oversized items keeps the line moving fast. A super-detailed, multi-step screening process is far more thorough, but it will slow everyone down to a crawl. In the same way, a lower micron rating creates more resistance, forcing water to work much harder to get through.
This extra resistance leads to two big headaches in your home. First, it can seriously slash your water pressure and flow rate, which we measure in gallons per minute (GPM). Second, it makes the filter clog up way faster, especially if your water is full of sediment.
Just imagine installing an ultra-fine, absolute 1-micron filter for your entire house. Sure, it would deliver incredibly pure water, but it could also turn your powerful showerhead into a sad, disappointing trickle. Trying to run the dishwasher while someone else takes a shower might become a test of your patience.
The real goal is to find the "sweet spot" for your home’s water. This is the micron rating that gets rid of your target contaminants without completely crippling your water flow. A well-chosen filter means you get both clean water and enough pressure to keep up with your family's daily needs.
The most common mistake we see homeowners make is over-filtering. Choosing a filter with a micron rating that’s too low for your specific water conditions will lead to constant filter changes and an ongoing battle with low water pressure.
For instance, if your main problem is visible gunk like sand or rust flakes, a 20-30 micron nominal filter for your whole house is often a perfect fit. It will clear up the water and protect your appliances without you ever noticing a drop in pressure. That’s a much smarter starting point than jumping straight to a 5-micron filter.
A finer filter doesn’t just slow down your water; it also gets packed with contaminants much more quickly. The tighter the pores, the more junk it pulls out of the water passing through. If your water source is heavy with sediment, a 5-micron filter might be totally clogged in just a few weeks, while a 20-micron filter in the same system could last for months.
This is a huge factor in the long-term cost and maintenance of your filtration setup. Nobody wants to be constantly buying and replacing clogged filters—it's expensive and a hassle. This is exactly why a staged filtration approach, where you use a larger micron filter to catch the big stuff before it hits a finer one, is such a smart strategy.
Ever wondered why your refrigerator's water filter, which makes your water taste so crisp, seems to slow to a drip after just a few months? It often comes down to its micron rating. Home filtration technology has come a long way since the 1970s, when pitcher filters started using media in the 0.5 to 5 µm range. Today, many filters, like those in ice machines, might have an absolute 1-micron rating that provides a 99.9% block on certain particles. But that same high-performance filter can sometimes cut the water flow in half, causing problems like misshapen ice cubes and forcing you to change it more often. You can find more details on how different ratings impact flow in this guide to water filter pressure.
Understanding this relationship between purity, pressure, and filter life is the key. It lets you design a system that works with your home's plumbing, not against it, giving you the clean water you want without all the frustration.

Alright, we’ve covered the technical side of micron ratings. Now it’s time for the fun part: putting that knowledge to work in your own home. Picking the right filter isn't about chasing the smallest number you can find. It’s about being a savvy homeowner and matching the filter to your water source and the specific issues you're trying to fix.
This practical approach is what saves you money, protects your pipes and appliances, and gets you the clean, clear water you’re after.
The two big scenarios we see every day are homeowners trying to clean up city water and folks trying to tame a private well. Each one has its own set of problems and requires a totally different game plan to get things right.
If your water comes from the city, it’s already been treated to be safe from a biological standpoint. Your main headaches are usually the stuff it picks up after leaving the treatment plant—like junk from old pipes or the chemicals used to disinfect it. For most people on city water, the mission is simply to "polish" what you've got for better taste, smell, and clarity.
You’re mainly focused on tackling:
For a general, whole-house upgrade on city water, a nominal 5-micron sediment filter is a fantastic place to start. It’s tight enough to catch the fine particles that cause cloudiness but won’t kill your water pressure. If you combine that with a good carbon block filter to grab the chlorine, you'll be amazed at the difference in taste and smell.
Well water is a whole different beast. Because it’s untreated raw water, it often carries a much heavier load of natural gunk like sand, silt, and clay. These bigger, abrasive particles can absolutely wreck your appliances and plumbing fixtures if you don't stop them first.
With well water, your first line of defense is always a robust sediment filter. Its job is to capture the larger particles before they can clog finer, more expensive downstream filters or damage your water heater and washing machine.
A solid starting point for most wells is a 20 to 50-micron whole-house filter. This rating is coarse enough to keep water flowing freely while still trapping the sand and heavy grit that cause the most damage. I see it all the time—people with sediment-heavy wells jump straight to a 5-micron filter, and it's a recipe for constant, frustrating filter changes.
For a truly effective and low-maintenance system, especially with challenging well water, the pros use a method called staged filtration. It’s exactly what it sounds like: you line up multiple filters in a series, starting with a larger micron rating and getting progressively smaller.
Think of it like sorting a pile of rocks and sand. You wouldn't use a tiny kitchen sieve to get the big boulders out first, right? You’d use a wide screen for the big rocks, then a finer screen for the pebbles, and then the sieve for the sand. This layered approach is way more efficient.
A classic staged setup for a home might look like this:
This strategy is brilliant because it makes every filter last longer. The cheap 25-micron pre-filter takes all the abuse, letting the finer, more expensive filters do their specialized jobs without getting clogged right away. It's the secret to getting high-purity water without sacrificing your water flow or your wallet.
Here's a quick cheat sheet to help you match your specific water problem with the most effective micron rating for your filter.
| Water Source / Issue | Common Contaminants | Recommended Micron Rating | Filter Type |
|---|---|---|---|
| City Water (General) | Fine sediment, some rust | 5 to 10 micron | Whole-House Sediment |
| Well Water (Heavy Sediment) | Sand, silt, rust, dirt | 20 to 50 micron | Whole-House Pre-Filter |
| Cloudy or Murky Water | Fine silt, clay | 5 micron | Sediment Filter |
| Protecting Appliances | Sand, large particles | 20 micron or higher | Whole-House Pre-Filter |
| Drinking Water Purity | Giardia, Cryptosporidium | 1 micron (Absolute) | Under-Sink or Countertop |
Use this as a starting point. Every home’s water is unique, but these recommendations will put you on the right track for solving the most common water quality headaches.
Trying to sort through water filtration specs can feel like taking a pop quiz in a subject you never studied. When you’re trying to understand what is a micron rating, it's all too easy to stumble into a few common traps that lead to frustrating and expensive mistakes. Let's clear the air and bust some of the biggest myths out there.
The most common myth? That a smaller micron number is always better. It seems to make sense—tighter pores should mean cleaner water, right? Well, not exactly. While an ultra-fine filter does remove more particles, it often comes at a price your home's plumbing has to pay.
Going with a super-low micron rating, like a 1-micron filter for your whole house, can seriously choke your water flow. This is what leads to weak showers and appliances that take forever to fill. It also means the filter cartridge will clog up way faster, forcing you to replace it constantly—especially if you're on well water with a lot of sediment.
A much smarter strategy is to match the filter's rating to the actual problem you're trying to solve. If you just want to get rid of the visible gunk making your water cloudy, a 20-micron filter is often a far more practical and effective choice than a 5-micron one.
The goal isn’t to chase the lowest number. It’s about finding that sweet spot between effective filtration and keeping your water pressure strong. Over-filtering is a very common and costly mistake.
Another huge misconception is thinking the micron rating is the be-all and end-all of water quality. While it's absolutely critical for grabbing physical particles like sand, silt, and rust, it tells you zero about a filter's ability to tackle chemical contaminants or things dissolved in the water.
If your main complaint is the chlorine taste and smell from city water, or if you have concerns about lead from older plumbing, a low micron rating on its own won't do a thing. Those issues require a completely different type of filtration technology.
This is where the filter material itself becomes the star of the show:
A top-notch carbon block filter might have a 5-micron rating, but its main job is chemical adsorption, not just physically straining particles. The micron rating is there to make sure sediment doesn't clog up the carbon and stop it from working. So, always look at both the micron rating and the filter media to get the full story.
Once you get a handle on the basics of what a micron rating is, a few practical questions almost always pop up. Let's run through the most common ones to make sure you’re ready to pick the right filter for your home.
This is a great question, and the short answer is no. A standard micron filter is essentially a very fine strainer, designed to physically block solid particles like sand, silt, and flecks of rust. Dissolved solids, like salt or the calcium and magnesium that cause hard water, are simply too small and will pass right through.
To tackle those dissolved minerals, you need a completely different approach. A reverse osmosis (RO) system is the go-to for removing salt and a wide range of other dissolved solids. For hard water, a water softener uses a process called ion exchange to specifically target and remove calcium and magnesium.
The clearest sign is a drop in your home's water pressure. As the filter does its job and collects gunk, it naturally gets clogged, which slows down the water flowing through it. You'll probably first notice it when you're taking a shower or filling up the tub.
A sudden dip in water pressure is your filter's way of saying it's full and can't work effectively anymore. It’s always smart to keep a spare filter cartridge on hand so you can swap it out right away.
While many filters suggest a replacement timeline, like every 3-6 months, your water quality is the real determining factor. If you've got a lot of sediment, you might be changing filters every month. If your water is relatively clean, you could go much longer.
For most people on a municipal water supply, it's usually not necessary. City water is already treated to be biologically safe, so you don't have to worry about harmful bacteria and cysts. A solid 5-micron sediment filter paired with a good carbon filter is typically all you need to make your water taste and smell great.
That said, choosing a sub-micron filter (rated at 1 micron or less) can add another layer of protection. An absolute 1-micron filter is certified to block protozoan cysts like Giardia and Cryptosporidium, which have been known to slip through municipal treatment on rare occasions. It’s a popular choice for families with young kids or anyone who just wants that extra peace of mind.
Here at Water Filter Advisor, our mission is to give you clear, straightforward advice for safer, better-tasting water. We cut through the noise with in-depth buying guides and maintenance tips, helping you make choices you can feel good about. To find your ideal filtration setup, check out all our resources at https://www.waterfilteradvisor.com.
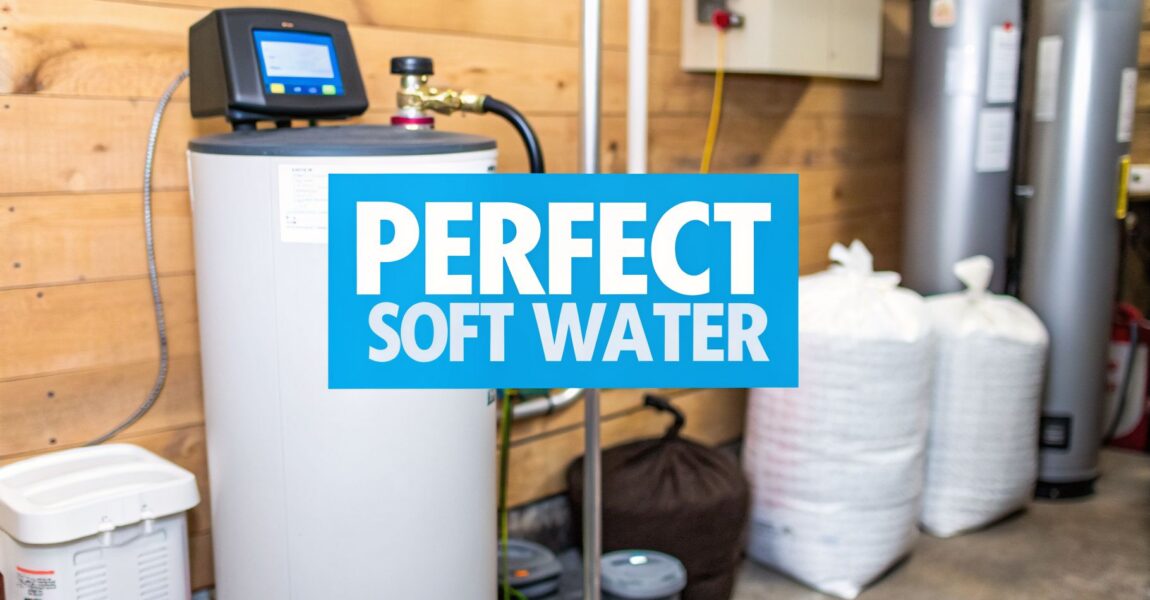
So, you’ve finally brought home your very own water softener, the undisputed champion in the war against hard water. You're ready to banish soap scum, rescue your crusty appliances, and finally experience the joy of a shower that doesn’t leave you feeling like a reptile. But… now what? You're staring at this glorious piece of home tech, wondering how to unleash its full potential.
Don't sweat it. Getting your system up and running is far less intimidating than it looks. It's mostly about giving it the right "fuel" (salt) and telling it when to clean itself.
This guide will walk you through those first crucial steps, turning you from a hard water victim into a soft water virtuoso. Let's dive in.
If you're fed up with dishes that look like they’ve been dusted with chalk and towels that could double as sandpaper, you’re in the right place. Properly setting up your water softener is the key to unlocking a whole new world of clean, and it's simpler than you might think. We'll skip the boring tech-speak and get straight to the good stuff.
Hard water isn't just an annoyance; it's a home-wrecker, plaguing over 85% of homes in the U.S. Your new softener is the frontline defense against this mineral menace, and a stellar initial setup ensures you're not wasting salt, water, or your sanity.
Below is your cheat sheet to getting started. These are the absolute must-do actions to take the moment your softener is installed.
| Action Item | Your First Steps | Why This Is Crucial |
|---|---|---|
| Add Salt | Pour one 40-pound bag of high-purity salt pellets into the brine tank. Aim for about half-full. | This is the "magic food" for your softener. Without it, the system can't recharge itself to fight another day. |
| Set Hardness | Find your water's hardness level (in GPG) from a local water report or a test kit. Program this number into the control head. | This tells your softener how tough the enemy is, so it can bring the right amount of firepower without wasting resources. |
| Schedule Regeneration | Program the regeneration cycle to run when you're dreaming, like at 2 AM, when no one is using water. | This "self-cleaning" cycle prevents hard water from sneaking into your pipes while the unit is recharging. |
Nailing these three things from the get-go sets your system up for a long and happy life of hassle-free operation.
Did you know your morning coffee is about 98% water? If your water tastes like a swimming pool, your coffee will too. Hard water minerals like calcium make your brew taste chalky and bitter. Softened water lets the true, vibrant flavors of your coffee beans shine through.
Once the salt is in, it's time to talk to the machine's brain: the control head. You’ll need to input your water hardness value, measured in grains per gallon (GPG). You can usually find this on your city's water quality report online, or get your hands dirty with a simple water hardness test kit from a hardware store.
After setting the hardness, program the time of day. The most important setting here is the regeneration time. I always recommend setting it for the dead of night—2 AM is the gold standard. Why? Because the system goes into bypass mode during regeneration, meaning you'll get untreated hard water if you turn on a faucet. Scheduling it for a time when everyone's dreaming of soft, fluffy clouds avoids this completely.
For more in-depth tips and tricks on water treatment, you can always explore a wide range of water filtration advice.
Finally, kick off a manual regeneration cycle right after you finish programming. This will get the resin bed fully charged and ready to start softening your water immediately.
To truly master your water softener, it helps to know what's going on inside that mysterious tank. Once you understand the mechanics, you can fine-tune its performance, save money, and keep it humming along for years. At its heart, a water softener is a surprisingly elegant system built around three key players.
Think of it as a well-oiled team:
The science behind how a softener obliterates hardness is a brilliant process called ion exchange. As your home’s hard water passes through the mineral tank, the negatively charged resin beads attract and grab onto the positively charged calcium and magnesium minerals (the bad guys). To complete the trade, the beads release harmless sodium ions into the water.
This is a continuous filtration process that springs into action every time you turn on a tap. A softener's main job is to prevent the very problems that might lead you to use a calcium hardness reducer in other places, like a swimming pool.
Eventually, those resin beads get completely covered with hardness minerals and can't grab any more. That’s the signal for the control valve to step in and start the all-important regeneration cycle.
The simple infographic below shows the basic steps to get your system ready to go for the first time.

As you can see, once you add salt and program your water hardness level, you just need to kick off a cycle to get things started.
The regeneration cycle is when your softener uses that salty brine solution to wash all the collected minerals off the resin beads and flush them down the drain. How your system decides when to do this makes a huge difference in its efficiency.
A modern, demand-initiated softener can save a family of four up to 2,000 gallons of water and 500 pounds of salt per year compared to an old timer-based model. It regenerates only when needed, not on a fixed schedule.
Older softeners work on a simple timer, regenerating every few days whether they need to or not. That’s like doing a full load of laundry for just one dirty sock—incredibly wasteful.
Modern, "smart" softeners are much more clever. They use a flow meter to track how much water your household actually uses. They only trigger a regeneration cycle after a pre-set volume of water has been softened. This "demand-initiated" regeneration adapts to your real life. It won't waste salt regenerating while you're on vacation, but it will be ready to handle the extra load when you have house guests for the weekend.

Think of the salt in your brine tank as the energy drink that powers your water softener's regeneration. Without it, the whole system grinds to a halt. Picking the right type and adding it correctly is a fundamental part of getting the most out of your home water filtration setup.
The quality of salt you use is directly linked to your softener’s efficiency and how often you'll be stuck cleaning out the tank. It's a simple equation: the purer the salt, the less gunk and sediment will build up.
When you hit the store, you'll generally see three main types of salt. Each comes with its own set of pros and cons for your home's water filtration system.
For almost every homeowner, evaporated salt pellets are the best bet. They might cost a little more upfront, but they dissolve cleanly and save you from the soul-crushing chore of cleaning out a sludgy tank. That small extra cost is well worth it.
Just as important as your salt choice is how you fill the brine tank. A classic rookie mistake is to dump in bags until it’s filled to the brim. This is a surefire way to cause headaches like "salt bridging," which we'll get into in a moment.
A good rule of thumb is to keep the salt level above the water line, but never fill the tank more than two-thirds full. Check the level once a month and toss in a new bag when it gets down to about one-third full.
This simple routine prevents overfilling and makes sure the salt can dissolve properly to create that all-important brine solution for regeneration.
Managing your salt isn't just about your softener—it's about protecting your entire home's water filtration ecosystem. Did you know that a properly working water softener can slash household plumbing repair bills by up to 75%? Hard water scale chokes pipes and appliances, leading to clogs that cost American homeowners over $2.5 billion every year. You can explore more about these findings and market trends to see the full financial impact.
A salt bridge is exactly what it sounds like: a hard crust of salt that forms inside your brine tank, usually just above the water level. This solid layer blocks the salt underneath from dissolving, meaning your softener can't make brine and can't regenerate. If you notice the salt level in your tank hasn't moved in a while, a salt bridge is the number one suspect.
Fixing it is surprisingly satisfying. Just take a long-handled tool, like a broom handle, and gently tap the crust to break it up. Once it's broken, scoop out any big, undissolved chunks. To keep it from happening again, remember not to overfill your tank and stick with high-purity salt pellets.
Your water softener is a true workhorse, but like any appliance that's constantly on the job, it needs a bit of regular TLC to keep performing at its peak. Think of it like changing the oil in your car—a little preventative care now saves you from massive, expensive headaches later.
Following a simple maintenance routine is the secret to getting the most out of your home water filtration investment and ensuring you always have that high-quality soft water you paid for.
You don't need a toolbox or a plumbing license for these. Just a few minutes each month can help you spot a small issue before it turns into a major flood or a system failure.
First, pop the lid on your brine tank and take a peek. Is the salt level at least one-third full? Great. While you're there, give the whole unit a quick visual scan for any drips or puddles. Catching a leak early can save you a world of hurt.
A well-maintained water softener doesn't just protect itself; it protects every single water-using appliance in your house. This is especially true for tankless water heaters, which are notoriously sensitive to hard water. Soft water is critical to their efficiency and longevity, helping you avoid premature failure and the need for specialized Tankless Water Heater Services.
Once a year, set aside a little time for a more thorough cleaning. This means completely emptying the brine tank to clear out all the gunk—sediment, dirt, and that lovely "salt mush"—that inevitably builds up at the bottom. If you let it go, this sludge can clog your system and severely cripple its filtration effectiveness.
Here’s a quick annual checklist to follow:
This is a huge part of learning how to use water softener systems for the long haul.
Seriously, don't skip the resin cleaner, especially if your water has high iron content. Iron fouling is one of the top reasons softeners begin to fail. Regular cleaning is the only real way to combat it and keep your softener regenerating like new for years to come.

Even a perfectly maintained water softener can have an off day. Before you reach for your wallet to schedule a service call, a little DIY detective work can often solve the most common glitches. If you’re suddenly noticing spotty dishes again or your soap just isn’t lathering like it used to, it’s time to play investigator.
Many issues are surprisingly simple fixes. With a bit of know-how, you can diagnose what's gone wrong and get your system back to delivering that silky-smooth water your home deserves.
This is the most common complaint, and it usually points to a few usual suspects. First, check the blindingly obvious: is the system plugged in and turned on? It sounds silly, but you'd be surprised how often a power flicker or an accidental unplug is the villain.
Next, make sure your softener isn't in bypass mode. Every softener has a bypass valve—usually a handle or a couple of knobs—that routes water around the unit for maintenance. If that handle got bumped into the wrong position, you're just getting untreated hard water straight from the source.
Finally, confirm your softener is actually regenerating. You should hear it kick on at its scheduled time, which for most people is around 2 AM. If it’s eerily silent, you could be looking at a power problem or a busted timer motor in the control valve.
Walking in to see a brine tank filled to the brim with water can be alarming, but don't panic. This almost always points to an issue with the brine line or the injector system, which is what creates the suction to pull that salty water into the mineral tank.
A few things could be at play here:
A clogged injector is usually an easy fix. Just check your manual to find it, then carefully take it apart and give it a good cleaning with a small brush and some water. This simple step often brings a dead system right back to life.
Ever wondered why your skin feels like sandpaper after showers? It's hard water stripping natural oils. Dermatologists note that soft water can reduce soap scum by 50%, letting you create a rich lather with half the soap—saving a typical family around $150 yearly on products alone. Learning to troubleshoot your system ensures these benefits never stop. Discover more insights about the growing household water softener market on databridgemarketresearch.com.
If you peek in your tank and the salt level hasn't moved in weeks, your softener isn't regenerating properly. This means you aren’t getting soft water, even if it sounds like the system is running. The number one cause here is a salt bridge.
A salt bridge is a hard, crusty layer of salt that forms just above the water level in your brine tank, almost like concrete. It prevents the salt below it from dissolving, so no brine gets made.
To fix it, just grab a broom handle and gently tap the crust until it breaks apart. Then, you can scoop out any big, undissolved pieces. To prevent this from happening again, try not to overfill the tank and always use high-purity salt pellets.
Jumping into the world of home water filtration can feel a little overwhelming. You’ve got questions, and we've got answers. Here are some of the most common things homeowners ask when getting started.
This is a big one, and the real answer is: it depends. Your water’s hardness, how much water your family uses, and the size of your brine tank are all factors.
As a rule of thumb, just pop the lid and check the salt level once a month.
You want the tank to stay at least one-third full. This ensures there's enough salt to make the brine needed for the regeneration cycle. A common mistake is filling it to the top—don't do it! This can lead to a "salt bridge" and clog up your system. For a typical family of four, you'll probably add a 40-pound bag of salt every month or two.
For most people, yes, absolutely. The amount of sodium added during the ion exchange process is directly tied to how hard your water was to begin with, and it’s usually a very small amount.
Let's say your water has a hardness of 15 GPG (grains per gallon). After softening, it will contain about 280 mg of sodium per liter. To put that in perspective, that’s less sodium than you'd get from two slices of regular white bread.
If you're on a strict, doctor-ordered low-sodium diet, it’s always best to check with them first. A popular solution is to install a separate reverse osmosis (RO) system at the kitchen sink for drinking and cooking water. This powerful filtration method removes virtually everything, including the added sodium.
Pro Tip: Water softeners don't just add a little sodium; they remove the hard minerals that make coffee taste chalky and bitter. With softened water, the true flavor of your coffee beans really comes through.
This is a classic head-scratcher, but don't call for a repairman just yet. There are a few things you can check yourself.
This is a crucial distinction in the world of home water filtration. A traditional water softener uses ion exchange to physically remove the hardness minerals (calcium and magnesium) from your water. This is the only method that provides all the benefits you associate with soft water—silky skin, spotless dishes, and bubbly lather.
A "salt-free water conditioner" doesn't actually remove anything. Instead, it uses a different technology (like Template Assisted Crystallization, or TAC) to alter the structure of the minerals so they won't stick to your pipes and appliances as scale. So, while conditioners are great for preventing scale buildup, they won't give you that truly soft water feeling or stop soap scum.
At Water Filter Advisor, our mission is to provide clear, unbiased information to help you get safer, better-tasting water. Check out our guides and reviews to find the right solution for your home at https://www.waterfilteradvisor.com.

Ever pour a glass of water and get a whiff of the local swimming pool? That all-too-common chlorine smell is exactly why NSF/ANSI 42 certification is your secret weapon in the quest for better water. Think of it as the official seal of approval that says a filter can genuinely make your water taste, smell, and look fantastic.

When you're shopping for a water filter, the box is usually a carnival of buzzwords and bold promises. Amid all that marketing noise, the one thing you should hunt for is that small blue NSF logo. It’s a game-changer. Seeing that seal means a filter isn't just claiming it makes your water better—it's been independently tested and proven by the pros to do just that.
Think of NSF/ANSI 42 as the "taste and odor" specialist. Its job isn't to wrestle with heavy-duty health contaminants like lead or cysts. Instead, it focuses squarely on the aesthetic issues that make your tap water unpleasant. This certification is your guarantee that a filter can successfully reduce the non-health-related stuff you can see, smell, or taste.
At its heart, NSF/ANSI 42 is all about peace of mind. It's confirmation that the product you bought has survived a gauntlet of third-party tests for very specific claims. You can trust it to do what it says it'll do, from the first refreshing glass to the last drop.
This standard makes your water better for everything:
Simply put, NSF/ANSI 42 is the certification for the sensory experience of your water. It’s what turns technically "safe" city water into water that's truly refreshing and delicious.
NSF/ANSI 42 is the benchmark for any water filter designed to fix aesthetic issues in drinking water—like that chlorine taste that makes you feel like you're sipping from the local pool. Developed by NSF International, this standard holds point-of-use and point-of-entry systems accountable for reducing things that affect taste, smell, and clarity. It doesn't certify for health-related contaminants, so you won't see claims for lead or cyst reduction under this standard.
This specific focus is why it’s a foundational certification for so many home water filters, from the simple cartridge in your fridge to a big whole-house system. When you see a product with this seal, you know it's built to improve your daily quality of life, one great-tasting glass of water at a time. For a deeper dive into the water treatment market, you can find detailed insights from sources like Polaris Market Research.

When you spot that NSF/ANSI 42 seal, you can be confident the filter is designed to tackle the specific things that make your water taste, smell, or look off. This standard isn't about chasing the heavy-hitter health contaminants; it’s all about fixing the aesthetic problems that make you think twice before filling your glass from the tap.
Think of this certification as a guarantee. It's proof that a filter can successfully reduce a specific list of nuisance contaminants. Let's dig into what that really means for the water flowing through your home.
Chlorine is an absolute workhorse for our public water systems. It’s a powerful disinfectant that keeps nasty bacteria from growing in the pipes on the long journey to your home. But once it gets to your faucet, its job is done.
That lingering "public pool" smell and chemical taste can ruin a good cup of coffee or even just a plain glass of water.
This is where an NSF/ANSI 42 certified filter really proves its worth. These filters are masters at reducing chlorine, and it’s often the single most dramatic improvement you’ll notice. Inside the filter, activated carbon media works like a magnet, grabbing and holding onto chlorine molecules through a process called adsorption. For a deeper dive into the mechanics, there are some great resources on chlorine removal from tap water available. The result? Water that tastes crisp and clean, just like it should.
Ever poured a glass of water that looked just a little hazy, or noticed tiny specks floating around? That’s usually particulates—microscopic bits of silt, sand, or rust that get picked up from aging city pipes or even your own plumbing. They won't hurt you, but they sure don't look appetizing.
An NSF/ANSI 42 certified filter acts like a super-fine screen, tested and proven to trap these tiny particles and give you back that crystal-clear water. The standard is broken down into performance classes:
This means no more cloudy ice cubes, no more gritty texture, and water that actually sparkles in the glass.
While chlorine and sediment are the big two, NSF/ANSI 42 can cover a few other common issues. A filter's specific capabilities will always be listed on its performance data sheet, but here are some other claims you might see.
The table below breaks down the main claims you'll encounter under this standard and what they mean for your everyday water quality.
| Claim Covered | What It Is | How It Affects Your Water | Everyday Benefit of Removal |
|---|---|---|---|
| Chlorine | A chemical disinfectant used in municipal water treatment. | Creates a "swimming pool" taste and smell. | Water and beverages taste fresh, clean, and natural. |
| Particulates | Tiny specks of rust, sand, silt, or sediment. | Causes cloudiness (turbidity) and a gritty texture. | Crystal-clear water and ice cubes; no sediment. |
| Chloramine | A stable disinfectant made from chlorine and ammonia. | Can cause a different kind of chemical or flat taste. | Eliminates off-tastes, similar to chlorine removal. |
| Iron | A mineral that can leach from pipes into the water. | Imparts a strong metallic taste; leaves red/brown stains. | Better-tasting water and no more ugly rust stains. |
| Zinc | A mineral that can also leach from older plumbing. | Creates a metallic or astringent taste. | Removes the metallic bite, making water more pleasant. |
Each of these reductions contributes to the main goal of NSF/ANSI 42: making your tap water genuinely enjoyable to drink.
So, what does it actually take for a water filter to get that official NSF/ANSI 42 seal of approval? It's not just a matter of filling out some paperwork. A manufacturer voluntarily puts its product through the wringer to prove it does what it says it does.
Think of it like an Olympic athlete submitting to drug testing. They can talk a big game, but the only way to prove they’re clean is to let an independent, third-party authority run the tests. For water filters, NSF International is that authority, and the NSF/ANSI 42 certification is the gold medal for aesthetic performance.
Before NSF even plugs the filter in, they take a hard look at what it's made of. The first gauntlet is the material safety test. This makes sure that nothing in the filter—not the plastic housing, the rubber seals, or the glue holding it together—is going to leach weird chemicals back into your water.
This is a dealbreaker. What good is a filter that removes chlorine but adds something else nasty in its place? NSF experts go over every single component that touches the water, guaranteeing it's safe for you and your family over the long haul.
Once the materials pass muster, it’s time to see if the filter can take a punch. The structural integrity test mimics the chaos that can happen inside your home's plumbing. They blast the filter with high-pressure water surges, way more intense than what it'll ever see under your sink.
The whole point is to answer one simple question: will it spring a leak? A certified filter has to prove it won’t crack, burst, or fail under pressure. This gives you peace of mind that you're buying a durable product, not a ticking water bomb for your kitchen.
The certification process isn't just a simple pass/fail on performance. It's a holistic evaluation that confirms a product is safely built, structurally sound, and effective for its entire recommended lifespan.
Now for the main event. The performance test is where the filter has to put its money where its mouth is and prove it can actually filter. For an NSF/ANSI 42 certification focused on chlorine, this is a seriously tough trial.
They don't just use regular tap water. The lab whips up a special "challenge water" spiked with a high concentration of chlorine—usually around 2.0 milligrams per liter, which is way more than you'd typically find coming out of your faucet. Then, they start running this super-chlorinated water through the filter.
And they don't stop after the first glass. They push the filter to 120% of its advertised lifespan. If a filter says it's good for 200 gallons, NSF runs a full 240 gallons through it, taking samples the whole time. To get the stamp of approval, the filter must cut down chlorine by at least 50% from the first drop to the very last.
This grueling process is why that little blue seal costs so much—a manufacturer might spend between $5,000 and $15,000 per model to get certified. But in a crowded market, that investment is what separates a proven product from an empty promise. You can learn more about the certification process and see how NSF operates in over 170 countries.
Walking through the water filter aisle can feel like you’re trying to crack a code. You see all these numbers and certifications, but what do they actually mean? When it comes to your family's water, the two most important standards to understand are NSF/ANSI 42 and NSF/ANSI 53.
Getting this right is everything. It's the difference between buying a filter that actually fixes your water problem and just buying a fancy-looking plastic box.
Think of it like this: NSF/ANSI 42 is for "Aesthetic Effects" (taste and smell), while NSF/ANSI 53 is for "Health Effects." One makes your water more pleasant; the other makes it safer. They do two totally different jobs, but both are critical.
Let’s use an analogy. Imagine you're renovating your kitchen. You hire an interior designer to pick out the perfect countertops and paint colors to make the space look and feel amazing. That designer is NSF/ANSI 42.
Then, you bring in a plumber to make sure the pipes aren't leaching lead and the water lines are secure. That plumber is NSF/ANSI 53. You need both for a safe and beautiful kitchen, and the same logic applies to your drinking water.
NSF/ANSI 42 is all about the things you can taste, see, and smell. Its main purpose is to certify that a filter can cut down contaminants like chlorine—the chemical that gives tap water that "public pool" odor—and tiny particulates that make your water look murky. It’s purely focused on improving the sensory experience.
On the other hand, NSF/ANSI 53 gets serious. It tackles a specific list of contaminants known to pose health risks. This is the standard you need if you’re worried about lead from old plumbing, nasty parasitic cysts like Giardia, or volatile organic compounds (VOCs). A filter with this certification has gone through brutal testing to prove it can reduce these specific health hazards.
The flowchart below shows just how rigorous the path to certification is, whether a filter is aiming for aesthetic or health claims.

As you can see, this isn't a simple pass/fail test. It ensures a filter not only works but is also built from safe materials and can stand up to everyday use without falling apart.
So, which one do you need? Your choice should come down to your specific water concerns.
If your city water is perfectly safe but just tastes and smells a little funky from the chlorine treatment, an NSF/ANSI 42 certified pitcher or faucet filter will likely do the trick. It’s an easy, budget-friendly fix for getting better-tasting water.
But if you live in an older house where lead pipes are a possibility, or your local water quality report has red-flagged other contaminants, then NSF/ANSI 53 is non-negotiable. For that, you’ll want to look at under-sink or even whole-house systems that are specifically certified to remove those threats. Luckily, many top-tier filters are dual-certified for both standards.
Here’s the bottom line: Never assume one certification covers the other. A filter that makes your water taste great isn't automatically protecting you from lead. And a filter that removes lead won't necessarily get rid of that chlorine smell.
To make it even clearer, check out this side-by-side comparison.
This table breaks down the two most common water filtration standards for homeowners. Use it to quickly decide which certification lines up with your needs.
| Feature | NSF/ANSI 42 (Aesthetic Effects) | NSF/ANSI 53 (Health Effects) |
|---|---|---|
| Primary Goal | Improves water's taste, odor, and clarity. | Reduces specific, health-related contaminants. |
| Typical Contaminants | Chlorine, Chloramine, Particulates (cloudiness), Iron, Zinc, Bad Tastes. | Lead, Cysts (Giardia, Cryptosporidium), Mercury, VOCs, Asbestos. |
| Think of It As… | Your water's personal stylist. Makes it look and taste good. | Your water's bodyguard. Protects you from hidden dangers. |
| Common Filter Types | Pitchers, Refrigerator Filters, Faucet-Mount Filters. | Under-Sink Systems, Countertop Filters, Whole-House Filters. |
| When to Choose It | Your main complaint is the bad taste or smell of your tap water. | You have a specific health concern based on your home's age or a water report. |
By matching what you want to fix about your water with the right certification, you can shop with confidence. You’ll know the filter you bring home is the right tool for the job, giving you and your family both great-tasting water and peace of mind.
Navigating the world of water filters can feel like a guessing game, but verifying an NSF/ANSI 42 certification is your best line of defense against slick marketing that doesn’t deliver. It really only takes a few simple steps to go from confused shopper to a confident buyer who can spot the real deal from a mile away.
First thing's first: know what to look for. The official blue NSF seal should be printed clearly on the product’s box, tucked inside the manual, or featured on the online product page. It’s a mark of quality that legitimate manufacturers are proud to display.
But just spotting the logo isn't the final step. The most important part is to quickly and independently verify that claim for yourself.
Trust, but verify. This is where the official NSF Certified Product and Service Listings database becomes your best friend. It’s a free, public search tool that lets you confirm any manufacturer's claims in just a few moments.
Here’s the simple process:
Find the Brand and Model Number: Grab the filter's box or look at the unit itself to find the exact brand name and model number. Be precise here—even a single digit or letter being off can point to a different, uncertified product.
Visit the NSF Database: Head over to the official NSF listings website. This is the one and only source of truth for all things certified.
Search for the Product: Type the brand name into the search bar. This will bring up a list of every certified product they make.
Confirm the Model: Now, scroll through that list and find the exact model number you're checking. If you can’t find it, the product simply isn’t certified. No ifs, ands, or buts.
Review the Certified Claims: Once you find the correct model, click on it. You’ll see a detailed "data sheet" that shows precisely which standards it’s certified for (like NSF/ANSI 42) and the exact contaminants it’s proven to reduce.
This final step is where you really take control. The NSF listing will lay it all out for you—from the exact percentage of chlorine reduction to which class of particulates it removes. This is how you match a filter's proven abilities directly to what you need for your home's water. For more expert insights on choosing the right filter, you can check out additional resources for water filter advice.
Be on high alert for vague language. Phrases like "tested to NSF standards," "meets NSF guidelines," or "NSF compliant" are huge red flags. These carefully chosen words do not mean the product is officially certified.
Getting certified is a tough, expensive, and ongoing process. If a product has truly earned the NSF seal, the manufacturer will say so clearly, and you’ll find it in the official database. Anything less is just marketing noise. By taking just a couple of minutes to verify, you guarantee that the filter you bring home actually does the job you're paying for.
Even after digging into the details, you probably have a few practical questions. That’s completely normal. Getting those last few answers straight is what helps you feel truly confident you’re buying the right filter for your home.
Let’s run through some of the most common things people ask about NSF/ANSI 42 certification.
Yes, and here’s why. When your city says the water is "safe," they mean it meets the bare minimum legal standards set by the EPA. But that water often travels through miles of pipes and is treated with disinfectants like chlorine, which can leave it with a pretty funky taste and smell.
An NSF/ANSI 42 certified filter is made for exactly this situation. It tackles those aesthetic problems, taking your water from just legally safe to genuinely delicious for drinking, brewing coffee, or cooking.
Think of it this way: The goal of an NSF/ANSI 42 certified filter isn't to make unsafe water safe; it's to make safe water taste great.
Absolutely. In fact, it's pretty common for high-quality filters to be certified for both NSF/ANSI 42 and the health-focused NSF/ANSI 53 standard, especially with under-sink or whole-house systems.
Getting a dual-certified filter is really the best of both worlds. You know it’s been put through the wringer and proven to handle both:
Just be sure to check the product’s official listing or the Performance Data Sheet to see the full list of what it's certified to remove.
Not quite, but it guarantees a major reduction. For a filter to earn its certification, it has to reduce a high chlorine concentration—2.0 mg/L, which is way more than you'd typically find in tap water—by at least 50%. And it has to keep doing that for its entire rated lifespan.
In the real world, cutting chlorine by that much is more than enough to get rid of any noticeable taste or odor. You’re left with fresh, clean-tasting water every time.
It sure does. The NSF/ANSI 42 standard can be applied to any type of water treatment system, whether it’s a simple pitcher you keep in the fridge or a big unit that treats all the water coming into your house.
The important thing to remember is that the certification is for a specific model and its performance. For example:
No matter the filter's shape or size, that NSF seal is your proof that it passed the same rigorous tests to get certified.
At Water Filter Advisor, our job is to make sense of these standards so you can find the perfect fix for your home's water. Check out our guides and reviews for clear, expert advice on getting safer, better-tasting water today. https://www.waterfilteradvisor.com
Ever wondered what it would be like to have a VIP bouncer for your tap water? That's exactly what an ultra filtration system is. It's the ultimate gatekeeper for your home's water supply, using a high-tech membrane riddled with microscopic pores to physically block nasty intruders like bacteria and viruses from crashing your party. It’s a seriously powerful way to get exceptionally pure water right from your faucet, and it does it all using your home's regular water pressure—no chemicals or funny business required.
You know how a coffee filter lets that beautiful dark liquid through but holds back the gritty grounds? Ultra filtration works on the exact same principle, just on a ridiculously small scale. It's a straightforward but incredibly effective mechanical filtering process that's pure genius in its simplicity.
The real MVP of any ultra filtration (UF) system is its hollow fiber membrane. This isn't just a flat sheet; it's a dense bundle of thousands of tiny, hollow tubes, like a fistful of microscopic straws. The walls of these straws are peppered with pores typically between 0.01 and 0.1 microns wide. To put that in perspective, a single human hair is about 70 microns thick. These pores are so small they act as an impenetrable wall against most waterborne baddies.
When tap water enters the UF system, your home's water pressure shoves it against the outside of these hollow fibers. The tiny water molecules are small enough to do the limbo, squeezing through the pores and into the hollow center of the tubes. They emerge on the other side as sparkling, purified water.
But anything larger gets left behind, physically denied entry. This includes a whole rogue's gallery of things you don't want in your glass:
The beauty of ultra filtration is its brute-force elegance. It's not a complex chemical reaction. It's a physical barrier that separates pure water from the gunk, just like a sieve separates flour from lumps—only on a much, much finer level.
This all happens in real-time, giving you clean water whenever you turn on the faucet without needing a bulky storage tank. And since it runs on normal water pressure, it's about as energy-efficient as it gets.
This effective and efficient technology is really catching on. While it's long been a workhorse in large-scale municipal water treatment, it's becoming the go-to hero for homes and businesses. The global market for these systems shows just how reliable they are, projected to jump from USD 1,987 million in 2025 to USD 3,146 million by 2034. This trend highlights a growing demand for water purification that is both powerful and sustainable. You can discover more insights about this growing market and its applications.
At the end of the day, what's happening inside an ultra filtration system is beautifully simple. It’s a solid physical barrier making sure that what comes out of your tap is just clean, safe water, ready for drinking, cooking, and enjoying.
Trying to pick the right water filter for your home can feel like you've stumbled into the wrong aisle at the hardware store. You're bombarded with technical jargon and a ton of competing claims. To get it right, you need a clear, no-nonsense comparison of how these different technologies actually stack up.
Ultra filtration (UF) systems hold a really unique sweet spot in the world of water purification. They offer a fantastic balance of powerful filtration, efficiency, and health benefits that makes them stand out from the other filters you see on the shelf.
This diagram gives you a quick visual of how it works. Contaminated water goes in, gets squeezed through the UF membrane, and comes out pure. Simple as that.

As you can see, the membrane is a physical gatekeeper. It literally blocks the bad stuff while letting the good, clean water molecules flow right through.
Now, let's break down how UF throws down against the competition.
It's easy to get lost in the specs, so here's a quick cheat sheet comparing the most common filter types you'll find for your home.
| Filtration Method | Removes Bacteria & Viruses | Keeps Healthy Minerals | Wastes Water | Best Use Case |
|---|---|---|---|---|
| Ultra Filtration | Yes | Yes | No | Whole-home or POU for comprehensive microbiological safety without removing minerals. |
| Reverse Osmosis | Yes | No | Yes | POU for removing the widest possible range of contaminants, including salts and minerals. |
| Carbon Filter | No | Yes | No | Improving taste and odor by removing chlorine and chemicals; often used with other filters. |
| Microfiltration | Bacteria Only | Yes | No | Basic microbiological protection, good for sediment and larger bacteria like Giardia. |
This table makes it pretty clear—each filter has its own superpower. The right choice really depends on what's lurking in your water and what you want to kick out.
Think of Reverse Osmosis (RO) as the heavyweight champion of water purification. It's incredibly powerful. RO systems use intense pressure to force water through a membrane with pores so tiny—we're talking 0.0001 microns—that almost nothing else gets through. This process strips out bacteria, viruses, heavy metals, and even dissolved salts.
But that raw power comes with a couple of big downsides for the average home. First, RO wastes a lot of water. To make one gallon of pure water, it might send several gallons of wastewater right down the drain. Second, because the filter is so strict, it also removes beneficial minerals like calcium and magnesium, which give water its taste and have health benefits.
Ultra filtration, with its 0.01 micron pores, strikes a much better balance. It’s small enough to block all the nasty microbiological threats—bacteria, protozoa, and even tiny viruses—but it lets those healthy, dissolved minerals pass right on through. You get water that’s safe from pathogens but still has its natural, healthy mineral content, all without the wasteful habits of an RO system.
Activated carbon filters are everywhere, and for good reason. Imagine a carbon filter as a powerful magnet for chemicals. It works through a process called adsorption, where things like chlorine, pesticides, and VOCs (volatile organic compounds) get stuck to the carbon’s massive surface area. This is why carbon filters are rockstars at making your water taste and smell amazing.
But here’s the catch: they do next to nothing for microbiological safety. A typical carbon filter in a pitcher or on your faucet just can't physically stop bacteria or viruses. The pores are simply too big.
This is where ultra filtration really shines. The UF membrane is a physical barrier that those tiny pathogens simply can't squeeze through. In fact, the best UF systems actually include carbon filters as part of their dream team. This combo gives you the best of both worlds: the carbon removes chemicals and improves taste, while the UF membrane ensures the water is completely free of dangerous microorganisms.
For a homeowner, the goal isn't just to pick one filter type over another. It's about finding a system that combines the right technologies for complete protection. A UF system with carbon stages is a far more robust solution than either one on its own.
Microfiltration (MF) is UF's closest relative. It also uses a physical membrane to block contaminants, but the pores are a bit bigger, usually around 0.1 microns. That's plenty small enough to stop protozoa like Giardia and Cryptosporidium, and it gets most bacteria, too.
The critical difference comes down to viruses. Viruses are so small they can often slip right through a microfiltration membrane. An ultra filtration system, with pores that are ten times smaller, offers a much more reliable defense against viral threats. For families with small children, elderly members, or anyone with a compromised immune system, that extra layer of protection is absolutely essential.
So, you’ve decided that an ultra filtration system is the right move for safer, cleaner water. Fantastic choice! Now comes the fun part: which one is the right fit for your home? The choice really boils down to one simple question—are you looking to purify water for a single tap, or do you want to give the entire house the VIP treatment?

This isn't just about where the filter goes; it’s about tailoring the solution to your family’s needs and your water quality goals. The two main types of residential ultra filtration systems are Point-of-Use (POU) and Point-of-Entry (POE), and they each play a very different role.
Think of a Point-of-Use (POU) system as a precision instrument. It’s designed to deliver highly purified water to one specific spot, which is almost always the kitchen sink. These are compact units that tuck away neatly under the sink and connect to their own dedicated faucet.
The big win with a POU system is getting targeted, top-quality filtration exactly where you need it most—for the water you drink and cook with.
This makes POU systems a fantastic choice for renters, smaller households, or anyone whose main mission is to purify their drinking water from nasty microbiological contaminants.
A Point-of-Entry (POE) system, also known as a whole-house system, is your home's comprehensive bodyguard. It’s installed right where the main water line enters your house, treating every last drop of water that flows through your pipes. That means clean water from the kitchen tap, the showers, the dishwasher, and the washing machine.
Going with a POE system brings the benefits of purified water to every room. This is a game-changer for families dealing with sensitive skin, as it strips out the irritants that can cause problems. To see how these stack up against other options, it's worth comparing them with other whole home water filtration systems.
A POE system offers total peace of mind. It creates a complete barrier that stops contaminants from ever entering your home's plumbing. This isn't just about protecting your health; it's about protecting your pipes and appliances from sediment and other gunk, too.
With a POE system, you're not just drinking clean water—you're bathing in it, washing your clothes in it, and truly living in it.
Once you've decided between POU and POE, you need to look at a couple of key numbers to make sure the system can keep up with your household's daily life.
Flow Rate (GPM): This is measured in Gallons Per Minute and tells you how much filtered water the system can kick out at once. For a POU system at your kitchen sink, a flow rate of 0.5 to 1 GPM is typically plenty. But for a POE system, you'll need a much beefier rate—think 10 to 20 GPM—to run a shower and the dishwasher at the same time without your water pressure dropping to a sad trickle.
Filter Lifespan: This tells you how long the filter cartridges will last before you need to swap them out. Keep in mind, this can vary a lot based on how much water you use and how gunky your local supply is. Always check the cost of replacement filters and factor that into your long-term budget.
The good news is that the market for these filters is booming. The global ultrafiltration market is expected to jump from USD 56.63 billion in 2025 to USD 87.21 billion by 2030. That means more innovation and better prices are on the way for you. Once you've weighed these factors, you can invest with confidence, knowing you've picked the perfect guardian for your home's water. If you're looking for more guidance, check out our page to get more expert water filter advice.
So you've decided an ultra filtration system is the right move for your home's water. Great call. But even the best system in the world won't do you much good if it's not installed correctly and looked after properly.
The awesome news? Keeping these systems running in tip-top shape is surprisingly straightforward. You don't need a plumbing degree to get pure, clean water flowing from your tap.

Whether you're looking at a small under-sink setup or a full whole-house unit, getting a handle on the setup and upkeep is key. It’s what ensures you’ll get great-tasting, safe water for years to come.
One of the first things people ask is, "Can I really install this myself?" It really boils down to two things: which system you bought and how friendly you are with a wrench.
Under-Sink (POU) Systems: These are practically made for the weekend warrior. Most of the time, you're just mounting the unit under the sink, tapping into the cold water line with some simple push-to-connect fittings, and drilling a hole for a dedicated faucet. If you can follow instructions and aren't afraid of a little plumbing, you can knock this out in an afternoon.
Whole-House (POE) Systems: This is a different beast entirely. A whole-house system ties directly into your home's main water line. One wrong move here can mean a serious leak and thousands in water damage. For this reason, we almost always tell people to hire a licensed plumber. It's just not worth the risk.
Let’s be real: while an under-sink system is a perfect DIY project, the peace of mind you get from a pro installing your whole-house system is worth every single penny. You know it’s done right from the start.
When it comes to long-term care, ultra filtration systems are wonderfully low-drama. It’s all about simple, routine check-ups, not complicated repairs. Being proactive here is what keeps your water pure and your system happy. Think of it as a little Planned Preventive Maintenance for your water.
Here’s what a typical schedule looks like:
Sediment & Carbon Pre-Filters (Every 6-12 Months): These guys are the first line of defense, catching big gunk and chlorine before they can reach the main UF membrane. Swapping them out is critical and usually just involves unscrewing the filter housing and popping in a new cartridge. If your water has a lot of sediment, you might be doing this closer to the 6-month mark.
UF Membrane (Every 2-5 Years): The hollow fiber membrane is the heart of the system, and it's built to last. Most systems have a backwashing feature—either automatic or manual—that flushes out the gunk that builds up on the membrane. This self-cleaning process is why the membrane can go for years, often needing replacement only every 2 to 5 years.
System Sanitization (Annually): Once a year, when you're already changing filters, it's a smart idea to sanitize the system. This is a quick step that prevents any nasty bacteria from setting up shop inside the filter housings and keeps your water as fresh as possible.
Stick to this simple routine, and you'll sidestep problems like low water pressure or reduced flow. It's a small bit of effort for a huge payoff: knowing your family’s water is always clean and safe.
When you’re shopping for an ultrafiltration system, the packaging can be a real headache. It’s usually covered in labels, percentages, and acronyms that make you feel like you need a chemistry degree just to figure out what you’re buying.
But cutting through that marketing noise is the single best way to know if a filter will actually walk the walk. The key is to look for independent, third-party certifications.
Think of a certification as a report card from an unbiased expert. These organizations put the filter through its paces under tough, standardized conditions to verify the manufacturer’s claims. The most respected name in the water filtration game is NSF/ANSI (National Sanitation Foundation/American National Standards Institute).
Not all NSF/ANSI certifications are created equal. For home water filters, you’ll mainly see two standards, and they test for completely different things. Knowing the difference is critical.
NSF/ANSI 42 – The "Looks and Tastes Better" Standard: If a filter has this stamp of approval, it’s been proven to improve the aesthetics of your water—its look, taste, and smell. This standard focuses on non-health-related issues, like reducing chlorine or particulates that make water cloudy.
NSF/ANSI 53 – The "Health and Safety" Standard: This is the big one. A system certified to NSF/ANSI 53 has passed rigorous testing for its ability to reduce specific health-related contaminants like lead, cysts (such as Giardia), asbestos, and certain chemicals.
Any ultrafiltration system built for microbiological safety should, at a bare minimum, have performance data showing it can remove tiny living organisms, which is often validated under protocols similar to NSF/ANSI 53.
You'll often see performance claims like “99.99% reduction of bacteria.” In scientific terms, this is called a "log reduction," which is just a simple way to talk about really, really big numbers.
A "log reduction" is a measurement of how thoroughly a filter removes contaminants. Each "log" represents a 90% reduction. So, a 1-log reduction is 90%, a 2-log reduction is 99%, a 3-log is 99.9%, and a 4-log is 99.99%.
When a UF system claims a 4-log reduction of bacteria, it means for every 10,000 bacteria that went into the filter, only one made it out the other side. That’s the kind of proven, high-level performance you need when you’re dealing with microscopic threats.
The quality of the filter membrane is what makes this possible. Today, polymeric ultrafiltration membranes are the industry standard, making up 65.0% of the market because they're both durable and affordable. This technology is a huge deal in the water treatment sector, which itself made up 41.7% of all membrane filtration revenue in 2025. You can find more details about membrane filtration technology and see why it's becoming so important.
By looking for these specific, third-party-verified numbers and certifications, you can confidently choose a system. You're no longer just taking a company's word for it—you're relying on proven, scientific data to protect your home's water.
Even after getting the full scoop on ultra filtration, you probably have a few practical questions kicking around. That's perfectly normal. When you're thinking about an investment in your home's water, you want to be sure about the day-to-day details.
We’ve rounded up the most common questions homeowners ask before taking the plunge. Let's get you some clear, straightforward answers.
On its own, a UF membrane is a physical barrier—it stops particles, not the dissolved stuff like chlorine that can make water taste like a swimming pool.
That's why you'll almost always find high-quality UF systems paired with activated carbon filters. The carbon acts like a sponge for bad tastes and odors, soaking up chlorine and other chemical flavors. The UF membrane handles the germs, but it’s the carbon that delivers that crisp, clean taste.
Any filter will add a little bit of resistance, but a properly sized UF system shouldn't cause a noticeable drop in your water pressure. If your shower suddenly feels weak after installation, it's usually a red flag for one of two things.
First, your filter cartridges might just be clogged and screaming for a change. The second possibility is that the system's flow rate isn't high enough for your home's demand. Whole-house systems are built for high flow, but sticking to the maintenance schedule is key to keeping that pressure strong and steady.
Filter life really depends on your water quality and how much you use, but here’s a good rule of thumb for budgeting. The main ultra filtration membrane is the workhorse and can last anywhere from 2 to 5 years.
The sediment and carbon pre-filters that protect that main membrane need more frequent swaps, typically every 6 to 12 months.
As for cost, you could be looking at around $50 for a set of under-sink pre-filters or up to a few hundred dollars for a whole-house UF membrane replacement. It’s smart to factor these ongoing costs into your decision to see the true long-term price tag.
When comparing systems, look at the total cost of ownership—the upfront price plus the filter replacements over time. A slightly pricier unit with longer-lasting filters might actually be the better deal in the long run.
Absolutely. UF systems are a fantastic line of defense for well water, especially against microbiological threats like bacteria (think E. coli) and general cloudiness from sediment. The membrane is a physical wall these contaminants just can't get through.
But well water can be tricky. It often comes with other issues like hardness minerals, iron, or sulfur that UF won’t touch. That's why getting a comprehensive water test done first is non-negotiable.
More often than not, the best setup for a well is a multi-stage approach—like putting a water softener or an iron filter in front of the UF system. This protects the membrane and tackles all of your water problems at once.
This one trips a lot of people up since both deal with microbiological safety. The main difference is how they do their job.
Ultra Filtration (UF) is a physical barrier. It removes contaminants by blocking them with a fine membrane and flushing them away.
Ultraviolet (UV) Purification is a disinfection process. It uses a special light to inactivate microorganisms, scrambling their DNA so they can't make you sick.
UF also pulls out physical gunk like silt, making the water clearer. UV, on the other hand, only zaps germs and needs other filters to handle anything else.
This is a huge question right now. A standard UF membrane by itself is not effective against PFAS. These "forever chemicals" are dissolved in water and the molecules are just too small to get caught in the UF membrane's pores.
However, top-tier ultra filtration systems solve this by adding other filtration stages.
Bottom line: If a water test shows you have PFAS, make sure the system you choose specifically includes one of these technologies. The UF membrane alone won't get the job done.
Choosing the right water filtration system is a significant step toward a healthier home. At Water Filter Advisor, we are committed to providing the clear, research-driven guidance you need to make the best choice for your family.
Explore our in-depth guides and expert reviews at Water Filter Advisor
Ever stared at your Brita pitcher and wondered what magical wizardry is happening inside that little white cartridge? You pour in regular old tap water, and out comes something that tastes crisp, clean, and way more refreshing.
So, what does a Brita filter actually pull out of your water?
The short answer is that it's a master at removing the stuff that makes your water taste and smell funky, especially chlorine. It also takes a bite out of some common heavy metals like mercury, copper, and zinc.
But the full story depends entirely on which filter you use. The trusty blue Standard filters and the more powerful white Elite models are worlds apart in what they can tackle.

Think of your Brita pitcher as the first line of defense for better-tasting water. Its primary mission isn't to create sterile, ultrapure water, but to make the H2O from your tap significantly more enjoyable to drink.
The biggest and most noticeable win for any Brita is its smackdown on chlorine. This chemical is a necessary evil used to disinfect municipal water supplies across the country, but nobody enjoys the swimming-pool aroma it leaves behind.
Standard Brita filters are champs at this, reducing chlorine taste and odor by 92% to 95%. The result? Water that instantly tastes cleaner and crisper. You can dive deeper into independent test results to see just how effective they are.
It’s absolutely crucial to know that not all Brita filters are created equal. The specific contaminants a filter can tackle comes down to the model you buy. Brita has two main types for its pitchers and dispensers:
To make it easier, here's a quick side-by-side look.
| Contaminant | Standard Filter (Blue) | Elite/Longlast+ Filter (White) |
|---|---|---|
| Chlorine (taste & odor) | ✅ | ✅ |
| Mercury | ✅ | ✅ |
| Copper | ✅ | ✅ |
| Cadmium | ✅ | ✅ |
| Lead | ❌ | ✅ |
| Asbestos | ❌ | ✅ |
| Benzene | ❌ | ✅ |
As you can see, the choice makes a huge difference.
The key takeaway is simple: your filter's performance is directly tied to the model you purchase. If you have specific health concerns, like lead from older plumbing, you absolutely need the Elite filter for any meaningful reduction.
At the end of the day, a Brita is a simple, accessible way to get better-tasting water right from your fridge. By understanding what it can—and can't—do, you can make a much smarter choice for your home.
Ever poured water into your Brita and wondered what’s really going on inside that little cartridge? It’s not just a simple strainer. Think of it as a tiny, two-stage water treatment plant, designed to make your tap water taste and smell a whole lot better.
The secret sauce is a clever team-up between two materials: activated carbon and ion-exchange resin.
Imagine the activated carbon as a massive, porous sponge made from superheated coconut shells. Heating them creates a huge surface area filled with microscopic nooks and crannies. This isn't the same as barbecue charcoal; its job is to act like a magnet for certain contaminants.
As water trickles through, the carbon grabs onto molecules through a process called adsorption. It’s like molecular flypaper. Instead of soaking up chemicals, it traps them on its surface, snagging things like chlorine, mercury, and other organic compounds that give tap water that off-taste.
While the carbon is busy making your water more pleasant, the ion-exchange resin is tackling a different problem.
It’s a molecular swap meet, plain and simple. The filter trades out bad-tasting and potentially harmful metals for neutral particles, leaving you with cleaner, better-tasting water. This is a big deal if your home has older copper plumbing.
This one-two punch is what makes a Brita filter so effective at what it’s designed to do. First, the carbon zaps the most obvious offender—that chlorine taste and odor. Right behind it, the resin beads reduce the concentration of specific heavy metals.
The system is designed to work quickly and efficiently, cleaning the water right as you fill the pitcher. It’s a simple but powerful process that explains why that first sip of filtered water is so much fresher than what comes straight from the tap. Every drop passes through this clever purification process before it ever hits your glass.
Company claims are one thing, but if you want to know what a filter really removes, you need to look at the official certifications. Think of them as a report card from a trusted, independent source—proof that a product actually does what it says it will.
Brita’s biggest claim to fame has always been its performance against chlorine. That "swimming pool" taste in tap water is the number one reason people buy a filter pitcher. On this front, Brita filters do an exceptional job, which is why the water tastes so much fresher.
But what about the more serious stuff you can't see or taste? That's where the story gets more complicated, and the specific filter you choose suddenly matters a whole lot more.

The gold standard in water filter testing comes from two organizations: the NSF (National Sanitation Foundation) and ANSI (American National Standards Institute). Seeing their seal on a filter means it has been put through the wringer in independent lab tests to meet strict public health standards.
You'll typically see two key certifications on Brita products, and they mean very different things:
If you’re serious about a contaminant, this is the certification you need to look for.
When it comes to heavy metals, not all Brita filters are created equal. This is a critical point, especially if you live in an older home with aging pipes.
Only specific Brita models are certified to reduce heavy metals like lead. The standard pitcher filters do not make this claim.
To get certified lead reduction of up to 99%, you absolutely have to use a Brita Elite (formerly called Longlast+) filter. These are the models certified under NSF/ANSI 53 for lead. According to Brita, these advanced filters also tackle mercury, asbestos, and other particulates like sediment and rust.
The Critical Takeaway: If lead is your concern, you must use a Brita Elite (or Longlast+) filter. The standard blue filters are not certified for lead reduction and won't give you the protection you're looking for.
For a deeper dive into what different Brita models handle, you can learn more about what Brita filters do and do not remove on callmother.com. This two-stage filtration process—using both activated carbon for taste and an ion-exchange resin for metals—is what makes the more advanced filters effective.

While a Brita pitcher is great for improving the taste of your water, it’s crucial to know what it doesn't do. Relying on a standard filter for total purification can give you a false sense of security, as many of the most serious contaminants slip right through.
Think of it this way: the activated carbon in a Brita is like a net with big holes, perfect for catching bulky stuff like chlorine. But smaller, more stubborn contaminants simply sail on through. Understanding these limits is the key to making a truly informed choice for your family's health.
Plenty of common and concerning substances are just too tough for a standard Brita filter to handle. It's important to have realistic expectations—"better-tasting" doesn't automatically mean "safer."
Here are the big categories of contaminants that Brita filters leave behind:
It's also worth understanding the distinction between drinking water and ultrapure water, which is stripped of everything and not intended for consumption.
One of today's biggest water quality concerns is PFAS (per- and polyfluoroalkyl substances), better known as "forever chemicals." These man-made compounds don't break down easily and have been linked to serious health problems.
While Brita’s Elite filter is certified to reduce two common PFAS chemicals (PFOA and PFOS), its performance is extremely limited compared to other filtration methods. This is where you need to read the fine print.
A 2024 study painted a clear picture of this struggle. When tested on Canadian tap water containing 13-56 ng/L of PFAS, the Brita Elite filter only managed a 36% removal rate within the first 20 liters of use. Worse, that number plummeted to just 8% as the filter aged.
By comparison, a competitor like ZeroWater achieved 99% removal under the same conditions.
At the end of the day, a standard Brita filter is a taste-enhancement tool, not a full-blown purification system. If your local water report shows high levels of dissolved solids, microbes, or specific chemicals like PFAS, you'll need a more powerful solution to get your water truly clean.
So, you’ve got a Brita pitcher. It’s a fantastic starting point, but if your water quality concerns run deeper than just chlorine taste, it’s probably time to look beyond the pitcher.
Brita does a solid job with the basics, but it was never designed to be a catch-all solution. For tougher contaminants like microbes, fluoride, or significant levels of PFAS, a simple pitcher filter just won't cut it. That's when you need to call in the heavy hitters of home water filtration.
This is where more advanced home water filtration systems really shine. We're not just talking about making tap water taste a bit better; we’re talking about true purification that targets specific, stubborn contaminants.
For anyone on a private well, the first step is always comprehensive well water testing. You can't fix a problem you don't know you have. Once you know exactly what’s in your water, you can choose a system designed to tackle it head-on.
The absolute best filtration system is the one that's built for your specific water issues. If you're after the purest water possible, a Reverse Osmosis (RO) system is the undisputed champion. It’s incredibly effective at removing things Brita can't touch, like fluoride, nitrates, arsenic, and a very high percentage of PFAS.
Maybe you just want dedicated clean water right at the kitchen sink. An under-sink filter is perfect for that. For a more complete solution, a whole-house system treats every drop of water coming into your home, protecting every faucet, shower, and appliance.
The goal is to move from a general solution to a targeted one. Once you identify what’s in your water, you can select the filtration technology certified to remove it effectively and give you total peace of mind.
To make things a little easier, here’s a quick guide to help you match common water worries with the right type of filter.
This table breaks down which technology is best suited for some of the most common contaminants that people want removed from their water.
| If You Want to Remove… | Best Filtration Technology | Example System Type |
|---|---|---|
| Fluoride, Nitrates, PFAS | Reverse Osmosis | Under-Sink RO Unit |
| Bacteria & Viruses | UV Purification or Ultrafiltration | Whole-House UV System |
| High Sediment or Iron | Sediment & Iron Filters | Whole-House System |
Knowing these options empowers you to choose a system that truly handles what a standard pitcher filter leaves behind. For more help deciding what’s right for your home, check out our expert filtration advice.
Let's clear up some of the most common questions people have about Brita filters. Knowing the answers helps you get the most out of your pitcher and make the right call for your home's water.
This is a big one, and the answer is a hard no. Brita filters are only meant for municipally treated tap water that’s already been disinfected and deemed biologically safe to drink.
Well water is a completely different story. It can harbor bacteria, viruses, and other microscopic nasties that a simple carbon filter just can't touch. Using a Brita with well water is dangerous because it gives you a false sense of security. If you're on a well, you first need to get your water tested by a professional and then look into a proper purification system, like one with UV sterilization, to make it safe.
Nope, Brita filters do not remove fluoride. The materials inside a standard Brita filter—activated carbon and ion-exchange resin—simply can't grab onto dissolved minerals like fluoride. If fluoride reduction is your top priority, you'll need a different type of system altogether.
A reverse osmosis (RO) system is the go-to solution for fluoride. Most RO systems can remove over 90% of it, making them the most effective choice for home use.
You can't fix what you don't know is broken. The only way to really understand your water quality is to get the data. You’ve got two solid options here:
At Water Filter Advisor, our goal is to help you find the perfect filtration solution for your home's unique needs. For in-depth reviews and expert buying guides, visit us at https://www.waterfilteradvisor.com.
Ever wonder if you could have a water filter smart enough to kick out tiny threats like viruses and lead, but cool enough to leave in the healthy minerals your body actually needs? That’s the magic of nanofiltration water filters. They act like a microscopic bouncer for your water supply, catching all the unwanted party-crashers while waving the good stuff, like calcium and magnesium, right on through. It's a total game-changer for anyone wanting seriously pure, great-tasting water right from the tap.

The heart of any nanofiltration (NF) system is a high-tech material called a semipermeable membrane. The best way to picture it is like a bouncer at a very exclusive nightclub. Only the most desirable guests—in this case, water molecules and beneficial minerals—get past the velvet rope.
How does it pull this off? The membrane is peppered with incredibly tiny pores, typically between 1 and 10 nanometers wide. To put that in perspective, a single human hair is about 80,000 nanometers thick. These minuscule openings are just big enough for water molecules to squeeze through but small enough to physically block a huge range of unwanted contaminants.
For any of this to happen, the system uses your home’s existing water pressure to push water against the membrane. This force squeezes the clean water through the tiny pores, leaving all the larger gunk behind. That leftover stream of concentrated contaminants gets flushed down the drain, so only purified water ends up at your faucet.
But what really sets nanofiltration apart is its selective nature, which works in two clever ways:
This one-two punch allows nanofiltration to do something pretty remarkable: it targets harmful dissolved contaminants that simpler filters can't touch, all while keeping the beneficial minerals like calcium and magnesium that more aggressive systems strip out.
This unique ability is why the technology has taken off. The global market for nanofiltration membranes shot up from $89.1 million in 2006 to over $738 million by 2022, and North America makes up over 32% of that. It’s a testament to how effective these systems are. If you want to dive deeper, you can explore more about the nanofiltration market trends and growth projections. It's this precise, intelligent approach that's making nanofiltration a go-to choice for so many families.
When you buy a water filter, you're not just buying a piece of hardware. You're buying the peace of mind that your family is protected from the invisible junk in your tap water. This is where nanofiltration systems really shine, acting as a fine-tuned guardian against a surprisingly wide range of contaminants.
The magic is in the membrane's incredibly tiny pores, typically just 1 to 2 nanometers wide. This isn't just a filter; it's a nearly impenetrable physical barrier. That kind of precision is what makes nanofiltration such a workhorse for keeping your home's water safe.
A major worry for any homeowner is heavy metals, which can leach from old pipes or find their way into the water supply from industrial runoff. Nanofiltration is exceptionally good at kicking these out.
The membrane is designed to block divalent ions—a science-y term for ions with a double positive charge. This group just happens to include some of the worst offenders:
But it's not just about metals. These systems are also a formidable defense against a whole host of man-made chemicals. They do a great job removing pesticides, herbicides, and other volatile organic compounds (VOCs) that can show up in both city and well water. This makes them a critical safety net, especially if you live in an agricultural or industrial area.
Here's a quick rundown of what a typical home nanofiltration system can handle.
This table gives you a general idea of the removal efficiency you can expect from a home nanofiltration system for common contaminants.
| Contaminant Category | Examples | Typical Removal Rate |
|---|---|---|
| Heavy Metals | Lead, Arsenic, Mercury, Cadmium, Copper | 90% – 98%+ |
| Hardness Minerals | Calcium, Magnesium | 50% – 90%+ |
| Microbiological | Bacteria, Viruses, Cysts (Giardia, Crypto) | 99%+ |
| "Forever Chemicals" | PFOA, PFOS, and other PFAS compounds | 90% – 99% |
| Pesticides/Herbicides | Atrazine, Glyphosate | 90% – 99%+ |
| Disinfection Byproducts | Trihalomethanes (THMs) | 85% – 95% |
| Dissolved Solids (TDS) | Sulfates, Nitrates, Chlorides | 50% – 80% |
Keep in mind that exact performance can vary based on your specific water chemistry and the system you choose, but this shows just how versatile these filters are.
Sick of that chalky white scale building up on your faucets and inside your coffee maker? That’s hard water, caused by too much calcium and magnesium. For years, the only fix was a salt-based water softener that swaps those hardness minerals for sodium.
Nanofiltration offers a smarter, salt-free alternative. Because calcium and magnesium are also divalent ions, the NF membrane catches and removes a big chunk of them—usually 50% to 90%. This "membrane softening" gives you all the perks of softer water, like better soap lather and longer-lasting appliances, without dumping extra salt into your drinking water.
Think of it as a two-for-one deal: you get top-tier purification from harmful contaminants and a built-in, chemical-free water softener. It’s a cleaner way to protect both your health and your home.
Water quality issues are always changing, and one of the biggest headlines today is about PFAS, the infamous "forever chemicals." These things are notoriously tough to get rid of, but nanofiltration is up to the task. Studies have shown NF membranes can achieve 90-99% removal rates for many types of PFAS by physically blocking their large, complex molecules.
Nanofiltration also provides a strong defense against microbiological threats. The pores are small enough to stop:
This is a huge plus for anyone on well water, where biological contamination is a bigger risk. It’s this all-around effectiveness that has made the technology so dominant. In fact, nanofiltration water filters have become a major player, making up 76% of the global water and wastewater treatment market in 2023. They hit the sweet spot of removing micropollutants, ions, and pathogens while letting beneficial minerals pass through—a game-changer for families who want truly reliable, high-quality water. You can read the full research on nanofiltration's market impact and performance to dive deeper.
Trying to pick a home water filtration system can feel like navigating a maze. You’ve probably seen terms like Reverse Osmosis, Ultrafiltration, and Nanofiltration floating around, and it’s tough to know which one is right for your kitchen. Let's break down these three powerhouse membrane technologies so you can see exactly how they stack up.
Think of it like sorting things in your kitchen. Ultrafiltration (UF) is your colander—perfect for catching big stuff like pasta, but smaller things like salt slip right through. Reverse Osmosis (RO) is more like a high-end espresso filter; it stops almost everything, letting only pure water pass.
Nanofiltration (NF) hits that perfect "just right" spot in the middle. It's like a fine-mesh tea strainer. It’s tight enough to catch all the unwanted, bitter tea leaves (dissolved contaminants) but loose enough to let the rich flavor of the brew (healthy minerals) flow into your cup. That simple picture is the key to understanding the difference.
Ultrafiltration systems use a membrane with fairly large pores, measuring around 0.01 to 0.1 microns. This size is great for physically blocking larger particles. We're talking suspended solids, sediment, and pesky microbiological threats like bacteria and protozoa.
The downside? UF can't touch dissolved contaminants. Because its pores are bigger, things like heavy metals, salts, pesticides, and hardness minerals sail right on through. That makes UF a solid choice if your main worry is biological safety from well water, but it won't do much for chemical contamination or hard water problems.
On the complete opposite end, you have Reverse Osmosis. RO uses an incredibly tight membrane with pores as tiny as 0.0001 microns. This lets it remove an almost unbelievable range of contaminants—we're talking up to 99% of all total dissolved solids (TDS).
But that extreme purity comes with a couple of trade-offs. First, RO systems strip out just about everything, including beneficial minerals like calcium and magnesium. This can leave the water tasting flat or "empty." Second, the process can be inefficient. Older RO systems were notorious for wasting up to 4 gallons of water for every single gallon they purified.
Reverse Osmosis gives you the absolute highest level of purity, but you sacrifice mineral content and water efficiency to get it. It’s the ultimate purification tool, but it's often overkill unless you truly need sterile-grade water.
This is exactly where nanofiltration water filters shine. With a pore size of about 0.001 microns, an NF membrane is perfectly wedged between UF and RO. It’s small enough to remove the vast majority of harmful dissolved contaminants that UF simply can't catch.
This diagram gives you a great visual of what nanofiltration is designed to remove, from heavy metals all the way down to microscopic organisms.

As you can see, NF acts as a powerful, multi-layered shield against a huge range of common household water pollutants.
But what really makes nanofiltration special is what it leaves in. The pores are engineered to let healthy monovalent ions, like calcium and magnesium, pass right through. You get the peace of mind that comes with near-RO level purification while keeping the beneficial minerals that make water taste great and support your health.
To make it even clearer, let's put these three technologies head-to-head.
This table breaks down the key differences between Nanofiltration, Reverse Osmosis, and Ultrafiltration at a glance.
| Feature | Nanofiltration (NF) | Reverse Osmosis (RO) | Ultrafiltration (UF) |
|---|---|---|---|
| Pore Size | ~0.001 micron | ~0.0001 micron | ~0.01 micron |
| Operating Pressure | Moderate (100-300 PSI) | High (150-600 PSI) | Low (30-100 PSI) |
| Contaminant Removal | Heavy metals, PFAS, viruses, hardness, pesticides | Nearly all TDS, including minerals, salts, and chemicals | Bacteria, sediment, viruses, protozoa |
| Mineral Retention | Yes, retains beneficial minerals like calcium and magnesium. | No, removes nearly all minerals, resulting in demineralized water. | Yes, all dissolved minerals pass through freely. |
| Water Efficiency | Good (80-95% recovery) | Fair (50-75% recovery) | Excellent (nearly 100% recovery) |
The comparison really highlights why nanofiltration is often seen as the ideal compromise. It’s far more water-efficient than RO, with some systems boasting an impressive 80-95% water recovery rate. It also runs on lower pressure, which can mean lower energy bills over time.
For most homeowners, nanofiltration offers robust protection against today's biggest water threats—from lead and PFAS to viruses and hardness minerals—all without the downsides of demineralized water or excessive waste. It’s a smart, balanced approach to getting clean, healthy, and great-tasting water for your entire home.
Deciding to bring a nanofiltration system into your home is a fantastic step toward cleaner, safer water. But once you start shopping, it's easy to feel a little overwhelmed by the options. The secret is to match the system to your home’s unique needs, and that all starts with one simple question: where do you need the filtered water?
Generally, you’ll find nanofiltration water filters fall into two main camps: point-of-use and point-of-entry. They’re each built for a completely different job.
A Point-of-Use (POU) system is your specialist. Think of it as a precision tool. These are typically compact units that get installed right under your kitchen sink to feed a single, dedicated faucet. They’re perfect for delivering that ultra-pure water right where you need it for drinking, cooking, and filling up your water bottle.
On the other hand, a Point-of-Entry (POE) system is the guardian of your entire home. Often called a "whole-house" filter, this much larger unit is installed at the main water line where it first enters your house. This means every single tap—from the kitchen and bathrooms to your shower and washing machine—gets treated, nanofiltered water.
Here’s a quick way to figure out which is for you:
Once you’ve settled on POU vs. POE, it’s time to get into the nitty-gritty. This checklist will help you narrow the field and find a system that’s the right fit, so you don't end up overspending or, worse, buying a filter that doesn't solve your problem.
Test Your Water First: This is non-negotiable. You can't fix a problem you haven't identified. A good lab test reveals exactly what’s lurking in your water—hardness minerals, specific heavy metals, bacteria, or chemicals like PFAS. These results are your roadmap to choosing a filter certified to remove your specific contaminants.
Calculate Your Daily Water Use: How much water does your family go through? A small POU system might be fine for a couple, but a bigger family will likely need a whole-house unit with a higher flow rate. Flow rate is measured in gallons per minute (GPM) and is especially critical for POE systems. You need enough GPM to run a shower and a load of laundry at the same time without the water pressure dropping to a trickle.
Scope Out Your Plumbing and Space: Before you click "buy," take a look under your sink or in your utility closet. Do you have enough space for a POU system under the kitchen sink? For a whole-house POE system, you'll need a decent amount of room near your main water line, usually in a basement, garage, or utility room. Also, be honest about your DIY skills—most POE systems require a professional plumber for installation.
Budget for Maintenance and Filters: The upfront price is just the beginning. You need to investigate the cost and replacement schedule for the pre-filters and the main nanofiltration membrane. A system with affordable, long-lasting filters can save you a ton of money over its lifespan. For more general advice on picking the right system, our water filtration advice and guides can be a big help.
In the world of water filtration, anyone can make a claim. Proof is what really counts. That’s where independent certifications from organizations like the NSF (National Sanitation Foundation) and the ANSI (American National Standards Institute) become so important.
An NSF/ANSI certification isn't just a fancy sticker on the box; it's a guarantee. It means the system has been put through its paces by an independent third party to confirm it meets strict standards for material safety and its ability to actually remove the contaminants it claims to.
When you're shopping, look for specific standards that align with your water test results. For instance, NSF/ANSI 58 is a key certification for systems that remove dissolved solids and certain health-related contaminants. NSF/ANSI 42, on the other hand, deals with aesthetic issues like the taste and smell of chlorine. Choosing a certified system is your best assurance that you're getting a product that will do what it promises.

A great nanofiltration water filter isn't just a one-time purchase. It's an investment in your home and your health, and understanding what comes after you get it home is crucial for making sure it runs smoothly for years. We'll walk through everything from installation day to routine filter changes so you know exactly what to expect.
Getting your system up and running is the first step, and the process really depends on whether you've chosen a smaller under-sink unit or a whole-house system.
If you have a point-of-use (POU) system that goes under your kitchen sink, there's a good chance you can handle the installation yourself. Most kits come with clear instructions and all the fittings you need to hook into your cold water line and add a separate faucet. If you're comfortable with basic plumbing, you can probably get it done in a couple of hours.
Whole-house, or point-of-entry (POE), systems are a different beast entirely. These units connect right where your main water line enters your home, which usually means cutting and fitting pipes. Unless you've got serious plumbing experience, this is a job for a professional. They'll make sure it's installed correctly and up to local code.
Once your filter is installed, regular maintenance is the single most important thing you can do to keep it working properly. It’s just like changing the oil in your car—if you skip it, you’re eventually going to have problems. A typical nanofiltration system has a few different stages, and each one needs attention at different times.
Here’s what a typical maintenance calendar looks like:
Sticking to this schedule is non-negotiable. If your pre-filters get clogged, water pressure will drop and the membrane will have to work overtime, wearing it out faster. If the membrane itself gets fouled, it won’t remove contaminants effectively, defeating the whole purpose of the filter. It's a good idea to get familiar with filter changes in general—even learning how to change a Maytag refrigerator water filter gives you a better sense of the upkeep involved with water purification.
Here's a pro tip: Set reminders on your phone or calendar for your filter changes. It's a simple habit that takes the guesswork out of maintenance and ensures your system is always delivering the clean, safe water you paid for.
To really understand the cost, you have to look past the sticker price. The true cost of ownership includes the initial purchase and the ongoing cost of replacement filters. While prices vary, we can map out a pretty realistic budget.
Let's break down the typical five-year costs for a quality under-sink nanofiltration system:
| Cost Component | Year 1 | Years 2-5 (Annual Average) | Total 5-Year Cost |
|---|---|---|---|
| Initial System Purchase | $300 – $600 | $0 | $300 – $600 |
| Annual Pre-Filter Set | $50 – $100 | $50 – $100 | $250 – $500 |
| NF Membrane (Replaced Once) | $0 | $25 – $40 (prorated) | $100 – $160 |
| Total Estimated Cost | $350 – $700 | $75 – $140 | $650 – $1,260 |
As you can see, after that first year, a good system can cost as little as $75 to $140 a year to keep running. Knowing these numbers upfront helps you plan and avoid any financial surprises. By investing in regular maintenance, you're not just taking care of your filter—you're guaranteeing your family has access to pure, healthy water for the long haul.
Diving into the world of advanced water filtration can bring up a lot of questions. We get it. This last section tackles the most common things homeowners ask us about nanofiltration water filters. Let's get you some clear, straightforward answers so you can feel good about your decision.
Think of nanofiltration as the modern, salt-free evolution of a traditional water softener. There's a reason it's often called "membrane softening." Instead of just swapping hardness minerals for sodium, it physically blocks and removes a huge chunk of the calcium and magnesium in your water.
This gives you all the perks of soft water—no more scale in your pipes, appliances that last longer, and soap that actually lathers up—without adding any salt. If you're dealing with both hard water and other headaches like heavy metals or pesticides, a nanofiltration system is a much more complete, all-in-one solution than a standard softener could ever be.
Yes, like reverse osmosis, nanofiltration systems have to flush away the contaminants they catch, creating a stream of wastewater. The good news? They are designed to be way more efficient.
Older RO systems were notorious for wasting three or even four gallons for every single gallon of pure water they made. Modern nanofiltration systems have seriously improved recovery rates. Many top-tier home systems now run close to a 1-to-1 ratio. That means you're only sending about one gallon of water down the drain for every gallon of pure water you get. It's a much more water-conscious choice for anyone wanting serious purification without the guilt.
A huge plus for nanofiltration is its high water recovery. Systems can hit 80-95% water recovery, making them a more sustainable choice than typical RO units, which often top out around 50-75%.
Anytime you add a filter to your plumbing, you can expect a slight drop in water pressure—the water just has to push through more stuff. But don't worry, modern whole-house nanofiltration systems are built specifically to keep this from being an issue.
To make sure you don't notice a difference, many of these point-of-entry systems come with a booster pump. This little workhorse keeps your pressure strong and steady for everything from a powerful shower to running the washing machine. As long as the system is sized correctly for your home and installed by a pro, any pressure change is usually so small you'll never even notice it. And for a simple under-sink system that just feeds one faucet? The impact on your home's overall pressure is practically zero.
Absolutely. In fact, nanofiltration is a fantastic solution for well water. It's a powerhouse that tackles a whole range of common well water problems at once, giving you a solid defense against whatever might be lurking in your private well.
A single NF system can handle:
The secret to success with well water is proper pre-treatment. Wells often kick up a lot of sediment, iron, and other gunk that can clog up and ruin a delicate nanofiltration membrane in no time. Installing a good sediment filter—and sometimes an iron filter or water conditioner—before the NF unit is a must. It's the smart move to protect your investment and ensure your system pumps out pure, safe water for years to come.
At Water Filter Advisor, our mission is to give you the clear, practical guidance you need to find the perfect water filtration solution for your home. We turn complex data into simple advice so you can protect your family with confidence. To continue your journey toward cleaner, better-tasting water, explore our comprehensive guides and reviews at https://www.waterfilteradvisor.com.
