Choosing the Right Types of Water Filters for Your Home

Shopping for a water filter can feel like navigating a maze in the dark. You've got beefy whole-house systems that guard every drop of water entering your home, and then you have nifty little filters that screw right onto your faucet. The tech is just as varied—from humble activated carbon filters that make your water taste like a mountain spring to sophisticated reverse osmosis systems that strip out a laundry list of contaminants.

The good news? Whatever your water woes, there’s a filter out there ready to be your hero.

Your Journey to Better, Safer Water Starts Here
A glass of clean water on a kitchen counter with a sink, faucet, and coffee maker in the background.

Welcome, water warrior. Let's cut through the noise and confusing jargon of the water filtration world. This guide is all about giving you clear, practical advice you can actually use to find the perfect filter for your home.

The "right" filter isn't always the biggest or most expensive. It’s the one that directly tackles the specific issues with your water. Whether you're on city water or a private well, the first step is always knowing what you're up against.

Why Filtering Your Water Matters

Even if your tap water is deemed "safe" by municipal standards, it can still harbor party-crashers that affect its quality, taste, and even your appliances. City-treated water often contains chlorine, which is a champ at disinfection but not so great for your morning coffee's flavor.

Other common troublemakers include:

  • Sediment: Little bits of rust, sand, and dirt that cloud up your water and can wreak havoc on your plumbing and appliances. Think of it as liquid sandpaper for your pipes.
  • Heavy Metals: Lead from old pipes is a major concern, as it can pose serious health risks, especially for children.
  • Hardness Minerals: If you have crusty buildup on your faucets, that’s calcium and magnesium. This "hard water" scale can destroy water heaters and dishwashers over time.

Homeowners are catching on. In fact, the global market for water purifiers is expected to explode from USD 48.1 billion in 2025 to USD 97 billion by 2035, and residential filters make up about 70% of that. You can dig into the numbers yourself in this detailed report on GM Insights.

Finding the right solution means first identifying your specific problem. A strange smell, cloudy appearance, or hard water stains are all clues pointing toward the type of filtration you need.

Think of this guide as your roadmap. We’ll walk through the different kinds of filters, break down the technologies that make them work, and show you exactly how to match a solution to your problem. By the time you're done, you'll have the confidence to choose the right system for your family's health and peace of mind.

Whole House vs Single Faucet Filtration
Image comparing whole home and faucet water filtration systems, featuring a house and an outdoor tap with running water.

Before we dive into the nitty-gritty of specific types of water filters, let's talk strategy. You have two main ways to tackle your home's water: treat every drop that comes in, or zero in on the spots where you use it the most. This single decision shapes everything that comes next—from cost and upkeep to the actual benefits you’ll get.

Think of it this way: you could install a giant gatekeeper at the entrance to your property to screen everyone who enters. Or, you could put high-tech locks just on the doors you use most, like your front door. Both work, but they solve different problems.

Point-of-Entry (POE) vs. Point-of-Use (POU) At a Glance

To make this decision easier, here’s a quick breakdown of the two approaches. This table compares the big-picture "gatekeeper" systems with the specialized "guard" filters, helping you see where each one shines.

Feature Point-of-Entry (Whole-House) Point-of-Use (Single Faucet, Shower, etc.)
Coverage Treats all water entering the home—faucets, showers, laundry, toilets. Treats water at a single location, like the kitchen sink or a specific shower.
Primary Goal Protects plumbing and appliances from scale, sediment, and chlorine. Provides highly purified water for drinking, cooking, or bathing.
Installation Usually requires a professional plumber; connects to the main water line. Often a simple DIY installation that takes just a few minutes.
Cost Higher upfront investment ($500 – $3,000+). Lower upfront cost ($30 – $500).
Best For Homeowners tackling hard water, sediment, or chlorine issues house-wide. Renters or those targeting specific contaminants like lead in drinking water.

Ultimately, the right choice comes down to what you're trying to fix. Are you waging a war on hard water buildup in your pipes and appliances? Go with a POE system. Are you just trying to get great-tasting, safe drinking water from one tap? A POU filter is your best bet.

The Gatekeeper: Point-of-Entry Systems

A Point-of-Entry (POE) system is that security gate for your whole property. Better known as a whole-house water filter, it gets hooked up to your main water line, treating every gallon of water that flows into your home. That means your showers, washing machine, toilets, and every sink get filtered water.

The main job of a POE system is often to protect your home’s guts—the pipes and appliances. By grabbing things like sediment, chlorine, and hard water minerals right at the source, it keeps them from ever causing trouble. This is a game-changer for extending the life of your water heater and dishwasher by stopping that crusty scale buildup.

These systems are a real long-term investment in your home's health. But they do come with a higher price tag and almost always need a professional to install them correctly.

The Specialist: Point-of-Use Filters

On the other side, you have Point-of-Use (POU) filters. These are the specialized guards. Think of the filter you screw onto your kitchen faucet, the one tucked away under the sink, or the one built right into your showerhead. Their whole purpose is to deliver highly purified water right where you need it most—for drinking, cooking, or showering.

POU systems are fantastic for renters or anyone who wants to fix a specific water problem without redoing their plumbing. For instance, an under-sink reverse osmosis system can give you incredibly pure drinking water, stripping out a huge range of contaminants like lead and other nasty dissolved solids. Even a simple faucet filter can make your tap water taste and smell a hundred times better by getting rid of chlorine.

Here's a pro tip: many people use both. They’ll install a whole-house filter as the first line of defense to catch sediment and chlorine, then add a point-of-use filter under the kitchen sink for an extra level of purification just for their drinking water.

So, how do you decide? It all comes down to your goals. Are you trying to save your entire plumbing system from hard water? Or are you just focused on getting the cleanest, best-tasting water from your kitchen tap? Answering that question is your first step toward picking from the many types of water filters and getting a setup that works perfectly for you.

A Look at the Most Common Types of Home Water Filters
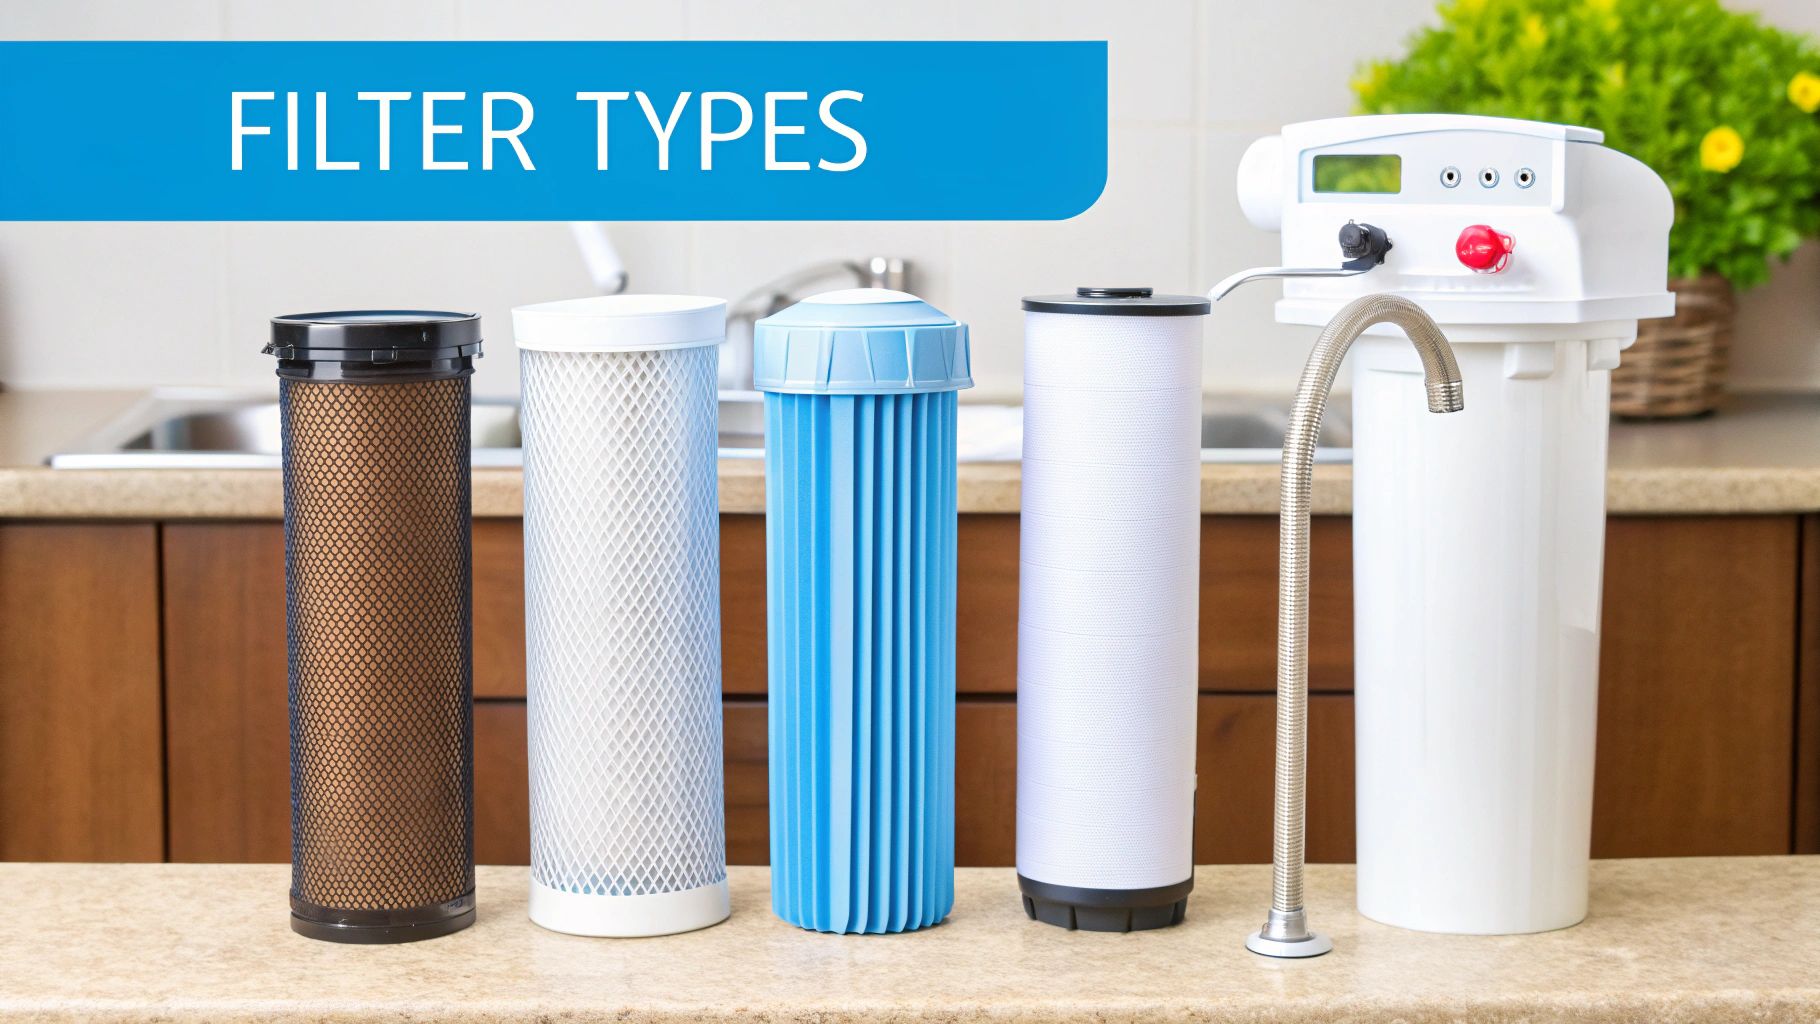
Different styles of water filter cartridges and a complete filtration system displayed in a kitchen.

Now that we've covered the big picture—treating your whole house versus just a single tap—we can get into the actual hardware. Picking a water filter is a lot like choosing the right tool for a job. You wouldn't bring a sledgehammer to hang a picture, right? Each filter is built for a specific purpose, budget, and home.

The demand for easy, effective solutions is booming. In fact, the global home water filtration market was on track to hit USD 7.13 billion by 2026, largely because so many people want systems they can install themselves. These point-of-use filters are a huge hit with renters and homeowners who don't want to get into a major plumbing project.

Let's dive into the most common options you'll find out there.

Whole-House Systems: The All-In-One Solution

Think of a whole-house system as the ultimate gatekeeper for your home's water. Installed right where the main water line enters your house, it treats every single drop. This protects not just your drinking water but your entire plumbing system and every appliance—from the dishwasher to the washing machine—from sediment, chlorine, and hard water minerals.

  • Best Use Case: Perfect for homeowners facing widespread issues like hard water scale, sediment from a well, or that swimming-pool chlorine smell from every faucet.
  • Cost & Installation: These are a bigger investment upfront, typically running from $500 to over $3,000. You'll almost always need a professional plumber to install it.
  • Maintenance: You'll usually change out large sediment and carbon filters every 6-12 months, though some high-end systems can go even longer.

Under-Sink Filters: The Hidden Powerhouse

Under-sink filters are probably the most popular choice for getting purified water right at the kitchen sink. They stay tucked away in the cabinet, connected to a dedicated faucet for drinking and cooking. These systems can be as simple as a single carbon filter or as powerful as a multi-stage reverse osmosis unit that strips out nearly everything.

They’re a fantastic choice for anyone who wants seriously purified water without cluttering up the countertop. Plus, having a separate faucet means you're not wasting that perfectly filtered water on washing dishes. If you're weighing your options, this water filtration systems comparison guide is a really helpful resource.

Faucet-Mounted Filters: The Quick and Easy Fix

For pure convenience and a dead-simple setup, nothing beats a faucet-mounted filter. These little gadgets screw right onto your kitchen faucet, usually in minutes and with no tools required.

Most have a small lever that lets you flip between filtered water for a drink and regular tap water for washing up, which makes the filter cartridge last longer. While they won't purify water to the same degree as an under-sink system, they do an amazing job of getting rid of chlorine and making your water taste great.

Key Takeaway: Faucet filters are your low-cost, no-commitment ticket into the world of water filtration. They are a brilliant option for renters, college dorms, or anyone who just wants better-tasting water right now.

Shower Head Filters: The Beauty and Wellness Upgrade

You might not think about the water you shower in, but filtering it can make a huge difference for your skin and hair. Shower head filters are specifically designed to tackle chlorine, which is notorious for stripping your body's natural oils and leaving you with dry, itchy skin and brittle hair.

  • Best Use Case: Anyone dealing with dry skin, a flaky scalp, or straw-like hair. They're also a must-have for preserving color-treated hair.
  • Cost & Installation: Super affordable, usually between $25 and $75. Installing one is as easy as screwing on a new showerhead.
  • Maintenance: Just pop in a new cartridge every 4-6 months.

Pitcher And Countertop Filters: The Portable Choice

Water filter pitchers are the classic, entry-level option. Just fill the top reservoir with tap water and let gravity do the work, slowly dripping filtered water into the pitcher below. Countertop units are a similar idea, but they're bigger and usually have a spigot for easy pouring.

They're cheap and you can take them anywhere, but they're also the slowest and hold the least amount of water. They really only make sense for one person or a small household just looking to filter a few glasses of drinking water a day. They're great for taste and chlorine but aren't built to handle more serious contaminants.

How Different Water Filtration Technologies Work

To really get a handle on the different types of water filters, you have to look under the hood. Think of filtration technologies as the special "skills" a filter has. Each one is a specialist, trained to go after specific kinds of contaminants.

This isn’t about dense science; it’s about matching the right tool to the right problem. Once you understand how these core technologies work, you can see right past the marketing jargon and know what a filter can actually do for your water.

Activated Carbon: The Contaminant Magnet

Activated carbon is the undisputed workhorse of the water filtration world. You'll find it in just about everything, from a simple pitcher to a sophisticated whole-house system. The easiest way to picture it is as a powerful magnet with a massive surface area.

So, how does it work? The carbon is "activated" with a process that creates millions of tiny pores, giving it a ridiculously large surface to trap junk. As water flows through, unwanted chemicals like chlorine, pesticides, and volatile organic compounds (VOCs) get stuck to the carbon's surface. This process is called adsorption.

This is exactly why activated carbon filters are absolute superstars at making your water taste and smell better. They grab the chlorine that gives city water that "public pool" odor, leaving you with nothing but clean, crisp-tasting water.

Reverse Osmosis: The Ultimate Gatekeeper

When you need the absolute highest level of purification, reverse osmosis (RO) is the technology you turn to. Imagine a screen so incredibly fine that only pure water molecules can squeeze through. Everything else—we're talking heavy metals like lead, dissolved salts, arsenic, and fluoride—gets blocked and flushed down the drain.

An RO system uses your home's water pressure to force tap water through a semi-permeable membrane. This process is so thorough that it can remove up to 99% of total dissolved solids (TDS) from your water.

Because it’s so powerful, RO is the go-to for tackling serious contamination issues. Membrane-based filters, especially RO systems, are the dominant force in home water treatment because they are so effective at removing dissolved solids and heavy metals. That said, UV-LED filtration is gaining ground as more people look for chemical-free purification. You can dig into more data on these market trends in this SkyQuest Technology industry report.

UV Purifiers: The Microbe Zapper

Some of the scariest contaminants in your water are totally invisible: bacteria, viruses, and other nasty microorganisms. Ultraviolet (UV) purification is a completely chemical-free way to deal with these biological threats.

Think of it like a concentrated blast of sunlight. A UV purifier uses a special lamp to zap the water with a specific wavelength of UV light. This light scrambles the DNA of microorganisms like E. coli, Giardia, and Cryptosporidium, which makes them harmless and unable to reproduce.

It's critical to know what UV doesn't do.

  • It does not remove sediment, chemicals, or metals. UV is purely for disinfection.
  • It needs clear water to work. Cloudy or murky water can shield microbes from the light.

For this reason, a UV purifier is almost always paired with a sediment pre-filter to make sure the light can reach and neutralize every last bug.

Ion Exchange: The Hard Water Softener

If you're in a constant battle with that chalky white buildup on your faucets and shower doors, you've got hard water. The culprits are calcium and magnesium minerals, and ion exchange is the technology built specifically to solve this problem.

Here’s a simple way to think about it: imagine a parking lot where every spot is taken by a sodium ion. As your hard water flows through a resin bed filled with these sodium ions, the calcium and magnesium "cars" come along, kick the sodium "cars" out, and take their parking spots. What comes out the other side is softened water that won't leave scale all over your fixtures.

Looking beyond typical filters, understanding advanced wastewater treatment, like polyethylene aerobic treatment units, can offer solutions for more specific water treatment needs, especially in rural settings.

Sediment Filters: The First Line of Defense

Last but not least, we have the unsung hero of many filtration systems: the sediment filter. Its job is simple but absolutely crucial—it’s the bouncer at the door, stopping all the big, clunky particles from getting inside.

These filters are made to catch physical debris like sand, dirt, rust, and silt. They usually act as a pre-filter, protecting more delicate and expensive technologies like RO membranes and UV lamps from getting clogged up and damaged.

A sediment filter is often the very first stage in any whole-house or multi-stage under-sink system. By handling the heavy lifting upfront, it lets all the other specialized filters focus on what they do best, which extends their lifespan and keeps the entire system running like it should.

Matching the Right Filter to Your Water Problems

Picking a water filter can feel like a guessing game. You know something’s off with your water, but with all the different types of water filters on the market, how do you know which one will actually fix your problem?

The secret is to stop looking at the filters first. Instead, start by playing detective with your water.

Think of it like going to the doctor. You wouldn't just ask for a random prescription; you'd tell them your symptoms. Is your water cloudy? Does it reek of chlorine? Do you see those annoying chalky white stains on your dishes and faucets? Each of these clues points you directly to the right filtration technology.

When you match the symptom to the solution, you can be confident you're buying a filter that will make a real difference. It’s simply the best way to get the results you want.

Diagnosing Your Home's Water Issues

Before you can pick the right hero for the job, you need to know who the villain is. Luckily, most household water problems fall into a few common categories, and each one has a telltale sign.

  • Bad Taste and Odor: The number one complaint is water that tastes or smells like a swimming pool. That's the chlorine that municipal treatment plants use to disinfect the water supply.
  • Hard Water Stains: If you're constantly scrubbing a crusty, white buildup off your faucets, showerheads, and glassware, you've got hard water. Those stains are caused by high levels of calcium and magnesium minerals.
  • Cloudy or Murky Water: Water that isn't perfectly clear is likely full of sediment. We’re talking about tiny particles of sand, rust, silt, or dirt that can sneak in from aging city water mains or a private well.
  • Serious Health Concerns: Some of the worst contaminants are completely invisible and have no taste or smell, but they pose major health risks. This includes heavy metals like lead (often from old pipes) and microorganisms like bacteria or viruses, which are a bigger worry for well water users.

This decision tree infographic is a great way to see how to connect a specific filtration technology, like activated carbon or reverse osmosis, to your water concerns.
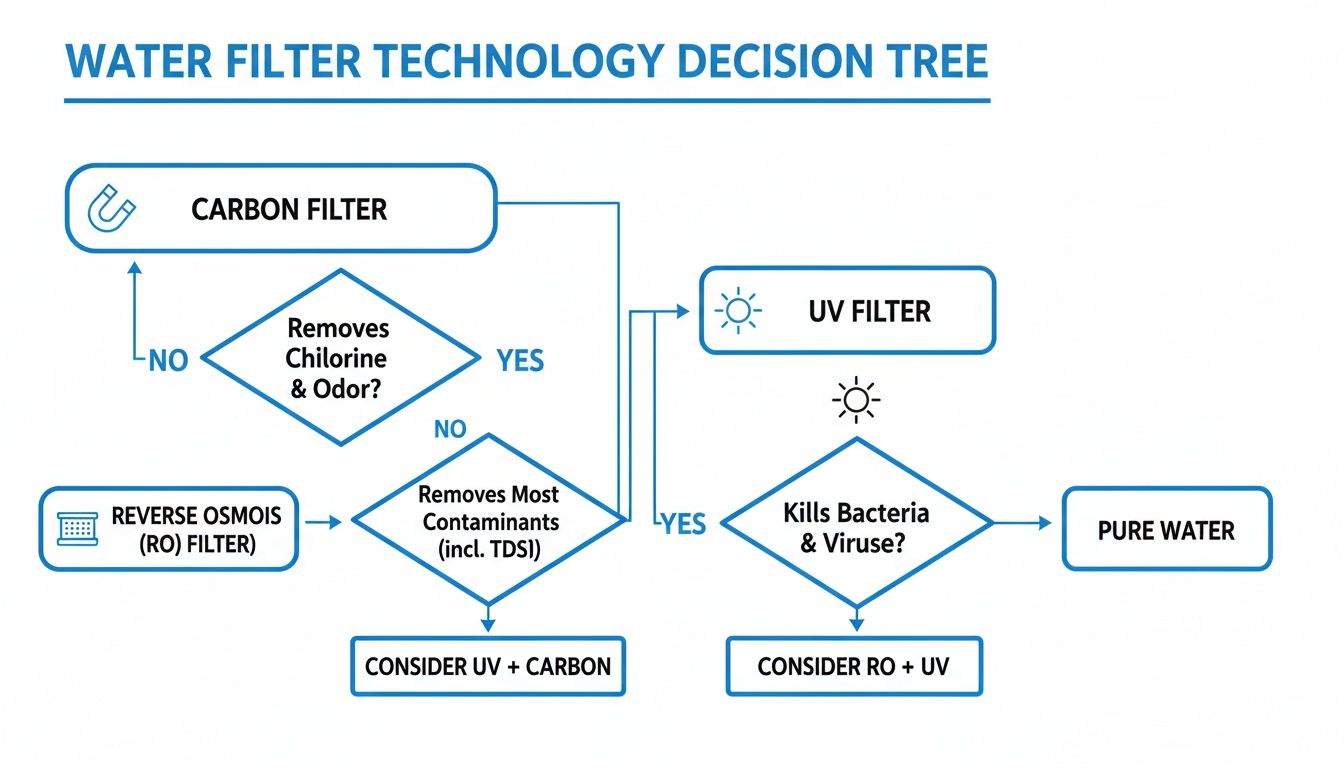
A decision tree flowchart for selecting water filter technology based on contaminant removal needs.

As you can see, the flowchart gives you a clear path from identifying your main issue—be it taste, hard water, or health contaminants—straight to the best technology for the job.

Your Prescription for Purer Water

Once you've diagnosed the problem, finding the fix is straightforward. This handy table acts as your quick reference guide. Just find your water complaint in the first column to see our recommended filter and the technology that makes it work.

Common Water Problems and Their Filtration Solutions

This table will help you quickly identify your water issue and find the most effective type of filter and technology to solve it.

Common Water Problem Primary Cause Recommended Filter Type Key Technology
Chlorine Taste & Odor Municipal disinfection chemicals Faucet, Pitcher, Under-Sink Activated Carbon
Hard Water Scale & Buildup High levels of calcium and magnesium Whole-House System Ion Exchange
Lead or Arsenic Concerns Leaching from old pipes or groundwater Under-Sink or Whole-House Reverse Osmosis
Cloudy Water with Particles Sand, rust, silt, and other suspended solids Whole-House System Sediment Filter
Bacterial or Viral Contamination Unsafe well water or boil water advisories Under-Sink or Whole-House UV Purification

This approach makes finding the right filter a whole lot simpler.

The smartest first step is always to get a water quality report. Your local municipality can provide one, or you can use an at-home testing kit. This report gives you concrete data, taking the guesswork out of choosing from the various types of water filters.

At the end of the day, this diagnostic approach ensures you aren't just buying a filter—you're investing in a targeted solution for your home. Whether that's an activated carbon filter for better-tasting coffee or a reverse osmosis system for total peace of mind, understanding your water is the key to making it better.

What to Consider Before You Buy a Water Filter

Picking out a water filter isn’t just a one-and-done purchase. It’s a real commitment to having better, safer water in your home for the long haul. So, before you grab one of the many types of water filters off the shelf, it’s worth looking past the price tag and thinking about the details that will matter day-in and day-out.

Thinking about these things upfront is the best way to land a system you’ll actually be happy with. It ensures you get the clean water you want without it turning into a surprise expense or a maintenance nightmare down the road. It's all about finding the right fit for your water and your lifestyle.

Understand the Total Cost of Ownership

That initial sticker price? It’s just the beginning of the story. The real cost of any filter is what we call the Total Cost of Ownership, which is the upfront price plus all the recurring expenses you'll have over its lifetime.

The biggest ongoing cost is almost always the replacement filter cartridges. A cheap faucet filter might look like a steal at $30, but if it needs a new $15 cartridge every two months, you'll end up spending way more over time than you would on a pricier under-sink system with a filter that lasts a whole year. Always, always check the cost and replacement schedule for cartridges before you commit.

Look for NSF and ANSI Certifications

How do you really know if a filter does what it says it does? You look for proof from independent organizations like the NSF (National Sanitation Foundation) and ANSI (American National Standards Institute).

An NSF/ANSI certification isn't just marketing fluff—it's your guarantee that a filter has been put through its paces in rigorous testing. It proves the filter removes the exact contaminants listed on the box. For example, NSF/ANSI 53 is the one you want to see for serious health-related contaminants like lead, while NSF/ANSI 42 covers things that affect taste and smell, like chlorine.

Choosing a certified product gives you real peace of mind, knowing your investment is actually protecting your family. If you want to dive deeper into making smart choices, you can find a ton of helpful water filtration advice and guides here.

Check the Flow Rate and Filter Lifespan

Performance is key, but so is practicality. Two numbers that directly affect how convenient a filter is to live with are its flow rate and lifespan.

  • Flow Rate: This is measured in gallons per minute (GPM) and tells you how fast clean water comes out. A slow flow rate might be perfectly fine for a little drinking water tap at the sink, but it would drive you crazy in a whole-house system or a shower filter.
  • Filter Lifespan: This is how many gallons the manufacturer says the filter can clean before it’s time for a replacement. Match this up with how much water your family uses to get a feel for the maintenance schedule and avoid a sudden drop in water quality.

By carefully weighing these factors—cost, certifications, and daily usability—you can stop just buying a product and start investing in a reliable, effective solution for your home's water.

Frequently Asked Questions About Water Filters

Even with all this information, you probably still have a few questions rattling around. That’s perfectly normal. Let's tackle some of the most common things people ask so you can feel 100% sure about choosing the right system for your home.

Do Water Filters Remove Beneficial Minerals?

This question comes up a lot, especially when we talk about powerful systems like reverse osmosis. The short answer is yes, some do. Reverse osmosis is so meticulous that it strips out nearly everything, which includes healthy minerals like calcium and magnesium.

But here’s the thing: most of us get the vast majority of our essential minerals from our food, not our water. If you’re still concerned, you can easily add a remineralization filter to your system. It puts a healthy balance of minerals right back into the water after it's been purified.

How Often Do I Really Need to Change My Filter Cartridge?

Following the manufacturer's schedule isn't just a suggestion—it's critical for your filter to work safely and effectively. An old, clogged filter simply can't do its job. Worse, a totally saturated filter can dump a concentrated backlog of contaminants back into your water.

Think of your filter like a sponge. Once it's full, it's done. Most faucet filters will last you 2-3 months, while the bigger under-sink and whole-house cartridges can go anywhere from 6 months to over a year.

What Is the Difference Between a Water Filter and a Water Softener?

This is a huge point of confusion, but the difference is simple. A water filter is built to remove contaminants to make your water safer and taste better. It goes after things like chlorine, lead, pesticides, and bacteria.

A water softener, on the other hand, does one specific job: it removes the "hard" minerals—calcium and magnesium—that cause scale buildup in your pipes and appliances. While you can find systems that do both, they are two different technologies for two very different problems.

Here's an easy way to remember it: Filters purify your water by removing contaminants. Softeners condition your water by removing hardness minerals.

Can I Install a Water Filter Myself?

Absolutely! Well, most of the time. The difficulty really depends on which of the types of water filters you choose.

  • DIY-Friendly: Faucet filters, pitchers, and most shower filters are a breeze. You usually don't need any tools, and it only takes a few minutes.
  • Moderate Skill: If you're comfortable with basic plumbing, you can probably handle many under-sink systems yourself.
  • Professional Recommended: For whole-house systems or complex reverse osmosis units that tie into your main water line, we always recommend calling a licensed plumber. It's the best way to make sure it's done right and prevent any leaks.

At Water Filter Advisor, our goal is to help you get cleaner, safer water. From our detailed guides to practical tips, we're here to give you the clarity you need. Explore all of our expert advice and find the perfect water solution for your home at https://www.waterfilteradvisor.com.
How to Install a Whole House Water Filter: Your Ultimate DIY Guide

Ready to declare independence from funky-tasting water? Installing a whole-house water filter is one of the most satisfying DIY projects you can tackle. It's your ticket to pure, clean water from every single tap in your home. Before you touch a single pipe, though, a little prep work is the secret sauce. The key to a smooth installation lies in three crucial upfront steps: testing your water to figure out what microscopic villains you're fighting, finding the main water shut-off valve and a good spot for the unit, and measuring your pipes to get the right parts.

Getting these details sorted out first is the difference between a triumphant weekend project and an unscheduled, frantic trip to the hardware store—or worse, a call to a very expensive plumber.

Your Blueprint for Water Filtration Glory

Seriously, don't even think about cutting a pipe until you've got a solid plan. Think of this as your mission briefing—it's where you figure out exactly what you're dealing with. I’ve seen too many DIY projects go sideways because someone rushed this part. A bit of reconnaissance now saves you from a world of plumbing pain later.

This is all about understanding your home's unique plumbing personality. Every house is a little different, and your water quality isn't the same as your neighbor's. The goal here is simple: match the right filtration superhero to your water's specific problems and make sure you've got a clear, accessible path for the installation.

Know Your Water Before You Start

You wouldn't take medicine without knowing what you're treating, right? The same logic applies to water filtration. A simple water test is your non-negotiable first step. It's like a spy report that tells you exactly what’s hiding in your water, whether that's an over-chlorinated taste from the city, sediment from old pipes, or too much iron from your well.

Without that data, you’re just flying blind. A test kit can tell you if your Total Dissolved Solids (TDS) are over the recommended 500 parts per million (ppm), which is a big clue you'll need a more robust, multi-stage filter. You have to know your enemy to win the battle. If you need some help choosing a filter based on your water quality, we've got some great https://www.waterfilteradvisor.com/advice/ to get you started.

Scout the Perfect Installation Location

Next up, it’s time to play detective in your own basement or garage. Your mission: find the perfect spot for your new filtration command center. The ideal location is almost always on the main water line, immediately after your main shut-off valve but before your water heater. Placing it here guarantees that every drop of water in your house—hot, cold, and in-between—gets the full purification treatment.

Look for a spot with enough room not only to hang the unit but also to make changing filters a breeze later on. Most models will need at least a foot of clearance below them for easy cartridge swaps.

Pro Tip: While you’re scouting, snap a few photos of your plumbing with your phone. They’ll be a lifesaver when you’re at the hardware store trying to remember if you need a 90-degree elbow or a straight union.

Measure Twice, Cut Once

Last but not least, let's get specific. You absolutely must know your pipe size. In the U.S., most homes run on either 3/4-inch or 1-inch main water lines. Grab a tape measure or a pair of calipers to get an exact measurement. This ensures you buy a filter and fittings that are a perfect match. Getting this wrong means another trip to the store with your project sitting half-finished and your plumbing in pieces.

Before you start the install, it's worth reminding yourself why you're doing this. Understanding the benefits of installing a home water filtration system can really reinforce your decision and keep you motivated through the process.

Making the Cut: The Core Installation Process

Alright, this is where the action begins. All that planning and prep work is about to pay off. You’ve scoped out the perfect spot, your tools are laid out, and it’s time to get your hands dirty. We're about to dive into the heart of the project: cutting into your home's main water line to tie in the new filtration system. It sounds a little nerve-wracking, I know, but if you take it step-by-step, it's a completely manageable job.

The whole game here is about being methodical and precise. We'll walk through shutting off the water, making clean cuts, and creating solid, leak-proof connections that will guard your home's water supply for years to come. This is the moment you transform that box of parts into a powerful protector for every faucet in your house.

Before we grab any tools, let's visualize the first few moves that set you up for success.

A clear process flow diagram outlining three steps for filter preparation: Test Water, Locate Valve, and Measure Pipe.

Nailing these three fundamentals—testing the water, finding the valve, and measuring your pipe—is the foundation for a smooth installation. It's how you avoid those "oops" moments and costly mistakes down the line.

Shutting Down the Flow

First thing's first: you have to shut off the main water supply to your house. Don't even think about skipping this. Find your main shut-off valve, which is usually tucked away in the basement, garage, or near the water meter. A lever-style valve is off when the handle is perpendicular to the pipe. If you have an older gate-style valve, turn it clockwise until it gently stops.

With the main off, you need to drain the water still sitting in your pipes. The best way to do this is to open the highest faucet in your house (like an upstairs bathroom) and the lowest one (maybe a basement utility sink). This breaks the vacuum and lets gravity work its magic. You might be surprised how much water comes out—often 5-10 gallons—so just let it run until it slows to a drip.

Making a Clean and Precise Cut

Now that the lines are drained, it's time to make your mark. Grab the measurements you took earlier and mark the section of pipe where the filter assembly will live. Don't forget to account for the width of the filter housing plus the fittings and unions you'll need on each side.

Your goal is a perfectly square, clean cut. A smooth, burr-free edge is absolutely critical for getting a watertight seal, especially if you're using modern push-to-connect fittings.

  • For Copper Pipe: A tube cutter is your best friend. It clamps on, and you just rotate it, tightening the knob a little with each turn until it pops right through.
  • For PEX or PVC Pipe: A ratcheting pipe cutter is the tool of choice. It works like a heavy-duty pair of scissors and gives you a quick, straight cut without much fuss.

Once the cut is made, take a minute to clean up the edges. Use a deburring tool or even a small file to smooth out the inside and outside of the pipe. This little step is a pro move; it prevents you from tearing the delicate O-rings inside your fittings.

Mounting the Filter Housing Securely

With a section of pipe removed, you can now mount the filter housing. Position the mounting bracket against the wall or joist and use a level to get it perfectly straight. A crooked filter doesn't just look sloppy; it can put unnecessary stress on your plumbing connections over time, begging for a leak.

Drill your pilot holes and sink the screws to get the bracket good and firm. Then, attach the filter housing to the bracket. One of the most common rookie mistakes is not leaving enough room underneath the filter. You need space to unscrew the sump to change the cartridge, so make sure you have at least a foot of clearance.

Insider Tip: Before you drill a single hole, do a "dry fit." Hold the entire filter assembly up to the pipes to see how everything lines up. This simple check confirms your measurements are spot-on and can save you from the headache of patching and drilling a new set of holes.

Creating Leak-Proof Connections

This is the moment of truth. Every connection has to be perfect. For most DIYers, push-to-connect fittings (like the popular SharkBite brand) are a game-changer because they don't require any soldering. You just push the clean, deburred pipe into the fitting until you feel it click. It creates a strong, reliable seal in seconds.

If you have the skills and tools, soldering copper is a fantastic, permanent solution. It just requires a torch, flux, and a bit of practice to get a clean joint. If you're tackling a bigger plumbing project, checking out some DIY bathroom installation tips can give you some transferable skills and a confidence boost.

No matter which method you choose, always use Teflon tape on any threaded fittings. Wrap the tape clockwise—the same direction you'll be tightening—about 3-4 times. This fills any microscopic gaps in the threads and helps you get a tight, leak-free seal.

A skilled DIYer can save a lot on professional fees here. With the main shut-off located, which is the case in about 85% of U.S. homes, the process is pretty straightforward. Installing the filter and bypass, taping the threads, and torquing the fittings to the recommended 50-60 ft-lbs can usually be knocked out in under two hours.

Bringing Your System Online: Flushing and Leak Testing

You’ve tightened the last fitting and the filter is mounted. Looks good, right? While the heavy lifting is done, you can’t just turn the water back on and call it a day. This final phase—commissioning the system—is where a good installation becomes a great one. It’s the difference between a reliable, leak-free setup and a future plumbing disaster.

We're about to bring your new filter to life. This means carefully reintroducing water to avoid any nasty shocks to your plumbing, flushing the new filter media to get it ready for action, and doing a meticulous leak check on every single connection you made. Let's get it done right.

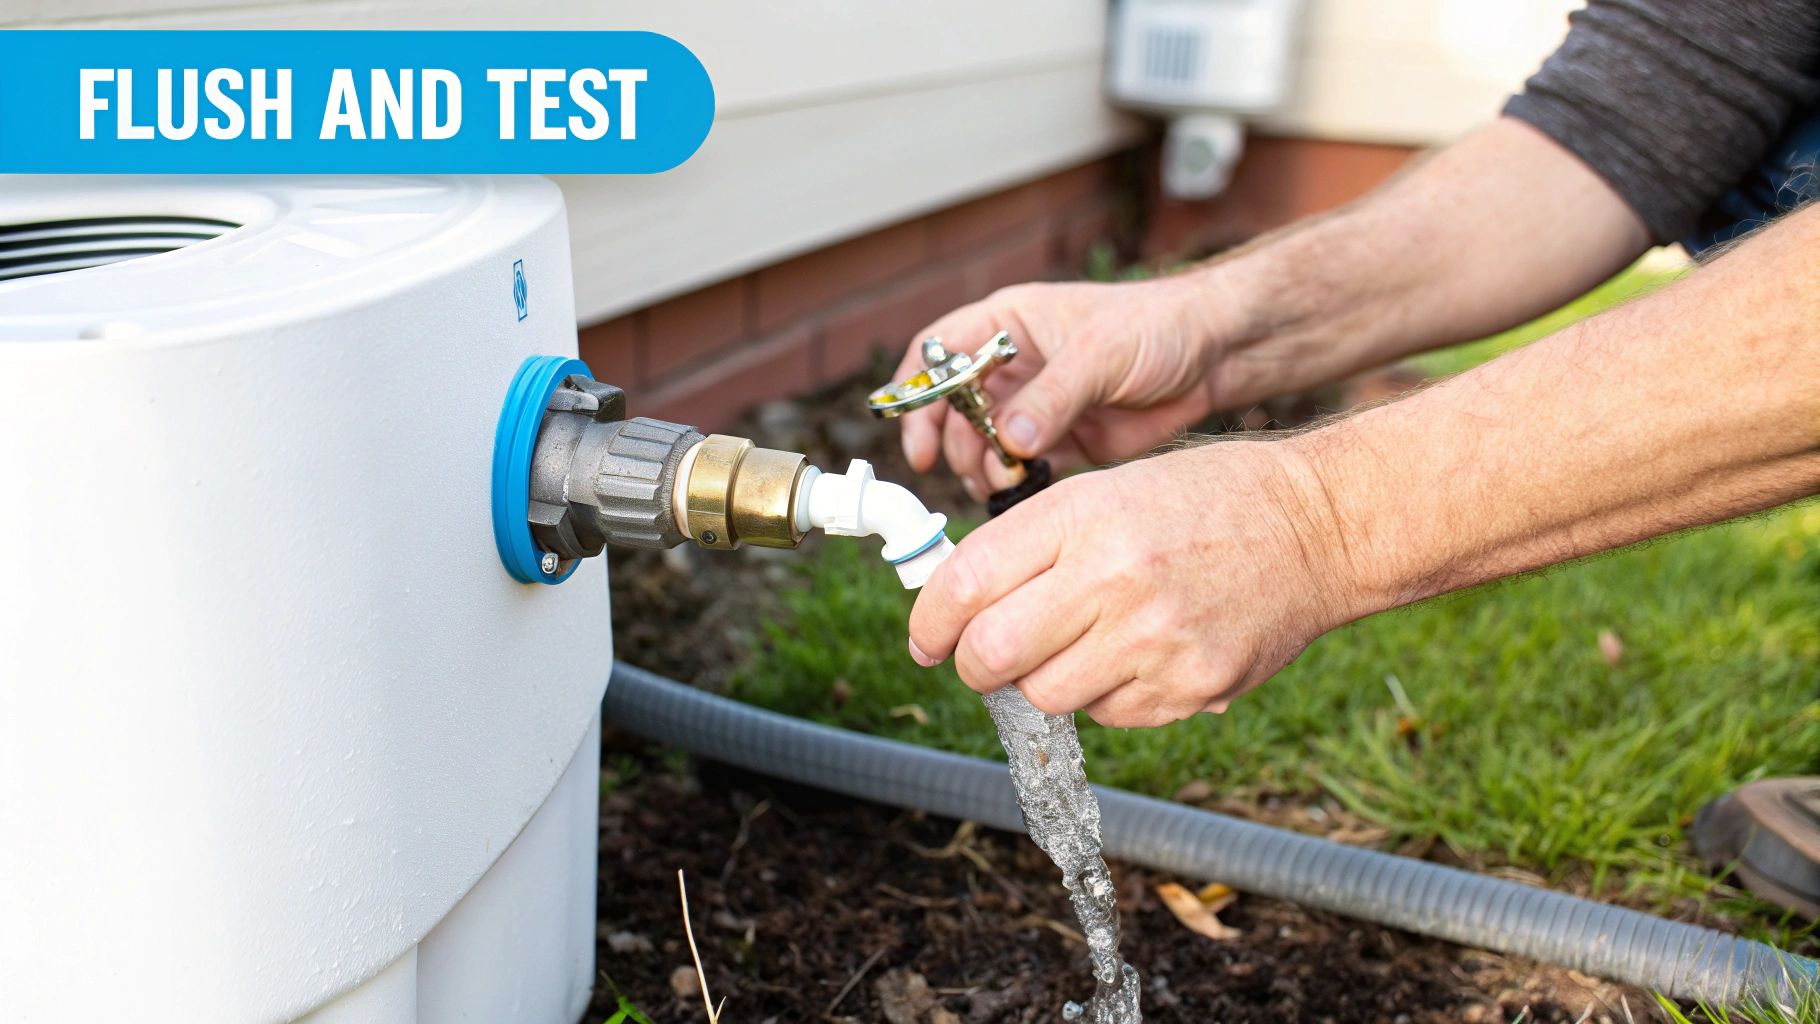
A person flushes water from an outdoor whole-house water filter unit into the grass.

Gently Reintroducing Water to Your System

Right now, your home's plumbing is full of air. If you just crank open the main valve, you’ll unleash a violent surge of water called a water hammer. It's that loud, banging noise that can shake pipes loose, damage joints, and even wreck your appliances. It’s a classic rookie mistake, and it’s completely avoidable.

The trick is to re-pressurize the system slowly and gently.

  1. Start in Bypass Mode: First thing's first, make sure your new filter is in the "bypass" position. This lets water flow through the original plumbing, temporarily skipping the new filter.
  2. Crack the Main Valve: Head back to your main shut-off valve. Don't open it all the way. Just give it a quarter turn—that's it. You'll hear the water start to hiss and trickle in.
  3. Listen and Wait: You’ll hear a lot of sputtering and gurgling as air gets pushed out of the open faucets you left on earlier. Just let it happen. Once the sounds die down, you can slowly open the main valve the rest of the way.

This simple, gradual process lets the air escape gently, protecting your entire plumbing system from a damaging shockwave.

The All-Important Flushing Process

Okay, water is back in the main lines. Now it’s time to activate the filter itself. The goal here is to wash out any leftover dust from manufacturing, especially the carbon "fines" you find in new filters. They're harmless, but you definitely don't want that gritty black stuff in your first glass of water.

Close the bypass valve and slowly open the inlet valve to the filter. You’ll hear the housing fill up. Once it’s full, open the outlet valve. Now, go to an outdoor spigot or a big utility sink and turn on the cold water full blast.

Let it run for a good 10-15 minutes. Don't be alarmed if the water comes out cloudy or even black at first—that's the carbon dust washing out, and it's totally normal. You're just cleaning the pipes, so to speak. Keep it running until the water is crystal clear.

A proper installation sequence is crucial. Generally, this involves shutting off the main, draining the system for a few minutes, making square cuts to avoid leak risks, and using 3-4 wraps of PTFE tape on threads. When reconnecting, opening the valve slowly is key. After that, flushing about 10-20 gallons clears the media dust and ensures your pressure drop stays under a manageable 10 PSI.

The Final Leak Inspection

This is the moment of truth. With the system under full pressure and the filter running, you have to inspect every single joint for leaks. Be patient and meticulous here. Even a tiny, slow drip can cause thousands in water damage down the road.

Your two best friends for this job are a bright flashlight and a dry paper towel.

  • Visual Check: Get your flashlight and look closely at every connection you made—unions, threaded fittings, push-to-connects, all of it. Shine the light from different angles to catch the glint of any moisture.
  • The Paper Towel Trick: This is a classic plumber's move for a reason. Take a bone-dry paper towel and wipe it firmly around the bottom of every single joint. Even a pinhole leak that your eyes might miss will show up instantly on the paper.

Check everything right after you turn the water on, and then circle back an hour later to check again. Some sneaky leaks take a little while to show themselves. If you find a drip, don't sweat it. Just shut the water off, drain the pressure, and re-tighten or re-tape the fitting. A completely dry system is the signature of a job well done.

Keeping Your Water Pure with Long-Term Filter Maintenance

You did it. The whole-house water filter is installed, and clean, fresh water is flowing through every pipe in your home. It’s a great feeling, but the job isn't completely done. Think of it like owning a new car—a little routine maintenance is all it takes to keep it running perfectly. This is all about getting into a simple rhythm of care to protect your investment and keep that water quality sky-high.

The best part? Keeping your system in top shape is a whole lot easier than the installation was. It really just boils down to changing filters on time, a quick clean now and then, and keeping half an eye on your water pressure.

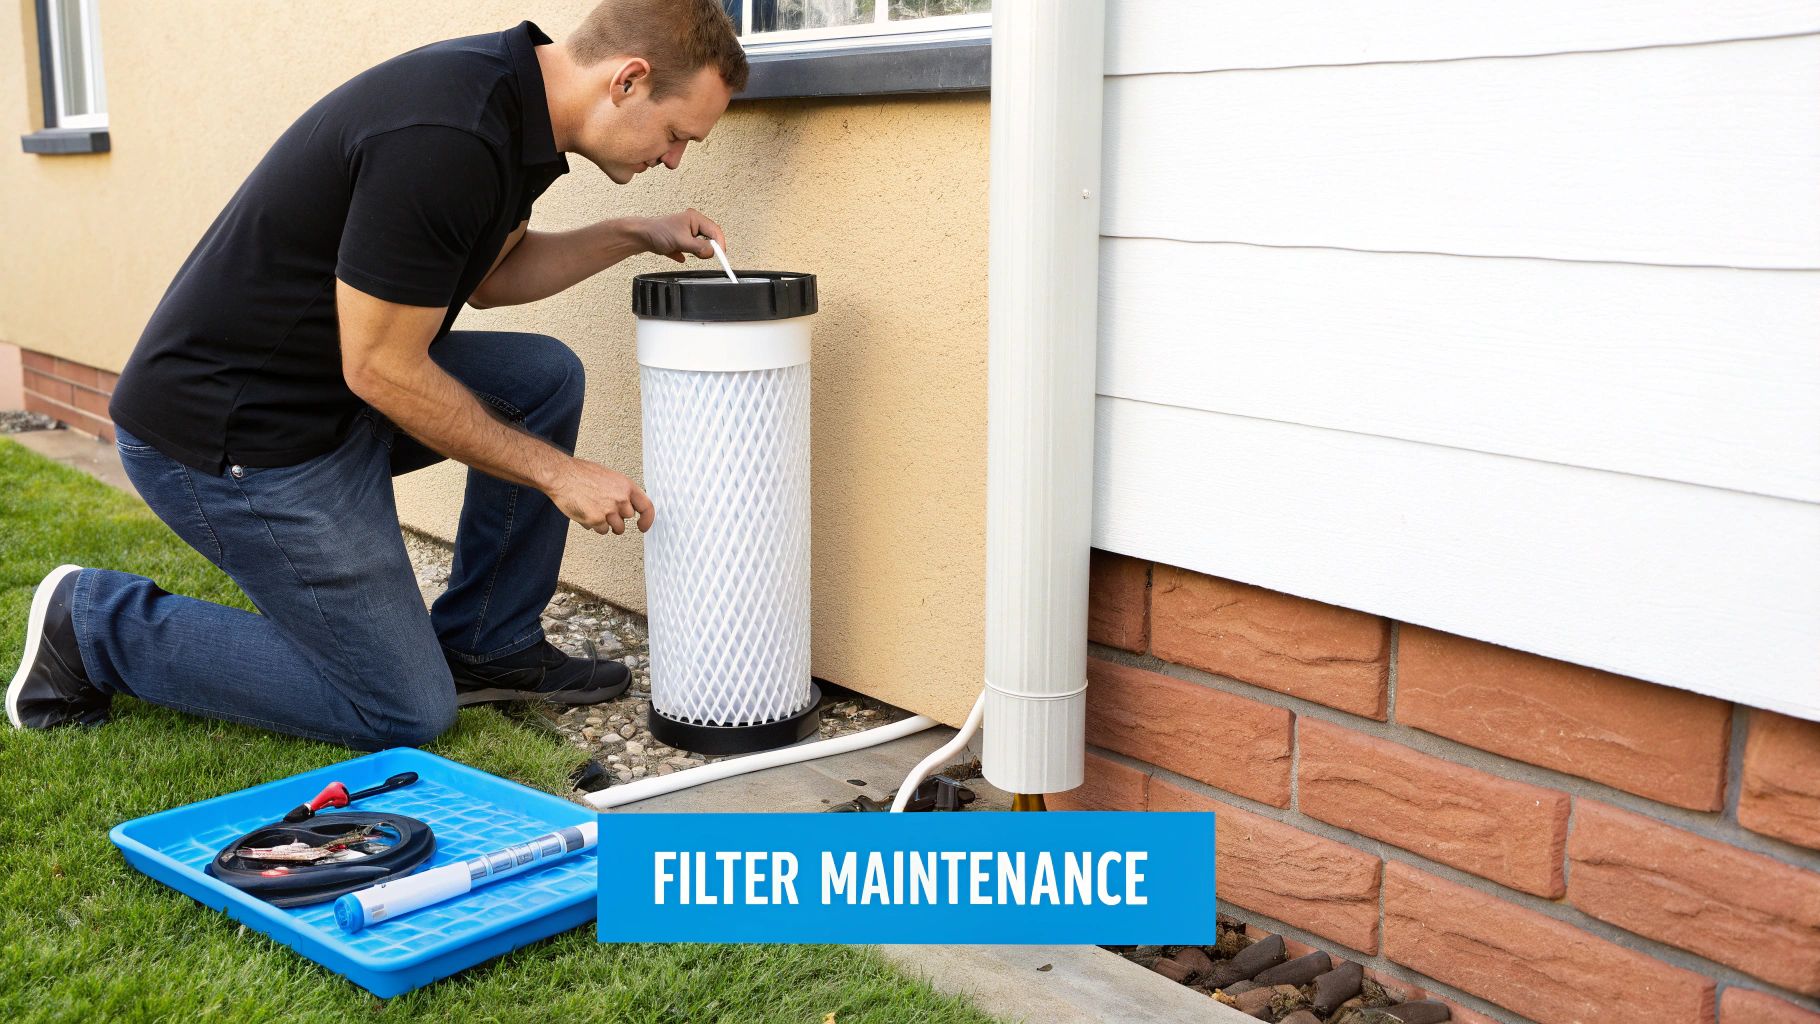
A man kneels on the grass, performing maintenance on an outdoor whole house water filter, with tools in a blue tray.

Establishing Your Filter Replacement Schedule

Not all filters are created equal, and they definitely don’t last the same amount of time. The manufacturer’s guide is your starting point, but your real-world replacement schedule will be dictated by your local water quality and how much you use. For instance, a house on well water with a lot of sediment is going to clog pre-filters way faster than a home on a clean city supply.

Here’s a general idea of what to expect for the most common filter types in a multi-stage system:

  • Sediment Pre-Filters: These are the unsung heroes catching all the big stuff like dirt, sand, and rust flakes. They’re the bodyguards for your more expensive filters. Plan to check and swap these out every 3 to 6 months.
  • Carbon Block Filters: This is your heavy hitter for stripping out chlorine, weird tastes, bad smells, and other chemicals. They typically last 6 to 12 months, though high chlorine levels can wear them out sooner.
  • Specialty Media (e.g., KDF, Calcite): Filters made for specific problems like heavy metals or acidic water often have much longer lifespans, sometimes lasting for years. You’ll definitely want to consult the manual for these.

I recommend keeping a simple log. Just grab a marker and write the date you changed the filter right on the housing, along with the date it’s next due. It takes two seconds and completely removes the guesswork.

The Filter Change Process: A Quick Guide

Changing a filter cartridge is a straightforward job that you’ll master after the first go. It's a quick and clean mission if you follow the right steps.

  1. Hit the Bypass: The first thing you'll do is switch the system into bypass mode. This isolates the filter unit so you can work on it without cutting the water off to your entire house.
  2. Let Off the Pressure: Find the red pressure-relief button, usually right on top of the housing, and give it a press. You’ll hear a quick hiss of air. Make sure you have a bucket underneath to catch the inevitable drips.
  3. Unscrew and Swap: Grab the filter wrench that came with your kit and use it to unscrew the main canister (the sump). Pull out the old, gunked-up filter, give the inside of the housing a quick rinse with some soap and water, and slide the new one in.
  4. Put It Back Together: Screw the sump back on, tightening it by hand until it’s good and snug. Give it a final quarter-turn with the wrench—but don't go crazy and overtighten. Slowly take the system out of bypass and hit that pressure-relief button one more time to bleed out any trapped air.

Crucial Maintenance Step: While you have the housing open, take a second to inspect and clean the O-ring. A little dab of food-grade silicone grease keeps it from drying out and ensures you get a perfect, leak-free seal every single time.

Monitoring Your Water Pressure

Forget the calendar for a second. Your home’s water pressure is the best real-time indicator of your filter's health. You should have pressure gauges on both the inlet and outlet sides of the filter. When a filter is fresh and clean, those two readings should be almost identical.

As the filter does its job and gets clogged with contaminants, the outlet pressure will start to dip. Once you see a pressure difference of 10-15 PSI between the inlet and outlet gauges, that’s your system screaming for a new filter, even if it's not "due" yet. It’s a clear sign the filter has done its duty and is ready for retirement. Paying attention to this one metric is the secret to proactive, smart maintenance.

Solving Common Installation Problems

Even the most carefully planned DIY project can throw you a curveball. You've followed every step, tightened every fitting, and suddenly your water pressure has vanished or you spot a stubborn little drip that just won't quit.

Don't panic. Most issues that pop up during a whole-house water filter installation are pretty common and, thankfully, have simple fixes. Think of this as your troubleshooting guide for those head-scratching moments. We’ll walk through the most frequent snags so you can get back on track without making a panicked call to a plumber.

Diagnosing a Sudden Drop in Water Pressure

You’ve turned the water back on, but the flow from your faucets is just a trickle. A big drop in pressure is one of the most common post-installation complaints, but it's rarely a sign of a serious problem. Before you start questioning your handiwork, let's run through the usual suspects.

Often, the issue is just an airlock trapped somewhere in your plumbing. This happens when air gets compressed in the pipes and blocks the flow of water. Another possibility is that the filter cartridge was installed incorrectly, or maybe a valve somewhere isn't fully open.

Here’s how to systematically hunt down the cause:

  • Check All Your Valves: Go back and physically double-check that your main shut-off valve, plus the inlet and outlet valves on your filter, are 100% open. It sounds almost too simple, but you'd be surprised how often a partially closed valve is the culprit.
  • Purge the Airlock: Go to the highest faucet in your house (usually a shower on the top floor) and open the hot and cold taps all the way. Next, open the lowest faucet (like a basement sink or outdoor spigot). Let them run for a few minutes; this will push all that trapped air out of the system.
  • Inspect the Filter Cartridge: If the pressure is still low, switch the system into bypass mode and carefully remove the filter cartridge. If your water pressure immediately returns to normal, the issue is with the filter itself. Make sure it's the correct model for your housing and that it's seated properly.

Fixing That Annoying Slow Drip

There is nothing more frustrating than seeing a tiny, perfect droplet of water forming on a brand-new connection. A leak, no matter how small, is a clear sign that a seal isn't quite right. The good news is the fix is usually quick. The most common reasons for a slow drip are an improperly sealed threaded fitting or a compromised O-ring.

Pro Tip: Never, ever overtighten a fitting to stop a leak. This is a classic rookie mistake that can crack the plastic housing or strip the threads, turning a tiny problem into a big, expensive one. The real solution is almost always to take it apart, re-seal it, and tighten it correctly.

If you spot a leak, shut off the water and open a faucet to relieve the pressure. Disconnect the leaking fitting and take a close look at the threads. Did you use enough Teflon tape? A good rule of thumb is 3-4 wraps in a clockwise direction (the same direction you tighten the fitting). If it's a connection with an O-ring, check that the ring isn't twisted, pinched, or dirty. A tiny piece of grit is all it takes to break the seal.

Silencing Noisy or Vibrating Pipes

After the installation, you might hear a new humming, rattling, or thumping sound when water is running. This is often caused by something called water hammer—a pressure surge that happens when flowing water suddenly stops or changes direction. Your new filter system can sometimes make this more noticeable, but it's easily managed.

First, make sure the filter housing is mounted securely to a solid surface like a wall stud or floor joist. A loose bracket will vibrate and amplify any noise in the pipes. If the sound continues, you might need to install a water hammer arrestor. These are small, inexpensive devices that absorb the shockwave and quiet your pipes right down. They’re easy to install and simply screw into a nearby faucet line, like the one for your washing machine.

Quick Troubleshooting Guide

When a problem pops up, it’s easy to get flustered. This little cheat sheet covers the most common issues at a glance to help you quickly identify the cause and get things flowing smoothly again.

Symptom Likely Cause Solution
Low Water Pressure Airlock in pipes; partially closed valve; clogged or incorrect filter. Purge air from the system; double-check all valves are fully open; verify and reseat the filter cartridge.
Slow Drip or Leak Improperly sealed threads; damaged or dirty O-ring. Shut off water, re-apply Teflon tape (3-4 wraps), clean and reseat O-ring. Do not overtighten.
Vibrating/Noisy Pipes Loose filter mounting bracket; "water hammer" effect. Securely tighten all mounting hardware; install a water hammer arrestor on a nearby appliance line.
Cloudy or Discolored Water Air bubbles in the water; sediment flushed from pipes. This is normal at first. Run faucets for 5-10 minutes until the water runs clear.
No Water Flow at All Main shut-off valve is still closed; system is in bypass mode. Fully open the main water supply valve; ensure the bypass valve is in the "service" or "filter" position.

Remember, most installation hiccups are minor and can be fixed with a bit of patience and a methodical approach. Don't be afraid to retrace your steps

Your Top DIY Installation Questions Answered

Even with the best guide in hand, it’s completely normal to have a few questions before you start cutting into your plumbing. This is a big project, after all. Let’s tackle some of the most common things people ask before they jump in.

How Much Does a DIY Installation Typically Cost?

This is usually the first question on everyone's mind. The honest answer? It depends on your specific system and plumbing setup. While getting a pro to do the job can set you back anywhere from $500 to over $2,000 just for labor, going the DIY route saves you a massive chunk of that.

Your main expenses will be the filter unit itself and the plumbing parts to connect it. A typical shopping list might look like this:

  • Fittings: Easy-to-use push-to-connect fittings will run you $10-$20 a piece. If you're comfortable with traditional copper or PEX, the fittings are cheaper, but the tool requirements go up.
  • Pipe: You might need a few extra feet of pipe, but this is usually a minor expense, often under $30.
  • Tools: If you’re starting from scratch, you'll need to grab a good pipe cutter and a deburring tool, which could cost $20-$50.

When all is said and done, a DIY install can easily save you 70% or more compared to hiring a plumber. That's a huge win for your wallet.

How Long Does a Typical Installation Take?

Time is money, right? For someone doing this for the first time—but who has read the instructions and has everything laid out—plan for about four to six hours. That gives you enough time to drain the system properly, make careful cuts, get the unit mounted securely, and double-check for leaks without rushing.

If you’ve done this kind of plumbing work before, you could probably get it done in two to three hours. The biggest things that affect the timeline are how easy it is to get to your main water line and what kind of pipes you have. Soldering copper always takes more time than using modern push-fit connectors.

My Advice: Whatever you estimate, add a couple of hours. Nothing good comes from rushing a plumbing project. Block out a Saturday morning so you're not trying to wrap things up when you're tired and it's getting dark.

When Should I Call a Professional Plumber?

Knowing when to tag in a pro is the sign of a smart DIYer, not a failure. This project is totally doable for most, but there are definitely times when it’s best to pick up the phone.

Think about hiring a plumber if you run into any of these situations:

  • You’re dealing with old, corroded, or galvanized pipes that look like they might crumble if you breathe on them too hard.
  • Your main shut-off valve is frozen solid or just won't close all the way.
  • The job requires a complicated rerouting of your pipes, or you have to solder in a super tight and awkward spot.
  • You’re just plain not comfortable with the idea of cutting into your home's main water supply—and that's perfectly okay!

There is absolutely no shame in calling for backup. That peace of mind from a professionally installed, guaranteed-not-to-leak system is often worth every penny.


At Water Filter Advisor, our goal is to help you get cleaner, safer water in your home. From picking out the perfect system to giving you the confidence to install it yourself, we've got your back. Check out all our guides and reviews at https://www.waterfilteradvisor.com.
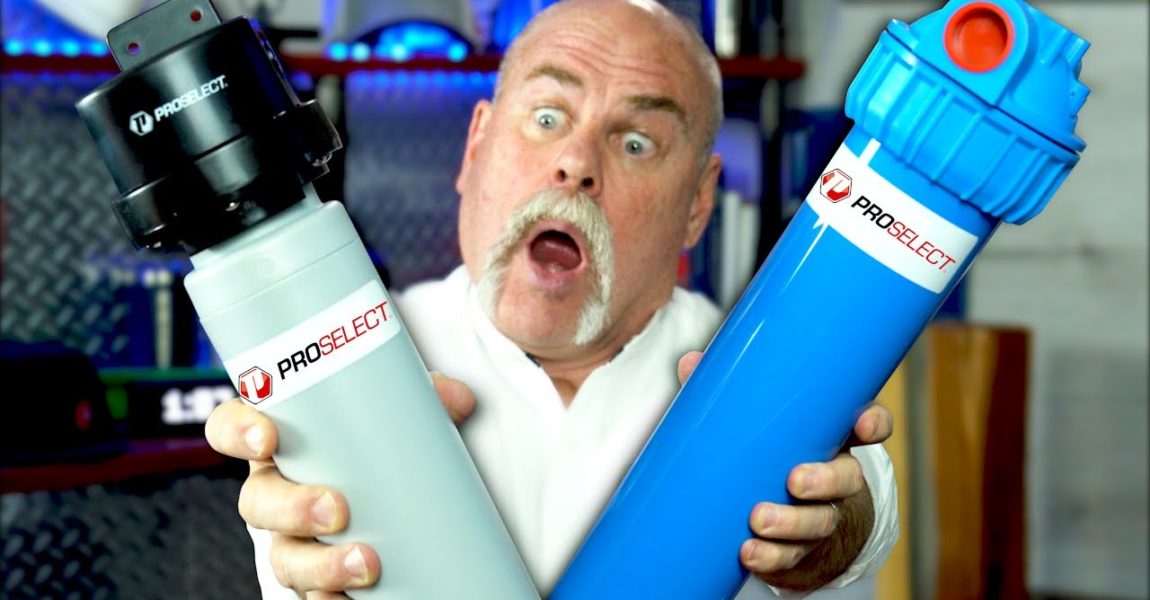
Worlds SMALLEST Whole House Water Filtration System

Worlds SMALLEST Whole House Water Filtration System


Hey Tuber Turds! Today’s Video is about the Worlds Best Whole House Water Filtration System! The PROSELECT Descaling System and the PROSELECT Under Counter Faucet Filter! You can find these at Ferguson.com! I hope y’all Enjoy! 🙂

► Thanks to Ferguson for Sponsoring This Video! —

► Click Here To Subscribe —

► My Free Mini – Course to Help You Begin Your Plumbing Career —

► Become a Member TODAY —

► Follow me on Tik Tok! —

► Check Out My Merch! — teespring.com/stores/tuberturds​

► Join My Subreddit! —

► My Networking Secrets That Grew My Plumbing Business FAST —

► My Recommended Plumbing Study Guide —

► Find Your Local Union —

Thanks for watching! I’m Roger Wakefield, LEED AP, The Expert Plumber and welcome to my channel. On this channel I teach homeowners how to save money on their plumbing by doing DIY plumbing projects. I also teach plumbers and plumbing company owners how to be the best plumbers in their area and run successful plumbing businesses. My goal is teach you everything you need to know about plumbing.

► Check Out Our Social Media:
Website —
Blog —
YouTube —
Facebook —
LinkedIn —
Twitter —
Instagram —
Tik Tok —

► Gear We Use:
Coolest Clock Ever –
Main camera –
Lens for main and Second cameras –
Second camera –
My microphone –
XLR Interface –
Wireless Lav Mic –
Tripod to hold our camera –
Our studio lights –

*NOTE: This description contains affiliate links that allow you to find the items mentioned in this video and support the channel at NO COST TO YOU. While this channel may earn minimal sums when the viewer uses the links, the viewer is in NO WAY obligated to use these links. Thank you for your support!

Original Video Source

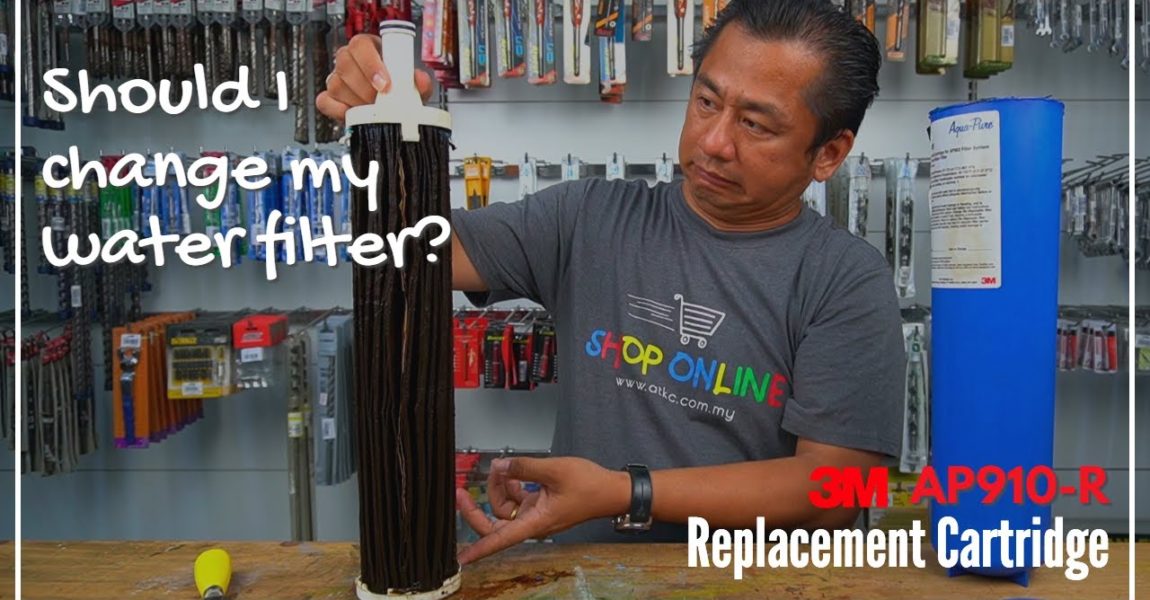
Should I Change My Water Filter? | 3M AP902 Whole House Filtration & AP910-R Replacement Cartridge

Should I Change My Water Filter? | 3M AP902 Whole House Filtration & AP910-R Replacement Cartridge


3M™ AP902 Whole House Water Filtery System

The Desired First Line of Defense
Strong endurance, efficient and certainly trustworthy: with AP902, your water will be well filtered and protected from the very second it enters your home.

Replacement Cartidge
AP910R Cartridge for AP902

‘*NSF International is an independent lab that ensures all drinking water systems are tested and certified to meet strict public health and safety standards.

NSF/ANSI Standard 42 is established to certify the claims of water filtration systems designed to reduce taste and odor, nominal particulate and chloramine, chemicals that could increase lead level in bloodstream as well as causing respiratory problems, such as asthma.

NSF/ANSI Standard 53 is established to certify the claims of water filtration systems designed to reduce specific health-related contaminants, such as lead, pesticides and cysts, which cause diarrhea, nausea and low grade fever as well as being potentially fatal.

*Advanced single-stage filtration delivers high output
*Components certified by NSF International with NSF/ANSI Standard 42*
*Manufactured from U.S Food and Drug Administration (FDA) CFR-21-compliant material
*Fully enclosed filter media ensure no spillage and mess
*Sanitary Quick Change (SQC) design – easy cartridge change-out
*304 stainless steel head and die-cast zinc locking latch

Specifications
*Inlet/Outlet Size: 1″ (2.54 cm) NPT.
*Flow Rate: 20 gpm (75.7 lpm).
*Micron Rating: 5 micron nominal.
*Capacity: 100,000 gallons (378,541 liters).
*Overall Dimension: 63.7cm (H) x 11.4cm (D).
*Overall weight: Dry – 7 lbs (3.2 kg), Wet – 15 lbs (6.8kg).

3M Outdoor Water Filter AP 902 Whole House Filtration System –
3M Outdoor Water Filter System Replacement Cartridge AP910-R for Model AP 902 –

For more information, please visit www.ewarehouse.my – Malaysia’s Largest Home Improvement Online Store.

Original Video Source

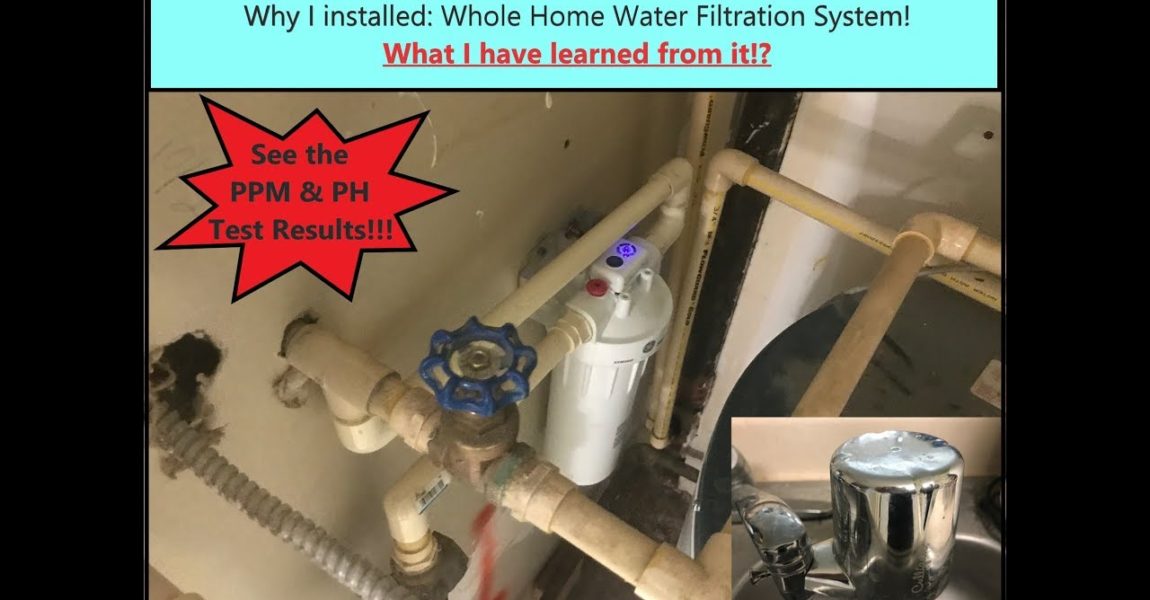
Installed Whole Home Water Filtration System - Why do it & what I have learned?

Installed Whole Home Water Filtration System – Why do it & what I have learned?


This is the part of the “How I” and Empowerment Series. This video is based on my reasons, best practices and what I have learned from installing the two tiered water filtration system. You will love all the benefits of installing a whole home water filtration system at home in Atlanta. Keep watching and watch for the PPM and PH tests. We tested Tap Water, Double Filtered Water, and Spring Water. What do you think may have the best waters? Keep watching and find out. If you are interested in purchasing the items I have used, please feel free to click on the Amazon Affiliate Link to the items.
Here are the affiliate links:

1) GE GXWH04F Water Filter-
2) GE FXWPC (Filters) –
3) Culligan FM-25 (Faucet Filtration) –
4) KETOTEK Digital Water TDS Meter PH Meter –

If you enjoyed this video, please subscribe as we will have more of these videos loaded in the near future. Please also hit the like button or share the video if you have enjoyed it as it will help our channel grow.

Sit back, enjoy and don’t forget to subscribe.
Filmed with the following:
Panasonic Lumix FZ 300

PERGEAR Aluminum Mini Tripod

Here is a list of our partner channels (You will LOVE THEM):
1) RobFuz –
2) Drop that Rope –
3) Bob and Ashley –
4) Mickey Bunch –

5) Cheri-Awesome Sunsets Travel –

*** If you are seeing this video outside of YouTube or YouTube affiliate or subsidiary sites/channel, it was stolen. Please go directly to my YouTube Channel at and you can watch all the fantastic videos and the original contents. Remember to subscribe so you can get notification from YouTube.

Original Video Source