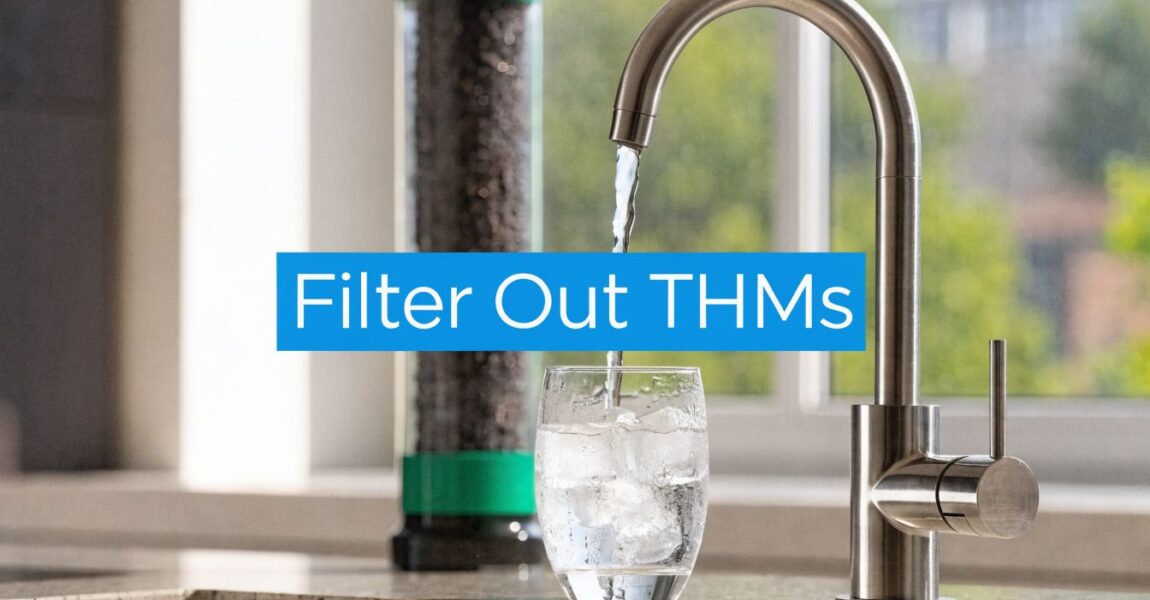
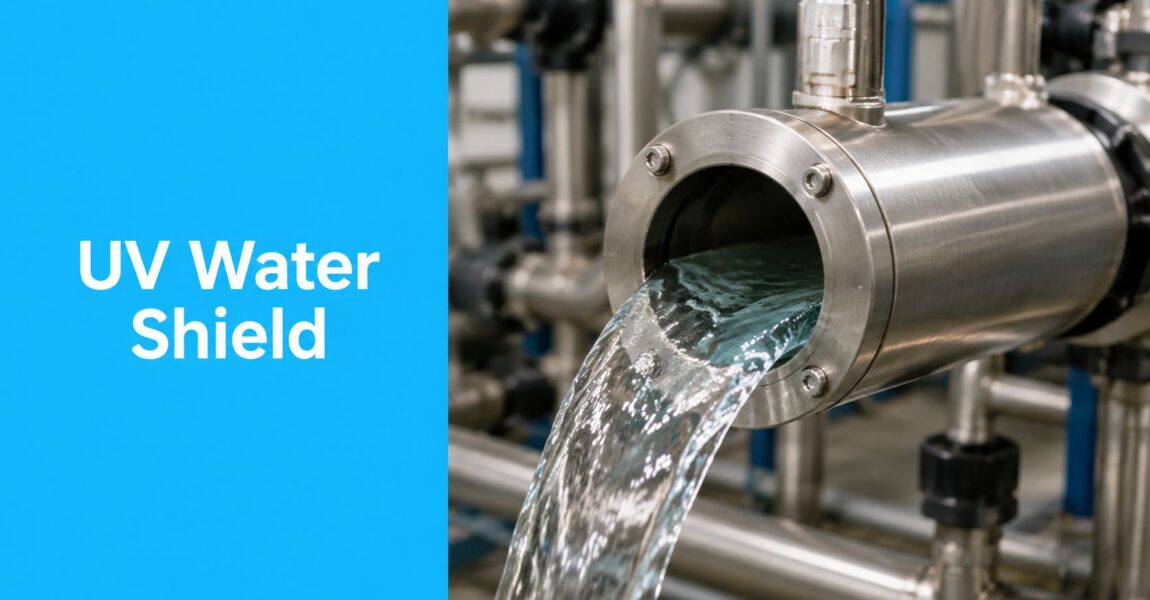
UV Water Purification Systems: Your 2026 Guide

You get your water test back, and one line grabs all your attention: bacteria. Or maybe you're on city water, everything seems fine most days, and then a boil-water notice lands in your inbox. Either way, the feeling is the same. The water looks normal, tastes normal, and suddenly doesn't feel normal at all.

That's where UV water purification systems earn their place. They're not flashy. They don't change the taste of your water, and they don't usually become the part of the plumbing system people brag about. But when they're installed correctly, they act like a silent final barrier against microbiological contamination.

For homeowners, that's the right way to think about UV. Not as a magic box that fixes every water problem, but as a focused tool for one job: making biologically unsafe water microbiologically safer to drink. If your concern is bacteria, viruses, or cyst-related risk, UV is one of the cleanest, most targeted solutions available. If your water also has sediment, metals, staining, sulfur smell, or chemical contamination, UV still helps, but only as one stage in a complete treatment setup.

The Invisible Shield Protecting Your Home's Water

You can have clear water, no odor, no staining, and still have a problem that only shows up on a lab report. That is usually the moment homeowners start looking at UV.

I see it in two situations all the time. Well owners want a final disinfection step after finding bacteria risk, and city-water homeowners want backup protection after a service interruption or boil-water notice. In both cases, the appeal is practical. UV adds disinfection without feeding chlorine or another chemical into the plumbing.

Why UV feels different from ordinary filtration

A sediment filter catches grit. Carbon reduces chlorine, taste, and some organic compounds. UV does a different job. It passes water through a chamber and exposes microorganisms to germicidal light, which works a lot like sunscreen in reverse for microbes. Instead of shielding them, the light damages them so they cannot keep multiplying.

That difference matters in real-world system design. Homeowners often expect one device to handle everything, but UV is usually the last protective step, not the whole treatment plan. If the water is cloudy or full of iron, hardness scale, or fine sediment, those issues need to be handled before the UV unit can do its job well.

That is also why ownership costs start before the unit is installed. A UV system may look simple on the wall, but the full decision includes prefiltration, lamp replacement, sleeve cleaning, and making sure the flow rate matches the house. The unit itself is only part of the purchase.

Where homeowners usually use it

Residential UV systems usually fit one of two setups:

  • Whole-house protection: Installed on the main line, usually after prefilters and any softener or iron treatment.
  • Point-of-use protection: Installed under a sink or at a dedicated drinking water tap.

Whole-house UV gives broader protection, but it costs more upfront and usually needs more careful sizing. Point-of-use UV costs less and can make sense if the concern is limited to drinking and cooking water, though it does nothing for showers, bathroom sinks, or ice makers on untreated lines.

Homeowners who have looked at HEPA and UV air systems already know the basic idea. UV handles threats you cannot see. In water treatment, the same principle applies, but sizing and water quality matter a lot more because the light has to reach organisms as water moves through the chamber.

One more distinction helps set expectations early. Some UV systems are built for contaminated water risk, while others are intended as added protection for already treated municipal water. That is why product class, flow rating, and the condition of your incoming water matter more than marketing language. UV is a targeted disinfection step, and it works best when the rest of the treatment train is planned around it.

How UV Light Makes Your Water Safe

A family can fill glasses from a perfectly clear tap and still have a disinfection problem. That is the part UV is built to address. It targets living microorganisms that you cannot see, taste, or smell.

UV treatment uses UV-C light, typically at 254 nm, to damage the genetic material inside microbes. A practical way to picture it is sunscreen in reverse. Instead of shielding cells from light damage, the system exposes bacteria, viruses, and protozoa to a level of light that keeps them from reproducing. Once they cannot reproduce, they cannot keep infecting people.

A diagram illustrating the four steps of a UV water purification system for removing active pathogens.

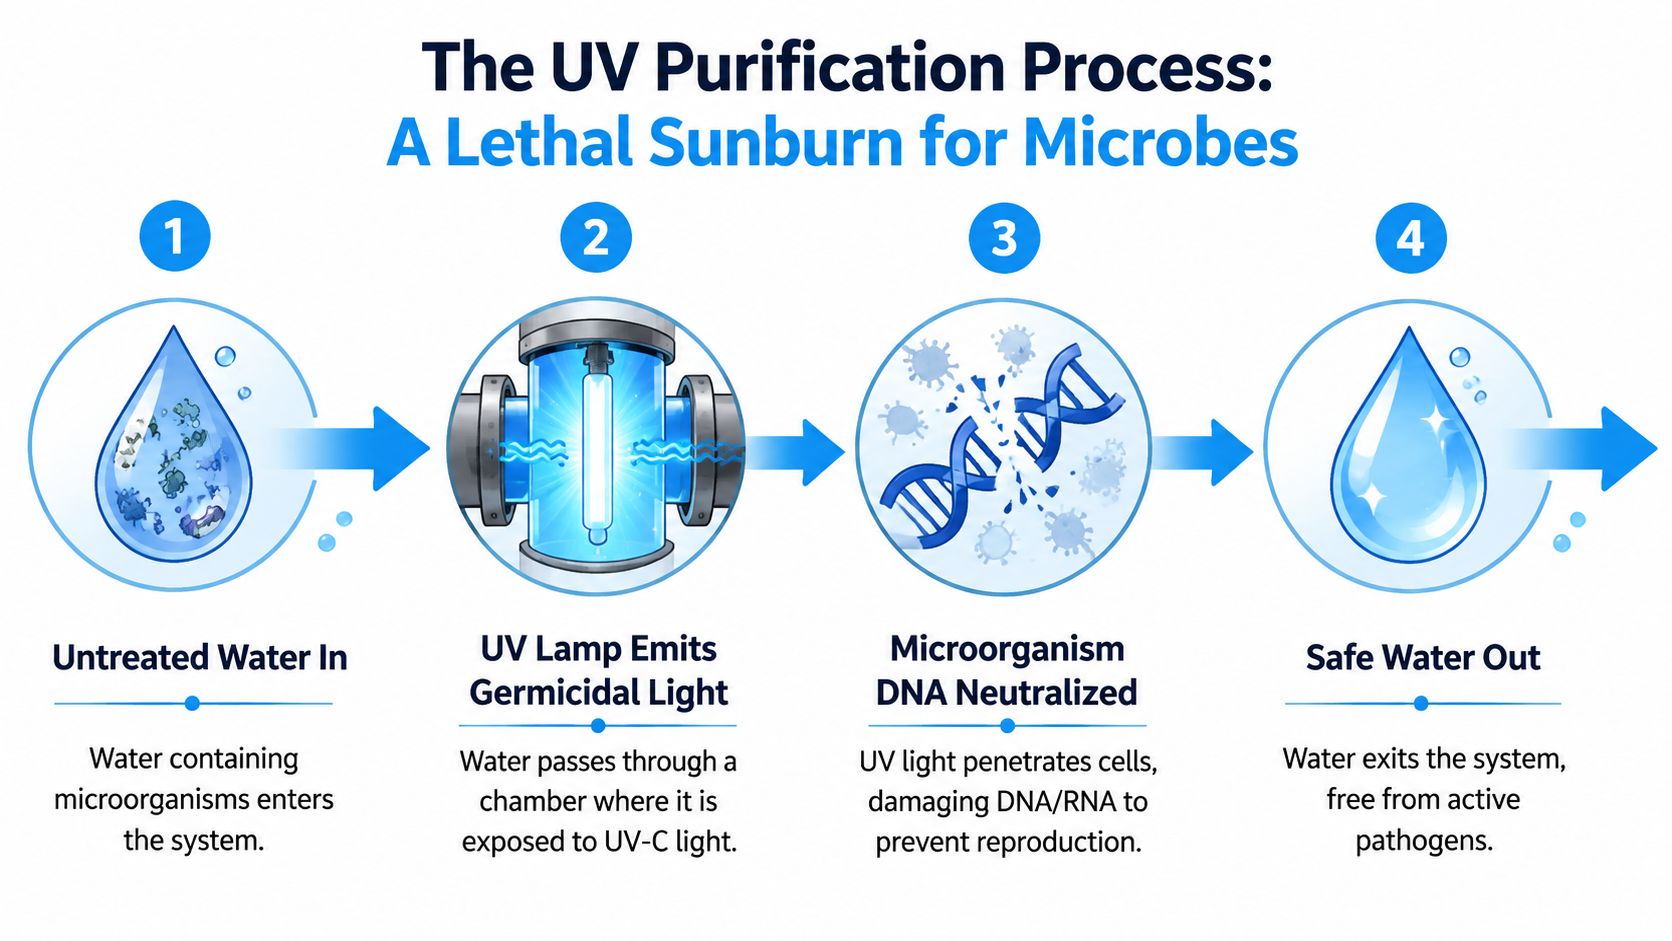
What actually happens inside the chamber

Inside the reactor, water flows past a UV lamp that sits inside a clear quartz sleeve. As water moves through that treatment zone, microorganisms are exposed to germicidal light for a controlled amount of time. If the unit is sized correctly and the water is clear enough for the light to pass through, the organisms are inactivated before the water reaches the rest of the house.

That last part matters. UV is a disinfection step, not a capture step. It does not strain organisms out of the water, and it does not remove dirt, chlorine, iron, hardness, or chemical contaminants. It changes whether microbes are still viable.

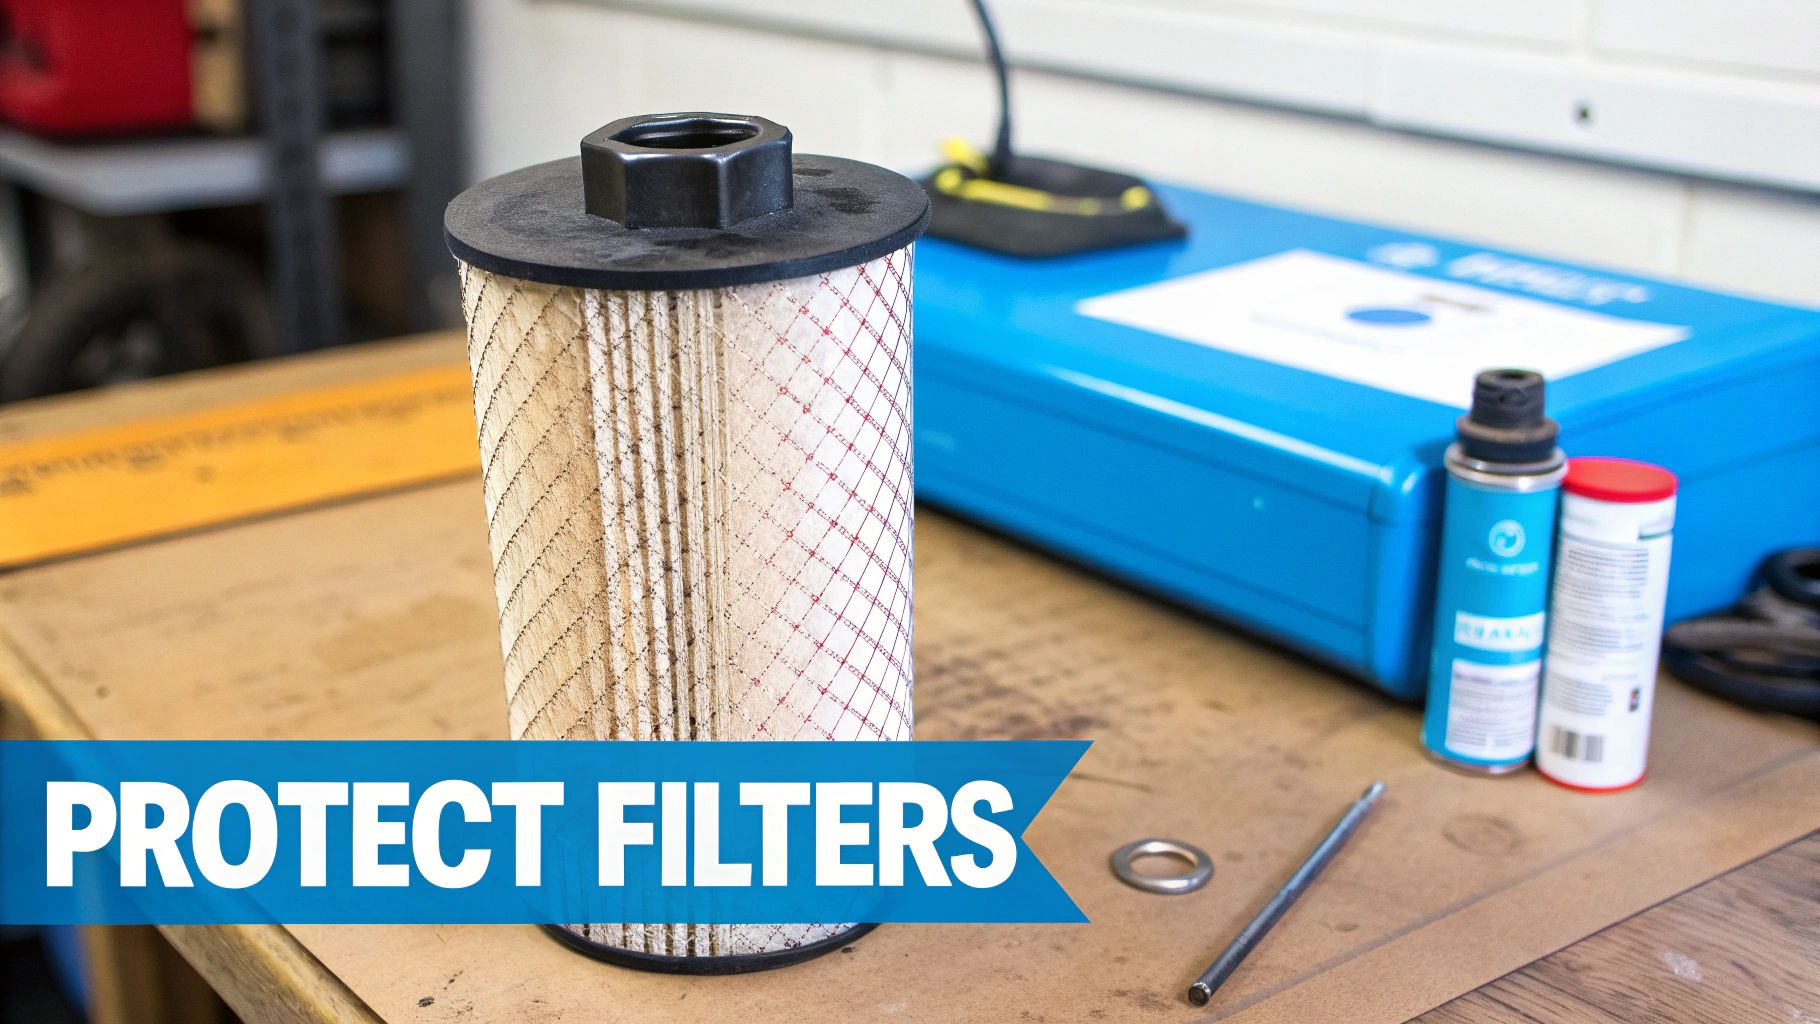
For homeowners, that distinction affects planning and long-term cost. A UV unit can do its job very well, but only if the water reaching the chamber gives the light a fair shot. Cloudiness, sediment, and mineral fouling on the sleeve all reduce performance, which is why prefiltration and sleeve maintenance are part of the complete ownership picture, not optional add-ons.

Why dose matters more than bulb wattage

A lot of product pages push lamp wattage because it is easy to compare. Wattage alone does not tell you whether the system will disinfect your water under real household conditions. UV dose matters more.

Dose is the amount of germicidal energy the water receives as it passes the lamp. A simple paint analogy fits here. A bigger paint sprayer helps, but coverage still depends on speed and distance. In a UV chamber, delivered dose depends on lamp output, contact time, flow rate, and how clear the water is.

This is why sizing mistakes show up later as ownership problems. A unit picked only by price or bulb size may look fine on paper, then struggle during high-demand periods when several fixtures run at once. A properly sized system is built around your peak flow, your incoming water quality, and the maintenance routine you will keep up with.

Why filtration and UV are often paired

If you've looked into indoor air quality, the logic will sound familiar. Homeowners often pair filtration with UV in air treatment for the same reason they pair sediment or carbon filtration with UV in water treatment. Each stage does a different job. This overview of HEPA and UV air systems shows that same layered approach in a different setting.

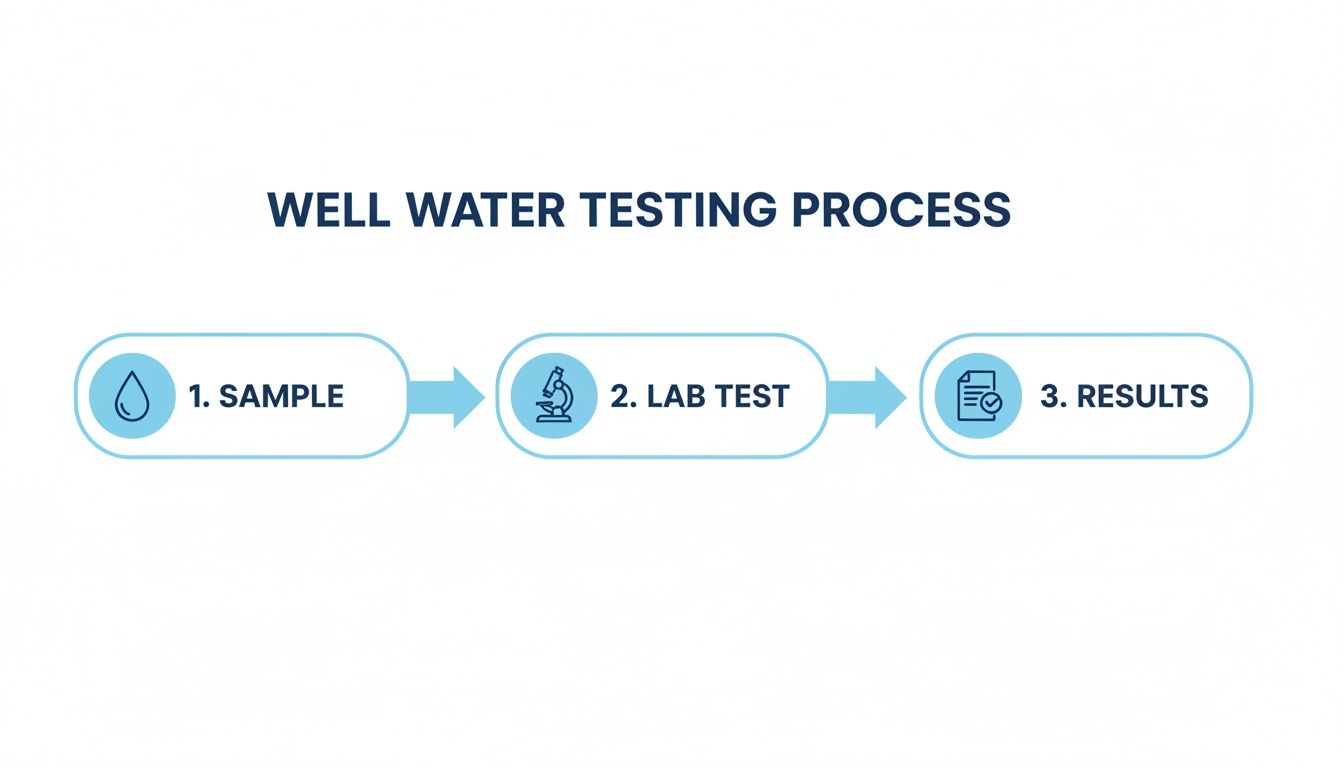
Here's a quick visual if you want to see the water-side process in action:

Practical rule: Judge a UV system by delivered dose at your home's real flow rate, and by the prefiltration and upkeep it needs to keep that dose consistent over time.

Anatomy of a Home UV Purification System

A home UV unit looks simple from the outside. Inside, four parts do almost all the work.
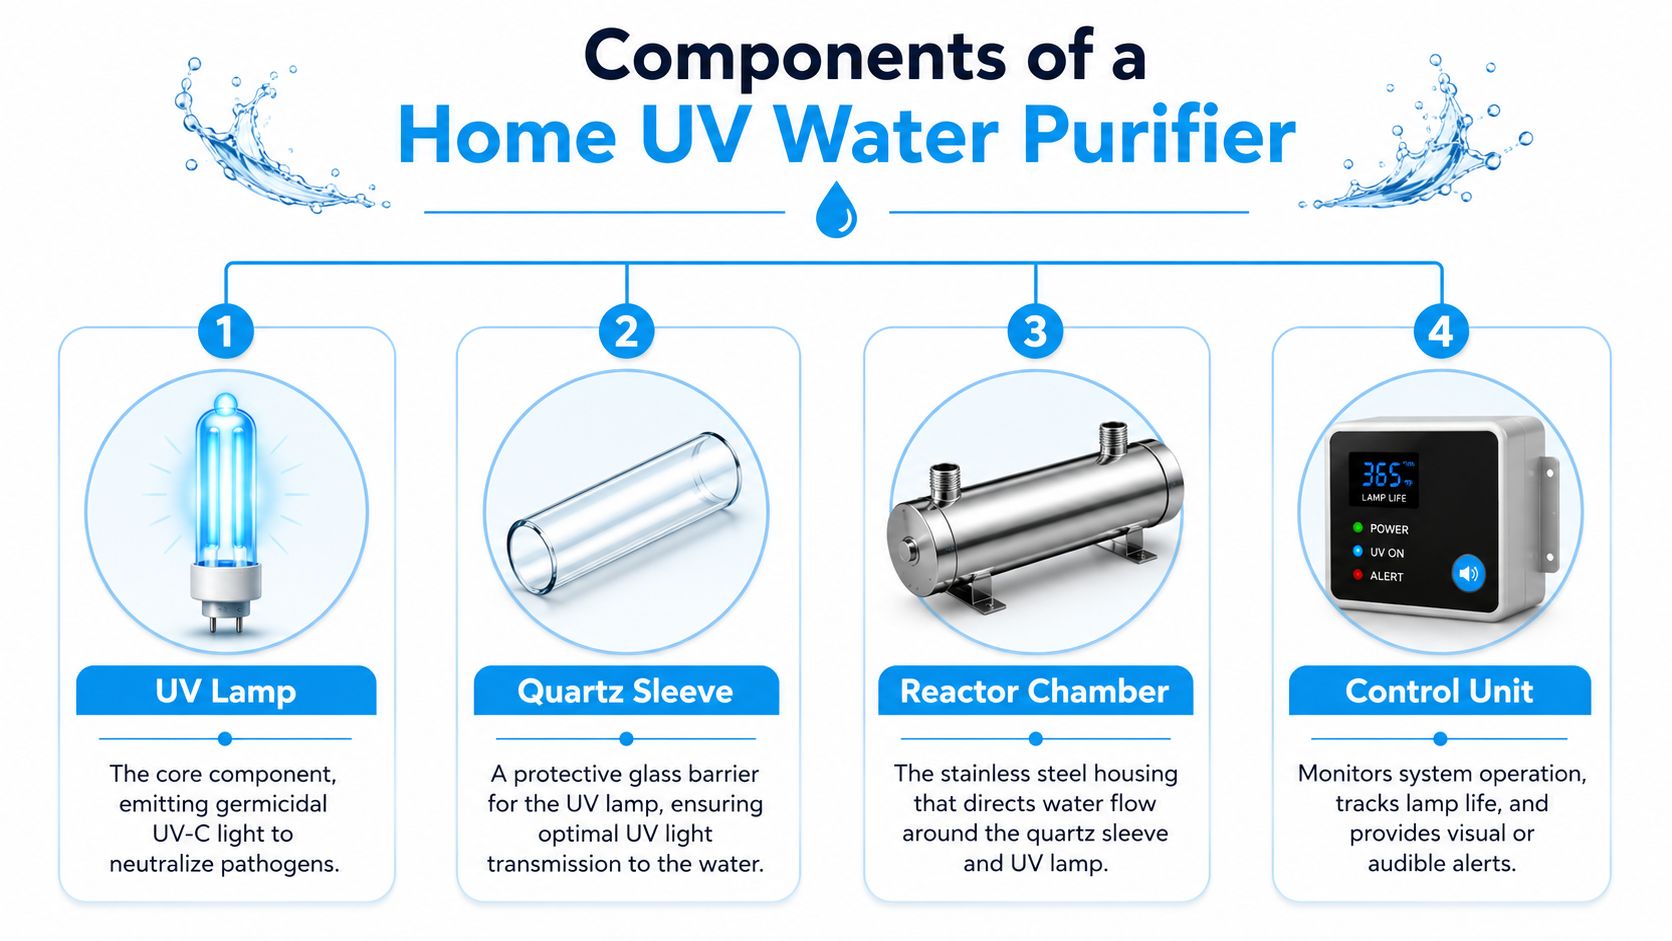
A diagram illustrating the four main components of a home UV water purification system.

The lamp

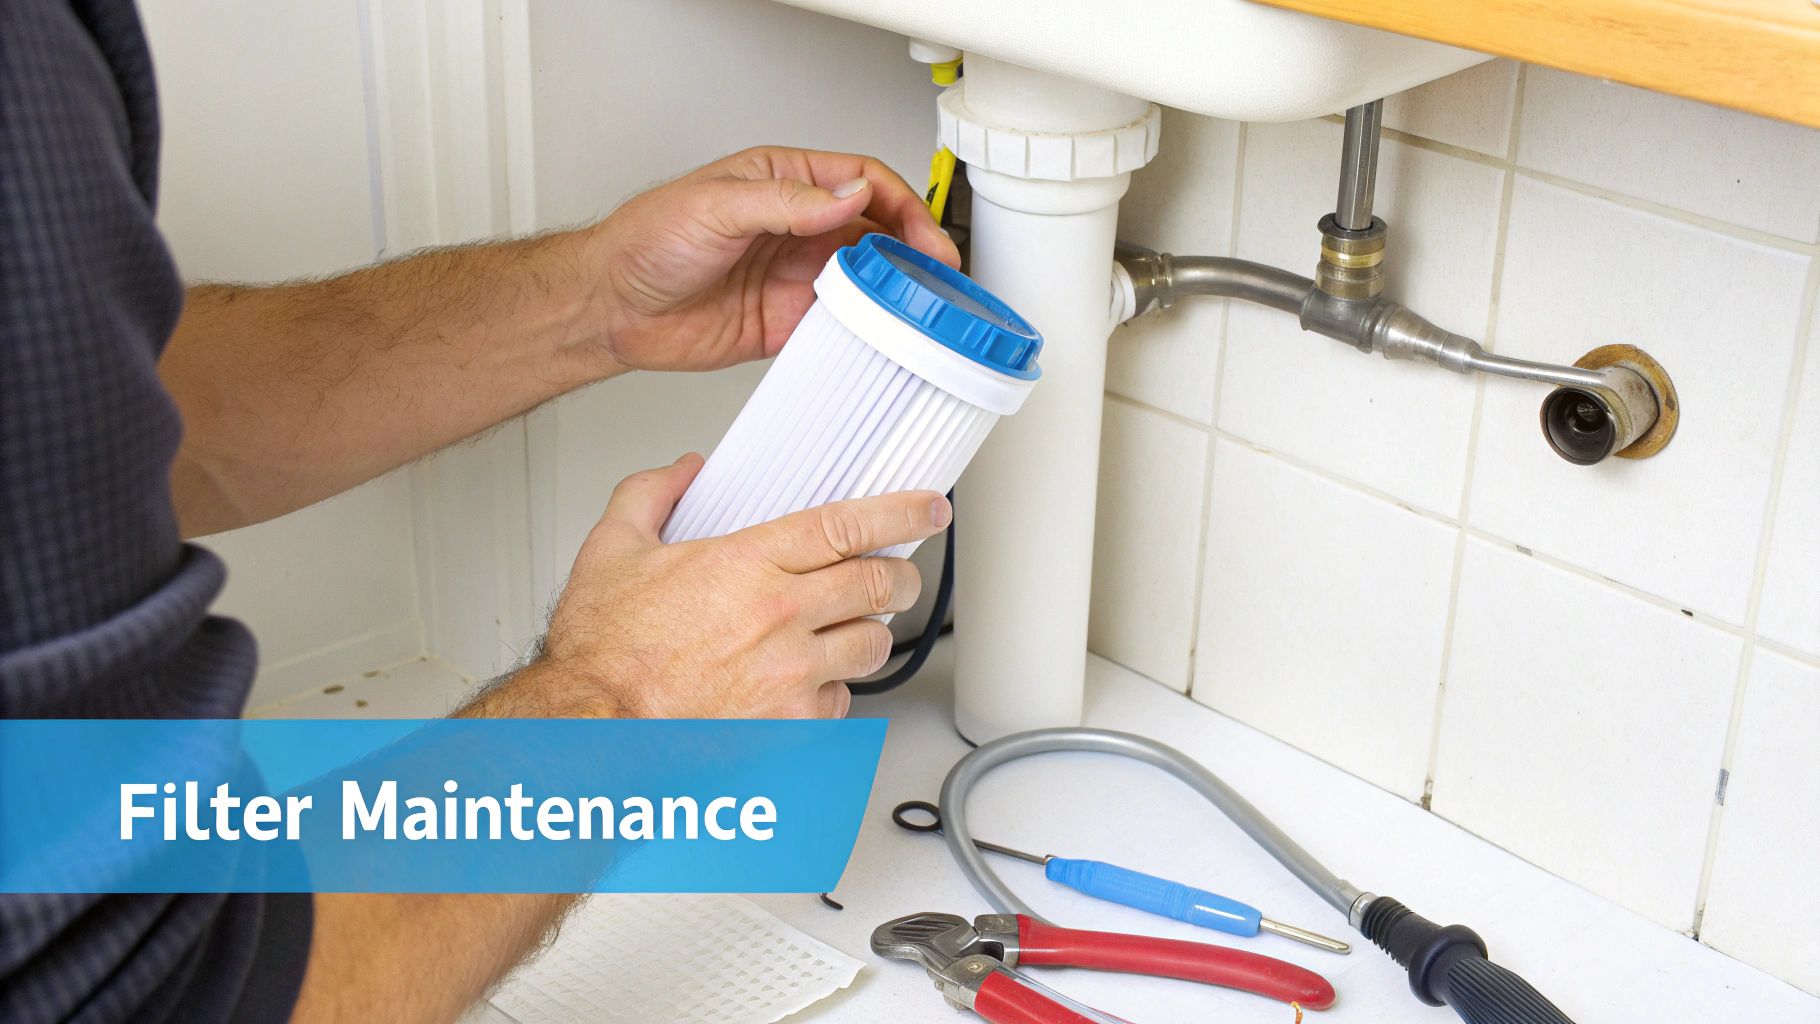
The UV lamp is the heart of the system. It generates the germicidal light that treats the water. When the lamp ages, the system may still appear to be on, but disinfection performance can drop if output isn't maintained. That's why lamp replacement is part of ownership, not an optional extra.

The quartz sleeve

The quartz sleeve is a clear protective tube that separates the lamp from the water. It lets UV light pass through while keeping the electrical lamp dry.

This part often gets ignored until performance problems show up. If minerals, iron fouling, or film build up on the sleeve, the lamp may still be glowing while less useful light reaches the water.

The reactor chamber

The reactor chamber is usually stainless steel. It holds the sleeve and lamp in the correct position and directs water through the treatment zone.

Good chamber design matters because water needs consistent exposure as it passes through. In practical terms, residence time and exposure path are combined.

The controller

The controller or ballast powers the lamp and usually provides status information. Better controllers help homeowners notice trouble early by tracking lamp condition or signaling when service is due.

A simple way to think about the whole assembly:

Component Job in the system
UV lamp Produces germicidal UV-C light
Quartz sleeve Protects lamp while allowing light through
Reactor chamber Routes water through the disinfection zone
Controller Powers and monitors system operation

When homeowners understand these parts, maintenance starts to make sense. You're not just “changing a bulb.” You're preserving the conditions that make disinfection possible.

What UV Purifiers Do and Do Not Remove

You install a UV unit, the lamp is glowing, and the water still smells like chlorine or leaves orange stains in the sink. That does not mean the UV system failed. It means it was asked to solve the wrong problem.

UV water purification systems target living contaminants. They are built to disable bacteria, viruses, and other microbes so they cannot reproduce and spread illness. In a home setup, that makes UV a disinfection step, not a catch-all treatment method.

A glass being filled with clean water from a kitchen faucet, emphasizing purified drinking water.

What UV is good at

A properly sized UV system works like sunscreen for microbes. The light damages their genetic material, so they can no longer multiply. That is why UV is often the last stage in the treatment line, after other filters have already cleaned up the water enough for the light to do its job.

This matters in real homes. If your concern is well water with possible bacterial contamination, UV can be a smart final barrier. If your concern is metallic taste, hard scale on fixtures, or chemical runoff, UV will not fix those issues.

What it leaves behind

UV does not remove:

  • Sediment and turbidity: Dirt, silt, rust, and cloudiness remain in the water.
  • Chemicals: Chlorine, pesticides, and many dissolved contaminants stay put.
  • Metals: Lead, iron, manganese, and similar metals are not filtered out by UV.
  • Hardness minerals: Calcium and magnesium still form scale.
  • Taste and odor compounds: If the cause is chemical, mineral, or organic, UV usually will not change the flavor or smell.

That limitation shapes the whole ownership cycle. A UV system is rarely a one-box answer. It usually sits behind sediment filtration, and often behind carbon as well, because those earlier stages handle the contaminants UV cannot touch. Homeowners comparing setups can review broader treatment combinations in this home water filtration advice library or find your ideal water purification system.

Why pre-filtration matters so much

Clear water gives UV the best chance to work. Cloudy water does the opposite.

Suspended particles can shield microbes from the light. I explain it to homeowners this way: if the germ is hiding behind a speck of sediment, the UV light may never reach it with enough strength to do the job. The lamp can be on, the controller can look normal, and protection can still drop if the upstream filtration is undersized or overdue for service.

That is one of the practical trade-offs many guides skip. The cost of owning UV is not just the unit itself. It includes the sediment filters, carbon cartridges if needed, and the maintenance discipline required to keep the water clear enough for the UV chamber to stay effective.

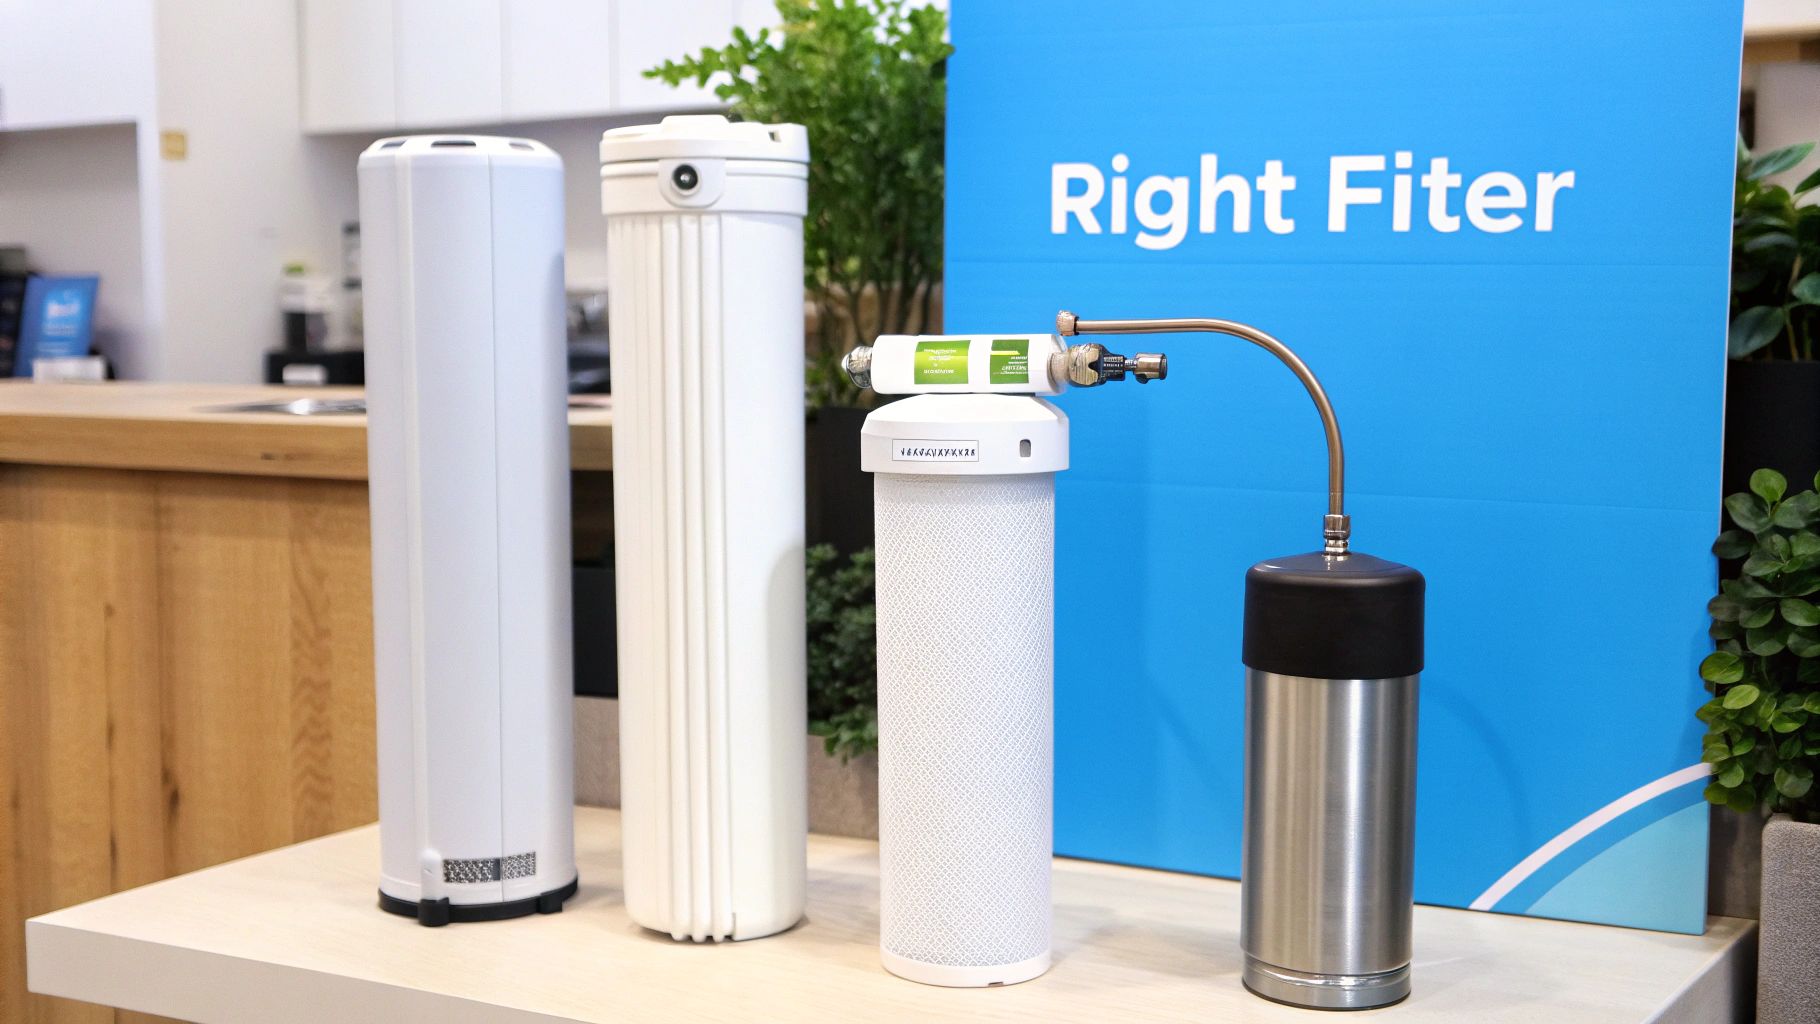
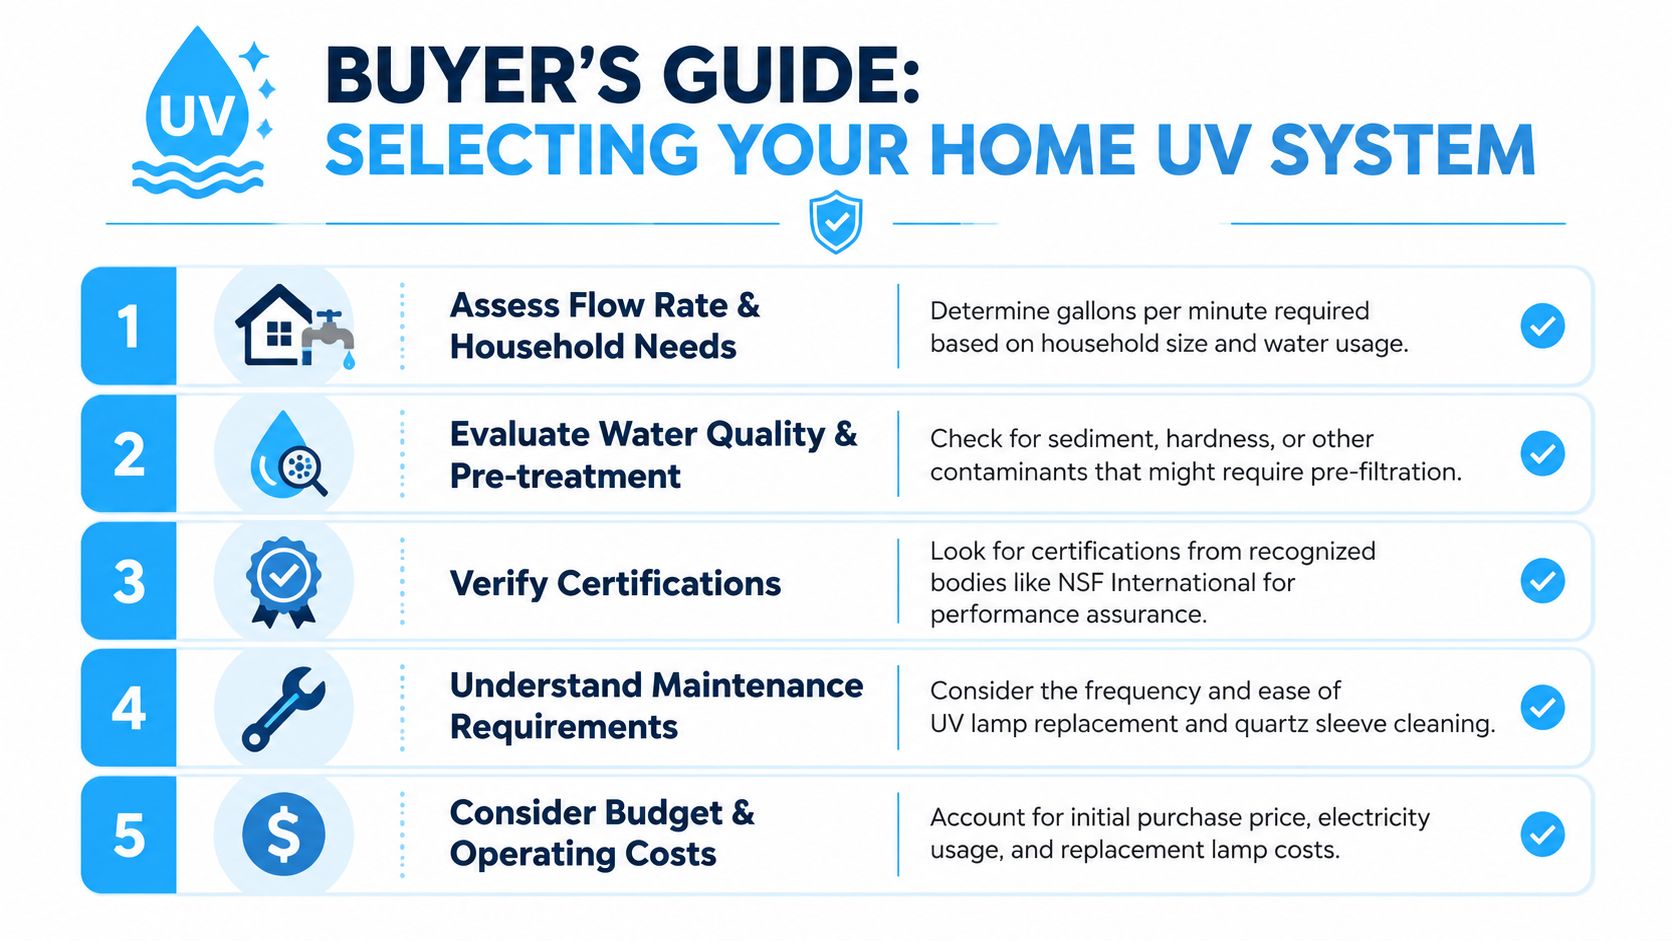
Choosing the Right UV System for Your Home

A family can live with a UV unit for years and still buy the wrong one on day one. The usual mistake is focusing on the box and forgetting the ownership cycle: water source, peak flow, pre-filtration, service access, and the steady cost of lamps, sleeves, and replacement filters.

A five-step buyer's guide infographic on selecting and installing a home UV water purification system.

Start with your water source

The right UV choice starts with one basic question: what water are you treating?

Private well owners usually need to be stricter about UV selection because they are responsible for the treatment barrier at the house. Municipal water users are often adding UV as extra protection at the point of entry or point of use, not replacing the utility's disinfection. That difference affects how much safety margin you want, whether whole-house treatment makes sense, and how much attention you need to give upstream filtration.

Water test results matter here. A UV chamber works like sunscreen for microbes. It blocks their ability to reproduce, but only if the light reaches them cleanly and at the right dose.

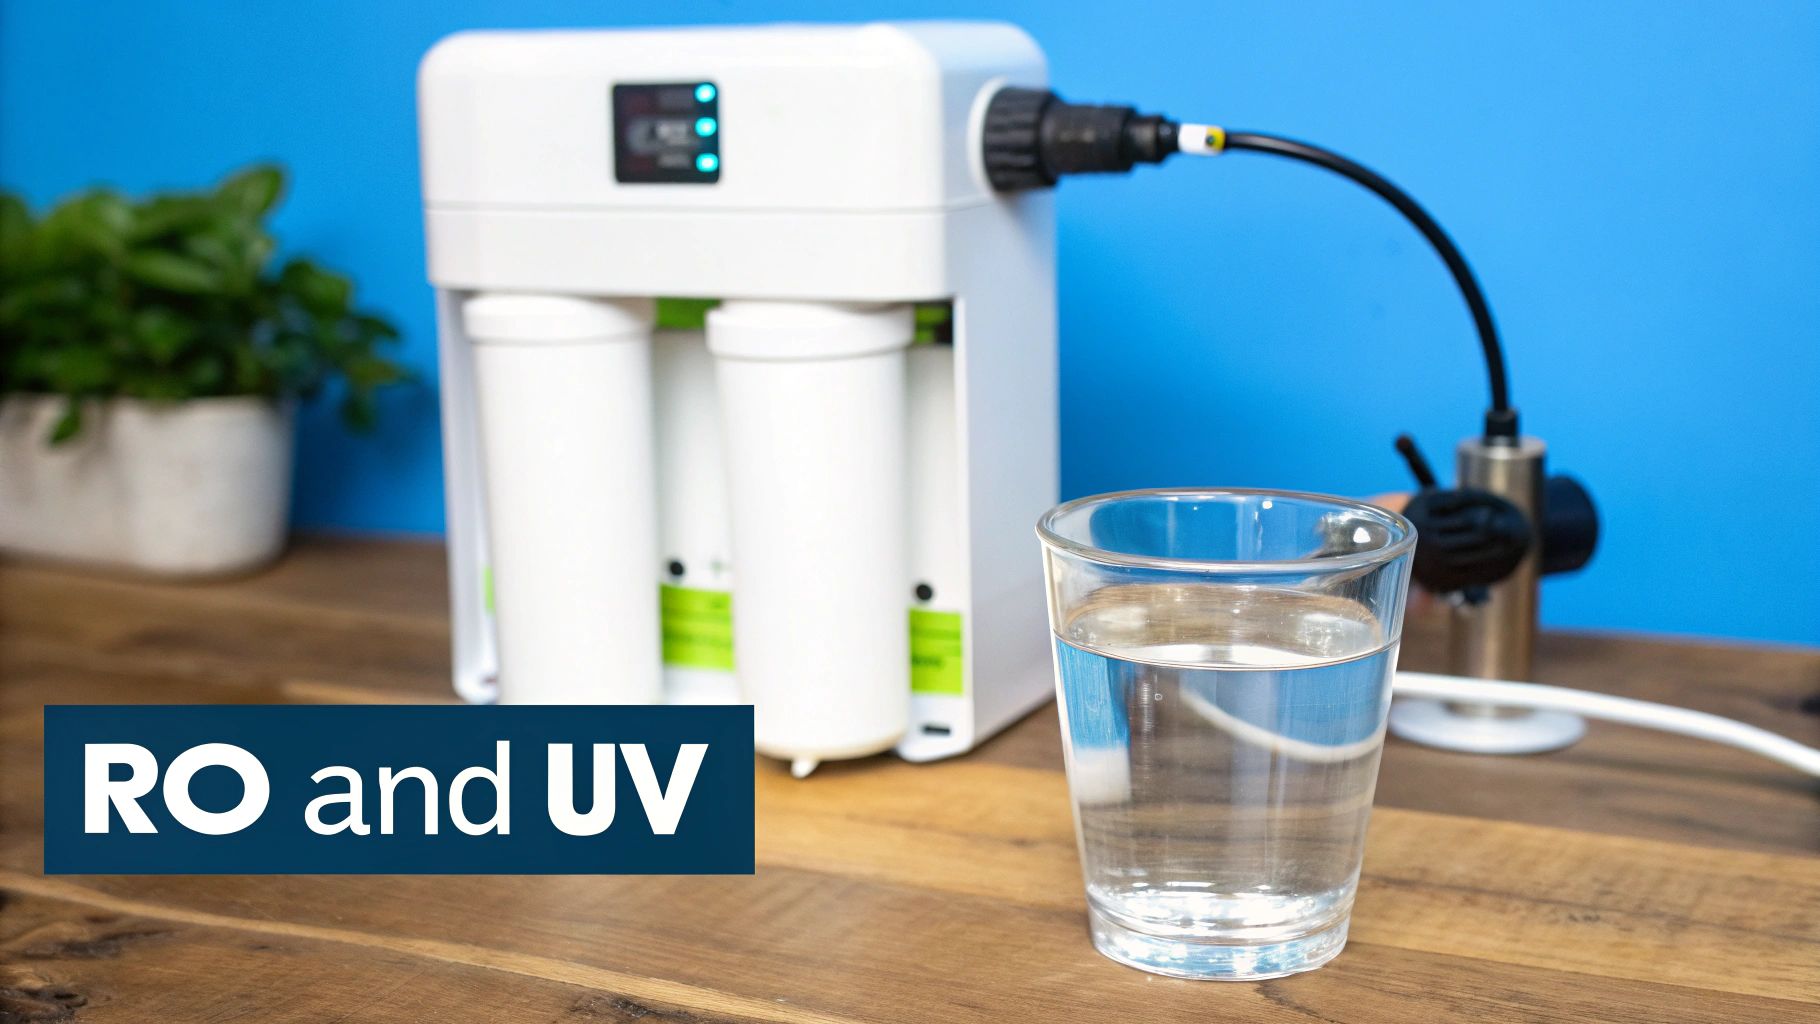
Whole-house or under-sink

A whole-house UV system treats incoming water for the entire home. That matters if you want every cold-water outlet covered, or if the concern is the source itself rather than one drinking tap.

An under-sink UV system is a narrower tool. It can be a practical fit for city water users who mainly want added protection for drinking and cooking water, or for homes where space and budget rule out a full point-of-entry install.

The better choice depends on risk and daily use, not just price. If the water source is questionable, treating one faucet leaves the rest of the house outside that protection.

Size for peak demand, not quiet-hour use

Sizing mistakes usually show up during busy household moments. One shower is running, a toilet refills, the washer starts, and someone opens the kitchen tap. That is the flow the UV unit has to handle.

UV is dose-based. As flow rises, contact time drops. In plain terms, water moving too fast through the chamber gets less exposure to the lamp. A unit that looks fine on paper can be undersized in real use if it was chosen around average consumption instead of simultaneous demand.

This is also where buyers miss the full-system cost. If the home needs better sediment reduction or carbon pre-treatment to support the UV chamber, the correct purchase is not just the UV unit. It is the UV unit plus the filter stages that keep it working as intended.

Understand Class A and Class B

Certification still matters, even if the labels are not always explained well in product listings.

Class A systems are intended for situations where microbiological safety is the main concern. Class B systems are typically used as an added measure on already potable water. For a homeowner, the practical takeaway is simple: if the source water itself may be unsafe, Class A is usually the category to look for first. If the goal is extra polish on treated city water, Class B may fit.

Do not treat those labels as marketing language. They describe different jobs.

A buying checklist that avoids expensive mistakes

Use this checklist before you order:

  • Test first: Confirm whether the problem is microbial, or whether sediment, iron, hardness, tannins, or chemicals also need treatment elsewhere in the system.
  • Match the unit to actual flow: Count fixtures that may run at the same time, not just your usual low-demand hours.
  • Choose the treatment scope: Whole-house for source-water protection across the home. Under-sink for one tap or a limited use case.
  • Confirm the certification class: Class A and Class B are not interchangeable.
  • Check pre-filtration needs: UV performs best when upstream filters are sized and maintained properly.
  • Leave room for service: Lamp changes and sleeve cleaning are routine ownership tasks, so cramped installs become expensive installs.
  • Price the full lifecycle: Include the lamp schedule, sleeve replacement risk, quartz cleaning, and any sediment or carbon cartridges the system depends on.

If you are still comparing treatment paths, these home water filtration advice resources can help you sort out where UV fits. You can also find your ideal water purification system if you are weighing UV against broader whole-home treatment setups.

Installation Tips and Lifetime Ownership Costs

A UV system usually succeeds or fails long before the first lamp change. The deciding work happens at installation. A well-sized unit, placed in the right spot with enough room to service it, tends to be quiet and dependable. A cramped install with weak pre-filtration turns routine maintenance into a recurring headache.

Set UV at the end of the treatment train, after sediment filtration and after any other treatment stages that can add debris or cloudiness. UV light only disinfects what the light can reach. If the water carries silt, rust, or other suspended material, some microbes can pass through shaded from the lamp, like sunscreen for microbes.

Where installation usually goes right or wrong

Placement is only part of the job. Service clearance matters just as much.

Leave enough straight space to remove the lamp and quartz sleeve without cutting pipe or unmounting the chamber. I have seen solid UV units installed so tightly against a wall joist that a simple lamp swap turned into a plumbing call. That is avoidable. Check the manufacturer's clearance requirements before the unit is mounted, not after.

Flow rate is the other common mistake. UV works on contact time. If the home can demand more water than the chamber is rated to treat, exposure drops right when protection is needed most. Size for real peak use, such as showers, laundry, and kitchen demand happening together, not for the quiet hour when one faucet is running.

A few practical install habits also pay off over the full life of the system:

  • Add isolation valves and a bypass if the layout allows. This makes lamp or sleeve service much easier.
  • Protect the chamber with the right pre-filtration. Sediment control upstream usually does more for long-term UV performance than homeowners expect.
  • Install where status lights or the controller are easy to see. Hidden alarms get missed.
  • Avoid hard-to-drain locations if your area deals with freezing risk or seasonal shutdowns.
  • Check water conditions before finalizing the layout. Hardness, iron, and manganese often decide how often the sleeve needs attention.

The best UV install is the one that is easy to maintain a year from now, not just easy to pipe in today.

What ownership actually costs

The purchase price is only the front end of ownership. The true budget shows up in the annual lamp schedule, occasional sleeve replacement, electricity use, and the filters that protect the chamber.

Here is where the money usually goes:

  • Lamp replacement: UV lamps are consumable parts. Even when a lamp still glows, its disinfecting output drops with age, so replacement follows the manufacturer's schedule.
  • Quartz sleeve cleaning: Mineral scale, iron film, and fouling reduce how much UV reaches the water. Some homes need only occasional cleaning. Others need it as part of regular service.
  • Quartz sleeve replacement: Sleeves can crack during handling, become badly etched, or stay fouled enough that cleaning is no longer worth the effort.
  • Pre-filter cartridges: This is the cost many buying guides skip. If the UV unit depends on sediment or carbon stages upstream, those filters are part of the UV system's real operating cost.
  • Power use: UV systems run continuously in many homes, so they add a small but ongoing electrical cost.

This is why I tell homeowners to price the first three years, not just the box on the shelf. A cheaper unit with expensive lamps, awkward sleeve access, or fussy pre-filtration can cost more to live with than a better-designed system.

Maintenance mindset

UV ownership works best with a calendar, not guesswork.

Check the controller or indicator lights. Replace the lamp on schedule. Inspect the sleeve if your water has hardness or iron. If water quality changes seasonally, pay closer attention during those months. Homes on wells often see this more than homes on stable municipal water.

Treat UV like a safety device that needs routine attention. It functions discreetly, but only if the lamp is fresh, the sleeve is clear, and the water reaching the chamber has already been properly filtered.

Frequently Asked Questions About UV Water Purifiers

Some questions keep coming up because they sit right at the intersection of plumbing, water quality, and daily life. Here are the short answers homeowners usually need.

Quick answers that matter in practice

Question Answer
Does UV change the taste of water? Usually no. UV disinfects microbiologically, but it doesn't remove chlorine, minerals, or other compounds that affect flavor.
Can UV fix cloudy water? No. Cloudiness and suspended matter should be handled upstream with filtration.
Is UV enough for well water? Sometimes, but only when microbiological contamination is the main issue. Many wells also need sediment, iron, hardness, or other treatment stages.
Should UV go before or after other filters? Usually after them, as the final disinfection step.
Can I install UV under the sink instead of treating the whole house? Yes, if your goal is protected drinking and cooking water at one location rather than every fixture in the home.
If the lamp is glowing, is the system definitely working properly? Not always. Lamp output, sleeve condition, and flow conditions all matter.
Does UV remove lead or pesticides? No. Those require other treatment methods.
What's the biggest mistake homeowners make? Buying UV to solve every water problem, instead of using it for the specific job it's designed to do.

The best owner mindset

The happiest UV owners usually do three things well. They test their water before buying, they build the treatment system in the right order, and they treat maintenance as part of the purchase, not a surprise later.

That approach keeps expectations realistic. It also keeps the UV unit doing the one thing it's meant to do well.

Buy UV for microbiological protection. Buy other filtration stages for everything else.


If you're comparing filtration options or trying to build the right treatment train for your home, Water Filter Advisor is a practical place to start. It helps homeowners sort through whole-house filters, under-sink systems, replacement cartridges, certifications, and maintenance questions so you can choose a setup that fits your actual water problems, not just the marketing.

What Are Trihalomethanes in Water? A Home Filter Guide

You sit down with your annual water quality report, skim past the chemical names, and then one abbreviation grabs your attention: TTHM. It looks technical, a little ominous, and not at all homeowner-friendly.

That reaction is normal. You probably don't spend your weekends thinking about disinfection byproducts, chlorine chemistry, or vapor exposure from a hot shower. You just want to know whether your water is safe, what the term means, and whether you need a filter.

If you've been searching what are trihalomethanes in water, the short answer is this: they're chemical byproducts that can form after water is disinfected. The more useful answer is what they mean for your home, your family, and the type of filter that works. That's where things get practical.

That Funny Acronym on Your Water Report

You open your water report at the kitchen counter, spot TTHM, and suddenly a routine document feels a lot more personal. If you have kids, if you drink tap water, or if someone in your house takes long hot showers, that little acronym stops looking abstract very quickly.

Trihalomethanes, or THMs, are chemicals that can form after a water utility disinfects water. On many reports, you will see TTHMs, which means total trihalomethanes. That term is the combined measurement of the main THMs being tracked in the water supply.

TTHMs work like the total on a grocery receipt. You may buy four separate items, but the number that catches your eye is the combined cost at the bottom. A water report does the same thing by grouping four related chemicals into one total:

  • Chloroform
  • Bromodichloromethane
  • Dibromochloromethane
  • Bromoform

A lot of homeowners assume this kind of result means the treatment plant made a mistake. In reality, TTHMs usually show up because disinfection happened. Utilities use disinfectants such as chlorine or chloramine to reduce the risk from bacteria, viruses, and other pathogens. THMs are one of the byproducts that can form during that process.

That does not mean you should ignore the number.

The reason TTHMs matter in a home is broader than a glass of tap water. People often focus on drinking water first, which makes sense, but THM exposure can also happen when warm water turns them into vapor in a shower or bath. That detail changes the question from “Do I need a filter on my sink?” to “How much of my daily exposure happens throughout the house?”

Why the term sounds more confusing than it is

“TTHM” sounds technical because it is a lab and regulatory term. For a homeowner, the plain-English meaning is much simpler. It is a summary number used to show how much of these related disinfection byproducts are present together.

Water utilities monitor that total because regulators set limits for it. If you see TTHMs listed on a Consumer Confidence Report, you are looking at a standard water quality category, not some strange one-off contaminant that appeared out of nowhere.

Why homeowners pay attention

You are reading the report for one reason. You want to know whether this number calls for action in your home.

That is a reasonable question, especially because THM exposure is not limited to what you swallow. A pitcher filter may improve the water you drink, but it does nothing for the steam you breathe in during a hot shower or for the air released from bathwater. For households concerned about THMs, that full exposure picture often points toward whole-house treatment rather than a kitchen-only fix.

How THMs Get Into Your Water

Your water utility adds chlorine for a good reason. It kills bacteria, viruses, and other microbes that can make people sick as water travels from the treatment plant to your home.

THMs form because chlorine does not stop reacting once the germs are handled.

It also reacts with naturally occurring organic material already in the source water, such as decaying leaves, algae, and small bits of plant matter. That chemical reaction creates a group of compounds called disinfection byproducts. Trihalomethanes are one of the most common examples homeowners see on a water report.

A simple way to understand the chemistry

A helpful comparison is a treatment plant working with raw ingredients that are never perfectly clean. The utility needs to disinfect the water to make it safe, but the same chlorine can also combine with leftover organic material and create byproducts. In plain English, THMs are the unintended chemical leftovers from that safety step.

An infographic showing the five-step process of how trihalomethanes form in water supplies through chlorine and organic matter.

The four chemicals behind the name

The four primary THMs are:

  • Chloroform, often the dominant one
  • Bromodichloromethane
  • Dibromochloromethane
  • Bromoform

The exact mix changes from one water system to another. Source water matters. Treatment methods matter too. That is why two towns can both disinfect with chlorine and still end up with different THM profiles.

Why levels change through the year

THM levels can rise in summer and fall in cooler months because warmer water speeds up the reactions that form them. Time in the pipes matters too. The longer disinfected water sits in the distribution system, the more opportunity chlorine has to keep reacting with organic material.

Ohio Watersheds at Ohio State explains that trihalomethanes form when chlorine or chloramines react with naturally occurring organic matter, and notes that warmer conditions can increase formation. That same reference also describes treated-water concentrations reaching 189.52 μg/L, with chloroform as the dominant species in the research discussed there.

Utilities may also see temporary increases after repairs, water main breaks, or periods when they raise disinfectant levels to control microbial risk. From a public health standpoint, that tradeoff makes sense. For a homeowner, it helps explain why THM levels are not always static.

This matters for more than drinking water. Once THMs are in the water, they do not stay limited to your kitchen tap. Warm water in showers and baths can release some of them into the air, which is one reason a sink filter may address only part of your household exposure.

Health Risks of Trihalomethane Exposure

A homeowner usually notices THMs on a water report long before they notice any symptom. That is part of what makes this topic confusing. The main concern is not a one-time exposure. It is repeated exposure over many years.

Health agencies have linked long-term exposure to high trihalomethane levels with a higher risk of bladder cancer. Researchers have also examined possible links to colon and rectal cancers, along with developmental effects during pregnancy. In plain terms, THMs are less like an immediate poison and more like a low-level stressor your body would rather avoid over time.

A hand holding a glass of clear water with bubbles against a blurred indoor background.

The safety benchmark homeowners should know

The EPA limit for total trihalomethanes, often listed as TTHMs on a water report, is 80 micrograms per liter. That number is the reference point utilities use to show whether their system is staying within federal standards.

For a homeowner, that limit is best understood as a warning line, not a comfort guarantee. A water system can meet the legal standard and still leave you wanting lower exposure in your own home, especially if your family takes long hot showers, has small children, or already uses filtration for other contaminants.

How to interpret the risk without panic

It helps to separate two questions that often get mashed together.

First, why is chlorine used at all? Because disinfected water protects households from bacteria, viruses, and other microbes that can cause immediate illness. Second, why pay attention to THMs? Because the same disinfection process can leave behind byproducts that raise concern over the long run.

A simple analogy helps here. Chlorine works like a strong cleaning tool that does an important job, but the cleanup process can leave residue behind. THMs are part of that residue. The practical goal at home is to keep the protection from disinfection while reducing your contact with the leftover byproducts.

Why this section matters for the rest of your house

Many homeowners hear "health risk" and think only about the glass in their hand. That is only part of the picture.

THMs can enter the body through drinking water, through the skin, and through the air once warm water releases them indoors. That airborne route is one reason families concerned about THMs often end up looking beyond sink filters and start thinking about whole-house treatment and even improving indoor air quality in Tucson.

The practical takeaway is simple. Repeated high THM exposure deserves attention, and the complete exposure picture goes beyond what you drink at the kitchen tap.

The Hidden Risk From Your Shower and Bath

It is often assumed that water exposure starts and ends with what one drinks. For THMs, that’s an incomplete picture.

These compounds are volatile, which means they can move from water into air. In a hot shower or bath, that matters. The steam in the room isn't just warm moisture. It can also carry vaporized THMs, which you then breathe in, and your skin is in contact with the water the entire time.

A close-up view of a shower head releasing hot water spray with visible steam in a bathroom.

Why the bathroom changes the equation

A kitchen filter only treats the water you drink or cook with. It does nothing for steam rising off a shower head.

That’s the blind spot with THMs. The Nova Scotia overview on THMs states that, due to their volatility, dermal and inhalation exposure during showering and bathing can result in “significantly higher” blood concentrations than ingestion alone. The same reference also notes that human bladder cancer risk rises by 59% at exposures greater than 50 ppb via all routes, citing the WHO.

For homeowners, the message is straightforward. If your concern is THMs, an under-sink filter solves only part of the problem.

What this means for filter choice

Filtration strategy requires more serious consideration.

A pitcher filter or faucet filter may help reduce what ends up in your glass. But if your family takes long showers, bathes children nightly, or spends a lot of time in steamy bathrooms, your exposure isn't limited to drinking water. That's why many households end up looking beyond point-of-use systems.

Three common approaches make sense:

  • Shower filter for renters or single-bathroom homes that want a quick improvement at one fixture
  • Under-sink system for households focused mainly on drinking and cooking water
  • Whole-house carbon filtration for homes that want to reduce THM exposure across taps, tubs, and showers

The bathroom air piece is often overlooked in broader home health conversations too. If you're already thinking about reducing airborne chemical exposure indoors, this guide on improving indoor air quality in Tucson is a useful companion read because it helps connect water-related vapor exposure with the bigger indoor air picture.

A short explainer may help you visualize why shower exposure matters:

The strongest case for whole-house filtration

If a contaminant stays mostly in cold drinking water, a kitchen filter can be enough. THMs don't behave that way.

They move through the entire house. They can affect the water you drink, the water your kids bathe in, and the air in the bathroom during a hot shower. That doesn't mean every home needs the biggest system available. It does mean your filter decision should match your exposure pattern, not just your water bottle filling routine.

A THM problem is often a whole-home exposure problem disguised as a drinking water problem.

How to Test Your Water for THMs

Testing for THMs is one of those jobs where the smartest first step is usually free. Before you buy any gear, look up your local utility’s Consumer Confidence Report and find the TTHM entry.

That report gives you the official compliance picture. It won't answer every question, but it tells you whether your system has reported TTHMs near or above the regulatory threshold and whether there have been recent issues in the distribution system.

Start with the water report

Look for terms such as TTHM, Total Trihalomethanes, running annual average, or individual sampling site results. If the numbers feel abstract, compare them to the EPA benchmark already discussed earlier.

This step is especially important because THM levels are not consistent from place to place. Research summarized in the PMC report on geographic and seasonal variation notes that some U.S. cities have recorded levels over 300 ppb, nearly four times the EPA limit in that context, and identifies Louisiana, Oklahoma, and Texas as the states with the highest number of cities facing contamination issues among the most-affected municipalities studied.

Use a home kit for a snapshot

If you want a faster, more immediate sense of your household water, a home testing kit can help. The key word is snapshot.

A kit is useful when:

  • You want current conditions, not last year’s utility average
  • Your water smells more chlorinated than usual
  • Recent repairs or flushing happened in your neighborhood

If you're comparing options, this overview of essential water quality tests gives a practical framework for deciding when an at-home screen is enough and when a lab test makes more sense.

Get a certified lab test when the decision matters

If you’re about to invest in a whole-house system, or if your utility report leaves you uneasy, a state-certified laboratory gives you the clearest answer. That’s the route I’d take if the result will affect a major filter purchase.

Timing matters too. Seasonal variation can change your results. Some systems peak in warmer summer months, while others can spike in colder periods depending on local conditions, treatment practices, and infrastructure patterns, as noted in the earlier PMC source. If your area has a history of higher readings, testing once during a lower period may give you false confidence.

A simple testing plan works well for most homeowners:

  1. Read the CCR first for the official baseline.
  2. Use a home kit if you want a household-level snapshot.
  3. Confirm with a lab before spending serious money on a treatment system.

Your Complete Guide to Removing THMs

Removing THMs gets easier once you match the filter to the way your family uses water.

If your only goal is better-tasting drinking water, a kitchen filter may be enough. If your concern includes long showers, hot baths, and steamy bathrooms, the answer often shifts toward whole-house treatment because THMs are part of your water use beyond the glass.

Activated carbon is the main tool homeowners use for THM reduction. It works like a sponge with millions of tiny pores. As water moves through that carbon, THM compounds stick to the surface instead of continuing on to the tap, showerhead, or tub faucet.

Performance depends on design details. Carbon type, contact time, flow rate, cartridge size, and replacement schedule all affect results. The performance of a tiny, uncertified cartridge is not comparable to a properly designed carbon block or GAC system.

Why certification matters

Marketing language can make weak products sound capable. For THMs, the shortcut is simple. Look for a clear claim for THM reduction and check whether the system is certified to NSF/ANSI 53 for that purpose.

That label matters because THM reduction is more specific than basic taste-and-odor improvement. Some filters are built mainly to reduce chlorine or improve flavor, which can leave homeowners assuming they solved a bigger problem than they did.

For practical help comparing filter types, installation limits, and upkeep, the articles in Water Filter Advisor’s water treatment advice library can help you narrow the options.

Comparing THM Water Filtration Methods

Filter Type THM Removal Effectiveness Average Cost (System and Annual) Best For
Pitcher with activated carbon Can help, but capacity and contact time are limited Varies by brand and cartridge schedule Renters, low-commitment trial use
Faucet-mounted carbon filter Covers one tap and offers moderate improvement when certified for THM reduction Varies by model and replacement interval Small households focused on kitchen tap water
Under-sink carbon system Strong option for drinking and cooking water Higher than faucet or pitcher systems Homeowners who want dedicated kitchen treatment
Shower filter with carbon media Can reduce exposure at one shower, but only at that fixture Varies by cartridge life and design Renters or homeowners focused on one bathroom
Whole-house GAC system Treats water before it reaches taps, showers, and tubs Highest upfront and maintenance commitment Families addressing whole-home THM exposure

Which option makes sense for your home

A pitcher or faucet unit can be reasonable if you rent and your main concern is drinking and cooking water. An under-sink system makes more sense if your household uses a lot of kitchen water and you want longer contact time with better filter media.

A shower filter can help in one bathroom, especially when a whole-house install is not realistic. But it does not address the rest of the home. You still have untreated water at other showers, bath faucets, and taps.

Whole-house GAC deserves a close look when your concern includes inhalation and skin contact during bathing. That setup treats the water before it spreads through the house, which gives you broader coverage where THMs often get overlooked most.

One practical rule helps many homeowners: if the contaminant matters in steam and vapor, not just in a glass, point-of-use drinking water filters only solve part of the problem.

Maintenance decides whether a good system stays good. Carbon has a working life. Once it is spent, removal drops off, so follow the replacement schedule, keep a simple service record, and choose a system you will realistically maintain.

Frequently Asked Questions About THMs

Does boiling water remove trihalomethanes

Boiling isn’t my first recommendation for THMs. Because these compounds are volatile, heating water changes how they behave, and boiling also reduces the volume of water left in the pot. That can make DIY “fixes” unreliable for household treatment.

For THMs, a properly selected activated carbon filter is the more practical home solution.

Are Brita-style or refrigerator filters enough

Sometimes, but not automatically. The deciding factors are the filter media, the size of the cartridge, and whether the product is certified for THM reduction under NSF/ANSI 53. Some basic refrigerator filters focus more on taste and odor than on broad contaminant reduction.

Read the spec sheet, not just the box front.

Do private well owners need to worry about THMs

Usually, THMs are more closely associated with disinfected water supplies, especially municipal systems that use chlorine or chloramines. If a private well isn't being chemically disinfected, THMs are often less central than issues like bacteria, iron, sulfur odors, or nitrate.

But if well water is chlorinated for treatment or shock disinfection, byproducts can become part of the conversation.

Should I buy a shower filter or a whole-house filter

That depends on your housing situation and how complete a solution you want.

A shower filter makes sense when installation needs to be simple or temporary. A whole-house carbon system makes more sense when you want one approach for showers, baths, sinks, and appliances. If your concern is what are trihalomethanes in water and how do I reduce my family’s overall exposure, whole-house treatment is usually the most complete answer.

What’s the smartest first move

Check your water report, then decide whether you need a home test or lab confirmation. Don’t buy filtration based on fear alone, but don’t ignore a pattern of high TTHMs either.

The best filter decisions come from matching the contaminant, the exposure route, and the home setup.


If you’re ready to compare practical filtration options without the jargon, Water Filter Advisor can help you sort through whole-house, under-sink, faucet, shower, and portable filters so you can choose a system that fits your water and your home.

Water Filter Coliform: Your Ultimate Guide to Safe Drinking Water

Discovering coliform bacteria in your water is like finding a stranger in your house—it's a sign something is seriously wrong with your security. But don't panic. A good water filter for coliform is the best home security system you can buy for your tap water. Technologies like Ultraviolet (UV) light, Reverse Osmosis (RO), or ultrafiltration are incredibly effective at either physically removing these unwanted guests or zapping them into oblivion.

While most coliforms won't harm you, their presence is a giant red flag. It’s your water’s way of screaming that a barrier has been breached, leaving a wide-open door for truly nasty pathogens like E. coli to waltz right in. A certified water filter acts as your home's personal bodyguard, ensuring that what comes out of your faucet is safe and clean, every single time.

What Are Coliform Bacteria in Your Water?

Think of coliforms as nature’s alarm system for your water. Their discovery in a water test is like the check engine light suddenly flashing on your car's dashboard.

The light itself isn't the problem, but it’s telling you something under the hood is seriously wrong. In the same way, most coliform bacteria are harmless, but their presence is a clear signal that the safeguards protecting your water have failed. It means a door has been left open for more dangerous germs to sneak into your pipes.

The Different Types of Coliform Bacteria

When you get a water test report back, you'll likely see a few different names. Understanding what they mean helps you gauge the real risk to your family. Water quality experts break them down into a few key groups, each telling a piece of the story.

There are three main categories you need to know:

  • Total Coliforms: This is a huge, diverse group of bacteria that are all over the place in nature—in soil, on plants, and in lakes and rivers. Finding them in your water suggests that surface contaminants have somehow seeped into your system, but it doesn't automatically mean it's from a hazardous source.
  • Fecal Coliforms: Now we're getting more specific. This is a sub-group of total coliforms, and they come from one place: the intestines and waste of warm-blooded animals (including people). Discovering these is a much more serious warning that your water has been contaminated by sewage or animal feces.
  • Escherichia coli (E. coli): This is the one everyone's heard of. As the most well-known member of the fecal coliform family, finding E. coli is the smoking gun for recent fecal contamination. Certain strains can cause violent gastrointestinal illness, so a positive test requires immediate action.

The U.S. Environmental Protection Agency (EPA) has a zero-tolerance policy for E. coli in drinking water. A single positive sample is considered a violation of safety standards and requires immediate notification and corrective action to protect public health.

Why They Are Called Indicator Organisms

So, why not just test for the dangerous germs directly? Because testing for every single waterborne virus and bacteria out there would be outrageously complicated and expensive. Instead, labs look for coliforms because they're common and easy to find.

They are called indicator organisms for a reason. If these widespread bacteria are present, it’s a powerful sign that the protective barriers around your water source—whether that’s the city treatment plant or your private well casing—have been compromised.

This failure means that the really bad stuff like Giardia, Cryptosporidium, and harmful E. coli strains could have slipped in, too. Coliforms are the canary in the coal mine, warning you of potential danger before anyone gets sick.

How Bacteria Get Into Your Home's Water

It's a bit unsettling to think about, but invisible bacteria can find a way into the water you drink every day. How they get there is a different story depending on where your water comes from—a private well or your city’s municipal supply.

But the core problem is always the same: a tiny breach is all it takes for contamination to start. Think of it like a fortress. Your water system is designed to be sealed and secure, but even the smallest crack in the wall can let intruders in. Figuring out where those weak points are is the key to defending your water with the right filter.

Why Private Wells Are So Vulnerable

If you have a private well, you're the one in charge of security. It's your responsibility to guard against contamination, which means you need to know where to look for trouble. It’s a lot like maintaining the roof on your house; a small, hidden leak can go unnoticed for a long time while causing serious damage.

Most well contamination happens quietly, out of sight.

  • A Broken Seal: A cracked well casing or a loose, improperly sealed well cap is like leaving your front door wide open. Rainwater washes over the ground, picking up bacteria from the soil, and funnels it straight into your well.
  • Nearby Farms: Living in a rural area has its perks, but nearby agricultural activity can be a risk. Runoff from fields treated with manure or fertilizers can soak into the ground, eventually making its way into the aquifer that feeds your well. This risk skyrockets after heavy rain.
  • Bad Septic Systems: A failing septic system—or even a perfectly good one that’s just too close to your well—can leak raw sewage into the surrounding soil. From there, it’s a short trip for dangerous stuff like fecal coliforms and E. coli to migrate through the ground and into your drinking water.

Studies on private wells have shown a direct link between septic systems and water quality. Wells located within 100 feet of a septic drain field were found to be far more likely to test positive for total coliforms and E. coli.

How City Water Can Go Wrong

You’d think being on city water means you’re in the clear, right? While it’s true that municipal water gets treated at a central plant, it still has to travel miles through a massive network of underground pipes to reach your home. And sometimes, that aging infrastructure is where the problems begin.

Picture the city's water main like a major highway. Most of the time, everything runs smoothly. But one bad accident can cause a massive pile-up and create unexpected problems for miles.

Here are the most common ways city water gets contaminated:

  • Old, Crumbling Pipes: Many American cities are relying on water pipes that were put in the ground before your grandparents were born. Over decades, these pipes corrode, rust, and develop cracks. Those cracks become entry points for contaminated groundwater to get sucked into the system.
  • Water Main Breaks: This is the most dramatic failure. When a large water main bursts, the pressure is lost instantly. As water rushes out, a vacuum is created, pulling in surrounding dirt, mud, and bacteria right into the clean water line.
  • Sudden Pressure Drops: You don't need a full-blown break for things to go wrong. A significant drop in pressure—maybe from firefighters hooking up to a hydrant or heavy use in one area—can cause the same vacuum effect. This "negative pressure" can slurp contaminants into the pipes through tiny, pre-existing cracks.

Whether you're on a well or city water, it's clear that contamination can happen. This is exactly why a good water filter for coliform is so important. It acts as your last line of defense, protecting you and your family right at the tap.

The Most Effective Coliform Removal Technologies

Finding out you have coliform bacteria in your water is alarming, but the good news is there are proven, reliable ways to get rid of them. Choosing the right water filter for coliform means understanding how these different systems work to protect your family. Each one tackles bacteria in a unique way, giving you a solid line of defense.

Think of it like hiring different kinds of security for your water supply. Some are like bouncers, physically blocking unwanted guests from getting in. Others are more like high-tech security systems, neutralizing threats before they can cause any harm. Let’s walk through the most effective options out there.

Ultraviolet Purification: A Sunburn for Microbes

One of the most powerful and popular methods for water disinfection is ultraviolet (UV) purification. A UV system doesn't actually remove bacteria from the water; instead, it zaps them and renders them completely harmless. It's basically a high-intensity, concentrated sunburn for microbes.

Here's how it works: your water flows through a chamber that houses a special UV lamp. This lamp emits intense ultraviolet light at a very specific wavelength (254 nanometers) that penetrates the cell walls of bacteria like coliform and E. coli and completely scrambles their DNA. This process, called ultraviolet germicidal irradiation (UVGI), makes it impossible for them to reproduce or make you sick.

One of the biggest wins for UV systems is that they purify water without adding a single chemical. That means the taste, smell, and color of your water don't change at all. You get powerful disinfection that neutralizes 99.99% of harmful bacteria and viruses while keeping your water's natural qualities intact.

Reverse Osmosis: The Nightclub Bouncer

If UV is the silent zapper, Reverse Osmosis (RO) is the exclusive nightclub bouncer with a list he checks twice. It's a physical filtration process that uses your home's water pressure to force water through a special membrane with ridiculously small pores—we're talking as tiny as 0.0001 microns.

This membrane is the ultimate gatekeeper. It's so selective that only pure H2O molecules are small enough to pass through. Everything else—bacteria, viruses, salts, heavy metals, and other contaminants—gets rejected and washed right down the drain. This is what makes RO systems so incredibly good at what they do.

This infographic shows just how easily both private wells and city water systems can get contaminated, which really drives home the need for a final barrier filter in your home.

Infographic detailing water contamination sources for private wells and city water, including septic systems and aging infrastructure.

Whether it’s a leaky well cap or a tiny crack in a city water main, these vulnerabilities show why having a filter at your home—either for the whole house or just at the kitchen sink—is a critical last line of defense.

Ultrafiltration: The Microscopic Net

Ultrafiltration (UF) is another highly effective physical barrier. The best way to picture a UF filter is as a microscopic net woven from thousands of tiny, hollow fibers. The pores in these fibers are bigger than an RO membrane's but still plenty small—around 0.02 microns—to physically block and trap bacteria, protozoa, and even some viruses.

Water is pushed through these hollow fibers, and while the clean water passes through, all the nasty stuff gets caught on the outside. Because UF doesn't remove dissolved minerals, it's a fantastic choice for people who want to keep the natural mineral content of their water while still getting total peace of mind from microbiological threats.

To help you figure out what’s best for your home, I've put together a table comparing these top technologies side-by-side.

Comparing Coliform Removal Technologies

This table compares the most effective water treatment methods for eliminating coliform bacteria, helping you choose the best fit for your home's needs and budget.

Technology How It Works Effectiveness on Coliforms Best For Typical Cost Key Maintenance
UV Purification Uses ultraviolet light to scramble bacterial DNA, preventing reproduction. Excellent (99.99% inactivation) Whole-house disinfection, especially for well water. $300 – $1,500 Annual UV lamp and quartz sleeve replacement.
Reverse Osmosis Forces water through a semipermeable membrane that blocks bacteria. Excellent (99.99%+ removal) Under-sink systems for drinking/cooking water. $200 – $600 Pre-filter changes every 6-12 months; membrane every 2-4 years.
Ultrafiltration Uses a hollow fiber membrane to physically block bacteria and viruses. Very Good (99.9%+ removal) Point-of-use or whole-house where mineral retention is desired. $250 – $1,200 Regular backwashing; cartridge replacement every 1-3 years.
Sub-Micron Filters Traps bacteria in a filter medium with a pore size of 0.2 microns or less. Good (for bacteria, not viruses) Portable filters, emergency use, or as a pre-filter. $50 – $200 Frequent cartridge replacement based on usage.

Each of these systems offers a rock-solid solution if you're dealing with coliforms. Your final decision will come down to things like your water source, how bad the contamination is, your budget, and whether you want to treat every drop of water in your house or just what comes out of the kitchen tap.

Choosing the Right Water Filter for Coliform

Now that you know which technologies can knock out coliform bacteria, how do you pick the right system for your home? Choosing the best water filter for coliform isn't about finding a single "magic bullet" product. It's about matching the right tool to the job, and that job looks very different depending on whether your water comes from the city or a private well.

Your entire decision boils down to one simple question: Are you adding a final line of defense against a potential municipal system failure, or are you building a complete bacterial shield for your own well water? Each scenario requires a totally different game plan.

Solutions for City Water Users

If you're on city water, your main worries are things like aging pipes, sudden water main breaks, or those dreaded boil water advisories. Your goal is simply to create a final, bulletproof barrier right where you use your water most. For this, a point-of-use system is almost always the most practical and effective way to go.

These systems treat the water at a single tap—usually the kitchen sink, where you get all your water for drinking and cooking.

  • Under-Sink Reverse Osmosis (RO) System: An RO unit tucked away under your kitchen sink is a fantastic final barrier. It doesn't just physically block bacteria; it also tackles a huge list of other common contaminants like lead, chlorine, and other dissolved solids.
  • Under-Sink UV Purifier: If your concern is purely microbiological, a dedicated UV system can be installed on the line to your main faucet. This guarantees that any stray bacteria that might have survived the trip from the treatment plant are zapped just seconds before the water hits your glass.

A More Robust Plan for Well Owners

For well owners, the game changes completely. The risk of contamination is much higher and can come from a number of sources. Since you are the sole manager of your water's safety from the ground up, a whole-house solution isn't just a good idea—it's the industry standard. This approach ensures every single tap in your home, from the kitchen to the bathroom shower, delivers microbiologically safe water.

A proper whole-house setup for well water is almost always a multi-stage process:

  1. Sediment Pre-filter: This is always step one. It catches all the dirt, sand, and rust particles. This isn't just for clean-looking water; it's critical because sediment can actually act like a shield for bacteria, protecting them from the UV light and making the whole system less effective.
  2. Whole-House UV Purifier: Right after the pre-filter, a powerful UV system acts as your primary microbiological defense, neutralizing 99.99% of bacteria and viruses as the water enters your home's plumbing.

As you weigh your options, it helps to understand the pros and cons of different types of filtration systems to make a truly informed choice.

Decoding Certifications: Your Seal of Approval

So, how can you be sure a filter actually does what the box says it does? You look for certifications from NSF International (which used to be called the National Sanitation Foundation). Think of an NSF seal as a stamp of approval from a trusted, independent third party that has rigorously tested and verified a product’s claims.

A sobering 2014 global assessment found that 1.8 billion people around the world depend on drinking water sources contaminated with fecal matter. That staggering number is a stark reminder of why a final barrier is so important, even on treated city water where old, cracking pipes can let contaminants back in.

When it comes to bacteria, two standards are absolutely essential:

  • NSF/ANSI 55 (Ultraviolet Microbiological Water Treatment Systems): This standard is broken into two tiers. Class A systems are certified to disinfect water, removing microorganisms like bacteria and viruses, which makes them suitable for treating contaminated water. Class B systems are only certified for "supplemental" treatment on water that's already considered safe, like public tap water.
  • NSF/ANSI 58 (Reverse Osmosis Drinking Water Treatment Systems): This certification confirms that an RO system is effective at reducing a broad spectrum of contaminants, including cysts, which are even larger than bacteria.

Choosing a certified product gives you peace of mind, knowing your investment is backed by real science and independent testing. For more in-depth guidance on finding the perfect system, be sure to check out our extensive advice on water filters.

Your Action Plan for Contaminated Water

Getting a water test back positive for coliform bacteria is definitely jarring. It's okay to feel a moment of shock, but don't panic. Think of it as a clear signal that it's time to take action. With a simple, methodical plan, you can tackle the problem head-on and make your home's water safe again.

We'll break this down into a calm, four-step drill for your water supply: Test, Isolate, Treat, and Retest. Following this process turns a moment of uncertainty into a clear path forward, giving you total control over the health and safety of your family.

Step 1: Confirm the Problem with Testing

First things first, let's make sure we know exactly what we're dealing with. A single positive test is a big red flag, but getting a second, follow-up test from a state-certified lab is absolutely critical. This confirms the initial findings and makes sure you aren't about to spend time and money chasing a false positive.

Your local health department can point you to a list of certified labs in your area. When you collect the sample, follow the lab's instructions to the letter. It’s surprisingly easy to accidentally contaminate the sample from your hands or the faucet, which can completely throw off the results. An accurate diagnosis is the bedrock of an effective solution.

Step 2: Isolate and Protect Your Household

While you're waiting for confirmation or figuring out a treatment plan, your number one priority is protecting everyone in your home. This means immediately stopping the use of your tap water for anything that involves consumption.

Put these safety measures in place right away:

  • Switch to Bottled Water: Use it for everything—drinking, cooking, making ice, and brushing teeth. No exceptions.
  • Issue a Household "Boil Water" Notice: For tasks like washing dishes or rinsing produce, bring a pot of water to a rolling boil for at least one full minute, then let it cool before using. This is a tried-and-true method for killing harmful bacteria.

Taking immediate protective steps is non-negotiable. A positive coliform test means there's a breach in your water's safety barrier. Temporary measures like boiling water are your essential first line of defense until a permanent fix is in place.

Step 3: Treat the Contamination

Now it's time to put a permanent solution in motion. This is where you choose and install the right water filter for coliform based on the technologies we've already covered, whether that's a whole-house UV purifier or an under-sink reverse osmosis system.

The best system for you really depends on your water source and how bad the problem is. A home with well water that has persistent coliform issues, for instance, is a prime candidate for a robust whole-house UV system paired with a sediment pre-filter. That combination ensures effective, long-term disinfection.

Beyond just filters, you need an immediate action plan, especially if you're dealing with a major contamination event. For instance, homeowners facing a worst-case scenario should consult an essential guide to sewage damage clean up to understand the much bigger steps required for severe situations.

Step 4: Retest to Verify the Solution

You've installed your new filtration system and it's up and running. Great! But you're not done just yet. The final, crucial step is to close the loop and verify that your solution actually worked. Wait a few days to a week after installation, then take another water sample and send it back to that certified lab.

This retest is your proof of success. A negative result for both coliform and E. coli is the official all-clear, confirming that your new filter has knocked out the threat and your water is safe to drink again. This final step is what turns a stressful situation into lasting peace of mind.

Maintaining Your Filter for Long-Term Safety

A person's hands are replacing a new water filter cartridge under a kitchen sink, with tools nearby.

Getting a high-quality water filter for coliform installed is a massive step toward making your home's water safe. But the job isn't done. Think of it like a performance car—it needs regular oil changes and tune-ups to keep running like it should.

Consistent maintenance is the single most important thing you can do to make sure your filter keeps protecting your family. A neglected system doesn't just stop working; it can actually become a breeding ground for bacteria, completely undoing all your hard work and investment.

Creating a Practical Maintenance Schedule

The real secret to long-term safety is consistency. Just follow the manufacturer's recommended schedule. It takes all the guesswork out of the process and keeps your system in peak condition. Different filters have different needs, but the basic rhythm of care is usually the same.

Think of your maintenance plan as a roadmap to safe water. It's what ensures every part of the system is doing its job, providing that critical barrier against coliforms and other nasty stuff.

Your schedule should include a few non-negotiable tasks:

  • Pre-Filter Swaps: If your system has sediment pre-filters, these are your first line of defense. They usually need to be replaced every 3 to 6 months. This prevents clogs that tank your water pressure and protects the more sensitive parts of your system down the line.
  • UV Lamp Replacement: The UV lamp is the heart of a UV purification system. It might still light up after a year, but its germ-killing power drops off a cliff. Swapping it out annually is non-negotiable if you want to be sure it’s actually neutralizing bacteria.
  • System Sanitization: Every so often, you need to flush and sanitize your system, especially if it's a reverse osmosis unit. This simple step prevents biofilm from building up and keeps everything clean and effective.

Here's something most people don't know: neglecting filter changes can lead to a problem called "channeling." This is where water literally carves a path around an old, clogged filter instead of passing through it. Contaminants, including bacteria, get a free pass right into your tap. It creates a completely false sense of security.

How to Spot Early Signs of Trouble

Beyond your regular schedule, you need to learn to spot the warning signs that your system needs attention. Catching these things early can stop a small problem from becoming a total failure.

These are the clues your system is asking for a check-up:

  • A Sudden Drop in Water Pressure: This is usually the first and most obvious sign of a clogged filter. If your showerhead starts trickling or your faucets are running slow, it's a dead giveaway that your sediment or carbon pre-filters are maxed out and need to be replaced.
  • Warning Lights or Alarms: Modern UV systems have sensors that watch the lamp's performance. If you see an indicator light or hear an alarm, it means the lamp is no longer effective. It needs to be replaced immediately to ensure disinfection is actually happening.
  • Changes in Water Taste or Odor: Remember that "off" taste or smell that your filter got rid of? If it suddenly comes back, that's a clear sign the filter media (like activated carbon) is spent and can no longer do its job.

Staying on top of this routine maintenance is what turns your water filter from a simple appliance into a reliable, long-term health investment. A well-maintained system gives you the peace of mind that every single drop of water from your tap is as safe as it can possibly be.

Got Questions About Coliform Filters? We've Got Answers.

When you're dealing with something like bacterial contamination in your water, you're bound to have questions. Finding the right water filter for coliform means getting clear, no-nonsense answers to protect your family's health.

Let's cut through the jargon and tackle the most common things homeowners ask when that water test comes back positive.

Will a Brita Pitcher Get Rid of Coliform Bacteria?

No, a standard pitcher filter like a Brita won't touch coliform bacteria. These filters are great for what they're designed for—using activated carbon to make your water taste and smell better by removing things like chlorine.

But their filter pores are way too big to catch microscopic bugs like bacteria. For something that small, you need a certified purification system—think UV, reverse osmosis, or an ultra-fine absolute filter that's specifically built to stop pathogens in their tracks.

How Often Should I Test My Well Water for Coliforms?

For private well owners, testing for total coliforms and E. coli at least once a year is non-negotiable. Think of it as your annual safety check-up.

You'll also want to test your water immediately if certain situations pop up:

  • After a flood or any significant ground disturbance near your wellhead.
  • If you notice any change in your water’s taste, odor, or color.
  • Anytime your well has been repaired or you've had the pump replaced.
  • If anyone in the house has unexplained stomach or gut issues.

Is Shocking My Well with Chlorine a Permanent Fix?

Shock chlorination is a powerful tool, but it's a temporary one. It’s like hitting a reset button—it wipes out the immediate bacterial problem that’s already in your well.

Think of shock chlorination as a one-time deep clean. It sanitizes the well but doesn't fix the leaky window that let the germs in.

The problem is, it doesn't plug the hole that let the bacteria in to begin with. If you have a cracked well casing or a faulty seal, the coliforms will be back. A permanent water filter for coliform, like a whole-house UV purifier, is what provides that constant, 24/7 protection against whatever might get in down the road. It’s the long-term solution, not just a quick fix.


At Water Filter Advisor, we're here to help you find the right filtration solution to keep your family's water safe. For more deep-dive guides, product reviews, and expert advice, come see us at https://www.waterfilteradvisor.com.

A Homeowner’s Guide on How to Remove Arsenic from Well Water

So, you've discovered you might have a sneaky, unwanted guest in your well water: arsenic. Take a deep breath. This is a common issue for well owners and, more importantly, a solvable one. But because arsenic is the ultimate ghost—tasteless, odorless, and invisible—guessing isn't an option. The first, non-negotiable step is a professional water test.

This isn't just about getting a "yes" or "no" on arsenic. It's about getting a detailed profile of the specific type of arsenic in your water so you can choose a filtration system that will actually trap it.

Many well owners are surprised to learn they're not alone. The U.S. Geological Survey found that about 7% of private wells they studied had arsenic levels above the EPA's safety limit of 10 micrograms per liter (µg/L). That's a lot of households staring down the same problem.

Why Your Neighbor’s Water Report Means Nothing for You

Here’s a classic mistake: assuming your water is fine because your neighbor's test came back clean. This is like assuming you don't need glasses because your friend has 20/20 vision.

Arsenic leaches into groundwater from surrounding rocks and soil. Its presence can vary wildly from one property to the next based on local geology and water chemistry. Your well could be just a few hundred feet from your neighbor's and have a completely different arsenic profile.

Don't gamble with your family's health. Testing your own well is the only way to know for sure what's coming out of your tap.

The whole process is pretty straightforward, from grabbing a sample to getting the lab results you need to make a smart decision.

A flowchart illustrating the well water testing process, showing steps for sample collection, lab testing, and results.

As you can see, getting that certified analysis is the critical step that tells you exactly what you're up against.

The Two Faces of Arsenic: Arsenic III vs. Arsenic V

Your lab report is the key that unlocks the right solution, and one detail is more important than any other: the form of arsenic you have. Arsenic shows up in two main "flavors" in well water, and they require totally different filtration game plans.

  • Arsenic-V (Arsenate): This is the "oxidized" form. Think of it as having a magnetic charge, which makes it easy for filtration systems like reverse osmosis and adsorptive media to grab onto and yank out of your water.
  • Arsenic-III (Arsenite): This form has no charge, making it super slippery and much harder for most filters to catch. It's the more toxic of the two and a true escape artist.

If your test shows a lot of Arsenic-III, a standard filter won't do the trick. The arsenic will just slide right through. You'll need an extra pre-treatment step—like an oxidation system—to convert the tricky Arsenic-III into the more manageable Arsenic-V before it ever reaches your main filter.

Key Takeaway: Knowing the specific type of arsenic in your well is non-negotiable. An effective filtration strategy depends entirely on targeting the correct form of the contaminant, which is why a comprehensive lab test is the essential first step.

Trying to decipher a water test report can feel like learning a new language. Getting some professional input can make all the difference in matching the right technology to your specific water profile. For more general insights, you can explore expert advice on a variety of water quality topics to make sure you’re not just buying a filter, but a real solution.

Comparing The Best Arsenic Removal Systems

With your lab results in hand, you’re ready to choose your defense against arsenic in your well water. This isn’t about picking the fanciest or most expensive filter; it’s about selecting the right technology for your specific water chemistry and your family’s needs.

Let's break down the heavy hitters in home water filtration to see how they stack up.

A technician tests private well water outdoors, holding a sample bottle and clipboard with a "TEST YOUR WELL" sign.

The three main technologies you'll encounter are Reverse Osmosis (RO), Adsorptive Media, and Anion Exchange. Each has its own superpowers, so knowing the difference is the key to making a confident choice.

Reverse Osmosis: The Precision Approach

When you want the absolute highest level of purity for drinking water, reverse osmosis is the gold standard. Think of it as a microscopic bouncer at the club door for your water. It uses an ultra-fine membrane to force pure water molecules through while leaving nearly everything else—including arsenic—behind. This method is incredibly effective, especially against the easier-to-remove Arsenic-V.

You’ll most often find RO systems as Point-of-Use (POU) units that fit neatly under the kitchen sink. This makes them a fantastic, budget-friendly way to guarantee your drinking and cooking water is pristine. You get a dedicated faucet that delivers highly purified water right where you need it most.

But this precision comes with a trade-off. RO systems create wastewater (often called brine) that carries away all the concentrated contaminants. For every gallon of pure water you get, several gallons are typically flushed down the drain. This is a key consideration if you're on a sensitive septic system or focused on water conservation.

Expert Insight: While whole-house RO systems exist, they're usually overkill for residential use. Their high water waste and energy demands make them impractical and expensive for most homeowners. An under-sink RO for drinking water is almost always the more practical and cost-effective route.

Adsorptive Media: The Whole-House Workhorse

If you need to treat all the water coming into your home, adsorptive media is often the champion. These systems use a specialized filter material, usually an iron-based media, that acts like a magnet for arsenic. As your water flows through the media tank, arsenic particles literally stick to the surface and are trapped.

The biggest advantage here is its effectiveness for Point-of-Entry (POE), or whole-house, applications. An adsorptive media system protects every single tap in your house, from the shower to the washing machine. It also doesn't produce any wastewater like an RO system, which is a huge bonus.

The main consideration is that the filter media is a consumable. Once it’s saturated with arsenic, it has to be replaced. How often you'll need to do this depends on your water usage and arsenic levels, so be sure to factor that long-term maintenance cost into your budget.

Anion Exchange: The Targeted Specialist

Anion exchange works a lot like a traditional water softener. It uses a special resin loaded up with harmless chloride ions. When water passes through, the resin grabs negatively charged contaminants like arsenate (Arsenic-V) and swaps them out for the chloride ions.

This method is fantastic for Arsenic-V but does absolutely nothing for the uncharged Arsenic-III. Its performance can also be thrown off by other things in your water, like sulfates, which will compete with the arsenic for a spot on the resin and wear it out much faster.

Because of this, an anion exchange system is a very specialized tool. It works best when your water is already fairly clean of other competing minerals and Arsenic-V is your primary target. Just like a softener, it needs regular regeneration with a salt solution to keep working effectively.

Arsenic Removal Methods At-A-Glance

To help you see the big picture, here’s a quick-and-dirty comparison. This table breaks down the key differences so you can weigh the pros and cons for your home.

Filtration Method Effectiveness (As-V) Effectiveness (As-III) Best For Avg. Initial Cost Maintenance Needs
Reverse Osmosis Up to 99% Poor POU (Drinking Water) $200 – $600 Annual filter changes
Adsorptive Media Up to 99% Poor POE (Whole House) $800 – $2,500 Media replacement (2-5 years)
Anion Exchange Up to 95% None POE (Specific Water) $900 – $2,000 Salt for regeneration

Choosing the right system comes down to matching the technology to your specific problem. Each of these methods has proven its worth in real-world applications.

The science backs this up. Independent research shows that these technologies can remove 80% to over 99% of arsenic from well water. Specifically, RO systems are known to achieve greater than 95% removal, though their brine waste is an important factor to weigh. You can dig deeper into the data by reading this in-depth study on arsenic removal from household water treatments.

Ultimately, the best system is the one that fits your lab results, your water usage, and your budget for both the upfront cost and the long-term upkeep.

The Hidden Water Issues That Derail Arsenic Filters

I've seen it happen more times than I can count: a homeowner invests in a top-notch arsenic filter, hooks it up, and… the arsenic levels barely budge. Why? Because simply installing an arsenic filter often isn't enough. You have to look at the rest of your water chemistry.

Think of your arsenic filter as a specialist surgeon. It’s brilliant at its one job, but it can’t perform surgery in a chaotic emergency room. It needs a clean, prepped environment to work effectively.

Four different water filtration systems displayed on a counter, with a blue "Right Fiter" sign.

The real performance of your system hinges on what else is floating around in your well water. Let’s pull back the curtain on the hidden problems that can sabotage your filtration efforts.

The Arsenic-III Conundrum

We've touched on the two forms of arsenic, but this is where it gets critical. If your lab results show you have Arsenic-III (arsenite), most standard arsenic filters will completely fail you.

Because Arsenic-III has no electrical charge, it zips right past the most common treatment methods like adsorptive media and anion exchange resins. They simply can't grab onto it.

To catch this slippery form of arsenic, you first have to change it into the much more cooperative Arsenic-V (arsenate). The process for this is called oxidation. An oxidation system is a pre-treatment step that uses something like chlorine or an air injection system to alter Arsenic-III's chemical structure. This "primes" the water so that by the time it gets to your main filter, the arsenic is in a form that can actually be removed.

A Real-World Example: A client called me, totally frustrated that his brand-new adsorptive media system wasn't working. I took one look at his water report and saw the problem: over 70% of his arsenic was Arsenic-III. We installed a simple chlorine injection system right before his main filter, and his next test came back with non-detectable arsenic levels. Problem solved.

When Iron and Manganese Crash the Party

Iron and manganese are the classic well water villains—they're the culprits behind those ugly reddish-brown or black stains on sinks, toilets, and laundry. But they're not just a nuisance; they are absolute saboteurs when it comes to arsenic removal.

Here’s how they ruin the show:

  • They Clog Everything Up: Both iron and manganese will happily coat the specialized media inside your arsenic filter. This is a process called fouling, and it creates a physical barrier that literally stops the media from touching and adsorbing the arsenic.
  • They Steal All the Good Seats: Think of your filter media as a concert venue with a limited number of seats for contaminants. Iron and manganese are aggressive—they’ll rush in and take up all the valuable spots, leaving no room for the arsenic.

If your water test shows iron levels above 0.3 parts per million (ppm) or manganese over 0.05 ppm, you absolutely must install a dedicated iron and manganese pre-filter. Think of it as a bodyguard for your arsenic system. It removes the troublemakers so your specialist filter can do its job without interference.

The Problem with Hard Water

Hard water, which is just water with high levels of calcium and magnesium, creates a different kind of disaster, especially for reverse osmosis (RO) systems.

When hard water is forced through a delicate RO membrane, the calcium and magnesium minerals crystallize and form a crusty layer called scale. This scale buildup clogs the microscopic pores of the membrane, crippling its efficiency and eventually destroying it.

If your water hardness is over 7 grains per gallon (GPG), a water softener is a non-negotiable pre-treatment investment. By removing the hardness minerals before they can reach your more sensitive arsenic filter, a softener dramatically extends the life of your equipment and guarantees it performs as intended.

At the end of the day, learning how to remove arsenic from well water is about seeing the whole picture. Your water is a complex ecosystem. A comprehensive water test isn't just about finding the arsenic—it's your roadmap to clearing all the other roadblocks that stand in the way of a truly effective, long-lasting solution.

Deciding Between Whole-House and Point-of-Use Filters

Alright, you've got your lab results and you know what you’re up against. Now for the big strategic question: do you treat just the water you drink and cook with, or do you treat every drop coming into your house? This is the classic Point-of-Use (POU) vs. Point-of-Entry (POE) debate.

There’s no single right answer here. The best choice for your home boils down to your specific water test results, your budget, and your daily habits.

A large industrial filter element on a workshop table with tools, emphasizing filter protection.

Let's walk through how to make a smart decision you can feel good about.

The Case for Point-of-Use Precision

A Point-of-Use (POU) system is like a sniper rifle—it’s a targeted strike right where you need it most. These systems are installed at a single faucet, usually the kitchen sink, to give you ultra-clean water for drinking and cooking. The go-to POU system for arsenic is typically an under-sink reverse osmosis (RO) unit.

This focused approach is brilliant for a few reasons:

  • Cost-Effective: It's way cheaper to install and maintain a small system for one tap than to treat your entire home. You get top-tier protection for the water you're actually ingesting without wasting money purifying toilet water.
  • High-Purity Water: Systems like RO are the gold standard for purification, removing an incredibly high percentage of all sorts of contaminants, including arsenic.
  • Simple Installation: Most homeowners with basic DIY skills can get an under-sink unit up and running in an afternoon.

If your arsenic levels are just a little over the 10 µg/L limit and your main concern is safe drinking water, a POU system is a smart, budget-friendly move. It tackles the primary risk—ingestion—head-on.

When a Whole-House System Is the Only Answer

A Point-of-Entry (POE) system, also known as a whole-house system, is like a fortress gate. It's installed right where the main water line enters your house, so every single drop gets treated. While it's a bigger investment, a POE system is sometimes the only practical solution.

You should seriously consider a whole-house system if:

  • Your Arsenic Levels are Very High: If your lab report came back with a number that made your jaw drop (say, over 50 µg/L), treating everything provides total peace of mind. While skin absorption of arsenic from water is not a primary health concern, at very high levels, eliminating all contact is the safest route.
  • You're Fighting Multiple Water Problems: This is a big one. A POE setup lets you build a complete treatment "train." You can line up a water softener, an iron filter, and then an adsorptive media tank for arsenic. It’s a comprehensive fix for complex well water.
  • You Value Total Convenience: With a whole-house system, you just don't have to think about it. Every faucet delivers clean, safe water. It simplifies life, especially for a busy family.

A Practical Way to Think About It
If your arsenic level is a minor issue, a POU filter is like hiring a security guard for just the front door. But if arsenic is a major threat, a POE system is like installing a full security system around your entire property.

This isn't just a problem for a few isolated wells; it's a massive global issue. The World Health Organization estimates that 140 million people across 70 countries are drinking water with unsafe arsenic levels. Many rely on private wells that go untested, making home filtration the critical last line of defense. You can learn more about the scale of the problem in this report on global arsenic contamination.

Ultimately, let your lab report be your guide. For low-to-moderate arsenic, a POU system is an effective way to protect your family's health and your wallet. But for higher concentrations or a cocktail of water quality issues, investing in a whole-house system provides the bulletproof protection your home deserves.

Keeping Your Filter in Fighting Shape: Maintenance & Testing

You’ve installed a high-quality arsenic removal system. That’s a massive step toward safer water, but the job isn’t finished. Think of your filter like a car—it needs regular tune-ups to keep running at peak performance. Consistent maintenance isn't just a good idea; it's the only way to guarantee your system continues to protect your family.

Skipping upkeep is a dangerous gamble. Over time, filter media gets saturated, membranes clog, and parts wear out. It's a huge mistake to just assume the system is working because water is still flowing from the tap, especially when you're dealing with an invisible threat like arsenic.

The Hidden Danger of "Media Breakthrough"

One of the biggest risks with adsorptive media and anion exchange systems is something called media breakthrough. This happens when the filter media becomes so loaded with arsenic that it simply can’t grab any more.

Once that media hits its limit, any new arsenic flowing in passes right through the tank, completely untreated, and straight into your pipes. You won't notice a thing—no change in taste, color, or smell. The only way to know for sure that you're still protected is to stick to a proactive maintenance and testing schedule.

The Hard Truth: A filter that has hit media breakthrough is no better than having no filter at all. This is why following a maintenance plan and re-testing your water are non-negotiable for long-term safety.

Your Maintenance and Testing Game Plan

Your system's user manual is your new best friend; it will lay out the specific timelines recommended by the manufacturer. But to give you a clearer picture of what to expect, here’s a general rundown for the most common systems.

  • Reverse Osmosis (POU) Systems:

    • Sediment & Carbon Pre-filters: Plan on changing these every 6 to 12 months. Their job is to protect the delicate RO membrane from gunk like sediment and chlorine.
    • RO Membrane: This is the heart of the system. It typically needs replacing every 2 to 3 years, depending on your water quality.
    • Carbon Post-filter: This "polishing" filter keeps your water tasting fresh and should be swapped out once a year.
  • Adsorptive Media (POE) Systems:

    • Media Replacement: The specialized arsenic-grabbing media is the main consumable. Expect to replace it every 3 to 5 years, depending on your water usage and arsenic levels.
    • Backwashing: Most of these systems have an automatic backwash cycle that cleans the media. You just need to check that the control valve is programmed correctly and doing its job.

When handling old filter media, remember it's concentrated with arsenic. Proper disposal is crucial, so it's wise to understand the basics of effective hazmat waste management strategies.

A clear schedule is the best way to stay on top of these tasks.

Sample Maintenance Schedule for Arsenic Filters

System Type Task Frequency Estimated Annual Cost
Reverse Osmosis (POU) Replace Sediment/Carbon Pre-filters Every 6-12 months $30 – $75
Replace RO Membrane Every 2-3 years $25 – $50 (prorated)
Replace Carbon Post-filter Annually $15 – $30
Adsorptive Media (POE) Replace Media Bed Every 3-5 years $150 – $400 (prorated)
Inspect Control Valve & Seals Annually $0 (DIY) – $150 (Pro)
Anion Exchange (POE) Replenish Salt/Brine Tank Monthly $50 – $100
Replace Resin Every 5-10 years $100 – $250 (prorated)

This table gives you a ballpark idea, but always follow the manufacturer's guide for your specific model to ensure you're keeping things in top shape.

The Only Way to Be Sure: Re-Test

So, how do you really know if your filter is still working? You have to test your water again. It's as simple as that. Even with a perfect maintenance routine, your well's water chemistry can shift over time, and that could impact your filter’s performance.

I always recommend this simple plan: test your treated water at least once a year. This "post-filter" test is the ultimate report card for your system. It’s the only way to confirm that your arsenic levels are staying safely below the 10 µg/L standard and gives you concrete proof that your investment is still paying off with safe, clean water for your family.

Common Questions About Arsenic in Well Water

Even with a solid plan, it’s natural for questions to pop up. When you’re dealing with something as critical as your family’s water safety, you need clear, straightforward answers.

Let's tackle some of the most common things homeowners ask about getting arsenic out of their well water.

Is It Safe to Shower in Water with Arsenic?

This is a great question and one we get all the time. For the most part, arsenic isn't absorbed well through the skin, so the actual risk from bathing or showering is considered extremely low.

The real danger comes from drinking the water or using it for cooking, which is how arsenic gets into your body. That said, if your levels are exceptionally high or you just want complete peace of mind, a whole-house (Point-of-Entry) system is the way to go. It treats every single drop of water coming into your home.

Can I Just Boil the Water to Remove Arsenic?

Absolutely not. This is a common and very dangerous misconception. Boiling water will not get rid of arsenic.

In fact, it does the exact opposite. As some of the water turns to steam and evaporates, the arsenic gets left behind in the remaining water. This actually increases the concentration of arsenic, making it even more hazardous. The only safe way to deal with arsenic is with a proper filtration system.

How Do I Know if My Arsenic Filter Is Still Working?

You can’t see, taste, or smell arsenic, so the only way to know for sure if your filter is doing its job is to test the water periodically.

We always tell people to test their treated water at least once a year. This is the only way to confirm your system is keeping arsenic below the 10 parts per billion (ppb) EPA limit. Don't just rely on the manufacturer's replacement schedule; your specific water chemistry and how much water you use can wear out a filter faster than you'd think.

What Happens to the Arsenic My Filter Removes?

Where the captured arsenic ends up completely depends on the type of system you have. It's a key difference to understand for maintenance down the road.

  • Reverse Osmosis systems work by flushing the arsenic and other contaminants out with wastewater. This concentrated "brine" just goes down your drain.
  • Adsorptive Media and Anion Exchange systems are different—they trap and hold onto the arsenic inside the filter. Once the media is full, you have to replace the cartridge or the entire tank of media. You'll need to dispose of the old filter according to local rules, so always check with your manufacturer or local waste authority for guidance.

At Water Filter Advisor, we're committed to giving you the clear, unbiased information you need to protect your home's water. Explore our expert guides and reviews to find the perfect solution for your family at https://www.waterfilteradvisor.com.

Can Reverse Osmosis Zap Bacteria? The Surprising Truth

So, you're eyeing that reverse osmosis system for your kitchen and wondering, "Can this thing really handle the nasty stuff, like bacteria?" The short answer is a big, confident yes. A well-maintained RO system isn't just a water filter; it's a microscopic bouncer, kicking nasty microbiological contaminants out of your drinking water.

It acts as a physical fortress, ensuring the water that fills your glass is incredibly pure and safe to drink.

How Reverse Osmosis Wins the Fight Against Bacteria

If you're even a little worried about what might be swimming in your tap water, you need a solution you can count on. Reverse osmosis is the heavyweight champion of home water filtration, designed to tackle these invisible threats right under your kitchen sink.

The real hero of the story is the RO membrane. This isn't just any filter; it's a high-tech sheet packed with microscopic pores measuring a ridiculously small 0.0001 microns. To give you some context, your average bacterium is a clumsy giant in comparison, measuring anywhere from 0.2 to 10 microns wide. In this game, size is everything—bacteria are simply too big to get through the door.

A Tough-as-Nails Physical Gatekeeper

Imagine the RO membrane as the world's most exclusive nightclub bouncer. It doesn't use chemicals or tricks to zap germs. Instead, it uses your home's water pressure to push tiny, pure water molecules through its super-fine surface while telling almost everything else, "You're not on the list."

This means it physically blocks and flushes away larger contaminants down the drain, including:

  • Bacteria like the notorious E. coli and Salmonella
  • Viruses that can ruin your week
  • Protozoa such as the dreaded Giardia and Cryptosporidium

This simple method of physical separation is what makes RO systems so incredibly reliable. In fact, the U.S. Centers for Disease Control and Prevention (CDC) points to reverse osmosis as a top-tier technology for kicking pathogens to the curb. A good system can get rid of more than 99% of bacteria, making it the go-to choice for homeowners who want genuine peace of mind with every sip.

A reverse osmosis system gives you a final, powerful line of defense right in your kitchen. It purifies the water you drink and cook with just moments before you use it.

By installing an RO system, you're putting a formidable barrier between your family and potential dangers lurking in both city and well water. It’s a foundational piece of any modern, safe home.

How Reverse Osmosis Performs Against Contaminants

To put it all in perspective, here's a quick look at how a typical residential RO system stacks up against various common contaminants. It's a true multi-stage workhorse.

Contaminant Type Example Typical Removal Rate
Microbiological E. coli, Giardia, Viruses 99%+
Heavy Metals Lead, Arsenic, Mercury 95% – 98%
Dissolved Solids Salt, Fluoride, Nitrates 90% – 99%
Chemicals Chlorine, Pesticides 98%+ (with carbon pre-filter)

As you can see, while RO is an absolute champion at removing bacteria and a wide range of other tough contaminants, its performance can depend on the specific substance. This is why multi-stage systems that include sediment and carbon filters are the standard.

How Reverse Osmosis Physically Blocks Bacteria

To really get how reverse osmosis (RO) handles bacteria, you have to think small. Really small. Imagine trying to shove a basketball through a keyhole—it’s just not going to happen. That’s the same genius principle behind an RO system, but on a microscopic level. It's a purely physical barrier, like a bouncer at a club who only lets the cool, small molecules through.

The heart of any RO system is its semipermeable membrane. This isn't your average coffee filter; it's an incredibly fine material with pores so tiny they're measured in angstroms. To put that in perspective, a typical RO membrane has pores around 0.0001 microns wide.

Now, let's talk about the bad guys. Bacteria like E. coli or Salmonella are tiny to us, but compared to an RO membrane's pores, they're absolute giants. A single bacterium can be anywhere from 0.2 to 10 microns in size, making it thousands of times too big to squeeze through. No VIP pass, no entry.

The Science of Size Exclusion

The process itself is both simple and powerful. Your home’s water pressure pushes water against this membrane. The water molecules, being exceptionally small, are forced through the tiny pores and collect on the other side as wonderfully purified water.

Meanwhile, all the larger contaminants get left behind. They simply can't pass through the membrane and are unceremoniously flushed down the drain. This rejected list includes a whole bunch of things you don't want in your glass:

  • Bacteria: Physically blocked and washed away.
  • Viruses: Also too large to pass through the 0.0001-micron pores.
  • Protozoan Cysts: Things like Giardia and Cryptosporidium don't stand a chance.
  • Dissolved Solids: This includes heavy metals like lead and arsenic, plus minerals like salt and fluoride.

This elegant process of "size exclusion" is what makes RO so incredibly effective. It doesn't need chemicals to kill or neutralize bacteria; it just flat-out denies them entry. So when someone asks, "can reverse osmosis remove bacteria?" the answer is a resounding yes—it physically separates them right out of your water.

This diagram helps visualize how the RO membrane acts as a gatekeeper for different contaminants.

Reverse osmosis filtration diagram showing removal of bacteria, viruses, and minerals through membrane

As you can see, the membrane is a rock-solid barrier against not just bacteria, but also viruses and dissolved minerals, giving you truly comprehensive purification.

Proven Performance You Can Count On

And this isn't just talk—the effectiveness of reverse osmosis has been tested time and again. Its ability to remove bacteria is a well-documented scientific fact, not just a marketing claim. In fact, study after study shows that membrane filtration is one of the most reliable ways to achieve microbiological purification.

One major review of water treatment methods found that reverse osmosis achieved a bacterial removal rate of about 99.997%. That incredible level of performance is why RO isn't just used in homes; it's trusted in critical places like hospitals and bottled water plants. If you're curious, you can dive deeper into the research on membrane filtration effectiveness and see the data for yourself.

The real strength of reverse osmosis is its consistency. As long as the membrane is intact and the system has enough pressure, it will reliably block bacteria and other pathogens every single time you turn on the faucet.

This mechanical separation gives homeowners a powerful and dependable final line of defense. Even if your city issues a boil water advisory, a properly working RO system under your sink ensures the water you drink is still safe. It puts you back in control of your water quality.

Understanding the Limits of an RO System

A reverse osmosis system is an absolute beast when it comes to water purification, but it's not a "set it and forget it" magic box. Think of it like a high-performance sports car—it delivers breathtaking results, but only if you keep it tuned up. Its power to consistently block bacteria depends entirely on the system's integrity and your commitment to proper maintenance.

Knowing the system's limits isn't about being negative. It's about being smart so you can keep it running at peak performance, ensuring your family gets the safest, purest water possible.

Micropipette dropping water onto virus illustration demonstrating reverse osmosis system integrity and filtration

The Critical Role of Membrane Integrity

The heart and soul of an RO system is its semipermeable membrane. This is the super-fine barrier that physically stops bacteria in their tracks. But this membrane is delicate. Over time, it can get damaged, developing microscopic tears or holes you'd never see with the naked eye.

Even a single, tiny breach can become a microscopic superhighway, letting bacteria and other nasty contaminants sneak right past the filtration process. This is, without a doubt, the biggest vulnerability of any RO system. Once that membrane is compromised, it's no longer the near-perfect shield you're relying on.

This is exactly why routine maintenance and changing the membrane on schedule aren't just polite suggestions—they are absolutely essential to keep your system working like a true microbiological purifier.

The Unsung Heroes: Pre-Filters

Long before water ever gets to the RO membrane, it has to pass through a couple of other filters first. We call these pre-filters, and they are the unsung heroes of your system. They're the bodyguards, and their job is critical.

Typically, you'll have two kinds:

  • Sediment Filter: This is the bouncer at the front door. It grabs all the bigger stuff like sand, rust, and dirt. Without it, these gritty particles could literally scratch or tear the delicate RO membrane, dramatically shortening its life.
  • Carbon Filter: This filter's job is to remove chlorine and other chemicals. Chlorine, which is used to disinfect most city water, is incredibly harsh on the membrane's material. It can eat away at it over time, causing it to fail.

By taking out these threats first, the pre-filters allow the RO membrane to focus on what it does best: tackling the tiniest and toughest contaminants, including bacteria.

The Sneaky Risk of Post-Filtration Contamination

Okay, so your RO system has done its job perfectly. The bacteria are gone, and you have pristine water. But the journey isn't quite over. After being purified, that water chills out in a small storage tank under your sink before it gets to your faucet. This is where a new, sneaky risk can pop up.

If the tank, the tubing, or the faucet itself isn't kept clean, it's possible for new bacteria from the surrounding environment to get in and start a party. Now, super-pure RO water is a terrible place for bacteria to thrive, but it's not impossible.

The key thing to remember is that an RO system purifies water as it's being made, not at the very instant you turn on the faucet. This makes sanitizing the whole system every year—including the tank and faucet—a non-negotiable part of your maintenance routine.

Interestingly, research shows that while some biofilm can grow in RO systems, the total number of bacteria is far, far lower than what you'd find in regular tap water. This tells us that RO doesn't just remove bacteria, it also makes it harder for them to grow back. You can dig into the full findings on bacterial regrowth in RO systems if you want the nitty-gritty details. It just goes to show that while the risk is low and totally manageable, it's still there and reinforces why regular cleaning is so important.

Creating a Bulletproof System with UV Light

For anyone who wants the absolute highest level of water safety—especially if you're on well water—pairing a reverse osmosis system with an Ultraviolet (UV) purifier is the gold standard. Think of it as a one-two punch for microbiological safety. Your RO system physically blocks bacteria and viruses, while the UV light zaps anything that might, by some miracle, sneak through.

This combination gives you a powerful safety net. Even if a tiny, unseen tear were to form in the RO membrane, the UV stage is right there to neutralize the threat. It's the ultimate peace of mind in a glass of water.

Reverse osmosis water filtration system with UV light purifier and glass of filtered water

How UV Light Neutralizes Microbes

So, how does this UV light stage work its magic? It's a brilliant and straightforward process. A UV purifier is a chamber that blasts water with a specific wavelength of ultraviolet light—254 nanometers, to be precise.

This light is a natural germicide. It doesn’t kill microbes with poison; instead, it completely scrambles their DNA and RNA as they pass by the lamp. This instantly destroys their ability to reproduce or cause any harm. It’s like giving them a fatal sunburn that makes them totally inert.

The best part is that this whole process is:

  • Chemical-Free: Nothing is added to your water, so there's no change to the taste or smell.
  • Extremely Fast: Purification happens instantly as the water flows through the chamber.
  • Highly Effective: UV is proven to neutralize 99.99% of common waterborne pathogens, including viruses that are too small for some filters to catch.

This combo provides a rock-solid answer to the question, "can reverse osmosis remove bacteria?" The RO membrane gets them out, and the UV light makes sure they stay out for good.

Comparing RO Alone vs an RO Plus UV System

While a standalone RO system is a fantastic filter, adding a UV stage takes your water purification to a whole new level. Deciding whether you need it often comes down to your water source and how much security you want against microscopic threats.

Here’s a quick breakdown of what each setup offers:

Feature Reverse Osmosis (Alone) Reverse Osmosis + UV Purifier
Primary Mechanism Physical barrier (membrane) Physical barrier plus germicidal light
Bacteria Removal Excellent (99%+ removal) Exceptional (Adds a 99.99% kill rate)
Virus Removal Excellent (99%+ removal) Exceptional (Targets even the smallest viruses)
Post-Filter Security Relies on system sanitation Actively sterilizes water just before the tap
Ideal For Most city water supplies Well water, boil advisory areas, immune-compromised households

The bottom line is that by adding a UV stage, you are no longer just filtering your water—you are actively sterilizing it. This is the best approach for anyone who simply can't afford to take risks with their water quality.

Is an RO/UV System Right for Your Home?

This powerful combination isn't necessary for every single household. If you're on a reliable city water system that is consistently free of microbiological problems, a high-quality RO system on its own is usually more than enough protection.

However, an RO/UV system becomes a critical investment in a few key situations. You should seriously consider this dual setup if:

  1. You use a private well. Well water isn't treated by a municipality and is much more likely to be contaminated by bacteria like E. coli from surface runoff.
  2. Your area has frequent boil water advisories. A combined system provides a reliable final barrier, protecting your family even when the public supply is compromised.
  3. You have vulnerable individuals at home. For households with infants, the elderly, or anyone with a compromised immune system, that extra layer of UV protection is invaluable.

Ultimately, combining RO with UV turns your water filter into a complete purification system. The RO handles the heavy lifting by removing everything from lead to salt, while the UV light delivers a final, targeted strike against any potential microbiological threat.

Your Simple Home Maintenance Checklist

Knowing how your reverse osmosis system works is great, but keeping it running like a well-oiled machine is what really counts. A properly maintained system is your number one defense against bacteria and other nasty stuff in your water. This checklist breaks down the essentials into simple, doable steps so your RO system can deliver pure, safe water for years to come.

Think of it like getting regular oil changes for your car. You wouldn't just skip them and hope for the best, right? The same logic applies here—a little consistent care goes a long way toward reliability and peace of mind.

Setting Your Filter Replacement Schedule

The filters are the workhorses of your RO system, and they need to be replaced on a strict schedule to keep that all-important RO membrane protected. If you want your system to actually remove bacteria, sticking to a replacement schedule is non-negotiable. Go ahead and mark these dates on your calendar or set a recurring reminder on your phone right now.

A typical RO system has a few different filter stages, and each has its own lifespan:

  • Sediment Pre-Filter: This one catches the big stuff like rust and dirt. You'll want to swap it out every 6 to 12 months to stop it from getting clogged and causing problems for the other, more delicate parts of the system.
  • Carbon Pre-Filter(s): These filters are crucial for removing chlorine, which will literally eat away at the RO membrane. Plan on replacing these every 6 to 12 months, too, as they lose their effectiveness over time.
  • RO Membrane: This is the heart of the whole operation. If you've been good about changing your pre-filters, the membrane itself should last a solid 2 to 3 years. You'll know it's time for a new one if your water production slows to a crawl or you notice a change in taste.
  • Carbon Post-Filter: This is the final "polishing" step that makes your water taste crisp and clean after it leaves the storage tank. Replace this one once a year to keep your water tasting great.

For a deeper dive into different filter types and how they all work together, you can find a ton of helpful resources and water filter advice from people who live and breathe this stuff.

Annual System Sanitization

Even with flawless filtration, the parts of the system after the membrane—like the storage tank, tubing, and faucet—can be a place for stray airborne bacteria to set up shop. This is exactly why an annual deep clean is so critical. Sanitizing the whole system once a year is a must-do step to prevent any bacterial regrowth and keep your water perfectly pristine.

The process is pretty simple. It usually just involves shutting off the water, draining everything, and then using a special food-safe sanitizing solution. You'll run the solution through the entire system, let it sit for a bit, and then flush it all out. Your RO system's manual should have detailed, step-by-step instructions to walk you through it.

Pro Tip: A great time to sanitize your system is whenever you replace the RO membrane. That way, you’re starting with a totally fresh and sterile environment for your newly purified water.

Choosing a System You Can Trust

If you're shopping for a new RO system or an RO/UV combo, don't let the price tag be your only guide. You absolutely need to look for third-party certifications that prove the system actually does what it says it does. These certifications are your guarantee that it's safe and performs as advertised.

Keep an eye out for these key labels on the box or in the product specs:

  • NSF/ANSI 58: This is the gold standard certification specifically for reverse osmosis systems. It confirms the system is effective at reducing a whole host of contaminants, including things like lead, arsenic, fluoride, and cysts. A system with this seal has been put through the wringer to meet strict public health standards.
  • NSF/ANSI 55 (Class A): If you're going for a system with a built-in UV light, this is the certification you need to see. Class A systems are rated for full-on disinfection—they're designed to kill bacteria and viruses in contaminated water, making them a safe bet for well water or other untreated sources.

By following this simple maintenance checklist and picking a certified system, you can rest easy knowing your reverse osmosis unit is an effective and reliable barrier against bacteria. Your diligence is the final, crucial step in securing safe and delicious drinking water for your home.

Common Questions About RO and Water Safety

Even after getting the hang of how reverse osmosis works, it's totally normal to have a few lingering questions. Let's walk through some of the most common things homeowners ask when they're thinking about an RO system to keep their family safe from bacteria and other nasty stuff.

Getting straight answers is the best way to feel good about the choice you're making for your home's water. Think of this as putting the final pieces of the puzzle in place.

Does Reverse Osmosis Remove Viruses Too?

That's a great question, and an important one. The answer is a big "yes." An RO membrane is an incredible barrier against viruses for the exact same reason it blocks bacteria—it all comes down to size.

Viruses are even smaller than bacteria, but they're still way too big to squeeze through the 0.0001-micron pores in the membrane.

That said, for total, bulletproof protection, you have to consider the real world. A tiny, microscopic flaw in a damaged membrane could theoretically let one of the absolute smallest viruses slip through. This is exactly why combining reverse osmosis with a UV light purifier is widely considered the gold standard for microbiological safety.

The RO system does the heavy lifting, acting as the main physical wall to stop over 99% of viruses. The UV light is your final, non-chemical safety net, zapping the DNA of anything that might have gotten past, making it completely harmless.

Is an RO System Necessary for City Water?

It's a fair point. Your city's water is treated and regulated to meet federal standards, so why bother with another filter? The simple answer is that a lot can happen to that water between the treatment plant and your kitchen faucet.

The water infrastructure in many parts of the country is old, and that creates contamination risks you have no control over. An RO system is your personal last line of defense right where you use your water.

Just think about these common situations:

  • Aging Pipes: Old pipes can rust and break down, potentially leaching lead and other contaminants into your water.
  • Water Main Breaks: When a major water line cracks, it can suck in untreated groundwater, bacteria, dirt, and whatever else is in the soil.
  • Boil Water Advisories: These get issued when your city finds a potential microbiological threat, meaning your tap water isn't safe to drink unless you boil it first.

In every one of those scenarios, a well-maintained RO system under your sink just keeps on working, giving you safe, purified water. It puts the control back in your hands, no matter what's going on with the pipes down the street.

How Will I Know When to Replace the RO Membrane?

The RO membrane is the heart of the whole operation, but it doesn't work forever. The good news is, your system will give you some pretty obvious signs when it's getting tired and needs to be replaced.

You don't need to be a water expert to see what's happening. Just pay attention to these three main clues that your RO membrane is on its way out:

  1. Slower Water Flow: This is usually the first thing people notice. Your RO faucet just doesn't fill a glass as fast as it used to. Over time, the membrane gets clogged up with all the contaminants it has filtered out, making it tougher for water to get through.
  2. Changes in Taste or Odor: If your RO water starts tasting or smelling more like your regular tap water, that’s a big red flag. It means the membrane isn't stripping out the dissolved solids that cause those off-flavors anymore.
  3. Higher TDS Meter Reading: For a more scientific check, grab an inexpensive handheld Total Dissolved Solids (TDS) meter. Test your tap water, then test your RO water. A healthy system should be rejecting over 90% of the solids. If that percentage starts to drop, you know the membrane is losing its punch and it's time for a new one.

At Water Filter Advisor, we believe every family deserves access to safe, great-tasting water. Our in-depth guides and unbiased reviews are designed to help you confidently choose the right filtration solution for your home. Explore our resources today at https://www.waterfilteradvisor.com.