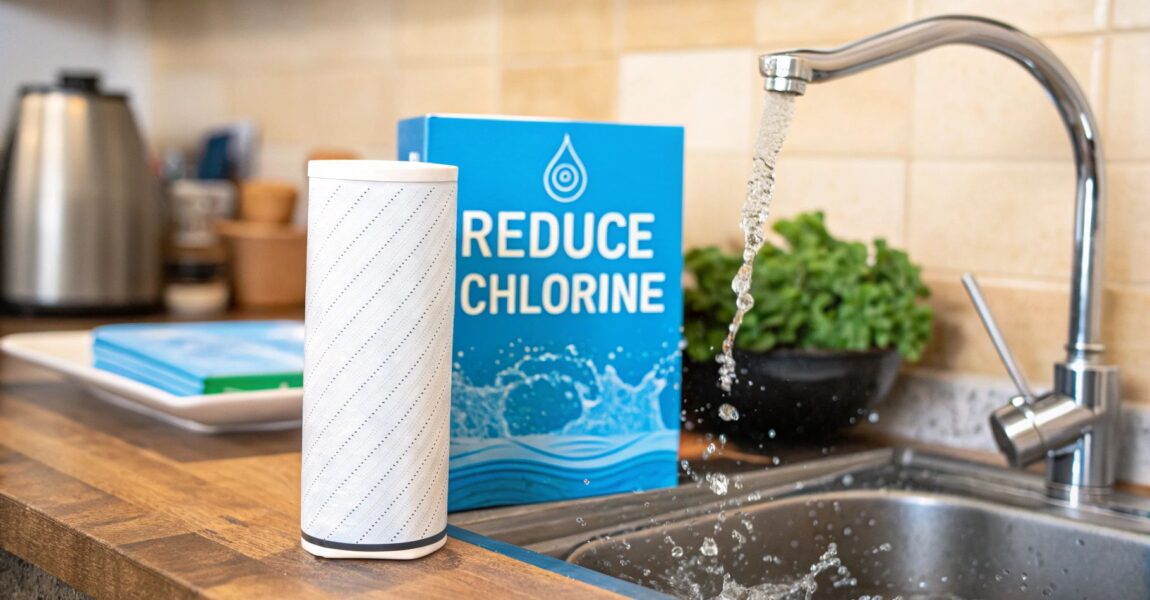
How to Reduce Chlorine in Your Home Water: A Filtration Guide

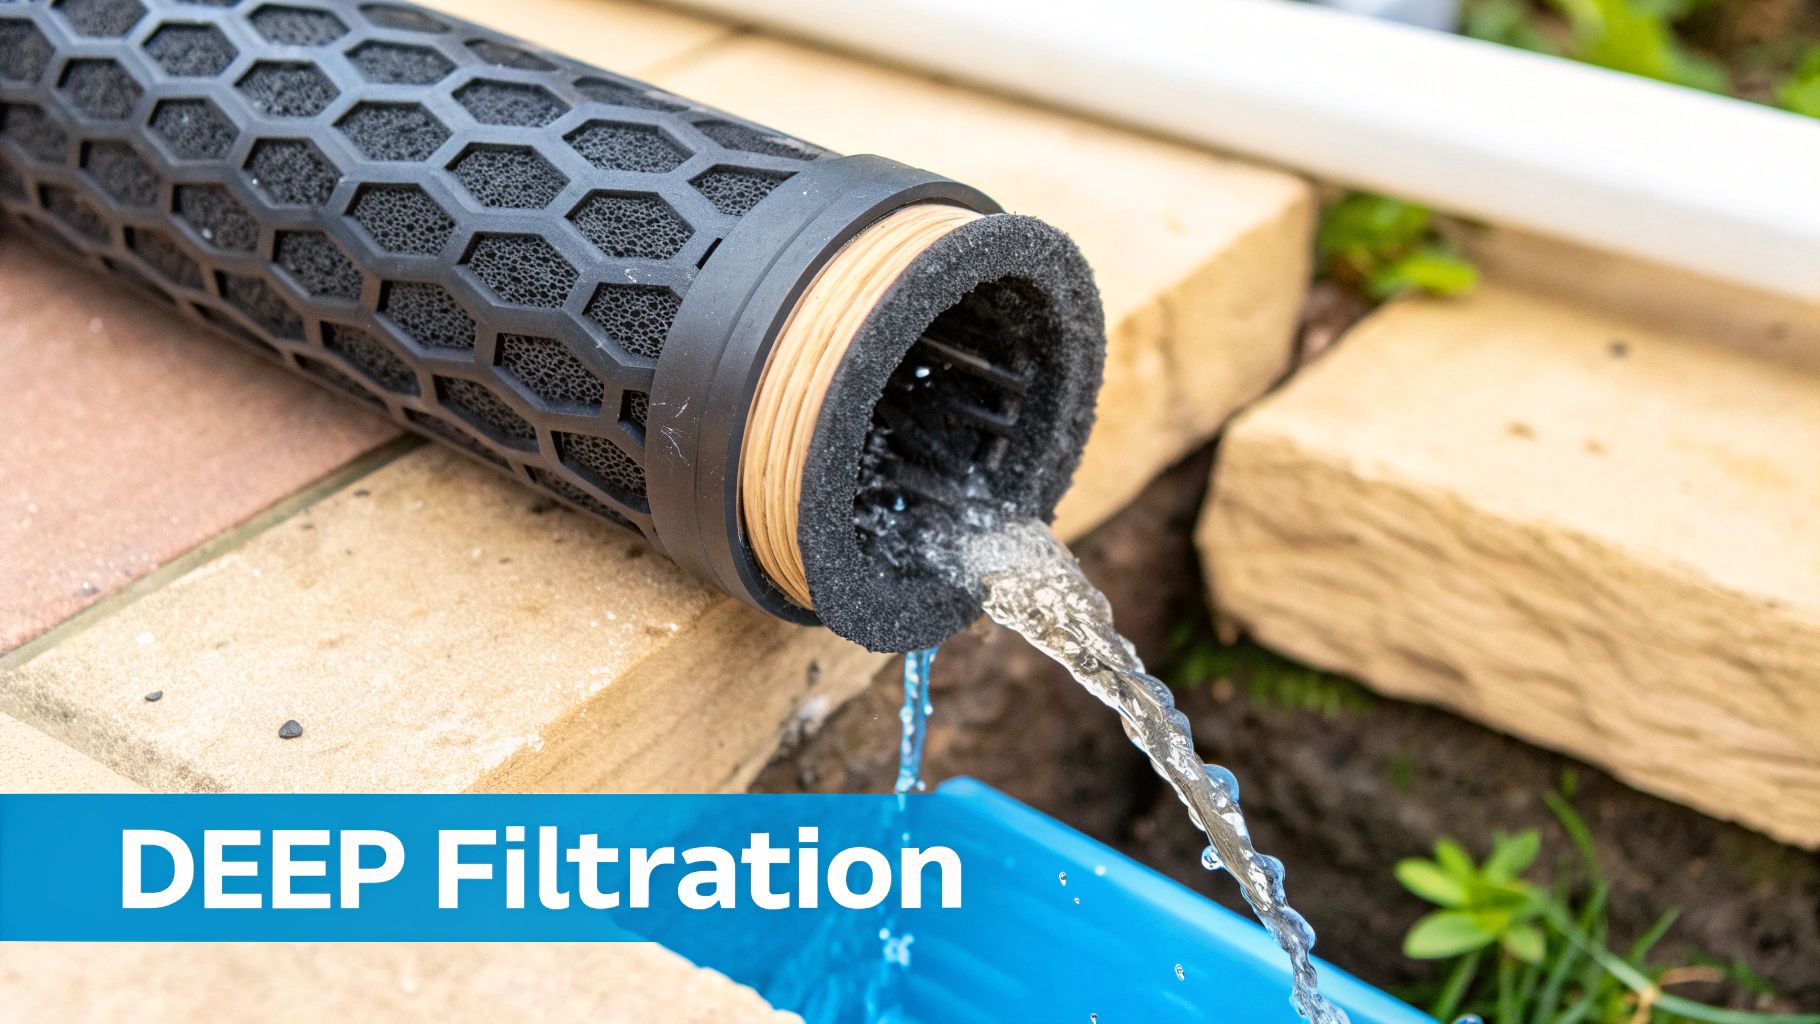
Tired of your tap water tasting like it just came from the local swimming pool? The undisputed champion for banishing chlorine from your home’s water is a quality filtration system, especially one powered by activated carbon. While letting a pitcher sit on the counter might help a little, it’s a slow-motion solution. For a real, lasting fix, filtration is the only way to go.

Why Your Tap Water Smells Like a Swimming Pool

Ever turn on the kitchen sink and get hit with that unmistakable "public pool" smell? You're not just imagining it. That distinct odor is chlorine, a powerful disinfectant your local water utility adds for a critical reason.

Think of it as a bodyguard for your water. Chlorine's job is to kill off nasty bacteria, viruses, and other pathogens during the long trip from the treatment plant all the way to your tap. This process, called chlorination, has been a massive public health success, saving countless people from waterborne diseases. Without it, drinking tap water would be a serious gamble.

But the very chemical that keeps our water safe can also make it taste and smell… less than ideal. This leaves a lot of people wondering how to get rid of the chlorine once it’s done its job and reached their home. The answer lies in targeted home filtration.

Chlorine vs. Chloramine

Just to make things interesting, many water suppliers now use chloramine instead of just chlorine. This is a more stable compound they make by adding ammonia to the chlorine.

Why the switch? While chlorine evaporates pretty quickly, chloramine sticks around much longer. It's designed to keep the water disinfected right to the end of the line, but that stability also makes it tougher to remove. This is a crucial detail because your standard chlorine filter might not be up to the task. Figuring out if you have chlorine or chloramine is the first step to picking the right filter.

It's About More Than Just Taste and Smell

Getting rid of that chemical taste is a big motivator, but it's not the only reason people install filters. When chlorine mixes with the natural organic stuff in water, it can create what are known as disinfection byproducts (DBPs), like trihalomethanes (THMs).

Your city's water is treated to keep these DBP levels within legally safe limits. Still, many folks would rather just minimize their exposure altogether right at home.

Filtering your water right where you use it gives you the best of both worlds. You get all the protection of a professionally disinfected public water supply, but you get to strip out the chlorine and its byproducts just before you drink, cook, or shower.

This approach lines up with where the industry is heading. Agencies like the U.S. Environmental Protection Agency are constantly tightening the rules, and as reported on GlobeNewswire, there's a lot of research into new ways to handle chlorine with less environmental impact. By installing a home filter, you're just taking that final, personal step to make sure your water is exactly how you want it.

How to Test Chlorine Levels in Your Water

Before you can fix that chlorine taste in your water, you have to know what you’re up against. Think of it like a detective—you need to gather evidence before you can pinpoint the right solution. Just guessing could mean you end up with a filtration system that's either total overkill or not nearly strong enough for the job.

The good news? You don't need a lab coat or a chemistry degree to get solid answers.

Testing your water at home is quick, easy, and gives you the hard data you need to make a smart decision. This first step will tell you exactly what concentration of chlorine you're dealing with.

Simple and Affordable Test Strips

The fastest way to get a reading is with test strips. These are just little disposable paper strips with chemical pads on them. Dip one into a glass of your tap water, give it a swirl for a few seconds, and pull it out.

After about a minute, the pads will change color. All you do is match those colors to the chart that comes with the kit. It's a dead-simple method that gives you a ballpark figure, usually in parts per million (PPM).

While they're super easy to use and cheap, they aren't the most precise tool. For most homes getting city water, a reading between 0.5 and 2.0 PPM is pretty standard. The EPA says levels up to 4.0 PPM are safe, but most of us can taste and smell it long before that—sometimes at levels as low as 0.5 PPM. Test strips are great for a quick "yes" or "no" on whether chlorine is present.

More Accurate Liquid Reagent Kits

If you're after a more precise number, your best bet is a liquid reagent kit, sometimes called a drop test kit. These are the same types of kits people use for swimming pools, but you can easily find versions made specifically for drinking water.

It's a pretty straightforward process:

  • Fill a small vial with a specific amount of your tap water.
  • Add a few drops of a chemical reagent into the vial.
  • Cap it, give it a little shake, and watch the water change color.

Just like with the strips, you compare the final color of the water to a printed chart to find the chlorine concentration. Because you're using a controlled amount of water and a precise number of drops, the results are a lot more reliable than what you'll get from a simple test strip.

Getting an accurate measurement is the first real step in your journey to better water. Knowing your specific chlorine level—whether it's 1.0 PPM or 3.5 PPM—directly influences which type of water filter will be most effective and economical for your household.

The Precision of Digital Meters

For anyone who loves gadgets and wants the most exact reading possible, a digital colorimeter is the way to go. These handheld electronic devices give you pinpoint accuracy and take all the guesswork out of matching colors.

You still add a reagent to your water sample, but instead of eyeballing it, you pop the vial inside the meter. The device shines a light through the sample and measures exactly how much of it is absorbed, then gives you a precise digital reading right on the screen.

Digital meters are definitely the most expensive option, but they're also the most accurate. They're perfect if you're really sensitive to chlorine or just want to track your levels over time to see how they change. Knowing your baseline is key to picking the right filter and, just as importantly, confirming it's actually working once you've got it installed.

Choosing Your Chlorine-Busting Filtration Weapon
A clear glass pitcher of water sitting on a wooden countertop in a sunlit kitchen.

Alright, you’ve tested your water and you know how much chlorine you’re dealing with. Now for the fun part: picking the right gear to get rid of it.

Diving into the world of water filtration can feel like a lot at first, with all the different technologies and acronyms out there. But when your main goal is knocking out chlorine, the best options quickly rise to the top.

The three heavy hitters you’ll see most often for home chlorine removal are Activated Carbon, KDF (Kinetic Degradation Fluxion), and Reverse Osmosis. They all work a bit differently, come with their own price points, and have unique maintenance needs. Let's break them down so you can find the perfect fit for your home and budget.

The Magic of Activated Carbon Filters

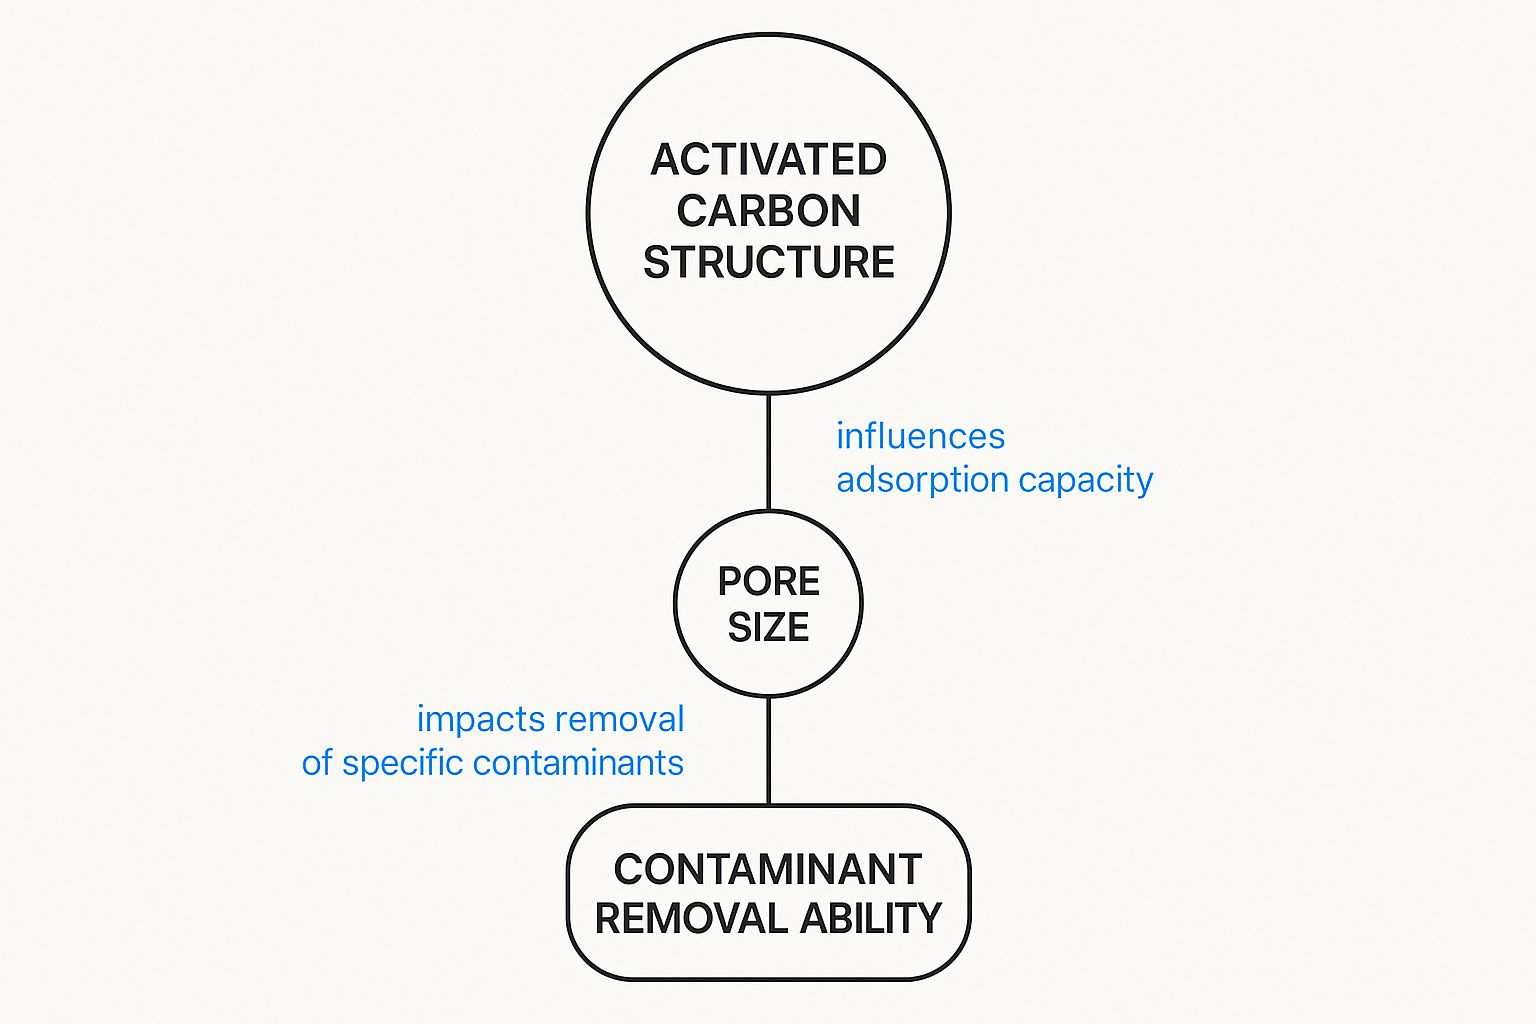
Think of activated carbon as a super-powered sponge with an almost magnetic attraction to chlorine. This isn't your backyard BBQ charcoal; it's a special carbon that’s been “activated” to create millions of microscopic pores. The surface area is staggering—a single pound of activated carbon can have a surface area of over 100 acres!

When water passes through the filter, chlorine molecules get pulled into these pores and stick to the surface. This process is called adsorption. The water flows right on through, but the chlorine gets left behind. The result? Water that tastes and smells noticeably cleaner and fresher.

There's a reason activated carbon is the go-to method. It's incredibly effective, pretty affordable, and you'll find it in everything from a simple pitcher filter to a large whole-house system. The core of these filters is often just replacement activated carbon for dechlorinator purifiers, which does the bulk of the work.

KDF Media: The Chemical Neutralizer

Next on the list is KDF, which stands for Kinetic Degradation Fluxion. If activated carbon is a sponge, think of KDF as a tiny chemical factory. This filter media is made of high-purity copper and zinc granules. As water flows over them, they create a small electrochemical reaction.

This reaction, known as redox (oxidation-reduction), literally changes free chlorine into a harmless chloride salt. It doesn’t just trap the chlorine; it neutralizes it on a chemical level. This makes KDF media exceptionally durable and long-lasting.

One of the coolest things about KDF is that it also stops bacteria, algae, and fungi from growing inside the filter. This bacteriostatic property means it not only tackles chlorine but also keeps the filter media itself clean, which can really extend the life of any activated carbon filters it’s paired with.

In fact, a lot of the best filters on the market use both KDF and activated carbon together. The KDF does the heavy lifting on chlorine, protecting the carbon and letting it focus on other organic stuff that affects taste and odor.

This infographic can help you map out your testing and filtering journey.
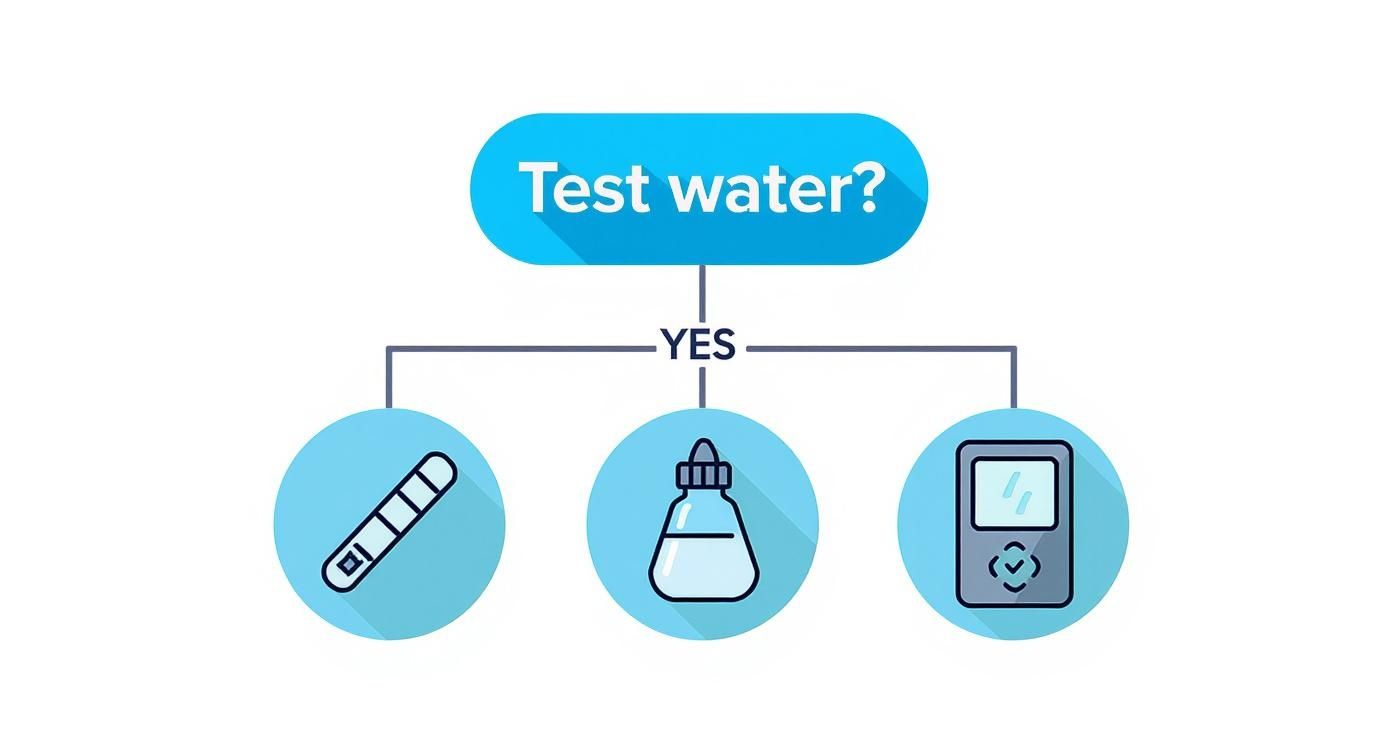
Infographic about how to reduce chlorine

It’s a simple visual that shows how getting some hard data—whether from simple test strips or a digital meter—is the essential first move.

Reverse Osmosis: The Ultimate Barrier

For the most complete filtration you can get at home, you’ve got Reverse Osmosis (RO). While carbon and KDF are chlorine-zapping specialists, an RO system is designed to remove a massive list of other things, like lead, fluoride, salts, and arsenic. And yes, it’s also fantastic at getting rid of chlorine.

An RO system works by pushing water through a very fine, semi-permeable membrane. The pores in this membrane are so tiny that only pure water molecules can squeeze through. Everything else, including chlorine, gets blocked and flushed down the drain.

The process is so thorough it can eliminate over 99% of chlorine. But there’s a small catch: chlorine is actually pretty tough on that delicate RO membrane. That’s why virtually every home RO system comes with pre-filters, usually activated carbon, to remove the chlorine before it even gets to the membrane. This is key to protecting the most important part of the system and making it last.

People who choose RO usually want more than just chlorine removal; they're aiming for the highest level of water purity possible. If you want to explore different setups, our water filtration advice guides have a ton of great information.

Comparing Chlorine Filtration Methods for Your Home

Trying to decide between these options can feel tough, but it really comes down to weighing how well they work against their cost and how much upkeep they need. This table puts the key details side-by-side to make the choice a little clearer.

Filtration Method Effectiveness Best For Typical Cost Maintenance Needs
Activated Carbon High for chlorine, taste, odor. Does not remove minerals or TDS. Budget-conscious users, improving taste and smell, renters. $ – $$ Regular filter changes (every 3-12 months).
KDF Media Very high for chlorine. Also reduces heavy metals and inhibits bacteria. Long-lasting performance, whole-house systems, pairing with carbon. $$ – $$$ Very low; media can last for several years.
Reverse Osmosis Extremely high (99%+). Removes chlorine and a wide range of other contaminants. Maximum purity, homes with multiple water quality concerns. $$$ – $$$$ Annual pre/post-filter changes; membrane replacement every 2-4 years.

Ultimately, the right system is the one that solves your water issues without becoming a major hassle or a drain on your wallet. Whether it's a simple carbon filter for better-tasting coffee or a full-blown RO system for total peace of mind, there's a solution that fits.

Keeping Your Water Filter Working Like New

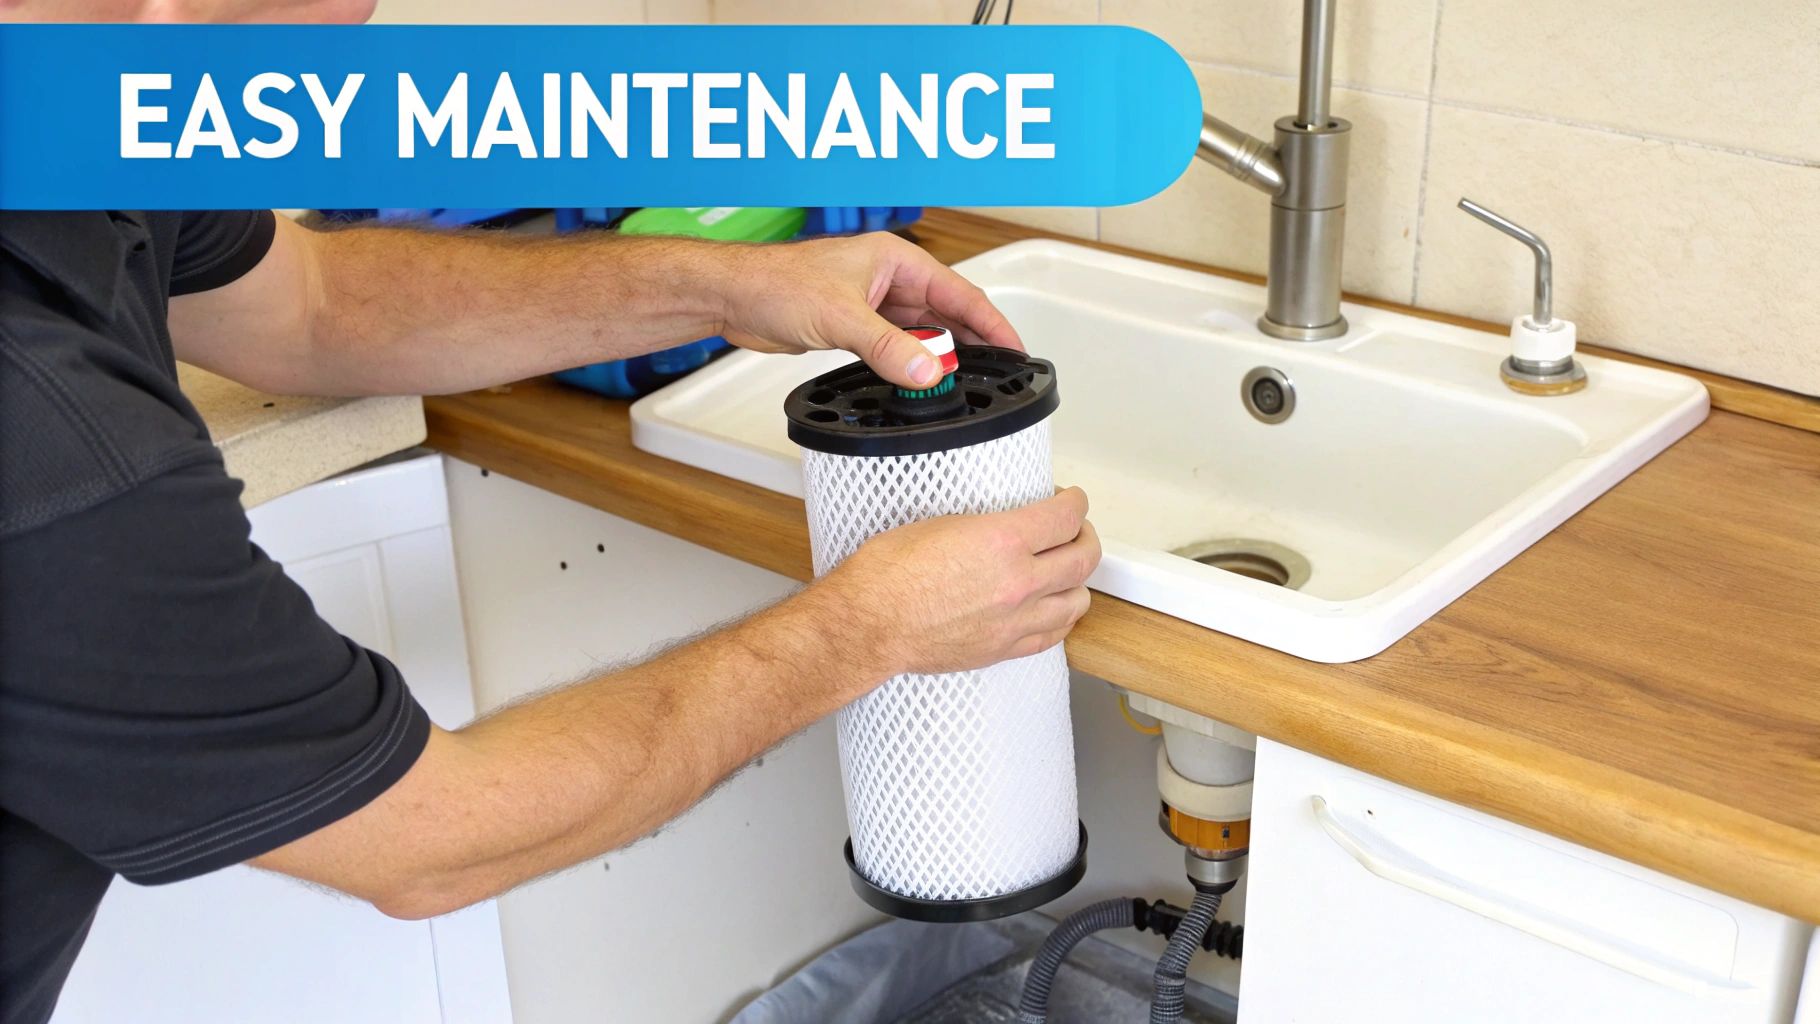
A water filter is only as good as its last cartridge change. Getting the system installed is really just the beginning—it’s the consistent maintenance that keeps that fresh, chlorine-free water flowing. If you neglect your filter, it's like buying a brand-new car and never bothering with an oil change. Sooner or later, performance is going to suffer.

I like to think of a filter cartridge as a microscopic parking lot for contaminants. When it's fresh out of the box, there are plenty of open spaces. But over time, every one of those spots gets filled up with chlorine, sediment, and other gunk. Once it’s full, any new contaminants just drive right on by and end up in your glass.

A simple maintenance routine doesn't just guarantee performance; it also prevents nasty bacteria from building up inside the filter housing. This protects your investment and, more importantly, your family's health.

Your Filter Maintenance Timetable

Every filter has a different lifespan, and your best bet is to stick to the manufacturer's recommended schedule. A little planning goes a long way here, ensuring you always have clean, great-tasting water on tap.

Here’s a general guide for the most common filter types:

  • Pitcher Filters: These are the sprinters of the filter world. Plan on swapping the cartridge every one to two months, or after filtering about 40 gallons.
  • Faucet-Mounted Filters: A bit more durable, these usually last for two to three months, which works out to around 100 gallons.
  • Under-Sink & Countertop Filters: These have a lot more capacity and can often go for six months to a year before you need to think about a new cartridge.
  • Whole-House Filters: The true marathon runners. Depending on your water usage and how much sediment is in your water, these can last anywhere from three months to over a year.

Telltale Signs a Filter Change Is Due

Even if you forget to mark your calendar, your filter will give you some clear clues when it's time for a change. You just have to pay attention to what your water is telling you.

The most obvious sign is the return of that distinct chlorine taste or smell. If your morning glass of water suddenly tastes like you're at the community pool, it's a dead giveaway that the filter is saturated and can't absorb any more.

Another huge indicator is a drop in water pressure. If the flow from your filtered tap slows to a trickle, the cartridge is probably clogged with all the sediment and particles it has successfully pulled from your water.

Pro Tip: Grab a permanent marker and write the date you changed the filter directly on the new cartridge or the housing. It's a simple little trick that takes all the guesswork out of remembering when it's due for a replacement.

The Bigger Picture of Chlorine Use

While we're focused on getting chlorine out of our homes, it’s fascinating to look at its use on a global scale. The Asia-Pacific region is a massive player in the chlorine industry, driven by rapid industrialization and an enormous demand for safe water.

For perspective, India's chlorine consumption is projected to hit 3.3 million tons by 2024. At the same time, China's production capacity is expected to reach 4.5 million tons. This growth really highlights the ongoing need for large-scale disinfection. Yet, even as global demand grows, the push to reduce chlorine dependence is gaining momentum, with new technologies offering better, more localized solutions. You can discover more insights about the chlorine market on straitsresearch.com.

This global context really drives home why point-of-use filtration at home is so effective. It lets municipal systems do their job of ensuring broad public health safety, while you get the final say over the quality of the water you and your family actually drink. Keeping that filter in top shape is simply your part of the deal.

Common Questions About Chlorine in Water

Even when you've done your homework, a few questions always seem to pop up when you're trying to improve your home's water quality. It's totally normal. Making the right call means understanding the little details, so let's clear up some of the most common things people ask about reducing chlorine.

Think of this as a quick-reference guide—no deep technical jargon, just straight answers to help you feel confident about your next steps.

Does a Water Softener Remove Chlorine

This is probably one of the biggest points of confusion I hear. The short answer is no, a standard water softener isn't built to remove chlorine. Its one and only job is to combat hard water by swapping out minerals like calcium and magnesium for sodium.

While that's fantastic for stopping scale buildup in your pipes and appliances, it does absolutely nothing to the chlorine or chloramine swimming around in your water. Some of the newer "hybrid" systems do combine a softener with a carbon filter stage, but if you have a typical salt-based softener, you'll need a separate, dedicated filter to tackle chlorine.

Is Chloramine Harder to Remove Than Chlorine

Yes, it absolutely is. Chloramine is a much more stubborn chemical than free chlorine. Water municipalities actually designed it that way—to be more stable and stick around longer in the water supply. Great for disinfection, but a real headache for home filtration.

Simple tricks like letting water sit out or giving it a quick boil are completely useless against chloramine.

To get rid of chloramine effectively, you need a special filter medium called catalytic carbon. Your average activated carbon filter is a champ against chlorine, but it will barely make a dent in chloramine. This is exactly why testing your water or checking your utility’s water report is a non-negotiable first step.

Will My Refrigerator Filter Remove Chlorine

For the most part, yes! The built-in water and ice dispensers on modern fridges almost always use a small activated carbon filter. They do a pretty decent job of reducing the taste and smell of chlorine, giving you clean-tasting drinking water right from the door.

The key thing to remember is their tiny capacity. These filters need to be replaced on a strict schedule—usually every six months—to keep working correctly. They're a great solution for the glass of water you're about to drink, but they won't touch the water coming out of your kitchen tap or showerhead.

Can I Just Boil the Chlorine Out of My Water?

While boiling water for about 15 minutes can force free chlorine to evaporate, it's not a practical home filtration strategy. Here’s why it falls short:

  • It’s an energy hog, making it totally impractical for anything more than a small pot of water.
  • It concentrates other contaminants like heavy metals or nitrates that don't evaporate.
  • It does not work for chloramine, which will stay right where it is.

The impact of chlorine goes beyond just what you drink. It can affect your hair and skin, which is why you see articles explaining the purpose of specialized 'De chlorinate My Hair' products. It just goes to show how far-reaching the effects of chlorinated water can be. Getting these common questions answered is the final step toward picking the right whole-home solution.


At Water Filter Advisor, our mission is to give you clear, research-backed advice so you can have safer, better-tasting water. From deep-dive buying guides to practical tips, we're here to help you make confident choices for your home. Check out all our resources to find the perfect filtration system for your family at https://www.waterfilteradvisor.com.
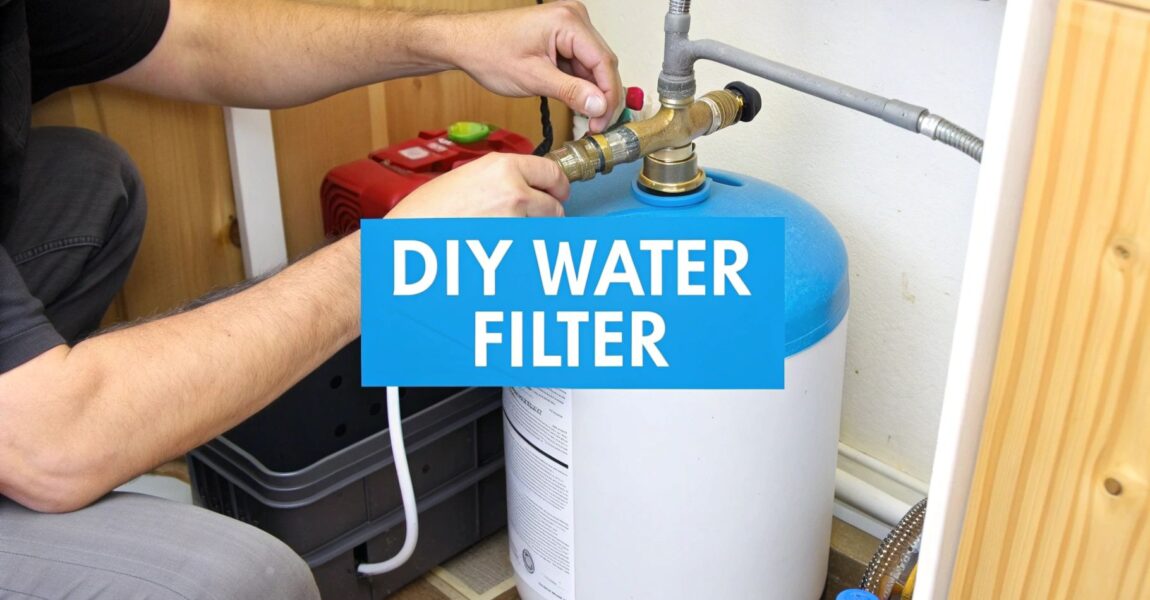
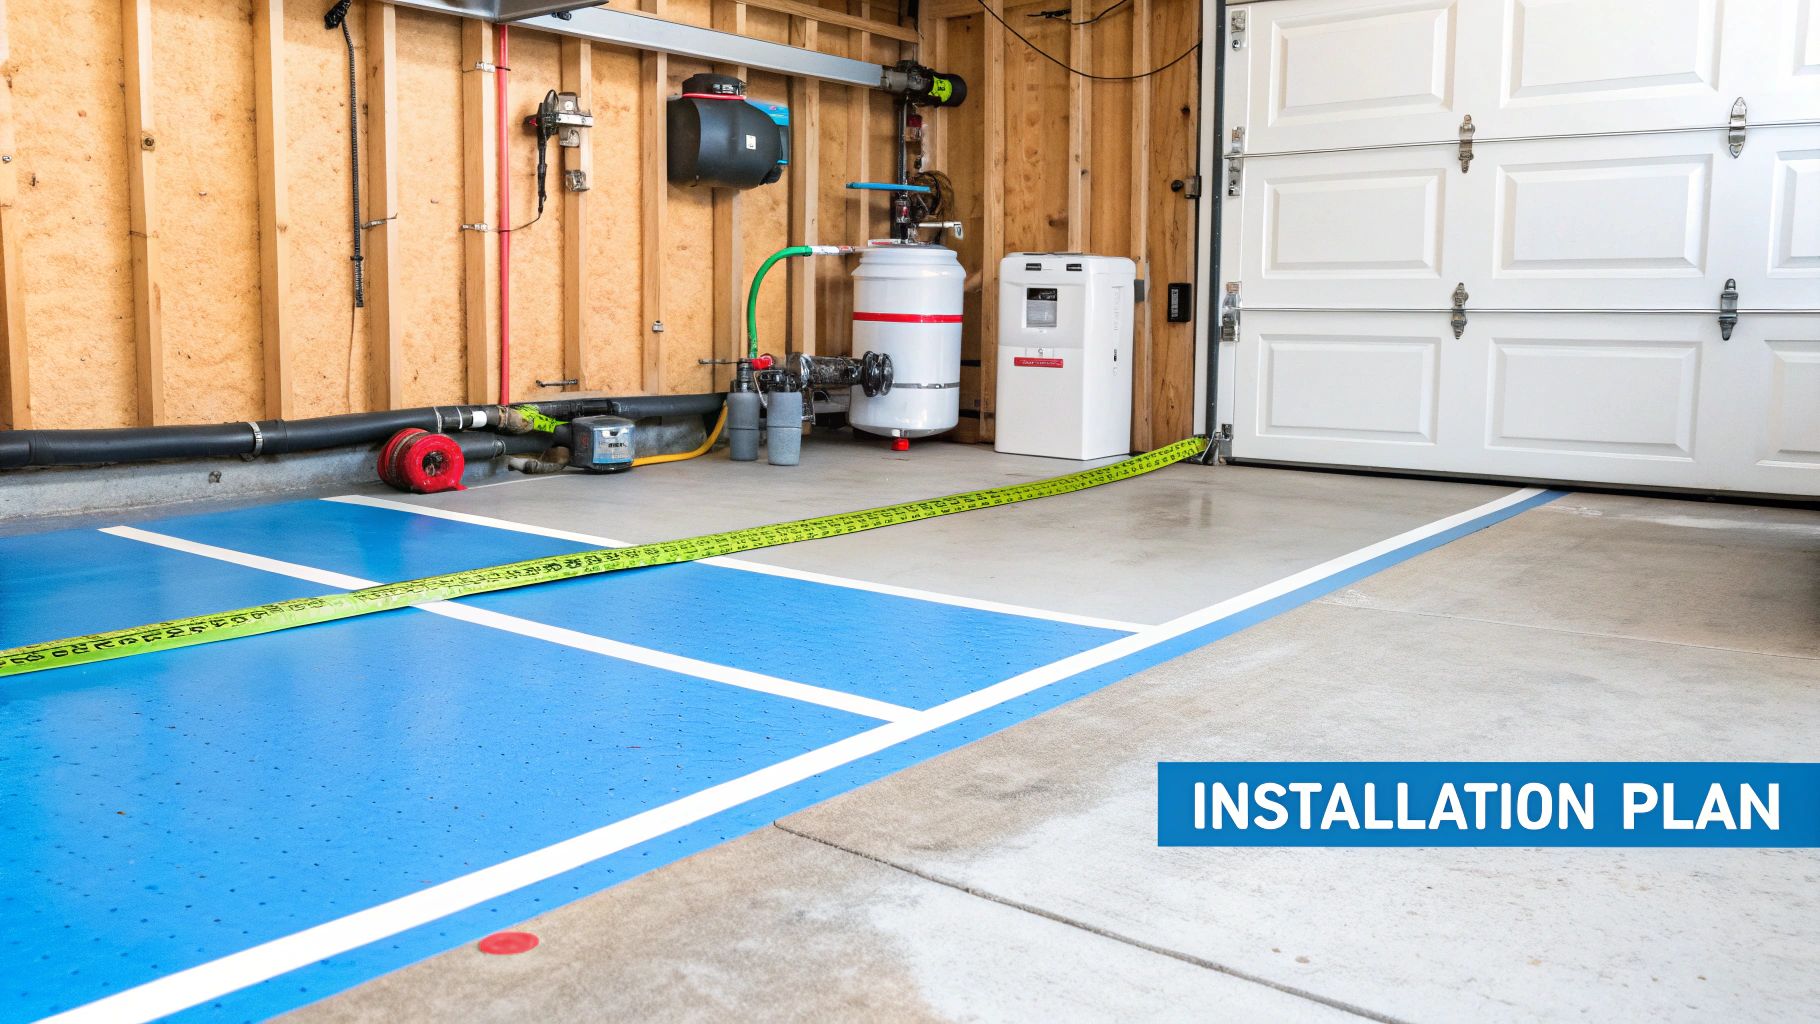
DIY Guide: How to Install a Whole House Water Filter

Putting in a whole house water filter isn't rocket science, but it does demand a bit of care. The basic idea is you'll find your main water line, shut everything down, cut out a piece of pipe, and then plumb the new filter system into that gap. For anyone who's comfortable with basic plumbing, you're looking at a 2 to 4 hour job from start to finish. A little planning goes a long way to making sure it's a leak-free success and every tap in your house delivers crisp, clean water.

Your Pre-Installation Game Plan

Before you even think about grabbing a pipe cutter, you need a solid game plan. This isn't just about saving time; it's about transforming your home's water from questionable to pristine. I can't tell you how many times I've seen DIY jobs go wrong because someone rushed this part. It's the difference between a smooth installation and multiple frustrating trips to the hardware store—or worse, a slow drip that turns into a water damage nightmare.

A person examining the plumbing connections for a whole house water filter system in a residential setting.

Seriously, spend an hour here. Map it all out in your head and on the floor. This prep work is where you spot potential problems and ensure you have every fitting and tool you need before the water is off and the real fun begins.

Pinpoint the Perfect Location

Where you put this thing is easily the most important decision you'll make. You want to install it on your main water line, right after the main shut-off valve but before the line splits off to your water heater. Get this right, and you guarantee every single drop of water in your house, both hot and cold, gets filtered and purified.

Basements, garages, and utility closets are the usual suspects because the main line is typically exposed and easy to get to. As you're scouting for the perfect spot, keep these three things in mind:

  • Accessibility: Don't just think about getting the unit in there. You have to change the filters later. Leave yourself at least a foot of clear space below the housing so you can actually unscrew it without busting your knuckles.
  • Protection: The filter has to be in a spot that won't freeze. A frozen filter housing will burst, and that's a flooded-basement-level catastrophe you don't want to deal with.
  • Support: These systems get heavy once they're full of water. Make sure the wall you're mounting it to is solid enough to hold the weight without sagging.

A classic rookie mistake is tucking the filter into a tight spot to hide it, only to find out there's no room to get a wrench in there or drop the sump for a filter change. Always, always think about future you.

Identify Your Plumbing Type and Size

Alright, time to play plumber's detective. You need to know exactly what your pipes are made of and how big they are. Most modern homes use either Copper, PEX (the flexible plastic stuff), or PVC. Figuring this out is non-negotiable because it determines the tools and fittings you need. You'll need a tubing cutter for copper, whereas a simple shear-style cutter works for PEX and PVC.

Just as important is the pipe's diameter. The vast majority of homes have either 3/4-inch or 1-inch main lines. The easiest way to check is to wrap a piece of string around the pipe, measure the string's length (the circumference), and then divide that by 3.14 (pi). Or, just grab an adjustable wrench, tighten it onto the pipe, and then measure the gap. Showing up with fittings for a 1-inch pipe when you have a 3/4-inch line will stop your project dead in its tracks. If you're getting into home improvement, looking into other helpful DIY plumbing projects is a great way to build up your skills.

Master the Dry-Fit Layout

This is my secret weapon for a stress-free installation: do a 'dry-fit' before you cut a single thing. Lay the filter unit, shut-off valves, bypass valve, and all your fittings out on the floor right next to where you're going to install it. It's like a dress rehearsal for your plumbing.

This simple step lets you see exactly how it will all go together. You'll know precisely how much pipe to cut and whether you need an extra elbow to get around an obstacle. It's so much easier to solve these little spatial puzzles on the floor than when you're crouched in a closet with water dripping. For more expert tips on choosing the right system, we have a ton of professional advice for your water filter needs to get you pointed in the right direction.

Gathering the Right Tools and Materials

Walking into a hardware store without a solid plan is the difference between a successful weekend project and a week-long headache filled with return trips. Let's get this right the first time. Think of this not just as a checklist, but as your battle plan for a smooth, leak-free whole house water filter installation.

Having every single piece on hand before you make that first cut is the secret. It allows you to work with confidence, moving from one step to the next without any frustrating interruptions.

Your Core Plumbing Arsenal

There are a few tools that are absolutely non-negotiable for this kind of plumbing work. Without them, you're just making the job harder and risking a sloppy finish.

  • Two Pipe Wrenches: You absolutely need two. One wrench holds your pipe or fitting steady while the other does the tightening. This simple trick prevents you from putting stress on your home's existing plumbing, which can cause surprise leaks far from where you're working.
  • Tubing Cutter: Ditch the hacksaw. A dedicated tubing cutter is your best friend for getting a perfectly clean, square cut. This is critical for getting a proper seal, especially if you're using modern push-to-connect fittings.
  • Deburring Tool: After you cut a pipe, the edges will be sharp. A quick spin with a deburring tool smooths them out, which is vital for protecting the O-rings and seals inside your new fittings from getting sliced up during assembly.

These are the fundamentals. They’re what separate a clean, professional-looking job from a messy, amateur one.

The Filtration System Components

Now for the main event—the filter itself and all the bits and pieces to tie it into your water line. What you need will depend on your specific system and whether you have Copper, PEX, or PVC pipes, so always double-check the manufacturer's guide.

Here's a pro tip: Before you go to the store, snap a quick photo of your main water pipe and the filter’s connection ports on your phone. It’s a simple step that can save you from the massive headache of buying the wrong size fittings.

Before you head to the hardware store, make sure you have everything on this list. Having it all laid out and ready to go will make the entire process feel a whole lot less intimidating.

Essential Toolkit for Your Filter Installation

Category Item Pro Tip
Filtration Whole House Filter Housing & Cartridges Look for a system with a built-in pressure relief button. Trust me, it makes changing filters down the road much, much easier.
Connections Fittings (Push-to-Connect, Threaded) Push-to-connect fittings are a DIYer's dream. They're incredibly fast, reliable, and don't require any soldering.
Valves Shut-off Valves (Ball Valves) Always install a shut-off valve before and after the filter. This creates a bypass loop that makes maintenance a breeze.
Sealing Plumber's Tape (Teflon Tape) When wrapping threaded fittings, go clockwise 3-4 times. This ensures the tape tightens as you screw the fitting on, instead of unraveling.
Mounting Mounting Bracket & Screws Use the right screws for your wall type. You'll want lag bolts for wood studs or masonry anchors if you're mounting to concrete.
Miscellaneous Buckets & Towels Have these within arm's reach before you start. You're going to spill some water—it’s inevitable. Be prepared for it.

This checklist covers your bases and helps prevent those last-minute, panicked runs back to the store.

While plenty of handy folks tackle this project themselves, it’s also important to know your own limits. This job involves cutting into your home's main water line. A professional plumber can usually get this done in about 2 to 4 hours. In fact, because it requires precise cuts and watertight connections, around 65% of homeowners choose to have a pro handle the installation. You can learn more about home filtration market trends to see how this fits into the bigger picture of consumer choices.

Alright, let's get this done. This is where the magic happens—where all that prep work pays off and you finally get your hands on the pipes. It can feel like the point of no return, but trust me, it’s the most satisfying part of the job. You're about to transform that box of parts into a clean-water powerhouse for your entire home.

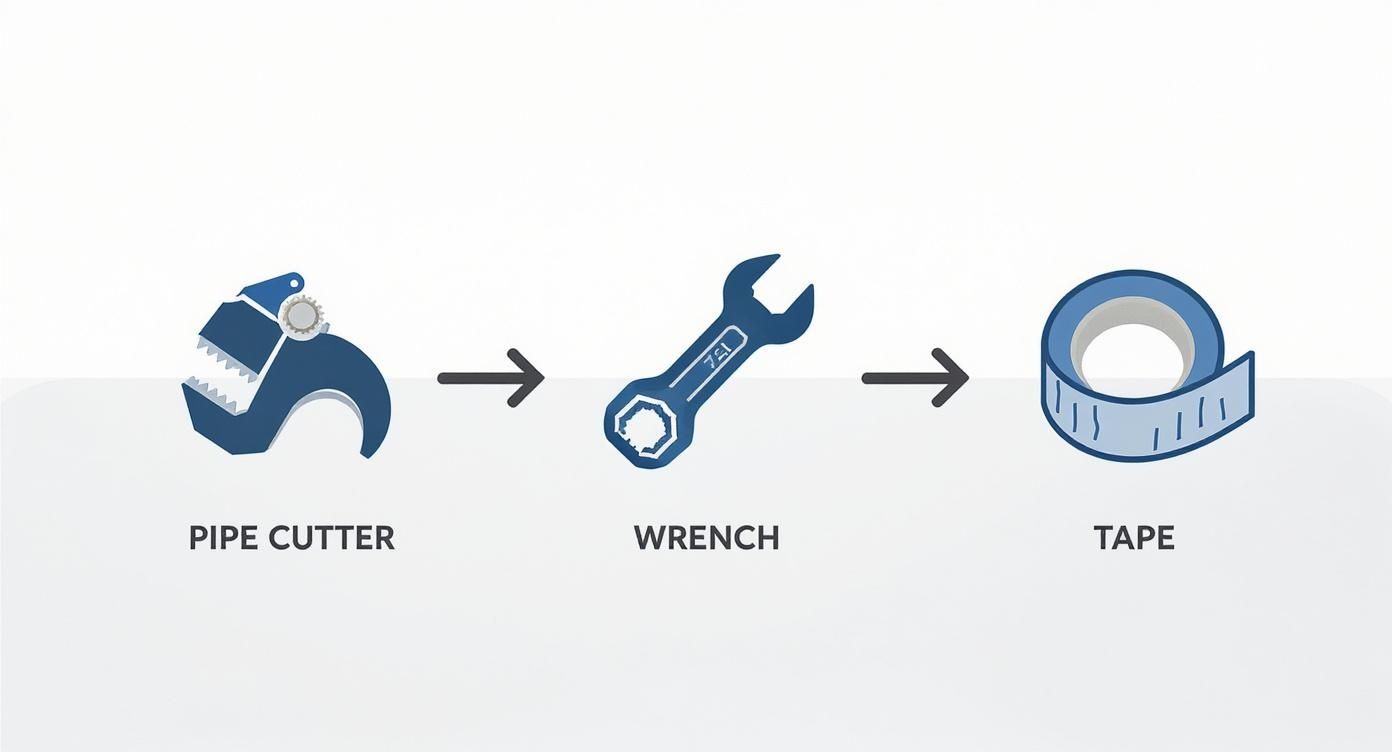
Before you make that first cut, just picture the flow: you'll use a pipe cutter for a nice, clean slice, wrenches to get everything snug, and a little plumber's tape to guarantee a leak-proof seal.

Infographic about how to install a whole house water filter

It really boils down to that simple sequence: cut clean, seal well, and tighten right. Get those three things down, and you're golden.

First Things First: Shut Down and Drain the Line

Before a single tool touches a pipe, you absolutely must shut off the main water supply to your house. Find that main shut-off valve—it's usually right where the water line enters your home—and crank it all the way off.

With the main shut, you've got to get the water out of the pipes. Head to the lowest faucet in your house (a basement sink or an outdoor spigot is perfect) and open it up. Then, pop open a faucet on the top floor. You’ll hear some gurgling as the lines drain and air gets in, which is exactly what we want. This little step saves you from a surprise shower when you make the cut.

Safety First: Keep a couple of buckets and some old towels handy. No matter how well you drain the system, there's always a bit of water left in the line. Being ready for it will keep your work area dry and safe.

Measure Twice, Cut Once: The Plumber's Mantra

Time to mark your pipe. Hold the fully assembled filter unit, with all its valves and fittings, right up against the section of pipe you're installing it on. Use a marker to pinpoint exactly where you need to cut.

Don't forget to account for the length of the fittings! You're not just making room for the filter body; you need space for the whole shebang. Double-check your measurements. Then, seriously, check them a third time. A bad cut is a major pain to fix.

When you're confident, get your tubing cutter on the mark. Slowly tighten it as you rotate it around the pipe. The key is a clean, square cut. A crooked cut is one of the biggest reasons for leaks down the road because it stops the fittings from seating properly.

Installing Your Valves for an Easier Future

With the piece of pipe removed, it's time to put in your new shut-off and bypass valves. This setup is a gift to your future self, I promise. It lets you isolate the filter entirely, meaning you can change cartridges later without shutting off water to the whole house.

First, take a moment to deburr the freshly cut ends of the pipe to smooth out any sharp edges. It seems small, but this step is critical—it prevents you from nicking the O-rings inside your fittings, which is a surefire way to cause a slow drip.

Now, install the first shut-off valve on the incoming water line. Follow that with the filter assembly itself, and then pop the second shut-off valve on the outgoing line. If you planned for a bypass, this is when you'll connect that little loop of pipe that bridges the gap between the two valves.

Sealing the Deal: The Art of Tightening Fittings

Connecting the filter properly is all about creating a watertight seal. If you're working with threaded fittings, plumber's tape is your best friend. Wrap the male threads 3 to 4 times in a clockwise direction. Wrapping it this way ensures the tape tightens down as you screw the fitting on, instead of bunching up.

When you're tightening, always use two wrenches. Use one to hold the filter head or valve steady, and the other to turn the fitting itself. This is called "backing up," and it stops you from putting a ton of stress on the filter housing or your home's plumbing.

Tighten until the connection feels snug, but do not overtighten. Going full-on Hercules here can crack the plastic housing or strip the threads, and that's a mistake you can't fix. You're aiming for "firmly tight," not "cranked-down-with-all-your-might tight."

A properly installed system can remove over 95% of common contaminants like chlorine, sediment, and heavy metals before they even get to your taps. By doing this, you're taking a real step to reduce your exposure to things linked to long-term health issues. You can find more data on the effectiveness of water filtration on persistencemarketresearch.com.

Last but not least, check the flow direction. Every filter head has arrows marking the "IN" and "OUT" ports. Getting this backward will make the filter useless and could even damage it. Make absolutely sure your incoming water line goes to "IN" and the line heading to your house connects to "OUT." All that prep work is about to pay off—you're just one step away from clean water everywhere.

Testing Your Work and Priming the System

https://www.youtube.com/embed/HPlMvL3QF2w

Alright, the pipes are connected and the filter is mounted solid. It’s that moment where you just want to crank the main valve open and call it a day. But hold on—this next part is what separates a successful DIY job from a frantic call to a plumber.

Properly testing your connections is the final, most important step. Think of it as a quality control check on your own work to guarantee a leak-free system. Rushing this is just asking for trouble.

The Slow-Pressure Leak Test

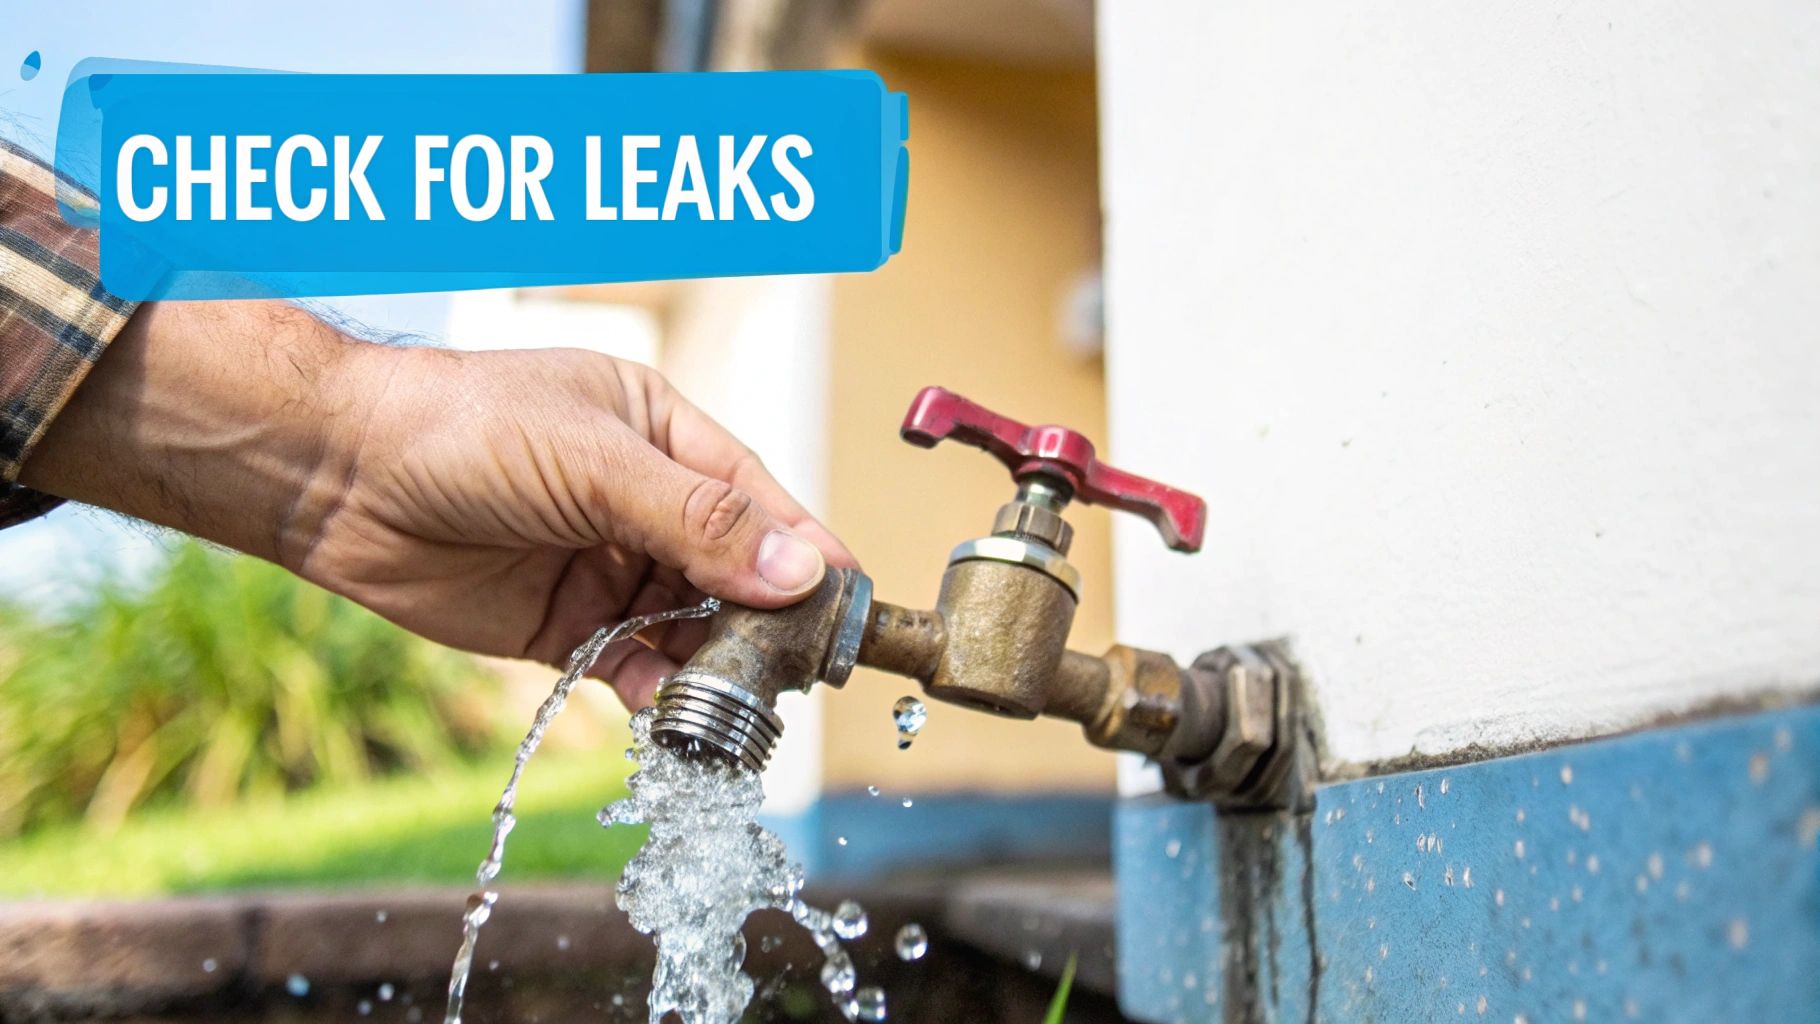
First things first, make sure the shut-off valves you installed before and after the filter are closed. If you put in a bypass valve (and I hope you did), open it up. This is a brilliant little trick that lets you test your main plumbing connections without even letting water touch the new filter yet. You're isolating the joints you cut into the main line, which are the most likely spots for a leak.

Now, walk over to your main water shut-off. Don't just throw it open. Turn it on just a quarter of the way—slow and easy. You’ll probably hear some hissing and gurgling as the pipes fill back up. This gentle pressurization is much kinder to your joints and gives you a chance to catch a major issue before it turns into a geyser.

Grab a good flashlight and start inspecting every single fitting you touched. You’re using three senses here: sight, sound, and touch.

  • Listen: A sharp hiss is a dead giveaway for a pinhole leak.
  • Look: Check under every connection for that first tell-tale drip. It often starts small.
  • Feel: My favorite trick is to run a dry paper towel over each joint. It will pick up even the slightest bit of moisture that your eyes might have missed.

While you're at it, it pays to know what to look for beyond an obvious drip. Being familiar with the critical signs of water damage can help you spot bigger problems before they get out of hand.

Getting the Filter Ready for Action

Once you're 100% certain your connections are bone-dry and solid, it's time to bring the filter online. You can't just open the valves; you need to prime the system to push all the air out.

Close the bypass valve. Now, very slowly, crack open the inlet valve (the one before the filter). You’ll hear the filter housing gurgling as it fills with water.

While it's filling, press the red pressure-relief button on top of the filter head. You'll hear a big whoosh of air escaping. Keep holding that button down until a solid little stream of water shoots out. That's how you know the air is gone.

Pro Tip: Have a small bucket or a bunch of rags right under the filter before you hit that pressure-relief button. It always shoots out more water than you expect once the air is purged.

With the air out, you can open the inlet valve all the way. Now, find a nearby faucet—a utility sink or a bathtub is perfect for this—and turn on the cold water full blast.

Flushing the Carbon Fines

Don't be alarmed when the water comes out cloudy or even blackish for a few minutes. This is totally normal. What you're seeing are carbon fines, which are basically harmless dust-like particles from the new carbon filter. It’s just leftover residue from the manufacturing process.

You need to let that faucet run for a good 10-15 minutes, or until the water is completely clear. This step is non-negotiable. If you skip it, you'll get that murky water coming out of your kitchen sink or into your washing machine.

Once the water is crystal clear, you can go back and fully open the outlet valve after the filter.

And that's it. Your whole house water filter is officially installed and running. Congratulations—you just upgraded the water quality for your entire home.

Long-Term Filter Care and Maintenance

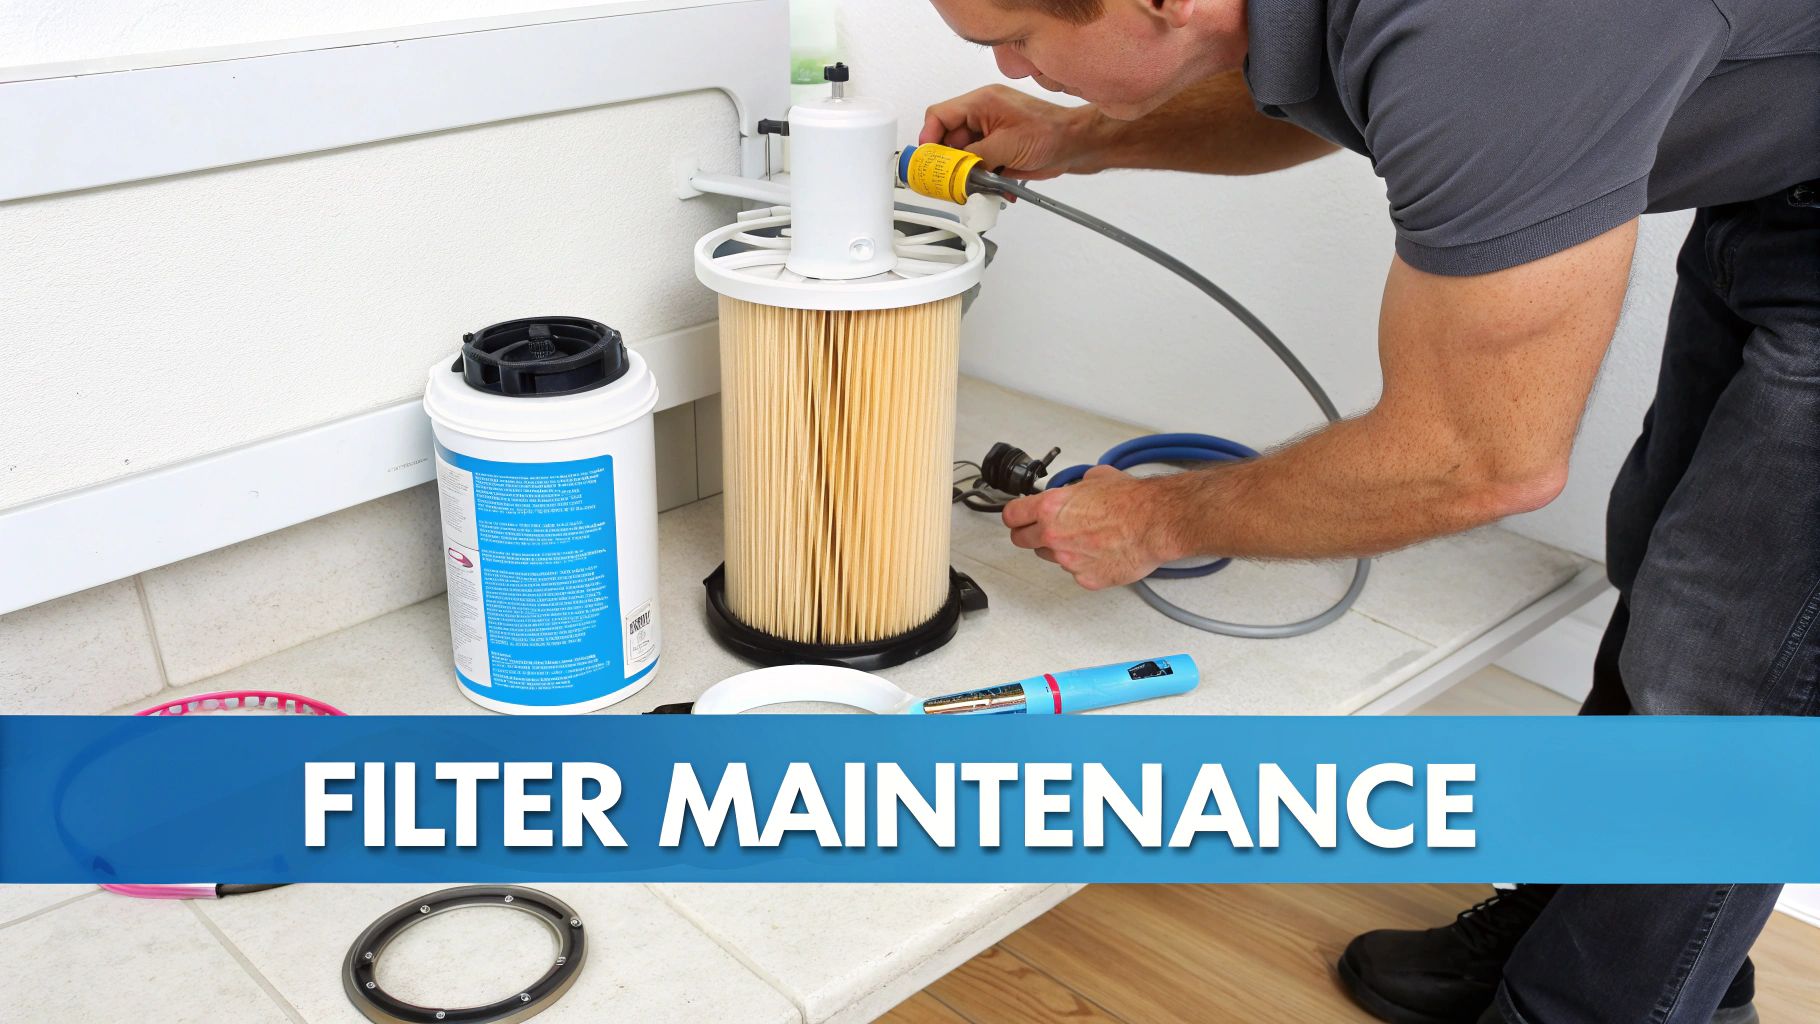
A person inspecting the O-ring and filter cartridge of a whole house water filter system during routine maintenance.

You did it. The whole house water filter is installed and humming along. But getting it running is only half the battle. Think of this system like a new car—it needs routine tune-ups to keep performing its best. A little bit of consistent care turns this project into a long-term win for your home's water quality.

This is where you shift from installer to owner. A simple maintenance schedule is all it takes to guarantee the system you worked so hard on keeps delivering clean, crisp water for years. It really just comes down to knowing what to do and when to do it.

Setting Up a Simple Replacement Schedule

The single biggest mistake I see homeowners make is forgetting to change the filter. A clogged-up cartridge can't do its job, and worse, it can choke your home's water flow. The easiest way to sidestep this problem is to get organized right from the start.

Most filter cartridges come with a recommended lifespan, usually measured in months or the number of gallons they've filtered.

  • Sediment Filters: These are the first line of defense and usually need replacing every 3-6 months.
  • Carbon Block Filters: These are the workhorses pulling out chlorine and chemicals, often lasting 9-12 months.

The moment you finish the installation, grab a permanent marker and write the date directly on the new filter cartridge. While you're at it, set a recurring reminder on your phone for a week before it’s due for a change. This simple trick takes all the guesswork out of maintenance.

It’s no surprise these systems are getting more popular. People are more aware of their water quality than ever before, which is why the global whole house water filter market is projected to hit about $16.91 billion by 2025. This shows a huge shift in how much we value clean water at home. You can dig into more data about whole house water purifier market growth on archivemarketresearch.com.

The Art of a Clean Filter Swap

When that calendar alert goes off, it's time for a quick filter swap. This is where you'll be glad you installed that bypass valve—it lets you change the filter without shutting off water to the rest of the house.

Here’s the drill:

  1. Engage the Bypass: First, close the shut-off valves on the inlet and outlet sides of the filter. Now open the bypass valve to keep water flowing to your home.
  2. Relieve the Pressure: Grab a bucket and place it under the housing. Press the red pressure-relief button on top of the filter housing until you hear a final hiss.
  3. Unscrew and Replace: Use the housing wrench that came with your kit to unscrew the sump. Pull out the old cartridge, give the housing a quick rinse to clear out any gunk, and drop in the new one.
  4. Check the O-Ring: This is a step you can't skip. Inspect the big rubber O-ring for any cracks or signs of wear. Wipe it clean and apply a thin layer of food-grade silicone grease. This keeps the seal from drying out and causing leaks.
  5. Reassemble and Test: Screw the housing back on by hand until it's snug, then give it a final quarter-turn with the wrench. Don't overtighten it. Slowly open the inlet valve and press the relief button again to bleed out any trapped air. Finally, open both valves completely and close the bypass.

A dry or cracked O-ring is the number one cause of a slow leak after a filter change. Taking a few seconds to inspect and lubricate it is one of the smartest things you can do.

Spotting the Signs of a Clogged Filter

Sometimes, your filter will give you a heads-up that it needs changing before your calendar does, especially if your water is heavy with sediment.

The most obvious clue is a noticeable drop in water pressure across the house. If your shower suddenly feels weak or the kitchen faucet seems sluggish, your filter is likely clogged. That's actually a good thing—it means the system is doing its job and trapping all that stuff before it gets to your taps. It's just time for a fresh cartridge.

Answering Your Top Installation Questions

Even after you've tightened the last fitting and turned the water back on, a few questions might still be nagging you. That's totally normal. Putting in a whole house filter is a serious upgrade, and it's smart to think through all the angles. Let's run through some of the most common questions we hear.

Think of this as your final debrief, making sure you're not just set for today, but for the long haul.

Can I Really Do This Myself?

You absolutely can, provided you're already pretty handy with basic plumbing. At its core, the job involves shutting off the water, cutting a piece of pipe, and fitting the new filter system in. Pulling it off yourself can easily save you hundreds of dollars on a plumber's bill.

But, you need to be honest with yourself. If the idea of cutting into your main water line makes you break out in a cold sweat, or if you're dealing with older, tricky plumbing like galvanized steel, calling a pro is the way to go. A small mistake can quickly turn into a big, expensive leak, wiping out any savings you were hoping for.

Where’s the Best Spot to Install the Filter?

The sweet spot is on your main water line, right after the main shut-off valve for your house but before the pipe splits off to feed your water heater. Placing it here means every single drop of water, both hot and cold, gets filtered before it goes anywhere else.

Most people find their main line is exposed in a garage, basement, or utility closet, which are all great spots. When you're picking the final location, keep two things in mind:

  • Easy Access: You have to change the filters later. Leave at least a foot of clear space below the filter housing so you can get the wrench in there and unscrew it without a struggle.
  • No Freezing: Never, ever install the filter where it could freeze. A frozen filter housing will crack, and you’ll be dealing with a flood.

What Happens If I Install It Backwards?

This happens more often than you'd think, and it's a critical mistake. Whole house filters are specifically designed for water to flow in one direction, which is why they have "IN" and "OUT" ports clearly marked.

If you hook it up backwards, you're essentially pushing water against the grain. This immediately tanks the filter's performance, can physically damage the filter cartridge itself, and will almost certainly cause a major drop in water pressure throughout your entire house. Always, always double-check the little flow-direction arrows on the filter head before making your final connections.

One of the most important steps in learning how to install a whole house water filter is verifying the water flow direction. Getting this simple detail right ensures the system works as intended from day one.

How Do I Know When It’s Time to Change the Filters?

How long your filters last is a mix of your local water quality and how much water your family uses. But here are some solid rules of thumb:

  • The sediment pre-filter (the one that catches the big stuff like rust and sand) usually needs to be swapped out every 3-6 months.
  • The main carbon block filter (which handles chlorine and chemicals) can often go for 9-12 months or is rated for a certain number of gallons, like 100,000 gallons.

Don't just rely on the calendar, though. Your house will tell you when it's time. The biggest clue is a slow but steady drop in water pressure at your faucets and in the shower. When that happens, it means the filter is clogged with gunk and has done its job—it just needs a fresh one to get your water flowing freely again.


Ready to take control of your home's water quality? At Water Filter Advisor, we provide the in-depth guides, unbiased reviews, and practical advice you need to find the perfect filtration solution. Explore our resources and make your next water filter decision with total confidence.

Find your perfect filter at https://www.waterfilteradvisor.com.
How to Install a Water Filter: Your Ultimate Guide to Cleaner Sips

So, you're ready to learn how to install a water filter? Let's start with a splash of reality: not every filter is a perfect match for every home or DIY skill level. What's a dream for a renter in a tiny apartment is a plumbing nightmare for a homeowner battling cloudy well water.

The secret isn't just about plumbing; it's about matching the filter's complexity to your own comfort zone. Let's turn that tap water into liquid gold, one step at a time.

Matching a Filter to Your Home and Skills

A person pointing to different types of water filters on a store shelf.

Before you even think about grabbing a wrench, you need to pick your battle. Installing a water filter isn’t a one-size-fits-all mission. The right choice boils down to your living situation, what you’re trying to filter out, and—let's be honest—your willingness to get up close and personal with the pipes under your sink.

It's no secret that the thirst for clean water is real. The global water filter market is projected to swell to an incredible $84.2 billion by 2032, a huge jump from $48.2 billion in 2025. This wave is powered by a growing focus on health and water purity. While this means you have more options than ever, it can also make choosing one feel like navigating a maze.

Finding Your Perfect Filtration Fit

Let's dive into a couple of common home scenarios.

If you're renting an apartment, making permanent changes to the plumbing is a one-way ticket to losing your security deposit. Your best friends here are a simple faucet-mounted filter or a countertop dispenser. These heroes usually require zero tools and can be set up in minutes, giving you an instant upgrade in taste and odor without any landlord drama.

On the flip side, if you own your home and want to declare war on specific contaminants like lead or chlorine, an under-sink system is your long-term champion. This is a more hands-on adventure. You'll need to shut off the water, possibly drill a hole in your countertop for a dedicated faucet, and ensure every connection is as tight as a drum.

Your goal isn't just to install a filter. It's to conquer a project that leaves you feeling accomplished and delivers delicious, clean water—without accidentally creating an indoor swimming pool. Choose a system that aligns with your skills today, not the master plumber you hope to become someday.

To help you out, here’s a quick comparison table that breaks down the most common home water filter types.

Home Water Filter Installation Comparison

Filter Type Installation Difficulty Common Tools Needed Best For
Pitcher/Dispenser Very Easy None Individuals, renters, basic taste/odor removal
Faucet-Mounted Easy None, maybe pliers Renters, small kitchens, improving tap water taste
Under-Sink Moderate Wrench, drill, bucket Homeowners, targeted contaminant removal
Whole-House Difficult Pipe cutter, wrenches, plumbing tape Homeowners, treating all water in the house

This table should give you a clear starting point. A pitcher is a grab-and-go solution, while a whole-house system is a serious commitment—a true weekend warrior project.

Weighing Your Filtration Options

To zero in on your perfect match, keep these three key factors in mind:

  • Installation Difficulty: Does it just screw on, or will you be cutting into your home's main arteries? Be brutally honest with yourself about what you can comfortably handle.
  • Maintenance Commitment: How often does the filter cartridge need changing? A fridge filter is a 30-second snap, but wrangling a whole-house system in a cramped crawl space is a whole different beast.
  • Long-Term Costs: Don't get mesmerized by the initial price tag. Calculate the cost of replacement filters over the next few years to see the real investment.

And remember, if you're eyeing a complex whole-house installation or the thought of touching your main water lines gives you the shivers, there's zero shame in calling in the cavalry. It's always a smart move to consult professional plumbing services when in doubt. Starting with the right filter for your home is the first and most important step to a successful installation.

Your Pre-Installation Toolkit and Workspace Prep

I’ve seen it a thousand times: a flawless, leak-free water filter installation has less to do with being a plumbing wizard and more to do with what happens before you ever touch a pipe. A little preparation is what separates a smooth DIY victory from a frantic, wallet-draining call to a plumber. It all comes down to having the right gear and a clean battlefield.

Diving in without the proper tools is like trying to bake a cake without an oven—it’s just not going to end well. Ever try to tighten a fitting under the sink with just one wrench? The whole thing just spins around mockingly. That’s why having two adjustable wrenches is my golden rule; one to hold the fort (the fitting), the other to do the tightening.

Gathering Your Essential Tools

Beyond the wrenches, a few other items will become your new best friends. You’ll absolutely need a roll of Teflon tape (aka plumber's tape) to create those beautiful, watertight seals on threaded connections. And please, do not underestimate the sheer genius of a good headlamp. It’s a dark, mysterious world under that sink, and a headlamp frees up both your hands for the important work, instead of one holding a flashlight.

Make sure you also have:

  • A bucket to catch the water that will inevitably escape the lines.
  • A few old towels for the drips and spills that are guaranteed to happen.
  • A utility knife or a dedicated tube cutter to get clean, square cuts on plastic tubing.

This nifty infographic breaks down the whole pre-installation game plan into three simple stages.

Infographic about how to install water filter

As you can see, a successful job starts with your toolkit, moves to prepping the space, and hinges on one critical action: shutting off the water.

Preparing Your Under-Sink Workspace

The space you're working in deserves just as much attention as your tools. First things first: completely empty that cabinet under your sink. You need room to maneuver and a clear line of sight to the plumbing. This isn’t just for comfort; it’s to save your cleaning supplies from an unexpected shower.

Here's the most critical tip I can give you: before you disconnect a single thing, find and test the water shut-off valves for your sink. Don't just assume they work. Old valves can seize up like they're frozen in time. Give each handle a gentle turn to make sure it moves freely and actually stops the water flow.

Once the cabinet is clear, lay down your old towels to cover the bottom. This small step is a game-changer, containing any stray water and making cleanup a breeze. With your tools at the ready and your space prepped, you’re officially ready to get started without any nasty surprises.

Installing an Under-Sink Water Filter

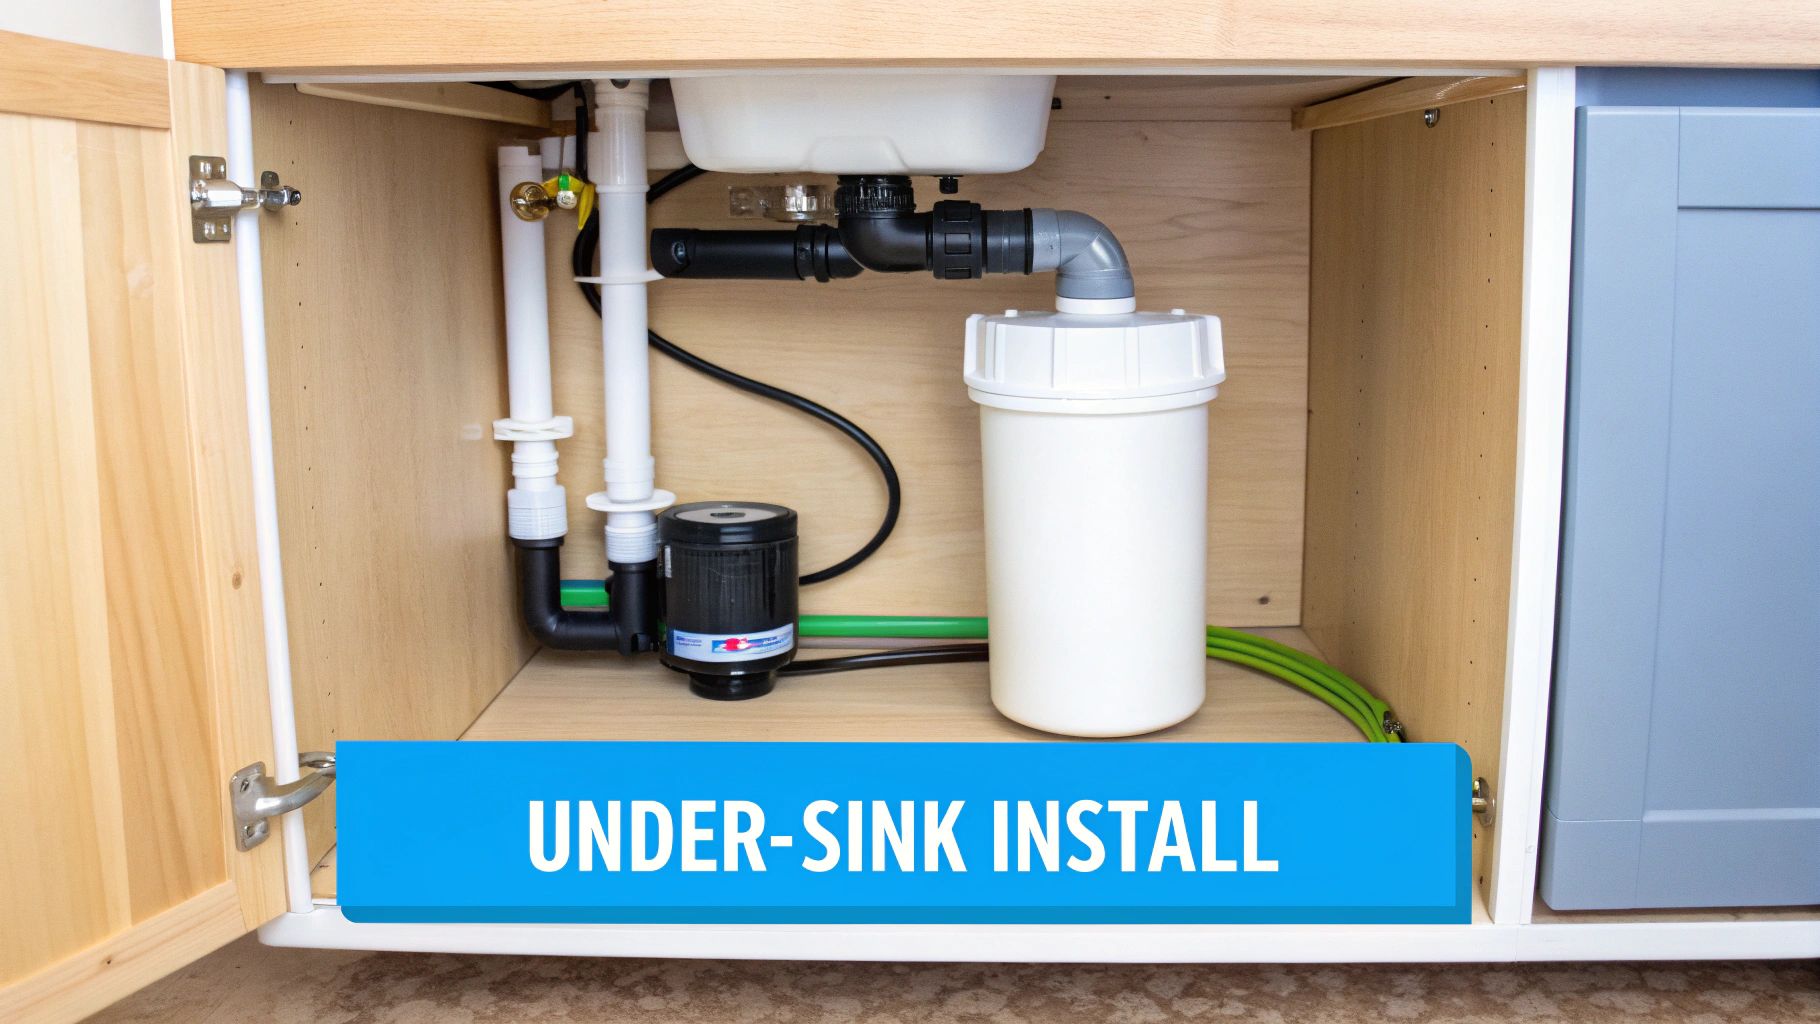
An under-sink water filter system neatly installed in a kitchen cabinet.

Alright, this is where the magic happens. Installing an under-sink water filter is hands-down one of the most popular and satisfying DIY projects for your home. It feels like a massive kitchen upgrade, but trust me, it’s completely manageable with a little patience. My goal here is to be your guide, walking you through it step-by-step so you end up with a professional, leak-free setup you can brag about.

First, and I cannot shout this from the rooftops enough: shut off the water. Find the cold water shut-off valve under your sink—it's that small, usually oval-shaped handle. Turn it clockwise until it stops. Next, open your kitchen faucet to let the line drain completely. This gets the leftover water out and, more importantly, relieves the pressure so you don’t get a surprise geyser to the face when you disconnect the supply line.

Making the T-Fitting Connection

That small T-fitting, sometimes called an adapter valve, is where most people get a little nervous. Don't be. This little piece is the heart of your new system. It brilliantly splits the cold water, sending some to your new filter and the rest along to your main faucet. With the water off, use an adjustable wrench to disconnect the flexible cold water line from the shut-off valve.

Now, screw the T-fitting directly onto the valve. Pro tip: wrap the male threads on the valve with a few layers of Teflon tape to guarantee a watertight seal. Once it's on, reconnect the original faucet supply line to the top of the T-fitting. And just like that, you’ve created a dedicated path for your filter.

A Word of Caution: When tightening the compression fittings on that T-adapter, you're aiming for "snug," not "crushed." If you unleash your inner Hulk and crank down too hard, you can damage the delicate plastic or rubber seals inside. That’s the number one cause of those slow, maddening drips that haunt you later.

Mounting the Filter and Faucet

With the plumbing rerouted, it’s time to find a forever home for the filter unit. Pick a spot on the cabinet wall where you can easily reach it for future filter changes. Don't banish it to the dark back corner where it can't be seen or reached! Mark your screw locations with a pencil, drill some small pilot holes, and then screw the mounting bracket securely to the cabinet wall.

Next up is the sleek new filter faucet that came with your kit.

  • Look for an existing hole: Many sinks have a pre-drilled hole covered by a cap, perhaps for a soap dispenser or an old sprayer. This is your golden ticket—the path of least resistance.
  • Drilling a new one: If you have to drill, lay down a layer of masking tape first. This gives your drill bit something to grab onto so it doesn't skate across your beautiful countertop. Always start with a small pilot hole before graduating to the larger bit designed for your specific material (like a diamond hole saw for granite).

This part requires a steady hand, but taking it slow is the secret to avoiding a countertop catastrophe.

Cutting and Connecting the Tubing

The final piece of this puzzle is all about precision. Your kit came with a roll of plastic tubing. You'll use this to connect the T-fitting to the filter's inlet, and then the filter's outlet to the new faucet. The secret to a leak-proof connection here is a perfectly square cut. If the end of the tube is jagged or angled, it won't create a proper seal inside the push-to-connect fittings.

I recommend using a sharp utility knife or, even better, a dedicated tube cutter for a clean, professional edge. Once cut, push the tube firmly into the fitting until you feel a distinct click or feel it bottom out. Give it a gentle tug to make sure it's locked in place. Repeat for all your connections, and you're golden.

This project is a fantastic way to upgrade your home’s water quality on your own terms. Of course, if this installation is part of a larger renovation or you'd just prefer a professional touch, you might want to look into professional kitchen remodeling services to get a seamless integration. But with these tips, you are well on your way to enjoying fresh, filtered water right from your own tap.

Whole-House Systems and Refrigerator Filters: The Full Spectrum

While an under-sink filter is a fantastic weekend project, it only purifies the water at one specific tap. If you're looking to go bigger—or even smaller and simpler—you'll encounter two other common players in the home filtration game: the mighty whole-house system and the humble refrigerator filter.

These two could not be more different in difficulty, but understanding them gives you the complete picture of your home water filtration options.

The Pro-Level Project: Whole-House Filter Installation

A whole-house filter is the undisputed heavyweight champion of water treatment. It cleans every single drop of water entering your home, meaning better water for your showers, your laundry, and every faucet in between.

But let's be crystal clear: this is a major league step up from an under-sink job. For most homeowners, this is a project best left to a professional plumber.

The process involves locating your main water line, usually hiding in a basement or utility closet, right after the water meter. You have to shut off the water to the entire house, drain all the pipes, and then physically cut into your main copper or PEX supply line. This is the point of no return where most DIYers understandably start to sweat. A mistake here isn't just a small leak under the sink; it's a potential indoor water park.

After the pipe is cut, the filter unit is installed using specialized fittings. These units are heavy, especially when full of water, so they also need to be securely anchored to a wall.

Even if you hire this job out, it pays to understand what's involved. You'll be able to ask your plumber intelligent questions, make sense of their quote, and know exactly what a safe, professional installation should look like.

The Easiest Win: Swapping Your Refrigerator Filter

On the complete opposite end of the spectrum, you have the refrigerator filter. This is likely the simplest filter change you will ever perform in your home.

Most modern fridges with water and ice dispensers have a small, built-in filter that needs to be replaced every six months. If you forget, you'll eventually notice the water flow slowing to a trickle and your ice starting to taste a bit…off.

The manufacturers design this to be a ridiculously easy process:

  • Find the filter. It's usually inside the fridge compartment behind a small pop-open door or tucked away at the bottom behind the base grille.
  • Pop the old one out. Most use a simple push-button or a quarter-turn twist-and-lock mechanism to release the old cartridge.
  • Slide the new one in. Just insert the new filter and twist it the opposite way until you hear or feel it click securely into place.
  • Flush the system. This is a critical final step! Run about two gallons of water through the dispenser. This clears out any harmless carbon dust from the new filter and purges any trapped air bubbles, preventing sputtering.

Modern filtration technology, from complex membranes in reverse osmosis systems to the simple activated carbon in your fridge filter, has given homeowners incredible power over their water quality. As you'd expect, different technologies often need specific installation know-how to function correctly. You can dig deeper into how these advancements are changing the market by checking out recent industry research.

Whether you're tackling a major plumbing overhaul or just a five-minute filter swap, doing it right is the key to getting the clean, great-tasting water you deserve.

Final Checks and Troubleshooting Common Drips

A person using a dry paper towel to check a water filter connection for leaks under a sink.

You’ve tightened the last fitting, the filter is mounted, and you're feeling victorious. It feels like you're done, right? Not so fast. These next few minutes are the most critical part of the entire installation. This is where we hunt down and eliminate the tiny drips that grow into big, ugly problems.

The trick is to reintroduce the water slowly. Don’t just crank the shut-off valve open. Crack it just a quarter turn to let the system fill up gently. You’ll hear the filter housing gurgle and sigh as it fills with water.

Now, pause. Just stop and listen for a moment. A hiss or a spray is an immediate red flag. If you hear anything like that, shut the water off instantly and revisit that connection. If all is quiet, you can proceed to the inspection.

The Paper Towel Test

This is an old plumber’s trick, and it's absolutely foolproof. Take a completely dry paper towel and wipe down every single connection you touched—the T-fitting, the lines going in and out of the filter, and the base of the new faucet.

Even the sneakiest, slowest seep will show up instantly on that dry paper towel. It’s a dead giveaway for a leak your eyes might have missed. A single drop every few minutes might seem harmless, but over time it’s more than enough to warp and rot the bottom of your cabinet.

A successful DIY job isn't about finishing fast. It's about not having to call a plumber a week later. Taking a few extra minutes for these final checks is your insurance policy against water damage and a world of frustration.

If everything stays bone-dry for a few minutes, you’re in the clear. Go ahead and open the shut-off valve the rest of the way. Now, run your new filter faucet for a while to flush the system out, just like the manufacturer's instructions recommend.

Solving Common Installation Hiccups

Even when you're careful, a couple of small issues can pop up. Don’t panic; the fixes are almost always surprisingly simple.

  • A Stubborn Drip at a Fitting: If that paper towel test reveals a slow drip from a threaded connection, your first instinct might be to tighten it more. Resist! Turn off the water, disassemble the fitting, and simply re-wrap the threads with some fresh Teflon tape. For compression fittings, usually, a simple quarter-turn with a wrench is all it needs to get a good seal.
  • Sputtering or Low Water Flow: This is almost always one of two things. First, quickly check that the plastic tubing hasn't been kinked or bent sharply. Second, you probably just have some air trapped in the lines, which is completely normal. Let the faucet run for a good 5-10 minutes. This will purge the air, and you’ll see the flow smooth out into a beautiful, steady stream.

By taking the time to perform these final checks, you can pack up your tools with the cool confidence of a pro. This careful finish ensures your hard work pays off with delicious, clean water and a leak-free setup you can count on.

Your Water Filter Installation Questions Answered

Got your filter installed? Fantastic. But if you’re like most people, a few questions are probably bubbling up right about now. It's totally normal to wonder about maintenance, how long the filter really lasts, and if you’ve set everything up for the best possible results.

Let's dive into some of the most common questions we hear in the world of home water filtration. Think of this as your final check-in to make sure you're ready to enjoy that pristine water with total peace of mind.

How Often Should I Really Change My Filter Cartridge?

This is the number one question, and the honest answer is: it depends. The manufacturer’s guideline—usually every six months—is a solid starting point. They base that on an "average" home with "typical" water.

But your home isn't average; it's yours. Your schedule might need to be different.

  • Is your water full of sediment? If you're on a well or live in an area with old city pipes, you’ll probably notice your water pressure dropping sooner. That’s your filter's way of crying for help. Time for an early change.
  • Do you have a big family? A house full of people cooking, drinking, and filling water bottles will exhaust a filter way faster than a single person would.
  • Can you taste a difference? The most reliable sign is when that old chlorine taste or funky smell starts to creep back in. Trust your taste buds—they are your best indicator that the filter has given its all.

Do I Need to Sanitize the System During a Filter Change?

Yes, and please don't skip this crucial step! It’s super simple. Over time, the inside of the filter housing can develop a thin, slimy biofilm made of harmless bacteria. When you remove the old cartridge, you have the perfect opportunity to give the housing a quick clean.

All it takes is a little unscented bleach or a dedicated sanitizer solution followed by a thorough rinse. This simple habit ensures that the pure water coming through your brand-new filter actually stays that way.

Taking a moment to sanitize the filter housing is a small investment in maintaining the highest water quality. It prevents the system itself from becoming a source of contamination, ensuring every glass is as pure as the first.

It's no surprise that more and more people are focused on this. The global water purifier market was valued at around $35.25 billion in 2024 and is expected to more than double by 2034. That incredible growth shows just how much people around the world care about water safety at home. You can dig into the numbers and trends by checking out the latest market research on water purifiers.

Can I Connect My Under-Sink Filter to My Refrigerator?

Absolutely! This is one of our favorite DIY home filtration upgrades. You get pristine, filtered water and ice right from your fridge dispenser without having to buy those pricey, brand-specific refrigerator filters.

You'll just need a T-fitting and some extra quarter-inch tubing. This lets you "split" the filtered water line, sending it to both your new faucet and your fridge's icemaker line. Just double-check that your under-sink system has enough water pressure to run the icemaker properly. Most modern systems can handle it just fine.


At Water Filter Advisor, our goal is to empower you with the knowledge to achieve safer, better-tasting water at home. From choosing the right system to a successful installation, we're here to help every step of the way. Explore our in-depth guides and reviews at https://www.waterfilteradvisor.com.
Choosing the Best Whole House Water Filter for Your Home

Ever wondered what's really in your tap water? When you start the hunt for the best whole house water filter, you're not just buying an appliance—you're taking control of every drop of water in your home. The top-tier systems all do a few key things brilliantly: they attack contaminants with multiple stages of filtration and are built like tanks to last for years. This isn't just a filter under your sink; it's a full-on water upgrade for your entire house, purifying water from the laundry room to your morning shower.

Your Guide to Pure Water in Every Room

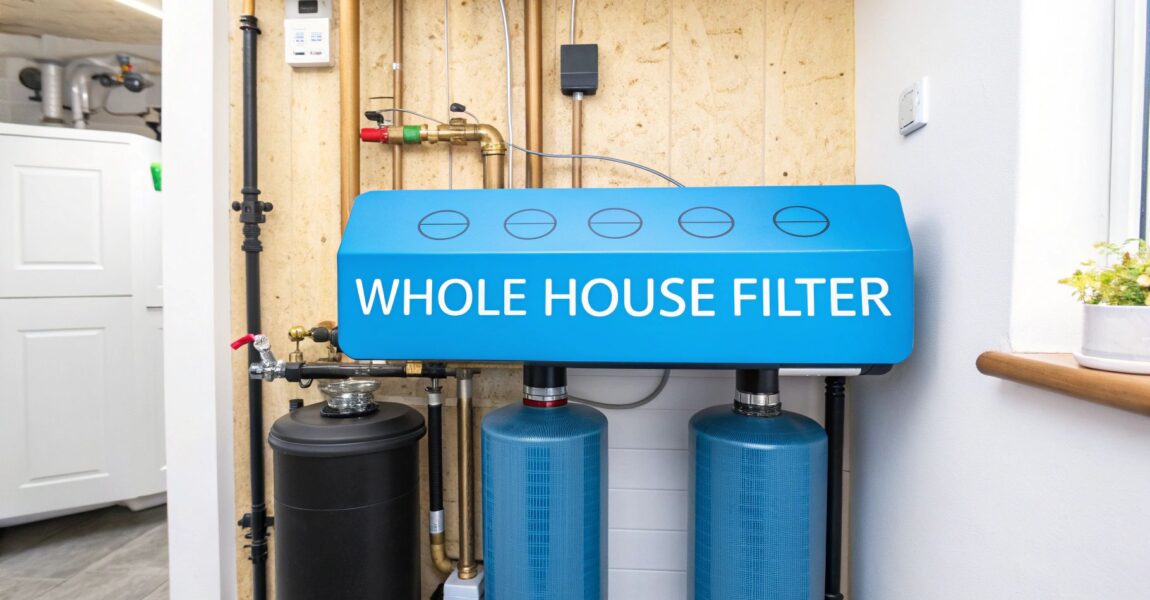
A modern whole house water filter system installed in a clean utility room

A whole house water filter, also known as a point-of-entry (POE) system, is the ultimate solution for your home's water quality. Forget those clunky pitchers or faucet attachments that only treat water at a single tap. This powerhouse gets installed right where your main water line enters your home.

The result? Every single faucet, showerhead, and water-using appliance—from your washing machine to your dishwasher—gets pristine, filtered water.

Choosing the right system is about more than just banishing a funky taste or smell. It's a serious investment in your family's well-being and the longevity of your home's plumbing. Unseen villains like chlorine, sediment, and heavy metals can wreak havoc on your pipes and force your appliances to work overtime, leading to costly repairs.

Why a Whole Home System is a Game-Changer

Installing a full-scale filtration system delivers benefits you'll feel all over the house. It provides a level of comprehensive protection and convenience that single-point filters simply can't match.

Here are the key perks:

  • Healthier Skin and Hair: Say goodbye to the dry, itchy skin and brittle hair that often comes from showering in chlorinated city water. Filtered water is gentler and more nourishing.
  • Appliance Lifeguard: Sediment and mineral scale are the arch-nemeses of dishwashers, washing machines, and water heaters. Clean water helps them run efficiently and last much longer.
  • Superior Taste and Odor: Finally, you can enjoy crisp, delicious water for drinking and cooking from any faucet in the house. No more stocking up on bottled water.
  • Total Peace of Mind: There's a certain confidence that comes with knowing your water is free from a whole host of potential contaminants every time you turn on the tap.

Many homeowners switch to a whole house filter because they're tired of the constant hassle of water treatment. It transforms water quality from a daily chore—refilling pitchers, changing tiny filters—into something that just works, silently and effectively, in the background.

The demand for these systems is surging as more people become aware of what's in their water. The U.S. water purifier market was valued at approximately USD 7.0 billion in 2024 and is projected to climb to USD 10.7 billion by 2033. This boom is fueled by a collective desire for healthier living and incredible advancements in filtration technology, proving just how much homeowners value a reliable, whole-home solution. We'll get into the nitty-gritty of testing your water, comparing different technologies, and finding the perfect system for your needs in the next sections.

Diagnosing Your Home's Water Quality

https://www.youtube.com/embed/fsosGnwhgd4

Before you can choose the right whole house water filter, you have to play detective. What’s actually in your water? Without knowing what you're fighting, you’re just shooting in the dark and might end up with a system that doesn't solve your specific problems.

Your water comes from one of two places: a municipal supply (city water) or a private well. Each source presents a unique cast of potential contaminants, and identifying yours is the most critical first step. This isn't just about making your water taste better; it's about safeguarding your health and your home.

City Water Versus Well Water

If a water bill shows up in your mailbox every month, you're on municipal water. This means a public utility treats the water with chemicals like chlorine or chloramine to kill germs before it reaches you. That's a huge head start on safety, but it leaves behind those treatment chemicals.

On the flip side, if your home has a private well, you are the sole guardian of your water's safety. Well water is far more likely to contain naturally occurring contaminants like sediment, iron, manganese, and even microorganisms like bacteria or viruses, particularly after heavy rain.

The core difference is this: city water is pre-treated for safety but contains disinfection byproducts, while well water is completely untreated and can harbor a much wider range of natural and environmental contaminants. Your filter choice must be tailored to your water source.

Uncovering What's in Your Water

Figuring out the specific chemistry of your water is easier than you might think. The path to answers is quite different depending on where your water originates.

For homeowners on municipal water, your local utility is legally required to provide you with an annual water quality report, often called a Consumer Confidence Report (CCR). This free document is your treasure map, listing detected contaminants and their levels against EPA standards. You can almost always find it on your city’s website.

If you have a private well, testing is your responsibility. While home test strips can give you a basic idea, sending a sample to a state-certified laboratory is the only way to get a truly accurate and detailed analysis. This is non-negotiable for identifying invisible threats like bacteria, nitrates, arsenic, or VOCs.

Common Contaminants and Their Impact

Once you have your report or lab results, you can start identifying the real culprits. Each one affects your water in a different way.

  • Chlorine & Chloramine: Used to disinfect city water, these are responsible for the "swimming pool" smell and taste. They also dry out your skin and hair and can cause textiles to fade faster in the laundry.
  • Sediment: This is a catch-all term for dirt, sand, rust, and other fine particles. It makes water cloudy, clogs faucet aerators, and can wear down the internal components of your appliances.
  • Hardness Minerals (Calcium & Magnesium): The cause of hard water. These minerals leave behind that crusty white limescale on fixtures, kill soap lather, and leave frustrating spots on your clean dishes.
  • Heavy Metals (Lead, Iron, Manganese): Lead can leach into water from old plumbing and is a serious health risk. Iron and manganese are common in well water, causing a metallic taste and leaving behind ugly reddish-brown or black stains in sinks, toilets, and on laundry.
  • Volatile Organic Compounds (VOCs): These are industrial chemicals and solvents that can seep into the water supply. They're often tasteless and odorless but can have serious long-term health effects.
  • Microorganisms (Bacteria, Cysts, Viruses): A major concern for well owners, these can cause gastrointestinal illnesses. Eliminating them requires a specific purification method like a UV light system.

Knowing exactly what's in your water is the first step to fixing it. For coffee lovers, this is a familiar topic; you can see how it applies to brewing in this piece on the most overlooked step in brewing: water quality. Once you know what you need to remove, selecting the right system becomes much clearer.

Comparing Top Water Filtration Technologies

Now that you know what might be lurking in your water, let's meet the technologies designed to take it out. Picking the best whole house water filter isn’t about finding a single "perfect" system. It's about assembling the right team of technologies to tackle your specific water issues. Each filtration method has a distinct specialty, excelling at removing certain contaminants while ignoring others.

This is where we get into the nuts and bolts. Forget the marketing hype for a moment and let's focus on the core technologies that make these systems work. Once you understand how each one functions, its strengths, and its maintenance needs, you can confidently build a solution that’s perfectly matched to your home.

Carbon Filters: The Chemical Sponges

Think of an activated carbon filter as a high-tech chemical sponge. Its surface is incredibly porous, packed with millions of microscopic nooks and crannies. As water flows through, these pores trap chemical contaminants through a process called adsorption.

This makes carbon filters the undisputed champions for improving the taste and smell of city water. They are phenomenal at grabbing chlorine and chloramine—the disinfectants responsible for that "public pool" scent. They also effectively remove a range of VOCs, pesticides, and industrial solvents.

However, carbon filters are not designed to remove sediment, heavy metals, or microorganisms. They are specialists, and their primary mission is to make your water taste and smell fantastic by eliminating specific chemical threats.

Sediment Filters: The Gatekeepers

Often the first line of defense in any whole house setup, a sediment filter is also the simplest. Its job is straightforward: to act as a physical barrier, catching solid particles like dirt, sand, rust, and silt before they can enter the rest of your plumbing.

These filters are rated in microns to indicate how small of a particle they can trap. A 5-micron filter, for example, will stop particles completely invisible to the naked eye.

By removing this debris first, a sediment filter protects the more expensive and sensitive filters downstream. It prevents them from getting clogged, which helps the entire system run more efficiently and last longer. A sediment filter is a non-negotiable component for nearly every setup, especially for homes on well water.

Think of your sediment filter as the bouncer at the club door of your filtration system. It stops the obvious troublemakers from getting inside and causing problems for the more specialized equipment, like your carbon filter or UV purifier.

UV Purifiers: The Microorganism Zappers

Unlike filters that physically trap contaminants, an Ultraviolet (UV) purifier is a sterilizer. It uses a powerful UV-C light lamp to scramble the DNA of living microorganisms, rendering them unable to reproduce and cause illness.

This technology is the gold standard for neutralizing biological threats like bacteria (E. coli, coliform), viruses, and protozoan cysts (Giardia, Cryptosporidium). A UV purifier is an absolute essential for any well water system or for anyone concerned about microbiological safety.

It's crucial to understand that a UV system doesn't remove anything else. It won't change your water's taste, smell, or chemical composition. That’s why it’s almost always paired with sediment and carbon pre-filters—the water must be crystal clear for the UV light to penetrate and work effectively.

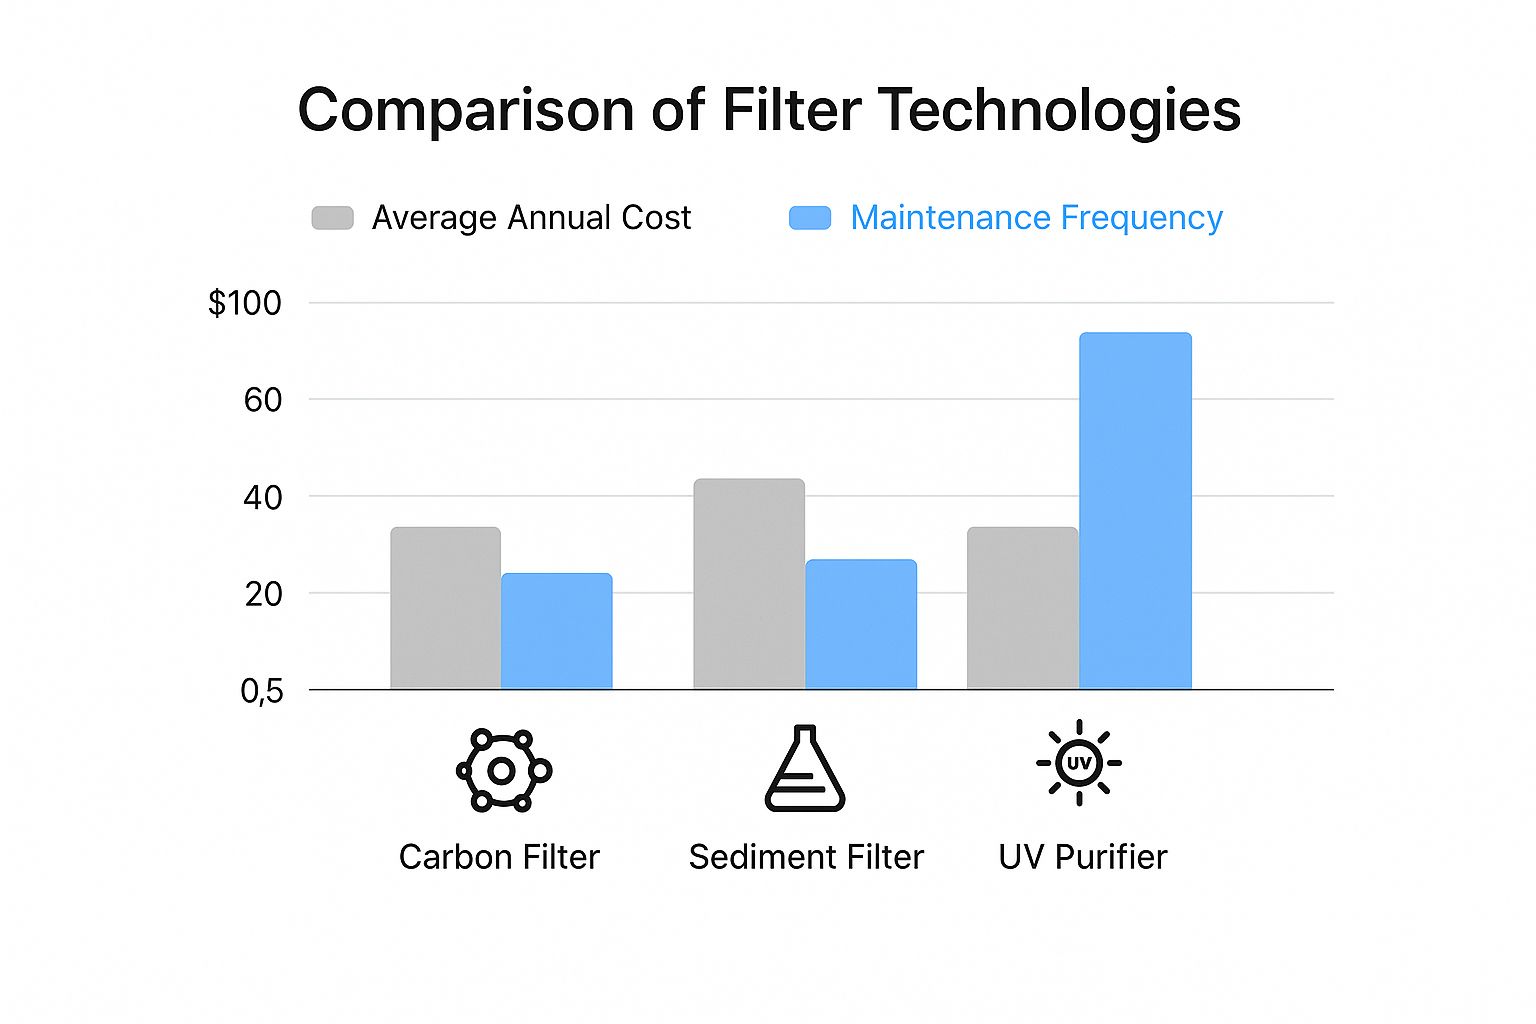
This infographic breaks down the ongoing costs and maintenance for these key technologies.

An infographic comparing the average annual cost and maintenance frequency for Carbon Filters, Sediment Filters, and UV Purifiers.

As you can see, while UV purifiers have a higher annual cost due to the lamp replacement, their maintenance is much less frequent than the cartridge-based carbon and sediment filters that need regular swaps.

To make things even clearer, here's a side-by-side comparison of what each technology does best.

Whole House Water Filter Technology Comparison

Filtration Technology Removes Best For Average Maintenance Notes
Carbon Filter Chlorine, chloramine, VOCs, pesticides, herbicides, bad taste & odor. Homes on municipal (city) water to improve taste, smell, and chemical safety. Cartridge change every 3-12 months. Doesn't remove minerals, heavy metals, or microbes. Effectiveness depends on the quality of the carbon.
Sediment Filter Dirt, sand, rust, silt, and other suspended solids. All homes, especially those on well water. Acts as a pre-filter. Cartridge change every 3-6 months. Protects other filters from clogging. Micron rating determines the size of particles it can stop.
UV Purifier Bacteria (E. coli), viruses, cysts (Giardia), and other microorganisms. Homes on well water or anyone concerned with microbiological contamination. UV lamp change every 12 months. A sterilizer, not a filter. Requires pre-filtration to ensure water clarity for the UV light to work.
Water Softener "Hardness" minerals like calcium and magnesium. Homes with hard water issues (limescale, soap scum, appliance damage). Refill salt every 1-2 months. Uses ion exchange. Doesn't filter other contaminants but solves major hard water problems.

This comparison clearly shows how each piece of equipment has a specific, targeted role. Building the ideal system is all about combining them to match your water test results.

Water Softeners: The Mineral Managers

Hard water isn't a health risk, but it's a massive household nuisance. Caused by high levels of dissolved calcium and magnesium, it leads to that crusty limescale buildup on fixtures, soap scum in the shower, and poor appliance performance.

A traditional salt-based water softener solves this problem through a process called ion exchange. It swaps the "hard" mineral ions for "soft" sodium ions, effectively stopping scale formation in its tracks. While it's the most effective way to truly soften water, it does require you to keep it topped up with salt.

The desire for solutions like these is driving massive growth in the home water treatment industry. The global home water filtration market was valued at USD 10.85 billion in 2021 and is expected to reach USD 26.73 billion by 2030, driven by consumers demanding reliable ways to clean their water. Advanced technologies like UV purifiers and multi-stage systems are a big part of that boom. You can explore more data on the home water filtration market if you're interested in the trends.

Understanding these core technologies is the key to building the best whole house water filter for your home. Next, we’ll look at how to combine them into effective systems designed for different real-world scenarios.

Matching a Filter System to Your Home

A family enjoying glasses of clean water in their modern kitchen, with sunlight streaming in.

You've got the tech down. Now for the fun part: designing the perfect system for your home. The best whole house water filter is never a one-size-fits-all solution. It’s a customized setup you build based on your water source, your family's size, and the specific contaminants revealed in your water test.

Let's move from theory to practice. We’ll walk through a few common household scenarios to show you how different components come together to solve real-world water problems. See which one sounds most like your situation—it’ll give you a fantastic starting point.

The Urban Home on City Water

If you live in a city or suburb, your water is already treated. The main complaints are almost always the swimming-pool smell of chlorine or the more persistent chloramine. It’s not just about taste; these disinfectants are also known for causing dry skin and brittle hair.

You don't need a complex system here. The goal is to refine the water the city provides.

Recommended System:

  • Stage 1 – Sediment Pre-filter: Don't skip this. Even city water can pick up rust and debris from aging municipal pipes. An inexpensive 5-micron sediment filter is crucial for protecting the more expensive carbon filter that follows.
  • Stage 2 – High-Capacity Carbon Filter: This is your workhorse. A large catalytic carbon or activated carbon block filter will adsorb the chlorine, chloramine, VOCs, and other chemicals, drastically improving how your water tastes, smells, and feels.

This simple two-stage setup is the perfect, cost-effective solution for the vast majority of homes on municipal water. You'll notice the difference at every single tap.

The Rural Property on Well Water

Well water is a completely different animal. It's raw, untreated groundwater, which means you could be facing a whole cocktail of issues. We're talking sediment, heavy metals like iron and manganese, and the most significant threat: potential microbiological contamination.

For well owners, filtration isn't a luxury; it's a critical safety measure. A robust, multi-stage system is non-negotiable.

Recommended System:

  • Stage 1 – Sediment Pre-filter: The absolute first step to catch sand, silt, and rust.
  • Stage 2 – Iron & Manganese Filter: If your water test shows these metals, you need a dedicated filter. It uses an oxidizing agent to remove them, preventing ugly stains and that metallic taste.
  • Stage 3 – Carbon Filter: This stage takes care of any earthy or organic tastes and odors, plus potential pesticides from nearby agricultural activity.
  • Stage 4 – UV Purifier: This is the final, and most critical, line of defense. A UV system zaps bacteria, viruses, and other microorganisms, making the water completely safe to drink.

For anyone on a well, the philosophy is "defense in depth." You have to assume contaminants are present and build a system that can handle sediment, chemical, and biological threats right from the start.

The Household Battling Hard Water

Hard water is an equal-opportunity offender, affecting both city and well water users. If you're fighting a losing battle against limescale on your fixtures, soap scum in the shower, and spotty dishes, your primary focus should be on mineral control.

This leads to a choice: a traditional water softener or a salt-free conditioner. A salt-based softener is the most effective fix for seriously hard water, as it actually removes the hardness minerals. A salt-free conditioner, on the other hand, alters the mineral crystals so they can't stick to surfaces, reducing scale without adding salt to your water.

Recommended Combination:

  • For Moderate Hardness: A sediment filter, followed by a salt-free conditioner and then a carbon filter, is a fantastic low-maintenance setup.
  • For Severe Hardness: You'll need the heavy artillery. Start with a sediment filter, then a salt-based water softener, and finish with a carbon filter to improve the taste.

This need for customized solutions is a global trend. The whole house water filter market is booming worldwide, driven by different local concerns. In North America, awareness of contaminants is a key driver. In Europe, it’s strict regulations, and in Asia, it's rapid urbanization. This global demand fuels continuous innovation. You can discover more insights about these global water quality trends and see how the market is evolving.

The Health-Conscious Family

For some homeowners, "good enough" isn't good enough. The goal is absolute purity. This is the family that wants to remove the widest possible range of contaminants—chlorine, sediment, heavy metals, fluoride, even trace pharmaceuticals. To achieve this, you need a comprehensive system that covers all the bases.

This is the top-tier approach for ultimate peace of mind.

Recommended System:

  • Multi-Stage Filtration: This type of system typically includes a sediment filter, a catalytic carbon filter for chemicals, and a KDF (Kinetic Degradation Fluxion) media filter that specifically targets heavy metals.
  • Optional Reverse Osmosis (RO): For the purest drinking water right at the kitchen sink, you can add a point-of-use RO system after the main whole-house unit. This will remove anything left, including dissolved solids, fluoride, and arsenic.

Planning Your Installation and Upkeep

A plumber is shown installing a whole house water filter system onto the main water line in a clean, well-lit basement.

Choosing the right whole house water filter is a huge step, but it’s only half the journey. A fantastic system is only as good as its installation and the ongoing care you provide. This is where a little planning goes a long way, transforming a box on your doorstep into a reliable source of clean water for your entire home.

Before you even make a purchase, create a solid plan for getting the system installed and maintaining it. You’ll need to decide between a DIY installation and calling a pro, and you must look beyond the initial price to understand the true, long-term costs. Getting this right from the start means no unpleasant surprises down the road.

DIY vs. Professional Installation

The first big decision is whether to install the filter yourself or hire a licensed plumber. The DIY route can certainly save you a few hundred dollars in labor costs, but it’s not a project for the faint of heart. You need to be comfortable with basic plumbing, because a single mistake could lead to leaks, water damage, or a filter that simply doesn't work correctly.

Hiring a professional plumber buys you peace of mind. They have the right tools, know the local building codes, and possess the experience to ensure your system is installed for optimal performance and water flow. While it costs more upfront, it's an investment in protecting both your new filter and your home.

If you're leaning toward DIY, make sure you know what you’re getting into. Here’s a quick reality check:

  • Essential Skills: You must be comfortable shutting off your home's main water supply and cutting into pipes (whether they're copper, PEX, or PVC). For copper pipes, you'll need soldering skills.
  • Necessary Tools: Be prepared with pipe cutters, a couple of good wrenches, a level, and Teflon tape. For copper pipes, a soldering torch and flux are also required.
  • Sufficient Space: You need clear access to your main water line with enough room to install the filter unit and any bypass valves without a struggle.

Keep this in mind: A professional installation isn't just for convenience. Many manufacturers will void their warranty if the system isn't installed by a licensed plumber. Suddenly, that DIY savings could become a very expensive gamble.

Calculating the True Cost of Ownership

That initial price tag on the filter? It’s just the beginning. To truly understand the investment, you have to factor in the ongoing maintenance costs that keep the system running effectively. Ignoring these will lead to unexpected bills and, even worse, a filter that eventually stops doing its job.

These predictable, recurring expenses reveal the true cost of the system over its lifetime and should be as important in your decision as the initial purchase price. For a deeper dive into managing your system long-term, you can explore our complete archive of water filter advice.

A Five-Year Maintenance Budget Framework

To give you a clearer picture, let's break down the common long-term costs. Thinking about these expenses over a five-year window will give you a realistic idea of the total investment.

Ongoing Expense Breakdown:

  • Filter Cartridge Replacements: This will be your most regular expense. Most sediment and carbon filters need to be swapped out every 3 to 12 months. Expect to pay anywhere from $25 to $100 per filter, depending on your system.
  • Media Re-bedding: For large tank-style systems (like carbon or oxidizing filters), the filtration media inside needs to be replaced every 5 to 10 years. It’s not frequent, but it's a significant expense when it comes due.
  • Water Softener Salt: If your system includes a salt-based softener, you’ll be adding salt every 1 to 2 months. This typically adds up to $100 to $200 per year.
  • UV Lamp Replacement: For systems that use a UV purifier to kill bacteria, the lamp must be replaced annually to remain effective. A new lamp usually runs between $70 and $150.
  • Electricity Use: It's a small cost, but UV purifiers and softeners with electronic controls do use electricity, so expect a minor increase in your monthly bill.

By mapping these costs out, you can choose a system that not only solves your water problems but also fits comfortably within your long-term budget.

Your Top Filtration Questions, Answered

As you narrow down your choices for the best whole house water filter, a few practical questions always come up. These are the real-world details that can make or break your experience. Let's get you quick, clear answers to these common sticking points so you can move forward with confidence.

Will a Whole House Water Filter Tank My Water Pressure?

Yes, any filter system will introduce some resistance to your plumbing, which can cause a slight drop in water pressure. However, a properly sized and installed system will have such a minimal effect that you likely won't even notice it. The goal is to avoid creating a bottleneck where your water enters the house.

A few factors influence pressure:

  • Filter Type: Densely packed filters and clogged sediment filters are the primary culprits for pressure loss.
  • System Flow Rate: Measured in gallons per minute (GPM), this is critical. If you choose a system with a GPM rating that's too low for your home, it will struggle to keep up during peak usage, and you’ll feel it when the shower and dishwasher are running simultaneously.
  • Pipe Condition: Older pipes with corrosion or scale buildup can worsen any existing pressure issues.

The best way to prevent problems is to select a system with a GPM rating that can handle your family's peak water demand. For most homes, a system rated for 15-20 GPM is more than adequate. Most importantly, nothing maintains strong water pressure better than changing your filters on schedule.

Will This Filter Make My Water Safe to Drink?

This is a critical question, and the honest answer is: it depends entirely on the filter system and your water source. A standard carbon filter is fantastic at removing chlorine and making water taste great, but it will not eliminate microbiological threats like bacteria or viruses.

A filter and a purifier are not the same thing. A filter removes particles and chemicals, while a purifier neutralizes living organisms. For truly safe drinking water from a questionable source, you often need both.

If your primary concern is ensuring your water is microbiologically pure—especially if you're on well water—you absolutely need a dedicated purification stage. This typically means adding a UV purification system after your main filter or choosing a specialized filter certified for cyst and virus removal, such as a sub-micron filter.

Always look for NSF/ANSI certifications. These independent, third-party ratings confirm what a system can actually remove. For example, NSF/ANSI 53 certifies a filter for removing health-related contaminants, while NSF/ANSI 55 is the standard for UV systems. It’s your guarantee that the filter lives up to its claims.

How Do I Know What Size Whole House Water Filter to Buy?

Sizing your system correctly is crucial for performance and satisfaction. It really comes down to two factors: how much water your household uses and how quickly you need it.

First, consider the number of people and bathrooms in your home. A larger family naturally uses more water, so you'll want a system with a higher filter capacity—the total number of gallons a filter can treat before it needs to be replaced.

Second, and more importantly, is the peak flow rate (GPM). You can get a rough estimate by adding up the flow rates of the fixtures you might use at the same time (a shower is about 2.5 GPM, a toilet flush is 2 GPM, a kitchen faucet is 1.5 GPM).

Here's a quick rule of thumb:

  • 1-2 Bathroom Homes: A system with a 10-15 GPM flow rate is usually sufficient.
  • 3-4+ Bathroom Homes: Look for a 15-25 GPM system to maintain strong pressure everywhere.

Choosing an undersized system is a common mistake that leads to frustration. It's always better to have a little more capacity than you think you need.


At Water Filter Advisor, our mission is to give you the knowledge to find the perfect water filtration solution for your home. We offer in-depth guides, honest reviews, and practical advice to make your decision simple. Explore our resources today to get safer, better-tasting water. Visit us at https://www.waterfilteradvisor.com.
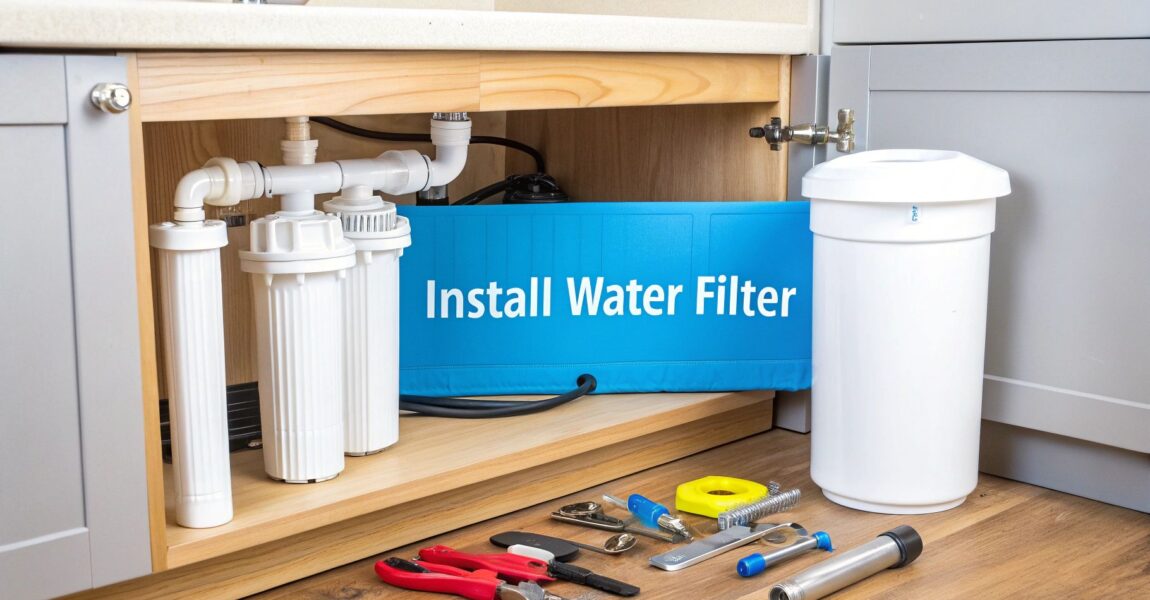
How to Read Water Test Results: Your Ultimate Guide to Choosing a Filter

So, the lab sent back your water test results. Now what? You’re staring at a wall of acronyms, chemical names, and numbers that look like they were written in a secret code. Don't sweat it. That piece of paper is your secret weapon, the treasure map that leads directly to safe, fantastic-tasting water right from your tap.

A person examining a water test result report with various charts and numbers, indicating a focus on data analysis.

Think of it as a personalized health check-up for your pipes. The trick is to stop seeing it as one overwhelming document and start looking at it as a simple Q&A. The only question that really matters is: "Is anything in my water at a level that could harm my family, wreck my appliances, or just taste plain gross?"

To answer that, you just need to find two columns on your report:

  • Your Results: This shows the actual amount of a substance found in your water sample.
  • The Safety Limit: This is the benchmark. It might be labeled MCL (Maximum Contaminant Level) or an Action Level, but its job is to give you the government-recommended maximum for safe drinking water.

Your job is to play a matching game. Find any line where "Your Results" are higher than the "Safety Limit." Those are your red flags, and they tell you exactly what kind of home water filtration you actually need. No more guesswork, no more buying filters that don’t solve your problem. This report is your roadmap to the perfect system.

Decoding the Language of Water Quality

To really get the full picture, you need to speak the language of the report. The results are often broken down into different categories like microbiologicals, chemical parameters, or physical characteristics, and each has its own red line.

For instance, seeing any coliform bacteria is a major red flag that requires immediate action, usually a UV purification system. It’s a serious issue, and a global one at that. The World Health Organization reported back in 2022 that at least 1.7 billion people are using a drinking water source contaminated with feces. It’s a stark reminder of why those microbial tests are so critical. You can dig into the WHO's findings on their global drinking water safety page.

A water test isn't just a pass/fail grade; it’s a detailed guide to choosing the right filter. It tells you exactly what you need to filter out, so you can choose a system that solves your specific problems instead of wasting money on a generic one.

To help you out, I've put together a quick cheat sheet for the most common terms you'll see.

Key Terms on Your Water Report Explained

This table breaks down the jargon into plain English, so you know what you're looking at and why it matters for your pipes, appliances, and health.

Term / Acronym What It Means Why It Matters for Your Home
MCL Maximum Contaminant Level. The highest level of a contaminant allowed in drinking water by the EPA. This is the most critical safety benchmark. If your result is above the MCL, you need a targeted filtration solution.
PPM Parts Per Million. A unit of concentration (1 PPM = 1 mg/L). Used for common minerals like calcium or contaminants like nitrates. Helps you gauge the amount of something in your water.
PPB Parts Per Billion. A smaller unit of concentration (1 PPB = 1 µg/L). Often used for trace metals like lead or arsenic where even tiny amounts are a health concern.
NTU Nephelometric Turbidity Unit. A measure of water cloudiness or haziness. High turbidity can interfere with disinfection and hide bacteria. It’s an aesthetic issue that can also signal a bigger problem.
Action Level The concentration of a contaminant which, if exceeded, triggers treatment or other requirements. Think of it as an early warning system. For lead and copper, exceeding this level means you need to act, even if it's not a strict MCL violation.

Hopefully, this little glossary makes reading that report feel a lot less intimidating. Once you can translate the terms, you hold all the power to pick the perfect filter.

Identifying Common Contaminants in Your Water

A close-up of clear water with bubbles, representing the purity and quality of filtered water.

Alright, you’ve got the report in hand and you know what the terms mean. Now let's dive into the usual suspects you'll find lurking in your water. Learning how to read water test results is really about recognizing that different contaminants fall into distinct groups. Each group tells a unique story about your water and, more importantly, points you directly to the right kind of filtration fix for your home.

First up are the physical characteristics—the stuff you can often see, taste, or feel. Your report might mention Turbidity, which is just a fancy way of saying your water is cloudy or murky. If that number is high, a simple sediment filter is almost always the first line of defense.

Then you have Total Dissolved Solids (TDS). This is a catch-all measurement for all the minerals, salts, and metals floating around in your water. High TDS isn't automatically a health concern, but it's often the culprit behind water that tastes metallic or just plain "off," and a clear sign you might want a more advanced filter.

Chemical Contaminants and Hardness

The chemical analysis section is usually where things get interesting (and detailed). This is where you'll find common additives like chlorine. Most municipal water systems use it as a disinfectant to keep the water safe on its journey to your tap. It does its job, but that swimming-pool taste and smell are exactly why so many people install a good carbon filter.

This section also flags heavy metals like lead, a serious concern that typically comes from the corrosion of old plumbing pipes and solder joints. With lead, there is no safe level. If you see any amount detected, a high-powered system like reverse osmosis is what I'd strongly recommend for ultimate peace of mind.

Water hardness is another big one you'll see here, caused by dissolved calcium and magnesium. While these minerals are perfectly fine to drink, they can be a nightmare for your home. They're the reason you see that crusty white limescale buildup in your pipes and on your fixtures, which kills the efficiency of appliances like your water heater. It's also why you might need to learn how to remove mineral deposits from your toilet bowl. For this problem, a dedicated water softener is the only real solution.

Microbiological Red Flags

Finally, we get to the most critical part of the report: the microbiological results. This is the section that tests for living organisms in your water.

The presence of any Total Coliforms or, more specifically, E. coli, is an immediate red flag. These bacteria indicate that your water may be contaminated with fecal matter and could cause serious illness.

If your report comes back positive for either of these, it means your water source has a breach and is not safe to drink as-is. This is a particularly urgent issue for anyone on a private well. A UV purification system is the most effective final barrier against these invisible threats. A positive micro test isn't something to ignore—it requires an immediate filtration solution to protect your health.

Understanding Safe Levels and Health Risks

So, you've got your water test results back, and it looks like a list of chemicals. Don't panic. Just because a substance shows up on your report doesn’t mean your water is unsafe. The real key to understanding how to read water test results is all about context—comparing your numbers to the established safety benchmarks to decide which home water filter is right for you.

The big one you need to know is the Maximum Contaminant Level (MCL). This is a standard set by the U.S. Environmental Protection Agency (EPA) and represents the highest level of a contaminant legally allowed in public drinking water. Think of it as the absolute ceiling; you don’t want to be at or above this number. If you are, a filtration system is a must.

But not everything has a hard-and-fast legal limit. Some contaminants are governed by Secondary Maximum Contaminant Levels (SMCLs). These are non-enforceable guidelines for things that cause aesthetic issues—bad taste, funky odors, or weird colors. A classic example is iron. High iron levels probably won't harm you, but they will absolutely leave rusty orange stains all over your sinks, toilets, and laundry, making a targeted iron filter a smart investment.

From Warning Signs to Action Levels

Then you have Action Levels. These are critical thresholds that, if exceeded, require your water system to take specific steps to fix the problem.

Lead is the most common one here, with an Action Level of 15 parts per billion (ppb). If your water hits that number, it’s not just a suggestion to get a filter. It's a major red flag that you need to find the source of the contamination, which is very often the plumbing inside your own home. A point-of-use reverse osmosis system is an excellent final barrier in this case.

Some things have a zero-tolerance policy. If your report shows any detectable level of coliform bacteria, for instance, that requires immediate action. It’s a sign that harmful pathogens could be getting into your water supply, and a UV purifier should be at the top of your shopping list.

To set these standards, the EPA relies on an enormous database called the Water Quality Portal (WQP), which holds over 430 million water quality records from countless monitoring programs. This massive collection of data is what helps them determine the benchmarks you see on your report. You can actually dig into the data yourself and learn more about the national water quality monitoring efforts on the EPA's website.

This infographic gives you a quick side-by-side look at a few common contaminant thresholds you might find.

Infographic about how to read water test results

As you can see, every contaminant is treated differently, from a hard Action Level for lead to a strict zero-tolerance rule for bacteria. Knowing these distinctions is the first step in picking the right water filtration system for your home.

Matching Your Results to the Right Filtration System

A person holding a glass of clear, clean water, symbolizing the outcome of choosing the right filtration system.

Alright, this is where the rubber meets the road. You’ve waded through the technical jargon on your water report and now you know exactly what’s lurking in your pipes. The next step is to put that knowledge to work by pairing your specific water problems with the right filtration technology.

Think of it this way: you wouldn't use a hammer to fix a leaky pipe. Likewise, knowing how to read water test results is the first step, but choosing the right tool for the job is what actually solves the problem. Let’s get into which filters fix which issues.

Solutions for Chemical and Physical Issues

Let's start with some of the most common complaints. Did your report show high levels of chlorine and a lot of sediment (also called turbidity)? If so, your water probably has that distinct "public pool" smell and might even look a little cloudy.

Fortunately, this is a pretty straightforward fix. A whole-house system that combines a sediment pre-filter with an activated carbon block filter is your best bet here.

  • Sediment Filter: This is your frontline defense. It physically catches the dirt, sand, rust, and other particles that cloud your water and can quickly clog up more sensitive filters down the line.
  • Activated Carbon Filter: This is the workhorse for getting rid of nasty tastes and smells. It works through a process called adsorption, grabbing onto chemicals like chlorine, chloramines, and pesticides, which vastly improves your water's quality.

If you want to explore all the different technologies out there, this collection of water filter advice and guides is a great resource for breaking things down even further.

Tackling Hard Water and Heavy Metals

But what if your report flagged something else entirely? Say your issue is high levels of calcium and magnesium—the minerals that cause hard water. An activated carbon filter won't do a thing to stop that chalky scale from building up on your fixtures and ruining your appliances. For that, you need a dedicated water softener.

Now, if your test results showed the presence of more serious contaminants like lead, arsenic, or high levels of nitrates, you need to call in the big guns: a reverse osmosis (RO) system. An RO system uses a special membrane to force water through at a microscopic level, leaving nearly all contaminants behind.

RO systems are incredibly effective, often removing over 99% of all dissolved solids. They are the gold standard for dealing with health-related contaminants and ensuring every drop from your tap is as safe as it can possibly be.

To make this even simpler, here's a quick cheat sheet for matching common problems to the right solutions.

Filtration Solutions for Common Water Problems

Problem Identified in Test Primary Contaminants Recommended Filtration System Best For
Bad Taste/Smell, Cloudiness Chlorine, Sediment, Volatile Organic Compounds (VOCs) Activated Carbon Filter with Sediment Pre-filter Improving general water quality, taste, and odor for the whole house.
Hard Water Scale Buildup Calcium, Magnesium Water Softener (Ion Exchange) Protecting appliances, pipes, and fixtures from mineral buildup.
Heavy Metals, Health Concerns Lead, Arsenic, Nitrates, Fluoride, Cysts Reverse Osmosis (RO) System Ultimate purification for drinking and cooking water at a specific tap.
Bacterial or Viral Contamination E. coli, Giardia, Cryptosporidium, Viruses UV Purifier Disinfecting water from private wells or areas with boil water advisories.

By matching your specific test results to this table, you can move forward confidently, knowing you’re investing in a system that truly addresses your home's unique water needs.

When to Retest and Monitor Your Water Quality

Figuring out how to read a water test report is a massive win, but don't hang up your hat just yet. Think of your water quality as a moving target—it can shift with the seasons, react to aging city pipes, or even be affected by a construction project miles away. This is exactly why water safety should be a regular part of your home maintenance routine, not a one-and-done task.

A good rule of thumb is to test your water at least once a year. This is especially true if you're on a private well. For well owners, annual testing for nitrates and coliform bacteria is absolutely non-negotiable. It’s the best way to catch common issues like agricultural runoff or septic system problems before they become a real headache.

Key Triggers for an Immediate Retest

Beyond your yearly check-up, certain events should set off alarm bells and prompt an immediate retest. These are red flags telling you it's time for a closer look to make sure your water is still safe and your filtration system is doing its job.

For starters, you should always perform a follow-up test 30 to 60 days after installing a new filtration system. This is the only real proof you have that your investment is actually working and has successfully knocked down the contaminants you were worried about.

Other critical times to schedule a new test include:

  • Noticeable Changes: If your water suddenly starts to taste, smell, or look different, that's a crystal-clear sign something in your supply has changed. Don't ignore it.
  • Local Disruptions: Big events in your area like flooding, a water main break, or even a prolonged drought can seriously mess with the composition of your local water source.
  • Household Health Issues: Are family members dealing with recurring stomach bugs or other gastrointestinal issues? A water test can quickly help rule out (or confirm) bacterial contamination as the culprit.

This proactive approach to monitoring is more crucial than ever. The global water testing market is projected to shoot up from USD 26.2 billion in 2025 to a whopping USD 51.0 billion by 2035. This boom is driven by a huge increase in public health awareness and tougher regulations. You can learn more about the growing demand for precise water analysis here. Staying ahead of potential problems is the best way to ensure your filtration system continues to provide the protection your family needs.

Frequently Asked Questions About Water Reports

Even after you've gone through your report, it's totally normal to still have a few questions pop up. I get these all the time from homeowners, so I've put together some of the most common ones. The answers are all geared toward helping you figure out what it all means for choosing the right water filter for your house.

What Is the Difference Between a Water Test and a Water Quality Report?

I like to use a doctor's visit analogy here.

The water test is the actual analysis done on your water sample at the lab—think of it as the bloodwork. The water quality report is the document you get back with all the results, showing contaminant levels and other data. It’s like the chart the doctor hands you, which you then use to decide what to do next, like picking out a filtration system.

My City Water Is Safe So Why Do I Need a Filter?

This is a great question. Municipal water is treated to meet minimum federal standards (MCLs), but "safe" doesn't always mean "ideal." It can still have legal amounts of contaminants like chlorine, which is what gives tap water that distinct taste and can dry out your skin.

More importantly, contaminants like lead can leach into the water from old pipes on its journey from the treatment plant to your tap. A home filter acts as your final, personalized barrier, tackling specific issues and providing a much higher quality of water than the minimum standard.

How Long Does It Take to Get Water Test Results Back?

It really depends on the lab and the complexity of the test you ordered. A basic test looking at things like chlorine or bacteria might only take a few business days.

If you've opted for a comprehensive analysis for a wider range of chemicals, pesticides, or heavy metals, expect it to take a bit longer, usually around one to two weeks.

Can I Use a DIY Test Kit From a Hardware Store?

Those DIY test strips can be a decent starting point. They're good for getting a quick snapshot and identifying major issues, like extremely hard water or very high chlorine levels.

However, if you want accurate, reliable numbers for health-related contaminants—things like lead, nitrates, or bacteria—a certified laboratory test is the only way to go. Lab reports give you the precise, quantitative measurements you need to choose the most effective filtration system to protect your home and family.


At Water Filter Advisor, we're committed to helping you make sense of your results and find the perfect filtration solution. Explore our in-depth guides and reviews to get started. Find out more at https://www.waterfilteradvisor.com.
Choosing the Right Types of Home Water Filters for Your Home

That glass of water from your tap looks pristine, but it’s been on a long, wild journey to get to your kitchen. Along the way, it can pick up some invisible hitchhikers. Most types of home water filters are designed to be the final, bouncer-at-the-door, grabbing these unwanted passengers—everything from the chlorine that makes your water smell like a public pool to microscopic party-crashers you’d never even see.

Figuring out what might be in your water is the first step to picking the perfect filtration sidekick for your home.

What's Really Lurking in Your Tap Water?

Think of your water supply like a cross-country road trip. It starts its journey at a treatment plant where it gets a basic cleaning, but it still has miles of pipes to navigate before it reaches your faucet. Some of these pipes might be older than your favorite classic rock band. It’s during this trip that all sorts of substances can hop aboard.

The point isn't to scare you into drinking nothing but sparkling water, but to arm you with knowledge. Once you understand the usual suspects, you'll see why a good home water filter is like a VIP checkpoint, making sure the water your family drinks is as clean and refreshing as it looks.

Common Contaminants on the Water Highway

Your tap water is more than just H₂O; it’s a cocktail of minerals, disinfectants, and sometimes, things you’d rather not be sipping. Here are some of the usual suspects that home water filters are built to tackle:

  • Chlorine: This is the chemical bodyguard most cities use to kill bacteria in the water supply. It does a fantastic job, but it can leave behind a chemical taste and smell that’s, well, pretty off-putting.
  • Lead and Heavy Metals: If you live in a home with vintage plumbing, there's a chance that lead from old pipes and solder could be leaching into your water. Other metals like mercury can also sneak into the water supply from industrial or environmental sources.
  • Microplastics: This is a newer, and frankly, weirder concern. These tiny bits of plastic are popping up in tap water worldwide, coming from larger plastic items breaking down over time. Scientists are still studying the long-term health effects.

This infographic breaks down these common contaminants, showing where they come from and just how common they are.

As you can see, contaminants can be anything from the byproducts of disinfection to pollutants from our environment, and they can enter the water at any point along its journey.

The Growing Demand for Cleaner Water

It’s not just about what you drink, either. The quality of your tap water can have a real impact on your appliances. For example, learning how tap water quality affects dishwasher performance can save you a lot of headaches from hard water spots and chalky buildup. This kind of awareness is a big reason why more people are looking into home filtration.

As people learn more about what's in their water, the demand for good filtration systems is skyrocketing. It’s all part of a bigger shift toward being more proactive about health and wellness at home.

The global market for home water filters is projected to hit about $28 billion by 2033, all because people want to live healthier lives. It really shows that for many families, a water filter isn’t a luxury anymore—it’s a non-negotiable part of a healthy household.

A Quick Guide to Filtration Technologies

Stepping into the world of home water filters can feel a bit like trying to read a menu in a foreign language. With so many terms and technologies floating around, it's easy to get lost. Before we dive into specific models, let’s get to know the core technologies that do all the heavy lifting.

Think of it like this: each filtration method is a specialist with a unique skill set. Most systems you'll find for your home use one of three main technologies: Activated Carbon, Reverse Osmosis (RO), or Ultraviolet (UV) Purification.

The Big Three of Water Filtration

Let's break down what each of these powerhouses does.

Activated carbon is the crowd-pleaser, great for improving the general taste and smell of your water by grabbing things like chlorine. Reverse osmosis is the perfectionist, using a super-fine membrane to strip out an incredible range of dissolved solids and contaminants. And UV purifiers? They're the silent bodyguards, using light to neutralize nasty microorganisms without adding a single chemical to your water.

You wouldn't use a spatula to hammer a nail, right? The same logic applies here. You've got to match the right filtration tool to the specific problem lurking in your water.

If your city water just has a funky chlorine taste, a simple carbon filter will probably do the trick. But if you're on well water and worried about bacteria, a UV system is a non-negotiable part of the setup. It's all about diagnosing the problem first.

Home Water Filter Technology at a Glance

To give you a clearer picture, let's put these technologies side-by-side. The table below is a great cheat sheet to quickly see what each filter type is designed to do, what it removes, and what kind of budget you'll need.

Filter Type Primary Function Removes Best For Average Cost
Activated Carbon Adsorption (traps contaminants) Chlorine, pesticides, bad taste & odor Improving taste and smell of city water $ (Low)
Reverse Osmosis Pushes water through a fine membrane Heavy metals, fluoride, salts, bacteria Maximum purity and removing a wide range of contaminants $$$ (High)
UV Purifier Neutralizes microorganisms with light Bacteria, viruses, protozoa Disinfecting well water or microbiologically unsafe water $$ (Medium)

Use this as your starting point. Seeing it all laid out like this really helps narrow down which filtration path makes the most sense for your home and your water.

Activated Carbon Filters: The Everyday Contaminant Magnet

If there's an MVP in the world of home water filtration, it’s the activated carbon filter. This is the technology you'll find in almost everything, from the simple pitcher in your fridge to more advanced under-sink systems.

Why is it so common? Because it nails one job perfectly: making your tap water taste and smell a whole lot better.

Think of activated carbon as a microscopic sponge with an enormous appetite. Thanks to millions of tiny pores, a single gram of the stuff can have more surface area than a football field. These pores act like magnets for certain contaminants as water flows past.

This isn't your typical filter that just strains out particles. The process is called adsorption, which means contaminants literally stick to the carbon's surface like static cling. It’s fantastic at grabbing onto things like chlorine, pesticides, herbicides, and other volatile organic compounds (VOCs) that give water that funky chemical flavor.

Two Forms: Granular vs. Block

When you start shopping, you’ll see activated carbon filters in two main styles. Knowing the difference will help you pick the right one for your setup.

  1. Granular Activated Carbon (GAC): This is just what it sounds like—loose granules of carbon packed into a cartridge. They're great at knocking down chlorine and improving taste, which is why they're the go-to for water pitchers and refrigerator filters where a fast flow rate matters.

  2. Carbon Block: These filters are made from finely powdered carbon that's been compressed into a solid block. This dense structure forces water through a much more winding path, giving it more contact time with the carbon. Because of this, carbon block filters are usually more powerful and can snag a wider range of contaminants, sometimes even heavy metals like lead. They also act as a physical barrier, filtering out sediment down to a certain micron level.

The real job of an activated carbon filter is to make your water more enjoyable to drink. It tackles the sensory stuff—the bad tastes and weird smells—that make so many people reach for bottled water instead of using the tap.

This makes it a perfect, wallet-friendly starting point for anyone on city water who just wants a simple upgrade.

The Strengths of Activated Carbon

For a huge number of households, an activated carbon filter is all they really need to completely transform their drinking water experience. The benefits are obvious right away.

  • Amazing Taste and Odor Removal: Nothing beats it for getting rid of that swimming-pool chlorine smell and taste, which is hands-down the most common complaint about tap water.
  • Super Affordable: Carbon filters are everywhere and are some of the most budget-friendly options you can buy.
  • Easy to Use: Whether it's a pitcher or a faucet attachment, these filters are almost always a breeze to install and replace.

Knowing Its Limits

It's just as important, though, to know what activated carbon can't do. It’s a specialist, not a cure-all. For a really good technical breakdown, check out this a comparison of carbon filters with other filtration types.

These filters will not remove:

  • Dissolved minerals (like the calcium and magnesium that cause hard water)
  • Fluoride
  • Nitrates
  • Bacteria or viruses

So, if your water worries go beyond just taste and smell—like if you're dealing with high levels of lead or potential microbial threats from a private well—you'll need to level up to a more advanced system. We'll get into those next.

Reverse Osmosis Systems for Maximum Purity

When just improving taste and smell isn't quite cutting it, you’ll eventually find your way to Reverse Osmosis (RO). If you're after the highest level of purification you can get in your home, this is the technology to look at. RO is the gold standard for stripping out the widest possible range of contaminants, leaving you with exceptionally pure water.

The secret sauce is the semipermeable membrane. Think of it like a microscopic nightclub bouncer with a very, very strict guest list. It lets the tiny, pure water molecules pass right through but turns nearly everything else away at the door—dissolved salts, heavy metals, fluoride, even bacteria.

This kind of performance puts RO systems in a class of their own, especially for anyone dealing with specific water quality issues that simpler filters just can't touch.

How the Multi-Stage Process Works

An RO system isn't just one filter; it's a whole team working in perfect harmony. It's a multi-stage process where each component preps the water for the next step, all leading up to that final, pure result.

  1. Sediment Pre-Filter: This is the first line of defense, catching all the big stuff like dirt, rust, sand, and silt. Its main job is to protect the more sensitive filters down the line from getting clogged up.
  2. Carbon Pre-Filter: Next up, the water hits an activated carbon filter. This stage is crucial for grabbing chlorine and other chemicals that could damage the delicate RO membrane.
  3. The RO Membrane: This is the heart of the whole operation. Your home's water pressure forces the water through this tightly wound membrane. Here, up to 99% of total dissolved solids (TDS) are separated out and flushed away.
  4. Carbon Post-Filter: As a final step, the now-purified water gets a "polishing" pass through one last carbon filter. This gets rid of any lingering tastes or odors the water might have picked up from its storage tank, making sure what comes out of your tap is crisp and clean.

The Unmatched Purity of RO Water

The biggest draw of a reverse osmosis system is its sheer filtration power. It's one of the few technologies that can remove an incredibly long list of contaminants you really don't want in your glass.

  • Heavy Metals: It's incredibly effective at reducing lead, arsenic, mercury, and chromium.
  • Dissolved Solids: Say goodbye to salts, nitrates, and fluoride.
  • Microorganisms: The membrane's pores are so fine that they block bacteria and viruses.

The real power of an RO system is the peace of mind it gives you. If your water report shows contaminants that have you worried, no other system offers this level of thorough removal.

Its effectiveness is a big reason why RO technology dominates the market. In 2021, the global home water filtration market was valued at $10.85 billion, and RO-based filters made up over 38% of global revenue. That tells you just how many homeowners trust RO for ultimate purity. You can dive deeper into the market trends over at Grand View Research.

The Trade-Offs to Consider

While RO systems deliver amazing results, they aren't perfect. It's important to understand the trade-offs before deciding if it's the right fit for your home.

The most common criticism is water waste. To separate the pure water, the system has to flush the contaminants away with what's called "brine" or wastewater. Older models were notorious for this, wasting several gallons for every one gallon of clean water they produced. Thankfully, modern systems have gotten much more efficient.

Another thing to know is that the RO membrane is so good that it also removes beneficial minerals like calcium and magnesium. While we get most of these minerals from food, some people find demineralized water tastes a bit "flat." To fix this, many RO systems now come with an optional remineralization stage that adds a healthy balance of minerals back into the water right before it hits your glass.

Finally, these systems are more complex than your average pitcher filter and require more maintenance. You'll need to swap out the pre- and post-filters every 6-12 months and the RO membrane itself every 2-5 years.

UV Purifiers: A Guardian Against Germs

So we've covered how activated carbon gets rid of nasty tastes and how reverse osmosis tackles dissolved solids. But what about the invisible threats? Microscopic bugs like bacteria, viruses, and cysts can easily slip through a standard filter. To deal with them, you need a different kind of guardian: an Ultraviolet (UV) purifier.

Unlike filters that physically trap contaminants, a UV system attacks on a microbiological level. It zaps the water with a powerful lamp that emits UV-C light, a very specific wavelength of ultraviolet light that’s absolutely lethal to microorganisms.

Think of it like giving germs a targeted, terminal sunburn. This intense UV-C radiation blasts through the cell walls of bacteria, viruses, and other pathogens, completely scrambling their DNA. They can't reproduce, they can't make you sick—they're effectively neutralized on the spot.

It's a Purifier, Not a Filter

This is a really important distinction. UV systems are purifiers, not filters. They don’t actually remove anything from the water—not sediment, not chlorine, not heavy metals. Their one and only job is to make your water microbiologically safe to drink.

Because a UV system only deals with living organisms, it’s almost always installed as the final piece of a larger filtration puzzle. The UV light needs a clear shot at the germs, and any murkiness or sediment in the water can create tiny shadows for them to hide in, making the system less effective.

That's why you'll almost always see a UV system installed after a sediment filter and often a carbon filter, too. Those pre-filters handle the dirty work of clearing out particles, giving the UV light an unobstructed path to zap every last potential threat.

Who Really Needs a UV Purifier?

So, do you need this level of protection? While it's great for peace of mind in any home, for some folks, it’s downright essential.

  • Homes with Well Water: Private wells aren't treated by a city, leaving them vulnerable to contamination from farm runoff or septic tanks. A UV purifier is your 24/7 defense against bacteria like E. coli and other viruses.
  • Areas with Boil Water Advisories: If your town is constantly issuing boil water notices, a UV system is a far more convenient and reliable way to ensure your tap water is always safe.
  • Immune-Compromised Individuals: For households with anyone who has a weakened immune system, a UV purifier adds a critical layer of protection against dangerous waterborne illnesses.

Benefits and Upkeep of UV Systems

The biggest win for UV is that it disinfects without chemicals. You get no chlorine taste and no weird disinfection byproducts. They’re also incredibly good at their job, wiping out 99.9% of harmful microorganisms when they're running properly.

Maintenance is simple but non-negotiable. That UV lamp has a limited lifespan, usually about a year of continuous operation. Even if the bulb still turns on after a year, its germ-killing power has faded significantly. To keep your water protected, you absolutely must replace the UV bulb annually.

Beyond the Sink: Whole House and Specialty Filters

Getting great-tasting water from your kitchen tap is one thing, but what about the water you shower in, wash your clothes with, and run through your expensive appliances? That’s where the conversation shifts to a much bigger-picture solution.

We're talking about point-of-entry (POE) systems, more commonly known as whole house filters.

Instead of treating water at a single faucet, these systems are installed right where the main water line enters your home. Think of it as a gatekeeper for your entire plumbing system. Every single drop that flows into your house—for the shower, the dishwasher, the washing machine—gets cleaned first.

This isn't just about better drinking water. It's about protecting your home's entire plumbing infrastructure from scale and corrosion, helping your appliances last longer, and getting softer skin and hair because you’re not showering in chlorinated water anymore.

First Line of Defense: Sediment Filters

Before you can even think about microscopic contaminants, you have to deal with the grit and grime you can actually see. This is where sediment filters come in. They are the unsung heroes of any serious water treatment setup.

They act like a bouncer at the door, catching all the obvious troublemakers:

  • Sand and silt
  • Rust flakes from aging city pipes
  • Dirt and other random gunk

By grabbing all this physical debris right away, a sediment filter keeps your more sophisticated (and more expensive) filters downstream from getting clogged up. They are an absolute must-have pre-filter that makes the rest of your system run better and last longer.

Solving Hard Water Woes: Water Softeners

If you're tired of seeing chalky white spots on your glassware and fighting a never-ending battle with soap scum, you have hard water. The solution isn't a typical filter, but a specialty system called a water softener.

A water softener is more of a water conditioner. It uses a process called ion exchange to literally swap out the "hard" minerals like calcium and magnesium for "soft" sodium ions. These hard minerals are the culprits behind all that nasty limescale buildup.

The result? Water that actually lathers up, is kinder to your appliances, and leaves your dishes sparkling clean. It’s a perfect example of a targeted system designed to solve one of the most common and annoying water problems out there.

The Ultimate Purity: Water Distillers

For those who want to get as close to pure H₂O as possible, water distillers are the gold standard. This method mimics nature’s own purification cycle: it boils water to create steam, leaving contaminants behind, and then condenses that pure steam back into clean liquid water.

Distillation is incredibly thorough, removing nearly everything—heavy metals, minerals, bacteria, and viruses. It’s a slower and more energy-intensive process, but the purity of the final product is unmatched.

It’s clear that people are thinking more seriously about their water quality. The residential water purifier market is expected to jump from $24.88 billion in 2025 to a whopping $76.61 billion by 2034. This boom is all about a growing awareness of what’s in our water and the desire for real solutions at home. You can dig deeper into these trends in the full report on residential water purifier market growth.

Answering Your Top Water Filter Questions

Alright, now that we’ve walked through everything from carbon filters to UV purifiers, you probably have a few practical questions bubbling up. Let's tackle those common "what about this?" and "how do I…?" thoughts to clear up any confusion and get you ready to choose the right system with total confidence.

How Do I Know Which Water Filter I Really Need?

Picking the right filter always starts with one thing: knowing what’s actually in your water. The best first step is to get your hands on your local water quality report, which your utility provider should offer for free. Think of it as a report card for your tap water—it tells you exactly what you’re dealing with.

If your biggest complaint is just a chlorine taste or that swimming pool smell, a simple activated carbon filter is a great, wallet-friendly fix. But if that report flags bigger issues like lead, fluoride, or a cocktail of other contaminants, then you need a heavy-hitter: a reverse osmosis system is going to give you the most complete purification.

And for anyone on private well water? A UV purifier isn't just a nice-to-have; it's a must. You'll almost always want to pair it with a sediment pre-filter to make sure it can do its job effectively against nasty bacteria and viruses.

How Often Should I Change My Water Filters?

There's no single, universal schedule for changing filters. It really boils down to the type of filter you have and how much water your family uses. Following the manufacturer's timeline is non-negotiable, because an old, gunked-up filter doesn't just stop working—it can turn into a breeding ground for bacteria.

As a rough guide, here’s what you can generally expect:

  • Pitcher Filters: These little guys usually need a swap every 2 months.
  • Faucet Filters: Plan on replacing these about every 3 months.
  • Under-Sink Carbon Filters: The larger cartridges give you more time, typically lasting 6 to 12 months.
  • RO Systems: The initial pre-filters need changing every 6-12 months, but the main RO membrane is the long-haul champ, lasting 2 to 5 years.

Remember, a filter's job is to trap contaminants. If you don't change it on time, you're essentially forcing your water through a collection of the very things you wanted to remove in the first place.

Will a Water Filter Remove Healthy Minerals?

That's a fantastic question, and the answer is: it depends entirely on the technology.

The most powerful systems, like reverse osmosis and distillation, are so thorough they strip out nearly everything—and that includes beneficial minerals like calcium and magnesium. Now, most of our minerals come from food, but some people simply prefer the taste of mineral water. If you want to dive deeper into this, you can find a ton of great resources offering in-depth water filter advice.

To get the best of both worlds, many modern RO systems now come with an optional remineralization stage. This cool feature adds those healthy minerals right back into the water after it’s been purified. On the flip side, filters like activated carbon, sediment, and UV are designed to leave all those good minerals completely alone.

Is Bottled Water a Better Option Than a Filter?

While it’s easy to grab a bottle of water on the go, it comes with some serious baggage. For starters, it’s way more expensive per gallon than filtered tap water, and it creates a mountain of plastic waste. Plus, studies have shown that some bottled water is just filtered municipal water anyway, and many popular brands have been found to contain microplastics.

Investing in one of the many types of home water filters gives you clean, great-tasting water on tap for a tiny fraction of the cost. It’s also a much more sustainable and environmentally friendly way to stay hydrated.


At Water Filter Advisor, our goal is to help you cut through the noise and find the perfect water solution for your home. Our detailed guides and honest reviews are here to give you the clarity you need for safer, better-tasting water. Explore all our resources today at https://www.waterfilteradvisor.com.
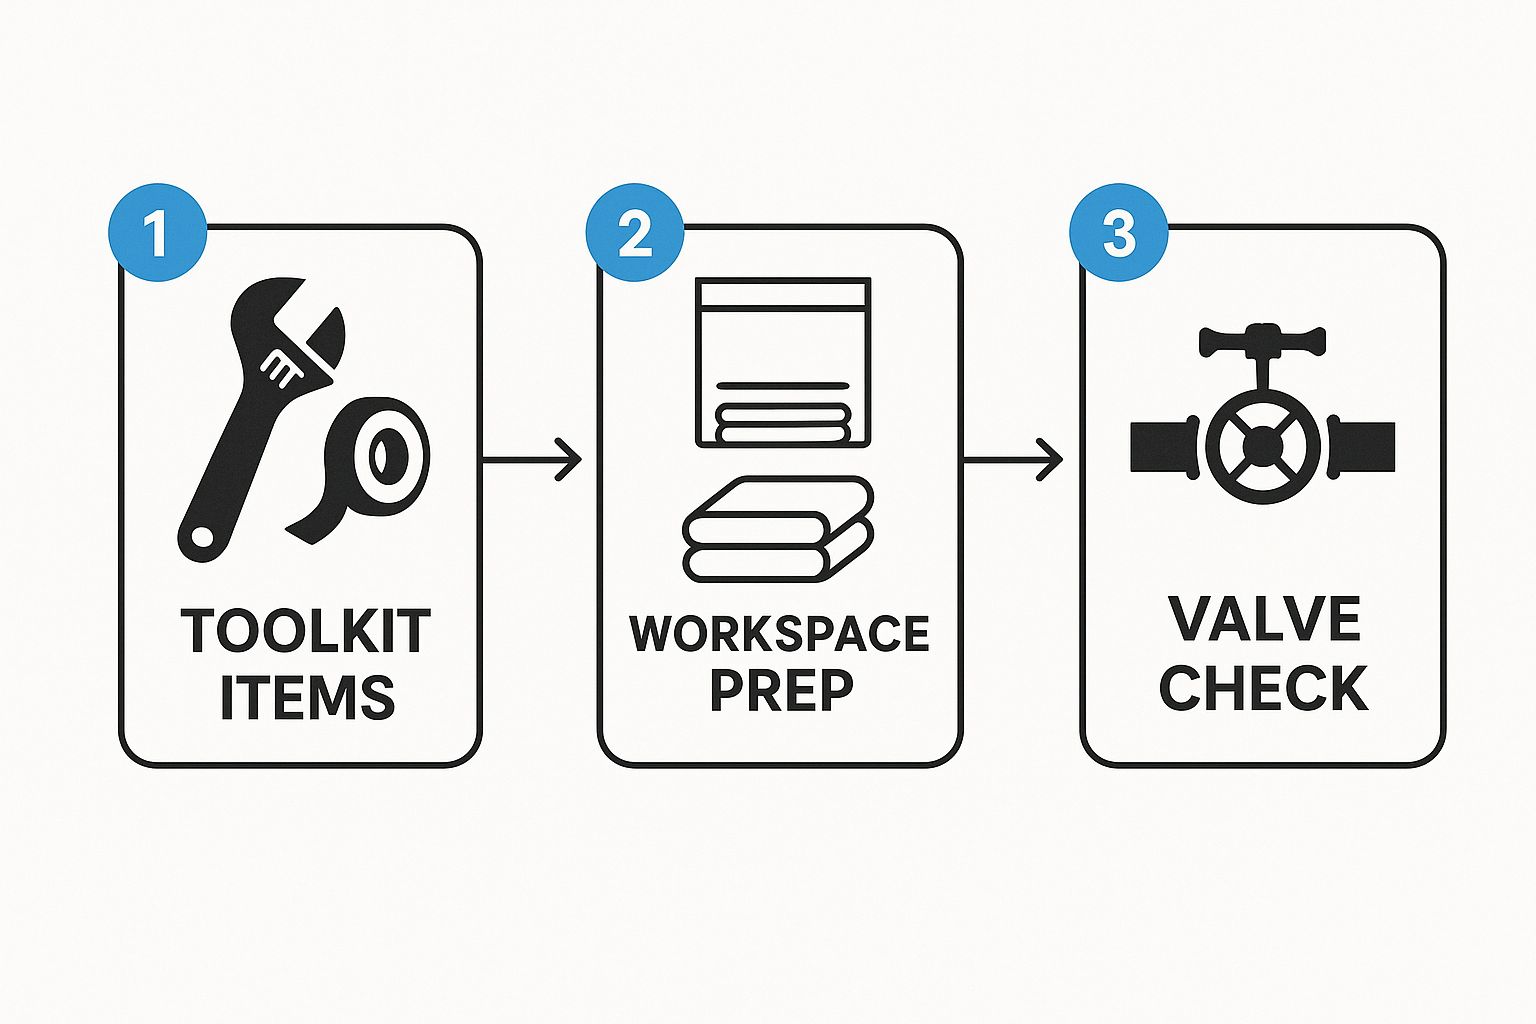
Your Guide to a Whole House Reverse osmosis System

Imagine turning on any faucet in your house—the shower, the kitchen sink, even the washing machine—and getting wonderfully pure, crisp water. Not just from a special little tap, but from everywhere. A whole house reverse osmosis system makes this dream a reality. It acts like a central purification fortress for your home's entire water supply, ensuring every single drop that flows through your pipes is spectacularly clean.

Why Whole Home Water Purity Matters

Are you tired of those chalky white spots making your glass shower doors look permanently foggy? Or maybe you're worried about the invisible party of contaminants potentially crashing your family's drinking water. These are common frustrations, and they're exactly why so many homeowners start hunting for a real solution. A simple pitcher filter is a fine start, but let's be honest—it only tackles a tiny fraction of the water you use every single day.

A whole house reverse osmosis system is a whole different beast. Think of it as a microscopic, hyper-vigilant security guard posted right where water enters your home. It uses immense pressure to force water through an incredibly fine membrane that blocks almost everything else—minerals, chemicals, and other unwanted guests—letting only pristine water molecules pass through. This isn't just about brewing a better-tasting cup of coffee; it's about fundamentally transforming the water you use for everything.

Image

Beyond the Drinking Glass

The ripple effects of whole-home purification go way beyond what you pour into a glass. You'll start noticing the difference in ways you probably haven't even considered.

This powerful filtration approach wages a multi-front war on water woes:

  • Hard Water Annoyances: Say goodbye to hard water stains for good. The minerals that cause that filmy buildup on your dishes and fixtures are filtered out, leaving everything sparkling clean with less effort.
  • Appliance Longevity: Scale buildup is a silent assassin for appliances like water heaters, dishwashers, and washing machines. Purified water protects these expensive investments from choking on mineral deposits, helping them live longer, more efficient lives.
  • Hidden Contaminants: Even municipally treated water can carry dissolved solids, chlorine, fluoride, and traces of other chemicals. A whole house RO system is precision-engineered to target and remove them.

By treating water right at the source, you're putting a protective shield around everything it touches. Showers feel luxuriously softer on your skin and hair. Your laundry comes out cleaner and brighter because detergents can finally work their magic without battling harsh minerals.

Setting the Stage for Purer Water

Installing a whole house reverse osmosis system is a serious upgrade. You're moving past temporary fixes and installing a permanent solution for superior water quality. It's a true investment in your home and your family's well-being.

In this guide, we’ll walk you through everything you need to know. We'll demystify the science, cover what to look for when you're shopping, and explore all the tangible benefits you'll enjoy every day. Let's dive in.

How Reverse Osmosis Makes Your Water Pure

At the heart of every whole house reverse osmosis system is a mind-boggling piece of technology that acts like a microscopic bouncer for your water. It’s not magic, but it’s astonishingly close. The entire process uses pressure to shove your home's water through a special barrier called a semipermeable membrane.

Think of this membrane as the world's most sophisticated strainer. Its pores are unbelievably tiny—around 0.0001 microns. To put that in perspective, a single human hair is about 80 microns wide. This ridiculously tight structure allows pure water molecules to slip right through but physically blocks up to 99% of dissolved salts, chemicals, and other microscopic troublemakers. It’s a physical blockade, not a chemical treatment, which means only the cleanest water gets past the velvet rope.

Image

The Bodyguards of the System: Pre-Filters

Before your water ever gets to meet that high-tech membrane, it has to get through a crucial warm-up act. Think of the pre-filters as the bodyguards for the main star of the show—the RO membrane itself. The membrane is powerful, no doubt, but it’s also delicate. It can easily get clogged or damaged by larger gunk.

This is where the pre-filtration stages step in:

  1. Sediment Filter: This is your first line of defense. It’s designed to trap bigger particles like dirt, rust, sand, and silt that would otherwise gum up the works and torpedo the system's efficiency.
  2. Carbon Filter: Next up, the water flows through one or more carbon filters. These are non-negotiable for snagging chlorine and chloramines—chemicals commonly used in city water treatment that can literally eat away at the RO membrane. As a fantastic bonus, they also make your water taste and smell a whole lot better.

By taking out these bigger threats first, the pre-filters let the reverse osmosis membrane focus on what it does best: tackling the tiniest dissolved impurities. This teamwork extends the membrane’s life and keeps the whole system running like a well-oiled machine.

The Heart of the Operation: The RO Membrane

Once the water gets past its bodyguards, it’s ready for the main event. This is where high pressure is applied, pushing that pre-treated water hard against the semipermeable membrane. The real separation happens right here.

While pure water molecules are squeezed through the membrane’s microscopic pores, a concentrated stream of rejected contaminants—including fluoride, arsenic, lead, salts, and PFAS—is left behind. This waste stream, known as brine, is flushed away down the drain, leaving behind exceptionally pure water.

This process is so ridiculously effective it’s become the gold standard for water purification across the globe. The demand speaks for itself; the reverse osmosis system market was valued at around USD 7.15 billion in 2021 and is expected to hit USD 8.8 billion by 2025. A big driver of that growth is the development of advanced thin-film composite membranes, which are known for their incredible efficiency. You can dig into more data on the global RO system market to see the full picture.

The Finishing Touch: Polishing with Post-Filters

The journey isn't quite over yet. After the RO membrane does its heavy lifting, the purified water usually chills out in a large storage tank, ready for you. When you turn on a faucet, this water takes one final trip through a post-filter.

This last stage, usually another carbon filter, is all about polishing. It gets rid of any stray tastes or odors the water might have picked up while sitting in the tank. Some systems even add a remineralization filter here, which puts back beneficial minerals like calcium and magnesium. This not only improves the taste but also raises the pH a bit. It’s this multi-stage approach that guarantees the water coming out of your tap is not just ridiculously pure, but also crisp and refreshing.

An Inside Look at Your RO System Components

A whole house reverse osmosis system might look complicated on the outside, but it’s really just a team of specialized parts working in perfect harmony. Think of it like a high-tech purification assembly line for your water—each station has a very specific job to get done. Figuring out what each part does is the key to understanding how these systems deliver such pristine water to every faucet in your home.

This diagram gives you a quick snapshot of the real-world benefits you get from a complete system, from contaminant removal and water output to potential long-term savings.

Image

As you can see, a top-tier system can strip out over 95% of contaminants, churn out hundreds of gallons of pure water daily, and even save you a good chunk of change each year. Every single component below plays a critical role in hitting those impressive numbers.

The First Line of Defense: Pre-Filters

Before the real magic happens, your water has to get through a crucial prep stage handled by the pre-filters. These act as the system's bodyguards, protecting the more delicate and expensive parts down the line from getting gummed up or damaged.

  • Sediment Filter: This is the bouncer at the front door. Its only job is to trap bigger, clunky particles like sand, dirt, rust, and silt. Without this guy, those abrasive materials would quickly clog up the more sensitive components.
  • Carbon Block Filter: Next up, the water flows through at least one carbon filter. These are absolutely essential for grabbing chlorine and chloramines—common city water disinfectants that can literally eat away at the RO membrane. As a bonus, they also make the water taste and smell a whole lot better by absorbing other funky organic compounds.

The Heart of the System: The RO Membrane

After the initial cleanup, the water finally reaches the heart of the whole operation: the semipermeable membrane. This is where the heavy-duty purification takes place.

This membrane is a marvel of engineering, packed with microscopic pores just 0.0001 microns in size. They're so incredibly tiny that only pure water molecules can squeeze through.

Under intense pressure, water is forced against the membrane. The pure H₂O molecules get pushed through to the "clean" side, while up to 99% of dissolved contaminants—things like salts, heavy metals, fluoride, and arsenic—are left behind and flushed down the drain.

This is the component that does almost all of the work, separating the good stuff from the bad at a molecular level. It's easily the single most important piece of the entire system.

The Support Crew: Storage Tank and Delivery Pump

Making water this pure isn't a fast process. Because reverse osmosis is slow and methodical, the system needs a way to store up the purified water so it's ready the instant you turn on the tap.

That's where the storage tank comes in. It's a large, pressurized tank that holds dozens or even hundreds of gallons of RO water, ensuring you always have a massive supply ready for showers, laundry, or cooking without any lag time. When you open a faucet, the tank delivers the water right away.

Working hand-in-hand with the tank is the delivery pump (or booster pump). Its job is to make sure the purified water travels from the tank and through your pipes with strong, consistent pressure. Without a good pump, you could end up with a disappointingly weak flow at your showerheads and faucets.

The demand for these powerful pumps is on the rise as more homes install high-performance purification systems. The global market for RO pumps was valued at USD 9.14 billion in 2025 and is expected to climb to USD 15.35 billion by 2035. If you're interested, you can discover more insights about RO pump market growth on futuremarketinsights.com.

The Final Polish: Post-Filters

Just before the water reaches your glass, it makes one last pass through a post-filter. This final stage is all about giving the water a last-minute polish to make sure it tastes absolutely perfect.

Most of the time, this is another carbon filter designed to catch any lingering tastes or odors the water might have picked up while sitting in the storage tank. Some systems also add a remineralization filter here. This component adds healthy minerals like calcium and magnesium back into the water, which can improve the taste and raise its pH for a more natural feel.

To pull it all together, here's a quick look at each component and how often you'll need to give it some attention.

Whole House RO System Component Breakdown

Component Primary Function Typical Maintenance Schedule
Sediment Pre-Filter Removes large particles like sand, dirt, and rust. Replace every 6-12 months
Carbon Pre-Filter Removes chlorine, chloramines, and improves taste/odor. Replace every 6-12 months
RO Membrane Separates pure water from dissolved contaminants. Replace every 2-4 years
Storage Tank Stores purified water for on-demand use. Check pressure annually
Delivery Pump Ensures strong water pressure throughout the home. Inspect annually
Carbon Post-Filter "Polishes" the water, removing any final tastes or odors. Replace every 12 months
Remineralization Filter (Optional) Adds beneficial minerals back to the water. Replace every 12 months

Keeping up with this simple maintenance schedule is the best way to ensure your system continues to produce incredibly pure water for years to come.

The Everyday Benefits of Pure Water at Home

So, we've talked about the hardware and the filtration stages, but what does a whole house reverse osmosis system really do for your family every single day? It's a total upgrade to the water in your home, and you'll notice the difference immediately—in what you taste, feel, and see. This isn't just about taking stuff out of your water; it's about what you get back in your daily life.

Think about that first cup of coffee or tea in the morning. With RO water, the pure, rich flavor of the coffee beans or tea leaves finally comes through. It's not hidden behind the taste of chlorine or other minerals anymore. That same pure taste transforms your cooking, too, letting the real flavors of your food shine.

Image

Even a simple glass of water or a tray of ice cubes becomes a whole new experience. Say goodbye to cloudy, strange-smelling ice. RO systems give you crystal-clear ice that won't leave behind any weird residue or aftertaste when it melts in your drink.

Experience a Softer, Healthier Clean

The perks of a whole house RO system go way beyond the kitchen. The first time you step into the shower, you'll feel it. The chlorine and hard minerals that parch your skin and make your hair feel brittle and dull are gone.

What you get instead is a shower that feels incredibly soft and clean. People often find their skin is less irritated and holds moisture better. Their hair gets shinier and is much easier to manage without being constantly attacked by harsh chemicals. It’s like showering in bottled-quality water every day.

  • Softer Skin: Your skin can finally hold onto its natural moisture without drying minerals and chlorine getting in the way.
  • Healthier Hair: With no mineral gunk coating your hair, it feels softer, looks brighter, and is way easier to style.
  • Cleaner Laundry: Your clothes will come out of the wash feeling softer and looking brighter because the detergent can finally do its job properly in pure water.

When you remove all the gunk that causes irritation and buildup, a whole house RO system basically turns every single faucet in your house into a source of gentle, purified water. It completely elevates your daily routine.

Protecting Your Home and Your Wallet

Here's one of the biggest long-term wins: protecting your home's plumbing and appliances. Those hard water minerals create scale—that crusty, white buildup you see inside your pipes, on your faucets, and, more importantly, inside your expensive appliances.

That scale buildup makes things like your water heater, dishwasher, and washing machine work way harder than they should. This leads to higher energy bills and a much shorter lifespan for your appliances. By filtering out these minerals right where the water enters your home, a whole house reverse osmosis system acts like a shield, stopping that expensive damage before it even starts. You'll be making fewer repair calls and your appliances will last longer, saving you hundreds, if not thousands, of dollars down the road.

Plus, with an unlimited supply of amazing water right from the tap, you can finally ditch single-use plastic water bottles for good. You'll not only shrink your environmental footprint but also cross a regular expense off your grocery list. Those savings really add up over the year.

How to Choose the Right System for Your Family

Picking the right whole house reverse osmosis system can feel like a huge task, but it’s actually pretty straightforward if you break it down. Don't get bogged down in technical jargon. The best place to start is with what you know: your family and your home. It’s all about matching the system's power to your specific needs.

Your first step is to nail down two key numbers: how much water your household uses daily and what’s actually in your water. These two facts will steer all your other decisions and keep you from buying a system that’s overkill or one that just can’t keep up.

Calculate Your Daily Water Demand

First things first, let’s figure out how much filtered water your family actually needs. This is measured in Gallons Per Day (GPD). A system’s GPD rating tells you the maximum amount of pure water it can produce over 24 hours.

Figuring out your usage is easier than you might think. You don't need to track every drop. Instead, just think about your busiest moments—like a typical morning when the shower is running, the laundry is going, and the dishwasher kicks on. A good whole house reverse osmosis system needs a big enough storage tank to handle all that at once without your water pressure taking a nosedive.

  • Small household (1-2 people): A system rated for 200-400 GPD should do the trick.
  • Average family (3-4 people): Look for something in the 400-800 GPD range.
  • Larger families (5+ people): You’ll probably need a system that can produce over 800 GPD to keep everyone happy.

Understand Your Water Quality

Next up, you need to know exactly what you’re trying to filter out. The key metric here is Total Dissolved Solids (TDS), which is just a measure of all the minerals, salts, and metals dissolved in your water. You can often find this in your city's annual water report, but for a truly accurate number, a cheap handheld TDS meter is the way to go.

Why does TDS matter so much? Because the more "stuff" in your water, the harder the RO system has to work. If your TDS is high (over 500 ppm), you'll need a stronger system, and probably a booster pump, to push water through the membrane effectively.

Think of your TDS level as a roadmap. It tells you exactly how tough the filtration job is going to be, which points you directly to the right kind of equipment.

Consider Essential System Features

Once you know your GPD and TDS numbers, you can start zeroing in on the features that make sense for your home.

One of the biggest factors is your home's water pressure. You can learn more about understanding your home's water pressure, but the bottom line is this: if your pressure is below 40-50 PSI, a booster pump isn't optional. It's essential. It provides the muscle needed to force water through the RO membrane.

If you’re on well water, a UV filter is another must-have. While RO membranes are fantastic at removing dissolved solids, they aren't designed to kill living organisms. A UV light acts as a final line of defense, zapping any bacteria or viruses to make sure your water is completely safe to drink.

Balancing Cost and Efficiency

Finally, let's talk budget and long-term costs. A huge factor here is the system's wastewater ratio—how much water goes down the drain for every gallon of pure water produced. Older systems were notoriously wasteful, sometimes with ratios as high as 4:1. Modern, high-efficiency models can get that down to 1:1, which saves a massive amount of water over the year.

The initial investment for a whole house reverse osmosis system can range from USD 1,000 to USD 4,000, with most homeowners spending around USD 2,500 for the equipment and installation. Typically, about 89% of that cost is for the parts and materials, while the other 11% covers professional labor. By figuring out your needs ahead of time, you can pick a system that delivers pure, clean water without a shocking price tag.

A Homeowner's Guide to Installation and Upkeep

https://www.youtube.com/embed/7tdKkeNClPE

So you've picked out the perfect whole house reverse osmosis system. Now for the fun part: getting it set up and running in your home. This really breaks down into two stages—the initial installation and the simple, ongoing maintenance that keeps your investment working hard for you. Get these two things right, and you'll be enjoying pure, clean water for years.

The first big question you need to answer is whether you'll hire a pro or tackle the installation yourself. There's no single right answer here; it really comes down to your own comfort level with plumbing and how much time you have.

Professional Installation vs DIY

Hiring a licensed plumber definitely brings peace of mind. They've seen it all before, know how to handle any surprises that might pop up, and will make sure every connection is leak-free. It's usually the best way to go if you have a complex setup or just want the assurance that the job is done right from the start.

On the flip side, a DIY install can be a really satisfying project—and save you some money—if you know your way around a toolbox. To pull it off, you'll need to be comfortable cutting into your main water line, possibly soldering pipes, and carefully following the system's instructions. Keep in mind, if any part of the job requires electrical work, it's crucial to prioritize safety by finding a trusted electrician.

Creating a Simple Maintenance Schedule

Don't let the word "maintenance" intimidate you. For these systems, it's mostly just a predictable schedule of changing filters and doing a quick check-in. This simple upkeep is the secret to getting the best performance and avoiding bigger problems later on.

Think of maintenance as a tune-up for your home’s water supply. A few simple steps each year ensure the entire system—from the powerful membrane to the final polishing filter—is working in perfect harmony to deliver the purest water possible.

Your long-term care plan boils down to just a few easy tasks. Once you get into a rhythm, it'll become second nature, and your water quality will thank you for it. If you want to dive deeper into general upkeep, you can find more water filtration advice to round out your knowledge.

Your Routine Upkeep Checklist:

  • Pre-Filters (Every 6-12 Months): These are the workhorses, catching all the sediment and chlorine before they can do any damage. Swapping them out is the most important thing you can do to protect the RO membrane.
  • Post-Filter (Every 12 Months): This final filter gets changed out once a year. It's what removes any lingering tastes the water might pick up from the storage tank, keeping it tasting crisp and fresh.
  • RO Membrane (Every 2-4 Years): This is the heart of your whole system. How long it lasts depends on your water quality and how much you use it, but planning for a replacement every few years is a good rule of thumb.
  • Annual System Check: Once a year, just take a quick look over everything. Check the air pressure in the storage tank and scan all the connections for any signs of leaks.

That's really all there is to it. Following this straightforward routine will keep your whole house reverse osmosis system running like a dream, delivering incredible water to every tap in your home.

Got Questions About Whole House RO Systems? Let's Clear Things Up.

Even after you’ve seen the benefits, it’s smart to have a few questions before you commit to a whole house reverse osmosis system. Let's walk through some of the most common things people ask, so you can feel totally confident in your decision.

What About Water Waste?

This is probably the number one concern we hear. It's true, older RO systems weren't exactly efficient, but today's technology is a completely different story.

Modern, high-efficiency systems have gotten that wastewater ratio way down—some are as low as 1:1. That means for every gallon of pure water you get, only one gallon goes down the drain. Some of the most advanced units even have brine-reclaim features to cut down on waste even more.

Does It Strip Out Healthy Minerals?

Another big question is about minerals. Since reverse osmosis is so thorough, it does remove beneficial minerals like calcium and magnesium right along with all the nasty stuff. But there's an easy fix.

We almost always recommend adding a post-remineralization filter. This is the last stop for your water before it hits the tap, adding a healthy blend of minerals back in. This not only makes the water healthier but also improves the taste and alkalinity.

You really get the best of both worlds: pure water with up to 99% of contaminants gone, plus the good minerals you want for balanced, great-tasting water.

What's the Upkeep Like?

Finally, how much maintenance are we talking about? You might be surprised. The main RO membrane—the heart of the system—is built to last. Depending on how hard your water is and how much you use, you’ll typically only need to replace it every 2 to 4 years.

The pre-filters need a bit more attention, usually a swap every 6-12 months. But it’s a simple job that protects that more expensive membrane, making sure your system runs at its best for years to come.


For more expert guidance on choosing the right water filtration solutions for your home, explore the in-depth reviews and practical advice from our team at Water Filter Advisor. Find your perfect water filter system today.

Carbon Block Filters Water: Your Guide to Purer, Better-Tasting Water

If your tap water has a weird taste or a faint chemical smell, a carbon block filter is one of the easiest and most affordable ways to fix the problem. Think of it as a super-powered Brita for your entire kitchen. These surprisingly simple devices use activated carbon to grab onto contaminants like chlorine, leaving you with cleaner, better-tasting water straight from the tap.

Let's dive into exactly how this clever technology works and find the perfect filter for your home.

Your Journey to Better Tasting Water Starts Here

Image

Ever notice your water tastes a bit like a swimming pool? That’s usually chlorine. Water treatment plants use it as a disinfectant to make sure the water is safe on its way to your house. It does a critical job, but nobody really wants to taste it when they pour a glass.

This is where a carbon block filter really shines. You can think of it like a super-powered sponge, made specifically to soak up all the junk you don't want in your water. It's a straightforward but incredibly effective way to make your daily drinking water much more enjoyable, without needing a complex or expensive system.

Why Carbon Filtration is a Popular Choice

It's no secret that people are paying more attention to what's in their water, and that's made carbon filtration a go-to for millions of homes. The market for these filters is booming, all part of a bigger global push for better water quality and health.

So what's the big deal? Why are these filters so common? It really boils down to a few major wins for your home:

  • Better Taste and Smell: They are fantastic at pulling out chlorine and other things that give water an "off" taste.
  • Contaminant Reduction: Carbon is great at targeting a whole range of organic chemicals, including certain pesticides and VOCs (volatile organic compounds).
  • Affordable and Easy to Find: Whether you want a simple pitcher or an under-sink system, there’s a carbon filter out there for just about any home and budget.

A carbon block filter works in two ways at once: it’s a gatekeeper and a magnet. It physically stops sediment from passing through, while its huge internal surface area chemically attracts and traps contaminants, pulling them right out of your water.

For an even more complete approach to your home's water, you can look into complementary treatments like water softening solutions such as Harvey Salt Blocks.

In this guide, we're going to break down the science behind how these filters work, show you exactly what they remove, and help you figure out the best system for your family. By the time you're done reading, you'll know exactly how to choose, install, and maintain a filter that completely transforms your tap water.

The Science Behind Carbon Block Water Filtration

To really get why a carbon block filters water so effectively, think of it as a microscopic maze with a magnetic personality. Water gets pushed through, but all the nasty stuff gets trapped, unable to find an exit. It's a simple idea, but it’s powered by two potent scientific principles working in tandem to clean up every single drop.

This isn't just a one-trick pony. The filter pulls double duty. First, it acts as a physical gatekeeper, kind of like a sieve, blocking bigger particles. At the very same time, it uses a powerful chemical attraction to snatch dissolved impurities right out of the water, making sure they never reach your glass.

The Power of Physical Filtration

The first job of a carbon block is just straightforward mechanical filtering. The carbon is packed into a dense, solid block that's riddled with incredibly tiny pores. These pores are measured in microns, and most home filters have a rating between 0.5 to 5 microns. To give you some perspective, a single human hair is about 70 microns thick.

As water is forced through this tight-knit structure, any particle larger than the pores gets stopped in its tracks. We're talking about things like silt, sand, rust, and even some microorganisms. It’s like a bouncer at a club door, only letting the water molecules and smaller, dissolved goodies pass through to the next stage. This first step is absolutely crucial for clearing up cloudy water and setting the stage for the deeper cleaning to come.

This image really shows the link between the carbon's structure, its pore size, and its knack for removing contaminants.

Image

As you can see, that huge internal structure and those tiny pores are what give activated carbon its incredible power.

Adsorption: The Secret to Purity

Now, this is where the real magic happens, down at the microscopic level. It’s a process called adsorption. Be careful not to mix this up with absorption—that’s when something soaks up liquid like a sponge. Adsorption is different. It’s when contaminants chemically stick to the outside of the carbon, like little magnets snapping onto a refrigerator door.

To make this happen, the carbon has to be “activated.” This is done by superheating carbon-rich materials (like coconut shells or coal) in a low-oxygen chamber. This process blasts open millions upon millions of tiny pores, which dramatically increases the carbon's total surface area.

It's hard to wrap your head around, but just one gram of activated carbon can have a surface area of over 3,000 square meters. That means the little carbon block in your filter might have an internal surface area the size of a football field.

This massive, porous landscape is what makes adsorption so brutally effective. As water winds its way through the filter's maze, contaminants like chlorine, volatile organic compounds (VOCs), and other chemicals that cause bad tastes and smells are electrochemically drawn to the carbon's surface. They get stuck in the pores and are taken out of the water for good.

Why Contact Time Matters

The performance of a carbon block filter really hinges on contact time—basically, how long the water gets to hang out with the carbon. The solid block design is far better than loose carbon bits (often called GAC) because it prevents "channeling." That’s where water finds an easy way through, carving a little path and bypassing most of the filter material.

A carbon block forces water to take the scenic route, a long and winding path through its dense structure. This maximizes contact time. The slower the water flows, the more chances the carbon has to grab onto those impurities. This is why filters come with a recommended flow rate; they're designed to ensure contaminants have enough time to get stuck to the carbon before the water hits your tap. This careful engineering is how a carbon block filters water so thoroughly, giving you that clean, fresh result you’re looking for.

What Contaminants Carbon Block Filters Remove

Image

So, we've covered the science of adsorption. Now, let's get down to what really matters: what is a carbon block filter actually pulling out of your water?

Think of it as a smart gatekeeper for your tap. It's incredibly good at targeting the specific impurities that make water taste and smell off, while also tackling certain invisible chemicals. Its main job is to go after organic compounds and the disinfectants used by city water systems.

Knowing what it targets helps you figure out if it's the right solution for your home. If your water has that "swimming pool" odor, you're in luck. A carbon block filters water by going straight for the source of that smell, along with a whole list of other things you'd rather not be drinking.

The Chlorine and Chloramine Busters

The #1 reason people get a carbon filter is to get rid of chlorine. Municipal water suppliers use it to kill off bacteria and viruses, which is great for public health. But by the time the water gets to your kitchen, that chlorine has done its job and often leaves behind a chemical taste and smell. Carbon is a superstar at adsorbing chlorine, which is why filtered water just tastes so much cleaner.

But what if your city uses chloramine? Many municipalities are switching to this more stable disinfectant, which is a mix of chlorine and ammonia. A standard carbon filter will remove some of it, but a special type known as catalytic carbon is way more effective. If your water bill says they use chloramines, look for a filter with catalytic carbon to get the best-tasting water.

Tackling Volatile Organic Compounds (VOCs)

Beyond just improving taste and odor, carbon filters are a powerful defense against a group of chemicals called Volatile Organic Compounds (VOCs). These are carbon-based chemicals that can seep into water supplies from things like industrial runoff, pesticides, and solvents.

VOCs include a wide range of substances, some of which are linked to health concerns. Carbon block filters are certified to reduce many of them, including benzene, toluene, and trihalomethanes (THMs)—a nasty byproduct of chlorine disinfection.

Other Contaminants on the Hit List

That massive internal surface area makes carbon a real workhorse. It’s skilled at grabbing onto plenty of other unwanted guests, too.

  • Pesticides and Herbicides: If you live near agricultural areas, runoff can carry these chemicals into the water system. Carbon is excellent at adsorbing them.
  • Bad Tastes and Odors: Carbon deals with all sorts of organic compounds that create musty, earthy, or even fishy smells, bringing your water back to a clean, neutral state.
  • Lead Reduction: While not all carbon filters can handle heavy metals, many modern carbon blocks are beefed up with special media (like KDF) designed specifically to reduce lead.

What Carbon Filters Do Not Remove

It's just as important to know what a carbon filter can't do. These filters aren't a cure-all for every single water problem out there. By design, they are selective—they leave some things in and can't touch others.

For instance, carbon filters won't remove healthy dissolved minerals like calcium, magnesium, and potassium. This is a good thing! These minerals are beneficial for your health and actually contribute to good-tasting water. They also generally don't remove fluoride, nitrates, arsenic, or microorganisms like bacteria and viruses. For those contaminants, you'd need a different kind of system, like reverse osmosis or a UV purifier.

This handy table breaks down what a typical carbon block filter can and can't handle.

Carbon Block Filter Contaminant Removal Guide

Contaminant Category Effectively Removed Generally Not Removed
Aesthetics Chlorine, bad tastes, and odors Hardness minerals (calcium, magnesium)
Chemicals VOCs, pesticides, herbicides Fluoride, nitrates, arsenic
Heavy Metals Lead (with special media) Mercury, cadmium (without special media)
Microbiological Cysts (with <1 micron rating) Bacteria, viruses

Ultimately, understanding this list helps you match the right filter to your specific water quality concerns, ensuring you get the performance you need.

Decoding Filter Performance and Certifications

When you're trying to compare different carbon block filters, the technical specs on the box can look like they're written in another language. But trust me, figuring out what these key metrics mean is the secret to picking a filter that actually works as advertised. Once you know what to look for, you can cut right through the marketing fluff and choose a filter with confidence.

These numbers tell you the whole story. They show you how fine the filter's "sieve" is, how fast you'll get clean water, and exactly how long it will run before you need to swap it out. Learning to read these specs is the single most important step in finding a reliable filter for your home.

Key Performance Metrics to Understand

When you're sizing up a filter, you'll see three main specs over and over: the micron rating, flow rate, and filter capacity. Each one gives you a critical piece of the puzzle.

  • Micron Rating: This tells you the size of the particles the filter can physically block. It’s simple: a smaller number means finer filtration. A 1-micron filter, for instance, will trap much smaller contaminants than a 5-micron one. If you're trying to get rid of things like tiny cysts (think Giardia and Cryptosporidium), you'll want a filter rated at 1 micron or less.

  • Flow Rate (GPM): This is measured in gallons per minute (GPM) and tells you how quickly water will move through the filter. A higher GPM is great for whole-house systems or your main kitchen faucet where you don't want to stand around waiting. Just keep in mind that slower is often better for contaminant removal, as it gives the water more contact time with the carbon.

  • Filter Capacity (Gallons): This is the total number of gallons the filter can clean before it’s clogged up and needs to be replaced. A little refrigerator filter might be rated for 200 gallons, while a beefier under-sink system could handle 600 gallons or more.

The Gold Standard: NSF Certifications

While the performance numbers are a great start, the real proof of a filter's effectiveness comes from third-party certifications. The most respected and common ones come from NSF International (formerly the National Sanitation Foundation), an independent group that tests and verifies product claims.

An NSF certification isn't just a sticker on a box; it's a guarantee that the filter has been rigorously tested and proven to remove the specific contaminants it claims to. It's the highest level of assurance you can get.

Looking for NSF/ANSI standards is the easiest shortcut to know you're buying a quality product. The two you'll see most often for carbon block filters water treatment are:

  • NSF/ANSI 42 Aesthetic Effects: This one confirms the filter can make your water taste and smell better. It's specifically tested on its ability to reduce things that are more of an annoyance than a danger, like chlorine and other particulates that give water a bad odor or cloudy look.

  • NSF/ANSI 53 Health Effects: This is a much tougher standard to meet. To earn this certification, a filter has to be proven to reduce specific health-related contaminants like lead, mercury, cysts, and a long list of VOCs. If you're worried about more than just taste, this is the certification you need to look for.

The demand for high-performance home filters is strong, partly because of solid regulatory standards and consumers who know what to look for. The compressed design of carbon block filters, which lets them remove a huge range of contaminants like lead and VOCs, has made them a dominant force in the home water filtration market. You can dig deeper into commercial water filter trends to see how this technology is evolving. By checking for these certifications, you can be sure your chosen filter meets the highest standards for both safety and performance.

Choosing the Right Carbon Filter for Your Home

Image

Alright, you can now read a filter’s spec sheet like an old pro. Now comes the fun part—matching a system to your actual life. From simple pitchers to whole-house units that treat every drop, there’s a carbon block filter solution for just about everyone.

The goal isn't to find the single "best" filter on the market, but the one that's the best for you. It really boils down to your budget, how much water you use daily, and how comfortable you are with a little installation work. Let's break down the most common types of home filters to see which one checks all your boxes.

Simple and Portable Water Filter Pitchers

If you're just dipping your toes into water filtration, a pitcher is the easiest place to start. They couldn't be simpler: fill the top, let gravity do the work, and pour yourself a glass of crisp, clean water. They’re cheap, require zero setup, and are a great fit for renters or anyone who just wants to improve the taste of their drinking water without any commitment.

Of course, there are some trade-offs. Pitchers are slow and don't hold much water, so you’ll find yourself at the sink refilling them often. The small filters also need to be swapped out more frequently than bigger systems, and that cost can add up.

  • Best For: Individuals, renters, or anyone looking for a low-cost, no-fuss option for drinking water.
  • Pros: Super affordable, totally portable, and no installation required.
  • Cons: Small capacity, slow filtering speed, and more frequent filter changes.

Convenient Refrigerator and Faucet Filters

Want filtered water on tap without a big project? Refrigerator and faucet-mounted filters are a fantastic middle ground. Fridge filters are built right into your water and ice dispenser, giving you chilled, clean water instantly. They're a true "set it and forget it" solution, usually needing a new cartridge only every six months.

Faucet filters screw directly onto your kitchen tap, letting you switch between filtered and regular water on the fly. This is a neat trick for extending the filter's life, since you can use unfiltered water for things like washing dishes. Both are a huge step up from pitchers in convenience and capacity.

These are what we call point-of-use (POU) systems. They’re designed to treat water right where you use it most—your kitchen sink. They strike a great balance between performance and convenience without needing to call a plumber.

High-Performance Under-Sink Systems

For those who want serious filtration power hidden away, an under-sink system is the gold standard for the kitchen. These units are installed discreetly in the cabinet below and connect right to your cold water line. They feed a separate, dedicated faucet, giving you a steady stream of pure water.

Because these systems use much larger carbon block filters, they have a higher capacity and last a lot longer than pitchers or faucet mounts. They cost more upfront and might require some basic plumbing know-how to install, but you get top-tier contaminant removal and fast-flowing water. It's a great long-term investment for a family.

Comprehensive Whole-House Systems

If your goal is better water from every single tap—showers, laundry, bathrooms, and all—then a whole-house system is the ultimate answer. Also called a point-of-entry (POE) system, this unit is installed right where the main water line enters your home.

This approach doesn't just protect your family's drinking water; it protects your pipes and appliances from the harsh effects of chlorine and sediment. While it's the most expensive option and typically requires a professional plumber to install, it delivers a seamless, whole-home solution. You'll even notice the difference in the shower, with softer skin and hair free from chlorine's drying effects.

Simple Installation and Maintenance Tips

One of the best things about modern carbon block water filters is that most are designed for easy, DIY installation. The idea of fiddling with your home’s plumbing can be a little nerve-wracking, but you don’t need to be a pro to get most systems up and running.

For example, swapping out a refrigerator filter is usually as simple as twisting out the old one and popping in the new—no tools needed. Under-sink systems might look more complicated, but many kits today come with everything you need, including clear instructions and quick-connect fittings that just snap into place.

Of course, while many setups are perfect for a weekend project, some complex whole-house systems or tricky plumbing situations are best left to the experts. If you hit a snag or just don't feel comfortable, it’s always a good call to bring in professional plumbing services to make sure it’s done right.

Why Timely Maintenance is Non-Negotiable

Getting your filter installed is just step one. The real key to consistently great-tasting water is keeping up with maintenance.

Think of your filter cartridge as a highly specialized sponge. Once it's completely full of trapped contaminants, it simply can’t absorb any more. Worse yet, the pressure of water flowing through can actually start to push some of those trapped impurities back into your water supply.

When you forget to change your filter, you’re basically turning your purifier off. The carbon becomes saturated and can’t grab any more contaminants, meaning all that nasty chlorine and other junk starts flowing right back out of your tap.

A clogged filter doesn't just stop working—it can become a breeding ground for bacteria. The trapped organic material creates a perfect environment for microorganisms to multiply, potentially making your water quality worse than it was before filtration.

Knowing When It's Time for a Change

So, how can you tell when your filter has reached the end of the line? Your system will give you a few clear signals that it's time for a replacement.

You should change your filter if you notice:

  • A Drop in Water Pressure: This is the classic tell-tale sign. As the filter’s pores get clogged with gunk and sediment, it becomes much harder for water to push through. The result is a weak, slow flow from your faucet or dispenser.
  • Return of Bad Tastes and Odors: If that familiar chlorine taste or musty smell starts creeping back into your water, you know the carbon’s job is done. Its adsorption capacity is maxed out, and it’s no longer pulling out the chemicals that ruin the flavor.
  • The Filter Indicator Light: Many modern refrigerators and under-sink systems take the guesswork out of it with a handy indicator light that alerts you when the filter is nearing its expiration date.

A good rule of thumb is to replace most refrigerator and under-sink filters every six months. But always double-check the manufacturer’s guidelines, as every filter is different. For more tips on keeping your system in top shape, check out this great advice from water filtration experts.

A simple trick? Set a recurring reminder on your phone or calendar. It’s an easy way to make sure you never miss a filter change.

Your Top Questions About Carbon Block Filters, Answered

As you narrow down your options for the perfect filter, it's totally normal to have a few last-minute questions. Getting those final details sorted is what helps you feel confident you're making the right call for your family.

So, let's dive into some of the most common things people ask about carbon block filters, from how long they last to how they stack up against other types.

How Long Do Carbon Block Water Filters Typically Last?

There’s no single answer here—a filter's lifespan really depends on its size, how much water you use every day, and the quality of your local water.

As a rule of thumb, a standard under-sink or refrigerator filter usually needs to be replaced every 6 to 12 months. A larger whole-house filter might go for a year or even longer. Your best bet is always to check the manufacturer's guidelines to keep your filter working like it should.

Will a Carbon Block Filter Reduce My Water Pressure?

When you first install a new carbon block filter, you might notice a tiny drop in water pressure, but it’s usually so small you won’t even feel it.

If you suddenly see a major drop in your water pressure, that’s the number one sign your filter is clogged with gunk and it's time for a change. It’s your system’s way of saying, "Hey, I'm full!" A new filter will get the flow back to normal and keep your water pure.

Are Carbon Block Filters Better Than GAC Filters?

Both use activated carbon, but yes, carbon block filters generally do a better job than Granular Activated Carbon (GAC) filters. The key is in the design. A carbon block is a solid, compressed brick of carbon.

This solid structure forces every drop of water to twist and turn through a dense maze, so it can't just find an easy path and sneak past the filter media. This gives the water much more contact time with the carbon.

It also means carbon blocks can be made with much smaller pores, allowing them to reliably filter out tiny contaminants like lead, certain cysts, and VOCs that loose GAC granules might miss. This level of performance is why the demand for these filters is soaring, with the global market expected to hit USD 10.3 billion by 2030. You can get more details on the global carbon block filter market trends to see what's driving this growth.


Ready to find the perfect filtration solution for your home? At Water Filter Advisor, we provide in-depth reviews, buying guides, and expert advice to help you choose with confidence. Explore our resources today at https://www.waterfilteradvisor.com.