Best Countertop Water Dispenser: 2026 Buying Guide

You fill a glass from the kitchen tap, hold it to the light, and it looks fine. That's the problem. Water issues that worry most families don't announce themselves. Chlorine can show up as taste and odor, but lead, dissolved solids, and newer concerns like PFAS don't give you the courtesy of a warning label.

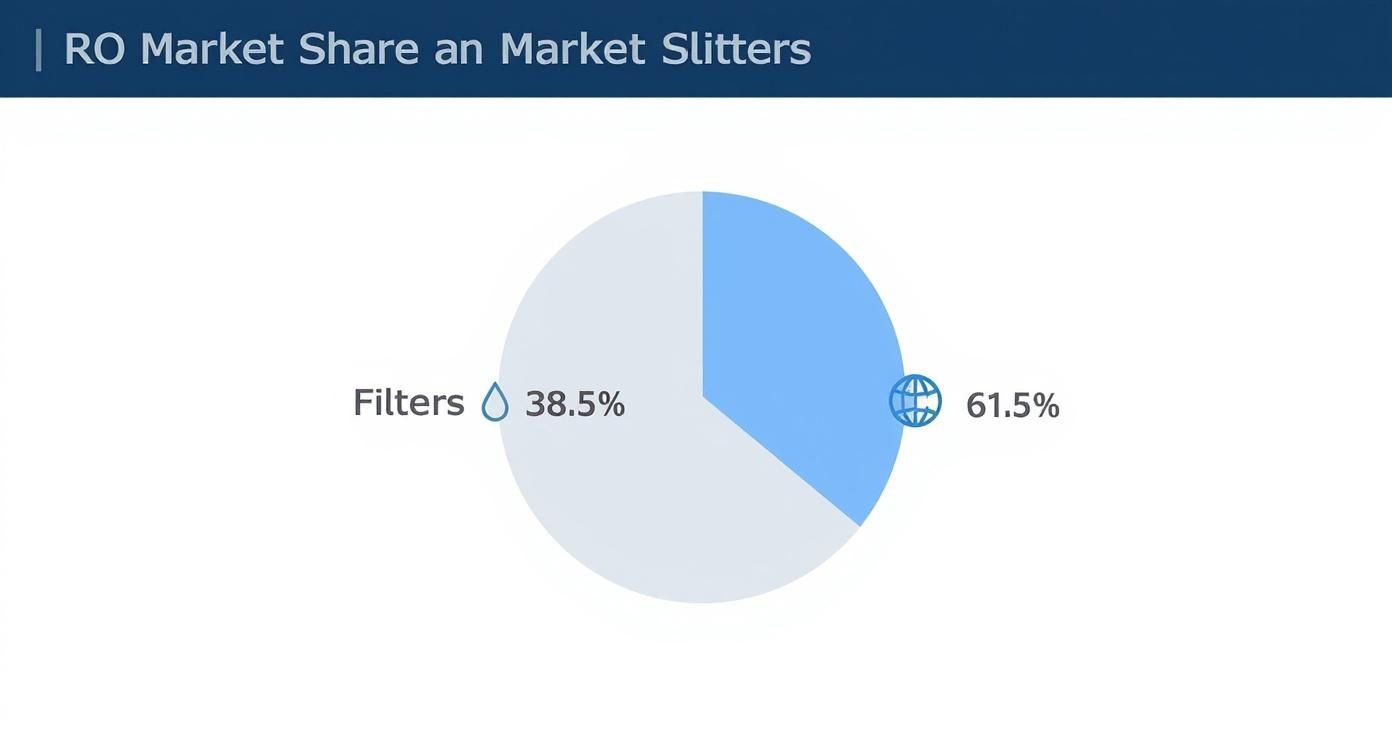
That's why countertop systems have moved from “nice to have” to a serious home upgrade. The category reached USD 3,157 million in 2024, with projected growth at 11.2% CAGR through 2031 to USD 6,638 million, and the average selling price of USD 160 per unit implies roughly 19,731,000 units sold globally in 2024 according to market analysis on countertop water dispensers. People want better water without opening cabinets, drilling counters, or committing to plumbing work.

A good countertop dispenser can absolutely solve that problem. A bad one can leave you with expensive filter replacements, weak contaminant removal, annoying refill routines, or a bulky appliance that becomes a regret purchase after the first month. The best countertop water dispenser isn't the one with the flashiest feature list. It's the one that fits your water risks, your kitchen, and your long-term budget.

The Clear Case for Better Water on Your Countertop

Countertop dispensers appeal to people who want control without remodeling. Renters like them because they don't need permanent installation. Homeowners like them because they can target drinking water quality without replacing the whole plumbing system.

That convenience matters, but convenience alone shouldn't drive the decision. Water filtration is a health purchase first. If your main complaint is flat taste or chlorine smell, a simpler system may be enough. If you're worried about a broader range of contaminants, the wrong technology can leave a big gap between what the product promises and what it removes in the glass you drink.

Here's the part many shoppers miss. This market is growing fast because countertop units have become mainstream, not because every unit performs equally well. The category is expanding faster than the broader water dispenser market, which tells me buyers are prioritizing ease of use and no-plumber setup, but it also means the shelves are crowded with models that look similar while doing very different jobs.

The smartest buyers start with the contaminants they care about, then choose convenience features second.

A family kitchen usually needs four things from a dispenser:

  • Reliable contaminant reduction: Not just marketing language, but meaningful removal claims.
  • Daily usability: Easy filling, reasonable waiting time, and enough capacity for actual household use.
  • Predictable upkeep: Filter changes, cleaning, and energy use that won't become a nuisance.
  • Value over time: A system that stays affordable after the honeymoon period.

That last point deserves more attention than it gets. I've seen plenty of people buy a countertop unit for the compact footprint, then realize the recurring costs are what really determine whether they keep using it.

Early on, it helps to compare by filtration type, ownership costs, and practical fit, not by lifestyle branding.

Best fit Filtration style Main strength Main trade-off
Taste and odor improvement Activated carbon Simple, familiar, convenient Doesn't match RO for broad contaminant removal
Broad contaminant reduction Reverse osmosis Strong removal of dissolved contaminants Slower process and maintenance complexity
Low-tech backup or off-grid use Gravity-fed No power required Slower dispensing and fewer premium features

Decoding Countertop Filtration Technologies

Most countertop units look like small appliances. Inside, they behave very differently. If you understand the filter type, you can ignore half the marketing language on the box.

Right near the top of the list is the filtration media itself.
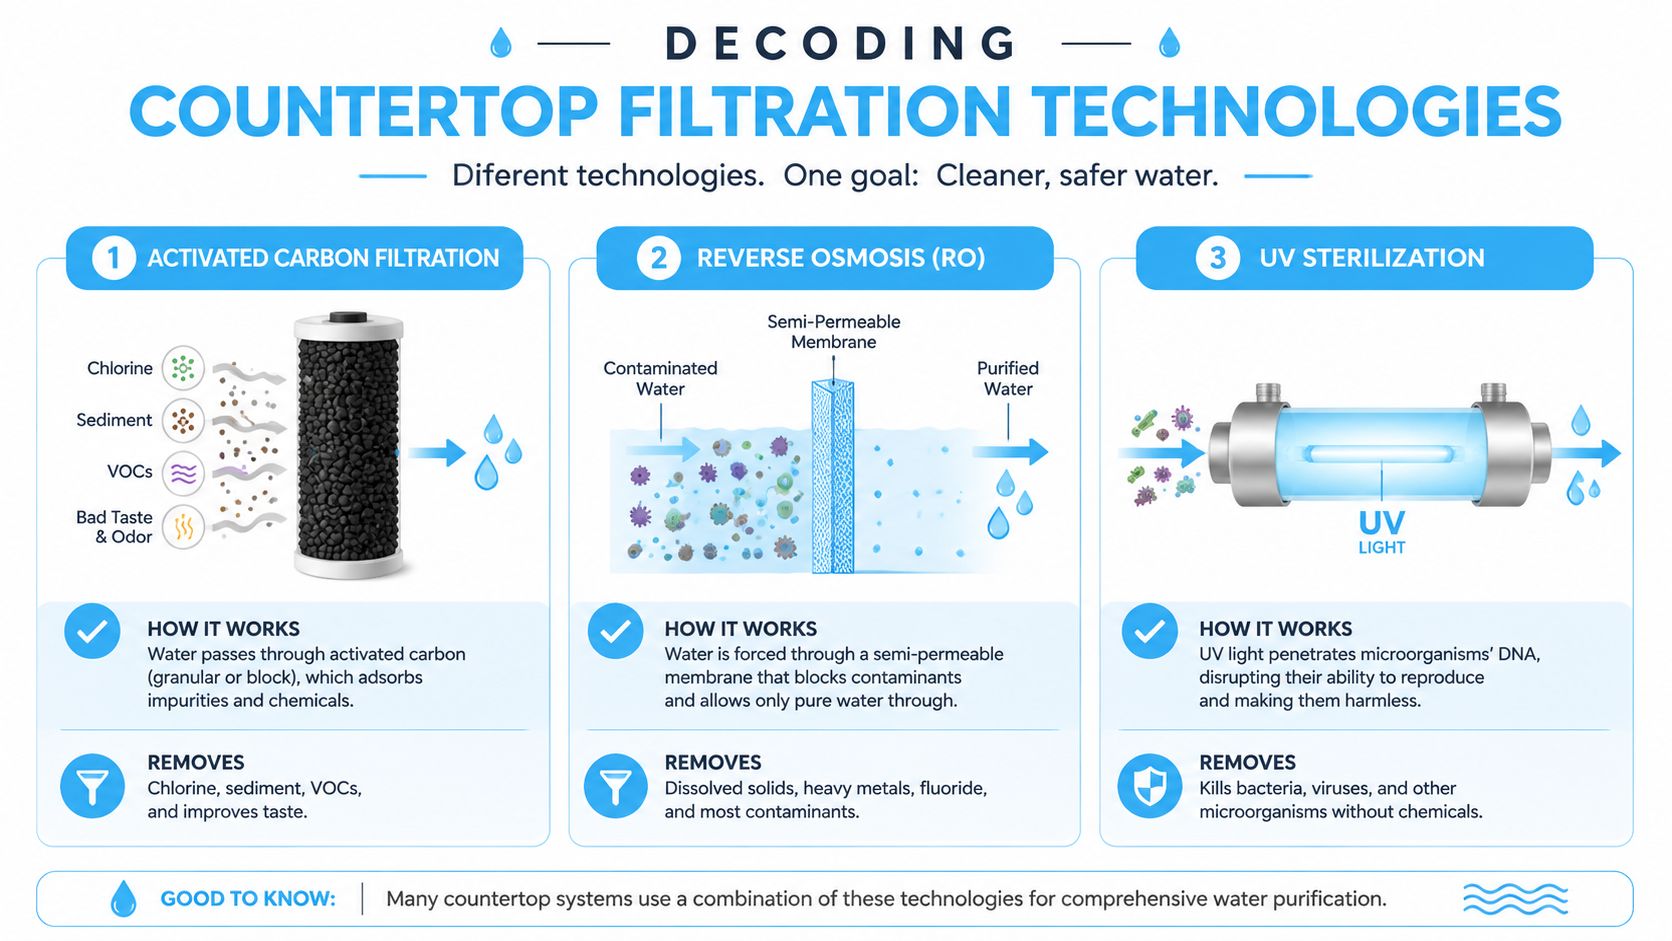
An infographic illustrating three common countertop water filtration technologies including activated carbon, reverse osmosis, and UV sterilization.

Activated carbon filtration

Activated carbon is the workhorse in countertop filtration. According to Consumer Reports' summary of countertop filter technology, activated carbon-block technology, the primary filtration method in all tested countertop water filters, uses black granular activated carbon to pull solid and gas contaminants from water flow, reducing chlorine, sediment, off tastes, odors, and sometimes lead, solvents, and pesticides.

In plain English, carbon acts like a contaminant trap. It's especially good for making municipal water more pleasant to drink. If your tap water smells like a pool or leaves a chemical aftertaste in coffee, carbon is often the first thing that helps.

What it doesn't do well is solve every water problem. Carbon is strong for taste-driven complaints and some health-related contaminants, but performance depends heavily on cartridge design, contact time, and certification. One carbon filter can be solid for chlorine and weak for broader reduction claims. Another can be much better. You have to read past the headline.

Reverse osmosis systems

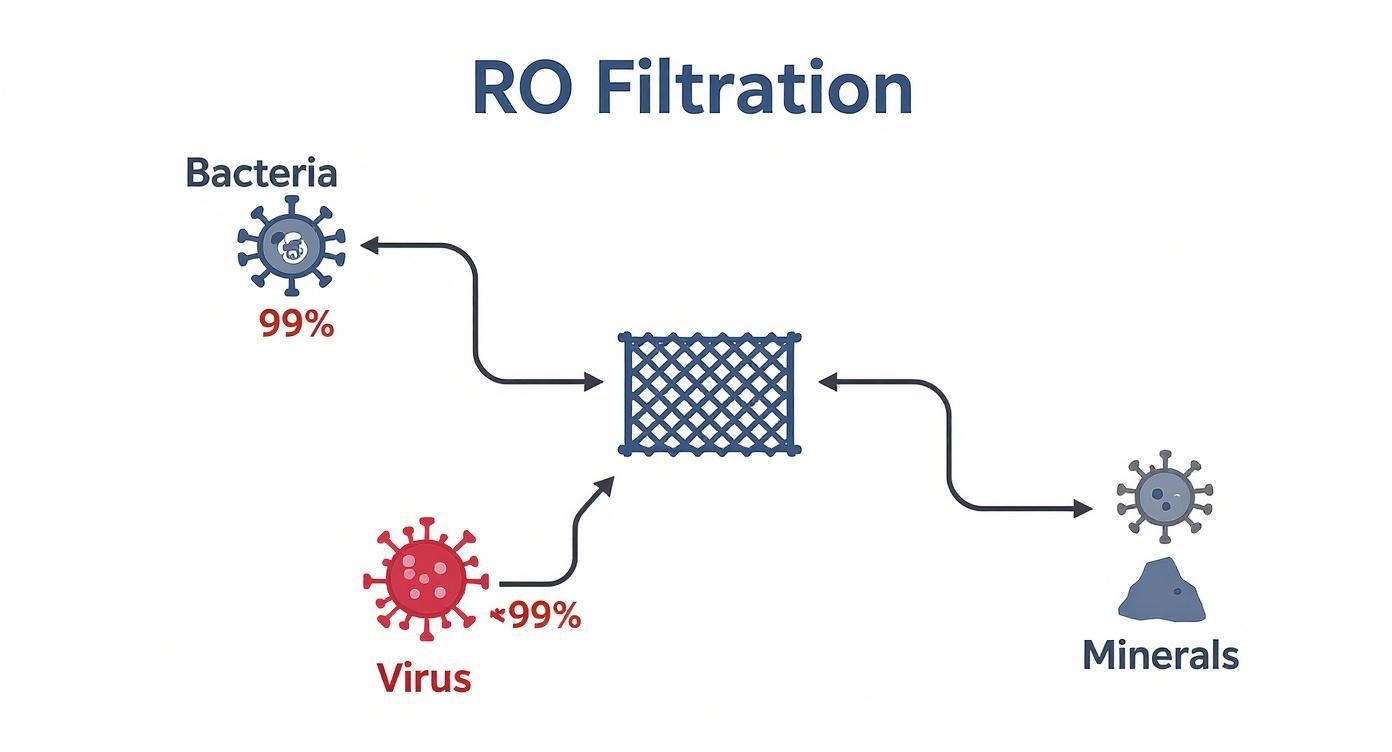
Reverse osmosis is the heavy-duty option in this category. It pushes water through a semipermeable membrane that removes dissolved solids, heavy metals, and many contaminants that simpler filters can't tackle as effectively.

The trade-off is mechanical complexity. RO systems are usually slower, they need more filter stages, and they produce reject water. The best measured efficiency among lab-tested countertop RO systems noted the AquaTru Carafe at a 4:1 pure-to-waste ratio, meaning 4 gallons of purified water for every 1 gallon wasted, according to testing cited in this countertop dispenser review. That's a strong result for countertop RO, but it still reminds you that high-performance purification comes with operational trade-offs.

For households concerned about PFAS, dissolved solids, or a wider contaminant profile, RO is usually where I tell them to start looking.

Before comparing specific models, this walkthrough gives a useful visual overview:

Gravity-fed and UV-assisted designs

Gravity-fed systems work by letting water move through filter media without pumps or pressure. Their appeal is obvious. They're simple, quiet, and often don't need electricity. That makes them attractive for backup use, cabins, or families who hate appliance complexity.

But gravity systems are usually slower, and they don't automatically compete with RO on dissolved contaminant removal. They're best when simplicity matters more than speed or advanced purification.

UV is different. UV doesn't filter particles out of water. It targets microorganisms by exposing water to ultraviolet light. In countertop dispensers, UV is best thought of as an added treatment layer, not a replacement for solid filtration. If a unit advertises UV, ask what the core filtration media does first. UV can be a useful bonus. It isn't a complete answer by itself.

Practical rule: Choose carbon for better-tasting city water, RO for the toughest contaminant concerns, and gravity when reliability and no-power operation matter most.

Essential Features and Performance Factors to Consider

A dispenser can filter well and still be annoying to live with. A proper test happens on a busy weekday morning when someone wants cold water, someone else is filling a bottle, and the unit is humming on the counter next to the coffee maker.

Certifications and what they actually tell you

The certification marks matter because they separate broad promises from defined test standards. Top countertop dispensers are commonly judged against NSF/ANSI 53 and 42, alongside performance factors like temperature stability and noise, according to this technical market guide for water dispensers. In practical terms, many shoppers use NSF/ANSI 42 to think about aesthetic issues like chlorine taste and odor, while NSF/ANSI 53 is more relevant when health-effect contaminant reduction is part of the buying decision.

Certification is where I start. Everything else comes after.

Noise, energy, and long-term livability

Powered countertop dispensers can be wonderfully convenient, but they're still appliances. Some make enough noise to irritate you in an open kitchen. In the same technical guide, the ClearJet Compact+ (Countertop) is listed at 32 dB, while annual energy use across the market ranges from 0 kWh for the EverClear EcoFlow S to 264 kWh for the AquaGuard Freestanding Elite. That range tells you how wide the gap can be between a passive system and a feature-heavy unit.

A few performance details are worth watching closely:

  • Temperature consistency: Leading models are evaluated for stability within +/- 1.2°F, which matters if you want dependable hot or cold dispensing.
  • Filter replacement burden: The same guide notes a $89 to $215 range in 3-year filter costs, with the AquaPure ProTemp 3200 at $114 over 3 years and 128 kWh annually.
  • Reliability testing: A benchmark of 1,000 continuous operating hours is used for stronger models to verify long-term consistency.

Size and routine use

Capacity, refill frequency, and dispenser height matter more than shoppers expect. A compact unit that fits under cabinets can still be frustrating if it can't handle family bottle refills without constant attention.

If you're comparing models and need a broader framework for evaluating certifications, maintenance, and use cases, Water Filter Advisor's advice library is a practical reference point.

Buy for your busiest day, not your quietest day. A dispenser that feels adequate for one glass can feel undersized by dinner.

Best Picks for Every Home and Budget in 2026

The best countertop water dispenser depends on what problem you're solving. I'd rather match a product to a household than declare one universal winner.
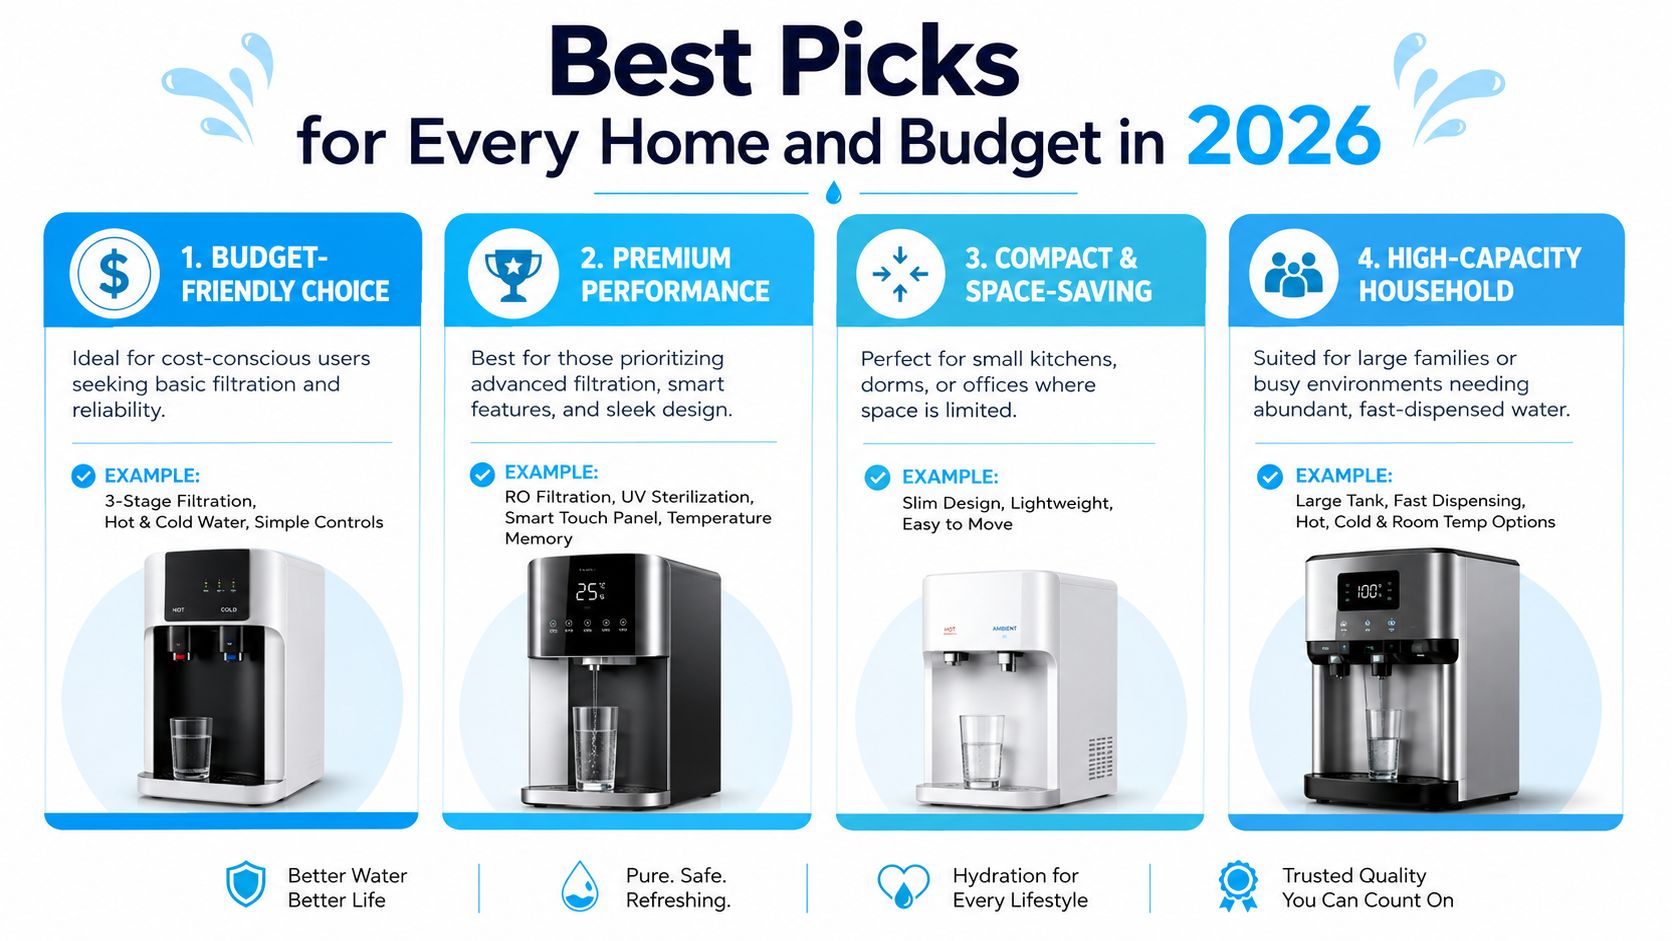
A comparison guide for choosing the best countertop water dispensers for various household needs and budgets.

Household need Recommended type or model Why it stands out Main caution
Maximum contaminant reduction AquaTru Carafe Exceptional validated contaminant performance Ongoing filter cost matters
Simple daily use Gravity-fed countertop system Quiet, low-tech, dependable Slower and less comprehensive
Small kitchens Compact carbon-based dispenser Better fit and easier placement Check cartridge performance carefully
Budget-focused homes Basic certified carbon system Lower entry cost and easy routine use Don't expect RO-level purification

Best for maximum contaminant removal

If your priority is health-focused performance, AquaTru Carafe is the standout name in this category. Independent Tap Score analysis in lab testing of 9 countertop RO systems gave it a 9.57/10 score, and the testing reported 100% removal of every health-related contaminant in baseline samples along with performance certification for all 83 of its claimed reduction metrics, as detailed in Water Filter Guru's countertop RO testing.

That's a rare result. It's the kind of performance benchmark that separates serious purification from “good enough for taste.”

For buyers worried about what they can't see, AquaTru Carafe is the strongest evidence-backed countertop pick in this group.

Pros

  • Broad contaminant reduction validated by lab testing
  • Countertop format avoids under-sink installation
  • Strong fit for households prioritizing water quality over gadget appeal

Cons

  • RO ownership costs are higher
  • Slower and more involved than a simple carbon system
  • More system complexity than many families need

Who this is for
Families concerned about a wide contaminant spectrum, including households that want stronger reassurance than basic chlorine and lead reduction.

Best for PFAS-focused shoppers

PFAS has pushed a lot of families to look beyond generic certifications. That's wise. Many countertop units can claim solid chlorine and lead performance while saying much less about emerging contaminants.

According to Quality Water Lab's countertop review, only the AquaTru Carafe is IAPMO-certified to eliminate 84 contaminants including PFOA and PFOS, while many competitors only meet NSF/ANSI 42 and 53 for chlorine and lead. If PFAS is your top concern, that distinction matters more than countertop aesthetics or touch controls.

Why I'd separate this category from the one above: a system can be generally strong and still not be the one I'd point to first for PFAS-focused buying. Here, the documented certification angle is the key advantage.

Best for simplicity and reliability

A gravity-fed countertop system isn't glamorous, but there's a reason many households stay loyal to this format. There's less to break, less noise, and usually less frustration. If you value predictable operation over fast dispensing or advanced temperature features, this style has a lot going for it.

What works well:

  • No dependence on powered cooling or heating: Fewer appliance-like failure points.
  • Straightforward maintenance: Cartridge changes and cleaning are usually easier to understand.
  • Flexible placement: Good for rentals, backup use, or kitchens where outlet space is limited.

What doesn't:

  • You wait longer
  • You refill more often
  • You won't usually get the broad contaminant coverage of top RO systems

This is also the category I suggest for people trying to solve coffee and water issues together in one kitchen setup. Taste improvement often changes tea, coffee, and drinking water all at once, and simpler countertop systems can be a sensible entry point if your goal is better flavor with minimal fuss.

Best for small kitchens

Small kitchens punish oversized appliances. A compact carbon-based countertop dispenser often makes the most sense here because it keeps the footprint manageable and the user experience simple.

The catch is that “compact” shouldn't become an excuse for weak filter performance. In tiny kitchens, buyers tend to overvalue dimensions and undervalue cartridge capability. That's backwards. I'd rather see a slightly larger unit with stronger certified reduction than a sleek cube that mostly improves taste and leaves bigger questions unanswered.

Counter space is expensive. Don't spend it on a dispenser that only looks efficient.

Who this is for
Apartment dwellers, condo owners, dorm users, and anyone working with low cabinet clearance or a crowded prep area.

Best budget-friendly option

A basic certified carbon system is still a smart buy for the right home. If your water is municipally treated, your main complaints are chlorine smell and unpleasant taste, and you want a lower-cost entry into filtration, this category can be very satisfying.

The mistake is assuming “budget” means “best value.” Sometimes it does. Sometimes it means a cheaper unit that burns you later with inconvenient cartridge changes or disappointing contaminant coverage. Budget buys work best when your expectations are realistic and your water concerns are modest.

Calculating the True Cost of Clean Water

Sticker price tricks people. A countertop dispenser can look affordable on day one and become expensive by the end of the first year.

That's especially true with RO systems. CNET's review of countertop water filters notes that AquaTru Carafe costs $375 and that replacement filters can exceed $100 annually. That doesn't make it a bad buy. It means you should judge it like an appliance with recurring operating costs, not like a one-time kitchen accessory.
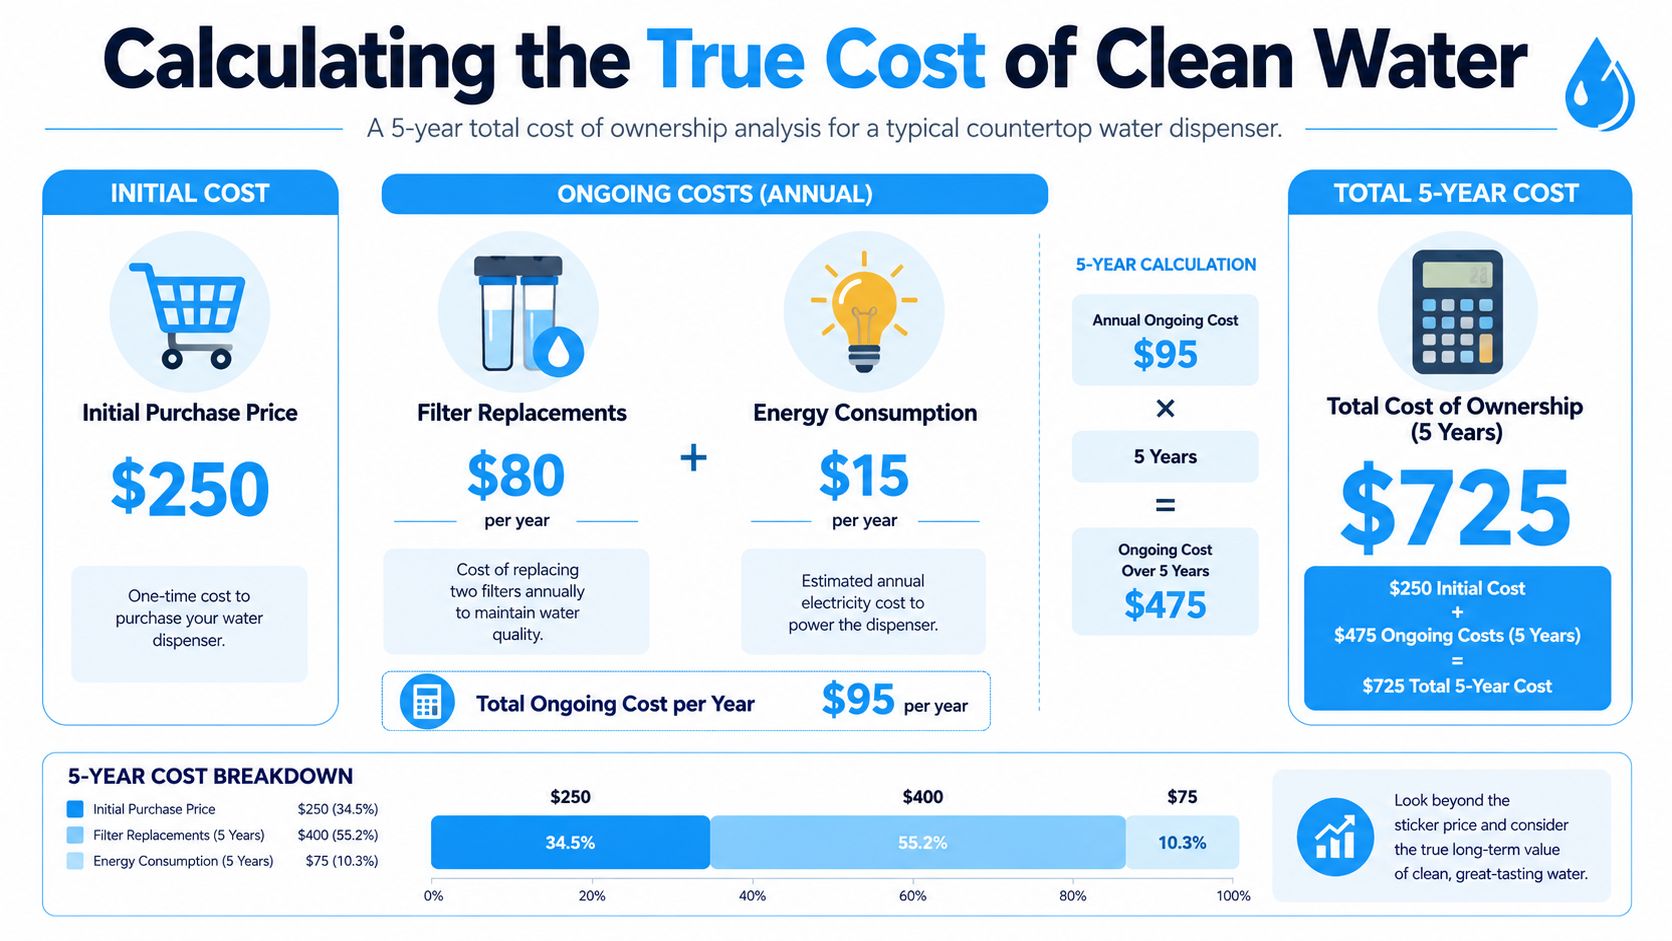
An infographic showing the five-year total cost of ownership for a typical countertop water dispenser.

The three costs that matter

When I evaluate a countertop unit, I separate ownership into three buckets:

  1. Purchase price
    This gets the most attention and often deserves the least.

  2. Replacement filters
    Regarding these components, cheap-looking systems can become expensive, and premium systems can justify themselves.

  3. Energy use
    Powered heating and cooling add convenience, but they can also add ongoing cost and noise.

A simple way to think about it is this. If a family buys for taste improvement only, a basic carbon unit may deliver a lower long-term burden. If a family needs stronger contaminant reduction, a more expensive RO unit may still be the better value because it solves the actual problem instead of the superficial one.

What good value actually looks like

Good value isn't the lowest upfront number. It's the lowest cost for the level of protection and convenience you need.

Use this quick screen when comparing options:

  • Ask what the filters cost over time: Not just the first replacement set.
  • Check whether the unit needs electricity: Especially if it offers heating or chilling.
  • Match the system to your risk level: Paying more makes sense if the water concern is serious.
  • Avoid false economy: A cheaper unit that doesn't address your priority contaminant is wasted money.

Regional water conditions can change the math, especially if you're comparing point-of-use filters against larger home upgrades. For households thinking more broadly, this water filtration guide for Northern Colorado homeowners is a useful example of how local conditions affect system choice and budgeting.

Simple Maintenance for Lasting Performance

A countertop dispenser only stays trustworthy if you maintain it. Neglected units can develop odor, scale, slime around dispensing points, and performance drop-off that people wrongly blame on the filter brand.
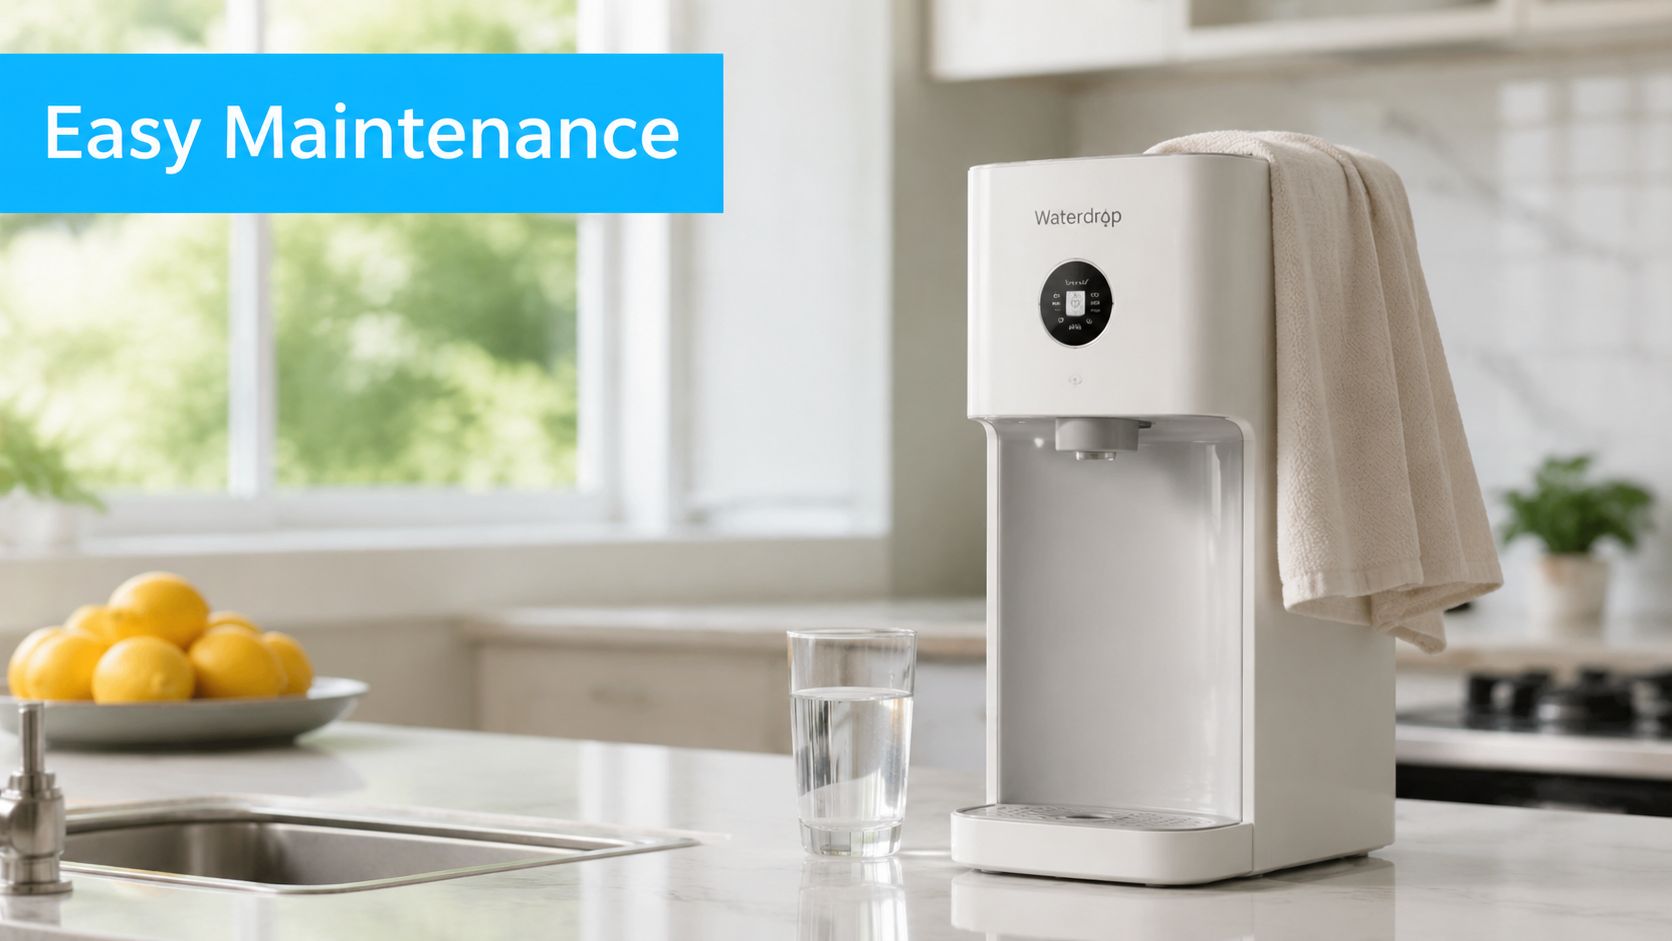
A modern white Waterdrop countertop water dispenser stands on a clean kitchen counter next to a glass of water.

A maintenance routine that actually works

  • Change filters on time: Don't stretch cartridges just because water still comes out. Delayed changes can reduce performance and worsen taste.
  • Wash reservoirs and carafes regularly: Use the manufacturer's approved cleaning method and rinse thoroughly so you don't leave residue behind.
  • Clean the spout area: This is one of the easiest places for buildup to form because hands, cups, and kitchen air all meet there.
  • Descale heated systems when needed: Hard water can punish hot-water functions fast. If your dispenser heats water, scale control matters.
  • Use fresh feed water: Don't leave stagnant source water sitting for long periods before filtration.

Mistakes I see often

Some owners replace the filter and forget the rest of the machine. Others clean the tank but ignore seals, lids, and drip trays. Both shortcuts come back to bite.

A clean filter in a dirty dispenser still gives you a dirty user experience.

The best habit is simple. Put maintenance on a calendar. Countertop systems don't need constant attention, but they do need consistent attention. A few minutes of care protects taste, flow, and confidence in what you're drinking.

Frequently Asked Questions

Do countertop dispensers chill the water

Some do, some don't. Chilling is a feature, not a default. If cold water matters in your home, verify that the unit actively cools rather than storing room-temperature filtered water.

Can I use well water with these systems

Sometimes, but you should be careful. Well water quality varies too much for blanket advice. Test the water first, then choose a system based on the actual contaminants present. A countertop dispenser can help, but it shouldn't be your first guess.

How do I know when to change the filter

Follow the manufacturer's schedule first. If the unit has an indicator, use it as a reminder, not an excuse to ignore taste changes, slow flow, or odor. Those are practical warning signs too.

Do these systems remove healthy minerals

Some do, especially RO systems. Whether that matters depends on your priorities and diet. For many buyers, contaminant reduction is the bigger concern. For others, mineral retention affects taste preference more than health concerns.

Will a countertop unit damage my counters

Usually no, if you manage drips, spills, and heat correctly. If your dispenser sits on quartz, these tips for protecting quartz counters are worth a look so the appliance doesn't leave stains, moisture issues, or heat marks over time.


If you're narrowing down the best countertop water dispenser for your home, Water Filter Advisor is a strong next stop for practical buying guides, filter comparisons, and maintenance advice that helps you choose a system you'll still be happy with long after installation day.

Water Filter Replacement Cartridge: A Homeowner’s Guide

You know the moment. The water from the kitchen tap suddenly tastes a little flat. The refrigerator dispenser slows to a tired trickle. Or that filter light starts glowing like a smoke alarm for your plumbing. The immediate thought is simple: “I guess I need a new filter.”

That's usually right, but the next problem shows up fast. Which one? How often? Does the cheaper compatible cartridge work, or are you asking for leaks, weak flow, or a return trip to the store?

I've changed enough filters to know the job itself usually isn't the hard part. The hard part is figuring out the right water filter replacement cartridge and understanding why replacement timing matters. If you can solve those two puzzles, the rest feels a lot less mysterious.

The Unsung Hero in Your Home's Water System

A water filter cartridge does a quiet job. It sits inside a housing under the sink, inside a refrigerator, or in a whole-house canister in the garage or basement, and nobody thinks much about it until the water starts acting different.

That's what makes it an unsung hero. It handles the daily grind so your water tastes better, smells cleaner, and flows the way it should. When it gets overloaded, the symptoms can be subtle at first. A faint chlorine smell. A slower pour into the coffee pot. A glass of water that just doesn't seem as crisp.

Homeowners often treat filters like they treat batteries in a smoke detector. Replace it when something nags you. But filtration systems are part of the bigger maintenance picture in a home, right alongside valves, hoses, shutoffs, and drain lines. If you like practical upkeep checklists, this roundup of valuable plumbing advice for homeowners is a useful companion.

Practical rule: If your water tastes worse, smells worse, or flows slower than it used to, the cartridge deserves suspicion before the faucet does.

The cartridge is the working part, not just an accessory. It catches sediment, reduces unwanted taste and odor issues, and in some systems supports more specialized treatment. Similar to a coffee maker's filter basket, if it's clean and matched correctly, the whole process works better. If it's clogged, worn out, or the wrong fit, the whole system struggles.

That's why buying “something that looks close” can go sideways. A cartridge can appear similar and still be a bad match for your housing, your water conditions, or your filtration goals.

What Is Inside a Water Filter Cartridge

Some cartridges look like plain white tubes. Others look like sealed plastic cylinders. Inside, though, they're doing very different jobs.

The easiest way to think about filter media is this: each type is built to catch a different kind of trouble. One grabs visible grit. Another helps with smell and taste. Another handles much finer contaminants.

What Is Inside a Water Filter Cartridge

Sediment media acts like a bouncer

A sediment filter is the bouncer at the club door. Big particles don't get in. Sand, rust, and other visible debris get stopped before they travel farther into your plumbing or into later filter stages.

Larger particles can clog more specialized media behind them, leading to reduced performance. If a sediment stage does its job well, it protects the stages that follow.

Carbon works more like a sponge

Activated carbon is less like a screen and more like a sticky sponge. Instead of just blocking chunks, it helps absorb things that affect taste and odor, including chlorine in many common household systems.

That's why water can look clear but still taste off. Clear doesn't mean untouched. Carbon is often the stage that makes people say, “The water tastes normal again.”

Some cartridges combine jobs

Not every cartridge contains one media type. Some are built in layers or stages. A performance sheet for a refrigerator-style system notes that replacement intervals can range from 25 to 30 gallons up to 150 gallons for pitcher filters, while some systems are designed for about one year of service, and some advanced cartridges use up to five filtration stages in the manufacturer performance information.

That tells you something important. The cartridge isn't always one simple filter. It can be a stack of jobs packed into one part.

Reverse osmosis is the ultra-fine screen

A reverse osmosis membrane is the fine net in the family. If sediment is a bouncer and carbon is a sponge, reverse osmosis is a super-fussy gatekeeper that allows very little through.

It's used in systems designed for much tighter filtration. Because it works differently from basic sediment or carbon cartridges, its maintenance rhythm and system role are different too.

Filter media cheat sheet

Media Type Primary Target Best For
Sediment Sand, rust, visible particles Pre-filtration and protecting downstream stages
Activated Carbon Chlorine, taste, odor issues Better drinking water from city supplies
KDF Media Heavy metals and helping control bacteria growth Specialized cartridges with multiple treatment goals
Reverse Osmosis Membrane Dissolved solids and microscopic contaminants Dedicated systems that need finer filtration

Water that looks clean can still need treatment. The eye is a poor filter tester.

A lot of confusion starts when people assume every cartridge does the same thing. It doesn't. If you know what media your system uses, you're already much closer to choosing the right replacement.

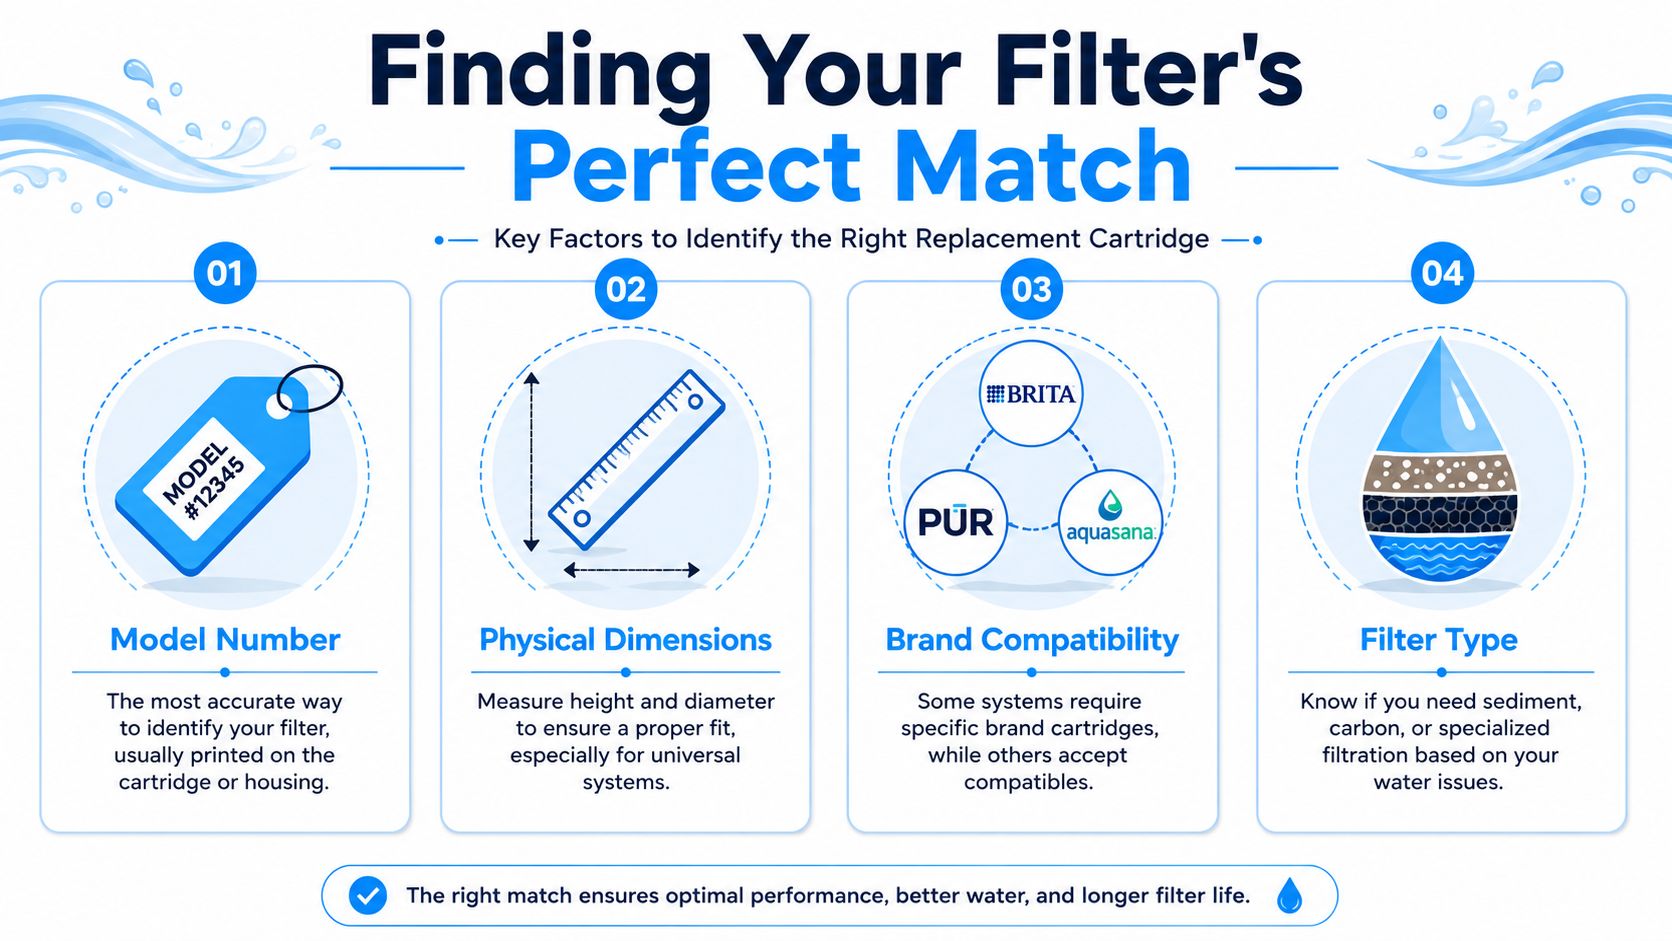
Finding Your Filter's Perfect Match

People often find themselves stuck. They pull out the old cartridge, hold it in one hand, scroll through product pages with the other, and realize a dozen filters all look almost the same.

They aren't.

Finding Your Filter's Perfect Match

Start with the easiest clue

Your best clue is usually the model number printed on the old cartridge, the filter housing, or the system manual. If you still have that, you're ahead.

If you don't, you become a filter detective. That means measuring and checking the details that many shoppers skip.

A practical reference library like this water filtration advice hub can help when you're trying to sort housing types, cartridge styles, and maintenance questions in one place.

The three measurements that matter

A replacement cartridge must match the housing by overall length, outside diameter, and inside diameter, and even a cartridge that seems to fit can still be wrong if the end style doesn't match, such as a single open-end versus double open-end design, as outlined in this cartridge identification guide from Boshart's filter support documentation.

That last part trips people up all the time.

A cartridge can slide into the housing and still fail as a proper replacement if the end-cap style doesn't seal the way the housing expects. It's like buying shoes that are your size but for the wrong foot. Close isn't good enough.

A smart identification checklist

Use this order when the label is missing:

  1. Check the old cartridge first
    Look for printed codes, arrows, brand names, or flow markings.

  2. Inspect the housing cap or sump
    Many housings carry useful identifiers even when the cartridge doesn't.

  3. Measure carefully
    Use a tape measure or ruler and write the dimensions down before shopping.

  4. Study the ends
    Open both ends? One open and one closed? Gasketed? Plain? This detail matters.

  5. Match filter type to water issue
    Sediment, carbon, specialty media, or membrane. A physical fit alone isn't enough.

OEM versus compatible

This is the other big fork in the road. OEM cartridges are the original brand's own replacements. Compatible or generic cartridges are made to fit the same system.

Sometimes compatibles work well. Sometimes they create headaches. The decision comes down to a few practical questions:

  • Fit confidence: If your system is old, unusual, or picky about seals, OEM usually reduces guesswork.
  • Performance confidence: If the original cartridge had a specific job, staying with the original design can feel safer.
  • Budget pressure: Compatible cartridges can be appealing when replacement is a recurring cost.

If you're dealing with a specialty kitchen setup, this guide on solutions for your instant boiling tap shows how replacement questions often get more specific once hot-and-cold dispensing systems enter the mix.

My rule of thumb is simple. When your housing is straightforward and the measurements and end style match exactly, a compatible cartridge may be worth considering. When the system is older, oddly shaped, or fussy, I'd rather pay for confidence than fight leaks and returns.

Decoding Your Cartridge Replacement Schedule

The most common bad habit in filter maintenance is treating replacement like a birthday reminder. Same date every time, no questions asked.

That's convenient, but it's incomplete.

A common service life for many cartridge-based systems is about 3 to 6 months, and one manufacturer-led guide recommends replacement after 6 months because bacterial buildup and sediment loading can happen before the cartridge looks dirty, with reduced flow called out as a practical warning sign in this instructional reference.

Time matters, but performance matters too

A cartridge doesn't age only by the calendar. It also ages by workload. If your home has heavier use, more sediment, or more demanding source water, the cartridge can lose effectiveness sooner than a reminder sticker suggests.

That's why “replace every six months” isn't a law of nature. It's a starting point.

What the warning signs are telling you

Watch for these clues:

  • Slower flow: The cartridge may be loading up with captured material, which raises resistance and reduces pressure at the tap.
  • Taste or odor coming back: Media that used to improve taste may be nearing the end of its useful run.
  • Water quality changes: If the water looks different or your dispenser behaves differently, the filter may be past its comfort zone.

A clean-looking cartridge can still be a tired cartridge.

People get tripped up because they expect obvious dirt. But filters often fail subtly. The media can become loaded long before the outside looks dramatic.

There's a useful parallel with HVAC upkeep. Homeowners often wait too long on furnace or AC filters because the problem builds gradually. This article on when to change air filters makes that same maintenance lesson easy to see in another part of the house.

Build a schedule that fits your water

A better routine blends both approaches:

  • Use the manufacturer interval as your baseline
  • Adjust sooner if flow drops
  • Pay attention to source water
  • Replace based on symptoms, not just the calendar

If your household uses a lot of filtered water every day, or if your water carries more sediment than average, your cartridge is working harder. A smart owner notices that and adapts.

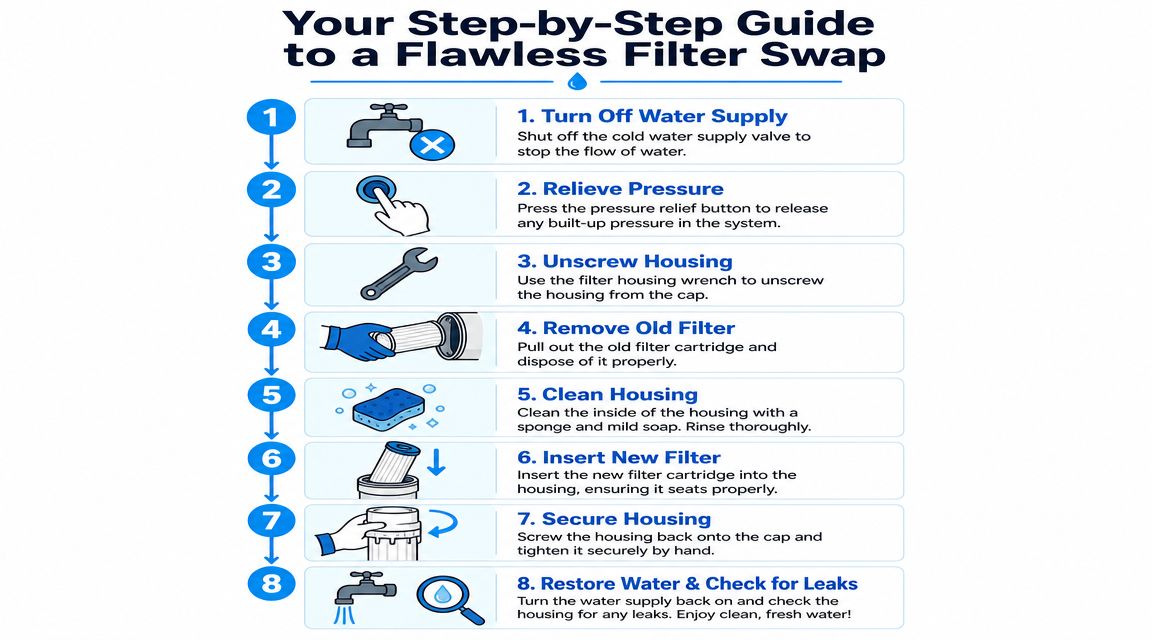
Your Step-by-Step Guide to a Flawless Filter Swap

The actual replacement job is usually very manageable. Most problems come from rushing, forgetting to relieve pressure, or pinching the O-ring.

Do it slowly and the job is usually uneventful, which is exactly what you want.

Your Step-by-Step Guide to a Flawless Filter Swap

Before you touch the housing

Set yourself up first:

  • Grab the new cartridge: Confirm it's the correct replacement before opening the housing.
  • Keep a towel and bucket nearby: Even a well-behaved system usually drips a little.
  • Have food-grade silicone ready if your system uses an O-ring: This small detail helps more than people realize.

System manuals and technical guidance instruct users to fully depressurize the system and lubricate O-rings with food-grade silicone before resealing, because that helps prevent leaks, bypass, and seal failure, as noted in this technical cartridge specification document.

The swap itself

  1. Turn off the water supply
    Shut off the valve feeding the filter system.

  2. Relieve pressure
    Open the nearby faucet or use the system's pressure-relief button if it has one. This step keeps the housing from fighting you.

  3. Unscrew the housing
    Use the housing wrench if needed. Keep the bucket under it.

  4. Remove the old cartridge
    Pull it out and note how it sat in the housing.

  5. Clean the inside of the housing
    Wipe out sediment or slime. A dirty housing can shorten the life of the new cartridge.

  6. Inspect the O-ring
    Make sure it's seated properly and not twisted, cracked, or dirty.

A visual walkthrough can help if you like to see the rhythm of the job before doing it:

Putting it back together

Insert the new cartridge in the correct orientation. Re-seat the housing carefully so the threads catch cleanly. Tighten firmly, but don't muscle it like you're closing a pickle jar for the apocalypse.

Then turn the water back on slowly. Slow fill gives you a chance to spot drips before they become sprays.

If a housing leaks right after replacement, the first suspects are usually pressure left in the system, a dry or twisted O-ring, or cross-threading.

Final checks

Run water through the system and watch the housing for a few minutes. Put your hand around the seam and fittings. If it stays dry, you're in good shape.

This is the part where patience saves cleanup. Most post-replacement leaks don't come from the cartridge itself. They come from sealing details.

The Afterlife of a Filter: Cost and Disposal

A water filter replacement cartridge isn't a one-and-done purchase. It's a recurring household supply, more like detergent or HVAC filters than a major appliance part. Once you see it that way, budgeting gets easier.

The key is to stop thinking only about the price of one cartridge. Think in terms of ownership habit. A cartridge that needs frequent replacement may cost less each time but still demand more attention. A cartridge with a longer service window may simplify your routine. Neither is automatically better. It depends on your system and water.

Budget for the routine, not the emergency

The cheapest way to own a filter is usually to replace it on time and avoid panic buying. Keep the correct model written down somewhere obvious. I like a note inside the sink cabinet door or on the side of the housing with the cartridge name and install date.

That little note solves two common problems. It keeps you from guessing at the store, and it keeps you from stretching a cartridge just because you forgot what fits.

What to do with the old cartridge

Disposal is less tidy than often expected. Many cartridges combine plastic, filter media, trapped sediment, and sometimes multiple internal layers. That mixed construction means they often aren't simple curbside recycling items.

A practical approach is:

  • Check the packaging first: Some brands provide disposal guidance or special return instructions.
  • Separate only if the manufacturer says to: Don't assume every cartridge is meant to be taken apart.
  • Let it drain before disposal: A waterlogged cartridge is messier and heavier.

The environmental reality

People want a neat answer here, but the situation is system-dependent. Some housings or outer components may be recyclable in certain programs, while the used filter media often isn't. The best homeowner move is to buy deliberately, replace on schedule, and avoid unnecessary early changes.

That last point matters. Throwing out a cartridge too soon wastes money and materials. Leaving it in too long can hurt performance. Good maintenance sits right in the middle.

Solving Common Filter Frustrations and FAQs

Most filter problems after replacement aren't disasters. They're usually small installation or identification mistakes. The trick is knowing which kind of mistake you're looking at.

Solving Common Filter Frustrations and FAQs

Why is my housing leaking after I changed the cartridge

Start with the boring answers first, because they're often the right ones.

  • The O-ring is dirty or twisted: Remove it, clean the groove, and reseat it.
  • The housing is cross-threaded: Back it off and start again carefully.
  • The cartridge isn't seated correctly: Some filters need to sit squarely against a post or end seal.

If the leak is tiny, don't ignore it. Tiny drips become cabinet stains.

Why is the water sputtering or cloudy

Sputtering often means trapped air. That usually clears after running water for a bit. Cloudiness right after a filter change can also happen as the system flushes out fine particles or air bubbles.

If it clears quickly, that's usually normal. If it doesn't, check whether the cartridge was installed in the proper direction and whether the housing sealed properly.

What if my water still tastes bad after I replaced the filter

Don't assume the new cartridge is defective. Ask three questions:

  1. Did you buy the right filter type for the job
  2. Did you flush the system after installation
  3. Is the issue coming from another part of the plumbing or appliance

A cartridge can't solve a problem it wasn't designed to address.

I have an old unlabeled system. How do I identify the cartridge

This is one of the biggest pain points in real homes. Guidance for replacement can range from six months for carbon filters to 3 to 5 years for RO membranes, and a major source of confusion is matching cartridges to older or unlabeled housings, where mainstream retailers often don't provide a clear universal answer, as explained by Pure Water Products in its undersink parts guidance.

When you don't have a label, go back to fundamentals:

  • Identify the filter type: Sediment, carbon, RO, or specialty media.
  • Measure the housing and old cartridge: Length, diameter, and opening style matter.
  • Look for clues on the housing itself: Caps, brackets, and nearby labels may tell you more than the spent cartridge.

Older systems can still be easy to maintain. They just require more detective work before you order.

Is a generic cartridge always a bad idea

No. But “fits” and “works properly” aren't always the same thing. If the dimensions, end style, and filter function match exactly, a compatible cartridge may be fine. If anything is fuzzy, buying the original style is often the calmer choice.

How can I make replacements easier next time

Write down the cartridge model, install date, and where you bought it. Better yet, keep one spare on hand if your system uses a common cartridge and your household depends on filtered water every day.

That turns filter replacement from a scavenger hunt into a five-minute maintenance job.


If you want clear help comparing cartridge types, understanding compatibility, and keeping your home filtration system running smoothly, Water Filter Advisor is a practical place to continue your research. It's built for homeowners who want better water without the guesswork.

The Best Water Filter Pitcher for Pure and Simple Hydration in 2026

When you're hunting for the best water filter pitcher, you'll find heavy hitters like Brita, PUR, and Clearly Filtered all vying for your attention. But let's be real: the right pitcher isn't about brand loyalty. It's the one that's a perfect match for your specific water quality and your daily life.

Why a Pitcher is Your First Step to Better Water

Let's talk about the magic of turning your tap water into crisp, clean hydration, straight from your fridge. With a growing list of concerns about what's really in our tap water—from the swimming pool perfume of chlorine to invisible intruders like lead and PFAS—a water filter pitcher is more than just a kitchen gadget. It's your home's first line of defense.

This simple tool puts the power back in your hands. It demands zero installation, fits into any home, and makes an immediate, noticeable difference in your water's taste and quality. For most of us, it’s the easiest and most accessible way to start the journey to better home water filtration.

A Practical Solution for Common Concerns

A water filter pitcher delivers peace of mind without a hefty investment or a complicated setup. It's the hero of home hydration.

Here’s what you're signing up for:

  • A Taste and Odor Revolution: The most dramatic change you'll notice is the banishment of chlorine. It's essential for disinfecting city water but leaves behind that distinct "public pool" taste and smell. A good filter erases it.
  • Serious Contaminant Reduction: A certified pitcher isn't just making water taste good; it can significantly reduce a wide array of harmful contaminants, including heavy metals, pesticides, and insidious emerging chemicals.
  • A Win for Your Wallet: Using a pitcher costs a fraction of buying bottled water. You get a continuous supply of clean water and can save hundreds of dollars a year.

A pitcher is a proactive step toward better health and a more sustainable lifestyle. It bridges the gap between uncertainty about your tap water and the pure, clean hydration you crave.

This guide is your roadmap. We’ll dive into the science happening inside the filter and break down the real-world costs. This is a booming market, valued at USD 3.5 billion in 2024 and projected to hit USD 5.4 billion by 2030. That growth tells a story: households are ditching single-use plastics and embracing smarter, in-home solutions. You can find more data on water filtration market trends here.

By the end of this guide, you'll be an expert, ready to choose the best water filter pitcher for your home, your budget, and your family's health.

How Pitcher Filters Turn Tap Water Into Clean Water

Ever stare at a water filter pitcher and wonder what sorcery is happening inside? It’s not magic, but it is some seriously clever engineering. Think of the filter as a microscopic obstacle course, precision-designed to trap the bad guys while letting only pure, clean water molecules pass through.

The whole show is powered by good old gravity. When you fill the top reservoir, water begins its slow descent through the filter cartridge. This deliberate drip is crucial—it gives the filter media inside enough contact time to work its purification magic.

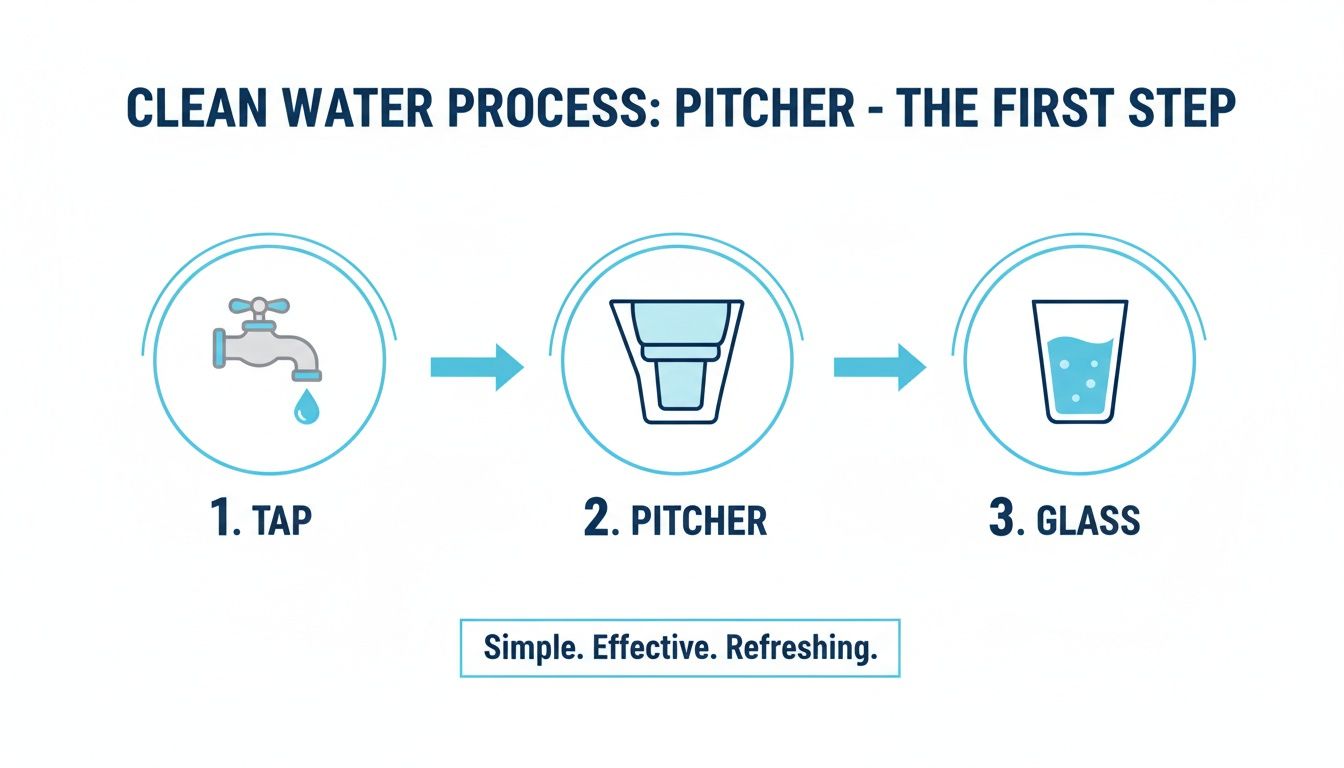
An illustration showing the clean water process: tap water goes into a pitcher, then into a glass. Simple and refreshing.

The Workhorse: Activated Carbon

The undisputed MVP of almost every pitcher filter is activated carbon. Picture it as a super-porous sponge on a molecular level. This carbon, often derived from coconut shells, is treated to create an astronomical internal surface area packed with microscopic nooks and crannies. To put it in perspective, just one gram of activated carbon can have the surface area of a football field.

As water meanders through, this vast surface acts like a chemical magnet, trapping contaminants in a process called adsorption. It’s like flypaper for the unwanted stuff in your water.

Activated carbon is the champion of improving taste and smell. It’s responsible for tackling:

  • Chlorine: The number one offender behind tap water that tastes and smells like it came from the local Y. Activated carbon is exceptional at neutralizing it, leading to a massive improvement in flavor.
  • Volatile Organic Compounds (VOCs): A broad class of industrial and commercial chemicals that can find their way into water sources.
  • Bad Tastes and Odors: Carbon traps the organic compounds that cause musty, earthy, or just plain weird smells, leaving your water tasting crisp, fresh, and like… well, nothing.

The Specialist: Ion-Exchange Resins

While activated carbon is the all-star for taste and odor, higher-end filters deploy a second, specialized unit: ion-exchange resins. Think of these as tiny, microscopic commandos on a mission to target specific contaminants that carbon alone can't handle.

These are tiny resin beads engineered to perform a very specific trade. They attract certain dissolved metals and minerals, swapping them for something harmless.

This ion-swap is the secret sauce that separates a basic taste-and-odor filter from one that can remove serious health-related contaminants. It's the key technology behind filters certified to reduce nasty things like lead and mercury.

Here’s the trade: The resin beads come loaded with harmless ions, like sodium or potassium. When water containing a heavy metal like lead flows past, the resin has a stronger chemical attraction to the lead. It snags the lead ion and releases one of its harmless ions in its place. It's a one-for-one swap that makes your water significantly safer. This process is brilliant for reducing heavy metals like lead, mercury, and copper. As an added bonus, it can also reduce the minerals that cause limescale, making your kettle happy.

When you're staring at a shelf full of water filter pitchers, the marketing claims can be a tidal wave of confusion. How do you cut through the noise and figure out which one actually delivers on its promises?

The answer is third-party certifications. Specifically, you want to be on the lookout for the NSF International seal.

Think of it like a crash-test rating for a car. You wouldn't trust a vehicle that hasn't been independently verified for safety. The same logic applies to the water you drink every day. These NSF standards aren't just marketing fluff; they are tough, legally enforceable benchmarks that prove a filter can do what it says it does.

NSF 42, 53, and 401 water filter certifications displayed next to a pitcher.

NSF 42: The Taste and Odor Standard

You'll see NSF/ANSI 42 on nearly every pitcher. This is the foundational certification for "aesthetic effects"—things that impact the way your water tastes, smells, and looks.

A filter certified to NSF 42 is proven to reduce:

  • Chlorine: This is the big one. It's what your city adds for disinfection and what gives tap water that "swimming pool" vibe. NSF 42 guarantees a significant reduction.
  • Particulates: This covers the tiny bits of sediment and rust that can make water look cloudy.

If your main goal is simply to make your tap water taste better and more inviting, NSF 42 is your starting point. It’s the baseline for improving your water’s drinkability.

NSF 53: The Health Effects Standard

For serious, health-focused protection, you need to look for NSF/ANSI 53. While NSF 42 is about taste, this standard is all about health and safety. Filters bearing this seal have endured much more rigorous testing to prove they remove specific contaminants that can pose a genuine health risk.

An NSF 53 mark on a filter means it has proven it can reduce specific health-related contaminants to a level deemed safe. This isn't about preference; it's about protection.

Now, here's the crucial detail: manufacturers must specify exactly which contaminants their filter is certified for under this standard. You need to check the packaging or the fine print. Common NSF 53 certifications include:

  • Lead: Reduces lead that can leach from old pipes and plumbing.
  • Mercury: Removes this dangerous heavy metal.
  • Cysts: Filters out nasty microorganisms like Giardia and Cryptosporidium.
  • Volatile Organic Compounds (VOCs): Tackles a range of industrial chemicals.

Just because a filter is NSF 53 certified for lead doesn't mean it's also certified for VOCs. Always verify it targets your specific water concerns.

NSF 401: The Emerging Contaminants Standard

Finally, we have NSF/ANSI 401. This is a newer standard for "emerging contaminants"—things like prescription drugs, herbicides, and chemicals that aren't yet regulated by the EPA but are being detected in our water supplies.

This standard covers trace amounts of substances like:

  • Certain prescription and over-the-counter drugs
  • Common herbicides and pesticides
  • Chemicals like Bisphenol A (BPA)

An NSF 401 certification offers an extra layer of confidence that your filter is tackling some of the modern pollutants finding their way into our water. Public awareness of these issues is exploding. After the Flint water crisis in 2014, pitcher sales shot up 25% in the area. Today, with PFAS—"forever chemicals"—found in the blood of 99% of Americans according to the CDC, filters certified for their removal are in high demand. You can learn more about the trends driving the water filter pitcher market and why these certifications matter more than ever.

To make this easier, the table below helps you match common water issues to the certification you should be looking for.

Common Contaminants and Corresponding NSF Certifications

This table helps you match your water quality concerns with the specific NSF/ANSI certification that guarantees a filter's effectiveness against that contaminant.

Contaminant Type Examples Primary Concern Relevant NSF/ANSI Standard
Aesthetic Chlorine, Particulates Bad taste, "pool" smell, cloudy water NSF 42
Heavy Metals Lead, Mercury, Cadmium Neurological damage, developmental issues NSF 53
Microbiological Cysts (Giardia, Cryptosporidium) Gastrointestinal illness ("beaver fever") NSF 53
Organic Chemicals Benzene, Pesticides (VOCs) Cancer risk, organ damage NSF 53
Emerging Pharmaceuticals, BPA, Herbicides Endocrine disruption, unknown long-term effects NSF 401
"Forever Chemicals" PFOA, PFOS (types of PFAS) Cancer risk, immune system effects NSF 53 (for PFOA/PFOS)

Ultimately, a filter is only as good as what it's proven to remove. By cross-referencing with these specific NSF certifications, you can be confident you're buying a product that will actually protect your health and deliver cleaner, safer water.

Matching a Pitcher to Your Lifestyle and Budget

Powerful filtration is essential, but the best water filter pitcher is the one you’ll actually use every single day. After you’ve pinpointed the right certifications for your water, it’s time to get practical. A pitcher that’s too slow, too small, or too expensive to maintain will just end up as a dusty relic in the back of a cupboard.

Let’s look beyond the contaminant removal stats and explore the real-world factors that make a pitcher fit seamlessly into your life. We'll cover size, design, and the true cost of ownership to help you find a model that feels like it was made for your home.

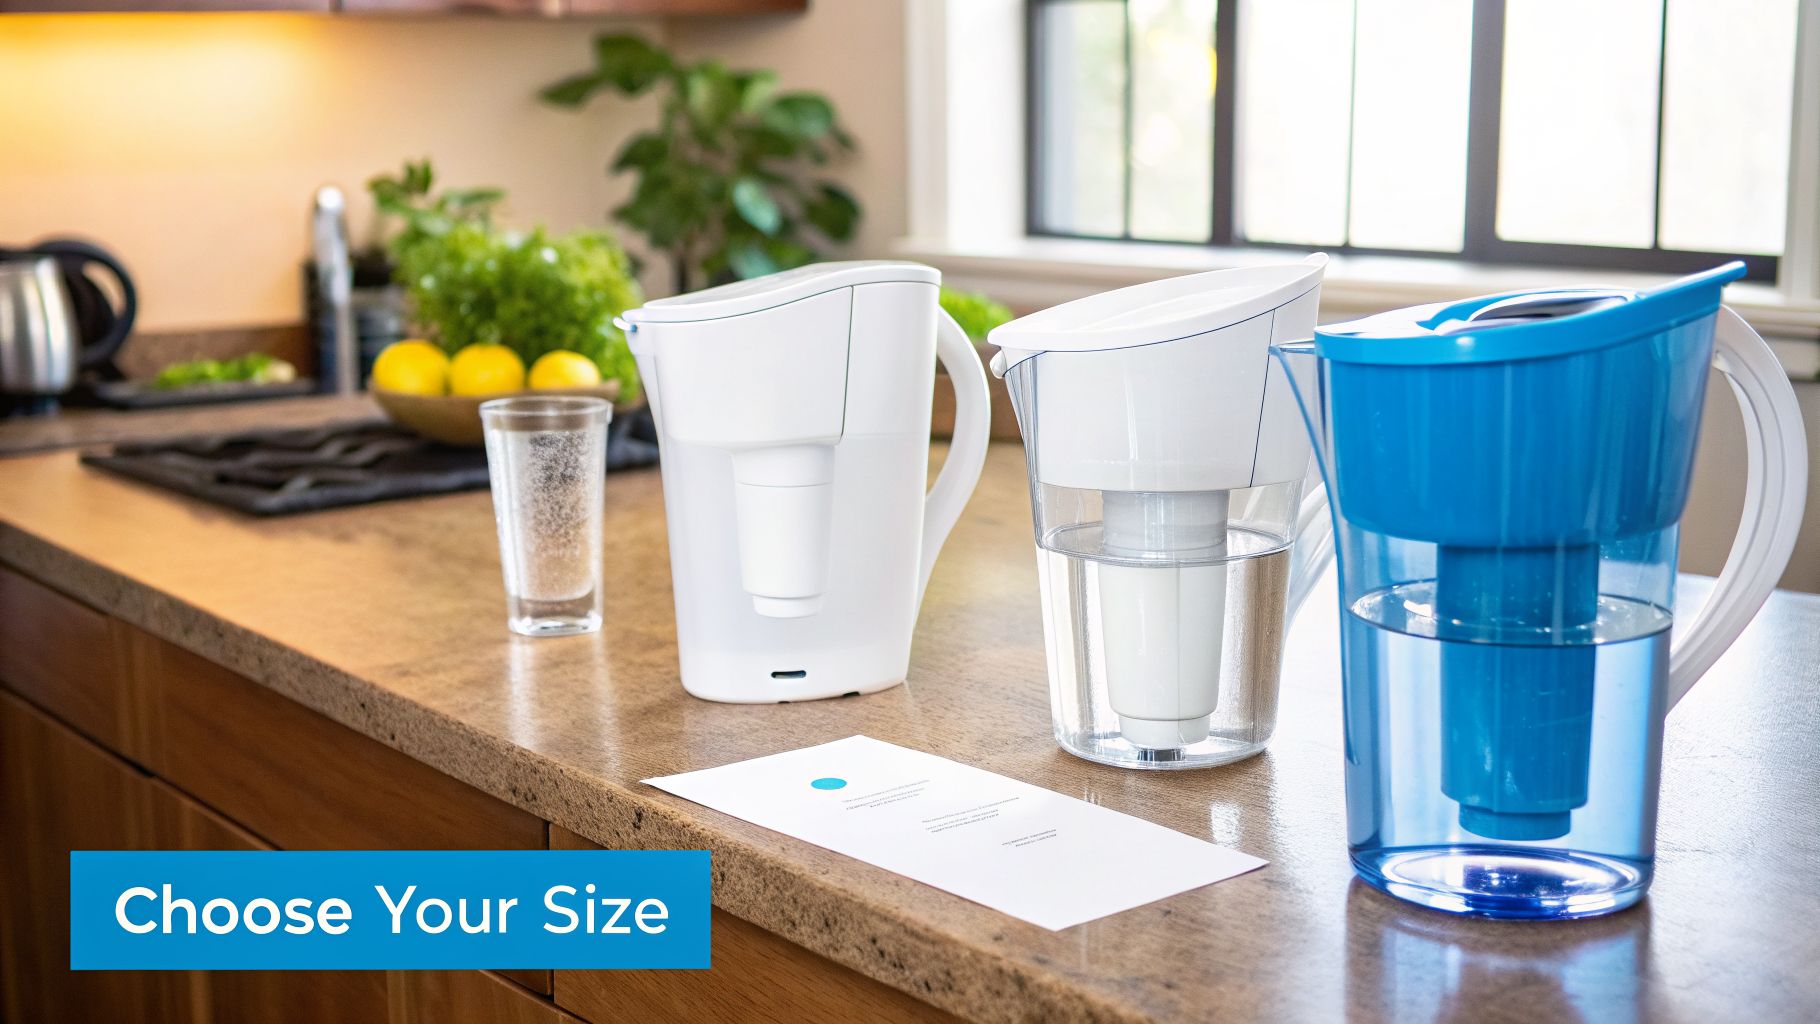
Three water filter pitchers of various sizes, in white and blue, on a kitchen counter with a glass.

Finding the Right Size and Capacity

Water filter pitchers are typically measured by the number of cups of filtered water they hold. Choosing the right size boils down to your household’s daily water habits and the number of people you're hydrating.

For solo dwellers or a couple in a cozy apartment, a small pitcher (5–6 cups) is a perfect fit. Its slim profile won't dominate your fridge, but be ready for frequent refills if you're a big water drinker.

A standard pitcher (8–10 cups) is the sweet spot for a family of three or four. This size provides enough filtered water for drinking and cooking without feeling like you're chained to the sink. It's the most common size, giving you the widest variety of options.

If you have a large family or chug water like it's your job, consider an extra-large dispenser (18+ cups). These countertop or fridge-shelf models feature a handy spigot, offering a large, chilled reservoir of filtered water on demand.

Don't Overlook Design and Ergonomics

It’s the small design details that make the biggest difference in your daily experience. Before you fall in love with a pitcher, imagine yourself actually handling it day in and day out.

Keep an eye out for these practical features:

  • Easy-Fill Lid: Can you fill it without removing the entire lid? A simple flip-top or a small opening is a surprisingly significant quality-of-life improvement.
  • Comfortable Handle: Picture carrying a full, heavy pitcher from the sink to the fridge. A solid, ergonomic handle prevents spills and makes pouring a breeze.
  • Spout Design: A well-designed spout delivers a smooth, drip-free pour. Some even have a cover to keep dust and stray fridge odors out of your pristine water.
  • Filter Change Indicator: Most pitchers come with some kind of reminder—from a simple sticker to a digital timer—to tell you when it's time to swap the filter. This is crucial for ensuring your filter is always performing at its peak.

The little conveniences are what separate a pitcher you tolerate from one you love. A pitcher that's a pain to fill or pour is one you're less likely to use consistently.

Calculating the True Cost of Ownership

The price on the box is just the opening act. The real cost of a water filter pitcher is the ongoing expense of replacement filters. A cheap pitcher with pricey, short-lived filters can easily end up costing you more over a year than a more expensive model with long-lasting, affordable filters.

To unearth the best long-term deal, you need to calculate the cost-per-gallon.

It's a simple, powerful formula:
Filter Price ÷ Gallons Filtered = Cost Per Gallon

For example, a filter that costs $7 and is rated for 40 gallons comes out to 17.5 cents per gallon. But what if another brand offers a $15 filter rated for 120 gallons? That one costs only 12.5 cents per gallon. Over the course of a year, the second option is the clear winner for your wallet.

Always check the filter's price and its rated gallon capacity before you commit to a pitcher.

Understanding the Trade-Offs Between Speed and Power

When you start exploring water filter pitchers, you'll quickly encounter a fundamental choice: do you want speed, or do you want power? Getting both is the holy grail, but it's a tough one to find. This is arguably the most important trade-off you’ll have to make.

Think of it this way. A simple filter that just removes chlorine is like a four-lane highway—water flows through quickly and easily. But a high-performance filter certified to remove lead, PFAS, and other serious contaminants? That's more like a winding country road with multiple security checkpoints. The journey is much slower, but the screening process is far more thorough.

The Speed vs. Safety Dilemma

So why does a filter certified for lead pour with the urgency of a sloth compared to one that just makes your water taste better? It all comes down to the filter's internal architecture. To trap stubborn contaminants like heavy metals, the filter needs a much more complex and dense structure, often combining activated carbon with ion-exchange resins.

This dense media creates significant resistance, which naturally slows the water down. This isn't a bug; it's a critical feature. This increased contact time is what gives the filter media enough time to actually grab onto and neutralize those tougher contaminants.

  • Fast Flow Filters: These are fantastic if you just want to improve the taste and smell of your tap water. If your only mission is to get rid of that chlorine taste for better coffee, a basic, fast-filtering model will serve you well.
  • Slow Flow Filters: These are engineered for health and safety. You absolutely need one if your water has known issues with lead, mercury, or those infamous "forever chemicals" like PFAS.

The flow rate is a direct clue to the filter's power. A slow drip isn't a design flaw; it's a sign that the filter is working diligently to provide a higher level of purification.

For instance, a standard Brita filter does a great job on chlorine and can fill your pitcher in just a few minutes. But a pitcher from a brand like Clearly Filtered, which is engineered to remove over 365 contaminants, is going to take considerably longer. We're talking 15-20 minutes or even more to filter the same volume of water.

Cost Versus Capability

The other major trade-off is cost versus what the filter can actually remove. It's a straightforward equation: filters that remove a wider, more serious range of contaminants will cost you more. That applies to both the pitcher itself and the replacement cartridges. The real question is, do you need to pay for a filter that can tackle things like fluoride or pharmaceuticals?

The answer depends entirely on your priorities and, more importantly, what’s in your local water. If your city’s water report is squeaky clean, a basic filter with an NSF 42 certification for chlorine might be all you need.

But if you’re concerned about "forever chemicals"—which have been found in the tap water of nearly half of all Americans—investing in a more powerful filter is a wise move. A recent Duke University study highlighted that a brand like AquaTru, while pricier, achieved non-detect levels for all the PFAS chemicals they tested.

Let’s consider two scenarios:

  • Pitcher A: Costs $25, and replacement filters are $7. It's fast, and by removing chlorine, it makes water taste great.
  • Pitcher B: Costs $70, and replacement filters are $15. It's slow, but it's certified to remove 99% of lead and also reduces PFAS.

If you live in a home with older plumbing, the peace of mind from Pitcher B is worth every penny and every extra minute of filtration time. Choosing the right pitcher is all about balancing what you value most: speed, safety, or your budget.

Your Action Plan for Choosing the Right Pitcher

You now understand how filters work, what certifications matter, and the performance trade-offs. It's time to channel that knowledge into a simple, actionable framework for choosing the perfect water filter pitcher for your home.

This is your step-by-step checklist to make a confident, informed decision.

Step 1 Identify Your Water Concerns

First things first: you need to become an expert on your own tap water. The best way to do this is by getting a copy of your local water quality report.

Every community water supplier in the U.S. is required to provide an annual Consumer Confidence Report (CCR). This document lists the contaminants detected in your water supply and at what levels. You can usually find it with a quick online search for "[Your City Name] water quality report". If you're on a private well, you'll need to arrange for independent water testing.

As you review the report, look for red flags:

  • High chlorine levels, which are the primary cause of bad taste and odor.
  • The presence of lead, a common concern in homes with older plumbing.
  • Any mention of PFAS, VOCs, or other industrial chemicals.

Step 2 Match Concerns to Certifications

With your water report in hand, you can now play matchmaker between your concerns and the right NSF certifications. This crucial step ensures you get a filter that solves your specific problems without overpaying for features you don't need.

  • For taste and odor (chlorine): An NSF 42 certification is the baseline standard you need.
  • For health contaminants (lead, mercury, PFAS): An NSF 53 certification is non-negotiable. It's critical to check the fine print to confirm which specific contaminants the filter is certified to remove.
  • For emerging contaminants (pharmaceuticals, BPA): Look for NSF 401 certification for an added layer of protection against modern pollutants.

Think of it like this: The water report is your diagnosis. The NSF certification is the specific prescription. If they don't match, the filter won't be effective for your needs.

Step 3 Calculate Your Household Needs

Next, be realistic about your daily water usage. A pitcher that’s too small will become a constant source of refill-related frustration.

  • 1-2 people: A slim 5- to 6-cup model is often sufficient.
  • 3-4 people: A standard 8- to 10-cup pitcher is the most common and versatile choice.
  • Large families or high consumption: An 18-cup dispenser is a more convenient, set-it-and-forget-it option.

Also, consider the design ergonomics. Do you need a flip-top lid for one-handed refills? Is the handle comfortable when the pitcher is full and heavy? These small details have a huge impact on daily satisfaction.

Step 4 Compare Long-Term Costs

The initial purchase price is just the cover charge. The true cost of ownership lies in the replacement filters. To make a financially savvy choice, calculate the cost-per-gallon.

Divide the price of one replacement filter by the number of gallons it's rated to filter. For example, a $15 filter rated for 120 gallons costs just 12.5 cents per gallon. That's a much better long-term value than a $7 filter rated for only 40 gallons, which costs 17.5 cents per gallon.

Don't let a low-cost pitcher lure you into a high-cost maintenance trap. For more expert insights, check out the in-depth water filter advice from Water Filter Advisor.

Water Filter Pitcher Selection Checklist

Use this checklist to crystallize your needs and guide your selection. Go through each step to build a clear profile of your ideal pitcher.

Consideration Your Requirement/Preference Notes
Primary Contaminants e.g., Lead, Chlorine, PFAS List the top 1-3 contaminants from your water report.
Required Certifications e.g., NSF 53 for Lead, NSF 42 Match the contaminants to NSF standards (42, 53, 401).
Household Size e.g., 2 people How many people will use the pitcher daily?
Daily Water Usage e.g., ~1 gallon/day Estimate your total daily drinking water consumption.
Ideal Pitcher Capacity e.g., 8-10 cups Based on size and usage, what's the minimum capacity?
Filter Lifespan Goal e.g., 3+ months How often are you willing to change the filter?
Budget (Long-Term) e.g., <$0.20 per gallon Calculate the cost-per-gallon for your top choices.
Must-Have Features e.g., Easy-fill lid, ergonomic handle What design features are non-negotiable for you?

Using this checklist will demystify the process, narrow your choices, and lead you to the perfect pitcher for your specific needs and budget.

Common Questions About Water Filter Pitchers

You've got the pitcher. Now you've got questions. Here are the straight answers to the most common queries, so you can use your new filter like a pro.

How Often Should I Really Change My Filter?

Follow the manufacturer's guidelines religiously. For most standard pitchers, that means replacing the filter every 40 gallons or roughly every two months, whichever comes first.

If you push a filter past its expiration date, it stops being effective. Even worse, an old, saturated filter can become a breeding ground for bacteria and may even release some of the contaminants it previously captured. Use the pitcher’s indicator if it has one, but also set a recurring reminder on your phone. Don't leave it to guesswork.

Can I Run Hot Water Through My Pitcher Filter?

Absolutely not. Never use hot water in your pitcher filter. These systems are designed for cold or room-temperature water only.

Hot water will damage the filter media—both the activated carbon and the ion-exchange resins. It can destroy the filter's carefully engineered internal structure and could even cause it to flush out contaminants it has already trapped right into your "clean" water.

Ever see those little black specks in the water when your filter is brand new? That's just harmless carbon dust. It's perfectly safe and is the reason you're instructed to soak and flush a new cartridge before use—it clears out any loose particles from shipping.

Does Keeping My Pitcher in the Fridge Make the Filter Last Longer?

It's a fantastic idea for having chilled, delicious water ready to go, but it will not extend the filter's life. Refrigeration has no effect on the filter's capacity.

A filter's lifespan is determined by volume—how many gallons of water pass through it. Time and temperature don't change that equation. However, keeping the pitcher in the fridge does help slow down any potential bacteria growth in the filtered water reservoir, so it's still a highly recommended practice.


At Water Filter Advisor, we provide the expert guidance you need to choose, use, and maintain the perfect filtration system for your home. Explore our comprehensive buying guides to find your ideal solution.

Finding the Best Faucet Water Filter for Pure, Clean Water

If you're on the hunt for the best faucet water filter, you've come to the right place. Sometimes the simplest choice is the smartest one, and the best models blend serious filtration power with a setup so easy you won't even need to open your toolbox. It’s no wonder brands like PUR and Brita are household names—they wage war on common culprits like chlorine and lead, which immediately makes your tap water taste better and safer to drink.

Your Quick Guide to Better Water from the Tap

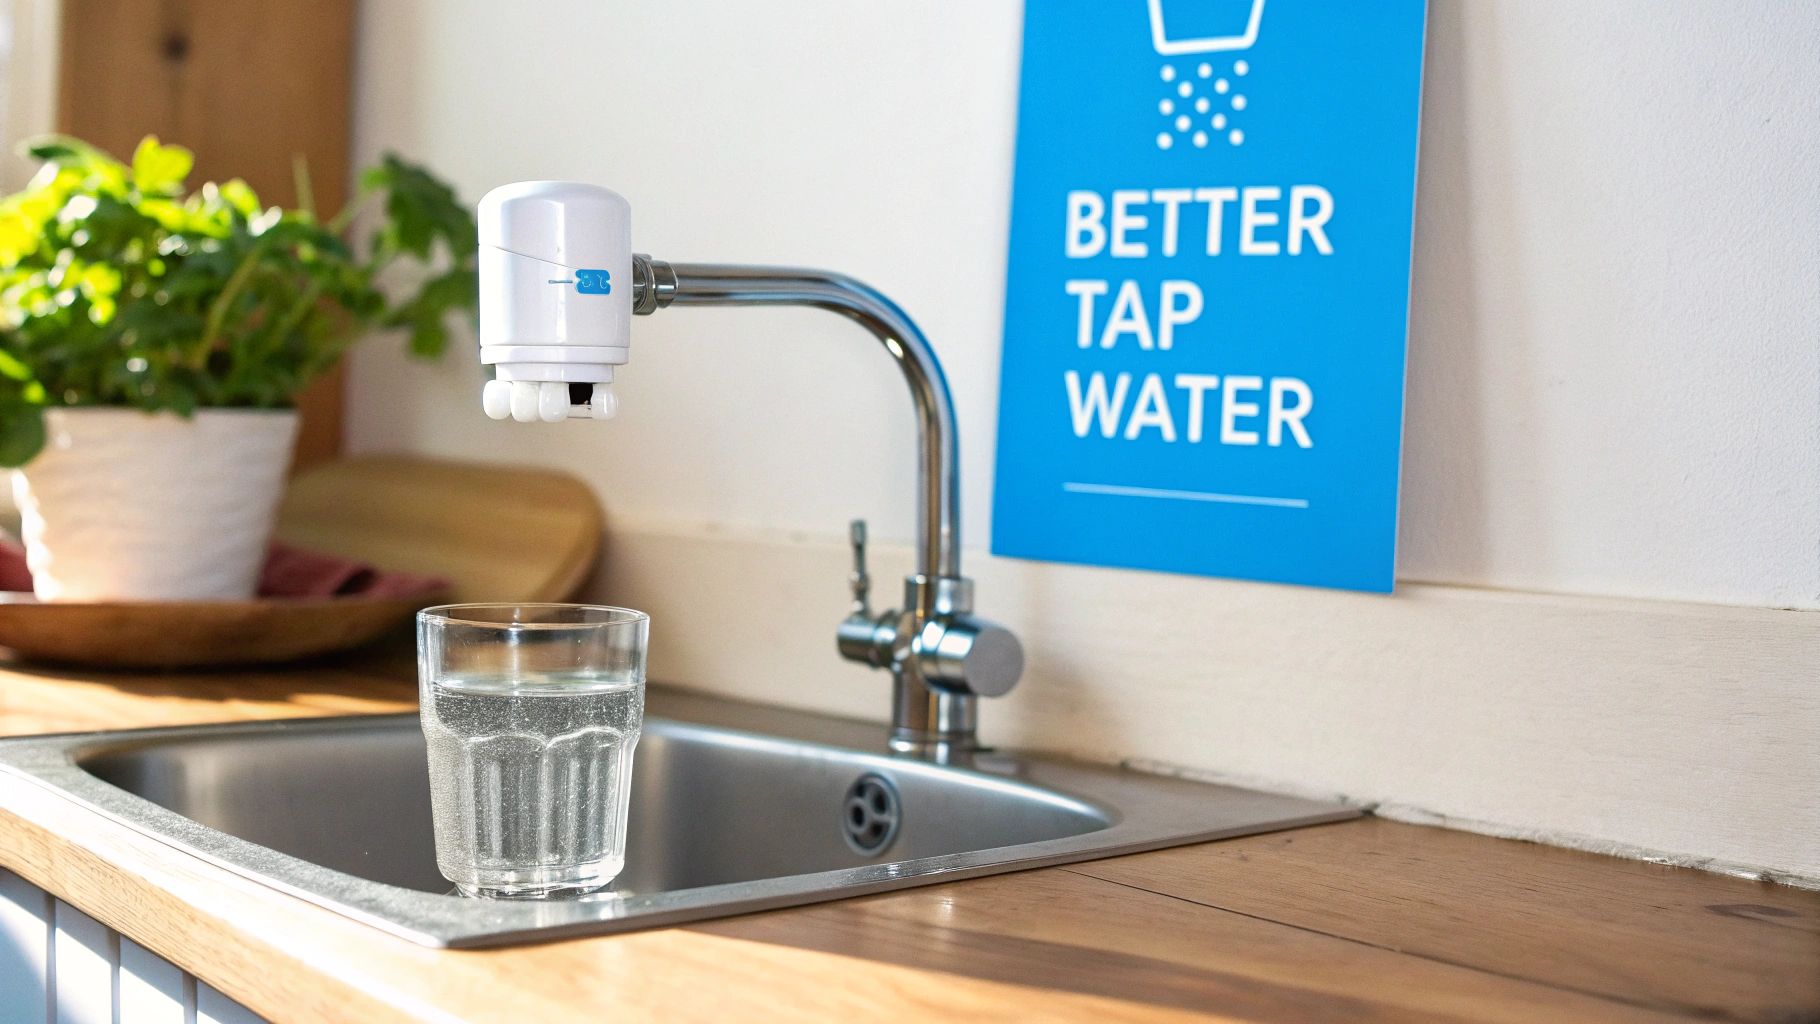
A white faucet water filter attached to a kitchen sink faucet, with a glass of water and a 'Better Tap Water' sign.

Giving your home's water quality a major upgrade doesn't have to mean calling a plumber or starting a complex renovation. A faucet-mounted filter is one of the most straightforward and effective solutions out there, delivering cleaner, purer water right where you use it most: the kitchen sink.

These little gadgets click right onto your existing faucet in minutes, making them a perfect match for homeowners and renters alike who crave powerful filtration without any permanent changes. The real beauty is in their simplicity and the instant gratification of truly delicious water.

The Power of Simplicity

Think of a faucet filter as a tiny, dedicated bodyguard for your tap. It stands guard, intercepting unwanted junk before it ever makes it into your glass, cup of coffee, or pot of pasta.

Here’s how it works: the device routes your tap water through a small, replaceable cartridge. Inside that cartridge is a marvel of filtration media, usually activated carbon, which acts like a super-magnet for contaminants. This process zeroes in on things that make water taste and smell funky, like chlorine, while also tackling more serious health concerns. It’s a simple concept that pays off every time you hydrate.

A great faucet water filter offers a critical line of defense, transforming your standard tap into a source of purified water with minimal effort and cost.

Faucet Water Filter Key Benefits at a Glance

So, what makes these filters such a smart addition to your kitchen? Let's break down the core benefits that have made them a go-to choice for so many households. The advantages, from better health to a smaller environmental footprint, really speak for themselves. You can find more in-depth filtration advice in our expert guides.

Benefit Why It Matters for Your Home
Improved Taste and Odor Removes chlorine and other chemicals that cause that classic "tap water" smell and aftertaste, making water genuinely enjoyable to drink.
Contaminant Reduction Certified models can slash levels of harmful stuff like lead, mercury, certain pesticides, and even pharmaceuticals.
Cost-Effective Gives you filtered water for pennies on the dollar compared to bottled water, saving you a surprising amount of money over time.
Convenience Delivers filtered water on-demand with the flick of a switch, right from your sink. No more waiting for a pitcher to fill up.
Easy Installation Most models just screw onto your faucet in minutes without any tools. This makes them perfect for renters and anyone who isn't a DIY pro.
Environmentally Friendly Drastically cuts down on the need for single-use plastic water bottles, shrinking your household's plastic waste.

Ultimately, a faucet filter is an incredibly practical tool that offers an immediate and noticeable improvement in your daily life, one delicious glass at a time.

How Faucet Filters Actually Clean Your Water

Ever wondered what's really going on inside that little gadget you snap onto your faucet? It’s not just an empty plastic shell. Think of it as a tiny, on-demand water treatment plant, working hard to make your tap water cleaner, safer, and taste a whole lot better. The secret is in a few clever filtration technologies working together to catch all the unwanted stuff.

At its heart, nearly every faucet filter uses a multi-stage process. Your water flows through different layers, and each layer is designed to grab specific types of contaminants. It’s kind of like a bouncer at an exclusive club, but for your water. The first layer stops the big, obvious troublemakers, while the next one is trained to spot the sneakier, invisible ones.

This process is exactly what separates a good faucet filter from a simple screen. It’s a fast, targeted, and scientific way to purify your water right as it comes out of the tap.

The Contaminant Sponge: Activated Carbon

The undisputed hero inside most of these filters is activated carbon. Picture a charcoal sponge, but one that’s incredibly porous. Its surface is covered in microscopic nooks and crannies, giving it a massive surface area—a single gram can have more surface area than a football field. This unique structure makes it a magnet for certain contaminants.

The process is called adsorption (with a 'd'), which just means chemicals and other gunk physically stick to the carbon’s surface, a lot like how lint sticks to a wool sweater. It’s especially good at grabbing:

  • Chlorine: This is what most cities use to disinfect water, and it’s the main reason tap water has that distinct smell and taste. Activated carbon is a champ at removing it, which is why the first thing you'll notice is a huge improvement in flavor.
  • Volatile Organic Compounds (VOCs): These are chemicals from industrial solvents and other sources that you definitely don't want in your water.
  • Pesticides and Herbicides: Runoff from farms can sometimes introduce these chemicals into the water supply. Carbon helps pull them out.

By the time your water makes it past the activated carbon, it's already much cleaner and tastes worlds better. This is the first and most important step for transforming your tap water.

Tiny Magnets for Heavy Metals

Carbon is great for making water taste good, but it can’t do much about serious health threats like lead. For that, you need a different trick up your sleeve: ion exchange. It’s a smart bit of chemistry that works like a magnet swap.

Inside the filter are tiny resin beads that are "pre-loaded" with harmless ions, like sodium or potassium. When water containing heavy metals like lead or mercury flows past, those dangerous contaminants are drawn to the resin.

In a split second, the resin grabs onto the lead ions and releases its harmless sodium or potassium ions back into the water. This “exchange” effectively yanks the dangerous metals right out of your drink.

This is a must-have feature, especially if you live in a home with older plumbing where lead can leach from the pipes. A filter with ion exchange media gives you a critical layer of defense against these invisible dangers.

Advanced Filtration for Tougher Contaminants

For folks dealing with more complex water issues, some of the better faucet filters pack in extra, specialized materials. They aren't always standard, but they provide an added level of purification when you need it.

One of these is catalytic carbon, which is basically activated carbon on steroids. It's specifically engineered to tackle chloramine, a long-lasting disinfectant that some water utilities use instead of chlorine. Regular carbon isn't great at removing chloramine, but catalytic carbon breaks it down effectively.

You might also see something called Kinetic Degradation Fluxion (KDF). This is a mix of high-purity copper and zinc that creates a tiny electrochemical reaction as water passes through. This process helps reduce other water-soluble heavy metals and also has the neat side effect of inhibiting the growth of bacteria and algae inside the filter, which helps keep it working well for longer. These advanced layers make sure your faucet filter is ready for just about anything.

What Contaminants and Certifications Really Mean

Let’s be honest, not all filters are created equal. When it comes to your drinking water, you can't just take a company's marketing claims at face value. This is where certifications come in—they are your independent, third-party proof that a filter actually does what it claims to do.

Think of it like reading the nutrition label on your food. Certifications tell you exactly what the filter is designed to remove, from common annoyances like chlorine to more serious threats like lead. Understanding them is the single best way to choose a filter with confidence.

Decoding the NSF Seal of Approval

If you spot an NSF/ANSI certification on a filter's box, that's a very good sign. The National Sanitation Foundation (NSF) is a highly respected, non-profit organization that puts products through the wringer to make sure they meet strict public health and safety standards.

When a filter earns that seal, it means it has been rigorously tested to prove it can consistently remove the specific contaminants listed. This isn't a one-and-done deal, either. NSF certification involves ongoing facility inspections and regular re-testing to ensure the quality never slips. It's a reliable stamp of quality that cuts right through the advertising hype.

An NSF/ANSI certification is more than just a sticker on a box; it’s a verified promise that the filter will protect your health by performing exactly as specified, from the first glass of water to the last.

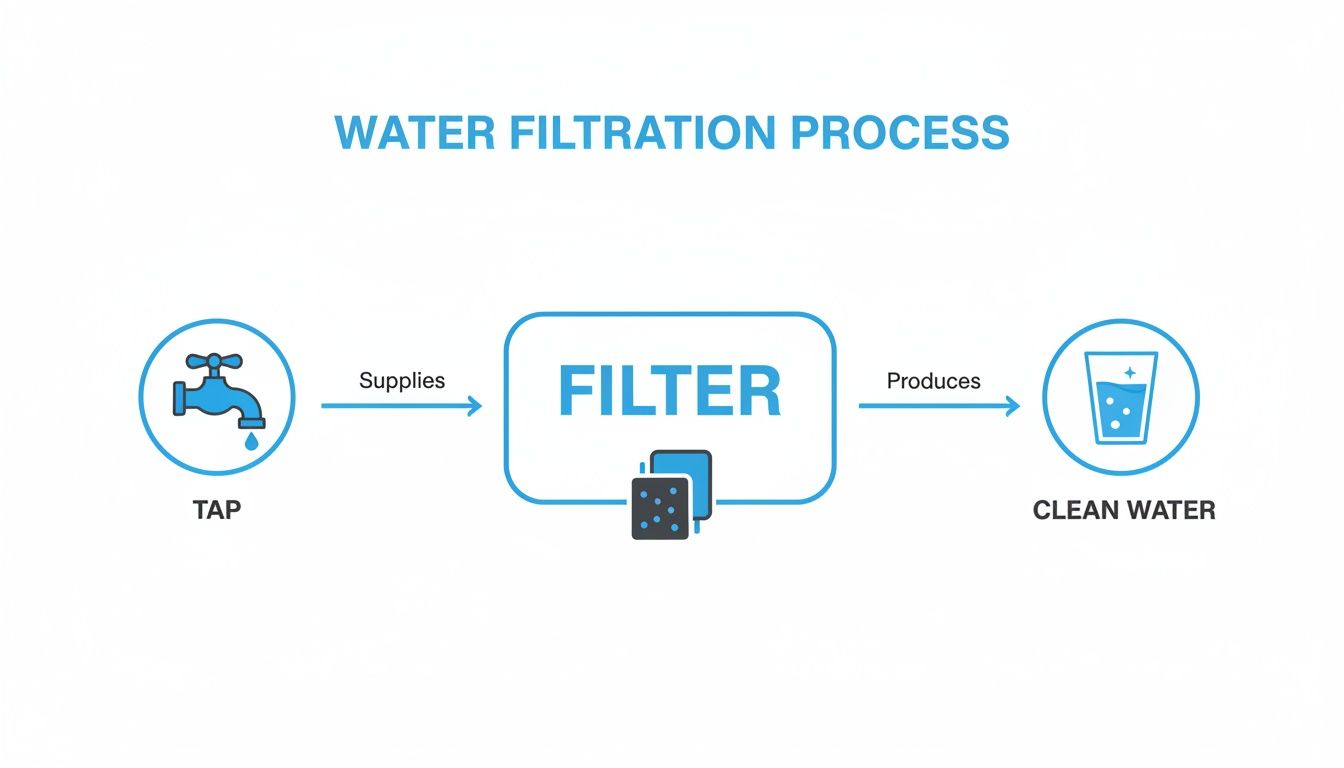
This simple diagram shows the basic idea of how a faucet filter gets the job done right at your tap.

A diagram illustrating the water filtration process, showing a tap supplying water to a filter, which then produces clean water.

As you can see, your tap water flows through the filter, which traps contaminants and sends fresh, purified water out for you to enjoy.

The Most Important Certifications to Know

Three main NSF/ANSI standards apply to the faucet filters you'll see on the shelf. Each one targets a different group of contaminants, so knowing the difference will help you pick the perfect filter for your home's water.

  • NSF/ANSI 42: Aesthetic Effects
    This is the most common certification out there. It focuses on things that affect the taste, smell, and look of your water. If your main complaint is that your tap water has a strong "swimming pool" odor, a filter with this certification is your ticket to better water. It’s certified to reduce things like chlorine and particulates, making your water much more pleasant for drinking and cooking.

  • NSF/ANSI 53: Health Effects
    This one is much more serious. This standard verifies that a filter can reduce contaminants known to be harmful to your health. If you have specific concerns about dangerous substances in your water, this is a critical certification to look for. A filter certified to NSF 53 can be tested against a whole list of nasty stuff, including lead, mercury, asbestos, and certain cysts like Giardia. The key here is that not every NSF 53 filter removes all these things, so you must read the fine print on the performance data sheet to see exactly what it’s certified for.

  • NSF/ANSI 401: Emerging Contaminants
    This is a newer standard designed to tackle a modern problem: trace amounts of pharmaceuticals, over-the-counter drugs, herbicides, and pesticides showing up in our water. While the long-term health effects of these "emerging contaminants" aren't fully understood, a lot of people would rather be safe than sorry. An NSF 401 certification offers that extra layer of protection and peace of mind.

The global market for faucet-mounted filters is growing at a steady 7.4%, a sign that more people are taking control of their water quality. Here in North America, which accounts for a massive 78.1% of regional purifier sales, US consumers are driving innovation. We're seeing advanced multi-stage carbon block filters that can eliminate 99.99% of cysts and VOCs, performance that is often validated by these crucial NSF certifications. You can explore the data behind these market trends to see just how much demand for certified filters is booming.

Making Sure the Filter Fits Your Faucet

You can do all the research in the world on certifications and contaminants, but none of it means a thing if the filter won't actually connect to your sink. A filter that doesn't fit is just a fancy paperweight. This final check is arguably the most important one.

The good news? Most faucet filters are designed for a near-universal fit with standard kitchen faucets. Installation is usually a simple DIY job that takes less than five minutes. Seriously.

You just unscrew the little mesh tip at the end of your faucet spout—that’s called the aerator—and screw the filter mount right into its place. That’s typically all it takes. No plumbers, no special tools, just a secure, hand-tightened connection.

Of course, "standard" is a word that doesn't cover every faucet out there. Before you click "buy," it's smart to confirm your faucet is compatible. Also, a quick tip: before you install a brand-new filter, make sure your faucet itself is in good shape. It’s a good idea to fix a leaky faucet before you add another component into the mix. A solid foundation prevents a lot of headaches down the road.

Understanding Faucet Threads and Adapters

So, how do they make one filter fit so many different faucets? The magic is in the adapters included in the box.

Most faucet spouts have threads to hold the aerator on, but sometimes the threads are on the outside (male-threaded) and other times they're on the inside (female-threaded). The best faucet filter kits come prepared for both, shipping with a small handful of plastic or metal adapters.

These little rings simply bridge the gap between your faucet’s specific threads and the filter’s mounting collar. You just find the one that fits your sink, screw it on, and then attach the filter. It’s an elegant system that creates a tight, leak-free seal.

Think of the adapters as a universal translator for your sink. They ensure the filter can "speak the same language" as your faucet's threads, creating a perfect connection regardless of its specific design.

When a Faucet Filter Will Not Work

While adapters solve the vast majority of compatibility issues, some faucet styles are just not built to work with these kinds of filters. A quick check before you buy will save you a ton of frustration and a return trip.

Keep an eye out for these common incompatible faucet types:

  • Pull-Out or Pull-Down Sprayers: If your faucet has a sprayer head that pulls out from the main spout, it lacks the standard threaded tip needed for a filter to attach.
  • Unthreaded Designer Faucets: Some high-end or uniquely shaped faucets have a smooth, unthreaded spout for a sleek look. No threads, no place to screw on a filter.
  • Sprayer-Style Faucets: If the faucet head itself is shaped like a mini shower sprayer, it's a no-go.
  • Portable or Unattached Faucets: These aren't common in kitchens but are sometimes used with portable dishwashers and don't have a standard connection point.

Just take a quick look at your current faucet. If you can see and feel threads where the aerator connects, you're almost certainly good to go with the best faucet water filters on the market.

How to Balance Performance, Cost, and Filter Life

A water filter, coins, and a glass of water illustrate cost vs performance comparison.

Picking the right faucet filter isn't just about grabbing the one that zaps the most contaminants. It’s really a strategic juggling act between filtration power, how long the filter lasts, and what it costs you in the long run. A filter might look amazing on the box, but it won’t do you much good if it clogs up in a month or needs pricey cartridges all the time.

The trick is understanding the give-and-take. A more aggressive filter that targets over 70 contaminants—we’re talking lead, pesticides, the serious stuff—often slows down your water flow a little. That's because the water needs more contact time with the filtration media to get purified. It’s a good thing for safety, but it can be a minor annoyance when you're trying to fill a big pot of water for pasta.

On the flip side, a simpler filter designed mostly for improving taste by removing chlorine will probably give you a faster flow and last longer. Neither one is "better" than the other; it all comes down to what you actually need. Finding your sweet spot is the key to getting a filter that feels like a natural part of your kitchen.

The True Cost of Clean Water

That initial price tag on the filter? That’s just the starting line. The real number you should be looking at is the total cost of ownership, which includes the ongoing cost of replacement filters. This is where a little upfront math can save you a bunch of cash later.

A cheaper filter unit might feel like a steal, but if its replacement cartridges are expensive or only last for 100 gallons, you could end up spending more over a year than you would with a pricier model that uses longer-lasting, more affordable filters. Always calculate the cost-per-gallon to get the real story.

Your goal is to find a filter that not only handles your water quality concerns but also fits comfortably into your long-term budget. A higher initial investment can often pay for itself through significant savings on replacement cartridges.

It's no surprise that faucet filters are a huge part of the booming water purifier market, which is expected to rocket from USD 48.1 billion in 2025 to a massive USD 97 billion by 2035. They also offer some serious savings. One analysis found that a family of four can save around $1,200 annually just by ditching bottled water. And with 85% of users saying their water tastes better after making the switch, the value is pretty clear. You can read more about the water purifier market's growth to see why so many people are turning to home filtration.

Lifespan vs. Filtration Power

A filter's lifespan, usually measured in gallons, is the final piece of the puzzle. Most standard faucet filters are rated for somewhere between 100 and 200 gallons, which for an average family means changing it out every two or three months. This capacity is directly tied to what the filter is designed to remove.

A high-performance filter certified for NSF 53 (which covers health-related contaminants) might have a shorter life. Its dense, multi-layered media has to work harder to grab heavy metals and other nasty particles, so it gets saturated faster. In contrast, a basic NSF 42 filter that just targets chlorine might last much longer because its job is less demanding.

To help you see how these trade-offs play out, I’ve put together a quick comparison. Think of it as a cheat sheet for understanding what you get for your money.

Faucet Filter Performance Trade-Off Comparison

Filter Type Typical Filter Life Flow Rate Contaminant Removal Focus Best For
Basic Taste & Odor 200 Gallons Fast Chlorine, Particulates (NSF 42) Households with good city water just looking for better taste.
Advanced Health 100 Gallons Moderate Lead, Mercury, Cysts (NSF 53) Homes with older plumbing or specific health concerns.
All-in-One 120 Gallons Moderate Broad Spectrum (NSF 42, 53, 401) Anyone wanting comprehensive protection against a wide range of contaminants.

Ultimately, choosing the best faucet filter is about knowing what you’re willing to compromise on. Do you want maximum protection, even if it means changing the filter more often? Or does a longer-lasting, taste-improving filter make more sense for your water and your lifestyle? Answering those questions is how you'll find the perfect balance between performance and practicality.

Putting It All Together: How to Pick the Right Faucet Filter

We've covered the tech, the certifications, and the costs. Now comes the fun part: figuring out which faucet filter is actually the right one for your kitchen. This isn't about finding some mythical "best" filter—it's about finding the perfect match for your water, your home, and what you care about most.

The good news is, this is simpler than it sounds. A few key questions will help you cut through the noise and narrow down the overwhelming number of options to just a couple of great candidates. The goal here is to solve your specific water problems without creating a new set of annoyances.

Start With Your Water

First things first: what are you trying to fix? The answer to this question is the single most important factor in your decision. Are you just trying to get rid of that swimming-pool smell from city water, or are you in an older home worried about lead from the pipes?

If you're a renter in a city apartment, your main complaint is probably the taste and odor of chlorine. A simple, affordable filter certified to NSF 42 is your best bet. It’ll knock out the chlorine and give you crisp, clean-tasting water without making you pay for filtration power you just don’t need.

But if you have genuine health concerns—like lead, cysts, or weird industrial chemicals that show up on your local water report—you need to bring out the bigger guns. A filter certified to NSF 53 is the only way to go. That certification is your proof that the filter can actually tackle those serious contaminants.

The right filter is a direct answer to your biggest water complaint. Don't overspend on heavy-duty lead filtration if chlorine taste is your only issue, and definitely don't settle for a basic taste filter if you're worried about your health.

Factor In Your Lifestyle

Your living situation makes a huge difference. A renter has totally different needs than a homeowner, and a big family will have different priorities than someone living alone.

A renter, for example, needs something that goes on and comes off easily without leaving a trace. A screw-on faucet filter is a perfect, no-fuss solution. For a homeowner looking for a more permanent and stylish upgrade, an integrated system might be the ticket. If you're exploring built-in filtered taps, looking into options like the Brita Extra C Tap can give you a good idea of how features and design can blend right into your kitchen.

Your Final Faucet Filter Checklist

Ready to pull the trigger? Just run through this quick checklist. If you can answer these questions, you're on the fast track to finding the ideal filter for your home.

  • What's My #1 Goal? Better taste (NSF 42), removing health contaminants (NSF 53), or a mix of both?
  • Will It Fit My Faucet? Double-check that you have a standard threaded faucet. These won't work with pull-out or sprayer-style heads.
  • What's the Real Cost? Don't just look at the upfront price. Compare the cost and lifespan of the replacement cartridges. A filter that handles 200 gallons is a much better deal over time than a 100-gallon filter you have to replace twice as often.
  • Did I Read the Details? For NSF 53 filters, always check the performance data sheet. Make sure it explicitly lists the specific contaminants you want to remove.
  • Am I Okay With Slower Water Flow? Top-tier filtration often means a slightly slower flow rate. Decide if you prioritize speed or maximum contaminant removal.

Answering these questions honestly will point you straight to the perfect faucet water filter, making sure every glass you pour is exactly what you want it to be: clean, safe, and refreshing.

Common Questions About Faucet Water Filters

Even after you've picked out the perfect faucet filter, you'll probably have a few questions once you start using it. Getting the hang of basic maintenance and use is the secret to getting clean, fantastic-tasting water for the long haul. Let's tackle some of the most common ones.

The big one is always about filter replacement. That schedule the manufacturer gives you isn't just a friendly suggestion—it’s a must for performance and safety. An old filter is a saturated filter, and it just can't grab contaminants anymore.

Even worse, it can turn into a hotspot for bacteria or, believe it or not, dump those trapped contaminants right back into your glass. For most faucet models, that means a new cartridge every 100 gallons or about every 2 to 3 months, whichever comes first.

Will It Affect My Water Pressure?

It's a common worry: will this thing slow down my tap? The truth is, a small drop in water pressure is totally normal. You should actually expect it. Think of it as proof the filter is doing its job.

Water has to push its way through some pretty dense material, like activated carbon, and that creates a little resistance. But if you ever notice a major drop in pressure, that's your filter shouting that it's clogged and ready to be replaced. A new cartridge will get that flow right back to its normal, slightly-slower self.

Using hot water with your faucet filter is a recipe for trouble. The heat can melt the adhesives holding the internal components together and damage the delicate filtration media, rendering it useless.

Can I Use Hot Water with the Filter?

That’s a hard no. Faucet water filters are strictly for cold water only. Trying to run hot water through one can wreck its internal parts.

The heat can also trigger something called "channeling," which is when hot water basically burns pathways right through the carbon filter media. When that happens, your filter is officially useless. It might even release a blast of the very stuff it was meant to catch. Always flip that diverter switch for unfiltered water when you need hot, like for doing dishes.


At Water Filter Advisor, we're dedicated to helping you find clear, safe, and great-tasting water solutions. Explore our expert guides and reviews to make confident decisions for your home at https://www.waterfilteradvisor.com.

Finding the Best Countertop Water Filter for Your Home

So, you're on the hunt for the best countertop water filter? Your quest probably started with a single, nagging thought: "What in the world is actually coming out of my kitchen tap?" For most folks, that question leads them down a path to two excellent choices: gravity-fed systems or reverse osmosis units. Both are superstars at providing powerful, multi-stage filtration without needing to call in a plumber.

Think of them as your personal bodyguards, standing between you and the mysterious stuff lurking in your water.

Why Your Tap Water Might Need a Hero

You turn the handle, and out comes clear, seemingly perfect water. It's easy to assume it's pure. And while U.S. tap water is among the safest on the planet, it travels a long, winding road from the treatment plant to your glass. Along the way, it can pick up some unwelcome hitchhikers that mess with its taste, smell, and overall quality.

A person fills a glass with water from a modern kitchen tap, with a 'CHECK YOUR TAP' banner.

This is where a countertop water filter swoops in to save the day. It’s not about distrusting your local water utility; it’s about taking complete control of that final foot of the journey before the water hits your lips.

The Usual Suspects in Your Tap Water

Most of us have noticed little quirks in our water that a good filter can eliminate in a heartbeat. Here are the common culprits:

  • The "Swimming Pool" Effect: Cities use chlorine to disinfect water and kill off nasty bacteria. It’s a necessary process, but it can leave behind that distinct chemical smell and taste. Not exactly the recipe for a refreshing drink.
  • Ancient Pipes: The pipes that deliver water to your house—and even the ones inside your walls—can be decades old. Older plumbing can leach contaminants like lead into your water, a serious health concern, especially for families with kids.
  • The Invisible Intruders: Often, the most worrisome stuff is what you can't see, taste, or smell. We're talking about industrial runoff, pesticides from farms, and even disinfection byproducts created during the water treatment process itself.

A high-quality countertop filter is like a bouncer at a club, politely showing these unwanted contaminants the door right before you take a sip. It's an incredibly simple upgrade for ensuring every glass is as pure and delicious as it should be.

Take Back Control of Your Water

A countertop filter puts the power of pure water back in your hands. It's a fantastic solution for homeowners and renters alike because it requires no permanent changes to your plumbing.

Whether you opt for a simple gravity-fed dispenser or a more advanced unit that connects to your faucet, you're essentially buying peace of mind.

For those facing significant water challenges or considering a whole-house solution, looking into professional water filtration systems can be a great option. For most kitchens, however, a countertop unit hits that perfect sweet spot of performance, convenience, and affordability. It's your first step toward healthier, better-tasting water, every single day.

How Countertop Water Filters Work Their Magic

Ever popped the lid off a countertop filter and wondered what alchemy is happening inside? It’s far more than just a fancy pitcher. Think of it as a high-tech obstacle course for your tap water, where different layers of defense team up to block unwanted intruders.

These clever devices pack some serious filtration technology to snag various types of contaminants. Understanding how they work is the secret to choosing the right one for your home, ensuring you’re not just buying a gadget, but a genuine solution to your water woes.

It’s no wonder people are seeking better water. The global market for these point-of-use systems was valued at $35.6 billion in 2025 and is projected to soar to $53.2 billion by 2032. And who’s leading this charge? Homeowners and renters just like you, making up a massive 70% of the market. You can read the full research about the growing water purifier market to see the big picture.

Activated Carbon: The Contaminant Magnet

The first and most common line of defense is activated carbon. Imagine a sponge that’s incredibly porous, with a surface area the size of a football field, acting like a powerful magnet for all sorts of chemical gunk. That's precisely what this material does.

As water flows through it, contaminants like chlorine, pesticides, and funky industrial chemicals (known as VOCs) get stuck to the carbon's surface. This process is called adsorption. It’s why activated carbon is the undisputed champion of banishing that swimming pool taste and smell, making your water instantly more enjoyable.

Reverse Osmosis: The Ultimate Gatekeeper

When you need to get serious about purity, you bring in the big guns: reverse osmosis (RO). Picture a bouncer at an exclusive club who only lets the absolute VIPs—in this case, pure water molecules—pass through the velvet rope. The "bouncer" here is the RO membrane, a filter with pores so minuscule that almost nothing else can squeeze through.

Your home’s water pressure pushes water against this membrane. The water molecules wriggle through to the clean side, while dissolved solids, heavy metals, and other nasty stuff are left behind and flushed down the drain.

Reverse osmosis is the heavy hitter of water filtration. It is phenomenally effective at blocking a huge list of contaminants, including lead, arsenic, fluoride, and nitrates. It is one of the most thorough purification methods available for home use.

This level of filtration offers unparalleled peace of mind, knowing that you’re drinking exceptionally clean water free from some of the most troubling modern contaminants.

Specialized Forces: Ion Exchange and UV Light

Some of the best countertop water filter models don't stop there. They deploy specialized stages to tackle specific problems.

  • Ion Exchange: This is essentially a trading system. The filter contains tiny resin beads that snatch minerals causing hard water, like calcium and magnesium. In exchange, they release a harmless ion like sodium. It's a simple swap that "softens" the water.
  • UV Purifiers: Think of this as the final security sweep. A UV lamp zaps the water with ultraviolet light, which scrambles the DNA of bacteria, viruses, and other microorganisms. It doesn't physically remove them, but it neutralizes them, rendering them completely harmless.

By layering these technologies, a great multi-stage filter builds a formidable defense. Carbon handles taste and odor, RO tackles dangerous microscopic particles, and other stages can manage hard water or neutralize germs. It’s this combined-arms approach that lets you pour a glass of water with absolute confidence.

Choosing Your Countertop Champion

Alright, now that you’re a filtration tech whiz, let's get practical. How do you pick the best countertop water filter for your real-life kitchen? It really boils down to comparing the main styles and deciding what fits best with your home, family, and daily routine.

We’re going to break down the three main contenders: the classic gravity-fed dispensers, the nimble faucet-diverter units, and the mighty standalone multi-stage systems. Each has its own unique strengths, and one is sure to be the perfect match for your counter space and water needs.

Gravity-Fed Dispensers: The Slow and Steady Winner

You’ve seen them: those classic, often stainless steel, gravity-fed systems. The concept is beautifully simple. You pour water into the top chamber, and gravity patiently pulls it down through filter elements into a bottom reservoir. From there, a spigot delivers your pure water.

People adore these for their simplicity and effectiveness. They don't need electricity or a connection to your plumbing, which makes them incredibly versatile. You can place one anywhere on your counter or even take it on a family camping trip.

The primary trade-off is speed. Filtering a full batch of water takes time, so it's more of a "fill it and let it do its thing" approach. They also command a fair amount of counter real estate, which might be a dealbreaker in cozier kitchens.

Faucet-Diverter Filters: Instant Gratification

A faucet-diverter filter is all about on-demand convenience. This compact unit screws directly onto your kitchen faucet. When you want filtered water, you simply flick a switch, and it diverts tap water through the filter. Presto, purified water in an instant.

Installation is typically a breeze, taking just a few minutes with no tools required. This makes them a fantastic choice for renters or anyone hesitant to modify their plumbing. They are also major space-savers, keeping your countertops clear.

The catch is usually the filtration power. While excellent for removing chlorine and improving taste, most faucet-diverter models aren't as comprehensive as their multi-stage cousins. Also, a word of warning: they are not compatible with pull-out or sprayer-style faucets, so be sure to check your tap style before you buy.

Standalone Multi-Stage Systems: The Powerhouse Performers

Standalone multi-stage filters are the heavyweights of the countertop world. These systems sit on your counter and often combine multiple technologies, like activated carbon and reverse osmosis, to deliver exceptionally pure water. You fill a reservoir, and the machine takes care of the rest.

These are the systems you choose when you’re serious about removing a long list of contaminants—from lead and fluoride to PFAS and other stubborn chemicals. Many of these advanced units are gaining popularity as people look for high-performance appliances when incorporating smart technology into your kitchen design.

The biggest selling point of a standalone system is its sheer purification power. They often combine multiple filter types to tackle nearly any water quality issue, giving you ultimate peace of mind.

Their main drawbacks can be a higher upfront cost and the space they occupy. They also require an electrical outlet to run the pumps needed for processes like reverse osmosis.

To help you visualize the best choice for your needs, this chart breaks down which filter type is ideal based on your primary water concern.

Flowchart guiding users to choose their water treatment solutions based on taste, mineral, or contaminant concerns.

As you can see, whether your goal is simply better taste, managing hard water minerals, or eliminating serious contaminants, there's a specific filter technology that gets the job done.

Here’s a quick cheat sheet to help you compare these options side-by-side.

Countertop Water Filter Types At a Glance

Filter Type Installation Filtration Speed Best For Removing Ideal Household
Gravity-Fed None Slow (batch processing) Chlorine, Sediment, some Heavy Metals Patient households, renters, and off-grid use.
Faucet-Diverter Simple (screws onto faucet) Instant (on-demand) Chlorine, Lead, Bad Taste/Odor Small kitchens, renters, singles, or couples.
Standalone None (sits on counter) Moderate (batch processing) Wide range including Fluoride, PFAS, Heavy Metals Families with serious water quality concerns.

This table lays it all out, helping you match a filter's strengths to what your home actually needs. Whether it's the grab-and-go convenience of a faucet filter or the deep-cleaning power of a multi-stage system, the right choice is all about your priorities.

Understanding Filter Certifications and Performance

When you're shopping for a countertop water filter, you'll be bombarded with technical jargon and bold marketing claims. How can you be sure a filter actually does what it promises on the box?

The secret is to look past the flashy advertising and find the official stamps of approval from third-party testers. Think of it this way: anyone can claim their car is fast, but it’s the verified time slip from a racetrack that provides the proof. For water filters, the most respected "racetrack" is NSF International.

An NSF/ANSI certification means an independent lab has rigorously tested the filter to verify that it truly removes the contaminants it claims to. It’s your guarantee that you're buying a proven performer, not just a slick piece of marketing.

Decoding the Most Important NSF Certifications

You don't need a degree in chemistry to understand this. For countertop filters, there are really only two key NSF/ANSI standards you need to recognize.

  • NSF/ANSI 42 – The "Taste and Smell" Standard: This certification is all about the aesthetic qualities of your water. It confirms that a filter is effective at reducing substances that affect taste and odor, like chlorine. If your main complaint is that your tap water has a "public pool" vibe, this is the standard to look for.

  • NSF/ANSI 53 – The "Health Effects" Standard: This is the heavy hitter. When a filter earns an NSF 53 certification, it has been proven to reduce specific contaminants that are harmful to your health. We're talking about nasty stuff like lead, mercury, asbestos, cysts (like Giardia), and a range of volatile organic compounds (VOCs). If you have serious concerns about your water quality, this is the certification that truly matters.

Seeing these seals on a product means you can trust the manufacturer's claims. It’s the best way to cut through the noise and choose a filter with confidence.

How to Read a Performance Data Sheet

Beyond the official seals, any reputable filter will come with a performance data sheet. It might look a bit intimidating, but this is where you find out the filter's true capabilities. It's a detailed report card that lists every contaminant the filter is certified to reduce and, more importantly, by how much.

Don't just scan for a long list of contaminants. Pay close attention to the percentage of reduction. A filter that removes 99.5% of lead is vastly superior to one that only removes 90%. The data sheet gives you the real numbers to compare apples to apples.

This sheet also specifies the filter's capacity, usually in gallons. This tells you how much water it can purify before the cartridge needs replacing, which is crucial for understanding the true long-term cost. For anyone concerned about contaminants like TTHMs or hydrogen sulfide in their city water, some NSF-certified systems offer multi-stage purification that can tackle over 50 contaminants. You can explore more trends in the countertop filtration market on Data Insights Market.

Once you know how to spot an NSF seal and read a performance data sheet, you transform from a casual shopper into an informed buyer. You’ll be able to see right past the hype and select the filter that is truly proven to work.

Calculating the Real Cost of Clean Water

It’s easy to focus on the initial price tag when you're shopping for a countertop water filter. But that sticker price is just the first chapter. The real cost unfolds over months and years of use, and knowing how to calculate it is the key to making a smart investment.

The biggest ongoing expense, by far, is the replacement filters. Think of it like a razor: you buy the handle once, but you'll be buying blades for as long as you use it. This is where the true cost of ownership is revealed.

The Cost-Per-Gallon Formula

To get a fair, apples-to-apples comparison between different models, you need a simple way to calculate your cost per gallon. Don't worry, it's easier than it sounds.

First, you need two numbers for any filter you're considering: the price of a replacement cartridge and its capacity (how many gallons it can purify before it's exhausted).

Then, just plug them into this simple formula:
Replacement Filter Cost ÷ Filter Capacity (in Gallons) = Cost Per Gallon

Let's say a replacement filter costs $60 and is rated for 400 gallons. Your math is simply $60 ÷ 400, which equals $0.15 per gallon. That single number is a game-changer. It allows you to cut through marketing claims and see which system will actually be kinder to your wallet in the long run.

By focusing on the cost-per-gallon, you shift from simply buying a product to investing in a long-term water solution. A filter with a higher upfront price but cheaper, longer-lasting cartridges might actually save you hundreds of dollars over time.

Countertop Filter vs. Bottled Water

So, where does that cost-per-gallon figure fit in the real world? Let's pit it against the never-ending expense of bottled water.

The average cost for a single-use bottle of water in the U.S. is about $1.50. Do the math, and that comes out to a staggering $11.35 per gallon. When you compare that to the $0.15 per gallon from our countertop filter example, the savings are astronomical.

  • Countertop Filter: Provides hundreds of gallons of pure water for mere pennies per gallon.
  • Bottled Water: Must be purchased over and over, at a cost that is often 50 to 70 times higher than filtered tap water.

Switching to a countertop filter isn't just a victory for your health—it's a massive win for your bank account. Over a single year, a family can easily save hundreds, if not thousands, of dollars just by kicking the bottled water habit.

The Hidden Value of Warranties and Support

Beyond the cost of filters, a couple of other factors add to the overall value of your purchase. A good warranty and accessible customer support are essentially an insurance policy for your investment.

Look for companies that stand behind their products with a solid warranty of at least one year. This protects you if a part is defective or fails prematurely. Likewise, good customer support can be a lifesaver when you're stuck on setup, have a maintenance question, or need to troubleshoot an issue. A company that’s easy to reach adds significant hidden value, ensuring your filter remains a reliable workhorse in your kitchen for years to come.

Simple Installation and Maintenance Tips

The idea of installing a new kitchen appliance can feel a bit daunting, but that’s one of the greatest things about countertop water filters: their sheer simplicity. Most are designed for you to get them up and running in minutes, often without even opening a toolbox.

You'll go from a sealed box to fresh, clean water faster than it takes to brew a pot of coffee.

A person's hands installing a white countertop water filter to a kitchen faucet above a stainless steel sink.

Whether you’ve chosen a model that connects to your tap or a standalone gravity system, you’ll be amazed at how easy it is. These devices are built for convenience, not complexity.

Getting Started: Your First Setup

The setup process varies slightly by filter type, but both are incredibly user-friendly. Don't even think about calling a plumber; this is a DIY job you can nail on the first try.

For Faucet-Mounted Filters:

  1. Unscrew the Aerator: First, just twist off the little screen at the tip of your faucet. Most come off by hand, but if it's stubborn, a pair of pliers will do the trick.
  2. Find the Right Adapter: Your filter kit will include a variety of adapters. Simply find the one that matches the threads on your faucet.
  3. Attach the Filter: Screw the adapter on, then connect the filter’s diverter valve. It’s usually just a hand-tighten job, and that’s it—you're done!

For Gravity-Fed Systems:
This is even easier. It’s really just a matter of assembling the parts and preparing the filters. You’ll need to seat the filter elements in the upper chamber and prime them, which usually just involves running some tap water through them to flush out any loose carbon dust.

The entire process, from unboxing to enjoying that first glass of pure water, typically takes less than 15 minutes. It's a tiny time commitment for a massive upgrade in your water quality.

Long-Term Care and Maintenance

Once your filter is up and running, a little routine care will keep it performing perfectly for years. Good maintenance isn't just about extending the life of your unit; it's about ensuring you’re always getting the cleanest, safest water possible.

Think of it as a quick health checkup for your filter.

A simple maintenance checklist really only has a few key tasks:

  • Filter Replacement Schedule: This is the most important one. Mark your calendar for when the cartridges need changing, following the manufacturer's gallon rating or time estimate (e.g., every six months).
  • Regular Cleaning: Give the exterior of the unit and the spigot a quick wipe-down with a damp cloth once a week. For gravity systems, wash the chambers with mild soap and water whenever you change the filters.
  • Watch for Performance Changes: Your filter will tell you when it’s getting tired. The most obvious sign is a slowdown in water flow. If it suddenly takes much longer to fill your glass, the filter is likely clogged with the contaminants it has removed and needs to be replaced.

Following these simple steps will ensure your investment continues to pay dividends with delicious, safe drinking water day after day.

Got Questions? We’ve Got Answers.

You've done the research, but a few practical questions might still be nagging at you. That's completely normal. Let's tackle the most common questions people have right before they choose a filter. This is your final check-in to make sure you're 100% confident in your choice.

Can I Hook a Filter Up to My Pull-Out Sprayer Faucet?

This is easily the number one question we get, and for good reason. The short answer is almost always no.

Faucet-diverter filters—the ones that screw onto the end of the tap—are designed for standard faucets with a removable aerator. Pull-out or sprayer-style faucets have a different head design, and the adapters included with filters simply won't fit. Trying to force it is a recipe for a broken faucet, a broken filter, or both.

If you have a pull-out faucet, don't despair! Your best options are a gravity-fed system or a standalone countertop unit. Since they don't connect to your plumbing at all, they completely sidestep the compatibility issue.

How Can I Find Out What’s Actually in My Tap Water?

This is the single most empowering step you can take. Your local water utility is required by the EPA to publish an annual water quality report, often called a Consumer Confidence Report (CCR). A quick search on their website should bring it right up.

Think of it as a report card for your tap water. It lists all the contaminants they tested for over the last year and shows the levels detected. With that report in hand, you can shop for a filter that is certified to remove the specific contaminants present in your water.

Are These Filters Really Better Than a Simple Pitcher?

Pitcher filters are a decent entry point, but countertop filters represent a major leap forward in both filtration power and daily convenience.

Here’s why they’re a solid upgrade:

  • Serious Filtration Power: Most countertop systems, especially multi-stage and reverse osmosis models, can remove a much wider range of contaminants. They often carry an NSF/ANSI 53 certification for health-related concerns like lead, which many basic pitchers cannot claim.
  • More Water, Faster: Forget the constant chore of refilling a small pitcher. Gravity systems can hold gallons of purified water, while faucet-diverter units provide filtered water instantly, right on demand.
  • Long-Lasting Filters: A typical countertop filter cartridge can purify hundreds of gallons before needing a swap. In comparison, most pitcher filters are only rated for about 40 gallons. That means fewer filter changes and a lower cost for every gallon you drink.

A pitcher is certainly better than nothing, but a countertop filter is a more powerful, convenient, and long-term solution for providing clean, safe, and great-tasting water for your family.


Ready to stop worrying about your tap water? Water Filter Advisor provides the expert reviews and straightforward advice you need to find the perfect filtration system for your home. Explore our in-depth guides and comparisons at https://www.waterfilteradvisor.com and start your journey to cleaner water today.

The Best Filter to Remove Fluoride From Your Home Water

So, you're on a quest for the best filter to remove fluoride from your tap water? Welcome to the club! It’s a hot topic, and the answer isn't a one-size-fits-all solution. The undisputed champions in the fluoride-fighting arena are reverse osmosis, activated alumina, and bone char filters.

These systems are the special ops of water filtration, built specifically to target and capture fluoride molecules. Your standard pitcher filter, bless its heart, just isn't equipped for this kind of mission—it's like sending a rowboat into a storm.

Finding the Best Fluoride Removal Filter

Choosing the right filter for your home can feel like you're trying to solve a Rubik's Cube in the dark, but it really just boils down to understanding a few key technologies.

Unlike basic filters that are great at making your water taste less like a swimming pool by removing chlorine, a true fluoride filter uses a specialized process to zero in on this particular mineral. Think of it as using the right tool for the right job. You wouldn't use a butterfly net to catch a bowling ball, and you can't use a simple carbon filter to effectively snag fluoride ions.

A white dual water filter system on a wooden kitchen counter with glasses of water and a 'COMPARE FILTERS' sign.

To cut through the noise, let's start with a head-to-head comparison. This table gives you a bird's-eye view of the most effective filtration methods, how well they perform, and what you can expect to spend. It’s a fantastic way to quickly see which approach fits your home's needs and your budget.

If you want more general advice on water treatment, we have plenty of guides to help you explore all the options for your home.

Comparing Top Fluoride Filtration Methods

Here’s a quick comparison of the most effective home water filtration technologies for removing fluoride to help you make a smart choice.

Filtration Method Fluoride Reduction Rate Best For Avg. Initial Cost
Reverse Osmosis (RO) Up to 99% Households wanting the most thorough purification for drinking water. $250 – $600
Activated Alumina Up to 95% Homes with high fluoride levels needing targeted removal. $150 – $400
Bone Char Carbon Up to 90% Those seeking a natural and effective fluoride reduction method. $100 – $300

Key Takeaway: The powerhouse of the group, reverse osmosis, acts like a microscopic gatekeeper. It lets only pure water molecules squeeze through while blocking nearly everything else, including up to 99% of fluoride. Activated alumina and bone char work more like powerful magnets, attracting and holding onto fluoride ions as water passes by.

Why Is Fluoride in Your Tap Water Anyway?

Ever found yourself staring at a glass of tap water and wondering how fluoride got in there in the first place? It’s a great question, and the answer isn’t a single story—fluoride finds its way to your faucet through two very different routes, one natural and one man-made.

First off, Mother Nature has a hand in it. Fluoride is a mineral that’s naturally present in rocks and soil all over the world. When groundwater makes its long journey through underground aquifers, it's like a liquid magnet, dissolving minerals from the earth it passes through. In areas with fluoride-rich geology, this natural process can lead to significant levels of fluoride in the water supply without any human help at all.

Community Water Fluoridation: A Public Health Initiative

The more common reason you’ll find fluoride in your tap water, though, is a practice called community water fluoridation. This is when your local water utility intentionally adds a very precise amount of fluoride to the public water supply, aiming for a level proven to help prevent cavities.

You can think of it like fortifying milk with vitamin D or bread with folic acid. It's a public health strategy that has been around for decades, supported by health organizations as a cost-effective way to boost the dental health of an entire community. This is especially true for folks who might not have easy access to a dentist. Today, about 73% of the U.S. population on public water systems gets fluoridated water.

The whole idea kicked off back in the 1940s. Researchers noticed that people in towns with naturally higher fluoride levels in their water had way fewer cavities. So, the goal became to replicate that same protective effect for everyone.

So, Why Would Anyone Want to Filter It Out?

If it's meant to be good for our teeth, why are so many people looking for a filter to remove fluoride? The reasons really come down to personal choice and a desire for more control over what we put in our bodies.

For some, it's about the total amount of fluoride they're exposed to from all sources—not just water, but also toothpaste, mouthwash, and even some processed foods and drinks. They'd rather start with fluoride-free water to manage their overall intake. For others, it’s a matter of principle; they simply believe that any additives, no matter how well-intentioned, should be a personal choice, not something that comes standard out of the tap.

Ultimately, deciding whether to filter fluoride is up to you. Now that you know how it gets there and why some people choose to take it out, you're in a much better position to figure out what makes the most sense for you and your family.

The Technologies That Actually Remove Fluoride

Not all water filters are created equal, especially when your goal is to get rid of fluoride. That standard pitcher filter you have is great for making water taste less like a swimming pool, but it won't touch the fluoride. For that job, you need a specialized filter to remove fluoride—one built with a specific technology designed to target this stubborn mineral.

Let's break down the heavy hitters of fluoride filtration. These are the systems with the power and precision to pull fluoride ions right out of your water, giving you total control over what's coming out of your tap. Each one works a bit differently, with its own set of pros and cons.

This simple flowchart shows the journey your water takes, from natural groundwater sources, through the municipal treatment plant, and finally to your home.

Flowchart illustrating the water journey from groundwater, through a water system, to a tap water.

It’s a good visual reminder of the different stages where contaminants like fluoride can be introduced, which really highlights why targeted, in-home filtration is so important.

Reverse Osmosis: The Gold Standard

When people talk about serious water purification, Reverse Osmosis (RO) is almost always the first thing that comes up. It’s widely considered the best in the business. An RO system is basically the ultimate gatekeeper for your water, using a process that’s surprisingly simple in theory but incredibly powerful in practice.

Think of it like a bouncer at an exclusive club, but on a microscopic scale. This "bouncer" is a semi-permeable membrane—a special material with pores so tiny that only pure water molecules can squeeze through. Everything else—dissolved salts, heavy metals, bacteria, and yes, fluoride—gets turned away at the door.

Your home's water pressure forces the tap water against this membrane. The pure H₂O molecules pass through to the other side, ready for you to drink. The rejected contaminants get flushed down the drain along with some of the water.

This process is so effective that RO systems can remove up to 99% of fluoride from drinking water, along with a huge list of other unwanted stuff.

Globally, RO technology is the dominant force in the water filter market, capturing around 36% of the total market value as demand skyrockets in regions with poor groundwater quality. You can dig into the full global market analysis on water filters from Persistence Market Research for more details.

Pros and Cons of Reverse Osmosis

Of course, every technology has its trade-offs. Here’s a quick rundown of what makes RO great and what you need to know before buying:

  • Pro: Unmatched Purity. No other home filtration method removes a wider spectrum of contaminants as effectively as reverse osmosis. It's your all-in-one solution for incredibly pure water.
  • Pro: Great Taste. By stripping out minerals and chemicals, RO water has a crisp, clean taste that many people swear by for both drinking and cooking.
  • Con: Water Waste. The process creates wastewater. For every gallon of purified water, several gallons are typically flushed away. Newer, more efficient models are getting much better at reducing this ratio, though.
  • Con: Removes Healthy Minerals. That powerful membrane is so thorough it also removes beneficial minerals like calcium and magnesium. To fix this, many modern systems now include a remineralization filter to add these healthy minerals back in before the water hits your glass.

Activated Alumina: The Fluoride Magnet

Next on the list is Activated Alumina, a type of filter media specifically engineered to attract and capture fluoride. Don't let the name scare you; it’s a completely safe, porous form of aluminum oxide that has a natural affinity for fluoride, arsenic, and selenium.

Think of an activated alumina filter like a super-strong magnet. As water flows through the filter cartridge, the fluoride ions are chemically drawn to the surface of the alumina beads, where they stick and are pulled out of the water. This process is called adsorption, and it’s highly effective for targeted fluoride removal. These filters are a common choice in areas where the groundwater has naturally high fluoride levels.

Bone Char: A Natural Approach

Another surprisingly effective method is Bone Char filtration. It might sound a bit odd, but it's a natural and time-tested medium for purifying water. Bone char is created by charring animal bones in a low-oxygen environment, which results in a highly porous carbon material with a massive surface area.

Much like activated alumina, bone char works through adsorption. The key difference is that its structure contains something called hydroxylapatite, which is fantastic at binding with fluoride ions. It's one of the oldest known methods for fluoride removal and is still a popular choice for people looking for a more natural filtration medium. It also does a great job of removing heavy metals like lead and cadmium.

Trusting the Label: The Importance of NSF Certification

With a million filters on the market, how do you know if a product actually does what it says it does? That's where third-party certifications come in. When you're shopping for a filter to remove fluoride, keep an eye out for a certification from NSF International.

NSF is an independent organization that tests and certifies water filtration products to make sure they meet strict public health and safety standards.

For fluoride removal, the certification you really want to see is NSF/ANSI 58.

NSF/ANSI 58 is the certification standard specifically for reverse osmosis systems. If a system has this certification, it means it has been rigorously tested and proven to effectively reduce fluoride, along with a whole host of other contaminants like lead, arsenic, and nitrates.

Choosing a certified system gives you peace of mind. You know its performance claims have been independently verified by a trusted authority. It’s the best way to ensure your investment delivers the safe, clean water your family deserves.

Choosing Your System: Whole-House vs. Under-Sink Filters

Alright, now that you’ve got a handle on the technologies that can actually pull fluoride out of your water, we need to tackle the next big question: where does the filter go? This is a huge decision, and it really comes down to a classic battle of comprehensive, whole-home treatment versus a more focused, targeted approach.

Think of it like this: do you want central air conditioning for the entire house, or a powerful window unit for the most important room?

Are you looking to get fluoride out of every single drop of water, from the shower to the laundry? Or is your main goal to stop drinking and cooking with it? There's no wrong answer here—it all boils down to your family's needs, your budget, and what you’re trying to accomplish.

Side-by-side comparison of a whole-house water filtration system and an under-sink kitchen faucet.

Point-of-Entry: Whole-House Systems

A whole-house system, also known as a Point-of-Entry (POE) system, is the all-in-one, "set it and forget it" solution. It’s installed right where your main water line enters your home, acting as a gatekeeper that filters every gallon before it ever gets to your faucets, showers, or appliances.

With this setup, you’re bathing, washing your clothes, and brushing your teeth with fluoride-reduced water. If you want to minimize your family's fluoride exposure across the board—not just in what you drink—a POE system is really the only way to go. But this full-coverage approach comes with a bigger price tag and a more complicated installation that almost always requires a plumber.

If you’re leaning towards a comprehensive solution for your home, digging into guides on whole house water filtration systems can give you a much deeper understanding of what these big-league purifiers involve.

Point-of-Use: Under-Sink and Countertop Systems

On the flip side, you have Point-of-Use (POU) systems. These are smaller, more localized filters that treat water at a single spot, usually the kitchen sink. An under-sink reverse osmosis system is the perfect example—it works its magic quietly right where you get your water for drinking and cooking.

POU systems are much more affordable and way easier to install; many models are perfect for a confident DIYer. This is the ideal filter to remove fluoride if your main worry is consumption. If you’re mostly focused on the water you drink, use for coffee, or boil pasta in, a POU system is a smart and budget-friendly choice.

A Head-to-Head Comparison

To help you really see the trade-offs, let's put these two approaches side-by-side. The table below breaks down the practical differences in cost, installation, maintenance, and overall convenience.

Whole-House vs. Point-of-Use Fluoride Filters

This table will help you decide which filtration approach is the right fit for your home and lifestyle.

Feature Whole-House System (POE) Point-of-Use System (POU)
Coverage Filters water for the entire home, including showers and appliances. Filters water at a single point, typically the kitchen sink.
Initial Cost Significantly higher, often ranging from $1,000 to $4,000+. More affordable, typically between $200 and $600.
Installation Complex and usually requires a professional plumber. Simpler installation, often manageable as a DIY project.
Maintenance Less frequent but larger and more expensive filter changes. More frequent filter changes, but cartridges are cheaper and easier to replace.
Best For Homeowners wanting to reduce total fluoride exposure in bathing and laundry. Renters and homeowners focused on purified drinking and cooking water.

As you can see, the choice really hinges on that core trade-off. A whole-house filter gives you complete peace of mind but requires a serious upfront investment. A point-of-use filter, in contrast, delivers top-tier water right where you need it most, all for a fraction of the cost.

Ultimately, picking the right system is a personal call. By weighing the benefits of total-home coverage against the sheer practicality and affordability of targeted filtration, you can find the perfect filter to remove fluoride that truly fits your family’s health goals and your budget.

What to Expect After You Buy Your Filter

So you’ve done the research, weighed your options, and finally picked the right fluoride filter for your home. Clicking "buy" feels like the finish line, but it’s really just the beginning of your clean water journey. The real work starts when that box lands on your doorstep.

Let's get into the nitty-gritty—what actually happens after the purchase. This includes installation, ongoing upkeep, and the true long-term costs that aren't always obvious from the initial price tag. The sticker price is just part one; you have to factor in replacement cartridges and any professional help you might need to get the full picture.

Installation: DIY or Call a Pro?

Your first mission is to get the system up and running. If you bought an under-sink reverse osmosis system, you might be surprised at how manageable a DIY installation can be. Most kits are designed for homeowners, with clear instructions and color-coded tubing. If you’re comfortable with a drill and a wrench, you can probably get it done in an afternoon.

But let's be honest, not everyone enjoys crawling under a sink. If plumbing isn’t your thing, or if you’ve invested in a more complex whole-house system, calling a licensed plumber is the way to go. It adds an upfront cost, but the peace of mind knowing it’s installed correctly—with no leaks and optimal performance—is often worth every penny.

Ongoing Maintenance and Filter Changes

Once your filter is installed, your main job is maintenance. And for almost every system, that boils down to one simple but critical task: changing the filter cartridges on schedule. Think of it like changing the oil in your car. It’s not optional if you want the machine to keep doing its job effectively.

Putting it off doesn't just mean your filter stops removing fluoride as well. It can lead to clogs, a drop in water pressure, and even damage more expensive parts like the RO membrane.

Pro Tip: The moment you finish installation, pull out your phone and set a recurring calendar reminder for every filter change. It’s a simple two-minute task that protects your investment and ensures you always have clean water.

Calculating the True Cost of Ownership

To really see what your filter will cost over the years, let's break it down with a real-world example. Here’s a look at the estimated five-year cost for a standard under-sink reverse osmosis system, a popular choice for tackling fluoride.

Sample 5-Year Cost Breakdown for a Reverse Osmosis System

This is a pretty typical look at what you can expect to spend over the first five years with a mid-range RO system.

Cost Component Year 1 Year 2 Year 3 Year 4 Year 5 5-Year Total
Initial System Cost $350 $350
Annual Pre/Post Filters $60 $60 $60 $60 $60 $300
RO Membrane (Replace Yr 3) $70 $70
Total Annual Cost $410 $60 $130 $60 $60 $720

As you can see, the maintenance costs over five years are nearly as much as the filter itself. Knowing this from the start helps you budget properly and avoids any surprises down the road.

Considering 74% of public water systems in the U.S. are fluoridated, a high-performance filter is a solid investment. With the residential sector accounting for 70% of the water purifier market—an industry expected to jump from USD 35.6 billion to USD 53.2 billion by 2032—it's clear that more and more people are taking control of their water quality. You can see more on the growing water purifier market and its latest trends.

Still Have Questions? Let’s Clear Things Up.

Even with all this information, you might still be wrestling with a few questions. That's perfectly normal. Making a change to your home's water is a big decision, and you want to get it right.

Think of this section as a final rapid-fire round to tackle the most common head-scratchers about fluoride filters. We’ll clear up any lingering confusion about popular filter types, minerals, testing, and how filtering stacks up against just buying bottled water.

Do Standard Pitcher Filters Like Brita or Pur Get Rid of Fluoride?

This is easily one of the most common questions we hear, and the short answer is no. Your standard Brita or Pur pitcher filter won't remove fluoride. They are designed with activated carbon, which does a great job of making your water taste and smell better by grabbing chlorine and other common chemicals.

But fluoride is a dissolved mineral, and it slips right past that standard carbon. The filter media just isn't designed to catch something that small.

If you're serious about reducing fluoride, you need a system that uses a specialized technology proven for the job. That means looking for one of these three methods:

  • Reverse Osmosis (RO): A super-fine membrane physically blocks fluoride ions.
  • Activated Alumina: This media acts like a magnet for fluoride, pulling it out of the water through adsorption.
  • Bone Char: A natural alternative that also uses adsorption to capture fluoride.

The bottom line? Always check the filter's performance data sheet and look for an official NSF/ANSI certification that specifically lists fluoride reduction.

Will a Fluoride Filter Also Remove the Good Minerals?

Yes, it’s a definite possibility, especially with the most heavy-duty filters. Reverse osmosis, which is the top performer for fluoride removal, is so thorough that it strips out almost everything else, too. That includes beneficial minerals like calcium and magnesium.

This process leaves you with what's often called "demineralized" water. While we get most of our essential minerals from food, some people just don't like the idea or taste of water that's been stripped bare.

The good news is that many modern RO systems have solved this problem with a remineralization stage. It's a final filter cartridge that adds a healthy blend of minerals back into the water right before it hits your glass. This not only improves the taste but also raises the pH, giving you the best of both worlds: pure, fluoride-free water that still has the good stuff.

How Can I Check if My Fluoride Filter Is Actually Working?

It's one thing to install a filter; it's another to know for sure that it's doing its job. Since you can't see, taste, or smell fluoride, testing is the only way to get that peace of mind.

The most reliable way is to send a water sample to a professional lab. You can order a simple kit, take one sample from your regular tap and another from your filtered tap, and mail them in. They’ll send back a detailed report showing the exact fluoride levels, so you can see precisely how well your filter is performing.

For more frequent check-ins at home, you could get a handheld digital photometer made for fluoride testing. They aren't as spot-on as a lab analysis, but they're perfect for monitoring your filter's performance over time. If you start to see the numbers creep up, you'll know it's time for a cartridge change.

Is It Better to Use a Filter or Just Buy Bottled Water?

While it’s true that some bottled water is fluoride-free (especially brands that use reverse osmosis), relying on it full-time has some major drawbacks. First off, it gets expensive fast. The long-term cost of bottled water is way higher than filtering your own at home.

Then there's the environmental toll of all that plastic, not to mention the hassle of constantly lugging heavy cases of water from the store.

A one-time investment in a good home water filter gives you an endless supply of pure, fluoride-free water on tap for just pennies a gallon. It’s simply the more affordable, convenient, and eco-friendly choice in the long run.


At Water Filter Advisor, we're committed to helping you find the perfect filtration solution for your home. Explore our in-depth guides and reviews to make a confident choice for your family's health and well-being. https://www.waterfilteradvisor.com

Choosing the Best Fluoride Removal Filter for Your Home

So, you're on a quest for the perfect fluoride removal filter. What exactly is this magical device? Think of it as your home's personal water bodyguard, specifically trained to spot and remove fluoride from your drinking water.

These aren't your run-of-the-mill filters. They use specialized media like activated alumina, bone char, or hyper-advanced reverse osmosis membranes to latch onto fluoride ions and show them the door. This is a high-level security detail that a standard carbon filter—like the one chilling in your fridge pitcher—simply isn't equipped to handle.

Why Is Fluoride in Water Suddenly a Hot Topic?

It seems like everyone is suddenly a water quality expert, and fluoride is public enemy number one. But why the sudden buzz? For decades, fluoride was hailed as the dental hygiene superhero, a public health triumph for its incredible cavity-fighting powers. But today, the conversation has changed. People are starting to look at their tap water with a more critical eye, asking what's really in it and demanding more control.

This isn't just a random trend. It's part of a massive cultural shift towards personal wellness and taking charge of what we put into our bodies. It's like a vitamin that was once a blanket recommendation for everyone, but now you want to decide on the dosage yourself. Homeowners are graduating from passive water consumers to active managers of their home's ecosystem.

From Public Health Triumph to Personal Choice

The story of water fluoridation began as a sweeping public health initiative. It's been a charged topic ever since municipalities started adding it to public water supplies back in the 1940s to combat tooth decay. Fast forward to today, and over 73% of Americans on public water systems receive fluoridated water.

But here's the flip side: growing concerns about overexposure. Studies have linked excessive fluoride intake to issues like dental fluorosis, which affected an estimated 23% of U.S. kids according to 2010 NHANES data. This very concern has propelled the market for fluoride removal filters from a niche product into a household staple. You can see the explosive growth in the filtration market for yourself over at MordorIntelligence.com.

This history is why the debate is so complex. To truly get it, you have to acknowledge the widely promoted dental benefits of fluoride rinse and other topical treatments, which form the bedrock of pro-fluoridation arguments. The core of today’s conversation isn’t about dismissing those benefits, but about gaining control over the dosage and its source.

The question has evolved. It's no longer a simple "Is fluoride good or bad?" but rather, "How much fluoride am I getting from all sources, and can I have the final say?" This shift towards personal oversight is the real engine driving the demand for effective home water filtration.

Taking Control of Your Tap Water

As a homeowner, you're the captain of your ship. The surging interest in a fluoride removal filter is a direct result of this empowerment. It’s about making a smart, informed decision for your family's health, whether you're in a downtown high-rise or a quiet suburban home.

This guide is your machete to cut through the jungle of information. We're here to validate your questions and give you a clear, practical roadmap to finding the perfect filtration system for your home. We’ll dissect the technology, demystify the costs, and review the real-world performance to help you become the master of your water quality.

So, how do these fluoride removal filters actually work their magic? It’s not some mystical plumbing ritual. It’s just clever science, and you don’t need a chemistry degree to get it.

Let's break down the main technologies. Think of them as three different types of security guards for your water, each with a unique strategy for kicking fluoride and other troublemakers to the curb. Understanding how they operate is the first step to choosing the right system for your home.

This infographic gives you a great overview of the whole fluoride debate, from its controversial history to the solutions available today.

Infographic discussing the fluoride in water debate, detailing its history, health benefits, concerns, and solutions.

As you can see, concerns over water fluoridation aren't new, and they've directly fueled the development of the filtration tech we're about to dive into.

Comparing Fluoride Removal Filter Technologies

To keep things simple, here’s a quick head-to-head comparison of the top three contenders in the fluoride removal arena. This table cuts through the jargon and shows you exactly what each technology brings to the table.

Filtration Technology How It Works (Analogy) Fluoride Removal Efficacy Best For
Reverse Osmosis (RO) The "Microscopic Bouncer" 90-99% Ultimate purity; removes the widest range of contaminants beyond just fluoride.
Activated Alumina The "Specialized Magnet" Up to 90% Targeted fluoride, arsenic, and selenium removal, especially in slightly acidic water.
Bone Char Carbon The "Natural Sponge" Up to 90% A natural approach that also tackles chlorine, heavy metals, and even radioactive isotopes.

Each of these systems has its own superpower. Now, let’s take a closer look at what’s happening under the hood.

Reverse Osmosis: The Microscopic Bouncer

Reverse Osmosis, or RO, is the undisputed heavyweight champion of water purification. Think of it as a bouncer at an exclusive nightclub with an incredibly strict guest list. It uses your home's water pressure to force water through a special semipermeable membrane.

This membrane is the real VIP. Its pores are so ridiculously tiny that only pure H₂O molecules can squeeze through. Everything else—fluoride ions, heavy metals like lead, dissolved salts, you name it—gets stopped at the velvet rope and flushed away.

Because it's so uncompromising, RO is often called the gold standard, capable of removing 90% to 99% of fluoride. It's more than just a fluoride filter; it’s a full-spectrum purification system that tackles a massive list of contaminants.

  • Fluoride Removal Rate: Typically 90-99%.
  • Also Removes: Lead, arsenic, chlorine, pesticides, salts, and most other dissolved solids.
  • The Process: Water is pushed through an ultra-fine membrane, leaving impurities behind.

The trade-off? RO systems create wastewater (the rejected contaminants) and can strip beneficial minerals from the water. Many modern systems solve this by including a remineralization filter to add healthy minerals like calcium and magnesium back into the water before it hits your glass.

Activated Alumina: The Specialized Magnet

If RO is a general bouncer, Activated Alumina is a specialist, a magnet designed for one primary mission: grabbing fluoride. The filter media is made from aluminum oxide (the same stuff in sapphires and rubies), but it's processed to be incredibly porous with a massive surface area.

Picture your water flowing through a maze filled with tiny, powerful magnets that only attract fluoride. As water passes over the Activated Alumina beads, fluoride ions are literally pulled out of the stream and latch onto the media. This process is called adsorption.

This method is highly effective and is one of the few technologies officially certified by the NSF for fluoride reduction. It works best when your water's pH is slightly acidic, ideally between 5.5 and 6.5.

Activated Alumina can knock out up to 90% of fluoride, but its effectiveness drops as the media gets saturated. That means you have to stay on top of filter changes to keep it performing at its best. It's also a champ at removing arsenic and selenium.

Bone Char Carbon: The Natural Sponge

Our third guard is Bone Char, which acts like a highly absorbent natural sponge. This is actually one of the oldest and most trusted water purification methods on the planet. It's made by charring animal bones in a low-oxygen kiln, creating a porous carbon material that's rich in calcium.

Imagine that bone char as a sponge filled with countless nooks and crannies. As water flows through, the bone char’s surface—which is high in tricalcium phosphate—naturally adsorbs fluoride ions, trapping them so they don't end up in your glass.

Bone char is a powerhouse, often reducing fluoride levels by up to 90%. But it doesn't stop there.

  • Chlorine: It’s fantastic at eliminating that chemical swimming-pool taste from chlorine.
  • Heavy Metals: It can also pull out harmful metals like lead, mercury, and cadmium.
  • Radioactive Isotopes: Uniquely, it even has the ability to remove certain radioactive particles.

This approach offers a powerful, all-natural way to get cleaner, safer, and better-tasting water flowing from your tap.

Choosing Your System: Point-Of-Use vs. Whole-House Filters

Split image comparing a point-of-use water filter system under a kitchen sink with a whole house exterior.

Alright, you've mastered the technologies that zap fluoride. Now for the next big decision: where do you want to filter your water? This choice is less about the science and more about your lifestyle.

Are you focused on purifying just the water you drink and cook with? Or are you aiming for a fortress-like solution that purifies every single drop entering your home? This is the core difference between Point-of-Use (POU) and Whole-House (POE) systems. Each has its pros and cons, and the best one for you depends entirely on your goals, your home, and your budget.

Let's unpack both options so you can figure out which one is your perfect match.

What Are Point-Of-Use Filters?

Think of a Point-of-Use system as a specialist. It targets water right where you’re going to use it—almost always the kitchen sink. It’s like having a personal chef for your drinking water, ensuring every glass you pour and every pot you fill is pristine.

These systems are a fantastic choice for renters and homeowners who want to zero in on their drinking and cooking water. They don't require major plumbing surgery, are easier on the wallet upfront, and come in several convenient forms.

  • Under-Sink Filters: These are the most popular for a reason. They hide away neatly under your sink and connect to a separate, dedicated faucet. You get a steady stream of pure water without any clutter on your countertop.
  • Countertop Filters: As the name implies, these units sit on your counter and connect directly to your main faucet. Installation is usually a snap, making them a great option if you can't or don't want to mess with the plumbing under the sink.
  • Water Pitcher Filters: Here’s a crucial heads-up: most of the pitcher filters you see at the store don't remove fluoride. You have to find a specialized model that uses the right filter media for the job. They’re simple and portable, but do your homework to make sure you get the right one.

POU systems are a fantastic way to dip your toes in the water, so to speak. You get high-quality, fluoride-free water for all your consumption needs without the cost and complexity of a massive installation.

The All-Encompassing Whole-House Filter Solution

If a POU system is a personal chef, then a Whole-House filter is the entire five-star kitchen staff. These systems, also called Point-of-Entry (POE), are installed right where your main water line enters your house.

From that point on, they treat everything. Every faucet, every shower, and every appliance gets the same purified water. This is the ultimate setup for families concerned about more than just ingestion—like absorbing contaminants through the skin in the shower or inhaling them from steam. It offers complete peace of mind.

A whole-house fluoride removal filter is a true investment in your home's infrastructure. It does more than protect your family; it also guards your plumbing and appliances against the scale and chemical damage that can shorten their lifespan.

This level of coverage comes with a higher price tag and usually requires a professional plumber for installation. But for a homeowner who wants a complete, set-it-and-forget-it solution, the value is undeniable. Imagine showering in water that’s as pure as the water you drink. It’s a growing priority for many, which is why the global water filter market hit USD 14.26 billion in 2023 and is projected to reach USD 26.22 billion by 2032. You can dig into the numbers in the full report from SkyQuest.

Making the Right Choice for Your Home

So, which one is it going to be? The decision usually becomes clear when you answer a few key questions. Let’s put these two options side-by-side.

Feature Point-of-Use (POU) Whole-House (POE)
Scope of Filtration Treats water at a single point, like the kitchen sink. Treats all water entering the home.
Primary Goal Provides high-quality drinking and cooking water. Ensures purified water from every tap, shower, and appliance.
Installation Often DIY-friendly (countertop) or minor plumbing (under-sink). Usually requires professional installation.
Initial Cost Lower ($100 – $600) Higher ($1,000 – $5,000+)
Best For Renters, smaller households, or those on a tighter budget. Homeowners, large families, and those seeking total protection.

Someone renting an apartment would find an under-sink reverse osmosis system to be a perfect, non-permanent solution for amazing drinking water. On the flip side, a family settling into their forever home might see a whole-house system as a smart, long-term upgrade that adds value to both their health and their property.

Understanding the True Cost of Clean Water

When you’re shopping for a fluoride removal filter, the sticker price is just the tip of the iceberg. To really understand the investment, you have to look at the total cost of ownership—that’s the whole shebang, including the initial purchase, ongoing maintenance, and even a few hidden costs you might not expect.

Thinking about the full financial picture upfront saves you from surprise expenses down the road and helps you budget like a pro. It’s like planning a kitchen remodel; you wouldn’t just budget for the new cabinets and call it a day. In fact, many people consult detailed guides on home renovation costs to see the whole picture. The same mindset applies here.

Let’s break down exactly what goes into the cost of pure, fluoride-free water.

The Initial Purchase Price

First up is the system itself. As we’ve covered, the price range is wide and really depends on whether you go for a targeted point-of-use system or a comprehensive whole-house solution.

  • Point-of-Use (POU) Systems: These are your most affordable entry point. A quality under-sink reverse osmosis or activated alumina filter will typically set you back anywhere from $150 to $600.
  • Whole-House (POE) Systems: If you want to treat every drop of water in your home, the initial investment is much larger. You're generally looking at $1,000 to over $5,000, depending on the size of your home and the technology you choose.

This upfront cost gets you the main hardware—the filter housings, the first set of cartridges, a storage tank (for RO systems), and a dedicated faucet. But this is just the beginning of the financial journey.

Recurring Costs: Replacement Filters and Media

The real long-term cost of any water filter is its consumables. To keep your system working correctly, you must replace the filter cartridges or media on schedule. If you don't, your filter will stop removing fluoride and could even become a breeding ground for bacteria.

It's just like owning a printer; the machine is a one-time purchase, but you'll always need more ink.

A realistic annual maintenance budget for a typical under-sink reverse osmosis system is between $80 and $200. This covers the pre-filters, post-filters, and a new RO membrane every few years.

For a whole-house system, the costs can be higher, but replacements are less frequent. The large media tanks might only need new material every 3 to 5 years, but that replacement could easily run several hundred dollars when it's due.

Hidden Costs: Water and Electricity

Some filtration technologies have operational costs that aren't printed on the box. Reverse osmosis systems, our best weapon against fluoride, are a prime example.

Because RO works by forcing water through an incredibly fine membrane, it also produces wastewater that carries away all the rejected contaminants. Older systems were notoriously inefficient, wasting several gallons of water for every clean gallon produced. Thankfully, modern systems are much better, often getting close to a 1:1 waste ratio, but it’s still an extra utility cost to factor in.

Additionally, some larger RO systems or units with a UV purification stage need electricity to run booster pumps or lamps. This adds a small but steady amount to your monthly power bill. While these "hidden" expenses might seem minor, they all contribute to the true cost per gallon of your filtered water.

Installation, Maintenance, and Testing Your Water

Hands installing a white water filter under a sink, with a blue filter and tools nearby.

Okay, you've chosen your champion filter. That's a huge step, but the journey isn't over. Owning a fluoride removal filter is a lot like owning a car; you have to install it correctly, keep it maintained, and check under the hood occasionally to make sure it's doing its job.

This is the phase where you get to see the real-world results of your investment and achieve total peace of mind. Let's walk through everything from setup to testing, so you can keep that pure, clean water flowing for years to come.

Getting Your System Set Up

The installation can range from a five-minute task to a project requiring a professional plumber. It all depends on the system you chose. Figuring this out ahead of time will save you a world of headaches.

  • DIY-Friendly Options: Most point-of-use systems, like countertop units and faucet-mounted filters, are designed to be ridiculously easy. Pop it on, and you're good to go. Even many under-sink systems are manageable for anyone with basic DIY skills—it's usually just a matter of connecting a few color-coded tubes.
  • Professional Installation: Now, whole-house systems are a different animal. Since they tie directly into your main water line, this is almost always a job for a licensed plumber. A pro will ensure it's installed to code, won't leak, and doesn't negatively impact your home's water pressure.

A Simple Maintenance Checklist

Your filter is a workhorse, but it needs a little TLC to keep performing. Regular maintenance isn't optional if you want safe, effective filtration. Once a filter cartridge gets clogged, it stops removing fluoride, restricts water flow, and can even become a breeding ground for bacteria.

Think of your filter cartridges like the oil filter in your car. You wouldn't just ignore it, right? Neglecting it doesn't just hurt performance; it eventually causes much bigger problems. Sticking to a schedule is the single best thing you can do for your system's health.

Here’s a general timeline to keep in mind, but always, always follow the manufacturer's specific guidelines for your model.

  1. Pre-Filters (Every 6-12 Months): These are the gatekeepers, catching the big stuff like sediment and chlorine to protect the more sensitive (and expensive) filters down the line.
  2. Post-Filters (Every 12 Months): Think of these as the "polishers." They often treat the water after the main filtration stage to improve the taste and catch anything left over.
  3. Main Media/Membranes (Every 2-5 Years): This is the heart of your system—the reverse osmosis membrane, activated alumina, or bone char filter. These last much longer, but replacing them on schedule is absolutely critical.

How Do You Know It's Working?

This is the million-dollar question, isn't it? After you've invested in a quality fluoride removal filter, you deserve proof that it's delivering on its promise. The great news is you don't have to just take the company's word for it. You can test the water yourself.

  • Home Water Test Kits: You can find specialized fluoride testing kits online. They usually use color-changing strips or simple electronic meters to give you an instant reading. They’re a fantastic way to get a quick before-and-after snapshot of your water.
  • Professional Lab Analysis: For the most accurate, bulletproof results, send a water sample to a certified laboratory. They'll give you a precise measurement of fluoride concentration, down to the parts per million. This is how you confirm your filter’s performance with scientific certainty.

The demand for filters that can handle fluoride and other stubborn chemicals is exploding. In fact, the global market for media that filters out contaminants like PFAS is projected to grow by a staggering 183.7%, shooting up from $2.9 billion in 2026 to $8.2 billion by 2036. Technologies like Granular Activated Carbon (GAC) are at the forefront, making up a huge piece of the market for families wanting to ensure their water is truly clean. You can dive deeper into these market trends in a report from Fact.MR.

Common Questions About Fluoride Removal Filters

Even after doing your homework, a few nagging questions can keep you from pulling the trigger on the right fluoride removal filter. That's totally normal. Making a confident choice for your home means getting those last few uncertainties ironed out.

This section is dedicated to tackling those common questions head-on. We'll give you clear, straightforward answers so you can move forward with confidence.

Will a Standard Brita Filter Remove Fluoride?

This is probably the number one question out there, and the answer is a simple, resounding no. A standard Brita filter, or most basic carbon pitchers you grab off the shelf, will not remove fluoride.

Those filters are great for their intended purpose—mainly removing chlorine to make your water taste and smell better. They use a simple activated carbon that acts like a sponge for larger contaminants.

Fluoride ions, however, are tiny and slippery, requiring a more specialized filtration media to capture them. To actually remove fluoride, you need a system that uses technologies like reverse osmosis, activated alumina, or bone char—the very methods we've been discussing.

Do These Filters Also Remove Healthy Minerals?

Great question. The answer really depends on the filtration technology. Some do, and some don't, which is a key difference in the final quality of your water.

  • Reverse Osmosis (RO): Yes, RO systems are incredibly thorough. They strip out almost everything, which includes beneficial minerals like calcium and magnesium. The membrane's pores are just too fine for these minerals to pass through. To address this, many modern RO systems now include a remineralization filter as the final stage to add those healthy minerals back in before the water hits your glass.

  • Activated Alumina and Bone Char: These methods are much more selective. Think of them as specialists that target specific contaminants like fluoride, arsenic, and certain heavy metals. For the most part, they leave the healthy minerals alone, which is a huge plus if you prefer mineral-rich water.

It often comes down to personal preference: Do you want the absolute purest water possible (and then add good stuff back), or would you rather have a filter that surgically removes the bad stuff while leaving the good stuff intact?

How Can I Find Out My Local Fluoride Level?

You have to know your starting point. You can't tell if your filter is working if you don't know how much fluoride is in your tap water to begin with. Luckily, this is usually pretty easy to find out.

Most municipalities are required to provide residents with an annual water quality report, sometimes called a Consumer Confidence Report (CCR).

This report breaks down exactly what's in your water, including fluoride levels. You can usually find it on your local water utility’s website. If it’s not online, just give their office a call. If you're on a private well, the only way to know for sure is to get your water tested by a certified lab.

Are the Filtration Methods Themselves Safe?

Absolutely. The technologies used in a quality fluoride removal filter are well-established and proven to be safe for home use. Still, it's smart to be informed.

For example, some people express concern that activated alumina filters might leach aluminum into the water. It’s a valid question, but filters certified by organizations like the NSF (National Sanitation Foundation) are rigorously tested to ensure they're safe and don't add anything harmful. Any potential aluminum leaching is minimal and considered safe.

Bone char is a natural media, and reverse osmosis is simply a physical barrier. The biggest risk with any filter isn't the technology itself—it's poor maintenance. If you don't change filter cartridges on schedule, they can stop working and even harbor bacteria. For a deeper dive on different water treatment options and safety, you can find a ton of info in articles that offer expert advice on water filters.

Just stay on top of your maintenance schedule, and your system will keep providing clean, safe, and fluoride-free water for years.


At Water Filter Advisor, we believe everyone deserves access to clean, safe water. We're dedicated to providing the most reliable, research-driven reviews and guides to help you make the best choice for your family. Explore our in-depth resources and find your perfect filtration solution today at https://www.waterfilteradvisor.com.

Can Reverse Osmosis Zap Bacteria? The Surprising Truth

So, you're eyeing that reverse osmosis system for your kitchen and wondering, "Can this thing really handle the nasty stuff, like bacteria?" The short answer is a big, confident yes. A well-maintained RO system isn't just a water filter; it's a microscopic bouncer, kicking nasty microbiological contaminants out of your drinking water.

It acts as a physical fortress, ensuring the water that fills your glass is incredibly pure and safe to drink.

How Reverse Osmosis Wins the Fight Against Bacteria

If you're even a little worried about what might be swimming in your tap water, you need a solution you can count on. Reverse osmosis is the heavyweight champion of home water filtration, designed to tackle these invisible threats right under your kitchen sink.

The real hero of the story is the RO membrane. This isn't just any filter; it's a high-tech sheet packed with microscopic pores measuring a ridiculously small 0.0001 microns. To give you some context, your average bacterium is a clumsy giant in comparison, measuring anywhere from 0.2 to 10 microns wide. In this game, size is everything—bacteria are simply too big to get through the door.

A Tough-as-Nails Physical Gatekeeper

Imagine the RO membrane as the world's most exclusive nightclub bouncer. It doesn't use chemicals or tricks to zap germs. Instead, it uses your home's water pressure to push tiny, pure water molecules through its super-fine surface while telling almost everything else, "You're not on the list."

This means it physically blocks and flushes away larger contaminants down the drain, including:

  • Bacteria like the notorious E. coli and Salmonella
  • Viruses that can ruin your week
  • Protozoa such as the dreaded Giardia and Cryptosporidium

This simple method of physical separation is what makes RO systems so incredibly reliable. In fact, the U.S. Centers for Disease Control and Prevention (CDC) points to reverse osmosis as a top-tier technology for kicking pathogens to the curb. A good system can get rid of more than 99% of bacteria, making it the go-to choice for homeowners who want genuine peace of mind with every sip.

A reverse osmosis system gives you a final, powerful line of defense right in your kitchen. It purifies the water you drink and cook with just moments before you use it.

By installing an RO system, you're putting a formidable barrier between your family and potential dangers lurking in both city and well water. It’s a foundational piece of any modern, safe home.

How Reverse Osmosis Performs Against Contaminants

To put it all in perspective, here's a quick look at how a typical residential RO system stacks up against various common contaminants. It's a true multi-stage workhorse.

Contaminant Type Example Typical Removal Rate
Microbiological E. coli, Giardia, Viruses 99%+
Heavy Metals Lead, Arsenic, Mercury 95% – 98%
Dissolved Solids Salt, Fluoride, Nitrates 90% – 99%
Chemicals Chlorine, Pesticides 98%+ (with carbon pre-filter)

As you can see, while RO is an absolute champion at removing bacteria and a wide range of other tough contaminants, its performance can depend on the specific substance. This is why multi-stage systems that include sediment and carbon filters are the standard.

How Reverse Osmosis Physically Blocks Bacteria

To really get how reverse osmosis (RO) handles bacteria, you have to think small. Really small. Imagine trying to shove a basketball through a keyhole—it’s just not going to happen. That’s the same genius principle behind an RO system, but on a microscopic level. It's a purely physical barrier, like a bouncer at a club who only lets the cool, small molecules through.

The heart of any RO system is its semipermeable membrane. This isn't your average coffee filter; it's an incredibly fine material with pores so tiny they're measured in angstroms. To put that in perspective, a typical RO membrane has pores around 0.0001 microns wide.

Now, let's talk about the bad guys. Bacteria like E. coli or Salmonella are tiny to us, but compared to an RO membrane's pores, they're absolute giants. A single bacterium can be anywhere from 0.2 to 10 microns in size, making it thousands of times too big to squeeze through. No VIP pass, no entry.

The Science of Size Exclusion

The process itself is both simple and powerful. Your home’s water pressure pushes water against this membrane. The water molecules, being exceptionally small, are forced through the tiny pores and collect on the other side as wonderfully purified water.

Meanwhile, all the larger contaminants get left behind. They simply can't pass through the membrane and are unceremoniously flushed down the drain. This rejected list includes a whole bunch of things you don't want in your glass:

  • Bacteria: Physically blocked and washed away.
  • Viruses: Also too large to pass through the 0.0001-micron pores.
  • Protozoan Cysts: Things like Giardia and Cryptosporidium don't stand a chance.
  • Dissolved Solids: This includes heavy metals like lead and arsenic, plus minerals like salt and fluoride.

This elegant process of "size exclusion" is what makes RO so incredibly effective. It doesn't need chemicals to kill or neutralize bacteria; it just flat-out denies them entry. So when someone asks, "can reverse osmosis remove bacteria?" the answer is a resounding yes—it physically separates them right out of your water.

This diagram helps visualize how the RO membrane acts as a gatekeeper for different contaminants.

Reverse osmosis filtration diagram showing removal of bacteria, viruses, and minerals through membrane

As you can see, the membrane is a rock-solid barrier against not just bacteria, but also viruses and dissolved minerals, giving you truly comprehensive purification.

Proven Performance You Can Count On

And this isn't just talk—the effectiveness of reverse osmosis has been tested time and again. Its ability to remove bacteria is a well-documented scientific fact, not just a marketing claim. In fact, study after study shows that membrane filtration is one of the most reliable ways to achieve microbiological purification.

One major review of water treatment methods found that reverse osmosis achieved a bacterial removal rate of about 99.997%. That incredible level of performance is why RO isn't just used in homes; it's trusted in critical places like hospitals and bottled water plants. If you're curious, you can dive deeper into the research on membrane filtration effectiveness and see the data for yourself.

The real strength of reverse osmosis is its consistency. As long as the membrane is intact and the system has enough pressure, it will reliably block bacteria and other pathogens every single time you turn on the faucet.

This mechanical separation gives homeowners a powerful and dependable final line of defense. Even if your city issues a boil water advisory, a properly working RO system under your sink ensures the water you drink is still safe. It puts you back in control of your water quality.

Understanding the Limits of an RO System

A reverse osmosis system is an absolute beast when it comes to water purification, but it's not a "set it and forget it" magic box. Think of it like a high-performance sports car—it delivers breathtaking results, but only if you keep it tuned up. Its power to consistently block bacteria depends entirely on the system's integrity and your commitment to proper maintenance.

Knowing the system's limits isn't about being negative. It's about being smart so you can keep it running at peak performance, ensuring your family gets the safest, purest water possible.

Micropipette dropping water onto virus illustration demonstrating reverse osmosis system integrity and filtration

The Critical Role of Membrane Integrity

The heart and soul of an RO system is its semipermeable membrane. This is the super-fine barrier that physically stops bacteria in their tracks. But this membrane is delicate. Over time, it can get damaged, developing microscopic tears or holes you'd never see with the naked eye.

Even a single, tiny breach can become a microscopic superhighway, letting bacteria and other nasty contaminants sneak right past the filtration process. This is, without a doubt, the biggest vulnerability of any RO system. Once that membrane is compromised, it's no longer the near-perfect shield you're relying on.

This is exactly why routine maintenance and changing the membrane on schedule aren't just polite suggestions—they are absolutely essential to keep your system working like a true microbiological purifier.

The Unsung Heroes: Pre-Filters

Long before water ever gets to the RO membrane, it has to pass through a couple of other filters first. We call these pre-filters, and they are the unsung heroes of your system. They're the bodyguards, and their job is critical.

Typically, you'll have two kinds:

  • Sediment Filter: This is the bouncer at the front door. It grabs all the bigger stuff like sand, rust, and dirt. Without it, these gritty particles could literally scratch or tear the delicate RO membrane, dramatically shortening its life.
  • Carbon Filter: This filter's job is to remove chlorine and other chemicals. Chlorine, which is used to disinfect most city water, is incredibly harsh on the membrane's material. It can eat away at it over time, causing it to fail.

By taking out these threats first, the pre-filters allow the RO membrane to focus on what it does best: tackling the tiniest and toughest contaminants, including bacteria.

The Sneaky Risk of Post-Filtration Contamination

Okay, so your RO system has done its job perfectly. The bacteria are gone, and you have pristine water. But the journey isn't quite over. After being purified, that water chills out in a small storage tank under your sink before it gets to your faucet. This is where a new, sneaky risk can pop up.

If the tank, the tubing, or the faucet itself isn't kept clean, it's possible for new bacteria from the surrounding environment to get in and start a party. Now, super-pure RO water is a terrible place for bacteria to thrive, but it's not impossible.

The key thing to remember is that an RO system purifies water as it's being made, not at the very instant you turn on the faucet. This makes sanitizing the whole system every year—including the tank and faucet—a non-negotiable part of your maintenance routine.

Interestingly, research shows that while some biofilm can grow in RO systems, the total number of bacteria is far, far lower than what you'd find in regular tap water. This tells us that RO doesn't just remove bacteria, it also makes it harder for them to grow back. You can dig into the full findings on bacterial regrowth in RO systems if you want the nitty-gritty details. It just goes to show that while the risk is low and totally manageable, it's still there and reinforces why regular cleaning is so important.

Creating a Bulletproof System with UV Light

For anyone who wants the absolute highest level of water safety—especially if you're on well water—pairing a reverse osmosis system with an Ultraviolet (UV) purifier is the gold standard. Think of it as a one-two punch for microbiological safety. Your RO system physically blocks bacteria and viruses, while the UV light zaps anything that might, by some miracle, sneak through.

This combination gives you a powerful safety net. Even if a tiny, unseen tear were to form in the RO membrane, the UV stage is right there to neutralize the threat. It's the ultimate peace of mind in a glass of water.

Reverse osmosis water filtration system with UV light purifier and glass of filtered water

How UV Light Neutralizes Microbes

So, how does this UV light stage work its magic? It's a brilliant and straightforward process. A UV purifier is a chamber that blasts water with a specific wavelength of ultraviolet light—254 nanometers, to be precise.

This light is a natural germicide. It doesn’t kill microbes with poison; instead, it completely scrambles their DNA and RNA as they pass by the lamp. This instantly destroys their ability to reproduce or cause any harm. It’s like giving them a fatal sunburn that makes them totally inert.

The best part is that this whole process is:

  • Chemical-Free: Nothing is added to your water, so there's no change to the taste or smell.
  • Extremely Fast: Purification happens instantly as the water flows through the chamber.
  • Highly Effective: UV is proven to neutralize 99.99% of common waterborne pathogens, including viruses that are too small for some filters to catch.

This combo provides a rock-solid answer to the question, "can reverse osmosis remove bacteria?" The RO membrane gets them out, and the UV light makes sure they stay out for good.

Comparing RO Alone vs an RO Plus UV System

While a standalone RO system is a fantastic filter, adding a UV stage takes your water purification to a whole new level. Deciding whether you need it often comes down to your water source and how much security you want against microscopic threats.

Here’s a quick breakdown of what each setup offers:

Feature Reverse Osmosis (Alone) Reverse Osmosis + UV Purifier
Primary Mechanism Physical barrier (membrane) Physical barrier plus germicidal light
Bacteria Removal Excellent (99%+ removal) Exceptional (Adds a 99.99% kill rate)
Virus Removal Excellent (99%+ removal) Exceptional (Targets even the smallest viruses)
Post-Filter Security Relies on system sanitation Actively sterilizes water just before the tap
Ideal For Most city water supplies Well water, boil advisory areas, immune-compromised households

The bottom line is that by adding a UV stage, you are no longer just filtering your water—you are actively sterilizing it. This is the best approach for anyone who simply can't afford to take risks with their water quality.

Is an RO/UV System Right for Your Home?

This powerful combination isn't necessary for every single household. If you're on a reliable city water system that is consistently free of microbiological problems, a high-quality RO system on its own is usually more than enough protection.

However, an RO/UV system becomes a critical investment in a few key situations. You should seriously consider this dual setup if:

  1. You use a private well. Well water isn't treated by a municipality and is much more likely to be contaminated by bacteria like E. coli from surface runoff.
  2. Your area has frequent boil water advisories. A combined system provides a reliable final barrier, protecting your family even when the public supply is compromised.
  3. You have vulnerable individuals at home. For households with infants, the elderly, or anyone with a compromised immune system, that extra layer of UV protection is invaluable.

Ultimately, combining RO with UV turns your water filter into a complete purification system. The RO handles the heavy lifting by removing everything from lead to salt, while the UV light delivers a final, targeted strike against any potential microbiological threat.

Your Simple Home Maintenance Checklist

Knowing how your reverse osmosis system works is great, but keeping it running like a well-oiled machine is what really counts. A properly maintained system is your number one defense against bacteria and other nasty stuff in your water. This checklist breaks down the essentials into simple, doable steps so your RO system can deliver pure, safe water for years to come.

Think of it like getting regular oil changes for your car. You wouldn't just skip them and hope for the best, right? The same logic applies here—a little consistent care goes a long way toward reliability and peace of mind.

Setting Your Filter Replacement Schedule

The filters are the workhorses of your RO system, and they need to be replaced on a strict schedule to keep that all-important RO membrane protected. If you want your system to actually remove bacteria, sticking to a replacement schedule is non-negotiable. Go ahead and mark these dates on your calendar or set a recurring reminder on your phone right now.

A typical RO system has a few different filter stages, and each has its own lifespan:

  • Sediment Pre-Filter: This one catches the big stuff like rust and dirt. You'll want to swap it out every 6 to 12 months to stop it from getting clogged and causing problems for the other, more delicate parts of the system.
  • Carbon Pre-Filter(s): These filters are crucial for removing chlorine, which will literally eat away at the RO membrane. Plan on replacing these every 6 to 12 months, too, as they lose their effectiveness over time.
  • RO Membrane: This is the heart of the whole operation. If you've been good about changing your pre-filters, the membrane itself should last a solid 2 to 3 years. You'll know it's time for a new one if your water production slows to a crawl or you notice a change in taste.
  • Carbon Post-Filter: This is the final "polishing" step that makes your water taste crisp and clean after it leaves the storage tank. Replace this one once a year to keep your water tasting great.

For a deeper dive into different filter types and how they all work together, you can find a ton of helpful resources and water filter advice from people who live and breathe this stuff.

Annual System Sanitization

Even with flawless filtration, the parts of the system after the membrane—like the storage tank, tubing, and faucet—can be a place for stray airborne bacteria to set up shop. This is exactly why an annual deep clean is so critical. Sanitizing the whole system once a year is a must-do step to prevent any bacterial regrowth and keep your water perfectly pristine.

The process is pretty simple. It usually just involves shutting off the water, draining everything, and then using a special food-safe sanitizing solution. You'll run the solution through the entire system, let it sit for a bit, and then flush it all out. Your RO system's manual should have detailed, step-by-step instructions to walk you through it.

Pro Tip: A great time to sanitize your system is whenever you replace the RO membrane. That way, you’re starting with a totally fresh and sterile environment for your newly purified water.

Choosing a System You Can Trust

If you're shopping for a new RO system or an RO/UV combo, don't let the price tag be your only guide. You absolutely need to look for third-party certifications that prove the system actually does what it says it does. These certifications are your guarantee that it's safe and performs as advertised.

Keep an eye out for these key labels on the box or in the product specs:

  • NSF/ANSI 58: This is the gold standard certification specifically for reverse osmosis systems. It confirms the system is effective at reducing a whole host of contaminants, including things like lead, arsenic, fluoride, and cysts. A system with this seal has been put through the wringer to meet strict public health standards.
  • NSF/ANSI 55 (Class A): If you're going for a system with a built-in UV light, this is the certification you need to see. Class A systems are rated for full-on disinfection—they're designed to kill bacteria and viruses in contaminated water, making them a safe bet for well water or other untreated sources.

By following this simple maintenance checklist and picking a certified system, you can rest easy knowing your reverse osmosis unit is an effective and reliable barrier against bacteria. Your diligence is the final, crucial step in securing safe and delicious drinking water for your home.

Common Questions About RO and Water Safety

Even after getting the hang of how reverse osmosis works, it's totally normal to have a few lingering questions. Let's walk through some of the most common things homeowners ask when they're thinking about an RO system to keep their family safe from bacteria and other nasty stuff.

Getting straight answers is the best way to feel good about the choice you're making for your home's water. Think of this as putting the final pieces of the puzzle in place.

Does Reverse Osmosis Remove Viruses Too?

That's a great question, and an important one. The answer is a big "yes." An RO membrane is an incredible barrier against viruses for the exact same reason it blocks bacteria—it all comes down to size.

Viruses are even smaller than bacteria, but they're still way too big to squeeze through the 0.0001-micron pores in the membrane.

That said, for total, bulletproof protection, you have to consider the real world. A tiny, microscopic flaw in a damaged membrane could theoretically let one of the absolute smallest viruses slip through. This is exactly why combining reverse osmosis with a UV light purifier is widely considered the gold standard for microbiological safety.

The RO system does the heavy lifting, acting as the main physical wall to stop over 99% of viruses. The UV light is your final, non-chemical safety net, zapping the DNA of anything that might have gotten past, making it completely harmless.

Is an RO System Necessary for City Water?

It's a fair point. Your city's water is treated and regulated to meet federal standards, so why bother with another filter? The simple answer is that a lot can happen to that water between the treatment plant and your kitchen faucet.

The water infrastructure in many parts of the country is old, and that creates contamination risks you have no control over. An RO system is your personal last line of defense right where you use your water.

Just think about these common situations:

  • Aging Pipes: Old pipes can rust and break down, potentially leaching lead and other contaminants into your water.
  • Water Main Breaks: When a major water line cracks, it can suck in untreated groundwater, bacteria, dirt, and whatever else is in the soil.
  • Boil Water Advisories: These get issued when your city finds a potential microbiological threat, meaning your tap water isn't safe to drink unless you boil it first.

In every one of those scenarios, a well-maintained RO system under your sink just keeps on working, giving you safe, purified water. It puts the control back in your hands, no matter what's going on with the pipes down the street.

How Will I Know When to Replace the RO Membrane?

The RO membrane is the heart of the whole operation, but it doesn't work forever. The good news is, your system will give you some pretty obvious signs when it's getting tired and needs to be replaced.

You don't need to be a water expert to see what's happening. Just pay attention to these three main clues that your RO membrane is on its way out:

  1. Slower Water Flow: This is usually the first thing people notice. Your RO faucet just doesn't fill a glass as fast as it used to. Over time, the membrane gets clogged up with all the contaminants it has filtered out, making it tougher for water to get through.
  2. Changes in Taste or Odor: If your RO water starts tasting or smelling more like your regular tap water, that’s a big red flag. It means the membrane isn't stripping out the dissolved solids that cause those off-flavors anymore.
  3. Higher TDS Meter Reading: For a more scientific check, grab an inexpensive handheld Total Dissolved Solids (TDS) meter. Test your tap water, then test your RO water. A healthy system should be rejecting over 90% of the solids. If that percentage starts to drop, you know the membrane is losing its punch and it's time for a new one.

At Water Filter Advisor, we believe every family deserves access to safe, great-tasting water. Our in-depth guides and unbiased reviews are designed to help you confidently choose the right filtration solution for your home. Explore our resources today at https://www.waterfilteradvisor.com.

Reverse Osmosis Water Filter vs. Carbon Filter: The Ultimate Showdown

So, you're standing in the water filter aisle (or scrolling through endless web pages), and you’re faced with a choice: reverse osmosis water filter vs carbon filter. It sounds complicated, but it all boils down to one simple question: What kind of superhero does your tap water need?

Are you looking for an all-powerful purifier that zaps nearly everything—from heavy metals to dissolved solids and fluoride—out of existence? Then a Reverse Osmosis (RO) system is your champion. But if you just want to improve the taste and smell of your city tap water by kicking chlorine to the curb, a simple carbon filter is a smart, budget-friendly sidekick.

Understanding the Core Differences

Choosing the right filter for your home shouldn't feel like a chemistry exam. Once you grasp what each technology is built for, the decision gets a lot easier. It’s like picking between a sledgehammer and a scalpel. Both are great tools, but for very different jobs.

Think of a carbon filter as a specialist—a taste-and-smell artist. Its main gig is to make your water more enjoyable by grabbing onto chemicals like chlorine. An RO system, on the other hand, is the all-in-one powerhouse. It's designed for serious purification, removing a much, much wider range of contaminants and giving you water that’s close to pure H₂O.

RO Filter vs Carbon Filter at a Glance

For a quick snapshot, let's lay out the key differences side-by-side. This table really highlights how a reverse osmosis water filter vs carbon filter compares on the things that matter most to homeowners.

Feature Reverse Osmosis (RO) Filter Carbon Filter
Primary Function Water purification (removes up to 99% of contaminants) Water improvement (removes taste & odor impurities)
Key Contaminants Removed Heavy metals, fluoride, dissolved solids, salts, bacteria Chlorine, pesticides, VOCs, sediment
Installation Complexity More involved; usually needs under-sink plumbing Simple; available as pitchers, faucet mounts, or under-sink
Initial Cost Higher Lower
Maintenance Multiple filters and a membrane replaced periodically Single cartridge replaced every few months
Best For Households wanting the highest purity for health concerns Improving the taste and smell of city tap water

After seeing the comparison, it’s clear they serve two distinct needs.

What This Means for Your Home

At the end of the day, the right filter for you depends on where your water comes from and what your standards are. If you’re on city water that’s generally safe but tastes like a swimming pool because of the chlorine, a carbon filter is an excellent, low-cost fix. It's a no-fuss way to get crisp, clean-tasting water right from your faucet.

Image

On the flip side, if you're using well water or are worried about specific contaminants like lead, arsenic, or nitrates, an RO system offers real peace of mind.

An RO system offers a robust defense against a vast array of unseen contaminants, making it an investment in your family's long-term health, not just a solution for better-tasting water.

This basic difference—purification vs. improvement—is the most important thing to remember in the reverse osmosis water filter vs carbon filter debate. As we dig deeper, you'll see how this single distinction affects everything from cost and upkeep to the exact contaminants each system can tackle.

How These Water Filtration Technologies Work

To really settle the reverse osmosis water filter vs carbon filter debate, you have to get under the hood and see how they actually work. They both give you cleaner water, but their approaches are completely different—think a high-tech security gate versus a super-powered sponge. One physically blocks junk from getting through, while the other uses a chemical attraction to grab and hold onto it.

Reverse Osmosis: The Gatekeeper Method

Picture a bouncer at an exclusive club with a list that's impossible to get on. That’s pretty much a reverse osmosis (RO) system. The star of the show is a semipermeable membrane, which is a fancy way of saying it has microscopic holes just barely bigger than a water molecule.

Your home's water pressure does all the work, pushing tap water up against this membrane. The tiny water (H₂O) molecules squeeze through, but nearly everything else gets stopped cold and physically blocked. We’re talking dissolved solids, salts, heavy metals like lead and arsenic, fluoride—even some microorganisms. The good, purified water collects on one side, while all the rejected gunk gets flushed down the drain as wastewater.

This brute-force physical separation is exactly why so many homeowners who want the purest water possible turn to RO. It's a full-on purification process, not just a simple filter.

It’s no surprise that RO systems are a huge force in the home water filtration market. The RO segment grabs a massive 38.5% of the global market share, and that's because it's proven to remove up to 99% of dissolved salts, lead, bacteria, arsenic, and other nasty stuff. For families, that kind of performance provides real peace of mind. If you want to dive deeper, you can explore more insights on water filter market trends.

Basically, a reverse osmosis system breaks your tap water down on a molecular level, separating the pure H₂O from almost everything else mixed in. It's the closest thing to getting bottled-water quality straight from your tap.

Carbon Filtration: The Sponge Method

Okay, now let's switch over to carbon filters. If RO is the bouncer, then a carbon filter is like a giant, magnetic sponge. The magic here is a process called adsorption, where impurities literally stick to the filter material instead of being physically strained out.

These filters are packed with activated carbon, which usually comes from something like coconut shells. The carbon is specially treated to give it a ridiculously porous structure and a massive internal surface area. To put it in perspective, a single gram of this stuff can have the same surface area as a football field.

As water flows through, things like chlorine, pesticides, herbicides, and volatile organic compounds (VOCs) are chemically drawn to the carbon's surface and trapped. This is why carbon filters are rockstars at making city water taste and smell better—they're exceptional at pulling out the chlorine that's added for disinfection.

Here’s a quick look at how the adsorption process works:

  • Massive Surface Area: All those pores in the activated carbon create countless spots for contaminants to latch onto.
  • Chemical Attraction: Certain chemicals are naturally attracted to the carbon surface.
  • Contaminant Trapping: The bad stuff sticks to the carbon, and cleaner water flows on through.

This method is fantastic for specific chemical contaminants, but it won't touch dissolved solids, salts, or most heavy metals. It's a targeted tool for improving aesthetics, not a comprehensive purification system, which is a key difference when you’re comparing a reverse osmosis water filter vs a carbon filter.

Contaminant Removal Side by Side

When you put a reverse osmosis filter and a carbon filter in a head-to-head matchup, the real difference is what each one actually pulls out of your water. This isn’t a simple question of which is “better.” It’s about picking the right tool for the job.

Think of it this way: one is a broad-spectrum solution designed to tackle nearly everything, while the other is a specialized treatment for the most common issues that affect taste and smell. The distinction is pretty stark. RO systems are built for maximum purification, while carbon filters are masters of targeted chemical adsorption.

The Heavy Hitters: Heavy Metals and Dissolved Solids

Let's start with the most serious contaminants, like heavy metals and total dissolved solids (TDS). This is where the gap between the two technologies is widest.

A reverse osmosis system is the undisputed champ here. Its semipermeable membrane is the key—it physically blocks particles down to an incredible .0001 microns. This brute-force approach allows it to remove a long list of nasty stuff, including:

  • Lead: A powerful neurotoxin that can leach from old pipes.
  • Arsenic: A common and dangerous contaminant, especially in well water.
  • Fluoride: Intentionally added to many municipal water supplies.
  • Nitrates & Sulfates: Often the result of agricultural runoff seeping into groundwater.
  • Total Dissolved Solids (TDS): This covers all the salts, minerals, and other dissolved inorganic compounds that a carbon filter just can't touch.

A standard carbon filter, on the other hand, just wasn't designed for this kind of work. It can't remove dissolved solids, salts, or the vast majority of heavy metals. While some specialized carbon block filters might reduce lead, they don't come close to the comprehensive removal you get from an RO system.

While a carbon filter makes water taste great, only a reverse osmosis system can reliably remove nitrates and dissolved salts. This is a critical distinction for anyone on well water or in an area with known contamination issues.

Aesthetics: Chlorine, Taste, and Odor

Now, let's talk about the things you can actually taste and smell. This is where the carbon filter really gets to show off and why it's the perfect solution for so many people.

The main reason city water tastes "off" is chlorine, which is added as a disinfectant. An activated carbon filter is an absolute powerhouse at adsorbing chlorine. As water passes through the filter media, the carbon's huge surface area snags and holds onto chlorine molecules, instantly getting rid of that "swimming pool" taste and smell.

Carbon filters also do a fantastic job of removing:

  • Volatile Organic Compounds (VOCs): Nasty industrial chemicals like pesticides and herbicides.
  • Chloramines: A disinfectant sometimes used as an alternative to chlorine.
  • Bad Odors: Caused by various organic compounds that find their way into the water supply.

Even though most RO systems have a carbon pre-filter to protect the sensitive membrane, the carbon filter's main job in any system is improving taste and odor.

Infographic about reverse osmosis water filter vs carbon filter

This infographic shows just how popular RO systems are, holding a massive 38.5% of the market. It really highlights that many consumers are looking for that deeper level of purification that goes far beyond just making the water taste better.

To break it down even further, here's a look at how each filter type stacks up against common contaminants.

Contaminant Removal Efficiency Comparison

Contaminant Type Reverse Osmosis Filter Carbon Filter
Heavy Metals (Lead, Arsenic) Excellent (95-99% removal) Poor to Fair (Specialized filters may reduce lead)
Total Dissolved Solids (TDS) Excellent (90-99% removal) No Removal
Chlorine & Chloramine Good to Excellent (Often has a carbon stage) Excellent (Primary function)
VOCs & Pesticides Good to Excellent (Carbon stage handles this) Excellent (Adsorbs effectively)
Fluoride Excellent (90-97% removal) No Removal
Bacteria & Viruses Very Good (Physical barrier) Poor (Can harbor bacteria if not changed)
Cysts (Giardia, Crypto) Excellent (Physical barrier) Fair to Good (Requires a 0.5-micron rating)

As you can see, the RO system offers a much broader shield against a wider array of potential threats. The carbon filter is more of a specialist, excelling at the aesthetic issues that plague most tap water.

Microorganisms: Bacteria and Viruses

When we get into biological contaminants like bacteria, cysts, and viruses, the lines can get a little fuzzy, but the RO system still comes out on top.

The pores in an RO membrane are so tiny that they physically block most bacteria and viruses from passing through, making it a very effective line of defense. It's worth remembering, though, that most residential RO systems aren't officially certified as microbiological purifiers.

Carbon filters, for the most part, do not remove bacteria or viruses. Worse, an old carbon filter that isn't changed on schedule can actually become a breeding ground for bacteria. Some high-end carbon block filters with a very fine micron rating (like 0.5 microns) can remove larger cysts like Giardia and Cryptosporidium, but they won't stop smaller bacteria or any viruses. For biologically unsafe water, a carbon filter just isn't the right choice.

Because they're so good at fixing the number one complaint about tap water—the taste—carbon filters are incredibly popular. They command a huge share of the market by removing chlorine, sediment, and VOCs, but they can't match the heavy-duty purification of an RO system. You can read the full analysis on the under-sink filter market to dig deeper into the numbers.

Ultimately, the choice comes down to your specific water quality concerns. If you need broad-spectrum protection from a whole host of contaminants, RO is the way to go. If your water is generally safe but just tastes bad, a carbon filter is a simple, effective, and budget-friendly solution.

Comparing Costs, Installation, and Ongoing Maintenance

Beyond just what they remove, the practical side of things—your budget and willingness to do upkeep—is a huge factor in the reverse osmosis water filter vs carbon filter debate. The true cost isn't just the price on the box. You've got to think about installation, filter replacements, and even hidden costs like wastewater. Let's break it down so you can see which system really fits your life and your wallet.

Right off the bat, the initial investment for these two systems is miles apart. Carbon filters are generally much cheaper to get started with, giving you options from simple faucet attachments to more serious under-sink units. An RO system, on the other hand, is a more significant purchase because of its complex, multi-stage setup.

Upfront Purchase and Installation Costs

The financial barrier to entry is probably the clearest difference here. You can pick up a simple under-sink or countertop carbon filter for a pretty low price, often well under $100. Their design is so straightforward that most people can install one themselves in less than an hour with just basic tools.

Reverse osmosis systems are a different story. They typically start in the low hundreds and can climb much higher for high-end models. The installation is also a bigger job. You'll likely need to drill a hole in your countertop for its own special faucet, hook up a drain line to your sink's plumbing, and find space for the storage tank. A confident DIYer can pull it off, but many people just call a plumber, which adds to that initial cost.

  • Carbon Filter: Lower upfront cost and a simple, DIY-friendly installation.
  • RO System: Higher upfront cost with a more complex installation that might require professional help.

Ongoing Maintenance and Filter Replacement

This is where the long-term cost comparison gets a little more nuanced. Carbon filters are cheap to buy, but you'll be buying replacement cartridges, and those costs can add up. This is especially true for the smaller pitcher or faucet-mounted filters that need to be swapped out pretty frequently.

An RO system’s maintenance is more involved but often more predictable. You’re looking at replacing a few different filters on different schedules:

  • Sediment & Carbon Pre-filters: These are the gatekeepers that protect the main membrane. You’ll usually replace them every 6 to 12 months.
  • RO Membrane: This is the core of the whole system. It’s a workhorse and typically lasts 2 to 4 years, though this depends heavily on your water quality.
  • Carbon Post-filter: This last filter gives the water a final "polish" and gets changed about once a year.

While the total annual cost for RO filter replacements might be higher than for a simple carbon filter, the actual cost per gallon of purified water can be surprisingly competitive when you look at it over the system's entire lifespan.

The Hidden Cost of RO Wastewater

One unique expense tied to RO systems is the wastewater. To keep that powerful membrane from clogging up with all the contaminants it removes, the system has to flush them away. This stream of concentrated gunk goes right down the drain along with a good bit of water. Older, less efficient models were notorious for this, wasting as much as 4 or 5 gallons of water for every single gallon of pure water they produced.

Thankfully, technology has come a long way. Modern RO systems are much more efficient, with many wasting only 1 to 2 gallons for every purified gallon. It will add a small amount to your water bill, but it’s a necessary trade-off for how effectively the system purifies your water.

Thinking beyond just the filters, understanding how water quality affects your home's entire plumbing system can help you dodge future problems. Proper upkeep, for example, can save you from a lot of headaches. You can learn more about how to prevent costly plumbing repairs through regular maintenance. Taking this wider view helps ensure your whole water system stays in great shape.

What's the Best Filter for Your Home?

Alright, let's move past the technical jargon. The real question in the reverse osmosis water filter vs. carbon filter showdown is: which one actually makes sense for your kitchen? The answer depends entirely on where you live, what your water is like, and what you’re trying to fix.

Let's walk through a few real-life situations. See which one sounds most like you.

A person pouring a glass of clean water from a kitchen faucet

Scenario 1: The City Apartment Dweller

You live in a city high-rise. The municipal water is technically safe according to the annual reports, but you can’t stand the swimming-pool smell. That chlorine taste ruins your morning coffee and makes a simple glass of water taste… off.

For this, a carbon filter is your best bet. It’s designed specifically to adsorb chemicals like chlorine and other compounds that mess with taste and odor. It’s a simple, affordable fix that gets right to the point without over-complicating things.

  • The Main Problem: Gross-tasting and smelling city tap water.
  • What You're Targeting: Chlorine, chloramines, and some volatile organic compounds (VOCs).
  • The Smart Choice: An under-sink or faucet-mounted carbon filter. It’s cheap, easy to put in, and you'll notice the difference immediately.

Scenario 2: The Rural Family on Well Water

Now, picture a family out in the country with their own private well. Their worries go way beyond just taste. They're concerned about things you can't see or smell—nitrates from nearby farms, naturally occurring heavy metals like arsenic, and even potential bacteria.

Here, a reverse osmosis system isn't just a nice-to-have; it's a critical safety measure. A basic carbon filter won’t touch dissolved solids, heavy metals, or microorganisms. The multi-stage process of an RO system is the only thing that offers the comprehensive protection they need for real peace of mind.

  • The Main Problem: Removing a whole spectrum of potential health hazards from untreated well water.
  • What You're Targeting: Nitrates, sulfates, arsenic, lead, fluoride, bacteria, and total dissolved solids (TDS).
  • The Smart Choice: A multi-stage under-sink reverse osmosis system. Its special membrane is a physical wall that stops the most dangerous contaminants found in well water.

It often just comes down to where your water is from. Public utility? You’re probably just fighting bad taste, so a carbon filter will do. Private well? You need serious purification, and that means reverse osmosis.

Scenario 3: The Health-Conscious Urbanite

Let's go back to the city. This person knows the water is "safe," but they want it to be pristine. They worry about the stuff that standard city tests might miss, like trace pharmaceuticals, microplastics, or the fluoride that’s intentionally added. They’re not just after better flavor; they want truly purified water.

This is another clear-cut case for a reverse osmosis system. While the tap water meets government standards, an RO system goes much further, stripping out up to 99% of all contaminants. It takes water down to nearly pure H₂O, addressing concerns that a simple carbon filter can't even touch.

  • The Main Problem: Getting the absolute purest water possible for health reasons.
  • What You're Targeting: Fluoride, heavy metals, dissolved solids, and other emerging contaminants.
  • The Smart Choice: An RO system, maybe even one with a remineralization filter to add healthy minerals back in for a better taste.

Scenario 4: The Budget-Minded Renter

Last one. Think of a student or anyone renting an apartment. They want cleaner water, but they can't mess with the plumbing. Money is tight, and they need something that works now and can move with them later.

A carbon filter—either in a water pitcher or a simple screw-on faucet attachment—is the perfect solution. There's no installation, the cost is minimal, and it does a great job on the number one complaint: chlorine. When the lease is up, they just pack it and go.

By looking at it this way, the choice becomes much simpler. It’s not about which filter is technically "better," but which one is the right tool for your specific job.

Making the Right Choice for Your Home

Figuring out whether a reverse osmosis or carbon filter system is right for you really just comes down to a few key questions. It’s not about which one is "better" in general, but which one is the right fit for your home and your water.

To make things simple, let's break it down into three critical areas.

Define Your Water Goals

First things first: what are you trying to remove from your water? A great place to start is your local water quality report.

Next, ask yourself if your main goal is simply better-tasting water, or if you need the highest possible level of purity for health and safety. Finally, you have to consider your budget, not just for the system itself but for the ongoing filter replacements.

Answering those questions will point you in the right direction:

  • For Better Taste: If your city water is already treated but has that distinct chlorine taste and smell, a carbon filter is a simple, cost-effective fix.
  • For Maximum Purity: If you're dealing with well water or have serious concerns about contaminants like lead, fluoride, or other total dissolved solids, a reverse osmosis system offers the most complete protection you can get.

The decision really hinges on a single trade-off. If your water is generally safe but just doesn't taste great, a carbon filter is all you need. But if you want total peace of mind with the highest level of purification available, then reverse osmosis is the hands-down winner.

Remember, while a good filter is essential, the cleanliness of your water source matters too. For a more complete picture, take a look at this a comprehensive guide to water tank cleaning.

If you need more personalized guidance on choosing the right filter, our team has put together some excellent resources. Learn more with our expert advice on water filters.

Frequently Asked Questions

When you're trying to choose between a reverse osmosis water filter vs carbon filter, a few questions always seem to pop up. Let's get right into the most common concerns we hear from homeowners.

Do Reverse Osmosis Systems Waste a Lot of Water?

This is probably the number one question we get about RO systems. It’s true that to get incredibly pure water, the system has to flush away all the gunk it removes, and that creates wastewater. Older systems were pretty bad, sometimes wasting many gallons for every one gallon they produced.

But technology has come a long way. Many modern, high-efficiency units now waste only 1 to 2 gallons for every gallon of pure water they make. Some even have a special permeate pump that uses the pressure from the wastewater to work more efficiently, which cuts down on waste and helps the tank fill up faster.

Will an RO Filter Remove Healthy Minerals?

Yes, it will. A reverse osmosis system is a powerhouse designed to strip out nearly everything from the water, which includes beneficial minerals like calcium and magnesium. What you're left with is exceptionally clean, demineralized water.

If you're worried about losing those minerals or just prefer the taste of mineral water, there’s an easy fix. Many RO systems come with a remineralization filter that gets added on at the very end. This puts a small amount of healthy minerals back into the water right before it hits your glass, which can really improve the taste and balance the pH.

While an RO system strips water down to its purest form, adding a remineralization stage gives you the best of both worlds—unmatched purity with the pleasant taste of essential minerals.

Can I Use a Carbon Filter with an RO System?

Not only can you, but you have to. Every single multi-stage reverse osmosis system actually includes at least one carbon filter, sometimes two. They perform a vital job.

The carbon pre-filter is there to remove chlorine and chloramines before the water can get to the delicate RO membrane. These chemicals, used for disinfection by water treatment plants, are really harsh and will literally eat away at the membrane. By taking the hit and absorbing these chemicals, the carbon filter acts like a bodyguard for the most expensive part of your system, making sure it lasts longer and works properly.


At Water Filter Advisor, our goal is to help you find the perfect water filtration solution for your family's needs. We provide clear, research-driven reviews and practical guides to make your decision easy. Explore our resources and find your ideal filter today at https://www.waterfilteradvisor.com.