Does Carbon Filter Remove Chloramine at Home

Yes, appropriately designed carbon filters can remove chloramine. But most small point-of-use cartridges may not give water enough time in the carbon bed to do the job well, so performance depends on the carbon type, bed depth, flow rate, and replacement schedule.

So, does a carbon filter remove chloramine in your home? The useful answer isn't just about whether the media is called “carbon.” It's about whether a particular filter has the right material and enough contact with the water to make chloramine reduction a realistic claim. A cartridge that improves chlorine taste may not be designed to reduce chloramine.

That difference matters when you're choosing a faucet, refrigerator, shower, or whole-house system. A filter can look convincing on a package and still be poorly matched to your water and household flow. The better approach is to treat chloramine removal as a design question, then check the certification, carbon volume, flow conditions, and maintenance guidance.

Why This Question Matters for Your Tap Water

The short answer is yes, but only an appropriately designed carbon system should be expected to remove chloramine. Pinellas County's public-health guidance says granular activated carbon, or GAC, can remove chloramine, while warning that most household purifiers aren't designed for that purpose (Pinellas County's chloramine guidance).

That warning explains why shoppers get mixed results. A small cartridge may reduce free chlorine's taste or smell, yet offer too little carbon or too little contact time for chloramine. The word “carbon” on a label doesn't tell you whether the filter has been tested for chloramine reduction under conditions that resemble your use.

Start with the disinfectant

Water utilities use disinfectants to control microbes as water travels through the distribution system. If your utility uses chloramine, a filter chosen only for a general “chlorine” or “taste and odor” claim may not address your actual concern. Check your utility's water-quality information before deciding what treatment you need.

The filter's intended use matters, too. A drinking-water cartridge only treats water at the tap where it's installed. A whole-house system treats water entering the home, but it also needs to be designed for the household's flow demands.

The practical distinction: A carbon filter isn't automatically a chloramine filter. Look for a model-specific chloramine reduction claim and evidence that the system is sized for its stated flow.

The rest of the decision comes down to a few connected questions: What kind of carbon is inside? How much water passes through it at once? How long does the water stay in contact with the media? And when should the filter be replaced? Those details make the difference between a plausible label and a system that fits your home.

What Chloramine Is and Why It Behaves Differently

Chloramine is a disinfectant made from chlorine and ammonia. Utilities use it because it stays active in water longer than free chlorine, helping maintain disinfection as water moves through pipes. That same persistence makes chloramine harder for a quick pass through a small carbon cartridge to address.

A useful comparison is a stain. Free chlorine is like a fresh, easy-to-lift mark: ordinary carbon can often reduce it quickly. Chloramine is more like a stubborn stain that needs the right surface chemistry and enough time to react. A brief encounter with carbon may not be enough.
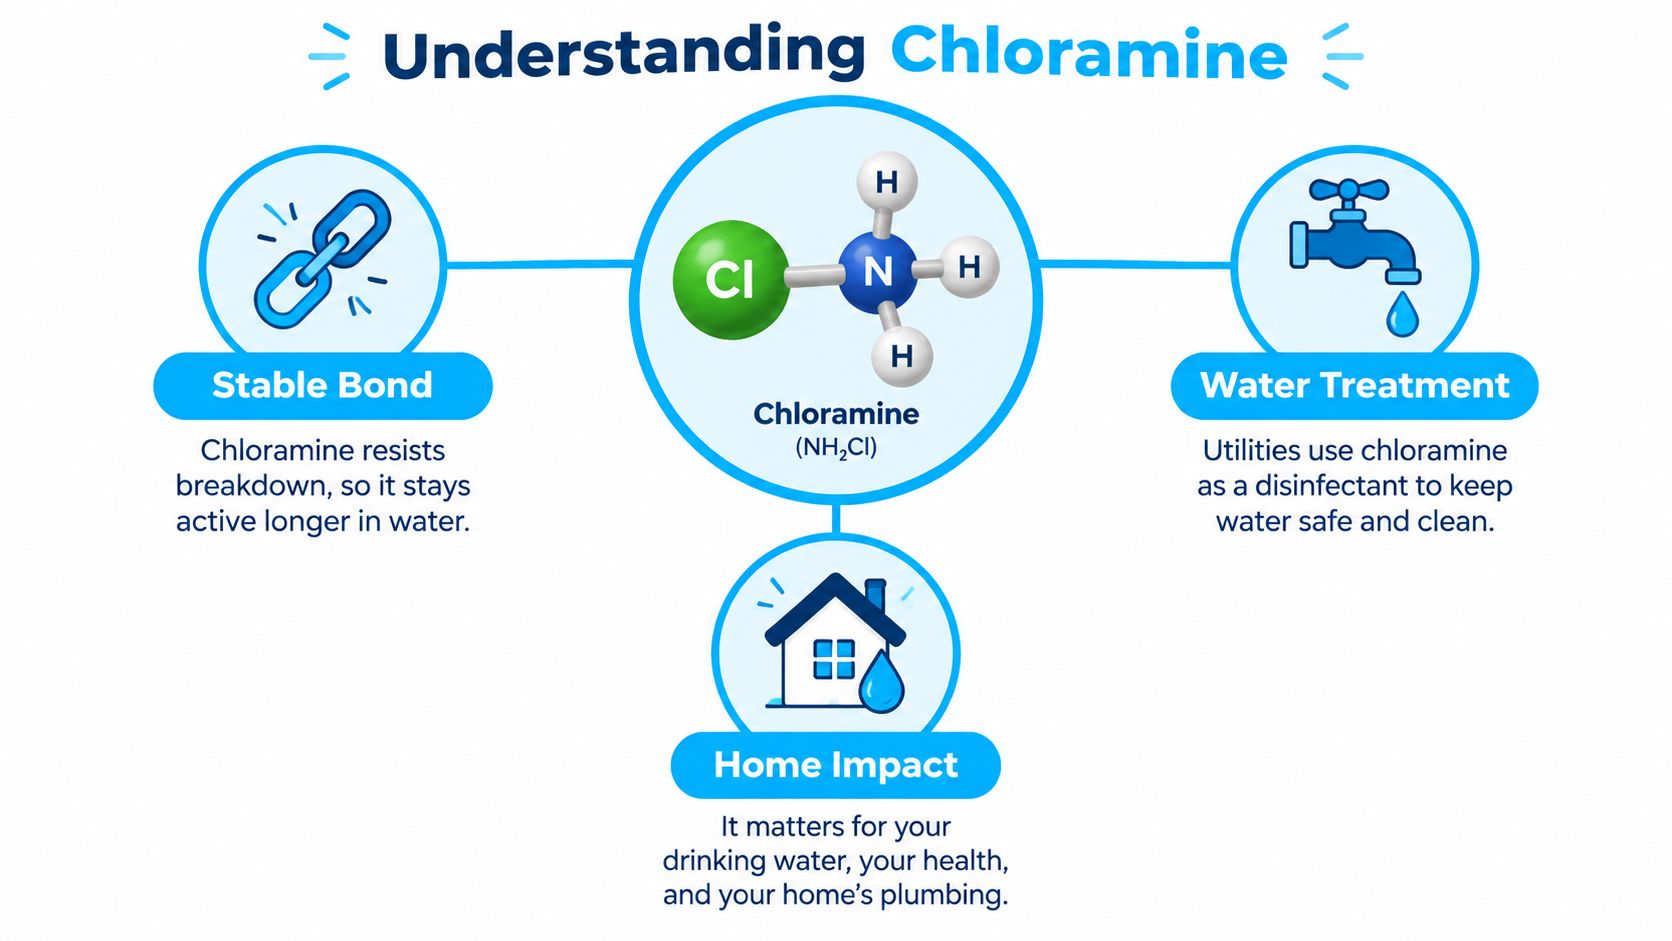
An infographic titled Understanding Chloramine explaining its stable bond, use in water treatment, and home impact.

Why a quick filter pass can disappoint

The dominant form most households are likely to encounter is monochloramine. When water moves quickly through a shallow bed of ordinary carbon, it may leave before enough of the needed reaction has happened. That's why a faucet filter that noticeably improves chlorine taste shouldn't be assumed to perform the same way on chloramine.

Contact time is the time water spends inside the carbon bed. More contact can give the media more opportunity to act, although the exact result also depends on the carbon and water conditions. A research figure cited in the chloramination literature reported nearly 90% monochloramine removal at a 0.75-minute empty-bed contact time, but that result isn't a guarantee for household cartridges (the chloramination entry's cited activated-carbon study).

That distinction is easy to miss because the filter may look and feel the same whether it's intended for chlorine or chloramine. The key question isn't whether a product contains carbon. It's whether that carbon, in that bed and at that flow, has demonstrated chloramine reduction.

Ordinary GAC Versus Catalytic Carbon

Granular activated carbon is a common filter medium. Its porous structure gives contaminants places to attach to the carbon surface, a process called adsorption. Ordinary GAC can work well for free chlorine and some taste and odor concerns, but chloramine is a tougher target.

Catalytic carbon is a modified form of activated carbon whose surface helps promote reactions involving chloramine. In plain terms, ordinary carbon is like a sponge that catches certain contaminants, while catalytic carbon also helps a difficult reaction happen at its surface. That's why manufacturers may specify catalytic carbon when chloramine is the treatment target.
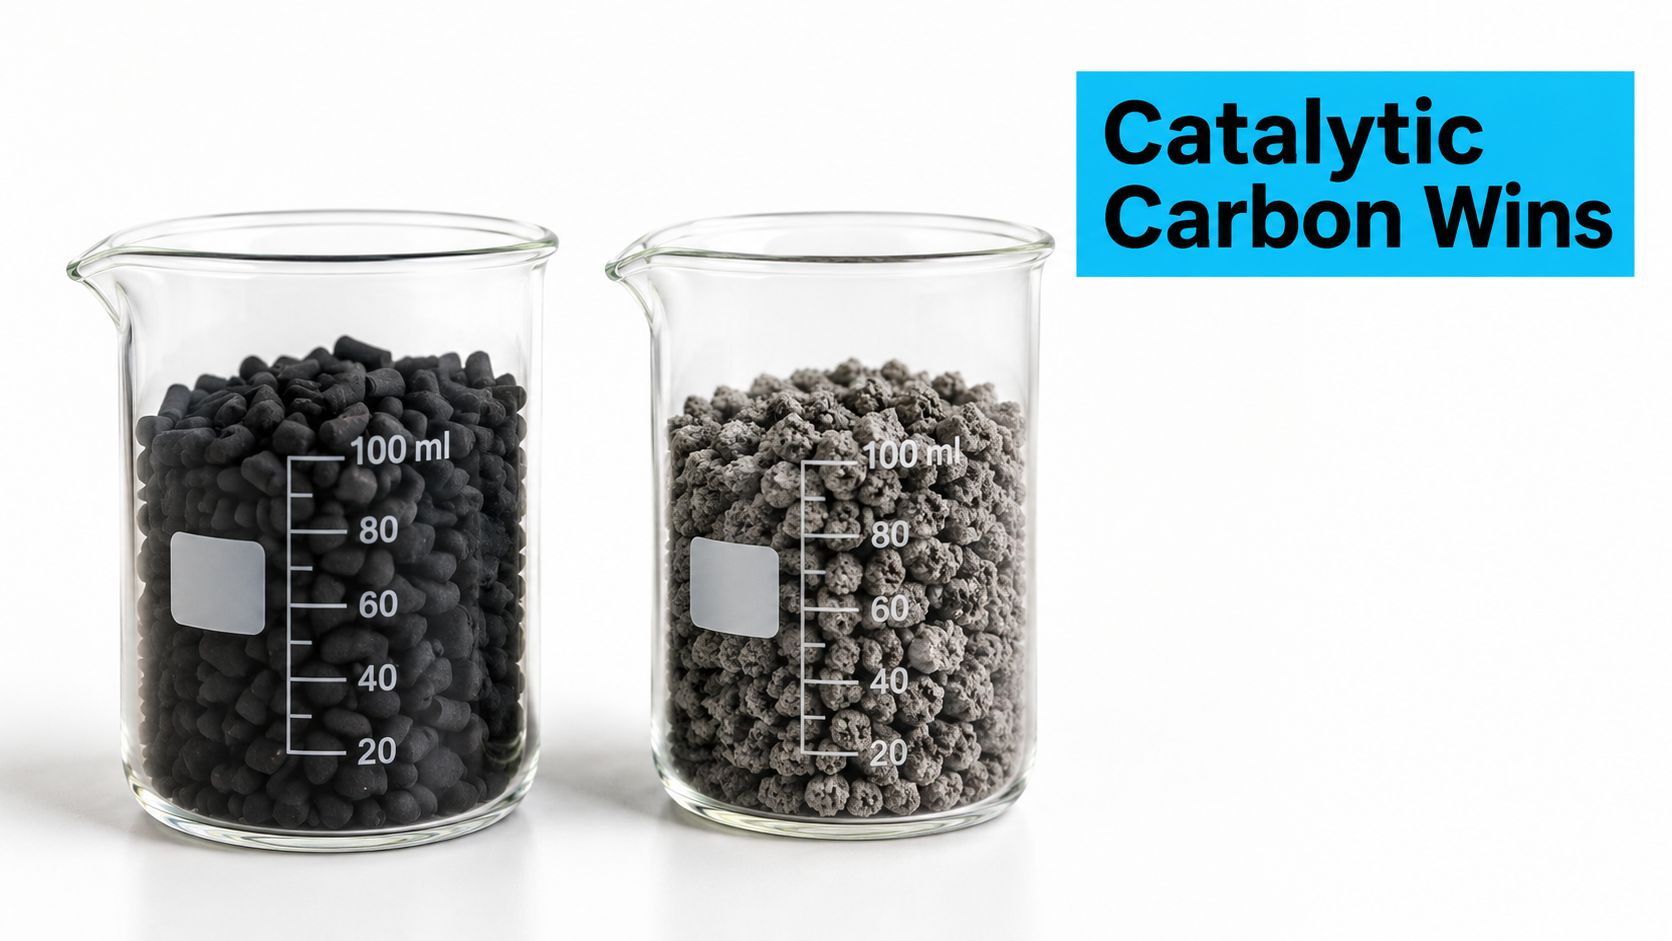
Two clear glass beakers filled with different types of black and grey granular activated carbon pellets.

Media names don't tell the whole story

“Carbon block” describes a filter form, while GAC describes loose granular media. Neither label alone proves chloramine performance. A block can contain different carbon types, and a loose-carbon system can vary in bed size and design. Ask what media the exact model uses and whether the manufacturer lists chloramine reduction, not only chlorine or taste improvement.

A laboratory study tested six catalytic-carbon varieties against a 30 ppm chloramine solution. The best-performing material reached a dynamic adsorption capacity of 900 mg per gram at a flow rate of 25 mL per minute and a 60-second EBCT. Those are controlled laboratory conditions, not a prediction for municipal tap water, but they show why catalytic carbon is used for chloramine-specific applications (the catalytic-carbon laboratory study).

For a clearer explanation of how carbon media differ, see this guide to activated carbon filtration media. When comparing products, prioritize the exact carbon type and a tested chloramine claim over broad wording such as “advanced carbon filtration.”

The Hidden Variable That Drives Performance

The most useful sizing concept is empty-bed contact time, usually shortened to EBCT. It estimates how long water would take to pass through the empty volume occupied by the carbon bed. A rough calculation is:

EBCT in minutes = carbon bed volume in gallons ÷ flow rate in gallons per minute

Use the volume of the carbon bed, not the outside dimensions of the tank or cartridge. If a manufacturer doesn't provide the carbon volume or a chloramine-rated flow condition, you may not have enough information to make a meaningful estimate.

Water-treatment guidance gives an example target of roughly 3 to 4 minutes of EBCT for chloramine treatment, compared with much shorter contact times often used for free-chlorine carbon polishing (activated-carbon treatment guidance). Treat that as a design reference, not a universal pass-or-fail threshold for every filter.

Use the table as a math template

The table below uses the EBCT formula at common flow settings. The bed volumes are example inputs, not recommended tank sizes; use your unit's actual carbon volume to estimate its contact time.

Carbon Bed Volume Flow 5 GPM Flow 7 GPM Flow 10 GPM
0.5 gallon 0.10 min 0.07 min 0.05 min
1 gallon 0.20 min 0.14 min 0.10 min
2 gallons 0.40 min 0.29 min 0.20 min
5 gallons 1.00 min 0.71 min 0.50 min

These calculations show why flow matters: the same bed gives less contact time as more water passes through it. A faucet cartridge used at a modest stream and a shower filter exposed to a strong flow may contain similar-looking media yet operate very differently. Don't assume a shower filter's performance from its appearance or a chlorine-focused claim.

Temperature, bed depth, water chemistry, and cartridge condition also affect real performance. Colder water and partially used media can change how effectively treatment proceeds, so a calculation is only a screening tool. Ask manufacturers for chloramine test data at the flow rate you expect to use, and compare that with the listed carbon volume and replacement schedule.

What the Lab and Field Data Actually Show

Carbon performance changes over time. A fresh bed has available capacity and a usable surface for treatment; as contaminants load the media, performance can decline. That's why a filter's replacement schedule is part of its chloramine claim, not a housekeeping detail.

In an EPA evaluation of alternative disinfectants and GAC, columns initially reduced contaminant concentrations, then became saturated after approximately 60 to 80 days. At steady state, average removal for the chloramine process stream was 53% for the measured target compounds (the EPA GAC evaluation). This was a specific treatment setup, not a universal result for every home filter.
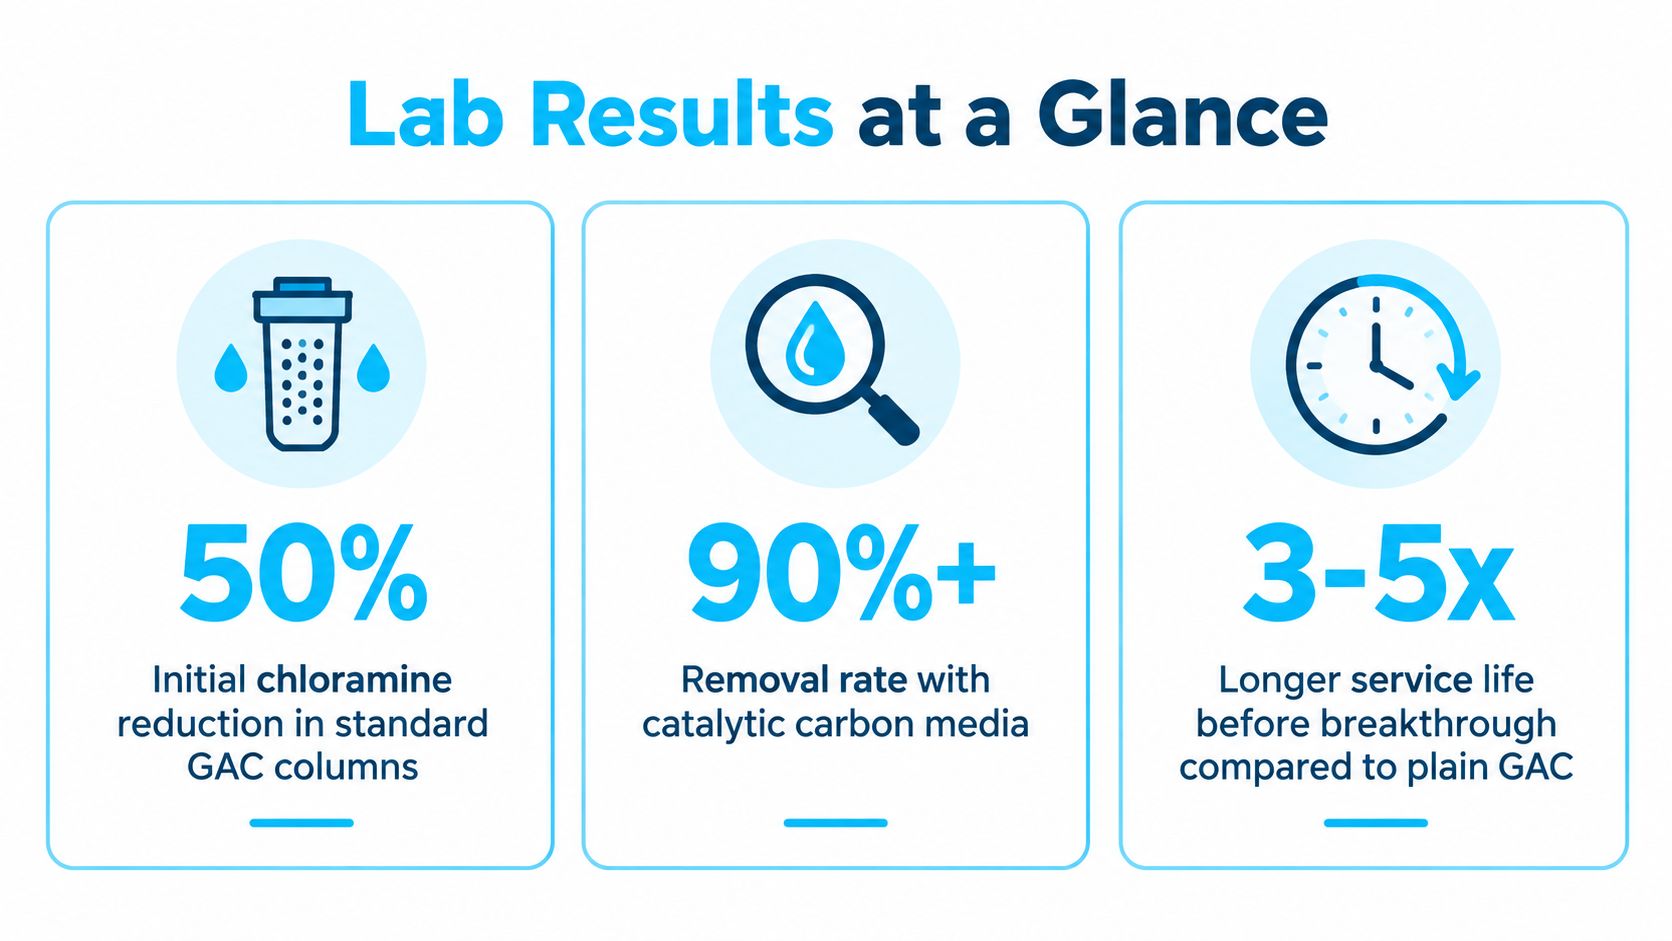
An infographic showing lab test results for chloramine removal using standard GAC and catalytic carbon media filters.

Read research results in context

A laboratory or treatment-plant column isn't the same as a small residential cartridge. Carbon type, bed size, water chemistry, flow rate, and operating conditions can differ. The EPA result does, however, illustrate a central point: performance depends on both system design and the condition of the carbon over time.

Think of the bed as a work surface with limited capacity. A new filter may perform differently from one that has treated water for months, just as a sponge handles a spill better before it's loaded with grime. Taste and smell can alert you to a change, but they can't confirm how much chloramine remains or whether other compounds have been reduced.

A replacement interval is part of the treatment design. If the maker gives no clear schedule or chloramine-specific performance information, ask for it before relying on the filter.

Use the research as evidence that GAC can reduce chloramine-related compounds under particular conditions, not as a promise that your household will see the same percentage or service life. For a home system, manufacturer testing tied to the exact model, flow rate, and replacement interval is more useful than a headline result alone.

How Carbon Stacks Up Against KDF, RO, and Hybrid Systems

Carbon isn't the only treatment option homeowners see. Catalytic carbon is a carbon-based approach designed for chloramine-specific treatment, while KDF is a different type of media often combined with carbon in multi-stage products. A hybrid system can put multiple media types to work, but the presence of several stages doesn't automatically establish chloramine reduction.

Reverse osmosis (RO) is commonly used for drinking-water treatment at a dedicated faucet. It's a different treatment approach from a carbon tank and may be appropriate when a household has broader dissolved-contaminant concerns. However, a product's RO label alone doesn't tell you what it does to chloramine; check the exact model's performance claims and any pretreatment requirements.

Option What to check
Catalytic carbon Confirm a model-specific chloramine claim and stated operating conditions.
KDF with carbon Identify what each stage is intended to reduce, and verify chloramine testing for the complete system.
RO system Check the model's documented chloramine performance and whether its design calls for pretreatment.
Hybrid system Review the full configuration, not just the number of stages or media names.

Certification can help narrow the field. NSF explains that NSF/ANSI 42 covers point-of-use and point-of-entry systems and includes chloramine among possible reduction claims. Verify that the exact model is certified for chloramine reduction; don't infer performance from a brand name or from certification for another claim (NSF's overview of filtration standards).

The right choice depends on where you want treatment and what you want it to accomplish. A drinking-water filter can focus on the kitchen tap, while a whole-house setup treats water at the home's entry point. Compare verified claims and operating requirements rather than treating carbon, KDF, and RO as interchangeable labels.

Choosing and Maintaining a Chloramine-Rated Carbon Filter

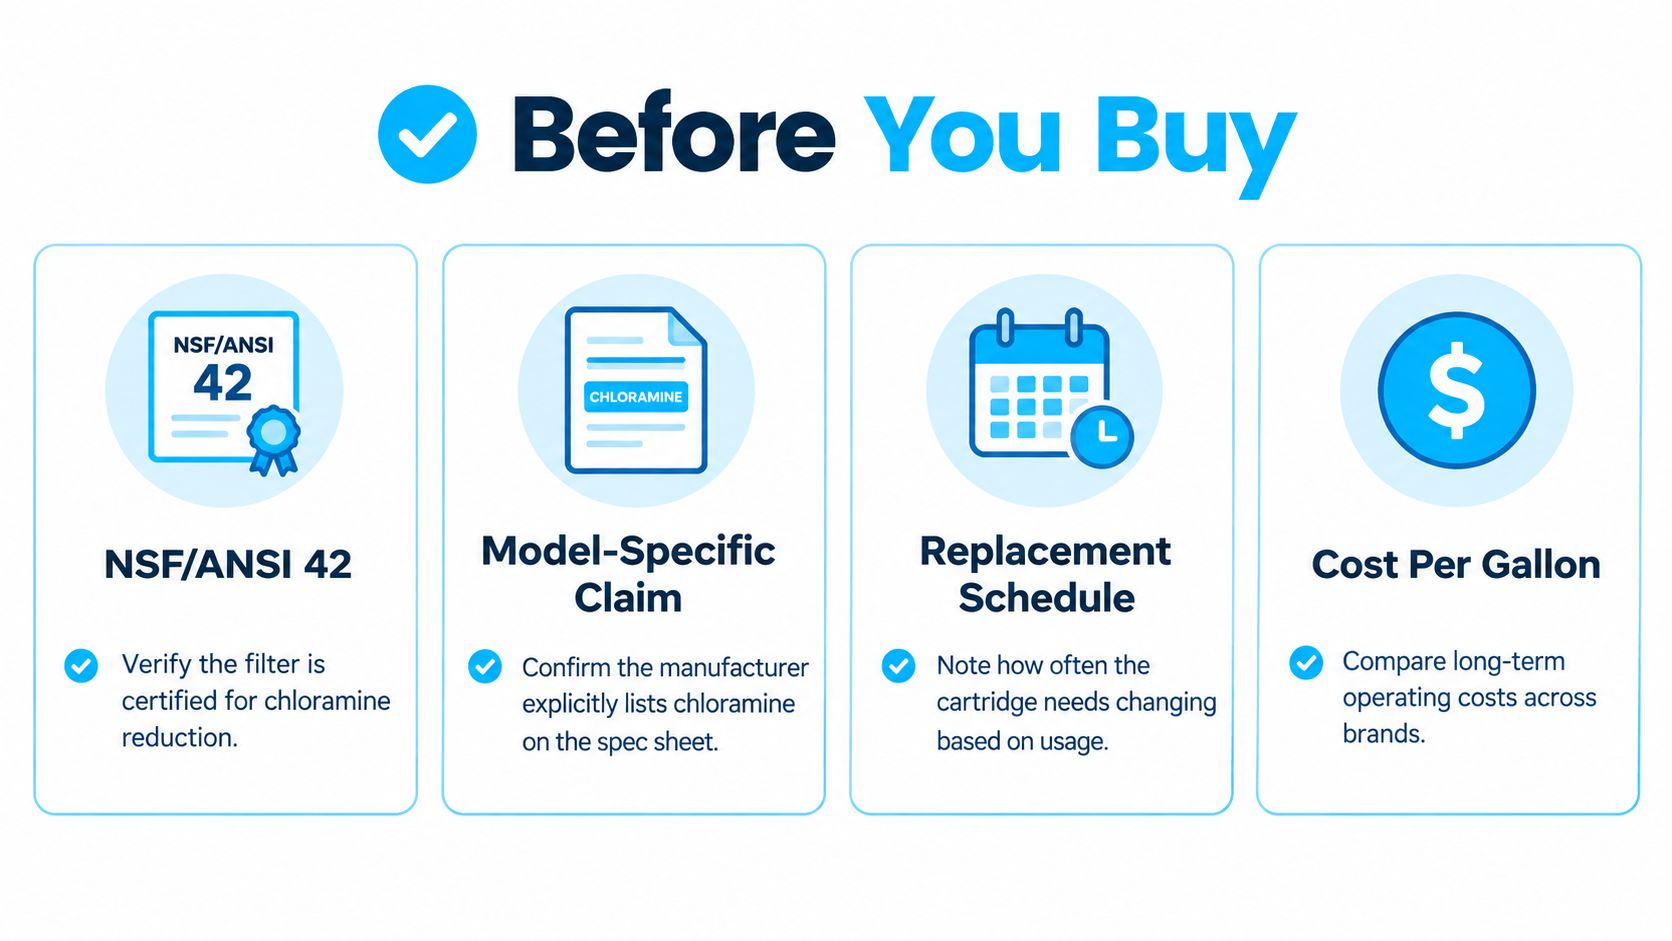
Before buying, get the details that make the product's claim testable. A reliable comparison should identify the exact model, the chloramine reduction claim, the carbon type, the rated flow, and the replacement schedule. If the information is missing, contact the manufacturer rather than guessing from the package.
A four-step checklist for consumers to evaluate before purchasing a chloramine water filter for their home.

A homeowner's buying and care checklist

  • Verify the exact model: Look for a chloramine-specific reduction claim and check whether the model is certified for that claim under NSF/ANSI 42.
  • Ask about the media: Find out whether the system uses ordinary GAC, catalytic carbon, or a combination, and how much carbon it contains.
  • Match the flow: Ask what flow rate was used for the chloramine test. A result at a lower flow may not represent a shower or whole-house system running at higher demand.
  • Set the replacement reminder: Follow the manufacturer's stated interval and conditions. Don't assume a cartridge still performs because water tastes normal.
  • Check your water information: Review the local utility's water-quality report to learn which disinfectant is used and whether chloramine is a relevant treatment target.

A return of a chlorine-like taste or odor may be a useful prompt to inspect the filter or check its replacement date. It isn't a measurement of chloramine, and a pleasant taste doesn't prove broad contaminant removal. If performance is important to your household, consider asking the manufacturer for test conditions or arranging appropriate laboratory testing.

A refrigerator or shower filter that lists chlorine reduction may still lack a chloramine claim. Look for a larger, properly specified carbon bed when the application demands higher flow, and don't let a general “carbon” label substitute for model-specific evidence.

The embedded video offers another way to review filter considerations:

The Smarter Question to Ask Any Filter Brand

Instead of asking only, “Does this filter remove chloramine?” ask: Which exact model is tested or certified for chloramine reduction, at what flow, with what carbon media, and under what replacement schedule? Those answers tell you far more than a broad claim on a box.

Then compare the stated flow with how you'll use the filter. A kitchen drinking-water cartridge and a whole-house system face different demands, so a claim should fit the intended use. If the manufacturer can't identify the carbon type, carbon volume, test conditions, or maintenance interval, treat the performance claim cautiously.

For help interpreting certification language, consult this guide to NSF drinking-water standards. The central takeaway is simple: properly designed and maintained carbon can remove chloramine, but the design conditions matter more than the word “carbon” on the label.


Water Filter Advisor offers consumer guides, product comparisons, and practical advice on choosing and maintaining home filtration systems, including filters intended for chloramine reduction. Visit Water Filter Advisor to compare options and make your next filter decision with clearer questions and better information.

3 Stage Filtration System Explained for Homeowners

You turn on the kitchen faucet and notice a faint chlorine smell. The next morning, the water looks clear, but a rusty ring has appeared in the sink. If you rely on well water, you may instead see fine grit in a glass or notice a sulfur-like odor after the water sits. A 3 stage filtration system can help, but its performance depends on what each cartridge contains, not on the number printed on the product box.

The most useful question isn't “How many stages does this filter have?” It's “Which contaminants does each stage target, and does that match my water report?” The answer determines whether a basic sediment-and-carbon setup is enough, or whether you need reverse osmosis, ion exchange, UV disinfection, or a different treatment plan.

What a 3 Stage Filtration System Does

A 3 stage filtration system is a sequence of treatment steps, not a fixed recipe. Its results depend on the media in each cartridge and on the contaminants identified in your water report. A generic setup may improve taste and reduce sediment, while leaving hardness, dissolved metals, or microorganisms untreated.

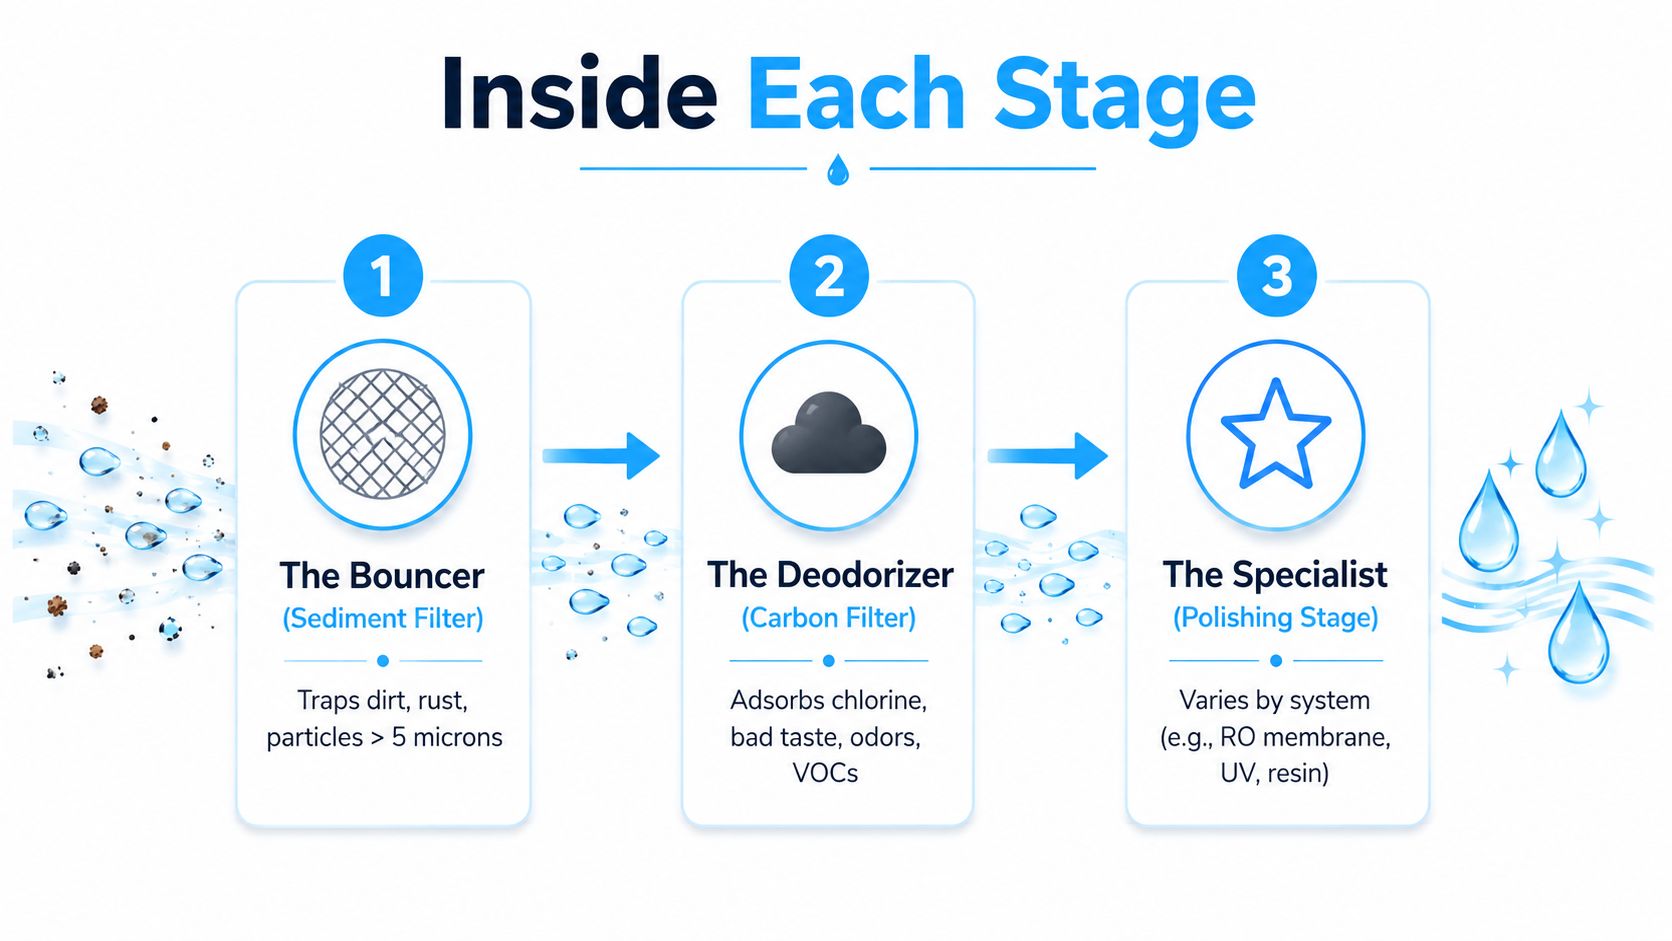
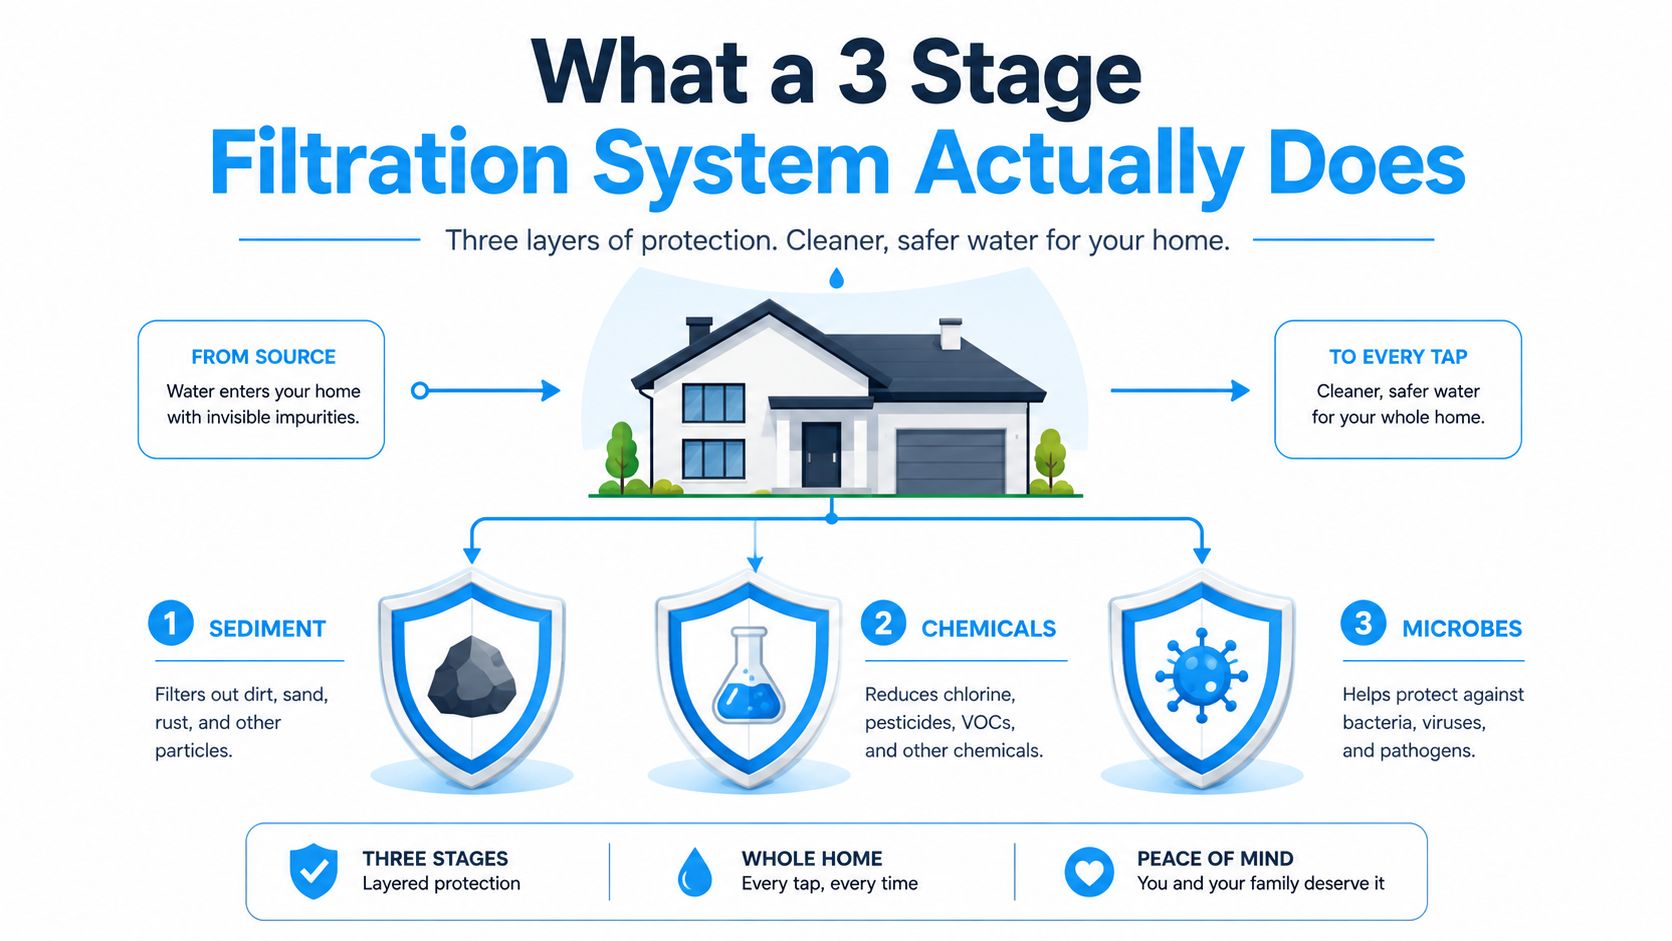
Water normally passes through a sediment stage, a carbon stage, and a specialized or polishing stage. The first works like a screen, holding back particles. The second uses a chemical sponge, adsorbing compounds that affect taste and odor. The third must match the remaining concern, such as a dissolved contaminant, hardness, or biological contamination.

An infographic showing how a three-stage water filtration system removes sediment, chemicals, and microbes for home use.

Why the order matters

A sediment prefilter commonly has a rating near 5 microns. It can intercept sand, silt, and rust before those particles reach finer media. This protects the downstream cartridges and helps preserve their usable capacity, instead of forcing one filter to handle every type of impurity. The arrangement appears in point-of-use and whole-house treatment, and the longer history of filtration is described in Luminor's filtration education resource.

The third housing is where product labels can mislead. A carbon cartridge may reduce chlorine and some organic compounds, but it does not automatically remove hardness, every dissolved metal, or microbial contamination. A specialized cartridge, reverse osmosis, ion exchange, or UV treatment may be needed, depending on the report and the manufacturer's tested claims.

Staged purification has a long history. Ancient Sanskrit writings described boiling, hot metal, sand, and charcoal around 2000 B.C. Hippocrates is credited with a simple sediment filter around 500 B.C., and Scotland built the first municipal water treatment plant using slow sand filtration in 1804. The Gorbals Waterworks later built three-stage upward-flow filters in 1846–48, extending staged treatment into municipal engineering.

Practical rule: Treat “three-stage” as a layout, not a performance guarantee. Match each cartridge to a documented contaminant target and your water report.

Inside Each Stage and What It Removes

A generic three-stage setup follows a sequence, but the label does not identify every contaminant it can reduce. The first cartridge catches particles, the second addresses chemicals affecting taste and odor, and the third is selected for the remaining concern on your water report. Media, flow rate, contact time, and tested claims determine the actual result.

A diagram illustrating the three stages of a water filtration system, explaining each filtering process sequentially.

Stage one catches suspended material

The first cartridge is usually a mechanical sediment filter. Its pores hold back sand, rust, silt, and other suspended particles as water passes through. It does not dissolve or chemically neutralize them.

That limited role still protects the cartridges that follow. A heavy grit load can foul a carbon bed faster and increase pressure loss. Whole-house systems often place sediment filtration before carbon for this reason, particularly when incoming water contains visible particles.

Stage two addresses taste and odor

The second stage commonly contains activated carbon. Carbon adsorbs chlorine, chloramines, VOCs, and compounds linked to unpleasant taste and odor. Performance depends on the carbon type, contact time, flow rate, and the manufacturer's tested claim.

Chlorine reduction improves water's sensory qualities, yet it does not show that the system handles every health-related contaminant. The EPA home drinking-water filtration fact sheet advises matching treatment to the contaminant. It also notes that many products carry NSF/ANSI 42 certification for chlorine taste and odor.

Stage three must match the report

The final cartridge can be a finer mechanical filter, carbon polishing cartridge, reverse osmosis membrane, ion-exchange resin, or UV disinfection chamber. Some systems use specialized media such as KDF. Others add a final carbon block to improve taste after more intensive treatment.

A carbon cartridge, for example, does not automatically remove hardness, every dissolved metal, or microbial contamination. Those concerns may require different media or treatment, and the manufacturer's tested claims should identify what the cartridge reduces.

Replacement timing follows the installed cartridges rather than a generic calendar. One consumer three-filter system recommends replacing all three filters together after 2,000 gallons, with reported intervals of about 9 to 15 months depending on household size, as described by Water Filtration Authority's multi-stage guidance. During a kitchen or bathroom renovation, a qualified bathroom remodel plumbing installer can confirm that the inlet, outlet, shutoff, and drain connections suit the planned installation.

The video below provides another visual explanation of staged filtration.

Choosing the Right Third Stage for Your Water

The third stage is where two systems carrying the same “3 stage” label can behave very differently. One may be designed mainly for better taste. Another may contain a membrane for dissolved contaminants. A third may use UV because the homeowner is concerned about microorganisms. The label alone can't tell you which one belongs in your home.

Reverse osmosis for dissolved contaminants

Reverse osmosis, or RO, uses a membrane to reduce dissolved solids and can target substances such as some heavy metals and other dissolved contaminants. It typically needs sediment and carbon prefiltration to protect the membrane. RO is often most appropriate at a drinking-water tap, where the household wants intensive treatment for a limited volume of water.

The trade-off is slower production and wastewater. It also requires attention to prefilters and membrane condition. A three-stage RO system therefore isn't equivalent to a three-stage whole-house carbon system, even though both have three primary treatment positions.

UV for biological concerns

UV disinfection uses ultraviolet light to inactivate microorganisms. It doesn't remove chlorine, dissolved metals, salts, or sediment, so it must be paired with appropriate filtration and requires reliable water clarity and operating conditions.

For a private well with a confirmed microbial concern, UV may be a sensible final barrier. It isn't a substitute for testing, source protection, or a sediment stage.

Ion exchange for hardness and selected ions

Ion exchange swaps certain dissolved ions for others. Water softeners use this principle to address hardness, while specialized resins may target particular contaminants. The correct resin matters, and homeowners should verify the claim against the laboratory report rather than assume that any resin cartridge handles every metal.

Carbon polishing for a lighter finish

A final carbon block is often the simplest option when the main goal is taste, odor, or residual chemical reduction. It can be a good fit for treated municipal water when the report doesn't identify a contaminant requiring RO, UV, or resin.

SRS International's three-stage technical specifications describe a common whole-house architecture using sediment, carbon, and final polishing. The source also associates that design with about 30–90 psi line pressure, 1–15 L/min residential flow, and cartridge-life ranges that vary by stage and water conditions.

A guide illustrating four options for a third stage water filtration system, highlighting their unique features and benefits.

Certifications That Actually Prove Performance

A certification mark matters only when it matches the claim you're evaluating. A cartridge certified for chlorine taste and odor isn't automatically certified for lead, PFAS, microbes, or every other contaminant that appears in a sales brochure.

Residential water-treatment filters aren't covered by federal regulations, so voluntary standards and testing protocols help define minimum safety and performance requirements. NSF's explanation of residential water-treatment standards explains why shoppers should look for the applicable standard and the specific reduction claim.

Read the standard beside the contaminant

NSF/ANSI 42 generally relates to aesthetic effects, such as chlorine taste and odor. That's useful if your municipal water tastes heavily chlorinated, but it isn't the same as a health-contaminant certification. The EPA also notes that chlorine is added by utilities for pathogen control, so removing chlorine at the tap doesn't mean the filter has addressed every possible microbial concern.

NSF/ANSI 53 applies to specific health-related reduction claims when the product has been tested for those claims. Lead reduction is a particularly important example. The EPA's consumer tool for lead-certified point-of-use and pitcher filters identifies products that can reduce lead to 5 ppb or less while meeting particulate reduction Class I capabilities under NSF/ANSI 53 and 42.

NSF/ANSI 401 may appear on products tested for certain emerging or incidental contaminants. Don't treat the number as a universal promise. Confirm the exact contaminant listed in the performance data.

Use a three-question check

  • What contaminant was tested? Look for the named substance, not a broad phrase such as “reduces impurities.”
  • Which standard applies? Match NSF/ANSI 42, 53, or 401 to the claim being made.
  • What are the operating limits? Flow rate, capacity, cartridge life, and installation conditions can affect performance.

A certification is a narrow proof of a tested claim. It isn't a blank check for every contaminant in your water.

How 3 Stage Systems Compare to 2 Stage and 4+ Stage Designs

A two-stage system can be perfectly reasonable when the water is already treated and the household mainly wants to reduce sediment and improve taste. A common arrangement pairs sediment filtration with activated carbon. It has fewer cartridges, fewer connections, and a smaller maintenance burden, but it may not provide a specialized response to dissolved solids, hardness, or microbes.

A 3 stage filtration system adds a dedicated position for that problem-specific job. The extra stage might be RO at a drinking tap, resin for hardness, UV for biological control, or a polishing cartridge for final taste improvement. That flexibility explains why three stages often sit at the practical center of residential filtration.

More stages can solve more problems, but not automatically

Systems with four or more stages may add prefilters, post-carbon treatment, remineralization, deionization, or additional polishing. Modern point-of-use systems may include up to seven stages when those extra functions are counted, according to Water Filtration Authority's multi-stage system overview.

More components make sense only when each one has a defined role. They can also increase cartridge replacement complexity, pressure loss, and the number of failure points. A homeowner who wants only chlorine taste reduction may gain little from adding a membrane and several polishing cartridges.

Compare the real ownership burden

Design Typical advantage Main trade-off
Two stage Simple sediment and carbon treatment Limited specialization
Three stage Adds a targeted finishing step More maintenance than two stages
Four or more Supports layered treatment for complex needs Higher complexity and potentially greater pressure loss

A system should match the water report, the installation location, and the household's willingness to maintain it. The same principle applies to other home filtration decisions, including Central Florida pollen humidity solutions where the filter choice also needs to reflect the specific problem rather than the product category alone.

Installation Basics and a Realistic Maintenance Schedule

A three-stage unit usually sits either under the sink for point-of-use drinking water or at the point of entry for whole-house treatment. In both cases, water enters the first housing, travels through the connected cartridges in sequence, and exits toward the faucet or household plumbing.

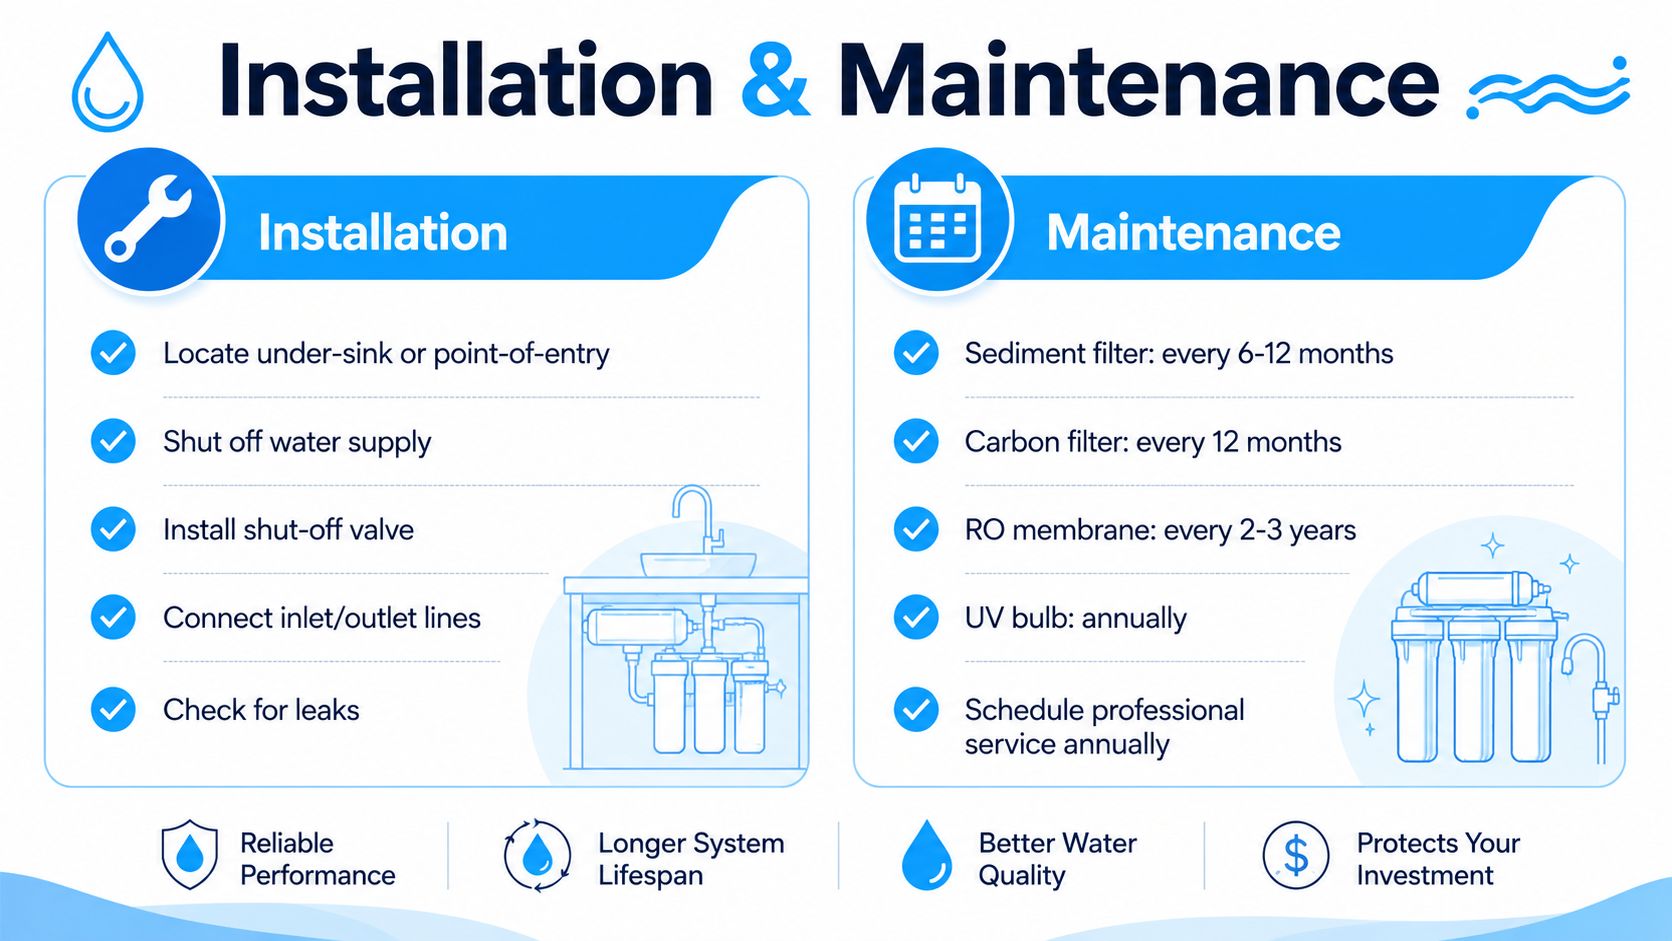
Before opening a housing, shut off the water supply and relieve pressure. Install the shutoff valve in an accessible position, connect the inlet and outlet lines in the correct direction, and check every fitting for leaks after restoring flow. Under-sink installations can be manageable for experienced DIY homeowners, but whole-house systems may require pipe cutting, support, bypass planning, and local plumbing knowledge.

An infographic detailing installation steps and maintenance schedules for a 3 stage filtration system for clean water.

Plan replacements by stage

Published technical specifications associate sediment and final-polish cartridges with roughly 6–12 months of life, while carbon cartridges may last about 12–18 months, depending on water quality and demand. Those ranges come from SRS International's cartridge-filtration specifications, but the manufacturer's instructions should control your schedule.

One system may recommend changing all three filters together, while another gives each cartridge its own interval. Keep a written replacement log and change a cartridge sooner if flow drops, taste changes, or the housing shows unusual loading.

Avoid common maintenance mistakes

  • Check pressure changes: A noticeable reduction in flow can signal clogging or excessive pressure drop.
  • Clean the housings: Wash and sanitize housings during cartridge changes according to the product instructions.
  • Use the correct cartridges: A physically compatible cartridge may not have the required media or certified contaminant claim.
  • Inspect seals: Re-seat O-rings carefully and replace damaged seals before pressurizing the system.

For additional installation and filter-care guidance, consult Water Filter Advisor's advice resources.

Matching the Right System to Your Household

A municipal-water household with acceptable test results and a taste complaint will often have a straightforward shortlist. Sediment plus carbon may be enough, with a final carbon polish if the manufacturer's data supports it. If lead appears in the plumbing or water test, choose a cartridge independently tested and certified for lead rather than assuming that carbon alone provides the needed protection.

Private well owners face more variation. Sediment, iron, hydrogen sulfide, hardness, and microbial concerns can require different media or separate treatment equipment. A generic three-stage label can't identify the correct solution without a water report.

Renters usually benefit from point-of-use systems that avoid permanent plumbing changes, while homeowners can consider an under-sink RO unit or a point-of-entry design when broader coverage is justified. Large families should pay close attention to flow, cartridge capacity, and replacement effort because demand can shorten service life.

Household Type Best Third Stage Estimated Cartridge Replacement
Municipal water, taste-focused Carbon polishing Follow the manufacturer's tested capacity
Municipal water, lead concern Lead-certified cartridge or RO Follow the certified cartridge instructions
Private well, microbial concern UV after suitable prefiltration Follow the UV manufacturer's schedule
Hard well water Ion exchange or dedicated softening treatment Depends on water quality and demand
Renter needing drinking-water improvement Compact carbon or RO point-of-use unit Based on cartridge capacity and usage
Large household High-flow specialized stage Monitor pressure and replace according to loading

Water Filter Advisor offers consumer guidance on whole-house, under-sink, faucet, shower, refrigerator, and portable filtration, along with replacement cartridges, media, certifications, and testing kits. Its material can help organize a shortlist, but the final choice should still follow the water report and the product's verified performance claim.

Questions Homeowners Ask Before Buying

Can a three-stage system reduce lead to a safe level?

It can, but only when the specific cartridge is independently tested and certified for lead reduction. The EPA identifies point-of-use and pitcher filters that reduce lead to 5 ppb or less under the relevant certified capabilities. A standard sediment and carbon arrangement without a lead-specific claim shouldn't be treated as proof of lead protection.

Does it remove PFAS?

Not every three-stage system does. PFAS performance depends on the media, membrane, flow conditions, and verified product claim. Look for documentation that names PFAS or the relevant compound directly. The number of stages alone doesn't establish performance.

Will it handle microbes?

Only if the system includes a technology designed and tested for biological treatment, such as UV disinfection, and the installation conditions support that technology. Sediment and carbon stages can improve clarity and taste, but they aren't automatically a complete disinfection system.

What about iron or hydrogen sulfide from a well?

Those problems need media selected for the specific chemistry and concentration. A generic carbon cartridge may not solve substantial iron loading or sulfur odor. Test the well water first, then compare the results with the manufacturer's removal data.

Can renters install one?

A faucet-mounted, countertop, or compact under-sink point-of-use system may be suitable when the lease allows it and the installation doesn't require permanent plumbing changes. Ask the landlord before modifying supply lines, and choose a system that can be removed without damaging the property.

The practical buying rule is simple: choose the media first, then count the stages. A two-stage system with the right certified cartridges can outperform a four-stage product that doesn't target your actual contaminant.


Water Filter Advisor helps households compare filtration types, understand replacement cartridges, review certification claims, and plan maintenance for municipal or well water. Visit Water Filter Advisor with your water report in hand to build a focused shortlist instead of buying based on a stage count alone.

Whole House Filter Before or After Water Softener? Guide

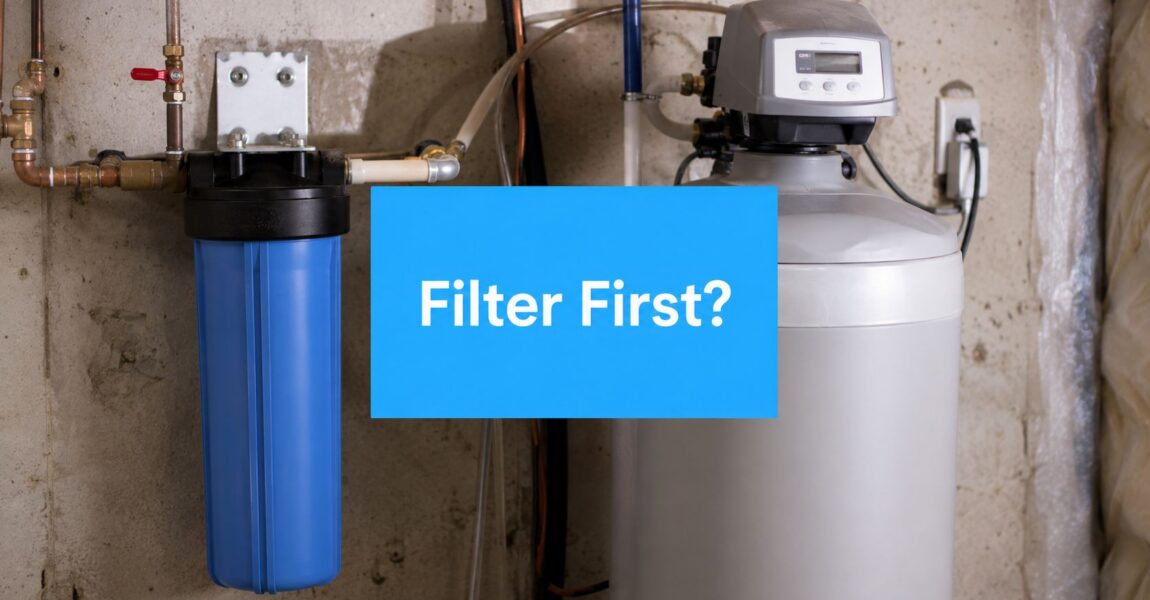
Put the whole-house filter before the water softener when the water carries sediment, chlorine, or iron, because those contaminants foul resin and choke flow. If your water is cleaner and only hard, the order can flip.

You've got the tanks sitting there, the pipe stub is staring back at you, and the only question that matters is simple, where does the filter go. The answer is usually filter first, however, the crucial task involves aligning the initial stage with the component requiring safeguarding, because a sediment filter, a carbon filter, and a softener do different work in the line. That distinction is what keeps a softener alive, keeps backwash moving, and keeps you from buying the wrong setup twice.

The Big Question Every Homeowner Asks First

You're standing in the basement with two shiny tanks and a pile of fittings, and the pipe out of the wall is the only thing left to decide. Put the whole-house filter before the water softener in the usual case, especially when you're dealing with grit, chlorine, or iron, because that order protects the softener and preserves pressure through the system. That basic rule is the one most installers reach for first, and it's the one that saves the most headaches later. Water Filter Advisor's advice page is a decent place to sanity-check the bigger picture, but plumbing logic is the primary driver.

The order changes what wears out first

A softener's resin is the expensive part. If the incoming water brings in sediment or chlorine, that resin takes the beating first, and the softener loses performance earlier than it should. Put the filter upstream and you give the softener cleaner water to work with, which is the point of the whole chain. That's why so many installation guides push the filter-first layout when the supply isn't already clean.

The order also changes how the system breathes

Backwash matters. If the first component in line is the one that needs the stronger backwash flow, it needs to sit upstream so it isn't starved of pressure during regeneration. A clogged prefilter can pinch flow, and a softener that can't backwash properly turns into a maintenance problem fast.

Practical rule: if the incoming water has anything you can see, smell, or taste before it reaches the softener, treat the front end of the line like protection gear, not decoration.

The best way to think about it is this. The filter is the gatekeeper, and the softener is the specialist. If the gatekeeper fails, the specialist gets abused.

What Each Piece of Equipment Actually Does

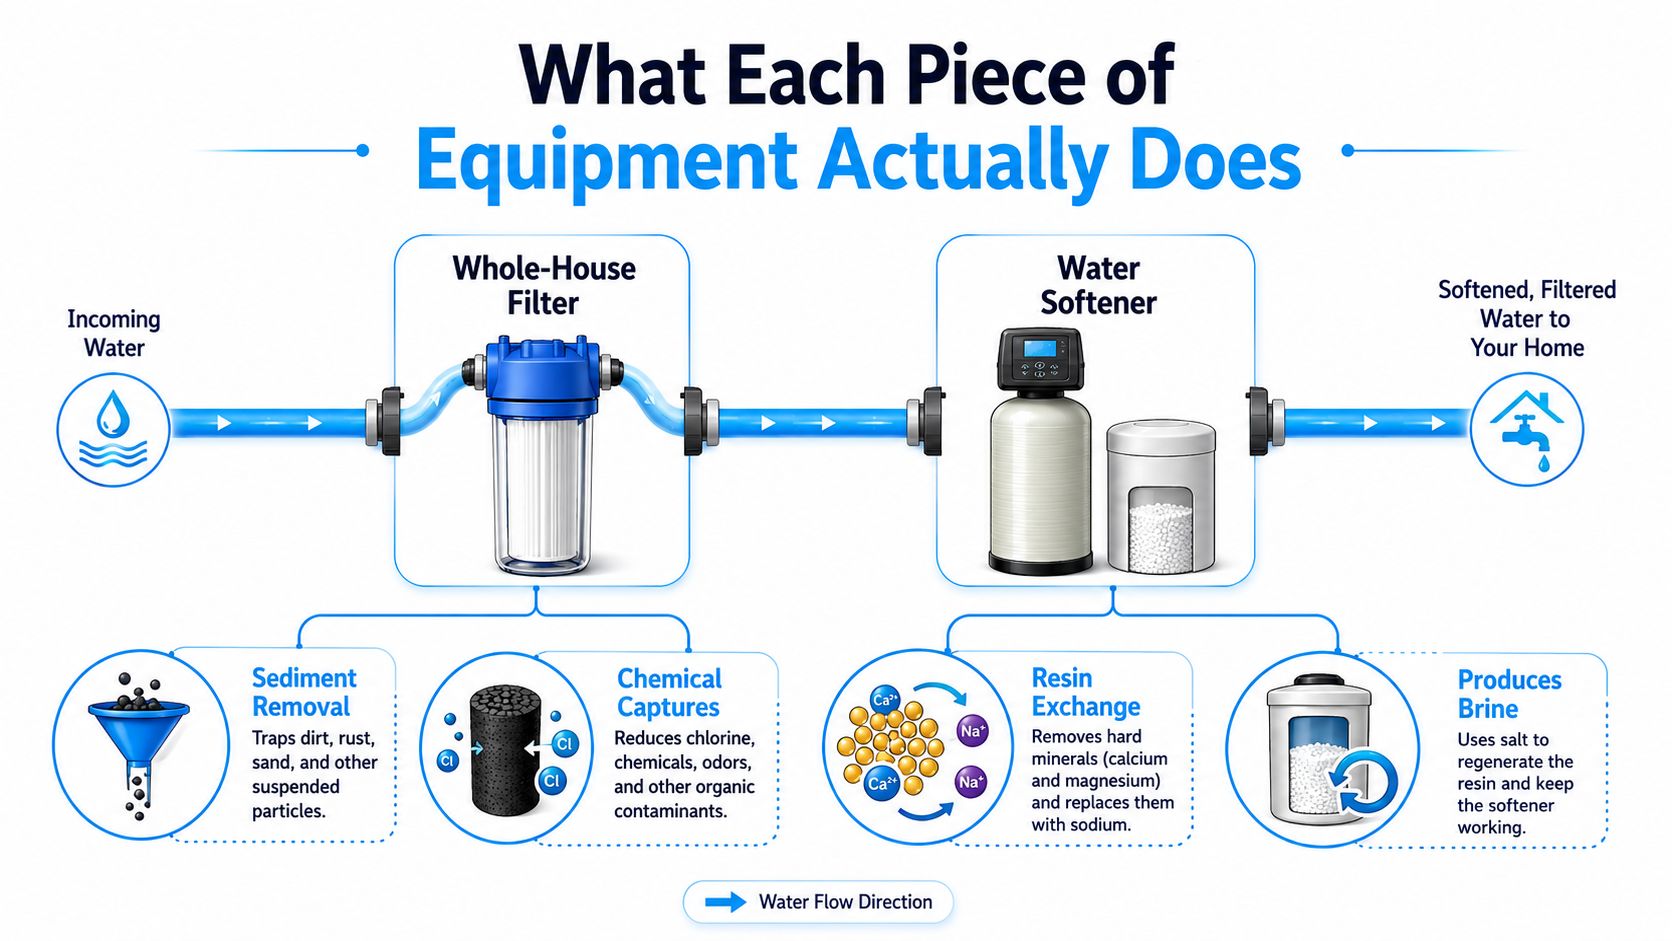
A whole-house filter and a water softener are not interchangeable, and that's where a lot of bad advice starts. A filter catches or reduces the stuff you don't want moving through the plumbing, while a softener changes the water's mineral makeup. They can sit in the same line, but they don't solve the same problem.

A diagram illustrating a water treatment system with a whole-house filter followed by a water softener unit.

The filter is the front line

Think of a whole-house filter like a coffee filter or a screen door. Sediment filters trap sand, rust, and grit. Carbon filters deal with chlorine and odor, which is why they show up so often on city-water systems.

The softener is a mineral swap machine

A water softener uses ion-exchange resin to swap hardness minerals, mainly calcium and magnesium, for sodium or potassium. It doesn't “clean” water in the broad sense, it specifically changes the water so it doesn't scale fixtures, cloud glass, or cake up appliances. That's why the softener wants reasonably clean water going into it, not a stream full of debris.

The softener is a specialist, not a garbage disposal for the water line.

Once you see the difference, the placement debate gets much easier. The filter protects the line. The softener protects the house from hardness. Put them in the wrong order, and you make one of them do a job it wasn't built for.

Why Order Matters for Resin, Flow, and Backwash

The biggest reason to put filtration ahead of softening is resin protection. Sediment, chlorine, and iron all shorten the life of ion-exchange resin, and resin is the part you do not want to replace early. That's not a theory, it's basic treatment-train logic, and the same rule shows up in installation guidance that places the higher-backwash component upstream when needed so it can run without being starved of pressure. Quality Water Lab explains that control rule clearly.

A diagram illustrating why a whole house filter should be placed before a water softener to protect resin.

Resin hates dirty water

If sediment gets into the softener first, it can clog the valve assembly and get into places it has no business being. Chlorine is a different problem, it wears down the resin itself, which is why carbon often matters so much on municipal water. Iron is worse still, because it can foul resin beds and leave the softener struggling long after the water looks fine.

Backwash needs room to work

A softener has to regenerate and backwash properly. If a prefilter is packed with debris, it can rob the system of pressure at exactly the wrong time. That's the plumbing version of trying to run a vacuum with a stuffed bag, the machine may still turn on, but it's not doing the job it was built to do.

When a homeowner tells me the softener “just isn't working right,” I don't start by blaming the softener. I look upstream first. Dirty water, clogged prefiltration, or a bad sequence usually shows up there before it shows up anywhere else.

City Water Versus Well Water Two Different Stories

City water and well water are not the same plumbing problem, so they don't deserve the same answer. Municipal water is commonly chlorinated, which makes chlorine protection the main issue. Well water more often brings iron, sediment, and hardness to the party, which shifts the priority toward physical prefiltration.

City water usually wants carbon ahead of the softener

On chlorinated municipal water, the softener's resin takes the hit from chlorine if nothing stops it first. That's why the usual move is a carbon filter before the softener, because carbon is there to reduce the chemical stress that wears the resin down. Some homes also need sediment removal first if the supply carries grit, but the chemical protection question is what usually drives the city-water layout.

Well water usually wants sediment and iron control first

Well water flips the script. There's often no chlorine to worry about, but there may be sand, rust, iron, and other particulates. In that case, the right first move is usually sediment or iron filtration before the softener so the resin doesn't get buried under contamination it can't handle well.

The simple rule is this. City water often asks, “How do I protect the resin from chlorine?” Well water often asks, “How do I keep grit and iron out of the softener?” Those are two different questions, and they deserve two different front-end setups.

My field rule: if the water smells like a pool, think carbon first. If it leaves orange stains or gritty residue, think sediment or iron first.

That's why the phrase whole house filter before or after water softener is really shorthand. It's not one decision. It's a decision tree.

Which Filter Type Goes Where in the Chain

Homeowners get into trouble when they treat every whole-house filter like the same piece of gear. A sediment filter, a carbon tank, and an iron filter each solve a different problem, and their position in the line should match that job. Put the wrong stage first and you waste capacity or fail to protect the softener.

Sediment almost always goes first

Sediment prefilters, whether they're pleated cartridges or spin-down units, belong at the front of the line when the water carries sand, rust, or visible grit. They protect valves, resin, and downstream media from getting clogged with junk that should have been removed earlier. The same logic shows up in installation guidance that places Sediment → Softener → Carbon/RO → UV → Point-of-Use as a standard home treatment train. Water Tech Advice lays out that sequence.

Carbon can go before or after, depending on the goal

Carbon before the softener makes sense when the softener needs protection from chlorine. Carbon after the softener makes sense when the goal is polishing taste and odor after hardness is already handled. That's why generic “filter first” advice is too crude on its own, carbon isn't always a prefilter, it's sometimes the finishing stage.

Iron and specialty media usually belong ahead of the softener

Iron filtration, manganese media, and similar specialty filters usually go upstream because they target contaminants that will foul resin or clog the softener path. If the water has iron, don't make the softener be the catcher's mitt. Let the iron media do that job first.

Filter Type What It Removes Recommended Position Why
Sediment filter Sand, rust, grit First Protects valves and media from clogging
Activated carbon Chlorine, taste, odor Before softener on chlorinated water, after softener for polishing Protects resin or improves final water quality
Iron filter Iron and related metals Before softener Keeps resin from fouling
Specialty media Problem contaminants specific to the source water Usually before softener Prevents downstream damage

That table is the whole game in one glance. The filter type matters more than the slogan.

A Standard Treatment Train From Wall to Tap

A good residential treatment train follows the water, not the marketing brochure. The common layout starts with sediment filtration, moves into softening, then uses carbon or reverse osmosis as the polish stage. UV or a point-of-use filter can sit near the end if the home needs that extra layer.

A diagram illustrating the six-step standard treatment train process for residential whole house water filtration systems.

Read the line from left to right

Main water line first. Then the pre-filter. Then the softener. Then the polishing stage. That order is easy to maintain because every stage sees water that's already been treated for the problem in front of it. A plumber can also line up bypass valves and drain access in that order without turning the basement into a maze of elbows.

Maintenance works better when the sequence is sane

A sediment cartridge gets changed at the front because it takes the first hit. The softener sits behind it because it doesn't want that load. Carbon, RO, UV, and point-of-use gear come later because they're doing refinement work, not brute-force cleanup.

That sequence also makes troubleshooting easier. If the water looks bad at the faucet, you can walk back through the chain in order and find the stage that failed first. In the field, that saves time, and time is money.

Installation Maintenance and Warranty Tradeoffs

The wrong order costs more than it should. If chlorine reaches a softener's resin continuously, the resin gets worn out sooner than it should, and that means an early replacement nobody budgeted for. If sediment hits the valve and control head, you get pressure swings, nuisance alerts, and service calls that should never have happened.

Warranty language matters

Many manufacturers expect a carbon prefilter upstream when chlorine is present. If you skip that and then ask for warranty help later, you may have a bad conversation on your hands. I've seen homeowners fight the softener manufacturer over damage that really came from bad upstream treatment, and that's not a fight you want.

Maintenance gets simpler when the order is right

Put the sediment stage first and you replace cartridges where they belong, before the softener starts carrying the burden. Put carbon before the softener on chlorinated water and you protect the resin instead of gambling with it. If you want a broader plumber's-eye look at installing and maintaining the rest of the system, the Growth 4 Trades plumbing guide is useful context for how pros think through the work.

A clean treatment train is cheaper to own than a messy one is to fix.

The greater cost isn't just the first install. It's the call you make later when a valve sticks, resin fouls early, or the system behaves like it was never designed to work together in the first place.

Common Myths and When to Break the Rules

The biggest myth is that filter first is a universal plumbing law. It isn't. It's a strong default, and on dirty or chlorinated water it's the correct move, but there are legitimate setups where the softener goes first or where a separate upstream filter already handled the dirty work.

An infographic showing common myths about water softener and filter installation order for home water systems.

When the softener can go first

If the water is relatively clean and the only real issue is hardness, the softener can go first. That fits homes without sediment, without chlorine stress, and without another contaminant that would punish the resin. It's not the common case, but it's a real one.

When the rule should be broken on purpose

If there's already an iron filter or another protective stage upstream, you don't need to repeat the same job. If the home is on a clean municipal supply and the softener is handling hardness alone, the sequence can be simpler than the usual treatment train. And if the goal is reverse osmosis at the tap, that stage usually sits last, not ahead of everything else.

Don't copy a generic install diagram and call it done. Match the order to the water you actually have.

Common questions homeowners ask

  • Do I always need both a filter and a softener? No. If hardness is the only issue, a softener may be enough.
  • Should carbon always come first? No. Carbon comes first when it's there to protect the softener from chlorine. It can also come after when it's polishing the water.
  • Is “filter first” a code requirement? No. It's a practical design principle, not a universal rule.

Make the sequence fit the source water, the problem you're solving, and the part you're trying to protect. That's how you build a system that works without drama.


If you want a cleaner answer for your own house, start with the water source and the contaminants, not the tank labels. Visit Water Filter Advisor for practical guidance on whole-house systems, softeners, and the right treatment order, then use that knowledge to choose the setup that protects your resin, your pressure, and your wallet.