
It’s a slow-burn kind of frustration, isn’t it? That moment you realize your shower feels more like a light mist than a powerful blast. Before you start blaming the city or picturing a catastrophic plumbing failure, take a breath. The fix is often surprisingly simple, and if you have a home water filter, that's the absolute best place to begin your search.
Your First Checks for Better Water Pressure
When your water flow drops, the first and most important clue is figuring out the scope of the problem. Is it just one sad, trickling faucet, or is every tap in the house feeling weak? Pinpointing this will immediately tell you if your whole-house filtration system is the likely villain.
This chart breaks down the thought process, helping you trace the issue back to its source.
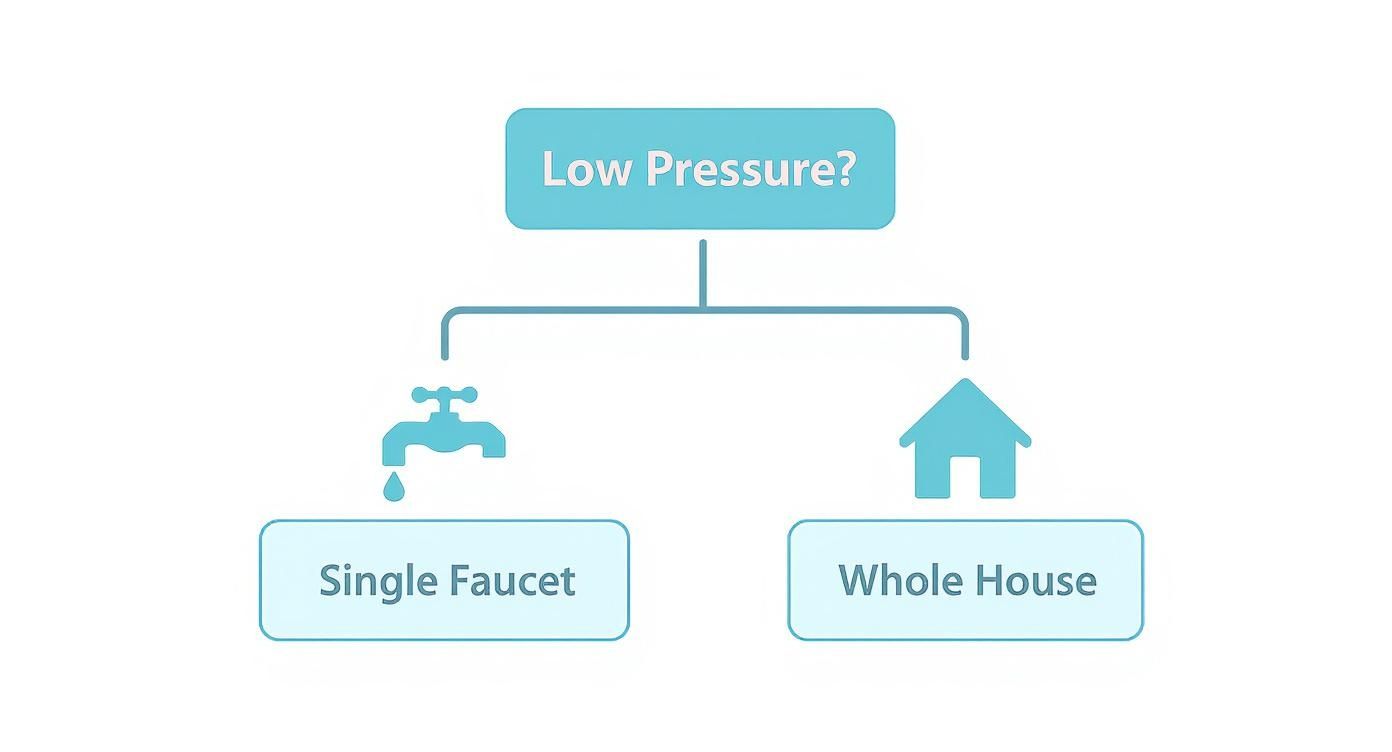
As you can see, a single-faucet issue is almost always a small, local clog. But a whole-house problem? That points directly to something affecting your main supply line—and your filtration system is suspect number one.
Is It One Faucet or the Whole House?
Put on your detective hat. If the kitchen sink is dribbling but the bathroom shower is blasting away just fine, your culprit is likely a clogged faucet aerator. These little screens at the tip of your faucet are great at catching the exact sediment and mineral buildup your filters are meant to remove. Over time, they get gummed up and choke off the water flow.
But if every fixture in your home is underperforming, the problem is bigger and sits closer to where your water comes in. This is where you need to look hard at your whole-house water filter. A filter cartridge that's past its prime is one of the most common reasons for a gradual, house-wide pressure drop.
A pressure drop of 15 to 20 PSI from the inlet to the outlet of your filter system is a dead giveaway. It means the cartridges are clogged and fighting the flow of water.
Quick Water Pressure Diagnostic Checklist
Before you start disassembling your filtration system, run through this quick checklist. It helps you rule out the simple stuff first and confirm that your filter is the real problem.
| Check | What It Tells You | Your Next Action |
|---|---|---|
| A Single Faucet | The problem is isolated to that specific fixture, not your main filter. | Unscrew the aerator and clean it. Check the shut-off valve under that sink. |
| All Hot Water Taps | The issue is likely with your water heater, not your whole-house filter. | Check the heater's shut-off valve to ensure it's fully open. |
| All Taps (Hot & Cold) | The restriction is affecting your entire home's water supply. | Your whole-house filter is the primary suspect. It's time to investigate it. |
| Neighbor's Pressure | If they have low pressure too, it's a municipal problem. | Call your local water utility to report an outage or issue. |
Completing these checks gives you a much clearer picture. If everything points to a whole-house issue, your water filtration system is where the investigation begins.
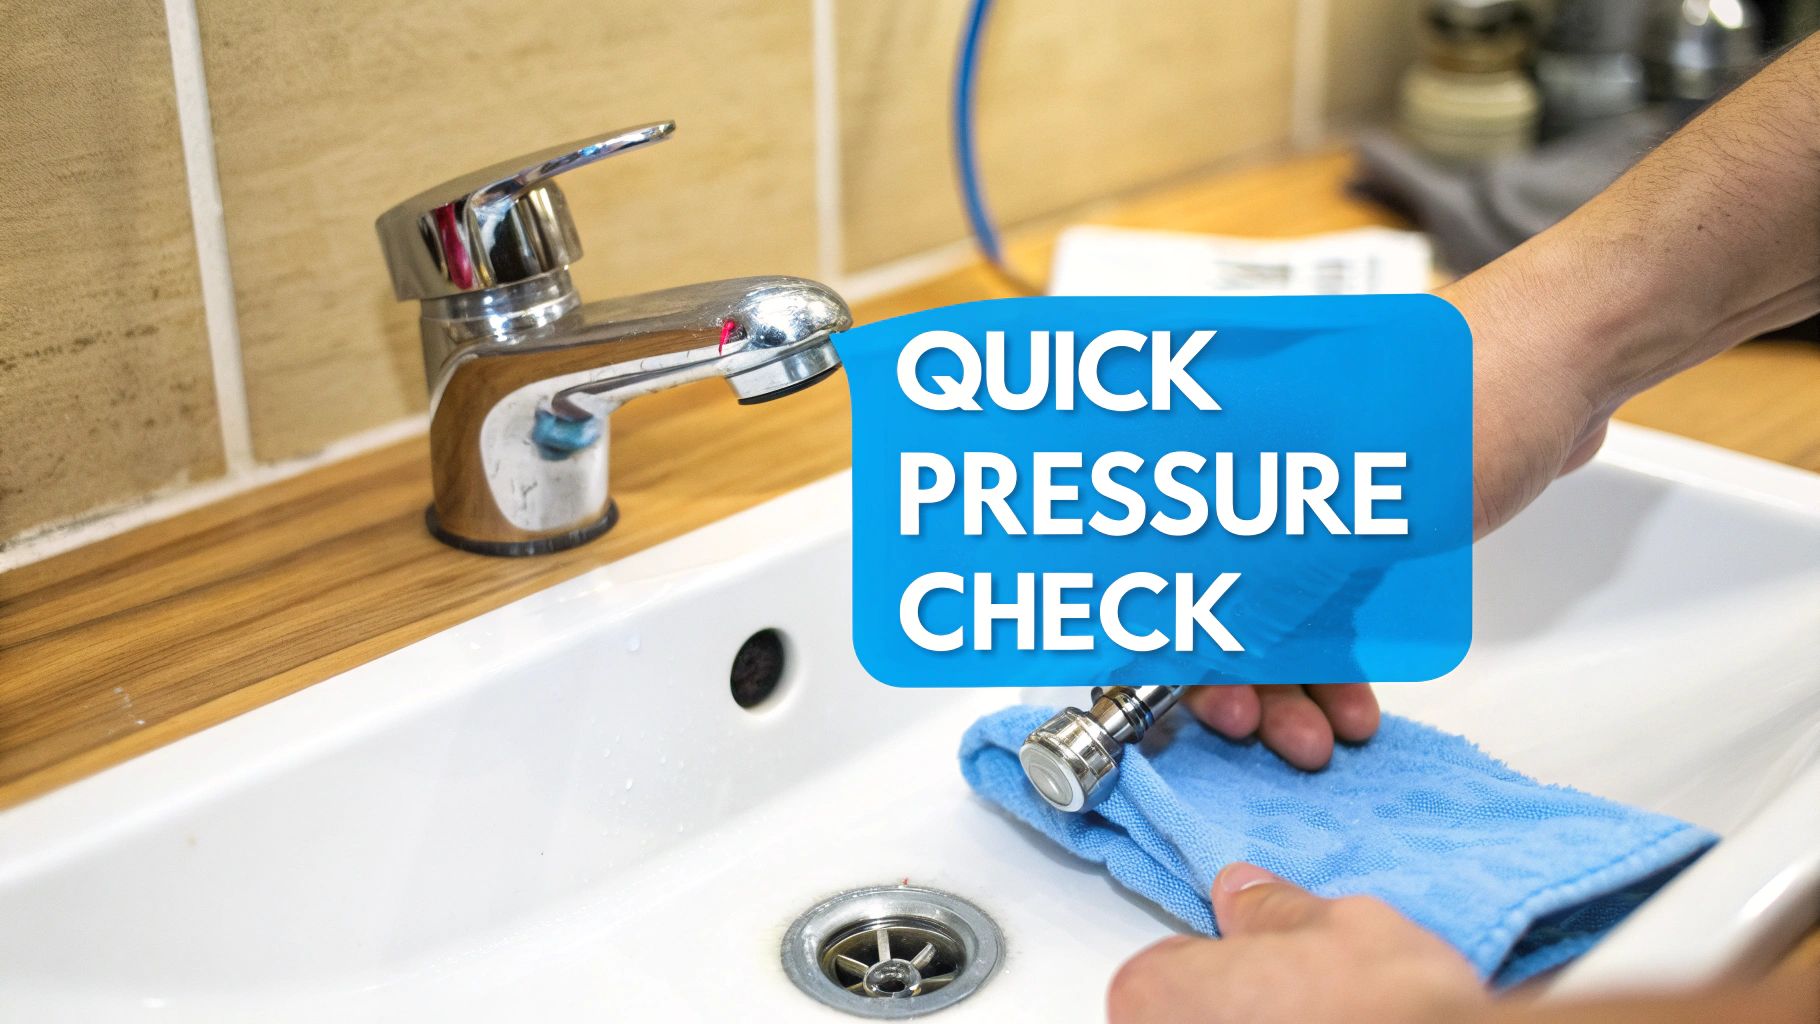
The Easiest Things to Check First
A few quick inspections can save you a world of hassle. Before you get the wrenches out, give these a look:
- Check the Shut-Off Valves: Your home has two main valves to check: the main shut-off for the house and the one on your water heater. If a plumber was just there or someone bumped one, it might be partially closed. Make sure both are turned fully counter-clockwise (all the way open).
- Inspect Faucet Aerators: For those single-faucet issues, just unscrew the aerator from the end of the spout. You’ll probably see a screen caked with gunk. A quick rinse under a working faucet or a short soak in vinegar will usually clear it right out.
- Confirm with Your Neighbors: This is the easiest check of all. A quick text or call to a neighbor can tell you if the problem is just your house or the whole block. If they’re having issues too, it’s time to call the water company.
Working through these steps will help you figure out if you have a simple fix on your hands or if it’s time to dig deeper into your filter system. For more expert tips, check out our in-depth advice on all types of water filters. Now, let's test your filtration system itself.
Is Your Water Filter the Hidden Culprit?
You got that whole-house water filtration system for crisp, clean water, but now your shower feels more like a weak mist. I've heard this story a thousand times. The very thing you installed to make your water better can, over time, turn into the biggest roadblock for your water pressure.
If you're seeing a gradual drop in pressure all over the house, a clogged or undersized filter is one of the first places I'd look.
Here’s what happens: every filter creates a little bit of resistance. That's its job. As the cartridge does its work trapping sediment, chlorine, and all the other gunk you don't want, the pathways for water get smaller and smaller. Eventually, it gets so saturated that it literally starts choking the water supply, and you feel that pressure drop at every single faucet.
Signs Your Filter Is the Problem
So, how do you know for sure the filter is the bad guy? Unlike a pipe that bursts suddenly, a filter issue is sneaky. The pressure doesn't just tank overnight; it slowly fades away over weeks or even months.
Keep an eye out for these tell-tale signs:
- A Slow Fade: The pressure was fantastic right after you put in that new filter cartridge, but it's been a slow march downhill ever since.
- Struggles Under Load: Running the dishwasher while someone tries to shower reduces the water flow to a pathetic trickle.
- Funky-Looking Water: If you get cloudy or discolored water for a bit right after a filter change, it's a good sign the old one was seriously packed with gunk and let some loose when you moved it.
Think of it just like the air filter in your car. When it's clean, the engine gets all the air it needs and runs great. But when it gets clogged with dirt, the engine struggles to breathe and performance tanks. Same deal with your water filter—when it's clogged, your whole plumbing system is struggling for a drink.
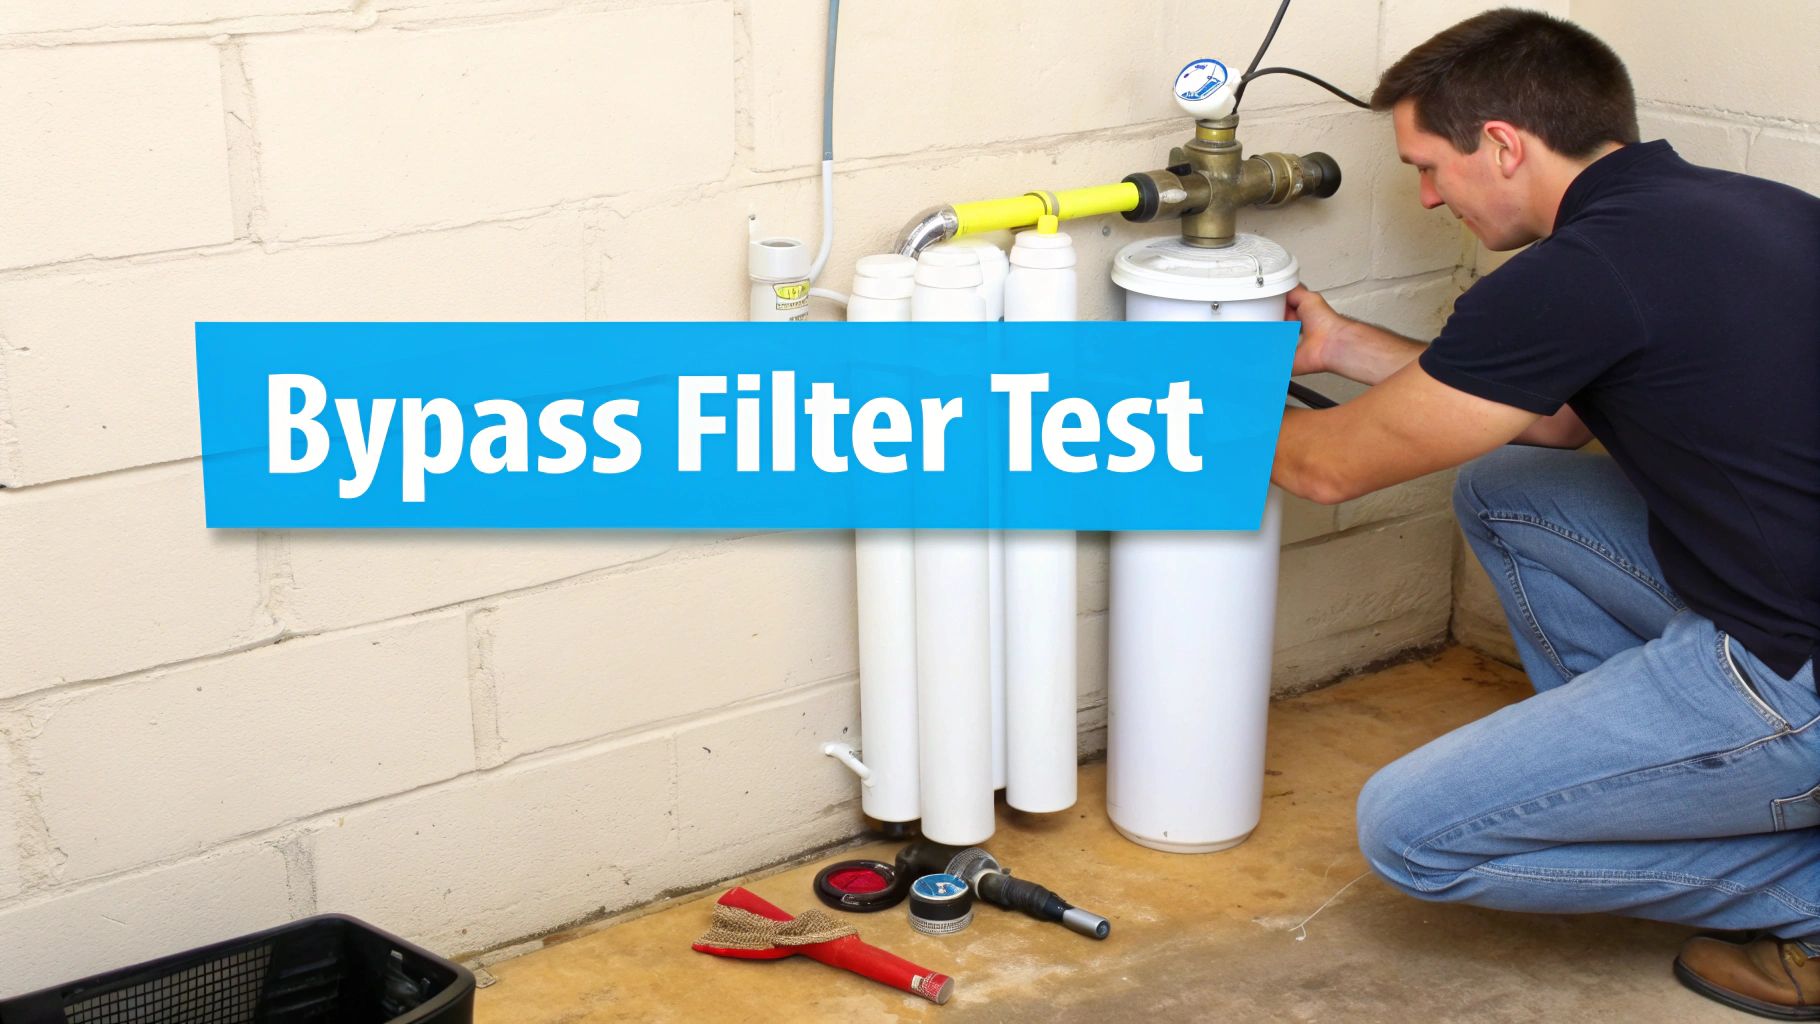
The Bypass Test: Your Definitive Diagnostic Tool
There’s no need to guess. There's a simple test that will give you a definitive answer. Almost every whole-house filter system is installed with a bypass valve for this exact reason. This lets you route water around the filter for a short time, sending it straight into your home's pipes. It’s the ultimate diagnostic trick.
If you flip that bypass and your water pressure roars back to life, you've found your culprit. No doubt about it. The problem is your filtration system.
Here's the right way to do it:
- Find the Bypass Valve: Look for a loop of pipes and valves right next to your main filter tank. You'll typically see three valves: one on the pipe going in, one on the pipe coming out, and one on the pipe connecting the two (that's the bypass).
- Close the Main Lines: Turn the handles on the inlet and outlet pipes so they're perpendicular to the pipe. This cuts off water to the filter.
- Open the Bypass: Now, turn the handle on that middle bypass pipe so it's parallel with the pipe. This opens up the detour.
- Check Your Pressure: Head inside and turn on a sink. If you've got strong pressure again, the problem is 100% your filter.
Key Takeaway: The bypass test is the single most important diagnostic you can run for filter-related pressure loss. It gives you a clear yes or no without you having to take anything apart.
Why Different Filters Affect Pressure Differently
It's also worth knowing that not all filters are created equal when it comes to pressure. The type of system you have makes a big difference in how much of a pressure drop you should expect.
- Sediment Filters: These are usually the first line of defense, catching sand, rust, and other big particles. Because they trap so much physical debris, they clog up the fastest, especially if you're on well water.
- Carbon Block Filters: These filters use super-dense blocks of carbon to pull out chemicals. That compact design naturally creates more resistance, so you'll often see a bit of a pressure drop even with a brand-new cartridge.
- Reverse Osmosis (RO) Systems: An RO system is the most restrictive filtration method out there. It shoves water through an incredibly fine membrane, which is a slow process that kills water pressure. That's why the under-sink RO systems you see have their own little storage tank and a special, smaller faucet.
Knowing this helps you manage your expectations. A small pressure drop is normal, but a huge one means it's time for maintenance. Sometimes, the problem is bigger than just a filter change. For instance, in areas with low municipal supply, installing pressure-boosting pumps and regulating valves is a common strategy. You can explore more about global water challenges to see how different technologies are used.
Keeping Your Filters Flowing Freely
So, you ran the bypass test, and surprise, surprise—your water filter is the culprit behind your weak shower. The good news? This is one of the easiest pressure problems to fix. You're not looking at a major repair bill; just a bit of simple, routine maintenance.
Think of it this way: a clean filter is a wide-open superhighway for your water. A clogged one is a five-o'clock traffic jam.
I'll walk you through everything you need to know to get your system tuned up and that strong, satisfying flow back where it belongs.
The Replacement Schedule Isn't Set in Stone
The manufacturer's guideline—"change every six months"—is a great starting point, but it's really just an educated guess. The reality of when you need to swap a filter depends entirely on your water and how you use it. Ignoring this is probably the single biggest mistake I see homeowners make, and it leads straight to pressure problems.
For example, if you have a sediment filter and you're on well water, it might get choked with silt and sand in just two months. But a carbon block filter on clean city water could easily go the full six months, maybe even longer.
Here's what you need to factor in:
- Your Water Source: Well water is notorious for sediment, which will clog up pre-filters in no time. City water is usually much cleaner.
- Your Household: A family of five puts a filter through its paces much faster than a couple does. More water used means a shorter filter life.
- The Filter Itself: Denser filters like carbon blocks have more surface area to trap gunk, but they also offer more resistance right out of the box compared to a basic sediment filter.
The most reliable way to know it's time for a change is to trust your pressure gauge. Once you see a drop of 15-20 PSI from when the filter was new, it’s time for a swap. Forget the calendar—the pressure tells the real story.
How to Change a Whole-House Filter Cartridge
Swapping a filter is a job almost anyone can tackle in under 30 minutes. Follow these steps, and you’ll avoid a wet floor and get a perfect, leak-free seal every time.
What You'll Need:
- Your new replacement filter cartridge
- The filter housing wrench (the plastic one that came with the system)
- A bucket
- An old towel or two
- Food-grade silicone grease
Let's Get to It:
- Isolate the Filter and Kill the Pressure: First, put the system in bypass mode, just like you did for the pressure test. Shut the inlet and outlet valves, then open the bypass. Now, press that little red pressure-relief button on top of the housing. Keep pressing it until the hissing stops. This is the secret to getting the housing off without a fight.
- Get the Housing Off: Stick your bucket underneath to catch the inevitable drips. Use the wrench to get the housing started—remember, lefty-loosey. Once it breaks free, you should be able to spin it off by hand.
- Scrub the Housing: This is the step everyone skips, and it's a big mistake. Over time, a slimy biofilm can build up inside the canister, which not only restricts flow but can also harbor bacteria. Give the inside a good scrub with warm, soapy water and a brush. For a true deep clean, you can use a diluted bleach solution (about a tablespoon per gallon of water), but make sure you rinse it out completely.
- Prep for the New Cartridge: Take a look at the large O-ring at the top of the housing. Is it cracked, dry, or flattened? If so, replace it. Smear a thin coat of silicone grease on it. This helps create a watertight seal and makes it easier to unscrew next time. Pop the new cartridge into the housing, making sure it sits straight.
- Put It Back Together: Screw the housing back on by hand until it's snug. Then, give it one last quarter-turn with the wrench—and that's it. Don't go crazy tightening it, or you risk cracking the plastic. Slowly open the inlet valve to let it fill. You'll hear air gurgling; press the relief button again until water spurts out. Now, fully open the inlet and outlet valves and close the bypass. Give the seal a quick check for any drips.
Make this little routine a habit, and your water filter will never be the reason for weak water pressure again. It's a small bit of effort for a huge payoff in performance.
Beyond Filters Exploring Other Pressure Problems
If a fresh filter didn't bring back the power to your shower, it's time to briefly look at the bigger picture. Your home’s filtration system is just one piece of a much larger plumbing puzzle. While a clogged filter is the most common cause of pressure loss, it's worth knowing what other issues could be at play before you upgrade your system.
It's easy to point the finger at the filter, but if a new one doesn’t do the trick, you have to broaden your search.

Check Your Main Water Shut-Off Valve
First things first: find your main water shut-off valve. This valve is the gatekeeper for all water coming into your house. It’s usually a lever (a ball valve) or a round handle you turn (a gate valve). After a plumbing repair, or even just from an accidental bump, these can get partially closed, creating a bottleneck for your entire home.
A half-closed valve can feel exactly like a clogged filter, so it's a super common mix-up. Before you start tearing anything else apart, find this valve (check the basement, garage, or a utility closet) and make sure it's open all the way. 100% open.
- Lever Handle: The handle should run parallel to the pipe.
- Wheel Handle: Turn it counter-clockwise until it stops.
Inspect the Pressure Reducing Valve
Lots of homes, especially those in areas with high city water pressure, have what’s called a Pressure Reducing Valve (PRV). It’s a bell-shaped contraption, usually installed right after the main shut-off. Its job is to dial down the incoming pressure to a safe level, typically around 50-60 PSI, to keep your pipes and appliances from getting blasted.
But these valves don't last forever. The internal parts can wear out or get gunked up with sediment, causing them to fail and kill your flow. A bad PRV is a notorious pressure assassin.
A classic sign of a failing PRV isn't just low pressure, but inconsistent pressure. You might also hear a "water hammer" banging sound in your pipes, or sometimes, no water comes out at all.
You can often try adjusting the PRV yourself. There's usually a screw on top—turning it clockwise should increase the pressure. Just make small, quarter-turn adjustments at a time. If tweaking it does nothing, the valve needs to be replaced by a plumber.
The Problem of Aging Pipes
Okay, so your valves are wide open and the PRV seems fine. The next suspect? The pipes themselves. This is a huge issue in older homes with galvanized steel pipes. Over decades, they literally rust from the inside out, building up scale and corrosion that shrinks the pipe's diameter.
Think of it like a clogged artery. A new pipe is wide open, but after 50 years of mineral buildup, it can get so narrow that only a trickle of water can squeeze through. This causes a chronic, whole-house low pressure issue that no filter change on earth is going to fix.
When you're troubleshooting tricky issues that go beyond a simple filter swap, consulting a comprehensive plumbing guide can be a lifesaver. It helps you understand how everything connects and diagnose the root cause.
By ruling out these other potential causes, you can be 100% confident that it's time to focus on the heart of the matter: your filtration system.
When It’s Time to Upgrade Your Filtration System
Are you in a never-ending cycle of changing your filter cartridge just to keep your shower from slowing to a pathetic trickle? While staying on top of maintenance is a big part of the game, sometimes it just isn't enough.
If you feel like you're constantly fighting for decent water flow, that’s a huge red flag. It often means your filtration system is completely mismatched for what your home actually needs. This isn't about a single clogged filter—it's about having a system that's too small or just not designed for your family’s water habits. The only real, long-term fix is an upgrade.
Matching Flow Rate to Your Household Needs
The single most important number to look at when choosing a new system is its flow rate, measured in Gallons Per Minute (GPM). This tells you exactly how much water the filter can handle at once. If your family’s peak water usage is higher than your filter's GPM, you're guaranteed to see your water pressure tank every time.
Think of it like a two-lane road during rush hour. It’s just not built to handle that much traffic, and everything slows to a crawl. An undersized filtration system is that two-lane road, and your family's morning routine is that 8 AM traffic jam.
To figure out what you need, just add up your peak demand:
- Shower: 2.5 GPM
- Dishwasher: 2.0 GPM
- Washing Machine: 2.5 GPM
- Kitchen Faucet: 1.5 GPM
A family of four can easily hit 7-10 GPM during those busy morning hours. Your whole-house system needs to handle that demand without even flinching. If your current filter is only rated for 5 GPM, it's no surprise the pressure disappears.
The Micron Rating Balancing Act
Another spec you can't ignore is the filter's micron rating. This number tells you the size of the particles it can trap. A lower number means finer filtration—so a 1-micron filter grabs way smaller gunk than a 20-micron one. It's tempting to just grab the lowest number for the "cleanest" water, but that can be a massive mistake for your water pressure.
An overly fine filter acts more like a dam than a screen, choking your water flow from day one. You have to find the sweet spot: a micron rating that’s fine enough to remove what's in your water but coarse enough to let water flow through freely. For most folks on city water, a 5 to 20-micron sediment filter is the right call. It's helpful to compare sand and cartridge pool filters to get a sense of how different filtration media work.
Choosing the right micron rating is a strategic balance. It’s not about getting the finest filter; it’s about getting the right filter for your water quality and pressure needs.
Adding a Pressure Booster Pump for Ultimate Control
So, what do you do if your city pressure is low to begin with, or your dream filtration setup is so heavy-duty that some pressure loss is just part of the deal? This is where a pressure booster pump completely changes the game. You install this device before your filters, and it actively cranks up the force of the water coming into your house.
A booster pump makes sure your filters get water at the ideal pressure (usually around 50-60 PSI), letting them do their job without killing your flow. It’s the best solution for homes that have always struggled with low pressure, turning weak streams into a powerful flow no matter how many faucets are running.
Common Water Pressure Questions Answered
https://www.youtube.com/embed/7yXNY6gbdws
When you start digging into how to improve your water pressure, a bunch of specific questions tend to bubble up, especially if you have a water filter or softener in the mix. Let's walk through some of the most common things homeowners ask when they're staring down a weak stream.
Can a Water Softener Reduce My Water Pressure?
Absolutely. A water softener is a very common culprit behind a frustratingly slow flow. The softening process itself forces your water through a dense bed of resin beads, and that's going to create some natural resistance. This alone can cause a noticeable pressure drop of 5 to 15 PSI, depending on your softener's size and your home's flow rate.
The issue gets a whole lot worse if the softener is too small for your home's needs or if that resin bed gets clogged with sediment. To get ahead of this, always install a sediment pre-filter before the softener. Also, make sure it's regenerating correctly to keep the resin clean and loose.
How Do I Know if I Need a Pressure Booster Pump?
It’s time to seriously consider a pressure booster pump if your pressure is already low before it even hits your filters (think under 40 PSI), or if your filtration setup is so extensive that it's causing an unacceptable drop.
The very first thing you should do is test your home's incoming pressure. A simple gauge from the hardware store, attached to an outdoor spigot, will give you the answer.
If your pressure is low right from the street, your filters are just fighting a losing battle. On the other hand, if the incoming pressure is decent but plummets after running through your system, a booster pump is the most direct fix. It gives your water the muscle it needs to push through the filtration media without losing momentum.
A pressure booster pump acts as a powerful ally to your filtration system. It doesn't just fix low pressure; it ensures your filters can perform optimally without turning your shower into a drizzle.
Will a Whole House Sediment Filter Always Lower Pressure?
Any filter will create a slight pressure drop—that's just physics. But a properly sized and maintained sediment filter really shouldn't cause a noticeable decrease in your day-to-day water flow.
If you're suddenly dealing with a frustratingly weak shower, the problem is almost always one of three things:
- The filter is clogged: Its job is done. The cartridge is saturated with gunk and needs to be replaced right away.
- The micron rating is too fine: You might be using a 1-micron filter when a 20-micron would do the job, creating a ton of unnecessary resistance.
- The housing is too small: The entire filter unit isn't big enough to handle your home's peak water demand, which creates a permanent bottleneck.
Choosing the right sediment filter is all about finding that sweet spot between effective filtration and maintaining the strong water pressure you expect at the tap.
At Water Filter Advisor, we believe you shouldn't have to choose between clean water and great pressure. Our expert guides and reviews help you find the perfectly matched filtration system for your home's unique needs. Explore our resources today at https://www.waterfilteradvisor.com.
- November 20, 2025
- 0
- Uncategorized