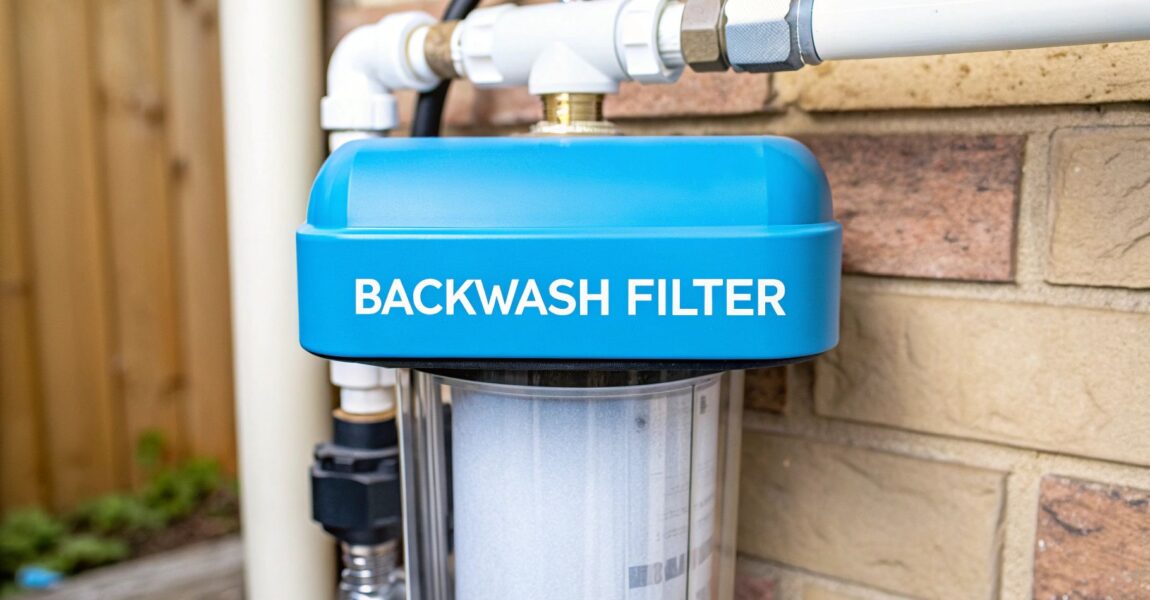
Your Guide to the Best Whole House Salt Free Water Softener of 2026

If you're fed up with the relentless assault of hard water, a whole house salt-free water softener—more accurately called a water conditioner—is a modern, low-hassle way to stop scale from building up in your home's plumbing and appliances. Forget the days of hauling heavy salt bags. These systems use clever filtration technology to neutralize hard water minerals, preventing them from causing expensive damage.

Tired of Hard Water? Here's the Salt-Free Solution

Let's be real—that chalky film on your dishes, the scratchy feel of your towels, and the constant worry about your water heater's lifespan are major headaches. If you've looked for a fix that doesn't involve lugging 40-pound salt bags from the store every few weeks, you're in the right place. It's time to outsmart hard water, not just fight it.

Unlike old-school salt-based softeners that strip calcium and magnesium from your water, a whole-house salt-free conditioner works very differently. It "conditions" the water by changing the physical structure of these hard minerals.

Think of it this way: the minerals are still there, but they've been neutralized so they can't stick to surfaces and create destructive scale buildup. It’s a completely different approach to home water filtration.

An Eco-Friendly Alternative on the Rise

This technology is more than just a novelty; it’s a major shift in how we filter water at home. Salt-free conditioners have been gaining ground since the early 2000s, especially as environmental rules get stricter.

In fact, some cities like San Francisco and Santa Fe have banned traditional salt-based softeners entirely. Why? Because the salty brine they discharge harms local water supplies and soil. For the 85% of U.S. households dealing with hard water, these systems offer real protection without the environmental baggage. You can see a full breakdown of salt-based vs. salt-free systems on lifesourcewater.com.

This approach offers some huge upsides for any homeowner who wants a set-it-and-forget-it filtration solution:

  • No More Salt Bags: Say goodbye to the recurring cost and physical labor of buying and adding hundreds of pounds of salt each year.
  • Appliance Protection: Stops limescale from clogging pipes and destroying the efficiency and lifespan of your water heater, dishwasher, and washing machine.
  • Eco-Friendly Operation: These systems don't waste any water and don't add salt or chemicals to the environment, making them a truly sustainable choice.
  • Healthier Water: Healthy minerals like calcium and magnesium are kept in your water, which most people prefer for drinking.

The core idea is simple: A salt-free system protects your home's plumbing and expensive appliances from scale damage, all without that slippery water feel or the constant maintenance of a traditional softener.

This guide will walk you through exactly how they work, what you should expect, and how to pick the right one for your home. But first, let’s get a quick side-by-side comparison.

Salt-Free Conditioner vs. Salt-Based Softener at a Glance

This table breaks down the key differences between the two main types of whole-house hard water treatment. It’s a quick way to see which filtration approach might be a better fit for your home and lifestyle.

Feature Salt-Free Water Conditioner Salt-Based Water Softener
Primary Function Prevents scale buildup by crystallizing minerals Removes hardness minerals (calcium & magnesium)
Water Feel Normal, not slippery "Slippery" or "silky" feel
Minerals Removed? No, beneficial minerals are retained Yes, replaces them with sodium
Ongoing Costs None, except occasional media replacement (every 6-10 years) Regular salt purchases (monthly/bi-monthly)
Maintenance Virtually maintenance-free Requires regularly adding salt (40-50 lb bags)
Water Waste None Wastes water during regeneration (backwashing)
Environmental Impact Eco-friendly, no salt discharge Discharges salt brine into wastewater systems
Electricity Required? No Yes, for control valve and regeneration cycles

As you can see, the choice isn't just about performance—it's also about maintenance, cost, and environmental responsibility. Each system has its place depending on your specific water chemistry and personal preferences.

How Salt-Free Conditioners Neutralize Scale

So, how does a whole house salt free water softener actually stop scale without using salt? The science behind this filtration method is clever but straightforward. It’s all about changing the physical behavior of the hard water minerals, not removing them.

Think of the dissolved calcium and magnesium in your water as being "sticky." In their natural state, they want to cling to each other and to any surface they find—like your pipes, faucets, and the inside of your water heater. That’s what creates limescale.

A salt-free conditioner works by changing those minerals so they can't stick anymore. The minerals are still there, but they are rendered harmless and simply flow through your plumbing.

The Magic of Template Assisted Crystallization

The core technology in most modern salt-free systems is called Template Assisted Crystallization (TAC). You might also see it called Nucleation Assisted Crystallization (NAC). This isn't a filter in the traditional sense; it’s a conditioner that works on a microscopic level.

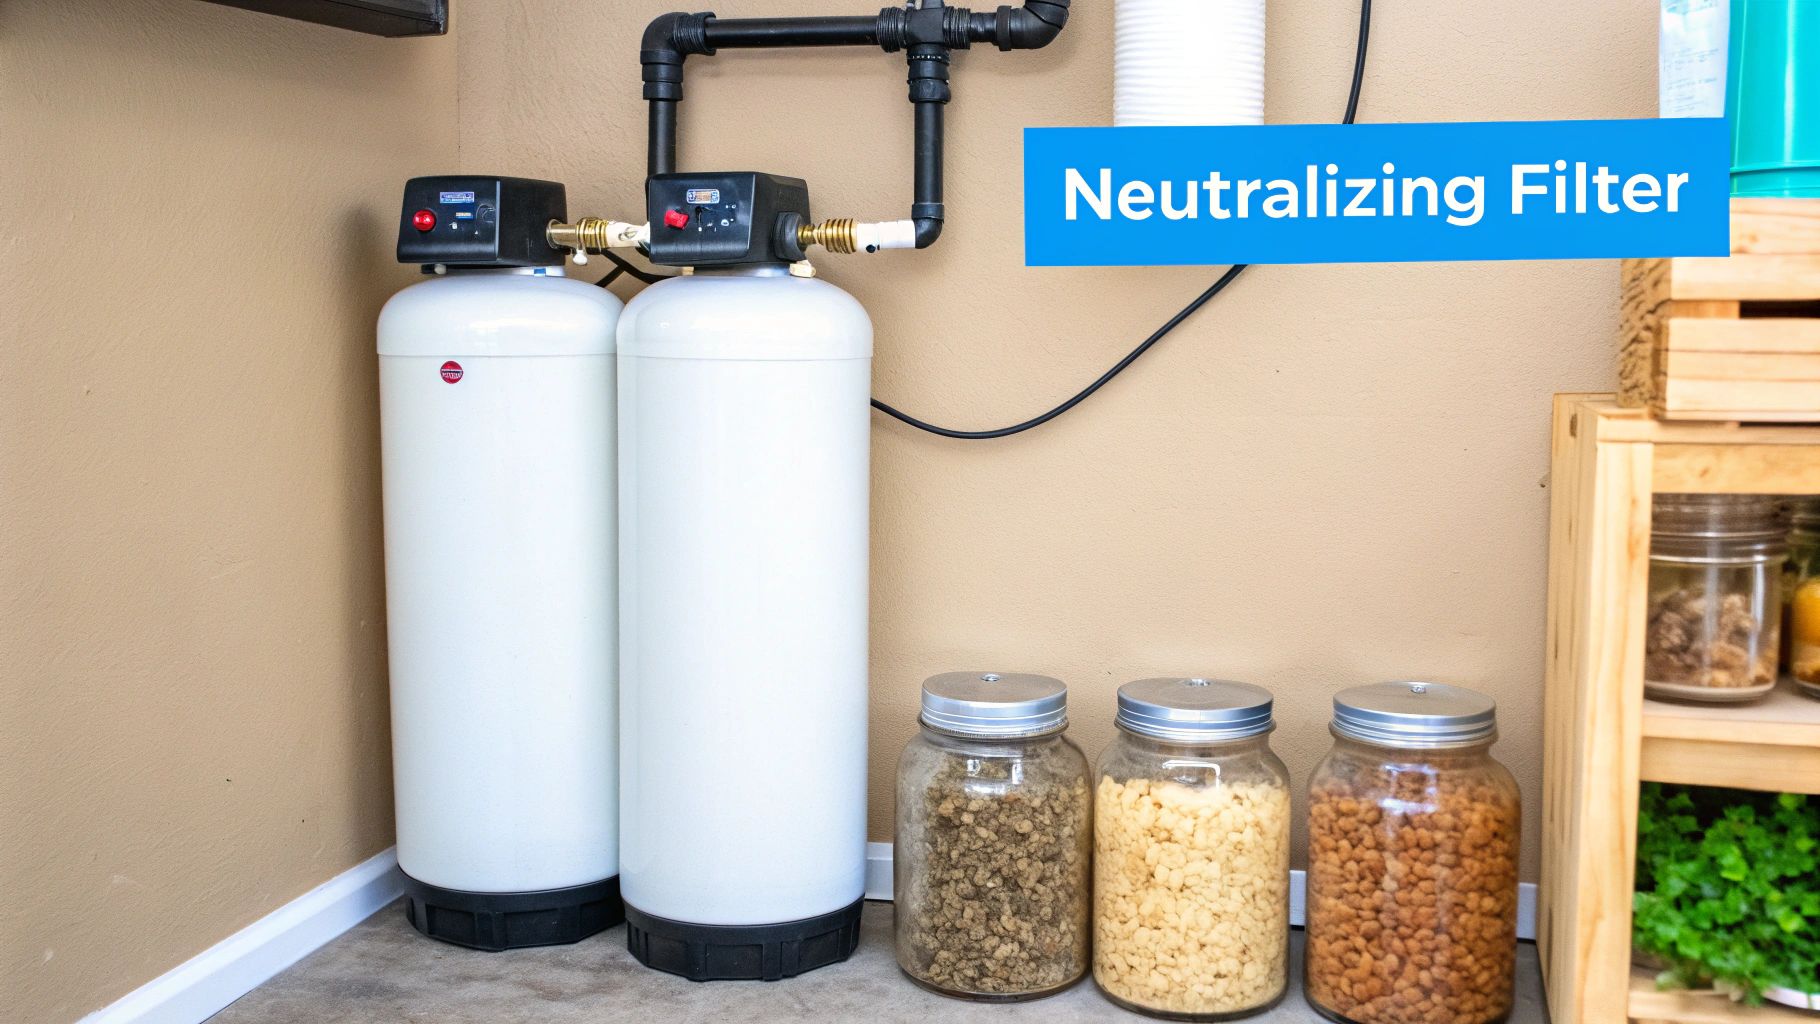
When water enters the conditioner, it flows through a tank filled with a special media. This media is covered in tiny "template sites" that act as a seed point for mineral crystals.

As a hard water mineral ion passes over one of these templates, it triggers a reaction. The template provides the perfect surface for that dissolved mineral to latch onto and form a stable, microscopic crystal.

The key takeaway is this: The minerals are transformed from a dissolved, "sticky" state into a crystallized, "non-stick" state. They become inert, harmless particles that remain suspended in the water.

These new crystals are tiny—nanometer-sized—and have a smooth, stable surface. They no longer carry the electrical charge that made them want to stick to things. Instead, they just travel with the water, passing right through your home and down the drain.

What This Filtration Means for Your Home

This process has a big impact on protecting your plumbing and appliances from scale buildup.

  • Appliance Protection: Your water heater element, dishwasher, and washing machine are protected from scale that kills efficiency. Studies show scale can slash a water heater's efficiency by up to 24%.
  • Plumbing Integrity: Your pipes stay clear. This prevents the pressure drops and blockages that heavy scale causes over the years.
  • Easier Cleaning: You might still see some light, powdery mineral residue on a shower door (the minerals are still in the water, after all). But it will be easy to wipe away, not the hard, crusty scale that needs chemicals to remove.

The conditioner media itself is built to last. The template sites are catalysts, meaning they are not used up in the process and can trigger this reaction again and again. That's why the media in a whole house salt free water softener can go for 5 to 7 years or more before needing a replacement. It’s a simple, physical process with no salt, no chemicals, no electricity, and no wasted water.

Understanding Their Real-World Performance

So, let's get right to it. Does a whole house salt-free water softener actually stop scale? Yes, it does—but you have to know what to expect in a real-world setting. Let's cut through the marketing noise and talk about how this filtration performs in an actual home.

For most homes with moderately hard water, these systems work incredibly well. A salt-free conditioner doesn't "soften" water like a salt-based system. It "conditions" it. That's the key difference, and it defines how it performs.

You will not get that slick, "can't-rinse-the-soap-off" feeling in the shower. Your water will feel completely normal, but the minerals in it will behave differently. Their ability to form destructive, crusty scale will be neutralized.

What to Expect on Your Surfaces

What does this look like in your daily life? You’ll see a massive reduction in the hard, white scale that builds up on shower doors, faucets, and countertops. Instead of cement-like deposits that need harsh chemicals to remove, you might see a fine, powdery white residue every now and then.

This powder is just the crystallized minerals left behind when water evaporates. Since the minerals aren't "sticky" anymore, they don't bond to your fixtures. A simple wipe with a cloth is all you need to clean it up, making your cleaning routine much, much easier.

The Performance Goal: A salt-free system is designed to stop new scale from forming inside pipes and appliances. It also makes any mineral spots you can see simple to wipe away. It protects what you can't see and simplifies cleaning what you can.

This is where a whole house salt free water softener really delivers. For the 70-80% of homes with moderate water hardness, these systems are proven to prevent 85-95% of new scale. They work by crystallizing calcium and magnesium instead of removing them, which means the water's natural Total Dissolved Solids (TDS) level stays the same—something many people prefer. You can find more on the effectiveness of salt-free systems at softprowatersystems.com.

Matching Flow Rate to Your Home

Performance isn't just about water chemistry; it's about water pressure. You have to pick a system with the right flow rate to make sure your home's water pressure never takes a hit. Flow rate is measured in gallons per minute (GPM) and tells you how much conditioned water the unit can deliver at one time.

Getting this wrong is a classic mistake. An undersized system creates a bottleneck, and you'll see a big pressure drop when you run the shower and the kitchen sink at the same time.

Here are the general numbers for sizing your system:

  • 1-3 Bathrooms: An 8-12 GPM system is typically enough for an average family home.
  • 4+ Bathrooms or High-Demand Households: Go with a 15 GPM system or higher to handle those peak usage times.

Always pick a system with a GPM rating that meets or slightly exceeds your home's needs. This is the key to ensuring your dishwasher, washing machine, and showers can all run at once without a problem. It’s a simple step that makes all the difference in how the system performs for you day-to-day.

Salt-Free vs. Salt-Based Systems: A Head-to-Head Comparison

When you’re staring down the barrel of a hard water problem, picking between a salt-free conditioner and a traditional salt-based softener can feel like a huge decision. And honestly, it is. These two systems tackle scale and mineral buildup from completely different directions, and knowing how they differ is the key to getting the right filtration for your home.

So, let's put them side-by-side. We’ll go beyond the sales pitches and look at what really matters to you as a homeowner: how they actually stop scale, what they cost you in the long run, their impact on the environment, and even how the water feels when you're taking a shower. This is the no-nonsense comparison you need to make a confident choice.

How They Stop Scale

The biggest difference, right off the bat, is how each system deals with the hard water minerals. This one distinction changes everything, from your weekend chores to your water bill.

A traditional salt-based water softener uses a process called ion exchange. Think of it as a bouncer at a club—it grabs the "hard" minerals like calcium and magnesium and swaps them out for "soft" sodium ions. The result is water that’s chemically soft because the minerals that cause all that limescale are literally gone.

On the other hand, a whole house salt-free water softener (which is really a conditioner) doesn't remove a thing. Instead, it uses a special filtration media to change the physical shape of the hardness minerals, a process called Template Assisted Crystallization (TAC). It forces them into tiny, stable crystals that won't stick to your pipes or faucets. The minerals are still there, but they’ve been neutralized and just flow right on by.

Water Feel and Health Factors

This difference in method leads directly to a very different experience at the tap. Because salt-based systems remove minerals and add a small amount of sodium, they produce water with a distinct "slippery" or "silky" feel. Some people absolutely love it; others complain they can never seem to rinse the soap off.

Salt-free conditioned water? It feels just like regular water. Since the minerals are still present (just in a different form), you won't get that slippery feeling at all. For many, this comes down to simple personal preference.

For anyone on a low-sodium diet, the choice gets a lot clearer. A salt-based softener will add some sodium to your water. A salt-free system adds zero sodium, keeping your water's natural mineral content and taste exactly as it was.

Maintenance and Long-Term Ownership

This is where the two systems really go their separate ways. The "set it and forget it" nature of a whole house salt-free conditioner is a huge part of its appeal.

  • Salt-Free Systems: These are about as low-maintenance as it gets. You're not buying salt, you're not lifting heavy bags, and you're not messing with any digital controls. The only task is swapping out the media inside the tank, and that’s usually only every 5-7 years.

  • Salt-Based Systems: These demand your regular attention. You’ll be on a constant mission to buy and haul heavy bags of salt (often 40-50 lbs a pop) to feed the brine tank. You also have to keep an eye on the regeneration settings to make sure it's running correctly.

That ongoing need for salt isn't just a chore; it's a constant expense. A typical family might spend $150-$300 a year just on salt, which really adds up over the decade or more you'll own the system.

Environmental Impact and Water Waste

If you're looking for the eco-friendly choice, this one's a landslide. A whole house salt-free conditioner is the clear winner.

They use zero water and create zero waste. Most don't even use electricity. They just sit there, passively preventing scale.

A salt-based softener, however, has a real environmental footprint. To clean itself out (a process called regeneration), it flushes hundreds of gallons of salt-filled brine down the drain every month. This chloride-heavy wastewater is a major headache for municipal water treatment plants and can damage local streams. In fact, some towns and cities have even banned them for this very reason. For homes with a septic system, flushing all that salt into your drain field can cause serious problems, too.

Detailed Feature Comparison Salt-Free vs. Salt-Based

To make the decision even clearer, let's break down the key features in a simple table. This will help you weigh the pros and cons based on what’s most important for your family and your home.

Factor Whole House Salt-Free Conditioner Traditional Salt-Based Softener
Scale Prevention Method Neutralizes minerals (TAC) so they can't stick Removes minerals (ion exchange) and replaces with sodium
Water Feel Feels like normal tap water, no slippery sensation "Silky" or "slippery" feel, can be hard to rinse soap
Minerals Removed? No, beneficial minerals remain in the water Yes, calcium and magnesium are removed
Sodium Added? No Yes, a small amount is added during ion exchange
Ongoing Maintenance Virtually none; replace media every 5-7 years Regular; must add 40-50 lb bags of salt frequently
Ongoing Costs None, until media replacement every 5-7 years Continuous salt purchases ($150-$300+ per year)
Water Waste None Wastes 200-400+ gallons per month during regeneration
Electricity Use None Yes, powers the control head and regeneration cycles
Environmental Impact Eco-friendly; no salt or brine discharge Brine discharge can harm septic systems and local ecosystems
Best For Preventing scale buildup while keeping water natural Homes with extremely hard water (11+ GPG) and where a "soft" feel is desired

Ultimately, this table shows two very different paths to solving a hard water problem. One is a passive, eco-friendly approach focused purely on scale prevention, while the other is a more aggressive, hands-on method that fundamentally changes the chemistry of your water.

Calculating the True Cost of a Salt-Free System

That higher sticker price doesn't always mean a higher total cost. When you're picking out a home water filtration system, you have to look past the number on the box. Let's break down the real financial picture over a decade to see how a whole house salt free water softener stacks up against a traditional salt-based unit.

While salt-free systems often cost more upfront, the savings start adding up right away. It's the classic "pay a bit more now to save a lot more later" scenario. The real value shows up when you realize you're not constantly paying for the upkeep that salt softeners demand.

The Hidden Costs of Salt-Based Systems

With a salt-based softener, the day you buy it is just the start of the spending. These systems have a whole list of ongoing costs that quietly eat away at your budget, year after year.

Let’s run the numbers.

  • The Never-Ending Salt Run: The most obvious cost is the salt itself. A typical family will spend $150 to $300 a year hauling those heavy, 40-pound bags home from the store.
  • Wasted Water: Every time a salt softener regenerates, it flushes hundreds of gallons of salty water down the drain. You’ll see this show up on your water bill.
  • Electricity Bill: These systems need power to run their control heads and trigger those regeneration cycles, adding another small but constant expense.

Over 10 years, these "little" costs can easily add up to thousands of dollars—expenses that salt-free systems just don't have.

The Long-Term Savings of a Salt-Free System

Now, let's look at the salt-free conditioner. Their "set it and forget it" design is where you really start to see the financial win. Once it’s installed, the ongoing costs are few and far between.

Cost analyses show that a whole house salt-free water softener is the better long-term value for most homes. Yes, the initial purchase might be 50-100% more than a salt-based unit. But the total cost of ownership drops fast because you're not buying salt—saving you $1,000 to $2,000 over ten years. Maintenance is almost zero, with no electricity needed and simple filter cartridge changes costing just $100 to $300 every 3 to 6 years. For a deeper dive into these benefits, you can explore a comprehensive guide on frizzlife.com.

The total cost of ownership (TCO) is where a salt-free system shines. By eliminating the need for salt, electricity, and wasted water, these systems often provide a faster return on investment and a lower overall cost.

For example, the 5-year TCO for a salt-free system in a standard three-bathroom house can be around $1,500. A salt-based system for the same home? It could easily top $2,500 once you add up all the ongoing expenses. As you weigh your options, it's also smart to understand the costs of other systems, and you can find good information on the reverse osmosis system installation cost.

The numbers don't lie: the upfront investment in a salt-free model typically pays for itself through years of hassle-free, cost-free operation.

Alright, you've done your homework and are ready to get this project moving. Let's walk through choosing and installing the right whole house salt-free water softener for your home.

This is the part where you turn your research into reality—clean, conditioned water running through every pipe.

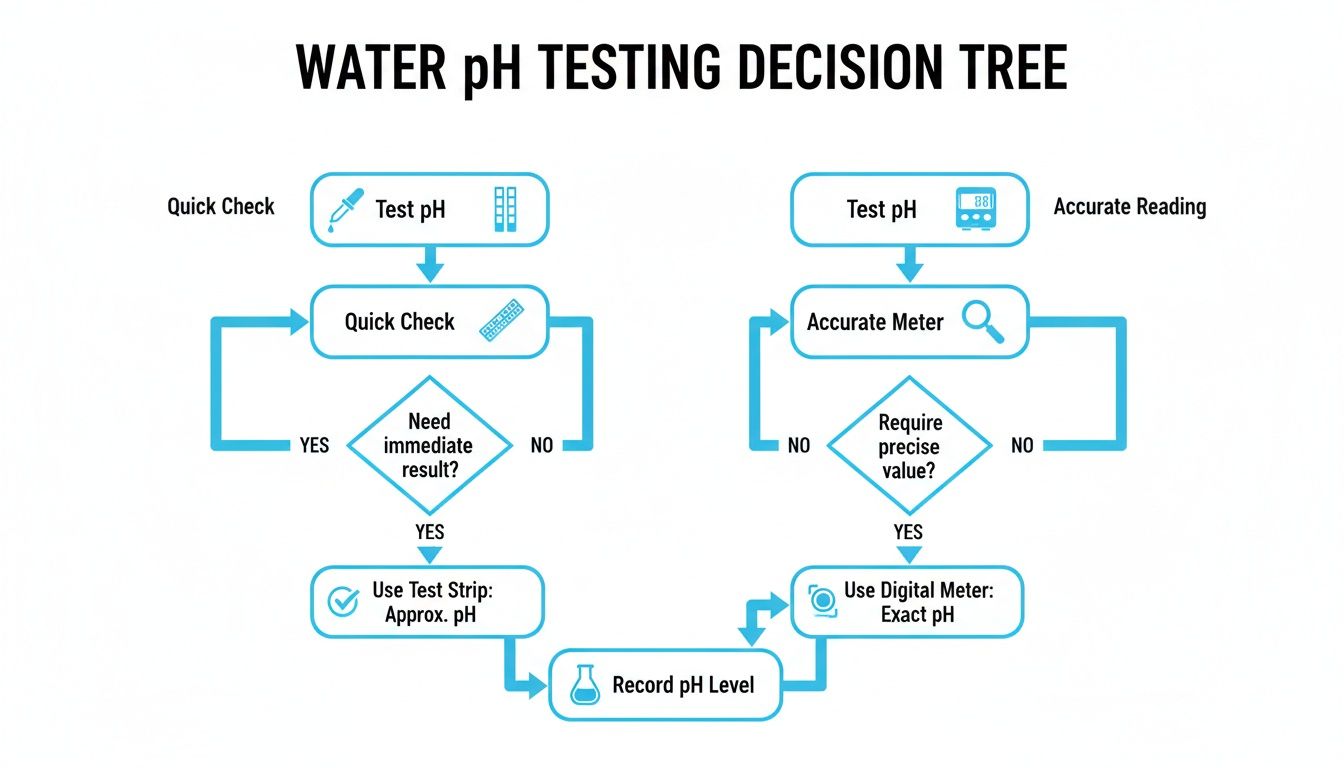
First things first: test your water. This isn't a step you can skip. You absolutely need to know your water's hardness, which is measured in grains per gallon (GPG). That one number will tell you if a salt-free system is even a viable filtration option for you.

This decision tree gives you a clear visual on how to weigh the investment over the long haul.

While the sticker price might be higher upfront, the real savings come over time. No salt bags, no regeneration cycles—that's where salt-free systems often win out financially.

Sizing Your System Correctly

So, your water chemistry is a good match. Great. Now you need to size the unit properly to avoid any headaches with water pressure down the line. It comes down to two simple things.

  • Household Size: How many people are using water in your home? The more people, the higher the demand.
  • Pipe Diameter: Go check your main water line where the unit will be installed. Most homes have either ¾-inch or 1-inch pipes. Your system must match that diameter.

Get the sizing right, and you'll ensure the conditioner keeps up even when the dishwasher is running during a shower.

DIY vs Professional Installation

The next question is whether you should install it yourself or call in a plumber. Going the DIY route can definitely save you a couple of hundred bucks, but you need to be confident in your plumbing skills.

If cutting pipes and sweating fittings isn't your idea of a fun Saturday, just hire a professional. A licensed plumber will get it done right, guarantee no leaks, and ensure the system runs perfectly from the start. They'll also install a bypass valve, which is a must-have for any future maintenance.

When you're making your final choice, look for this certification: NSF/ANSI 61. This is the gold standard, confirming that the materials touching your water are safe. Don't buy a system without it.

Maintenance and Certifications

One of the best things about a whole house salt-free water softener is how little you have to mess with it. Forget hauling heavy salt bags or programming a control head. Your job is pretty simple.

  • Pre-Filter Changes: If your setup has a sediment pre-filter, plan on swapping it out every 12-24 months. This keeps sediment from fouling the main conditioning media.
  • Media Replacement: The conditioner media itself is the workhorse. You'll only need to replace it every 5-7 years in most cases.

It’s about as low-maintenance as it gets. If you're looking for more tips and general water treatment info, our water filtration advice section has you covered.

Frequently Asked Questions

Still have a few questions about salt-free filtration systems? Here are some straightforward answers to the most common things homeowners ask.

Do Salt-Free Systems Really Work?

Yes, but it's important to know they "condition" water instead of "softening" it. They use a method called Template Assisted Crystallization (TAC) to change hard minerals into tiny, stable crystals that won't form scale on your pipes or in your appliances.

This filtration process gives you up to 95% scale prevention without stripping healthy minerals out of your water.

Will I Still See Water Spots?

You might. Because minerals like calcium are still present in the water, you may notice some faint, powdery white residue on surfaces like glass shower doors after water evaporates.

These spots are not the same as the crusty, hard-to-remove limescale you're used to. They wipe away easily with a cloth.

You may still see some mineral residue, but it won't be the destructive, hard-to-clean scale you're used to. The system’s main job is protecting the pipes and appliances you can't see.

Is This a True Water Softener?

Not in the classic sense. A traditional "water softener" uses an ion exchange process to physically remove hardness minerals and swap them for sodium. This is what creates that slick, "slippery" feel in the water.

A whole house salt free water softener is more accurately called a water conditioner. It neutralizes the minerals so they can't cause damage, but it doesn't remove them.

What Maintenance Is Required?

This is one of their biggest benefits—the maintenance is incredibly low. Unlike salt-based softeners that need constant refilling with heavy bags of salt, these systems are mostly "set it and forget it."

  • Pre-Filter Changes: If your system has a sediment pre-filter, plan on replacing it every 12-24 months.
  • Media Replacement: The conditioning media in the main tank has a long lifespan, typically lasting 5 to 7 years before it needs to be replaced.

There are no salt bags to haul, no electricity needed, and no backwash cycles that waste water.


At Water Filter Advisor, our goal is to give you the clear, unbiased information you need to choose the perfect water filtration solution for your home. Explore our buying guides and reviews to find the best system for your family's needs at Water Filter Advisor.
Water Filtration System Cost: A Clear Guide to Your Home’s H2O Upgrade

So, you've decided to upgrade your tap water. Fantastic! But as you start shopping for a water filter, you'll find prices are all over the map. You could spend $30 on a simple pitcher or go all-in with a $3,000+ whole-house system that treats every drop in your home. The final water filtration system cost really boils down to the type of filter, how tricky the installation is, and what it costs to keep it humming with fresh cartridges.

Your Quick Guide to Water Filtration System Costs

Diving into the world of water filters can feel like stepping onto a car lot. You've got your no-frills, get-you-from-A-to-B models (hello, water pitchers!) and your fully-loaded, luxury SUVs with all the bells and whistles (we're looking at you, whole-house systems). Each serves a different purpose and, naturally, comes with a very different price tag. This guide is your friendly salesperson, here to cut through the noise and give you a crystal-clear look at what you can expect to pay for better water at home.

First, let's take a quick snapshot of the typical price ranges for the most common home systems. Think of this as your cheat sheet—a way to get a feel for the market before you get lost in a sea of technical jargon. After all, the best filter is one that solves your water woes without springing a leak in your budget.

Finding the Right Fit for Your Wallet

The true cost of a water filter isn't just the number on the box. It’s a cocktail of three key ingredients: the upfront price of the system, the ongoing maintenance (mostly filter swaps), and the specific water problem it’s built to solve. If you're a renter who just wants your tap water to taste less like a swimming pool, a simple faucet filter is a brilliant, low-cost fix. But for a homeowner trying to shield their pipes and appliances from the tyranny of hard water, a whole-house system is a much more significant, long-term investment.

This chart breaks down those core costs so you can see exactly where your money goes.

A bar chart visually breaking down filter costs, showing upfront, annual maintenance, and per-use expenses.

As you can see, the systems with a higher price tag upfront often treat more water and can sometimes have lower annual costs relative to their output. On the other hand, the simpler filters are cheap to get started with but need more frequent attention.

To lay it all out, here's a quick comparison of the most popular types of home water filters. This table breaks down what you'll pay initially, what you can expect to spend each year to keep it running, and who each system is really for.

The real water filtration system cost isn't just the initial purchase. It’s the total you'll invest over its entire life, including the hardware, any installation help, and all the replacement filters.

Use this table as a quick reference to match a filter to your needs and budget.

Home Water Filter Costs at a Glance

Filter Type Upfront Cost Range Annual Maintenance Cost Best For
Pitcher/Dispenser $20 – $80 $60 – $180 Renters and individuals looking for basic taste and odor improvement for drinking water.
Faucet-Mounted $30 – $100 $50 – $150 Easy, tool-free filtration for drinking and cooking water directly from the kitchen tap.
Under-Sink $150 – $1,200 $100 – $300 Homeowners wanting advanced, multi-stage filtration for drinking water, hidden from view.
Whole-House $500 – $4,000+ $75 – $500 Homeowners aiming to treat all water entering the house to protect plumbing and appliances.

This at-a-glance view should give you a solid idea of which categories make the most sense for you to explore further.

Decoding the Upfront Price of Different Filter Types

Ever wonder why a whole-house system can set you back thousands while a simple faucet filter costs less than dinner for two? The upfront water filtration system cost is a lot like comparing home security. A basic door alarm is great for one entry point, but a fully integrated smart system protects the entire property.

Each filter type is engineered for a different mission, and its price tag reflects that—from its complexity and capacity to its raw power to yank out contaminants.

An under-sink water filtration system with multiple filters and a separate faucet in a kitchen cabinet.

Let's start with the heavy hitters and work our way down. Knowing what you're paying for is the first step to making a smart investment in your home's water quality.

Whole-House Systems: The Ultimate Home Protection

Whole-house water filters are the undisputed champions of home water treatment—and they have the price tag to prove it. Plumbed in right where your main water line enters your home, these systems treat every single drop you use, from the kitchen sink to the shower and washing machine.

Their price reflects their beefy construction and massive capacity. You aren't just buying a filter; you're investing in a serious piece of equipment designed to process tens of thousands of gallons.

  • Carbon-Based Systems ($500 – $1,500): Think of these as the all-stars for great-tasting water. They're fantastic for kicking out chlorine, sediment, and chemicals that cause funky tastes and smells.
  • Water Softeners ($800 – $3,000): Built specifically to fight the scourge of hard water, these use ion exchange to remove minerals like calcium and magnesium, stopping that crusty scale buildup in its tracks.
  • Multi-Stage Systems ($1,500 – $4,000+): These are the all-in-one powerhouses. They combine sediment filters, carbon filters, and sometimes even UV purifiers to tackle a whole mess of issues, from dirt and chemicals to bacteria and viruses.

That high upfront cost covers durable tanks, complex valve heads, and huge beds of filter media that are built to last for years.

Under-Sink Systems: The Hidden Powerhouse

For anyone who wants targeted, high-purity drinking water without a major plumbing overhaul, under-sink filters are a fantastic middle ground. Tucked away in a cabinet, these systems hook right into your cold water line and give you filtered water through a separate, dedicated faucet.

An under-sink system's price is mostly about its filtration tech. A simple two-stage carbon filter might run you $150, but a more advanced reverse osmosis (RO) system can easily jump past $500.

Reverse osmosis systems are wildly popular for a reason—they offer one of the most thorough filtration methods you can get at home. By forcing water through a super-fine membrane, they can remove up to 99% of dissolved solids, including nasty stuff like fluoride, lead, and arsenic.

The demand for these powerful systems is booming. The global water treatment market is expected to rocket from USD 45.15 billion in 2025 to USD 91.39 billion by 2034. Reverse osmosis units already grab a huge 29% share of that market, with home setups typically costing between $300 and $1,200. You can dig into the numbers and trends in this detailed analysis about global water treatment system growth on precedenceresearch.com.

Point-of-Use Filters: Affordable and Accessible

Let's be real—not everyone needs or can afford a big, permanent system. Point-of-use filters are your friendly neighborhood heroes, offering an easy, budget-friendly way to get clean water right where you use it most. These devices are all about convenience and a low initial cost.

Their simplicity is their superpower, and it's what keeps them cheap. They use smaller, less complicated parts and are usually designed for you to install yourself, which saves you a plumber's fee.

Here’s a quick look at the most common types:

  • Faucet Filters ($30 – $100): These little gadgets attach right to your kitchen faucet, letting you switch between filtered and unfiltered water with the flick of a lever. They're perfect for renters or anyone who wants a quick upgrade for cooking and drinking.
  • Countertop Filters ($50 – $200): Sitting next to your sink, these systems pull water from the faucet through a separate filtration unit. They usually have bigger filters than the faucet-mounted kind, which means fewer changes.
  • Showerhead Filters ($25 – $75): These are specifically made to get chlorine and other chemicals out of your shower water. By doing so, they can help cut down on dry skin and hair, making them a cheap and easy investment in your daily routine.

While the upfront cost is low, just remember their smaller filters need to be swapped out more often—we'll get into that in the next section on maintenance.

The Hidden Costs of Filter Maintenance and Upkeep

Buying a water filtration system is a lot like adopting a pet—the initial price is just the beginning. The real, long-term water filtration system cost comes from the ongoing care and feeding. It's the filter changes, occasional tune-ups, and other little expenses that you really have to budget for over its lifetime.

This is where you'll find the lifetime expenses you need to plan for. From replacement cartridges and plumbing fees to the subtle costs of extra water or electricity, knowing these factors helps you figure out the true cost of ownership before you commit.

Household water filtration system components including filters, a faucet, and a tank, highlighting upfront costs.

The Never-Ending Story of Replacement Filters

The biggest recurring expense for any water filter is, without a doubt, the replacement cartridge. Think of it as a subscription for clean water. The filters are the unsung heroes, trapping all the gunk, but eventually they fill up and have to be swapped out to keep your water safe and delicious.

How often you do this—and how much it costs—varies wildly. A cheap water pitcher might seem like a bargain, but its small filters usually need replacing every 1-2 months. That can add up to $60 to $180 per year. On the other hand, a big whole-house system might only need a new filter once every 12 months or even longer, with annual costs running from $75 to $500.

Here’s a quick look at what to expect:

  • Pitcher Filters: Every 40 gallons (about every 2 months).
  • Faucet Filters: Every 100 gallons (roughly every 3 months).
  • Under-Sink Filters: These have multiple stages. Expect to change sediment filters every 6-12 months, carbon filters annually, and the RO membrane every 2-4 years.
  • Whole-House Sediment Filters: Typically every 3-6 months.
  • Whole-House Carbon Tanks: The carbon media inside can last 3-5 years or more before it needs to be replaced.

Putting off a filter change is a bad idea. Not only does it stop working well, but an old, clogged filter can actually become a breeding ground for bacteria. It can even release all the junk it trapped right back into your water, making it worse than when you started.

Professional Installation and Setup Fees

While you can install many smaller filters yourself, bigger systems like whole-house filters and some under-sink units are best left to a professional plumber. This is a one-time cost, but it's a big one, often adding $300 to $1,500 to your initial investment.

That fee covers the expertise needed to cut into your main water line, install the right valves, and make sure everything is leak-free and up to code. Sure, a DIY job can save you cash, but one mistake could lead to thousands in water damage. For complex jobs, a pro is worth every penny.

The Cost of Checking Your Work: Water Testing

How do you know if your filter is actually doing its job? You have to test your water. While it’s not a direct maintenance cost for the filter itself, it's the only way to be sure you're getting the clean water you're paying for.

You've got a few options here:

  1. DIY Test Strips: These are cheap ($20-$40) and give you a quick read on basics like chlorine, pH, and hardness.
  2. Mail-in Lab Kits: For around $100-$300, you can send a sample to a certified lab for a deep dive into contaminants like lead, arsenic, and VOCs.

My advice? Test your water before you buy a filter, and then re-test it once a year to make sure your system is still on its A-game, especially if you're on well water.

Hidden Utility Costs: Water and Electricity

Finally, don't forget that some systems use water and electricity to run. Reverse osmosis (RO) systems are famous for being incredibly effective, but they also create wastewater. For every gallon of pure water you get, an RO system might send 3-4 gallons of concentrated, contaminated water down the drain. It's a necessary part of the process, but it will show up on your water bill.

Systems with UV purifiers or booster pumps will also draw a small but constant amount of electricity. It's not much, but it's another small piece of the total cost puzzle. A standard residential RO unit, for example, might run $200 to $800 upfront, with another $50 to $150 per year for filters.

For folks in the U.S., systems with official NSF testing offer peace of mind, and their lifetime costs can be 30% lower than buying bottled water over five years. With growing health concerns, U.S. households spent a whopping $15 billion on bottled water in 2023, which is driving more people to home filtration. You can dive deeper into this trend in the full market analysis on water purifiers from fortunebusinessinsights.com.

Calculating Your Return on Investment

So, is a water filter actually worth the money? After looking at the upfront price tags and long-term upkeep, it’s easy to get lost in the numbers. Let’s shift the conversation from just cost to real-world value. Think of a filtration system less as an expense and more as a smart investment in your home.

The easiest way to see this is by looking at your wallet. The return on investment (ROI) is a fancy term for a simple idea: comparing what you spend on the system to what you save over time. For most people, the biggest and fastest savings come from finally kicking the bottled water habit.

Two water filters, a calendar, and a notebook titled 'Maintenance Costs' on a blue mat, planning expenses.

Let's break down how quickly a filter can pay for itself and start putting cash back into your budget.

The Financial Payback Period

Picture a family that spends about $50 a month on cases of bottled water. That habit adds up to a surprising $600 per year. When you stack that annual cost against a one-time purchase of a filtration system, the benefits become pretty clear.

  • Faucet Filter Example: A simple $50 faucet filter with maybe $100 in replacement cartridges for the year brings your total first-year cost to $150. That little gadget would pay for itself in just three months, saving the family $450 in that first year alone.

  • Under-Sink System Example: Let's say you go for a more serious under-sink unit that costs $400 upfront, plus $150 for the first year's filters. Your total is $550. Even at that price, it pays for itself in just under a year. After that, it’s pure savings, year after year.

This quick ROI is getting easier to achieve. For homeowners who are comfortable with a little DIY, a $400 investment in a good under-sink system can cancel out a $600-a-year bottled water habit in as little as eight months. Plus, recent water treatment system advancements on precedenceresearch.com show that new materials have caused a 25% drop in filtration media costs since 2015, making bottled-quality water at home more affordable than ever.

The core idea is simple: you are shifting your spending from a disposable product (bottled water) to a durable home asset. Once the initial water filtration system cost is covered, your ongoing expense for clean water drops dramatically, often to just pennies per gallon.

Beyond the Bank Account: The 'Soft' Returns

While saving money is great, the true value of a water filter goes way beyond your budget. These are the "soft" returns—the daily quality-of-life upgrades you'll start to notice almost immediately.

It’s kind of like buying a really good mattress. You don’t just do it to save on future chiropractor bills; you do it for the immediate reward of better sleep and feeling great every morning. A water filter delivers similar, everyday perks.

Healthier Skin and Hair

Ever get out of the shower and your skin feels tight and itchy? Or your hair feels dry and brittle? The culprit is often chlorine, the standard disinfectant used in city water. A simple showerhead filter or a whole-house system removes that chlorine before it even gets to you.

The difference is immediate:

  • Softer, more hydrated skin that doesn't need as much lotion.
  • Shinier, healthier-looking hair that's less frizzy and easier to style.
  • Less irritation for anyone with sensitive skin or conditions like eczema.

Better Tasting Food and Drinks

Think about it—your morning coffee is over 98% water. So is your tea, your soup, and the water you use to boil pasta. If your tap water tastes a little "off" because of chlorine or other chemicals, that flavor is going straight into everything you cook and drink.

With filtered water, you get:

  • A cleaner, smoother cup of coffee where you can actually taste the notes of the bean.
  • Tea that tastes pure and refreshing, without any weird chemical aftertaste.
  • Food that tastes the way it's supposed to, without picking up funky flavors from the water.

In the end, calculating the ROI isn't just a spreadsheet exercise. It’s about recognizing that a water filtration system is a powerful investment in your home’s comfort, your family’s health, and your long-term financial well-being.

How to Save Money on Your Water Filtration System

Getting clean, great-tasting water flowing from your taps shouldn't mean draining your bank account. The initial water filtration system cost can definitely look intimidating, but there are plenty of smart ways to chip away at both the upfront price and those pesky long-term expenses.

With a bit of planning, you can make a savvy financial choice without ever having to compromise on your family’s water quality. Think of it like grocery shopping—you could pay full price, or you can stack sales, coupons, and smart choices to get the exact same quality for a lot less. It’s all about knowing where to look.

Hunt for Deals and Seasonal Sales

Your first stop should always be a hunt for discounts. Manufacturers and big-box retailers are constantly running promotions, especially around holidays like Black Friday, Memorial Day, and Labor Day. A quick sign-up for a few brand newsletters can also give you a heads-up on flash sales or exclusive offers.

As you're zeroing in on a system, keep an eye out for coupons or promotional offers from both manufacturers and installers. A simple search can sometimes turn up a percentage-off deal or a rebate that takes a real bite out of the purchase price.

Prioritize Certified Systems

This one might feel a little backward, but spending a little more on a certified product can absolutely save you money down the road. You want to see systems that have been independently tested and certified by organizations like the NSF (National Sanitation Foundation) or ANSI (American National Standards Institute).

These certifications are your proof that a filter actually does what the box says it does. A cheap, uncertified filter might claim to remove lead and chlorine, but without that NSF/ANSI stamp, you’re just taking their word for it. Paying for performance you aren't actually getting is the quickest way to throw money away.

When you choose a certified system, you’re not just buying a filter; you’re buying confirmed results and avoiding overpaying for empty promises. If you need more in-depth guidance on finding the right system for your specific water issues, you can find a ton of resources and advice for water filters on waterfilteradvisor.com.

Consider DIY Installation for Simpler Systems

One of the biggest cost drivers is installation. While a big whole-house system is almost always a job for a professional plumber, a lot of the smaller filters are designed for an easy DIY install.

  • Good for DIY: Faucet filters, countertop systems, showerhead filters, and most under-sink units can be up and running in under an hour with just a few basic tools. This can easily save you $200 to $500 in labor fees.
  • Call a Pro: Leave the whole-house systems and some of the more complex reverse osmosis units to the experts. These often involve cutting into your main water line, and one mistake there could lead to a very expensive water damage problem. A plumber is a worthwhile investment here.

Explore Filter Subscription Services

Let's be honest, the biggest long-term cost is replacing the filters. To make this easier on the wallet, a lot of companies now offer subscription services. Signing up often gets you a nice discount (usually 10-15%) on replacement cartridges, and they’ll show up at your door right when it’s time for a change.

This not only saves you money but also takes the guesswork out of maintenance, ensuring your system keeps running at peak performance.

To help you keep track of all the ways you can save, here’s a quick checklist you can use.

Your Cost-Saving Checklist for Water Filtration

Use this table to pinpoint the best strategies for your budget and needs. A little effort upfront can lead to significant savings over the life of your system.

Strategy Potential Savings Effort Level
Shop Holiday & Seasonal Sales 15-30% off initial purchase price Low
Search for Manufacturer Coupons $25 – $100 or more off upfront cost Low
Choose NSF/ANSI Certified Filters Avoids wasted money on ineffective products Medium
DIY Installation (for simple systems) $200 – $500 in professional labor fees Medium
Sign Up for Filter Subscriptions 10-15% off all replacement filters Low
Buy Multi-Packs of Filters 5-10% discount compared to single packs Low
Perform Regular Maintenance Prevents costly repairs and extends system life Medium

By combining a few of these tips, you can make a huge dent in the total cost of ownership. Smart shopping and a little bit of planning go a long way.

Making the Right Financial Choice for Your Home

So, what's the bottom line? Picking the best water filter isn't about grabbing the cheapest option you can find. It’s about matching a system to your home's specific water, your family's needs, and—of course—your budget.

Making a smart call means looking past the initial price tag. The real water filtration system cost shows up over years of use, once you factor in filter replacements and any ongoing maintenance. A simple pitcher is cheap to buy, but those filter swaps add up. A whole-house system is a bigger investment upfront, but it protects every tap in your home with less frequent upkeep. You just have to match the solution to the problem.

From Cost to Investment

Think of a quality filter system as a proactive investment in a healthier home. For many people, it pays for itself a lot faster than you'd think.

For example, a solid reverse osmosis system can pay for itself in just 2-3 years by cutting out bottled water completely. With households spending an average of $300 on bottled water in 2023, the savings are real. As our water sources get more stressed, a good filtration system also protects you from potential price hikes down the road.

Ultimately, choosing the right system is just one part of a bigger plan to master your household monthly expenses and keep your finances in good shape for the long haul.

Here's the most important takeaway: the upfront price is just the first chapter. The total cost of ownership is what really impacts your wallet and your peace of mind.

Now that you know what to look for, your first step is simple: get your water tested. Once you know exactly what’s in your water, you can choose the right system with confidence and without wasting a dime.

Got Questions About Filtration Costs? We’ve Got Answers.

Still have a few things you're wondering about? You're not the only one. When it comes to the cost of a water filtration system, the same handful of questions tend to pop up. Let's clear the air and give you the straightforward answers you need.

Here are some of the most common questions we hear from homeowners.

What’s the Real Cost to Install a Whole House Water Filter?

Getting a whole-house water filter professionally installed will typically run you somewhere between $300 and $1,500. Where you land in that range really depends on a few things: how complicated your plumbing setup is, the type of system you bought, and what plumbers charge in your neck of the woods.

A basic, single-tank carbon filter, for instance, will be on the lower end of that scale. But if you're installing a beefier, multi-stage system that includes a water softener, expect the price to creep toward that $1,500 mark. Sure, you can save that cash by doing it yourself, but unless you're confident in your plumbing skills, it's a risky move that could lead to some very pricey leaks.

Is a Water Filter System Actually Cheaper Than Buying Bottled Water?

In the long run? Absolutely, and it's not even close. The initial cost of a filtration system might seem steep, but it almost always beats a bottled water habit over time. Think of it as paying a bit more upfront to save a whole lot more down the road.

Let's do the math. A family spending just $30 a month on bottled water is shelling out $360 a year. A simple faucet filter or under-sink system will pay for itself in well under a year. Even a high-end whole-house system will give you a solid return on your investment within a few years, all while delivering clean water from every tap in your house.

Do I Really Need a More Expensive Filter for My Well Water?

More often than not, yes. Unlike city water that's been treated, well water is raw and can carry a much wider, and wilder, range of contaminants. You could be dealing with everything from heavy sediment and iron to bacteria that municipal water plants would have zapped long before it reached a home.

This means you’ll likely need a more powerful, multi-stage filtration system to get your well water clean and safe—and that naturally costs more. The single most important thing you can do is get your well water professionally tested first. Those test results will give you a perfect roadmap, showing you exactly what contaminants you need to target so you can buy the right system and not a penny more.

Can I Save Money by Using Generic Replacement Filters?

You can, but you have to be careful. Generic or third-party filter cartridges are usually a lot cheaper than the brand-name ones, which is obviously tempting. The catch is that they might not have the same quality, performance, or—most importantly—the certifications (like NSF/ANSI) that come with the manufacturer's own filters.

You could end up with a filter that barely removes contaminants or, worse, one that could damage your system. If you're going to try generic filters, do your homework first. Dig into the brand, check for any independent certifications, and read a ton of user reviews to make sure it's a safe and effective choice for your system.


At Water Filter Advisor, our goal is to help you find the right filtration solution for your home and your budget. Check out our in-depth guides and reviews to make a smart, confident decision for your family's health. Learn more at https://www.waterfilteradvisor.com.

How to Clean Your Water Softener Brine Tank Like a Pro

To get your brine tank sparkling clean, you'll need to start by putting your water softener into bypass mode. After that, unplug it, and get ready to manually empty out all the old salt and water. Once it's empty, a good scrub with mild soap and warm water is in order, followed by a sanitizing rinse with a diluted bleach or vinegar solution. Rinse it out thoroughly, put it all back together, and you're good to go. This whole process is your secret weapon for getting rid of that nasty sludge and stopping salt bridges before they start.

Why a Clean Brine Tank Is Your Secret Weapon for Soft Water

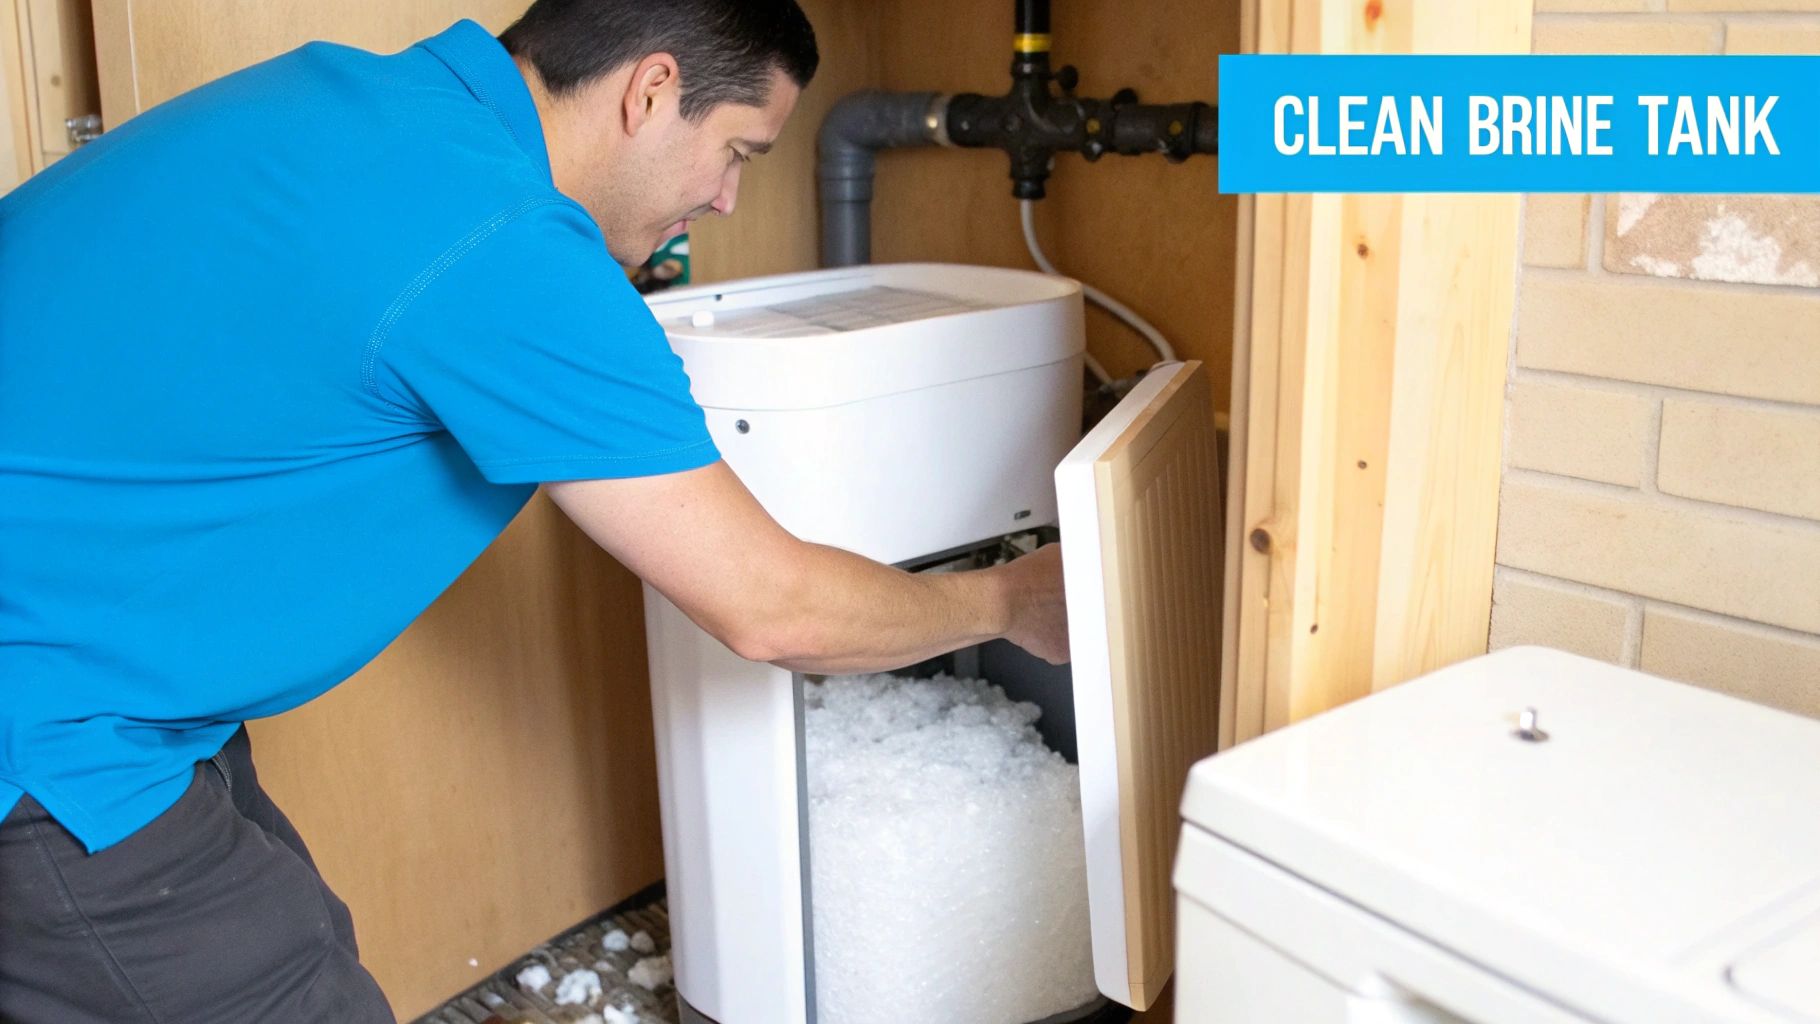
A man in a blue shirt inspects the inside of a water softener brine tank filled with salt.

Ever notice your glassware coming out of the dishwasher with those chalky spots again? Or maybe your skin and hair just feel dry and dull, even though you have a water softener. The problem might not be the system itself, but its often-forgotten sidekick: the brine tank.

This simple tank is the heart of your softener’s regeneration process. Keeping it clean isn’t just a random chore on your to-do list—it's one of the most important maintenance tasks for making sure your home has consistently soft, luxurious water.

Think of the brine tank as the recharger for your entire home water filtration system. It’s where salt dissolves in water to create a powerful brine solution. During a regeneration cycle, this salty water gets pulled into the main resin tank to wash away the hard minerals—calcium and magnesium—that have been collected from your water. If that brine isn't clean and potent, the whole process just falls apart.

The Enemies of Soft Water: Salt Bridges and Mushing

When a brine tank gets neglected, a couple of common villains can pop up and stop your system dead in its tracks. Knowing what they are is the first step to defeating them.

  • Salt Bridges: This is when a hard crust of salt forms over the top of the water level in the tank. You're left with a hollow space underneath, which means the rest of the salt can't actually dissolve. Your softener will still try to regenerate, but it ends up pulling in plain water instead of salty brine, leaving the resin beads full of hard minerals.
  • Salt Mushing: Down in the murky depths of the tank, undissolved salt can turn into a thick, sludge-like mess. This "mush" can clog up the brine well and block water flow, making the regeneration cycle completely useless.

A properly functioning brine tank is the unsung hero of home water filtration. Regular cleaning isn't just a chore; it’s an investment in protecting your appliances, plumbing, and the soft water your family depends on.

Ignoring these problems means your softener isn't actually softening your water. This brings back all the classic hard water headaches: limescale buildup on faucets and inside pipes, appliances that work harder and die sooner, and needing to use way more soap and detergent. This guide will walk you through the entire cleaning process, turning what seems like a big job into a simple, confidence-building project.

Gearing Up for a Brine Tank Clean-Out

A little prep work goes a long way. Before you even think about touching the brine tank, taking a few minutes to get your gear together can be the difference between a quick, painless job and a messy, frustrating afternoon. Trust us, you don’t want to be halfway through, with salty water on the floor, realizing you need to run to the hardware store.

Let’s walk through exactly what you’ll need to have on hand. The good news? You probably already have most of this stuff tucked away in your garage or laundry room.

Your Brine Tank Cleaning Toolkit

We've put together a quick checklist of everything you'll need for a successful cleaning. Having these items ready and within arm's reach will make the entire process a breeze.

Item Recommended Type Pro Tip
Buckets 2-3 gallon buckets (at least two) Use one for scooping out old salt and the other for dirty water to avoid a sloshy mess.
Scoop Sturdy plastic cup or small scoop Never use metal! It can easily scratch the inside of the tank, creating little hiding spots for gunk.
Shop-Vac Wet/dry vacuum This is a game-changer for getting that last bit of water and sludge out of the bottom. Totally optional, but highly recommended.
Garden Hose Standard hose with a spray nozzle Makes rinsing the tank after scrubbing incredibly fast and effective.
Brush Long-handled with stiff (not metal) bristles Find one that lets you comfortably reach the bottom of the tank. A toilet brush dedicated to this task works surprisingly well.
Towels/Rags Old, absorbent towels Spills happen. Be ready for them to protect your floors and make cleanup easy.

Once your hardware is squared away, you just need a few more things to handle the actual cleaning and, more importantly, to keep yourself safe.

Cleaning Supplies and Safety Gear

Before you start scrubbing, let’s talk safety. You're dealing with grime, possibly some mold, and cleaning agents. It's smart to gear up properly. For a deep dive into why this matters, check out this guide on Personal Protective Equipment for Chemicals.

Here’s what you’ll need to grab:

  • Waterproof Gloves: A good pair of rubber or nitrile gloves is a must. Brine is corrosive, and you don’t want that stuff on your hands.
  • Safety Glasses: A simple pair of safety glasses will protect your eyes from any accidental splashes, especially if you’re using a bleach solution.
  • Mild Dish Soap: Your everyday, non-abrasive dish soap is perfect for breaking down the initial layer of grime inside the tank.
  • Sanitizer: You've got options here. A solution of 2-3 tablespoons of unscented household bleach per gallon of water is a powerful disinfectant. If you prefer a non-chemical route, plain old white vinegar works great too.

Pro Tip: The absolute best time to tackle this job is when your salt level is low, right before you’d normally add a new bag. It means a lot less heavy, wet salt you have to scoop out. Work smarter, not harder!

Finally, and this is the most critical part, you need to prep the softener itself. First, find the bypass valve on your unit and push or turn it to the bypass position. This keeps water flowing to your house but stops it from entering the softener.

Once it's in bypass, unplug the water softener from the electrical outlet. This is a non-negotiable safety step. It guarantees the system won’t kick into a regeneration cycle while your hands are inside the tank.

The Complete Guide to Cleaning Your Brine Tank

Okay, you've got your gear ready and the softener is safely in bypass mode. Now for the main event. Don't worry, this isn't some complex plumbing nightmare. We're going to walk through this step-by-step, and you'll see it's more like deep-cleaning a kitchen appliance than anything else.

With a little bit of elbow grease, we'll get that brine tank looking brand new, and your softener will run so much better for it.

Phase One: Draining and Salt Removal

First things first, we need to get everything out of that tank—the water, the old salt, and whatever gunk has settled at the bottom. The less salt you have to deal with, the quicker this goes. That's why timing this for when your salt is already low is a pro move.

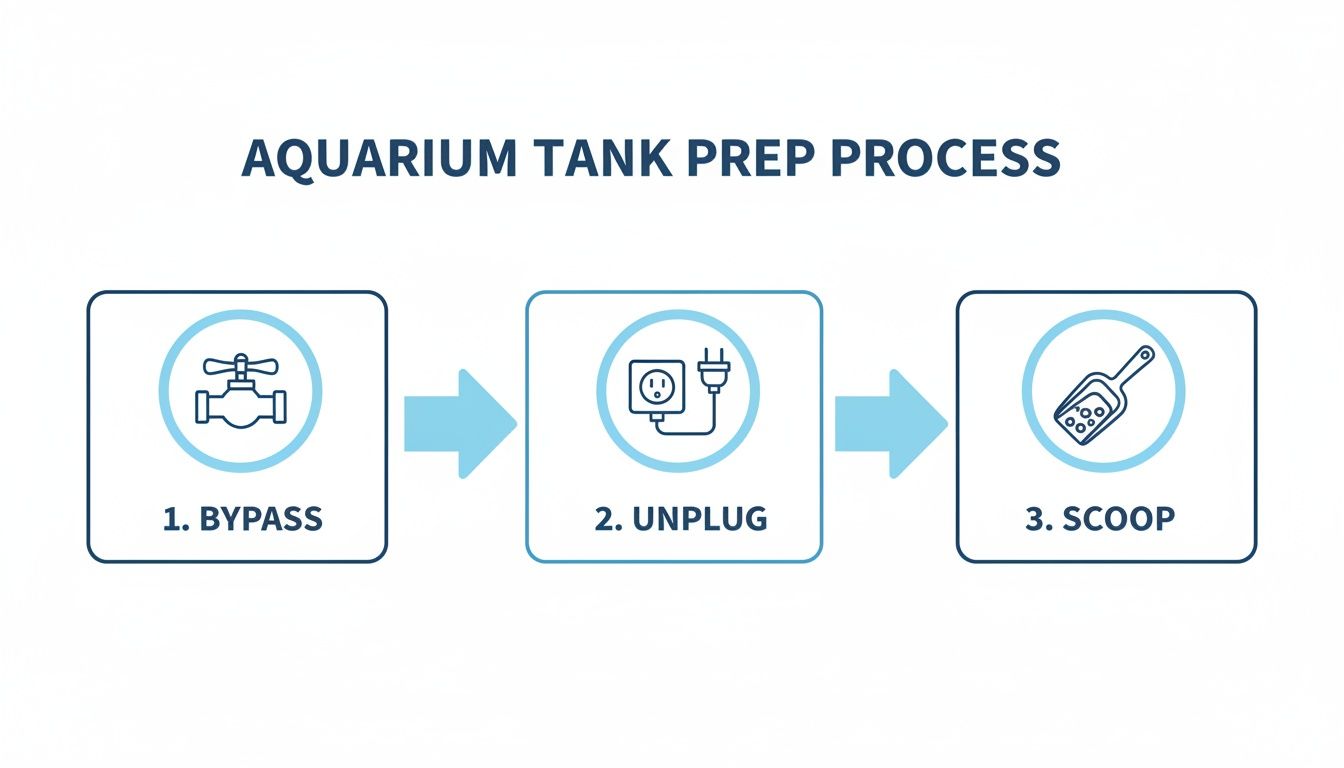
This diagram gives you a quick visual of the prep work before you start digging in.

A diagram illustrates three steps for aquarium tank preparation: bypass, unplug, and scoop.

Hitting these three points—bypassing, unplugging, and getting your scoop ready—is the key to a smooth and safe cleaning job.

Go ahead and disconnect the brine line and the overflow tube from the tank. They’re usually held on by simple clips or threaded fittings. Just be gentle here; old plastic can get brittle. Pop them off and move them out of your way.

Now, let's tackle that salt.

  1. Scoop it out: Grab your plastic scoop and start moving the leftover salt into your buckets. If the salt is damp, it gets heavy fast, so don't try to be a hero and overfill the buckets.
  2. Keep it or toss it? If the salt looks clean and isn't a mushy mess, feel free to set it aside to reuse later. But if it's discolored or feels sludgy, it’s better to just get rid of it and start fresh.
  3. Deal with the water: After the salt is out, you'll have a few gallons of salty water left. You can bail it out with your scoop, but a wet/dry shop vac is your best friend here. It makes quick work of that last bit of gritty water.

Once the tank is empty, you'll likely see the enemy: a layer of dirt, sediment, and general sludge. This is the stuff that can clog your system and cause all sorts of problems.

It's really common to find a gritty, sand-like layer in tanks that haven't been cleaned for a few years. This is usually just insoluble material from lower-grade salts that builds up over time and can mess with the brine draw.

With the tank empty, we're ready for the satisfying part—the scrub-down.

Phase Two: Scrubbing and Sanitizing

This is where the magic happens. A clean tank surface is essential for stopping bacteria growth and making sure your new salt dissolves correctly. We want a deep clean, but without using harsh chemicals that could damage the tank.

Grab your mild dish soap. Squirt a good amount into the tank and add a gallon or two of warm water. Now, take your long-handled brush and give the whole interior a really good scrub.

Focus on the bottom and the corners where all the grime likes to collect. Work your way up the sides, breaking loose any salt residue. Don't forget to scrub the lid, too.

After you've scrubbed every surface, it's time to rinse. The easiest way is to take the tank outside and blast it with a garden hose. If you're stuck indoors, you'll have to use your buckets and rags to rinse it completely. Keep rinsing until the water runs clear and all the soap is gone.

Now for the sanitizing step—this is critical for killing any lingering bacteria or mold. You've got a couple of great options:

  • Bleach Solution: Mix 2 to 3 tablespoons of unscented household bleach with about 3 gallons of water. Pour it in and use your brush to splash it all over the interior surfaces. Let it sit for about 15 minutes.
  • Vinegar Solution: For a non-bleach option, mix one cup of white vinegar with 2 to 3 gallons of water. Do the same thing—pour it in, coat the sides, and let this one sit for 20 minutes. Vinegar is a great natural disinfectant.

After the sanitizing solution has done its job, you have to rinse the tank out thoroughly. Any leftover bleach or soap can cause problems for the resin. Rinse it two or three times until you can't smell any bleach or vinegar.

Phase Three: Cleaning the Brine Well and Float

Look inside your brine tank and you'll see a tall tube—that's the brine well. It holds the safety float, which is the mechanism that keeps your tank from overflowing. It's a key part of the system that needs a gentle cleaning.

The brine well is usually held in by a couple of clips at the bottom. Carefully detach it so you can clean it out properly.

Here’s how to handle it:

  • Disassemble with care: The float assembly typically lifts right out of the tube. Pay attention to how it comes apart so you can put it back together the same way.
  • Clean the tube: Use your brush and soapy water to clean the inside and outside of the brine well. Slime can build up in there, so get it nice and clear.
  • Inspect the float: Wipe down the float mechanism with a rag and soapy water. Make sure it moves up and down its guide rod smoothly. If it sticks, it can't shut off the water properly.
  • Rinse and reassemble: Rinse everything well, put the float back inside the brine well, and then snap the whole unit back into place in the tank.

Paying attention to these smaller parts makes sure your whole system is ready to work perfectly.

Phase Four: Reassembly and Refill

We're in the home stretch! The tank is sparkling clean, and it's time to put it all back together.

First, reconnect the brine line and the overflow tube. The connections should be snug, but don't go crazy overtightening them. Hand-tight is almost always enough to prevent leaks.

Next, add the salt. If you saved your old salt, you can put it back in. If not, open up a new bag. Pour the salt into the tank, trying to aim for the sides rather than dumping it right on top of the brine well.

Now for the water. A good rule of thumb is to add just enough water to be about one inch above the salt level. For most home softeners, this will be around 3 to 5 gallons. Use your buckets to pour it in gently.

Don't fill the tank all the way up with water. The softener will automatically add the right amount after it regenerates. This initial water is just to get the first batch of brine made.

Finally, plug the softener back in. Slowly turn the bypass valve back to the "service" position. You should hear water start to flow back into the unit. Do a quick check around your connections for any drips.

With everything hooked up, the very last step is to kick off a manual regeneration cycle. This will pull the new brine into the resin tank and get the whole system back online. Check your manual, but it's usually as simple as holding down a "regenerate" button for a few seconds.

The cycle will probably take an hour or two. Once it's finished, you're all done! Your water softener is now running with a perfectly clean brine tank, ready to give you great soft water again.

How to Bust Salt Bridges and Other Common Problems

A person uses a brush to break up a cracked salt bridge in a blue water softener brine tank.

Even with a perfectly clean brine tank, you can still run into a couple of really common, frustrating issues. We're talking about the two biggest culprits that can stop your water softener in its tracks: salt bridges and salt mushing.

Think of this as your field guide to fixing these headaches yourself. You'll save a surprise bill from the plumber.

These problems can pop up for a few reasons—high humidity in the basement, using the wrong kind of salt, or just filling the tank a little too high. The good news? Both are usually pretty simple to fix once you know what you're looking for.

Spotting and Fixing a Salt Bridge

A salt bridge is exactly what it sounds like. It's a hard, solid crust of salt that forms a "bridge" over the water in your tank. This creates a big air pocket underneath, so the loose salt on top never actually dissolves into the brine. Your softener goes through its cycle, but it's just pulling in plain water instead of the saltwater it needs. That's when your hard water problems come roaring back.

So, how do you know you've got one?

  • The Tap Test: Your water suddenly feels hard again. Soap isn't lathering like it should, and you're seeing spots on your clean dishes.
  • The Visual Check: You look in the tank, and the salt level never seems to go down, even after a few regeneration cycles.
  • The Poke Test: This is the surefire way. Grab a broom handle or a long wooden dowel and gently push it down into the center of the salt. If it hits a hard layer and then suddenly breaks through into empty space, you’ve found your salt bridge.

Once you’ve confirmed the bridge, breaking it up is easy. Take your broom handle and gently tap and push down on the crust in a few different places. The goal is just to break it into smaller pieces that can fall down into the water.

Be careful here. Don't use anything sharp or metal, and don't get too aggressive. There's a delicate plastic float mechanism inside that brine well, and one forceful jab can damage it, leading to a much more expensive repair.

After breaking it up, give the salt a good stir to help it dissolve. From there, just kick off a manual regeneration cycle on your softener to get the system back on track.

Dealing with Salt Mushing

Salt mushing is the sneaky cousin of the salt bridge. This is where undissolved salt and all its impurities turn into a thick, gooey sludge right at the bottom of the brine tank. This mush can clog the brine well and completely block the flow of water, making regeneration impossible.

You'll usually discover this problem during a routine cleaning when you empty the tank out. It tends to be more common in homes with high humidity or if you're using lower-purity salts, like rock salt, which often contains more dirt and sediment.

If you find a layer of that sludge at the bottom of your tank, the only real solution is to get it out.

  1. Scoop the Sludge: Use a plastic scoop to get all of that mushy, recrystallized salt out of the tank and dump it into a bucket.
  2. Scrub and Rinse: This is where that full clean we already covered becomes essential. You've got to scrub the tank thoroughly to remove every bit of that residue.
  3. Rinse Again: Make absolutely sure you rinse the tank completely to get rid of any fine sediment that could cause clogs later on.

The best way to prevent both salt bridges and mushing is just to be proactive. In fact, neglecting a brine tank can lead to salt bridges in up to 70% of residential systems within the first year alone. For a deeper dive into your system's health, it's worth reviewing a complete water softener maintenance checklist. Sticking to a simple routine is really the key.

Keeping Your Water Softener in Peak Condition

Now that your brine tank is sparkling clean, let’s talk about how to keep it that way. Moving from a one-off cleaning to a smart, proactive maintenance routine is the real secret to a long-lasting softener and consistently soft water. Trust us, it’s always easier to prevent problems than it is to fix them.

A proactive approach really just starts with a simple schedule. For most homes, giving the tank a thorough cleaning once a year is perfect. However, if you're on well water or dealing with high iron—the usual suspect behind those nasty rust stains—you’ll want to bump that up to every six to eight months. This keeps you ahead of any serious sediment or sludge buildup.

Choosing the Right Salt Makes a Huge Difference

The type of salt you use directly impacts how often you’ll find yourself cleaning that tank. It might seem like salt is just salt, but the purity level makes a world of difference and is the single biggest factor in preventing future gunk.

Here’s a quick rundown of what you’ll find on the shelf:

  • Evaporated Salt: This is the good stuff. It’s your best choice for any water softener, hands down. Typically 99.9% pure, it dissolves cleanly and leaves almost nothing behind. Using evaporated salt pellets dramatically cuts down on salt “mushing” and bridging.
  • Solar Salt: Made by evaporating seawater, solar salt is a solid, budget-friendly option with a purity of about 99.5%. It’s a huge step up from rock salt but can sometimes contain tiny bits of insoluble material that will eventually build up.
  • Rock Salt: This is your cheapest option, but it's also the least pure. It looks like little pebbles for a reason—it’s often full of dirt and other minerals that don't dissolve. This stuff will quickly create a sludgy mess at the bottom of your tank.

By simply switching from rock salt to a high-purity evaporated salt, many homeowners find they can push their cleaning schedule from every six months to once a year, or even longer. The few extra cents per bag absolutely pays for itself in less work for you.

Don't Forget the Resin Cleaner

While keeping the brine tank clean is crucial, it’s only half the battle. Inside the main mineral tank, you have thousands of tiny resin beads doing the heavy lifting of grabbing those hard minerals. Over time, things like iron and manganese can foul these beads, and regular salt regeneration just can't get them clean.

Using a dedicated water softener resin cleaner every few months is a fantastic maintenance habit. You just pour the right amount into the brine well or directly into the tank right before a regeneration cycle. The cleaner gets sucked into the resin tank with the salt water, where it chemically strips away that stubborn buildup and gets the beads back to working like new.

Maintaining your whole system is one of the smartest investments you can make. To keep all your home equipment running smoothly for years, it’s a good idea to adopt some general top preventive maintenance best practices. This proactive mindset doesn’t just save you from surprise repair bills; it ensures your family gets the full benefits of soft water every single day. For more tips on home water systems, check out our guides for more expert advice on water filtration.

Brine Tank Maintenance: Your Top Questions Answered

Let's tackle some of the most common questions that pop up when it's time to clean a brine tank. Getting these details right makes the whole process smoother and keeps your system running like a top.

What’s the Best Salt to Use to Avoid Future Headaches?

Your salt choice is genuinely the biggest factor in how often you'll need to roll up your sleeves and clean this thing. If you want to make life easier, evaporated salt pellets are the way to go, hands down.

These pellets are incredibly pure, often testing at 99.6% to 99.9% sodium chloride. That high purity means they dissolve almost completely, leaving behind minimal gunk that would otherwise turn into sludge at the bottom of your tank. They might be a little more expensive, but they pay for themselves in reduced labor.

A simple switch to a high-purity salt can easily push your cleaning schedule from every six months out to once a year. The few extra bucks per bag are well worth it to avoid the hassle.

Can I Clean My Brine Tank with Vinegar Instead of Bleach?

You absolutely can. White vinegar is an excellent natural sanitizer if you'd rather not use bleach. It's great for handling any lingering mold or bacteria without the harsh chemicals.

Here’s how to do it:

  • Once the tank is scrubbed with soap and fully rinsed, pour in 2-3 gallons of fresh water.
  • Add about one cup of white vinegar and give it a good swish to mix.
  • Let the solution sit for around 20 minutes, making sure it gets on all the inside surfaces.
  • Finally, give it one last scrub with your brush and rinse everything out completely.

How Can I Tell if the Softener is Working Right After I Clean It?

This is the satisfying part—confirming your hard work paid off. The fastest and most reliable method is to use a water hardness test strip.

After you've put the tank back together, added the new salt, and poured in a few gallons of water, you'll need to trigger a manual regeneration cycle. This usually takes an hour or two. Once it's finished, grab a water sample from a faucet inside your home. If everything's working correctly, the test strip should show a hardness level near zero.

You'll also feel the difference pretty quickly. Soap will lather up nicely again, and you'll see those tell-tale, spot-free glasses coming out of the dishwasher. That's the real proof.


At Water Filter Advisor, we're here to help you get the best water quality for your home. For more in-depth guides and honest product reviews, check us out at https://www.waterfilteradvisor.com.

DIY Home Water Filtration: Your Complete Guide to Purer, Tastier Water

Building your own home water filtration system is one of the most empowering projects you can take on. It puts you in the driver's seat, giving you total control over the quality of your water. You get to build a solution that's a perfect match for your home's unique needs—often for a lot less than hiring a pro—and you get complete peace of mind about what's coming out of your tap.

Why Build Your Own Home Water Filter?

A smiling woman and a child fill a glass with clean tap water from a kitchen faucet.

Ever notice that faint swimming pool smell from your tap? Or wonder why your morning coffee just tastes a bit… off? While municipal water is treated to be safe, it often leaves behind things like chlorine, sediment, and minerals that can mess with the taste, smell, and even the lifespan of your appliances.

Taking on a DIY home water filtration project lets you tackle these issues head-on. This isn't just about saving money; it’s about becoming more self-reliant. You'll gain a real understanding of your home's water—from the source right to your glass—and build something that fixes your specific problems.

Addressing Real-World Water Woes

Imagine a family on well water who's constantly dealing with that awful "rotten egg" smell from hydrogen sulfide. A professionally installed system could run them thousands, but a well-designed DIY setup with the right carbon filter can knock out that odor for a fraction of the cost.

Or think about the city apartment dweller who's sick of chlorine ruining their tea. A simple under-sink activated carbon filter—a project you can easily knock out in an afternoon—solves the problem instantly. It's this direct, hands-on approach that connects your concerns with a real, working solution.

The real magic of the DIY approach is customization. You aren't just buying a generic box off the shelf. You're engineering a solution perfectly matched to your water quality report, whether you're targeting lead, sediment, or excessive hardness.

This drive for tailored solutions is a big reason why the home water filtration market, valued at a massive USD 20.26 billion in 2024, is projected to hit USD 50.89 billion by 2033. For people like us, simple point-of-use filters are a huge part of this trend. Going the DIY route can slash installation costs by up to 70% compared to hiring a professional.

DIY vs. Professional Installation: Cost and Benefit Snapshot

Deciding between a DIY project and hiring a pro often comes down to balancing cost, time, and complexity. This table gives you a quick look at what to expect from each path for common filtration setups.

Factor DIY Home Water Filtration Professional Installation
Upfront Cost Low. Mainly parts and basic tools. High. Includes parts, labor, and company overhead.
Time Commitment Moderate. From a few hours to a full weekend. Low. Usually completed in a few hours.
Skills Required Basic plumbing and handyman skills. None. The expert handles everything.
Customization High. You choose every component. Limited to the pro's available systems.
Key Benefit Cost savings and deep system knowledge. Convenience and warranty-backed work.

While hiring a professional guarantees a quick and polished result, the satisfaction and savings from doing it yourself can't be beaten, especially for simpler systems.

The Power of Knowing Your System

When you build your own filter, you know exactly what's inside it, how every part works, and when it needs a tune-up. That knowledge is incredibly empowering.

  • Complete Control: You hand-pick the filtration media, whether it's a sediment filter to catch rust or a carbon block to absorb chemicals.
  • Cost Savings: Sourcing your own parts and putting in the elbow grease dramatically cuts the final price tag, making top-tier filtration more affordable.
  • Skill Building: You’ll pick up basic plumbing skills and get more confident with home maintenance—a huge win for any homeowner.

There's a special kind of satisfaction that comes from turning on your faucet and knowing you're the one responsible for that pure, great-tasting water. If you enjoy the self-sufficiency that comes from creating your own home solutions, you might also be interested in exploring other DIY home wellness projects. It's about more than just a project; it's about making your daily life better, one drop at a time.

Understanding Your Water Before You Build

Before you even think about buying parts for a DIY home water filtration system, you need to play detective.

Building a filter without knowing what’s in your water is like trying to fix a car without looking under the hood—you might get lucky, but you're probably wasting time and money. The goal is to build a system that solves your specific water problems, not someone else's.

The very first step is to figure out exactly what you're up against. Are you dealing with the lingering taste of chlorine from city treatment, or is your well water leaving rust-colored stains from high iron content? Each contaminant requires a different filtration strategy.

Decoding Your City Water Report

If you get your water from a municipal source, you have a powerful tool at your disposal: the Consumer Confidence Report (CCR). Your local water utility is required by law to provide this report to its customers annually. It's a detailed breakdown of what's in your water, including detected contaminant levels and how they compare to legal safety limits.

You can usually find your CCR on your water company's website. Keep an eye out for terms like:

  • Chlorine/Chloramine: These are common disinfectants. While effective, they can leave a chemical taste and odor. High levels are a clear signal that an activated carbon filter should be a core component of your build.
  • Hardness: Measured in grains per gallon (GPG), high hardness is caused by calcium and magnesium. It's not a health risk, but it causes scale buildup that can destroy appliances.
  • Lead and Copper: These often leach from old plumbing pipes. If your report shows levels close to the action limit, a specialized filter certified for lead reduction is essential.

Understanding this report turns a guessing game into a targeted plan. For more detailed advice on interpreting these results and choosing the right filter, you can find a wealth of information in guides for homeowners. For an in-depth look, you might be interested in exploring the expert advice at Water Filter Advisor to make a more informed decision.

When to Test Your Well Water

For those on private well water, the responsibility for testing falls squarely on you. Unlike city water, well water isn't treated or monitored by a utility, meaning its quality can change with the seasons or due to environmental factors. A professional lab test is a non-negotiable first step.

A comprehensive well water test will screen for a different set of potential troublemakers. You'll want to check for things like iron, manganese, sulfur (that "rotten egg" smell), nitrates, and bacteria like E. coli. High sediment, for instance, points to the need for a robust pre-filter to protect the more sensitive components of your system downstream.

A water test isn't an expense; it's an investment in your project's success. It provides the exact blueprint you need to build a DIY filtration system that actually works, ensuring every dollar you spend is on a component that targets a real problem.

Before deciding on a filtration method, it's also crucial to understand the quality of water entering your home, and for many, this includes ensuring a clean water supply starts at the source with proper water tank cleaning. Contaminants can build up in storage tanks, undermining even the best filtration system.

Once you have your test results in hand, you can confidently move forward. High iron? An oxidizing filter is your answer. Bacteria present? A UV purification stage becomes a priority. This data-driven approach is the foundation of every successful DIY home water filtration project, ensuring you get safe, clean, and great-tasting water from day one.

Choosing Your Filtration Superheroes

Alright, you’ve got your water test results in hand and you know what you’re up against. Now for the fun part: choosing your filtration method. This isn't a one-size-fits-all situation. The best DIY home water filtration setup depends entirely on what you're trying to remove.

Think of it like building a custom toolkit. You need to pick the right components for the job, balancing performance, cost, and how much time you want to spend on the project. Let's dig into the most common technologies you can put together yourself.

The Foundation: Sediment Filters

A sediment filter is the first line of defense for any serious water filtration system. Its job is simple but crucial: it catches all the big stuff. We’re talking about the sand, silt, rust particles from aging pipes, and any other gunk that makes your water look murky.

This is almost always the first stage in any DIY build, and for good reason. It acts as a bodyguard for the more delicate (and expensive) filters down the line. Without it, a high-end carbon filter or a reverse osmosis membrane would get clogged and destroyed in no time.

You'll run into a few main types:

  • String-Wound: These look just like they sound—a big spool of string. They’re fantastic for well water where you might have particles of all different sizes.
  • Pleated: With a huge surface area, these filters allow for great water flow without a big drop in pressure. They're usually the go-to for city water.
  • Spun-Polypropylene: These are a solid, budget-friendly choice for basic sediment removal.

If you're in an apartment on city water, a simple pleated filter is probably all you need to snag any debris from the pipes. But if you're on a well, you'll likely want a lower-micron string-wound filter to handle the heavier load.

The Workhorse: Activated Carbon Filters

Hate that "public pool" smell and taste? Activated carbon is your answer. These filters are masters at pulling chlorine out of water. They work through a process called adsorption, where chemical contaminants literally stick to the carbon's massive internal surface area.

Beyond just chlorine, activated carbon is a champ at removing volatile organic compounds (VOCs), pesticides, and a whole host of other chemicals that mess with your water's taste and odor.

For most DIY projects, you'll be looking at an activated carbon block filter. These solid blocks can filter particles down to an incredibly fine 0.5 microns. That means they don't just improve taste—they can also trap nasty cysts like Giardia and Cryptosporidium, making them a seriously versatile part of your system.

A simple two-stage setup with a sediment pre-filter and a carbon block filter is probably the most popular DIY project out there. It’s a weekend warrior’s dream, solving the most common city water problems—cloudiness and chlorine—in just a couple of hours.

This combo is perfect for renters or anyone who wants a massive upgrade in water quality without touching their home's main plumbing.

The Heavy-Hitter: Reverse Osmosis (RO)

When you need water that's as pure as you can possibly get it, you bring in the big guns: Reverse Osmosis (RO). This is serious filtration. An RO system uses high pressure to force water through a special membrane that strips out almost everything else. We’re talking lead, arsenic, fluoride, nitrates, salts—you name it.

Putting together a DIY RO system is a more involved project, but it's totally achievable. A typical setup has a few key parts:

  1. Pre-filters: You'll always have a sediment filter and at least one carbon filter to protect the RO membrane.
  2. RO Membrane: This is the heart of the system, where the real magic happens.
  3. Storage Tank: RO makes water slowly, so a small tank keeps a supply of purified water ready to go.
  4. Post-filter: This is usually a final carbon filter to give the water a final "polish" for taste before it hits your glass.

The market shows just how effective these systems are. RO units command over 60% of the market share, but other technologies are making moves. For example, UV purifiers are seeing a projected 10.6% growth rate, largely because they offer a chemical-free way to kill bacteria, which is a great option for renters. As a reader of Water Filter Advisor, you know the golden rule: test your water first, then build your system with NSF-certified media. You can read the full analysis of the home water filtration market to see where the industry is heading.

Building an RO system is a commitment, but if your water report shows heavy metals or other nasty contaminants, it's the single most effective DIY path to getting water that’s purer than most bottled brands, right from your own tap.


Choosing the right filter media is the most critical decision in your DIY build. This table breaks down what each type is good at, so you can mix and match components to target the specific contaminants in your water.

Filtration Media Performance Against Common Contaminants

Filtration Media Removes Chlorine Removes Sediment Removes Lead/Metals Removes Bacteria/Viruses
Sediment Filter No Excellent No No
Activated Carbon Excellent Good (some) Good (some) Poor (cysts only)
Reverse Osmosis Excellent Excellent Excellent Good
UV Purifier No No No Excellent

As you can see, no single filter does it all. That's why multi-stage systems are so popular and effective. A sediment filter protects a carbon filter, which in turn protects an RO membrane, giving you layers of purification that cover all your bases.

Building a Basic Under-Sink Water Filter

Alright, time to roll up your sleeves. We're going to walk through one of the most practical and rewarding DIY home water filtration projects you can tackle: a two-stage under-sink filter. This setup is a fantastic starting point for dealing with both sediment and common chemical culprits like chlorine.

We’ll go from gathering the parts to doing that final, all-important leak check. Even if you're new to this kind of work, don't sweat it. The process is pretty straightforward when you take it one step at a time. With a bit of patience, you can have a custom filter up and running in a single afternoon.

Gathering Your Tools and Materials

A successful project starts with having everything you need laid out and ready to go. Trust me, there’s nothing worse than having to make a frantic trip to the hardware store with your water shut off.

Here’s what you'll need for a standard two-stage system:

  • Two 10-inch Filter Housings: These are the main bodies that hold your filter cartridges. Make sure the kit includes a mounting bracket and a housing wrench—you'll need it.
  • A Sediment Filter Cartridge (5-micron): This is your first line of defense, designed to catch the bigger stuff like rust, sand, and silt.
  • An Activated Carbon Block Cartridge (0.5 to 5-micron): Stage two. This one is for tackling chlorine, weird tastes and smells, and VOCs.
  • PEX Tubing or Braided Steel Lines: You'll need a couple of sections to plumb the water from your cold line, through the filters, and back to the faucet.
  • Shut-off Valve (Angle Stop Adapter): This little piece is a game-changer. It lets you isolate the filter system so you don't have to shut off water to the whole sink just to change a cartridge.
  • Fittings: You'll need the right connectors (push-to-connect and compression are common and easy to use) for your tubing, filter housings, and water line.
  • Plumber's Tape: An absolute must-have for creating a watertight seal on any threaded connection.

For tools, grab a pipe cutter, an adjustable wrench, a drill for the mounting bracket, and definitely a bucket and some old towels. No plumbing job is ever completely dry.

The diagram below shows a typical filtration sequence. It starts with a sediment filter, then carbon for chemicals, and often reverse osmosis for the highest level of purification.

Diagram illustrating a three-stage filter selection process for water purification: Sediment, Carbon, and RO.

This multi-stage approach is so effective because each filter does a specific job and protects the next one down the line, making the whole system more efficient and longer-lasting.

Assembling and Mounting the Filter Unit

With all your parts in front of you, the first real step is putting the filter unit together. Go ahead and attach the two filter housings to the mounting bracket. Next, you'll install the inlet and outlet fittings into the housing caps. Before you do, wrap the threads with plumber's tape—give it three to four wraps in a clockwise direction—then tighten them down.

Pro Tip: Get your fittings hand-tight first, then give them just a gentle quarter-to-half turn more with a wrench. Over-tightening is the #1 reason people end up with cracked housings and annoying leaks. The tape is what creates the seal, not brute force.

Once it's all assembled, find a good spot for it under your sink. You need to leave enough clearance below the housings—at least a couple of inches—to have room to unscrew them when it's time to swap cartridges. Use your drill to mount the bracket securely to the cabinet wall.

Tapping Into Your Cold Water Line

This is the part that seems intimidating, but it's really not that bad. First thing's first: shut off the main water supply to your house. Then, open your kitchen faucet to let the line drain completely.

Put your bucket under the cold water line to catch the last few drips. Now, use your pipe cutter to make a single, clean cut in the line that runs between the wall shut-off and the faucet. This is where you'll install your new angle stop adapter. This adapter is key because it gives you an extra port to feed water to your new filter system.

From there, it's just a matter of connecting the dots. Run a piece of PEX tubing from the adapter's outlet port to the "IN" port of your first housing (the sediment filter). Then, connect another piece of tubing from the "OUT" port of your second housing (the carbon block) and run it back to connect with the faucet's cold water line.

The Moment of Truth: Testing for Leaks

Okay, deep breath. Before turning the water back on, give every connection one last check to make sure it's snug. A great trick is to place a dry paper towel under each fitting; they'll show you even the tiniest drop of water instantly.

Now, head to your main valve and very slowly turn the water back on just a crack. Go back to the sink and listen for any hissing and watch every single connection point for drips. If everything looks good and stays dry, you can open the main valve the rest of the way.

Let the water run through the new filters and out the faucet for about five minutes. This flushes out any loose carbon fines from the new cartridge.

And that's it! You just built and installed your own under-sink water filter. This simple but powerful DIY home water filtration system will give you much cleaner, better-tasting water right from your kitchen tap.

Maintaining Your DIY Filtration System

A person's hands are changing white cylindrical water filters on a clean white kitchen counter.

So, you’ve built and installed your DIY home water filter. Fantastic work. But getting it up and running is just the first step. To keep that clean, pure water flowing, you've got to think about long-term care.

Proper maintenance is what keeps your system working like it should. If you neglect it, filters get clogged, water pressure plummets, and worst of all, it stops trapping contaminants. A filter that's completely saturated can actually start leaking the gunk it's already captured right back into your water.

The easiest way to avoid this is to set up a simple maintenance schedule you can stick to.

Creating a Practical Filter Replacement Schedule

Knowing when to swap out your filters is the heart of the maintenance plan. There's no single magic number here—lifespan depends on the filter type and just how much work it has to do with your specific water source. Someone on well water with lots of sediment will be changing pre-filters way more often than a person on city water.

As a rule of thumb, here are some good starting points for common filters:

  • Sediment Filters: These are your workhorses, catching all the initial grit and grime. Expect to change them every 3 to 6 months.
  • Activated Carbon Block Filters: Great for taste, odor, and chemicals, these typically last 6 to 12 months before they're "full."
  • Reverse Osmosis (RO) Membranes: The RO membrane itself is surprisingly resilient. If you're good about changing your pre-filters, it can last 2 to 3 years.

Of course, these are just guidelines. The real trick is learning to recognize the signs that your system is telling you it's time for a change.

Visual Cues and Performance Indicators

Your filter will give you some pretty clear hints when it's time for a swap. Instead of just marking a date on the calendar, learn to spot the physical signs of a filter that's done its job.

One of the first things you'll almost always notice is a drop in water pressure. If your faucet flow has slowed to a sad trickle, it’s a dead giveaway your sediment filter is clogged and fighting a losing battle.

Another clue is when old problems reappear. That chlorine taste you got rid of suddenly comes back? Your carbon filter is saturated. For sediment filters, you don't even have to guess—just look at it. If a once-white filter cartridge is now a nasty shade of brown or orange, it's long overdue for a change.

The Importance of Post-Installation Testing

How can you be sure your filter is still working? You test the water. Regular testing is the only way to get real proof that your system is performing up to snuff.

You don't need to be a chemist or send samples off to a lab every week. There are plenty of simple, affordable home water testing kits that give you quick answers on things like chlorine levels, pH, and water hardness.

Testing your water every few months is a smart move. Let's say a test shows chlorine is slipping past your filter. That tells you it's time for a new carbon cartridge, even if you haven't hit the six-month mark yet. This kind of data-driven approach takes all the guesswork out of maintenance and makes sure your water is always as clean as you intended.

Got Questions About DIY Water Filtration?

Building your own home water filtration system is a great project, but it's totally normal to have a few questions before you start twisting wrenches. Getting the right answers can be the difference between a smooth installation and a frustrating Saturday afternoon. We've pulled together some of the most common questions we hear to help you get started.

What Size Filter Do I Need?

Picking the right filter size is all about balancing how much filtration you need with your home's water flow.

For most projects tucked under a sink or sitting on a countertop, the standard 10-inch filter housing is your best bet. It’s small enough to fit into tight spaces but big enough to hold a huge variety of effective filter cartridges.

But if you're building a system for your whole house, you need to think bigger. We're talking about the 20-inch "Big Blue" style housings. These brutes can handle a much higher volume of water without choking your home's water pressure. Just match the filter size to the demand you’re putting on it.

Will a DIY Filter Kill My Water Pressure?

Yes, any filter will reduce water pressure a little bit, but it shouldn't feel like you've gone back to a low-flow showerhead from the 90s. If you notice a major drop, your system probably isn't designed right.

The usual suspects for pressure loss are:

  • A Clogged Sediment Filter: This is the #1 reason. As that first filter catches all the gunk, it gets harder for water to pass through. You have to change these regularly.
  • An Undersized System: Trying to force all your home’s water through a little 10-inch filter is a recipe for a weak flow.
  • A Super-Fine Filter: A filter with a tiny micron rating (like a 0.5-micron carbon block) will naturally slow things down more than a standard 5-micron filter.

To keep your pressure up, always use the right size filter for the job and don't slack on your replacement schedule.

A properly built DIY system might cause a pressure drop so small you'll barely notice. If your shower suddenly feels weak right after an install, your first move should be to check for a clogged or undersized filter.

Can I Actually Filter My Own Well Water?

Absolutely. In fact, this is where DIY systems really shine. You can build a custom, multi-stage setup to knock out the specific problems common in well water, like iron, sulfur, and heavy sediment—issues you rarely see with city water. A typical DIY well setup might go from a heavy-duty sediment filter to an iron filter, then finish with a carbon filter to fix any taste and odor issues.

The most important first step, though, is getting a comprehensive lab test on your well water. This test is your roadmap; it tells you exactly what you're fighting so you can pick the right tools for the job. If you skip the test, you're just guessing.

How Often Do I Really Need to Change My Filters?

The "change every six months" on the box is a good starting point, but the real answer comes down to your water quality and how much you use. If your water is loaded with sediment, you might be changing that first-stage filter every three months, while the carbon filter after it could easily last the full year.

Let the system tell you what it needs.

  • Look: Is that white sediment filter looking more like mud? It's time.
  • Taste: Can you taste the chlorine coming through again? Your carbon filter is done.
  • Flow: Has your water pressure taken a nosedive? Your pre-filter is probably clogged solid.

It helps to jot down when you change each filter. Soon you'll have a realistic schedule dialed in for your specific home and water. Consistent maintenance is what makes a DIY home water filtration system work, giving you clean, safe water for years.


Ready to stop wondering and start building? The team at Water Filter Advisor has spent years reviewing and testing every type of filter imaginable. Our in-depth guides and unbiased reviews will help you choose the perfect components for your project, ensuring you get it right the first time. Visit us today to make confident, cost-effective decisions for your home's water.

Find your perfect filter at https://www.waterfilteradvisor.com.

Will Reverse Osmosis Remove Chlorine From Your Water?

Yes, a reverse osmosis (RO) system is brilliant at removing chlorine from your tap water. But if you think it's the fancy, high-tech membrane doing all the work, you're in for a surprise. The real story is a classic tale of teamwork.

It’s not actually the famous RO membrane doing the heavy lifting here.

Chlorine Removal in RO Systems Is a Team Effort

You’d be forgiven for thinking the sophisticated RO membrane is the star player for every contaminant, but when it comes to chlorine, another component steals the show. The unsung hero is the activated carbon pre-filter, which acts as a dedicated bodyguard for the entire system.

Its main job is to grab onto and neutralize chlorine before it ever gets a chance to reach the delicate RO membrane.

This pre-filtration step is absolutely critical for two main reasons:

  • Protection: Chlorine is a powerful oxidant that can eat away at the thin-film material of an RO membrane. Without a pre-filter, the membrane would get damaged and fail way too early, which is an expensive fix.
  • Taste and Odor: The carbon filter is what finally gets rid of that unpleasant "swimming pool" taste and smell that comes from chlorinated tap water, giving you crisp, clean-tasting water.

Modern home RO systems are remarkably good at this, with quality models often achieving chlorine removal rates over 99%. This incredible efficiency is all thanks to the activated carbon pre-filter adsorbing the chlorine molecules long before the water hits the main event: the membrane.

This diagram shows you exactly how water flows through these initial stages to get the job done.

As you can see, the carbon filter is the essential first line of defense, neutralizing chlorine to protect the RO membrane downstream.

To give you a clearer picture, here’s a quick breakdown of which part does what.

Chlorine Removal At A Glance

System Component Role in Chlorine Removal Typical Effectiveness
Carbon Pre-Filter The primary workhorse; removes chlorine through adsorption. Highly effective, often removing >99% of chlorine.
RO Membrane Secondary role; primarily removes salts and dissolved solids. Limited effectiveness; can be damaged by direct exposure.
Carbon Post-Filter "Polishes" the water, removing any lingering tastes or odors. Very effective for final taste and odor improvement.

So, while the RO system as a whole gets the job done, it's really the carbon filters doing the specific work of chlorine removal.

This all ties into the broader impact of water quality and filtration on things you might not even think about, like how your morning coffee tastes. Getting that first stage right is what makes the entire process a success.

Meet the Carbon Filter: Your System's First Line of Defense

While the reverse osmosis membrane usually gets all the glory, the real workhorse for chlorine removal is actually the activated carbon pre-filter. This isn't just some minor preliminary step; it's a critical component that acts as your home system's first and most important line of defense against chlorine damage.

It all works because of a process called adsorption. Think of it like a magnet for contaminants. Instead of soaking up impurities like a sponge (that would be absorption), adsorption means the bad stuff sticks to the surface of the filter media. The activated carbon in these pre-filters is incredibly porous, giving it a massive internal surface area.

Just how massive? Get this: a single pound of activated carbon can have a surface area larger than 100 football fields. This intricate, web-like structure is what makes it so effective. As water rushes through, chlorine molecules are chemically attracted to the carbon's surface, where they get trapped and effectively neutralized.

An activated carbon filter cartridge and a pile of carbon granules sit next to a box labeled 'ACTIVATED CARBON FILTER'.

Every tiny crevice and passage you see in that image multiplies the surface area available for chlorine to grab onto, ensuring it's stripped out of the water before it can cause any trouble.

Why This Pre-Filter Is Not Optional

This carbon pre-filter stage is absolutely non-negotiable in a home RO system. Chlorine is a powerful oxidizer—that’s what makes it great for killing bacteria in city water, but it's also what makes it incredibly destructive to the delicate polyamide material of an RO membrane.

Without the carbon pre-filter, chlorine would literally burn microscopic holes right through the membrane. This damage would completely ruin the most expensive part of your RO system and let all sorts of other contaminants sneak through, defeating the whole purpose of having a filter in the first place.

This is why understanding will reverse osmosis remove chlorine means looking at the entire system. The carbon filter is the essential bodyguard, clearing out the threat so the RO membrane can do its job safely and effectively.

Granular vs. Solid Block Carbon Filters

When you're shopping for a home RO system, you'll generally see two types of carbon pre-filters. They look a little different but both get the same critical job done.

  • Granular Activated Carbon (GAC): These filters are filled with loose, coffee-ground-like granules of carbon. Water simply flows through the loose media, which offers a huge surface area for adsorption. They're fantastic for chlorine removal and getting rid of bad tastes and odors.
  • Solid Carbon Block: These are made from finely powdered carbon that’s been compressed into a solid block. They tend to provide even finer filtration, often coming with a micron rating that means they can trap sediment in addition to chlorine. Because the water is forced through the dense block, it gets more contact time with the carbon, which many consider to be a bit more thorough.

In the end, both GAC and carbon block filters are extremely effective at their primary mission: protecting your RO membrane from chlorine. Any high-quality home RO system will have one of these right at the front, guaranteeing you get pure, great-tasting water for years to come.

The RO Membrane: The Heavy Lifter of Water Purification

Once the carbon pre-filter has done its job and neutralized the chlorine, the real star of the show can get to work. The reverse osmosis membrane is what takes your water from simply being "filtered" to being genuinely pure. This is where the heavy lifting happens, targeting the stubborn, microscopic contaminants that most other filters can't touch.

A white and blue RO Membrane filter with water dripping on it, resting on a wooden surface.

Think of the RO membrane as an incredibly exclusive gatekeeper for your home's water supply. It’s a tightly wound sheet of material with pores so tiny—around 0.0001 microns—that only water molecules can get an invitation to pass through.

Just how small is that? It's about 500,000 times smaller than a single strand of human hair. Nothing but pure H₂O is getting past this bouncer.

How Pressure Does the Hard Work

Your home’s water pressure provides the force needed to push water molecules through this semipermeable membrane. While pure water squeezes through, anything larger is physically blocked and left behind. It’s a surprisingly simple yet profoundly effective process.

This is how the membrane rejects a massive list of unwanted guests in your water, delivering unparalleled purity.

If the carbon filter is the bodyguard that handles the obvious threat (chlorine), the RO membrane is the high-tech security system that scans for everything else. It separates pure water from a whole host of dissolved contaminants with incredible precision.

The contaminants that get rejected don't just build up and clog the system. Instead, they’re mixed into a small amount of wastewater (called brine) and flushed right down the drain. This keeps the membrane clean and efficient, ready for the next drop.

What the RO Membrane Really Removes

With chlorine out of the way, the membrane can focus on the contaminants that are often the most difficult to remove and potentially the most harmful. This is what truly separates RO from basic carbon or sediment filters you might find at the hardware store.

Here’s a shortlist of what the RO membrane is designed to eliminate from your drinking water:

  • Heavy Metals: Lead, arsenic, mercury, and cadmium don’t stand a chance.
  • Dissolved Solids (TDS): This includes things like salts, nitrates, and fluoride, which are all stripped away.
  • "Forever Chemicals": The membrane is one of the most effective ways to remove emerging contaminants like PFAS, microplastics, and trace pharmaceuticals.

By letting the carbon filter handle the chlorine first, the RO membrane is protected and can perform at its best for much longer. This teamwork is why a complete RO system can confidently eliminate chlorine while also tackling hundreds of other contaminants, giving you the purest water possible right from your kitchen tap.

Chlorine vs. Chloramine: Understanding Your Water Supply

Just when you thought chlorine was your main concern, another player has entered the game for many homeowners. A growing number of cities and towns—now over 20% in the U.S.—have made the switch from standard chlorine to a compound called chloramine to treat their water.

This change has some big implications for how you should filter the water in your home.

Chloramine is what you get when you mix chlorine with ammonia. It's a more stable compound, which means it lasts longer as it travels through the city's pipe system. While that's great for the municipality, that same stability makes chloramine a much tougher nut to crack for most home water filters.

Glass vial and blue box with 'CHLORINE vs CHLORAMINE' text discussing water treatment.

This is why it's so important to know what's in your water. A standard activated carbon pre-filter is fantastic at grabbing chlorine, but it really drops the ball when it comes up against the tough chemical bond in chloramine.

The Problem with Standard Carbon Filters

Think of a standard carbon filter like a magnet specifically designed to attract and hold onto chlorine. It works great for that one job. But when chloramine flows by, that magnet just doesn't have the right kind of pull. The filter gets overwhelmed and stops working effectively in no time.

If your water has chloramine, a standard carbon pre-filter won't do enough to protect your RO membrane. This can cause the membrane to fail way too early, torpedoing your system's performance and letting other contaminants slip right on through.

So, what's the fix? You need a filter that's built for the job.

The Solution: Catalytic Carbon

The answer is a special type of filter media called catalytic carbon. This isn't just a slightly beefed-up version of activated carbon; it's engineered from the ground up to break the stubborn bond between chlorine and ammonia. It acts as a catalyst, triggering a chemical reaction that dismantles the chloramine molecule.

Here’s a quick look at how the two filter types stack up against these disinfectants:

Filter Type Effective Against Chlorine? Effective Against Chloramine?
Standard Activated Carbon Yes No (Very limited)
Catalytic Carbon Yes Yes

Before you pick out a home RO system, you absolutely need to find out what your local water utility uses. You can usually get this info from your city’s annual water quality report, or you can just give them a call. Knowing whether you're dealing with chlorine or chloramine is the critical first step to ensuring your system will actually do its job and remove these chemicals from your home's water.

Comparing RO Against Other Filtration Methods

Walk into any home improvement store, and the wall of water filters is enough to make your head spin. You’ve got pitchers, faucet-mount gadgets, and a dozen other options. So, where does a reverse osmosis (RO) system actually fit in for a homeowner?

While most of those simpler filters do a decent job of making your tap water taste less like a swimming pool, that's pretty much where their job ends. They're a one-trick pony. This is where a home RO system really starts to shine.

Think of it this way: a basic pitcher or faucet filter is like a bouncer at a club. It checks for the most obvious problem—in this case, the taste and smell of chlorine—and lets everything else slide. They use a simple layer of carbon, make the water more drinkable, and call it a day.

A reverse osmosis system, on the other hand, is the full-on Secret Service detail for your water. It doesn’t just deal with the obvious threat; it runs a comprehensive security check to handle all the invisible troublemakers.

A Head-to-Head Comparison

The difference in what these filters can do is night and day once you look past just chlorine. While the simpler options are focused on a single problem, RO systems are engineered from the ground up to be a complete water purification solution for your home.

Sure, a standard carbon filter can knock out 85-95% of chlorine, and a pitcher filter might get you 75-90% of the way there. But an RO system goes further, removing over 95% of chlorine while also eliminating up to 98% of arsenic, 95% of lead, and 90-99% of nasty PFAS "forever chemicals." You can see the full list of contaminants an RO system handles on softprowatersystems.com to get the whole picture.

The real takeaway here is that while lots of filters can make your water taste better, an RO system is one of the few that provides true purification. It gets rid of the chlorine, then keeps going to tackle the heavy metals, dissolved solids, and other contaminants the others just can't touch.

To lay it all out, let's put these systems side-by-side. This simple table makes it crystal clear where each filter excels and where it comes up short.

Chlorine Filter Comparison RO vs Other Methods

When you're shopping for a chlorine filter, it helps to see exactly what you're getting for your money. Here's a quick rundown of the most popular options for home use.

Filter Type Chlorine Removal % Removes Other Contaminants? Average Cost
Water Pitcher Filter 75-90% Very limited (some sediment, maybe zinc) $20 – $50
Faucet-Mount Filter 85-95% Limited (often lead and some VOCs) $30 – $70
Reverse Osmosis System >95% Yes (heavy metals, TDS, PFAS, etc.) $200 – $600+

As you can see, asking if RO removes chlorine is really just scratching the surface. Its true value is in its power to do so much more, giving you a level of protection and peace of mind that single-stage filters simply can't offer for your home.

Keeping Your RO System Running Smoothly

Knowing how your reverse osmosis system works is one thing, but keeping it in top shape is how you get years of pure, fantastic-tasting water. A little bit of routine care goes a very long way in protecting your investment in your home's water quality.

When you're shopping for a system, keep an eye out for official certifications. These aren't just marketing fluff; they're your guarantee of performance. Specifically, you want to see NSF/ANSI 42 certification, which confirms the system is effective at reducing chlorine, taste, and odor. On top of that, NSF/ANSI 58 is the gold standard for the overall performance of RO systems, verifying their claims for reducing a whole host of contaminants.

Choosing a certified system means you're not just taking a manufacturer's word for it. You're buying a product that has been independently tested and proven to meet strict public health and safety standards.

Your Simple Maintenance Checklist

Once your system is up and running, the maintenance is actually pretty simple. It mostly just boils down to swapping out the filters on a regular schedule. If you let this slide, you'll start to see reduced water flow, off-tastes, and—worst of all—you could damage the delicate RO membrane.

Here are the dead giveaways that it’s time for a filter change:

  • Slower Water Flow: If your RO faucet has gone from a steady stream to a disappointing trickle, that’s a classic sign your pre-filters are clogged up and need to be replaced.
  • A Change in Taste or Odor: The return of that all-too-familiar "swimming pool" smell is a sure sign your carbon pre-filter is spent and isn't pulling chlorine out of the water anymore.

The easiest way to stay on top of this is to just set a calendar reminder to check your filters every six to twelve months. Sticking to a schedule is the single best thing you can do to make sure your system keeps removing chlorine and other gunk for years to come.

For more pro tips on system upkeep, check out the comprehensive advice on water filter maintenance from our specialists. This simple routine protects your system and guarantees the pure water you expect.

Got Questions About RO & Chlorine? We've Got Answers.

We get a lot of questions from homeowners trying to figure all this out. Here are some of the most common ones, answered straight and simple.

Will Reverse Osmosis Get Rid of That Chlorine Smell?

You bet. That "swimming pool" odor and weird chemical taste you get from the tap? That's all chlorine. The activated carbon filter that comes before the RO membrane is a superstar at grabbing those chlorine compounds right out of the water.

It completely knocks out the taste and the smell, giving you nothing but clean, fresh-tasting water right in your kitchen.

Can I Test My Water to Make Sure the Chlorine is Actually Gone?

Absolutely, and you don't need a science degree to do it. You can pick up some simple DPD test strips or drops—the same kind used for pools and spas—at most hardware stores. They're cheap and easy to use.

Just test a sample from your kitchen tap and then another from your RO faucet. When your RO water shows a reading of zero, you know your system is doing its job perfectly.

Is It Okay to Use an RO System With a Water Softener?

Not just okay—it's one of the best things you can do for your home's water system. A water softener's job is to remove hard minerals like calcium and magnesium, which are notorious for building up scale and wrecking the delicate RO membrane.

Think of the water softener as a bodyguard for your RO system. By letting the softener tackle the hard minerals first, you protect the most critical (and expensive) part of your reverse osmosis unit. This little bit of teamwork helps the RO membrane last longer and keeps the whole setup running at peak efficiency for years to come.


Here at Water Filter Advisor, our whole goal is to give you clear, honest, research-backed advice so you can feel good about the water in your home. Check out our detailed guides and reviews to find the right water filter for your family at https://www.waterfilteradvisor.com.

Carbon Block Filtration: Your Secret Weapon for Amazing Tap Water

That faint swimming pool smell from your kitchen tap? Or maybe the water looks just a little… murky in the glass? Those are the battle scars from your water's long, epic journey from the treatment plant to your home. But fear not! Carbon block filtration is a surprisingly simple yet incredibly powerful technology that acts as a final, heroic gatekeeper, trapping those unwanted impurities to give you safer, tastier water right where you use it most.

Your First Step Toward Better Tasting Water

When you turn on the faucet, you want clean, refreshing water. But what you often get is H2O that's been treated with chlorine to kill off bacteria—leaving behind that all-too-familiar chemical tang and odor. It's easily one of the biggest complaints people have about their tap water, and the first thing you'll notice is gone with a good filter.

Beyond just the taste, your water can pick up other unwanted hitchhikers on its way through ancient pipes and treatment plants. We're talking about things like sediment, industrial chemicals, and even pesticides. While your local utility works hard to meet safety standards, having a final line of defense in your own home offers real peace of mind. This is exactly where carbon block filtration shines.

How This Guide Will Help You

Think of a carbon block filter as a microscopic maze packed with a contaminant-grabbing sponge. It physically blocks larger particles and uses a process called adsorption—where impurities literally stick to the carbon's surface—to snag chemical contaminants, letting only the pure, clean water molecules pass through.

This guide will walk you through everything you need to know, covering:

  • The simple science behind how these filters work their magic.
  • How carbon block stacks up against other popular filtration methods.
  • Exactly what they remove—and just as importantly, what they don't.
  • Practical tips for choosing the right system for your home, from a simple pitcher to a whole-house solution.

By the time you're done here, you’ll have the know-how to pick and maintain the perfect filter for your family's needs. If your goal is pristine water from every tap, understanding carbon block filtration is the first step.

This technology is a straightforward and effective way to improve your water's quality, taste, and safety without a bunch of complicated plumbing. For more general guidance, you can explore additional advice on water filters to get a broader view of your options. Our goal is to give you clear, no-nonsense information so you can make the best choice for your home.

How Carbon Block Filters Actually Purify Your Water

To really get how a carbon block filter cleans your water, picture a super-dense, magnetic sponge shot through with billions of tiny tunnels. This isn't just any old sponge, though. It's an engineered maze designed to trap all the gunk you don't want, while letting clean water molecules sail right through.

This whole process boils down to two distinct methods working together in perfect harmony: a chemical attraction and a physical roadblock.

The magic ingredient is activated carbon, usually sourced from coconut shells. The "activation" part is key—it blasts the carbon with heat, creating a massive internal surface area. Believe it or not, a single gram of this stuff can have more surface area than a football field, giving contaminants plenty of room to get stuck.

This brings us to the first, and most powerful, purification method.

The Magnetic Pull of Adsorption

The main way a carbon block filtration system works is through a process called adsorption. It’s easy to mix up with absorption, but they’re totally different. A kitchen sponge absorbs water by soaking it in. Adsorption is when contaminants chemically stick to the outside surface of the carbon, kind of like how magnets snap to a fridge.

Here’s how it works: common troublemakers in tap water like chlorine, pesticides, and many VOCs (volatile organic compounds) have a negative charge. Activated carbon, on the other hand, has a slight positive charge. This creates a natural pull that yanks these impurities out of the water and holds on tight. As water flows through, these chemicals are drawn to the carbon's surface and trapped for good.

This is why you notice such a dramatic improvement in your water's taste and smell almost instantly after installing a carbon block filter. It’s tackling the biggest offenders head-on.

Key Takeaway: Adsorption is basically a chemical magnet. The massive, porous surface of activated carbon attracts and locks away chemicals like chlorine, stopping them from ever reaching your glass.

The Physical Barrier of Mechanical Filtration

While adsorption is busy grabbing chemicals, the solid structure of the carbon block is dealing with physical debris. This is the second critical purification method: mechanical filtration.

Think of it as a bouncer at a club with a very strict door policy. The carbon block is packed so tightly that the gaps between the particles are microscopic—often measured in microns. A micron, for reference, is one-millionth of a meter.

This dense structure creates a physical barrier that stops any particle larger than its pores from getting through. This includes stuff like:

  • Sediment: Fine bits of sand, dirt, and rust from older pipes.
  • Silt: Earthy material that makes water look cloudy.
  • Particulate matter: Any other gunk floating around in your water.

By physically blocking these particles, the filter doesn't just make your water clearer; it also helps protect your plumbing and appliances from getting clogged up over time.

Why the Solid Block Design Matters

So what’s the big deal about the block itself? Manufacturers take fine activated carbon powder, mix it with a binder, and then compress it under intense heat and pressure to form a solid, dense cylinder. This solid structure is precisely what gives it an edge over other filter types.

The biggest advantage is that it completely prevents channeling. In filters that use loose carbon granules, water can sometimes cheat the system by carving a single path of least resistance right through the media, bypassing most of the filtration.

A carbon block is a solid, uniform mass. This forces water to follow a long, winding route—what we call a "tortuous path"—through its microscopic maze. This design guarantees that every drop of water makes maximum contact with the activated carbon, boosting both adsorption and mechanical filtration. It’s this extended contact time that makes carbon block filters so reliable for delivering clean, great-tasting water.

Comparing Carbon Block to Other Filtration Methods

Choosing a water filter can feel like you're trying to crack a secret code. You're hit with a bunch of acronyms and tech specs, and it's tough to know what's what. While a carbon block filter is a seriously powerful tool for cleaning up your home's water, it’s not the only option out there.

Knowing how it stacks up against the other players is the real key to building a system that actually solves your water problems.

The most common comparison you'll see is with its closest cousin, the Granular Activated Carbon (GAC) filter. They both use the same magic ingredient—activated carbon—but how they're built makes a world of difference in how they perform.

Think of a GAC filter as a big jar of loose coffee grounds. The carbon granules are all packed in there, but water can still find some pretty easy paths to wiggle through. This means you get a great flow rate, which is a big deal for whole-house systems where you don't want to kill your water pressure. But there’s a catch. This design can lead to channeling, where water carves a mini-river right through the filter, completely bypassing most of the carbon. A lot of contaminants can just sneak right by.

Now, picture a carbon block filter. It’s more like a solid puck of espresso, where those same grounds are compressed into a dense, solid block. This design forces every last drop of water to take a long, winding journey through a maze of microscopic pores. It guarantees the water spends a ton of time in contact with the carbon, which means much more thorough and reliable filtration.

Carbon Block Versus GAC Filters

The real difference comes down to that structure. A GAC filter's loose carbon can be a bit of a gamble, while a carbon block’s solid form means every single drop of water gets the full treatment. It’s a much more consistent and dependable process.

Let's break down the key differences between these two common carbon filter types. While both have their place, understanding their strengths and weaknesses is crucial for choosing the right one for your home.

Carbon Block vs Granular Activated Carbon (GAC) at a Glance

Feature Carbon Block Filter Granular Activated Carbon (GAC) Filter
Structure Solid, compressed block of carbon powder Loose bed of individual carbon granules
Flow Rate Generally lower; can slightly reduce pressure Typically higher; minimal impact on pressure
Channeling Risk Virtually zero; forces uniform water flow High risk; water can bypass the carbon media
Filtration More thorough; longer contact time with carbon Less consistent; shorter contact time
Sediment Removal Good; acts as a sediment filter (e.g., 5 microns) Poor; loose media doesn't block fine particles
Common Use Under-sink systems, pre-filter for RO Whole-house systems, refrigerator filters

Ultimately, while both use the power of adsorption, the solid structure of a carbon block offers a superior defense. It eliminates the risk of water finding an easy way out, ensuring more contaminants are captured along the way.

Carbon Block Filters in a Multi-Stage System

A carbon block filter is often the star of the show, but it also plays incredibly well with others. Most homes have more going on with their water than just chlorine, which is where systems like Reverse Osmosis (RO) and UV purifiers enter the picture.

A carbon block is your specialist for taking out chemicals, funky tastes, and weird smells. It's a champion at grabbing chlorine, VOCs, and pesticides. But it can’t do everything.

Reverse Osmosis (RO) Systems
RO systems are the heavy hitters. They use a super-fine membrane to force out a massive range of dissolved solids—we’re talking salts, nitrates, and heavy metals. The process is incredibly effective, but it has one major weakness: chlorine will absolutely shred that delicate RO membrane.

That’s why you'll find a carbon block filter acting as a pre-filter in nearly every RO system on the market. The carbon block takes out the chlorine first, acting as a bodyguard for the RO membrane so it can do its job for years to come. It's the perfect partnership.

Ultraviolet (UV) Purifiers
If you're on well water or just worried about what might be swimming in your pipes, a UV purifier is a must-have. It zaps bacteria, viruses, and other nasty microbes with ultraviolet light, scrambling their DNA so they can't make you sick. But there’s a condition: that UV light needs a clear shot.

If your water is cloudy with sediment, those tiny particles can act like microscopic umbrellas, casting shadows that shield germs from the UV rays. By installing a carbon block filter right before the UV lamp, you clarify the water. It removes the sediment and other gunk, ensuring the light can reach and neutralize every last threat.

So, What Do Carbon Block Filters Actually Remove?

Alright, let's get down to what this impressive piece of filtration tech is pulling out of your water. This is where a carbon block really shows its value, acting like a bouncer at the door of your home's water supply. It uses a one-two punch of physical filtration and chemical adsorption to grab a huge range of things you definitely don't want to be drinking.

The effectiveness of a carbon block filtration system really shines across three main areas. Each one tackles a different part of your water quality, all working together to give you water that’s cleaner, safer, and just plain better.

Improving Taste and Odor with Aesthetic Filtration

The first thing you’ll notice—probably within minutes of installing a carbon block filter—is how much better your water tastes and smells. That’s because these filters are absolute rockstars at nabbing the aesthetic impurities that make tap water unpleasant.

The biggest offender here is chlorine. Your local water treatment plant adds it to kill off nasty bacteria, which is a good thing. But the leftover chlorine can make your water taste and smell like a swimming pool. Not so good.

A carbon block filter uses adsorption to grab onto those chlorine molecules and hold them tight, pretty much eliminating them. In fact, many high-quality filters are certified to remove over 97% of chlorine, giving you instantly better-tasting water. It also goes after chloramine, a tougher disinfectant made from chlorine and ammonia that many other filters miss.

Targeting Harmful Health-Concern Chemicals

Beyond just making your water more enjoyable, a carbon block filter is a critical defense against a bunch of invisible chemicals that can pose real health risks. This is where the filter's tiny pores and massive internal surface area do the heavy lifting.

These filters are incredibly good at reducing a wide variety of synthetic chemicals, including:

  • Volatile Organic Compounds (VOCs): This is a huge category of industrial chemicals like benzene and trichloroethylene that can get into groundwater from things like fuel spills or factory waste.
  • Pesticides and Herbicides: Runoff from farms can wash these chemicals into water supplies. A good carbon block will seriously cut down on common ones like atrazine.
  • Pharmaceutical Residues: Tiny amounts of medications can end up in our water, and carbon filtration is one of the best ways to get them out.

By trapping these compounds, a carbon block filter gives you real peace of mind, knowing your family isn't drinking or cooking with this stuff.

Think of a carbon block filter as a chemical sponge, perfectly designed to attract and trap organic, carbon-based contaminants. It's a must-have for anyone on city or well water who's worried about chemical pollution.

Reducing Certain Heavy Metals

While it’s not their main job, top-tier carbon block filters can also reduce certain heavy metals. This usually depends on the specific blend of carbon used and whether any special media has been added to the mix.

The big ones a carbon block can help with are lead and mercury. Lead is a major health risk, especially for kids, and can get into water from old pipes. Specially designed carbon blocks can bind to lead and pull it out of the water. They can do the same for mercury, another toxic metal that can find its way into our water.

What Carbon Block Filters Do Not Remove

It’s just as important to know what a filter can't do. Being realistic about a carbon block's limitations helps you figure out if you need another piece of equipment to get the job done right.

Here’s what you can expect to stay in your water:

  • Healthy Minerals: Good-for-you minerals like calcium, magnesium, and potassium don't have the right chemical signature for carbon to grab, so they pass right through. This is actually a plus—these minerals are beneficial and make water taste better.
  • Dissolved Solids and Nitrates: Things like salts and nitrates won't be removed by carbon adsorption. If those are your concern, you’ll need to look at a reverse osmosis system.
  • Microorganisms: A standard carbon block won't remove bacteria or viruses. While some specialized filters with a very tight pore size (under 1 micron) can filter out larger cysts like Giardia, they aren't a replacement for a UV purifier, especially if you're on well water.

While carbon blocks are fantastic for chemicals and bad tastes, if you're worried about microbiological safety, you might want to look into how to remove bacteria from drinking water. It just goes to show how important it is to match the right filtration technology to your specific water problems.

Choosing the Perfect Carbon Block Filter for Your Home

Alright, you’ve got a handle on the science behind carbon block filters. Now, let's get practical and figure out how to pick the right one for your home.

Walking into the world of water filtration can feel a little overwhelming. Suddenly you're dealing with terms like "microns" and "GPM." Don't worry. This guide will help you cut through the jargon and give you a clear roadmap to find the perfect filter for what you actually need.

A good starting point is to pinpoint your main concern. Are you just trying to get rid of that funky chlorine taste, or are you worried about something more serious?

Flowchart illustrating water safety by checking tap water for bad taste/smell to remove chlorine or chemicals.

This simple chart lays out the most common decision for homeowners: are you dealing with a taste and smell problem, or do you have deeper concerns about invisible chemical contaminants?

Decoding the Technical Specs

When you start shopping for filters, you'll notice a few key numbers pop up on every product label. Understanding these is the secret to matching a filter's performance with your family's daily water use. Think of them as the filter's vital stats.

  • Micron Rating: This number tells you how small the pores are inside the carbon block. It’s simple: a smaller number means finer filtration. A 5-micron filter is a solid choice for general sediment and chlorine, but a 0.5-micron filter—often called a "sub-micron" filter—can snag much smaller things, including nasty cysts like Giardia.

  • Flow Rate (GPM): This is all about speed, measured in Gallons Per Minute (GPM). It tells you how fast water can get through the filter without losing pressure. A weak flow rate in a shower filter is incredibly frustrating. For a kitchen faucet, 1-2 GPM is usually plenty, but a whole-house system needs to be in the 10-20 GPM range to keep up with multiple showers and appliances running at once.

  • Total Capacity: This is basically the filter's lifespan, measured in gallons. A filter rated for 600 gallons will need to be replaced far more often than one rated for 10,000 gallons. You have to follow the manufacturer's replacement schedule to make sure you’re actually getting clean water.

Why NSF Certifications Are Your Best Friend

Want proof that a filter actually does what it says on the box? The most reliable way to know for sure is to look for third-party certifications from an independent organization like NSF International (formerly the National Sanitation Foundation). These aren't just fancy marketing stickers; they represent rigorous, standardized testing.

When you see an NSF/ANSI certification, it means the product has been scientifically tested and verified to meet specific standards for removing certain contaminants. It’s the gold standard for trust in the water filtration industry.

For carbon block filters, there are three main certifications you should keep an eye out for:

  1. NSF/ANSI 42 (Aesthetic Effects): This is your guarantee against bad tastes and odors. If a filter has this stamp, it’s been proven to significantly reduce chlorine and other things that make your water taste or smell off.

  2. NSF/ANSI 53 (Health Effects): This one is a much bigger deal. This standard certifies that a filter can reduce contaminants with known health risks—we’re talking about things like lead, mercury, asbestos, and certain volatile organic compounds (VOCs). If you’re concerned about your family's health, this certification is non-negotiable.

  3. NSF/ANSI 401 (Emerging Contaminants): This newer standard tackles the stuff we're just starting to worry about, like trace amounts of pharmaceuticals, herbicides, and pesticides that are showing up in water supplies. It’s an extra layer of defense against compounds that aren't even regulated yet.

A filter might be certified for one, two, or all three of these standards. Always dig a little deeper and check the filter's performance data sheet. It will tell you exactly which contaminants it's certified to remove and at what percentage.

Matching the Filter Type to Your Home

The last piece of the puzzle is deciding where you need filtered water. The right setup depends on your budget, whether you rent or own, and your ultimate clean water goals.

  • Under-Sink Systems: Installed neatly under a kitchen or bathroom sink, these systems connect to their own dedicated faucet. They strike a great balance between performance and convenience, giving you a steady stream of highly filtered water right where you need it for drinking and cooking.

  • Refrigerator and Pitcher Filters: These are the easiest and cheapest way to get started. They’re super convenient for getting cold, filtered drinking water, but their capacity is small and the flow rate is slow. They’re a good first step, but they’re really only effective for basic chlorine removal.

  • Whole-House Systems: For total peace of mind, a whole-house system is the ultimate solution. It treats every single drop of water that enters your home. That means cleaner water for drinking, cooking, showering, and doing laundry. As a bonus, it also protects your plumbing and appliances from sediment buildup and reduces your family's exposure to chlorine vapors in the shower.

By keeping these key factors in mind—micron ratings, flow rates, and those all-important certifications—you can confidently pick a carbon block filter that will deliver the clean, safe, and great-tasting water your family deserves.

Simple Maintenance for Long-Lasting Pure Water

A high-performance carbon block filter is a fantastic investment, but it's not a "set it and forget it" appliance. Think of it like changing the oil in your car—regular, simple maintenance is the secret to getting pure, great-tasting water year after year. If you let it go, you don't just lose performance; you can actually make your water quality worse.

The single most important job you have is replacing the filter cartridge on time.

Day in and day out, that carbon block is trapping a massive amount of junk. Eventually, every square inch of its surface area gets saturated, and it simply can't grab any more chemicals like chlorine. At the same time, all the sediment it has caught clogs up the pores, which is why you'll start to see your water pressure take a nosedive.

But it gets worse than just being ineffective. An old, saturated filter can become a breeding ground for bacteria. All that trapped organic gunk is a perfect food source, allowing nasty stuff to multiply inside the filter housing. Before you know it, your filter could be dumping contaminants back into your water, completely defeating the purpose of having it.

When to Call a Pro for Installation

While most under-sink or refrigerator filters are easy enough to install yourself, whole-house systems are a different beast entirely.

If the job requires cutting into your home's main water line, soldering pipes, or you just don't feel confident with that level of plumbing, call a licensed professional. It's always the smart move. A pro will make sure the system is installed correctly, preventing costly leaks and guaranteeing you get the flow and performance you paid for right from the start.

Quick Troubleshooting Checklist

Noticed a sudden change in your water? Don't panic. A few quick checks usually point right to the problem. Run through this list before you pick up the phone:

  • Sudden drop in water pressure? This is the classic, number-one sign that your filter is clogged solid. Check the manufacturer's replacement schedule—you're probably past due for a new one.
  • Is the chlorine taste back? If you start tasting or smelling that "public pool" flavor again, the activated carbon is officially spent. It's time for a fresh cartridge.
  • Lingering odors or a funky taste? This is a red flag. It almost always means the filter is saturated and potentially harboring bacteria. Replace it immediately to get your water quality back on track.

Staying on top of your filter changes—typically every 6 to 12 months for most under-sink systems—ensures your carbon block filter remains a reliable guardian for your home's water.

Common Questions About Carbon Block Filters

Even after getting the science down, a few practical questions always seem to come up when you're thinking about putting one of these filters in your home. Let's tackle some of the most common ones.

How Often Should I Change My Carbon Block Filter?

This really boils down to how much water you use and the specific filter you have. For a quick rule of thumb, plan on swapping out your under-sink or refrigerator filter every 6 to 12 months.

Bigger whole-house filters have a much longer lifespan, often lasting anywhere from one to three years. Your best bet is to always follow the manufacturer's directions, because once a filter hits its limit, its performance drops off a cliff.

Will a Carbon Block Filter Tank My Water Pressure?

When you install a new, correctly sized carbon block filter, you should barely notice any change in your water pressure. If you start seeing a major drop in pressure down the road, that’s a dead giveaway the filter is clogged with gunk and needs to be replaced.

Think of a sudden pressure drop as your filter's way of saying, "I'm full!" Ignoring it means you're not getting the clean water you paid for.

Can I Use a Carbon Block Filter with Well Water?

You bet. Carbon block filters do a fantastic job of pulling out the organic chemicals, pesticides, and funky tastes and smells you often find in well water.

But here’s the critical part: they do not remove bacteria or viruses, which is a major concern for any well owner. If you're on a well, your carbon block filter should be just one piece of a bigger system. You'll absolutely want a sediment pre-filter before it and a UV purifier after it to ensure your water is microbiologically safe.

Beyond just filtering, many homeowners are also thinking about protecting their homes from water damage. Looking into things like smart water leak detectors can provide that extra layer of security and peace of mind.


Ready to experience the difference for yourself? Water Filter Advisor provides in-depth guides and unbiased reviews to help you find the perfect water filtration solution. Visit us at https://www.waterfilteradvisor.com to compare systems and start your journey to safer, better-tasting water today.

How to Filter and Remove Fluoride from Your Water: A Homeowner’s Guide

Yes, the right filter can remove fluoride from your water, but here's the catch: your standard fridge filter or that basic pitcher in your kitchen probably won't cut it. To actually pull fluoride out, you need a system with technology specifically designed to capture tiny dissolved minerals like fluoride ions. Think of it as needing a specialist, not a general practitioner.

Your Quick Guide to Fluoride Filtration Methods

So, you're on a quest for the best way to remove fluoride from your home's drinking water? Fantastic! You've come to the right place. Most of us are familiar with filters that make water taste better by getting rid of chlorine, but taking out fluoride is a whole different ballgame. It's like going from playing checkers to playing chess.

The fluoride ion is incredibly small, which means it can zip right through the pores of a typical activated carbon filter. Imagine trying to catch sand with a fishing net—it just doesn't work. You need a much finer, more specialized tool for the job. Fortunately, several proven technologies are up to the task, each with its own clever approach.

A collection of water filtration systems, including reverse osmosis and bone char, labeled for fluoride removal.

The Four Main Technologies That Work

For homeowners serious about removing fluoride, it really boils down to four main technologies. Each one uses a different scientific principle to separate fluoride from your water, almost like a magic trick happening right under your sink.

  • Reverse Osmosis (RO): This is the heavy hitter of water purification. An RO system uses high pressure to push water through a special membrane with microscopic pores. These pores are so small they block fluoride, lead, chlorine, and a whole host of other contaminants, letting only pure water molecules pass through. It's the bouncer of the filtration world, letting only the VIPs (water molecules) through the velvet rope.
  • Activated Alumina (AA): This method works like a magnet for fluoride. The filter contains a porous material that chemically attracts and traps fluoride ions as water flows over it, effectively pulling them out of your drinking water.
  • Bone Char (BC): This might sound old-school, but it's incredibly effective. Bone char is a type of porous carbon media made from animal bones, and its unique structure is naturally excellent at adsorbing fluoride. It's one of nature's original water filters.
  • Distillation: This process is nature's own purification method, just done in a machine on your countertop. It works by boiling water to create steam, leaving fluoride and other heavy contaminants behind. The steam is then cooled and condensed back into pure, clean water.

Water fluoridation in the U.S. started way back in 1945 to help with dental health, and today, about 63% of Americans (that's over 200 million people) get fluoridated tap water.

Of all the options, reverse osmosis systems are a real standout. Independent lab tests for top brands show they can remove up to 99.9% of fluoride. If you want to dive deeper, you can explore more research on the water filtration market to see the performance data for yourself.

To help you get a clearer picture of which one might be right for you, here’s a quick rundown of how these technologies stack up.

Comparing Fluoride Filtration Technologies

This table offers a quick comparison of the most effective technologies for removing fluoride from your home's drinking water.

Filtration Method Fluoride Removal Rate Best For Pros Cons
Reverse Osmosis 90-99% Under-sink systems Highly effective; removes many other contaminants Wastes some water; higher initial cost
Activated Alumina 85-95% Countertop & under-sink Great for targeted fluoride removal Media needs regular replacement
Bone Char Up to 90% Countertop & pitchers Natural media; also removes other contaminants Slower flow rate; less common
Distillation 99%+ Countertop units Produces extremely pure water Slow process; uses electricity

As you can see, each method has its trade-offs. The best choice really depends on your budget, how much water you need, and your performance expectations.

Why Your Standard Water Filter Can't Remove Fluoride

It’s a common misconception, and a frustrating one for many homeowners. You buy that popular water pitcher or refrigerator filter, assuming it’s giving you pure, clean water. But when it comes to fluoride, that trusty filter is basically taking a nap. The reason is all about size and chemistry.

Your standard filter is great at its job, but its job description simply doesn't include catching something as tiny and slippery as a fluoride ion.

A water filter pitcher with a "Not for fluoride" label sits on a wooden kitchen counter.

Think of it like trying to catch fine sand with a fishing net. The net is perfect for catching fish, but the sand will slip right through the holes. That’s exactly what’s happening inside your filter. Fluoride exists in water as dissolved ions, which are incredibly small particles. Most basic filters use activated carbon as their main tool.

What Activated Carbon Filters Are Good At

Let's be clear: activated carbon is a workhorse. Its surface is a maze of microscopic pores and crevices, which gives it an enormous surface area. This structure makes it a master of adsorption—a process where certain contaminants literally stick to the carbon's surface as water passes by.

This is why it's so effective at tackling the big stuff that makes your water taste and smell off. Activated carbon filters are champs at removing:

  • Chlorine: This is their number one job. They excel at grabbing the chlorine used to treat city water, which is the main reason filtered water tastes so much cleaner and fresher.
  • Volatile Organic Compounds (VOCs): This includes a range of industrial chemicals and solvents that can sometimes seep into water sources.
  • Sediment and Particulates: They also trap larger bits of rust, silt, and sand that can make water cloudy.

The bottom line is that these filters are designed to improve the aesthetics of water by capturing large, clunky contaminants.

Activated carbon filters work by adsorption, where contaminants stick to the filter's surface. While this is great for chlorine and sediment, the fluoride ion is simply too small and not chemically attracted to the carbon in a way that allows for effective removal.

The Fluoride Filtration Challenge

Fluoride ions, however, play by a different set of rules. They are dissolved minerals, meaning they're completely integrated into the water at a molecular level. They are far too small to get physically trapped in the pores of a standard carbon filter.

On top of that, they don't have the right chemical charge to be "sticky" enough for the carbon to grab them. So, the fluoride ions just cruise right on through the filter along with the water molecules, completely untouched.

This is the fundamental mismatch. To pull something that small out of water, you need a totally different strategy. It requires more advanced technologies like reverse osmosis, activated alumina, or distillation, which are specifically engineered to separate these tiny dissolved solids—a task a standard carbon filter was never built to handle.

A Deep Dive into Effective Fluoride Filtration Technologies

So, you've figured out your standard carbon filter isn't going to cut it for fluoride. Now it's time to call in the specialists.

Think of it like this: your basic pitcher filter is a general practitioner, good for common stuff like chlorine. But for a specific issue like fluoride, you need an expert with the right tools. We’re talking about technologies designed from the ground up to pull dissolved minerals out of your water. These systems don’t just strain particles; they use some pretty cool science to get the job done.

We're going to break down the four heavy hitters in the fluoride removal game: Reverse Osmosis (RO), Activated Alumina, Bone Char, and Distillation. Each one works on a completely different principle, and each has its own set of pros and cons for your home.

Reverse Osmosis: The Purity Powerhouse

Reverse osmosis, or RO, is pretty much the gold standard when you want everything gone.

Imagine a bouncer at an exclusive club, but for water molecules. This bouncer is a special semi-permeable membrane with microscopic pores so tiny that only pure H₂O can squeeze through. Your tap water is pushed against this membrane under pressure, and while the small water molecules make it to the other side, bigger molecules—like fluoride, lead, arsenic, and salts—get bounced and flushed down the drain.

It’s a brute-force physical separation that’s incredibly effective. A good RO system will often strip out more than 90% of all total dissolved solids (TDS), making it the top pick if you're concerned about more than just fluoride.

Modern systems like reverse osmosis (RO), activated alumina, bone char, and ion exchange are game-changers, with RO leading at 99.9% removal efficiency in commercial tests. Take the Cloud RO: NSF-certified to standard 58, it erased 100% fluoride, chlorine, arsenic, and lead in rigorous trials, reducing TDS dramatically while remineralizing to a healthy pH of 9.7. Even pitcher options hold up—Clearly Filtered zapped fluoride from 2.18 mg/L to <0.01 mg/L (>99.54%), fluosilicate by 99.49%, and fluosilicic acid by 99.52%, tackling dental fluorosis head-on. You can discover more insights about these commercial fluoride removal systems to see the full scope of their capabilities.

Activated Alumina: The Fluoride Magnet

If RO is a bouncer, then Activated Alumina (AA) is a powerful magnet tuned specifically to grab fluoride. The filter media is made from aluminum oxide, which is loaded with tiny pores, giving it a massive surface area.

As your water flows through, fluoride ions are chemically drawn to the surface of the alumina and get stuck. This process is called adsorption—the contaminants literally stick to the outside of the filter material. It's a highly targeted approach that also works well on arsenic and selenium.

But there are a few catches with Activated Alumina:

  • Water pH is Key: It performs best in slightly acidic water, ideally with a pH between 5.5 and 6.5.
  • Slow and Steady: The water needs to hang out with the media long enough for the magic to happen. That means flow rates are typically on the slower side.
  • Needs Swapping Out: Eventually, the alumina gets clogged with fluoride and stops working. You have to replace the cartridge regularly to keep it effective.

Bone Char: The Natural Adsorbent

Okay, bone char might sound a little weird, but it's one of the oldest tricks in the book for getting rid of fluoride. It’s made from charred animal bones and has a super porous structure that’s fantastic at grabbing fluoride and other heavy metals.

Just like activated alumina, bone char works through adsorption. Its secret weapon is a high concentration of hydroxylapatite, a calcium-phosphate compound that has a natural attraction to fluoride ions. When water passes through, the fluoride gets pulled out and locks onto the bone char.

Lots of people prefer this method because it's a natural material, not something cooked up in a lab. It's also pretty good at removing chlorine and lead, making it a solid, well-rounded option for generally better water quality.

Distillation: The Classic Purifier

Distillation is basically nature's water cycle in a box on your countertop. The concept is dead simple, but it works like a charm. You boil water to create steam, leaving almost all the impurities behind.

Here's the play-by-play:

  1. Boil: Water in the distiller heats up and turns to steam. All the heavy stuff—fluoride, salts, heavy metals—can't evaporate, so it gets left behind.
  2. Cool: The pure water vapor travels into a cooling coil.
  3. Collect: As the steam cools, it turns back into liquid water, which drips into a clean container.

The water you get is about as pure as it gets, with fluoride removal rates often topping 99%. The trade-off? It’s slow, it uses electricity, and it removes everything, including the good minerals. That's why you usually see distillers used for small batches of drinking water, not for an entire house.

Choosing the Right Fluoride Filter System for Your Home

Knowing the science behind a filter to remove fluoride is one thing. Picking the perfect system for your kitchen? That's the real challenge.

What works great for your neighbor might be a terrible fit for you. It really boils down to your kitchen space, how much water your family uses, and your budget. Let’s shift from the technical specs to the practical reality of your home and look at the most common options—from heavy-duty under-sink units to grab-and-go pitchers.

Under-Sink Systems: The Hidden Powerhouse

If you’re looking for top-tier fluoride removal without a machine cluttering up your counter, an under-sink reverse osmosis (RO) system is the gold standard. These systems are tucked away neatly in the cabinet right below your sink, connecting directly to the cold water line.

They usually come with their own dedicated, smaller faucet that sits on your sink, giving you a constant supply of purified water for drinking and cooking. This setup is perfect for families who go through a lot of water and want the best filtration possible without sacrificing counter space. Installation is a bit more involved, but the sheer convenience of having pure water on tap is hard to beat.

Countertop Units: Versatility and Ease

Renting your home? Or maybe you just don’t want a permanent installation? A countertop filter is an excellent choice. These units sit right next to your sink and connect to your faucet with a simple diverter valve. When you want filtered water, you just flip a switch; the rest of the time, your faucet works like normal.

Countertop systems hit that sweet spot between power and convenience. They often use multiple filter stages, including activated alumina or specialized carbon, to effectively get rid of fluoride. Since they don’t require any permanent plumbing changes, they’re ideal for apartments or smaller kitchens where under-sink real estate is at a premium.

Specialized Pitchers: Portable and Practical

Don't expect your standard Brita to do the job here. While most pitchers won't touch fluoride, there are specialized models designed specifically for it. These pitchers use advanced media like bone char or ion-exchange resins to zero in on and capture fluoride ions.

They are by far the most affordable and portable option—great for a single person, a small household, or even for taking to the office. The trade-off is capacity and speed. You’ll be refilling the pitcher constantly, and it filters much slower than a larger system. But for low-volume needs, it’s a simple and effective solution.

If you're trying to figure out which style fits your daily life, this decision tree can help point you in the right direction.

A flowchart guiding users to choose the right fluoride filter based on volume, counter space, and portability.

As the chart shows, if you need a lot of water, an under-sink system is your best bet. If you're on a budget or need something you can move around, a pitcher is the way to go. Countertop units fill that middle ground perfectly.

Why Whole-House Fluoride Filtration Is Rarely a Good Idea

You might be tempted to just filter all the water coming into your home, but this is one of those cases where going bigger isn't better. Whole-house fluoride filtration is incredibly expensive and usually impractical for a couple of big reasons.

The main reason to steer clear of whole-house systems is the massive cost and waste. An RO system big enough to handle an entire house is a huge investment, and it generates a ton of wastewater, which can send your water bill through the roof. On top of that, you'd lose the topical dental health benefits of fluoride when you shower.

For these reasons, your best bet is to stick with a point-of-use filter for the water you drink and cook with. It's the most sensible and cost-effective approach. For more help finding the perfect fit, our collection of expert water filtration advice can offer more guidance.

Independent reviews often praise RO systems like Aquatru, which scored a 9.59 for its 100% fluoride elimination and impressive performance against PFAS and chlorine. Lab data for pitchers from brands like Clearly Filtered shows they can remove over 99.54% of fluoride. However, commercial stress tests show RO maintains its high removal rate of 99.9%, while some pitchers can drop below 50%. This makes your choice of system absolutely critical. Learn more about the global market for these powerful water filters to see how different technologies stack up in the real world.

How to Verify a Filter's Fluoride Removal Claims

The water filter market is a noisy place, full of bold promises. With so many brands claiming their filter can remove fluoride, how do you cut through the marketing hype to find a product that actually works? The secret is looking for independent, third-party proof.

Think of it this way: buying a water filter is an investment in your family's health. You wouldn't make that kind of investment without doing a little homework first. Thankfully, trustworthy manufacturers make it easy by providing clear, verifiable data that shows their products deliver.

A person at a desk examining documents related to certification, with a model house and Sica bottle.

Look for Independent Certifications

The single most reliable way to confirm a filter's claims is to look for a seal of approval from an independent testing organization. These groups have no skin in the game; their only job is to put a product through its paces against tough industry standards.

In the world of water filtration, the most respected name out there is the NSF (National Sanitation Foundation). When a filter is NSF certified, it means it's been rigorously tested to meet strict public health and safety standards. And for fluoride removal, one specific certification is the one you really want to see.

NSF/ANSI 58: The Gold Standard for Fluoride Reduction
This certification is designed specifically for reverse osmosis (RO) systems and requires testing for fluoride reduction. If an RO system has that NSF/ANSI 58 seal, it’s been independently verified to do the job right.

When you spot that certification, you can feel confident that the product’s claims were proven in a lab, not just dreamed up by a marketing team. You can usually find the NSF seal right on the product packaging, the system itself, or on the manufacturer's official website.

How to Read a Performance Data Sheet

Beyond the official seals, any reputable manufacturer should also provide a Performance Data Sheet. This is basically a technical report card that breaks down exactly which contaminants the filter removes and by how much. Don't let the technical jargon scare you off—you only need to look for a couple of key things.

When you get your hands on a data sheet for a filter you think can remove fluoride, just follow these simple steps:

  1. Find the Fluoride Entry: Quickly scan the list of contaminants for "Fluoride." If you don't see it, the filter wasn't designed or tested to remove it. Simple as that.
  2. Check the Reduction Rate: Right next to the fluoride entry, there should be a percentage. This number tells you how much fluoride the filter successfully removed during testing. For real-world effectiveness, you want to see reduction rates of 90% or higher.
  3. Note the Testing Conditions: The sheet should also mention the conditions of the test, like water pressure and pH level. This gives you some context for how the filter is likely to perform with the water coming out of your own tap.

By learning to spot these key details, you can tune out all the noise and make a truly informed decision. Choosing a certified filter with a clear data sheet is the best way to ensure you're getting a system that delivers on its promise of cleaner, healthier water for your home.

Looking Beyond the Sticker Price: The True Cost of Fluoride Filtration

When you're shopping for a fluoride filter, it’s easy to get tunnel vision and focus only on the initial price tag. But that's just the beginning of the story. The real cost of any water filter system isn't what you pay on day one—it’s the total cost of ownership over months and years of use.

Think of it like buying a car. The upfront cost is a big deal, but so are the ongoing expenses for gas, oil changes, and new tires. Water filters are the same. You're not just buying a piece of hardware; you're committing to its upkeep to keep it running right.

The Hidden Costs: What You'll Really Be Paying For

That initial purchase price is just the down payment. To keep getting clean, fluoride-free water, you'll need to account for a few other things that will definitely add up.

  • Replacement Filter Cartridges: This is the big one. It's the most significant and consistent expense you'll have. Whether it's an activated alumina cartridge or a reverse osmosis membrane, these filters don't last forever. They need to be swapped out on schedule to keep doing their job.
  • Your Utility Bills: Some systems use more resources than others. A water distiller, for example, has to boil water, which takes a fair amount of electricity and will show up on your power bill. Reverse osmosis systems are known for creating wastewater—for every one gallon of pure water you get, it might flush three to four gallons down the drain, slightly bumping up your water bill.

The single biggest long-term cost is almost always the replacement filters. If you put off changing them, you’re not just drinking lower-quality water; you could end up damaging the whole system and facing a much bigger repair bill.

A Five-Year Cost Showdown

Let's make this real. Here’s a look at how the costs stack up for two popular choices over a five-year stretch. It’s a perfect example of how a cheaper start doesn’t always mean you save money in the long run.

Cost Component Under-Sink Reverse Osmosis System Specialized Fluoride-Removing Pitcher
Initial Purchase $250 – $500 $50 – $80
Annual Filter Cost $60 – $120 (for pre-filters & post-filters) $120 – $180 (replacing every 2-3 months)
5-Year Filter Total $300 – $600 $600 – $900
Membrane Replacement $50 – $100 (once every 2-4 years) N/A
Estimated 5-Year Total $600 – $1200 $650 – $980

As you can see, that pitcher looks like a steal at first. But because you're replacing those filters so often, the total cost over five years can creep up to be nearly as much as a high-performance under-sink RO system. This is exactly why you have to look at the big picture before deciding.

Got Questions About Fluoride Removal? We Have Answers.

As you start looking into filters, you'll naturally run into some common questions. From kitchen myths to the practical side of testing, let's clear up the most frequent queries so you can move forward with confidence.

Will Boiling Water Get Rid of Fluoride?

This is a classic kitchen myth. While boiling is great for zapping bacteria and viruses, it actually works against you when it comes to fluoride.

When you boil a pot of water, pure H₂O escapes as steam, but the fluoride ions get left behind. This means the water left in the pot has an even higher concentration of fluoride than when you started. For removing fluoride, you need a filter, not heat.

Do Standard Brita Filters Remove Fluoride?

This is probably the biggest point of confusion out there, and the answer is a firm no. Your standard pitcher filter, like a Brita, uses activated carbon. That’s fantastic for making your water taste and smell better because it grabs onto things like chlorine.

But as we've covered, fluoride ions are tiny and just don't stick to regular carbon. They slip right through. So, while those pitchers are popular, they do not lower the fluoride level in your water. You absolutely need a specialized filter designed for the job.

The decision to remove fluoride is a personal one. It often comes down to your health philosophy, how much fluoride you get from other sources (like toothpaste), and the actual levels in your local water.

How Can I Test My Water for Fluoride?

You can't fix what you don't measure. Knowing your starting point is key. You've got two main ways to go about it:

  • Home Test Kits: You can find test strips or digital meters online that give you a quick reading. They’re convenient for a ballpark figure, but their accuracy can be a bit hit-or-miss.
  • Professional Lab Services: For a rock-solid, reliable number, you can send a water sample to a certified lab. Don't forget, your local water utility also publishes an annual report listing the average fluoride level in your city's supply.

Is It Healthy to Remove All Fluoride from Water?

This question gets right to the heart of a decades-long public health debate. For a long time, community water fluoridation has been praised for drastically cutting down on cavities. Supporters say removing it takes away a vital tool for public dental health.

On the other side of the coin, some people worry about their total fluoride exposure from all sources—water, food, dental products, you name it. They prefer to take control of their intake by using a filter to remove fluoride and relying on topical treatments like toothpaste for the dental benefits. At the end of the day, it's a personal call based on your own research and health priorities.


Here at Water Filter Advisor, we're all about giving you clear, research-backed advice to help you feel confident about your home's water quality. Dive into our in-depth guides and reviews to find the perfect filtration solution for your family at https://www.waterfilteradvisor.com.

Your Ultimate Guide to Whole House Water Filter Maintenance

Think of your whole house water filter as the unsung hero of your home, the silent guardian of your pipes, appliances, and every drop of water your family uses. To keep this champion fighting fit, a little routine maintenance is non-negotiable. This isn't just about swapping a cartridge; it's about protecting your investment and ensuring the water flowing from your taps is as pure and refreshing as it gets.

The Sneaky Cost of Forgetting Your Filter

It's tempting to fall into the "set it and forget it" trap. The filter is installed, the water tastes great—mission accomplished, right? Wrong. That mindset is a one-way ticket to a world of watery woes, problems that go way beyond a slight dip in quality. Think of maintenance not as a chore, but as the secret to unlocking your filter's full potential.

When you let a filter go for too long, it gets completely clogged with all the gunk it was designed to trap. This is where the trouble begins, unleashing a cascade of issues that can impact your health, your home, and your wallet.

From Hero to Villain: A Filter's Dark Turn

An old, saturated filter doesn't just stop working; it can become a villain in its own story. It can transform into a breeding ground for bacteria and slimy biofilm. All that trapped organic matter becomes a five-star buffet for microorganisms. Eventually, the filter can release this concentrated sludge back into your water, making what comes out of your tap potentially worse than the unfiltered water you started with.

On top of that, a maxed-out filter loses its power to absorb chemicals like chlorine. You'll start noticing that familiar swimming-pool smell creeping back in, and that dry, itchy feeling on your skin and hair after a shower will return with a vengeance.

The Ripple Effect on Your Home

A clogged filter sends shockwaves through your entire plumbing system. The first sign of trouble is usually a dramatic drop in water pressure. Your invigorating shower becomes a pathetic trickle, faucets dwindle to a dribble, and appliances gasp for water.

This sluggish flow puts a serious strain on your water-dependent appliances:

  • Washing Machine: Longer fill times can wear out the inlet valve and motor.
  • Dishwasher: Without strong water pressure, your dishes will come out looking like a modern art project.
  • Water Heater: Sediment that sneaks past a failed filter can build up in your tank, killing its efficiency and drastically shortening its lifespan.

Keeping up with filter maintenance is more than a water quality issue. It's a fundamental part of home protection, preventing the catastrophic (and expensive) damage that can occur if a filter housing cracks or a connection fails under pressure.

To help you stay on track, here's a quick-glance guide to a typical maintenance schedule.

Quick-Reference Maintenance Timetable

This table gives you a general idea of how often to service different parts of your system. Remember, if your water is particularly hard or has a lot of sediment, you'll need to be more vigilant.

Filter Component Maintenance Task Standard Frequency Frequency in High-Use or Hard Water Areas
Sediment Pre-Filter Replace Cartridge Every 3-6 months Every 1-3 months
Carbon Block Filter Replace Cartridge Every 6-12 months Every 4-6 months
UV Sterilizer Replace UV Lamp Every 12 months Every 9-12 months
Filter Housings Clean & Sanitize Annually Every 6 months
Pressure Gauges Check Readings Monthly Weekly

Sticking to a schedule like this transforms maintenance from a frantic reaction into a proactive, money-saving superpower.

A Smart Financial Move

The numbers don't lie: consistent whole house water filter maintenance is a financially savvy decision. The household water purifier market is exploding, expected to grow by a massive USD 2,102.2 million between 2025 and 2029. Here in the US, where these systems make up 25% of the residential market, homeowners who properly maintain their units slash their long-term costs by around 30% over five years. That means avoiding $500-$1,000 in premature replacement fees.

Ultimately, viewing maintenance as a planned investment is the smartest play. It guarantees your system delivers clean, safe water day in and day out, protects your expensive appliances, and keeps your home's water flowing smoothly for years to come.

A Practical Seasonal Maintenance Checklist

Let's be real: thinking about whole house water filter maintenance can feel like a chore you'd rather put off. But it doesn't have to be a massive, once-a-year headache. The secret to keeping your system running like a dream is to break the job down into smaller, bite-sized pieces.

Think of it like tending a garden or prepping your house for winter. A simple seasonal routine turns a daunting task into a quick, easy checklist. This approach helps you spot the little whispers of trouble—a tiny drip or a slight pressure drop—before they become a full-blown scream for your plumber.

Your Quarterly Quick-Check Routine

Every three months, carve out ten minutes for a quick inspection. This is your first line of defense and the easiest way to catch problems when they're small and harmless.

  • Go on a Leak Hunt: Grab a flashlight and carefully inspect the filter housings and all connections. You're looking for drips, moisture, or the chalky white residue from mineral buildup. Even a slow drip can waste a surprising amount of water and cause damage.
  • Check the Pressure Gauges: If your system has gauges, compare the inlet and outlet readings. Is the outlet pressure 10-15 PSI lower than the inlet? That's the classic calling card of a filter that's getting clogged and needs changing soon.
  • Listen for Odd Noises: Have someone run a shower and listen near the filter unit. Any strange humming, knocking, or whistling can point to pressure issues or loose parts that need attention.

This simple 90-day check-in is the cornerstone of great whole house water filter maintenance. It costs you almost no time but reveals a ton about your system's health.

Pro Tip: Keep a small dry-erase board or a dedicated notebook near your filter system. Every quarter, jot down the date and the pressure readings. This simple log makes it incredibly easy to spot a gradual pressure drop you might otherwise miss.

Semi-Annual Deep Clean and Prep

Twice a year, typically in spring and fall, it's time to roll up your sleeves and dig a little deeper. This is when you'll tackle the important tasks that prevent bacteria from moving in and get your system ready for the season ahead.

The main event is sanitizing the system. Biofilm—a fancy name for a slimy layer of bacteria—can accumulate inside the filter housings, especially if you're on well water. A quick sanitizing cycle with a bit of unscented household bleach or a purpose-made solution flushes out all that gunk, keeping your water safe and fresh.

While you're at it, give the outside of the filter housings a good wipe-down. This isn't just for looks; cleaning off dust and grime can reveal hairline cracks or other signs of wear that you need to address.

Annual Filter Overhaul and System Reset

This is the big one. Once a year, you'll replace your main filter cartridges and give the entire system a fresh start. For most homes, a carbon filter is good for about 6-12 months, so planning for an annual swap is a brilliant move.

Here's your yearly game plan:

  1. Replace Key Filters: This is non-negotiable. Swap out the main sediment and carbon filters. It's the single most important thing you can do for your water quality.
  2. Lubricate O-Rings: While the housings are open, pop out the large rubber O-rings. Wipe them clean and apply a thin layer of food-grade silicone grease. This keeps them supple and prevents cracks, ensuring a perfect, leak-proof seal.
  3. Update Your Calendar: After installing the new filters, write the date on the cartridge with a permanent marker. Then, pull out your phone and set reminders for your next quarterly, semi-annual, and annual checks right then and there.

By breaking down your whole house water filter maintenance into this easy seasonal rhythm, you transform a dreaded chore into a simple, satisfying routine. This not only guarantees cleaner, safer water but also helps your system last longer, saving you a fortune in the long run.

Replacing Filter Cartridges Like a Pro

Changing the filter cartridge is the most critical and satisfying part of your maintenance routine. This is where the real magic happens—you’re swapping out a tired, gunked-up filter for a fresh one, instantly restoring your system to peak performance. Think of it less as a chore and more as hitting the reset button on your home's water quality.

Forget the confusing, generic instructions that came in the box. Let's walk through this the way a professional would, focusing on the small details that prevent leaks and guarantee you get the best filtration possible.

Setting The Stage For A Clean Swap

A little preparation is the difference between a breezy, five-minute job and a frustrating hour spent mopping up your utility room. The goal here is pure efficiency.

First, double-check that you have the right replacement cartridge. It sounds obvious, but you'd be amazed how many homeowners grab the wrong one. Look for the model number and dimensions (e.g., 10" x 4.5") on the filter housing or in your manual. Make sure the micron rating matches what you need, too.

A quick visual guide can help you see how this task fits into the bigger picture of your annual maintenance routine. It’s all about a simple, repeatable rhythm.

Process flow diagram showing seasonal filter check steps: quarterly, semi-annual, and annual.

As you can see, regular checks lead up to the annual filter replacement, keeping your system in top shape year-round.

Your Filter Replacement Toolkit

Nothing kills momentum like getting halfway through a job and realizing you're missing a key tool. Get your gear together before you start. It makes the whole process smoother.

Item Purpose Pro Tip
Housing Wrench Loosens and tightens the filter housing. Use the wrench that came with your system. A generic one can easily strip the plastic.
Bucket Catches water when you open the housing. A standard 5-gallon bucket is perfect. It's tall enough to prevent splashes.
Old Towels For managing the inevitable drips and spills. Lay one down before you start. A dry workspace is a safe workspace.
Food-Grade Silicone Grease Lubricates the O-ring for a perfect seal. Do not use petroleum jelly! It will eat away at the rubber O-ring and cause leaks.
New Replacement Cartridge The star of the show. Keep it in the plastic wrap until the second you’re ready to pop it in.

With these items at the ready, you're primed for a clean, hassle-free filter swap.

The Art of The Pressure Release

This is where most DIY jobs go sideways. You absolutely cannot just start wrenching on the housing while it’s holding back your home's full water pressure. You'll create a geyser in your utility room and find the housing is nearly impossible to turn.

You have to release the pressure first. It's simple.

  1. Find the shut-off valve on the inlet side of your filter and turn it off.
  2. Press the red pressure-relief button on top of the filter housing. You’ll hear a satisfying hiss of air and see a little water trickle out.
  3. Keep holding it down until the sound stops completely. Now you know the pressure is gone.
  4. No button? No problem. Just open a faucet somewhere in the house after you’ve shut the main valve to the filter. It does the same thing.

Remember, that filter housing is engineered to withstand immense force. Taking a moment to properly depressurize it is the single most important step for a controlled, mess-free filter change. It turns a potential wrestling match into a simple twist.

Perfecting The Seal And Flush

Now that the pressure is off, grab your housing wrench and give the canister a turn to loosen it. Once it breaks free, you should be able to unscrew it the rest of the way by hand. Dump the old water and the used filter right into your bucket.

Before you pop in the new cartridge, take a moment to inspect the big rubber O-ring in the groove at the top of the housing. Carefully pull it out, wipe it clean, and clean out the groove itself. Then, apply a thin coat of food-grade silicone grease to the O-ring. This tiny step is your best defense against slow, annoying leaks.

Slide the new cartridge in, making sure it’s centered, and then hand-tighten the housing back on. Use the wrench for one last quarter-turn to snug it up—but don't go crazy. Overtightening can crack the housing.

Last step: the flush. This is crucial for carbon filters, which often release loose carbon "fines" (harmless black specks). Slowly turn the water supply back on. Go to a nearby faucet and let it run for 5-10 minutes until the water is perfectly clear.

That’s it. You've reset your system. Sticking to this routine is more than just good practice; it's a smart investment. Whole house water filter maintenance is a cornerstone of a rapidly growing residential water purifier market. In the US, where these systems have about 20% market penetration, properly maintained filters can avert 15% of certain gastrointestinal illnesses. This is because a neglected filter can harbor over 1 million bacteria per square centimeter after just six months. While annual maintenance costs average $200-$400, this proactive spending yields a 40% savings compared to the $1,500+ cost of a full system replacement. Discover more insights about the residential water purifier market.

Troubleshooting Common Water Filter Problems

Even a perfectly maintained whole-house water filter will hit a snag eventually. That’s just the nature of mechanical systems. But the good news is that most of the little headaches that pop up are surprisingly easy to diagnose and fix on your own.

Think of this as your troubleshooting field guide. Instead of panicking when something goes wrong, you’ll have a logical process to hunt down the culprit. We’ll walk through the most common issues, from pressure drops to pesky leaks, so you can tackle them with confidence.

Diagnosing a Sudden Drop in Water Pressure

This is the big one—the most common complaint from homeowners. You hop in the shower one morning, and the pressure has just vanished. Your first suspect is probably the filter, and you're often right, but it pays to confirm before you start taking things apart.

A clogged filter is almost always the prime suspect. As it traps sediment, it essentially becomes a dam, choking the flow of water to your house.

If your system has pressure gauges on both the inlet and outlet pipes, diagnosis is a breeze. A difference of 10-15 PSI or more between the two is a dead giveaway. That filter is saturated, and it's time for a change.

No gauges? No problem.

  • Use the Bypass: Nearly every filter has a bypass valve. Flip it. This sends water around the filter instead of through it. If your pressure suddenly roars back to life, you’ve found your culprit. It’s the filter.
  • Check Your Faucets: Is the low pressure everywhere? The kitchen sink, the shower, the outdoor hose? If it's a house-wide issue, the problem is likely at a central point like your filter. If it’s just one showerhead, you've probably got a local clog instead.

Running through this quick diagnostic can save you from changing a perfectly good filter or, worse, ignoring a more serious plumbing issue.

The Annoying Drip Leaks and How to Stop Them

Nothing is more maddening than seeing a puddle forming under your filter housing. Luckily, the fix is usually simple and won't require a call to the plumber. The vast majority of these leaks come down to one thing: a faulty O-ring.

The O-ring is the large rubber gasket that creates a watertight seal between the filter housing and the filter head. If that ring is dry, dirty, nicked, or not seated correctly, water will find a way out.

Here’s your game plan:

  1. Shut off the water to the filter and use the pressure-relief button to release any pressure in the lines.
  2. Unscrew the housing and carefully pull out the O-ring.
  3. Wipe the O-ring and the groove it sits in until they are perfectly clean.
  4. Coat the O-ring with a thin layer of food-grade silicone grease. This keeps it pliable and helps create a bulletproof seal.
  5. Pop the O-ring back into its groove, ensuring it’s sitting flat and isn't twisted. Then, screw the housing back on until it's hand-tight.

A huge mistake people make is grabbing Vaseline or another petroleum jelly to lubricate the O-ring. Don't do it. Petroleum products will degrade the rubber, making it brittle and causing even worse leaks down the road. Stick with food-grade silicone grease.

If a clean, greased O-ring doesn't stop the drip, carefully inspect the plastic housing itself for any hairline cracks. They can be tough to spot, but if you find one, the whole housing will need to be replaced.

When Bad Tastes and Smells Return

You bought the filter to banish that swimming pool smell and weird taste from your tap water. So when they suddenly return, it's a huge letdown. This is almost always a sign that your activated carbon filter has reached the end of its life.

Carbon filters work by adsorption, where contaminants literally stick to the massive internal surface area of the carbon. But that surface area is finite. Eventually, all the spots get filled up, and the filter can't grab any more chlorine or smelly compounds. It becomes an empty vessel, letting all the bad stuff pass right through.

There’s no magic fix here; the only solution is to replace the filter cartridge. If you notice the water quality taking a dive, that's your system screaming for a new carbon filter. Sticking to your whole house water filter maintenance schedule is the best way to prevent this and keep your water tasting great.

Caring For UV Systems and Water Softeners

A man in sunglasses inspects a UV and water softening system in a utility room.

If your home's water treatment setup includes an ultraviolet (UV) purifier or a water softener, you've got some extra firepower. These components are fantastic, but they require their own specific maintenance to keep the entire system operating in harmony.

Ignoring them is like changing your car's oil but never checking the tire pressure—you're missing a critical piece of the puzzle. These advanced systems tackle specific problems, from neutralizing bacteria to fighting hard water scale, and a little upkeep goes a long way.

Keeping Your UV Purifier at Full Strength

Think of your UV system as a microscopic security guard, using intense light to neutralize nasty bacteria, viruses, and cysts. But for it to work, that light has to be powerful and unobstructed.

The single most important task is the annual replacement of the UV lamp. The light might still be on after a year, but its germ-killing intensity plummets. It’s like a weak flashlight in the dark; you can see a little, but it’s not really doing the job.

Just as critical is the quartz sleeve—the clear glass tube that protects the lamp from the water. Over time, it gets coated with a film of minerals, blocking the UV light from reaching the water.

  • When to Clean: Inspect it every six months, but always give it a thorough cleaning during your annual lamp change.
  • How to Clean: Slide it out carefully—it's fragile!—and wipe it down with a cloth soaked in a simple scale remover like CLR or even just white vinegar.

Managing Your Water Softener

A water softener is your home’s best defense against scale buildup. It protects your pipes and appliances while making your skin and hair feel amazing. Luckily, its maintenance is pretty straightforward.

Your main job is keeping the brine tank topped up with salt. Check it once a month and make sure it’s at least half-full. Stick to high-quality salt pellets designed for softeners; cheaper options can cause clogs.

The bigger, though less frequent, task is dealing with a "salt bridge." This is a hard crust of salt that can form above the water level in the brine tank, preventing salt from dissolving and regenerating the system.

A salt bridge effectively starves your softener. If your water suddenly feels hard again after being soft for months, a salt bridge is almost always the culprit.

Fixing it is easy. Just take a broom handle and carefully break up the crust. This is also a great time to clean out the tank and check the system's injector (or venturi) for any clogs.

While you're thinking about your home's water systems, don't forget the heater. These essential hot water maintenance tips are just as important for keeping things running efficiently.

It's worth noting how critical this is. The North American water filtration market holds a 35% global share for a reason. Well-maintained systems can reduce lead by up to 99%, according to the EPA. Yet, surveys show only about 65% of owners replace their filters on schedule. For advanced gear, the stakes are higher. A UV lamp is only good for about 9,000 hours—that’s one year—and changing it on time is the only way to ensure 90% effectiveness and uptime.

Answering Your Top Maintenance Questions

Once you get the hang of your whole-house water filter, questions are bound to pop up. It’s one thing to follow a schedule, but it's another to really understand the "why" behind each task. Let's tackle some of the most common questions we hear from homeowners.

Getting these answers straight will empower you to manage your system with confidence, ensuring your whole house water filter maintenance routine is always on point.

How Do I Find the Right Replacement Filter?

This is probably the most critical part of the whole process. Your first stop should be the system's user manual—it will list the exact model number you need.

Can't find the manual? No worries. There's almost always a sticker or label on the filter housing itself with all the info. As a last resort, when you take the old filter out, just bring it with you to the hardware store for a side-by-side comparison.

You must match two key specs:

  • Physical Dimensions: The length and diameter (like 10" x 4.5") must be identical. The wrong size is a recipe for leaks or a bad seal that lets unfiltered water sneak by.
  • Micron Rating: This number (e.g., 5 microns) indicates the filter's pore size. Swapping it for a different rating will completely change your water flow and what gets filtered out.

Can I Just Clean and Reuse My Sediment Filter?

We get this one a lot, and the simple answer is almost always a hard no. The vast majority of sediment filters—especially the common spun polypropylene or pleated paper types—are strictly single-use. They are engineered to trap particles deep within their fibers.

Trying to wash them is a futile exercise. You'll likely damage the delicate filter media, and worse, you could dislodge all the trapped contaminants, sending them straight into your home's water. A quick rinse might briefly improve your water pressure, but the filter's ability to do its job is gone for good. Just replace it.

Think of a sediment filter like a disposable coffee filter. You wouldn’t try to rinse and reuse one because it's already done its job, and trying to clean it just makes a mess. The same logic applies here—a fresh filter is the only way to guarantee performance.

What Happens If I Forget to Change My Filter?

Putting off a filter change kicks off a chain reaction of problems. The first thing you'll notice is your water pressure taking a nosedive. As the filter clogs, your showers will feel weaker and your washing machine will take forever to fill.

More importantly, an old carbon filter completely loses its ability to remove chlorine and other chemicals. The bad tastes and smells you bought the filter to eliminate will come roaring back. A badly clogged sediment filter also puts a ton of extra strain on your home’s plumbing and appliances.

Worst-case scenario? A neglected filter can become a breeding ground for bacteria. All that trapped organic matter is a perfect food source, potentially making your water quality even worse than before you had a filter.

When Should I Call a Professional for Help?

While most routine whole house water filter maintenance is a perfect DIY job, some situations call for a pro.

If you have a stubborn leak that a fresh, properly lubricated O-ring won't solve, you might be dealing with a tiny crack in the housing that needs an expert eye.

Additionally, if you have a complex setup with backwashing media tanks, UV purifiers, or integrated water softeners and feel out of your depth, calling in a pro for an annual check-up is a smart investment. Finally, if a standard filter change doesn't fix a major, sudden drop in your water quality, it’s time to call a plumber. They can diagnose bigger issues with your system or the water coming into your house. For more helpful insights, you can find a wealth of water filtration advice on our blog.


At Water Filter Advisor, we're committed to helping you achieve cleaner, safer water with confidence. Explore our in-depth guides and reviews to find the perfect solution for your home at https://www.waterfilteradvisor.com.

A Homeowner’s Guide on How to Raise pH in Water

So, you've discovered your home's water has the personality of a grumpy lemon. What's the plan? Before you do anything, you need an accurate pH reading. From there, your two main battle plans are using alkaline additives like baking soda for a quick, "help-me-now" fix in a pitcher, or installing a whole-home pH neutralizing filter to solve the problem for good. These methods work by telling the acidity in your water to take a hike, bringing its chemistry back into a happy, balanced state.

Why Your Home's Water pH Matters

Ever notice those sneaky blue-green stains in your sink or bathtub? That’s not a quirky design choice from your plumbing—it's a cry for help. It’s the first big warning sign of acidic water, and it's a much bigger problem than a bit of discoloration.

When your water has a low pH, it gets aggressive. It becomes corrosive, silently munching away at your plumbing from the inside out. This isn't just about aesthetics; it's a direct threat to your home's circulatory system. Corroding copper pipes can leach metal into your drinking water, and if you live in an older home, you could be facing lead contamination from old solder. Yikes.

Beyond the serious health concerns, acidic water is a bully to your expensive appliances. It can cause premature failure in water heaters, washing machines, and dishwashers. Tackling low pH isn't just about making your water taste better; it's about protecting your castle from a slow-motion, expensive disaster. That's why testing is the critical first step.

Getting an Accurate pH Reading

You wouldn't start randomly replacing parts in your car without a diagnostic, and the same logic applies to your water. Guessing your pH is a recipe for frustration and wasted money. Luckily, you've got a few solid options to get a reliable measurement.

Which method you choose really comes down to what you need. If you just want a quick "Is everything okay in here?" check, test strips are fine. But if you're about to invest in a whole-home filtration system, you need the hard numbers that only a digital meter or a lab test can provide.

  • pH Test Strips: These are the cheap-and-cheerful option. Just dip a strip in your water, watch it do a color-changing magic trick, and match it to the chart. They’re great for getting a ballpark idea but aren't precise enough for making serious treatment decisions.
  • Digital pH Meters: For a much more accurate reading, a digital meter is the way to go. These cool little gadgets give you a specific number, often down to one or two decimal places. They need to be calibrated now and then, but that accuracy is exactly what you need to properly size and configure a water treatment system.
  • Professional Lab Testing: If you suspect other villains are crashing the party (like heavy metals) or you just want the most comprehensive analysis possible, sending a sample to a certified lab is your best bet. They'll give you a pinpoint-accurate pH level and a full report card on a whole range of other contaminants.

This flowchart breaks down how to choose the right testing method, whether you need a quick spot-check or a highly detailed analysis.

Decision tree flowchart illustrating different methods for water pH testing, from quick checks to accurate readings.

As you can see, while strips are handy for a quick peek, a digital meter is really the minimum you'll want for accuracy when planning any kind of water filtration strategy.

Comparing Home Water pH Testing Methods

To make it even simpler, here's a quick rundown of the most common home testing methods. This should help you decide which tool is the right one for your mission.

Testing Method Accuracy Cost Best For
pH Test Strips Low Low Quick, "just curious" checks and getting a general idea.
Digital pH Meter High Medium Accurate readings needed for sizing filtration systems.
Professional Lab Test Very High High Comprehensive analysis for complex issues or total peace of mind.

Ultimately, investing in a good digital meter or a lab test upfront can save you a ton of guesswork and money down the road.

Understanding the pH Scale in Your Home

You probably remember the pH scale from science class—it runs from 0 to 14 and measures how acidic or alkaline something is. In your home's water, anything below a pH of 7.0 is acidic, and anything above is alkaline.

Modern testing has become incredibly precise. Post-1993 guidelines, for example, have tightened potentiometric uncertainty to less than 0.02 pH units. That level of accuracy is a game-changer for the 80% of the global population that relies on treated water sources.

For most household water, you're aiming for a pH between 6.5 and 8.5. If your water drops below 6.5, it’s corrosive enough to start damaging your pipes. If it creeps above 8.5, you'll start seeing scale buildup on fixtures and might notice a bitter taste.

Knowing your water's exact pH is key because the solution depends entirely on how grumpy your water is. Mildly acidic water might be happy with a simple calcite filter, but extremely low pH levels will demand a more powerful setup. For a broader look at how this fits into your home's water quality, check out our general water filtration advice.

Quick Fixes Using Common Household Additives

A pitcher of water, white powder, spoon, and a pH test strip chart on a kitchen counter for a quick pH fix.

So you've tested your water and confirmed it's on the acidic side. Your mind might jump straight to complex, expensive filtration systems, but hold on. For small, immediate tweaks, the solution might be sitting right in your kitchen pantry.

These simple household additives are perfect for neutralizing acidity in small batches, like a single pitcher of drinking water. It's crucial to understand these are temporary band-aids. They won't do a thing to protect your pipes or appliances from the long-term corrosion party happening throughout your home. Think of this as first aid, not a cure.

Using Baking Soda: The Go-To Neutralizer

The easiest and most common additive is sodium bicarbonate, which you know as good old baking soda. It's a mild alkaline substance that gently raises both pH and total alkalinity. This is great because it also helps stabilize the water chemistry and prevents wild pH swings.

Think of it as an antacid for your water. It calms the acidity down and nudges it back toward neutral. Because it’s so gentle, it’s the perfect place to start. A tiny pinch in a gallon of drinking water can often be enough to get rid of that slightly metallic taste that comes with low pH.

A Word of Caution: Baking soda adds sodium to your water. If you’re watching your sodium intake for health reasons, you’ll want to use this method sparingly for drinking water.

Dosing for Small Batches

When you're adding anything to your water, precision is everything. Just dumping in a spoonful is a surefire way to send the pH skyrocketing, creating a whole new problem. The mantra is: start small, test, and then adjust.

Here are some real-world starting points for using baking soda:

  • For a Gallon of Drinking Water: Start with just 1/8 teaspoon. Stir it until it’s fully dissolved, give it 30 minutes to settle, and then test the pH again.
  • For a Small Aquarium (10 gallons): A good first dose is 1/4 teaspoon. Always dissolve it in a separate cup of tank water before you slowly pour it in. This prevents shocking your fish.

These are just guidelines. The golden rule here is to add less than you think you need. You can always add a little more, but you can’t take it out.

When to Use a Stronger Solution

If your water is more than just slightly acidic, you might need to bring out the bigger guns. Soda ash (sodium carbonate) is a much more concentrated alkaline powder. It packs a bigger punch and will raise pH much more dramatically than baking soda, so you have to handle it carefully. You’ll use a lot less soda ash than baking soda to get the same result.

It’s interesting to think about how what we do in our kitchen mirrors larger-scale environmental chemistry. Just like agricultural runoff can raise the pH in rivers, we’re doing the same thing by adding these mineral-based powders. Research on water quality often shows how elements like calcium play a huge role in elevating pH, which is the exact principle we're using. You can actually explore a full study on physicochemical factors influencing water pH to see how these concepts apply on a global scale.

Ultimately, these quick fixes are handy in a pinch, but they're not a practical whole-home solution. If you’re dealing with acidic water throughout your entire house, a permanent, automated filtration system is always the smarter long-term investment.

Choosing the Right pH Neutralizing Filter for Your Home

Two white water neutralizing filters with black pipes installed in a home utility room next to food jars.

Sure, quick fixes like baking soda can help in an emergency, but they aren't a real strategy for protecting your home. That approach does nothing to stop the acidic water that’s silently eating away at your pipes and appliances. For a permanent, "set it and forget it" solution, a dedicated neutralizing filter is the gold standard of home water treatment.

These systems get installed right where your main water line enters your house, treating every last drop of water before it ever reaches a faucet or shower. They act as a constant guardian, using a special mineral media to raise the pH and bring your water chemistry back into a safe, non-corrosive zone. The real beauty here is that these filters are self-regulating. They’re the workhorses of residential water treatment, and understanding the two main types is key to picking the right one.

The Gentle Workhorse: Calcite Filters

The most common type of neutralizing filter uses calcite. Think of it as a super pure, ground-up form of calcium carbonate—basically limestone or marble. When acidic water flows through a tank full of this calcite media, it slowly dissolves the calcium, neutralizing the acid and bumping up the pH.

The process is naturally self-limiting. Calcite will only dissolve until the water hits a neutral pH of around 7.0. Because of this, it's almost impossible to "overcorrect" and make your water too alkaline. This makes calcite a fantastic choice for homes with mildly acidic water, usually in the pH range of 6.0 to 6.9.

A calcite filter is like a slow-release capsule for your water system. It provides a steady, gentle dose of alkalinity that solves the corrosion problem without a lot of fuss or risk of overshooting your target pH.

One thing to know is that this process does add some hardness to your water since you're introducing calcium minerals. For most folks, that's a very minor trade-off for protecting thousands of dollars in plumbing and appliances.

The Heavy Hitter: Corosex Filters

So, what if your water is more than just a little bit acidic? If you've got a pH below 6.0, calcite alone might struggle to keep up. This is where Corosex enters the picture.

Corosex is a specially processed form of magnesium oxide, and it's far more reactive than calcite. It can neutralize acidity much more aggressively—in fact, it can raise the pH up to 100 times more than the same amount of calcite.

That power comes with a serious warning: Corosex is not self-limiting. If water sits in the tank too long (say, overnight), it can push the pH way too high. For this reason, you'll almost always see Corosex used in a blend with calcite, typically a ratio of 80-90% calcite to 10-20% Corosex. This mix gives you the best of both worlds: the gentle, steady action of calcite with an extra kick from Corosex to handle more severe acidity.

Comparing Your Filter Options

Deciding between calcite, Corosex, or a blend all comes down to what your water test results say. Getting a precise pH reading is non-negotiable for making the right call. To help you choose, let's put these two filter media options head-to-head.

Calcite vs Corosex: Which Neutralizing Filter Is for You?

Feature Calcite (Calcium Carbonate) Corosex (Magnesium Oxide)
Best For Mildly acidic water (pH 6.0 – 6.9) Severely acidic water (pH below 6.0)
Effectiveness Gentle, slow-acting, and self-limiting Highly reactive and powerful, not self-limiting
Risk of Overcorrection Very low; naturally stops at a neutral pH High if used alone; best when blended with calcite
Maintenance Media must be refilled annually as it dissolves Dissolves faster and requires more frequent refilling
Impact on Hardness Adds calcium hardness to the water Adds magnesium hardness to the water

Ultimately, your water test will point you in the right direction. A pH of 6.5? Calcite is your friend. A pH of 5.5? You'll need a calcite/Corosex blend to get the job done right.

Installation and Long-Term Value

Most neutralizing filters are whole-house systems, which means they'll need to be installed by a professional plumber. While there's an upfront cost, the long-term value is undeniable. You're not just getting better drinking water; you're safeguarding your entire plumbing network. A one-time investment in a neutralizing filter can prevent catastrophic and expensive headaches. Maintenance is pretty straightforward, too. You'll just need to top off the tank with new media about once a year.

When You Might Need a Chemical Injection System

Sometimes, standard neutralizing filters just don't have the muscle for the job. If your water's pH is extremely low, or if your household has a really high water flow rate, a typical calcite filter can struggle to keep up. This is where you bring in the heavy artillery: a chemical injection system.

Think of it as the precision tool for serious water chemistry problems. Instead of letting water flow over a dissolving media, this system actively injects a neutralizing solution right into your water line. It gives you a level of control that passive filters simply can't match, making it the go-to for really challenging water.

How These Systems Work

At its heart, a chemical injection system is a proactive approach for when other methods of raising water pH just fall short. The system has a few key parts working together:

  • Solution Tank: This is where you mix your neutralizing agent—usually soda ash (sodium carbonate)—with water to create a liquid solution.
  • Dosing Pump: This small electric pump is the brains of the operation. It pulls the solution from the tank and injects a tiny, precisely measured dose into your main water line.
  • Flow Switch or Meter: This device tells the pump when to work. The moment you turn on a faucet, the switch kicks the pump on. Turn the faucet off, and the pump stops.

This setup delivers an incredibly accurate and consistent pH level throughout your home. It doesn't matter how much water you're using; the system adds the perfect amount of solution to keep everything balanced.

Scenarios That Call for an Injection System

While a neutralizing filter is great for mildly acidic water, an injection system becomes the clear winner in more extreme cases. This method is often the only real choice for homes with a water pH that drops below 5.5. With acidity that aggressive, a standard filter would dissolve its media so fast that maintenance would become a constant headache.

High water demand is another key factor. Large families or homes with high-flow fixtures can send water through a filter tank too quickly for the media to do its job. A chemical pump injects its solution instantly, ensuring complete neutralization no matter the flow rate.

Why Professional Calibration is So Important

Unlike a calcite filter that more or less self-regulates, a chemical injection system needs to be calibrated perfectly. The dosing pump's injection rate has to be fine-tuned based on your water's starting pH, your flow rate, and the concentration of your soda ash solution. Get this balance wrong, and you could overcorrect and send the pH way too high, leading to a bitter taste and nasty scale buildup. Because of this, professional setup and calibration are critical to get the chemistry just right.

Maintaining Your Balanced Water System

Hands hold a water testing device under a running kitchen faucet during routine maintenance.

Getting your home's water pH into that perfect neutral zone is a huge win, but the job isn't quite finished. Think of your water treatment setup like any other major home system—it needs a little ongoing attention to keep performing at its best. This isn't about creating more work. It's about a smart, simple maintenance plan that ensures your filtration investment continues to protect your home.

Creating a Realistic Testing Schedule

The golden rule of water filtration is to never just assume your system is working. Regular testing is the only way you know for sure, and it's how you catch small issues before they snowball into big problems.

  • Initial Follow-Up: Right after you install your new filter, test the water weekly for the first month to confirm the pH has stabilized.
  • Quarterly Checks: Once things look good, switch to testing once every three months. This is frequent enough to notice if your filter media is getting low or if your water source's chemistry has changed.
  • Annual Deep Dive: At least once a year, it's a good idea to do a more thorough test, especially if you notice any changes in water taste or see stains reappearing.

This regular feedback loop is your best defense against surprises.

Hands-On Maintenance for Your System

The actual maintenance you'll need to do depends on the kind of filter system you chose. For neutralizing filters that use calcite or a calcite/Corosex blend, your main job is topping off the media. This mineral bed is designed to slowly dissolve, so it will need to be replenished. A good rule of thumb is to check the media level every 6 months and plan to add more roughly once a year.

If you're running a chemical injection system, your routine will center around the solution tank. You'll have to mix a new batch of soda ash solution whenever the tank runs low. Getting into the habit of checking the level monthly is smart.

Don’t forget the simple stuff. No matter what system you have, give the filter tank or solution pump a quick visual inspection every few months. Look for leaks, listen for unusual noises, and just make sure everything looks clean and operational.

Watching for Signs of Trouble

Even with a great system, things can sometimes drift off-course. One of the most common issues is overcorrection, where the water becomes too alkaline (pH over 8.5).

Keep an eye out for these signs of overcorrection:

  • Water that feels slippery or almost slimy to the touch.
  • A bitter or "chemical" taste.
  • The return of scale—that white, chalky buildup on faucets and showerheads.

Another thing to be aware of is increased water hardness. Since calcite filters work by adding calcium minerals, they will naturally make your water harder. This is a normal trade-off. If the hardness becomes a nuisance, you might consider adding a water softener after your neutralizing filter for the ultimate one-two punch.

Interestingly, the principles we use to manage water chemistry in our homes are the same ones being considered for our oceans. Since pre-industrial times, global surface ocean pH has dropped from 8.11 to 8.04. One proposed solution involves adding calcium carbonate to boost alkalinity—the exact same principle your calcite filter uses. You can learn more about the science behind counteracting acidification on a global scale.

This ongoing vigilance ensures your journey of learning how to raise pH in water ends with a stable, long-term filtration solution, not a whole new set of problems.

Common Questions About Raising Water pH

Even with the best plan, you're bound to have some questions pop up when you're figuring out how to raise the pH in your water. Let's be honest, tweaking your home's water chemistry can feel a little intimidating. We'll walk through some of the most common questions we hear from homeowners to help you feel good about your next steps.

Can a Water Pitcher Filter Raise My Water's pH?

This is a big point of confusion for a lot of people. While you can find specialized (and usually pricey) alkaline water pitchers designed to bump up pH, your standard carbon pitcher from a brand like Brita isn't going to do it. The main job of those filters is to get rid of things like chlorine to make your water taste and smell better, not to fix a core chemistry issue like low pH.

Think of a regular pitcher filter like a strainer—it catches the big stuff. It just doesn't contain the right kind of filter media to actually neutralize acid. So, while it might improve the taste, it offers zero protection for your home’s plumbing against the corrosive damage that acidic water causes.

Will Raising the pH Make My Water Hard?

Yes, it often will, and it’s a really important trade-off to get your head around. The most common whole-house filtration fixes for low pH—calcite and Corosex filters—work by dissolving minerals like calcium carbonate and magnesium oxide into your water. Those happen to be the exact same minerals that cause water hardness.

This process is great for solving the acidity problem and saving your pipes. The flip side is you might start seeing the classic signs of hard water, like soap scum in the shower or chalky scale on your faucets. For most people, that's a much easier problem to deal with than corroding pipes.

Pro Tip: If the new hardness is driving you crazy, the best setup is to install a water softener after the pH neutralizing filter. That combination gives you the best of both worlds: water that’s non-corrosive and soft all through the house.

Is It Safe to Drink Water with Baking Soda Added?

For a one-off, small adjustment, adding a tiny, carefully measured pinch of baking soda to a pitcher of drinking water is generally considered fine. But it is absolutely not a healthy or sustainable long-term solution for your daily drinking water.

Doing this every day can add a lot of sodium to your diet, which is a real concern if you're watching your blood pressure. Even more critical, it’s just a spot treatment. It does absolutely nothing to protect all the plumbing that brings the water to your tap. A proper neutralizing filter that adds beneficial minerals like calcium is a far safer and more effective way to treat your whole home.

How Do I Know If My Water Is Too Alkaline?

Just like acidic water causes headaches, so does water that's swung too far the other way. If your pH is consistently testing above 8.5, you've likely overcorrected. The signs are usually pretty obvious and can become a whole new set of frustrations.

Here’s what you should be looking out for:

  • A slippery or almost "slimy" feel to the water when you wash your hands.
  • A bitter, unpleasant taste, which is distinct from the metallic taste of acidic water.
  • Scale buildup on fixtures and inside appliances, which can happen even faster with high alkalinity.
  • Your water heater seems less effective, often because scale has built up on the heating elements.

The only way to know for sure is to test your water again after your treatment system has been running. If you find the pH is way too high, you’ll need to adjust your system, which might mean dialing back the feed rate on a chemical injection pump or calling a pro to adjust your filter's bypass valve.


At Water Filter Advisor, we believe every homeowner deserves access to safe, clean, and balanced water. Navigating the world of pH correction and filtration can be complex, but our in-depth guides and unbiased reviews are here to help you make confident decisions. Explore our resources to find the perfect solution for your home at https://www.waterfilteradvisor.com.