How to Check a Well Pump: Step-by-Step Guide

You usually don't start checking a well pump because you're curious. You start because the shower went weak, the faucet spit air, or a sediment cartridge that should still look decent already looks like it came out of a mud line.

That's the part many homeowners miss. A pump problem isn't only a water supply problem. It's often a water filtration problem first. If the pump can't deliver steady pressure and clean flow, every filter downstream has to absorb the abuse. Sediment filters load up early. Carbon media doesn't get the contact time it needs. Reverse osmosis systems struggle when feed pressure swings around.

Knowing how to check a well pump helps you avoid more than a no-water emergency. It helps you protect the equipment you already paid for, and it helps you catch the kind of slow performance decline that ruins cartridges long before the pump quits completely.

Why Your Water Filters Hate a Failing Well Pump

A sputtering faucet usually sends people in the wrong direction. They blame the filter housing, the cartridge, or the softener. Sometimes that's true. Often it isn't.

The common assumption is that a pump is either working or dead. That view is too simple. Some troubleshooting sources note that most guides are binary: working vs. broken, even though a pump can still run while drawing abnormal current, producing lower flow, or overheating as it slips toward failure, especially in private well systems dealing with seasonal changes or sediment buildup (video-based troubleshooting notes).

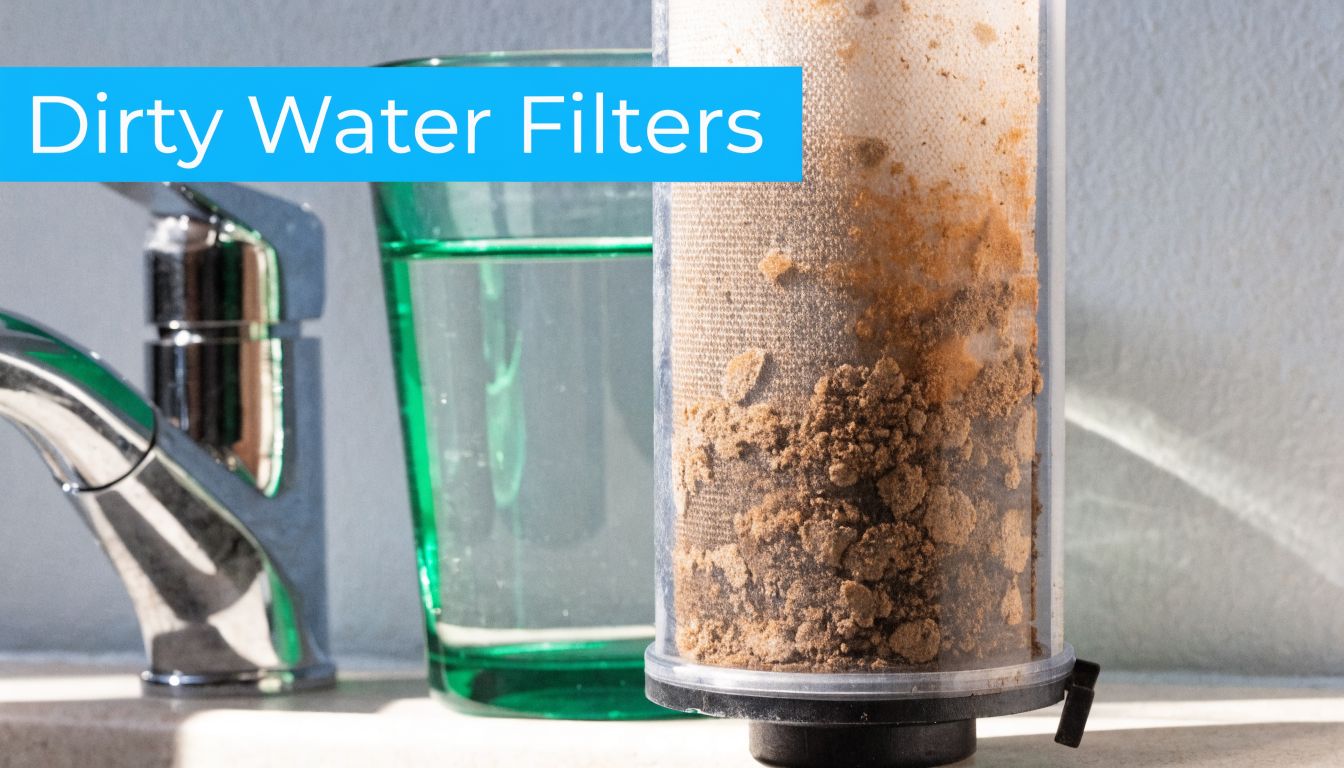
A close-up view of a dirty, sediment-clogged water filter cartridge sitting on a counter next to a glass.

Filters see pump trouble before you do

A weak pump doesn't always announce itself with silence. It often shows up as nuisance filter behavior.

  • Sediment cartridges clog too fast because pressure swings and disturbed well conditions can send bursts of grit into the line.
  • Carbon filters perform poorly when flow becomes erratic. Water can move too fast one moment and too weakly the next.
  • RO systems get fussy because they prefer stable feed conditions, not a pressure gauge that hunts up and down.
  • Backwashing equipment struggles when the pump can't maintain the flow the media bed needs.

If you've been comparing options for well water filtration systems for the home, this is the hidden rule nobody should ignore. The filter train is only as healthy as the pump feeding it.

Practical rule: If a filter problem appears suddenly across the whole house, check the well system before you keep buying cartridges.

Performance loss is expensive in quiet ways

A failing pump can short-cycle, overheat, or run with reduced output while still giving you some water. That in-between stage is rough on filtration equipment. Pressure spikes hammer housings and switches. Low flow can leave treatment systems underfed. Sediment slugs turn maintenance into guesswork.

Homeowners often replace the visible part first because it's easy. They change a cartridge, clean an aerator, maybe even blame the softener. Then the same symptoms come back. The pump was the actual issue all along.

Your First Look Before Touching Any Tools

Before you open anything, loosen anything, or test anything electrical, get a baseline. Good troubleshooting starts with observation, not disassembly.

A surprising number of well calls come down to a tripped breaker, a closed valve, or a symptom that only affects one fixture. Those are easy wins, and they matter because they keep you from chasing the wrong problem into the well house.

Start with what the system is telling you

Walk the house first. Don't go straight to the pressure switch.

Ask three simple questions:

  1. Is the problem everywhere, or only at one faucet or shower?
  2. Did the issue start as low pressure, sputtering, or no water at all?
  3. Did it happen suddenly, or has it been getting worse?

If one faucet is weak and the rest of the house is fine, that's usually a fixture issue, clogged aerator, or local valve issue. If every tap is weak, the well system moves to the top of the list.

Then look at the breaker panel. A well pump circuit that has tripped once may trip again, so resetting it without paying attention isn't a diagnosis. It's only a clue.

Quick diagnosis symptoms and first checks

Symptom Most Likely Cause First Thing to Check
No water anywhere Power loss, control issue, pump issue Breaker position and whether the pressure gauge is reading pressure
Weak pressure everywhere Pump performance issue, tank problem, clogged prefilter Pressure gauge behavior while water is running
Sputtering faucets Air in the line, low well level, check valve issue Whether the issue affects multiple fixtures
Pump noise or repeated clicking Short-cycling, switch issue, tank problem Pressure gauge movement and pump on-off pattern
One fixture has low flow Local plumbing restriction Aerator, shutoff valve, or fixture cartridge

Listen before you touch

Stand near the pressure tank and switch area while someone opens a faucet. Listen for the pump system response. You're not trying to become a motor expert by ear. You're only trying to answer basic questions.

  • Silent system when pressure has dropped can point toward electrical or control trouble.
  • Frequent starts and stops suggest cycling trouble.
  • Continuous running with weak delivery points toward performance loss rather than a simple on-off failure.

If the gauge and the sound of the system don't match what the faucets are doing, don't assume the filter is the culprit.

One more filtration-specific check matters here. Look at your prefilter housing if you have one. If the sump suddenly holds more visible grit than usual, that often means the well system has been disturbed, not that the filter did something wrong.

Checking the Brains of Your Well System

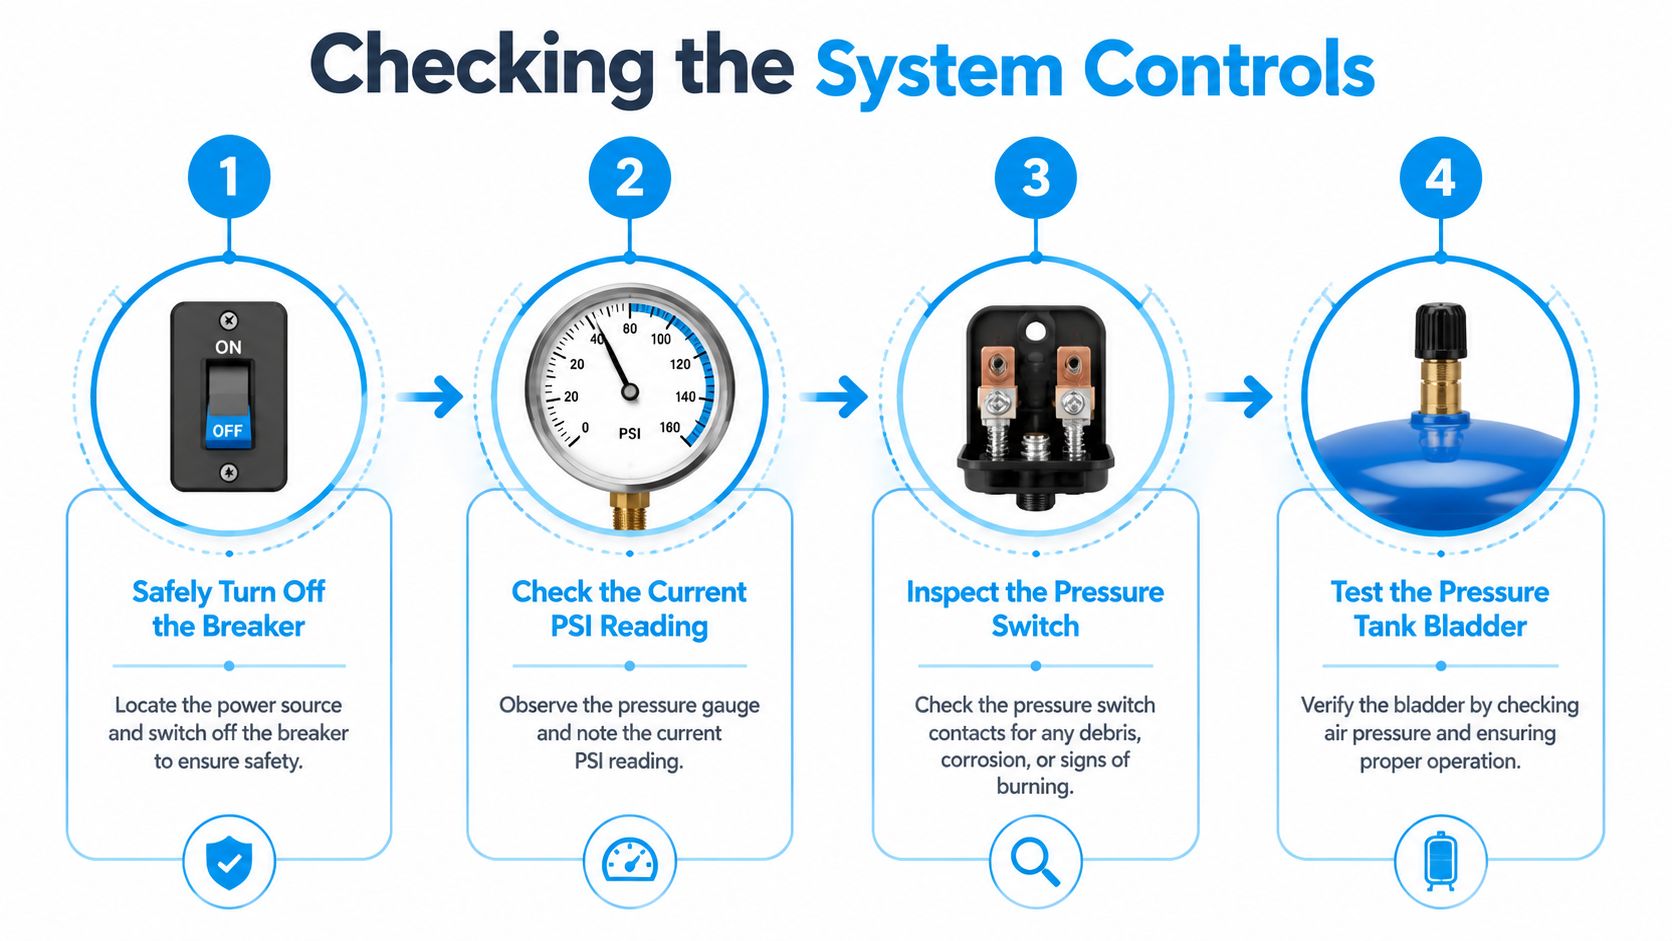
The pressure switch and pressure tank decide how your pump behaves. If the pump is the heart, these parts are the brain and lungs. When they're out of sync, the whole house feels it, and filters usually take the beating first.

The switch tells the pump when to start and stop. The tank smooths out delivery so the pump doesn't fire every time someone rinses a spoon. When either one is off, the result is often short-cycling, uneven pressure, and hard service life on cartridges, housings, and treatment valves.

An infographic showing four steps to check well pump system controls safely and effectively.

Watch a full pressure cycle

Pick a faucet that runs cleanly and let water flow long enough for the system to react. Keep your eyes on the gauge.

What you want is a calm pattern. Pressure drops as water is used. The pump turns on at the switch's cut-in point. Pressure climbs steadily. The pump shuts off at cut-out. The gauge then holds reasonably steady while no water is being used.

A bad pattern looks different:

  • Rapid on and off cycling usually means the tank isn't buffering correctly, the air charge is wrong, or the system is losing pressure somewhere.
  • Pressure that won't build normally can point toward a weak pump, worn controls, or a plumbing restriction upstream of your filtration equipment.
  • A gauge that drifts downward with no water running deserves attention fast.

Isolate the tank and see if pressure holds

One of the most useful checks is also one of the simplest. A reliable first diagnostic is to isolate the pressure tank from the house plumbing and observe whether pressure holds. If pressure drops, a leaking check valve is a prime suspect because it lets water drain back and can force short-cycling. Technicians also verify voltage at the pressure switch. On a 240V setup, each leg should read about 115V to ground, and a missing leg often points to wiring or breaker trouble rather than the pump itself, as described in this submersible pump diagnostic guide.

That pressure-hold test matters for filtration because a leaking check valve creates unstable delivery. Your filters don't see a smooth stream. They see repeated starts, pressure swings, and occasional bursts that stir up fines.

A lot of homeowners replace a pressure switch because the system is cycling fast. If pressure falls after the plumbing is isolated, the switch may be innocent.

Check the tank before blaming the pump

A bad tank or bad air charge can mimic pump trouble so well that people pull a pump they didn't need to pull.

Here's the practical sequence:

  • Turn off power first. Never open a switch or inspect contacts live.
  • Drain the tank fully before checking its air side.
  • Inspect the switch visually for corrosion, debris, or burned contacts.
  • Check for waterlogging symptoms such as very short run times and abrupt pressure changes.

An unhealthy tank creates fake evidence. It can make a decent pump look weak because the system never gets a stable cushion of compressed air. That instability also makes whole-house filtration behave badly, especially if you have a softener or backwashing media filter that expects predictable flow and pressure.

Is Your Pump Working Hard or Hardly Working

Some pumps fail dramatically. More often, they fade. The house still has water, but the pressure feels thin, the sediment filter darkens too quickly, and treatment equipment starts acting temperamental.

That's where actual measurement helps. At this point, guessing stops being useful.

A close up view of a water pressure gauge attached to a hose on blue background.

Run the bucket test

The bucket test is simple, but it tells you whether your pump can still feed the house and the treatment equipment attached to it.

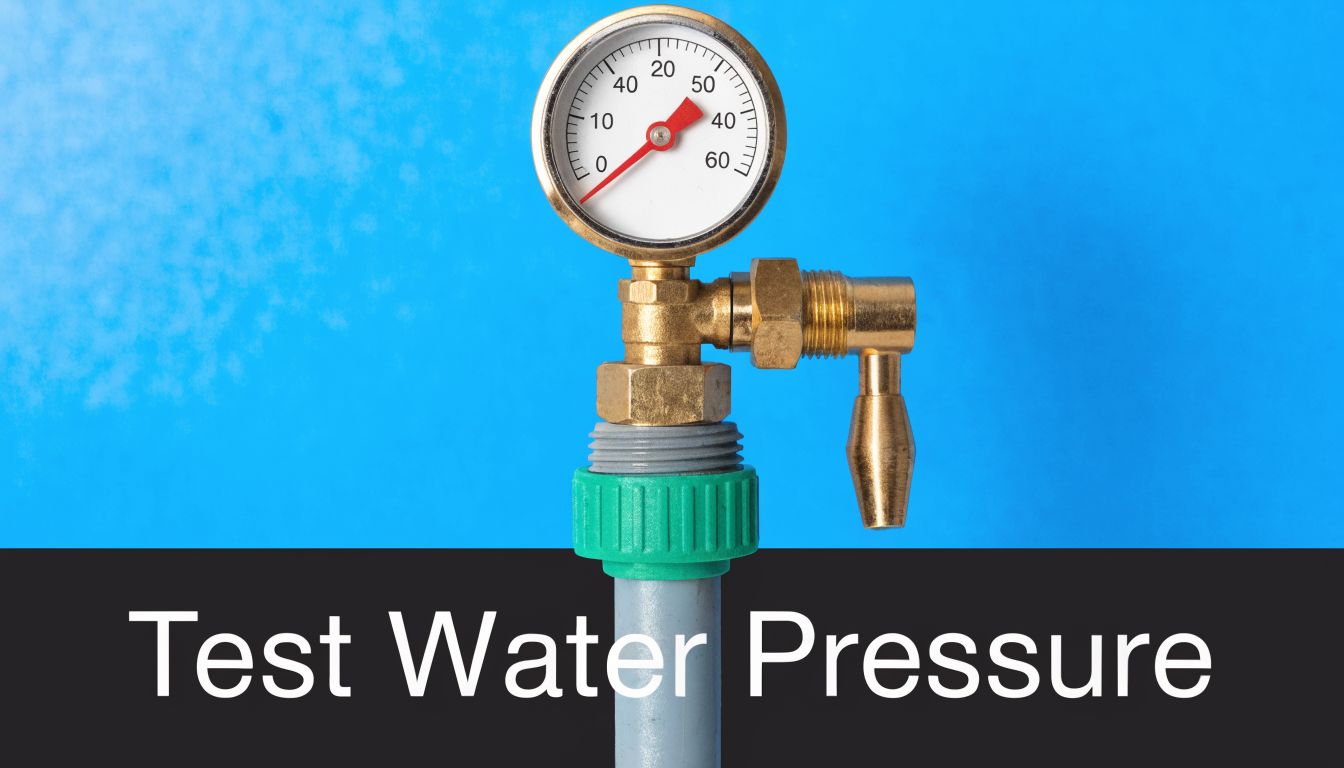
In many residential markets, most modern submersible well pumps in single-family homes deliver between 5 and 15 GPM under normal conditions, with 5 GPM generally treated as the minimum acceptable household flow and 10 to 15 GPM seen as a strong setup. Target system pressure is commonly 40 to 60 psi. A standard field method is to run water until the pump engages, then fill a 5-gallon bucket repeatedly until the pump cycles off, record the gallons and seconds, and calculate flow with (Gallons ÷ Seconds) × 60. Those residential testing details are summarized in this well pump efficiency testing guide.

Why this matters for filtration is straightforward. Filters and treatment systems are built around flow windows. Too little flow and the house feels weak. Too much flow can reduce contact time or push equipment past what it was meant to handle. If you're trying to improve low water pressure in a house, this test helps separate a true pump issue from a plumbing-side complaint.

What the numbers mean in real life

If your bucket test shows the system is struggling to sustain household flow, don't only think about showers and sinks. Think about:

  • Sediment filtration getting loaded unevenly because the system surges
  • Carbon tanks not seeing the consistent service flow they were sized around
  • Water softeners regenerating and backwashing less predictably
  • RO units receiving feed pressure that drifts instead of staying stable

A pump can still technically run while failing your filtration setup.

Field note: A system can be “good enough” for a bathroom sink and still be a poor match for a whole-house treatment train.

Check current draw if you know how to work safely

Flow tells you what the pump delivers. Amperage tells you how hard it's working to deliver it.

For homeowners or technicians comfortable with electrical testing, a clamp meter on the pump lead gives useful information during startup and run. The practical benchmark from residential pump guidance is that a 1 HP pump commonly draws about 8 to 10 amps under load. If actual draw doesn't line up with expected pump size, the system may be dealing with internal wear, overload, or another developing problem.

Before making too much of that reading, remember the setup matters. Tank condition, switch condition, and water level all affect what you see. A pump that overheats under low-water conditions can look like a generic pressure complaint from inside the house.

A short demonstration helps if you want to see the measurement process in action:

The filter clue most people ignore

If current draw looks off and your sediment load has also increased, pay attention. That pairing often means the system isn't just aging. It may be working under stress from low water, debris, or mechanical wear.

That's exactly when it makes sense to stop replacing cartridges as a first response and start treating the pump as the root problem.

Know When to Call a Pro

Some parts of how to check a well pump are solid DIY territory. Other parts can hurt you, damage the system, or turn a manageable repair into a full replacement job.

The line is simple. Observation is one thing. Live electrical diagnosis, pulling a submersible pump, or opening a control box when you're unsure is another.

The red-line situations

Call a professional if any of these apply:

  • You need to work around live power. The pressure switch area is not a place for trial and error.
  • The diagnosis points below ground. Pulling a pump, drop pipe, or check valve assembly isn't a casual weekend job.
  • The system keeps short-cycling after basic checks. Repeated starts are hard on motors and hard on filtration equipment.
  • You see pressure loss that doesn't make sense. Hidden leaks, failing valves, or low-well conditions can mimic one another.
  • Your filters are failing unusually fast and the cause isn't obvious. That often means the water supply side needs a trained set of eyes.

A professional tool bag with plumbing equipment placed next to a well pump on a sunny day.

Why calling early often saves money

Once a pump starts running poorly, every extra day can punish the rest of the system. Filters clog. Pressure switches arc and wear. Tanks suffer from repeated cycling. Treatment valves get fed unstable pressure and flow.

That's why calling a pro isn't giving up. It's protecting the expensive parts downstream.

If your test results don't tell one clear story, stop there. Ambiguous well problems are where DIY damage usually starts.

A good technician won't just ask whether the pump runs. They'll want to know how the pressure behaves, how the filters have been acting, whether sediment has increased, and whether the trouble is constant or demand-related. That full picture is what leads to the right repair.

Your Well Pump Questions Answered

How often should I check my well pump if my main goal is protecting filters

Check the system any time the water changes behavior. Weak pressure, sputtering taps, sudden sediment loading, or unusual cycling all justify a pump check. If you're on a private well with treatment equipment, regular observation of pressure behavior and cartridge condition is smarter than waiting for a total failure.

Can a bad well pump make water quality seem worse even if the water source hasn't changed

Yes. A struggling pump or unstable control setup can stir sediment, introduce air, and create pressure swings that make filters less effective. The water source may be the same while the delivered water feels worse because the system is handling it poorly.

Should I replace filters first when pressure drops

Only if the restriction clearly starts at the filter. If the whole house changes at once, start upstream at the well system. Replacing cartridges without checking pump behavior often wastes time and money.

What's the most overlooked check

The pressure tank and its air side. People jump straight to the pump because it feels like the important part. In practice, a bad tank setup can imitate pump trouble and make filter performance erratic.

Are manufacturer resources worth reading if I'm trying to understand pump basics

Yes, especially if you want to get familiar with pump types and general operating principles before talking to a technician. A good example is this Ingersoll Rand pump guide from MA Hydraulics Ltd, which is useful for broader pump context even if your home well system uses a different brand.

What should I tell a technician so they can diagnose faster

Give them symptoms in sequence, not guesses. Say when the pressure changed, whether faucets sputter, whether filters started clogging faster, whether the gauge drops while no water is running, and whether the issue is house-wide. That kind of detail is far more useful than saying, “I think the pump is bad.”


If you're trying to protect your cartridges, improve pressure, or choose a treatment setup that actually fits your well system, Water Filter Advisor has practical guides that help you match filtration to real-world water conditions.

Your Guide to Vanquishing Sediment in Well Water

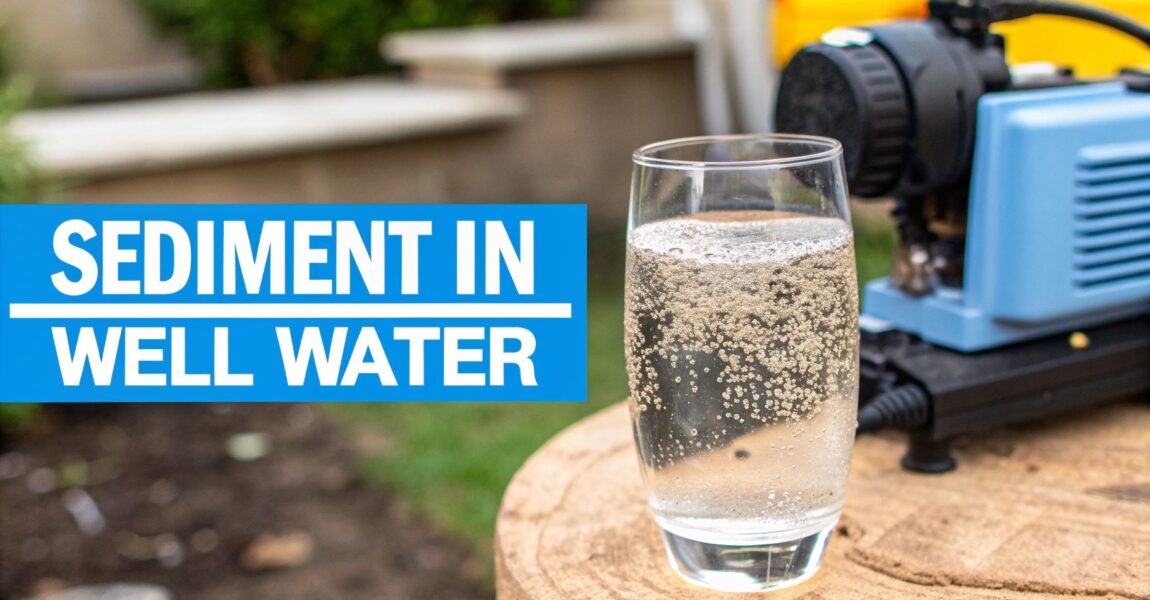
You pour a glass of water from your kitchen tap, hold it up to the light, and… there it is. Tiny particles doing a slow-motion dance—the tell-tale sign of sediment in your well water. It's an incredibly common issue for homeowners with wells, basically meaning bits of sand, silt, or clay have snuck into your plumbing. The good news? It's a completely winnable battle with the right filtration setup.

What Is This Gritty Stuff in My Well Water?

Ever noticed a gritty film at the bottom of a drinking glass after it sits for a while? Or found mysterious specks staining your freshly washed laundry? Congratulations, you've met sediment. At its heart, sediment is just a mix of natural, solid particles that get stirred up and hitch a ride in your water.

Think of your well as a giant straw sipping water from an underground aquifer. That aquifer is surrounded by layers of earth—sand, clay, rock, and silt. Heavy rain, a shifting water table, or even an aging well pump can shake these fine particles loose, pulling them right into your home's water supply.

Why You Should Actually Care About This Gritty Intruder

A little bit of grit might not seem like a big deal, but it’s a lot more than a visual annoyance. These tiny particles are the uninvited bullies of your plumbing system, acting like liquid sandpaper. They slowly wear down pipes, clog faucet aerators, and can absolutely wreck expensive appliances like your water heater, dishwasher, and washing machine. It’s a silent war that can cause serious financial damage over time.

And this isn't some rare occurrence. Sediment in well water is a widespread problem affecting millions, especially in areas not hooked up to a municipal water system. The United Nations World Water Development Report noted that in 2022, over 3.5 billion people relied on water sources outside of safely managed systems, and a huge number of them depend on wells. You can learn more about this global water challenge on UNESCO's site.

The most important thing to know is that you don't have to live with it. A good whole-house water filtration system acts like a bouncer at the club, stopping these unwelcome particles before they ever enter your home and wreak havoc.

Filtration: Your Ultimate Weapon Against Grit

Instead of constantly cleaning out clogged faucets or watching your appliances die a slow, painful death, a whole-house filtration system provides a real, permanent answer. By installing a filter right where your main water line enters your home, you guarantee that every single tap—from the kitchen sink to the shower—delivers clean, clear water.

Here’s what a dedicated filtration system brings to the party:

  • Crystal-Clear Water, Instantly: It gets rid of that cloudy, murky look and all the visible specks, giving you pristine water for drinking, cooking, and bathing.
  • Protection for Your Fortress: By catching all that abrasive sediment, it prevents clogs and helps your valuable appliances live long, prosperous lives.
  • Total Peace of Mind: There's a special kind of confidence in knowing your water is clean and free of suspended gunk every time you turn on the faucet.

At the end of the day, tackling sediment in well water is all about taking back control of your home’s most vital resource. With the right filter, you can make that cloudy, gritty water a distant memory.

Decoding the Sediment in Your Water

Clear glass jar containing layered sediment samples from well water for identification and testing purposes

Not all sediment is created equal, and the first step to clear water is figuring out exactly what you're dealing with. Think of yourself as a water detective. The clues are floating right there in your glass, and knowing what they mean is critical for choosing the right filter.

It’s like using the right tool for the job. You wouldn't use a spaghetti colander to strain coffee grounds, right? The same logic applies here—a filter designed for coarse sand won't do a thing against ultra-fine clay. This is where a little hands-on diagnosis pays off big time.

The Simple Jar Test: Your Secret Weapon

You don’t need a fancy lab to get started. Your best diagnostic tool is probably already in your kitchen cabinet: a plain, clear glass jar. This ridiculously easy test will tell you a surprising amount about the sediment in your well water.

Here’s your mission, should you choose to accept it:

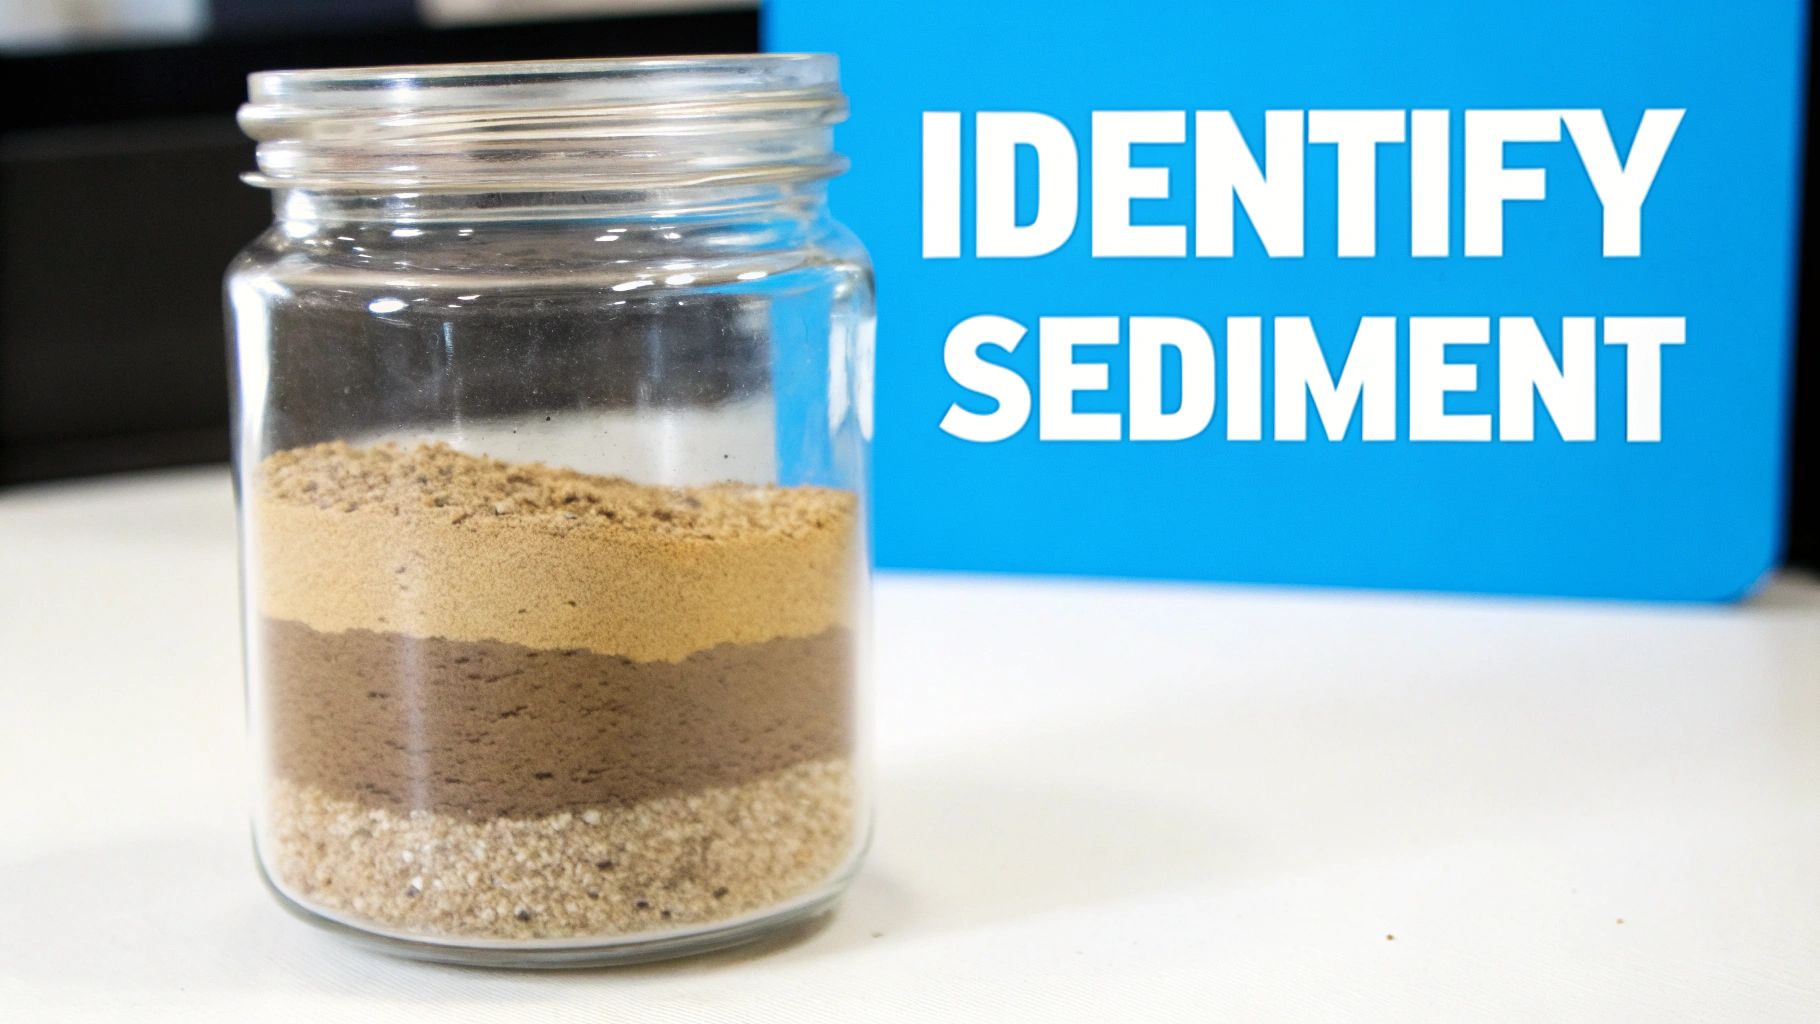
  1. Collect Your Evidence: Grab a large, clear jar and fill it with cold water. Use a faucet that doesn’t have an aerator, like an outdoor spigot or your bathtub tap, to make sure you get a raw, unfiltered sample.
  2. Let It Chill: Put the jar on a counter or shelf where it won’t be disturbed. Now, just leave it alone for at least 24 hours. Patience, detective.
  3. Observe the Results: Take a look at what happened. How fast did the particles fall? What do the layers look like after they’ve settled at the bottom?

The way the particles separate tells a story. Heavy, coarse sand will drop to the bottom in just a few minutes, while fine silt might take a few hours. The absolute finest clay particles can stay suspended, keeping your water cloudy for a full day or even longer.

This simple observation is your cheat code for picking the right filtration system. Heavier gunk is easy to trap, but those tiny suspended particles require a much finer filter to get the job done.

Identifying the Common Culprits

Once your jar test is done, you can compare the layers at the bottom to figure out what’s floating around in your pipes. Here's a quick field guide to help you identify the usual suspects.

Common Well Water Sediment Types and Indicators

Sediment Type Appearance in Water Feel Potential Cause
Sand or Grit Heavy particles that settle instantly Coarse, gritty texture Failing well screen, pump set too low
Silt Muddy, cloudy, or murky water Soft, flour-like powder when dry Runoff, well construction issues
Clay Water stays cloudy for 24+ hours Very fine, almost sticky powder Surface water infiltration, very fine earth
Rust / Iron Red, orange, or brown flakes Flaky or gritty Aging iron pipes, high iron in groundwater

Knowing what you’re up against is half the battle.

Is it coarse sand? Or is it fine, suspended silt that just won't settle? The answer directly points to the type of filter you’ll need. Without this step, you’re just guessing, and that can lead to buying the wrong equipment and wasting a pile of money.

How Sediment Damages Your Home (And Maybe You)

You might not think much of those tiny particles swirling in your well water, but they're waging a slow, costly war on your home's plumbing and appliances. It's helpful to think of sediment as liquid sandpaper, constantly grinding away inside every pipe. This nonstop abrasive action is the start of a whole cascade of expensive problems.

This gritty flow gradually wears down everything from pipe fittings and faucet seals to valve seats. The result? Drips and leaks that can lead to serious water damage over time. Your water-using appliances, however, are on the front lines, taking the worst of the assault.

The Slow, Silent Appliance Killer

Sediment is the secret enemy of your home's hardest-working machines. It sneaks into tiny passages, builds up in tanks, and grinds away at delicate components, dramatically shortening their lifespan. You’ll find yourself facing more frequent repairs or, even worse, having to replace an expensive appliance far too soon.

The most common appliance casualties include:

  • Water Heaters: Sediment loves to settle at the bottom of the tank, forming a thick, insulating layer. This forces the heating element to work overtime just to heat your water, which spikes your energy bills and eventually burns out the element. In tankless heaters, it’s even worse—it can clog the heat exchanger and cause a total system failure.
  • Washing Machines and Dishwashers: Those little inlet valve screens get clogged with tiny particles, restricting water flow and triggering error codes. Over time, that same grit can destroy the water pump and leave a nasty, gritty film all over your clothes and dishes.
  • Faucets and Showerheads: The fine mesh screens (aerators) in your faucets and showerheads are magnets for sand and silt. This blockage is exactly why you end up with sputtering fixtures and a frustrating loss of water pressure.

When the staining and clogging from well water sediment gets bad enough, some homeowners find they need to look at major improvements like these sink and faucet upgrades just to get things working properly again.

Health Concerns Hiding in the Haze

Beyond the mechanical damage, sediment in well water can hide some real health concerns. While particles like sand, silt, and clay usually aren't toxic on their own, they create the perfect hiding spot for harmful microorganisms.

Think of a sediment particle as a tiny shield. It can protect dangerous bacteria, viruses, and protozoa from disinfectants like chlorine or UV light. This "shielding" effect means that even if you treat your water, nasty contaminants can survive by hiding behind the sediment.

This makes it incredibly difficult to know if your water is truly safe to drink. High turbidity—the technical term for cloudiness caused by suspended sediment—is often linked to a higher risk of gastrointestinal illnesses. The particles can also act like little sponges, soaking up and carrying contaminants like heavy metals or pesticides.

Ultimately, filtering out the sediment is a critical first step toward guaranteeing the safety and quality of your well water.

Choosing the Right Filtration System for Your Home

Alright, you've played detective with your water, seen what kind of gunk is floating around, and you know the damage it can cause. Now for the fun part: picking the right solution. It can feel like a lot to take in, but it really just boils down to matching the right filter to the type of sediment you have. You wouldn't use a tiny screwdriver on a massive bolt, right? Same idea here.

The goal is to get a whole-house sediment filter in place. This is a single unit that treats every drop of water coming into your home, protecting everything from your showerhead to your washing machine. Let's walk through the main options and break down how they work so you can feel confident you're making the right call.

Comparing Home Sediment Filtration Options

To make sense of the different technologies out there, it helps to see them side-by-side. Each type of filter has its own strengths and is designed to tackle a specific kind of sediment problem. This table lays out the most common choices to help you figure out what's best for your home, your water, and your budget.

Filter Type Best For Micron Range Maintenance Upfront Cost
Spin-Down Heavy, coarse sediment like sand and grit 75 to 1,000 microns Flush periodically (low) Moderate to High
Cartridge Fine particles like silt, clay, and rust 1 to 100 microns Replace cartridge regularly Low to Moderate
Backwashing Both fine and coarse sediment 5 to 100 microns Automatic (very low) High

Ultimately, the "best" filter is the one that directly addresses the type of sediment you discovered in your jar test. A spin-down is fantastic for "heavy" problems, while a cartridge filter is your go-to for clearing up that persistent cloudiness from fine particles.

Spin-Down Filters: The Centrifuge for Your Plumbing

If your jar test showed a layer of sand or heavier grit at the bottom, a spin-down filter is probably your best first move. These things are pretty clever—they work like a mini centrifuge right in your plumbing line. Water zips into the filter and is forced into a rapid spin.

This spinning motion throws the heavier sediment particles to the outside wall of the filter housing, where gravity takes over and they settle at the bottom. The clean, sediment-free water then continues on its way into your house. The best part? Maintenance is incredibly simple. When you see gunk building up in the clear housing, you just open a valve at the bottom and flush it all out. No cartridges, no fuss.

A spin-down filter is a great choice if you have:

  • Coarse sand or grit that settles out fast.
  • A lot of large sediment that would absolutely destroy a normal cartridge filter in a week.
  • The desire for a low-maintenance, reusable filter.

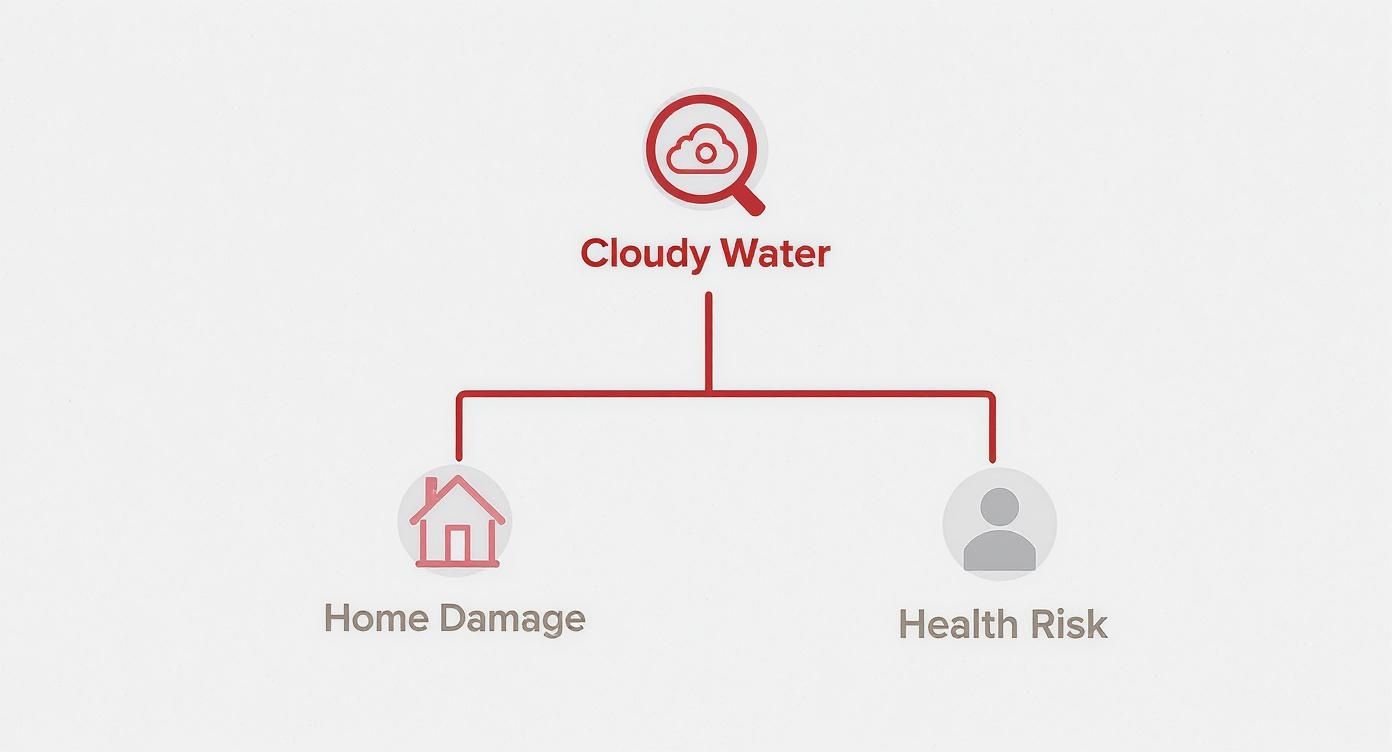
This diagram really drives home what happens when you let sediment problems go unchecked.

Diagram showing cloudy water causing home damage and health risks with magnifying glass icon

As you can see, what starts as cloudy water can quickly spiral into bigger issues for both your home and your health.

Cartridge Filters: The Microscopic Net

Now, if your water is murky with fine silt or clay that just seems to hang there forever, a cartridge filter is what you need. Think of these as a super-fine net. Water is pushed through a pleated or spun material that physically traps tiny particles, letting only the clean water get through.

The key to these filters is the micron rating. A micron is just a microscopic unit of measurement, and the rating on a filter tells you exactly how small of a particle it can catch.

A 100-micron filter is like a pasta strainer—great for catching big, obvious debris. But a 5-micron or 1-micron filter is more like an espresso filter, designed to grab the super-fine particles that make your water look hazy.

Getting the micron rating right is everything. For that fine silt you saw in your test, starting with a 20-micron or 5-micron filter is usually a sweet spot. It's fine enough to clear up the water but not so fine that it clogs up immediately and kills your water pressure.

Creating a Multi-Stage Filtration System

For a lot of well owners, the water has a mix of both heavy sand and fine silt. If that's you, a single filter might not cut it. The real pro move here is to combine filters into a multi-stage system. The most common and effective setup is putting a spin-down filter before a cartridge filter.

This one-two punch is incredibly effective:

  1. The Spin-Down (Pre-Filter): This first filter does all the heavy lifting, grabbing the sand and large grit.
  2. The Cartridge (Polishing Filter): Now that the big stuff is gone, this second filter can easily "polish" the water by trapping the fine silt and clay without getting overwhelmed.

Going this route will make your replacement cartridges last way, way longer, which saves you a ton of hassle and money over time. If you want to dive deeper into different filter setups, feel free to check out our other articles for more in-depth guidance at https://www.waterfilteradvisor.com/advice/.

And remember, your whole-house system is just one piece of the puzzle. Things like maintaining refrigerator water filters are also part of keeping clean water flowing everywhere. By matching the right filtration technology to the specific sediment in your well water, you can build a system that delivers perfectly clear water for years to come.

Installation, Maintenance, and Long-Term Costs

Picking the right filter is a huge step, but what you do next is just as crucial for keeping that water clear and clean for years. It's easy to focus on the upfront price, but thinking about the installation, ongoing upkeep, and the total cost of ownership is what really makes it a smart investment, not just a quick fix for the sediment in your well water.

Let's break down what you can really expect. This will help you budget your time and your money without any surprises down the road.

DIY vs. Professional Installation

First things first: are you going to install this yourself or call in a pro? There’s no single right answer, and it really depends on the filter’s complexity and how comfortable you are with plumbing.

For a lot of handy homeowners, putting in a simple cartridge or spin-down filter is a totally manageable weekend project. You'll likely need to cut into your main water line, fit some new connections, and mount the filter housing. If that sounds like something you can tackle, you could save a few hundred bucks on labor.

But when you get into more advanced systems like backwashing filters, things get tricky. These often involve wiring for the control valve and more complex plumbing. One wrong move could lead to leaks, a drop in water pressure, or a system that just doesn't work right. Hiring a licensed plumber, which usually runs between $300 and $800, buys you peace of mind. They'll get it done right and make sure everything is up to code.

Creating a Maintenance Playbook

Here's the secret to making your filter last: proper maintenance. If you ignore it, it’s like never changing the oil in your car—sooner or later, things are going to grind to a halt. A well-maintained filter doesn't just give you clear water; it protects your home's water pressure, too.

Your maintenance routine will look completely different depending on your filter type:

  • Spin-Down Filters: These are the simplest. Just open the flush valve at the bottom to purge all the gunk it’s collected. If you have a really sandy well, you might do this weekly. For water with less debris, once a month might be fine.
  • Cartridge Filters: The name of the game here is replacing the filter cartridge. The classic tell-tale sign is a noticeable drop in your water pressure. For most homes, you'll be swapping these out every 1-3 months.
  • Backwashing Filters: For the most part, these systems run on autopilot. The control valve will trigger a backwash cycle on its own to flush the media clean. Your only real job is making sure it has power and the drain line isn't blocked. The filter media inside can last a surprisingly long time—often 5 to 10 years—before it needs to be replaced.

Don't just guess when it's time for a filter change. Set a recurring reminder on your phone's calendar. It's a simple habit that protects your investment and keeps your system working like it should.

Understanding Long-Term Costs

When you’re budgeting, it’s critical to look past the sticker price. The true long-term cost is a mix of the initial purchase, the installation, and all the replacement parts you'll need over the years.

A basic cartridge filter system might only set you back $50-$150 to start, but those replacement filters ($20-$60 each) will add up over time. A spin-down filter costs a bit more upfront ($100-$300), but with a reusable screen, it has almost zero ongoing costs.

Backwashing systems carry the biggest initial price tag, often from $600 to over $1,500. But because they're automated and the media lasts for years, their long-term running costs are actually very low. For wells with stubborn, persistent sediment problems, they often end up being the most cost-effective choice. By weighing these factors, you can find the perfect solution for both your water and your wallet.

Your Questions About Well Water Sediment Answered

Figuring out the right filtration strategy can leave you with a few lingering questions. It's totally normal. Dealing with sediment in well water feels like a big job, so it’s smart to get all the facts straight first. Let's tackle some of the most common concerns homeowners run into.

We'll clear up the confusion so you can get the job done with confidence, knowing you’ve covered all the bases for crystal-clear water.

Will a Sediment Filter Reduce My Water Pressure?

This is the number one worry we hear, and for good reason—nobody wants to trade gritty water for a trickle of a shower. Here’s the short answer: a correctly sized and maintained sediment filter will not noticeably tank your water pressure.

Where people run into trouble is when a filter is too small for the home's flow rate, or the micron rating is way too fine for the kind of gunk in their water. Think about it like trying to drain a swimming pool through a coffee filter. It’s just not going to work, and you’ll get a major backup. The same principle applies when a filter gets clogged because it's the wrong type or it hasn't been changed on schedule.

Here’s how to keep your pressure up:

  • Size it right: Make sure the filter's flow rate (gallons per minute, or GPM) matches what your household actually uses at peak times.
  • Use a multi-stage approach: If you're dealing with a lot of sediment, a spin-down pre-filter is your best friend. It catches the big stuff before it ever gets to your finer cartridge filter.
  • Stay on top of maintenance: The minute you notice the pressure dropping, it's time to change that cartridge or flush your system.

What Is the Difference Between a Sediment Filter and a Water Softener?

This is a classic mix-up, but they do completely different jobs. A good way to think about it is that a sediment filter is like a bouncer at a club, while a water softener is more like a chemist.

A sediment filter is a physical barrier. Its only job is to block and trap solid particles—sand, dirt, rust, and other debris. It grabs all the "floaties" to make your water clear.

A water softener, on the other hand, doesn't remove particles at all. It uses a chemical process called ion exchange to target dissolved minerals like calcium and magnesium that make water "hard." Sediment can actually wreck a water softener, which is why you always install a sediment filter before the softener in your water line.

One can't do the other's job. You need a sediment filter for cloudy, gritty water and a water softener if you're fighting hard water stains and scaly buildup.

How Do I Choose the Right Micron Rating?

Picking a micron rating sounds technical, but it doesn't have to be. Just follow this simple rule of thumb: start with a higher micron rating (which is less fine) and only go lower if you need to.

If you can see coarse sand in your water, a 100-micron spin-down filter might be all it takes to solve the problem. For that general cloudy look caused by silt or clay, a 20- to 30-micron cartridge is a fantastic starting point. Only move down to a 5-micron filter if the water still isn't clear enough.

Jumping straight to a super-fine 1-micron filter without any pre-filter is just asking for constant clogs and pressure problems.


Here at Water Filter Advisor, we're all about helping you find a practical solution that actually works for your home. Our detailed guides and honest reviews are designed to cut through the marketing noise, making it easier to choose a system that will deliver clean, safe water for your family. To build the right plan for your well, check out our resources at https://www.waterfilteradvisor.com.