How to Compare Water Filter Systems for Your Home
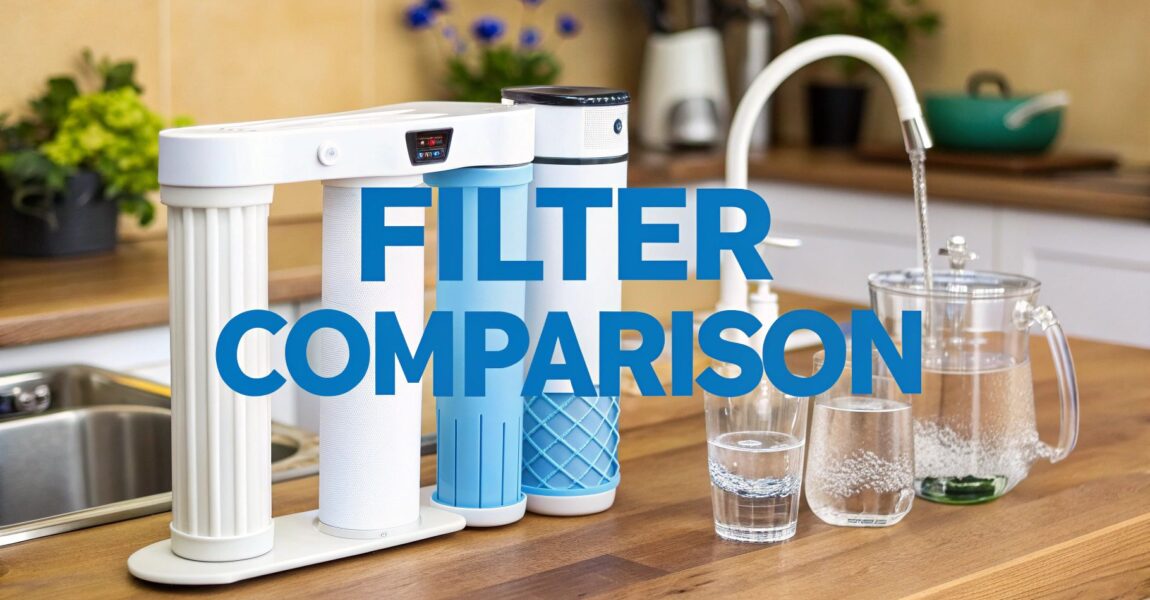
So, you've decided to stop drinking tap water that tastes faintly of swimming pool. Bravo! When you start to compare water filter systems , the fi ...
So, you've decided to stop drinking tap water that tastes faintly of swimming pool. Bravo! When you start to compare water filter systems , the fi ...

Let's be honest, a successful whole-home water filtration system installation doesn't start with a pipe cutter. It begins long before you even dream of getting your tools out; it starts with a rock-solid plan. This isn't just about avoiding a DIY disaster—good planning is what separates a system that delivers pure, delicious water for years from one that becomes your next big headache.
Jumping into the installation without a little forethought is like trying to bake a cake by just throwing ingredients in a bowl. It’s a recipe for chaos. Trust me, spending an hour or two on planning will save you a world of frustration and maybe even a call to an emergency plumber. This is what separates a pro-level setup from a weekend project gone sideways.
It's no surprise that more people are seeking water that doesn't taste like a swimming pool. The global home water filtration market is expected to hit a staggering USD 37.54 billion by 2034, and whole-house systems are a massive part of that wave. In fact, interest in these systems is set to grow by 61.56% by 2026, mostly because we're all tired of that chlorine funk coming from every tap. You can learn more about these market trends to see just how big this movement for better water has become.
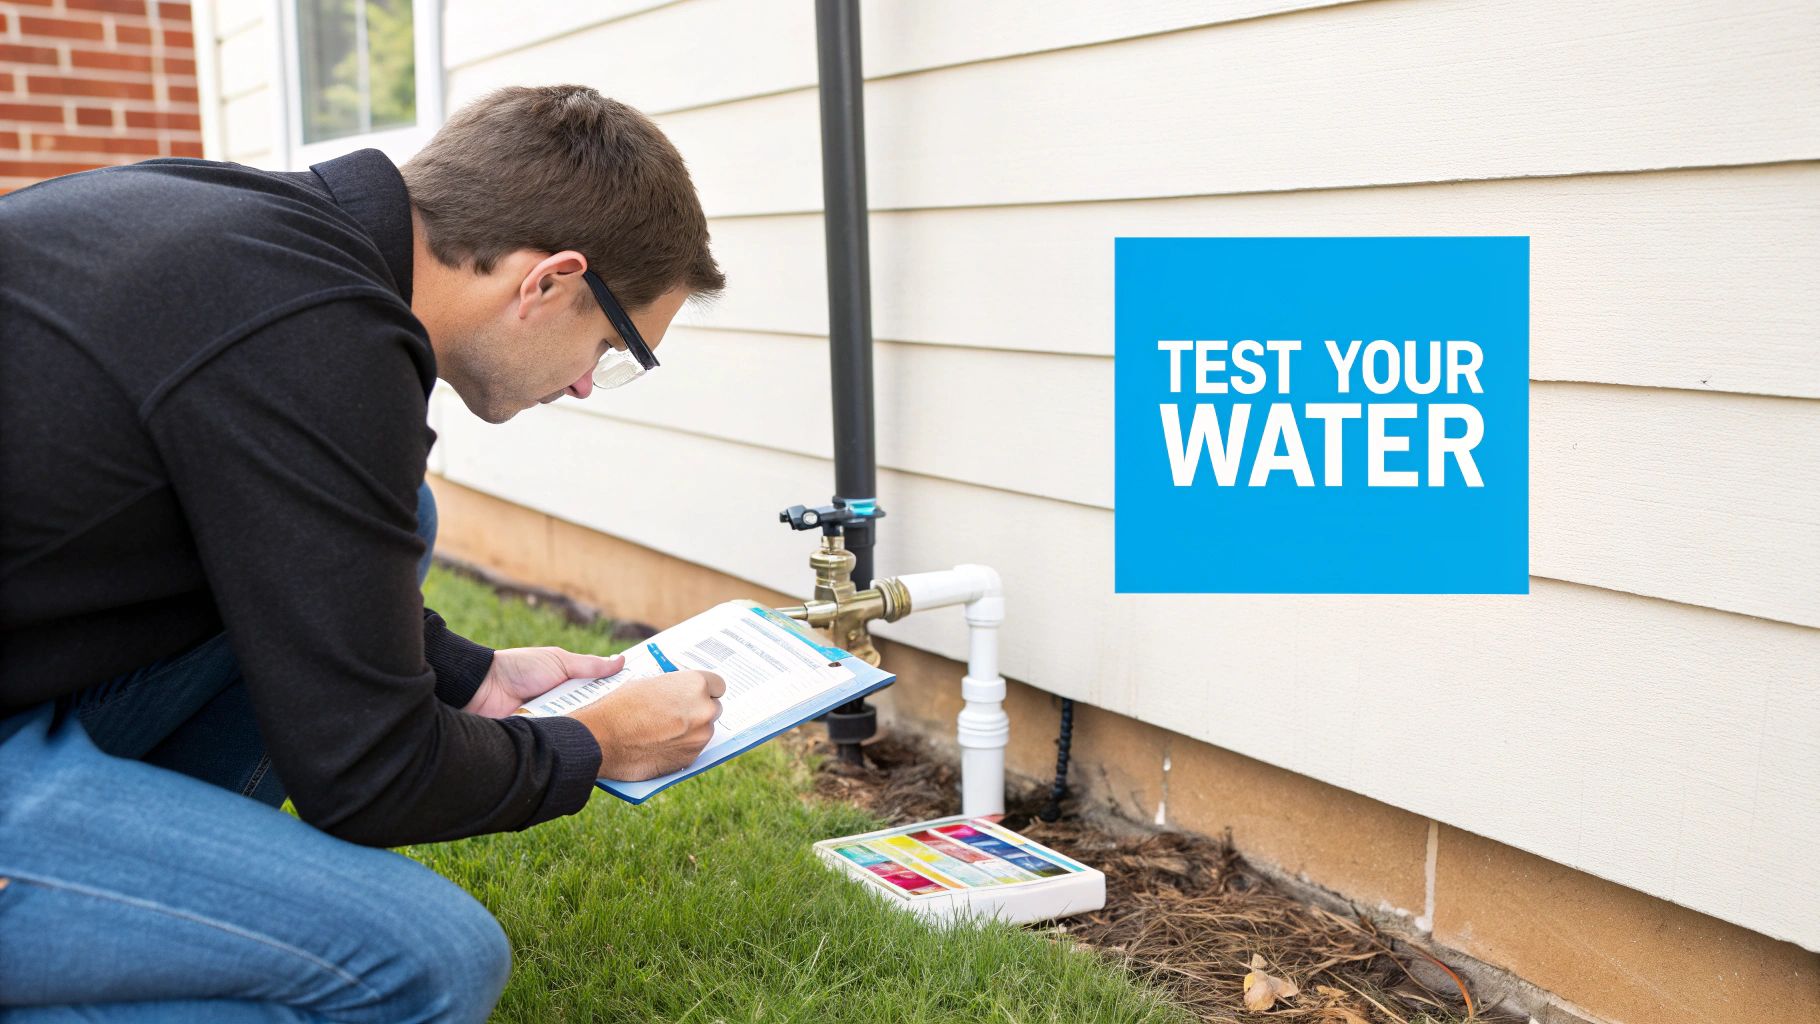
Before you can fix your water, you have to know what you're fighting. Is it "hard," leaving that chalky film on your shower door? Does it have that faint swimming pool smell or, worse, smell like rotten eggs? Maybe you’re seeing those lovely rust-colored stains in your sinks and toilets.
A good water test is non-negotiable. You can grab a simple DIY kit from the hardware store for a quick snapshot, but for the real story, I recommend sending a sample to a certified lab. They'll give you a detailed report on contaminants like:
Once you know exactly what’s lurking in your H2O, you can choose a filter that’s specifically designed to kick those contaminants to the curb.
Location, location, location! The best spot for your system is almost always right where the main water line enters your house. Think basement, garage, or a utility closet. Placing it here ensures every single drop of water, both hot and cold, gets purified before it travels anywhere else in your home.
When you’re scouting for a location, keep these things in mind:
One of the most common DIY mistakes is buying a system that's too small for the home. The result? A frustrating drop in water pressure every time you try to do two things at once, turning your powerful shower into a pathetic dribble.
To get this right, you need to match the system to your home's peak water demand, which is measured in gallons per minute (GPM).
Think about a chaotic morning in your house—the shower's running, the dishwasher is on, and someone's washing their hands. You need a filter that can handle all of that without breaking a sweat. A plumber can do a proper flow rate test, but you can also get a good estimate based on your home’s size and the number of bathrooms. For more in-depth guidance on choosing the right system, you might find valuable advice on specialized water filtration platforms like https://www.waterfilteradvisor.com.
Of course, clean water is just one piece of the healthy home puzzle. Many homeowners who upgrade their water also look into things like whole-home air purifiers to improve their environment from top to bottom.
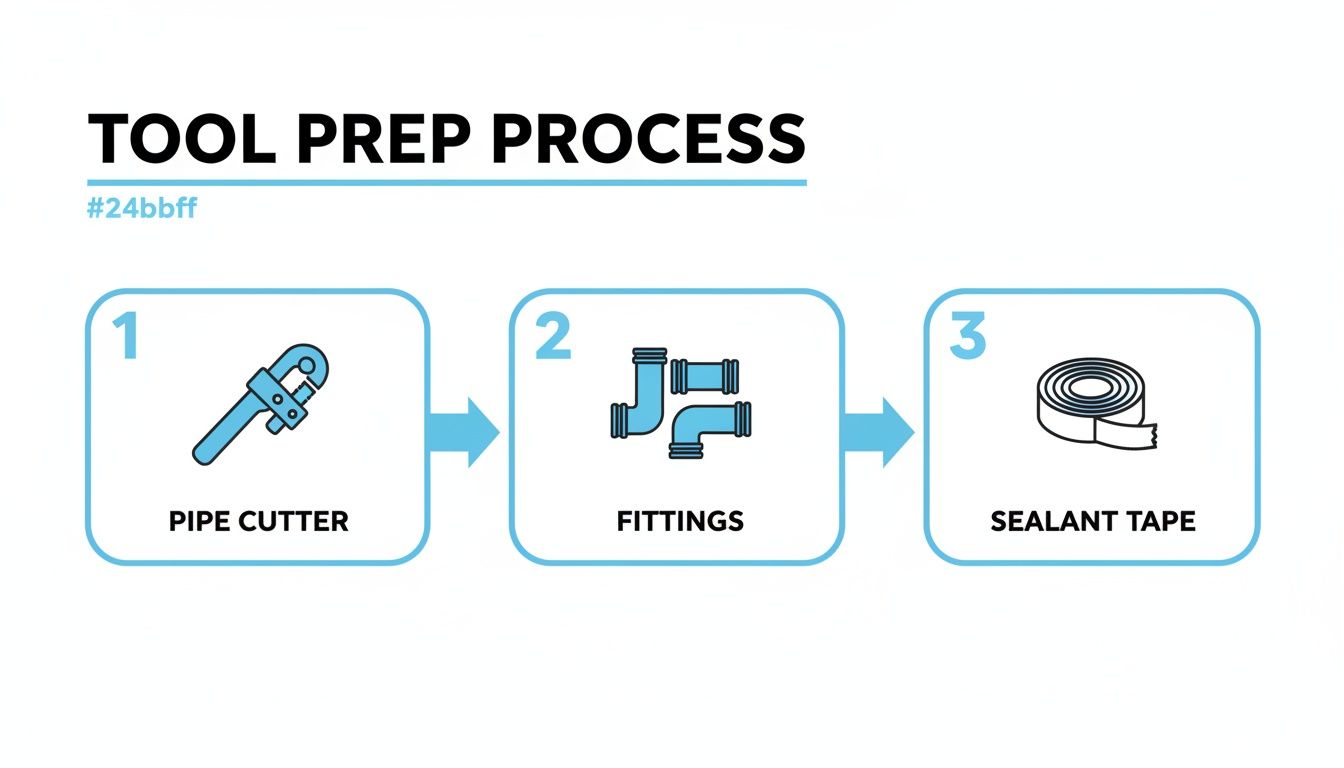
Nothing kills the momentum of a weekend project faster than an unexpected, last-minute trip to the hardware store for that one tiny fitting you forgot. Trust me, we've all been there. A successful whole home water filtration system installation hinges on having every single tool and part ready before you make that first cut.
Think of it like a TV chef preparing their ingredients—what they call mise en place. Everything is in its place, prepped and waiting. Taking the time to get organized turns a potentially chaotic job into a smooth, professional-feeling process.
Before you even think about shutting off the water, lay everything out on a tarp or drop cloth near your work area. This simple step keeps tiny fittings from rolling into oblivion and protects your floors. It's also your final chance to eyeball everything and make sure you have it all, from the big wrenches down to the last screw.
To make sure you're not that person making a frantic mid-project hardware store run, I've put together a checklist. This covers just about everything you could need for a standard installation.
| Tool or Material Category | Essential Items | Pro Tip for Selection |
|---|---|---|
| Cutting & Measuring | Pipe cutter (specific to your pipe type), measuring tape, permanent marker. | For copper, a simple tubing cutter is best. For PEX or PVC, a ratchet-style cutter prevents burrs and ensures a clean, square cut. |
| Wrenches & Fasteners | Two pipe wrenches (or one pipe, one adjustable), drill with assorted bits, screwdriver set. | Always use two wrenches working in opposite directions on fittings. This stops you from stressing and damaging old pipes. |
| Safety Gear | Safety glasses, work gloves. | Non-negotiable. Debris in your eye or a sharp metal burr on your hand will end your project and your good mood instantly. |
| Sealing & Cleanup | Thread seal tape (Teflon tape), a bucket, several old towels or rags. | Wrap Teflon tape clockwise on male threads. If you go counter-clockwise, it will unravel as you tighten the fitting. |
| Piping Specifics | Solder & flux (copper), crimp rings & tool (PEX), or primer & cement (PVC/CPVC). Push-to-connect fittings can be a universal alternative. | Double-check that your primer/cement is rated for the type of plastic pipe (PVC vs. CPVC) you have. They are not interchangeable. |
Having these items on hand before you start is the difference between a frustrating afternoon and a job you can be proud of.
The tools get the job done, but the materials are what guarantee every connection stays secure and leak-free for years. This is where you buy your peace of mind.
A leak isn't just a drip; it's a potential disaster waiting to happen. Using the correct fittings and sealant for your pipe type is the single most important step in preventing water damage down the road.
Your shopping list for materials will depend entirely on what kind of plumbing you have. Let's break down the most common setups.
For Copper Pipes: You'll be soldering. This means you need solder, flux, a propane torch, and the right copper fittings. Don't forget a small piece of emery cloth or a wire brush to clean the pipe ends—flux won't stick to a dirty surface.
For PEX Tubing: Your main options are crimp or clamp rings, which require a special tool. Alternatively, push-to-connect fittings (like SharkBite) are a fantastic, solder-free option that's incredibly DIY-friendly.
For PVC/CPVC Pipes: This is a solvent-weld job. You'll need primer (usually purple) and cement specifically designed for your pipe material. The primer cleans the plastic and prepares it for a permanent chemical bond with the cement.
One universal item is thread seal tape. You'll wrap this 3 to 5 times around any male pipe threads to create a perfect, watertight seal.
And for a final bit of real-world advice: have a drill ready. You’ll need it to mount the filter housing securely to a wall or joist. If you’re working in a basement, knowing about selecting the right drill bit for concrete is crucial for anchoring into those tough foundation walls.
Alright, you’ve done the prep work, your tools are laid out, and now it’s time to bring on the main event. All that planning is about to pay off as we get hands-on with the whole home water filtration system installation. Let's walk through this together, step by step, so you can feel like a plumbing rockstar.
The very first thing you need to do is arguably the most important. To keep this project from turning into an indoor swimming pool, you have to shut off the water supply to the entire house.
First, find your main water shutoff valve. It's usually hiding in a basement, crawl space, or sometimes in an exterior utility box near your water meter. Give the handle a full clockwise turn until it stops. If it's a lever-style ball valve, you need to turn it 90 degrees until it’s perpendicular to the pipe.
With the main shutoff closed, you still need to get the water out of the pipes. Go open the lowest faucet in your house—think basement sink or outdoor spigot—and then the highest one, like a second-floor bathroom. This little trick uses gravity to drain the lines so you don't get a face full of water when you make that first cut.
Pro Tip: Even after draining, there’s always some water left in the pipes. I always stick a bucket right under where I'm about to cut and have a few old towels ready. It’s the best way to keep your workspace from turning into a swamp.
You’ve heard it a thousand times, but "measure twice, cut once" is the gospel of plumbing for a reason. Hold your fully assembled filter unit up to the section of pipe you’ve chosen. Don't just measure for the filter housing; make sure you account for all the fittings and, crucially, the bypass valve.
Grab a permanent marker and mark your cut lines clearly on the pipe. A crooked cut is a recipe for a bad seal and a frustrating, slow leak down the road.
When you’re ready, grab the right cutter for your pipes:
Once the pipe is cut, take a minute to clean up the edges. A simple deburring tool or even a small piece of sandpaper will smooth out any burrs. This is a critical step—any little plastic or metal bits can tear the O-rings inside your new fittings and cause a leak you'll be chasing for weeks.
Before you even think about fitting this into your main line, it’s much easier to assemble the filter head, housing, and the bypass valve on a workbench. That bypass valve is a non-negotiable part of the setup. It’s a three-valve system that lets you route water around the filter, which is a total game-changer when it’s time for maintenance. No more shutting off water to the whole house just to swap a filter.
Pay close attention to the manufacturer's directions here, especially the flow-direction arrows on the filter head. For every threaded connection, use thread seal tape. Wrap it clockwise 3-5 times around the male threads; this ensures the tape tightens as you screw in the fitting instead of unraveling.
Now it’s time to marry the filter assembly to the main water line you just prepped. How you do this depends entirely on the type of plumbing you have.
As you can see, it comes down to three things: a clean cut, the right fitting, and a proper seal.
These are the most common ways to make the connection:
With your connections made, the last step is to securely mount the filter bracket to a wall stud or another solid surface. A filter full of water is surprisingly heavy, and you don't want that weight hanging directly on your pipes.
You’ve tightened every fitting and secured the last bracket. Now comes the moment of truth. This is the commissioning process, where patience pays off big time. Jumping in too fast here can lead to leaks, sputtering faucets, and water that still tastes off.
This stage is the real test of your whole home water filtration system installation. Rushing it now puts all that careful work at risk.
First, leave the bypass valve open and close both the inlet and outlet valves on the filter. Then head to your main shutoff valve and crack it open—just a quarter turn is enough. Listen for a soft hiss as the pipes begin to fill.
After that gentle hiss fades, open the valve fully. Grab a flashlight and go inspect every connection you made. Even a tiny droplet on a new joint means you need to tighten it again before moving forward.
Next, shut off the bypass valve. Very slowly open the inlet valve feeding the filter and listen as water floods the housing. This is the most pressure-sensitive moment; any weak seal might start leaking now.
The most common leak appears the second the system pressurizes. Watch every connection like a hawk—if you spot a drip, close the inlet, release the pressure, and fix it immediately.
Once the inlet is fully open, repeat the process with the outlet valve. Your system is now under full pressure.
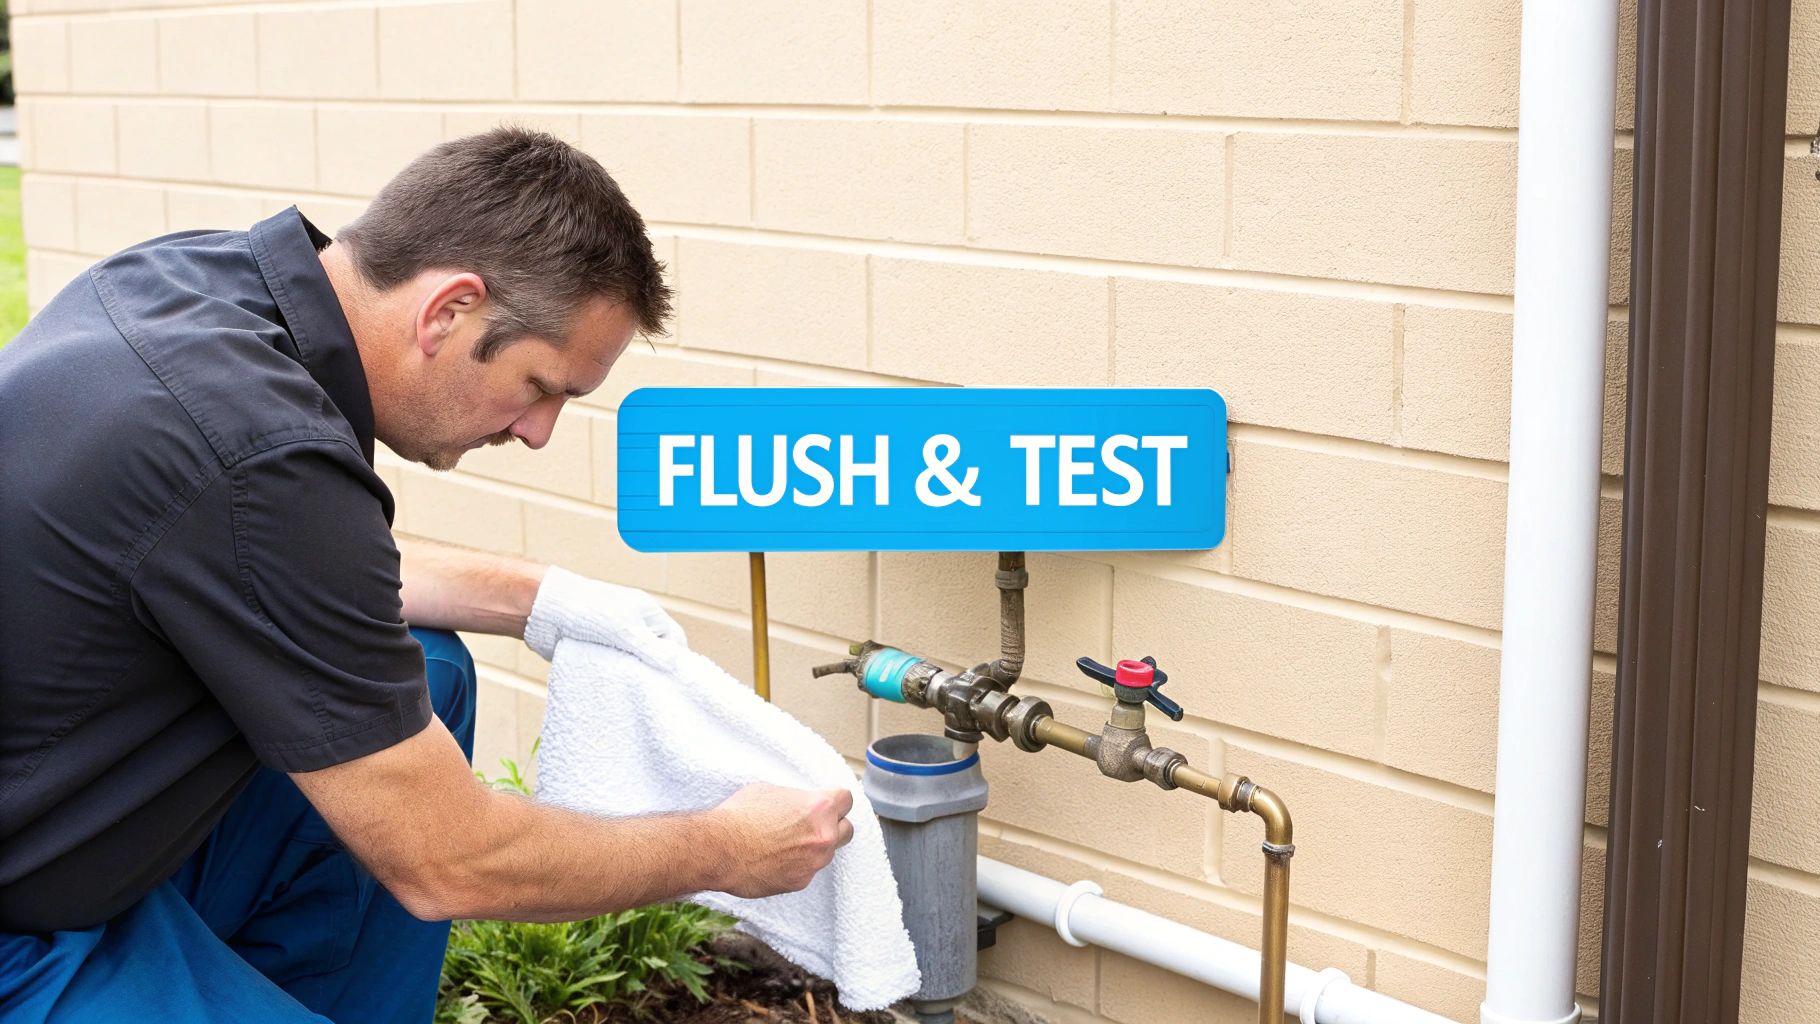
Finally, get the air out. Turn on a nearby cold-water tap (a laundry sink is perfect for this) and let it sputter and spit until you see a smooth, steady stream.
If your system supports backwashing, now's the time to trigger the cycle from the control head. Expect it to run for 10 to 30 minutes as it washes out fine particles and factory dust.
For simpler cartridge-style setups, you just need to do a straight flush.
Once you see that crystal-clear stream, pour yourself a glass. With air purged, leaks resolved, and the filter media flushed, your whole home water filtration system is officially open for business.
Alright, your whole home water filtration system installation is done. You're already enjoying that clean, crisp water flowing from every faucet. But to keep things running like a dream, a little routine care is in order. Think of it as protecting your investment, not another chore.
A good maintenance schedule is your ticket to consistently great water. Let it slide, and you're looking at clogged filters, a noticeable drop in water pressure, and the return of the very contaminants you worked so hard to get rid of.
The filter media is the heart of your system. Whether it’s a simple sediment cartridge or a massive tank of carbon, it has a limited lifespan. Once it’s saturated with all the gunk it has pulled from your water, it’s done. Using an exhausted filter is like trying to dry dishes with a soaking wet towel—it just doesn’t work.
That’s why sticking to a replacement schedule is the single most important thing you can do.
You don't need a complicated spreadsheet for this. Just pop a few reminders in your phone's calendar or scribble the dates on a sticky note and slap it right on the filter housing. This little habit will save you a ton of headaches.
Your water filtration system is the guardian of your home's water supply. A little routine maintenance is all it asks for in return to keep doing its job effectively day in and day out.
To make it even easier, here’s what a typical maintenance plan might look like.
This schedule gives you a ballpark idea. Your manufacturer's guide will have the exact details, but this is a great starting point.
| System Type | Maintenance Task | Recommended Frequency | Time Commitment |
|---|---|---|---|
| Cartridge-Based System | Replace sediment pre-filter. | Every 3-6 months | 15-20 minutes |
| Carbon Tank System | Replace carbon filter cartridge. | Every 6-12 months | 20-30 minutes |
| Water Softener | Check and refill salt reservoir. | Monthly | 5-10 minutes |
| UV Purifier | Replace UV lamp and clean quartz sleeve. | Annually | 30-45 minutes |
| All Systems | Conduct a post-installation water test. | Annually | 10 minutes (to collect a sample) |
A little bit of planning goes a long way in keeping your water pure and your system humming.
Here’s a pro tip: when you change a cartridge filter, take an extra ten minutes to sanitize the housing. A few capfuls of unscented household bleach mixed into a gallon of water is all you need. Give the inside a good scrub to keep any nasty bacteria from setting up shop.
It's also a smart move to test your water again about a year after the installation. This confirms the system is still working as it should and alerts you if any new contaminants have snuck into your water supply.
Staying on top of this is more important than ever. The home water treatment market is projected to hit an incredible USD 91.39 billion by 2034, driven by homeowners who are more aware of water quality issues. You can learn more about these market trends and see how consumer awareness is shaping the industry. A little upkeep ensures your system remains a top-tier solution.
Even with the best guide in hand, tackling a whole home water filtration system installation for the first time can leave you with a few nagging questions. That's completely normal. This is a big upgrade for your home, so let's clear up some of the common uncertainties we hear from homeowners.
Think of this as the final pep talk. Getting this right isn't just a plumbing project; it's an investment in your family's health and the longevity of all the water-using appliances in your house.
If you're thinking of calling a licensed plumber instead of going the DIY route, you can expect the cost to land somewhere between $300 and $1,500.
Why such a big range? It really boils down to the complexity of the job. If you have easy-to-access PEX or PVC pipes and you're installing a basic cartridge system, you'll be on the lower end. But if it's an involved multi-tank system that requires sweating new copper pipes and running a drain line, the price will naturally creep up.
My best advice? Always get at least three itemized quotes from reputable, licensed plumbers. It's the only way to know you're getting a fair price.
Absolutely. If you have some basic plumbing skills under your belt and the right tools, installing a whole house water filter is a totally doable weekend project. Honestly, systems with modern push-to-connect fittings have made the job easier than ever.
But you have to be honest with yourself. If the thought of taking a pipe cutter to your home's main water line gives you cold sweats, or if you've never soldered a copper joint, hiring a pro is the smart move. A small mistake can turn into a hidden leak or a full-blown flood—and the cost of that water damage will make a plumber's invoice look like a bargain.
This is probably the number one concern we hear. The short answer is yes, it will reduce it slightly, but it shouldn't be a deal-breaker. A correctly sized system will typically only cause a minor drop of about 5 to 15 PSI. Most people barely even notice it.
The secret to keeping your pressure strong is all in the sizing. You have to make sure your system's flow rate—measured in gallons per minute (GPM)—can keep up with your family's water usage at its peak.
To keep that pressure drop to a minimum, here's what to do:
Location is everything. The sweet spot is on your main water line, right after it enters your house but before it splits off to your water heater or any other fixtures.
Most people find these spots work best:
The perfect location isn't just about space. It needs to be easy to get to, so you aren't doing plumbing gymnastics in a crawlspace. It also has to be a spot that's protected from freezing temperatures—a frozen filter housing will crack, and you'll have a major mess on your hands. And don't forget, if your system needs power or has a backwashing feature, you'll need an electrical outlet and a drain nearby.
At Water Filter Advisor, our mission is simple: give you the knowledge you need to get cleaner, safer water in your home. From picking the perfect system to walking you through the install, we're here to help you make smart choices for your family. Check out all our in-depth guides and reviews at https://www.waterfilteradvisor.com.
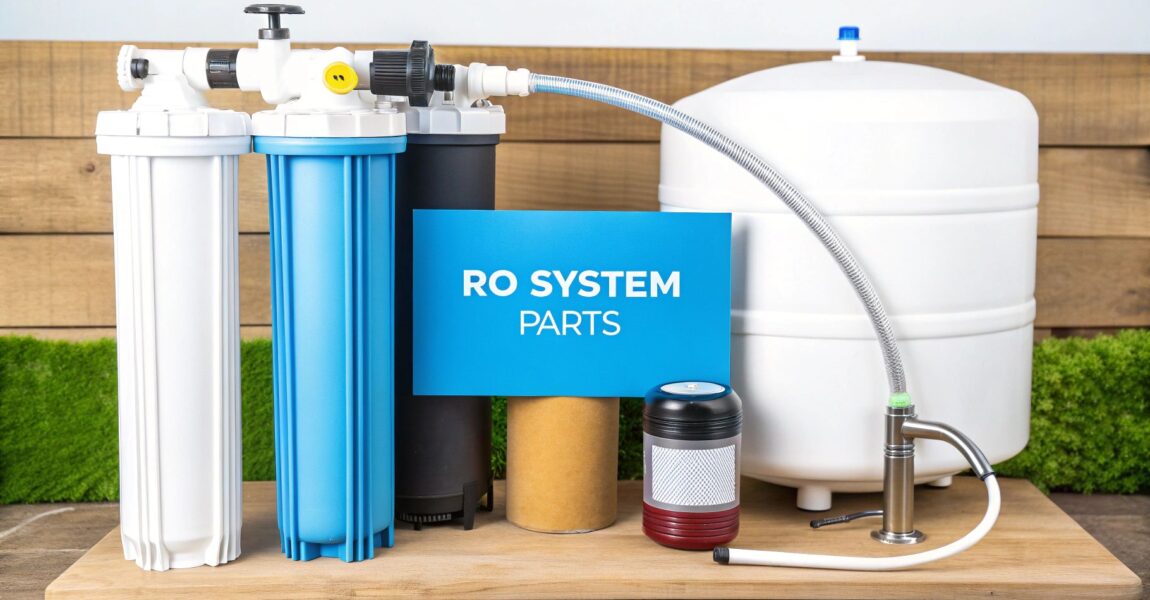
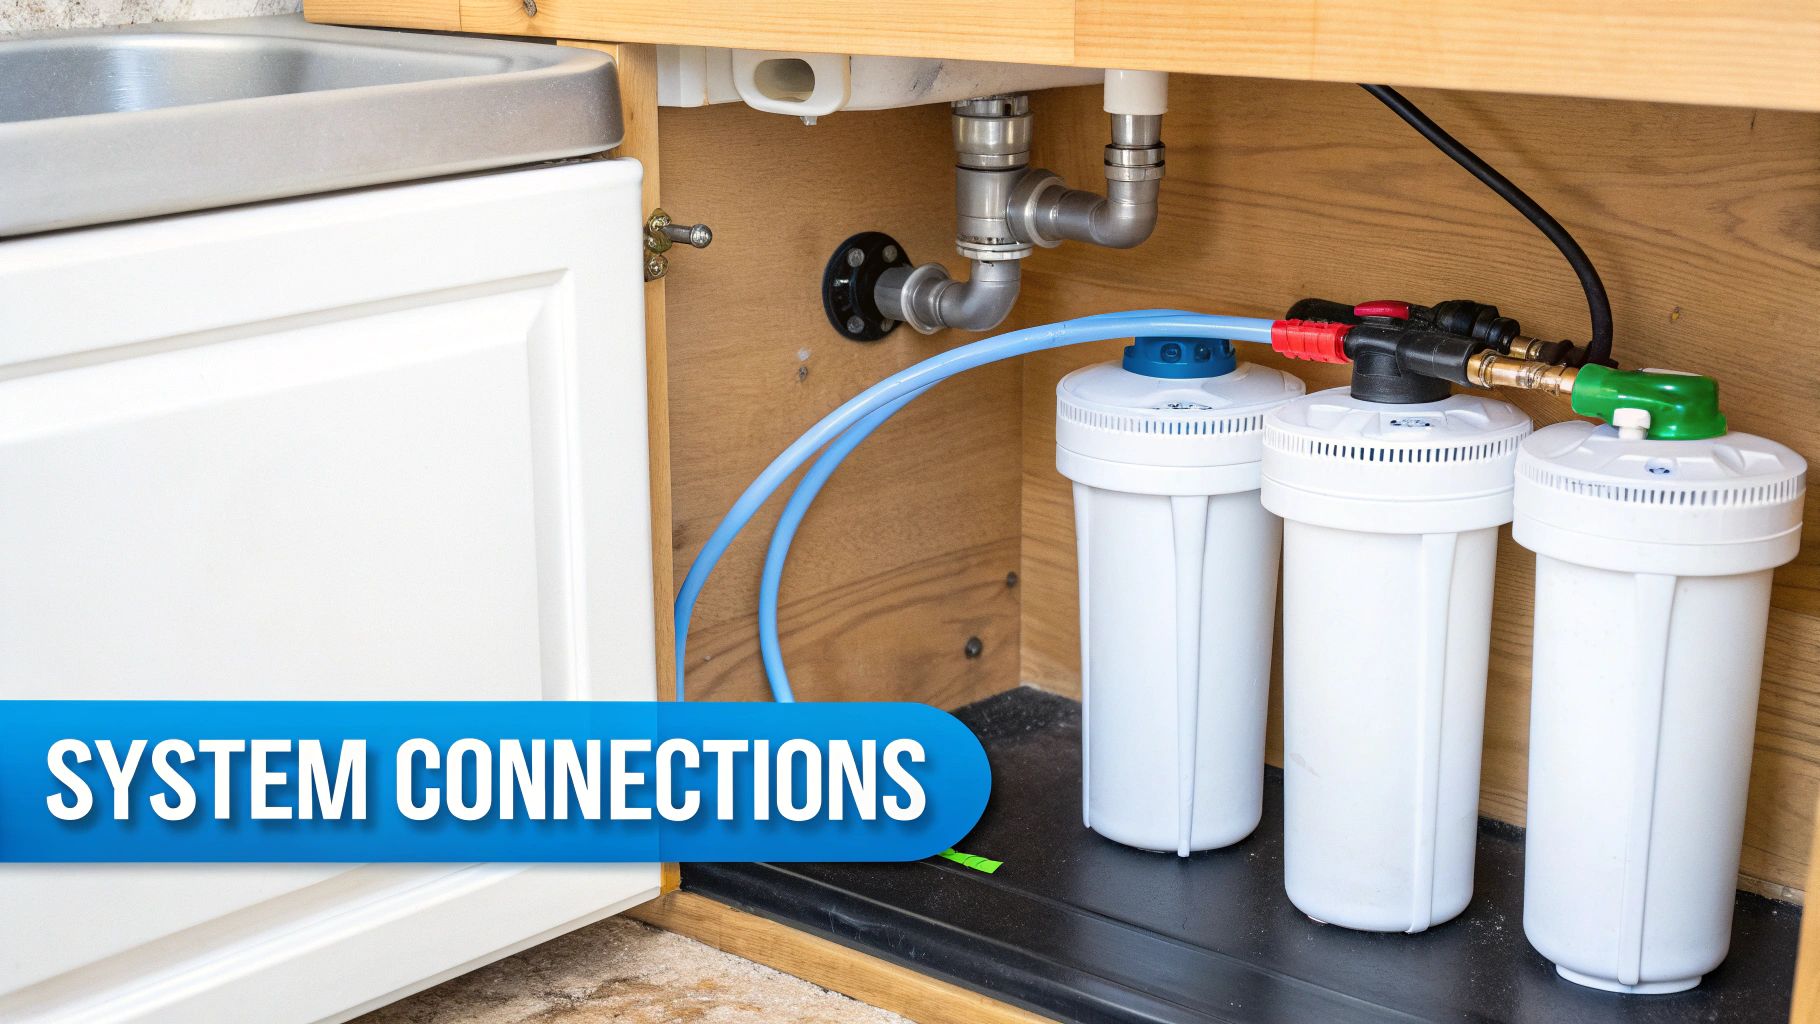
A reverse osmosis system isn't just one filter—it's a whole team of components working in concert to give you incredibly pure water right from your kitchen sink. The main players are the protective pre-filters, the powerhouse RO membrane, a storage tank for on-demand water, and a final polishing post-filter.
Think of it as a specialized security detail for your tap water, making sure only the purest H₂O molecules make it to your glass.
Ever peeked under your kitchen sink and wondered what's actually going on in that tangle of tubes and canisters? It's a fascinating, multi-stage water purification party.
Imagine your tap water is a rowdy crowd trying to crash an exclusive event. The pre-filters are the bouncers at the door. Their job is to stop the obvious troublemakers first—things like silt, sand, rust, and the funky taste of chlorine. They handle the big, clumsy contaminants so the real star of the show can do its job.
This initial screening is absolutely critical. It clears the way for the main event: the reverse osmosis membrane. This is the VIP entrance, an incredibly fine filter that rejects up to 99% of the really nasty stuff like lead, arsenic, fluoride, and dissolved salts. Only pure water molecules are on the guest list.
This diagram gives you a great visual of the journey your water takes.
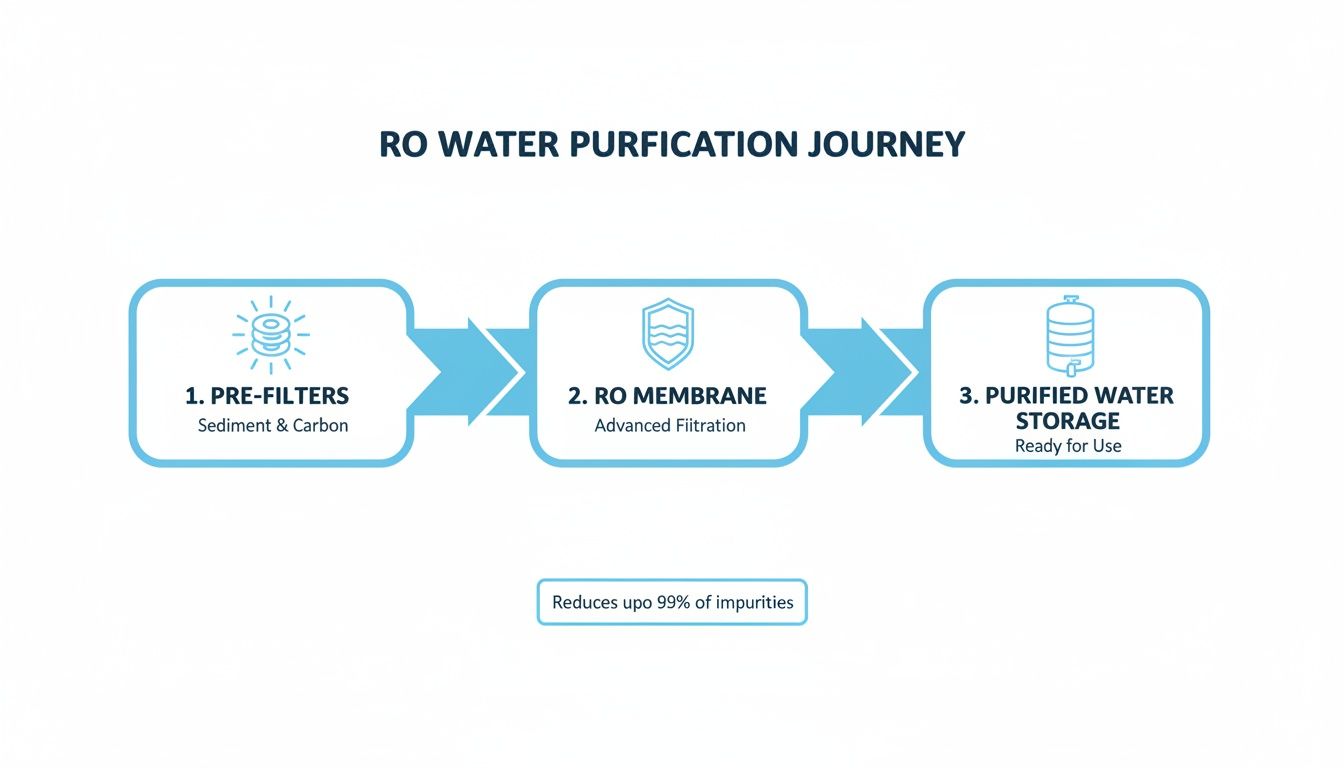
As you can see, the water moves logically from basic sediment removal to advanced molecular filtration before it's finally stored and ready to drink.
For a quick overview of how these parts work together, here's a simple breakdown.
| Component | Primary Function | Stage in Filtration |
|---|---|---|
| Pre-filters (Sediment & Carbon) | Remove large particles and chlorine. | Stages 1-3 (Protect the RO Membrane) |
| Reverse Osmosis Membrane | Filters out dissolved contaminants. | Stage 4 (The primary purification step) |
| Storage Tank | Holds purified water for on-demand use. | Post-Filtration (Holds water after it passes the membrane) |
| Post-filter (Carbon) | Polishes water, removing final tastes/odors. | Final Stage (Just before the faucet) |
This table shows the clear, step-by-step process that ensures every drop from your faucet is pristine.
Because this purification process is so ridiculously thorough, it's also pretty slow. You can't just force water through a filter that fine at high speed. That’s where the storage tank comes in. It acts as a reservoir, collecting the purified water so you have a ready supply the moment you turn on your dedicated RO faucet. No waiting around.
But before the water reaches your glass, it goes through one last checkpoint: the post-filter. Usually made of carbon, this final stage gives the water a last-minute polish, removing any faint tastes or odors it might have picked up while sitting in the tank. It’s what makes that final sip so perfectly crisp and clean.
Once you understand what each part does, maintaining your system and trusting your water quality becomes second nature. It's this powerful combination of stages that makes RO filtration one of the most effective methods out there for home use.
We're going to break down every single one of these components in detail throughout this guide. If you're looking for more general info, you can find a ton of water filtration advice for your home to get you started.
Before your water ever gets near the reverse osmosis membrane, it has to run a gauntlet. This first line of defense is your pre-filters. Think of them as the opening act at a rock concert, warming up the crowd and making sure the stage is perfect for the headliner.
Without these filters doing the dirty work, the RO membrane—the real heart of the system—would get clogged up and wrecked in no time.
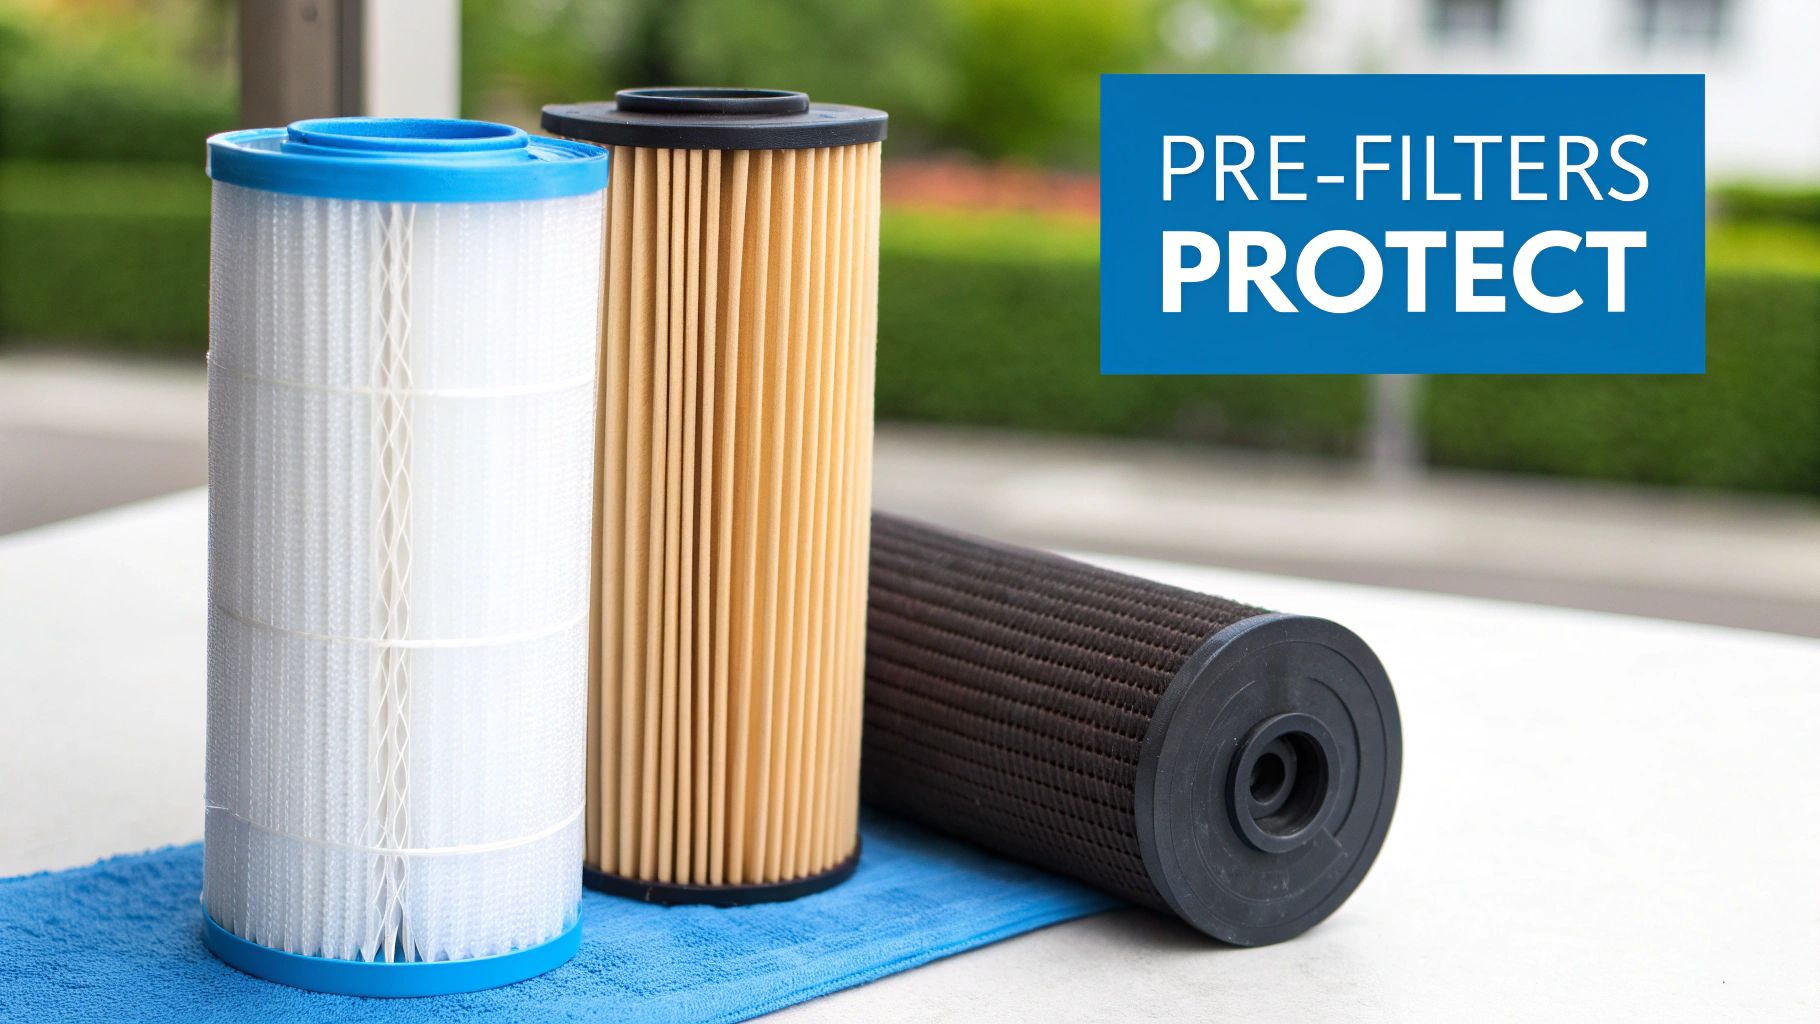
These pre-filters are the system's workhorses. Most home RO units use a one-two punch for pre-filtration, usually pairing two different filter types to tackle specific problems. Let's break down how these crucial parts work.
The very first stop for your tap water is the sediment filter. Its job is simple but absolutely critical: catch all the big stuff. It’s basically a super-fine net that traps all the suspended particles that would otherwise gum up the works.
We’re talking about common gunk found in city and well water alike:
By snagging these larger contaminants right at the start, the sediment filter keeps the more sensitive filters downstream from clogging up. It’s a simple, mechanical process, but it’s the foundation for everything that follows.
After the sediment filter, water flows to the second bodyguard: the activated carbon block filter. If the sediment filter is a net, the carbon filter is more like a powerful sponge with a magnetic attraction for chemicals. Its surface is incredibly porous, giving it a massive area to grab onto and absorb chemical contaminants in a process called adsorption.
The number one enemy for the carbon filter is chlorine. Municipal water suppliers use it to kill bacteria, but it absolutely destroys the delicate material of an RO membrane, causing it to break down and fail.
The carbon block filter neutralizes chlorine, protecting the most expensive part of your system. It also does wonders for the taste and smell of your water by removing chlorine, chloramines, and other volatile organic compounds (VOCs).
You'll see pre-filters rated in microns, which just tells you how small of a particle they can trap. For reference, a human hair is about 50 microns thick. Most sediment filters in home RO systems are rated for 5 microns, meaning they'll stop anything bigger than that. If you want to get into the weeds on filter specs, check out this a comprehensive guide to micron filters.
Because these filters are catching all that junk 24/7, they obviously don't last forever. In fact, clogged pre-filters are the #1 cause of most RO system problems.
Typical Replacement Schedule:
You’ll know it’s time for a change when your RO faucet’s water pressure drops off a cliff or the system takes forever to make water. Staying on top of this schedule is the single best thing you can do to protect your investment and keep your system running like new.
If the pre-filters are the system's bodyguards, the reverse osmosis membrane is the VIP they’re protecting. This is where the real magic happens. It’s not just another screen; it’s a high-tech, semi-permeable wonder that draws the line between ordinary tap water and genuinely pure H₂O.
Think of the membrane as a microscopic gatekeeper with an incredibly strict guest list. Its pores are a mind-boggling 0.0001 microns wide. For a little perspective, a single human hair is around 50 microns thick, making this membrane over 500,000 times finer. Only pure water molecules get the nod to pass through.
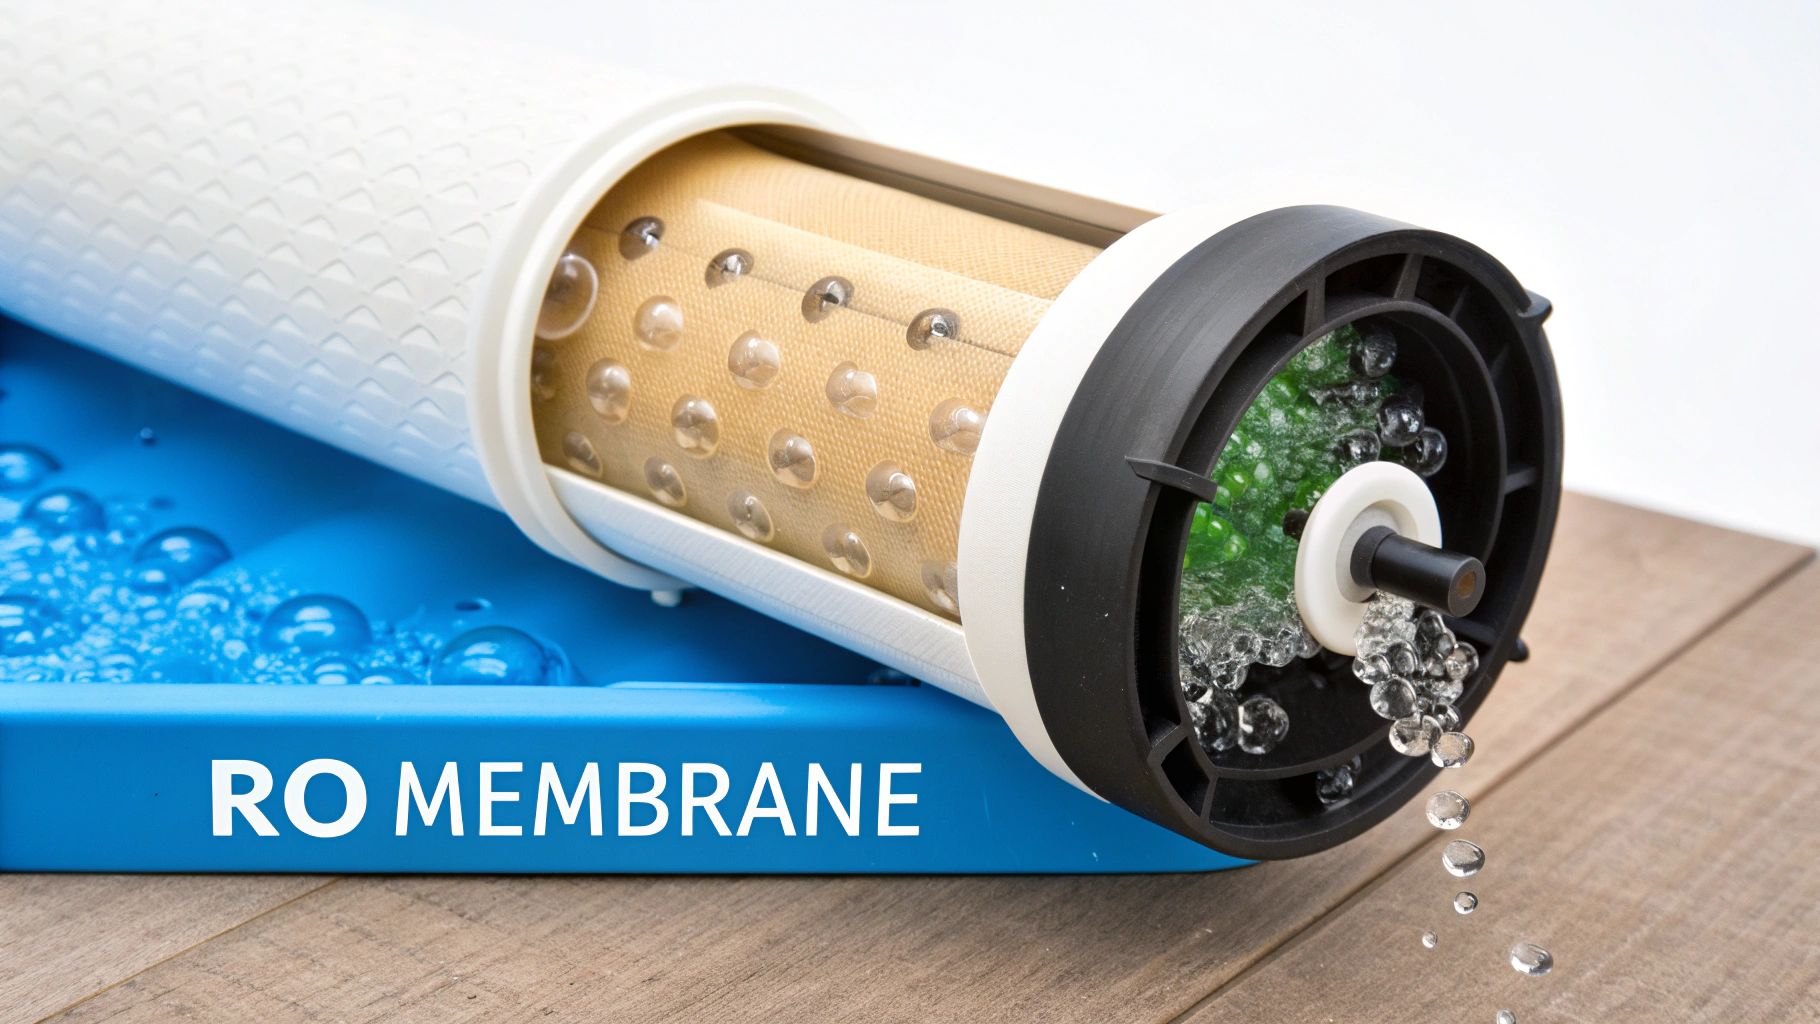
This unbelievably precise design is what allows it to pull off a feat of molecular separation. Your home’s water pressure is all the muscle it needs, forcing water molecules through while leaving almost everything else behind.
At its core, the process is a marvel of physics. The membrane lets clean water slip through but rejects a staggering list of dissolved contaminants. We're not just talking about catching silt here; this is about yanking out substances that are completely dissolved in the water, the stuff you can't even see.
It all comes down to molecular size and ionic charge. When pressurized water hits the membrane, only the tiny H₂O molecules can actually squeeze through those microscopic pores.
The larger contaminant molecules get blocked and are simply flushed away down the drain line as wastewater (often called "brine"). This single function is what makes it one of the most effective parts of a reverse osmosis system.
This is the system's heavy lifter. While the pre-filters deal with the bulky stuff like sediment and chlorine, the RO membrane goes after the most difficult and concerning contaminants that homeowners worry about.
Its primary targets include:
This is precisely why RO systems are the go-to for anyone concerned about specific issues like lead from older pipes or high fluoride levels in their municipal supply.
The semi-permeable membrane stands as the heart of any reverse osmosis (RO) system, acting like a molecular gatekeeper that allows pure water molecules to pass while blocking up to 99% of dissolved salts, minerals, heavy metals, and contaminants. Modern membranes are packed into compact spiral-wound modules, an innovation that folds massive surface areas into a small housing, a design that dominates 85% of RO applications today. In residential systems, these membranes can achieve rejection rates exceeding 99.5% for TDS. To discover more insights about this amazing technology, check out the history of reverse osmosis technology.
When you’re looking at a new system or just a replacement membrane, you'll see a rating called Gallons Per Day (GPD). This number tells you the maximum amount of purified water the membrane can produce in a 24-hour period, assuming ideal conditions (like specific water temperature and pressure).
For most homes, the common ratings are:
A higher GPD rating means your system makes water faster, so the storage tank fills up more quickly. That can be a real game-changer if your family is constantly filling up water bottles for sports, cooking with purified water, or just drinks a lot of it.
Unlike the pre-filters that need changing every 6-12 months, the RO membrane is built to last—it has those pre-filters running interference for it, after all. But it doesn't last forever.
On average, you can expect to replace a residential RO membrane every 2 to 3 years. Of course, this timeline can shift depending on how hard your local water is and how much you use the system.
Here are the tell-tale signs that your membrane is on its way out:
Swapping out the membrane is a simple job that brings your system right back to peak performance, ensuring the water you're drinking is as pure as the day you installed it.
After the reverse osmosis membrane does its molecular magic, the purified water still has a couple more stops to make before it's ready for your glass. The RO process is incredibly thorough, but that also means it’s slow. This is where the final components—some of the most important parts of a reverse osmosis system for day-to-day use—come into play.
These finishing touches are what make your system practical for a busy kitchen. They’re the reason you have pure water the instant you want it, and why every sip tastes so crisp and clean. It’s all about turning meticulously filtered water into a perfect, on-demand drinking experience.
Reverse osmosis is a game of patience. Water gets pushed through a membrane with pores so tiny they can block contaminants at a molecular level. Because it’s so precise, a typical home RO system might only produce a few ounces of pure water every minute. That’s barely enough to fill a glass quickly, let alone a big pot for pasta.
This is exactly why a storage tank is a non-negotiable part of the setup. It acts as a reservoir, slowly collecting all that purified water until you’re ready to use it. When you turn on your RO faucet, the tank delivers that stored water instantly.
So how does it work? Picture a small, flexible balloon inside a metal tank. As the RO system sends pure water into the tank, it fills this balloon (which is actually a rubber bladder) and squishes a pocket of trapped air around it. This creates pressure. When you open the faucet, that built-up air pressure is what forces the clean water out of the bladder and up to your glass.
It's a simple but brilliant design that ensures you always have a few gallons of pure water ready to go.
Once the water leaves the storage tank, it makes one final stop before hitting your faucet: the post-filter. You can think of this as the system's final quality control checkpoint. Its only job is to give the water a last-minute polish, ensuring it tastes absolutely perfect.
While the water in the tank is perfectly pure, it can sometimes pick up a faint "tank taste" from sitting against the rubber bladder. The post-filter, which is almost always an inline carbon filter (sometimes called a polishing filter), is there to remove those last traces of taste or odor.
Think of the post-filter as the final buff and shine on a freshly detailed car. It removes any lingering off-tastes that might have developed during storage, guaranteeing the water you drink is exceptionally crisp, clean, and refreshing.
This last step truly elevates the experience, making the difference between just pure water and genuinely delicious water.
Looking after these last two components is pretty straightforward, but it's crucial if you want to keep enjoying top-quality water. The post-filter, just like your pre-filters, needs to be replaced regularly to stay effective.
A well-maintained tank and post-filter work together to complete the system. They give you instant water flow for a busy kitchen and use that final carbon stage to strip away anything that might affect the taste. These little post-filters are surprisingly powerful, removing 95-99% of VOCs and other compounds that might sneak past the membrane. It’s a big reason why people overwhelmingly prefer RO water in blind taste tests. Find out more about how these components complete the RO process.
While the filters and membranes get all the attention, a reverse osmosis system is just a collection of parts without the network of plumbing that ties it all together. These are the unsung heroes—the faucets, valves, and tubing—that manage the flow of water, making the whole purification process work seamlessly right under your sink.
Think of these parts as the central nervous system of your RO unit. They might not be the main attraction, but they're in charge of directing every single drop, making sure water gets exactly where it needs to go, right when it needs to be there.
Getting a handle on how these components work together really demystifies the setup, making future maintenance feel way less intimidating. Before you can properly hook up your RO system, you need a basic feel for how water moves through your house in the first place. You can get a great head start by understanding your home's plumbing system to build a solid foundation.
One of the first things you'll notice about an RO system is its own separate, dedicated faucet. This isn't just for show—it's absolutely critical. Since the system connects to your cold water line, this separate tap guarantees that you’re only getting that ultra-pure water. It never mixes with your regular hot or cold tap water.
You'll usually run into two main kinds:
Valves are basically the traffic cops of your RO system. They open and close to guide water exactly where it needs to go, preventing waste and making sure the system runs on autopilot without you having to do a thing.
The most clever of them all is the Automatic Shut-Off (ASO) valve. When your storage tank is full, the back-pressure created signals the ASO valve to completely stop any more water from coming in. This shuts down the entire production process. It's a simple, brilliant mechanical device that stops the system from running 24/7 and mindlessly sending water down the drain.
Without the ASO valve, an RO system would just keep making pure water and flushing wastewater down the drain, even with a full tank. This one little component is responsible for saving thousands of gallons of water over the life of the system.
Other important valves include the feed water valve, which is the first connection point that taps into your cold water supply, and the tank valve. That's just a simple on/off switch sitting on top of the storage tank that lets you shut it off when it's time to change filters.
Finally, you've got the tubing. The whole system is connected by a web of flexible, color-coded plastic tubes. It might look like a mess of spaghetti under your sink at first, but the colors create a surprisingly simple roadmap.
These color codes make life so much easier for a DIYer trying to troubleshoot a leak or perform a filter change. Knowing what each tube does instantly tells you the path the water is taking, from the moment it enters the system to the final, clean drop that fills your glass.
Your standard reverse osmosis setup already does an incredible job of purifying your water, but you don't have to stop there. You can customize your system even further to solve specific problems or just improve your day-to-day drinking experience.
Think of these as specialized add-ons. They aren't necessary for every home, but for the right situation, they can be total game-changers. These components plug right into the main parts of a reverse osmosis system to boost its performance, whether that means making your water taste better, saving water, or adding a final layer of safety.
Let's dive into three of the most popular and effective upgrades homeowners are adding to their systems.
If there's one small knock against the RO process, it's that it works a little too well. It strips out beneficial minerals like calcium and magnesium right along with all the nasty contaminants. This can leave the water with a slightly acidic pH and a "flat" taste that some people just don't find refreshing.
That's where a remineralization filter comes in. It's the perfect fix. This filter is installed after the storage tank, acting as one last stage before the faucet. As the pure water flows through, it picks up a healthy blend of minerals.
This simple upgrade does two things: it bumps the water’s pH to a more alkaline level and dramatically improves the taste. You get a crisper, more natural flavor that many people find much more satisfying.
A common gripe about RO systems is the amount of wastewater they produce. The permeate pump is a brilliant, non-electric device designed to tackle that exact problem. It cleverly uses the energy from the wastewater heading to the drain to help shove the purified water into the storage tank with more force.
This ingenious pressure boost gives you two huge wins:
This upgrade is a lifesaver for homes with low water pressure, as it helps the RO membrane operate at its peak performance.
While an RO membrane is exceptionally good at blocking bacteria and viruses, a UV sterilizer gives you an extra, fail-safe layer of protection. This is especially crucial for homes on well water, which can be more vulnerable to microbiological contamination.
A UV sterilizer zaps the water with ultraviolet light, which scrambles the DNA of any microorganisms and makes them completely harmless. It acts like a final security checkpoint, ensuring that 99.99% of living organisms are neutralized just before the water hits your glass. If you're at all concerned about biological contaminants, a UV light delivers absolute peace of mind.
Once you get a handle on the different parts, you'll inevitably have some practical questions that come up from using the system every day. Let's tackle some of the most common things homeowners ask about their reverse osmosis setup.
Think of them as the bouncer and the host at a club—they stand at opposite ends of the process and have totally different jobs.
The pre-filters are the heavy-lifters right at the start. Their entire job is to protect that all-important RO membrane. They catch the big stuff like sediment and rust and knock out harsh chemicals like chlorine before they can cause any damage.
The post-filter, on the other hand, comes in at the very end. This is your "polishing" filter. After the water has been sitting in the storage tank, this filter gives it one last pass to remove any weird tastes or odors, making sure what comes out of your faucet is perfectly crisp and clean.
Absolutely. This is one of the best features of modern RO systems. Most brands use standard-sized parts, like the common 10-inch filter housings, which makes upgrading a breeze.
You can easily customize your system by adding things like:
Upgrading individual components is a fantastic, budget-friendly way to tailor your RO system to your home's specific water challenges. You get a custom setup without having to buy a whole new unit.
This is the single most important piece of maintenance you can do. Honestly, the number one reason we see systems fail or underperform is because someone forgot to change the filters on time.
As a general rule of thumb for most households, here's a good schedule to follow:
Keep in mind, if your local water is particularly nasty, you might need to change them more often. Always check what the manufacturer suggests and pay attention to clues like your water flow slowing down.
A dripping RO faucet almost never has to do with the faucet itself. It's usually a water pressure issue. The culprit is typically the air pressure in the storage tank being too high or too low, or a faulty automatic shut-off valve that keeps letting water trickle through when it shouldn't.
As for strange noises, a little gurgling is perfectly normal—that’s just the sound of the system working its magic and sending wastewater down the drain. But if you hear a constant "hiss," that could be a sign of a tiny leak or another problem with that shut-off valve.
At Water Filter Advisor, we believe everyone deserves access to clean, safe, and great-tasting water. Our in-depth guides and unbiased reviews are designed to help you make confident decisions about your home’s water quality. Explore our resources today at https://www.waterfilteradvisor.com to find the perfect filtration solution for your family.

Think of your whole house water filter as the unsung hero of your home, the silent guardian of your pipes, appliances, and every drop of water your family uses. To keep this champion fighting fit, a little routine maintenance is non-negotiable. This isn't just about swapping a cartridge; it's about protecting your investment and ensuring the water flowing from your taps is as pure and refreshing as it gets.
It's tempting to fall into the "set it and forget it" trap. The filter is installed, the water tastes great—mission accomplished, right? Wrong. That mindset is a one-way ticket to a world of watery woes, problems that go way beyond a slight dip in quality. Think of maintenance not as a chore, but as the secret to unlocking your filter's full potential.
When you let a filter go for too long, it gets completely clogged with all the gunk it was designed to trap. This is where the trouble begins, unleashing a cascade of issues that can impact your health, your home, and your wallet.
An old, saturated filter doesn't just stop working; it can become a villain in its own story. It can transform into a breeding ground for bacteria and slimy biofilm. All that trapped organic matter becomes a five-star buffet for microorganisms. Eventually, the filter can release this concentrated sludge back into your water, making what comes out of your tap potentially worse than the unfiltered water you started with.
On top of that, a maxed-out filter loses its power to absorb chemicals like chlorine. You'll start noticing that familiar swimming-pool smell creeping back in, and that dry, itchy feeling on your skin and hair after a shower will return with a vengeance.
A clogged filter sends shockwaves through your entire plumbing system. The first sign of trouble is usually a dramatic drop in water pressure. Your invigorating shower becomes a pathetic trickle, faucets dwindle to a dribble, and appliances gasp for water.
This sluggish flow puts a serious strain on your water-dependent appliances:
Keeping up with filter maintenance is more than a water quality issue. It's a fundamental part of home protection, preventing the catastrophic (and expensive) damage that can occur if a filter housing cracks or a connection fails under pressure.
To help you stay on track, here's a quick-glance guide to a typical maintenance schedule.
This table gives you a general idea of how often to service different parts of your system. Remember, if your water is particularly hard or has a lot of sediment, you'll need to be more vigilant.
| Filter Component | Maintenance Task | Standard Frequency | Frequency in High-Use or Hard Water Areas |
|---|---|---|---|
| Sediment Pre-Filter | Replace Cartridge | Every 3-6 months | Every 1-3 months |
| Carbon Block Filter | Replace Cartridge | Every 6-12 months | Every 4-6 months |
| UV Sterilizer | Replace UV Lamp | Every 12 months | Every 9-12 months |
| Filter Housings | Clean & Sanitize | Annually | Every 6 months |
| Pressure Gauges | Check Readings | Monthly | Weekly |
Sticking to a schedule like this transforms maintenance from a frantic reaction into a proactive, money-saving superpower.
The numbers don't lie: consistent whole house water filter maintenance is a financially savvy decision. The household water purifier market is exploding, expected to grow by a massive USD 2,102.2 million between 2025 and 2029. Here in the US, where these systems make up 25% of the residential market, homeowners who properly maintain their units slash their long-term costs by around 30% over five years. That means avoiding $500-$1,000 in premature replacement fees.
Ultimately, viewing maintenance as a planned investment is the smartest play. It guarantees your system delivers clean, safe water day in and day out, protects your expensive appliances, and keeps your home's water flowing smoothly for years to come.
Let's be real: thinking about whole house water filter maintenance can feel like a chore you'd rather put off. But it doesn't have to be a massive, once-a-year headache. The secret to keeping your system running like a dream is to break the job down into smaller, bite-sized pieces.
Think of it like tending a garden or prepping your house for winter. A simple seasonal routine turns a daunting task into a quick, easy checklist. This approach helps you spot the little whispers of trouble—a tiny drip or a slight pressure drop—before they become a full-blown scream for your plumber.
Every three months, carve out ten minutes for a quick inspection. This is your first line of defense and the easiest way to catch problems when they're small and harmless.
This simple 90-day check-in is the cornerstone of great whole house water filter maintenance. It costs you almost no time but reveals a ton about your system's health.
Pro Tip: Keep a small dry-erase board or a dedicated notebook near your filter system. Every quarter, jot down the date and the pressure readings. This simple log makes it incredibly easy to spot a gradual pressure drop you might otherwise miss.
Twice a year, typically in spring and fall, it's time to roll up your sleeves and dig a little deeper. This is when you'll tackle the important tasks that prevent bacteria from moving in and get your system ready for the season ahead.
The main event is sanitizing the system. Biofilm—a fancy name for a slimy layer of bacteria—can accumulate inside the filter housings, especially if you're on well water. A quick sanitizing cycle with a bit of unscented household bleach or a purpose-made solution flushes out all that gunk, keeping your water safe and fresh.
While you're at it, give the outside of the filter housings a good wipe-down. This isn't just for looks; cleaning off dust and grime can reveal hairline cracks or other signs of wear that you need to address.
This is the big one. Once a year, you'll replace your main filter cartridges and give the entire system a fresh start. For most homes, a carbon filter is good for about 6-12 months, so planning for an annual swap is a brilliant move.
Here's your yearly game plan:
By breaking down your whole house water filter maintenance into this easy seasonal rhythm, you transform a dreaded chore into a simple, satisfying routine. This not only guarantees cleaner, safer water but also helps your system last longer, saving you a fortune in the long run.
Changing the filter cartridge is the most critical and satisfying part of your maintenance routine. This is where the real magic happens—you’re swapping out a tired, gunked-up filter for a fresh one, instantly restoring your system to peak performance. Think of it less as a chore and more as hitting the reset button on your home's water quality.
Forget the confusing, generic instructions that came in the box. Let's walk through this the way a professional would, focusing on the small details that prevent leaks and guarantee you get the best filtration possible.
A little preparation is the difference between a breezy, five-minute job and a frustrating hour spent mopping up your utility room. The goal here is pure efficiency.
First, double-check that you have the right replacement cartridge. It sounds obvious, but you'd be amazed how many homeowners grab the wrong one. Look for the model number and dimensions (e.g., 10" x 4.5") on the filter housing or in your manual. Make sure the micron rating matches what you need, too.
A quick visual guide can help you see how this task fits into the bigger picture of your annual maintenance routine. It’s all about a simple, repeatable rhythm.
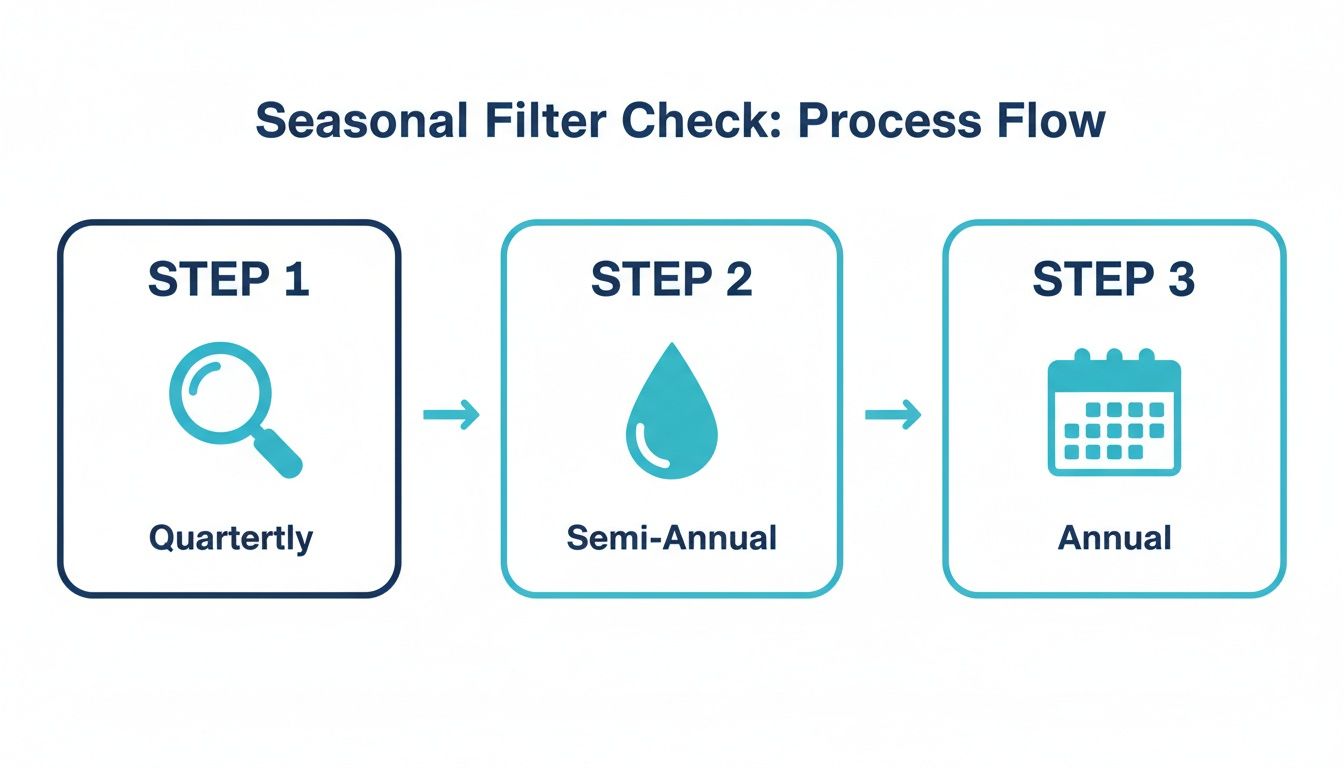
As you can see, regular checks lead up to the annual filter replacement, keeping your system in top shape year-round.
Nothing kills momentum like getting halfway through a job and realizing you're missing a key tool. Get your gear together before you start. It makes the whole process smoother.
| Item | Purpose | Pro Tip |
|---|---|---|
| Housing Wrench | Loosens and tightens the filter housing. | Use the wrench that came with your system. A generic one can easily strip the plastic. |
| Bucket | Catches water when you open the housing. | A standard 5-gallon bucket is perfect. It's tall enough to prevent splashes. |
| Old Towels | For managing the inevitable drips and spills. | Lay one down before you start. A dry workspace is a safe workspace. |
| Food-Grade Silicone Grease | Lubricates the O-ring for a perfect seal. | Do not use petroleum jelly! It will eat away at the rubber O-ring and cause leaks. |
| New Replacement Cartridge | The star of the show. | Keep it in the plastic wrap until the second you’re ready to pop it in. |
With these items at the ready, you're primed for a clean, hassle-free filter swap.
This is where most DIY jobs go sideways. You absolutely cannot just start wrenching on the housing while it’s holding back your home's full water pressure. You'll create a geyser in your utility room and find the housing is nearly impossible to turn.
You have to release the pressure first. It's simple.
Remember, that filter housing is engineered to withstand immense force. Taking a moment to properly depressurize it is the single most important step for a controlled, mess-free filter change. It turns a potential wrestling match into a simple twist.
Now that the pressure is off, grab your housing wrench and give the canister a turn to loosen it. Once it breaks free, you should be able to unscrew it the rest of the way by hand. Dump the old water and the used filter right into your bucket.
Before you pop in the new cartridge, take a moment to inspect the big rubber O-ring in the groove at the top of the housing. Carefully pull it out, wipe it clean, and clean out the groove itself. Then, apply a thin coat of food-grade silicone grease to the O-ring. This tiny step is your best defense against slow, annoying leaks.
Slide the new cartridge in, making sure it’s centered, and then hand-tighten the housing back on. Use the wrench for one last quarter-turn to snug it up—but don't go crazy. Overtightening can crack the housing.
Last step: the flush. This is crucial for carbon filters, which often release loose carbon "fines" (harmless black specks). Slowly turn the water supply back on. Go to a nearby faucet and let it run for 5-10 minutes until the water is perfectly clear.
That’s it. You've reset your system. Sticking to this routine is more than just good practice; it's a smart investment. Whole house water filter maintenance is a cornerstone of a rapidly growing residential water purifier market. In the US, where these systems have about 20% market penetration, properly maintained filters can avert 15% of certain gastrointestinal illnesses. This is because a neglected filter can harbor over 1 million bacteria per square centimeter after just six months. While annual maintenance costs average $200-$400, this proactive spending yields a 40% savings compared to the $1,500+ cost of a full system replacement. Discover more insights about the residential water purifier market.
Even a perfectly maintained whole-house water filter will hit a snag eventually. That’s just the nature of mechanical systems. But the good news is that most of the little headaches that pop up are surprisingly easy to diagnose and fix on your own.
Think of this as your troubleshooting field guide. Instead of panicking when something goes wrong, you’ll have a logical process to hunt down the culprit. We’ll walk through the most common issues, from pressure drops to pesky leaks, so you can tackle them with confidence.
This is the big one—the most common complaint from homeowners. You hop in the shower one morning, and the pressure has just vanished. Your first suspect is probably the filter, and you're often right, but it pays to confirm before you start taking things apart.
A clogged filter is almost always the prime suspect. As it traps sediment, it essentially becomes a dam, choking the flow of water to your house.
If your system has pressure gauges on both the inlet and outlet pipes, diagnosis is a breeze. A difference of 10-15 PSI or more between the two is a dead giveaway. That filter is saturated, and it's time for a change.
No gauges? No problem.
Running through this quick diagnostic can save you from changing a perfectly good filter or, worse, ignoring a more serious plumbing issue.
Nothing is more maddening than seeing a puddle forming under your filter housing. Luckily, the fix is usually simple and won't require a call to the plumber. The vast majority of these leaks come down to one thing: a faulty O-ring.
The O-ring is the large rubber gasket that creates a watertight seal between the filter housing and the filter head. If that ring is dry, dirty, nicked, or not seated correctly, water will find a way out.
Here’s your game plan:
A huge mistake people make is grabbing Vaseline or another petroleum jelly to lubricate the O-ring. Don't do it. Petroleum products will degrade the rubber, making it brittle and causing even worse leaks down the road. Stick with food-grade silicone grease.
If a clean, greased O-ring doesn't stop the drip, carefully inspect the plastic housing itself for any hairline cracks. They can be tough to spot, but if you find one, the whole housing will need to be replaced.
You bought the filter to banish that swimming pool smell and weird taste from your tap water. So when they suddenly return, it's a huge letdown. This is almost always a sign that your activated carbon filter has reached the end of its life.
Carbon filters work by adsorption, where contaminants literally stick to the massive internal surface area of the carbon. But that surface area is finite. Eventually, all the spots get filled up, and the filter can't grab any more chlorine or smelly compounds. It becomes an empty vessel, letting all the bad stuff pass right through.
There’s no magic fix here; the only solution is to replace the filter cartridge. If you notice the water quality taking a dive, that's your system screaming for a new carbon filter. Sticking to your whole house water filter maintenance schedule is the best way to prevent this and keep your water tasting great.
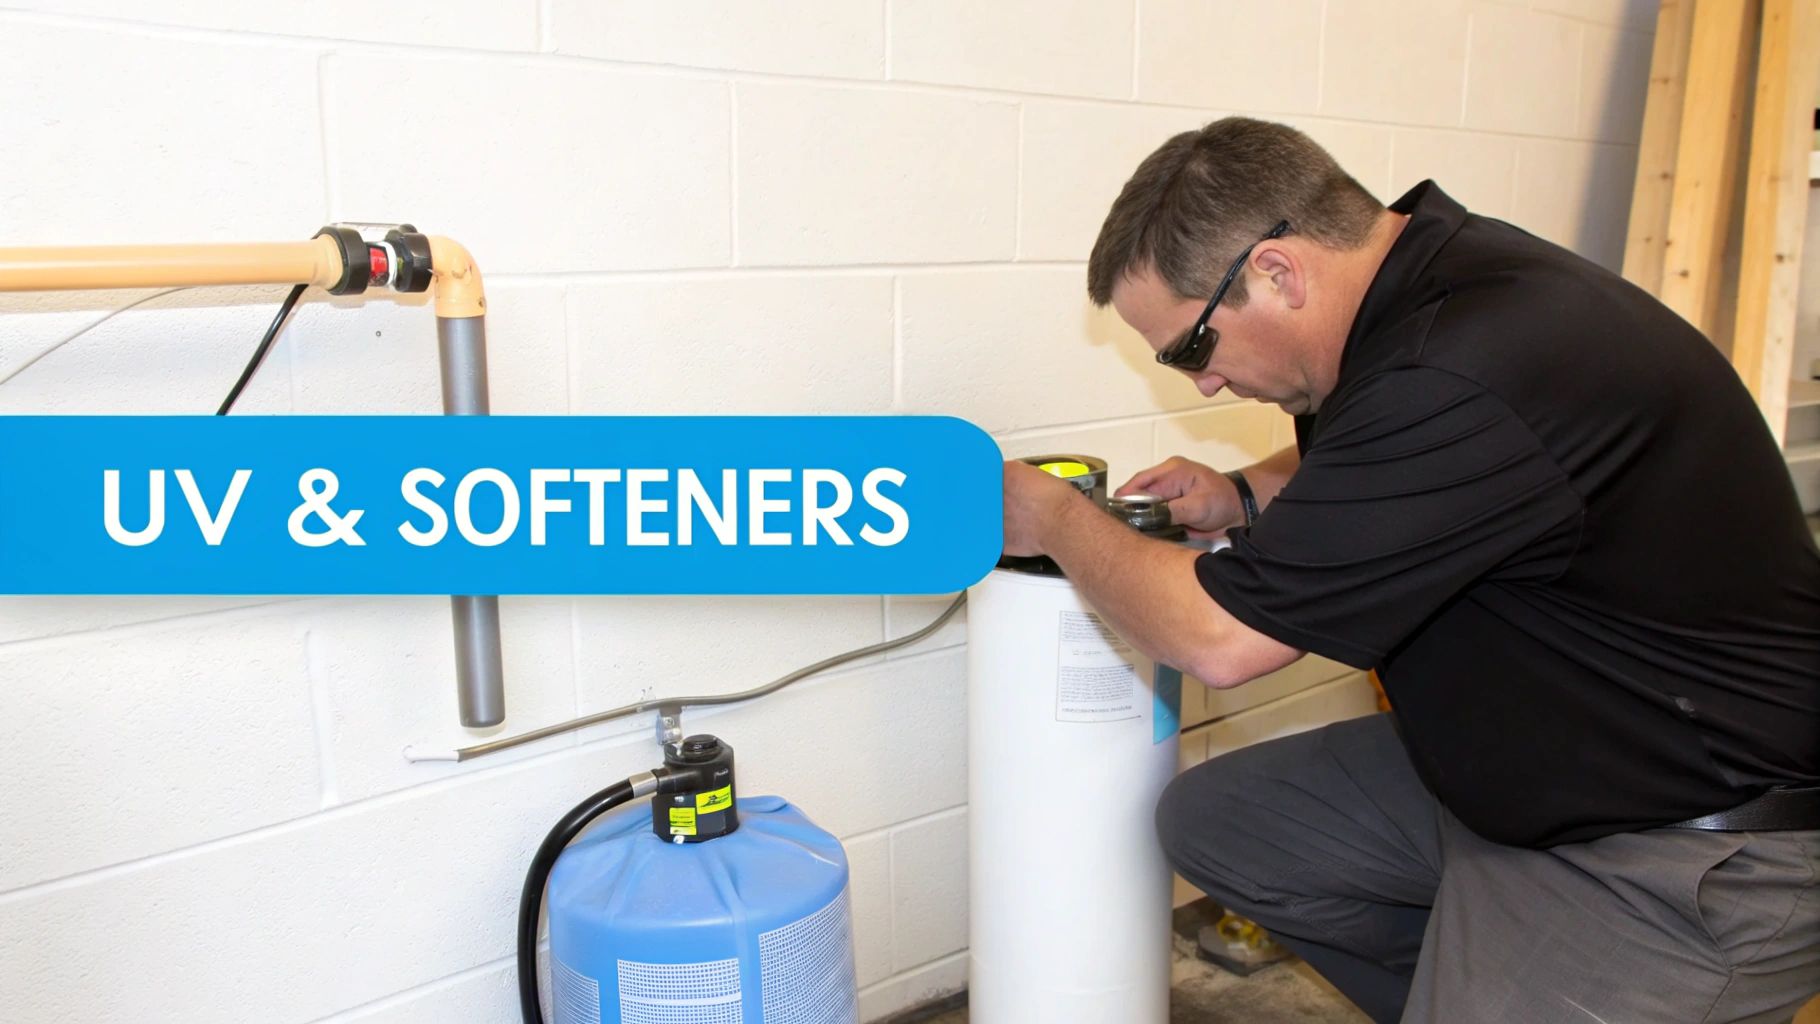
If your home's water treatment setup includes an ultraviolet (UV) purifier or a water softener, you've got some extra firepower. These components are fantastic, but they require their own specific maintenance to keep the entire system operating in harmony.
Ignoring them is like changing your car's oil but never checking the tire pressure—you're missing a critical piece of the puzzle. These advanced systems tackle specific problems, from neutralizing bacteria to fighting hard water scale, and a little upkeep goes a long way.
Think of your UV system as a microscopic security guard, using intense light to neutralize nasty bacteria, viruses, and cysts. But for it to work, that light has to be powerful and unobstructed.
The single most important task is the annual replacement of the UV lamp. The light might still be on after a year, but its germ-killing intensity plummets. It’s like a weak flashlight in the dark; you can see a little, but it’s not really doing the job.
Just as critical is the quartz sleeve—the clear glass tube that protects the lamp from the water. Over time, it gets coated with a film of minerals, blocking the UV light from reaching the water.
A water softener is your home’s best defense against scale buildup. It protects your pipes and appliances while making your skin and hair feel amazing. Luckily, its maintenance is pretty straightforward.
Your main job is keeping the brine tank topped up with salt. Check it once a month and make sure it’s at least half-full. Stick to high-quality salt pellets designed for softeners; cheaper options can cause clogs.
The bigger, though less frequent, task is dealing with a "salt bridge." This is a hard crust of salt that can form above the water level in the brine tank, preventing salt from dissolving and regenerating the system.
A salt bridge effectively starves your softener. If your water suddenly feels hard again after being soft for months, a salt bridge is almost always the culprit.
Fixing it is easy. Just take a broom handle and carefully break up the crust. This is also a great time to clean out the tank and check the system's injector (or venturi) for any clogs.
While you're thinking about your home's water systems, don't forget the heater. These essential hot water maintenance tips are just as important for keeping things running efficiently.
It's worth noting how critical this is. The North American water filtration market holds a 35% global share for a reason. Well-maintained systems can reduce lead by up to 99%, according to the EPA. Yet, surveys show only about 65% of owners replace their filters on schedule. For advanced gear, the stakes are higher. A UV lamp is only good for about 9,000 hours—that’s one year—and changing it on time is the only way to ensure 90% effectiveness and uptime.
Once you get the hang of your whole-house water filter, questions are bound to pop up. It’s one thing to follow a schedule, but it's another to really understand the "why" behind each task. Let's tackle some of the most common questions we hear from homeowners.
Getting these answers straight will empower you to manage your system with confidence, ensuring your whole house water filter maintenance routine is always on point.
This is probably the most critical part of the whole process. Your first stop should be the system's user manual—it will list the exact model number you need.
Can't find the manual? No worries. There's almost always a sticker or label on the filter housing itself with all the info. As a last resort, when you take the old filter out, just bring it with you to the hardware store for a side-by-side comparison.
You must match two key specs:
We get this one a lot, and the simple answer is almost always a hard no. The vast majority of sediment filters—especially the common spun polypropylene or pleated paper types—are strictly single-use. They are engineered to trap particles deep within their fibers.
Trying to wash them is a futile exercise. You'll likely damage the delicate filter media, and worse, you could dislodge all the trapped contaminants, sending them straight into your home's water. A quick rinse might briefly improve your water pressure, but the filter's ability to do its job is gone for good. Just replace it.
Think of a sediment filter like a disposable coffee filter. You wouldn’t try to rinse and reuse one because it's already done its job, and trying to clean it just makes a mess. The same logic applies here—a fresh filter is the only way to guarantee performance.
Putting off a filter change kicks off a chain reaction of problems. The first thing you'll notice is your water pressure taking a nosedive. As the filter clogs, your showers will feel weaker and your washing machine will take forever to fill.
More importantly, an old carbon filter completely loses its ability to remove chlorine and other chemicals. The bad tastes and smells you bought the filter to eliminate will come roaring back. A badly clogged sediment filter also puts a ton of extra strain on your home’s plumbing and appliances.
Worst-case scenario? A neglected filter can become a breeding ground for bacteria. All that trapped organic matter is a perfect food source, potentially making your water quality even worse than before you had a filter.
While most routine whole house water filter maintenance is a perfect DIY job, some situations call for a pro.
If you have a stubborn leak that a fresh, properly lubricated O-ring won't solve, you might be dealing with a tiny crack in the housing that needs an expert eye.
Additionally, if you have a complex setup with backwashing media tanks, UV purifiers, or integrated water softeners and feel out of your depth, calling in a pro for an annual check-up is a smart investment. Finally, if a standard filter change doesn't fix a major, sudden drop in your water quality, it’s time to call a plumber. They can diagnose bigger issues with your system or the water coming into your house. For more helpful insights, you can find a wealth of water filtration advice on our blog.
At Water Filter Advisor, we're committed to helping you achieve cleaner, safer water with confidence. Explore our in-depth guides and reviews to find the perfect solution for your home at https://www.waterfilteradvisor.com.
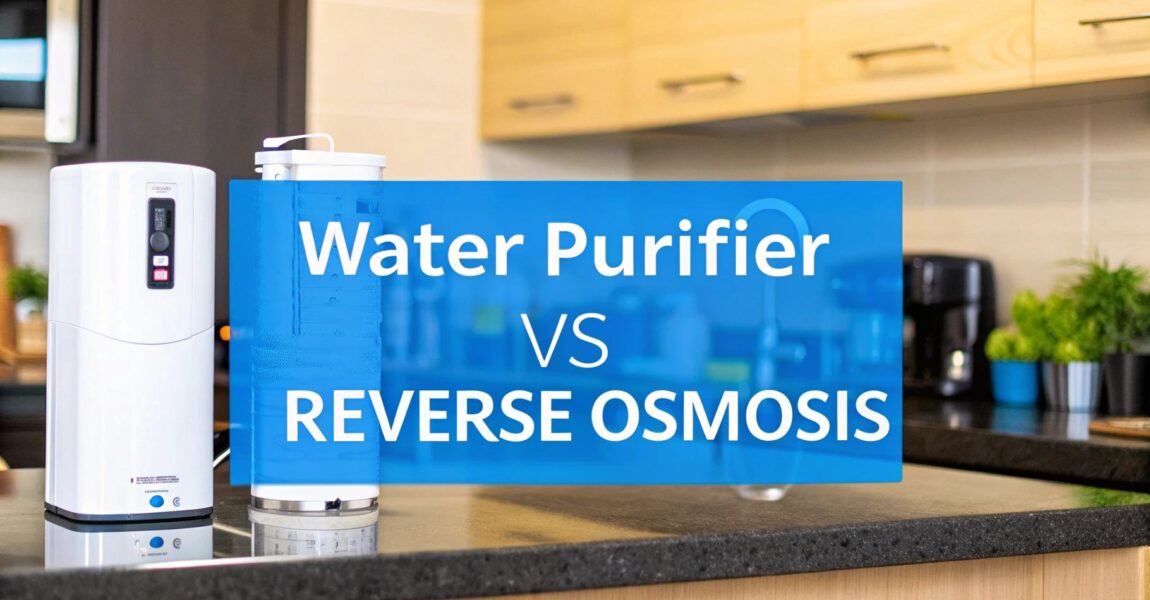
When you’re staring down the water purifier vs reverse osmosis aisle, it’s easy to get lost in the jargon. Here’s the secret: "water purifier&quo ...

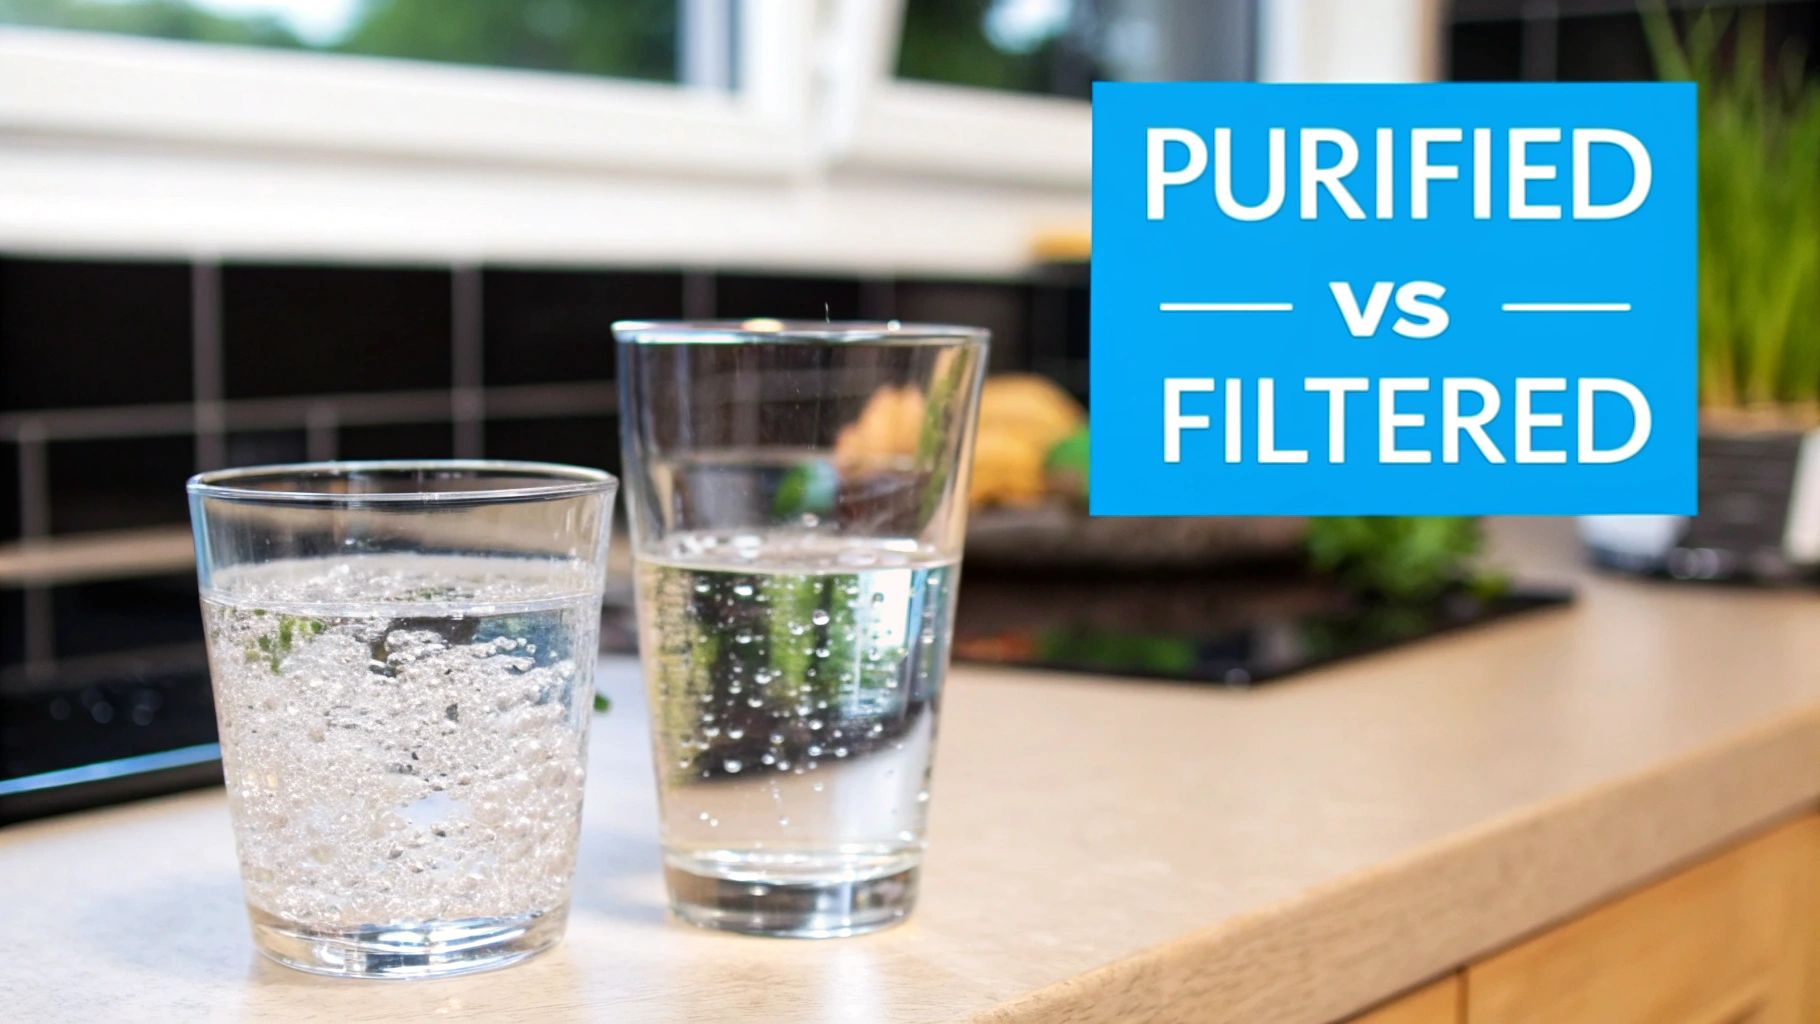
Let's get one thing straight right out of the gate: all purified water is filtered, but not all filtered water is purified. It’s a classic "all squares are rectangles, but not all rectangles are squares" situation, and understanding this little riddle is the key to getting the best water for your home.
The real difference boils down to the level of treatment. Think of filtered water as your friendly neighborhood security guard—it keeps out the obvious troublemakers, making your water taste and smell a whole lot better. Purified water, on the other hand, is like a secret service detail. It goes through an intensive process to strip out at least 99% of all dissolved solids, achieving an exceptional, almost obsessive, level of purity.
When you're staring at bottles in the grocery store or shopping for a home water system, the words "filtered" and "purified" can feel like marketing buzzwords designed to confuse you. They aren't. They represent two very different approaches to water treatment, and knowing the difference is the secret to picking the right one for your home and family.
At its core, the distinction is all about what gets removed from your water. Both methods are designed to give you cleaner, safer water, but they operate on completely different scales of "clean."
Filtered water is exactly what it sounds like—tap water that has been passed through a physical filter, usually made of activated carbon. The main goal here is to fix the aesthetics—the taste and smell of your water.
Think of a carbon filter like a bouncer at a club who only turns away the rowdy, obvious troublemakers. It’s fantastic at grabbing things like chlorine, sediment, and certain volatile organic compounds (VOCs) that give water that funky "tap" taste and smell. It’s a huge improvement for most city water and makes every glass more enjoyable.
What it doesn't do is remove most of the microscopic dissolved solids. That means healthy minerals like calcium and magnesium are left behind (a good thing!), but so are potential hidden threats like lead, bacteria, or viruses that are too small for it to catch.
Purified water takes filtration to a whole new level. To even earn the "purified" label from the pros, water has to meet strict standards set by the U.S. Pharmacopeia (USP), which means it must have fewer than 10 parts per million (PPM) of total dissolved solids (TDS).
Purified water goes through an advanced process like reverse osmosis or distillation to strip away at least 99% of everything that isn’t pure H₂O. This includes salts, minerals, heavy metals like lead and arsenic, bacteria, and viruses.
The result is water that’s incredibly clean and consistent. It offers a much higher degree of protection against a far wider range of contaminants you might find in your home's water source, giving you ultimate peace of mind.
To make it even clearer, here’s a quick side-by-side look at the fundamental differences. This table breaks down the main goal, common methods, and what you can expect from each type of water for your home.
| Attribute | Filtered Water | Purified Water |
|---|---|---|
| Primary Goal | Improve taste, odor, and clarity | Remove the maximum amount of all contaminants |
| Purity Level | Varies by filter type | Extremely high (less than 10 PPM of TDS) |
| Common Methods | Activated carbon, sediment filters | Reverse osmosis, distillation, deionization |
| Mineral Content | Healthy minerals are typically retained | Nearly all minerals are removed |
Ultimately, filtered water is about making good water better, while purified water is about creating the purest water possible, regardless of the starting source.
To really get to the bottom of the purified vs. filtered water debate, we need to pop the hood and look at the technologies doing the work. These aren't just vague terms; they're specific processes, and each one has a distinct job in cleaning up your tap water. Some are simple, everyday workhorses, while others are high-performance engines built for maximum purity.
Let's kick things off with the most common player in the filtration camp: activated carbon. You'll find these filters in everything from your basic water pitcher to more complex under-sink systems. They are the undisputed champs of making water taste and smell fantastic.
Think of an activated carbon filter as a super-porous sponge with an incredible amount of surface area. It uses a process called adsorption, where certain contaminants literally stick to the carbon's surface as water passes through. This makes it fantastic at grabbing chlorine, volatile organic compounds (VOCs), and other chemicals that give water that off-putting flavor.
Beyond just taste, home filtration systems also act as physical roadblocks. This is where sediment filters come into the picture.
A sediment filter is basically a fine screen that's there to catch physical debris before it gets into your glass or, worse, clogs up more sensitive parts of your plumbing and appliances. Its job is to trap the "big stuff," like:
These filters are usually the first line of defense in any multi-stage home system, making sure larger gunk doesn't mess with the more precise filtration steps that come next.
When your goal isn't just better-tasting water but the highest level of purity you can get for your family, the technology gets a lot more serious. This is where purification takes over, and the leading method for homes is Reverse Osmosis (RO).
Reverse Osmosis, or RO, uses your home's water pressure to push water molecules through a semipermeable membrane—a filter with pores so tiny they're hard to imagine. This membrane is so ridiculously fine that it lets water pass through but blocks a huge list of contaminants.
An RO system is like a bouncer at an exclusive club with a VIP list. Only pure water molecules get in. Dissolved salts, heavy metals like lead and arsenic, fluoride, and even viruses are all turned away at the door.
Another powerhouse purification method, though not as common in homes these days, is distillation. This process is just like nature's own water cycle. Water is boiled into steam, leaving almost all contaminants behind. That pure water vapor is then captured and cooled back down into pristine liquid. It takes a lot of energy, but it's incredibly effective at achieving near-total purity. To see how these and other methods stack up, you can explore different water purification methods.
The growing interest in these advanced systems is clear. As more homeowners clue into what's actually in their water, the global demand for water filters keeps climbing. While activated carbon filters made up an estimated 45.6% of the North American market in 2024, it's reverse osmosis systems that hold the majority share in the U.S. That's all thanks to their incredible performance, often removing up to 99% of dissolved contaminants. By understanding these different approaches, you can see that filtration and purification are really built for different tasks, which is the key to picking the right solution for your home.
When you're trying to decide between purified and filtered water for your home, it really all boils down to one question: what's actually being removed? This is where you get past the marketing hype and see the real differences in performance. The answer has a direct impact on your water’s safety, how it tastes, and its overall quality.
Filtered water is fantastic at improving the day-to-day experience of your tap water. Its main workhorse, the activated carbon filter, is incredibly effective at getting rid of the common complaints people have with city water. Think of it as a great quality control step for water that’s already considered safe to drink.
But it's important to know that standard filtration has its limits. While it does a great job with larger particles and specific chemicals, it just isn't built to tackle microscopic threats or things that are fully dissolved in the water. That’s the line in the sand that separates it from true purification.
A typical carbon-based filter, whether it’s in a pitcher or tucked under your sink, is a specialist. It uses a process called adsorption to essentially grab and hold onto certain contaminants as water flows through.
This makes it highly effective against things like:
By zeroing in on these issues, a filter gives you water that's much more pleasant to drink. But that's pretty much where its job ends.
The effectiveness of a standard filter drops off a cliff when it comes up against dissolved solids, heavy metals, and microorganisms. It simply doesn't have the right tools to capture contaminants that are invisibly dissolved in the water or are too tiny for its pores to catch.
This means nasty things like lead, arsenic, fluoride, nitrates, bacteria, and viruses can slip right through most basic filters. If your home water source has these kinds of risks, a simple filter isn't going to give you the protection you need.
Understanding how different filter types work is key. For instance, comparing a HEPA vs Carbon Filter for air purification shows how specific materials target distinct problems—a principle that applies directly to water, where carbon filters are the go-to for chemical removal.
Purification is a whole different ballgame. Systems that use methods like reverse osmosis (RO) or distillation are engineered for one purpose: near-total removal of contaminants across a much broader and more serious spectrum.
An RO system, for example, pushes water through a special membrane with pores so incredibly small that almost nothing but pure water molecules can squeeze through. This creates a powerful, physical barrier against a huge list of potential contaminants.
This chart really drives home how much the demand for effective home water solutions has grown, and what technologies people are choosing.
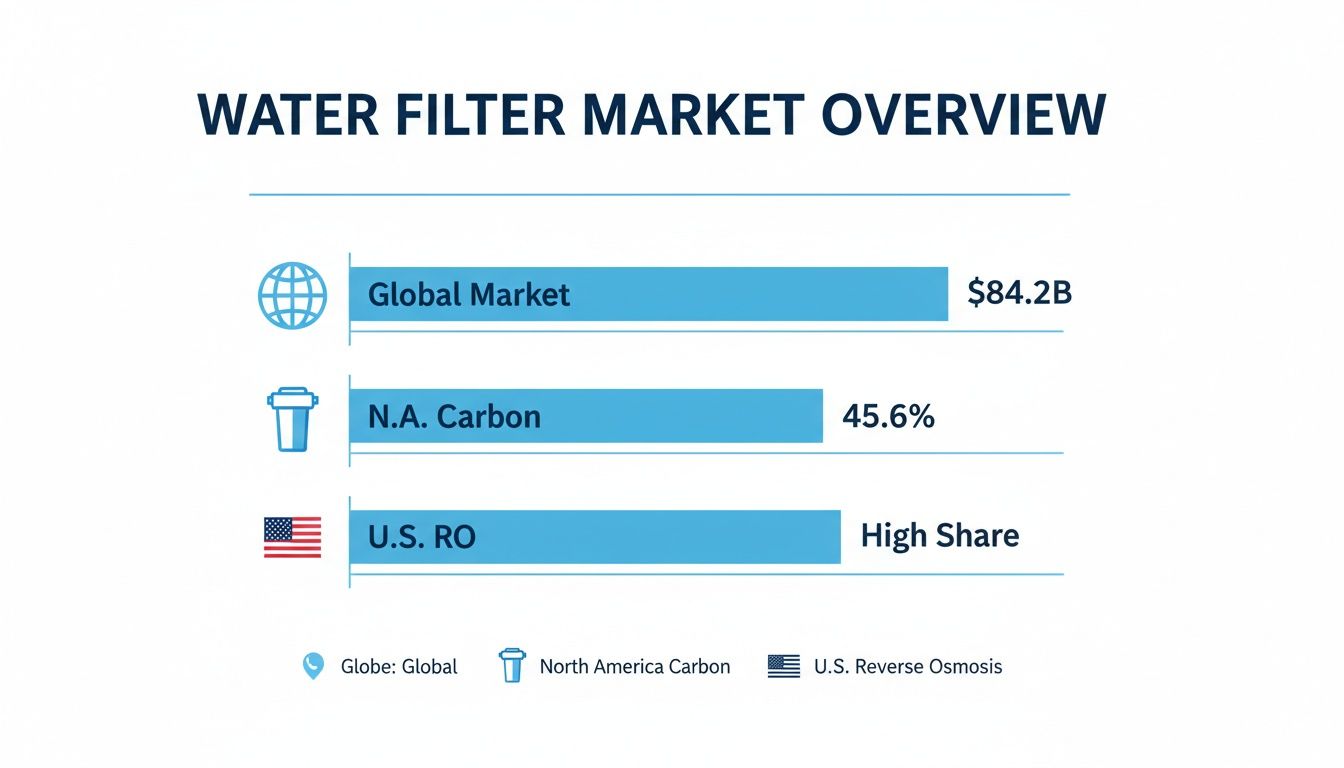
You can see a clear trend in the data. While carbon filters are popular for making water taste better, more and more homeowners are investing in high-performance RO systems when their top priority is comprehensive safety.
Purification excels at removing:
Here's the bottom line: A carbon filter is your best friend for better-tasting water, but only a purification system can give you true peace of mind against a wide range of invisible contaminants.
This all-encompassing removal capability is precisely why purification is the gold standard for anyone with specific health concerns, young children or elderly family members, or those getting their water from less-reliable sources like a private well.
To really put it all in perspective, let's look at a direct, side-by-side comparison. This table clearly lays out how the different technologies perform against specific, common water contaminants. It makes it easy to see where each system shines—and where it falls short.
| Contaminant | Activated Carbon Filter | Sediment Filter | Reverse Osmosis (Purified) | Distillation (Purified) |
|---|---|---|---|---|
| Chlorine | Excellent | None | Excellent | Excellent |
| Sediment/Rust | Good | Excellent | Excellent | Excellent |
| Lead | Varies (Low to Good) | None | Excellent | Excellent |
| Bacteria/Viruses | None | None | Excellent | Excellent |
| Arsenic/Fluoride | None | None | Excellent | Excellent |
| TDS (Salts/Minerals) | None | None | Excellent | Excellent |
Ultimately, the right choice for your home really hinges on what you're trying to achieve. If your main goal is just to improve the taste and smell of your city water, a high-quality filter is a great, affordable option. But if your water report shows heavy metals, or if you simply want the highest level of protection against the widest range of known and unknown contaminants, a purification system is the only way to get there.
Beyond the charts and technical jargon, what does all this mean for your daily life? The choice between purified and filtered water has a real, tangible impact on your family’s health, the flavor of your morning coffee, and even how long your appliances last. Getting a handle on these practical differences is the only way to make a smart decision for your home.

Let's cut to the chase—health is what matters most. Both filtered and purified water are a massive step up from untreated tap water, but they don’t offer the same level of protection. For most homes with a decent municipal supply, a quality filter is a great, cost-effective way to knock out common issues like chlorine taste and odor.
But in certain situations, "good enough" isn't enough. That's where purification comes in. If you have anyone at home with a compromised immune system, have young kids, or live in an area with known risks—like old plumbing that could leach lead—a purification system provides a level of safety that a standard filter just can't touch.
The mineral question comes up all the time. Purification methods like reverse osmosis are so aggressive they strip out nearly everything, including beneficial minerals like calcium and magnesium. This makes some folks worry they're missing out on key nutrients.
Here's the reality: while those minerals are good for you, the vast majority of your daily intake comes from your food, not your water. The amount you get from a glass of tap water is tiny compared to what a balanced diet provides.
For most people, the health benefits of removing potentially harmful contaminants far outweigh the negligible loss of minerals from drinking purified water. Some modern RO systems even include a remineralization stage to add a healthy mineral blend back into the water for improved taste.
Taste is personal, but the difference between these two water types is distinct. Filtered water keeps its natural mineral content, giving it a more familiar, crisp flavor that many people associate with bottled spring water. It tastes clean, but it still has character.
Purified water is a whole different ballgame. Stripping out virtually all dissolved solids leaves you with water that's incredibly clean and neutral. Some people find this taste "flat," while others love its absolute purity. Think of it as a blank canvas—it lets the true flavors of your coffee, tea, or soup shine through without any interference from the water itself.
This isn't just about what you drink. The minerals left behind in tap and filtered water are what cause that ugly, chalky limescale buildup in your appliances. Over time, that mineral scale can do some serious damage.
This buildup forces your machines to work harder, making them less efficient and shortening their lifespan. If you've ever had to descale your coffee maker or seen that white crust form on your humidifier, you know exactly what we're talking about.
This is where purified water really shines for certain household uses:
For day-to-day drinking and cooking, filtered water is a solid choice. But for any appliance that heats or evaporates water, using purified water is a smart move that will save you a lot of cleaning headaches and replacement costs down the road.
When you're trying to decide between purified and filtered water systems for your home, the price tag is usually the first thing that catches your eye. But that initial number doesn't tell the whole story. To really get a handle on the long-term value, you have to look at everything: the upfront investment, the ongoing maintenance, and even some of the hidden operational costs.
Take simple filtration systems, like water pitchers. They have an incredibly low entry cost, often less than $50, which makes them a really tempting place to start. The catch? Their small filters need to be replaced constantly—sometimes every month or two—and those replacement costs can really sneak up on you over the course of a year.
Under-sink or faucet-mounted filters are a step up, typically running between $100 to $300. While you're spending more at the outset, their filters last much longer, usually for six months to a year. This means you end up with a lower cost-per-gallon and less time spent fiddling with replacements.
The main draw of standard filtration is how easy it is on your wallet upfront. You can get better-tasting water almost right away without having to make a major financial commitment.
But it’s those recurring costs you really need to watch. For a family of four using a pitcher, you could easily spend over $150 a year just on replacement filters. In comparison, an under-sink system might need an annual filter change that costs $60 to $100, which actually offers better long-term savings.
The primary financial trade-off with filtration is pretty clear: you're balancing convenience against cost. Those lower upfront prices often mean you'll be spending more on replacement cartridges over time.
Purification systems, especially reverse osmosis (RO), come with a much higher initial price. They often start around $300 and can go up to $1,000 or more for the really advanced models. That number can feel a bit intimidating, but it's important to see the bigger picture.
While the initial hit is significant, the cost per gallon of purified water is often much, much lower than what you'd get from a pitcher filter. The core of the system, the RO membrane, can last for two to four years, and the pre-filters usually only need to be swapped out once or twice a year. That means fewer trips to the store and less hands-on maintenance.
There is, however, a hidden cost with RO systems you need to be aware of: water waste. For every gallon of pure water it makes, several gallons of "brine" water—the water carrying all the rejected contaminants—gets flushed down the drain. Modern, high-efficiency models have gotten much better at reducing this ratio, but it’s still something that will show up on your water bill.
This growing demand for high-purity solutions at home is part of a huge global trend. The global purified water market was valued at about USD 154.62 billion in 2024 and is expected to hit roughly USD 255.90 billion by 2032. You can find more insights on this trend over at Data Bridge Market Research. It shows a real shift as more families decide to invest in top-tier water treatment.
In the end, it all comes down to balancing your budget with what you need the system to do. Filtration is an affordable way to make your water taste better and get rid of chlorine. Purification is a bigger investment, for sure, but it delivers comprehensive contaminant removal and great long-term value, giving you a level of peace of mind that many people find priceless.
Trying to decide between purified and filtered water can feel like a chore, but it really just comes down to a simple, three-step process. Once you know what you're dealing with, you can match your needs to the right technology. This straightforward plan will help you find the perfect system for your family.
First things first: you have to know what's actually in your water. You can't fix a problem you haven't identified. If you're on city water, your local utility provider is required to publish an annual Consumer Confidence Report (CCR) that details any tested contaminants.
For those with a private well or anyone wanting a more immediate and precise snapshot of their tap water, a home water test kit is a smart move. These kits can screen for common culprits like chlorine, lead, hardness, and pH levels, giving you a clear picture to start from.
Once you have your water quality report in hand, the next step is to decide what you actually want to accomplish. Are you just trying to get rid of that funky taste in your morning coffee, or are you worried about specific health risks lurking in your pipes? Your goal is what will ultimately point you toward either a filtration or a purification system.
Think about these common scenarios:
By clearly identifying whether your main concern is taste, a specific contaminant, or overall purity, you narrow down your options significantly and avoid paying for a system that doesn't match your needs.
Finally, it's time to match your goal with a solution that fits your budget and how much work you want to put into installation. This is where the debate over purified vs. filtered water becomes a personal decision. Armed with the right information, you can find more detailed guides and advice to help you select the best water filter for your home.
Here’s some practical, situational advice to get you started:
We get a lot of questions about the day-to-day realities of purified vs. filtered water. Here are some quick answers to the most common ones we hear.
Does purified water taste different?
Absolutely. Purified water is stripped of almost everything, including minerals, which gives it a very distinct "clean" or "crisp" taste. Some people, however, find it tastes a bit flat. Filtered water, on the other hand, keeps those healthy minerals in, so it often has a taste closer to what you'd expect from a premium bottled spring water. To bridge this gap, some reverse osmosis systems now include a special remineralization filter to add beneficial minerals back in for better flavor.
Is bottled water typically filtered or purified?
It really comes down to what the label says. If you see "Spring Water," that means it was bottled from an underground source. It's usually filtered just enough to remove sediment while keeping its natural mineral content. But if the bottle is labeled "Purified Drinking Water," it has gone through a rigorous process like reverse osmosis or distillation. The original source could be anything from a spring to your local city tap water.
Should I get a whole-house system or a point-of-use filter?
This decision really depends on what you’re trying to fix. A point-of-use system, like a simple filter on your faucet or a more robust unit under your sink, is a great, budget-friendly way to get high-quality water right where you need it for drinking and cooking.
A whole-house (point-of-entry) system treats every drop of water coming into your home. This is a much bigger investment, but it's the right choice if you're dealing with larger problems like hard water minerals or sediment that can wreck your plumbing and appliances over the long haul.
A simple way to think about it: point-of-use is for improving the water you drink and cook with, while a whole-house system protects your entire home infrastructure.
Ready to figure out the perfect water treatment solution for your family? The team at Water Filter Advisor has you covered with in-depth guides, straight-shooting reviews, and practical advice to help you make a choice you can feel good about. Check out our resources and get started on your path to safer, better-tasting water today at https://www.waterfilteradvisor.com.
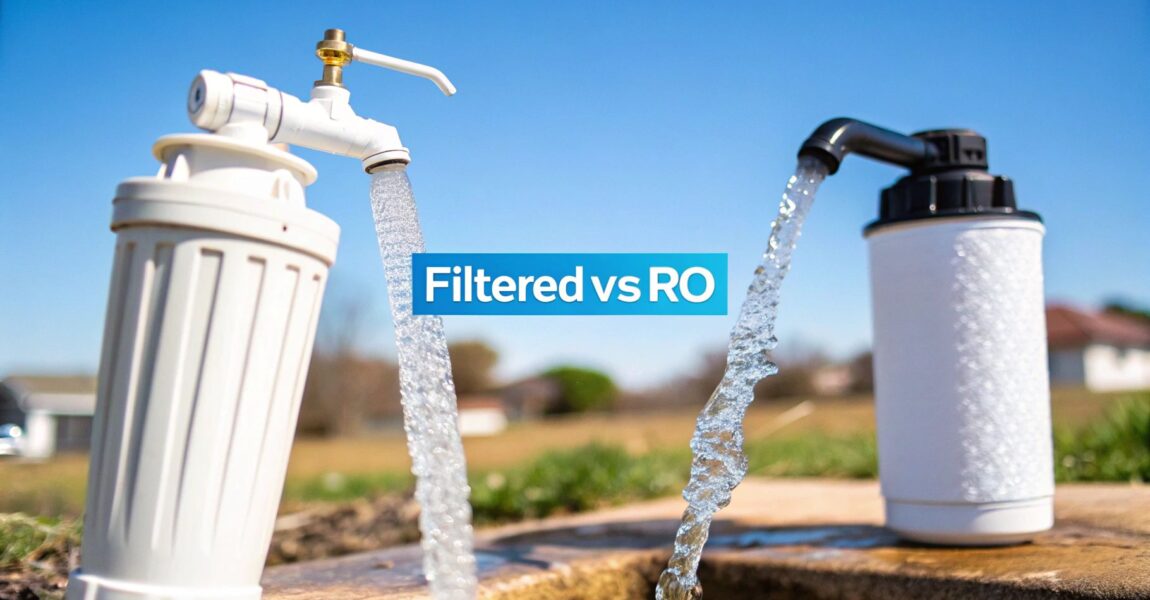
Trying to pick the right water filter for your home? It’s a classic showdown that usually boils down to choosing between a standard filter and a reverse osmosis system. They both promise cleaner water, but they go about it in wildly different ways.
So what's the short answer? Standard filters are perfect for a quick and easy upgrade to your tap water's taste and smell, getting rid of annoyances like chlorine. On the other hand, reverse osmosis systems are the heavy hitters, providing a much more intense level of purification that strips out nearly everything—we're talking dissolved salts, lead, and even fluoride.
This guide is here to walk you through exactly what each technology does. We’ll break down what they remove, how much they cost, and which system really makes sense for your kitchen. The goal is to give you the confidence to pick the best option for your family's health and hydration.
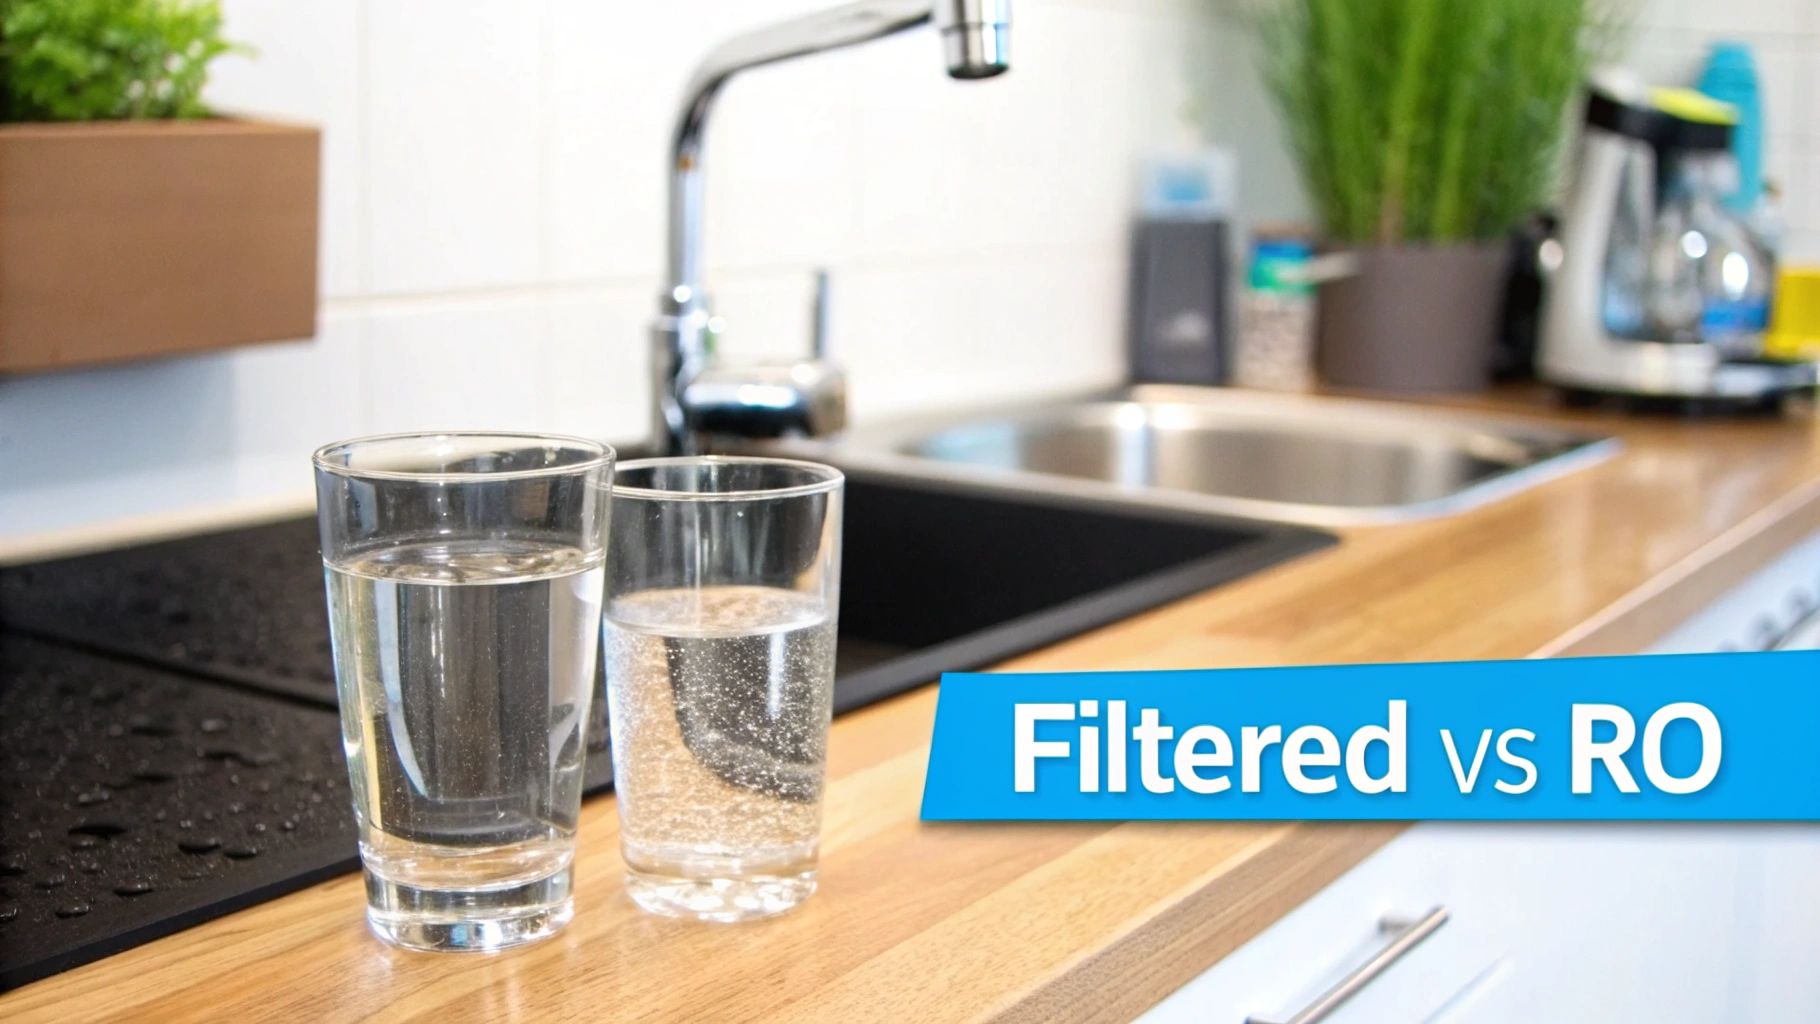
When you think "filtered water," you probably picture a simple pitcher in your fridge or a small filter clicked onto your faucet. These are incredibly popular for a reason—they work great for improving the basic quality of city water. Most of them rely on activated carbon to tackle those aesthetic issues, making your water much more enjoyable to drink.
A Reverse Osmosis (RO) system is a different beast altogether. It's a more comprehensive setup, usually installed under your kitchen sink. It pushes water through a multi-stage process, with a special membrane at its core, to remove a significantly wider range of contaminants. For those curious about specific faucet options, this overview of BRITA integrated water filter taps provides a great deep dive into how those particular systems work.
To get a quick handle on the key differences, it helps to see them side-by-side.
This table lays out the core distinctions between standard filters and RO systems. Think of it as your cheat sheet before we dive into the nitty-gritty.
| Feature | Standard Water Filter (e.g., Carbon) | Reverse Osmosis (RO) System |
|---|---|---|
| Primary Goal | Improves taste and odor by removing chlorine. | Comprehensive purification, removing up to 99% of contaminants. |
| Key Technology | Activated carbon adsorption. | A semi-permeable membrane that blocks dissolved solids. |
| Contaminants Removed | Chlorine, some VOCs, sediment, bad tastes/smells. | Lead, arsenic, fluoride, dissolved salts, pesticides, and more. |
| Installation | Very easy (pitchers) to simple DIY (faucet). | Moderate DIY, may require a plumber for under-sink models. |
| Cost | Low upfront cost, frequent filter replacements. | Higher initial cost, less frequent but pricier replacements. |
As you can see, the choice isn't just about "better" filtration—it's about matching the right technology to your specific needs, budget, and water quality concerns at home.
When most people talk about "filtered water" at home, they're usually thinking of the common, easy-to-use filters that tackle specific water problems. These standard filters are your first line of defense against the usual suspects that give tap water that off-putting taste or smell. Think of them as specialists, not generalists—they're built for quick, noticeable improvements, not total purification.
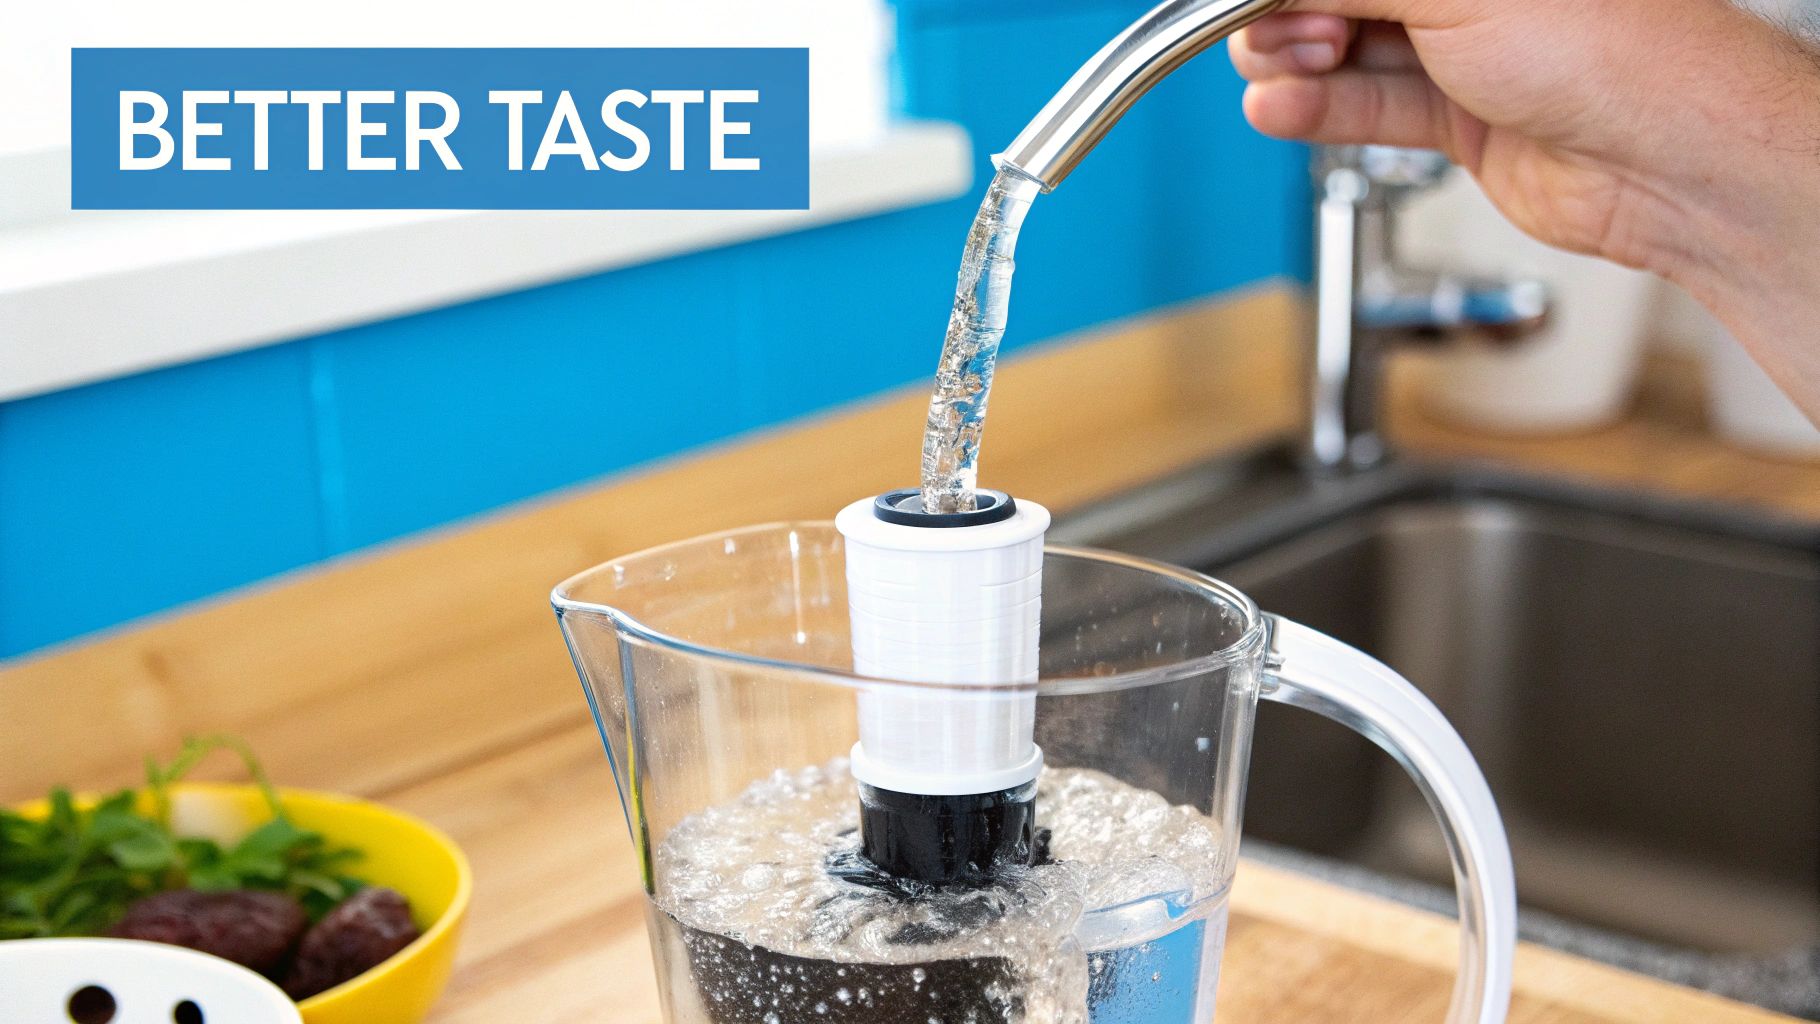
The secret sauce for most of these filters is activated carbon. It’s pretty amazing stuff. Imagine a super-porous sponge with a massive internal surface area. To put it in perspective, just a single gram of activated carbon can have a surface area bigger than a football field. That structure makes it an incredibly effective magnet for certain contaminants.
Activated carbon works its magic through a process called adsorption. This is where impurities chemically latch onto the carbon's surface rather than being physically strained out. It’s an incredibly effective method for grabbing the specific things that mess with taste and odor, which is why you’ll find it in almost every home water filter.
Here's what it's best at nabbing:
By zeroing in on these contaminants, a simple carbon filter in a pitcher or screwed onto your faucet can take your drinking water from just "drinkable" to genuinely "enjoyable." It's a targeted fix for a very common household complaint.
Key Takeaway: Standard filters lean heavily on activated carbon to make your tap water taste and smell better. They’re great for chlorine but aren't designed to remove the tough stuff like lead or fluoride.
While carbon is the star of the show, it often works with a supporting cast, especially in more serious under-sink or whole-house systems. Another common player is the sediment filter, which acts more like a simple screen or sieve.
Sediment filters are all about catching physical debris. Think of them as the bouncer at the club, stopping the big, clunky stuff from getting in.
Their job is to block:
These filters are absolutely crucial for protecting the more delicate filtration stages that come after them, whether that's a carbon filter or the high-tech membrane in a reverse osmosis system. By trapping all that grit, they keep things from getting clogged and help the whole system last longer.
This kind of specialization is what really defines standard filtration. You have a carbon filter adsorbing chlorine and a sediment filter blocking rust—each piece has a specific job. This is the heart of the filtered water vs. reverse osmosis debate; one improves, the other purifies.
If you think a standard water filter is doing a lot, a reverse osmosis (RO) system is on a whole other level. This isn't just about filtering out the obvious stuff; it's a deep-clean purification process that literally takes your water apart, scrubs it clean of almost everything, and then puts it back together for drinking.
Think of it less like a simple screen and more like a high-tech water treatment plant shrunk down to fit under your sink. Every drop of water goes through a rigorous, multi-stage journey, which is what really separates RO from a basic pitcher or faucet filter.
The real power of reverse osmosis comes from its methodical, step-by-step approach. Your tap water doesn't just hit one filter and call it a day. It has to pass through a series of checkpoints, each designed to tackle a different problem and protect the next stage down the line.
It all kicks off with pre-filtration. Before the water even gets close to the main event, it has to get past the bouncers. These usually include:
These pre-filters are the unsung heroes of the operation. They're the bodyguards that make sure the star of the show can do its job properly.
Once the pre-filtering is done, the real magic happens. The water is pushed at high pressure up against a semi-permeable membrane. This is a special material with pores so tiny—around 0.0001 microns—that they’re almost impossible to imagine.
These microscopic holes are just big enough for H₂O molecules to squeeze through, but they slam the door on almost everything else. This is where an RO system leaves other filters in the dust.
An RO membrane is an incredible barrier, capable of kicking out up to 99% of all total dissolved solids (TDS). We’re talking about heavy metals like lead and arsenic, inorganic minerals like fluoride, and dissolved salts that breeze right through simpler carbon filters.
After the water has been forced through the membrane, it’s collected in a small storage tank. But there’s one final step. Right before it comes out of your special RO faucet, the water gets a final once-over from a post-carbon filter. This last filter acts as a "polisher," wiping away any lingering off-tastes or smells the water might have picked up in the tank. The result is water that's not just clean, but noticeably crisp and fresh.
This technology is so effective it's become a massive force in the global water filtration world. According to Mordor Intelligence, its ability to remove such a huge range of contaminants makes it a go-to solution for ensuring water safety in homes everywhere. It's this tough, multi-stage process that makes RO the heavyweight champion for anyone serious about getting incredibly pure drinking water.
When you're trying to choose between filtered water and reverse osmosis, it really comes down to one question: what does each system actually take out of my water? This is where the two go their separate ways. Think of standard filters as specialists, while reverse osmosis systems are the all-in-one purifiers designed to catch pretty much everything.
This difference is a big deal. With concerns about water quality growing, effective home filtration has become a top priority for families everywhere. The global market for water purifiers is booming, and RO filters are leading the pack simply because of how well they perform.
Standard filters, especially the ones using activated carbon, are fantastic for making your water taste and smell better. They go after the common stuff that makes tap water unappealing.
Here’s what they tackle best:
But it's crucial to know what they don't do. Standard filters can't remove dissolved solids. That means things like heavy metals, fluoride, arsenic, and nitrates slide right past the carbon and stay in your glass.
A reverse osmosis (RO) system is a whole different beast. It purifies water on another level, using a multi-stage process to strip out a huge list of contaminants that standard filters can’t even touch.
This diagram gives you a great visual of how water moves through an RO system—from the initial pre-filters, through the powerhouse membrane, and to a final post-filter.
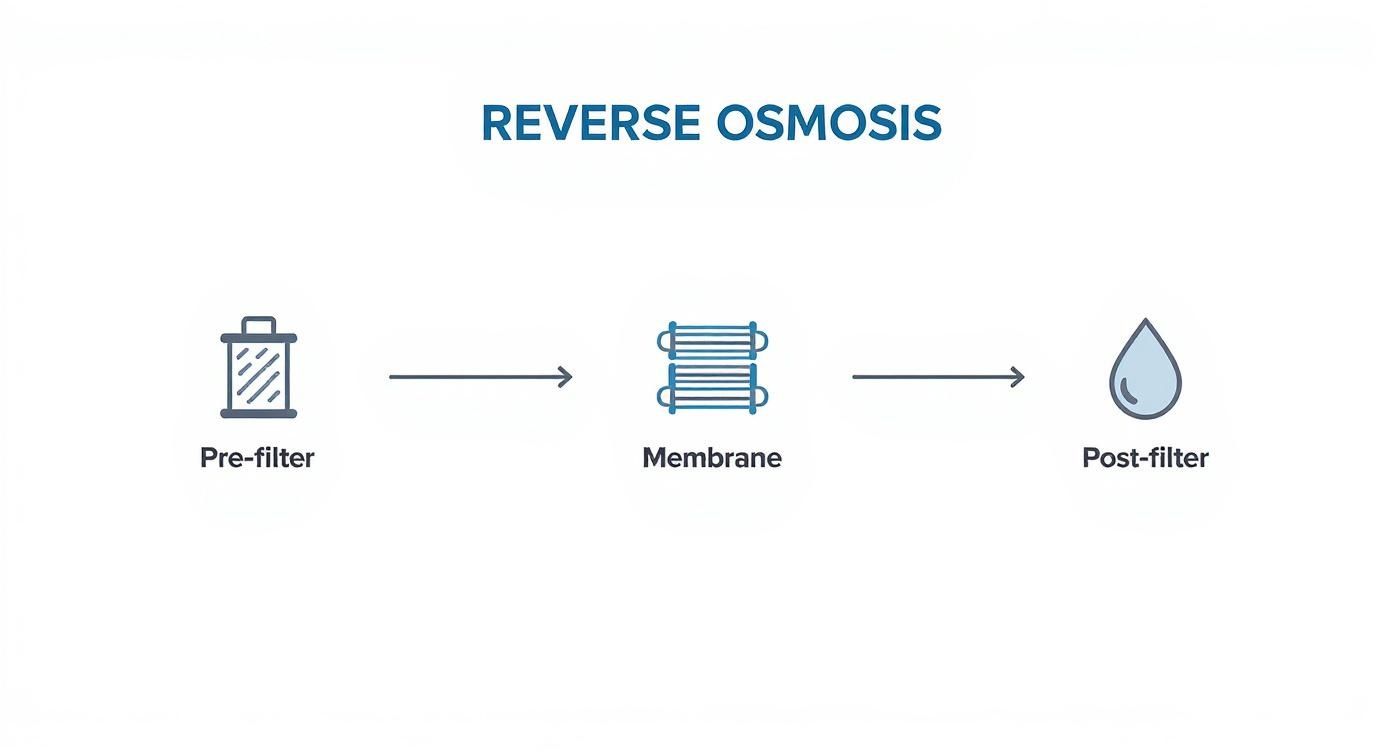
Each stage has a specific role, but the RO membrane is the star of the show, separating pure water molecules from nearly everything else.
The secret is the semi-permeable membrane at the heart of the system. Its pores are incredibly tiny—about 0.0001 microns—so they block almost anything that isn't a water molecule.
An RO system’s real claim to fame is its ability to remove up to 99% of Total Dissolved Solids (TDS). This is a massive category that includes some of the most serious health concerns, many of which you can't see, taste, or smell.
Let's put them side-by-side to see where RO really shines.
| Contaminant Concern | Standard Filter (Activated Carbon) | Reverse Osmosis System | The Bottom Line |
|---|---|---|---|
| Chlorine | Excellent | Excellent (via pre-filter) | Both are great for fixing this common taste and smell problem. |
| Lead & Heavy Metals | Limited / None | Excellent | RO is the clear winner for removing lead, arsenic, mercury, and other metals. |
| Fluoride | Ineffective | Excellent | If you want to remove fluoride, an RO membrane is the only reliable way. |
| Nitrates & Sulfates | Ineffective | Excellent | These dissolved salts get right through carbon but are stopped by an RO membrane. |
| Bacteria & Viruses | Ineffective | Highly Effective | The pores in an RO membrane are just too small for microorganisms to get through. |
| Total Dissolved Solids (TDS) | No Reduction | Excellent (up to 99%) | This is the key difference. RO cleans water at the molecular level. |
Seeing it laid out like this makes the decision much simpler. If your main goal is just to improve the taste of your city water, a standard filter is a solid, budget-friendly choice. But if you're worried about specific health-related contaminants like lead, fluoride, or arsenic—or you just want the purest water possible—a reverse osmosis system is hands-down the best option for your home. It delivers a level of confidence that standard filters just can't offer.
Let's get practical. Beyond what a filter actually removes from your water, the real-world factors of cost, upkeep, and setup are often what seal the deal. This is where the filtered water vs. reverse osmosis debate really heats up, because the right choice for your home has to balance the upfront investment with long-term effort and expenses.
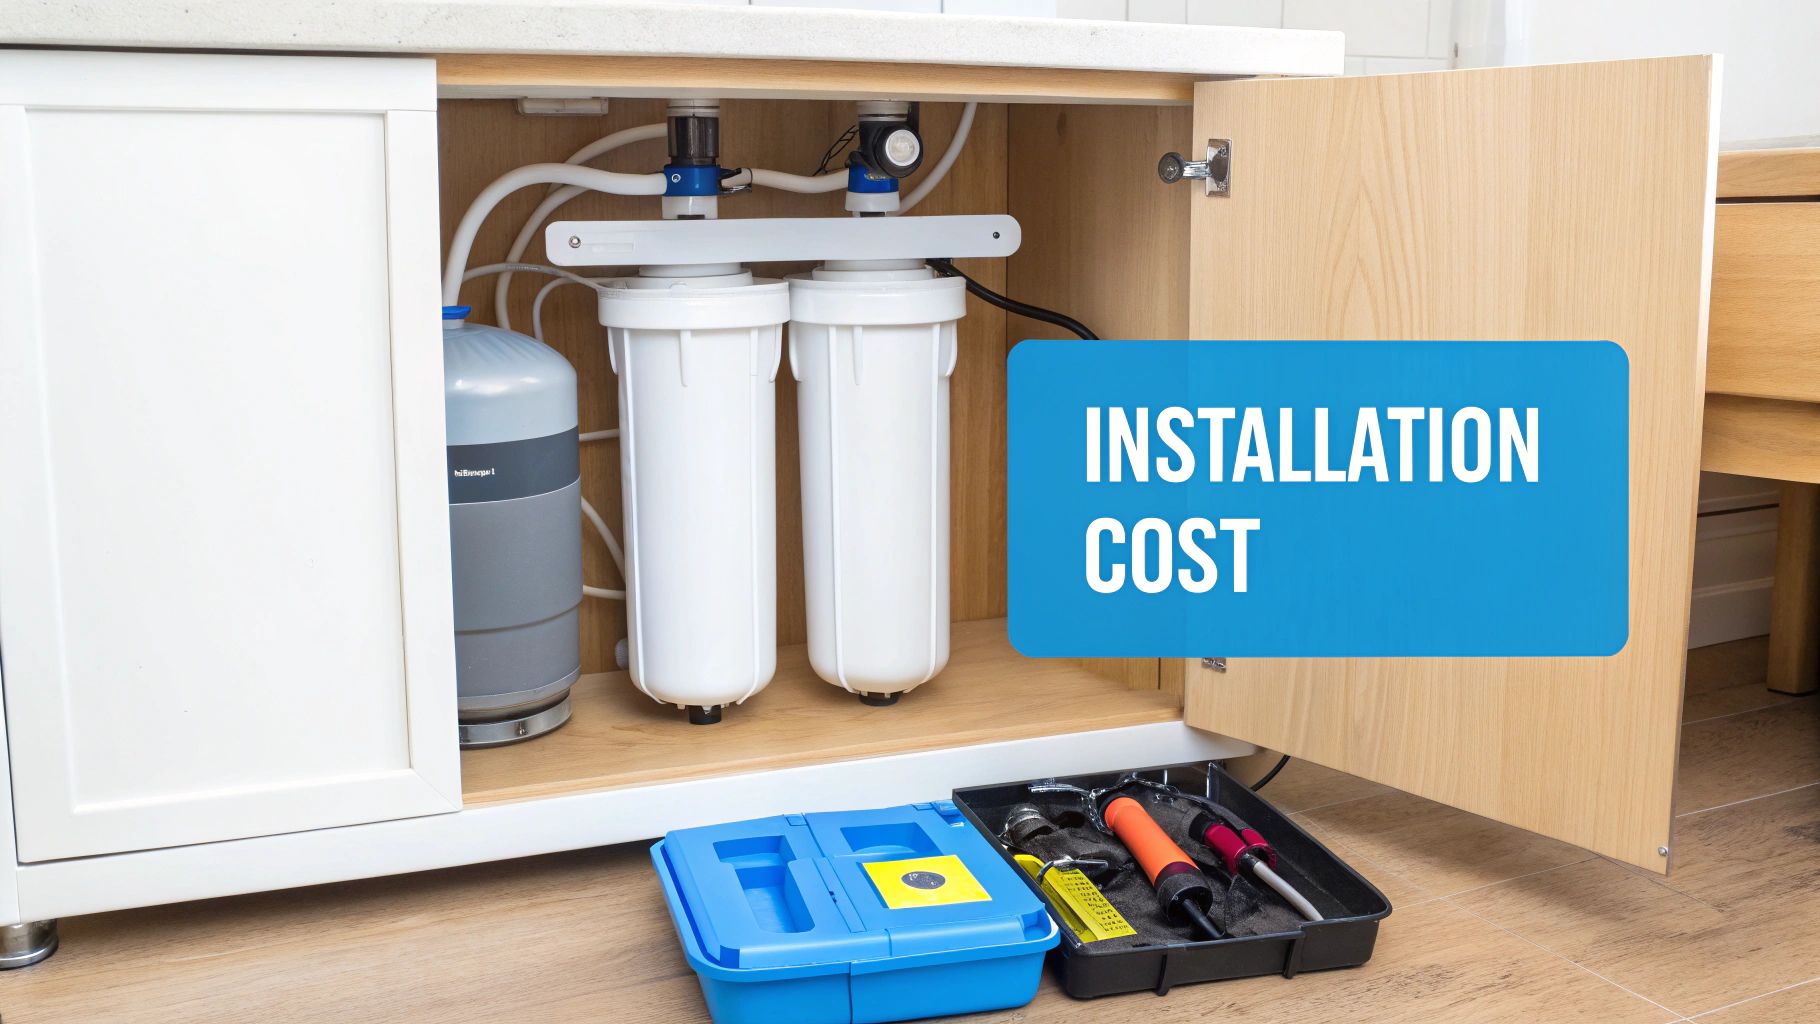
Standard filters, like the pitcher in your fridge or a simple faucet attachment, are incredibly easy to get started with. You can grab one for as little as $20-$50, making them a super accessible first step toward better water. The catch? Their true cost is hidden in the constant, recurring expense of replacement filters, which can absolutely pile up over a year.
On the other side of the ring, reverse osmosis (RO) systems are a more serious initial investment. You’re typically looking at $150 to over $500 for a solid under-sink model. While that stings a bit more upfront, the ongoing maintenance is usually more predictable. The workhorse RO membrane can last for 2-4 years, spreading that cost out over a much longer timeline.
You have to look at the total cost of ownership, not just the price tag on the box.
That simple water pitcher might seem like a bargain, but if you're replacing its $15 filter every two months, you're spending $90 a year. Fast forward three years, and you've sunk $270 into a solution that only filters water for one pitcher at a time.
Now, let's look at an under-sink RO system that costs $250 to buy. Its annual filter kits—for the sediment and carbon pre-filters—usually run about $60-$80. The main RO membrane, which costs around $50-$100, only needs to be swapped out every few years. When you do the math, RO often becomes the more cost-effective choice for truly pure drinking water in the long run.
Thinking about the long-term care of a water system is a lot like other home improvement projects. It's smart to see it as part of your overall upkeep strategy, similar to the other essential home maintenance tips that keep your house running smoothly.
The setup experience couldn't be more different between standard filters and RO systems. It’s the classic trade-off: simplicity for performance.
The Installation Verdict: If you're renting or just want an immediate, no-fuss fix, standard filters are the hands-down winner. But for homeowners willing to tackle a straightforward plumbing project for far superior water quality, an under-sink RO system is a rewarding and permanent upgrade.
One of the biggest knocks against reverse osmosis has always been water waste. And it’s true—early models were horribly inefficient, sending gallons of water down the drain for every gallon of pure water they produced. But this is one area where the technology has made huge leaps.
Modern, high-efficiency RO systems have drastically improved their game. We've come a long way from the old days where a system might waste three or more gallons for every one it purified. Thanks to better membrane technology, some newer systems have drastically cut down on waste water, making them far more efficient.
This makes today's RO a much more responsible and sustainable choice for any eco-conscious homeowner.
Choosing between standard filtered water and reverse osmosis really boils down to your specific situation. We’ve gone through the tech and the costs, but now it's time to connect that to the reality of your kitchen sink. The "best" choice isn't about which system is superior on paper, but which one truly fits your home, your water, and your lifestyle.
To simplify things, let’s walk through a few common household scenarios. Your own needs will almost always point you straight to the right solution.
Take a moment to think about your living situation and what your main worries are about your water. The right answer usually becomes obvious when you look at it this way.
For the Renter or College Student: You need a portable, no-installation fix to make your water taste better. A simple pitcher or faucet filter is perfect. They give you immediate results for chlorine and odors without making any permanent changes to the plumbing.
For the Suburban Family on City Water: You generally trust your municipal supply for safety but worry about hidden stuff like lead from old pipes or trace industrial chemicals. An under-sink reverse osmosis system is your strongest move for targeted, high-level purification right where you get your drinking and cooking water.
For the Homeowner with Well Water: If you're on a private well, you are 100% responsible for your water's safety. Well water can have a huge range of unknown contaminants like nitrates, arsenic, and bacteria. In this case, a reverse osmosis system is almost always the go-to recommendation for real peace of mind and comprehensive protection.
The core of the filtered water vs. reverse osmosis debate is this: standard filters improve water, while reverse osmosis systems purify it. Your choice hinges on which of those two things your water actually needs.
Feeling a bit overwhelmed? Don't be. You can pick the perfect system with confidence by following three simple steps. This approach cuts through the noise and zeroes in on what actually matters for your family.
Test Your Water: You can't fix a problem you don't understand. The first step is always getting a quality water test kit to see exactly what’s in your tap water. This data is the single most critical piece of the puzzle.
Evaluate Your Budget: Look at both the upfront price and the long-term cost of replacing filters. A pitcher is cheap to buy, but those filter costs add up. An RO system is a bigger initial investment but usually has more predictable yearly maintenance.
Consider Your Installation Capabilities: Be honest with yourself about your DIY comfort level. Are you looking for something you can use right out of the box, or are you okay with a more involved under-sink installation?
For more great tips on choosing a system that works for you, check out the helpful resources in our detailed water filter advice section.
By taking this approach, you move past just comparing specs on a box and instead choose the system that is genuinely the right fit for your home's unique water challenges.
Even with all the details laid out, you probably still have a few lingering questions. That's perfectly normal. Let's tackle some of the most common ones we hear to help you feel confident in your decision.
Yes, that's a fair point. An RO membrane is so powerful that it pulls out nearly everything—that includes beneficial minerals like calcium and magnesium right along with the bad stuff. But here's the thing: most people get the vast majority of their essential minerals from a healthy diet, not from their tap water.
If you're still concerned, many modern RO systems have a great solution: an optional remineralization filter. This adds a balanced mix of healthy minerals back into the water right before it comes out of the faucet, which also tends to improve the taste and pH.
That really depends on the system you choose and how much gunk is in your starting water. It’s a bit of a sliding scale.
Always double-check the manufacturer's recommendations. If you have particularly high sediment or heavy usage, you might need to change them a bit sooner. Staying on schedule is the key to keeping your water pure.
Honestly, not usually. It's definitely more involved than just filling up a pitcher, but most under-sink RO systems are designed for a homeowner to install themselves. The kits come with everything you need and step-by-step instructions.
You'll basically be connecting a valve to your cold water line, installing a new, dedicated faucet (this might mean drilling a small hole in your countertop), and running a tube to your sink's drain. If you're comfortable with a few basic tools, it's a project you can easily knock out on a Saturday.
At Water Filter Advisor, we want to help you find the right solution for your home. Check out our detailed guides and reviews to make a smart, cost-effective choice for your family at https://www.waterfilteradvisor.com.

You can’t always trust your eyes. That crystal-clear water flowing from your kitchen tap might be hiding some nasty secrets. The only real way to know what you’re drinking is to test water heavy metals—we’re talking about invisible villains like lead and arsenic that pose serious health risks. Getting proactive about testing is the single best way to make sure the water in your home is safe and to find the perfect filtration system for your family.
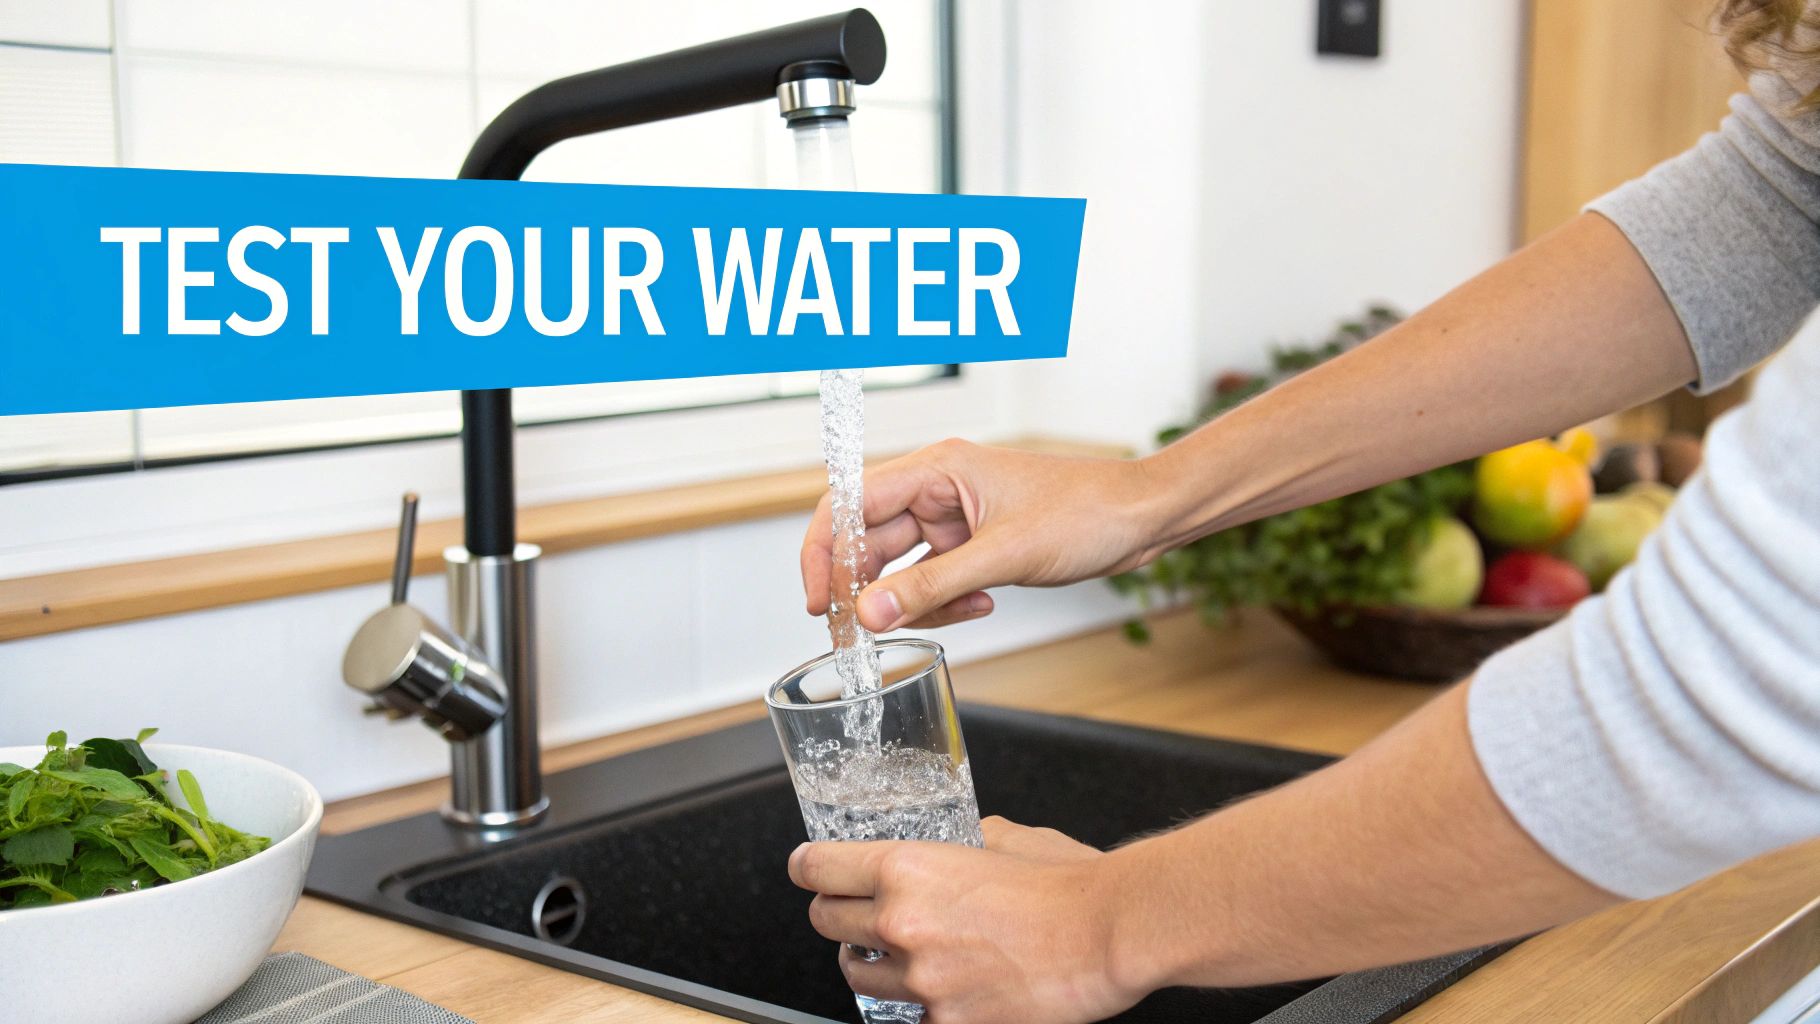
It’s easy to get a false sense of security, especially if your local water report comes back with a clean bill of health. But here’s the thing: those reports only tell part of the story. They test the water at the treatment plant, not at the end of its journey—your faucet. This is where a home filtration strategy becomes your best line of defense.
The real problem often crops up in the miles of pipes the water travels through to get to you. Much of this infrastructure is decades old, and that’s where heavy metal contamination can really take hold.
For instance, many older homes and communities still have plumbing made with lead or copper. Over time, these pipes corrode, and tiny, microscopic particles flake off into the water passing through. This means that water that was perfectly safe when it left the plant can pick up a load of contaminants just a few feet before it fills your glass—a problem only a point-of-use or whole-house filter can solve.
It isn’t just about the pipes leading to your house, either. The water source itself, whether it’s a city supply or a private well, is exposed to all sorts of environmental factors that can introduce heavy metals long before it ever gets treated.
A few common culprits include:
The unsettling truth is that even if your water looks, smells, and tastes perfectly fine, it could still have elevated levels of these harmful elements. Because they are colorless and odorless, the only way to be certain is to perform a test.
At the end of the day, your city’s report gives you a general snapshot, but a home test gives you the real picture of what your family is actually drinking. It’s the essential first step to choosing a water filtration system that truly protects your household.
So, you're ready to find out what's really lurking in your tap water. Great! Your first mission, should you choose to accept it, is deciding how you're going to test it.
When you're looking to test water for heavy metals, you've got two main routes: the quick-and-easy DIY test kit or the comprehensive professional lab analysis. Think of it like this: a DIY kit is like taking your temperature at home, while a lab test is like getting a full diagnostic workup from a specialist. Both are useful, but they serve very different purposes in your quest for clean water.
DIY kits are all about instant gratification. They’re cheap, you can find them almost anywhere, and you get results in minutes. Most work by dipping a test strip into a water sample and matching the color it turns to a chart. It’s a fantastic way to get a quick, general overview and find out if you need to investigate further.
Just keep in mind that these kits are mostly qualitative. They’ll tell you if a contaminant is present, but usually not how much. You'll get a simple "yes" or "no," which might be all you need to decide it’s time to upgrade from a basic pitcher filter. For anyone who enjoys a hands-on approach, using a DIY kit fits right in with other DIY home upkeep strategies.
On the flip side, you have professional lab analysis. This is the gold standard for accuracy, no contest. It costs more and you'll have to wait a bit—usually a week or two for the report. But the level of detail you get in return is your secret weapon for choosing the perfect home filtration system.
You'll receive a report with precise, quantitative data showing the exact concentration of various heavy metals, often measured down to the parts per billion (ppb).
This kind of detail is absolutely essential in a few common situations:
Choosing a method isn't just about cost; it's about confidence. A DIY kit gives you a clue, but a lab test gives you the definitive blueprint for building your home's water defense system.
To help you weigh your options, I've put together a simple table that breaks down the key differences between the two methods.
This side-by-side comparison should make it easier to decide which water testing method fits your needs, budget, and how much accuracy you're looking for.
| Feature | DIY Test Kits | Professional Lab Analysis |
|---|---|---|
| Accuracy | Good for presence/absence | Highly accurate quantitative results |
| Cost | Generally $20 – $50 | Typically $100 – $300+ |
| Speed | Instant or within minutes | 1-2 weeks for results |
| Scope | Tests for a limited range of metals | Can test for a wide array of contaminants |
| Best For | Quick screenings, routine checks | Health concerns, filtration planning, well water |
So, what's the verdict? A DIY kit is a fantastic first step. If it flags anything concerning, follow up with a professional lab analysis. That hard data is exactly what you need to pick the perfect filtration solution and declare victory over contaminants.
When you set out to test your water for heavy metals, the accuracy of your results boils down to one simple thing: how well you collect the sample. It's a bit like a crime scene investigation—if you accidentally contaminate the evidence, the lab's findings are useless. A small mistake here can lead you to buy the wrong filter or, worse, miss a real problem entirely.
Luckily, getting a clean sample is easy once you know what to do. The whole process starts with a single question: what are you actually trying to measure? Are you checking the water coming from the city's main line, or are you trying to figure out if your own pipes are leaching lead? Each goal needs a slightly different approach.
You'll need to understand the difference between a "first draw" and a "flushed" sample. They each tell a unique story about your water and can help you pinpoint where to install a filter.
First Draw Sample: This is literally the first water out of your tap in the morning. You collect it before you run any faucets, showers, or flush any toilets. This water has been sitting still in your pipes all night, giving it plenty of time to pick up any contaminants like lead or copper. This is the most important test for sniffing out problems inside your own home's plumbing.
Flushed Sample: To get this sample, you'll let the cold water run for a solid 3-5 minutes before filling the bottle. This pushes all the stagnant water out of your home's pipes and pulls in fresh water from the main supply or your well. This sample tells you what the water quality is like before it even gets to your plumbing.
Taking both samples gives you the full picture. If your first-draw results show high lead but the flushed sample is clean, you’ve just pinpointed the problem to your home's pipes or fixtures. Now you know an under-sink filter might be a better solution than a whole-house system.
This simple three-step process—from grabbing a sample to understanding the results—is the foundation of taking control of your water quality.
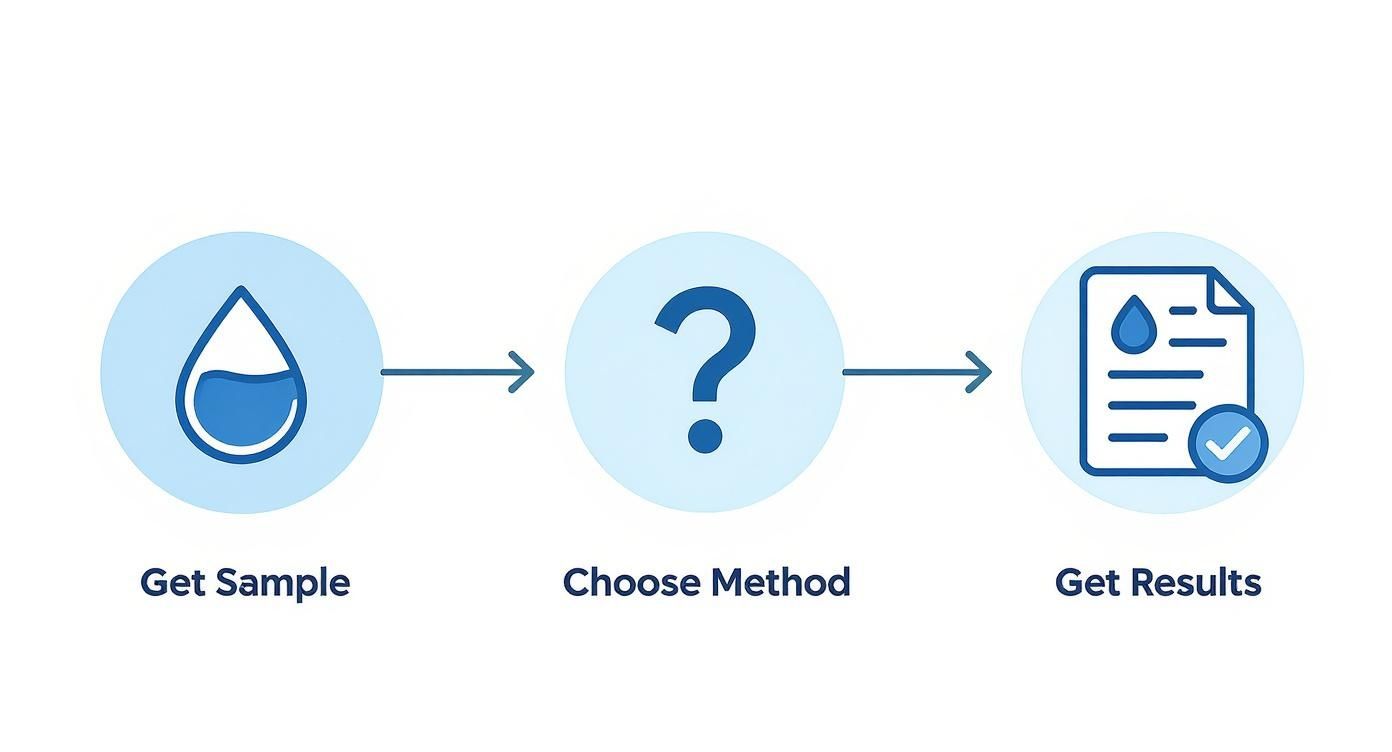
As you can see, it all starts with that first step. A good sample leads to good data and, ultimately, the right filtration choice.
To make sure nothing skews your results, here are a few critical but easy-to-follow guidelines I always recommend.
Following these steps is the best way to ensure that when you test water for heavy metals, you’re getting a real-world snapshot of what’s coming out of your tap. From there, you can confidently find the right filter to fix it.
Getting that lab report back can feel a little intimidating. It often looks like a foreign language—just a wall of numbers, chemical symbols, and acronyms that don't mean much at first glance.
But don’t sweat it. This report is your treasure map, and it's about to lead you straight to the perfect water filter. Once you get the hang of a few key terms, you’ll be able to read it like a pro.
You’ll probably notice measurements like mg/L (milligrams per liter) or ppb (parts per billion). To put that into perspective, one part per billion is like a single drop of water in an Olympic-sized swimming pool. It sounds microscopic, but for potent heavy metals like lead and arsenic, even those tiny amounts are a big deal.
Your report will list out the metals and their concentrations. Your job is to play detective and compare these numbers against the safety benchmarks set by the Environmental Protection Agency (EPA).
The EPA sets a Maximum Contaminant Level (MCL) for many substances found in public drinking water. This is the absolute highest level of a contaminant that’s legally allowed. For some of the most dangerous metals, though, the goal is much, much stricter.
Let's break down a few common heavy metals and what the EPA guidelines say:
The big takeaway here is that just because a metal is detected doesn't automatically mean your water is dangerous. It's all about comparing the concentration found in your test to these established safety limits to determine your filtration needs.
Let’s say you get your results back and see 22 ppb of lead and 5 ppb of arsenic.
The arsenic level (5 ppb) is under the EPA’s 10 ppb limit, so that’s good news. But the lead level at 22 ppb is a different story—it's significantly over the 15 ppb Action Level. This result is a clear red flag that you have a lead contamination issue that needs to be addressed with a targeted filtration system.
And this isn't just an issue in old cities. Heavy metal contamination is a massive global problem. A 2025 global soil study revealed that up to 17% of the world’s arable land is contaminated with toxic heavy metals, which can seep into water sources. You can discover more about these heavy metal findings to get a sense of the scale of the problem.
Understanding your report is what moves you from just having data to taking decisive action. When you test water heavy metals and decode the results, you gain the clarity needed to choose the perfect filtration solution, ensuring every drop from your tap is safe.
Okay, you’ve got your test results. The worrying part is over, and now you know exactly what you’re dealing with. This is the moment you can take real action and choose a defense for your home.
It’s all about connecting the dots—linking the data from your water report to a specific filtration technology that will actually solve the problem.
Let's be clear: a basic pitcher filter is great for making water taste better. But when you’re up against serious contaminants like lead or arsenic, you need to bring in the heavy artillery.
If your report lit up like a Christmas tree showing several different heavy metals—even at low levels—a reverse osmosis (RO) system is usually your best bet. Think of an RO system as an elite bodyguard for your water supply. It forces water through an incredibly fine membrane with microscopic pores.
This membrane is so effective that it blocks a huge range of contaminants, typically knocking out over 95% of heavy metals like lead, arsenic, mercury, and copper. It’s a true workhorse for getting exceptionally pure drinking and cooking water right at your kitchen sink.
Consider an RO system if:
Investing in the right filter is a direct response to your water quality report. It’s not about guessing; it's about using your data to make a confident, targeted decision that protects your family’s health for years to come.
Sometimes your report might pinpoint just one or two specific culprits, like lead leaching from old pipes or unusually high copper levels. In a situation like that, a more specialized filter might be a smarter and more cost-effective choice than a full RO setup.
Kinetic Degradation Fluxion (KDF) filters are a perfect example. These systems use a high-purity copper-zinc alloy that starts an electrochemical reaction, essentially neutralizing contaminants like lead, mercury, and chlorine and turning them into harmless substances. You'll often find KDF media inside whole-house systems or high-end shower filters.
While industrial pollution is a significant source of heavy metals, it's worth noting that strong regulations work. In Europe, for example, industrial releases of metals like lead and mercury into waterways have plummeted over the last few decades. You can discover more about these environmental improvements to see how focused efforts can create cleaner water for everyone.
When you test water heavy metals, you’re creating a roadmap. Your results point you directly to the filtration technology that will turn your tap water from a source of concern into a source of pure, safe hydration.
Once you’ve decided to test your water, you’re bound to have a few more questions. That’s totally normal. People often wonder about the costs involved, how often they really need to re-test, and whether their filters are actually doing the job they’re supposed to.
Let’s clear up some of that confusion so you can feel confident you're on the right track.
The first thing on everyone's mind is usually the cost. A DIY kit is your most budget-friendly option, typically running under $50. It’s a great starting point. If you go for a certified lab analysis, expect to spend between $100 and $300. I always tell people to think of it as an investment—that detailed lab report is your roadmap to a solid filtration strategy.
This is a big one, and it really comes down to where your water comes from and what your first test results look like.
Here’s a pro tip: If you discover high levels of a specific heavy metal, you’ll want to re-test about 1-3 months after you install a new filter. This is the only way to be certain the system is working and has knocked those contaminant levels down to a safe range.
It's a common misconception that any filter will remove all contaminants. The truth is, a filter's effectiveness is all about its specific technology. That basic carbon pitcher filter does a fine job with chlorine, but it won’t touch things like lead or arsenic. This is exactly why you need to match your filter to your test results.
A reverse osmosis (RO) system, for instance, is a powerhouse against heavy metals and can remove over 95% of most contaminants. But even then, no single system gets rid of 100% of everything. When you test water heavy metals, you get the exact data you need to choose the right line of defense.
You can find more helpful information in our extensive library of water filtration advice to guide your decision-making process.
At Water Filter Advisor, we're committed to helping you find the perfect, most effective solution for your home's specific needs. Explore our reviews and guides to make a confident choice for your family's health and safety.
So, you're standing in the water filter aisle (or scrolling through endless web pages), and you’re faced with a choice: reverse osmosis water filter vs carbon filter. It sounds complicated, but it all boils down to one simple question: What kind of superhero does your tap water need?
Are you looking for an all-powerful purifier that zaps nearly everything—from heavy metals to dissolved solids and fluoride—out of existence? Then a Reverse Osmosis (RO) system is your champion. But if you just want to improve the taste and smell of your city tap water by kicking chlorine to the curb, a simple carbon filter is a smart, budget-friendly sidekick.
Choosing the right filter for your home shouldn't feel like a chemistry exam. Once you grasp what each technology is built for, the decision gets a lot easier. It’s like picking between a sledgehammer and a scalpel. Both are great tools, but for very different jobs.
Think of a carbon filter as a specialist—a taste-and-smell artist. Its main gig is to make your water more enjoyable by grabbing onto chemicals like chlorine. An RO system, on the other hand, is the all-in-one powerhouse. It's designed for serious purification, removing a much, much wider range of contaminants and giving you water that’s close to pure H₂O.
For a quick snapshot, let's lay out the key differences side-by-side. This table really highlights how a reverse osmosis water filter vs carbon filter compares on the things that matter most to homeowners.
| Feature | Reverse Osmosis (RO) Filter | Carbon Filter |
|---|---|---|
| Primary Function | Water purification (removes up to 99% of contaminants) | Water improvement (removes taste & odor impurities) |
| Key Contaminants Removed | Heavy metals, fluoride, dissolved solids, salts, bacteria | Chlorine, pesticides, VOCs, sediment |
| Installation Complexity | More involved; usually needs under-sink plumbing | Simple; available as pitchers, faucet mounts, or under-sink |
| Initial Cost | Higher | Lower |
| Maintenance | Multiple filters and a membrane replaced periodically | Single cartridge replaced every few months |
| Best For | Households wanting the highest purity for health concerns | Improving the taste and smell of city tap water |
After seeing the comparison, it’s clear they serve two distinct needs.
At the end of the day, the right filter for you depends on where your water comes from and what your standards are. If you’re on city water that’s generally safe but tastes like a swimming pool because of the chlorine, a carbon filter is an excellent, low-cost fix. It's a no-fuss way to get crisp, clean-tasting water right from your faucet.
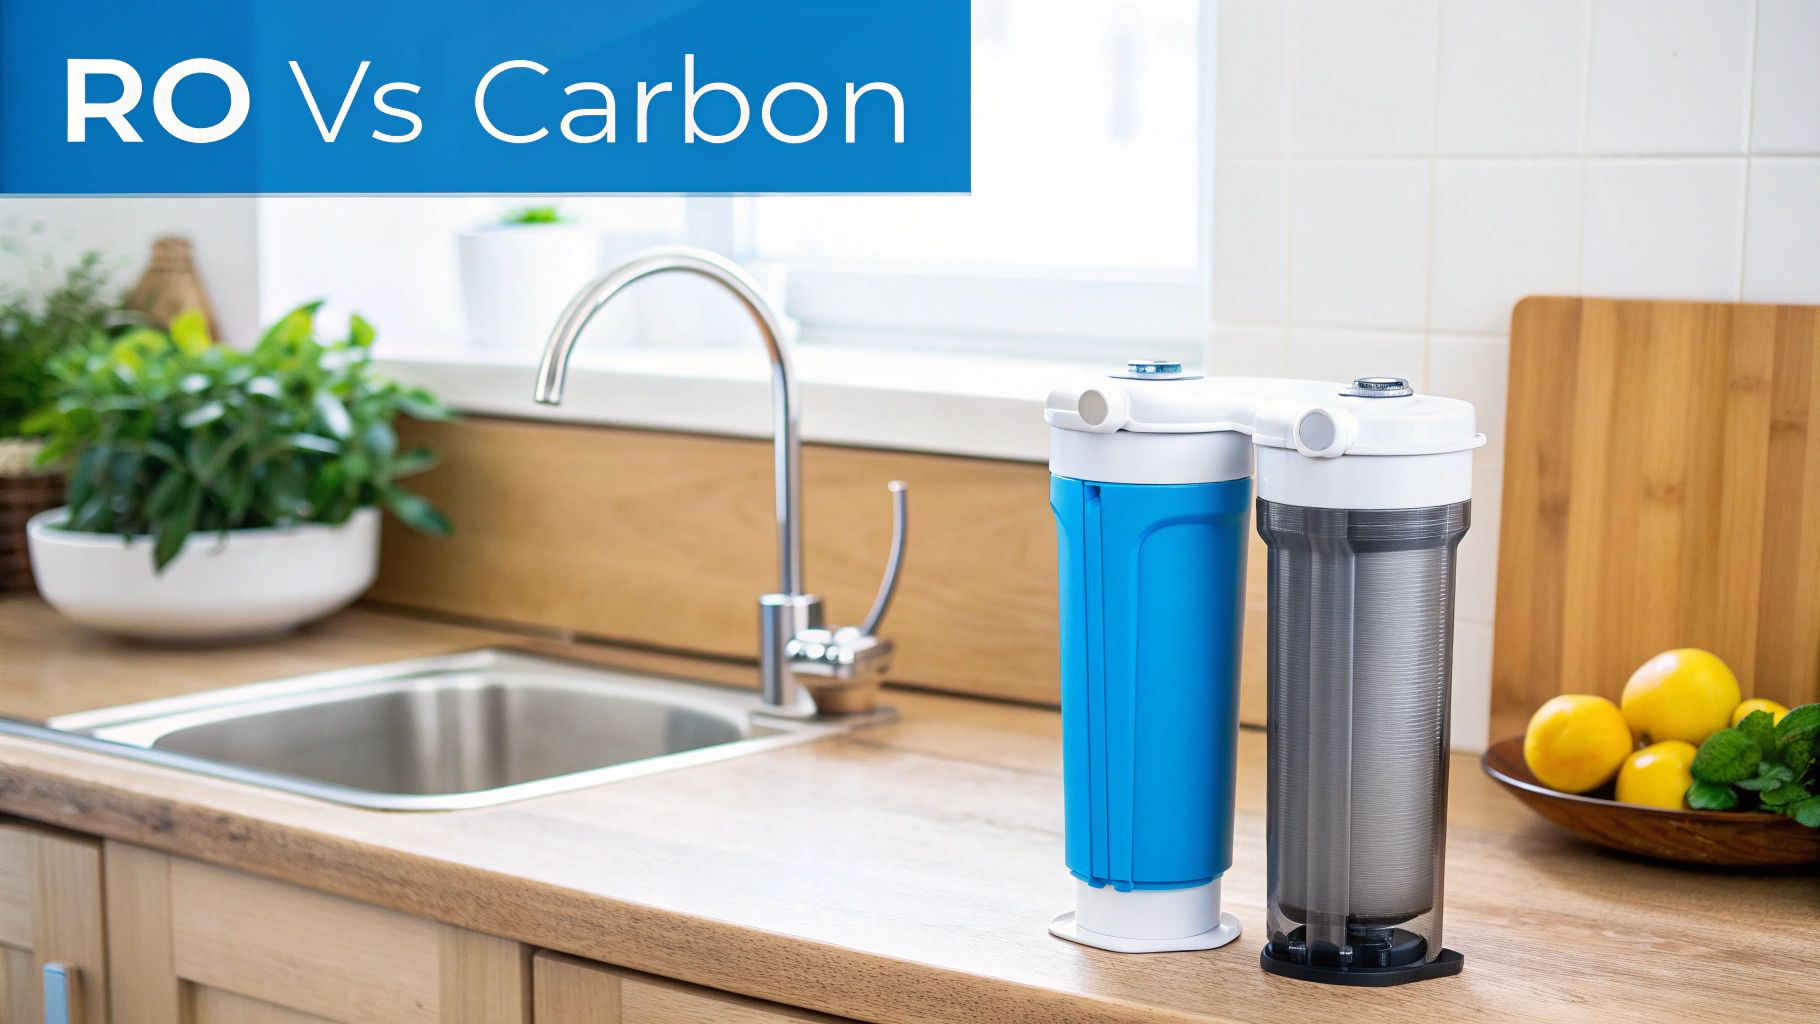
On the flip side, if you're using well water or are worried about specific contaminants like lead, arsenic, or nitrates, an RO system offers real peace of mind.
An RO system offers a robust defense against a vast array of unseen contaminants, making it an investment in your family's long-term health, not just a solution for better-tasting water.
This basic difference—purification vs. improvement—is the most important thing to remember in the reverse osmosis water filter vs carbon filter debate. As we dig deeper, you'll see how this single distinction affects everything from cost and upkeep to the exact contaminants each system can tackle.
To really settle the reverse osmosis water filter vs carbon filter debate, you have to get under the hood and see how they actually work. They both give you cleaner water, but their approaches are completely different—think a high-tech security gate versus a super-powered sponge. One physically blocks junk from getting through, while the other uses a chemical attraction to grab and hold onto it.
Picture a bouncer at an exclusive club with a list that's impossible to get on. That’s pretty much a reverse osmosis (RO) system. The star of the show is a semipermeable membrane, which is a fancy way of saying it has microscopic holes just barely bigger than a water molecule.
Your home's water pressure does all the work, pushing tap water up against this membrane. The tiny water (H₂O) molecules squeeze through, but nearly everything else gets stopped cold and physically blocked. We’re talking dissolved solids, salts, heavy metals like lead and arsenic, fluoride—even some microorganisms. The good, purified water collects on one side, while all the rejected gunk gets flushed down the drain as wastewater.
This brute-force physical separation is exactly why so many homeowners who want the purest water possible turn to RO. It's a full-on purification process, not just a simple filter.
It’s no surprise that RO systems are a huge force in the home water filtration market. The RO segment grabs a massive 38.5% of the global market share, and that's because it's proven to remove up to 99% of dissolved salts, lead, bacteria, arsenic, and other nasty stuff. For families, that kind of performance provides real peace of mind. If you want to dive deeper, you can explore more insights on water filter market trends.
Basically, a reverse osmosis system breaks your tap water down on a molecular level, separating the pure H₂O from almost everything else mixed in. It's the closest thing to getting bottled-water quality straight from your tap.
Okay, now let's switch over to carbon filters. If RO is the bouncer, then a carbon filter is like a giant, magnetic sponge. The magic here is a process called adsorption, where impurities literally stick to the filter material instead of being physically strained out.
These filters are packed with activated carbon, which usually comes from something like coconut shells. The carbon is specially treated to give it a ridiculously porous structure and a massive internal surface area. To put it in perspective, a single gram of this stuff can have the same surface area as a football field.
As water flows through, things like chlorine, pesticides, herbicides, and volatile organic compounds (VOCs) are chemically drawn to the carbon's surface and trapped. This is why carbon filters are rockstars at making city water taste and smell better—they're exceptional at pulling out the chlorine that's added for disinfection.
Here’s a quick look at how the adsorption process works:
This method is fantastic for specific chemical contaminants, but it won't touch dissolved solids, salts, or most heavy metals. It's a targeted tool for improving aesthetics, not a comprehensive purification system, which is a key difference when you’re comparing a reverse osmosis water filter vs a carbon filter.
When you put a reverse osmosis filter and a carbon filter in a head-to-head matchup, the real difference is what each one actually pulls out of your water. This isn’t a simple question of which is “better.” It’s about picking the right tool for the job.
Think of it this way: one is a broad-spectrum solution designed to tackle nearly everything, while the other is a specialized treatment for the most common issues that affect taste and smell. The distinction is pretty stark. RO systems are built for maximum purification, while carbon filters are masters of targeted chemical adsorption.
Let's start with the most serious contaminants, like heavy metals and total dissolved solids (TDS). This is where the gap between the two technologies is widest.
A reverse osmosis system is the undisputed champ here. Its semipermeable membrane is the key—it physically blocks particles down to an incredible .0001 microns. This brute-force approach allows it to remove a long list of nasty stuff, including:
A standard carbon filter, on the other hand, just wasn't designed for this kind of work. It can't remove dissolved solids, salts, or the vast majority of heavy metals. While some specialized carbon block filters might reduce lead, they don't come close to the comprehensive removal you get from an RO system.
While a carbon filter makes water taste great, only a reverse osmosis system can reliably remove nitrates and dissolved salts. This is a critical distinction for anyone on well water or in an area with known contamination issues.
Now, let's talk about the things you can actually taste and smell. This is where the carbon filter really gets to show off and why it's the perfect solution for so many people.
The main reason city water tastes "off" is chlorine, which is added as a disinfectant. An activated carbon filter is an absolute powerhouse at adsorbing chlorine. As water passes through the filter media, the carbon's huge surface area snags and holds onto chlorine molecules, instantly getting rid of that "swimming pool" taste and smell.
Carbon filters also do a fantastic job of removing:
Even though most RO systems have a carbon pre-filter to protect the sensitive membrane, the carbon filter's main job in any system is improving taste and odor.
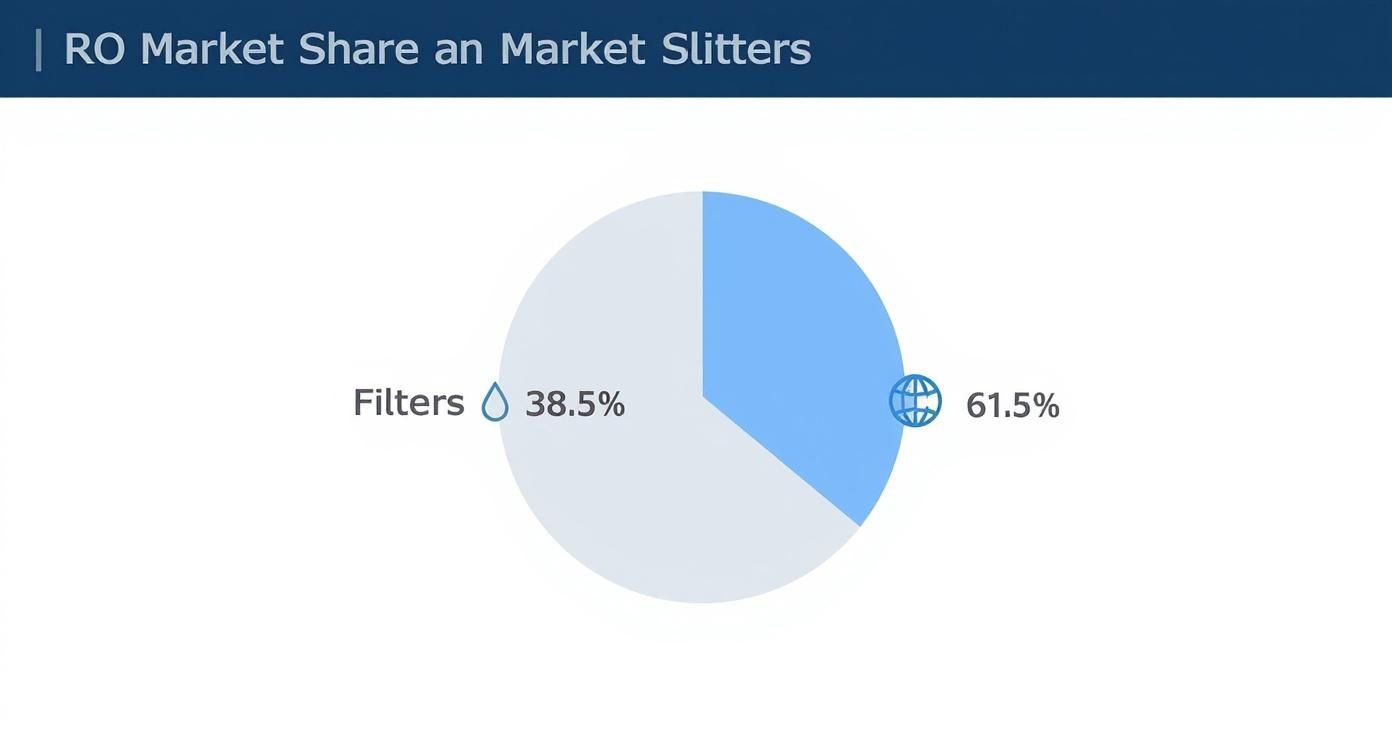
This infographic shows just how popular RO systems are, holding a massive 38.5% of the market. It really highlights that many consumers are looking for that deeper level of purification that goes far beyond just making the water taste better.
To break it down even further, here's a look at how each filter type stacks up against common contaminants.
| Contaminant Type | Reverse Osmosis Filter | Carbon Filter |
|---|---|---|
| Heavy Metals (Lead, Arsenic) | Excellent (95-99% removal) | Poor to Fair (Specialized filters may reduce lead) |
| Total Dissolved Solids (TDS) | Excellent (90-99% removal) | No Removal |
| Chlorine & Chloramine | Good to Excellent (Often has a carbon stage) | Excellent (Primary function) |
| VOCs & Pesticides | Good to Excellent (Carbon stage handles this) | Excellent (Adsorbs effectively) |
| Fluoride | Excellent (90-97% removal) | No Removal |
| Bacteria & Viruses | Very Good (Physical barrier) | Poor (Can harbor bacteria if not changed) |
| Cysts (Giardia, Crypto) | Excellent (Physical barrier) | Fair to Good (Requires a 0.5-micron rating) |
As you can see, the RO system offers a much broader shield against a wider array of potential threats. The carbon filter is more of a specialist, excelling at the aesthetic issues that plague most tap water.
When we get into biological contaminants like bacteria, cysts, and viruses, the lines can get a little fuzzy, but the RO system still comes out on top.
The pores in an RO membrane are so tiny that they physically block most bacteria and viruses from passing through, making it a very effective line of defense. It's worth remembering, though, that most residential RO systems aren't officially certified as microbiological purifiers.
Carbon filters, for the most part, do not remove bacteria or viruses. Worse, an old carbon filter that isn't changed on schedule can actually become a breeding ground for bacteria. Some high-end carbon block filters with a very fine micron rating (like 0.5 microns) can remove larger cysts like Giardia and Cryptosporidium, but they won't stop smaller bacteria or any viruses. For biologically unsafe water, a carbon filter just isn't the right choice.
Because they're so good at fixing the number one complaint about tap water—the taste—carbon filters are incredibly popular. They command a huge share of the market by removing chlorine, sediment, and VOCs, but they can't match the heavy-duty purification of an RO system. You can read the full analysis on the under-sink filter market to dig deeper into the numbers.
Ultimately, the choice comes down to your specific water quality concerns. If you need broad-spectrum protection from a whole host of contaminants, RO is the way to go. If your water is generally safe but just tastes bad, a carbon filter is a simple, effective, and budget-friendly solution.
Beyond just what they remove, the practical side of things—your budget and willingness to do upkeep—is a huge factor in the reverse osmosis water filter vs carbon filter debate. The true cost isn't just the price on the box. You've got to think about installation, filter replacements, and even hidden costs like wastewater. Let's break it down so you can see which system really fits your life and your wallet.
Right off the bat, the initial investment for these two systems is miles apart. Carbon filters are generally much cheaper to get started with, giving you options from simple faucet attachments to more serious under-sink units. An RO system, on the other hand, is a more significant purchase because of its complex, multi-stage setup.
The financial barrier to entry is probably the clearest difference here. You can pick up a simple under-sink or countertop carbon filter for a pretty low price, often well under $100. Their design is so straightforward that most people can install one themselves in less than an hour with just basic tools.
Reverse osmosis systems are a different story. They typically start in the low hundreds and can climb much higher for high-end models. The installation is also a bigger job. You'll likely need to drill a hole in your countertop for its own special faucet, hook up a drain line to your sink's plumbing, and find space for the storage tank. A confident DIYer can pull it off, but many people just call a plumber, which adds to that initial cost.
This is where the long-term cost comparison gets a little more nuanced. Carbon filters are cheap to buy, but you'll be buying replacement cartridges, and those costs can add up. This is especially true for the smaller pitcher or faucet-mounted filters that need to be swapped out pretty frequently.
An RO system’s maintenance is more involved but often more predictable. You’re looking at replacing a few different filters on different schedules:
While the total annual cost for RO filter replacements might be higher than for a simple carbon filter, the actual cost per gallon of purified water can be surprisingly competitive when you look at it over the system's entire lifespan.
One unique expense tied to RO systems is the wastewater. To keep that powerful membrane from clogging up with all the contaminants it removes, the system has to flush them away. This stream of concentrated gunk goes right down the drain along with a good bit of water. Older, less efficient models were notorious for this, wasting as much as 4 or 5 gallons of water for every single gallon of pure water they produced.
Thankfully, technology has come a long way. Modern RO systems are much more efficient, with many wasting only 1 to 2 gallons for every purified gallon. It will add a small amount to your water bill, but it’s a necessary trade-off for how effectively the system purifies your water.
Thinking beyond just the filters, understanding how water quality affects your home's entire plumbing system can help you dodge future problems. Proper upkeep, for example, can save you from a lot of headaches. You can learn more about how to prevent costly plumbing repairs through regular maintenance. Taking this wider view helps ensure your whole water system stays in great shape.
Alright, let's move past the technical jargon. The real question in the reverse osmosis water filter vs. carbon filter showdown is: which one actually makes sense for your kitchen? The answer depends entirely on where you live, what your water is like, and what you’re trying to fix.
Let's walk through a few real-life situations. See which one sounds most like you.
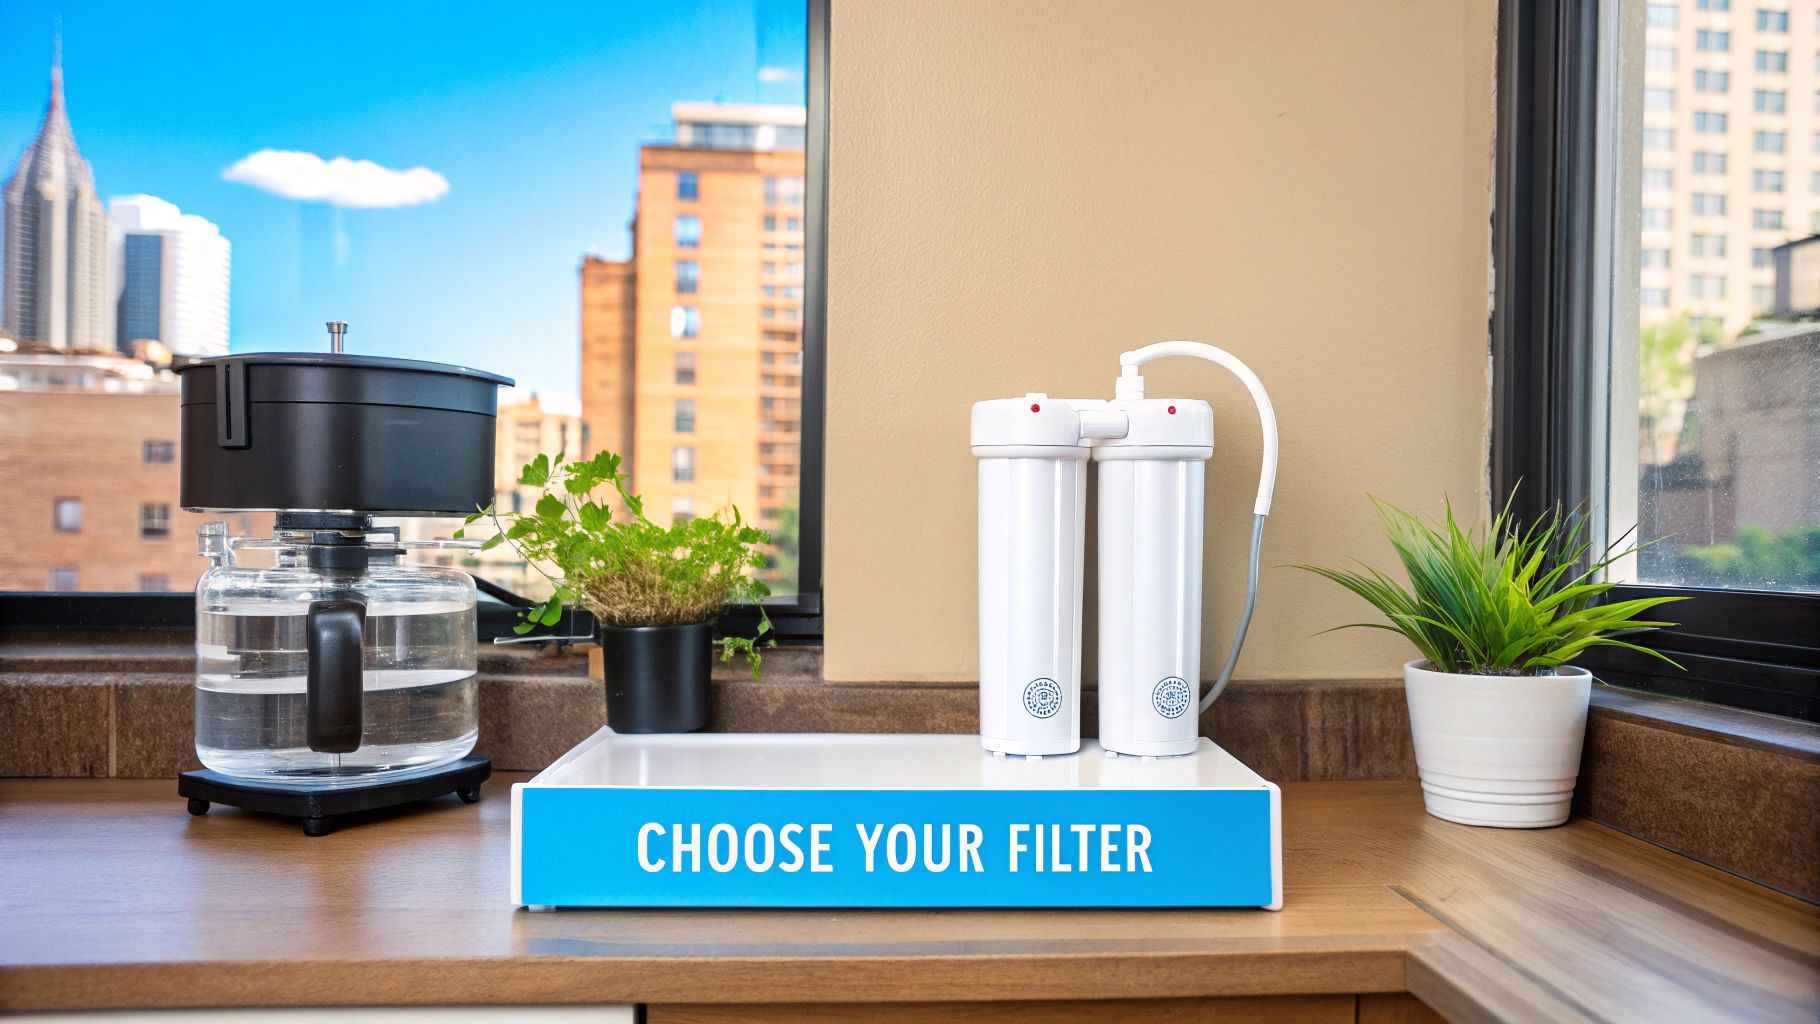
You live in a city high-rise. The municipal water is technically safe according to the annual reports, but you can’t stand the swimming-pool smell. That chlorine taste ruins your morning coffee and makes a simple glass of water taste… off.
For this, a carbon filter is your best bet. It’s designed specifically to adsorb chemicals like chlorine and other compounds that mess with taste and odor. It’s a simple, affordable fix that gets right to the point without over-complicating things.
Now, picture a family out in the country with their own private well. Their worries go way beyond just taste. They're concerned about things you can't see or smell—nitrates from nearby farms, naturally occurring heavy metals like arsenic, and even potential bacteria.
Here, a reverse osmosis system isn't just a nice-to-have; it's a critical safety measure. A basic carbon filter won’t touch dissolved solids, heavy metals, or microorganisms. The multi-stage process of an RO system is the only thing that offers the comprehensive protection they need for real peace of mind.
It often just comes down to where your water is from. Public utility? You’re probably just fighting bad taste, so a carbon filter will do. Private well? You need serious purification, and that means reverse osmosis.
Let's go back to the city. This person knows the water is "safe," but they want it to be pristine. They worry about the stuff that standard city tests might miss, like trace pharmaceuticals, microplastics, or the fluoride that’s intentionally added. They’re not just after better flavor; they want truly purified water.
This is another clear-cut case for a reverse osmosis system. While the tap water meets government standards, an RO system goes much further, stripping out up to 99% of all contaminants. It takes water down to nearly pure H₂O, addressing concerns that a simple carbon filter can't even touch.
Last one. Think of a student or anyone renting an apartment. They want cleaner water, but they can't mess with the plumbing. Money is tight, and they need something that works now and can move with them later.
A carbon filter—either in a water pitcher or a simple screw-on faucet attachment—is the perfect solution. There's no installation, the cost is minimal, and it does a great job on the number one complaint: chlorine. When the lease is up, they just pack it and go.
By looking at it this way, the choice becomes much simpler. It’s not about which filter is technically "better," but which one is the right tool for your specific job.
Figuring out whether a reverse osmosis or carbon filter system is right for you really just comes down to a few key questions. It’s not about which one is "better" in general, but which one is the right fit for your home and your water.
To make things simple, let's break it down into three critical areas.
First things first: what are you trying to remove from your water? A great place to start is your local water quality report.
Next, ask yourself if your main goal is simply better-tasting water, or if you need the highest possible level of purity for health and safety. Finally, you have to consider your budget, not just for the system itself but for the ongoing filter replacements.
Answering those questions will point you in the right direction:
The decision really hinges on a single trade-off. If your water is generally safe but just doesn't taste great, a carbon filter is all you need. But if you want total peace of mind with the highest level of purification available, then reverse osmosis is the hands-down winner.
Remember, while a good filter is essential, the cleanliness of your water source matters too. For a more complete picture, take a look at this a comprehensive guide to water tank cleaning.
If you need more personalized guidance on choosing the right filter, our team has put together some excellent resources. Learn more with our expert advice on water filters.
When you're trying to choose between a reverse osmosis water filter vs carbon filter, a few questions always seem to pop up. Let's get right into the most common concerns we hear from homeowners.
This is probably the number one question we get about RO systems. It’s true that to get incredibly pure water, the system has to flush away all the gunk it removes, and that creates wastewater. Older systems were pretty bad, sometimes wasting many gallons for every one gallon they produced.
But technology has come a long way. Many modern, high-efficiency units now waste only 1 to 2 gallons for every gallon of pure water they make. Some even have a special permeate pump that uses the pressure from the wastewater to work more efficiently, which cuts down on waste and helps the tank fill up faster.
Yes, it will. A reverse osmosis system is a powerhouse designed to strip out nearly everything from the water, which includes beneficial minerals like calcium and magnesium. What you're left with is exceptionally clean, demineralized water.
If you're worried about losing those minerals or just prefer the taste of mineral water, there’s an easy fix. Many RO systems come with a remineralization filter that gets added on at the very end. This puts a small amount of healthy minerals back into the water right before it hits your glass, which can really improve the taste and balance the pH.
While an RO system strips water down to its purest form, adding a remineralization stage gives you the best of both worlds—unmatched purity with the pleasant taste of essential minerals.
Not only can you, but you have to. Every single multi-stage reverse osmosis system actually includes at least one carbon filter, sometimes two. They perform a vital job.
The carbon pre-filter is there to remove chlorine and chloramines before the water can get to the delicate RO membrane. These chemicals, used for disinfection by water treatment plants, are really harsh and will literally eat away at the membrane. By taking the hit and absorbing these chemicals, the carbon filter acts like a bodyguard for the most expensive part of your system, making sure it lasts longer and works properly.
At Water Filter Advisor, our goal is to help you find the perfect water filtration solution for your family's needs. We provide clear, research-driven reviews and practical guides to make your decision easy. Explore our resources and find your ideal filter today at https://www.waterfilteradvisor.com.
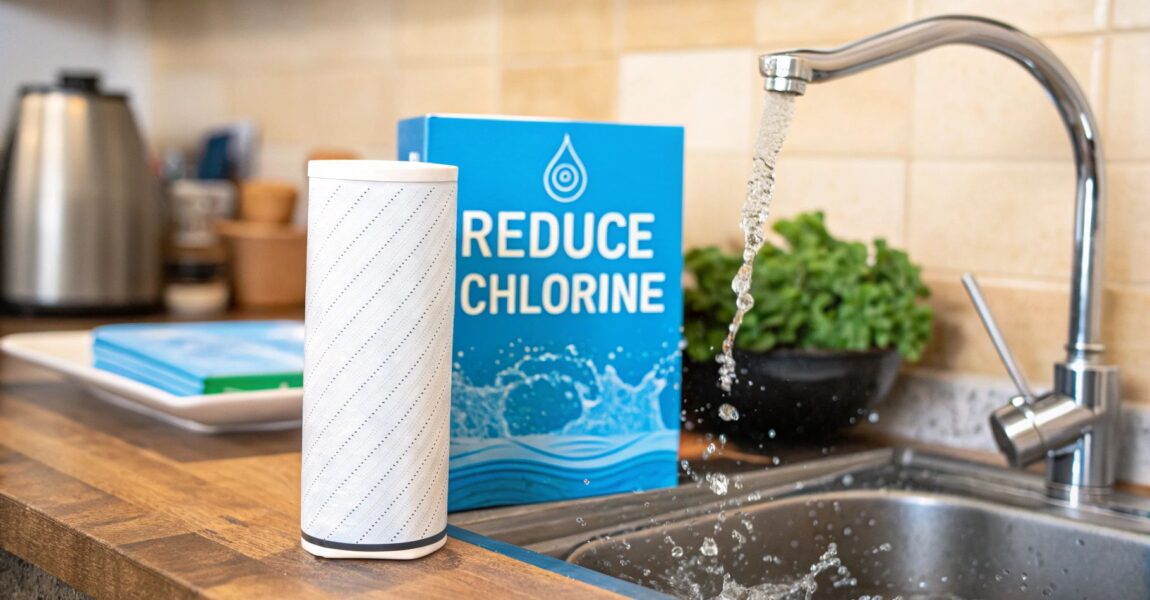
Tired of your tap water tasting like it just came from the local swimming pool? The undisputed champion for banishing chlorine from your home’s water is a quality filtration system, especially one powered by activated carbon. While letting a pitcher sit on the counter might help a little, it’s a slow-motion solution. For a real, lasting fix, filtration is the only way to go.
Ever turn on the kitchen sink and get hit with that unmistakable "public pool" smell? You're not just imagining it. That distinct odor is chlorine, a powerful disinfectant your local water utility adds for a critical reason.
Think of it as a bodyguard for your water. Chlorine's job is to kill off nasty bacteria, viruses, and other pathogens during the long trip from the treatment plant all the way to your tap. This process, called chlorination, has been a massive public health success, saving countless people from waterborne diseases. Without it, drinking tap water would be a serious gamble.
But the very chemical that keeps our water safe can also make it taste and smell… less than ideal. This leaves a lot of people wondering how to get rid of the chlorine once it’s done its job and reached their home. The answer lies in targeted home filtration.
Just to make things interesting, many water suppliers now use chloramine instead of just chlorine. This is a more stable compound they make by adding ammonia to the chlorine.
Why the switch? While chlorine evaporates pretty quickly, chloramine sticks around much longer. It's designed to keep the water disinfected right to the end of the line, but that stability also makes it tougher to remove. This is a crucial detail because your standard chlorine filter might not be up to the task. Figuring out if you have chlorine or chloramine is the first step to picking the right filter.
Getting rid of that chemical taste is a big motivator, but it's not the only reason people install filters. When chlorine mixes with the natural organic stuff in water, it can create what are known as disinfection byproducts (DBPs), like trihalomethanes (THMs).
Your city's water is treated to keep these DBP levels within legally safe limits. Still, many folks would rather just minimize their exposure altogether right at home.
Filtering your water right where you use it gives you the best of both worlds. You get all the protection of a professionally disinfected public water supply, but you get to strip out the chlorine and its byproducts just before you drink, cook, or shower.
This approach lines up with where the industry is heading. Agencies like the U.S. Environmental Protection Agency are constantly tightening the rules, and as reported on GlobeNewswire, there's a lot of research into new ways to handle chlorine with less environmental impact. By installing a home filter, you're just taking that final, personal step to make sure your water is exactly how you want it.
Before you can fix that chlorine taste in your water, you have to know what you’re up against. Think of it like a detective—you need to gather evidence before you can pinpoint the right solution. Just guessing could mean you end up with a filtration system that's either total overkill or not nearly strong enough for the job.
The good news? You don't need a lab coat or a chemistry degree to get solid answers.
Testing your water at home is quick, easy, and gives you the hard data you need to make a smart decision. This first step will tell you exactly what concentration of chlorine you're dealing with.
The fastest way to get a reading is with test strips. These are just little disposable paper strips with chemical pads on them. Dip one into a glass of your tap water, give it a swirl for a few seconds, and pull it out.
After about a minute, the pads will change color. All you do is match those colors to the chart that comes with the kit. It's a dead-simple method that gives you a ballpark figure, usually in parts per million (PPM).
While they're super easy to use and cheap, they aren't the most precise tool. For most homes getting city water, a reading between 0.5 and 2.0 PPM is pretty standard. The EPA says levels up to 4.0 PPM are safe, but most of us can taste and smell it long before that—sometimes at levels as low as 0.5 PPM. Test strips are great for a quick "yes" or "no" on whether chlorine is present.
If you're after a more precise number, your best bet is a liquid reagent kit, sometimes called a drop test kit. These are the same types of kits people use for swimming pools, but you can easily find versions made specifically for drinking water.
It's a pretty straightforward process:
Just like with the strips, you compare the final color of the water to a printed chart to find the chlorine concentration. Because you're using a controlled amount of water and a precise number of drops, the results are a lot more reliable than what you'll get from a simple test strip.
Getting an accurate measurement is the first real step in your journey to better water. Knowing your specific chlorine level—whether it's 1.0 PPM or 3.5 PPM—directly influences which type of water filter will be most effective and economical for your household.
For anyone who loves gadgets and wants the most exact reading possible, a digital colorimeter is the way to go. These handheld electronic devices give you pinpoint accuracy and take all the guesswork out of matching colors.
You still add a reagent to your water sample, but instead of eyeballing it, you pop the vial inside the meter. The device shines a light through the sample and measures exactly how much of it is absorbed, then gives you a precise digital reading right on the screen.
Digital meters are definitely the most expensive option, but they're also the most accurate. They're perfect if you're really sensitive to chlorine or just want to track your levels over time to see how they change. Knowing your baseline is key to picking the right filter and, just as importantly, confirming it's actually working once you've got it installed.

Alright, you’ve tested your water and you know how much chlorine you’re dealing with. Now for the fun part: picking the right gear to get rid of it.
Diving into the world of water filtration can feel like a lot at first, with all the different technologies and acronyms out there. But when your main goal is knocking out chlorine, the best options quickly rise to the top.
The three heavy hitters you’ll see most often for home chlorine removal are Activated Carbon, KDF (Kinetic Degradation Fluxion), and Reverse Osmosis. They all work a bit differently, come with their own price points, and have unique maintenance needs. Let's break them down so you can find the perfect fit for your home and budget.
Think of activated carbon as a super-powered sponge with an almost magnetic attraction to chlorine. This isn't your backyard BBQ charcoal; it's a special carbon that’s been “activated” to create millions of microscopic pores. The surface area is staggering—a single pound of activated carbon can have a surface area of over 100 acres!
When water passes through the filter, chlorine molecules get pulled into these pores and stick to the surface. This process is called adsorption. The water flows right on through, but the chlorine gets left behind. The result? Water that tastes and smells noticeably cleaner and fresher.
There's a reason activated carbon is the go-to method. It's incredibly effective, pretty affordable, and you'll find it in everything from a simple pitcher filter to a large whole-house system. The core of these filters is often just replacement activated carbon for dechlorinator purifiers, which does the bulk of the work.
Next on the list is KDF, which stands for Kinetic Degradation Fluxion. If activated carbon is a sponge, think of KDF as a tiny chemical factory. This filter media is made of high-purity copper and zinc granules. As water flows over them, they create a small electrochemical reaction.
This reaction, known as redox (oxidation-reduction), literally changes free chlorine into a harmless chloride salt. It doesn’t just trap the chlorine; it neutralizes it on a chemical level. This makes KDF media exceptionally durable and long-lasting.
One of the coolest things about KDF is that it also stops bacteria, algae, and fungi from growing inside the filter. This bacteriostatic property means it not only tackles chlorine but also keeps the filter media itself clean, which can really extend the life of any activated carbon filters it’s paired with.
In fact, a lot of the best filters on the market use both KDF and activated carbon together. The KDF does the heavy lifting on chlorine, protecting the carbon and letting it focus on other organic stuff that affects taste and odor.
This infographic can help you map out your testing and filtering journey.
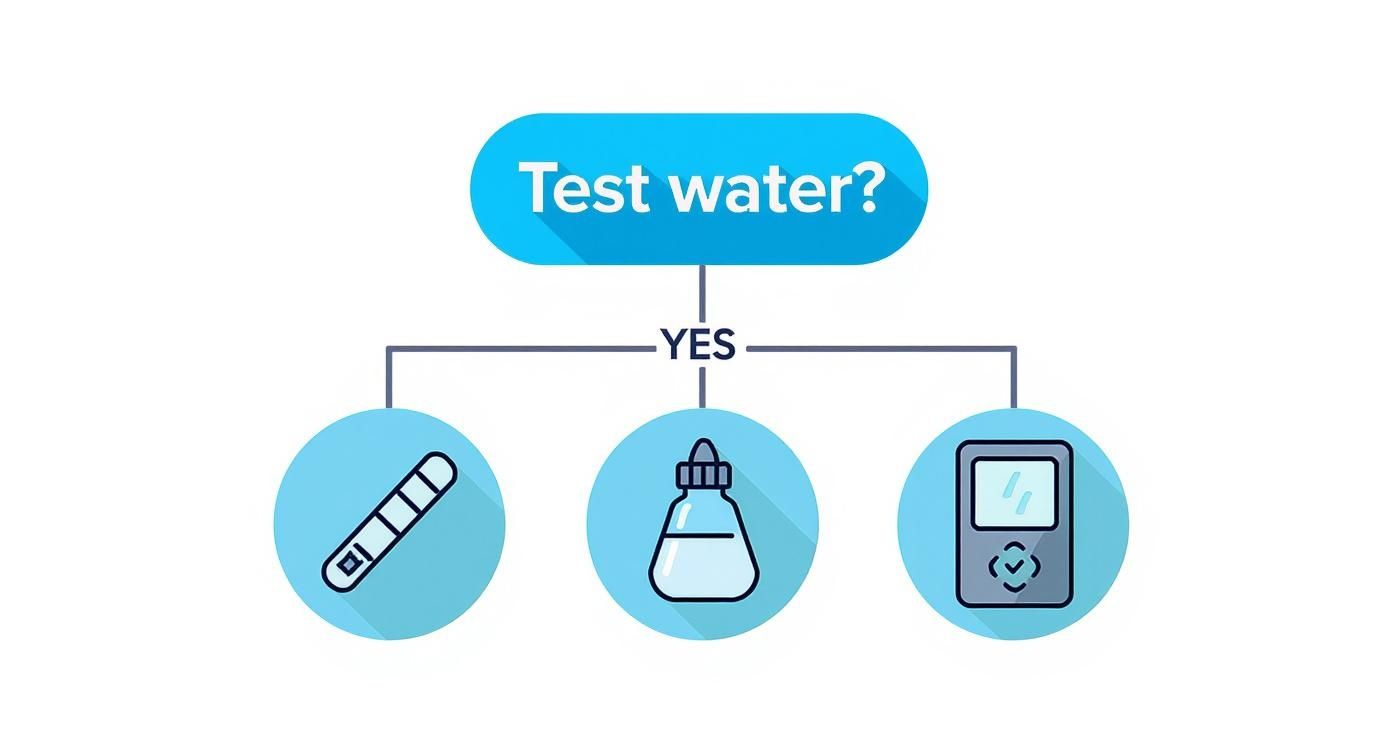
It’s a simple visual that shows how getting some hard data—whether from simple test strips or a digital meter—is the essential first move.
For the most complete filtration you can get at home, you’ve got Reverse Osmosis (RO). While carbon and KDF are chlorine-zapping specialists, an RO system is designed to remove a massive list of other things, like lead, fluoride, salts, and arsenic. And yes, it’s also fantastic at getting rid of chlorine.
An RO system works by pushing water through a very fine, semi-permeable membrane. The pores in this membrane are so tiny that only pure water molecules can squeeze through. Everything else, including chlorine, gets blocked and flushed down the drain.
The process is so thorough it can eliminate over 99% of chlorine. But there’s a small catch: chlorine is actually pretty tough on that delicate RO membrane. That’s why virtually every home RO system comes with pre-filters, usually activated carbon, to remove the chlorine before it even gets to the membrane. This is key to protecting the most important part of the system and making it last.
People who choose RO usually want more than just chlorine removal; they're aiming for the highest level of water purity possible. If you want to explore different setups, our water filtration advice guides have a ton of great information.
Trying to decide between these options can feel tough, but it really comes down to weighing how well they work against their cost and how much upkeep they need. This table puts the key details side-by-side to make the choice a little clearer.
| Filtration Method | Effectiveness | Best For | Typical Cost | Maintenance Needs |
|---|---|---|---|---|
| Activated Carbon | High for chlorine, taste, odor. Does not remove minerals or TDS. | Budget-conscious users, improving taste and smell, renters. | $ – $$ | Regular filter changes (every 3-12 months). |
| KDF Media | Very high for chlorine. Also reduces heavy metals and inhibits bacteria. | Long-lasting performance, whole-house systems, pairing with carbon. | $$ – $$$ | Very low; media can last for several years. |
| Reverse Osmosis | Extremely high (99%+). Removes chlorine and a wide range of other contaminants. | Maximum purity, homes with multiple water quality concerns. | $$$ – $$$$ | Annual pre/post-filter changes; membrane replacement every 2-4 years. |
Ultimately, the right system is the one that solves your water issues without becoming a major hassle or a drain on your wallet. Whether it's a simple carbon filter for better-tasting coffee or a full-blown RO system for total peace of mind, there's a solution that fits.
A water filter is only as good as its last cartridge change. Getting the system installed is really just the beginning—it’s the consistent maintenance that keeps that fresh, chlorine-free water flowing. If you neglect your filter, it's like buying a brand-new car and never bothering with an oil change. Sooner or later, performance is going to suffer.
I like to think of a filter cartridge as a microscopic parking lot for contaminants. When it's fresh out of the box, there are plenty of open spaces. But over time, every one of those spots gets filled up with chlorine, sediment, and other gunk. Once it’s full, any new contaminants just drive right on by and end up in your glass.
A simple maintenance routine doesn't just guarantee performance; it also prevents nasty bacteria from building up inside the filter housing. This protects your investment and, more importantly, your family's health.
Every filter has a different lifespan, and your best bet is to stick to the manufacturer's recommended schedule. A little planning goes a long way here, ensuring you always have clean, great-tasting water on tap.
Here’s a general guide for the most common filter types:
Even if you forget to mark your calendar, your filter will give you some clear clues when it's time for a change. You just have to pay attention to what your water is telling you.
The most obvious sign is the return of that distinct chlorine taste or smell. If your morning glass of water suddenly tastes like you're at the community pool, it's a dead giveaway that the filter is saturated and can't absorb any more.
Another huge indicator is a drop in water pressure. If the flow from your filtered tap slows to a trickle, the cartridge is probably clogged with all the sediment and particles it has successfully pulled from your water.
Pro Tip: Grab a permanent marker and write the date you changed the filter directly on the new cartridge or the housing. It's a simple little trick that takes all the guesswork out of remembering when it's due for a replacement.
While we're focused on getting chlorine out of our homes, it’s fascinating to look at its use on a global scale. The Asia-Pacific region is a massive player in the chlorine industry, driven by rapid industrialization and an enormous demand for safe water.
For perspective, India's chlorine consumption is projected to hit 3.3 million tons by 2024. At the same time, China's production capacity is expected to reach 4.5 million tons. This growth really highlights the ongoing need for large-scale disinfection. Yet, even as global demand grows, the push to reduce chlorine dependence is gaining momentum, with new technologies offering better, more localized solutions. You can discover more insights about the chlorine market on straitsresearch.com.
This global context really drives home why point-of-use filtration at home is so effective. It lets municipal systems do their job of ensuring broad public health safety, while you get the final say over the quality of the water you and your family actually drink. Keeping that filter in top shape is simply your part of the deal.
Even when you've done your homework, a few questions always seem to pop up when you're trying to improve your home's water quality. It's totally normal. Making the right call means understanding the little details, so let's clear up some of the most common things people ask about reducing chlorine.
Think of this as a quick-reference guide—no deep technical jargon, just straight answers to help you feel confident about your next steps.
This is probably one of the biggest points of confusion I hear. The short answer is no, a standard water softener isn't built to remove chlorine. Its one and only job is to combat hard water by swapping out minerals like calcium and magnesium for sodium.
While that's fantastic for stopping scale buildup in your pipes and appliances, it does absolutely nothing to the chlorine or chloramine swimming around in your water. Some of the newer "hybrid" systems do combine a softener with a carbon filter stage, but if you have a typical salt-based softener, you'll need a separate, dedicated filter to tackle chlorine.
Yes, it absolutely is. Chloramine is a much more stubborn chemical than free chlorine. Water municipalities actually designed it that way—to be more stable and stick around longer in the water supply. Great for disinfection, but a real headache for home filtration.
Simple tricks like letting water sit out or giving it a quick boil are completely useless against chloramine.
To get rid of chloramine effectively, you need a special filter medium called catalytic carbon. Your average activated carbon filter is a champ against chlorine, but it will barely make a dent in chloramine. This is exactly why testing your water or checking your utility’s water report is a non-negotiable first step.
For the most part, yes! The built-in water and ice dispensers on modern fridges almost always use a small activated carbon filter. They do a pretty decent job of reducing the taste and smell of chlorine, giving you clean-tasting drinking water right from the door.
The key thing to remember is their tiny capacity. These filters need to be replaced on a strict schedule—usually every six months—to keep working correctly. They're a great solution for the glass of water you're about to drink, but they won't touch the water coming out of your kitchen tap or showerhead.
While boiling water for about 15 minutes can force free chlorine to evaporate, it's not a practical home filtration strategy. Here’s why it falls short:
The impact of chlorine goes beyond just what you drink. It can affect your hair and skin, which is why you see articles explaining the purpose of specialized 'De chlorinate My Hair' products. It just goes to show how far-reaching the effects of chlorinated water can be. Getting these common questions answered is the final step toward picking the right whole-home solution.
At Water Filter Advisor, our mission is to give you clear, research-backed advice so you can have safer, better-tasting water. From deep-dive buying guides to practical tips, we're here to help you make confident choices for your home. Check out all our resources to find the perfect filtration system for your family at https://www.waterfilteradvisor.com.