Signs of Lead in Water: What to Look for and How to Test

The advice shows up in every homeowner forum: a metallic taste, cloudy water, or blue-green stains on the sink are the signs of lead in water. Every one of those clues fails. Dissolved lead has no color, no smell, and no taste a person can reliably detect, and it turns up most often in water that looks and drinks perfectly normal.

What finds lead is duller than a checklist. A laboratory test on a sample from the right tap, collected the right way, tells you whether lead is in the water. A blood test tells you whether someone has absorbed it.

Households get stuck because three questions get blended into one. Is lead in the water? Has anyone absorbed lead? Has lead caused a health effect? Each has its own evidence, its own test, and its own fix. Treat a symptom as proof of the water and you'll chase the wrong thing. Treat clear water as proof of safety and you'll miss the exposure entirely.

The clues worth acting on are about plumbing, not senses: the material of the service line, the age of the solder in the joints, brass fixtures of unknown origin, and how long water sits in the pipes before you pour a glass.

Which Household Clues Can Reveal Lead in Water

Nothing you can see, smell, or taste tells you whether lead is in your tap water. The EPA's basic information on lead in drinking water states that lead contamination usually has no visible, taste, or odor warning, so laboratory testing, not a change in appearance or flavor, is the only reliable way to identify harmful concentrations. Those exposed to lead, children included, have no immediate symptoms at all.

That last point is why the symptom checklists floating around online mislead so badly. A child with lead exposure can look and behave exactly like a child without it. The water in a contaminated home can pour clear and cold and taste like nothing.

So why does the metallic-taste advice survive? Because it's free and it takes a second. The table below ranks the familiar clues by what they can tell you. Several are worth acting on. None of them settles the question.

Clue How Reliable It Is What It Points To
Metallic, bitter or sour taste No Cannot identify lead; test the water
Cloudy, yellow or rust-colored water Weak Usually iron or sediment; lead can be present in clear water
Home built before 1986 with lead solder Risk indicator Possible lead solder in joints; test the first draw
Lead or galvanized service line in utility records Strong risk indicator Lead entering from the street main to the home
Brass fixtures or faucets of unknown age Possible Brass can contain lead; check age and certification
Water sitting overnight in pipes Raises risk Stagnant water collects more lead from plumbing
Nothing visible, tastes normal No reassurance Most dissolved lead is invisible; a clear glass proves nothing

Read the table and a pattern appears. The rows you can trust are about materials and time, not about your senses. A tint in the glass tells you something moved through the pipes, but it can't tell you what, and a clear glass tells you nothing at all. Iron, sediment, and air from a disturbed main account for most of the color homeowners worry about, while lead rides along in water that looks perfect.

Three actions turn these clues into something usable:

  • Call your water utility and ask about the service line. The pipe running from the street main into your home is either lead, galvanized steel, or copper. Ask which, and ask for the answer in writing.
  • Get a plumber's eyes on it if records are missing. Have a licensed plumber look at where the line enters the house, usually visible at the basement wall or where it rises through the floor.
  • Record the finding and keep it. A confirmed lead or galvanized service line is the strongest clue on the list, strong enough to justify a certified laboratory test on its own, even when the water runs clear and tasteless.

Health Signs That Call for a Blood Test

Symptoms of lead exposure are real, and they're also ordinary. Headache, stomachache, fatigue, constipation, irritability: the same list you'd get for a dozen mild illnesses. That vagueness cuts both ways. A symptom can't tell you the water is contaminated, and a symptom is never a reason to relax.

In young children, watch for attention problems, trouble learning, irritability, delayed development, and stomach pain. In adults the list runs to fatigue, headache, nausea, constipation, abdominal pain, and blood pressure that has crept up at a routine checkup.

The thresholds sit lower than expected. The World Health Organization's lead poisoning overview states that there is no known safe blood lead concentration, and that levels as low as 5 micrograms per deciliter (µg/dL) may be associated with reduced intelligence, behavioral difficulties, and learning problems in children. The same source cites the U.S. National Institute of Environmental Health Sciences: blood lead below 5 µg/dL is associated with decreased IQ and academic achievement in children, and below 10 µg/dL with increased blood pressure and hypertension in adults.

A symptom is a reason to get a blood test. It is never proof of where the lead came from.

Those three questions have to stay apart. A blood lead test answers whether someone has absorbed lead. A certified water test answers whether the tap is a source. Neither substitutes for the other, and a normal blood result doesn't clear your pipes any more than a clean water test clears a child's blood. For the full picture of what lead does at low doses, our guide to the health effects of lead in drinking water is worth reading before you sit down with a pediatrician.

Ask a doctor for a blood lead test first if a young child lives in the home, if someone is pregnant, or if anyone has symptoms alongside old plumbing, a lead service line, or recent renovation work that disturbed paint or pipes.

Why Lead Leaches From Old Pipes and Fixtures

Water is a slow solvent, and old plumbing gives it plenty to work on.

Years of that work show up at the joint under a kitchen sink:
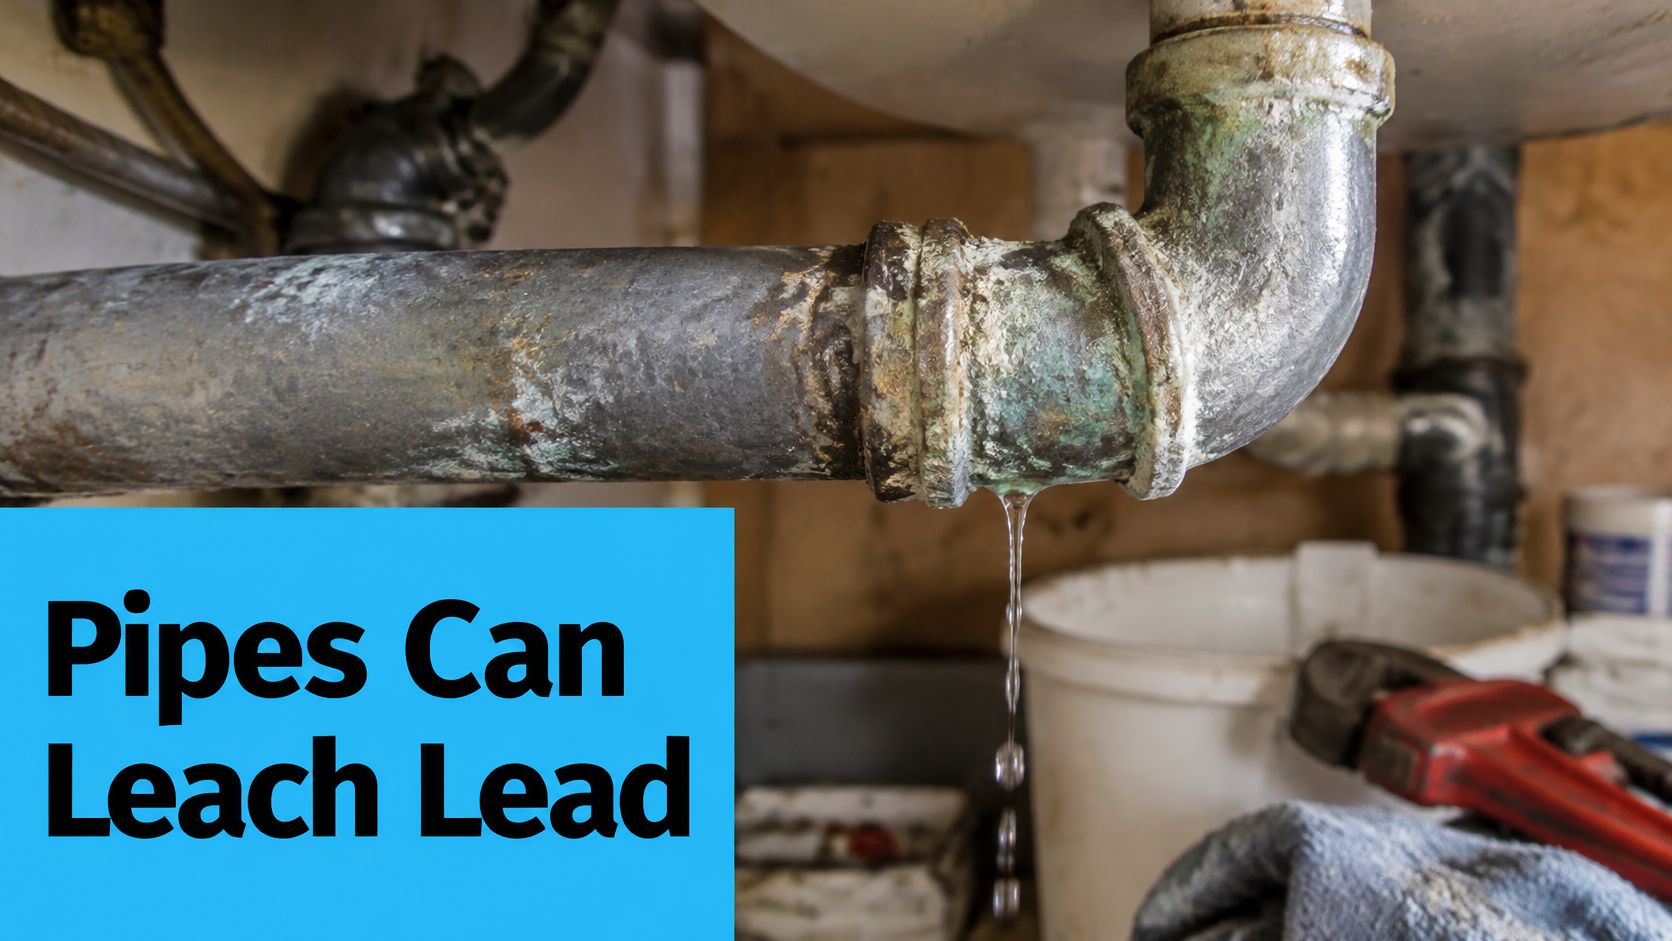
A close-up of a corroded metal plumbing pipe with water leaking from a joint under a sink.

Most lead enters drinking water after it leaves the treatment plant. Acidic water, or water low in dissolved minerals, corrodes the inside of lead service lines, lead solder in older joints, brass fittings and faucets, and galvanized pipes. The water picks up lead while it sits in contact with those materials, the way tea darkens the longer it steeps. A glass poured at 6 a.m. from a line that sat idle all night carries more than a glass poured after the shower has run.

Two faucets in the same house can read differently for exactly that reason: different branch lengths, different fixtures, different amounts of idle time. And none of it shows. Corrosion happens at concentrations your eyes, nose, and tongue cannot register, so clear water from one tap says nothing about the tap down the hall.

What Flint showed about water that looks fine

In April 2014, Flint, Michigan switched its water source to the Flint River without adequate corrosion control. Lead entered the water from brass fittings, brass fixtures, galvanized pipes, and, most significantly, lead service lines. The EPA's record of Flint water sampling shows that once those service lines were removed, the total mass of lead contributed to drinking water fell by an average of 86 percent.

The chemistry shift itself was invisible at the tap. Lead climbed while the water still looked, smelled, and tasted normal. Children's blood-lead levels then rose during the period after the source change and returned toward earlier levels once the city switched back and corrosion control improved. Flint ran both questions at once, one about the water and one about the children, and only a test settled either.

The chemistry that drove it is worth two minutes:

When the service line itself is the source, a filter at the kitchen tap treats the water while the plumbing stays as it was. Replacing that line is a job for a licensed plumber who can pull the permit and manage the shutoff, and the scope changes with climate, soil, and how deep the line sits. Homeowners facing that project in southern Nevada can look at main water line replacement in Las Vegas from MG Plumbing Services LLC for a sense of the work before calling anyone local.

The lesson travels well beyond Michigan. When water chemistry shifts, lead that sat in old plumbing for decades starts moving, and appearance will not tell you it happened.

How to Test Your Tap for Lead Correctly

Four tests get confused with one another constantly. Only one measures a person, and only one measures your kitchen tap.

Test What It Measures Use It When
Blood lead test Lead absorbed by a person Children, pregnant people, or anyone with symptoms and suspected exposure
Certified lab first-draw water test Lead leached during stagnation at one tap Old plumbing, water unused overnight, or fixtures of unknown age
Certified lab flushed sample Lead in incoming water after running the tap Comparing the water source with the plumbing
Utility water-quality report System-wide average from sampling sites Background only; does not prove one tap is safe

The utility report is the one households lean on hardest and the weakest of the four for a household decision. Its samples come from sites chosen for compliance, not from your kitchen faucet. As EPA's guidance on reducing lead exposure puts it, testing is the only sure way to determine whether harmful quantities are present in a specific drinking-water sample. Which tap, at what time, and under what sampling conditions decides what the number means.
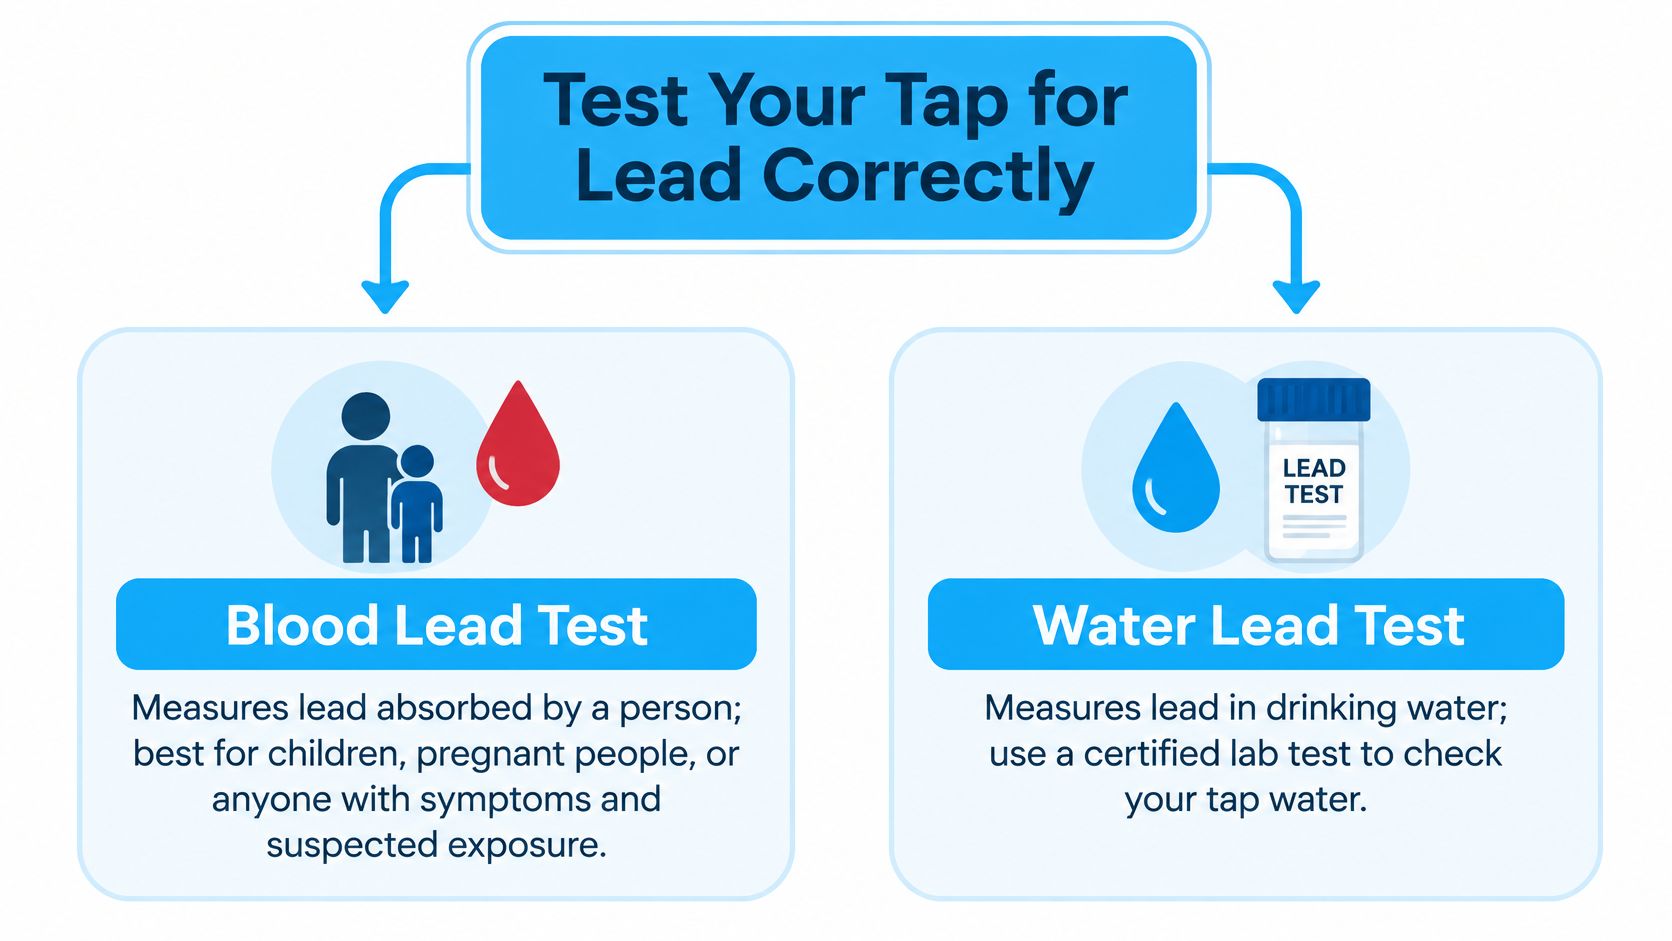
An infographic comparing blood lead tests for people and water lead tests for testing tap water.

The first-draw sample is the one that tells you about your own plumbing. Here's the collection sequence, and why each step matters.

  1. Order the bottle from a state-certified laboratory. Use the bottle the lab supplies. A rinsed jam jar adds its own chemistry to the sample.
  2. Leave the tap alone for at least 6 to 8 hours. Overnight is the easiest way to hit that window. Don't run water, don't do dishes, don't fill a pot first.
  3. Fill the bottle from the first water out of the tap. EPA's sampling guidance calls for the first water, typically 250 mL for some screening protocols or 1 L under Lead and Copper Rule sampling. That first draw captures lead that leached from faucets, solder, fixtures, or service lines while water sat in contact with plumbing.
  4. Label it with the tap and the time. Kitchen cold tap, 7:05 a.m., date. If you sample a second tap later, the labels should tell the samples apart without you remembering.
  5. Get it to the lab promptly. Follow the lab's hold time and drop-off instructions exactly as written.

Read the result against the EPA's action level of 15 µg/L (15 ppb), and read it carefully. That figure is a treatment-technique trigger for corrosion-control performance, not a line proving water is safe below it. EPA and CDC state that no safe level of lead exposure is known.

A high first draw is a finding, not a verdict. Confirm it with a second certified sample and switch to an alternative safe source for drinking and cooking until the plumbing has been evaluated.

Flush Today and Act on Your Results

Start with what you can do tonight, before any test result exists.

  1. Run the cold tap after any long pause. EPA's guidance on lead in drinking water says a cold-water line unused for six hours or longer may need to run until the water becomes as cold as possible, roughly 5 to 30 seconds after heavy recent use, or two minutes or more otherwise.
  2. Drink and cook with cold water only. Hot water pulls more lead out of the plumbing, and boiling concentrates whatever is already dissolved in it.
  3. Clean the aerator. Unscrew the screen at the faucet tip and rinse out the grit. Sediment collects there and holds particles in the water you drink.
  4. Flush again after a trip. A week away is a long stagnation, and the first glass back deserves to go down the drain.

Flushing lowers what's sitting in the pipe. It doesn't remove lead from the plumbing, and it's no substitute for a laboratory test or a certified point-of-use filter.

Then the results path:

  1. Ask for a blood test if a child, a pregnant person, or anyone with symptoms lives in the home.
  2. Confirm a high first draw with a second certified sample, and use an alternative safe source for drinking and cooking in the meantime.
  3. Fix the source. A licensed plumber can replace a lead service line, swap out old brass, or correct the corrosion problem, and the tap gets retested after the work.
  4. Put retesting on a calendar. After any plumbing change, and periodically otherwise. Compare any home kit reading against a certified laboratory before making a major decision.

Context helps here. In 2024, nine out of ten sampled homes in the Massachusetts Water Resources Authority system had lead concentrations below 6.9 parts per billion, according to the Massachusetts Water Resources Authority. Encouraging for that system, and no information at all about your faucet, which is why the sample still has to come from your kitchen.

If you'd rather not spend an afternoon hunting for a lab, we link readers to water test kits they can run at home, and our Simple Water Test Kits section lists the ones we've looked at. Our Choosing a Water Filter guide covers what to do once the numbers are back.

Choosing a Home Filter Certified for Lead

A filter is a purchase you can get exactly right or exactly wrong, and the difference is printed on the box.

The claim that matters is independent certification for lead reduction. NSF/ANSI 53 is the standard used to evaluate drinking-water treatment units for reduction of contaminants including lead, and reverse-osmosis systems may also be evaluated under NSF/ANSI 58. Certified lead-reduction filters are tested with water containing 150 ppb lead, a challenge concentration ten times EPA's 15 ppb action level, according to NSF's certified lead-reduction listings.

Filter Format Certification to Verify Where It Installs
Pitcher or faucet-mounted filter NSF/ANSI 53 with lead reduction listed Countertop or faucet; replace cartridge on schedule
Under-sink carbon filter NSF/ANSI 53 with lead reduction listed Under the kitchen sink on the cold line
Under-sink reverse osmosis system NSF/ANSI 58 with lead reduction listed Under the sink with storage tank; check rated flow

A certification mark answers a question about a product. Your plumbing is a separate question. Five checks close the gap.
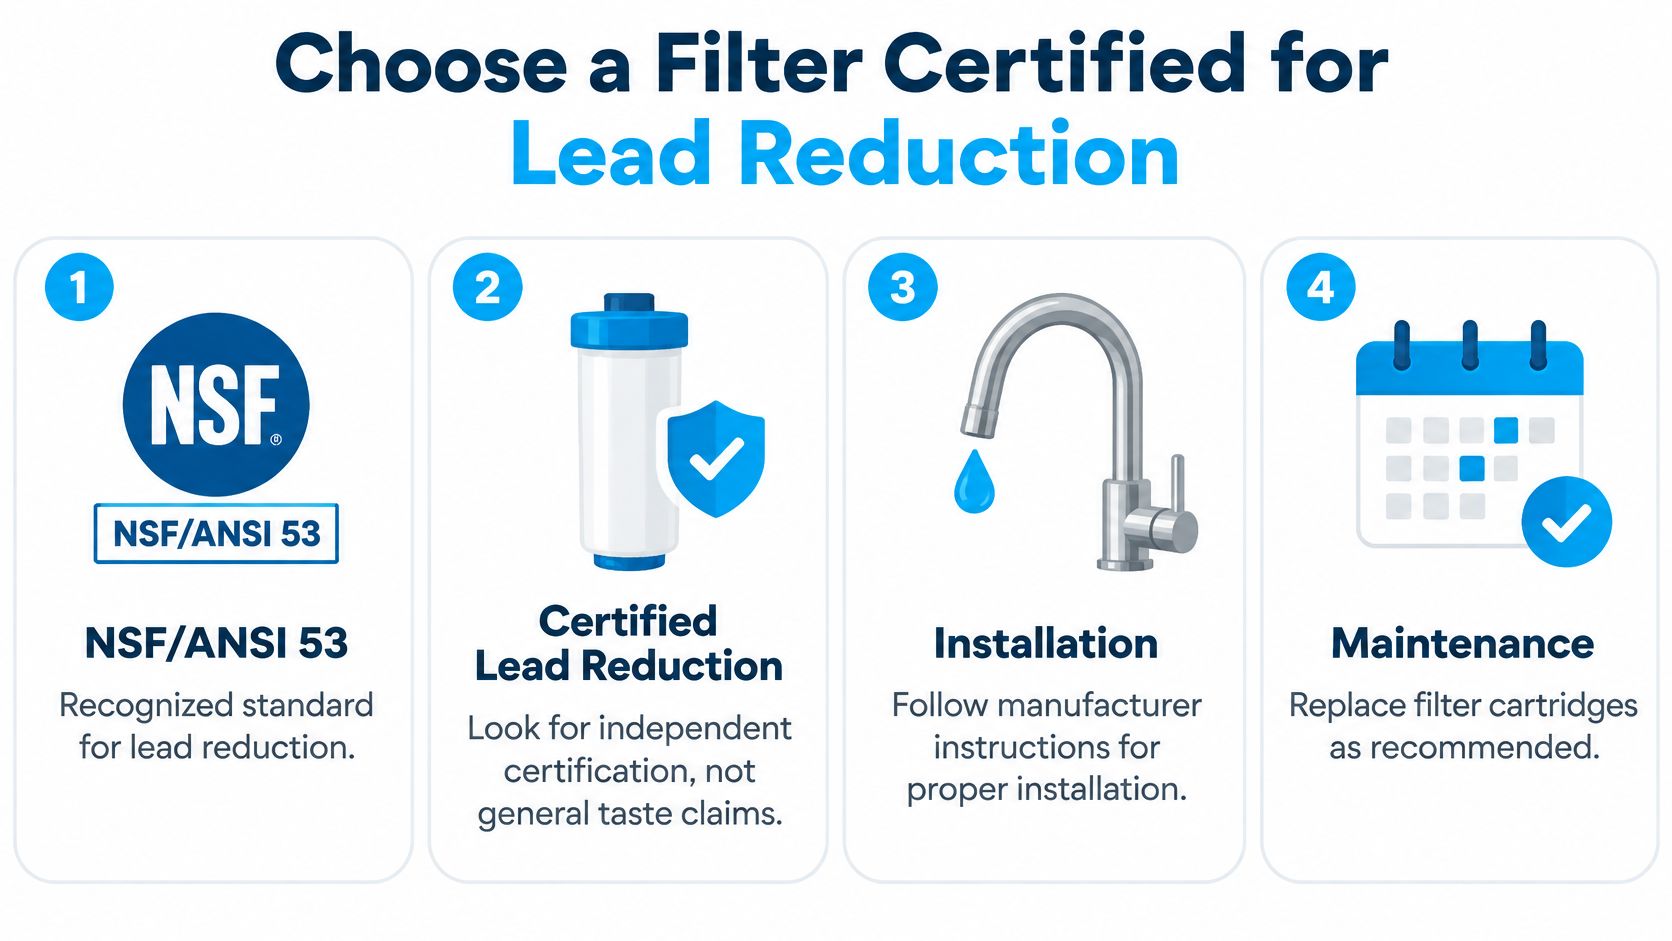
An infographic showing four steps to choose a water filter certified for effective lead reduction.

  1. Find the exact model and replacement cartridge in the current listing. Manufacturers revise cartridge media without renaming the housing, so an old listing for the housing may not cover the cartridge you're buying.
  2. Match rated flow and capacity to your household. A unit rated for two gallons a day won't keep pace with a family filling bottles, cooking, and making coffee.
  3. Install it as instructed, including on the cold line for under-sink models. Hot water degrades media and voids the performance claim.
  4. Replace cartridges on schedule. Certification applies to defined test conditions, not unlimited use. A loaded cartridge stops reducing lead and can begin passing it.
  5. Retest the tap after installation. That's the only way to know the filter works in your plumbing, at your flow rate, with your water chemistry.

Buying rule: a taste claim is not a certification. The listing is the proof.

A certified filter reduces exposure. It doesn't identify the source, and it doesn't repair a lead service line. If your first draw came back high, that result still decides whether a plumber needs to open a wall. Our guide to choosing a certified lead water filter walks through the models that carry the listing and the ones that only sound like they do.

One action, then: until a certified first-draw result is in front of you, don't buy a filter on a taste claim. Order the certified first-draw test for your kitchen tap this week.


Water Filter Advisor has been digging into home filtration since 2007, and lead holds a special place in that work because it's the contaminant that hides. The site's buying guides cover filters across the formats above and beyond, from pitchers and faucet mounts to under-sink, whole-house and portable systems, and it links readers to water test kits for sampling a kitchen tap. Visit Water Filter Advisor to compare kits, filters, and replacement cartridges before you spend a dollar on either.

Water Testing Kit for Home: Types, Accuracy, and Best Picks

You're standing at the sink with a glass that looks clean, but something's off. Maybe the water smells faintly metallic, maybe the tea tastes flat, or maybe you're mixing formula and you'd rather not guess what's coming out of the tap. That's the exact moment a water testing kit for home stops being a gadget and starts being the first sensible move before you buy a filter.

A filter without a test is a blind purchase. You can spend money on the wrong media, the wrong installation, or a system built for a problem you don't have. The smarter move is simple, test first, then match the filter to the water, not the other way around.

An infographic illustrating why home water testing is essential for health, safety, taste, and plumbing maintenance concerns.

If you want a broader consumer guide to taste and quality issues before you commit to hardware, the PureHQ coffee water quality guide is a useful companion read. For a more filtration-focused overview, the advice hub at https://www.waterfilteradvisor.com/advice/ is worth keeping handy while you sort out what your water needs.

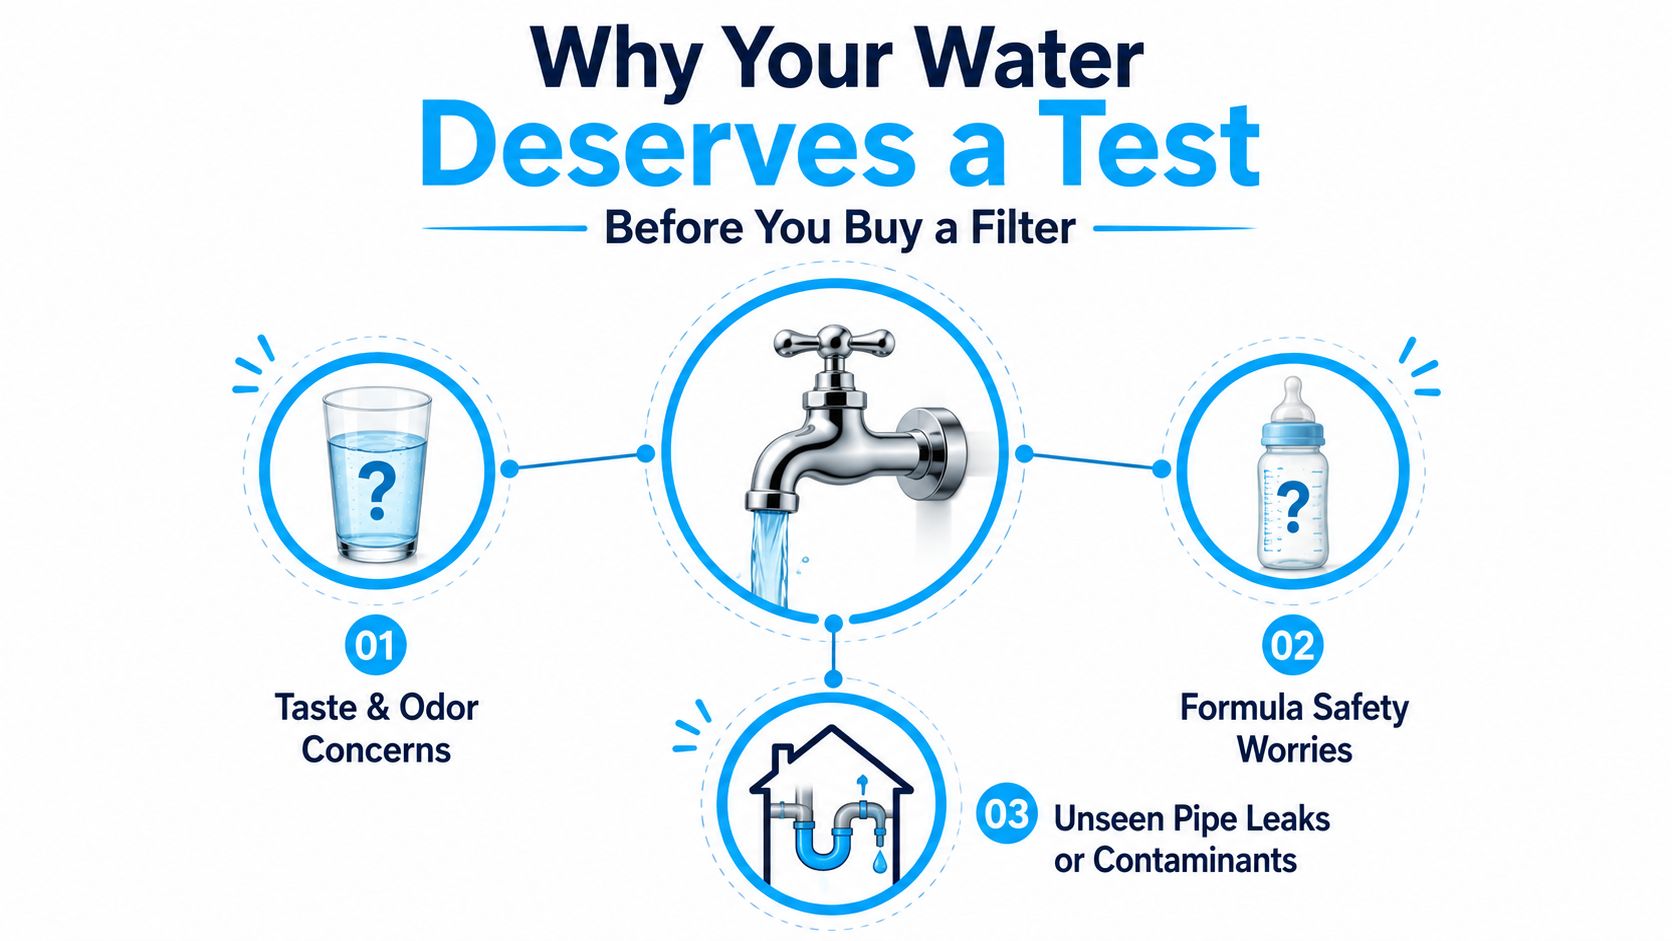
Why Your Water Deserves a Test Before You Buy a Filter

The quickest way to waste money on filtration is to shop by guesswork. A homeowner notices a smell, hears a neighbor complain, or sees a little scale on fixtures, then buys a random cartridge system that claims to fix everything. That usually ends in disappointment, because a filter that handles chlorine will not solve iron staining, and a softener will not address bacteria concerns.

The EPA has long treated home water testing as a routine task, not a panic move. For private wells, it recommends testing every year for total coliform bacteria, nitrates, total dissolved solids, and pH, and every 3 years for sulfate, chloride, iron, manganese, hardness, and corrosion EPA home water testing guidance. It also recommends extra testing after a new well, pipe repairs, or an objectionable taste or smell, which is exactly why a water testing kit for home is a screening tool you keep using, not a one-time novelty.

Practical rule: if the water source changed, the plumbing changed, or the taste changed, test before you treat.

The family-health side gets overlooked too often. The EPA specifically says nitrate should be tested in the early months of pregnancy and again during the first six months of a baby's life. That makes testing especially important for households with infants or pregnancy concerns, because a clean-looking glass tells you nothing about dissolved contaminants EPA home water testing guidance.

A quick test is the cheapest insurance policy in filtration. It tells you whether you need chlorine reduction, softening, iron control, or a higher-confidence lab result before you buy the wrong fix.

If you want a broader consumer guide to taste and quality issues before you commit to hardware, the PureHQ coffee water quality guide is a useful companion read. For a more filtration-focused overview, the advice hub at Water Filter Advisor advice is worth keeping handy while you sort out what your water needs.

The Four Main Types of Home Water Testing Kits

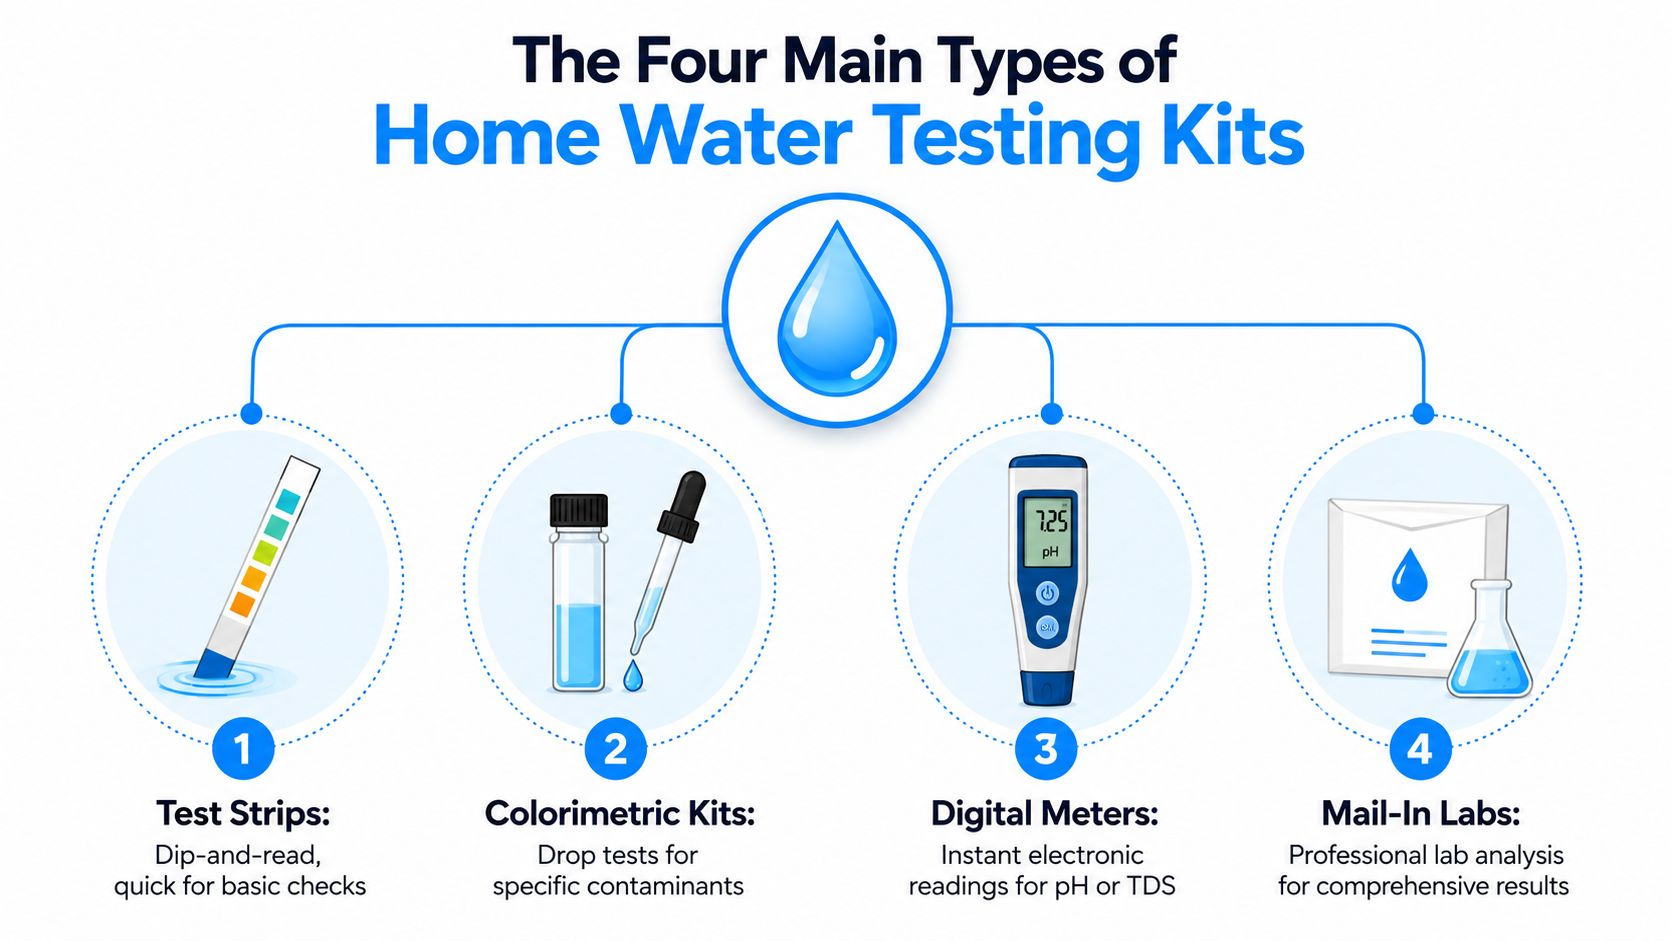
A water testing kit for home usually falls into one of four buckets, and the format matters more than the packaging. Test strips are a fast screen. Drop kits are a little more hands-on and usually more specific. Digital meters give you a number for a narrow measurement. Mail-in labs hand the sample to professionals and give you the broadest picture.

Test strips

Test strips are the quickest option. You dip them, wait, and compare the color to a chart. They're useful for everyday checks like pH, chlorine, hardness, and sometimes nitrates or iron, but they're not magic and they're definitely not the right tool for every concern.

Colorimetric drop kits

Drop kits work more like a small home chemistry set. You add reagents to a sample, watch for a color change, and read the result against a chart or vial scale. They usually give you better control than a strip when you're chasing one parameter, especially if you care about a specific nuisance like hardness or chlorine residual.

Digital meters

Digital meters are the blunt, no-drama tools. They're best for narrow readings such as pH or TDS, where you want a number instead of a color guess. They don't cover broad contamination, but for routine monitoring they're easy to live with and faster to read than a strip if you're the kind of person who hates squinting at pale yellow squares.

Mail-in laboratory kits

Mail-in kits are the heavyweight option. You collect the sample at home, ship it out, and get a lab report back. Independent review coverage notes that some of these kits can measure more than 100 contaminants, including metals like lead, mercury, and arsenic, VOCs like chloroform, bacteria, pesticides, and nitrates, while DIY strips stay much narrower Wirecutter review of home water test kits.

An infographic illustrating four main types of home water testing kits including strips, drops, meters, and labs.

Kit Format Typical Parameters Best For Limits
Test Strips pH, chlorine, hardness, sometimes nitrates or iron Quick baseline checks Narrow coverage, color reading can be fuzzy
Colorimetric Kits Specific contaminants with better visual resolution Targeted homeowner testing Still limited to what the kit is built to measure
Digital Meters pH, TDS, and similar narrow readings Fast numeric tracking Doesn't tell you much about actual contaminant type
Mail-In Labs Broad panels for metals, VOCs, bacteria indicators, pesticides, nitrates Serious screening and deeper confidence Slower turnaround, more hassle, more expensive than strips

What Each Kit Type Actually Detects

The marketing on the box often oversells convenience and undersells limits. That's a bad trade for homeowners, because the central question isn't how many boxes of color you get. The central question is whether the kit can detect the contaminant you're concerned about at a useful level.

Strips and simple screens

Strips are fine for basics like pH, hardness, chlorine, and sometimes a rough read on nitrates or iron. They're a decent first pass if you want a quick read on whether your softener is working or whether chlorine is present in city water. They are not the right answer when you need action-level confidence on trace metals or bacteria.

Drop kits and narrow chemistry

Colorimetric kits usually do one thing better than strips, they give you a more controlled read on a chosen parameter. That makes them better for a homeowner who already suspects a specific issue, like scale, low pH, or residual disinfectant. They don't turn into a broad contamination detector just because they look more technical on the counter.

Digital meters and lab panels

Digital meters are built for narrow measurements, not broad safety screening. They shine when you want repeatable pH or TDS readings and nothing else. Mail-in lab kits, by contrast, are built for wider screening and can include metals, VOCs, bacteria indicators, pesticides, and nitrates, which is why they're the right tool when you need a real map of the water, not a snapshot.

A kit that measures more parameters isn't automatically better. If it can't detect the contaminant you care about at a meaningful level, the extra boxes on the label are just decoration.

Format What It Commonly Detects Well What It Misses
Test strips pH, chlorine, hardness, sometimes nitrates or iron Lead at actionable levels, bacteria, deeper contamination
Colorimetric kits Specific single-issue chemistry with better visual resolution Broad pathogen screening, many trace contaminants
Digital meters pH, TDS, other narrow numeric readings Actual contaminant identity, health-risk context
Mail-in labs Wider contaminant panels, including metals, VOCs, bacteria indicators, pesticides, nitrates Depends on the chosen panel, not all labs test the same list

Accuracy and Limitations You Should Know Upfront

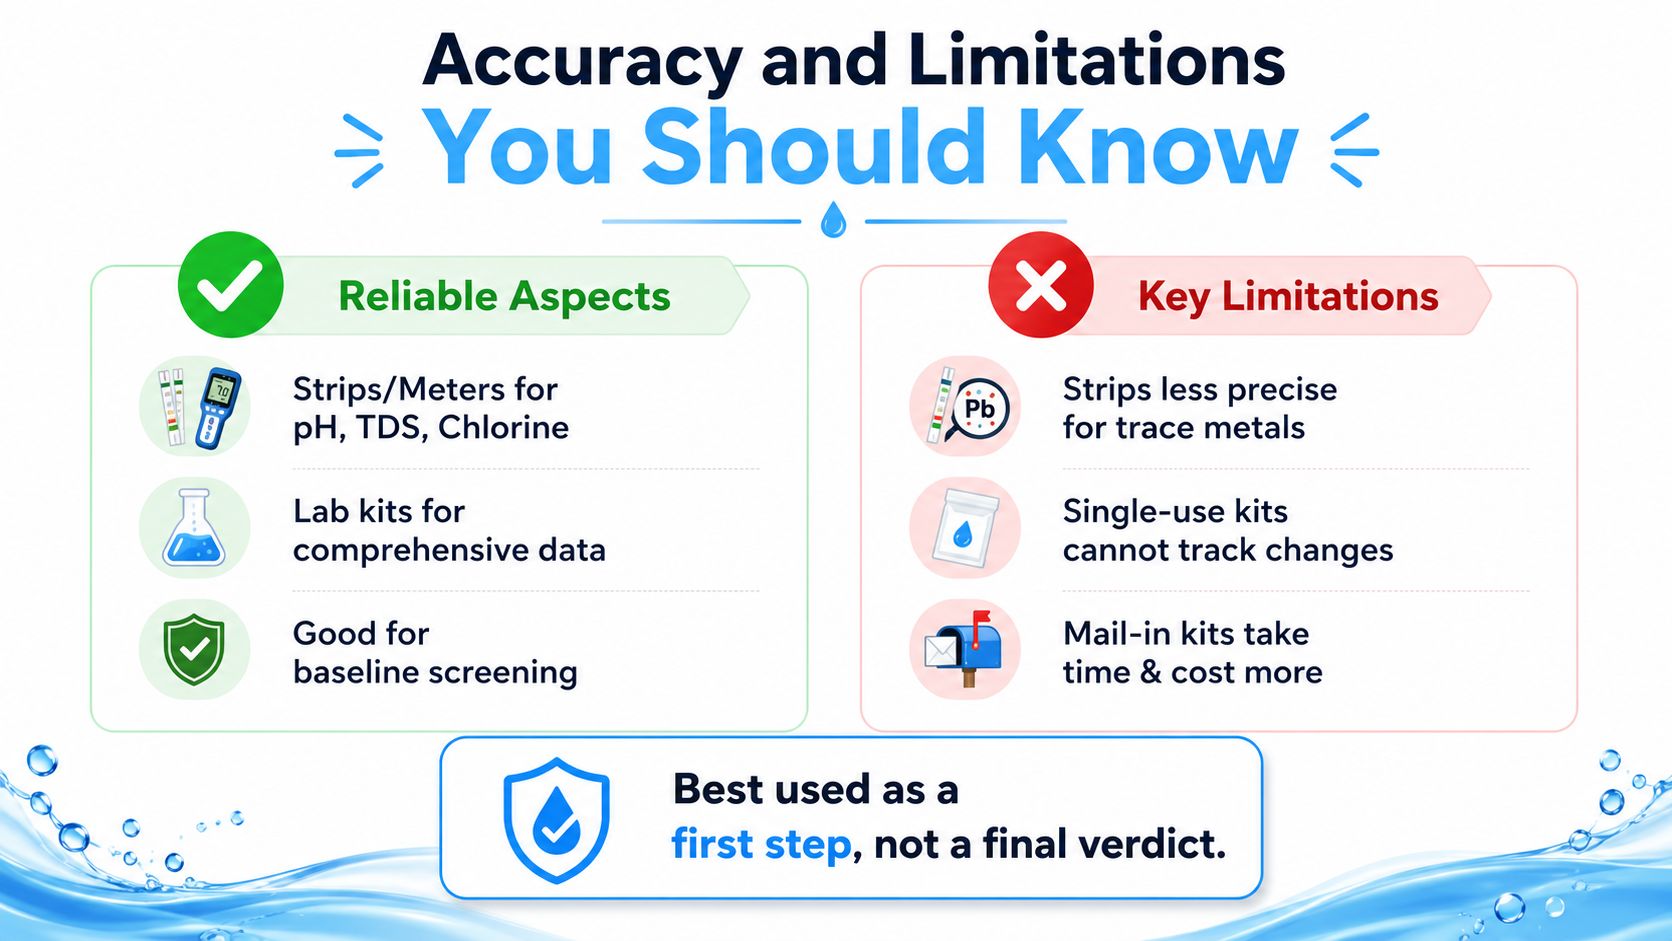
The hard truth is that a water testing kit for home can be useful and still be imperfect. A 2025 PubMed-indexed study found home-use drinking water test kits were highly repeatable, but performance varied depending on the contaminant, the water matrix, and the kit used PubMed study on home water test kit performance. That's the detail homeowners need to hear, because repeatable doesn't always mean equally accurate across every contaminant.

The big takeaway is simple. Single-parameter tests tend to be more dependable than multiparameter tests when you care about a specific reading. A 2025 University of Massachusetts Amherst study reported high variability among at-home water kits, and found that none of the multiparameter tests detected low levels of iron while 3 of 4 single-parameter tests did UMass Amherst study coverage. That matters because iron is a common nuisance contaminant that affects taste, staining, and filter choice.

False positives and false negatives are real. Color-matching errors happen when lighting is bad or the user reads the strip too early or too late. Multi-parameter strips also create a trap that shoppers fall into all the time, they assume more paddles on the card means broader truth. It doesn't. It often means more places for the reading to drift.

An infographic titled Accuracy and Limitations You Should Know, outlining pros and cons of various water testing methods.

Best use: treat home testing as a first step, not a final verdict, especially when the concern is lead, bacteria, or illness-related.

Accuracy matters, but so does the question you're asking. A kit can be perfectly decent for baseline screening and still be the wrong tool for a health-triggering problem. The goal is not to get an answer fast. The goal is to get the right answer.

How to Collect a Sample and Run the Test Correctly

Bad sampling ruins good kits. You can buy a solid tester and still get a nonsense result if you pull from the wrong faucet, grab the sample too soon, or touch the reactive end of a strip. Homeowners blame the water when the actual problem is the sample.

Start with the tap that reflects the water you drink. If you're testing household plumbing, use a kitchen cold tap unless the kit says otherwise. If you're testing a well or post-filter water, sample at the point you care about, not somewhere convenient that gives you a distorted reading.

A few habits keep you from contaminating the result:

  • Flush first: run the tap before collecting, because stagnant water can exaggerate metal readings.
  • Skip the aerator if instructed: debris trapped at the faucet tip can skew a sample.
  • Handle strips by the edge: skin oils and wet fingers can interfere with the pad.
  • Read on time: every strip and color chart has a window, and missing it changes the result.
  • Use good light: daylight or a bright neutral bulb beats a dark sink corner every time.

Do this every time: if you don't flush the line first, you're testing what sat in the pipe, not necessarily what your water source actually contains.

The flush time matters because standing water can pick up copper or lead from plumbing before you ever touch the glass. That's why a first-draw sample and a flushed sample answer different questions. One tells you what sat in the pipe, the other tells you what's coming through the line under normal use.

If you're using a lab kit, follow the kit's bottle order and preservation steps exactly. Those details matter more than people think. A rushed collection turns a useful test into expensive guesswork, and guesswork is how homeowners buy the wrong filter twice.

Reading the Results and Knowing What They Mean

Numbers mean nothing until you tie them to a decision. A result can be acceptable, worth monitoring, or a sign that you need a different filter or a lab follow-up. The point is not to stare at the chart. The point is to know what the chart is telling you about water quality, plumbing, and taste.

What the common parameters usually tell you

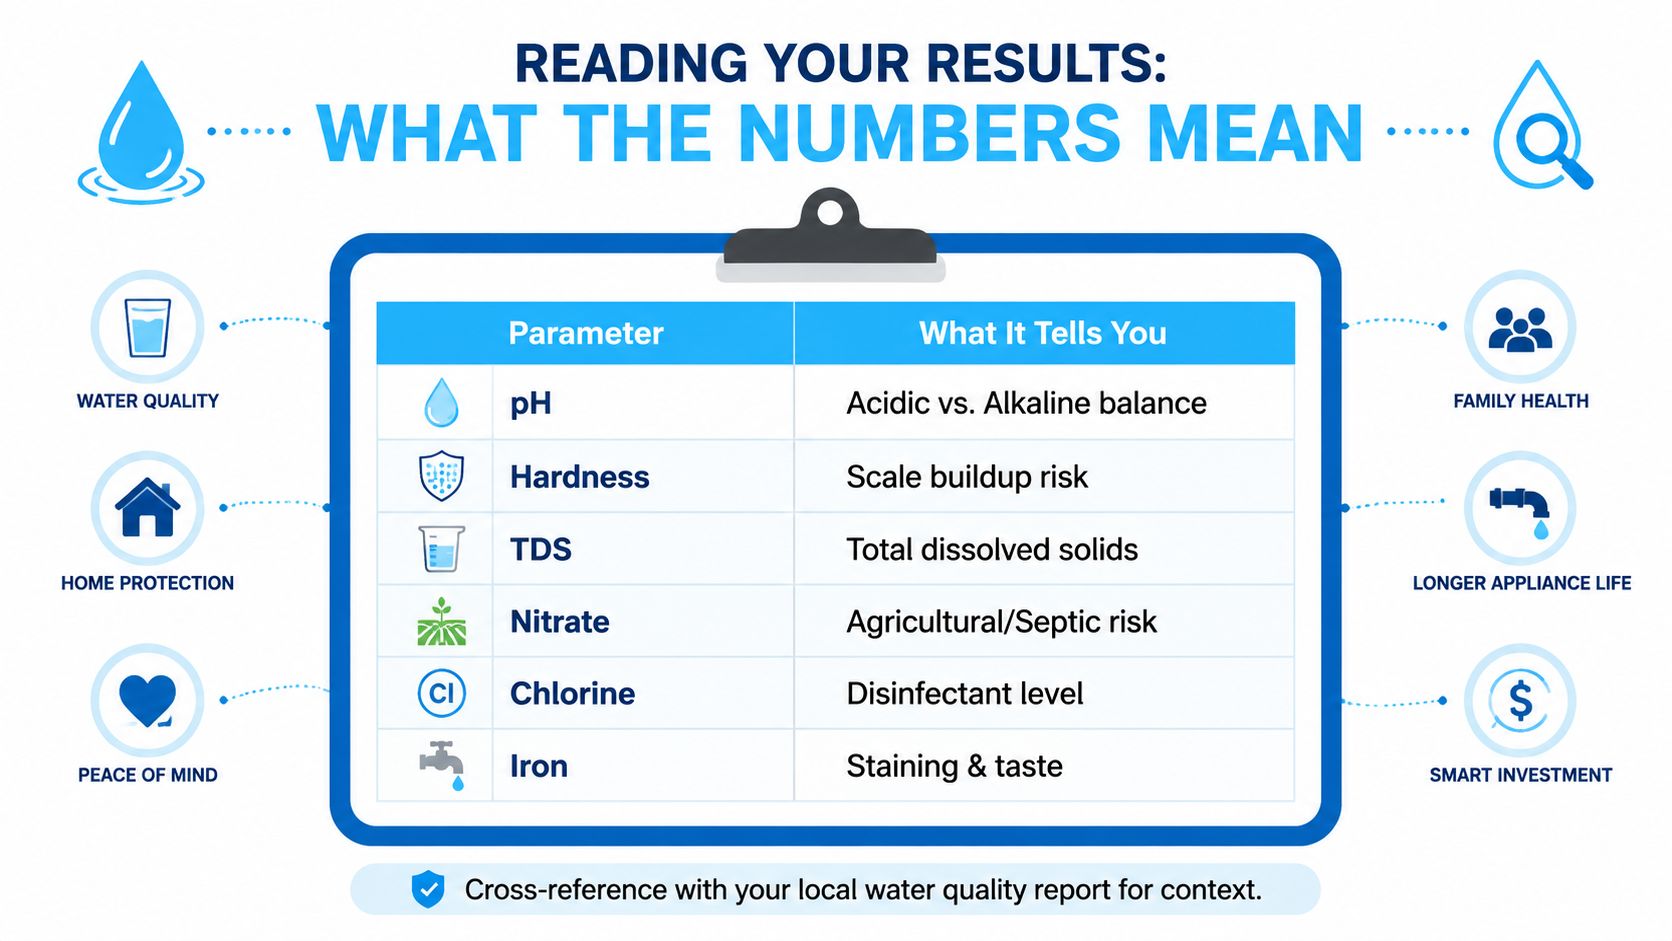
pH tells you whether water leans acidic or alkaline. Low pH can point toward corrosion risk, which matters for plumbing and for any household worried about metals leaching from pipes. Hardness points to scale buildup risk, which is why it changes shower feel, spot residue, and softener selection.

TDS means total dissolved solids, a broad measure that tells you how much dissolved material is in the water, not exactly what the material is. Nitrate is a red-flag screening item for households on well water, especially where agriculture or septic influence is possible. Chlorine tells you whether disinfectant is present in treated municipal water. Iron points to staining and taste issues, and it also changes what kind of filter media makes sense.

If a lab report arrives, don't let the jargon intimidate you. Look for the parameter name, the unit, the detection limit, and whether the result is flagged. A result below the detection limit is not the same as a clean bill of health, it just means the lab couldn't quantify it at that level.

A realistic example helps. If a well-water test shows low pH and iron, the immediate takeaway is not panic. It means you may be looking at corrosion control, stain control, or both, which points you toward the right treatment path instead of a random pitcher filter.

An infographic explaining water test parameters like pH, hardness, TDS, nitrate, chlorine, and iron levels.

Cross-reference your result with your local water quality report if you have one, but don't use that report as a substitute for the sample in your hand. The report gives context. Your kit tells you what your household sees at the tap.

When a Home Kit Is Not Enough and You Need a Lab

Homeowners often get themselves into trouble. A casual kit is fine for routine screening, but it's the wrong call when the issue moves from convenience to health concern. If the water smells off after flooding, if a well was just repaired, if plumbing changed, or if someone in the house is sick and water is a suspect, stop guessing and escalate.

The EPA's own guidance draws a line between screening and higher-confidence testing, and it recommends retesting after plumbing changes, flooding, well repairs, or suspected contamination EPA home drinking water testing page. That's the moment to use a state-certified lab or get guidance from your health department, not because home kits are useless, but because the situation is more than a strip can handle.

Here's where I'd push most homeowners toward a lab immediately:

  • Bacteria concerns: especially when illness, septic issues, or contamination after flooding are part of the story.
  • Lead worries: especially in homes with children or pregnancy.
  • Sudden taste or odor changes: because the cause may be broader than a basic screen can explain.
  • New well or plumbing work: because disturbed systems can change the water picture fast.
  • Repeated bad results: because one odd strip reading is a clue, but repeated concerns deserve better analysis.

If you need a lab, use a state-certified one and choose the panel based on the concern, not the marketing language. A broad lab panel is worth it when you need confidence, especially for metals, bacteria indicators, or compounds that basic home kits don't handle well. The cost and turnaround are the tradeoff, and they're worth paying when the alternative is buying the wrong treatment or missing a serious issue.

The rule is plain. Screen at home. Confirm at a lab when the problem is health-related, system-related, or oddly persistent.

Choosing the Right Kit Based on Your Water Source and Concerns

Start with three questions. Where does the water come from? What are you worried about? How much certainty do you need? Answer those and the right kit type usually picks itself.

If you're on municipal water and your complaint is taste, odor, or scale, a strip, drop kit, or digital meter may be enough for a first screen. If you're on a private well, routine screening matters more, and a mail-in lab or a targeted home kit is the smarter default when you need a broader contaminant view. If you're worried about lead, bacteria, or an illness-linked problem, skip the casual all-in-one strip and go straight to a lab-backed approach.

For routine maintenance, choose the simplest tool that answers the question. For filter selection, match the kit to the contaminant. For health concerns, use home testing as a checkpoint, not the finish line. That approach keeps you from overbuying on false alarms and underbuying when the water really does need serious treatment.

The cleanest strategy is a two-step path. Use a home kit to identify the likely issue, then pair it with a lab test when the reading is unclear, or the source is a well. That's how homeowners stop buying generic filters and start building a filtration setup that fits the water in the house.


If you want a straight answer on filters after you test, Water Filter Advisor breaks down which systems fit different water problems without the marketing fluff. Visit Water Filter Advisor when you're ready to match your test results to the right home filtration setup and avoid buying the wrong kit or the wrong system twice.