How a Water Quality Tester Can Help You Pick the Perfect Home Filter
Think your tap water is just plain old H₂O? Think again. What if I told you your morning coffee tastes a little 'meh' because of invisible m ...
Think your tap water is just plain old H₂O? Think again. What if I told you your morning coffee tastes a little 'meh' because of invisible m ...
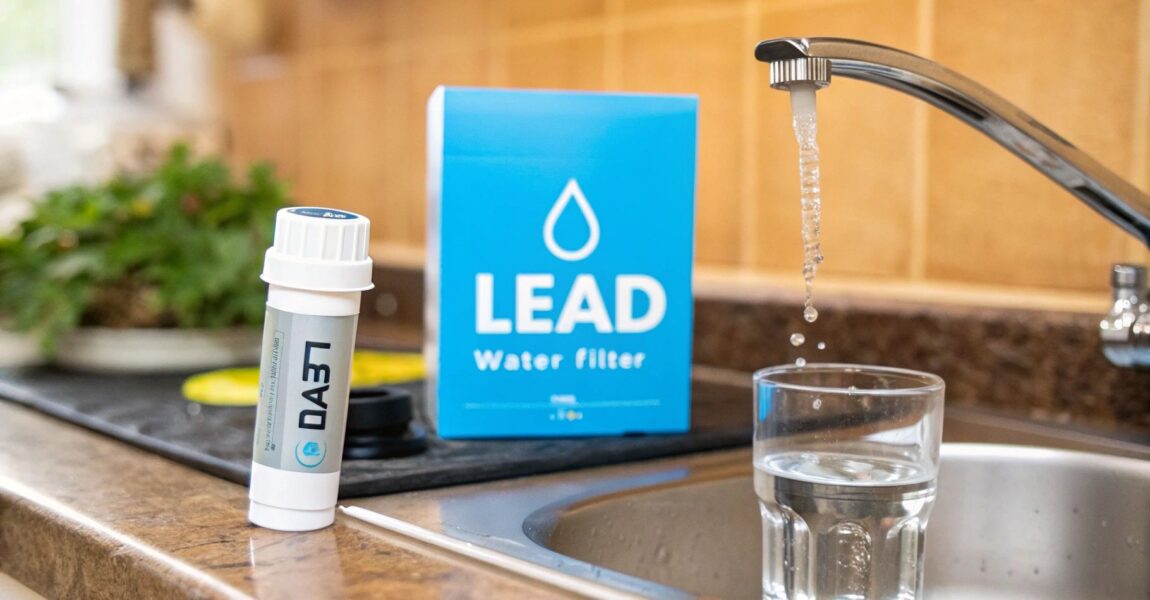
When you turn on your faucet and fill a glass, you expect that water to be pure. But what if it's hiding an invisible neurotoxin? Knowing how to filter lead from water isn't just another home improvement task—it's a critical step in protecting your family's health. This guide gives you the actionable steps you need to secure your home's water supply.
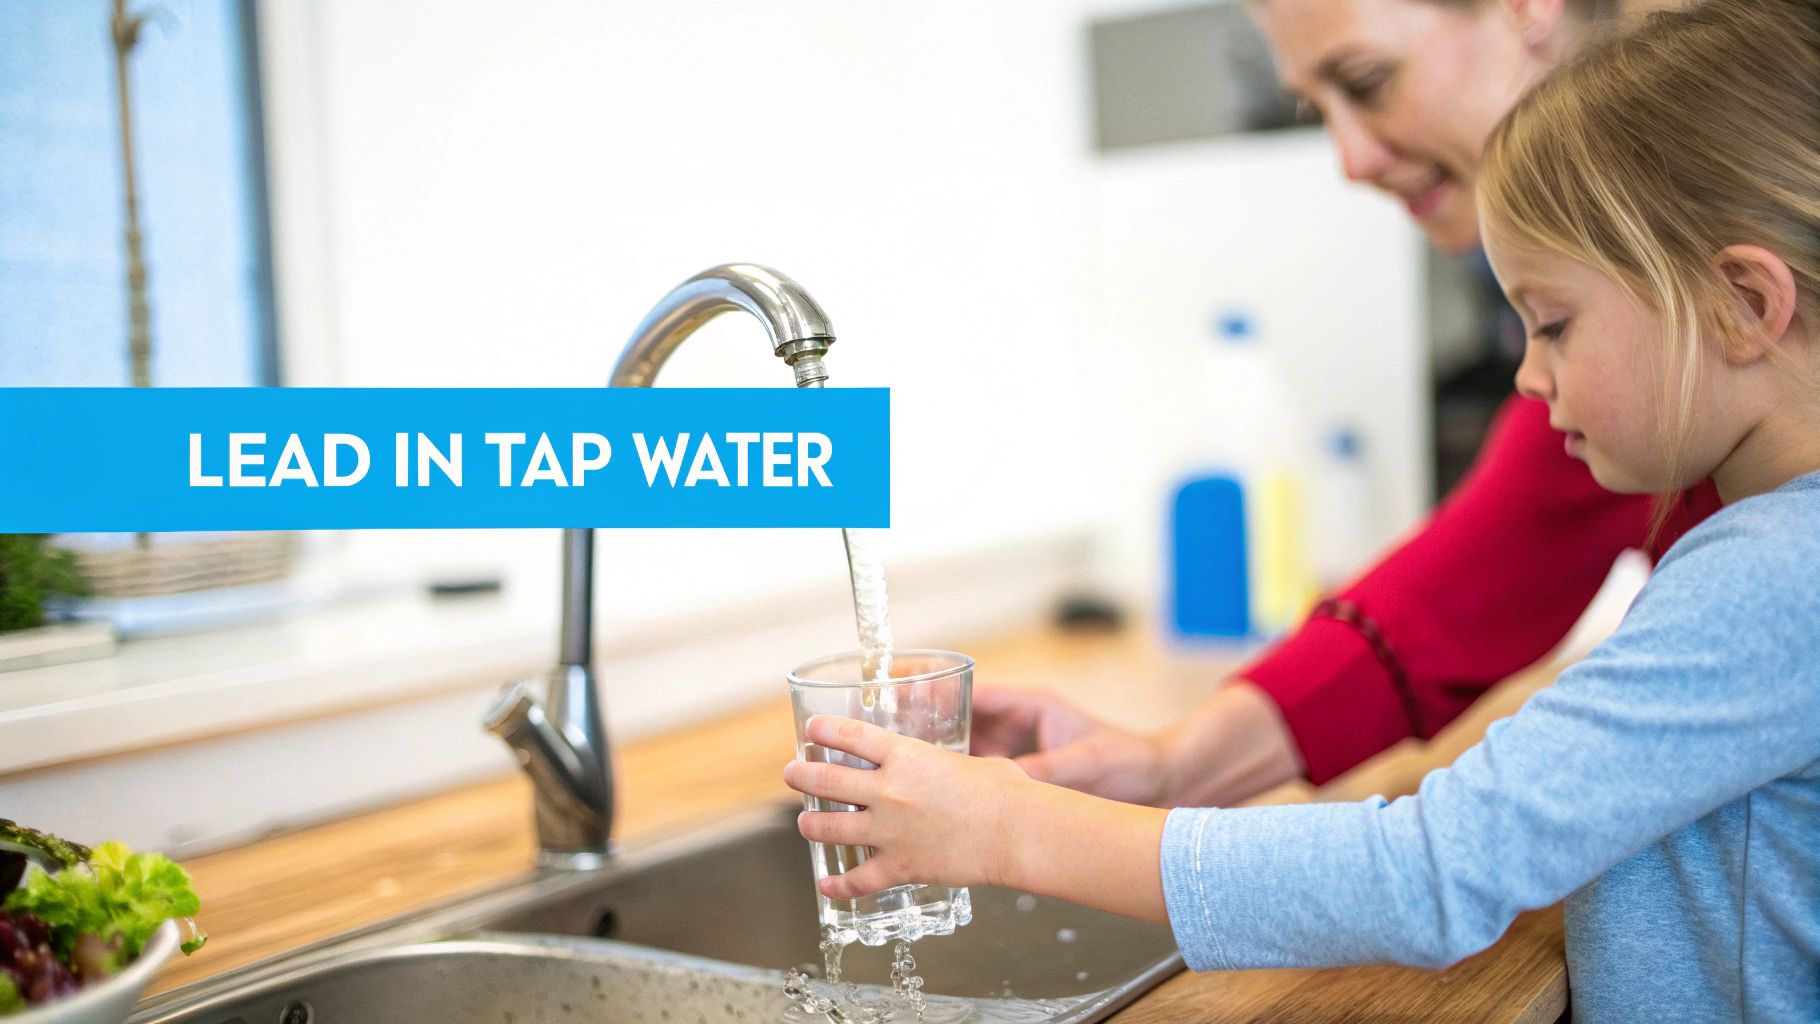
The water flowing from your kitchen tap looks clean. It’s clear, has no odd smell, and tastes fine. Yet, a hidden danger could be lurking inside—one you can't see, smell, or taste. Lead, a potent heavy metal, can leach into your drinking water from the very pipes that deliver it.
This isn't just a problem for old industrial towns or historic homes. While houses built before the 1980s are at higher risk because of lead pipes and solder, even modern plumbing isn't completely safe. Today's regulations for "lead-free" fixtures still permit trace amounts of lead in brass fittings, faucets, and valves, which can contaminate your water over time.
Here’s the hard truth: there is no safe level of lead exposure. The health effects are serious and often permanent, which makes the need to filter lead from water an urgent issue for every household. The risks are especially high for the most vulnerable among us.
This is why this contaminant needs your immediate attention:
This problem points to a troubling global reality. According to the World Health Organization (WHO), about 1 in every 3 children worldwide—a staggering 800 million kids—have elevated blood lead levels from sources that include drinking water. It really drives home the need for effective filtration. At Water Filter Advisor, we recommend certified systems proven to capture over 99% of lead, drastically cutting these risks. You can read more about the global commitment to safer drinking water on sdgs.un.org.
The biggest danger with lead in water is how sneaky it is. Contamination happens silently, day after day, and the health problems can build up for years before you even notice them. This is why being proactive with filtration is the only reliable way forward.
To fix the problem, you first have to know where it's coming from. Lead usually gets into your water after it leaves the municipal treatment plant. The contamination happens somewhere in the distribution system or right inside your home's plumbing.
The pipes that run from the street to your house, known as service lines, are a common source. Inside your home, older copper pipes joined with lead-based solder or old brass faucets are also big offenders. Because the problem is often so close to your tap, a point-of-use filter is an incredibly powerful defense. By taking control of your water quality right at the source, you create that final, vital barrier to protect your family.
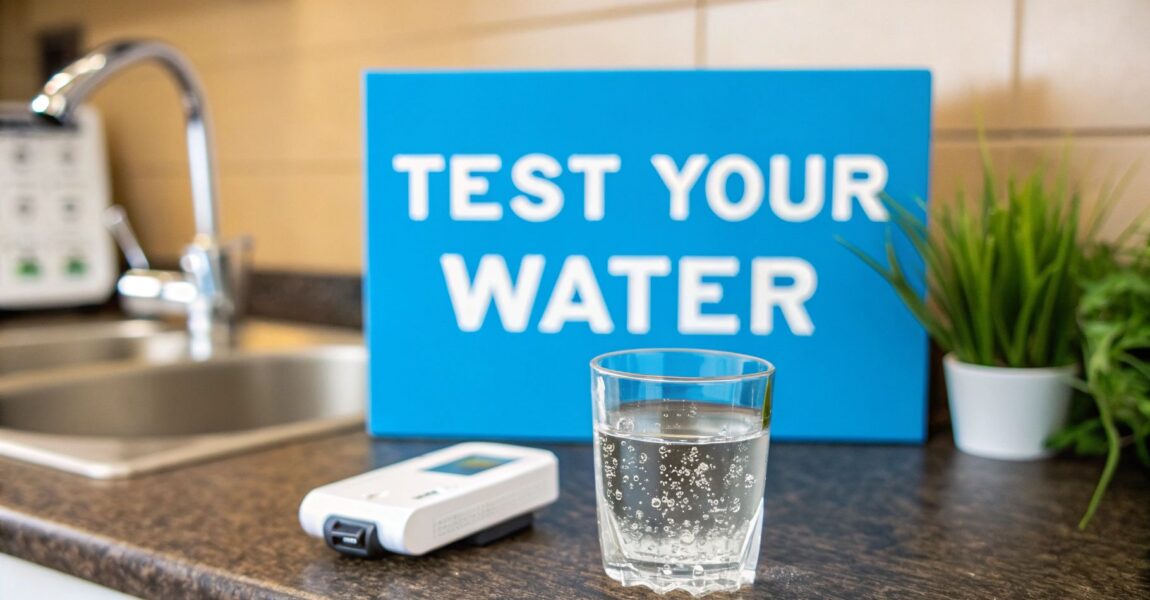
Before you can even think about a filter, you have to know what you’re up against. Guessing just won’t cut it when it comes to your family’s health—you need to know for sure if lead is in your water and, if so, how much.
Think of it as the diagnostic step. You wouldn't take medicine without a diagnosis, right? Same principle. You have two solid options to get the data you need: quick-and-easy DIY kits or a full professional lab test.
For a fast, initial screening, a DIY home test kit is a decent place to start. You can grab these online or at most big-box hardware stores pretty cheaply. Most of them are simple test strips that change color if lead is detected above a certain level, usually around the EPA's action level of 15 parts per billion (ppb).
A word of caution, though: make sure you buy a kit specifically for water, not lead paint. While these kits are handy for a quick "yes" or "no" answer, that's all they give you. They can't tell you the exact concentration, just that you're over a certain threshold. They're great for a first look, but they don't give you the whole story.
If you want the real numbers, nothing beats sending a sample to a professional lab. This is the gold standard. It’s the most accurate method and gives you a detailed report with the precise concentration of lead, and often a whole list of other potential contaminants, too. This is the hard data that lets you choose the right filter with total confidence.
Finding a certified lab is simple. Just check with your local health department or water utility; they’ll have a list of state-approved labs.
The process is a breeze:
In a week or two, you’ll have a full report in your hands. This is the information you need to take targeted, effective action.
Pro Tip: The First Draw Technique
The "first draw" is key. It means you collect water from your tap first thing in the morning before you've run the shower, flushed a toilet, or made coffee. This captures the water that’s been sitting in your pipes overnight, which is when the highest amount of lead leaches out. It gives you the worst-case scenario reading, which is exactly what you need to know.
Your report will show a number in parts per billion (ppb) or micrograms per liter (µg/L). Here's the most important thing to remember: health experts agree that there is no safe level of lead. The EPA's 15 ppb "action level" is a guideline for municipal water systems, not a safety threshold for your home.
Any detectable lead is a signal to take action. Even a reading as low as 5 ppb means you should be seriously considering a filtration system. Now that you have the facts, the guesswork is over. You know the scale of the problem and can move forward to pick the right solution to get that lead out of your water for good.
Okay, you've got your water test results. The guessing game is over, and now you have the facts. This is the moment you switch from reactive to proactive, choosing the right defense to get that lead out of your water for good.
Stepping into the world of water filters can feel a bit overwhelming at first, with all the talk of "adsorption," "microns," and "membranes." But don't sweat it. We're going to break down the three most effective technologies for lead removal into plain English so you can feel confident in your choice.
When you want the absolute highest level of purification, you look at Reverse Osmosis, or RO. Think of it as the ultimate bouncer for your water supply—it has an incredibly strict guest list.
RO systems use household water pressure to push water through a special semi-permeable membrane. This membrane is so fine that only tiny, pure water molecules can pass through. Heavier stuff like lead, arsenic, and fluoride simply can't make it and get flushed away. It's a remarkably effective process, making RO a go-to for anyone who wants to be absolutely sure they’re getting rid of lead.
This flowchart can help you visualize the steps from initial testing to making a decision.
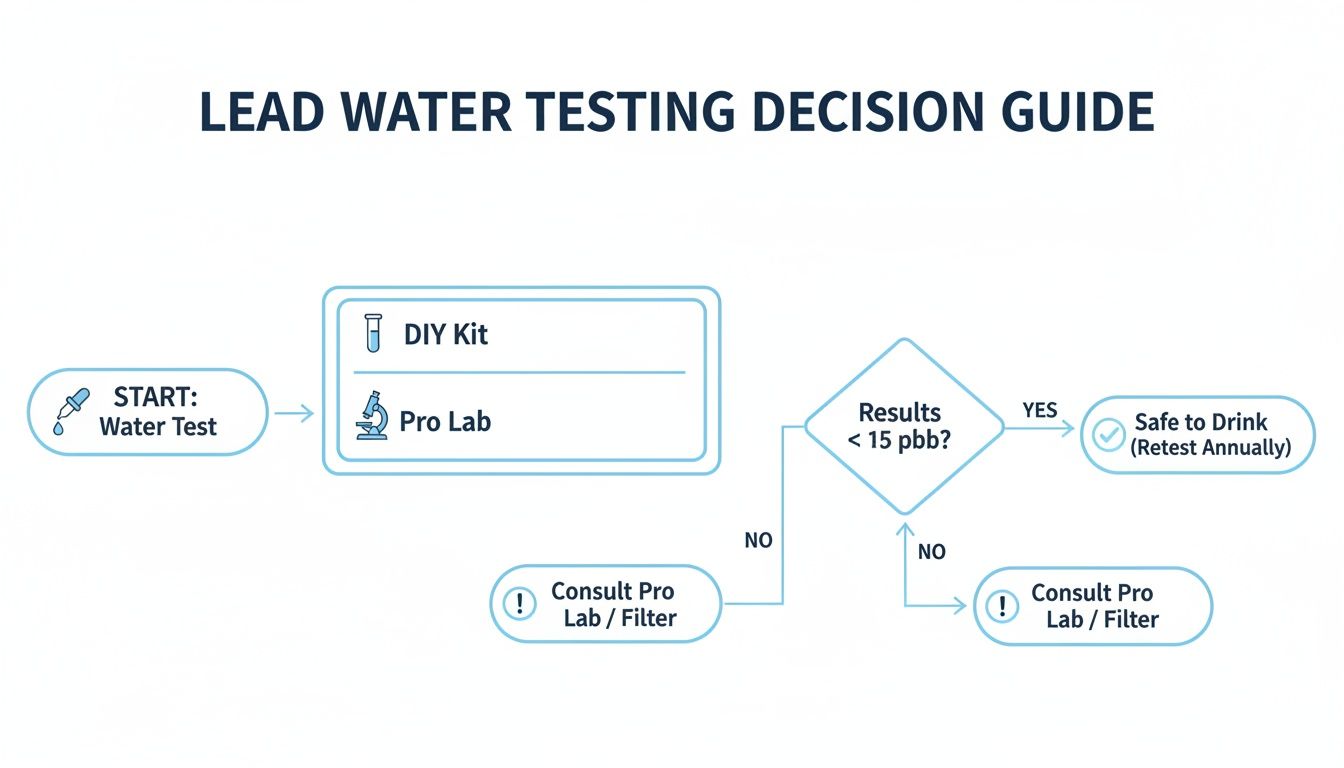
Whether you start with a quick DIY kit or go straight for a precise lab test, the goal is the same: get solid data so you can pick the right filter.
Activated carbon is probably the most familiar filter technology out there, but here's the crucial part: not just any carbon filter will handle lead. To be effective, it must be certified to NSF/ANSI 53.
That certification is your proof that the filter has been independently tested and proven to reduce lead. These filters use a process called adsorption, where lead particles essentially get stuck to the carbon's massive surface area, kind of like a magnet grabbing metal shavings.
The most important thing to remember is the certification. A basic carbon filter just for taste and odor won't do much for lead. Always look for that NSF/ANSI 53 mark on the box.
The great thing about activated carbon is its flexibility. You can find it in all sorts of formats:
Since we started in 2007, we've helped thousands of families find the right solution. Lead in water is a serious issue, but the fixes are incredibly effective. A quality RO system can reject 98-99% of lead, and a certified activated carbon filter can adsorb 95% or more. Installing a proven system is the best way to protect your family right now.
Ion exchange is a more specialized technology you’ll often find inside water softeners or as part of a multi-stage filter cartridge. It works like a trade. The filter media is loaded with harmless ions (like sodium) and when water flows through, it swaps them for undesirable ions, like lead.
While it's a great technology, you rarely see ion exchange used as a standalone lead filter for drinking water. It’s more of a team player, often working alongside activated carbon to provide a more complete filtration solution for various water quality issues.
To help you decide, it's useful to see how these top-tier technologies stack up. While a detailed guide to choosing the perfect water filter can provide more depth, this table gives you a quick, side-by-side look.
| Filtration Technology | Lead Removal Rate | Initial Cost | Annual Maintenance | Best For |
|---|---|---|---|---|
| Reverse Osmosis | 95-99+% | $150 – $500+ | $50 – $150 | Homeowners wanting the highest level of purification for drinking/cooking water. |
| Activated Carbon (NSF 53) | 95-99% | $30 – $400 | $40 – $120 | Renters and homeowners needing a flexible, effective solution for specific taps. |
| Ion Exchange | 95-98% | Varies | Varies | Homes with multiple water issues, often used in conjunction with other filters. |
At the end of the day, the best filter is one that's certified for lead, fits your budget, and is easy for you to maintain. Whether it’s a simple faucet filter or a full under-sink RO system, taking this step puts a vital barrier between your family and this invisible threat.
For more in-depth reviews and comparisons, check out our comprehensive advice on water filters at Water Filter Advisor.
Picking out the right filter feels like a huge win, but it’s really only half the job done. A top-of-the-line system is completely worthless if it’s installed incorrectly or you let its maintenance slide. This is where you come in—your ongoing attention is what keeps your filter doing its one critical job: to filter lead from water effectively, day after day.
Think of it like owning a high-performance car. It needs to be set up right from the start and requires regular tune-ups to keep running at its peak. If you skip these steps, you’re not just getting poor performance; you’re creating a false sense of security while contaminants slip right through.
Proper installation is the foundation for safe water. While a complex whole-house system is a job best left to a professional plumber, many of the point-of-use systems you'll encounter—like faucet mounts and under-sink units—are actually designed for a straightforward DIY setup.
Take a simple faucet-mounted filter, for example. Installing one of those often takes less than five minutes. Seriously. It's usually just a matter of unscrewing your faucet’s aerator and twisting the filter unit on. Most come with a handful of adapters to make sure you get a snug fit on any standard faucet. It’s an empowering first step toward cleaner water.
Under-sink systems, like a Reverse Osmosis (RO) unit, are a bit more involved but are still totally manageable for anyone with basic DIY confidence. The absolute key here is to follow the manufacturer's instructions to the letter. Don’t just skim them. Lay out all the parts, identify them with the manual, and take your time connecting the color-coded tubes. One wrong connection can lead to leaks or a system that doesn’t filter at all.
Once your system is up and running, the real work begins. Maintenance isn't just a suggestion; it's a non-negotiable part of keeping your water safe. An old, clogged filter can’t capture lead. Even worse, it can sometimes do the opposite and release a concentrated burst of trapped contaminants back into your water.
Here’s a practical breakdown of what needs your attention:
Pro Tip: Listen to Your Water
Your own senses can be a fantastic early warning system. If you ever notice a sudden drop in water pressure from your filtered tap, or if the water starts to taste or smell different, that’s a huge red flag. It’s a strong sign your filter is clogged and needs to be replaced right away, even if it’s before the scheduled date.
Besides a drop in water flow, other subtle clues can tell you a filter is on its last legs. Many modern systems come with a filter life indicator light, which is your most obvious signal. It usually changes from green to yellow (a warning) and finally to red (replace now).
But don't rely on the light alone. These indicators are often just simple timers and don't actually measure the filter's real-world performance. The most reliable method is sticking to a strict replacement schedule based on the manufacturer's gallon capacity rating. If you have a big family and go through a lot of water, you’ll probably need to replace filters more often than a single person would.
Following these guidelines is the only way to ensure your system continues to reliably filter lead from water, protecting your home and family with every glass you pour.
While a high-quality filter is your main line of defense, it’s not the only move you can make. A few smart habits can act as a powerful backup, creating an extra layer of protection that works with your filter to keep lead exposure to an absolute minimum.
These aren't complicated changes. They’re small, easy adjustments to your daily routine that make a surprisingly big difference in the quality of your water.
Here’s something to think about: when your home is quiet overnight, the water just sits in the pipes. It has hours and hours to pick up lead from older plumbing, solder, or even brass fittings. That means the very first glass of water from the tap in the morning can have the highest lead concentration of the day.
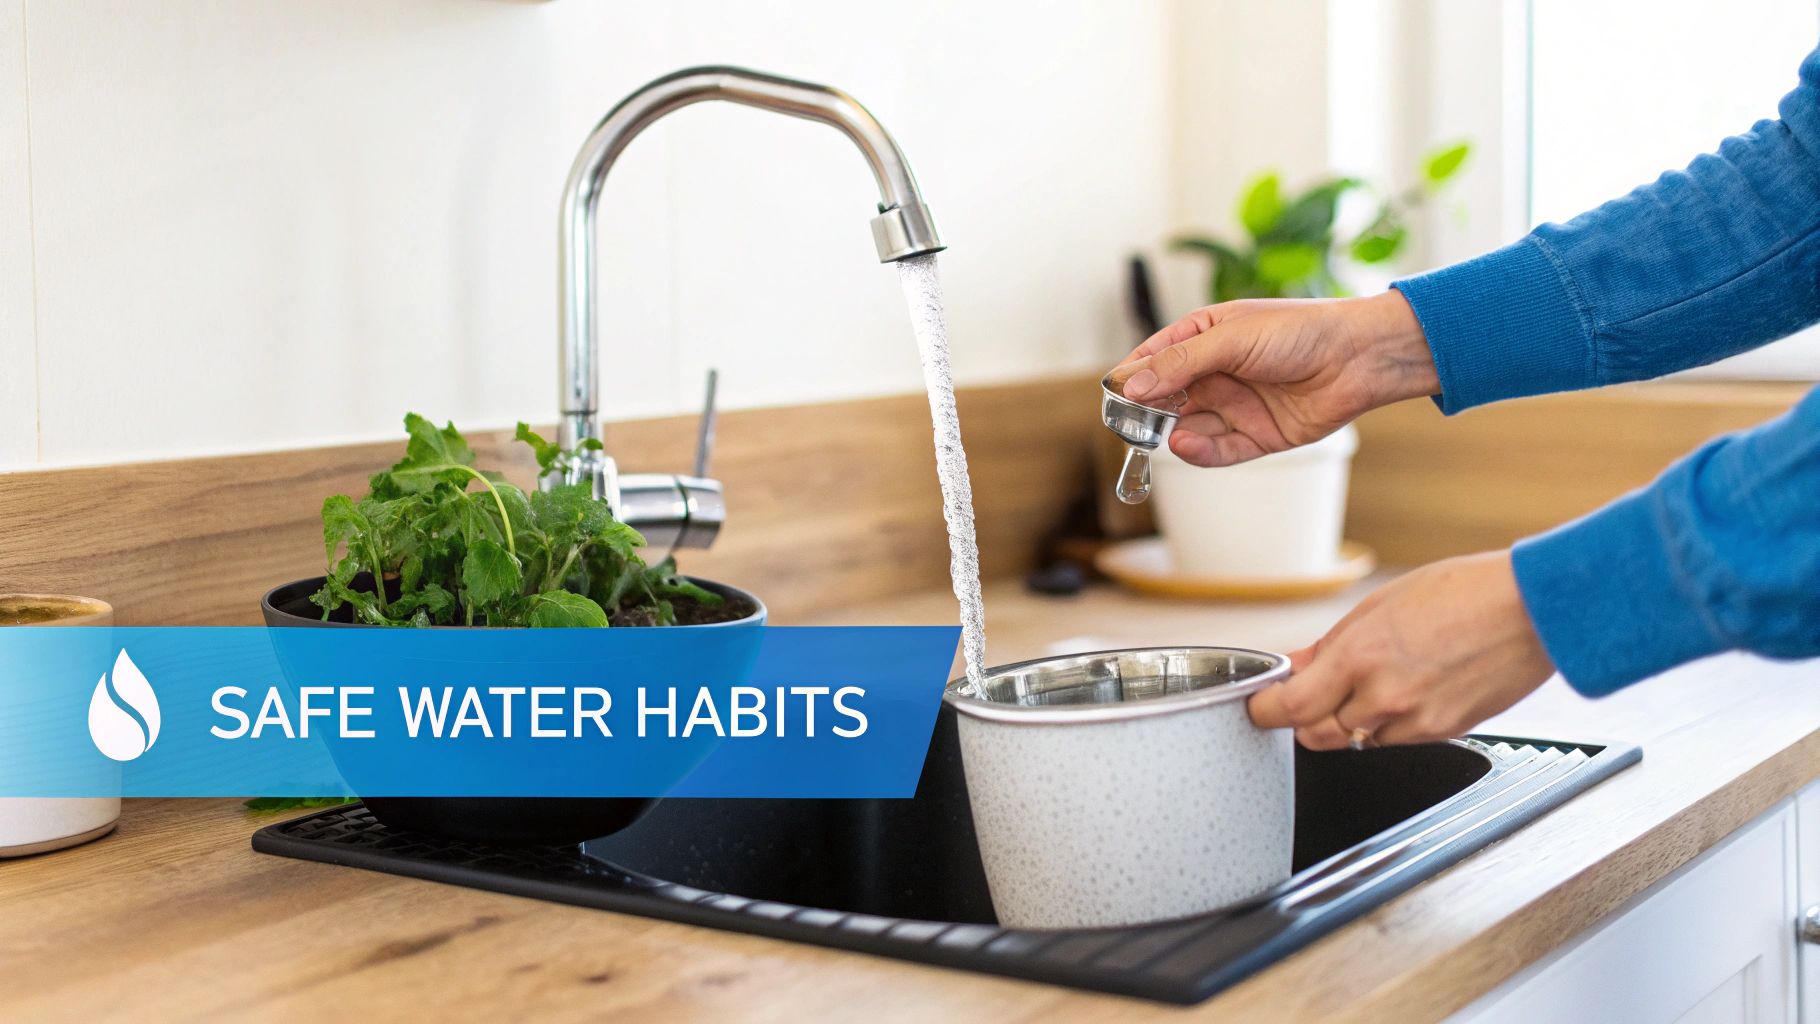
The fix is incredibly simple: flush your pipes. Before you make coffee or fill a glass, just run the cold water for a minute or two. This pushes out that stagnant, lead-heavy water and brings in fresh water from the main.
You don't have to waste it, either. Use that first bit of water for things you won't be drinking:
This one habit is probably the easiest and most effective way to support your efforts to filter lead from water.
"The first draw of water in the morning can be a real wild card. By simply running the tap for a minute, you’re not just flushing the line—you’re actively reducing the contaminant load your filter has to deal with, which can even help extend its life."
This is a golden rule in our house: the hot water tap is for cleaning, not for cooking or drinking. Period. Hot water is much more effective at dissolving metals like lead from your plumbing.
It’s tempting to use hot water to get a pot of pasta boiling faster, but it's a risky shortcut. The heat from your water heater actually speeds up the leaching process, potentially delivering a much higher dose of lead straight into your food. Always, always start with cold water and heat it on the stove or in a kettle.
You know that little screen on the tip of your faucet? That's an aerator. Its job is to mix air into the water so it doesn't splash everywhere, but it also acts like a tiny net, catching sediment and other gunk. If there's lead in your plumbing, lead particles can get trapped right there.
Every few months, just unscrew the aerators and give them a quick cleaning. A simple rinse and a gentle scrub with an old toothbrush is all it takes to clear out any buildup. It’s a two-minute job that keeps your water flowing clean.
The Flint water crisis back in 2014 was a tough lesson on what happens when corrosion control goes wrong, with some homes testing over 100 ppb for lead. While there's a global push for lead-free water by 2040, filtration is what protects families right now. You can read more about these global water safety initiatives on Frontiersin.org. Combining a good NSF/ANSI 53-certified filter with these simple habits gives you a rock-solid defense against lead.
Once you've picked a filtration system and started building better habits, a few questions almost always pop up. Getting these final details right is what gives you real confidence that your home's water is safe. Let's dig into some of the most common things people ask when they're tackling a lead problem.
Getting clear answers on these points helps you know you’ve covered all your bases. From what popular products can't do to knowing when you can finally stop worrying, these details bring your whole water safety plan together.
This is a huge point of confusion, and the answer is not necessarily. Your average water pitcher you grab off the shelf is really just designed to make your water taste and smell better, mostly by reducing chlorine. It’s simply not built to capture heavy metals like lead.
If you want a pitcher that works for lead, you absolutely have to find one that is certified under NSF/ANSI 53 for that specific job. Always check the box or, even better, look it up on the NSF's online database to be sure. Certified pitchers can be a great, convenient option, but remember they hold very little water and the filters need to be changed way more often than an under-sink system.
Having a new home is a fantastic head start, but it’s not a 100% guarantee against lead. Even though lead pipes and solder were banned decades ago, today's "lead-free" plumbing regulations still allow for up to 0.25% lead content in new fixtures like faucets, valves, and other fittings.
Over time, tiny amounts of lead can still leach out of these brand-new parts, especially if your city's water is on the corrosive side. There's also the service line—the pipe connecting your new house to the water main could still be an older, lead-based pipe owned by the utility. The only way to know for sure is to test the water coming directly out of your tap.
The term "lead-free" is a bit misleading. It just means very low lead, not zero. That's why testing is still so important, even in modern homes. It's the only way to confirm what's in your water and make the right call on filtration.
This all comes down to being diligent. The single most important thing you can do is stick to the manufacturer's filter replacement schedule. They don't just pull those timelines out of thin air; they're based on extensive testing to figure out the filter's maximum capacity in gallons or months.
For some extra peace of mind, you can also:
This is a dangerous myth that needs to be busted right now. Boiling water does NOT remove lead. In fact, it actually makes the concentration of lead higher.
Think about it: when water boils, some of it turns to steam and evaporates, but the lead gets left behind in the pot. This makes the lead in the remaining water more concentrated and even more hazardous to drink. The only methods proven to filter lead from water are technologies like reverse osmosis, specialized ion exchange, and properly certified activated carbon filters. Never, ever boil water to try and make it safe from lead.
At Water Filter Advisor, we're here to give you the clear, unbiased information you need to protect your family. From in-depth reviews to practical maintenance guides, we help you navigate every step of your journey to safer water. Explore our resources to find the perfect solution for your home at https://www.waterfilteradvisor.com.
So, you've got a microscopic party happening in your pipes, and coliform bacteria are the uninvited guests. What's the plan? You need a bouncer, a filtration system that either zaps these critters into oblivion with ultraviolet (UV) light or physically blocks them with a barrier so fine they can't sneak through, like reverse osmosis or ultrafiltration. The mission is simple: neutralize the bacteria or trap them so they never make it to your morning coffee.
Think of coliform bacteria as the smoke alarm for your water supply. Just finding them doesn’t mean your house is on fire, but it’s a blaring warning that your water's defense system has been breached. It’s a sign that a pathway exists for more dangerous germs to crash the party.
Before you can pick the right bouncer for your plumbing, you need to know who you're dealing with. These microscopic intruders can show up in city water from old, cracking pipes or in private wells thanks to a leaky septic tank or farm runoff.
Not all coliforms wear the same villainous cape. The type found in your water test tells you if you're dealing with a petty thief or a master villain. Labs usually test for three categories, and each one paints a different picture of your water’s safety.
Total Coliforms: This is a huge, sprawling family of bacteria living all around us—in soil, on plants, and in rivers. Most are as harmless as a housefly. But if they're in your drinking water, it means the front door has been left wide open for nastier microbes to wander in.
Fecal Coliforms: This is a smaller, more concerning sub-group of total coliforms. They come from the gut and waste of warm-blooded animals (yep, including us). Finding these is a major red flag that your water was recently contaminated by sewage or animal manure. Time to pay attention.
E. coli (Escherichia coli): The most infamous member of the fecal coliform family, E. coli is the clearest sign of recent fecal contamination. While most types of E. coli are just harmless gut dwellers, some nasty strains can make you seriously sick with stomach-twisting gastrointestinal issues.
Finding any of these in your water means it's time to take action. A positive test for fecal coliforms or E. coli means you need to act fast to keep your family safe.
Contamination isn't just a problem for rustic farm wells—it can happen anywhere. If you live in a city, old pipes and water main breaks can create tiny cracks where dirt and bacteria sneak into the treated water supply long before it reaches your home.
Well owners have their own set of worries. The contamination trail often starts at sources like:
This is a massive global issue. In 2022, the World Health Organization estimated that at least 1.7 billion people around the world drink from water sources contaminated with feces. According to WHO guidelines, safe water should have zero detectable E. coli in a 100 mL sample. That incredibly strict standard is what drives the technology behind modern bacteria filters.
To really get a handle on preventing coliforms, you have to look at your entire water system. This even includes things like maintaining clean water tanks, where bacteria can set up a colony if they aren't cleaned out. A positive test result is your signal to find the source of the problem and put a reliable filter in place.
When you find coliform bacteria in your water, it's not just a minor inconvenience—it's a massive red flag. Your water system is supposed to be a closed, protected pipeline. The presence of coliforms is like finding a crack in that pipe, a breach that allows all sorts of nasty things from the outside to get in.
That crack opens the door for genuinely dangerous pathogens like E. coli O157:H7, Salmonella, and Giardia. These aren't your average germs. They're capable of causing severe gastrointestinal illnesses, leading to debilitating cramps, vomiting, and diarrhea. Ignoring a positive coliform test is, frankly, a gamble you don't want to take with your family's health.
A healthy adult might fight off a low-level exposure and just feel a bit off for a day. But for others in your home, the stakes are significantly higher.
The point isn't to scare you; it's to give you a clear-eyed view of the urgency. A reliable water filter isn't a luxury; it's the last line of defense, a crucial barrier that protects everyone under your roof from these invisible threats.
The connection between contaminated water and disease on a global scale is staggering. Unsafe water contributes to an estimated 1.7 million deaths each year. In fact, a shocking 88% of diarrheal diseases worldwide are traced back to unsafe water, inadequate sanitation, and poor hygiene, highlighting just how critical effective filtration is for public health.
A compromised water supply is often a symptom of a larger environmental issue in your home. It’s a sign that the whole system may need a closer look. Beyond the immediate worry of waterborne bacteria, homeowners should also be understanding the health risks associated with common household mould, another contaminant that can thrive in damp environments and impact both air and water quality.
Ultimately, a positive coliform test means the natural or municipal safeguards for your water have failed. Taking swift, decisive action is the only responsible next step. Installing the right water filters for coliform bacteria is how you restore that protective barrier and ensure every tap in your home delivers clean, safe water.
You can't fight an enemy you can't see. Before you even think about buying a water filter for coliform bacteria, you have to know for sure if they're actually in your water. This isn't a time for guesswork—you need solid data.
The good news? Testing your water is pretty straightforward. You have two main options: send a sample to a professional lab or use a simple at-home test kit. Both are useful, but only one gives you the concrete proof needed to make big decisions about your water treatment.
For absolute certainty, nothing beats getting a professional water analysis from a state-certified laboratory. This is the only way to get a precise, legally defensible result, which is a must if you're on well water or need to know just how bad the contamination is.
Finding a certified lab is easier than you might think. Your local health department is a great place to start, or you can check the EPA's website for a list of accredited labs in your area. Once you get in touch, they'll send you a specialized collection kit with sterile bottles and very specific instructions.
Following their instructions to the letter is critical. If you don't, you could easily contaminate the sample yourself and get a false positive. Here’s the basic rundown:
The lab will take it from there, giving you a clear report that says whether total coliforms, fecal coliforms, or E. coli are present.
If you just want a quick check, at-home test kits are convenient and fast. You can find them easily online or at hardware stores, and they'll give you a simple "present" or "absent" result for total coliforms, often in about 48 hours. They're perfect for an initial screening or for doing periodic spot-checks between professional tests.
Just be aware of their limits. These DIY kits aren't as sensitive as a lab analysis and are prone to user error during collection, which can mess with the results.
Contamination isn't just a problem for remote wells. A 2023 survey in one California valley found total coliforms in a shocking 50% of tap-water samples and 41% of school fountains. It’s a powerful reminder of how widespread these invisible threats can be. This is exactly why regular testing is so important for catching risks before they turn into health problems. You can discover more about these microbial survey findings and what they mean for public health.
Bottom line: if an at-home kit comes back positive, your very next step should be to confirm it with a professional lab test. Think of the home kit as the smoke alarm—it tells you there might be a problem. The lab test is the firefighter who comes in to confirm if there’s a real fire and where it’s coming from. Once you have that confirmation, you can confidently move forward and choose the right filtration solution for your home.
So, your water test came back positive for coliform bacteria. The next logical step is to pick the right shield to protect your home's water supply. This isn't a job for your standard pitcher filter; those are great for taste and odor, but they won't touch microscopic threats like bacteria. You need a system specifically built for the task.
Let's dive into the heavy hitters—the proven technologies that either physically block bacteria or neutralize them completely, making sure your tap water is safe to drink.
Think of a UV disinfection system as giving bacteria a lethal sunburn. Water flows through a chamber where it's blasted with a powerful UV lamp. This intense light zaps the DNA of bacteria, viruses, and other nasty microorganisms, turning them into harmless, sterile zombies.
It's important to understand that this process doesn't remove the bacteria; it just renders them sterile and harmless. They can't reproduce or make you sick. The biggest plus here is that UV is a chemical-free process, so it doesn't change the taste or smell of your water one bit.
Reverse Osmosis (RO) is less of a zapper and more of an impenetrable barrier. It works by using high pressure to force water through an incredibly fine membrane. The pores in this membrane are minuscule—around 0.0001 microns—which is so small that bacteria, viruses, lead, chlorine, and even dissolved salts are left behind and flushed away.
RO systems are the champions of purification, producing exceptionally clean water. The trade-off is that the process is slow, which is why they're usually installed as point-of-use systems under the kitchen sink, feeding a dedicated faucet for drinking and cooking water.
Key Takeaway: The difference between disinfection (UV) and filtration (RO) is critical. UV zaps bacteria, rendering them harmless but leaving them in the water. RO physically blocks and removes them, flushing them away with the wastewater.
Before you choose a system, you need to be certain about what's in your water. The infographic below shows the two main ways to confirm contamination.
As you can see, a full lab test gives you the complete picture, while a home kit is great for a quick, preliminary check.
To make sense of all the options, it helps to see them side-by-side. This table breaks down the most effective methods for getting rid of coliform bacteria, comparing how they work, how well they perform, and what they'll cost you.
| Technology | How It Works | Effectiveness on Coliforms | Pros | Cons | Best For |
|---|---|---|---|---|---|
| UV Disinfection | Scrambles microbial DNA with ultraviolet light, rendering them harmless. | Very High (99.99% inactivation) | No chemicals, no wastewater, low maintenance, keeps healthy minerals. | Requires electricity, ineffective in cloudy water, doesn't remove other contaminants. | Whole-house treatment for well water with known biological contamination. |
| Reverse Osmosis (RO) | Forces water through a semipermeable membrane with tiny pores (0.0001 microns). | Extremely High (Physical removal) | Removes a vast range of contaminants including bacteria, viruses, metals, and salts. | Wastes water, removes healthy minerals, slower flow rate, requires a storage tank. | Point-of-use (e.g., under-sink) systems for the purest possible drinking water. |
| Ultrafiltration (UF) | Pushes water through a hollow fiber membrane with pores of 0.01-0.1 microns. | High (Physical removal) | Blocks bacteria and viruses without wasting water or removing minerals. | Doesn't remove dissolved contaminants like salts, chlorine, or lead. | Point-of-use or whole-house systems where mineral retention is desired. |
| Ceramic Filters | Uses the natural, complex pore structure of ceramic to physically trap bacteria. | High (Physical removal) | Inexpensive, no electricity needed, long-lasting and cleanable filter elements. | Slow filtration rate, can be brittle, requires regular cleaning to prevent clogging. | Gravity-fed countertop units, portable filters, and emergency preparedness. |
| Distillation | Boils water to create steam, leaving contaminants behind, then condenses it back to liquid. | Extremely High (Complete removal) | Removes nearly all contaminants, including bacteria, minerals, and heavy metals. | Very slow process, high energy consumption, removes healthy minerals. | Creating small batches of highly purified water for specific uses (not practical for whole-house). |
Each of these technologies offers a solid defense against coliforms, but the right one for your home depends on your specific water test results, your budget, and how you use your water every day.
While UV and RO get most of the attention, a few other technologies are excellent at stopping coliform bacteria in their tracks.
You can think of Ultrafiltration as a slightly less extreme version of Reverse Osmosis. Its membrane has larger pores (around 0.01 to 0.1 microns), but that's still more than small enough to physically block bacteria, parasites, and even some viruses.
Unlike RO, UF systems don't need a storage tank and don't produce wastewater, which makes them much more efficient. The downside is that they won't remove dissolved minerals or salts, so the water's mineral content remains unchanged.
These classic filters rely on the natural, maze-like pore structure of ceramic to trap contaminants. The pore size is small enough to physically block bacteria and larger protozoan cysts. You'll often find them in gravity-fed countertop systems or portable filters, making them a fantastic choice for renters or for your emergency prep kit.
This method is a perfect imitation of the Earth's natural water cycle. Water is boiled, turning it into steam and leaving everything else—bacteria, minerals, you name it—behind. The steam is then cooled and condenses back into pure, clean water. While it’s incredibly effective, distillation is slow and uses a lot of energy, making it impractical for a whole-house solution but great for producing small amounts of purified water.
Feeling a bit buried under all the technical specs and different options? Let's cut through the noise. This checklist is designed to walk you through the process, turning what seems complicated into a series of clear, manageable steps.
Think of it as your roadmap. We’ll go step-by-step, making sure you’ve covered all the important bases before you decide on the right water filter for coliform bacteria for your home.
Before you spend a dime on equipment, you need to know exactly what you’re dealing with. A positive lab test is your non-negotiable starting point.
Now, think about where you need clean water. Are you just worried about drinking and cooking, or do you want every tap in the house to be safe? This is the point-of-use vs. point-of-entry decision.
Point-of-Use (POU) Systems: These systems treat water at a single spot, like your kitchen faucet.
Point-of-Entry (POE) Systems: Often called whole-house systems, these are installed right where the main water line enters your home.
Where your water comes from makes a huge difference. Private wells and city water supplies have completely different challenges, so they need different solutions.
The EPA has a zero-tolerance policy for E. coli or fecal coliforms in public drinking water. A single positive sample is a violation. This standard underscores the importance of choosing a filter that guarantees complete removal or inactivation.
Don't just take a manufacturer's word for it. You need proof from a third-party that the system actually performs as advertised.
By walking through this checklist, you can confidently choose a system that delivers certified protection. For more detailed comparisons and recommendations, you can find a ton of expert water filter advice to help you find the perfect fit for your family.
Finding out you have coliform bacteria in your water can be a pretty stressful experience. Suddenly, you're faced with a whole host of questions you never thought you'd have to ask. Don't worry, you're not alone. We've compiled the most common questions we hear from homeowners to give you the clear, straightforward answers you need to handle this.
This is probably the most important question we get, and the answer is a hard no. Your standard Brita-style pitcher filter is designed to make your water taste and smell better. They use activated carbon, which is great for pulling out things like chlorine.
But when it comes to microscopic bacteria, they just don't cut it. The pores in those filters are way too big to physically stop something as small as a coliform bacterium. Thinking a pitcher filter will protect you is a dangerous mistake. You absolutely need a system that's specifically built and certified for microbiological purification, like UV, reverse osmosis, or a certified sub-micron filter.
Not necessarily, but it’s usually the most surefire way to protect your entire home. It really boils down to where the contamination is getting in. Your first move should always be to try and figure out the source.
This is a fantastic question because it gets right to the heart of how these systems work. People often use the terms interchangeably, but they describe two totally different ways of dealing with contaminants.
Filtration is a physical barrier. It’s like a bouncer at a club door. The filter membrane has microscopic pores that are small enough to physically block bacteria and other contaminants while letting clean water pass through. Reverse osmosis is a classic example of this.
Disinfection is more like a neutralization process. It doesn't remove the microbes, but it zaps them so they can't hurt you. A UV purifier is the perfect example—it uses ultraviolet light to scramble the DNA of bacteria and viruses, making it impossible for them to reproduce and cause illness. They're left in the water, but they're completely harmless.
Often, the best systems use a one-two punch of both. You might have a sediment filter to get rid of physical debris, which then flows into a UV chamber that disinfects whatever's left.
Expert Insight: The EPA has a zero-tolerance policy for E. coli or fecal coliforms in drinking water. A single positive sample is considered a violation of federal standards. This strict rule is why choosing a system that provides complete disinfection or removal is non-negotiable for your family's health.
Getting a new system installed is a huge relief, but you're not quite at the finish line. The only way to know for sure that your system is still doing its job is through regular testing.
Here’s a simple schedule to follow:
Consistent testing isn't just a suggestion; it’s a core part of keeping your home's water safe. It's how you ensure that investment in a water filter for coliform bacteria keeps paying off for years to come.
Ready to find the perfect filtration solution for your home? The experts at Water Filter Advisor have done the research for you, with in-depth reviews and easy-to-understand guides on everything from UV systems to reverse osmosis. Take the guesswork out of water safety and explore your options today at WaterFilterAdvisor.com.

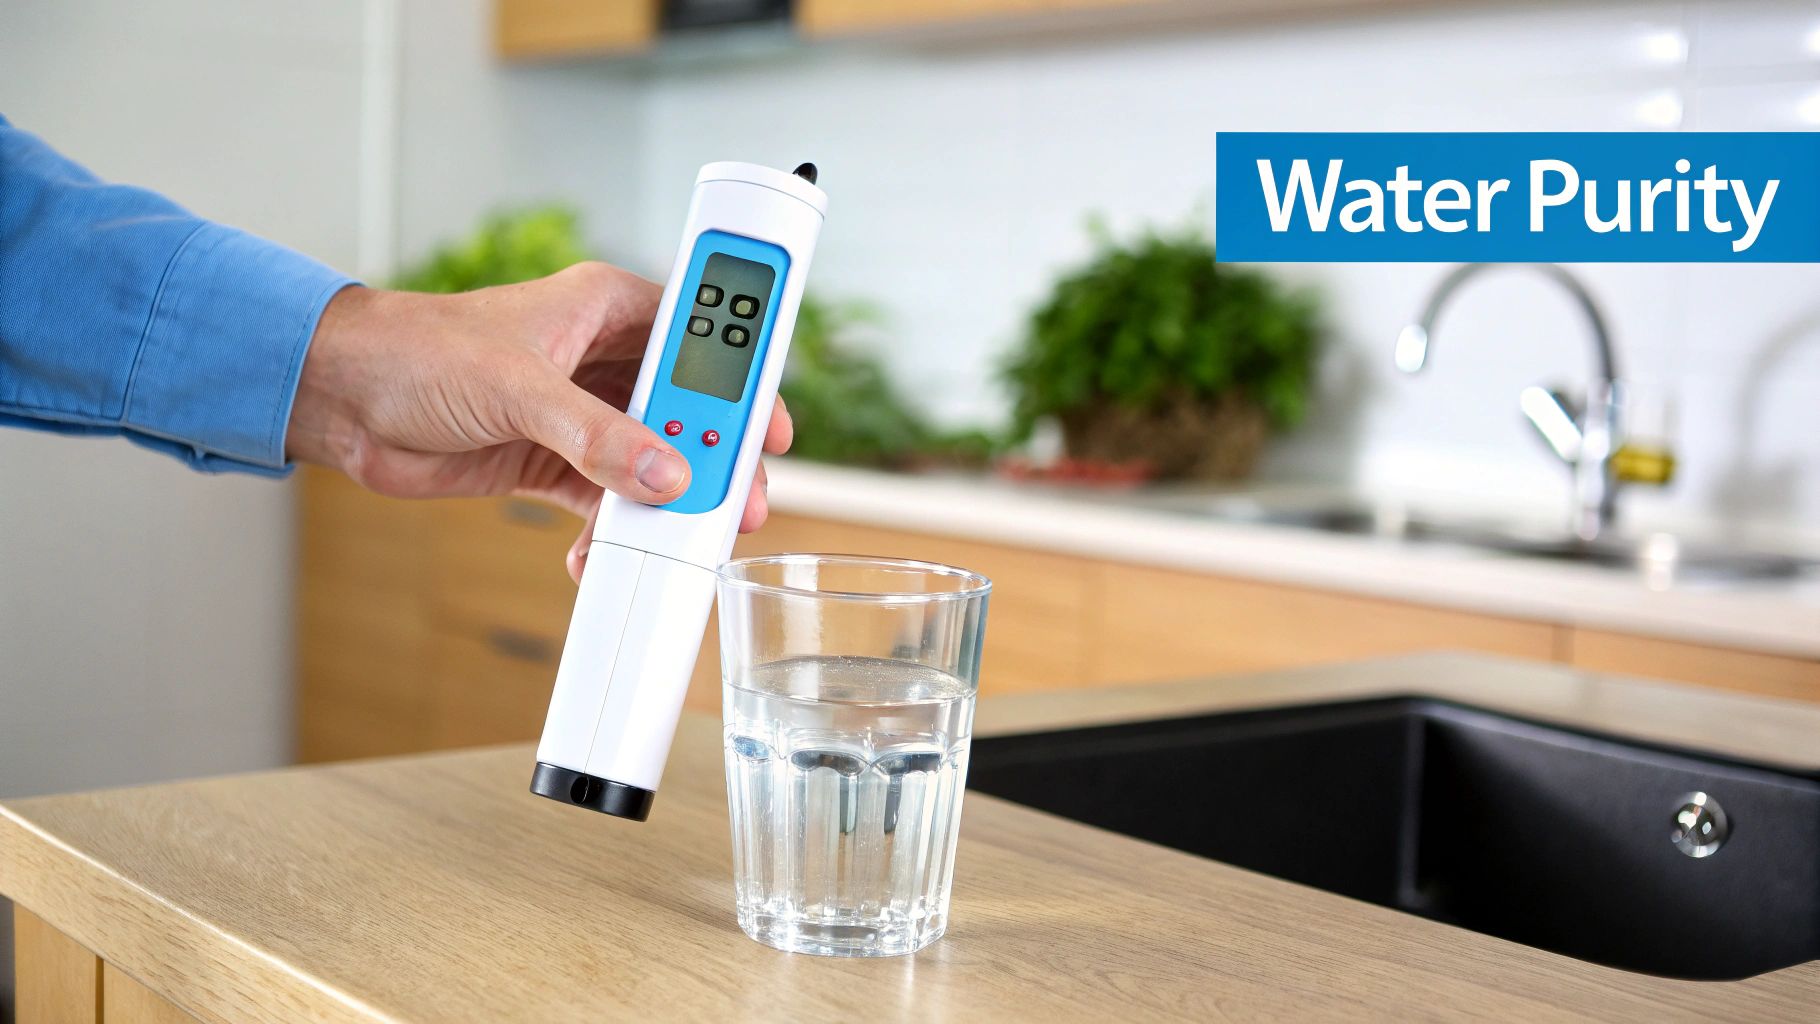
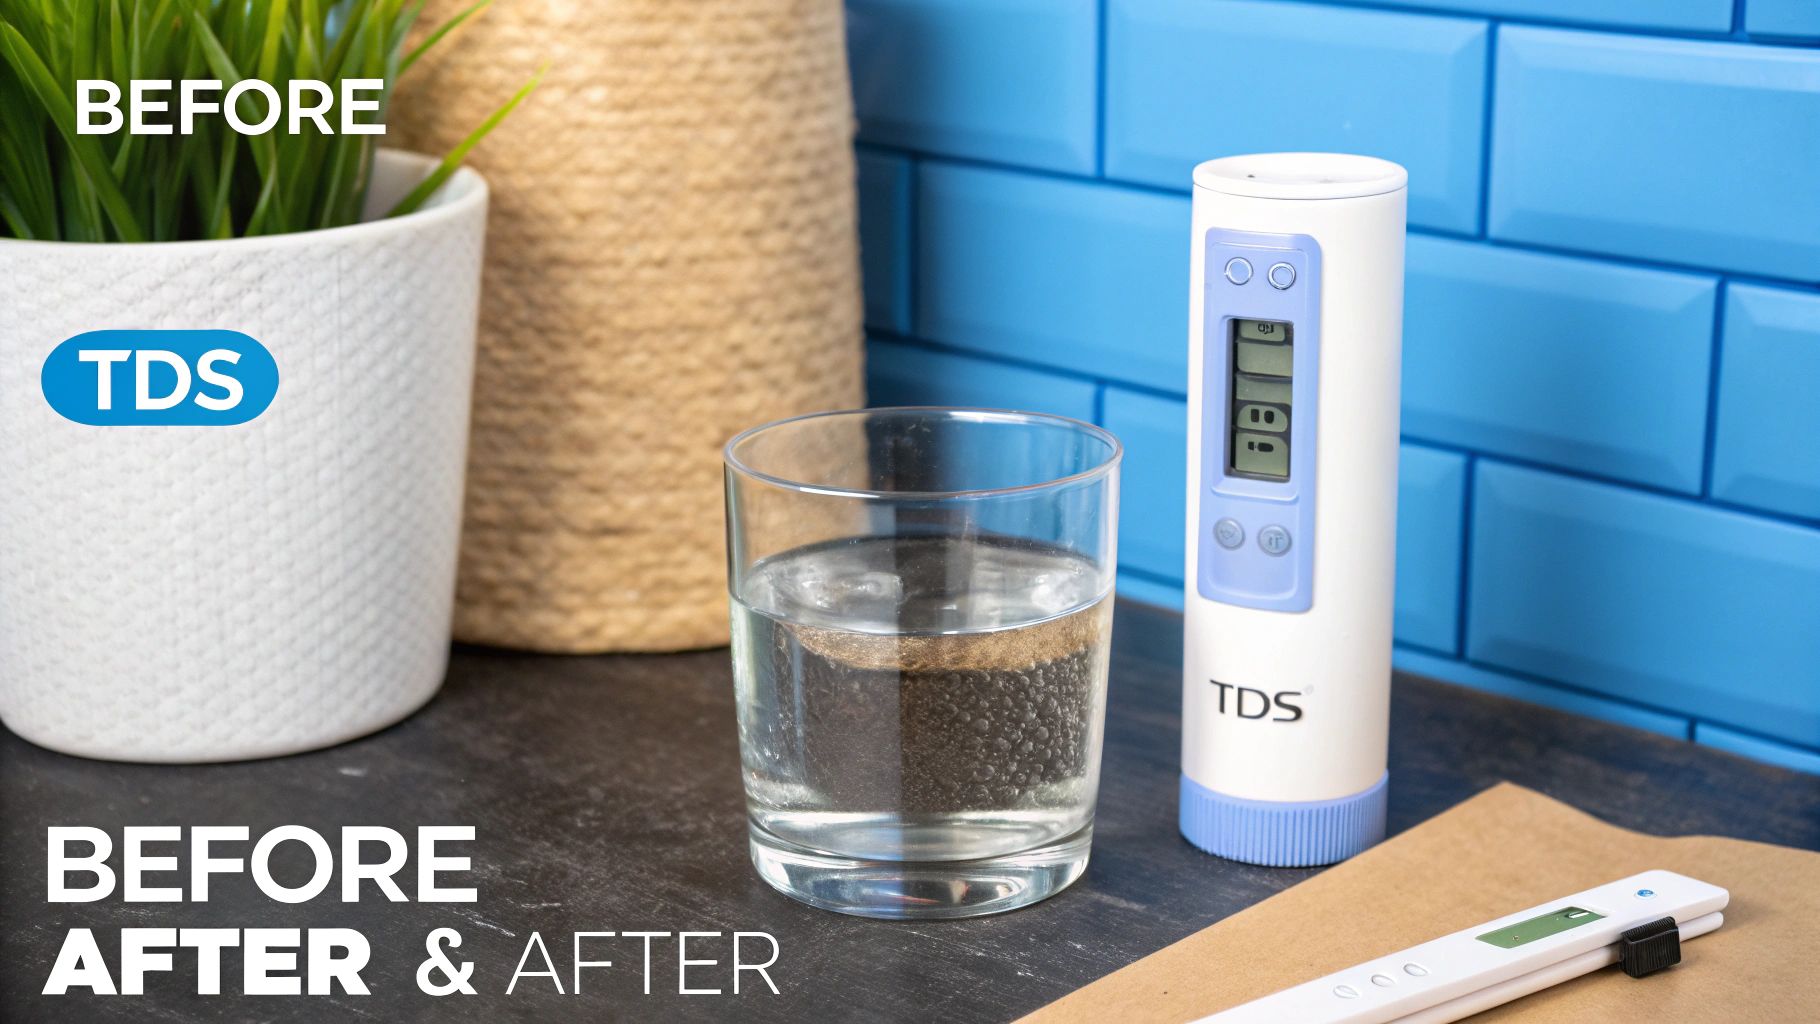
Ever poured a glass of tap water, held it up to the light, and wondered what’s really swimming around in there? It might look crystal clear, but your water is carrying a secret cargo of dissolved stuff—minerals, salts, metals, you name it.
Think of a TDS meter as your personal water quality detective. This simple handheld gadget gives you a near-instant reading of the Total Dissolved Solids (TDS) in your water. In just a few seconds, you get a snapshot of what’s going on with your water, giving you the power to know if your home water filter is actually doing its job.
Just because water looks clean doesn't mean it is. It can be carrying all sorts of dissolved materials that make your coffee taste off, give your ice cubes a weird cloudy look, or even build up as crusty scale inside your pipes and appliances over time.
This is where understanding Total Dissolved Solids, or TDS, becomes a game-changer for any homeowner interested in better water.
A TDS meter doesn't magically identify every single substance. Instead, it measures the water's electrical conductivity. The more dissolved ionic solids like salts and minerals there are, the more easily electricity can pass through. The meter translates this conductivity reading into a number, usually in parts per million (ppm), which gives you a solid estimate of the total "stuff" dissolved in your water.
Getting a number from the meter is the easy part. Making sense of it is where the fun begins. A high reading isn't automatically a red alert, as many of those dissolved solids are perfectly harmless minerals like calcium and magnesium that our bodies can use.
But what that number does give you is a crucial baseline.
A TDS reading is your first clue in an investigation. It tells you if there's a high concentration of dissolved "stuff," prompting you to ask the next important question: "What is that stuff, and is my filter removing it?"
This simple piece of information is incredibly valuable, especially if you have a water filter or are thinking about getting one. It’s the starting point for deciding if your tap water could taste better, be kinder to your home, and if your filtration system is truly earning its keep. For anyone who cares about the quality of the water in their home, a TDS meter is an essential tool.
It might seem like some kind of high-tech magic, but the science behind a TDS meter is actually pretty straightforward. It's not "seeing" or identifying individual particles in your water. Instead, it’s measuring how well your water can conduct electricity.
Imagine your glass of water is a tiny highway. All those dissolved solids—the calcium, magnesium, sodium, and so on—are the cars on that road. Pure, distilled water is like a completely empty highway; electricity has a tough time getting from one side to the other. But once you add those mineral "cars," you create a perfect path for an electrical current to flow right through.
A TDS meter uses this exact principle. Its tip has two little metal probes (electrodes). When you dip it in water, the meter sends a tiny, harmless electrical charge from one probe to the other.
The meter then measures how much of that electrical charge makes it to the second probe. The more dissolved solids you have, the more "cars" are on the highway, and the stronger the electrical signal will be. This measurement is called electrical conductivity (EC).
From there, a smart little chip inside the meter takes that EC reading and converts it into a number we can all understand: parts per million (ppm). It’s important to know that this is a very good estimate, not a precise chemical breakdown from a lab.
In short, a TDS meter isn't counting particles. It's really just checking the electrical traffic in your water and giving you a simple number that represents the total amount of dissolved stuff.
This is what makes a TDS meter such a fantastic tool for any homeowner. You get an instant snapshot of your water quality without having to send a sample off to a lab.
Once you understand how it works, the readings become a powerful tool. For example, if you test the water coming from a reverse osmosis (RO) system, you want to see a very low number. RO systems are designed to strip out nearly all of those conductive minerals.
So, if you test your RO water and the reading is almost the same as your tap water, you know something’s up. The "highway" is still packed with cars, which means your filter isn't doing its job anymore. This simple electrical checkup gives you the feedback you need to keep your system running right and ensure your family is drinking pure, clean water.
Getting a number to pop up on your TDS meter’s screen is the easy part. But what does it actually mean? That's where you turn a simple number into real, useful knowledge about your home's water quality.
The most important thing to remember is that different water sources have wildly different—and often perfectly normal—TDS levels. A reading of 250 ppm from your city tap water might be totally fine, but seeing that same number from your reverse osmosis system would definitely tell you something is wrong. It all comes down to the source and the filter.
Honestly, the "ideal" TDS level depends on your personal taste and your filtration goals. Well water, for example, naturally picks up beneficial minerals like calcium and magnesium as it filters through layers of rock. A higher reading here isn't a red flag; it just means you have mineral-rich water.
On the other hand, a good reverse osmosis (RO) system is designed to strip out pretty much everything, getting the water as pure as possible. In that case, a low reading, often below 50 ppm, is exactly what you want to see. It’s a clear sign your filter is doing its job right.
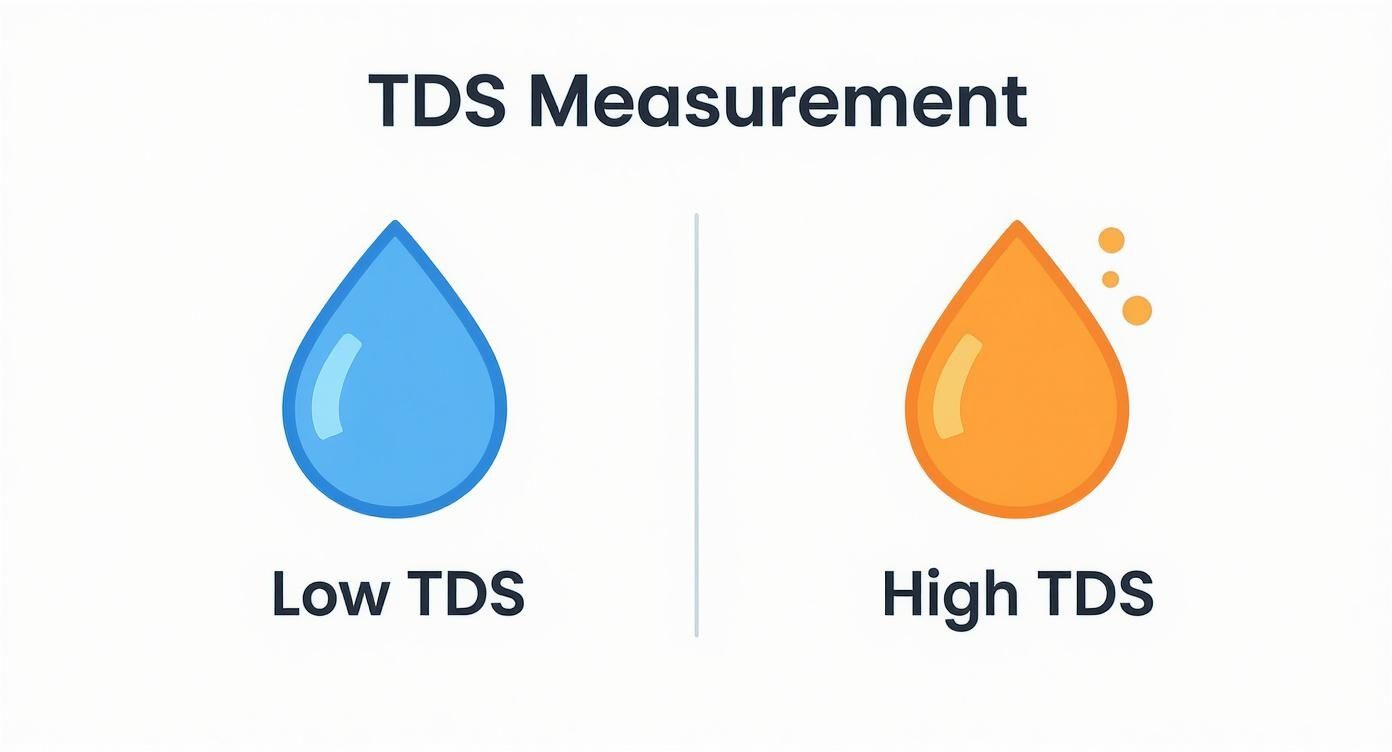
This just shows that a higher TDS simply means more "stuff" is dissolved in the water. That stuff could be anything from harmless minerals to contaminants you'd rather not drink. Your filter's job is to remove the unwanted stuff.
To make sense of your own results, it helps to see how they stack up against typical levels for other types of water you might find around the house. Bottled spring water is going to have a much different TDS profile than your tap water, and both will be different from the water coming out of your refrigerator's filter.
Each source has a unique story, and its TDS level is a big part of that.
Remember, a "high" TDS reading doesn't automatically mean "bad water." It's simply an indicator of a higher concentration of dissolved substances. The crucial next step is understanding what those substances might be and if your filter is removing them.
The table below gives you a quick reference for what to expect when you test different water sources. Think of it as a cheat sheet to help you benchmark your own results and figure out if your filter is performing as it should.
Here’s a quick comparison of average TDS readings you can expect from different types of water you might test at home.
| Water Source | Typical TDS Range (ppm) | Primary Dissolved Solids |
|---|---|---|
| Reverse Osmosis Water | 0 – 50 ppm | Very few; highly purified. A low number confirms the filter is effective. |
| Bottled Spring Water | 50 – 200 ppm | Natural minerals like calcium and potassium that contribute to taste. |
| Typical Tap Water | 150 – 400 ppm | A mix of chlorine, salts, and minerals added during municipal treatment. |
| Well Water | 200 – 500+ ppm | Naturally occurring minerals like magnesium, calcium, and iron from the ground. |
Seeing where your water falls on this chart can give you a much better sense of whether your numbers are normal or if it's time to investigate your filtration options further.
While a TDS meter is a fantastic tool to have in your water filtration toolkit, it's really important to know what it doesn't do. Think of it this way: it's like stepping on a bathroom scale. The scale gives you one number—your total weight—but it can't tell you your body fat percentage, muscle mass, or bone density. It just sees the total.
A TDS meter is the same way with your water. It gives you a single number for the total quantity of dissolved stuff, but it has absolutely no idea what that stuff is. If you remember only one thing about its limitations, let it be that.
It only picks up on solids that can conduct electricity. That means a whole host of nasty contaminants can be floating around in your water, completely undetected by your meter.
Because the meter works by measuring electrical conductivity, it's totally blind to some of the most serious water contaminants people worry about. These substances don't carry an electrical charge, so as far as the meter is concerned, they simply don't exist.
A TDS meter will NOT detect:
This same principle applies in other areas, too. For instance, understanding pool water maintenance is all about using specific tests for chlorine and pH levels, not just a TDS meter, to keep the water safe and balanced.
A low TDS reading does not guarantee your water is safe. It only means there is a low amount of dissolved ionic solids like minerals and salts.
So, what's the takeaway? Use your TDS meter as a first-pass screening tool for your water filter's performance. A high number is a red flag telling you it's time to get a real lab test that can pinpoint exactly what’s in your water. Only then can you choose a filter that actually solves your problem.
Okay, this is where a TDS meter really shines. It stops being just a neat gadget and becomes your go-to partner for home water filtration. Think of it as a report card for your filter, giving you clear, hard numbers on whether it’s actually doing its job.
The key is the simple "before and after" test. This is especially powerful if you have a system designed to strip out nearly everything, like a Reverse Osmosis (RO) unit. It’s the easiest way to know if your investment is paying off.
It couldn’t be simpler. First, grab a sample of your regular tap water and jot down the TDS reading.
Then, run that same water through your filter system and test the filtered water. That's it. The gap between those two numbers tells you everything.
A good RO system should be knocking out over 90% of the total dissolved solids. So, if your tap water starts at 300 ppm, the water coming out of your RO faucet should be way down, ideally under 30 ppm. If those numbers are creeping closer together, it's a huge red flag that your filter membranes are shot and need to be replaced.
This quick check takes all the guesswork out of the equation. Forget just swapping filters when the calendar says so. Now you can change them based on actual performance, making sure you’re always getting the pure water you paid for.
Here’s something important to remember: not all filters are made the same, and they definitely don't all tackle TDS. A meter helps you understand what your filter is supposed to do, so you don't have unrealistic expectations.
People are catching on to this. The global market for digital TDS meters hit about $2.5 billion in 2023 and is expected to grow to around $3.8 billion by 2028. This isn't just a niche hobby; it's a worldwide trend of people wanting to know exactly what’s in their water.
Once you know how your filter is meant to work, your TDS meter becomes a powerful tool. And if you're looking into different filtration options, our guides have some great advice on choosing the right water filter for your needs. At the end of the day, a TDS meter is the accountability partner that proves your filter is living up to its promises.
https://www.youtube.com/embed/EtoCiUM9RwE
Ready to find out what's in your water? Good news: using a TDS meter is about as easy as it gets. You can get a reading in less than a minute.
Just pop the cap off, turn it on, and dip the end with the two metal probes into a glass of your water. You don't need to sink the whole thing—just the tip.
Give it a gentle swirl to knock off any tiny air bubbles that might be clinging to the probes. After a few seconds, the number on the display will lock in. That’s it! That number is your TDS reading in parts per million (ppm).
To make sure your results are reliable every single time, a few little habits go a long way. This is especially important if you're trying to track how well a water filter is working over time.
Most TDS meters are all set and calibrated right out of the box. But like any measuring tool, they can drift a bit over time and lose their pinpoint accuracy.
Calibration is just a fancy word for resetting your meter against a solution with a known TDS level, making sure its readings are trustworthy.
If you test your water a lot, it’s a smart move to check the calibration every few months. A quick tune-up with a calibration solution ensures you can always trust the numbers you're seeing, giving you real confidence in your water quality.
Even after getting the hang of it, you might still have a few questions floating around. That’s perfectly normal. Let's tackle some of the most common things people ask when using a TDS meter to figure out their water.
Honestly, there isn't a single "perfect" number because everyone's taste is a little different. For safety and aesthetics, the EPA recommends keeping TDS below 500 ppm.
Many people find that water with some natural minerals, usually in the 50-150 ppm range, tastes best. On the other hand, if you're using a high-quality reverse osmosis system, you'll see readings under 50 ppm, which gives you that exceptionally pure, crisp taste.
It's a really strong hint, but it's not a definite "yes." Hard water is specifically caused by high concentrations of calcium and magnesium. Since those are dissolved solids, water that's truly hard will always give you a high TDS reading.
But, you can also get a high TDS reading from other things like sodium or potassium, which don't cause hardness. Just think of it this way: a TDS meter points toward potential hardness, but you'd need a specific hardness test to be sure.
A high TDS reading is a signal to investigate, not to panic. It’s your first step toward understanding your water, empowering you to ask the right questions and find the best filtration solution for your home.
A high number is just your cue to do a little more digging. A great first step is to look up your local water utility’s annual quality report, which you can usually find online. This report breaks down exactly what's in your municipal water.
If you're on well water or just want more detail, the best next move is a comprehensive lab test. A professional analysis will pinpoint the specific substances pushing your TDS up, so you can choose a water filter that actually targets those contaminants.
Ready to take the next step toward purer, better-tasting water? The experts at Water Filter Advisor provide in-depth guides and unbiased reviews to help you find the perfect filtration system for your home. Explore your options at https://www.waterfilteradvisor.com.

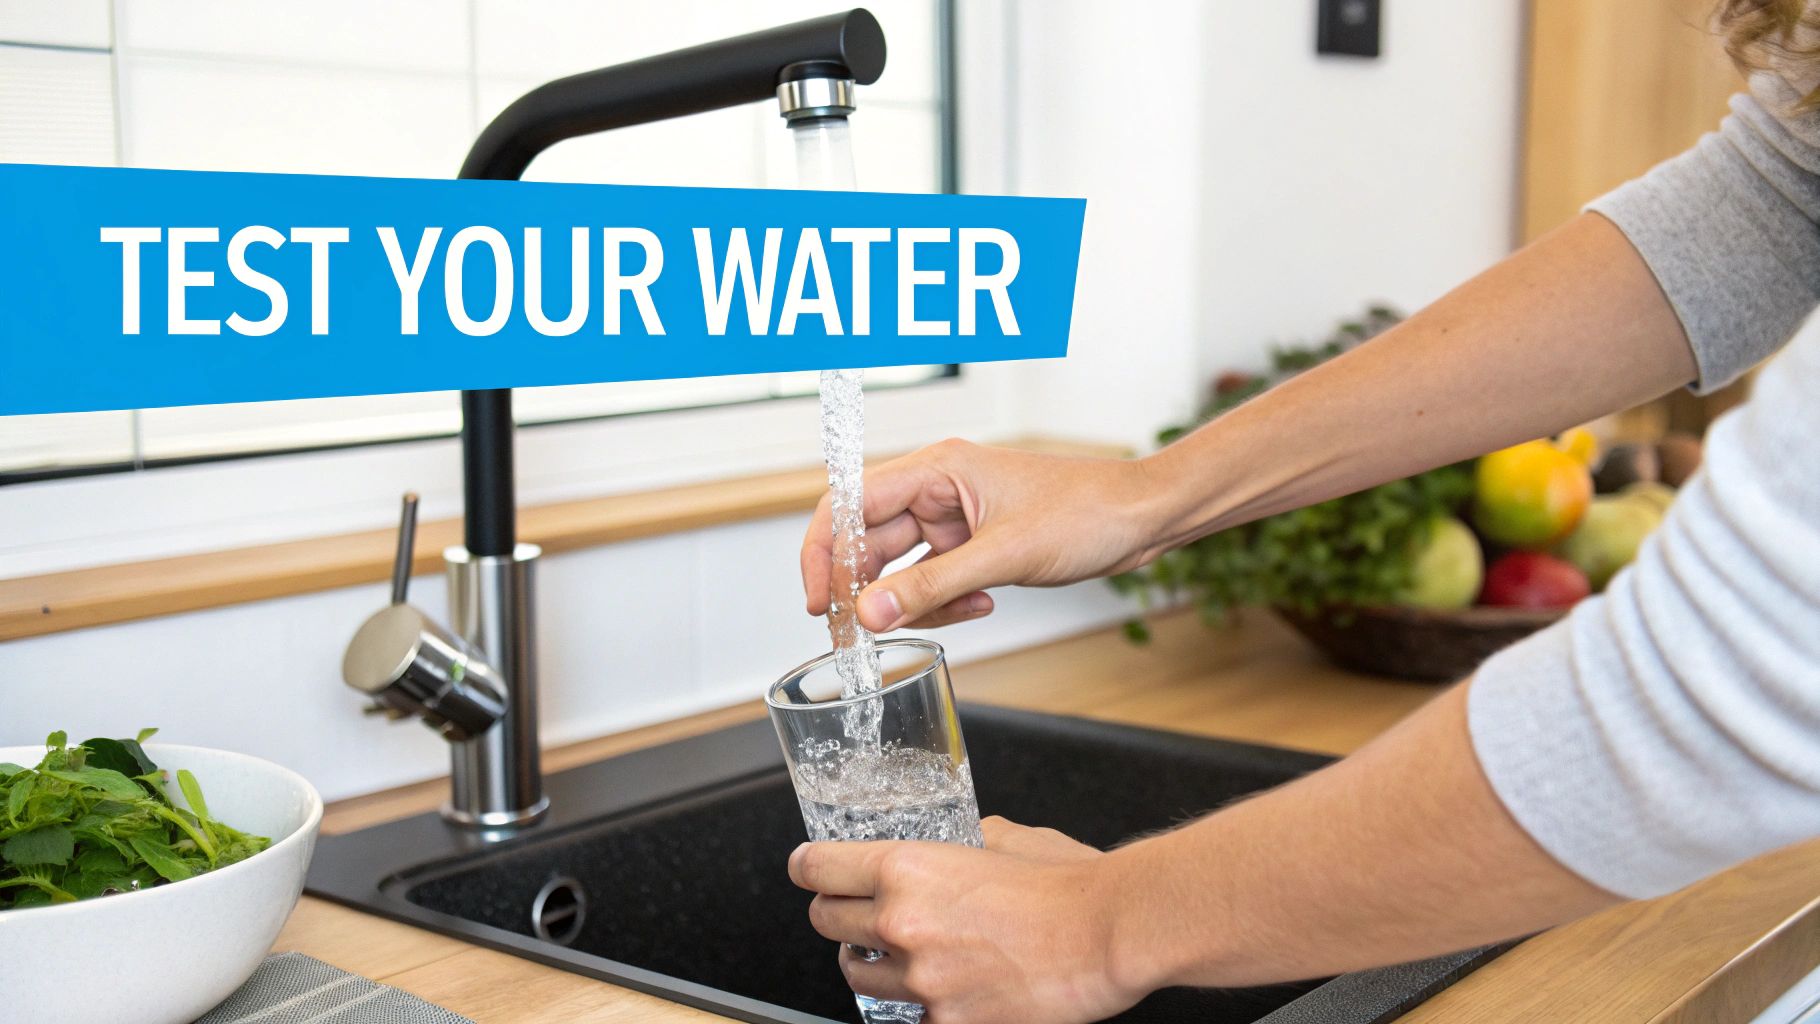
You can’t always trust your eyes. That crystal-clear water flowing from your kitchen tap might be hiding some nasty secrets. The only real way to know what you’re drinking is to test water heavy metals—we’re talking about invisible villains like lead and arsenic that pose serious health risks. Getting proactive about testing is the single best way to make sure the water in your home is safe and to find the perfect filtration system for your family.
It’s easy to get a false sense of security, especially if your local water report comes back with a clean bill of health. But here’s the thing: those reports only tell part of the story. They test the water at the treatment plant, not at the end of its journey—your faucet. This is where a home filtration strategy becomes your best line of defense.
The real problem often crops up in the miles of pipes the water travels through to get to you. Much of this infrastructure is decades old, and that’s where heavy metal contamination can really take hold.
For instance, many older homes and communities still have plumbing made with lead or copper. Over time, these pipes corrode, and tiny, microscopic particles flake off into the water passing through. This means that water that was perfectly safe when it left the plant can pick up a load of contaminants just a few feet before it fills your glass—a problem only a point-of-use or whole-house filter can solve.
It isn’t just about the pipes leading to your house, either. The water source itself, whether it’s a city supply or a private well, is exposed to all sorts of environmental factors that can introduce heavy metals long before it ever gets treated.
A few common culprits include:
The unsettling truth is that even if your water looks, smells, and tastes perfectly fine, it could still have elevated levels of these harmful elements. Because they are colorless and odorless, the only way to be certain is to perform a test.
At the end of the day, your city’s report gives you a general snapshot, but a home test gives you the real picture of what your family is actually drinking. It’s the essential first step to choosing a water filtration system that truly protects your household.
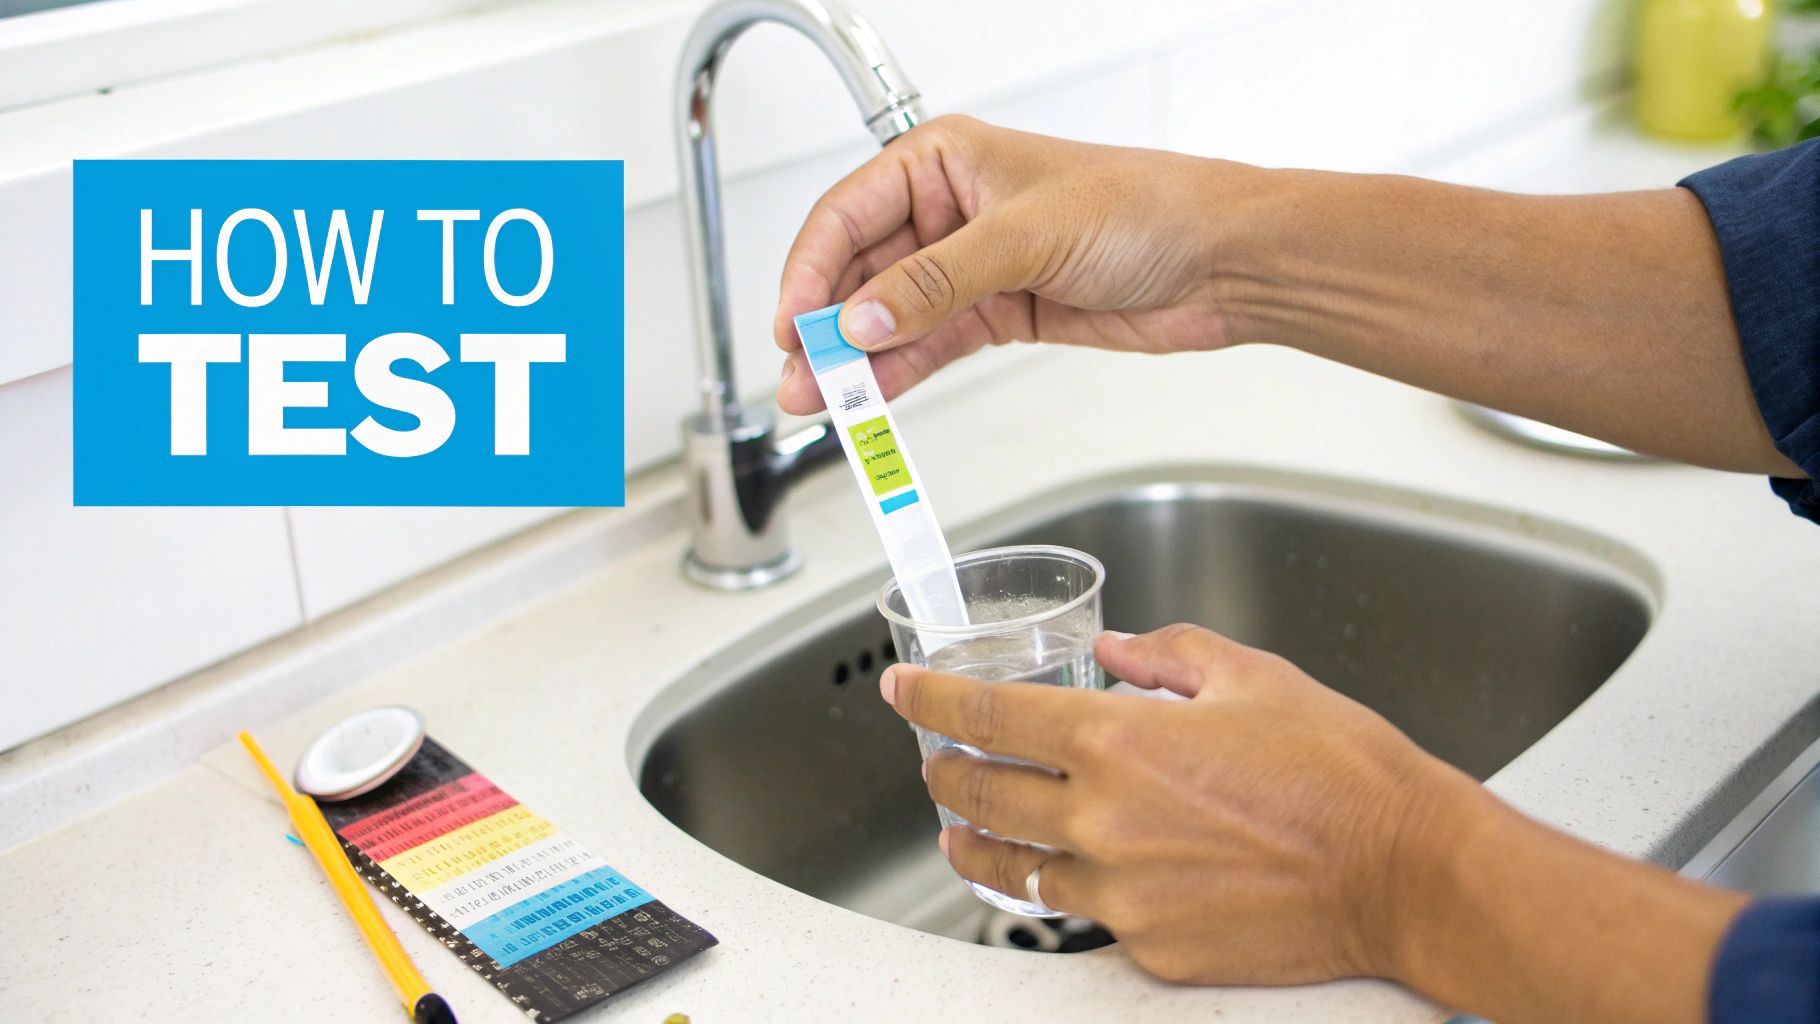
So, you're ready to find out what's really lurking in your tap water. Great! Your first mission, should you choose to accept it, is deciding how you're going to test it.
When you're looking to test water for heavy metals, you've got two main routes: the quick-and-easy DIY test kit or the comprehensive professional lab analysis. Think of it like this: a DIY kit is like taking your temperature at home, while a lab test is like getting a full diagnostic workup from a specialist. Both are useful, but they serve very different purposes in your quest for clean water.
DIY kits are all about instant gratification. They’re cheap, you can find them almost anywhere, and you get results in minutes. Most work by dipping a test strip into a water sample and matching the color it turns to a chart. It’s a fantastic way to get a quick, general overview and find out if you need to investigate further.
Just keep in mind that these kits are mostly qualitative. They’ll tell you if a contaminant is present, but usually not how much. You'll get a simple "yes" or "no," which might be all you need to decide it’s time to upgrade from a basic pitcher filter. For anyone who enjoys a hands-on approach, using a DIY kit fits right in with other DIY home upkeep strategies.
On the flip side, you have professional lab analysis. This is the gold standard for accuracy, no contest. It costs more and you'll have to wait a bit—usually a week or two for the report. But the level of detail you get in return is your secret weapon for choosing the perfect home filtration system.
You'll receive a report with precise, quantitative data showing the exact concentration of various heavy metals, often measured down to the parts per billion (ppb).
This kind of detail is absolutely essential in a few common situations:
Choosing a method isn't just about cost; it's about confidence. A DIY kit gives you a clue, but a lab test gives you the definitive blueprint for building your home's water defense system.
To help you weigh your options, I've put together a simple table that breaks down the key differences between the two methods.
This side-by-side comparison should make it easier to decide which water testing method fits your needs, budget, and how much accuracy you're looking for.
| Feature | DIY Test Kits | Professional Lab Analysis |
|---|---|---|
| Accuracy | Good for presence/absence | Highly accurate quantitative results |
| Cost | Generally $20 – $50 | Typically $100 – $300+ |
| Speed | Instant or within minutes | 1-2 weeks for results |
| Scope | Tests for a limited range of metals | Can test for a wide array of contaminants |
| Best For | Quick screenings, routine checks | Health concerns, filtration planning, well water |
So, what's the verdict? A DIY kit is a fantastic first step. If it flags anything concerning, follow up with a professional lab analysis. That hard data is exactly what you need to pick the perfect filtration solution and declare victory over contaminants.
When you set out to test your water for heavy metals, the accuracy of your results boils down to one simple thing: how well you collect the sample. It's a bit like a crime scene investigation—if you accidentally contaminate the evidence, the lab's findings are useless. A small mistake here can lead you to buy the wrong filter or, worse, miss a real problem entirely.
Luckily, getting a clean sample is easy once you know what to do. The whole process starts with a single question: what are you actually trying to measure? Are you checking the water coming from the city's main line, or are you trying to figure out if your own pipes are leaching lead? Each goal needs a slightly different approach.
You'll need to understand the difference between a "first draw" and a "flushed" sample. They each tell a unique story about your water and can help you pinpoint where to install a filter.
First Draw Sample: This is literally the first water out of your tap in the morning. You collect it before you run any faucets, showers, or flush any toilets. This water has been sitting still in your pipes all night, giving it plenty of time to pick up any contaminants like lead or copper. This is the most important test for sniffing out problems inside your own home's plumbing.
Flushed Sample: To get this sample, you'll let the cold water run for a solid 3-5 minutes before filling the bottle. This pushes all the stagnant water out of your home's pipes and pulls in fresh water from the main supply or your well. This sample tells you what the water quality is like before it even gets to your plumbing.
Taking both samples gives you the full picture. If your first-draw results show high lead but the flushed sample is clean, you’ve just pinpointed the problem to your home's pipes or fixtures. Now you know an under-sink filter might be a better solution than a whole-house system.
This simple three-step process—from grabbing a sample to understanding the results—is the foundation of taking control of your water quality.
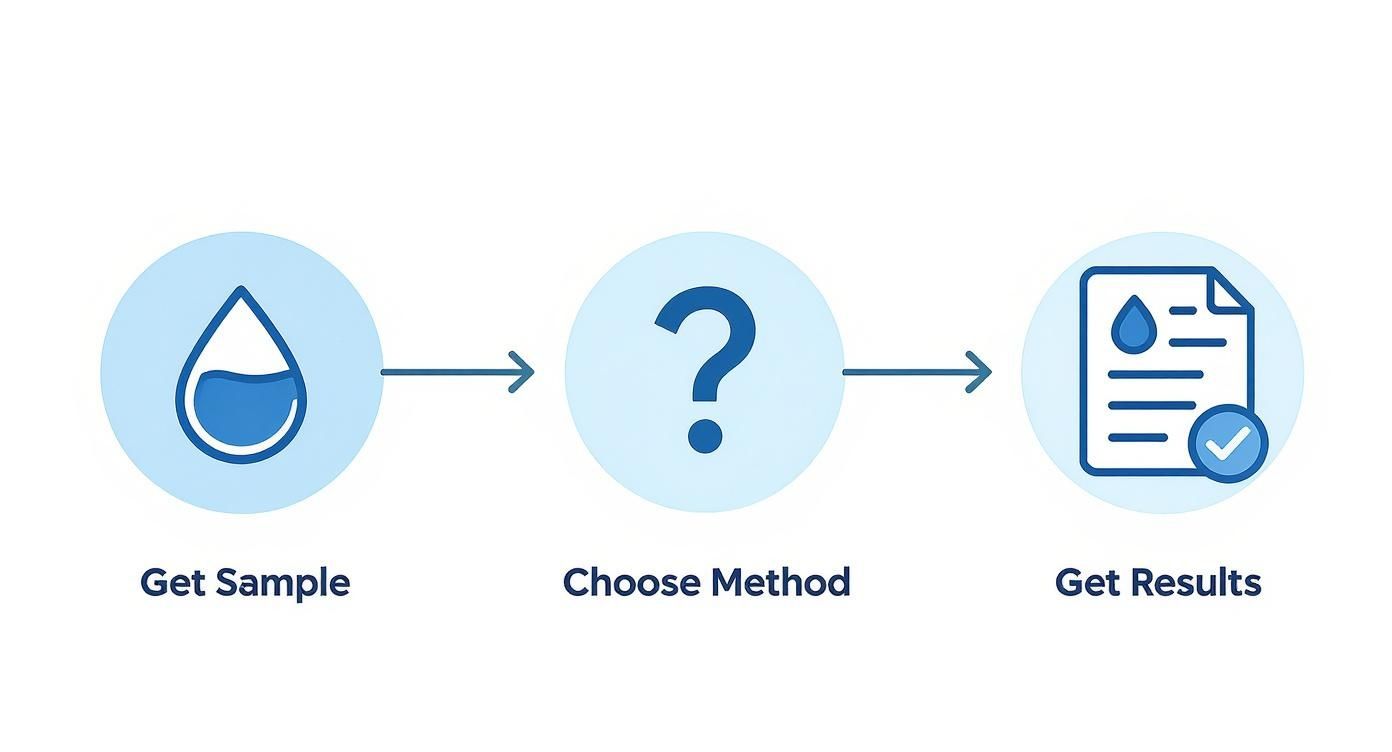
As you can see, it all starts with that first step. A good sample leads to good data and, ultimately, the right filtration choice.
To make sure nothing skews your results, here are a few critical but easy-to-follow guidelines I always recommend.
Following these steps is the best way to ensure that when you test water for heavy metals, you’re getting a real-world snapshot of what’s coming out of your tap. From there, you can confidently find the right filter to fix it.
Getting that lab report back can feel a little intimidating. It often looks like a foreign language—just a wall of numbers, chemical symbols, and acronyms that don't mean much at first glance.
But don’t sweat it. This report is your treasure map, and it's about to lead you straight to the perfect water filter. Once you get the hang of a few key terms, you’ll be able to read it like a pro.
You’ll probably notice measurements like mg/L (milligrams per liter) or ppb (parts per billion). To put that into perspective, one part per billion is like a single drop of water in an Olympic-sized swimming pool. It sounds microscopic, but for potent heavy metals like lead and arsenic, even those tiny amounts are a big deal.
Your report will list out the metals and their concentrations. Your job is to play detective and compare these numbers against the safety benchmarks set by the Environmental Protection Agency (EPA).
The EPA sets a Maximum Contaminant Level (MCL) for many substances found in public drinking water. This is the absolute highest level of a contaminant that’s legally allowed. For some of the most dangerous metals, though, the goal is much, much stricter.
Let's break down a few common heavy metals and what the EPA guidelines say:
The big takeaway here is that just because a metal is detected doesn't automatically mean your water is dangerous. It's all about comparing the concentration found in your test to these established safety limits to determine your filtration needs.
Let’s say you get your results back and see 22 ppb of lead and 5 ppb of arsenic.
The arsenic level (5 ppb) is under the EPA’s 10 ppb limit, so that’s good news. But the lead level at 22 ppb is a different story—it's significantly over the 15 ppb Action Level. This result is a clear red flag that you have a lead contamination issue that needs to be addressed with a targeted filtration system.
And this isn't just an issue in old cities. Heavy metal contamination is a massive global problem. A 2025 global soil study revealed that up to 17% of the world’s arable land is contaminated with toxic heavy metals, which can seep into water sources. You can discover more about these heavy metal findings to get a sense of the scale of the problem.
Understanding your report is what moves you from just having data to taking decisive action. When you test water heavy metals and decode the results, you gain the clarity needed to choose the perfect filtration solution, ensuring every drop from your tap is safe.
Okay, you’ve got your test results. The worrying part is over, and now you know exactly what you’re dealing with. This is the moment you can take real action and choose a defense for your home.
It’s all about connecting the dots—linking the data from your water report to a specific filtration technology that will actually solve the problem.
Let's be clear: a basic pitcher filter is great for making water taste better. But when you’re up against serious contaminants like lead or arsenic, you need to bring in the heavy artillery.
If your report lit up like a Christmas tree showing several different heavy metals—even at low levels—a reverse osmosis (RO) system is usually your best bet. Think of an RO system as an elite bodyguard for your water supply. It forces water through an incredibly fine membrane with microscopic pores.
This membrane is so effective that it blocks a huge range of contaminants, typically knocking out over 95% of heavy metals like lead, arsenic, mercury, and copper. It’s a true workhorse for getting exceptionally pure drinking and cooking water right at your kitchen sink.
Consider an RO system if:
Investing in the right filter is a direct response to your water quality report. It’s not about guessing; it's about using your data to make a confident, targeted decision that protects your family’s health for years to come.
Sometimes your report might pinpoint just one or two specific culprits, like lead leaching from old pipes or unusually high copper levels. In a situation like that, a more specialized filter might be a smarter and more cost-effective choice than a full RO setup.
Kinetic Degradation Fluxion (KDF) filters are a perfect example. These systems use a high-purity copper-zinc alloy that starts an electrochemical reaction, essentially neutralizing contaminants like lead, mercury, and chlorine and turning them into harmless substances. You'll often find KDF media inside whole-house systems or high-end shower filters.
While industrial pollution is a significant source of heavy metals, it's worth noting that strong regulations work. In Europe, for example, industrial releases of metals like lead and mercury into waterways have plummeted over the last few decades. You can discover more about these environmental improvements to see how focused efforts can create cleaner water for everyone.
When you test water heavy metals, you’re creating a roadmap. Your results point you directly to the filtration technology that will turn your tap water from a source of concern into a source of pure, safe hydration.
Once you’ve decided to test your water, you’re bound to have a few more questions. That’s totally normal. People often wonder about the costs involved, how often they really need to re-test, and whether their filters are actually doing the job they’re supposed to.
Let’s clear up some of that confusion so you can feel confident you're on the right track.
The first thing on everyone's mind is usually the cost. A DIY kit is your most budget-friendly option, typically running under $50. It’s a great starting point. If you go for a certified lab analysis, expect to spend between $100 and $300. I always tell people to think of it as an investment—that detailed lab report is your roadmap to a solid filtration strategy.
This is a big one, and it really comes down to where your water comes from and what your first test results look like.
Here’s a pro tip: If you discover high levels of a specific heavy metal, you’ll want to re-test about 1-3 months after you install a new filter. This is the only way to be certain the system is working and has knocked those contaminant levels down to a safe range.
It's a common misconception that any filter will remove all contaminants. The truth is, a filter's effectiveness is all about its specific technology. That basic carbon pitcher filter does a fine job with chlorine, but it won’t touch things like lead or arsenic. This is exactly why you need to match your filter to your test results.
A reverse osmosis (RO) system, for instance, is a powerhouse against heavy metals and can remove over 95% of most contaminants. But even then, no single system gets rid of 100% of everything. When you test water heavy metals, you get the exact data you need to choose the right line of defense.
You can find more helpful information in our extensive library of water filtration advice to guide your decision-making process.
At Water Filter Advisor, we're committed to helping you find the perfect, most effective solution for your home's specific needs. Explore our reviews and guides to make a confident choice for your family's health and safety.

So you want to know what's really in your tap water? Good call. Testing for chlorine is surprisingly simple. You can use test strips, grab a liquid kit, or get fancy with a digital meter. This quick check is your first step to exposing the secrets in your pipes, arming you with the intel needed to pick the right water filtration system. The goal? To finally get that pure, clean taste you've been missing.
Let's be real—most of us turn on the tap without a second thought. But ever catch a whiff of that faint swimming pool smell? That’s your old friend, chlorine. It's the go-to disinfectant that stops our public water supply from becoming a bacterial free-for-all.
While it's a hero for public health, its job should be over long before that water hits your coffee maker. Knowing the specific chlorine levels in your home's water is the secret to choosing a filter that actually works. This isn't about guesswork; it's about getting hard numbers so you can make a smart move. Think about it—before modern water treatment, cities were constantly fighting off waterborne diseases. The introduction of chlorination was a game-changer, slashing illnesses like typhoid and cholera. But that doesn't mean you want it in your drinking glass.
When you run a test, you're looking for two different villains. Nailing down the difference between them is the key to finding a filter that will actually get the job done.
Knowing both figures helps you diagnose the problem. High free chlorine means a strong chemical taste. But high total chlorine points to those pesky chloramines, which many basic filters can't touch.
Testing takes all the guesswork out of buying a water filter. It gives you a clear, data-driven starting point so you can invest in a solution that targets what's actually in your water, instead of just grabbing a generic filter pitcher that might not be up to the task.
This proactive approach puts you in control. Just like you'd want to know what's in your water, it's smart to consider other parts of your home's environment, like the air you're breathing every day. You can learn more about creating a healthier living space with expert air quality tests for a safer home. Ultimately, testing for chlorine empowers you to take charge of your water quality, leading you straight to the perfect filtration strategy.
Choosing a chlorine test kit can feel a bit overwhelming. Walk into any hardware store and you'll see a wall of options—strips, droppers, and digital readers, all promising to reveal the truth about your water. The trick is to match the tool to your mission. Your home water filtration goals will point you to the right choice.
Think of it this way: if you just snapped a new filter into your pitcher and want a quick thumbs-up that it's working, simple test strips are perfect. They're cheap, fast, and give you a solid ballpark reading in seconds.
But if you're installing a whole-house filtration system or trying to figure out why your tap water tastes a little "off," you're going to need more precision. That’s where liquid reagent kits and digital meters enter the ring. They deliver the detailed data you need to make bigger, more informed decisions about your home's water quality.
The world of home water testing really boils down to three main players. Each has its own strengths and weaknesses, so there's no single "best" option—it's all about what fits your budget, your patience, and your need for dead-on accuracy.
To make it easier, I've put together a quick comparison of the most common types of chlorine test kits you'll find. This should help you zero in on the best one for your situation.
| Test Kit Type | Best For | Accuracy | Ease of Use | Average Cost |
|---|---|---|---|---|
| Test Strips | Quick spot-checks & confirming a filter is working | Low to Moderate | Very Easy | $10 – $20 |
| Liquid Reagent Kits | Accurate home testing & troubleshooting | Moderate to High | Moderate | $15 – $30 |
| Digital Meters | Precise, data-driven analysis & system optimization | Very High | Easy | $50 – $150+ |
As you can see, you can get started for very little money, but investing a bit more can give you a much clearer picture of what's happening in your pipes—and which filter can fix it.
Let’s break these down a bit more:
This infographic breaks down the two key measurements you'll be taking when you test for chlorine.

Understanding both free chlorine and total chlorine is fundamental. These two numbers are the foundation for any smart home filtration strategy.
Before you buy anything, ask yourself why you're testing. Are you just curious, or are you on a mission to solve a problem like dry skin after a shower or foul-tasting coffee?
The goal isn't just to get a number; it's to get actionable intel for your filtration strategy. A quick, cheap test is great for confirming a filter works, while a more precise test is essential for choosing and optimizing a whole-house system.
If you're about to invest in a serious filtration setup, you absolutely need an accurate baseline measurement first. For more in-depth guidance on choosing the right filters, check out the expert advice on Water Filter Advisor. Getting good data from the start is the only way to be sure you’re picking a solution that will actually solve your specific chlorine issues.
Alright, you've got your test kit. Now for the fun part. Forget the tiny, confusing print on the box for a minute—let's walk through how to actually do this right. Getting an accurate reading is the whole point, and a few simple tricks can make all the difference in choosing the right filter.
First things first: grab your water sample. Don’t just stick the vial under a trickling tap. Let the cold water run for at least 30 to 60 seconds. This flushes out any stagnant water sitting in your pipes, giving you a sample that truly represents what's flowing into your home from the main line.
Test strips are the quickest way to get a reading, but their speed can be their downfall if you’re not careful. The most common mistake? Rushing the timing.
If you just dip the strip and immediately check the color, you'll get a faint, inaccurate reading. But if you leave it in too long, the reagents bleed out, also messing up the results. The sweet spot is a quick dip-and-remove, then waiting the recommended time—usually 15 to 30 seconds—before you match the color.
A few pointers to get it right every time:
Liquid reagent kits, often using a DPD indicator, give you a nice bump in accuracy. You add a few drops to your water sample and watch for a color change, usually some shade of pink or red. It sounds simple, but the details really matter.
When the instructions say to "mix," they mean a gentle swirl or turning the capped vial over a couple of times. They definitely don't mean a vigorous, bubble-making shake. Shaking too hard dissolves extra oxygen into the water, which can interfere with the chemical reaction and skew your results.
Your goal is an even, consistent color throughout the sample. A gentle swirl is all it takes to mix the reagent completely without adding other variables that could lead you to buy the wrong type of filter.
Here’s another pro tip: hold the vial against a plain white background when you compare it to the color chart. A busy countertop can trick your eyes into seeing a different shade. A simple white piece of paper works perfectly and ensures you’re making an accurate assessment.
This kind of color-based testing has been the backbone of water safety for a long time. Developing reliable methods to test chlorine was a cornerstone of public health for over a century. Early techniques were basic, but modern tech allows treatment plants to keep chlorine levels in that sweet spot—between 0.2 and 2.0 mg/L—to kill germs without ruining the taste. You can learn more about the history of water testing on the USGS website.
So you've done the test, and now you’re staring at a color or a number. What does it actually mean for your water filtration plan? The real trick is translating jargon—like "parts per million" (ppm) or "milligrams per liter" (mg/L)—into a clear course of action.
A test result isn't just data; it's a direct command from your water on which filter to buy. Most city water systems aim to keep chlorine between 0.2 and 2.0 ppm. The EPA sets the absolute maximum at 4.0 ppm, a level your water should never even approach.
Getting these numbers right is a delicate balancing act for water engineers. They need enough chlorine to kill pathogens but not so much that it creates an unpleasant taste or harmful byproducts. You can learn more about how global water safety standards are maintained on ketos.co.
Honestly, what you do next comes down to your personal goals. Your test result is your personal benchmark for deciding if you need a water filter—and if so, which kind.
Let's break it down with some real-world filtration scenarios:
A reading of 1.0 ppm might be perfectly safe according to public health guidelines, but if you're battling dry, itchy skin or can't stand the taste in your morning coffee, your personal standard is what truly matters when choosing a filter.
When it comes down to it, for the water you drink and shower in, you want both your free and total chlorine numbers to be as close to zero as possible. A good filtration system makes this happen.
Any reading above zero simply means there's a disinfectant in your water that has already done its job. Your test results give you the exact data you need to choose the right filtration system to get you there, turning a confusing number into a clear plan of action.
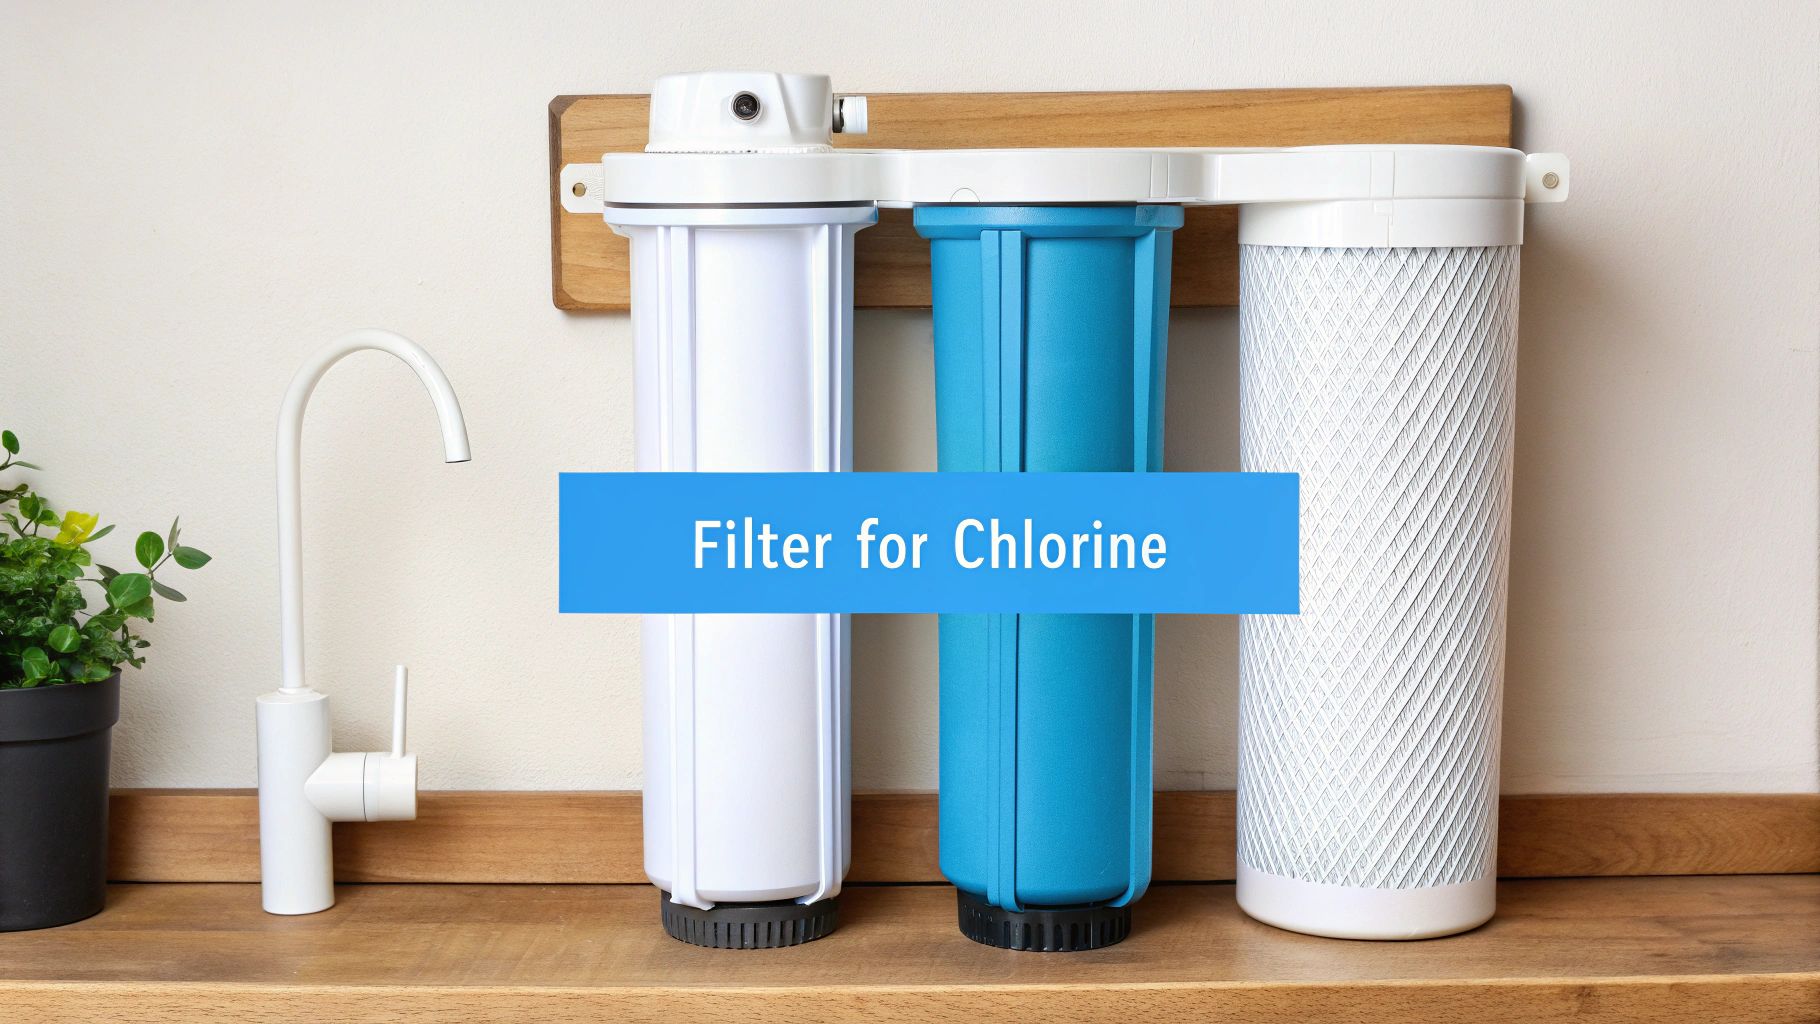
Alright, you've done the detective work. You have your test results. That's the diagnosis; now it's time for the cure. With your chlorine numbers in hand, you can stop guessing and finally pick a filter that solves your specific water problem.
When it comes to chlorine removal, there's one clear champion: activated carbon.
Think of it like a powerful chemical magnet. Through a process called adsorption, it grabs onto chlorine and chloramine molecules, pulling them right out of your water. So, the real question isn't if you need a carbon filter, but which type is the right fit for your home.
Your test results are your personal roadmap to pure water. A high chlorine reading just at the kitchen sink points to a completely different solution than a house-wide issue that makes your skin feel tight and itchy after every shower.
If your tests show high chlorine levels all over the house, a whole-house system is hands-down the best investment. It doesn't just fix the taste of your drinking water—it deals with the chlorine you absorb in the shower and the stuff that’s fading your clothes in the laundry.
An under-sink system strikes a great balance. It gives you high-performance filtration right where you need it most—the kitchen tap—without the expense and installation of a full whole-house unit. These systems typically use larger, more powerful carbon block filters than what you'd find in a basic pitcher.
But if you’re truly fed up with dry skin, brittle hair, and that swimming pool smell every time you turn on a faucet, only a whole-house carbon filtration system gets to the root of the problem. It's installed at your main water line, transforming every single tap in your home into a source of clean, chlorine-free water.
Your test results gave you the data. Now you can make an informed choice and invest in a solution that will directly fix your water quality issues.
Once you start testing, a few common questions almost always pop up. Let's tackle some of the things people wonder about as they dive deeper into their home filtration journey.
This all comes down to your filtration setup and your goals.
If you have a whole-house carbon filter, checking your water every three to six months is a smart move. This confirms the system is still working hard and gives you a heads-up when a filter change is on the horizon.
Using a simpler pitcher or faucet filter? A quick test right after you install a new cartridge is a great way to confirm it’s working. After that, testing once or twice a year—or anytime the water starts tasting "off"—is plenty.
You're not imagining things if your water seems more chlorinated in the summer. It's a real phenomenon.
When it gets hot, the warmer water in pipes and reservoirs creates a breeding ground for bacteria. To fight this, municipal water suppliers often increase the amount of chlorine they add. This means your filtration system has to work harder in July than in January, which is why regular testing is so important.
Yes, and this is a big one. It's a critical distinction many people miss.
Most standard chlorine test kits use a DPD reagent that only measures free chlorine. The problem is, they can't properly detect chloramines—a more stable compound of chlorine and ammonia. Testing for chloramine requires a different chemical reaction.
To get the full story, you need a test kit that specifically measures total chlorine. The difference between your total and free chlorine readings reveals the amount of chloramine present. This is vital to know because chloramine is much harder for many standard carbon filters to remove, often requiring a special type of filter called catalytic carbon.
Here's a little pro tip: Don't just toss an expired test strip. While you shouldn't trust it for an exact reading, an old strip can often still give you a basic "yes/no" indication for high chlorine levels. It's handy for a quick, informal check when you don't need a precise number.
Keeping up with testing is what empowers you to make the best decisions for your home's water filtration. It ensures the system you've invested in is actually working as hard as you expect it to.
At Water Filter Advisor, we're dedicated to helping you find the perfect filtration solution based on your specific needs. Explore our in-depth guides and reviews to make a confident, cost-effective decision for safer, better-tasting water at home. Learn more at https://www.waterfilteradvisor.com.

Ever wonder how to check for chlorine in your water? Good news: you don't need a chemistry degree. The easiest ways involve using test strips, liquid reagent kits, or digital meters. You can grab these just about anywhere, and they’re designed for regular folks, not mad scientists. In just a few minutes, you'll know exactly what's flowing from your faucet and be one step closer to delicious, clean water.
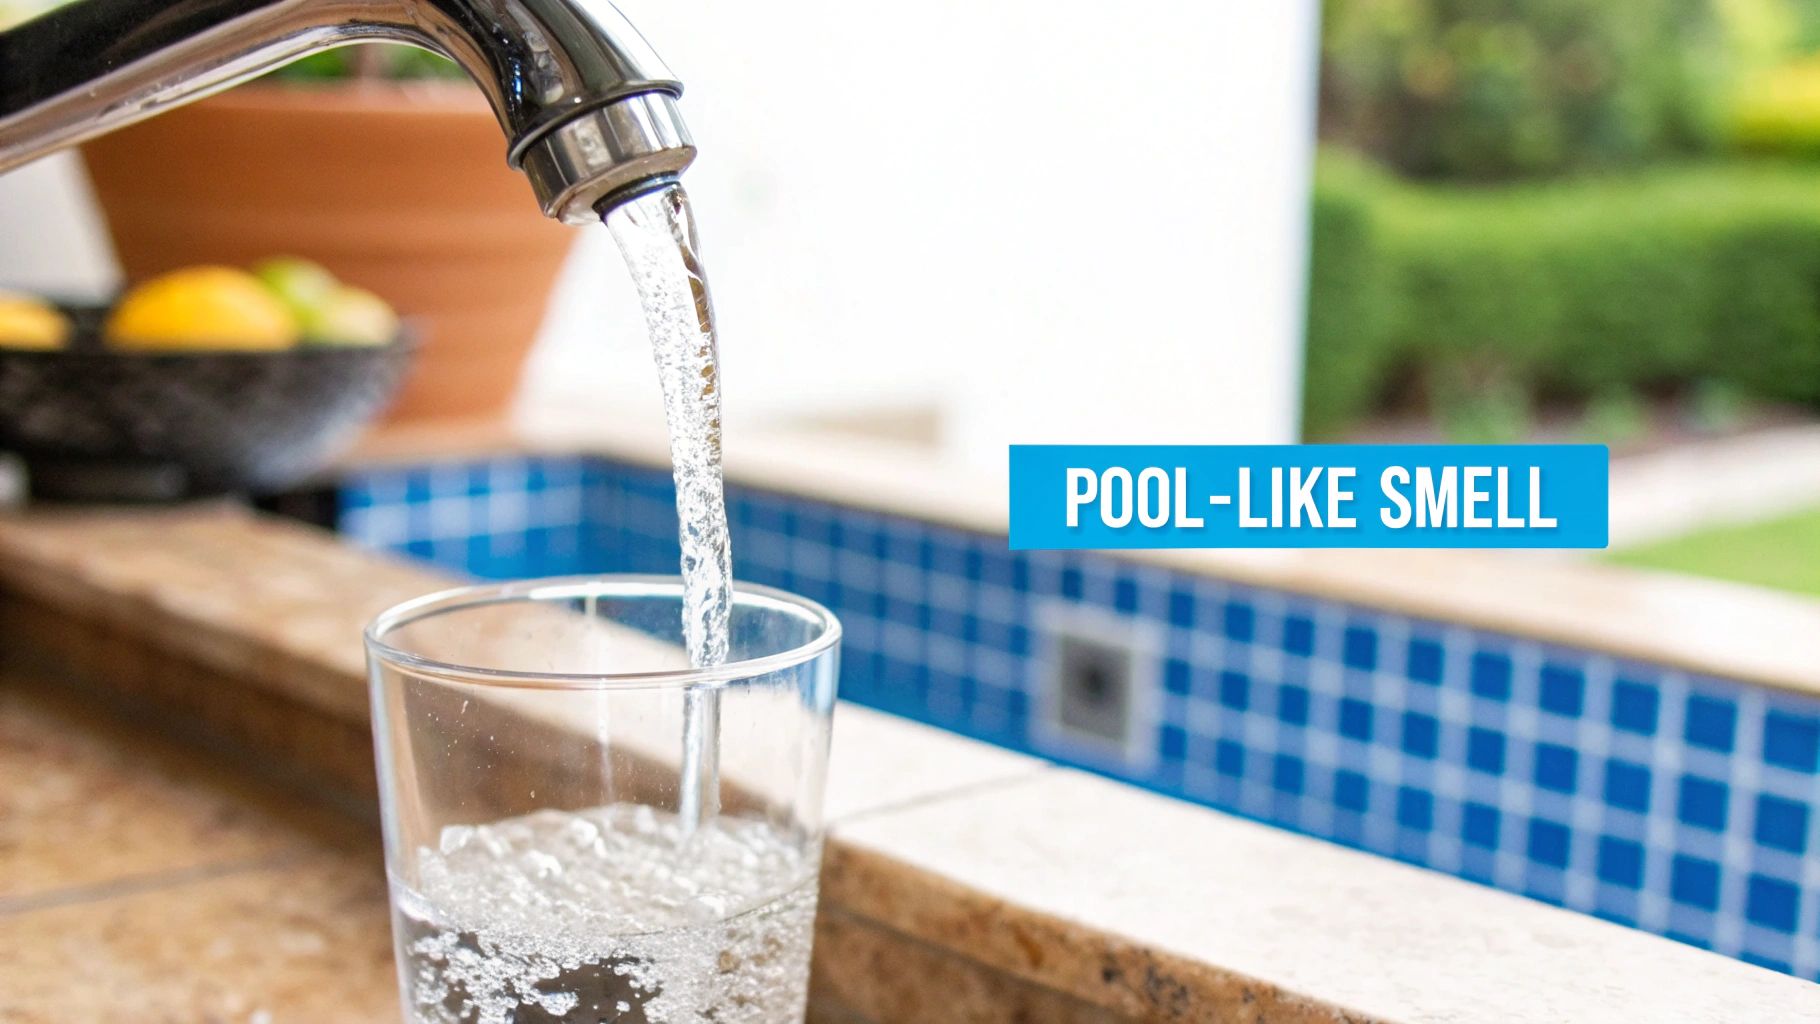
That bleach-like, "clean" smell wafting from your kitchen sink isn't just your imagination—it's chlorine, the unsung hero and occasional villain of your tap water. City water treatment plants add it to the public water supply for one glorious reason: to obliterate harmful bacteria, viruses, and other microscopic baddies. It's a fantastic disinfectant that keeps our water safe on its long, winding journey to your house.
Think of it as a bodyguard for your H₂O. It does a knockout job preventing waterborne illnesses, but its ghost tends to stick around long after the mission is complete. This leftover disinfectant is called residual chlorine, and it’s the culprit behind that familiar swimming pool perfume in your drinking glass.
While chlorine is a public health champion, this residual amount isn't always the most pleasant houseguest. The impact goes beyond just a funky taste in your morning coffee or that pot of pasta. Its presence can be a real buzzkill in other ways around the house.
When you learn how to check chlorine levels in your water, you take back control. Testing is the first, non-negotiable step. It tells you what you're dealing with so you can choose a home water filtration system that brings back your water's clean, natural taste.
So, what's a "normal" amount of chlorine? The levels in your municipal water can actually fluctuate wildly depending on the season, recent weather (like a massive rainstorm), and even how far your house is from the treatment plant.
Global health organizations have set guidelines for what's considered safe. The World Health Organization (WHO), for example, suggests that residual chlorine should ideally stay between 0.2 and 0.5 milligrams per liter (mg/L). This is the sweet spot for effective disinfection without going overboard. You can learn more about the WHO's drinking-water guidelines to see how your tap water stacks up.
Knowing the specific chlorine level in your water is the only way to connect the dots. A quick test will tell you if your levels are low, moderate, or hitting the high notes, giving you the intel you need to choose the perfect water filter for your family.
Before you can even dream about picking a water filter, you have to know what you're up against. Finding out how to check the chlorine in your water is a simple but super important first step. You've got three main ways to do this, and each one offers a different blend of convenience, accuracy, and cost.
Think of these as your personal water-testing toolkit. You don’t need to be a scientist to use them—just a few minutes and a glass of water from your tap. Let's break them down so you can find your perfect match.
Want an answer in less time than it takes to microwave popcorn? Chlorine test strips are your go-to. They couldn't be easier: just dip a strip into your water sample, give it a little swish, and match the color on the strip to the chart on the bottle. It’s a lightning-fast and cheap way to get a general vibe of your chlorine levels.
Test strips are perfect for a quick spot-check. Maybe you just moved into a new place, or you’ve suddenly noticed your water smells a bit "off." A test strip gives you a ballpark reading right away, satisfying your curiosity in seconds. The trade-off for all that speed, though, is precision. They’re great for sniffing out a problem, but not so great for measuring exactly how big that problem is.
For a more accurate reading that won't make your wallet cry, liquid test kits (sometimes called "dropper kits") are an excellent choice. This is where you'll usually find the DPD method, which is a trusted standard in the water testing world.
With these kits, you add a few drops of a liquid reagent into a small vial of your tap water. The water changes color based on the chlorine content, and you match that color to a printed comparator. This method gives you a much clearer and more detailed result than a test strip, letting you feel a bit like a home scientist.
One of the most common methods is the colorimetric DPD (N,N-diethyl-p-phenylenediamine) approach, which uses a color change to quantify chlorine. Research shows that while test strips are fast, DPD-based photometric equipment is generally preferred for precise chlorine control. You can learn more from these detailed reports on water quality testing methods.
When you need the most precise measurement you can get—no ifs, ands, or buts—a digital meter or colorimeter is the tool for the job. These slick handheld electronic devices eliminate all the guesswork of matching colors by eye.
You just pop a water sample into the meter, and it gives you a direct digital reading of the chlorine concentration, often down to two decimal places.
Digital meters are perfect for homeowners who want to geek out on their water quality, especially before and after installing a whole-house filter. They cost more upfront, but for people serious about their water, their accuracy and ease of use are unbeatable.
To make it simple, here’s a quick showdown of how the three main methods compare.
| Method | Best For | Accuracy | Speed | Typical Cost |
|---|---|---|---|---|
| Test Strips | Quick, initial checks and identifying a potential issue. | Low to Moderate | Very Fast (1 minute) | $10 – $20 |
| Liquid Test Kits | Balancing accuracy and affordability for regular use. | Moderate to High | Fast (2-5 minutes) | $15 – $30 |
| Digital Meters | Getting precise, data-driven results for tracking. | Very High | Fast (1-3 minutes) | $50 – $150+ |
So, what's the right call? It really depends on your mission. Are you just casually curious, or are you on a quest to solve a specific issue like dry skin or coffee that tastes like it was brewed in a swimming pool? Any of these methods will arm you with the crucial info you need to take the next step: picking a filtration solution that’s a perfect fit for your home.
Alright, let's get to the main event—actually testing your water. Don't worry, you won't need a lab coat for this. The goal is simple: get a true snapshot of the water quality coming out of your tap. Getting a reliable number you can act on is easier than you think; a few pro tips are all it takes.
We'll walk through the best practices for each testing method, but first, a couple of golden rules apply no matter which kit you have. These simple tricks ensure you're testing what’s flowing through your pipes, not what's been sitting around getting stale.
This visual guide breaks down your three main options for checking chlorine, from simple strips to precise digital readers.
As the infographic shows, there's a clear trade-off between speed and accuracy. Test strips are the fastest, but digital meters give you the most exact reading. It's all about matching the right tool to your needs.
Before you even crack open your test kit, a couple of quick steps will set you up for success. They seem small, but they make a huge difference in accuracy.
First, let your tap run for about 30-60 seconds before you collect any water. Water that sits in your pipes overnight can have a different chlorine level than the fresh supply from the main line. Running the tap for a minute clears out that old, stagnant water.
Second, always grab a clean container. Any leftover soap, food, or even old water residue can mess with your results. If you’re using a vial that came with your kit, just give it a good rinse with the same tap water you’re about to test.
Test strips are all about speed, but there's a right way and a wrong way to use them. Rushing the process is the number one mistake people make, and it can give you a completely bogus reading.
Here's how to nail it:
When it's time to read, match the color pads to the chart in good, natural light. It's surprisingly hard to tell the difference between subtle shades of pink in a dimly lit room.
Liquid dropper kits, often using DPD reagent, are a big step up in accuracy. Success here is all about the details. The reagent turns the water a pinkish-purple color when chlorine is present—the deeper the color, the higher the chlorine.
The single best tip for this method is to read the results against a white background. Just hold a plain piece of paper behind the vial when you compare its color to the chart. It makes the color pop and helps you find a much more exact match.
Also, be precise:
You might wonder why this matters. Well, city water with chlorine is great for preventing bacteria, but it's a problem for some hobbies. People who ferment foods or keep fish aquariums have to dechlorinate their water first, often by letting it sit out for 24 hours or boiling it for 15 minutes to let the chlorine gas dissipate. For the rest of us, a good filter is a much faster solution.
If you've opted for a digital meter, you're on your way to the most precise results possible at home. But even these high-tech tools need a little TLC to stay accurate. The most important step is calibration.
Think of it like tuning a guitar. You have to give the meter a reference point so it knows what "zero" looks like. Most meters are calibrated with chlorine-free water, like distilled water. You just put the "blank" sample in the meter and hit the "zero" or "calibrate" button.
Do this regularly, especially if you haven't used the meter in a while or if the readings seem off. Once it's calibrated, the rest is a breeze. You add your tap water, drop in the DPD reagent (it often comes in a little powder packet), and the meter gives you a specific number in parts-per-million (ppm) or milligrams-per-liter (mg/L). No more guesswork.
By following these simple steps, you can trust the number you see. That reliable data is the foundation for figuring out what it all means and choosing the right water filter to reclaim your tap.
You’ve done the test, matched the colors, and now you have a number. So what does a reading of 0.8 ppm or 1.5 mg/L actually mean for the water you drink and shower in every day? This is where we turn that number into a story about your daily life.
Understanding your results is less about complex chemistry and more about context. That number on your test strip or digital meter is the concentration of chlorine in your water, measured in parts per million (ppm), which is the same as milligrams per liter (mg/L). It tells you how your water is treated and what you're likely experiencing at home.
The chlorine in your tap water isn't just one thing. It’s a mix of different compounds, and your test kit can help you figure out what’s what. Grasping these two key terms is the first step to truly decoding your results.
When you test your water, you’ll often see options to measure both free chlorine and total chlorine. They sound similar, but the difference between them is crucial for understanding your water quality and choosing the right filter.
Free Chlorine: Think of this as the "active-duty" chlorine. It’s the potent disinfectant that’s ready and available to zap bacteria and other pathogens. This is the portion of chlorine that hasn't reacted with anything yet, and it’s what you typically taste and smell.
Total Chlorine: This is the sum of free chlorine plus combined chlorine (better known as chloramines). Combined chlorine forms when free chlorine gets tangled up with organic stuff in the water. It’s a less effective disinfectant but hangs around in the system much longer.
If your total chlorine level is way higher than your free chlorine, it means a lot of the disinfectant has already been "used up," creating chloramines. This often creates that potent, unpleasant chemical smell that's even worse than chlorine alone. For home filtration, knowing both numbers helps you choose a filter that can tackle the entire problem.
Key Takeaway: Think of free chlorine as the 'available' soldier ready for battle, and total chlorine as the entire army, including those who have already engaged with contaminants. Both contribute to the overall taste, smell, and feel of your water.
So, what should your chlorine reading actually be? According to the EPA, the maximum safe level is 4.0 ppm (mg/L). Most city water systems aim to keep it between 0.5 and 2.0 ppm by the time it reaches your faucet.
But "safe" and "pleasant" are two very different things.
Some people have super-senses and can taste or smell chlorine at levels as low as 0.5 ppm. Others might not notice it until it gets closer to 1.5 ppm or higher. This is often the point where you start to feel its effects, like dry, itchy skin after a shower or that distinct bleach-like taste in your drinking water.
It's also important to know that these levels aren't static. Chlorine concentration can swing up or down based on how far your home is from the treatment plant, seasonal changes, or even a recent heavy rainstorm that forces the city to use more disinfectant. This is exactly why you can't just rely on the city's annual water quality report; you need the real-time data from your own tap.
By understanding what a typical reading is and connecting it to your own experience—that dry skin, the flat-tasting coffee—you can decide what to do next. A consistently low reading might mean a simple faucet filter is all you need, while higher readings point toward a more robust whole-house system to protect every tap in your home.
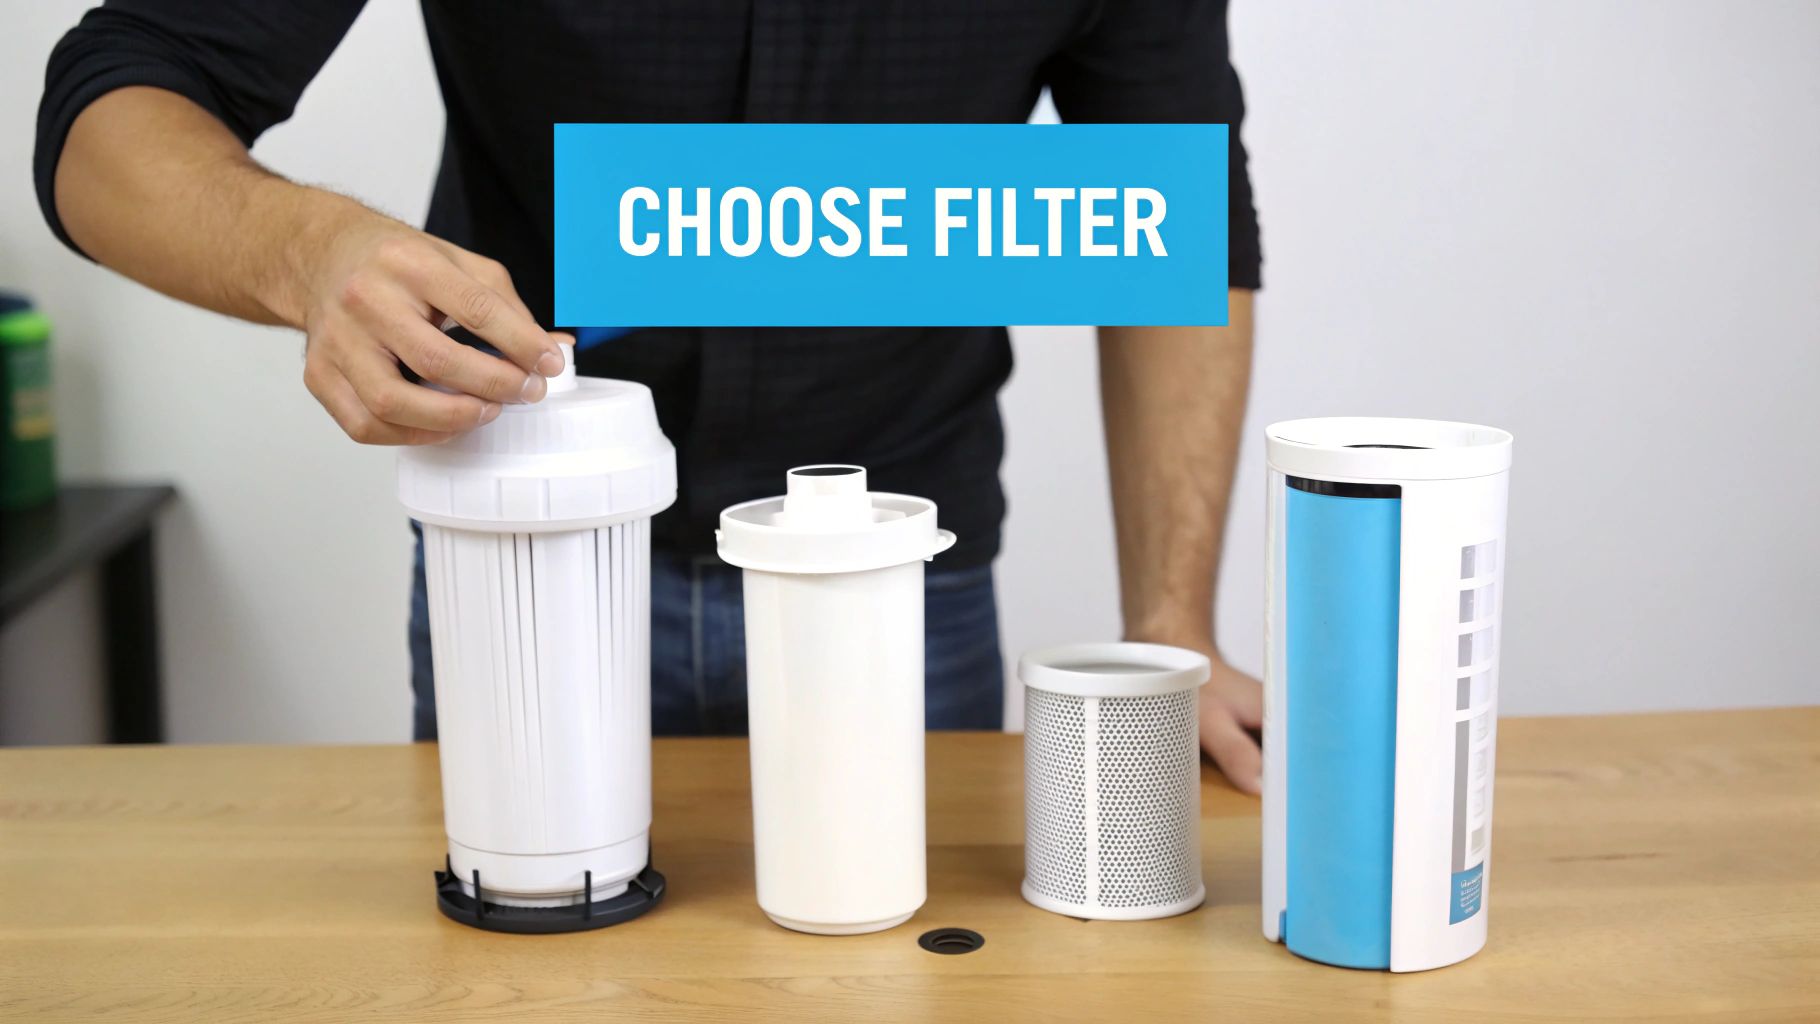
Alright, you've done the testing and you're holding the results. This is the moment where that data transforms into an action plan for getting amazing water in your home. The right filter all comes down to what your tests revealed. Are we talking about a minor taste issue, or are you dealing with a chlorine level that makes your shower feel like a dip in the public pool?
Think of your chlorine reading as a signpost. It points you straight to the most effective and budget-friendly solution for your water. There's no single "best" filter for everyone—the best one is the one that solves the specific problem you just uncovered. Let's turn that PPM number into a home upgrade.
If your test came back in this range, you're in good company. This is the most common scenario, where the complaints are usually about taste and smell. Maybe your coffee tastes a little funky, your drinking water isn't as crisp as you'd like, or you catch a faint swimming pool scent now and then.
Good news: you don't need a massive, complicated system. The fix here is simple and targeted.
Both of these use activated carbon, a ridiculously porous material that acts like a chlorine magnet. As water flows through, chlorine gets trapped on the carbon's massive surface area. It's an incredibly effective and affordable way to get that pure water taste back.
Once your readings consistently climb over 1.0 ppm, you’re in territory where the effects are more than just a nuisance. This is when you start feeling that tight, dry-skin feeling after a shower or begin to worry about the long-term impact of chlorine and its byproducts.
A simple pitcher just isn't going to cut it for the whole house. It's time to level up with a more comprehensive solution.
Your test results are your guide. A reading of 1.5 ppm or higher, combined with noticeable skin irritation or a strong chemical smell, is a clear signal that a point-of-use or whole-house system is a smart investment in your family's comfort and health.
If your chlorine levels are consistently high, or you just want every single tap, shower, and appliance in your house protected, a whole-house water filter is the ultimate solution. These are installed right where the main water line enters your home, meaning every drop of water that flows through your pipes gets treated.
A whole-house system is your best defense against not only chlorine but also its disinfection byproducts, like trihalomethanes (THMs). When you're dealing with really stubborn chlorine issues, you might even look at what the pros use. High-purity facilities often rely on specialized equipment like lab water purifiers for distilled water to get absolute purity.
For your home, a robust whole-house carbon filter delivers that same kind of peace of mind. You're not just improving your drinking water—you're protecting your appliances from wear and your skin and hair from dryness. It's a total home transformation, one filtered drop at a time.
By matching your specific chlorine reading to one of these strategies, you can stop guessing and make a smart choice. You've already done the detective work; now you can pick the right tool for the job with total confidence.
Even with the right gear, a few questions always pop up when you're learning how to check chlorine levels in your water. We’ve rounded up quick answers to the most common queries to clear up any confusion and help you move forward with your filtration plan.
As a general rule, testing your home’s water every 3 to 6 months is a smart move. Chlorine levels from your city can change with the seasons or after heavy rain, so regular checks keep you informed.
A pro tip: always test right before and after you install a new water filter. This gives you concrete, undeniable proof of how well your new system is working and lets you see (and taste) the difference right away.
It’s tempting, but please don't. Stick to kits made specifically for drinking water. Pool test strips are designed for much higher chlorine concentrations and a completely different water chemistry.
Using pool strips on your tap water will almost certainly give you a wildly inaccurate reading, making it completely useless for choosing a filter. For results you can actually trust, always grab a dedicated drinking water test kit.
If you're looking for more guidance on selecting the right tools and understanding different water contaminants, you can find a wealth of information in our comprehensive water filtration advice section.
Not necessarily. If you're on city water, a zero reading might just mean you live far from the treatment plant. The chlorine has simply done its job and faded away by the time the water reaches you.
While that’s great for the taste, it also means the water no longer has that final layer of disinfectant protection. If you're concerned about microbial safety, adding a UV purification system after your main filter is a fantastic, chemical-free way to ensure total peace of mind.
This is a super common mix-up. A standard water softener will not touch chlorine. Softeners are designed for one job: removing hardness minerals like calcium and magnesium through a process called ion exchange. They're all about preventing scale buildup, not improving taste.
To actually get rid of chlorine, you need a filter that uses activated carbon. Many homeowners create the ultimate water dream team by pairing a water softener with a whole-house carbon filter to tackle both hard water and chlorine at the same time.
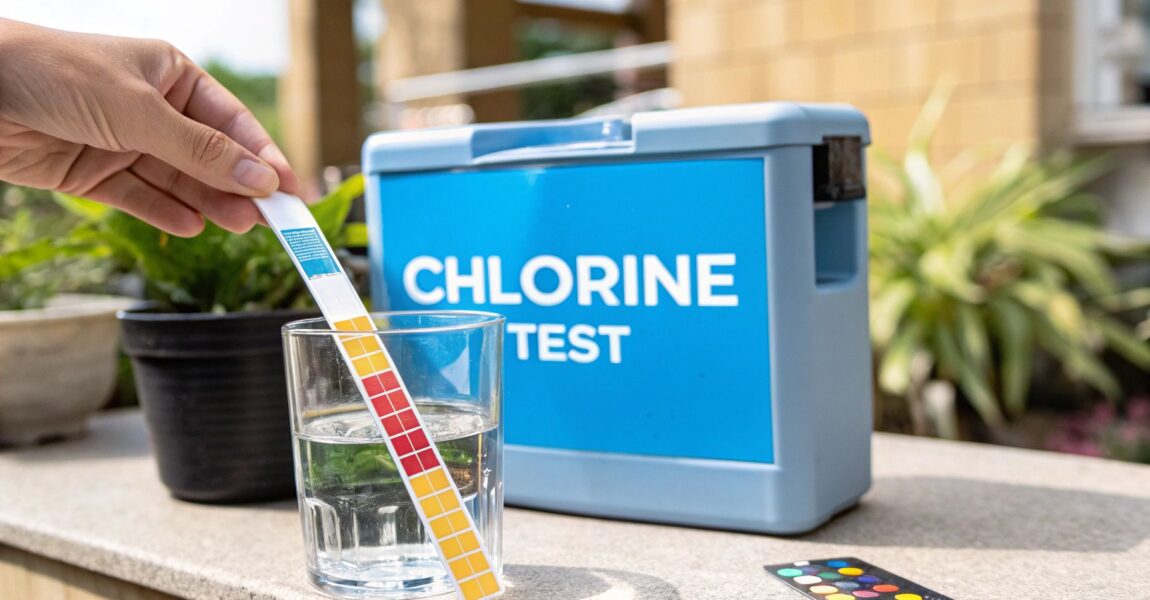
So, you want to know how much chlorine is in your tap water? You've got a few solid options for playing detective right at home: test strips, DPD kits, or even digital readers. Test strips are the quick and dirty route—just a simple color match. For a bit more accuracy, DPD kits use a cool chemical reaction that feels like a mini science experiment. And if you want to get super precise, lab-quality numbers without leaving your kitchen, a digital reader is your high-tech hero.
Ever installed a brand-new water filter and just crossed your fingers, hoping it was working? Checking your water's chlorine level is how you pull back the curtain and see the magic happen. Chlorine is the unsung hero that keeps our municipal water safe from nasty bugs, but the amount hitting your tap can swing wildly day to day.
Those fluctuations have a direct impact on your water's taste and smell—goodbye, swimming pool vibes! More importantly, they affect how long your precious filter lasts.
Getting a handle on your home's chlorine levels is the first real step toward becoming a water filtration genius. Think of it less like a chore and more like protecting your investment. For example, if you have a whole-house carbon filter, its entire job is to pull that chlorine out. If your tap water is swimming in higher-than-average chlorine, that filter is working overtime and will burn out much faster, forcing you into more frequent and costly replacements.
Chlorine has been a public health champion for over a century, first used in a big way back in 1897 in Maidstone, UK, to stop a deadly typhoid outbreak. It's a powerful disinfectant, which is why it’s still the standard today.
To see why managing chlorine is so important for your filter, it helps to understand how potent a chemical we're dealing with. A properly prepared disinfectant solution bleach can obliterate all sorts of nasty contaminants. Your home filter is working hard around the clock to remove that very same chemical from every drop of water you use. Knowing exactly what it's up against helps you keep it running like a well-oiled machine.
The ultimate "Aha!" moment is testing your chlorine levels before and after installing a filter. This isn't just a fun party trick; it's hard proof that your system is earning its keep and doing what you paid for.
Taking just a few minutes to test empowers you to:
Testing puts you back in the driver's seat of your home's water quality. For more tips on keeping your system in top shape, check out our other water filter advice.
So, you're ready to figure out what's really in your tap water? When it comes to testing for chlorine at home, you've basically got three solid options. Each one has its place, depending on how much accuracy you crave, what your budget is, and how much time you're willing to invest.
Think of it like choosing the right tool for a job—you wouldn't use a sledgehammer to hang a picture frame. This decision tree can point you in the right direction fast.
This guide helps you decide based on a couple of key questions: Are you just curious about your tap water, or are you trying to confirm a new filter is actually doing its job? Let’s walk through the options.
To help you choose, here's a quick comparison of the three main methods for testing chlorine at home. This should make it easy to see which one fits your specific needs and budget.
| Method | Best For | Accuracy | Cost |
|---|---|---|---|
| Test Strips | Quick, simple checks and "Is there chlorine?" questions. | Low | $ |
| DPD Kits | Reliable results for tracking your filter's performance. | Medium | $$ |
| Digital Readers | Lab-quality precision for troubleshooting and total peace of mind. | High | $$$ |
As you can see, there's a clear trade-off between cost and precision. For most homeowners looking after a filtration system, the DPD kit hits that sweet spot of value and reliability. But let's get into the nitty-gritty of each one.
If you just want a fast, ballpark figure, test strips are your best friend. They are super cheap and give you an answer in about 15 seconds. You just dip a strip in your water, watch the color bloom, and match it to the chart on the bottle. Easy peasy.
This is the perfect way to do a quick annual check-up or see if you can spot a "before and after" difference with that new faucet filter you just screwed on. Just remember, their accuracy is limited. Think of it as getting a general idea, not a laser-precise number to live by.
When you need a more trustworthy result, especially after investing in a new whole-house filtration system, a DPD (N,N-diethyl-p-phenylenediamine) kit is the way to go. These kits have you add a reagent—either a little tablet or liquid drops—to a water sample, which magically turns the water a shade of pink.
The deeper the pink, the more chlorine is crashing the party. You compare that color to a more detailed chart that comes with the kit. It takes a couple more minutes than a test strip, but the boost in accuracy is well worth it for anyone who wants to seriously track how well their filter is performing over time.
For most homeowners trying to manage their filtration system, a DPD kit offers the best mix of affordability and precision. It’s what a lot of pros use for field testing because it delivers results you can count on without needing pricey equipment.
For the data nerds and anyone who needs definitive, lab-quality numbers, a digital colorimeter or photometer is the top-tier tool. These slick handheld gadgets take all the guesswork out of matching colors by eye. You still use a DPD reagent to create the pink reaction, but instead of squinting at a color chart, you pop the vial into the reader.
The device shines a beam of light through the sample and gives you an exact digital readout of the chlorine concentration. They're definitely the most expensive option, but for anyone who has to monitor their filter’s performance closely or troubleshoot a tricky problem, the precision is unmatched.
Test strips are by far the fastest and simplest way to figure out the chlorine levels in your water. While they're known for giving a quick answer, there's definitely a right way and a wrong way to use them. Doing it right is the difference between a wild guess and a result you can actually use to check on your filter.
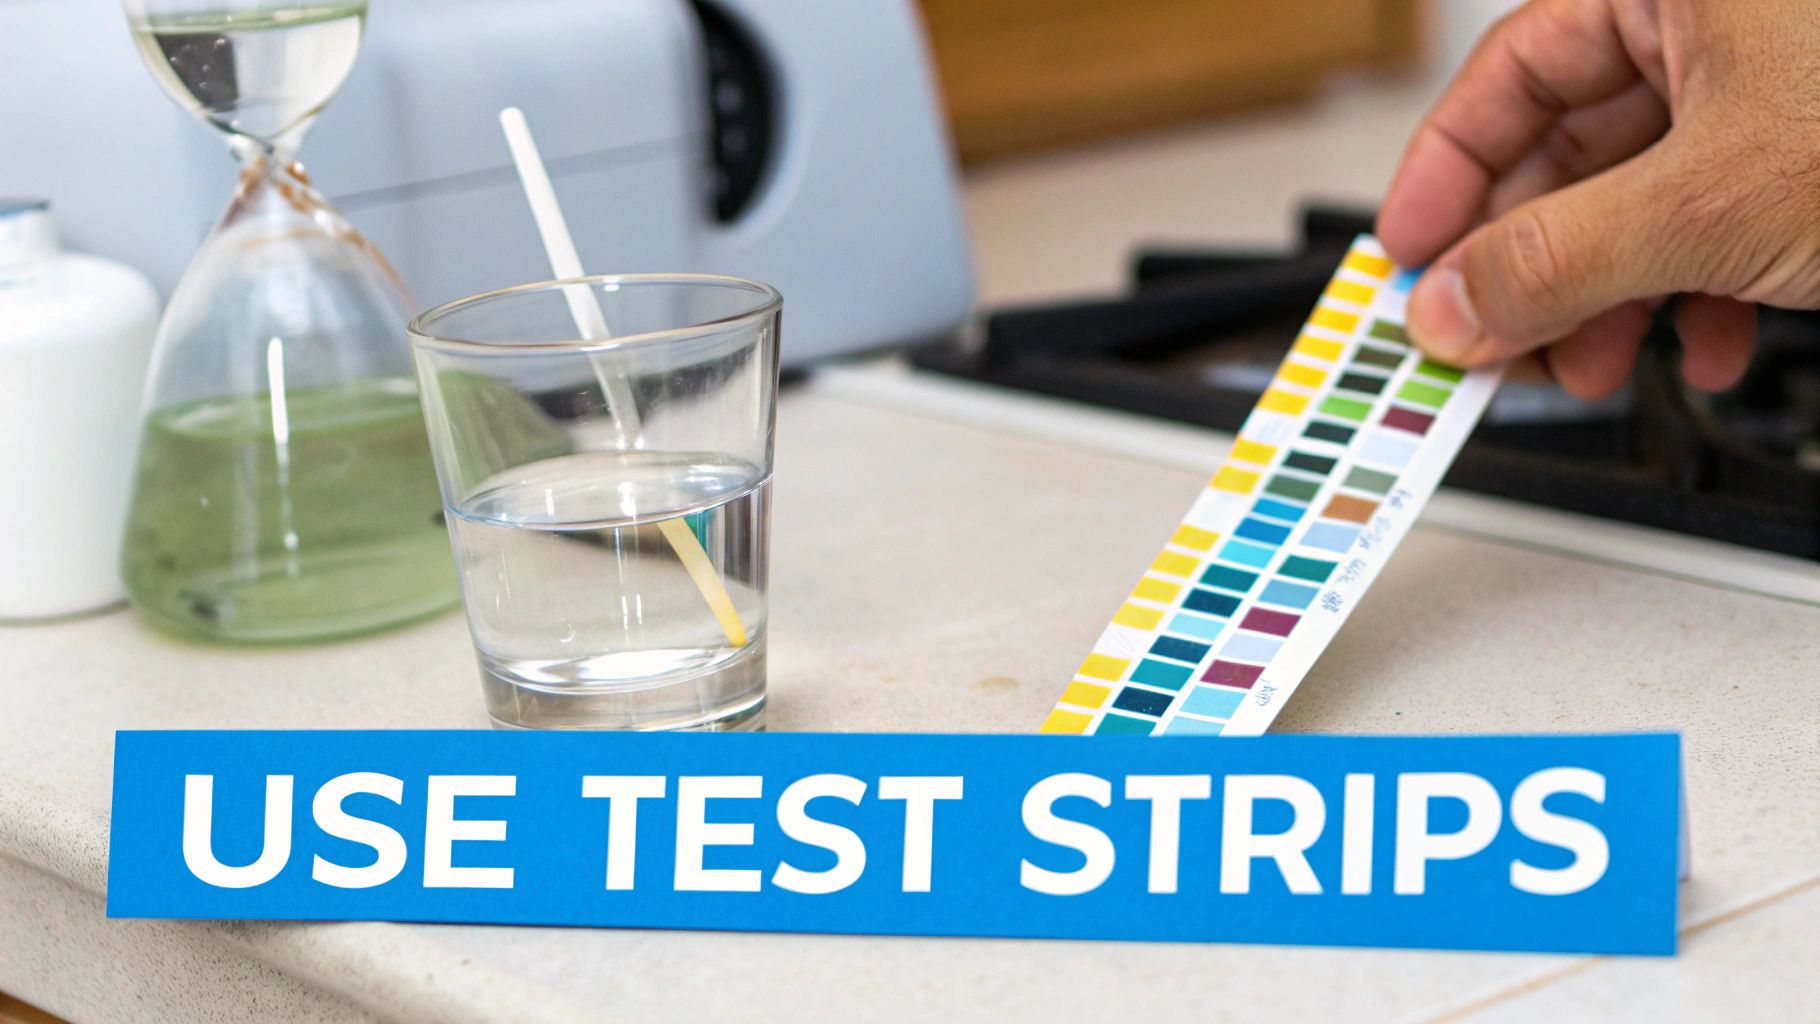
The directions on the bottle can be pretty sparse, so here are a few pro tips that will make your readings much more accurate. First off, always grab a clean glass for your water sample. Never just stick the strip under a running faucet—that's a surefire way to get a wonky reading.
Instead, let the cold water run for about 30 seconds first. This flushes out any water that's been sitting in your pipes and gets you a true sample of what’s coming from your main line, which is exactly what your filter is dealing with. Then, fill your glass.
When you look at the color chart on the bottle, you’ll almost always see two separate pads for chlorine: free chlorine and total chlorine. Knowing what these mean is the secret to figuring out if your water filter is actually earning its keep.
A high-quality carbon filter should knock your free chlorine down to almost zero. If you test your filtered water and still get a high reading for total chlorine, it’s a big clue you might have chloramines. To get rid of those, you'll need a special catalytic carbon filter designed for this tougher challenge.
When it comes to reading the strip, timing is everything. You can't just let it sit there. Check the instructions and read the result at the exact moment it specifies—usually between 15 and 30 seconds. If you wait too long, the colors can bleed or get darker, giving you a falsely high reading.
Finally, hold the strip right up against the color chart in good, natural light if possible. This little trick helps you avoid shadows and makes it way easier to get a perfect color match. It's a simple step that helps you make confident decisions about your water filter's performance.
When a simple ballpark estimate from a test strip just won't cut it, it's time to level up to a DPD kit. Think of it as the gold standard for home chlorine testing, giving you the reliable data you need to truly manage your home filtration.
These kits are your best bet for checking if that expensive whole-house filtration system is actually doing its job. The process itself is pretty straightforward, but a little attention to detail goes a long way.
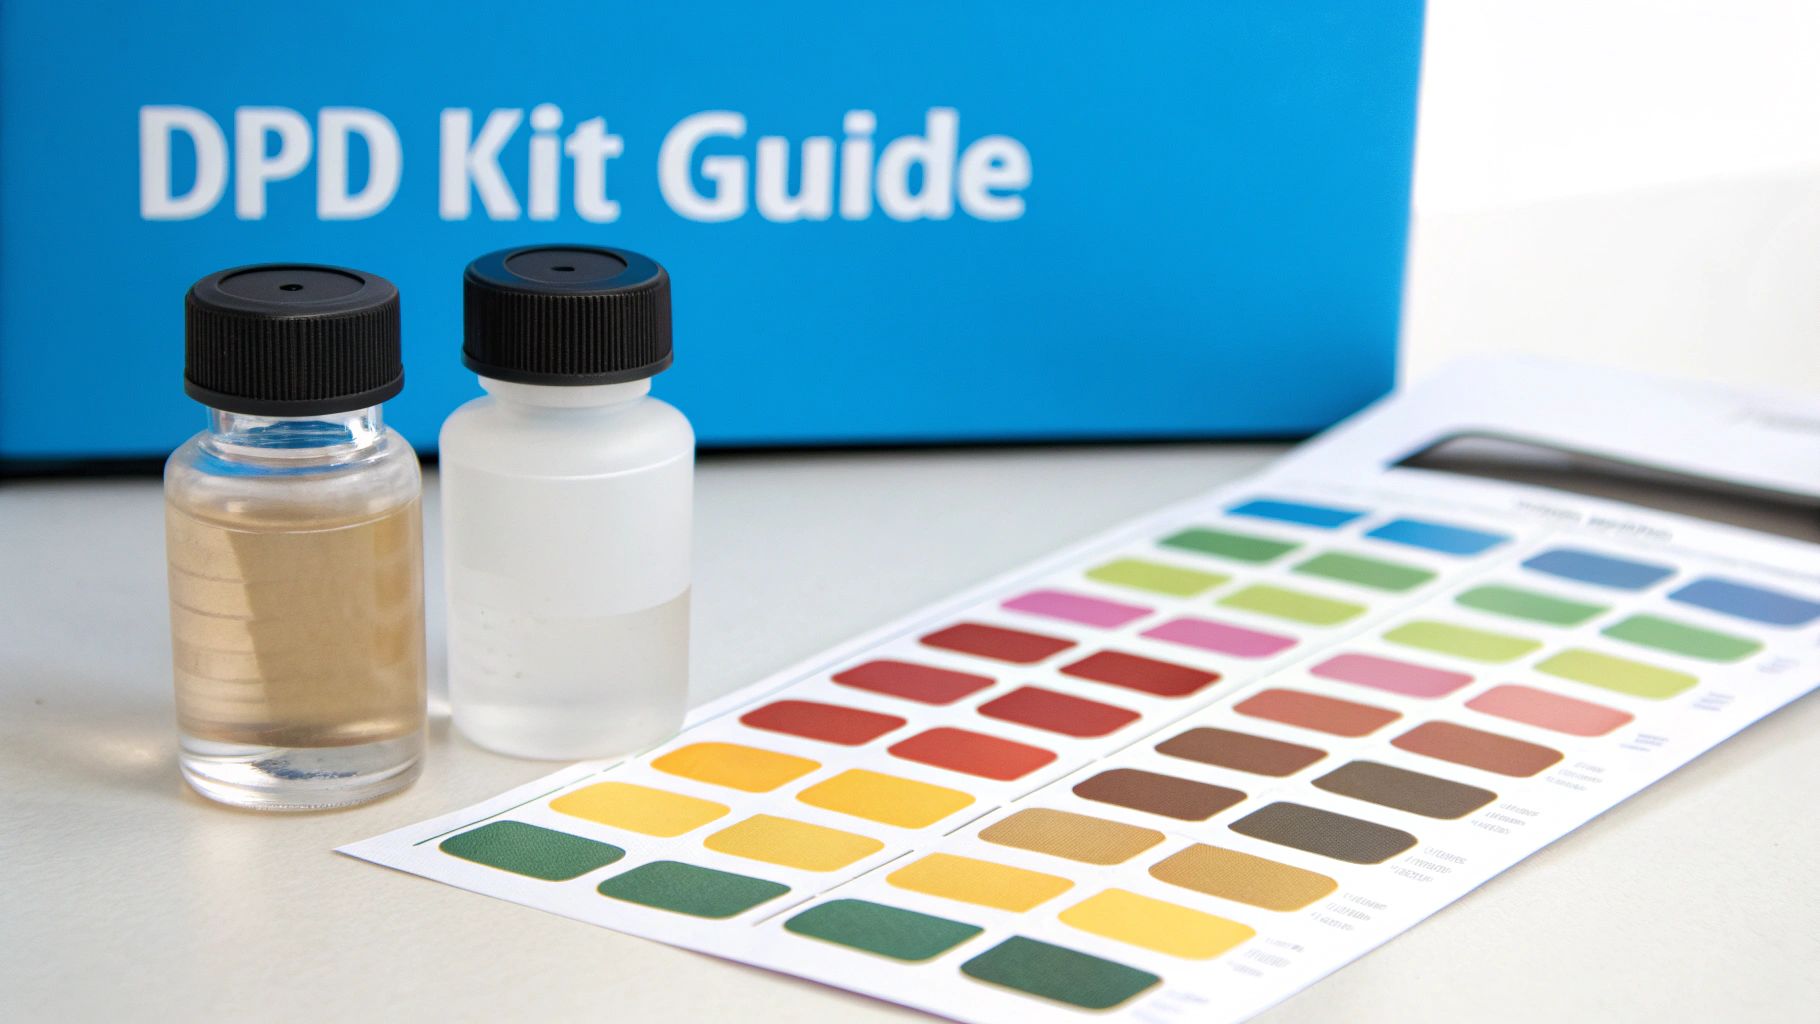
At the heart of every DPD kit is a chemical reagent. It usually comes as either liquid drops or a small tablet that you add to your water sample. This reagent reacts specifically with chlorine, turning the water a certain shade of pink.
It's a simple visual cue: the deeper the pink, the higher the chlorine concentration. You then hold your sample up to the color comparator chart that came with the kit to get your reading in parts per million (ppm).
To make sure your results are spot-on, there are a couple of small habits that make a huge difference. These are the little things that separate a good-enough test from a great one.
Here's the real power of a DPD kit: it gives you a clear, hard number. A test strip might just say "low," but a DPD kit will tell you the level is 0.5 ppm. That's a specific piece of data you can use to track your filter's health and performance over time.
Don't forget about proper storage, either. To keep the reagents from going bad, store your kit in a cool, dark place away from direct sunlight. Once you're done testing, just follow the manufacturer's instructions for disposal—it usually just involves flushing the tested water down the drain with plenty of running water.
You’ve dipped the strip or swirled the vial, and now you have a number. So, what does a result of 0.5 ppm versus 3.0 ppm actually tell you about your tap water? More importantly, what does it say about your filtration system? This is where a simple test transforms into actionable knowledge for your home.
Think of your activated carbon filter like a sponge. A higher chlorine reading—let’s say anything above 2.0 ppm—means that sponge has to work a lot harder. It’s soaking up more disinfectant with every drop of water that passes through. This directly shortens its lifespan, forcing you to swap out filter cartridges more often to keep your water tasting fresh and clean.
On the flip side, a very low reading might mean your filter is coasting, and you can stick to a less frequent replacement schedule, saving you some money in the long run.
Understanding your parts per million (ppm) result lets you fine-tune your entire filtration strategy. That number isn't just a grade; it's a guide. For example, if your unfiltered tap water tests consistently come back high, it might be time to upgrade to a more robust, higher-capacity carbon filter designed for challenging water conditions.
Your test result is the single best indicator of your filter's real-world workload. It takes the guesswork out of maintenance and helps you get the most value from your investment, ensuring your water is always crisp and clean.
It’s also important to remember that chlorine levels are managed for public health. The World Health Organization (WHO) and other health bodies set guidelines for chlorine, and municipal water plants follow strict rules to keep water safe. You can discover more insights about these global water safety standards.
Here’s a quick breakdown of how to use specific results from your unfiltered tap water:
Even with the right gear, you'll probably have a few questions when you first start testing. Here are some quick answers to the most common ones we hear from homeowners focused on their filtration systems.
For most folks with a filtration system, testing your water every 3-6 months is a solid plan. This is frequent enough to keep an eye on your filter’s performance as it ages and to notice any big seasonal changes from your city's water supply.
Just installed a new filter? It's a great idea to test both filtered and unfiltered water weekly for the first month. This helps you establish a baseline and confirms the system is working perfectly right out of the box.
First, don't panic. A brand new, high-quality filter should reduce chlorine to undetectable levels (below 0.1 ppm). If you're seeing a reading over 0.2 ppm in your filtered water, it's time to investigate. Run the test again just to be sure. If you get the same result, it most likely means your filter cartridge is exhausted and needs to be replaced.
If you have a brand-new filter and you're still seeing chlorine, you might be dealing with chloramines. These tricky compounds require a special catalytic carbon filter to be removed effectively.
A common rookie mistake is not flushing a new filter cartridge long enough before you use it. Always run cold water through a new filter for at least five minutes. This activates the carbon media and clears out any harmless fine particles before you take your first test sample.
Ready to take control of your home's water quality? Water Filter Advisor provides expert reviews and practical guides to help you choose the best filtration system for your needs. Explore your options at https://www.waterfilteradvisor.com.
That glass of water from your tap might look perfectly clear, but let's be honest, looks can be deceiving. What you can't see could be a real problem for your home, your appliances, and your health. Before you assume that clear equals clean, it's time to play detective. Testing your water is the only way to know for sure what you're dealing with before you even think about buying a water filter.
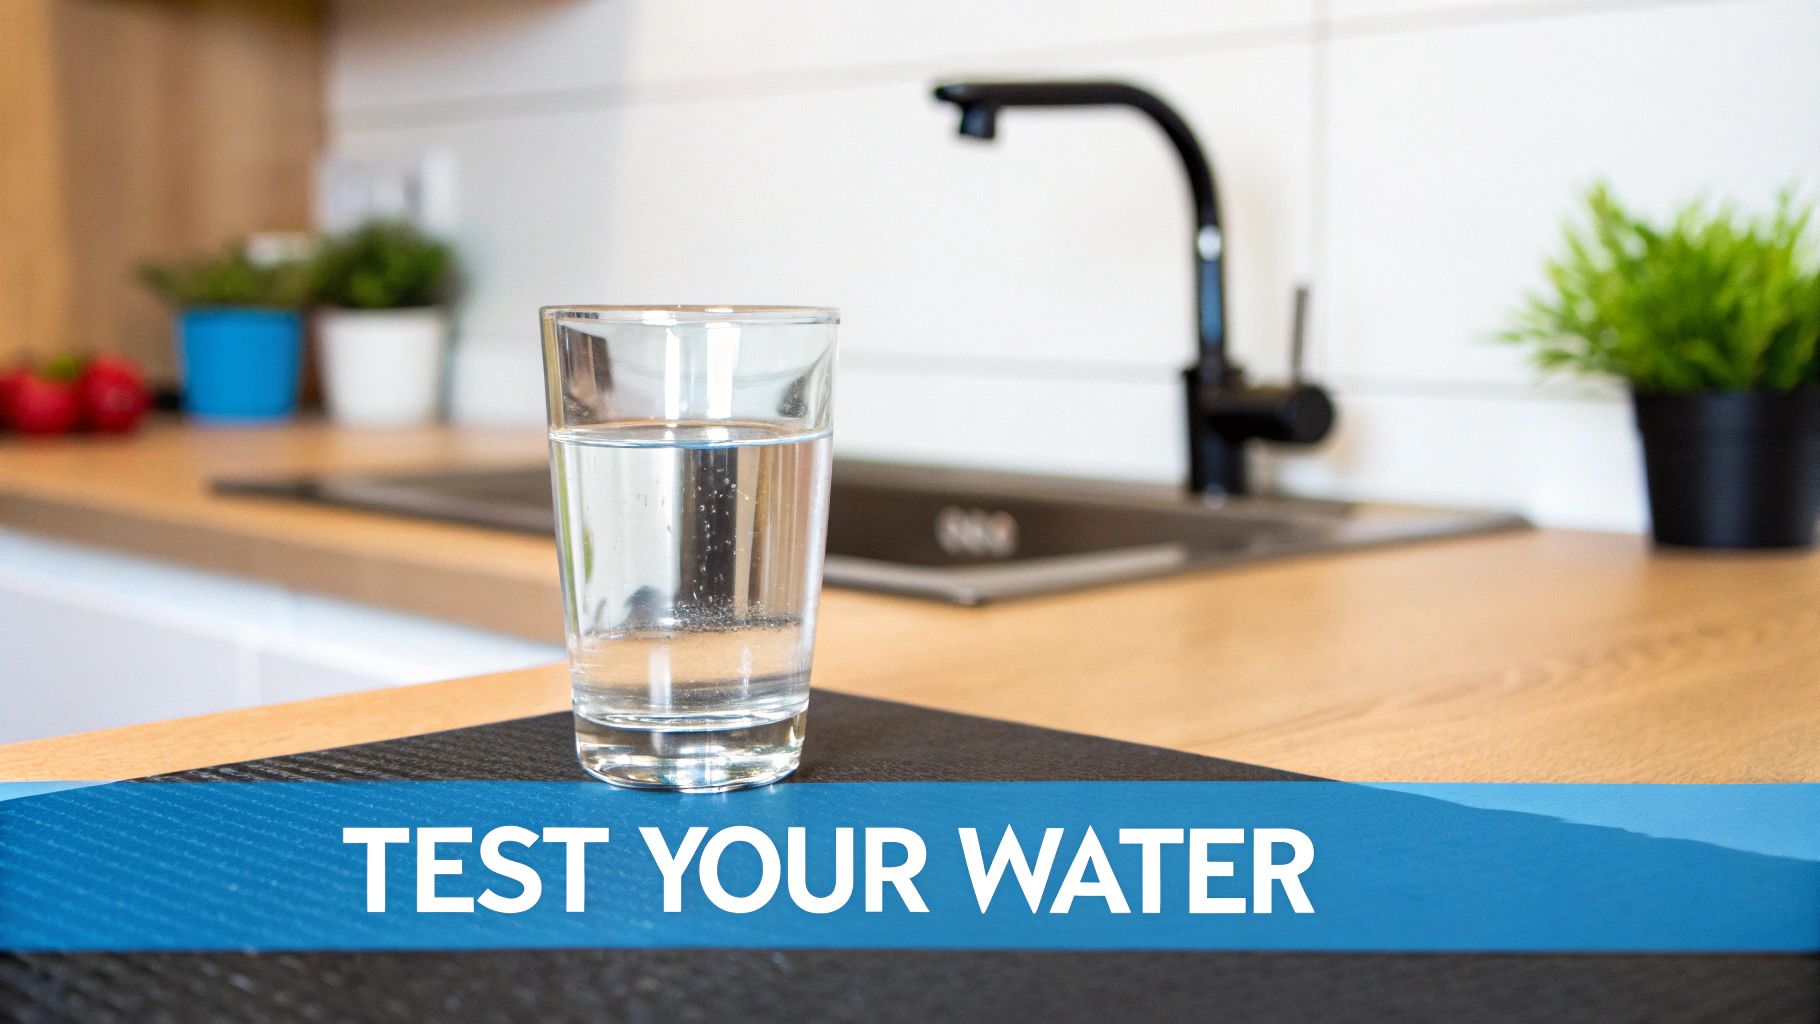
It’s easy to put your trust in the water flowing from your faucet, especially if you're on a city supply. And while that water is treated, contamination can absolutely happen as it travels through miles and miles of pipes to get to you.
Older plumbing in your neighborhood—or even lurking inside your own walls—can leach things like lead and copper straight into your drinking water.
On top of that, the very chemicals used to make the water safe, like chlorine, can create byproducts (known as DBPs) that have been linked to health concerns. This doesn’t automatically mean your water is dangerous, but it does show how much its quality can change on its journey to your glass.
You don’t have to wait for an official alert to start questioning your water. Sometimes, your house gives you clues. These are some of the most common red flags I see that point to a hidden issue:
Here’s the thing: testing your water isn't just about finding problems. It's about finding the right solution. Buying a water filter without knowing what's in your water is like throwing darts in the dark—you might get lucky, but you'll probably miss the bullseye.
Testing first gives you the power to pick a filtration system that actually targets the specific contaminants in your supply. This keeps you from wasting money on a complex system you don’t need, or worse, buying a cheap filter that doesn't fix your real problem.
At the end of the day, testing your water is about gaining peace of mind and taking back control over what’s flowing into your home.
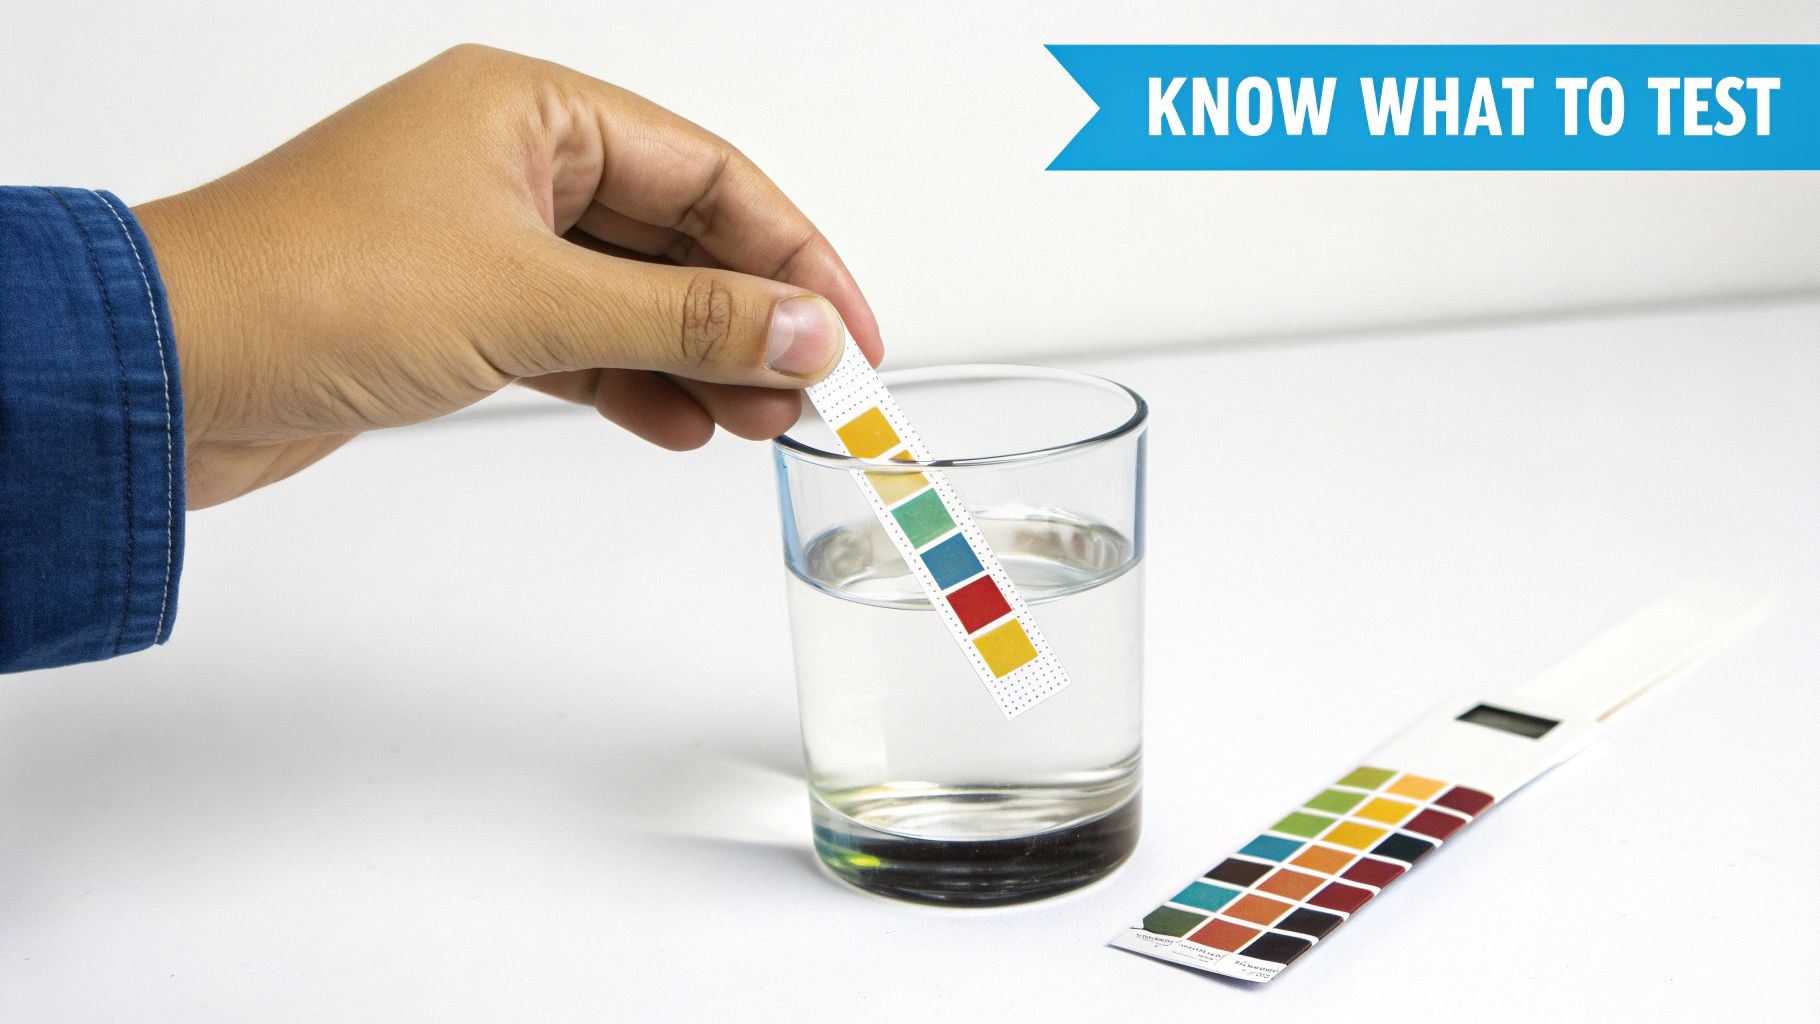
Before you can pick the right water filter, you first have to know what you’re up against. Think of it as playing detective—the clues are right there in your water. Learning how to test your water quality at home means knowing exactly which culprits to look for.
Most contaminants fall into a few key categories. This helps you figure out what matters most, whether you're dealing with city water and its treatment chemicals or you're a well owner worried about what's seeping into your groundwater.
This is the big one. This group includes contaminants that pose a direct risk to your family's health. They’re often invisible, odorless, and tasteless, which makes testing the only way you’ll ever know they’re there.
These guys aren't usually as dangerous as the first group, but they can still wreak havoc on your home and make life unpleasant. These are the problems you can often see, taste, or feel.
The most frustrating part of nuisance issues is the slow, silent damage they do. You might not notice the scale buildup inside your water heater until it fails, or the dingy look of your laundry until it's too late.
A perfect example is water hardness, which is caused by too much calcium and magnesium. It's the culprit behind that chalky white scale on your faucets and the soap scum ring in your shower. Another classic is iron, which leaves those ugly reddish-brown stains in your sinks and toilets and can give your water a metallic tang.
Finally, there are the general indicators that give you a bigger picture of your water’s overall condition. They don’t point to one specific contaminant but offer clues that something might be off.
Total Dissolved Solids (TDS) is a measure of everything dissolved in your water, both organic and inorganic. A high TDS reading isn't necessarily a health risk (it can include harmless minerals), but a sudden spike can be a red flag that something new has gotten into your water supply.
Similarly, the pH level tells you how acidic or alkaline your water is. Water that’s too acidic can actually corrode your pipes, which might leach metals like copper and lead right into your drinking water.
This kind of household-level testing is becoming a big deal globally. Since 2012, large-scale surveys in 29 countries have started using home water tests to get a better handle on drinking water safety. This is especially important for rural and lower-income families who often face higher risks. The data shows where city monitoring falls short and proves just how critical it is to check your water right at the tap. You can learn more about how household surveys identify water safety gaps and help inform public health.
Alright, so you know what you might be looking for in your water. Now comes the big question: how do you find it? This is where you decide on your approach.
You’ve got two main paths to choose from when it comes to testing your water quality at home: doing it yourself with a DIY kit or sending a sample off for a professional lab analysis.
Each one has its place, and the right choice really boils down to your specific situation, how much you want to spend, and what will give you peace of mind. I like to think of it like a quick health check—sometimes, taking your own temperature at home tells you all you need to know, but other times, you need to see a doctor for the full workup to get the real story.
For a quick, on-the-spot snapshot of your water, you can't beat a DIY kit. These are the test strips, color disk kits, and handheld digital meters you can find online or at your local hardware store. They're built for speed, convenience, and affordability.
Most of these kits are designed to flag general quality indicators and common nuisance problems. They’re fantastic for getting a baseline reading on things like:
You get results in minutes, which makes these kits a brilliant starting point. They empower you to quickly spot basic issues that a simple pitcher or faucet filter might be able to handle.
Choose a DIY kit when: You want a quick, general screening of your city water, you're curious about nuisance issues like hardness or chlorine, or you just need an affordable way to get an initial feel for your water's condition.
A really popular type of DIY option these days are digital water testers. I've seen these handheld gadgets become a favorite for homeowners who want to keep a constant eye on their water. They usually measure things like Total Dissolved Solids (TDS), pH, and temperature, giving you an instant number on a screen.
Now, they won't tell you if you have lead or arsenic, but they're an excellent screening tool. For example, a TDS reading below 300 ppm is generally considered pretty good. But if you see a number over 500 ppm, that’s a clear sign it's time to dig a little deeper.
These digital testers, which usually run between $20 to $100, are also incredibly handy for checking if your filtration system, like a reverse osmosis unit, is still doing its job.
DIY kits are great for a quick look, but they have their limits. They simply can’t see everything.
When you're dealing with serious health concerns or complex water issues, nothing beats the accuracy and detail you get from a professional, state-certified laboratory test. This is the gold standard for filtration prep.
It’s the most thorough way to find out exactly what’s in your water. The process is straightforward: the lab sends you a special collection kit, you fill it up with your water, and you mail it back. In about a week or two, you’ll get a detailed report breaking down dozens of potential contaminants with scientific precision.
Once you have those results, figuring out the next steps can feel overwhelming. For more in-depth guidance on choosing the right filtration systems, you might find our full library of water filtration advice helpful.
Opt for a lab test when: You're on private well water, you have a reason to suspect dangerous contaminants like lead or arsenic, you have infants or immunocompromised folks at home, or you simply want the most accurate, complete picture before investing in a whole-house filter.
Still on the fence? This head-to-head comparison should help you decide which water testing method is the right fit for your needs and your filtration goals.
| Feature | DIY Test Kits (Strips & Digital Meters) | Professional Lab Analysis |
|---|---|---|
| Accuracy | Good for general estimates, but not precise. | Highly accurate and scientifically precise. |
| Contaminants Detected | Limited to common parameters like chlorine, pH, hardness. | Can detect hundreds of contaminants, including heavy metals, VOCs, bacteria, and pesticides. |
| Speed | Instantaneous results (usually within minutes). | Slower turnaround, typically 1-2 weeks. |
| Cost | Very affordable, often $15 – $100. | More expensive, ranging from $100 to $500+ depending on the tests. |
| Best For | Quick screenings, identifying nuisance issues, monitoring city water, and checking filter performance. | Well water owners, confirming specific health-related contaminants, and getting a comprehensive water profile. |
Ultimately, the best method is the one that answers your specific questions and gives you confidence to choose the right water filter for the job.
Okay, you've done the detective work and your water test results are in. This is where all that effort pays off, because you can finally turn that raw data into a real solution.
Instead of just guessing which filter to buy, you now have a clear roadmap. You know exactly what problem you need to solve.
Think of it like getting a prescription from a doctor. You wouldn't just grab any medicine off the shelf; you get the one prescribed for your specific issue. It’s the same exact principle with water filters. Matching the filter to your results saves you money and, more importantly, actually fixes the problem.
This infographic is a handy little decision tree to help you visualize whether a quick test strip check-up is enough or if you need to call in the big guns with a lab analysis.

As you can see, the right testing method really depends on your initial concerns. This helps point you in the right direction from the get-go.
Let's connect the dots between what your report says and the hardware that can fix it. Most water quality headaches fall into a few common buckets, and luckily, there are specialized filters for each one.
Problem: Chlorine Taste and Odor
Does your tap water taste and smell like a public pool? Your test results probably showed high chlorine levels. Good news: this is an easy fix. Activated carbon filters are your best friend here. They basically act like a magnet for chlorine, yanking it out of the water and making it taste and smell great. You'll find these in affordable options like water filter pitchers, faucet-mounted filters, and even most refrigerator filters.
Problem: Hard Water and Scale Buildup
If your results flagged high levels of calcium and magnesium, you've got hard water. That's the stuff causing that chalky white scale on your faucets and making it impossible to get a good lather with soap. The only real fix for this is a water softener. These systems use a process called ion exchange to physically remove those hardness minerals, which will save your pipes and appliances from costly scale damage down the road.
Problem: Heavy Metals Like Lead
A positive test for lead demands an immediate and serious response. Reverse osmosis (RO) systems are one of the most effective tools for removing lead and a whole bunch of other nasty contaminants. These are usually multi-stage filters installed right under your sink. They work by forcing water through a special membrane that blocks things like lead, arsenic, and nitrates.
Some test results call for a much stronger defense. If you're on a private well or your lab report came back with microbiological threats, you need a system that offers true purification.
A UV purification system is a fantastic, chemical-free way to deal with bacteria and viruses. It uses powerful ultraviolet light to zap the DNA of nasty microorganisms like E. coli, which stops them from reproducing and making you sick. For well water, it's often paired with a sediment pre-filter to make sure the UV light can get a clear shot at any pathogens.
When you have real data from a water test, you're no longer just a consumer—you're an empowered homeowner. You stop buying generic products and start investing in a specific solution that’s perfectly matched to your home’s unique water profile.
This proactive mindset is catching on. Field studies have shown that the simple act of home water testing has a real impact on people's behavior. One study found that giving households access to water testing led to a 5.3 percentage point increase in the use of safer commercial water supplies over time.
It’s simple: when people know what’s in their water, they are far more likely to do something about it. You can read the full research on how testing changes water habits and see the data for yourself.
So you've installed a new water filter. That initial sense of relief is great, but the job isn't quite over. Keeping your water pure is an ongoing commitment, not a one-and-done deal.
Think of your filter like any other hard-working appliance in your home—it needs regular attention to keep doing its job right. This means you'll need to retest your water every so often to make sure your system is still working effectively.
Things can change with your water supply, sometimes without any warning. A big storm, a nearby construction project, or even small shifts in how your city treats its water can throw off the chemistry.
The best way to stay ahead of potential issues is to have a simple schedule based on where your water comes from and anything you notice that seems off.
Beyond retesting, the single most important piece of maintenance is swapping out your filter cartridges on schedule. It’s so easy to let this slide, but putting it off can cause real problems.
An old, clogged filter doesn't just stop working; it can become a source of contamination itself.
Over time, all the junk your filter has been catching builds up. A saturated filter can turn into a breeding ground for bacteria, potentially making your so-called "filtered" water even worse than what's coming straight from the tap.
Sticking to the manufacturer’s replacement schedule—whether it’s every three months or once a year—is absolutely essential for protecting your investment and your family’s health.
And if you're thinking beyond just filtering what comes out of the tap, storing drinking water is another important step. You can find a comprehensive guide to potable water storage tanks that covers everything from materials and sizing to the crucial maintenance needed to ensure that water stays pure. Regular upkeep is the key to consistently safe water.
Even after you've got a plan, a few questions always seem to pop up. It's totally normal. Let's dig into some of the most common things people ask when they're figuring out how to test their water at home. This should clear up any last bits of confusion.
This is a big one, and the answer really hinges on where your water comes from. There's no single schedule that fits everyone.
If you have a private well, you're the one in charge of your water quality. Think of yourself as your own water utility manager. Because of that responsibility, an annual lab test is a must. Wells can be affected by all sorts of things—seasonal rain runoff, a neighbor's septic system, you name it. Consistent testing is the only way to stay on top of it and ensure your water is safe.
Now, if you get your water from the city, it's a bit different. That water is treated and tested before it even leaves the plant. The problem is, it can pick up contaminants on its long journey to your faucet. For city water, a good rule of thumb is to test every three to five years. The exception? Test immediately if you notice any weird taste or smell, or if the city issues a water advisory.
Ah, the "free" test. It's a tempting offer, but you have to be careful with this one. These tests usually come with a major catch.
More often than not, the person doing the test isn't a neutral water quality expert—they're a salesperson. Their entire job is to sell you a water filtration system. The "test" is really just a sales demonstration, designed to show you problems that their specific products can fix. It might reveal you have hard water or some chlorine, but it’s almost never a comprehensive, scientifically sound analysis of serious health concerns.
A free test might give you a small clue about your water, but it's usually just a high-pressure sales tactic in disguise. If you want a truly unbiased and accurate report on what's in your water, an independent lab test is the only way to go.
This is probably the most dangerous assumption you can make about your drinking water. So many of the worst contaminants are completely invisible to our senses. You simply cannot see, taste, or smell major threats like:
Let me say it again: clear water does not mean clean water. Testing is the only way to get the proof you need to know for sure that your water is free from these hidden dangers. It’s what lets you protect your family's health and make a smart, informed choice about whether you need a filter.
Ready to take the next step and find a filtration system that perfectly matches your water's needs? At Water Filter Advisor, we provide in-depth reviews, buying guides, and expert advice to help you make a confident, cost-effective choice. Explore our guides and find the right filter for your home today!