A DIY Guide to whole home water filtration system installation That Won’t End in a Flood

Let's be honest, a successful whole-home water filtration system installation doesn't start with a pipe cutter. It begins long before you even dream of getting your tools out; it starts with a rock-solid plan. This isn't just about avoiding a DIY disaster—good planning is what separates a system that delivers pure, delicious water for years from one that becomes your next big headache.

Planning Your Installation for Flawless, Filtered Water
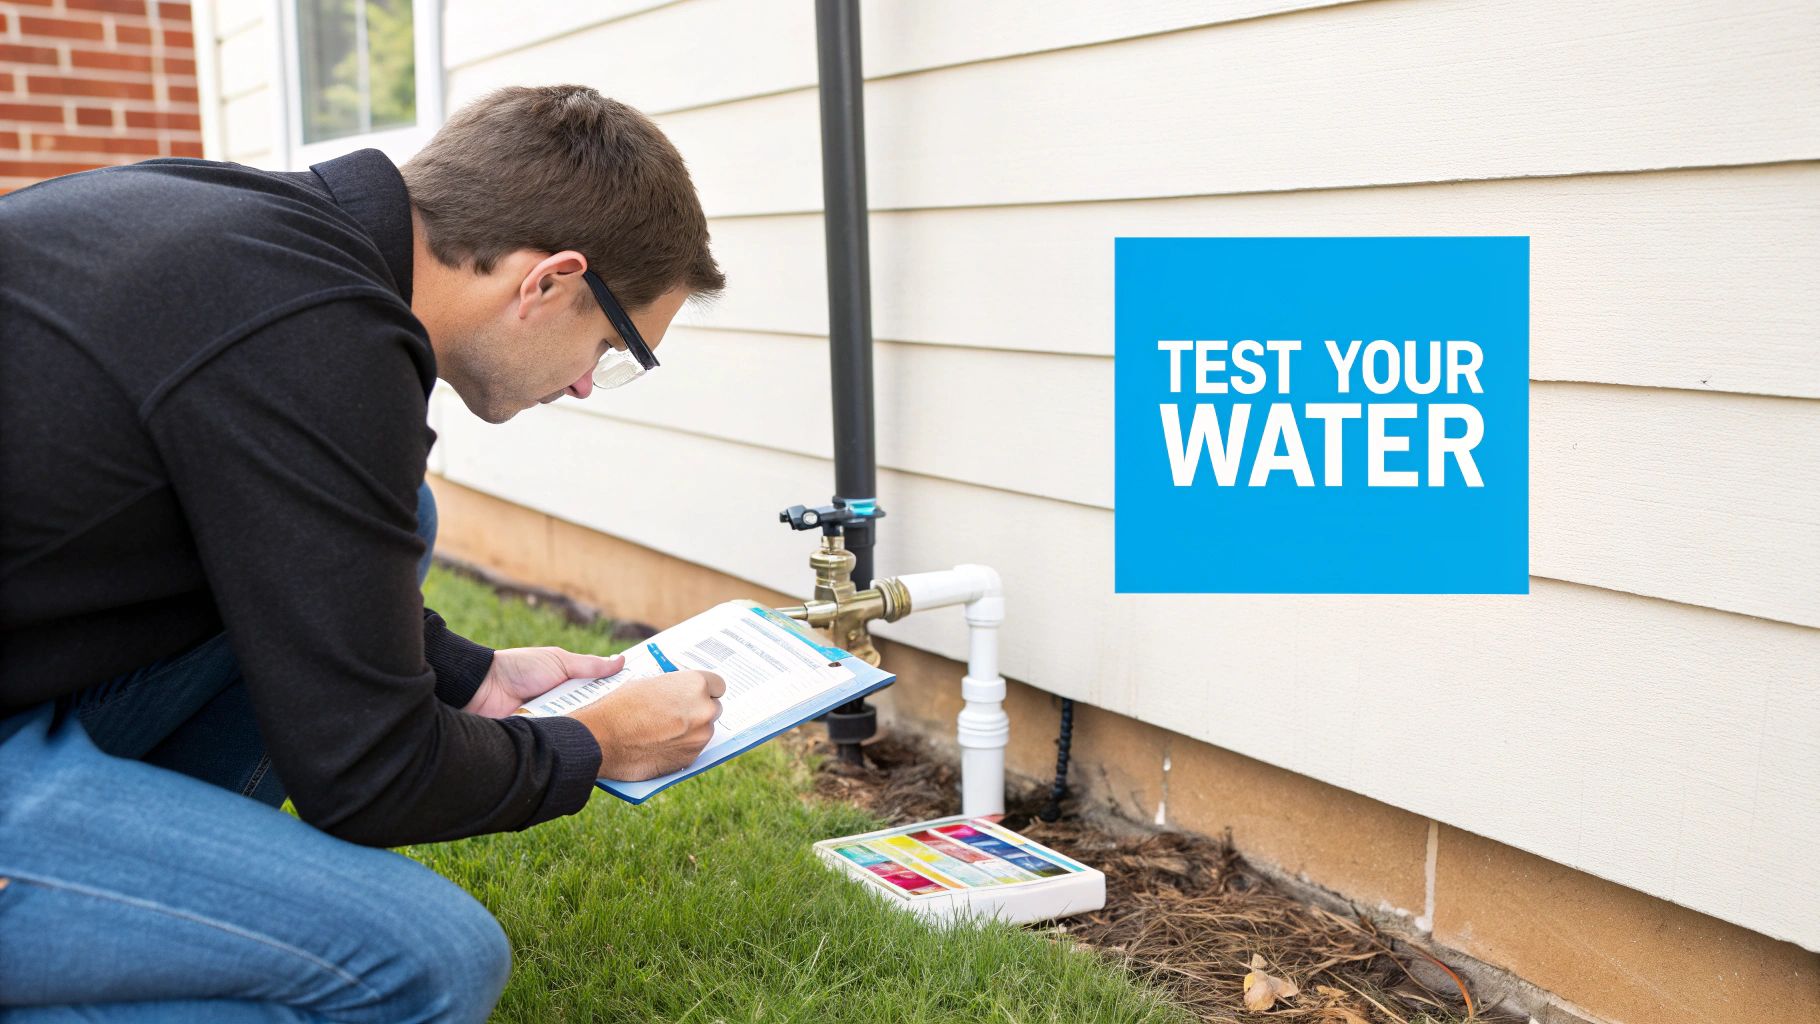
A man kneels outside a home, writing on a clipboard while performing a water quality test.

Jumping into the installation without a little forethought is like trying to bake a cake by just throwing ingredients in a bowl. It’s a recipe for chaos. Trust me, spending an hour or two on planning will save you a world of frustration and maybe even a call to an emergency plumber. This is what separates a pro-level setup from a weekend project gone sideways.

It's no surprise that more people are seeking water that doesn't taste like a swimming pool. The global home water filtration market is expected to hit a staggering USD 37.54 billion by 2034, and whole-house systems are a massive part of that wave. In fact, interest in these systems is set to grow by 61.56% by 2026, mostly because we're all tired of that chlorine funk coming from every tap. You can learn more about these market trends to see just how big this movement for better water has become.

First Things First: Play Detective with Your Water

Before you can fix your water, you have to know what you're fighting. Is it "hard," leaving that chalky film on your shower door? Does it have that faint swimming pool smell or, worse, smell like rotten eggs? Maybe you’re seeing those lovely rust-colored stains in your sinks and toilets.

A good water test is non-negotiable. You can grab a simple DIY kit from the hardware store for a quick snapshot, but for the real story, I recommend sending a sample to a certified lab. They'll give you a detailed report on contaminants like:

  • Chlorine and Chloramine: The stuff cities use to disinfect water that makes your morning coffee taste "off."
  • Sediment and Silt: Gritty particles that make water cloudy and can slowly destroy your appliances from the inside.
  • Hard Minerals: Calcium and magnesium, the tag-team duo behind stubborn limescale buildup.
  • Iron and Manganese: Metals that leave ugly orange and black stains and give water a metallic tang.
  • Lead and VOCs: The more serious troublemakers you definitely want to know about.

Once you know exactly what’s lurking in your H2O, you can choose a filter that’s specifically designed to kick those contaminants to the curb.

Find the Perfect Home for Your Filter

Location, location, location! The best spot for your system is almost always right where the main water line enters your house. Think basement, garage, or a utility closet. Placing it here ensures every single drop of water, both hot and cold, gets purified before it travels anywhere else in your home.

When you’re scouting for a location, keep these things in mind:

  • Accessibility: You're going to need to get to this thing to change filters. Don't shove it into a creepy corner you can barely reach. Think about future-you.
  • Protection: Make sure it's in a place that won't freeze. A frozen filter housing will crack, and you’ll have an indoor water park you never asked for.
  • Drain Access: If you choose a system that backwashes (like a water softener or some large carbon filters), it needs a place to send its wastewater.
  • Power Source: Many modern systems have electronic control heads or UV lights that need to be plugged into a standard outlet.

Don't Choke Your Water Flow: Size Your System Correctly

One of the most common DIY mistakes is buying a system that's too small for the home. The result? A frustrating drop in water pressure every time you try to do two things at once, turning your powerful shower into a pathetic dribble.

To get this right, you need to match the system to your home's peak water demand, which is measured in gallons per minute (GPM).

Think about a chaotic morning in your house—the shower's running, the dishwasher is on, and someone's washing their hands. You need a filter that can handle all of that without breaking a sweat. A plumber can do a proper flow rate test, but you can also get a good estimate based on your home’s size and the number of bathrooms. For more in-depth guidance on choosing the right system, you might find valuable advice on specialized water filtration platforms like https://www.waterfilteradvisor.com.

Of course, clean water is just one piece of the healthy home puzzle. Many homeowners who upgrade their water also look into things like whole-home air purifiers to improve their environment from top to bottom.

Assembling Your Tools and Materials Like a Pro

Nothing kills the momentum of a weekend project faster than an unexpected, last-minute trip to the hardware store for that one tiny fitting you forgot. Trust me, we've all been there. A successful whole home water filtration system installation hinges on having every single tool and part ready before you make that first cut.

Think of it like a TV chef preparing their ingredients—what they call mise en place. Everything is in its place, prepped and waiting. Taking the time to get organized turns a potentially chaotic job into a smooth, professional-feeling process.

Before you even think about shutting off the water, lay everything out on a tarp or drop cloth near your work area. This simple step keeps tiny fittings from rolling into oblivion and protects your floors. It's also your final chance to eyeball everything and make sure you have it all, from the big wrenches down to the last screw.

Your Essential Water Filter Installation Toolkit

To make sure you're not that person making a frantic mid-project hardware store run, I've put together a checklist. This covers just about everything you could need for a standard installation.

Tool or Material Category Essential Items Pro Tip for Selection
Cutting & Measuring Pipe cutter (specific to your pipe type), measuring tape, permanent marker. For copper, a simple tubing cutter is best. For PEX or PVC, a ratchet-style cutter prevents burrs and ensures a clean, square cut.
Wrenches & Fasteners Two pipe wrenches (or one pipe, one adjustable), drill with assorted bits, screwdriver set. Always use two wrenches working in opposite directions on fittings. This stops you from stressing and damaging old pipes.
Safety Gear Safety glasses, work gloves. Non-negotiable. Debris in your eye or a sharp metal burr on your hand will end your project and your good mood instantly.
Sealing & Cleanup Thread seal tape (Teflon tape), a bucket, several old towels or rags. Wrap Teflon tape clockwise on male threads. If you go counter-clockwise, it will unravel as you tighten the fitting.
Piping Specifics Solder & flux (copper), crimp rings & tool (PEX), or primer & cement (PVC/CPVC). Push-to-connect fittings can be a universal alternative. Double-check that your primer/cement is rated for the type of plastic pipe (PVC vs. CPVC) you have. They are not interchangeable.

Having these items on hand before you start is the difference between a frustrating afternoon and a job you can be proud of.

The Right Stuff for a Watertight Seal

The tools get the job done, but the materials are what guarantee every connection stays secure and leak-free for years. This is where you buy your peace of mind.

A leak isn't just a drip; it's a potential disaster waiting to happen. Using the correct fittings and sealant for your pipe type is the single most important step in preventing water damage down the road.

Your shopping list for materials will depend entirely on what kind of plumbing you have. Let's break down the most common setups.

Working with Your Pipe Type

  • For Copper Pipes: You'll be soldering. This means you need solder, flux, a propane torch, and the right copper fittings. Don't forget a small piece of emery cloth or a wire brush to clean the pipe ends—flux won't stick to a dirty surface.

  • For PEX Tubing: Your main options are crimp or clamp rings, which require a special tool. Alternatively, push-to-connect fittings (like SharkBite) are a fantastic, solder-free option that's incredibly DIY-friendly.

  • For PVC/CPVC Pipes: This is a solvent-weld job. You'll need primer (usually purple) and cement specifically designed for your pipe material. The primer cleans the plastic and prepares it for a permanent chemical bond with the cement.

One universal item is thread seal tape. You'll wrap this 3 to 5 times around any male pipe threads to create a perfect, watertight seal.

And for a final bit of real-world advice: have a drill ready. You’ll need it to mount the filter housing securely to a wall or joist. If you’re working in a basement, knowing about selecting the right drill bit for concrete is crucial for anchoring into those tough foundation walls.

Installing Your Water Filtration System: The Main Event

Alright, you’ve done the prep work, your tools are laid out, and now it’s time to bring on the main event. All that planning is about to pay off as we get hands-on with the whole home water filtration system installation. Let's walk through this together, step by step, so you can feel like a plumbing rockstar.

The very first thing you need to do is arguably the most important. To keep this project from turning into an indoor swimming pool, you have to shut off the water supply to the entire house.

Safety First: Shutting Down Your Water Supply

First, find your main water shutoff valve. It's usually hiding in a basement, crawl space, or sometimes in an exterior utility box near your water meter. Give the handle a full clockwise turn until it stops. If it's a lever-style ball valve, you need to turn it 90 degrees until it’s perpendicular to the pipe.

With the main shutoff closed, you still need to get the water out of the pipes. Go open the lowest faucet in your house—think basement sink or outdoor spigot—and then the highest one, like a second-floor bathroom. This little trick uses gravity to drain the lines so you don't get a face full of water when you make that first cut.

Pro Tip: Even after draining, there’s always some water left in the pipes. I always stick a bucket right under where I'm about to cut and have a few old towels ready. It’s the best way to keep your workspace from turning into a swamp.

Measuring and Cutting Your Main Water Line

You’ve heard it a thousand times, but "measure twice, cut once" is the gospel of plumbing for a reason. Hold your fully assembled filter unit up to the section of pipe you’ve chosen. Don't just measure for the filter housing; make sure you account for all the fittings and, crucially, the bypass valve.

Grab a permanent marker and mark your cut lines clearly on the pipe. A crooked cut is a recipe for a bad seal and a frustrating, slow leak down the road.

When you’re ready, grab the right cutter for your pipes:

  • For copper pipe: A tubing cutter clamps on, and you just rotate it around the pipe, tightening the knob with each turn until it pops right through.
  • For PEX or PVC/CPVC: A ratchet-style plastic pipe cutter will give you a clean, straight cut with a few squeezes.

Once the pipe is cut, take a minute to clean up the edges. A simple deburring tool or even a small piece of sandpaper will smooth out any burrs. This is a critical step—any little plastic or metal bits can tear the O-rings inside your new fittings and cause a leak you'll be chasing for weeks.

Assembling the Filter and Bypass Valve

Before you even think about fitting this into your main line, it’s much easier to assemble the filter head, housing, and the bypass valve on a workbench. That bypass valve is a non-negotiable part of the setup. It’s a three-valve system that lets you route water around the filter, which is a total game-changer when it’s time for maintenance. No more shutting off water to the whole house just to swap a filter.

Pay close attention to the manufacturer's directions here, especially the flow-direction arrows on the filter head. For every threaded connection, use thread seal tape. Wrap it clockwise 3-5 times around the male threads; this ensures the tape tightens as you screw in the fitting instead of unraveling.

Making Your Final Connections

Now it’s time to marry the filter assembly to the main water line you just prepped. How you do this depends entirely on the type of plumbing you have.
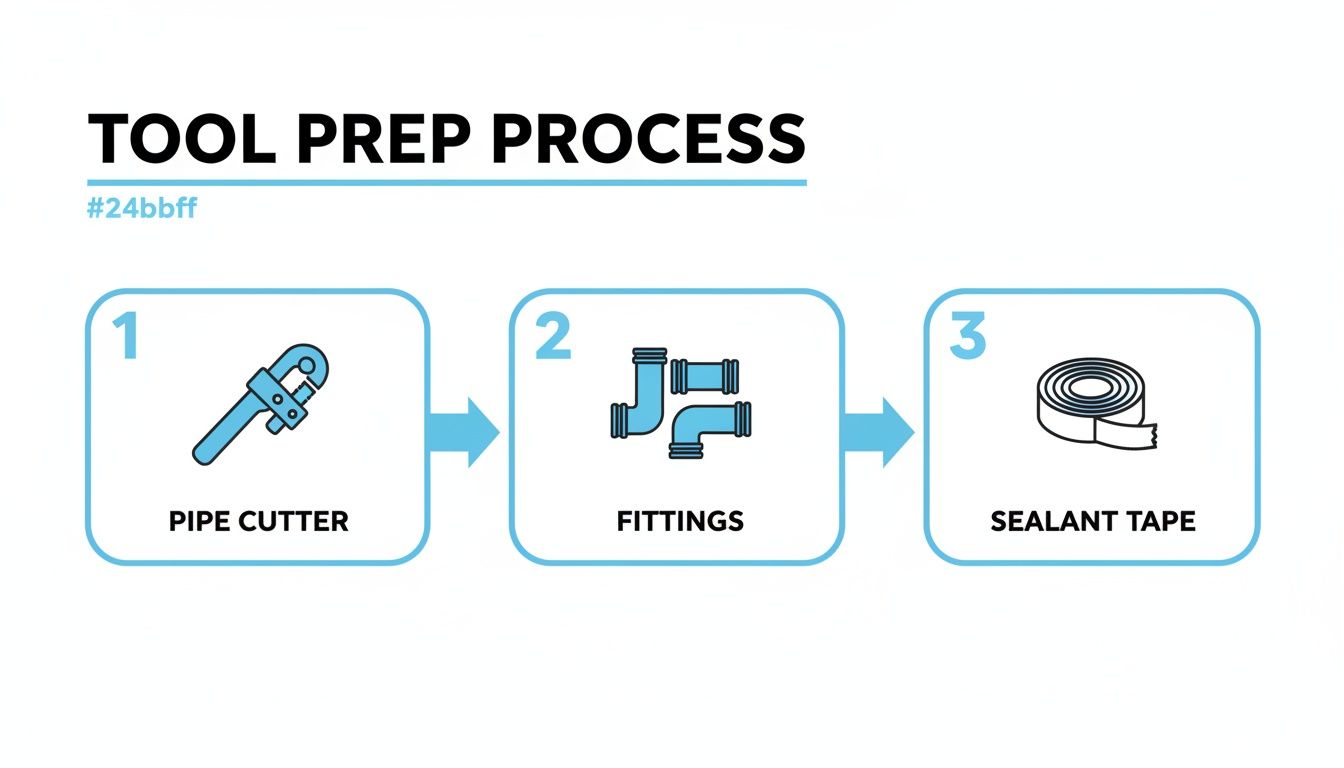
A diagram illustrating three steps for tool preparation: pipe cutter, fittings, and sealant tape.

As you can see, it comes down to three things: a clean cut, the right fitting, and a proper seal.

These are the most common ways to make the connection:

  • Push-to-Connect Fittings (e.g., SharkBite): These are a DIYer's dream. You just push the fitting onto a clean, deburred pipe until you feel it "click." They work on copper, PEX, and CPVC.
  • PEX Crimp/Clamp Rings: If you have PEX, you'll slide a metal ring over the tubing, insert a barbed fitting, and use a special tool to secure the ring tightly over the barb. It creates a rock-solid connection.
  • Copper Soldering: This is a more advanced skill. It involves cleaning and fluxing the pipe and fitting, heating the joint with a torch, and letting solder flow into the gap to create a permanent bond.
  • PVC/CPVC Solvent Weld: For plastic pipes, you'll apply primer, then a coat of cement. Push the pipe into the fitting with a quarter-turn twist and hold it firmly for about 30 seconds while the chemicals literally weld the two pieces together.

With your connections made, the last step is to securely mount the filter bracket to a wall stud or another solid surface. A filter full of water is surprisingly heavy, and you don't want that weight hanging directly on your pipes.

Bringing Your New System To Life: The Moment of Truth
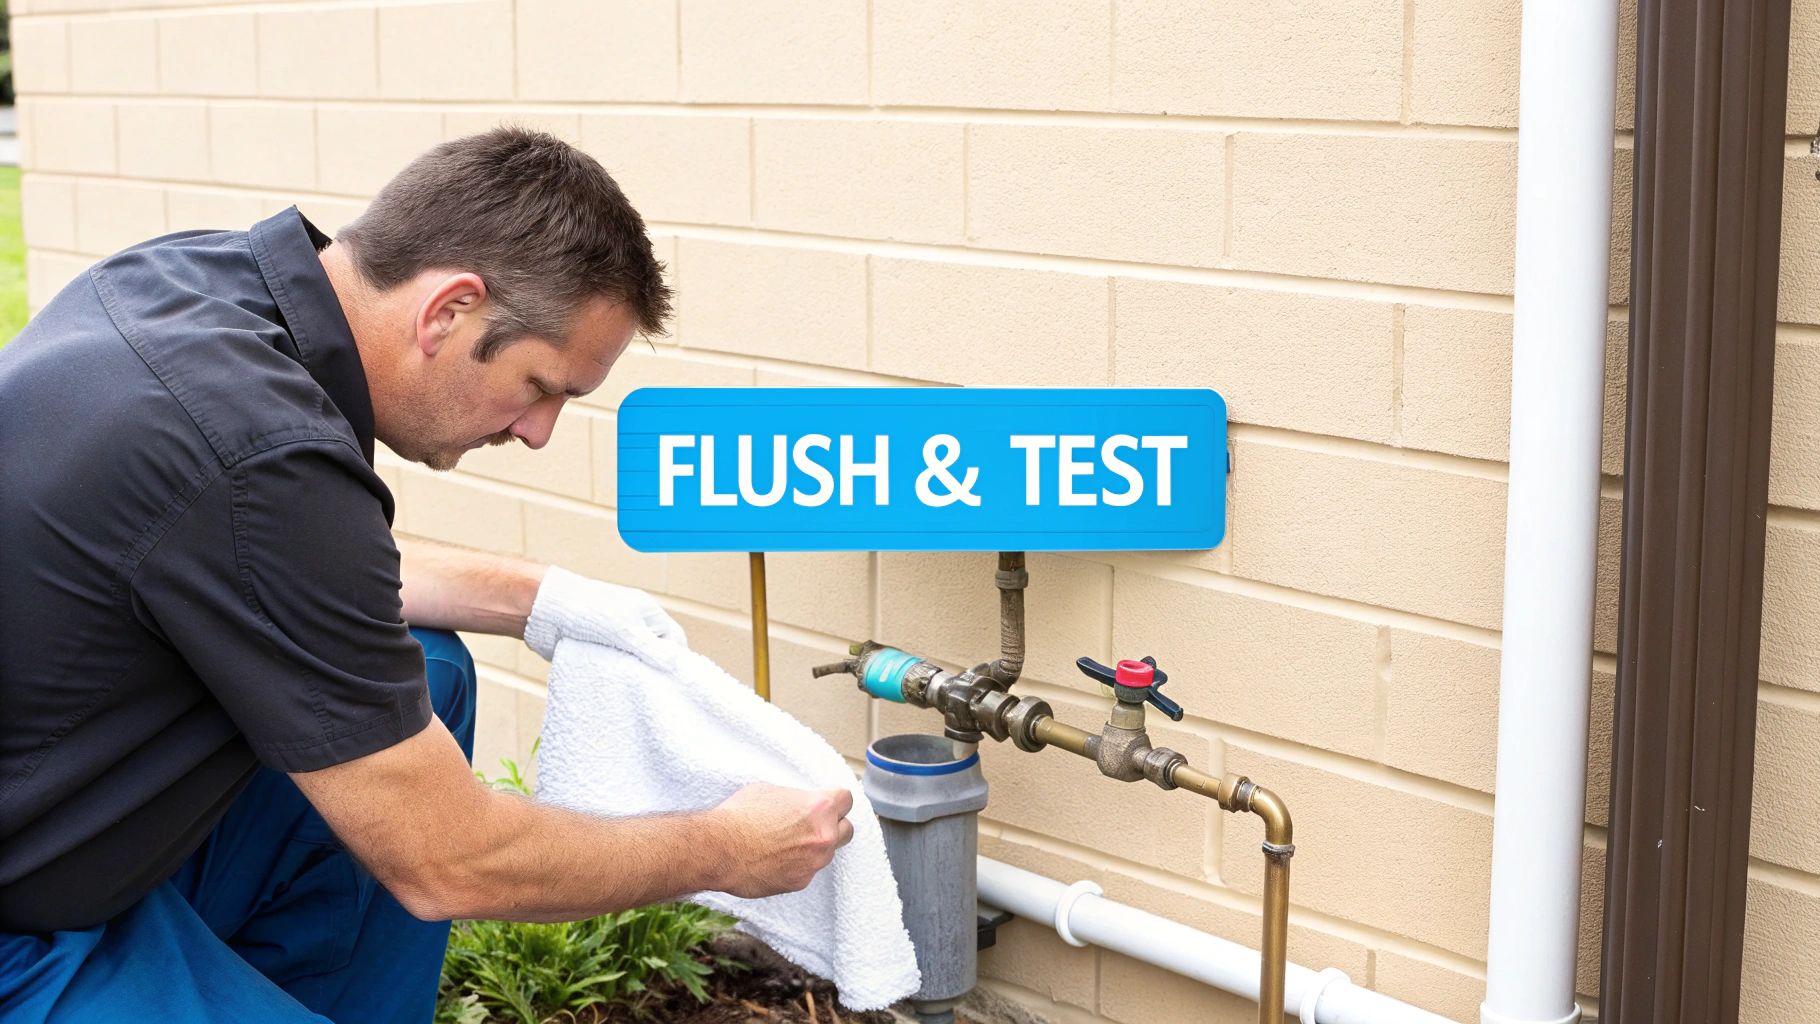
A man in a blue shirt inspecting an outdoor water filtration system on a house wall.

You’ve tightened every fitting and secured the last bracket. Now comes the moment of truth. This is the commissioning process, where patience pays off big time. Jumping in too fast here can lead to leaks, sputtering faucets, and water that still tastes off.

This stage is the real test of your whole home water filtration system installation. Rushing it now puts all that careful work at risk.

The Slow And Steady Water Turn-On

First, leave the bypass valve open and close both the inlet and outlet valves on the filter. Then head to your main shutoff valve and crack it open—just a quarter turn is enough. Listen for a soft hiss as the pipes begin to fill.

After that gentle hiss fades, open the valve fully. Grab a flashlight and go inspect every connection you made. Even a tiny droplet on a new joint means you need to tighten it again before moving forward.

Purging Air And Hunting For Leaks

Next, shut off the bypass valve. Very slowly open the inlet valve feeding the filter and listen as water floods the housing. This is the most pressure-sensitive moment; any weak seal might start leaking now.

The most common leak appears the second the system pressurizes. Watch every connection like a hawk—if you spot a drip, close the inlet, release the pressure, and fix it immediately.

Once the inlet is fully open, repeat the process with the outlet valve. Your system is now under full pressure.

Finally, get the air out. Turn on a nearby cold-water tap (a laundry sink is perfect for this) and let it sputter and spit until you see a smooth, steady stream.

Initiating The First Flush

If your system supports backwashing, now's the time to trigger the cycle from the control head. Expect it to run for 10 to 30 minutes as it washes out fine particles and factory dust.

For simpler cartridge-style setups, you just need to do a straight flush.

  • How to Flush: Simply run cold water from a high-flow tap, like a bathtub, for at least 15-20 minutes.
  • What to Look For: Initially, the water may look cloudy or discolored from fine carbon dust ("fines"). This is completely normal and expected.
  • When It's Ready: Keep flushing until the water runs perfectly clear.

Once you see that crystal-clear stream, pour yourself a glass. With air purged, leaks resolved, and the filter media flushed, your whole home water filtration system is officially open for business.

Maintaining Your System for Long-Term Awesome Water

Alright, your whole home water filtration system installation is done. You're already enjoying that clean, crisp water flowing from every faucet. But to keep things running like a dream, a little routine care is in order. Think of it as protecting your investment, not another chore.

A good maintenance schedule is your ticket to consistently great water. Let it slide, and you're looking at clogged filters, a noticeable drop in water pressure, and the return of the very contaminants you worked so hard to get rid of.

Why You Can’t Just "Set It and Forget It"

The filter media is the heart of your system. Whether it’s a simple sediment cartridge or a massive tank of carbon, it has a limited lifespan. Once it’s saturated with all the gunk it has pulled from your water, it’s done. Using an exhausted filter is like trying to dry dishes with a soaking wet towel—it just doesn’t work.

That’s why sticking to a replacement schedule is the single most important thing you can do.

  • Sediment Pre-filters: These are the bouncers at the club door, catching all the dirt and rust. They usually need swapping out every 3 to 6 months. If you notice your water pressure taking a nosedive, a clogged pre-filter is almost always the culprit.
  • Carbon Filters: The big carbon tank is the heavy lifter, tackling chlorine, funky tastes, and chemicals. The media inside can last a surprisingly long time—anywhere from 3 to 10 years, depending on the quality of the carbon and how much water your family uses.
  • Specialty Cartridges: If you have extra stages for things like bacteria (a UV bulb) or heavy metals (KDF), they have their own schedules. A UV lamp, for instance, needs to be replaced every year. Even if it’s still lit, its sterilizing power fades over time.

Creating Your Simple Maintenance Schedule

You don't need a complicated spreadsheet for this. Just pop a few reminders in your phone's calendar or scribble the dates on a sticky note and slap it right on the filter housing. This little habit will save you a ton of headaches.

Your water filtration system is the guardian of your home's water supply. A little routine maintenance is all it asks for in return to keep doing its job effectively day in and day out.

To make it even easier, here’s what a typical maintenance plan might look like.

A Simple Maintenance Schedule for Whole Home Filters

This schedule gives you a ballpark idea. Your manufacturer's guide will have the exact details, but this is a great starting point.

System Type Maintenance Task Recommended Frequency Time Commitment
Cartridge-Based System Replace sediment pre-filter. Every 3-6 months 15-20 minutes
Carbon Tank System Replace carbon filter cartridge. Every 6-12 months 20-30 minutes
Water Softener Check and refill salt reservoir. Monthly 5-10 minutes
UV Purifier Replace UV lamp and clean quartz sleeve. Annually 30-45 minutes
All Systems Conduct a post-installation water test. Annually 10 minutes (to collect a sample)

A little bit of planning goes a long way in keeping your water pure and your system humming.

Beyond the Basics: Sanitizing and Testing

Here’s a pro tip: when you change a cartridge filter, take an extra ten minutes to sanitize the housing. A few capfuls of unscented household bleach mixed into a gallon of water is all you need. Give the inside a good scrub to keep any nasty bacteria from setting up shop.

It's also a smart move to test your water again about a year after the installation. This confirms the system is still working as it should and alerts you if any new contaminants have snuck into your water supply.

Staying on top of this is more important than ever. The home water treatment market is projected to hit an incredible USD 91.39 billion by 2034, driven by homeowners who are more aware of water quality issues. You can learn more about these market trends and see how consumer awareness is shaping the industry. A little upkeep ensures your system remains a top-tier solution.

Got Questions About Your Filter Install? We've Got Answers.

Even with the best guide in hand, tackling a whole home water filtration system installation for the first time can leave you with a few nagging questions. That's completely normal. This is a big upgrade for your home, so let's clear up some of the common uncertainties we hear from homeowners.

Think of this as the final pep talk. Getting this right isn't just a plumbing project; it's an investment in your family's health and the longevity of all the water-using appliances in your house.

How Much Does It Cost to Have a Pro Install It?

If you're thinking of calling a licensed plumber instead of going the DIY route, you can expect the cost to land somewhere between $300 and $1,500.

Why such a big range? It really boils down to the complexity of the job. If you have easy-to-access PEX or PVC pipes and you're installing a basic cartridge system, you'll be on the lower end. But if it's an involved multi-tank system that requires sweating new copper pipes and running a drain line, the price will naturally creep up.

My best advice? Always get at least three itemized quotes from reputable, licensed plumbers. It's the only way to know you're getting a fair price.

Can I Really Install a Whole House Water Filter Myself?

Absolutely. If you have some basic plumbing skills under your belt and the right tools, installing a whole house water filter is a totally doable weekend project. Honestly, systems with modern push-to-connect fittings have made the job easier than ever.

But you have to be honest with yourself. If the thought of taking a pipe cutter to your home's main water line gives you cold sweats, or if you've never soldered a copper joint, hiring a pro is the smart move. A small mistake can turn into a hidden leak or a full-blown flood—and the cost of that water damage will make a plumber's invoice look like a bargain.

Will a Whole House Filter Kill My Water Pressure?

This is probably the number one concern we hear. The short answer is yes, it will reduce it slightly, but it shouldn't be a deal-breaker. A correctly sized system will typically only cause a minor drop of about 5 to 15 PSI. Most people barely even notice it.

The secret to keeping your pressure strong is all in the sizing. You have to make sure your system's flow rate—measured in gallons per minute (GPM)—can keep up with your family's water usage at its peak.

To keep that pressure drop to a minimum, here's what to do:

  • Go for a High Flow Rate: Pick a system with a GPM rating that meets or beats your home's demand. A house with 3-4 bathrooms, for example, really needs a filter rated for 12-15 GPM.
  • Choose Bigger Ports: Look for filters with 1-inch inlet and outlet ports instead of the smaller ¾-inch ones. Bigger pipes mean better flow.
  • Consider a Booster Pump: If your water pressure is already on the low side to begin with, you can install a water pressure booster pump right alongside the filter to solve the issue for good.

Where’s the Best Place to Install My Filter System?

Location is everything. The sweet spot is on your main water line, right after it enters your house but before it splits off to your water heater or any other fixtures.

Most people find these spots work best:

  • Basements
  • Garages
  • Utility closets

The perfect location isn't just about space. It needs to be easy to get to, so you aren't doing plumbing gymnastics in a crawlspace. It also has to be a spot that's protected from freezing temperatures—a frozen filter housing will crack, and you'll have a major mess on your hands. And don't forget, if your system needs power or has a backwashing feature, you'll need an electrical outlet and a drain nearby.


At Water Filter Advisor, our mission is simple: give you the knowledge you need to get cleaner, safer water in your home. From picking the perfect system to walking you through the install, we're here to help you make smart choices for your family. Check out all our in-depth guides and reviews at https://www.waterfilteradvisor.com.
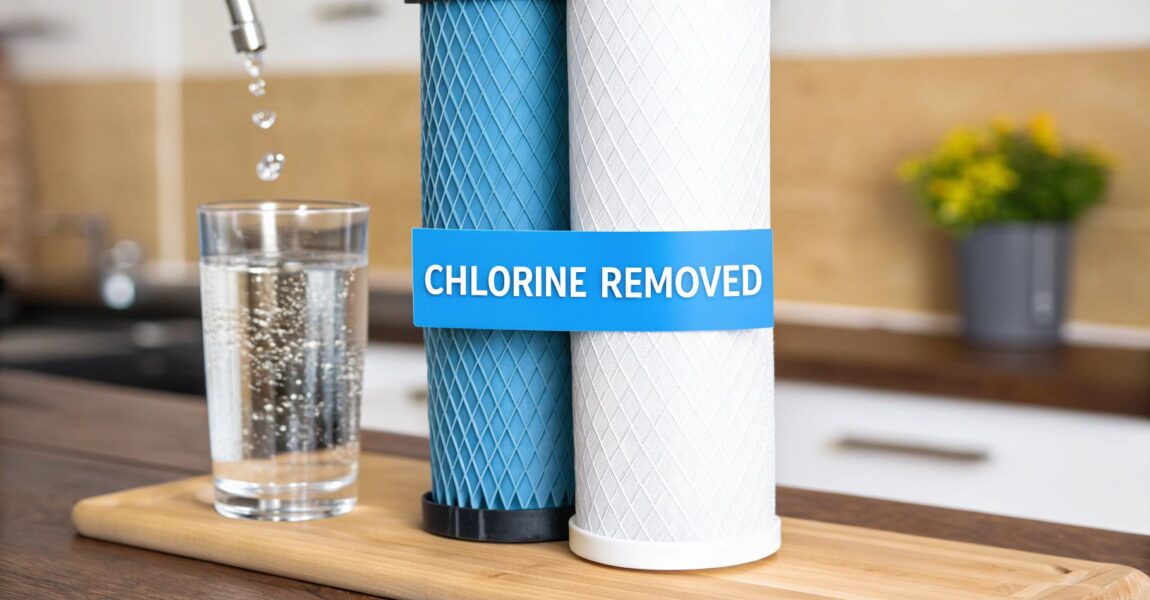
Does Reverse Osmosis Remove Chlorine From Your Water?

Yes, a reverse osmosis (RO) system is a powerhouse when it comes to getting chlorine out of your water. But here’s the twist: the famous RO membrane, the star of the show, isn't the component doing the chlorine-busting work.

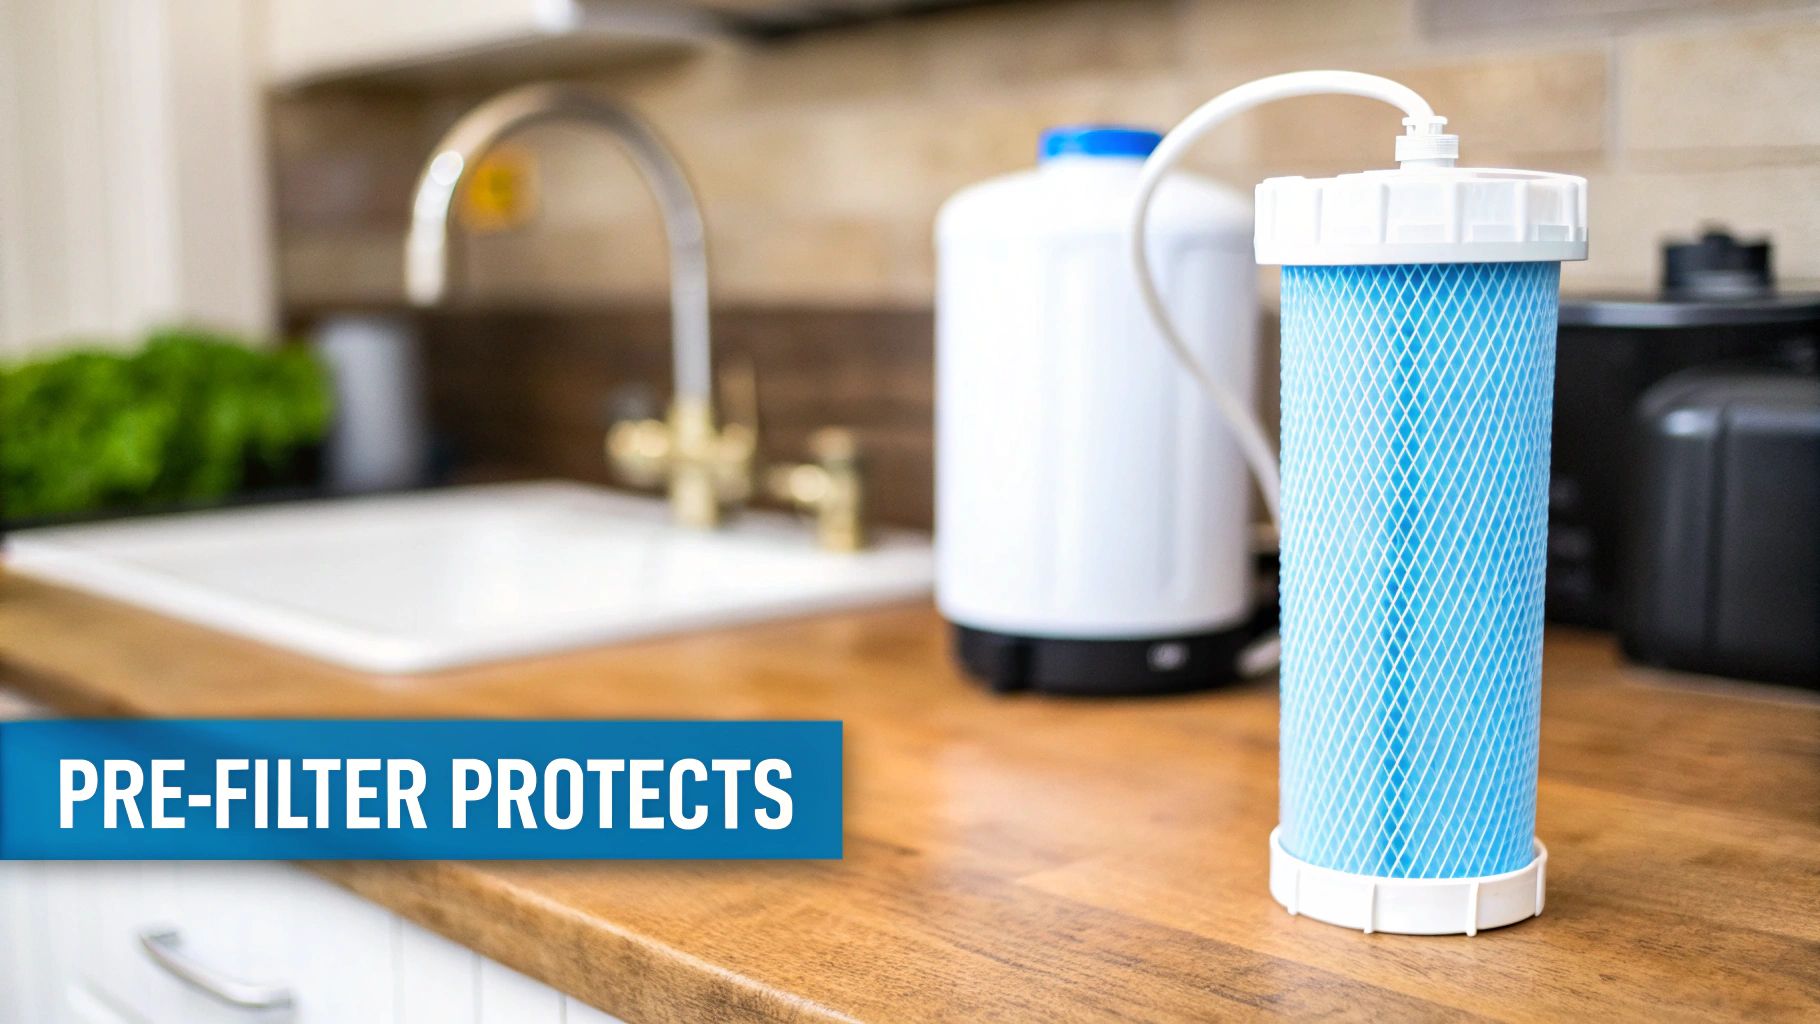
The real MVP is an unsung hero—the activated carbon pre-filter that comes with every complete RO system. It’s the bouncer at the club door, handling all the chlorine before the water gets anywhere near the delicate, high-tech membrane.

Why the Pre-Filter is the Real Star of the Show

A blue pre-filter for water purification stands on a wooden kitchen counter next to a sink.

The water flowing from your kitchen tap has been treated with chlorine to kill off nasty bacteria and viruses—a standard public health practice that keeps us safe. While this is great for getting water safely to your home, it leaves behind that distinct "swimming pool" taste and smell.

Even worse, that same chlorine is public enemy number one for the heart of your RO system.

A proper home RO setup is a multi-stage affair, and it's designed this way for a very good reason. Think of the carbon pre-filter as a bodyguard for the RO membrane, neutralizing threats before they can cause any damage.

The Critical Role of Carbon Prefiltration

That first filter your tap water hits is typically an activated carbon block. Imagine it's a super-sponge with a massive, porous surface area that acts like a powerful magnet for chlorine. Through a process called adsorption, it grabs onto and neutralizes the chlorine molecules, stopping them in their tracks.

This isn't just a bonus feature; it's essential for the system's longevity. Chlorine is an oxidizer, meaning it would chemically burn and shred the thin-film composite RO membrane over time, completely ruining it.

A reverse osmosis system without a functioning carbon pre-filter is a system on a fast track to failure. Protecting the membrane is the single most important job of the pre-filtration stage.

So, while the RO system as a whole gets rid of chlorine, the credit really belongs to its hardworking carbon pre-filter.

You can count on this process being incredibly effective. Most residential RO systems with a standard carbon pre-filter will remove over 95% of chlorine. High-end systems can push that number up to an impressive 99–99.5%.

Considering that city water is usually treated with 0.2–1.0 mg/L of chlorine, this pre-filter step is more than enough to protect your system and give you fantastic-tasting water. You can learn more about the specifics of chlorine filtration from Island Well Service.

Chlorine Removal At A Glance: RO vs. Other Filters

It helps to see how a complete RO system stacks up against other common water filters when it comes to chlorine. While many methods work, they achieve it in different ways.

Filtration Method Typical Chlorine Removal Rate Key Mechanism
Reverse Osmosis System 95% to 99%+ Adsorption via carbon pre-filter
Activated Carbon Filter 95% to 98% Adsorption
KDF Filter 95% to 99% Redox (chemical reaction)
Catalytic Carbon Filter 98% to 99%+ Enhanced adsorption

As you can see, the carbon pre-filter in an RO system puts its performance right up there with dedicated chlorine filters. The main difference is that the RO system goes on to remove hundreds of other contaminants, too.

Understanding Why Chlorine Is The Membrane's Worst Enemy

To really get why reverse osmosis systems are built the way they are, you have to look at the relationship between chlorine and the RO membrane. It’s not just a minor tiff; it’s a full-on chemical assault that can wreck your entire filtration system. Without a pre-filter standing guard, the heart of your system gets destroyed in a shockingly short time.

Modern RO membranes are typically made from a material called Thin Film Composite (TFC). It's an incredible piece of engineering—a multi-layered polymer sheet rolled up like a scroll. It’s designed with microscopic pores, about 0.0001 microns wide, that are just big enough for water molecules to pass through while blocking almost everything else.

The Science Of Membrane Damage

This high-tech material is fantastic at its job, but it has one major kryptonite: it's extremely vulnerable to oxidation. Chlorine, the same chemical your city uses to disinfect the water supply, is a powerful oxidizing agent. When chlorinated water hits a TFC membrane directly, the chlorine literally attacks and burns the delicate polymer surface.

Think of it this way: your RO membrane is like a finely woven, high-tech piece of silk. Pouring chlorinated water onto it is like dumping bleach straight onto that fabric. The silk doesn’t just get a stain; its very fibers start to dissolve, weaken, and tear apart on a microscopic level.

This oxidative damage rips tiny tears and stretches the existing pores in the membrane. These new, bigger holes become a superhighway for all the contaminants the membrane was supposed to block in the first place.

Once a membrane is damaged by chlorine, it cannot be repaired. The damage is permanent and irreversible, allowing contaminants like heavy metals, salts, and dissolved solids to pass straight through into your drinking water.

The Consequences Of Chlorine Exposure

A membrane that's been hit by chlorine doesn't just work poorly—it fails spectacularly. Here’s what happens when that critical barrier is broken:

  • Contaminant Breakthrough: The system completely loses its ability to remove dissolved solids. Your water quality tanks as contaminants that were once blocked start pouring right out of your tap.
  • Reduced System Efficiency: A damaged membrane can't maintain the pressure needed for reverse osmosis to work. This leads to way more wastewater going down the drain and less purified water for you.
  • Costly Replacements: The RO membrane is the most complex and expensive part of the whole system. Letting chlorine get to it means you're looking at a big replacement bill much sooner than you ever should.

Ultimately, letting chlorine reach the RO membrane defeats the whole purpose of owning the system. You’re not just risking slightly less pure water; you're actively destroying its most important component, turning a powerful purification machine into little more than a leaky filter. This is precisely why the carbon pre-filter isn't just a nice-to-have—it's absolutely essential for protecting your investment.

Meet The Unsung Hero: The Carbon Pre-Filter

We’ve seen how chlorine can absolutely wreck a reverse osmosis membrane, but how do RO systems prevent this catastrophe? It’s all thanks to an often-overlooked component that does the heavy lifting.

While the RO membrane gets all the credit for its precision filtering, the real star of the chlorine removal show is the activated carbon pre-filter. Think of it as the system's bodyguard, working tirelessly to neutralize chlorine before it ever gets a chance to cause damage.

This little powerhouse works through a fascinating process called adsorption. This isn't the same as absorption, where a sponge soaks up water. Adsorption is all about molecules sticking to a surface.

Picture the activated carbon inside the filter as a massive, porous coral reef with an unbelievable amount of surface area. In fact, just one gram of activated carbon can have a surface area as large as a football field. As chlorinated water rushes through, the chlorine molecules are drawn to this huge surface and get trapped in all its nooks and crannies, sticking like tiny magnets.

Why Adsorption is a Game-Changer

This process is incredibly good at its job. The carbon pre-filter essentially sacrifices itself by adsorbing the vast majority of chlorine, keeping the delicate and expensive RO membrane safe and sound downstream. Without this critical first step, the entire system would be doomed to fail.

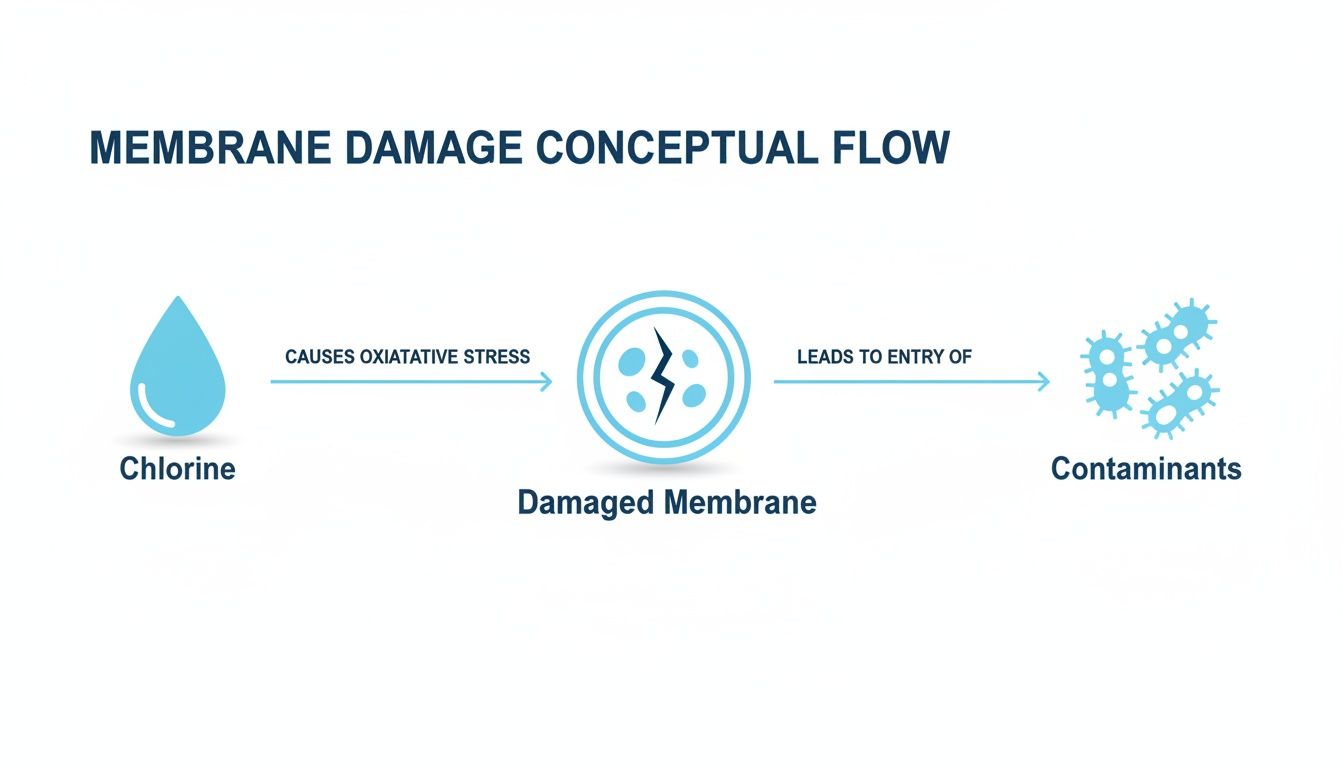
The diagram below shows exactly what happens when chlorine gets past this protective shield and reaches the membrane.

Flow diagram illustrating how chlorine causes oxidative stress, leading to membrane damage and contaminant entry.

It’s a simple but critical chain of events: a worn-out pre-filter leads directly to a damaged membrane, which ultimately lets contaminants sneak into your drinking water.

Two Key Types of Carbon Pre-Filters

When you’re shopping for a home RO system, you'll mainly run into two kinds of carbon pre-filters. Knowing the difference between them is key to understanding how well a system will protect itself from chlorine.

If you ever need help comparing systems or figuring out what’s best for your home, our experts at Water Filter Advisor have put together a ton of helpful water filtration advice to guide you.

Carbon Pre-Filter Showdown: GAC vs. Carbon Block

To really understand the difference, let's break down the two main players you'll find in home RO systems: Granular Activated Carbon (GAC) and Carbon Block filters.

Feature Granular Activated Carbon (GAC) Carbon Block
Structure Loose granules of activated carbon, similar to coarse sand or coffee grounds. Powdered carbon that has been compressed into a solid, dense block.
Water Flow Water flows around the loose granules, which can sometimes create channels and bypass some media. Forces water through the entire dense block, ensuring maximum contact time.
Performance Effective, but "channeling" can sometimes lead to slightly less consistent chlorine removal over time. Highly consistent and thorough removal of chlorine and other contaminants due to its uniform structure.
Contaminant Removal Primarily removes chlorine, taste, and odors. Less effective on very fine sediment. Excellent for chlorine, taste, odors, and can also filter out finer sediments and some VOCs.
Typical Lifespan Generally requires more frequent replacement due to potential for channeling. Often has a longer, more predictable service life because the entire media is used evenly.

Ultimately, for the best protection against chlorine, systems that include at least one carbon block pre-filter are the superior choice. Their solid design prevents water from finding an easy way out, ensuring every drop gets treated thoroughly. Knowing this helps you look past the marketing and see how well a system is truly built to last.

What Happens When Your Water Contains Chloramine

Just when you think you've got chlorine figured out, some cities throw a curveball: chloramine. This isn't just a fancy name for the same thing. It's a totally different chemical, made by mixing chlorine with ammonia.

Water suppliers love chloramine because it's tough and stable. It keeps doing its job disinfecting water as it travels through miles of pipes to get to your tap. That's great for public health, but its stubborn nature creates a real headache for most water filters.

Why Standard Carbon Filters Struggle

Your run-of-the-mill activated carbon pre-filter, which is a rockstar at grabbing free chlorine, just can't keep up with chloramine. The chemical bond holding the chlorine and ammonia together is incredibly strong, and simple adsorption just doesn't cut it.

Here’s a good way to think about it: a standard carbon filter is like a magnet for loose chlorine particles floating in the water. But chloramine is like chlorine that's been locked inside a chemical cage with ammonia. Your magnet can't just snatch it out; you need a special key to break the lock first.

If your city uses chloramine and your RO system only has a standard carbon filter, you're rolling the dice with your RO membrane. The pre-filter simply won't remove enough chloramine, letting it slip through and chew away at the membrane just like free chlorine would.

This is a huge deal for homeowners. You can't just buy a system that says "chlorine removal" and assume you're covered for chloramine, too. You need a filter specifically designed to break that bond.

The Solution: Catalytic Carbon

To really go to war with chloramine, you need to upgrade your ammo to catalytic carbon. This isn't just a re-branded filter. It's a special type of activated carbon that's been treated to give its surface a reactive charge.

This "catalytic" surface actively forces a chemical reaction to happen, shattering that stubborn bond between chlorine and ammonia. Once the cage is broken, the filter can easily grab the now-free chlorine and deal with the leftover ammonia.

Catalytic carbon is a complete defense system in one package:

  • It Breaks the Bond: First, it acts like the "key" to unlock the chloramine molecule.
  • It Adsorbs the Chlorine: Then, it works just like a standard carbon filter, pulling the free chlorine out of the water.
  • It Handles the Ammonia: Finally, it helps convert what’s left of the ammonia into harmless compounds that won't mess with your water quality.

For anyone living in an area with chloramine-treated water, picking an RO system with a catalytic carbon pre-filter isn't optional—it's essential. It is the only reliable way to protect your membrane and ensure your drinking water is truly free from these disinfectants. Anything less is like bringing a knife to a gunfight.

Keeping Your System's Chlorine Shield Strong

A man replaces a water filter in an under-sink reverse osmosis system beneath a kitchen counter.

Putting a reverse osmosis system in your home is a huge step toward better water, but its power to block chlorine isn't something you can just set and forget. That carbon pre-filter—your system's personal bodyguard against chlorine—is a consumable part. Think of it like the oil filter in your car; it needs to be changed regularly to keep the whole machine running right and protect the really expensive parts down the line.

Honestly, skipping this one simple task is the number one reason I see RO systems fail way too early. Once that carbon filter’s huge internal surface area gets clogged up with chlorine and everything else it has absorbed, it just stops working. This leaves your very delicate RO membrane totally exposed to the one chemical it was never built to handle.

Your Most Important Maintenance Task

If you do nothing else, the single most critical job for keeping your RO system alive is replacing the pre-filters on schedule. For most homes, this means you'll be swapping out the carbon and sediment filters every 6 to 12 months.

Picture that carbon filter as a sponge with a limited capacity. Once every microscopic pore is full, it physically can't grab another molecule of chlorine. From that moment on, chlorinated water just flows right past it and starts its destructive assault on the RO membrane.

Your maintenance schedule isn't just a friendly suggestion—it's the lifeline that protects your investment. A few dollars spent on new pre-filters can easily save you from a costly membrane replacement and ensure your system keeps delivering pure, chlorine-free water.

Sticking to the schedule is the absolute best way to guarantee your system's chlorine shield stays strong year after year.

How to Know When It's Time for a Change

While following the manufacturer's timeline is your safest bet, you can also use your own senses to tell when a filter is on its last legs. You just need to be on the lookout for a few key signs that chlorine is starting to slip past your system's defenses.

These clues mean your pre-filter is tapped out and needs to be replaced right away:

  • The Return of the Chlorine Smell: The most obvious sign is that faint but unmistakable swimming pool scent coming back to your purified water.
  • A Change in Taste: Your RO water should taste clean and crisp. If it starts to have a slight chemical or "tap water" flavor again, that's a red flag.
  • Visible Sediment: Noticing cloudy water or little particles could mean the sediment pre-filter is also clogged, which puts even more stress on the carbon filter.

If you want to be extra sure, grab some simple and cheap chlorine test strips. Just dip one into a glass of your RO water for a quick visual check. If that strip changes color, you know for a fact chlorine is getting through, and it’s time to change that pre-filter immediately.

How To Choose The Right RO System For Your Home

Now that you understand how a reverse osmosis system protects itself, picking the right one should feel a lot less intimidating. You know the secret: the carbon pre-filter is the unsung hero that takes care of the chlorine. With that piece of the puzzle in place, you can shop with confidence.

Your first move should be to zoom in on the pre-filtration stages of any system you're considering. Don't just glance at it—really look. You want to see models that specifically call out having at least one carbon block pre-filter. While a granular activated carbon (GAC) filter is okay, the tightly packed structure of a carbon block is way better. It forces the water to have more contact time with the carbon, which is key for completely wiping out the chlorine.

Check For The Right Certifications

How do you know if a system really does what it claims? Look for a crucial third-party seal of approval: NSF/ANSI 42. This is the specific industry standard for a filter’s ability to handle "aesthetic" issues like chlorine, funky tastes, and weird smells. When you see this certification, it means an independent lab has tested it and confirmed it actually works.

An NSF/ANSI 42 certification isn't just marketing fluff. It’s your proof that the pre-filters are up to the task of removing chlorine, which in turn protects the delicate RO membrane and gives you great-tasting water.

Address Chloramine If Necessary

Before you pull the trigger on a purchase, do one last bit of homework. Find out if your local water utility uses chloramine instead of just chlorine. This is a common practice. You can usually find this info on their website with a quick search, or just give them a call.

If they do use chloramine, you absolutely must get a system that has a catalytic carbon pre-filter. A standard carbon filter just won’t cut it against chloramine, and your expensive RO membrane will be left exposed to damage. By confirming what’s in your water first, you can match it to the right pre-filter technology and buy a system that’s truly built to last.

Common Questions Answered

Even after getting into the weeds of how reverse osmosis systems deal with chlorine, some specific questions always seem to come up. Let's get you some quick, clear answers to help you make the right call.

Does Reverse Osmosis Get Rid of Chlorine Taste and Odor?

You bet. In fact, killing that "pool water" taste and smell is one of the first things you'll notice. This job falls squarely on the carbon pre-filter. It grabs onto the chlorine compounds that cause the nasty flavor, leaving you with nothing but crisp, clean water.

Can I Add a Carbon Filter to My RO System?

Yes, and it's a super common maintenance step. If your current RO system isn't cutting it or you just want to beef up its chlorine defense, you can easily swap out the pre-filter cartridges. A great move is to upgrade from a standard Granular Activated Carbon (GAC) filter to a more solid carbon block filter for better performance and protection.

Your entire RO system's health really comes down to the pre-filters. Swapping them out on schedule is the single most important thing you can do to protect your investment.

How Long Does a Carbon Pre-Filter Last?

How long a carbon pre-filter lasts really depends on two things: how much chlorine is in your water and how much water your family uses. For most folks, you'll need to replace these filters every 6 to 12 months. A good carbon block filter might last a bit longer than a basic GAC one, but always stick to what the manufacturer says. Waiting too long is an expensive mistake you don't want to make.


Here at Water Filter Advisor, we're all about giving you the straight-up info you need to pick the best filtration setup for your family. Check out our detailed guides and reviews to find the right system for your home at https://www.waterfilteradvisor.com.
Finding Your Perfect Home Water Filtration System: The Ultimate Guide

Let's be real: choosing the best home water filtration system feels a lot like trying to order a coffee in a café with a fifty-item menu. Do you want the pour-over, the cold brew, the reverse-osmosis-double-shot-latte? It's confusing! But relax. Finding the right system isn't about knowing all the jargon; it's about figuring out what you want from your water. For some, it’s a fortress-like whole-house system that guards every tap. For others, it's a specialized under-sink unit that turns kitchen water into liquid gold. The perfect fit is always a blend of power, price, and practicality for your home.

Your Guide to Choosing the Right Water Filter

A person pouring a glass of clean, filtered water from a kitchen faucet into a glass.

Diving into the world of home water filters can make your head spin. You’ll hear terms like "reverse osmosis," "activated carbon," and "point-of-entry," and it’s tempting to just close the tab and grab another bottle of water. But let's cut through the noise. The mission is simple: make the water your family drinks, cooks with, and bathes in as pristine as possible.

This guide is your friendly translator. We're going to give you a clear roadmap to help you pick the system that's genuinely right for you. Think of this not as a chore, but as an upgrade to your home—an investment in your family's health and your own peace of mind.

Why This Decision Matters More Than Ever

Let's face it, we're all a little more obsessed with what's in our water these days, and for good reason. The global market for home water filtration was pegged at around USD 13.98 billion in 2024, and it's projected to rocket to nearly USD 37.54 billion by 2034. That explosive growth isn't just a trend; it's a sign that we're all becoming more aware of waterborne contaminants and demanding safer options right from our own taps. You can read more about the growth of the home water filtration market if you love digging into the data.

We'll break down everything you need to know, from the big-gun systems to the quick-and-easy fixes, so you can match the right filter to your specific water woes.

A Quick Comparison of Popular System Types

Before we get into the nitty-gritty, let's get a bird's-eye view. This table is your cheat sheet to the most common options, showing you at a glance what they do and where they live.

System Type Primary Coverage Best For Typical Installation
Whole-House Every tap and appliance in the home Comprehensive protection against chlorine, sediment, and chemicals Professional installation at the main water line
Under-Sink A single tap, usually the kitchen sink Purifying drinking and cooking water with high precision DIY or professional installation under the sink
Faucet-Mounted A single faucet Renters or those seeking an easy, temporary solution Simple DIY installation directly on the faucet
Countertop Dispensing purified water Small households or individuals wanting a portable option No installation; sits on the counter

Once you see these categories, you can start to figure out which path makes sense for your home, your lifestyle, and your clean-water goals.

Comparing Home Water Filtration System Types

Figuring out the best water filter for your home really comes down to one question: where do you want to treat your water? Think of it like home security. You could install a massive system that guards every window and door, or you could put a single smart camera on the front porch. Both are effective, but they solve very different problems.

Each type of filter has a specific superpower. Your choice will likely depend on whether you own or rent, and if your main quest is simply better-tasting drinking water or protecting your entire home's plumbing from unseen villains. Let's meet the four main contenders.

Whole-House Systems: The All-Encompassing Guardian

A whole-house water filtration system is the big kahuna. Also known as a Point-of-Entry (POE) system, it’s the most comprehensive solution on the market. Installed right where your main water line enters your house, it acts as a bouncer, cleaning every drop of water before it gets inside. That means your kitchen faucet, showers, washing machine, and dishwasher all get the VIP treatment with filtered water.

This is the only setup that truly protects your plumbing and appliances from the crud—like sediment and chlorine—that can cause damage over time. For a homeowner, it’s a game-changer. You’ll get chlorine-free water for showers and baths (hello, softer skin and hair!), and you'll extend the life of your appliances by stopping scale and gunk before they can build up. It’s a long-term investment in your home’s health.

A huge, often overlooked benefit here is protecting your home's entire plumbing network. By catching sediment and chlorine at the source, a whole-house system stops the slow, steady corrosion and clogging that can lead to some seriously expensive repair bills down the road.

Under-Sink Systems: The Drinking Water Specialist

While a whole-house system is great for broad-spectrum defense, an under-sink water filter is a specialist, a sniper rifle aimed squarely at the water you drink and cook with. Tucked away in the cabinet under your kitchen sink, these systems use advanced technologies like reverse osmosis to deliver incredibly pure water right where it matters most.

These units tap into your cold water line and typically come with their own dedicated, elegant faucet. This is perfect for homeowners and renters who want to eliminate specific, hard-to-catch contaminants like lead, fluoride, pesticides, or pharmaceuticals from their drinking water, without wasting filter life on the water used to flush the toilet.

Here’s where an under-sink system really shines:

  • For the Health-Conscious Family: A good reverse osmosis system can remove up to 99% of total dissolved solids (TDS). That’s about as pure as H₂O gets.
  • For the Gourmet Cook: Filtered water makes everything taste better. Your morning coffee, evening tea, soups, and even pasta will have a cleaner, more vibrant flavor without the chemical aftertaste.
  • For Apartment Dwellers: Many of these systems are surprisingly easy to install and, more importantly, uninstall, making them a practical, high-performance choice when you can't make permanent changes.

Countertop and Faucet-Mounted Filters: The Convenient Solvers

If you're looking for simplicity and a setup you can complete in the time it takes to make a cup of coffee, countertop filters and faucet-mounted filters are your heroes. These Point-of-Use (POU) systems are incredibly easy to install and are a fantastic choice for renters, dorm rooms, or anyone who can't (or doesn't want to) mess with their plumbing.

A faucet-mounted filter screws right onto your kitchen tap, and a little lever lets you switch between filtered and unfiltered water instantly. Countertop filters sit next to your sink, connecting with a small tube to filter water into their own dispenser. Both are champions at making tap water taste and smell better by kicking chlorine to the curb. Just know their capacity is smaller, and they won't remove as broad a range of contaminants as the bigger systems.

Still, their convenience and low upfront cost make them the best home water filtration system for individuals, college students, or small households with basic water quality concerns.

How Different Water Filtration Technologies Perform

Choosing the best home water filtration system is less about the box it comes in and more about the magic happening inside. Once you understand how different filtration methods work, you can match a system to the specific troublemakers in your water. Let's pull back the curtain on what these technologies actually do.

We'll look at the four major players in home water filtration: Activated Carbon, Reverse Osmosis (RO), UV Purification, and Ion Exchange. Each one is a specialist, designed to tackle a different set of challenges, from a funky chlorine taste to invisible microbial invaders.

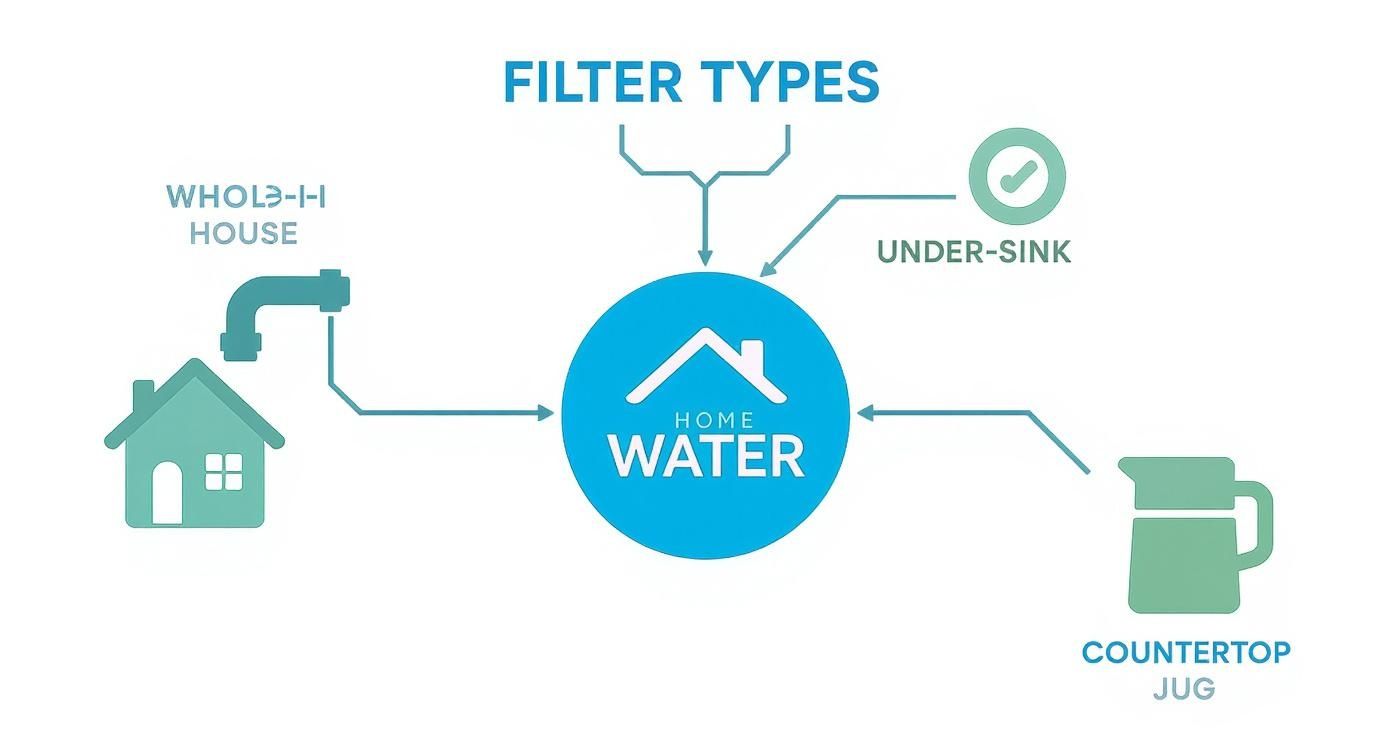
This map gives you a quick visual on how different filters are categorized by where they go in your home.

Infographic about best home water filtration system

As you can see, the first decision is where you need filtration—the whole house, a single sink, or just a countertop pitcher. That choice starts to narrow down the technology you'll probably end up with.

Activated Carbon: The Workhorse for Taste and Odor

Activated carbon is the rockstar of the filter world, found in everything from simple pitchers to massive whole-house systems. It works like a chemical magnet. Its surface is covered in millions of microscopic pores, creating a huge surface area that traps organic compounds and chemicals like chlorine through a process called adsorption.

This is precisely why activated carbon filters are the undisputed champions at making municipal water taste and smell fantastic. They are brilliant at removing chlorine, chloramines, volatile organic compounds (VOCs), and some pesticides. For most people on city water, a good carbon filter is all it takes to turn funky tap water into something crisp and refreshing.

Just know its focus is specific. Activated carbon won’t touch heavy metals like lead, dissolved minerals, nitrates, or microorganisms. It's a targeted tool, not a cure-all.

Reverse Osmosis: The Purity Powerhouse

When you want water that is as pure as a mountain spring, Reverse Osmosis (RO) is the undisputed king. This technology uses household water pressure to force water through a semipermeable membrane with pores so tiny that almost nothing besides a water molecule can squeeze through.

RO systems are absolute beasts at removing a massive list of contaminants, including:

  • Heavy metals like lead, arsenic, and mercury.
  • Dissolved solids such as salts, fluoride, and nitrates.
  • Even some viruses and bacteria.

This level of purification makes it the gold standard for drinking water. The market agrees; reverse osmosis systems claimed over a 38% revenue share in 2021 because they’re just that effective. UV systems also hold a big piece of the market, valued for their ability to neutralize pathogens. You can review the home water filtration unit market analysis for more data on these trends.

But this power comes with a trade-off. The RO process is slow and it produces wastewater—for every gallon of pure water, several gallons carrying the rejected contaminants are flushed away. It also strips out beneficial minerals like calcium and magnesium, which can affect the water’s taste and pH.

UV Purification: The Microbial Guardian

Unlike other methods that physically trap contaminants, UV Purification is a silent assassin. It zaps water with ultraviolet light, which scrambles the DNA of microorganisms like bacteria, viruses, and protozoa (think Giardia and Cryptosporidium). This renders them harmless, preventing them from reproducing and making you sick.

A UV purifier isn't a "filter" in the traditional sense, since it doesn't remove anything from the water. Its one and only job is to make water microbiologically safe. This makes it an absolute must-have for homes on well water, which isn't treated by a municipality and can be a breeding ground for nasty bugs.

It's critical to remember that UV systems always need a pre-filter, usually for sediment. UV light can only work its magic in clear water; any murkiness can act like a shield, protecting pathogens from the purifying light. It has zero effect on chemicals, heavy metals, or chlorine.

Ion Exchange: The Hard Water Specialist

Ever seen that chalky white limescale on your faucets or struggled to get a good lather from your soap? You've met hard water. Ion Exchange is the technology built to solve that exact problem and is the science behind traditional water softeners.

The system uses a bed of resin beads charged with sodium (or sometimes potassium) ions. As hard water flows through, the beads grab onto the hardness minerals—calcium and magnesium—and release the sodium ions in their place. This "exchange" effectively softens the water, saving your plumbing and appliances from scale buildup.

Some specialized ion exchange resins can also target other contaminants like nitrates or even heavy metals. But like UV, it’s a highly specific tool. It won't remove chlorine, sediment, or bacteria, so it’s usually part of a larger system, not a standalone solution for drinking water.

To help you sort through it all, here's a quick breakdown of how each technology stacks up against common water issues.

Filtration Technology Performance Matrix

Technology Removes Chlorine & Odor Removes Lead & Heavy Metals Removes Bacteria & Viruses Average Annual Cost Best For
Activated Carbon Excellent Poor No $50 – $200 Improving the taste and smell of city water.
Reverse Osmosis Excellent Excellent Good $150 – $300 Maximum purity for drinking water, removing a wide range of contaminants.
UV Purification No No Excellent $100 – $150 Disinfecting well water or ensuring microbiological safety.
Ion Exchange No Some (Specialized) No $200 – $400+ Softening hard water to prevent scale buildup and protect appliances.

At the end of the day, the best home water filtration system is often a combination of these technologies, custom-built to tackle the unique chemistry of your home's water.

Finding a Filter for Your Unique Household Needs

A family smiling and drinking glasses of clean water in their kitchen.

Sure, the technical specs on a water filter box are a good start, but they don't tell the whole story. The best filter is the one that solves your problems and fits into your life without a fuss. A powerful whole-house system is overkill for a solo renter, while a simple pitcher just won't cut it for a large family on well water.

Let's walk through a few real-world scenarios to see how to match the right technology to the right home.

The Renter in a City Apartment

Picture this: you're in a downtown apartment. You can't touch the plumbing, but you're tired of that swimming-pool taste in your tap water and the endless parade of plastic water bottles. Your mission is simple: get better-tasting water for drinking and cooking, no plumber required.

In this scenario, a non-permanent, point-of-use (POU) system is the hero. Your best bets are:

  • A High-Quality Water Pitcher: The easiest fix of all. A pitcher with a solid activated carbon filter will zap that chlorine taste and smell almost instantly.
  • A Faucet-Mounted Filter: This gives you filtered water on demand, right from the tap. It screws on in minutes and comes off just as easily when you move.
  • A Countertop Reverse Osmosis System: If you’re worried about more than just taste—like lead from the building's old pipes—a countertop RO unit brings serious purification power without any installation headaches.

The name of the game here is convenience. These options require zero permanent changes and deliver immediate results where you need them most: the kitchen.

The Health-Focused Family with Young Children

Now, let's imagine a family in a suburban home with young kids. Safety is their top priority. They’ve seen their local water quality report and are concerned about potential lead from aging city pipes, industrial chemicals like PFAS, and disinfection byproducts.

This family needs a serious line of defense for their drinking water. The clear winner is an under-sink reverse osmosis (RO) system. An RO system is a purification powerhouse, capable of removing up to 99% of all dissolved solids from your water.

This technology is a champion at targeting contaminants like:

  • Lead and other heavy metals
  • PFAS "forever chemicals"
  • Chlorine and chloramines
  • Nitrates and fluoride

By putting an RO system under the kitchen sink, this family gets peace of mind. They know every glass of water, every baby bottle, and every pot of pasta is made with truly purified water. It's targeted, high-level protection without the cost of treating every drop in the house.

If you're already planning some work, keep in mind that a big project like an ultimate kitchen remodel checklist is the perfect time to integrate an under-sink system. Planning for it during a renovation makes the installation seamless.

The Rural Homeowner on Well Water

Finally, let’s head out to the country to a home on a private well. Unlike city water, well water is untreated. It can come with a whole menu of surprises depending on the local geology—sediment, hard water minerals, iron that leaves ugly orange stains, and even bacteria or viruses.

For this homeowner, a single filter won't do the job. The best solution is a customized, multi-stage whole-house (point-of-entry) system designed to tackle the well's specific problems head-on.

A common setup for well water usually involves a few key stages:

  1. A Sediment Pre-Filter: This is the first line of defense, catching all the sand, dirt, and rust to protect the more delicate filters downstream.
  2. An Iron Filter or Water Softener: An iron filter gets rid of that metallic taste and prevents staining, while a softener tackles the calcium and magnesium that cause nasty limescale buildup.
  3. A Carbon Filter: This stage handles chemical contaminants, pesticides, and any lingering bad tastes or odors.
  4. A UV Purifier: This is the non-negotiable final step. An ultraviolet light zaps any bacteria, viruses, or other microorganisms, making the water safe to drink without adding chemicals like chlorine.

This layered strategy ensures that every single tap—from the kitchen sink to the shower—delivers clean, safe, and great-tasting water, protecting both the family's health and the home's plumbing.

What to Look For Before You Buy a Water Filter

So, you’re ready to get cleaner water. Fantastic! But it’s easy to get swayed by marketing hype. To find a system that actually delivers on its promises, you need to look past the flashy ads and focus on a few key details.

This is your final checkpoint. We'll walk through the essential questions to ask, making sure the filter you choose is a sound investment for your home and health.

The absolute first thing to look for is third-party certification. This isn't just a "nice to have"—it's proof that a filter actually works. Certifications from organizations like the NSF (National Sanitation Foundation) and ANSI (American National Standards Institute) mean the system has been independently tested to do what it claims.

Understanding Key Certifications

Not all certifications are created equal. They test for different contaminants, so knowing what they mean helps you find the right filter for your specific water problems.

  • NSF/ANSI 42: Think of this as the "taste and smell" certification. It confirms a filter's ability to reduce aesthetic impurities like chlorine. If your goal is simply better-tasting tap water, this is a great standard to look for.
  • NSF/ANSI 53: This one is all about health effects. It's a much tougher standard that verifies a filter can remove specific, harmful contaminants like lead, mercury, asbestos, and parasites like Cryptosporidium. If you have health concerns, this certification is non-negotiable.
  • NSF/ANSI 58: This standard is specifically for reverse osmosis (RO) systems. It validates the system’s power to drastically reduce a long list of contaminants, including hard-to-remove ones like fluoride, nitrates, and heavy metals.

A filter without independent certification is just making a promise. An NSF/ANSI certified system has provided proof, giving you confidence that it will protect your family's health as advertised.

Flow Rate and Long-Term Costs

Beyond what a filter removes, you have to consider how it performs day-to-day. For whole-house systems, the flow rate—measured in gallons per minute (GPM)—is a huge deal. An undersized system will lead to a frustrating drop in water pressure whenever you try to shower and run the dishwasher at the same time.

Make sure the GPM rating of any whole-house system can handle your household's peak demand. A good rule of thumb is to estimate the flow rates of your major water-using appliances and fixtures.

Finally, think beyond the sticker price. The true cost of ownership includes the initial purchase, installation, and the ongoing expense of replacement filters. A cheap system with expensive, short-lived filters can end up costing you far more over time than a quality unit with longer-lasting filters. For more guidance on this, check out our collection of water filter advice.

Installation and Professional Help

The last piece of the puzzle is getting it installed. Faucet filters and countertop units are easy DIY jobs you can finish in minutes.

However, under-sink and whole-house systems often require cutting into your home’s plumbing. If that sounds intimidating, it's wise to budget for a professional. Understanding the scope of general plumbing services can help you find a qualified installer to get the job done right—no leaks, no hassle, just peace of mind.

Common Questions About Home Water Filtration

It’s normal to have a few final questions before choosing a new filter. Getting a handle on the day-to-day details is what makes the difference between a good purchase and a great one. Let's tackle some of the most common things people ask when choosing the best home water filtration system.

First, how do you even know what you’re trying to filter out? It’s simpler than you might think.

Your local water utility is required to publish an annual Consumer Confidence Report (CCR), or water quality report. A quick search on your town's website should bring it right up. This report gives you a detailed look at what contaminants were tested for and at what levels.

If your home uses a private well or you just want a more specific reading of the water coming from your pipes, grab an at-home water test kit. It's a great way to pinpoint issues like lead, bacteria, or hardness that a city-wide report might miss.

Do Water Filters Remove Healthy Minerals?

This is a fantastic question, and the answer depends entirely on the filtration technology.

Filters that rely on activated carbon—including most pitchers, faucet attachments, and many basic whole-house systems—are selective. They excel at grabbing chemicals like chlorine but typically let beneficial minerals like calcium and magnesium pass right through. You get cleaner water without sacrificing the good stuff.

A Reverse Osmosis (RO) system, on the other hand, is a purist. Its membrane is so fine that it strips out nearly everything, including those healthy minerals. While this produces incredibly pure water, many people add a remineralization filter to their RO setup to put those essential minerals back into the water for better taste and health benefits.

How Often Should I Change The Filter?

Sticking to the manufacturer's replacement schedule is non-negotiable. An old, clogged filter doesn't just stop working; it can become a breeding ground for bacteria and potentially dump all the contaminants it caught right back into your water.

Here’s a rough idea of what to expect:

  • Faucet Filters: Every 2 to 3 months is typical.
  • Under-Sink Carbon Filters: Plan on every 6 to 12 months.
  • RO Membranes: These are the long-haul players, often lasting 2 years or more.
  • Whole-House Sediment Filters: This depends heavily on your water quality, but a 3 to 6-month swap is common.

Always follow the official schedule for your specific model. It’s the only way to guarantee your system is working as certified and keeping your water consistently safe and delicious.


Ready to take the next step toward cleaner, safer water? The experts at Water Filter Advisor provide in-depth reviews, comparisons, and maintenance guides to help you make a confident choice. Visit us at https://www.waterfilteradvisor.com to find the perfect solution for your home.

Best Shower Filter for Hard Water – Your Guide to Better Skin & Hair

If your skin feels tight, your hair is dull, and soap scum seems to be your bathroom’s permanent resident, you might be blaming the wrong culprit. The secret to a better shower might not be in a new shampoo bottle but in a simple shower filter for hard water. These clever little gadgets attach right to your shower arm, working as a bouncer to block harsh minerals before the water even hits you. Many people feel a dramatic difference from the very first wash.

The Unseen Battle Happening in Your Shower

That constant struggle with brittle hair and itchy skin? It might have nothing to do with your expensive conditioners or lotions. The real problem could be flowing right out of your showerhead. For millions of us, the invisible menace of hard water is turning a refreshing daily ritual into a frustrating battle against dryness and buildup.

This isn't just a niche problem—it's everywhere. Over 60% of households in the United States are showering in hard water, which is loaded with minerals like calcium and magnesium. These minerals are notorious for wreaking havoc on skin and hair, often making dryness worse and even aggravating conditions like eczema. People are catching on, which is why the U.S. shower filter market, valued at $360 million in 2024, is projected to grow. You can find more home water filtration trends on accio.com.

Why Your Shower Routine Might Be Backfiring

Without a filter, every shower can feel like you're washing with "liquid rock." The dissolved minerals in hard water leave a film on your skin and hair, causing a few common problems you might recognize:

  • Dull, Lifeless Hair: Mineral buildup coats every strand, blocking moisture from penetrating. This leaves your hair feeling heavy, brittle, and almost impossible to style.
  • Dry, Irritated Skin: Hard water strips away your skin's natural oils. When this protective barrier is compromised, it can lead to constant dryness, itchiness, and sensitivity.
  • The Never-Ending Cleaning Cycle: See those chalky white spots on your shower doors and fixtures? That's limescale, the calling card of hard water. It also reacts with your soap to create that thick, stubborn soap scum.

A shower filter for hard water acts as a gatekeeper. It intercepts these damaging minerals and contaminants like chlorine before they can disrupt your skin's natural balance or build up on your hair.

Think about it this way: you wouldn't wash your face with dirty water, so why shower with water full of harsh minerals? Adding a filter is a simple upgrade that can transform your shower from a source of irritation into a true sanctuary. It’s the lightbulb moment for anyone tired of fighting the symptoms without ever fixing the root cause.

What Exactly Is Hard Water?

Ever get frustrated that your soap just won’t lather up, or notice a chalky film stubbornly clinging to your shower door? It’s not your cleaning skills—it's almost certainly your water. The term "hard water" might sound technical, but the concept is simple.

Just imagine your water is carrying microscopic, invisible rocks through your pipes.

Image

These "rocks" are dissolved minerals, mostly calcium and magnesium, that the water picks up on its journey through the ground. While they're not harmful to drink, they cause a whole lot of grief in the shower. They interfere with soap's ability to dissolve properly, creating a sticky residue we call soap scum instead of a rich, clean lather.

This reaction doesn’t just stick to your bathroom tiles; it sticks to you, too. The minerals in hard water leave a film on your skin and hair, creating a barrier that can cause all sorts of persistent issues.

The Invisible Culprits in Your Shower

Think of hard water minerals as tiny troublemakers that stop your hair and skin from ever getting truly clean. They leave behind a film that can clog pores, leading to skin irritation and breakouts. At the same time, this residue coats every strand of your hair, weighing it down and blocking moisture from conditioners, leaving it dull, brittle, and just plain unmanageable.

It's a surprisingly common problem, affecting an estimated 85% of American homes. The minerals literally "harden" the water, making it far less effective for washing. For a deeper dive into what hard water is and its potential solutions around your entire home, this resource is a great start.

But it's not just the hardness minerals that are uninvited guests in your shower. Municipal water is almost always treated with disinfectants like chlorine.

While chlorine is essential for killing bacteria and making water safe to drink, it's not so friendly to your skin and hair. In the shower, it acts like a harsh cleanser, stripping away the natural oils that keep your skin hydrated and your hair soft.

This stripping effect can leave your skin feeling tight and itchy and your hair feeling like straw. When you combine that with the mineral buildup from hard water, you've got a one-two punch that sabotages your entire shower routine. A good shower filter for hard water is designed to tackle both problems head-on.

A Closer Look at Common Contaminants

To really understand what you're up against, it helps to see exactly what each contaminant does. While there can be dozens of substances in tap water, a few are notorious for causing problems in the shower.

Here's a quick look at the primary offenders and the damage they do. This really shows why a multi-stage shower filter is so important for protecting your hair, skin, and even your bathroom from daily exposure.

Common Contaminants in Shower Water and Their Effects

Contaminant Effect on Hair & Skin Effect on Bathroom Surfaces
Calcium & Magnesium Leaves a mineral film that clogs pores, dries skin, dulls hair, and can worsen eczema. Creates chalky white limescale on faucets and soap scum buildup on tiles and glass.
Chlorine Strips natural oils, leading to dry, itchy skin, brittle hair, and potential color fading. Can accelerate the tarnishing of metal fixtures over time with prolonged exposure.
Sediment & Rust Can cause skin irritation and discoloration of light-colored hair. Leaves reddish-brown stains in the shower and can clog showerhead nozzles.

As you can see, the issues go beyond just aesthetics. These contaminants directly impact your body and the longevity of your bathroom fixtures, making a quality filter a worthwhile investment.

How Shower Filters Actually Clean Your Water

At first glance, a shower filter seems way too simple to do much of anything. How can that little device you screw onto your shower arm really change your water? The magic is all on the inside, where a mix of different materials wages a tiny war against all the gunk flowing through your pipes.

Think of a good shower filter for hard water as a multi-level obstacle course. It’s designed to trap, zap, and neutralize specific impurities. Each layer inside the filter has its own job, and they all work together to purify the water just before it hits your skin and hair. It's not sorcery—just some clever chemistry and physics working in tandem.

Image

And this process really works. Independent lab tests on popular filters show just how big of a difference they can make. One test, for instance, found a KDF-based filter slashed total water hardness by an incredible 99.94%. It took the water from 128.19 parts per million (PPM) all the way down to just 0.076 PPM.

At the same time, that filter achieved a 100% chlorine removal rate, knocking out the two biggest troublemakers in shower water.

The Powerhouse Players in Water Filtration

While the designs can vary, most filters rely on a handful of proven materials. Each one is a specialist at tackling different problems, which is why the best filters always use a combination. Let's break down the key players you'll usually find inside.

1. KDF (Kinetic Degradation Fluxion)

Think of KDF as a powerful magnet for nasty metals. This special copper-zinc blend creates a tiny electrochemical reaction when water flows over it. This process, called oxidation-reduction (or redox), neutralizes some of the worst stuff in your water.

  • Chlorine Conversion: KDF is a beast when it comes to chlorine. It changes harmful free chlorine into a simple, harmless chloride ion—basically, the same stuff as table salt.
  • Heavy Metal Reduction: It also helps reduce heavy metals like lead, mercury, and iron. It makes them stick to the KDF media, trapping them so they don't end up on you.

2. Activated Carbon

Activated carbon is like a super-sponge with a ridiculously large surface area. Just one gram of it can have the same surface area as a football field. This makes it incredibly good at grabbing onto contaminants through a process called adsorption.

When water passes through this layer, chemicals and organic compounds get stuck to the carbon's surface instead of flowing out of your showerhead. It's especially good at nabbing chlorine, VOCs, and other things that make your water smell funky. It's worth learning more about how common water impurities like chlorine impact your hair to see why getting rid of them matters so much.

Specialized Media for Targeted Results

Beyond those two mainstays, many filters add extra layers to deal with specific issues, from crazy high chlorine levels to stubborn mineral scale. These materials add another layer of polish to the whole process, making sure your shower is as clean as it can be.

Vitamin C Filters

This might sound like something out of a smoothie bar, but Vitamin C (ascorbic acid) is a powerhouse at dechlorinating water. It neutralizes chlorine and chloramine almost instantly. A Vitamin C filter is a fantastic choice if you have really sensitive skin or live somewhere that uses chloramine, which can be tough for other filter types to remove completely.

Calcium Sulfite

This material is a champ at removing chlorine, especially in hot water where activated carbon can start to lose its edge. You'll find a layer of calcium sulfite in many multi-stage filters just to make sure chlorine is getting zapped consistently, no matter how hot you like your showers.

By mixing and matching these different materials, a shower filter for hard water builds a complete defense system. From catching sediment to neutralizing chemicals, each layer does its part to strip away the bad stuff, leaving you with nothing but clean, soft water.

Choosing the Right Shower Filter for Your Home

Now that you understand the science, you're ready to pick the perfect shower filter for hard water for your home. This is about looking past the flashy marketing and zeroing in on what actually affects performance, how long the filter will last, and your daily shower experience.

Think of it like choosing the right tool for a job. You wouldn't use a hammer to drive a screw. In the same way, the best shower filter for you depends on what's in your water and what you want it to do. Are you trying to banish that dry, itchy skin from chlorine, or is the endless buildup of limescale your main enemy?

Decode the Technical Specs

When you're comparing different filters, a few key numbers will tell you almost everything you need to know about how they'll perform. Don't let the technical terms throw you off; they translate directly into real-world results.

  • Flow Rate (GPM): This is measured in Gallons Per Minute and tells you how much water can move through the filter. Most modern showerheads run at 2.0 to 2.5 GPM. A good filter needs to match that rate so you don't feel a big drop in water pressure.

  • Certifications: Keep an eye out for filters certified by the NSF (National Sanitation Foundation). The NSF/ANSI 177 standard is made specifically for shower filters. It confirms that the product actually reduces free available chlorine like it's supposed to. It's a seal of approval you can trust.

  • Cartridge Lifespan: This is usually given in months or gallons (for example, 6 months or 10,000 gallons). To figure out the real cost, just divide the price of a replacement cartridge by how long it's expected to last. A filter that's cheaper upfront might end up costing you more if it needs frequent, pricey replacements.

Match the Filter to Your Needs

To help simplify your choice, we’ve put together a quick guide to help you find the right filter type based on your water hardness and how sensitive your skin is.

Image

As you can see, your personal needs are just as important as your water quality when choosing a filter. Often, a multi-stage filter that combines different media gives the best all-around solution for tackling several problems at once.

To help you compare your options at a glance, we've put together this simple checklist. Think of it as your cheat sheet for matching a filter's specs to your household's needs.

Shower Filter Selection Checklist

Feature What to Look For Why It Matters
Filter Media A combination like KDF, activated carbon, and polyphosphate. Each one targets different problems—chlorine, scale, or heavy metals.
Flow Rate 2.0 to 2.5 GPM. Matches modern showerheads so you don't lose water pressure.
Certifications NSF/ANSI 177 is the gold standard. This proves the filter has been independently tested to reduce chlorine.
Cartridge Lifespan At least 6 months or 10,000 gallons. A longer life means fewer replacements and lower long-term costs.
Installation "Tool-free" or simple screw-on design. You want something you can easily install yourself in minutes.

With this checklist, you can confidently compare models and find one that truly solves your water woes, not just covers them up.

Figuring out your main frustration is the first step. If the strong smell of chlorine and skin irritation is your biggest issue, you need a filter with strong activated carbon and KDF media. But if you're constantly scrubbing away limescale, you'll want a filter with polyphosphate or another scale-inhibiting media designed to stop mineral buildup. If you're looking for more detailed guidance, you might find the various advice articles on water filtration from industry experts helpful.

Your goal is to find a filter that solves your biggest water-related problem. By focusing on your specific needs—be it skin sensitivity, limescale, or chlorine—you can confidently select a model that will deliver a noticeable improvement.

Ultimately, choosing a shower filter for hard water is a small home upgrade that makes a big impact. By checking your water, understanding the key performance numbers, and matching a filter's features to your needs, you can turn every shower into a better experience. It's a smart approach that ensures you get a solution that works for you, giving you softer skin, healthier hair, and a cleaner bathroom.

Getting Your New Filter Installed and Maintained

Alright, you've picked out the perfect shower filter for hard water and it's time to get it hooked up. Don't sweat it—this is probably one of the simplest home upgrades you'll ever do. You won't need a plumber or a big toolbox. Most of these filters are designed for a quick, tool-free installation you can knock out in less than 15 minutes.

The whole idea is to place the filter between the shower arm (the pipe coming out of the wall) and your showerhead. Think of it like a little bouncer for your water, stopping minerals and chlorine right at the door before they can get into your shower.

Image

A Quick Guide to Installation

Most filters follow the same straightforward steps, so what might seem like a plumbing job is actually a quick win. Here’s how it usually goes:

  1. Twist Off the Old Showerhead: Your current showerhead should just unscrew from the shower arm. If it’s a bit stubborn, wrap a cloth around it for a better grip.
  2. Wipe the Threads Clean: Give the threads on the shower arm a quick wipe to get rid of any old plumber's tape or gunk. A clean surface helps create a tight, leak-free seal.
  3. Screw on the Filter: Attach the new shower filter directly onto the shower arm. Hand-tighten it until it feels snug.
  4. Put Your Showerhead Back On: Now, just screw your showerhead onto the other side of the filter. Again, hand-tight should do the trick.
  5. Run a Leak Check: Turn on the water for a moment to see if there are any drips. If you spot a leak, just tighten the connections a little more. You can also use the plumber’s tape that usually comes included in the box.

And that’s all there is to it! In just a couple of minutes, you’ve set up a system that will give you better water for months.

How to Keep Your Filter Working Like New

To keep that soft water flowing and your water pressure strong, a tiny bit of maintenance is all you need. Your filter works hard trapping all those contaminants, and eventually, the cartridge inside gets full. It’s just like a vacuum bag—once it's full, it can't do its job anymore.

Most filter cartridges will last you anywhere from three to six months, which is roughly 10,000 gallons of water. Of course, this can change depending on how hard your water is and how many people are using the shower.

The number one sign that your filter cartridge is ready to be changed is a sudden drop in water pressure. If you stay on top of replacing it, you'll get consistent performance and protection.

Here are a few quick tips to get the most out of your filter:

  • Set a Reminder: Put a note on your calendar or an alert on your phone for every three or six months. It’s the easiest way to remember to check on it.
  • Check the Manual: Always follow the manufacturer's instructions for your specific model's replacement schedule and steps.
  • Watch Your Water Pressure: If your shower starts feeling weak, that's a huge clue the filter is clogged. Go ahead and swap it out to get your flow back.

Replacing the cartridge is just as easy as putting the filter on in the first place. You'll unscrew the housing, pull out the old cartridge, and drop the new one in. A simple habit like this ensures your shower filter for hard water keeps giving you softer skin, healthier hair, and a cleaner shower every single day.

The Real-World Benefits of a Shower Filter

Okay, so we've talked about all the technical stuff—filter types, flow rates, and certifications. But what does a shower filter for hard water actually do for you in the real world? It's not just about taking things out of your water; it’s about what you get back in your daily life. And honestly, you’ll probably notice the difference right away.

The biggest change you'll feel is with your hair and skin. When you remove the harsh minerals and chlorine that strip away your body's natural oils, your hair can finally get the moisture it needs. The result? Hair that’s genuinely softer, shinier, and way easier to manage. Your skin benefits, too, holding onto its natural moisture and feeling less dry and irritated the second you step out of the shower.

A Cleaner Shower and a Happier Home

The perks don't stop with you, either. One of the best side effects is cutting down on your bathroom cleaning time.

  • Less Soap Scum: Without all those minerals reacting with your soap, that annoying film on your shower doors and tile just doesn't build up like it used to.
  • No More Limescale: You can say goodbye to those crusty white deposits that clog your showerhead and stain your fixtures. Everything stays looking clean and new.

More and more people are discovering these benefits, which is why the demand for these filters is on the rise. In fact, the shower filter market was valued at around $561 million in 2025 and is only expected to grow. You can check out the full report on the shower head filter market growth on datainsightsmarket.com if you're curious.

At the end of the day, a shower filter isn't just another gadget. It's a small, easy investment in your home and personal comfort that pays off from the very first time you use it.

Frequently Asked Questions About Shower Filters

Jumping into the world of shower filters can bring up a lot of questions. From performance worries to practical details, it’s smart to get the facts straight before you pick a shower filter for hard water. This section is here to clear up the common confusion and help you choose with confidence.

We've rounded up the questions we hear most often and laid out some clear, simple answers. This way, you'll know exactly what to expect from your new filter and how to get the most out of it.

Will a Shower Filter Reduce My Water Pressure?

This is easily the biggest concern people have, and for good reason—nobody enjoys a weak, trickling shower. The good news is that a quality filter is designed from the ground up to match standard showerhead flow rates, which are typically between 2.0 and 2.5 gallons per minute (GPM). When you first install it, you shouldn't notice any real drop in pressure.

If you do start to feel the flow getting weaker over time, that's almost always a tell-tale sign the filter cartridge has done its job. It's clogged with all the gunk it has trapped, and it's time for a replacement. Sticking to the recommended replacement schedule is the secret to keeping your water pressure strong and steady.

How Do I Know if I Have Hard Water?

The signs of hard water are usually hiding in plain sight. Once you know what to look for, the evidence is everywhere.

Keep an eye out for these classic indicators:

  • Chalky white residue (limescale) building up on your faucets, showerhead, and glass doors.
  • Stubborn soap scum that feels impossible to fully scrub away.
  • Spots on your glassware and dishes, even right after a wash.
  • Skin that feels dry, tight, and itchy the moment you step out of the shower.
  • Hair that looks dull, feels brittle, or just won't cooperate.

If you want a definitive answer, you can always grab an inexpensive hard water test kit online or at a local home improvement store.

Is a Shower Filter the Same as a Water Softener?

Nope, they're two different tools for two different jobs. A whole-house water softener is a major plumbing installation that treats all the water coming into your home. Its main purpose is to remove the calcium and magnesium minerals that make water "hard." It’s a comprehensive solution, but also a much bigger investment.

A shower filter is a point-of-use solution. It’s designed for one specific task: improving the water quality right where you shower. While it can reduce some scale, its main goal is typically to get rid of chlorine, heavy metals, and other contaminants. Think of it as an affordable, targeted upgrade for your daily routine.

How Long Does a Shower Filter Cartridge Last?

The lifespan of a cartridge varies between brands and models, but a good rule of thumb is 3 to 6 months of use. This usually works out to around 10,000 gallons of water. How long it actually lasts for you depends on two key things: how hard your water is and how much water your household uses.

If your water is loaded with minerals or you have a big family showering every day, you'll probably find yourself on the shorter end of that 3-month timeline. Always follow the manufacturer's guidelines to make sure your filter is working at its best.


At Water Filter Advisor, our mission is to give you clear, research-backed advice to help you find the best water filtration solutions for your home. From our in-depth reviews to practical tips, we’re here to help you get safer, better-tasting water. Check out all our resources to make a confident choice at https://www.waterfilteradvisor.com.

Article created using Outrank