Under Sink Water Filter Cartridge: A 2026 Buyer’s Guide

You open the cabinet under the kitchen sink, see a blinking filter light, and realize you have no idea what cartridge you need. Or maybe the water still looks clear, but it suddenly tastes flat, chlorinated, or a little “off.” That's usually the moment homeowners learn an under-sink filter system is only as good as the cartridge inside it.

The cartridge does the main work. It's the part that traps sediment, reduces taste and odor problems, and, in many systems, targets specific contaminants. If the cartridge is wrong for your water, worn out, or difficult to replace, the whole system becomes a hassle instead of a help.

A lot of shopping advice gets stuck on brand names. That matters less than commonly believed. The smarter way to choose an under sink water filter cartridge is to match it to your water, your cabinet space, and the kind of maintenance you'll consistently maintain.

What Is an Under Sink Water Filter Cartridge

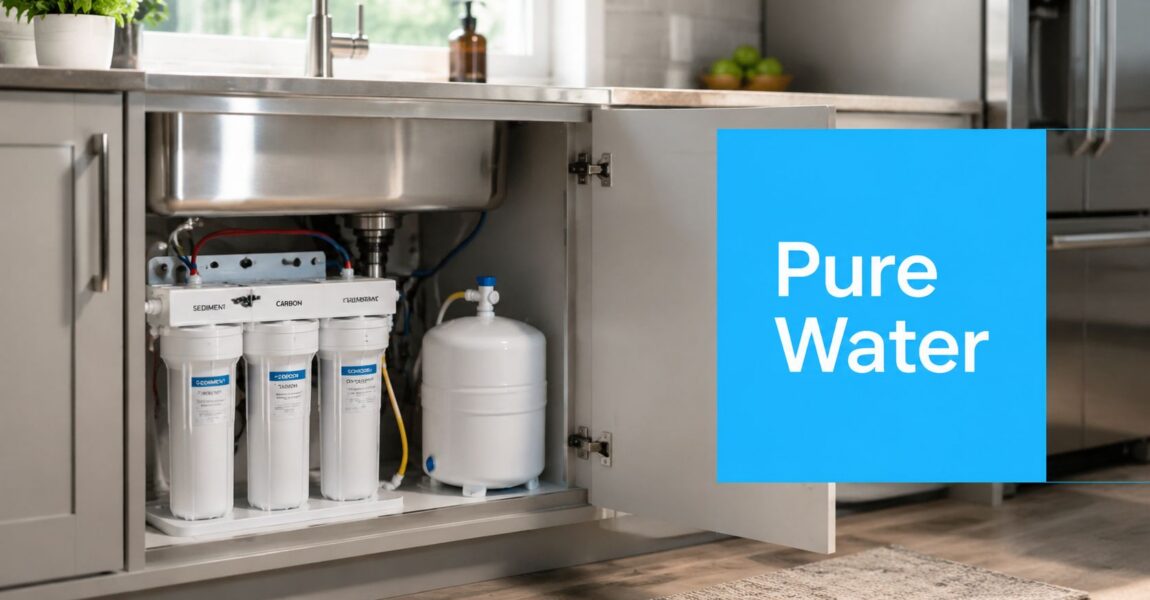
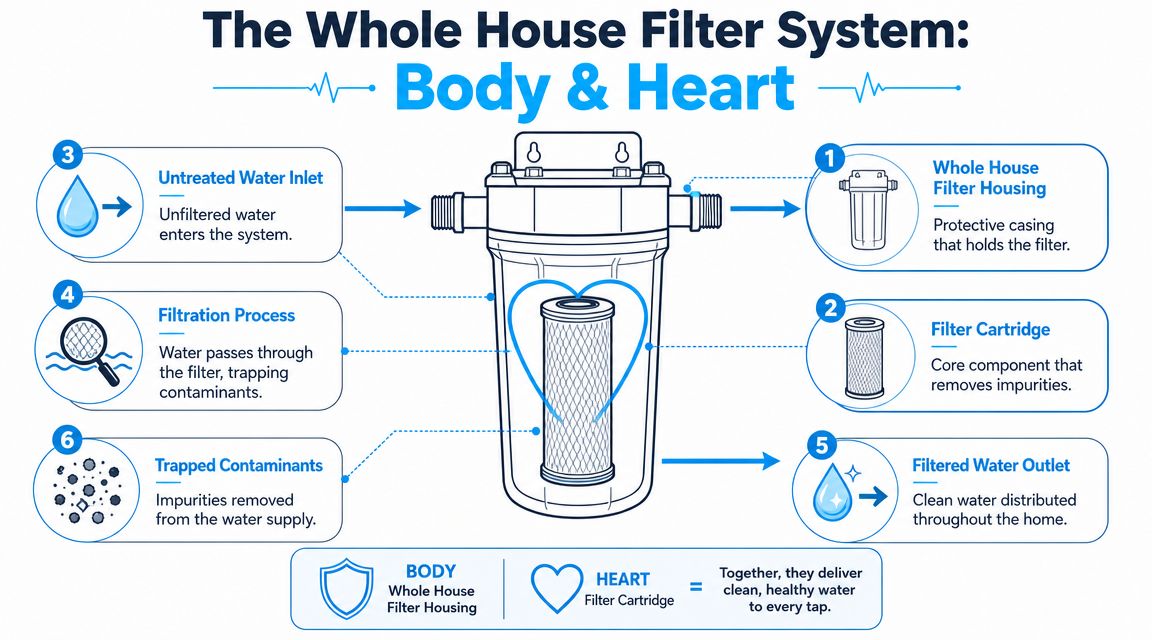
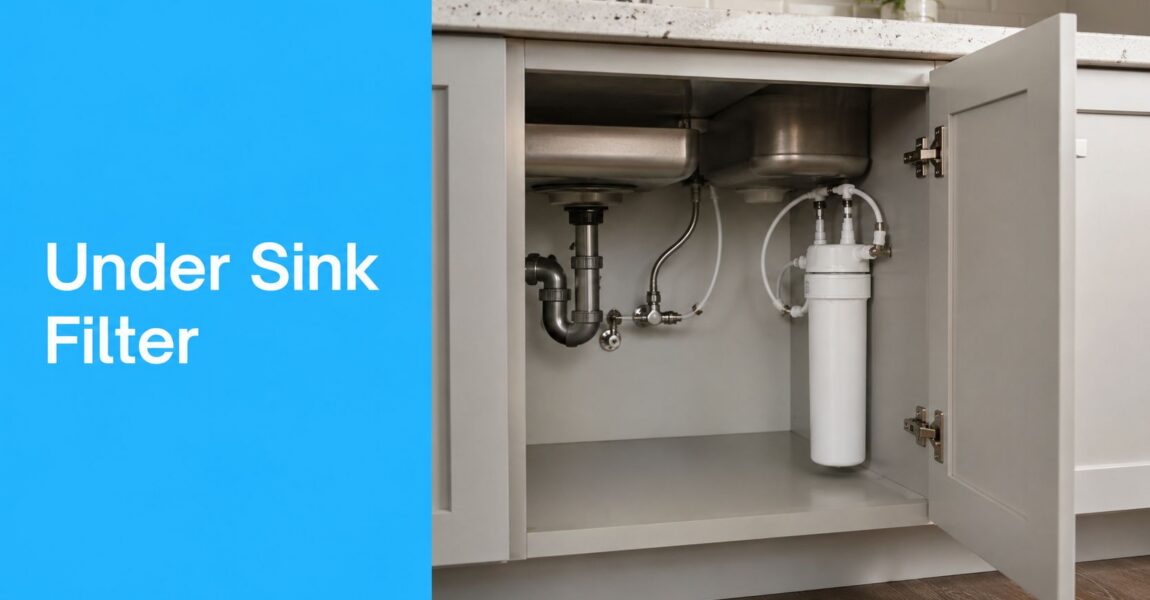
You open the cabinet, find a slim plastic tube running into a filter housing, and realize the part you need is not the whole system. It is the cartridge. That replaceable piece is the working core of an under-sink filter, similar to how a computer's processor handles core computing while the outer case holds everything in place.

An under sink water filter cartridge sits inside the filter housing and treats water at a single tap, usually the kitchen sink. Homeowners use these systems for drinking, cooking, coffee, ice, and rinsing produce. The cartridge is the part that does the cleanup. If it is not designed for your water problems, clear water can still carry the taste, odor, or contaminants you were trying to reduce.

That is why cartridge shopping goes wrong so often. People compare housings, brand labels, or faucet style, but the smarter questions are more specific. What is in your water. How long will this cartridge last in your home. How easy will it be to swap out when you are kneeling in a cramped cabinet with supply lines in the way.

Why the cartridge matters more than the box

Two under-sink systems can look nearly identical and still do very different jobs. One cartridge may be built mainly to reduce chlorine taste and odor. Another may be designed to address sediment, lead, cysts, or a combination of problems. The outside does not tell you much. The cartridge specification does.

A good practical rule is simple. Match the cartridge to the contaminant, not just to the housing.

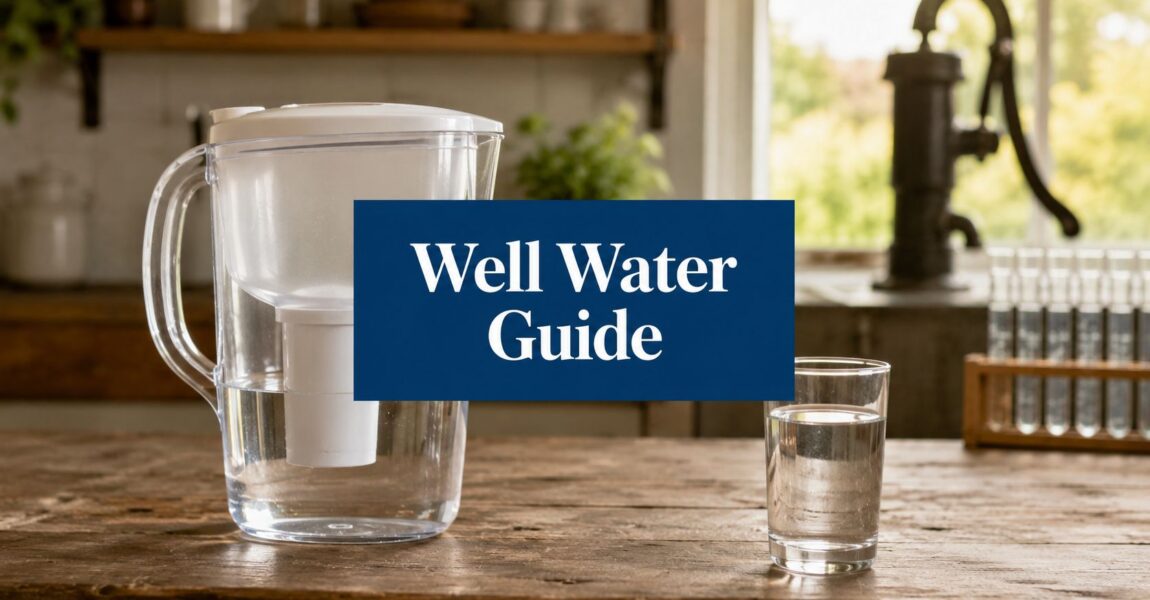
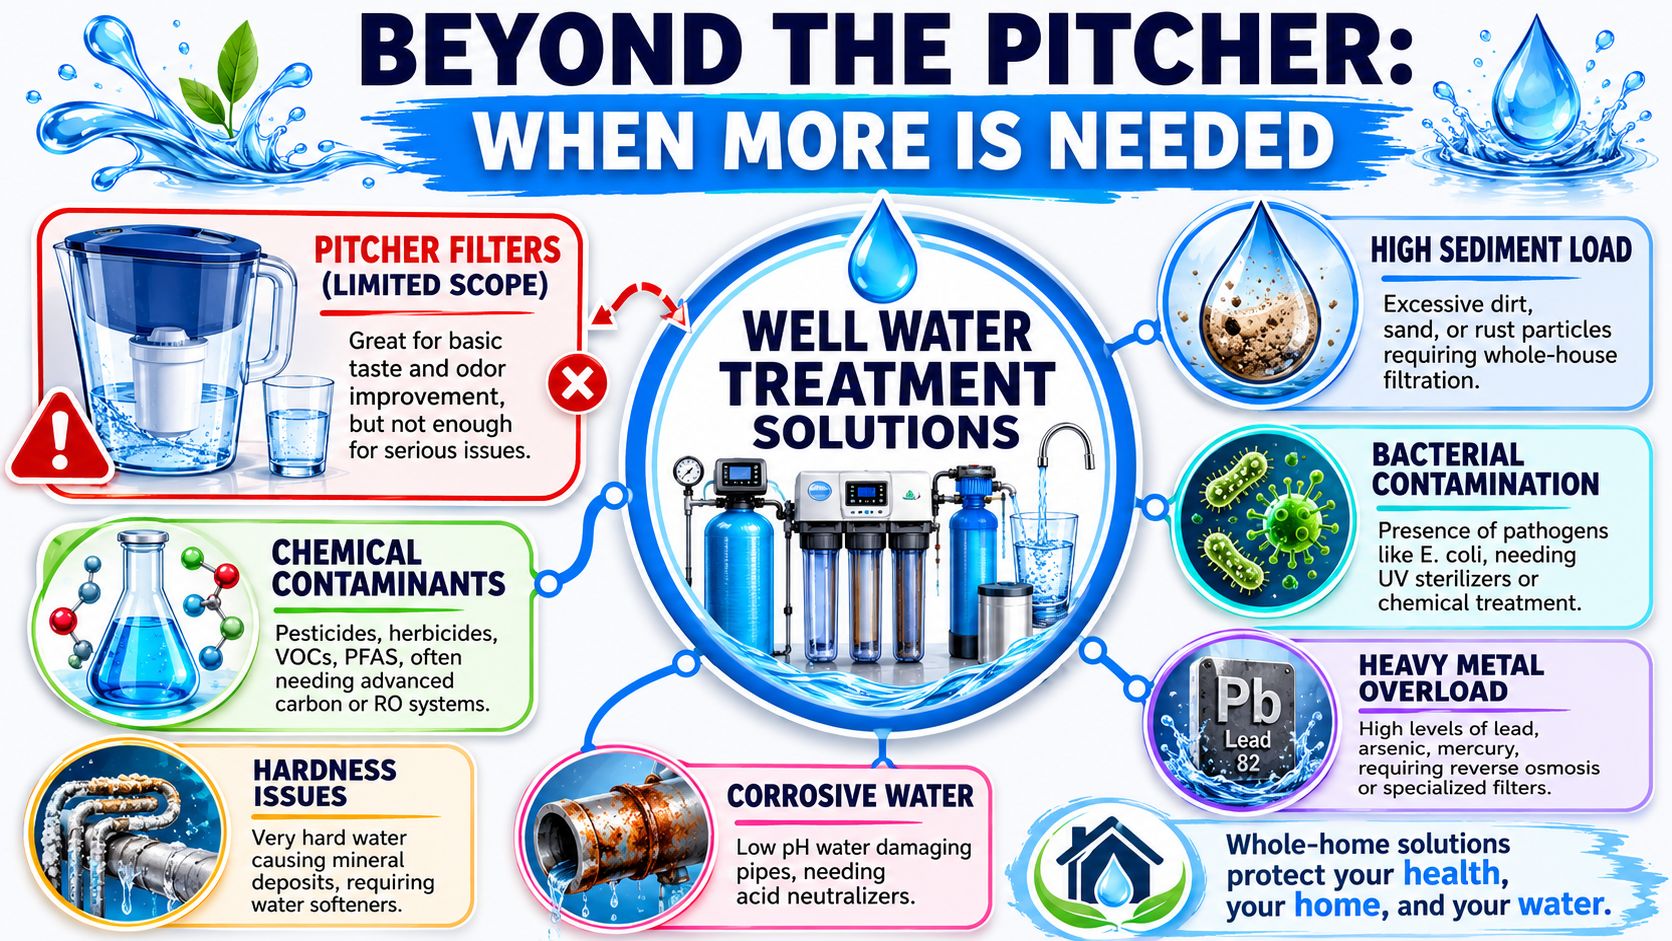
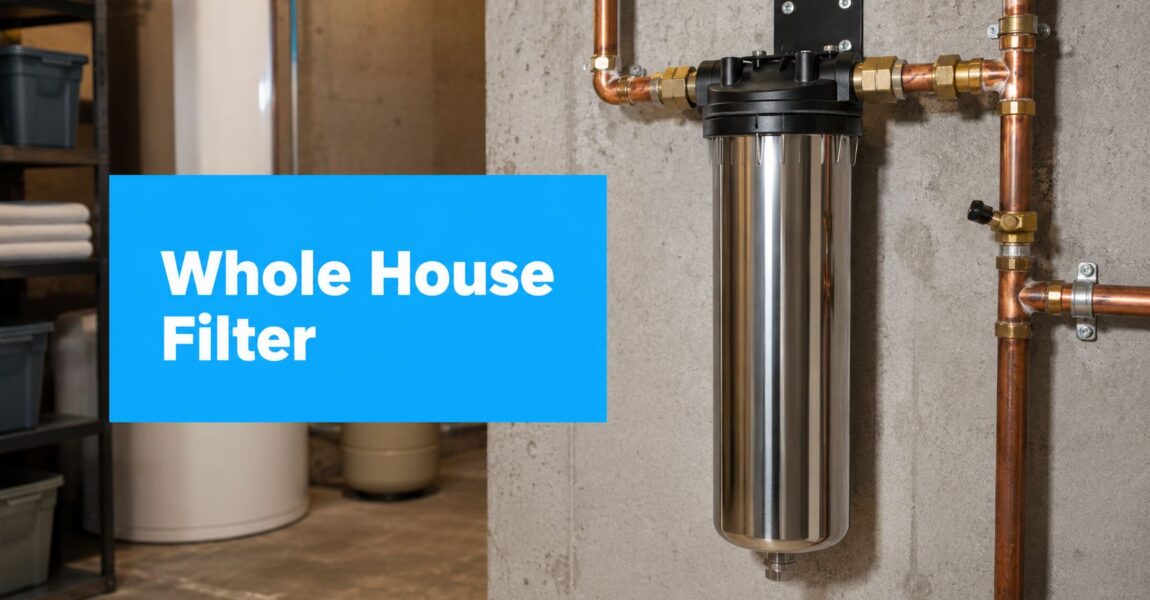
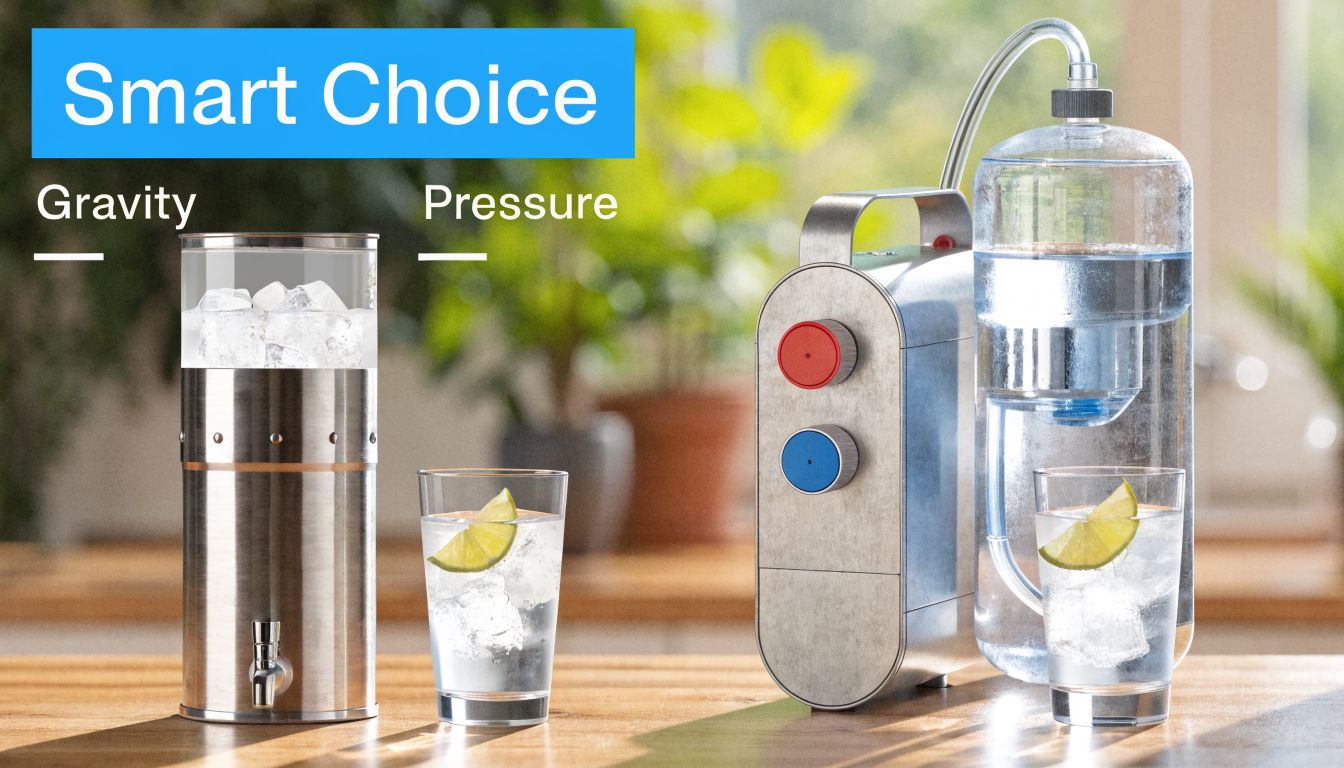
That point matters because an under-sink filter is a point-of-use tool. It is meant to improve the water you drink and cook with at one location, not every tap in the house. If you are still deciding between a kitchen-only setup and a whole-house approach, it helps to compare water filtration options before buying replacement parts.

What homeowners usually confuse

Three terms get mixed together all the time, and clearing them up makes shopping much easier:

  • The system is the full assembly under the sink, including the housing, fittings, tubing, and sometimes a dedicated faucet.
  • The cartridge is the replaceable insert that you change on schedule.
  • The media is the material inside the cartridge that does the filtering, such as activated carbon or sediment-filtering material.

A simple way to remember it is container, replaceable part, and filtering material. Once you separate those three, it becomes easier to check fit, performance, and replacement cost without guessing.

That last point is easy to overlook. A cartridge that removes the right contaminant but is hard to twist out in a tight cabinet, or needs frequent replacement, may cost more and cause more frustration over time than a slightly pricier option that fits your space and lasts longer.

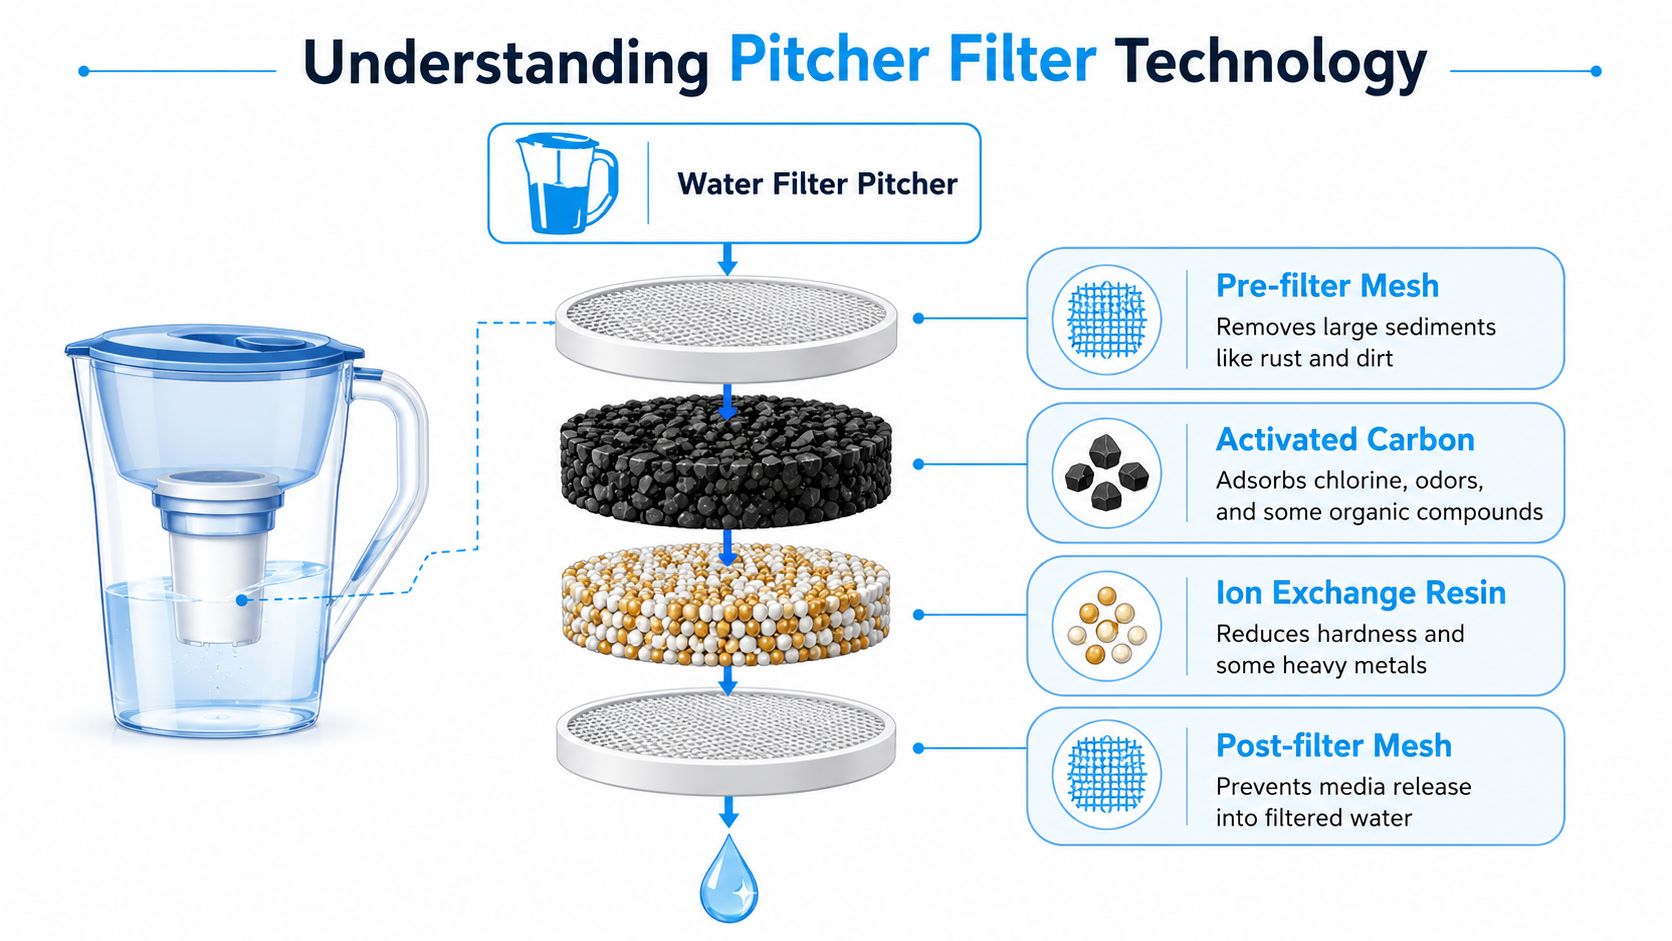
Common Cartridge Types and Filtration Media

The easiest way to understand cartridges is to picture different fishing nets. One net catches leaves. Another catches smaller fish. Another doesn't work by “catching” at all. It pulls certain unwanted stuff out of the water through a different process.

That's what filtration media does. Different media targets different problems.
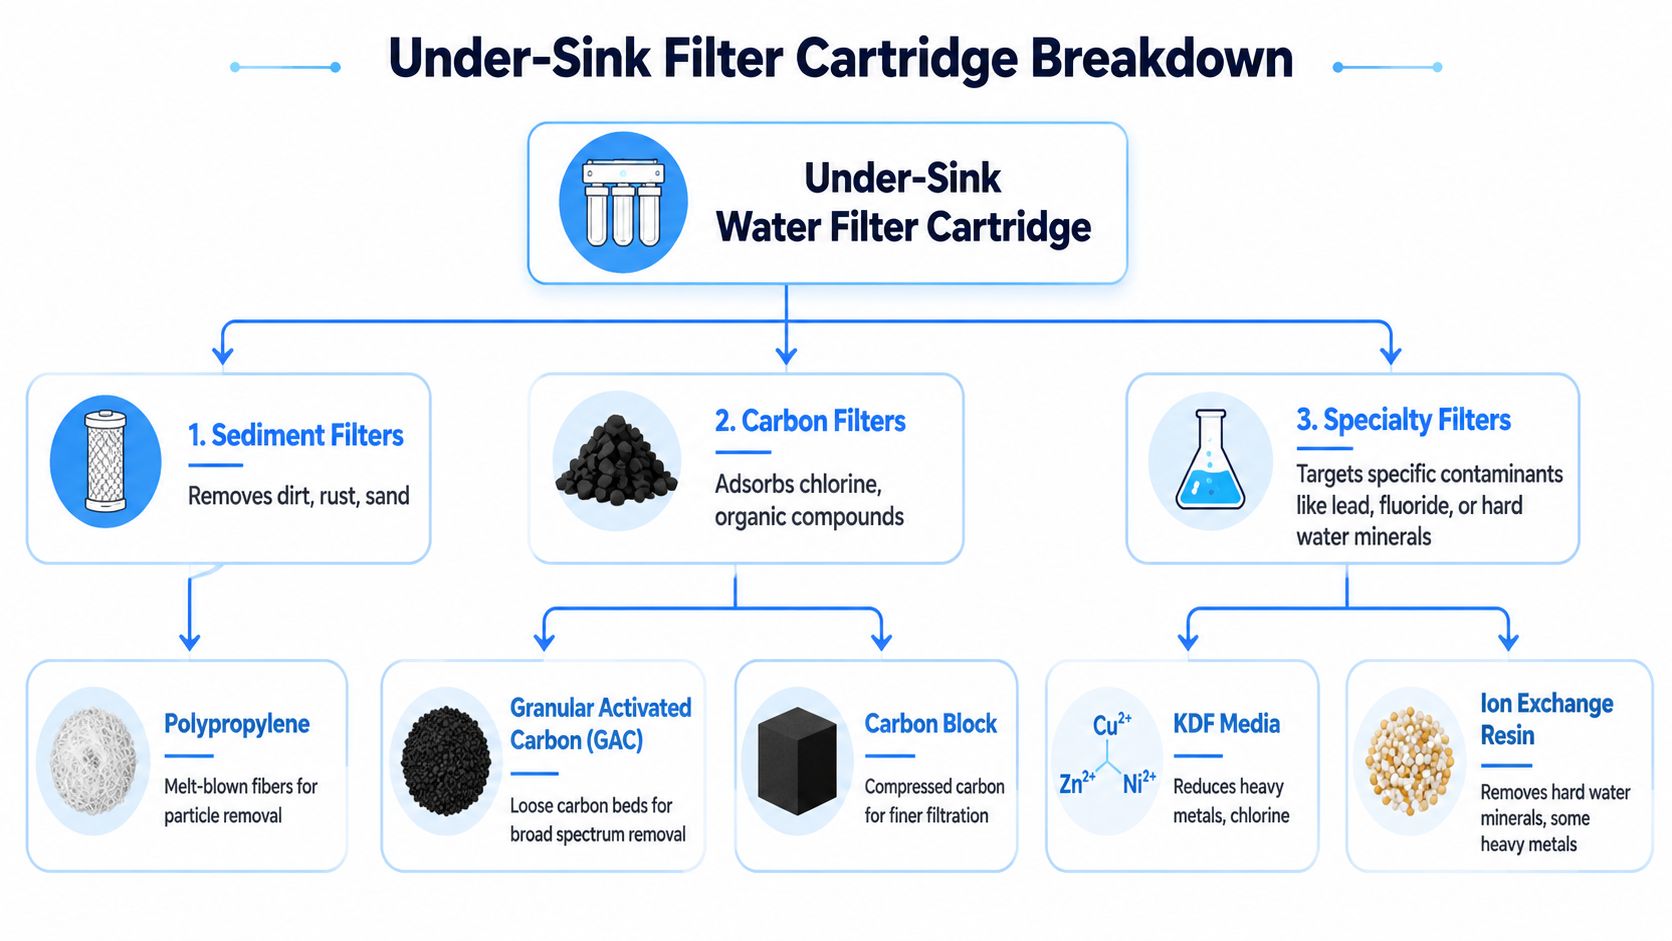
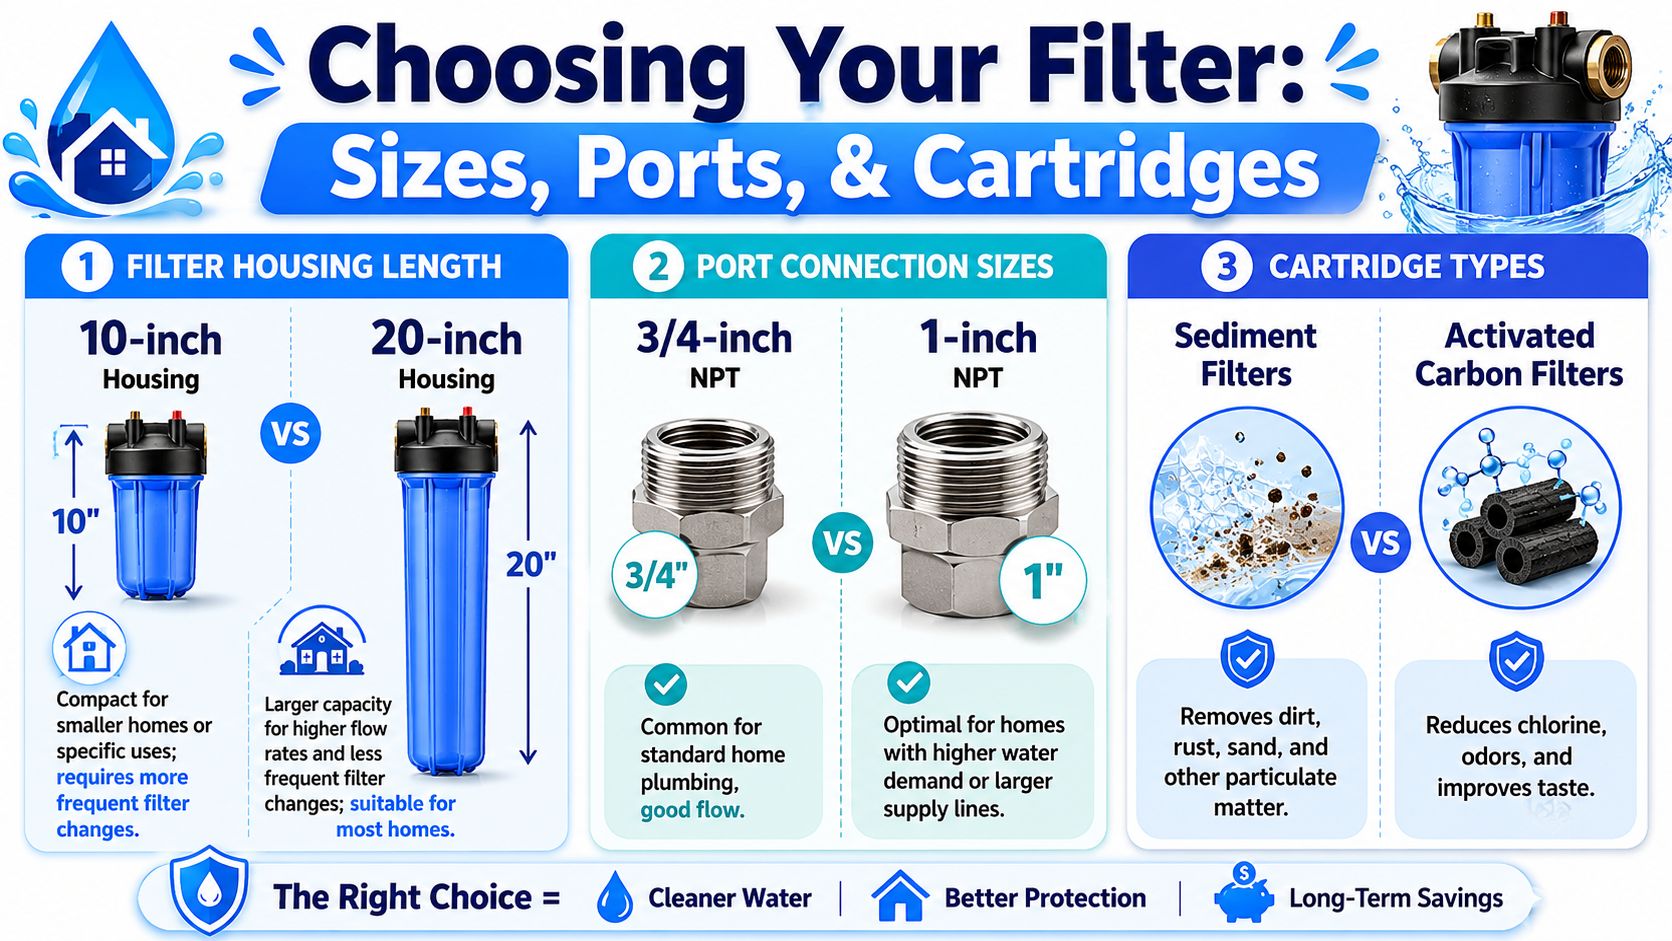
A diagram explaining the different components and types of under-sink water filter cartridges used for filtration.

Sediment cartridges

Sediment cartridges are the first line of defense in many systems. They catch visible or near-visible particles such as dirt, rust, and sand before those particles clog finer filter stages.

A useful way to think about them is as the doormat at the front door. They don't handle every problem, but they stop the big mess from moving deeper into the house.

Technical guidance for cartridge selection notes that under-sink systems often use 2 to 5 micron sediment stages to protect finer downstream stages, and geometry matters too: inner diameter, outer diameter, and length must match the housing so the cartridge seats correctly, as discussed in this cartridge sizing and micron overview.
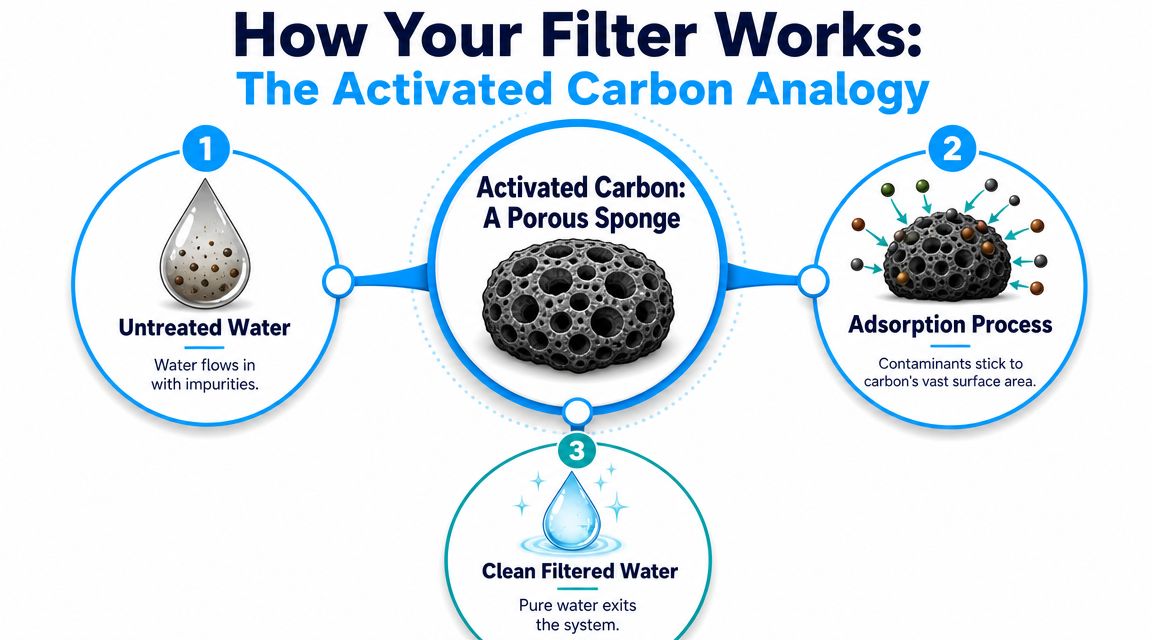
Carbon cartridges

Carbon is the workhorse in many home systems. It's commonly used when homeowners want water that tastes and smells better, especially if they notice chlorine.

You'll usually see two broad styles:

  • Granular activated carbon
    Loose carbon granules give water contact with a bed of media and are often used for broad taste and odor improvement.

  • Carbon block
    Compressed carbon acts more like a denser, finer filtering layer. It often supports more precise reduction claims than looser media designs.

Specialty cartridges

Some cartridges are built for specific jobs. These may target contaminants such as lead, or work as part of a more complex system that includes reverse osmosis stages or polishing filters.

The key point is simple. Don't buy a specialty cartridge because the label sounds advanced. Buy it because it matches a real water concern in your home.

Media Type Best For Reducing Common Use Case
Sediment media Dirt, rust, sand, particulate matter Pre-filter stage to protect downstream cartridges
Granular activated carbon Chlorine, taste, odor, some organic compounds Municipal water with chlorine taste or smell
Carbon block Chlorine, taste, odor, and finer reduction goals depending on certification Homes that want stronger everyday drinking-water filtration
Specialty media Specific contaminants depending on design Lead-focused systems, multi-stage systems, or special water problems

Why micron rating confuses people

A micron rating describes how small a particle a filter is designed to catch. Smaller isn't automatically better.

A tighter filter can improve particulate capture, but it can also slow flow and increase pressure loss. That's why many systems pair stages together instead of using one ultra-tight cartridge for everything.

A good cartridge setup balances contaminant reduction, faucet flow, and the pressure your home already has.

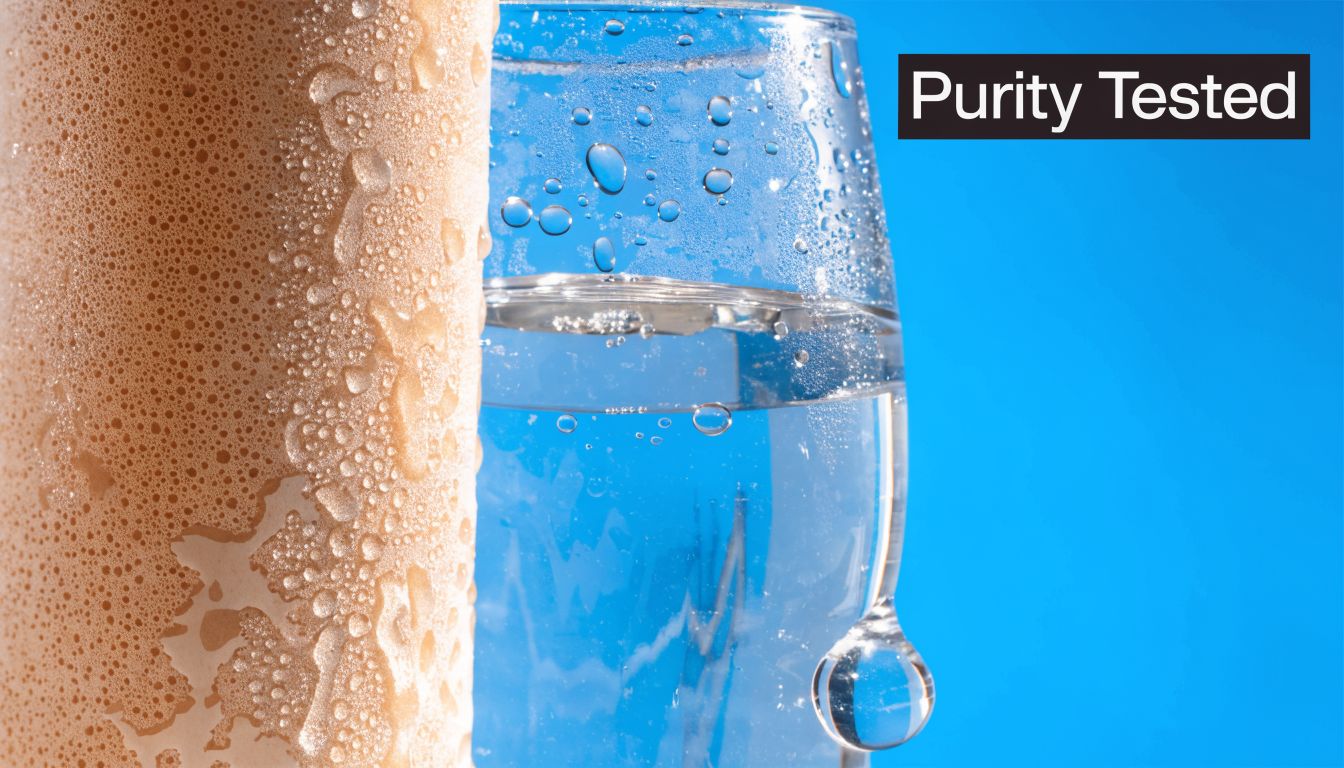
Understanding Certifications and Lifespan

An infographic explaining water filter certifications, including NSF standards and tips for maximizing cartridge lifespan.

You are standing in the aisle, holding two cartridges that look almost identical. One promises better taste. The other lists a few certification numbers and costs more. Those numbers are often the difference between buying a filter that makes water more pleasant and buying one that is tested for a contaminant you need to reduce.

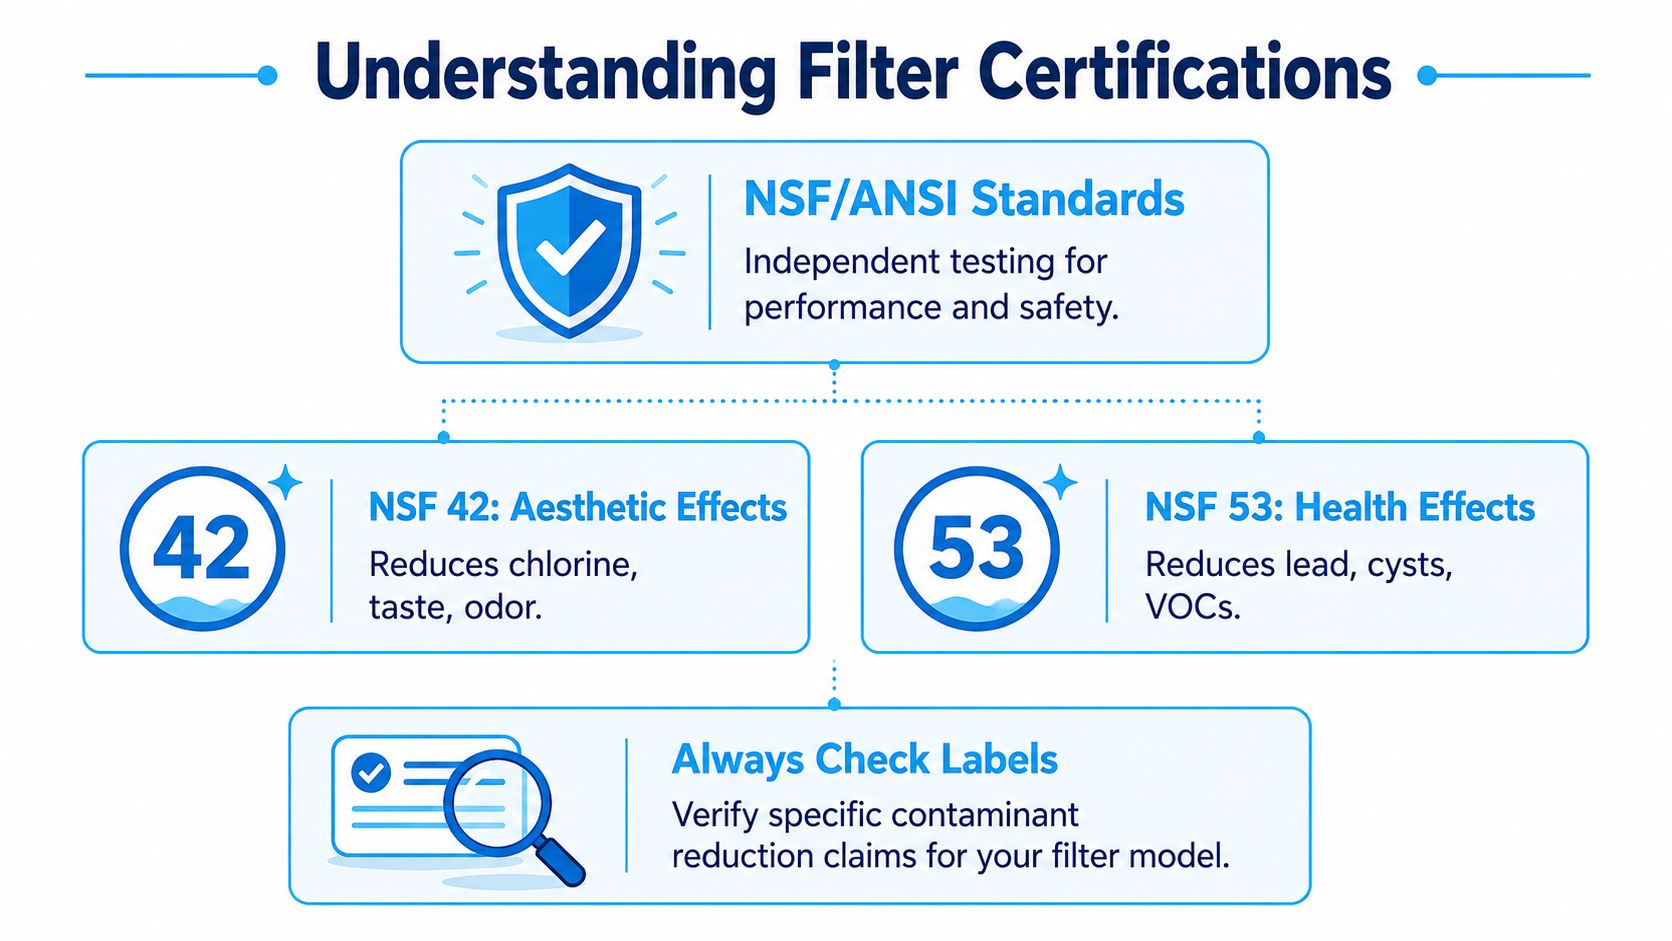
For under sink cartridges, NSF certifications are one of the clearest ways to sort marketing from tested claims. They help you match the cartridge to the job, which matters more than the brand name on the box.

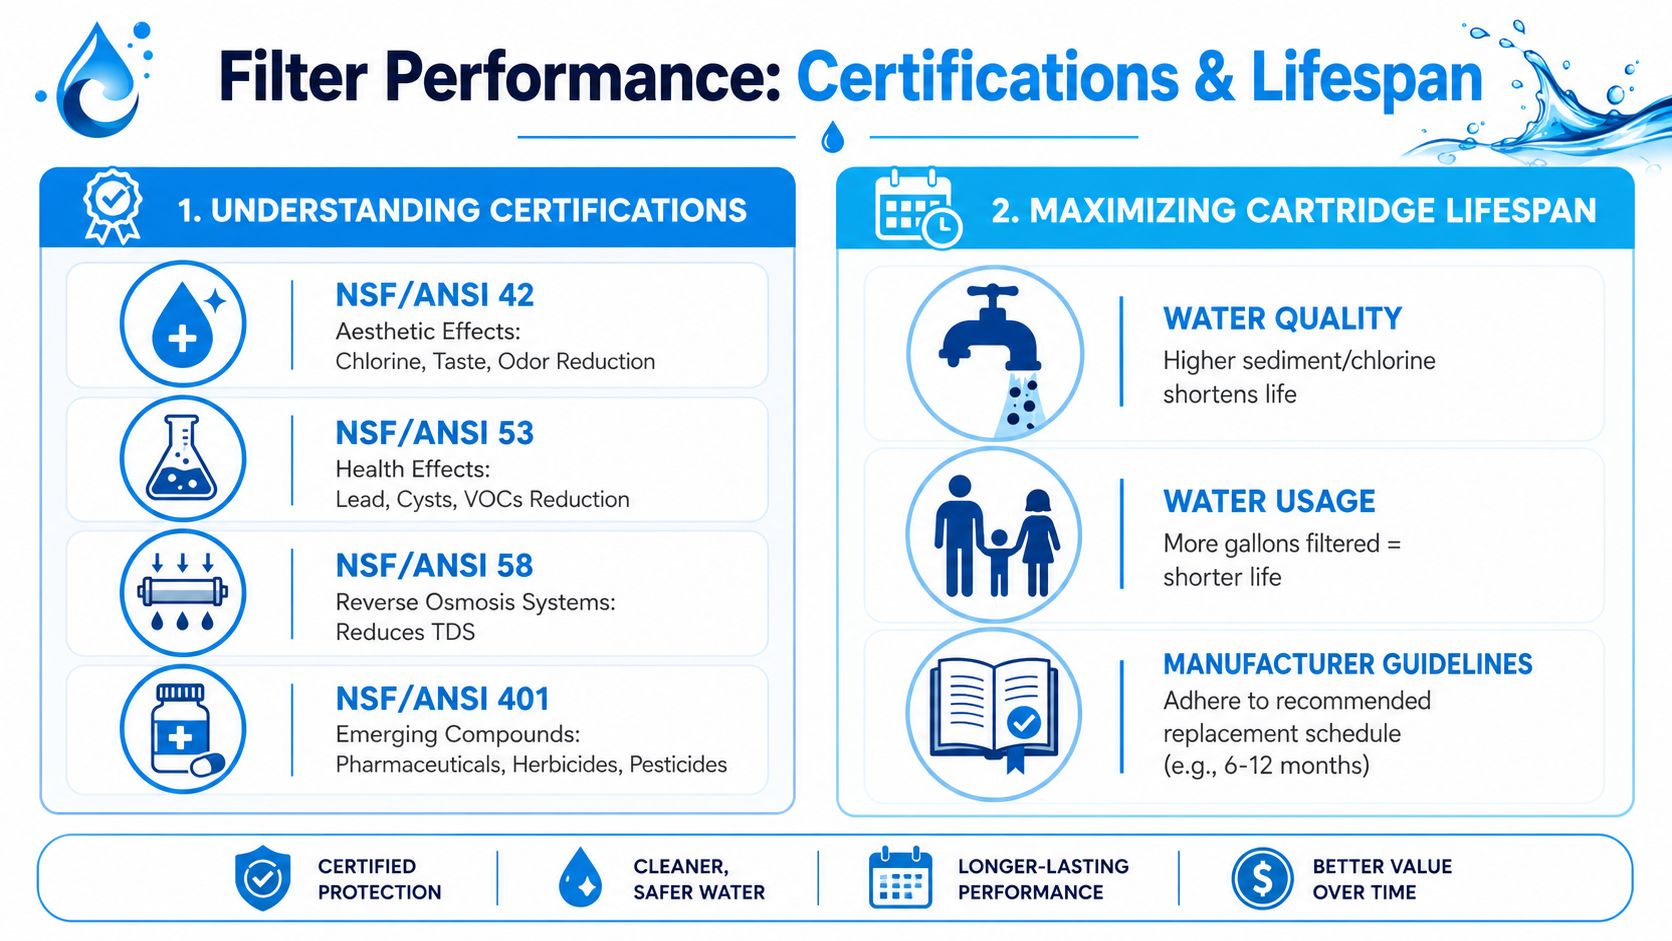
What those certification numbers mean in real life

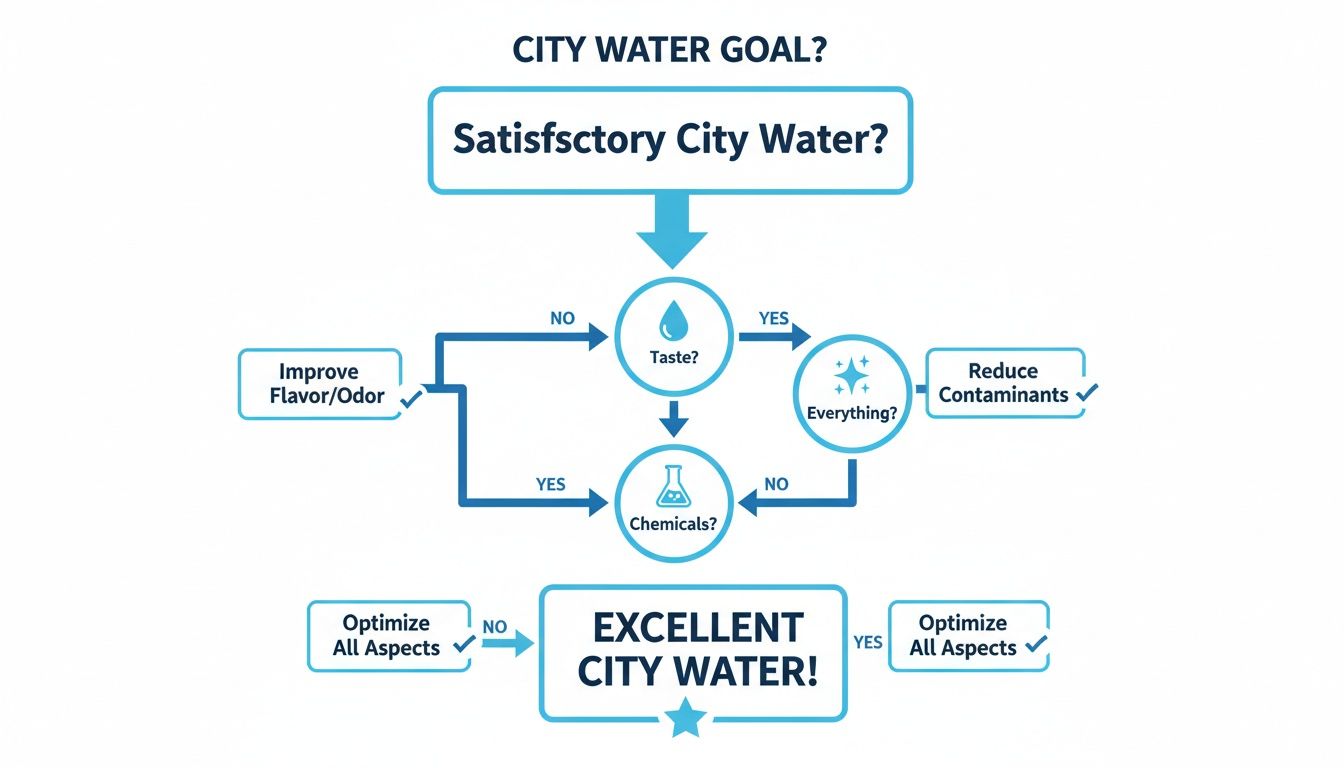
The easiest way to read these numbers is to ask one question: What problem am I trying to solve?

  • NSF 42 points to aesthetic improvements, such as chlorine taste and odor.
  • NSF 53 applies to cartridges tested for certain health-related contaminant reductions, such as lead or cysts.
  • NSF 58 is tied to reverse osmosis systems, which filter water through a membrane instead of relying only on a standard carbon cartridge.

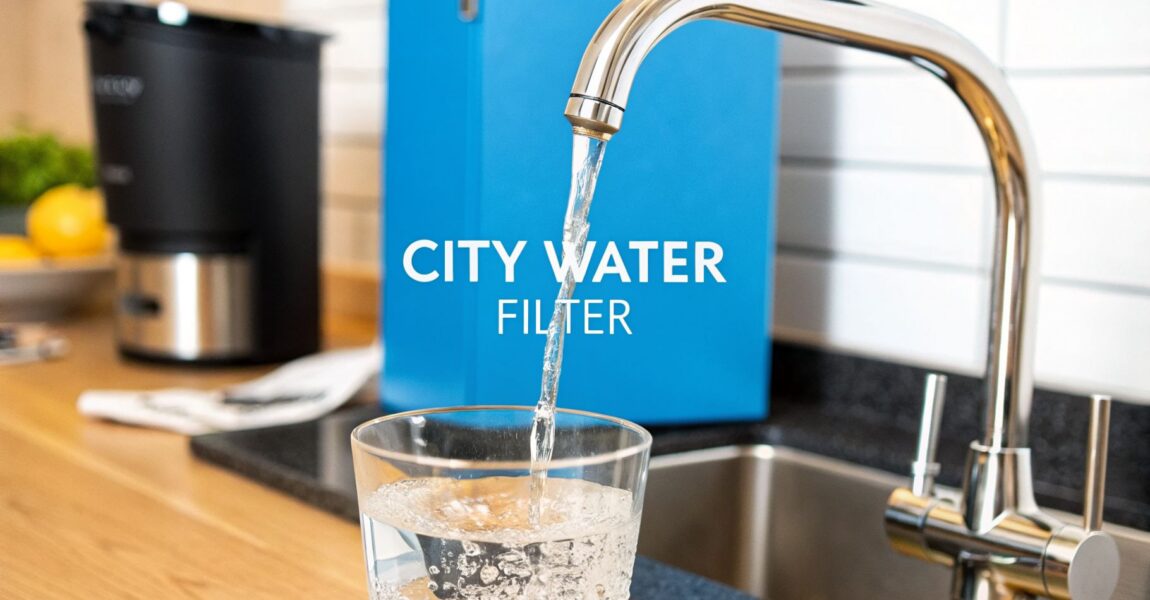
A good shortcut is this. If your complaint is, “My city water tastes like a swimming pool,” NSF 42 may cover what you care about. If your concern is, “I want a cartridge tested for lead reduction,” look for the specific certification and reduction claim that matches that concern.

That is the hidden factor many shoppers miss. A cartridge can be high quality and still be the wrong choice if its certifications do not line up with your water.

Time rating versus gallon rating

Cartridge life is usually shown in two ways. One is time, such as a replacement every several months. The other is capacity, which is how many gallons the cartridge is designed to treat.

A simple way to read this is to treat the cartridge like a pair of work boots. Time matters because materials age. Usage matters because heavy use wears them down faster. Your replacement point is whichever limit comes first.

If a cartridge is rated for a certain number of months but your household uses filtered water for drinking, cooking, coffee, pet bowls, and filling reusable bottles all day, you may hit the gallon limit sooner than the calendar suggests. On the other hand, a lightly used guest kitchenette may age out on time before it reaches full capacity.

What shortens cartridge life

Real kitchens rarely match ideal test conditions. Several things can use up a cartridge faster:

  • Sediment-heavy water
    Dirt, rust, and fine particles can clog the cartridge early, much like dust loading up a furnace filter.

  • Higher daily water use
    Bigger families and frequent cooking simply push more water through the media.

  • Tougher contaminant loads
    If the cartridge is working hard to reduce a target contaminant, its useful life can shrink.

  • Poor match between cartridge and water
    A cartridge chosen for taste and odor may not hold up well if the actual issue is something more demanding.

Long-term cost gets clearer. A cheaper cartridge that needs frequent replacement can cost more over a year than a better-matched cartridge with a longer service life.

Watch for practical clues, too. Slower flow, returning chlorine taste, or a change in odor usually means the cartridge is reaching the end of its useful life. In a cramped sink base, that matters twice, because every extra replacement is another trip back into that cabinet.

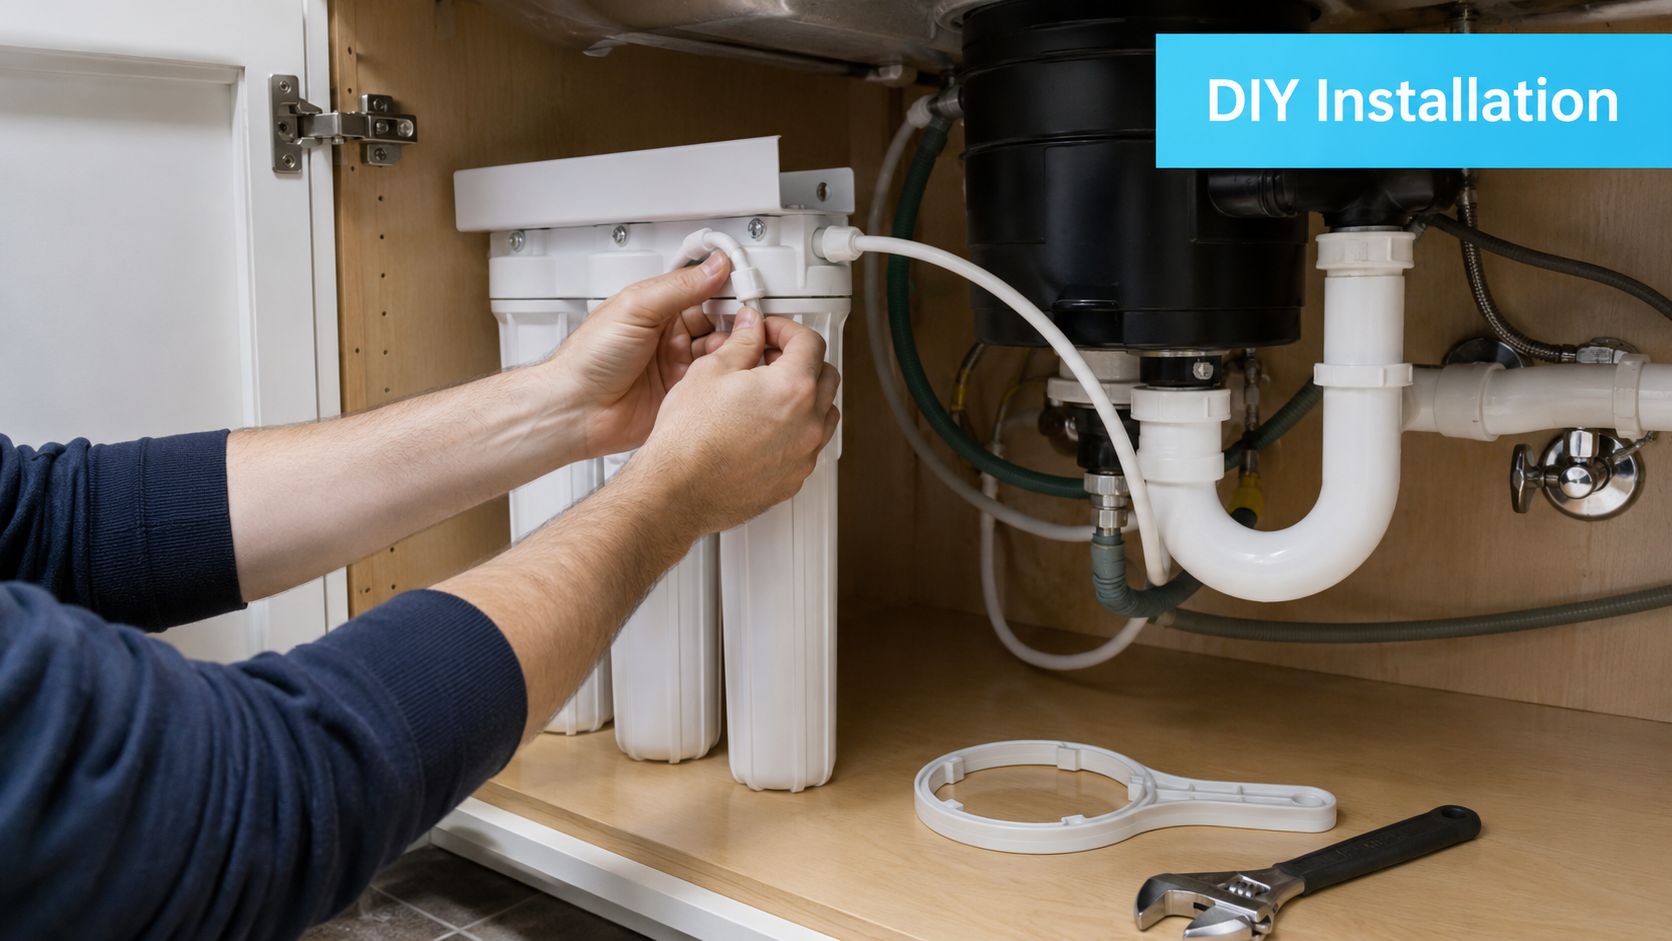
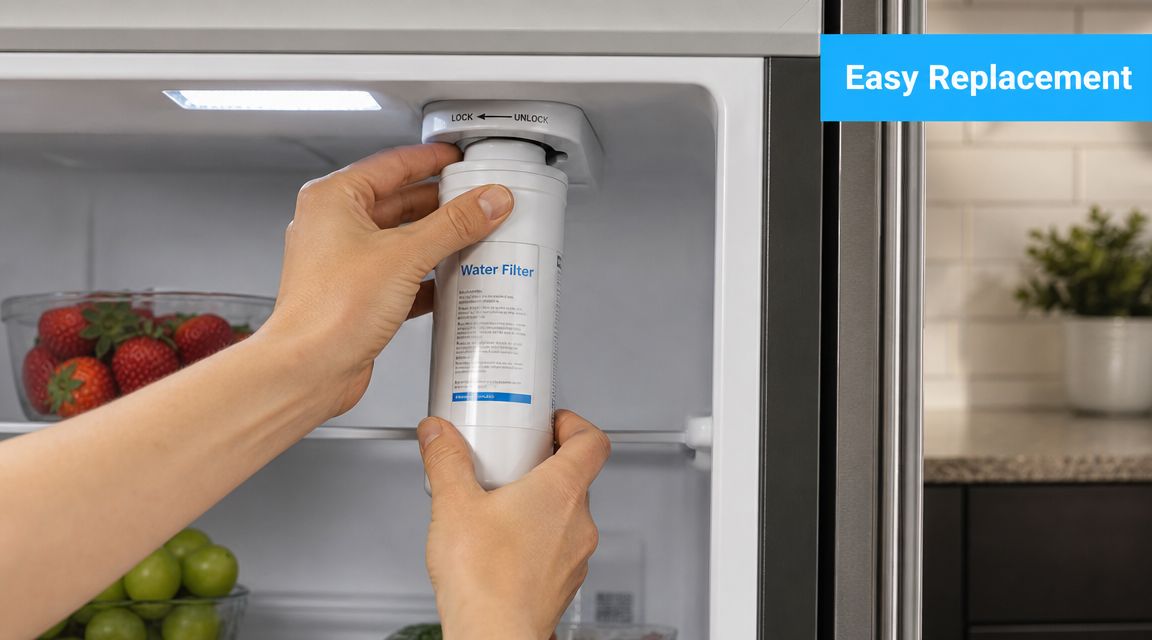
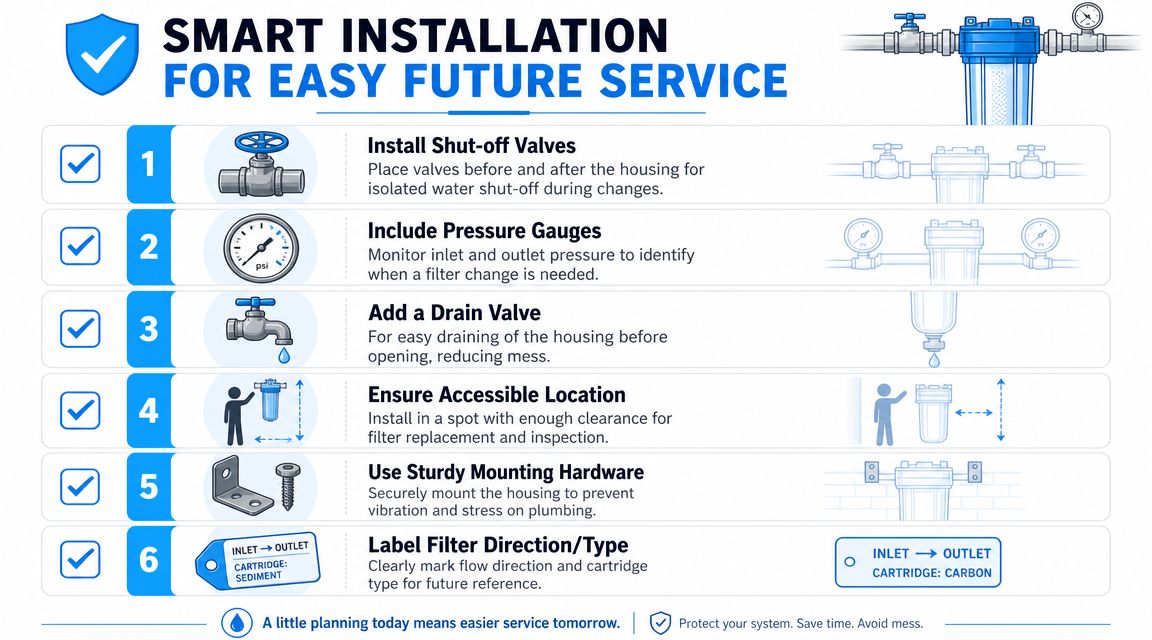
Cartridge Installation and Replacement Basics

Most cartridge replacements start the same way. You kneel on the kitchen floor, move the spray cleaner, trash bags, and dish soap out of the cabinet, then realize the hard part isn't the filter. It's the space.

A person replaces an A. O. Smith brand under-sink water filter cartridge in a kitchen cabinet.

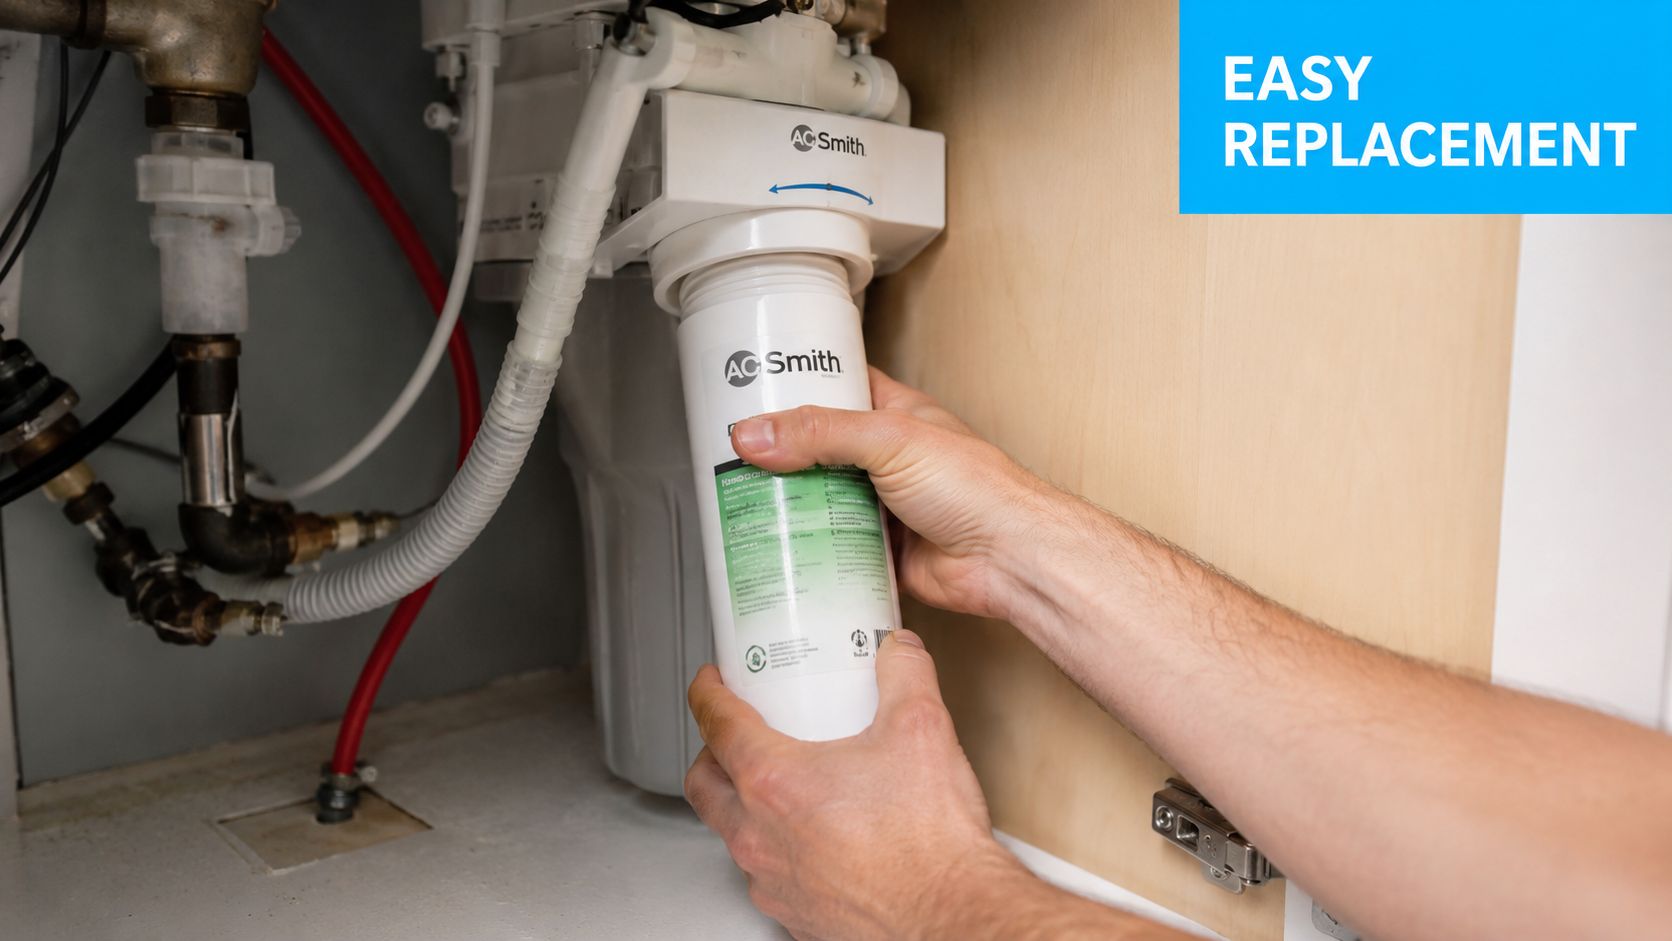
A common mistake is measuring only the cabinet footprint. Installation and servicing also require enough vertical clearance to pull the cartridge down without unmounting the whole unit, which can raise leak risk over time, as noted in this under-sink installation guide.

Before you loosen anything

Start with the basics:

  1. Shut off the feed water to the filter.
  2. Relieve pressure by opening the filtered-water faucet.
  3. Place a towel or shallow pan under the housing.
  4. Check your clearance before you twist the cartridge or housing loose.

That last part saves a lot of frustration. If the housing can't drop far enough, you may have to shift storage items, reroute tubing carefully, or in some setups reconsider the mounting position.

The small details that prevent leaks

Many replacement jobs go wrong on the little stuff, not the big stuff.

  • Watch the O-ring
    If the seal is dry, twisted, dirty, or out of place, you can end up chasing drips for the next hour.

  • Don't overtighten
    Hand-tight is usually the goal after the seal is seated properly. Forcing it can damage parts or make the next change miserable.

  • Match the cartridge exactly
    A cartridge that looks close may still be the wrong geometry or the wrong filtration class.

Here's a helpful walk-through if you want to see a replacement process in action:

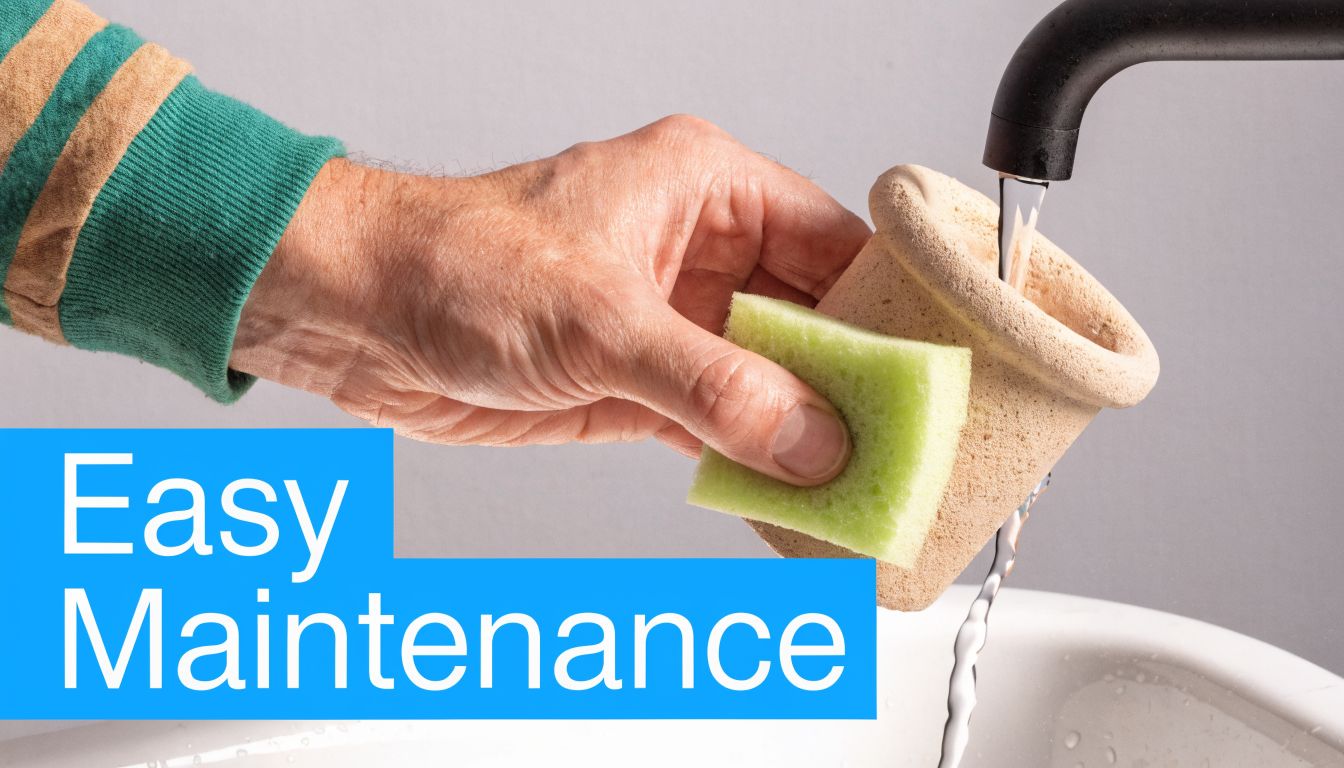
Don't skip the flush

A new cartridge usually needs a flush before normal use. In multi-stage systems, the replacement can involve removing and reseating cartridges, reconnecting tubing, and flushing the system afterward. That's one reason maintenance burden matters when choosing a cartridge style in the first place.

Some cartridges are easy to swap in a minute or two. Others turn a simple maintenance job into a cramped, wet project. The better choice is often the one you'll actually replace on time.

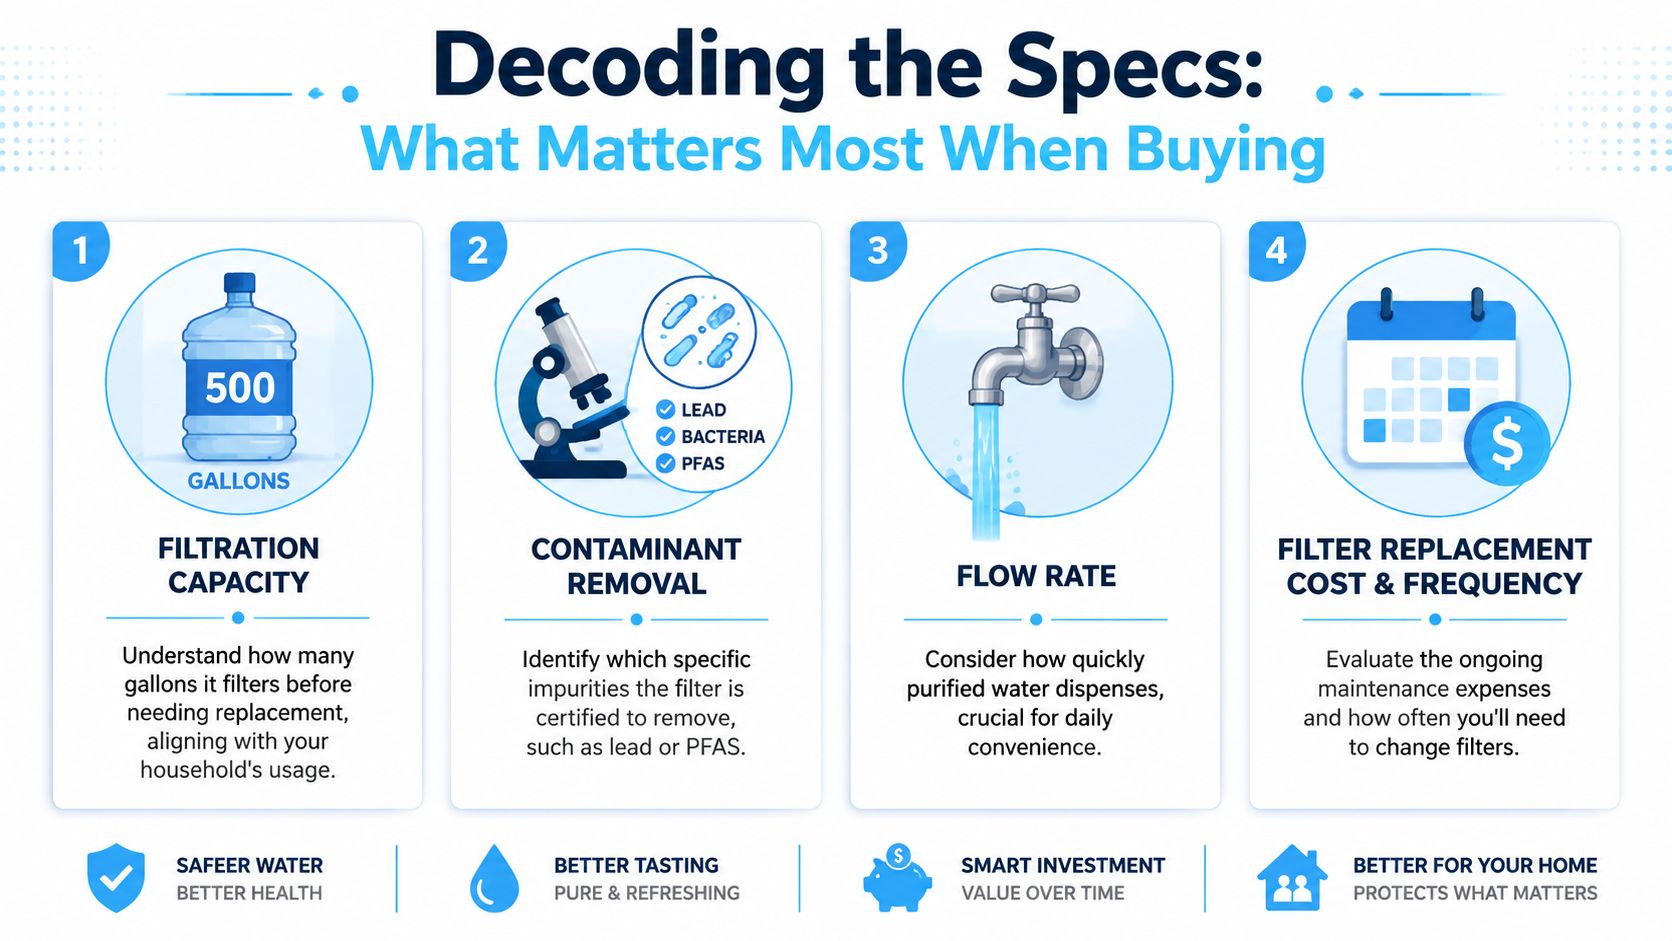
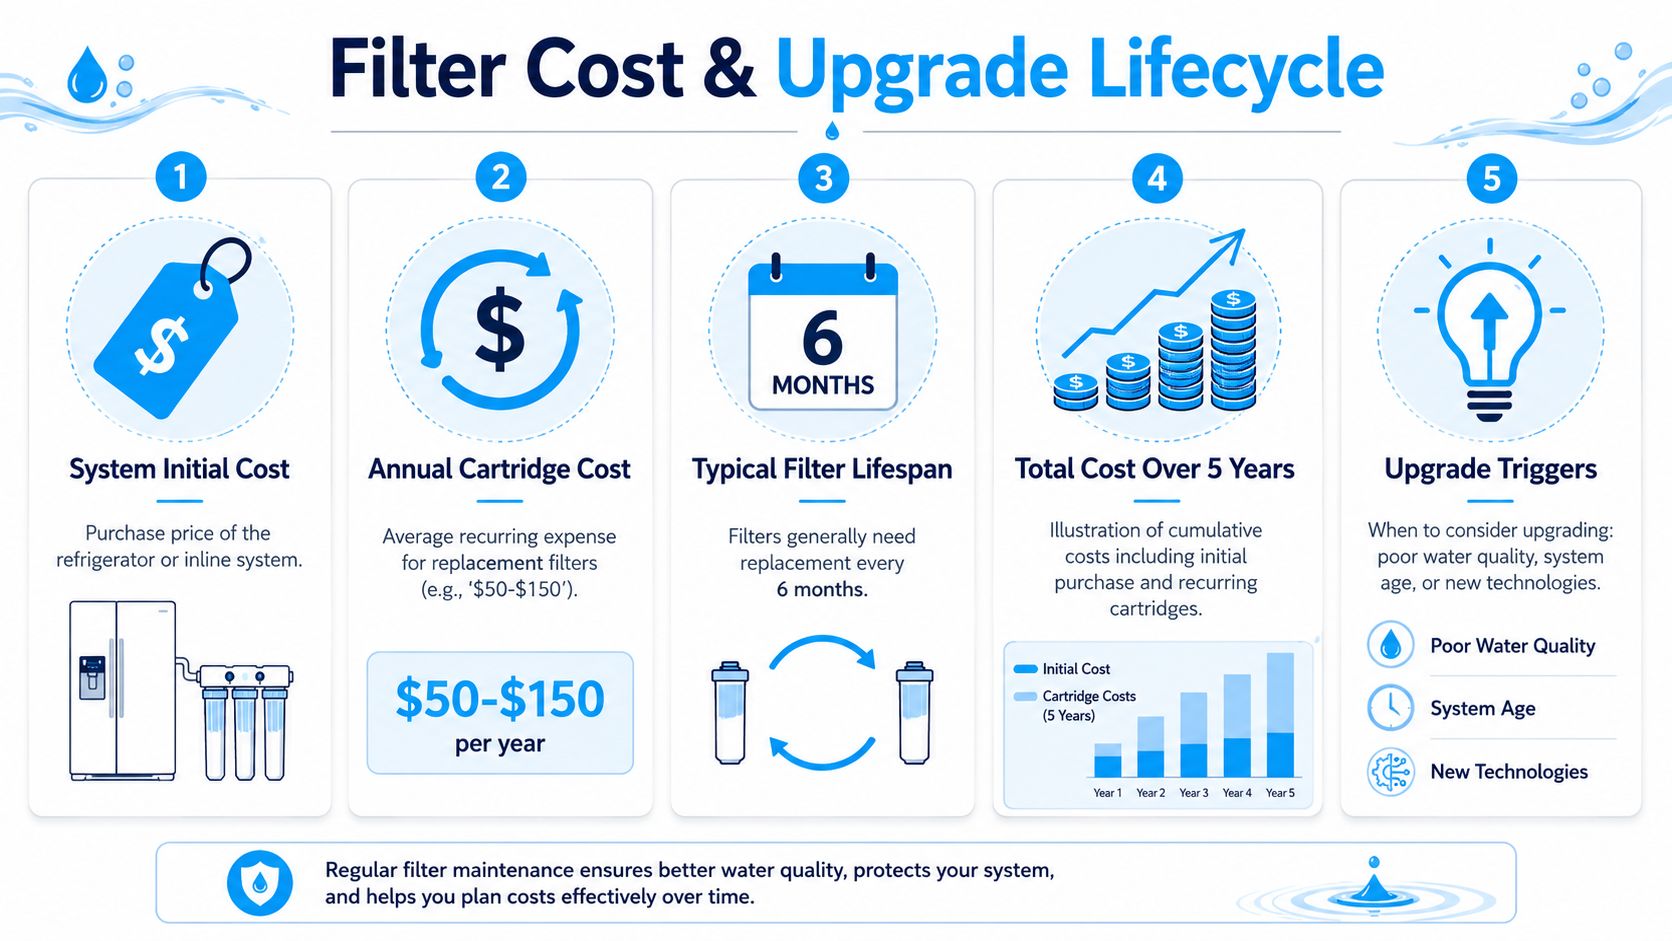
Estimating Your Total Cost of Ownership

The cheapest cartridge on the shelf can be the most expensive one you own. That sounds backward until you look at replacement frequency, capacity, and the hassle cost of poor flow.

A simple way to think about total cost of ownership is this:

System cost + replacement cartridge cost over time + the inconvenience cost of maintenance

That last part isn't on the receipt, but it matters. If a cartridge is annoying to change, people delay it. Then performance drops.

Capacity is money in disguise

A cartridge's capacity tells you how long it can do its job under expected conditions. That directly affects how often you buy replacements.

A real market example helps. One replacement under-sink cartridge is rated for about 720 gallons with replacement every 6 months and a stated flow rate of 0.72 to 1.0 GPM, according to WaterChef's replacement cartridge details. That gallon rating isn't decoration. It's an operational limit tied to maintaining performance.

How to compare two cartridge options

When you're choosing between cartridges, ask these questions:

  • How often will I replace it
    A lower upfront price may come with more frequent purchases.

  • What's the usable flow like
    Slow faucet performance creates daily annoyance, especially when filling pots or bottles.

  • Am I paying for features I don't need
    A more complex cartridge can cost more without solving a problem you have.

  • How difficult is the swap
    A hard-to-replace cartridge has a hidden cost in time, mess, and procrastination.

Here's a practical comparison mindset. Cartridge A costs less today, but it needs more frequent changes and has slower flow. Cartridge B costs more upfront, but it lasts longer and is easier to service. Over time, Cartridge B may be the more sensible buy even before you count the frustration factor.

Don't confuse high capacity with universal value

High capacity is useful only if the cartridge also matches your water goals and your system. A long-life cartridge that doesn't fit the housing or target the right contaminants is still the wrong cartridge.

For homeowners, the smart move is to compare the real ownership rhythm. How often you order replacements. How annoying the change process is. How the faucet feels every day. That's the cost you live with.

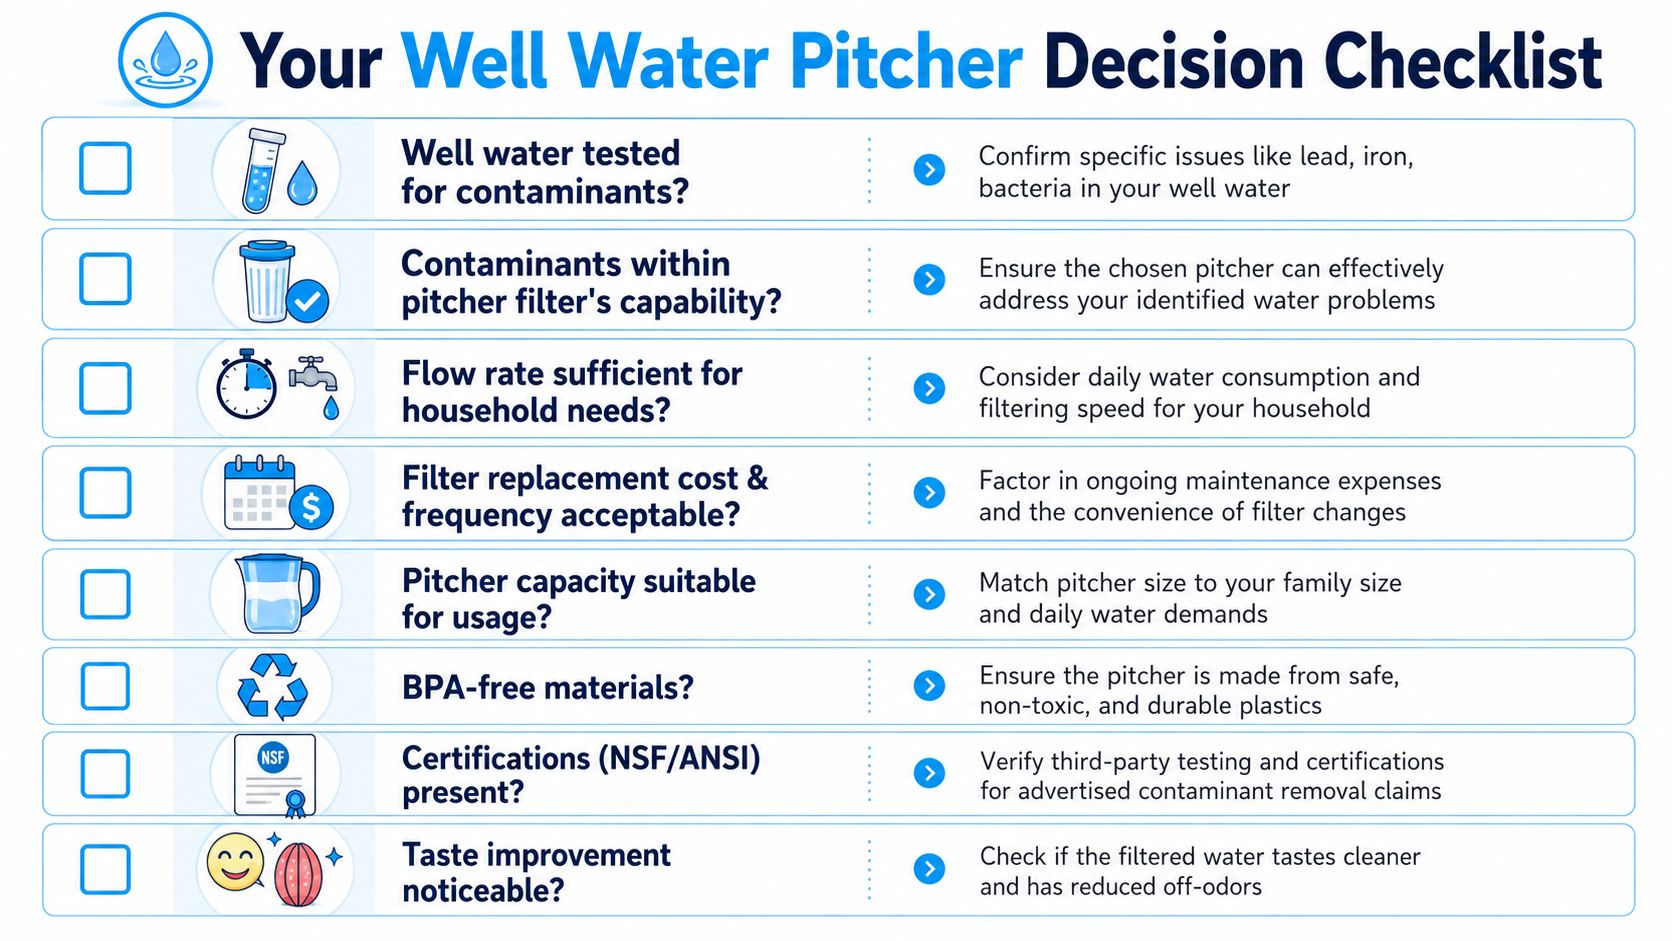
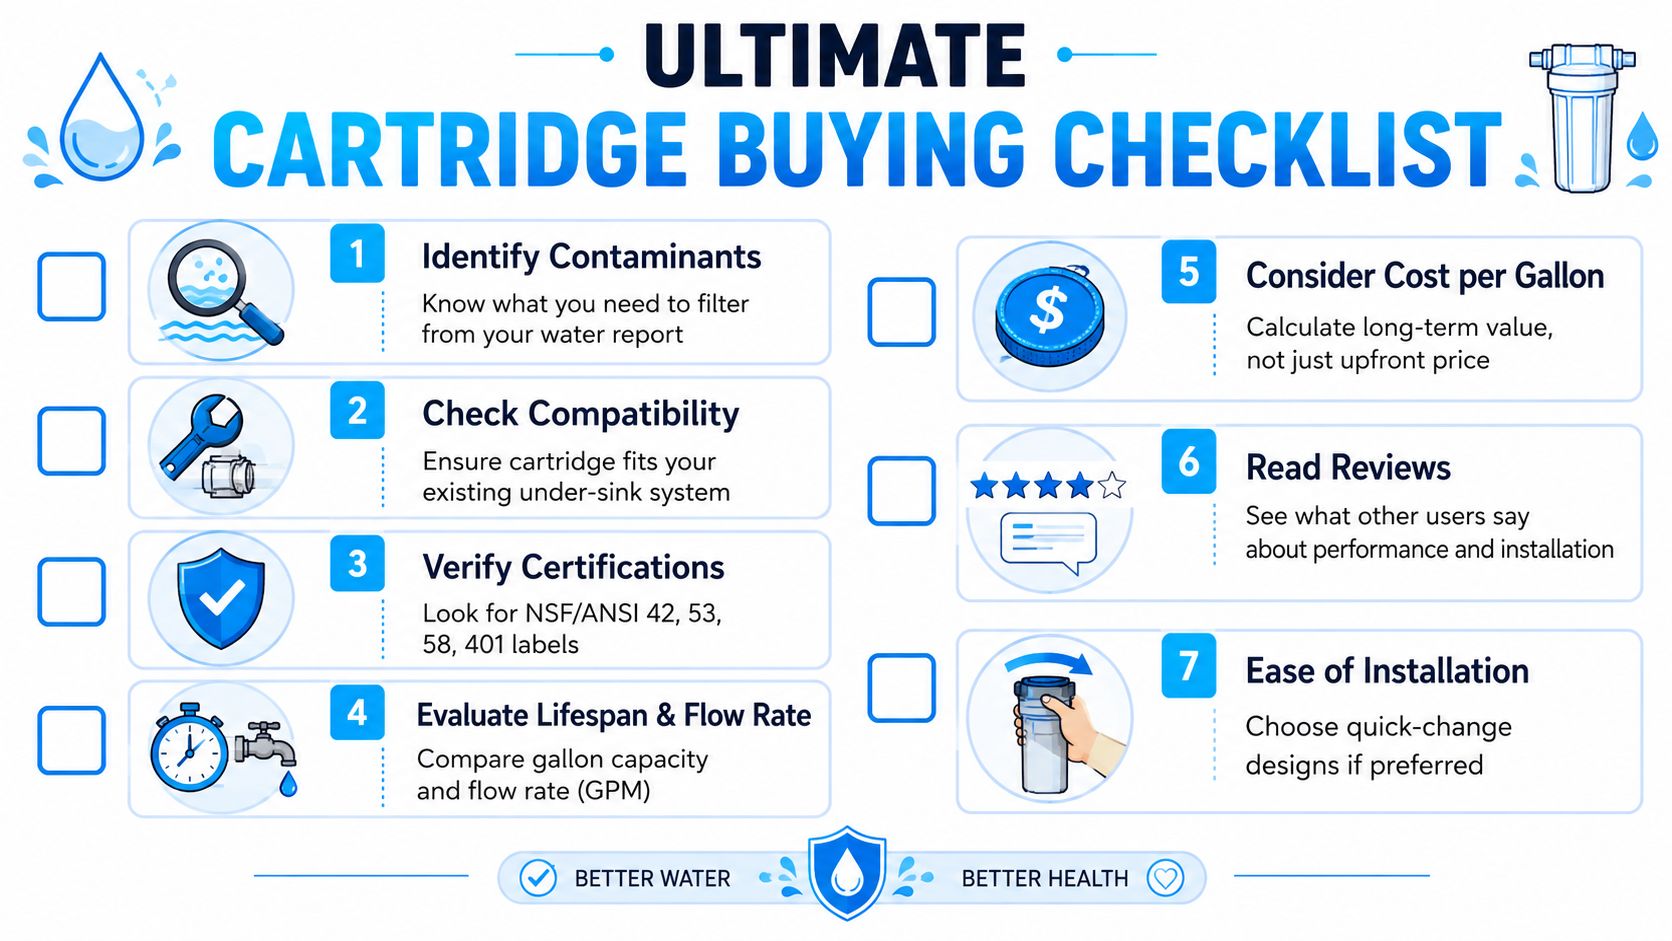
Your Ultimate Cartridge Buying Checklist

By the time you're ready to buy, the goal isn't to memorize filter jargon. It's to narrow the decision to a cartridge that fits your system, fits your water problem, and fits your patience level for maintenance.

A helpful checklist for buying water filter cartridges featuring seven essential steps for making informed purchases.

Use this checklist before you order

  • Identify the problem first
    If your issue is chlorine taste, you're shopping differently than someone worried about lead or someone dealing with sediment.

  • Confirm physical compatibility
    Check the exact cartridge style, housing fit, and whether your system uses a proprietary shape or a more standard form.

  • Match the cartridge to the filtration job
    Sediment, carbon, and specialty media each play different roles. Buy for the problem, not the marketing.

  • Check the certification label
    Packaging should tell you what the cartridge is certified to reduce. That matters more than vague promises.

  • Look at lifespan and daily use
    A cartridge may be right on paper but annoying in a busy household if it needs frequent changes or slows the faucet too much.

  • Be honest about maintenance tolerance
    The best cartridge choice depends not just on water goals but also on how much maintenance burden you'll accept, since multi-stage systems can involve more complex replacements and flushing, as shown in this hands-on replacement discussion.

  • Think beyond the cartridge itself
    If your real goal is less bottled water at home, it's worth learning more about reducing single-use plastic while you plan your filtration setup.

One smart final check

Before buying, pull up the product page, your old cartridge, and a photo of your under-sink setup at the same time. That simple habit catches a lot of mistakes.

If you want a broader library of practical comparisons and maintenance guidance, Water Filter Advisor's advice center is one place homeowners can use to compare filter types, certifications, and replacement considerations across common home systems.

The right cartridge is the one you can identify clearly, install without drama, replace on schedule, and trust for the specific water you actually have.


If you want help sorting through cartridge types, certifications, and replacement decisions without the guesswork, visit Water Filter Advisor for practical guides built around real household water filtration needs.

Under Sink Water Filter Kit: Safe, Great-Tasting Water

You're probably here because your kitchen tap has started raising questions. Maybe the water tastes flat, smells a little chlorinated, leaves you second-guessing what your family drinks every day, or doesn't inspire confidence. That's the moment many homeowners stop treating filtration like a gadget and start treating it like part of the house.

An under sink water filter kit fits that shift well. It stays out of sight, feeds water where you use it, and avoids the clutter of countertop machines or the compromises of a pitcher. More important, it gives you a way to choose treatment based on your real water concerns instead of guessing from taste alone.

The Hidden Hero in Your Kitchen Cabinet

People generally don't focus on the space under the kitchen sink until something leaks or runs out of room. But that cabinet is where one of the most practical water upgrades in a home can live.

The CDC classifies under-sink systems as point-of-use filters, meaning they treat water at a single tap instead of filtering the whole house. The same CDC guidance points buyers toward NSF standards 42, 53, and 58 as the main benchmarks for comparing claims, and notes that by 2026 Consumer Reports had rated under-sink systems ranging from $86 to nearly $700, with category capacities around 1,000 to 2,000 gallons in many systems, showing how far the market has matured beyond simple add-ons and into long-life household appliances (CDC guidance on choosing home water filters).

That matters because a serious under sink water filter kit isn't just there to make water taste nicer. It's a piece of equipment with performance standards, maintenance schedules, and a clear job description. It should tell you what it's designed to reduce, how long the cartridge lasts, and what certification backs that claim.

Why this category keeps winning space in kitchens

An under-sink setup solves a very practical problem. You want cleaner water, but you don't want to give up counter space or deal with filtering every drop used in showers, toilets, and laundry when your main concern is drinking and cooking water.

That point-of-use approach is efficient. You treat the water that matters most at the place you need it most.

Practical rule: Buy an under-sink system the same way you'd buy a smoke detector or a sump pump. Start with the risk it needs to handle, then check whether the product was built and certified for that job.

What makes it feel like an appliance, not an accessory

A mature category has a few signs. Under-sink systems now span budget and premium tiers, they publish service life expectations, and they're built around standard testing language. That's a big improvement over the old “better tasting water” pitch that told you almost nothing.

If you want a reliable buying framework, think in this order:

  • Your water concern first. Taste and odor need a different solution than lead or PFAS concerns.
  • Certification second. The right standard matters more than a flashy product page.
  • Service life third. A filter you won't maintain isn't a good filter.
  • Fit and convenience last. Cabinet space and faucet setup still matter, but they're not the starting point.

How Under Sink Water Filters Actually Work

An under sink water filter kit works like a multi-stage security checkpoint for water. Water comes in from the cold-water line, moves through one or more treatment stages, and exits at either a dedicated drinking-water faucet or the main faucet, depending on the design.

Each stage has a job. One catches grit and sediment. Another absorbs chlorine, odors, or organic compounds. In more advanced systems, a membrane or final polishing filter handles smaller or more difficult contaminants. The filtration process resembles a highway with different exits. Large particles get stopped early, chemical tastes and smells get intercepted further down the road, and the finest screening happens at the strictest checkpoint.

A diagram illustrating the three-stage filtration process of an under-sink water filter system from intake to output.

The basic path from supply line to glass

The flow usually looks like this:

  1. Cold water enters the system through a feed connection under the sink.
  2. A pre-filter stage catches sediment like rust or debris that would otherwise foul later media.
  3. A carbon stage reduces chlorine, odor, and some organic contaminants.
  4. An optional membrane or post-filter handles finer reduction and taste polishing.
  5. Filtered water exits at the drinking faucet.

That sequence is why stage order matters. If you send dirty, particle-heavy water straight to a delicate membrane, you shorten its useful life. Good systems are built to protect the most sensitive component, not just advertise the final result.

Why point-of-use differs from other filter styles

A faucet-mounted filter is visible and easy to add, but it's usually a lighter-duty option. A whole-house system treats more water and solves different problems, but it's not always the right answer if your priority is drinking water at the kitchen sink.

Under-sink systems sit in the middle. They're more substantial than temporary add-ons and more targeted than whole-house treatment. That makes them ideal when the problem you care most about is what goes into coffee, pasta, baby bottles, and drinking glasses.

A filter format doesn't tell you what it can handle. The treatment technology and certification do.

That distinction matters because buying by shape alone can lead people into the wrong system. Guidance tied to NSF/ANSI standards makes clear that different certifications cover different contaminant claims, and recent EPA attention to PFAS has made that matching process more important for households with specific chemical concerns rather than simple taste complaints (under-sink treatment guidance and certification context).

What works and what doesn't

What works is matching the tool to the job. A carbon system can be a very sensible choice for many kitchens. It can also be the wrong choice if your concern calls for a different technology.

What doesn't work is assuming every under sink water filter kit does the same thing because it installs in the same place. Two systems may look nearly identical in photos and perform very differently once you read the certification details and contaminant list.

Decoding the Specs What Really Matters When You Buy

Specs can either help you buy smart or bury you in jargon. The trick is to ignore the flashy phrasing and focus on four things that affect daily use and long-term value.

An infographic detailing the four key specifications to consider when purchasing a home water filtration system.

Start with capacity, not marketing

Capacity tells you how much water a cartridge is expected to treat before replacement. That number gives you something concrete to compare across systems.

Published summaries of under-sink carbon systems commonly place them in a range of 500 to 2,000 gallons, with lower-capacity basic models and higher-capacity premium systems at the upper end. The same category overview notes examples such as Hydroviv, which reports 720 gallons per cartridge and IAPMO certification to NSF/ANSI 42, 53, and 372 while targeting contaminants such as PFAS, lead, arsenic, chromium-6, VOCs, and disinfection byproducts (Frizzlife market guide summary).

A simple way to think about capacity is this: it's the size of your fuel tank. A bigger tank doesn't automatically mean better filtration, but it does tell you how often you'll be stopping for maintenance.

Certifications tell you more than brand language

A product page may say “cleaner,” “healthier,” or “advanced.” Those words don't mean much by themselves. Certification language does.

Here's the practical interpretation:

  • NSF/ANSI 42 usually matters when taste and odor are front and center.
  • NSF/ANSI 53 matters when the system makes health-related contaminant reduction claims.
  • NSF/ANSI 58 is the benchmark you'll see tied to reverse osmosis systems.

A buyer who only reads the headline benefit often misses the true question: certified for what?

Filter media is the engine room

Different media do different jobs, leading to many buying mistakes. Carbon is a strong option when the issue is chlorine taste, odor, or some organics. Sediment media protects downstream components. More advanced systems add membrane-based treatment when the contaminant profile calls for it.

A useful way to judge product copy is to ask whether it explains why each stage exists. If every stage sounds interchangeable, the listing probably isn't helping you compare intelligently.

Buyer's shortcut: If the product page makes broad promises but doesn't clearly show contaminant claims, certifications, and cartridge life, keep shopping.

Flow rate affects daily annoyance more than people expect

Flow rate is the convenience spec. It decides whether filling a pot feels normal or whether you stand there waiting with a glass in your hand.

You won't always get an apples-to-apples comparison across brands, and some listings handle this poorly. But you can still think through the consequence. A more compact direct-connect filter may feel more effortless in daily use, while a deeper treatment system may trade some speed or setup complexity for broader reduction claims.

Here's a simple buying table to keep your priorities straight:

What you care about What to check first Why it matters
Better taste and odor Certification scope and carbon stage Helps separate cosmetic improvement from broader treatment
Health-related concerns NSF/ANSI 53 or technology-specific certification Supports claims tied to specific contaminants
Fewer cartridge changes Capacity rating Helps estimate maintenance rhythm
Easy everyday use Faucet style, layout, and flow feel A system you enjoy using gets used

The Three Main Filter Kits Explained

There are three broad under-sink categories most homeowners end up comparing. Think of them like home security choices. One is a basic lock, one is a deadbolt and sensor package, and one is a more complete security setup with layers working together.

A comparison chart outlining the pros and cons of single-stage versus multi-stage under sink water filter kits.

Single-cartridge kits

This is the straightforward option. One cartridge, fewer connections, less cabinet impact.

These systems usually make the most sense when your main complaint is taste, smell, or convenience. They're often easier to install and easier to live with if you want a clean, compact setup.

Good fit:

  • Renters or simple remodels where minimal disruption matters
  • Households focused on chlorine taste and odor
  • Buyers who want fewer parts under the sink

Trade-off: they're usually less versatile than systems built with separate stages.

Multi-stage carbon systems

These are the practical middle ground. Instead of asking one cartridge to do everything, they divide the work among multiple stages.

That separation often leads to better protection for each filter stage and more targeted treatment. It also gives you a more transparent system. You can usually see what each stage is there to do.

This category often suits homeowners who want more than cosmetic improvement but don't necessarily want a full RO setup.

A decent analogy is a mudroom. If you stop dirt at the door, then remove wet shoes, then hang up the coat, the house stays cleaner. Multi-stage systems use that same logic. Each stage handles its own mess before the next stage takes over.

Reverse osmosis kits

RO is the heavy-duty option in the under-sink world. It's the system people choose when they want broader reduction capability and are willing to accept more installation complexity, more parts, and a dedicated service schedule.

AquaTru's under-sink RO design is a good example of why stage separation matters. The manufacturer describes a pre/carbon filter with about a 6-month service life, an RO membrane with about a 2-year service life, and a VOC carbon filter with about a 1-year service life, with the system positioned to remove up to 84 contaminants. The pre-stages protect the membrane, and the final carbon stage helps with taste and residual organics (AquaTru under-sink reverse osmosis purifier).

That's not just a stack of parts. It's a chain of custody for the water.

If you choose reverse osmosis, don't judge it like a single-cartridge filter. Judge it like a layered system with different parts wearing at different speeds.

Which one is right for you

Here's the simplest side-by-side view:

Kit type Best for Main strength Main compromise
Single-cartridge Taste and odor concerns Simplicity Narrower treatment scope
Multi-stage carbon Broader non-RO treatment goals Better task separation More parts and space
Reverse osmosis Households with more demanding contaminant concerns Deep, layered treatment More complex setup and maintenance

The mistake I see most often is people buying the most complicated unit when a simpler one would've solved the actual problem, or buying the simplest one when their water concern clearly called for more.

Planning Your Installation A DIY Guide

Installation scares off more buyers than maintenance does. In practice, most of the stress comes from not knowing what to check before the box arrives.

A person installing a multi-stage under sink water filter kit in a kitchen cabinet.

Check the cabinet before you buy

Open the sink base and look at it like a mechanic, not a shopper. Note the cold-water shutoff, the drain path, garbage disposal clearance, and where the filter body could mount or sit without getting bumped every time someone puts away cleaners.

If you're not used to looking at sink plumbing, a plain-language guide on plumbing rough-in explained helps make sense of what's fixed in place and what usually has room to work around. That's useful before you choose between a compact direct-connect unit and a larger dedicated-faucet system.

A few pre-purchase checks matter most:

  • Measure usable space. Don't count the whole cabinet. Count the area not occupied by the sink bowl and disposal.
  • Identify your faucet plan. Some kits need a dedicated drinking-water faucet. Others tie into the existing line.
  • Locate shutoffs and access points. Tight quarters make simple installs frustrating.

What usually comes in the box

Most under-sink kits include the filter body, cartridges, tubing, fittings, and mounting hardware. Dedicated-faucet kits usually include the faucet too. The details vary, but the basic rhythm is the same. Connect cold-water feed, route tubing, mount the unit, flush the system, and inspect for leaks.

The job isn't exotic. It's mostly about patience, clean connections, and giving yourself enough room to tighten fittings without forcing anything.

For a visual walkthrough, this installation video from Water Filter Advisor guidance is a useful reference before you start turning valves.

How the job usually unfolds

Most DIY installs follow this sequence:

  1. Shut off cold water and relieve pressure.
  2. Mount the filter where cartridges can still be changed later.
  3. Connect the feed line and outlet tubing.
  4. Install the faucet if required.
  5. Turn water back on slowly and check every joint.
  6. Flush the system until the water runs as the manufacturer directs.

Tighten fittings firmly, not aggressively. Under-sink leaks are often caused by rushed connections, crossed threads, or tubing that wasn't fully seated.

What doesn't work is cramming a larger multi-stage unit into a cabinet that can barely fit it. What does work is planning for cartridge access now instead of discovering later that you have to uninstall half the system just to service it.

The True Cost of Clean Water Maintenance and Cartridges

The purchase price gets attention because it's visible. The actual cost of an under sink water filter kit shows up over time in cartridge replacements, service intervals, and how willing you are to keep the system maintained.

Think in cycles, not sticker price

A useful benchmark comes from Hydroviv's under-sink system, which is rated for 720 gallons per cartridge, or about 6 months in a typical home, and carries NSF/ANSI 53 certification for health-related contaminant claims such as lead. That kind of rating gives homeowners a practical baseline for estimating replacement frequency and comparing ongoing value (Hydroviv under-sink filter details).

You don't need a complicated spreadsheet to make that useful. You just need the cartridge price and the gallon rating. Then ask two questions:

  • How often will this system likely need service in my household?
  • Am I comfortable paying that on a recurring basis?

If the replacement cost feels annoying every time it comes up, you probably bought the wrong system for your habits, even if the filtration is solid.

Cost per gallon is the honest metric

Cost per gallon strips away a lot of sales language. If one filter has a lower upfront price but short service life, and another costs more but lasts longer, the better long-term buy may not be the cheaper box on day one.

You can compare systems with a plain formula:

What to calculate Formula
Replacement frequency Household usage divided into rated gallons
Cost per gallon Cartridge cost divided by rated gallons
Ownership rhythm Filter lifespan plus how easy replacements are

That last point matters more than people think. Some homeowners are good at calendar-based maintenance. Others need a simple cartridge swap and fewer parts to track.

Signs a filter is ready for replacement

Most systems don't fail dramatically. They get less convenient first.

Watch for:

  • Slower flow that wasn't there after installation
  • Taste or odor changes returning
  • Calendar milestones based on the manufacturer's service life
  • System-specific reminders if your model includes them

RO systems add another layer because not all stages age at the same speed. That's one reason they can perform well over time, but it also means you need to keep the maintenance plan straight.

Maintenance isn't the downside of filtration. Neglected maintenance is.

The households happiest with their under-sink system are usually the ones that treat cartridge replacement like buying HVAC filters or smoke-alarm batteries. It becomes routine instead of a surprise expense.

Your Final Checklist for Choosing the Right Kit

Buying the right under sink water filter kit gets much easier when you stop asking, “Which one is best?” and start asking, “Which one matches my water and my household?”

Use this decision framework

If your main goal is better taste and odor, a simpler carbon-based system is often the sensible place to start. You want clear contaminant claims, straightforward maintenance, and a setup that doesn't take over the cabinet.

If your main concern is health-related contaminants, don't buy based on format alone. Focus on certification and treatment method. A system that looks sleek under the sink can still be the wrong tool if it isn't built for the contaminants you care about.

If you want stronger overall treatment, and you're comfortable with more parts and a dedicated maintenance schedule, a multi-stage system or reverse osmosis unit will usually make more sense than a basic single-cartridge filter.

If your cabinet is tight, your plumbing access is awkward, or you want the easiest ownership experience, prioritize compact design and cartridge access. A system that fits your space and routine usually performs better in real life because you'll regularly maintain it.

The short version

  • Taste and chlorine concerns call for a simpler, well-specified carbon setup.
  • Broader contaminant concerns call for careful certification matching.
  • Maximum treatment ambition points toward multi-stage or RO.
  • Low tolerance for maintenance means you should favor simpler service schedules, even if the system is less elaborate.

Clean water is a daily-use upgrade. The right choice isn't the flashiest box or the biggest claims. It's the one that matches your water risk, fits your kitchen, and keeps doing its job long after the excitement of installation wears off.


If you want help narrowing the field, Water Filter Advisor offers practical buying guides, maintenance advice, and side-by-side explanations that can help you compare under-sink options without getting lost in marketing language.

Best Water Filter Pitcher for Well Water: 2026 Guide

A lot of advice about the best water filter pitcher for well water starts in the wrong place. It starts with brands, pitcher size, or which one tastes best.

That's backwards.

If you've just moved into a home with a private well, a pitcher might help, but it also might give you false confidence. Well water isn't pre-treated the way city water is. It can look crystal clear and still have a problem a basic pitcher won't touch. And some of the most common well issues, like sediment, bacteria, iron, or sulfur odors, can overwhelm a pitcher fast.

A pitcher can still make sense in a narrow situation. The key is knowing whether you're dealing with a small drinking-water problem or a whole-house water-treatment problem. That distinction matters more than the logo on the box.

Can a Water Filter Pitcher Really Handle Well Water

A water filter pitcher is often the wrong tool for well water.

That sounds backward because pitchers are sold as a simple fix. Fill it, wait a few minutes, pour a glass. For a home on treated city water, that can be enough for taste or odor. For a private well, the safer question is not “Which pitcher is best?” It is “Is a pitcher appropriate at all?”

Why the usual advice falls apart

A standard pitcher works like a small, targeted filter. It can help with certain drinking water problems if the cartridge is certified for that exact contaminant. It does not clean all the water in your home, and it does not fully treat a well with multiple issues.

That distinction matters.

Well water problems often come in layers. You might notice a smell, but the bigger concern could be something you cannot see or taste. Or you may have sediment and iron that clog a pitcher quickly, even if the pitcher helps a little with flavor. In that case, the pitcher is not solving the main problem. It is covering one symptom while the underlying issue stays in place.

A good way to frame it is tool versus job. A pitcher can be the right tool for a narrow drinking-water problem. It is a poor fit for water that needs disinfection, heavy sediment removal, strong iron treatment, or whole-house protection. If you want a simple way to sort those situations, our well water treatment advice and filter guides can help you match the problem to the right kind of system.

Bottom line: The best water filter pitcher for well water is only “best” if your test results show a problem the pitcher is built to handle.

What well owners usually miss

People new to private wells usually judge the water by the clues they can spot right away. That makes sense. If the water smells like sulfur or leaves orange stains, it is hard to think about anything else.

But visible clues only tell part of the story.

  • Bad taste
  • Musty or sulfur smell
  • Cloudiness
  • Orange or black staining

Those signs can point to real treatment needs, but they do not tell you whether a pitcher is enough. A pitcher may improve taste and still leave the main risk untouched. That is the trap with well water. Better-tasting water can make people feel safer than they should.

The better approach is to start with the water itself, not the pitcher box. Once you know what is in the well, you can decide whether a pitcher makes sense for a limited drinking-water use or whether the job calls for a stronger system.

Before You Buy Anything Test Your Well Water

Testing isn't an extra step. It's the first step.

If you skip it, you're guessing. And with well water, guessing is how people end up filtering for chlorine they don't have, while ignoring a problem they do have.

A hand holds a multi-parameter water test strip dipped into a clear glass of tap water.

Why testing matters more for wells

A city utility usually treats water before it reaches your house. A private well doesn't come with that safety net. The well owner is responsible for knowing what's in the water and choosing treatment that fits.

The hard part is that well problems fall into very different buckets. One family may have sediment and iron. Another may have a contamination issue that needs disinfection or specialized filtration. Both homes might say, “Our water tastes a little off,” but the solution could be completely different.

Here's a practical way to approach this:

Water issue type What it can include Why a basic pitcher may fall short
Microbiological Bacteria and other microbes Many standard pitchers aren't designed as primary disinfection tools
Metals and inorganic contaminants Lead and other dissolved substances Some pitchers can reduce certain metals, but only if the model is certified for them
Organic contamination Agricultural or chemical contamination Performance varies widely, and broad marketing language isn't enough
Aesthetic problems Taste, odor, and some discoloration Pitchers often help here, but that doesn't mean the water is comprehensively treated

Test first, then match the filter

Consumer Reports' advice for well owners is the right mindset: test first, then buy a pitcher certified to remove the contaminants your report found. It also warns that phrases like “tested to” aren't the same as certification. That's an important distinction because pitcher performance varies a lot, especially once you move past taste and odor concerns.

If you want plain-language help interpreting results and comparing treatment options, Water Filter Advisor's filtration advice library is a useful place to keep reading after you have your report in hand.

Water that looks fine can still require treatment. A lab result tells you what your eyes and taste buds can't.

Lab test or home kit

A home kit can be a decent early clue. It can tell you whether something seems off. But if you're making a buying decision about the best water filter pitcher for well water, a certified lab test is the safer basis for that decision.

Use the home kit like a smoke alarm. Use the lab report like the fire inspector.

When you read the report, don't get distracted by marketing promises on a box. Focus on one simple question: what specific contaminants need to be reduced for your drinking water?

Why modern pitchers still need matching chemistry

Pitcher filters have become more advanced over time. An academic study of nine water filter pitchers found models using up to five filtration stages. Some filters reduced fluoride significantly, including two with statistical significance at p < 0.001 and p = 0.030, while most also reduced calcium concentrations at p < 0.01, according to this academic review of pitcher filtration performance.

That sounds promising, and it is, but it leads to the most important lesson: performance is not uniform. Different pitchers use different media and behave differently. So the right question isn't “Which brand is popular?” It's “Which certified filter chemistry matches my water?”

Decoding Pitcher Filters What They Can and Cannot Do

Inside a pitcher, you're not getting one magical layer. You're getting a small stack of media, and each layer has a different job.

Imagine fishing nets with different mesh sizes. One net catches leaves. Another catches pebbles. Another is designed for something much smaller. If you throw the wrong net in the water, the fish you care about swim right through.

A diagram illustrating the four layered components of a water filter pitcher and their purification functions.

What the common filter media do

Most pitchers use some combination of the following:

  • Activated carbon: This is the workhorse for improving taste and odor. It can also reduce some chemicals, depending on the design.
  • Ion-exchange resin: This media can help with certain dissolved contaminants, including some metals.
  • Pre-filter and post-filter screens: These help manage larger particles and keep filter media from ending up in your drinking water.

That mix is why one pitcher can be decent for lead reduction while another mainly improves flavor. From the outside they can look nearly identical. Inside, they may be solving different problems.

What pitchers usually handle reasonably well

If your well test points to a limited drinking-water issue, a pitcher can sometimes be useful for:

  • Taste and odor improvement
  • Certain certified contaminant reductions
  • Convenient point-of-use treatment for drinking water only

This is the lane where pitchers shine. They're simple, easy to use, and they don't require plumbing changes.

A pitcher is a point-of-use tool, not a whole-home fix. Treat it like a coffee maker for cleaner drinking water, not like a treatment plant for the entire house.

Where pitchers hit a wall

Many buyers are often confused. A pitcher may make water taste better while leaving the actual problem unsolved.

A standard pitcher is generally a poor fit for these common well-water situations:

Problem in well water Why a pitcher struggles
Heavy sediment or silt The filter clogs quickly and flow slows down
Iron or manganese These usually need specialized treatment, not a fridge pitcher
Hydrogen sulfide odor The “rotten egg” issue often needs a treatment approach beyond pitcher media
Hardness Pitchers aren't a practical fix for whole-house scaling and soap problems
Microbial contamination A pitcher should not be your first-line answer when disinfection is needed

Some newer pitchers are marketed for bacteria or parasite reduction, and that can sound like the perfect answer for a well. The catch is practicality. Source water with sediment, iron, or recurring contamination can make a specialized pitcher slow, expensive, or frustrating to live with.

So if you're evaluating the best water filter pitcher for well water, don't just ask what it removes. Ask how it behaves when real well water starts stressing the filter.

How to Choose a Pitcher That Matches Your Water Test

A good pitcher choice starts with one question: what, exactly, showed up in your water test?

That sounds obvious, but it is where buyers get tripped up. A pitcher box may promise cleaner, better-tasting water, while your lab report is asking a much narrower question. Can this filter reduce the specific contaminant in my well water, at the level and under the conditions I have?

A water test is your map. The pitcher is only one tool in the toolbox. If you use the wrong tool, you may get better taste and still leave the actual risk in the glass.

Start with certified claims you can match to the report

As noted earlier, independent ratings often show a gap between taste improvement and meaningful contaminant reduction. That matters for well owners because taste is not the same thing as treatment.

Read the package like you would read a prescription label. Look for a claim that matches your test report, not a broad promise.

Here is the plain-English version:

  • Certified means the claim has been checked against an independent standard.
  • Tested or lab tested sounds reassuring, but it may only reflect the brand's own testing.
  • Reduces many contaminants is too fuzzy to trust for a specific well-water problem.

If your report shows lead, for example, the pitcher should clearly say it is certified to reduce lead. If your report shows PFAS, the claim should name PFAS. If the package makes you guess, keep shopping.

Use a filter-match process, not a popularity contest

A lot of roundup articles rank pitchers like coffee makers. Well water does not work that way. You are matching a device to a contaminant profile.

Use this process:

  1. Mark the contaminants that matter for drinking water
    Circle the items on your report that affect health or make the water unpleasant enough that your family will avoid it.

  2. Separate pitcher problems from system problems
    Some issues belong in the pitcher category. Others belong in the treatment-system category. A pitcher may fit mild chlorine taste in city water. Well water with iron, sulfur, sediment, recurring bacteria, or major hardness usually needs a different class of equipment.

  3. Match each concern to a named certified claim
    Do not settle for “better water” language. Match contaminant to claim, one by one.

  4. Check capacity against your real routine
    One person filling a glass twice a day has very different needs than a family filling bottles, cooking pasta, and making coffee.

  5. Estimate maintenance realistically
    Well water can be harder on filters than the ideal test conditions used for marketing. Slow flow and frequent cartridge changes are common signs that the pitcher is being asked to do too much.

A quick way to judge whether a pitcher fits your test

Here is a practical screen you can use.

Water test result Pitcher may fit? Why
A specific contaminant the pitcher is certified to reduce, with otherwise clear water Possibly This is the narrow use case where a pitcher can make sense
Sediment, sand, or visible particles Usually no Particles clog filters fast and shorten cartridge life
Iron or manganese Usually no These often need specialized treatment media
Hydrogen sulfide or strong sulfur odor Usually no Odor may improve briefly, but the root issue often remains
Bacteria or other microbial concerns Use extreme caution A pitcher should not be your fallback safety plan for a contaminated well
Hardness, scale, soap problems No practical fit That is a house-wide water chemistry issue, not a pitcher job

This table is why a pitcher is often the wrong first purchase for well water. It can be useful, but only in a narrow lane.

Secondary details matter more with well water

Once you confirm the filter claim matches your test, look at the daily-use details.

Filter life matters more than many new well owners expect. A cartridge rated for a certain number of gallons may hit frustratingly slow flow much sooner if your water carries fine sediment or nuisance metals.

Pitcher speed matters too. Slow filtration sounds like a small annoyance until three people are waiting to fill bottles before school.

Total cost deserves a hard look. A cheap pitcher with frequent cartridge changes can end up being the expensive option. If your test suggests you are already close to needing a stronger treatment setup, compare that long-term cost with the benefits of Halo water solutions or another whole-home approach designed for well conditions.

What a sensible pitcher choice looks like

A reasonable pitcher choice for well water usually looks like this:

  • You have a current water test.
  • The concern is narrow and clearly identified.
  • The pitcher has a matching certified claim for that specific contaminant.
  • Your water is not loaded with sediment, iron, sulfur, or microbes.
  • You only need better drinking and cooking water at the kitchen level.
  • You accept the refill routine and cartridge costs.

That is a much smaller target than product roundups usually admit. For well water, that honesty matters. A pitcher can be a useful finishing tool, but only when the water test says it is the right tool.

When to Look Beyond a Pitcher for Well Water Treatment

Some well-water problems are too serious, too broad, or too stubborn for a pitcher. That doesn't mean your water is hopeless. It just means you need the right class of treatment.

An infographic detailing water contamination issues and the necessity of whole-home well water treatment solutions beyond pitchers.

The clearest signs a pitcher isn't enough

If any of these sound familiar, stop looking for a fridge pitcher as your main answer:

  • Your water test shows bacteria or recurring microbial issues
  • You see sand, dirt, rust, or heavy cloudiness
  • Fixtures stain orange, black, or blue-green
  • The water smells strongly like sulfur
  • Your home has scale buildup, soap problems, or appliance wear linked to hardness
  • You're trying to protect the whole house, not just one drinking-water container

Those are treatment-system clues, not pitcher clues.

Match the problem to the right tool

Here's the practical side-by-side view:

Well water problem Better treatment direction
Bacterial contamination UV purification or another disinfection approach
Sediment and silt Whole-house sediment prefiltration
Iron and manganese Specialized iron treatment
Hardness Water softening
Broad contaminant concerns for drinking water Under-sink treatment or reverse osmosis, depending on the issue
Corrosive low-pH water Neutralizing treatment

A pitcher sits at the end of the line. These systems address the problem earlier, where it affects the whole home or where stronger treatment is needed.

For homeowners trying to understand what a more complete approach can look like, this overview of the benefits of Halo water solutions from JMJ Plumbing is a helpful example of how whole-home treatment is framed around actual water conditions, not just convenience.

Why high-performance pitchers can still be a bad fit

Some newer pitchers are marketed for bacteria and parasites. That sounds promising, especially for anxious well owners. But the often-missed question is whether those products are practical on real well water.

Epic's discussion of well-water pitchers highlights the issue clearly. It notes that high-performance pitchers can still be expensive or inconvenient for wells because flow rate, replacement cost, and filter life become a problem when source water has high sediment, iron, hydrogen sulfide, or recurring microbial load, as described in Epic Water Filters' discussion of pitcher suitability for wells.

That means a specialized pitcher may be a stopgap, not a durable plan.

This short video gives a helpful visual overview of why well treatment often goes beyond countertop options.

A simple neighbor-to-neighbor rule

If the problem affects only the glass you drink, a pitcher may help.

If the problem affects pipes, fixtures, showers, laundry, appliances, or family safety, you're in system territory.

That's the point where looking for the best water filter pitcher for well water can waste time. The smarter move is upgrading to treatment that matches the seriousness of the problem.

Your Well Water Pitcher Decision Checklist

A good decision isn't complicated once you strip away the packaging language. Save this checklist and use it before you buy anything.

A checklist for selecting a water filter pitcher specifically designed for well water filtration systems and safety.

Run through these questions in order

  • Have you tested your well water?
    If not, stop here. Don't pick a filter blind.

  • Is the problem limited to drinking water?
    If the issue shows up all over the house, a pitcher is too small a solution.

  • Does your report show a contaminant a pitcher can reasonably address?
    Some do. Many well-water problems don't fit this category.

  • Does the exact pitcher have the right certification for your contaminant?
    “Better tasting water” is not enough.

  • Will sediment, iron, sulfur odor, or microbial load make the pitcher impractical?
    Even a capable filter can become a headache on rough well water.

  • Can your household live with the refill routine, flow rate, and cartridge replacement schedule?
    Convenience matters because treatment only helps if people make use of it.

  • Are you using the pitcher as a temporary drinking-water tool, not as a substitute for whole-home treatment when that's needed?
    Safe decisions usually become obvious when considering this.

If you need confidence more than convenience, choose the treatment category first and the product second.

A pitcher can be the right answer, but only in a narrow lane. For many private wells, the safer answer is broader treatment and a pitcher only as a supplemental tool, if you want one at all.


If you're sorting through test results, certifications, and the difference between a quick fix and a proper treatment plan, Water Filter Advisor can help you compare options in plain English and choose a filtration setup that fits your home.

Refrigerator Water Filtration System: Ultimate Guide 2026

You fill a glass from the refrigerator, drop in a few cubes, and assume you're getting the cleanest water in the house. That's a reasonable assumption. The dispenser feels more advanced than the kitchen tap, and the filter tucked inside the fridge sounds like a built-in layer of protection.

Sometimes that assumption holds up well enough. Sometimes it doesn't.

A refrigerator water filtration system is convenient, familiar, and easy to ignore until the change light comes on or the water starts tasting flat. The trouble is that most homeowners don't get a straight explanation of what that filter does, what it doesn't do, and when it makes more sense to feed the fridge with better filtered water from somewhere else.

That's where most buying mistakes happen. People either overtrust the little cartridge in the fridge, or they replace it forever without asking whether a better setup would cost less, work better, and be easier to maintain.

That Little Filter in Your Fridge Does More Than You Think

You notice this section of your water system when something goes wrong. The dispenser slows to a trickle. The ice picks up an off taste. Or you stand in the appliance aisle holding a replacement cartridge and realize you are not sure what the old one was really handling.

A refrigerator filter does useful work. It improves the water you drink every day, keeps filtration tucked out of sight, and treats both the dispenser and the ice maker without adding another faucet at the sink. For many homes, that convenience is the whole appeal.

The catch is simple. Convenience often gets mistaken for broad protection.

Homeowners see “filtered water” on the front of the fridge and assume the cartridge is addressing every water quality concern coming into the house. In practice, many standard refrigerator filters are narrow-purpose parts. They often help most with taste and odor, and sometimes with a shorter list of contaminants if the cartridge has the right certification.

Practical rule: Treat your fridge filter as a useful finishing filter, not your entire water treatment plan.

That matters more in houses with older plumbing, private well concerns, lead risk, PFAS concerns, or a local water issue that shows up on your utility report. In those cases, the right question is not whether refrigerator filters work in general. The right question is what your exact filter is certified to reduce, and whether its capacity matches how much water your household uses for drinking and ice.

There is another blind spot I see all the time. Many homeowners assume the choices are limited to replacing the factory cartridge forever or installing a full whole-house system. There is a strong middle option that gets overlooked. Feed the refrigerator with cleaner water from an external inline filter or an under-sink system.

That setup is often a significant improvement when the built-in cartridge is expensive, hard to source, or too limited for the contaminants you care about. It can also lower long-term filter costs and give the ice maker better water than the refrigerator cartridge alone would provide.

The small filter inside the fridge still matters. It just should not get credit for jobs it was never built to do.

How Refrigerator Filtration Actually Works

A refrigerator water filtration system is usually a point-of-use activated carbon cartridge. Think of activated carbon like a sponge made of countless tiny tunnels and pockets. Water moves through it, and certain impurities cling to that carbon surface instead of continuing into your glass.

That process is called adsorption. It's not the same as a kitchen sponge soaking up water. The water keeps moving. The contaminants stick to the carbon.

An infographic showing the three steps of how an activated carbon water filter removes impurities.

What the cartridge is actually doing

In most refrigerators, the filter's main job is to improve taste and smell by reducing things like chlorine-related off-notes. The CDC notes that most home filters, including fridge filters, aren't designed to remove germs, and refrigerator filters are mainly a taste-and-odor solution unless the cartridge carries additional contaminant certifications, as explained in the CDC's guide to choosing home water filters.

Many fridge cartridges use activated carbon alone. Some add other media, including ion-exchange media, to target specific contaminants more effectively. That extra media can help, but only if the cartridge is designed and certified for that purpose.

Flow rate, capacity, and the built-in compromise

Every refrigerator filter has to balance two competing jobs. It needs to clean the water, and it also has to keep enough pressure for the dispenser and ice maker to work properly.

Current guidance shows many cartridges are rated around 300–400 gallons while targeting flow in the 0.5–0.8 gpm range. Some higher-end inline ultrafiltration designs add a 0.01 micron membrane at about 0.75 GPM, according to this refrigerator water filter guide.

That balancing act is why tiny pores aren't always better in a fridge application. Finer filtration can capture more, but it also creates more pressure drop. In plain language, the tighter the screen, the harder the water has to work to get through.

The best refrigerator filter isn't the one with the boldest marketing. It's the one that matches your water problem without choking your dispenser.

Why older plumbing changes the equation

If your home has sediment, rust, or older plumbing, the fridge filter often gets loaded with junk it was never meant to handle alone. That shortens cartridge life and drags down flow.

A simple prefilter upstream can help protect the refrigerator filter from early clogging. That's especially helpful when the dispenser starts slowing down long before the replacement interval you expected.

The Three Main Types of Fridge Filter Systems

Homeowners usually think there's only one type of refrigerator water filtration system. There are three common approaches, and each one solves a different problem.

The smart choice depends on what you care about most. Simplicity, contaminant coverage, or long-term operating cost.

OEM internal cartridges

This is the standard setup built into the refrigerator. You twist or push a cartridge into the fridge housing, and the dispenser and ice maker run through that filter.

OEM filters are the easiest path when you want zero guesswork on fit. They're designed for that exact refrigerator model, and they usually play nicely with the fridge's filter indicator and bypass system.

The downside is familiar. Replacement costs add up, choices are limited, and performance may be narrower than you assumed.

External inline refrigerator filters

An external inline filter installs on the water line behind the refrigerator. Instead of filtering inside the appliance, it filters the incoming supply before the water reaches the fridge.

This approach gives you more flexibility. You can often choose a different filter format, a different housing style, or a cartridge with different certifications than the built-in option.

It also creates a cleaner maintenance setup in some kitchens. You aren't wrestling a cartridge out of a cramped fridge housing, and you can place the filter where access is easier if the line layout allows it.

Under-sink or external system feeding the refrigerator

This is the overlooked option, and in many homes it's the best one.

Instead of depending on the refrigerator's own cartridge, you install a better filtration system elsewhere, often under the sink, and route that filtered water to the fridge's dispenser and ice maker. Installation guidance shows this strategy is feasible, but many consumer guides still ignore compatibility, plumbing layout, and fridge-specific bypass details, as discussed in this video on routing filtered water to a refrigerator.

This setup makes sense when the fridge cartridge is expensive, hard to source, or too limited for your water concerns. It also makes sense when you want one stronger point-of-use system serving both a drinking faucet and the refrigerator.

If you hate paying for proprietary fridge cartridges, feeding the refrigerator from an under-sink filter is often the cleanest workaround.

Refrigerator Filtration System Comparison

System Type Installation Complexity Typical Contaminant Removal Long-Term Cost
OEM internal cartridge Low Often strongest on taste and odor improvement, with health-related reduction depending on model certification Can be high because of proprietary replacements
External inline filter Moderate Varies by cartridge selected Often more flexible than OEM
Under-sink system feeding fridge Moderate to high Usually broader than standard fridge-only filtration, depending on system chosen Can be better over time if one system serves multiple uses

Here's the practical takeaway. If your water tastes bad but your risk profile is otherwise straightforward, the built-in cartridge may be enough. If you're chasing stronger filtration or lower replacement hassle, external feed options deserve a serious look.

Decoding Certifications and Contaminant Claims

The label on a filter box can feel like alphabet soup. NSF/ANSI 42, 53, 401, sometimes more. Once you know the code, the label gets much easier to read.

The simplest way to think about it is this: certifications are like a checklist from an independent referee. They don't tell you a filter removes everything. They tell you what it was tested and certified to reduce.

An infographic explaining NSF and ANSI certifications for water filters, detailing NSF 42, NSF 53, and label verification.

What the key standards mean

NSF/ANSI 42 covers aesthetic effects. Think chlorine taste and odor. If your main complaint is that the water tastes like a swimming pool, this is the certification that speaks directly to that issue.

NSF/ANSI 53 is the one many homeowners should pay closer attention to when they care about health-related contaminants such as lead. This is a more demanding standard than 42.

NSF/ANSI 401 deals with selected emerging contaminants. It can include some pharmaceutical and chemical reduction claims. The key is that the claim has to be explicit for the model in front of you.

NSF also notes that certification does not mean a filter removes every contaminant. It verifies reduction only for the substances named in the certification or performance sheet. That's the core lesson from NSF's explanation of standards for water treatment systems.

What to look for on the box

Don't stop at the standard number alone. Look for the exact contaminant list tied to the exact cartridge model.

A good buyer checklist looks like this:

  • Match the problem first: If your concern is taste, look for NSF/42. If your concern is lead, focus on NSF/53.
  • Check the exact model number: A brand may sell several similar cartridges with different claims.
  • Read the performance sheet: Broad phrases like “advanced filtration” don't tell you enough.
  • Watch for newer claims carefully: NSF/401 can be useful, but only when the listed contaminants match your actual concern.

Why this matters more now

Consumer Reports notes that common refrigerator filter certifications can also include NSF/ANSI 372 for lead-free materials, NSF/ANSI P473 covering PFOS and PFOA, and NSF/ANSI 401 for trace pharmaceuticals and chemicals, but those benefits depend on the specific cartridge. In practice, a refrigerator water filtration system starts as a taste-and-odor solution first. Health protection depends on what that exact filter is certified to do.

That's why a vague claim like “removes contaminants” doesn't help much. You don't need broad promises. You need a model-specific receipt.

Installation and Replacement Made Easy

Most refrigerator filter jobs are well within basic DIY range. You don't need fancy tools for an internal cartridge swap, and many inline installs are straightforward if you work carefully and give yourself time.

Start with the simplest rule. Never rush the leak check.

A person's hands installing a white replacement water filter cartridge inside a modern kitchen refrigerator.

Replacing an internal fridge cartridge

The exact latch or twist pattern depends on the refrigerator brand, but the workflow is usually close to universal.

  1. Find the cartridge location: It may be inside the fresh-food compartment, in the grille, or behind a small cover.
  2. Shut off the water if your model or manual calls for it: Some fridges let you swap without shutting off supply, but many homeowners feel better doing it.
  3. Remove the old filter carefully: Twist, pull, or press release tabs as designed. Don't force it.
  4. Inspect the O-rings and housing: If something looks pinched, cracked, or dirty, fix that before inserting the new cartridge.
  5. Install the new filter fully: Most flow problems come from a cartridge that feels seated but isn't locked in place.
  6. Flush the system: Run enough water to clear carbon fines and trapped air.
  7. Reset the filter indicator if your refrigerator has one.

A small habit saves headaches later. Write the install date on the cartridge or keep it in your phone notes.

Installing an external inline filter

Inline filters take a little more attention because now you're working on the supply line, not just a cartridge slot.

Before you start, it helps to think like you would with HVAC filters. Air filters and water filters both depend on matching the right restriction level to the equipment. If you've ever compared furnace filters, this overview of MERV rating information is a useful analogy. Better filtration can also mean more resistance if you choose blindly.

For an inline installation:

  • Turn off the feed line: Use the shutoff serving the refrigerator line.
  • Relieve pressure: Dispense water until the line stops pushing.
  • Cut or disconnect the line where the filter will go: Follow the filter's flow direction arrow.
  • Use the correct fittings only: Cross-threading and mismatched connectors create most avoidable leaks.
  • Mount the filter where you can reach it later: Don't bury a service item where you can't inspect it.
  • Turn water back on slowly: That makes leak spotting much easier.
  • Flush thoroughly: New carbon media often releases harmless fines at first.

A short visual helps if you're tackling your first swap:

Two mistakes that cause most callback problems

The first is skipping the flush. Fresh carbon cartridges need that initial rinse, and air in the line can make the dispenser sputter or slow down.

The second is ignoring the fridge's bypass expectations. Some refrigerators need the filter compartment set up correctly even if you're feeding the appliance with externally filtered water. If you want deeper brand-by-brand maintenance help, this library of water filter advice is a practical next stop.

Troubleshooting Common Fridge Filter Problems

When a refrigerator water filtration system acts up, the symptom usually points to a short list of causes. Don't start replacing random parts. Start with the last thing that changed.

Slow water flow

If the flow dropped right after a filter replacement, the cartridge may not be fully seated. Remove it, inspect the seals, and reinstall it firmly.

If the filter is seated correctly, trapped air may still be working through the line. Dispense water in longer bursts until the sputtering stops.

Other common causes include:

  • A clogged cartridge: This happens faster in homes with sediment or older plumbing.
  • A kinked supply line: Check behind the refrigerator after pushing it back.
  • An over-restrictive external filter: Some finer filters reduce pressure more than expected.

Water still tastes bad

A new cartridge doesn't instantly solve every taste problem.

Check these basics:

  • Flush enough water first: Carbon fines and stale water need to clear.
  • Clean the ice bin: Old ice can keep bad taste around even after the filter is fixed.
  • Check the source issue: If taste comes from something the cartridge isn't designed to reduce, replacement won't solve it.
  • Inspect the water line: Old tubing can add taste on its own.

Bad taste after a filter change often comes from old ice, trapped air, or an unflushed cartridge, not a defective new filter.

Leaks around the filter or housing

Leaks usually come from a bad seal, a crooked cartridge, or a fitting that wasn't tightened correctly after an inline install.

Dry everything first so you can see where the water starts. Then check:

  • The O-ring condition
  • The cartridge lock position
  • Any push-fit or threaded connection on the external line
  • Hairline cracks in the housing

The dispenser stops working after a change

This often happens when the fridge doesn't recognize the filter as properly installed, or when the bypass setup isn't correct.

Pull the cartridge back out and confirm it's the right model. If you're using external filtration and bypassing the fridge cartridge, make sure the refrigerator's bypass arrangement matches the manufacturer's design. A perfectly good filter setup can fail if the fridge thinks the filter path is blocked.

Cost Lifecycle and When to Upgrade Your System

A refrigerator filter often looks cheap at first because the cost is spread out. Then the replacements start stacking up. By year two or three, many homeowners have spent enough on cartridges to justify a better setup.

The market keeps growing because replacement filters create steady repeat sales, not just a one-time appliance add-on. That matters when you compare long-term cost, because the fridge itself is often the inexpensive part of the filtration plan. The cartridges are where the money goes.

An infographic showing the cost breakdown and maintenance lifecycle for a refrigerator water filtration system.

When sticking with the fridge filter makes sense

The built-in filter is still a reasonable choice in some homes.

Keep it if your goals are simple and the replacement cycle is predictable:

  • Your main complaint is chlorine taste or odor: A standard carbon cartridge can handle that well.
  • Your filter is easy to find at a fair price: Convenience has real value.
  • Your water use is modest: Lower demand usually means fewer replacements and fewer flow problems.
  • Your fridge filter is certified for the contaminants you care about: If the cartridge matches the job, there is no need to complicate it.

When an upgrade is the smarter move

Upgrade when the fridge cartridge starts acting like a bottleneck. That shows up in two places. Cost and performance.

An external inline or under-sink system feeding the refrigerator is often the better answer, especially when a household wants cleaner drinking water and better ice without being locked into proprietary fridge cartridges. I recommend this route often because it solves a problem many people miss. The refrigerator dispenser is only as good as the small filter cavity inside the fridge, and that space limits media volume, contact time, and filter options.

Consider an upgrade if:

  • You replace fridge cartridges often enough that the annual cost keeps climbing
  • Your filter options are brand-specific, overpriced, or hard to source
  • You want filtered water at both the sink and the refrigerator from one system
  • Your water has issues beyond basic taste and odor
  • Your fridge filter clogs quickly and flow drops before the scheduled replacement date

External filtration offers distinct advantages. A larger inline or under-sink unit can hold more carbon, add specialty media, or use multiple stages. In plain terms, it gives the water more treatment before it reaches the dispenser and ice maker. It also lets you choose a system based on your water problem instead of your refrigerator model number.

That matters for homes dealing with lead concerns, PFAS questions, sediment, or mixed water quality issues. A standard refrigerator filter may reduce some of that, but many do not offer the depth of treatment or cartridge capacity an external system can provide.

The best next step before you spend money

Start with your water, not the appliance. Read your municipal water report or test your well water, then match the filter to the contaminants you need to address.

That simple step prevents two expensive mistakes. Buying a larger system than necessary, or continuing to buy convenient fridge cartridges that were never designed for the problem in your water.

If you want help comparing refrigerator filters, under-sink systems, and maintenance options without getting buried in marketing copy, Water Filter Advisor is a strong place to start. It's built for households that want practical buying guidance, clear explanations of certifications, and real-world advice on choosing a water filtration setup that fits the water you have.

Whole House Filter Housing: A Homeowner’s Guide for 2026

You're usually looking into a whole house filter housing after something starts bothering you. The water smells like chlorine in the shower. A faucet aerator fills with grit. Ice tastes off. A toilet tank shows staining. Or maybe nothing dramatic has happened, but you're tired of guessing what's moving through every pipe in the house.

That's when most homeowners start shopping for “a filter” and run straight into a wall of canisters, cartridges, micron ratings, clear sumps, blue sumps, brass ports, Big Blue bodies, and pressure warnings. The housing often gets treated like a minor accessory. It isn't. The housing is the part that has to sit on your main line, hold the cartridge under pressure, seal reliably, and stay serviceable when it's time to change filters with wet hands in a cramped utility room.

A lot of water problems also overlap. Sediment, chlorine, odor, and mineral issues don't always show up the same way from room to room. If you're also sorting out scale, fixture buildup, or appliance wear, this guide on how hard water affects your plumbing gives useful context for separating hardness problems from filtration problems.

The Unsung Hero of Your Home's Water System

A whole house filter housing is easy to underestimate because it doesn't do the glamorous part. The cartridge gets the attention. The housing gets ignored until it leaks, cracks, won't unscrew, or turns a simple filter change into a wrestling match.

In the field, the pattern is predictable. A homeowner buys a decent cartridge, mounts the housing wherever there's a little wall space, and calls it done. Six months later the sump won't clear the floor, the pipe coming out of the head twists when the canister is loosened, and the whole setup suddenly feels like a mistake. The water issue may be better, but the ownership experience is miserable.

The best filter setup is the one you can service without damaging plumbing or dreading the next cartridge change.

That's why I treat the housing as the foundation of the system. If the housing is undersized, awkwardly mounted, or poorly matched to your plumbing, every replacement cycle becomes harder than it should be. If the housing is chosen well, the rest of the system usually behaves.

Homeowners also tend to think about water quality room by room. Drinking water in the kitchen. Soap scum in the shower. Sediment in the laundry. But a whole house setup changes the problem at the main line. One properly chosen housing can support treatment before the water reaches any of those fixtures.

What homeowners usually notice first

  • Taste and odor changes: Chlorine smell or a stale taste often push people toward carbon filtration.
  • Visible grit: Sand, rust, or cloudy water usually point toward a sediment stage.
  • Fixture complaints: Clogged aerators, dirty screens, and stained appliance inlets often tell you there's a system-wide issue, not a single bad faucet.
  • Maintenance fatigue: The old setup may technically work, but if servicing it is awful, the housing itself may be the underlying problem.

What a Filter Housing Actually Does

A whole house filter housing is the body of the filtration assembly. The cartridge inside is the working media that traps or reduces specific contaminants. The housing's job is to hold that cartridge in place, direct water through it, and do it safely while connected to the main water line.

The important distinction is simple. The housing doesn't magically clean water on its own. It creates the sealed, pressurized chamber that lets the cartridge do its work without bypass, leaks, or blowouts.

A diagram illustrating the components and the filtration process of a whole house water filter system.

It belongs at the entry point

The CDC explains that a whole-home filter is installed at the point where water enters the house, so the system treats water for the entire home rather than just one sink or faucet. The CDC also notes that choosing a system depends on what contaminants are in your water and recommends testing your water and looking for NSF certification tied to the specific removal claims you need (CDC guidance on choosing home water filters).

That matters because a whole house filter housing is part of a point-of-entry system, not a point-of-use gadget. You're not solving one drinking tap. You're affecting showers, toilets, the water heater, washing machine, hose bibs, and every other downstream fixture unless the plumbing is split around it.

What water does inside the housing

Think of the flow path like this:

  1. Untreated water enters the inlet through the housing head.
  2. Water is forced through the cartridge rather than around it.
  3. The cartridge captures or reduces what it is designed for, such as sediment or chlorine-related taste and odor concerns.
  4. Filtered water exits the outlet and feeds the rest of the house.

That sounds basic, but the housing has to make all of that happen without letting water shortcut around the cartridge or escape at the threads and O-ring.

Why the housing matters more than it looks

A cheap or poorly installed housing can cause problems that have nothing to do with the cartridge itself:

  • Leaks at the top: Often a sealing or alignment issue.
  • Pressure loss: Sometimes the housing and cartridge combination is too restrictive for the application.
  • Difficult maintenance: Tight clearances turn routine service into a chore.
  • Premature wear: Mechanical stress on the housing body or ports can shorten its useful life.

Practical rule: Don't shop the housing like a bucket. Shop it like a pressure component that has to be opened, resealed, and trusted over and over again.

Choosing Your Housing Type and Material

Homeowners often shop by color and price first. That usually leads to the wrong housing. Start with function. Then choose material.

The first decision is configuration. The second is what the housing body is made from. Those two choices determine how much the system can do, how easy it is to inspect, and how forgiving it will be over time.

Housing layouts that make sense at home

A single housing works when you're solving one main problem, usually sediment or chlorine taste and odor, and you want the simplest service routine. One canister, one cartridge, one replacement step.

A dual housing gives you more control. A common residential pairing is sediment first, carbon second. That sequence protects the downstream cartridge from loading up early and usually gives a cleaner ownership experience than trying to make one cartridge do everything.

Larger or more customized systems can add more stages, but the practical trade-off is straightforward. More stages can improve targeting. They also add wall space demands, more connections, and more maintenance points.

Material changes the ownership experience

Opaque plastic housings are common because they're practical and widely available. They hide cartridge condition, but they also keep the body from constantly showing every bit of discoloration or trapped sediment.

Clear housings appeal to homeowners because you can visually inspect sediment loading. That can be helpful on water supplies with changing turbidity, rust, or sand. If your source water swings with weather or seasonal conditions, being able to see the sump has value.

Stainless housings exist for tougher-duty applications and for buyers who want a different durability profile, but they usually make less visual inspection possible and can shift the budget upward.

Pressure is not a detail

A lot of DIY installs go wrong. A housing is a pressure vessel. Mechanical stress matters. One widely sold 10-inch transparent whole-house housing uses 1-inch brass inlet and outlet ports, includes a pressure-relief button, is rated for an initial pressure drop of 1 PSI, and has a maximum operating pressure of 60 PSI. The same installation guidance warns that line pressure above 70 psi requires a pressure-limiting valve, and that water hammer can crack the housing or deform seal surfaces (Ronaqua housing specifications and installation guidance).

That tells you two things. First, the printed pressure number isn't the only story. Second, shock loads can be harder on a housing than homeowners expect.

If the house bangs when a valve closes, fix that before blaming the filter housing.

Whole House Filter Housing Comparison

Housing Type / Material Best For Typical Cost Pros Cons
Single opaque plastic One main issue, simple setups Varies by brand and size Straightforward, common, practical for basic sediment or carbon use No visual check of sediment loading
Single clear plastic Sediment-heavy water where visual inspection helps Varies by brand and size Easy to see buildup, helpful for changing conditions Can tempt people to focus on looks instead of service planning
Dual housing system Homes needing staged treatment Varies by brand and size Better separation of sediment and carbon duties More fittings, more wall space, more maintenance points
Large-format Big Blue style Higher household demand and longer service intervals Varies by brand and size Better fit for higher flow and reduced change frequency Heavier and more awkward to mount and service
Stainless housing Buyers prioritizing a different durability profile Varies widely Robust feel, often chosen for demanding environments Less visual inspection, often more expensive

Decoding Sizes Port Connections and Cartridges

Once you get past the housing style, the confusing part is the sizing language. Most homeowners see 10-inch, 20-inch, standard, and Big Blue and assume it's just product jargon. It isn't. Those dimensions affect service frequency, pressure behavior, and how well the system keeps up when multiple fixtures run at once.

An infographic comparing whole house filter housing sizes, port connections, and cartridge types for water filtration systems.

Length and diameter both matter

A 10-inch standard housing is compact and easy to fit into small utility areas. That's the good news. The downside is shorter cartridge life and less forgiveness on busy households or dirty water.

For whole-house use, 20-inch Big Blue housings are a common standard because they support higher capacity and longer service intervals. Filters Fast notes that a 20-inch Big Blue filter typically lasts 6 to 12 months, while a 10-inch standard filter lasts 1 to 3 months. The same source also lists 10-inch Big Blue and 20-inch standard filters at 3 to 6 months (Filters Fast whole-house filter FAQs and sizing guidance).

That's the kind of difference homeowners feel immediately. Fewer filter changes means fewer chances to spill water, pinch an O-ring, or put off maintenance because the housing is awkward to open.

Big Blue usually fits real homes better

A larger body generally makes more sense when the home has:

  • Multiple bathrooms: More simultaneous demand.
  • Sediment or rust issues: More cartridge loading over time.
  • A family that uses water: Laundry, showers, dishwashing, and irrigation all stack up.
  • A tight maintenance schedule: Longer service intervals reduce the chore count.

There's a second practical point from the same source. Lower micron ratings filter more tightly, but they can clog faster and restrict flow. A 20 to 30 micron range is a practical starting point for whole-house applications before going tighter if performance and pressure allow it.

Port sizes can create a bottleneck

The housing ports need to make sense with the plumbing feeding them. If the house has larger supply plumbing and you neck down through a small housing connection, the system can become more restrictive than it needed to be.

Common residential ports include 3/4-inch and 1-inch connections. The right choice depends on the actual plumbing layout and water demand, not just what's easy to find online.

Cartridge fit isn't completely universal

Many housings use common cartridge formats, which gives you useful replacement flexibility. But “standard size” still needs to match the housing body and intended cartridge type.

Check three things before ordering replacements:

  • Housing length: A 10-inch cartridge doesn't belong in a 20-inch housing.
  • Housing diameter: Standard and Big Blue bodies aren't the same width.
  • Filter purpose: Sediment, carbon, and specialty media cartridges don't solve the same problems.

Smart Installation for Easy Future Service

Most bad whole house filter housing installs don't fail on day one. They fail on the first filter change, when the canister is full of water, the wrench has no swing room, and the mounting board flexes like cardboard.

That's why service planning matters more than the initial hookup. A housing that's easy to pipe is not always a housing that's easy to own.

An instructional infographic demonstrating six tips for smart whole house water filter system installation and maintenance.

Mount it like it will be opened for years

Installation guidance for whole-house systems warns against relying on drywall alone. A large water-filled canister is heavy and awkward, and enough clearance must be left to remove the sump without fighting nearby piping or walls. Practical install guidance also warns against routing pipes under the sump where they interfere with removal (whole-house installation guidance video).

A solid backing panel anchored into studs is the right approach. Plywood is common because it spreads load, gives you flexibility for brackets and valves, and holds up better than trying to hang everything off a thin wall surface.

Clearance is not optional

Homeowners measure width and forget vertical space all the time. Then the housing has nowhere to drop when it's time to remove the sump.

You need room for:

  • The full sump length: It has to come down cleanly.
  • Your hands and the wrench: Not just a gap on paper.
  • Water spill management: Some water stays in the canister even after shutoff.
  • Cartridge removal: The old cartridge needs space to come out without scraping around elbows and valves.

Leave enough room that a tired version of you can service it on a Saturday morning without inventing new curse words.

Build for isolation and control

A housing should never feel welded into the plumbing system. Add control points so maintenance stays contained.

Good install practice usually includes:

  • Shutoff valves before and after the housing: So you can isolate it.
  • A bypass path if the setup is more involved: Handy when servicing takes longer.
  • Mechanical support at the housing: Don't let the pipes carry the full strain.
  • Thoughtful orientation: Pressure relief access, wrench access, and label visibility all matter.

What doesn't work

Here are the setups that create headaches:

  • Mounted on unsupported drywall: The wall moves, the piping sees extra stress, and service becomes riskier.
  • Installed too close to the floor: The sump can't clear.
  • Cramped between other utilities: Every filter change becomes awkward.
  • Hanging from rigid piping without support: Loosening the housing transfers force into the plumbing.
  • Buried in a crawlspace corner: Technically installed, practically neglected.

A clean install isn't just about looks. It changes whether the system gets maintained on time or ignored until flow drops and leaks show up.

Maintenance Routines and Troubleshooting

Owning a whole house filter housing is mostly routine work. The good news is that most problems are preventable. The bad news is that small mistakes, especially with sealing surfaces, usually show up when you restore pressure.

A man servicing a blue whole house water filter housing unit attached to copper plumbing pipes.

The maintenance habits that matter

A key task that gets skipped all the time is O-ring care. Guidance for water filter housings emphasizes inspecting and lubricating the O-ring during every filter change, flushing the sump, and making sure the O-ring is clean and properly seated to prevent leaks. Transparent reinforced housings may help with visual sediment checks, but they don't replace proper servicing (housing maintenance guidance and housing types).

A good maintenance cycle looks like this:

  1. Shut off the water to the housing.
  2. Relieve pressure before trying to loosen the sump.
  3. Unscrew the housing carefully with the proper wrench if needed.
  4. Remove and discard the old cartridge if it's a disposable type.
  5. Flush and wipe the sump so trapped debris doesn't stay inside.
  6. Remove, inspect, clean, and lubricate the O-ring before reassembly.
  7. Install the new cartridge squarely and reseat the sump evenly.
  8. Restore water slowly and watch for leaks.

If you like checklists, a simple maintenance log helps. Something as basic as a dated service sheet borrowed from a preventive maintenance guide for contractors can keep cartridge changes, O-ring inspection, and leak checks from turning into guesswork.

Common problems and what they usually mean

  • Leak at the top of the housing: Most often the O-ring is dirty, twisted, dry, damaged, or out of its groove.
  • Sudden pressure drop: The cartridge may be loaded with sediment and needs replacement.
  • Sump is stuck: Pressure may still be trapped, or the housing was overtightened last time.
  • Recurring drips after filter changes: Look for debris on the sealing surfaces and make sure the sump is threading on evenly.

For more filter-specific homeowner guidance, the advice library at Water Filter Advisor's water filtration advice center is a useful place to compare maintenance topics across different filter types.

A quick visual walkthrough can also help if you're more comfortable seeing the process before opening the housing:

A leak after a cartridge change usually starts with the seal, not the cartridge.

Frequently Asked Questions

Can I use any brand of cartridge in my housing

Not safely just because the listing says “universal.” The cartridge has to match the housing's length and diameter, and it has to be the right type for the problem you're solving. A standard body and a Big Blue body do not take the same width cartridge, even if the length sounds similar.

What is the red pressure-relief button for

It helps release pressure from the housing before service. That makes the sump easier and safer to remove. If the housing has one, use it as part of the shutdown routine instead of trying to muscle the canister loose under trapped pressure.

Should the housing go before or after a water softener

It depends on what the housing is doing. A sediment stage is commonly placed upstream so sand, rust, or grit don't beat up downstream equipment. The broader rule is to match the order to the water problem, which is why testing and filter selection matter more than copying someone else's plumbing layout.

Is a clear housing always better than an opaque one

Not always. Clear housings help when you want visual confirmation of sediment loading. Opaque housings can be perfectly fine if access is good and you already have a reliable maintenance schedule. Visibility is useful. Serviceability matters more.

How tight should the sump be

Snug and properly seated. The seal comes from the O-ring, not brute force. If someone had to fight the sump off last time, it was probably overtightened or assembled with a dry or poorly seated O-ring.


If you're comparing housings, cartridges, and full-system layouts, Water Filter Advisor is a solid next stop for practical buying guides, maintenance help, and filtration education that keeps the focus where it belongs, on cleaner water and fewer surprises at home.

A Guide to the Best Ceramic Candle Water Filter for 2026

A neighbor once brought me a countertop ceramic filter and asked why it had become painfully slow. The answer was sitting right on the outside of the candle: a thin layer of trapped dirt doing exactly what the filter was built to do.

The Enduring Simplicity of Ceramic Water Filtration

A century ago, a family could set a clay filter on the counter, pour in cloudy water, and wait. No outlet, no app, no moving parts. The same basic appeal still draws homeowners to ceramic filtration today.

A ceramic candle water filter is simple by design. A porous, candle-shaped element sits inside a housing, and water passes through it slowly under gravity. The pace is part of the bargain. You get a filter that keeps working during a power outage, asks very little from the user, and is easy to understand with your own eyes and hands.

That simplicity is why ceramic filters have lasted so long. They solve a narrow set of problems well. If your main concern is visible dirt, cloudiness, or microbe reduction in a low-tech setup, a ceramic unit can be a practical fit. It works a bit like an old cast-iron pan in the kitchen. Slow, plain, dependable, and still useful because the basic job has not changed.

The trade-off matters.

A ceramic candle is not a fast, all-purpose treatment system. It usually produces water gradually, so it suits daily drinking and cooking better than whole-house demand. It also does not cover every contamination risk. Some dissolved chemicals, salts, and very small contaminants can pass through, which means the best choice depends on what is in your water, not just what you can see.

That is where many homeowners get tripped up. Clear water is not always fully treated water. Ceramic filtration earns its reputation by being reliable, repairable, and affordable to maintain, but its strengths are specific, not unlimited.

Used for the right job, it is one of the most sensible filter designs around. Used for the wrong job, it can give a false sense of security.

How a Ceramic Candle Turns Murky Water Clear

A homeowner fills the upper chamber with cloudy well water before bed. By morning, the lower chamber holds water that looks noticeably cleaner. The change can feel almost too simple to trust, especially because nothing buzzes, spins, or doses the water with chemicals.

What is happening is straightforward. A ceramic candle cleans by microfiltration. Its wall is full of tiny pores, and those pores act as a physical barrier. Water moves through. Larger particles and many microbes do not.

A diagram illustrating the four stages of a ceramic microfiltration water filter process, from contaminated water to clean water.

A coffee filter is a useful comparison for the first step of understanding. It separates liquid from visible solids. A ceramic candle does the same job at a much finer scale, catching material that is far too small to see clearly with the naked eye.

That is why murky water often clears up so well. The cloudiness usually comes from suspended sediment, silt, rust, or organic matter. As water passes across and through the ceramic surface, much of that material gets strained out and stays behind on the outside of the candle.

Here is the process in plain language:

  1. Untreated water surrounds the ceramic shell
    Gravity or household pressure pushes water toward the porous wall.

  2. The ceramic surface screens out larger contaminants
    Sediment and other suspended particles collect first on the outer surface, much like lint collecting on a dryer screen.

  3. Some particles lodge within the pore network
    The filter does not work only at the skin. It also traps material within its fine passages as water moves through.

  4. Filtered water reaches the inner core and exits cleaner
    In some candle designs, the water then passes through added media such as carbon for extra taste and odor improvement.

If you have ever noticed a used candle turning brown or gray, that discoloration is evidence of the job it is doing. The dirt is not disappearing. It is staying on the filter.

Pore size is the key idea that makes the whole system easier to understand. A ceramic candle is selective by size. It is very good at removing what is larger than its pore openings and far less dependable for contaminants that are dissolved in water or much smaller than the pores. That practical limit matters as much as the cleaning effect you can see in the reservoir.

Flow rate is the trade-off you feel every day. Water has to squeeze through a rigid maze of tiny passages, so production is gradual. Ceramic units work more like a slow drip coffee maker than a kitchen tap. That slow pace is part of why they are reliable and power-free, but it also means they are better suited to drinking and cooking water than to high-demand jobs.

People sometimes assume a slower filter is a failing filter. Often, the opposite is true. With ceramic candles, steady flow usually means the barrier is doing real physical work. If flow drops too far, the usual cause is buildup on the surface, which is why routine cleaning matters.

What Ceramic Filters Remove and What They Miss

A ceramic candle is often easiest to judge by the water it improves most clearly. If the problem is cloudy water, grit, or many larger microbes, it can do a very good job. If the problem is viruses, fluoride, or dissolved chemicals, a plain ceramic shell has clear limits.

A ceramic candle water filter showing condensation on its textured surface next to a glass of water.

That trade-off is why ceramic filtration has lasted so long. It is simple, durable, and easy to understand. But simple does not mean it handles every water problem.

Where ceramic candles perform well

Ceramic works like a very fine coffee filter for suspended material. It strains out what is physically larger than its pores, so it is well suited to water issues you can often see or that travel as particles.

In everyday home use, that usually means:

  • Sediment and turbidity
    If water looks muddy or hazy, ceramic candles are a strong match because they trap the fine material causing that cloudiness.

  • Many bacteria
    Bacteria are often large enough to be reduced effectively by a properly made and well-maintained ceramic element.

  • Protozoa and cysts
    These are larger targets than bacteria, so ceramic filters are often a good fit for this category too.

A good way to frame it is this. Ceramic candles are strongest when the contamination behaves like particles that can be screened out.

Where homeowners can get a false sense of safety

Cleaner-looking water can invite overconfidence.

A review from IRC on household ceramic filters notes that real-world microbiological performance can vary, and some commercial candles tested in older evaluations did not consistently produce water of acceptable bacteriological quality as standalone treatment devices (IRC review of household ceramic filter performance). That matches what water professionals see in practice. Ceramic filters can improve water significantly, but the result depends on the filter design, the condition of the candle, and the quality of the source water.

Clear water is not the same as fully treated water.

This matters most for private wells, stored rainwater, surface water, and emergency use. If the source may carry sewage-related contamination or outbreak-related pathogens, a ceramic candle alone may not give you enough protection.

The biggest gap is usually viruses

Viruses are much smaller than bacteria and protozoa. That is where the size-based strength of ceramic becomes a weakness.

For a homeowner, the practical question is simple. Could your water source be exposed to fecal contamination from failing septic systems, floodwater, livestock runoff, or poor sanitation upstream? If the answer might be yes, a ceramic candle should be treated as one part of a system, not the whole system.

That is why many households pair ceramic with disinfection, such as UV or boiling during higher-risk periods. You give up some simplicity, but you gain a wider safety margin.

Dissolved contaminants need different media

Ceramic is much less useful for contaminants that are dissolved into the water itself. Once a substance is dissolved, it is no longer acting like a particle that can be screened out by pore size alone.

Fluoride is a common example. Standard ceramic candles usually do not reduce it well unless the filter includes media made for that purpose (fluoride-specific ceramic candle example). The same caution applies to many dissolved chemicals and some metals. If the product does not list a dedicated treatment media for those contaminants, do not assume the ceramic shell is handling them.

Taste and odor follow the same pattern. A plain ceramic candle may make water look cleaner, but chlorine taste, musty smells, and many organic compounds are usually better handled by carbon. If you want a simple explanation of that pairing, this guide to how carbon block filters improve taste and chemical reduction is useful.

A plain-English scorecard

Water issue Ceramic candle alone
Cloudiness and visible sediment Strong fit
Bacteria Often a good fit, but performance depends on design, condition, and source water
Protozoa and cysts Strong fit
Viruses Weak fit
Fluoride Usually not effective unless specially enhanced
Taste and odor from chlorine Better handled when carbon is added
Broad dissolved chemical reduction Usually needs added media or different technology

The practical lesson is straightforward. A ceramic candle water filter earns its place when you want low-tech, power-free filtration for sediment and many larger microbes. It is a weaker choice when the main concern is viral contamination or dissolved pollutants.

Enhancing Filtration with Carbon Silver and UV

A ceramic candle is a strong first barrier, but it is only one barrier. That matters in real homes, because the problems in water do not all behave the same way. Mud, chlorine taste, bacterial growth inside the filter, and viruses each call for a different tool.

The practical question is simple. What are you trying to fix, and what trade-off are you willing to accept? Adding carbon, silver, or UV can make a ceramic system more capable, but each upgrade solves a specific problem rather than turning the unit into an all-purpose purifier.

What carbon adds

Carbon handles a different job from ceramic. Ceramic works like a coffee filter for sediment and larger organisms. Activated carbon acts more like a sponge at the molecular level, holding onto many compounds that affect taste, odor, and some chemical concerns.

That is why a ceramic filter with a carbon core often feels better to use day to day. Water may already look clear after passing through ceramic, yet still smell like chlorine or have a stale taste. Carbon is the part that usually improves that experience. If you want a plain-language explanation of why this pairing is so common, this guide to how carbon block filters improve taste and chemical reduction is a helpful reference.

There is a trade-off. Carbon has a finite capacity, and performance depends on the contact time, the type of contaminant, and how the cartridge is built. It can improve water noticeably, but it does not remove every dissolved pollutant.

What silver is actually doing

Silver is often misunderstood.

In a ceramic candle, silver is generally used to limit bacterial growth on or within the filter media itself. In practical terms, it helps the filter stay more sanitary between cleanings and during routine use. That supports reliability, especially in slow gravity systems that hold water for hours at a time.

Homeowners sometimes read "silver" and assume broad disinfection. That is too much credit. Silver supports the filter. It does not replace proper filtration, and it does not guarantee protection against every microbe in the source water.

When UV makes sense

UV works at the end of the treatment train, after the water is already clear enough for the light to do its job well. It does not remove grit, and it does not improve taste. Its role is disinfection, especially in setups where microbial risk goes beyond what a ceramic pore barrier can reliably address.

This is often the point where trade-offs become clear. A plain gravity ceramic unit is simple, quiet, and power-free. Add UV, and you gain another layer against microorganisms, but you also add cost, electricity dependence, lamp replacement, and a need for correct sizing and maintenance.

For some households, that is a smart exchange. If your water comes from a well, a rainwater system, surface-influenced storage, or an emergency reserve, UV can be a sensible partner for ceramic. If your main complaint is chlorine taste in treated municipal water, carbon may solve the problem without the extra complexity.

A layered system gives you a more targeted result because each part covers a weakness in the others. Ceramic handles sediment and many larger microbes. Carbon improves taste and addresses some chemicals. UV adds a disinfection step for risks that physical filtration alone may miss.

That same logic shows up in other home maintenance decisions. You do not judge one tool by asking it to do every job. The process of comparing professional cleaners in Northern Arizona follows the same common-sense approach. Match the method to the problem, then decide whether the added effort is worth the added protection.

For many homeowners, that is the best way to judge upgrades to a ceramic candle water filter. Keep the system simple if your water problem is simple. Add carbon, silver, or UV only when the water quality goal clearly calls for it.

Maintaining Your Ceramic Filter for Peak Performance

A ceramic candle often looks worst right before it reminds you why people still trust it. The outside turns brown or gray. Flow slows to a trickle. It can look like the filter is failing, when in many cases it is loaded with what would otherwise be in your drinking water.

That visible buildup is part of the trade-off. Ceramic filtration is simple and dependable because it works as a physical barrier, much like a very fine coffee filter for grit and suspended matter. The same barrier that catches sediment also clogs over time, so maintenance is the price you pay for that simplicity.

A hand washes a porous ceramic candle water filter element with a sponge under running tap water.

Why the outside gets dirty

Water meets the outer wall of the candle first. As water passes inward through tiny pores, larger particles stay behind on the surface. Over days or weeks, that coating gets thicker and flow drops.

That is usually normal.

The key point is to read the filter correctly. A stained exterior often means the candle has been catching sediment and other particulate matter as intended. Clearer source water usually means slower buildup. Silty well water, rainwater with fine debris, or stored emergency water can foul the surface much faster.

A simple cleaning routine

Ceramic maintenance is low-tech, but it still rewards care. Scrubbing too hard can wear away useful material. Handling the clean side with dirty hands can undo the benefit of cleaning in the first place.

Use a routine like this:

  • Wash your hands first
    Start clean so you do not transfer contamination to the filter body, threads, or lower chamber.

  • Remove the candle carefully
    Ceramic is durable in use but brittle if knocked against a sink or countertop.

  • Scrub only the outer surface
    A soft brush or non-aggressive pad works well for loosening the film of trapped material.

  • Rinse with clean water
    Flush away the loosened residue before reinstalling the candle.

  • Check washers and seals during reassembly
    A good filter element cannot protect you if water slips around it instead of through it.

For a broader maintenance checklist that applies across filter types, this guide on how to clean water filters gives a useful framework for handling cartridges, housings, and hygiene.

The logic is the same as routine cleaning elsewhere in the home. Regular light maintenance usually works better than waiting for a bigger problem. If you have ever looked into comparing professional cleaners in Northern Arizona, you have seen the same pattern. Consistent care preserves performance.

Watch the flow, not just the calendar

Calendar reminders help, but flow rate is often the better clue. A ceramic candle rarely stops all at once. It usually gets slower in stages.

Treat that slowdown as feedback. If a cleaning brings flow back to a useful level, the candle is still doing its job. If flow stays poor after proper cleaning, the pores may be too fouled, the element may be wearing thin from repeated scrubbing, or the candle may be at the end of its service life.

This is one of the practical trade-offs with ceramic systems. They give you a visible, understandable maintenance signal. You can often see the buildup and feel the slowdown. In return, you give up the set-and-forget convenience people expect from some enclosed cartridge systems.

Here's a practical visual walk-through of the process:

Signs it's time to replace the candle

Cleaning extends service life, but it does not make a ceramic element last forever. Replace the candle if you notice any of the following:

  • Flow remains very slow after cleaning
    That usually means buildup is no longer limited to the surface, or the element has reached the end of useful life.

  • Cracks, chips, or hairline damage
    Even a small fracture can create a path for untreated water to pass.

  • Changes in taste or odor in ceramic-carbon models
    The ceramic shell and the carbon media age differently. The carbon portion may be spent even if the outer ceramic still looks usable.

  • Repeated cleaning removes more material than buildup
    If the candle is getting noticeably thinner, replacement is safer than trying to stretch its life.

A ceramic candle should age gradually. Sudden changes in clarity, flow, or taste deserve a close inspection.

Maintenance keeps a ceramic candle water filter honest. It also helps you decide whether this simple system still matches your water. If cleaning becomes too frequent or performance remains inconsistent, the issue may not be the candle alone. Your source water may need a prefilter, a second treatment step, or a different setup altogether.

Choosing the Right Ceramic Filter Setup for Your Home

A homeowner with cloudy well water usually asks two questions first. Will this make the water look and taste better, and will it fit into daily life without becoming a chore? Those questions point you toward the right ceramic setup faster than any brand comparison.

A ceramic candle filter works best when the setup matches your routine, your water source, and your tolerance for slow flow. The practical trade-off is simple. You gain reliability, low-tech operation, and modest ongoing cost. You give up speed, and you may still need another treatment step if your water has viral risk or dissolved contaminants.

A side-by-side comparison of a gravity-fed water dispenser and a pressure-based water filtration system on a counter.

Gravity-fed countertop units

Gravity-fed units are the simplest version to live with. You pour water into the top chamber, gravity pulls it through the ceramic candles, and treated water collects below. It works much like letting coffee drip through a filter cone. The process is easy to see, easy to explain, and easy to troubleshoot.

This setup fits renters, cabins, emergency backup plans, and homes that do not want plumbing changes. It also suits people who value independence from electricity and moving parts.

The trade-off is output. These systems are slow by design, so they reward planning. If your household fills bottles in the morning and keeps a reserve ready, that pace often feels perfectly acceptable. If several people expect filtered water on demand from a tap, the slowness can become frustrating.

Pressurized and plumbed systems

Pressurized ceramic systems place the element inside an under-sink or faucet-connected housing. They feel more natural in a busy kitchen because filtered water comes from a tap where you already wash produce, fill pots, and pour drinking water.

They also give you more room to build a staged system. A sediment prefilter can protect the ceramic element from heavy dirt load. Carbon can help with taste and some chemicals. UV can add a disinfection step where microbiological risk is higher.

The trade-off here is maintenance discipline. A ceramic candle may be simple, but the full system includes housings, seals, fittings, and sometimes several cartridges with different replacement schedules. If you want the easiest possible ownership experience, a countertop gravity unit usually wins.

A side-by-side decision guide

Home situation Better ceramic setup
Apartment or rental Gravity-fed countertop unit
Power outage backup Gravity-fed countertop unit
Minimal installation hassle Gravity-fed countertop unit
Daily cooking and drinking at the sink Pressurized under-sink setup
Layered treatment with multiple stages Pressurized setup
Frequent moves Portable gravity unit

Cost and ownership

Ceramic often appeals to homeowners who dislike disposable, high-turnover filter systems. A good candle can last a long time with proper cleaning, and replacement costs are often manageable compared with more complex systems. Another practical advantage is that ceramic filtration does not remove the full mineral content of water the way reverse osmosis does, which some households prefer for taste.

That said, low operating cost only holds true when the filter matches the job. Very dirty source water can clog a candle quickly and turn a low-maintenance system into a frequent cleaning project. In that case, adding a simple prefilter can make the entire setup easier to own.

When ceramic is the right primary filter

A ceramic candle water filter makes the most sense when:

  • Your main concerns are visible sediment, cloudiness, and many larger microbes
  • You want a filtration method that works without electricity
  • You prefer equipment you can inspect, clean, and understand without special tools
  • You want a practical daily-use filter or a reliable backup option

When you should look beyond ceramic alone

Ceramic alone is usually the wrong tool if your main concern is something you cannot strain out physically. Dissolved contaminants do not behave like grit in water, and viruses are smaller than the pore sizes many ceramic candles are designed to block.

Choose another technology, or pair ceramic with other treatment, if you are dealing with:

  • Possible viral contamination
  • Fluoride reduction
  • A wide range of dissolved contaminants
  • High daily water demand where slow flow will feel limiting

A good buying rule is to match the filter claim to the problem in your water. If a product promises reduction of a specific contaminant, check for clear testing or certification for that contaminant, not just general marketing language.

Is a Ceramic Candle Filter Your Best Choice?

For many households, the answer is yes. A ceramic candle water filter is one of the most practical ways to improve water when your priorities are simplicity, reliability, low running cost, and freedom from electricity.

It's especially appealing if you want a countertop or portable solution that handles sediment, cloudiness, and many larger microbes without turning your kitchen into a plumbing project. It also earns points for long service life and easy cleaning when used within its limits.

But those limits matter. Ceramic is not the best standalone answer for viruses. It's also not the right tool if your main goal is aggressive reduction of fluoride or a broad range of dissolved contaminants. In those cases, ceramic works better as part of a multi-barrier setup than as a solo hero.

If your water challenges are mostly physical and microbiological, ceramic may be exactly the right fit. If your risks are more complex, use ceramic as the sturdy first stage and let other technologies handle the rest.


If you're comparing filter types, replacement costs, or home setups, Water Filter Advisor is a helpful place to research practical options for kitchens, whole-house systems, and ongoing filter maintenance.

Faucet Water Filtration Systems for Home: A 2026 Guide

You fill a glass from the kitchen tap, hold it to the light, and pause. Maybe it smells a little like a swimming pool. Maybe the taste is flat, metallic, or just off enough that you reach for coffee, juice, or bottled water instead. That hesitation is exactly why so many households start looking into faucet water filtration systems for home.

A good faucet filter sits in a practical middle ground. It's easier than a major plumbing project, more immediate than waiting on a city report, and often enough to solve the day-to-day problems people notice first: better taste, less odor, and more confidence when pouring water for kids, cooking pasta, or filling the kettle.

That First Sip Why Trust in Tap Water is Fading

For many people, the issue starts small. A strange smell one week. Cloudiness after plumbing work. A glass of water that tastes fine at one house and unpleasant at another. You don't need to be alarmist to admit that trust can fade quickly when something seems off.

That loss of confidence shows up in national research too. NSF found that 91% of Americans are now using water filters, and only 52% of filtration owners trust their home tap water overall. In rural areas, that drops to 44%, according to NSF's research on trust in certified water filters.

What people are reacting to

Most homeowners aren't starting with lab chemistry. They're reacting to real-life signs:

  • Taste changes: Water can taste like chlorine, metal, or stale minerals.
  • Odor surprises: A noticeable smell makes people question safety, even if the water is technically compliant.
  • Family routines: Parents often become more selective when they're mixing baby formula, packing school bottles, or making meals.
  • Old plumbing worries: If the home is older, the concern often shifts from the water source to what happens on the way to the faucet.

Trust doesn't disappear because someone read a technical report. It disappears when daily use no longer feels normal.

That's why faucet filters have become such a common first step. They let people improve the water they drink and cook with right at the sink, without committing to a major remodel or a whole-house system.

Why faucet filters feel approachable

A faucet-mounted system answers a simple question: “What can I do today?”

It gives you filtered water on demand, usually at the exact spot where you fill a glass, rinse produce, or top off the coffee maker. For many households, that's enough to move from vague concern to a concrete solution.

And that matters. Better-tasting water often means people drink more of it. Cleaner-smelling water can make tea, soup, and coffee more enjoyable. A modest kitchen upgrade can also reduce the temptation to keep buying bottled water out of habit.

Decoding the Different Types of Faucet Filters

When shoppers say they want a faucet filter, they usually mean one of a few different setups. Some attach directly to the faucet. Others hide under the sink but still serve the main kitchen tap. A few live nearby on the counter and connect when needed.

An infographic showing four common types of water filtration systems for homes with descriptions and illustrations.

The main categories at a glance

Type Best for What it feels like in daily use Main tradeoff
Faucet-mounted Renters, quick upgrades, low-commitment buyers Flip a lever or run water through the attached unit Visible on the faucet
Countertop People who want more filter room without going under the sink Sits beside the sink and connects to the faucet Takes up counter space
Pitcher Small households, dorms, backup use Fill, wait, pour Batch filtering, not on-demand
Under-sink direct-connect or point-of-use Homeowners or renters who want a cleaner look Filtered water through sink plumbing with less clutter up top Some install effort and under-sink space needed

Faucet-mounted filters

These are the classic screw-on units. They install directly onto the faucet spout and usually include a diverter, so you can switch between filtered and unfiltered water.

Their appeal is simple: low fuss. If your goal is better-tasting water for drinking and cooking, a faucet mount often gets you there fast. They're especially attractive for renters because they can usually come off just as easily when it's time to move.

Countertop filters and pitchers

These aren't faucet-mounted in the strict sense, but they often show up in the same shopping journey. Countertop filters connect to the faucet while keeping the filter body off the spout itself. That can be useful if you dislike the bulky look of a mounted unit.

Pitchers are the least permanent option. They're handy for refrigerators, guest rooms, or temporary setups, but they don't give you filtered water instantly from the tap.

Direct-connect under-sink systems

This category deserves more attention than it gets. Some newer models are designed to avoid the usual “major install” fear. Aquasana says renter-friendly direct-connect systems are responding to a 40% rise in renter queries for “no-drill” systems, and its Claryum Direct Connect offers a 15-minute DIY install while removing 78 contaminants, including chloramine, as described on Aquasana's under-sink filter page.

That matters if you want a cleaner countertop and don't love a device hanging off your faucet. It also matters if chloramine is on your radar, since some standard faucet-mounted options focus more narrowly on chlorine and lead.

Quick shortcut: If you want the easiest path, choose faucet-mounted. If you want the tidiest kitchen look, direct-connect under-sink models deserve a serious look.

If you want a side-by-side look at specific models, browsing these faucet water filter reviews can help you narrow down what fits your sink, habits, and budget.

The Science Inside How Your Filter Cleans Water

Most faucet filters look simple from the outside. Inside, they're doing layered work. Different materials target different problems, and knowing the basics helps you match the filter to what bothers you about your water.

A close-up view of a transparent faucet water filtration system with layered filter media purifying running water.

Activated carbon is the taste-and-odor workhorse

Think of activated carbon like an ultra-porous sponge with a huge amount of internal surface area. Water passes through it, and unwanted compounds stick to that surface instead of staying in your glass.

That's why carbon is so common in home filters. It's especially useful for reducing chlorine and certain compounds that affect taste and odor. If your coffee tastes harsh or your iced water smells like a pool, carbon is often the part doing the heavy lifting.

The technical side is impressive, but the practical side is what matters. Better taste usually means better everyday use. You notice it in plain drinking water first, then in tea, soups, rice, pasta, and coffee.

Ion exchange helps with heavy metals

Now picture a second layer that works more like a selective catcher. Ion exchange resin attracts and holds certain dissolved metals, including lead.

That's important because taste alone doesn't tell you whether a metal is present. Some of the contaminants people care most about aren't the ones they can smell. A filter that combines carbon with ion exchange can tackle both the obvious annoyances and the less visible concerns.

Why multi-stage design matters

A strong faucet filter usually doesn't rely on one material doing everything. It uses a sequence. One stage improves taste and odor. Another targets metals. Sometimes additional media are included for a wider contaminant range.

According to Tap Score's explanation of faucet filter media and standards, activated carbon has a surface area of about 1000 m²/g, adsorbs chlorine and VOCs, and ion exchange resins capture heavy metals. The same source notes that an NSF/ANSI 53 certified filter must demonstrate more than 99% lead reduction over its rated capacity, often 100 to 200 gallons.

That phrase “over its rated capacity” is the key detail many buyers miss. A filter shouldn't just work on day one. It needs to keep working until it reaches the cartridge's stated life.

Practical rule: If your main complaint is taste, carbon matters a lot. If your concern is lead, look for a filter that clearly includes the right media and certification for that job.

Why filters slow down over time

Every cartridge has limits. As media fill up, water can move more slowly and contaminant reduction can weaken. That doesn't mean the filter failed suddenly. It means it's doing what all filters do: collecting what you asked it to remove until replacement is due.

That's why a fresh cartridge often restores both flavor and flow. It's also why replacement timing isn't just a maintenance chore. It's part of the filter's actual performance.

Reading the Labels Understanding Certifications

Water filter packaging loves acronyms. The most useful ones tell you whether a product's claims were checked against a real standard. That's where NSF/ANSI certifications become valuable.

A simple way to think about certifications is this: marketing tells you what a brand says the filter does. Certification helps show what the filter has been tested to do.

The standards most shoppers should recognize

Here's the plain-English version of the labels you'll see most often on faucet water filtration systems for home:

  • NSF/ANSI 42: Focuses on aesthetic improvements such as reducing chlorine taste and odor.
  • NSF/ANSI 53: Covers health-related contaminant reduction, including concerns such as lead.
  • NSF/ANSI 372: Relates to lead content in the product materials themselves.
  • NSF/ANSI 401: Applies to certain emerging contaminants and is worth noticing if you want broader performance coverage.

If you only remember one distinction, make it this one: 42 is usually about making water more pleasant, while 53 is about reducing specific health-related contaminants.

How to read a box without getting lost

Don't stop at a logo on the front panel. Look for the exact claims tied to the standard. A filter might be certified for chlorine reduction but not for lead. Another might reduce lead but say nothing about chloramine.

That's where shoppers get tripped up. They assume “certified” means “certified for everything.” It doesn't. It means certified for the specific things listed.

A good label answers three questions clearly: what it reduces, which standard applies, and how long that claim lasts.

A simple shopping framework

When you compare filters, use this checklist:

  1. Start with your concern. Taste and odor? Lead? A broader list?
  2. Match the concern to the standard. Don't buy a taste-focused filter if lead is your main reason for shopping.
  3. Check the rated life. A strong certification matters most when the claim lasts through the cartridge's usable capacity.
  4. Prefer independent certification. It adds confidence that the performance claim wasn't self-declared.

This is one of the easiest ways to avoid buyer's remorse. Many disappointing filter purchases happen because the product worked exactly as designed, but the buyer chose the wrong design for the problem.

Simple Setup and Ongoing Filter Maintenance

Installation worries stop a lot of people before they start. In reality, many faucet-mounted systems are very manageable for a basic DIYer. You're usually removing the faucet aerator, matching an adapter if needed, and twisting the unit into place.

A person installing a water filtration system onto a kitchen faucet with easy setup instructions.

A typical faucet-mount install

Most setups follow a familiar pattern:

  1. Remove the aerator from the faucet tip.
  2. Check the threads and choose the correct adapter if the filter includes more than one.
  3. Hand-tighten the filter housing onto the faucet or adapter.
  4. Run water through the new cartridge to flush carbon fines and prep the media.

The biggest mistake is forcing the wrong adapter. If the fit feels off, stop and verify the threading before tightening further. Cross-threading turns a quick project into an annoying leak chase.

A few setup details matter

A faucet filter works best when it matches both your plumbing and your habits. If you have an unusual faucet shape, a pull-down sprayer, or limited clearance, compatibility is just as important as the contaminant list.

For homeowners who want a better grasp of plumbing basics before installing anything near the sink, Northpoint Construction's plumbing advice offers useful context on how water lines and fixtures come together behind the wall. You don't need to become a plumber, but a little background makes the install feel less mysterious.

If a filter leaks on first install, the issue is often simple: wrong adapter, crooked threading, or a washer that didn't seat properly.

Maintenance is where performance lives

A faucet filter is only as good as its replacement routine. You don't need to obsess over it, but you do need to pay attention.

Common signs it's time to replace the cartridge include:

  • Slower flow: Water takes longer to fill a glass or pot.
  • Taste returning: Chlorine or off-flavors start creeping back in.
  • Indicator alerts: Some models have built-in reminders.
  • Heavy recent use: Holidays, house guests, or lots of cooking can use up filter life faster.

A short visual can help if you want to see a faucet-style install in action:

Keep maintenance realistic

The easiest system to maintain is the one that fits your routine. If you know you won't remember a complicated schedule, choose a model with a clear cartridge indicator or an easy subscription option for replacements.

That small convenience matters more than people think. A well-maintained basic filter will usually serve a household better than an advanced system with cartridges that get ignored.

Calculating the True Cost of Clean Water

The box price gets attention. The replacement cartridge determines whether you'll still like the purchase a year later.

Buyers often make the wrong comparison. They line up upfront prices, pick the cheapest model, and only later realize the ongoing cost or replacement frequency changes the value equation.

Upfront price versus ownership cost

According to Consumer Reports' faucet filter cost comparison, faucet filters often cost $15 to $80 upfront, while annual replacement costs for popular models such as ZeroWater Extremelife and Brita Basic SAFF-100 range from $36 to $57. The same source notes that faucet models can end up costing more over time than some under-sink options because their cartridges may need more frequent replacement.

That doesn't mean faucet filters are a poor value. It means the cheapest-looking option isn't always the least expensive to live with.

A better way to compare

Use three questions instead of one:

  • What does the unit cost to start?
  • How often will I replace cartridges in my household?
  • Am I paying for performance I need?

A single person filling a bottle and making coffee may be perfectly happy with a compact faucet mount. A busy family using filtered water for drinking, cooking, and filling multiple bottles every day may burn through cartridges much faster.

Where hidden costs show up

The long-term cost usually rises because of one of these reasons:

Cost driver Why it matters
Replacement frequency More cartridge swaps mean more spending and more hassle
Low capacity Heavy use shortens the time between replacements
Flow frustration If a filter feels slow, people may bypass it and waste the investment
Mismatch with water quality Sediment or certain water conditions can make a cartridge less practical in daily use

The true price of a filter isn't what you pay on day one. It's what you pay to keep getting water you actually enjoy using.

Faucet filter or under-sink

For some households, a faucet filter is still the smartest financial choice because the initial commitment is low and installation is simple. For others, especially those using a lot of filtered water, a direct-connect under-sink model can make more sense over time.

The practical lesson is simple. Don't ask only, “What can I afford today?” Ask, “What will this feel like to own?” That one shift leads to better decisions than chasing the lowest sticker price.

How to Choose the Right Faucet Filter System

Choosing among faucet water filtration systems for home gets easier when you stop shopping by brand first and start shopping by situation. The right filter for a renter in a studio kitchen isn't the right filter for a family with older plumbing.

A good decision usually comes down to three things: your water concern, your kitchen setup, and your household's daily volume.

Match the filter to the person using it

Here's a practical way to think about it.

The renter who wants no drama

You want something easy to install, easy to remove, and unlikely to start a conversation with a landlord. A faucet-mounted unit is often the safest bet. A renter-friendly direct-connect under-sink option can also work if you want a cleaner look and your sink cabinet has room.

Look for straightforward installation and clear replacement access. If you move often, portability matters almost as much as performance.

The family with young kids

You're probably thinking beyond taste. You want stronger reassurance at the tap used for drinking, cooking, and filling cups all day.

Certification and flow rate become more important. A system that performs well but feels too slow during busy mornings can become frustrating fast.

The coffee and cooking household

If flavor is your main issue, focus on a filter known for improving taste and odor. Water used in coffee, tea, soups, oatmeal, and pasta has nowhere to hide. You'll notice improvements quickly when chlorine-heavy taste is reduced.

Use flow rate and capacity as real-life clues

According to Pfister's Xtract performance overview, high-performing faucet filter systems can reach 1.5 GPM and filter 300 to 500 gallons, while standard models may deliver 0.8 GPM for 200 gallons. The same source says households of 4 or more should prioritize more than 1 GPM to avoid bottlenecks.

That “bottleneck” point is practical, not technical. If multiple people fill bottles, cook, and make drinks from the same sink, a slower filter changes the way the kitchen functions.

A simple decision checklist

Before buying, ask yourself:

  • What bothers me most right now? Taste, smell, lead concern, convenience, clutter?
  • Do I need an easy install? If yes, lean faucet-mounted or renter-friendly direct-connect.
  • How many people use this sink daily? Larger households should pay close attention to flow and capacity.
  • Do I want the filter visible or hidden? This alone can narrow the list quickly.
  • Will I keep up with replacements? Choose a system whose maintenance style matches your habits.

Buy for your real routine, not your ideal one. The best filter is the one your household will use correctly every day.

If you're comparing options side by side, this roundup of the top faucet water filters can help you narrow your shortlist and focus on systems that fit your sink, budget, and water concerns.


If you want help comparing models, understanding certifications, and finding a system that fits your home without guesswork, Water Filter Advisor is a useful place to start. It's built for people who want clear, practical guidance on choosing and maintaining better water filtration at home.

Find the Best Water Filter for City Water: A Splash Course in Purity

Let’s be honest, you probably think the water gushing from your tap is as pure as a mountain spring. And while your city puts in a heroic effort to treat it, the long, winding journey to your home isn't always a clean one. A good water filter for city water acts as your personal bouncer, catching uninvited guests from old pipes and leftover treatment chemicals before they crash your party and end up in your glass.

Is Your City Water as Clean as You Think?

It's a common assumption: treated municipal water equals perfectly safe drinking water. But let's get real. Think of it like a package delivery. Your water leaves the "warehouse"—the city treatment plant—in pristine condition. But then it travels through miles of ancient, underground pipes to get to your front door.

Along the way, it can pick up some travel companions you definitely didn't order. Just like a package can get dented or smudged in transit, your water can gather a whole host of contaminants before it gracefully pours from your faucet.

Clear water fills a glass from an outdoor tap, promoting 'CHECK YOUR TAP'.

Common Intruders Crashing Your Tap Water Party

Even after the city's best efforts, a few uninvited guests tend to show up. The most obvious one is the distinct swimming-pool aroma of chlorine, the workhorse disinfectant used to slay bacteria. It does its job, but let's face it, it can make your morning coffee taste like a trip to the local YMCA.

Then there are the stealthy troublemakers. Older homes and city plumbing can have lead pipes or solder, which can leach this dangerous heavy metal right into your water. You also have to worry about disinfection byproducts (DBPs), like TTHMs. These are nasty little compounds that form when chlorine has a chemical mixer with organic stuff in the water.

The bottom line is this: your tap water is more than just H₂O. It’s a complex cocktail that can carry everything from disinfectants to metals from the pipes themselves. Taking control of that final few feet with a home filter is the only way to be certain the water your family drinks is genuinely, refreshingly clean.

These concerns are why so many of us are turning to home filtration. In fact, point-of-use filters, like the ones that go under your sink or on your faucet, now make up 40% of residential sales in the U.S. and Europe. This isn't surprising, especially when you see reports linking millions of gastrointestinal illnesses to tap water each year. You can dig into the numbers in the full global market report on water filters.

Pinpointing Your Water Problems

Figuring out what’s actually funky with your water is the first step to a flawless fix. Sure, you can taste, smell, or see some issues, but what about the invisible stuff? Your local water report is a great start, but you also need to consider your own home's plumbing. For instance, understanding backflow prevention basics to keep your drinking water safe is a crucial piece of the home water safety puzzle.

To make things easier, I've put together a quick guide to match the most common city water complaints with the right filter technology.

Your Quick Guide to City Water Problems and Filter Fixes

This table gives you a simple, at-a-glance look at how to tackle your specific water woes and get back to enjoying clean, safe water right from your tap.

Common Problem Likely Culprit Best Filter Solution
Chlorine taste & smell Municipal disinfection Activated Carbon, KDF
Cloudy or murky water Sediment, Silt Sediment Filter, Whole-House System
Metallic taste Lead, Copper, Iron Reverse Osmosis, KDF, Ion Exchange
"Rotten egg" smell Hydrogen Sulfide Activated Carbon, KDF, Oxidation
Hard water stains Calcium, Magnesium Water Softener, Ion Exchange

With this chart, you can quickly diagnose the likely cause of your water problem and see exactly what kind of filter is engineered to solve it. It’s your first step toward making a choice with confidence.

How to Read Your Local Water Quality Report (Without a Chemistry Degree)

Before you can choose the right water filter for city water, you have to know what you’re fighting.

By law, your local water utility must send you an annual water quality report card. It's officially called a Consumer Confidence Report (CCR), but think of it as the "nutrition label" for your tap water.

It’s a complete breakdown of everything detected in your water over the last year, showing whether those levels meet legal safety standards. It’s your secret weapon.

Close-up of hands holding a water report guide document with a pen, laptop, and plant on a wooden desk.

Finding Your Report

Getting your hands on this document is usually a breeze.

  • Check Your Mail: Many utilities still mail a paper copy directly to your home.
  • Go Online: The fastest method is to check your local water provider's website. Look for a "Water Quality" or "Consumer Confidence Report" link.
  • Use the EPA's Tool: If you're struggling to find it, the Environmental Protection Agency (EPA) has a search tool to locate your local CCR online.

These reports look dense, but you only need to focus on a few key sections to get the intel you need.

Decoding Key Terms

The most critical part of the CCR is the data table listing detected contaminants. Here are the two columns you need to understand.

MCLG (Maximum Contaminant Level Goal): This is the dream goal. It's the contaminant level where there is no known health risk. Think of this as the "perfect score."

MCL (Maximum Contaminant Level): This is the legally enforceable limit. It’s the highest level of a contaminant allowed in public drinking water. The MCL is set as close to the MCLG as is practical with current treatment tech.

Here's the kicker: Your water can be legally "safe" (below the MCL) but still contain contaminants far above the ideal health goal (the MCLG). That gap is where a good water filter for city water becomes your family’s hero.

What to Look For

When you scan the report, keep your eyes peeled for these common culprits that often appear in municipal water supplies.

1. Disinfectants & Disinfection Byproducts (DBPs):

  • Chlorine/Chloramine: The report will show the disinfectant levels used. If your tap water has a strong chemical or pool-like smell, this is your guy.
  • Total Trihalomethanes (TTHMs) & Haloacetic Acids (HAA5): These are DBPs created when chlorine reacts with organic matter. Long-term exposure is linked to health issues, making them a top priority for filtration. For example, one city report showed radium levels at 9.7 pCi/L, nearly double the EPA's maximum, which prompted many residents to seek robust filtration.

2. Inorganic Contaminants:

  • Lead & Copper: These metals typically don't come from the water source but leach from older pipes and fixtures. Your report will often list the "90th Percentile" result, showing if high levels are a widespread issue in your area.
  • Nitrate/Nitrite: These usually come from agricultural runoff (fertilizers) and are a particular health concern for infants.

Once you’ve identified which of these are in your water, you're ready for the fun part: matching them to a filtration system designed to knock them out.

Alright, you’ve got your water quality report in hand. Now you know exactly what’s in your tap water.

The next job is to match those specific contaminants to the right filtration technology. This is the most important step. Not all filters do the same thing, and picking the right one is the only way to get the clean, safe water you’re after.

Think of it this way: different filters are like different tools in a toolbox. You wouldn’t use a hammer to turn a screw. Same idea here.

The Workhorse: Activated Carbon

If you’ve ever used a simple filter pitcher, you’re already familiar with activated carbon. It’s the superstar of the filtration world for a good reason. Picture a microscopic sponge with a massive internal surface area, covered in millions of tiny pores.

These pores grab onto certain chemicals through a process called adsorption—basically, they act like a magnet for the stuff that makes your water taste and smell bad.

Activated carbon is the champ for:

  • Chlorine: This is its main gig. If your water tastes or smells like a swimming pool, a carbon filter will fix it, and you'll notice the delicious difference immediately.
  • Volatile Organic Compounds (VOCs): This includes things like pesticides, herbicides, and industrial solvents.
  • Bad Tastes and Odors: Carbon is fantastic at trapping the organic compounds that cause musty or funky smells.

But here’s the catch: standard activated carbon on its own won't touch things like lead, nitrates, or other dissolved solids. It's a fantastic first step for making city water taste better, but for more serious health contaminants, you'll need to call in the specialists.

The Gatekeeper: Reverse Osmosis

When you need the highest level of purification, reverse osmosis (RO) is the undisputed king.

Think of it as the ultimate bouncer for your water. It uses a special membrane with pores so ridiculously small that only pure water molecules can squeeze through. Everything else—lead, heavy metals, salts, disinfection byproducts, you name it—gets rejected and flushed down the drain.

The power of reverse osmosis is its ability to remove contaminants down to 0.0001 microns. At that level, almost nothing but H₂O can pass through, giving you exceptionally pure drinking water.

It's no surprise that RO systems are driving huge growth in the home water purifier market. They are on track to make up about 55% of the market by 2026 precisely because they are so effective at removing tough contaminants like TTHMs and lead. You can dig into more of the numbers in this detailed market analysis.

Catalytic Carbon and KDF Media

So what do you do if your city uses chloramine instead of chlorine? Chloramine, a mix of chlorine and ammonia, is tougher to remove, and standard carbon filters just can't keep up.

That’s where catalytic carbon steps in. It’s a special type of activated carbon that’s been supercharged to break the chemical bond in chloramine, effectively neutralizing it.

Another key player is KDF (Kinetic Degradation Fluxion) media. This is a blend of high-purity copper and zinc that creates a tiny electrochemical reaction. This process is excellent for:

  • Tackling Chlorine and Chloramine: KDF is another great option for neutralizing disinfectants.
  • Reducing Heavy Metals: It can reduce water-soluble metals like lead, mercury, and iron.
  • Stopping Bacteria Growth: The environment it creates prevents bacteria and algae from growing inside your filter, which helps the filter last longer.

To give you a clearer picture of how these technologies stack up, we've put together a comparison table.

Filtration Technology Performance Showdown

This table breaks down which filter technology is best for tackling the most common city water problems. Use it to quickly see which "tool" you need for the job.

Filtration Technology Removes Chlorine Taste Removes Chloramine Reduces Lead and Metals Reduces TTHMs and VOCs Ideal Use Case
Activated Carbon Excellent Poor No Good Improving basic taste and odor from chlorine.
Catalytic Carbon Excellent Excellent No Good Targeting chloramine-treated city water.
KDF Media Good Good Good No Reducing chlorine/chloramine and some heavy metals.
Reverse Osmosis (RO) Excellent Good Excellent Excellent Maximum purification of drinking water at a single tap.

As you can see, there’s no single "best" filter—only the best filter for a specific contaminant.

Many of the top-tier water filters for city water will actually combine these technologies. For example, a whole-house system might use a sediment pre-filter, followed by a tank of KDF and catalytic carbon. An under-sink RO system will almost always include carbon pre-filters.

By understanding what each one does, you can choose a system that truly solves your water problems instead of just guessing.

Choosing Your Ideal Home Water Filter System

Alright, you've figured out what's in your city water and you know which technologies can get rid of it. Now for the fun part: picking the right filter system that actually fits your life. The best water filter for city water isn't just about what it removes; it's about matching the system to your home, your daily routine, and your budget.

I like to think of it like choosing a sound system. Do you want music in every single room? That’s your whole-house system. Or do you just want incredible, high-fidelity sound in your favorite listening chair? That’s more like an under-sink system. Sometimes, all you need is a portable speaker you can grab and go—that’s your countertop or faucet filter. Each one has its place.

Whole-House Water Filters: The All-In-One Solution

A whole-house water filter—also called a point-of-entry (POE) system—gets installed right where the main water line enters your house. This is the big-picture solution. It treats every single drop of water you use, from the kitchen tap to every showerhead.

This is the way to go if you’re dealing with problems that go beyond just your drinking water. If your city water is loaded with chlorine or chloramine, you've probably noticed it can lead to dry, itchy skin and brittle hair. A whole-house system with the right carbon filter media tackles those irritants, making your showers a whole lot more comfortable.

Here’s a real-world example: A family brings home a new baby and finds that bath time leaves the little one with red, irritated skin. They check their city's water report and see high levels of chloramine. By putting in a whole-house filter, they solve the problem at the source. Now, even the bathwater is gentle and free from those harsh chemicals.

Under-Sink Water Filters: The Drinking Water Powerhouse

An under-sink water filter, known as a point-of-use (POU) system, lives right under your kitchen sink. It’s all about delivering the absolute best water for drinking and cooking, usually from its own dedicated faucet.

This is where heavy-hitter technologies like reverse osmosis really get to work. While you can get a whole-house RO system, they're usually overkill and pretty expensive for most homes. An under-sink RO, on the other hand, gives you incredible purification right where you need it most, zeroing in on everything from lead and arsenic to nitrates and TTHMs.

This is the perfect setup for someone who's seen their water report and is worried about specific health-related contaminants. They want total peace of mind knowing their drinking water is as pure as possible, without spending the money to treat the water that just flushes the toilet.

For top-tier drinking water, an under-sink system is the most popular choice. It hits that sweet spot between powerful, targeted filtration and affordability, making it the go-to for health-conscious families.

To make the choice a little clearer, this decision tree can help you visualize the best path forward based on what you're trying to achieve.

A flowchart detailing steps and questions to achieve excellent city water quality, focusing on taste, chemicals, and contaminants.

As you can see, your main goal—whether it's just better taste, getting rid of specific chemicals, or aiming for total purity—points you directly to the right type of system for your home.

Countertop and Faucet Filters: The Convenient Choice

For renters, or really anyone who wants a simple, no-plumbing-required solution, countertop filters and faucet-mounted filters are fantastic. You can set them up in minutes.

  • Faucet Filters: These just screw onto your existing faucet. A small switch lets you flip between filtered and unfiltered water. They're perfect for quickly making chlorinated water taste and smell better.
  • Countertop Filters: These systems sit on your counter and connect to your faucet with a small hose. They’re usually a bit bigger than faucet filters, which means they can hold more advanced filter cartridges for better performance.

Think about a college student moving into their first apartment. They can't make any permanent changes but are sick of buying bottled water. A simple faucet filter gives them better-tasting water on the spot, and they can just unscrew it and take it with them when they move out.

These systems are a huge and growing market. Advanced filters designed for city water contaminants hit a market value of USD 33.62 billion in 2023 and are projected to reach USD 113.7 billion by 2034, growing at an impressive 14.5% CAGR.

If you're looking for more specific recommendations, it's worth diving into the pros and cons of each type. Check out our guide on filtration advice for more detailed comparisons.

Making Sense of Filter Certifications and Performance

You’ve got a few filters in mind that look promising. But let's be honest, how do you really know if they'll do what the company claims? In the water filter game, marketing can be all flash, but performance comes down to one thing: independent, third-party testing.

This is where certifications save the day. They're your best shot at cutting through the sales pitches and picking a filter based on hard facts. A certification mark means the product was put through the wringer against a national standard to prove it removes the exact contaminants it says it does.

The Gold Standard: NSF/ANSI Certifications

The most trusted names in the business are the NSF (National Sanitation Foundation) and ANSI (American National Standards Institute). An NSF/ANSI certification is like a brutally honest audit of a water filter. It's not a one-and-done deal, either—manufacturers have to keep up with regular testing and inspections to hold onto that seal of approval.

If you’re shopping for a water filter for city water, you need to know three key standards. They tell you exactly what a filter is built to handle.

  • NSF/ANSI 42: Aesthetic Effects. This one is all about taste and smell. If a filter has this certification, it's proven to reduce things like chlorine, giving you water that actually tastes crisp and clean.
  • NSF/ANSI 53: Health Effects. Now we're getting serious. This is a much tougher standard for contaminants that pose a health risk. Filters with this stamp are certified to reduce lead, mercury, asbestos, and nasty things like certain cysts or VOCs.
  • NSF/ANSI 401: Emerging Compounds. This standard tackles those "incidental contaminants" you hear about—trace amounts of pharmaceuticals, over-the-counter drugs, and other chemicals showing up in our water.

Quick tip: Look for the specific NSF/ANSI numbers on the box or in the filter's specs. A vague claim like "tested to NSF/ANSI standards" is not the same as being "certified to NSF/ANSI standards." Certification is what really counts.

How to Read a Performance Data Sheet

Beyond the big certifications, any legit filter will have a Performance Data Sheet. Think of this as the filter's resume. It lists every single contaminant the filter is certified to reduce and, just as importantly, by what percentage.

This is where you match your water report to the filter. Say your city's report showed high lead levels. Here's what you'd look for on the data sheet:

  1. Contaminant: It should clearly state "Lead Reduction."
  2. Certification: It should list NSF/ANSI 53 right next to it.
  3. Percentage: It will give you the reduction rate, which is often 99% or higher for lead.

This is how you make a decision you can feel good about. If a company makes it hard to find their performance data sheet, take that as a major red flag. Good companies are transparent. By matching your water quality needs to a filter's certified performance, you can buy with confidence, knowing you're getting the clean, safe water your family deserves.

Calculating the True Cost of Your Clean Water

Choosing a water filter for city water is a fantastic move for your family's health. But what’s the real financial picture? It’s easy to get fixated on the price tag, but that's just the tip of the iceberg.

To make a smart decision, you have to look at the total cost of ownership. This means adding up the upfront price, the cost of replacement filters, and any installation fees. It might seem like a lot to track, but it's the only way to see the true value you’re getting.

Uncovering the Total Cost of Ownership

Let's break down the actual expenses. The numbers will vary, of course, but the cost categories are always the same.

  • Initial System Cost: This is what you pay for the unit itself. It can be as low as $30 for a basic faucet model or climb to $1,500 or more for a top-of-the-line whole-house or reverse osmosis system.
  • Installation Costs: Many filters, like countertop or faucet-mounted ones, are designed for easy DIY installation, costing you nothing but a few minutes. For under-sink or whole-house systems, you might want to call in a plumber. That could add $150 to $600 to your startup cost.
  • Filter Replacement Costs: This is the big one for the long haul. Filters don't last forever. You have to swap them out regularly to keep the system running right.

Here’s a good rule of thumb: always check the annual cost of replacement filters. A system that looks cheap upfront can end up costing you more over time if its filters are expensive and need to be changed often. Sometimes, a higher-quality system with longer-lasting cartridges is the more affordable choice in the long run.

The Real Math: Filtration vs. Bottled Water

Now, let's put a home filtration system head-to-head with the alternative many people turn to: bottled water. The numbers here might just shock you. A 2022 study found that the average household that buys bottled water spends around $1,368 per year.

Let's run a quick comparison using a common mid-range under-sink reverse osmosis (RO) system as our example.

Example Scenario: Under-Sink RO System

  • Initial Cost: $400
  • Installation: $200 (if you hire a pro)
  • Annual Filter Cost: $150
  • Total First-Year Cost: $750

Comparing the First Year:

  • Under-Sink Filter: $750
  • Bottled Water: $1,368

Even in the very first year, when you're paying for the system and professional installation, the RO filter saves you more than $600.

From the second year on, your only real cost is the $150 for new filters. That means you're saving over $1,200 every single year.

The financial case is a slam dunk. And that's not even getting into the massive environmental benefit of ditching all those single-use plastic bottles. Investing in a home water filter isn't just a one-time purchase; it’s a long-term plan for healthier water, serious savings, and a greener lifestyle.

Your Top Questions About City Water Filters, Answered

Jumping into the world of water filters can feel a little overwhelming. I get it. You've got questions, and you need straight answers. Let's tackle some of the most common things homeowners ask when picking out a filter for city water.

How Often Do I Really Need to Change My Filter Cartridges?

This really comes down to the specific filter you own and how much water your household uses. As a general rule, you can expect to change most under-sink or whole-house cartridges every 6 to 12 months, but that's just a ballpark.

Your manufacturer’s guide is the best place to look for a solid recommendation, which is usually based on the number of gallons the filter can treat. I always tell people to set a reminder on their phone or calendar to order new ones ahead of time—there's nothing worse than needing a filter and not having one on hand.

Pro Tip: Your system will give you clues. If you notice your water pressure dropping, or if that old chlorine taste and smell starts creeping back in, it’s time for a change. Don't wait for the calendar if your filter is telling you it's done.

Will My City Water Filter Work if I Move to a Home with Well Water?

I wouldn't count on it, and you definitely shouldn't use it without getting your new well water tested first. Think of it this way: city water and well water are two completely different beasts.

A filter designed for municipal water is a specialist—it's built to target chlorine, chloramine, and the byproducts left over from the disinfection process. Well water brings a totally different set of challenges, like bacteria, iron, nitrates, sediment, and sometimes even heavy metals like arsenic. Those require entirely different types of filtration.

Before you even think about filtering well water, you must get a sample tested by a certified lab. Only then can you find a system that’s actually equipped to handle what's in your water.

Can I Install a Water Filter System Myself, or Do I Need a Pro?

This all depends on the type of system you choose and how comfortable you are with some basic plumbing tasks.

  • DIY Friendly: Things like faucet filters, countertop units, and many of the simpler under-sink filters are made for easy installation. You can usually get these set up in just a few minutes with no special tools.
  • Consider a Pro: Whole-house systems and more complex under-sink setups (like reverse osmosis) often require cutting into your main water line. If you're a seasoned DIYer, you might be fine. But for most people, hiring a plumber for $150 to $600 is a smart investment for the peace of mind that it’s done right.

My City Uses Chloramine. Do I Need a Special Kind of Filter?

Yes, you absolutely do. This is a critical point many people miss. Your standard activated carbon filter does a fantastic job removing chlorine, but it's almost useless against chloramine.

To effectively remove chloramine, you need a filter with catalytic carbon. This is a special type of carbon media specifically designed to break the strong chemical bond between chlorine and ammonia. When you're shopping, look for "chloramine reduction" on the filter's performance data sheet to be sure it can handle the job.


At Water Filter Advisor, our goal is to give you the clear research and honest advice you need to protect your family's water. To learn more, explore our guides and reviews to make a confident choice at https://www.waterfilteradvisor.com.

A Definitive PUR Water Filter Review: Is It Your Kitchen’s New Best Friend?

Let's talk tap water. You turn the knob, water comes out—simple, right? Well, not exactly. That water has been on a long journey, and it might have picked up some unwanted hitchhikers along the way. Think chlorine, sediment, and maybe even some heavy metals like lead.

You’re here because you want cleaner, better-tasting water at home without a major plumbing overhaul. PUR is a huge name in home water filtration, known for being affordable and certified to yank out a whole slew of contaminants. But are they the right choice for your kitchen?

This in-depth PUR water filter review will pour out all the details, from filtration power to long-term costs, so you can decide for yourself.

Is a PUR Water Filter Your Best Choice for Cleaner Water?

A PUR water filter pitcher sits on a wooden kitchen counter next to a sink, promoting cleaner water.

The water flowing from your tap isn't always just H₂O. It can carry stuff you’d rather not drink, like the chlorine that gives it a "public pool" aroma, gritty sediment, and sometimes invisible troublemakers like heavy metals. A good water filter’s job is to act as a bouncer, stopping these contaminants before they get into your glass.

The demand for cleaner water is booming. The U.S. home water filtration market is massive, growing from USD 7.30 billion in 2025 to a projected USD 10.81 billion by 2034. Homeowners make up a whopping 65% of the market, proving that people are serious about improving their water quality.

PUR is a go-to brand because its filters are certified to reduce over 70 contaminants, including the big one: 99% of lead.

Why Simplicity is King in Home Water Filtration

You don't always need a complex, whole-house system that requires a professional plumber and a second mortgage. For many of us, especially renters or those with cozy kitchen spaces, a straightforward solution is a godsend.

This is where PUR's most popular products shine. Their pitchers and faucet mounts are designed for immediate gratification. No tools, no permanent changes to your plumbing—just open the box, set it up in minutes, and enjoy cleaner water.

Finding Your Perfect PUR Match

The right PUR filter for you boils down to your lifestyle. Do you just want a cold, refreshing glass of water from the fridge, or do you need an endless supply of filtered water on tap for cooking, coffee, and everything in between?

Here's a quick look at PUR's main filter types to help you find your perfect fit.

PUR Filter Systems at a Glance

This table provides a cheat sheet for PUR's main home filtration systems. Use it as a starting point to see which type aligns with your daily water habits.

Filter Type Best For Typical Price Key Feature
Pitchers Small households, renters, and fridge-chilled water $20 – $40 Portable convenience and easy setup
Dispensers Larger families and high-volume use $30 – $50 High capacity with a simple spigot
Faucet Mounts On-demand filtration and cooking $25 – $50 Instant filtered water from the tap

Each system has its superpowers. Pitchers are portable, dispensers are the family-sized upgrade, and faucet mounts deliver filtered water straight from the sink.

We'll dive deeper into each model in this review. For more general guidance, check out our expert advice on choosing water filters.

Exploring the PUR Filter Product Lineup

Choosing a PUR water filter isn't about finding a single "best" option. It’s about matching the right filtration tool to your specific needs and daily routine.

PUR understands that a college student in a dorm has wildly different water needs than a family of five. Let's break down their main product lines so you can see which one screams "this is for me!"

PUR Pitchers: The Grab-and-Go Solution

For most people, a PUR water filter pitcher is the easiest entry point into the world of home filtration. They’re perfect if you live alone, with a partner, or just love having water chilled and ready to pour from the fridge.

The magic is in their simplicity. Fill it up, pop it in the fridge, and you're set. The main difference between models is capacity.

  • Small Pitchers (7-8 Cups): Ideal for one person, a dorm room, or if your fridge is already packed. The PUR 8 Cup Slim Pitcher is cleverly designed to fit inside a mini-fridge door.
  • Large Pitchers (11 Cups): A better choice for small families or anyone who guzzles water throughout the day. That extra capacity means fewer trips to the sink.

A small but mighty feature on many PUR pitchers is the Filter Change Light or calendar sticker. This little nudge takes the guesswork out of maintenance, so you know you're always drinking properly filtered water. Trust us, it's shockingly easy to forget when you last swapped that filter.

PUR Dispensers: For Busy Households

What happens when a pitcher just can't keep up? For larger families, home offices, or if you're the designated host for every get-together, refilling a pitcher constantly gets old, fast. That’s where PUR Dispensers come to the rescue.

Think of a dispenser as a pitcher that hit the gym. These units hold around 30 cups (1.8 gallons) of water—more than double the capacity of the largest pitchers. They sit happily on a countertop or fridge shelf, giving you a steady supply of clean water from a simple spigot.

A dispenser is the perfect solution for keeping kids hydrated with clean water or having enough on hand for cooking big meals. It bridges the gap between the portability of a pitcher and the sheer volume of a more complex system.

PUR Faucet Mounts: Instant Filtration on Demand

Pitchers and dispensers are great for cold drinking water, but they’re not so helpful when you need to wash vegetables or fill a big pot for pasta. For that, you want filtered water straight from the tap, and that's precisely what PUR Faucet Mounts deliver.

This is a true kitchen game-changer. Instead of waiting for a pitcher to filter, you just flip a switch on the device. This lets you toggle between regular unfiltered water for washing dishes and crisp, filtered water for drinking and cooking.

Another huge win here is the filter life. A standard pitcher filter is rated for about 40 gallons, but a faucet filter can clean up to 100 gallons. That means you'll be changing filters far less often, making it a fantastic low-maintenance choice for any busy kitchen. This on-demand access makes it a favorite for families and home cooks who value their time—and as our full PUR water filter review confirms, it's a major selling point.

How Well Do PUR Filters Actually Work?

Forget the flashy marketing. When it comes to water filtration, the only thing that truly matters is certified performance. To figure out if a PUR filter is the real deal, we need to look at the science and the independent testing that backs up their claims.

The secret code to decipher is the NSF/ANSI certifications printed on the box. These aren't just fancy logos; they come from the National Sanitation Foundation (NSF), an independent public health organization. Think of them as a filter’s official report card, proving it does what it promises.

What Do the NSF Certifications Mean?

PUR filters boast a few different certifications, each targeting specific unwanted guests in your water. Knowing what they mean helps you pick the right filter for your tap.

  • NSF/ANSI 42 – The Taste and Odor Standard: This is the baseline certification. It confirms the filter reduces things that make your water taste and smell funky, like the chlorine that gives tap water that "swimming pool" character. If your main goal is simply better-tasting water, this is your starting point.

  • NSF/ANSI 53 – The Health Effects Standard: This one is a much bigger deal. A filter with this certification is proven to reduce contaminants that pose known health risks. We’re talking about heavy metals like lead and mercury, certain pesticides, and industrial chemicals. This offers a significantly higher level of protection.

  • NSF/ANSI 401 – The Emerging Contaminants Standard: This standard addresses newer concerns, like trace amounts of pharmaceuticals and herbicides that can find their way into the water supply. While the long-term health effects are still being studied, having a filter that removes them provides extra peace of mind.

This diagram shows how PUR's different products—all of which use certified filters—are categorized.

PUR product line hierarchy diagram showing filters categorized into pitchers, faucet mounts, and dispensers.

As you can see, PUR organizes its products into pitchers, faucet mounts, and dispensers, making it easier to match a filter type to your kitchen's needs.

PUR Filter Technology and Performance Data

So how do they pull it off? PUR filters use a powerful one-two punch of activated carbon and ion exchange media. The carbon acts like a magnet for chlorine and other chemicals that wreck the taste and smell of your water. The ion exchange resin specifically targets heavy metals, swapping out bad guys like lead for harmless particles.

To see what this means in practice, here’s a breakdown of how PUR's standard and advanced filters perform against common contaminants, according to their NSF certifications.

PUR Filter Certification & Contaminant Reduction

Contaminant PUR Basic Filter Reduction PUR Plus Filter Reduction (Lead) NSF/ANSI Standard
Lead Not Certified 99% 53
Mercury Not Certified 96% 53
Chlorine 96% 99% 42
Certain Pesticides Not Certified 92% 53
Certain Pharmaceuticals Not Certified 96% 401
Industrial Chemicals Not Certified 99% 53

The table tells a clear story: the PUR Plus filter, with its extra certifications, offers a far more robust defense against health-related contaminants, especially lead.

For a family living in a house with older plumbing, the fact that a PUR Plus filter is certified to remove 99% of lead is a game-changer. That single feature can dramatically reduce daily exposure to a harmful neurotoxin.

Overall, PUR’s advanced filters are certified to reduce 71 contaminants, including that 99% reduction in chlorine for fresh-tasting water right from the tap. Their powerful performance is a big reason why their faucet mounts have seen a 25% jump in sales recently.

Of course, a filter is just one part of your kitchen's water story. If you're dealing with other odd tastes, you might be wondering how to fix bad taste of water in a refrigerator, as other factors can sometimes play a role.

What to Expect: PUR Filter Costs & Maintenance

A person's hands are shown changing a black filter in a white water pitcher on a wooden table. A blue sign in the background reads "EASY FILTER CHANGE".

A filter is only as good as its last change. While PUR systems are easy on the wallet upfront, the real cost of ownership comes down to maintenance. Fortunately, PUR has made this process painless.

Getting a pitcher ready is a breeze. Just wash the pitcher, rinse the new filter under cold water for 15 seconds, and lock it into place. Fill it once to flush the system, toss that water, and you’re ready to drink.

The faucet mounts are just as user-friendly. They screw directly onto your existing faucet—no tools required. Just find the right adapter from the included kit, twist it on, and make sure it’s snug to prevent leaks.

Calculating the True Cost of Ownership

The price on the box is just the beginning. To understand the real cost, you need to look at the cost-per-gallon, which depends on how long the filter lasts and how much replacements cost.

This is where you'll see the biggest difference between PUR’s systems. A standard PUR pitcher filter is rated for 40 gallons, lasting about two months for a typical household. The PUR faucet mount filter, however, cleans up to 100 gallons and usually lasts closer to three months.

The longer life of faucet filters means you're not just changing them less often—you're also getting a lower cost per gallon. For families or anyone who uses a lot of filtered water for drinking and cooking, the faucet mount is usually the more economical choice in the long run.

Let's break down the annual costs.

Annual Filter Replacement Cost Breakdown

To figure out your yearly spend, you just need to know which filter you're using.

  • Pitcher Filters: At two months per filter, you'll need six filters a year. Buying multipacks helps, but you can expect to spend around $30 to $50 annually.
  • Faucet Mount Filters: Since these last three months, you’ll need four filters a year. The annual cost is similar, around $40 to $60, but you're getting more than double the amount of filtered water for that price.

When you compare that to bottled water, the savings are staggering. A family drinking just a gallon of water a day can easily spend over $500 a year on plastic bottles. Switching to a PUR system can slash that cost by over 90%. It’s a huge win for both your wallet and the planet.

This shift toward home filtration is a key reason the global water purification market hit USD 44,220 million in 2024. In North America, PUR’s pitcher filters hold a 20% share of the point-of-use market, with users reporting 40% better taste than competitors. You can dig into more industry data in this water purification industry report.

The Filter Change Light Explained

One of the smartest features on PUR systems is the filter change light. It's a simple little sensor that removes all the guesswork from maintenance.

On the faucet mounts, a small light blinks to show the filter's status:

  • Green: You're good to go. The filter is working perfectly.
  • Yellow: Time to order a new one. The filter is nearing the end of its life.
  • Red: Change it now. The filter has hit its 100-gallon limit and is no longer effectively removing contaminants.

Pitchers have a similar light or a simple calendar sticker to help you track the two-month mark. It’s crucial to pay attention to these. An old, clogged filter can't do its job and might even release the junk it has already trapped. This little light is your guarantee that you're always getting safe, clean water.

How PUR Stacks Up Against Brita and Other Competitors

Once you start shopping for a home water filter, you'll quickly realize it's a crowded arena. While our focus is this PUR water filter review, it's impossible to discuss them without bringing their biggest rivals into the ring.

For most shoppers, the decision boils down to a head-to-head battle between PUR and Brita, with another major player, ZeroWater, also demanding attention.

Think of it like choosing the right tool for a job. Each brand excels in different areas, so the "best" one depends on what you’re trying to fix about your water. Are you just battling a funky taste, or are you worried about specific, harmful contaminants lurking in your pipes?

The Classic Showdown: PUR vs. Brita

In the world of pitcher and faucet filters, the PUR vs. Brita rivalry is the main event. For decades, Brita has been the household name for filtered water, and for good reason—they are masters at improving the taste and smell of tap water.

  • Brita: Brita’s standard filters are wizards at eliminating chlorine, the primary culprit behind that "tap water" odor. They're affordable, widely available, and make a noticeable difference in how your water, coffee, and tea taste. If all you want is better-tasting water on a budget, Brita is a fantastic choice.

  • PUR: This is where PUR, particularly with its PUR Plus filters, pulls ahead on the safety front. They also tackle chlorine effectively, but their trump card is the NSF/ANSI 53 certification for lead reduction. A standard Brita filter isn’t certified to remove lead, but a PUR Plus filter is certified to remove 99% of it.

That single distinction is often the deciding factor for many households.

If you live in an older home or a city with aging infrastructure, the potential for lead in your water isn't something to ignore. In that scenario, PUR’s certified lead removal isn't just a nice-to-have feature—it’s a crucial safety measure. Brita makes water taste great, but PUR adds a certified layer of health protection on top of that.

The Specialist: ZeroWater

Then you have ZeroWater, which plays an entirely different game. While PUR and Brita typically use a 2-stage filtration process (activated carbon and ion exchange), ZeroWater brings out the heavy artillery with a more complex 5-stage system.

This supercharged process allows ZeroWater to do something the others can't: reduce Total Dissolved Solids (TDS) all the way down to 000 on a water quality meter. That means it strips out virtually everything—lead, chromium, and even beneficial minerals like calcium and magnesium.

  • The Good: If you're after the absolute purest water you can get from a pitcher, ZeroWater is the undisputed champion. Its ability to achieve that level of purity is unmatched by standard filters.
  • The Bad: This intense level of filtration comes with trade-offs. The filters clog much faster and need to be replaced more frequently, making them the most expensive option over time. Also, by removing all the minerals, some people find the water tastes a bit "flat" or sterile.

A Head-to-Head Comparison

To help you decide, let's put these brands side-by-side based on what matters most for home filtration.

Feature PUR Brita ZeroWater
Lead Reduction Certified to remove 99% (PUR Plus) Not certified on standard filters Certified to remove 99%
Taste & Odor Excellent (removes chlorine) Excellent (removes chlorine) Good (removes everything, can taste "flat")
Filter Lifespan 40 gallons (pitcher), 100 gallons (faucet) 40 gallons (standard pitcher) 15-25 gallons (varies by water quality)
Annual Cost Moderate Low High
Best For Certified health protection (lead) & taste Improving taste and odor on a budget Maximum contaminant and TDS removal

When you lay it all out, PUR really hits that sweet spot. It delivers far better protection against serious contaminants than a standard Brita, but without the high running costs and mineral-stripping side effects of ZeroWater.

Your Questions About PUR Filters Answered

Let's tackle some of the most common questions about PUR filters to help you make your final decision.

How Do I Know Which PUR Filter Is Right for My Water?

Start by identifying your main concern. If you live in an older home and are worried about lead, you need a filter certified for lead reduction. Look for the PUR Plus or a dedicated faucet filter.

If your goal is simply to get rid of the chlorine taste from city water, a basic PUR pitcher filter will do the job perfectly. For a more precise approach, consider getting your water tested to see exactly what’s in it, then match the results to PUR's filter performance data.

Do PUR Filters Remove Fluoride?

No, standard PUR pitcher and faucet filters are not designed to remove fluoride.

The activated carbon and ion exchange technology they use is excellent for targeting contaminants like lead, mercury, and chlorine. Fluoride, however, isn't captured by this process. If removing fluoride is your top priority, you will need to look into different filtration technologies, such as reverse osmosis systems.

Can I Use a PUR Filter with Well Water?

This is a critical point. While a PUR filter can improve the taste and clarity of well water, it is not designed to treat microbiologically unsafe water. These filters are intended for use with water that is already considered potable, like what comes from a municipal supply.

You must have your well water professionally tested for bacteria, viruses, and nitrates before relying on a simple filter. If tests confirm your well water is microbiologically safe, a PUR filter can then be an effective way to further enhance its quality.

What Happens If I Don't Change My PUR Filter on Time?

Forgetting to change your filter is worse than not using one at all. Over time, the filter media becomes completely saturated with contaminants and simply stops working.

Worse yet, a clogged filter can become a breeding ground for bacteria it has already trapped. This can cause it to release a concentration of contaminants back into your water, making it even less safe than water straight from the tap. Always follow the replacement schedule—typically every two months (40 gallons) for pitchers and three months (100 gallons) for faucet filters—to ensure your water stays clean and safe.


The team at Water Filter Advisor has spent years researching and comparing systems to help you find the perfect fit for your home. Explore our expert guides and choose with confidence. https://www.waterfilteradvisor.com