Water Conditioner for House: The Ultimate 2026 Guide

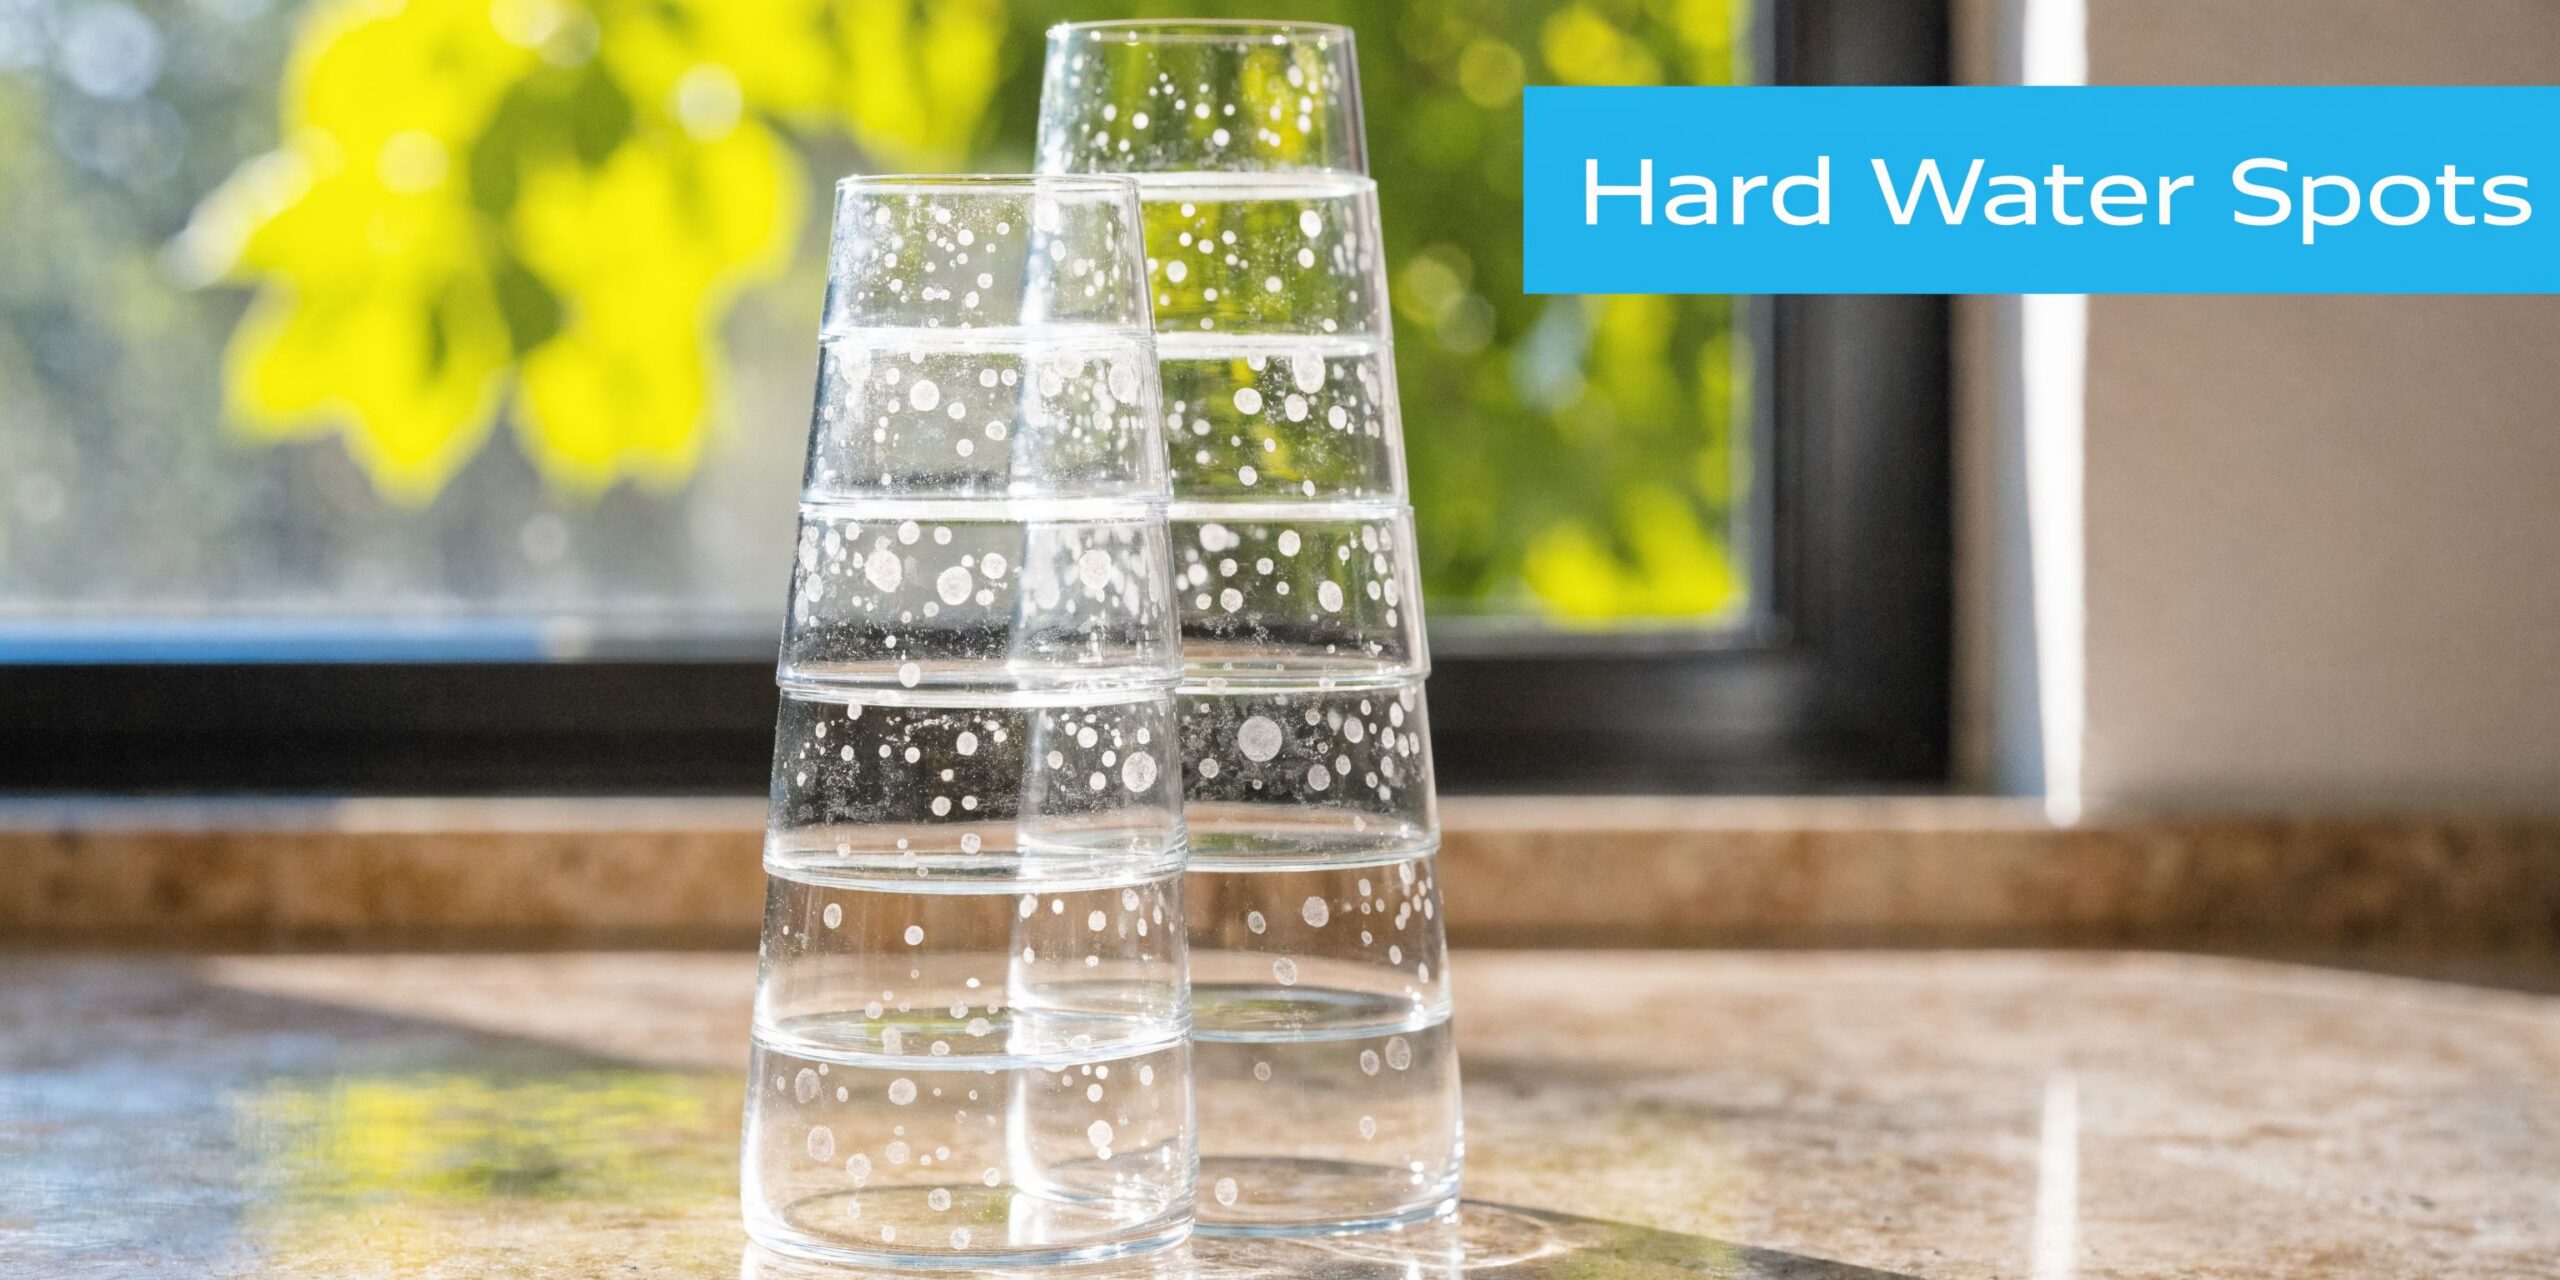
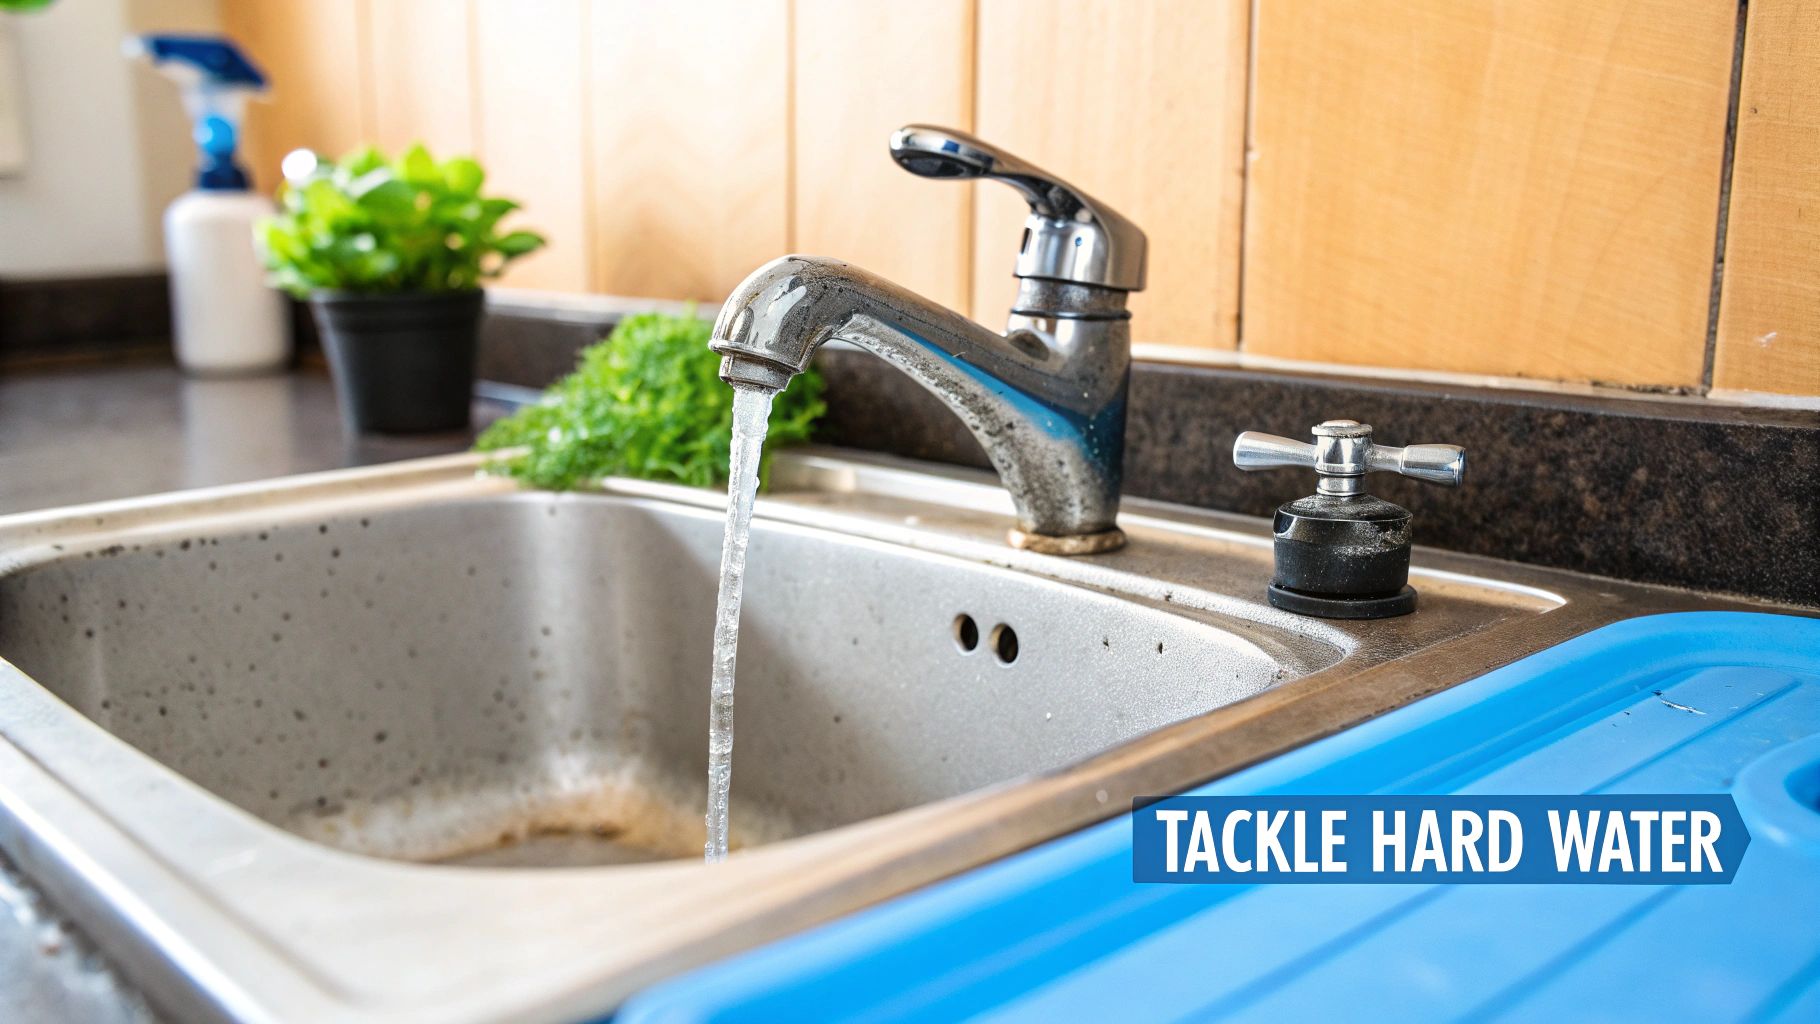
You wipe the bathroom faucet, and two days later that chalky crust is back. Your dishwasher leaves spots. The shower door looks cloudy no matter how much glass cleaner you use. Soap seems lazy, as if it gave up halfway through the job.

That’s the daily grind of hard water.

A lot of homeowners start searching for a water conditioner for house setups because they want relief without hauling salt bags, adding drain lines, or turning the basement into a mini treatment plant. That’s reasonable. But this topic gets confusing fast, mostly because stores and manufacturers often blur the line between conditioning, softening, and filtering.

That blur causes expensive mistakes. Many people buy a conditioner expecting silky-soft shower water, then feel disappointed when their water still behaves like hard water in some ways. Others buy a softener when all they really wanted was scale protection on fixtures and appliances.

The good news is that the right choice becomes much simpler once you know what each system does.

Tired of Hard Water? An Introduction to Water Conditioners

Hard water is one of those home problems that rarely feels dramatic, but it nags at you every day. It leaves white marks on faucets, stiffens up laundry, and turns glassware into a spot collection. It also works imperceptibly inside your plumbing, where you can’t see it.

That hidden part is what worries most homeowners. Scale can collect in water heaters, pipes, and appliances over time. If you’ve ever dealt with hardness issues in other systems, even outside the house, you already know how frustrating mineral balance can be. This hot tub water hardness guide is a good example of how the same basic mineral problem shows up in different water environments.

What a conditioner is trying to solve

A whole-house water conditioner is designed to reduce the damage caused by hard water minerals, mainly calcium and magnesium. The key word is damage.

A conditioner’s main job isn’t to make water feel silky. It’s to help stop minerals from sticking where they shouldn’t, such as:

  • Inside water heaters where scale can collect on heating surfaces
  • On fixtures where white crust builds around taps and showerheads
  • In appliances like dishwashers, coffee makers, and washing machines
  • Along plumbing lines where mineral deposits can gradually narrow passageways

Why people get confused

The word “conditioner” sounds like a softer, friendlier version of “softener.” That’s where the trouble starts. In everyday conversation, people use them almost interchangeably. In water treatment, they are not the same thing.

Practical rule: If your main complaint is crusty scale and you want a lower-maintenance option, a conditioner may fit. If you want water that feels soft on skin and helps soap lather better, you’re probably looking for a softener instead.

That distinction matters more than any brand name on the box.

The Great Water Debate Conditioner vs Softener vs Filter

Most water treatment confusion comes from one mistaken assumption. People think all whole-house systems are just different versions of the same machine.

They’re not.

Three glasses showing water treatment concepts labelled as Filtering with sand, Softening with minerals, and Conditioning with algae.

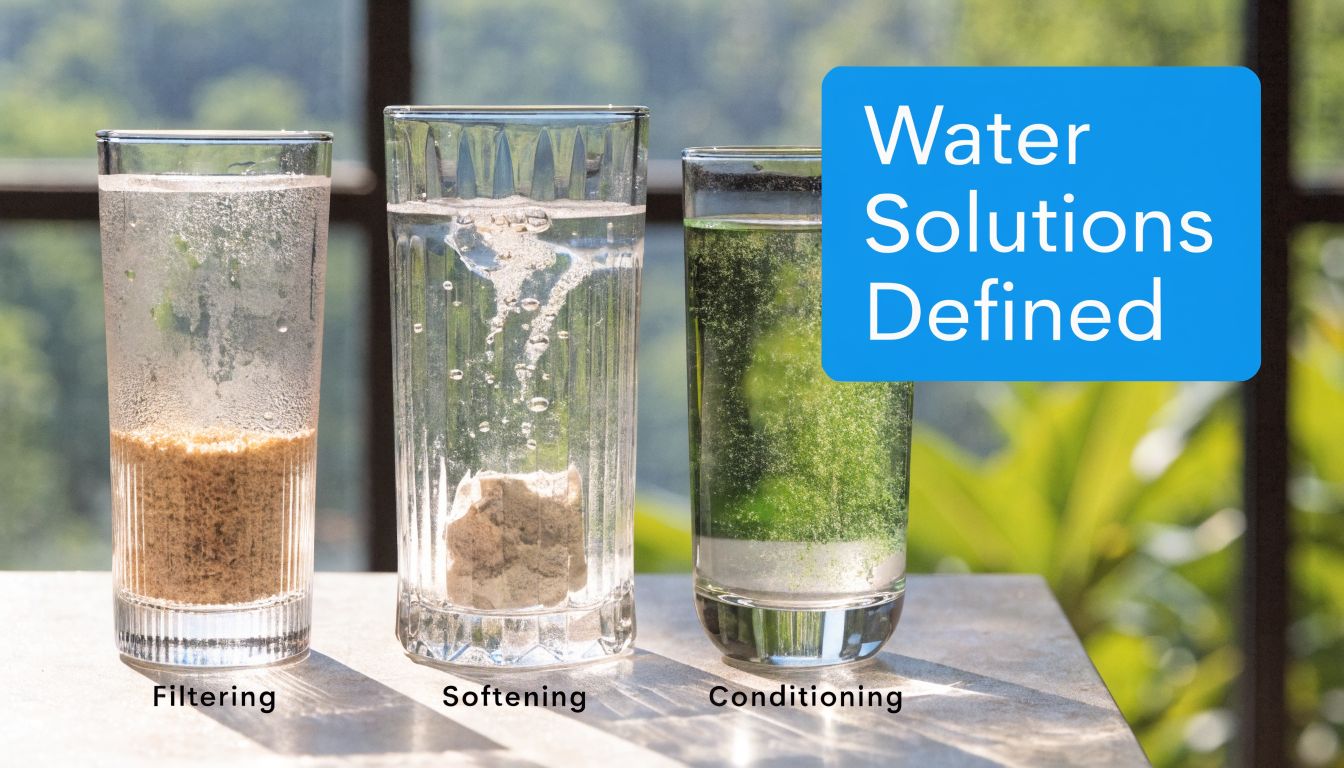
A simple way to think about it is this:

  • A filter is a gatekeeper
  • A softener is a removal service
  • A conditioner is a transformer

Each one solves a different problem.

What a filter does

A whole-house water filter targets contaminants such as sediment, chlorine, odor-causing compounds, or other unwanted substances, depending on the media inside it. A filter is not built to deal with hardness in the same way a softener or conditioner is.

If your water smells like a swimming pool, tastes off, or carries visible particles, a filter is usually part of the answer. But a filter alone won’t stop classic hard-water scale.

What a softener does

A water softener removes hardness minerals from the water. That’s why softened water feels different in the shower and usually works better with soap.

If you want the slippery, soft-water feel, fewer soap issues, and actual hardness removal, this is the category that matches that goal. It’s also why softeners are still the standard choice for many homes with serious hardness problems.

The market reflects how strong that demand remains. The global household water softener system market was valued at USD 1.51 billion in 2025 and is projected to reach USD 2.40 billion by 2033, with North America holding 36% revenue share in 2025. Salt-based systems held 61.5% market share in 2025, according to Data Bridge Market Research on the household water softener system market.

What a conditioner does

A water conditioner for house use tackles hardness from a different angle. It doesn’t remove the minerals. It changes how they behave.

Salt-free water conditioners use Template Assisted Crystallization (TAC) technology to convert hardness minerals into microscopic crystals that remain suspended in water. Unlike salt-based softeners, they do not remove the minerals, which is why the water may still feel hard and may not lather soap as effectively, even while scale buildup is prevented, as explained in Aquasure’s guide to salt-free water conditioners.

That one point saves people from the most common buying mistake.

If you buy a conditioner expecting “soft water,” the product didn’t fail. The expectation did.

The everyday analogy that helps

Think of your kitchen after a busy dinner.

  • A filter is the person standing at the door, stopping unwanted guests from entering.
  • A softener is the cleanup crew that removes the mess entirely.
  • A conditioner is the organizer who keeps the mess from sticking to everything.

All three are useful. They just do different jobs.

Why this matters before you shop

Many product pages throw around terms like “descaler,” “conditioner,” “salt-free softener,” and “whole-house treatment system.” That wording makes different technologies sound interchangeable.

They aren’t. Before you compare brands, know what result you want:

  1. Scale protection only
    A conditioner may be enough.

  2. Soft-feeling water and mineral removal
    A softener is the better fit.

  3. Chlorine, sediment, or taste issues
    You likely need a filter, possibly alongside one of the systems above.

If you want a quick visual explanation before reading deeper, this short video gives useful context.

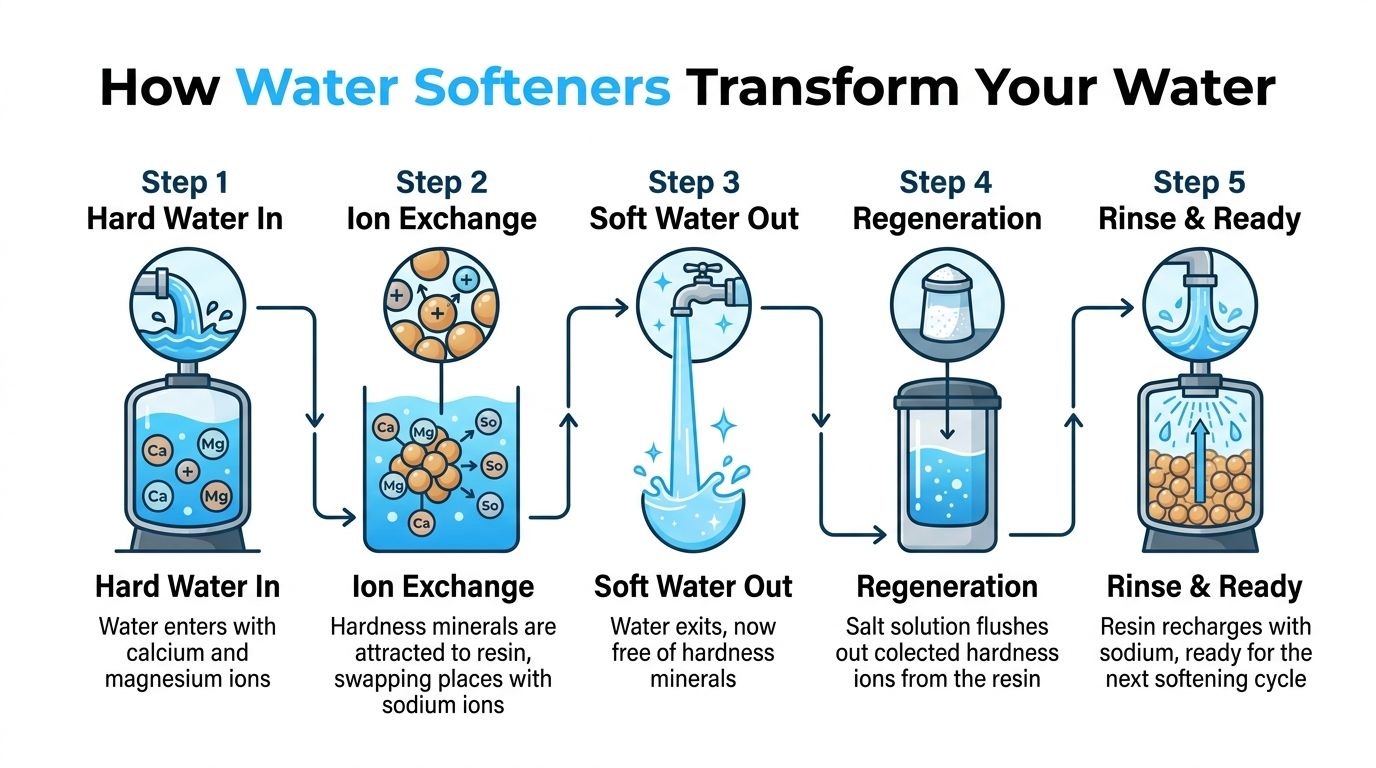
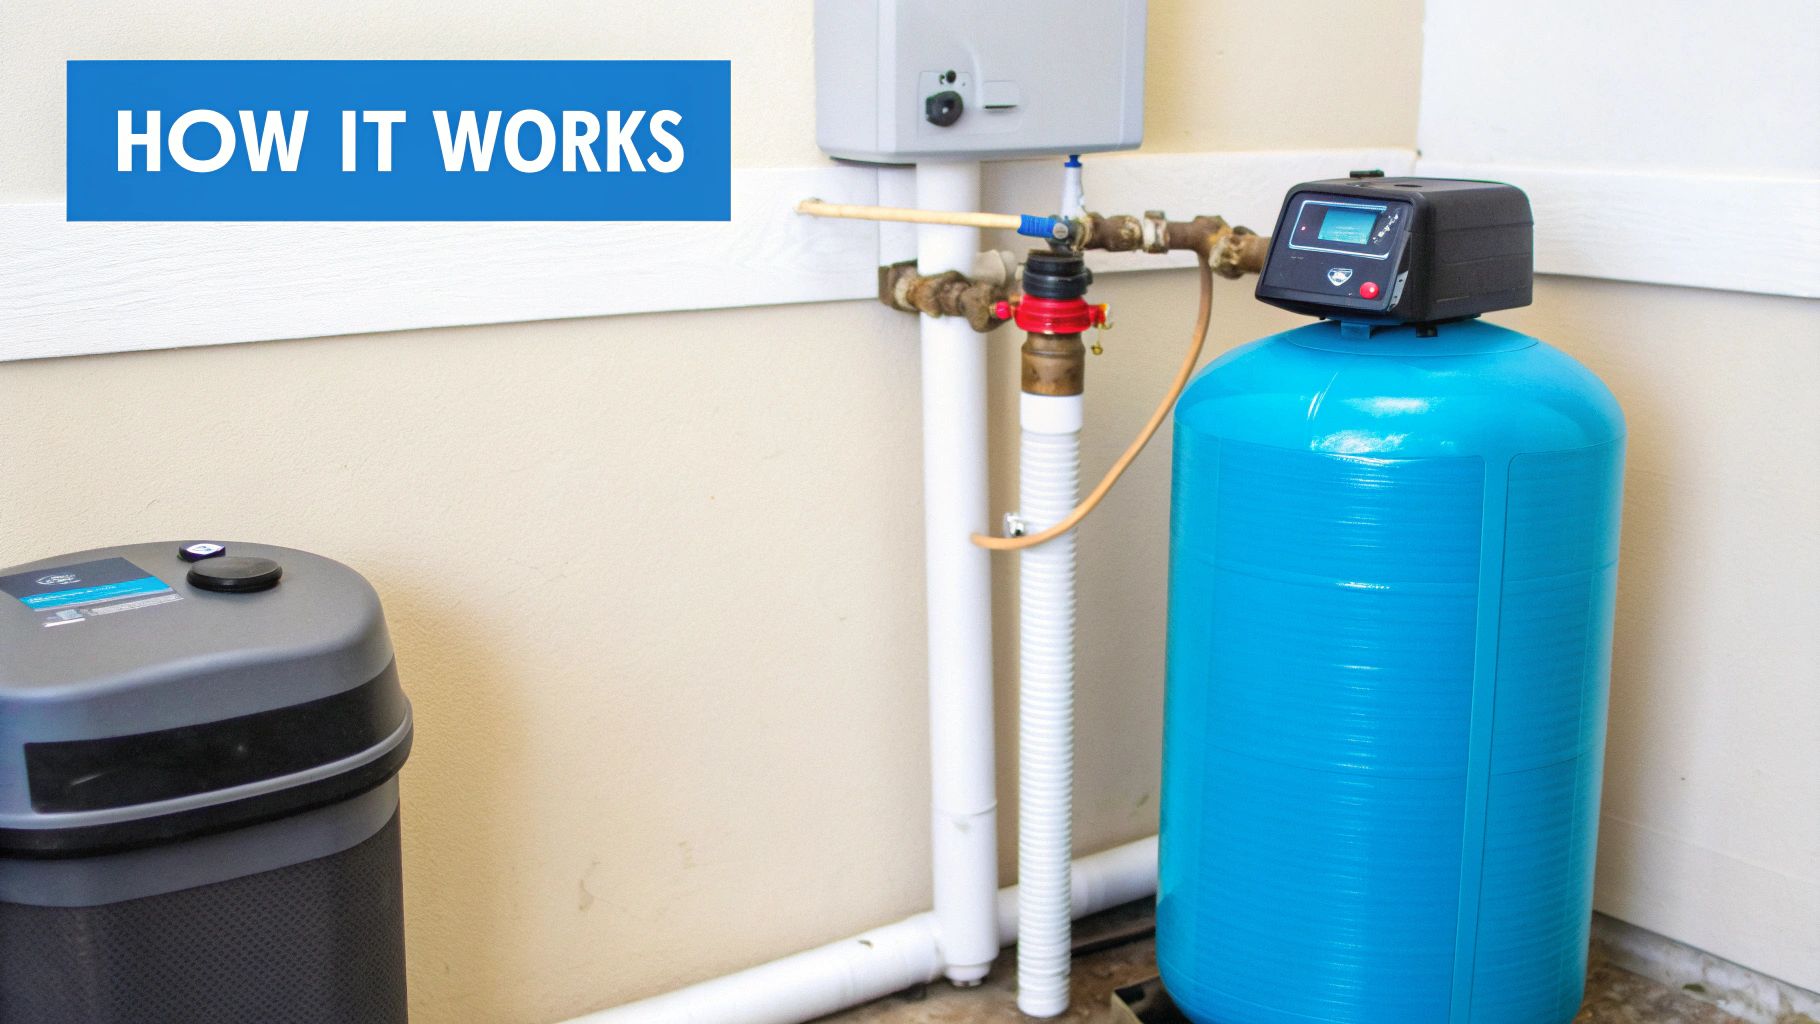
How a Water Conditioner Transforms Your Water

A good conditioner can seem mysterious because the water coming out of the tap still looks exactly the same. Nothing dramatic happens. No sudsy magic. No obvious change in taste. Yet scale problems can ease up.

That makes more sense once you stop thinking about conditioning as removal and start thinking about it as mineral behavior control.

A close-up of mineral-rich water flowing through a cylindrical filter, symbolizing water purification processes.

TAC in plain English

The best-known salt-free approach uses TAC media. Inside the tank, the media acts like a staging surface. As hard-water minerals pass through, they’re encouraged to form tiny crystals.

A simple mental picture helps. Hardness minerals in untreated water behave like sticky snowflakes. They land on hot surfaces, pipe walls, and fixtures, then pile up. TAC turns them into tiny ball bearings. They’re still present, but they’re less likely to stick.

That’s why a conditioner can help protect equipment while leaving the water chemically hard.

What that means in the home

When minerals are less likely to attach to surfaces, you can see fewer scale-related headaches in places like:

  • Water heaters
  • Dishwashers
  • Tankless heating elements
  • Showerheads and faucet aerators
  • Coffee machines and kettles

Scale isn’t just cosmetic. Technical guidance for residential softening equipment notes that hard water can reduce appliance heat transfer efficiency by 20% to 30%, and effective systems are designed to operate within common household conditions such as 0.2 to 0.6 MPa supply pressure with only 0.03 to 0.06 MPa pressure drop, according to this technical specification guide for water softeners.

What about electronic or magnetic units

Some systems use an electronic or magnetic approach rather than media inside a tank. These products aim to influence mineral behavior through an electromagnetic field around the pipe.

The appeal is obvious. They’re compact, often easier to install, and don’t involve salt or regeneration. But they also tend to raise more questions from homeowners because the process is less visible and less intuitive than water passing through a media tank.

A tank-based conditioner gives many homeowners a clearer mental model: water flows through media, minerals are altered, scale is reduced.

That doesn’t make every electronic unit ineffective. It just means you should pay extra attention to water conditions, installation instructions, and realistic expectations.

Conditioning is not filtration

This is another place where people trip up. A conditioner doesn’t usually remove chlorine, sediment, lead, or other drinking-water contaminants. If those are concerns, you’ll need filtration designed for those jobs.

A conditioner is more like a specialist. It focuses on hardness-related scale behavior. That specialization can be useful, but it’s not broad-spectrum treatment.

Exploring Types of Whole House Water Conditioners

Walk through enough product listings and you’ll see a messy mix of labels. “Descaler.” “Salt-free softener.” “Conditioner.” “Anti-scale system.” Some are legitimate categories. Some are marketing shortcuts.

The easiest way to sort them is by how they try to manage hardness.

An infographic showing three different types of whole house water conditioners, including salt-free, magnetic, and chelation options.

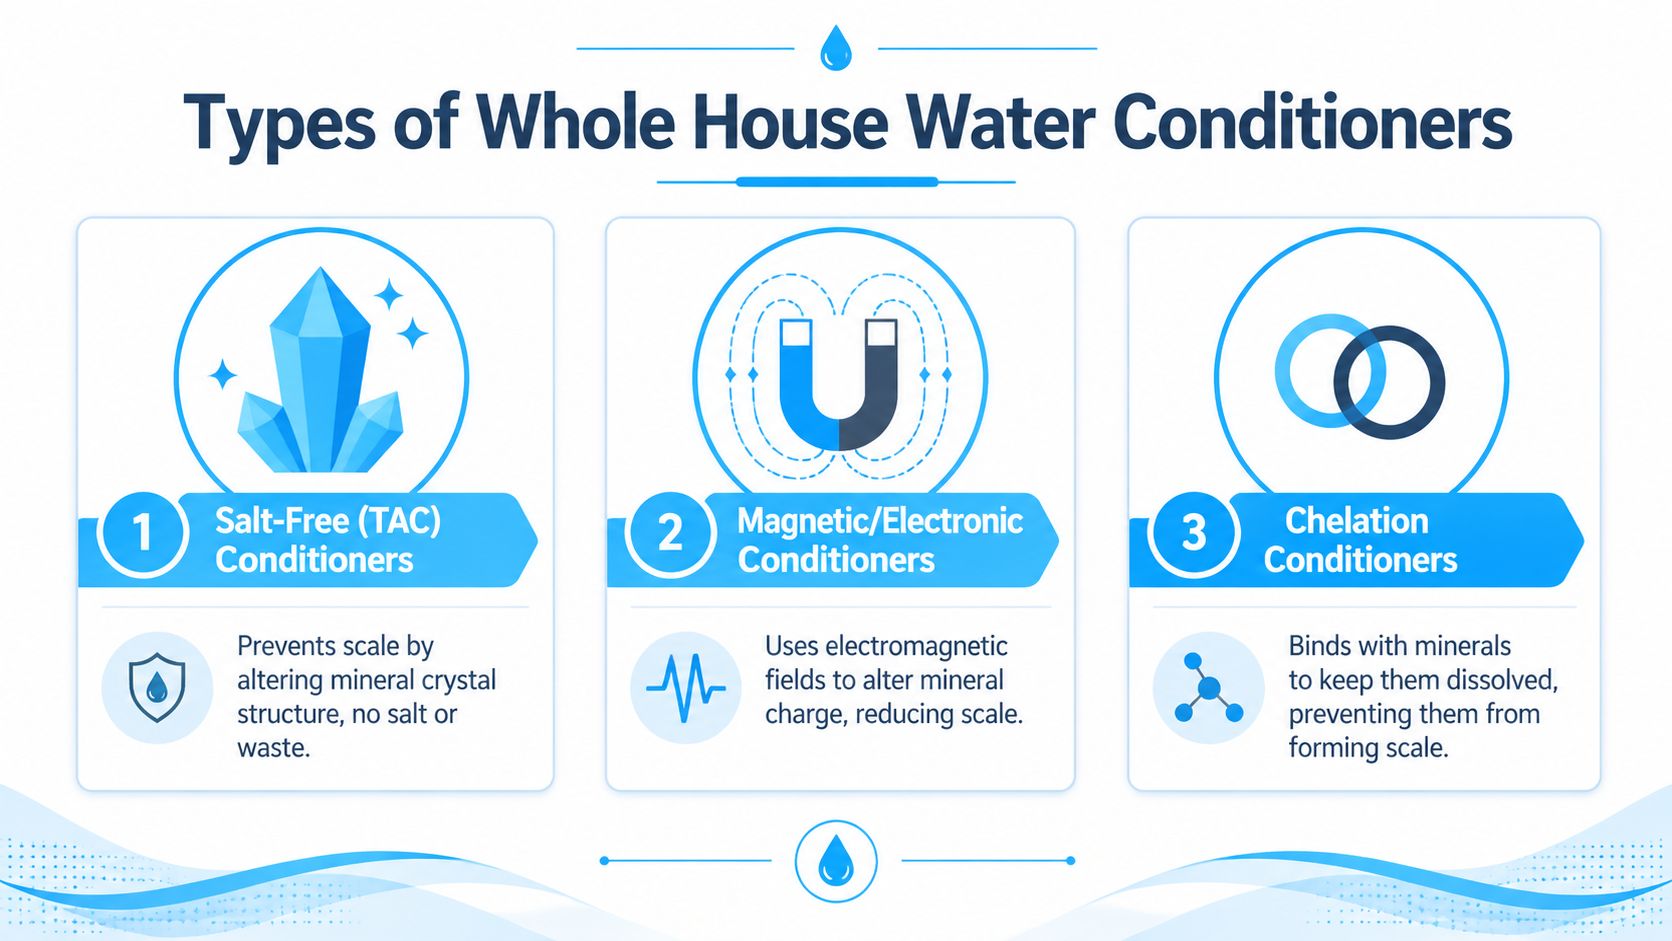
Salt-free TAC conditioners

These are the systems most homeowners mean when they search for a water conditioner for house use. They rely on media inside a tank to alter how hardness minerals form and deposit.

Their strongest selling point is straightforward. They target scale without salt, drain lines, or regeneration cycles.

In performance tests across 12 homes, salt-free conditioners were 92% effective in scale prevention, while premium salt-based softeners removed up to 98% of hardness minerals, according to water softener performance testing from Quality Water Treatment. That’s the trade-off in one sentence. Conditioners shine at scale prevention. Softeners do a better job if you want actual mineral removal.

Best fit for TAC systems

  • Homes focused on appliance protection
  • Owners who want low routine upkeep
  • People avoiding salt handling
  • Municipal-water homes where hardness is the main headache

Possible frustration points

  • Water won’t feel fully soft
  • Soap may still behave like it does in hard water
  • Spotting can still happen
  • Other contaminants still require separate filtration

Electronic and magnetic descalers

These systems usually mount on or around the pipe rather than using a large treatment tank. They aim to reduce scale formation through electromagnetic influence.

Their biggest advantage is convenience. They’re attractive to people with limited install space or those who don’t want to cut into plumbing as much as a tank system may require.

Their challenge is predictability. Real-world performance can be more dependent on plumbing layout, water characteristics, and proper installation. For homeowners who want the most familiar and established whole-house anti-scale format, tank-style TAC systems often feel less abstract.

Chelation-style conditioners

Some products use chelation concepts, meaning they bind with minerals to keep them dissolved and less likely to form scale. In homeowner conversations, this category gets less attention than TAC or electronic systems, but you may still see it in the market.

The key thing to remember is the same core principle. This is still conditioning, not softening. The goal is scale control, not complete removal of calcium and magnesium.

Why softeners belong in this comparison

A softener is not technically a conditioner, but it belongs in this conversation because it’s the product many people actually need when they think they want one.

If your priority list includes better soap performance, a softer shower feel, or true hardness removal, comparing only conditioners will steer you wrong. You need the contrast.

Water Conditioner and Softener Comparison

System Type How It Works Primary Benefit Removes Minerals? Maintenance Avg. Cost
Salt-Free TAC Conditioner Alters hardness minerals so they are less likely to stick as scale Scale prevention without salt No Low routine upkeep, but media replacement may be needed over time Varies by brand and size
Electronic or Magnetic Conditioner Uses an electromagnetic field to reduce mineral scaling tendency Compact anti-scale option No Usually light routine attention Varies by brand and installation needs
Chelation Conditioner Binds with minerals to keep them from forming scale deposits Scale control in specific applications No Depends on design and any added media stages Varies by brand
Salt-Based Softener Uses ion exchange to remove calcium and magnesium True soft water and hardness removal Yes Regular salt refills and periodic service needs Varies by brand and capacity

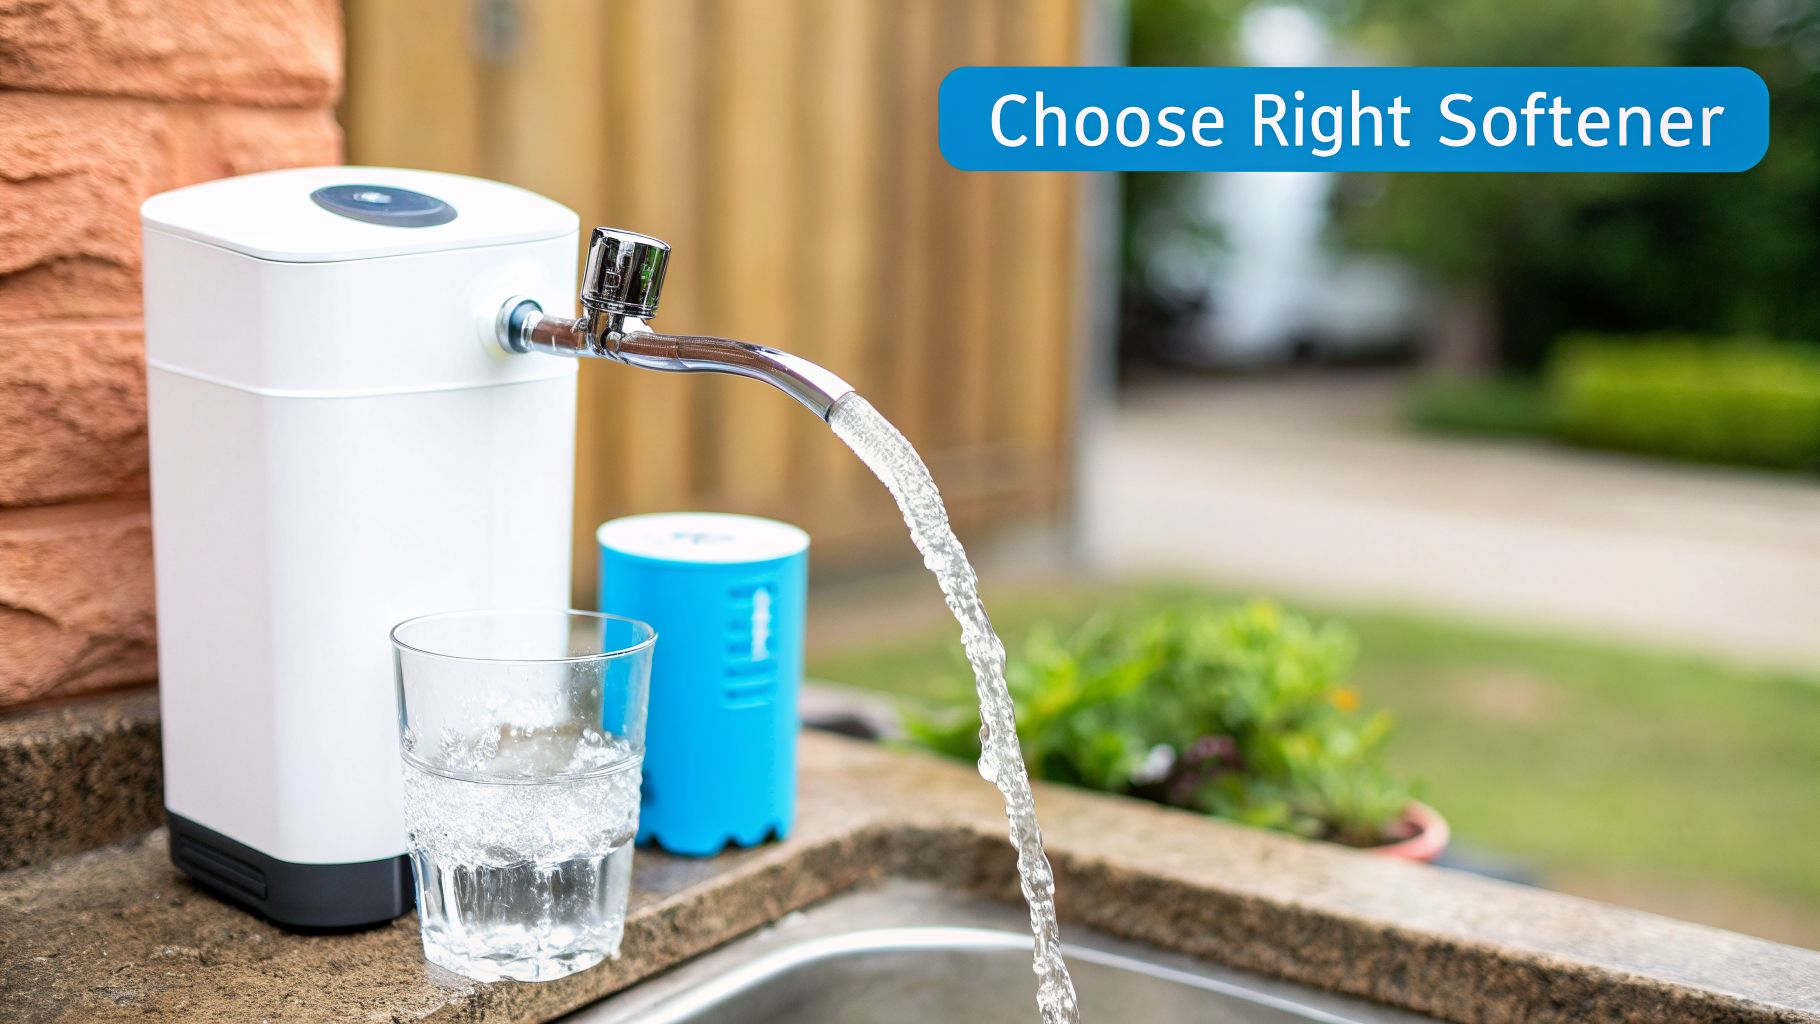
A practical way to narrow the field

Ask one question first: Do I want scale control, or do I want soft water?

If the answer is scale control, TAC and similar conditioner options deserve a serious look. If the answer is soft water, stop shopping conditioners and move into softener territory.

The wrong system often comes from answering the wrong question, not from choosing the wrong brand.

Benefits and Realistic Expectations for Your Home

A conditioner can be a smart upgrade. It can also disappoint people who expect it to behave like a softener. Both things are true.

The primary value of a water conditioner for house use is mostly about protection. You’re trying to reduce scale trouble where water flows, heats, sprays, and dries.

What homeowners often like

A well-matched conditioner can help with the kinds of day-to-day annoyances that make a house feel older than it is.

  • Less scale buildup on fixtures means less scrubbing around faucets and showerheads.
  • Appliance protection can matter for water heaters, dishwashers, and other equipment that hates mineral crust.
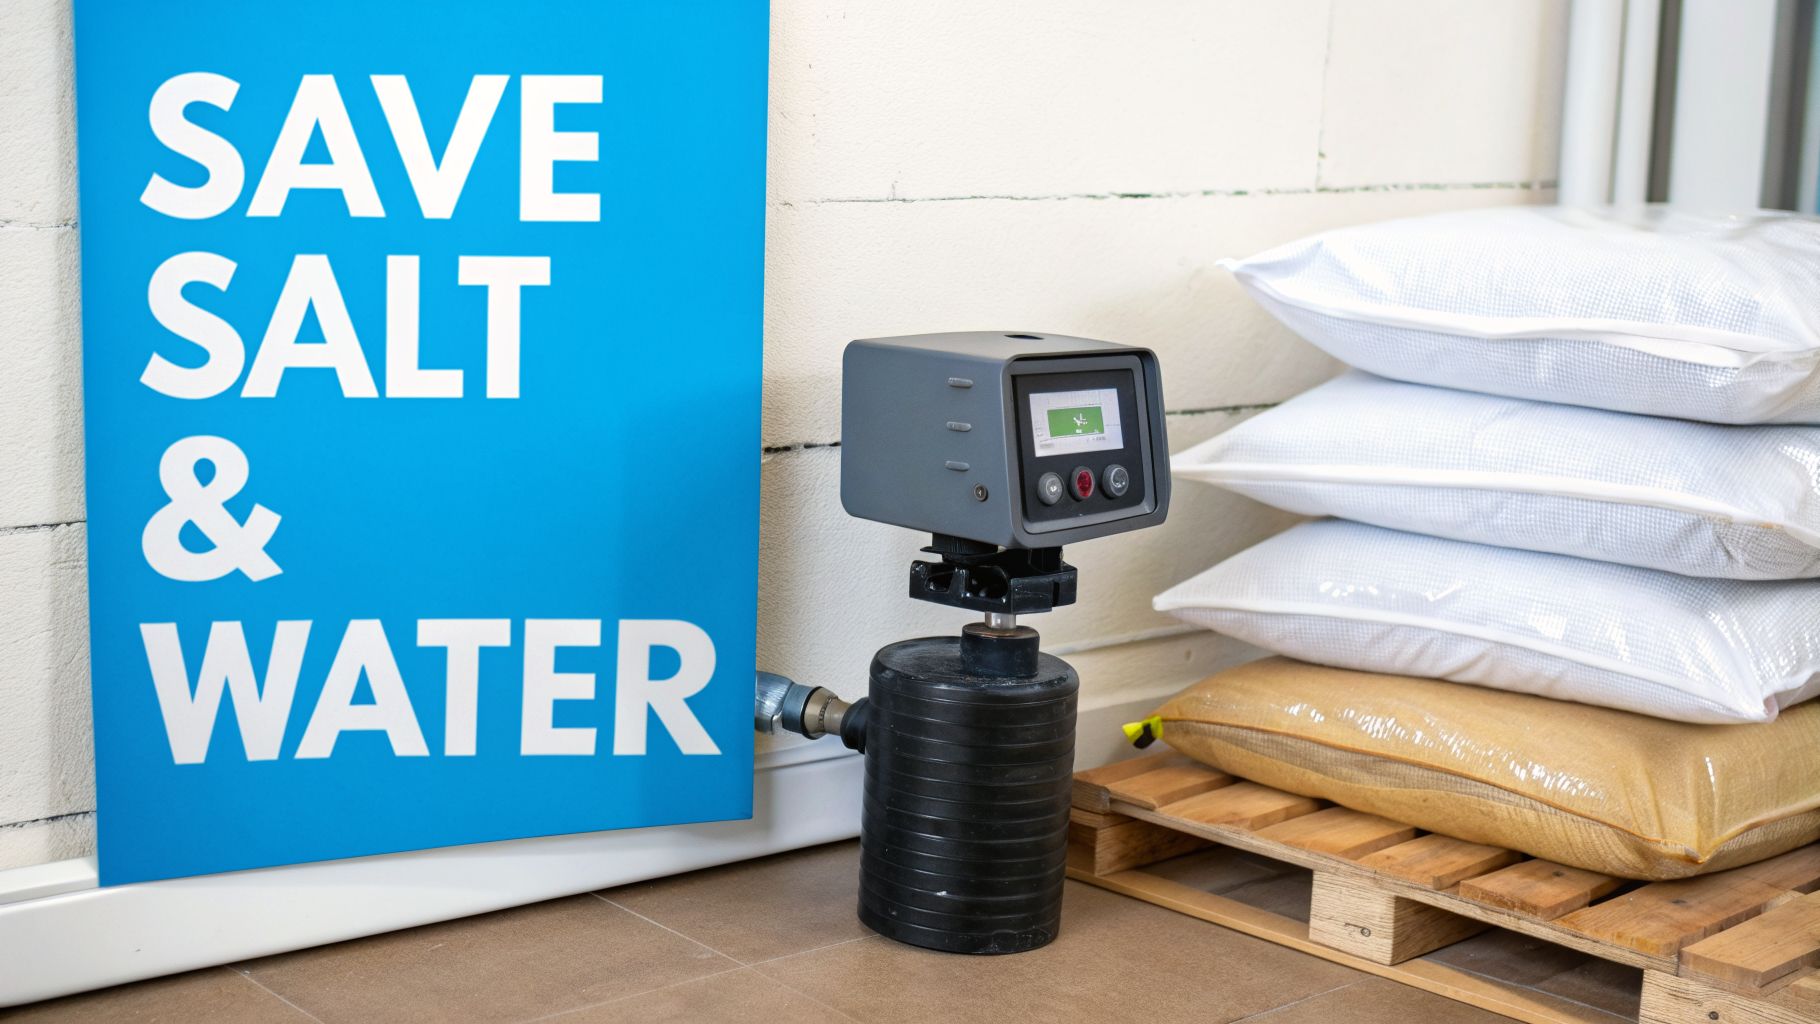
  • Lower-maintenance operation appeals to homeowners who don’t want regular salt refills.
  • No salt discharge is attractive for people focused on simpler, more environmentally conscious operation.

For many homes, that’s enough. If your biggest complaint is “I’m tired of cleaning white crust off everything,” a conditioner may solve the right problem.

What it probably won’t do

Here, honesty matters.

A conditioner usually won’t give you that slippery soft-water feel after a shower. It may not make soap lather dramatically better. It also won’t replace a carbon filter if your water smells chlorinated or tastes strange.

That’s why some homeowners love conditioners and others think they bought a dud. They were measuring success by completely different standards.

Buy a conditioner for scale prevention. Buy a softener for soft water. Buy a filter for contaminants.

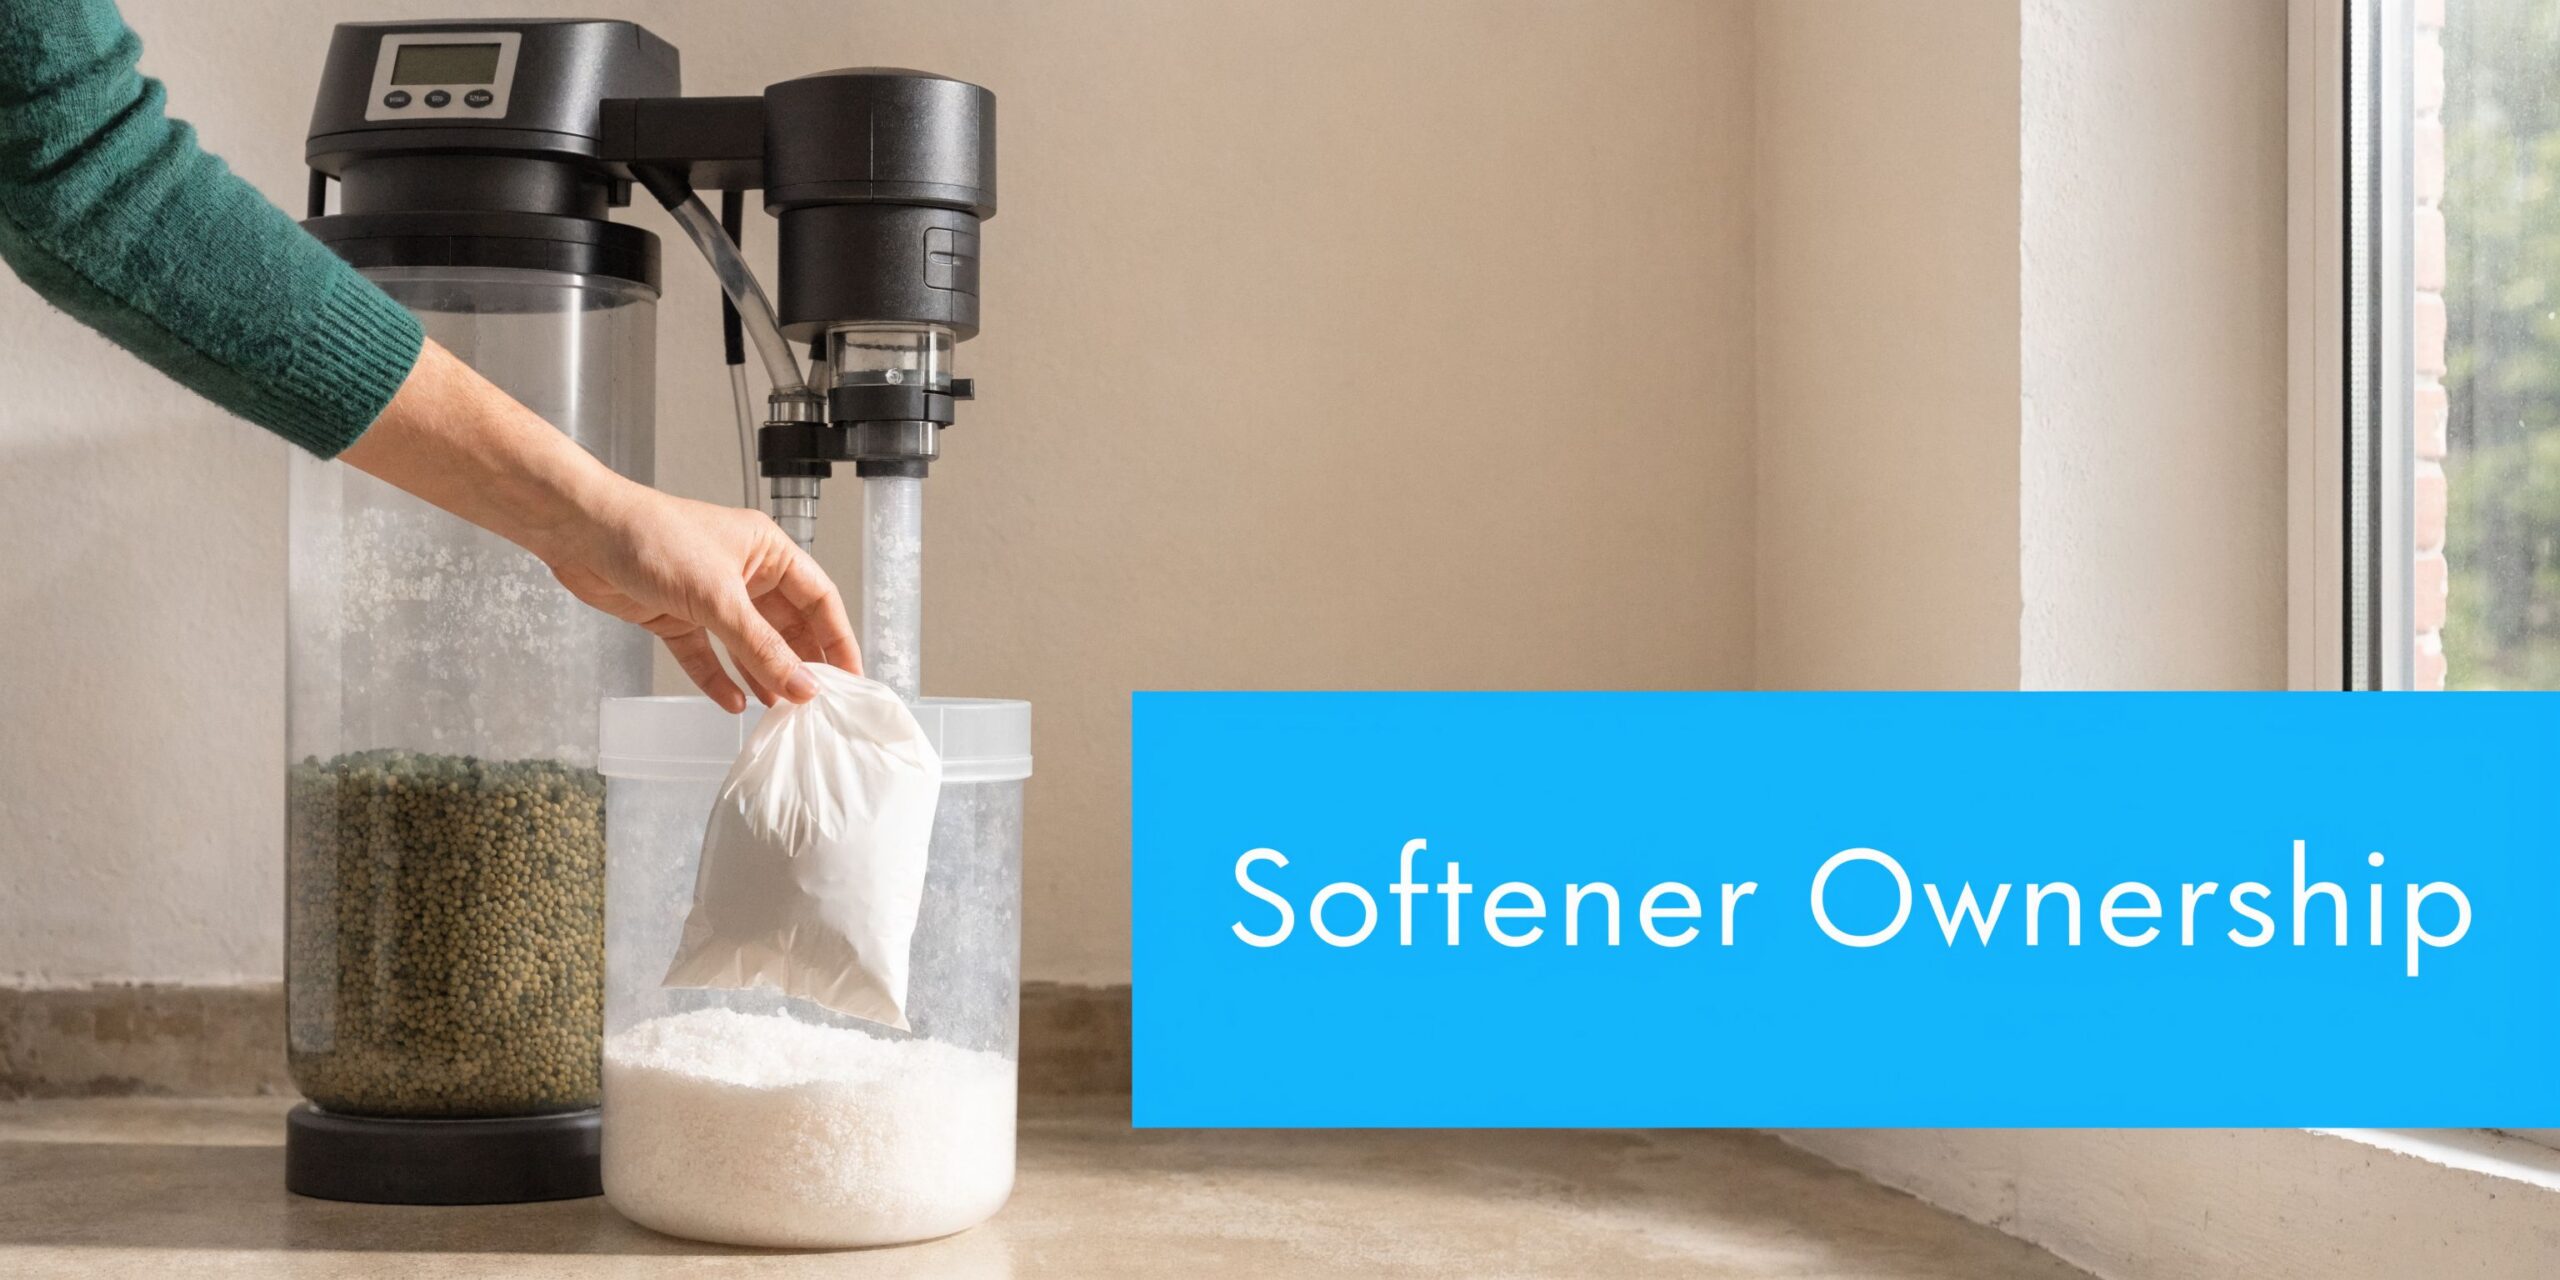
Don’t ignore long-term ownership

Some salt-free systems are marketed as “maintenance-free” and may have lifespans up to 10 years, but long-term cost still matters. You may need pre-filters, post-filters, replacement media cartridges after the initial lifespan, or in some cases an entire unit replacement, as noted by APEC’s salt-free water conditioner overview.

That doesn’t mean conditioners are a bad deal. It means “no salt” is not the same as “no future cost.”

The honest homeowner test

A conditioner is a strong candidate if you’re saying:

  • “I want less scale on appliances and fixtures.”
  • “I don’t need the feel of softened water.”
  • “I want a simpler whole-house setup.”

It’s the wrong fit if you’re saying:

  • “I want my skin and hair to feel different.”
  • “I want soap to work better.”
  • “I want the water to test soft.”

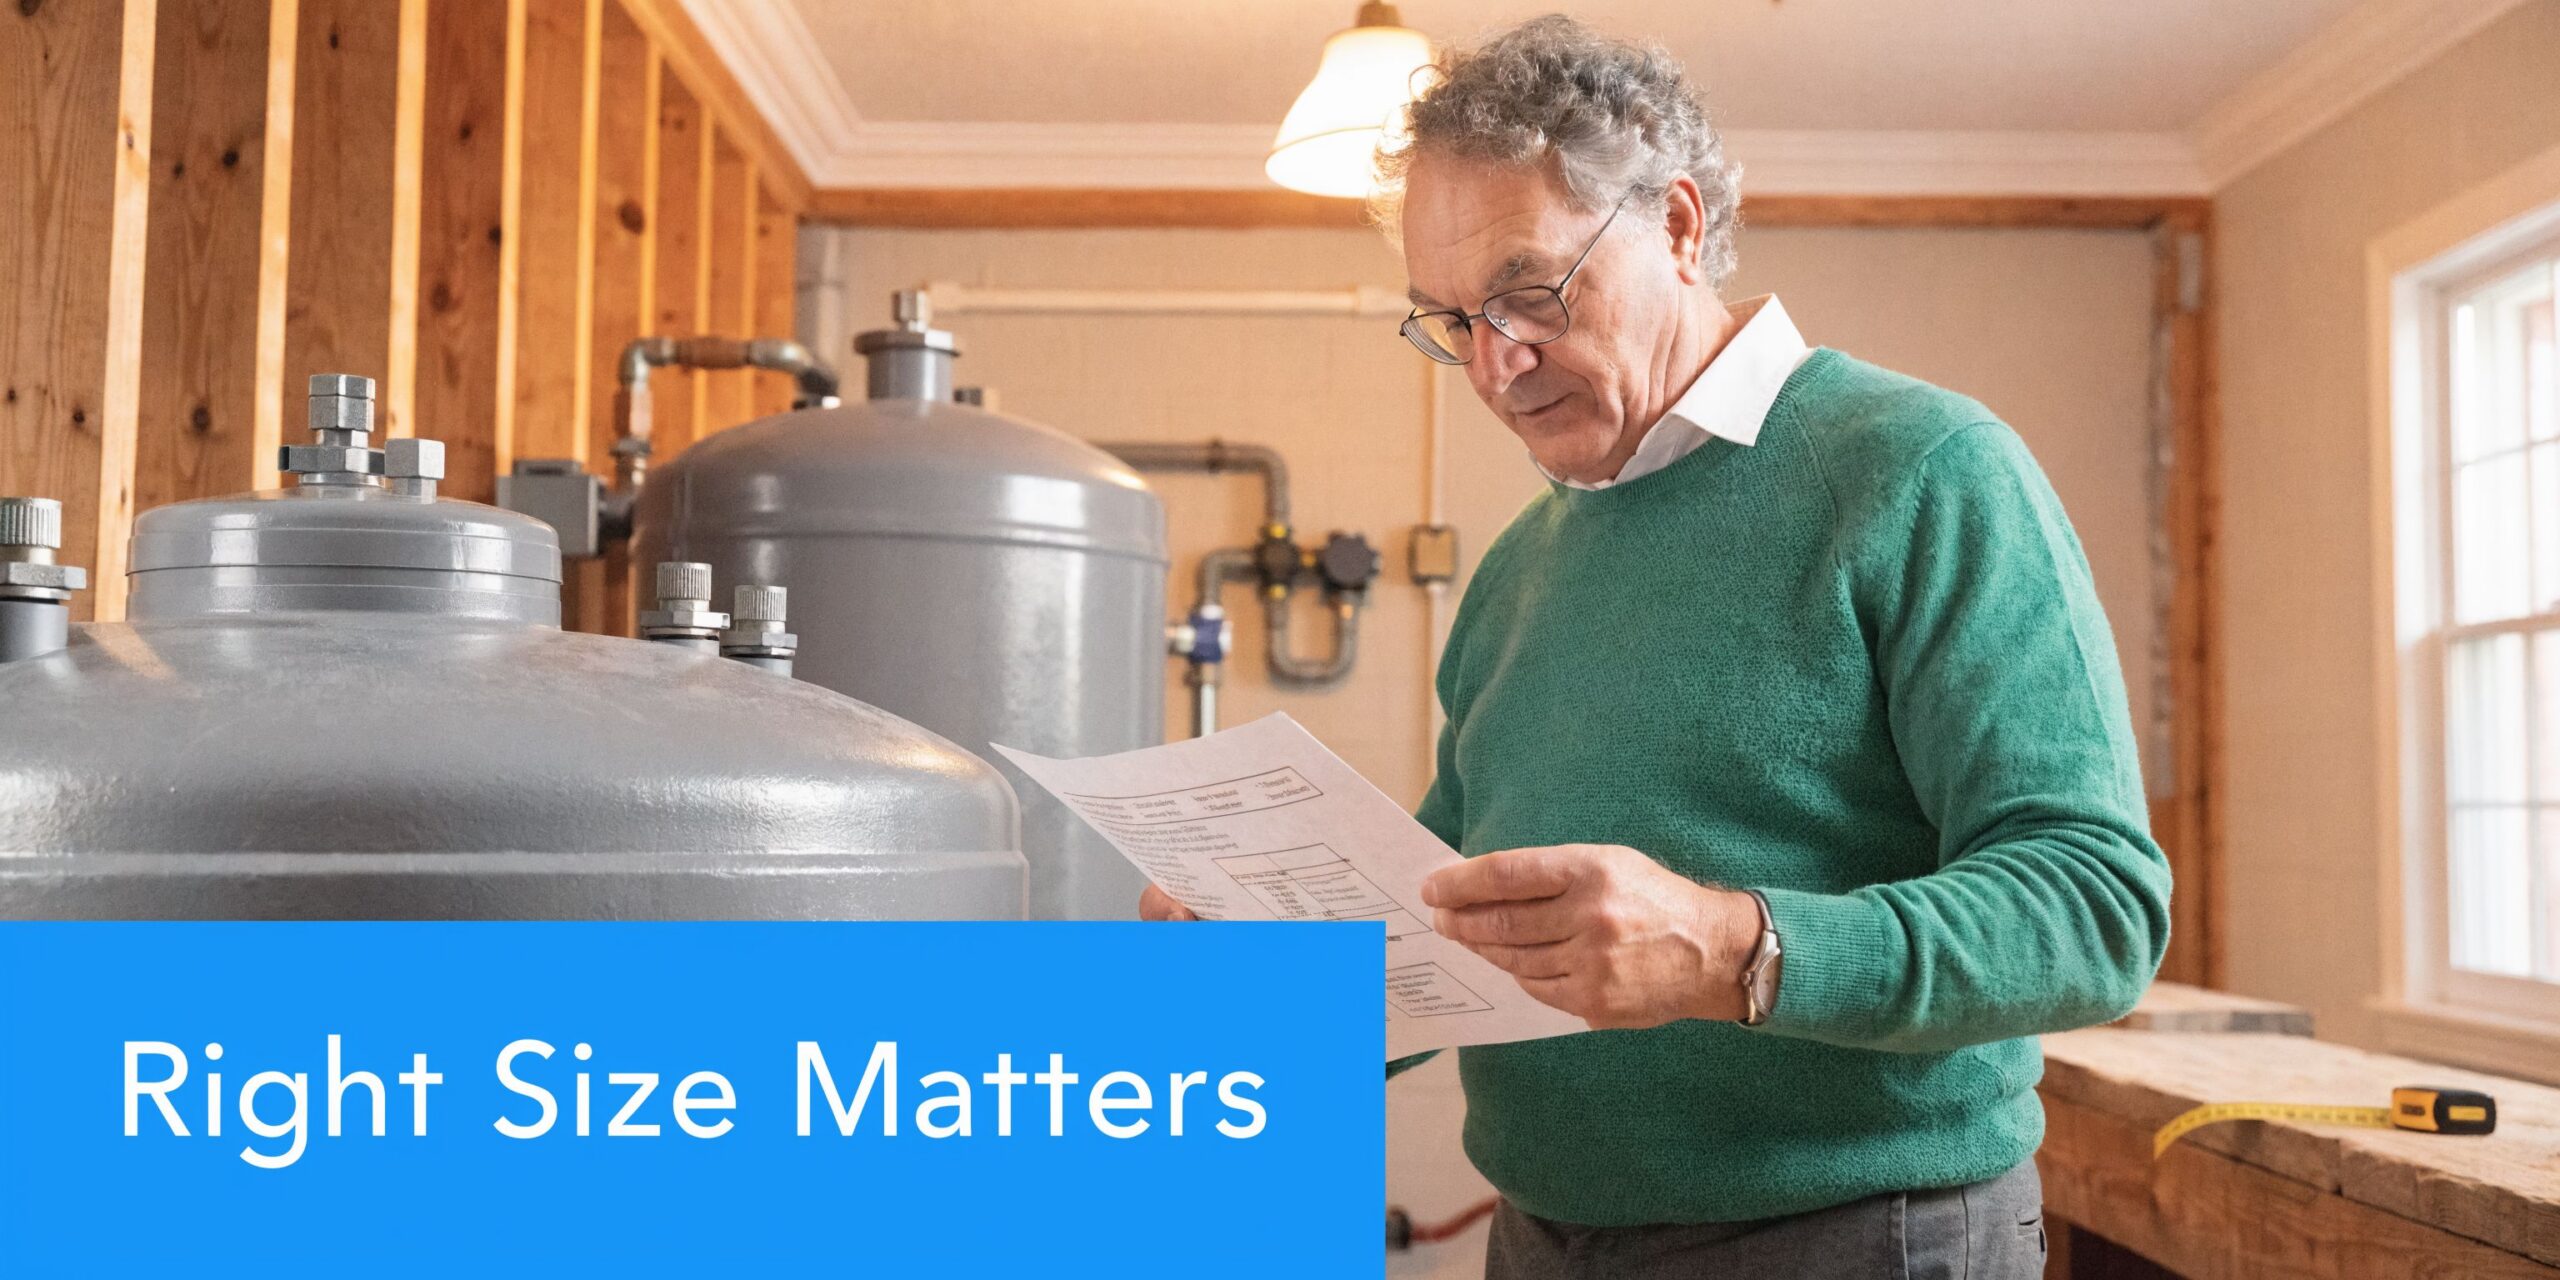
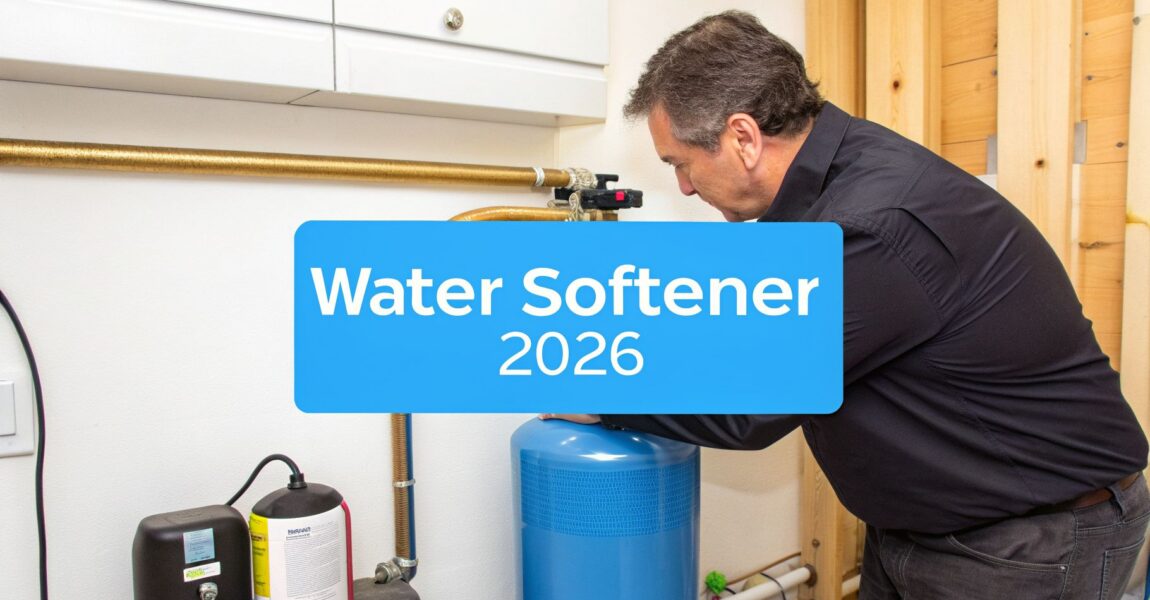
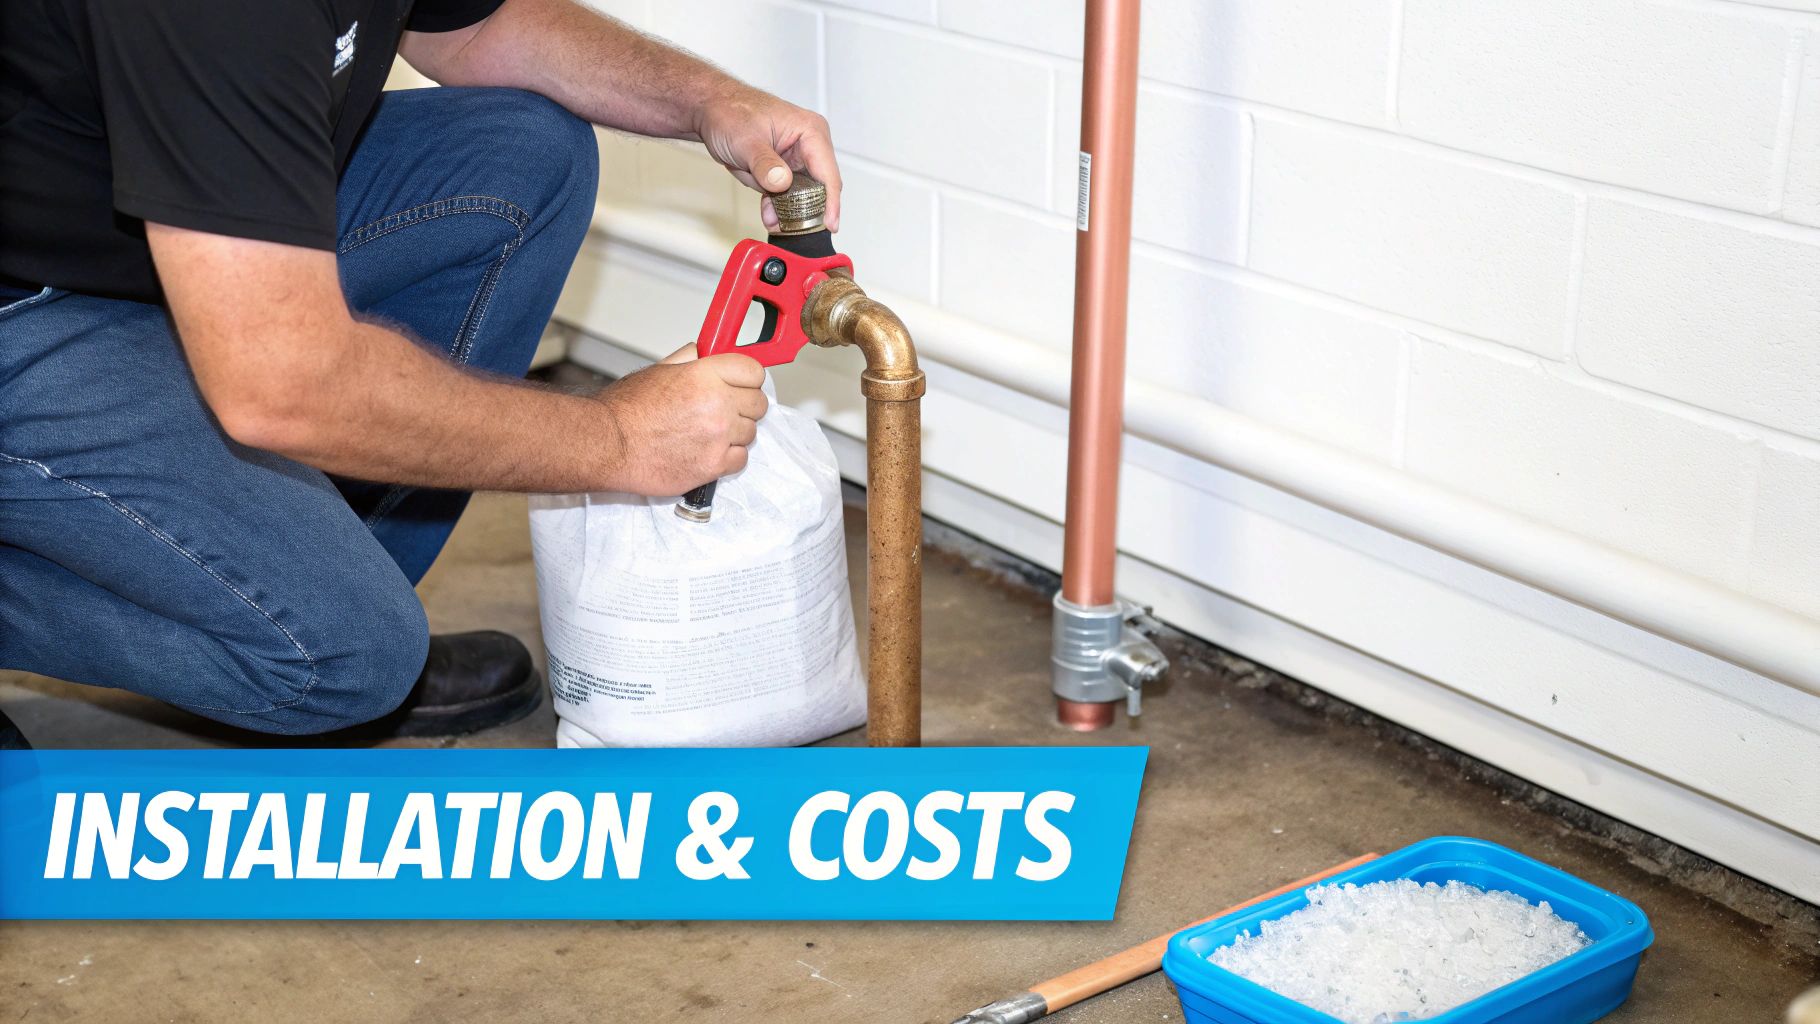
Sizing Installing and Maintaining Your System

At this stage, a lot of promising systems go sideways. Homeowners spend weeks comparing technologies, then undersize the unit, install it in the wrong place, or forget about maintenance until performance slips.

A water conditioner for house use works best when it matches your plumbing reality, not just your online wish list.

A person measures a vertical stainless steel water treatment tank with a blue ruler for system planning.

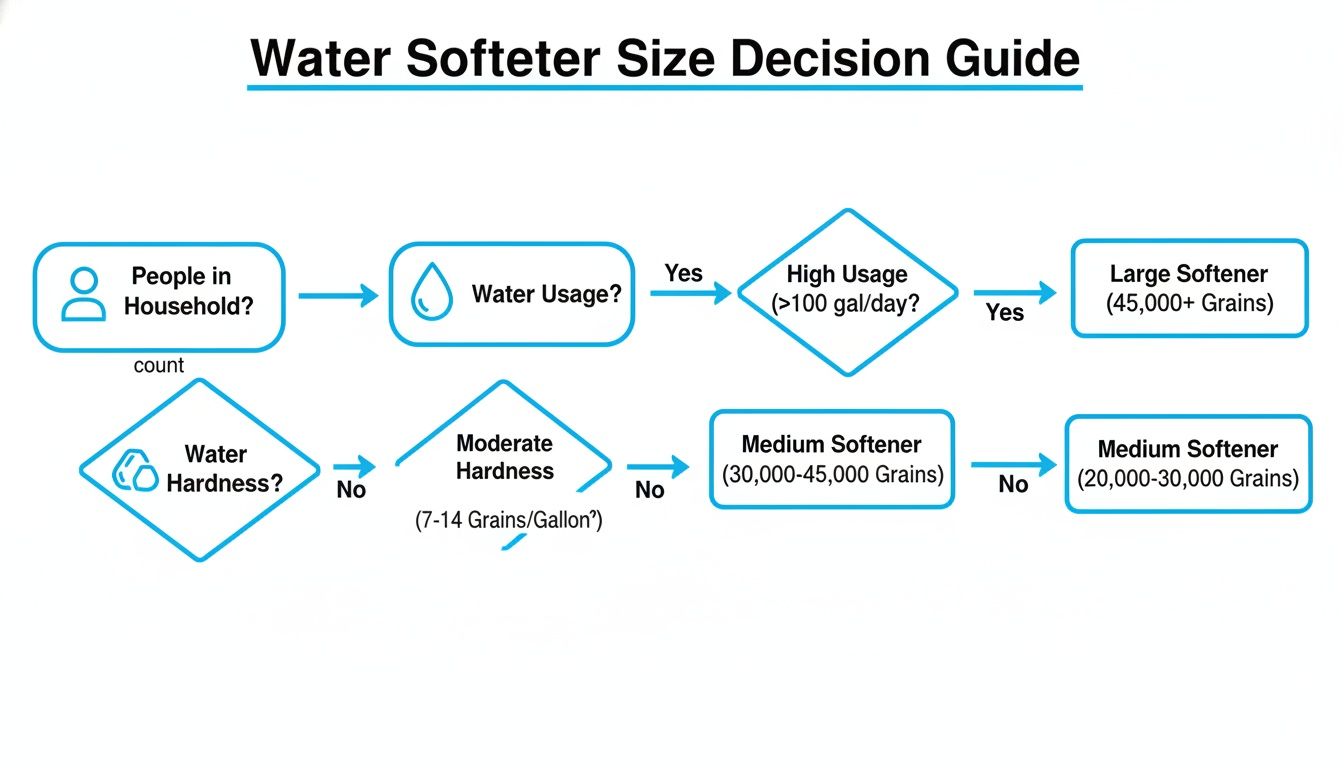
Start with hardness and flow

If you’re sizing a traditional salt-based softener, the benchmark formula is (# people × 82 gal/day × GPG) × 3. For a 4-person home at 10 GPG, that points to a 32,000-grain unit. For salt-free conditioners, the bigger issue is matching the system to your home’s peak flow rate, with 8 to 12 GPM being important for a 1 to 3 bath home, according to the U.S. Department of Energy’s guide to purchasing and maintaining a water softener.

That distinction matters. Softeners are usually discussed in grain capacity. Conditioners are more often selected by flow handling and plumbing fit.

A simple sizing routine

Use this order when planning:

  1. Check your water hardness
    Municipal users can review their local report or test at home. Well owners should test directly.

  2. Count simultaneous water use
    Think about what happens during busy hours. Two showers, a washing machine, and a dishwasher can push demand fast.

  3. Match the conditioner to real flow needs
    A unit that looks fine on paper can feel disappointing if it restricts flow during peak use.

  4. Look at install space
    Measure width, height, and service clearance before you buy.

Field advice: The prettiest system in the catalog is useless if you can’t service it comfortably after installation.

DIY or plumber

Some electronic units are friendly to confident DIY homeowners. Tank-based systems often require more planning because they become part of the main water line.

DIY can make sense if you already know how to:

  • Shut down and drain your main line
  • Cut and reconnect plumbing cleanly
  • Add bypass valves if needed
  • Support the unit securely and keep access open

Hire a plumber when:

  • Your plumbing layout is tight or awkward
  • You’re mixing a conditioner with pre-filtration
  • You need to preserve warranty compliance
  • You’re working with older pipe materials
  • You’re unsure where the unit should sit relative to shutoffs and other equipment

If you’re sourcing parts locally in the UK, these London plumbing shop recommendations can help you find fittings, valves, and install supplies without guessing.

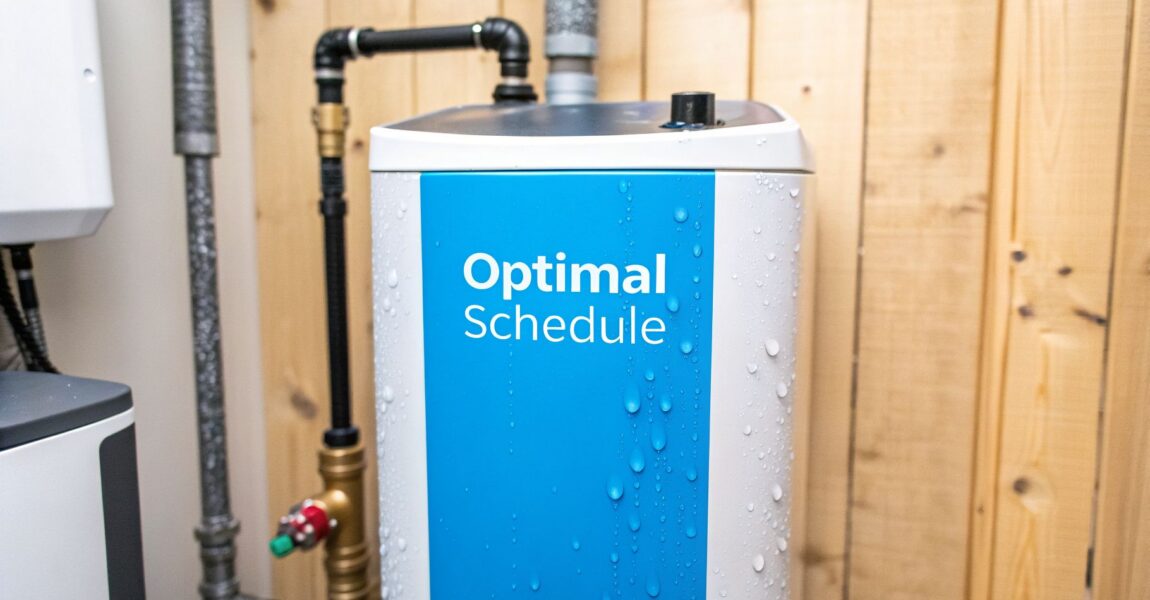
Maintenance is still part of the deal

Conditioners often need less attention than softeners, but “less” doesn’t mean “none.”

A sensible maintenance plan includes:

  • Inspecting the unit periodically for leaks, loose fittings, or bypass issues
  • Replacing media when the manufacturer recommends if you have a TAC-style system
  • Checking any pre-filter stage if your setup includes one
  • Reviewing performance signs like renewed scaling around fixtures or appliances
  • Keeping your water records handy so future troubleshooting is easier

For broader homeowner troubleshooting and maintenance reading, the practical guides in the Water Filter Advisor advice center are useful when you’re comparing system layouts and upkeep demands.

Your Decision Checklist Before You Buy

You don’t need to memorize every water-treatment term to choose well. You just need to answer the right questions in the right order.

The five-point checklist

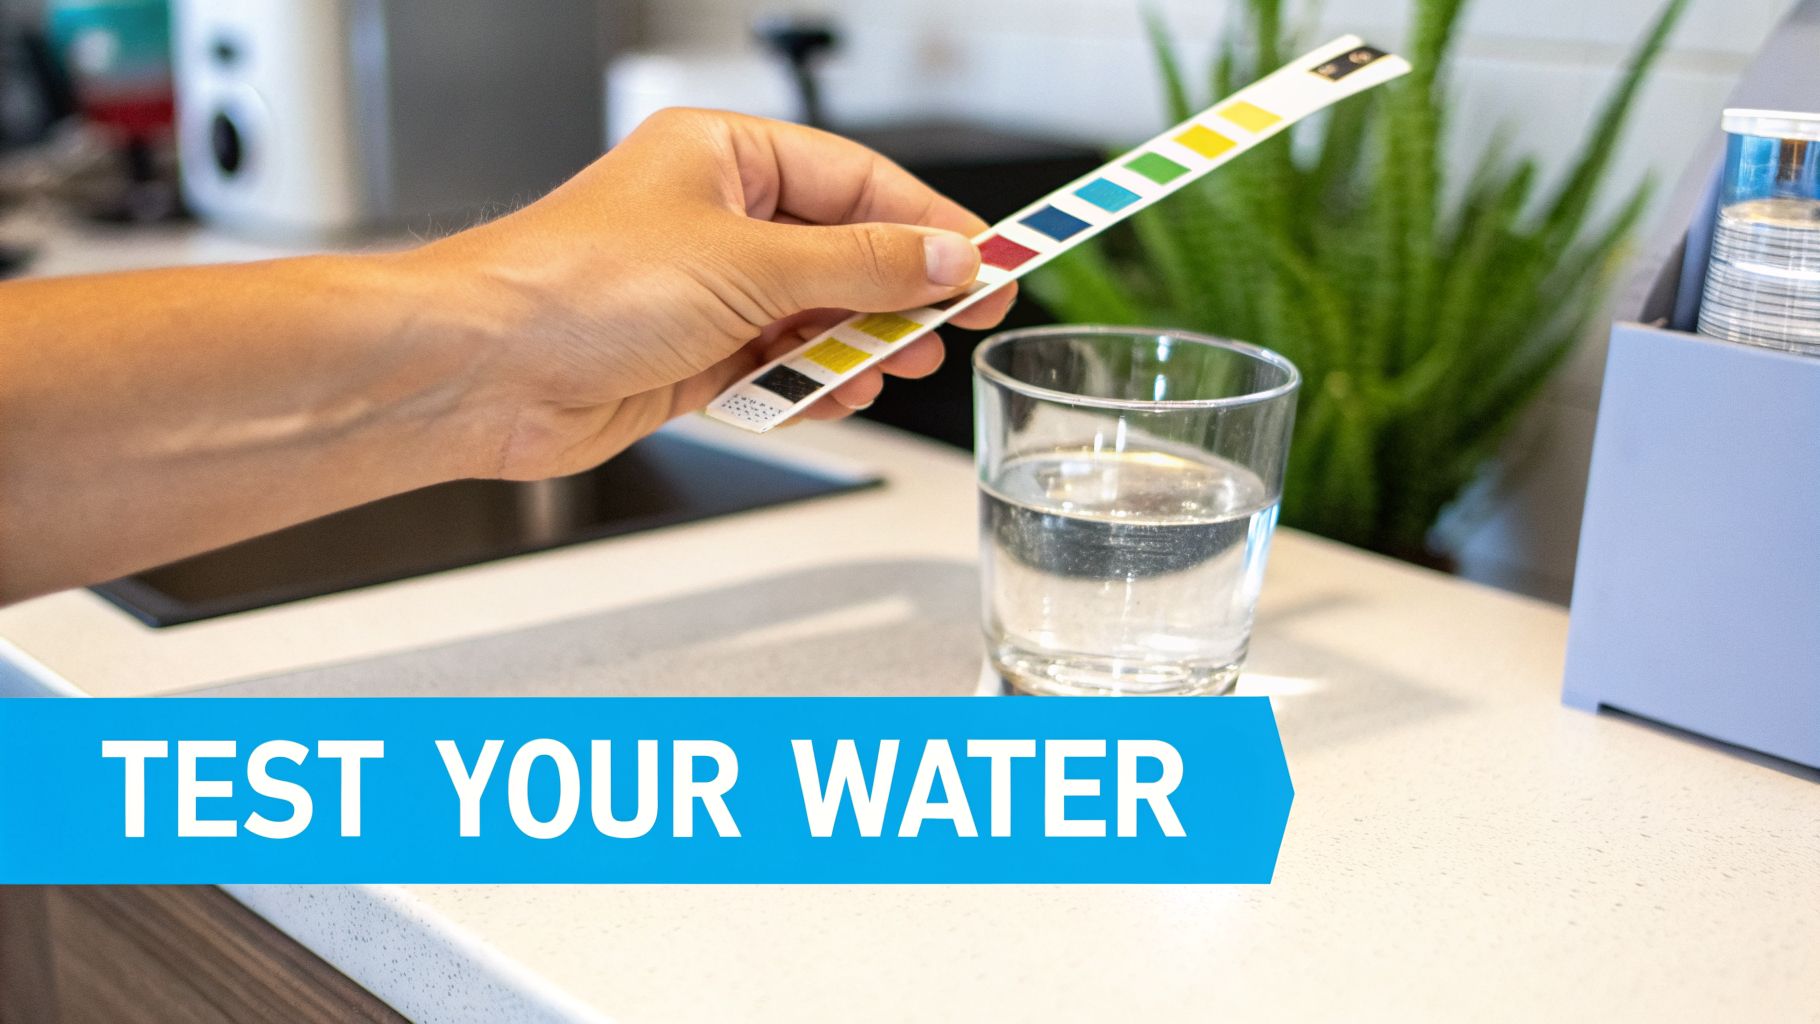
  • Test your water first
    Don’t buy based on guesswork. Hardness level shapes the whole decision.

  • Name your real goal
    If you want to stop scale, a conditioner may work. If you want the feel and performance of soft water, shop for a softener instead.

  • Think beyond purchase price
    Look at future media changes, filter replacements, service access, and any plumber costs.

  • Check your space and plumbing setup
    Measure the install area and think about bypass valves, shutoff access, and whether you may add filtration later.

  • Match the technology to the problem
    Conditioner for scale behavior. Softener for mineral removal. Filter for contaminants.

Two questions that settle most decisions

Ask yourself these and the answer often becomes obvious:

  1. Do I care more about how the water feels, or what it leaves behind?
  2. Am I solving hardness, contamination, or both?

If you care more about shower feel, soap performance, and soft water, a conditioner won’t scratch that itch. If you mostly want to protect fixtures and appliances from mineral crust without dealing with salt, a conditioner may be exactly right.

The best system is the one that solves your actual complaint, not the one with the most impressive label.

Frequently Asked Questions about Water Conditioners

Will a water conditioner help my skin and hair

Sometimes a little, but usually not in the same way a softener does.

A conditioner may reduce some scale-related effects in the plumbing system, but it doesn’t remove hardness minerals from the water. Because of that, many people won’t notice the same change in shower feel, soap rinsing, or hair texture that softened water can provide. If skin and hair comfort is your top priority, a softener is usually the closer match.

Does a water conditioner filter chlorine lead or sediment

No, not by default.

A conditioner’s job is to reduce hardness-related scaling behavior. That’s different from filtration. If you’re worried about chlorine taste, odor, sediment, lead, iron, or other contaminants, you need a filter designed for those specific issues. Many homes benefit from combining technologies rather than asking one device to do everything.

Are electronic descalers real or just hype

They’re real products, but they require careful expectations.

Some homeowners choose them because they’re compact and easier to install than tank-based systems. Their performance can be more dependent on installation quality, water characteristics, and application details. If you want the clearest and most familiar whole-house anti-scale approach, tank-style salt-free conditioners often feel easier to evaluate.

Will a conditioner make my water test soft

No.

That’s one of the most important points in this whole topic. Conditioners don’t remove the calcium and magnesium the way a softener does, so hardness tests usually still show those minerals are present. The aim is not to erase hardness from the water. The aim is to make those minerals less likely to form scale on surfaces.

Is a conditioner enough for well water

Sometimes, but well water often needs a closer look.

Well water can bring hardness together with sediment, iron, sulfur, or other issues. In those cases, a conditioner may be only one part of the final setup. Many well owners need pre-treatment or targeted filtration before adding any anti-scale equipment.

What’s the safest way to avoid buying the wrong system

Get a water test and write down your top complaint in one sentence.

If your sentence starts with “I want water to feel soft,” buy with that goal in mind. If it starts with “I want less scale,” a water conditioner for house use deserves a serious look.


If you’re comparing whole-house systems and want clear, no-hype guidance, Water Filter Advisor is a strong place to keep researching. The site helps homeowners sort out water filters, softeners, conditioners, testing, and maintenance so you can choose a setup that fits your water and your home.

Ultimate Guide to Home Water Softeners

You unload the dishwasher, hold up a “clean” wine glass, and there it is again. Chalky spotting. The towels feel a little stiff. Your shower leaves your skin tight instead of refreshed. The faucet keeps growing a white crust no matter how often you wipe it down.

Those little annoyances usually point to one thing. Hard water.

Your Battle Against Hard Water Annoyances Ends Here

A lot of homeowners live with hard water for years before they realize it isn’t just “how water is.” They assume cloudy glasses are a dishwasher problem. They blame dry skin on weather. They think the crust around the showerhead is just normal wear.

It’s not.

Hard water carries extra calcium and magnesium, and those minerals leave traces behind everywhere water goes. That means your dishes, your fixtures, your water heater, your laundry, and your skin all feel the effect.

Several clean wine glasses sitting on a drying rack next to a stack of soft white towels.

This is a widespread household problem, not a niche one. Over 85% of American homes contend with hard water containing high levels of calcium and magnesium, according to All American Plumbing Services.

What hard water feels like in daily life

Some signs are obvious. Others sneak up on you.

  • On dishes and glassware you’ll see spots, haze, or a filmy look that survives the wash cycle.
  • In the bathroom soap scum sticks harder to tile, glass, and fixtures.
  • On your body skin can feel dry, and hair can feel heavier or rougher after rinsing.
  • In the laundry clothes may feel less soft than they should.
  • Inside the house appliances and plumbing slowly collect mineral scale.

Hard water doesn’t just make cleaning harder. It leaves mineral residue behind every time water dries.

Why home water softeners matter

A water softener isn’t mainly about making water feel fancy. It’s about changing the outcome of everyday water use.

When a softener removes hardness minerals, soap rinses better. Glassware dries cleaner. Fixtures stay cleaner longer. Water-using appliances don’t have to fight as much scale buildup.

That’s the “so what?” behind home water softeners. You’re not buying a tank because tanks are exciting. You’re buying fewer headaches at the sink, in the shower, and around the house.

If you’ve been wrestling with the same hard water annoyances week after week, this is the fix that addresses the cause instead of the symptoms.

The Science of How Water Softeners Work

The core idea is simple. Hard water contains dissolved minerals. A softener removes the minerals that cause the trouble.

That sounds technical, but the process is easier to picture than many expect.

What makes water hard

Water hardness is mostly about calcium and magnesium. As water moves through the ground, it picks up these minerals. By the time it reaches your home, those minerals are still riding along.

Hardness is measured in grains per gallon, often shortened to GPG. Water with hardness levels over 10.5 GPG can cause severe scale buildup and can reduce water heater efficiency by up to 48%, according to Liberty Home Guard.

That’s why hard water becomes more than a cosmetic issue. It’s not only the white crust on the faucet. It’s the invisible buildup inside equipment too.

A five-step diagram showing the process of how home water softeners remove minerals to soften water.

Ion exchange in plain English

Most home water softeners use ion exchange.

Think of the resin tank like a nightclub with a strict bouncer. Calcium and magnesium walk up to the door. The resin beads inside the tank are set up to grab those hardness minerals and swap them for something else, usually sodium or potassium ions.

The hard minerals get stopped at the door. The softer ions take their place in the water.

That swap is the whole trick.

Here’s the cleaner version of the science. Negatively charged resin beads attract and bind positively charged calcium and magnesium ions. In exchange, the softener releases sodium or potassium ions into the water. The minerals causing hardness stay in the tank until the system cleans itself out.

What comes out of the faucet

After ion exchange, the water isn’t stripped down to nothing. It’s missing the main minerals that create hardness problems.

That changes how water behaves:

  • Soap lathers more easily
  • Rinsing is cleaner
  • Mineral spotting drops
  • Scale buildup slows down

People often confuse “softened” with “filtered.” They’re not the same thing.

A water softener focuses on hardness minerals. It doesn’t do the full job of a drinking water filter that targets taste, odor, chlorine, sediment, or other contaminants. In many homes, people pair softening with filtration because each solves a different problem.

Why regeneration matters

A resin bed can’t grab hardness minerals forever. Eventually, it fills up.

When that happens, the system runs a regeneration cycle. It flushes the resin with brine so the resin can release the captured calcium and magnesium and recharge itself with sodium or potassium again.

If ion exchange is the bouncer, regeneration is the cleanup crew resetting the room for the next shift.

Practical rule: A softener that regenerates efficiently usually saves you hassle over time because it wastes less water and less salt while keeping the resin ready to work.

The main alternative you’ll hear about

Not every system marketed in this category is a traditional softener.

Some homeowners look at salt-free conditioners, often built around a process that changes how minerals behave rather than removing them. The key distinction is important. A salt-free system may help reduce scale formation, but it does not remove calcium and magnesium through ion exchange.

That means the minerals are still in the water.

For some households, that’s acceptable. For others, especially homes with clearly stubborn hard water symptoms, it won’t deliver the same daily feel or appliance protection as an ion-exchange softener.

Where readers usually get confused

The most common mix-up is this:

Question Short answer
Does a softener filter water? Not in the same way a dedicated filter does
Does salt go directly into my tap water? The system uses salt to regenerate the resin
Does soft water contain zero minerals? No, but the hardness-causing minerals are removed through exchange
Are all anti-scale systems true softeners? No

If you remember one thing, remember this: home water softeners remove hardness minerals through ion exchange. Everything else, from smoother-feeling water to cleaner dishes, follows from that one process.

Choosing Your Ideal Home Water Softener System

Shopping for home water softeners gets confusing fast because different products solve different versions of the problem.

One system removes hardness minerals. Another mainly helps control scale. One unit protects the whole house. Another only treats a shower or sink. And then there’s the control valve, which sounds boring until it affects how much salt and water you use for years.

Salt-based versus salt-free

This is the first big fork in the road.

A salt-based water softener uses ion exchange. It removes hardness minerals. A salt-free conditioner changes mineral behavior to reduce scaling but doesn’t remove those minerals in the same way.

Here’s the side-by-side view.

Feature Salt-Based Water Softener Salt-Free Water Conditioner
Primary job Removes hardness minerals through ion exchange Conditions minerals to help reduce scale
Best fit Homes with clear hard water symptoms and stubborn scale Homes seeking lower-maintenance scale control
Water feel Usually gives the classic soft-water feel people expect Doesn’t usually create the same softened feel
Maintenance Needs salt or potassium replenishment Usually lower routine involvement
Drinking water concern May raise sodium content, which matters for some households Avoids that specific sodium issue
Very hard water performance Better choice when hardness is severe Often less satisfying when hardness is strong
Bottom line Best when you want true softening Best when you mainly want scale management

The “best” option depends on your goal.

If your main complaints are rough laundry, mineral spots, soap scum, and scale buildup, a true softener is usually the more direct answer. If you mainly want a lower-maintenance approach and your water issues are milder, a salt-free conditioner may be worth considering.

Whole-house or point-of-use

The next decision is about coverage.

Whole-house systems treat water as it enters the home. That means showers, sinks, water heater, laundry, and appliances all benefit.

Point-of-use units treat water at one location, like a shower or under-sink faucet.

A simple way to decide:

  • Choose whole-house if your problem shows up everywhere, especially on fixtures, in showers, and in appliances.
  • Choose point-of-use if you only care about one outlet and want a more limited fix.
  • Choose a combined approach if you want soft water for the house and dedicated filtration at the kitchen sink.

For homeowners comparing broader treatment setups, it can help to look at how full-home systems are packaged in practice. Resources like Halo Water Filtration systems show how softening and filtration may be combined depending on the house and the water issue.

The feature that matters more than most buyers realize

A lot of people focus on tank size and skip the controller. That’s a mistake.

Demand-initiated regeneration, often shortened to DIR, is one of the smartest upgrades you can choose. Instead of regenerating on a fixed timer whether you used water or not, a DIR system regenerates based on actual usage.

According to the EPA water softener technical sheet, DIR systems can reduce water and salt waste by 20% to 60% and extend resin life to 20+ years, compared with 10 years for timer-based systems.

That’s not an abstract spec sheet advantage. It affects daily ownership in practical ways:

  • Less waste means fewer unnecessary regeneration cycles
  • Lower routine upkeep means you’re not refilling as often for avoidable reasons
  • Longer resin life means fewer long-term headaches
  • Smarter operation means the system matches your real household pattern

If two softeners look similar on paper, the one with demand-initiated regeneration often makes more sense for long-term living.

A simple way to choose

If you’re stuck, use this decision path.

You likely want a salt-based softener if

  • Scale is heavy on fixtures, shower doors, and appliances
  • You want the soft-water feel on skin, laundry, and dishes
  • You need real hardness removal, not just scale management

A salt-free conditioner may fit if

  • You want less routine maintenance
  • Your main goal is reducing scale formation
  • You’re cautious about added sodium

Whole-house makes more sense when

  • The problem affects more than one room
  • You want to protect appliances and plumbing
  • You’re tired of treating symptoms one faucet at a time

The smartest buyers don’t ask only, “Which system is cheapest?” They ask, “Which system changes daily life the way I want?” That question leads to better choices every time.

How to Size Your System for Peak Performance

The most common water softener buying mistake isn’t choosing the wrong brand. It’s choosing the wrong size.

A too-small unit often looks fine on paper and disappoints in real life. It may keep up when one person is home, then struggle when showers, laundry, and the dishwasher overlap.

A professional man reviewing technical documents next to large industrial water tanks in a home basement.

According to Quality Water Treatment, undersized units often fail to handle peak-hour demand, and experts recommend matching both grain capacity and flow rate. They note examples of 32,000 to 48,000 grain systems for a 4-person home, while multiple simultaneous uses can require 10 to 15 GPM to avoid pressure drops.

The two numbers that matter most

You need more than a vague estimate.

Start with:

  1. Your water hardness
  2. Your household water demand

Hardness is measured in GPG. Your water supplier may provide it, or a local water test can confirm it. Household demand means how much water your household uses in normal life, especially during busy periods.

A family that uses water in staggered ways has different needs than a family that stacks everything into the same hour every morning.

Grain capacity and flow rate are not the same thing

People often get tripped up here.

Grain capacity tells you how much hardness the unit can remove before regeneration.

Flow rate tells you how much water it can move without becoming a bottleneck.

You need both.

A softener can have enough capacity for the week and still perform poorly if it can’t keep up during peak use. That’s when homeowners say things like, “We bought a system, but the water still seems hard when everyone’s home.”

A practical sizing mindset

Think about your home at its busiest, not at its average.

Ask yourself:

  • Morning rush Are two showers likely to run while someone starts laundry?
  • Kitchen overlap Does the dishwasher often run near dinner while sinks are in use?
  • Appliance protection Do you want the softener to protect the whole house, not just survive light usage?

Buy for your busiest realistic hour, not your quietest weekday afternoon.

A decent sizing conversation should include the number of people in the home, your tested hardness, and whether your house has high simultaneous water use.

Watch this before you compare models

A quick visual walkthrough can make sizing much easier to understand.

What happens when the softener is undersized

The symptoms can be sneaky.

  • Hard water slips through during busy periods
  • Regeneration happens too often, which can wear on the system
  • Water pressure may suffer when too many fixtures run at once
  • Scale and soap scum return, making you wonder why you invested at all

The right size doesn’t feel dramatic. That’s the point. It keeps up.

When home water softeners are properly sized, you stop thinking about them. Your showers feel consistent. Your dishes dry cleaner. Your appliances get the protection you paid for.

Installation and Long-Term Maintenance Explained

Once you’ve picked the right system, the next question is practical. Where does it go, how does it connect, and what will you need to do after it’s installed?

For most whole-house setups, the softener is installed where water enters the home so it can treat the water supply before it reaches fixtures and appliances. That usually means a basement, garage, utility room, or another service area with drain access and enough room for the mineral tank and brine tank.

A professional technician installing and maintaining home water softener systems in a residential basement utility room.

What a typical installation includes

A whole-house installation usually involves:

  • Main line connection so incoming water passes through the system
  • Bypass valve setup so you can isolate the unit for service
  • Drain connection for regeneration discharge
  • Brine tank placement where you can refill salt or potassium easily

If your setup includes additional storage or related plumbing components, it helps to understand tank installation basics too. A practical reference on how to properly install a polyethylene tank can be useful when reviewing broader water system layouts.

DIY or hire a pro

Some homeowners can handle installation if they’re comfortable cutting into plumbing, managing shutoffs, and confirming drain requirements. Others are better off hiring a professional, especially if the space is tight, older plumbing is involved, or local code requirements are unfamiliar.

A good rule of thumb is simple. If you’re already nervous about modifying the main water line, this isn’t the place to learn by trial and error.

The maintenance most owners do

Most of the time, ownership is straightforward.

For a salt-based system, the regular job is checking the brine tank and refilling the salt or potassium when needed. That’s the task people remember.

The task people forget is keeping an eye on whether the salt is available to the system. Sometimes a crust forms in the tank and creates a salt bridge, which leaves salt in the tank but prevents proper use.

The maintenance people skip until there’s a problem

Home water softeners don’t need constant fussing, but they do need attention now and then.

Keep an eye on these basics

  • Salt level Don’t wait until the tank is empty.
  • Brine tank condition Break up bridging if the salt has hardened into a crust.
  • Bypass position Make sure nobody accidentally left the unit bypassed after service.
  • Performance signs If spotting and soap scum return, check the system before blaming your dishwasher.

A softener can look fine from the outside and still need a simple fix like salt replenishment or clearing a bridge in the brine tank.

What about resin life

The resin inside the mineral tank doesn’t last forever. Over time, it wears down or loses effectiveness. If your system gets older and performance drops even after normal maintenance, resin may be part of the conversation.

That isn’t usually a frequent task, but it’s part of long-term ownership.

What good maintenance feels like

A well-kept softener is boring in the best possible way.

You refill media as needed. You notice problems early. You don’t wait for scale to return all over the bathroom before checking the system. And because the unit stays in shape, your home keeps getting the practical benefits you bought it for.

Health Environmental and Lifetime Cost Considerations

A water softener solves one household problem while raising a few fair questions. People want to know what happens to the water they drink, what regeneration sends down the drain, and whether long-term ownership still makes financial sense after the purchase.

Those are the right questions.

The sodium question

For many households, softened water is fine for general use. But some people need to pay closer attention.

According to the Minnesota Department of Health, softened water can add 10 to 30 mg/L of sodium, which can matter for people with hypertension or households following low-sodium diets.

That doesn’t mean everyone should avoid salt-based softeners. It means some households should plan around the issue.

Practical ways to reduce sodium concerns

The good news is that you have options.

  • Use an unsoftened tap for drinking and cooking This is one of the simplest solutions.
  • Ask your doctor if sodium is a concern That matters most if someone in the home has a medical reason to monitor intake closely.
  • Use potassium chloride instead of sodium chloride This reduces the sodium issue, though some owners find it behaves differently in the tank.

Some households soften water for bathing and appliances but keep one kitchen tap unsoftened for drinking and cooking. That setup gives you the mechanical benefits without making every glass of water part of the tradeoff.

The environmental side

Softener ownership has an environmental footprint because regeneration produces brine discharge and uses water. That’s one reason efficiency features matter so much.

A system that regenerates based on actual need is generally a better fit than one that cycles on a blind schedule. Smarter regeneration means less avoidable waste. It also means your system is working in a way that reflects real household behavior.

Another practical choice is using a bypass for outdoor irrigation. Most homeowners don’t want softened water going to lawns or gardens if they can avoid it.

How to think about lifetime cost

A lot of buyers focus only on purchase price. That’s understandable, but it misses the bigger picture.

The true cost of home water softeners includes:

  • The system itself
  • Installation
  • Salt or potassium over time
  • Water used during regeneration
  • Routine upkeep
  • How well the system protects appliances and plumbing

A cheap unit that regenerates wastefully or struggles to keep up can cost more in frustration and upkeep than a better-designed model. A properly matched softener can also help reduce some of the waste hard water creates around the house, such as extra detergent use or early appliance wear.

The smart way to judge value is to ask two questions:

  1. What will this system cost me to own?
  2. What household problems will it prevent?

When buyers look at both sides, the decision gets clearer.

Your Top Water Softener Questions Answered

Even after a system is installed, a few questions tend to come up again and again. These are the ones I hear most from homeowners.

Why does my water still feel hard after installation

Start with the obvious checks first. Make sure the unit isn’t in bypass mode, confirm there’s salt or potassium available for regeneration, and check whether the system was sized correctly for your household.

If the problem shows up mostly during busy hours, sizing or flow rate may be the issue rather than total capacity alone.

Why is my softener using so much salt

That can happen when the system regenerates too often, when settings aren’t matched to your water hardness, or when the unit is undersized and works harder than it should.

A demand-based model usually handles this better than an older timer-based unit because it reacts to actual use instead of a fixed schedule.

Is softened water safe for drinking

For many people, it’s acceptable. But if someone in the household has hypertension or follows a low-sodium diet, it’s smart to review the sodium issue with a doctor and consider an unsoftened drinking tap or another workaround.

Can I use softened water on plants or the lawn

Many homeowners prefer not to. If your plumbing setup allows it, bypassing outdoor water use is usually the cleaner choice.

How do I know regeneration is working properly

Look for normal soft-water performance in daily life. If spotting returns, soap doesn’t lather the way it used to, or fixtures start building scale again, the system may need attention.

You should also watch for practical clues like low salt, a salt bridge, incorrect settings, or an accidental bypass.

Do I need a softener, a filter, or both

That depends on the problem. A softener handles hardness minerals. A filter targets other water quality issues such as taste, odor, or specific contaminants.

Many homes benefit from both because the two systems do different jobs.

What’s the easiest first step if I’m unsure

Test your water and define the problem clearly. Don’t shop by brand name first. Shop by water condition and household need.

If you want more plain-English help on water treatment decisions, troubleshooting, and home system choices, this advice library is a strong next stop: https://www.waterfilteradvisor.com/advice/


If you’re comparing water treatment options for your home, Water Filter Advisor is a solid place to keep researching. It helps homeowners sort through filtration and softening choices, compare system types, and understand maintenance before spending money on the wrong setup.

Water Softener for City Water: A 2026 Buyer’s Guide

You unload the dishwasher, hold a glass up to the light, and there they are again. White spots. The same thing happens on the shower door, the faucet, and the black coffee maker that somehow looks dusty right after you wiped it down.

Then the shower starts feeling wrong. Soap does not rinse clean. Skin feels tight. Hair feels dull. You blame the soap, then the detergent, then the dishwasher. Often, the culprit is simpler. Your city water is safe to drink, but it is still carrying hardness minerals your treatment plant never tried to remove.

Why Your Spotless Glasses Still Have Spots

A lot of homeowners assume municipal water should already be “finished.” It is treated, tested, and delivered by the city, so it feels reasonable to expect it to behave well in the house. The surprise is that hardness is usually not the city’s problem to solve.

Calcium and magnesium move through the distribution system and into your plumbing just fine. They are considered safe for consumption, but they are rough on fixtures, water heaters, dishes, and skin comfort. That is why a home can have water that is perfectly acceptable from a public health standpoint and still be annoying every single day.

Two stacks of clear drinking glasses covered in white calcium mineral deposits on a marble countertop.

The scale issue is not rare. Over 85% of households in the United States receive city water classified as hard, and that translates to roughly 110 million households dealing with things like scale buildup, reduced appliance efficiency, and skin irritation, according to this city water hardness overview.

What hard water looks like in real life

The first clues are usually boring, repetitive problems:

  • Dishes never look finished: Glassware dries with cloudy marks or chalky dots.
  • Bathroom cleanup gets old fast: Faucets and shower doors collect crusty mineral residue.
  • Soap acts strange: It lathers poorly and leaves a filmy feel behind.
  • Hot water equipment takes the hit: Heaters, dishwashers, and washing machines work in mineral-heavy water every day.

Tip: If your house has both chlorine smell and hard water spotting, treat those as two separate jobs. A softener handles hardness. Carbon filtration handles chlorine taste, odor, and resin protection.

A good water softener for city water does not just make water feel nicer. It protects the plumbing you cannot see and the appliances you do not want to replace early.

Decoding Your City's Water Hardness Report

Hardness sounds abstract until you think of it this way. Your water is carrying a small amount of dissolved rock.

Those minerals are invisible in the glass, but once water dries or heats up, they stop being polite and start sticking to everything. That is why the inside of a kettle, water heater, or showerhead ends up looking like it has been dusted with chalk.

What GPG means

Most softener sizing is based on grains per gallon, usually shortened to GPG. It is just a way of expressing how much hardness mineral is dissolved in your water.

A practical rule of thumb used in the industry looks like this:

Hardness reading Plain-English meaning
0 to 3 GPG Soft to slightly hard
4 to 7 GPG Moderately hard
7 to 10.5 GPG Hard
Above 10.5 GPG Very hard

That last threshold matters. Once hardness climbs into clearly hard territory, daily annoyances become equipment problems. You get more spotting, more buildup, and more scale in hot-water appliances.

Where to find the number

Start with your city’s annual water quality report. Many utilities publish it online, and customer service can usually point you to the latest version if it is hard to find. Some reports list hardness directly. Others focus mostly on safety contaminants and leave hardness out.

If the city report does not clearly spell it out, use a home hardness test kit. They are simple and practical. You are not trying to run a lab. You just need a dependable hardness number so you can choose the right water softener for city water.

Use this simple process:

  1. Check the municipal report first: It gives you a baseline and sometimes notes seasonal changes.
  2. Test cold water from a frequently used tap: Kitchen cold water is usually fine for this.
  3. Write down the result in GPG: Keep it with your appliance records.
  4. Retest if something changes: New spotting, plumbing work, or a move to another neighborhood can justify another test.

Why one city can have different results by neighborhood

Municipal systems are not always perfectly uniform. Source blending, seasonal changes, and distribution zones can make one side of town feel different from another. Two homes with the same zip code can have noticeably different hardness behavior.

That is why I do not like buying a system based only on a neighbor’s experience. Borrow their plumber if you want. Do not borrow their hardness number.

Key takeaway: Do not shop by brand name first. Shop by your hardness level first. The wrong measurement leads to the wrong machine.

Once you know the number, the buying process gets clearer. You stop guessing and start matching technology to the water entering your house.

Comparing Softener Technologies for Municipal Water

Not all “softening” products do the same job. Homeowners lose money here, because boxes on showroom floors make very different technologies sound interchangeable.

They are not.

A proper water softener for city water needs to match the problem in the home. If you want soft water, one technology leads the pack. If you mainly want scale control with lower maintenance, another option can make sense. And if you are eyeing magnetic gadgets because they seem easy, that category deserves a hard look before you spend anything.

Infographic

Ion exchange versus TAC in plain English

A salt-based ion exchange softener is the workhorse. It removes hardness minerals from the water. Consider it a coat check that takes calcium and magnesium away before they head into your plumbing.

A salt-free TAC conditioner works differently. It does not remove the minerals. It changes how they behave so they are less likely to cling to surfaces as scale. It is more like an usher guiding troublemakers to keep moving instead of sitting down and causing a mess.

That distinction matters because your water will still test hard after TAC treatment. The house may experience less scale, but the minerals are still present.

In a six-month study of homes with city water, premium salt-based softeners achieved up to 98% reduction of calcium and magnesium, compared to 70% for salt-free conditioners, with the gap becoming especially important in areas above 10.5 GPG, according to this performance comparison.

Quick comparison table

Feature Salt-Based Ion Exchange Salt-Free (TAC) Conditioner Magnetic Descaler
Main job Removes hardness minerals Reduces scale formation behavior Claims to reduce scaling behavior
Water feel Soft water feel Water still feels like hard water to many users Unpredictable
Spotting and soap performance Best improvement Mixed improvement Often inconsistent
Maintenance Salt refills, periodic service Low routine maintenance Low maintenance, but questionable payoff
Best fit Homes that want true soft water Homes focused on scale control and low upkeep Buyers should be cautious
City water concern Chlorine can be hard on components, so prefiltration may help Often paired with sediment or carbon stages Usually sold as a simple fix, often oversimplified

Salt-based softeners for city water

If your goals are cleaner glassware, easier bathing, less soap scum, and better protection for hot-water appliances, ion exchange is usually the strongest answer.

These systems are especially sensible when city water is firmly hard or very hard. They do ask more from the homeowner. You need salt. You need a drain. You need occasional attention. But they solve the hardness problem instead of working around it.

For municipal water, I like seeing a softener paired with sediment filtration and, when chlorine is noticeable, carbon treatment ahead of the resin. Chlorine is useful for public disinfection, but it is not a friend to softener media over the long haul.

Salt-free TAC systems

TAC units earn attention because they avoid bags of salt and do not produce brine discharge in the same way as traditional softeners. If your main objective is scale prevention, not the silky feel of fully softened water, they can be a practical fit.

They also appeal to homeowners who want lower day-to-day maintenance. There is no salt bin to babysit, and ownership usually feels less hands-on.

Where TAC disappoints is expectation mismatch. People buy one expecting soft-water performance. Then they still see some spotting or still notice the shower does not feel like true soft water. That is not failure. That is buying the wrong tool for the wrong expectation.

Magnetic descalers

This is the category where I tell neighbors to slow down and get skeptical.

Magnetic and electronic descalers are often pitched as simple clamp-on cures. They sound wonderful because they promise almost no plumbing changes and little maintenance. In practice, results are inconsistent enough that I would not treat one as the primary answer for a home that clearly has hard city water.

If you already have one and think it helps a little, fine. I would not build a whole-house water strategy around it.

Practical advice: If your biggest complaint is dry skin, soap scum, cloudy glassware, and crust on fixtures, buy a system known to deal with hardness directly. Do not buy a gadget because the install looks easier.

One more city-water trade-off

Municipal homes often have both hardness and heated-water concerns. If scale is already affecting your water heater choice, this guide on tankless water heater vs regular water heater is useful context. Hard water changes the maintenance picture on either style, and tankless units are especially unforgiving when scale gets ignored.

Calculating the Right Softener Size for Your Home

Most bad softener experiences start with sizing mistakes. The unit is too small, so it regenerates too often and eats through salt. Or it is chosen by marketing label alone, not by household demand.

“Grain capacity” sounds technical, but the logic is simple. It is just the amount of hardness a system can handle before it needs to clean itself and go back to work.

A person holding a architectural blueprint and a calculator with the text Softener Sizing overlaid.

Start with the hardness load

Use this formula:

Daily water use per person × number of people × hardness in GPG = daily grain load

That gives you the amount of hardness your softener must handle each day.

For a 4-person home using 75 gallons per person per day with 15 GPG city water, the daily hardness load is 4,500 grains, according to the U.S. Department of Energy guidance summarized here on purchasing and maintaining a water softener.

What that means in practice

That same guidance gives a very useful real-world comparison. In that example, a 32,000-grain softener would regenerate every 7 days, while a larger unit could go 10 to 14 days, which improves salt and water efficiency. It also recommends a 20% to 25% capacity buffer for better performance.

That is the part many homeowners miss. Buying the smallest unit that technically works often raises the long-term operating cost. Frequent regeneration means more salt handling, more water use, and more wear.

A fast way to think about capacity

  • Too small: Like a trash can that fills before pickup day.
  • Right-sized: Handles normal life without constant cycling.
  • Too large without purpose: Costs more upfront and can be awkward if your plumbing setup is tight.

Do not ignore flow rate

Capacity is only half the sizing job. Flow rate matters just as much.

If the system cannot keep up when two showers run and the washing machine fills, people notice it as weak pressure or poor performance. Product brochures can be slippery when discussing this aspect. A unit may sound powerful because of grain capacity while still being a bad fit for a busy household’s peak demand.

For a typical home, match the softener to the way the house is used, not just the family headcount. A one-bath house and a three-bath house with the same number of people can have very different peak flow patterns.

A few sizing mistakes I see often

  1. Buying by square footage: Water use does not follow house size neatly.
  2. Ignoring future household changes: A guest room that becomes a teen bedroom changes demand.
  3. Forgetting iron or other adjustments: If your water report includes extra complications, sizing gets more nuanced.
  4. Choosing based on sale price alone: Cheap systems become expensive when they regenerate too often.

This walkthrough is a good visual refresher if you want to see the parts and sizing logic in a more hands-on format:

Sizing rule I trust: Buy enough capacity to reduce unnecessary regeneration, but not so much that you ignore the home’s flow needs and installation space.

A well-sized water softener for city water should feel boring in the best way. No pressure complaints. No constant refills. No surprise performance drop halfway through the week.

Installation, Maintenance, and Total Cost of Ownership

The box price is only the opening bid. Ownership cost is where the comparison happens.

A lot of buyers compare two systems based on sticker price, then discover later that one asks for regular salt hauling, drain access, programming, and occasional service while the other mostly sits there. Neither approach is automatically better. The better choice is the one that fits your water and your tolerance for maintenance.

What installation usually involves

A whole-house unit needs the right location, a bypass valve, and a drain route that is practical. On city water, I also like seeing enough room to service prefilters and enough access to shutoffs without turning the utility corner into a yoga pose.

DIY installation can be fine for confident homeowners with straightforward plumbing. It gets less fun when you run into tight spaces, old valves, odd pipe materials, or no obvious drain path. That is where professional installation saves frustration and often leaves you with a cleaner service setup.

A person pouring salt pellets into a white plastic container connected to a water softener system.

The costs people forget

Salt-based systems keep charging rent after installation.

You buy salt. You use water during regeneration. You may eventually replace media or related parts. None of that makes the system a bad purchase, but it changes the overall math.

Salt-free TAC systems often win this comparison on simplicity. They can reduce ownership costs by up to 40% compared with salt-based systems by eliminating salt and brine discharge, and the source data also notes salt as an about $100 to $200 annual expense while TAC media can last 5 to 7 years before replacement, according to this city-water TAC overview.

Comparing ownership styles

Salt-based ownership feels like owning a hardworking appliance. It solves the bigger hardness problem, but it wants regular input from you.

Salt-free ownership feels lighter. Less routine handling, fewer recurring chores, but also less of the “true soft water” experience many homeowners expect.

A practical budget checklist

Before buying, account for these line items:

  • Plumbing modifications: Extra shutoffs, drain routing, and fittings can matter more than the machine itself in a cramped utility area.
  • Consumables: Salt for ion exchange systems is the obvious one.
  • Service access: Leave room for cleaning, media changes, and bypass use.
  • Pretreatment needs: Municipal sediment or chlorine issues may justify adding filtration ahead of the unit.
  • Replacement planning: Every system has parts or media that age out eventually.

If you want a broader framework for comparing ongoing upkeep across treatment types, the practical advice at https://www.waterfilteradvisor.com/advice/ is a good place to organize the maintenance side before you buy.

Good buying habit: Ask not just “What does it cost to install?” Ask “What will this ask from me every year?”

That one question filters out a lot of buyer’s remorse.

Sodium Concerns and Smart Home Integration

Salt-based softeners create a predictable question. If the system uses salt, how much sodium ends up in the water you drink?

For many households, that is not the deciding factor. For some, it absolutely is.

Sodium in softened water

Salt-based softeners can add 10 to 30 mg/L of sodium to treated water, which matters more for sensitive households and especially for people managing sodium intake. The same source notes that this is a potential concern for the 116 million U.S. adults with high blood pressure, and advises testing post-softener water for those who are sensitive, with reverse osmosis as an option for drinking water, according to this discussion of city water softeners and sodium.

That does not mean a whole-house softener is off the table. It means you should separate household comfort water from drinking water strategy.

The pairing that solves most of the problem

A very practical setup is:

  • Whole-house softener for plumbing and appliances
  • Point-of-use reverse osmosis at the kitchen sink for drinking and cooking

That combination lets the softener protect the house while the RO system handles the water you consume most directly. It is a common-sense split of labor.

If sodium is a serious concern in your home, test the softened water after installation instead of guessing. This is one of those areas where “probably fine” is not as useful as a result from your own tap.

Neighbor-level advice: If someone in the house has been told to watch sodium, do not rely on forum debates. Test the treated water and set up a dedicated drinking-water tap if needed.

Smart softeners are starting to matter

The newer wrinkle in this category is smart control. Some city-water softeners now include app-based monitoring, usage tracking, and predictive regeneration features.

The primary benefit is not novelty. It is fewer “forgot to check the salt” moments, better visibility into water use, and earlier warning when something starts drifting. Smart features can also make it easier to spot unusual water consumption that might indicate a running toilet, a leak, or a regeneration setting that needs correction.

I like smart features when they solve maintenance blindness. I do not care much about them when they just add another app to your phone without making ownership easier.

The best use case is a homeowner who travels, rents out part of the house, or wants reminders instead of manual checking. The weak use case is paying a premium for flashy controls on a system that is still poorly sized or poorly matched to the water.

Your Action Plan for Perfect City Water

Most homeowners do not need more options. They need a clean decision path.

Start with your water, not the marketing. Get the hardness number from your city report or a home test. Then decide what result you want. If you want true soft water, ion exchange is the usual answer. If you mainly want less scale and lower routine maintenance, TAC may fit better.

The shortest path to a good decision

  1. Measure hardness first: Never buy a system blind.
  2. Choose the right technology: Removal and scale control are not the same thing.
  3. Size for your household: Capacity and flow rate both matter.
  4. Budget for ownership: Salt, service access, and plumbing changes belong in the decision.
  5. Plan drinking water separately if needed: Especially if sodium or chlorine is a concern.

A lot of buyers also benefit from seeing how softening fits into the larger picture of home water treatment options. It helps to view the softener as one part of a complete municipal-water strategy rather than the cure for every water issue in the house.

What I would tell a neighbor

Do not overcomplicate it. Buy the machine that solves the problem you have.

If your home is fighting hard water every day, a properly sized water softener for city water can be one of the most satisfying upgrades you make. The glassware looks better. The shower feels better. The fixtures stay cleaner. And the plumbing hidden behind the walls gets a break too.

Frequently Asked Questions

Can renters do anything about hard city water

Yes, but usually not with a full whole-house softener. Renters often get the most practical improvement from shower filters, faucet filters, or countertop drinking-water systems. Those will not duplicate whole-house softening, but they can improve comfort and tap quality without permanent plumbing work.

Do I still need chlorine filtration if I install a softener

Often, yes. A softener targets hardness minerals. It does not do the same job as carbon filtration for chlorine taste and odor. On city water, pairing the right softener with chlorine-focused filtration is often a smarter setup than expecting one device to handle everything.

Will a softener reduce water pressure

A properly sized and properly installed system should not create noticeable pressure problems in normal use. Pressure complaints usually point to bad sizing, clogged pretreatment, poor plumbing layout, or a unit that cannot meet the home’s peak flow demand.

Is salt-free the better choice for everyone

No. Salt-free systems can be a very good fit for homeowners who want lower maintenance and scale control. They are not the best answer for someone who wants softened water and the strongest improvement in soap performance, spotting, and day-to-day feel.

Are magnetic descalers worth trying

I would treat them cautiously. Some homeowners report modest help, but I would not rely on one as the primary answer for a house with clear hard-water symptoms. If you need dependable performance, choose a proven technology and size it correctly.

How often should I check on my system

Make it part of normal home maintenance. Look at salt level if you own an ion exchange unit. Watch for new spotting, reduced lather, or scale returning. Those changes usually show up before a complete failure does.


Water problems are easier to solve when the advice is clear and practical. Water Filter Advisor helps homeowners compare systems, understand maintenance, and choose filtration that fits the way they live. If you want straightforward guidance before you buy your next filter or softener, it is a solid place to start.

How to Choose a Water Softener in 2026

Are you tired of playing detective, trying to figure out which water softener is the one for your home? It can feel like you’re lost in a funhouse of complicated specs and confusing claims. But here's the good news: you can cut through the noise by focusing on what really matters. The quest for the perfect water softener boils down to three key clues: how hard your water actually is, how much water your family uses, and which type of system is the right sidekick for your home.

Let's crack the code together, so you can make a brilliant choice without getting lost in the technical jargon.

Your Quick Guide to the Right Water Softener

A white water softener dispensing clean water into a sink, with a glass of water nearby.

If you're in a constant battle with chalky white buildup on your faucets, soap scum that laughs at your cleaning efforts, and laundry that feels more like sandpaper, you've met the villain of our story: hard water. And you’re definitely not alone. The vast majority of American homes are dealing with water that’s loaded with mineral freeloaders like calcium and magnesium.

A water softener is your home's superhero. It's a whole-house water filter that swoops in to remove those minerals, protecting your pipes, appliances, and even your skin and hair from their damaging effects. But with all the different types, sizes, and brands out there, picking one can feel like a chore.

First Things First: Know Your Numbers

The absolute first step on this adventure is to discover your water's hardness level. This single number is the treasure map that will guide almost every other decision you make.

According to the U.S. Geological Survey, water hardness is measured in grains per gallon (GPG). Anything over 10.5 GPG is considered 'very hard,' and this affects more than 85% of U.S. households, where water typically exceeds 7 GPG. That kind of scale buildup on your water heater's elements can drive up energy bills by 20-30%. You can learn more about finding the right solution for your specific situation over at HomeWater101.com.

Once you have your GPG number, you can start zeroing in on the right system.

Key Water Softener Decision Factors at a Glance

To make this easier, here's a quick table summarizing the most important things to consider. Use it as a checklist to match a system to your home's needs.

Decision Factor What to Look For Why It Matters
Water Hardness (GPG) Your home's specific GPG number from a water test. This number determines the softener's required grain capacity. A higher GPG needs a higher capacity system.
Household Size & Usage The number of people in your home and your average daily water consumption. A larger family requires a higher-capacity unit to avoid running out of soft water between regeneration cycles.
Technology Type Salt-based ion exchange vs. salt-free conditioners. Salt-based systems physically remove minerals. Salt-free conditioners alter them to prevent scale buildup but don't create "soft" water.
Long-Term Costs Initial purchase price plus ongoing expenses for salt and water. The cheapest unit upfront isn't always the most economical. Factor in operating costs for a true comparison.

This table should give you a solid framework. Now let’s look a little closer at a few of these key factors.

Other Factors to Guide Your Search

Beyond your hardness level, a few other details will help you narrow down the field.

  • Household Size and Water Usage: A couple living in a small home has very different needs than a family of five. We’ll get into the exact math later, but for now, just think about how many people use water in your house daily.

  • Technology Type: The big debate is usually between traditional salt-based systems and salt-free conditioners. Salt-based units truly remove the hard minerals, giving you that slick, soft water feel. Salt-free conditioners change the mineral structure to stop them from forming scale, but the minerals are still present.

  • Long-Term Costs: Don’t just look at the sticker price. You have to factor in the ongoing cost of salt (for salt-based systems), the water used during regeneration cycles, and any potential maintenance down the road.

The goal isn't just to buy a water softener. It’s to invest in the right one that works efficiently, protects your home, and gives you great water for years to come.

This guide will walk you through each of these points, giving you the practical know-how to choose with confidence. For more general guidance on all types of water filters, you can also check out our extensive advice section.

Testing Your Water for Hardness and Contaminants

A hand holds a water testing strip over a glass of water on a kitchen counter for quality analysis.

Before you even think about buying a water softener, you have to know what you’re up against. You can’t solve a problem you don’t understand. This isn't just about softening; it's about comprehensive home water filtration.

If you’re seeing stubborn white spots on your faucets and shower doors, that’s a dead giveaway you have hard water. Those crusty deposits are limescale, and they’re a pain. We’ve even got a great guide on understanding and removing hard water stains if you want to tackle the mess you already have.

But what you can see is only half the story. To choose the right equipment, you need real data. Buying a water softener without testing your water is like getting a prescription without seeing a doctor—you’re just guessing.

DIY Testing vs. Professional Lab Analysis

You’ve got two main options for figuring out your water's chemistry: a quick DIY test or a full professional lab analysis.

DIY Water Test Kits are the fast and cheap route.

  • You can grab these simple test strips or liquid drop kits at any home improvement store.
  • They give you an immediate, ballpark reading of your water hardness, and sometimes chlorine and pH.
  • The big downside? They aren't always super accurate and won't tell you about other critical issues like iron or manganese that can destroy a softener.

Professional Lab Analysis is the gold standard.

  • You simply collect a sample from your tap and mail it to a certified lab.
  • In return, you get a highly accurate and detailed report covering not just hardness but also iron, manganese, pH, total dissolved solids (TDS), and other contaminants that affect your home's water quality.
  • It costs more and takes a bit longer, but the information is priceless.

For anyone on well water, I always recommend a professional lab test. It's a small investment that prevents you from buying the wrong thousand-dollar system. Get it right the first time.

Demystifying Your Water Test Results

Once you have your results, a few key numbers will jump out at you. This is where you get the exact information needed to size your whole-house filtration system correctly.

The most important number is your water hardness. It’s usually measured in one of two ways:

  1. Grains Per Gallon (GPG): This is what the water softener industry uses in the U.S. It’s the number you’ll need to do your calculations.
  2. Parts Per Million (PPM) or Milligrams per Liter (mg/L): These two are the same thing and are common on lab reports.

Converting is simple. Just divide your PPM number by 17.1 to get your GPG.

Let's say your lab report shows 200 PPM of hardness.

200 PPM / 17.1 = 11.7 GPG

That 11.7 GPG tells you your water is officially "very hard," and it's the exact figure you'll use to size your system.

But don’t stop at hardness. Look for other troublemakers, especially iron. If your report shows iron levels at or above 0.3 PPM, a standard softener is going to struggle. The iron will foul the resin beads, choking the system and drastically shortening its life. In that case, you’ll need to look at either a dedicated iron filter or a softener specifically built to handle high iron—a true multi-stage water filtration approach.

Sizing Your Water Softener: How to Get It Just Right

Choosing the right size water softener is a lot more than just a guess. Get it wrong, and you're in for some frustration. This is the heart of effective home water filtration.

A system that’s too small is a classic rookie mistake. It will struggle to keep up, constantly running regeneration cycles and still leaving you with hard water when you need soft water the most. On the flip side, an oversized unit is just plain wasteful. It will burn through salt and water, regenerating long before it needs to.

So, how do you find that perfect fit? It’s not about how big your house is or even just how many bathrooms you have. The key is calculating your household's actual daily softening needs based on your water hardness and how much water your family uses.

The Only Formula You Need

Let’s get right to it. There's a straightforward bit of math that will give you the most critical number for choosing a softener: the total grains of hardness your system needs to remove each week.

Here's the formula:

(# of People in Home) x (Daily Gallons Per Person) x (Your Water Hardness in GPG) x (7 Days)

This calculation gives you your weekly hardness load, which is the number you’ll use to match with a softener's grain capacity.

What Goes Into the Calculation

To use this formula, you just need to plug in three numbers.

  • Number of People: Simple enough. Just count everyone living in your home.

  • Daily Water Use: This one requires a good estimate. While everyone's habits are different, the industry standard for these calculations is 75 to 80 gallons per person per day. This figure covers everything from showers and laundry to flushing toilets and washing dishes.

  • Water Hardness (GPG): This is the number you got from your water test. It tells you exactly how much mineral content the softener has to tackle in every gallon.

Once you have those figures, you're ready to calculate the grain capacity your home demands. An incorrectly sized system can lead to real waste—an oversized unit might use 25% more water and salt than necessary, while an undersized one will leave you with hard water. If you want to dive deeper into system features, Whirlpool Water Solutions has a great guide on what to look for.

The Bottom Line: Sizing a softener isn't guesswork. It's about matching the machine's capacity to your home's specific demand, which is a direct product of your family's size and your water's mineral content.

A Real-World Example

Let's walk through a quick scenario to see how this plays out.

Imagine a family of four whose water test came back at 15 GPG—moderately hard.

  1. First, we find their total daily water use:

    • 4 people x 75 gallons/person = 300 gallons per day
  2. Next, we calculate the daily hardness load:

    • 300 gallons x 15 GPG = 4,500 grains of hardness per day
  3. Finally, we find the weekly requirement:

    • 4,500 grains/day x 7 days = 31,500 grains per week

For this family, a softener needs to remove at least 31,500 grains of hardness between regeneration cycles.

This makes a 32,000-grain capacity water softener the ideal choice. It's perfectly matched to handle a full week's worth of water before it needs to regenerate, making it incredibly efficient.

What happens if they choose poorly? A smaller, 24,000-grain unit would be forced to regenerate more frequently, wasting salt and water. A huge 48,000-grain system would be overkill, going too long between cycles, which can be inefficient and lead to other problems. The 32,000-grain system hits that sweet spot for consistent performance and optimal efficiency.

Comparing Water Softener Technologies

When you start shopping, you'll quickly realize the term "water softener" gets thrown around a lot. But not all of these home water filtration systems are created equal. The technology inside can be wildly different, and that's where a lot of homeowners get tripped up.

You're really looking at two main camps: salt-based ion exchange softeners and salt-free water conditioners. They approach hard water from completely different angles. Getting the results you want—whether it's silky-smooth water or just protecting your pipes—starts with understanding this fundamental difference.

The Classic: Salt-Based Ion Exchange Softeners

This is the tried-and-true method, the only technology that actually removes the hard minerals from your water. If you want truly soft water, an ion exchange system is the undisputed champion of home water filtration.

Think of it like this: the system's main tank is filled with tiny resin beads that are loaded with sodium ions. As your hard water passes through, the calcium and magnesium—the culprits behind scale and soap scum—get pulled out of the water and stick to the resin. In their place, a sodium ion is released. It's a simple, effective trade.

The end result? Genuinely soft water. It’s what gives you that signature "slick" feel in the shower, makes your soap and shampoo lather up like crazy, and stops scale in its tracks.

Of course, there's a trade-off. Eventually, that resin fills up with hard minerals and needs to be cleaned. That’s the regeneration cycle, where a saltwater brine solution washes the resin, sending all the collected minerals down the drain. This means you’ll have the ongoing task of adding salt to the brine tank and it will use some extra water.

The Low-Maintenance Option: Salt-Free Conditioners

Here’s where we need to be really clear. A salt-free conditioner is not a water softener. A better name for it is a scale-reduction system. It's a different kind of water filtration hero.

These systems use a fascinating technology called Template Assisted Crystallization (TAC). Instead of removing the calcium and magnesium, the TAC media changes their structure. It acts as a template that forces the mineral ions to form into tiny, harmless micro-crystals.

These little crystals are inert and won't stick to anything. They flow right through your plumbing without building up as scale on your pipes, faucets, or hot water heater element.

The key takeaway is this: the minerals are still in your water. A TAC system just crystallizes them so they can’t cause scale damage. You won’t get the slick feel or sudsing benefits of soft water, but you get powerful scale protection.

The big win for salt-free conditioners is that they are completely passive. Set it and forget it. No salt bags to haul, no electricity to run a control valve, and no wastewater from regeneration. They’re a fantastic choice for anyone who wants a zero-maintenance water filtration solution or lives in an area where salt-based softeners are banned.

This flowchart can help you visualize how your home’s specific needs line up with the right system size and type.

Flowchart guiding water softener size selection based on household size, water usage, and water hardness.

Simply trace your path from household size and water hardness, and it will point you toward the right capacity for your home.

Water Softener vs. Water Conditioner Comparison

To make the choice even clearer, let's put these two water filtration technologies side-by-side. This table breaks down exactly what you get (and what you don't) with each system.

Feature Salt-Based Ion Exchange Softener Salt-Free Water Conditioner (TAC)
Primary Function Removes hard minerals (calcium & magnesium) from water. Conditions minerals to prevent scale buildup; does not remove them.
Resulting Water Genuinely soft water. You'll feel the "slickness" and see better lather. Water with scale-causing potential neutralized. Minerals remain present.
Scale Prevention 100% scale elimination by removing the source minerals. Excellent scale prevention (up to 99%) on pipes and appliances.
Maintenance Requires you to add salt regularly. Uses water and electricity for regeneration. Virtually zero maintenance. No salt, no electricity, no wastewater.
Ongoing Costs Salt bags, water for regeneration, minor electricity use. No ongoing operational costs. Media may need replacement every 3-6 years.
Best For Homeowners who want all benefits of soft water (softer skin, less soap, no scale). Homeowners focused on protecting plumbing and appliances with a hands-off system.
Environmental Impact Discharges salt brine (chloride) into wastewater systems. No environmental impact; adds nothing to the water and produces no waste.

Ultimately, choosing between a salt-based softener and a salt-free conditioner comes down to your primary goal. One isn't better than the other—they just do different jobs.

So, Which Technology Is Right For You?

It really boils down to what you want to achieve with your water treatment.

  • Go with a Salt-Based Softener if: You want the full soft-water experience. We're talking no more scale, using less soap, having brighter clothes, and feeling that difference on your skin and hair. You're okay with the simple task of adding salt every few months.

  • Go with a Salt-Free Conditioner if: Your number one priority is protecting your home's pipes and expensive appliances from scale damage. You want a system you can install and forget about, and you don't mind that the minerals technically remain in the water. This is also your only option if your local municipality has put a ban on brine discharge.

Both are great home water filtration technologies. The secret is simply matching the right tool to your specific job.

Don't Forget the Long-Term Costs

Water softener control unit, stacked salt bags, and a blue sign reading 'SAVE SALT & WATER'.

When you’re shopping for a whole-house water filter, it’s easy to get tunnel vision on the price tag. But the real cost? That shows up on your utility bills and in your salt purchases for years to come. How much salt, water, and electricity a system uses over its lifetime is what really determines its value.

All of these ongoing costs come down to one critical process: regeneration. This is how a salt-based system cleans and “recharges” itself, and understanding the different ways they do it is the key to not getting stuck with a resource-guzzling machine.

Smart Regeneration vs. Outdated Timers

Think of it like this: some systems are smart, and some are… well, not. The old-school approach is a timer-based softener. It’s a simple concept—the softener regenerates on a fixed schedule, like every three days at 2 AM, no matter what.

  • Timer-Based Systems: These are often cheaper upfront, but they’re incredibly wasteful. If you go on vacation, it regenerates anyway, wasting salt and water. If you have a house full of guests, it might not regenerate soon enough, leaving you with hard water when you need soft water most.

The modern, and much smarter, approach is a demand-initiated (or metered) softener. This type of system has a small water meter inside that tracks your actual water usage. It only triggers a regeneration cycle when it knows the resin beads are almost saturated.

  • Demand-Initiated Systems: This “on-demand” method is the only way to go in 2026. It adapts to your household’s unique rhythm, preventing needless regeneration cycles and saving a ton of salt and water in the process.

Choosing the right regeneration style can slash your running costs by up to 50%. A metered system regenerates only when needed, saving 30-40% on salt compared to an old timer model. For a typical family, that can cut annual salt use from 200-300 lbs down to a much more manageable 100-150 lbs.

What About Water Pressure? Don't Underestimate Flow Rate

We’ve all experienced it: you're in the shower, someone flushes a toilet, and the water pressure suddenly vanishes. A water softener that's too small for your home can create that same annoying problem, but for every faucet. That's where flow rate becomes a huge deal.

Measured in Gallons Per Minute (GPM), flow rate tells you how much softened water the system can deliver at any given moment. To avoid pressure drops, you need a softener that can keep up with your family’s peak demand.

Think about what might be running at the same time on a busy morning:

  • A standard shower needs about 2.5 GPM.
  • A dishwasher running a cycle uses 2 GPM.
  • Your washing machine could be pulling 3-4 GPM.

If you've got a couple of those going at once, you’re already at 7 GPM or more. For a typical 3-4 bathroom home, I always recommend looking for a system with a flow rate of at least 10-12 GPM. You can find this number, usually called the "service flow rate," on the manufacturer’s spec sheet. Don't skip checking it.

Look for Independent Proof of Performance

With so many brands making big claims, how can you be sure a softener actually does what it says? You look for a third-party certification seal.

The most important one by far is NSF/ANSI 44. This is the gold standard for whole-house water filtration. It’s an independent certification that proves the softener has been rigorously tested to meet specific performance criteria. An NSF/ANSI 44 certification tells you three crucial things:

  • The system truly reduces water hardness to the level it claims.
  • It is built with materials that are safe for contact with your drinking water.
  • The manufacturer's salt and water efficiency ratings are accurate and verified.

Getting a certified system is your best insurance against slick marketing and poor performance. And while you're focused on efficiency, remember that the softener is just one part of your home. To find more ways to lower your utility bills, check out these practical energy efficiency tips that can lead to significant savings across the board.

Frequently Asked Questions on Water Softeners

Common questions about home water filtration and softeners. Get clear answers to help you choose a system with confidence.

How Much Sodium Does a Water Softener Add?

The amount of sodium added depends directly on your water’s hardness level. It's often less than people think.

For water with a hardness of 10 Grains Per Gallon (GPG), the softening process adds about 75 milligrams (mg) of sodium per quart. For comparison, one slice of white bread can have over 150 mg of sodium.

For those on a strict low-sodium diet, an under-sink reverse osmosis (RO) system is a great addition. This point-of-use filter removes the added sodium from your drinking and cooking water.

Can I Install a Water Softener Myself?

Yes, if you have solid plumbing skills. A DIY installation is possible if you can confidently cut into pipes and follow detailed instructions. Most modern units can be installed in several hours.

The critical step is cutting into your home's main water supply line. If you are not comfortable with this, hire a professional plumber. A professional install guarantees it is leak-free, meets local codes, and functions correctly. A pro installation typically costs between $400 and $800.

What Kind of Salt Should I Use?

You will find two main types of salt for water softeners:

  • Solar Salt: Created from evaporated seawater. It is less expensive but may contain insolubles that can build up in the brine tank over time.
  • Evaporated Salt: A much purer salt, often 99.9% pure. This is the cleanest option, reducing the risk of "salt bridging" or "mushing" in the tank.

Evaporated salt pellets are recommended for most high-efficiency softeners. They dissolve cleanly and help your system run with less maintenance.

How Long Does a Water Softener Last?

A quality, well-maintained salt-based water softener should last 10 to 20 years.

The lifespan of this whole-house water filter is determined by the control valve and resin tank quality. The resin beads inside the tank, which perform the softening, generally need replacement every 10 to 15 years. High iron or chlorine levels in your water can shorten the resin's life. Salt-free conditioners have a similar lifespan, though their media often requires replacement every 3 to 6 years.

Will a Water Softener Reduce My Water Pressure?

A correctly sized water softener will not cause a noticeable drop in your water pressure. If you experience pressure loss, the system is likely too small for your home's water demand.

Check the flow rate, measured in Gallons Per Minute (GPM), before buying. This indicates how much softened water the system can produce at once. A typical home needs a flow rate of at least 10-12 GPM to support a shower and dishwasher running at the same time. Always confirm the "service flow rate" on the unit’s specifications.


Ready for soft water? Water Filter Advisor provides in-depth reviews and maintenance information. We help you find the perfect water filtration system for your home. Explore our guides at https://www.waterfilteradvisor.com to get started.

Water Softener Regeneration Frequency: Find Your Optimal Schedule

Most water softeners run their regeneration cycle about every 4 to 7 days, but don't take that as a hard-and-fast rule. The right schedule for your home is a custom recipe based on your water hardness, how much water your family uses, and the size of your softener. Getting this balance right is the secret to keeping your home's water feeling luxuriously soft and clean.

How Often Should a Water Softener Regenerate?

Think of your water softener's resin bed as a super-powered mineral magnet. Its one job is to snatch hard minerals like calcium and magnesium from all the water entering your house. But just like any magnet, it eventually gets completely covered and can't hold anymore. Regeneration is just the process of washing that magnet with a salt brine solution to "recharge" it, getting rid of all the collected minerals so it can get back to work.

If your system doesn't run this reset, you’ll start seeing the old signs of hard water creep back in. You'll get those chalky spots on your glasses, find it impossible to get a good lather with your soap, and your laundry will feel stiff and scratchy. Dialing in the right water softener regeneration frequency is everything for consistent, high-quality soft water.

A white water softener system with a digital display next to a wooden shelf, showing 'Every 4-7 Days'.

Finding Your System's Sweet Spot

Most softeners are set to regenerate in the middle of the night, usually around 2 AM, so you don't even notice it's happening. While every home's water situation is a little different, there are some pretty common benchmarks for a home filtration setup.

For a correctly sized system, you're typically looking at a regeneration cycle every 3 to 5 days. This seems to be the sweet spot for balancing performance with salt and water usage. For instance, a standard 30,000-grain capacity softener dealing with fairly hard water at 25 GPG (Grains Per Gallon) will treat around 1,200 gallons before it needs to regenerate. For a family of four, that works out to about every 4 days. You can find more specific examples and calculations over at ProAquaWater.com.

What Controls the Schedule?

It all boils down to a few key factors:

  • Higher Water Hardness: The harder your water, the faster your resin "magnet" fills up. This means it needs to regenerate more often.
  • Larger Household Size: More people means more showers, more laundry, and more dishes. All that extra water usage forces the system to regenerate sooner.
  • System Capacity: A softener with a higher grain capacity can hold more hardness minerals, so it can go longer between cycles.

To give you a better idea, here's a quick look at how these factors play out with a standard 32,000-grain water softener for your home.

Estimated Regeneration Frequency At a Glance

The table below shows how often a typical 32,000-grain unit might need to regenerate based on your home's specific conditions.

Water Hardness (GPG) Household Size (People) Approximate Regeneration Frequency
10 (Slightly Hard) 2 Every 11-12 Days
10 (Slightly Hard) 4 Every 5-6 Days
20 (Very Hard) 2 Every 5-6 Days
20 (Very Hard) 4 Every 2-3 Days
30 (Extremely Hard) 2 Every 3-4 Days
30 (Extremely Hard) 4 Every 1-2 Days

Keep in mind, these are just estimates to give you a starting point. Your actual household usage will determine the perfect setting.

A properly set water softener shouldn't need to regenerate every single day, but it also shouldn't go much longer than a week. The ideal frequency matches your home's real-world water use, which is what saves you money on salt and water in the long run.

What Happens During a Regeneration Cycle

Ever heard your water softener making some strange whirring or swishing sounds in the middle of the night? Don’t worry, it's not a ghost in the machine. That’s the sound of the regeneration cycle, the crucial “recharging” process that keeps your home's water consistently soft. This is where the magic really happens, making sure your system is always ready to protect your home from hard water minerals.

Think of the resin beads inside your softener tank like tiny, powerful magnets that are purpose-built to grab onto hardness minerals—namely calcium and magnesium. As your water passes through the tank, these beads snatch the minerals right out, allowing soft water to flow to your faucets. But just like any magnet, they eventually get completely covered and can't hold onto anything else.

Recharging the Resin Magnets

Once the resin is saturated, the system has to clean itself off. That's where the brine tank, filled with salt and water, enters the picture. The regeneration process uses this salty solution to strip the collected calcium and magnesium off the resin beads, washing them harmlessly down the drain. After the beads are clean and "recharged" with sodium ions, they’re ready to get back to work pulling hardness out of your water.

The whole thing is a surprisingly efficient, multi-step operation. It might sound complicated, but it's really just a simple cleaning dance that takes place inside the tank.

Key Takeaway: Regeneration isn't just a side task; it's the core function that makes a water softener actually work. It’s an automatic reset that cleans the mineral-trapping resin, guaranteeing a continuous flow of soft water for your home.

The Four Stages of Regeneration

Getting to know the regeneration cycle helps pull back the curtain on how your softener operates. Most modern systems follow a similar four-stage process that usually takes about 70 to 90 minutes from start to finish.

  1. Brine Draw: This is the main event. The system slowly sips the concentrated salt water (brine) from the brine tank and pulls it into the resin tank. This salty solution flows over the resin beads, forcing the attached calcium and magnesium ions to let go. In their place, sodium ions from the salt latch onto the resin, effectively recharging the beads.

  2. Slow Rinse: After the brine has worked its magic, the system follows up with a slow rinse. This step gently pushes any leftover brine through the entire resin bed, making sure every last bead is fully regenerated. The deliberate, slow pace is what makes the salt so effective.

  3. Fast Rinse: Next up is a powerful, fast rinse using fresh water. This has two jobs. First, it completely flushes out all the remaining brine and the released hardness minerals, sending them down the drain. Second, it compacts the resin bed, which gets fluffed up during the cycle, settling the beads back down for normal water flow.

  4. Refill: In the final step, the control valve adds a measured amount of water back into the brine tank. This water dissolves the salt to create the brine solution needed for the next regeneration cycle. Once that's done, the softener shifts back into "service" mode, ready to soften water again.

The Three Factors That Control Regeneration Frequency

To really get your water softener dialed in, you need to get a handle on three key pieces of information. It's like a recipe—get one part wrong, and the whole batch is off. You’ll either end up wasting salt and water on cycles you don’t need or, even worse, see those chalky hard water spots start creeping back.

Let's break them down one by one.

First, and most important, is your home’s water hardness. This is measured in Grains Per Gallon (GPG), which is simply a number that tells you how much dissolved calcium and magnesium is floating around in your water. The higher that GPG number, the "harder" the water, and the more your softener has to work.

You can usually find this number on your city’s annual water quality report, which is often posted online. If you're on a well or just want a dead-on accurate number, a simple water test kit will give you a precise GPG reading in just a few minutes.

Household Water Usage

Next up is how much water your family actually uses. This one’s pretty straightforward: the more water that flows through your pipes, the faster the softener's resin beads get coated with those hardness minerals. That means you need a good idea of how many gallons your household consumes each day.

A good rule of thumb is about 75 gallons per person, per day. For a family of four, you're looking at a daily usage of around 300 gallons (4 people x 75 gallons). That covers everything from showers and laundry to dishwashing and flushing toilets. Of course, if you've got teenagers who practically live in the shower, you might want to nudge that number up a bit.

This flowchart gives you a great visual of how the resin beads, hard minerals, and saltwater brine all work together during a regeneration cycle.

Flowchart illustrating the water softener regeneration cycle, showing interactions between hard minerals, resin beads, saltwater, and waste.

The resin essentially grabs onto the hard minerals as water passes by. Once it’s full, it uses the saltwater to wash itself clean, sending all those collected minerals down the drain.

Your System's Capacity

Finally, you need to know your system’s capacity. When you see a water softener advertised as a "32,000-grain" or "48,000-grain" unit, that’s its capacity. This number tells you exactly how many grains of hardness the system can pull out of your water before it’s maxed out and has to regenerate.

Think of it like the size of the gas tank in your car. A bigger tank (a higher grain capacity) means you can go longer between "fill-ups" (regeneration cycles). This is exactly why getting the right size softener for your home's hardness level and water usage is so important for running an efficient system.

Technology has come a long way here. The earliest softeners often regenerated every single day. By the 1980s, smarter demand-initiated systems came along that could process anywhere from 15,000 to 45,000 grains—or about 500 to 1,500 gallons of water—before needing a cycle. As you can learn more about these historical changes on SoftProWaterSystems.com, it was a massive improvement.

By mastering these three factors—your water hardness (GPG), your daily water usage, and your system's grain capacity—you gain complete control over your softener. You can program it with precision, ensuring it only regenerates when necessary, saving you a significant amount on salt and water costs over time.

Calculate Your Perfect Regeneration Schedule

Tired of guessing when your softener should run? Let's ditch the guesswork. While it might seem like a black box, figuring out the perfect water softener regeneration frequency is just some simple math. You don't need a PhD in water chemistry to dial in your home filtration system.

This formula is all you really need to take charge of your softener’s schedule.

The Go-To Formula for Regeneration

This calculation tells you exactly how many days your softener can treat your water before it needs to clean itself. It’s based on three things: your system's capacity, your water's hardness, and your family's daily water use.

Here's the formula:

(System Capacity ÷ Water Hardness) ÷ Daily Water Usage = Days Between Cycles

Let's break down what each part means:

  • System Capacity: This is the "grain" rating of your unit. You'll see numbers like 32,000, 48,000, or 64,000 grains.
  • Water Hardness: You need this number in Grains Per Gallon (GPG). If you don't know it, a simple water test kit will tell you.
  • Daily Water Usage: This is your household's total gallons used per day. A good rule of thumb is 75 gallons per person.

Once you plug in your numbers, you’ll know the exact number of days to program between regeneration cycles. This stops you from wasting salt on cycles that are too frequent or, worse, dealing with hard water because you waited too long.

Regeneration Calculation Examples

Seeing the math in action with real numbers makes it click. Let's look at how two very different households would calculate their schedules.

This table shows a suburban family on city water versus a rural family on a private well. It’s the perfect illustration of why a "one-size-fits-all" setting for home water filtration just doesn't cut it.

Regeneration Calculation Examples

Variable Household A (Suburban Family) Household B (Rural Family)
System Capacity 32,000 Grains 48,000 Grains
Water Hardness 15 GPG (Moderately Hard) 30 GPG (Very Hard)
Household Size 3 People 5 People
Daily Water Usage 225 Gallons (3 x 75) 375 Gallons (5 x 75)

Now, we just run the numbers for each one.

Household A Calculation:
(32,000 Grains ÷ 15 GPG) ÷ 225 Gallons = 9.4 Days

This family can set their softener to regenerate every 9 days. Easy.

Household B Calculation:
(48,000 Grains ÷ 30 GPG) ÷ 375 Gallons = 4.2 Days

With five people and much harder water, this family needs their system to regenerate every 4 days to keep up.

As you can see, knowing your specific numbers is key. A few minutes with a calculator is all it takes to get your softener working efficiently, giving you consistent soft water without wasting salt or water.

Metered Softeners vs. Timer-Based Models

Not all water softeners are created equal. The type you have in your home makes a huge difference in how efficiently it runs and how much it costs you. The two main players are timer-based and metered systems, and it's a classic battle of an old-school schedule versus smart home water filtration.

The Old-Fashioned Timer-Based Softener

A timer-based water softener is like an old alarm clock—it goes off at the same time every day, no matter what. You set it to regenerate on a fixed schedule, say every three days, and it will run that cycle like clockwork.

The problem? It regenerates even if you haven't used any water. If your family is on vacation for a week, that softener is still running its cycles, wasting salt, water, and your money. It's a simple system, but often a very inefficient one for a modern home.

The Modern Metered Softener

A metered water softener, also called a demand-initiated regeneration (DIR) system, is the smart home device for your water. It doesn't run on a rigid schedule. Instead, it has a built-in meter that keeps track of how much water your household actually uses.

This system knows exactly how many gallons have passed through it. It only kicks off a regeneration cycle when the resin inside is actually getting full and needs to be cleaned. It adjusts to your life, whether you have a house full of holiday guests or you're gone for the weekend.

By regenerating only when necessary, a metered softener gets the most out of every drop of water and every grain of salt. For any homeowner looking to cut costs and waste, it’s the clear winner.

The numbers back this up. Metered water softeners regenerate 20-40% less often than the old timer-based models. For an average family, that efficiency can save $150-300 every year on salt and water bills, especially in places with very hard water. Even with longer 3-5 day intervals, these systems still maintain over 95% softening efficiency. You can dig into more of these performance details by reading the insights on RayneWater.com.

Bottom line, a metered system takes all the guesswork out of the equation. You get perfectly soft water while using the least amount of resources possible.

Signs Your Regeneration Schedule Is Wrong

Your house has a way of talking to you. If your water softener's regeneration schedule is off, you'll get clear signals from your faucets, your dishes, and even your skin. The trick is knowing how to listen.

Learning to spot these clues is the key to troubleshooting your home water filtration system and getting back to that perfectly soft water you love.

A kitchen sink area displaying a dirty glass with hard water spots, a sponge, and a sign 'Signs of Hard Water'.

It’s incredibly frustrating to invest in a water softener, only to see the very problems you were trying to fix start creeping back in. These issues are almost always the first sign that your system isn't regenerating often enough to keep up.

Clues Your System Regenerates Too Infrequently

When your softener waits too long between cycles, its resin bed gets completely maxed out. At that point, it can't grab any more hardness minerals, so hard water starts flowing right into your home.

You'll know this is happening if you see these old, familiar signs pop up again:

  • Chalky Spots and Film: That white, crusty residue starts showing up again on your glassware, shower doors, and chrome fixtures.
  • Poor Soap Lather: Your soap and shampoo just won't work up a good lather. It can leave your skin feeling dry and your hair looking limp and dull.
  • Stiff, Scratchy Fabrics: You might notice your towels feel scratchy and your clothes aren't as bright as they should be, which can be a real headache for your regular laundry care.

If you spot these classic hard water indicators, it's a sure bet you need to check your settings and shorten the time between regenerations.

Telltale Signs of Over-Regeneration

On the flip side, a system that regenerates too often is just being wasteful. This is a common issue with older, timer-based models, but it can also happen if a modern metered system is programmed with the wrong numbers.

Your salt bag is the biggest clue here. A properly set softener for an average family of four will usually go through about one 40-pound bag of salt per month. If you’re flying through salt much faster than that, your unit is almost certainly regenerating too often.

You might also hear the softener running its cycle way more than it should, maybe even every single night. Not only does this waste hundreds of gallons of water and pounds of salt over the course of a year, but it also puts unnecessary wear and tear on the softener itself. If this sounds familiar, it's time to program a longer interval between cycles.

Common Questions About Regeneration

Here are answers to the most frequent questions homeowners ask about their water softener's regeneration cycle. Use this to manage your system and understand the details of its regeneration frequency.

Why Does My Softener Regenerate at 2 AM?

This is the factory default time for most softeners. It is scheduled for a time of low water use, which prevents hard water from getting into your home's plumbing while the system is cleaning itself.

How Much Salt Should My Softener Use?

A standard regeneration cycle will use between 6 and 10 pounds of salt. The precise amount is based on your softener's grain capacity and its programmed efficiency settings. A properly set up system avoids salt waste.

Can I Start a Regeneration Cycle Myself?

Yes. Most modern water softeners include a "Manual Regeneration" or "Regen Now" button. This is useful when you have guests, after refilling an empty salt tank, or if you see signs of hard water before the next scheduled cycle.

You can find more general home water filtration advice on maintaining your systems.

What If I Have More Complex Questions?

While this guide addresses common issues, some installation problems or ongoing performance trouble might require a professional. If you are unable to resolve an issue, consider getting help from expert water filtration system services.

Your Epic Guide to Installing a Home Water Filtration System

Tired of your glassware looking like it was washed in milk? Fed up with laundry that feels like sandpaper and faucets coated in a ghostly white film? You're not just imagining it—you're living the hard water nightmare. Let's embark on a weekend quest to install a water softener system and totally transform your home's water from a villain into a hero. This isn't just a DIY project; it's a guide to reclaiming your home, protecting your appliances, and maybe even saving some cash along the way.

Why Silky-Smooth Water is the Ultimate Home Upgrade

Fresh water pouring from a kitchen faucet into a clear glass, with a 'Soft Water Benefits' banner.

Before you even dream of picking up a wrench, let's talk about the incredible payoff. Deciding to install a water softener is more than a home improvement chore; it’s an investment in your castle and your family's daily comfort.

Hard water isn't a rare beast; it plagues over 85% of households in the U.S. alone. This makes installing a top-notch water filtration system a true game-changer for millions. Making this one upgrade can extend the lifespan of your water-loving appliances like your water heater by up to 50%. You can get a better sense of why this is becoming so common by reading the latest water softener market analysis.

Vanquish the Evil Limescale Monster

The most glaring villain of hard water is limescale. It’s that chalky, white crud that encrusts your shower doors, faucets, coffee maker, and dishes, forcing you into a never-ending battle with harsh chemicals just to keep things looking decent.

Soft water filtration kicks out the minerals that create this scaly horror show. What does that mean for you? Your fixtures stay gleaming, your glassware emerges from the dishwasher looking like crystal, and you spend far less of your precious time scrubbing. It’s a simple fix that makes your kitchen and bathrooms look like they have a professional cleaning crew on retainer.

The most immediate victory homeowners report is the vanishing act of scale. It feels less like a home improvement project and more like liberating yourself from the shackles of endless cleaning.

Become the Hero Your Plumbing and Appliances Deserve

That mineral gunk you see on the outside? It’s also staging a hostile takeover inside your pipes and appliances. This internal scale buildup forces your water heater, washing machine, and dishwasher to work harder, leading to higher bills and a tragically short lifespan. It’s the silent assassin that costs a fortune in the long run.

A water softener acts like an invisible force field for your home's vital systems by intercepting those damaging minerals. Your appliances will operate at peak efficiency, which means lower energy bills and fewer distress calls to the repairman. It's a proactive move that truly pays for itself over time.

Unlock Next-Level Comfort and Savings

The benefits don't stop with your hardware; they extend to your personal care and your bank account. The minerals in hard water are notorious for sabotaging soap and shampoo, preventing them from creating a rich lather and leaving a sticky residue on your skin and hair.

Once you install your water filtration system, the difference is legendary:

  • Luxurious Skin and Hair: Your skin feels baby-soft, and your hair becomes shinier and more manageable because your soaps can finally rinse away completely.
  • Use Way Less Soap: You’ll be shocked at how little soap, shampoo, and detergent you need—often up to 50% less.
  • Brighter, Softer Laundry: Your clothes and towels will emerge from the wash feeling cloud-soft and looking vibrant, since there are no more mineral deposits trapping dirt and dulling the fabrics.

Mission Prep: Scouting the Location & Assembling Your Arsenal

I’ve seen it a hundred times—the difference between a smooth weekend victory and a soul-crushing saga of endless hardware store trips boils down to one thing: preparation. Nail this part, and the rest is a cakewalk. It’s all about finding the perfect HQ for your new filtration system and having every single tool and part at the ready before you make the first cut.

Let's start by finding a home for your new appliance. Your water softener has three basic needs: it must connect to your main water line, it requires a standard electrical outlet, and it needs a place to drain.

Scouting the Perfect Installation Location

Finding a spot that checks all three boxes can feel like a bit of a treasure hunt, but most homes have a few obvious places to look first.

  • The Lair (Basements): This is usually the best-case scenario. You get direct access to the main water supply right where it enters the house. Basements almost always have plenty of space, a floor drain, and outlets. The only real drawback? Hauling 40-pound bags of salt downstairs.
  • The Command Center (Garages): A close second, and the go-to for homes without basements. Your main water line might already run through there, and you’ve got a concrete floor, power, and easy access for loading salt. Just make sure the unit won't freeze if you live in a colder climate.
  • The Nook (Utility Closets): If your water heater lives in a dedicated closet, that can be a great spot. The plumbing is all in one place. The only catch is that these spaces can be tight, so you'll need to measure with surgical precision.

Before you commit to a location, grab a tape measure. Mark out the softener's footprint on the floor. You need to leave at least a foot of clear space around it for future maintenance, plus enough headroom to comfortably pour those heavy salt bags into the brine tank.

Your Complete Tool and Materials Checklist

Once you've picked your spot, it's time to gear up. Assembling your arsenal now means you won't have to make a panicked run to the store with your water shut off.

Your exact shopping list will vary depending on your home's plumbing—whether you have copper, PEX, or CPVC pipes. But the core set of tools you’ll need is pretty much the same for any mission.

Essential Tools for the Job:

  • Pipe Cutter: Don't even think about using a hacksaw. A dedicated tubing cutter gives you the clean, straight cuts you need for a leak-proof seal.
  • Two Adjustable Wrenches: One to hold fittings in place, the other to do the tightening.
  • Tape Measure: Absolutely critical for getting your pipe cuts right.
  • Bucket and Towels: For capturing the water that will inevitably try to escape when you cut into the line.
  • Deburring Tool: This cheap little gadget cleans the rough edges off cut pipe, which is essential for a perfect connection.

Core Materials You'll Likely Need:

  • Plumber's Tape (Teflon Tape): Use this on every threaded fitting. No exceptions. It’s your best defense against insidious slow drips.
  • Flexible Water Lines: Get two of these. They connect your plumbing to the softener's bypass valve and make lining everything up way less of a headache.
  • Pipe Fittings: This is where you need to know your pipe type. Push-to-connect fittings (like SharkBite) are a popular DIY choice, but you might need compression or sweat fittings for copper.
  • Drain Tubing: Your kit should come with this, but always double-check that it’s long enough to reach your drain without being stretched tight.

Here's the most common rookie mistake: buying the wrong size fittings. Before you go anywhere, confirm the diameter of your main water pipe. It’s almost always ¾-inch or 1-inch. Getting this right the first time will save you a world of frustration.

Alright, this is where the adventure truly begins. We're about to get hands-on and tap directly into your main water line to connect the softener. It’s the most critical part of the job, but don't sweat it. We’ll walk through it step-by-step.

Before you even think about cutting a pipe, there’s some essential prep work. This infographic lays out the groundwork perfectly.

Infographic outlining the water softener preparation process with three steps: choose location, gather tools, and prepare space.

As you can see, getting the location right, gathering your tools, and prepping the space are the first three things you need to nail down before moving on.

Shutting Down the Water Supply Safely

First things first: shut off the water to the entire house. You’ll find the main shut-off valve where the water line enters your home—usually in the basement, a utility closet, or the garage. Crank it all the way to the "off" position.

Next, you need to drain the pipes. Open the faucet at the lowest point in your house (like a basement sink) and the highest one (maybe an upstairs shower). This lets air in and drains the remaining water out, which will save you from a surprise shower when you make your first cut. Still, keep a bucket and a few old towels nearby. There’s always a little water left behind.

Here's a tip I’ve learned the hard way: after you think the water is off, try turning on a faucet. If you get more than a slow drip, your main valve isn't sealing properly. You'll want to get that fixed before you go any further.

Making the Cut and Installing the Bypass Valve

Time to make the cut. Carefully measure the section of your main water line where the new bypass valve assembly will go. This valve is your best friend—it lets you send water around the softener for maintenance without turning off the water to the whole house.

Double-check your measurements, then grab your pipe cutter and make two clean, straight cuts. A good, square cut is everything for getting a leak-free seal. Once that piece of pipe is out, use a deburring tool to clean up the inside and outside edges of the pipes. It’s a small step, but it protects the O-rings in your new fittings from getting sliced up.

Now, you’ll install the bypass valve. How you do this depends on your pipes:

  • Push-to-Connect Fittings: These are the gold standard for DIY. You just push them onto the pipe until they click into place. No soldering, no glue. It’s that simple.
  • Soldering Copper Pipes: This is the old-school method. It creates a rock-solid bond but definitely requires practice with a torch, flux, and solder.
  • Compression Fittings: A great middle-ground option. These use a nut and a small brass ring to create a seal as you tighten them with a wrench.

Understanding Inlet and Outlet Connections

Pay close attention here. Your bypass valve will have a marked inlet and an outlet. This isn't a suggestion—it's mandatory. The inlet must connect to the pipe coming from your water supply, and the outlet connects to the pipe feeding the rest of your house.

If you get this backward, the softener simply won't work, and you risk damaging the unit. Most valves have big arrows molded right into the plastic to make it almost foolproof. Water has to flow in, through the resin beads to get softened, and then back out to your faucets.

Practical Examples for Common Plumbing Setups

Most homes use one of three types of pipe, and your connection method will change for each.

  • Copper Plumbing: If you’re not a pro at soldering, just use push-to-connect fittings made for copper. They are incredibly reliable and will save you a ton of headache.
  • PEX Tubing: This flexible plastic is a dream to work with. While crimp rings are common, push-to-connect fittings are easily the fastest way to get the job done for a DIY install water softener system.
  • CPVC Pipe: This rigid plastic requires a specific primer and solvent cement. It’s not hard, but it's unforgiving—once that glue sets, the joint is permanent.

A full DIY setup can be knocked out in an afternoon, letting you bypass plumber fees that can easily run from $500 to $1,500. As the team at Water Filter Advisor often points out, always look for systems certified to NSF/ANSI 44 standards to ensure they actually do what they claim. To see what's popular, you can even check out a market analysis of home water softeners and see how these systems are trending.

Connecting the Drain and Brine Tank

With the main plumbing connections behind you, the toughest part of the job is done. Now it's time to hook up the drain and brine lines so the softener can flush out the hardness minerals it collects and regenerate itself.

Think of it this way: your filtration system traps minerals, and during its cleaning cycle (regeneration), it needs to dump that mineral-rich water somewhere. That's the drain line's job. The brine tank provides the salt solution needed for that cleaning process.

Setting Up the Drain Line Correctly

Your system comes with a flexible drain tube that runs from the control valve to a suitable drain. The destination you choose is important for a safe, reliable setup.

You have a few solid options here:

  • Utility Sink: The simplest choice if one is close by. Just run the tube over the sink's edge and secure it so it won't pop out during the regeneration cycle.
  • Floor Drain: Ideal for basement or garage installations.
  • Standpipe: This is a dedicated drain pipe, much like the one your washing machine uses, and provides a very clean, professional look.

No matter which option you choose, you absolutely must include an air gap. This is a physical space of about 1.5 to 2 inches between the end of your drain tube and the drain opening itself.

An air gap is a non-negotiable safety measure. It prevents contaminated drain water from ever being siphoned back into your home's clean water supply. Never seal the drain line directly into a pipe—it's a serious health hazard and a plumbing code violation.

Make sure you secure the tubing with a clamp or zip tie. The water comes out with a surprising amount of force during the backwash cycle, and a loose hose can make a huge mess.

Connecting the Brine Tank

The brine tank is the shorter, wider tank that holds the salt. Your task here is to connect the small brine line from the softener's control valve to the safety float assembly inside this tank.

That safety float is a clever little mechanism. It works just like the float in your toilet, shutting off the water when the tank is full to prevent a salty, messy overflow.

Connecting it is straightforward. The brine tank itself is a tough plastic container; if you want some general tips on handling this kind of material, this guide on how to install a polyethylene tank can be helpful.

Simply run the thin brine tube from the control valve over to the fitting on the safety float. Most systems use simple compression fittings that you can just tighten by hand.

Finally, connect the overflow tube. This is a larger emergency hose that attaches to a port near the top of the brine tank. If the safety float ever fails, this tube will direct any excess water to your floor drain instead of all over the floor. Route this tube to the same drain you're using for the main unit, making sure its end sits lower than the softener's main drain connection.

Final Setup and Bringing Your System Online

Man installing a water softening system, connecting pipes to a blue tank in a utility room.

Alright, the heavy lifting is over and all your pipes are connected. You’re in the home stretch now, turning this plumbing project into a fully functional home water filtration system. There are just a few key things left to do: get the salt ready, program the brains of the operation, and run a test cycle.

First up, let’s deal with the brine tank. Grab a bucket and pour about three to four gallons of water right into the tank itself. This initial water is essential—it’s what the softener will use to mix up the very first batch of brine for its first regeneration cycle.

Now for the salt. Go ahead and fill the brine tank with your water softener salt pellets. A good rule of thumb is to stop about four to six inches from the top. Don’t be tempted to fill it to the brim; overfilling can lead to “salt bridging,” which is a nasty, hard crust of salt that forms inside and stops your system from working right.

With the salt and water sorted, plug the control valve into a standard electrical outlet. You should see the display light up, which means you're ready to get programming.

Programming the Control Valve

The control valve is the command center for your entire system, and getting the settings right is what makes it all run on autopilot. Don’t let the digital display and buttons intimidate you—it’s actually pretty straightforward.

Your user manual is going to be your best guide here, but virtually all modern softeners need the same three pieces of information:

  • Water Hardness: This is the big one. You’ll need to input your water’s hardness level, which is measured in grains per gallon (GPG). If you don’t have this number, you can find it with a simple home test kit or by checking your local water utility’s annual report online.

  • Current Time: Just like any other clock, set it to the current time of day. This is crucial for making sure the regeneration cycle runs when you want it to.

  • Regeneration Time: The softener needs to clean itself every so often, and you want this to happen when no one is using water. The factory default is usually 2:00 a.m., and honestly, that’s the perfect time for most homes.

Getting the hardness level right is critical. If you set it too low, your water won't be fully softened. Set it too high, and you'll just be wasting salt and water by regenerating more often than you need to. If you’re not sure, it’s always better to round up slightly.

Running a Manual Regeneration Cycle

Once it's programmed, you'll want to kick off a manual regeneration cycle right away. This initial run does two important things: it purges all the air out of the resin tank and gives you a chance to confirm everything is working perfectly before you let soft water flow into your home.

Look for a button labeled "Regen" or "Regenerate" on the control valve. You'll probably need to press and hold it for a few seconds. You'll hear the motor start to turn as the valve clicks through its cycles—backwash, brine draw, rinse, and so on.

This is your moment to play inspector. Listen and watch as the unit runs. Make sure you see water flowing out of the drain line during the backwash and rinse cycles. It's also a great time to double-check that brine line connection for any sneaky leaks.

More and more homeowners are taking on this project themselves. In fact, after 2020, nearly 70% of U.S. owners chose whole-house units. While hiring a pro can cost anywhere from $800 to $2,000, a quality DIY kit can slash that bill in half. For many, it's a simple valve swap that only takes a few hours. You can dig into more industry stats by checking out the global market for water softeners.

Introducing Soft Water to Your Home

After that first regeneration cycle finishes, you’re ready for the grand finale. Head back to the bypass valve you installed earlier. Now, slowly—and I mean slowly—turn the handle to let water back into your home’s main supply line.

Going slowly is key to preventing "water hammer," which is a loud, jarring bang in your pipes that can cause real damage. Once the valve is all the way open, walk to the faucet closest to the softener and turn on the cold water. Let it run for a few minutes until the stream is clear and you don’t see any more air bubbles. Then, do the same with a hot water faucet to clear the air out of your water heater.

Do one final walk-around, meticulously checking every connection point for drips. That’s it! Your install water softener system project is officially a wrap. Your home is now set to enjoy all the benefits of soft water.

Common Questions About Your New Water Filtration System

Even after you've tightened the last fitting and checked for leaks, it’s totally normal to have a few questions pop up. Getting used to a new water softener takes a little time. Let's walk through some of the most common things people ask right after they install a water softener system.

What Hardness Level Should I Program Into My New Softener?

Getting this setting right is everything for your softener's efficiency. You have to tell the system exactly how hard your water is so it knows when to run a cleaning cycle, or "regenerate." The most accurate way to find this number is by using a water test kit, which measures hardness in grains per gallon (GPG).

No test kit? No problem. Check the annual water quality report from your local water utility. Most municipalities post these online, and you can usually find the hardness level listed there. Nailing this number prevents you from wasting salt or, even worse, letting hard water sneak back into your pipes.

Think of it like a recipe. If you don’t measure the main ingredient correctly, the final dish won't turn out right. Setting the hardness too low results in partially softened water, while setting it too high causes the system to regenerate too often, wasting salt and water.

So, if your test comes back at 15 GPG, that's the number you'll punch into your control valve. For anyone on a private well, testing is non-negotiable since hardness levels can change over time.

How Often Will I Need To Add Salt?

How often you'll be lugging those heavy bags depends on two things: how hard your water is and how much of it you use. For a typical family of four dealing with moderately hard water, you might find yourself adding a 40-pound bag of salt every month or two.

This is where a modern, high-efficiency softener really shines. These units use what's called "demand-initiated regeneration." In simple terms, they only clean themselves after a set amount of water has been used, not just on a timer. This smart feature can slash your salt use by up to 50% compared to older, timer-based models.

Get into the habit of peeking inside the brine tank once a month. You just want to make sure the salt level is always a few inches above the water line. Whatever you do, don't let it run completely dry.

Is A Water Softener A Good Idea For A Well Water System?

Absolutely, but there’s often an extra step involved. Well water is notorious for containing more than just hardness minerals like calcium and magnesium; it can also be high in iron and sediment.

A standard water softener can handle small amounts of iron—usually around 1-3 parts per million (PPM). Anything more than that can clog up the resin beads and eventually wreck the control valve.

If your well has significant iron, the best practice is to install a dedicated iron filter before the water softener. This pre-treatment step acts as a bodyguard for your softener, protecting your investment and letting it do what it does best: fight hardness. For more on this, you can find a ton of expert advice on our blog.

Should I Also Soften The Water For My Garden Hoses?

That’s a common question, and the answer is almost always a firm "no." There’s really no upside to watering your lawn, washing your car, or filling the kiddie pool with softened water. In fact, the sodium a softener adds can actually harm your plants over the long haul.

For this exact reason, most professional plumbers will set up the system to bypass your outdoor spigots completely. The whole point is to soften the water inside your house—the water that runs through your appliances, showers, and faucets.

DIY Water Softener Installation A Homeowner’s Guide to Pure Water

Taking on a DIY water softener installation is one of the best home filtration upgrades you can make, and you can conquer this project in just a few hours. This is a totally manageable mission for a handy homeowner. Modern systems come in plug-and-play kits that can save you a bundle on plumber fees.

Your Guide To Winning The War On Hard Water

If you're sick of the chalky white spots on your faucets, stiff laundry, and the ghost of soap scum haunting your shower doors, you've come to the right place. The villain in this story is hard water, which is loaded with minerals like calcium and magnesium. It might not be a health risk, but it's a real menace to your home's plumbing and appliances.

Close-up of a kitchen sink and faucet heavily covered in hard water stains and mineral deposits.

A water softener is the permanent fix. By installing one yourself, you're not just getting better water—you're protecting your big-ticket investments. Mineral buildup clogs pipes, guts the efficiency of your water heater, and sends dishwashers and washing machines to an early grave.

Why DIY Is The Ultimate Home Filtration Hack

DIY water softener jobs are booming, and for good reason. Today's salt-based and salt-free systems usually include complete kits, letting you sidestep a professional plumber and save anywhere from $500 to $1,000 on the install. The global market for these home water filtration systems reflects this trend.

This guide is here to walk you through the entire process, so you know exactly what you're getting into. We’ll cover the two main types of systems you’ll be looking at:

  • Salt-Based Ion Exchange Systems: The traditional workhorses. They are the heavyweight champions of water filtration, pulling hardness minerals out of your water and swapping them with sodium ions. The result is truly soft water.
  • Salt-Free Water Conditioners: These don't actually remove the minerals. Instead, they use a process called Template Assisted Crystallization (TAC) to change the mineral structure so it won't stick to surfaces and build up as scale.

When you install a water softener yourself, you gain a deep understanding of your home's water filtration system. You'll be ready for any future maintenance and can be proud you fixed the problem on your own.

We'll give you clear, actionable steps for a successful installation, from planning it out to firing it up. If you want to check out other home water filtration strategies, take a look at our broader https://www.waterfilteradvisor.com/advice/ section. Let's get started on bringing pure, soft water to every tap in your house.

Laying the Groundwork for Your Install

A successful water softener installation is all about the prep work. Honestly, what you do before you even unbox the unit is what separates a smooth Saturday project from a frustrating, leaky mess.

Get these first few steps right, and you'll end up with the right filtration system for your house without any nasty surprises down the road.

First thing's first: you need to know exactly what you're up against. That means testing your water to find out its hardness, measured in grains per gallon (GPG). Don't guess. Grab a simple water hardness test kit online or from the hardware store.

This single number is the most critical piece of the puzzle. It's the secret code that tells you everything you need to know to size your new filtration system correctly.

Choosing Your Water Softener Type

Before you get too deep into sizing, you need to decide which type of system is right for you. The two main players in home water filtration are traditional salt-based softeners and salt-free conditioners. Each has its pros and cons depending on your water, budget, and even local rules.

This table breaks down the key differences to help you make the right call.

Feature Salt-Based (Ion Exchange) Salt-Free (TAC Conditioners)
How It Works Physically removes hardness minerals (calcium & magnesium) through ion exchange. A true water filtration process. Crystallizes minerals so they can't stick to pipes and surfaces. It doesn't actually remove them.
Feel of Water Creates a noticeably "slippery" or "silky" feel. No change in the water's feel.
Maintenance Requires regular salt refills and uses water/power for regeneration cycles. Virtually maintenance-free. No salt, no electricity, no wastewater.
Best For Very hard water (over 10 GPG); when you want to eliminate scale buildup completely. Moderately hard water; areas with brine discharge restrictions; those on low-sodium diets.
Environmental Impact Discharges salt brine into the sewer or septic system. No salt or chemical discharge, making it more eco-friendly.

Ultimately, if you're battling seriously hard water and want that classic soft water feel, a salt-based system is your best bet. If you have moderate hardness and prefer a low-maintenance, eco-friendly option that still protects your pipes, a salt-free conditioner is a fantastic choice.

Getting the Sizing Right

Once you know your GPG, you need to figure out your home's daily water demand. A good, solid estimate is to multiply the number of people in your house by 75 gallons per day.

So, a family of four will use roughly 300 gallons of water each day (4 people x 75 gallons/person).

Now, let's put those two numbers together to find out how much filtration work the softener needs to do daily. The math is easy:

Daily Gallons Used × Water Hardness (GPG) = Daily Grains to Remove

Let's stick with our family of four, and say their water tested at 15 GPG:

300 gallons × 15 GPG = 4,500 grains per day

This tells you that you need a softener that can handle at least 4,500 grains of hardness between its cleaning (regeneration) cycles. Softeners are sold by their total capacity, which usually falls between 24,000 to 64,000 grains. A standard 32,000-grain unit would work perfectly here, needing to regenerate about once a week (32,000 ÷ 4,500 ≈ 7 days).

My advice? It's always better to go slightly bigger than you think you need. An undersized unit has to regenerate constantly, which just wastes salt and water and wears out the system faster. Think of it as buying a filtration system with room to grow.

Finding the Right Spot for Your System

With your capacity figured out, it's time to play scout and find the perfect home for your new unit. For any DIY water softener installation, you want to place it as close as you can to where the main water line enters your house. Crucially, it must be installed before the pipe splits off to your water heater.

This makes sure you get filtered, soft water for both your hot and cold taps (we usually leave outdoor faucets on hard water). A basement, garage, or utility closet is your best bet. Make sure the spot has:

  • Enough Room: You need space for both the main resin tank and the separate brine (salt) tank, plus room to walk around them for maintenance.
  • Power Nearby: Most softeners need a standard 110V GFCI outlet to run the control valve.
  • A Place to Drain: The softener has to flush out salty water during regeneration. A floor drain, laundry sink, or standpipe are all good options.

A Quick Check on Local Rules

Last but not least, do yourself a favor and check your local plumbing codes before you buy anything. This is especially important for salt-based systems, as some towns have rules about discharging brine into the sewer or a septic tank.

A quick phone call to your city's building department will clear up any questions. Getting this sorted out now saves a massive headache later and ensures your home filtration project isn't just done right, but done legally.

Assembling Your Tools And Materials

A successful DIY water softener installation all comes down to good prep. Trust me, nothing kills your weekend project faster than having to make multiple runs back to the hardware store for a single fitting you forgot. Let's get everything you need laid out before you even think about cutting a pipe.

Think of it like this: a clean cut, a solid wrench, and good thread sealant are the three pillars of any home filtration plumbing job. Get these right, and you're already halfway to a leak-free installation.

Essential plumbing tools process showing a pipe cutter, wrench, and teflon tape icons.

Must-Have Tools For The Job

Let's sort out the absolute non-negotiables. You simply won’t be able to finish the job without these items in your toolkit.

Core Tool Checklist:

  • Pipe Cutters: Make sure you have a cutter specifically for your pipe type—PEX, copper, or PVC. A clean, straight cut is everything for a good seal.
  • Adjustable Wrenches (x2): You absolutely need two. One wrench holds the fitting in place while the other does the tightening. A couple of 10-inch or 12-inch wrenches are perfect.
  • Tape Measure: The old rule holds true: measure twice, cut once. Getting your pipe lengths right from the start saves a lot of headaches.
  • Bucket and Towels: Water is going to spill when you drain the lines. It's just a fact. Having a bucket underneath to catch the initial flow and towels for cleanup is just working smart.
  • Teflon Tape: Also called plumber's tape, it’s essential for sealing threaded connections. I always grab two rolls. It's cheap, and running out mid-job is the worst.

If you're working with PEX tubing, you’ll also need a dedicated PEX crimping tool and the right size crimp rings. These are specialized, but they're the only way to create a secure connection that will pass inspection and last for years.

Gathering Your Plumbing Materials

Most softener kits will give you the main components: the control head, mineral tank, brine tank, and the bypass valve. That bypass valve is a crucial piece—it lets you shut off the softener for maintenance without turning off water to the entire house.

What the kit won't include is the plumbing to connect that bypass valve to your main water line. The exact pieces you need depend entirely on what's already in your house.

A hard-won personal tip: always buy a few extra fittings than you think you need. Having an extra elbow or connector on hand can turn a potential showstopper into a minor inconvenience.

When you're shopping, you’ll see different pipe materials. Knowing the pros and cons of PPR vs PVC vs CPVC is helpful if you're running new lines, but for this job, you'll mainly need adapters.

  • Flexible Water Heater Connectors: These braided stainless steel hoses are a DIYer's best friend. Their flexibility makes it so much easier to line up the softener with your existing pipes. Check the fitting size you need—usually ¾-inch or 1-inch.
  • Pipe-Specific Fittings: You'll need the right adapters to go from your home's pipes (copper, PEX, PVC) to the softener's connections. For a no-solder option on copper or PEX, SharkBite fittings are fantastic. They just push to connect and create a surprisingly strong seal.
  • Drain Tubing: The kit probably includes a length of this, but unroll it and check. Make sure it's long enough to reach your floor drain or utility sink without any sharp bends or kinks that could block the flow.

Alright, you've got your tools, unboxed the new softener, and picked the perfect spot. Now for the main event: the installation itself. Don't let the plumbing intimidate you. We'll walk through this step-by-step, with some real-world advice to keep things dry and straightforward.

A man installs a white water softener system, adjusting brass fittings in a utility room.

Think of it like minor surgery on your water lines. The plan is to shut everything down, make a few clean connections, and then bring it all back online. Just take your time and check every connection twice.

Safety First: Shut Down and Drain

Before you even think about touching a pipe cutter, kill the water supply to your house. Find the main shutoff valve—it’s usually in the basement, a crawlspace, or near where the water line enters your home from the outside. Crank it all the way off.

Now, you have to get the water out of the pipes. Head to the lowest faucet in your house (maybe a basement sink or an outdoor spigot) and the highest one (like an upstairs shower) and open them both up. This lets air into the system and helps every last drop drain out. This is a non-negotiable step if you want to avoid a surprise shower the second you cut into a pipe.

Making the Cut

With the system drained, it’s time to get to work on the main water line. Grab your tape measure and mark out the section of pipe you’ll be removing to install the bypass valve. Always remember the old rule: measure twice, cut once.

Stick a bucket right underneath where you plan to cut. No matter how well you think you've drained the pipes, there’s always a little water left. Use your pipe cutter to make two clean, straight cuts and remove the section. A clean cut is absolutely critical for getting a perfect, leak-free seal later.

Installing the Bypass Valve

The bypass valve is the nerve center of your new setup. It’s what lets you shut off water to the softener for maintenance without cutting off water to the entire house. Trust me, you’ll be glad you have it.

Most kits come with a bypass valve that attaches right to the softener's control head. Pay close attention to the arrows that show the direction of water flow. This part is crucial:

  • The INLET side connects to the pipe bringing water from your main supply.
  • The OUTLET side connects to the pipe that feeds the rest of your house and the water heater.

Pro Tip: When you install the bypass valve, make sure the handles are easy to get to. Don't face them toward a wall where you can't reach them. A little bit of planning here will save you a ton of hassle down the road when it's time for maintenance.

Now, connect the valve to your main lines using whatever fittings you chose. If you're using flexible braided lines, get them hand-tight and then give them one last quarter-turn with a wrench. For push-to-connect fittings like SharkBites, make sure the pipe end is clean and push it in firmly until you hear and feel it click home.

Connecting the Softener Tanks

Next, it’s time to hook the main mineral tank up to the bypass valve. Attach your flexible hoses to the inlet and outlet ports on the control head. Again, follow the arrows to make sure water flows in through the hard water side and out through the soft water side.

This is where your type of home filtration system really matters. A traditional salt-based system has two tanks, while a salt-free conditioner is usually just a single unit.

  • For Salt-Based Systems: You'll have a separate brine tank. Connect the small brine line tube from the control head over to the port on the brine tank. This little tube is what pulls the salt solution into the main tank during the regeneration cycle.
  • For Salt-Free Conditioners: No brine tank, no problem. You can skip that step entirely. Just connect your inlet and outlet, and your plumbing work is almost finished.

This all sounds more complicated than it is. For most DIYers, connecting the valves and tanks is a straightforward job that takes just 2-3 hours. The payoff is huge, often leading to a 99% reduction in hardness down to less than 7 grains per gallon. For a family in a hard-water area, that can mean saving around $200 a year on soaps and energy. You can dig into more data on the water softening market to see just how big an impact these home water filtration systems have.

Running the Drain and Overflow Lines

A salt-based softener has to flush out all the hardness minerals and salty brine it collects during regeneration. To do that, you need to run two lines to a drain.

First is the main drain line. This flexible tube runs from the control head to a floor drain, standpipe, or utility sink. It's critical to leave an air gap of at least 1.5 inches between the end of the tube and the drain. This prevents any contaminated water from being siphoned back into your fresh, filtered system.

Second is the brine tank overflow tube. This is purely a safety measure. If the brine tank ever gets too full, this tube directs the excess water to the same drain, stopping a salty flood before it starts. Use zip ties or a clamp to make sure both tubes are secure and won't pop out of the drain.

Once all your connections are solid and the drain lines are secure, you're officially done with the hardest part of your DIY water softener installation. Step back and admire your handiwork before we move on to the final checks and startup.

Bringing Your New System Online

A hand adjusts the digital control panel of a blue water softener system, displaying 'SYSTEM STARTUP'.

Alright, the pipes are all connected and you’ve double-checked every fitting. This is the moment you've been working toward. It's time to fire up your new water softener and program the brains of the operation.

The tough part is behind you. Now let's get this filtration system commissioned the right way.

The Slow Introduction of Water

Don't just crank the main water valve all the way open. You never want to slam a new system with a sudden blast of high-pressure water. That's a good way to stress the connections or even damage the softener's guts. Slow and steady is the name of the game here.

First, make sure the softener's bypass valve is still set to "bypass." This lets water flow to the house while keeping the softener isolated for now.

Slowly turn your main water shutoff valve about a quarter-turn open. Go run a faucet somewhere in the house to confirm you have flow, then head back and inspect all your new plumbing for any drips.

If it's all dry, you can now slowly move the bypass valve toward the "service" position. Listen closely—you should hear the big mineral tank start to fill with water. This is your most important leak check. Get a flashlight and get a good look at every single connection you made. Look for the smallest bead of water.

I always give it a solid 15-20 minutes after the tank fills before I call it leak-free. I've seen slow seeps take their time to show up, and finding one now is much better than finding a puddle later.

Programming the Control Head

Once you're positive everything is watertight, go ahead and plug in the control head. This is where you'll tell the softener just how hard your water is and set up its cleaning schedule. The digital display might look a little intimidating, but the process is usually pretty simple.

Your most important job is to enter the water hardness number (in GPG) from your water test. This one setting is the key to the whole operation, as it tells the unit how often it needs to regenerate.

Next, you'll set the time of day and the regeneration time. I always recommend setting it for a time when no one is using water, like 2:00 AM. This way, the regeneration cycle won't interrupt a shower with hard water or cause a drop in water pressure. Some newer softeners have smart features that track your water usage and only regenerate when needed, which is a great way to save on salt and water.

While this is a DIY guide, getting different perspectives on installing water softeners can give you extra tips on programming and what to expect long-term.

Kicking Off the First Regeneration

With the programming done, you have to manually start the very first regeneration cycle. This is a critical step. It flushes out any leftover dust or debris from the manufacturing process and, more importantly, it gives the resin beads their initial charge by soaking them in brine.

Pour a few gallons of water directly into the brine tank first, then add one or two bags of good-quality softener salt. Check your manual to find the "Manual Regeneration" button—you'll usually need to press and hold it to get the cycle started.

This first cycle can take up to two hours to complete. It will run through a few key stages:

  • Backwash: Loosens up the resin bed and washes out any sediment.
  • Brine Draw: Sucks the salty water from the brine tank to "recharge" the resin.
  • Slow Rinse: Pushes the brine solution completely through the resin.
  • Rapid Rinse: Flushes all the excess salt and hardness minerals out to the drain line.
  • Brine Refill: Adds water back to the brine tank to dissolve salt for the next cycle.

Once that's finished, your system is officially up and running. Congratulations, you're now making beautifully filtered, soft water!

A Simple Maintenance Schedule

Your DIY water softener installation might be complete, but a little bit of care will keep it running smoothly for years to come. The good news is, there isn't much to it.

Your Long-Term Checklist:

  1. Check Salt Levels Monthly: This is your main job. Just peek in the brine tank once a month and make sure it's at least one-third full of salt.
  2. Use the Right Salt: Stick to high-purity salt pellets or crystals. You want to avoid rock salt; it's full of dirt and impurities that can eventually clog your filtration system.
  3. Clean the Brine Tank Annually: About once a year, let the salt level get low and then clean out the bottom of the brine tank. This gets rid of any "salt mush" or sediment and prevents a "salt bridge"—a hard crust that can form and stop the softener from making brine.

Common Questions About DIY Installation

Even after you've followed a guide, questions will pop up. A DIY water softener installation has a lot of moving parts, and it’s totally normal to hit a snag or two.

We get calls all the time about these exact situations. Here are the most common questions we hear, with answers to get you through the finish line.

Can I Install A Water Softener On A Well System?

Absolutely. In fact, if you have well water, you probably need a softener more than most. The main thing to know is that well water often comes with extra baggage—sediment, sand, and sometimes a lot of iron. All that gunk can destroy a new softener.

Your best move is to install a sediment pre-filter right before the water softener's inlet. Think of it as a bodyguard for your softener. It catches all the debris before it can clog up the resin bed. If you skip this, the resin gets fouled, its filtration efficiency tanks, and you’ll be replacing the whole unit way sooner than you should.

What Should I Do If I Notice A Small Leak After Installation?

First, don't panic. A small drip is almost always an easy fix.

Hit the bypass valve first. This is exactly why you installed it. You can shut off water to the softener and keep it running for the rest of the house.

Now, find the leak. Most of the time, it’s a threaded connection that isn't quite sealed.

  • Shut off the water to the unit and drain any pressure.
  • Unscrew the fitting that's dripping.
  • Clean all the old Teflon tape off the threads.
  • Wrap the male threads with fresh Teflon tape. Give it a good 3-4 wraps, going in the same direction you'll be tightening the fitting.
  • Screw it back together. Get it snug, but don’t go crazy, especially with plastic parts. Over-tightening is a great way to crack a fitting.

Slowly turn the water back on and check your work. That extra tape usually does the trick.

Does My Whole House Need Soft Water?

That’s a great question, and the practical answer is no, probably not. Soft water is incredible for your showers, appliances, and laundry, but your lawn and garden won’t be fans. The sodium in softened water isn't great for plants long-term.

For that reason, standard practice for a DIY water softener installation is to plumb the system so it treats all the water after your outdoor spigots. This gives you the best of both worlds: your indoor plumbing and appliances are protected by superior water filtration, and your garden stays happy.

Why Is My Water Pressure Lower After Installation?

A big drop in water pressure is not normal. It's a red flag that something went wrong during the install.

Start with the simple stuff: check that every single valve is fully open. The main shutoff, the bypass valve, all of them. It's surprisingly easy to leave one only halfway open.

If the valves are good, look for a kink in one of the flexible connector hoses or even the drain line. Also, make sure you didn't install the unit backward—if the water is flowing against the intended direction, it will choke off your pressure. Finally, this can happen if the home filtration system is too small for your house, which is why getting the sizing right from the very beginning is so important.


Water Filter Advisor is your go-to resource for making sense of home water filtration. From in-depth guides to unbiased reviews, we provide the clarity you need to choose the best solutions for your family's health and comfort. Explore our resources today at https://www.waterfilteradvisor.com.

A Beginner’s Guide to Using a Water Softener Like a Pro

So, you’ve finally brought home your very own water softener, the undisputed champion in the war against hard water. You're ready to banish soap scum, rescue your crusty appliances, and finally experience the joy of a shower that doesn’t leave you feeling like a reptile. But… now what? You're staring at this glorious piece of home tech, wondering how to unleash its full potential.

Don't sweat it. Getting your system up and running is far less intimidating than it looks. It's mostly about giving it the right "fuel" (salt) and telling it when to clean itself.

This guide will walk you through those first crucial steps, turning you from a hard water victim into a soft water virtuoso. Let's dive in.

Your Quick Start to a Softer Water World

If you're fed up with dishes that look like they’ve been dusted with chalk and towels that could double as sandpaper, you’re in the right place. Properly setting up your water softener is the key to unlocking a whole new world of clean, and it's simpler than you might think. We'll skip the boring tech-speak and get straight to the good stuff.

Hard water isn't just an annoyance; it's a home-wrecker, plaguing over 85% of homes in the U.S. Your new softener is the frontline defense against this mineral menace, and a stellar initial setup ensures you're not wasting salt, water, or your sanity.

Below is your cheat sheet to getting started. These are the absolute must-do actions to take the moment your softener is installed.

Quick Guide to Getting Your Water Softener Running

Action Item Your First Steps Why This Is Crucial
Add Salt Pour one 40-pound bag of high-purity salt pellets into the brine tank. Aim for about half-full. This is the "magic food" for your softener. Without it, the system can't recharge itself to fight another day.
Set Hardness Find your water's hardness level (in GPG) from a local water report or a test kit. Program this number into the control head. This tells your softener how tough the enemy is, so it can bring the right amount of firepower without wasting resources.
Schedule Regeneration Program the regeneration cycle to run when you're dreaming, like at 2 AM, when no one is using water. This "self-cleaning" cycle prevents hard water from sneaking into your pipes while the unit is recharging.

Nailing these three things from the get-go sets your system up for a long and happy life of hassle-free operation.

Did you know your morning coffee is about 98% water? If your water tastes like a swimming pool, your coffee will too. Hard water minerals like calcium make your brew taste chalky and bitter. Softened water lets the true, vibrant flavors of your coffee beans shine through.

Programming Your First Cycle

Once the salt is in, it's time to talk to the machine's brain: the control head. You’ll need to input your water hardness value, measured in grains per gallon (GPG). You can usually find this on your city's water quality report online, or get your hands dirty with a simple water hardness test kit from a hardware store.

After setting the hardness, program the time of day. The most important setting here is the regeneration time. I always recommend setting it for the dead of night—2 AM is the gold standard. Why? Because the system goes into bypass mode during regeneration, meaning you'll get untreated hard water if you turn on a faucet. Scheduling it for a time when everyone's dreaming of soft, fluffy clouds avoids this completely.

For more in-depth tips and tricks on water treatment, you can always explore a wide range of water filtration advice.

Finally, kick off a manual regeneration cycle right after you finish programming. This will get the resin bed fully charged and ready to start softening your water immediately.

Peeking Under the Hood: How Your Water Softener Actually Works

To truly master your water softener, it helps to know what's going on inside that mysterious tank. Once you understand the mechanics, you can fine-tune its performance, save money, and keep it humming along for years. At its heart, a water softener is a surprisingly elegant system built around three key players.

Think of it as a well-oiled team:

  • The Mineral Tank: This is the main event. It’s a big tank filled with thousands of tiny resin beads that act like powerful magnets for hard water minerals. As water flows through, these beads snatch up the calcium and magnesium, sending beautifully soft water out to your home.
  • The Brine Tank: This is the salt reservoir, the softener's loyal sidekick. You keep it filled with salt, which dissolves in water to create a potent brine solution that recharges those resin beads.
  • The Control Valve: This is the brain of the whole operation. It directs the flow of water and decides when it's time to run the cleaning process, known as regeneration.

The Magic of Ion Exchange

The science behind how a softener obliterates hardness is a brilliant process called ion exchange. As your home’s hard water passes through the mineral tank, the negatively charged resin beads attract and grab onto the positively charged calcium and magnesium minerals (the bad guys). To complete the trade, the beads release harmless sodium ions into the water.

This is a continuous filtration process that springs into action every time you turn on a tap. A softener's main job is to prevent the very problems that might lead you to use a calcium hardness reducer in other places, like a swimming pool.

Eventually, those resin beads get completely covered with hardness minerals and can't grab any more. That’s the signal for the control valve to step in and start the all-important regeneration cycle.

The simple infographic below shows the basic steps to get your system ready to go for the first time.

A three-step guide for first water softener use: add salt, set hardness, and run cycle.

As you can see, once you add salt and program your water hardness level, you just need to kick off a cycle to get things started.

Smart Regeneration vs. Timed Regeneration

The regeneration cycle is when your softener uses that salty brine solution to wash all the collected minerals off the resin beads and flush them down the drain. How your system decides when to do this makes a huge difference in its efficiency.

A modern, demand-initiated softener can save a family of four up to 2,000 gallons of water and 500 pounds of salt per year compared to an old timer-based model. It regenerates only when needed, not on a fixed schedule.

Older softeners work on a simple timer, regenerating every few days whether they need to or not. That’s like doing a full load of laundry for just one dirty sock—incredibly wasteful.

Modern, "smart" softeners are much more clever. They use a flow meter to track how much water your household actually uses. They only trigger a regeneration cycle after a pre-set volume of water has been softened. This "demand-initiated" regeneration adapts to your real life. It won't waste salt regenerating while you're on vacation, but it will be ready to handle the extra load when you have house guests for the weekend.

Choosing the Right Salt and Filling Your Brine Tank

Various types of salt are displayed in containers, with water actively pouring from a blue barrel.

Think of the salt in your brine tank as the energy drink that powers your water softener's regeneration. Without it, the whole system grinds to a halt. Picking the right type and adding it correctly is a fundamental part of getting the most out of your home water filtration setup.

The quality of salt you use is directly linked to your softener’s efficiency and how often you'll be stuck cleaning out the tank. It's a simple equation: the purer the salt, the less gunk and sediment will build up.

Salt Types Explained

When you hit the store, you'll generally see three main types of salt. Each comes with its own set of pros and cons for your home's water filtration system.

  • Evaporated Salt: This is the top-shelf, premium choice, boasting a purity of around 99.9%. It’s made in a controlled, indoor process, which means almost no insoluble gunk makes its way into the bag. If you want to minimize maintenance and keep your tank sparkling clean, this is your champion.
  • Solar Salt: Created by evaporating seawater, solar salt is also quite pure, clocking in at about 99.5%. The catch is that it’s harvested outdoors, so small amounts of sediment can sometimes sneak in and accumulate in your tank over time.
  • Rock Salt: This is the budget option, but it also has the lowest purity. It looks like tiny pebbles and contains a lot more insoluble material that can quickly lead to a dirty brine tank and even clogs.

For almost every homeowner, evaporated salt pellets are the best bet. They might cost a little more upfront, but they dissolve cleanly and save you from the soul-crushing chore of cleaning out a sludgy tank. That small extra cost is well worth it.

How to Fill Your Brine Tank

Just as important as your salt choice is how you fill the brine tank. A classic rookie mistake is to dump in bags until it’s filled to the brim. This is a surefire way to cause headaches like "salt bridging," which we'll get into in a moment.

A good rule of thumb is to keep the salt level above the water line, but never fill the tank more than two-thirds full. Check the level once a month and toss in a new bag when it gets down to about one-third full.

This simple routine prevents overfilling and makes sure the salt can dissolve properly to create that all-important brine solution for regeneration.

Managing your salt isn't just about your softener—it's about protecting your entire home's water filtration ecosystem. Did you know that a properly working water softener can slash household plumbing repair bills by up to 75%? Hard water scale chokes pipes and appliances, leading to clogs that cost American homeowners over $2.5 billion every year. You can explore more about these findings and market trends to see the full financial impact.

Tackling the Dreaded Salt Bridge

A salt bridge is exactly what it sounds like: a hard crust of salt that forms inside your brine tank, usually just above the water level. This solid layer blocks the salt underneath from dissolving, meaning your softener can't make brine and can't regenerate. If you notice the salt level in your tank hasn't moved in a while, a salt bridge is the number one suspect.

Fixing it is surprisingly satisfying. Just take a long-handled tool, like a broom handle, and gently tap the crust to break it up. Once it's broken, scoop out any big, undissolved chunks. To keep it from happening again, remember not to overfill your tank and stick with high-purity salt pellets.

Essential Maintenance for Long-Term Performance

Your water softener is a true workhorse, but like any appliance that's constantly on the job, it needs a bit of regular TLC to keep performing at its peak. Think of it like changing the oil in your car—a little preventative care now saves you from massive, expensive headaches later.

Following a simple maintenance routine is the secret to getting the most out of your home water filtration investment and ensuring you always have that high-quality soft water you paid for.

Quick Monthly Checks

You don't need a toolbox or a plumbing license for these. Just a few minutes each month can help you spot a small issue before it turns into a major flood or a system failure.

First, pop the lid on your brine tank and take a peek. Is the salt level at least one-third full? Great. While you're there, give the whole unit a quick visual scan for any drips or puddles. Catching a leak early can save you a world of hurt.

A well-maintained water softener doesn't just protect itself; it protects every single water-using appliance in your house. This is especially true for tankless water heaters, which are notoriously sensitive to hard water. Soft water is critical to their efficiency and longevity, helping you avoid premature failure and the need for specialized Tankless Water Heater Services.

Annual Deep Cleaning

Once a year, set aside a little time for a more thorough cleaning. This means completely emptying the brine tank to clear out all the gunk—sediment, dirt, and that lovely "salt mush"—that inevitably builds up at the bottom. If you let it go, this sludge can clog your system and severely cripple its filtration effectiveness.

Here’s a quick annual checklist to follow:

  • Scrub the Brine Tank: Once you've emptied the old salt and water, give the inside of the tank a good scrub with simple soap and water. Make sure to rinse it out completely before you add new salt.
  • Clean the Resin Bed: Grab a bottle of specialized water softener resin cleaner. This stuff is formulated to dissolve the iron, manganese, and other junk that coats the resin beads and stops them from grabbing hardness minerals.
  • Clear the Injector: The venturi and nozzle assembly, also known as the injector, can get clogged with tiny bits of sediment. Check your user manual for how to take it apart and clean these small parts. This ensures the system creates the proper suction to pull brine during the regeneration cycle.

This is a huge part of learning how to use water softener systems for the long haul.

Seriously, don't skip the resin cleaner, especially if your water has high iron content. Iron fouling is one of the top reasons softeners begin to fail. Regular cleaning is the only real way to combat it and keep your softener regenerating like new for years to come.

Troubleshooting Common Water Softener Issues

A man kneels outdoors, using a diagnostic tool on a home water softener system.

Even a perfectly maintained water softener can have an off day. Before you reach for your wallet to schedule a service call, a little DIY detective work can often solve the most common glitches. If you’re suddenly noticing spotty dishes again or your soap just isn’t lathering like it used to, it’s time to play investigator.

Many issues are surprisingly simple fixes. With a bit of know-how, you can diagnose what's gone wrong and get your system back to delivering that silky-smooth water your home deserves.

My Water Is Hard Again!

This is the most common complaint, and it usually points to a few usual suspects. First, check the blindingly obvious: is the system plugged in and turned on? It sounds silly, but you'd be surprised how often a power flicker or an accidental unplug is the villain.

Next, make sure your softener isn't in bypass mode. Every softener has a bypass valve—usually a handle or a couple of knobs—that routes water around the unit for maintenance. If that handle got bumped into the wrong position, you're just getting untreated hard water straight from the source.

Finally, confirm your softener is actually regenerating. You should hear it kick on at its scheduled time, which for most people is around 2 AM. If it’s eerily silent, you could be looking at a power problem or a busted timer motor in the control valve.

The Brine Tank Is Full of Water

Walking in to see a brine tank filled to the brim with water can be alarming, but don't panic. This almost always points to an issue with the brine line or the injector system, which is what creates the suction to pull that salty water into the mineral tank.

A few things could be at play here:

  • Clogged Injector: This is the most frequent culprit. A tiny part called a venturi injector gets blocked with sediment or salt gunk, killing the suction needed to draw brine.
  • Kinked Brine Line: Check the small tube running from the brine tank to the control valve. If it’s kinked, squashed, or clogged, the brine can’t flow.
  • Stuck Safety Float: Inside the brine well, there’s a safety float. If it gets stuck in the "up" position, it can mess with how the system adds and removes water.

A clogged injector is usually an easy fix. Just check your manual to find it, then carefully take it apart and give it a good cleaning with a small brush and some water. This simple step often brings a dead system right back to life.

Ever wondered why your skin feels like sandpaper after showers? It's hard water stripping natural oils. Dermatologists note that soft water can reduce soap scum by 50%, letting you create a rich lather with half the soap—saving a typical family around $150 yearly on products alone. Learning to troubleshoot your system ensures these benefits never stop. Discover more insights about the growing household water softener market on databridgemarketresearch.com.

The System Is Not Using Any Salt

If you peek in your tank and the salt level hasn't moved in weeks, your softener isn't regenerating properly. This means you aren’t getting soft water, even if it sounds like the system is running. The number one cause here is a salt bridge.

A salt bridge is a hard, crusty layer of salt that forms just above the water level in your brine tank, almost like concrete. It prevents the salt below it from dissolving, so no brine gets made.

To fix it, just grab a broom handle and gently tap the crust until it breaks apart. Then, you can scoop out any big, undissolved pieces. To prevent this from happening again, try not to overfill the tank and always use high-purity salt pellets.

Your Top Water Softener Questions Answered

Jumping into the world of home water filtration can feel a little overwhelming. You’ve got questions, and we've got answers. Here are some of the most common things homeowners ask when getting started.

How Often Should I Add Salt?

This is a big one, and the real answer is: it depends. Your water’s hardness, how much water your family uses, and the size of your brine tank are all factors.

As a rule of thumb, just pop the lid and check the salt level once a month.

You want the tank to stay at least one-third full. This ensures there's enough salt to make the brine needed for the regeneration cycle. A common mistake is filling it to the top—don't do it! This can lead to a "salt bridge" and clog up your system. For a typical family of four, you'll probably add a 40-pound bag of salt every month or two.

Can I Drink Softened Water?

For most people, yes, absolutely. The amount of sodium added during the ion exchange process is directly tied to how hard your water was to begin with, and it’s usually a very small amount.

Let's say your water has a hardness of 15 GPG (grains per gallon). After softening, it will contain about 280 mg of sodium per liter. To put that in perspective, that’s less sodium than you'd get from two slices of regular white bread.

If you're on a strict, doctor-ordered low-sodium diet, it’s always best to check with them first. A popular solution is to install a separate reverse osmosis (RO) system at the kitchen sink for drinking and cooking water. This powerful filtration method removes virtually everything, including the added sodium.

Pro Tip: Water softeners don't just add a little sodium; they remove the hard minerals that make coffee taste chalky and bitter. With softened water, the true flavor of your coffee beans really comes through.

My Softener Is Using Salt, but the Water Is Still Hard. What's Wrong?

This is a classic head-scratcher, but don't call for a repairman just yet. There are a few things you can check yourself.

  • Is it in Bypass? First, check the bypass valve. Someone might have accidentally bumped the handle, causing water to skip the softener entirely.
  • Do you have a Salt Bridge? Look inside the tank. You might see a hard, solid crust of salt that has formed over the water. This "bridge" stops the salt underneath from dissolving. If you see one, you can usually break it up carefully with something like a broom handle.
  • Are the Resin Beads Fouled? Over many years, the resin beads that do the heavy lifting can get coated with iron or other contaminants, making them less effective. A special resin cleaner, run through the system, can often bring them back to life.

What's the Difference Between a Softener and a Salt-Free Conditioner?

This is a crucial distinction in the world of home water filtration. A traditional water softener uses ion exchange to physically remove the hardness minerals (calcium and magnesium) from your water. This is the only method that provides all the benefits you associate with soft water—silky skin, spotless dishes, and bubbly lather.

A "salt-free water conditioner" doesn't actually remove anything. Instead, it uses a different technology (like Template Assisted Crystallization, or TAC) to alter the structure of the minerals so they won't stick to your pipes and appliances as scale. So, while conditioners are great for preventing scale buildup, they won't give you that truly soft water feeling or stop soap scum.


At Water Filter Advisor, our mission is to provide clear, unbiased information to help you get safer, better-tasting water. Check out our guides and reviews to find the right solution for your home at https://www.waterfilteradvisor.com.

Your Ultimate Guide on How to Reduce Water Hardness at Home

Ever notice those stubborn white spots on your glassware or feel like your “clean” laundry is still stiff and scratchy? You’re not just imagining it—you're dealing with hard water. The fix is a magical thing called water filtration, designed to remove or neutralize the high levels of dissolved minerals—mostly calcium and magnesium—that are wreaking havoc in your home. Think of learning how to reduce water hardness not just as a chore, but as a superhero move to save your plumbing and appliances from a slow, crusty demise.

Why Hard Water Is Waging a Secret War on Your Home

A bathroom sink faucet shows visible mineral deposits, highlighting hard water damage.

If you've ever felt a chalky film on your hands after washing them or wondered why your shampoo just won't lather up, you've met hard water. It's what happens when water travels through rock and soil, picking up mineral hitchhikers along the way. While it's perfectly safe to drink, those minerals can create a surprising amount of chaos around the house.

And this isn't some rare occurrence. According to the U.S. Geological Survey, a staggering 85% of households in the United States have hard water. In big chunks of the country, like the Midwest and Southwest, hardness levels often top 120 mg/L of calcium carbonate—that's well above the 60 mg/L threshold considered even moderately hard.

The Visible Signs Of A Hidden Problem

The most common signs of hard water are the daily cosmetic annoyances. You’ve probably seen them:

  • Soap Scum: Minerals in the water react with soap to create that gross, sticky film that coats your shower doors, tiles, and tubs.
  • Spotted Dishes: That cloudy haze on your glasses and silverware right out of the dishwasher? That’s mineral residue left behind when the water evaporates.
  • Dull, Stiff Fabrics: Those minerals get tangled up in the fibers of your clothes, making them feel rough and causing colors to fade way too quickly.

But these everyday headaches are just the tip of the iceberg. The real damage is happening where you can't even see it.

The real villain here is limescale—a hard, chalky deposit of calcium carbonate. This stuff builds up inside your pipes, fixtures, and appliances, slowly choking off water flow and tanking their efficiency.

To put it simply, what you see on your faucet is also happening inside your home's vital systems. This table breaks down the daily struggles of hard water versus the perks of switching to soft water.

Hard Water Problems vs Soft Water Benefits

Area of Impact Problem with Hard Water Benefit of Soft Water
Plumbing & Pipes Limescale buildup clogs pipes, reducing water flow. Pipes remain clear, maintaining strong water pressure.
Appliances Reduced efficiency and shorter lifespan for water heaters, dishwashers. Appliances run efficiently and last longer.
Kitchenware Cloudy film and spots on glasses and dishes. Sparkling, spot-free dishes and glassware.
Laundry Stiff, scratchy fabrics and faded colors. Softer, brighter clothes that feel and look newer.
Bathroom Surfaces Stubborn soap scum on showers, sinks, and tubs. Easier cleaning with little to no soap scum buildup.
Skin & Hair Dry, itchy skin and dull, brittle hair. Softer skin and smoother, more manageable hair.

As you can see, the benefits go far beyond just looks.

Long-Term Damage And Hidden Costs

Over time, that mineral buildup turns into a real financial drain. Limescale acts like an insulator, forcing your water heater to work much harder and burn more energy just to heat the same amount of water. This drives up your utility bills and can even shorten the appliance's lifespan, pushing you toward a costly replacement sooner than you’d expect.

And it doesn't stop there. Your coffee maker, dishwasher, and washing machine are all on the chopping block. The tiny valves and pipes inside these machines can get clogged, leading to breakdowns and expensive service calls. Another major headache from all this buildup is a drop in water flow, which often leads to frustrating issues like having no water pressure in your house.

Tackling this problem head-on is a wise investment in your home. By learning how to reduce water hardness, you aren't just making your daily life a little easier—you're protecting your most valuable assets from silent, creeping damage.

How to Accurately Test Your Water Hardness

A hand uses a test strip in a glass of water to check quality on a countertop, 'TEST YOUR WATER' banner.

Before you declare war on hard water, you’ve got to know exactly what you’re up against. Think of it like a doctor needing a diagnosis before prescribing a treatment. If you just guess, you might end up spending a ton of money on a system you don't really need or, even worse, buying one that barely makes a dent in the problem.

The good news is that figuring out your water's mineral content is pretty straightforward. You don’t need a fancy chemistry degree to get a solid baseline. There are a few different ways to go about it, from a quick kitchen experiment to a super-precise professional analysis.

The Quick and Simple Soap Test

Let's start with the easiest method of all: the DIY soap test. This is a fantastic first step that gives you a rough idea of your water’s situation in just a few minutes, using stuff you already have lying around.

All you need is a clean, clear bottle with a lid that seals tight (a regular water bottle works great) and some basic liquid soap. Make sure to use a pure soap, not a detergent that has added softeners or perfumes.

  1. Fill the bottle about a third of the way with regular tap water.
  2. Add just a few drops of the liquid soap, screw the cap on, and give it a really good shake for about 15 seconds.
  3. Now, take a look. If your water is soft, you'll see a healthy layer of suds, and the water underneath should be nice and clear.
  4. If you’ve got hard water, you'll find it’s a real struggle to get a good lather. Instead of fluffy bubbles, you’ll likely see a cloudy, milky solution with a scummy film floating on top.

While this test won't give you an exact number, it’s a great initial indicator. If you're seeing almost no suds and a lot of that soap scum, you know you’re dealing with a pretty significant hardness issue.

Using Water Hardness Test Strips

For a more precise, number-based reading, water hardness test strips are your best bet. They’re cheap, easy to find online or at any home improvement store, and incredibly simple to use. These kits give you a quantitative result, which is what you really need to choose the right size and type of water filter.

Using them is a breeze. You just dip a strip into a glass of your tap water for a couple of seconds, pull it out, and wait for the color to develop. After about a minute, you compare the color on the strip to the chart that came with the kit.

The chart will give you a reading in either parts per million (PPM) or grains per gallon (GPG). Just so you know, one GPG is the same as 17.1 PPM of dissolved minerals.

What does GPG mean for you? Here’s a quick breakdown of the water hardness scale:

  • Soft: 0–3.5 GPG
  • Moderately Hard: 3.5–7 GPG
  • Hard: 7–10.5 GPG
  • Very Hard: Over 10.5 GPG

Knowing your exact GPG number is a game-changer. A house with 10 GPG is going to need a much more powerful filtration system than a home with just 4 GPG. This little piece of data helps you avoid overspending and makes sure the system you buy can actually handle the job.

When Professional Lab Testing Is Necessary

For most homeowners who get their water from a city or municipal supply, those simple test strips are more than enough. However, if your water comes from a private well, or if you have a nagging suspicion that there are other contaminants besides just minerals, professional lab testing is the most reliable way to go.

Well water isn't regulated by the EPA, so its quality can be all over the map. A professional test can nail down the exact hardness level and also screen for things like iron, manganese, sulfur, bacteria, and other nasty stuff that might require a more specialized, multi-stage filtration system.

To get a lab test done, you can start by contacting your local health department for recommendations or find a state-certified lab online. They’ll send you a collection kit with simple instructions. It’s the most accurate assessment you can get and gives you the complete picture to make the smartest long-term investment for your home.

Short-Term Fixes for Hard Water Headaches

Jumping straight to a whole-house water filter isn't always in the cards. Maybe you're renting, you're on a tight budget, or you just want to dip your toe in the water—pun intended—before committing to a big installation. The good news? You don't have to put up with the daily grind of hard water while you weigh your options.

There are some really effective, non-permanent ways to get immediate relief from the most annoying hard water problems. These quick fixes target specific issues, from scratchy towels to irritated skin, giving you a way to manage the problem without tearing into your plumbing.

Get Your Laundry Bright and Soft Again

Hard water and your washing machine are not friends. The calcium and magnesium in the water latch onto your detergent, making it way less effective. Instead of cleaning, a chunk of that soap turns into a nasty curd that sticks to your clothes, leaving them stiff, dingy, and dull.

You can fight back. The easiest weapon in your arsenal is a chelating agent, which you might know as a water conditioner. Products like Calgon or even good old-fashioned borax are fantastic for this. They work by grabbing onto those pesky mineral ions and neutralizing them, freeing up your detergent to do its job.

Just add a conditioner to each load, and you’ll see a real difference. Your whites will look brighter, colors won't fade as fast, and your towels will finally lose that crunchy, board-like feeling. It’s a simple, cheap trick for anyone trying to figure out how to soften water just for their laundry.

Give Your Skin and Hair a Break from the Buildup

The daily battle with hard water gets personal in the shower. Those same minerals that leave spots on your glasses also leave a film on your skin and hair. This residue can clog pores, cause breakouts and dryness, and leave your hair feeling brittle, limp, and impossible to style.

A showerhead filter is a brilliant point-of-use solution here. These little devices just screw on between the shower arm and your showerhead—most don't even need tools to install. Inside, they use filtration media like KDF (Kinetic Degradation Fluxion) or activated carbon to specifically target the minerals and chlorine coming through your pipes.

You'll feel the difference almost right away. Your skin will probably feel less tight and itchy post-shower, and your hair will feel softer and look shinier because it's finally getting a clean rinse without a coating of mineral gunk.

Fight Back Against That Crusty Limescale

Those ugly white deposits crusted around your faucets and all over your shower doors are the most obvious calling card of hard water. This stuff, called limescale, is basically rock and regular cleaners just can't cut it.

To get immediate results, you need something acidic to dissolve the mineral buildup. You've got a couple of options:

  • Vinegar Solution: A simple 50/50 mix of white vinegar and water is a powerhouse, non-toxic limescale buster. For really stubborn spots, soak a rag in the solution and wrap it around the fixture for an hour before you start scrubbing.
  • Commercial Descalers: Products made specifically to tackle calcium, lime, and rust are incredibly effective. They use stronger acids to break down those mineral deposits in a hurry.

Making these little changes can help you keep the most visible signs of hard water in check. While these temporary fixes don't solve the problem at its source, they offer targeted relief and make everyday life a lot more comfortable.

Choosing the Right Permanent Water Filtration System

If you're sick of scrubbing soap scum and dealing with scratchy towels, it's time to look past the quick fixes. A permanent, whole-house system is the only way to stop hard water problems at the source, protecting your pipes, appliances, and sanity. This is where the real game-changers come in.

Picking the right technology can feel like a chore, with a dozen different systems all claiming to be the best. Let's walk through the most common and effective options out there. We’ll cover true water softeners that rip minerals out of your water and conditioners that just stop them from making a mess, so you can figure out what truly fits your home and your budget.

The Gold Standard: Ion-Exchange Water Softeners

When most people think of solving hard water, they’re picturing an ion-exchange water softener. This is the classic, time-tested method for actually getting rid of hardness minerals for good. It physically strips the calcium and magnesium from your water, giving you genuinely soft water at every single tap.

These systems work on a pretty clever principle. Your water gets routed into a large tank filled with thousands of tiny resin beads that are coated in sodium (or potassium) ions. As hard water washes over these beads, they act like tiny magnets, grabbing the "hard" minerals and releasing the "soft" sodium ions into the water instead.

This process is incredibly effective. Water softeners can slash water hardness by 95-99%, which is why they’re still the most powerful solution you can buy. This is a huge deal for the millions of households plagued by limescale buildup that wrecks plumbing and appliances.

Of course, those resin beads eventually fill up with all the minerals they’ve collected. That's when the system "regenerates" by automatically flushing itself with a saltwater (brine) solution from a second tank. This bath washes all the gunk off the beads, sends it down the drain, and recharges them with a fresh coat of sodium ions.

Sodium vs. Potassium Systems

You have a choice of what to fill that brine tank with.

  • Sodium Chloride: This is just plain old salt. It's the most common, cheapest, and easiest-to-find option. It’s highly effective and keeps the system humming along without a fuss.
  • Potassium Chloride: If you're on a strict low-sodium diet or just prefer not to add any sodium to your water, potassium chloride is a solid alternative. It works the exact same way but uses potassium instead. Just know that it’s a bit pricier and sometimes harder to track down.

The Low-Maintenance Alternative: Salt-Free Water Conditioners

Maybe you love the idea of preventing scale but hate the thought of lugging 40-pound bags of salt into your basement. If so, a salt-free water conditioner might be exactly what you need. But let's be crystal clear: these systems don't soften the water—they condition it.

What's the difference? They don't remove the calcium and magnesium. Instead, they use a process called Template Assisted Crystallization (TAC). As water flows through the TAC media, the hard minerals are changed into microscopic crystals that can’t stick to surfaces.

These tiny, harmless crystals just flow right through your plumbing without ever building up as limescale on your pipes, faucets, or water heater. You still get the health benefits of drinking mineral-rich water, but you get the massive perk of scale prevention.

Key Takeaway: A salt-free conditioner is a scale-prevention tool, not a water softener. You won't get that slick, "slippery" feeling of truly soft water or see a dramatic change in soap lather. What you will get is protection for your home's plumbing and appliances from destructive limescale.

Reverse Osmosis for Pure Drinking Water

A whole-house system takes care of your showers and laundry, but what about the water you actually drink? A Reverse Osmosis (RO) system is what’s known as a point-of-use filter, usually installed right under the kitchen sink, and it delivers some of the purest water you can get.

RO systems work by forcing water through a special membrane that’s so fine it removes up to 99% of pretty much everything—hardness minerals, chlorine, lead, fluoride, you name it. It's the same technology used to make most bottled water.

A lot of homeowners go for the one-two punch: a whole-house softener to protect the entire home, paired with an under-sink RO system for pristine, amazing-tasting water for drinking and cooking. You can explore our guides for more in-depth advice on building the perfect setup.

This chart can help you quickly find a temporary fix for whatever hard water headache you're dealing with right now.

Flowchart illustrating temporary hard water fixes for laundry, shower, and various surfaces.

As you can see, whether it's your laundry, shower, or kitchen sink, there's always a targeted fix you can use while you figure out a permanent plan.

A Word on Magnetic Descalers

You've probably seen ads for magnetic or electronic "descalers" online. These are little gadgets that you just clip onto your main water line. They claim to use a magnetic field to change the structure of the hardness minerals so they can't form scale.

It sounds fantastic—no salt, no filters, no maintenance. The problem? The science backing these things up is thin, and their performance is highly debated in the industry. Unlike ion-exchange softeners or TAC conditioners, there are no real standards or certifications to prove they actually work. For results you can count on, you’re much better off sticking with proven technology. Even for small appliances, targeted solutions are key, which is why it's worth learning about specific water filters for preventing limescale where it matters most.

Understanding System Installation, Maintenance, and Costs

Picking out a water filtration system is a huge first step, but the journey doesn't end with the price tag. The real commitment comes with installation, ongoing maintenance, and what I call the "total cost of ownership"—what you'll actually spend over the system's entire life.

Figuring this out upfront means no nasty surprises down the road. Let’s walk through what you can realistically expect after you've made your choice, from getting it set up to keeping it running like a champ.

Getting Your System Installed

Once you have your new water softener or conditioner, you've got two roads to take: roll up your sleeves and DIY, or call in a professional plumber. Your decision really boils down to how comfortable you are with basic plumbing and the complexity of the unit you bought.

A DIY install can definitely save you a few hundred bucks if you're handy. Most systems come with pretty good instructions, and the job typically looks something like this:

  • Shut off the main water supply to your house. (Don't forget this part!)
  • Cut into the main water line right where it comes into your home.
  • Plumb the system's inlet and outlet ports into that line.
  • Connect a drain line for the regeneration cycle (this is for traditional softeners).
  • Plug it in and program the control head.

If the thought of cutting pipes gives you a headache, hiring a pro is the stress-free route. A licensed plumber will make sure everything is installed correctly and up to code, which is great for peace of mind. You won't have to worry about leaks or performance problems.

Expect professional installation to run anywhere from $300 to $800, depending on how tricky your plumbing setup is and local labor rates.

The Long-Term Maintenance Checklist

Keeping your system in peak condition is pretty straightforward, but it does need some regular love. The to-do list changes based on what kind of system you have. For a traditional ion-exchange water softener, you'll be the most hands-on.

You’ll want to check the salt level in the brine tank about once a month and top it off as needed. A good rule of thumb is to keep the tank at least one-third full of salt pellets. For a typical family, this usually means adding a 40-pound bag of salt every couple of months.

Beyond just adding salt, it's a smart move to clean out the brine tank once a year. Over time, junk from the salt can create a "salt bridge" or a layer of sludge at the bottom, which can clog things up and stop the system from regenerating properly.

The resin bed—the real heart of the softener—is incredibly tough and can last 15 to 20 years with good care. If you have a lot of iron or chlorine in your water, though, using a special resin cleaner once a year will help it last even longer and work more efficiently.

Salt-free conditioners, on the other hand, are the champs of low maintenance. No salt, no electricity, no drain line. The internal media is built to last for years—often 6 to 10 years—before you even have to think about replacing it.

Calculating the Total Cost of Ownership

To really make a smart decision, you need to look at the whole financial picture. The sticker price is just the starting line. The total cost of ownership includes the unit itself, installation, and all the ongoing expenses.

A quality water softener can cost anywhere from $800 to over $2,500 for the unit alone. Factor in professional installation, and your upfront investment might be closer to $1,200 to $3,300. From there, your main ongoing cost is salt, which will likely run you $100 to $200 per year.

While that might sound like a lot, the payoff is huge. A 2023 study found that a whole-house water softener can cut your soap and detergent use by up to 50%, saving the average family $150 a year. Even better, it can extend the lifespan of appliances like water heaters by 30%, saving you from a premature replacement that could cost over $1,000. If you want to dive deeper into how water quality affects homes, you can explore the full findings on water stress.

Salt-free conditioners have a similar upfront cost but have almost zero ongoing expenses, saving you cash on salt and water. Reverse osmosis systems have their own costs, mainly filter replacements, which can range from $50 to $150 per year. By weighing these lifetime costs, you can pick a system that gives you great water without breaking the bank.

Your Hard Water Questions Answered

Deciding on a water treatment system is a big move, and it's totally normal to have some questions floating around before you commit. Once you start digging into how to fix hard water, you run into all sorts of myths and common worries. Let's tackle them head-on so you can feel good about your decision.

Will My Water Taste Salty?

This is the first thing everyone asks, and I get it. The good news? No, it won't. A properly working water softener uses salt, but only to clean itself. That salty brine solution gets flushed right down the drain during the regeneration cycle—it never makes it to your tap.

A tiny bit of sodium does get swapped for the hard minerals, but we're talking a minuscule amount. To put it in perspective, an 8-ounce glass of softened water has less sodium than a single slice of white bread. Honestly, most people can't taste the difference at all.

Is Softened Water Safe to Drink?

You bet. For the overwhelming majority of people, softened water is perfectly fine for drinking, cooking, and everything else. The only exception might be for someone on a very strict, doctor-ordered, low-sodium diet.

If that's a concern for you, or if you just want the purest water possible, the gold-standard setup is a whole-house softener paired with a reverse osmosis (RO) system under the kitchen sink. The softener protects your pipes and appliances from scale, and the RO filter takes care of the drinking water, removing the trace sodium and just about everything else.

Here's a simple way to think about it: The whole-house softener is for your house. The reverse osmosis system is for your body.

How Do I Pick the Right Size System?

Sizing a softener has nothing to do with your home's square footage. It’s all about two things: how much water you use and how hard that water is. A system that's too small will run itself ragged trying to keep up, regenerating constantly and burning out way too soon. Go too big, and you've just spent more money upfront than you needed to.

To nail the right size, you just need two key numbers:

  • Daily Water Use: A good rule of thumb is 75 gallons per person, per day. So, a family of four will use roughly 300 gallons daily.
  • Water Hardness in Grains Per Gallon (GPG): You'll get this number from your water test kit or a lab report.

Now for the simple math: multiply those two numbers together. For that family of four with water that’s 10 GPG, you'd get 3,000 (300 gallons x 10 GPG). This means you need a system that can remove at least 3,000 grains of hardness each day. Softeners are rated by their total grain capacity (like 32,000-grain or 48,000-grain), which tells you how much hardness they can pull out before they need to regenerate.

Can I Use Softened Water on My Plants and Garden?

This is one area where you need to be a little strategic. Most houseplants and garden veggies aren't big fans of sodium. Over time, watering with softened water can cause salt to build up in the soil, which can stunt their growth or even kill them.

Thankfully, the fix is incredibly simple. When a softener is installed, the plumber should always set it up to bypass the outdoor hose bibs. Most systems also come with a built-in bypass valve. This gives you the best of both worlds: soft water inside for your showers and appliances, and the untreated hard water your garden needs—which still has the calcium and magnesium that plants actually like.


At Water Filter Advisor, our goal is to cut through the confusion and give you clear, practical information to find the right water solution for your home. From our in-depth guides to unbiased reviews, we’re here to help you get safer, better-tasting water. Explore all of our resources today at https://www.waterfilteradvisor.com.

Water Descaler vs Softener: The Ultimate Home Filtration Showdown

So, you're standing at the crossroads of home water treatment, staring down the epic battle of water descaler vs softener. Let's cut through the noise. It all boils down to this: a classic softener yanks out those pesky hard minerals, while a descaler gives them a stern talking-to so they behave and don't wreck your plumbing. Softeners give you that famous silky-smooth water, but descalers are the "set it and forget it" heroes, protecting your pipes and appliances without the drama.

Tackling the Hard Water Villain in Your Home

A close-up of a kitchen sink faucet with running water, showing visible hard water stains.

Hard water is the quiet saboteur of the home. It leaves its calling card everywhere—that crusty white film on faucets, soap scum that just won't quit, and appliances that mysteriously die years before their time. The culprits are simple: water that’s jam-packed with dissolved minerals, mainly calcium and magnesium. They’re like uninvited houseguests that refuse to leave.

While these minerals won't hurt you to drink, they're the building blocks of limescale. That stubborn, rock-like gunk is what clogs your plumbing and strangles your water heater, forcing it to work way harder than it should. To fight back, homeowners have two main weapons in their home filtration arsenal: old-school water softeners and their clever, modern cousins, water descalers.

The Scale of the Problem

Getting a handle on hard water isn't just about sparkling faucets; it’s a big deal with real financial consequences. A mind-boggling 85% of American homes have hard water, making the quest for perfect home water filtration a national pastime.

That limescale can slash the lifespan of your pipes by 2-3 years and jack up your home's energy use by 15-25%. It's no wonder the global market for these treatment systems is expected to hit USD 25.5 billion by 2035.

Descaler vs Softener: A Quick Comparison

Nailing the core difference between these two systems is your first mission. While this guide is all about preventing scale from ever forming, you might also need some effective methods for cleaning hard water stains that have already taken hold.

Here’s a quick tale of the tape.

Feature Comparison Water Descaler (Conditioner) Water Softener (Ion Exchange)
Primary Function Alters mineral structure to prevent scale Physically removes hard minerals
Water Feel Unchanged; no "slippery" feel Silky, "soft" feel
Maintenance None; set it and forget it Requires regular salt refills
Environmental Impact Eco-friendly; no salt or wastewater Creates brine discharge (wastewater)
Best For Scale prevention with minimal upkeep Eliminating all hard water symptoms

The Science Behind Each Water Filtration Method

A water treatment system with a blue tank, control head, pipes, and a gray unit, illustrating 'How It Works'.

When you're trying to solve the "water descaler vs softener" puzzle, you have to get past the sales hype and look at the science. Both systems aim to stop the carnage caused by hard water minerals, but they go about it in completely different ways.

Think of it like this: one is a burly bouncer at a club, physically throwing the troublemakers (calcium and magnesium) out onto the street. The other is more like a wise diplomat, changing their behavior so they don't cause any problems in the first place.

This fundamental difference changes everything—from how your shampoo lathers up to how much work you have to put in and its impact on the planet. Let's lift the hood and see how these home filtration wizards really work.

How Traditional Water Softeners Work: The Ion Exchange Swap

A classic water softener uses a process that’s been the heavyweight champion for decades: ion exchange. This is a chemical magic trick that physically snatches the hardness minerals right out of your water. It’s like a super-specific net that only catches calcium and magnesium.

Inside the main tank is a bed of tiny resin beads loaded with a negative charge. Before you even flip the switch, these beads are covered in "soft" sodium ions. As your hard water flows through, the party starts. The positively charged calcium and magnesium ions are drawn to the negatively charged beads like moths to a flame.

This attraction is so powerful that the hardness minerals literally kick the sodium ions off the beads and take their place. The now-homeless sodium ions flow out with your water, giving you chemically "soft" water all over the house.

The key takeaway: a softener actually changes the chemical recipe of your water. It’s not just stopping scale—it’s creating brand-new water that’s free from the minerals that made it hard in the first place.

This cycle continues until the resin beads are completely saturated with hardness minerals. At that point, the system has to "regenerate." This is just a fancy term for a cleaning cycle where a super-salty solution (brine) from a second tank floods the resin. The rush of sodium ions from the brine pries the trapped calcium and magnesium off, flushing them down the drain. The resin beads are then recharged with fresh sodium, ready for another round.

How Water Descalers Work: The Conditioning Approach

Water descalers—also called water conditioners—take a completely different, almost zen-like approach. Instead of removing the minerals, they change their physical structure to stop them from forming scale. It's a physical transformation, not a chemical one.

There are a few descaler technologies out there, but one of the most proven is Template Assisted Crystallization (TAC). This method uses special media that acts as a template, or a pattern, for the minerals to grow on.

When hard water passes over this media, the calcium and magnesium ions team up and form tiny, harmless "seed crystals." These microscopic crystals are stable and just don't stick to anything—not your pipes, your water heater, or your showerhead.

Here’s what that means for your home:

  • Minerals Stay Put: The beneficial minerals, calcium and magnesium, are still in your water. You just don't have to deal with the scale.
  • Scale Is Prevented: The little crystals just float harmlessly through your plumbing and go right down the drain.
  • No Salt, No Waste: Because nothing is being removed or flushed out, these systems don't need salt and don't create any wastewater.

You might also see electronic or magnetic descalers, which use electric fields or magnets to get a similar result by agitating the minerals so they can't stick together. No matter the tech, the goal is the same: manage the minerals to stop scale without actually taking them out. This is also why you won't get that slick, "slippery" feeling from a descaler that you get with soft water.

Water Descalers vs. Water Softeners: The Showdown

This is where the rubber meets the road. Deciding between a water descaler and a water softener boils down to one question: do you want to manage the hard minerals, or completely eradicate them?

Each path offers a totally different experience for your home and lifestyle. It’s not just a plumbing decision; it affects your morning shower, your monthly bills, and how you maintain your home. The real question is what you value more—getting rid of every single trace of hardness, or a maintenance-free, eco-friendly way to protect your plumbing.

Scale Prevention Effectiveness

Let's be clear: the number one job for both is stopping limescale. A water softener wins with brute force. By yanking calcium and magnesium out of the water, there’s literally nothing left to form scale. It's a time-tested method that’s incredibly effective, especially if your water is rock-hard (think 10 grains per gallon or more).

Water descalers, specifically the Template Assisted Crystallization (TAC) types, are also shockingly good at this. They don't remove minerals but instead change them into microscopic crystals that can't stick to surfaces. Independent studies show these systems can prevent over 95% of scale buildup, putting them in the same league as softeners. The only catch? Electronic or magnetic descalers are a bit of a wild card; their results can be all over the place.

If your water hardness is off the charts, a softener offers a knockout punch. For more moderate hardness, a quality TAC descaler delivers nearly identical scale prevention without messing with your water's chemistry.

Impact on Water Feel and Taste

Here’s where you’ll notice the biggest daily difference. A water softener gives you that distinctively "soft," almost slippery water. Because the hard minerals are gone, soap lathers up like a bubble machine, leaving your skin feeling silky. Some people love it. Others feel like they can never rinse the soap off. Softened water also picks up a slightly salty taste from the ion exchange process, which can be a dealbreaker if you're watching your sodium.

A water descaler, on the other hand, leaves your water completely alone. The minerals are still in there, so you get no change in how your water feels or tastes. It's the same water you've always had, just without the scale-forming downside. You won't get that slippery feeling or mountains of lather. If your only mission is to protect your plumbing and you like your water as-is, a descaler is a perfect match.

Unpacking Maintenance Demands

The long-term ownership experience is a huge factor. A water softener is a bit needy and requires consistent, hands-on attention.

  • Lugging Salt: Get ready to buy and haul heavy bags of salt, usually 40 lbs a pop, to refill the brine tank every month or so.
  • Regeneration Cycles: The system has to clean itself regularly with a brine solution, using up both water and electricity.
  • Tank Cleaning: Every so often, you'll have to clean out the brine tank to prevent "salt bridges" that can shut the whole system down.

A water descaler is the complete opposite. It's the definition of a "set it and forget it" appliance. Once it's installed, you’re done. There's no salt to buy, no wastewater, and most models don't even use electricity. That zero-maintenance reality is a massive perk for anyone who wants a simple, hassle-free filtration solution.

The True Cost of Ownership

When you’re budgeting for home filtration, you have to look past the sticker price. A good descaler and a softener might have similar upfront costs, but their long-term expenses are worlds apart.

To give you a clearer picture, here’s a quick breakdown of how they stack up over time.

Key Differences At a Glance: Descaler vs Softener

Feature Water Descaler (Conditioner) Water Softener (Ion Exchange)
How It Works Alters mineral structure to prevent scale Removes hardness minerals via ion exchange
Scale Prevention Highly effective (TAC models) Extremely effective, total removal
Water Feel No change, feels "hard" "Soft" and silky, sometimes slippery
Maintenance Virtually none ("set and forget") Requires regular salt refills & cleaning
Ongoing Costs None (media may need replacing every 3-5 yrs) Salt, water, and electricity for regeneration
Environmental Impact Eco-friendly, no waste Creates salt-heavy brine discharge
Best For Moderate hardness, eco-conscious homeowners Very hard water, those wanting "soft" water feel

The lifetime cost of a water softener adds up. You're looking at hundreds of dollars a year just for salt, not to mention higher water and electricity bills. A softener can easily waste an extra 25 gallons of water per day—or 3,000 gallons per year—just on regeneration. Over the 10-15 year life of the unit, that's a significant expense. A descaler’s only potential future cost is new TAC media every 3-5 years.

The market shows where people's priorities are. Salt-based water softeners still dominate, holding a whopping 74.18% of the global market share because they are a proven, reliable workhorse. But there's a shift happening. Salt-free systems are projected to have the fastest growth through 2030, a clear sign that homeowners are looking for more sustainable ways to filter their water. You can dig into these trends in recent industry reports on water treatment markets.

How to Choose the Right Filtration System for Your Home

Navigating the water descaler vs softener debate can feel like a chore, but picking the right system for your house is probably easier than you think. It really just boils down to what's in your water, your lifestyle, and what you expect your water filtration system to do.

This isn't about finding the single "best" system. It's about finding the one that’s a perfect match for your specific hard water woes.

The first question to ask yourself is this: are you trying to completely transform how your water feels and behaves, or are you just looking to protect your pipes and appliances from that crusty, destructive limescale? Once you know that, you're halfway there.

Start with a Simple Water Test

Before you even think about shopping, your absolute first step should be to test your water. You can't fight an enemy you don't understand. A water test gives you the hard data you need, telling you your water's hardness level, measured in grains per gallon (GPG).

That one number is your treasure map. It immediately tells you which systems are good options and which would be a waste of money. Without it, you're just guessing.

  • Under 3 GPG: This is soft or just slightly hard water. You can probably skip any treatment.
  • 3-7 GPG: Moderately hard. This is the sweet spot where a quality water descaler really shines.
  • 7-10 GPG: Hard water. At this level, both systems are contenders, and your choice will come down to personal preference.
  • Over 10 GPG: Very hard water. For this level of mineral assault, a traditional salt-based water softener is almost always your best bet.

You can get this info from a simple home test kit or send a sample to a lab. Once you know your GPG, the path forward becomes much clearer.

Scenarios When a Water Softener Is the Clear Winner

A water softener is the right call when your goal is to wipe out all the annoying effects of hard water, not just prevent scale. It works by physically removing the problem minerals, which fundamentally changes your water.

You should be leaning toward a water softener if:

  • Your Water Hardness Is Over 10 GPG. When you're dealing with very hard water, a softener's mineral-removing power offers the most complete protection.
  • You Want That "Soft Water" Feel. If you're after silky-smooth skin, brighter clothes, and soap that lathers like crazy, only a softener can deliver.
  • You Have High Iron Content. Many softeners are also great at removing ferrous iron, the culprit behind those ugly rust stains in your sinks and toilets.

A water softener is an investment in total comfort and mineral removal. It’s the definitive solution for anyone fed up with every single symptom of hard water and willing to do a bit of maintenance to get rid of them for good.

Situations Where a Water Descaler Is Superior

A water descaler is the perfect solution for homeowners focused on preventing scale in an eco-friendly, zero-maintenance way without changing the water itself. It's a modern, set-it-and-forget-it approach to filtration.

A descaler is the better choice for you if:

  • Your Water Hardness Is Moderate (3-7 GPG). Descalers are highly effective in this range, stopping scale buildup before it starts without needing salt or chemicals.
  • You're Watching Your Sodium Intake. Since descalers don't add anything to the water, they're the ideal choice for anyone on a sodium-restricted diet.
  • You Want an Eco-Friendly, No-Fuss System. With no salt bags to haul, no wastewater, and often no electricity, descalers are the ultimate hands-off home filtration solution.

And the market is showing a clear preference for these sustainable options. The global water descaler market was recently valued at $2.1 billion and is projected to hit $3.9 billion by 2034. This huge growth shows that for many people, descalers are a compelling alternative that avoids the hassle of salt, making them a great fit for renters and environmentally conscious families.

This handy flowchart breaks down the decision. You've got the descaler on the left for low-maintenance scale prevention, and the softener on the right for complete mineral removal.

Flowchart guiding the choice between a descaler and water softener for home water systems.

As the chart shows, it really comes down to your water hardness and personal priorities—like how much maintenance you're willing to do. If you're looking for more detailed guidance on different types of home water systems, you can find a lot more information at https://www.waterfilteradvisor.com/advice/.

Installation, Maintenance, and What It Really Costs to Own

A person's hands installing a water treatment device on a brass pipe with a red tool.

When you’re weighing a water descaler vs. a softener, the differences go way beyond how they filter your water. The day-to-day reality of owning one—from setup to upkeep—is a completely different story. Nailing these practical details is key to picking a system you’ll love for years to come.

The initial setup can set the tone. A water softener, for example, is a much bigger job right from the start. It has to be plumbed directly into your home's main water line.

This means a plumber will be cutting pipes, soldering fittings, and running a new drain line for the salty discharge from its regeneration cycles. For most people, this isn't a simple weekend DIY project. If you're leaning toward a softener, getting familiar with the process of water softener installation and repair is a smart move to avoid headaches.

The Simplicity of Descaler Installation

Water descalers, especially the electronic kind, are the complete opposite when it comes to installation. Most of them are designed for an easy DIY setup.

Instead of serious plumbing work, you just wrap some wires or clamp the device onto the outside of your main water pipe. No cutting, no draining, no plumber. This makes them a fantastic fit for renters or anyone who doesn't want to make major changes to their plumbing.

Maintenance: A Tale of Two Systems

The real split between these two systems becomes clear with ongoing maintenance. A water softener needs your constant attention to keep working right. The biggest chore is keeping that brine tank full of salt.

This involves:

  • Constant Salt Runs: You'll be buying heavy, 40-pound bags of salt on a regular basis.
  • Heavy Lifting: Then you have to lug those bags from the store to wherever your softener is located.
  • System Check-ups: You also need to watch out for "salt bridges," which are hard crusts that can form in the tank and stop the whole system from working.

A water descaler, by comparison, is the definition of a "set it and forget it" device. Once it's installed, you're pretty much done.

With a water descaler, you can cross salt bags, tank refills, and system checks off your to-do list for good. This zero-maintenance design is a huge win for homeowners who just want a simple, hassle-free filtration solution.

Calculating the True Cost of Ownership

The sticker price is just the beginning. To get the full financial picture, you have to look at all the ongoing costs over the system's life. A water softener's expenses keep coming long after you've paid for the unit.

Your long-term softener budget needs to account for:

  • Salt: This is the most obvious recurring cost, which can easily run you $100-$300 per year, depending on your water hardness and family size.
  • Water: The regeneration process flushes thousands of gallons of water down the drain each year, which you'll see on your utility bill.
  • Electricity: The system’s control valve and timer are always on, using electricity 24/7.

A water descaler, on the other hand, has almost no running costs. Electronic models use a tiny amount of power, and TAC systems might need a media change every three to five years. But even that is minor compared to the constant cash outlay for a softener, making the descaler a much more predictable and often cheaper choice over its lifetime.

Your Top Questions About Home Water Filtration, Answered

Jumping into the world of water filtration can feel a little overwhelming. When you're stuck between a water descaler and a softener, it’s easy to get lost in the jargon. Let’s clear up the most common questions so you can make a choice you feel great about.

Will a Water Descaler Make My Water Feel Silky and Soft?

Nope, and this is probably the biggest point of confusion in the water descaler vs softener conversation. A descaler won't change how your water feels one bit. You won’t get that classic "slippery" feeling in the shower that’s a dead giveaway of softened water.

That’s because descalers are designed to leave beneficial minerals like calcium and magnesium right where they are. All they do is alter the minerals to stop them from sticking to your pipes as ugly scale buildup. Think of it as a scale prevention device, not a water-feel-changer.

Can I Use a Descaler if I Have Seriously Hard Water?

While descalers are great for moderately hard water, a traditional salt-based softener is almost always the smarter move for very hard water—we're talking anything over 10 grains per gallon (GPG). The same advice holds true if your water has a high iron content.

Softeners are just plain stronger in these tough situations because they physically yank the problem-causing minerals out of the water entirely. This gives your plumbing and expensive appliances far more reliable protection when mineral levels are off the charts.

If your water test comes back in the double digits for hardness, a water softener offers the most complete and effective fix for the long haul. A descaler might not be able to keep up, leaving your home at risk.

Do Water Softeners Add a Ton of Sodium to My Diet?

This is a really common worry, but the amount of sodium a softener adds is usually much smaller than you'd think. The exact amount is tied to how hard your water is—the harder it is, the more sodium is exchanged.

For most people, a full glass of softened water contains less sodium than a single slice of white bread. That said, if you're on a strict, doctor-ordered low-sodium diet, a descaler is the safer choice. Another popular option is to install a reverse osmosis filtration system for your drinking water after the softener, giving you the best of both worlds.

Are All Water Descalers Created Equal?

Definitely not. The performance of water descalers varies wildly depending on the technology inside.

  • Template Assisted Crystallization (TAC): These systems have solid, third-party data to back them up, often preventing over 95% of scale. They're widely seen as the most dependable salt-free option.
  • Electronic and Magnetic Descalers: The results from these gadgets are a lot more debated. Their performance can be hit-or-miss, often depending on your specific water chemistry, pipe material, and water flow rate.

If you’re leaning toward a descaler, looking for one that uses TAC technology is your best bet for results you can actually count on.


Ready to find the perfect water filtration solution for your home? Water Filter Advisor provides expert reviews and in-depth guides to help you compare the best systems on the market. Explore our resources and make a confident choice at https://www.waterfilteradvisor.com.