घर पर बनायें , शानदार वॉटर प्यूरीफायर | Homemade Water Filter How to make water purifier at home

घर पर बनायें , शानदार वॉटर प्यूरीफायर | Homemade Water Filter How to make water purifier at home


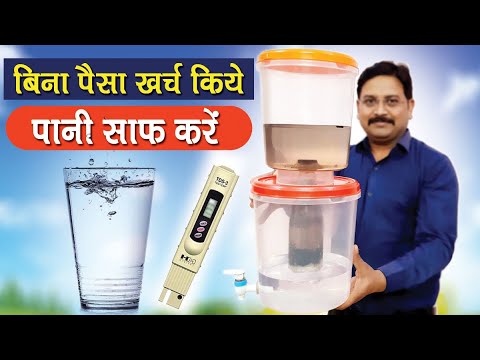
This video is low budget water purifier and you can make it also in free, For make it free use old boxes and a cooldrink bottle. we can check water TDS before and after. Students make this project for science class. DIY water purifier is very easy science project.

►Follow us on Instagram:
►Like Us On Facebook:
►Follow us on Twitter:
►Follow us on Linkedin:

Our Food Chanel-

Equipment used :
Camera Used :
Lens used :
Mic Used :
Desktop Used :
Tripod Used :
Soft Lights Used :

►Follow us on Instagram:
►Like Us On Facebook:
►Follow us on Twitter:
►Follow us on Linkedin:

Container –

Original Video Source

Homemade UV + UF (4 stage) water purifier for tap water- very effective & cheap

Homemade UV + UF (4 stage) water purifier for tap water- very effective & cheap


This is video tutorial to make very effective & cheap 4 stage water purification system to purify municipal water (tap water). You can also add pre- filter as 5th stage, this will increase life of other filters. Pre- filter can be easily clean.
You can find all the material at local spare part shop. Or you can purchase it online using links at the end.
I recommend to purchase the material from local store because prices are little high online.
Materials:-
1x Sediment filter (standard 12 inch filter)
1x Carbon filter (standard 12 inch filter)
1x UF Membrane
1x UV barrel / bowl 8”
1x UV lamp 11 watt (Philips make)
1x UV Choke / adapter 220v AC
1x Teflon tape
6x Elbow (1 side push fit & 1 side threaded)
3x I-connector
12x Push fitting locks
4x C-Clamps
4x X-Clamps (1 side large and 1 side small)
4x 1” Nut bolt
10 feet RO filter Pipe
Double sided tape
2-3” piece of ½” water tube (pipe)
23 x 15 cm piece of plywood
1x Cooler pump (optional)

Note : replace the filters ( sediment, carbon & UF) every 12-18 months based on water uses. Do not drink 1st 10 liters of water during 1st use as it may contain residual dirt etc.

Amazon.in , Ebay.com & amazon.com links

Amazon.in links
Carbon, Sediment filters and Elbows

UF membrane & Elbows

UV barrel, lamp and choke

RO Pipe

RO filter cartridge

You can use nylon tie in place of C-clamps and X-clamps ( there are very expensive online) at local store they are available @ 10 Rs/ Piece

Pre- filter ( 5th stage)

Ebay.com links:

amazon.com links

Original Video Source

Water Purifier Easy Installation & Maintenance Video In Telugu |Self Service at Home|Money Mantan TV

Water Purifier Easy Installation & Maintenance Video In Telugu |Self Service at Home|Money Mantan TV


Water Purifier Easy Installation & Maintenance Video In Telugu |Self Service at Home|Money Mantan TV
#Self Service at Home
#WaterPurifier #WaterPurifierMaintenance #BestPurifiers #BestWaterPurifiers
#TeluguTopVideos #Telangana #WaterPurificationProcess #WaterPurificationTelugu #NeoWaterPurifiers
#NeoWaterPurifierService #WaterPurifierServices #Hyderabad #KentWaterPurifiers #AquaWaterPurifiers
Water purification is the process of removing undesirable chemicals, biological contaminants, suspended solids, and gases from water. The goal is to produce water fit for specific purposes
Access to clean drinking water is a basic need, and you can enjoy the same with this Livpure water purifier. It puts water under a six-stage purification process , the first filter removes fine and coarse particulate matter from water, the second filter absorbs harmful pesticides and odor-causing organic compounds from water, the third filter prevents salts from scaling on membrane layers which improves the membrane’s purification capacity and increases its longevity, the fourth stage is where hazardous chemicals and tiny microbes are removed, the fifth filter disinfects water with UV radiation, and the sixth filter improves the clarity of water by removing fine suspended impurities from it. Additionally, this water purifier also enhances the taste of water by removing volatile organic impurities from it. What you get in the end is clean, odorless, and better-quality drinking water
Keep water-borne diseases away from your home by installing the Kent Ace Plus Water Purifier. This kitchen appliance features a Double Purification system, Kent’s Mineral RO Technology, and a High-storage Capacity to ensure that you do not run out of pure water in your home.
Electrical & Storage Electric purification suitable for areas with water shortage.
8 L More the capacity, more the users can be served with drinking water
RO + UV + UF + TDS Uses many filters to remove salts & microbes in multiple stages,,
Follow Us on:
Subscribe Us
Facebook:
Twitter:
Website:
Website:

Original Video Source

How To Make Water Filter At Home Easy Way DIY

How To Make Water Filter At Home Easy Way DIY

What is the best way to filter tap water?

A tasteless and odorless liquid at room temperature, it has the important ability to dissolve many other substances, the versatility of water as a solvent is essential to live organisms.

Life is believed to have originated in the aqueous solutions of the world’s oceans, and living organisms depend on aqueous solutions, such as blood and digestive juices, for biological processes.

It is one of the most plentiful and essential of compounds, it is vital for all known forms of life, even though it provides no calories or organic nutrients, we are 80% made of water.

Unfortunately, in our modern society, not every water that comes to us is clean, even though it appears clean, tap water for instance has various contaminants that can harm your health, such as chlorine, microorganisms, flour, lead, etc.  If you want to know more you can have a look at your contaminants page right here.

So, answering your question: The best way to filter tap or any other water is to buy the most useful tool against these chemicals and contaminants, which is a Water Filter.

We know that sometimes we cannot afford to buy such equipment, because we are having economical problems, or even we are in places that don’t have it for sale, or maybe you are going on vacation or camping and need fresh and clean water, these are common situations.

You must be asking yourself what are the problems of ingesting unpure water in those cases we mentioned before, I mean, It’s just a few times, right?

And this is the crucial point where you do not want to think like that!! Drinking impure water is the first cause of death for people that are lost in the woods or camping, etc.

You can get very sick and spoil your trip or even worse! Thinking about people that can’t afford the water filter we are going to share How To Make Your WaterFilter- DIY

What is the simplest way to purify water?

Boiling

The simplest and most reliable method to purify water is to boil it for a good amount of time.

High temperatures cause the bacteria and virus to dissipate, removing all impurities from the water.

In doing so, chemical additions cease to exist in the water as well.
However, boiling uses fuel and could take a while. Furthermore, you will need to filter the water to remove all solid particles especially if the water was taken from a doubtful water source.

Use of Iodine solution, tablets or crystals

This is an effective and more convenient method, It can kill viruses and bacteria.

  1. Once you drop the tablet into the water container
  2.  Shake the container and hold the bottle upside down
  3. Have the lid slightly unscrewed to let the iodine to flow into the threads of the bottle cap.But It takes about thirty minutes before you can drink the treated water, it has an unusual aftertaste. Be careful: It is also not suitable for pregnant women.

J.Crow’s Lugol’s Iodine Solution, 2 oz, Twin Pack (2 Bottles) – Lowest heavy metals rating by the Natural News Forensic Food Lab. Equivalent to USP or Higher

What household items can you use to purify water?

A quick trick to make it look better is to pour the water through a coffee filter or clean cloth.

This won’t make it safe to drink, but it can improve the clarity of the water, which will help the following disinfection methods work better.

And remember, if you are very sensitive to chemicals, you can always just boil your water for 10 minutes instead of chemically treating it.

Bleach

Our next trick is to carefully use ordinary household bleach to disinfect water.

As a rule, colder water needs a little more bleach than warm water, and muddier water needs more bleach than clear water. Let the water stand for several minutes if it is muddy, and just pour the clearer water off the top. This will make disinfection much more effective.

  1. Add 2 to 4 drops of ordinary chlorine bleach per quart of water.
  2. Use 2 drops if the water is warm and clear.
  3. Go to 4 drops if it is very cold or murky – or both.
  4. Put the bottle lid back on, and shake the container for a minute.
  5. Then turn the bottle upside down, and unscrew the cap a turn, or two.
  6. Let a small amount of water flow out to clean the bottle threads and cap.
  7. Screw the lid back on tight, and wipe the exterior of the bottle to get the chlorine on all surfaces.

Buy here: Clorox – Concentrated Germicidal Bleach, Regular, 121oz Bottle, 3/Carton 30966CT

Solar Power

Use a clear PET bottle (the one typically used for sodas and soft drinks) as some glasses block out too much of the UV-A rays – If the water is too cloudy then filter it first using a clean cloth before pouring it into the bottle.

Lay the bottle face down under the sun, If it’s a clear sky or not too cloudy – then just 6 hours of sunlight is enough. If not, 2 days of exposure might be required.

Fire

Boiling water can kill almost all bacteria and viruses, to speed up the process you can cover the pot and let it boil.

Chlorine Drops

Chlorine kills the bacteria in the water but can be harmful if added in excess. The package will usually tell you how many drops for how many liters and for how long you need to wait. It typically takes about 30 minutes to treat the water.

HTH 42033 Super 3-inch Chlorinating Tablets for Swimming Pools, 5 lbs – BENEFITS: Sanitizes and protects your pool water so you can enjoy swimming in clean and clear water all season long USE: Place a tab in pool skimmer, floater, or feeder for simple, DIY pool care; 1 tablet treats 10,000 gallons of water for up to a week

How can I make a cheap water filter?

Here is how to make a cheap Water Filter in 12 Steps:

Supplies Needed:

  • Plastic bottle or comparable food-safe container
  • Another container for clean water
  • Clean cotton or cheesecloth
  • Coffee filter or porous cloth
  • Charcoal
  • Sand (fine and coarse)
  • Gravel or pebbles

Step 1 – Cut Bottom Off

Use scissors or a knife to cut off the bottom part of the bottle you will be putting the filter material in.

Step 2 – Cut Drain Hole

Use scissors or a knife to poke a small hole in the cap. If there is no cap, cut off the top of the bottle instead of the bottom for the previous step then poke several small holes in the bottom of the bottle.

Step 3 – 1st Layer: Straining Fabric

Stuff the bottom of the bottle with a fine cloth or paper fabric, such as a coffee filter, cheesecloth or cotton stuffing.

Sand and grass can also be used in this first stage. Fill the bottom with about 3 inches of grass clippings to filter out larger particulates and help give water a clean taste from chlorophyll contained in the grass. Then fill with 3-4 inches of very fine sand.

Be careful not to use poisonous or unidentified weeds when collecting grass clippings. Do not use Highway Department sand, as it can be full of road salt and chemicals.

Step 4 – Break Up Charcoal

Take charcoal from campfire or BBQ charcoal (do not use match/instant light type because it’s soaked in chemicals) and use hammer or rock to break it down into the smallest particles you can.

Step 5 – Layer 2: Pulverized Charcoal

Pour about 3 inches of pulverized charcoal into a bottle. If available, cover with another coffee filter to prevent the charcoal from being displaced too much during filtering.

Step 6 – 3rd Layer: Fine Sand

Add a 2-3 inch layer of the finest sand you can find. This and the subsequent layers you will add are to filter out particulates in the water.

Do not use Highway Department sand, as it can be full of road salt and chemicals.

Step 7 – 4th Layer: Coarse Sand

Add a 2-3 inch layer of coarse sand or very small pebbles.

Step 8 – 5th Layer: Fine Sand

Add 2-3 inch layer of the fine sand. Multiple varying filter stages (like a reverse osmosis system) ensures that most of the particles present in the water are caught.

Step 9 – 6th Layer: Gravel

Add a 2-3 inch layer of gravel or small rocks to prevent the water from being poured in from displacing the sand.

Step 10 – Top Strainer

Cover top of the filter with a piece of porous cloth, such as a bandana or cheesecloth. This step is optional but helpful in straining any large debris from the water and stop the pouring from displacing the sand inside the filter.

Step 11 – Pouring & Collecting

Pour water slowly into the filter while holding it over the second container.

Make sure to wipe off or clean the collection container. Pour water slowly so as not to disturb filter layers too much or to cause filter container to overflow and possibly spilling unfiltered water into the collection container.

Step 12 – Sterilize Water

Even though you have filtered the water through many different layers, microbes can still exist in the water and it still needs to be sterilized. Boiling the water in a pot or kettle is the easiest way.

You can also use sunlight to sterilize water. Pour filtered water into a clean, clear plastic or glass bottle up to 3/4 full and screw-on cap. Shake for thirty seconds to add more oxygen to the water. Place on a light or reflective surface in direct sunlight. The amount of exposure it needs it dependant on weather conditions. A clear day requires 6 hours of exposure whereas 50% or more cloud coverage will require 2 days of sunlight.

If you want a faster step-by-step get a look at our DIY video: