Can Reverse Osmosis Remove Chlorine? Your Ultimate Guide to Pure, Great-Tasting Water

So, can reverse osmosis remove chlorine from your water? Yes, absolutely! An RO system is a fantastic way to banish that swimming-pool taste from your kitchen sink. But here's the plot twist: the famous reverse osmosis membrane, the superstar of the system, isn't the one doing the chlorine-busting. The real hero is a humble activated carbon filter that works as its bodyguard.

Let’s dive into how this dynamic duo gives you perfectly pure water, right from your tap.

Why Your Water Needs a Chlorine Bodyguard

Ever fill up a glass of water and get a whiff of the local pool? That's chlorine, and it’s in your tap water for a very good reason. Water treatment plants add it to annihilate nasty bacteria and viruses, keeping our public water supply safe. We can all thank chlorine for that.

But once that water reaches your home, chlorine’s job is done. What’s left behind is that distinct chemical taste and smell. Even worse, chlorine is a harsh chemical that can wreak havoc on the delicate machinery inside a high-tech water filter. This is where an RO system truly shines, using a clever, multi-stage process to transform your tap water into something spectacular.

The Chlorine Removal Teamwork

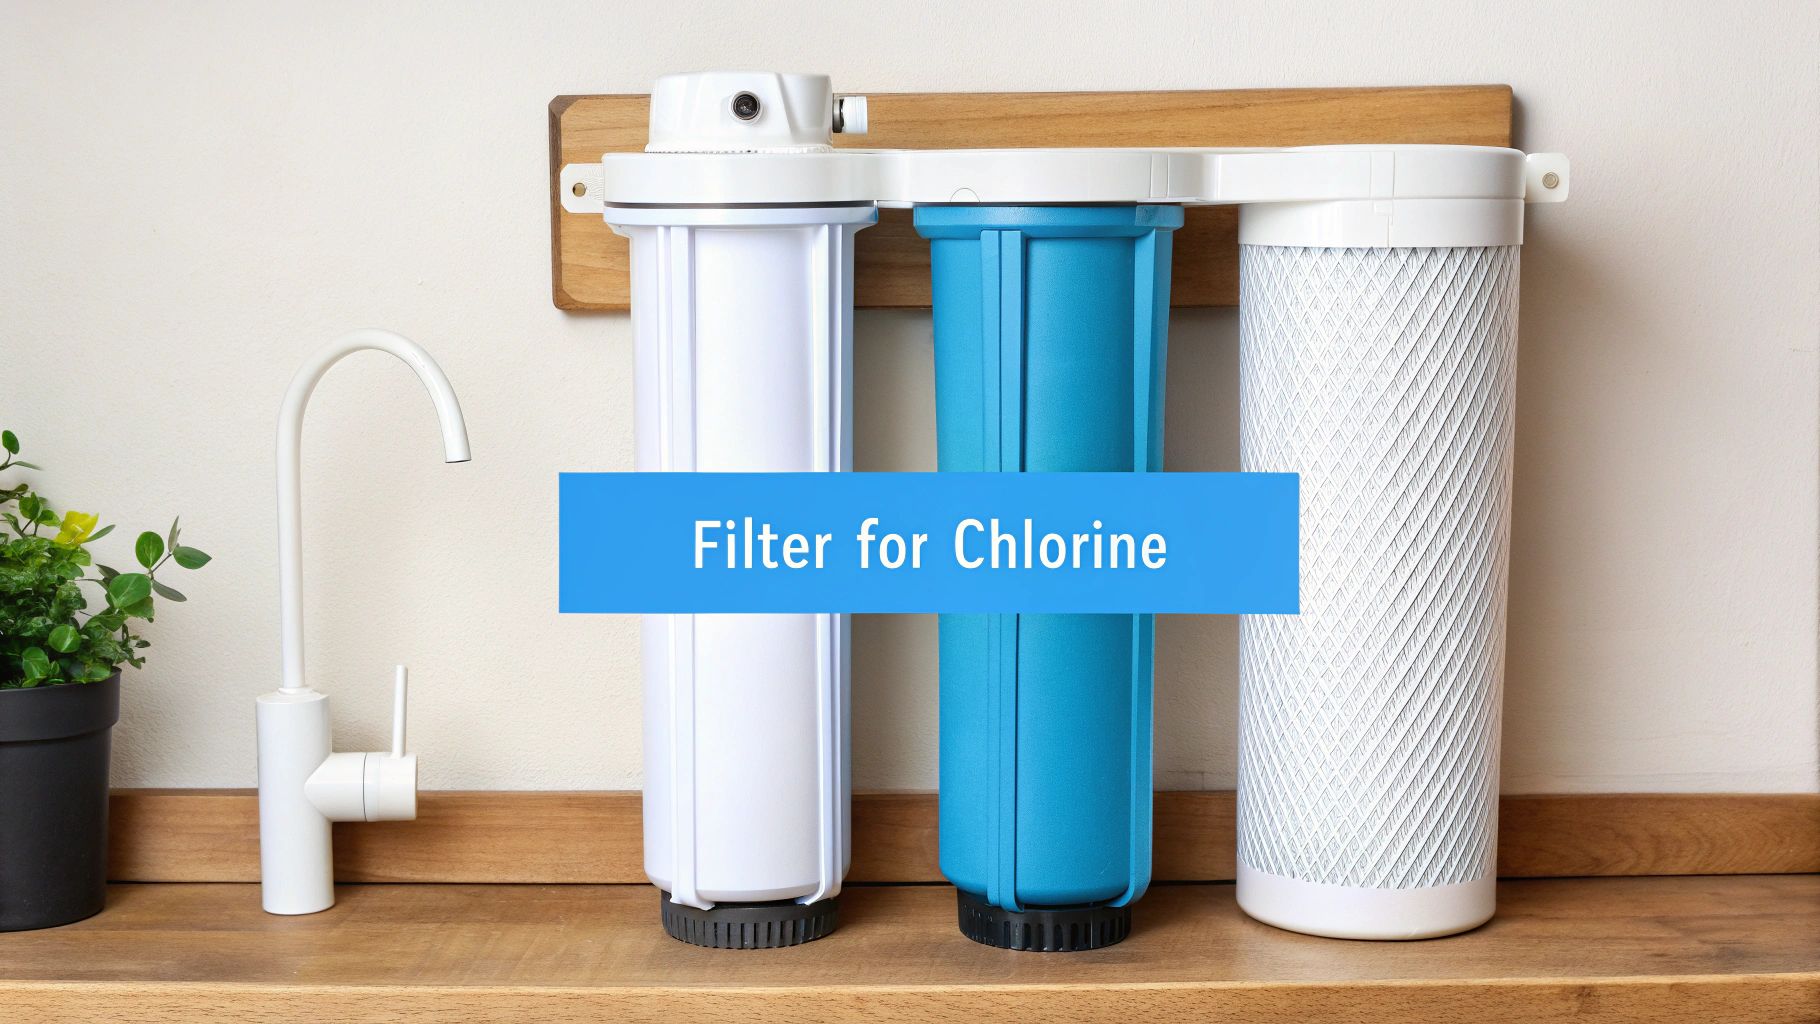
The real magic behind an RO system's chlorine-fighting power is the tag-team effort of two key players. First up is the activated carbon pre-filter, the bouncer at the door, specifically designed to grab chlorine molecules and stop them in their tracks.

Think of it as a bodyguard for the far more sensitive (and expensive) RO membrane that comes next in line.

This first step is non-negotiable. Chlorine is an oxidizer, meaning it will literally shred the microscopic pores of an RO membrane, ruining its ability to filter anything else.

The most crucial job of the carbon filter is protecting the reverse osmosis membrane. Without this pre-filtration step, the membrane's lifespan would be drastically shortened, and the entire system's performance would collapse.

This tag-team approach is incredibly effective. Nearly every home RO system includes an activated carbon pre-filter that strips out up to 99% of chlorine before the water gets anywhere near the main membrane. In U.S. cities where chlorine levels can hit 4 parts per million (ppm) to meet EPA standards, this pre-filter is the system's MVP. You can find more insights about RO performance on leafhome.com. This first stage is what lets us answer "can reverse osmosis remove chlorine?" with a confident yes.

How RO Systems Tackle Chlorine At A Glance

To make it crystal clear, let's break down how each part of a standard home RO system contributes to that perfect, chlorine-free glass of water. This table shows who’s doing what in the fight for pure water.

Component Primary Role Effect on Chlorine Impact on Water Quality
Carbon Pre-Filter Adsorbs chemicals and contaminants Removes up to 99% of free chlorine Eliminates chlorine taste/odor and protects the RO membrane
RO Membrane Separates dissolved solids from water Minimal; not designed for chlorine removal Removes a vast range of contaminants like lead, fluoride, and salts
Carbon Post-Filter "Polishes" the water after the tank Removes any lingering tastes or odors Provides a final improvement to taste and purity before it hits your glass

In short, while the RO membrane gets all the glory for making water ultra-pure, it’s the carbon filters that specifically target and neutralize chlorine, ensuring your whole system works flawlessly for years.

Meet The Carbon Filter: Chlorine's Kryptonite

While the reverse osmosis membrane is the brains of the operation, the real hero of chlorine removal is the activated carbon filter. Think of it as a chemical sponge with an impossibly huge surface area, packed with microscopic nooks and crannies just waiting to trap unwanted chemicals.

When your chlorinated tap water first enters the RO system, it flows straight into this carbon filter. What happens next isn't "filtering" in the normal sense; it's a process called adsorption. Instead of just blocking particles, the carbon's surface actively grabs onto chlorine molecules like a magnet and holds them tight, preventing them from going any further.

Granular Carbon Versus Carbon Blocks

Not all carbon filters are created equal. They typically come in two flavors, and knowing the difference is key to understanding why some RO systems for your home are better than others.

  • Granular Activated Carbon (GAC): These filters contain loose bits of carbon. They work, but sometimes water can find an easy path and create little channels through the granules, letting some chlorine slip by. It's like a lazy river for water molecules.
  • Solid Carbon Blocks: This is the good stuff. Finely powdered carbon is compressed into a dense, solid block, forcing water to navigate a complex maze. This ensures the water spends much more time in contact with the carbon, leading to far more thorough chlorine removal.

Because they're so much more effective, solid carbon blocks are the standard in any high-quality home RO system. They simply leave no escape route for chlorine. It’s these carbon pre-filters that allow modern RO systems to adsorb chlorine and other volatile organic compounds (VOCs) at rates higher than 99%. You can learn more about what else RO removes on frizzlife.com.

This pre-filter isn't just a nice-to-have feature; it's absolutely critical. Chlorine is a powerful oxidizer that will literally eat away at the delicate RO membrane, destroying it in short order. The carbon filter is a bodyguard, taking the hit to protect the main system.

Why Regular Filter Changes Are Crucial

Like a kitchen sponge, a carbon filter can only hold so much gunk. Over time, all its little pores get clogged with the chlorine and other impurities it has pulled from your water. Once it's full, it effectively clocks out and stops working.

When that happens, the carbon can no longer protect the RO membrane, and you'll probably start to notice that chlorine taste and smell creeping back into your water.

That's why sticking to the manufacturer's replacement schedule—usually every six to twelve months—is non-negotiable. Swapping out a carbon pre-filter is a cheap and easy task that protects the much bigger investment you made in the RO system itself. It’s the secret to keeping the whole setup working like new, year after year.

The Role Of The Reverse Osmosis Membrane

Once the carbon pre-filter has neutralized the chlorine, it's time for the star of the show to take the stage: the reverse osmosis membrane. This is where your ordinary tap water is transformed into something exceptionally pure through a filtration process so fine-tuned it operates on a molecular level.

Think of the RO membrane as the world's most exclusive bouncer. It has an incredibly strict guest list, and only pure water molecules are getting past the velvet rope. Your home's water pressure is all it takes to push water against this semi-permeable sheet. The pores in this membrane are ridiculously small—around 0.0001 microns—so only H₂O molecules are tiny enough to slip through.

Everything else? It gets turned away and flushed down the drain.

What The RO Membrane Actually Removes

This is where a home RO system truly earns its keep. The membrane is engineered to block a massive list of dissolved contaminants that most other filters can't even see. Its primary mission is to target and strip out the stuff that's chemically bonded with the water itself.

This includes a whole host of things you definitely don't want in your drinking glass:

  • Heavy Metals: Nasty stuff like lead, arsenic, mercury, and chromium are stopped dead in their tracks.
  • Dissolved Solids (TDS): This catches all the salts, nitrates, and other inorganic compounds that contribute to high TDS readings.
  • Fluoride: The RO membrane is one of the single most effective ways to reduce fluoride added to municipal water supplies.
  • PFAS: Those notorious "forever chemicals" that persist in the environment are also rejected by the RO process.

So, the RO membrane is the heart of the purification process. It tackles the most difficult contaminants, but it can only do its job safely because its bodyguard—the carbon pre-filter—has already taken out the damaging chlorine.

The Final Polish for Perfect Taste

After making its way through the membrane, the water is unbelievably pure. But most high-quality systems add one last step to guarantee a perfect glass of water every time. This purified water is held in a small storage tank under your sink, ready for when you need it.

Before that water ever gets to your faucet, it flows through a final carbon "post-filter." This last stage acts like a polishing filter, getting rid of any lingering off-tastes or odors the water may have picked up while sitting in the tank.

This finishing touch ensures the water you drink isn't just incredibly clean, but also has that crisp, refreshing taste you expect from bottled water. It's this complete, multi-stage approach—pre-filter, membrane, and post-filter—that makes a reverse osmosis system so incredibly good at delivering truly purified water right from your kitchen sink.

Chlorine vs. Chloramine: The Filtration Curveball

Just when you think you’ve got water figured out, your local water utility might throw you a curveball. A growing number of municipalities are now using chloramine instead of chlorine to disinfect the water supply. In fact, about one in five Americans now has chloramine-treated water piped into their home.

They both do the same job of killing germs, but they behave completely differently when they meet a water filter. Understanding this difference is critical to ensuring your home RO system is actually doing the job you hired it for.

Why Chloramine Is A Different Beast

So what’s the big deal? Chloramine is made by mixing chlorine with a little ammonia. This creates a much more stable chemical that sticks around in the water longer. That’s great for keeping pipes clean across a city, but it's a huge problem for the standard activated carbon filters we’ve been talking about.

The chemical bond in chloramine is simply too tough for regular carbon to break. A standard RO pre-filter that’s an all-star at removing chlorine will let a ton of chloramine pass right through. This doesn't just affect your water's taste; it sends a damaging chemical straight to the delicate RO membrane—the very component the pre-filter is supposed to protect!

The bottom line is simple: a standard carbon filter is the wrong tool for removing chloramine. Using one against chloramine is like trying to unlock a door with the wrong key—it just won’t work, and you might damage the lock in the process.

The Solution: Catalytic Carbon

So, what's the answer? You need a specialized type of filter media called catalytic carbon. Think of it as activated carbon that’s been given a superpower. Its surface has been modified to act as a catalyst, actively snapping that stubborn chlorine-ammonia bond.

This special process allows the filter to completely neutralize the chloramine, removing both the chlorine and ammonia components before they can do any harm. If your city uses chloramine, an RO system with a catalytic carbon pre-filter isn't just a good idea—it's an absolute necessity for your home.

Choosing The Right Filter: Chlorine vs. Chloramine

Characteristic Chlorine Chloramine
Chemical Makeup Simple chlorine (Cl) Chlorine + Ammonia (NH₂Cl)
Stability Less stable, dissipates quickly Highly stable, lasts longer
Taste & Odor Distinct "pool" smell Milder, but can affect taste
Required Filter Standard Activated Carbon Catalytic Carbon is needed

The easiest way to find out what your municipality uses is to check your local water utility’s annual water quality report, which is usually posted on their website. A quick search will tell you exactly what you’re dealing with, allowing you to pick a home RO system with the right pre-filter for the job.

What Else Does A Reverse Osmosis System Remove?

You came here wondering how to get rid of chlorine. What you've discovered is a system that provides a powerful, multi-layered defense against a massive range of water contaminants.

Choosing an RO system just for a chlorine problem is like hiring a world-class security team to stop a dog from barking. You end up with so much more protection than you ever imagined.

This isn't just about making your water taste and smell better. It’s about delivering genuine peace of mind by targeting all the unseen and unwelcome guests flowing from your tap. The whole system is engineered to catch a wide array of contaminants that other home water filters simply can't touch.

Beyond Chlorine: A Wider Net of Protection

The real beauty of a reverse osmosis system is its comprehensive approach. The same process that shields the membrane from chlorine also eliminates a host of other troublemakers in your water.

Here’s a quick rundown of what else a complete RO system is designed to kick to the curb:

  • Heavy Metals: Lead from old pipes, arsenic, and mercury are all effectively rejected by that super-fine RO membrane.
  • Nitrates and Sulfates: These dissolved salts, often from agricultural runoff, are easily removed.
  • PFAS "Forever Chemicals": An RO membrane is one of the single most effective ways to remove these stubborn industrial chemicals right in your home.
  • Disinfection Byproducts (DBPs): When chlorine mixes with organic matter in water, it can create nasty compounds like Trihalomethanes (TTHMs). That carbon pre-filter helps reduce these, too.

This multi-stage process provides a serious safety net. By knocking out chlorine first, the system lets the RO membrane do its job at peak efficiency, removing up to 99% of all total dissolved solids (TDS) from your water.

The numbers don't lie. While typical U.S. tap water has about 1.0-1.5 mg/L of chlorine, RO systems bring this down to practically zero. At the same time, the carbon and membrane stages work in tandem to achieve 90-99% removal of PFAS, 85-95% of fluoride, and a huge percentage of heavy metals. For more details, check out the EPA's overview of drinking water treatment technologies.

So, when you install a reverse osmosis system in your home to fix a chlorine issue, you're getting a solution that does so much more. You're investing in a purification process that ensures the water your family drinks isn't just better-tasting, but fundamentally safer and cleaner.

Choosing And Maintaining Your Home RO System

Alright, you’re ready to kick that chlorine taste out of your water for good. Picking the right reverse osmosis system for your home and keeping it running smoothly is actually pretty straightforward. With a little know-how, you can enjoy pure, clean water for years. It's a fantastic upgrade for any kitchen.

The first thing to look for is an official certification. A system that's NSF/ANSI 58 certified has been rigorously tested by independent labs to prove it really does what it claims. That seal is your guarantee that it will take care of chlorine and a whole lot more.

Clear water in a glass, with laboratory test tubes in the background, highlights contaminant removal.

Upgrading Your Water Quality

A popular add-on for home RO systems is a remineralization filter. See, RO is so good at purifying that it strips out everything—including beneficial minerals like calcium and magnesium. A remineralization stage simply adds those healthy minerals back in after the water is purified.

This simple addition does two great things:

  • It significantly improves the taste, giving you a smoother, more natural flavor instead of the "flat" taste some purified water has.
  • It also bumps up the water's pH, balancing out the acidity and making it healthier to drink.

Keeping your system in top shape comes down to a simple, predictable maintenance schedule. Stick to it, and your water will stay pure and your system will be protected from damage.

Your Simple RO Maintenance Schedule

Changing the filters regularly is the absolute key to making your system last and ensuring it keeps pulling chlorine out effectively. The schedule can vary a bit between brands, but most follow a pretty standard, easy-to-manage timeline.

  • Sediment & Carbon Pre-Filters: These are the frontline workers. Plan on swapping them out every 6 to 12 months to stop chlorine and sediment from ever reaching the membrane.
  • RO Membrane: This is the heart of the operation. Because the pre-filters do such a great job protecting it, the membrane itself only needs to be replaced every 2 to 4 years.
  • Carbon Post-Filter: This is the final polishing step. Change it every 12 months to keep your water tasting crisp and clean.

Follow these simple steps, and you'll have no trouble picking out a great home system and keeping it in perfect shape. For more detailed guides and tips, you might want to check out the extensive advice section on WaterFilterAdvisor.com.

Common Questions About RO Systems And Chlorine

Jumping into the world of home water filtration can feel a little overwhelming, but we’ve got your back. Here are some clear, no-nonsense answers to the most common questions homeowners ask about reverse osmosis and chlorine.

Will An RO System Affect My Kitchen's Water Pressure?

Nope, it won't touch the pressure at your main kitchen faucet. An under-sink RO system connects to its own dedicated, smaller faucet that gets installed right next to your main one.

The flow from the RO faucet itself is a bit slower—that’s the intensive purification process at work—but it fills a storage tank under your sink. This means you always have a few gallons of perfectly purified water ready to go, whenever you want it.

How Do I Know When To Change The Carbon Pre-Filter?

Most manufacturers suggest swapping it out every 6 to 12 months. But the best way to know for sure? Trust your senses.

If you suddenly notice that familiar chlorine taste or smell creeping back into your water, that’s your filter crying for help. It means the carbon is saturated and can't absorb any more chlorine, leaving your delicate RO membrane exposed. Change it right away.

Don't wait for a bad taste to be your only reminder. Sticking to a regular replacement schedule is the best way to ensure your system consistently removes chlorine and protects its most vital components from damage.

Beyond just filtering chlorine, understanding the broader health implications, such as the symptoms of chemical sensitivity, highlights the comprehensive benefits of clean water in creating a healthier living space.

Can I Install A Home Reverse Osmosis System Myself?

Absolutely. Most under-sink RO systems sold today are designed with DIY in mind. They usually come with easy-to-follow instructions, quick-connect fittings, and color-coded tubing that takes the guesswork out of installation.

If you’re comfortable with basic home plumbing tasks, you can likely get it done in an afternoon. If not, any plumber can handle the job quickly and ensure it’s a leak-free setup.


Ready to enjoy the purest, best-tasting water right from your kitchen sink? The experts at Water Filter Advisor provide in-depth guides and unbiased reviews to help you choose the perfect RO system for your home. Explore your options today at https://www.waterfilteradvisor.com.

Learn How to Test for Chlorine in Water with This Easy Guide

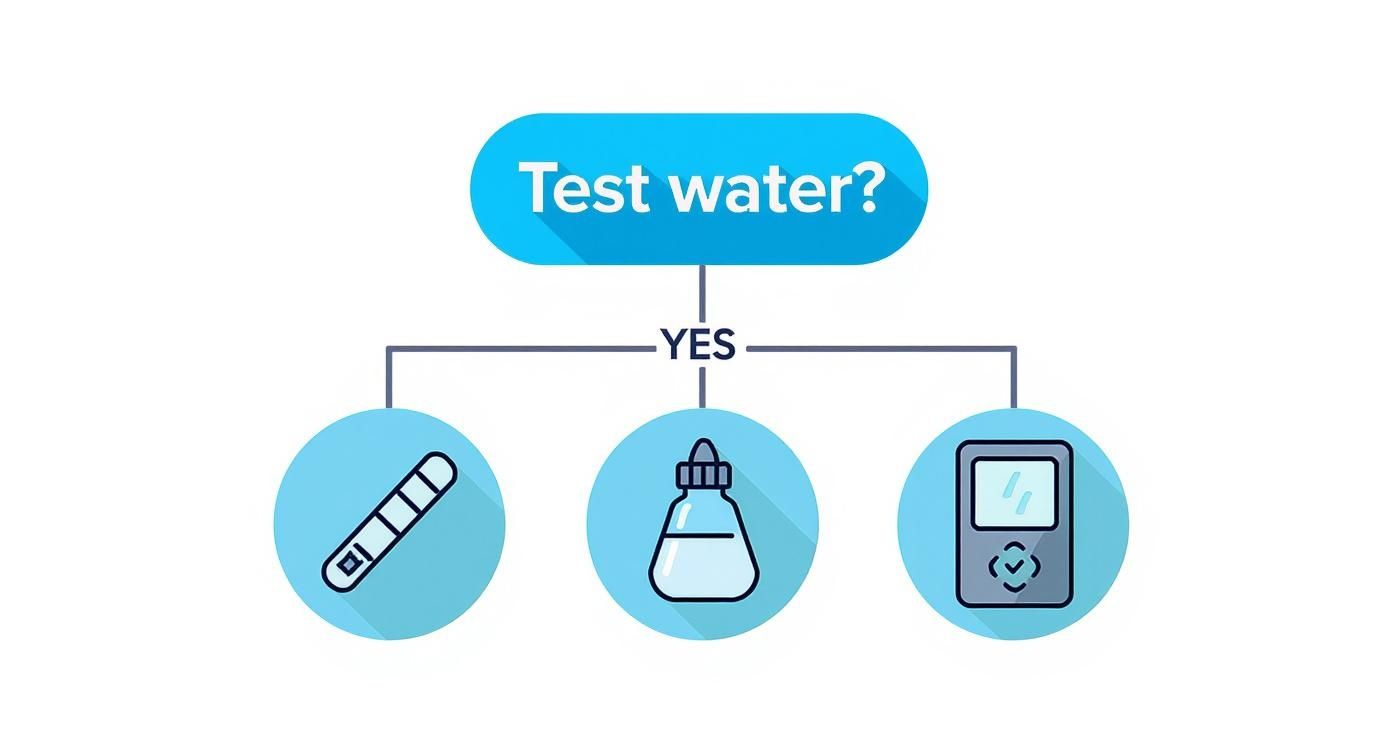
So you want to know what's really in your tap water? Good call. Testing for chlorine is surprisingly simple. You can use test strips, grab a liquid kit, or get fancy with a digital meter. This quick check is your first step to exposing the secrets in your pipes, arming you with the intel needed to pick the right water filtration system. The goal? To finally get that pure, clean taste you've been missing.

Why Bother Testing Your Tap Water for Chlorine?

Let's be real—most of us turn on the tap without a second thought. But ever catch a whiff of that faint swimming pool smell? That’s your old friend, chlorine. It's the go-to disinfectant that stops our public water supply from becoming a bacterial free-for-all.

While it's a hero for public health, its job should be over long before that water hits your coffee maker. Knowing the specific chlorine levels in your home's water is the secret to choosing a filter that actually works. This isn't about guesswork; it's about getting hard numbers so you can make a smart move. Think about it—before modern water treatment, cities were constantly fighting off waterborne diseases. The introduction of chlorination was a game-changer, slashing illnesses like typhoid and cholera. But that doesn't mean you want it in your drinking glass.

Free Chlorine vs. Total Chlorine: The Showdown

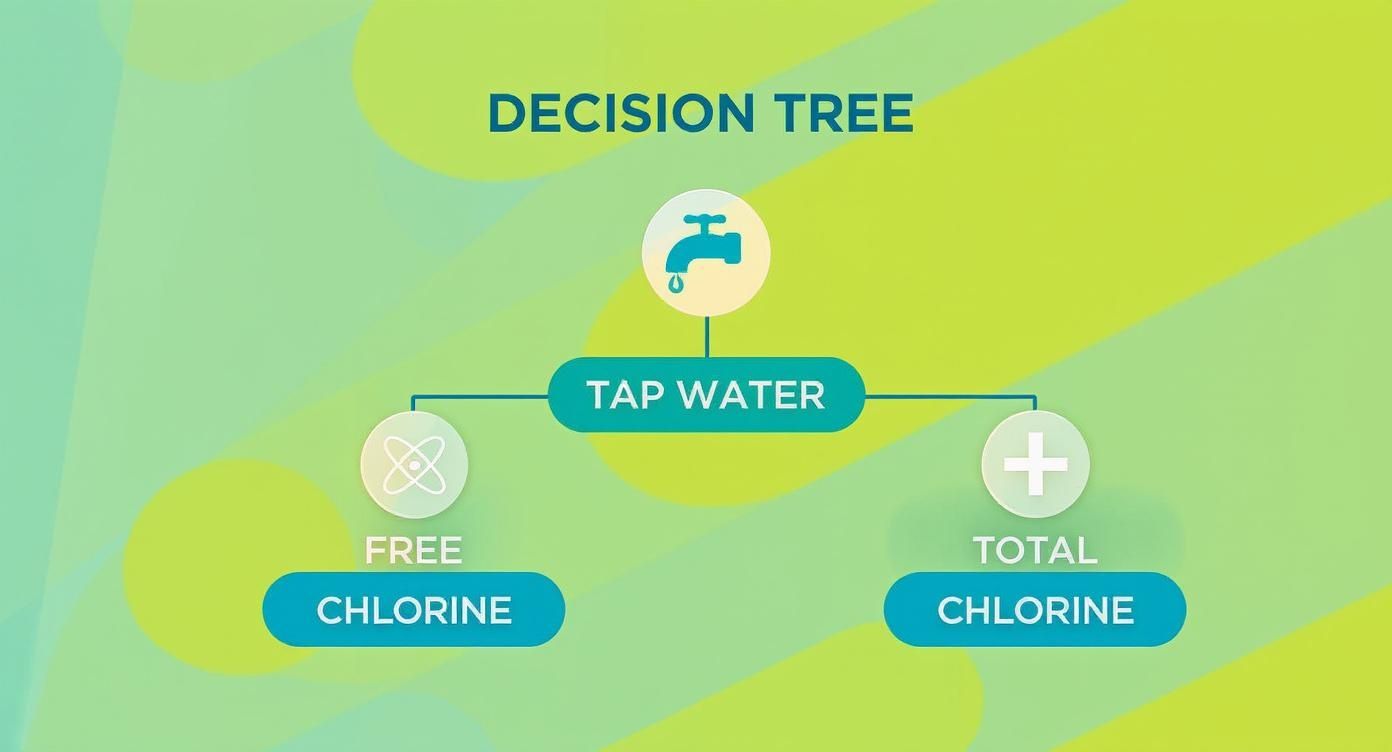
When you run a test, you're looking for two different villains. Nailing down the difference between them is the key to finding a filter that will actually get the job done.

  • Free Chlorine: This is the active, germ-killing stuff. It's the frontline soldier keeping your water safe as it travels from the treatment plant to your faucet.
  • Total Chlorine: This is the big number that includes both free chlorine and its sneaky sidekicks, chloramines. Chloramines are what you get when chlorine mixes with organic stuff in the water. They are more stubborn and are often the real culprit behind that "chemical" taste and smell you can't stand.

Knowing both figures helps you diagnose the problem. High free chlorine means a strong chemical taste. But high total chlorine points to those pesky chloramines, which many basic filters can't touch.

Testing takes all the guesswork out of buying a water filter. It gives you a clear, data-driven starting point so you can invest in a solution that targets what's actually in your water, instead of just grabbing a generic filter pitcher that might not be up to the task.

This proactive approach puts you in control. Just like you'd want to know what's in your water, it's smart to consider other parts of your home's environment, like the air you're breathing every day. You can learn more about creating a healthier living space with expert air quality tests for a safer home. Ultimately, testing for chlorine empowers you to take charge of your water quality, leading you straight to the perfect filtration strategy.

Finding the Right Chlorine Test Kit for Your Home

Choosing a chlorine test kit can feel a bit overwhelming. Walk into any hardware store and you'll see a wall of options—strips, droppers, and digital readers, all promising to reveal the truth about your water. The trick is to match the tool to your mission. Your home water filtration goals will point you to the right choice.

Think of it this way: if you just snapped a new filter into your pitcher and want a quick thumbs-up that it's working, simple test strips are perfect. They're cheap, fast, and give you a solid ballpark reading in seconds.

But if you're installing a whole-house filtration system or trying to figure out why your tap water tastes a little "off," you're going to need more precision. That’s where liquid reagent kits and digital meters enter the ring. They deliver the detailed data you need to make bigger, more informed decisions about your home's water quality.

Comparing Your Testing Options

The world of home water testing really boils down to three main players. Each has its own strengths and weaknesses, so there's no single "best" option—it's all about what fits your budget, your patience, and your need for dead-on accuracy.

To make it easier, I've put together a quick comparison of the most common types of chlorine test kits you'll find. This should help you zero in on the best one for your situation.

Comparison of Home Chlorine Test Kits

Test Kit Type Best For Accuracy Ease of Use Average Cost
Test Strips Quick spot-checks & confirming a filter is working Low to Moderate Very Easy $10 – $20
Liquid Reagent Kits Accurate home testing & troubleshooting Moderate to High Moderate $15 – $30
Digital Meters Precise, data-driven analysis & system optimization Very High Easy $50 – $150+

As you can see, you can get started for very little money, but investing a bit more can give you a much clearer picture of what's happening in your pipes—and which filter can fix it.

Let’s break these down a bit more:

  • Test Strips: The speed demons of water testing. You just dip a strip into your water, wait a few seconds, and match the color to a chart. They're fantastic for quick checks and getting that instant gratification that a new filter is doing its job.
  • Liquid Reagent Kits: The reliable workhorse. You add a few drops of a chemical reagent (like DPD) to a vial of water, and it changes color. Compare that hue to a color chart to find the chlorine level. This is a big step up in accuracy from strips without a huge jump in price.
  • Digital Meters (Colorimeters): For the data nerds and precision fanatics. It works like a liquid kit, but instead of you squinting at a color chart, a light sensor measures the color change electronically. This eliminates the guesswork and gives you a precise, numerical reading—perfect for optimizing a high-end filtration system.

This infographic breaks down the two key measurements you'll be taking when you test for chlorine.

Infographic about how to test for chlorine in water

Understanding both free chlorine and total chlorine is fundamental. These two numbers are the foundation for any smart home filtration strategy.

Matching the Kit to Your Goal

Before you buy anything, ask yourself why you're testing. Are you just curious, or are you on a mission to solve a problem like dry skin after a shower or foul-tasting coffee?

The goal isn't just to get a number; it's to get actionable intel for your filtration strategy. A quick, cheap test is great for confirming a filter works, while a more precise test is essential for choosing and optimizing a whole-house system.

If you're about to invest in a serious filtration setup, you absolutely need an accurate baseline measurement first. For more in-depth guidance on choosing the right filters, check out the expert advice on Water Filter Advisor. Getting good data from the start is the only way to be sure you’re picking a solution that will actually solve your specific chlorine issues.

A Practical Guide to Testing Your Water

Person using a liquid reagent kit to test tap water for chlorine.

Alright, you've got your test kit. Now for the fun part. Forget the tiny, confusing print on the box for a minute—let's walk through how to actually do this right. Getting an accurate reading is the whole point, and a few simple tricks can make all the difference in choosing the right filter.

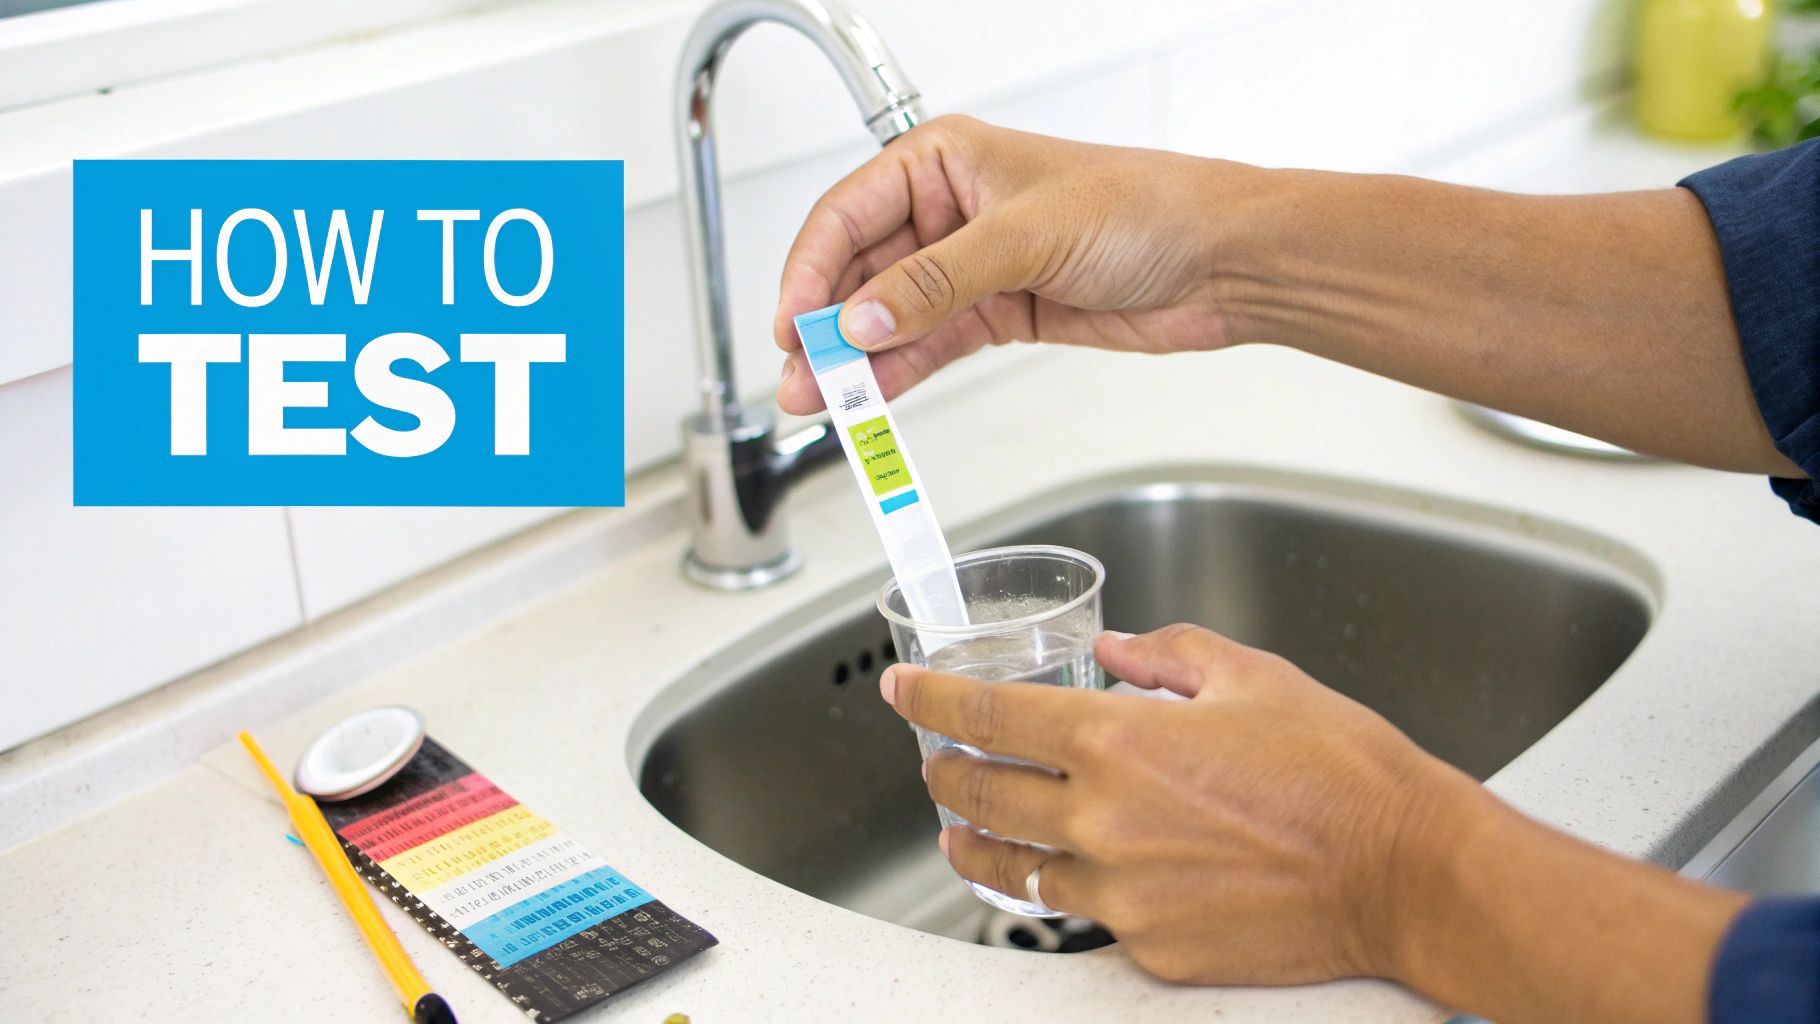
First things first: grab your water sample. Don’t just stick the vial under a trickling tap. Let the cold water run for at least 30 to 60 seconds. This flushes out any stagnant water sitting in your pipes, giving you a sample that truly represents what's flowing into your home from the main line.

Mastering Test Strips Without Mistakes

Test strips are the quickest way to get a reading, but their speed can be their downfall if you’re not careful. The most common mistake? Rushing the timing.

If you just dip the strip and immediately check the color, you'll get a faint, inaccurate reading. But if you leave it in too long, the reagents bleed out, also messing up the results. The sweet spot is a quick dip-and-remove, then waiting the recommended time—usually 15 to 30 seconds—before you match the color.

A few pointers to get it right every time:

  • Keep it level: After dipping, hold the strip perfectly horizontal. This stops the colors on the different pads from running into each other and muddying the results.
  • Find good light: Don't try to read the strip in a dim kitchen. Natural daylight is your best friend, as artificial lights can totally change how the colors look.
  • Hands off the pads: The oils on your fingers can contaminate the little reagent pads. Always hold the strip by the plastic end.

Nailing the Liquid Reagent Drop Test

Liquid reagent kits, often using a DPD indicator, give you a nice bump in accuracy. You add a few drops to your water sample and watch for a color change, usually some shade of pink or red. It sounds simple, but the details really matter.

When the instructions say to "mix," they mean a gentle swirl or turning the capped vial over a couple of times. They definitely don't mean a vigorous, bubble-making shake. Shaking too hard dissolves extra oxygen into the water, which can interfere with the chemical reaction and skew your results.

Your goal is an even, consistent color throughout the sample. A gentle swirl is all it takes to mix the reagent completely without adding other variables that could lead you to buy the wrong type of filter.

Here’s another pro tip: hold the vial against a plain white background when you compare it to the color chart. A busy countertop can trick your eyes into seeing a different shade. A simple white piece of paper works perfectly and ensures you’re making an accurate assessment.

This kind of color-based testing has been the backbone of water safety for a long time. Developing reliable methods to test chlorine was a cornerstone of public health for over a century. Early techniques were basic, but modern tech allows treatment plants to keep chlorine levels in that sweet spot—between 0.2 and 2.0 mg/L—to kill germs without ruining the taste. You can learn more about the history of water testing on the USGS website.

Making Sense of Your Chlorine Test Results

So you've done the test, and now you’re staring at a color or a number. What does it actually mean for your water filtration plan? The real trick is translating jargon—like "parts per million" (ppm) or "milligrams per liter" (mg/L)—into a clear course of action.

A test result isn't just data; it's a direct command from your water on which filter to buy. Most city water systems aim to keep chlorine between 0.2 and 2.0 ppm. The EPA sets the absolute maximum at 4.0 ppm, a level your water should never even approach.

Getting these numbers right is a delicate balancing act for water engineers. They need enough chlorine to kill pathogens but not so much that it creates an unpleasant taste or harmful byproducts. You can learn more about how global water safety standards are maintained on ketos.co.

What Your Chlorine Reading Tells You

Honestly, what you do next comes down to your personal goals. Your test result is your personal benchmark for deciding if you need a water filter—and if so, which kind.

Let's break it down with some real-world filtration scenarios:

  • Below 0.5 ppm: This is great news. Your water probably has very little chemical taste. A simple carbon-based pitcher or faucet filter is likely all you need to polish it to perfection.
  • Between 0.5 ppm and 1.5 ppm: This is typical for most city water. You can definitely smell and taste the chlorine here. It might even cause dry skin. This is where a more robust under-sink or countertop filter becomes a smart upgrade.
  • Above 1.5 ppm: At this level, the chlorine is impossible to ignore. Your iced tea tastes funky and your shower feels harsh. You should seriously consider a whole-house filtration system to get the chlorine out of every single tap.

A reading of 1.0 ppm might be perfectly safe according to public health guidelines, but if you're battling dry, itchy skin or can't stand the taste in your morning coffee, your personal standard is what truly matters when choosing a filter.

Free vs. Total Chlorine: What's the Goal for Filtration?

When it comes down to it, for the water you drink and shower in, you want both your free and total chlorine numbers to be as close to zero as possible. A good filtration system makes this happen.

Any reading above zero simply means there's a disinfectant in your water that has already done its job. Your test results give you the exact data you need to choose the right filtration system to get you there, turning a confusing number into a clear plan of action.

Choosing a Water Filter Based on Your Chlorine Levels

Person installing an under-sink water filter.

Alright, you've done the detective work. You have your test results. That's the diagnosis; now it's time for the cure. With your chlorine numbers in hand, you can stop guessing and finally pick a filter that solves your specific water problem.

When it comes to chlorine removal, there's one clear champion: activated carbon.

Think of it like a powerful chemical magnet. Through a process called adsorption, it grabs onto chlorine and chloramine molecules, pulling them right out of your water. So, the real question isn't if you need a carbon filter, but which type is the right fit for your home.

Matching the Filter to Your Test Results

Your test results are your personal roadmap to pure water. A high chlorine reading just at the kitchen sink points to a completely different solution than a house-wide issue that makes your skin feel tight and itchy after every shower.

  • Low to Moderate Chlorine (0.5 – 1.5 ppm): If you're mainly looking to improve the taste of your drinking water, a simple point-of-use filter is a great, wallet-friendly choice. This could be a pitcher filter, a faucet-mounted unit, or a countertop system. They're dead simple to install and focus on the water you consume.
  • High Chlorine (>1.5 ppm): When your tests come back high, you feel the effects everywhere. This is when it's time to upgrade to a more serious system. An under-sink filter is a fantastic option for a dedicated stream of purified water, while a whole-house system tackles the problem at the source.

If your tests show high chlorine levels all over the house, a whole-house system is hands-down the best investment. It doesn't just fix the taste of your drinking water—it deals with the chlorine you absorb in the shower and the stuff that’s fading your clothes in the laundry.

Point-of-Use vs. Whole-House Systems

An under-sink system strikes a great balance. It gives you high-performance filtration right where you need it most—the kitchen tap—without the expense and installation of a full whole-house unit. These systems typically use larger, more powerful carbon block filters than what you'd find in a basic pitcher.

But if you’re truly fed up with dry skin, brittle hair, and that swimming pool smell every time you turn on a faucet, only a whole-house carbon filtration system gets to the root of the problem. It's installed at your main water line, transforming every single tap in your home into a source of clean, chlorine-free water.

Your test results gave you the data. Now you can make an informed choice and invest in a solution that will directly fix your water quality issues.

Common Questions About Chlorine Water Testing

Once you start testing, a few common questions almost always pop up. Let's tackle some of the things people wonder about as they dive deeper into their home filtration journey.

How Often Should I Test My Water?

This all comes down to your filtration setup and your goals.

If you have a whole-house carbon filter, checking your water every three to six months is a smart move. This confirms the system is still working hard and gives you a heads-up when a filter change is on the horizon.

Using a simpler pitcher or faucet filter? A quick test right after you install a new cartridge is a great way to confirm it’s working. After that, testing once or twice a year—or anytime the water starts tasting "off"—is plenty.

Why Do Chlorine Levels Change Seasonally?

You're not imagining things if your water seems more chlorinated in the summer. It's a real phenomenon.

When it gets hot, the warmer water in pipes and reservoirs creates a breeding ground for bacteria. To fight this, municipal water suppliers often increase the amount of chlorine they add. This means your filtration system has to work harder in July than in January, which is why regular testing is so important.

Do I Need a Special Kit for Chloramine?

Yes, and this is a big one. It's a critical distinction many people miss.

Most standard chlorine test kits use a DPD reagent that only measures free chlorine. The problem is, they can't properly detect chloramines—a more stable compound of chlorine and ammonia. Testing for chloramine requires a different chemical reaction.

To get the full story, you need a test kit that specifically measures total chlorine. The difference between your total and free chlorine readings reveals the amount of chloramine present. This is vital to know because chloramine is much harder for many standard carbon filters to remove, often requiring a special type of filter called catalytic carbon.

Here's a little pro tip: Don't just toss an expired test strip. While you shouldn't trust it for an exact reading, an old strip can often still give you a basic "yes/no" indication for high chlorine levels. It's handy for a quick, informal check when you don't need a precise number.

Keeping up with testing is what empowers you to make the best decisions for your home's water filtration. It ensures the system you've invested in is actually working as hard as you expect it to.


At Water Filter Advisor, we're dedicated to helping you find the perfect filtration solution based on your specific needs. Explore our in-depth guides and reviews to make a confident, cost-effective decision for safer, better-tasting water at home. Learn more at https://www.waterfilteradvisor.com.

How to Reduce Chlorine in Your Home Water: A Filtration Guide

Tired of your tap water tasting like it just came from the local swimming pool? The undisputed champion for banishing chlorine from your home’s water is a quality filtration system, especially one powered by activated carbon. While letting a pitcher sit on the counter might help a little, it’s a slow-motion solution. For a real, lasting fix, filtration is the only way to go.

Why Your Tap Water Smells Like a Swimming Pool

Ever turn on the kitchen sink and get hit with that unmistakable "public pool" smell? You're not just imagining it. That distinct odor is chlorine, a powerful disinfectant your local water utility adds for a critical reason.

Think of it as a bodyguard for your water. Chlorine's job is to kill off nasty bacteria, viruses, and other pathogens during the long trip from the treatment plant all the way to your tap. This process, called chlorination, has been a massive public health success, saving countless people from waterborne diseases. Without it, drinking tap water would be a serious gamble.

But the very chemical that keeps our water safe can also make it taste and smell… less than ideal. This leaves a lot of people wondering how to get rid of the chlorine once it’s done its job and reached their home. The answer lies in targeted home filtration.

Chlorine vs. Chloramine

Just to make things interesting, many water suppliers now use chloramine instead of just chlorine. This is a more stable compound they make by adding ammonia to the chlorine.

Why the switch? While chlorine evaporates pretty quickly, chloramine sticks around much longer. It's designed to keep the water disinfected right to the end of the line, but that stability also makes it tougher to remove. This is a crucial detail because your standard chlorine filter might not be up to the task. Figuring out if you have chlorine or chloramine is the first step to picking the right filter.

It's About More Than Just Taste and Smell

Getting rid of that chemical taste is a big motivator, but it's not the only reason people install filters. When chlorine mixes with the natural organic stuff in water, it can create what are known as disinfection byproducts (DBPs), like trihalomethanes (THMs).

Your city's water is treated to keep these DBP levels within legally safe limits. Still, many folks would rather just minimize their exposure altogether right at home.

Filtering your water right where you use it gives you the best of both worlds. You get all the protection of a professionally disinfected public water supply, but you get to strip out the chlorine and its byproducts just before you drink, cook, or shower.

This approach lines up with where the industry is heading. Agencies like the U.S. Environmental Protection Agency are constantly tightening the rules, and as reported on GlobeNewswire, there's a lot of research into new ways to handle chlorine with less environmental impact. By installing a home filter, you're just taking that final, personal step to make sure your water is exactly how you want it.

How to Test Chlorine Levels in Your Water

Before you can fix that chlorine taste in your water, you have to know what you’re up against. Think of it like a detective—you need to gather evidence before you can pinpoint the right solution. Just guessing could mean you end up with a filtration system that's either total overkill or not nearly strong enough for the job.

The good news? You don't need a lab coat or a chemistry degree to get solid answers.

Testing your water at home is quick, easy, and gives you the hard data you need to make a smart decision. This first step will tell you exactly what concentration of chlorine you're dealing with.

Simple and Affordable Test Strips

The fastest way to get a reading is with test strips. These are just little disposable paper strips with chemical pads on them. Dip one into a glass of your tap water, give it a swirl for a few seconds, and pull it out.

After about a minute, the pads will change color. All you do is match those colors to the chart that comes with the kit. It's a dead-simple method that gives you a ballpark figure, usually in parts per million (PPM).

While they're super easy to use and cheap, they aren't the most precise tool. For most homes getting city water, a reading between 0.5 and 2.0 PPM is pretty standard. The EPA says levels up to 4.0 PPM are safe, but most of us can taste and smell it long before that—sometimes at levels as low as 0.5 PPM. Test strips are great for a quick "yes" or "no" on whether chlorine is present.

More Accurate Liquid Reagent Kits

If you're after a more precise number, your best bet is a liquid reagent kit, sometimes called a drop test kit. These are the same types of kits people use for swimming pools, but you can easily find versions made specifically for drinking water.

It's a pretty straightforward process:

  • Fill a small vial with a specific amount of your tap water.
  • Add a few drops of a chemical reagent into the vial.
  • Cap it, give it a little shake, and watch the water change color.

Just like with the strips, you compare the final color of the water to a printed chart to find the chlorine concentration. Because you're using a controlled amount of water and a precise number of drops, the results are a lot more reliable than what you'll get from a simple test strip.

Getting an accurate measurement is the first real step in your journey to better water. Knowing your specific chlorine level—whether it's 1.0 PPM or 3.5 PPM—directly influences which type of water filter will be most effective and economical for your household.

The Precision of Digital Meters

For anyone who loves gadgets and wants the most exact reading possible, a digital colorimeter is the way to go. These handheld electronic devices give you pinpoint accuracy and take all the guesswork out of matching colors.

You still add a reagent to your water sample, but instead of eyeballing it, you pop the vial inside the meter. The device shines a light through the sample and measures exactly how much of it is absorbed, then gives you a precise digital reading right on the screen.

Digital meters are definitely the most expensive option, but they're also the most accurate. They're perfect if you're really sensitive to chlorine or just want to track your levels over time to see how they change. Knowing your baseline is key to picking the right filter and, just as importantly, confirming it's actually working once you've got it installed.

Choosing Your Chlorine-Busting Filtration Weapon

A clear glass pitcher of water sitting on a wooden countertop in a sunlit kitchen.

Alright, you’ve tested your water and you know how much chlorine you’re dealing with. Now for the fun part: picking the right gear to get rid of it.

Diving into the world of water filtration can feel like a lot at first, with all the different technologies and acronyms out there. But when your main goal is knocking out chlorine, the best options quickly rise to the top.

The three heavy hitters you’ll see most often for home chlorine removal are Activated Carbon, KDF (Kinetic Degradation Fluxion), and Reverse Osmosis. They all work a bit differently, come with their own price points, and have unique maintenance needs. Let's break them down so you can find the perfect fit for your home and budget.

The Magic of Activated Carbon Filters

Think of activated carbon as a super-powered sponge with an almost magnetic attraction to chlorine. This isn't your backyard BBQ charcoal; it's a special carbon that’s been “activated” to create millions of microscopic pores. The surface area is staggering—a single pound of activated carbon can have a surface area of over 100 acres!

When water passes through the filter, chlorine molecules get pulled into these pores and stick to the surface. This process is called adsorption. The water flows right on through, but the chlorine gets left behind. The result? Water that tastes and smells noticeably cleaner and fresher.

There's a reason activated carbon is the go-to method. It's incredibly effective, pretty affordable, and you'll find it in everything from a simple pitcher filter to a large whole-house system. The core of these filters is often just replacement activated carbon for dechlorinator purifiers, which does the bulk of the work.

KDF Media: The Chemical Neutralizer

Next on the list is KDF, which stands for Kinetic Degradation Fluxion. If activated carbon is a sponge, think of KDF as a tiny chemical factory. This filter media is made of high-purity copper and zinc granules. As water flows over them, they create a small electrochemical reaction.

This reaction, known as redox (oxidation-reduction), literally changes free chlorine into a harmless chloride salt. It doesn’t just trap the chlorine; it neutralizes it on a chemical level. This makes KDF media exceptionally durable and long-lasting.

One of the coolest things about KDF is that it also stops bacteria, algae, and fungi from growing inside the filter. This bacteriostatic property means it not only tackles chlorine but also keeps the filter media itself clean, which can really extend the life of any activated carbon filters it’s paired with.

In fact, a lot of the best filters on the market use both KDF and activated carbon together. The KDF does the heavy lifting on chlorine, protecting the carbon and letting it focus on other organic stuff that affects taste and odor.

This infographic can help you map out your testing and filtering journey.

Infographic about how to reduce chlorine

It’s a simple visual that shows how getting some hard data—whether from simple test strips or a digital meter—is the essential first move.

Reverse Osmosis: The Ultimate Barrier

For the most complete filtration you can get at home, you’ve got Reverse Osmosis (RO). While carbon and KDF are chlorine-zapping specialists, an RO system is designed to remove a massive list of other things, like lead, fluoride, salts, and arsenic. And yes, it’s also fantastic at getting rid of chlorine.

An RO system works by pushing water through a very fine, semi-permeable membrane. The pores in this membrane are so tiny that only pure water molecules can squeeze through. Everything else, including chlorine, gets blocked and flushed down the drain.

The process is so thorough it can eliminate over 99% of chlorine. But there’s a small catch: chlorine is actually pretty tough on that delicate RO membrane. That’s why virtually every home RO system comes with pre-filters, usually activated carbon, to remove the chlorine before it even gets to the membrane. This is key to protecting the most important part of the system and making it last.

People who choose RO usually want more than just chlorine removal; they're aiming for the highest level of water purity possible. If you want to explore different setups, our water filtration advice guides have a ton of great information.

Comparing Chlorine Filtration Methods for Your Home

Trying to decide between these options can feel tough, but it really comes down to weighing how well they work against their cost and how much upkeep they need. This table puts the key details side-by-side to make the choice a little clearer.

Filtration Method Effectiveness Best For Typical Cost Maintenance Needs
Activated Carbon High for chlorine, taste, odor. Does not remove minerals or TDS. Budget-conscious users, improving taste and smell, renters. $ – $$ Regular filter changes (every 3-12 months).
KDF Media Very high for chlorine. Also reduces heavy metals and inhibits bacteria. Long-lasting performance, whole-house systems, pairing with carbon. $$ – $$$ Very low; media can last for several years.
Reverse Osmosis Extremely high (99%+). Removes chlorine and a wide range of other contaminants. Maximum purity, homes with multiple water quality concerns. $$$ – $$$$ Annual pre/post-filter changes; membrane replacement every 2-4 years.

Ultimately, the right system is the one that solves your water issues without becoming a major hassle or a drain on your wallet. Whether it's a simple carbon filter for better-tasting coffee or a full-blown RO system for total peace of mind, there's a solution that fits.

Keeping Your Water Filter Working Like New

A water filter is only as good as its last cartridge change. Getting the system installed is really just the beginning—it’s the consistent maintenance that keeps that fresh, chlorine-free water flowing. If you neglect your filter, it's like buying a brand-new car and never bothering with an oil change. Sooner or later, performance is going to suffer.

I like to think of a filter cartridge as a microscopic parking lot for contaminants. When it's fresh out of the box, there are plenty of open spaces. But over time, every one of those spots gets filled up with chlorine, sediment, and other gunk. Once it’s full, any new contaminants just drive right on by and end up in your glass.

A simple maintenance routine doesn't just guarantee performance; it also prevents nasty bacteria from building up inside the filter housing. This protects your investment and, more importantly, your family's health.

Your Filter Maintenance Timetable

Every filter has a different lifespan, and your best bet is to stick to the manufacturer's recommended schedule. A little planning goes a long way here, ensuring you always have clean, great-tasting water on tap.

Here’s a general guide for the most common filter types:

  • Pitcher Filters: These are the sprinters of the filter world. Plan on swapping the cartridge every one to two months, or after filtering about 40 gallons.
  • Faucet-Mounted Filters: A bit more durable, these usually last for two to three months, which works out to around 100 gallons.
  • Under-Sink & Countertop Filters: These have a lot more capacity and can often go for six months to a year before you need to think about a new cartridge.
  • Whole-House Filters: The true marathon runners. Depending on your water usage and how much sediment is in your water, these can last anywhere from three months to over a year.

Telltale Signs a Filter Change Is Due

Even if you forget to mark your calendar, your filter will give you some clear clues when it's time for a change. You just have to pay attention to what your water is telling you.

The most obvious sign is the return of that distinct chlorine taste or smell. If your morning glass of water suddenly tastes like you're at the community pool, it's a dead giveaway that the filter is saturated and can't absorb any more.

Another huge indicator is a drop in water pressure. If the flow from your filtered tap slows to a trickle, the cartridge is probably clogged with all the sediment and particles it has successfully pulled from your water.

Pro Tip: Grab a permanent marker and write the date you changed the filter directly on the new cartridge or the housing. It's a simple little trick that takes all the guesswork out of remembering when it's due for a replacement.

The Bigger Picture of Chlorine Use

While we're focused on getting chlorine out of our homes, it’s fascinating to look at its use on a global scale. The Asia-Pacific region is a massive player in the chlorine industry, driven by rapid industrialization and an enormous demand for safe water.

For perspective, India's chlorine consumption is projected to hit 3.3 million tons by 2024. At the same time, China's production capacity is expected to reach 4.5 million tons. This growth really highlights the ongoing need for large-scale disinfection. Yet, even as global demand grows, the push to reduce chlorine dependence is gaining momentum, with new technologies offering better, more localized solutions. You can discover more insights about the chlorine market on straitsresearch.com.

This global context really drives home why point-of-use filtration at home is so effective. It lets municipal systems do their job of ensuring broad public health safety, while you get the final say over the quality of the water you and your family actually drink. Keeping that filter in top shape is simply your part of the deal.

Common Questions About Chlorine in Water

Even when you've done your homework, a few questions always seem to pop up when you're trying to improve your home's water quality. It's totally normal. Making the right call means understanding the little details, so let's clear up some of the most common things people ask about reducing chlorine.

Think of this as a quick-reference guide—no deep technical jargon, just straight answers to help you feel confident about your next steps.

Does a Water Softener Remove Chlorine

This is probably one of the biggest points of confusion I hear. The short answer is no, a standard water softener isn't built to remove chlorine. Its one and only job is to combat hard water by swapping out minerals like calcium and magnesium for sodium.

While that's fantastic for stopping scale buildup in your pipes and appliances, it does absolutely nothing to the chlorine or chloramine swimming around in your water. Some of the newer "hybrid" systems do combine a softener with a carbon filter stage, but if you have a typical salt-based softener, you'll need a separate, dedicated filter to tackle chlorine.

Is Chloramine Harder to Remove Than Chlorine

Yes, it absolutely is. Chloramine is a much more stubborn chemical than free chlorine. Water municipalities actually designed it that way—to be more stable and stick around longer in the water supply. Great for disinfection, but a real headache for home filtration.

Simple tricks like letting water sit out or giving it a quick boil are completely useless against chloramine.

To get rid of chloramine effectively, you need a special filter medium called catalytic carbon. Your average activated carbon filter is a champ against chlorine, but it will barely make a dent in chloramine. This is exactly why testing your water or checking your utility’s water report is a non-negotiable first step.

Will My Refrigerator Filter Remove Chlorine

For the most part, yes! The built-in water and ice dispensers on modern fridges almost always use a small activated carbon filter. They do a pretty decent job of reducing the taste and smell of chlorine, giving you clean-tasting drinking water right from the door.

The key thing to remember is their tiny capacity. These filters need to be replaced on a strict schedule—usually every six months—to keep working correctly. They're a great solution for the glass of water you're about to drink, but they won't touch the water coming out of your kitchen tap or showerhead.

Can I Just Boil the Chlorine Out of My Water?

While boiling water for about 15 minutes can force free chlorine to evaporate, it's not a practical home filtration strategy. Here’s why it falls short:

  • It’s an energy hog, making it totally impractical for anything more than a small pot of water.
  • It concentrates other contaminants like heavy metals or nitrates that don't evaporate.
  • It does not work for chloramine, which will stay right where it is.

The impact of chlorine goes beyond just what you drink. It can affect your hair and skin, which is why you see articles explaining the purpose of specialized 'De chlorinate My Hair' products. It just goes to show how far-reaching the effects of chlorinated water can be. Getting these common questions answered is the final step toward picking the right whole-home solution.


At Water Filter Advisor, our mission is to give you clear, research-backed advice so you can have safer, better-tasting water. From deep-dive buying guides to practical tips, we're here to help you make confident choices for your home. Check out all our resources to find the perfect filtration system for your family at https://www.waterfilteradvisor.com.