
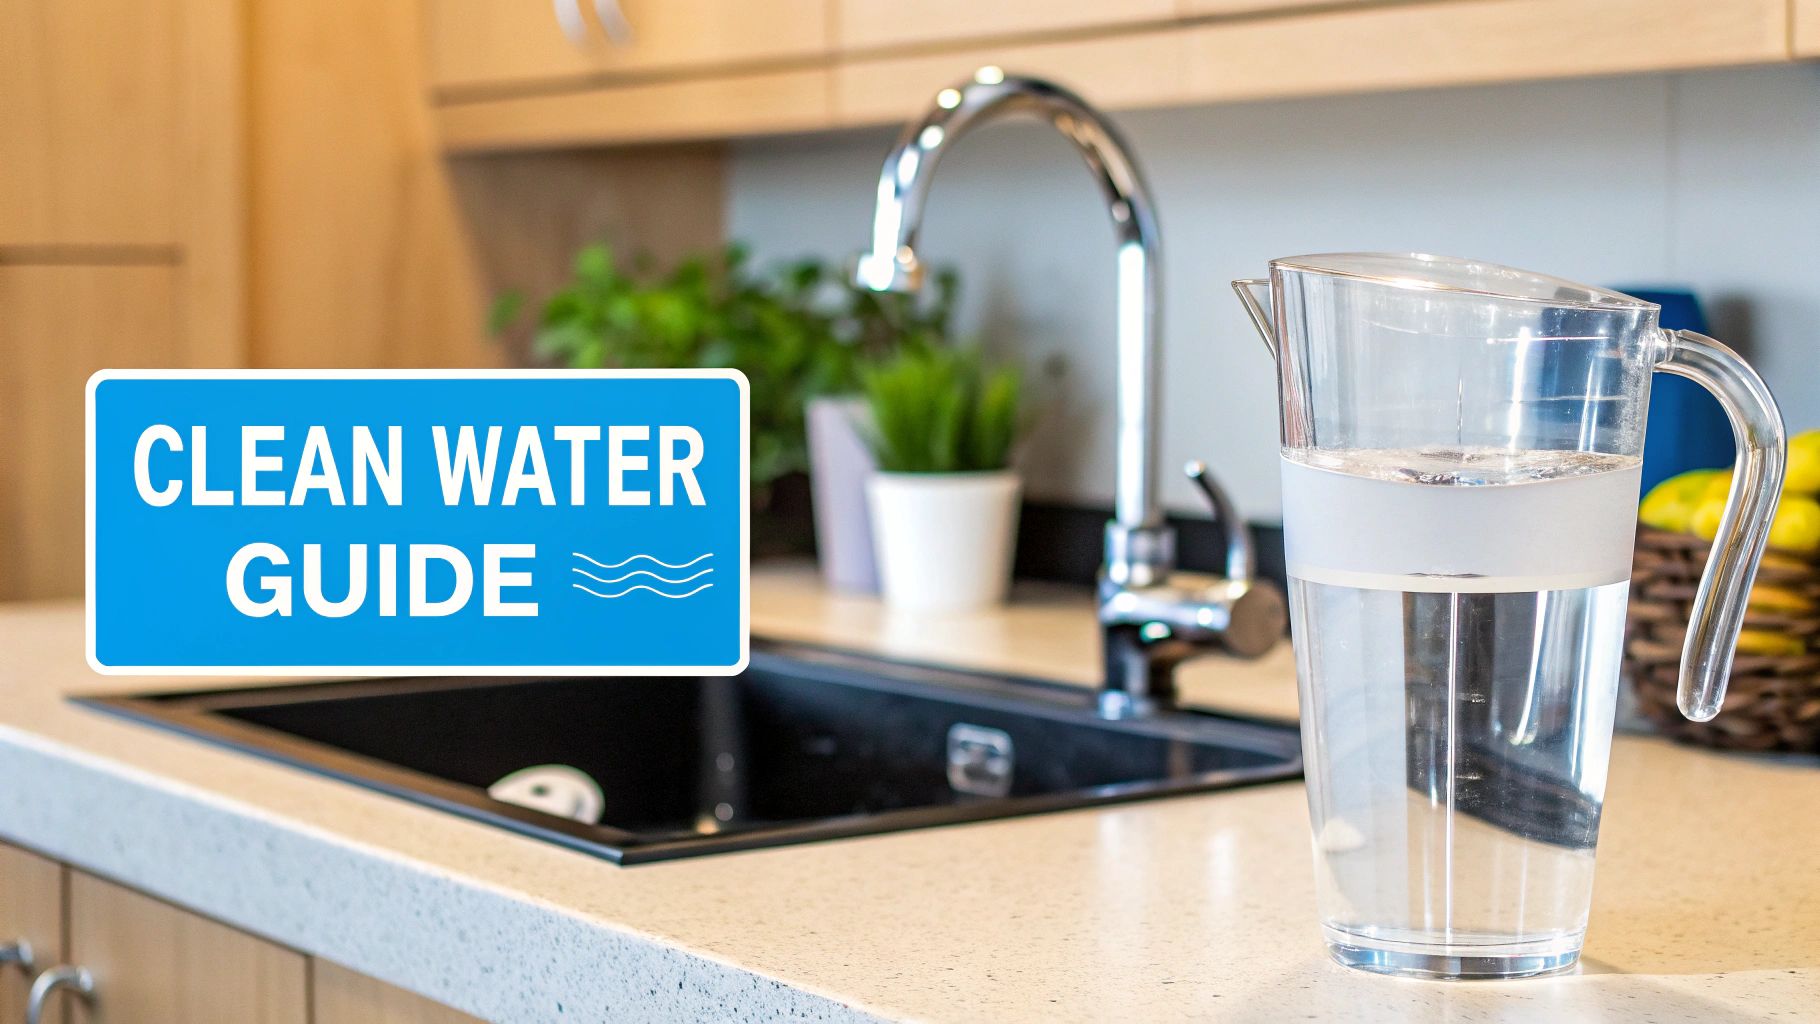
Choosing The Best Whole House Water Filter Systems
Ready to banish that chlorine smell from your showers and stop scrubbing rust stains from your sinks? Finding the best whole house water filter system ...
Ready to banish that chlorine smell from your showers and stop scrubbing rust stains from your sinks? Finding the best whole house water filter system ...

Ever turn on your faucet and get hit with a smell that whisks you away to the local swimming pool? That powerful, chemical scent is almost always chlorine, and it’s coming straight from your tap.
It’s the number one reason people complain about a smell of chlorine in house, and it’s a direct result of how your city keeps its water supply safe for everyone. But just because it's common doesn't mean you have to live with it. The secret to kicking that smell to the curb lies in your water.

So, why is this pool chemical in your drinking water in the first place? For more than 100 years, chlorine has been the world's go-to disinfectant for public water systems. It’s incredibly cheap and brutally effective at wiping out the nasty germs that can make you sick.
Think of it this way: water has a long, winding journey from the treatment plant to your home. As it travels through miles and miles of pipes, it needs a bodyguard to keep it pure. Chlorine is that bodyguard, creating a protective barrier that kills off bacteria and viruses along the way. Your home is the final stop on its tour.
Have you ever noticed the chlorine smell is way more potent some days than others? You're not just imagining it. A few different things can cause the chlorine concentration in your water to spike temporarily.
The amount of chlorine in your water is carefully monitored. According to EPA standards, the maximum level allowed is 4.0 mg/L, but what you typically get at home is somewhere between 0.2–3.0 mg/L. For a lot of us, even the low end of that range is enough to cause that distinct, bleach-like smell. Discover more insights about chlorine in drinking water on frizzlife.com.
To help you narrow down where that smell is coming from, here’s a quick guide to common trouble spots.
This table can help you quickly figure out what's causing that chlorine odor by matching the location with common activities.
| Source Location | Common Activity | Why It Smells Stronger Here |
|---|---|---|
| Kitchen Sink | Washing dishes, filling a pot | The aeration from the faucet releases dissolved chlorine gas. |
| Bathroom Shower | Taking a hot shower | Hot water and steam cause chlorine to vaporize, concentrating the smell in a small space. |
| Washing Machine | Doing a load of laundry | The agitation and hot water used in a wash cycle can release a strong chlorine odor. |
| Dishwasher | Running a cleaning cycle | High-temperature water jets spray chlorinated water, releasing the gas inside the machine. |
This shows that while the source is always the water, certain activities and appliances can make the problem much more noticeable.
The problem isn’t just about an unpleasant odor in your drinking glass. When you do something like take a hot shower or run the dishwasher, the heat and steam work together to turn that dissolved chlorine into a gas.
This process, known as volatilization, releases chlorine straight into the air inside your home.
All of a sudden, the issue isn't confined to your water. It’s in the air you and your family are breathing in the bathroom and kitchen, which can really impact your home's air quality and overall comfort. For anyone with sensitivities, this airborne chlorine can be especially irritating. The smell is the most obvious sign, but it’s really a signal that your water could be affecting your daily life in ways you haven't even considered. A simple water filter can fix this.
That swimming pool smell you're noticing isn't just a weird quirk of your tap water—it's your home's way of telling you something is off. While the smell of chlorine in the house is the most obvious sign, the effects ripple out into your daily life in ways that might surprise you, creating hidden costs and constant little annoyances.
Ever get out of the shower and immediately feel like you need to slather on lotion? That tight, itchy feeling isn't your imagination. Chlorine is fantastic at its job, but it can't tell the difference between bad stuff in the water and the natural oils that keep your skin and hair healthy. The result is chronic dryness, brittle hair, and irritated skin.
Your laundry is another victim. That same chemical slowly but surely bleaches the life out of your clothes. If you've noticed your vibrant colors looking dull and faded way too soon, the chlorine in your wash water is likely the culprit, forcing you to replace favorite items more often.
Things get a lot more interesting when you turn up the heat. A hot shower is the perfect environment for chlorine to go airborne, turning from a liquid into a gas you can inhale. As your bathroom fills with steam, you're breathing in more than just water vapor.
For anyone in your family with asthma, allergies, or other respiratory issues, that vaporized chlorine can be a real irritant to their airways.
Here's something else to consider: the issue isn’t always just the chlorine itself. When chlorine mixes with the tiny bits of organic matter that are naturally in water, it can create a whole new class of compounds called disinfection byproducts (DBPs). Your water utility works hard to keep these within safe limits, but many people prefer to add their own layer of protection at home.
This is where filtering your water comes in. A whole-house water filter doesn't just get rid of the annoying smell—it tackles the root cause of dry skin, faded laundry, and those airborne irritants all at once. It’s a single move that brings comfort and peace of mind back to your entire home.
So you’ve noticed that distinct smell of chlorine in house, and your first instinct is to blame the tap water. You might be right, but it's not always the whole story. Often, an unexpected partner in crime is lurking right under your sink: your everyday household cleaners.
Think about it. Many of the most common all-purpose sprays, disinfectants, and toilet bowl cleaners are bleach-based. When you start cleaning and mix these with other products—especially anything with a citrus scent like lemon or orange—you can accidentally kick off a chemical reaction right in your home. This reaction can release airborne particles that make that chlorine smell feel way more intense.
This is where things get tricky. Your tap water might be contributing a baseline level of chlorine, but your cleaning routine can act like a powerful amplifier, making it nearly impossible to figure out what's really causing the smell. You end up pointing the finger solely at the water when your cleaning products are actually making the problem much worse.
It turns out there's some real science behind this. A fascinating study from Bucknell University found that when bleach fumes meet citrus compounds (the technical term is limonene) under normal indoor light, they create what are called secondary organic aerosols. These are tiny particles that can really irritate your eyes, nose, and throat. The smell threshold for chlorine is already super low, but this chemical mix can make the odor you perceive—and the potential for irritation—much stronger. You can read more about the study on common cleaners and its interesting findings.
This is exactly why a whole-house water filter can be such a game-changer. By stripping the chlorine out of your water right where it enters your home, you completely eliminate that baseline chemical odor. Suddenly, it becomes much easier to tell if other things, like your cleaning supplies or even your HVAC unit, are the real culprits behind any lingering smells. If you're trying to track down a strange scent, it’s worth understanding why your AC smells and how different issues can sometimes be mistaken for one another.
Once you have clean, chlorine-free water, managing these secondary sources is a breeze. Just improving your ventilation by cracking open a window or switching on an exhaust fan while you clean can make a world of difference. It's a simple habit that helps disperse any chemical fumes, leaving your home feeling—and smelling—much fresher.
Before you can fix that lingering smell of chlorine in house, you need to put on your detective hat. Pinpointing the exact source is the crucial first step. It ensures you’re tackling the real issue instead of just taking a wild guess.
Thankfully, you don't need a forensics lab—a few simple DIY tests can give you all the clues you need.
The easiest place to start is what I call the "glass test." Just fill a clean glass with water from the faucet you suspect is the problem. Then, take the glass and walk into a different room, well away from the sink area. Now, give the water a sniff. This simple move isolates the water's scent from anything else that might be going on, like drain odors or leftover cleaning spray in the sink.
Next up, let's see if temperature makes a difference. Test your hot and cold water taps one at a time. First, run the cold water for about a minute and smell it. Then, do the exact same thing with the hot water.
Is the chlorine smell way more intense from the hot tap? That's a huge clue. Hot water makes it easier for dissolved chlorine to turn into a gas (a process called "volatilization"), which concentrates that swimming pool smell, especially in a small space like a shower.
If the odor is only strong on the hot side, it could point to a problem inside your water heater. Sediment buildup at the bottom of the tank can sometimes react with the chlorine in your water and make the smell worse. But if the smell is equally strong from both hot and cold taps, the culprit is almost certainly the water coming from your city's supply.
Sometimes, what your nose registers as chlorine is actually an imposter. In older homes, a musty, chemical-like odor can come from mold compounds that trick you into thinking you're smelling chlorine. When you're trying to track down a mysterious smell, getting accurate info from something like a guide for an air quality testing kit can be a big help. In fact, some Swedish studies of homes built before 1980 found that specific "mold odors" can easily be mistaken for chlorine.
This flowchart can help you trace that chemical smell back to its origin.

As you can see, the process helps you figure out if the smell is real, if it's a "smell-alike" like mold, or if it’s definitely coming from your water.
If you're ready to move past the sniff test and get some hard numbers, a home water testing kit is your best friend. These kits are incredibly simple to use and will tell you the exact concentration of free chlorine in your water.
You’ll generally find two types:
Once you run these simple diagnostics, you’ll have the evidence you need. Knowing for sure that chlorine is in your water—and at what level—gives you the power to move forward with confidence. From there, the next step becomes obvious: finding the right water filtration system to get rid of it for good.

Alright, you've pinpointed the source of that pesky chlorine smell. Now, let's talk about the most effective way to get rid of it for good: a solid water filtration system.
When it comes to battling chlorine, one material is the undisputed champ: activated carbon.
Think of activated carbon as a highly porous sponge, but on a microscopic level. It has an enormous surface area packed into a small space. As water passes through, the carbon uses a process called adsorption to essentially grab and hold onto chlorine molecules, trapping them so they can't get through to your tap. It’s a simple but incredibly powerful method that zaps that chemical taste and odor, leaving you with nothing but clean, great-tasting water.
Not all filters are built the same, and the best one for you really boils down to your budget, whether you own or rent, and just how thoroughly you want to tackle the chlorine issue.
You’ve got two main paths you can take: a point-of-entry system that treats every drop of water in your home, or a point-of-use filter that focuses on a specific faucet or outlet.
A whole-house system is the all-in-one solution. It’s installed right where your main water line enters your house, meaning every faucet—from the kitchen sink and washing machine to every shower—gets purified water. This is the top choice for homeowners who are serious about protecting their skin, hair, and even their appliances from chlorine's harsh, drying effects.
On the other hand, if you’re renting or just need a more targeted, budget-friendly fix, point-of-use filters are a fantastic option. You can install one under your kitchen sink for clean drinking and cooking water, or even attach a filter directly to your showerhead. That last one is a game-changer for anyone tired of breathing in chlorine steam during a hot shower.
The Gold Standard of Certification
When you're shopping for a filter, keep an eye out for the NSF/ANSI 42 certification. This is an independent seal of approval. It proves the filter has been put through its paces and is guaranteed to reduce aesthetic issues like chlorine taste and odor. Think of it as your peace of mind that the product actually does what it claims.
To help you find the perfect match, let's compare the most common types of filters. Each offers a different mix of coverage, cost, and convenience.
| Filter Type | Best For | Chlorine Removal Effectiveness | Typical Cost Range | Installation |
|---|---|---|---|---|
| Whole-House Filter | Homeowners wanting a complete, set-it-and-forget-it solution for every tap. | Very High (Typically removes 97% or more of chlorine from all water) | $500 – $1,500+ | Professional installation is often recommended. |
| Under-Sink Filter | Renters or homeowners who want purified water for drinking and cooking at the kitchen sink. | High (Excellent removal for a single, targeted faucet) | $150 – $400 | DIY-friendly for most people with basic plumbing skills. |
| Showerhead Filter | Anyone wanting to protect their skin and hair from chlorine's drying effects. | High (Specifically designed to remove chlorine from hot shower water) | $30 – $100 | Very easy DIY installation; usually just screws on. |
Ultimately, picking the right filter comes down to what you’re trying to achieve. Do you just want better-tasting drinking water? Or are you looking to get rid of chlorine everywhere, from your laundry to your shower? Our experts have put together more detailed advice on all kinds of water filtration topics, which can help you find the best solution for your needs.
By weighing these options, you can confidently invest in a filter that brings that fresh, clean feeling back to your home.
Putting in a water filter is a huge win against the smell of chlorine in your house, but don't hang up your toolbelt just yet. The job isn’t quite finished.
Think of your filter as a hardworking gatekeeper. If it gets overloaded, it simply can’t do its job effectively. Regular, consistent maintenance is the real secret to keeping that clean, fresh water flowing for years to come.
The single most important task is changing the filter cartridges on schedule. This isn’t a friendly suggestion—it’s absolutely essential for the system to perform as it should. Over time, the activated carbon inside gets completely saturated with chlorine and all the other gunk it's been pulling out of your water. Eventually, it just can't trap anything else.
A clogged filter doesn't just stop working; it can become a breeding ground for bacteria or even release concentrated bursts of the very contaminants it was meant to remove. Sticking to a schedule is non-negotiable for safe, odor-free water.
Different types of filter media, like granular activated carbon (GAC) and carbon block, have different lifespans. These typically range from six months to a year, so check the manufacturer's recommendation.
The easiest way to stay on top of it? The moment you install a new cartridge, pull out your phone and create a calendar reminder for the replacement date. Simple as that.
For bigger jobs, like installing a whole-house system, calling in a professional plumber is always the smartest move. And if that chlorine smell ever comes back out of the blue, take it as a clear signal from your system that it’s time for a professional check-up.
Even after you've pinpointed the source of that chemical smell, a few questions might still be nagging you. Let's get you some clear, straightforward answers so you can finally knock out that smell of chlorine in your house for good.
It's not just your imagination—that chemical odor often ramps up in the winter, and it's usually because we're using more hot water. When you heat chlorinated water for a shower or to do dishes, you're speeding up the process where chlorine turns into a gas. This gas gets released right into the steamy, enclosed air of your bathroom or kitchen.
On top of that, the colder, drier air in winter can actually make our sense of smell a bit more sensitive to these chemicals. A whole-house water filter tackles this problem at the source, removing chlorine before it gets to your water heater. That means even the longest, steamiest winter shower will be free of that harsh chemical smell.
Nope, a standard water softener isn't built for that job. Water softeners are fantastic at removing hardness minerals like calcium and magnesium through a process called ion exchange, but that process does absolutely nothing to dissolved chlorine.
The real hero for getting rid of chlorine smell is a filtration system that uses activated carbon. Think of carbon as a sponge for chlorine—it adsorbs and traps the molecules, completely neutralizing both the taste and odor.
You can find some great modern systems that actually combine both softening and carbon filtration into a single unit. This gives you a one-two punch, solving both hard water spots and that nasty chlorine smell at the same time.
This is a common one, and there are a couple of likely culprits. First, if you're using a point-of-use filter, like one that screws onto a single faucet, it's only treating the water at that one spot. You'll still get that chlorine smell from your showerhead and every other tap in the house.
If you already have a whole-house filter and the smell has come back, it's almost a sure bet that your filter cartridge is done and needs to be replaced. Over time, that carbon media gets clogged up and can't grab onto any more chlorine. Keeping up with a regular replacement schedule is the key to making sure your filter keeps doing its job, giving you fresh, odor-free water everywhere in your home.
At Water Filter Advisor, we're all about giving you in-depth guides and honest reviews to help you find the right water filtration solution. Check out our expert advice and take the first step toward pure, clean water today at https://www.waterfilteradvisor.com.
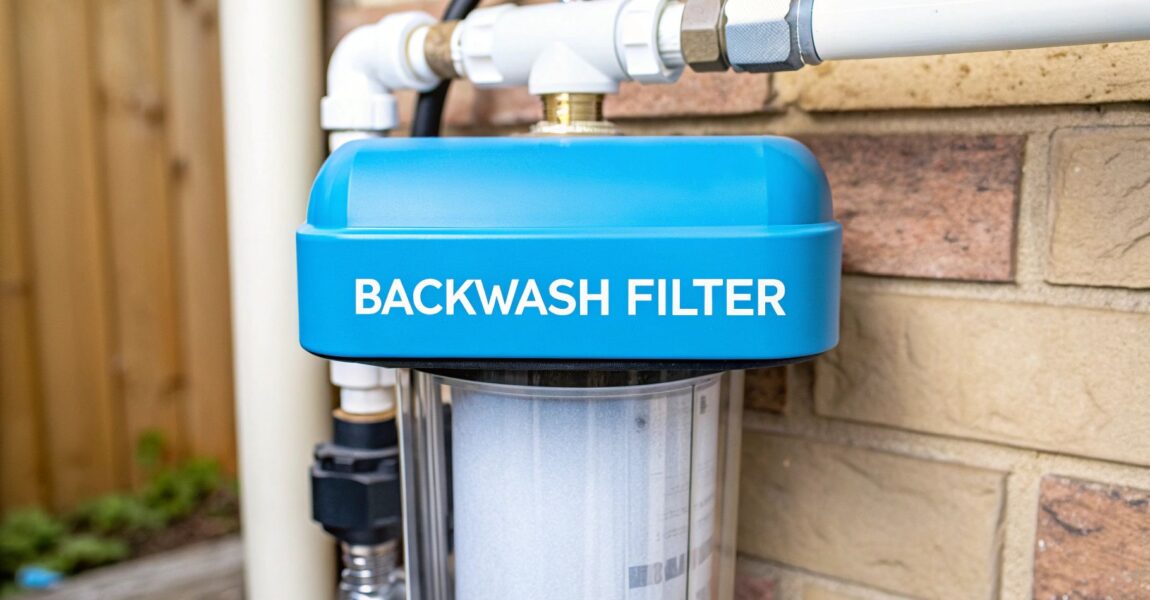
A backwashing water filter is the undisputed champion of ‘set it and forget it’ solutions for getting pristine water throughout your entire home. Unli ...

The most obvious signs of contaminated water are the ones that assault your senses—an off-putting flavor, a funky odor, or water that looks like it came from a puddle. These sensory clues are your home's built-in alarm system, screaming that it’s time to stop guessing what’s in your water and start filtering it.

We’ve all been there. You turn on the kitchen tap for a refreshing glass, and something just feels… wrong. Maybe it's a weird smell you can't quite place, or the water looks a little murky. That gut feeling is your first line of defense, telling you to put down the glass and pay attention.
But here’s the catch: the most dangerous stuff is often completely invisible, with no taste or odor. While crystal-clear water looks reassuring, it's no guarantee of purity. The journey from the treatment plant to your tap is a long one, and your water can pick up all sorts of unwanted hitchhikers from aging city pipes or even the plumbing inside your own walls. The only real way to take control is with a home water filtration system.
Before we dive deep, here's a quick, scannable table to help you connect the dots between what you're observing and which filter might be your hero. Think of it as a first-glance diagnostic tool for your home's water woes.
| Observable Sign (Taste, Smell, or Look) | Potential Problem Source | Your First Filtration Thought |
|---|---|---|
| Metallic or bitter taste | High levels of copper, iron, zinc, or lead | A reverse osmosis (RO) system is a powerhouse for this |
| Chlorine or bleach-like smell | Excess chlorine from municipal treatment | An activated carbon filter is the perfect chlorine-killer |
| Rotten egg (sulfur) odor | Hydrogen sulfide gas or certain bacteria | Look into a specialized iron/sulfur filter or an aeration system |
| Musty or earthy smell/taste | Algae blooms or decaying organic matter | A whole-house carbon filter will freshen things right up |
| Cloudy or milky appearance (turbidity) | Air bubbles or suspended solids/silt | A sediment pre-filter is your first line of defense |
| Red, brown, or orange discoloration | Rust from iron pipes or sediment | An iron filter or a water softener with iron removal is key |
| Green or blue stains on fixtures | High levels of copper, likely from pipe corrosion | An acid neutralizer filter can stop corrosion in its tracks |
| Gritty sediment or floating particles | Dirt, rust flakes, or scale from old pipes | A sediment filter is a must-have for catching this gunk |
This table covers the most common red flags, but remember, it’s a starting point. The only way to know for sure what's in your water is to test it, which will point you to the perfect filtration solution.
Long before you order a test kit, your own eyes, nose, and tongue are on the job. Paying attention to these subtle (and not-so-subtle) signals is the first real step toward choosing a filtration system that protects your family’s health and prevents costly damage to your pipes and appliances.
A sudden change in your water's taste, smell, or appearance isn't just a nuisance. It's a clear signal that something has shifted, and it's time to find the right filter to fix it.
Understanding what these signals mean is key. For instance, persistent moisture issues that lead to musty smells can be connected to bigger problems, so it's wise to understand the truth about mold contamination and health risks.
This guide will walk you through exactly what to look for. We'll break down the common signs of contamination, explain the likely causes, and give you clear, actionable steps to get your water back to clean and safe with the right filtration setup.
Your nose and taste buds are your home's front-line defense—they’re surprisingly good at detecting when your water is off. If it tastes or smells weird, that’s not something to ignore. It’s a clear warning that something isn’t right, and figuring out what that message means is the first step to choosing the perfect filter to fix it.
A distinct metallic taste is a big red flag for excess metals in your supply. It could be naturally occurring stuff like iron and manganese, or it could be something more serious like copper, zinc, or even lead that's leaching from old pipes. A bitter taste, on the other hand, often points to a high level of dissolved solids.
Either way, your water has picked up some unwanted hitchhikers. Your best bet for a permanent fix is an under-sink reverse osmosis (RO) system. It's a filtration powerhouse, stripping out a huge range of dissolved metals and getting your water back to tasting pure and clean.
Some smells are more common than others, but they're all cause for concern. Knowing where the odor comes from is the key to picking the right filter to get rid of it for good.
Here are the usual suspects:
A foul odor, especially one like rotten eggs or sewage, is one of the most urgent signs of contamination. It can signal hydrogen sulfide or, in a worst-case scenario, bacterial growth from sewage pollution.
This isn't just a local problem. According to the UN and WHO-UNICEF, a staggering 2.2 billion people don't have access to safely managed drinking water. If you're interested, you can read more about worldwide water scarcity issues to see the global scale of the challenge.
The good news? You don’t have to put up with nasty water. Modern filtration systems are built to zero in on these specific problems. You just have to match the filter to the contaminant.
It's like using the right tool for the right task—you wouldn't use a hammer on a screw. A filter that knocks out chlorine might not do a thing for a sulfur smell.
For example, a whole-house catalytic carbon filter is a fantastic choice for tackling odors. It’s a pro at removing chlorine, chloramine (another disinfectant), and those organic compounds that cause musty smells. But if you have a serious hydrogen sulfide problem, you'll probably need a dedicated iron and sulfur filter or an aeration system to completely knock it out.
Ultimately, identifying the specific taste or odor is your most important clue. It points you toward the most effective filtration strategy, ensuring you get a system that actually solves your problem.
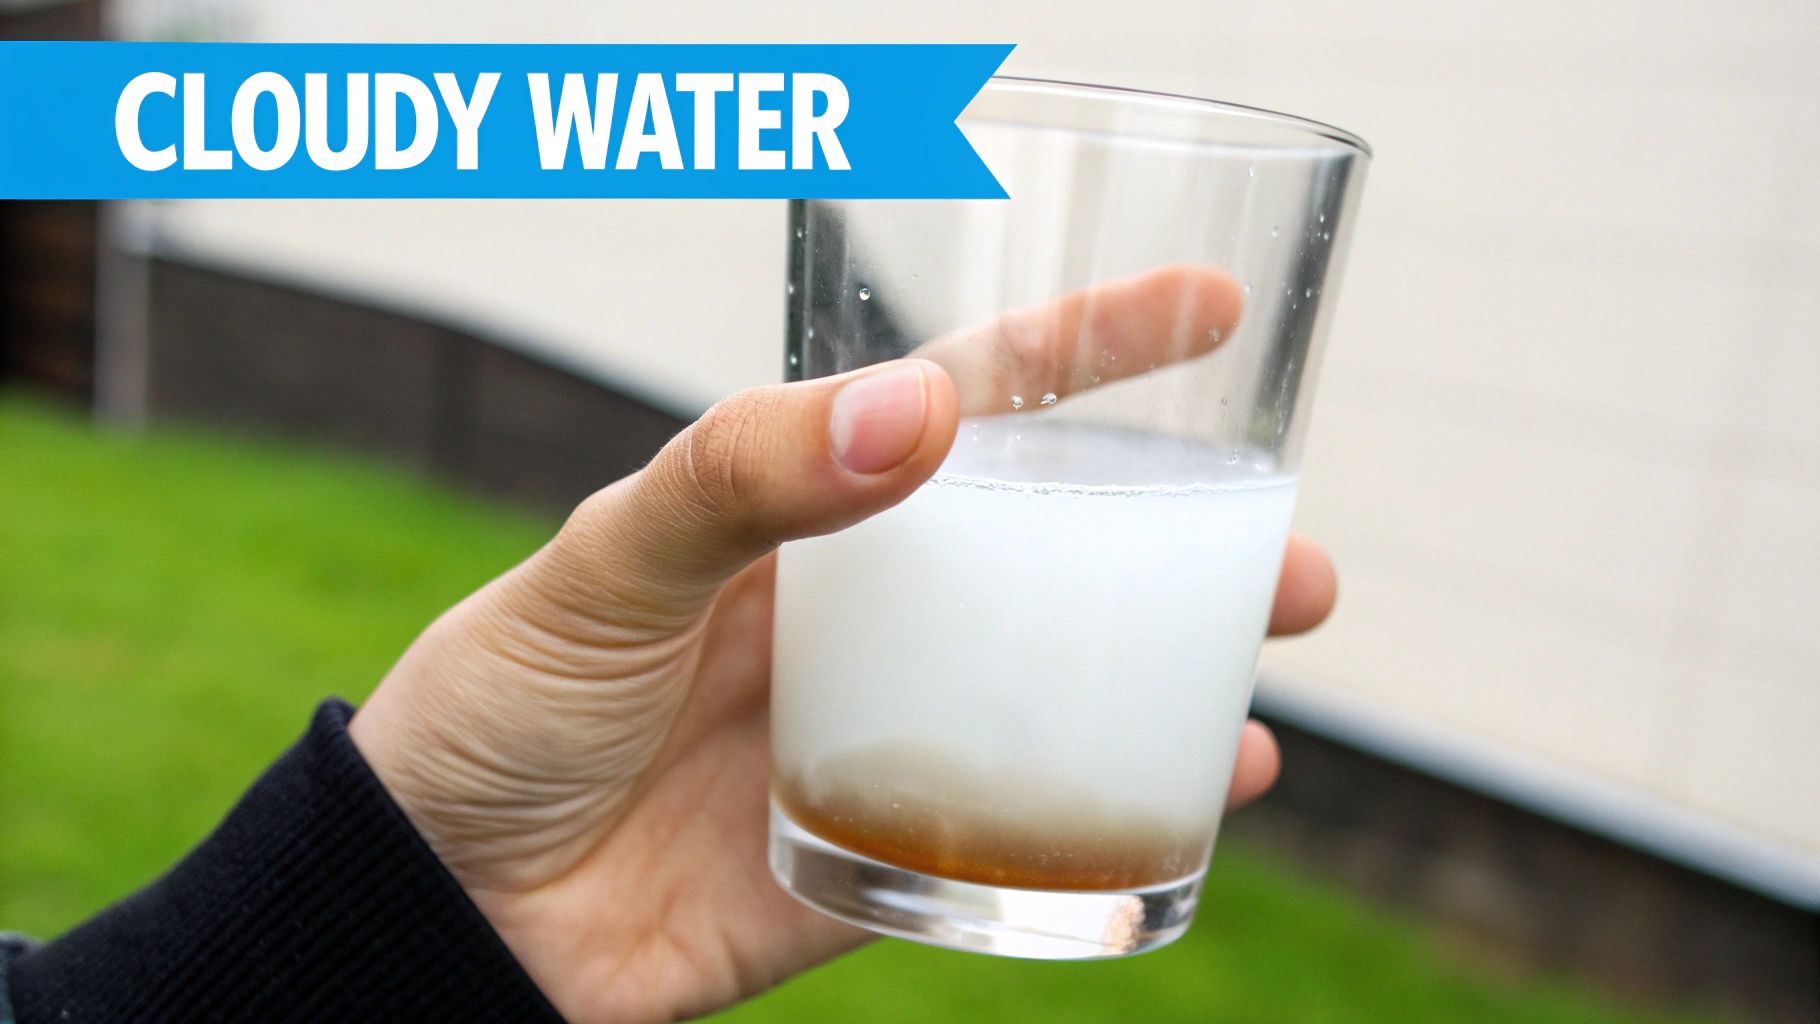
While odd tastes and smells are strong warnings, some of the most common signs of contaminated water are the ones you can see. Clear water isn’t automatically clean, but water that’s cloudy, discolored, or has stuff floating in it is sending a loud and clear message: it’s time to filter.
Think of your water glass as a window into your plumbing. Just like a mechanic can tell a lot about an engine by its exhaust, you can learn a ton just by looking at your water. These visual clues are your first step toward picking the right filter to get it back to crystal clear.
Ever fill a glass and it looks hazy or milky? That’s called turbidity, a fancy word for water that isn't clear. It’s caused by tiny suspended particles creating a noticeable cloudiness when they band together.
These particles could be anything from harmless air bubbles to silt, sand, or clay. There’s an easy test: fill a glass and let it sit. If the cloudiness clears from the bottom up, it’s just pressurized air bubbles—totally harmless.
If that water is still cloudy after a few minutes, you’ve got suspended solids. This is where a whole-house sediment filter really shines. It acts like a bouncer at the door, catching all those particles before they ever make it to your glass or start clogging up your appliances.
Discolored water is usually a more dramatic—and often more concerning—sign. The exact color is a huge clue that points you right to the type of contaminant you’re likely dealing with, and therefore, the type of filter you need.
Shifts in water color often signal the presence of heavy metals. In the United States, EPA data flags millions of homes with potential lead risks. You can learn more about global water quality goals and statistics to see how widespread these issues really are.
Once you’ve figured out what you're seeing, you can pick the right filter to fix it. It's just like using a specific cleaner for a rust stain versus a grease spot—you need the right tool for the job.
Solutions for Visual Contaminants:
| Visual Sign | Likely Contaminant | Recommended Filtration Solution |
|---|---|---|
| Cloudiness/Turbidity | Sediment, Silt, Clay | Whole-house sediment pre-filter |
| Red, Brown, Orange | Iron, Rust | Specialized iron filter or a water softener with iron removal capabilities |
| Yellow Tint | Iron, Tannins | Iron filter or a dedicated tannin removal system |
| Blue/Green Stains | Copper (from acidic water) | Acid neutralizer filter followed by a carbon filter |
Taking care of these visual signs isn't just about making your water look pretty. It's about protecting your home and your family. An iron filter, for example, doesn't just stop those ugly rust stains; it also makes your water taste better and keeps iron-loving bacteria from growing in your pipes. By paying attention to what you see, you can make a smart, targeted investment in a filtration system that truly solves the problem.
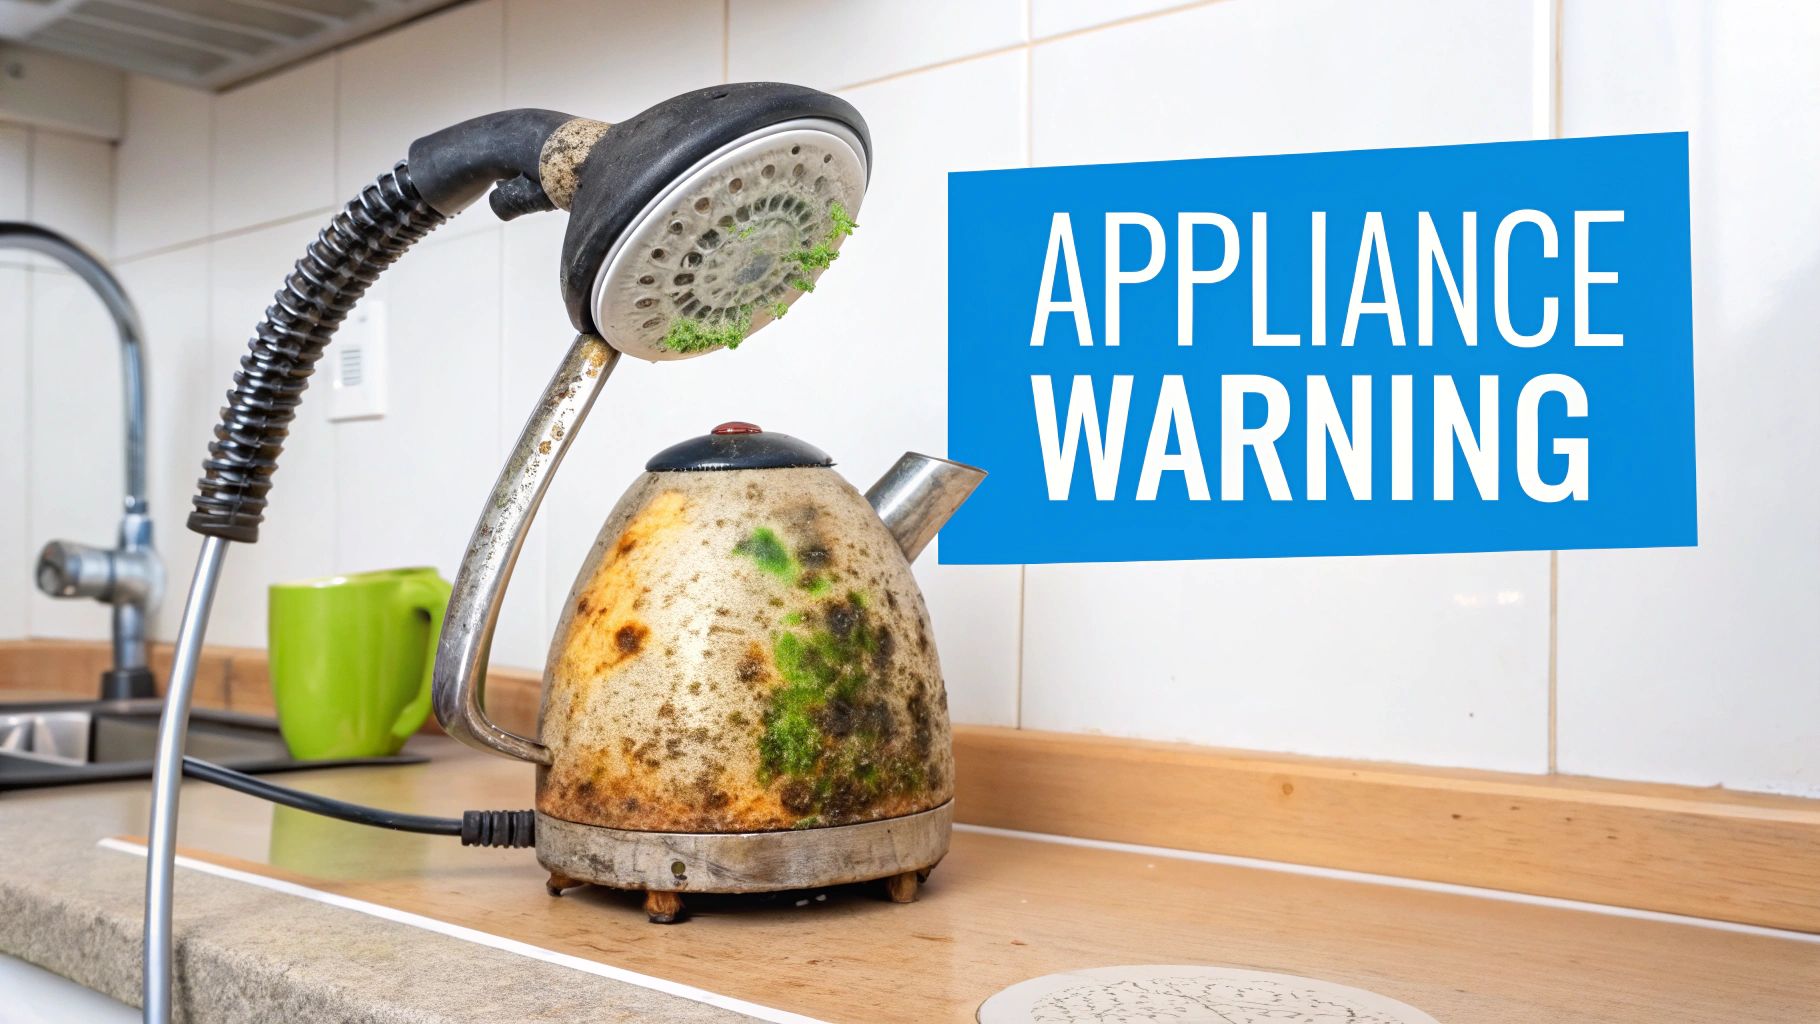
Sometimes, the clearest signs of contaminated water don't show up in your drinking glass. They’re hiding in plain sight, slowly destroying your home’s most valuable appliances. Your plumbing, dishwasher, and water heater will be the first to tell you when your water is waging a secret war on your home. If your water is full of minerals or corrosive elements, a home filtration system isn't a luxury—it's essential protection.
If you live in a hard water area, you know all about that chalky white residue. That’s limescale, a crusty deposit of calcium and magnesium that builds up, layer by stubborn layer. It's more than just an ugly nuisance; it’s a silent appliance killer.
Limescale basically suffocates your appliances from the inside. Your showerhead loses pressure because its nozzles get clogged. Your coffee maker sputters and takes forever. The biggest victim? Your water heater.
A study from the Water Quality Research Foundation found that hard water can slash a water heater's efficiency by up to 48%. The scale forces the heating element to work overtime, jacking up your energy bills and drastically shortening the unit's lifespan.
The only real defense here is a whole-house water softener or a scale-reduction filter. By treating water right as it enters your home, you protect every faucet and appliance from this costly mineral assault.
On the other end of the spectrum is water that's too soft or acidic, making it corrosive. This water literally eats away at metal, which is a massive problem for anyone with copper or galvanized steel pipes. You might first notice those blue-green stains we talked about, but the real damage is happening out of sight. Corrosive water can cause tiny pinhole leaks that lead to thousands in water damage behind your walls.
An acid neutralizer filter is the fix. It simply raises the water's pH before it gets a chance to circulate through your pipes, stopping corrosion cold and protecting your plumbing and your health.
Ever find a slimy, pinkish-orange film inside your toilet tank or around a faucet? That's usually the handiwork of iron-eating bacteria. These little microbes chow down on any iron in your water, leaving behind a nasty slime that clogs up pipes and fixtures.
While this biofilm isn't usually a direct threat, it’s a dead giveaway that you have iron in your water. A dedicated iron filter or a good whole-house system will take care of it easily. By getting rid of their food source, you stop the slime before it even starts.
You’ve seen the signs—the weird smell, the cloudy water, or the scaly buildup choking your showerhead. So, now what? The next step is to move from suspicion to certainty with water testing. This is the most important step before you buy a filtration system. If you just guess, you could easily buy a filter that does absolutely nothing to fix your actual problem. Testing gives you a precise roadmap, showing you exactly which contaminants you need to go after.
When it comes to testing your water, you really have two main paths: the quick-and-easy DIY route or a full-blown professional analysis. Each one has its place.
At-Home DIY Test Kits: These are fast, cheap, and great for a quick baseline. They’re perfect for checking things like chlorine, water hardness, pH, and sometimes basic metals like iron and copper.
Professional Lab Testing: This is the gold standard for accuracy. A certified lab will give you a detailed report on a huge range of contaminants, including the invisible threats like lead, arsenic, bacteria, pesticides, and volatile organic compounds (VOCs).
If you're noticing obvious issues like a chlorine smell or hard water buildup, a DIY kit might be all you need to confirm your suspicions and choose a basic filter. But if you have a private well, live in an area with known contamination problems, or have young children, a professional lab test is a very smart investment that will point you to the perfect filtration solution.
Choosing the right test is the first step toward the right solution. A lab test is the only way to get a definitive answer about hidden dangers, empowering you to select a filtration system certified to remove your specific contaminants.
Once you have your results, you're officially in the driver's seat. That test report is basically a personalized shopping list for the perfect water filter. If it shows high levels of sediment and iron, you know a whole-house sediment filter combined with an iron filter is your answer. If lead is the problem, then a certified under-sink reverse osmosis system is a non-negotiable.
This data-driven approach takes all the guesswork out of the process. Instead of just buying a generic filter and crossing your fingers, you can confidently pick a system that’s designed to solve your home's unique water quality challenges. For more help matching filters to specific problems, you can find a ton of information in our extensive water filtration advice articles.
Alright, you've done the detective work and spotted the signs of contaminated water in your home. Now it's time to switch hats from investigator to problem-solver. The good news is, all that knowledge you've gathered makes picking a filter a whole lot easier. You can narrow down the millions of options by thinking about two main strategies: spot treatment or a whole-house wash.
Point-of-Use (POU) systems are your "spot treatments." They filter water right at the specific tap where you need it most, like your kitchen sink or shower. This is the perfect solution if your main concern is getting pure water for drinking and cooking.
POU filters are targeted, effective, and usually don't hit the wallet as hard upfront.
These are great for renters or anyone who wants to fix a very specific issue—like getting rid of that chlorine taste—without overhauling their entire plumbing setup.
Point-of-Entry (POE) systems, often called whole-house filters, are the "full wash cycle" for your home. They get installed right where your main water line comes into the house, meaning they treat every single drop of water heading to every faucet, appliance, and shower.
This is the way to go when you're up against bigger problems like hard water scale, sediment throughout your pipes, or high iron levels that stain everything. A POE system doesn't just protect your family's health; it protects your home. By stopping contaminants at the source, you're preventing scale from killing your water heater and stopping rust from staining your sinks and tubs.
A whole-house system is really an investment in your property. It keeps your appliances running longer, saves your plumbing from expensive damage, and gives you the peace of mind that every tap is delivering clean, safe water.
Once you've decided between a targeted POU system or a comprehensive POE system, the last step is to match the filter technology to the specific problem you've found.
Activated Carbon: This is the undisputed champ for getting rid of chlorine and other gunk that causes funky tastes and smells. Think of it like a super-powered sponge that traps those unwanted particles.
Reverse Osmosis (RO): When you need serious filtration power, this is it. An RO system forces water through a special membrane that strips out a huge list of contaminants, including heavy metals like lead and arsenic, salts, and other dissolved solids (TDS).
UV Purification: If you’re worried about bacteria, viruses, or other living organisms in your water, a UV filter is a great chemical-free solution. It uses ultraviolet light to zap these microbes, making them harmless.
If your water is cloudy or turbid, the best way to tackle this is often with a multi-stage filter. For example, under-sink reverse osmosis systems can remove 99% of these tiny particles. For a whole-house fix, water softeners are fantastic for preventing the scale buildup that clogs pipes in so many homes. It’s all about picking the right tool for the job.
Even after you've spotted the signs and started looking at solutions, a few key questions always seem to come up. Let's tackle them head-on so you can feel confident about your home's water quality and pick the right filtration plan.
Boiling is a great go-to for killing biological nasties like bacteria, viruses, and parasites. If your town issues a boil water advisory, it's a solid, short-term fix to make your water safe for drinking.
But here's the catch: boiling does nothing to get rid of chemical contaminants. In fact, it can make things worse. As the water boils off, the concentration of things like lead and pesticides can actually go up. For real, long-term safety, you need a filtration system certified to remove those specific chemicals.
That little filter in your fridge is really just for one thing: making your water taste better. It uses a small activated carbon filter to pull out chlorine and other minor impurities that cause weird flavors or smells. It's fantastic for that, but it’s not a serious safety device.
These small filters just aren't designed to handle major health threats like lead, arsenic, or bacteria. To truly protect yourself, you’ll want a more powerful system, like an under-sink reverse osmosis unit or a full-on whole-house filter.
If you're on a city water supply, testing your water once a year is a smart move. You should test immediately if you ever notice a sudden, weird change in your water's taste, smell, or color.
For those with a private well, the EPA suggests annual testing for bacteria, nitrates, and pH levels. It’s also a good idea to test after big events like a flood or major plumbing work. Understanding the different kinds of water contamination is key, especially when dealing with severe problems like Category 3 water damage.
This flowchart can help you decide whether you need to treat water at a single tap or protect your entire home.
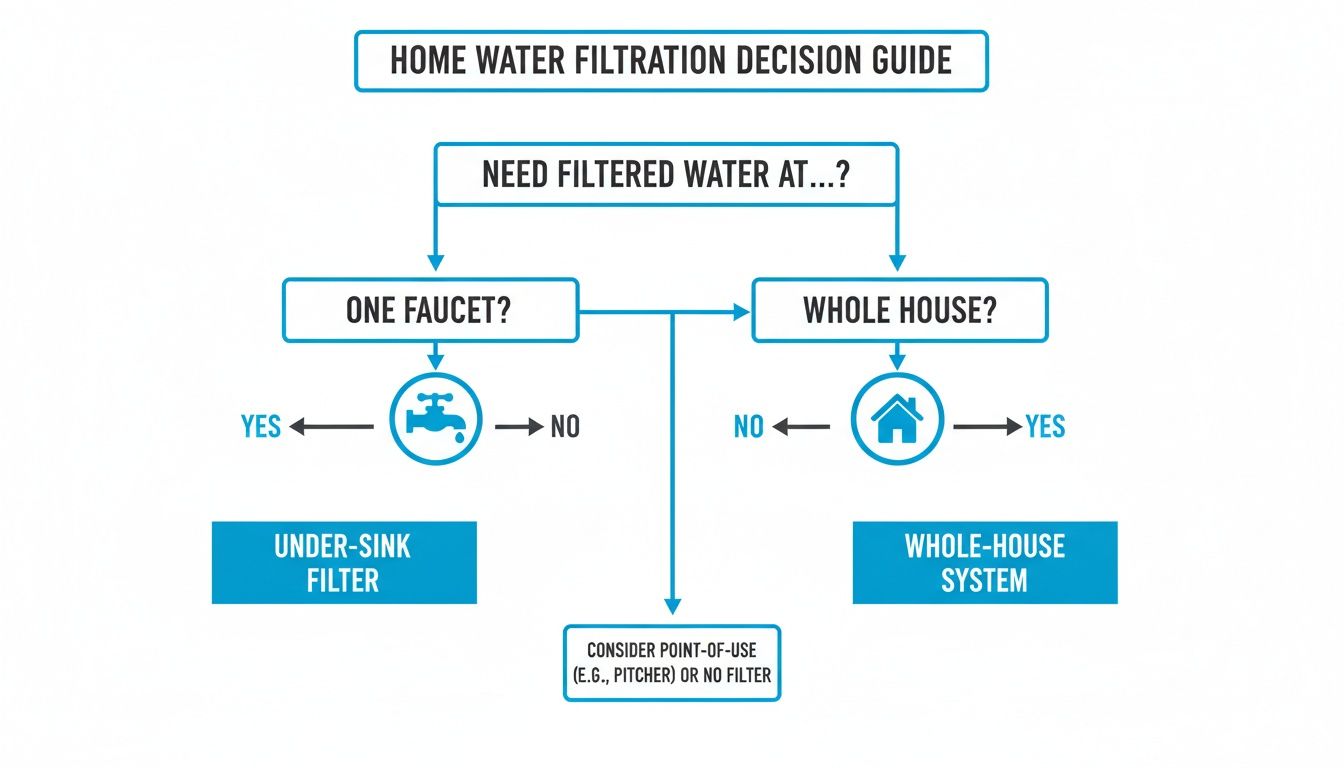
It all boils down to your goal: are you looking for targeted purity for drinking water, or do you want total protection for every faucet and appliance?
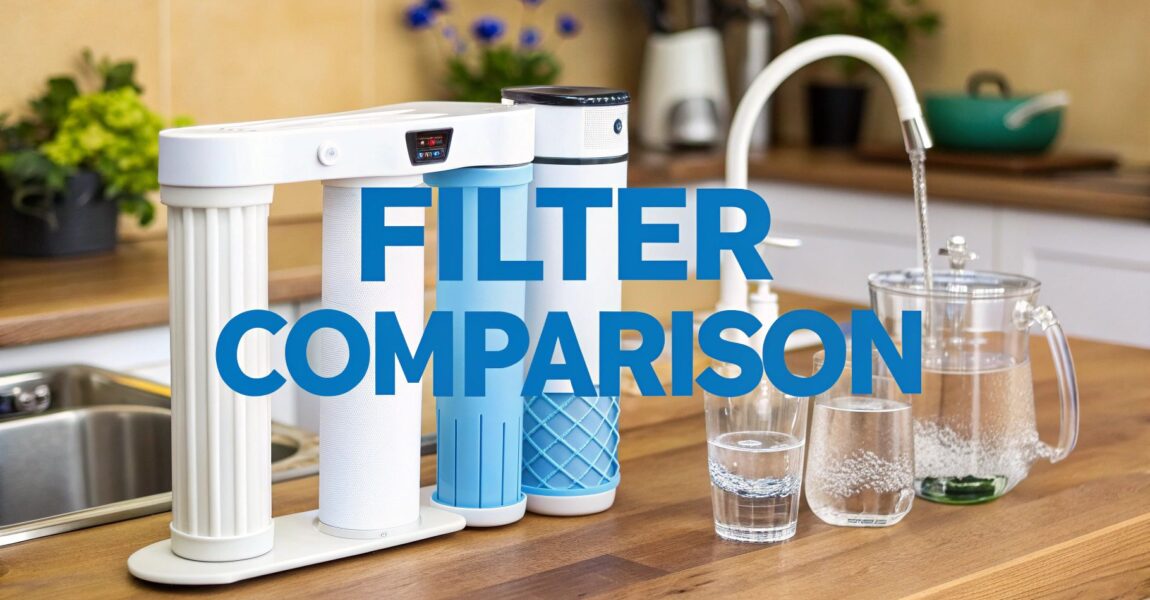
So, you've decided to stop drinking tap water that tastes faintly of swimming pool. Bravo! When you start to compare water filter systems , the fi ...
So, you're on a quest for the perfect fluoride removal filter. What exactly is this magical device? Think of it as your home's personal water bodyguard, specifically trained to spot and remove fluoride from your drinking water.
These aren't your run-of-the-mill filters. They use specialized media like activated alumina, bone char, or hyper-advanced reverse osmosis membranes to latch onto fluoride ions and show them the door. This is a high-level security detail that a standard carbon filter—like the one chilling in your fridge pitcher—simply isn't equipped to handle.
It seems like everyone is suddenly a water quality expert, and fluoride is public enemy number one. But why the sudden buzz? For decades, fluoride was hailed as the dental hygiene superhero, a public health triumph for its incredible cavity-fighting powers. But today, the conversation has changed. People are starting to look at their tap water with a more critical eye, asking what's really in it and demanding more control.
This isn't just a random trend. It's part of a massive cultural shift towards personal wellness and taking charge of what we put into our bodies. It's like a vitamin that was once a blanket recommendation for everyone, but now you want to decide on the dosage yourself. Homeowners are graduating from passive water consumers to active managers of their home's ecosystem.
The story of water fluoridation began as a sweeping public health initiative. It's been a charged topic ever since municipalities started adding it to public water supplies back in the 1940s to combat tooth decay. Fast forward to today, and over 73% of Americans on public water systems receive fluoridated water.
But here's the flip side: growing concerns about overexposure. Studies have linked excessive fluoride intake to issues like dental fluorosis, which affected an estimated 23% of U.S. kids according to 2010 NHANES data. This very concern has propelled the market for fluoride removal filters from a niche product into a household staple. You can see the explosive growth in the filtration market for yourself over at MordorIntelligence.com.
This history is why the debate is so complex. To truly get it, you have to acknowledge the widely promoted dental benefits of fluoride rinse and other topical treatments, which form the bedrock of pro-fluoridation arguments. The core of today’s conversation isn’t about dismissing those benefits, but about gaining control over the dosage and its source.
The question has evolved. It's no longer a simple "Is fluoride good or bad?" but rather, "How much fluoride am I getting from all sources, and can I have the final say?" This shift towards personal oversight is the real engine driving the demand for effective home water filtration.
As a homeowner, you're the captain of your ship. The surging interest in a fluoride removal filter is a direct result of this empowerment. It’s about making a smart, informed decision for your family's health, whether you're in a downtown high-rise or a quiet suburban home.
This guide is your machete to cut through the jungle of information. We're here to validate your questions and give you a clear, practical roadmap to finding the perfect filtration system for your home. We’ll dissect the technology, demystify the costs, and review the real-world performance to help you become the master of your water quality.
So, how do these fluoride removal filters actually work their magic? It’s not some mystical plumbing ritual. It’s just clever science, and you don’t need a chemistry degree to get it.
Let's break down the main technologies. Think of them as three different types of security guards for your water, each with a unique strategy for kicking fluoride and other troublemakers to the curb. Understanding how they operate is the first step to choosing the right system for your home.
This infographic gives you a great overview of the whole fluoride debate, from its controversial history to the solutions available today.
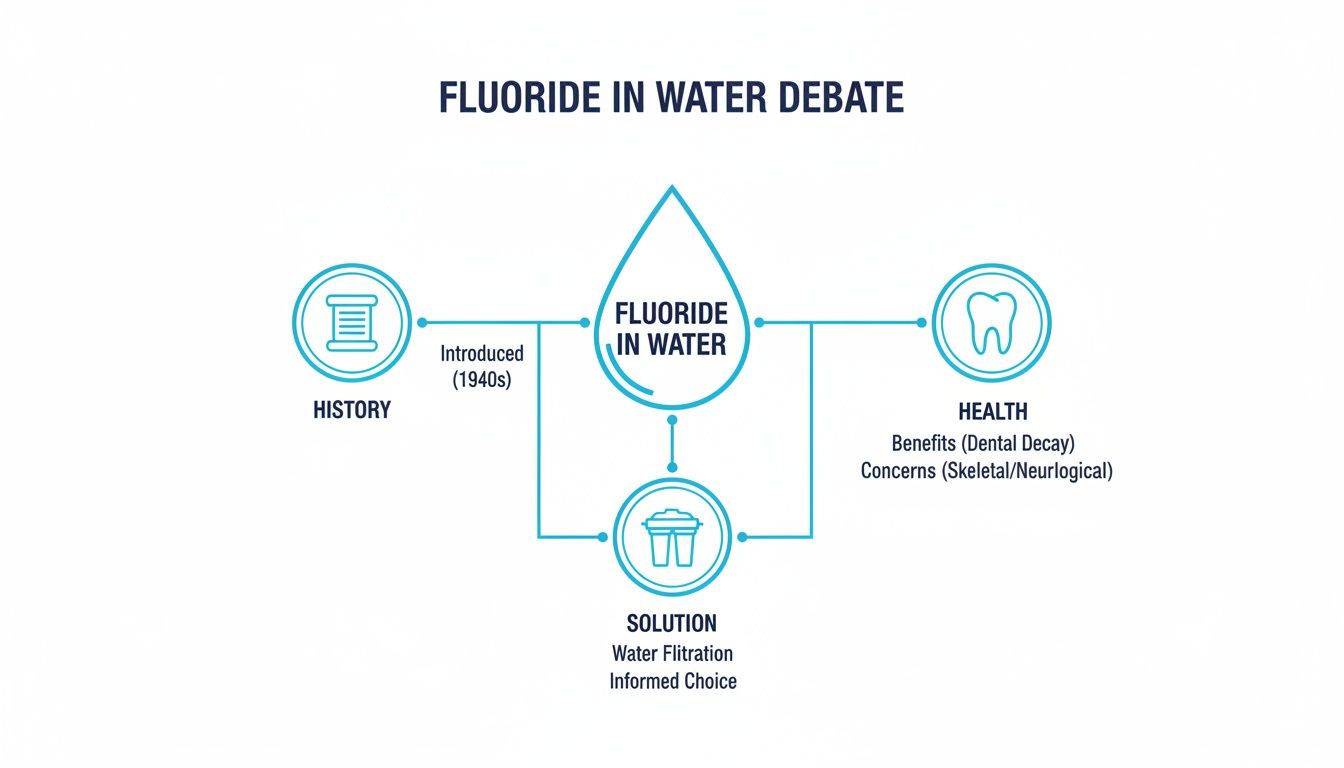
As you can see, concerns over water fluoridation aren't new, and they've directly fueled the development of the filtration tech we're about to dive into.
To keep things simple, here’s a quick head-to-head comparison of the top three contenders in the fluoride removal arena. This table cuts through the jargon and shows you exactly what each technology brings to the table.
| Filtration Technology | How It Works (Analogy) | Fluoride Removal Efficacy | Best For |
|---|---|---|---|
| Reverse Osmosis (RO) | The "Microscopic Bouncer" | 90-99% | Ultimate purity; removes the widest range of contaminants beyond just fluoride. |
| Activated Alumina | The "Specialized Magnet" | Up to 90% | Targeted fluoride, arsenic, and selenium removal, especially in slightly acidic water. |
| Bone Char Carbon | The "Natural Sponge" | Up to 90% | A natural approach that also tackles chlorine, heavy metals, and even radioactive isotopes. |
Each of these systems has its own superpower. Now, let’s take a closer look at what’s happening under the hood.
Reverse Osmosis, or RO, is the undisputed heavyweight champion of water purification. Think of it as a bouncer at an exclusive nightclub with an incredibly strict guest list. It uses your home's water pressure to force water through a special semipermeable membrane.
This membrane is the real VIP. Its pores are so ridiculously tiny that only pure H₂O molecules can squeeze through. Everything else—fluoride ions, heavy metals like lead, dissolved salts, you name it—gets stopped at the velvet rope and flushed away.
Because it's so uncompromising, RO is often called the gold standard, capable of removing 90% to 99% of fluoride. It's more than just a fluoride filter; it’s a full-spectrum purification system that tackles a massive list of contaminants.
The trade-off? RO systems create wastewater (the rejected contaminants) and can strip beneficial minerals from the water. Many modern systems solve this by including a remineralization filter to add healthy minerals like calcium and magnesium back into the water before it hits your glass.
If RO is a general bouncer, Activated Alumina is a specialist, a magnet designed for one primary mission: grabbing fluoride. The filter media is made from aluminum oxide (the same stuff in sapphires and rubies), but it's processed to be incredibly porous with a massive surface area.
Picture your water flowing through a maze filled with tiny, powerful magnets that only attract fluoride. As water passes over the Activated Alumina beads, fluoride ions are literally pulled out of the stream and latch onto the media. This process is called adsorption.
This method is highly effective and is one of the few technologies officially certified by the NSF for fluoride reduction. It works best when your water's pH is slightly acidic, ideally between 5.5 and 6.5.
Activated Alumina can knock out up to 90% of fluoride, but its effectiveness drops as the media gets saturated. That means you have to stay on top of filter changes to keep it performing at its best. It's also a champ at removing arsenic and selenium.
Our third guard is Bone Char, which acts like a highly absorbent natural sponge. This is actually one of the oldest and most trusted water purification methods on the planet. It's made by charring animal bones in a low-oxygen kiln, creating a porous carbon material that's rich in calcium.
Imagine that bone char as a sponge filled with countless nooks and crannies. As water flows through, the bone char’s surface—which is high in tricalcium phosphate—naturally adsorbs fluoride ions, trapping them so they don't end up in your glass.
Bone char is a powerhouse, often reducing fluoride levels by up to 90%. But it doesn't stop there.
This approach offers a powerful, all-natural way to get cleaner, safer, and better-tasting water flowing from your tap.

Alright, you've mastered the technologies that zap fluoride. Now for the next big decision: where do you want to filter your water? This choice is less about the science and more about your lifestyle.
Are you focused on purifying just the water you drink and cook with? Or are you aiming for a fortress-like solution that purifies every single drop entering your home? This is the core difference between Point-of-Use (POU) and Whole-House (POE) systems. Each has its pros and cons, and the best one for you depends entirely on your goals, your home, and your budget.
Let's unpack both options so you can figure out which one is your perfect match.
Think of a Point-of-Use system as a specialist. It targets water right where you’re going to use it—almost always the kitchen sink. It’s like having a personal chef for your drinking water, ensuring every glass you pour and every pot you fill is pristine.
These systems are a fantastic choice for renters and homeowners who want to zero in on their drinking and cooking water. They don't require major plumbing surgery, are easier on the wallet upfront, and come in several convenient forms.
POU systems are a fantastic way to dip your toes in the water, so to speak. You get high-quality, fluoride-free water for all your consumption needs without the cost and complexity of a massive installation.
If a POU system is a personal chef, then a Whole-House filter is the entire five-star kitchen staff. These systems, also called Point-of-Entry (POE), are installed right where your main water line enters your house.
From that point on, they treat everything. Every faucet, every shower, and every appliance gets the same purified water. This is the ultimate setup for families concerned about more than just ingestion—like absorbing contaminants through the skin in the shower or inhaling them from steam. It offers complete peace of mind.
A whole-house fluoride removal filter is a true investment in your home's infrastructure. It does more than protect your family; it also guards your plumbing and appliances against the scale and chemical damage that can shorten their lifespan.
This level of coverage comes with a higher price tag and usually requires a professional plumber for installation. But for a homeowner who wants a complete, set-it-and-forget-it solution, the value is undeniable. Imagine showering in water that’s as pure as the water you drink. It’s a growing priority for many, which is why the global water filter market hit USD 14.26 billion in 2023 and is projected to reach USD 26.22 billion by 2032. You can dig into the numbers in the full report from SkyQuest.
So, which one is it going to be? The decision usually becomes clear when you answer a few key questions. Let’s put these two options side-by-side.
| Feature | Point-of-Use (POU) | Whole-House (POE) |
|---|---|---|
| Scope of Filtration | Treats water at a single point, like the kitchen sink. | Treats all water entering the home. |
| Primary Goal | Provides high-quality drinking and cooking water. | Ensures purified water from every tap, shower, and appliance. |
| Installation | Often DIY-friendly (countertop) or minor plumbing (under-sink). | Usually requires professional installation. |
| Initial Cost | Lower ($100 – $600) | Higher ($1,000 – $5,000+) |
| Best For | Renters, smaller households, or those on a tighter budget. | Homeowners, large families, and those seeking total protection. |
Someone renting an apartment would find an under-sink reverse osmosis system to be a perfect, non-permanent solution for amazing drinking water. On the flip side, a family settling into their forever home might see a whole-house system as a smart, long-term upgrade that adds value to both their health and their property.
When you’re shopping for a fluoride removal filter, the sticker price is just the tip of the iceberg. To really understand the investment, you have to look at the total cost of ownership—that’s the whole shebang, including the initial purchase, ongoing maintenance, and even a few hidden costs you might not expect.
Thinking about the full financial picture upfront saves you from surprise expenses down the road and helps you budget like a pro. It’s like planning a kitchen remodel; you wouldn’t just budget for the new cabinets and call it a day. In fact, many people consult detailed guides on home renovation costs to see the whole picture. The same mindset applies here.
Let’s break down exactly what goes into the cost of pure, fluoride-free water.
First up is the system itself. As we’ve covered, the price range is wide and really depends on whether you go for a targeted point-of-use system or a comprehensive whole-house solution.
This upfront cost gets you the main hardware—the filter housings, the first set of cartridges, a storage tank (for RO systems), and a dedicated faucet. But this is just the beginning of the financial journey.
The real long-term cost of any water filter is its consumables. To keep your system working correctly, you must replace the filter cartridges or media on schedule. If you don't, your filter will stop removing fluoride and could even become a breeding ground for bacteria.
It's just like owning a printer; the machine is a one-time purchase, but you'll always need more ink.
A realistic annual maintenance budget for a typical under-sink reverse osmosis system is between $80 and $200. This covers the pre-filters, post-filters, and a new RO membrane every few years.
For a whole-house system, the costs can be higher, but replacements are less frequent. The large media tanks might only need new material every 3 to 5 years, but that replacement could easily run several hundred dollars when it's due.
Some filtration technologies have operational costs that aren't printed on the box. Reverse osmosis systems, our best weapon against fluoride, are a prime example.
Because RO works by forcing water through an incredibly fine membrane, it also produces wastewater that carries away all the rejected contaminants. Older systems were notoriously inefficient, wasting several gallons of water for every clean gallon produced. Thankfully, modern systems are much better, often getting close to a 1:1 waste ratio, but it’s still an extra utility cost to factor in.
Additionally, some larger RO systems or units with a UV purification stage need electricity to run booster pumps or lamps. This adds a small but steady amount to your monthly power bill. While these "hidden" expenses might seem minor, they all contribute to the true cost per gallon of your filtered water.
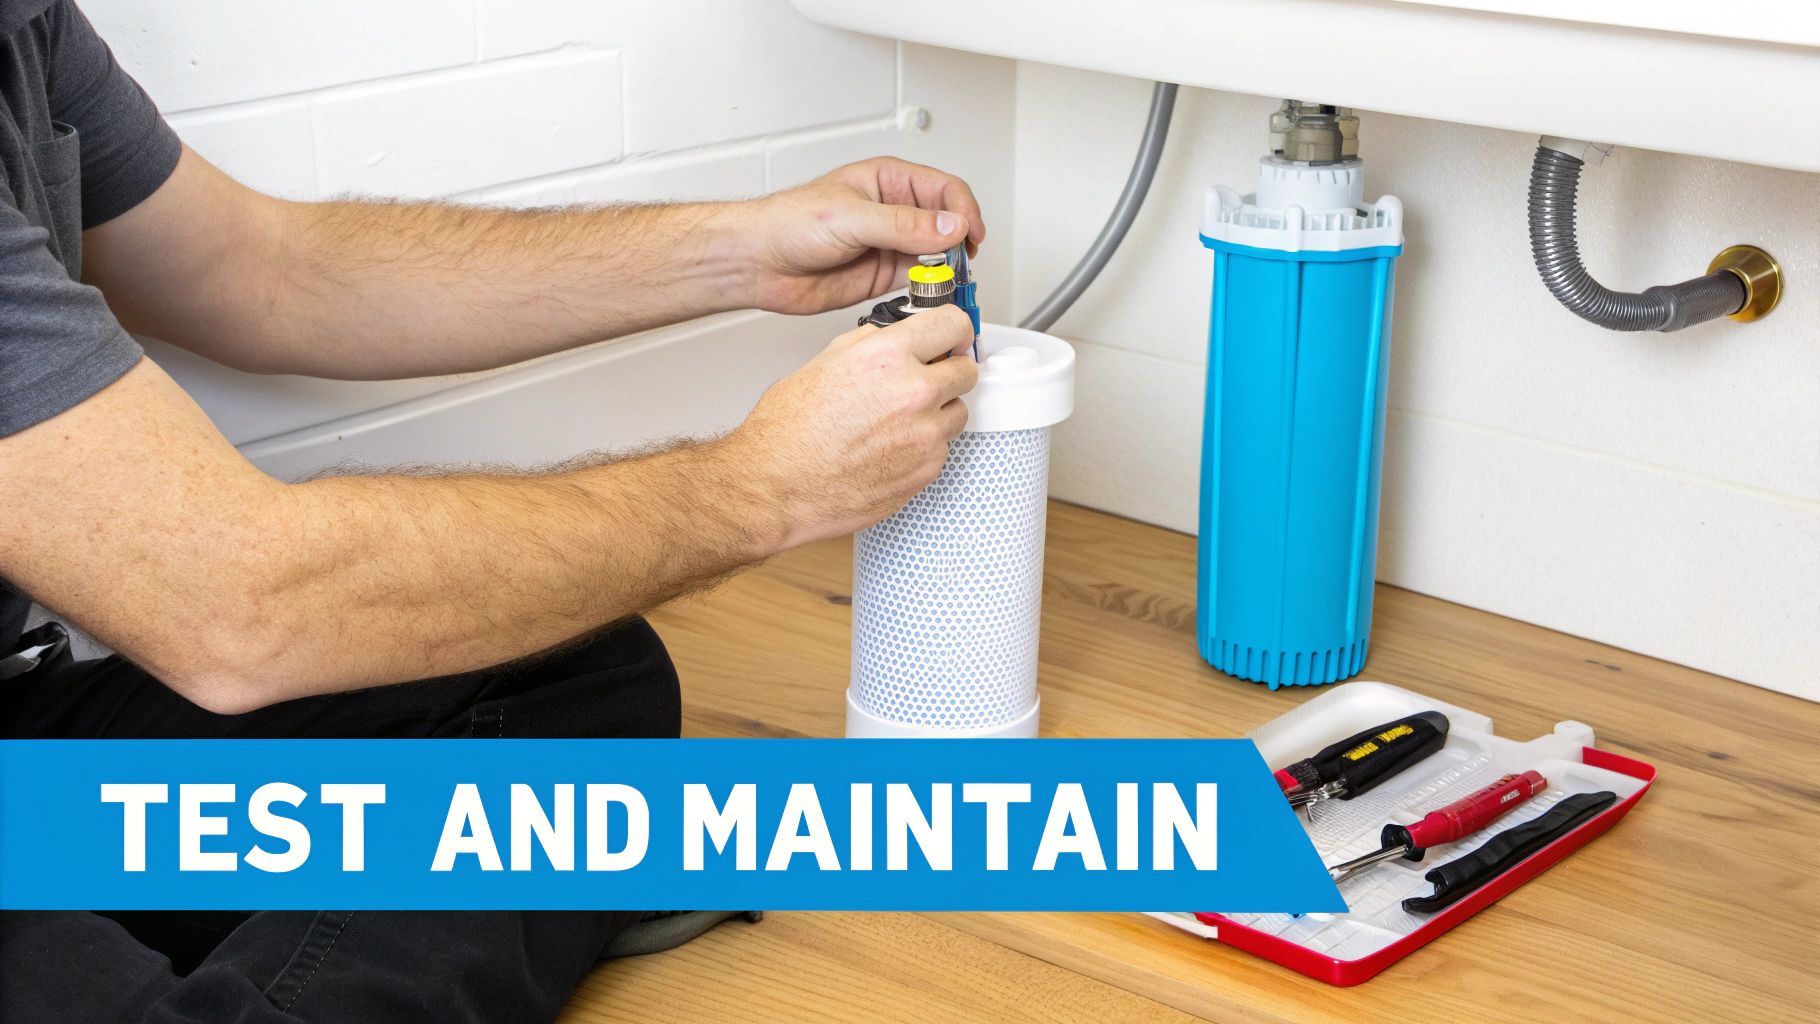
Okay, you've chosen your champion filter. That's a huge step, but the journey isn't over. Owning a fluoride removal filter is a lot like owning a car; you have to install it correctly, keep it maintained, and check under the hood occasionally to make sure it's doing its job.
This is the phase where you get to see the real-world results of your investment and achieve total peace of mind. Let's walk through everything from setup to testing, so you can keep that pure, clean water flowing for years to come.
The installation can range from a five-minute task to a project requiring a professional plumber. It all depends on the system you chose. Figuring this out ahead of time will save you a world of headaches.
Your filter is a workhorse, but it needs a little TLC to keep performing. Regular maintenance isn't optional if you want safe, effective filtration. Once a filter cartridge gets clogged, it stops removing fluoride, restricts water flow, and can even become a breeding ground for bacteria.
Think of your filter cartridges like the oil filter in your car. You wouldn't just ignore it, right? Neglecting it doesn't just hurt performance; it eventually causes much bigger problems. Sticking to a schedule is the single best thing you can do for your system's health.
Here’s a general timeline to keep in mind, but always, always follow the manufacturer's specific guidelines for your model.
This is the million-dollar question, isn't it? After you've invested in a quality fluoride removal filter, you deserve proof that it's delivering on its promise. The great news is you don't have to just take the company's word for it. You can test the water yourself.
The demand for filters that can handle fluoride and other stubborn chemicals is exploding. In fact, the global market for media that filters out contaminants like PFAS is projected to grow by a staggering 183.7%, shooting up from $2.9 billion in 2026 to $8.2 billion by 2036. Technologies like Granular Activated Carbon (GAC) are at the forefront, making up a huge piece of the market for families wanting to ensure their water is truly clean. You can dive deeper into these market trends in a report from Fact.MR.
Even after doing your homework, a few nagging questions can keep you from pulling the trigger on the right fluoride removal filter. That's totally normal. Making a confident choice for your home means getting those last few uncertainties ironed out.
This section is dedicated to tackling those common questions head-on. We'll give you clear, straightforward answers so you can move forward with confidence.
This is probably the number one question out there, and the answer is a simple, resounding no. A standard Brita filter, or most basic carbon pitchers you grab off the shelf, will not remove fluoride.
Those filters are great for their intended purpose—mainly removing chlorine to make your water taste and smell better. They use a simple activated carbon that acts like a sponge for larger contaminants.
Fluoride ions, however, are tiny and slippery, requiring a more specialized filtration media to capture them. To actually remove fluoride, you need a system that uses technologies like reverse osmosis, activated alumina, or bone char—the very methods we've been discussing.
Great question. The answer really depends on the filtration technology. Some do, and some don't, which is a key difference in the final quality of your water.
Reverse Osmosis (RO): Yes, RO systems are incredibly thorough. They strip out almost everything, which includes beneficial minerals like calcium and magnesium. The membrane's pores are just too fine for these minerals to pass through. To address this, many modern RO systems now include a remineralization filter as the final stage to add those healthy minerals back in before the water hits your glass.
Activated Alumina and Bone Char: These methods are much more selective. Think of them as specialists that target specific contaminants like fluoride, arsenic, and certain heavy metals. For the most part, they leave the healthy minerals alone, which is a huge plus if you prefer mineral-rich water.
It often comes down to personal preference: Do you want the absolute purest water possible (and then add good stuff back), or would you rather have a filter that surgically removes the bad stuff while leaving the good stuff intact?
You have to know your starting point. You can't tell if your filter is working if you don't know how much fluoride is in your tap water to begin with. Luckily, this is usually pretty easy to find out.
Most municipalities are required to provide residents with an annual water quality report, sometimes called a Consumer Confidence Report (CCR).
This report breaks down exactly what's in your water, including fluoride levels. You can usually find it on your local water utility’s website. If it’s not online, just give their office a call. If you're on a private well, the only way to know for sure is to get your water tested by a certified lab.
Absolutely. The technologies used in a quality fluoride removal filter are well-established and proven to be safe for home use. Still, it's smart to be informed.
For example, some people express concern that activated alumina filters might leach aluminum into the water. It’s a valid question, but filters certified by organizations like the NSF (National Sanitation Foundation) are rigorously tested to ensure they're safe and don't add anything harmful. Any potential aluminum leaching is minimal and considered safe.
Bone char is a natural media, and reverse osmosis is simply a physical barrier. The biggest risk with any filter isn't the technology itself—it's poor maintenance. If you don't change filter cartridges on schedule, they can stop working and even harbor bacteria. For a deeper dive on different water treatment options and safety, you can find a ton of info in articles that offer expert advice on water filters.
Just stay on top of your maintenance schedule, and your system will keep providing clean, safe, and fluoride-free water for years.
At Water Filter Advisor, we believe everyone deserves access to clean, safe water. We're dedicated to providing the most reliable, research-driven reviews and guides to help you make the best choice for your family. Explore our in-depth resources and find your perfect filtration solution today at https://www.waterfilteradvisor.com.

Ready to dive into the world of water filters? It can feel like a deep ocean of options, but here's a secret: it all starts with one simple question. Do you want to treat all the water flooding into your house, or just the water at a specific tap, like your kitchen sink?
That's the real difference between Point-of-Entry (POE) systems, which guard your entire home's water supply, and Point-of-Use (POU) systems, which give you VIP filtration right where you drink. Nailing this one decision is your first and most important step toward tastier, safer water.
Imagine a Point-of-Entry (POE) system as the ultimate bouncer for your home. It’s installed where your main water line comes in, checking every single drop before it gets to your shower, washing machine, toilets, and taps. It’s the heavyweight champion for fighting house-wide problems, like hard water that coats everything in a crusty film or sediment that clogs your pipes.
A Point-of-Use (POU) system, on the other hand, is like a personal bodyguard for a specific faucet. These are your under-sink filters, countertop units, and faucet attachments that serve up ultra-purified water right where you need it for drinking your morning coffee or boiling pasta.
To make it even clearer, let's break down the core differences in a simple table.
This table provides a high-level comparison between the two primary categories of home water filtration systems to help you quickly understand their core differences.
| Feature | Point-of-Entry (Whole-House) | Point-of-Use (Single Tap/Appliance) |
|---|---|---|
| Treatment Scope | Treats all water entering the home. | Treats water at a single location (e.g., kitchen sink). |
| Typical Use Case | Addressing widespread issues like hardness, chlorine, sediment. | Improving taste, odor, and purity of drinking/cooking water. |
| Installation | Professional installation is often required. | Typically a simple DIY installation. |
| Cost | Higher initial investment. | Lower initial cost, more accessible. |
| Maintenance | Less frequent filter changes (e.g., every 6-12 months or longer). | More frequent filter changes (e.g., every 2-6 months). |
As you can see, the choice isn't about which one is "better" overall, but which one is better for you.
Figuring this out from the start saves you a world of headaches. It explains why your neighbor might install a massive whole-house system to stop hard water from destroying their appliances, while you might be perfectly happy with a simple pitcher filter just to make your iced tea taste better. It all comes down to your water and your goals.
It's no surprise that targeted, easy-to-use solutions are wildly popular. In fact, Point-of-Use (POU) filters are on track to make up nearly 44.8% of total revenue in the home filtration market by 2025. Why? Because they're easy. Anyone can grab a pitcher or screw on a faucet filter without calling a plumber. If you want to dig deeper, you can discover more insights about the water filter market and its growth.
The real question isn't just "What's in my water?" but also "Where do I need the cleanest water?" Answering that will instantly point you in the right direction.
This guide will walk you through all the specific types of home water filtration systems that fall into both of these categories. Now that you understand the basic landscape, you're ready to explore the different technologies—from reverse osmosis to activated carbon—and find the perfect fit for your home.
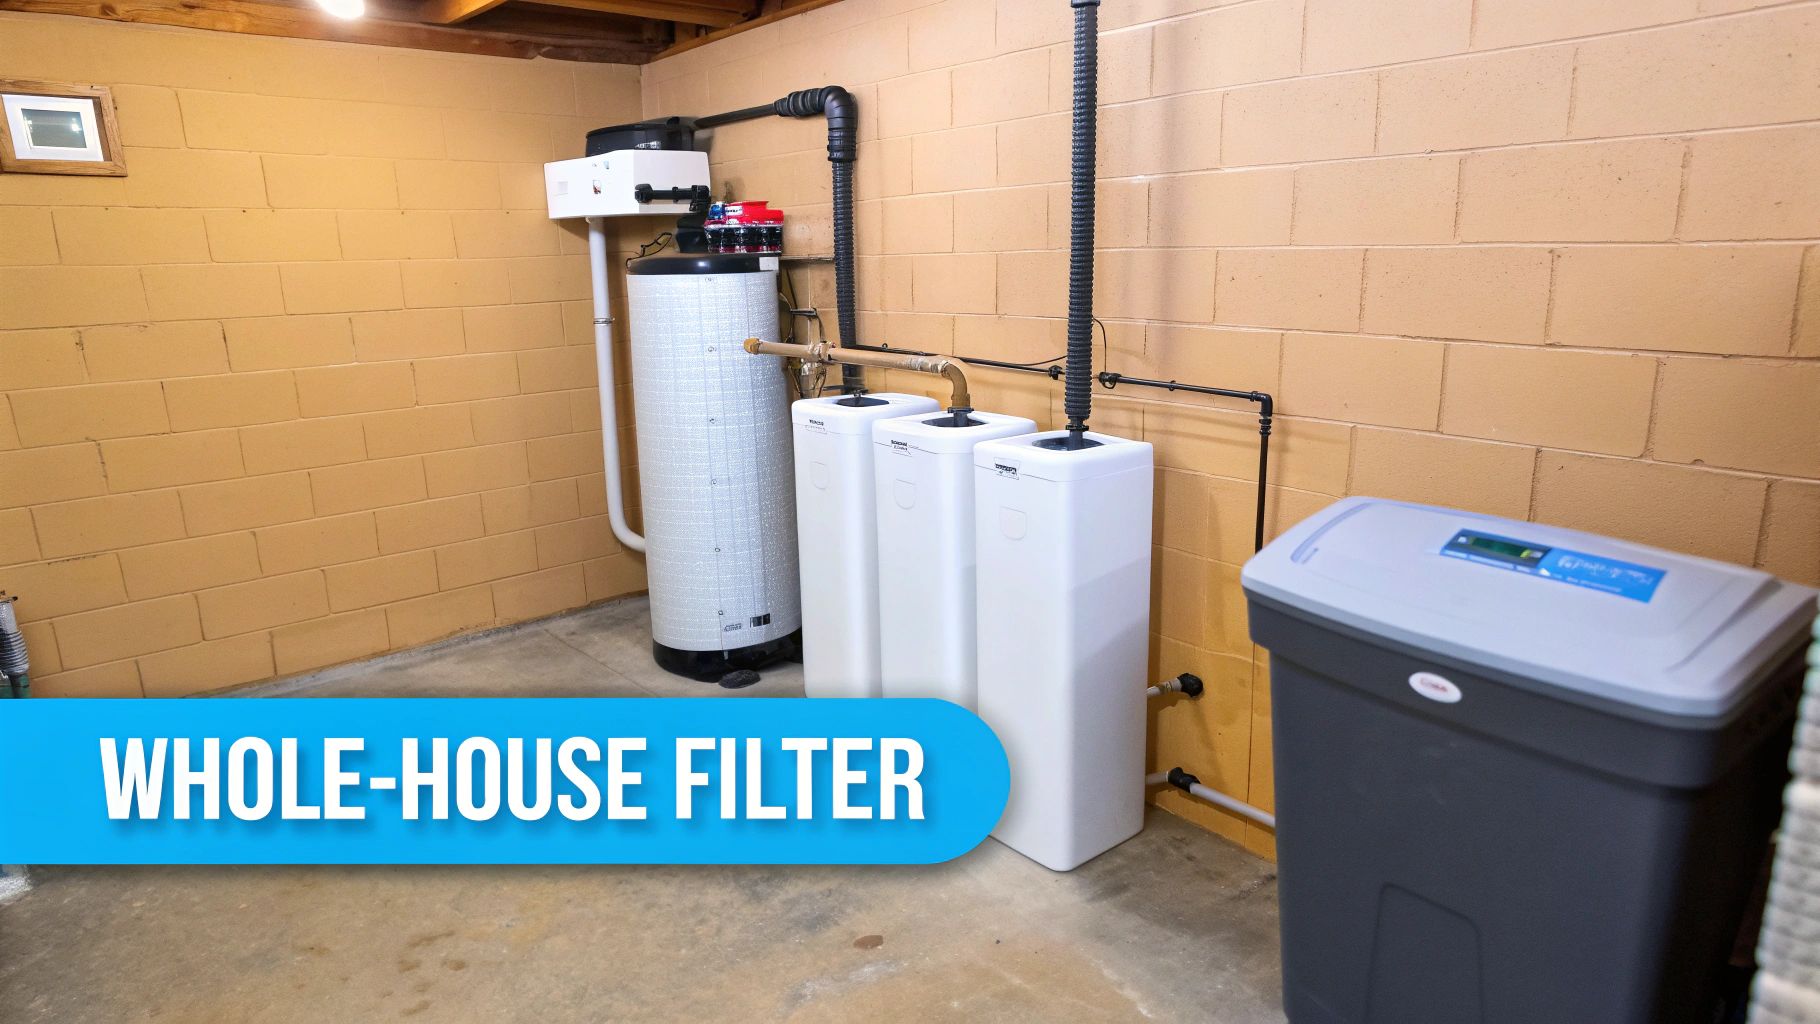
Imagine turning on any faucet in your house—the shower, the washing machine, the bathroom sink—and getting pure, clean water. Not just in the kitchen, but everywhere. Every single drop is treated. That’s not a dream—it's what a Point-of-Entry (POE), or whole-house, water filtration system delivers.
These systems are the comprehensive guardians of your home’s water. Installed right where the main water line enters your house, they stand as a fortress to ensure that every appliance and tap gets the good stuff.
This all-in-one approach is exactly why so many homeowners are opting for a total water quality upgrade. The market is booming, expanding from $20,502.5 million in 2021 with a forecast to hit $25,389.4 million by 2025. People are tired of dealing with widespread issues like chlorine, sediment, and other contaminants, and they want a solution that tackles them at the source.
Think of a whole-house filter like a multi-stage security checkpoint for your water. As water enters from the main line, it’s pushed through a series of different filter media, with each layer designed to snag specific troublemakers. This layered defense is what makes them so powerful against a whole range of issues.
A typical setup often includes a few key players working together:
Many systems can also be customized with add-ons like a water softener to fight hard water minerals (calcium and magnesium) or a UV purifier to zap any lingering microbiological threats. The right combination really depends on what’s in your water to begin with.
The payoff of a whole-house system goes way beyond just better-tasting water from the kitchen tap. Since every drop is treated, you’ll notice the benefits in places you might not expect. Your shower water will be free of drying chlorine, and your clothes will come out of the wash brighter and last longer.
One of the biggest long-term wins is how it protects your plumbing and all your water-using appliances. By filtering out corrosive chemicals and scale-building minerals, you extend the life of your water heater, dishwasher, washing machine, and pipes, saving yourself a ton of money on repairs and replacements.
This makes a whole-house system a really smart investment, especially if you're already planning a big home upgrade. If you're tackling a major project, thinking about your water from the get-go is key. For example, this helpful whole house renovation checklist shows how water filtration can fit right into the bigger picture of your home improvements.
Making the jump to a whole-house system means weighing the upfront cost against the incredible long-term, home-wide benefits.
Here’s what you need to keep in mind:
For any homeowner who is serious about getting the absolute best water quality in every part of their home, a whole-house filter is the definitive solution.
While whole-house systems cast a wide net, sometimes you need surgical precision. For many of us, the most critical battleground for water quality is the kitchen sink—the source of our drinking and cooking water. This is precisely where under-sink filtration systems come in, giving you a powerful, localized defense right where it counts most.
Tucked away in the cabinet, these units are the quiet heroes of home water treatment, delivering incredibly clean water without the need for a major plumbing overhaul.
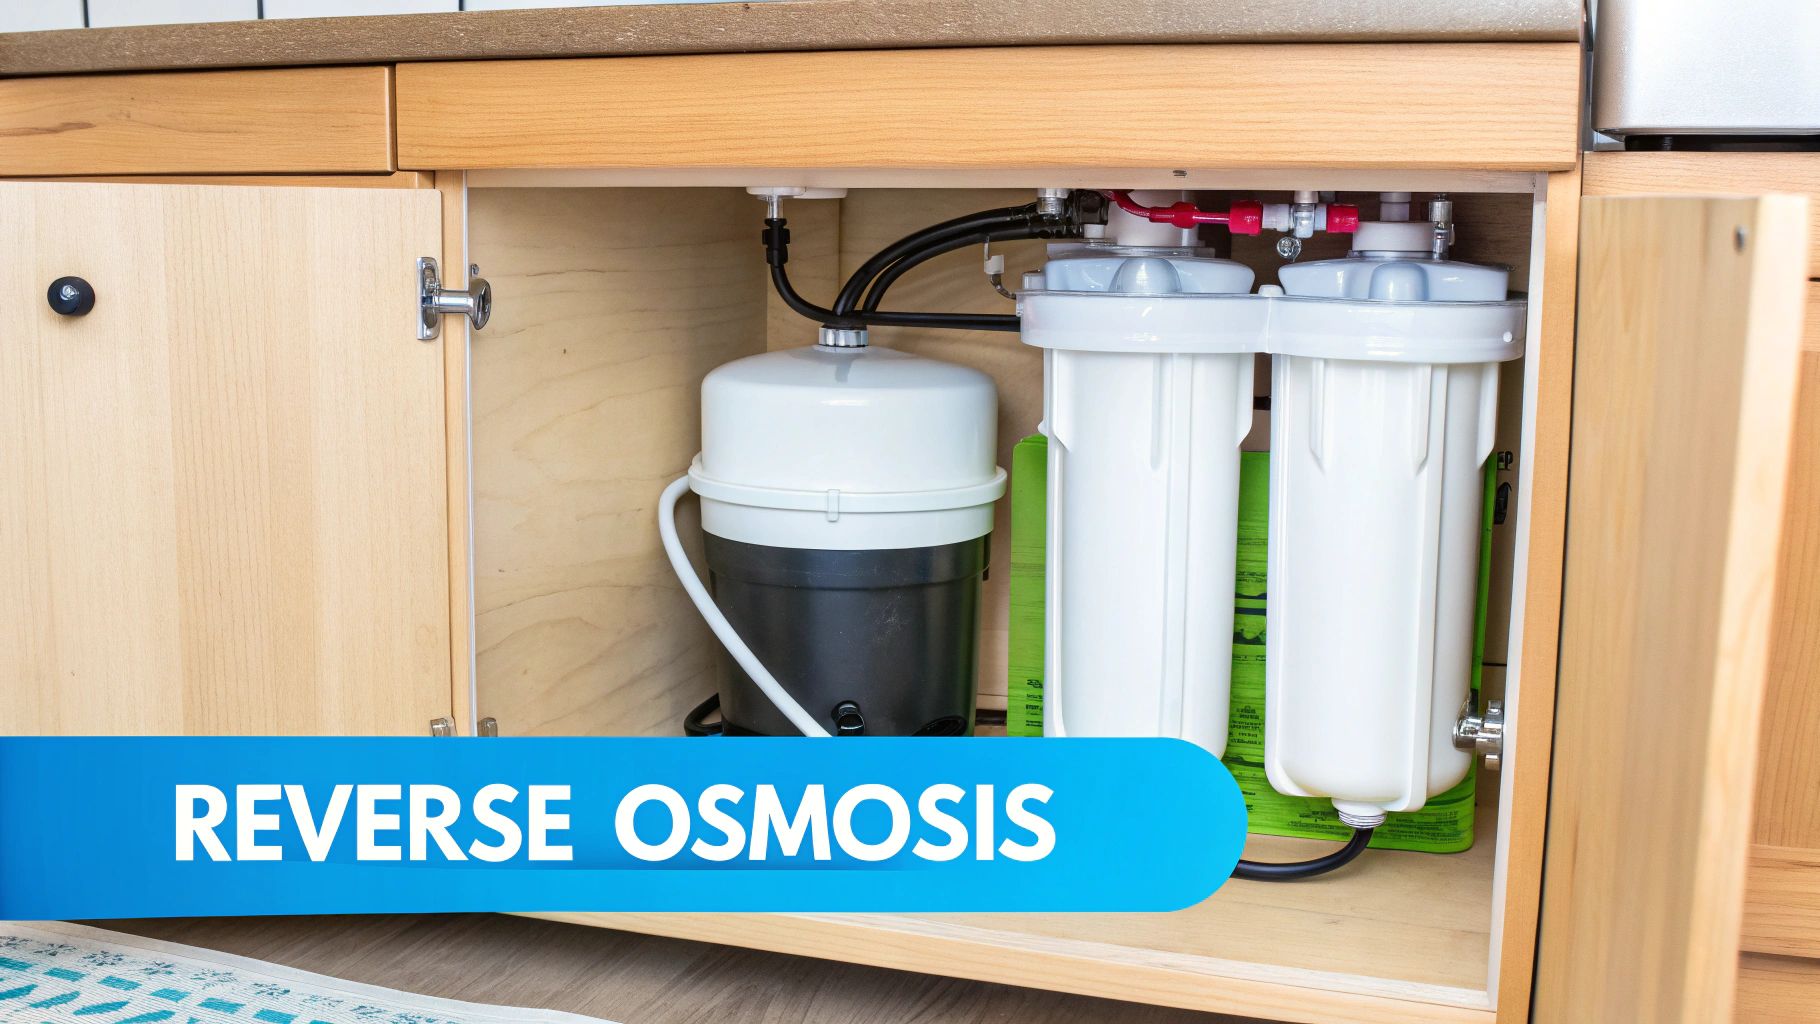
When you start looking at under-sink options, one technology consistently rises to the top as the gold standard for purity: Reverse Osmosis (RO). It's the system of choice for anyone serious about getting the cleanest water possible, tackling contaminants other filters simply can't touch.
Think of a Reverse Osmosis system as the ultimate gatekeeper for your water. It’s not just a simple filter; it's a multi-stage purification process. Water first travels through a series of pre-filters, typically sediment and carbon, which knock out the big stuff like rust, dirt, and chlorine.
But the real workhorse is the RO membrane. This is where the magic happens.
This specialized, semipermeable membrane has microscopic pores so tiny that only water molecules can pass through. Nearly everything else—up to 99% of dissolved solids—is physically blocked, rejected, and sent down the drain. The result is water that is exceptionally pure.
Common Contaminants Removed by RO Systems
Because this process is so meticulous, it's also a bit slow. That’s why nearly every RO system comes with a small storage tank. This tank keeps a few gallons of purified water on deck, ready to flow the moment you turn on the dedicated faucet.
Like any high-performance technology, Reverse Osmosis has its trade-offs. It delivers a level of purification that’s second to none, but it’s important to understand what that involves.
The real beauty of an RO system is its ability to remove an incredibly broad spectrum of contaminants. It gives you peace of mind that your water isn't just filtered—it's truly purified.
Let's break down the good and the not-so-good:
| Pros of Reverse Osmosis | Cons of Reverse Osmosis |
|---|---|
| Superior Contaminant Removal: The most effective point-of-use method for getting rid of the widest range of pollutants. | Wastewater Production: The system flushes away rejected contaminants, which creates wastewater (often 1-3 gallons for every pure gallon produced). |
| Improved Taste and Odor: By removing almost all impurities, it delivers crisp, clean-tasting water. | Slower Water Flow: The purification process is methodical, which is why a storage tank is necessary for on-demand use. |
| Cost-Effective: Over time, it's far cheaper and more convenient than buying endless cases of bottled water. | Requires a Dedicated Faucet: Most setups need a separate, smaller faucet installed on your sink just for the purified water. |
| Hidden from View: The entire system lives neatly under the sink, leaving your countertops free of clutter. | Removes Beneficial Minerals: The membrane is non-discriminatory; it removes healthy minerals like calcium along with the bad stuff. Some systems include a remineralization stage to fix this. |
If a full RO system seems like more than you need, there's a great middle-ground option: a multi-stage carbon filter. These units also install under the sink and connect directly to your cold-water line, but they work with your existing kitchen faucet.
These systems use a combination of advanced carbon blocks and other filter media. While they won't remove dissolved solids like fluoride or nitrates, they are fantastic at eliminating chlorine, lead, pesticides, and other chemicals that ruin the taste and smell of your water. They're also simpler to install, produce zero wastewater, and don't slow down your water flow, making them an excellent choice for targeted, high-quality filtration.
Sometimes, you don’t need a massive, complex system to get better-tasting water. For many people—especially renters, college students, or anyone wanting an immediate and affordable upgrade—the solution is right on the countertop or attached to the kitchen tap.
This is the world of water filter pitchers and faucet-mounted units, the most convenient entry points into home water filtration.
These simple devices are perfect for tackling the most common complaints about tap water, like that unmistakable chlorine smell or a slightly "off" taste. They're designed for quick results, transforming your water glass by glass, without needing any tools, plumbers, or permanent changes to your home's plumbing. It's no wonder they're one of the most popular types of home water filtration systems out there.
The secret weapon inside both pitchers and faucet filters is activated carbon. Imagine a tiny, porous sponge with a massive surface area. As water passes through the filter cartridge, this carbon acts like a magnet for certain contaminants.
Its porous structure physically traps and absorbs undesirable elements. This process, known as adsorption, is incredibly effective at grabbing the specific culprits that mess with taste and odor, making your water instantly more palatable.
What Activated Carbon Filters Typically Remove:
The result is a noticeable improvement in the quality of your drinking water, coffee, and even the water you use for cooking. Suddenly, those fruity notes in your expensive coffee beans actually come through because they aren't being masked by chemical tastes.
A water filter pitcher is often the very first filtration device people buy. It’s the definition of plug-and-play; just fill the reservoir, let gravity do the work, and pour. It’s an incredibly low-stakes way to see if filtered water makes a difference for you.
Of course, this convenience comes with a few trade-offs. The main limitations are capacity and speed. You have to refill it constantly, and waiting for the water to trickle through the filter can be a test of patience when you're thirsty. Filter life is also short, typically requiring a replacement every 40 gallons or about two months, which means ongoing costs.
For those who want filtered water on demand without the wait, a faucet-mounted unit is a fantastic step up. These devices screw directly onto your existing kitchen faucet in minutes—no tools needed. A small lever lets you switch between a filtered stream for drinking and an unfiltered one for washing dishes, which helps extend the filter's lifespan.
The real advantage of a faucet filter is its immediacy. You get a continuous flow of clean water right when you need it, bridging the gap between the patience required for a pitcher and the commitment of an under-sink system.
While they filter a wider range of contaminants than many basic pitchers and last longer (around 100 gallons or three months), they do have their own quirks. They can slow down your water flow and might not fit on all faucet types, especially those with pull-out sprayers.
Both pitchers and faucet units are excellent starting points, but they are primarily designed to improve aesthetics—taste and smell—rather than remove a broad spectrum of microscopic contaminants.
Sometimes, the problems with your water go way beyond a funny taste or smell. You could be dealing with invisible microorganisms or hard water minerals that are slowly killing your pipes and appliances. When a standard carbon filter just won't cut it, you have to bring in the specialists.
These advanced systems are engineered to solve very specific problems, giving you a targeted defense against some of the toughest water quality issues out there. The most common and effective are UV purifiers, water distillers, and ion exchange systems. Each one uses a different scientific angle to get the job done.
If you get your water from a private well or you’re worried about what might be swimming in it, a UV Purifier is your silent guardian. This tech doesn't "filter" water in the classic sense; instead, it zaps it with a powerful ultraviolet light.
Think of it like a security checkpoint for germs. As water flows through the unit, it’s hit with a special UV lamp that emits light at a specific wavelength (254 nanometers). This intense UV-C light blasts through the cell walls of things like bacteria, viruses, and protozoa (like Giardia and Cryptosporidium), completely scrambling their DNA. They can't reproduce, so they can't make you sick. It's a remarkably effective way to disinfect your water without adding a drop of chemicals.
So, when do you actually need a UV Purifier?
Maintenance is pretty simple. You'll need to replace the UV lamp once a year to make sure it's still powerful enough, and the quartz sleeve that protects the bulb needs a good cleaning every so often.
For anyone chasing the absolute purest water possible, a Water Distiller is the answer. This machine basically copies the earth’s natural water cycle—evaporation, condensation, and rain—to produce exceptionally clean water right on your countertop.
The process itself is straightforward but incredibly powerful. A distiller boils water, turning it into steam. As that steam rises, it leaves almost everything else behind: heavy metals, salts, bacteria, viruses, minerals, and chemicals. The pure water vapor is then cooled back down in a condenser coil and drips out as clean, distilled water.
A water distiller is the ultimate purification machine, knocking out a wider range of contaminants than just about any other single system. It's the gold standard for anyone who needs water that's as close to pure H₂O as you can get.
But that level of purity has its downsides. Distillation is slow, typically making only a few gallons a day, and it uses a fair bit of electricity. It also strips out beneficial minerals like calcium and magnesium, which gives the water a "flat" taste that some people don't care for.
Ever see those chalky white spots on your glassware? Or that crusty buildup on your showerhead? That's hard water. The culprits are high levels of calcium and magnesium, and the solution is an Ion Exchange system—what most of us just call a water softener.
Inside a water softener is a tank filled with thousands of tiny resin beads. These beads are "charged up" with sodium (or sometimes potassium) ions. When your hard water flows through the tank, the resin beads act like tiny magnets. They grab the hard water minerals (calcium and magnesium) and, in exchange, release the sodium ions into the water.
This simple "swap" is what makes your water soft. It stops scale buildup in its tracks, protects your appliances, and even makes your skin and hair feel softer. Of course, those beads eventually get full of minerals, so the system has to "regenerate" every so often. It does this by flushing itself with a brine (salt water) solution, which washes the calcium and magnesium away and recharges the beads with fresh sodium ions.
Feeling a bit overwhelmed by the sheer number of options out there? That’s completely normal. Choosing from all the different types of home water filtration systems can seem complicated, but it really just boils down to answering three simple questions about your home and what you’re trying to achieve.
Answering these will cut through the noise and point you straight to the perfect solution. So, let's forget the technical jargon for a moment; this is your practical game plan for getting it right.
You can’t solve a problem if you don’t know what it is. The single most important first step is to figure out exactly what contaminants are flowing through your tap water. Honestly, you might be surprised by what you find.
For City Water: Your local municipality is required to send out an annual water quality report, often called a Consumer Confidence Report (CCR). This document lists all the tested contaminant levels and is a fantastic starting point.
For Well Water: If you have a private well, the responsibility for testing falls on you. Getting your water tested by an independent lab is essential to check for things like bacteria, nitrates, heavy metals, and other common groundwater issues.
Once you have this data, you have a clear target. You're no longer guessing; you're making a smart decision based on real facts. For more help, the extensive advice from Water Filter Advisor can help you make sense of your results.
This simple flowchart is a great way to visualize the process of testing your water and matching the results to the right filter technology.
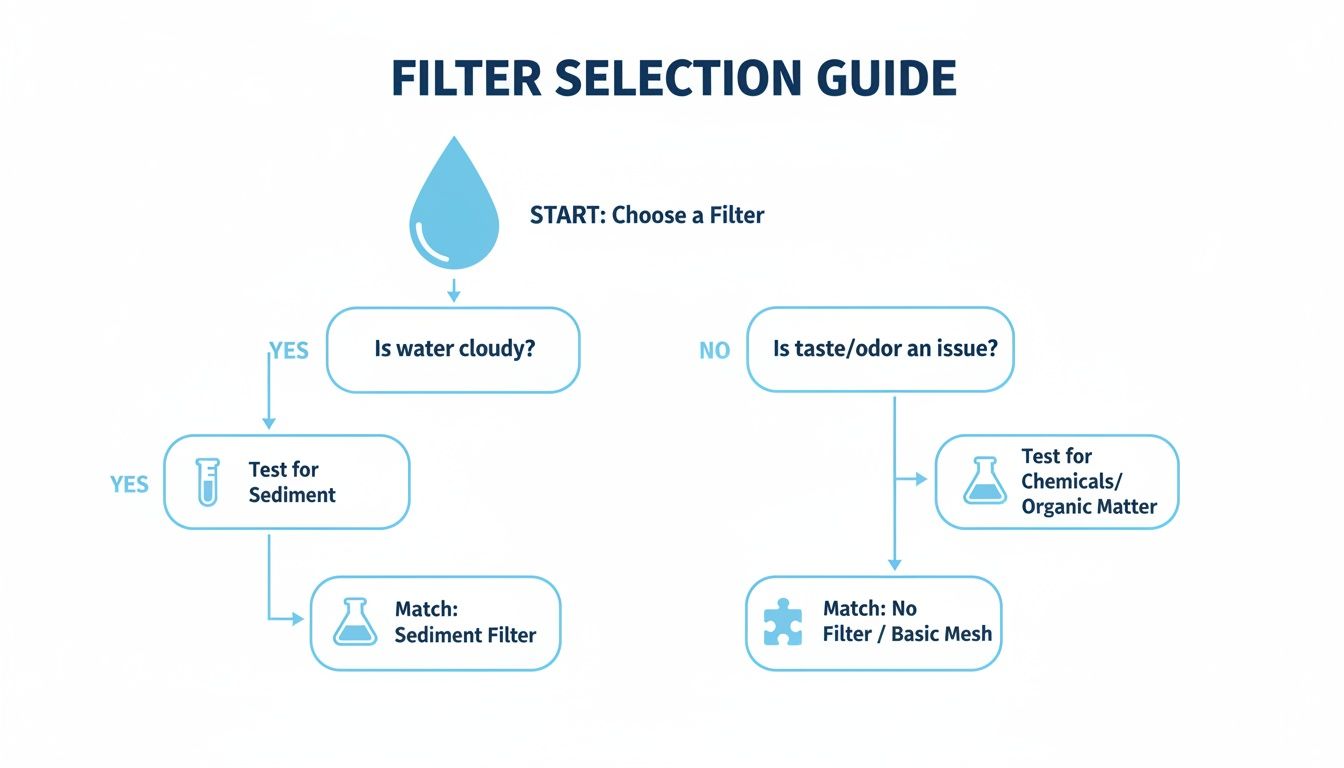
The key takeaway here is pretty straightforward: let your water's specific issues—whether it’s a bad taste, a strange smell, or invisible contaminants—directly guide your choice of filter.
Now that you know what you need to remove, you can match the problem to the right tool for the job. Not all filters are created equal; each type is designed to target different things.
The goal isn't to find the "best" filter on the market, but to find the best filter for your water. A system that’s perfect for removing chlorine might do absolutely nothing for hard water minerals.
To simplify things, I've put together a quick table to help you connect common water complaints with the most effective filtration systems we've talked about.
This table is designed to help you quickly identify the most effective filtration system based on the specific water quality issues you're facing at home.
| Common Water Problem | Primary Contaminants | Recommended Filter Type(s) |
|---|---|---|
| Bad Taste/Smell (Chlorine) | Chlorine, Chloramine, VOCs | Activated Carbon (Pitcher, Faucet, Under-Sink, Whole-House) |
| Cloudy or Murky Water | Sediment, Silt, Rust | Sediment Filter (Often part of a Whole-House system) |
| Hard Water Stains & Buildup | Calcium, Magnesium | Ion Exchange (Water Softener) |
| Lead, Fluoride, Arsenic Concerns | Heavy Metals, Dissolved Solids | Reverse Osmosis (Under-Sink) |
| Well Water Safety (Bacteria/Viruses) | E. coli, Giardia, Viruses | UV Purifier, Distiller |
By pinpointing your problem in the first column, you can easily see which type of filter is best equipped to handle it.
Finally, you have to think about the practical side of things. How much are you willing to invest, and are you comfortable with a DIY project, or would you rather hire a pro? A simple pitcher filter might cost less than $50 and requires zero installation, while a whole-house system can run into the thousands and definitely needs a plumber.
Be realistic about your budget for both the initial purchase and long-term maintenance, like filter replacements. Once you've considered all these factors, you can start to explore yasutrading's product range to see what fits your needs and price point. With this structured approach, you'll feel confident choosing a system that truly protects your home.
Even after looking at all the options, you probably still have a few questions. That's normal. Let's tackle some of the most common ones we hear from homeowners to clear up any final confusion.
Sure, the water coming from your city's treatment plant meets the legal minimum safety standards. But that doesn't mean it's great. It's often loaded with disinfectants like chlorine or chloramine, which is why your tap water can taste and smell like a swimming pool. These chemicals can also dry out your skin and hair.
Don't forget that water travels a long way to get to you, and it can pick up contaminants like lead from old pipes along the journey. A home filter is your last line of defense, making sure the water is as clean as possible right where you use it.
It's a great question. Think of it this way: filtration is like cleaning, while purification is like sterilizing.
Filtration removes sediment, chemicals, and other particles that affect taste and clarity. Most carbon-based filters are in this category. Purification is a more intense process that kills or removes living microorganisms like bacteria and viruses. Systems using Reverse Osmosis or UV light are considered purifiers. For most people on city water, filtration is all you need. If you're on well water, purification is often a must.
This one is non-negotiable: you have to follow the manufacturer's schedule. A filter that's past its prime doesn't just stop working—it can actually become a breeding ground for bacteria and make your water worse than it was before.
A filter's lifespan is a promise, not a suggestion. Ignoring it means you're no longer protecting your water; you're just running it through a dirty sponge.
Here are some general timelines, but always check your specific model:
Staying on top of this one simple task is the best way to guarantee your system keeps working like it's supposed to.
Ready to find the perfect filtration solution for your home? At Water Filter Advisor, we provide expert reviews, in-depth guides, and practical advice to help you make a confident choice. Explore our resources today and start your journey to better water at https://www.waterfilteradvisor.com.
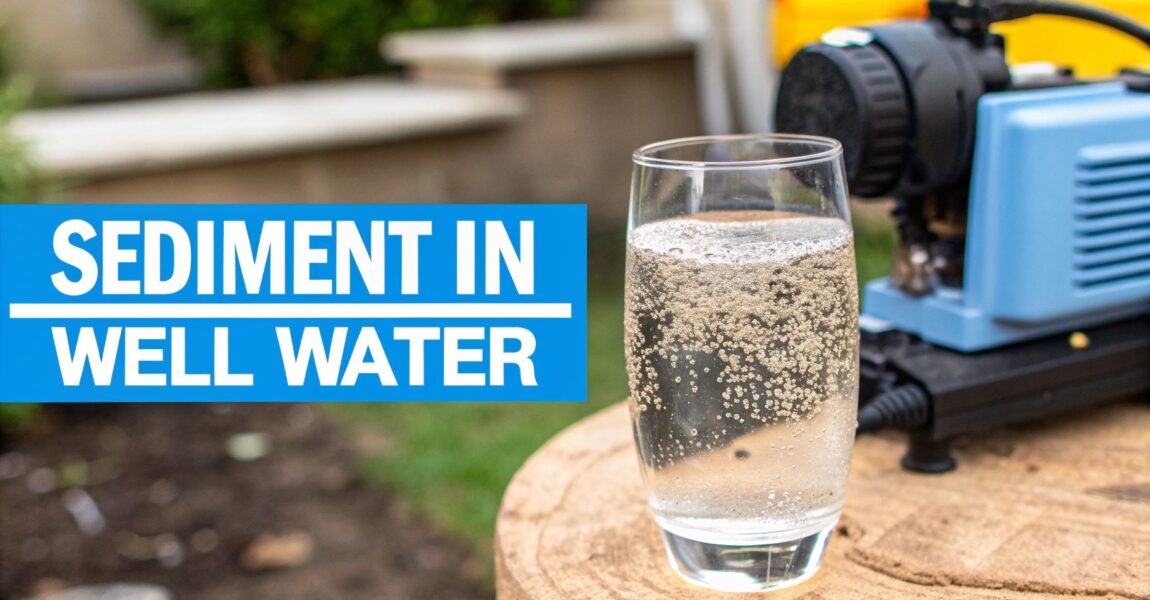
You pour a glass of water from your kitchen tap, hold it up to the light, and… there it is. Tiny particles doing a slow-motion dance—the tell-tale sign of sediment in your well water. It's an incredibly common issue for homeowners with wells, basically meaning bits of sand, silt, or clay have snuck into your plumbing. The good news? It's a completely winnable battle with the right filtration setup.
Ever noticed a gritty film at the bottom of a drinking glass after it sits for a while? Or found mysterious specks staining your freshly washed laundry? Congratulations, you've met sediment. At its heart, sediment is just a mix of natural, solid particles that get stirred up and hitch a ride in your water.
Think of your well as a giant straw sipping water from an underground aquifer. That aquifer is surrounded by layers of earth—sand, clay, rock, and silt. Heavy rain, a shifting water table, or even an aging well pump can shake these fine particles loose, pulling them right into your home's water supply.
A little bit of grit might not seem like a big deal, but it’s a lot more than a visual annoyance. These tiny particles are the uninvited bullies of your plumbing system, acting like liquid sandpaper. They slowly wear down pipes, clog faucet aerators, and can absolutely wreck expensive appliances like your water heater, dishwasher, and washing machine. It’s a silent war that can cause serious financial damage over time.
And this isn't some rare occurrence. Sediment in well water is a widespread problem affecting millions, especially in areas not hooked up to a municipal water system. The United Nations World Water Development Report noted that in 2022, over 3.5 billion people relied on water sources outside of safely managed systems, and a huge number of them depend on wells. You can learn more about this global water challenge on UNESCO's site.
The most important thing to know is that you don't have to live with it. A good whole-house water filtration system acts like a bouncer at the club, stopping these unwelcome particles before they ever enter your home and wreak havoc.
Instead of constantly cleaning out clogged faucets or watching your appliances die a slow, painful death, a whole-house filtration system provides a real, permanent answer. By installing a filter right where your main water line enters your home, you guarantee that every single tap—from the kitchen sink to the shower—delivers clean, clear water.
Here’s what a dedicated filtration system brings to the party:
At the end of the day, tackling sediment in well water is all about taking back control of your home’s most vital resource. With the right filter, you can make that cloudy, gritty water a distant memory.
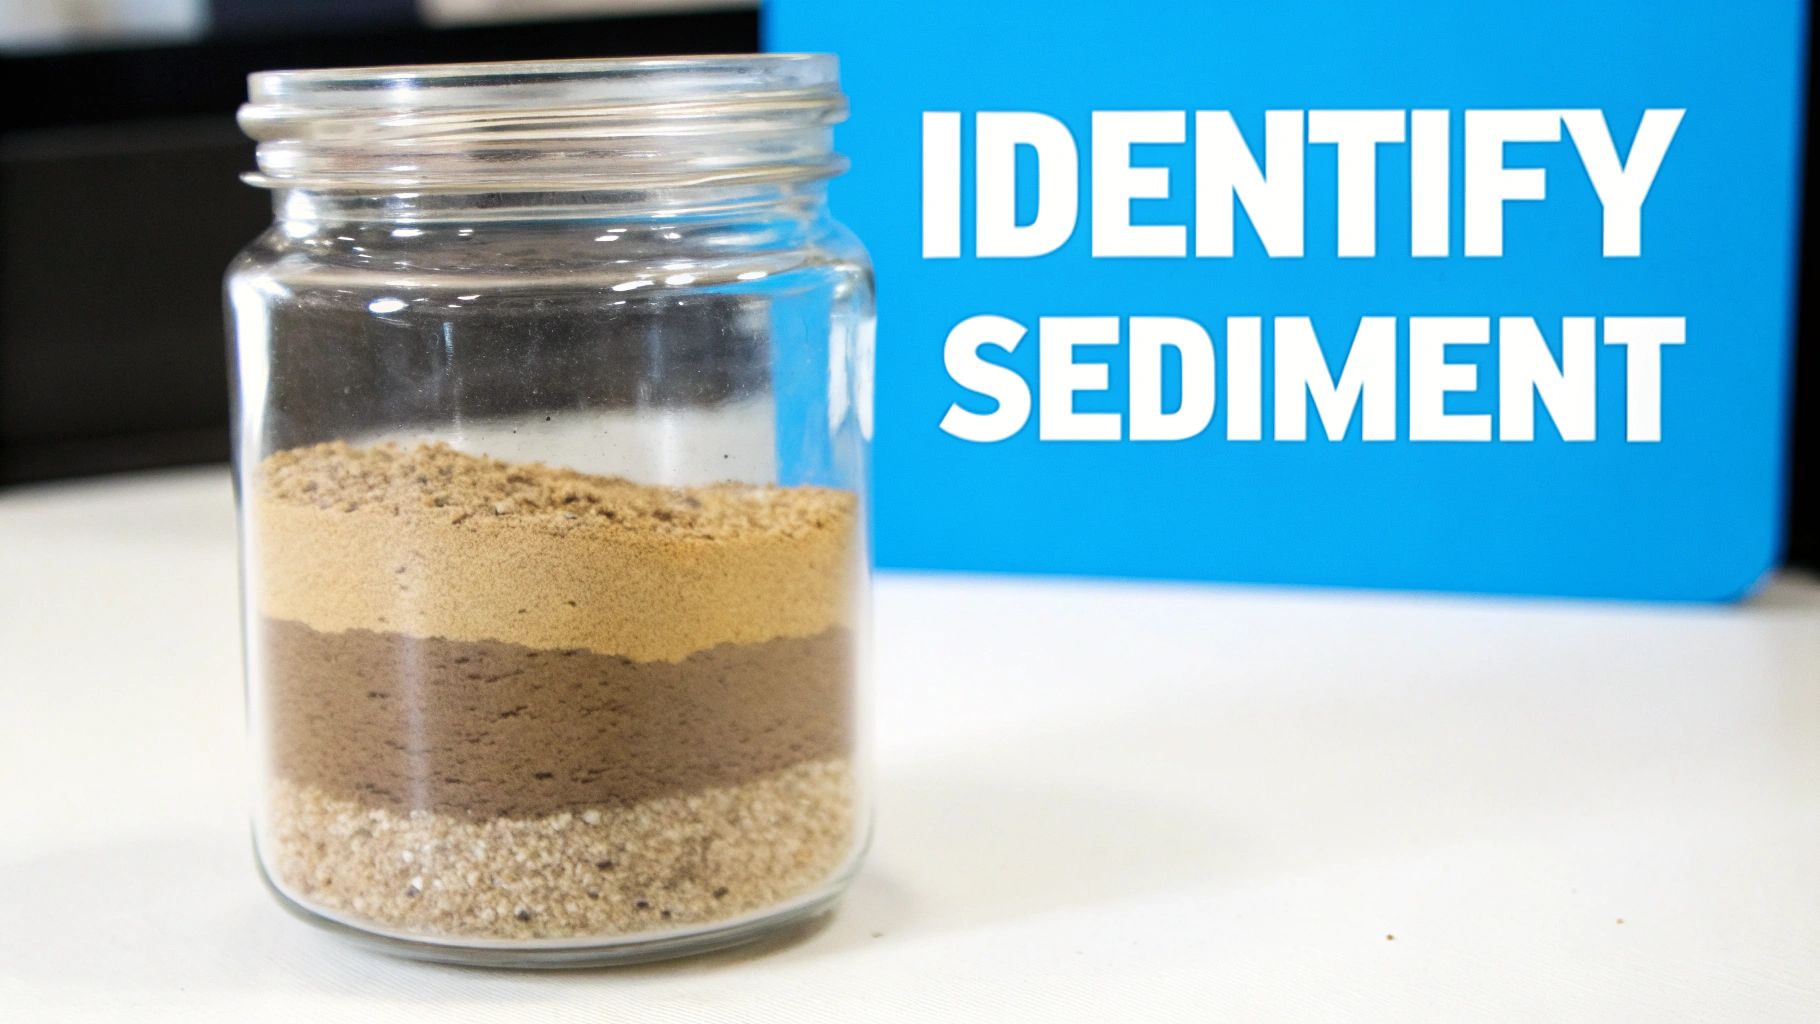
Not all sediment is created equal, and the first step to clear water is figuring out exactly what you're dealing with. Think of yourself as a water detective. The clues are floating right there in your glass, and knowing what they mean is critical for choosing the right filter.
It’s like using the right tool for the job. You wouldn't use a spaghetti colander to strain coffee grounds, right? The same logic applies here—a filter designed for coarse sand won't do a thing against ultra-fine clay. This is where a little hands-on diagnosis pays off big time.
You don’t need a fancy lab to get started. Your best diagnostic tool is probably already in your kitchen cabinet: a plain, clear glass jar. This ridiculously easy test will tell you a surprising amount about the sediment in your well water.
Here’s your mission, should you choose to accept it:
The way the particles separate tells a story. Heavy, coarse sand will drop to the bottom in just a few minutes, while fine silt might take a few hours. The absolute finest clay particles can stay suspended, keeping your water cloudy for a full day or even longer.
This simple observation is your cheat code for picking the right filtration system. Heavier gunk is easy to trap, but those tiny suspended particles require a much finer filter to get the job done.
Once your jar test is done, you can compare the layers at the bottom to figure out what’s floating around in your pipes. Here's a quick field guide to help you identify the usual suspects.
| Sediment Type | Appearance in Water | Feel | Potential Cause |
|---|---|---|---|
| Sand or Grit | Heavy particles that settle instantly | Coarse, gritty texture | Failing well screen, pump set too low |
| Silt | Muddy, cloudy, or murky water | Soft, flour-like powder when dry | Runoff, well construction issues |
| Clay | Water stays cloudy for 24+ hours | Very fine, almost sticky powder | Surface water infiltration, very fine earth |
| Rust / Iron | Red, orange, or brown flakes | Flaky or gritty | Aging iron pipes, high iron in groundwater |
Knowing what you’re up against is half the battle.
Is it coarse sand? Or is it fine, suspended silt that just won't settle? The answer directly points to the type of filter you’ll need. Without this step, you’re just guessing, and that can lead to buying the wrong equipment and wasting a pile of money.
You might not think much of those tiny particles swirling in your well water, but they're waging a slow, costly war on your home's plumbing and appliances. It's helpful to think of sediment as liquid sandpaper, constantly grinding away inside every pipe. This nonstop abrasive action is the start of a whole cascade of expensive problems.
This gritty flow gradually wears down everything from pipe fittings and faucet seals to valve seats. The result? Drips and leaks that can lead to serious water damage over time. Your water-using appliances, however, are on the front lines, taking the worst of the assault.
Sediment is the secret enemy of your home's hardest-working machines. It sneaks into tiny passages, builds up in tanks, and grinds away at delicate components, dramatically shortening their lifespan. You’ll find yourself facing more frequent repairs or, even worse, having to replace an expensive appliance far too soon.
The most common appliance casualties include:
When the staining and clogging from well water sediment gets bad enough, some homeowners find they need to look at major improvements like these sink and faucet upgrades just to get things working properly again.
Beyond the mechanical damage, sediment in well water can hide some real health concerns. While particles like sand, silt, and clay usually aren't toxic on their own, they create the perfect hiding spot for harmful microorganisms.
Think of a sediment particle as a tiny shield. It can protect dangerous bacteria, viruses, and protozoa from disinfectants like chlorine or UV light. This "shielding" effect means that even if you treat your water, nasty contaminants can survive by hiding behind the sediment.
This makes it incredibly difficult to know if your water is truly safe to drink. High turbidity—the technical term for cloudiness caused by suspended sediment—is often linked to a higher risk of gastrointestinal illnesses. The particles can also act like little sponges, soaking up and carrying contaminants like heavy metals or pesticides.
Ultimately, filtering out the sediment is a critical first step toward guaranteeing the safety and quality of your well water.
Alright, you've played detective with your water, seen what kind of gunk is floating around, and you know the damage it can cause. Now for the fun part: picking the right solution. It can feel like a lot to take in, but it really just boils down to matching the right filter to the type of sediment you have. You wouldn't use a tiny screwdriver on a massive bolt, right? Same idea here.
The goal is to get a whole-house sediment filter in place. This is a single unit that treats every drop of water coming into your home, protecting everything from your showerhead to your washing machine. Let's walk through the main options and break down how they work so you can feel confident you're making the right call.
To make sense of the different technologies out there, it helps to see them side-by-side. Each type of filter has its own strengths and is designed to tackle a specific kind of sediment problem. This table lays out the most common choices to help you figure out what's best for your home, your water, and your budget.
| Filter Type | Best For | Micron Range | Maintenance | Upfront Cost |
|---|---|---|---|---|
| Spin-Down | Heavy, coarse sediment like sand and grit | 75 to 1,000 microns | Flush periodically (low) | Moderate to High |
| Cartridge | Fine particles like silt, clay, and rust | 1 to 100 microns | Replace cartridge regularly | Low to Moderate |
| Backwashing | Both fine and coarse sediment | 5 to 100 microns | Automatic (very low) | High |
Ultimately, the "best" filter is the one that directly addresses the type of sediment you discovered in your jar test. A spin-down is fantastic for "heavy" problems, while a cartridge filter is your go-to for clearing up that persistent cloudiness from fine particles.
If your jar test showed a layer of sand or heavier grit at the bottom, a spin-down filter is probably your best first move. These things are pretty clever—they work like a mini centrifuge right in your plumbing line. Water zips into the filter and is forced into a rapid spin.
This spinning motion throws the heavier sediment particles to the outside wall of the filter housing, where gravity takes over and they settle at the bottom. The clean, sediment-free water then continues on its way into your house. The best part? Maintenance is incredibly simple. When you see gunk building up in the clear housing, you just open a valve at the bottom and flush it all out. No cartridges, no fuss.
A spin-down filter is a great choice if you have:
This diagram really drives home what happens when you let sediment problems go unchecked.
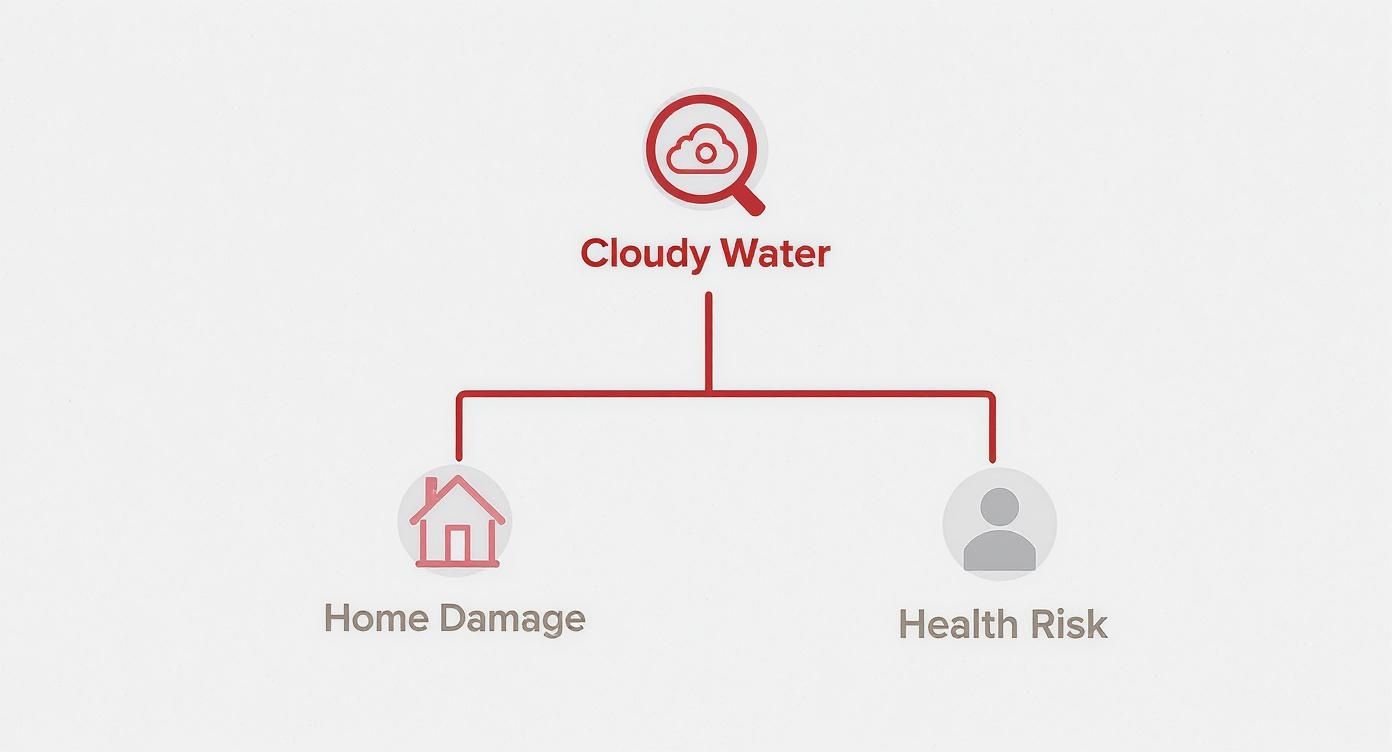
As you can see, what starts as cloudy water can quickly spiral into bigger issues for both your home and your health.
Now, if your water is murky with fine silt or clay that just seems to hang there forever, a cartridge filter is what you need. Think of these as a super-fine net. Water is pushed through a pleated or spun material that physically traps tiny particles, letting only the clean water get through.
The key to these filters is the micron rating. A micron is just a microscopic unit of measurement, and the rating on a filter tells you exactly how small of a particle it can catch.
A 100-micron filter is like a pasta strainer—great for catching big, obvious debris. But a 5-micron or 1-micron filter is more like an espresso filter, designed to grab the super-fine particles that make your water look hazy.
Getting the micron rating right is everything. For that fine silt you saw in your test, starting with a 20-micron or 5-micron filter is usually a sweet spot. It's fine enough to clear up the water but not so fine that it clogs up immediately and kills your water pressure.
For a lot of well owners, the water has a mix of both heavy sand and fine silt. If that's you, a single filter might not cut it. The real pro move here is to combine filters into a multi-stage system. The most common and effective setup is putting a spin-down filter before a cartridge filter.
This one-two punch is incredibly effective:
Going this route will make your replacement cartridges last way, way longer, which saves you a ton of hassle and money over time. If you want to dive deeper into different filter setups, feel free to check out our other articles for more in-depth guidance at https://www.waterfilteradvisor.com/advice/.
And remember, your whole-house system is just one piece of the puzzle. Things like maintaining refrigerator water filters are also part of keeping clean water flowing everywhere. By matching the right filtration technology to the specific sediment in your well water, you can build a system that delivers perfectly clear water for years to come.
Picking the right filter is a huge step, but what you do next is just as crucial for keeping that water clear and clean for years. It's easy to focus on the upfront price, but thinking about the installation, ongoing upkeep, and the total cost of ownership is what really makes it a smart investment, not just a quick fix for the sediment in your well water.
Let's break down what you can really expect. This will help you budget your time and your money without any surprises down the road.
First things first: are you going to install this yourself or call in a pro? There’s no single right answer, and it really depends on the filter’s complexity and how comfortable you are with plumbing.
For a lot of handy homeowners, putting in a simple cartridge or spin-down filter is a totally manageable weekend project. You'll likely need to cut into your main water line, fit some new connections, and mount the filter housing. If that sounds like something you can tackle, you could save a few hundred bucks on labor.
But when you get into more advanced systems like backwashing filters, things get tricky. These often involve wiring for the control valve and more complex plumbing. One wrong move could lead to leaks, a drop in water pressure, or a system that just doesn't work right. Hiring a licensed plumber, which usually runs between $300 and $800, buys you peace of mind. They'll get it done right and make sure everything is up to code.
Here's the secret to making your filter last: proper maintenance. If you ignore it, it’s like never changing the oil in your car—sooner or later, things are going to grind to a halt. A well-maintained filter doesn't just give you clear water; it protects your home's water pressure, too.
Your maintenance routine will look completely different depending on your filter type:
Don't just guess when it's time for a filter change. Set a recurring reminder on your phone's calendar. It's a simple habit that protects your investment and keeps your system working like it should.
When you’re budgeting, it’s critical to look past the sticker price. The true long-term cost is a mix of the initial purchase, the installation, and all the replacement parts you'll need over the years.
A basic cartridge filter system might only set you back $50-$150 to start, but those replacement filters ($20-$60 each) will add up over time. A spin-down filter costs a bit more upfront ($100-$300), but with a reusable screen, it has almost zero ongoing costs.
Backwashing systems carry the biggest initial price tag, often from $600 to over $1,500. But because they're automated and the media lasts for years, their long-term running costs are actually very low. For wells with stubborn, persistent sediment problems, they often end up being the most cost-effective choice. By weighing these factors, you can find the perfect solution for both your water and your wallet.
Figuring out the right filtration strategy can leave you with a few lingering questions. It's totally normal. Dealing with sediment in well water feels like a big job, so it’s smart to get all the facts straight first. Let's tackle some of the most common concerns homeowners run into.
We'll clear up the confusion so you can get the job done with confidence, knowing you’ve covered all the bases for crystal-clear water.
This is the number one worry we hear, and for good reason—nobody wants to trade gritty water for a trickle of a shower. Here’s the short answer: a correctly sized and maintained sediment filter will not noticeably tank your water pressure.
Where people run into trouble is when a filter is too small for the home's flow rate, or the micron rating is way too fine for the kind of gunk in their water. Think about it like trying to drain a swimming pool through a coffee filter. It’s just not going to work, and you’ll get a major backup. The same principle applies when a filter gets clogged because it's the wrong type or it hasn't been changed on schedule.
Here’s how to keep your pressure up:
This is a classic mix-up, but they do completely different jobs. A good way to think about it is that a sediment filter is like a bouncer at a club, while a water softener is more like a chemist.
A sediment filter is a physical barrier. Its only job is to block and trap solid particles—sand, dirt, rust, and other debris. It grabs all the "floaties" to make your water clear.
A water softener, on the other hand, doesn't remove particles at all. It uses a chemical process called ion exchange to target dissolved minerals like calcium and magnesium that make water "hard." Sediment can actually wreck a water softener, which is why you always install a sediment filter before the softener in your water line.
One can't do the other's job. You need a sediment filter for cloudy, gritty water and a water softener if you're fighting hard water stains and scaly buildup.
Picking a micron rating sounds technical, but it doesn't have to be. Just follow this simple rule of thumb: start with a higher micron rating (which is less fine) and only go lower if you need to.
If you can see coarse sand in your water, a 100-micron spin-down filter might be all it takes to solve the problem. For that general cloudy look caused by silt or clay, a 20- to 30-micron cartridge is a fantastic starting point. Only move down to a 5-micron filter if the water still isn't clear enough.
Jumping straight to a super-fine 1-micron filter without any pre-filter is just asking for constant clogs and pressure problems.
Here at Water Filter Advisor, we're all about helping you find a practical solution that actually works for your home. Our detailed guides and honest reviews are designed to cut through the marketing noise, making it easier to choose a system that will deliver clean, safe water for your family. To build the right plan for your well, check out our resources at https://www.waterfilteradvisor.com.

It’s a slow-burn kind of frustration, isn’t it? That moment you realize your shower feels more like a light mist than a powerful blast. Before you start blaming the city or picturing a catastrophic plumbing failure, take a breath. The fix is often surprisingly simple, and if you have a home water filter, that's the absolute best place to begin your search.
When your water flow drops, the first and most important clue is figuring out the scope of the problem. Is it just one sad, trickling faucet, or is every tap in the house feeling weak? Pinpointing this will immediately tell you if your whole-house filtration system is the likely villain.
This chart breaks down the thought process, helping you trace the issue back to its source.
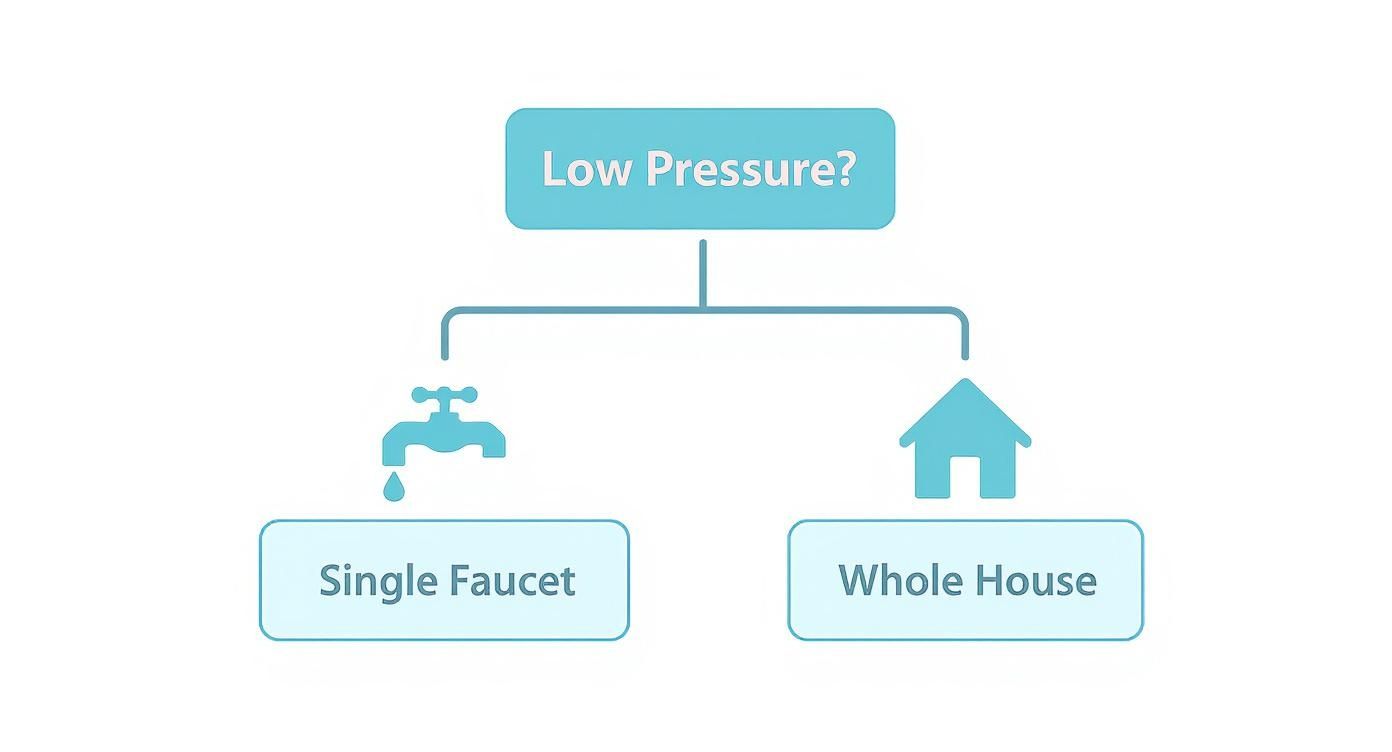
As you can see, a single-faucet issue is almost always a small, local clog. But a whole-house problem? That points directly to something affecting your main supply line—and your filtration system is suspect number one.
Put on your detective hat. If the kitchen sink is dribbling but the bathroom shower is blasting away just fine, your culprit is likely a clogged faucet aerator. These little screens at the tip of your faucet are great at catching the exact sediment and mineral buildup your filters are meant to remove. Over time, they get gummed up and choke off the water flow.
But if every fixture in your home is underperforming, the problem is bigger and sits closer to where your water comes in. This is where you need to look hard at your whole-house water filter. A filter cartridge that's past its prime is one of the most common reasons for a gradual, house-wide pressure drop.
A pressure drop of 15 to 20 PSI from the inlet to the outlet of your filter system is a dead giveaway. It means the cartridges are clogged and fighting the flow of water.
Before you start disassembling your filtration system, run through this quick checklist. It helps you rule out the simple stuff first and confirm that your filter is the real problem.
| Check | What It Tells You | Your Next Action |
|---|---|---|
| A Single Faucet | The problem is isolated to that specific fixture, not your main filter. | Unscrew the aerator and clean it. Check the shut-off valve under that sink. |
| All Hot Water Taps | The issue is likely with your water heater, not your whole-house filter. | Check the heater's shut-off valve to ensure it's fully open. |
| All Taps (Hot & Cold) | The restriction is affecting your entire home's water supply. | Your whole-house filter is the primary suspect. It's time to investigate it. |
| Neighbor's Pressure | If they have low pressure too, it's a municipal problem. | Call your local water utility to report an outage or issue. |
Completing these checks gives you a much clearer picture. If everything points to a whole-house issue, your water filtration system is where the investigation begins.
A few quick inspections can save you a world of hassle. Before you get the wrenches out, give these a look:
Working through these steps will help you figure out if you have a simple fix on your hands or if it’s time to dig deeper into your filter system. For more expert tips, check out our in-depth advice on all types of water filters. Now, let's test your filtration system itself.
You got that whole-house water filtration system for crisp, clean water, but now your shower feels more like a weak mist. I've heard this story a thousand times. The very thing you installed to make your water better can, over time, turn into the biggest roadblock for your water pressure.
If you're seeing a gradual drop in pressure all over the house, a clogged or undersized filter is one of the first places I'd look.
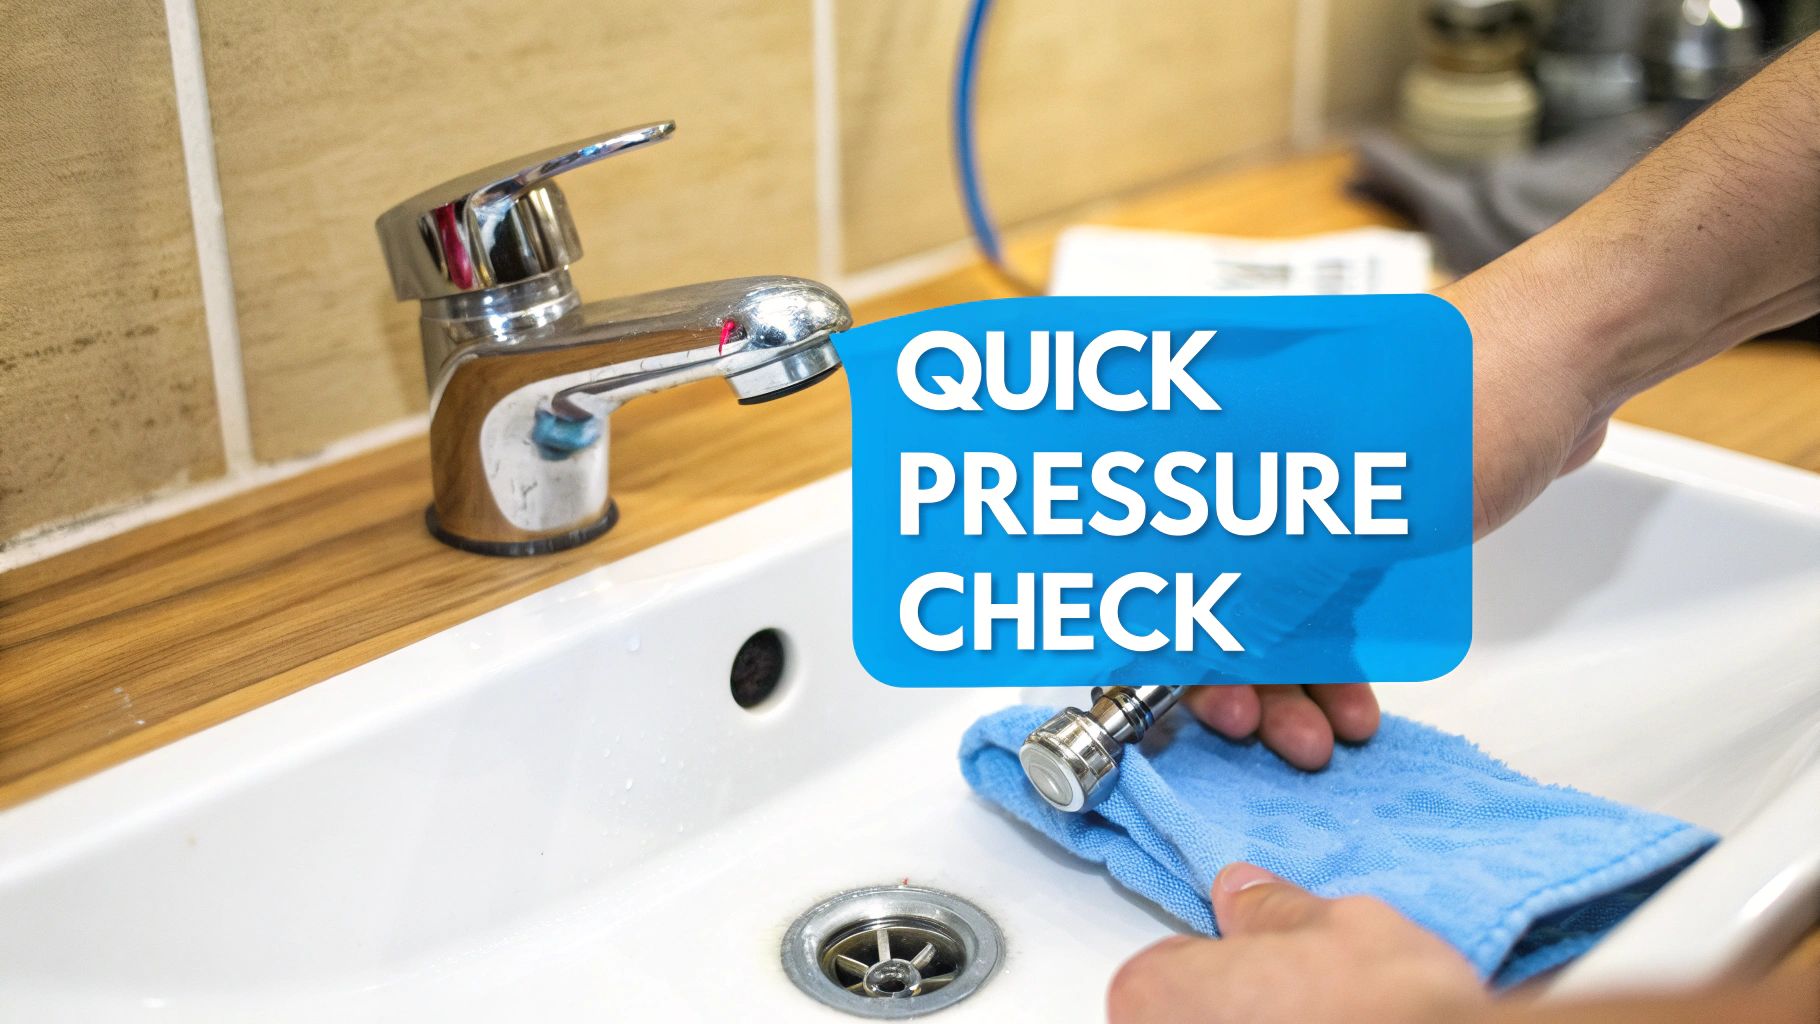
Here’s what happens: every filter creates a little bit of resistance. That's its job. As the cartridge does its work trapping sediment, chlorine, and all the other gunk you don't want, the pathways for water get smaller and smaller. Eventually, it gets so saturated that it literally starts choking the water supply, and you feel that pressure drop at every single faucet.
So, how do you know for sure the filter is the bad guy? Unlike a pipe that bursts suddenly, a filter issue is sneaky. The pressure doesn't just tank overnight; it slowly fades away over weeks or even months.
Keep an eye out for these tell-tale signs:
Think of it just like the air filter in your car. When it's clean, the engine gets all the air it needs and runs great. But when it gets clogged with dirt, the engine struggles to breathe and performance tanks. Same deal with your water filter—when it's clogged, your whole plumbing system is struggling for a drink.
There’s no need to guess. There's a simple test that will give you a definitive answer. Almost every whole-house filter system is installed with a bypass valve for this exact reason. This lets you route water around the filter for a short time, sending it straight into your home's pipes. It’s the ultimate diagnostic trick.
If you flip that bypass and your water pressure roars back to life, you've found your culprit. No doubt about it. The problem is your filtration system.
Here's the right way to do it:
Key Takeaway: The bypass test is the single most important diagnostic you can run for filter-related pressure loss. It gives you a clear yes or no without you having to take anything apart.
It's also worth knowing that not all filters are created equal when it comes to pressure. The type of system you have makes a big difference in how much of a pressure drop you should expect.
Knowing this helps you manage your expectations. A small pressure drop is normal, but a huge one means it's time for maintenance. Sometimes, the problem is bigger than just a filter change. For instance, in areas with low municipal supply, installing pressure-boosting pumps and regulating valves is a common strategy. You can explore more about global water challenges to see how different technologies are used.
So, you ran the bypass test, and surprise, surprise—your water filter is the culprit behind your weak shower. The good news? This is one of the easiest pressure problems to fix. You're not looking at a major repair bill; just a bit of simple, routine maintenance.
Think of it this way: a clean filter is a wide-open superhighway for your water. A clogged one is a five-o'clock traffic jam.
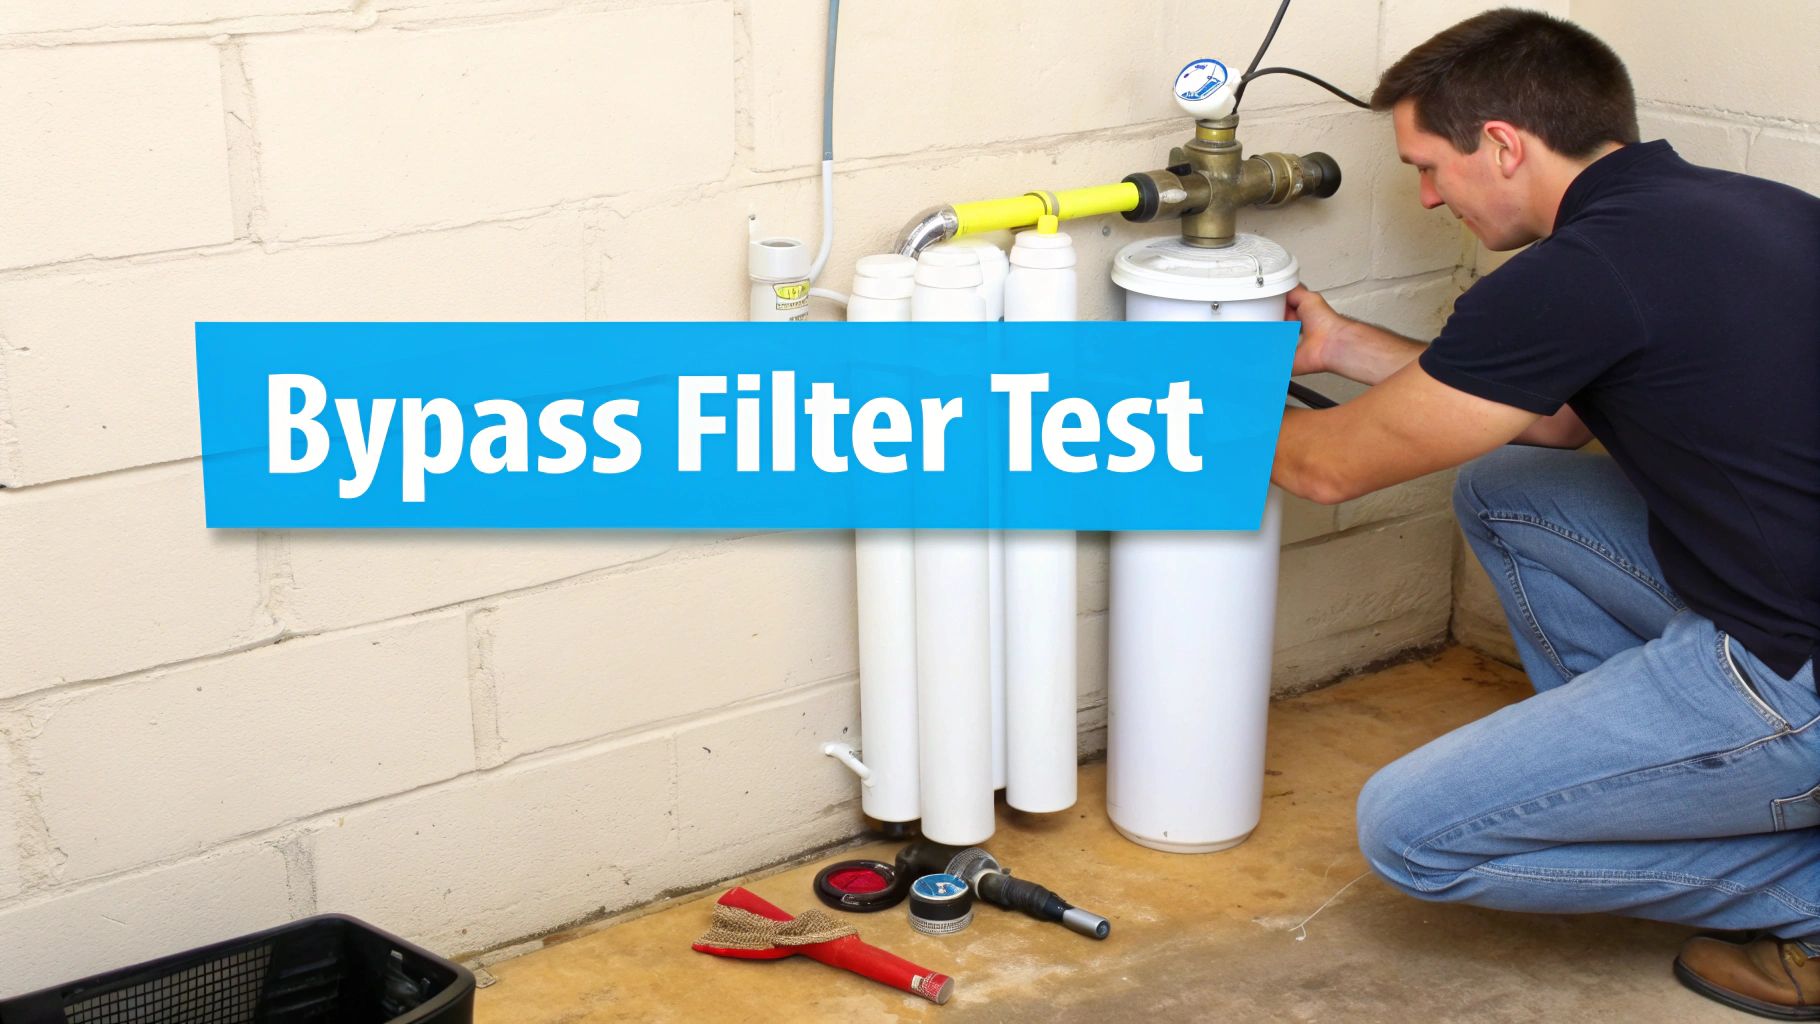
I'll walk you through everything you need to know to get your system tuned up and that strong, satisfying flow back where it belongs.
The manufacturer's guideline—"change every six months"—is a great starting point, but it's really just an educated guess. The reality of when you need to swap a filter depends entirely on your water and how you use it. Ignoring this is probably the single biggest mistake I see homeowners make, and it leads straight to pressure problems.
For example, if you have a sediment filter and you're on well water, it might get choked with silt and sand in just two months. But a carbon block filter on clean city water could easily go the full six months, maybe even longer.
Here's what you need to factor in:
The most reliable way to know it's time for a change is to trust your pressure gauge. Once you see a drop of 15-20 PSI from when the filter was new, it’s time for a swap. Forget the calendar—the pressure tells the real story.
Swapping a filter is a job almost anyone can tackle in under 30 minutes. Follow these steps, and you’ll avoid a wet floor and get a perfect, leak-free seal every time.
What You'll Need:
Let's Get to It:
Make this little routine a habit, and your water filter will never be the reason for weak water pressure again. It's a small bit of effort for a huge payoff in performance.
If a fresh filter didn't bring back the power to your shower, it's time to briefly look at the bigger picture. Your home’s filtration system is just one piece of a much larger plumbing puzzle. While a clogged filter is the most common cause of pressure loss, it's worth knowing what other issues could be at play before you upgrade your system.
It's easy to point the finger at the filter, but if a new one doesn’t do the trick, you have to broaden your search.

First things first: find your main water shut-off valve. This valve is the gatekeeper for all water coming into your house. It’s usually a lever (a ball valve) or a round handle you turn (a gate valve). After a plumbing repair, or even just from an accidental bump, these can get partially closed, creating a bottleneck for your entire home.
A half-closed valve can feel exactly like a clogged filter, so it's a super common mix-up. Before you start tearing anything else apart, find this valve (check the basement, garage, or a utility closet) and make sure it's open all the way. 100% open.
Lots of homes, especially those in areas with high city water pressure, have what’s called a Pressure Reducing Valve (PRV). It’s a bell-shaped contraption, usually installed right after the main shut-off. Its job is to dial down the incoming pressure to a safe level, typically around 50-60 PSI, to keep your pipes and appliances from getting blasted.
But these valves don't last forever. The internal parts can wear out or get gunked up with sediment, causing them to fail and kill your flow. A bad PRV is a notorious pressure assassin.
A classic sign of a failing PRV isn't just low pressure, but inconsistent pressure. You might also hear a "water hammer" banging sound in your pipes, or sometimes, no water comes out at all.
You can often try adjusting the PRV yourself. There's usually a screw on top—turning it clockwise should increase the pressure. Just make small, quarter-turn adjustments at a time. If tweaking it does nothing, the valve needs to be replaced by a plumber.
Okay, so your valves are wide open and the PRV seems fine. The next suspect? The pipes themselves. This is a huge issue in older homes with galvanized steel pipes. Over decades, they literally rust from the inside out, building up scale and corrosion that shrinks the pipe's diameter.
Think of it like a clogged artery. A new pipe is wide open, but after 50 years of mineral buildup, it can get so narrow that only a trickle of water can squeeze through. This causes a chronic, whole-house low pressure issue that no filter change on earth is going to fix.
When you're troubleshooting tricky issues that go beyond a simple filter swap, consulting a comprehensive plumbing guide can be a lifesaver. It helps you understand how everything connects and diagnose the root cause.
By ruling out these other potential causes, you can be 100% confident that it's time to focus on the heart of the matter: your filtration system.
Are you in a never-ending cycle of changing your filter cartridge just to keep your shower from slowing to a pathetic trickle? While staying on top of maintenance is a big part of the game, sometimes it just isn't enough.
If you feel like you're constantly fighting for decent water flow, that’s a huge red flag. It often means your filtration system is completely mismatched for what your home actually needs. This isn't about a single clogged filter—it's about having a system that's too small or just not designed for your family’s water habits. The only real, long-term fix is an upgrade.
The single most important number to look at when choosing a new system is its flow rate, measured in Gallons Per Minute (GPM). This tells you exactly how much water the filter can handle at once. If your family’s peak water usage is higher than your filter's GPM, you're guaranteed to see your water pressure tank every time.
Think of it like a two-lane road during rush hour. It’s just not built to handle that much traffic, and everything slows to a crawl. An undersized filtration system is that two-lane road, and your family's morning routine is that 8 AM traffic jam.
To figure out what you need, just add up your peak demand:
A family of four can easily hit 7-10 GPM during those busy morning hours. Your whole-house system needs to handle that demand without even flinching. If your current filter is only rated for 5 GPM, it's no surprise the pressure disappears.
Another spec you can't ignore is the filter's micron rating. This number tells you the size of the particles it can trap. A lower number means finer filtration—so a 1-micron filter grabs way smaller gunk than a 20-micron one. It's tempting to just grab the lowest number for the "cleanest" water, but that can be a massive mistake for your water pressure.
An overly fine filter acts more like a dam than a screen, choking your water flow from day one. You have to find the sweet spot: a micron rating that’s fine enough to remove what's in your water but coarse enough to let water flow through freely. For most folks on city water, a 5 to 20-micron sediment filter is the right call. It's helpful to compare sand and cartridge pool filters to get a sense of how different filtration media work.
Choosing the right micron rating is a strategic balance. It’s not about getting the finest filter; it’s about getting the right filter for your water quality and pressure needs.
So, what do you do if your city pressure is low to begin with, or your dream filtration setup is so heavy-duty that some pressure loss is just part of the deal? This is where a pressure booster pump completely changes the game. You install this device before your filters, and it actively cranks up the force of the water coming into your house.
A booster pump makes sure your filters get water at the ideal pressure (usually around 50-60 PSI), letting them do their job without killing your flow. It’s the best solution for homes that have always struggled with low pressure, turning weak streams into a powerful flow no matter how many faucets are running.
https://www.youtube.com/embed/7yXNY6gbdws
When you start digging into how to improve your water pressure, a bunch of specific questions tend to bubble up, especially if you have a water filter or softener in the mix. Let's walk through some of the most common things homeowners ask when they're staring down a weak stream.
Absolutely. A water softener is a very common culprit behind a frustratingly slow flow. The softening process itself forces your water through a dense bed of resin beads, and that's going to create some natural resistance. This alone can cause a noticeable pressure drop of 5 to 15 PSI, depending on your softener's size and your home's flow rate.
The issue gets a whole lot worse if the softener is too small for your home's needs or if that resin bed gets clogged with sediment. To get ahead of this, always install a sediment pre-filter before the softener. Also, make sure it's regenerating correctly to keep the resin clean and loose.
It’s time to seriously consider a pressure booster pump if your pressure is already low before it even hits your filters (think under 40 PSI), or if your filtration setup is so extensive that it's causing an unacceptable drop.
The very first thing you should do is test your home's incoming pressure. A simple gauge from the hardware store, attached to an outdoor spigot, will give you the answer.
If your pressure is low right from the street, your filters are just fighting a losing battle. On the other hand, if the incoming pressure is decent but plummets after running through your system, a booster pump is the most direct fix. It gives your water the muscle it needs to push through the filtration media without losing momentum.
A pressure booster pump acts as a powerful ally to your filtration system. It doesn't just fix low pressure; it ensures your filters can perform optimally without turning your shower into a drizzle.
Any filter will create a slight pressure drop—that's just physics. But a properly sized and maintained sediment filter really shouldn't cause a noticeable decrease in your day-to-day water flow.
If you're suddenly dealing with a frustratingly weak shower, the problem is almost always one of three things:
Choosing the right sediment filter is all about finding that sweet spot between effective filtration and maintaining the strong water pressure you expect at the tap.
At Water Filter Advisor, we believe you shouldn't have to choose between clean water and great pressure. Our expert guides and reviews help you find the perfectly matched filtration system for your home's unique needs. Explore our resources today at https://www.waterfilteradvisor.com.
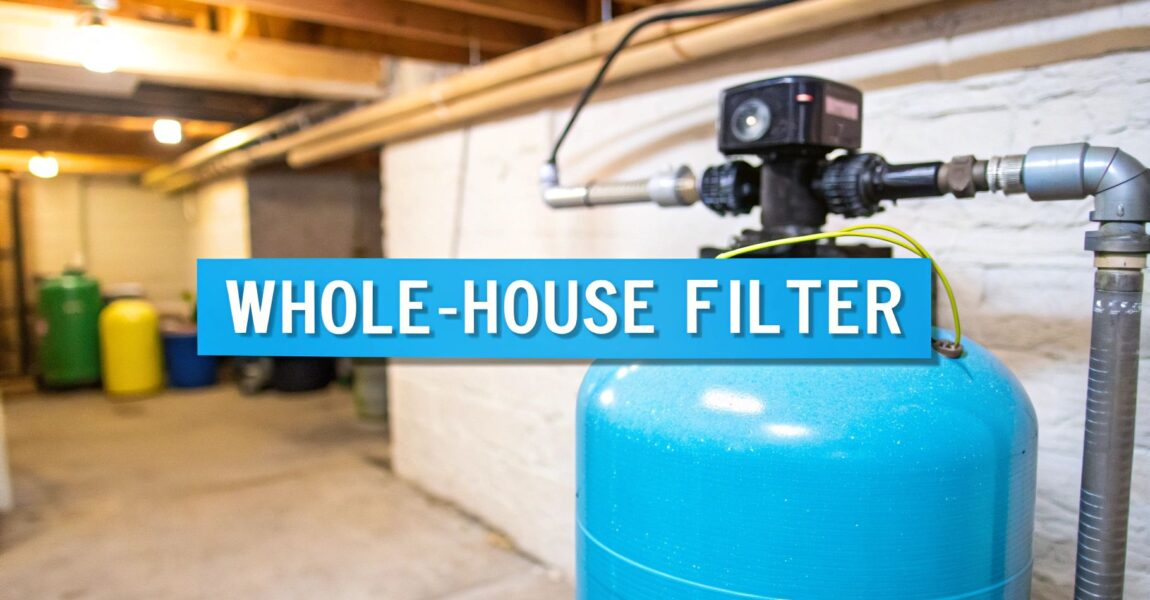
Picture this: you turn on any tap in your house—the kitchen sink for a glass of water, the shower after a long day, the bathroom faucet to brush your teeth—and out comes pure, clean, refreshing water. Every. Single. Time. That isn't a far-off dream; it's the reality a point-of-entry (POE) water filter delivers. Think of it as hiring a top-notch security guard for your home's entire water supply, inspecting and purifying every drop the moment it steps onto your property.
This isn't about slapping a filter onto a single faucet. A POE system is a comprehensive solution that cleans all your water at its source, protecting not just your family's health, but your expensive appliances from a whole rogues' gallery of unwanted contaminants.
A point-of-entry filter, known in the biz as a whole-house water filter, is a system plumbed directly into your main water line. It's the ultimate gatekeeper. Before a single drop of water can make its way to your shower, washing machine, or that fancy coffee maker, it has to pass inspection through this central filtration fortress.
This setup ensures that every drop you use for bathing, cooking, cleaning, and drinking is purified. Instead of playing whack-a-mole with water quality issues from room to room, a POE system provides one powerful, all-encompassing solution. These systems are true workhorses, built to handle a serious volume of water, easily purifying thousands of gallons a day without ever making your home's water flow skip a beat.
The quest for cleaner water is more than just a trend; it's a growing necessity. It's estimated that in the U.S. alone, over 7.1 million Americans fall ill each year from waterborne contaminants. That's a staggering public health issue, and it's prompting more and more homeowners to take a hard look at what's really flowing through their pipes.
This rising awareness is fueling a massive market shift. In fact, the demand for point-of-entry systems is projected to explode into an USD 18.15 billion industry by 2035. You can dive deeper into the data behind this trend over at Spherical Insights & Consulting.
By treating every drop entering your home, these systems solve a wide array of problems that affect your daily life, and the benefits extend far beyond just better-tasting water.
A point of entry system isn't just about purifying drinking water; it's about elevating the quality of life throughout your entire home. It protects your health, preserves your appliances, and enhances your daily routines, from showering to doing laundry.
Installing a point-of-entry water filter in your home brings a cascade of immediate and long-term perks:
To truly appreciate what a point-of-entry water filter does, you need to peek inside the tank. Don't imagine a simple screen; picture a highly coordinated team of filtration specialists, each with a specific mission to purify your water. When water flows in from your main line, it isn't just passing through a single barrier. It’s embarking on a journey through several sophisticated layers of filter media.
This multi-stage gauntlet is what makes these systems so formidable. Each layer is engineered to target and eliminate different types of impurities. By the time the water exits the tank, it has been thoroughly scrubbed, ensuring that one system can tackle a huge range of issues, from dirt and chemicals to heavy metals.
This graphic provides a clear visual of how a POE filter acts as the gatekeeper for your home's entire water supply, treating it before it ever reaches your faucets.
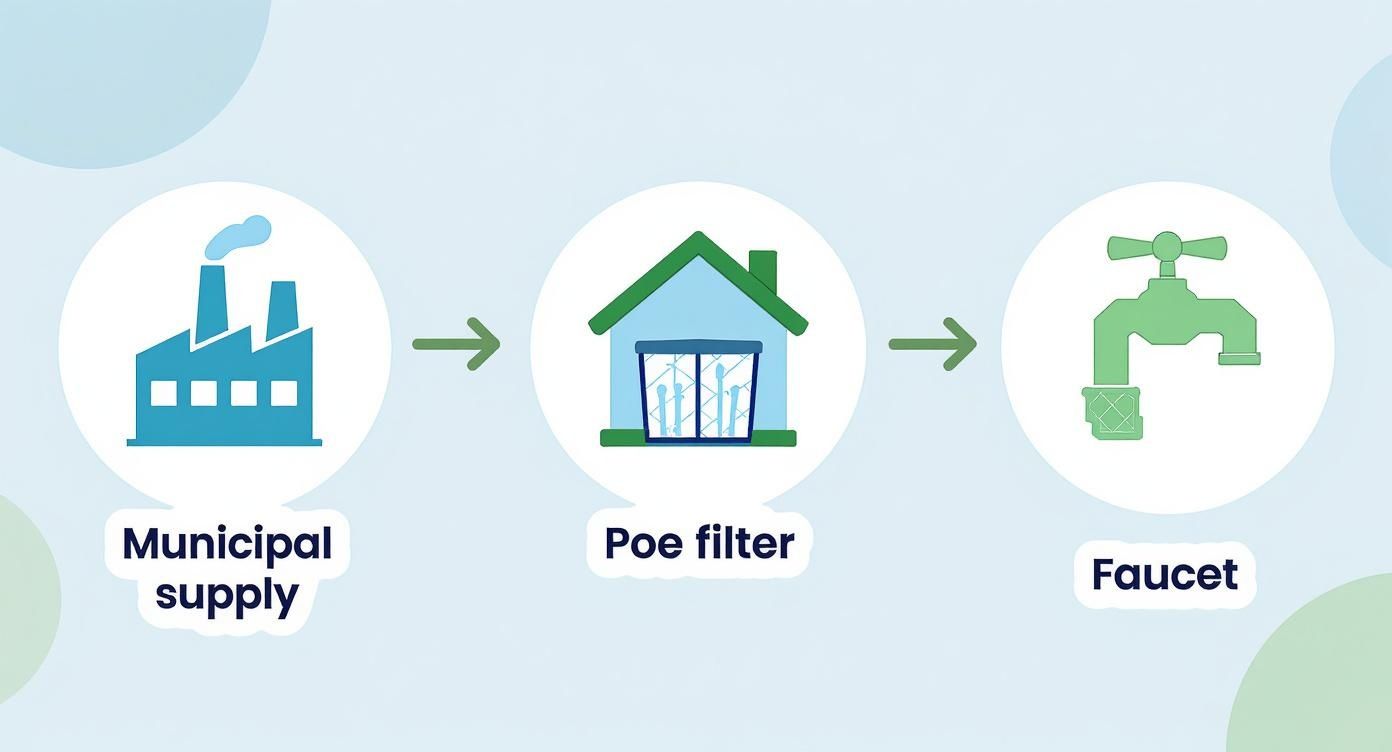
As you can see, the filter is a central checkpoint. It guarantees that every tap—from your kitchen sink to your shower—delivers purified water.
The journey always begins with the sediment filter. Think of it as the bouncer at an exclusive club. Its sole job is to stop the big, obvious troublemakers from getting past the velvet rope. This initial stage snags physical debris like sand, dirt, silt, and rust that can make water cloudy and wreak havoc on your plumbing fixtures over time.
It's essentially a high-tech colander for your water. This simple but absolutely crucial first step prevents larger particles from clogging up the more delicate, specialized filter media that comes next. By clearing the path, the sediment filter protects the rest of the system, helping it perform better and last longer.
Once the water is free of sediment, it moves on to meet the undisputed champion of chemical removal: activated carbon. Now, this isn't the same charcoal you use for grilling. It's an incredibly porous material with a mind-boggling surface area—a single gram can have the surface area of an entire football field.
Activated carbon uses a process called adsorption, where chemical contaminants literally stick to its surface like tiny magnets. It’s a beast at grabbing things like chlorine, pesticides, herbicides, and those nasty volatile organic compounds (VOCs) that give your water weird tastes and smells. This is exactly why it’s a non-negotiable part of nearly every top-tier point-of-entry water filter.
By yanking out chlorine and its byproducts, activated carbon doesn’t just make your water taste and smell fantastic. It also makes it much kinder to your skin and hair when you shower.
Some homes face water challenges that require more than just the basics. For those dealing with more stubborn or specific contaminants, advanced filtration media provides that next level of protection. These are highly engineered materials designed to tackle the tough stuff that standard carbon filters might miss.
To give you an idea of the available arsenal, we’ve put together a table breaking down the most common types of filter media and their specific targets.
| Filtration Media | Primary Function | Removes Contaminants Like… |
|---|---|---|
| Sediment | Physical Particulate Removal | Sand, silt, rust, dirt, and other suspended solids. |
| Activated Carbon | Adsorption of Chemicals | Chlorine, pesticides, herbicides, VOCs, and improves taste/odor. |
| KDF (Kinetic Degradation Fluxion) | Redox Reactions & Bacteriostatic | Heavy metals (lead, mercury, iron), chlorine, and inhibits bacteria/algae growth. |
| Catalytic Carbon | Catalytic Conversion | Chloramine (a persistent chlorine/ammonia disinfectant), hydrogen sulfide. |
| Oxidation Media (e.g., Manganese Greensand) | Oxidation and Filtration | Iron, manganese, and hydrogen sulfide (rotten egg smell). |
These advanced stages work in concert with the sediment and carbon layers. Each one builds on the last, systematically stripping away impurities until only clean, safe water is left to flow through your home. This teamwork is the real secret behind a truly effective whole-house system.

When you're picking out a point-of-entry water filter, it's not about finding the biggest, most expensive unit you can. The best system is the one that fits your home's unique water needs like a glove.
It’s a bit like buying a car. You wouldn't get a tiny two-seater sports car for a family of six, right? And you probably wouldn't commute to the office every day in a massive RV. Your water filter needs to be the right fit for your household, and that comes down to three things: sizing, flow rate, and performance certifications. Nail these, and you'll have clean, reliable water without any headaches.
First things first, you need a handle on how much water your family actually uses. A system that’s too small will constantly struggle to keep up. You'll end up with clogged filters way too soon and, even worse, a drop in water pressure. On the flip side, an oversized system is just money down the drain.
To get a solid estimate, just look at two key factors:
So, a family of four in a three-bathroom home has very different needs than a couple living in a two-bathroom condo. Sizing your system correctly ensures it can handle your busiest moments without skipping a beat. For more detailed help, you can find a ton of professional advice over at https://www.waterfilteradvisor.com/advice/.
Ever been enjoying a hot shower when someone flushes a toilet, and suddenly your water pressure tanks? That’s what a poor flow rate feels like. Flow rate is measured in gallons per minute (GPM), and it basically tells you how much water can pass through your filter at one time.
A point of entry water filter's flow rate must be high enough to meet your home's peak demand. This is the amount of water needed when multiple appliances and faucets are running simultaneously, like the shower, dishwasher, and a sink.
A standard shower head uses about 2.5 GPM, a dishwasher needs around 2 GPM, and a kitchen faucet runs at about 1.5 GPM. If your family often has all these going at once, your peak demand could easily be 6 GPM or more. You need to pick a system with a GPM rating that meets—or even better, exceeds—that number to keep the water pressure strong and steady everywhere in the house.
So, how can you be sure a filter actually does what the box says it does? This is where you look for certifications from independent organizations like the NSF (National Sanitation Foundation) and ANSI (American National Standards Institute). They’re your best friend in this process.
These certifications aren't just clever marketing. They are cold, hard proof that a third-party lab has put the system through its paces to make sure it really removes the contaminants it claims to.
For example, NSF/ANSI 42 certifies that a filter makes your water taste and smell better by reducing chlorine. NSF/ANSI 53, on the other hand, is a much more serious certification confirming it can remove health-related contaminants like lead or cysts. If you're building a new home, it's a good idea to review some essential questions to ask a custom home builder to ensure they plan for plumbing that can accommodate certified filtration systems.
Always check for these certification marks when you're shopping around. They give you an unbiased guarantee of performance and peace of mind that you're making a solid investment in your family's water quality.
So, you're trying to figure out if you need a big whole-house system or just something small for the kitchen sink. It can feel like a tough choice, but there's a simple way to think about it.
A whole-house filter is like your home's central air conditioning—it treats every single room, providing consistent comfort everywhere. A single-faucet filter, on the other hand, is like a portable window AC unit. It does an amazing job cooling one specific room, but the rest of the house is on its own.
Both are great at what they do. The right one for you really comes down to what you're trying to fix, your budget, and how much of your home you want to cover. Let's break down the differences.
A point of entry (POE) system, also known as a whole-house filter, is the ultimate "set it and forget it" solution for your water. It gets installed right where the main water line enters your house, so it filters every single drop of water before it ever reaches a tap.
This means you get filtered water for everything, not just drinking. Think about it:
The biggest plus is peace of mind. You never have to wonder which faucet is safe—they all are. The trade-off? These systems have a higher upfront cost and usually need a professional to install them correctly.
Point-of-use (POU) filters are the sharpshooters of water filtration. These are your under-sink systems or faucet-mounted units that treat water at a single spot, usually the kitchen sink. They are fantastic for making sure the water you drink and cook with is as pure as possible.
To get a better idea of how these fit in, it helps to understand the various types of kitchen faucets where you'd typically install a POU filter. Their popularity comes from being affordable and pretty easy to install yourself.
In fact, the global water filter market is expected to reach USD 48.2 billion by 2025, and POU systems account for a huge chunk of that—almost 44.8% of total revenue. People love them because they're a low-cost, effective way to get great-tasting water right where they need it most.
The bottom line is this: POE systems give you complete, home-wide protection. POU filters give you high-purity water for drinking and cooking at a much lower cost, but they leave the rest of your home’s water untreated.
To give you a clearer picture, here’s a quick side-by-side comparison of the two approaches.
| Feature | Point of Entry (Whole-House) | Point of Use (Single-Faucet) |
|---|---|---|
| Coverage | Treats all water entering the home. | Treats water at a single tap (e.g., kitchen sink). |
| Protection | Protects plumbing and all water-using appliances. | Protects only the specific faucet it's attached to. |
| Installation | Typically requires professional plumbing. | Often a simple DIY installation. |
| Upfront Cost | Higher initial investment ($500 – $3,000+). | Lower initial investment ($50 – $500). |
| Maintenance | Less frequent filter changes (e.g., 6-12 months or longer). | More frequent filter changes (e.g., 2-6 months). |
| Best For | Widespread issues like chlorine, sediment, or hard water. | Targeted removal of contaminants for drinking water. |
This table helps illustrate the core trade-offs. It's not about one being "better," but about which one is the right tool for your specific job.
For a lot of homeowners, the perfect setup isn't an "either/or" decision. It’s a "both/and" strategy. You can actually combine both types of systems to create a powerful, multi-layered defense against any water contaminant.
Here’s how it usually works: You install a whole-house carbon filter to take care of the big stuff—chlorine, sediment, and general chemicals—at every tap. Then, you add a specialized POU system, like a reverse osmosis unit, under the kitchen sink to get rid of the really tough contaminants like lead, fluoride, or arsenic.
This hybrid approach gives you the absolute best of both worlds. You get general protection for your appliances, pipes, and skin, plus surgical precision for the water you and your family actually drink. It's a comprehensive solution that leaves no stone unturned.
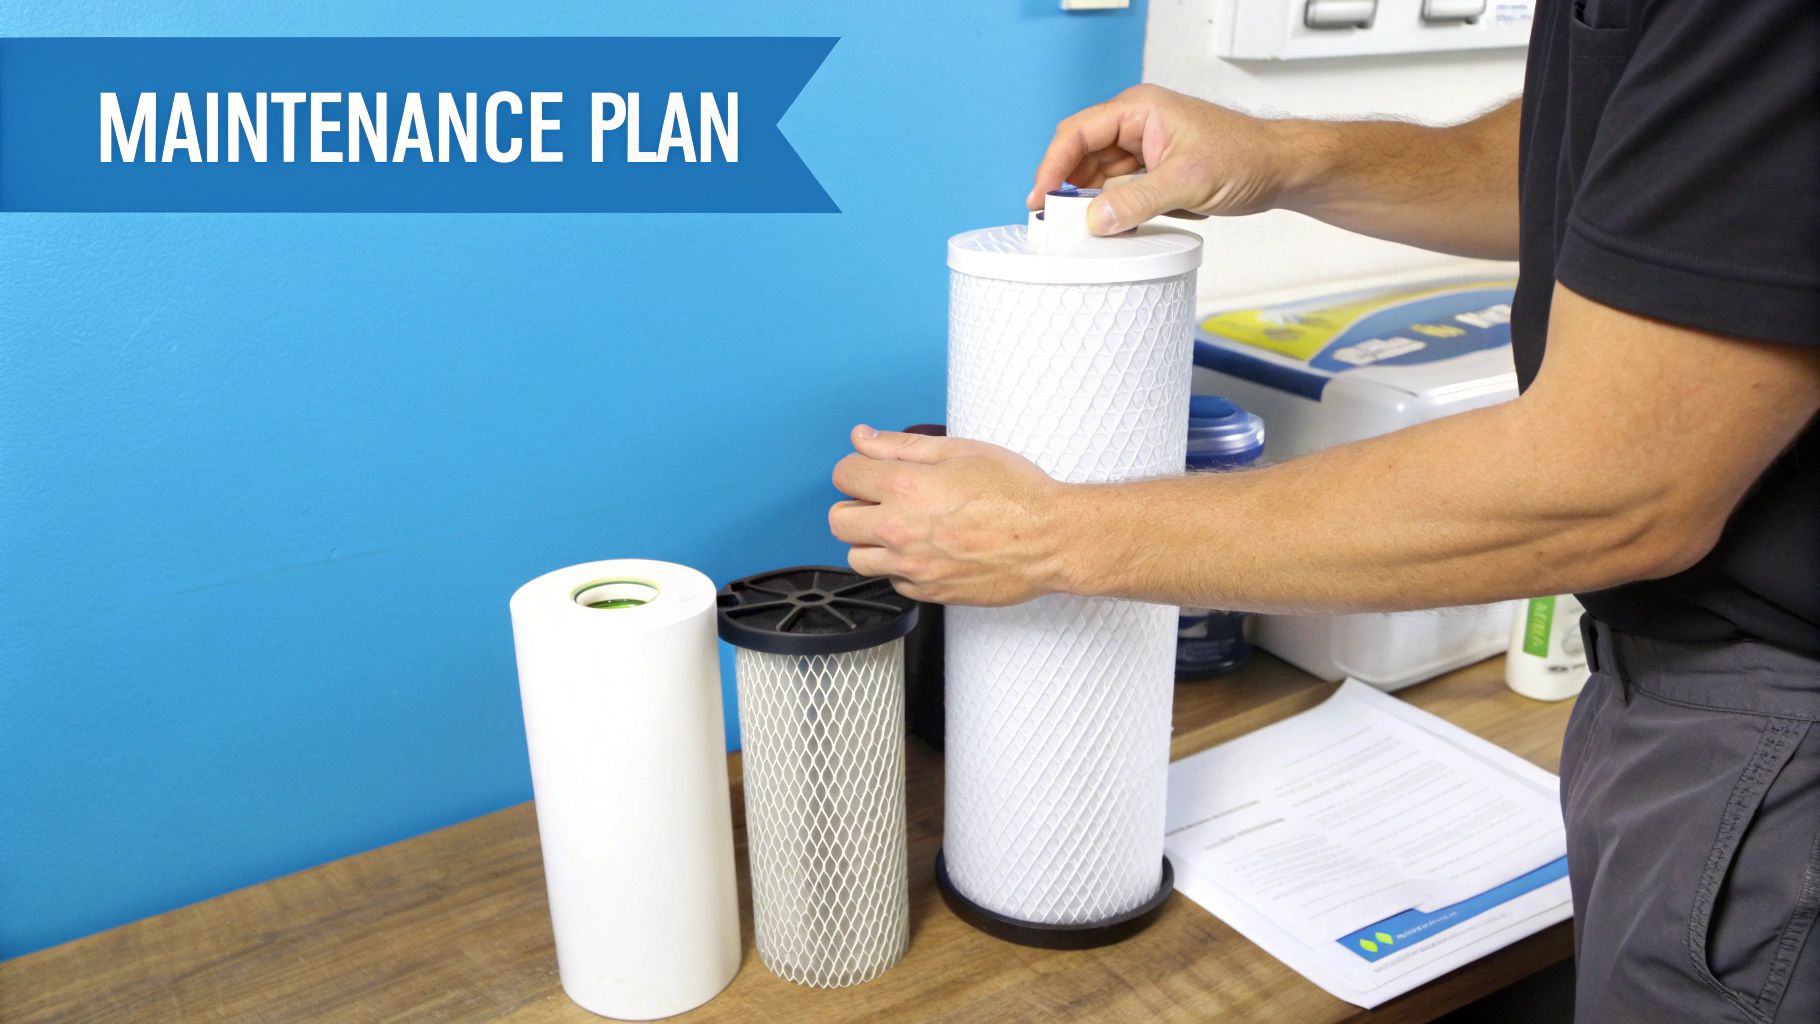
Buying a whole-house water filter is a bit like buying a car. The sticker price is just the beginning. To really understand the investment, you have to factor in the installation, the regular maintenance, and the total cost over its lifetime. Think of it as the fuel, oil changes, and tune-ups that keep it running smoothly for years.
Planning for these things from the start means you’ll get the clean, safe water you paid for without any nasty surprises down the road. It turns a simple purchase into a smart, long-term investment in your home and your family's health.
So, you’ve picked out the perfect point of entry water filter. Now what? The first step is getting it installed, which usually means cutting into your home's main water line. It’s a job that demands a steady hand and a solid understanding of plumbing.
You’ve got two options here: DIY or hire a pro. Going the DIY route can definitely save you some money on labor, but it’s a serious project. One slip-up could lead to leaks, a drop in water pressure, or a system that isn't even filtering properly. For most people, hiring a licensed plumber is the way to go. It ensures the job is done right, meets local codes, and keeps your warranty intact.
Professional installation for a whole house system can run anywhere from $300 to over $1,000, depending on how complex your plumbing is and the going rates in your area. It's an extra cost, sure, but the peace of mind is often worth every penny.
Your whole-house filter is a workhorse, but it’s not a “set it and forget it” appliance. To keep it working at peak performance and maintain strong water pressure, you'll need to do some regular upkeep. The good news is the schedule is predictable and pretty easy to manage.
Maintenance mostly boils down to swapping out the filter media. How often you do this depends on the specific part and just how "gunky" your water is to begin with.
Here’s a general idea of what to expect for a replacement schedule:
To budget properly, you need to look past the initial price tag and think about the total cost of ownership over the filter's entire life. This gives you a clear, honest picture of what you'll be spending over time.
Let's break down the costs you can expect with a point of entry water filter:
When you add it all up, you get a realistic picture of your investment. A little foresight here means you can enjoy great-tasting, clean water without any financial stress.
Even after you've got a handle on how these systems work, it's totally normal to have some practical questions pop up. Think of this section as your personal FAQ, where we'll tackle the common worries and head-scratchers we hear about all the time.
We've pulled together the top questions from homeowners just like you. Let's get you some answers.
This is probably the number one concern we hear, and for good reason. Nobody wants a weak shower. The short answer is no—a properly sized and installed system should have almost no noticeable effect on your home's water pressure.
If you do see a significant drop in pressure, it's a big red flag that something's wrong. The usual suspects are a system that’s too small for your house's needs or, more commonly, a filter cartridge that's clogged and way past its replacement date. Keeping up with the maintenance schedule is the single best way to keep your water flowing strong.
This is a common mix-up. A whole-house water filter and a water softener are two completely different tools for two different jobs. Most POE filters are rockstars at pulling out things like chlorine, sediment, and other chemical contaminants. What they don't do is remove the dissolved minerals—calcium and magnesium—that cause hard water scale and soap scum.
So, the bottom line is yes, if you have hard water, you will likely still need a separate water softener. Many people opt for an integrated setup that combines both filtration and softening into one seamless system. It's the best way to get a complete fix for both water quality and hardness.
The only way to know for sure what's in your water is to test it. A good starting point is your local water utility's annual Consumer Confidence Report, which is free. For a much closer look, you can grab an at-home test kit or send a sample to a certified lab. The results will point you directly to the contaminants you need to address.
A good quality point-of-entry system is a long-term investment. The main tank and valve head—the core hardware—can easily last 10 to 15 years, or even longer if you take care of it.
The part that needs regular replacement is the filter media inside the tank. That's the stuff doing all the heavy lifting, and it eventually gets used up.
Here’s a general idea of the replacement timeline:
When you look at the system's longevity alongside its maintenance needs, you get a much clearer picture of what you're investing in for the long haul.
At Water Filter Advisor, we're committed to helping you find the perfect water filtration solution for your home. Explore our in-depth guides and unbiased reviews to make a confident decision for your family's health. Learn more at https://www.waterfilteradvisor.com.