Why Your House Smells Like a Pool and How to Fix It With Water Filtration

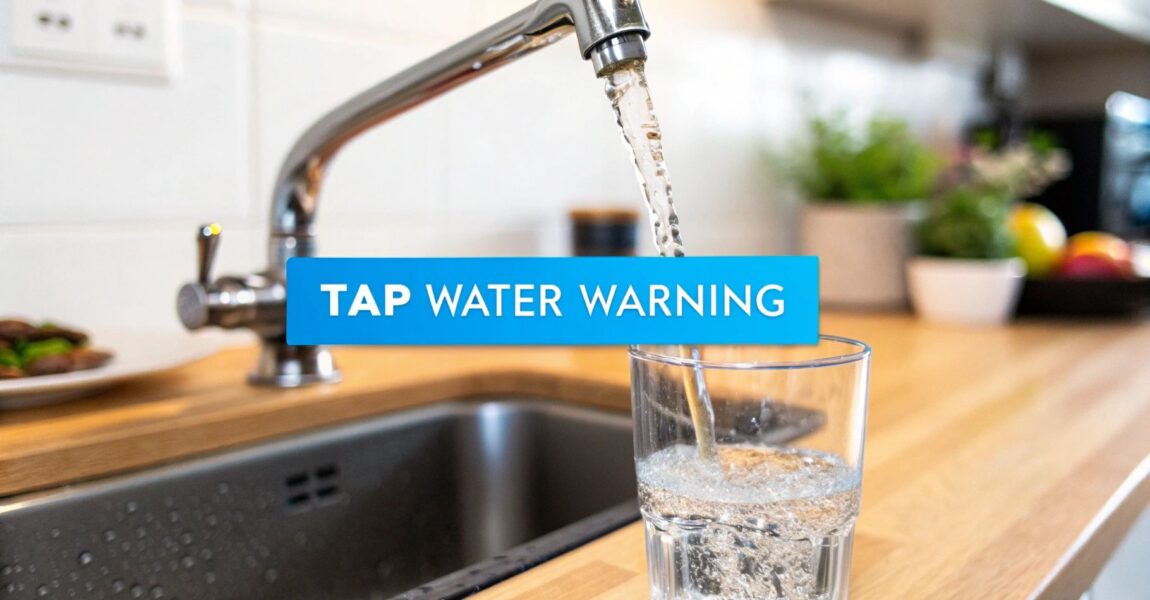
Ever turn on your faucet and get hit with a smell that whisks you away to the local swimming pool? That powerful, chemical scent is almost always chlorine, and it’s coming straight from your tap.

It’s the number one reason people complain about a smell of chlorine in house, and it’s a direct result of how your city keeps its water supply safe for everyone. But just because it's common doesn't mean you have to live with it. The secret to kicking that smell to the curb lies in your water.

So, Why Is My House Suddenly a Chlorine Zone?

Tap water filling a glass from a modern kitchen faucet, with visible bubbles, implying chlorine presence.

So, why is this pool chemical in your drinking water in the first place? For more than 100 years, chlorine has been the world's go-to disinfectant for public water systems. It’s incredibly cheap and brutally effective at wiping out the nasty germs that can make you sick.

Think of it this way: water has a long, winding journey from the treatment plant to your home. As it travels through miles and miles of pipes, it needs a bodyguard to keep it pure. Chlorine is that bodyguard, creating a protective barrier that kills off bacteria and viruses along the way. Your home is the final stop on its tour.

Why Does the Smell Suddenly Get Stronger?

Have you ever noticed the chlorine smell is way more potent some days than others? You're not just imagining it. A few different things can cause the chlorine concentration in your water to spike temporarily.

  • Recent Heavy Rainfall: After a big storm, all that runoff can wash more contaminants into the water source. To combat this, treatment plants often have to bump up the chlorine levels to keep the water safe.
  • Water Main Maintenance: When the city flushes or repairs the water lines in your area, they often use a higher dose of chlorine to disinfect the pipes and make sure everything is clean.
  • Living Close to the Source: If your home is just a short hop from the water treatment facility, you might get water with more chlorine in it. It simply hasn't had as much time to dissipate on its journey to you.

The amount of chlorine in your water is carefully monitored. According to EPA standards, the maximum level allowed is 4.0 mg/L, but what you typically get at home is somewhere between 0.2–3.0 mg/L. For a lot of us, even the low end of that range is enough to cause that distinct, bleach-like smell. Discover more insights about chlorine in drinking water on frizzlife.com.

To help you narrow down where that smell is coming from, here’s a quick guide to common trouble spots.

Quick Guide to Chlorine Smell Sources in Your Home

This table can help you quickly figure out what's causing that chlorine odor by matching the location with common activities.

Source Location Common Activity Why It Smells Stronger Here
Kitchen Sink Washing dishes, filling a pot The aeration from the faucet releases dissolved chlorine gas.
Bathroom Shower Taking a hot shower Hot water and steam cause chlorine to vaporize, concentrating the smell in a small space.
Washing Machine Doing a load of laundry The agitation and hot water used in a wash cycle can release a strong chlorine odor.
Dishwasher Running a cleaning cycle High-temperature water jets spray chlorinated water, releasing the gas inside the machine.

This shows that while the source is always the water, certain activities and appliances can make the problem much more noticeable.

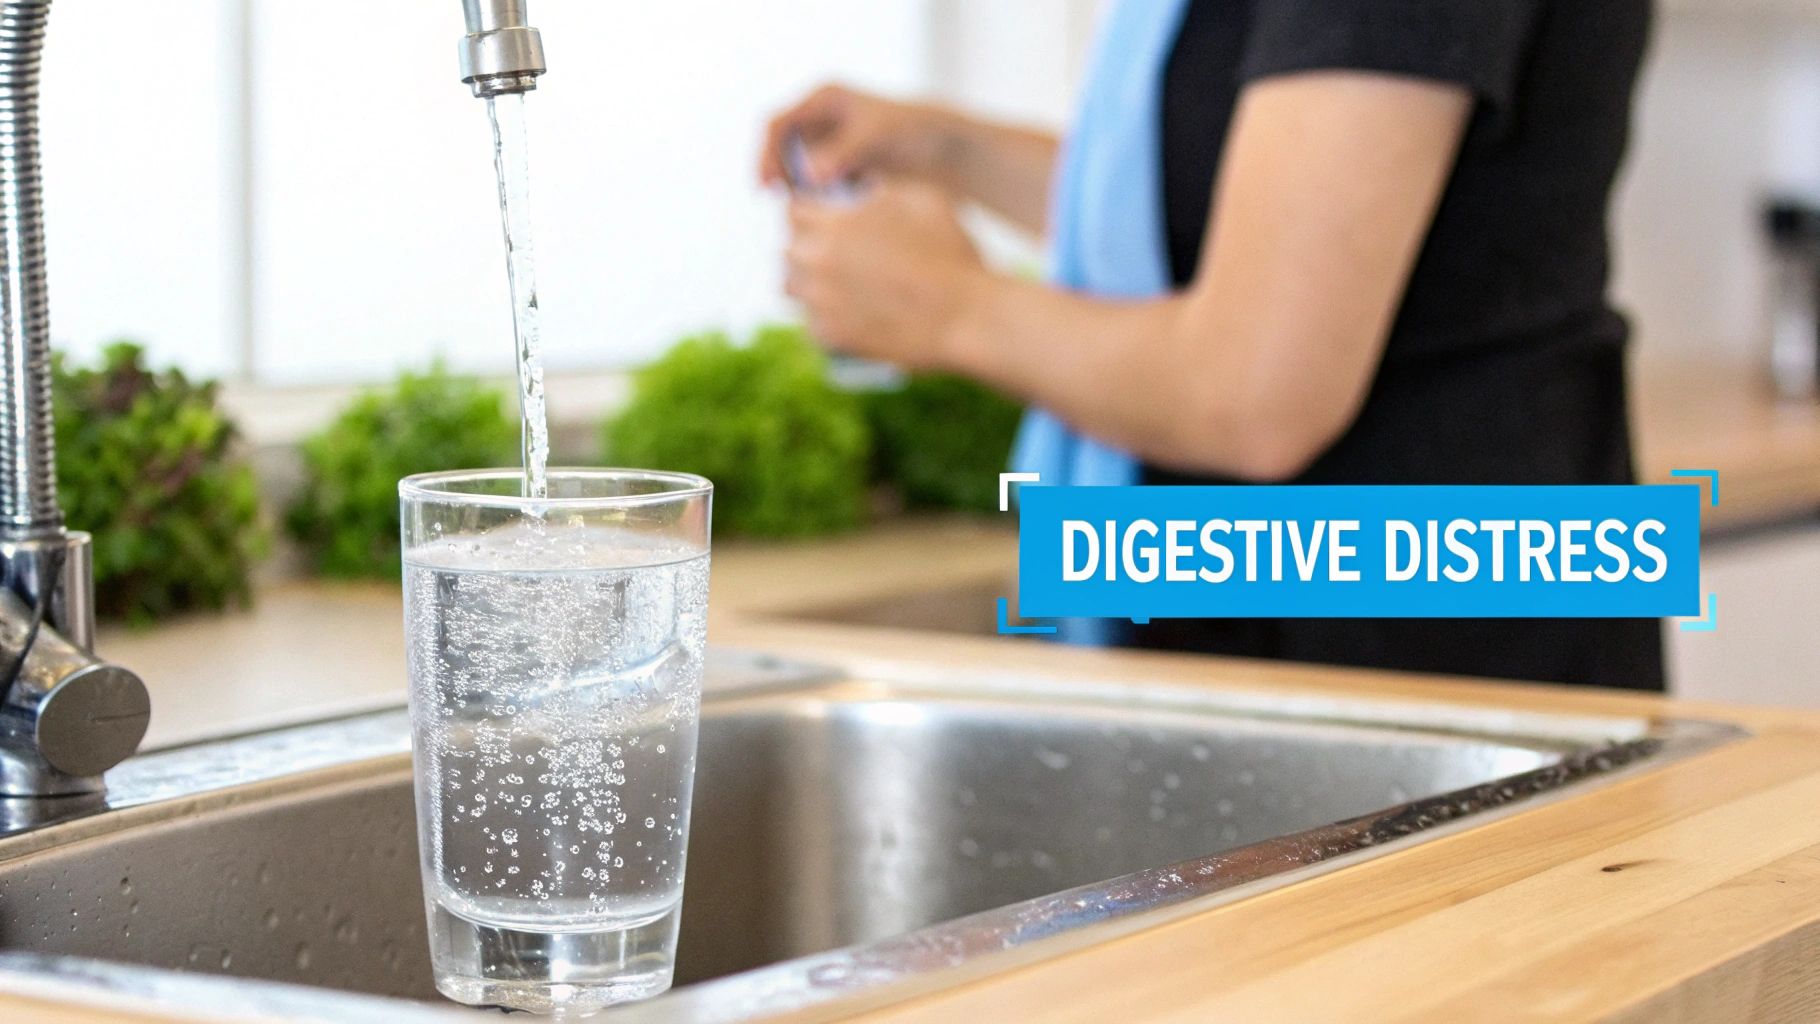
It's More Than Just a Bad Smell

The problem isn’t just about an unpleasant odor in your drinking glass. When you do something like take a hot shower or run the dishwasher, the heat and steam work together to turn that dissolved chlorine into a gas.

This process, known as volatilization, releases chlorine straight into the air inside your home.

All of a sudden, the issue isn't confined to your water. It’s in the air you and your family are breathing in the bathroom and kitchen, which can really impact your home's air quality and overall comfort. For anyone with sensitivities, this airborne chlorine can be especially irritating. The smell is the most obvious sign, but it’s really a signal that your water could be affecting your daily life in ways you haven't even considered. A simple water filter can fix this.

The Hidden Costs of That Chlorine Smell

That swimming pool smell you're noticing isn't just a weird quirk of your tap water—it's your home's way of telling you something is off. While the smell of chlorine in the house is the most obvious sign, the effects ripple out into your daily life in ways that might surprise you, creating hidden costs and constant little annoyances.

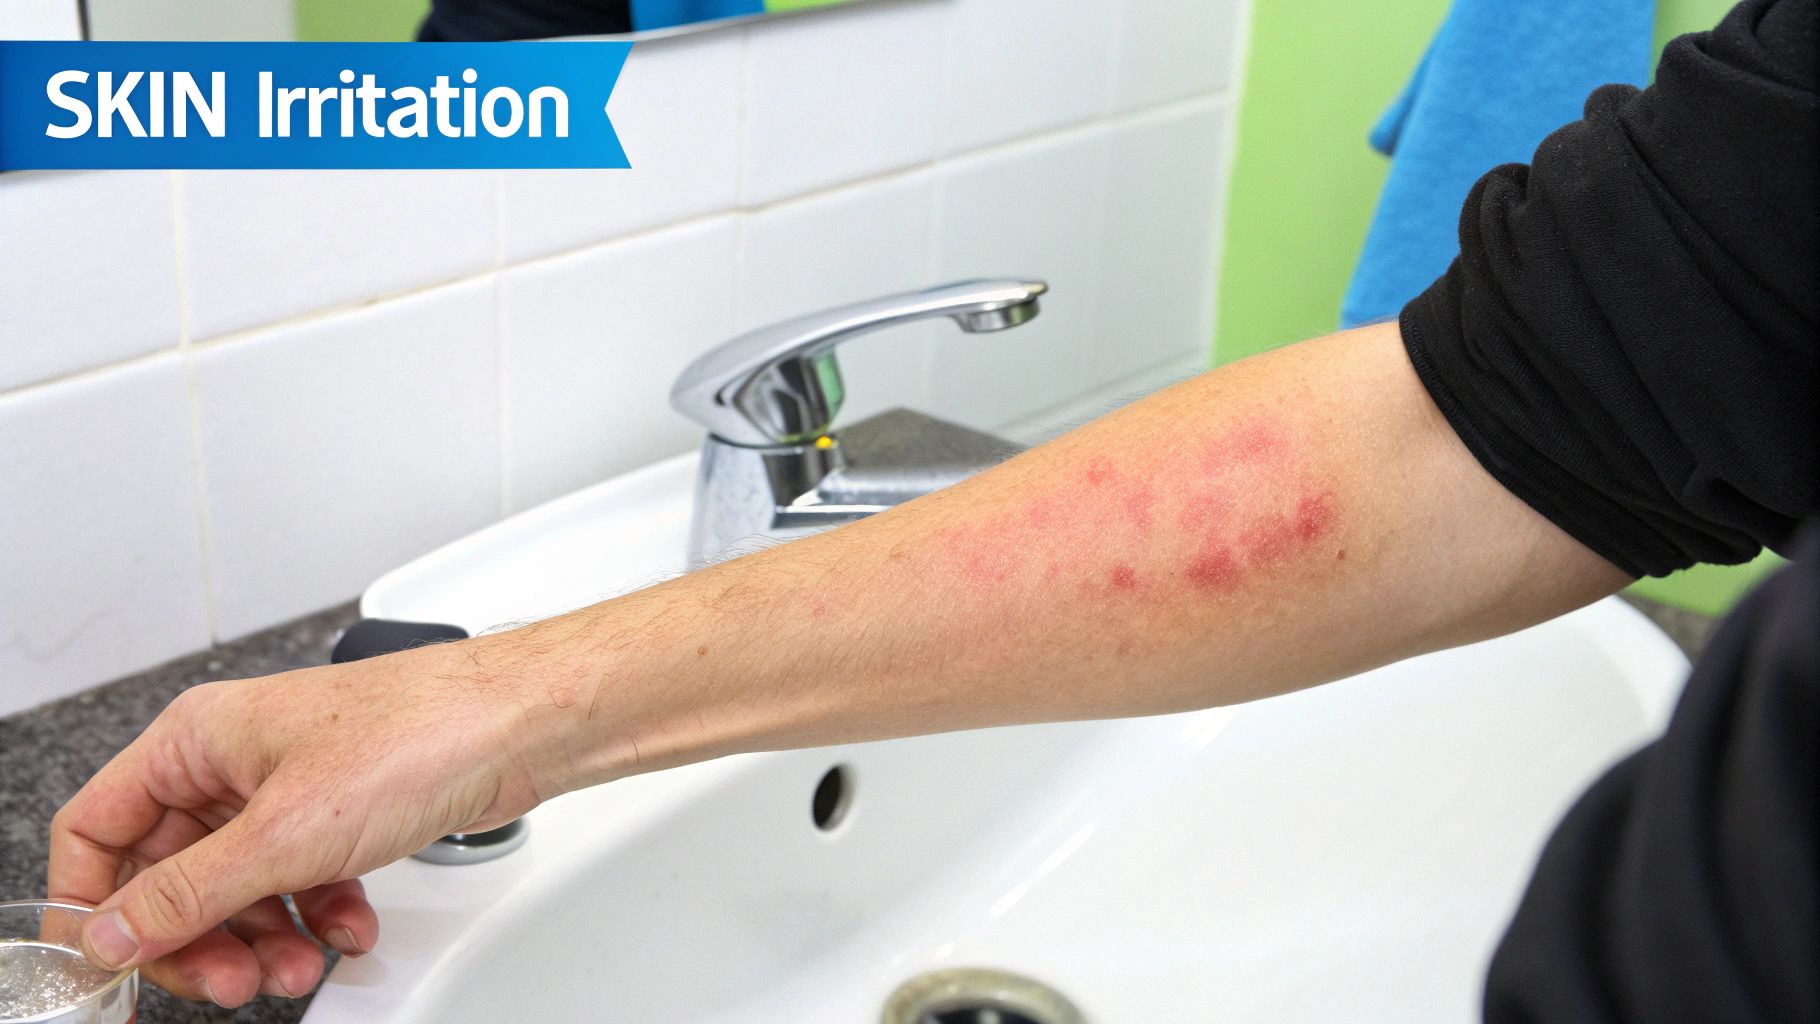
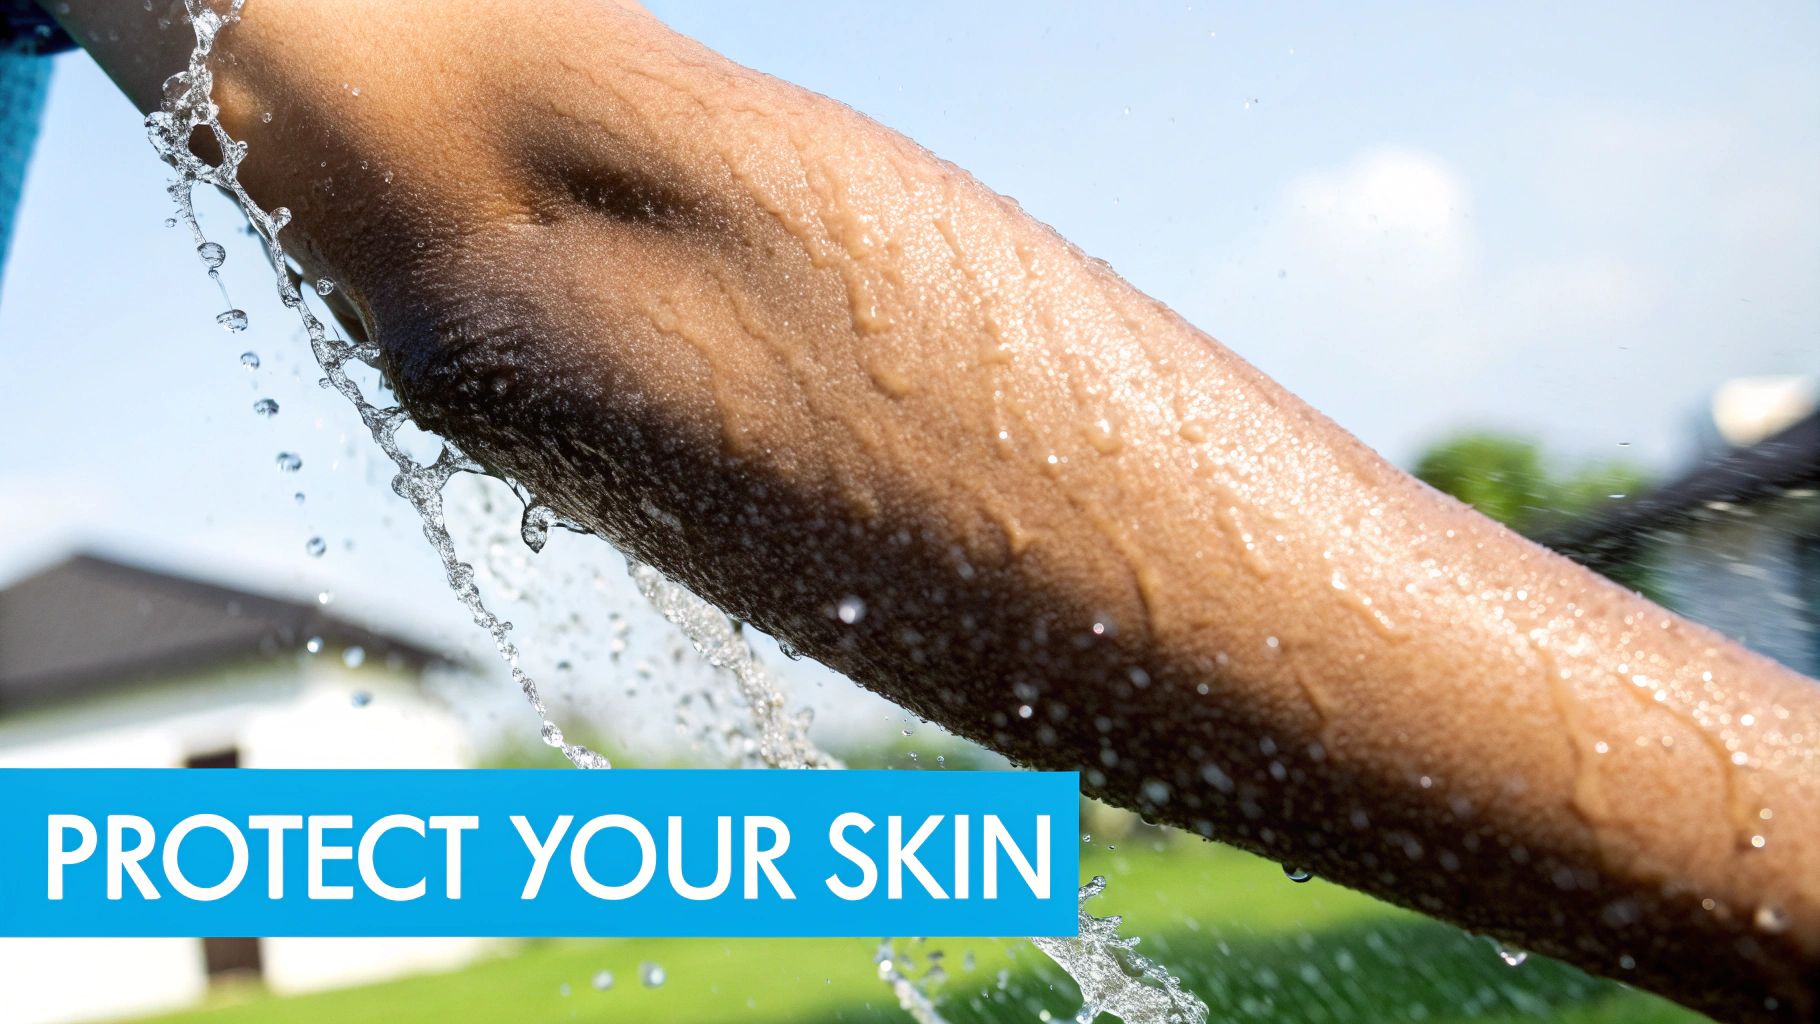
Ever get out of the shower and immediately feel like you need to slather on lotion? That tight, itchy feeling isn't your imagination. Chlorine is fantastic at its job, but it can't tell the difference between bad stuff in the water and the natural oils that keep your skin and hair healthy. The result is chronic dryness, brittle hair, and irritated skin.

Your laundry is another victim. That same chemical slowly but surely bleaches the life out of your clothes. If you've noticed your vibrant colors looking dull and faded way too soon, the chlorine in your wash water is likely the culprit, forcing you to replace favorite items more often.

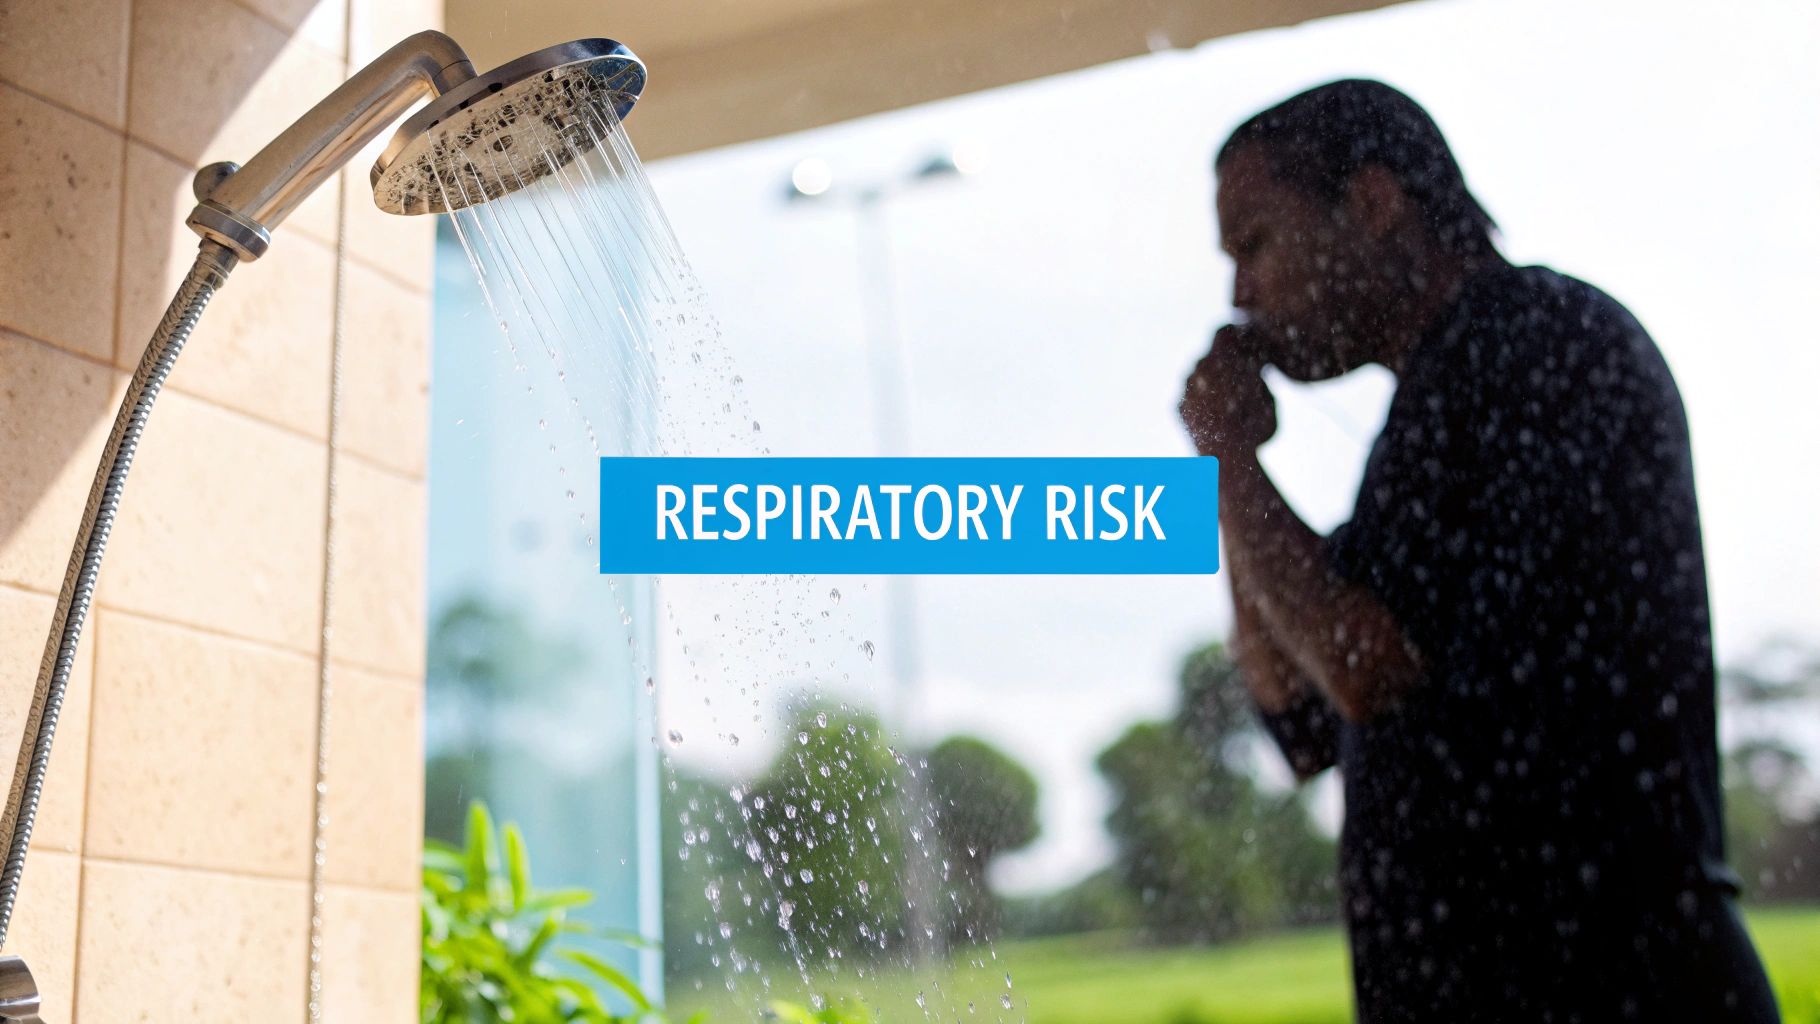
From Your Shower to Your Lungs

Things get a lot more interesting when you turn up the heat. A hot shower is the perfect environment for chlorine to go airborne, turning from a liquid into a gas you can inhale. As your bathroom fills with steam, you're breathing in more than just water vapor.

For anyone in your family with asthma, allergies, or other respiratory issues, that vaporized chlorine can be a real irritant to their airways.

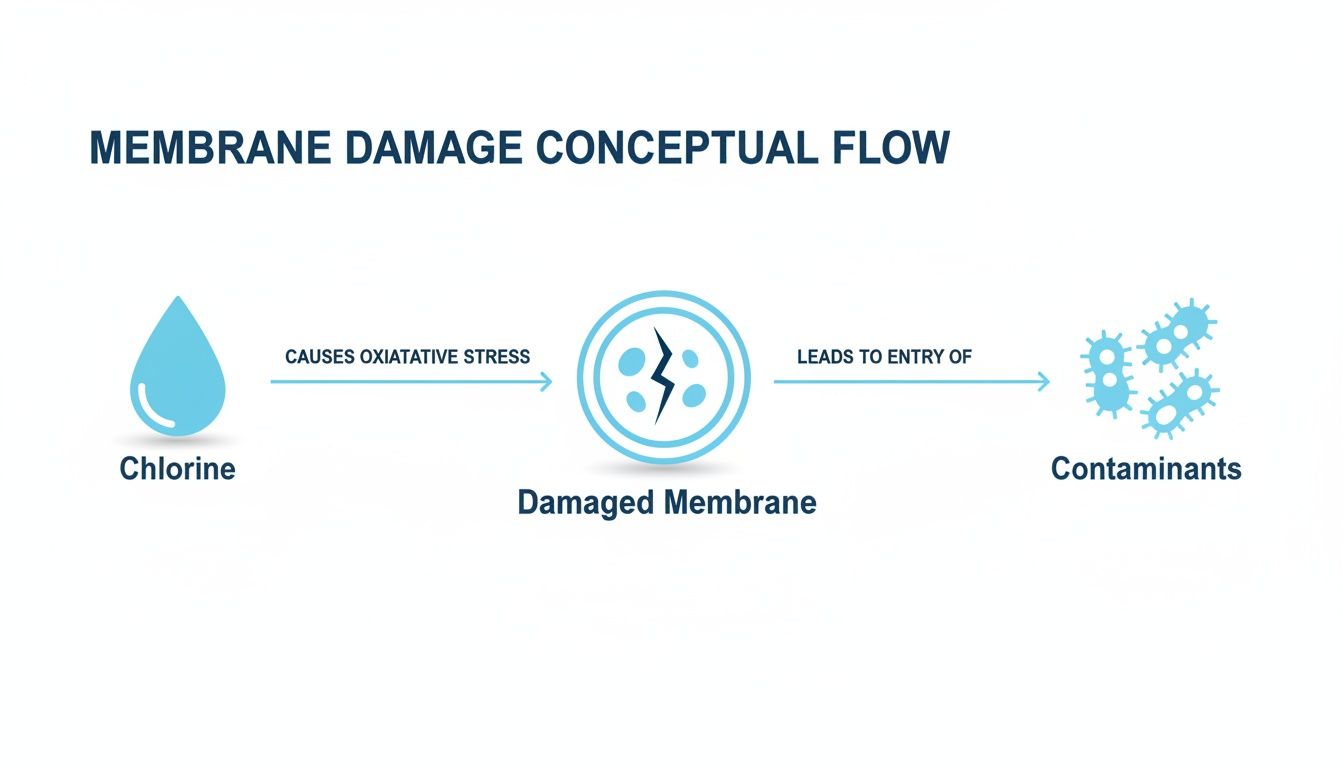
Here's something else to consider: the issue isn’t always just the chlorine itself. When chlorine mixes with the tiny bits of organic matter that are naturally in water, it can create a whole new class of compounds called disinfection byproducts (DBPs). Your water utility works hard to keep these within safe limits, but many people prefer to add their own layer of protection at home.

This is where filtering your water comes in. A whole-house water filter doesn't just get rid of the annoying smell—it tackles the root cause of dry skin, faded laundry, and those airborne irritants all at once. It’s a single move that brings comfort and peace of mind back to your entire home.

Uncovering a Sneaky Chlorine Smell Imposter

So you’ve noticed that distinct smell of chlorine in house, and your first instinct is to blame the tap water. You might be right, but it's not always the whole story. Often, an unexpected partner in crime is lurking right under your sink: your everyday household cleaners.

Think about it. Many of the most common all-purpose sprays, disinfectants, and toilet bowl cleaners are bleach-based. When you start cleaning and mix these with other products—especially anything with a citrus scent like lemon or orange—you can accidentally kick off a chemical reaction right in your home. This reaction can release airborne particles that make that chlorine smell feel way more intense.

The Cleaner Conundrum

This is where things get tricky. Your tap water might be contributing a baseline level of chlorine, but your cleaning routine can act like a powerful amplifier, making it nearly impossible to figure out what's really causing the smell. You end up pointing the finger solely at the water when your cleaning products are actually making the problem much worse.

It turns out there's some real science behind this. A fascinating study from Bucknell University found that when bleach fumes meet citrus compounds (the technical term is limonene) under normal indoor light, they create what are called secondary organic aerosols. These are tiny particles that can really irritate your eyes, nose, and throat. The smell threshold for chlorine is already super low, but this chemical mix can make the odor you perceive—and the potential for irritation—much stronger. You can read more about the study on common cleaners and its interesting findings.

This is exactly why a whole-house water filter can be such a game-changer. By stripping the chlorine out of your water right where it enters your home, you completely eliminate that baseline chemical odor. Suddenly, it becomes much easier to tell if other things, like your cleaning supplies or even your HVAC unit, are the real culprits behind any lingering smells. If you're trying to track down a strange scent, it’s worth understanding why your AC smells and how different issues can sometimes be mistaken for one another.

Once you have clean, chlorine-free water, managing these secondary sources is a breeze. Just improving your ventilation by cracking open a window or switching on an exhaust fan while you clean can make a world of difference. It's a simple habit that helps disperse any chemical fumes, leaving your home feeling—and smelling—much fresher.

Simple Steps to Diagnose Your Chlorine Problem

Before you can fix that lingering smell of chlorine in house, you need to put on your detective hat. Pinpointing the exact source is the crucial first step. It ensures you’re tackling the real issue instead of just taking a wild guess.

Thankfully, you don't need a forensics lab—a few simple DIY tests can give you all the clues you need.

The easiest place to start is what I call the "glass test." Just fill a clean glass with water from the faucet you suspect is the problem. Then, take the glass and walk into a different room, well away from the sink area. Now, give the water a sniff. This simple move isolates the water's scent from anything else that might be going on, like drain odors or leftover cleaning spray in the sink.

Hot Versus Cold Water Clues

Next up, let's see if temperature makes a difference. Test your hot and cold water taps one at a time. First, run the cold water for about a minute and smell it. Then, do the exact same thing with the hot water.

Is the chlorine smell way more intense from the hot tap? That's a huge clue. Hot water makes it easier for dissolved chlorine to turn into a gas (a process called "volatilization"), which concentrates that swimming pool smell, especially in a small space like a shower.

If the odor is only strong on the hot side, it could point to a problem inside your water heater. Sediment buildup at the bottom of the tank can sometimes react with the chlorine in your water and make the smell worse. But if the smell is equally strong from both hot and cold taps, the culprit is almost certainly the water coming from your city's supply.

Sometimes, what your nose registers as chlorine is actually an imposter. In older homes, a musty, chemical-like odor can come from mold compounds that trick you into thinking you're smelling chlorine. When you're trying to track down a mysterious smell, getting accurate info from something like a guide for an air quality testing kit can be a big help. In fact, some Swedish studies of homes built before 1980 found that specific "mold odors" can easily be mistaken for chlorine.

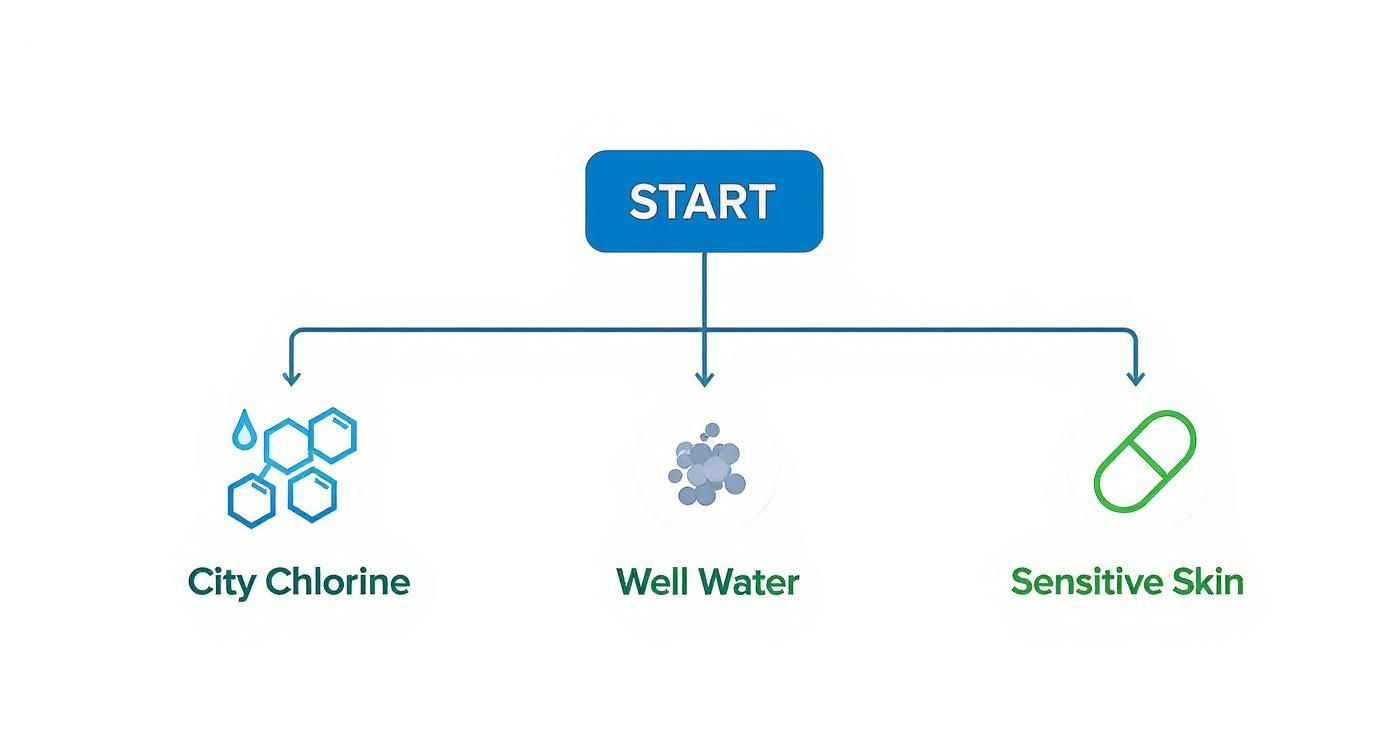
This flowchart can help you trace that chemical smell back to its origin.

A flowchart explaining the potential sources of chlorine smell, whether airborne or in water.

As you can see, the process helps you figure out if the smell is real, if it's a "smell-alike" like mold, or if it’s definitely coming from your water.

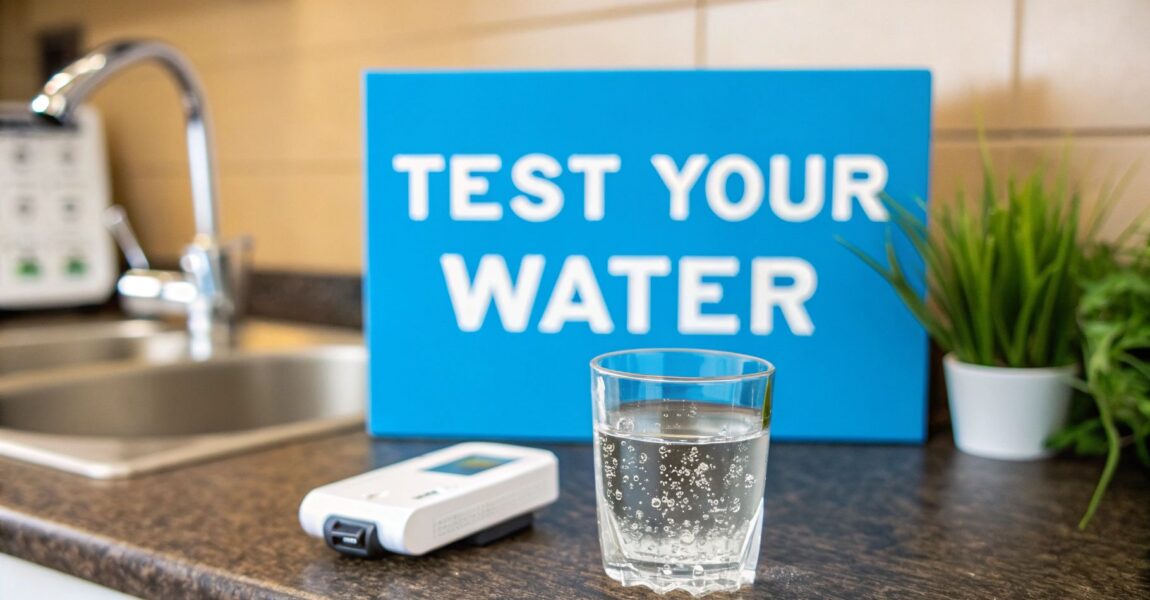
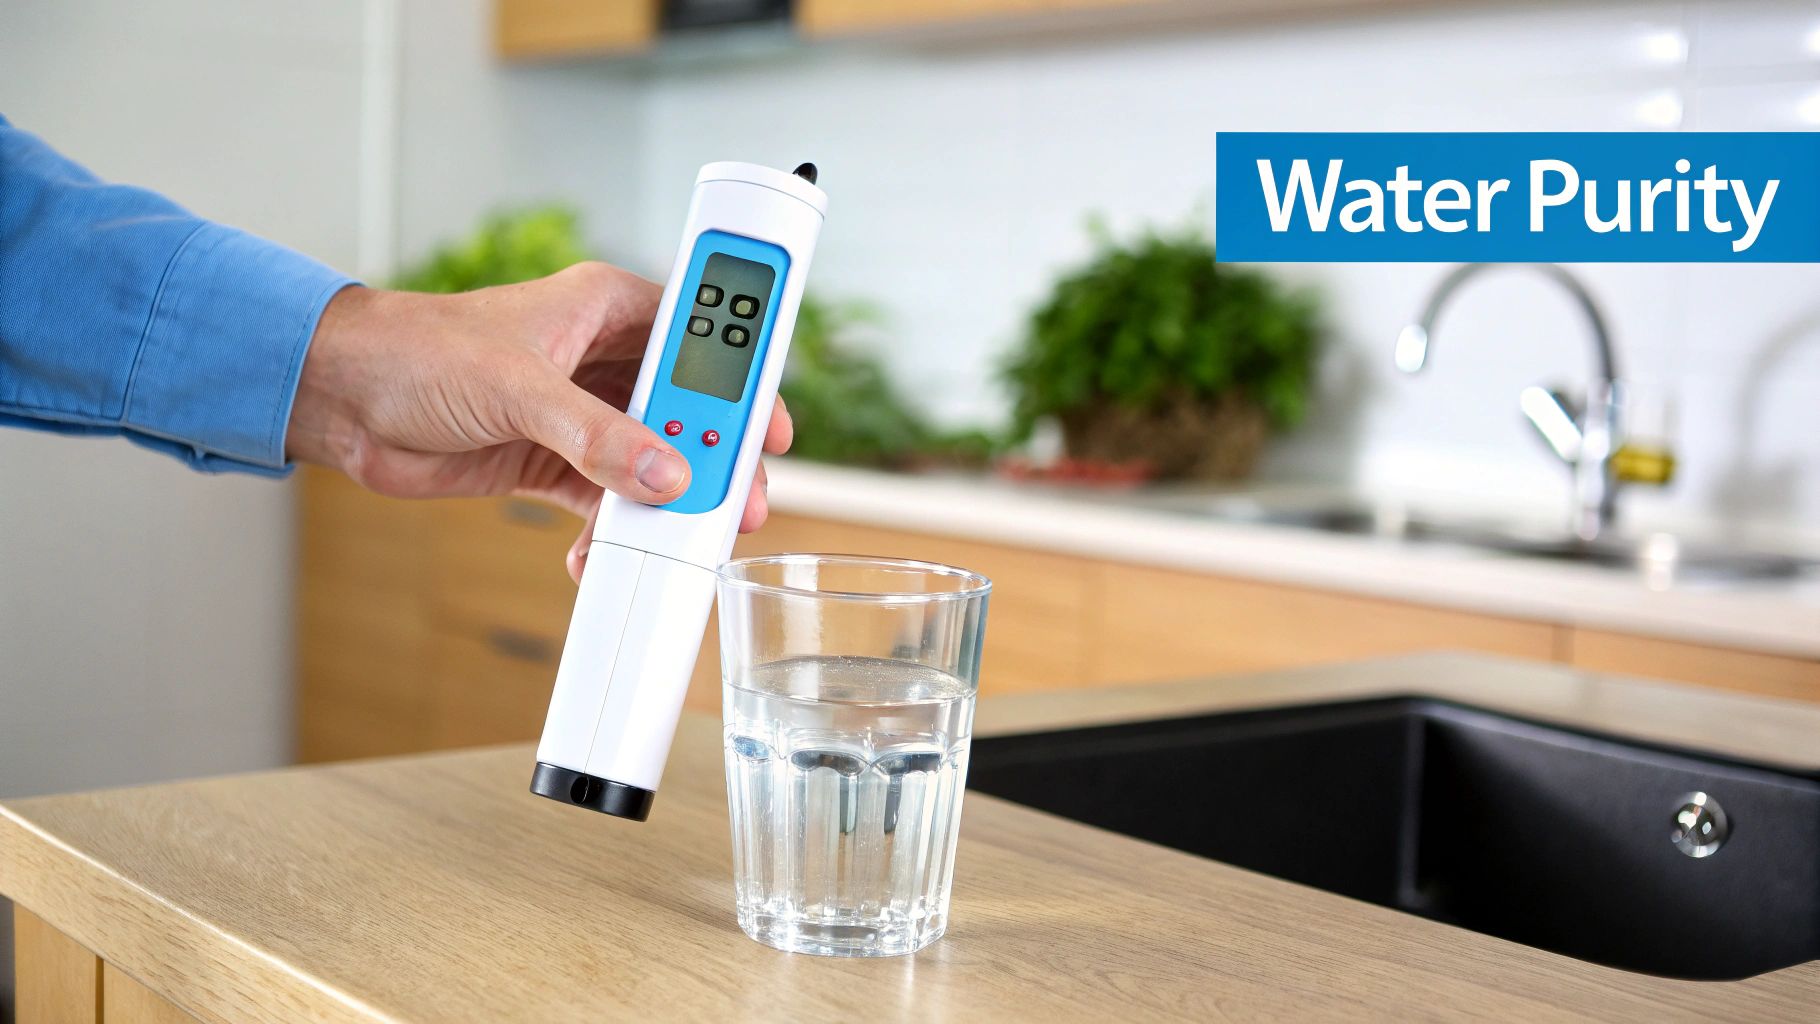
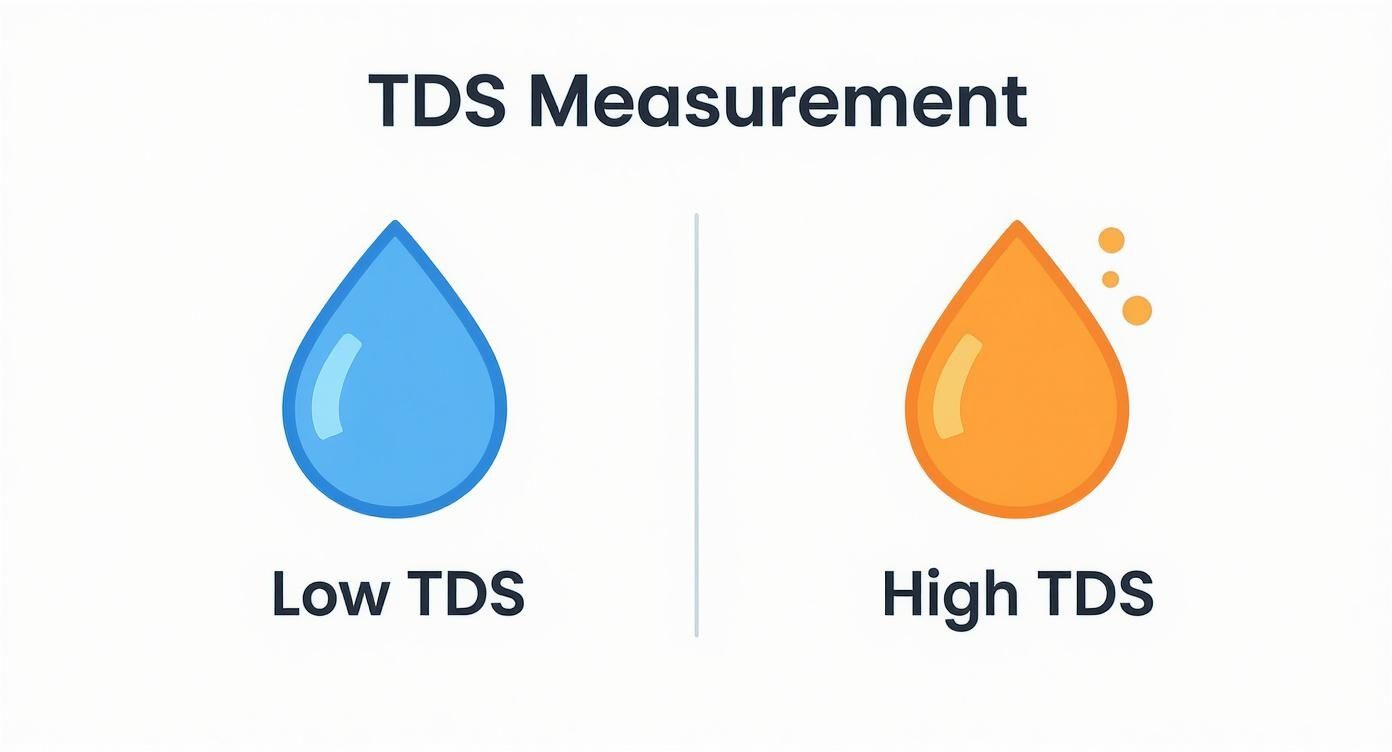
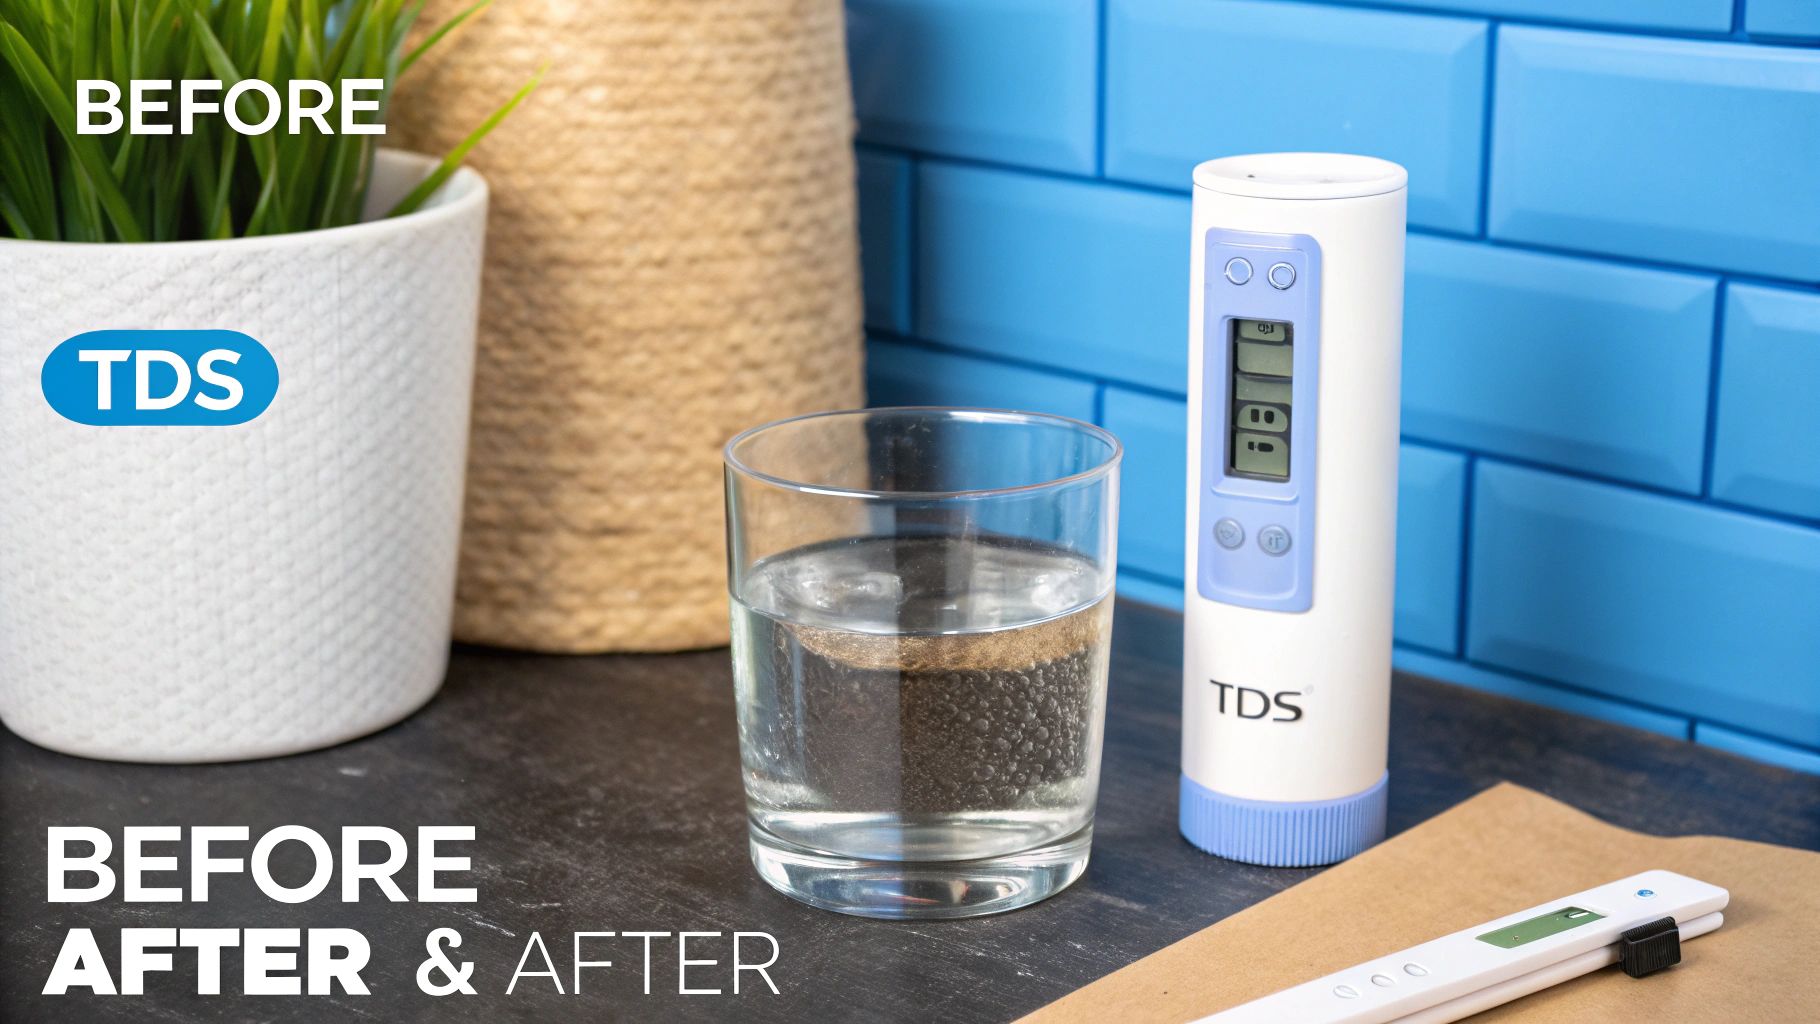
Getting Concrete Data with Water Tests

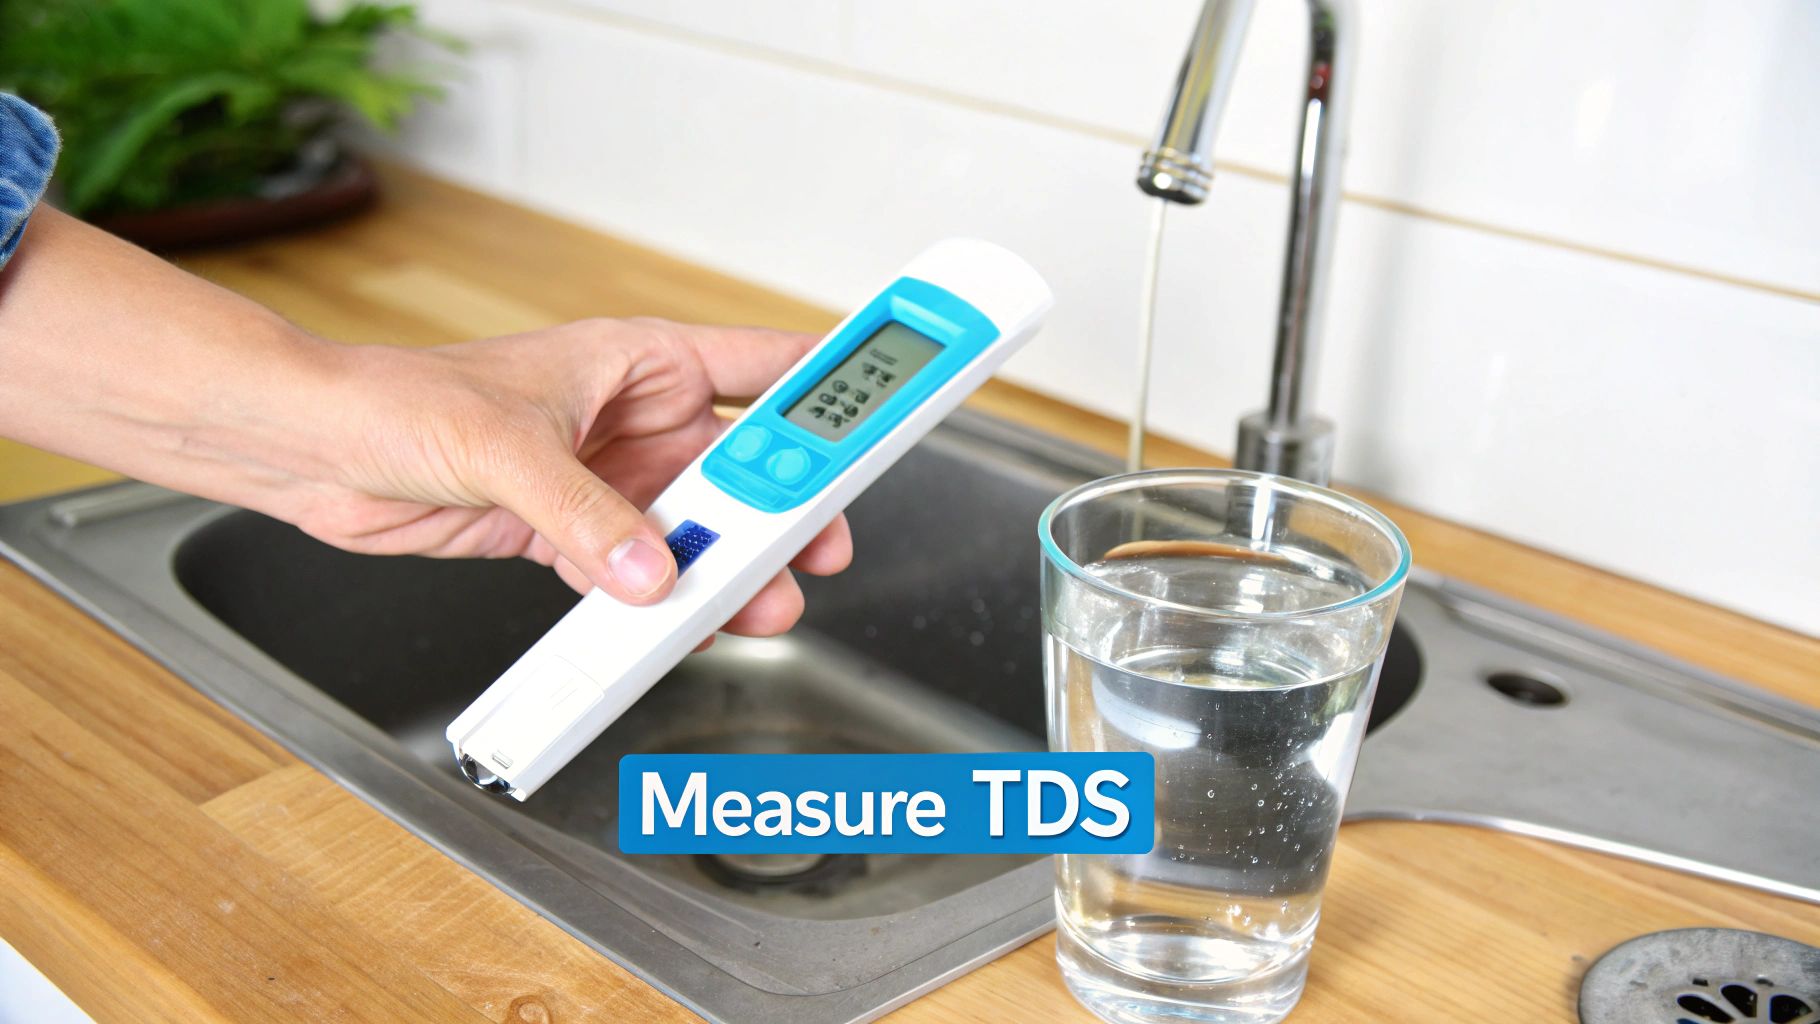
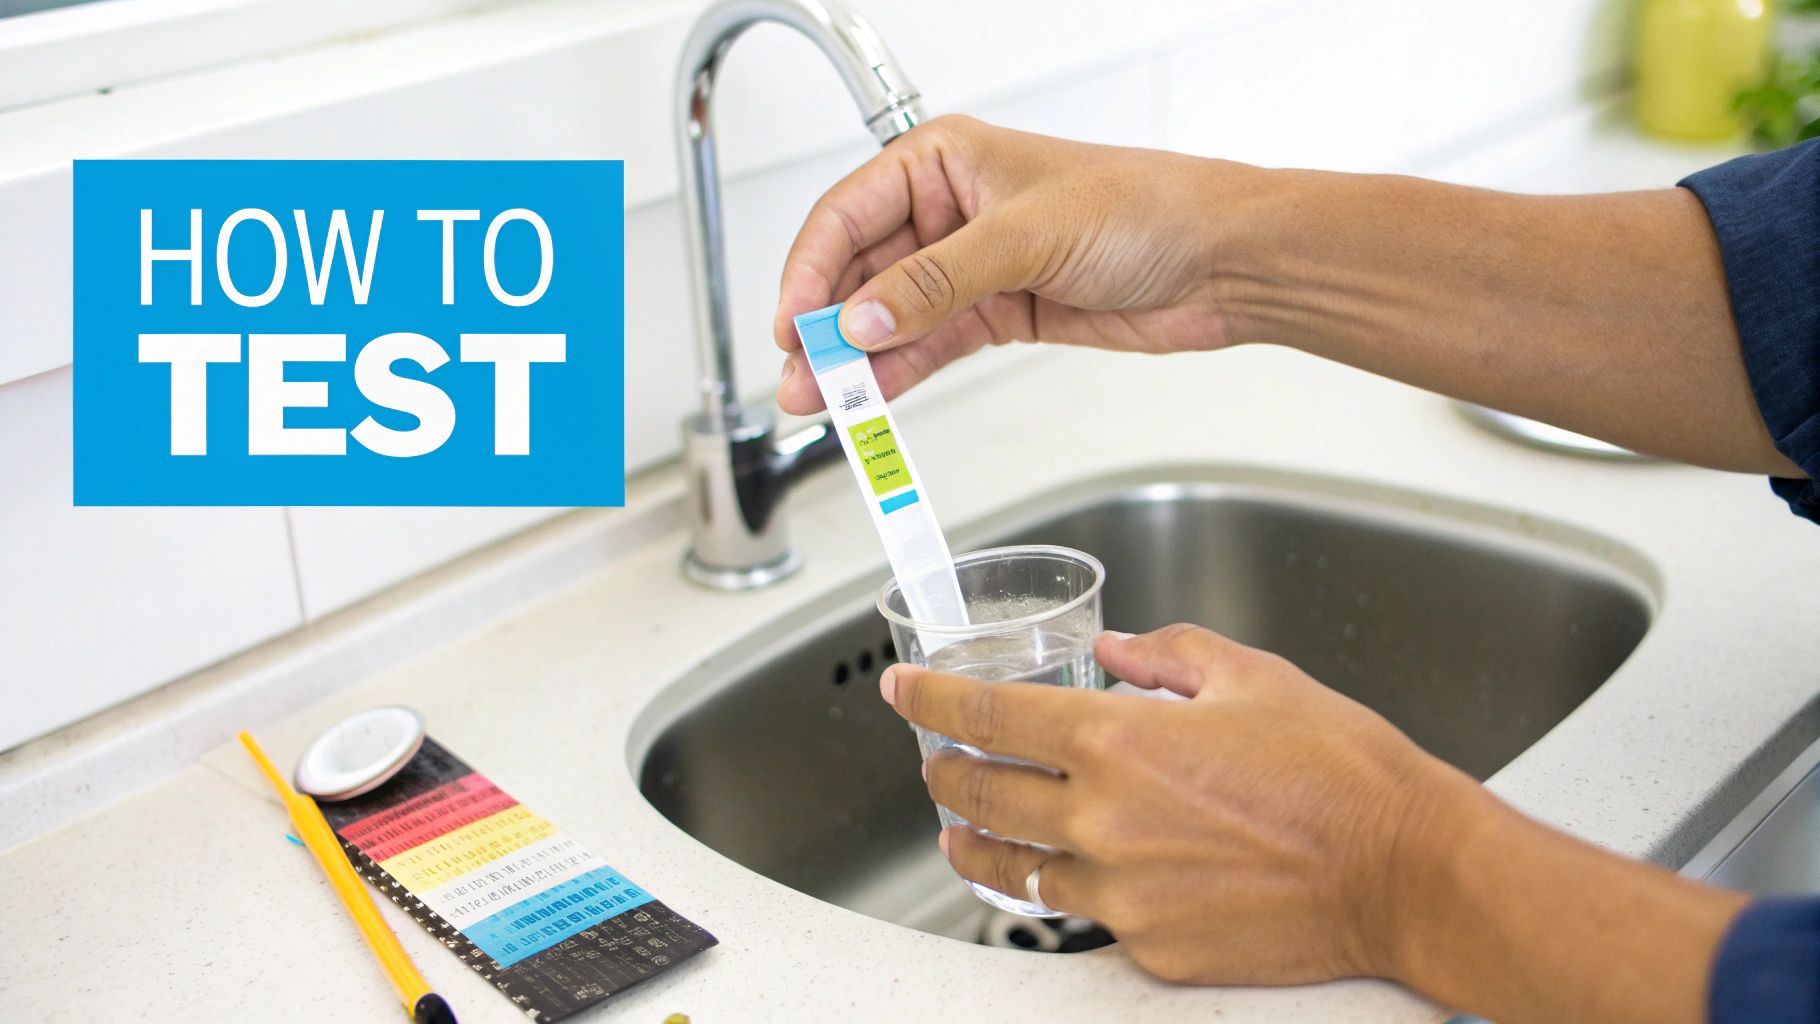
If you're ready to move past the sniff test and get some hard numbers, a home water testing kit is your best friend. These kits are incredibly simple to use and will tell you the exact concentration of free chlorine in your water.

You’ll generally find two types:

  • Test Strips: You just dip a strip into a water sample, and the color change tells you the chlorine level when you match it to a chart. They give you a quick, ballpark reading.
  • Digital Testers: For more accuracy, these handheld electronic gadgets give you a precise numerical reading of chlorine levels. There's no guesswork involved.

Once you run these simple diagnostics, you’ll have the evidence you need. Knowing for sure that chlorine is in your water—and at what level—gives you the power to move forward with confidence. From there, the next step becomes obvious: finding the right water filtration system to get rid of it for good.

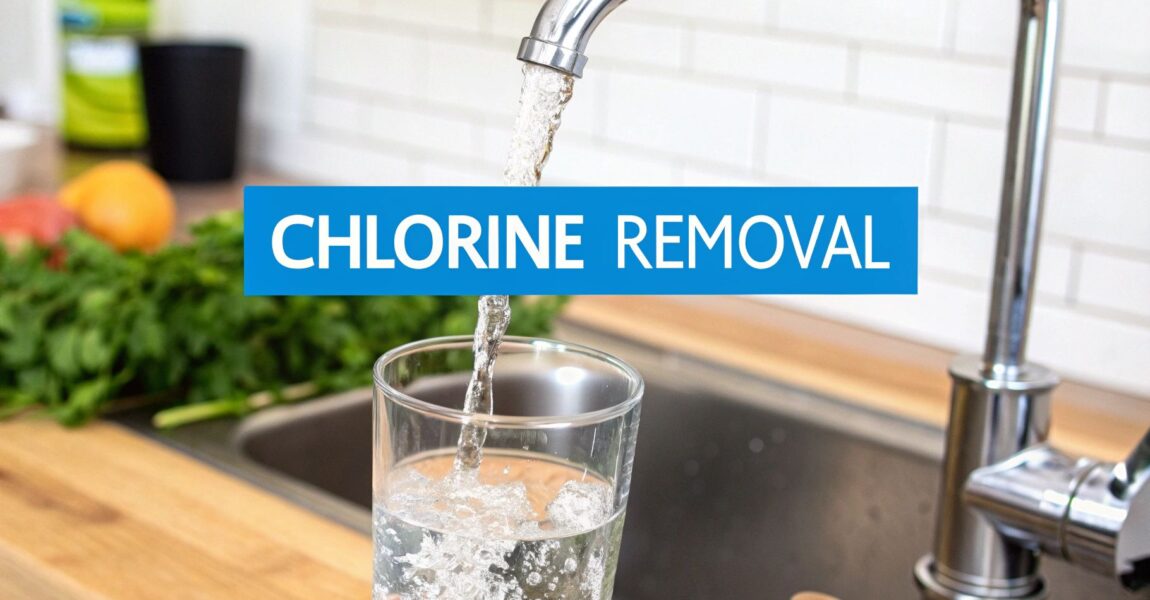
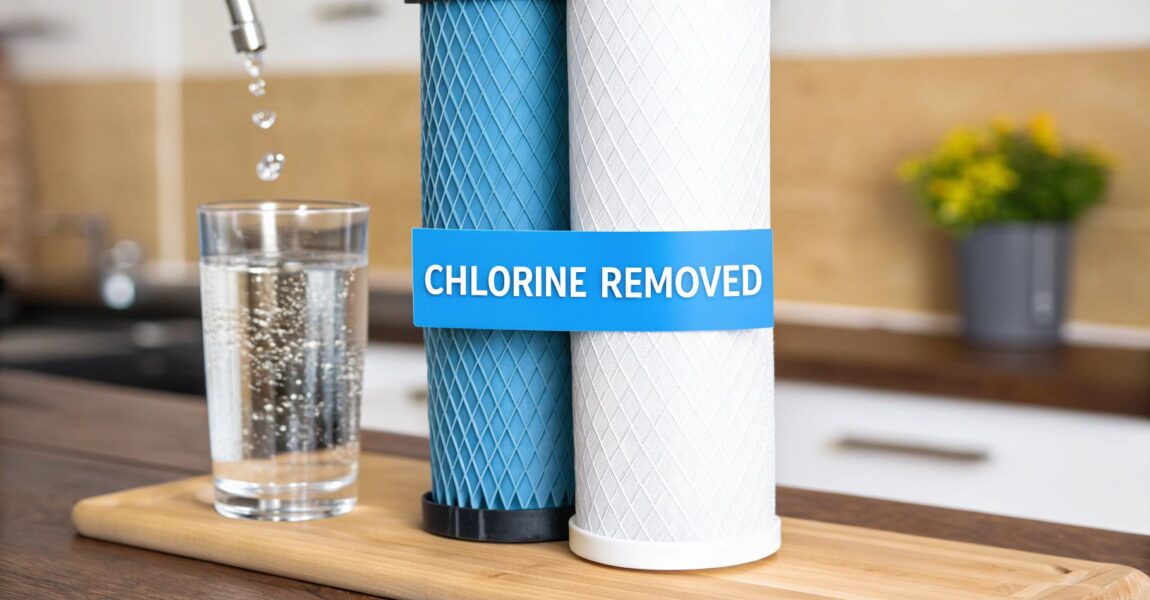
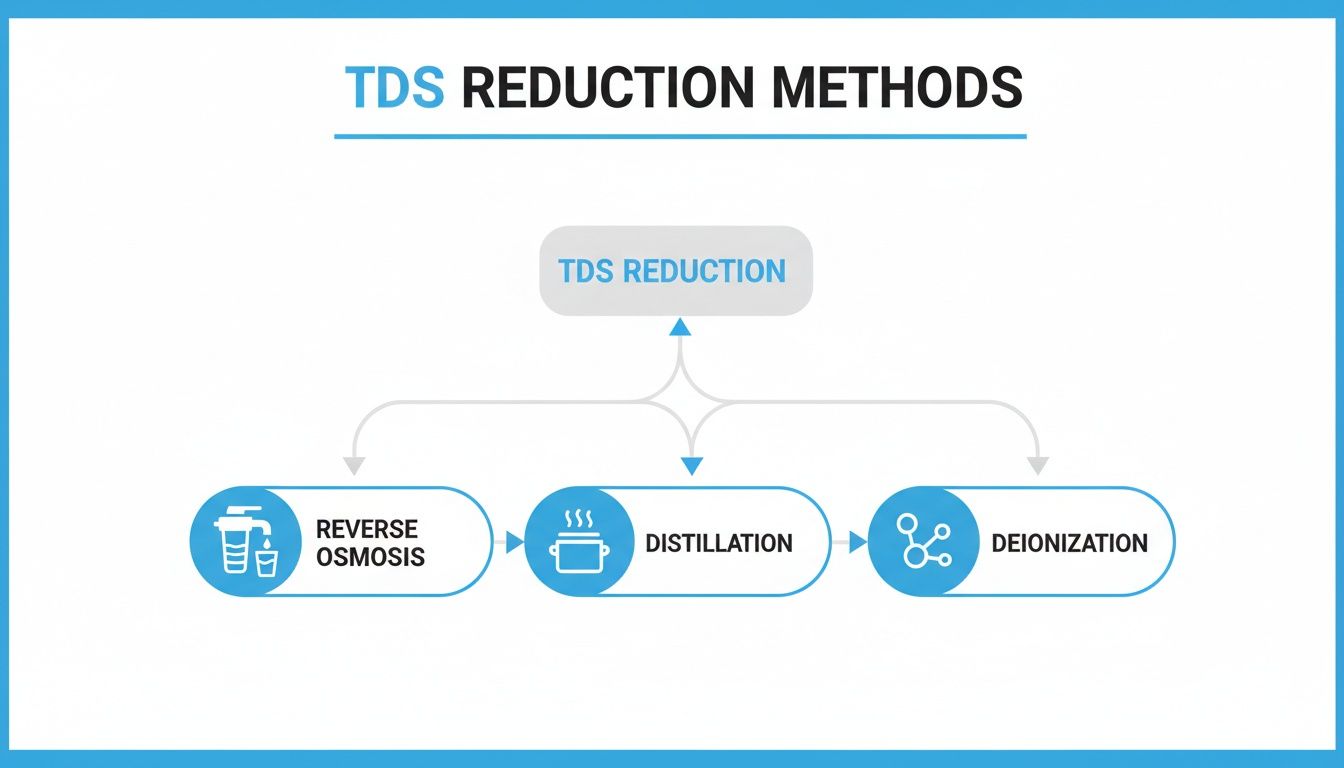
The Ultimate Guide to Chlorine Removal Filters

Under-sink water filter system for chlorine removal with multiple cartridges and a separate faucet.

Alright, you've pinpointed the source of that pesky chlorine smell. Now, let's talk about the most effective way to get rid of it for good: a solid water filtration system.

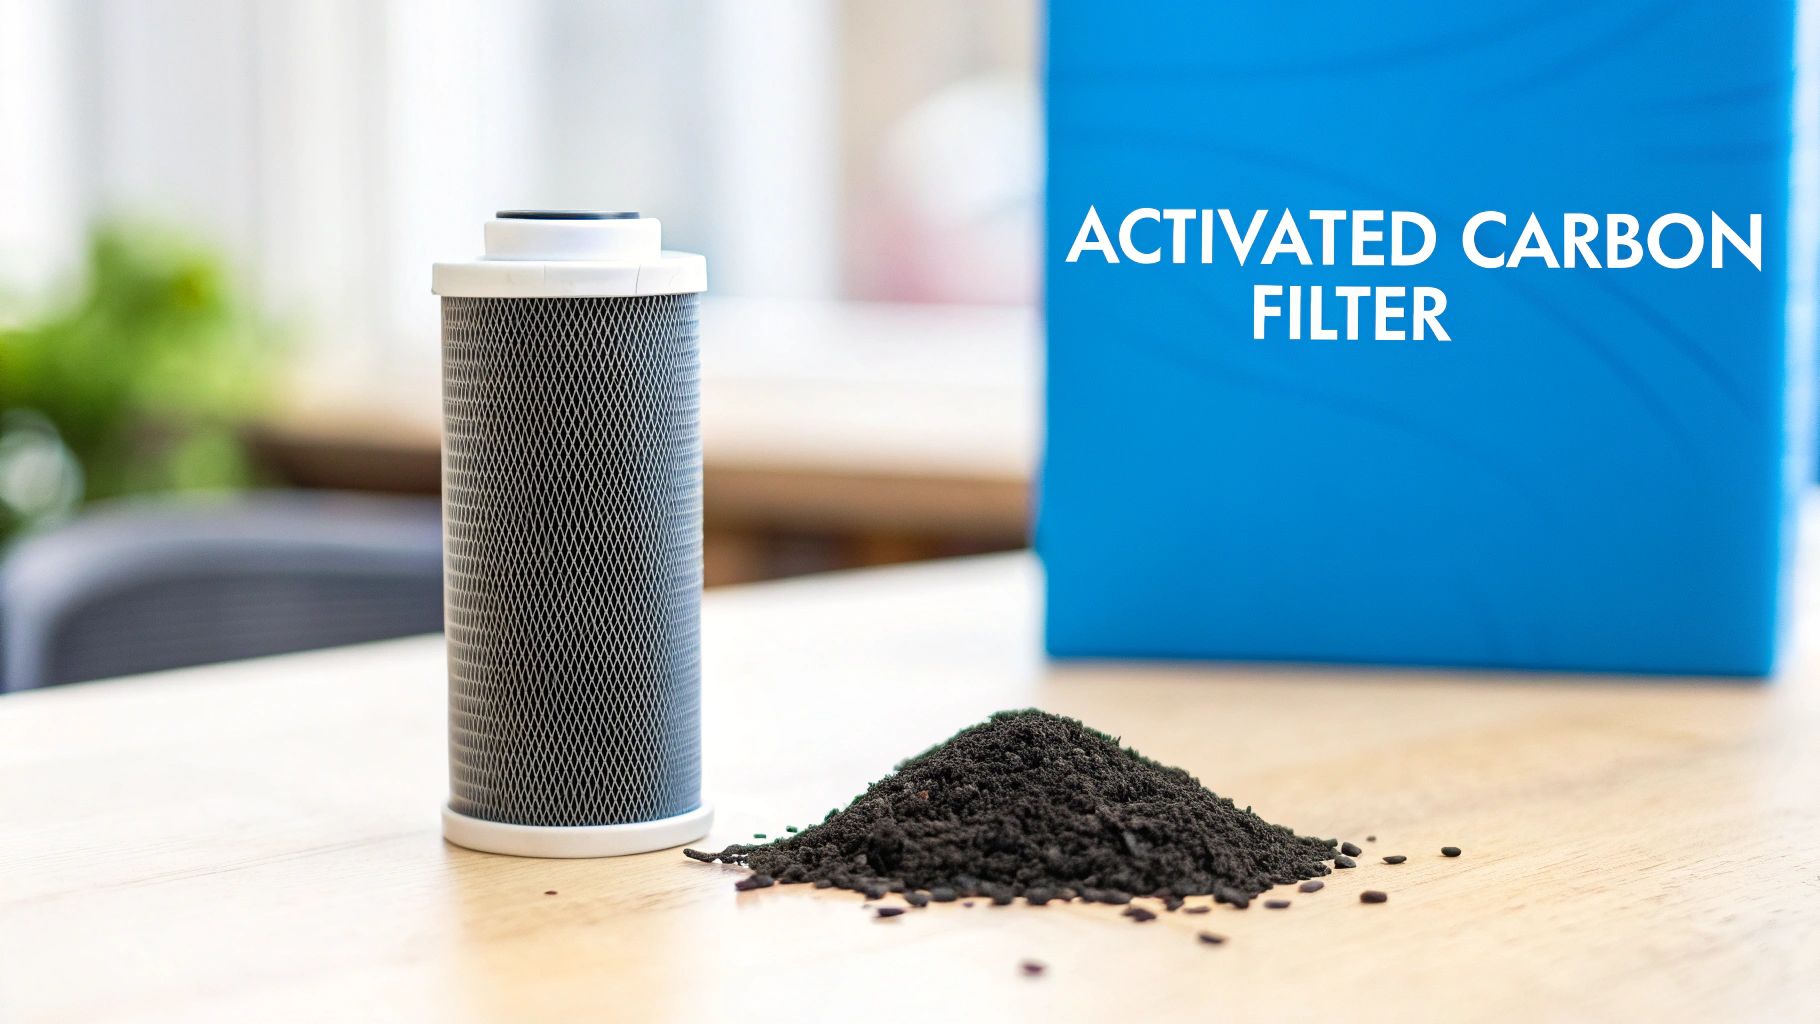
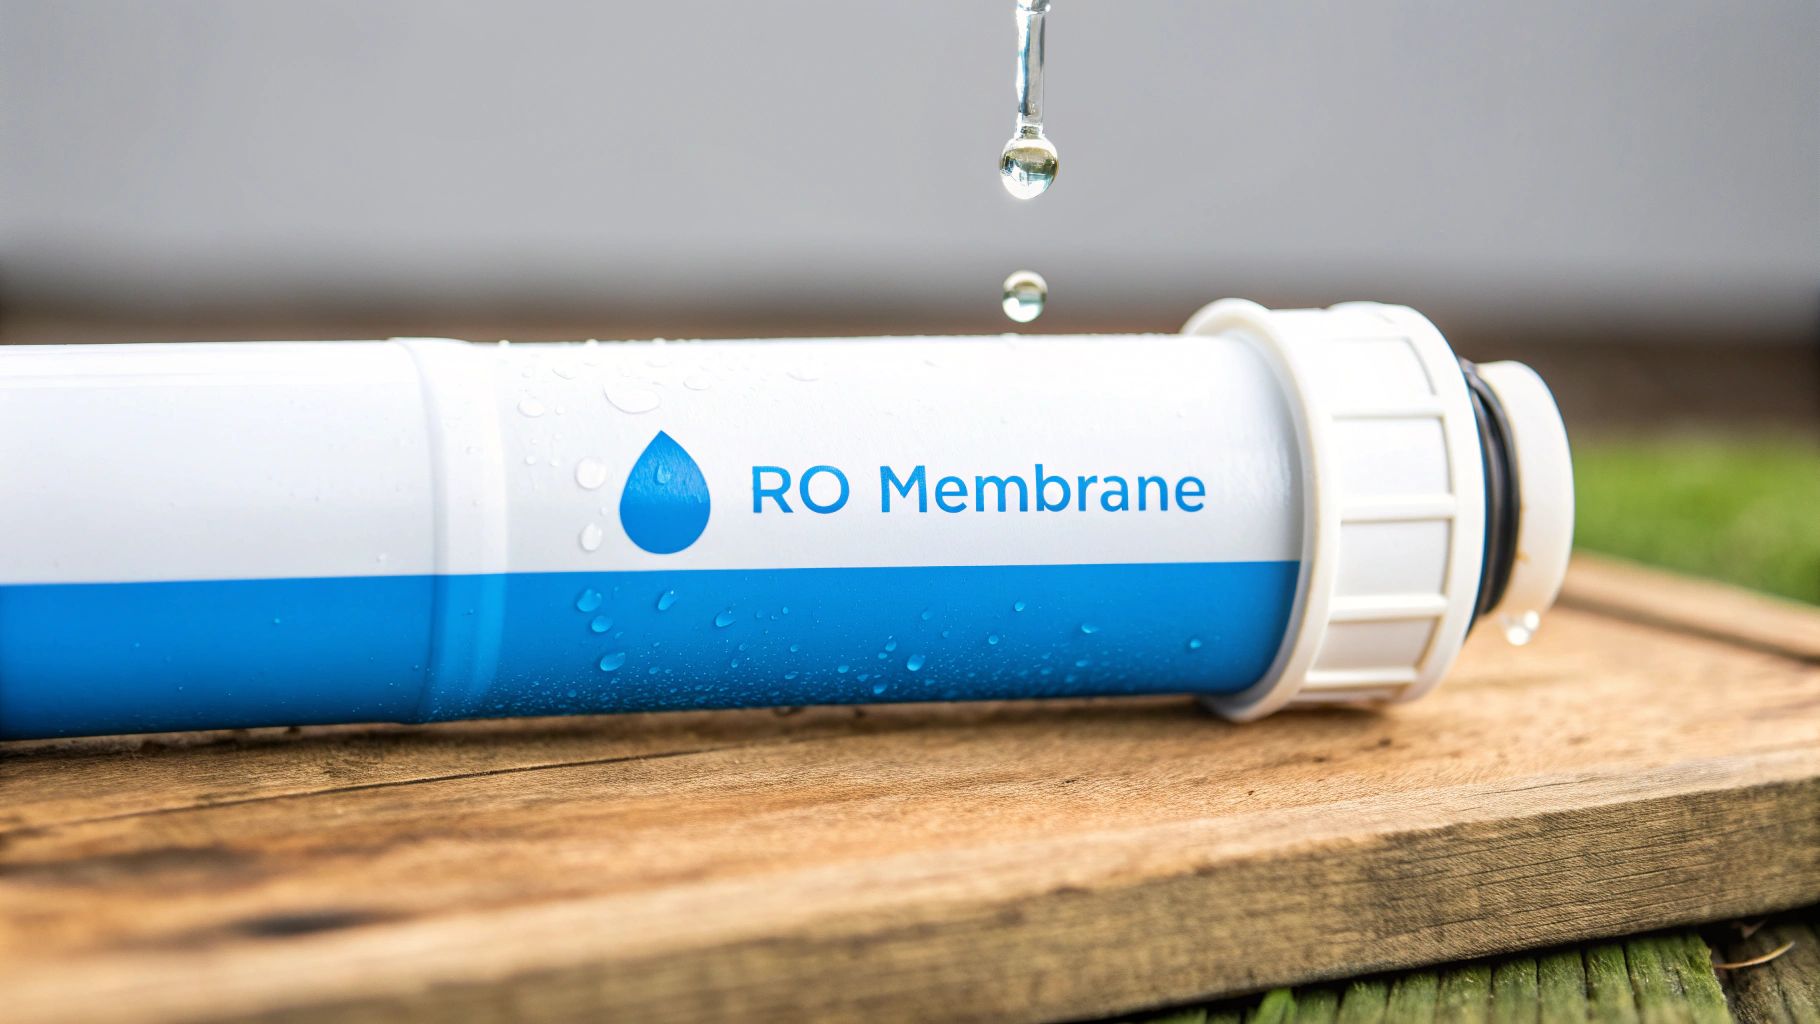
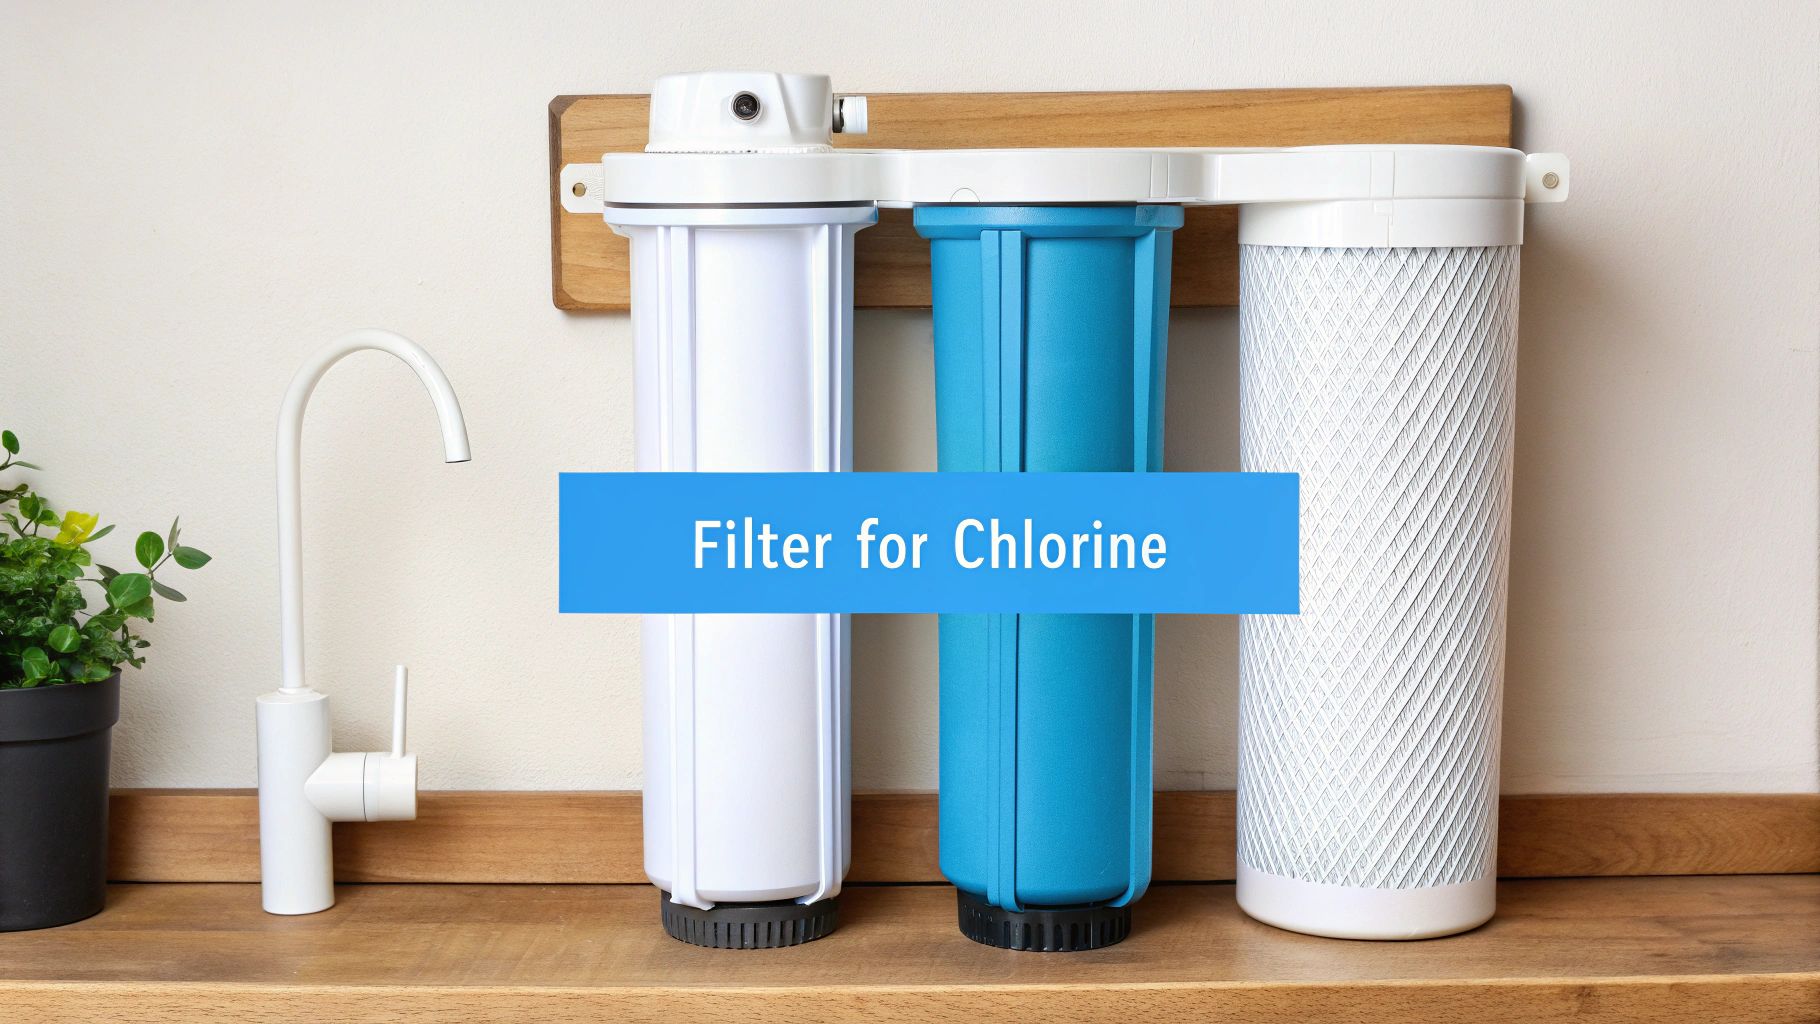
When it comes to battling chlorine, one material is the undisputed champ: activated carbon.

Think of activated carbon as a highly porous sponge, but on a microscopic level. It has an enormous surface area packed into a small space. As water passes through, the carbon uses a process called adsorption to essentially grab and hold onto chlorine molecules, trapping them so they can't get through to your tap. It’s a simple but incredibly powerful method that zaps that chemical taste and odor, leaving you with nothing but clean, great-tasting water.

Choosing Your Filtration Strategy

Not all filters are built the same, and the best one for you really boils down to your budget, whether you own or rent, and just how thoroughly you want to tackle the chlorine issue.

You’ve got two main paths you can take: a point-of-entry system that treats every drop of water in your home, or a point-of-use filter that focuses on a specific faucet or outlet.

A whole-house system is the all-in-one solution. It’s installed right where your main water line enters your house, meaning every faucet—from the kitchen sink and washing machine to every shower—gets purified water. This is the top choice for homeowners who are serious about protecting their skin, hair, and even their appliances from chlorine's harsh, drying effects.

On the other hand, if you’re renting or just need a more targeted, budget-friendly fix, point-of-use filters are a fantastic option. You can install one under your kitchen sink for clean drinking and cooking water, or even attach a filter directly to your showerhead. That last one is a game-changer for anyone tired of breathing in chlorine steam during a hot shower.

The Gold Standard of Certification
When you're shopping for a filter, keep an eye out for the NSF/ANSI 42 certification. This is an independent seal of approval. It proves the filter has been put through its paces and is guaranteed to reduce aesthetic issues like chlorine taste and odor. Think of it as your peace of mind that the product actually does what it claims.

Choosing the Right Water Filter to Remove Chlorine

To help you find the perfect match, let's compare the most common types of filters. Each offers a different mix of coverage, cost, and convenience.

Filter Type Best For Chlorine Removal Effectiveness Typical Cost Range Installation
Whole-House Filter Homeowners wanting a complete, set-it-and-forget-it solution for every tap. Very High (Typically removes 97% or more of chlorine from all water) $500 – $1,500+ Professional installation is often recommended.
Under-Sink Filter Renters or homeowners who want purified water for drinking and cooking at the kitchen sink. High (Excellent removal for a single, targeted faucet) $150 – $400 DIY-friendly for most people with basic plumbing skills.
Showerhead Filter Anyone wanting to protect their skin and hair from chlorine's drying effects. High (Specifically designed to remove chlorine from hot shower water) $30 – $100 Very easy DIY installation; usually just screws on.

Ultimately, picking the right filter comes down to what you’re trying to achieve. Do you just want better-tasting drinking water? Or are you looking to get rid of chlorine everywhere, from your laundry to your shower? Our experts have put together more detailed advice on all kinds of water filtration topics, which can help you find the best solution for your needs.

By weighing these options, you can confidently invest in a filter that brings that fresh, clean feeling back to your home.

Keeping Your Home Chlorine-Free for Good

Putting in a water filter is a huge win against the smell of chlorine in your house, but don't hang up your toolbelt just yet. The job isn’t quite finished.

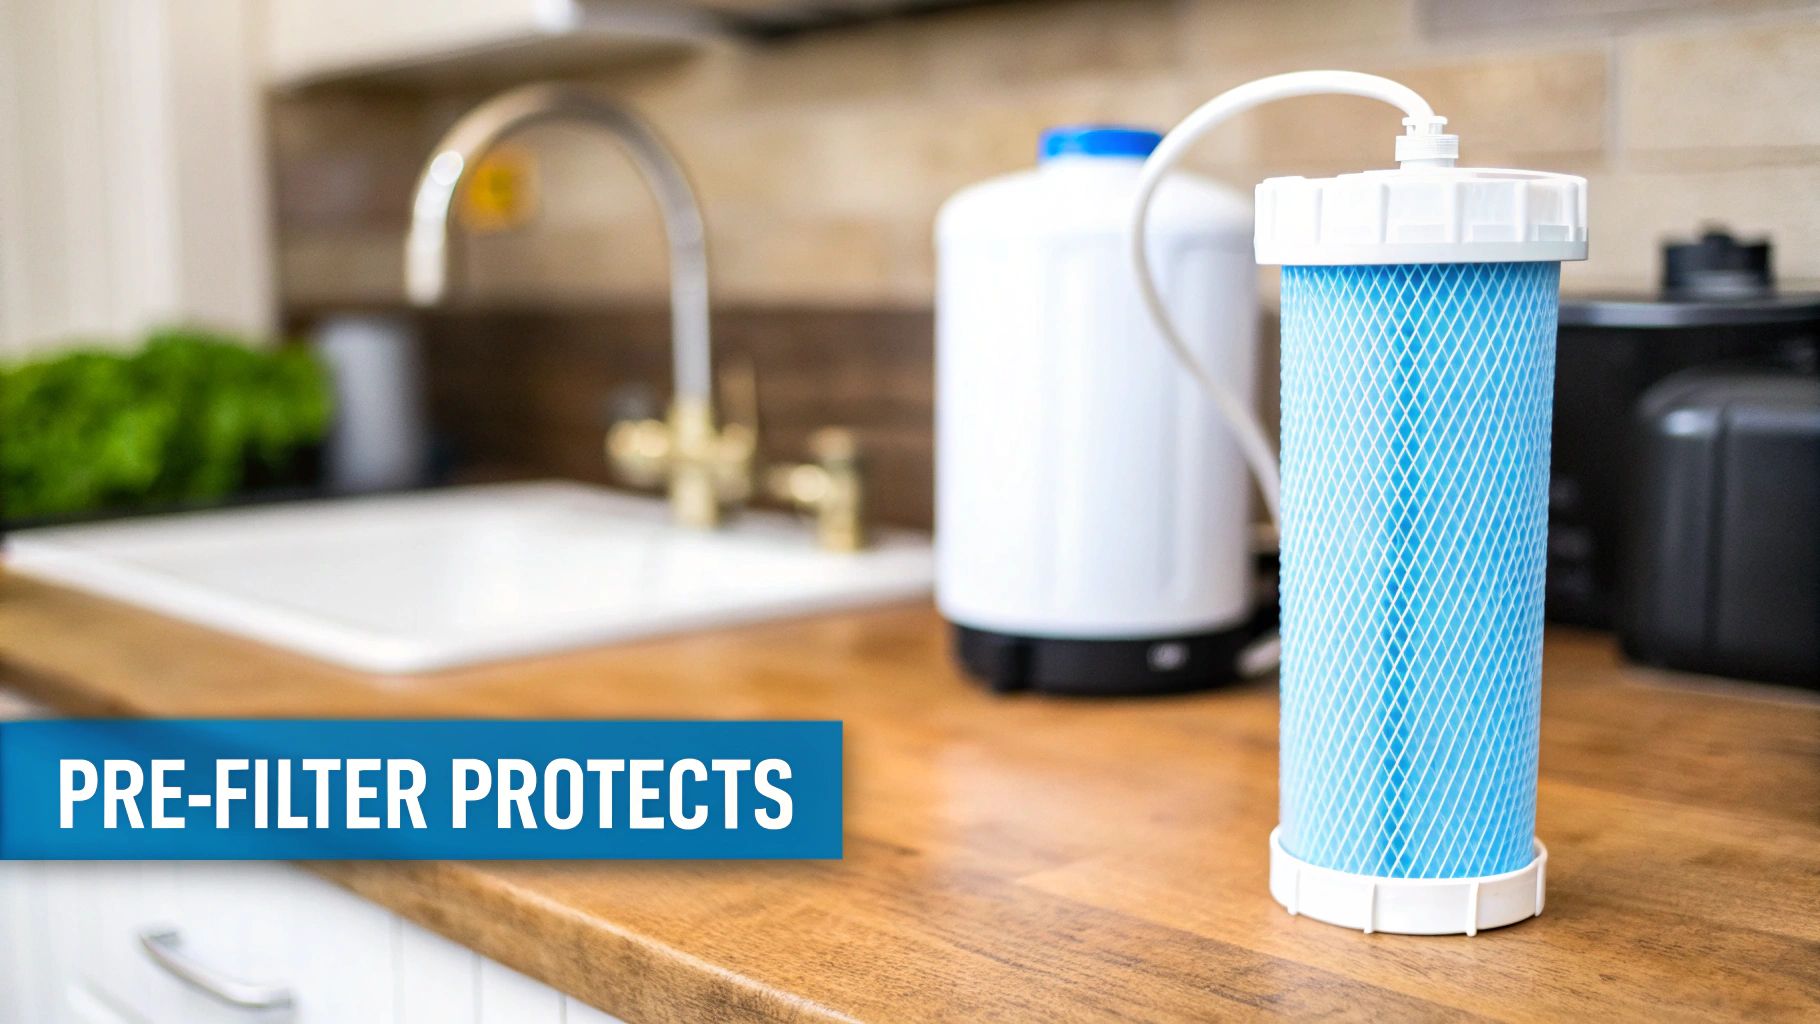
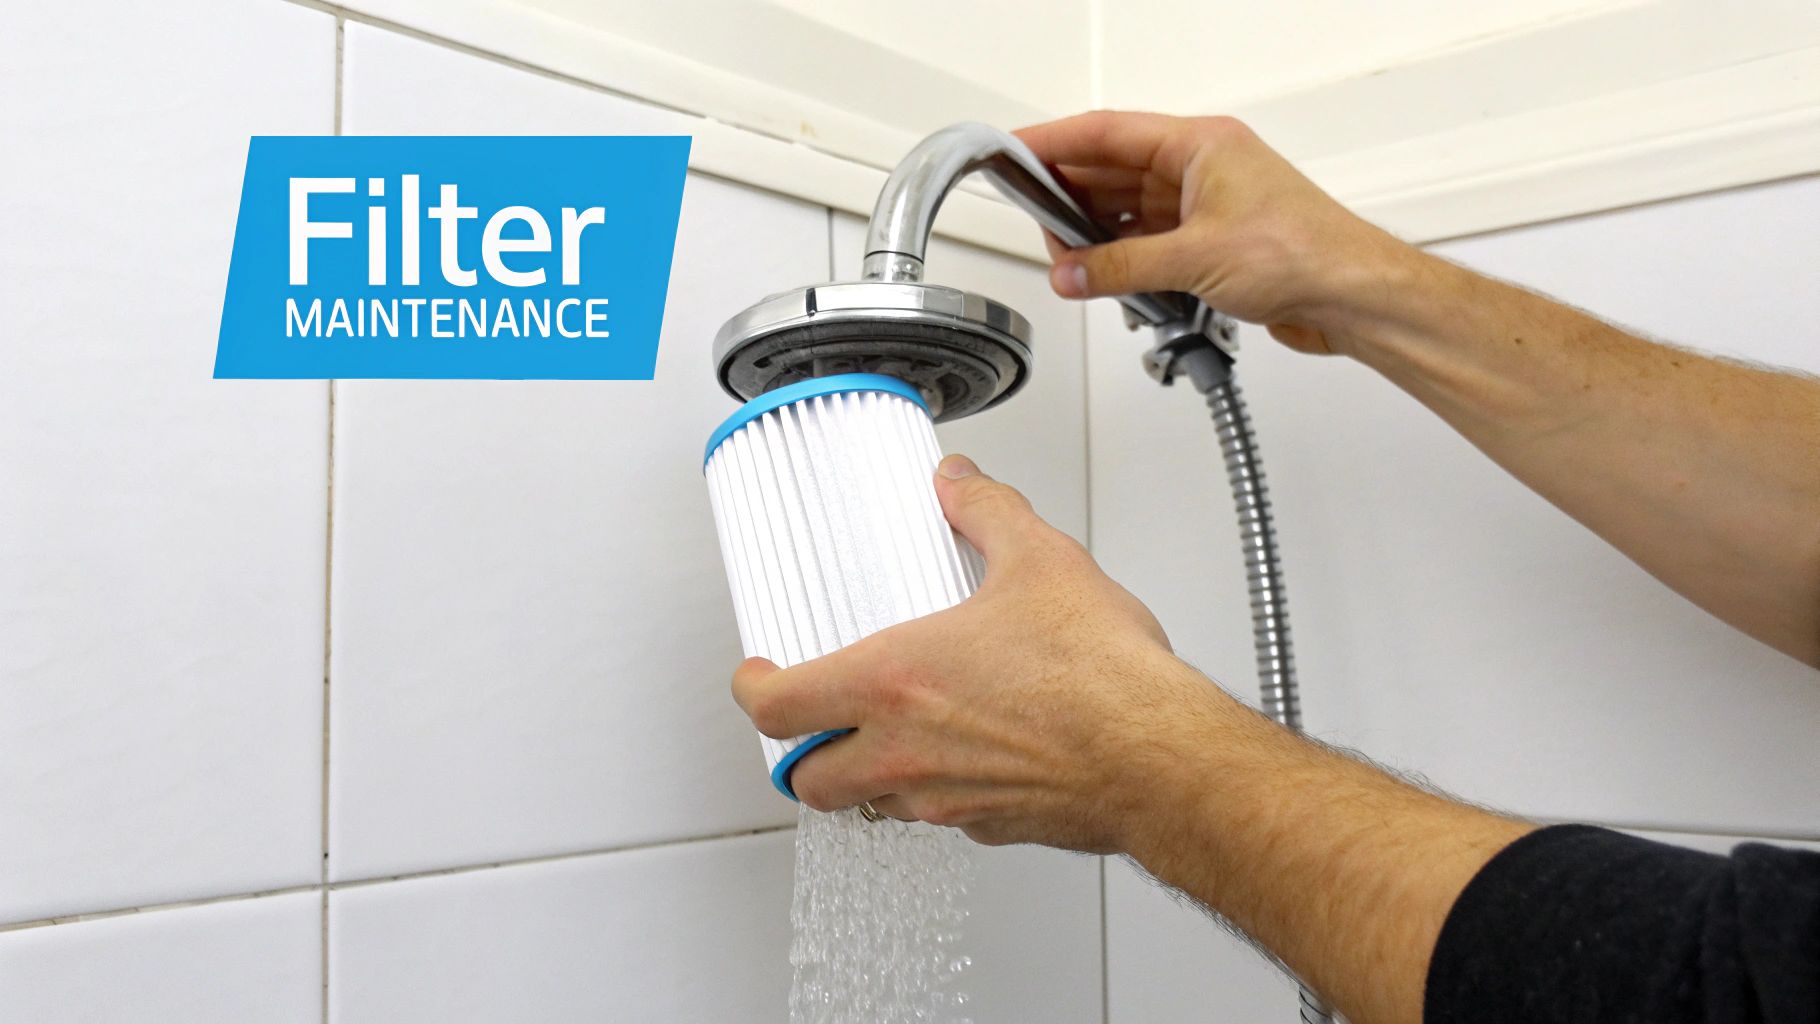
Think of your filter as a hardworking gatekeeper. If it gets overloaded, it simply can’t do its job effectively. Regular, consistent maintenance is the real secret to keeping that clean, fresh water flowing for years to come.

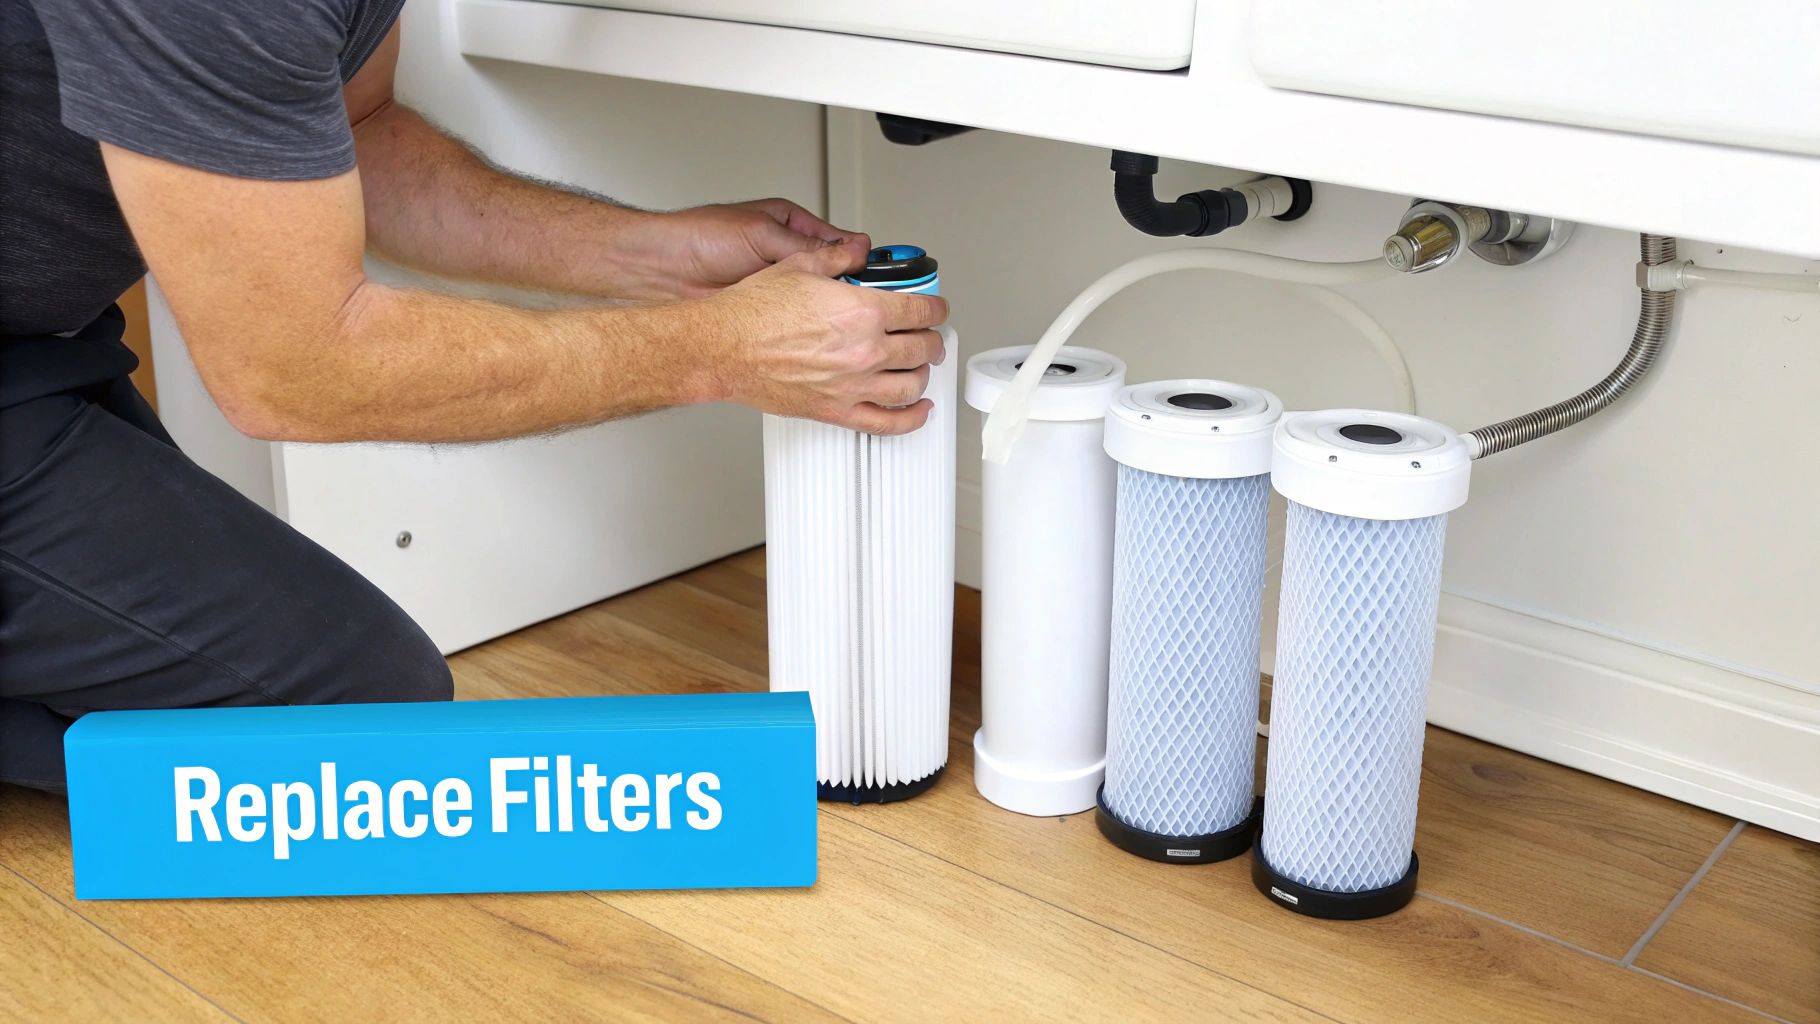
The single most important task is changing the filter cartridges on schedule. This isn’t a friendly suggestion—it’s absolutely essential for the system to perform as it should. Over time, the activated carbon inside gets completely saturated with chlorine and all the other gunk it's been pulling out of your water. Eventually, it just can't trap anything else.

A clogged filter doesn't just stop working; it can become a breeding ground for bacteria or even release concentrated bursts of the very contaminants it was meant to remove. Sticking to a schedule is non-negotiable for safe, odor-free water.

A Simple Maintenance Plan

Different types of filter media, like granular activated carbon (GAC) and carbon block, have different lifespans. These typically range from six months to a year, so check the manufacturer's recommendation.

The easiest way to stay on top of it? The moment you install a new cartridge, pull out your phone and create a calendar reminder for the replacement date. Simple as that.

For bigger jobs, like installing a whole-house system, calling in a professional plumber is always the smartest move. And if that chlorine smell ever comes back out of the blue, take it as a clear signal from your system that it’s time for a professional check-up.

Your Questions About Chlorine Smell Answered

Even after you've pinpointed the source of that chemical smell, a few questions might still be nagging you. Let's get you some clear, straightforward answers so you can finally knock out that smell of chlorine in your house for good.

Why Does the Chlorine Smell Get Worse in Winter?

It's not just your imagination—that chemical odor often ramps up in the winter, and it's usually because we're using more hot water. When you heat chlorinated water for a shower or to do dishes, you're speeding up the process where chlorine turns into a gas. This gas gets released right into the steamy, enclosed air of your bathroom or kitchen.

On top of that, the colder, drier air in winter can actually make our sense of smell a bit more sensitive to these chemicals. A whole-house water filter tackles this problem at the source, removing chlorine before it gets to your water heater. That means even the longest, steamiest winter shower will be free of that harsh chemical smell.

Will a Water Softener Get Rid of the Chlorine Smell?

Nope, a standard water softener isn't built for that job. Water softeners are fantastic at removing hardness minerals like calcium and magnesium through a process called ion exchange, but that process does absolutely nothing to dissolved chlorine.

The real hero for getting rid of chlorine smell is a filtration system that uses activated carbon. Think of carbon as a sponge for chlorine—it adsorbs and traps the molecules, completely neutralizing both the taste and odor.

You can find some great modern systems that actually combine both softening and carbon filtration into a single unit. This gives you a one-two punch, solving both hard water spots and that nasty chlorine smell at the same time.

I Have a Filter, but I Still Smell Chlorine. What's Wrong?

This is a common one, and there are a couple of likely culprits. First, if you're using a point-of-use filter, like one that screws onto a single faucet, it's only treating the water at that one spot. You'll still get that chlorine smell from your showerhead and every other tap in the house.

If you already have a whole-house filter and the smell has come back, it's almost a sure bet that your filter cartridge is done and needs to be replaced. Over time, that carbon media gets clogged up and can't grab onto any more chlorine. Keeping up with a regular replacement schedule is the key to making sure your filter keeps doing its job, giving you fresh, odor-free water everywhere in your home.


At Water Filter Advisor, we're all about giving you in-depth guides and honest reviews to help you find the right water filtration solution. Check out our expert advice and take the first step toward pure, clean water today at https://www.waterfilteradvisor.com.

8 Sneaky Symptoms from Your Tap Water & How a Filter Can Fix It

That crystal-clear glass of H2O from your kitchen faucet looks innocent enough, but it could be a Trojan horse, smuggling in a microscopic army of troublemakers. We often blame stress, diet, or bad luck for those nagging headaches, surprise stomach bugs, or skin that just won't behave. But what if the real culprit is flowing right out of your pipes? Recognizing the sneaky symptoms of drinking contaminated water is the first step to reclaiming your health and turning your tap into a trusted source of pure refreshment.

Think of this guide as your "whodunit" for water-related woes. We're about to uncover eight tell-tale signs that your water might be working against you. From tummy troubles that strike out of nowhere to hair and skin issues that defy all logic, we'll connect the dots between how you feel and what’s really in your water. We’ll be looking at the usual suspects: bacteria, viruses, parasites, heavy metals, and pesky chemicals.

But this isn't just about doom and gloom—it's about empowerment. The hero of our story? The humble home water filter. We’ll show you how installing the right filtration system is like hiring a microscopic bodyguard for every faucet, effectively kicking those harmful contaminants to the curb. By the end, you'll be a water detective, ready to spot the signs and choose the perfect filter to ensure every drop in your home is delightfully clean and safe.

1. Gastrointestinal Distress and Diarrhea

The most classic and fastest-acting symptom is a full-blown mutiny in your gut. Stomach cramps, nausea, vomiting, and diarrhea are your body’s emergency alarm bells, screaming, "Get this out of me, now!" When you unknowingly sip on water contaminated with party-crashers like E. coli, Salmonella, Norovirus, or parasites like Giardia, your digestive system goes into full-on eviction mode.

Water flows from a faucet into a glass in a kitchen sink, with 'DIGESTIVE DISTRESS' text.

These unwelcome symptoms can pop up within hours or lie in wait for a few days, making it tricky to pinpoint your tap water as the villain. For a deeper dive into what makes your stomach churn, check out what causes viral gastroenteritis. This isn't just a day-ruiner; it can lead to serious dehydration, especially for kids and the elderly.

Your Home Filtration Fix

Think your water is waging war on your stomach? It's time to fight back with a smart filtration strategy.

  • Become a Symptom Detective: If you suspect your water, keep a log. Does your stomach act up after drinking from the tap? Does the whole family feel it? This is your evidence.
  • Install a Multi-Stage Guardian: A system that combines activated carbon and sediment filters is a fantastic first line of defense. It traps many bacteria, parasites, and chemical yuck. For fortress-level security, a whole-house filter protects every tap.
  • Bring in the Special Forces: For microscopic assassins, Reverse Osmosis (RO) and Ultraviolet (UV) purifiers are the ultimate solution. A UV filter acts like a bouncer, zapping the DNA of bacteria and viruses so they can't cause harm.
  • Test, Don't Guess: Grab a home water testing kit. It’s the easiest way to see what's really going on in your pipes, especially if you have well water.

With the right home water filter, you transform your faucet from a source of potential misery into a fountain of pure, safe hydration. For expert help choosing your system, check out this treasure trove of water filter advice.

2. Skin Rashes and Irritation

Beyond what’s happening inside, your skin can be the billboard that announces your water is contaminated. That itchy, red, or angry rash that appeared out of nowhere could be your skin's reaction to bathing in or drinking water laced with irritants. The culprits are often chemicals like chlorine, pesticides, or heavy metals, but pesky bacteria can also be to blame.

A person's arm with a visible red skin rash over a bathroom sink, labeled 'SKIN Irritation'.

The signs can range from simple redness and itching to full-blown hives or dermatitis. Unlike an instant stomach ache, skin problems can develop over time or show up only on areas that get wet in the shower. This delay makes it easy to blame your soap or lotion, but your tap water could be the secret saboteur.

Your Home Filtration Fix

If unexplained skin issues are making you miserable, it's time to put your water quality under the microscope. The right filter can remove the specific troublemakers causing the irritation.

  • Target the Shower: If your skin feels worse after a shower, a dedicated showerhead filter is a game-changer. These are specifically designed to remove chlorine and other common chemical irritants, often providing instant relief.
  • Protect the Whole House: For total peace of mind, a whole-house filtration system ensures that the water you drink, cook with, and bathe in is pure. It’s the ultimate defense against a wide array of chemical invaders.
  • Trap the Chemicals: Activated carbon filters are the superheroes of chemical removal. They excel at absorbing chlorine, pesticides, and other organic compounds that are notorious for causing skin reactions.
  • Test for Certainty: Use a home water testing kit to check for specific culprits like heavy metals (lead, arsenic) and high chlorine levels. Knowing your enemy helps you choose the most effective filtration weapon.

By filtering out the source of the irritation, you can protect your family's skin and turn every shower into a soothing, safe experience instead of a risky gamble.

3. Headaches and Fatigue

If you're constantly battling headaches and a sense of fatigue that coffee can't fix, your tap water might be playing a sneaky neurological game. This isn't your typical "I need more sleep" tiredness. It's a profound lack of energy and persistent head pain that could signal the presence of heavy metals like lead or arsenic, nitrates, or other toxins that mess with your body's systems. These symptoms are particularly tricky because they build up slowly and are easy to dismiss as just a part of modern life.

Symptoms can vary from a dull, throbbing headache to intense migraines, paired with a bone-deep weariness. Because these signs are so vague, a family might drink contaminated water for months or even years before connecting the dots, which is why treating your water filter as an essential home appliance is so critical.

Your Home Filtration Fix

If brain fog, headaches, and fatigue have become the norm in your house, it's time to investigate your water supply. Targeted filtration isn't just a solution; it's a path back to feeling your best.

  • Become a Symptom Detective: Keep a diary. Does your headache get worse at home? Do you feel more energetic when you're away or drinking bottled water? These clues are vital.
  • Install a Heavy Metal Shield: To capture contaminants like lead and arsenic, you need specialized filters. Look for systems that use activated carbon, ion exchange resin, or KDF media—these are designed specifically to trap and remove dangerous heavy metals.
  • Go for the Gold Standard: A Reverse Osmosis (RO) system is one of the most powerful defenses available for your home. It uses pressure to force water through a super-fine membrane, blocking a massive range of contaminants, including the heavy metals and nitrates that can cause neurological issues. An under-sink RO unit for your kitchen is a fantastic investment in your family's health.
  • Test, Don't Guess: You can't fight an invisible enemy. Use a high-quality home kit or a professional service to test specifically for lead, arsenic, mercury, and nitrates. This is non-negotiable for anyone with a private well.

4. Nausea and Vomiting

When your body forcefully rejects something, it’s not being subtle. Nausea and vomiting are your system’s most dramatic and unmistakable signs that you’ve consumed something toxic. This is a direct, often violent, response to water contaminated with pathogens, chemicals, or bacterial toxins. Your body’s self-preservation instincts kick in, triggering an immediate expulsion to stop the toxins from being absorbed. The onset can be terrifyingly fast, making these some of the scariest symptoms of drinking contaminated water.

This reaction is far more than just unpleasant; it can rapidly lead to dehydration and dangerous electrolyte imbalances. For young children, the elderly, or anyone with a compromised immune system, this can become a medical emergency in a very short time. If these symptoms hit after drinking tap water, treat it as a five-alarm fire.

Your Home Filtration Fix

If sudden nausea and vomiting strike your family, your water supply should be treated as "guilty until proven innocent." Swift, decisive action with filtration can prevent a bad situation from getting worse.

  • Stop Drinking Immediately: Rule number one: stop drinking the tap water. Switch everyone to bottled water for both drinking and cooking until you've figured out the problem.
  • Call for Backup: Contact your local health department to report the issue. A professional water test is essential to identify the specific pathogen or chemical culprit.
  • Deploy an Emergency Filter: As a first-aid measure, a high-quality countertop filter or an under-sink reverse osmosis (RO) system can remove a huge spectrum of contaminants, from bacteria and viruses to chemical toxins.
  • Secure Your Castle: For ultimate, long-term protection, a whole-house filtration system is the answer. A setup with multi-stage filters—including sediment, activated carbon, and a UV purifier—creates a fortress around your home's water. UV purification is especially brilliant, as it destroys the DNA of microorganisms, making them completely harmless.

5. Musculoskeletal Pain and Joint Aches

Some symptoms of contaminated water are sprinters, hitting you fast and hard. Others are marathon runners, causing damage slowly over time. Chronic muscle pain and aching joints fall into the second category. Long-term exposure to certain contaminants, especially heavy metals like lead or excessive minerals like fluoride, can cause them to build up in your body, triggering inflammation and interfering with your bone and nerve health.

This kind of pain develops so gradually that you'd almost never think to blame your tap water. Lead can cause inflammation that shows up as muscle and joint pain. Too much fluoride can lead to skeletal fluorosis, a painful condition that stiffens joints. Arsenic is also linked to inflammatory conditions that directly impact your muscles and joints. It's a silent attack that you might only notice after years of damage.

Your Home Filtration Fix

If you're dealing with persistent aches and pains with no obvious cause, it's time to investigate your water. The only way to stop this slow-motion assault is to filter out the contaminants at the source.

  • Test for the Heavy Hitters: Don't rely on your senses; heavy metals are invisible. Get your water tested by a certified lab specifically for lead, arsenic, cadmium, and fluoride. This is especially crucial if you have well water or live in a home with old pipes.
  • Install a Targeted Defense: To remove heavy metals, a whole-house system that combines activated carbon with an ion exchange medium is a powerful solution. This setup is designed to capture dissolved metal contaminants before they even enter your home.
  • Purify Your Drinking Water: For the water you actually consume, a Reverse Osmosis (RO) system is the undisputed champion. It removes an incredibly wide range of dissolved minerals and heavy metals, offering the highest level of protection.
  • Track Your Progress: After installing a filter, keep a health journal. A noticeable decrease in your aches and pains over time is strong evidence that your water was the culprit.
  • Stay Vigilant with Maintenance: A filter is only as good as its last cartridge change. Follow the replacement schedule and test your water every year or two to make sure your system is still doing its job.

6. Fever and Chills

When you suddenly get the chills and your temperature spikes, your body is screaming that it's at war with an invader. A fever is one of the most serious systemic symptoms of drinking contaminated water, indicating that an infection has taken hold and your immune system is in an all-out battle. Drinking water contaminated with powerful bacteria like Salmonella or viruses like Hepatitis A triggers this response, as your body raises its internal temperature to try and cook the pathogens out.

A fever, especially a high one (over 103°F/39.4°C), is a major red flag that a waterborne illness is getting serious. It's often paired with other symptoms like stomach issues or muscle aches and means you need to take action fast. This isn't something to ignore; it’s a clear and present danger signal from your body.

Your Home Filtration Fix

A fever demands a two-pronged attack: immediate medical attention for the person who is sick, and an immediate lockdown of your water supply to protect everyone else.

  • See a Doctor: First things first, a fever with other severe symptoms requires a trip to the doctor. At the same time, stop all use of tap water and switch to bottled or boiled water.
  • Report and Test: Alert your local health department about the suspected contamination. To find out exactly what you're fighting, get a professional water test that can identify specific bacteria, viruses, and parasites.
  • Use Emergency Measures: While you wait for results, boil all drinking water for at least one minute or use a portable water filter certified for pathogen removal.
  • Install an Advanced Purifier: To permanently eliminate the threat, you need a serious purification system. Ultraviolet (UV) purification is a fantastic choice, as it uses light to scramble the DNA of bacteria and viruses, making them harmless without adding chemicals. A Reverse Osmosis (RO) system also provides an excellent barrier against microscopic pathogens.

By installing a robust, multi-stage filtration system with UV or RO, you can transform your home's water from a potential threat into a source of pure, life-giving refreshment.

7. Hair Loss and Brittle Nails

Hair thinning and nails that constantly break or peel are frustrating beauty issues, but they can also be subtle signs that your body is dealing with long-term toxic exposure from your water. Chronic consumption of water containing heavy metals like arsenic, lead, or thallium can cause these toxins to accumulate in your system. They disrupt the vital processes your body uses to build strong hair and nails, leading to noticeable thinning, hair loss, and weak, discolored nails.

Because these symptoms develop slowly over months, it’s easy to overlook the connection to your tap water. However, the good news is that unlike some other chronic health issues, these symptoms can often be reversed once you remove the source of contamination by filtering your water.

Your Home Filtration Fix

If you're noticing more hair in your brush than on your head, it's time to give your tap water a hard look. The right filtration system can stop the exposure and help your body get back to building healthy hair and nails.

  • Track the Evidence: Take photos of your hair and nails. This gives you a clear baseline to compare against after you've installed a water filter and can be a powerful motivator.
  • Install a Heavy Metal Blocker: A whole-house system using KDF media and activated carbon is excellent at removing a wide range of heavy metals like lead and mercury from every single tap in your home.
  • Purify What You Drink: For the water you ingest, a Reverse Osmosis (RO) system is the gold standard. It’s powerful enough to strip out even the tiniest dissolved heavy metal ions, giving you the purest possible drinking water.
  • Test for Specific Villains: Don't just guess what's in your water. Order a professional test that specifically looks for a panel of heavy metals, including arsenic, lead, and thallium, to confirm your suspicions.

8. Respiratory Issues and Coughing

We think of water contamination as something we drink, but sometimes the danger is in the air we breathe at home. A persistent cough, wheezing, or shortness of breath can be surprising symptoms linked to contaminated water—specifically, water you inhale. When you take a hot, steamy shower, chemicals and pathogens in the water can become aerosolized, turning your bathroom into a delivery system for airborne threats.

A shower head sprays water, with a blurred person in the background appearing to cough, accompanied by the text 'RESPIRATORY RISK'.

The number one offender here is the Legionella bacteria, which causes the severe pneumonia known as Legionnaires' disease. It loves to grow in warm water environments like hot water heaters and pipes. Chemicals like chlorine and volatile organic compounds (VOCs) can also turn into a gas in hot water, irritating your lungs and causing symptoms that mimic asthma, especially in a poorly ventilated bathroom.

Your Home Filtration Fix

Protecting the air you breathe during your daily shower is just as important as purifying the water you drink. A combination of smart filtration and maintenance is your best defense.

  • Install a Shower Filter: This is your first and easiest line of defense. A quality showerhead filter with KDF media and activated carbon can significantly reduce chlorine and help inhibit the growth of bacteria right where you need it most.
  • Turn Up the Heat: Make sure your hot water heater is set to at least 131°F (55°C). This temperature is hot enough to kill off Legionella bacteria lurking inside the tank.
  • Consider a UV Purifier: For whole-house protection against germs, a UV purification system is a brilliant solution. As water flows past the UV light, it zaps the DNA of bacteria and viruses, making them harmless.
  • Flush and Ventilate: If you have a guest bathroom that's rarely used, run the taps and shower for a few minutes each week to prevent water from stagnating. And always, always use the exhaust fan during and after a shower to clear the air.

Contaminated Water: 8-Symptom Comparison

Symptom 🔄 Implementation Complexity ⚡ Resource Requirements ⭐ Expected Outcomes 📊 Ideal Use Cases 💡 Key Advantages / Tips
Gastrointestinal Distress and Diarrhea Moderate — point‑of‑use + UV/RO or whole‑house multi‑stage Moderate — RO/UV units, testing kits, possible medical care High ⭐ — rapid reduction in pathogens and acute illness with proper filtration Households facing bacterial/viral/parasitic contamination; wells, boil‑water alerts Install RO/UV or multi‑stage carbon filters; keep test kits and use bottled water in emergencies
Skin Rashes and Irritation Low–Moderate — shower/faucet filters or whole‑house chemical removal Low–Moderate — shower filters, carbon cartridges, water tests Moderate ⭐ — quick symptom improvement after removing chemical irritants Homes with high chlorine/heavy metals or chemical exposure affecting skin Use KDF/activated carbon shower filters and whole‑house carbon; test for chlorine and metals
Headaches and Fatigue Moderate — whole‑house heavy‑metal removal; professional testing advised Moderate–High — lab testing, RO, ion exchange, long‑term filtration Moderate–High ⭐ — gradual cognitive/energy improvement after contaminant removal Areas with suspected heavy metals, nitrates, or chronic low‑level exposure Get certified testing; prioritize under‑sink RO for drinking water and whole‑house metal filters
Nausea and Vomiting High — fast emergency response plus long‑term system upgrade Moderate — emergency bottled/boiled water, portable filters, RO/UV High ⭐ — immediate relief when water source removed; prevents dehydration Acute outbreaks from bacterial toxins or rapid‑onset contaminants Stop tap use, switch to bottled/boiled water; contact health dept and install emergency filtration
Musculoskeletal Pain and Joint Aches High — long‑term remediation, pipe replacement and heavy‑metal filtration High — certified lab tests, whole‑house RO/ion exchange, possible plumbing work Moderate ⭐ — slow improvement; some damage may be irreversible if prolonged Regions with chronic heavy metals or excess fluoride in groundwater Test for metals/fluoride; install ion exchange/RO and consider replacing corroded pipes
Fever and Chills High — urgent medical management and pathogen elimination (UV/RO) Moderate — medical care, professional water testing, UV/RO systems High ⭐ — fever resolution with treatment and pathogen removal; serious if delayed Suspected systemic infections (typhoid, Legionella, hepatitis A) Seek immediate medical care; discontinue tap use, report to authorities, use UV/RO and boiling as interim
Hair Loss and Brittle Nails Moderate–High — targeted heavy‑metal removal and sustained filtration Moderate — lab testing, RO, ion exchange, nutritional support Moderate ⭐ — visible recovery over months after contaminant removal Chronic heavy‑metal exposure in wells or industrial areas Test for arsenic/thallium; use RO/ion exchange and document improvement with photos
Respiratory Issues and Coughing High — building system remediation, shower filtration and temperature controls Moderate–High — shower filters, UV, system flushing, HVAC/temperature maintenance High ⭐ — can prevent aerosolized pathogen transmission with proper controls Hot water systems, showers, buildings with Legionella or chemical aerosols Install Legionella‑resistant shower filters, maintain hot‑water temps >55°C (131°F), flush unused lines and use UV purification

Your Next Step: From Symptoms to Solutions with Filtration

Recognizing the diverse symptoms of drinking contaminated water is your superpower. We've seen how everything from an upset stomach and skin rashes to headaches and even a cough could be traced back to your tap. These symptoms are your body's way of sending an SOS, signaling that the water you depend on every day might be doing more harm than good.

But waiting for these alarms to go off is a risky game. Now that you're armed with this knowledge, you can switch from playing defense to playing offense. The most reliable and empowering solution to this invisible threat is a high-quality home water filtration system.

Your Action Plan for Pure Water

Realizing your fatigue could be linked to your faucet is a lightbulb moment. Now, it’s time to take action and turn that awareness into a safer home environment.

Your game plan is simple:

  1. Confirm the Enemy: Symptoms are clues, but a water test is the smoking gun. Testing reveals exactly what's in your water—be it bacteria, chemicals, or heavy metals. This intel is vital for choosing the right weapon.
  2. Choose Your Shield: With your test results in hand, you can confidently select your filtration system. A whole-house system is like a force field, protecting every drop of water in your home. For targeted, high-purity defense, an under-sink reverse osmosis unit for drinking water is an unbeatable choice.
  3. Maintain Your Defenses: A filter isn't a "set it and forget it" appliance. Regular maintenance is key. Understanding the importance of regularly changing your water filter is crucial. An old, clogged filter can stop working or even become a breeding ground for bacteria, undoing all your hard work.

The Ultimate Payoff: Peace of Mind

Investing in a water filtration system is one of the best investments you can make in your family's health. It ends the guessing game. Instead of wondering if your water is safe, you can drink, cook, and shower with the absolute confidence that you are protected from a whole host of contaminants.

Key Takeaway: A water filter isn't just another gadget; it's a preventative health tool for your home. It's your 24/7 bodyguard, stopping threats at the source so you don't have to deal with the symptoms later.

By taking this step, you're filtering out much more than just lead or chlorine. You're filtering out worry. You're creating a healthier home where your water actively supports your well-being instead of secretly undermining it. This shift from reactive worry to proactive confidence is the ultimate win, ensuring every glass of water is pure, safe, and delicious.


Ready to find the perfect filtration system to eliminate the root cause of these symptoms? The experts at Water Filter Advisor provide unbiased, in-depth reviews and guides to help you navigate the options. Visit Water Filter Advisor to compare systems, understand certifications, and make a confident choice for your home's water safety.

Will Reverse Osmosis Remove Chlorine From Your Water?

Yes, a reverse osmosis (RO) system is brilliant at removing chlorine from your tap water. But if you think it's the fancy, high-tech membrane doing all the work, you're in for a surprise. The real story is a classic tale of teamwork.

It’s not actually the famous RO membrane doing the heavy lifting here.

Chlorine Removal in RO Systems Is a Team Effort

You’d be forgiven for thinking the sophisticated RO membrane is the star player for every contaminant, but when it comes to chlorine, another component steals the show. The unsung hero is the activated carbon pre-filter, which acts as a dedicated bodyguard for the entire system.

Its main job is to grab onto and neutralize chlorine before it ever gets a chance to reach the delicate RO membrane.

This pre-filtration step is absolutely critical for two main reasons:

  • Protection: Chlorine is a powerful oxidant that can eat away at the thin-film material of an RO membrane. Without a pre-filter, the membrane would get damaged and fail way too early, which is an expensive fix.
  • Taste and Odor: The carbon filter is what finally gets rid of that unpleasant "swimming pool" taste and smell that comes from chlorinated tap water, giving you crisp, clean-tasting water.

Modern home RO systems are remarkably good at this, with quality models often achieving chlorine removal rates over 99%. This incredible efficiency is all thanks to the activated carbon pre-filter adsorbing the chlorine molecules long before the water hits the main event: the membrane.

This diagram shows you exactly how water flows through these initial stages to get the job done.

As you can see, the carbon filter is the essential first line of defense, neutralizing chlorine to protect the RO membrane downstream.

To give you a clearer picture, here’s a quick breakdown of which part does what.

Chlorine Removal At A Glance

System Component Role in Chlorine Removal Typical Effectiveness
Carbon Pre-Filter The primary workhorse; removes chlorine through adsorption. Highly effective, often removing >99% of chlorine.
RO Membrane Secondary role; primarily removes salts and dissolved solids. Limited effectiveness; can be damaged by direct exposure.
Carbon Post-Filter "Polishes" the water, removing any lingering tastes or odors. Very effective for final taste and odor improvement.

So, while the RO system as a whole gets the job done, it's really the carbon filters doing the specific work of chlorine removal.

This all ties into the broader impact of water quality and filtration on things you might not even think about, like how your morning coffee tastes. Getting that first stage right is what makes the entire process a success.

Meet the Carbon Filter: Your System's First Line of Defense

While the reverse osmosis membrane usually gets all the glory, the real workhorse for chlorine removal is actually the activated carbon pre-filter. This isn't just some minor preliminary step; it's a critical component that acts as your home system's first and most important line of defense against chlorine damage.

It all works because of a process called adsorption. Think of it like a magnet for contaminants. Instead of soaking up impurities like a sponge (that would be absorption), adsorption means the bad stuff sticks to the surface of the filter media. The activated carbon in these pre-filters is incredibly porous, giving it a massive internal surface area.

Just how massive? Get this: a single pound of activated carbon can have a surface area larger than 100 football fields. This intricate, web-like structure is what makes it so effective. As water rushes through, chlorine molecules are chemically attracted to the carbon's surface, where they get trapped and effectively neutralized.

An activated carbon filter cartridge and a pile of carbon granules sit next to a box labeled 'ACTIVATED CARBON FILTER'.

Every tiny crevice and passage you see in that image multiplies the surface area available for chlorine to grab onto, ensuring it's stripped out of the water before it can cause any trouble.

Why This Pre-Filter Is Not Optional

This carbon pre-filter stage is absolutely non-negotiable in a home RO system. Chlorine is a powerful oxidizer—that’s what makes it great for killing bacteria in city water, but it's also what makes it incredibly destructive to the delicate polyamide material of an RO membrane.

Without the carbon pre-filter, chlorine would literally burn microscopic holes right through the membrane. This damage would completely ruin the most expensive part of your RO system and let all sorts of other contaminants sneak through, defeating the whole purpose of having a filter in the first place.

This is why understanding will reverse osmosis remove chlorine means looking at the entire system. The carbon filter is the essential bodyguard, clearing out the threat so the RO membrane can do its job safely and effectively.

Granular vs. Solid Block Carbon Filters

When you're shopping for a home RO system, you'll generally see two types of carbon pre-filters. They look a little different but both get the same critical job done.

  • Granular Activated Carbon (GAC): These filters are filled with loose, coffee-ground-like granules of carbon. Water simply flows through the loose media, which offers a huge surface area for adsorption. They're fantastic for chlorine removal and getting rid of bad tastes and odors.
  • Solid Carbon Block: These are made from finely powdered carbon that’s been compressed into a solid block. They tend to provide even finer filtration, often coming with a micron rating that means they can trap sediment in addition to chlorine. Because the water is forced through the dense block, it gets more contact time with the carbon, which many consider to be a bit more thorough.

In the end, both GAC and carbon block filters are extremely effective at their primary mission: protecting your RO membrane from chlorine. Any high-quality home RO system will have one of these right at the front, guaranteeing you get pure, great-tasting water for years to come.

The RO Membrane: The Heavy Lifter of Water Purification

Once the carbon pre-filter has done its job and neutralized the chlorine, the real star of the show can get to work. The reverse osmosis membrane is what takes your water from simply being "filtered" to being genuinely pure. This is where the heavy lifting happens, targeting the stubborn, microscopic contaminants that most other filters can't touch.

A white and blue RO Membrane filter with water dripping on it, resting on a wooden surface.

Think of the RO membrane as an incredibly exclusive gatekeeper for your home's water supply. It’s a tightly wound sheet of material with pores so tiny—around 0.0001 microns—that only water molecules can get an invitation to pass through.

Just how small is that? It's about 500,000 times smaller than a single strand of human hair. Nothing but pure H₂O is getting past this bouncer.

How Pressure Does the Hard Work

Your home’s water pressure provides the force needed to push water molecules through this semipermeable membrane. While pure water squeezes through, anything larger is physically blocked and left behind. It’s a surprisingly simple yet profoundly effective process.

This is how the membrane rejects a massive list of unwanted guests in your water, delivering unparalleled purity.

If the carbon filter is the bodyguard that handles the obvious threat (chlorine), the RO membrane is the high-tech security system that scans for everything else. It separates pure water from a whole host of dissolved contaminants with incredible precision.

The contaminants that get rejected don't just build up and clog the system. Instead, they’re mixed into a small amount of wastewater (called brine) and flushed right down the drain. This keeps the membrane clean and efficient, ready for the next drop.

What the RO Membrane Really Removes

With chlorine out of the way, the membrane can focus on the contaminants that are often the most difficult to remove and potentially the most harmful. This is what truly separates RO from basic carbon or sediment filters you might find at the hardware store.

Here’s a shortlist of what the RO membrane is designed to eliminate from your drinking water:

  • Heavy Metals: Lead, arsenic, mercury, and cadmium don’t stand a chance.
  • Dissolved Solids (TDS): This includes things like salts, nitrates, and fluoride, which are all stripped away.
  • "Forever Chemicals": The membrane is one of the most effective ways to remove emerging contaminants like PFAS, microplastics, and trace pharmaceuticals.

By letting the carbon filter handle the chlorine first, the RO membrane is protected and can perform at its best for much longer. This teamwork is why a complete RO system can confidently eliminate chlorine while also tackling hundreds of other contaminants, giving you the purest water possible right from your kitchen tap.

Chlorine vs. Chloramine: Understanding Your Water Supply

Just when you thought chlorine was your main concern, another player has entered the game for many homeowners. A growing number of cities and towns—now over 20% in the U.S.—have made the switch from standard chlorine to a compound called chloramine to treat their water.

This change has some big implications for how you should filter the water in your home.

Chloramine is what you get when you mix chlorine with ammonia. It's a more stable compound, which means it lasts longer as it travels through the city's pipe system. While that's great for the municipality, that same stability makes chloramine a much tougher nut to crack for most home water filters.

Glass vial and blue box with 'CHLORINE vs CHLORAMINE' text discussing water treatment.

This is why it's so important to know what's in your water. A standard activated carbon pre-filter is fantastic at grabbing chlorine, but it really drops the ball when it comes up against the tough chemical bond in chloramine.

The Problem with Standard Carbon Filters

Think of a standard carbon filter like a magnet specifically designed to attract and hold onto chlorine. It works great for that one job. But when chloramine flows by, that magnet just doesn't have the right kind of pull. The filter gets overwhelmed and stops working effectively in no time.

If your water has chloramine, a standard carbon pre-filter won't do enough to protect your RO membrane. This can cause the membrane to fail way too early, torpedoing your system's performance and letting other contaminants slip right on through.

So, what's the fix? You need a filter that's built for the job.

The Solution: Catalytic Carbon

The answer is a special type of filter media called catalytic carbon. This isn't just a slightly beefed-up version of activated carbon; it's engineered from the ground up to break the stubborn bond between chlorine and ammonia. It acts as a catalyst, triggering a chemical reaction that dismantles the chloramine molecule.

Here’s a quick look at how the two filter types stack up against these disinfectants:

Filter Type Effective Against Chlorine? Effective Against Chloramine?
Standard Activated Carbon Yes No (Very limited)
Catalytic Carbon Yes Yes

Before you pick out a home RO system, you absolutely need to find out what your local water utility uses. You can usually get this info from your city’s annual water quality report, or you can just give them a call. Knowing whether you're dealing with chlorine or chloramine is the critical first step to ensuring your system will actually do its job and remove these chemicals from your home's water.

Comparing RO Against Other Filtration Methods

Walk into any home improvement store, and the wall of water filters is enough to make your head spin. You’ve got pitchers, faucet-mount gadgets, and a dozen other options. So, where does a reverse osmosis (RO) system actually fit in for a homeowner?

While most of those simpler filters do a decent job of making your tap water taste less like a swimming pool, that's pretty much where their job ends. They're a one-trick pony. This is where a home RO system really starts to shine.

Think of it this way: a basic pitcher or faucet filter is like a bouncer at a club. It checks for the most obvious problem—in this case, the taste and smell of chlorine—and lets everything else slide. They use a simple layer of carbon, make the water more drinkable, and call it a day.

A reverse osmosis system, on the other hand, is the full-on Secret Service detail for your water. It doesn’t just deal with the obvious threat; it runs a comprehensive security check to handle all the invisible troublemakers.

A Head-to-Head Comparison

The difference in what these filters can do is night and day once you look past just chlorine. While the simpler options are focused on a single problem, RO systems are engineered from the ground up to be a complete water purification solution for your home.

Sure, a standard carbon filter can knock out 85-95% of chlorine, and a pitcher filter might get you 75-90% of the way there. But an RO system goes further, removing over 95% of chlorine while also eliminating up to 98% of arsenic, 95% of lead, and 90-99% of nasty PFAS "forever chemicals." You can see the full list of contaminants an RO system handles on softprowatersystems.com to get the whole picture.

The real takeaway here is that while lots of filters can make your water taste better, an RO system is one of the few that provides true purification. It gets rid of the chlorine, then keeps going to tackle the heavy metals, dissolved solids, and other contaminants the others just can't touch.

To lay it all out, let's put these systems side-by-side. This simple table makes it crystal clear where each filter excels and where it comes up short.

Chlorine Filter Comparison RO vs Other Methods

When you're shopping for a chlorine filter, it helps to see exactly what you're getting for your money. Here's a quick rundown of the most popular options for home use.

Filter Type Chlorine Removal % Removes Other Contaminants? Average Cost
Water Pitcher Filter 75-90% Very limited (some sediment, maybe zinc) $20 – $50
Faucet-Mount Filter 85-95% Limited (often lead and some VOCs) $30 – $70
Reverse Osmosis System >95% Yes (heavy metals, TDS, PFAS, etc.) $200 – $600+

As you can see, asking if RO removes chlorine is really just scratching the surface. Its true value is in its power to do so much more, giving you a level of protection and peace of mind that single-stage filters simply can't offer for your home.

Keeping Your RO System Running Smoothly

Knowing how your reverse osmosis system works is one thing, but keeping it in top shape is how you get years of pure, fantastic-tasting water. A little bit of routine care goes a very long way in protecting your investment in your home's water quality.

When you're shopping for a system, keep an eye out for official certifications. These aren't just marketing fluff; they're your guarantee of performance. Specifically, you want to see NSF/ANSI 42 certification, which confirms the system is effective at reducing chlorine, taste, and odor. On top of that, NSF/ANSI 58 is the gold standard for the overall performance of RO systems, verifying their claims for reducing a whole host of contaminants.

Choosing a certified system means you're not just taking a manufacturer's word for it. You're buying a product that has been independently tested and proven to meet strict public health and safety standards.

Your Simple Maintenance Checklist

Once your system is up and running, the maintenance is actually pretty simple. It mostly just boils down to swapping out the filters on a regular schedule. If you let this slide, you'll start to see reduced water flow, off-tastes, and—worst of all—you could damage the delicate RO membrane.

Here are the dead giveaways that it’s time for a filter change:

  • Slower Water Flow: If your RO faucet has gone from a steady stream to a disappointing trickle, that’s a classic sign your pre-filters are clogged up and need to be replaced.
  • A Change in Taste or Odor: The return of that all-too-familiar "swimming pool" smell is a sure sign your carbon pre-filter is spent and isn't pulling chlorine out of the water anymore.

The easiest way to stay on top of this is to just set a calendar reminder to check your filters every six to twelve months. Sticking to a schedule is the single best thing you can do to make sure your system keeps removing chlorine and other gunk for years to come.

For more pro tips on system upkeep, check out the comprehensive advice on water filter maintenance from our specialists. This simple routine protects your system and guarantees the pure water you expect.

Got Questions About RO & Chlorine? We've Got Answers.

We get a lot of questions from homeowners trying to figure all this out. Here are some of the most common ones, answered straight and simple.

Will Reverse Osmosis Get Rid of That Chlorine Smell?

You bet. That "swimming pool" odor and weird chemical taste you get from the tap? That's all chlorine. The activated carbon filter that comes before the RO membrane is a superstar at grabbing those chlorine compounds right out of the water.

It completely knocks out the taste and the smell, giving you nothing but clean, fresh-tasting water right in your kitchen.

Can I Test My Water to Make Sure the Chlorine is Actually Gone?

Absolutely, and you don't need a science degree to do it. You can pick up some simple DPD test strips or drops—the same kind used for pools and spas—at most hardware stores. They're cheap and easy to use.

Just test a sample from your kitchen tap and then another from your RO faucet. When your RO water shows a reading of zero, you know your system is doing its job perfectly.

Is It Okay to Use an RO System With a Water Softener?

Not just okay—it's one of the best things you can do for your home's water system. A water softener's job is to remove hard minerals like calcium and magnesium, which are notorious for building up scale and wrecking the delicate RO membrane.

Think of the water softener as a bodyguard for your RO system. By letting the softener tackle the hard minerals first, you protect the most critical (and expensive) part of your reverse osmosis unit. This little bit of teamwork helps the RO membrane last longer and keeps the whole setup running at peak efficiency for years to come.


Here at Water Filter Advisor, our whole goal is to give you clear, honest, research-backed advice so you can feel good about the water in your home. Check out our detailed guides and reviews to find the right water filter for your family at https://www.waterfilteradvisor.com.

Does Reverse Osmosis Remove Chlorine From Your Water?

Yes, a reverse osmosis (RO) system is a powerhouse when it comes to getting chlorine out of your water. But here’s the twist: the famous RO membrane, the star of the show, isn't the component doing the chlorine-busting work.

The real MVP is an unsung hero—the activated carbon pre-filter that comes with every complete RO system. It’s the bouncer at the club door, handling all the chlorine before the water gets anywhere near the delicate, high-tech membrane.

Why the Pre-Filter is the Real Star of the Show

A blue pre-filter for water purification stands on a wooden kitchen counter next to a sink.

The water flowing from your kitchen tap has been treated with chlorine to kill off nasty bacteria and viruses—a standard public health practice that keeps us safe. While this is great for getting water safely to your home, it leaves behind that distinct "swimming pool" taste and smell.

Even worse, that same chlorine is public enemy number one for the heart of your RO system.

A proper home RO setup is a multi-stage affair, and it's designed this way for a very good reason. Think of the carbon pre-filter as a bodyguard for the RO membrane, neutralizing threats before they can cause any damage.

The Critical Role of Carbon Prefiltration

That first filter your tap water hits is typically an activated carbon block. Imagine it's a super-sponge with a massive, porous surface area that acts like a powerful magnet for chlorine. Through a process called adsorption, it grabs onto and neutralizes the chlorine molecules, stopping them in their tracks.

This isn't just a bonus feature; it's essential for the system's longevity. Chlorine is an oxidizer, meaning it would chemically burn and shred the thin-film composite RO membrane over time, completely ruining it.

A reverse osmosis system without a functioning carbon pre-filter is a system on a fast track to failure. Protecting the membrane is the single most important job of the pre-filtration stage.

So, while the RO system as a whole gets rid of chlorine, the credit really belongs to its hardworking carbon pre-filter.

You can count on this process being incredibly effective. Most residential RO systems with a standard carbon pre-filter will remove over 95% of chlorine. High-end systems can push that number up to an impressive 99–99.5%.

Considering that city water is usually treated with 0.2–1.0 mg/L of chlorine, this pre-filter step is more than enough to protect your system and give you fantastic-tasting water. You can learn more about the specifics of chlorine filtration from Island Well Service.

Chlorine Removal At A Glance: RO vs. Other Filters

It helps to see how a complete RO system stacks up against other common water filters when it comes to chlorine. While many methods work, they achieve it in different ways.

Filtration Method Typical Chlorine Removal Rate Key Mechanism
Reverse Osmosis System 95% to 99%+ Adsorption via carbon pre-filter
Activated Carbon Filter 95% to 98% Adsorption
KDF Filter 95% to 99% Redox (chemical reaction)
Catalytic Carbon Filter 98% to 99%+ Enhanced adsorption

As you can see, the carbon pre-filter in an RO system puts its performance right up there with dedicated chlorine filters. The main difference is that the RO system goes on to remove hundreds of other contaminants, too.

Understanding Why Chlorine Is The Membrane's Worst Enemy

To really get why reverse osmosis systems are built the way they are, you have to look at the relationship between chlorine and the RO membrane. It’s not just a minor tiff; it’s a full-on chemical assault that can wreck your entire filtration system. Without a pre-filter standing guard, the heart of your system gets destroyed in a shockingly short time.

Modern RO membranes are typically made from a material called Thin Film Composite (TFC). It's an incredible piece of engineering—a multi-layered polymer sheet rolled up like a scroll. It’s designed with microscopic pores, about 0.0001 microns wide, that are just big enough for water molecules to pass through while blocking almost everything else.

The Science Of Membrane Damage

This high-tech material is fantastic at its job, but it has one major kryptonite: it's extremely vulnerable to oxidation. Chlorine, the same chemical your city uses to disinfect the water supply, is a powerful oxidizing agent. When chlorinated water hits a TFC membrane directly, the chlorine literally attacks and burns the delicate polymer surface.

Think of it this way: your RO membrane is like a finely woven, high-tech piece of silk. Pouring chlorinated water onto it is like dumping bleach straight onto that fabric. The silk doesn’t just get a stain; its very fibers start to dissolve, weaken, and tear apart on a microscopic level.

This oxidative damage rips tiny tears and stretches the existing pores in the membrane. These new, bigger holes become a superhighway for all the contaminants the membrane was supposed to block in the first place.

Once a membrane is damaged by chlorine, it cannot be repaired. The damage is permanent and irreversible, allowing contaminants like heavy metals, salts, and dissolved solids to pass straight through into your drinking water.

The Consequences Of Chlorine Exposure

A membrane that's been hit by chlorine doesn't just work poorly—it fails spectacularly. Here’s what happens when that critical barrier is broken:

  • Contaminant Breakthrough: The system completely loses its ability to remove dissolved solids. Your water quality tanks as contaminants that were once blocked start pouring right out of your tap.
  • Reduced System Efficiency: A damaged membrane can't maintain the pressure needed for reverse osmosis to work. This leads to way more wastewater going down the drain and less purified water for you.
  • Costly Replacements: The RO membrane is the most complex and expensive part of the whole system. Letting chlorine get to it means you're looking at a big replacement bill much sooner than you ever should.

Ultimately, letting chlorine reach the RO membrane defeats the whole purpose of owning the system. You’re not just risking slightly less pure water; you're actively destroying its most important component, turning a powerful purification machine into little more than a leaky filter. This is precisely why the carbon pre-filter isn't just a nice-to-have—it's absolutely essential for protecting your investment.

Meet The Unsung Hero: The Carbon Pre-Filter

We’ve seen how chlorine can absolutely wreck a reverse osmosis membrane, but how do RO systems prevent this catastrophe? It’s all thanks to an often-overlooked component that does the heavy lifting.

While the RO membrane gets all the credit for its precision filtering, the real star of the chlorine removal show is the activated carbon pre-filter. Think of it as the system's bodyguard, working tirelessly to neutralize chlorine before it ever gets a chance to cause damage.

This little powerhouse works through a fascinating process called adsorption. This isn't the same as absorption, where a sponge soaks up water. Adsorption is all about molecules sticking to a surface.

Picture the activated carbon inside the filter as a massive, porous coral reef with an unbelievable amount of surface area. In fact, just one gram of activated carbon can have a surface area as large as a football field. As chlorinated water rushes through, the chlorine molecules are drawn to this huge surface and get trapped in all its nooks and crannies, sticking like tiny magnets.

Why Adsorption is a Game-Changer

This process is incredibly good at its job. The carbon pre-filter essentially sacrifices itself by adsorbing the vast majority of chlorine, keeping the delicate and expensive RO membrane safe and sound downstream. Without this critical first step, the entire system would be doomed to fail.

The diagram below shows exactly what happens when chlorine gets past this protective shield and reaches the membrane.

Flow diagram illustrating how chlorine causes oxidative stress, leading to membrane damage and contaminant entry.

It’s a simple but critical chain of events: a worn-out pre-filter leads directly to a damaged membrane, which ultimately lets contaminants sneak into your drinking water.

Two Key Types of Carbon Pre-Filters

When you’re shopping for a home RO system, you'll mainly run into two kinds of carbon pre-filters. Knowing the difference between them is key to understanding how well a system will protect itself from chlorine.

If you ever need help comparing systems or figuring out what’s best for your home, our experts at Water Filter Advisor have put together a ton of helpful water filtration advice to guide you.

Carbon Pre-Filter Showdown: GAC vs. Carbon Block

To really understand the difference, let's break down the two main players you'll find in home RO systems: Granular Activated Carbon (GAC) and Carbon Block filters.

Feature Granular Activated Carbon (GAC) Carbon Block
Structure Loose granules of activated carbon, similar to coarse sand or coffee grounds. Powdered carbon that has been compressed into a solid, dense block.
Water Flow Water flows around the loose granules, which can sometimes create channels and bypass some media. Forces water through the entire dense block, ensuring maximum contact time.
Performance Effective, but "channeling" can sometimes lead to slightly less consistent chlorine removal over time. Highly consistent and thorough removal of chlorine and other contaminants due to its uniform structure.
Contaminant Removal Primarily removes chlorine, taste, and odors. Less effective on very fine sediment. Excellent for chlorine, taste, odors, and can also filter out finer sediments and some VOCs.
Typical Lifespan Generally requires more frequent replacement due to potential for channeling. Often has a longer, more predictable service life because the entire media is used evenly.

Ultimately, for the best protection against chlorine, systems that include at least one carbon block pre-filter are the superior choice. Their solid design prevents water from finding an easy way out, ensuring every drop gets treated thoroughly. Knowing this helps you look past the marketing and see how well a system is truly built to last.

What Happens When Your Water Contains Chloramine

Just when you think you've got chlorine figured out, some cities throw a curveball: chloramine. This isn't just a fancy name for the same thing. It's a totally different chemical, made by mixing chlorine with ammonia.

Water suppliers love chloramine because it's tough and stable. It keeps doing its job disinfecting water as it travels through miles of pipes to get to your tap. That's great for public health, but its stubborn nature creates a real headache for most water filters.

Why Standard Carbon Filters Struggle

Your run-of-the-mill activated carbon pre-filter, which is a rockstar at grabbing free chlorine, just can't keep up with chloramine. The chemical bond holding the chlorine and ammonia together is incredibly strong, and simple adsorption just doesn't cut it.

Here’s a good way to think about it: a standard carbon filter is like a magnet for loose chlorine particles floating in the water. But chloramine is like chlorine that's been locked inside a chemical cage with ammonia. Your magnet can't just snatch it out; you need a special key to break the lock first.

If your city uses chloramine and your RO system only has a standard carbon filter, you're rolling the dice with your RO membrane. The pre-filter simply won't remove enough chloramine, letting it slip through and chew away at the membrane just like free chlorine would.

This is a huge deal for homeowners. You can't just buy a system that says "chlorine removal" and assume you're covered for chloramine, too. You need a filter specifically designed to break that bond.

The Solution: Catalytic Carbon

To really go to war with chloramine, you need to upgrade your ammo to catalytic carbon. This isn't just a re-branded filter. It's a special type of activated carbon that's been treated to give its surface a reactive charge.

This "catalytic" surface actively forces a chemical reaction to happen, shattering that stubborn bond between chlorine and ammonia. Once the cage is broken, the filter can easily grab the now-free chlorine and deal with the leftover ammonia.

Catalytic carbon is a complete defense system in one package:

  • It Breaks the Bond: First, it acts like the "key" to unlock the chloramine molecule.
  • It Adsorbs the Chlorine: Then, it works just like a standard carbon filter, pulling the free chlorine out of the water.
  • It Handles the Ammonia: Finally, it helps convert what’s left of the ammonia into harmless compounds that won't mess with your water quality.

For anyone living in an area with chloramine-treated water, picking an RO system with a catalytic carbon pre-filter isn't optional—it's essential. It is the only reliable way to protect your membrane and ensure your drinking water is truly free from these disinfectants. Anything less is like bringing a knife to a gunfight.

Keeping Your System's Chlorine Shield Strong

A man replaces a water filter in an under-sink reverse osmosis system beneath a kitchen counter.

Putting a reverse osmosis system in your home is a huge step toward better water, but its power to block chlorine isn't something you can just set and forget. That carbon pre-filter—your system's personal bodyguard against chlorine—is a consumable part. Think of it like the oil filter in your car; it needs to be changed regularly to keep the whole machine running right and protect the really expensive parts down the line.

Honestly, skipping this one simple task is the number one reason I see RO systems fail way too early. Once that carbon filter’s huge internal surface area gets clogged up with chlorine and everything else it has absorbed, it just stops working. This leaves your very delicate RO membrane totally exposed to the one chemical it was never built to handle.

Your Most Important Maintenance Task

If you do nothing else, the single most critical job for keeping your RO system alive is replacing the pre-filters on schedule. For most homes, this means you'll be swapping out the carbon and sediment filters every 6 to 12 months.

Picture that carbon filter as a sponge with a limited capacity. Once every microscopic pore is full, it physically can't grab another molecule of chlorine. From that moment on, chlorinated water just flows right past it and starts its destructive assault on the RO membrane.

Your maintenance schedule isn't just a friendly suggestion—it's the lifeline that protects your investment. A few dollars spent on new pre-filters can easily save you from a costly membrane replacement and ensure your system keeps delivering pure, chlorine-free water.

Sticking to the schedule is the absolute best way to guarantee your system's chlorine shield stays strong year after year.

How to Know When It's Time for a Change

While following the manufacturer's timeline is your safest bet, you can also use your own senses to tell when a filter is on its last legs. You just need to be on the lookout for a few key signs that chlorine is starting to slip past your system's defenses.

These clues mean your pre-filter is tapped out and needs to be replaced right away:

  • The Return of the Chlorine Smell: The most obvious sign is that faint but unmistakable swimming pool scent coming back to your purified water.
  • A Change in Taste: Your RO water should taste clean and crisp. If it starts to have a slight chemical or "tap water" flavor again, that's a red flag.
  • Visible Sediment: Noticing cloudy water or little particles could mean the sediment pre-filter is also clogged, which puts even more stress on the carbon filter.

If you want to be extra sure, grab some simple and cheap chlorine test strips. Just dip one into a glass of your RO water for a quick visual check. If that strip changes color, you know for a fact chlorine is getting through, and it’s time to change that pre-filter immediately.

How To Choose The Right RO System For Your Home

Now that you understand how a reverse osmosis system protects itself, picking the right one should feel a lot less intimidating. You know the secret: the carbon pre-filter is the unsung hero that takes care of the chlorine. With that piece of the puzzle in place, you can shop with confidence.

Your first move should be to zoom in on the pre-filtration stages of any system you're considering. Don't just glance at it—really look. You want to see models that specifically call out having at least one carbon block pre-filter. While a granular activated carbon (GAC) filter is okay, the tightly packed structure of a carbon block is way better. It forces the water to have more contact time with the carbon, which is key for completely wiping out the chlorine.

Check For The Right Certifications

How do you know if a system really does what it claims? Look for a crucial third-party seal of approval: NSF/ANSI 42. This is the specific industry standard for a filter’s ability to handle "aesthetic" issues like chlorine, funky tastes, and weird smells. When you see this certification, it means an independent lab has tested it and confirmed it actually works.

An NSF/ANSI 42 certification isn't just marketing fluff. It’s your proof that the pre-filters are up to the task of removing chlorine, which in turn protects the delicate RO membrane and gives you great-tasting water.

Address Chloramine If Necessary

Before you pull the trigger on a purchase, do one last bit of homework. Find out if your local water utility uses chloramine instead of just chlorine. This is a common practice. You can usually find this info on their website with a quick search, or just give them a call.

If they do use chloramine, you absolutely must get a system that has a catalytic carbon pre-filter. A standard carbon filter just won’t cut it against chloramine, and your expensive RO membrane will be left exposed to damage. By confirming what’s in your water first, you can match it to the right pre-filter technology and buy a system that’s truly built to last.

Common Questions Answered

Even after getting into the weeds of how reverse osmosis systems deal with chlorine, some specific questions always seem to come up. Let's get you some quick, clear answers to help you make the right call.

Does Reverse Osmosis Get Rid of Chlorine Taste and Odor?

You bet. In fact, killing that "pool water" taste and smell is one of the first things you'll notice. This job falls squarely on the carbon pre-filter. It grabs onto the chlorine compounds that cause the nasty flavor, leaving you with nothing but crisp, clean water.

Can I Add a Carbon Filter to My RO System?

Yes, and it's a super common maintenance step. If your current RO system isn't cutting it or you just want to beef up its chlorine defense, you can easily swap out the pre-filter cartridges. A great move is to upgrade from a standard Granular Activated Carbon (GAC) filter to a more solid carbon block filter for better performance and protection.

Your entire RO system's health really comes down to the pre-filters. Swapping them out on schedule is the single most important thing you can do to protect your investment.

How Long Does a Carbon Pre-Filter Last?

How long a carbon pre-filter lasts really depends on two things: how much chlorine is in your water and how much water your family uses. For most folks, you'll need to replace these filters every 6 to 12 months. A good carbon block filter might last a bit longer than a basic GAC one, but always stick to what the manufacturer says. Waiting too long is an expensive mistake you don't want to make.


Here at Water Filter Advisor, we're all about giving you the straight-up info you need to pick the best filtration setup for your family. Check out our detailed guides and reviews to find the right system for your home at https://www.waterfilteradvisor.com.

How to Reduce TDS in Water for a Cleaner, Tastier Drink

If you're looking for the fastest way to lower the TDS in your water, you'll need a serious filtration system. We're talking about the heavy hitters of home water treatment: reverse osmosis, distillation, or deionization.

These methods are the special ops of water purification, designed to physically pull those dissolved solids out of the water. They go way beyond what a standard carbon filter can do, which mostly just handles things like chlorine and funky smells. For most homes, a reverse osmosis system is the undisputed champ for tackling high TDS.

What Is This TDS Stuff in My Water Anyway?

A kitchen counter with a glass of water, various solid particles, and a banner about Total Dissolved Solids.

Ever notice your water tastes a bit… off? Or that your "clean" glasses come out of the dishwasher looking like they have a case of the spots? Maybe your morning coffee just doesn't hit the spot. If any of this sounds familiar, you might be dealing with high Total Dissolved Solids, or TDS.

It sounds like a complicated lab term, but its effects are super practical and show up all over your home.

TDS is simply a measure of everything dissolved in your water that isn't pure H₂O. These particles are microscopic, so you can't see them, but they definitely make their presence known. Think of your water as a delivery truck, and TDS is all the cargo it picked up on its journey to your faucet.

Where Do These Solids Come From?

That "cargo" in your water comes from all sorts of places, both natural and man-made. As rainwater seeps into the ground, it naturally dissolves minerals from rocks and soil. This is why you hear about "mineral-rich" spring or well water—that's just a fancy way of saying it has high TDS.

The most common sources of TDS in your tap water include:

  • Good Minerals: Things like calcium and magnesium are big contributors to TDS and are the main reason you get "hard water."
  • Salts and Ions: Sodium, potassium, and chlorides often dissolve into water from natural deposits underground.
  • Trace Metals: Older plumbing can sometimes leach elements like iron, copper, or zinc into the water as it passes through.
  • Runoff: Agricultural runoff carrying fertilizers and pesticides, along with urban discharge, can add a whole host of other substances into the water supply.

Because the sources are so diverse, a TDS reading is really a measure of quantity, not quality. It tells you how much stuff is in your water, but it doesn't tell you what that stuff is. A high reading could just mean you have hard, mineral-heavy water, which is perfectly safe. But in some cases, a spike in TDS could hint at other, less desirable contaminants.

What High TDS Means for Your Home

The U.S. Environmental Protection Agency (EPA) doesn't regulate TDS as a direct health threat. Instead, they consider it a "secondary standard." But high levels can still create a whole bunch of annoying and expensive headaches around the house.

A high TDS reading is often the hidden villain behind common household frustrations. It affects everything from the taste of your food and drinks to the efficiency and lifespan of your water-using appliances.

Here’s where you’ll feel the impact of high TDS the most:

  • Taste and Odor: High concentrations of dissolved solids often give water a bitter, salty, or metallic taste. This ruins the flavor of your coffee, tea, and anything you cook with water, like pasta or soup.
  • Cleaning Nightmares: See those stubborn white spots on your dishes and shower doors? That’s mineral residue left behind when high-TDS water evaporates. It also makes it harder for soap to lather, leading to soap scum and laundry that feels stiff and looks dull.
  • Appliance Assassination: This is the big one. That mineral buildup, known as limescale, can clog pipes and coat the heating elements in your water heater, dishwasher, and coffee maker. This forces them to work harder, use more energy, and eventually, break down completely.

Getting a read on your water's TDS level is the first step. It gives you a clear baseline to figure out if it's a problem you need to solve to make life at home a little bit better.

Testing Your Water's TDS Level at Home

A hand holds a TDS meter above a glass of water next to a running faucet in a kitchen sink, illustrating water quality testing.

Before you can tackle a high TDS problem, you have to know if you even have one. You can't just guess based on spotty dishes or dull laundry—you need a real number. The good news? Getting that number is surprisingly simple and affordable, and you can do it right in your kitchen.

The quickest and most common tool for the job is a digital TDS meter. These handy little devices are inexpensive and give you an instant reading of the total dissolved solids in your water, measured in parts per million (ppm). Think of it as a pocket-sized detective for your water.

Getting a Good Reading with Your TDS Meter

Just dipping the meter in water isn't quite enough to get an accurate reading. To make sure your results are solid, there are a few quick steps to follow. This process will give you a reliable baseline to work from as you figure out how to best treat your water.

Here’s a simple routine for a dependable measurement every time:

  • Prep Your Samples: First, grab two clean, dry glasses. Fill one right from your kitchen tap with cold water, but let the faucet run for about 30 seconds first to clear the pipes. If you already use a filter (like in a pitcher or your fridge), fill the second glass with that water.
  • Ready the Meter: Pop the protective cap off your TDS meter and switch it on.
  • Take the Measurement: Submerge the meter's tip about an inch into the first glass of tap water. Give it a gentle swirl to knock off any air bubbles that might be clinging to the sensors.
  • Log the Number: Just wait a moment for the reading on the digital display to settle. That number is your water’s TDS level in ppm. Jot it down.
  • Rinse and Repeat: Before you test your filtered water, give the meter's probe a quick rinse with distilled water (if you have some handy) or just shake it dry. Then, repeat the whole process with the second glass. The difference between those two numbers is a great indicator of how well your current filter is working.

It's important to know what your TDS reading means. While the EPA suggests a level below 500 ppm for aesthetic reasons like taste and odor, most folks are aiming for a reading somewhere between 50-150 ppm for the best-tasting drinking water.

When a TDS Meter Isn't Enough

A TDS meter is a fantastic tool for getting a quick snapshot of your water, but it does have one big limitation: it tells you how much stuff is dissolved in your water, but not what that stuff is. It can't tell the difference between harmless minerals like calcium and more concerning contaminants like heavy metals.

I always recommend a professional lab test if:

  • You're on well water, which is far more prone to contamination.
  • Your TDS reading is consistently over 500 ppm.
  • You live in an area with known water quality problems or have very old plumbing.
  • You notice a sudden, big jump in your TDS levels that you can't explain.

A lab analysis will give you a detailed report breaking down the specific minerals, salts, metals, and anything else lurking in your water. This is the complete picture you need to choose the right filtration system for your home’s unique water profile, moving you from just a number to a real, targeted solution.

A Head-to-Head Comparison of TDS Reduction Methods

Flowchart illustrating three methods for TDS reduction: reverse osmosis, distillation, and deionization.

So, you've got your TDS number. Now what? The next step is figuring out the best way to lower it, and let's be clear—not all water filters are up to the task. That trusty pitcher filter you keep in the fridge is great for making tap water taste better by zapping chlorine, but it won’t do a thing for dissolved solids.

To really tackle TDS, you need to call in the specialists.

We're talking about three core technologies that are the go-to solutions for slashing TDS at home: Reverse Osmosis (RO), Distillation, and Deionization (DI). Each one has a completely different playbook for stripping solids out of your water, and they all come with their own set of trade-offs.

Reverse Osmosis: The Gold Standard for Home Filtration

For most people looking to get serious about their water quality, Reverse Osmosis is the undisputed champion. It’s the most practical and popular way to get low-TDS water right from your tap.

Think of it like an ultra-exclusive nightclub for water molecules. An RO system uses your home’s water pressure to push water through a special semipermeable membrane. This membrane is a marvel of engineering, with pores so tiny that only pure H₂O can get through.

Everything else—the salts, heavy metals, and other dissolved gunk—gets left behind and flushed down the drain. What comes out the other end is incredibly clean water, often with a TDS reading that’s nearly zero. A good RO system will reliably remove 95% to 99% of all total dissolved solids.

Distillation: The Tried-and-True Purifier

Distillation is one of the oldest tricks in the book for purifying water, and its elegance lies in its simplicity. It’s basically a man-made version of the earth’s natural water cycle.

A home distiller boils water, turning it into pure steam. As the steam rises, it leaves behind all the dissolved solids—minerals, salts, and other contaminants that can't evaporate. The steam is then cooled in a separate container, where it condenses back into liquid. The result is some of the purest water you can make, with a TDS of virtually zero.

While it’s incredibly effective, distillation isn’t always practical for a busy household. It's a slow process, it uses a fair amount of electricity to boil the water, and you can only make a few gallons at a time. It’s a great option for specific uses, but less so for the all-day demands of a family.

Deionization: The Ultimate TDS Scrubber

Deionization, or DI, uses a bit of chemistry to get the job done. A DI system sends water through special resins that are loaded with positive and negative charges. These resins act like super-magnets for dissolved solids, which are basically ions.

As water flows past, the resin beads snatch ions like calcium and chloride right out of the water, swapping them for hydrogen (H+) and hydroxyl (OH-) ions. Those two new ions immediately bond to form pure water (H₂O).

DI systems are amazing at producing ultra-pure water and can easily bring TDS down to absolute zero. But they’re usually reserved for specialized applications like reef aquariums or lab work, not so much for drinking water. The resin cartridges get used up quickly, especially in high-TDS areas, and can be pricey to replace.

For pure, great-tasting drinking and cooking water from a dedicated faucet, Reverse Osmosis is the clear winner. It offers the best balance of performance, affordability, and convenience for the modern home.

Comparing TDS Reduction Technologies for Your Home

To really see how these methods stack up, let's put them side-by-side. This table gives you a quick look at the top home water filtration methods for reducing Total Dissolved Solids (TDS).

Method TDS Removal Rate Initial Cost Ongoing Maintenance Best For
Reverse Osmosis 95-99% Moderate Filter changes (every 6-24 months) Creating superior drinking and cooking water at a dedicated faucet.
Distillation 99%+ Low to Moderate Regular cleaning to remove scale buildup Producing small batches of ultra-pure water for specific uses.
Deionization 99%+ Low to High Frequent resin cartridge replacement Polishing already filtered water for aquariums, labs, or medical use.

For many homes, the ultimate solution is often a tag-team approach. You might have a whole-house carbon filter to handle chlorine and sediment for all your taps and appliances, combined with a dedicated under-sink RO system for the purest possible water right at the kitchen sink.

Choosing the Right Filtration System for Your Home

Okay, you've got your TDS reading and you know the basics of how these systems work. Now it’s time to pick the right one for your home. This isn't about buying the most powerful or expensive system; it's about finding the one that actually fits your water, your budget, and your daily life.

The decision really comes down to a few key questions. Thinking through these helps you get past the technical jargon and focus on what you'll actually use day-to-day. A setup that's perfect for a big family on well water would be total overkill for someone in a city apartment. Let's match the solution to your specific problem.

Start with Your Water Source and TDS Reading

That TDS number you measured is your North Star. It sets the stage for everything else and tells you just how much work needs to be done. Your water source—whether it’s from the city or a private well—is just as important.

Let’s look at a couple of real-world scenarios:

  • The Suburban Family on City Water: Picture a family whose tap water comes from the city and has a TDS reading of 350 ppm. The water is safe, but they're annoyed with spotty dishes and that funky taste in their morning coffee. Their main goal is getting crystal-clear drinking and cooking water. An under-sink Reverse Osmosis (RO) system is a fantastic fit here. It targets the water they actually consume, it's budget-friendly, and it's often a manageable weekend DIY project.

  • The Rural Homeowner with Well Water: Now, think about a family with a private well. Their TDS reading comes in at a whopping 800 ppm, and it’s full of minerals like calcium and iron. They're not just worried about taste; they're seeing limescale build up on showerheads and they know it's slowly wrecking their water heater. A simple filter won't cut it. A whole-house water softener to knock out the hardness minerals, followed by an under-sink RO system for pure drinking water, gives them a powerful one-two punch that protects their appliances and their health.

Sizing Up Your Household Needs

How many people are in your home? How much water do you use? A single person might do just fine with a small countertop distiller, but a family of five would find it completely impractical.

You'll need to decide if you want to treat water at a single faucet (point-of-use) or treat all the water coming into your house (point-of-entry).

  • Point-of-Use (POU) Systems: These are your under-sink RO units and countertop distillers. They’re perfect for targeting just your drinking and cooking water. This makes them a really cost-effective way to improve taste and purity right where you need it most.

  • Point-of-Entry (POE) Systems: Also called whole-house systems, these are installed right where your main water line enters your home. Full whole-house RO systems are pretty rare and expensive for residential use, but a common strategy is to pair a whole-house sediment filter with an under-sink RO for drinking water.

As you can see, if getting the highest purity drinking water is your top priority, Reverse Osmosis is almost always the most direct and popular solution for homeowners.

Budget and Installation Considerations

Your budget is obviously a big factor. You'll want to think about the initial purchase price and the long-term cost of replacing filters. Under-sink RO systems usually hit a sweet spot, with prices ranging from a couple hundred to several hundred dollars. Whole-house solutions are a bigger upfront investment, but they can save you money down the road by protecting expensive appliances.

Pro Tip: Make sure any RO system you're looking at has an NSF/ANSI 58 certification. This isn't just marketing fluff. It's an independent verification that the system has been tested and proven to reduce TDS and other contaminants just like it claims. It's your peace of mind.

Finally, there's the installation. Many under-sink RO systems are designed for DIYers, complete with color-coded tubes and step-by-step guides. But if you’re not comfortable with basic plumbing, there’s no shame in calling a pro to make sure it’s done right.

Keeping Your System Running for Peak Performance

A person replaces multiple water filters under a kitchen sink, with new filters on the wooden floor.

Putting in a quality water filtration system is a huge first step. But the real secret to getting that clean, low-TDS water for years to come? It's all in the follow-through.

The initial setup and a consistent maintenance schedule are what truly keep your system at the top of its game. If you let it slide, you’re basically buying a high-performance car and never changing the oil. Sooner or later, you'll see that performance drop.

Setting Up Your System for Success

Getting your system installed can be anything from a simple Saturday project to a job for the pros, all depending on what you bought.

A standard under-sink Reverse Osmosis (RO) unit, for instance, is usually pretty DIY-friendly. Most people with basic tools can get one up and running. Manufacturers have really stepped up their game with things like color-coded tubes and dead-simple instructions.

A whole-house system, though? That's a different story. You’ll be cutting into your main water line, and that takes some serious plumbing know-how. If that sounds intimidating, it’s a smart move to call in a licensed plumber. They'll make sure it's done right, with no leaks, and everything's up to code.

A flawless installation is the foundation of a high-performing filtration system. Taking the time to do it right—or hiring someone who can—prevents common headaches like leaks, low pressure, and premature filter failure.

Your Essential Maintenance Checklist

Once you're all set up, the game shifts to routine maintenance. This isn't just about keeping the water on; it's about making sure your system is actually pulling its weight and cutting down those TDS levels. Over time, those filters get packed with all the gunk they’re supposed to be removing.

For a typical RO system, here’s a rough timeline to follow:

  • Pre-Filters (Every 6-12 Months): Think of these as the bouncers for your system. The sediment and carbon filters grab the big stuff—rust, silt, chlorine—before it can get to the more sensitive parts. Swapping these out on schedule is the best thing you can do to protect the RO membrane.
  • RO Membrane (Every 2-3 Years): This is the heart of the operation, where the serious TDS reduction happens. How long it lasts really depends on your water quality and how diligent you are with those pre-filters.
  • Post-Filter (Every 12 Months): This is the final polish. This last carbon filter gets rid of any lingering off-tastes before the water hits your glass.

This isn't just about under-sink systems, either. Even simpler filters need attention. Knowing the basics of routine filter changes keeps all your drinking water sources clean and safe.

Troubleshooting Common Filtration Issues

Even with the best maintenance, things can go sideways. No need to panic. Most problems have simple fixes.

If you suddenly notice a drop in water pressure, a clogged pre-filter is almost always the cause. If the water starts tasting "off" all of a sudden, that’s your post-filter telling you it's time for a change.

The biggest red flag, though, is a sudden spike in your TDS readings. If you test your water and see the numbers have jumped, it’s a strong sign your RO membrane has finally given up the ghost. Keeping a TDS meter handy lets you do quick spot-checks to catch these problems early. It’s this kind of proactive approach that ensures you always know how to reduce TDS in water.

Your Top Questions About Lowering TDS in Water

Once you start looking into TDS, it's natural for a bunch of questions to come up. It can feel like a whole new world. To help you out, we've gathered the most common questions and myths we hear from people just like you and answered them in plain English.

Think of this as your go-to guide for busting myths and getting clear on how to manage the TDS in your home's water. We want you to have the practical, real-world info you need to make the right choice for your family.

Is a High TDS Level Automatically Dangerous?

This is the big one, and the short answer is: usually, no. A high TDS number doesn't automatically mean your water is dangerous. Most of the time, it just points to a high concentration of harmless minerals like calcium and magnesium, which are the culprits behind "hard water."

The catch is that a basic TDS meter can't distinguish between those benign minerals and nasty stuff like lead, arsenic, or pesticides. That's why the EPA suggests keeping TDS below 500 ppm. If your reading is north of that—or if you're on well water—it's smart to get a proper lab test done. That's the only way to know for sure what you're dealing with.

Why Doesn't Boiling Water Lower My TDS?

This is a really common misconception. People assume boiling purifies water, and while it does kill germs, it actually makes your TDS worse.

Here’s why: when you boil water, the pure H₂O turns into steam and escapes, but all the dissolved solids—the salts, minerals, and metals—are left behind. As the water level drops, those solids become even more concentrated. So, while boiling is great for disinfecting water, your TDS reading will actually go up, not down.

Key Takeaway: Boiling water sterilizes it but concentrates dissolved solids, increasing the TDS level. True TDS reduction requires physically removing the solids through filtration or distillation.

What Is the Difference Between a Regular Filter and an RO System?

This is a super important distinction to understand. The standard carbon filter you have in your pitcher or fridge is designed to make your water taste and smell better. It does a fantastic job of grabbing things like chlorine and some organic chemicals.

A Reverse Osmosis (RO) system, on the other hand, is a whole different beast. It uses a high-tech semipermeable membrane with microscopic pores to physically block and strip out up to 99% of all dissolved solids.

Let's break it down simply:

  • Standard Carbon Filter: Think of it like a sponge that soaks up specific contaminants like chlorine. It won't do much for your TDS reading.
  • Reverse Osmosis System: This is more like a bouncer at an exclusive club. It only lets pure water molecules through and kicks almost everything else out. For lowering TDS at home, it’s the best tool for the job.

Can My Water's TDS Be Too Low?

It's a fair question. Once you see how powerful an RO system is, you might wonder if you can take too much out of the water. Some worry that removing minerals makes water unhealthy or "dead."

The truth is, we get the vast majority of our essential minerals from our food, not our water. The amount of calcium or magnesium you'd get from even very hard water is pretty tiny compared to what a balanced diet provides.

In fact, most people end up loving the pure, clean taste of low-TDS water, which typically clocks in between 0-50 ppm. For almost everyone, the peace of mind that comes from removing potential contaminants far outweighs the loss of a few trace minerals from your water.


At Water Filter Advisor, we believe everyone deserves access to clean, safe, and great-tasting water. Our in-depth guides and unbiased reviews are designed to help you find the perfect filtration solution for your home, so you can feel confident with every sip. Explore our expert buying guides and find your ideal water filter today.

What is a TDS Meter: Your Secret Weapon for Better Home Water

Ever poured a glass of tap water, held it up to the light, and wondered what’s really swimming around in there? It might look crystal clear, but your water is carrying a secret cargo of dissolved stuff—minerals, salts, metals, you name it.

Think of a TDS meter as your personal water quality detective. This simple handheld gadget gives you a near-instant reading of the Total Dissolved Solids (TDS) in your water. In just a few seconds, you get a snapshot of what’s going on with your water, giving you the power to know if your home water filter is actually doing its job.

Your Quick Guide to Water Purity Testing

A person tests water purity in a glass with a TDS meter on a modern kitchen counter.

Just because water looks clean doesn't mean it is. It can be carrying all sorts of dissolved materials that make your coffee taste off, give your ice cubes a weird cloudy look, or even build up as crusty scale inside your pipes and appliances over time.

This is where understanding Total Dissolved Solids, or TDS, becomes a game-changer for any homeowner interested in better water.

A TDS meter doesn't magically identify every single substance. Instead, it measures the water's electrical conductivity. The more dissolved ionic solids like salts and minerals there are, the more easily electricity can pass through. The meter translates this conductivity reading into a number, usually in parts per million (ppm), which gives you a solid estimate of the total "stuff" dissolved in your water.

What Does Your First Reading Actually Mean?

Getting a number from the meter is the easy part. Making sense of it is where the fun begins. A high reading isn't automatically a red alert, as many of those dissolved solids are perfectly harmless minerals like calcium and magnesium that our bodies can use.

But what that number does give you is a crucial baseline.

A TDS reading is your first clue in an investigation. It tells you if there's a high concentration of dissolved "stuff," prompting you to ask the next important question: "What is that stuff, and is my filter removing it?"

This simple piece of information is incredibly valuable, especially if you have a water filter or are thinking about getting one. It’s the starting point for deciding if your tap water could taste better, be kinder to your home, and if your filtration system is truly earning its keep. For anyone who cares about the quality of the water in their home, a TDS meter is an essential tool.

So, How Does This Little Gadget Actually Work?

It might seem like some kind of high-tech magic, but the science behind a TDS meter is actually pretty straightforward. It's not "seeing" or identifying individual particles in your water. Instead, it’s measuring how well your water can conduct electricity.

Imagine your glass of water is a tiny highway. All those dissolved solids—the calcium, magnesium, sodium, and so on—are the cars on that road. Pure, distilled water is like a completely empty highway; electricity has a tough time getting from one side to the other. But once you add those mineral "cars," you create a perfect path for an electrical current to flow right through.

A TDS meter uses this exact principle. Its tip has two little metal probes (electrodes). When you dip it in water, the meter sends a tiny, harmless electrical charge from one probe to the other.

From Electricity to a Simple Number

The meter then measures how much of that electrical charge makes it to the second probe. The more dissolved solids you have, the more "cars" are on the highway, and the stronger the electrical signal will be. This measurement is called electrical conductivity (EC).

From there, a smart little chip inside the meter takes that EC reading and converts it into a number we can all understand: parts per million (ppm). It’s important to know that this is a very good estimate, not a precise chemical breakdown from a lab.

In short, a TDS meter isn't counting particles. It's really just checking the electrical traffic in your water and giving you a simple number that represents the total amount of dissolved stuff.

This is what makes a TDS meter such a fantastic tool for any homeowner. You get an instant snapshot of your water quality without having to send a sample off to a lab.

Why This Matters for Your Water Filter

Once you understand how it works, the readings become a powerful tool. For example, if you test the water coming from a reverse osmosis (RO) system, you want to see a very low number. RO systems are designed to strip out nearly all of those conductive minerals.

So, if you test your RO water and the reading is almost the same as your tap water, you know something’s up. The "highway" is still packed with cars, which means your filter isn't doing its job anymore. This simple electrical checkup gives you the feedback you need to keep your system running right and ensure your family is drinking pure, clean water.

Decoding the Numbers on Your TDS Meter

Getting a number to pop up on your TDS meter’s screen is the easy part. But what does it actually mean? That's where you turn a simple number into real, useful knowledge about your home's water quality.

The most important thing to remember is that different water sources have wildly different—and often perfectly normal—TDS levels. A reading of 250 ppm from your city tap water might be totally fine, but seeing that same number from your reverse osmosis system would definitely tell you something is wrong. It all comes down to the source and the filter.

What Is a Good TDS Reading for My Water?

Honestly, the "ideal" TDS level depends on your personal taste and your filtration goals. Well water, for example, naturally picks up beneficial minerals like calcium and magnesium as it filters through layers of rock. A higher reading here isn't a red flag; it just means you have mineral-rich water.

On the other hand, a good reverse osmosis (RO) system is designed to strip out pretty much everything, getting the water as pure as possible. In that case, a low reading, often below 50 ppm, is exactly what you want to see. It’s a clear sign your filter is doing its job right.

Illustration comparing a blue water drop labeled 'Low TDS' with an orange drop labeled 'High TDS' indicating water quality.

This just shows that a higher TDS simply means more "stuff" is dissolved in the water. That stuff could be anything from harmless minerals to contaminants you'd rather not drink. Your filter's job is to remove the unwanted stuff.

Comparing Common Household Water Sources

To make sense of your own results, it helps to see how they stack up against typical levels for other types of water you might find around the house. Bottled spring water is going to have a much different TDS profile than your tap water, and both will be different from the water coming out of your refrigerator's filter.

Each source has a unique story, and its TDS level is a big part of that.

Remember, a "high" TDS reading doesn't automatically mean "bad water." It's simply an indicator of a higher concentration of dissolved substances. The crucial next step is understanding what those substances might be and if your filter is removing them.

The table below gives you a quick reference for what to expect when you test different water sources. Think of it as a cheat sheet to help you benchmark your own results and figure out if your filter is performing as it should.

Typical TDS Levels in Common Household Water Sources

Here’s a quick comparison of average TDS readings you can expect from different types of water you might test at home.

Water Source Typical TDS Range (ppm) Primary Dissolved Solids
Reverse Osmosis Water 0 – 50 ppm Very few; highly purified. A low number confirms the filter is effective.
Bottled Spring Water 50 – 200 ppm Natural minerals like calcium and potassium that contribute to taste.
Typical Tap Water 150 – 400 ppm A mix of chlorine, salts, and minerals added during municipal treatment.
Well Water 200 – 500+ ppm Naturally occurring minerals like magnesium, calcium, and iron from the ground.

Seeing where your water falls on this chart can give you a much better sense of whether your numbers are normal or if it's time to investigate your filtration options further.

What a TDS Meter Cannot Tell You

While a TDS meter is a fantastic tool to have in your water filtration toolkit, it's really important to know what it doesn't do. Think of it this way: it's like stepping on a bathroom scale. The scale gives you one number—your total weight—but it can't tell you your body fat percentage, muscle mass, or bone density. It just sees the total.

A TDS meter is the same way with your water. It gives you a single number for the total quantity of dissolved stuff, but it has absolutely no idea what that stuff is. If you remember only one thing about its limitations, let it be that.

It only picks up on solids that can conduct electricity. That means a whole host of nasty contaminants can be floating around in your water, completely undetected by your meter.

What Your TDS Meter Won't Detect

Because the meter works by measuring electrical conductivity, it's totally blind to some of the most serious water contaminants people worry about. These substances don't carry an electrical charge, so as far as the meter is concerned, they simply don't exist.

A TDS meter will NOT detect:

  • Lead and Other Heavy Metals: Things like arsenic, mercury, and chromium won't show up.
  • Pesticides and Herbicides: Runoff from farms or your neighbor's lawn? Your meter won't see it.
  • Pharmaceuticals: Trace amounts of medications in the water supply are invisible to a TDS test.
  • Chlorine: The very disinfectant your city uses to treat the water doesn't register.
  • Bacteria and Viruses: Biological threats like E. coli are not measured at all.

This same principle applies in other areas, too. For instance, understanding pool water maintenance is all about using specific tests for chlorine and pH levels, not just a TDS meter, to keep the water safe and balanced.

A low TDS reading does not guarantee your water is safe. It only means there is a low amount of dissolved ionic solids like minerals and salts.

So, what's the takeaway? Use your TDS meter as a first-pass screening tool for your water filter's performance. A high number is a red flag telling you it's time to get a real lab test that can pinpoint exactly what’s in your water. Only then can you choose a filter that actually solves your problem.

Using a TDS Meter with Your Water Filter

A TDS meter, glass of water, and plant, illustrating water quality before testing.

Okay, this is where a TDS meter really shines. It stops being just a neat gadget and becomes your go-to partner for home water filtration. Think of it as a report card for your filter, giving you clear, hard numbers on whether it’s actually doing its job.

The key is the simple "before and after" test. This is especially powerful if you have a system designed to strip out nearly everything, like a Reverse Osmosis (RO) unit. It’s the easiest way to know if your investment is paying off.

The Before and After Performance Check

It couldn’t be simpler. First, grab a sample of your regular tap water and jot down the TDS reading.

Then, run that same water through your filter system and test the filtered water. That's it. The gap between those two numbers tells you everything.

A good RO system should be knocking out over 90% of the total dissolved solids. So, if your tap water starts at 300 ppm, the water coming out of your RO faucet should be way down, ideally under 30 ppm. If those numbers are creeping closer together, it's a huge red flag that your filter membranes are shot and need to be replaced.

This quick check takes all the guesswork out of the equation. Forget just swapping filters when the calendar says so. Now you can change them based on actual performance, making sure you’re always getting the pure water you paid for.

Why Different Filters Affect TDS Differently

Here’s something important to remember: not all filters are made the same, and they definitely don't all tackle TDS. A meter helps you understand what your filter is supposed to do, so you don't have unrealistic expectations.

  • Carbon Filters (like in pitchers or on your faucet): These are great for making water taste and smell better by removing things like chlorine. They don't remove dissolved mineral salts, so you’ll see little to no drop in your TDS reading. That's normal!
  • Reverse Osmosis (RO) Systems: These are the champs of TDS reduction. An RO system forces water through a special membrane that strips out the vast majority of dissolved solids. With these, you expect to see a huge drop in the TDS number.
  • Water Softeners: This one trips people up. A softener works by swapping "hard" mineral ions (calcium, magnesium) for "soft" sodium ions. Since it's just trading one dissolved solid for another, a water softener will not lower your TDS. In fact, it might even make it go up slightly.

People are catching on to this. The global market for digital TDS meters hit about $2.5 billion in 2023 and is expected to grow to around $3.8 billion by 2028. This isn't just a niche hobby; it's a worldwide trend of people wanting to know exactly what’s in their water.

Once you know how your filter is meant to work, your TDS meter becomes a powerful tool. And if you're looking into different filtration options, our guides have some great advice on choosing the right water filter for your needs. At the end of the day, a TDS meter is the accountability partner that proves your filter is living up to its promises.

Your Simple Guide to Using a TDS Meter

https://www.youtube.com/embed/EtoCiUM9RwE

Ready to find out what's in your water? Good news: using a TDS meter is about as easy as it gets. You can get a reading in less than a minute.

Just pop the cap off, turn it on, and dip the end with the two metal probes into a glass of your water. You don't need to sink the whole thing—just the tip.

Give it a gentle swirl to knock off any tiny air bubbles that might be clinging to the probes. After a few seconds, the number on the display will lock in. That’s it! That number is your TDS reading in parts per million (ppm).

Tips for an Accurate Reading

To make sure your results are reliable every single time, a few little habits go a long way. This is especially important if you're trying to track how well a water filter is working over time.

  • Test at Room Temperature: The temperature of the water can actually change the reading. For the most consistent and accurate results, try to test your water when it's around 77°F (25°C).
  • Use a Clean Glass: Seems obvious, but any leftover soap or residue in a glass can easily throw off your numbers. Always grab a sparkling clean, well-rinsed glass for your sample.
  • Keep the Probes Clean: After you're done, give the meter’s probes a quick rinse with distilled water (if you have some) and gently wipe them dry. This stops minerals from building up and messing with your next test.

A Quick Word on Calibration

Most TDS meters are all set and calibrated right out of the box. But like any measuring tool, they can drift a bit over time and lose their pinpoint accuracy.

Calibration is just a fancy word for resetting your meter against a solution with a known TDS level, making sure its readings are trustworthy.

If you test your water a lot, it’s a smart move to check the calibration every few months. A quick tune-up with a calibration solution ensures you can always trust the numbers you're seeing, giving you real confidence in your water quality.

Common Questions About Using a TDS Meter

Even after getting the hang of it, you might still have a few questions floating around. That’s perfectly normal. Let's tackle some of the most common things people ask when using a TDS meter to figure out their water.

What Is the Ideal TDS Level for Drinking Water?

Honestly, there isn't a single "perfect" number because everyone's taste is a little different. For safety and aesthetics, the EPA recommends keeping TDS below 500 ppm.

Many people find that water with some natural minerals, usually in the 50-150 ppm range, tastes best. On the other hand, if you're using a high-quality reverse osmosis system, you'll see readings under 50 ppm, which gives you that exceptionally pure, crisp taste.

Does High TDS Mean I Have Hard Water?

It's a really strong hint, but it's not a definite "yes." Hard water is specifically caused by high concentrations of calcium and magnesium. Since those are dissolved solids, water that's truly hard will always give you a high TDS reading.

But, you can also get a high TDS reading from other things like sodium or potassium, which don't cause hardness. Just think of it this way: a TDS meter points toward potential hardness, but you'd need a specific hardness test to be sure.

A high TDS reading is a signal to investigate, not to panic. It’s your first step toward understanding your water, empowering you to ask the right questions and find the best filtration solution for your home.

My Tap Water Reading Is High. What Should I Do?

A high number is just your cue to do a little more digging. A great first step is to look up your local water utility’s annual quality report, which you can usually find online. This report breaks down exactly what's in your municipal water.

If you're on well water or just want more detail, the best next move is a comprehensive lab test. A professional analysis will pinpoint the specific substances pushing your TDS up, so you can choose a water filter that actually targets those contaminants.


Ready to take the next step toward purer, better-tasting water? The experts at Water Filter Advisor provide in-depth guides and unbiased reviews to help you find the perfect filtration system for your home. Explore your options at https://www.waterfilteradvisor.com.

Finding the Best Shower Filters for Chlorine

If you're hunting for the best shower filters for chlorine, you’ll quickly discover the real champions use a multi-stage filtration strategy. Think of it like an all-star team for your water. The powerhouses combine Kinetic Degradation Fluxion (KDF), Activated Carbon, and sometimes Vitamin C to knock out chlorine and its nasty sidekicks. This triple-threat approach is what saves your skin and hair from that harsh, post-shower dryness, and it runs circles around simpler, single-media filters.

Your Quick Guide to a Chlorine-Free Shower

Showering in chlorinated water can feel a lot like taking a daily dip in the local pool. It leaves your skin feeling tight, your hair brittle, and generally zaps the luxury out of your shower routine. Chlorine is a necessary evil for disinfecting the municipal water supply, but its benefits stop the moment it leaves your showerhead. Worse yet, the steam from a hot shower can release chlorine gas, which you then breathe in. A quality shower filter is a simple, yet game-changing, upgrade for any home.

The secret to choosing the right filter is understanding what’s happening under the hood. Different filter materials are pros at grabbing different contaminants, especially in the high-temperature, high-flow environment of a shower.

Core Filtration Technologies Explained

To make a smart choice, it helps to know the main players doing the heavy lifting in chlorine filtration. Each one has a specific job, but they all work together to give you a healthier, more refreshing shower.

  • Kinetic Degradation Fluxion (KDF): This is a fancy name for a granular copper-zinc alloy that’s an absolute workhorse. It uses a slick electrochemical reaction to neutralize free chlorine, and it actually performs better in hot water—making it perfect for shower filters.
  • Activated Carbon: A classic for a reason. Activated carbon is brilliant at adsorbing not just chlorine but also other organic gunk that can cause funky smells, immediately improving your water's quality.
  • Vitamin C: This powerful antioxidant is your best friend if you have sensitive skin or color-treated hair. It instantly neutralizes both chlorine and its tough-to-remove cousin, chloramine, on contact.

The biggest leap in shower water quality comes from filters that layer these technologies. This synergy means that what one medium might miss, another one will catch, giving you a much more complete defense against common water contaminants.

This is just the beginning, of course. For a deeper dive into the world of home water filtration, you can explore more expert advice on water filters.

To see how these technologies stack up at a glance, check out the summary table below.

Comparing Top Chlorine Filtration Technologies

This table breaks down the primary ways shower filters eliminate chlorine, giving you a quick look at how well they perform, their longevity, and the water conditions they're best suited for.

Filtration Technology Primary Function Effective Against Best For
KDF Converts chlorine into harmless chloride Free Chlorine, Heavy Metals Hot water environments; long-lasting chlorine removal.
Activated Carbon Adsorbs chemicals and contaminants Chlorine, Odors, VOCs General-purpose filtering and improving water smell.
Vitamin C Instantly neutralizes chlorine and chloramine Chlorine, Chloramine Sensitive skin, color-treated hair, and chloramine removal.

Each of these has its place, but as you can see, combining them in a single home water filtration unit gives you the most comprehensive protection.

Why Chlorine in Your Shower Is a Health Concern

You know that “clean” smell your tap water has? That’s usually chlorine. It's a fantastic disinfectant for getting water safely to your home, killing off pathogens along the way. But once it hits your shower, its job is pretty much done. That’s where the benefits stop and the problems can start, especially for your skin.

A person's arm being rinsed with water droplets, with a blue banner stating 'PROTECT YOUR SKIN'.

The main problem is that chlorine is an oxidant. It doesn't know the difference between a harmful bacteria and the natural oils (sebum) that keep your skin and hair healthy and moisturized. It just strips them all away, and doing that day after day leads to a whole host of issues.

This constant stripping action is why your skin might feel tight, dry, and itchy right after you towel off. If you already deal with sensitive skin, eczema, or psoriasis, chlorinated water can be a real nightmare, triggering flare-ups and making a simple daily shower a source of constant irritation.

The Impact on Hair Health

Your hair doesn't get a pass, either. Chlorine directly attacks the hair cuticle—the protective outer layer of each strand—leaving it rough, damaged, and porous. The results are both visible and tangible.

  • Increased Dryness and Brittleness: When those natural oils are gone, hair gets brittle and becomes way more prone to breakage and split ends.
  • Color Fading: If you color your hair, chlorine is public enemy number one. It strips color fast, making vibrant shades look dull and brassy in no time.
  • Unmanageable Texture: A damaged cuticle leads to frizzy, tangled, and lackluster hair that just won’t cooperate.

If you want to get into the nitty-gritty of how the chemical wreaks havoc on your hair, check out this a comprehensive guide to chlorine damage to hair. Knowing exactly what you’re up against is the first step to fixing it.

More Than Just Skin Deep

The issues with chlorine go beyond just surface irritation. A hot, steamy shower completely changes how you’re exposed to it. The heat causes chlorine to turn into a gas much faster than the water around it.

In a hot shower, the enclosed space fills with chlorine gas. Studies have shown you can absorb more chlorine through inhalation and your skin in a single 10-minute shower than by drinking eight glasses of the same water.

Breathing this in sends the chemical straight to your respiratory system and into your bloodstream. It gets worse. When chlorine mixes with the normal organic stuff in water (like bits of leaves), it creates disinfection byproducts (DBPs), like trihalomethanes (THMs). These compounds are even easier for your body to absorb and are a significant health concern.

It's no surprise that people are catching on. The global shower filter market was valued at around USD 1.12 billion and is expected to hit USD 2.13 billion by 2033. This growth is all about people like you wanting to cut down on their daily chemical exposure. Grabbing one of the best shower filters for chlorine isn't just about comfort anymore—it’s a smart, proactive step for your home and health.

A Look at the Top Chlorine Filter Technologies

To pick the right shower filter for your home, you need to know what's going on inside it. Not all filters are built the same, especially when you're dealing with hot water and harsh chemicals like chlorine. The best ones use specific technologies, and each has its own way of tackling the bad stuff before it ever touches your skin or hair.

We're going to dive into the main players in chlorine filtration: Kinetic Degradation Fluxion (KDF), Activated Carbon, Vitamin C, and Calcium Sulfite. Once you understand what each one does—and what it doesn't do—you'll be able to find the perfect fit for your shower.

Kinetic Degradation Fluxion (KDF): The Advantage

KDF, which stands for Kinetic Degradation Fluxion, is a special blend of high-purity copper and zinc that's a beast at neutralizing chlorine. It all comes down to a simple electrochemical process called redox (reduction-oxidation). You can think of it as a tiny, non-stop chemical reaction happening right inside your filter.

As chlorinated water passes over the KDF media, the two different metals create a small electrical charge. This zap instantly converts free chlorine—a nasty oxidant—into harmless chloride ions. We're essentially talking about basic salt. This process is incredibly effective, and it works even better in hot water, making it a go-to for shower filters.

Another huge benefit of KDF is its bacteriostatic properties. The environment it creates prevents bacteria, algae, and fungi from growing inside the filter cartridge. That means no gross gunk buildup, which keeps your filter working better, longer.

Activated Carbon: The Adsorption Powerhouse

Activated carbon is probably the most famous material in the water filter world, and for good reason. It works through a process called adsorption, where contaminants literally stick to the carbon’s enormous internal surface area. Just one gram of activated carbon can have a surface area the size of a football field.

This massive surface is riddled with microscopic pores that are perfect for trapping organic chemicals and other contaminants, including chlorine. It’s especially good at grabbing the compounds that create funky odors, which is why water filtered with carbon just smells and tastes cleaner.

But activated carbon has a weakness in the shower: it becomes less effective as the water heats up. That's why you almost always see it paired with KDF in multi-stage filters. The KDF does the heavy lifting with chlorine in the hot water, and the carbon swoops in to polish it off by removing other impurities.

Key Differentiator: KDF is the champ in hot water and stops bacteria growth, while activated carbon is better at removing a wider variety of organic compounds and odors. When you put them together in a home water filter, you get a powerful one-two punch against the most common chemicals in city water.

It's no surprise that demand for these smarter, multi-stage systems is on the rise. The filtered shower head market is on track to hit USD 4.5 billion by 2033, growing at a solid 7% each year. This boom shows people are actively seeking out better, more convenient ways to improve their water at home. You can explore more on these market trends and see what's new in filtration tech.

Vitamin C: The Instant Neutralizer

Vitamin C, or ascorbic acid, might seem like a newcomer to the filtration party, but it's an incredibly effective tool. Its claim to fame is its ability to neutralize not just free chlorine but also its tougher cousin, chloramine, on contact. Many cities now use chloramine (a mix of chlorine and ammonia) because it lasts longer in the water system.

The chemistry is simple: Vitamin C instantly turns both chlorine and chloramine into harmless compounds. This makes it a fantastic option if you have very sensitive skin, eczema, or color-treated hair, since it leaves absolutely no harsh oxidants behind.

  • Speed: The reaction is pretty much instantaneous.
  • Effectiveness: It's one of the only technologies that's great against chloramine in a small shower filter.
  • Gentleness: It’s completely safe and mild on skin and hair.

The only real trade-off with Vitamin C filters is their lifespan. The Vitamin C gets used up in the process, so you might find yourself replacing cartridges more often than KDF or carbon models, especially if your home water has high chlorine levels.

Calcium Sulfite: The Hot Water Specialist

Calcium Sulfite is another workhorse that excels at reducing chlorine in hot water, much like KDF. It's a ceramic-like material that triggers a chemical reaction, converting chlorine into harmless chloride.

Its biggest selling point is its efficiency at high temperatures, which is right where activated carbon starts to struggle. Because of this, you’ll often find Calcium Sulfite beads packed into multi-stage filters right alongside KDF and carbon. This layered approach creates a filter that aggressively targets chlorine no matter how hot you like your showers.

By seeing how each of these technologies works, it becomes clear why a filter using a combination of them is far superior. A home water filtration system that strategically layers KDF, Calcium Sulfite, Activated Carbon, and maybe even Vitamin C offers the most complete protection, making sure every shower is free from the damaging effects of chlorine and other junk.

Choosing the Right Filter for Your Home's Water

Knowing the difference between KDF and Vitamin C is great, but how do you turn that into the right purchase for your shower? The truth is, the best shower filters for chlorine are never one-size-fits-all.

What works for one home might be overkill for another. Your water chemistry, your family's needs, and even whether you own or rent all play a huge part in finding the perfect match. This is where we get practical.

Matching a Filter to Your Life

Let's move past the lab specs and into real-world situations. The ideal filter for a solo renter is going to be completely different from what a family with young kids needs. Here are a couple of common scenarios to show you what I mean.

Scenario 1: The Family with Sensitive Skin

If anyone in your house deals with eczema, psoriasis, or just chronically dry, itchy skin, your top priority is getting rid of irritants. You need a filter that’s as gentle as possible, which means neutralizing every last bit of chlorine and chloramine.

  • Top Concern: Removing skin irritants to soothe and protect delicate skin.
  • Best Bet: A multi-stage filter that includes Vitamin C. It's fantastic because Vitamin C instantly neutralizes both chlorine and chloramine, leaving nothing behind to cause a reaction. Add KDF media into the mix, and you’ve got powerful chlorine reduction that holds up even in steamy, hot showers.

Scenario 2: The Renter in a Hard Water Area

If you're renting, a whole-home water filtration system is usually off the table. You need something simple to pop on and off. If you're also in a hard water area, you're fighting a two-front war against chlorine and the mineral buildup that makes hair feel like straw and leaves a chalky film on your skin.

  • Top Concern: Chlorine removal, super easy installation, and some relief from hard water.
  • Best Bet: An in-line filter or an all-in-one filtered shower head that contains a scale inhibitor (like polyphosphate). These are typically tool-free, so you won't be breaking any lease agreements. While they don't technically "soften" water, they prevent scale from building up, making the water feel much smoother on your skin and hair.

Choosing a filter isn't just about water chemistry; it's about solving a personal problem. Whether it's protecting your child's sensitive skin or saving your color-treated hair from fading, the right filter delivers a tangible improvement to your daily life.

This quick decision tree can give you a starting point based on what matters most to you.

A flowchart diagram showing 'START' branching into three options: City Chlorine, Well Water, and Sensitive Skin.

It’s a simple visual guide: KDF for most city water, activated carbon if you have well water concerns, and Vitamin C if you're dealing with serious skin sensitivity.

Building Your Buyer's Checklist

To make this even easier, running through a checklist ensures you don't miss anything important before you click "buy." It helps you think through your actual needs instead of getting distracted by marketing hype.

I've put together a simple but powerful checklist to walk you through the key points. Use these questions to size up any filter you’re considering. It’s a straightforward way to focus on what really matters for performance and long-term value.

Your Shower Filter Buyer's Checklist

This table will guide you through the essential questions to ask yourself, helping you match your unique needs with the right filtration technology for your home.

Consideration Questions to Ask Yourself Recommended Filter Type
Water Source & Contaminants Does my city use chlorine or chloramine? Do I have hard water mineral buildup? Do I smell sulfur or other odors? Chloramine: Vitamin C or catalytic carbon. Hard Water: Filter with scale inhibitor. Odors: Activated carbon.
Household Needs Do I or my family members have sensitive skin, eczema, or allergies? Is my hair color-treated? Sensitive Skin: Vitamin C filter. Color-Treated Hair: Multi-stage filter with KDF and Vitamin C.
Installation & Compatibility Am I a renter needing a temporary solution? Do I have a fixed, handheld, or rain shower head? Renter: In-line filter or all-in-one filtered shower head. Compatibility: Check product specs for your shower type.
Flow Rate & Water Pressure Is low water pressure a concern in my home? Do I prefer a high-pressure shower experience? Look for filters with a rated flow rate of 2.0 GPM (gallons per minute) or higher to minimize pressure loss.
Long-Term Cost & Maintenance What is the cost of replacement cartridges? How often do they need to be replaced (e.g., 3, 6, or 12 months)? Calculate the annual cost of ownership (initial price + yearly cartridge cost) to find the best value over time.

By working through this checklist, you go from just another shopper to an informed buyer. You’ll be ready to pick one of the best shower filters for chlorine that not only works but also fits your home, your lifestyle, and your budget.

Installation, Maintenance, and Long-Term Costs

A great filter is only as good as its upkeep. After you’ve picked out the best shower filter for chlorine, the real work begins with installation and a simple maintenance plan. This is what ensures you get consistent, clean water and that your investment actually pays off.

Hands performing maintenance on a shower filter, with water flowing from the white filter cartridge.

The good news? Most modern shower filters are designed for a quick DIY install. You’ll rarely need more than a few basic tools and maybe 15 minutes of your time. The whole point is to create a solid, leak-free connection so all the water is forced through the filter media.

Your Guide to a Leak-Free Installation

Whether you bought an in-line unit or a complete filtered shower head, the process is pretty much the same. Preventing annoying drips comes down to getting a tight seal at every connection point.

Here's a quick rundown:

  1. Prep the Area: First things first, shut off the water to the shower. Go ahead and unscrew your current shower head from the arm coming out of the wall. If it’s been on there for a while, you might need an adjustable wrench to get it loose.
  2. Clean the Threads: With the old head off, grab a rag and wipe down the threads on the shower arm. Getting rid of old sealant tape and mineral gunk is the secret to a good seal.
  3. Apply Plumber's Tape: Wrap the clean threads on the shower arm with plumber's tape, which usually comes in the box. Go clockwise about 3-4 times to create a nice, watertight barrier.
  4. Install the Filter: Now, screw the new filter or filtered shower head onto the taped threads. Get it hand-tight first, then give it one last gentle turn with a wrench if you feel it needs it. Be careful not to overtighten—you can crack the plastic housing.

If you're in the middle of a bigger project or notice your plumbing looks a bit ancient, sometimes it's best to call in a pro. For a full overhaul or just to make sure everything is perfect, professional bathroom renovation services can handle the installation and ensure your new setup is integrated flawlessly.

Keeping Your Filter in Top Shape

Maintenance really just means one thing: swapping out the filter cartridge on schedule. A spent cartridge can’t remove chlorine effectively, and you'll notice your water pressure taking a nosedive. Most brands suggest a replacement every three to six months, or after it’s handled 10,000 to 12,000 gallons of water.

The most obvious sign your filter is done is a sudden drop in water pressure. You might also start to smell that distinct "public pool" chlorine scent again. These are your filter's way of telling you its work is done.

Do yourself a favor and set a recurring reminder on your phone for replacement day. This simple habit is the single most important thing you can do to keep your filter working at its best.

Calculating the True Cost of Ownership

The price on the box is just the beginning. To get the full picture, you need to think about the Total Cost of Ownership (TCO). This means adding the upfront price to the ongoing cost of replacement cartridges over a year or two.

Let's break it down with two fictional filters:

Feature Filter A (Budget Model) Filter B (Premium Model)
Initial Cost $30 $65
Cartridge Cost $15 $25
Cartridge Lifespan 3 Months (4 per year) 6 Months (2 per year)
Annual Cartridge Cost $60 ($15 x 4) $50 ($25 x 2)
First-Year Total Cost $90 $115
Second-Year Total Cost $150 $165

As you can see, the budget filter looks like a steal at first glance. But with more frequent cartridge changes, its long-term cost creeps up to nearly match the premium one. Filter B, with its longer-lasting cartridge and likely superior media, often makes the slightly higher price a worthwhile trade-off. This kind of math helps you see past the marketing and find what offers real, sustainable value.

A Few Final Questions About Shower Filters

Even with all the data and comparisons, you might still have a few practical questions. To make sure you've got all the pieces of the puzzle, we've rounded up the most common things people ask when picking out the best shower filter for chlorine for their home.

How Can I Tell If My Shower Filter Is Actually Working?

The easiest and most certain way to know is to test your water. Grab some simple chlorine test strips or a droplet kit—you can find them online or at any pool supply store. First, test the plain tap water from your sink to get a baseline reading.

Then, let your shower run for about a minute and test the water coming through the filter. If you see a big drop in the chlorine level, your filter is doing its job. You'll probably also notice other changes over time, like that "swimming pool" smell completely disappearing and your hair and skin feeling softer.

The most obvious sign a filter is at the end of its life? A sudden and serious drop in water pressure. When your shower's powerful spray turns into a weak trickle, it's time to swap out that cartridge.

Will a Chlorine Filter Get Rid of Chloramine, Too?

This is a really important question, and the answer is almost always no. Most standard KDF and activated carbon filters are fantastic at removing free chlorine, but they're not built to handle chloramine. Chloramine is a much tougher compound made of chlorine and ammonia that many cities now use.

If your local water utility uses chloramine, you absolutely need a filter made specifically for it. Your best bet will be a multi-stage filter that includes either catalytic carbon or Vitamin C, since both are great at breaking the chloramine bond. Always check your local water report first, then shop for a filter that's certified for chloramine removal.

Is a Shower Filter Going to Ruin My Water Pressure?

Putting anything in the direct line of your water flow will technically reduce pressure a tiny bit, but a well-made, modern shower filter is designed to keep this to a minimum. Most high-quality filters are rated for a flow rate of 2.0 to 2.5 GPM (gallons per minute), which is right in line with what standard shower heads put out. You really shouldn't notice a difference.

If you do experience a major, sudden drop in pressure, that's your filter telling you it's clogged up. It means the filter media is full of gunk and can't let water through efficiently anymore. Stick to the manufacturer's replacement schedule, and you'll keep your water flowing strong.

Are Pricier Shower Filters Really Any Better?

Not necessarily. The price tag doesn't always reflect how well a filter works. What truly matters is the quality of the filtration media inside and whether it’s the right type for your water—not how much it costs. A more affordable filter with certified KDF and calcium sulfite can easily do a better job than a fancy, expensive one that lacks any third-party proof.

Instead of focusing on price, look for these things:

  • NSF/ANSI Certifications: This is your guarantee that the filter performs as advertised.
  • Filtration Media: Make sure it’s designed to remove what’s actually in your water (chlorine vs. chloramine).
  • Cartridge Lifespan: Look at the long-term cost of replacement cartridges, not just the initial price of the unit.

By focusing on these performance details, you can find one of the best shower filters for chlorine that provides real value, no matter the cost.


Here at Water Filter Advisor, our mission is to empower you with clear, practical information to make the best decisions for your home's water quality. From our in-depth guides to honest reviews, we're here to help you create a healthier home for your family. Explore all our resources at https://www.waterfilteradvisor.com.

Learn How to Test for Chlorine in Water with This Easy Guide

So you want to know what's really in your tap water? Good call. Testing for chlorine is surprisingly simple. You can use test strips, grab a liquid kit, or get fancy with a digital meter. This quick check is your first step to exposing the secrets in your pipes, arming you with the intel needed to pick the right water filtration system. The goal? To finally get that pure, clean taste you've been missing.

Why Bother Testing Your Tap Water for Chlorine?

Let's be real—most of us turn on the tap without a second thought. But ever catch a whiff of that faint swimming pool smell? That’s your old friend, chlorine. It's the go-to disinfectant that stops our public water supply from becoming a bacterial free-for-all.

While it's a hero for public health, its job should be over long before that water hits your coffee maker. Knowing the specific chlorine levels in your home's water is the secret to choosing a filter that actually works. This isn't about guesswork; it's about getting hard numbers so you can make a smart move. Think about it—before modern water treatment, cities were constantly fighting off waterborne diseases. The introduction of chlorination was a game-changer, slashing illnesses like typhoid and cholera. But that doesn't mean you want it in your drinking glass.

Free Chlorine vs. Total Chlorine: The Showdown

When you run a test, you're looking for two different villains. Nailing down the difference between them is the key to finding a filter that will actually get the job done.

  • Free Chlorine: This is the active, germ-killing stuff. It's the frontline soldier keeping your water safe as it travels from the treatment plant to your faucet.
  • Total Chlorine: This is the big number that includes both free chlorine and its sneaky sidekicks, chloramines. Chloramines are what you get when chlorine mixes with organic stuff in the water. They are more stubborn and are often the real culprit behind that "chemical" taste and smell you can't stand.

Knowing both figures helps you diagnose the problem. High free chlorine means a strong chemical taste. But high total chlorine points to those pesky chloramines, which many basic filters can't touch.

Testing takes all the guesswork out of buying a water filter. It gives you a clear, data-driven starting point so you can invest in a solution that targets what's actually in your water, instead of just grabbing a generic filter pitcher that might not be up to the task.

This proactive approach puts you in control. Just like you'd want to know what's in your water, it's smart to consider other parts of your home's environment, like the air you're breathing every day. You can learn more about creating a healthier living space with expert air quality tests for a safer home. Ultimately, testing for chlorine empowers you to take charge of your water quality, leading you straight to the perfect filtration strategy.

Finding the Right Chlorine Test Kit for Your Home

Choosing a chlorine test kit can feel a bit overwhelming. Walk into any hardware store and you'll see a wall of options—strips, droppers, and digital readers, all promising to reveal the truth about your water. The trick is to match the tool to your mission. Your home water filtration goals will point you to the right choice.

Think of it this way: if you just snapped a new filter into your pitcher and want a quick thumbs-up that it's working, simple test strips are perfect. They're cheap, fast, and give you a solid ballpark reading in seconds.

But if you're installing a whole-house filtration system or trying to figure out why your tap water tastes a little "off," you're going to need more precision. That’s where liquid reagent kits and digital meters enter the ring. They deliver the detailed data you need to make bigger, more informed decisions about your home's water quality.

Comparing Your Testing Options

The world of home water testing really boils down to three main players. Each has its own strengths and weaknesses, so there's no single "best" option—it's all about what fits your budget, your patience, and your need for dead-on accuracy.

To make it easier, I've put together a quick comparison of the most common types of chlorine test kits you'll find. This should help you zero in on the best one for your situation.

Comparison of Home Chlorine Test Kits

Test Kit Type Best For Accuracy Ease of Use Average Cost
Test Strips Quick spot-checks & confirming a filter is working Low to Moderate Very Easy $10 – $20
Liquid Reagent Kits Accurate home testing & troubleshooting Moderate to High Moderate $15 – $30
Digital Meters Precise, data-driven analysis & system optimization Very High Easy $50 – $150+

As you can see, you can get started for very little money, but investing a bit more can give you a much clearer picture of what's happening in your pipes—and which filter can fix it.

Let’s break these down a bit more:

  • Test Strips: The speed demons of water testing. You just dip a strip into your water, wait a few seconds, and match the color to a chart. They're fantastic for quick checks and getting that instant gratification that a new filter is doing its job.
  • Liquid Reagent Kits: The reliable workhorse. You add a few drops of a chemical reagent (like DPD) to a vial of water, and it changes color. Compare that hue to a color chart to find the chlorine level. This is a big step up in accuracy from strips without a huge jump in price.
  • Digital Meters (Colorimeters): For the data nerds and precision fanatics. It works like a liquid kit, but instead of you squinting at a color chart, a light sensor measures the color change electronically. This eliminates the guesswork and gives you a precise, numerical reading—perfect for optimizing a high-end filtration system.

This infographic breaks down the two key measurements you'll be taking when you test for chlorine.

Infographic about how to test for chlorine in water

Understanding both free chlorine and total chlorine is fundamental. These two numbers are the foundation for any smart home filtration strategy.

Matching the Kit to Your Goal

Before you buy anything, ask yourself why you're testing. Are you just curious, or are you on a mission to solve a problem like dry skin after a shower or foul-tasting coffee?

The goal isn't just to get a number; it's to get actionable intel for your filtration strategy. A quick, cheap test is great for confirming a filter works, while a more precise test is essential for choosing and optimizing a whole-house system.

If you're about to invest in a serious filtration setup, you absolutely need an accurate baseline measurement first. For more in-depth guidance on choosing the right filters, check out the expert advice on Water Filter Advisor. Getting good data from the start is the only way to be sure you’re picking a solution that will actually solve your specific chlorine issues.

A Practical Guide to Testing Your Water

Person using a liquid reagent kit to test tap water for chlorine.

Alright, you've got your test kit. Now for the fun part. Forget the tiny, confusing print on the box for a minute—let's walk through how to actually do this right. Getting an accurate reading is the whole point, and a few simple tricks can make all the difference in choosing the right filter.

First things first: grab your water sample. Don’t just stick the vial under a trickling tap. Let the cold water run for at least 30 to 60 seconds. This flushes out any stagnant water sitting in your pipes, giving you a sample that truly represents what's flowing into your home from the main line.

Mastering Test Strips Without Mistakes

Test strips are the quickest way to get a reading, but their speed can be their downfall if you’re not careful. The most common mistake? Rushing the timing.

If you just dip the strip and immediately check the color, you'll get a faint, inaccurate reading. But if you leave it in too long, the reagents bleed out, also messing up the results. The sweet spot is a quick dip-and-remove, then waiting the recommended time—usually 15 to 30 seconds—before you match the color.

A few pointers to get it right every time:

  • Keep it level: After dipping, hold the strip perfectly horizontal. This stops the colors on the different pads from running into each other and muddying the results.
  • Find good light: Don't try to read the strip in a dim kitchen. Natural daylight is your best friend, as artificial lights can totally change how the colors look.
  • Hands off the pads: The oils on your fingers can contaminate the little reagent pads. Always hold the strip by the plastic end.

Nailing the Liquid Reagent Drop Test

Liquid reagent kits, often using a DPD indicator, give you a nice bump in accuracy. You add a few drops to your water sample and watch for a color change, usually some shade of pink or red. It sounds simple, but the details really matter.

When the instructions say to "mix," they mean a gentle swirl or turning the capped vial over a couple of times. They definitely don't mean a vigorous, bubble-making shake. Shaking too hard dissolves extra oxygen into the water, which can interfere with the chemical reaction and skew your results.

Your goal is an even, consistent color throughout the sample. A gentle swirl is all it takes to mix the reagent completely without adding other variables that could lead you to buy the wrong type of filter.

Here’s another pro tip: hold the vial against a plain white background when you compare it to the color chart. A busy countertop can trick your eyes into seeing a different shade. A simple white piece of paper works perfectly and ensures you’re making an accurate assessment.

This kind of color-based testing has been the backbone of water safety for a long time. Developing reliable methods to test chlorine was a cornerstone of public health for over a century. Early techniques were basic, but modern tech allows treatment plants to keep chlorine levels in that sweet spot—between 0.2 and 2.0 mg/L—to kill germs without ruining the taste. You can learn more about the history of water testing on the USGS website.

Making Sense of Your Chlorine Test Results

So you've done the test, and now you’re staring at a color or a number. What does it actually mean for your water filtration plan? The real trick is translating jargon—like "parts per million" (ppm) or "milligrams per liter" (mg/L)—into a clear course of action.

A test result isn't just data; it's a direct command from your water on which filter to buy. Most city water systems aim to keep chlorine between 0.2 and 2.0 ppm. The EPA sets the absolute maximum at 4.0 ppm, a level your water should never even approach.

Getting these numbers right is a delicate balancing act for water engineers. They need enough chlorine to kill pathogens but not so much that it creates an unpleasant taste or harmful byproducts. You can learn more about how global water safety standards are maintained on ketos.co.

What Your Chlorine Reading Tells You

Honestly, what you do next comes down to your personal goals. Your test result is your personal benchmark for deciding if you need a water filter—and if so, which kind.

Let's break it down with some real-world filtration scenarios:

  • Below 0.5 ppm: This is great news. Your water probably has very little chemical taste. A simple carbon-based pitcher or faucet filter is likely all you need to polish it to perfection.
  • Between 0.5 ppm and 1.5 ppm: This is typical for most city water. You can definitely smell and taste the chlorine here. It might even cause dry skin. This is where a more robust under-sink or countertop filter becomes a smart upgrade.
  • Above 1.5 ppm: At this level, the chlorine is impossible to ignore. Your iced tea tastes funky and your shower feels harsh. You should seriously consider a whole-house filtration system to get the chlorine out of every single tap.

A reading of 1.0 ppm might be perfectly safe according to public health guidelines, but if you're battling dry, itchy skin or can't stand the taste in your morning coffee, your personal standard is what truly matters when choosing a filter.

Free vs. Total Chlorine: What's the Goal for Filtration?

When it comes down to it, for the water you drink and shower in, you want both your free and total chlorine numbers to be as close to zero as possible. A good filtration system makes this happen.

Any reading above zero simply means there's a disinfectant in your water that has already done its job. Your test results give you the exact data you need to choose the right filtration system to get you there, turning a confusing number into a clear plan of action.

Choosing a Water Filter Based on Your Chlorine Levels

Person installing an under-sink water filter.

Alright, you've done the detective work. You have your test results. That's the diagnosis; now it's time for the cure. With your chlorine numbers in hand, you can stop guessing and finally pick a filter that solves your specific water problem.

When it comes to chlorine removal, there's one clear champion: activated carbon.

Think of it like a powerful chemical magnet. Through a process called adsorption, it grabs onto chlorine and chloramine molecules, pulling them right out of your water. So, the real question isn't if you need a carbon filter, but which type is the right fit for your home.

Matching the Filter to Your Test Results

Your test results are your personal roadmap to pure water. A high chlorine reading just at the kitchen sink points to a completely different solution than a house-wide issue that makes your skin feel tight and itchy after every shower.

  • Low to Moderate Chlorine (0.5 – 1.5 ppm): If you're mainly looking to improve the taste of your drinking water, a simple point-of-use filter is a great, wallet-friendly choice. This could be a pitcher filter, a faucet-mounted unit, or a countertop system. They're dead simple to install and focus on the water you consume.
  • High Chlorine (>1.5 ppm): When your tests come back high, you feel the effects everywhere. This is when it's time to upgrade to a more serious system. An under-sink filter is a fantastic option for a dedicated stream of purified water, while a whole-house system tackles the problem at the source.

If your tests show high chlorine levels all over the house, a whole-house system is hands-down the best investment. It doesn't just fix the taste of your drinking water—it deals with the chlorine you absorb in the shower and the stuff that’s fading your clothes in the laundry.

Point-of-Use vs. Whole-House Systems

An under-sink system strikes a great balance. It gives you high-performance filtration right where you need it most—the kitchen tap—without the expense and installation of a full whole-house unit. These systems typically use larger, more powerful carbon block filters than what you'd find in a basic pitcher.

But if you’re truly fed up with dry skin, brittle hair, and that swimming pool smell every time you turn on a faucet, only a whole-house carbon filtration system gets to the root of the problem. It's installed at your main water line, transforming every single tap in your home into a source of clean, chlorine-free water.

Your test results gave you the data. Now you can make an informed choice and invest in a solution that will directly fix your water quality issues.

Common Questions About Chlorine Water Testing

Once you start testing, a few common questions almost always pop up. Let's tackle some of the things people wonder about as they dive deeper into their home filtration journey.

How Often Should I Test My Water?

This all comes down to your filtration setup and your goals.

If you have a whole-house carbon filter, checking your water every three to six months is a smart move. This confirms the system is still working hard and gives you a heads-up when a filter change is on the horizon.

Using a simpler pitcher or faucet filter? A quick test right after you install a new cartridge is a great way to confirm it’s working. After that, testing once or twice a year—or anytime the water starts tasting "off"—is plenty.

Why Do Chlorine Levels Change Seasonally?

You're not imagining things if your water seems more chlorinated in the summer. It's a real phenomenon.

When it gets hot, the warmer water in pipes and reservoirs creates a breeding ground for bacteria. To fight this, municipal water suppliers often increase the amount of chlorine they add. This means your filtration system has to work harder in July than in January, which is why regular testing is so important.

Do I Need a Special Kit for Chloramine?

Yes, and this is a big one. It's a critical distinction many people miss.

Most standard chlorine test kits use a DPD reagent that only measures free chlorine. The problem is, they can't properly detect chloramines—a more stable compound of chlorine and ammonia. Testing for chloramine requires a different chemical reaction.

To get the full story, you need a test kit that specifically measures total chlorine. The difference between your total and free chlorine readings reveals the amount of chloramine present. This is vital to know because chloramine is much harder for many standard carbon filters to remove, often requiring a special type of filter called catalytic carbon.

Here's a little pro tip: Don't just toss an expired test strip. While you shouldn't trust it for an exact reading, an old strip can often still give you a basic "yes/no" indication for high chlorine levels. It's handy for a quick, informal check when you don't need a precise number.

Keeping up with testing is what empowers you to make the best decisions for your home's water filtration. It ensures the system you've invested in is actually working as hard as you expect it to.


At Water Filter Advisor, we're dedicated to helping you find the perfect filtration solution based on your specific needs. Explore our in-depth guides and reviews to make a confident, cost-effective decision for safer, better-tasting water at home. Learn more at https://www.waterfilteradvisor.com.